Комментарии
3
Войдите или зарегистрируйтесь, чтобы писать комментарии, задавать вопросы и участвовать в обсуждении.
Войти
Зарегистрироваться
Promo82
Я езжу на Renault Espace III
Огромнейшее спасибо! Скачал без проблем.
8 месяцев
lDzmitriyl
Я езжу на Renault Espace III
Хотел полистать, но что то не скачивает)
Только просмотр онлайн
3 года
alart94
Автор
Я езжу на Renault Espace III
Если у кого-то что-то не скачивается!Пишите номер телефона в личку скину на Viber. Или на e-mail
3 года
Renault Espace Mark III Руководство по ремонту и эксплуатации с бензиновыми двигателями: F3R 728/768 2.0 л (1998 см³) 140 л.с./103 кВт, Z7X 775 3.0 л (2963 см³) 167 л.с./123 кВт и дизельными G8T 714/716 SOHC/ G9T 718 DOHC 2.2 л (2188 см³) 150 л.с./110 кВт; технические характеристики, особенности конструкции, поиск неисправностей, диагностика, электросхемы. Иллюстрированное практическое пособие минивэн Рено Эспейс третьего поколения передне- и полноприводные модели выпуска с 1996 по 2003 год
Рено Эспейс 3 оригинальное (Русское издание) руководство по ремонту и техобслуживанию для СТО с 1996 Здесь
Сборник принципиальных электросхем Рено Эспейс 3 с 09-2000, Техническая нота 8166A
Renault Espace Mark III 1997-2003 Service and Repair Manual (Renault s.a.s. Edition Anglaise)
Renault Espace III (The Driver’s Handbook) руководство по эксплуатации
ЕСЛИ ВЫ ВИДИТЕ ОШИБКУ 406 Not Acceptable и не видите документ, то скорей всего у Вас IP РФ и его надо сменить, на любой другой страны, с помощью VPN ( Scribd и SlideShare блокируют посетителей с Российским IP).
Видео Рено Эспейс (Renault Espace)
Рено Эспейс общая информация (Renault Espace)
В Европе Renault в сотрудничестве с Matra в 1984 году выпустили первый однообъемный автомобиль Espace 1 Для поддержки своих позиций на рынке автомобилей, оба партнера проводят рестайлинг автомобиля в январе 1988 года (Espace 2), затем следующий рестайлинг в апреле 1991 года (Espace 3) с усовершенствованием стиля кузова модернизацией механических узлов.
Автомобиль представленный в 1996 году — это совершенно новая модель, которая со своими предшественниками имеет только общее название. Поступивший в продажу в декабре 1996 года автомобиль Espace IV оснащался четырьмя поперечно расположенными двигателями.
Бензиновый 8-клапанный двигатель F3R с чугунным блоком цилиндров и алюминиевой головкой цилиндров, рабочим объемом 1998 см³ развивает мощность 115 л.с. при частоте вращения коленчатого вала 5400 об/мин и развивает крутящий момент 168 Нм при частоте вращения коленчатого вала 3500 мин, Он соединен с типовой механической коробкой передач JC5, однако, с марта 1998 года он агрегатируется и с автоматической коробкой передач.
Дизельный двигатель G8T с рабочим объемом 2188 см³ и турбокомпрессором Garret Т25 с теплообменником воздух/ воздух развивает мощность 115 л.с. при частоте вращения коленчатого вала 4300 об/мин и развивает крутящий момент 234 Нм при частоте вращения коленчатого вала 2000 об/мин. Этот 12 клапанный дизельный двигатель с механическим или полу-электронным управлением соединен с трехвальной коробкой передач РК1, которая была создана для автомобиля Safrane и позже устанавливалась на автомобили Laguna.
Самый дорогой автомобиль в семействе Espace — это автомобиль с бензиновым двигателем Z7X с рабочим объемом 3 л V6 и мощностью 170 л.с. Также как и коробки передач, существенная часть элементов переднего моста были заимствованы у автомобиля Laguna Задний мост сохраняет активный компонент предыдущего поколения с более короткими рычагами и задней балкой со стабилизирующей перекладиной.
| № | Спецификация / Specs | Данные |
| Габариты (мм/mm) и масса (кг/kg) / Dimensions and Weight | ||
| 1 | Длина / Length | 4517 |
| 2 | Ширина (без/с зеркалами) / Width | 1810/2070 |
| 3 | Высота (загружен/пустой) / Height | 1692/1773 |
| 4 | Колёсная база / Wheelbase | 2702 |
| 5 | Дорожный просвет (клиренс) / Ground clearance | 110 |
| 6 | Снаряжённая масса / Total (curb) weight | 1630 |
| Полная масса / Gross (max.) weight | 2510 | |
|
Двигатель / Engine |
||
| 7 | Тип / Engine Type, Code | Дизельный, жидкостного охлаждения, четырехтактный, G8Т 716 |
| 8 | Количество цилиндров / Cylinder arrangement: Total number of cylinders, of valves | 4-цилиндровый, 12V, рядный, SOHC с верхним расположением одного распределительного вала |
| 9 | Диаметр цилиндра / Bore | 87.0 мм |
| 10 | Ход поршня / Stroke | 92.0 мм |
| 11 | Объём / Engine displacement | 2188 см³ |
| 12 | Система питания / Fuel supply, Aspiration | Непосредственный впрыск топлива форсунками ТНВД Роторный насос, Bosch VE 4/9 F 2400 R708 |
| Турбонаддув и промежуточное охлаждение наддувочного воздуха | ||
| 13 | Степень сжатия / Compression ratio | 22.0:1 |
| 14 | Максимальная мощность / Max. output power kW (HP) at rpm | 83 кВт (113 л.с.) при 4500 об/мин |
| 15 | Максимальный крутящий момент / Max. torque N·m at rpm | 234 Нм при 2000 об/мин |
|
Трансмиссия / Transmission |
||
| 16 | Сцепление / Clutch type | B02300308 Однодисковое, сухое, с диафрагменной нажимной пружиной и гасителем крутильных колебаний, постоянно замкнутого типа |
| 17 | КПП / Transmission type | PK1 050 МКПП 5 пятиступенчатая механическая, двухвальная, с синхронизаторами на всех передачах переднего хода |
О Книге
- Название: Renault Espace Руководство по ремонту и эксплуатации
- Бензиновые двигатели: F3R 728/768 2.0 л (1998 см³) 140 л.с./103 кВт, Z7X 775 3.0 л (2963 см³) 167 л.с./123 кВт и дизельными G8T 714/716/ G9T 718 2.2 л (2188 см³) 150 л.с./110 кВт
- Выпуск с 1996 года
- Серия: «Гуси-Лебьляди»
- Год издания: 2012
- Автор: Коллектив авторов
- Издательство: «Ассоциация независимых издателей»
- Формат: PDF
- Страниц в книге: 280
- Размер: 60.4 МБ
- Язык: Русский
- Количество электросхем: 4
Поиск по сайту
Остались вопросы или пожелания? Пишите на почту: support@vnx.su
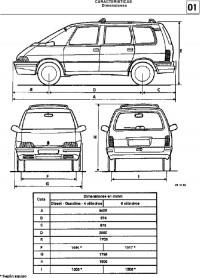
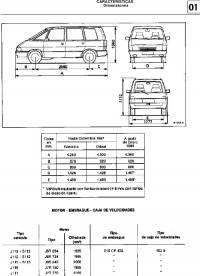
Руководство на испанском языке по техническому обслуживанию и ремонту автомобиля Renault Espace второго поколения.
- Автор: —
- Издательство: Renault
- Год издания: —
- Страниц: —
- Формат: PDF
- Размер: 7,6 Mb
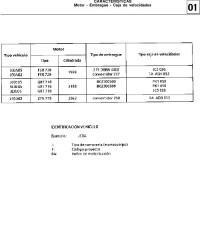
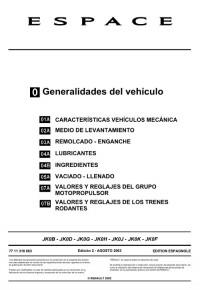
Руководство на испанском языке по техническому обслуживанию и ремонту автомобиля Renault Espace третьего поколения.
- Автор: —
- Издательство: Renault
- Год издания: —
- Страниц: —
- Формат: PDF
- Размер: 17,6 Mb
Руководство на испанском языке по техническому обслуживанию и ремонту автомобиля Renault Espace четвертого поколения.
- Автор: —
- Издательство: Renault
- Год издания: 2003
- Страниц: —
- Формат: PDF
- Размер: 25,7 Mb
Руководство на испанском языке по техническому обслуживанию и ремонту автомобиля Renault Espace первого поколения.
- Автор: —
- Издательство: Renault
- Год издания: —
- Страниц: —
- Формат: PDF
- Размер: 8,3 Mb
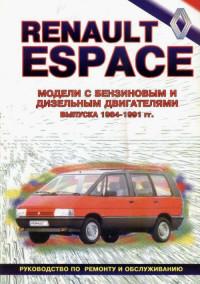
Руководство по техническому обслуживанию и ремонту автомобиля Renault Espace 1984-1991 годов выпуска с бензиновыми и дизельными двигателями.
- Автор: —
- Издательство: Техинформ
- Год издания: —
- Страниц: 100
- Формат: —
- Размер: —
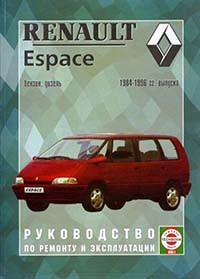
Руководство по эксплуатации и ремонту автомобиля Renault Espace 1984-1996 годов выпуска с бензиновыми и дизельными двигателями.
- Автор: —
- Издательство: Петит
- Год издания: 2004
- Страниц: 207
- Формат: PDF
- Размер: 425,5 Mb
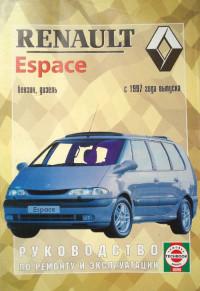
Руководство по эксплуатации и ремонту автомобиля Renault Espace с 1996 года выпуска с бензиновыми и дизельными двигателями.
- Автор: —
- Издательство: Гуси-лебеди
- Год издания: 2006
- Страниц: 280
- Формат: PDF
- Размер: 59,9 Mb
Спецификация автомобиля Renault Espace.
- Автор: —
- Издательство: Renault
- Год издания: —
- Страниц: 29
- Формат: PDF
- Размер: 402 Kb

Сборник мультимедийных схем на нескольких языках (в том числе русском) электрооборудования автомобиля Renault Espace 2002-2007 годов выпуска.
- Автор: —
- Издательство: Renault
- Год издания: —
- Страниц: —
- Формат: ISO
- Размер: 980,4 Mb

Downloaded from www.Manualslib.com manuals search engine
RENAULT recommends ELF
ELF has developed a complete range of lubricants for RENAULT:
fengine oils
fmanual and automatic gearbox oils
Warning: to ensure the engine operates optimally, the use of a lubricant may be restricted to certain vehicles. Please refer to your maintenance document.
Benefiting from the research applied to Formula 1, lubricants are very high-tech products.
Updated with the help of RENAULT’s technical teams, this range is perfectly compatible with the specific features of the brand’s vehicles. f ELF lubricants enhance your vehicle’s performance significantly.
Photo credit: Total/DPPI Imacom group
RENAULT recommends approved ELF lubricants for oil changes and top-ups.
Contact your RENAULT Dealer or visit www.lubrifiants.elf.com
Une marque de
Downloaded from www.Manualslib.com manuals search engine
Welcome to your new vehicle
This Driver’s Handbook contains the information necessary:
–for you to familiarise yourself with your vehicle, to use it to its best advantage and to benefit fully from the all the functions and the technical developments it incorporates.
–to ensure that it always gives the best performance by following the simple, but comprehensive advice concerning regular main tenance.
–to enable you to deal quickly with minor faults not requiring specialist attention.
It is well worth taking a few minutes to read this handbook to familiarise yourself with the information and guidelines it contains about the vehicle and its functions and new features. If certain points are still unclear, our Network technicians will be only too pleased to provide you with any additional information.
The following symbol will help you when reading this handbook:
To indicate a hazard, danger or safety recommendation.
The descriptions of the models given in this handbook are based on the technical specifications at the time of writing. This hand — book covers all items of equipment (both standard and optionavailablel) for these models but whether or not these are fitted to the vehicle depends on the version, options selected and the country where the vehicle is sold.
This handbook may also contain information about items of equipment to be introduced later in the model year.
Throughout the manual, the “approved Dealer” is your RENAULT Dealer.
Enjoy driving your new vehicle.
Translated from French. Copying or translation, in part or in full, is forbidden unless prior written permission has been obtained from the vehicle manu facturer.
0.1
Downloaded from www.Manualslib.com manuals search engine

0.2
Downloaded from www.Manualslib.com manuals search engine
Getting to know your vehicle ………………………….
Driving ………………………………………………………….
Your comfort …………………………………………………
Maintenance ………………………………………………….
Practical advice ……………………………………………..
Technical specifications ………………………………..
Alphabetical index …………………………………………
0.3
Downloaded from www.Manualslib.com manuals search engine

0.4
Downloaded from www.Manualslib.com manuals search engine
Section 1: Getting to know your vehicle
|
RENAULT card: general information, use, deadlocking . . . . . . . . . . . . . . . . . . |
1.2 |
|||
|
Doors . . . . . . . . . . . . . . . . . . . . . . . . . . . . . . . . . . . . . |
1.7 |
|||
|
Engine immobiliser system. . . . . . . . . . . . . . . . . . . . . . . . . . . . . |
1.13 |
|||
|
Headrests — Seats. . . . . . . . . . . . . . . . . . . . . . . . . . . . . . . . |
1.15 |
|||
|
Seat belts. . . . . . . . . . . . . . . . . . . . . . . . . . . . . . . . . . . . . . . . . . . . . . . . . . . . . . . . . . . . . . . . . . . . . . |
1.20 |
|||
|
Additional methods of restraint. . . . . . . . . . . . . . . . . . . . . . . . . . . |
1.23 |
|||
|
to the seat belt. . . . . . . . . . . . . . . . . . . . . . . . . . . . . . . |
1.23 |
|||
|
side protection devices. . . . . . . . . . . . . . . . . . . . . . . . . . . . |
1.27 |
|||
|
Child safety: general information. . . . . . . . . . . . . . . . . . . . . . . . . . . |
1.29 |
|||
|
choosing a child seat mounting. . . . . . . . . . . . . . . . . . . . . . . . |
1.32 |
|||
|
fitting a child seat. . . . . . . . . . . . . . . . . . . . . . . . . . . . . . |
1.34 |
|||
|
deactivating/activating the front passenger airbag. . . . . . . . . . . . . . . . . |
1.38 |
|||
|
Steering wheel. . . . . . . . . . . . . . . . . . . . . . . . . . . . . . . . . . |
1.41 |
|||
|
Driving position. . . . . . . . . . . . . . . . . . . . . . . . . . . . . . . . . |
1.42 |
|||
|
Instrument panel. . . . . . . . . . . . . . . . . . . . . . . . . . . . . . . . . |
1.46 |
|||
|
On-board computer . . . . . . . . . . . . . . . . . . . . . . . . . . . . . |
1.52 |
|||
|
Clock and exterior temperature. . . . . . . . . . . . . . . . . . . . . . . . . . . |
1.63 |
|||
|
Rear-view mirrors . . . . . . . . . . . . . . . . . . . . . . . . . . . . . . . . |
1.64 |
|||
|
Audible and visual signals. . . . . . . . . . . . . . . . . . . . . . . . . . . . . |
1.66 |
|||
|
Lighting and exterior signals. . . . . . . . . . . . . . . . . . . . . . . . . . . . |
1.67 |
|||
|
Headlight beam adjustment. . . . . . . . . . . . . . . . . . . . . . . . . . . . . |
1.70 |
|||
|
Washers/Wipers . . . . . . . . . . . . . . . . . . . . . . . . . . . . . . . . . |
1.71 |
|||
|
Fuel tank (filling with fuel). . . . . . . . . . . . . . . . . . . . . . . . . . . . . |
1.74 |
|||
|
1.1 |
||||
Downloaded from www.Manualslib.com manuals search engine
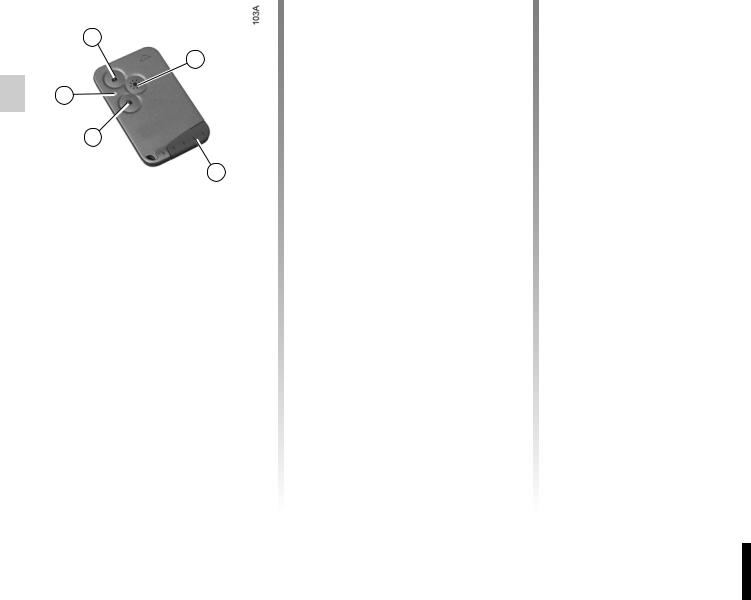
“Hands-free” RENA ULT card: general information(1/3)
|
The RENA ULT card is used |
||||
|
1 |
for: |
|||
|
– |
locking/unlocking the doors and lug |
— |
||
|
2 |
gage compartment (doors, luggage |
|||
|
compartment) and the fuel filler flap |
||||
|
5 |
(see the following pages); |
|||
|
– |
depending on the vehicle, automatic |
|||
|
4 |
closing of windows and sunroof |
|||
|
(refer to the information on the “One |
— |
|||
|
3 |
touch electric windows: remote con |
— |
||
|
trol closing” and “Electric sunroof: |
||||
|
remote control closing” in Section |
3); |
|
– operation of certain devices (e.g.: |
||||
|
radio, electrically controlled seats, |
||||
|
1 |
Unlocking the doors and tailgate. |
etc.); |
||
|
2 |
Locking all doors and tailgate. |
– |
starting the engine (see the infor- |
|
|
3 |
Integrated key. |
mation on “Starting the engine” in |
||
|
4 |
Switching on the lighting remotely. |
Section 2); |
||
|
5 |
Locking/unlocking the luggage com |
— |
– |
switching off the “See-me-home |
|
partment. |
lighting” function (refer to the infor- |
|
mation on “Exterior lighting and sig — |
|
|
nals” in Section 1). |
Battery life
RENAULT cards are powered by a battery which must be replaced when battery tell-tale light 4 no longer lights up (refer to the information on the “RENAULT card: battery» in Section 5).
|
Special note: for some vehicles, the |
|
|
RENAULT card records the settings se |
— |
|
lected by the card user: the choice of |
|
|
settings for the automatic climate con- |
|
|
trol, some radios, electric seats (if this |
|
|
is stored), the rear view mirror position |
— |
|
ing, etc. It is therefore advisable always |
|
|
to keep the same RENAULT card so |
|
|
that you can recall your personal set- |
|
|
tings. |
1.2
Downloaded from www.Manualslib.com manuals search engine
“Hands-free” RENA ULT card: general information(2/3)
RENA ULT card operating range
This varies according to the surroundings. It is important to make sure when handling the RENAULT card that you do not lock or unlock the doors by inadvertently pressing the buttons.
When the battery is flat, you can still lock/unlock and start your vehicle. Refer to the information on “Locking/unlocking the doors” in Section 1 and “Starting the engine” in Section 2.
Advice
Avoid leaving the card in hot, cold or humid areas.
Do not keep the RENAULT card in a place where it could be bent or damaged accidentally, such as in a back pocket of a garment.

Never leave your vehicle

for a short while.
They may pose a risk to themselves or to others by starting the engine, activating equipment such as the electric windows or by locking the doors.
Risk of serious injury.
1.3
Downloaded from www.Manualslib.com manuals search engine
“Hands-free” RENA ULT card: general information(3/3)
|
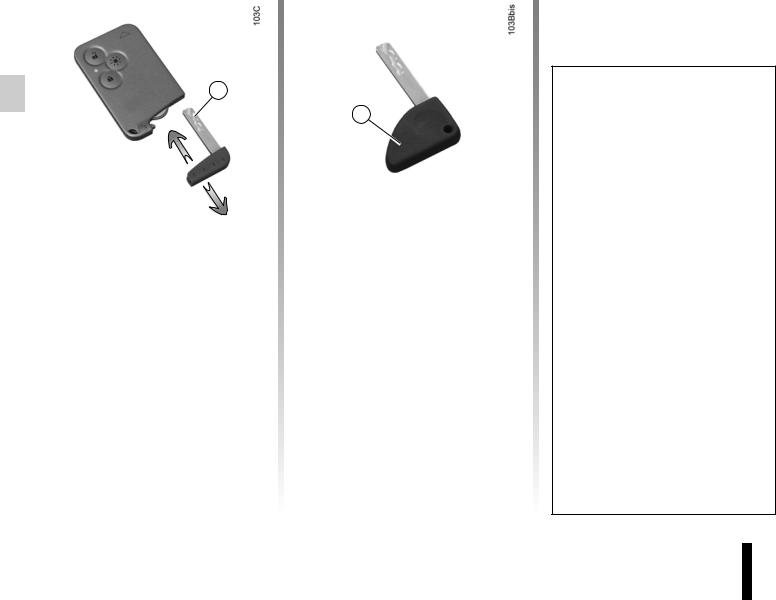
Integrated 3 or separate 6 |
For instructions on how to use the |
|
emergency key |
emergency key, refer to the information |
|
(depending on vehicle) |
on “Locking and unlocking the doors”. |
|
This is only used in exceptional circum |
— Once you have entered the vehicle |
|
stances. It locks or unlocks the left- |
using the emergency key, insert the |
|
hand door if the RENAULT card does |
RENAULT card into the card reader |
|
not work: |
so that the engine can be started. |
–if the vehicle is located in a zone of high electromagnetic radiation;
–use of devices using the same frequency as the card;
–when the RENAULT card battery is drained, flat battery, etc.
1.4
Replacement: need for an additional RENA ULT Card
If you lose your RENAULT card or require another, you can obtain one from an approved dealer.
If a RENAULT card is replaced, it will be necessary to take the vehicle and all of its RENAULT cards to an approved dealer to initialise the system.
You may use up to four RENAULT cards per vehicle.
Faults with the RENA ULT card
Make sure that the batteries are always in good condition: they have a service life of approximately two years.
Refer to the information on the “RENAULT card: Batteries» in Section 5.
Downloaded from www.Manualslib.com manuals search engine
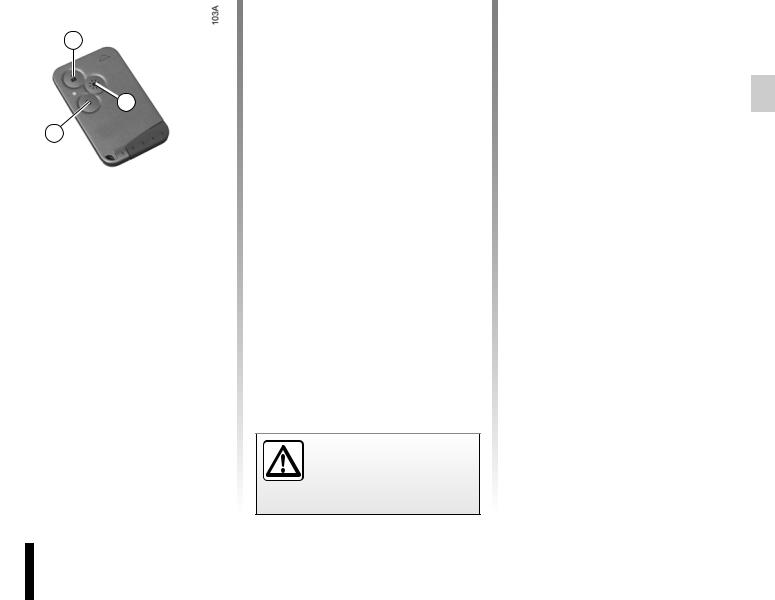
“Hands-free” RENA ULT card: use
Use
It allows the vehicle to be locked/unlocked without touching the RENAULT card, when present in the detection zone.
Locking the doors
With the doors closed, walk away from the vehicle carrying your RENAULT card: the doors will lock automatically.
Note: the distance at which the vehicle locks depends on the surroundings.
The hazard warning lights flash twice and the side indicator lights light up (for approximately 10 seconds) to indicate that the doors have been locked. A beep also sounds.
This beep can be chosen from a range of several options or turned off. Consult an approved dealer.
Unlocking the doors
Walk up to your vehicle carrying your RENAULT card.
As soon as you grip one of the handles (doors or tailgate), the locks will open automatically.
The hazard warning lights flash once to indicate that the doors have been un — locked.
Never leave your vehicle with the RENAULT card inside.
Operation in manual mode
If you wish, you can exit the hands-free mode by pressing button 1 or 2; you will then switch to manual mode and the RENAULT card operates as described in the section entitled «Hands-free RENAULT card: general information»:
Returning to hands-free mode
Hands-Free mode returns automatically each time the vehicle ignition is switched on.
Distance lighting function
This can, for example, identify the vehicle from a distance when parked in a car park.
The side lights, dipped lights, indicators and interior lights light up for about 30 seconds when button 3 is pressed.
Note: pressing button 3 again during the 30 seconds turns the lights off.
1.5
Downloaded from www.Manualslib.com manuals search engine
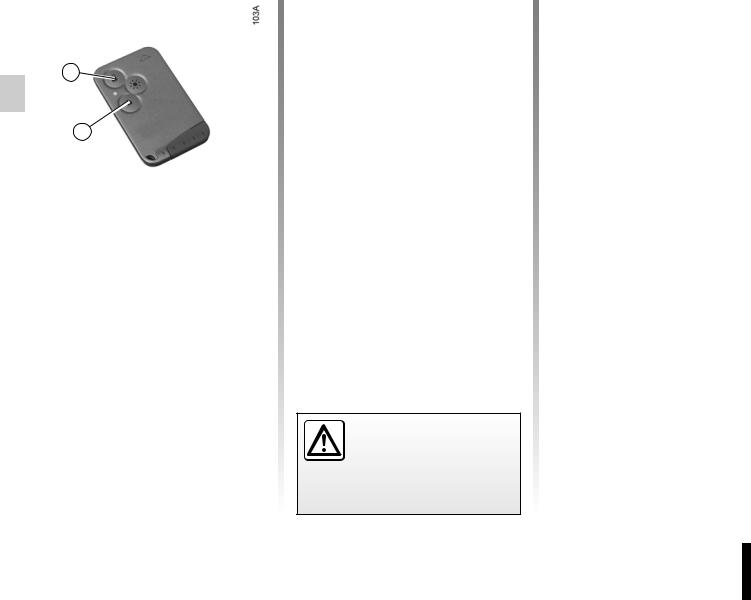
To activate deadlocking, you can:
–press button 2 twice, briefly;
–press and hold button 2.
The hazard warning lights flash four times to indicate that the vehicle is locked.
Note: deadlocking is not possible if the hazard warning lights or the side lights are lit.
If the vehicle is equipped with a deadlocking function, this allows you to lock the opening elements and to prevent the doors from being unlocked using the interior handles (for example, by breaking the window and then trying to open the door from the inside).
Never use deadlocking if someone is still inside the vehicle.
Special notes for the HandsFree mode
Activating the deadlocking function exits hands-free mode.
To unlock the doors, you must press button 1 (refer to the information on the “Hands-free RENAULT card: use»).
Hands-Free mode returns automatically each time the vehicle ignition is switched on.
1.6
Downloaded from www.Manualslib.com manuals search engine
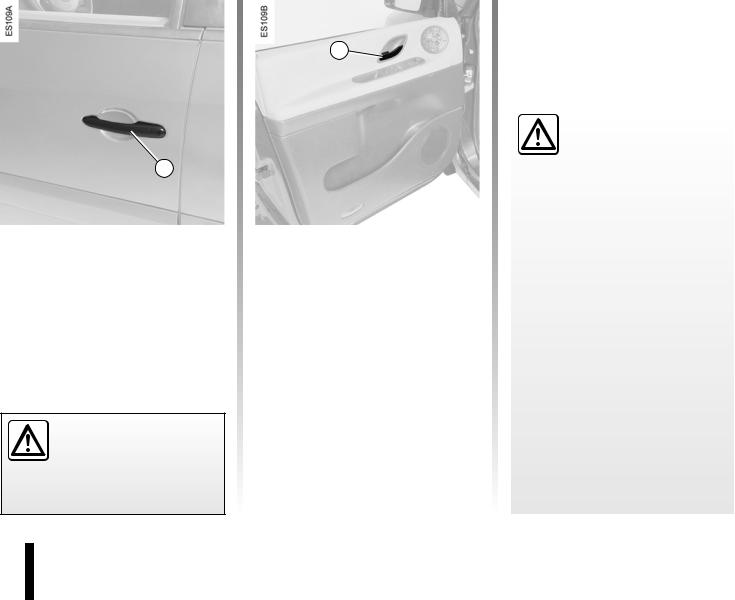
OPENINGAND CLOSING TH E DOORS
Opening from the outside
Once the doors have been unlocked, or with the hands-free RENAULT card on your person, pull handle 1 towards you to open the door.
As a safety precaution, the doors should only be opened or closed when the vehicle is stationary.
|
Driver’s responsibility |
|||
|
when parking or stopping |
|||
|
the vehicle |
|||
|
Never leave an animal, |
|||
|
child or adult who is not self-suffi- |
|||
|
cient alone on your vehicle, even for |
|||
|
a short time. |
|||
|
Opening from the inside |
They may pose a risk to themselves |
||
|
or to others by starting the engine, |
|||
|
Pull handle 2. |
activating equipment such as the |
||
|
electric windows or locking the |
|||
|
Lights-on warning buzzer |
doors. |
||
|
Also, in hot and/or sunny weather, |
|||
|
If you have left the lights on after switch — |
|||
|
please remember that the tempera |
— |
||
|
ing off the ignition, a reminder buzzer |
ture inside the passenger compart |
— |
|
|
will sound when a door is opened (to |
ment increases very quickly. |
||
|
prevent discharge of the battery, etc.). |
RISK OF DEATH OR SERIOUS |
||
|
INJURY. |
|||
1.7
Downloaded from www.Manualslib.com manuals search engine
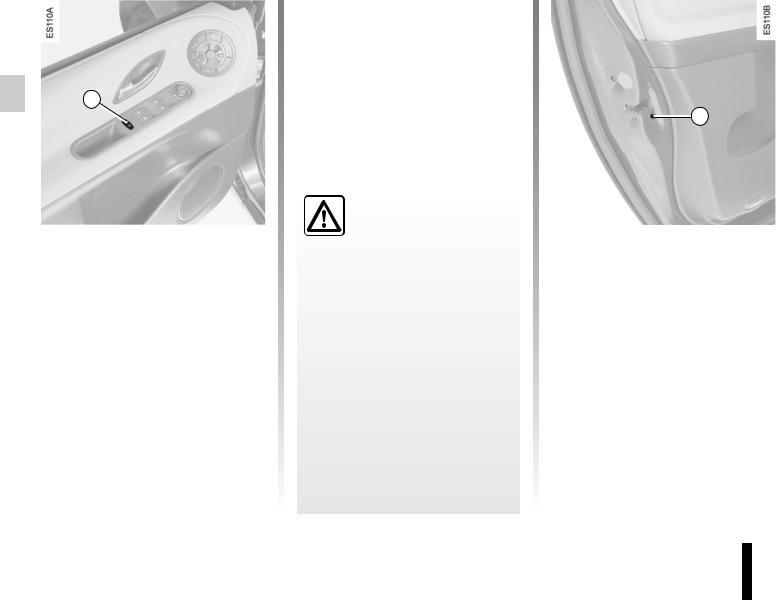
OPENINGAND CLOSING TH E DOORS(continued)
|
Safety of rear occupants |
|||
|
The driver can authorise |
|||
|
Child safety |
operation of the rear doors |
Vehicles not fitted with switch 3 |
|
|
and, depending on the ve- |
To make it impossible for the rear doors |
||
|
Vehicles fitted with switch 3 with |
hicle, the electric windows by press |
— |
|
|
ing switch 3 on the side with the |
to be opened from the inside, move |
||
|
integrated indicator light |
|||
|
lever 4 on each door and check from |
|||
|
Press switch 3 to lock the rear doors |
symbol. |
||
|
the inside that the doors are securely |
|||
|
and prevent operation of the rear elec — |
Depending on the vehicle, in the |
||
|
locked. |
|||
|
tric windows. |
event of a fault: |
||
|
The indicator light in the switch lights |
– a beep sounds; |
||
|
– a message is displayed on the in |
— |
||
|
up to confirm that the doors have been |
|||
|
strument panel; |
|||
|
locked. |
|||
|
– the integrated indicator does not |
|||
|
Special note |
light up. |
||
|
This function also deactivates the rear |
If the battery has been discon- |
||
|
heating and ventilation controls (refer |
nected, press switch 3 on the side |
||
|
to the information on “automatic climate |
with the symbol to lock the rear |
||
|
control” in Section 3). |
doors. |
||
1.8
Downloaded from www.Manualslib.com manuals search engine
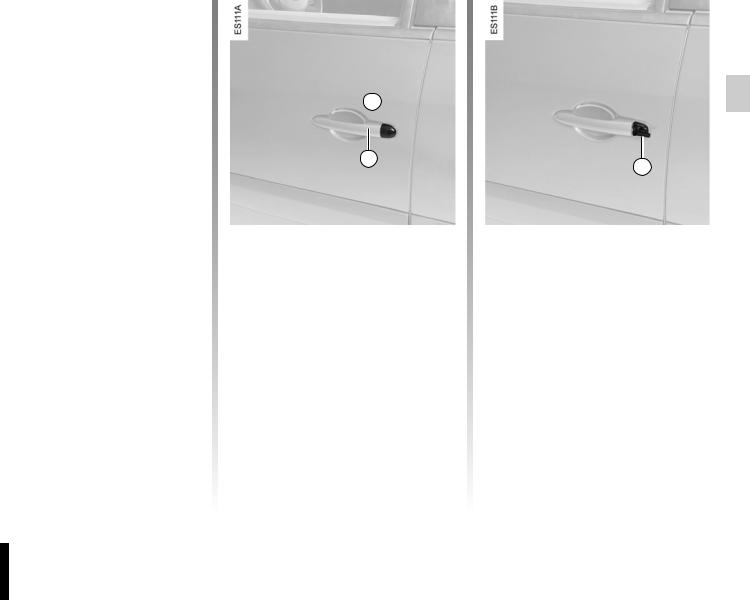
LOCKING/U NLOCKING TH E DOORS(1/3)
Locking/unlocking the doors from the outside
This is done using the RENAULT card; refer to the information on the «RENAULT card» in Section 1.
In certain cases, the RENAULT card may not work:
–if the vehicle is located in a zone of high electromagnetic radiation;
–use of appliances operating on the same frequency as the card (mobile phone, etc.);
–when the RENAULT card battery is drained, flat battery, etc.
It is then possible:
–to use the emergency key (integrated into the card or separate, de pending on the vehicle) in the front left-hand door;
–to lock using the emergency key (in tegrated into the card or separate, depending on the vehicle);
–to use the interior door locking/unlocking control (refer to the following pages).
|
Unlocking using integrated |
|
|
— |
emergency key 2 |
|
Remove cover A from the front left- |
|
|
— |
hand door (using the end of the emer — |
|
gency key) in notch 1. |
|
|
Move it upwards to remove cover A. |
Insert the key 2 into the lock and lock or unlock the door.
1.9
Downloaded from www.Manualslib.com manuals search engine
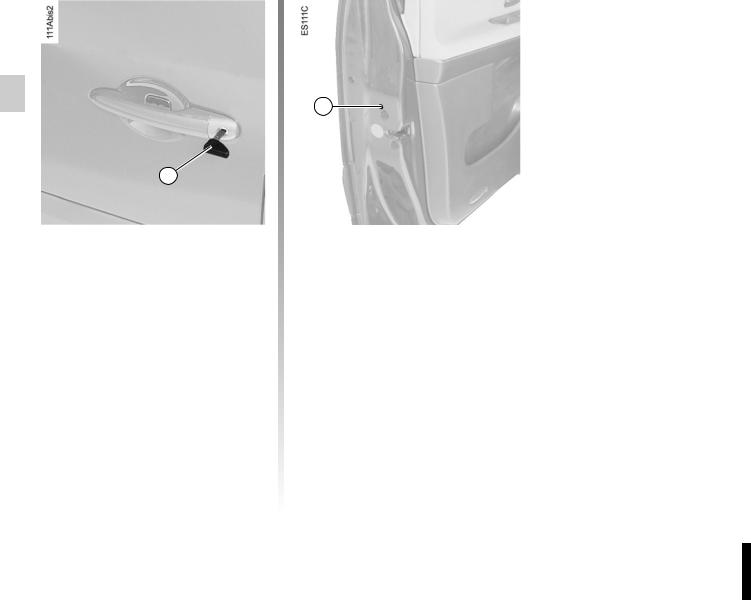
LOCKING/U NLOCKING TH E DOORS(2/3)
Unlocking using separate emergency key 3
(depending on vehicle)
Insert key 3 in the left-hand side door and lock or unlock the door.
Locking the doors manually
Turn the screw 4 with the door open (using a tool such as a flat blade screw — driver) and close the door.
This means that the doors are then locked from the outside.
The door can only be opened from the inside of the vehicle.
1.10
Downloaded from www.Manualslib.com manuals search engine
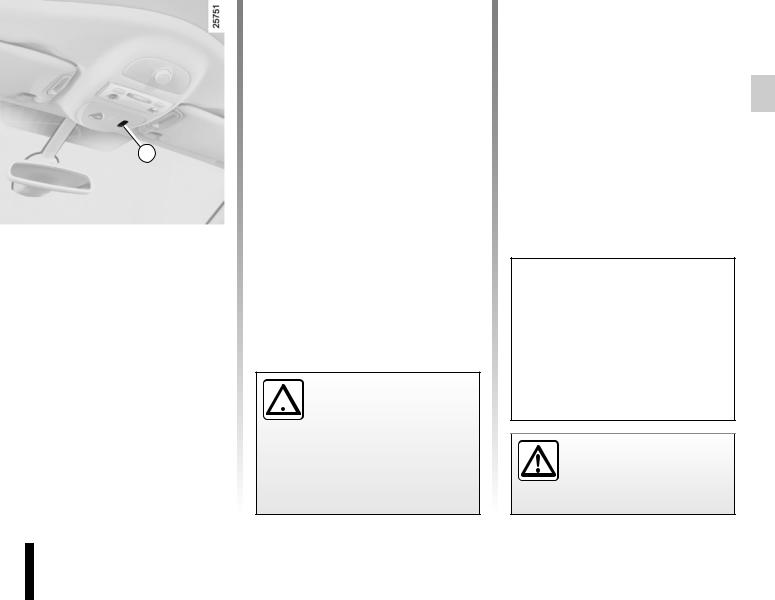
LOCKING/U NLOCKING TH E DOORS(3/3)
Interior locking/unlocking door control
Switch 5 controls the doors, the tailgate and the fuel filler flap simultaneously.
If a door or the tailgate is open or not closed properly, the doors and tailgate lock/unlock quickly.
Locking the doors without the RENA ULT card
For example, in the event of a discharged battery or if the RENAULT card is temporarily not working, etc.
With the ignition switched off and a front door open, press switch 5 for more than five seconds.
When the door is closed, all the doors and the tailgate will be locked.
Unlocking the vehicle from the outside will only be possible with the RENAULT card.
Driver’s responsibility

sisting you to gain access to the passenger compartment in the event of an emergency.
Doors and tailgate status indicator light
When the ignition is switched on, the indicator light integrated in switch 5 informs you of the status of the doors and tailgate:
–light on, the doors and tailgate are locked,
–light off, the doors and tailgate are unlocked.
When you lock the doors, the indicator light remains lit for approximately one minute then goes out.
After locking/unlocking the vehicle only using the buttons on the RENAULT card, remote locking and unlocking in hands-free mode are deactivated.
To reactivate the “hands-free” mode: restart the vehicle.
Never leave your vehicle with the RENAULT card inside.
1.11
Downloaded from www.Manualslib.com manuals search engine
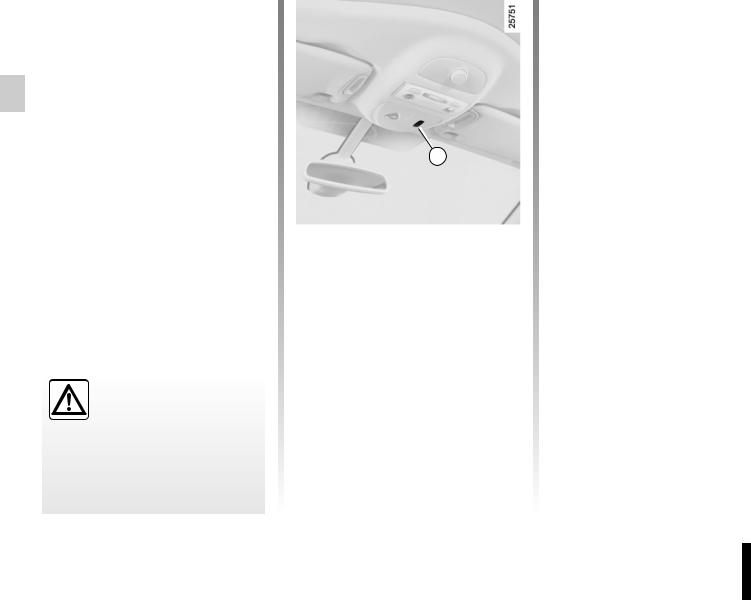
RENA ULTANTI-INTRUDER DEVICE (RAID)
You can decide whether you want to activate this function.
Operating principle
When the vehicle is started, the system automatically locks the doors when you are driving at approximately 6 mph (10 km/h) and over.
|
The door can be unlocked: |
1 |
||
|
– |
by opening a front door (vehicle sta |
— |
|
|
tionary). |
|
Note: if a door is opened, it will auto |
— |
|||
|
matically be locked again when the |
||||
|
vehicle reaches a speed of approxi |
— |
To activate |
||
|
mately 6 mph (10 km/h); |
||||
|
– by pressing door unlocking button 1. |
With the ignition on, press central lock |
— |
||
|
ing button 1 on the locking side (pad- |
||||
|
lock side) for approximately 5 seconds, |
||||
|
until you hear the beep. |
||||
|
To deactivate |
||||
|
With the ignition on, press central lock |
— |
|||
|
ing button 1 on the unlocking side (op |
— |
|||
|
posite padlock side) for approximately |
||||
|
Driver’s responsibility |
5 seconds, until you hear the beep. |
|||
|
If you decide to keep the |
||||
|
doors locked when you are |
||||
|
driving, remember that it |
||||
|
may be more difficult for those as- |
||||
|
sisting you to gain access to the |
||||
|
passenger compartment in the |
||||
|
event of an emergency. |
||||
|
1.12 |
Operating faults
If you notice an operating fault (automatic locking impossible), first check that all doors are correctly locked. If they are correctly locked and the fault is still present, contact an approved Dealer.
Also make sure that locking has not been inadvertently deactivated.
If it has, switch the ignition off and on again and reactivate it.
Downloaded from www.Manualslib.com manuals search engine
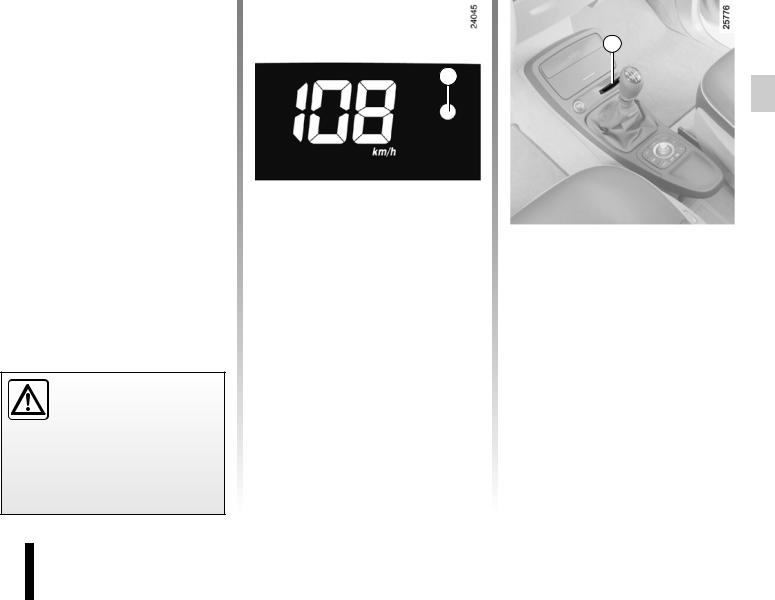
ENGINE IMMOBILI SER
This prevents the vehicle from being started by anyone not in possession of the vehicle’s RENA ULT card.
The vehicle is automatically protected a few seconds after the engine is switched off.
Any unauthorised work carried out on the engine immobiliser (computers, wiring, etc.) could be dan-
gerous. Work must be carried out by qualified personnel.
Operating principle
As soon as the system detects the card, indicator light 1 comes on continuously for a few seconds then goes out.
The vehicle has recognised the code and the engine can be started.
If the vehicle does not recognise the code, indicator light 1 and card reader 2 will flash (rapid flashing), and the vehi — cle cannot be started.
1.13
Downloaded from www.Manualslib.com manuals search engine
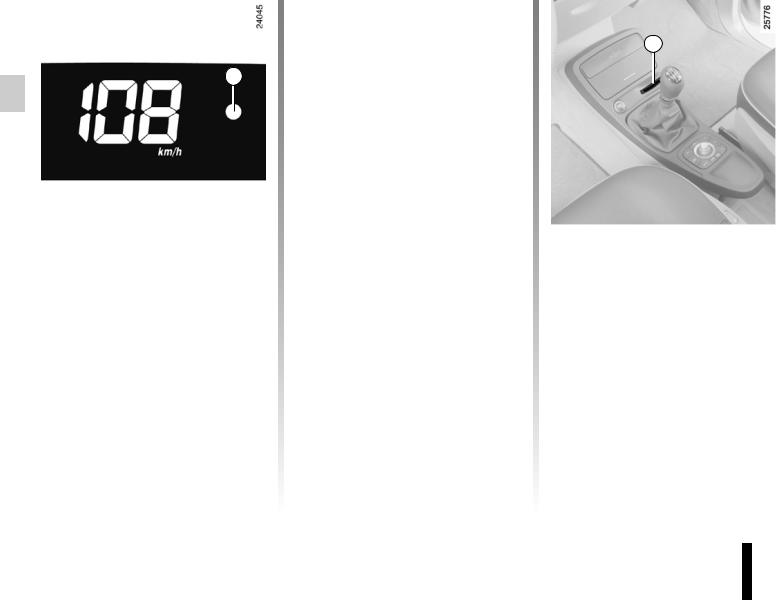
ENGINE IMMOBILI SER(continued)
|
Operating fault warning light |
||
|
If there is interference and/or the hands- |
2 |
|
|
free RENAULT card is not recognised, |
||
|
insert it in card reader 2. |
||
|
1 |
If warning light 1 continues to flash or |
|
|
remains continuously lit, then the card |
||
|
is present but it is not recognised; this |
||
|
indicates that there is an operating fault |
||
|
in the system. |
Indicator lights
Vehicle protection tell-tale light
A few seconds after the ignition has been switched off, warning light 1 will flash continuously.
If the RENAULT card is faulty (card reader and warning light 1 flashing rap — idly), use the second RENAULT card (supplied with the vehicle) if possible.
Call an approved dealer, who is the only person capable of repairing the engine immobiliser system.
1.14
Downloaded from www.Manualslib.com manuals search engine
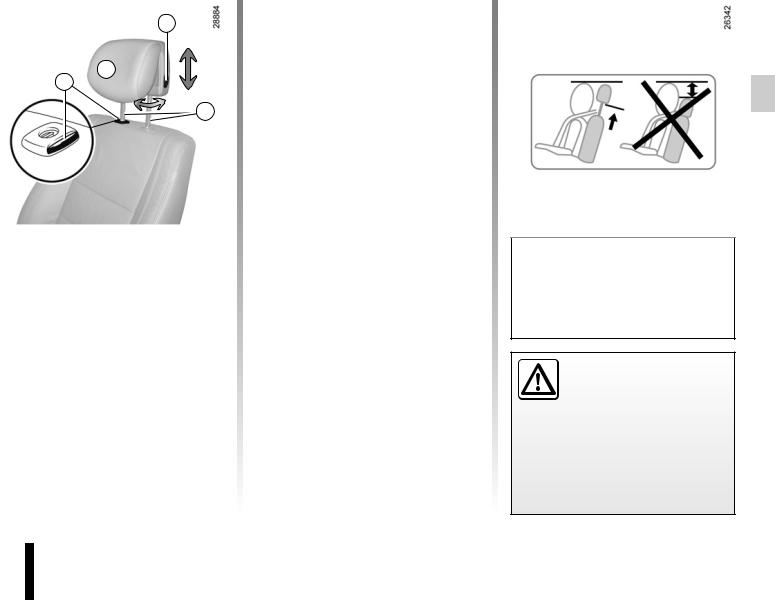
Front headres ts
To raise the headrest
Pull the headrest upwards to the desired height.
To lower the headrest
Press button 2 and guide the headrest down to the desired height.
To adjust the angle of the headrest
Depending on the vehicle, tilt section A towards or away from you to the required position.
To remove the headrest
Raise the headrest to its highest position (tilt the seatback backwards if necessary). Press button 1 and lift the headrest to release it.
To refit the headrest
|
Pull out the headrest rods 3 as far as |
|
|
possible by pulling from the top. Take |
|
|
care to ensure they are clean and cor |
— |
|
rectly aligned and, if there are any prob |
— |
|
lems, check that the notches are facing |
|
|
forwards. |
|
|
Insert the headrest rods into the holes |
|
|
(tilt the seatback backwards if neces- |
|
|
sary). |
|
|
Lower the headrest until it locks, press |
|
|
button 1 and lower the headrest as far |
|
|
as possible. |
|
|
Check that each headrest rod 3 is se- |
|
|
curely locked in the seatback by trying |
|
|
to pull them up or push them down. |
The three upper positions can be manipulated without pressing button 2. However, it is preferable to press this button to lower the head — rest.
The headrest is an important safety component: ensure that it is in place and in the correct position. The
distance between your head and the headrest and the distance between the head and section A should be as small as possible.
1.15
Downloaded from www.Manualslib.com manuals search engine
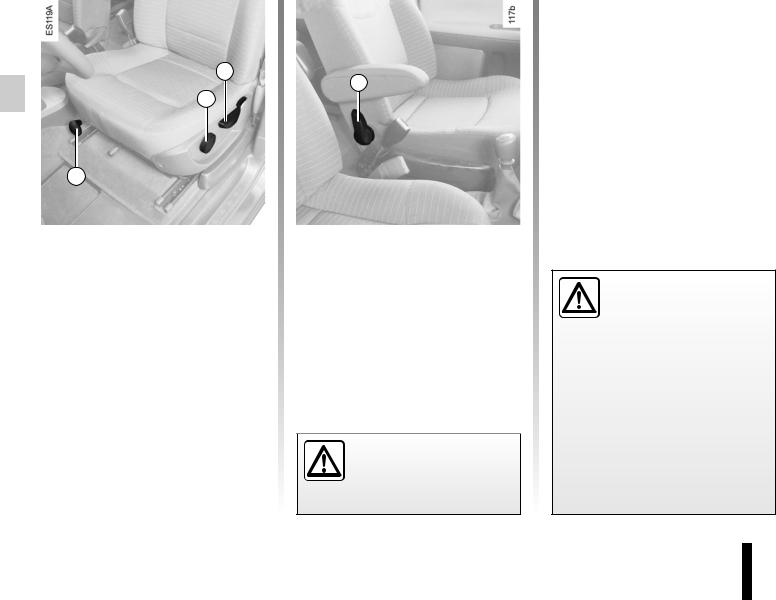
FRONT SEATS WITH M ANUAL CONTROL
To move forwards or backwards
Lift lever 1 to unlock the seat. When the seat is in the required position, release the lever and ensure that the seat is locked in place.
To tilt the seatback
Lift lever 4 and tilt the seatback to the desired position.
To adjust the lumbar support on the driver’s seat:
Pull handle 2 .
1.16
To adjust the driver’s seat height:
Move lever 3 as many times as neces — sary:
–upwards to raise the seat,
–downwards to lower the seat.
For safety reasons, carry out any adjustments when the vehicle is not being driven.
We would advise you not to recline the seatbacks too far to ensure that the effec —
tiveness of the seat belts is not reduced.
Make sure that the seatbacks are locked in place correctly.
Nothing should be placed on the floor (area in front of driver) as such objects may slide under the pedal during braking manoeuvres, thus obstructing its use.
Downloaded from www.Manualslib.com manuals search engine
FRONT SEATS WITH ELECTRIC CONTROL
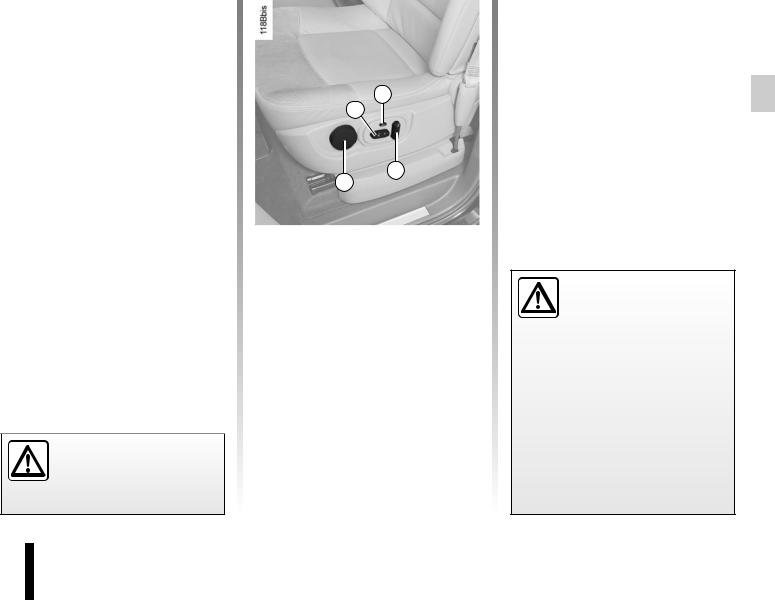
Switches 1 and 3 are the same shape as the seat squab and seatback: switch 1 is used for adjusting the seat squab and switch 3 is used for adjusting the seatback.
|
On equipped vehicles, button |
2 is used |
2 |
||
|
to store the chosen driving position. It |
||||
|
is possible to store a driving position |
1 |
|||
|
using the RENAULT Card. |
||||
|
The system operates: |
||||
|
– hands-free RENAULT card de- |
4 |
3 |
||
|
tected or, depending on the vehicle, |
— |
|||
|
RENAULT remote control in ‘acces |
||||
|
sories’ position in the card reader; |
–for vehicles with button 2, this also operates for about 40 minutes when the driver’s door is opened and the ignition is switched off.
For safety reasons, carry out any adjustments when the vehicle is not being driven.
Adjusting the seat squab: switch 1
–To move forwards
Move it forwards.
–To move backwards
Move it backwards.
–To raise
Lift the rear of the switch.
–To lower
Lower the rear of the switch.
Adjusting the seatback: switch 3
To tilt the seatback
Move the switch forward or backwards.
Adjusting the lumbar support on the driver’s seat
Pull handle 4 .
We would advise you not to recline the seatbacks too far to ensure that the effec —
tiveness of the seat belts is not reduced.
Make sure that the seatbacks are locked in place correctly.
Nothing should be placed on the floor (area in front of driver) as such objects may slide under the pedal during braking manoeuvres, thus obstructing its use.
1.17
Downloaded from www.Manualslib.com manuals search engine
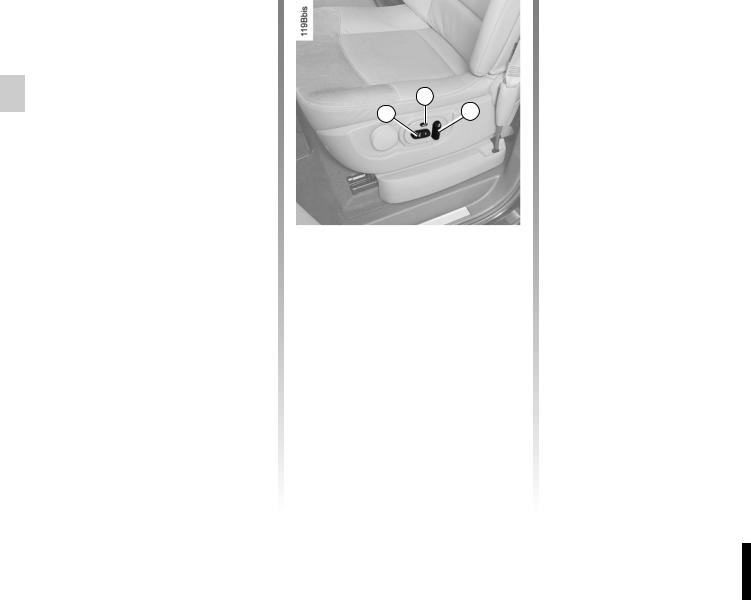
STORING TH E DRIVER’S SEAT PO SITIO N
It is possible to store a driving position using the RENAULT Card.
A driving position includes the driver’s seat position and door mirror settings.
When a driving position is stored, the seat and door mirror settings linked to the RENAULT Card used are automati — cally recalled when the doors are unlocked and opened using the RENAULT Card.
|
The system operates: |
||
|
– hands-free RENAULT card de- |
||
|
tected or, depending on the vehicle, |
||
|
RENAULT remote control in ‘acces |
— |
|
|
sories’ position in the card reader; |
Driver’s seat memory |
|
|
– when the driver’s door is opened, |
procedure |
|
|
with the ignition off, for about 40 min |
— |
|
|
utes. |
With the ignition on, adjust the seat |
|
|
using switches 1 and 3 (see informa- |
||
|
tion on “Front seats with electric con- |
||
|
trol” in Section 1). |
||
|
Press button 2 until you hear a beep: |
||
|
the driving position is stored. |
||
|
Repeat this procedure for each of the |
||
|
RENAULT Cards. |
1.18
Recalling a stored position
With the vehicle stationary, briefly press button 2.
Note: recall of the stored position is in — terrupted if one of the seat adjustment buttons is pressed during recall.
When driving, it is possible to adjust the driving position, but it is not possible to recall a driving position.
Special case
Several hands-free cards in the vehicle.
In this case:
– there is no automatic recall;
– it is possible to recall the driving po — sition by inserting the RENAULT card in the card reader and pressing button 2.
Downloaded from www.Manualslib.com manuals search engine
FRONTARMRES TS/HEATED SEATS
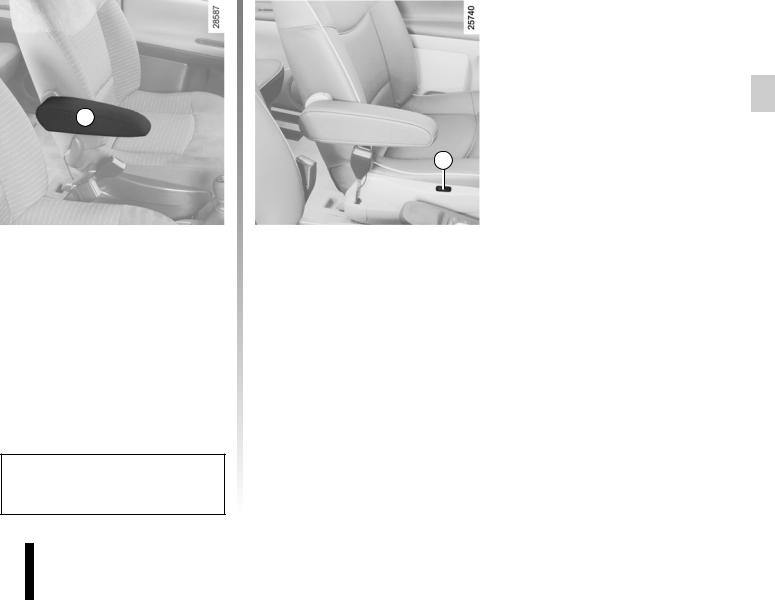
1
|
Armrests |
Heated seats |
|
|
Adjustment |
With the engine running, press |
|
|
switch 2. The indicator light in the |
||
|
If the vehicle is fitted with this, lift arm — |
||
|
switch lights up. |
||
|
rest 1 fully. Lower it fully then raise it to |
The system, which has a thermostat, |
|
|
the desired height. |
||
|
decides whether or not the heating is |
||
|
needed. |
Fasten the seat belt before adjusting the armrest.
1.19
Downloaded from www.Manualslib.com manuals search engine
SEAT BELTS(1/3)
Always wear your seat belt when trav elling in your vehicle. You must also comply with the legislation of the particular country you are in.
Before starting, first adjust your driv ing position, then ask all occupants to adjust their seat belts to ensure optimum protection.
Incorrectly adjusted or twisted seat belts may cause injuries in the event
of an accident.
Use one seat belt per person, whether child or adult.
Even pregnant women should wear a seat belt. In this case, ensure that the lap belt is not exerting too much pressure on the abdomen but do not allow any slack.
—Adjusting your driving position
–Sit well back in your seat (having removed your coat or jacket etc.).
—This is essential to ensure your back
is positioned correctly.
–Adjust the distance between the seat and the pedals. Your seat should be as far back as possible while still allowing you to depress the clutch pedal fully. The seatback should be adjusted so that your arms are slightly bent when you hold the steering wheel.
– Adjust the position of your head — rest. For the maximum safety, your head must be as close as possible to the headrest.
The top of your head should be in line with the top of the headrest.
–Adjust the height of the seat. This adjustment allows you to select the seat position which offers you the best possible view.
–Adjust the position of the steering wheel.
Adjusting the seat belts
Sit with your back firmly against the seatback.
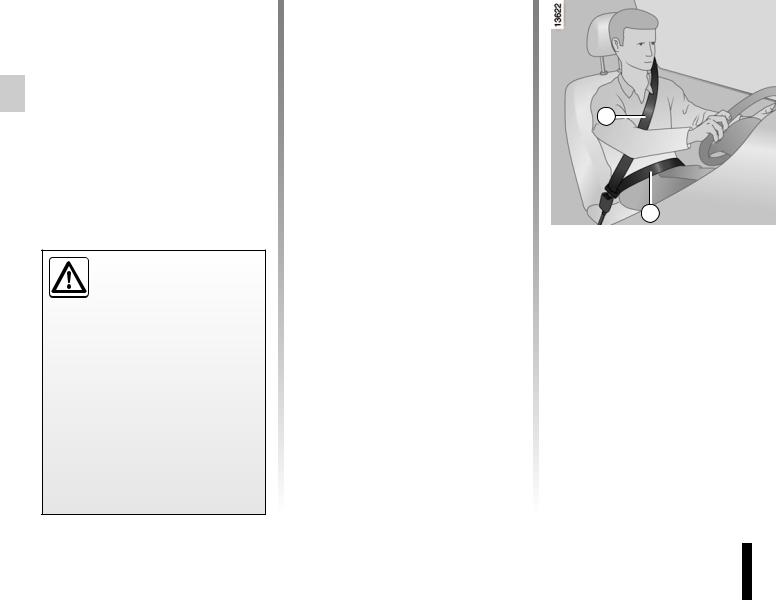
Shoulder strap 1 should be as close as possible to the base of the neck but not on it.
Lap belt 2 should be worn flat over the thighs and against the pelvis.
The seat belt should be worn so that it is as close as possible to your body, i.e.: avoid wearing heavy clothing or keeping bulky objects under the belts, etc.
1.20
Downloaded from www.Manualslib.com manuals search engine
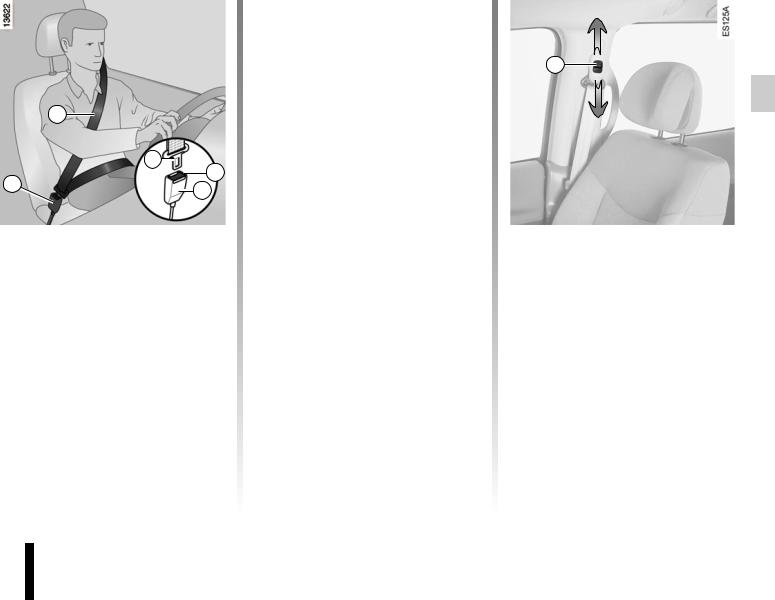
ÇFront seat belt reminder warning light
|
If this warning light on the instrument |
|||
|
panel or the dashboard goes out, the |
6 |
||
|
front seat belts have been correctly fas |
— |
||
|
tened. |
|||
|
Unfastening |
|||
|
Press button 4 on buckle 5 and the seat |
|||
|
4 |
belt will be rewound by the inertia reel. |
||
|
Guide the buckle to help the operation. |
|||
|
5 |
Fastening
Unwind the belt slowly and smoothly and ensure that buckle 3 locks into catch 5 (check that it is locked by pulling on buckle 3). If the belt jams, allow it to return slightly before attempting to unwind it again.
If your seat belt is completely jammed, pull slowly, but firmly, so that just over 3 cm unwinds. Allow it to return slightly before attempting to unwind it again.
If there is still a problem, contact an ap — proved dealer.
Adjusting the height of the front seat belts
Press button 6 to adjust the seat belt height so that the shoulder strap is worn as shown previously;
Press button 6 and raise or lower the seat belt.
Make sure that the seat belt is locked
in position correctly after you have ad — justed it.
1.21
Downloaded from www.Manualslib.com manuals search engine
SEAT BELTS(3/3)
The following information applies to the vehicle’s front and rear seat belts.
– No modification may be made to the component parts of the originally fitted restraint system: belts, seats and their mountings. For special operations (e.g. fitting child seats), contact an authorised dealer.
– Do not use devices which allow any slack in the belts (e.g. clothes pegs, clips, etc.): a seat belt which is worn too loosely may cause injury in the event of an accident.
–Never wear the shoulder strap under your arm or behind your back.
–Never use the same belt for more than one person and never hold a baby or child on your lap with your seat belt around them.
–The belt should never be twisted.
–Following an accident, have the seat belts checked and replaced if necessary. Always replace your seat belts as soon as they show any signs of wear.
–When refitting the rear bench seat, take care that the seat belts are correctly positioned so that they can be used properly.
–Make sure that the buckle is inserted into the appropriate catch.
–Ensure that no objects are placed in the area around the seat belt catch as they could prevent it from being properly se cured.
–Make sure the seat belt catch is properly positioned (it should not be hidden away, crushed or flattened by people or ob jects).
1.22
Downloaded from www.Manualslib.com manuals search engine
METHO DS OF RES TRAINT INADD ITIO N TO TH E FRONT SEAT BELTS(1/4)
These are:
–buckle pretensioners,
–lap belt pretensioners in the front seats,
–force limiters,
–air bags for driver and front passenger.
|
These systems are designed to act in |
— |
|
dependently or together when the vehi |
— |
|
cle is subjected to a frontal impact. |
|
|
Depending on the severity of the |
|
|
impact, the system can trigger: |
–seat belt locking;
–the buckle pretensioner (which engages to correct seat belt slack);
–the lap pretensioner, the low volume front air bag and the force limiter;
–the large volume front air bag.
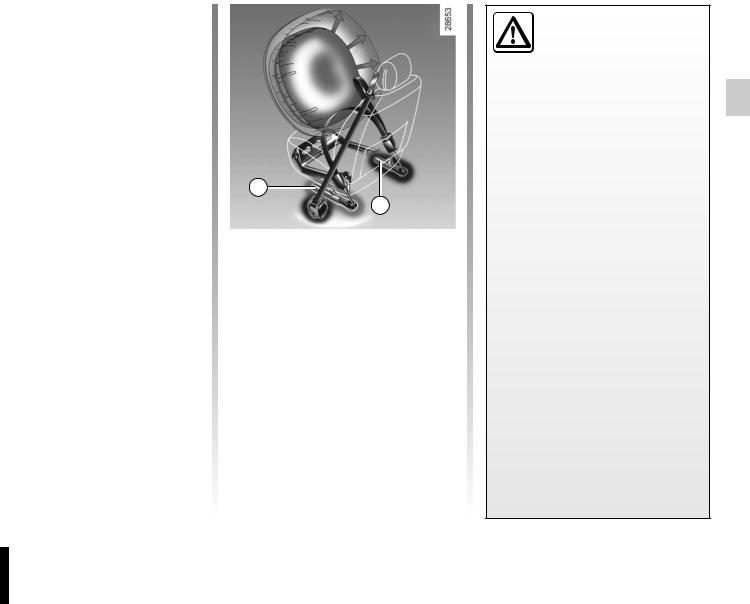
Pretensioners
In the event of a severe frontal impact and if the ignition is switched on, the system may engage the following depending on the force of the impact:
–piston 1 which immediately retracts the seat belt;
–piston 2.
The pretensioners hold the seat belt against the body and thus increase its efficiency.
–Have the entire restraint system checked following
an accident.
– No operation whatsoever is permitted on any part of the system (pretensioners, air bags, computers, wiring) and the system components must not be reused on any other vehicle, even if identical.
–To avoid incorrect triggering of the system which may cause injury, only qualified personnel from an approved dealer may work on the pretensioner and air bag system.
–The electric trigger system may only be tested by a specially trained technician using special equipment.
–When the vehicle is scrapped, contact an approved dealer for disposal of the pretensioner and air bag gas generators.
1.23
Downloaded from www.Manualslib.com manuals search engine
METHO DS OF RES TRAINT INADD ITIO N TO TH E FRONT SEAT BELTS(2/4)
Force limiter
Above a certain level of impact force, this mechanism is used to limit the force of the belt against the body so that it is at an acceptable level.
B A
Air bags for driver A and front passenger B
An air bag may be provided for both the driver and the front passenger.
An “Air bag” marking on the steering wheel, dashboard and, depending on the vehicle, the lower section of the windscreen inform you of the presence of additional means of restraint (air bags, pretensioners, etc.) in the passenger compartment.
Each air bag system consists of:
–an air bag and gas generator fitted on the steering wheel for the driver and in the dashboard for the front passenger;
–a shared electronic unit which includes the impact detector and a monitoring system which controls
the ignition module for the gas gen — erator;
–a single Åwarning light on the instrument panel.
The air bag system uses pyrotechnic principles. This explains why, when the air bag inflates, it will gener-
ate heat, produce smoke (this does not mean that a fire is about to start) and make a noise upon detonation. In a situation where an air bag is required, it will inflate immediately and this may cause some minor, su — perficial grazing to the skin or other problems.
1.24
Downloaded from www.Manualslib.com manuals search engine

METHO DS OF RES TRAINT INADD ITIO N TO TH E FRONT SEAT BELTS(3/4)
Operating faults
Å This warning light will light up on the instrument panel when the ignition is switched on and then go
out after a few seconds.
If it does not light up when the ignition is switched on, or comes on when the engine is running, there is a fault in the system.
Contact your approved dealer as soon as possible. Your protection will be re — duced until this fault is rectified.
Operation
This system is only operational when the ignition is switched on.
If a severe frontal impact occurs, the air bag(s) inflate(s) rapidly, cushioning the impact of the driver’s head and chest against the steering wheel and the front passenger’s head against the dashboard. The air bag then deflates immediately so that the passengers are not impeded in any way when they get out of the vehicle.
Special feature of the front air bag
There are two volumes of operation de — pending on the severity of the impact:
–low volume air bag, this is the first stage of operation;
–large volume air bag, the air bag seams rip so that a larger volume of gas is released into the bag (for the most severe impacts).
1.25
Downloaded from www.Manualslib.com manuals search engine

METHO DS OF RES TRAINT INADD ITIO N TO TH E FRONT SEAT BELTS(4/4)
All of the warnings below are given so that the air bag is not obstructed in any way when it is inflated and also to prevent the risk of serious injuries caused by items which may be dislodged when the air bag inflates.
Warnings concerning the driver’s air bag
– Do not modify the steering wheel or the steering wheel boss.
–Do not cover the steering wheel boss under any circumstances.
–Do not attach any objects (badge, logo, clock, telephone cradle, etc.) to the steering wheel boss.
–The steering wheel must not be removed (except by qualified personnel from our Network).
–Do not sit too close to the steering wheel when driving: sit with your arms slightly bent (see Section 1 “Adjusting your driving position”). This will allow sufficient space for the air bag to deploy correctly and be fully effective.
Warnings concerning the passenger air bag
–Do not attach or glue any objects (badge, logo, clock, telephone cradle, etc.) to the dashboard in the air bag zone.
–Do not place anything between the dashboard and the passenger (animal, umbrella, walking stick, parcels, etc.).
–The passenger must not put his or her feet on the dashboard or seat as there is a risk that serious injuries may occur. As a general rule, keep all body parts (knees, hands, head, etc.) away from the dashboard.
–The devices in addition to the front passenger seat belt should be reactivated as soon as a child seat is removed, to ensure the protection of the passenger in the event of an impact.
A REAR -FAC ING CHILD SEAT MU ST NOT B E FITTED TO TH E FRONTASSENP GER SEAT UNLESS THE ADD ITIO NAL RES TRAINT SYSTEMS, I.E. THASSENP GERAIR BAG,ARE DEAC TIVATED.
(Refer to the information on “Child safety: deactivating/activating the front passenger air bag” in Section 1).
1.26
Downloaded from www.Manualslib.com manuals search engine

SIDE PROTECTION DEVICES
|
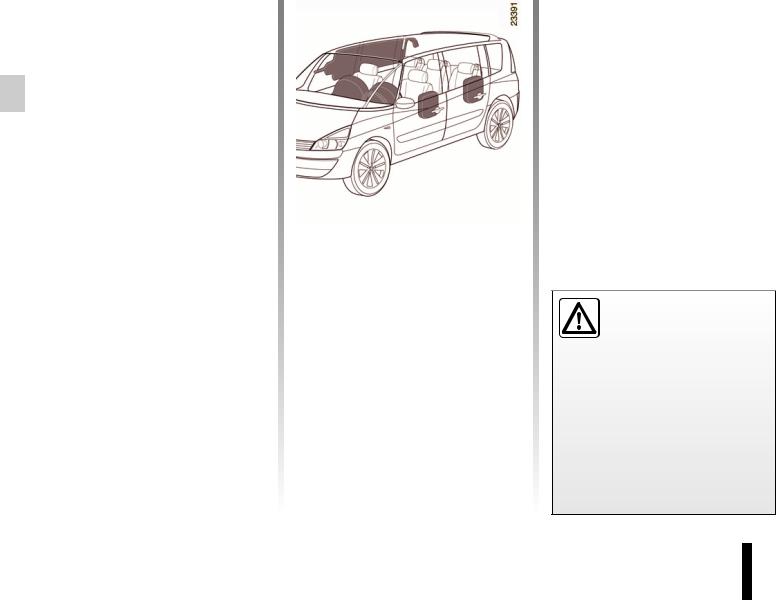
Curtain air bags B |
||
|
These are fitted on both upper sides of |
||
|
B |
the vehicle. They deploy along the front |
|
|
and rear side windows to protect oc- |
||
|
cupants in the event of a severe side |
||
|
A |
impact. |
|
|
A |
Depending on the vehicle, a marking on the windscreen informs you of the presence of additional means of restraint (air bags, pretensioners, etc.) in the passenger compartment.
Side air bags A
These are fitted to the front seats and, depending on the vehicle, the rear door panels for the first rear row. They are triggered at the side of the seats (door side) to protect the occupants in the event of a severe side impact.
The slits on the seatbacks (door side) correspond to the area of air bag operation: Never place any ob-
jects here.
Warning concerning the side air bag
– Fitting seat covers: seats equipped with an air bag require covers specifically designed for your vehicle. Contact an approved Dealer to find out if these covers are available. The use of any covers other than those
designed for your vehicle (including those designed for another vehicle) may affect the operation of the air bags and reduce your protection.
–Do not place any accessories, objects or even pets between the seatback, the door and the internal fittings. Do not cover the seatback with any items such as clothes or accessories. This may prevent the air bag from operating correctly or cause injury when the air bag is deployed.
–No work or modification whatsoever may be carried out on the seat or internal fittings, except by qualified personnel from an approved dealer.
1.27
Downloaded from www.Manualslib.com manuals search engine

ADD ITIO NAL METHO DS OF RES TRAINT
All of the warnings below are given so that the air bag is not obstructed in any way when it is inflated and also to prevent the risk of serious injuries caused by items which may be dislodged when the air bag inflates.
The air bag is designed to complement the action of the seat belt. Both the air bags and seat belts are integral parts of the same protection system. It is therefore essential to wear seat belts at all times. If seat belts are not worn, the oc cupants are exposed to the risk of serious injury in the event of an accident. It may also increase the risk of minor su perficial injuries occurring when the air bag is deployed, although such minor injuries are always possible with air bags.
The air bags are not always triggered if the vehicle should overturn or in the event of a rear impact, however severe. Impacts to the underside of the vehicle, e.g. from pavements, potholes or stones, can all trigger these systems.
–No work or modification whatsoever may be carried out on any part of the air bag system (air bags, arches, pretensioners, computer, wiring harness, etc.), except by qualified personnel from an approved dealer.
–To ensure that the system is in good working order and to avoid accidental triggering of the system which may cause injury, only qualified Network personnel may work on the air bag system.
–As a safety precaution, have the air bag system checked if your vehicle has been involved in an accident, or is stolen or broken into.
–When selling or lending the vehicle, inform the user of these points and hand over this driver’s handbook with the vehicle.
–When scrapping your vehicle, contact your approved dealer for disposal of the gas generator(s).
1.28
Downloaded from www.Manualslib.com manuals search engine

Chil d safe ty: General information (1/2)
Carrying children
Children, and adults, must be correctly seated and strapped in for all journeys. The children being carried in your vehi — cle are your responsibility.
A child is not a miniature adult. Children are at risk of specific injuries as their muscles and bones have not yet finished growing. The seat belt alone would not provide suitable protection. Use an approved child seat and ensure you use it correctly.
To prevent the doors being opened, use the “Child safety” device (refer to the information on “Opening
and closing the doors” in Section 1).
A collision at 30 mph (50 km/h) is the same as falling a distance of 10 metres.
Transporting a child without a restraint is the equivalent of allowing him or her to play on a fourthfloor balcony without railings.
Never travel with a child held in your arms. In the event of an accident, you will not be able to keep hold of the child, even if you yourself are wearing a seat belt.
If your vehicle has been involved in a road accident, replace the child seat and have the seat belts and ISOFIX anchorage points checked.
|
Driver’s responsibility |
||
|
when parking or stopping |
||
|
the vehicle |
||
|
Never leave an animal, |
||
|
child or adult who is not self-suffi- |
||
|
cient alone on your vehicle, even for |
||
|
a short time. |
||
|
They may pose a risk to themselves |
||
|
or to others by starting the engine, |
||
|
activating equipment such as the |
||
|
electric windows or by locking the |
||
|
doors. |
||
|
Also, in hot and/or sunny weather, |
||
|
please remember that the tempera |
— |
|
|
ture inside the passenger compart |
— |
|
|
ment increases very quickly. |
||
|
RISK OF DEATH OR SERIOUS |
||
|
INJURY. |
||
1.29
Downloaded from www.Manualslib.com manuals search engine

Chil d safe ty: General information (2/2)
|
Using a child seat |
|||
|
Set a good example by always fas |
— |
||
|
The level of protection offered by the |
|||
|
child seat depends on its ability to re- |
tening your seat belt and teaching |
||
|
strain your child and on its installation. |
your child: |
||
|
Incorrect installation compromises the |
– to strap themselves in correctly; |
||
|
protection it offers the child in the event |
– to always get in and out of the car |
||
|
of harsh braking or an impact. |
at the kerb, away from busy traf |
— |
|
|
Before purchasing a child seat, check |
fic. |
||
|
Do not use a second-hand child |
|||
|
that it complies with the regulations for |
|||
|
the country you are in and that it can |
seat or one without an instruction |
||
|
be fitted in your vehicle. Consult an ap — |
manual. |
||
|
proved dealer to find out which seats |
Check that there are no objects in |
||
|
are recommended for your vehicle. |
|||
|
the vicinity of the child seat which |
|||
|
Before fitting a child seat, read the |
could impede its operation. |
||
|
manual and respect its instructions. If |
|||
|
you experience any difficulties during |
|||
|
Never leave a child unat- |
|||
|
installation, contact the manufacturer |
|||
|
tended in the vehicle. |
|||
|
of the equipment. Keep the instructions |
|||
|
Check that your child is |
|||
|
with the seat. |
|||
|
always strapped in and that |
|||
|
the belt or safety harness used is |
|||
|
correctly set and adjusted. Avoid |
|||
|
wearing bulky clothing which could |
|||
|
cause the belts to slacken. |
|||
|
Never let your child put their head or |
|||
|
arms out of the window. |
|||
|
Check that the child is in the correct |
|||
|
position for the entire journey, espe |
— |
||
|
cially if asleep. |
|||
1.30
Downloaded from www.Manualslib.com manuals search engine

Chil d safe ty: Choosing a child seat
|
Rear-facing child seats |
Forward-facing child seats |
|
A baby’s head is, proportionally, heavier |
The child’s head and abdomen need to |
|
than that of an adult and its neck is very |
be protected as a priority. A forward -fac- |
|
fragile. Transport the child in this posi |
— ing child seat which is firmly attached to |
|
tion as long as possible (until the age of |
the vehicle will reduce the risk of impact |
|
2 at the very least). It supports both the |
to the head. Ensure your child travels in |
|
head and the neck. |
a forward-facing seat with a harness or |
|
Choose a bucket type seat for best side |
buckle for as long as their size permits. |
|
protection and change it as soon as the |
Choose a bucket type seat for optimum |
|
child’s head is higher than the shell. |
side protection.w |
Booster cushions
From 15 kg or 4 years, the child can travel using a booster seat, which will enable the seat belt to be adapted to suit his size and shape. The booster seat cushion must be fitted with guides to position the seat belt on the child’s thighs rather than the stomach. It is recommended that you use a seatback which can be adjusted in terms of height to position the seat belt in the centre of the shoulder. It must never rest on the neck or on the arm.
Choose a bucket type seat for optimum side protection.
1.31
Downloaded from www.Manualslib.com manuals search engine

child safe ty: choosing a child seat mounting (1/2)
|
There are two ways of attaching child |
Attachment using the I SOFIX |
|||||||||||
|
Do not use the child seat |
||||||||||||
|
seats: via the seat belt or using the |
system |
|||||||||||
|
if it may unfasten the seat |
||||||||||||
|
ISOFIX system. |
Authorised ISOFIX child seats are ap- |
|||||||||||
|
belt restraining it: the base |
||||||||||||
|
Attachment via the seat belt |
of the seat must not rest on |
proved in accordance with regulation |
||||||||||
|
The seat belt must be adjusted to |
the buckle and/or catch of the seat |
ECE-R44 in one of the three following |
||||||||||
|
belt. |
scenarios: |
|||||||||||
|
ensure that it is effective in the event of |
– ISOFIX universal 3-point forward- |
|||||||||||
|
harsh braking or an impact. |
facing seat |
|||||||||||
|
Ensure that the strap paths indicated |
– ISOFIX semi-universal 2-point seat |
|||||||||||
|
by the child seat manufacturer are re- |
– specific |
|||||||||||
|
spected. |
For the latter two, check that your child |
|||||||||||
|
Always check that the seat belt is cor |
— |
seat can be installed by consulting the |
||||||||||
|
rectly fastened by pulling it up, then |
list of compatible vehicles. |
|||||||||||
|
pulling it out fully whilst pressing on the |
Attach the child seat with the ISOFIX |
|||||||||||
|
child seat. |
locks, if these are provided. The ISOFIX |
|||||||||||
|
Check that the seat is correctly held by |
system allows quick, easy, safe fitting. |
|||||||||||
|
moving it from side to side and back |
The seat belt must never |
The ISOFIX system consists of 2 rings |
||||||||||
|
to front: the seat should remain firmly |
and, in some cases, a third ring. |
|||||||||||
|
be twisted or the tension |
||||||||||||
|
fixed. |
||||||||||||
|
relieved. Never |
pass |
the |
||||||||||
|
Check that the child seat has not been |
shoulder strap |
under |
the |
|||||||||
|
installed at an angle and that it is not |
arm or behind the back. |
|||||||||||
|
resting against a window. |
Check that the seat belt has not |
|||||||||||
|
been damaged by sharp edges. |
||||||||||||
|
If the seat belt does not operate nor |
— |
Before using an ISOFIX |
||||||||||
|
mally, it will not protect the child. |
child seat that you pur- |
|||||||||||
|
Consult an approved dealer. Do not |
chased for another vehicle, |
|||||||||||
|
use this seat until the seat belt has |
check that its installation is |
|||||||||||
|
No modifications may be |
been repaired. |
authorised. Consult the list of ve- |
||||||||||
|
made to the component |
hicles which can be fitted with the |
|||||||||||
|
parts of the restraint system |
seat from the equipment manufac- |
|||||||||||
|
(ISOFIX seat belts, seats |
turer. |
|||||||||||
|
and their mountings) originally fitted. |
||||||||||||
|
1.32 |
||||||||||||
Downloaded from www.Manualslib.com manuals search engine

child safe ty: choosing a child seat mounting (2/2)
The two rings 1 are located between the seatback and the seat base of the seat and are identified by a marking.
To ensure your child seat can be easily fitted and locked on rings 1, use access guides 2 on the child seat.
The third ring is used to attach the upper strap on some child seats.
To access ring 3, lower cover 4 shown by a marking on the back of the seat.
Fix the hook of the strap onto ring 3 and pull the strap so that the seatback of the child seat comes into contact with the seatback of the vehicle seat.
The ISOFIX anchorage points have been exclusively designed for child seats with the ISOFIX system. Never fit a different type of child seat, seat belt or other objects to these anchorage points.
Check that nothing is obstructing the anchorage points.
If your vehicle has been involved in a road accident, have the ISOFIX anchorage points checked and replace your child seat.
1.33
Downloaded from www.Manualslib.com manuals search engine

child safe ty: fitting a child seat (1/4)
Some seats are not suitable for fitting child seats. The diagram on the following page shows you how to attach a child seat.
The types of child seats indicated may not be available. Before using a differ ent child seat, check with the manufac turer that it can be fitted.
Fit the child seat in a rear seat wherever possible.
Check that when installing the child seat in the vehicle it is not at risk of coming loose from
its base.
If you have to remove the headrest, check that it is correctly stored so that it does not come loose under harsh braking or impact.
Always attach the child seat to the vehicle even if it is not in use so that it does not come loose under harsh braking or impact.
|
In the front seat |
In the rear seat |
||||
|
The laws concerning children travel- |
A carrycot can be installed across the |
||||
|
ling in the front passenger seat differ in |
vehicle and will take up at least two |
||||
|
every country. Consult the legislation in |
seats. Position the child with his or her |
||||
|
force and follow the indications on the |
feet nearest the door. |
||||
|
— diagram on the following page. |
Move the front seat as far forward as |
||||
|
— Before fitting a child seat in this seat (if |
possible to install a rear-facing child |
||||
|
authorised): |
seat, then move back the seat in front |
||||
|
– lower the seat belt as far as possible; |
as far as it will go, although without al |
— |
|||
|
– |
move the seat as far back as possi — |
lowing it to come into contact with the |
|||
|
ble; |
child seat. |
||||
|
– |
gently tilt the seatback away from |
For the safety of the child in the for- |
|||
|
vertical (approximately 25°); |
|||||
|
ward-facing seat, do not move the seat |
|||||
|
– |
on equipped vehicles, raise the seat |
||||
|
in front back past the middle of the |
|||||
|
base as far as possible. |
|||||
|
runner, do not tilt the seatback too far |
|||||
|
Do not change these settings after the |
(maximum of 25° ) and raise the seat as |
||||
|
child seat is installed. |
much as possible. |
||||
|
Check that the forward-facing child seat |
|||||
|
is resting against the back of the vehi |
— |
||||
|
cle seat and that the headrest of the ve |
— |
||||
|
hicle is not obstructing its use. |
|||||
|
To install a large rear-facing ISOFIX |
|||||
|
RISK OF DEATH OR |
|||||
|
child seat (size C) in the 2nd row, fit the |
|||||
|
SERIOUS INJURY: before |
seats in the centred position or use the |
||||
|
fitting a rear-facing child |
centre seat. |
||||
|
seat in this position, check |
|||||
|
that the air bag has been deacti- |
|||||
|
vated (refer to the information on |
|||||
|
“Child safety: deactivating/activat- |
|||||
|
ing the front passenger air bag” in |
|||||
|
Section 1). |
|||||
1.34
Downloaded from www.Manualslib.com manuals search engine

child safe ty: fitting a child seat (2/4)
³Check the status of the air bag before fitting a child seat or allowing a passenger to use the seat.
RISK OF DEATH OR SERIOUS INJURY: before fitting a rear-facing child seat to this seat, check that
the air bag has been deactivated (refer to the information on “Child safety: deactivating/activating the front passenger air bag” at the end of the paragraph).
Child seat attached using the belt
¬Seat which allows a child seat with “Universal” approval to be attached by a seat belt.
−Seat which only allows a rearfacing seat with “Universal” approval to be attached with a seat belt.
Child seat attached using the ISOFIX mounting
ÜSeat which allows an ISOFIX child seat to be fitted.
±The rear seats are fitted with an anchorage point which allows a forward-facing ISOFIX child seat with universal approval to be fitted. The an — chorage points are located at the back of each rear seat.
The size of the ISOFIX child seat is in — dicated by a letter:
–A, B and B1: for forward-facing seats in group 1 (9 to 18 kg);
–C: rear-facing seats in group 1 (9 to 18 kg);
–D and E: shell seat or rear-facing seats in group 0 or 0+ (less than 13 kg);
–F and G: cots in group 0 (less than 10 kg).
Using a child safety system which is not approved for this vehicle will not correctly protect the baby or child. They risk serious or even fatal injury.
1.35
Downloaded from www.Manualslib.com manuals search engine

child safe ty: fitting a child seat (3/4)
The table below summarises the information already shown on the diagram on the previous page, to ensure the regula tions in force are respected.
|
Weight of |
Seat size |
Seats suitable for fitting a child seat |
|||||
|
Type of child seat |
|||||||
|
the child |
ISOFIX (2) |
Front passenger |
Rear seats, |
||||
|
st |
|||||||
|
seat (1) (3) (4) |
Rear seats, 1 row (4) |
2nd row (4) |
|||||
|
Carrycot fitted across the |
|||||||
|
vehicle |
< 10 kg |
F, G |
X |
U – IL (6) |
U – IL (6) |
||
|
Group 0 |
|||||||
|
Shell seat/rear-facing seat |
< 13 kg |
D, E |
U (5) |
U — IL |
U — IL |
||
|
Group 0 and 0+ |
|||||||
|
Rear-facing seat |
9 to 18 kg |
C |
U (5) |
U |
U — IL |
||
|
Group 1 (8) |
|||||||
|
Forward-facing seat |
9 to 18 kg |
A, B, B1 |
X |
U — IUF — IL (7) |
U — IUF — IL (7) |
||
|
Group 1 |
|||||||
|
Booster seat |
15 to 25 kg |
||||||
|
and 22 to |
X |
U (7) |
U (7) |
||||
|
Group 2 and 3 (9) |
|||||||
|
36 kg |
|||||||
(1) RISK O FDEATH O RSER IOU S INJURY: before fitting a rear-facing child seat to this seat, check that the air bag has been deactivated (refer to the information on “Child safety: deactivating/activating the front passenger air bag” at the end of the paragraph).
1.36
Downloaded from www.Manualslib.com manuals search engine

child safe ty: fitting a child seat (4/4)
X = Seat not suitable for fitting child seats.
U = Seat which allows a child seat with “Universal” approval to be installed using a seat belt; check that it can be fitted.
IUF/IL = On equipped vehicles, seat which allows an approved “Universal”/“semi-universal” or “vehicle specific” child seat to be attached using the ISOFIX system; check that it can be fitted.
(2)The size of the child seat with the ISOFIX mounting is indicated by the Üsymbol followed by a letter (A, B, B1, C, D, E, F, G).
(3)Only a rear-facing child seat may be installed in this seat.
(4)Raise the seat to the maximum and position it as far back as possible, tilting the seatback slightly (approximately 25°).
(5)Only vehicles equipped with a seat with seat base height adjustment are authorised for fitting child seats.
(6)A carrycot can be installed across the vehicle and will take up two seats. Position the child with his or her feet nearest the door.
(7)Forward-facing child seat; position the seatback of the child seat in contact with the seatback of the vehicle seat. Adjust the height of the headrest or remove it if necessary; do not push the seat in front of the child more than halfway back on its runners and do not recline the seatback more than 25°.
(8)To install a large rear-facing ISOFIX child seat (size C) in the 2nd row, fit the seats in the centred position or use the centre seat.
(9)A child over 10 years of age, weighing more than 36 kg or taller than 1.36 m can be strapped directly into the seat like an adult.
1.37
Downloaded from www.Manualslib.com manuals search engine

child safe ty: deactivating/activating the front passenger air bag (1/3)
|
Deactivating the front |
To deactivate the air bags: when the |
|
|
passenger air bags |
vehicle is stationary, push and turn |
|
|
(on equipped vehicles) |
lock 1 to the OFFposition. |
|
|
With the ignition on, you must check |
||
|
You must deactivate the devices in ad — |
||
|
dition to the front passenger seat belt |
that indicator light 2 Ãis lit on the |
|
|
before fitting a child seat in the front |
central display and, depending on the |
|
|
passenger seat. |
||
|
vehicle, that the message “Passenger |
||
|
Passenger seats with seat base |
air bag deactivated” is displayed. |
|
|
height adjustment |
This light remains permanently lit to |
|
|
You must adjust the cushion to the |
let you know that you can fit a child |
|
|
highest position. |
seat. |
The passenger air bag must only be deactivated or acti —
vated with theignition off.
If it is interfered with when the vehicle is being driven, the
Åand Úwarning lights will come on.
Switch the ignition off then on again to reset the air bag in accordance with the lock.
1.38
Downloaded from www.Manualslib.com manuals search engine

child safe ty: deactivating/activating the front passenger air bag (2/3)
A
DAN GER

fit a rear-facing child seat on a front passenger seat with an active front air bag. The child may suffer very serious injuries if the air bag is trig — gered.
The markings on the dashboard and labels A on each side of passenger sun blind 3 (example: label shown above) remind you of these instructions.
1.39
Downloaded from www.Manualslib.com manuals search engine

child safe ty: deactivating/activating the front passenger air bag (3/3)
Activating the front passenger air bags
You should reactivate the air bag as soon as you remove the child seat from the front passenger seat to ensure the protection of the front passenger in the event of an impact.
To reactivate the air bags: when the vehicle is stationary, push and turn lock 1 to the ON position.
With the ignition on, it is essential to
check that warning light 2, Ã, is off.
The front passenger seat belt additional restraint systems are activated.
It is forbidden to fit a rear-facing child seat to the front passenger seat if the air bag activation/deactivation system is faulty.
Allowing any other passenger to sit in that seat is not recommended.
Contact your approved dealer as soon as possible.
DAN GER

fit a rear-facing child seat on a front passenger seat with an active front air bag. The child may suffer very serious injuries if the air bag is trig — gered.
The passenger air bag must only be deactivated or acti —
vated with theignition off.
If it is interfered with when the vehicle is being driven, the
Åand Úwarning lights will come on.
Switch the ignition off then on again to reset the air bag in accordance with the lock.
1.40
Downloaded from www.Manualslib.com manuals search engine

Steer ing wheel/pow er-ass isted s teer ing
Steering wheel
Height and reach adjustment
Pull lever 1 and place the steering wheel in the required position; push the lever to lock the steering wheel in place.
Make sure that the steering wheel is correctly locked.
For safety reasons, only adjust the steering wheel when the vehicle is station — ary.
Power-assisted steering
With the engine running, do not leave the steering wheel at full lock while sta — tionary as this may damage the powerassisted steering pump.
With the engine switched off, or if there is a system fault, it is still pos — sible to turn the steering wheel. The force required will be greater.
Never switch off the ignition when travelling downhill, and avoid doing so in normal driving (assistance
is not provided).
1.41
Downloaded from www.Manualslib.com manuals search engine

DRIVER’S POSITIO N, LEFT-HAND DRIVE
Downloaded from www.Manualslib.com manuals search engine

DRIVER’S POSITIO N, LEFT-HAND DRIVE(continued)
The equipment fitted, described below, depends on the version, the vehicle options and the country.
|
1 |
Electric controls for: |
9 |
Instrument panel. |
21 |
Multimedia equipment |
controls |
||
|
– |
windows; |
10 |
Centre air vents. |
(depending on the vehicle). |
||||
|
– |
door mirrors. |
22 |
Cigar lighter. |
|||||
|
2 |
Side air vent. |
11 |
Upper centre storage compartment |
|||||
|
3 |
Heating and ventilation controls. |
(split into one or several compart — |
23 |
Engine Start/Stop button. |
||||
|
ments, depending on the vehicle, |
Location for cup holder and/or ash — |
|||||||
|
4 |
Stalk for: |
integrating the audio system and |
24 |
|||||
|
– |
direction indicator lights; |
the audio connection sockets). |
tray. |
|||||
|
– |
exterior lights; |
12 |
Right-hand upper storage com- |
25 |
Control for adjusting |
steering |
||
|
– |
front fog lights; |
|||||||
|
– |
rear fog lights. |
partment. |
wheel height and reach. |
|
5 |
Horn. |
13 |
Passenger air bag location. |
26 |
Controls for: |
|
|
Location for driver’s air bag. |
14 |
Air vent. |
– electric beam height adjust- |
|||
|
ment; |
||||||
|
6 |
Left-hand upper storage compart- |
15 |
Heating and ventilation controls. |
– |
lighting dimmer for control in- |
|
|
ment; |
struments; |
|||||
|
location of fuses. |
16 |
Side air vent. |
– |
Electronic Stability Program |
||
|
(ESP); |
||||||
|
7 |
Radio remote control. |
17 |
Passenger glove box. |
– |
parking distance control; |
|
|
8 |
Controls for: |
– |
cruise control and speed limiter. |
|||
|
18 |
Lower centre storage compart- |
|||||
|
– windscreen and rear screen |
27 |
Assisted parking brake. |
||||
|
wash/wipe; |
ment. |
28 |
Bonnet release control. |
|||
|
– trip computer and warning |
19 |
Gear lever. |
||||
|
system information readout. |
||||||
|
20 |
RENAULT card reader. |
1.43
Downloaded from www.Manualslib.com manuals search engine

DRIVER’S POSITIO N, RIGHT-H AND DRIVE
Downloaded from www.Manualslib.com manuals search engine

От
LexaBOSS
Электрические схемы Espace выпуска с 09-2000
962 раза скачали
(2 отзыва)
0 комментариев
Отправлено 28 апреля, 2017
От
LexaBOSS
Двигатели F3R 728/768, Z7X 775, G8T 714/716, G9T 718
Файл PDF. Размер 59.85 Mb
613 раза скачали
(3 отзыва)
0 комментариев
Обновлено 17 апреля, 2017
(2 отзыва)
0 комментариев
Отправлено 9 мая, 2017
От
LexaBOSS
Файл PDF. Размер 2.05 Mb
394 раза скачали
(1 отзыв)
0 комментариев
Обновлено 17 апреля, 2017
(0 отзывов)
0 комментариев
Отправлено 9 мая, 2017
(0 отзывов)
0 комментариев
Отправлено 21 сентября, 2017
От
rwad
Активация БК!!!
294 раза скачали
(0 отзывов)
0 комментариев
Отправлено 21 апреля, 2017
(0 отзывов)
0 комментариев
Отправлено 26 августа, 2017
(1 отзыв)
0 комментариев
Обновлено 28 сентября, 2020
От
rwad
Особенности автомобиля
JE0 X фаза 1
с Сентября 2000
244 раза скачали
(0 отзывов)
0 комментариев
Отправлено 21 апреля, 2017
От
rwad
Характеристики, нормы заправки
237 раз скачали
(0 отзывов)
0 комментариев
Обновлено 21 апреля, 2017
От
LexaBOSS
Файл PDF. Размер 604.25 Kb
215 раз скачали
(2 отзыва)
0 комментариев
Отправлено 17 апреля, 2017
(0 отзывов)
0 комментариев
Отправлено 9 мая, 2017
От
LexaBOSS
Двигатели F3R, G8T, Z7X.
Файл PDF. Размер 4.79 Mb
190 раз скачали
От
AlexSk
Технота 3028А «Отличия машин с компьютером BII» и исправления к ней 3057А.
186 раз скачали
- bii
(0 отзывов)
0 комментариев
Отправлено 11 января, 2021
От
rwad
Руководство по ремонту механические коробки передач
177 раз скачали
(0 отзывов)
0 комментариев
Обновлено 22 апреля, 2017
От
AlexSk
NT3444A (особенности G9T)
176 раз скачали
- g9t
(0 отзывов)
0 комментариев
Отправлено 9 ноября, 2017
(1 отзыв)
0 комментариев
Отправлено 9 мая, 2017
От
LexaBOSS
F4R 700/701/730/740/741/780
172 раза скачали
(0 отзывов)
0 комментариев
Обновлено 1 августа, 2017
От
hakimby
Данный файл содержит информацию о ремнях
169 раз скачали
(0 отзывов)
0 комментариев
Отправлено 28 апреля, 2017
От
LexaBOSS
Файл PDF. Размер 3.05 Mb
168 раз скачали
(2 отзыва)
0 комментариев
Отправлено 17 апреля, 2017
От
LexaBOSS
Двигатели G9T 710/720/722
Файл PDF. Размер 3.17 Mb
167 раз скачали
(2 отзыва)
0 комментариев
Обновлено 17 апреля, 2017
(0 отзывов)
0 комментариев
Отправлено 1 августа, 2017
От
LexaBOSS
Технические и эксплуатационные характеристики JE0A JE0D JE0E JE0G JE0M JE0N JE0P JE0R
139 раз скачали
(0 отзывов)
0 комментариев
Обновлено 3 июля, 2018
От
LexaBOSS
Двигатели F3R, G8T.
Файл PDF. Размер 1.77 Mb
135 раз скачали
(2 отзыва)
0 комментариев
Обновлено 17 апреля, 2017


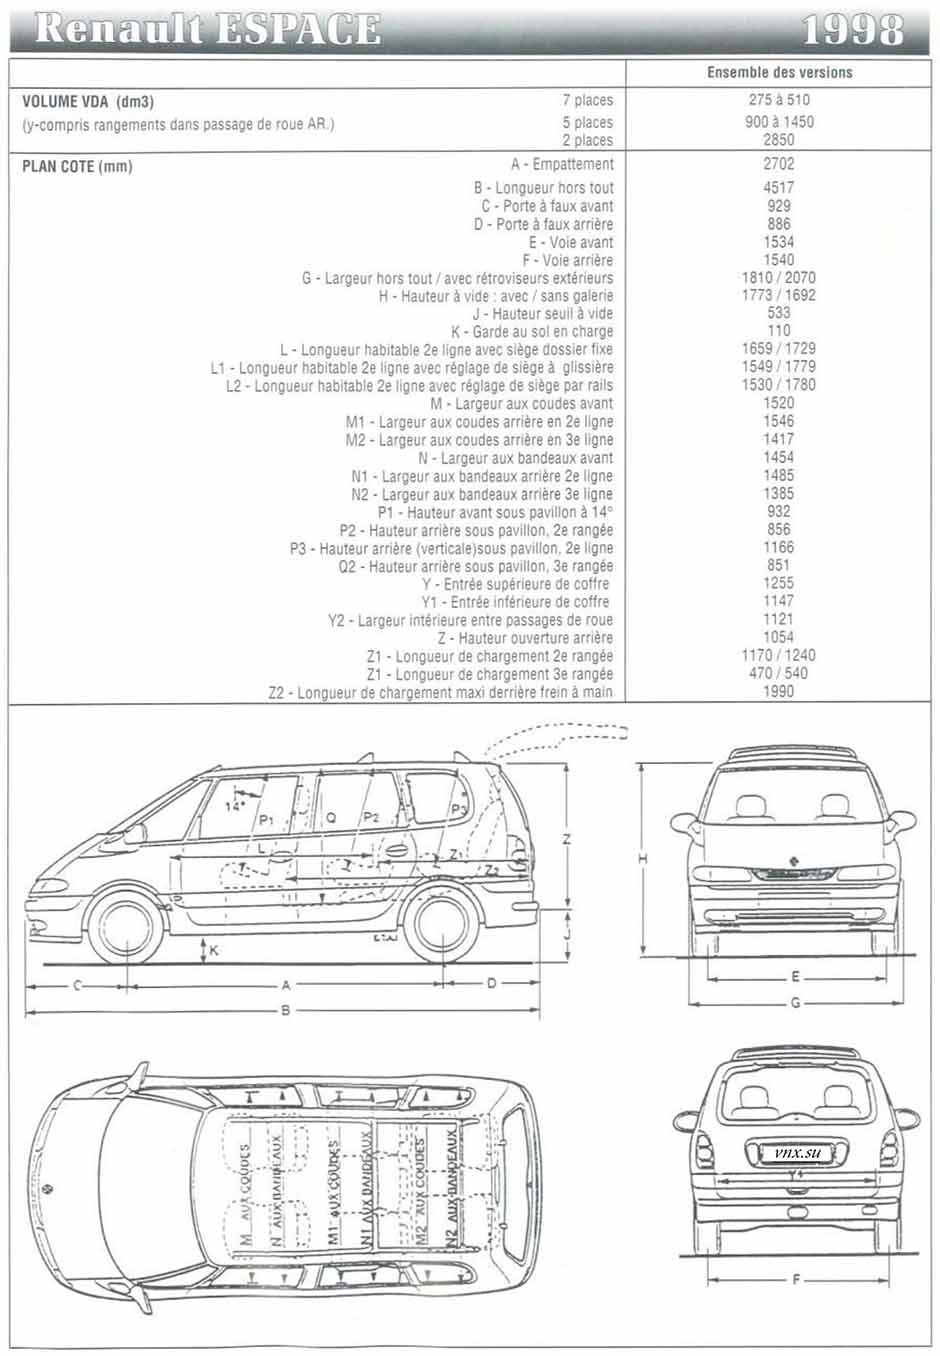
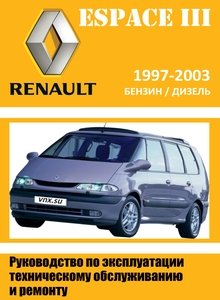

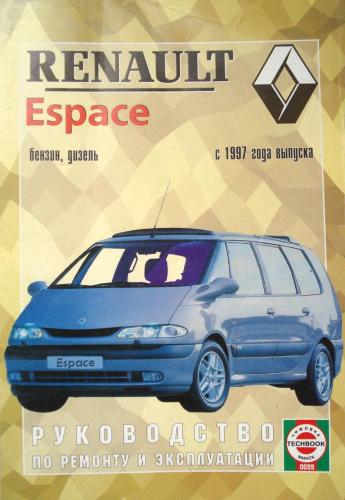
.thumb.jpg.ae261c9e14824ed9fccbdac7374a9bdd.jpg)
