Ознакомьтесь с правилами эксплуатации вашего автомобиля Toyota, изучив электронную версию руководства.
На данной странице представлены следующие типы руководств:
- Общее руководство для владельца
- Руководство по мультимедиа и навигации
- Руководство по вождению в условиях бездорожья
У меня часто спрашивают о некоторых технических нюансах эксплуатации автомобиля или предназначении тех или иных кнопок и т.п. Выкладываю «Руководство пользователя ТЛК-100». Думаю, многим оно будет полезно, особенно тем, кто недавно приобрел эту замечательную машину. По крайней мере, мне он помог разобраться, что к чему ))
Руководство пользователя (30 мб)
И бонусом еще пара фвйлов для любителей поковырять свою машину:
Техдокументация (452 мб)
Еще один вариант (456 мб).
Кстати, эти инструкции висят в облаке и я, собираясь в очередное путешествие, всегда имею под рукой ссылки для их скачивания. Так что в любой точке мира у меня есть инструкции. Добавляйте в закладки и путешествуйте спокойно!
Еще одна ссылка на мануалы manualforauto.ru/news/1-0-1
PS. Спасибо, что делитесь этой информацией со своими подписчиками!

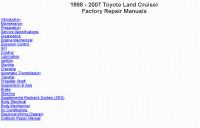
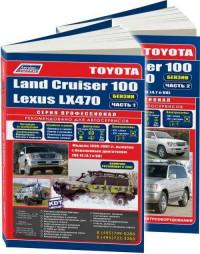
Сборник руководств на английском языке по техническому обслуживанию и ремонту автомобиля Toyota Land Cruiser 100-й серии.
- Автор: —
- Издательство: Toyota Motor Corporation
- Год издания: —
- Страниц: —
- Формат: PDF
- Размер: 132,1 Mb
Мультимедийное руководство на английском языке по техническому обслуживанию и ремонту автомобиля Toyota Land Cruiser 200-й серии 2008 года выпуска.
- Автор: —
- Издательство: TIS techstream
- Год издания: —
- Страниц: —
- Формат: ISO
- Размер: 159,0 Mb
Мультимедийное руководство на английском языке по техническому обслуживанию и ремонту автомобиля Toyota Land Cruiser 200-й серии 2008 года выпуска.
- Автор: —
- Издательство: TIS techstream
- Год издания: —
- Страниц: —
- Формат: ISO
- Размер: 159,0 Mb

Мультимедийное руководство на английском языке по техническому обслуживанию и ремонту автомобиля Toyota Land Cruiser 200-й серии.
- Автор: —
- Издательство: —
- Год издания: —
- Страниц: —
- Формат: —
- Размер: 311,9 Mb
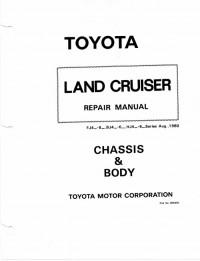
Руководство на английском языке по техническому обслуживанию и ремонту автомобиля Toyota Land Cruiser 40-й и 60-й серий 1980 года выпуска.
- Автор: —
- Издательство: Toyota Motor Corporation
- Год издания: —
- Страниц: 851
- Формат: PDF
- Размер: 491,7 Mb

Руководство на английском языке по техническому обслуживанию и ремонту автомобиля Toyota Land Cruiser 50-й серии.
- Автор: —
- Издательство: Toyota Motor Corporation
- Год издания: —
- Страниц: 346
- Формат: PDF
- Размер: 68,5 Mb
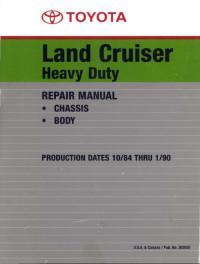
Сборник руководств на английском языке по техническому обслуживанию и ремонту автомобиля Toyota Land Cruiser 60-й серии.
- Автор: —
- Издательство: Toyota Motor Corporation
- Год издания: —
- Страниц: —
- Формат: PDF
- Размер: 628,5 Mb

Сборник руководств на английском языке по техническому обслуживанию и ремонту автомобиля Toyota Land Cruiser 70-й серии
- Автор: —
- Издательство: Toyota Motor Corporation
- Год издания: —
- Страниц: —
- Формат: PDF
- Размер: 330,2 Mb
Сборник руководств на английском языке по техническому обслуживанию и ремонту автомобиля Toyota Land Cruiser 80-й серии.
- Автор: —
- Издательство: Toyota Motor Corporation
- Год издания: —
- Страниц: —
- Формат: PDF
- Размер: 181,7 Mb
Мультимедийное руководство на английском языке по техническому обслуживанию и ремонту автомобиля Toyota Land Cruiser 100-й серии.
- Автор: —
- Издательство: Toyota Motor Corporation
- Год издания: —
- Страниц: —
- Формат: MDF
- Размер: 491,5 Mb

Мультимедийное руководство по эксплуатации и ремонту автомобиля Toyota Land Cruiser 1980-1997 годов выпуска.
- Автор: —
- Издательство: —
- Год издания: —
- Страниц: —
- Формат: —
- Размер: 184,6 Mb

Руководство по эксплуатации и техническому обслуживанию автомобиля Toyota Land Cruiser 1999 года выпуска.
- Автор: —
- Издательство: MoToR
- Год издания: —
- Страниц: 296
- Формат: —
- Размер: —

Руководство по эксплуатации и техническому обслуживанию автомобиля Toyota Land Cruiser 2005 года выпуска.
- Автор: —
- Издательство: Toyota Motor Corporation
- Год издания: 2004
- Страниц: 407
- Формат: PDF
- Размер: 54,4 Mb

Руководство по ремонту автомобилей Toyota 4Runner/Pick-Up/Land Cruiser/T100/Tundra/Tacoma 1997-2000 годов выпуска.
- Автор: —
- Издательство: Алфамер Паблишинг
- Год издания: —
- Страниц: 504
- Формат: —
- Размер: —
Руководство по техническому обслуживанию и ремонту + каталог расходных запчастей автомобиля Toyota Land Cruiser 80-й серии 1990-1998 годов выпуска с дизельными двигателями объемом 3,5/4,2 л.
- Автор: —
- Издательство: Легион-Автодата
- Год издания: —
- Страниц: 392
- Формат: —
- Размер: —

Руководство по техническому обслуживанию и ремонту + каталог расходных запчастей автомобиля Toyota Land Cruiser 80-й серии 1990-1998 годов выпуска с бензиновыми двигателями объемом 4,0/4,5 л.
- Автор: —
- Издательство: Легион-Автодата
- Год издания: —
- Страниц: 366
- Формат: —
- Размер: —
Руководство по эксплуатации, техническому обслуживанию и ремонту + каталог расходных запчастей автомобилей Lexus LX470, и Toyota Land Cruiser 1998-2007 годов выпуска с бензиновым двигателем объемом 4,7 л.
- Автор: —
- Издательство: Легион-Автодата
- Год издания: —
- Страниц: 508
- Формат: —
- Размер: —
Руководство по эксплуатации, техническому обслуживанию и ремонту автомобилей Lexus LX470, и Toyota Land Cruiser 1998-2007 годов выпуска с бензиновым двигателем объемом 4,7 л.
- Автор: —
- Издательство: Легион-Автодата
- Год издания: —
- Страниц: 850
- Формат: —
- Размер: —

Руководство по эксплуатации, техническому обслуживанию и ремонту + каталог расходных запчастей автомобилей Toyota Land Cruiser 100/105 1998-2007 годов выпуска с дизельными двигателями.
- Автор: —
- Издательство: Легион-Автодата
- Год издания: —
- Страниц: 522
- Формат: —
- Размер: —

Руководство по эксплуатации, техническому обслуживанию и ремонту + каталог расходных запчастей автомобилей Toyota Land Cruiser 100/105 1998-2007 годов выпуска с дизельными двигателями.
- Автор: —
- Издательство: Легион-Автодата
- Год издания: —
- Страниц: 880
- Формат: —
- Размер: —
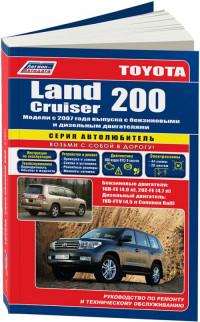
Руководство по техническому обслуживанию и ремонту автомобиля Toyota Land Cruiser 200-й серии с 2007 года выпуска с бензиновыми и дизельными двигателями.
- Автор: —
- Издательство: Легион-Автодата
- Год издания: —
- Страниц: 610
- Формат: —
- Размер: —

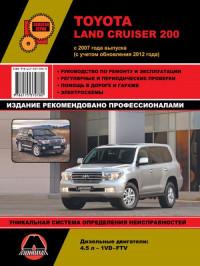
Руководство по эксплуатации, техническому обслуживанию и ремонту + каталог расходных запчастей автомобиля Toyota Land Cruiser 200-й серии с 2007 года выпуска с дизельным двигателем объемом 4,5 л.
- Автор: —
- Издательство: Легион-Автодата
- Год издания: —
- Страниц: 710
- Формат: —
- Размер: —

Руководство по эксплуатации, техническому обслуживанию и ремонту + каталог расходных запчастей автомобиля Toyota Land Cruiser 200-й серии с 2007 года выпуска с бензиновыми двигателями объемом 4,0/4,6/4,7 л.
- Автор: —
- Издательство: Легион-Автодата
- Год издания: —
- Страниц: 876
- Формат: —
- Размер: —

Руководство по эксплуатации, техническому обслуживанию и ремонту автомобилей Toyota Land Cruiser и Toyota Land Cruiser Prado 70-й серии 1985-1996 годов выпуска с дизельными двигателями.
- Автор: —
- Издательство: Легион-Автодата
- Год издания: —
- Страниц: 286
- Формат: —
- Размер: —
Руководство по эксплуатации и ремонту автомобиля Toyota Land Cruiser 200-й серии с 2007 года выпуска с дизельным двигателем объемом 4,5 л.
- Автор: —
- Издательство: Монолит
- Год издания: —
- Страниц: 526
- Формат: —
- Размер: —
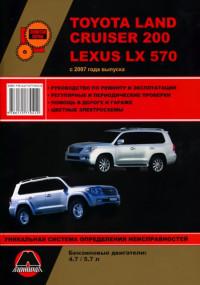
Руководство по эксплуатации и ремонту автомобилей Lexus LX570 и Toyota Land Cruiser 200 с 2007 года выпуска с бензиновыми двигателями объемом 4,7/5,7 л.
- Автор: —
- Издательство: Монолит
- Год издания: —
- Страниц: 726
- Формат: —
- Размер: —
Руководство по установке жидкостного предпускового подогревателя-отопителя марки Webasto на автомобиль Toyota Land Cruiser 200 с 2007 модельного года, с дизельным двигателем и левосторонним расположением руля.
- Автор: —
- Издательство: Webasto
- Год издания: 2008
- Страниц: 20
- Формат: PDF
- Размер: 4,7 Mb
Мультимедийное руководство по техническому обслуживанию и ремонту автомобилей Lexus LX470 и Toyota Land Cruiser 100 с 1997 года выпуска.
- Автор: —
- Издательство: —
- Год издания: —
- Страниц: —
- Формат: —
- Размер: 62,1 Mb


Corolla
Руководство для владельца
Руководство по эксплуатации навигационной и мультимедийной системы

Camry
Руководство для владельца
Руководство по эксплуатации навигационной и мультимедийной системы

C-HR
Руководство для владельца
Руководство по эксплуатации навигационной и мультимедийной системы

RAV4
Руководство для владельца
Руководство по эксплуатации навигационной и мультимедийной системы

Highlander
Руководство для владельца
Руководство по эксплуатации навигационной и мультимедийной системы

Fortuner
Руководство для владельца
Руководство по эксплуатации навигационной и мультимедийной системы

Land Cruiser Prado
Руководство для владельца
Руководство по эксплуатации навигационной и мультимедийной системы
Руководство по вождению в условиях бездорожья

Land Cruiser 300
Руководство для владельца

Руководство для владельца
Руководство по эксплуатации навигационной и мультимедийной системы

Hilux
Руководство для владельца
Руководство по эксплуатации навигационной и мультимедийной системы

Alphard
Руководство для владельца
Руководство по эксплуатации навигационной и мультимедийной системы

Hiace
Руководство для владельца
Руководство по эксплуатации навигационной и мультимедийной системы
Смотрите также:
- Manuals
- Brands
- TOYOTA Manuals
- Automobile
- LAND CRUISER
Manuals and User Guides for TOYOTA LAND CRUISER. We have 5 TOYOTA LAND CRUISER manuals available for free PDF download: Owner’s Manual, Service Manual Supplement, Repair Manual

Toyota LAND CRUISER Owner’s Manual (623 pages)
Station Wagon
Brand: Toyota
|
Category: Automobile
|
Size: 12.75 MB
Table of Contents
-
Table of Contents
2
-
Table of Contents
3
-
Exterior
9
-
Pictorial Index
9
-
Interior
12
-
Instrument Panel
16
-
Lift-Up Back Door Type
22
-
Luggage Compartment
22
-
Double Back Door Type
23
-
Accessories, Spare Parts and Modification of Your Toyota
25
-
For Your Information
25
-
Installation of a Mobile Two-Way Radio System
26
-
Vehicle Data Recordings
26
-
Event Data Recorder
27
-
Disclosure of the EDR Data
28
-
Scrapping of Your Toyota
28
-
Arrows Indicating Operations
30
-
Cautions & Notices
30
-
Symbols
30
-
Symbols Used in Illustrations
30
-
1 Before Driving
32
-
1-1. Key Information
33
-
Keys
33
-
Using the Mechanical Key
33
-
Key Number Plate
34
-
When Required to Leave the Vehicle’s Key with a Parking Attendant
34
-
When Riding in an Aircraft
34
-
Smart Entry & Start System
35
-
-
-
1-2. Opening, Closing and Locking the Doors
35
-
Back Door
36
-
Side Door Handle
36
-
Unlocking and Locking the Doors
36
-
Antenna Location and Effective Range
37
-
Conditions Affecting Operation
39
-
Operation Signals
39
-
Switching the Door Unlock Function
40
-
Battery-Saving Function
41
-
Electronic Key Battery Depletion
41
-
To Operate the System Properly
41
-
Note for the Entry Function
42
-
When the Vehicle Is Not Driven for Extended Periods
42
-
Alarms and Warning Indicators
43
-
Security Feature
43
-
Customization that Can be Configured at Toyota Dealer
46
-
If the Smart Entry & Start System Does Not Operate Properly
46
-
Vehicles with a Smart Entry & Start System
47
-
Vehicles Without a Smart Entry & Start System
47
-
Wireless Remote Control
47
-
Alarm
48
-
Door Lock Buzzer
48
-
Operating Conditions
48
-
Power Back Door Operation
48
-
If the Wireless Remote Control Does Not Operate Properly
49
-
-
Side Doors
51
-
Door Lock Switch
52
-
Inside Lock Button
52
-
Locking the Front Doors from the Outside Without a Key
53
-
Rear Door Child-Protector Lock
53
-
Using the Mechanical Key (Vehicles with a Smart Entry & Start System)
54
-
-
Back Door (Lift-Up Type)
55
-
Locking and Unlocking the Back Door
55
-
Opening the Back Door from Outside the Vehicle
55
-
Canceling the Power Back Door System
56
-
Opening the Back Door from Inside the Vehicle
56
-
Power Back Door Switch
56
-
Rear Step Bumper
57
-
When Closing the Back Door
57
-
The Power Back Door Can be Opened/Closed When
58
-
If the Back Door Opener Is Inoperative
59
-
Back Door Closer (Vehicles with Power Back Door)
60
-
Fall-Down Protection Function
60
-
Jam Protection Function (Vehicles with Power Back Door)
60
-
When Re-Connecting the Battery
60
-
-
Back Door (Double Type)
67
-
Back Door Child-Protector Lock
70
-
Manual Seat
73
-
-
-
Adjustable Components (Seats, Mirrors, Steering Wheel) Front Seats
73
-
Active Head Restraint
74
-
Power Seat
74
-
Rear Seats
76
-
Second Seat
76
-
Third Seat (with Center Seat)
76
-
Third Seat (Without Center Seat)
76
-
Before Tumbling the Second Seats
77
-
Tumbling the Second Seats and Third Seat Entry
77
-
Tumbling the Second Seats
78
-
If You Cannot Raise the Right Side Seatback
79
-
Before Folding up the Third Seats
80
-
Folding up the Third Seats
80
-
-
Driving Position Memory System
86
-
Entering a Position to Memory
86
-
Recalling the Memorized Position
87
-
Linking Driving Position Memory with Door Unlock Operation
88
-
Using the Wireless Remote Control
88
-
Canceling the Linked Door Unlock Operation
89
-
Using the Door Lock Switch
89
-
If the Battery Is Disconnected
90
-
Retained Accessory Power
90
-
To Cancel Seat Position Recall
90
-
-
Head Restraints
91
-
Adjusting the Height of the Head Restraints
92
-
Adjusting the Second Center Seat Head Restraint
92
-
Third Outboard Seats
92
-
Removing the Head Restraints
93
-
Installing the Head Restraints
94
-
When Not Using the Third Center Seat Head Restraint
94
-
Correct Use of the Seat Belts
95
-
Fastening and Releasing the Seat Belt
95
-
-
Seat Belts
95
-
Fastening and Releasing the Third Center Seat Belt
96
-
Releasing and Storing the Third Center Seat Belt
97
-
Adjusting the Height of the Belt
98
-
Seat Belt Pretensioners (Front and Second Outboard Seats)
98
-
Automatic Locking Retractor (ALR)
99
-
Emergency Locking Retractor (ELR)
99
-
Pre-Crash Seat Belts
99
-
Child Seat Belt Usage
100
-
Replacing the Belt after the Pretensioner Has Been Activated
100
-
Seat Belt Regulations
100
-
When the Third Center Seat Belt Cannot be Extended
100
-
Manual Tilt & Telescopic Steering Wheel (Type A)
105
-
-
Steering Wheel
105
-
To Change the Angle
105
-
To Change the Column Length
105
-
Manual Tilt & Telescopic Steering Wheel (Type B)
106
-
Auto Tilt Away
107
-
Power Tilt & Telescopic Steering Wheel
107
-
Automatic Adjustment of the Steering Position
108
-
Adjusting the Height of the Rear View Mirror
109
-
-
Anti-Glare Inside Rear View Mirror
109
-
Anti-Glare Function
110
-
Auto Anti-Glare Inside Rear View Mirror
110
-
Manual Anti-Glare Inside Rear View Mirror
110
-
To Prevent Sensor Error
111
-
Manually-Adjustable Type
112
-
-
Outside Rear View Mirrors
112
-
Power-Adjustable Type
112
-
Folding Back the Mirrors
113
-
Auto Anti-Glare Function
114
-
Linked Mirror Function When Reversing
114
-
Mirror Angle Can be Adjusted When (with Power-Adjustable Type Only)
114
-
When the Mirrors Are Fogged up
114
-
-
Power Windows
116
-
-
1-4. Opening and Closing the Windows and Moon Roof
116
-
Lock Switch
117
-
Door Lock Linked Window Operation
118
-
Jam Protection Function (Type a Driver’s Window Only and Type B)
118
-
Operating the Power Windows after Turning the Engine off
118
-
The Power Windows Can be Operated When
118
-
When the Power Window Does Not Close Normally
119
-
Moon Roof
121
-
Opening and Closing
121
-
Door Lock Linked Moon Roof Operation
122
-
Jam Protection Function
122
-
The Moon Roof Can be Operated When
122
-
To Reduce Moon Roof Wind Noise
122
-
If the Moon Roof Closes but then Re-Opens Slightly
123
-
If the Moon Roof Tilts down but then Tilts Back up
123
-
When the Moon Roof Does Not Close Normally
123
-
Moon Roof Open Reminder Function
124
-
Moon Roof Open Warning Buzzer (Vehicles with Optitron Type Meters)
124
-
Before Refueling the Vehicle
125
-
Opening the Fuel Tank Cap
125
-
Closing the Fuel Tank Cap
127
-
Fuel Types
127
-
Use of Ethanol Blended Gasoline in a Gasoline Engine
127
-
-
Engine Immobilizer System
130
-
-
1-6. Theft Deterrent System
130
-
Conditions that May Cause the System to Malfunction
131
-
System Maintenance
131
-
Setting the Alarm System
132
-
Triggering of the Alarm
132
-
Deactivating or Stopping the Alarm
133
-
Items to Check before Locking the Vehicle
133
-
Alarm-Operated Door Lock
135
-
Panic Mode
135
-
When the Battery Is Disconnected
135
-
Correct Driving Posture
136
-
-
1-7. Safety Information
136
-
SRS Airbags
138
-
Front Airbags
138
-
Side and Curtain Shield Airbags
139
-
Airbag System Components
140
-
If the SRS Airbags Deploy (Inflate)
141
-
SRS Airbag Deployment Conditions (SRS Front Airbags)
141
-
Types of Collisions that May Not Deploy the SRS Airbag (Front Airbags)
142
-
Types of Collisions that May Not Deploy the SRS Airbag
143
-
Deactivating the Curtain Shield Airbags in a Vehicle Rollover
151
-
This Switch Only Should be Used
152
-
Operating Conditions When the RSCA off Indicator Is on
152
-
-
Child Restraint Systems
153
-
Types of Child Restraints
153
-
Baby Seat (Infant Seat)
154
-
Child Seat (Convertible Seat)
154
-
Junior Seat (Booster Seat)
154
-
Child Restraint System Suitability for Various Seating Positions
155
-
When Installing the Child Restraint System on the Front Passenger Seat
159
-
Selecting an Appropriate Child Restraint System
159
-
-
Installing Child Restraints
162
-
ISOFIX Rigid Anchor
162
-
Child Restraint Anchor Fitting
162
-
Installing Child Restraints Using a Seat Belt
163
-
Removing a Child Restraint System Installed with a Seat Belt
168
-
Installation with ISOFIX Rigid Anchor
168
-
Using the Child Restraint Anchor Fitting
170
-
When Installing Child Restraint System in the Front Passenger’s Seat
171
-
-
2 When Driving
176
-
-
Driving Procedures Driving the Vehicle
177
-
Starting on a Steep Uphill
177
-
Breaking in Your New Toyota
178
-
Driving in the Rain
178
-
Drum-In-Disc Type Parking Brake System
178
-
Engine Speed While Driving
178
-
Idling Time before Engine Stop (Diesel Engine)
179
-
Operating Your Vehicle in a Foreign Country
179
-
Eco Driving Indicator
180
-
Engine (Ignition) Switch (Vehicles Without a Smart Entry & Start System)
190
-
Starting the Engine
190
-
Changing the Engine Switch Positions
191
-
If the Engine Does Not Start
192
-
Key Reminder Function
192
-
Turning the Key from “ACC” to “LOCK”
192
-
When the Steering Lock Cannot be Released
192
-
-
Engine (Ignition) Switch (Vehicles with a Smart Entry & Start System)
194
-
Changing “ENGINE START STOP” Switch Mode
195
-
Operation of the “ENGINE START STOP” Switch
196
-
When the “ENGINE START STOP” Switch Indicator Flashes in Amber
196
-
Auto Power off Function
197
-
-
Automatic Transmission
199
-
Shifting the Shift Lever
199
-
Shift Position Uses
200
-
Selecting a Driving Mode
201
-
Changing Shift Ranges in “S” Mode
202
-
Downshifting Restrictions Warning Buzzer (in the “S” Mode)
203
-
Shift Ranges and Their Functions
203
-
When Driving with the Cruise Control or Radar Cruise Control Activated
203
-
“S” Mode
203
-
Ai-Shift
204
-
Second Start Mode Automatic Deactivation
204
-
If the Indicators Flash Faster than Usual
205
-
-
Turn Signal Lever
205
-
Turn Signals Can be Operated When
205
-
Parking Brake
206
-
After Adjusting the Steering Wheel
207
-
Horn
207
-
Non-Optitron Type Meters
208
-
Optitron Type Meters
208
-
-
-
Instrument Cluster Gauges and Meters
208
-
Engine Coolant Temperature Gauge
209
-
Fuel Gauge
209
-
Speedometer
209
-
Tachometer
209
-
Switching the Display
210
-
Eco Driving Indicator Light Customization
211
-
Instrument Cluster Light Control (Optitron Type Meters)
212
-
The Brightness of the Instrument Cluster Lights
212
-
Indicators and Warning Lights
214
-
Center Panel (Vehicles with Navigation System)
215
-
Center Panel (Vehicles Without Navigation System)
215
-
Indicators
216
-
Warning Lights
218
-
-
Multi-Information Display
219
-
Trip Information
219
-
Average Fuel Consumption after Refueling
221
-
Average Fuel Consumption and Eco Driving Indicator Zone Display
221
-
Display Items
221
-
Switch the Display
221
-
Current Fuel Consumption
222
-
Driving Range
222
-
Average Vehicle Speed
223
-
Front Tire Angle
223
-
Turn-By-Turn Navigation (Vehicles with a Navigation System)
223
-
System Check Display
224
-
Turn-By-Turn Navigation (Vehicles with Navigation System)
224
-
When Disconnecting and Reconnecting Battery Terminals
224
-
-
Headlight Switch
225
-
-
2-3. Operating the Lights and Wipers
225
-
Turning on the High Beam Headlights
226
-
Automatic Light off System
227
-
Daytime Running Light System
227
-
Headlight Control Sensor
227
-
Automatic Headlight Leveling System
228
-
Fog Light Switch
229
-
Windshield Wipers and Washer
230
-
Without Intermittent Type
230
-
With Intermittent Type
231
-
Intermittent Wiper with Interval Adjuster
232
-
Rain-Sensing Windshield Wipers
234
-
Effects of Vehicle Speed on Wiper Operation
236
-
If no Windshield Washer Fluid Sprays
236
-
Rain Drop Sensor (Vehicles with Rain-Sensing Windshield Wipers)
236
-
The Windshield Wiper and Washer Can be Operated When
236
-
-
Rear Window Wiper and Washer
238
-
The Rear Window Wiper and Washer Can be Operated When
239
-
Headlight Cleaner Switch
240
-
The Headlight Cleaner Can be Operated When
240
-
Windshield Washer Linked Operation
240
-
-
Cruise Control
241
-
Setting the Vehicle Speed
241
-
-
2-4. Using Other Driving Systems
241
-
Adjusting the Set Speed
242
-
Canceling and Resuming the Constant Speed Control
242
-
Accelerating after Setting the Vehicle Speed
243
-
Automatic Cruise Control Cancelation
243
-
Cruise Control Can be Set When
243
-
Dynamic Radar Cruise Control
245
-
Changing the Vehicle-To-Vehicle Distance
248
-
Canceling and Resuming the Speed Control
249
-
Vehicle-To-Vehicle Distance Settings
249
-
Driving in Vehicle-To-Vehicle Distance Control Mode
250
-
Example of Constant Speed Cruising
250
-
Example of Deceleration Cruising
250
-
Approach Warning
251
-
Example of Acceleration
251
-
Example of Follow-Up Cruising
251
-
Warnings May Not Occur When
251
-
Selecting Conventional Constant Speed Control Mode
252
-
Automatic Cancelation of Vehicle-To-Vehicle Distance Control
253
-
Dynamic Radar Cruise Control Can be Set When
253
-
Automatic Cancelation of Constant Speed Control
254
-
Radar Sensor and Grille Cover
254
-
Warning Messages and Buzzers for Dynamic Radar Cruise Control
254
-
Sensor Types
259
-
-
Toyota Parking Assist-Sensor
259
-
Toyota Parking Assist-Sensor Switch
259
-
Touch Screen (Vehicles with a Navigation System)
260
-
Corner Sensors
261
-
Sensor Detection Display, Obstacle Distance
261
-
Rear Center Sensors
262
-
Buzzer Operation and Distance to an Obstacle
263
-
Detection Range of the Sensors
264
-
Alert Volume Setting
265
-
Setting up Toyota Parking Assist-Sensor
265
-
Alert Distance Setting
266
-
Display On/Off Setting
266
-
The Toyota Parking Assist-Sensor Can be Operated When
266
-
Toyota Parking Assist-Sensor Display
266
-
Sensor Detection Information
267
-
Center Differential Lock/Unlock Switch
270
-
Four-Wheel Drive Control Switch
270
-
-
Four-Wheel Drive System
270
-
Shifting between “H4” and “L4”
271
-
Shifting from “H4” to “L4”
271
-
Shifting from “L4” to “H4”
271
-
The Four-Wheel Drive Control Switch Can be Operated When
271
-
Advice for Driving on Slippery Roads
272
-
Locking/Unlocking the Center Differential
272
-
The Center Differential Lock Indicator Light
272
-
The Center Differential Lock/Unlock Switch Can be Operated When
272
-
-
Crawl Control (with Turn Assist Function)
275
-
Crawl Control Switch
275
-
Speed Modes
276
-
Turn Assist Function
276
-
Crawl Control
277
-
When the System Is Turned off
277
-
Automatic System Cancelation
278
-
Function Limitations
279
-
When the Crawl Control System Is Operated Continuously
279
-
Sounds and Vibrations Caused by the Crawl Control System
280
-
When There Is a Malfunction in the System
280
-
-
Multi-Terrain Select
281
-
Selectable Modes
282
-
Multi-Terrain Select Control Starting Conditions
283
-
Switching Modes
283
-
Statement on the Multi-Information Display
284
-
When It Is Difficult to Generate Traction
285
-
When the Brake System Operates Continuously
285
-
When the Vehicle Is Stuck
285
-
-
Multi-Terrain Monitor
287
-
Switching the Image
288
-
When the Shift Lever Is in “R”
288
-
Automatic Display Mode
289
-
Range Covered by each Camera
290
-
Display
291
-
Front Monitor
291
-
Side-Front Simultaneous Display Monitor
291
-
Wide View Front & Side Monitor Display
291
-
Rear Monitor (Toyota Parking Assist Monitor)
292
-
Side-Rear Simultaneous Display Monitor
292
-
Using the Monitor
293
-
Minimum Projected Turning Circle Display Mode
298
-
No Course Lines Mode
298
-
Projected Course Line Display Mode
298
-
Turning Course Line Display Mode
298
-
Switching Projected Course Line Display Mode
299
-
Using the Vehicle Width Line & Course Line
300
-
Vehicle Width Line
300
-
Minimum Projected Turning Circle & Projected Course Line
301
-
Automatic System Cancellation
302
-
Interruption Screens
302
-
The Multi-Terrain Monitor Can be Operated When
302
-
Displayed Area
303
-
Side Camera (Wide View Front & Side Monitor Display)
304
-
Side Camera (Side-Front Simultaneous Display Monitor)
305
-
Side Camera (Side-Rear Simultaneous Display Monitor)
306
-
Multi-Terrain Monitor Cameras
307
-
Display Settings
308
-
Flicker Effect
308
-
Smear Effect
308
-
If the Message “System Initializing.” Is Displayed
309
-
Active TRC (Traction Control)
312
-
Brake Assist
312
-
-
Driving Assist Systems
312
-
Multi Terrain ABS (Anti-Lock Brake System)
312
-
Trailer Sway Control
313
-
To Disable Active TRC And/Or VSC and Trailer Sway Control
314
-
Automatic Active TRC Reactivation
315
-
Automatic Reactivation of Active TRC, VSC and Trailer Sway Control
315
-
Turning off Active TRC, VSC and Trailer Sway Control
315
-
Automatic Active TRC, VSC and Trailer Sway Control Reactivation
316
-
Hill-Start Assist Control Is Operational When
316
-
If the Brake System Overheats
316
-
-
PCS (Pre-Crash Safety)
320
-
Pre-Crash Brake Assist
320
-
Pre-Crash Seat Belts (Front Seats Only)
320
-
Radar Sensor
320
-
Obstacles Not Detected
321
-
The Pre-Crash Safety System Is Operational When
321
-
Automatic Cancelation of the Pre-Crash Safety System
323
-
-
Off-Road Precautions
325
-
Off-Road Vehicle Feature
325
-
Advertisement
Toyota LAND CRUISER Service Manual Supplement (410 pages)
Brand: Toyota
|
Category: Automobile
|
Size: 73.11 MB
Table of Contents
-
Caution
2
-
Table of Contents
5
-
General Description
6
-
Troubleshooting
6
-
Preparation
6
-
Repair Procedures
6
-
How to Use this Manual
6
-
Specifications
7
-
How to Use this Manual in
7
-
Cautions, Notices, Hints
8
-
Si Unit
8
-
Engine Serial Number
9
-
Vehicle Identification Number
9
-
-
Identification Information
9
-
General Repair Instructions
10
-
Precaution
13
-
Before Beginning Test
14
-
FREE Position
15
-
LOCK Position
16
-
Braking Force Test
16
-
Speedometer Test or Other Tests
17
-
On —Vehicle Wheel Balancing
17
-
Precaution in
17
-
When Towing Full-Time 4Wd Vehicles
19
-
-
Vehicle Lift and Support Locations
20
-
Hardtop & Canvas Top
20
-
Station Wagon
22
-
-
Abbreviations Used in this Manual
23
-
How to Determine Bolt Strength
24
-
Standard Bolt Torque Specifications
24
-
Specified Torque for Standard Bolts
25
-
Clutch
26
-
Clutch Master Cylinder
27
-
Clutch Master Cylinder Removal
27
-
Components
27
-
Master Cylinder Disassembly
28
-
Master Cylinder Inspection
28
-
Connect Clutch Line Union
29
-
Install Master Cylinder
29
-
Install Reservoir Tank
29
-
Master Cylinder Installation
29
-
Manual Transmission
30
-
(Hardtop & Canvas Top) Description
31
-
Preparation
32
-
Transmission Removal and Installation
33
-
Remove Transfer Shift Lever
34
-
Transmission Removal
34
-
Remove Clutch Release Cylinder
35
-
Remove Front Exhaust Pipe
35
-
Remove Speedometer Cable
35
-
Remove Starter
35
-
Remove Crossmember
36
-
Remove Stabilizer Braket Set Bolts
36
-
Remove Transmission
36
-
Support Transmission
36
-
Remove Engine Rear Mounting
37
-
Remove Transfer from Transmission
37
-
Install Crossmember
38
-
Install Engine Rear Mounting
38
-
Install Transmission to Engine
38
-
Transmission Installation
38
-
Install Clutch Release Cylinder
39
-
Install Front Exhaust Pipe
39
-
Install Stabilizer Bracket Set Bolts
39
-
Install Starter
39
-
Install Speedometer Cable
40
-
Fill Transmission with Gear Oil
41
-
Install Transfer Shift Lever
41
-
Install Transmission Shift Lever
41
-
Tighten Fan Shroud
41
-
Output Shaft
42
-
In002
43
-
Inspect each Gear Oil Clearance
43
-
Inspect each Gear Thrust Clearance
43
-
Output Shaft Disassembly
43
-
Remove Ball Bearing and First Gear
43
-
Inspect Output Shaft
46
-
Output Shaft Assembly Inspection
46
-
Output Shaft Component Parts Inspection
46
-
INSPECT SYNCHRONIZER RING for 2Nd GEAR
47
-
Output Shaft Assembly
48
-
Inspect Fifth Gear Thrust Clearance
49
-
Install Snap Ring
49
-
Install Third Gear and Hub Sleeve No.2 Assembly
49
-
Inspect Third Gear Thrust Clearance
50
-
Install Second Gear and Hub Sleeve No.1 Assembly
50
-
Inspect Second Gear Thrust Clearance
51
-
Install Ball Bearing
51
-
Install First Gear
51
-
Service Data
53
-
-
Service Specifications
53
-
Torque Specifications
54
-
Description
55
-
Preparation
56
-
Sst (Special Service Tools)
56
-
Outputshaft
57
-
Service Specifications
69
-
Automatic Transmission
71
-
(Station Wagon) Description
72
-
Operation
74
-
Function of Components
75
-
Hydraulic Control System
78
-
Electronic Control System
79
-
Control of Lock-Up System
80
-
Control of Overdrive
80
-
Control of Shift Timing
80
-
Function of Tcm
80
-
A/T. Fluid Temperature Warning System
81
-
A/T. P. (Automatic Transmission Parking) INDICATOR
81
-
Equipment
82
-
-
Preparation
82
-
Troubleshooting
84
-
Check «O/D Off» Indicator Light
87
-
Diagnosis System
87
-
Read Diagnostic Code
88
-
Diagnostic Codes
89
-
Cancel out Diagnostic Code
90
-
Diagnostic Code 41
91
-
Diagnostic Code 42
91
-
Troubleshooting Flow-Chart
91
-
Diagnostic Code 61
92
-
Diagnostic Code 62
92
-
Diagnostic Code 63
92
-
No.2 Speed Sensor Circuitry
92
-
Diagnostic Code 64
93
-
Diagnostic Code 65
93
-
Diagnostic Code 86
93
-
Diagnostic Code 88
94
-
Engine Speed Sensor Circuitry
94
-
Check Fluid Condition
95
-
Check Fluid Level
95
-
Preliminary Check
95
-
Inspect Throttle Cable
96
-
Inspect Transmission Shift Lever Range
96
-
Inspect Idle Speed (N Range)
97
-
Inspect Neutral Start Swtich
97
-
Manual Shifting Test
98
-
Electronic Control Circuit
99
-
Electronic Control Components
101
-
Troubleshooting Flow — Chart
102
-
Trouble No.2 Shift Point too High or too Low
103
-
Trouble No.3 no Up-Shift to Overdrive (after Warm-Up)
104
-
Inspect Brake Signal
106
-
Inspect each Upshift Position
106
-
Inspect Throttle Position Sensor Signal
106
-
Terminal Voltage Inspection
106
-
Electronic Control Componenets
107
-
Inspect Voltage of Ect Ecu
107
-
Inspect Solenoid
109
-
Check Solenoid Seals
110
-
Check the Lock-Up Solenoid Valve
110
-
Inspect Throttle Position Sensor
110
-
Inspect Neutral Start Switch
111
-
Inspect No.2 Speed Sensor
111
-
Inspect O/D Switch
111
-
Inspect Pattern Select Switch
111
-
A/T Fluid Temperature Warning System Circuit
112
-
Inspect A/T Fluid Temperature Sensor
112
-
Inspect A/T Fluid Temperature Warning Light
112
-
Measure Stall Speed
113
-
Stall Test
113
-
Measure Time Lag
115
-
Time Lag Test
115
-
Hydraulic Test
117
-
Measure Line Pressure
117
-
Road Test
119
-
2 Range Test
120
-
L Range Test
121
-
R Range Test
121
-
Automatic Shift Schedule
123
-
Troubleshooting Matrix Chart
126
-
Drain Transmission Fluid
128
-
Remove Oil Pan and Gasket
128
-
Remove Oil Pan Protector
128
-
Valve Body Removal
128
-
Remove Oil Strainer
129
-
Remove Valve Body
129
-
Valve Body Installation
129
-
Install Drain Plug
131
-
Install Magnets in Pan
131
-
Install Oil Pan
131
-
Fill Transmission with Atf
132
-
Remove Frame Crossmember Set Bolts
133
-
Remove Throttle Cable
133
-
Remove Throttle Cable Clamp
133
-
Throttle Cable Removal
133
-
Connect Throttle Cable
134
-
If Throttle Cable Is New, Paint Mark on Inner Cable
134
-
Install Four Center Support Apply Gasket
134
-
Throttle Cable Installation
134
-
Assembly Removeal and Installation
136
-
Disconnect Throttle Cable
138
-
-
Assembly Removal and Installation
139
-
Disconnect Two Oil Cooler Tubes
141
-
Remove Engine under Cover
142
-
Remove Six Torque Converter Mounting Bolts
142
-
Remove Transmission Assembly
143
-
Torque Converter and Drive Plate Inspection
146
-
Torque Converter Cleaning
146
-
Remove Oil Filler Tube
151
-
Service Date
156
-
-
Service Specifications
156
-
Torque Specification
158
-
Transfer
159
-
-
(Hf2Av for Station Wagon with Abs) Description
160
-
Specifications
160
-
Precautions
161
-
Troubleshooting
161
-
Components
162
-
Remove Motor Actuator
163
-
Remove Output Gear
163
-
Remove Screw Plug, Spring and Ball
163
-
-
Transfer Disassembly
163
-
Remove Front Extension Housing
164
-
Remove Power Take-Off Case
164
-
Remove Transfer Indicator Switches
164
-
Remove Rear Extension Housing
165
-
Remove Retainer
165
-
Separate Shift Fork No.2 and Fork Shaft
165
-
Remove Case Cover
166
-
Separate Front Case and Rear Case
166
-
-
Component Parts
170
-
Disassembly of Input Shaft Assembly
170
-
Input Shaft Assembly
170
-
Assembly of Input Shaft Assembly
172
-
Install Front Ball Bearing
172
-
Install Input Gear
172
-
Install Rear Ball Bearing
173
-
Disassembly of Idler Gear Assembly
174
-
-
Idler Gear Assembly
174
-
Assembly of Idler Gear Assembly
175
-
Center Differential Assembly
177
-
Disassembly of Center Differential Assembly
177
-
Remove Front Drive Gear Piece
178
-
Remove Front Taper Roller Bearing
178
-
Disassembly of Front Extension Housing Assembly
186
-
-
Front Extension Housing Assembly
186
-
Remove Ball Bearing
187
-
Remove Dust Deflectors
187
-
Remove Front Output Shaft
187
-
Remove Oil Seal
187
-
Assembly of Front Extension Housing Assembly
188
-
-
Rear Extension Housing Assembly
190
-
Disassembly of Rear Extension Housing Assembly
191
-
Assembly of Rear Extension Housing Assembly
195
-
Check Side Clearance of Oil Pump
195
-
Check Tip Clearance of Driven Rotor
195
-
Install Dust Deflectors
196
-
Install Oil Seal
196
-
Install Rear Output Shaft
196
-
Install Center Differential Control Coupling Assembly
197
-
Install Oil Pump Plate Separator
197
-
Install Speedometer Drive Gear
197
-
Install Drive Rotor
198
-
Install Driven Rotor
198
-
Install Oil Pump Cover
198
-
Install Oil Receiver to Front Case
199
-
Install Two Bearing Races to Front Case
199
-
-
Transfer Assembly
199
-
Assemble Shift Fork No.1 and Fork Shaft
200
-
Install Input Shaft Assembly
200
-
Assemble Front Case and Rear Case
201
-
Install Oil Strainer to Rear Case
201
-
Install Case Cover
202
-
Install Rear Extension Housing
203
-
Install Retainer
203
-
Assemble Shift Fork No.2 and Fork Shaft
204
-
Install Front Extension Housing
204
-
Install Ball, Spring and Screw Plug
205
-
Install Power Take-Off Case
205
-
Install Transfer Indicator Switches
205
-
Install Motor Actuator
206
-
Install Output Gear
206
-
Inspect Shift Lever Position
207
-
-
Motor Shift Control System
207
-
System Inspection
207
-
Inspect Center Differential Lock Control Relay
208
-
Parts Inspection
208
-
-
Service Specifications
209
-
Propeller Shaft
211
-
Suspension and Axle
215
-
-
Assembly Removal and Installation
216
-
Front Differential
216
-
Primary Inspection
217
-
Wheel Alignment
217
-
Adjust Toe-In
218
-
Front Wheel Alignment
218
-
Inspect Caster
218
-
Inspect Toe-In
218
-
Inspect Wheel Angle
219
-
-
Assembly Removal and Installation
220
-
Front Differential
220
-
Service Specifications
221
-
Brake System
223
-
Preparation
224
-
Recommended Tools
224
-
Brake Pedal Check and Adjustment
226
-
Master Cylinder Removal
228
-
Remove Master Cylinder Boot
231
-
Remove Reservoir
231
-
Remove Reservoir Cap and Strainer
231
-
Install Two Pistons
232
-
Master Cylinder Assembly
232
-
Install No.2 Piston Stopper Bolt
233
-
Install Reservoir
233
-
Install Reservoir Cap
233
-
Connect Brake Lines
234
-
Load Sensing Proportioning and By-Pass Valve (Lsp & Bv)
235
-
Fluid Pressure Check and Adjustment
236
-
Set Rear Axle Load
236
-
Lsp & Bv Removal
237
-
Lsp & Bv Assembly Disassembly
238
-
Lsp & Bv Assembly
239
-
Lsp & Bv Inspection
239
-
Connect Shackle No.2 to Bracket
240
-
Install Lsp & Bv Assembly
240
-
Install Valve Bracket
240
-
Lsp & Bv Installation
240
-
Set Valve Body
241
-
-
Anti-Lock Brake System (Abs) Br-2O
242
-
System Parts Location
243
-
Wiring Diagram
244
-
Connectors
245
-
Diagnosis System Inspection
246
-
Clear Diagnostic Codes
249
-
Diagnostic Codes Clearing
249
-
«ABS» Warning Light Comes On.
250
-
Check that Warning Light Turns on
256
-
Inspect Battery Voltage
256
-
-
Speed Sensor and Deceleration Sensor Diagnosis System
256
-
Inspect Speed Sensor Signal Change
257
-
Diagnostic Code
259
-
-
Deceleration Sensor Operation Diagnosis System
260
-
Inspect Sensor Detection Point
260
-
Inspect Sensor Operation
261
-
-
Abs Actuator
262
-
Abs Actuator Removal and Installation
262
-
Main Points of Removal and Installation
263
-
Abs Actuator Inspection
264
-
Inspect Brake Actuator Operation
265
-
Inspect for Other Wheels
265
-
Connect Connectors
266
-
Push Sub Motor Switch
266
-
-
Control Relay
267
-
Control Relay Inspection
267
-
Front Speed Sensor
268
-
Front Speed Sensor Inspection
268
-
Front Speed Sensor and Sensor Rotor Serrations Inspection
269
-
Inspect Sensor Installation
269
-
Visually Inspect Sensor Rotor Serrations
269
-
Front Speed Sensor Installation
270
-
Front Speed Sensor Removal
270
-
Front Speed Sensor Air Gap Adjustment
271
-
-
Rear Speed Sensor
273
-
Rear Speed Sensor Inspection
273
-
Rear Speed Sensor and Sensor Rotor Serrations Inspection
274
-
Rear Speed Sensor Installation
275
-
Rear Speed Sensor Removal
275
-
-
Anti-Lock Brake System Circuit
277
-
Service Specifications
279
-
Body Electrical System
280
-
(Hardtop, Canvas Top & Station Wagon) Wiper and Washer System
281
-
Combination Meter Parts Location
282
-
Meter Circuit
283
-
Shift Position Indicator
286
-
Speed Sensor Inspection
289
-
Speedometer System
289
-
Fuel Gauge System
290
-
Fuel Receiver Gauge Inspection
290
-
Tachometer Inspection
290
-
Tachometer System
290
-
Fuel Level Warning System
291
-
Fuel Sender Gauge Inspection
291
-
Inspect Warning Light
291
-
Inspect Warning Switch
291
-
Water Temperature Gauge System
292
-
Water Temperature Receiver Gauge Inspection Operation
292
-
Inspect Voltmeter (On-Vehicle)
293
-
Voltmeter System
293
-
Oil Pressure Gauge System
294
-
Oil Pressure Receiver Gauge Inspection
294
-
Oil Pressure Sender Gauge Inspection
294
-
Brake Warning Light Inspection
295
-
Brake Warning System
295
-
Open Door Warning System
295
-
Parking Brake Switch Inspection
295
-
Door Courtesy Switch
296
-
Seat Belt Buckle Switch Inspection
296
-
Seat Belt Warning Inspection
296
-
Seat Belt Warning System
296
-
Engine Oil Level Warning System
298
-
Inspect Engine Oil Level Sensor
298
-
Meter Illumination Control System
298
-
Parts Location
300
-
-
Power Seat Control System
300
-
Power Seat Switch
302
-
Power Seat Switch Inspection
302
-
Circuit Breaker Operation
304
-
Front Vertical Motor Inspection
304
-
Power Seat Motor
304
-
Slide Motor Inspection
304
-
Rear Vertical Motor Inspection
305
-
Reclining Motor Inspection
305
-
Circuit Breaker Operation Driver’ S Seat
306
-
Circuit Breaker Operation Passenger’s Seat
306
-
Motor Operation Passenger’ S Seat
306
-
Lumbar Support Motor Inspection Motor Operation
307
-
-
Cruise Control System
308
-
Connector Diagrams
309
-
Control Switch Operation
310
-
Main Switch Operation
310
-
Manual Cancel Operation
310
-
Speed Control Operation
310
-
System Description
310
-
Power Source Circuit
314
-
Cruise Control Indicator Circuit
315
-
Control Switch Circuit
316
-
Actuator Circuit
317
-
Speed Sensor Circuit
319
-
Stop Light Switch Circuit
320
-
Parking Brake Switch Circuit
322
-
ECT SOLENOID No.2 CIRCUIT (with A/T)
323
-
Neutral Start Switch Circuit
323
-
Idl Signal Circuit
324
-
Cruise Control ECU Circuit
325
-
Control Switch Inspection
326
-
Stop Light Switch Inspection
326
-
Cruise Control Actuator Inspection
327
-
Adjust Control Link Assembly
328
-
Control Link Assembly Adjustment
328
-
Extra (Sub) Tank System
329
-
Fuel Pump
332
-
Inspect Fuel Pump Operation
332
-
Inspect Sub Fuel Switch
332
-
Sub Fuel Switch
332
-
Fuel Level Switch
333
-
Fuel Sender Gauge
334
-
Fuel Solenoid Valve
334
-
Fuel Pump Control Ecu
335
-
-
Satellite Navigation System
338
-
Wiring Diagrams
339
-
Air Conditioning System
341
-
Electrical Wiring Diagram
342
-
Drive Belt
350
-
Inspect Drive Belt Tension
350
-
Refrigeration Lines
351
-
Compressor Removal
352
-
Magnet Clutch Disassembly
353
-
Cooling Unit Disassembly
354
-
Air Conditioner Amplifier
355
-
Inspect Amplifier Circuit
356
-
On-Vehicle Inspection
362
-

TOYOTA LAND CRUISER Owner’s Manual (576 pages)
Brand: TOYOTA
|
Category: Automobile
|
Size: 7.61 MB
Table of Contents
-
Table of Contents
6
-
Instrument Panel Overview
2
-
Instrument Cluster Overview
5
-
Indicator Symbols on Instrument Panel
6
-
Table of Contents
9
-
Keys
10
-
Engine Immobilizer System
12
-
Side Doors
13
-
Power Windows
21
-
Power Quarter Windows
23
-
Back Door
24
-
Hood
26
-
Theft Deterrent System
27
-
Fuel Tank Cap
29
-
Electric Moon Roof
30
-
-
1 3 Section —
33
-
Front Seats
34
-
Seats
34
-
Armrest
37
-
Rear Seats
37
-
Head Restraints
46
-
Seat Heaters
47
-
Seat Belts
48
-
SRS Driver Airbag and Front Passenger Airbag
58
-
Child Restraint
76
-
-
1 4 Section —
97
-
Power Tilt and Telescopic Steering Wheel
98
-
Outside Rear View Mirrors
99
-
Anti- Glare Inside Rear View Mirror
100
-
Sun Visors
105
-
-
1 5 Section —
107
-
Headlight and Turn Signals
108
-
Emergency Flashers
110
-
Front Fog Lights
111
-
Instrument Panel Light Control
111
-
Interior Lights
112
-
Personal Lights
113
-
Ignition Switch Light
114
-
Windshield Wipers and Washer
114
-
Rear Window Defogger
115
-
Rear Window Wiper and Washer
115
-
Outside Rear View Mirror Heaters
116
-
-
1 6 Section —
117
-
Engine Coolant Temperature Gauge
118
-
Fuel Gauge
118
-
Engine Oil Pressure Gauge
119
-
Tachometer
120
-
Voltmeter
120
-
Odometer and Two Trip Meters
121
-
Service Reminder Indicators and Warning Buzzers
122
-
Brake System Warning Light
123
-
Driver’s Seat Belt Reminder Light
125
-
Discharge Warning Light
125
-
Malfunction Indicator Lamp
126
-
Low Fuel Level Warning Light
126
-
SRS Warning Light
127
-
Open Door Warning Light
128
-
Unengaged «Park» Warning Light
128
-
-
Trip Information Display
129
-
-
1 7 Section —
133
-
Ignition Switch with Steering Lock
134
-
Automatic Transmission
135
-
Four-Wheel Drive System
139
-
Cruise Control
142
-
Parking Brake
142
-
Active Traction Control System
145
-
Vehicle Stability Control System
147
-
-
1 8 Section —
151
-
Reference
152
-
Using Your Audio System
152
-
Car Audio System Operating Hints
162
-
Rear Seat Audio System
166
-
Audio Remote Controls (Steering Switches)
167
-
-
1 9 Section —
169
-
Front Air Conditioning System: Controls
170
-
Air Flow Selector Settings
174
-
Operating Tips
175
-
Instrument Panel Vents
177
-
-
Rear Air Conditioning System: Controls
178
-
Air Flow Selector Settings
180
-
-
-
1 10 Section —
181
-
Clock
182
-
Outside Temperature Display
182
-
Rear View Monitor System
183
-
Cigarette Lighter and Ashtray
186
-
Power Outlets
186
-
Roll Sensing of Curtain Shield Airbags off Switch
187
-
Rear Console Box
188
-
Roll Sensing of Curtain Shield Airbags off Indicator Light
188
-
-
Garage Door Opener
189
-
Glove Box
189
-
Auxiliary Boxes
192
-
Cup Holders
193
-
Card Holder
195
-
Tie- down Hooks
195
-
Cargo Net Hooks
196
-
Roof Luggage Carrier
196
-
Floor Mat
198
-
Coat Hooks
199
-
-
2 Section
201
-
Off- Road Vehicle Precautionss
202
-
Break- in Period
203
-
Fuel
203
-
Fuel Pump Shut off System
205
-
Operation in Foreign Countries
205
-
Three- Way Catalytic Converter
206
-
Engine Exhaust Cautions
207
-
Facts about Engine Oil Consumption
208
-
Brake System
209
-
Iridium- Tipped Spark Plugs
209
-
Brake Pad Wear Limit Indicators
213
-
Rear Step Bumper
213
-
Buzzers» on
213
-
-
Limited- Slip Differential
214
-
Your Toyota’s Identification
214
-
Suspension and Chassis
215
-
Theft Prevention Labels
215
-
Tire Information
216
-
Cargo and Luggage
224
-
Vehicle Load Limits
224
-
Types of Tires
227
-
-
3 Section
229
-
Before Starting the Enginee
230
-
How to Start the Engine
230
-
Tips for Driving in Various Conditions
231
-
Off- Road Driving Precautions
232
-
Winter Driving Tips
234
-
Dinghy Towing
235
-
Trailer Towing
235
-
How to Save Fuel and Make Your Vehicle Last Longer, too
243
-
-
4 Section
245
-
In Case of an Emergency
245
-
If Your Vehicle will Not Startt
246
-
If Your Engine Stalls While Driving
249
-
If You Cannot Increase the Engine Speed
250
-
If Your Vehicle Overheats
250
-
If You Have a Flat Tire
251
-
If Your Vehicle Becomes Stuck
262
-
If Your Vehicle Needs to be Towed
262
-
If You Cannot Shift Automatic Transmission Selector Lever
266
-
If You Lose Your Keys
266
-
Corrosion Prevention and Appearance Care
267
-
-
-
6 Section
275
-
Maintenance Requirementss
276
-
General Maintenance
277
-
Does Your Vehicle Need Repairing
279
-
Emissions Inspection and Maintenance (I/M) Programs
280
-
-
7 1 Section —
281
-
Engine Compartment Overview
282
-
Fuse Locations
283
-
Do- It- Yourself Service Precautions
284
-
Parts and Tools
285
-
Advertisement
Toyota LAND CRUISER Owner’s Manual (256 pages)
Brand: Toyota
|
Category: Automobile
|
Size: 6.9 MB
Table of Contents
-
Table of Contents
6
-
Important Information about this Manual
3
-
Driving Tips
5
-
Model Code
7
-
Operation of Instruments and Controls
8
-
Overview of Instruments and Controls
8
-
Instrument Panel Overview
9
-
-
-
1 2 Section −
14
-
Keys and Doors
14
-
Keys
15
-
Engine Immobilizer System
17
-
Side Doors
18
-
Power Windows
20
-
Door Vent Windows
24
-
Side Windows
24
-
Back Door
25
-
Rear Window
25
-
Hood
27
-
Fuel Tank Cap
29
-
-
1 3 Section −
32
-
Seats, Seat Belts, Steering Wheel and Mirrors
32
-
Front Seats
33
-
Seats
33
-
Adjusting Front Seats
35
-
Rear Seats
36
-
Folding Rear Seats
41
-
Head Restraints
41
-
Seat Belt Precautions
42
-
Seat Belts
42
-
SRS Driver Airbag and Front Passenger Airbag
48
-
Child Restraint
54
-
Child Restraint System
55
-
-
Tilt and Telescopic Steering Wheel
74
-
Anti−Glare Inside Rear View Mirror Anti Anti− − Glare Inside Rear View Mirror
75
-
-
Outside Rear View Mirrors
75
-
-
1 4 Section −
76
-
Lights and Wipers
76
-
Headlights and Turn Signals
77
-
Emergency Flashers
78
-
Front Fog Lights
79
-
Interior Light
79
-
Luggage Compartment Light
80
-
Windshield Wipers and Washer
80
-
Rear Window Wiper and Washer
81
-
Rear Window Defogger
82
-
-
1 5 Section −
84
-
Gauges, Meters and Service Reminder Indicators
84
-
Fuel Gauge
85
-
Sub Fuel Gauge
85
-
Engine Coolant Temperature Gauge
86
-
Oil Pressure Gauge
87
-
Tachometer
88
-
Voltmeter
88
-
-
Odometer, Two Trip Meters and Meter Light Control Display
88
-
Service Reminder Indicators and Warning Buzzers
90
-
-
1 6 Section −
96
-
Engine (Ignition) Switch, Transmission and Parking Brake
96
-
Engine (Ignition) Switch
97
-
Idle up Switch
97
-
Manual Transmission
98
-
Four−Wheel Drive System Wheel Drive System
99
-
Front and Rear Differential Lock System
100
-
Parking Brake
102
-
Audio System
104
-
Controls and Features
108
-
Air Conditioning System System
130
-
Air Conditioning Filter
137
-
-
1 9 Section −
140
-
Other Equipment
140
-
Clock
141
-
Cigarette Lighter and Ashtrays
143
-
Storage Precautions
143
-
Bottle Holders
144
-
Glove Box
144
-
Power Outlet Box
145
-
Tie−Down Hooks down Hooks
145
-
Floor Mat
146
-
Rear Console Box
146
-
Toyota LAND CRUISER Repair Manual (19 pages)
TOYOTA LAND CRUISER
Brand: Toyota
|
Category: Automobile
|
Size: 3.37 MB
Table of Contents
-
Manual Transmission
4
-
Automatic Transmission
4
-
Propeller Shaft
4
-
Brake System
4
-
Air Conditioning System
4
-
Table of Contents
5
-
How to Use this Manual
6
-
Identification Information
8
-
General Repair Instructions
8
-
Precautions for Vehicles Equipped with a Catalytic Converter
11
-
Precautions for Vehicles with an Audio System with Built-In Anti-Theft System
11
-
Precautions When Servicing Full-Time 4Wd Vehicles
12
-
Precautions When Towing Full-Time 4Wd Vehicles
17
-
Vehicle Lift and Support Locations
18
-
Abbreviations Used in this Manual
19
Advertisement
Related Products
-
Toyota LANDCRUISER 2019
-
Toyota LAND CRUISER 2010
-
TOYOTA LAND CRUISER — BROCHURE 2011
-
Toyota Land Cruiser 2000
-
Toyota Land Cruiser 1986
-
Toyota Land Cruiser 2005
-
Toyota Land Cruiser 1999
-
Toyota Land Cruiser 2004
-
Toyota Land Cruiser 2003
-
Toyota Land Cruiser Prado
TOYOTA Categories
Automobile
Automobile Accessories
Car Navigation system
Sewing Machine
Car Receiver
More TOYOTA Manuals