Logic Pro X обеспечивает несколько способов получения ответов на вопросы как для знакомства с элементами управления и функциями во время вашей работы в приложении, так и для просмотра подробной информации обо всех аспектах работы приложения. Вы также можете просматривать информацию непосредственно в самом приложении, используя функцию «скорой помощи» — Quick Help. В дополнение к той информации, которую вы можете получить из меню Help приложения Logic Pro, полный набор справочной документации доступен онлайн как в формате HTML, так и в формате PDF.
Quick Help | Скорая помощь
Вы можете просматривать краткие описания окон, элементов управления и других элементов интерфейса приложения Logic Pro, не выходя из приложения и не прерывая своего рабочего процесса. Вы можете включить просмотр Quick Help либо в области Inspector, либо в подвижном плавающем окне.
- Для просмотра Quick Help в Inspector, откройте Inspector, затем выберите Help > Quick Help.
- Для просмотра Quick Help в плавающем окне, закройте inspector, затем выберите Help > Quick Help.
Подробная информация о работе с приложением Logic Pro X
В качестве полной справочной информации компания Apple предоставляет четыре Руководства пользователя, касающиеся различных аспектов работы с приложением Logic Pro X:
- Logic Pro X User Guide | Руководство пользователя приложением Logic Pro X
- Logic Pro X Instruments | Инструменты приложения Logic Pro X
- Logic Pro X Effects | Эффекты приложения Logic Pro X
- Logic Pro X Control Surfaces Support | Поддержка управляющих консолей в приложении Logic Pro X
Logic Remote | Удаленное управление приложением Logic
Для пользователей IPad доступно отдельное приложение, которое позволяет просматривать подробную справочную информацию на вашем IPad во время работы в приложении Logic Pro. Приложение Logic Remote доступно в магазине App Store.
- Для получения Справки Logic Remote для iPhone на русском языке перейдите по адресу
http://help.apple.com/logicremote/iphone/1.4/logicpro/?lang=ru - Для получения Справки Logic Remote для iPad на русском языке перейдите по адресу
http://help.apple.com/logicremote/ipad/1.4/logicpro/?lang=ru
Copyright © 2019 Apple Inc. All rights reserved.
Copyright © 2019 Алексей Алимкин (перевод).
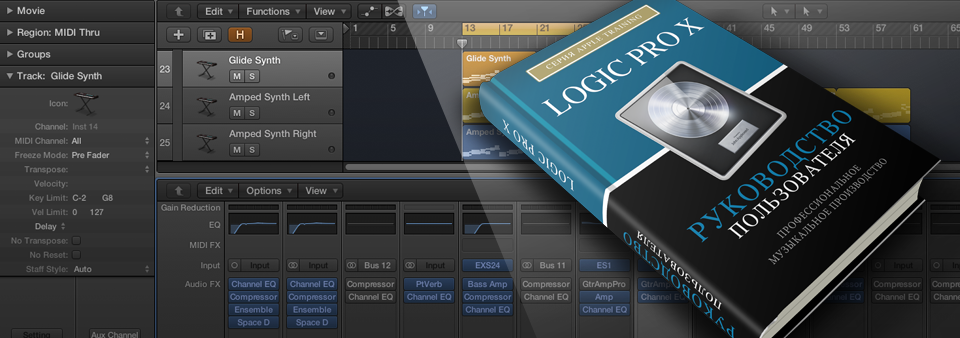
Канальная линейка (Channel Strip).
Для начала давайте рассмотрим каким образом протекает сигнал по канальной линейке.
На вход канальной линейки подается аудио сигнал либо сигнал из программного инструмента, затем сигнал подвергается обработке, например, эквалайзером и далее уже обработанный сигнал идет на выход и вы слышите конечный результат.
С помощью кнопки посыла Send можно направить часть сигнала с канальной линейки через виртуальную шину Bus на вспомогательную линейку Aux для обработки сигнала процессорами эффектов. Например, ревербератором. При посыле сигнала на Aux можно регулировать уровень обработанного сигнала и подмешивать его к необработанному. При этом обработанный сигнал и необработанный на выходе суммируются, это влияет на общий уровень сигнала.
Подробнее…
Logic Pro X Микшер
Микшер (Mixer).
Микшер показывает все канальные линейки, которые используются в вашем проекте, включая канальные линейки треков, вспомогательные и выходные каналы, а также мастер канал. Открывается микшер по умолчанию с помощью горячей клавиши [X] либо с помощью кнопки Mixer на панели инструментов, а также в главном меню View > Show/Hide Mixer:

Окно микшера может отображаться двумя способами. Как часть главного окна в нижней части области треков, либо как отдельное окно. Это очень удобно, когда необходимо создать собственный скринсет, который будет состоять, например, только из микшера. Чтобы открыть микшер в отдельном окне нужно зайти в главное меню Window >Open Mixer либо воспользоваться горячими клавишами [Command] + [2].
Подробнее…
From support and training to tutorials and an online community of knowledgeable music pros, take your experience with Logic Pro to a new level.
Support and Learning
Support
Logic Remote
Wirelessly extend the creative power of Logic Pro using your iPad or iPhone. Logic Remote takes full advantage of Multi-Touch on iOS and iPadOS devices and offers incredible ways to record, mix, and even perform on instruments in Logic Pro from anywhere in the room.
Learn more about logic remote
AppleCare Support
AppleCare Professional Audio Support can help you keep your project running smoothly whether you’re setting up a new installation or troubleshooting an existing setup.
Learn more about AppleCare support
Training Videos and Tutorials
Whether you’re new to Logic Pro and MainStage or just looking to pick up some tips, you can get up to speed quickly with free online tutorials or fee-based training provided by today’s leading music creation software trainers.
ADSR
Specializing in both beat-making content and electronic music creation videos, ADSR’s production experts deliver free training on YouTube. Additionally, ADSRsounds.com subscribers gain full access to in-depth courses on all aspects of music production and music creation techniques.
Ask.Audio
A daily resource covering the latest news, reviews, tutorials, and interviews relating to Logic Pro.
Groove3
Presenting full coverage and in-depth Logic Pro video tutorials from industry experts, Groove3 has a diverse catalog of lessons that cover all aspects of production with Logic Pro for every type of user — from beginner to advanced.
Im A Music Mogul
Learn the secrets of beat-making with Logic Pro, uniquely taught through the lens of popular music and presented in hundreds of entertaining and informative YouTube videos.
macProVideo
An extensive collection of online courses for Logic Pro and MainStage. Training staff include Grammy- and Emmy Award–winning producers and professional audio engineers.
MusicTechHelpGuy
Engaging and fun music production lessons delivered by expert Logic Pro instructor Josh Carney — an experienced recording engineer, musician, composer, producer, educator, and YouTuber with over 14 years of experience in the field.
Why Logic Pro Rules
Audio engineer, producer, and expert Logic Pro educator Chris Vandeviver delivers entertaining and informative video training on all things Logic Pro — presented on his popular YouTube channel and website.
Books
Documentation
Online Communities
As the world of Logic Pro professionals continues to expand, the body of collective knowledge grows with it. Tap into a rich source of information and collegial support by joining a user group, participating in a web forum, or browsing a Logic Pro blog.
Web Forums
Logic User Group
Share insights and information with the worldwide community of Logic Pro users.
Logic Pro Help
Learn more about Logic Pro from one of the most active and supportive web communities focused on Logic Pro, MainStage, and GarageBand.
Logic Subreddits
The most popular subs for Reddit users who want to learn more about Logic Pro.
LogicPro
Logic_Studio
White Papers
Elemental Morphing in Alchemy
Learn how to morph between and combine elements of different sounds in exciting ways. Examples demonstrate the behavior and effect of each Morph Element control to illustrate some of the creative potential of the morphing and resynthesis tools in Alchemy.
Elemental Morphing in Alchemy (PDF)
Alchemy for Creative Loop Manipulation
Read a workflow-driven examination of tools and techniques in Alchemy you can use to creatively alter loop playback. Explore examples demonstrating how to make loops play at project tempo and transpose in real time. Additional demos take it a step further, showing how to transform loops with modulation and other effects.
Alchemy for Creative Loop Manipulation (PDF)
Plug-ins and Content
Audio Units Plug-ins
macOS provides a robust plug-in architecture called Audio Units, which gives you access to thousands of instruments and sound-processing tools made by today’s leading developers.
Logic Pro Sampler Libraries
Loop Libraries
Hardware
Controller Keyboards
USB keyboard controllers designed to take full advantage of the core technologies provided by macOS and Logic Pro.
Control Surfaces
Audio Interfaces
Third-party hardware manufacturers specializing in studio-quality audio recording hardware compatible with macOS and Logic Pro.
MIDI Interfaces
Connect legacy MIDI hardware to your Mac and Logic Pro.
![]()
Download Article
![]()
Download Article
Logic Pro X is a software programs created by Apple for the purpose of producing music. These instructions are designed for those individuals who have a background in music production and/or are well versed in music theory. The following steps explain the basics on how to set up and create a song in Logic Pro X.
-

1
Set up your workstation. Before beginning work on Logic Pro X, make sure all of your equipment (MIDI keyboard, Mixer, Mic, Monitors, etc.) are all properly connected.
-
2
Open up Logic Pro X. Ensure your Mac has sufficient battery, and open up the software. Close other programs for optimal performance.
Advertisement
-
3
Set up your project. Before beginning work on any project, you must set the Tempo, Key, and Time Signature. This can be set up at the bar at the top that shows your project info.
- You can always change the tempo of your project later. However, you cannot change the tempo with any tracked out instruments or vocals, as those are tracked out according to the tempo that was present when they were recorded. If you do need to change the tempo in such a scenario, you must re-record those particular components.
- It is also recommended that you change your «Count In» settings before you record so you have a comfortable amount of room before your actual recording begins. You can do so by going into the «Record» option at the top of the bar, scrolling down to «Count in» and selecting what you are comfortable with.
-
4
Create a new track. To create a new track, navigate your mouse to the «Track» option in the top bar and select «New Track». Select the first track you want to add in the arrange window.
-
5
Record software instruments. With your MIDI keyboard/synthesizer, you can emulate hundreds of different instruments through Logic’s library.
- From the new track window, click «Software Instrument». Select your instrument and make sure your MIDI workstation is connected and ready. Press «R» your keyboard to record.
-
6
Use Quantization. To correct any discrepancies in timing when recording software instruments, you can quantize that track to a certain time signature, based on its frequency in the recording.
- To do so, first go into the inspector by clicking «View» at the top bar, and then «Show Inspector».
- Select your track, then navigate to the «Quantize» option and select your particular timing. Those notes will automatically align themselves according to the timing you select.
-
7
Record real instruments. To record any real instrument you can either connect to the mixer or use a mic.
- Make sure your instrument/mic is connected to the mixer, and is turned on.
- Go to the «New Track» window, and select «Audio» as the option.
- Specify your input device as the the mixer you are using, and the output device as your headphones. Press «R» on your keyboard to record.
-
8
Record vocal tracks. To record vocals must use a mic that is connected to the mixer.
- Make sure your mic is connected to the mixer and turned on.
- Go to the «New Track» window, and select «Audio» as the option.
- Specify your input device as the mixer you are using, and output as the headphones. Press «R» to record
-
9
Use Apple loops. Logic Pro X provides a large amount of pre-created audio loops for those who want to use them in their project.
- Navigate to the «View» window and select «Show Apple Loops».
- Select the loop you want to use based on the categories that are shown. Clicking on multiple categories narrows down your options.
- Drag the loop and drop it into the area labeled «Drag Apple Loops Here».
-
10
Save your project. Periodically as you are working on your project, you must continue to save so you do not lose any of your work.
- Navigate to the «File» option at the top bar and select «Save As» or «Save», and give your project a name.
-
11
Bounce your project. Whether you are finished with a draft, or the final, Logic Pro X allows you to bounce this project as a variety of different formats based on your needs. («Bouncing» refers to creating one individual track that is made up of a number of tracks that you select.)
- You can track out your project as a different audio tracks for mixing using another software, such as Pro Tools. Navigate to the «File» option in the top bar, and select «Export» and then click on «All Tracks As Audio Files». Select the format of the files, and click «Bounce».
- You can bounce the entire project, or a selected few tracks, to listen to it as if they were a finished song (at that point.). Select the particular tracks that you want to hear in the bounce. Navigate to the «File» option in the top bar, and select «Bounce», and then click «Project or Section». Specify your formatting options and select «Bounce».


Advertisement
Add New Question
-
Question
Can I do this without the equipment?

Yes. You can use only software instruments and input notes with the «musical typing» option. You can also use your internal Mac microphone for real instruments, but it will be very low quality.
-
Question
How can I send the song to YouTube with a picture playing behind it?
Jelke de Jong
Community Answer
If you have Final Cut or iMovie installed on your Mac, you can use the Bounce function in Logic (make sure you deselect any track before you do this, or else it will only export that specific track) to export your song to an mp3, which you can open in Final Cut or iMovie and insert a picture.
Ask a Question
200 characters left
Include your email address to get a message when this question is answered.
Submit
Advertisement
-
You can loop a section of your track to make it easier when producing. Do so by selecting turning the loop option on, and selecting the region you want to loop. The loop button lies directly to the right of the project info bar.
-
If your mic is not picking up sound:
- Ensure that all wire connections are made and phantom power is turned on. Afterwards, try creating a new audio track using this mic
- If this is still not working, create a new audio track using the computer’s own «Built-in-Output». This will allow you to see if it is an issue with the hardware (mixer/mic) or software. If the built in mic picks up sound, then most likely it is a problem with the hardware, for which you should contact the manufacturer.
-
If Logic Pro X keeps crashing:
- Check to see if you have the latest version of Logic Pro X. Usually if there is a bug causing the software to crash then Apple will put out a stable release in short time.
- Close other apps/programs that you have running (such as Safari, iMessage, etc.) that you do not need running at the time.
Thanks for submitting a tip for review!
Advertisement
-
When use a mic with Phantom Power, make sure you switch the Phantom power on only after you have connected to the mixer.
-
Never set your individual audio track levels above 0db to make sure there is no clipping. This can lower the quality of the sound farther into the process. You can adjust the levels through the mixer (press X on your keyboard).
-
Make sure you periodically save your work!
Advertisement
Things You’ll Need
- Logic Pro X software
- Any type of Mac computer (Macbook, iMac, Mac Pro, etc.)
- Mixer
- Recording Mic
- MIDI workstation
- Studio Monitor speakers
- Headphones
About This Article
Thanks to all authors for creating a page that has been read 34,359 times.
Did this article help you?
![]()
Logic Pro 8
User Manual
Apple Inc.
© 2007 Apple Inc. All rights reserved.
Under the copyright laws, this manual may not be copied, in whole or in part, without the written consent of Apple. Your rights to the software are governed by the accompanying software licence agreement.
The Apple logo is a trademark of Apple Inc., registered in the U.S. and other countries. Use of the “keyboard” Apple logo (Option-Shift-K) for commercial purposes without the prior written consent of Apple may constitute trademark infringement and unfair competition in violation of federal and state laws.
Every effort has been made to ensure that the information in this manual is accurate. Apple Inc. is not responsible for printing or clerical errors.
Note: Because Apple frequently releases new versions and updates to its system software, applications, and Internet sites, images shown in this book may be slightly different from what you see on your screen.
Apple Inc.
1 Infinite Loop Cupertino, CA 95014-2084 408-996-1010 www.apple.com
Apple, the Apple logo, Bonjour, Final Cut, Final Cut Pro, FireWire, iMovie, iPod, iTunes, Jam Pack, Logic, Mac, MacBook, Macintosh, Mac OS, PowerBook, QuickTime, Soundtrack, and Ultrabeat are trademarks of Apple Inc., registered in the U.S. and other countries.
Apple Remote Desktop, Finder, GarageBand, and Safari are trademarks of Apple Inc.
.Mac and iTunes Store are service marks of Apple Inc.
Adobe is a trademark or registered trademark of Adobe Systems Incorporated in the U.S. and/or other countries.
Manufactured under license from Dolby Laboratories. “Dolby,”“Pro Logic,” and the double-D symbol are trademarks of Dolby Laboratories.
Intel, Intel Core, and Xeon are trademarks of Intel Corp. in the U.S. and other countries.
Other company and product names mentioned herein are trademarks of their respective companies. Mention of third-party products is for informational purposes only and constitutes neither an endorsement nor a recommendation. Apple assumes no responsibility with regard to the performance or use of these products.

1 Contents
|
Preface |
15 |
Logic Pro 8: Documentation and Resources |
|
16 |
Logic Pro 8 Documentation Conventions |
|
|
17 |
Logic Pro Onscreen Help |
|
|
17 |
Apple Websites |
|
|
Chapter 1 |
19 |
An Introduction to Logic Pro |
|
20 |
Creating Music in Logic Pro |
|
|
23 |
The Basics: Projects and Regions |
|
|
Chapter 2 |
27 |
Overview of the Logic Pro Interface |
|
28 |
A Tour of the Logic Pro Interface |
|
|
48 |
Common Features of Logic Pro Windows |
|
|
51 |
Interactions Between Arrange Window Areas |
|
|
55 |
Using Logic Pro Interface Elements |
|
|
57 |
Using the Computer Keyboard |
|
|
Chapter 3 |
59 |
Customizing Your Window Setup |
|
59 |
Window Types |
|
|
61 |
Opening and Closing Windows |
|
|
63 |
Moving and Resizing Windows |
|
|
65 |
Working at Different Hierarchy Levels |
|
|
66 |
Selecting the Working Area |
|
|
67 |
Zooming |
|
|
71 |
Relationships Between Windows |
|
|
73 |
Customizing the Transport Bar |
|
|
73 |
Customizing the Arrange Window Toolbar |
|
|
74 |
Hiding or Revealing the Inspector |
|
|
74 |
Adjusting the Bar Ruler Display |
|
|
76 |
Displaying Global Tracks |
|
|
78 |
Using Screensets |
3
|
Chapter 4 |
81 |
Setting Up Your System |
|
81 |
Designing Your Music Production System |
|
|
88 |
Connecting Your Audio and MIDI Devices |
|
|
95 |
Using External MIDI Devices |
|
|
95 |
Using External Audio Effects |
|
|
96 |
Configuring Your Audio Hardware |
|
|
99 |
Using Distributed Audio Processing |
|
|
Chapter 5 |
105 |
Navigating Your Project |
|
105 |
Setting the Playhead Position |
|
|
108 |
Using the Transport Buttons |
|
|
109 |
Using Transport Key Commands |
|
|
110 |
Using Cycle Mode |
|
|
115 |
Using the Chase Events Function |
|
|
117 |
Customizing the Transport Bar |
|
|
Chapter 6 |
123 |
Working With Markers |
|
124 |
Opening Marker Areas and Windows |
|
|
125 |
Creating Markers |
|
|
128 |
Selecting Markers |
|
|
128 |
Deleting Markers |
|
|
128 |
Naming Markers |
|
|
130 |
Changing the Appearance of Marker Text |
|
|
131 |
Editing Markers |
|
|
133 |
Navigating With Markers |
|
|
134 |
Customizing the Marker Display in the Marker List |
|
|
Chapter 7 |
135 |
Working With Projects |
|
135 |
Learning About Projects |
|
|
136 |
Creating Projects |
|
|
139 |
Opening Projects |
|
|
141 |
Opening and Creating Projects Automatically |
|
|
141 |
Importing Settings From Other Projects |
|
|
142 |
Checking and Repairing Projects |
|
|
143 |
Setting Project Properties |
|
|
150 |
Managing Projects |
|
|
152 |
Saving Projects |
|
|
154 |
Closing and Quitting |
|
Chapter 8 |
155 |
Basic Operations |
|
155 |
Using the Mouse |
|
|
156 |
Entering Numerical Values |
|
|
157 |
Entering Text |
|
|
158 |
Working With Key Commands |
|
|
166 |
Working With Tools |
|
|
170 |
Working With Help Tags |
|
|
171 |
Using the Shortcut Menu |
|
|
172 |
Selection Techniques |
|
|
176 |
Working With the Clipboard |
|
|
177 |
Undoing and Redoing Editing Operations |
|
|
Chapter 9 |
179 |
Working With Tracks |
|
181 |
Configuring the Track Header |
|
|
182 |
Reclaiming Workspace Used by the Track Header |
|
|
183 |
Creating Tracks and Channels |
|
|
190 |
Deleting Tracks |
|
|
190 |
Selecting a Track |
|
|
191 |
Rearranging Tracks |
|
|
191 |
Naming Tracks |
|
|
193 |
Assigning Tracks to Channels |
|
|
195 |
Zooming Individual Tracks |
|
|
196 |
Assigning Track Icons |
|
|
197 |
Muting Tracks |
|
|
199 |
Soloing Tracks |
|
|
200 |
Record-Enabling Tracks |
|
|
200 |
Freezing Tracks |
|
|
204 |
Hiding Tracks |
|
|
205 |
Protecting Tracks |
|
|
206 |
Using Track Button Slide Activation |
|
|
Chapter 10 |
207 |
Working With Instruments and Effects |
|
208 |
A Quick Mixer and Channel Strip Primer |
|
|
212 |
Inserting, Moving, and Removing Plug-ins |
|
|
219 |
Loading and Removing Entire Channel Strip Configurations |
|
|
223 |
Using the Plug-in Window |
|
|
225 |
Common Plug-in Window Functions |
|
|
232 |
Using the Library to Choose Plug-in Settings |
|
|
233 |
Learning About Effect Routings |
|
|
237 |
Working With Instruments |
|
|
249 |
Working With ReWire Applications |
|
|
251 |
Working With External Audio Effects |
|
|
252 |
Using Plug-ins From Other Manufacturers |
|
Chapter 11 |
255 |
Adding Pre-Recorded Media |
|
255 |
Supported File Formats |
|
|
256 |
About Pre-Recorded Media Types Supported by Logic Pro |
|
|
257 |
Accessing Media Files in the Browser |
|
|
262 |
Finding Apple Loops in the Loop Browser |
|
|
270 |
Adding and Removing Audio Files |
|
|
278 |
Adding MIDI and Project Files |
|
|
Chapter 12 |
279 |
Getting to Know Regions |
|
279 |
What Are Regions? |
|
|
283 |
MIDI and Audio Regions Compared |
|
|
284 |
Handling Regions in the Audio Bin and Sample Editor |
|
|
Chapter 13 |
293 |
Creating Your Arrangement |
|
295 |
Making Region Edits Faster and Easier |
|
|
305 |
Selecting Regions |
|
|
305 |
Selecting Parts of a Region |
|
|
307 |
Adding and Recording Regions |
|
|
307 |
Removing and Restoring Regions |
|
|
309 |
Moving Regions |
|
|
313 |
Resizing Regions |
|
|
319 |
Cutting, Copying, and Pasting Regions |
|
|
320 |
Adding or Removing Song Passages |
|
|
324 |
Repeating Regions |
|
|
331 |
Dividing, Demixing, and Merging Regions |
|
|
338 |
Using Folders |
|
|
342 |
Creating Crossfades and Fades on Audio Regions |
|
|
346 |
Setting Region Parameters |
|
|
Chapter 14 |
351 |
Recording in Logic Pro |
|
351 |
Recording Audio |
|
|
351 |
A Quick Overview of the Recording Steps |
|
|
352 |
Preparations for Recording |
|
|
360 |
Setting Up Track Channels |
|
|
362 |
Making an Audio Recording |
|
|
372 |
Handling Audio Recordings |
|
|
374 |
Creating Comps |
|
|
376 |
Managing Take Folders |
|
|
378 |
Recording MIDI |
|
|
379 |
Recording MIDI Regions in Real Time |
|
|
384 |
MIDI Step Input Recording |
|
|
389 |
Using the Caps Lock Keyboard |
|
Chapter 15 |
391 |
Introduction to MIDI Editing |
|
392 |
Opening the Editors |
|
|
394 |
Hearing MIDI Events When Editing |
|
|
394 |
Editing MIDI Events in the Arrange Area |
|
|
395 |
Monitoring and Resetting MIDI Events |
|
|
Chapter 16 |
397 |
Editing MIDI Events in the Piano Roll Editor |
|
397 |
Learning the Piano Roll Editor Interface |
|
|
400 |
Creating and Editing Note Events |
|
|
413 |
Splitting Chords |
|
|
414 |
Using Hyper Draw |
|
|
416 |
Customizing the Piano Roll Editor |
|
|
416 |
Piano Roll Editor Shortcuts |
|
|
Chapter 17 |
417 |
Editing MIDI in the Hyper Editor |
|
419 |
Creating and Editing Events in the Hyper Editor |
|
|
427 |
Working With Event Definitions |
|
|
434 |
Working With Hyper Sets |
|
|
Chapter 18 |
437 |
Editing MIDI Events in the Event List |
|
438 |
Learning and Using the Event List Interface |
|
|
440 |
Selecting and Creating Events |
|
|
443 |
Editing Events |
|
|
446 |
Deleting and Muting Events |
|
|
446 |
Soloing and Renaming Regions or Folders |
|
|
447 |
Learning About Event Types |
|
|
452 |
The Event Float Window |
|
|
Chapter 19 |
453 |
Quantizing MIDI Events |
|
454 |
Quantizing Regions |
|
|
459 |
Event and Note Quantization |
|
|
461 |
Creating Groove Templates |
|
|
Chapter 20 |
465 |
Editing MIDI Events in the Transform Window |
|
466 |
Choosing and Using Transform Sets |
|
|
475 |
Using the Transform Window Parameters |
|
|
482 |
Creating Your Own Transform Sets |
|
|
482 |
Importing Transform Sets From Other Projects |
|
|
483 |
Usage Examples |
|
Chapter 21 |
487 |
Editing Audio in the Sample Editor |
|
488 |
Playing Audio Files |
|
|
490 |
Navigating Audio Files |
|
|
491 |
Changing the X and Y Axis Scales |
|
|
493 |
Displaying the Waveform as Sample Bits |
|
|
494 |
Making Selections |
|
|
495 |
Copying, Pasting, Deleting, and Cutting |
|
|
496 |
Destructive Audio Editing and Processing |
|
|
501 |
Adjusting the Project Tempo |
|
|
501 |
Sample Loop Functions |
|
|
501 |
Undoing Editing Steps in the Sample Editor |
|
|
502 |
Creating Manual Backups |
|
|
504 |
Working With the Digital Factory |
|
|
518 |
Using an External Sample Editor |
|
|
518 |
Using AudioSuite Plug-ins |
|
|
Chapter 22 |
519 |
Removing Silent Passages From Audio Regions |
|
519 |
How You Can Use Strip Silence |
|
|
521 |
Using Strip Silence |
|
|
Chapter 23 |
523 |
Adjusting the Tempo of Audio Regions |
|
523 |
Automatic Tempo Matching |
|
|
524 |
Setting the Project Tempo to Match an Audio Region |
|
|
525 |
Time Stretching Regions |
|
|
526 |
Using the Follow Tempo Function |
|
|
Chapter 24 |
529 |
Managing Audio Files |
|
529 |
Sorting, Grouping, and Renaming Files in the Audio Bin |
|
|
534 |
Moving Audio Files |
|
|
535 |
Copying or Converting Audio Files |
|
|
536 |
Deleting Audio Files |
|
|
537 |
Optimizing Audio Files |
|
|
537 |
Saving Regions as Individual Audio Files |
|
|
538 |
Exporting Tracks as Audio Files |
|
|
539 |
Dealing With SDII Files |
|
|
539 |
Finding and Replacing Orphaned Audio Files |
|
|
Chapter 25 |
541 |
Mixing |
|
543 |
Basic Mixing Steps |
|
|
545 |
Channel Strip Elements |
|
|
546 |
Setting Channel Strip Levels |
|
|
549 |
Setting the Pan, Balance, or Surround Position |
|
|
550 |
Soloing and Muting Channels |
|
|
552 |
Adding Effects: Using Inserts |
552 Working With Sends
552Working With Channel Strip Settings
553Monitoring With Effect Plug-ins
553 Arming Channel Strips
553Changing the Channel Input Format
554Setting the Automation Mode
554 Handling Mixer Inputs and Outputs
560 Adjusting Elements of Multiple Channel Strips
562 Adjusting Channel Strips in Record or Playback Mode
562 Working With Groups
566 Channel Strip Types
574 Customizing the Mixer
579 Using the I/O Labels Window
|
Chapter 26 |
581 |
Working With Automation |
|
582 |
Displaying Track Automation |
|
|
585 |
Setting an Automation Mode |
|
|
588 |
Writing Track Automation Data |
|
|
589 |
Editing Track Automation in the Arrange Area |
|
|
594 |
Editing Track Automation Data in an Event List |
|
|
594 |
Writing Track Automation With External Controllers |
|
|
596 |
Using Hyper Draw |
|
|
600 |
Conversion of Automation Data |
|
|
Chapter 27 |
601 |
Bouncing Your Project |
|
602 |
Creating a Bounce |
|
|
602 |
Routing Channels to an Output |
|
|
603 |
Defining the Bounce Range |
|
|
603 |
Using the Bounce Window |
|
|
613 |
Setting the Bounce File Name and Folder |
|
|
613 |
Bouncing and POW-r Dithering |
|
|
Chapter 28 |
615 |
Creating Apple Loops |
|
616 |
Creating Apple Loops in Logic Pro |
|
|
618 |
Creating Apple Loops in the Apple Loops Utility |
|
|
619 |
Converting ReCycle Files into Apple Loops |
|
|
620 |
Adding Apple Loops to the Loop Browser |
|
|
621 |
Global Tracks and Apple Loops |
|
|
623 |
Converting Apple Loops to Audio Files |
|
|
624 |
Apple Loops and Sample Rates |
|
Chapter 29 |
625 |
Project and File Interchange |
|
625 |
Sharing Logic Pro Data Over a Network |
|
|
630 |
Backing Up Audio Files |
|
|
630 |
Backing Up and Sharing Projects |
|
|
632 |
Working With Standard MIDI Files |
|
|
634 |
Importing GarageBand Projects |
|
|
635 |
Working With OMF Files |
|
|
636 |
Working With OpenTL Files |
|
|
638 |
Opening, Importing, and Exporting AAF Files |
|
|
639 |
Importing and Exporting Final Cut Pro XML Files |
|
|
640 |
Exporting Regions |
|
|
640 |
Exporting Tracks as Audio Files |
|
|
Chapter 30 |
641 |
Advanced Tempo Operations |
|
641 |
Tempo Display |
|
|
642 |
Using the Tempo Track |
|
|
646 |
Recording Tempo Changes |
|
|
646 |
Adjusting the Tempo to Fit Audio Regions |
|
|
646 |
Using the Tempo List |
|
|
649 |
Using the Tempo Operations Window |
|
|
652 |
Using the Tempo Interpreter |
|
|
654 |
Using the Tempo Fader |
|
|
Chapter 31 |
655 |
Beat Mapping Regions |
|
656 |
Beat Mapping With MIDI Regions |
|
|
658 |
Beat Mapping With Audio Regions |
|
|
659 |
Beats From Region |
|
|
660 |
Beat Mapping to Scene Markers |
|
|
660 |
Beat Mapping to Markers |
|
|
Chapter 32 |
661 |
Editing Transposition With the Chord and Transposition Track |
|
662 |
How MIDI Events and Apple Loops Are Transposed |
|
|
663 |
Creating and Editing Transposition and Chord Events |
|
|
665 |
Analyzing MIDI Regions |
|
|
Chapter 33 |
667 |
Working With Notation |
|
668 |
Learning About the Score Editor |
|
|
672 |
Entering Notes and Symbols in the Score Editor |
|
|
673 |
Real Time MIDI Recording |
|
|
673 |
Step Input |
|
|
674 |
Mouse Input (Using the Part Box) |
|
|
677 |
Using Hyper Draw in the Score Editor |
|
|
678 |
Working With the Part Box |
|
|
681 |
Learning About Part Box Groups |
690Editing Notes and Symbols: Basic Operations
690Using the Shortcut Menu
691Changing Several Objects Simultaneously
692Deleting Objects From the Score Editor
692 Moving or Copying Objects With the Mouse
695Working With Aliases in the Score Editor
696Changing the Graphical Position of Objects
697Resizing Notes and Symbols
698Editing Notes and Symbols: Advanced Operations
698Editing Notes
704Creating and Inserting Rests
705Editing Clefs
707Editing Slurs and Crescendi
709Editing Repeat Signs and Bar Lines
710Working With Text
711Inserting Text
712Editing Text
713Using Musical Symbol Fonts
714Learning About Text Styles
715Working With Text Styles
716Working With Global Text
717Working With Automatic Text Objects
718Creating Lyrics
719Creating Chord Symbols
723Working With Time and Key Signatures
724Creating Time Signatures
725Creating Key Signatures
725Selecting Signatures
726Copying Signatures
727Editing Signatures
727Deleting Signatures
727Creating and Choosing Signature Alternatives
728Transcribing MIDI Recordings
729Default Settings for New MIDI Regions
729Selecting Multiple Regions in the Score Editor
730Display Parameters
735Hidden MIDI Regions
735Using Note Attributes to Change Individual Notes
741Working With Staff Styles
762Using Score Sets to Create Scores and Parts
769Printing the Score
769Preparing the Score Layout for Printing
772Printing the Score
774Exporting the Score as a Graphic File
774Preparing the Export
774Exporting the Score
775Customizing the Score Editor’s Appearance
775Choosing a Color Mode
775Displaying Folders
776Displaying Global Tracks
776 Displaying Instrument Names
776 Project Settings for Score Display
776 Global Score Settings
781 Numbers & Names
784 Guitar Tab
788 Clefs & Signatures
790 Layout
792MIDI Meaning
793Colors
795 Score Preferences
|
Chapter 34 |
797 |
Working With Video |
|
798 |
Using the Movie Window |
|
|
799 |
Using the Video Track |
|
|
800 |
Working With Scene Markers |
|
|
801 |
Creating Scene Markers |
|
|
802 |
Handling QuickTime Movie Audio Tracks |
|
|
803 |
Video Project Settings |
|
|
805 |
Video Preferences |
|
|
Chapter 35 |
807 |
Working With Surround |
|
808 |
Surround Formats Supported by Logic Pro |
|
|
812 |
Configuring Logic Pro for Surround |
815Setting the Project Surround Format
816Setting the Channel Input Format
817Changing the Appearance of Surround Level Meters
818Setting the Output Format of a Channel Strip
819Working With the Surround Panner
823 Inserting Surround Plug-ins
825 Working With Multi-Channel Effects
827Working With the Surround Master
828Bouncing Surround Audio Files
|
Chapter 36 |
829 |
Synchronizing Logic Pro |
|
830 |
The Synchronization Master and Slave Relationship |
|
|
830 |
Using External Synchronization |
|
|
832 |
Synchronization Project Settings |
|
|
842 |
Displaying and Using SMPTE Positions |
|
|
844 |
MIDI Machine Control |
|
|
846 |
Synchronization Problems and Solutions |
|
|
Chapter 37 |
847 |
Working With Plug-in Latencies |
|
847 |
About Latency |
|
|
848 |
Working With the Low Latency Mode |
|
|
849 |
Working With Plug-in Delay Compensation |
|
|
Chapter 38 |
853 |
Working With Split Channel Audio File Formats |
|
854 |
Importing Split Channel Files |
|
|
854 |
Working With Split Stereo Files |
|
|
856 |
Exporting Split Channel Files |
|
|
Chapter 39 |
857 |
Working in the Environment |
|
858 |
Using the Environment |
|
|
858 |
An Introduction to the Environment |
|
|
859 |
Working With Layers |
|
|
862 |
Customizing the Environment Display |
|
|
863 |
Working With Objects |
|
|
868 |
The MIDI Signal Path |
|
|
875 |
Common Environment Object Parameters |
|
|
877 |
Exchanging Environments |
|
|
880 |
The Environment Objects |
|
|
880 |
Standard Instruments |
|
|
883 |
Multi Instruments |
|
|
888 |
Mapped Instruments |
|
|
892 |
GM Mixer |
|
|
895 |
MMC Record Buttons |
|
|
895 |
Keyboard |
|
|
896 |
Monitor Object |
|
|
896 |
Channel Splitter Object |
|
|
897 |
Arpeggiator |
|
|
899 |
Transformer Object |
|
|
904 |
Delay Line Object |
|
|
905 |
Voice Limiter Object |
|
|
906 |
Chord Memorizer Object |
|
|
908 |
Touch Tracks Object |
|
|
911 |
Physical Input and Sequencer Input Objects |
913 MIDI Click Object
913 Internal Objects
915Alias
916Ornament
916Macros
918Faders
935 Channel Strip Objects
|
Chapter 40 |
939 |
Project Settings and Preferences |
|
940 |
Saving Project Settings and Preferences |
|
|
940 |
Project Settings |
|
|
940 |
Synchronization Settings |
|
|
941 |
Metronome Settings |
|
|
943 |
Recording Settings |
|
|
944 |
Tuning Settings |
|
|
950 |
Audio Settings |
|
|
951 |
MIDI Settings |
|
|
952 |
Score Project Settings |
|
|
952 |
Video Project Settings |
|
|
952 |
Assets Project Settings |
|
|
953 |
Preferences |
|
|
953 |
Global Preferences |
|
|
957 |
Audio Preferences |
|
|
963 |
MIDI Preferences |
|
|
966 |
Display Preferences |
|
|
969 |
Score Preferences |
|
|
969 |
Video Preferences |
|
|
969 |
Automation Preferences |
|
|
970 |
Control Surfaces Preferences |
|
|
970 |
Sharing Preferences |
|
|
Glossary |
971 |
|
|
Index |
1003 |

Logic Pro 8: Documentation and
Resources
Preface
Logic Pro 8 offers an extensive documentation collection that will help you to learn and make full use of all application features.
Further information about Logic Pro, including data on updated versions and support texts, can be found on the Apple web site.
Logic Pro 8 ships with the following documentation:
ÂLogic Pro 8 User Manual: This book is the final arbiter on all things in Logic Pro, and covers all areas of the program in detail, with the exception of plug-ins. Print and in Help menu.
ÂLogic Pro 8 Getting Started: This book is designed to quickly get you up and running with Logic Pro. Print and in Help menu.
ÂNew Features in Logic Pro 8: This document provides a high-level overview of the improvements and changes found in Logic Pro 8. You can find it in the Help menu and in the Documentation folder of the Logic Pro 8 Install DVD.
ÂLogic Pro 8 Control Surfaces Support: This document covers the use of control surfaces with Logic Pro 8. In Help menu and Documentation folder of the Logic Pro 8 Install DVD.
ÂLogic Pro 8 TDM Guide and Logic Pro 8 Working With Apogee Hardware: These documents cover the essential aspects of using TDM or Apogee hardware in
Logic Pro 8. In Help menu and Documentation folder of the Logic Pro 8 Install DVD.
ÂLogic Studio Instruments and Effects: This book covers the use of all Logic Studio effect and instrument plug-ins. It is a universal guide for all Logic Studio applications that include instruments or effects, and does not cover the application-specific use of plug-ins—only the plug-in functions, parameters, and usage are discussed. Print and in Help menu.
ÂLate-Breaking News: This document is published online and may be updated as new versions of Logic Pro 8 are released, or new information becomes available
15
Important: All topics described in this manual were accurate at the date of printing. For up to date information on changes or additions made after printing, please refer to the Late-Breaking News document in the Logic Pro Help menu, and to the Update Info, included with each Logic Pro update.
Logic Pro 8 Documentation Conventions
The following section introduces you to conventions used throughout the Logic Pro 8 documentation.
Menu Functions
For functions that can be reached via hierarchical menus, the different menu levels are illustrated as follows: Menu > Menu entry > Function.
Important Entries
Some text will be shown as follows:
Important: Information on function or parameter.
These entries discuss a key concept or technical information that should, or must, be followed or taken into account. Please pay special attention to these entries.
Notes
Some sections provide additional information or tips that will assist your use of Logic Pro. These are displayed as shown below:
Note: Information on function or parameter.
Key Commands
Many Logic Pro functions can be activated or accessed with key commands— computer keyboard shortcuts. The key commands mentioned in this guide are based on the standard key command set.
Tips
A number of shortcuts, alternative methods, or general working tips are included throughout the documentation. These may help your workflow, or provide additional information on other uses for functions. Tips are shown as below:
∏ Tip: Information on function or parameter.
|
16 |
Preface Logic Pro 8: Documentation and Resources |

Warnings
A few warning messages are included for functions that are destructive, and could result in irretrievable data loss, or could cause damage to your equipment. Warnings are displayed as follows:
Warning: Information on function or parameter.
Please pay special attention to these entries, as they can save you from making costly mistakes.
Logic Pro Onscreen Help
The Logic Pro Help incorporates the Logic Pro 8 user documentation in electronic form. These documents have the advantage of being at your fingertips whenever you need them, and are searchable, making it quick to find the information you need.
ÂThe Logic Pro Help menu also provides additional features, including direct access to the Logic Pro pages on the Apple website.
ÂA comprehensive bookmark list allows you to quickly choose (and tag) what you want to see, and navigates to the resource when the link is clicked.
Late-Breaking News
This document is published online and may be updated as new versions of Logic Pro 8 are released, or new information becomes available.
To check for recent updates, choose Late-Breaking News from the Help menu. The LateBreaking News PDF file is downloaded. If Safari is the default web browser for your system, the Late-Breaking News PDF file is displayed directly in Safari. Other web browsers may not have the ability to display PDF files directly, in which case the PDF file is downloaded to the default download location.
Apple Websites
There are a variety of discussion boards, forums, and educational resources related to Logic Pro on the web.
Logic Pro Websites
The following websites provide general information, updates, and support information for Logic Pro, as well as the latest news, resources, and training materials.
For information about Logic Pro go to http://www.apple.com/support/logic.
For information on Apple Training Programs go to http://www.apple.com/training.
To provide comments and feedback to Apple about Logic Pro, go to the Apple discussion forums http://discussions.apple.com/category.jspa?categoryID=156.
|
Preface Logic Pro 8: Documentation and Resources |
17 |
Apple Service and Support Website
This is the place to go for software updates and answers to the most frequently asked questions for all Apple products, including Logic Pro. You’ll also have access to product specifications, reference documentation, plus Apple and third-party product technical articles.
To access Apple’s Service and Support web page:
m Open your Internet browser, and type in http://www.apple.com/support.
Other Websites
Âhttp://www.apple.com: Start at the Apple home page to find the latest information on Apple products.
Âhttp://www.apple.com/quicktime: QuickTime is Apple’s industry-standard technology for handling video, sound, animation, graphics, text, music, and 360-degree virtual reality (VR) scenes. QuickTime provides a high level of performance, compatibility, and quality for digital video delivery. Go to the QuickTime website for information on the types of media supported, a tour of the QuickTime interface, specifications, and more.
Âhttp://www.apple.com/firewire: FireWire is one of the fastest peripheral standards ever developed, which makes it great for use with multimedia peripherals, such as audio interfaces, video camcorders, and the latest high-speed hard disk drives. Visit this website for information on the benefits of FireWire technology, FireWire software information, and details on third-party FireWire products.
Âhttp://www.apple.com/pro: This website provides news, information, and other resources on seminars, events, and third-party tools used in web publishing, document design and printing, CAD, music and audio, desktop movies, digital imaging, modelling and animation, and the media arts.
Âhttp://store.apple.com: Go here to buy software, hardware, and accessories direct from Apple. You can also find special promotions and deals that include third-party hardware and software products.
|
18 |
Preface Logic Pro 8: Documentation and Resources |

|
1 |
An Introduction to Logic Pro |
1 |
Logic Pro is a sophisticated, fully-featured audio and MIDI application that provides all the tools you need to create professional-quality music productions.
Logic Pro allows you to record audio and MIDI, edit audio loops plus MIDI and software instrument parts, add high-quality effects, and mix your music in stereo or Surround. The final mix can be exported to one or more standard audio files, or burned to an audio CD, or DVD that can be played on any computer, home stereo, or imported into other applications and devices.
Some of the things you can do with Logic Pro include:
ÂRecord MIDI information via connected MIDI input devices, such as keyboards, and play back this information via any connected MIDI device (such as a synthesizer keyboard or module) or the integrated Logic Pro software instruments.
ÂCreate, arrange, and edit MIDI projects, and print out musical notation via a printer connected to your computer.
ÂDigitally record acoustic and electric instruments, or vocal performances, into your projects, and process these audio recordings with a huge array of built-in real time effects.
ÂMake use of the integrated software instruments, including: Sculpture, Ultrabeat, ES1, ES2, EVP88, EVB3, EVD6, EXS24 mkII, over a dozen high-quality GarageBand instruments, or third-party Audio Unit instruments.
ÂLoad projects or channel strips from GarageBand, and enhancing them with the additional processing and editing possibilities afforded by Logic Pro.
ÂMix your MIDI and audio tracks, including effects and software instrument settings, via a sophisticated total recall mix automation system. Logic Pro includes highquality effects that you can use in your projects. You can also install and use thirdparty Audio Units effects and instruments.
ÂBounce (mix down) all audio data, including instruments, effects and mix automation settings, to stereo or multiple Surround format files for mastering or further processing,.
19
ÂWork in real time: You can work on Logic Pro projects in real time; adding to, and editing audio and MIDI parts while the project is playing, and hearing the results of your changes immediately.
ÂUse existing loop libraries: Logic Pro directly supports Apple Loops files, and is compatible with a wide variety of existing audio file types, including those created in ReCycle.
ÂLocate and preview files easily: The Media area, part of the Logic Pro interface, provides powerful file browsing and search features, making it easy to locate audio files and other supported file types.
Creating Music in Logic Pro
Logic Pro can be used in a variety of ways, ranging from the simple to the incredibly sophisticated. The following section outlines a common workflow example that many projects adhere to. The structure of this manual will follow this basic workflow, where applicable.
Step 1: Creating a project
You begin working in Logic Pro by creating a new project, or opening an existing one.
A project file contains MIDI data recordings plus information about the audio and other files used, including pointers to these files.
All files (audio, video, samples, and so on) can be saved in a project folder. All project files are automatically placed into appropriate sub-folders within the project folder.
More detail can be found in “The Basics: Projects and Regions” on page 23.
Step 2: Creating and importing your musical material
Getting musical material into Logic Pro can basically be broken down into two methods:
ÂMaking new audio or MIDI data recordings (the latter can be played back through either external MIDI synthesizers or software instruments).
ÂImporting existing audio recordings (audio files, samples, loops) or MIDI (and other file data) into your projects. You can import existing audio recordings by simply dragging them from the Media area, shown at the right of the Arrange window.
Recordings are made through suitable MIDI or audio hardware that is connected to, or installed in, your Macintosh.
|
20 |
Chapter 1 An Introduction to Logic Pro |
MIDI recordings are used to trigger (play back through) either external MIDI devices, such as synthesizers, or internal software instruments. Software instruments are calculated on the Macintosh CPU, and played back through your audio interface or the Macintosh audio outputs. Not only can you record the notes of your performance, but you can also record and play back information such as synthesizer parameter changes—all in real time.
Audio recordings can be made by playing an instrument (such as a guitar) or singing into a microphone, as examples.
Step 3: Arranging and editing
Once your musical material has been imported or recorded into Logic Pro, you will generally organize it into a “song structure.”This is done in the main Logic Pro window, called the Arrange window.
Musical material appears as rectangular blocks, known as regions. These regions run from left to right across the Arrange area, and are positioned on vertically stacked lanes, known as tracks. You may freely copy, repeat, loop, move, shorten, lengthen, or delete regions—either on a track or across tracks. This grid-like layout and the use of building blocks (regions) makes it easy to see, and create, the overall song structure.
There will be many occasions where you’ll need to perform more detailed edits to your MIDI or audio data recordings than is possible at the region level. Logic Pro offers a number of editing windows that allow you to modify your musical material at a variety of levels. As examples of where this might be useful:
ÂYou have made a recording of a great main vocal performance, but can hear a thud in the silent passages between two phrases, where the vocalist kicked the microphone stand. It probably goes without saying that this isn’t a sound you’d like to have on the finalized CD. No problem. Simply edit the recording by inserting silence during the thud, or perhaps cut that portion out of the recording entirely.
ÂYou have made a MIDI keyboard recording that is perfect but for one note that should have been a C, but is a B. No problem. You can simply drag the MIDI note event from B to C.
More detail can be found in “The Basics: Projects and Regions” on page 23.
Step 4: Mixing, automating, using plug-ins
Following the creation of your arrangement and any edits that may have been required, you would commonly move on to the mixing phase of your project. Mixing, as a term, generally refers to balancing the relative levels of each song component. Put another way, the main vocal needs to be louder than the bass, guitars, drums, and keyboards, thus allowing the lyrics to be heard.
|
Chapter 1 An Introduction to Logic Pro |
21 |
Mixing also entails the use of audio effects, which change, enhance, or suppress particular song components, adding up to a unified and polished final product. Logic Pro features numerous effects that can be used to turn your basic song into a professionally finished project.
Logic Pro enables you to record, or automate, changes you make to track, instrument, and effect parameters, such as volume, pan, filters, and other controls. This can be done in real time or offline with the mouse or an external MIDI device. These changes play back when you play the project, and can be edited independently of the musical material. This is very useful for a number of reasons:
ÂYou can only adjust one level or setting of a playback track, if using the computer mouse. The ability to record and play back multiple adjustments of all track elements allows for a sophisticated mix.
ÂPerformances are rarely consistent. To clarify, a vocalist will often sing louder or softer during different sections of their performance, so you may need to even out these level changes over the course of the song, or to balance the soft and loud vocal sections against the musical backing.
ÂSong dynamics (the loud and soft sections of a song) benefit from animation. In other words, building the intensity of a song section can often be achieved by gradual or immediate level changes. Songs that are of a consistent level throughout tend to sound flat and lifeless.
Step 5: Exporting and bouncing
The final step of the Logic Pro music creation process is exporting your final product. Logic Pro allows you to produce a stereo file of your completed mix in a variety of audio file formats. You can also produce several stem files, formatted for most common Surround encoding schemes. This is achieved in the Bounce window; simply choose the desired outcome(s) in the available menus and press the onscreen Bounce button. You can even burn a stereo mix directly to CD or DVD with one simple step.
|
22 |
Chapter 1 An Introduction to Logic Pro |
The Basics: Projects and Regions
This section will provide you with an introduction to the basic elements and terminology of a Logic Pro project. Detailed, step-by-step instructions on working with projects, regions, and events are provided in later chapters. If you are an experienced user, you may wish to skip ahead to “A Tour of the Logic Pro Interface” on page 28.
Projects
You start working in Logic Pro by creating a project, or opening an existing one. This is similar to using a word processing application, that requires a document to be opened before you can begin typing. Logic Pro, like word processors, also allows you to have multiple documents (projects) open at the same time, and transfer media and other data between them.
A Logic Pro project file contains all MIDI events and parameter settings, information about the audio and video files to be played and all edits to MIDI and audio data.
It is important to note that the project file points to your audio and video files, which are stored as separate entities on disk. You have the choice of including these, and other file types, in the project folder.
This approach has two main benefits:
ÂSaving a project without its assets (audio, video, sample files, and so on) minimizes the memory requirements for project (and project backup) file storage.
ÂSaving a project with assets simplifies tasks such as archiving and transport to other Logic Pro-based studios—either physically or as email attachments.
The Project Folder
A project can consist of the complete collection of files used, including the “song” (the project document) itself,“song” backups, all audio, sampler instruments, and samples for the EXS24 or Ultrabeat, Space Designer reverb impulse response files and video.
These are collectively known as the project assets.
When you create a new project, a project folder is created, named, and a hard disk location is specified. New recordings are automatically placed into an Audio Files subfolder within the project folder.
If you choose to include the project assets, further sub-folders will be created automatically. These can include Audio Files, Project Backups, Samples, Video, ReCycle, and Sampler Instruments folders.
|
Chapter 1 An Introduction to Logic Pro |
23 |

The sub-folder structure of all projects is identical, making it easy and consistent to navigate both your projects and those of other Logic Pro users.
Project Folder
Project file (“song”)
Movie Files folder
Audio Files folder
Project assets
Sampler Instruments folder
Impulse Responses folder
Regions
The main window of Logic Pro is known as the Arrange window. This is the window that you first see when you open the application, and a project is loaded. This is also the window that is used for recording, editing, and arranging your projects. Your audio and MIDI files appear in the Arrange window as rectangular areas called regions. Audio files are represented by audio regions, MIDI files by MIDI regions.
Audio Regions and Audio Files
Audio regions simply refer to (point to) an underlying audio file. Audio regions are used as playback markers (start and end points) that can be as long as the entire audio file, or may only be a few seconds long, playing a small portion of the audio file that they point to.
Audio file
|
Audio region 1 |
|
Audio region 2 |
Audio region 3
|
24 |
Chapter 1 An Introduction to Logic Pro |

Any audio file used in Logic Pro is automatically linked to at least one audio region that is, by default, the length of the entire audio file.
You can freely create as many audio regions as you require. To give you an example of where this may be useful, imagine a live stereo drum track that runs for the duration of your project. During the second chorus, the drummer played perfectly, but was a little sloppy during all other chorus sections.
Logic Pro allows you to create an audio region that points to the second chorus section of the overall (drum track) audio file, and use this perfect take in multiple places in the project.
This is achieved by creating one audio region (that points to chorus 2 in the drum track audio file), and copying it to each position that the chorus occurs in the Arrange area.
A great benefit of working with audio regions, rather than audio files is that they use very little memory, whereas multiple copies of the same section of the audio file would require a lot of hard disk storage space.
It is, of course, possible to directly edit, copy, and move audio files. This is achieved in the Sample Editor and Media area.
MIDI Regions and Events
MIDI regions, by comparison, actually contain MIDI data events. They are not related to information stored in external files. MIDI regions can be saved as individual files, but they can also be, and generally are, stored as part of the project.
MIDI region
|
MIDI note events |
MIDI controller events |
The MIDI data events stored within MIDI regions include; note, controller, program change, and other information. These data events represent MIDI performances that you have recorded into Logic Pro. MIDI performances are generally created with a MIDI keyboard, but can certainly be generated with MIDI controllers, MIDI guitars, your computer keyboard or the mouse.
MIDI data events can be affected as a group by processing the MIDI region that contains them. Such processing includes; transposition, quantization (timing correction, which is similar to the spell checker of a word processor, when dealing with the language of music), timing delays, and more.
|
Chapter 1 An Introduction to Logic Pro |
25 |
You can also edit individual events within a MIDI region. This is achieved by opening the region in one of the MIDI editors. These windows allow you to precisely alter the position, length, and pitch of MIDI note events. Other MIDI event types can also be altered in various ways. You may freely enter MIDI data with your MIDI keyboard, the mouse, and/or computer keyboard in these editors.
More information on MIDI and MIDI event types can be found in Chapter 15, “Introduction to MIDI Editing,” on page 391.
|
26 |
Chapter 1 An Introduction to Logic Pro |

|
2 Overview of the |
2 |
|
Logic Pro Interface |
The Logic Pro interface features several areas, each specialized for particular tasks. The main workspace is the Arrange window, which can incorporate all areas and editors.
This chapter introduces you to the Arrange window. You’ll learn how it interacts with other Logic Pro windows and editors. Detailed information about these editors and their functions can be found in cross referenced chapters.
You are encouraged to open Logic Pro to view these windows and familiarize yourself with them. Click and explore the various parts of the Logic Pro interface as they are discussed. This will give you a feel for where things are, a brief overview of what they do, and how they work with each other.
To open Logic Pro:
m In the Finder or Dock, double-click the Logic Pro icon in the Applications folder.
When you open Logic Pro for the first time, the Templates dialog is displayed, allowing you to select a template for the project type you want to create (for more information on the New dialog, see “Creating Projects” on page 136). The setup of the Logic Pro interface depends on the chosen template.
27

A Tour of the Logic Pro Interface
The following section will introduce you the various elements of the Logic Pro interface. This is principally a “getting to know you” exercise, where the fundamentals of each area are covered. Full details on all options, functions, and uses are covered in dedicated chapters that appear later in the user manual.
The Arrange Window
The Arrange window can incorporate all working areas and editors. It features a Toolbar at the top and a Transport bar at the bottom.
You have the choice of displaying additional areas, as follows:
ÂEditing area, horizontally tiled, below the Arrange area.
ÂMedia or Lists area, vertically tiled, right of the Arrange (and editing) area.
ÂInspector, vertically tiled, left of the Arrange (and editing) area.
If an area is not visible, clicking on the appropriate Toolbar or Arrrange area button will open it, and resize any existing areas to accommodate the new area.
∏Tip: Many of the editor and other areas can also be opened as separate windows, independent of the Arrange window. This is done in the Window menu (or with the corresponding key commands).
|
Arrange window |
Arrange area |
|||||||||||
|
Click this button to |
||||||||||||
|
Toolbar |
display the Toolbar |
|||||||||||
|
Click this button to |
||||||||||||
|
Click this button to |
||||||||||||
|
display the Inspector |
display the Lists area |
Inspector
Media area
Transport bar
Click these buttons to display one of the editors
ÂArrange area: This is where you record audio and instrument parts as regions, and arrange these audio and MIDI regions into a song structure.
|
28 |
Chapter 2 Overview of the Logic Pro Interface |

ÂMedia or Lists area: Use the various tabs to locate and preview audio files (Browser tab), select effects, instruments, and their settings (Library tab), and more, when the Media button in the Arrange Toolbar is clicked. When the Lists button is clicked, you have the choice of viewing MIDI events (Event List), tempo events (Tempo List), and more. You can also enable the Media or Lists area via the Arrange window View menu (or use the corresponding key commands).
ÂEditing area: You can open or close the Mixer, Piano Roll Editor, Hyper Editor, Score Editor, or Sample Editor directly in the Arrange window by clicking any of the buttons along the lower edge of the Arrange area. These windows allow you to precisely modify, delete, or add different types of data.
ÂTransport bar: Used to navigate through your project. The current playback, recording, or editing position is indicated by the playhead—the thin, vertical line that appears in all Logic Pro windows that offer real time display of playback— namely the Arrange and editor windows.
ÂInspector: Used to set track and region parameters when working in the Arrange area, or the parameters of the editing window with key focus. As examples:
ÂClicking the Score Editor area at the bottom of the editor area shows all scoring symbols in the Inspector.
ÂClicking the Hyper Editor area displays the parameters of the currently selected hyper definition (selected row in the Hyper Editor window).
The Arrange Toolbar
The Toolbar appears at the top of the Arrange window. It contains buttons for frequently used commands.
The Toolbar can be customized to include buttons that show the Inspector, Media, and Lists areas, create new tracks, add audio files, and other common functions. For more information, see “Customizing the Arrange Window Toolbar” on page 73.
The Transport Bar
The Transport bar spans the entire lower edge of the Arrange window. You can use it to move through your project and start recording. It contains buttons that will be immediately familiar if you’ve used a tape recorder or CD/DVD player, such as Play, Rewind, Pause, and so on. The Transport bar also incorporates a number of features that simplify tasks you will perform in Logic Pro, such as recording over a repeatedly cycled section, or listening to a part in isolation.
|
Chapter 2 Overview of the Logic Pro Interface |
29 |

The Transport bar consists of three parts:
|
Transport buttons |
Display area |
Mode buttons |
|||||||||
ÂTransport buttons: Used to navigate your project.
ÂDisplay area: Provides information that helps with project navigation.
ÂMode buttons: Enable advanced recording and playback functions.
You can alter the Transport bar by adding or removing buttons and displays, providing faster access to the functions you need most often. You can also open an independent SMPTE or Bar display window. For more information, see “Customizing the Transport Bar” on page 73.
Arrange Area
The Arrange area is shown directly below the Toolbar. It is used to record, import, collate, and organize MIDI and audio data containers, known as regions, in a project.
Bar ruler
Arrange grid
Track list
ÂBar ruler: A linear bar divided into bar and beat segments. The Bar ruler can also display time in hours, minutes, seconds, and finer divisions. It offers a number of facilities that can be used to mark project sections for different playback and recording tasks. More detail in Chapter 5,“Navigating Your Project,” on page 105.
ÂArrange grid: This where all MIDI and audio regions are displayed on horizontal lanes, called tracks, aligned to time positions in a grid-like layout.
ÂTrack list: This is where you set the destination channel strip for playback of the MIDI or audio regions on each horizontal track lane. The headers of each track list lane can display the track name, icons, and several track buttons.
|
30 |
Chapter 2 Overview of the Logic Pro Interface |
![]()
Media Area
The Media area can be opened or closed by clicking on the Media button in the Toolbar. The Media area is where you manage all files associated with your project, including audio, video, and plug-in settings. It has four tabs:
ÂAudio Bin: Helps you to manage all audio files used in the project.
ÂLoop Browser: Used to search for loop files (Apple Loops, for example).
ÂLibrary This is where you search for (and can directly assign) plug-in, channel strip, and MIDI instrument settings.
ÂBrowser: Used to search for all Logic Pro related files.
Getting to Know the Audio Bin
The Audio Bin shows all audio files used in the project. You can picture the Audio Bin as an audio file catalog for the project. It also provides an overview of regions that are derived from each audio file.
You can define new, edit, delete, or rename existing audio files and regions in the Audio Bin. All audio files and regions can be dragged directly from the Audio Bin into the Arrange area, where you can edit, move, and copy them. You can also add files that aren’t yet used in the arrangement to the Audio Bin, allowing easy access during song construction.
|
Chapter 2 Overview of the Logic Pro Interface |
31 |

ÂName column: Displays all audio files in the current project by name. The disclosure triangle to the left of the file name reveals all regions associated with the selected audio file.
ÂInfo column: Displays audio file and region information. Horizontal bars indicate the overall audio file length. Colored sections of these bars indicate the location and size of regions within the audio file. Additional data, including the sample rate, bit depth, mono, stereo, or surround status, and file size are also shown in the Info column.
Mono files are identified by a single circle symbol, stereo files by a double, interlocked circle symbol, and surround files by five circle symbols.
ÂPlay button: Click to hear the selected audio file or region. Click a second time to stop playback.
ÂLoop button: Click to hear the selected audio file or region repeatedly. Click a second time to stop playback.
When you open the Audio Bin as an independent window, and resize it, the Audio Bin’s Info column can display waveform overviews of audio files and regions.
|
32 |
Chapter 2 Overview of the Logic Pro Interface |

Getting to Know the Loop Browser
The Loop Browser is designed to make finding Apple Loops intuitive and fast.
You can search for loops by using keywords, perform text searches, preview loops, view information about loops, and limit the display to loops from a specific Jam Pack or loop library. Matching files are displayed in the Search Results list. When you find files you want to use, you can add them to your project by dragging them into the Arrange area.
|
View menu |
View buttons |
|||
Search field
Category buttons
Click to narrow the search for appropriate loops
Search Results list
Displays all loops that match the set search criteria
Volume slider
The Loop tab has three views: Column view, Music view, and Sound Effects view. The default Music view displays 54 buttons, each featuring a musically-related category. Simply click on the desired buttons in the matrix to narrow your search for appropriate Apple Loops. Activated buttons are highlighted.
|
Chapter 2 Overview of the Logic Pro Interface |
33 |

The Sound Effects view offers effect-related category buttons such as Explosions, Foley, or People.
Column view offers a standard Mac OS X column file menu that is hierarchically separated into All, By Genres, By Instruments, By Moods, and Favorites search criteria.
Category columns
ÂView buttons: Click to switch between the three views. The left button switches to Column view, the second button (featuring the note icon) switches to Music view, and the third button (featuring the FX icon) switches to Sound Effects view.
ÂView pop-up menu: Restricts displayed loops to a specific loop library.
ÂSearch field: Type text in the field to display files with names that contain the search text string.
ÂCategory buttons (Music and Sound Effects view only): Click to display files matching the category in the Search Results list.
ÂCategory columns (Column view only): Choose a category column to display its subcategories.
ÂSearch Results list: Displays all loops that match the set search criteria.
ÂVolume slider: Adjusts the playback level of the selected file.
|
34 |
Chapter 2 Overview of the Logic Pro Interface |

Getting to Know the Library
The Library is a powerful tool that you can use to access the following file types.
ÂChannel strip settings (.cst)
ÂPlug-in settings (.pst)
ÂEXS instruments (.exs)
ÂEnvironment instruments, and programs or banks of MIDI instruments created in the Audio MIDI Setup utility
ÂReWire MIDI instruments, and active ReWire hosts
The Library automatically displays setting files that match the selected channel strip type and section (Channel Strip Settings menu, Insert slot, Instrument slot). A white frame indicates the selected section of the Arrange channel strips.
You can browse for files by opening folders, or search by performing text searches. Matching files are displayed in the Search Results list. When you find a file you want to use, you can simply load it by selecting it.
|
Chapter 2 Overview of the Logic Pro Interface |
35 |

Getting to Know the Browser
The Browser allows you to navigate to, or search for all file types that can be used in Logic Pro, enabling easy access to (and use) of this data during production. It displays the following file types on any connected media volume:
ÂLogic project files
ÂSong files of older Logic versions
ÂGarageBand projects
ÂAll project interchange file formats Logic Pro is compatible with (OMF, AAF, OpenTL, XML, MIDI files)
ÂAudio files
ÂQuickTime movies
|
Computer, Home, |
||
|
Path menu |
and Project buttons |
View buttons |
Back and Forward
buttons
Search field
Search filters
File list
Play button
|
Volume slider |
Action pop-up menu |
ÂBack and Forward buttons: Move through previously viewed levels of the folder hierarchy.
ÂPath pop-up menu: Displays the levels of the file path to the current location, allowing you to move back to a previous level.
|
36 |
Chapter 2 Overview of the Logic Pro Interface |
ÂComputer button: Displays the contents of the local hard disk, optical drive, and other storage media connected to your computer, if applicable.
ÂHome button: Displays the contents of your home directory.
ÂProject Folder button: Displays the contents of the current project folder.
ÂView buttons: Switches the file list between column and list view modes.
ÂSearch field: Type text in the field to display files with a name that contains the search text. In addition to searching for files by name, you can search by other criteria (further information stored with your files). Click the plus button to display additional search filters. Logic Pro always searches at the displayed location.
ÂSearch filters: Use the menus to narrow down your search to specific file types, file formats, date, size, and other criteria.
ÂFile list: Displays Logic-related files and folders at the current location. In column view, you can browse folder contents by clicking the desired folders.
ÂAction pop-up menu: Choose menu items to add a selected audio file to the Audio Bin, or show the file location in the Finder.
ÂVolume slider: Adjust the playback volume.
ÂPlay button: Click to play the selected audio file.
Lists Area
The Lists area can be opened or closed by clicking the Lists button in the Toolbar. It provides four independent tabs that show a listing of the following types of data:
ÂEvent List: Displays regions or MIDI events.
ÂMarker List: Lists all markers in your project.
ÂTempo List: Displays all tempo changes.
ÂSignature List: Shows all time signature and key change events in the project.
The list tabs are well suited for a number of precise editing tasks, and when a complete view of all data is required.
|
Chapter 2 Overview of the Logic Pro Interface |
37 |

Getting to Know the Event List
The Event List presents a list of all events in your project, such as MIDI note events or region start events. Use it whenever you need to make precise alterations to recorded data, and where the graphic display of the other editors is not as well-suited to the task. You can restrict the types of events that are shown, making it easier to find specific event types.
The Event List can display two types of data: Region related or event related. The information that is displayed depends on the current hierarchy level—in other words, whether you are viewing information at the Arrange level, or looking inside one or more MIDI regions in the Arrange area. Further information about the display hierarchy can be found in “Working at Different Hierarchy Levels” on page 65.
|
Region display |
Event display |
|
Hierarchy button
Create and Filter buttons
Event type buttons
List area
ÂHierarchy button: Click to move up one level in the Event List hierarchy. This allows you to see all regions in the current project.
ÂCreate and Filter buttons: Determine the function of the event type buttons. When you enable the Create button, clicking the event type button adds the selected event type. When you activate the Filter button, you can use the event type buttons to filter specific event types from the display. This merely hides the events from the display, it does not affect playback.
|
38 |
Chapter 2 Overview of the Logic Pro Interface |

ÂEvent type buttons: Click to filter specific event types from the display, or add them (depending on the status of the Create and Filter buttons).
ÂList area: Shows the actual list of events or regions, separated into columns. Details in Chapter 18,“Editing MIDI Events in the Event List.”
Getting to Know the Marker List
The Marker List displays all markers in the project. You can use it to create new markers, edit existing ones, and to select markers for text editing. It also serves as a navigation aid—you can click on a marker name to jump to (move the playhead to) a marker position.
Marker Text Area button
Create button
Marker list area
Marker Text area
ÂCreate button: Creates a new marker.
ÂMarker list area: Displays all markers in your project.
ÂMarker Text Area button: Click to display the optional Marker Text area, allowing you to enter or edit marker text.
ÂMarker Text area: Enter text for the selected marker here.
|
Chapter 2 Overview of the Logic Pro Interface |
39 |

Getting to Know the Tempo List
The Tempo List displays all tempo changes in the project. You can also use it to create new tempo events, or to edit existing ones.
Create button
Tempo list
ÂCreate button: Click to create a new tempo event.
ÂTempo list: Displays all tempo changes, and their position in a project.
|
40 |
Chapter 2 Overview of the Logic Pro Interface |
![]()
Getting to Know the Signature List
The Signature List shows all time and key signature events in the project. Score symbols, if present in the score of the project, are also shown. These include: Repeat signs and double bar lines (including end of score events), half/short bar lines, hidden bar lines and manually inserted bar lines.
You can use the Signature List to create, copy, move, and delete time and key signature events.
The initial time and key signature of the project is always displayed at the top of the list, without bar position indicators.
|
Chapter 2 Overview of the Logic Pro Interface |
41 |

The Inspector
The Inspector can be displayed or hidden by clicking on the Inspector button in the Toolbar. The Inspector content depends on the area in key focus: Either the Arrange or one of the editing areas below it. The following screenshot shows the Inspector when the Arrange area is in key focus.
Region Parameter box
Track Parameter box
Arrange channel strips
ÂTrack Parameter box: Used to alter various aspects of track channel strips. All regions on the track lane will be affected by any changes made here (as all regions are routed through this channel strip). Clicking on the small triangle to the left of the name shows or hides the contents of the box. Closing the box provides room for the elements below.
ÂRegion Parameter box: Used to set playback parameters, such as transposition and quantization, for individual regions on track lanes. None of the parameters in the Region Parameter box actually alters the original data in the region. They only affect the way the region (and events within the region) are played back. These parameter alterations occur in real time, as the region is played. Clicking on the small triangle to the left of the name shows or hides the contents of the box.
|
42 |
Chapter 2 Overview of the Logic Pro Interface |
ÂArrange channel strips: The left-hand channel strip controls the output of the selected arrange track. The right-hand channel strip can vary, dependent on actions performed in the left channel strip. As examples, the right channel strip can display the first aux or output destination channel strip for the left-hand channel strip. This facility makes it quick and easy to set up flexible effects and audio routing schemes. It also provides an at-a-glance view of processing and routing for the selected arrange track, and you can access all of the mixer channel functions (volume, pan, sends, inserts, and so on) directly from the Arrange area. Any adjustments you make to a track’s arrange channel strip will be reflected in the corresponding Mixer channel strip, and vice-versa.
Note: The horizontal size of the Inspector can not be altered. In situations where the area in key focus does not provide a parameter area, the Inspector for the Arrange area is displayed.
As the Inspector updates to display the parameters of the window with key focus, usage details are found in the chapters for each window.
|
Chapter 2 Overview of the Logic Pro Interface |
43 |

The Editing Area
You can open the Mixer, Sample Editor, Piano Roll Editor, Score Editor, and Hyper Editor directly in the Arrange window by clicking the corresponding button at the bottom of the Arrange window. Here’s a brief overview of what each window offers.
Getting to Know the Mixer
The Mixer is where you mix your project. Each track is played back through a channel strip. You can adjust the level and pan position of a channel strip, add effects, mute and solo tracks, and send the output of a channel strip to other channel strip types, such as output and auxilliary channels.
|
View buttons |
Filter buttons |
||||
Channel strips
ÂChannel strips: Use the channel strip controls to adjust the level and other aspects of the audio signal played through the channel strip.
ÂView buttons: Switch the Mixer between the Single, Arrange, and All Mixer views, limiting the Mixer view to channel strips required for the task at hand.
ÂFilter buttons: Filter the display of specific channel strip types.
Full details can be found in Chapter 25,“Mixing,” on page 541.
|
44 |
Chapter 2 Overview of the Logic Pro Interface |

Getting to Know the Sample Editor
The Sample Editor displays the contents of audio files as waveform graphics. You can use the Sample Editor to precisely edit audio files (and regions). The Sample Editor also features a number of useful destructive processing tools—these allow you to time stretch and pitch shift audio, change sample rates, extract MIDI grooves from the audio, and even quantize audio.
|
Waveform overview |
Info display |
|||
Ruler
Waveform display
Anchor
ÂRuler: Shows the position of the region in the arrangement. If you have not yet added the audio file to the arrangement, the position marker lines are dotted, indicating no time connection exists.
ÂInfo display: Shows the start point and length of the selected area.
ÂWaveform overview: Displays a miniature view of the entire waveform. The white frame shows the extent of the section visible in the waveform display. The dark gray frame shows the currently selected area.
ÂWaveform display: Provides a detailed waveform display. If you’re dealing with a stereo file, both channels are displayed, with the left side on top, and the right side below. Left of the waveform display is the amplitude scale.
ÂPlayhead: The gray line in the waveform display shows the current position of the playhead.
ÂAnchor: Sets a temporal reference point for an audio region. When you move a region in the Arrange area, Logic Pro displays the position of the anchor in the help tag, and snaps the region’s anchor to the selected Snap menu grid division.
ÂRegion area: Edit this beam to adjust the length of the region.
|
Chapter 2 Overview of the Logic Pro Interface |
45 |

Getting to Know the Piano Roll Editor
The Piano Roll Editor displays MIDI notes as beams on a grid. The piano keyboard to the left is aligned with the note pitches represented by each beam. Note length is indicated by the relative length of each beam. Note position is displayed from left to right—a ruler and vertical grid lines make it easy to see where notes begin and end. Note velocity (how hard a note is struck, and usually how loud) is indicated by color.
Full details can be found in Chapter 16,“Editing MIDI Events in the Piano Roll Editor,” on page 397.
Getting to Know the Score Editor
The Score Editor uses traditional music notation to display the MIDI note events (plus pedal and other event types) of MIDI regions. You can insert and edit MIDI note events in staffs, and use musical symbols to clarify their meaning in this editor. Text, such as lyrics, titles, and comments, can also be integrated into the score. The Print function allows you to print complete scores, with staff numbers only limited by the paper size.
|
46 |
Chapter 2 Overview of the Logic Pro Interface |

Details on Score Editor use can be found in Chapter 33,“Working With Notation,” on page 667.
Getting to Know the Hyper Editor
The Hyper Editor displays MIDI note or controller events as vertical beams, placed along a user-defined time grid. This makes the Hyper Editor the ideal place to:
ÂAdd or edit controller data, such as note velocities. It makes some editing tasks— such as data scaling—much faster.
ÂQuickly create and edit MIDI drum parts.
Event Definition
Parameter box
MIDI events
Event definitions
ÂEvent definition: Each horizontal row (or lane) provides an event definition, which determines the type of event displayed/affected. When you select a row in the name column, its event definition is shown in the Inspector’s Event Definition Parameter box.
ÂMIDI events: Each MIDI event is represented by a vertical beam, aligned with a particular time position. The value of the controller, or velocity of the note, is indicated by the height of the beam. Taller beams indicate higher values.
|
Chapter 2 Overview of the Logic Pro Interface |
47 |

Common Features of Logic Pro Windows
All Logic Pro windows, including the Arrange area, feature a number of common elements. This consistent approach between windows makes your life easier, as you will find these elements in the same place throughout the application.
Local Menu Bars
A window’s local menu bar contains buttons that access functions which are specific to the window. As an example, the Score Editor provides an enharmonic shift function, which is relevant to notation, but not to Piano Roll editing.
Local menu bar
Tool Menus
The tools available in the Tool menus of each window are specific to tasks performed in the window. As examples: the Arrange area provides tools for different arrangement tasks, such as cutting or moving regions, and automation editing. The Score Editor provides tools used for score layout, and tasks such as voice separation.
The left Tool menu assigns the default tool. The right menu assigns a secondary tool. A further tool menu will appear if the right mouse button is not assigned to other tasks. For more information, see “Working With Tools” on page 166.
|
48 |
Chapter 2 Overview of the Logic Pro Interface |

Catch, Link, and Hierarchy Buttons
Most windows contains Catch, Link, and Hierarchy buttons. These are used to tie or associate Logic Pro windows, and can aid in navigating through different levels of your song structure. As an example of where this is useful, if you click on a region in the Arrange area, the contents of a linked window (the Piano Roll editor, for example) will update immediately to show the events within the region.
|
Hierarchy button |
Link button |
|
Catch button
Scroll Bars
Vertical and horizontal scroll bars are shown at the right and bottom edges of the window. These enable you to view sections that fall outside the visible display area.
Zoom Sliders
Vertical and horizontal sliders are shown at the bottom right corner of the window. These allow you to horizontally or vertically resize the contents of the window, enabling a closer or more distant view of data.
Bar Ruler
All linear editing windows feature a Bar ruler at the top. The position of regions and events within a project are aligned with Bar ruler positions. The Bar ruler displays markers and locators, and reflects time signature changes. It also indicates three important operational modes—solo, recording, or synchronized.
|
Chapter 2 Overview of the Logic Pro Interface |
49 |

Global Tracks
All linear editing windows also feature global tracks, which are displayed just below the Bar ruler, when opened. Click the disclosure triangle to the left of the Bar ruler (labeled Global tracks) to view the global tracks.
ÂMarker track: Contains markers, which are used to label bar positions and parts of the project. Their length, text, and color can be edited freely (for details, see “Working With Markers” on page 123).
ÂTempo track: Contains all tempo changes in the project. For further information, see “Using the Tempo Track” on page 642.
ÂBeat Mapping track: Allows you to assign the desired bar position to any musical event (both MIDI notes and distinct accents in audio regions). This makes it possible to adjust the musical timeline to the original timing of a MIDI or audio region that has been recorded rubato (free time, including speeding up and slowing down), or just without a metronome click. The audible outcome remains unchanged, but the resulting display will fit the musical timeline.
ÂSignature track: Contains the basic key of the project, along with all time and key signatures, as they are displayed in the Score Editor.
ÂChord track: Contains chord symbols that can be derived from MIDI regions or created with the mouse. These chord symbols may also be inserted into the score. The root note of the chords determines the transposition (pitch shifting) of all Apple Loops, and can also affect the playback of MIDI regions.
ÂTransposition track: Shows global transposition events. It is linked to the progression of the chord root notes in the Chord track: Changing a chord root will be reflected in the Transposition track, and vice-versa.
ÂVideo track: Displays frames of a QuickTime movie as thumbnails that are perfectly synchronized with the music, making it ideal for film scoring. Cuts in the movie can be automatically detected and marked.
|
50 |
Chapter 2 Overview of the Logic Pro Interface |
 Loading…