![]()
MAC 500/E
user manual

© 1997 — 2000 Martin Professional A/S, Denmark.
All rights reserved. No part of this manual may be reproduced, in any form or by any means, without permission in writing from Martin Professional A/S, Denmark.
Printed in Denmark.
P/N 35000016, Rev. E
|
section 1 |
|
|
Introduction |
|
|
MAC 500/E safety information……………………………………………………………………………………… |
…………………………………………. 4 |
|
section 2 |
|
|
Setup |
|
|
Unpacking ……………………………………………………………………………………………………………………………………………………………… |
5 |
|
Installing or changing the lamp…………………………………………………………………………………………………………………………………. |
5 |
|
Powering the fixture………………………………………………………………………………………………………………………………………………… |
6 |
|
Rigging………………………………………………………………………………………………………………………………………………………………….. |
6 |
|
Connecting the serial link ………………………………………………………………………………………………………………………………………… |
7 |
|
section 3 |
|
|
Operation |
|
|
Martin RS-485 control …………………………………………………………………………………………………………………………………………….. |
9 |
|
DMX-512 control……………………………………………………………………………………………………………………………………………………. |
9 |
|
Controllable effects ……………………………………………………………………………………………………………………………………………….. |
10 |
|
section 4 |
|
|
Control Panel |
|
|
Menu navigation …………………………………………………………………………………………………………………………………………………… |
12 |
|
Personality settings ……………………………………………………………………………………………………………………………………………….. |
13 |
|
Address and protocol selection ……………………………………………………………………………………………………………………………….. |
14 |
|
Readouts………………………………………………………………………………………………………………………………………………………………. |
14 |
|
Manual control ……………………………………………………………………………………………………………………………………………………… |
15 |
|
Stand-alone sequences …………………………………………………………………………………………………………………………………………… |
15 |
|
Utilities………………………………………………………………………………………………………………………………………………………………… |
16 |
|
section 5 |
|
|
Gobos and Color Filters |
|
|
Gobo specifications……………………………………………………………………………………………… ……………………………………………….. |
17 |
|
Gobo orientation and positions ……………………………………………………………………………………. …………………………………………. |
17 |
|
Changing rotating gobos ………………………………………………………………………………………….. ……………………………………………. |
19 |
|
Changing static gobos ……………………………………………………………………………………………. ……………………………………………… |
19 |
|
Default color filter positions ……………………………………………………………………………………. …………………………………………….. |
20 |
|
Changing color filters…………………………………………………………………………………………… ……………………………………………….. |
20 |
|
section 6 |
|
|
Maintenance and Basic Service |
|
|
Accessing parts …………………………………………………………………………………………………………………………………………………….. |
21 |
|
Removing the printed circuit board …………………………………………………………………………………………………………………………. |
21 |
|
Replacing fuses …………………………………………………………………………………………………………………………………………………….. |
22 |
|
Changing the XLR pin-out……………………………………………………………………………………………………………………………………… |
22 |
|
Changing voltage and frequency settings …………………………………………………………………………………………………………………. |
22 |
|
Updating software …………………………………………………………………………………………………………………………………………………. |
23 |
|
Changing lenses ……………………………………………………………………………………………………………………………………………………. |
24 |
|
Replacing the lamp………………………………………………………………………………………………………………………………………………… |
24 |
|
Optimizing lamp alignment ……………………………………………………………………………………………………………………………………. |
25 |
|
Installing the optional head shell safety wire…………………………………………………………………………………………………………….. |
25 |
|
Maintenance schedule ……………………………………………………………………………………………………………………………………………. |
25 |
|
Cleaning ………………………………………………………………………………………………………………………………………………………………. |
26 |
|
Lubrication …………………………………………………………………………………………………………………………………………………………… |
26 |
|
section 7 |
|
|
Appendices |
|
|
DMX protocol ……………………………………………………………………………………………………. ………………………………………………… |
27 |
|
Messages ……………………………………………………………………………………………………….. ……………………………………………………. |
31 |
|
Troubleshooting ………………………………………………………………………………………………… ………………………………………………… |
32 |
|
Circuit board layout …………………………………………………………………………………………….. ……………………………………………….. |
33 |
|
Specifications ………………………………………………………………………………………………….. …………………………………………………… |
34 |
3

s e c t i o n 1
I N T R O D U C T I O N
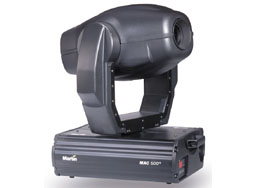
Thank you for purchasing the MAC 500/E moving-head spotlight from Martin. Every detail of its construction and programming is designed to make the MAC 500/E extremely bright, quiet and reliable. With proper setup and maintenance, it will provide years of trouble-free operation.
This manual covers the MAC 500 with magnetic ballast and the MAC 500 E with electronic ballast. “MAC 500/E” refers to both models when describing common features and procedures. The features in software version 1.9 are described. The latest MAC 500/E news and software is available from the Martin web site at http://www.martin.dk.
M A C 5 0 0 / E s a f e t y i n f o r m a t i o n
W A R N I N G !
This product is for professional use only. It is not for household use.
This product presents risks of lethal or severe injury due to fire and heat, electric shock, ultraviolet radiation, lamp explosion, and falls. 5HDG WKLV PDQXDO before powering or installing the fixture, follow the safety precautions listed below and observe all warnings in this manual and printed on the fixture. If you have questions about how to operate the fixture safely, please contact your Martin dealer or call the Martin 24-hour service hotline at +45 70 200 201.
To p r o t e c t y o u r s e l f a n d o t h e r s f r o m e l e c t r i c s h o c k
•Disconnect the fixture from AC power before removing or installing the lamp, fuses, or any part, and when not in use.
•Always ground (earth) the fixture electrically.
•Use only a source of AC power that complies with local building and electrical codes and has both overload and ground-fault protection.
•Do not expose the fixture to rain or moisture.
•Refer any service operation not described in this manual to a qualified technician.
To p r o t e c t y o u r s e l f a n d o t h e r s f r o m U V r a d i a t i o n a n d l a m p e x p l o s i o n
•Never operate the fixture with missing or damaged lenses and/or covers.
•When replacing the lamp, allow the fixture to cool for at least 15 minutes before opening the fixture or removing the lamp. Protect your hands and eyes with gloves and safety glasses.
•Do not stare directly into the light. Never look at an exposed lamp while it is lit.
•Replace the lamp before usage exceeds the maximum service life, or if the lamp is defective or worn out.
To p r o t e c t y o u r s e l f a n d o t h e r s f r o m b u r n s a n d f i r e
•Never attempt to bypass the thermostatic switch or fuses. Always replace defective fuses with ones of the specified type and rating.
•Keep all combustible materials (for example fabric, wood, paper) at least 1.0 meter (39 inches) away from the fixture. Keep flammable materials well away from the fixture.
•Do not illuminate surfaces within 1.0 meter (39 inches) of the fixture.
•Provide a minimum clearance of 0.1 meters (4 inches) around fans and air vents.
•Never place filters or other materials over the lens.
•The exterior of the fixture can reach temperatures up to 140° C (284° F). Allow the fixture to cool for at least 5 minutes before handling.
•Do not modify the fixture or install other than genuine Martin parts.
•Do not operate the fixture if the ambient temperature (Ta) exceeds 40° C (104° F).
To p r o t e c t y o u r s e l f a n d o t h e r s f r o m i n j u r y d u e t o f a l l s
•When suspending the fixture above ground level, verify that the structure can hold at least 10 times the weight of all installed devices.
•Verify that all external covers and rigging hardware are securely fastened and use an approved means of secondary attachment such as a safety cable.
•Block access below the work area whenever installing or removing the fixture.
•Do not lift the fixture by its head.

s e c t i o n 2
S E T U P
This section describes the steps required to prepare the MAC 500/E for operation.
U n p a c k i n g
The MAC 500/E package includes:
•2 Fast-Lock clamp brackets
•5-meter XLR-XLR control cable
•User manual
•7 extra gobos
•1 spare rotating gobo spring
The packing material is carefully designed to protect the fixture during shipment — always use it or a custom MAC 500/ 600 flight case to transport the fixture.
1RWH 0$& IOLJKW FDVHV SURGXFHG EHIRUH 6HSWHPEHU DUH QRW GHHS HQRXJK IRU WKH 0$& ( These flight cases can be identified by the outside measurements: 860 mm (34″) from bottom to top, including wheels, on the outside. Suitable flight cases measure 894 mm (35.2″) from bottom to top, including wheels.
I n s t a l l i n g o r c h a n g i n g t h e l a m p
W A R N I N G !
Disconnect the fixture from AC power before proceeding. Always wear safety goggles to protect your eyes and allow a hot lamp to cool for at least
15 minutes before removing it from the fixture.
The MAC 500/E is designed to work with the Philips MSR-575/2, Philips MSD-575, Osram HSD-575, or the Osram HSR-575/2 discharge lamps. ,QVWDOOLQJ DQ RWKHU ODPS PD GDPDJH WKH IL[WXUH The lamp holder is pre-adjusted at the
factory; precise alignment may be necessary due to slight variations between lamps. The procedure is described on page 25.
1.The MAC 500/E must be cool and isolated from AC power. Remove the 2 screws holding the lamp assembly. Gently remove the assembly.
2.If changing the lamp, remove the old lamp from the socket.
3.Holding the new lamp by its ceramic base (do not touch the glass), carefully insert it firmly and squarely into the lamp socket.
4.Clean the glass bulb with the cloth supplied with the lamp, particularly if your fingers touch the glass. A clean, lint-free cloth wetted with alcohol may also be used.
5.Re-insert the lamp assembly and replace the screws.

6.Before turning the lamp on, reset the RLAH and RLST counters. See “Readouts” on page 14.
P o w e r i n g t h e f i x t u r e
W A R N I N G !
For protection from dangerous electric shock, the fixture must be grounded (earthed). The AC mains supply shall be fitted with a fuse or circuit breaker and ground-fault protection.
C h e c k v o l t a g e a n d f r e q u e n c y s e t t i n g s
7KH YROWDJH DQG IUHTXHQF VHWWLQJV PXVW PDWFK WKH ORFDO $& SRZHU VXSSO Operating at the incorrect setting can result in poor light output, shortened lamp life, overheating and damage to the fixture. The settings are printed on the serial number label on the bottom of the base: if the voltage does not match the local supply or the frequency (50/ 60 Hz) is different, then the ballast and/or transformer must be rewired as described on page 22.
I n s t a l l a p l u g o n t h e p o w e r c o r d
You may need to install a cord cap that fits your supply on the power cable. Following the manufacturer’s instructions, install an approved 3-prong grounding-type plug that fits your supply. Connect the wires to the pins as listed below. The table shows some possible pin identification schemes; if the pins are not clearly identified, or if you have any doubts about proper installation, consult a qualified electrician.
|
Wire |
Pin |
Marking |
Screw (US) |
|||||
|
brown |
live |
“L” |
yellow or brass |
|||||
|
blue |
neutral |
“N” |
silver |
|||||
|
yellow/green |
ground |
green |
||||||
When ready to operate, connect the MAC 500/E directly to AC power. ‘R QRW FRQQHFW LW WR D GLPPHU VVWHP GRLQJ VR PD GDPDJH WKH IL[WXUH To apply power, set the power switch on the base to the “I” position.
R i g g i n g
W A R N I N G !
Use 2 clamps to rig the fixture. Lock each clamp with both fasteners.
The 1/4-turn fasteners are locked only when turned fully clockwise.
Attach an approved safety cable to the base.
The MAC 500/E can be placed directly on the stage floor or rigged in any orientation on a truss. The integrated FastLock system enables quick and easy fastening of the clamp adapters in 4 different positions as shown below. See page 35 for a list of suitable clamps available from Martin.
1.Verify that the rigging clamps (not included) are undamaged and can bear at least 10 times the weight of the fixture. Bolt the clamps securely to the clamp brackets with a grade 8.8 (minimum) M12 bolt and lock nut, or as recommended by the clamp manufacturer.
2.Tip the MAC 500/E on its side or install the clamps while the fixture is in the flight case.
3.Align a clamp with 2 mounting points. Insert the fasteners into the base and turn both levers a full 1/4-turn clockwise to lock. Install the second clamp.
4.Verify that the structure can bear at least 10 times the weight of all installed fixtures, clamps, cables, auxiliary equipment, etc.

safety wire attachment point
arrow points to front (neutral pan)
5.Working from a stable platform, hang the fixture on the truss. The front of the fixture is indicated by the arrow on the base.
6.Install a safety wire that can bear at least 10 times the weight of the fixture. The attachment point is designed to fit a caribiner clamp. Never use the carrying handles for secondary attachment.
7.Tighten the rigging clamps securely to the structure.
8.Verify that there are no combustible materials or surfaces to be illuminated within 1 meter of the fixture, and that there are no flammable materials nearby.
I M P O R T A N T !
When rigging the fixture within 1 meter of other fixtures, avoid illuminating one fixture with another. The intense light can melt plastic parts.
C o n n e c t i n g t h e s e r i a l l i n k
T i p s f o r b u i l d i n g a s e r i a l l i n k
1.Use shielded twisted-pair cable designed for RS-485 devices: standard microphone cable cannot transmit DMX data reliably over long runs. For links up to 300 meters (1000 ft.) long, you can use 24 AWG, low capacitance, 85-150 ohm characteristic impedance, shielded cable with 1 or more twisted pairs. For runs up to 500 meters (1640 ft.) use 22 AWG cable. Use an amplifier if the serial link exceeds 500 meters.
2.Never use a “Y” connector to split the link. To split the serial link into branches use a splitter such as the Martin 4-Channel Opto-Isolated RS-485 Splitter/Amplifier.
3.Do not overload the link. Up to 32 devices may be connected on a serial link.
4.Terminate the link by installing a termination plug in the output socket of the last fixture on the link. The termination plug, which is simply a male XLR connector with a 120 ohm, 0.25 watt resistor soldered between pins 2 and 3, “soaks up” the control signal so it does not reflect back down the link and cause interference. If a splitter is used, terminate each branch of the link.
C o n n e c t i n g f i x t u r e s
The MAC 500/E has locking 3-pin data input and output sockets that can be configured for use with either DMX or Martin Protocol controllers. 7KH GHIDXOW SLQ RXW LV FRQILJXUHG WR WKH ‘0; VWDQGDUG, i.e., pin 1 to shield, pin 2
to signal (-) and pin 3 to signal (+).
|
3-pin to 3-pin |
3-pin to 5-pin |
5-pin to 3-pin |
5-pin to 3-pin |
3-pin to 5-pin |
|||||||||||||||||||
|
Phase-Reversing |
Phase-Reversing |
Phase-Reversing |
Straight |
Straight |
|||||||||||||||||||
|
Cable |
Cable |
Cable |
Cable |
Cable |
|||||||||||||||||||
|
Connections |
Connections |
Connections |
Connections |
Connections |
|||||||||||||||||||
|
Male |
Female |
Male |
Female |
Male |
Female |
Male |
Female |
Male |
Female |
||||||||||||||
|
1 |
1 |
1 |
1 |
1 |
1 |
1 |
1 |
1 |
1 |
||||||||||||||
|
2 |
2 |
2 |
2 |
2 |
2 |
2 |
2 |
2 |
2 |
||||||||||||||
|
3 |
3 |
3 |
3 |
3 |
3 |
3 |
3 |
3 |
3 |
||||||||||||||
|
4 |
4 |
4 |
4 |
||||||||||||||||||||
|
5 |
5 |
5 |
5 |
||||||||||||||||||||
|
P/N 11820006 |
P/N 11820002 |
P/N 11820003 |
P/N 11820005 |
P/N 11820004 |
|||||||||||||||||||
1.Connect the controller’s data output to the MAC 500/E’s data input. For a
•DMX controller with 5-pin output: use a cable with 5-pin male and 3-pin female connectors such as P/N 11820005. Pins 4 and 5 are not used.
•DMX controller with 3-pin output: use a cable with 3-pin male and female connectors such as the one supplied.
•Martin RS-485 Protocol controller: use a phase-reversing cable, such as P/N 11820006, with 3- pin male and female connectors or reconfigure the XLR output.
2.Continue the link: connect the output of the fixture closest to the controller to the input of the next fixture. Use a phase-reversing cable when connecting a DMX-standard (pin 3 +) device to a Martin-standard (pin 3 -) device.
3.Insert a male 120 Ω XLR termination plug in the output of the last fixture on the link.
s e c t i o n 3
O P E R A T I O N
This section describes the MAC 500/E’s controllable effects and the options for customizing them for your application. Option selection is described in the next section.
M a r t i n R S — 4 8 5 c o n t r o l
The MAC 500/E may be controlled with the Martin 3032 controller with version 2.04 or later software. To respond to the controller, either the protocol setting (PSET) must be set to Martin (MART) as described in the previous section, or automatic protocol detection (SPEC/AUTO) must be enabled. If automatic protocol detection is enabled, send a dummy command and wait 1 second to allow the fixture to respond before sending real commands.
D M X — 5 1 2 c o n t r o l
The MAC 500/E may be operated with USITT DMX512 controllers in 4 modes that combine tracking or tracking/vector movement with 8-bit or 16-bit pan/tilt resolution.
Tr a c k i n g c o n t r o l
Tracking is available in all 4 DMX modes. With tracking control, the controller calculates the positions along the path between an effect’s starting point and it’s ending point. It uses the fade time to calculate the change (delta) of each update or refresh, which the fixture “tracks.” For smooth movement with any fade time, the MAC 500/E has a filter algorithm that looks at several position updates (samples), and calculates the ideal speed.
This algorithm is adjustable to compensate for controllers that calculate position changes unevenly. In most cases the default settings work well.
If movement is not satisfactory there are 2 parameters that can be adjusted. The first is the calculation method used and is selected under SPEC/TRAC/MOdE. MOd1, the default, calculates speed based on the absolute value of the change in DMX; it is the best choice with controllers that calculate intermediate positions that are close to the line of travel. MOd2 uses the real value of the DMX delta to calculate speed and is better if the intermediate positions stray significantly from the line of travel.
The second parameter is the number of position updates used to calculate speed. The level is adjustable between 1 and 10 under SPEC/TRAC/CAL. Increasing the number of samples increases the distance over which speed is calculated, making movement smoother but less responsive to sudden changes.
The ideal settings for both parameters will vary from controller to controller: experiment for best results. The real value algorithm (MOd2) is recommended when using the MAC 500/E with the Martin Lighting Director system.
Ve c t o r c o n t r o l
With vector control, available in DMX modes 3 and 4, the fixture is given just 1 position — the end position — and a speed, which is set on a separate channel. )RU VPRRWK PRYHPHQW WKH IDGH WLPH PXVW EH VHW WR L H WKH HIIHFW ³EXPSV´ RU ³VQDSV´ IURP RQH SRVLWLRQ WR WKH QH[W With controllers that do not have programmable fade times, vector control
provides a way to set speed. Because the end point and speed are known from the beginning, vector control results in smooth movement regardless the fade time or the controller’s processing power.
The speed channels allow vector control to be turned off, resulting in tracking control. In addition, they offer a “blackout speed,” described below, and overrides of the PTSP (pan/tilt speed), MOdE (studio mode), and SCUT (shortcuts) personality settings.
When blackout speed is enabled, effects move at full speed. The dimmer/shutter closes while the effects move to make the transition invisible. Dimmer/shutter strobe and pulse effects, however, override the blackout command.
8 — b i t v e r s u s 1 6 — b i t p a n / t i l t r e s o l u t i o n
With 8-bit pan/tilt resolution, the pan and tilt are divided into 256 equal increments. Finer position control and smoother movement is provided in the 16-bit modes, which divide the full pan range into 32,768 increments and the full tilt range into 45,567 increments.
C o n t r o l l a b l e e f f e c t s
All moving effects are reset to a “home” position when the fixture is powered up. The fixture can also be reset via DMX if DMX reset (SPEC/dRES) is enabled. There is also a combination of DMX values that allows you to reset the MAC 500/E even if this feature is disabled; see the DMX protocol for details.
An on-the-fly position correction system monitors the position of the color wheels, fixed-gobo wheel, and rotating gobos. If an error is detected, the shutter closes and the effect is reset to its home position. Normal operation resumes immediately thereafter. This feature can be disabled by setting effects feedback (SPEC/EFFb) to OFF.
General operation may be optimized for speed or quietness with the studio mode setting (SPEC/MOdE). The menu setting may be overridden via DMX using the effects speed channel in DMX modes 3 and 4.
L a m p
The MAC 500/E can be set to automatically strike the lamp within 90 seconds of being powered on by setting the Automatic Lamp On (SPEC/ALON) personality to ON. A delay determined by the fixture address prevents all lamps from striking at the same time.
If Automatic Lamp On is set to off (default), the lamp remains off until a “lamp on” command is sent from the controller. A peak of electric current that can be many times the operating current is drawn for an instant when striking the lamp: striking many lamps at once may cause a voltage drop large enough to prevent lamps from striking or trip the main circuit breaker. Avoid this by programming a “lamp on” sequence that strikes lamps one at a time at 5 second intervals.
Power to the lamp can be turned off from the controller if the DMX Lamp Off (SPEC/dLOF) feature is enabled.
There is also a combination of DMX values that allows you to turn off the lamp even if this feature is disabled; see the DMX protocol. %H FDUHIXO: it is not possible to strike the lamp within 8 minutes of having switched it off. The MAC
500/E will store a “lamp on” command and strike the lamp automatically when the 8 minutes have elapsed.
With the MAC 500 E, lamp power falls to 400 watts for cooler operation and longer lamp life when the shutter is closed for 10 seconds. Power instantly returns to full when the shutter opens. Reduced power mode can also be forced — with the shutter open — by setting channel 1 to a DMX value from 73 to 79.
P a n a n d t i l t
The moving head pans 440° and tilts 306°. Movement may be optimized for speed by setting the pan/tilt speed (PTSP) personality to FAST, or for smoothness by setting it to SLOW. The setting may be overridden on the speed channel in vector mode. Setting the movement speed to “blackout” in vector mode causes the shutter to black out the light while the mirror is moving. The pan and tilt channels (DMX) can be inverted and/or swapped for convenience using the pan/tilt (PATI) menu.
C o l o r w h e e l s
The MAC 500/E has 2 9-position-plus-open color wheels, yielding a total of 100 possible combinations. The 4 temperature correction filters and 14 dichroic colors combine in 67 useful ways that can be called on 1 DMX channel. Both wheels can be scrolled, allowing for split color effects, snapped to fixed positions, and continuously rotated in both directions at different speeds. The 67 colors can be called randomly on DMX channel 4.
The Shortcuts (SPEC/SCUT) setting determines whether the wheels take the shortest path to the next position or turn in one direction only. The setting may be overridden on the speed channel in vector mode. Setting the color speed to “blackout” in vector mode causes the shutter to black out the light while the wheels are moving.
F o c u s
The beam may be focused from 2 meters (6.5 feet) to infinity. The beam angle with the standard lenses is 17°. An optional 23.5° wide-angle lens set is available as well. See “Accessories” on page 35.
F i x e d ( s t a t i c ) g o b o s
There are 2 operating modes available for the fixed-gobo wheel, which has 9 positions for metal gobos plus an open position. In “fixed” mode ( SPEC/gMOd/FIX), the wheel steps between fixed positions and shakes at variable speeds. In “scroll” mode ( SPEC/gMOd/SCRL), the wheel scrolls continuously, shakes at 1 speed, and rotates in 2 directions at variable speed.
Setting the fixed-gobo speed to “blackout” in vector mode causes the shutter to black out the light while the wheel turns from one position to another.
The Shortcuts (SPEC/SCUT) setting determines whether the gobo wheel takes the shortest path to the next position or turns in one direction only. The setting may be overridden on the speed channel in vector mode.
R o t a t i n g g o b o s
The MAC 500/E has 5 rotating positions for glass or metal gobos. Gobos may be rotated in both directions at varying speeds or indexed to any position. The function and gobo are selected on channel 5 and the velocity or index position are selected on channel 6. Setting the rotating-gobo speed to “blackout” in vector mode causes the shutter to black out the light while the wheel turns from one position to another and, if indexing is selected, while the gobo rotates between positions.
To change the gobos, see “Gobo orientation and positions” on page 17.
I r i s
The iris diameter ranges from 100 to 15 percent open. There are 6 variable/random pulsating iris effects callable on channel 9. These can be disabled by switching DMX Macros (SPEC/dMAC) off. The iris reflection reduction setting (SPEC/IRR) closes the iris slightly from full open to eliminate a halo effect seen in very early units.
R o t a t i n g p r i s m / v a r i a b l e f r o s t
The 3-facet prism can rotate in both directions at varying speeds. There are 8 preprogrammed macros that combine the prism with rotating gobos on channel 10. These can be disabled by switching DMX Macros (SPEC/dMAC) off. Setting the prism speed to “blackout” in vector mode causes the shutter to black out the light while the prism moves in and out.
An optional frost filter may be installed in place of the rotating prism to provide a variable frost effect. If the frost filter is installed, the fixture type personality (SPEC / FTYP) must be set to “ FROS” to enable the frost variation of the protocol.
D i m m e r / s h u t t e r
The mechanical dimmer/shutter system provides smooth, high-resolution 100 percent dimming, “instant” open and blackout, random and variable strobe effects up to 23 Hz, and random and variable pulses in which the dimmer snaps open and slowly dims or snaps closed and slowly opens. The pulse and random strobe effects can be disabled by switching DMX Macros (SPEC/dMAC) off.
The Dimmer Mode (SPEC/dMOd) setting allows you to select between linear or simulated tungsten fade curves. The fade time must be 0 to simulate tungsten dimming.

s e c t i o n 4
C O N T R O L P A N E L
The 4-digit LED control panel on the front of the MAC 500/E allows you to set the address and personalities, read lamp hours and other information, calibrate effects, control the fixture manually, and run stand-alone tests and demo programs. Most of these functions may be performed remotely via the serial link with the MPBB1 Uploader
The display can be flipped for easy reading by pressing the [−] and [↓] keys simultaneously. The intensity is adjustable and the display can be set to go out 2 minutes after the last key-press.
M e n u n a v i g a t i o n
The DMX or Martin address, depending on the protocol setting, and any error messages are displayed when the MAC 500/E is turned on. To enter the menu, press [MENU]. Use the [−] and [↓] keys to move within the menu. To select a function or submenu, press [ENTER]. To escape a function or menu, press [MENU].
Address/
Messages
|
PSET |
dAdr |
MAdr |
TIME |
AdJ |
CAL |
PATI |
MAN |
dMXL |
TSEQ |
dEMO |
PTSP |
||||||||||||||||||||||||
|
Po H |
RST |
P OF |
SWAP |
RST |
STCO |
DEM1 |
|||||||||||||||||||||||||||||
|
RPoH |
L ON |
T OF |
PINV |
L ON |
SHUT |
PAN |
|||||||||||||||||||||||||||||
|
TILT |
|||||||||||||||||||||||||||||||||||
|
LA H |
LoFF |
d OF |
TINV |
LoFF |
…. |
FOCU |
|||||||||||||||||||||||||||||
|
SEQ |
|||||||||||||||||||||||||||||||||||
|
RLAH |
HEAd |
C1OF |
SHUT |
E SP |
|||||||||||||||||||||||||||||||
|
DEM2 |
|||||||||||||||||||||||||||||||||||
|
LSTR |
dIM |
C2OF |
dIM |
||||||||||||||||||||||||||||||||
|
COL1 |
MINP |
||||||||||||||||||||||||||||||||||
|
RLST |
COL2 |
RGOF |
COL1 |
MAXP |
|||||||||||||||||||||||||||||||
|
Fgob |
MINT |
||||||||||||||||||||||||||||||||||
|
Rgob |
FGOF |
COL2 |
MAXT |
||||||||||||||||||||||||||||||||
|
FOCU |
FOCU |
||||||||||||||||||||||||||||||||||
|
IRIS |
FOOF |
Fgob |
SEQ |
||||||||||||||||||||||||||||||||
|
PRIS |
|||||||||||||||||||||||||||||||||||
|
PATI |
Rgob |
||||||||||||||||||||||||||||||||||
|
FOCU |
|||||||||||||||||||||||||||||||||||
|
IRIS |
|||||||||||||||||||||||||||||||||||
|
PRIS/ |
|||||||||||||||||||||||||||||||||||
|
FROS |
|||||||||||||||||||||||||||||||||||
|
PAN |
|||||||||||||||||||||||||||||||||||
|
TILT |
VER 
 SPEC
SPEC
CPU 
 FTYP FEbA
 dISP dISP
 dINT
dINT
dLOF
dRES
ALON
FEbA
dFSE
FACT
CUS1
CUS2
CUS3
dFOF
AUTO
UPLd
TEMP
bASE HEAd
PCbT
SCUT
IRR
FTST
dMAC
MOdE
dMOd
EFFb
TRAC
MOdE
CAL
gMOd
FIX
SCRL
 Loading…
Смотреть руководство для Martin MAC 500 ниже. Все руководства на ManualsCat.com могут просматриваться абсолютно бесплатно. Нажав кнопку «Выбор языка» вы можете изменить язык руководства, которое хотите просмотреть.

MANUALSCAT | RU
Вопросы и ответы
У вас есть вопрос о Martin MAC 500, но вы не можете найти ответ в пользовательском руководстве? Возможно, пользователи ManualsCat.com смогут помочь вам и ответят на ваш вопрос. Заполните форму ниже — и ваш вопрос будет отображаться под руководством для Martin MAC 500. Пожалуйста, убедитесь, что вы опишите свои трудности с Martin MAC 500 как можно более детально. Чем более детальным является ваш вопрос, тем более высоки шансы, что другой пользователь быстро ответит на него. Вам будет автоматически отправлено электронное письмо, чтобы проинформировать вас, когда кто-то из пользователей ответит на ваш вопрос.
Задать вопрос о Martin MAC 500
- Бренд:
- Martin
- Продукт:
- свет
- Модель/название:
- MAC 500
- Тип файла:
- Доступные языки:
- английский
Сопутствующие товары Martin MAC 500
Martin MAC 500: List of Available Documents
Note for Owners:
Guidesimo.com webproject is not a service center of Martin trademark and does not carries out works for diagnosis and repair of faulty Martin MAC 500 equipment. For quality services, please contact an official service center of Martin company. On our website you can read and download documentation for your Martin MAC 500 device for free and familiarize yourself with the technical specifications of device.
More DJ Equipment Devices:
-
Gemini GSYS-4000
At Gemini, our highest priority is making your experience unforgettable. Need help with setting up, troubleshooting, or looking for some tips?We’re here for you, Monday through Friday 9AM-5PM EST.GSYS-4000DUAL 12” BLUETOOTHPARTY SYSTEMUSER MANUALhe||<>@9emini$<>und~¢<>m1-844-GEMlN|9wvvvv.geminisound.comI’:|[email protected] …
GSYS-4000 DJ Equipment, 16
-
Cree KBL Series
KBL Series LED Luminaire Universal Hook and Cord, and Optional Junction box or Pendant Mount1 of 3LPN00502X0001A1_AINSTALLATION INSTRUCTIONSINSTRUCTIONS D’INSTALLATIONIMPORTANT SAFEGUARDSWhen using electrical equipment, basic safety precautions should always be followed including the following:READ AND FOLLOW ALL SAFETY INSTRUCTIONS1. DANGER- Risk of shock- Disconnect power before installation. …
KBL Series DJ Equipment, 3
-
American DJ Snap Shit DMX/D
American DJ®LOS ANGELES, CA. 90058 USA — SNAP SHOT DMX/D PG.1SPECIFICATIONS:Lamp: ZB-400 100W, Power: 120V 60Hz Weight: 3 lbs. Size: 7.75” x 7.75” x 8”Fuse: 10A.Thank you for purchasing this American DJ® product. For your convenience this product has been lamped and is ready to be used, there is no assembly required.Please read the following instructions before installing or using you …
Snap Shit DMX/D DJ Equipment, 3
-
American DJ FREQ MATRIX
User Instructions Rev. 10/13©2013 ADJ Products, LLC all rights reserved. Information, specications, diagrams, images, and instructions herein are subject to change without notice. ADJ Products, LLC logo and identifying product names and numbers herein are trademarks of ADJ Products, LLC. Copyright protection claimed includes all forms and matters of copyrightable materials and information now …
FREQ MATRIX DJ Equipment, 12
-
TM 87 36pcs 4 in 1 LED Moving Head zoom
36pcs 4 in 1 LED Moving Head zoom User Manual This manual contains important information. Please read before o …
36pcs 4 in 1 LED Moving Head zoom DJ Equipment, 11
Recommended Documentation:
КАТАЛОГ

Артикул: 43655
Martin MAC500 Прибор с полным движением в картонной коробке, черный
- Описание товара
- Характеристики
- Отзывы
- Аксессуары
распечатать
Производитель: Martin Pro
Характеристики и комплектация могут быть изменены фирмой-производителем без предварительного уведомления.
Фото и описания товара на сайте могут не точно соответствовать товару.
Описание
Прибор с полным вращением для лампы MSR 575. Элегантный внешний вид, широкие возможности создания световых эффектов, яркий и ровный луч -всё это MAC 500. Лампа приобретается отдельно.
- Дистанционная фокусировка
- Два колеса гобо (5 взаимозаменяемых вращающихся гобо, память позиции, 9 взаимозаменяемых статичных гобо)
- Два цветовых колеса (14 дихроичных фильтров, 4 корректирующих фильтра, 9 взаимозаменяемых)
- Механический диммер
- Стробоскоп (до 23 Гц)
- Вращающаяся 3-х гранная призма
- Вращение Pan: 440°, Titl: 306°
- 4-х сегментный индикатор
- Управление: Martin RS-485, DMX-512
- Потребляемая мощность 750 Вт (230 В, 3.4 А)
- Габаритный размер 447х495х673 мм
- Вес 32.8 кг
Добавить отзыв
- Прожекторы и светильники
- Системы управления светом и контроллеры
- Интеллектуальные световые приборы
- Лампы
- Световые эффекты
- Лазеры
- Светофильтры и материалы
- Стойки и конструкции
- Архитектурное и интерьерное освещение
- Специальные эффекты
- Световые ленты
- Светодиодные экраны
- Световые комплекты
Музыкальный магазин › Световое Оборудование › Интеллектуальные световые приборы › Сканеры с вращающимся корпусом (moving head) › MAC500
|
ПОДЕЛИТЬСЯ СТРАНИЦЕЙ: |
|
прибор с полным движением, 67 цветов, 14 гобо, диммер, строб, ирис, фокус, призма, движение 16 бит — 440 х 306 град., с лампой Philips MSR 575/2, вес 32,8 кг Описание Martin Pro MAC500 Прибор с полным вращением для лампы MSR 575. Элегантный внешний вид, широкие возможности создания световых эффектов, яркий и ровный луч –всё это MAC 500. Лампа приобретается отдельно.
|
|
4741 Комментарии посетителей интернет магазина о Martin Pro MAC500 :Дополнительная информация по товарам и магазину |

* Возможен безналичный расчет!
Если Вы не нашли какое либо оборудование, отправьте запрос по электронной почте, мы Вам обязательно поможем.
Подробнее о том как совершить покупку интернет магазине Музбазар