Работа в ПО Microinvest Hotel PRO

В этой статье мы заполним номенклатуру отеля и подготовим программу к работе.Статья разделена на 3 этапа:Добавление номеров Добавление услуг отеля Пра..
Прием и отклонение ТТН в ЕГАИС

При поступлении ТТН от поставщика, информация о ней будет показана в главном окне программы Microinvest ЕГАИС менеджер.
ТТН будет п..
Регистрация на сайте Честный Знак

Регистрация в Честный Знак обязательна для участников оборота товарных групп подлежащих обязательной цифровой маркировке. Пройти регистрацию необходим..
Выгрузка данных из Microinvest в 1С

Доброго времени суток, в этой статье пойдёт речь о выгрузке данных из базы данных Microinvest в базу данных 1С на примере платформы 8.3. Нам понадобят..
Импорт номенклатур и операций

Импорт номенклатуры товаров в программе Microinvest через Microsoft Excel!Внимание. Импорт следует производить очень аккуратно и сверять количество ст..
Сохранение товара в базе Microinvest

1. Нажать кнопку“Товары”(горячая клавиша Ctrl+S) на панели инструментов. 2. Нажать на кнопку Новый3. Заполнение окна.3.1.Отметить галочкой Автом.ген..
Просмотр отчета продаж по карте Visa

!Внимание. Продажа по карте работает как и обычная стандартная продажа, разница лишь в том, что финансовые средства поступают не сразу в денежный ящик..
Поступление денег от контрагента

Действия бухгалтера при поступлении денег от контрагента.1. Счет выставляется без изменений в программе «1С»2. После поступления денег , перейти в про..
Приход товара в Microinvest

1.Нажать кнопку Приход 2.Откроется окно Приход: 2.1.В поле Партнер – нажать кнопку и выбрать поставщика товара «Коркунов». Нажать ОК. 2.2.В поле Объе..
Программа для автоматизации товарного учета

Программа для автоматизации товарного учета
Программа для автоматизации товарного учета
Кому подходит
Кому подходит
Микроинвест Склад Pro позволяет автоматизировать рабочие места; менеджера, товароведа, оператора и директора магазина.
Для каждой категории пользователей указывается роль в системе, определяется индивидуальный набор прав и интерфейсов.


Микроинвест Склад Pro – идеальное решение для автоматизации торговых процессов на складских объектах, в барах, кафе, ресторанах, супермаркетов, магазинов и других заведений, занимающихся оптовой и розничной торговлей. С помощью,представленного ПО можно в значительной степени упростить управление бизнес-процессами, решая целый ряд актуальных задач.
Микроинвест Склад Pro позволяет автоматизировать рабочие места; менеджера, товароведа, оператора и директора магазина.
Для каждой категории пользователей указывается роль в системе, определяется индивидуальный набор прав и интерфейсов.
Микроинвест Склад Pro – идеальное решение для автоматизации торговых процессов на складских объектах, в барах, кафе, ресторанах, супермаркетов, магазинов и других заведений, занимающихся оптовой и розничной торговлей. С помощью,представленного ПО можно в значительной степени упростить управление бизнес-процессами, решая целый ряд актуальных задач.
Подключаемое торговое оборудование
Официантские станции, кассовые станции, POS-терминалы, фискальные регистраторы, стандартные принтеры печати, принтеры печати штрихкодов, весы, сканеры, устройства проверки цены, ценники и многое др.


Подключаемое торговое оборудование
Подключаемое торговое оборудование
Официантские станции, кассовые станции, POS-терминалы, фискальные регистраторы, стандартные принтеры печати, принтеры печати штрихкодов, весы, сканеры, устройства проверки цены, ценники и многое др.

Основные возможности
- Работа в режиме клиент-сервер + Репликация данных;
- Встроенная база данных штрих-кодов и наименований продуктов;
- Поддержка больших нагрузок, справочников и операций;
- Подробные и понятные графические отчеты.
- Древовидные структуры всех справочников;
- Удобный интерфейс и эргономичный графический стиль;
- Удобный импорт данных из MS Excel и из других продуктов фирмы Microinvest;
- Полный контроль над оплатой: сроки, предоплаты, долги;
- Дисконтная система для посетителей (от скидок и наценок, до многоуровневого маркетинга и SMS-рассылок).
- Гибкая система прав и уровней доступа для каждого пользователя;
- WEB интерфейс и администрирование;
- Работа с маркированными товарами;
- Поддержка учета партий, серийных номеров, гарантийного срока.
- Многоязычность и мультивалютность;
- Полная совместимость с Windows XP/Vista/7/8/10 32-bit и 64-bit;
Визуальный стиль
Наличие мастера настройки для любого варианта Микроинвест Склад Pro позволит оперативно ознакомиться с функционалом и научиться эксплуатировать без прохождения специальных курсов. Грамотно продуманная система отчетов в совокупности с большим выбором фильтров позволит получить данные по любой операции – движение товаров, прибыль, взаиморасчеты, а также любая цифровая и графическая информация. Это позволит вести точную аналитику и динамично развивать свой бизнес.
Визуальные отчеты
Полезные материалы

- Руководство Микроинвест Склад Pro для начинающих
- Руководство по эксплуатации Микроинвест Склад Pro
- Обновление сертификатов Windows7, XP
- Форум технической поддержки Микроинвест

- Видеоуроки по основам работы с Микроинвест Склад Pro
- Видеоуроки по работе со скидками в Микроинвест Склад Pro
- Видеоуроки для работы управляющих в Микроинвест Склад Pro
- Видеоуроки по работе с отчетами в Микроинвест Склад Pro
Стандартная версия Microinvest Warehouse Open является бесплатной, Open Source продукт под GPL лицензией. Существует расширенная Plus версия, которая добавляет специальные модули и функции, которые оплачиваются отдельно от основного GPL ядра продукта. Microinvest Warehouse Open создан болгарской софтуерной компанией Microinvest с помощью и поддержкой внешних специалистов. Продукт предназначен для операционной системы Linux.
Microinvest Warehouse Open работает в основном с MySQL базой данных. В последних версиях продукта можно использовать дополнительно работу с SQLite базой данных и облачной услугой. Облачная услуга доступна через дополнительный абонамент в www.vladster.net
Работа серверной базы данных (MySQL), дает возможность работать в режиме клиент – сервер, как в локальной сети, так и удаленно через Internet. При использовании SQLite нет возможности работать в сети, только на локальной станции. Облачная технология позволяет работу с нескольких удаленных точек через централизованное объединение данных в облаке. Услуга требует дополнительный абонемент в www.vladster.net.
Продукт разработан через технологию mono, по данной причине нет основания для специального выбора Linux дистрибутива. Перед официальной презентации новой версии, Microinvest проверяет совместимость продукта с Ubuntu, Kubuntu, Xubuntu и Mandriva Free. Дополнительно проверяются популярные Debian дистрибутивы и их клоны. Технология mono предполагает, что произвольный дистрибутив подходит для установки данного продукта.
Microinvest Warehouse Open имеет возможность прямого управления разными фискальными и POS устройствами, включительно весами, считывателями, кухонными принтерами, клиентскими дисплеями и специализированными устройствами. Полный список поддерживаемого оборудования опубликован на сайте и с ним можно ознакомиться здесь.
Да. Linux версия полностью совместима с основной платформой и может работать совместно с Windows версией. В центральном сервере используется база данных MySQL (без значения от операционной системы, Linux или Windows), где оба продукта используют ее синхронно. Обязательно нужно обращать внимание на версии двух продуктов, чтобы исключить случаи расхождения в технических функциях.
Microinvest Warehouse Open не может работать с мобильным приложением для разносной торговли Microinvest. Мобильная технология использует MSSQL сервер, где Microinvest Warehouse Open может работать только с MySQL сервером. Дополнительно возможна интеграция Microinvest Warehouse Open с приложением IncoDroid под Android или с Microinvest FastPOS для Android. Описанные приложения доступны для загрузки через Google Play.
Warehouse Open работает на многих языках – болгарский, английский, русский, румынский, армянский, испанский, грузинский и украинский. В программе есть инструмент для добавлении новой локализации (язык и страна), перевод произвольного языка легкий и следует стандартной процедуры.
Установочный файл продукта можете загрузить отсюда. Полная версия продукта (Live-CD, которое может быть установлено) можете загрузить отсюда. Технология для установки продукта и соответствующие архивы и дистрибутивные пакеты описаны в меню “Установка” на сайте.
Предпочитаемая конфигурация: Pentium III 1 GHz, 20 МB HDD, 256 MB RAM. Пользователи, которые хотят использовать программу при полных возможностях желательно обеспечить подходящую компьютерную систему достаточной памятью и быстрым процессором. Нужно отметить, что наличие MySQL сервера в той же системе консумирует наличную память и ресурсы процессора, потому производительность системы уменьшается от дополнительных серверных процессов.
Версия продукта проверяется от меню Помощь – О программе или через комбинацию клавиш Ctrl+F1. Там описаны версии программы и базы данных. Версия содержит и дату продукта в себе, таким образом версия 1.13.12.17 означает семейство 1, год 2013, месяц 12, дата 17 или 17.12.2013 г.
Данные моей фирмы вводятся в меню Редакция-> Администрирование-> Фирменная информация. Ввод всех данных фирмы обеспечит правильность при выводе документов и специализированных модулей. Совет – пополнить все данные полностью и точно.
Приходные цены связаны с документом “Приход”, определяются самой операцией, не могут быть изменены произвольно пользователями. Операции “Приход” и “Переучет” активируют выбранный метод для обработки цен, например “Средняя приходная цена” и весь математический алгоритм определяет и следит данные цены. В отличии от продажных цен, приходные цены не могут быть изменены по усмотрению пользователя.
Да. Программа имеет возможность создания рецептов, которыe состоят из ингредиентов и продуктов. Создана возможность для их автоматического производства при совершении операции, например Продажа. Данный механизм является очень удобным при работе ресторана и заведения, где продаются обработанные продукты или еда и напитки.
В Microinvest Warehouse Open есть встроенный модуль для прямого управления разных видов принтеров. Полный список поддерживаемого оборудования можете посмотреть здесь. Каждое устройство может исполнять определенную роль и издавать подходящий документ – фискальный чек, торговый документ, кухонная марка заказа, предварительный чек, служебный чек и другие. Настройка позволяет детальное распределение документов в отдельных звеньях организации (кухня, бар, касса и обслуживание клиентов).
Да. Microinvest Warehouse Open работает со всеми видами сканерами штрих-кодов. Если привязываете через серийный интерфейс, то необходимо его добавить в “Устройства”. Если привязываете устройство через USB, то программа распознает работает с ним напрямую без дополнительных действий со стороны пользователя.
Да. В Microinvest Warehouse Open есть возможность работать с магнитными картами. Если привязываете через серийный интерфейс, то необходимо его добавить в “Устройства”. Если привязываете устройство через USB, то программа распознает работает с ним напрямую без дополнительных действий со стороны пользователя.
В Microinvest Warehouse Open есть встроенный модуль для прямого управления внешними клиентскими дисплеями. Полный список устройств можете посмотреть здесь. Настройка устройства позволяет задавать различные режимы работы.
В Microinvest Warehouse Open есть возможность прямой коммуникации с электронными весами. Полный список поддерживаемых устройств можно посмотреть здесь. Данные с весов переносятся в реальном времени и вес отображается в программе. Не используется встроенная память весов для программирования товаров или других специфичных параметров.
В Microinvest Warehouse Open есть экспорт в стандартные файлы – csv, xml, xls.Данный модуль является частью Plus версии и используется после активации платной лицензии.
© Copyright 2014 Microinvest Bulgaria

User Manual
Microinvest Warehouse Pro
and
Microinvest Warehouse Pro Light
2014
-1-
CONTENTS:
Introduction… … … … … … … … … … … … … … … … … … … … … … … … … … … … … … … … … … … … … … … … … … … … …
Hardware and Software Requirements … … … … … … … … … … … … … … … … … … … … … … … … … … … … … …
Work with Servers … … … … … … … … … … … … … … … … … … … … … … … … … … … … … … … … … … … … … … … … … …
Application Installation
…………………………………………………………………………………………………
Possible Problems During Installation … … … … … … … … … … … … … … … … … … … … … … … … … … … … … … …
Licensing Microinvest Warehouse Pro … … … … … … … … … … … … … … … … … … … … … … … … … … … … …
Work in Network … … … … … … … … … … … … … … … … … … … … … … … … … … … … … … … … … … … … … … … … … … …
6
7
8
9
10
11
12
I. Starting up with Microinvest Warehouse Pro … … … … … … … … … … … … … … … … … … … … … … 13
1. Creating New Databases … … … … … … … … … … … … … … … … … … … … … … … … … … … … … … … … … … … … 13
2. Inputting Data … … … … … … … … … … … … … … … … … … … … … … … … … … … … … … … … … … … … … … … … … … 14
3. Settings in Microinvest Warehouse Pro … … … … … … … … … … … … … … … … … … … … … … … … … … 18
4. Operations in Microinvest Warehouse Pro … … … … … … … … … … … … … … … … … … … … … … … … 18
5. Printing of Documents … … … … … … … … … … … … … … … … … … … … … … … … … … … … … … … … … … … … … … 20
6. Discounts and Price Groups … … … … … … … … … … … … … … … … … … … … … … … … … … … … … … … … … … … 21
7. Work with Currencies and Measures … … … … … … … … … … … … … … … … … … … … … … … … … … … … … 23
8. Invoicing … … … … … … … … … … … … … … … … … … … … … … … … … … … … … … … … … … … … … … … … … … … … … 23
9. Payment … … … … … … … … … … … … … … … … … … … … … … … … … … … … … … … … … … … … … … … … … … … … … … 25
10. Editing, Deleting and Reprinting of Documents … … … … … … … … … … … … … … … … … … … … … … 26
11. Administration … … … … … … … … … … … … … … … … … … … … … … … … … … … … … … … … … … … … … … … … … … 27
II. Work with Microinvest Warehouse Pro
1. File … … … … … … … … … … … … … … … … … … … … … … … … … … … … … … … … … … … … … … … … … … … … … … … … … 28
1.1 New Database
1.2 New Template Database
1.3 Open Database
1.4 Active Database
1.5 Backup / Restore Database
1.6 Exit
2. Operations … … … … … … … … … … … … … … … … … … … … … … … … … … … … … … … … … … … … … … … … … … … … 31
2.1 Sales … … … … … … … … … … … … … … … … … … … … … … … … … … … … … … … … … … … … … … … … … … … 32
2.2 Purchases … … … … … … … … … … … … … … … … … … … … … … … … … … … … … … … … … … … … … … … … 33
2.3 Production … … … … … … … … … … … … … … … … … … … … … … … … … … … … … … … … … … … … … … … 35
2.3.1 Recipes
2.3.2 Production
2.3.3 Complex Recipes
2.3.4 Complex Production
2.4 Transfer … … … … … … … … … … … … … … … … … … … … … … … … … … … … … … … … … … … … … … … … … 38
2.5 Waste and Write-off … … … … … … … … … … … … … … … … … … … … … … … … … … … … … … … … … … 38
2.6 Refund … … … … … … … … … … … … … … … … … … … … … … … … … … … … … … … … … … … … … … … … … 39
2.7 Debit Note … … … … … … … … … … … … … … … … … … … … … … … … … … … … … … … … … … … … … … … … 39
2.8 Credit Note … … … … … … … … … … … … … … … … … … … … … … … … … … … … … … … … … … … … … … … … 40
2.9 Invoicing … … … … … … … … … … … … … … … … … … … … … … … … … … … … … … … … … … … … … … … … … 40
2.9.1 Issue Invoice
2.9.2 Receive Invoice
2.9.3 Void Issued Invoice
2.9.4 Void Received Invoice
2.9.5 Notes
2.9.5.1 Debit Note
2.9.5.2 Credit Note
2.9.5.3 Void Debit Note
2.9.5.4 Void Credit Note
2.10 Cash Ledger … … … … … … … … … … … … … … … … … … … … … … … … … … … … … … … … … … … … … … 44
2.11 Consignments … … … … … … … … … … … … … … … … … … … … … … … … … … … … … … … … … … … … … 56
2.11.1 Consign
2.11.2 Sales on Consignment
2.11.3 Return on Consignment
-2-
3.
4.
5.
6.
2.12 Management … … … … … … … … … … … … … … … … … … … … … … … … … … … … … … … … … … … … … 47
2.12.1 Orders, Offers and Proform Invoices
2.12.2 Requests
2.12.3 Auto request
2.12.4 Warranty Cards
2.12.5 Price List
2.13 Point of Sale … … … … … … … … … … … … … … … … … … … … … … … … … … … … … … … … … … … … … 49
2.14 Touch Screen … … … … … … … … … … … … … … … … … … … … … … … … … … … … … … … … … … … … … 50
2.15 Document Transformation … … … … … … … … … … … … … … … … … … … … … … … … … … … … … 50
2.16 Notes … … … … … … … … … … … … … … … … … … … … … … … … … … … … … … … … … … … … … … … … … … 51
2.17 Select Lot … … … … … … … … … … … … … … … … … … … … … … … … … … … … … … … … … … … … … … 51
Edit
3.1 Partners … … … … … … … … … … … … … … … … … … … … … … … … … … … … … … … … … … … … … … … … 52
3.2 Items
… … … … … … … … … … … … … … … … … … … … … … … … … … … … … … … … … … … … … … … … 54
3.3 Users
… … … … … … … … … … … … … … … … … … … … … … … … … … … … … … … … … … … … … … … … … 57
3.4 Locations … … … … … … … … … … … … … … … … … … … … … … … … … … … … … … … … … … … … … … … … … 59
3.5 Currencies … … … … … … … … … … … … … … … … … … … … … … … … … … … … … … … … … … … … … … … … 62
3.6 VAT Groups
… … … … … … … … … … … … … … … … … … … … … … … … … … … … … … … … … … … … … 63
3.7 Items Locator
… … … … … … … … … … … … … … … … … … … … … … … … … … … … … … … … … … … … … 64
3.8 Payments … … … … … … … … … … … … … … … … … … … … … … … … … … … … … … … … … … … … … … … … 64
3.9 Payment Types
… … … … … … … … … … … … … … … … … … … … … … … … … … … … … … … … … … … … 65
3.10 Documents
… … … … … … … … … … … … … … … … … … … … … … … … … … … … … … … … … … … … … 67
3.11 Merge Documents … … … … … … … … … … … … … … … … … … … … … … … … … … … … … … … … … … … 68
3.12 Reprint Documents
… … … … … … … … … … … … … … … … … … … … … … … … … … … … … … … … … 69
3.13 Administration … … … … … … … … … … … … … … … … … … … … … … … … … … … … … … … … … … … … 69
3.13.1 Change Active User
3.13.2 Input Company Data
3.13.3 Change Prices
3.13.4 Revaluation
3.13.5 Price Rules
3.13.6 Stocktaking
3.13.7 Total Production
3.13.8 Operations Exchange
3.13.9 Import Operations
3.13.10 Import Items
3.13.11 Export to Accounting
3.13.12 Print Manager
3.13.13 Permissions
3.13.14 Recalculate Average Price
Reports … … … … … … … … … … … … … … … … … … … … … … … … … … … … … … … … … … … … … … … … … … … … … 85
Manager’s reports … … … … … … … … … … … … … … … … … … … … … … … … … … … … … … … … … … … … … … 89
Excel Documents and User’s reports … … … … … … … … … … … … … … … … … … … … … … … … … … … 95
Reports Results
… … … … … … … … … … … … … … … … … … … … … … … … … … … … … … … … … … … … 96
Review Reports Results … … … … … … … … … … … … … … … … … … … … … … … … … … … … … … … … … … … 97
Settings
5.1 Calendar
… … … … … … … … … … … … … … … … … … … … … … … … … … … … … … … … … … … … … … … 98
5.2 Settings
… … … … … … … … … … … … … … … … … … … … … … … … … … … … … … … … … … … … … … … 98
5.3 Users settings … … … … … … … … … … … … … … … … … … … … … … … … … … … … … … … … … … … … … 99
5.4 General settings … … … … … … … … … … … … … … … … … … … … … … … … … … … … … … … … … … … … … 100
5.5 Visual settings … … … … … … … … … … … … … … … … … … … … … … … … … … … … … … … … … … … … … 101
5.6 Operations settings
… … … … … … … … … … … … … … … … … … … … … … … … … … … … … … … … … 102
5.7 Print settings
… … … … … … … … … … … … … … … … … … … … … … … … … … … … … … … … … … … … … 104
5.8 Special settings … … … … … … … … … … … … … … … … … … … … … … … … … … … … … … … … … … … … … 105
5.9 Database settings … … … … … … … … … … … … … … … … … … … … … … … … … … … … … … … … … … … … 106
5.10 Other settings
… … … … … … … … … … … … … … … … … … … … … … … … … … … … … … … … … … … … 107
View … … … … … … … … … … … … … … … … … … … … … … … … … … … … … … … … … … … … … … … … … … … … … … … … 108
6.1 Customize Toolbar
6.2 Skin
-3-
6.3 Document Visual Style
6.4 Toolbar
6.5 Status Bar
6.6 Window
Microinvest Warehouse Pro Light
I. Introduction to Microinvest Warehouse Pro Light … … … … … … … … … … … … … … … … … … …
Hardware and Software Requirements … … … … … … … … … … … … … … … … … … … … … … … … … … … … … …
Work with Servers … … … … … … … … … … … … … … … … … … … … … … … … … … … … … … … … … … … … … … … … … …
Application Installation … … … … … … … … … … … … … … … … … … … … … … … … … … … … … … … … … … … … … … …
Possible Problems During Installation … … … … … … … … … … … … … … … … … … … … … … … … … … … … … … …
Licensing of Microinvest Warehouse Pro Light … … … … … … … … … … … … … … … … … … … … … … …
Work in Network … … … … … … … … … … … … … … … … … … … … … … … … … … … … … … … … … … … … … … … … … … …
112
112
112
113
113
113
113
II. Starting up with Microinvest Warehouse Pro Light … … … … … … … … … … … … … … … … … … 114
III. Work Modes in Microinvest Warehouse Pro Light … … … … … … … … … … … … … … … … … … 116
1. Point of Sale Mode … … … … … … … … … … … … … … … … … … … … … … … … … … … … … … … … … … … … … … … 117
1.1 Visual Style 1 … … … … … … … … … … … … … … … … … … … … … … … … … … … … … … … … … … … … … … 118
1.2 Visual Style 2 … … … … … … … … … … … … … … … … … … … … … … … … … … … … … … … … … … … … … … 120
1.3 Selecting Items … … … … … … … … … … … … … … … … … … … … … … … … … … … … … … … … … … … … 121
1.4 Completing Operations … … … … … … … … … … … … … … … … … … … … … … … … … … … … … … … … … 122
1.5 Adding New Items … … … … … … … … … … … … … … … … … … … … … … … … … … … … … … … … … … … … 122
1.6 Adding New Partners … … … … … … … … … … … … … … … … … … … … … … … … … … … … … … … … … … 122
1.7 Check Prices … … … … … … … … … … … … … … … … … … … … … … … … … … … … … … … … … … … … … … … 123
1.8 Change Active User … … … … … … … … … … … … … … … … … … … … … … … … … … … … … … … … … … … 123
1.9 Issue Invioce
… … … … … … … … … … … … … … … … … … … … … … … … … … … … … … … … … … … … … 124
2. Restaurant Mode … … … … … … … … … … … … … … … … … … … … … … … … … … … … … … … … … … … … … … … 125
Visual Styles … … … … … … … … … … … … … … … … … … … … … … … … … … … … … … … … … … … … … … … … … 126
Add new order … … … … … … … … … … … … … … … … … … … … … … … … … … … … … … … … … … … … … … … 129
Save order … … … … … … … … … … … … … … … … … … … … … … … … … … … … … … … … … … … … … … … … … … 130
Split active order … … … … … … … … … … … … … … … … … … … … … … … … … … … … … … … … … … … … … … 130
Closing active order … … … … … … … … … … … … … … … … … … … … … … … … … … … … … … … … … … … … 131
3. Program Settings
3.1 Main Settings … … … … … … … … … … … … … … … … … … … … … … … … … … … … … … … … … … … … … … 133
3.2 Cash register Settings … … … … … … … … … … … … … … … … … … … … … … … … … … … … … … … … … 134
3.3 Special Settings … … … … … … … … … … … … … … … … … … … … … … … … … … … … … … … … … … … … … 135
IV. Installation and configuration of SDC device for Rwanda
1. Equipment…………………………………………………………………………………………………………………….....137
2. Configuration of the CIS system……………………………………………………………………….………….137
IV. Help
1. Microinvest Assistant … … … … … … … … … … … … … … … … … … … … … … … … … … … … … … … … … … … … … 139
2. Licensing … … … … … … … … … … … … … … … … … … … … … … … … … … … … … … … … … … … … … … … … … … … 139
3. Documentation
… … … … … … … … … … … … … … … … … … … … … … … … … … … … … … … … … … … … … … … … … 140
4. Check for Updates … … … … … … … … … … … … … … … … … … … … … … … … … … … … … … … … … … … … … … … … 140
5. Microinvest on the Web … … … … … … … … … … … … … … … … … … … … … … … … … … … … … … … … … … … … … 141
6. About
… … … … … … … … … … … … … … … … … … … … … … … … … … … … … … … … … … … … … … … … … … … … … 141
7. Frequently Asked Questions … … … … … … … … … … … … … … … … … … … … … … … … … … … … … … … … … … … 141
-4-
Introduction
Urged by the increased introduction of novelties on the Bulgarian market and by
the new challenges after Bulgaria became a member state of the European Union,
Microinvest created an innovative warehouse application, which conforms with the
increasing requirements of its customers and features the latest trends in this class of
products.
Microinvest Warehouse Pro is a flexible system for management of warehouse availabilities and cash flows of companies on the Bulgarian market. It is capable
of responding to all needs of control over the movement of items in companies. The
application is capable of controlling all processes, connected with management of production and commercial activity of the companies.
Different ideas and proposals of our customers are accepted and implemented
during application development, which has led to further development and expanding
of the product. As a result, an entirely complete, highly effective and convenient application was created and functions in full compliance with the regulations in the country.
The requirement for universality of such system type led to the creation of additional modules – Warehouse Pro Light POS and Warehouse Pro Light Restaurant and the more specific Warehouse Pro Mobile – application for mobile devices
of Pocket PC type, which practically gives indefinite possibilities of the application.
The policy of Microinvest not to restrict the implementation of single copies of
its applications, but to create complex business solutions of universal character, inspired the development of subsidiary applications, directly communicating with
Microinvest Warehouse Pro, such as Microinvest Barcode Printer Pro,
Microinvest Archi Pro and connection with the accounting application Microinvest
Delta, which is already well-known on the market.
Respecting the latest interface requirements for this product class, Microinvest
Warehouse Pro is an adaptive and intuitive application, allowing the users to learn it
quick.
Microinvest Warehouse Pro may be installed on Touch Screen terminals, it
allows communication with barcode readers and direct connection with all fiscal devices, distributed on the Bulgarian market. This facilitates the user in case the work process is more loaded.
We are convinced that in becoming acquainted with Microinvest Warehouse
Pro and this user manual, Microinvest customers will quickly experience the actual
possibility of increased development speed and acceleration of business processes in
their companies and that the application shall become an irreplaceable assistant in
their busy schedule. The support and servicing of Microinvest Warehouse Pro is
done by a specially trained, highly qualified and well motivated team.
How to use this user manual?
This user manual will help you in:
• Installing of the application;
• Licensing of the application;
• Creating of new databases;
• Entering of lists;
• Settings of the application;
• Editing, canceling and reprinting of documents;
• Administration;
• Generating of reports.
The user manual presents the menus and work modes of the application and gives
answers to the most frequently asked questions.
-5-
Before you start, you must check whether your computer complies with the system
requirements of Microinvest Warehouse Pro.
Hardware and Software Requirements
1. Hardware Requirements:
Minimum
• Processor – Pentium II 433MHz;
• RAM – 128МВ;
• HDD – 10GB
Recommended
• 1.2 GHz processor or faster;
• 512МВ RAM or more;
• 20GB hard drive or more;
• DVD-ROM Drive;
• Network interface;
• Printer.
2. Software Requirements:
Operating System: Windows 2000 SP4, Windows XP SP2, Windows 2003,
Windows Vista;
If you are planning to use the in-built Excel documents in Microinvest Warehouse Pro or the in-built feature of the application for export of reports to
Microsoft Excel or Microsoft Word, you must install Microsoft Office 2003 or
Microsoft Office 2007;
If you are planning to use SQL databases, you must install an SQL server
(MSDE, MSSQL Server, MySQL or Oracle) on one of the computers.
Work with Servers
Microinvest Warehouse Pro uses an entirely new database architecture. The
ideology is identical to the one used in large ERP systems. By default the application is
installed for work with MS Access databases. The advantages of work with SQL server
are quick operation, stability, work with larger lists and possibility to work through the
Internet. Microinvest Warehouse Pro supports work with five server types – MSDE,
MySQL, MSSQL Server and Oracle. In order to increase the speed while working with
remote offices and large lists, it is recommended to use the so called data replication.
Short explanation of the term “Replication”
Replication is a set of resources of the contemporary computer technology, used
for data copying from one database to another. In our case the replication provides
real time data exchange between various servers in different locations of a single
company, whereas only data differences are transmitted through the communication channel. This ensures fast operation of the whole system, as well as protection
from data loss, since data is copied on the servers.
Microinvest Warehouse Pro supports real time work with remote locations.
The work scheme is the following:
1. The SQL server is installed on a central computer with good Internet connection. This server contains the database;
-6-
2. Local installations of the application are made in the central office of the
company and the connection to the central server is made.
Recommendations:
– for lists with less than 2500 items – the application is installed in regional locations (offices or stores). The connection with the central server is made directly,
without an intermediate server;
– for lists with more than 2500 items – a local replication SQL server and the
application itself are installed in the regional locations. The application connection is
done through the local SQL server. This allows higher speed while working with lists.
The local SQL server becomes subordinate to the central SQL server and works in data
replication mode. There are numerous advantages, but most importantly, the system
works steady and fast.
Connection Requirements:
1. The central SQL server must have a real static IP address and 10 Мbit/s
symmetric data channel.
2. Local SQL servers must have 1 Mbit/s symmetric data channel for access to
the central server and real IP address while using MSSQL replication.
Such system guarantees the simultaneous real time work of an unlimited number of locations and access to all data in the central office. The data from the whole
organization is collected in the central office with real time merging. No import/export
of operations is necessary. The system is highly reliable, since through replication on
servers the data is copied on various servers and its integrity is guaranteed.
The server types, which Microinvest Warehouse Pro works with, are the following:
• MSDE – supports up to 5 workstations with Microinvest Warehouse Pro,
which operate simultaneously. It cannot be used a as main server for database replication (Publisher), but it can be used as a subordinate server (Subscriber) of MSSQL
server 2000. In the event of work through the Internet, the server and the workstation must both be connected to the Internet. If the connection to the Internet fails
on either one of them, the database cannot be used.
• MySQL – supports an unlimited number of workstations with Microinvest
Warehouse Pro. It can be used for one-way database replication with another
MySQL server of master to slave type. While working with this server type, during
replication all workstations save operations on the central (master) server, and the
items, prices and reports are obtained from the local (slave) server. It is necessary
that the central server and the local (slave) servers are connected to the Internet.
• MSSQL Server – supports an unlimited number of workstations. There are
four types of MSSQL servers – Express, Workgroup, Standard, Enterprise. Express
Edition can be used independently or as subordinate server (Subscriber) during replication. The other types can be used independently and during data replication can be
used as central servers (Publisher) or as subordinate servers (Subscribers). During
replication with such server type, even if connection to the Internet temporary fails,
users can work with Microinvest Warehouse Pro. If a Pocket PC is used, this is the
most suitable base for building up of a system and database management.
Application Installation
The installation process is the most wayward moment in the introduction of a computer system. During this process the application “gets to know” the computer
system, on which it shall work and configures its features. The memory, processor
and disk space are tested, as well as the availability of local network, printer and other peripheral devices. In order to facilitate the procedure, it is necessary that:
-7-
•
•
The operation system MS Windows is stable;
The date format in Short Date Format is dd.mm.yyyy
The application can be installed from a CD-ROM or through an installation file,
which can be downloaded from our site http://microinvest.net.
Installing from CD-ROM
Place the CD, containing Microinvest Warehouse Pro, in the CD drive of the
computer. Wait while installation file loads. The main application window with the
list of products appears.
Note: If the installation file does not load within 30 seconds after the CD is
placed, you must select the CD-ROM and start Autorun.exe or go to Products
folder and select the application you wish to install.
1. The installation process consists of 3 stages:
• System checking and installation of the necessary additional applications
(Microsoft.NET Framework, Crystal Reports, Windows Installer);
• Selection of working directory;
• Copying of files in the working directory.
2. After the installation process is completed, the last window contains an option
to start the application.
Installing from the Internet
Go to http://microinvest.net and click the Download button.
1. Select Microinvest Warehouse Pro from the list.
2. The installation file will be saved on your computer.
3. The installation process consists of 3 stages:
• System checking and installation of the necessary additional applications
(Microsoft.NET Framework, Crystal Reports, Windows Installer);
• Selection of working directory;
• Copying of files in the working directory.
4. After the installation process is completed, the last window contains an option
to start the application.
Possible Problems During Installation
The installation of Microinvest Warehouse Pro usually runs smoothly without
any complications. After starting of the installation disk, it might be necessary to install several components, needed by the application (in case they have not been installed previously):
• Microsoft Installer
• NET.Framework
• Microsoft Data Access Components (MDAC)
• Crystal Reports.
After that the actual installation of the application begins. Several problems are possible during installation:
• On a hardware level, there may not be enough free disk space on Local Disk C,
where the application is installed by default. It is recommended to have free
disk space of 1GB or more. Please, provide enough free disk space, in case it is
insufficient.
-8-
•
•
•
The installation must be performed by a user with administrative access rights
and not by a user with restricted rights, such as User or Guest.
After the installation is completed and the program is started, it is possible to
have problems connecting to the database. In this case the problem is localized
in Microsoft Data Access Components (MDAC) and the operating system or
MDAC itself must be reinstalled.
Upon selecting Bulgarian from menu “Language” it is possible that illegible
characters appear on the screen. To solve this problem, go to “Control panel”
and select “Regional and Language options”. From the drop-down list select
“Bulgarian” and from the “Advanced” button select “Bulgarian” again.
Licensing Microinvest Warehouse Pro
You can license Microinvest Warehouse Pro by doing one of the following:
Hardware License
Hardware license is an advanced method of product licensing and offers new
possibilities for license management.
How to use the hardware license?
The hardware license is contained in a miniature USB device, which is placed in
a free USB port on the computer and is recognized by all Microinvest products. The
device does not require any drivers and does not make any changes in the computer
configuration. For products from the Pro series you must enter an individual license
number of the product. This number is the same for all computers, on which the application shall be used. The number is determined by the hardware key itself. The
number is given to the customer by Microinvest, along with the device and is valid
for an unlimited period of time. It is not necessary to enter a serial number for all
other applications, since placing this device unlocks all Microinvest products.
What are the advantages of the hardware license?
The hardware license has a number of advantages and provides new possibilities, as follows:
1. Computer independence. With a single license you can use the computer at
work, as well as the computer at home;
2. Hardware independence. If any of the computers is damaged, you can place the
key on another computer and continue work;
3. It is not affected by reinstallation of the operating system. The key contains the
license and even a full reinstallation of the operating system will not affect the
registration of the applications.
Who can benefit from such key?
All customers, who have more than one computer and wish to have a license on
all of them, can benefit from the hardware key. At the same time, all customers who
change computers frequently or wish to reinstall the operating system, have their investment protected and do not need to obtain new serial or license numbers.
When is it compulsory to use a hardware license?
All customers of Microinvest, who have not kept the standard procedure for
transferring of serial numbers or have had a computer damage, are recommended to
use hardware key protection. This rule protects customers against repeated computer
damages and also protects Microinvest against illegal distribution of products by
other companies.
-9-
Online Activation
Upon online activation a key for one time activation for the product is given. Upon purchasing of Microinvest Warehouse Pro you will be given a 25-digit code. After accepting the terms of the license agreement, you must enter the code from menu
“Help -> Register”. In order for the activation to run smoothly, you must be connected to the Internet at the time of licensing.
Licensing through the Internet Site
For this type of licensing the customer is given a username and password for access to http://register.microinvest.net. The customer must enter the username and
password in this site on every computer, which will be licensed. The advantage of Internet licensing is complete independence from Microinvest office. Licensing can be
done at any time and does not require contact with a company’s employee.
Work in Network
1. Work in network with MS Access database
Work in network of several workstations with Microinvest Warehouse Pro and
MS Access database is done through Map Network Drive. The folder, containing the
database, on the computer, containing the database, must be shared. On the rest of
the computers My Computer must be opened. From the Tools menu select Map Network Drive. In the Drive field select the letter of the drive, which shall be seen in My
Computer. Click the Browse button to select the computer and the shared network
folder. Click the Finish button to confirm the settings. After that, open Microinvest
Warehouse Pro and go to File –> Open Database menu. From the drop-down list
“Look in” select the letter of the device, which is set in Map Network Drive and select
the database, you will be working with. This can be done from Settings –> Database menu as well.
Specify the database type as MS Access and in Database Path click the button
to the right of the field and select the letter of the device, specified in Map Network
Drive and select the database you will be working with.
2. Work in network with SQL database
SQL server is installed on one computer and permission is given in Windows
Firewall for the corresponding port of the selected server
-
MSDE – port 1433
-
MySQL – port 3306
-
MSSQL – port 1433
The information, necessary for work on other computers, is the IP address of the
server, the username and password for access to the database. On the computers in
the network open Microinvest Warehouse Pro, go to Tools –> Settings –> Database menu and select the database type. Fill in the fields as follows:
- 10 -
• In the Server name field fill in the name or the IP address of the computer, on
which the SQL server is installed. If you are working with MySQL replication, fill
in the IP address of the central server (master) in this field. If you are using
MSSQL replication fill in the IP address of the subordinate server (Subscriber) in
this field;
• In the Repl. Server field fill in the IP address of the subordinate server (slave).
Note: Fill in this field only if you are using MySQL replication;
• In the Database name field fill in the name of the database or click the button
to the right to select an existing database (if all other fields are filled in accurately);
• In the User field fill in the username for access to the database;
• In the Password field fill in the password for access to the database.
Click the Test button to check whether there is a connection with the server.
I. Starting up with Microinvest Warehouse Pro
Microinvest Warehouse Pro is a modern system for warehouse management,
suitable for small, medium and corporate businesses. It is designed to work on a single computer, as well as in local network or through the Internet. Using in-built multitasking and module functionality, the application allows full control and optimization of
the work process.
Microinvest Warehouse Pro allows the companies to work with a large number of
databases. You can change the database or create new databases.
- 11 -
1. Creating New Databases
To create a new database (working file) start the application. From the File
menu select New Database or use keyboard shortcut Ctrl+N. The application will
display the Create New Database window, in which you must enter the name of the
database. The name cannot contain any special symbols, only Latin numbers or letters. Select the directory in which the database will be stored.
If you are working with MSDE, MySQL, MSSQL or Oracle servers, you must go to
Tools -> Settings menu and select Database. Fill in accurately all fields – database
type, server name or IP address, database name and password and click the New
Database button to enter its name.
- 12 -
When you are done, you can enter all necessary lists – company data, partners,
items, locations, users.
2. Inputting Data
Data inputting can be done by selecting the desired category from the Edit
menu.
• Input Company Data – use this category to enter data about companies, on
behalf of which various types of documents will be issued. To do so, go to Edit
menu and select Administration -> Input Company Data. Click the New
button to open a window, in which data for the corresponding company can be
entered. You can enter the following parameters: company name, contact person, address, telephone numbers, UIC and VAT number, as well as e-mail address, bank accounts and bank name of the company. If “Default Company” is
checked, the current company becomes active and is colored in blue – this is
your company, on behalf of which all documents will be issued. When you close
the Company Data window, the name of the default company is visualized in
the Status Bar.
•
Partners – these are all contracting parties (companies or physical persons),
your company is working with. To enter new partners, go to Edit menu and select Partners or use keyboard shortcut Ctrl+P. Click the New button to open
a window in which to enter data for the corresponding contracting party – company name, contact name, address, telephone numbers, UIC and VAT numbers,
e-mail address, bank numbers and accounts, bank name.
Click the Additional Information tab to select a price group, partner type
(supplier, client, etc.) and to enter a discount percentage and card number of
the client.
Partners can be grouped for faster and more convenient work. Groups have a
tree structure and can be an unlimited number as well as to contain an unlimited number of subgroups. In the Basic Information tab you can choose a
state for the partner: “Enabled”, “Partner is frequently used, sort before others”
or “Disabled”.
- 13 -
● Items – this is the list of items or services, offered by the company. Items are
generated by selecting Items from the Edit menu. You can visualize the New
Item window by clicking the New button or by using keyboard shortcut Ctrl+S.
In the Basic information tab enter the name, code (if “Auto generate” is
checked, the application will automatically generate a code for the corresponding item), barcode, catalogue numbers and additional information about the
item in the Description field.
Click the Additional tab to enter additional details about the item: basic and
additional measure, transformation ratio from one measure to another, minimal
and nominal quantity for the corresponding item. Thus the application performs
a constant control on the availability of this item and alarms you if the quantity
is below or above the defined parameters. In the VAT group field you can enter the VAT for the corresponding group of the item.
- 14 -
The Prices tab allows you to organize items in various price groups. Items, as
well as locations, can be grouped. The number of groups and subgroups is unlimited. In the Basic Information tab you can choose a state for the item: “Available”, “Frequently used” or “Discontinued”.
● Locations – these are all locations of the company, from which operations are
performed. To add a new location, go to Edit menu and select Locations. Click
the New button to open the New Location window. In the Code field fill in the
code of the location. If “Auto generate” is checked, the application will automatically generate a code. Enter the name and price group for the location. The
Groups tab is analogical to the one in Items and Partners. In the “Basic Information tab” you can choose a state for the location: “Enabled”, “The location
is frequently used, sort before others” or “Disabled”.
- 15 -
•
Users are all persons, authorized to use the application. To add a new user, go
to Edit menu and select Users. Click the New button to open the New User
window and to enter the corresponding data. Enter the name and code of the
user. For better security and data protection, you can enter a password in the
Password field and confirm it in the “Confirm password field. You can also
set a different access level for each user in the drop-down list User level. In
the Location field select the location, in which the corresponding user will be
working. If the user has limited access rights, he will be able to work only in
this location. Use the Company used field to “lock” the user to a specific
company, which is not necessarily the default company. In the Basic Information tab you can choose a state for the user: “Enabled”, “The user is frequently used, sort before others” or “Disabled”.
3. Settings in Microinvest Warehouse Pro
To open the Settings window, go to Tools -> Settings. You can use this window to configure the application based on your specific needs. The information is divided into categories, placed in the bottom left part of the window. When you click on
a category, it becomes active and all of its settings are displayed. Click the OK button
to confirm changes and close the window. Click the Cancel button to close the window without any changes being made. Click the Apply button to apply changes without closing the window. Settings can be applied to various users, as well as to databases or to the whole application. You can select the level for applying of settings in
the Users section of the window.
- 16 -
4. Operations in Microinvest Warehouse Pro
Microinvest Warehouse Pro is a comprehensive product, developed to fully
cover operations, necessary for the management of the contemporary dynamic business. The application is able to perform low level functions, necessary for the existing
of a warehouse (purchases, sales, production, etc.), as well as high level operations,
necessary for the management – orders, price lists, customs declarations, etc. The
integrated modules have an entirely different functionality, but use a similar interface
for easier organization and improving of local business climate.
The Sales module is the most frequently used one. You can open the Sales
window from the Operations -> Sales menu, from the Sales icon or by pressing the
F2 key. It allows you to perform sales by selecting the partner, with whom the deal is
concluded, the location, from which the operation is performed and the operator, responsible for the operation. To open the lists with locations, partners and operators,
click the
icon or press Enter. To visualize the items list, press F4 or fill in part or
the whole information about the desired item (code, name) in any of the fields. To
save the operation, press F9 or click the Save button.
- 17 -
The application will open the Payment window. The options are as follows:
1. The customer pays the whole amount. In this case, the amount in the Paid field is
equal to the amount in the Amount field.
2. The customer does not pay the whole amount. In this case, the amount in the
“Paid” field is less than the amount in the Amount field. The Balance field displays
the remaining amount due by the partner. The Remaining days field displays the
remaining days to the due date.
The rest of the modules in
Microinvest
Warehouse
Pro are analogical to the
Sales module.
Besides a wide range of
operations,
Microinvest
Warehouse Pro provides
several work methods, which
differ on a syntactic level.
This allows you to choose the
most precise and most suitable method, necessary for the
business and for the customization of the product.
To access the various work methods, go to Tools -> Settings and select Special. In the Work method drop-down list you can select one of the following:
1. Average price – the price of the item is the average of the remaining quantity
from a previous purchase and the amount of the item from the last purchase made.
2. Last purchase price – the price of the item from the last purchase made is used
upon sale.
- 18 -
3. FIFO (First In First Out) – the price of the item from the lot which was delivered
first is used upon sale.
4. LIFO (Last In First
Out) – the price of the
item from the lot which
was delivered last is used
upon sale.
5. FEFO (First Expiry
First Out) – the price of
the item with an expiring
date is used upon sale.
6. Select lots – upon
performing a sale you
can select any lot with
the corresponding item
price.
Upon performing an operation with one of the
above work methods,
Microinvest
Warehouse Pro offers you to
print a document, belonging to the corresponding operation.
5. Printing of Documents
Microinvest Warehouse Pro has an in-built system for printing of all types of documents, generated by the application.
Use the Print Manager module to print documents. To configure the Print Manager,
go to Edit -> Administration -> Print Manager.
The Print Manager allows you to specify on which of the installed printers the various types of documents shall be printed. The number of copies for the corresponding
- 19 -
document are filled in for each printer. A single document can be printed on several
printers simultaneously. You can also select an Excel document, which will be started
automatically upon completion of the selected operation.
Upon completion of each operation, the application requires you to confirm or cancel
the printing of the corresponding document. To change this setting, go to Tools ->
Settings and click the Print category. In the Print mode field you can select
“Always”, “Confirmation” or “Never”.
To select whether to visualize the documents on the screen before printing, go to
Tools -> Settings and click the Print category. Enable or disable this option in the
Print preview field. These settings can be applied for a specific user. To do so, select
his username in the left part of the Settings window.
If you cancel printing of the document upon completion of the operation or the application does not prompt you to print (if Print mode is set to “Never”), you can always
print the corresponding document later. To do so, go to Edit -> Reprint Documents.
Select the operation type (Purchases, Sales, Refund, Waste, etc.), select the already issued document and confirm printing.
6. Discounts and Price Groups
There are several methods for selection of work with discounts in Microinvest Warehouse Pro: various schemes for automatic discount for specific amounts, specific
amounts, total amount of the operation, partner’s turnover, discount for specific products, for specific partners, partners group, location, locations group, user of the application, users group, item, items group, etc. These methods can be combined upon
performing of the corresponding operation.
- 20 -
1. You can enter a discount for the customer. To do so, go to Edit -> Partners menu
and open the Additional Information tab in the Edit partner window. The discount
has a value between 0 and 100 and is applied to the customer upon performing a selected operation for him.
2. The application allows you to enter price groups, which will be applied for the corresponding partner. You must enter them in the information about client by selecting
the Edit -> Partners menu and clicking the Edit button, Additional Information
tab – Price group. The price group determines which prices will be applied for the
current partner. You can define up to 10 price groups, where item prices are determined through Edit -> Administration -> Change Prices or upon delivery of the
corresponding item.
3. The third method for applying
of discounts uses the so called
Price Rules. To set the rules, go
to Edit -> Administration ->
Price Rules menu.
In the Price Rules window you
can enter rules for performing of
specific actions, depending on the
specific case upon performing an
operation.
The Price Rules Wizard allows
you only to create rules. To start
using price rules you have to apply the necessary settings. To do
so, go to Tools -> Settings
menu and select Operations category, Working with price
rules. These settings can be applied for a specific user by selecting his name in the upper left part
of the Settings window.
- 21 -
7. Work with Currencies and Measures
● Currencies - Microinvest Warehouse Pro is a contemporary software
product and allows you to work with various currencies. Go to Edit -> Currencies
menu to open the Currencies window, where you can add, edit and delete necessary
currencies. The application has a default currency, which can be edited, but cannot be
deleted. Thus the application can work accurately upon currency selection.
● Measures – The convenience of item measures imposes the creating and
using of many of them. To enter measure units in the application go to Edit -> Items
menu and click the New button, Additional tab.
In the Additional tab you
can enter additional parameters of the item: Basic
measure, Ratio, Additional measure, etc. By default,
the basic and additional
measure fields contain the
most
frequently
used
measures, but you can write
any measure unit, which will
automatically be added to
the list. The ratio determines
the connection between the
basic and the additional
measure of the item – for
example, the number of bottles in a crate or the number
of boxes in a cardboard box or a stack. The measure unit choice does not affect the
work of the application.
8. Invoicing
Invoicing is necessary for each product, related to commercial activity. It is in
compliance with all requirements of the normative legislation in the country. Invoicing
covers the following operations: Issue Invoice, Receive Invoice, Void Issued In- 22 -
voice, Void Received Invoice and Notes (Debit Note, Credit Note, Void Debit
Note, Void Credit Note).
Invoice issuing in Microinvest Warehouse Pro is easy and can be done in two ways:
1. The first and most frequently used invoicing method, while using warehouse
software, is after performing of the operations sale and purchase. First you must issue
a sales or purchases document (stock receipt) and then go to Operations -> Invoicing menu and specify whether the invoice will be issued or received. It is important to
note that the numbering of stock receipts is separate from the numbering of invoices
and notes.
After you select the corresponding menu, you must specify the number of the
document, which will be invoiced. Thus the primary document (stock receipt) represents the incomes/expenses from the item and the writing off or adding of the
item in the warehouse. The invoice is a tax representation of the deal and determines the type of the deal. This means that a single invoice can contain one or more
stock receipts.
Generally, an invoice can be issued only based on an existing stock receipt. The
invoice and the stock receipt contain a list of the same items and are for the same
amount. You cannot edit or delete part of the rows of an invoice, after it has been issued based on a stock receipt.
2. In the second invoicing method you must activate the corresponding option
in the application settings Tools -> Settings, Operations category – Quick invoicing. This allows you to automatically create the accounting document without going
through the above steps.
This type of invoicing is useful for warehouses and locations with a larger percent of
corporate customers and requirements in compliance with the latest market trends in
Bulgaria and the European Union.
You can also use quick invoicing in locations with intense work and several
workstations with Microinvest Warehouse Pro. One or more of the workstations can
- 23 -
be set to work with this method. All customers who wish to receive an invoice, shall
be serviced at these workstations. This leads to a faster business process and facilitates the work of the users. This is the principle of work in hypermarkets and wholesale markets.
3. Issuing of notes is an inseparable part of the invoicing process, which is necessary for correction of an already issued accounting document. The options in the
application are in compliance with the normative acts and allow you to edit the
amount, as well as the quantity. In order to create a note, you must perform the corresponding operation and then generate the document, which must follow the numbering of already issued invoices. The sequence is as follows: perform the operation
from Operations –> Notes menu. The operation will change the amount with a plus
or minus sign, i.e. it will affect the Cash Ledger or will change the quantities in the
selected location again with a plus or minus sign, depending on whether the customer
has selected a debit or a credit note. After that create the actual document, related to
the correcting operation. To do so go to Operations –> Invoicing –> Notes menu.
Select the submenu for the corresponding type of note and based on the performed
operations generate a document, which like invoices will be an original or a copy. The
original is for the customer, whose items or amounts in the invoice are changed. In
the window for issuing of notes you must specify the number of the invoice, which will
be changed.
This option of the application can be automated to a certain degree, i.e. the application allows you at the time of performing of the operation to generate a note immediately after the document. This is not always recommended, since it is advisable
such operations to be controlled directly by the business process manager or another
competent person – generally, the accountant.
Voiding of already issued notes is analogical to voiding of already issued invoices. A note cannot be edited, it can only be voided. It is important to note that received notes are not reflected in the application.
9. Payment
Payment is the natural ending of the commercial activity of companies, using
the software product Microinvest
Warehouse Pro. This feature is
very well developed and is in compliance with the latest trends in
this field.
The application can track installment payments and payment
due dates. This allows you to track
amounts due by partners and by
documents.
Upon ending of any of the
main commercial activities – sale
or purchase, the application opens
the payment window, unless the
user has selected as payment settings that the total amount remains due or that the whole operation is automatically
accepted as paid.
In the Payment window you can specify the amount paid by the customer and if
there is an amount due – the due date and the payment method – in cash, via bank
- 24 -
account or via POS terminal. If payment will be made in more than one installment, a
payment document can be printed for every installment made by checking “Print
payment document”. Upon each payment, this document will contain the new amount
and will display the previous amounts due. This allows to both the user and his customer to track what is the remaining amount due. The menu with reports related to
the “Payment” operation includes the main set of reports, which contain thorough information about cash flows in the company, payments history and payments due
dates. This facilitates the users and leads to better control of cash.
10. Editing, Deleting and Reprinting of Documents
Microinvest Warehouse Pro allows you to edit any information, related to
lists, entered by you. You can edit all issued documents, whereas this will change the
status of cash amounts or quantities in the warehouse. If you wish to delete the whole
document, go to Edit -> Documents menu, select the desired document and in the
new window click the Delete button to delete the selected row. This operation will
automatically restore the quantities in the warehouse, but the Cash Ledger will still
contain the corresponding income or expense, i.e. you must delete it afterwards.
You must be especially precise when you are editing a document, if you are
working with lots, because otherwise this could lead to total confusion in available lots
and you will not be able to use them. When you are working with lots, we recommend
you to use reverse transferring and not to edit transfer documents.
The only documents, which cannot be edited and are not listed in the Edit
menu, are invoices and notes. This is in compliance with the laws regarding these
documents. They can only be voided from the Operations menu, where you issue
them as well. What is more specific about notes is that they can be edited, but only if
just the Notes operation is performed. You can void notes if they have been created
as a document and attached to Notes operation from the Invoicing submenu in Operations menu.
You can work with invoices in a similar way, but you manipulate them only from
the Operations -> Invoicing menu. You can only reprint invoices from the Edit
menu.
In the Edit menu you can create VAT groups, depending on the client’s needs,
as well as to define various currencies. This does not lead to automatic conversion in
the application, but a main currency is tracked.
- 25 -
Microinvest Warehouse Pro allows you to reprint any issued document. If a
document has been lost or if you have not been able to print the document upon performing of the operation, go to Edit -> Reprint Documents and reprint the document.
The most specific part of the Edit menu is the Administration submenu. There
you can perform service functions, which directly affect the work of the application.
The function Permissions in this submenu allows a user with unrestricted access rights to set the access rights of other users.
In the Print Manager submenu you can specify several printers, on which various documents can be printed.
If you are using the application for production purposes, you can use the Total
Production function to produce products, which are sold, but have not been produced beforehand.
The Change Prices function allows you to change all prices in the database except for the purchase price. The purchase price can be set only through purchase or
stocktaking.
Revaluation is an identical function to the above described, but the user can
affect one price through another not only for a single item, but for a group of items or
for all available items in the database.
- 26 -
The direct connection of the application with
Microsoft Excel allows you to import operations, partners lists and items lists directly in
the database. Import is very useful for the
initial administration of the database, i.e. if
you have a table, containing the items or the
partners, you can import them in the application. After that, through an identical table,
you can import operations like stocktaking or
purchases to obtain the initial quantities of
items.
The service functions “Rebuild
items in stock” and “ Recalculate average price” allow you to amend inconformity in reports due to incorrect editing by the user.
II. Work with Microinvest Warehouse Pro
1. File
1.1 New Database
Data about the processed company is stored in a file or group of files, called
"Database". Using the New Database function you can create a file for a new
company containing data similar to or different from the existing company. Generally,
each database is a single file, containing data about a single company. This is valid
when you use MS Access to create databases. When you use an SQL server, the
database is stored in the
server and consists of one or
several
files.
What
is
peculiar in this case is that
the user has no direct access
to the file. The file is
processed by the server and
has a logical name
Use the Create New Database
window
(click
icon or use keythe
board shortcut Ctrl+N to
open it) to create a file for
storing of the information
about the new database.
- 27 -
You can open a file by choosing the folder and filename. By default, the program
works with files with .MDB extensions and you cannot choose a different file type (you
can choose a different database type in Database Settings). Filenames on the screen
show the already existing files in the folder. The structure of the directories is also
displayed and you can choose a different folder to store the new database. Icon
shortcuts to recently used databases, the desktop, My Documents and Microinvest
Warehouse Pro can facilitate your work.
It is advisable to use Latin characters for database filenames.
The newly created file becomes the active database of the application.
1.2. New Template Database
The New Template Database function is used for creating a new database (new
company), which has the same items as the old one. This allows you to transfer data
about items, partners, locations, users, currencies, VAT groups and company data
without any operations and quantities with it. You do not need to re-enter the items,
but you can perform new operations with them. You can use this function to create a
new period for the same company, to open database of a new location using the same
information or to start a database of a parallel company
Use the New Template Database window to choose a file for storing of the
information about the new database.
1.3. Open Database
Use the
change
another
opening
and can
Open Database function to change the active database. This allows you to
the company you are working with and load data and operations about
company. Generally, each database stores data about a single company and
a new database will change the active company. Databases are independent
be stored in one or several different folders.
- 28 -
You can use the Open Database window (keyboard shortcut Ctrl+O) to select a
database from the already created (through New Database or New Template Database) databases.
Select the desired database and click the Open button. Confirm your choice in the
pop-up window.
1.4 Show Active Database
Each database contains information about one company. Use the Show Active
Database function to check which file you are currently working with. The Show
Active Database window (keyboard shortcut Ctrl+A) gives you information about
the folder, location and filename of the last file, opened through Open Database.
The Show Active Database window (keyboard shortcut Ctrl+A) tells you which is
the active database, opened through the Open Database window.
1.5 Backup / Restore Database
Use the Backup function to save a copy of the active database. This operation allows
you to store important information in case of database damage or system crash. To
restore the database use the Restore function
On database backup Microinvest Warehouse Pro compresses the file and reduces
its size. This allows you to sore the database more effectively and transfer it more
easily. On database backup the data is stored exactly as it is when the process is
started.
The system offers you two options depending on backup settings:
•
Automatic backup upon a previously set time period
•
Manual backup upon user request
The Restore function reverts the database (company) to the time of the last backup. A
common mistake is to restore data and lose operations and changes made after
backup. Data Restore should be applied only in case of a system crash or when you
wish to revert the database to a previous time regardless of changes. This is
appropriate in case of wrongly input data, when database restoring is easier than
editing data.
Note: When using MSDE, MySql or Microsoft SQL servers, Database Backup is done
by the server or by Microinvest Archi Pro.
1.6 Exit
Use the Exit menu to close the program.
This operation will save the current state of the application and will release all system
resources. This allows other users to have exclusive access to the database.
- 29 -
2. Operations
Fill in the windows in Operations in the following way:
In the Partner field fill in the name of the client/company.
To select a partner do one of the following:
- use keyboard shortcut F4 in the partners list;
- use the Enter key in the partners list;
- click the
button;
- type the partner’s name in the text field;
- type the partner’s code in the text field;
- type the partner’s UIC in the text field.
In the Location field fill in the name of the location to take items from.
To select a location do one of the following:
- use keyboard shortcut F4 in the locations list;
- use the Enter key in the locations list;
- click the
button;
- type the name of the location in the text field;
- type the code of the location in the text field.
In the Operator field fill in the name of the operator who will perform the operation.
To select a user do one of the following:
- use keyboard shortcut F4 in the users list;
- use the Enter key in the users list;
- click the
button;
- type the user’s name in the text field;
- type the user’s code in the text field.
In the Name field fill in the items.
To select an item do one of the following:
- use keyboard shortcut F4 in the items list;
- use the Enter key in the items list;
- click the
button;
- type the name of the item in the text field;
- type the code of the item in the text field;
- type the barcode of the item in the text field.
If you are working with lots, you can select an item by lot or by serial number.
If you wish to select more than one item, open the items list using keyboard shortcut
F4, hold down the Ctrl key and click on desired items. You can select adjacent items
by holding down the Shift key and using the up and down arrow keys.
- 30 -
To save the document press the F9 key or click on the Save button. To cancel the
operation press Esc or click the Cancel button.
To refresh item quantities without closing and opening the window, click the Refresh
button. You can add a note to the current operation by using the Note button.
When you save the operation, the application may offer you to print the document,
depending on the Print Settings.
2.1 Sales
Sales are the most frequently used operation. They represent the production and
distribution of goods and services to clients or partners. Sales decrease quantities of
chosen items in your warehouse and transfer them to the partner. The operation is
completed by payment and issuing of a document.
To open the Sales window click the
icon or use keyboard shortcut F2.
In the Quantity column fill in the number of items being purchased. Press Enter to
move on to the Sale Price column. The sale price of the item will be filled in automatically, according to the price group of the customer or the location (the price group of
the customer has a priority). If no price groups are set for the partner and/or the location, the application will fill in the retail price. The sale price can be edited and the
change will be applied only to the current document. In the Discount column fill in
the discount for the selected customer. Press Enter to confirm. The application
automatically fills in the Amount column. Use the same method to enter data about
each item, purchased by the customer.
- 31 -
If you are working with lots, you must enter a lot number in the window. Then enter a
sale quantity and press Enter. The application will split the quantity by lots,
depending on the method set in Special Settings. Fill in the serial number, the best
before and production dates and the position of each lot in the warehouse in the text
fields in the upper part of the window. In case you do not provide lot information, the
Lot column is filled in automatically with "NA".
When you save the operation, the application may offer you to specify the payment
type and whether the document (or part of it) is paid or remains due, in case the
payment window is enabled in the Program Settings.
2.2 Purchases
Purchases represent the receiving of new quantities of items in your warehouse. The
quantity of items in stock in the warehouse of the company increases and their
average or lot prices are calculated.
To open the Purchases window click the
icon or use keyboard shortcut F3.
In the Quantity column fill in the number of items being purchased. Press Enter to
move on to the Purchase Price column and fill in the purchase price of the item. In
the Sale Price field you can fill in the sale price of the item, which will apply to the
price group of the partner or the location (if no price group is set, it shall be saved as
retail price). In the Discount column fill in the discount for the selected partner. Press
Enter to confirm the information. The application automatically fills in the Amount
column. Use the same method to enter data about each item, which shall be delivered
by the partner.
- 32 -
If you are working with lots, you must enter a lot number in the window. You can
enter the serial number, the best before and production dates and the position of each
purchased lot in the warehouse in the upper part of the window. You can open the
button or by pressing the F4 key, when filling
Calendar window by clicking on the
the Best Before and Production Date fields.
The application allows you to automatically split item quantities by lots. To do so,
enter the total quantity in the corresponding field and press the F12 key. The
application will add as many rows as the total quantity, where each row has a quantity
of "1". By default, the lots will be automatically filled in with "NA". Then, you can
change lot names and data in the other fields.
In case you do not provide lot information, the Lot column is filled in automatically
with "NA".
When you save the operation, the application may offer you to specify the payment
type and whether the document (or part of it) is paid or remains due, in case the
payment window is enabled in the Program Settings.
2.3 Production
2.3.1 Recipes
Use the Recipes window to enter and edit recipes, which will later on be used for
production.
- 33 -
To fill in the Recipes window, do the following: in the Recipe item column fill in the
item, for which a recipe will be created. You can choose an item from the list of
button. In the Raw
complex recipes by pressing the F4 key or by clicking on the
Materials column fill in the raw materials, which will be used in the recipe. In the
Quantity column enter the quantity, needed for production of one recipe item.
Click on the Apply button or press the F9 key to save the recipe and proceed to the
next recipe. Click on the ОК button to save the recipe and close the window. Click on
the Cancel button to close the window without saving any changes. The created
recipe is colored in blue.
You can use the Recipes window to edit recipe items. Choose the recipe item from
the list by pressing the F4 key or by clicking on the
button. The raw materials will
be filled automatically. You can edit the name of the item (or choose a name from the
list using the F4 key), as well as improperly entered quantities. To delete a row in the
document, type "0" in the corresponding quantity column. To delete the whole
document type "0" in all quantity columns of the document. When you are done with
the changes, press the F9 key or click on the Apply button to save the recipe.
2.3.2 Production
Use the Production window to aid you in producing items based on already saved
recipes.
You can open the Production window by clicking the
icon.
In the Quantity column fill in the quantity of items that will be produced. The
Purchase Price column is filled automatically based on prices of raw materials.
The names, quantities and purchase price of raw materials used in the recipe will be
displayed in the upper part of the window after you select the recipe item, which will
be produced.
- 34 -
2.3.3 Complex Recipes
Use the Complex Recipes window to create recipes, which will later on be used for
complex production. In complex production a single raw material is used for the
production of several recipe items or several raw materials are used for the production
of several recipe items.
To fill in the Complex Recipes window, do the following: in the Recipe name text
field enter the name of the recipe, which will be used for complex production.
- 35 -
Enter the raw materials in the Raw Materials column. Fill in the necessary quantities
of raw materials in the Quantity column.
Enter the recipe items in the Production column. In the Quantity column fill in the
quantity of the item, obtained from the raw materials.
If you wish to select more than one item, open the items list using keyboard shortcut
F4, hold down the Ctrl key and click on desired items. You can select adjacent items
by holding down the Shift key and using the up and down arrow keys.
Click on the Apply button or press the F9 key to save the recipe and proceed to the
next recipe. Click on the OK button to save the recipe and close the window. Click on
the Cancel button to close the window without saving any changes.
You can use the Complex Recipes window to edit recipe items. Choose the recipe
item from the list of complex recipes by pressing the F4 key or by clicking on the
button. The raw materials will be filled automatically. You can edit the name of the
item (or choose a name from the list using the F4 key), as well as improperly entered
quantities. To delete a row in the document, type "0" in the corresponding quantity
column. To delete the whole document type "0" in all quantity columns of the
document. When you are done with the changes, press the F9 key or click on the
Apply button to save the recipe
2.3.4 Complex Production
Use the Complex Production window to obtain recipe items from raw materials,
based on previously created complex recipes. In complex production a single raw
material is used for the production of several recipe items or several raw materials are
used for the production of several recipe items.
In the Quantity column enter the quantity that will be produced. The Purchase
Price column is automatically filled based on prices of raw materials used in
production.
The calculation of product cost is as follows.
Purchase prices of all products are summed to form a calculation basis. Each product
forms a ratio of its sale price to this basis. The purchase price of each product is
obtained by multiplying the corresponding ratio by the total purchase price. For
example:
The unit price of Raw material 1 is $100.00 and the unit price of Raw material 2 is
$200.00. Recipe item 1 with sale price of $300.00 and recipe item 2 with sale price of
$400.00 will be produced.
A complex recipe is created:
Raw Material 1 - 1 unit / Recipe item 1 - 1 unit
Raw Material 2 - 1 unit / Recipe item 2 - 1 unit
Choose the recipe in Complex Production and enter 1 unit. The purchase price of
recipe item 1 will be $128.57, i.e.:
1 х $300.00
----------------------------------- = 0.42857142
1 х $300.00 + 1 х $400.00
(1 х $100.00 + 1 х $200.00) х 0.42857142 = $128.57
- 36 -
The net cost of the recipe item is the total purchase price divided by the quantity
($128.57/1 = $128.57 in the example)
The net cost of recipe item 2 is $171.43.
This calculation method forms a higher cost for expensive recipe items and a lower
cost for cheap recipe items. This ensures that some sales do not generate losses,
while others generate unrealistically high profits.
The names, quantities and purchase price of raw materials used in the recipe will be
displayed in the upper part of the window after you select the recipe item, which will
be produced.
Note: Enter the sale price of recipe items in Items or Change Prices window.
2.4 Transfer
Use the Transfer window to aid you in transferring items from one warehouse to
another. The quantity of items in the first warehouse will decrease, while the quantity
of items in the second one will increase. The operation reflects transferring of items
from one location to another. This does not affect incomes and expenses of the
company, since it is an internal circulation.
To open the Transfer window click the
icon or use keyboard shortcut F5.
In the Quantity column fill in the number of items being transferred. The Purchase
Price and Sale price columns will be filled in automatically upon selecting an item
and cannot be edited. Press Enter to confirm. The application automatically fills in the
Amount column. Use the same method to enter data about each item, which will be
transferred to the second location
If you are working with lots, you must enter a lot number in the window. You must
enter a quantity and press Enter. The application will “split” the quantity by lots,
depending on the method set in Special Settings. Fill in the serial number, the best
before and production dates and the position of each lot in the warehouse in the
textfields in the upper part of the window.
2.5 Waste and Write-off
Use the Waste operation to aid you in writing-off of waste items. The operation
decreases the quantities of these items in the corresponding warehouse. The items
leave the warehouse, but sales incomes remain unchanged.
Use the Write-off operation to aid you in writing-off of items for company’s own
needs – for example, when part of the available items is needed for internal
operations or for own consumption. The operation is similar to Sales, but no incomes
are generated.
- 37 -
In the Quantity column fill in the number of discarded or written-off items. The
Purchase Price column filled in automatically upon selecting an item and cannot be
edited. Press Enter to confirm. The application automatically fills in the Amount
column. Use the same method to enter data about each item, which will be discarded
or written-off.
If you are working with lots, you must enter a lot number in the window. Then enter a
quantity and press Enter. The application will “split” the quantity by lots, depending
on the method set in Special Settings. Fill in the serial number, the best before and
production dates and the position of each lot in the warehouse in the text fields in the
upper part of the window.
2.6 Refund
Refunding represents returning of items from a customer to your warehouse. The
operation is similar to Purchase – it increases the quantity of available items in the
warehouse of the company and generates expenses, but sale and purchase prices of
the items remain unchanged.
In the Quantity column fill in the number of items returned and press Enter to move
on to the Sale Price column. There you can enter a sale price of the item, which will
apply for the price group of the partner or the location (if no price group is set, it will
be saved as retail price). Press Enter to confirm. The application automatically fills in
the Amount column. Use the same method to enter data about each item, which will
be returned by the customer.
If you are working with lots, you must enter a lot number in the window. Fill in the
serial number, the best before and production dates and the position of each returned
lot in the warehouse in the text fields in the upper part of the window.
In case you do not provide lot information, the Lot column is filled in automatically
with "NA".
2.7 Debit Note
A debit note is a fiscal note, indicating the amount increase based on an issued
document, as well as tax details. The reason for the increase is also indicated in the
debit note. A debit note is issued only based on an issued invoice. The Debit Note
operation reduces the quantities of items in stock.
In the Quantity column
fill in the number of items,
which are part of the operation. Press Enter to
move on to the Sale
Price column and fill in
the sale price of the item.
In the Discount field fill
in the discount for the selected
partner.
Press
Enter to confirm. The
application automatically
fills
in
the
Amount
column. Use the same
method to enter data
about each item, which is
part of the operation.
- 38 -
After you save the operation, the application may offer you to specify the payment
type, depending on the payment settings.
When you are done with the Payment window, you must fill in the Issue Debit Note
window. You can use it to enter general and additional data in the issued invoice:
document number, date of issuing, ext. invoice, from date, recipient, recipient’s UCN,
the name of the person issuing the document, number of print copies – originals and
copies, date of fiscal event, reason for the transaction, description and place of the
deal, as well as payment method – cash, cheque, credit card or voucher.
2.8 Credit Note
A credit note is a fiscal note, indicating the amount decrease based on an issued
document, as well as tax details. The reason for the transaction is also indicated in the
credit note. A credit note is issued only based on an issued invoice. The Credit Note
operation increases the quantities of items in stock and forms an average purchase
price.
In the Quantity column fill in the number of items, which are part of the operation.
Press Enter to move on to the Purchase Price column and fill in the purchase price
of the item. In the Sale Price column fill in the sale price of the item. In the Discount column fill in the discount for the selected partner. Press Enter to confirm. The
application automatically fills in the Amount column. Use the same method to enter
data about each item, which is part of the operation.
After you save the operation, the application may offer you to specify the payment
type, depending on the payment settings.
When you are done with the Payment window, you must fill in the Issue Credit
Note window. You can use it to enter general and additional data in the issued
invoice: document number, date of issuing, ext. invoice, from date, recipient,
recipient’s UCN, the name of the person issuing the document, number of print copies
– originals and copies, date of fiscal event, reason for the transaction, description and
place of the deal, as well as payment method – cash, cheque, credit card or voucher.
2.9 Invoicing
2.9.1 Issue Invoice
You can use the Issue Invoice window (click on the
icon or use keyboard
shortcut F7 to open it) to transform a selected sales document into an invoice. The
sequence is as follows:
1. Create a sales document (stock receipt);
2. Attach a new document to the first one. The new document will be the invoice.
You can use the first document (stock receipt) to represent the incomes form the item
and its writing-off. The second document is a tax representation of the deal and
determines the type of the official document.
Generally, an invoice can be issued only based on an existing stock receipt. The
invoice and the stock receipt contain a list of the same items and are for the same
amount.
- 39 -
In the Select Document window select the sales document, based on which the
invoice will be issued. To merge two or more sales documents, hold down the Ctrl key
and click on the desired documents.
The invoiced documents will be colored in red.
You can use the Issue Invoice window to enter general data in the issued invoice:
document number, date of issuing, ext. invoice, from date, recipient, recipient’s UCN,
the name of the person issuing the document. You can enter additional data as well:
payment method –cash, cheque, credit card or voucher; date of fiscal event, reason
for the transaction, description and place of the deal.
You can choose the number of print copies – originals and copies.
- 40 -
If To cash register is checked, the data will be sent to the cash register and a cash
register receipt will be printed.
If Items grouping is checked, items with the same names and prices will be printed
in a single row in the issued invoice. This is useful when you merge documents, in
which a single item is used multiple times. If you are working with lots, the quantity of
all lots is printed in a single row.
Data about the issuer is automatically filled from the selected Company Data.
2.9.2 Receive Invoice
You can use the Receive Invoice window (use keyboard shortcut Ctrl+F7 to open it)
to transform a selected purchases document into an invoice. The sequence is as
follows:
1. Create a purchases document (stock receipt);
2. Attach a new document to the first one. The new document will be the invoice.
You can use the first document (stock receipt) to represent the expenses from the
item and its delivery into the warehouse. The second document is a tax representation
of the deal and determines the type of the official document.
Generally, an invoice can be issued only based on an existing stock receipt. The
invoice and the stock receipt contain a list of the same items and are for the same
amount.
In the Select Document window select the purchase document, based on which the
invoice will be issued. The invoiced documents will be colored in red.
-
Use the Purchase Invoice window to enter document number, date of issuing, payment and type.
2.9.3 Void Issued Invoice
The Void Issued Invoice window (keyboard shortcut Alt+F7) contains a list of all
invoiced sales documents. To void an issued invoice, select the document and click the
OK button. Click the Cancel button to exit without selecting a document.
After you void an invoice, you can issue a new invoice with the same number from the
Issue Invoice window, as well as edit the sales document in the Edit Sale window.
2.9.4 Void Received Invoice
The Void Received Invoice window contains a list of all invoiced purchase
documents. To void a received invoice, select the document and click the ОK button.
Click the Cancel button to exit without selecting a document.
After you void an invoice, you can issue a new invoice with the same number from the
Receive Invoice window, as well as edit the purchase document in the Edit Purchase
window.
- 41 -
2.9.5 Notes
2.9.5.1 Debit Note
You can use the Debit Note window to select a document, which will be used to issue
a debit note. The sequence is as follows:
1. Create a debit note document;
2. Attach the debit note to an invoice.
Generally, a debit note can be issued only based on an existing invoice. The debit note
and the invoice contain a list of the same items.
In the Select Document window select the document, based on which the invoice
will be issued.
The invoiced documents will be colored in red.
You can use the Issue Debit Note window to enter general data in the issued invoice: document number, date of issuing, ext. invoice, from date, recipient, recipient’s
UCN, the name of the person issuing the document. You can enter additional data as
well: payment method, date of fiscal event, reason for the transaction, description
and place of the deal.
You can choose the number of print copies – originals and copies.
If Items grouping is checked, items with the same names and prices will be printed
in a single row in the issued invoice. This is useful when you merge documents, in
which a single item is used multiple times. If you are working with lots, the quantity of
all lots is printed in a single row.
Data about the issuer is automatically filled from the selected Company Data.
2.9.5.2. Credit Note
You can use the Credit Note window to select a document, which will be used to
issue a credit note. The sequence is as follows:
1. Create a credit note document;
2. Attach the credit note to an invoice.
Generally, a credit note can be issued only based on an existing invoice. The credit
note and the invoice contain a list of the same items.
In the Select Document window select the document, based on which the invoice
will be issued.
The invoiced documents will be colored in red.
You can use the Issue Credit Note window to enter general data in the issued
invoice: document number, date of issuing, ext. invoice, from date, recipient, recipient’s UCN, the name of the person issuing the document. You can enter additional
- 42 -
data as well: payment method, date of fiscal event, reason for the transaction,
description and place of the deal.
You can choose the number of print copies – originals and copies.
If Items grouping is checked, items with the same names and prices will be printed
in a single row in the issued invoice. This is useful when you merge documents, in
which a single item is used multiple times. If you are working with lots, the quantity of
all lots is printed in a single row.
Data about the issuer is automatically filled from the selected Company Data.
2.9.5.3 Void Debit Note
The Void Debit Note window contains a list of all documents, based on which a debit
note has been issued. To void a debit note, select the document and click the ОK
button. Click Cancel to exit without selecting a document.
2.9.5.4 Void Credit Note
The Void Credit Note window contains a list of all documents, based on which a
credit note has been issued. To void a credit note, select the document and click the
ОK button. Click Cancel to exit without selecting a document.
2.10. Cash Ledger
The Cash Ledger is a chronological diary of cash flows in the company. Each row
represents an operation (income or expense) and contains the amount, the date, the
type and a description. You can use the Cash Ledger to trace cash flows and to obtain
information about the current financial status of the company. All sales and purchases
are automatically filled in the Cash Ledger with their total amounts or the amounts
that have been paid (upon saving an operation in the Payment window or by using the
Payment module).
- 43 -
Use the New button to add a new income or expense.
You can enter a date, short description, amount and type for each new element. The
standard types are: Expense Purchase, Expense Materials, Expense Salary, Expense
Rent, Expense Other, Not Defined, Profit Other, Profit Sale, and Fuel.
You can print a cash note, if Print cash note is checked in the New income/expense
window. You can print a Cash disbursement note or a Cash receipt note, depending on
the selected type of note.
To edit incomes or expenses, select the desired row and click the Edit button. You can
edit all fields.
To delete incomes or expenses, select the desired row and click the Delete button or
press the Delete key.
You must confirm the deletion in the pop-up window.
You can print the Cash Ledger by pressing the F9 key or by clicking the Print button.
2.11 Consignments
2.11.1 Consign
Consigning is a process, in which you write-off items from your warehouse and
account them to a selected partner. The quantities of these items in the warehouse
decrease and the partner owes you the total amount of the consigned items. When
the partner sells the items, you generate a report using the Sales on Consignment
option and the application increases your incomes. If the partner returns the items,
you use the Return on Consignment option. The partner ceases to owe you the
total amount of the consigned items and the quantities of these items in the
warehouse increase, because the application registers them in the warehouse once
again.
To open the Consignments window click the
icon or use keyboard shortcut F6.
In the Quantity column fill in the number of consigned items. Press Enter to move
on to the Sale Price column. The application will automatically fill in the sale price of
- 44 -
the item, according to the price group of the client or the location (the price group of
the client has a priority). If no price groups are set for the client and/or the location,
the application will fill in the retail price. The sale price can be edited and the change
will affect only the current document. Type in the discount for the selected partner in
the Discount column (if it has not been set previously). Press Enter to confirm. The
application automatically fills in the Amount column based on the sale price and the
discount. Use the same method to enter data about each consigned item.
If you are working with lots, you must enter a lot number in the window. Enter the
quantity and press Enter. The application will split the quantity by lots, depending on
the method set in Special Settings. You can trace the serial number, the best before
and production dates and the position of each lot in the warehouse in the upper part
of the window.
2.11.2 Sales on Consignment
Use the Sales on Consignment option to decrease quantities of items in a selected
partner and to generate sales. When the partner takes items on consignment, he
owes you the total amount of the consigned items. When you report sales on
consignment, the application indicates the consigned items as sold to the partner. The
partner pays the total amount and generates an income for you. Thus, quantities of
items in stock remain unchanged (they have decreased upon consigning), but the
partner ceases to owe you the total amount of the consigned items and your incomes
increase
To open the Sales on Consignment window click the
shortcut Ctrl+F6.
icon or use keyboard
In the Sold column you can see the consigned quantity of each item, which is part of
the operation. In the Quantity column fill in the quantity of items sold by the customer. What is left when you subtract Quantity from Sold remains with the customer.
2.11.3 Return on Consignment
Returning on Consignment is a process, in which the partner is unwilling or unable
to sell the items and returns them to the warehouse. The partner ceases to owe you
the total amount of the consigned items and the quantities of these items in your
warehouse increase.
To open the Return on Consignment window click the
shortcut Alt+F6.
icon or use keyboard
In the Sold column you can see the consigned quantity of each item, which is part of
the operation. In the Quantity column fill in the quantity of items returned by the
customer. What is left when you subtract Quantity from Sold remains with the
customer.
- 45 -
2.12 Management
2.12.1 Orders, Offers and Proform Invoices
The Order is an operation in which you receive an inquiry from a customer and register his interest towards your items and products. You can use the order to plan a
future deal with your customer. The order does not change quantities of items in the
warehouse, no incomes are generated and it serves only as information about the
forthcoming deal. It is useful when analyzing warehouse status and provides
information whether all items are in stock.
The Offers module can be used to create a representative price list of selected items
for a particular partner. Offers do not change quantities of items in stock and no
incomes or expenses are generated. They are used only as an example of how the
customer can purchase the items.
The Proform Invoices module is used to generate a sample sale of selected items to
a particular partner. Proform invoices usually precede sales and determine transaction
parameters (price, quantities, amounts and bank accounts) precisely. Proform
invoices do not change quantities of items in stock and no incomes or expenses are
generated. They are used only as a template for the transaction.
In the Quantity column fill in the number of items, which are part of the operation.
Press Enter to move on to the Sale Price column. The application will automatically
fill in the sale price of the item, according to the selected price group for the client or
the location (the price for the client has a priority). If no price group is set for the
client and/or the location, the application will fill in the retail price. The sale price can
be edited and the change will affect only the current document. Type in the discount
for the selected partner in the Discount column. Press Enter to confirm. The application automatically fills in the Amount column. Use the same method to enter data
about each item, that the client wishes to purchase.
2.12.2 Requests
The Request is a document your company uses to request items from a supplier. The
request contains a list of items that you are willing to purchase from the supplier. You
can use the request to calculate the forthcoming purchase expenses and to plan your
financial resources. Requests do not change quantities of items in stock and do not
generate expenses. They only provide information about the forthcoming transaction.
The request document can be automatically transformed into a purchase document.
In the Quantity column fill in the number of requested items. Press Enter to move on
to the Purchase Price column and fill in the purchase price of the item. In the Sale
price column you can fill in the sale price of the item, which will apply for the price
group of the partner or the location. Type in the discount for the selected partner in
the Discount column. Press Enter to confirm. The application automatically fills in
the Amount column. Use the same method to enter data about each requested item.
- 46 -
2.12.3 Auto request
Use the Auto request window to automatically create a request or purchase of items,
which have below minimum up to nominal or below nominal quantities.
In the Operation field select whether to request or to purchase items. In the Criteria
field select which items will be part of the operation – those below minimum, up to
nominal or below nominal quantity.
In the Items group field you can select a particular items group, for which the operabutton.
tion will be performed. To select a group click the
Minimum and nominal quantities are additional item parameters. You can define them
in the New Item window when you create the items list.
In the Partner field select the partner, who will deliver the items. In the Location
field select the location in which the items will be delivered and in the User field select
the user who will perform the operation. Click OK to generate an operation window.
The new window will display all items, matching the specified criteria and their quantities will be complemented to minimum or nominal.
2.12.4 Warranty Cards
The Warranty Cards operation helps you to issue warranty cards for free post-sale
servicing in the event of an item damage.
You can open the Warranty Cards window by using keyboard shortcut Alt+F8.
In the Quantity column fill in the number of sold items. Press Enter to move on to
the Serial Number column and fill in the serial number of the item. Type in the
discount for the selected partner in the Discount column (if it has not been set
previously). Press Enter to move on to the Warranty Period column and fill in the
warranty period. Use the same method to enter data about each item, being
purchased by the client.
2.12.5 Price List
Use the Price List function to create an order to a client in Excel format.
- 47 -
The initial window of the operation contains filtering criteria and fields, which can be
added to the price list.
Only fields marked with
are added to the price list.
You can choose a filter for each field by using keyboard shortcut F4 or by clicking on
button.
the
The Clear button removes all filters and adds all fields without any restrictions.
Click on the ОK button to start the operation with the specified criteria. Click on the
Cancel button to cancel the operation.
If you choose to start the operation, the Export Price List window opens. Type a
filename and select folder in which to save the list. The default filename is PriceList.xls
and it is stored in the program directory.
The created Price List contains separate help documentation, which will give you
details how to use the list.
2.13. Point of Sale
The Point of Sale is a highly specialized trade module. It is essentially the same as
Sales, but requires detailed data specification and works faster. This facilitates the
process and is particularly important in conveyer work – in a store, for example.
Quantities of items in the warehouse decrease and company incomes increase.
You can open the Point of Sale window by clicking the
icon. To fill in the window
do the following:
The Location and User fields are filled in only once when the corresponding user
starts work and they remain filled after the operation is saved. This is done to
optimize the work time in the location.
If you are working with lots, you must enter a lot number in the window. In the upper
part of the window you can trace the serial number, the best before and production
dates and the position of each lot in the warehouse.
- 48 -
2.14. Touch Screen
The Touch Screen is a highly specialized trade module, in which you work without a
mouse, keyboard and any additional controls. All operations are extremely simplified
and are done by touching the screen. The module is essentially the same as Sales
and it works faster. This facilitates the process and is particularly important in
conveyer work – in a store, for example. Quantities of items in the warehouse
decrease and company incomes increase.
The Touch Screen window (click on the
icon to open it) can be used on Touch
Screen monitors and sales can be processed without using the mouse and keyboard.
All necessary functional keys are displayed as buttons and can be pressed directly on
the monitor.
To fill in the Touch Screen window do the following:
Fill in the items ordered by the customer in the Name field. To select an item do one
of the following:
- type the initial letters of the item – the field will be filled with the first item,
containing the initial letters;
- press the
button in the window;
- type the code of the item in the text field;
- type the barcode of the item in the text field;
In the Quantity column fill in the sold quantity. Press Enter to confirm. The amount
will be automatically filled by the application. Use the same method to enter data
about each item purchased by the client. Press the Finish button to save the
document.
By default, the application uses Default partner as partner or company, purchasing
items.
The first location entered in the database is the location from which default quantities
are taken. Sales cannot be performed unless such location exists.
The active user is filled in automatically as User.
2.15. Document Transformation
Use the Document Transformation window (keyboard shortcut Ctrl+T) for quick
and easy document type transformation. For example, you can transform a Request
document into a Purchase document or an Offer document into a Sales document.
This allows you to use the system more efficiently. A typical example is when a
customer orders items from your company. You create an Order document and you
can create an Offer document to attract the customer. The offer can be created based
on the order by using transformation. If the customer approves the offer, you can
use the Document Transformation option again to create a Proform Invoice
document. The proform invoice can be transformed into a Sales document upon
payment and then into a Warranty Card. You enter document data only once in this
process and the other documents are created very quickly
- 49 -
From the drop-down list Transform from select the document type you will be
transforming and from the drop-down list to select the transformed document type.
In the Sort by area you can choose how to sort the list of issued documents – by
document number, by partner, by date or by amount.
The Delete source document is active only for management operations - offer, order, proform invoice and request. If you check this option, the old document will be
deleted from the database after the document transformation is completed.
2.16. Note
To open the Note window, click on the Note button in any operation window. You can
use it to add any text to an operation. The note can be an explanation to a column in
the operation or can be a supplement to the operation itself.
If Permanent Note is
checked, the note will be
added
to
all
subsequent
operations of the same kind,
which are performed without
closing the window of the
corresponding operation. You
must enter a new note, if you
open a different operation or
close and open again the
same operation.
2.17. Select Lot
The Select Lot window is displayed only when you work with lots.
You can use it to enter quantities of lots in sales, transfer, waste, write-off, consign
and debit note operations.
- 50 -
The window contains the following information: name of the lot, item price, item serial
number, best before and production dates, the position of each lot in the warehouse,
items in stock in each lot and quantity used in the operation.
Use the Quick Search option to find lots faster by typing parts of their names.
The Select Lot window is displayed when you enter items and quantities in operations. By default, the quantity is allocated by chronology of lots.
3. Edit
3.1 Partners
Use the Partners window (keyboard shortcut Ctrl+P) to select a partner, to add a
new partner and to edit the partners list. To select a partner, click on the
corresponding row in the table. Click the OK button to confirm. Click the Cancel
button to exit without selecting a partner.
- 51 -
You can use the New, Edit and Delete buttons to add a new partner or to edit and
delete an existing one. Before you actually edit or delete an existing partner, you will
be prompted to confirm the action. The Locator button allows you to perform an
extended search for partners by providing a keyword to be used as a match. Use the
Print button to print the list of partners
In the Sort by area you can choose how to sort the list of partners – by company
name, by code or by contact person.
The Quick Search option allows you to quickly position on a particular partner by
typing all or part of his name. If filter is checked, the application will display only
partners whose names start with the symbols you entered.
If the groups option is enabled the structure of the partners groups and subgroups is
displayed.
New Partner
Use the New Partner window to add new partners to the list.
Click on the Basic
Information tab to
enter basic details
about the partner:
code,
company,
contact name, city,
address, phone, fax,
UIC and VAT number.
If you select The
partner
is
frequently
used,
sort before others
in the State field, the
partner will appear at
the top of the list
regardless
of
his
code, name and the
selected sorting order.
Click on the Additional Information tab to enter additional details about the
partner: e-mail, bank
name,
BIC,
IBAN,
bank VAT account,
price group, discount
partner type and card
number.
The
price
group
determines
which
price list the partner
belongs to. You can
define up to 10 price
groups.
Use
the
Change Prices module to define prices.
- 52 -
You can specify the Partner Type in the last drop-down list: a client, a supplier or not
specified.
Click on the Groups tab to create a structure of groups and subgroups. The newly
added partner will become a part of the currently selected group.
You can add subgroups to already created groups. To do so, select an existing group
and click on the New button. The new group will become a subgroup of the selected
one if
is checked.
To edit a particular group, select it and click the Edit button.
To delete a particular group, select it and click the Delete button. You will be
prompted to confirm before the actual deletion takes place. You cannot delete any
groups that contain partners.
3.2 Items
Use the Items window (keyboard shortcut Ctrl+S) to select an item, to add a new
item and to edit items list. To select an item, click on the corresponding row in the
table. Click on the OK button to confirm. Click on the Cancel to exit without selecting
an item.
If you are performing an operation (Sales, Purchases, etc.) and you wish to select
more than one item, hold down the Ctrl key and click on desired items. You can select
adjacent items by holding down the Shift key and using the up and down arrow keys.
- 53 -
You can use the New, Edit and Delete buttons to add a new item or to edit and
delete an existing one. Before you actually edit or delete an existing item, you will be
prompted to confirm the action. You can open the Edit window by double-clicking on
the desired item, as well. The Locator button allows you to perform an extended
search for items by providing a keyword to be used as a match. Use the Print button
to print the list of items.
In the Sort by area you can choose how to sort the list of items – by code, by name,
by measure, by purchase price, by sale price or by quantity.
The Quick Search option allows you to quickly position on a particular item by typing
all or part of its name. If filter is checked, the application will display only items
whose names start with the symbols you entered.
If the groups option is enabled the structure of the items groups and subgroups is
displayed.
New Item
Use the New Item
window to add new
items to the list.
Click on the Basic
Information tab to
enter basic details
about the item: code,
name, barcode, catalogue and description.
Click on the
button
to enter additional
barcodes of the item.
Each item can be
- 54 -
associated with three catalogue numbers. If you select Frequently used in the State
field, the item will appear at the top of the list regardless of its code, name and the
selected sorting order.
Click on the Additional Information tab to enter additional details about the item:
basic measure, transformation ratio, additional measure, minimum quantity, nominal
quantity, item type and VAT group. The Basic Measure and Additional Measure
fields are initialized with a list of the most commonly used measure units. You can
type a different measure unit in the field and it will be automatically added to the list.
Ratio determines the correlation between the basic and the additional measure – the
number of bottles in a crate or the number of boxes in a stack, for example.
Minimum Quantity predefines the critical minimum quantity of the item. Item Type
determines whether the item is “standard” or it has a “fixed price”. VAT of items with
fixed prices is fixed to retail prices in Sales and Purchases and does not depend on the
partner’s price group. Selecting an item type allows you to generate grouped reports
by type. The VAT Group field contains a list of all VAT groups in the application, from
which you can select a VAT percent for the item
- 55 -
Click on the Prices tab to enter all sale prices of the item. You can enter values for
Wholesale Price, Retail Price, Price Group 1, Price Group 2, Price Group 3, Price Group
4, Price Group 5, Price Group 6, Price Group 7 and Price Group 8.
Click on the Groups tab to create a structure of groups and subgroups. The newly
added item will become a part of the currently selected group.
You can add subgroups to already created groups. To do so, select an existing group
and click the New button. The new group will become a subgroup of the selected one
if
is checked.
To edit a particular group, select it and click the Edit button.
To delete a particular group, select it and click the Delete button. You will be
prompted to confirm before the actual deletion takes place. You cannot delete any
groups that contain items.
3.3 Users
Use the Users window to select a user, to add a new user and to edit users lists. To
select a user, click on the corresponding row in the table. Click on the OK button to
confirm. Click Cancel to exit without selecting a user.
You can use the New, Edit and Delete buttons to add a new user or to edit and
delete an existing one. Before you actually edit or delete an existing user, you will be
prompted to confirm the action. The Locator button allows you to perform an
extended search for users by providing a keyword to be used as a match. Use the
Print button to print the list of users.
In the Sort by area you can choose how to sort the list of users – by name, by code
or by user level.
- 56 -
The Quick Search option allows you to quickly position on a particular user by typing
all or part of his name. If filter is checked, the application will display only users
whose names start with the symbols you entered.
If the groups option is enabled the structure of groups and subgroups of the users list
is displayed.
New User
Use the New User window to add new users to the list.
- 57 -
Click on the Basic Information tab to enter basic details about the user: code, user
name, password, password confirmation and user level. If you select The user is
frequently used, sort before others in the State field, the user will appear at the
top of the list regardless of his code, name and the selected sorting order.
The first user that is added to the list automatically receives Owner access level. The
access level for other users can be selected from a predefined list and may be any of
the following: User, Manager, Administrator and Owner.
The Location field contains a list of all locations in the application. Only owners and
administrators can select a location. The Location and User fields are locked when a
user is logged in and all operations for other locations become automatically invisible.
The Company used field contains a list of all companies entered in the application.
You can choose the name of the company on behalf of which documents will be issued
– it can be different from the default company. Documents are issued by the active
user and not the one performing the operation.
Click on the Groups tab to create a structure of groups and subgroups. The newly
added user will become a part of the currently selected group.
You can add subgroups to already created groups. To do so, select an existing group
and click the New button. The new group will become a subgroup of the selected one
is checked.
if
To edit a particular group, select it and click the Edit button.
To delete a particular group, select it and click the Delete button. You will be
prompted to confirm before the actual deletion takes place. You cannot delete any
groups that contain users.
3.4 Locations
Use the Locations window to select a location, to add a new location and to edit locations list. To select a location, click on the corresponding row in the table. Click the
OK button to confirm. Click Cancel to exit without selecting a location.
- 58 -
You can use the New, Edit and Delete buttons to add a new location or to edit and
delete an existing one. Before you actually edit or delete an existing location, you will
be prompted to confirm the action. The Locator button allows you to perform an
extended search for locations by providing a keyword to be used as a match. Use the
Print button to print the list of locations.
In the Sort by area you can choose how to sort the list of locations – by name or by
code.
The Quick Search option allows you to quickly position on a particular location by
typing all or part of its name. If filter is checked, the application will display only
locations whose names start with the symbols you entered.
If the groups option is enabled the structure of groups and subgroups of the locations
list is displayed.
New Location
Use the New Location window
to add new locations to the list.
Click on the Basic Information tab to enter basic
details about the location:
code, name and price group. If
you select The location is
frequently used, sort before
others in the State field, the
location will appear at the top
of the list regardless of its code,
name and the selected sorting
order.
- 59 -
The Price Group determines which price list will be applied to the location, when no
price group is specified for the partner. You can define up to 10 price groups. Use the
Change Prices module to define prices.
Click on the Groups tab to create a structure of groups and subgroups. The newly
added location will become a part of the currently selected group.
You can add subgroups
to
already
created
groups. To do so,
select
an
existing
group and click the
New button. The new
group will become a
subgroup
of
the
selected one if
is
checked.
To edit a particular
group, select it and
click the Edit button.
To delete a particular
group, select it and
click
the
Delete
button. You will be prompted to confirm before the actual deletion takes place. You
cannot delete any groups that contain locations.
Document Numbers by Locations
Use the Document Numbers by Locations window to assign numbers to documents
of each location. The window is active when the “Document numeration by locations”
option is enabled. To open it, click on the Numeration button in the Locations
window.
By default, the application assigns
document numbers at intervals of 100
000 and sorts locations in alphabetic
order. The Default location is the last in
the list. When you enter a new location,
it takes its place in the list. The
application will offer you to assign a
document number equal to the sum of
100 000 and the first number of the
default location. You can edit the next
document number, but numbers must
be in a sufficiently large interval. The
application will display a warning for
possible number overlapping in case the
interval is less than 100 000.
Note: To prevent confusion in
document numbers by locations, enter
all locations and then enable the option
to assign initial numbers by locations.
- 60 -
After that you can perform operations.
Click on the Next button to move on to the next location. Click on the Back button to
go back to the previous location. To save changes click on the Finish button. Click
Cancel if you wish to exit without saving changes.
3.5 Currencies
Use the Currencies window to select a currency, to add a new currency or to edit the
list of currencies.
You can use the New, Edit and Delete buttons to add a new currency or to edit and
delete an existing one. Before you actually edit or delete an existing currency, you will
be prompted to confirm the action. The Locator button allows you to perform an
extended search for currencies by providing a keyword to be used as a match. Use the
Print button to print the list of currencies.
In the Sort by area you can choose how to sort the list of currencies –by name, by
exchange rate or by description.
The Quick Search option allows
you to quickly position on a
particular currency by typing all or
part of its name. If filter is
checked,
the
application
will
display only currencies whose
names start with the symbols you
entered.
New Currency
Use the New Currency window to
add new currencies to the list.
- 61 -
Fill in the currency name and exchange rate in the first two fields. The Description
field is optional.
3.6 VAT Groups
Use the VAT Groups window to add a new VAT group or to edit the list of VAT
groups.
You can use the New, Edit and Delete buttons to add a new VAT group or to edit and
delete an existing one. Before you actually edit or delete an existing VAT group, you
will be prompted to confirm the action. The Locator button allows you to perform an
extended search for VAT groups by providing a keyword to be used as a match. Use
the Print button to print the list of VAT groups.
In the Sort by area you can choose how to sort the list of VAT groups – by code, by
name or by value.
The Quick Search option allows you
to quickly position on a particular
VAT group by typing all or part of its
name. If filter is checked, the
application will display only VAT
groups whose names start with the
symbols you entered.
New VAT Group
Use the New VAT Group window to
add new VAT groups to the list.
Fill in the code, name and value (%)
of the VAT group in the text fields.
- 62 -
3.7 Items Locator
Use the Locator window to search items by any symbol or by a combination of
symbols. Click on the Search button to perform the search in all items in the lists.
Matching symbols are colored in red.
To find the group containing the item, select the corresponding row and click on the
OK button.
Click on the Cancel button to exit the Locator.
3.8. Payments
Use the Payments window (keyboard shortcut Ctrl+F11) to view or perform payment operation based on an already issued document.
- 63 -
In the Sort by area you can choose how to sort the list of documents – by document
number, by invoice number, by operation, by partner or by balance.
The Quick Search option allows you to quickly position on a particular document by
typing all or part of the partner’s name or by typing all or part of the document number. If filter is checked, the application will display only documents of partners whose
names start with the symbols you entered or only documents with the corresponding
number.
drop-down list you can choose whether to view all documents or
In the
only paid or unpaid ones.
To perform a payment operation, select the desired document and click on the
Payment button.
You can register payment of the whole amount or part of it. The number of partial
payments related to a given document is unlimited.
In the Payment window you can specify the payment type: cash, cheque, credit card,
voucher. You can specify an end date of the payment. If the Print payment
document option is enabled, the payment will be printed out.
Click the Group payment button for payment of all unpaid documents of the same
type for a specific partner. Select an operation and a partner and click Group payment. You can pay the whole amount or part of it. The amount will be distributed following the order of the documents.
Click on the Edit button to edit a payment. You can change payment due dates and
amounts. You can print the document as well.
Documents paid in cash (full or partial payments) are automatically registered in the
Cash Ledger.
To trace all payments of a particular partner, that are overdue, select any document
of this partner and click on the Notice button. In the Notice window you can specify
a filename and folder in which to save the notice. By default, the filename is
Due_Notice.xls and is saved in the application folder. The file contains all payments of
the partner that are overdue.
3.9 Payment Types
Use the Payment Types window to
enter a new payment type or to edit
or delete an existing one.
Click the New button to add a new
payment type. In the Name field fill
in the name of the payment and in
the Type field select the payment
type: In cash, To bank account, By
card or Other.
- 64 -
To edit a payment type, select the corresponding row and click the Edit button.
To delete a payment type, select the corresponding row and click the Delete button
or press the Delete key.
The default payment types (Cash, Cheque, Credit Card and Voucher) cannot be
deleted or edited.
3.10 Documents
Edit Documents
Use the windows for selection of documents to edit or delete an already performed
operation.
In the first window select the document you wish to edit and click the OK button. If
you wish to delete the entire document, click the Delete button.
In the Sort by area you can choose how to sort the list of issued documents – by
number, by partner, by location or by date.
The Quick Search option allows you to quickly position on a particular document by
typing its number or by typing all or part of the partner’s name. If filter is checked,
the application will display only documents of partners whose names start with the
symbols you entered.
- 65 -
The Partner field allows you to edit the client/company name. You can type a name
or choose one from a list. Press the F4 key or click the
button on the form to
visualize the list.
The Location field allows you to edit the name of the location from which the items
were taken. You can type a name or choose one from a list. Press the F4 key or click
the
button on the form to visualize the list.
The Operator field allows you to edit the name of the user who has performed the
operation. You can type a name or choose one from a list. Press the F4 key or click
the
button on the form to visualize the list.
The Name field allows you to edit the name of a particular item. You can type a name
button on the form to
or choose one from a list. Press the F4 key or click the
visualize the list. To add a new item add a new row to the list by pressing the Enter
key.
You can type a new value in the Quantity field if you wish to modify the current
entry.
To remove a particular row from the document, change its quantity to zero. To delete
the entire document, set all quantities to zero.
Double-click on the document's issue date to modify the current value. The Calendar
window will pop up. You can choose a new date by double-clicking it or by clicking the
OK button. When you close the Calendar the selected date will replace the old one in
the Edit window.
Press the F9 key or click the Save button to save all changes.
Edit Production
Production and complex production cannot be edited. They can only be deleted.
Edit Consign
In the Consign, Sale on Consignment and Return on Consignment operations
you can edit only the user who has performed the operation, as well as the items
quantity.
Edit Stocktaking
You can type a new value in the Difference field if you wish to modify the current
entry. You must enter the difference between the old quantity and the quantity entered in stocktaking.
When you are editing stocktaking you can change prices of items. This operation deletes the old prices and saves the new ones. When you are working with lots you cannot change prices, because the edited row would be considered a new lot.
Warning!
Editing of prices and discounts affects only the current document. This does not
change prices of items!
Note: You can edit sales documents, purchase documents, debit notes and credit
notes only in case invoices have not been issued for them.
- 66 -
3.11 Merge Documents
Use the Merge Sales and Merge Consignments windows to merge two or more
documents.
If you wish to select more than one document, hold down the Ctrl key and click on
desired documents. You can select adjacent documents by holding down the Shift key
and using the up and down arrow keys. The merged document is saved under the
largest number of all documents and has the date of the last issued document.
Sales documents that are invoiced are colored in red. If you wish to merge an
invoiced document, you must void its invoice first.
Note: Documents can be merged only if they are issued to the same partner and for
the same location.
3.12 Reprint Documents
You can use the reprint windows to reprint existing operations.
In the Select Document window select the document you wish to reprint and click
ОK.
After you select the document that will be reprinted, you will be prompted to confirm
your choice. You will be able to preview or directly print the document, depending on
your Print Settings.
Preview Document
Use the buttons in the upper left corner to select, zoom and export documents.
- 67 -
Click the
button to go to the first page.
Click the
button to go to the previous page.
Click the
button to go to the next page.
Click the
button to go to the last page.
Click the
button to print the document.
Click the
user.
button to refresh the document in case it has been changed by another
Click the
button to export the document in one of the following formats: Adobe
Acrobat, Excel, Word or Rich Text Format.
To export the document, you must enter a filename and select the desired format.
Click the
Click the
button to zoom the document from 25% to 400%.
button to exit.
3.13 Administration
3.13.1 Change Active User
Use the Change Active User window (keyboard shortcut Ctrl+0) to change the user
currently logged in the application. Select a user name from the drop-down list User
name and enter a valid password in the Password field.
- 68 -
Click OK to confirm.
The application logs in the new user and automatically turns on his personal settings.
3.13.2 Input Company Data
Use the Input Company Data window to enter data about companies, on behalf of
which documents will be issued.
In the Sort by area you can choose how to sort the list of locations – by company, by
code or by contact name.
The Quick Search option allows you to quickly position on a particular location by
typing its number or by typing all or part of its name. If filter is checked, the
application will display only locations whose names start with the symbols you
entered.
The Locator button allows you to search company data by entering a keyword.
Use the New button to enter a new location.
- 69 -
When Default Company is checked, the current company becomes active and is
colored in blue. All documents will be issued on behalf of this company. The name of
the default company is visualized in the Status Bar after you close the Input
Company Data window.
Use the Edit button to edit data of an existing location
Use the Delete button to delete a selected location. You cannot delete a location in
case operations have been performed in it.
Use the Print button to print data of an existing location.
3.13.3 Change prices
Use the Change
Prices
window
(keyboard shortcut
Ctrl+R) to initially
enter or edit sale
prices in all price
groups. The prices
entered
are
the
same
for
all
locations. The different price groups
refer to customers,
for which a price
group
has
been
defined (By default,
Retail prices are
applied to customers, for which no
price
group
has
been defined).
- 70 -
Click the Apply button to save changed prices. Click Cancel to exit without saving
changes.
Click on the Scheme button to enter the appreciation percent for the selected price
group.
You can enter the appreciation percents for the Purchase price and Wholesale price in
the Price Scheme window, thus obtaining prices of selected price groups.
3.13.4 Revaluation
Use the Revaluation window to automatically change prices of items and services. To
change prices of a particular item or group of items, select the corresponding fields by
clicking on the
button or by pressing the F4 key. Check Subgroups if you wish to
include the items from the subgroups of the selected group. Select a revaluation
scheme by doing the following:
•
Select prices, which will be changed.
•
Define the type of change - "Added to", "Multiplied by", "Subtracted by" or
"Divided by".
•
Enter the numeric value of the revaluation in the corresponding field.
- 71 -
Click the Apply or OK button to save changes. Click Cancel to exit without saving
changes.
The application allows you to perform revaluation during operation. In this case
you can change only the sale and purchase prices of the items, which are part of the
operation.
Check Apply revaluation to items in stock to change prices of other items or price
groups. Prices will change automatically. Click the OK button to save changes for all
items in stock.
3.13.5 Price Rules
Use the Price Rules window to enter rules about particular actions, depending on the
sales case.
You should use the Price Rules window only to create rules. To apply them, you must
save the Sales operation.
To activate work with price rules, you must make the corresponding changes in
Operation Settings.
Click the New Rule button to create a rule. The Price Rules Wizard will open. Select
a rule condition by double-clicking it. A separate window, where you can enter criteria,
opens up for each condition. The rules will be applied only if the selected conditions
are fulfilled. You can choose between the following conditions: partner, partners
group, location, locations group, user, users group, item, items group, time period in
hours, time period by dates, document amount, partner’s turnover, document
quantity and amounts due by partner, days of the week, unpaid amount with expired
due date, content of item in the operation, content of item of group in the operation.
After you select a condition, click the Next button to move on to the next step.
- 72 -
Step 2 contains actions, which will be done, if the conditions from Step 1 are fulfilled.
To select an action double-click on it and enter the criteria.
- 73 -
You can choose between the following actions:
•
Stop operation – stop the sales operation if, for example, you do not wish to
sell items to a partner whose liabilities are too many;
•
Stop price rules - if more than one price rule is active, this rule stops all other
rules with lower priority and they are not executed;
•
Message - display a message, notifying you of certain conditions. The message
can contain any text you enter from the keyboard;
•
Send e-mail - send an e-mail to a specified address;
•
Add item on promotion - add an item at promotional price to each item used in
the operation. You can select the quantity and the promotional price of the
item;
•
Change price - change prices of all items used in the operation to a set value,
to prices from a price group or to the last sale price for the partner;
•
Change discount - change discount of all items used in the operation.
After you select an action, click the Next button to move on to the next step. Click
the Back button in case you want to go back and edit a condition.
You can set exceptions to the rule in Step 3 of the Price Rules Wizard. This step is
optional.
- 74 -
You can choose between the following exceptions: partner (for example, if the partner
belongs to a group, but is not a particular partner of this group); partner group (for
example, if the partner belongs to a particular group, but not to a subgroup of this
group); location; location group; user; user group; item and item group.
Click again Next to move on to the next step.
Enter rule name and status in Step 4.
Click the Finish button to add the rule in the Price Rules window.
You can edit rules in the Change Rule window by following steps one through four.
To copy a rule, select it from the list and click on the Copy Rule button. This will open
the Price Rules Wizard. You can change the conditions and criteria of the rule if
necessary by following steps on through four. To leave the rule unchanged, just click
the Next button.
Use the Delete Rule button to delete a rule. Select the rule and click on the button.
You will be prompted to confirm before the actual deletion takes place.
Use the arrow buttons to sort rules by priority.
Only checked rules are active and will be executed upon saving of an operation. You
can activate the rules in the Price Rules window by double-clicking on them.
- 75 -
Click the Apply button to save new rules and changes without closing the window.
Click the OK button to save changes and close the window. Click Cancel to close the
window without saving any changes.
3.13.6 Stocktaking
To open the Stocktaking window click the
Ctrl+J.
icon or use keyboard shortcut
You can select the location, user and item following the same steps as in any other
operation.
In the Quantity column fill in the number of items in stock (as counted at that
particular time). The Availability column displays the current quantity of items, as
calculated by the application. Press Enter to move on to the Purchase Price column
and fill in the purchase price of the item (if change is necessary). Press Enter once
again to confirm and move on to the Sale Price column and fill in the sale price of the
item (if change is necessary). The application automatically fills in the Amount
column. Use the same method to enter data about each item for which stocktaking
will be performed
If you are working with lots, you must enter a lot number in the window. If you are
using this method, the application will split the quantity by lots, after you select an
item. To change the quantity in a selected lot, enter the counted quantity in the
corresponding column. To change the price, lot or item data, enter “0” in the quantity
column of the corresponding lot and select the item in a new row. Enter the new
values in the corresponding columns. Thus, the old lot will be replaced by the new
one.
You can use the Stocktaking operation to enter initial states of items.
- 76 -
When you save the operation, the application may offer you to print the stocktaking
document, depending on the Print Settings. If the Payment window is enabled from
the application settings, you can define the payment type and whether the corresponding document (or part of it) is paid or remains due.
3.13.7 Total Production
Use the Total Production function to produce all recipes with negative quantities in
the warehouse, without performing the Production operation. This allows you to sell
recipe items, even if you do not have enough of them in stock.
You can use total production only if the following special settings are enabled:
1. Work method: Average price or Last purchase price;
2. Work with negative quantity: Enabled;
3. Auto production: Disabled.
The Total Production function works as follows:
1. Checks database for recipe items with negative quantities;
2. Produces as many recipes items as necessary to equalize their quantity to zero
for all created locations;
3. Saves all operations in the
Reports/Production/Production;
database,
so
they
can
be
tracked
in
4. In case automatically produced recipes contain other recipes, they will not be
produced, but will only decrease with the number necessary for production of
the main recipe. If their quantity becomes negative, another total production
must be performed, i.e. for each included level a new total production must be
performed.
Note: The Total Production function affects only normal production. It does not
affect complex production.
3.13.8 Operations Exchange
Use the Operations Exchange window to exchange operations between databases.
For that purpose, certain operations must be exported on the emitting computer by
setting an initial and end number of the operations or by setting an initial and end
date for each type of operation.
Enable the Copy file from USB Flash or floppy disk option when copying
operations using these devices. (The application offers you to copy files to floppy disk,
when no USB Flash is found.).
Enable the All operations to be copied as purchases option to copy sales or
writing-off as purchases to the target database.
Click on the Daily export button to copy all operations performed during the day.
During operation export a file named TRANSFER.LOG is created. All selected
operations and the corresponding partners are saved in this file.
- 77 -
You must import the data
from
the
remote
computer after saving
this file. To do so, use
the Import function and
the
application
will
execute the operations
assigned by the emitting
computer.
Enable the Copy file to
USB Flash drive or
floppy disk option when
copying
the
TRANSFER.LOG file using
these devices.
Enable the Copy purchase price from the
exchange
and
Copy
sale price from the exchange options when
prices have been changed.
Notes:
1. The application checks whether the items necessary for the import exist. They are
automatically added, in case they are not found.
2. The application checks whether the partners necessary for the import exist. In case
they are not found, they are automatically added with all data sent during export. (A
partner is considered new if any different symbol is found.)
3. A transfer file can be imported unlimited number of times.
3.13.9 Import Operations
Use the Import Operations
window to import operations from
MS Excel to Microinvest Warehouse Pro.
To import operations do the following:
In the Import file field fill in the
name and path of the Excel file or
click the Browse button to search
for the file. Click the Open button
to open the file that will be
imported. Fill in the Operation,
Partner, Location and User fields
and click on the Next button to
move on to the next step.
- 78 -
In the next window fill in the name of the Excel sheet, containing the data, the first
and last row that will be imported and the names of columns that will be imported.
For example, if you are importing a purchase and the item code is in column C, type
in C next to Item code. The Quantity parameter, as well as one of the Item or Item
code parameters, is required. In case Purchase price and Sale price are left blank, the
application uses the current database prices and fills in “0” in Discount. Click on the
Next button to generate data. A table with the specified data will be displayed. You
can go back and edit the table by clicking on the Back button. Click Next to move on
to the last screen. Click on the Finish button to import the data from MS Excel to the
selected operation in Microinvest Warehouse Pro. For example, if you select
purchase, the data will be imported in the Purchase window, where you can edit it.
Then, you can save the operation by pressing F9 and print the document
3.13.10 Import Items
Use the Import Items window
to import items and partners
from MS Excel to Microinvest
Warehouse Pro. To import
items and partners do the following:
In the Import file field fill in the
name and path of the Excel file or
click on the Browse button to
search for the file. Click on the
Open button to open the file that
will be imported. In the File
Contents section select whether
to import items or partners and
click on the Next button to move
on to the next step.
- 79 -
In the next window fill in the name of the Excel sheet, containing the data, the first
and last row that will be imported and the names of columns in Excel that will be
imported. For example, if you are importing partners and the partner code is in
column B, type in B next to Partner code. The Company parameter is required. All
other parameters are optional. You can go back and select another file by clicking on
the Back button. To move on to the next step, click Next.
You can select in which group to transfer the corresponding item or partner. To do this
you must have already entered groups in the application and created a column with
groups in the Excel file. The Excel file must contain the name or path to the group, in
case it is a subgroup. For example, if the main group is "Beverages" and contains a
subgroup "Soft drinks" and you wish to import item "Coca Cola" in "Soft drinks", you
must fill in “Beverages/Soft drinks” in the group field in the Excel file. If there is no
matching group or if a group is not specified, the items will be transferred in the default group.
Import of items allows you to specify whether a partner or an item is frequently used.
If the “Frequently used” column in the Excel file is filled with "Yes" or "1", the application considers it is frequently used. All other cases are considered as not frequently
used.
From the drop-down list Import mode, you can select how partners and items will be
imported. Import will import all items no matter whether there are codes or names
that already exist. If a partner code in the imported file matches a partner code that
already exists in the application, you can rewrite this data by selecting Replace.
Thus, the application will not import a new partner with the same code, name or UIC.
If you are importing items, all prices, minimum and nominal quantities of items with
the same codes, names or barcodes will be rewritten. If you select Ignore, only items
which have no matches will be imported.
A table with the specified data will be displayed in the Generate preview window.
You can go back and edit the table by clicking on the Back button. Click on the Finish
button to import the data from MS Excel to Microinvest Warehouse Pro.
- 80 -
3.13.11 Export to Accounting
Use this module for automatic accounting of Microinvest Warehouse PRO documents – received invoices, purchases, issued invoices, sales, debit and credit notes, in
Microinvest Delta, Business Navigator or Ajur-L.
Select to which product the import will be done, select the documents you wish to export and select their corresponding period. The application will create an Import.txt
file in its directory. Copy this file in the corresponding directory of Microinvest Delta,
Business Navigator or Ajur-L.
3.13.12 Print Manager
Use the Print Manager window to specify which of the installed printers will be used
for printing of documents. Enter the number of copies that should be printed by each
printer. You can print a single document on several printers at a time.
Click on the Default button to use the standard scheme, in which all documents are
printed by the default printer.
- 81 -
3.13.13 Permissions
Use the Permissions window to limit the access of any user to certain features and
menus of the application. Only owners or administrators can apply any restrictions.
Follow these steps:
In the Operators section select the user to which restrictions will be applied.
The Categories section contains all main menus of the application. Each category
contains its sub-menus classified by pages.
Each menu has two states:
-
Enabled – the menu is visible and accessible
Disabled – the menu is invisible and inaccessible
You can apply restrictions for buttons in the lists, as well. This is similar to applying
restrictions for the menus, where each list contains sub-categories with the
corresponding buttons.
Click the OK button to save changes and close the window. Click Cancel to close the
window without saving any changes. Click Apply to save changes without closing the
window.
3.13.14 Recalculate Average Price
You can use the Recalculate Average Price function only when the corresponding
special setting is selected as a work method.
- 82 -
This function must be used carefully, since this could lead to changes in the incomes
and expenses of the company and this could affect the total profit. It is advisable that
this function is used only by the manager of the company or by the system administrator.
Use this function when the purchase price or the discount in a purchase document has
been edited. This prevents inconformity in the total purchase amounts of items in various reports, due to the fact that the item price has been changed only in the edited
document.
After you select the Recalculate Average Price option from the menu, the application will open the Purchases – Select Document window. Select the edited document and click ОК. The average price of all items in the document will be recalculated
and all amounts will be equalized. For operations performed after the purchase has
been edited, the purchase price will be replaced with the new recalculated price.
4. Reports
In the first window of the report specify the filter criteria and the fields that will be
visualized.
Only rows that are checked
are visualized in the report.
You can choose a filter in each field by doing one of the following:
- type in the whole name in the field;
- use keyboard shortcut F4;
- click the
button;
- 83 -
- type in any part of the name in the field, preceded by "~". For example, if you type
in "~ro" in the item name field, the application will generate a result for all items,
containing "ro" in their names.
You can limit the report to a single criterion or you can apply several criteria at a time.
You can also select sorting criteria for the report.
If you are working with lots, the application will add filters about the lot number,
serial number, best before and production dates and location.
To remove all specified filters, click the Clear button. The report will display all operations without any restrictions.
Click the OK button to generate the report using the specified criteria. Click the Cancel button to exit the window.
Use the buttons in the upper left corner to print or export the report to EXCEL, WORD,
HTML and other standard formats. You can also specify work with several reports at a
time and you can set the report to work in background.
Sales Report
The Sales Report displays the chronological order of sales documents and items,
whereas no grouping or mathematical data processing is done. Thus each document
can be displayed by rows and all documents can be displayed together. You can use
the report to track actual data input by documents, by users, by dates, etc. without
summarizing documents or items. Each row in the documents corresponds to a row in
the report.
Purchases Report
The Purchases Report displays the chronological order of purchase documents,
whereas no grouping or mathematical data processing is done. Thus each document
can be displayed by rows containing the corresponding items. You can use the report
- 84 -
to track actual data input by items, by documents, by users and by dates. Each row in
the documents corresponds to a row in the report.
Recipes Report
The Recipes Report displays the recipe documents by rows, where each raw material
and recipe item is displayed in a separate row. You can use the report to track items
that are used in recipes. Each row in the documents corresponds to a row in the
report.
Production Report
The Production Report displays the production documents by rows, where each raw
material and recipe item is displayed in a separate row. You can use the report to
track actual data input by documents, by users, by dates, etc. without summarizing
documents or items. Each row in the documents corresponds to a row in the report.
Complex Recipes Report
The Complex Recipes Report displays the complex recipes documents by rows,
where each raw material and recipe item is displayed in a separate row. You can use
the report to track items that are used in complex recipes. Each row in the documents
corresponds to a row in the report.
Complex Production Report
The Complex Production Report displays the complex production documents by
rows, where each raw material and recipe item is displayed in a separate row. You can
use the report to track actual data input by documents, by users, by dates, etc.
without summarizing documents or items. Each row in the documents corresponds to
a row in the report.
Transfer Report
Use the Transfer Report to track and control transfer documents. Each row in the
document corresponds to a row in the report. Thus, the report shows items flow from
one location to another.
The transfer report contains data about transferred quantities from one location to
another. It shows the document number, the date and the user, who performed the
operation.
Waste Report
The Waste Report displays waste documents by rows, where each item is displayed
in a separate row. You can use the report to track actual data input by documents, by
users, by dates, etc. without summarizing documents or items. Each row in the
documents corresponds to a row in the report.
Write-off Report
The Write-off Report displays write-off documents by rows, where each item is
displayed in a separate row. You can use the report to track actual data input by
documents, by users, by dates, etc. without summarizing documents. Each row in the
documents corresponds to a row in the report.
- 85 -
Refund Report
The Refund report displays the chronological order of refund documents. The data is
not mathematically processed or grouped. Thus the report can display each separate
document by rows with the corresponding items in it. You can use this report to track
actual data input of refunds. Each row in the documents corresponds to a row in the
report.
Stocktaking Report
The Stocktaking Report displays the stocktaking documents by rows, where each
item is displayed in a separate row. You can use the report to track stocktaking and
data about each item for which stocktaking has been performed. Each row in the
documents corresponds to a row in the report.
Debit Notes Report
The Debit Notes Report displays the debit notes documents by rows, where each
item is displayed in a separate row. You can use the report to track actual data input
by users, by locations, by dates, etc. without summarizing documents or items. Each
row in the documents corresponds to a row in the report.
Credit Notes Report
The Credit Notes Report displays the credit notes documents by rows, where each
item is displayed in a separate row. You can use the report to track actual data input
by users, by locations, by dates, etc. without summarizing documents or items. Each
row in the documents corresponds to a row in the report.
Operations Report
The Operations Report displays the operations documents by rows, where each item
is displayed in a separate row. You can use the report to track rows of a particular
operation or of all operations and to track data about each item in the operation. Each
row in the documents corresponds to a row in the report.
Consignments Report
The Consignments Report displays the item flow (consigned, reported and returned
items) by documents. Each row in the document shows the corresponding item,
prices, dates, quantities and amounts. You can use the report to track consigned
items flow, as well as all consignment operations.
In the “Operation” drop-down list select the operation that will be visualized in the
report: Consign, Sales on Consignment, Return on Consignment.
Consignment Turnover Report
The Consignment Turnover Report is a summarized consignment report, containing
three columns about each item – consigned, reported and returned. You can use the
report to track items profile. Each item is displayed in a separate row and each
column shows the quantity in the corresponding operation. You can use the report to
track items flow and their availability in the warehouse or by partners. You can also
check the current state of items for a particular partner.
- 86 -
Amounts Due by Consignees Report
The Amounts Due by Consignees Report is a summarized report by partners. It
shows the amounts due by each consignee for the remaining consigned items. You
can use the report to track amounts due by partners. Each partner is displayed in a
separate row of the report.
This report contains data about partners, to which items were consigned. It shows the
location from which the items were taken, the user, who has performed the operation
and the amount of the remaining quantity.
Orders Report
The Orders Report displays items ordered by customers. The items are divided by
rows and by documents. You can use the report to track actually ordered items and
you can filter the data by users, partners and dates. Each row in the order
corresponds to a row in the report.
Offers Report
The Offers Report displays items offered to customers. The items are divided by
rows. You can use the report to track actually offered items in documents and you can
filter the data by users, partners and dates. Each row in the offer corresponds to a
row in the report.
Proform Invoices Report
The Proform Invoices Report displays items included in proform invoices. Each row
in the report displays an item and its price, quantity, amount and date of the
operation. You can use the report to track documents and you can filter the data by
users, partners and dates. Each row in the proform invoice corresponds to a row in
the report.
Requests Report
The Requests Report displays items included in requests. The items are divided by
rows and by documents. You can use the report to track actually requested items and
you can filter the data by users, partners and dates. Each row in the request
corresponds to a row in the report.
Warranty Cards Report
The Warranty Cards Report displays items for which warranty cards have been
issued. The items are divided by rows and by documents. You can use the report to
track issued warranty cards and you can filter the data by users, partners and dates.
Each row in the warranty card corresponds to a row in the report.
Recent Reports
Use Recent Reports for quick access to the last reports that have been generated.
The application places a report in this menu, after it is displayed on the screen. When
you activate a report from the Recent Reports menu, it will be displayed with the
same filters that have been applied before.
Partners Report
Use the Partners Report to print a detailed list of partners. You can use this report
to generate lists of routes, cities and regions and to print tax numbers of partners.
- 87 -
The report shows all fields of the partners list and can be sorted by different criteria
(name, code, etc.).
Items Report
Use the Items Report to print a detailed list of items, including prices, measures and
codes. You can use this report to generate price lists, lists for stocktaking, etc. The
report shows all fields of the items list and can be sorted by item names or item
codes.
Users Report
Use the Users Report to print a detailed list of users, including their access level and
additional data. The report shows all fields of the users list and can be sorted by
different criteria (name, code, etc.).
Locations Report
Use the Locations Report to print a detailed list of locations. You can use this report
to generate lists of routes, cities and regions. The report shows all fields of the
locations list and can be sorted by different criteria (name, code and access level).
Currencies Report
The Currencies Report displays all currencies and their current exchange rates. You
can use this report to check the current state of currencies and to print the exchange
rates of the day.
Items Flow Report
The Items Flow Report is a mathematical summarizing of item quantities by
operations. The current quantity for each operation is defined in a separate column for
each item. You can use this report for summary tracking of all operations. The
quantity in the report is the item quantity in all selected operations. Each item is
displayed on a separate row in the report for each location.
Manager’s Reports
The Manager’s Reports
is a set of the most
useful reports for analysis of the current state
of the company and the
location. You can use
these reports to track
the current balance of
the company, the daily
incomes, the reports by
users, the turnover, etc.
Each report is generated
for the current date (you
cannot specify a date)
and contains the essential data about the business activity
- 88 -
The Manager’s Reports window contains the most frequently used reports for the
day, divided in categories.
To generate a report, select the desired category and report and click on the Search
button.
The Manager’s Reports window contains five main report groups – payments,
amounts due, financial, turnover and other, which give you a precise and direct
information about the most frequently tracked business processes:
Payments
This report displays information about the three payment types for the corresponding
day. It summarizes separately the received funds:
- Cash payments for the day,
- Day payments via bank transfer,
- Card payments for today,
- Other payments for today.
Amounts due
This report displays information about unpaid or partially paid documents by customers and/or suppliers:
- Amounts due as of today,
- Amounts due as of the current month,
as well as
- Overdue payments
Financial
This report displays information for the corresponding day:
- Sales incomes for the day,
- Other incomes for the day – payments and incomes, registered in the Cash Ledger,
- Total incomes for the day,
- Purchase expenses for the day,
- Other expenses for the day – payments and expenses, registered in the Cash Ledger – materials, salaries, rents, etc.,
- Total expenses for the day.
Turnover
This report displays information about the net incomes in cash, via bank transfer and
via POS terminal for the corresponding day:
- Day turnover,
- Day turnover by users,
- Amounts of the fully paid documents.
Other
- Application log,
This report displays information about document editing and shows the document type
and number, the date and time of editing and the user, who performed it.
Items in Stock Report
This report displays quantities of items in stock by locations, purchase and sale prices,
as well as purchase and sale amounts. In the Report type specify the contents of the
- 89 -
report. Stocktaking with quantity displays only quantities and an empty column
"Counted". Stocktaking without quantity displays only the column "Counted".
Brief displays only item quantities
Availability as of Report
The Availability as of Report displays availability of items as of a selected date.
Microinvest Warehouse Pro recalculates quantities by adding operations, in which
items are taken in (purchase, return on consignment, etc.) and subtracting
operations, in which items are taken out (sale, waste, write-off, etc.). The result is the
availability in the warehouse as of the selected date.
List of Items Report
The List of Items Report displays a list of items by codes and names.
Invoiced Items Report
The Invoiced Items Report displays all items, which are part of issued or received
invoices, depending on the selected operation filter. The report contains information
about the invoice number, the location of the operation, the partner, who has received
the invoice, the operator who has performed the operation, the name and quantity of
the item, the purchase and the sale price.
Sales / Purchases per Items Report
The Sales / Purchases per Items Report displays information about sales or
purchases of items (depending on the filter). It shows the date, the item, barcodes,
the measures, the sale or purchase amount and quantity, the location and the user,
who performed the operation.
Operations per Period Report
The Operations per Period Report contains information about performed operations
– sales, purchases, waste or stocktaking (depending on the filter) for particular
months or days. It shows the name and code of items, the location of the corresponding operation and the quantities for the corresponding month or day.
Grouped Operations Report
The Grouped Operations Report calculates the total quantities and amounts of
items in a selected operation, grouped by item, partner, location or user, depending
on the applied filter. The filter for items, locations, users and partners has two fields in
which you must specify the group and the name of the list.
Grouped Transfer Report
The Grouped Transfer Report calculates the total quantities and amounts of all
items, which are part of the transfer operation. The report contains data about transferred items from and to locations. It displays the quantity, the amount, the VAT and
the total amount of items.
Most Profitable Items Report
The Most Profitable Items Report contains data about sold items and the
generated profit in descending order. It shows the name, code and barcode of the
item, the date and location (depending on the applied filter) and the company that
generated the profit.
- 90 -
Best Selling Item by Amount Report
The Best Selling Item by Amount Report contains data about sold items and their
total sale price. It shows the name, code and barcode of the item, the date, the
location, the company and the user who performed the operation.
Best Selling Item by Quantity Report
The Best Selling Item by Quantity Report contains data about sold items and their
total quantity. It shows the name, code and barcode of the item, the date, the location, the company, the user who performed the operation and the quantity that has
been sold.
Items Below Minimum Quantity Report
The Items Below Minimum Quantity Report contains data about items with
quantities below the ones set as minimum in the warehouse for them. It shows the
name, code and barcode of the item, the item group, the availability as of the time
being, the minimum quantity and the location.
Minimum Quantities Set Report
The Minimum Quantities Set Report contains data about minimum quantities set
for items. It shows the name, code and barcode of the item, the item group and the
minimum quantity.
Balance of Items Report
The Balance of Items Report calculates the total quantity of items by operations
and displays the difference between this quantity and the quantity of items in stock.
The Balance of Items Report contains data about performed operations (depending
on the applied filter) by items, users, partners or locations (depending on the applied
filter). It shows the quantity used in the specified operation, the total availability at
the location and the difference between the quantity in stock and the quantity used in
the operation.
Sales by Partners Report
The Sales by Partners Report contains data about sale amounts of specified
partners. It shows the partner’s name, the total quantity and the sale amount of the
operation. The report groups data by partners thus showing each partner on a single
row.
Purchases by Partners Report
The Purchases by Partners Report contains data about purchase amounts of
specified partners. It shows the partner’s name, the total quantity and the purchase
amount of the operation. The report groups data by partners thus showing each
partner on a single row.
Partners by Profit Report
The Partners by Profit Report contains data about profits of specified partners. It
shows the partner’s name and the profit amount for the selected period. The report
groups data by partners thus showing each partner on a single row.
- 91 -
Partners by Turnover Report
The Partners by Turnover Report contains data about turnovers of specified
partners. It shows the partner’s name and the turnover for the selected period. The
report groups data by partners thus showing each partner on a single row.
Sales by Locations Report
The Sales by Locations Report contains data about sale amounts of specified
locations. It shows the name of the location, the total quantity and the sale amount of
the operation. The report groups data by locations thus showing each location on a
single row.
Purchases by Locations Report
The Purchases by Locations Report contains data about purchase amounts of specified locations. It shows the name of the location, the total quantity and the purchase
amount of the operation. The report groups data by locations thus showing each
location on a single row.
Locations by Profit Report
The Locations by Profit Report contains data about profits of specified locations. It
shows the name of the location and the profit amount for the selected period. The
report groups data by locations thus showing each location on a single row.
Locations by Turnover Report
The Locations by Turnover Report contains data about turnovers of specified
locations. It shows the name of the location and the turnover for the selected period.
The report groups data by locations thus showing each location on a single row.
Sales by Users Report
The Sales by Users Report contains data about sale amounts of specified users. It
shows the user’s name, the total quantity and the sale amount of the operation. The
report groups data by users thus showing each user on a single row.
Purchases by Users Report
The Purchases by Users Report contains data about purchase amounts of specified
users. It shows the user’s name, the total quantity and the purchase amount of the
operation. The report groups data by users thus showing each user on a single row.
Users by Profit Report
The Users by Profit Report contains data about profits of specified users. It shows
the user’s name and the profit amount for the selected period. The report groups data
by users thus showing each user on a single row.
Users by Turnover Report
The Users by Turnover Report contains data about turnovers of specified users. It
shows the user’s name and the turnover for the selected period. The report groups
data by users thus showing each user on a single row.
- 92 -
Sales by Amount Report
The Sales by Amount Report contains data about performed sales by total amounts
of the corresponding document. It shows the document date and number, the partner
and the sale amount.
Purchases by Amount Report
The Purchases by Amount Report contains data about performed purchases by total amounts of the corresponding document. It shows the document date and number,
the partner and the purchase amount.
Issued Invoices Report
The Issued Invoices Report contains data about sales, for which invoices were
issued. It shows the date and number of the invoice, the date and number of the
document, the partner, the location, the user who issued the document, the person
who received the invoice and the total amount.
Received Invoices Report
The Received Invoices Report contains data about purchases, for which invoices
were received. It shows the date and number of the invoice, the date and number of
the document, the person who received the invoice and the total amount.
Debit Notes Report
The Debit Notes Report contains data about invoices, for which notes were issued.
It shows the date and number of the note, the number of the invoice, the partner, the
location, the user, who issued the document, the payment type and the total amount.
Credit Notes Report
The Credit Notes Report contains data about invoices, for which notes were issued.
It shows the date and number of the note, the number of the invoice, the partner, the
location, the user, who issued the document, the payment type and the total amount.
Payments by Documents Report
The Payments by Documents Report contains data about documents – all or of a
single operation (depending on the applied filter), that are fully and/or partially paid.
It shows the paid document, the date, the operation, the partner, the payment type,
the amount due, the balance, income and expense.
Payments by Partners Report
The Payments by Partners Report contains data about payments by customers and
suppliers. It shows the date, the operation type, the payment type, the amount due,
the balance, the income and the expense.
Cash Ledger
The Cash Ledger Report contains data about all records in the cash ledger. It shows
the operation type, the location, the income or the expense.
- 93 -
Payment Due Dates Report
The Payment Due Dates Report contains data about unpaid documents and
incomes from partners. It shows the document date, the due date, the partner, the
operation type, the payment type, the amount due and the remaining amount.
Payments History Report
The Payments History Report contains data about unpaid and/or partially paid
operations and the payments themselves. It shows the document number, the date,
the partner, the operation type, the payment type and the amount of the operation.
When the amount has a negative value, it means the document is unpaid. When the
amount has a positive value, a payment has been made.
Incomes Report
The Incomes Report contains data about total unpaid documents and incomes from
partners. It shows the partner, the operation type, the payment type and the current
total incomes.
Excel Documents and User’s Reports
The first page of the Reports Manager window contains a list of all templates of
Excel documents.
You can use the Excel documents to present issued documents in Microsoft Excel
and to create various reports.
To use this feature:
1. You must have Microsoft Office 2003, including Microsoft Excel, installed on
your computer
2. You must set the Security Level to Low. To do so, open Excel and go to
Tools/Macro/Security. Select Low and click on the OK button.
Click on the document’s
name and then the OK
button to select it. Click
Cancel to exit without
selecting a document.
The Excel documents of
Sales, Purchases, Transfer, Waste, Stocktaking,
Sale on Consignment,
Return on Consignment,
Offers, Proform Invoices, Requests, Warranty
Cards,
Purchases
Lot
List, Sales Lot List, Tax
invoice and Simplified
Invoice
are
standard
document types. To generate such document,
- 94 -
enter its number in the yellow field Number and press Enter
The Excel documents of Turnover by Users, Amounts due by Partners, Sales by
Groups and Purchases by Groups are generated for a specific time period. To generate
such documents, enter the period in the yellow fields From date and To date and
press Enter.
The Sales by Users and Sales by Locations documents are generated automatically
when the report is loaded. They are based on all operations and lists in the database.
The second page of the Reports Manager window contains the User’s Reports.
User’s Reports are individual reports for each user. You can generate any report depending on your needs.
To select a report, double-click on it or click the OK button. The report looks and
works as usual.
The Description field contains a short description of the report’s contents.
Report Results
Use the buttons in the upper left corner to print or export the report to EXCEL, WORD,
HTML and other standard formats. You can also specify work with several reports at a
time and you can set the report to work in background.
Click the
button to close the report.
- 95 -
Click the
Settings).
Click the
or XML.
button to print or preview the report (depending on the selected Print
button to export the report to a text file, EXCEL, WORD, HTML
After you select the desired format, specify a file name to export the report.
Click the
button to set one or more reports to work in background.
Review Report Results
Use the buttons in the upper left corner to print, zoom and display the report by
pages.
- 96 -
Click the
button to print the report.
Click the
button to zoom the document (from 10% to 500%).
Click the
button to display the report by pages.
Click the
button to display two pages of the report.
Click the
button to display three pages of the report.
Click the
button to display four pages of the report.
Click the
button to display six pages of the report.
Click the
button to close the report.
5. Settings
5.1 Calendar
The Calendar window displays the current date.
- 97 -
To set a current date, select it on the calendar and click the OK button. This will add
the date in the Status Bar. You can set the date by double-clicking on it, as well. Click
Cancel to close the Calendar window without any changes being made. Click the
Today button to activate the current date and close the window.
You can type a date in the empty field at the bottom of the window. The program will
automatically position the calendar to the selected date.
5.2 Settings
You can use the Settings window to configure the application based on your specific
needs (click on the
icon to open it). The information is divided into categories
placed in the bottom left part of the screen. Select a category to display all its
settings. Click on the OK button to save changes and close the window. Click on the
Cancel button to close the window without any changes being made. Click on the
Apply button to save changes without closing the window
Settings can be applied to users, as well as to databases or for the whole application.
You can select users in the Users section.
5.3 Users
Settings can be applied to specific users, as well as to databases or for the whole application.
Select a level in the Users section and then select the settings.
“Global” settings are applied for the whole application. By default, when you create a
new database, it will use these settings. Local settings are applied only for the current
database. When you create a new user, the active database settings are applied. The
priority order is: user settings, local settings, global settings.
- 98 -
If you right-click a level or a user in the Users section, you can open a menu with
three functions:
•
Apply to – contains a list of all users; applies the current settings of the selected user/level to a selected user from the list.
•
Copy from - contains a list of all users and levels; copies the current settings of
a selected user/level from the list to the selected user/level.
•
Default – applies the default settings to the selected user.
Click the OK button to save the settings for the selected user or level.
5.4 General
Use the Autocomplete option to select items in operations faster. When you type a
part of the name, the application automatically fills in the first matching name with
common root. For example, if an item "Whiskey glasses" exists in the database, the
application will automatically find it, when you type "whiskey".
Use the Auto Backup option to set an interval for automatic backup of the current
database.
Use the Maximum Discount option to define the maximum discount in percents that
a particular user can indicate in operations.
- 99 -
Use the Price Format option to define the format of prices in operations. For
example, if you select 0.00, a price of 3 will be visualized as 3.00.
Use the Quantity Format option to define the format of quantities in operations. For
example, if you select 0.000, a quantity of 20.1 will be visualized as 20.100.
Note:
You can choose the user to whom settings will be applied from the Users section. To
apply the new settings press the OK button.
5.5 Visual
Enable the Assistant option to display screen tips when holding the mouse over
controls (buttons, text fields, etc.).
Enable the Tip of the day option to display a randomly selected tip when the
application starts.
Enable the Show toolbar option to display the toolbar when the application starts.
The application remembers the size and position of the toolbar, as well as the order
and number of buttons in it.
Enable the Show Status Bar option to visualize the status bar.
- 100 -
Enable the Save controls state option to save the windows’ position, size, text fields,
etc. before closing the application.
Enable the Confirm saving data option to display a confirmation window before
saving data in operations.
Enable the Highlight invalid values option to display invalid values in red color (a
sale price that is less than the purchase price, insufficient quantity in stock, etc.).
Enable the Numerical sorting option to sort lists using numeric codes (2< 10).
Disable this option to sort lists using symbols (10<2).
Enable the Limit document count option to determine the number of documents,
which will be displayed in Select document windows.
Note:
Settings can be applied to users, as well as to databases or for the whole application.
You can choose the users from the Users section. To apply the new settings press the
OK button.
5.6 Operations
Use the Payment type option to select one of the following payment types:
- 101 -
•
The total amount is paid – no payments remain due
•
Manually filled window– displays a payment window, in which amounts are filled
manually
•
Automatically filled window – displays a payment window, in which amounts are
filled automatically
•
The total amount remains due – the amount remains due, no payment is made
upon the operation
Use the Stocktaking prices option to define what prices will be used when performing stocktaking
Enable the Print transfer document by sale prices to print transfer documents by
sale prices. Disable the option to print transfer documents by purchase prices.
Enable the Quick invoicing option to generate invoices upon saving of operations.
Use the Discount calculation option to define the discount calculation method. The
standard method uses the formula: Discount = Price * Discount / 100. The alternative
method uses the formula: Discount = Price * Discount / (100 + Discount).
Enable the Combined payment option to define combined payment via POS terminal
and in cash. Disable the option to define payment only via POS terminal, in which case
any remaining amount is due.
The Full stocktaking option can be enabled only when working without lots. This
allows you to set a quantity of zero for all items, not included in stocktaking.
Use the Additional columns in operations option to add selected columns in
operation tables.
Enable the Working with price rules option to allow work with price rules.
You can enable the Preview applied price rules option only when working with price
rules. When you save an operation, the application opens a window, containing a list
of price rules, applied to the corresponding operation and showing how they affect the
operation.
Enable the Hide items quantity option to hide item quantities for the selected
location in the operations table.
Enable the Hide purchase price option to hide purchase prices in the items list,
when performing an operation, as well as to hide them in all reports, containing
purchase prices and purchase amounts.
Note:
Settings can be applied to users, as well as to databases or for the whole application.
You can choose the users from the Users section. To apply the new settings press the
OK button.
- 102 -
5.7 Print
Select Never in the Print mode drop-down list, if you do not wish to print
documents. Select Confirmation to display a confirmation window before printing.
Select Always to print documents directly.
Enable the Print preview option to display the document before printing.
Enable the Print to cash register option to pass operation data to a cash register.
Use the Print cash receipt without payment option to define whether to print a
cash receipt if no payment has been made.
Use the Print to client’s display option to define whether to display data on an
external display, if such is connected.
Select the number of copies that will be printed in the Number of copies drop-down
list.
The Print lot list option is active only when working with lots. Enable it to print lot
lists when saving operations. The list includes the code, name, measure, quantity and
lot of all items in the operation.
Use the Documents skin option to define the visual style of all documents that will
be printed.
- 103 -
Note:
Settings can be applied to users, as well as to databases or for the whole application.
You can choose the users from the Users section. To apply the new settings press the
OK button.
5.8 Special
Attention! Apply special settings only when you start the application. It is not
recommended to apply them while working, as this can lead to changes in
already entered data!
You can choose between the following Work methods:
•
Average price – lots are disabled and an average purchase price is formed
•
Last purchase price – lots are disabled and the last entered purchase price is
used
•
FIFO - lots are enabled and items are written-off following the rule “first in –
first out”, i.e. the first incoming lot is the first to be written-off
•
LIFO - lots are enabled and items are written-off following the rule “last in –
first out”, i.e. the last incoming lot is the first to be written-off
•
Select lots – lots are enabled and items can be written-off from a selected lot
- 104 -
Use the Work with negative quantity option to determine whether to allow work
with negative item quantities in databases.
You can enable the Auto production option only when working with negative
quantities. The products/recipes are automatically produced upon sale without having
to perform the operation “Production”. When the production operation is performed,
the raw material recipes used for the main recipe are automatically produced.
Enable the VAT included option to include VAT in all prices. Disable the option to
display VAT on a separate row.
Use the Tax Law Registration option to determine whether the application will
include VAT.
Enable the Document numbers by locations option to allow selection of initial
document number in Locations for each document type.
Note:
Special settings cannot be applied to particular users. You can apply special settings
for the application or for the database. To apply the new settings click the OK button
and confirm your choice in the pop-up window.
5.9 Database
Use the Database type option to define the database type in the application. You can
choose between MS Access, MSDE, MySQL, SQL Server or Oracle.
- 105 -
The Database path option shows the database path, when MS Access database type
is selected.
If you select a database type other than MS Access, the Server name, Repl. Server,
Database name, User and Password fields display the parameters of the server
connection and the database name.
Click on the New Database button to open the Create New Database window. Click
on the Test button to test the connection with the database of the selected type.
Note:
Database settings cannot be applied to particular users. You can apply database
settings for the application. To apply the new settings click the OK button and confirm
your choice in the pop-up window.
5.10 Other Settings
Use the Language option to set the interface language.
Use the Visual Style option to define the visual style of windows and icons.
Use the Mail (SMTP) Server option to define the SMTP server for sending of e-mail
messages. It is recommended that only administrators use this option.
- 106 -
Use the Check for updates option to enable or disable Internet updating of the
application from the Help menu.
Note:
Other settings cannot be applied to particular users or databases. You can apply them
for the whole application. To apply the new settings click the OK button and confirm
your choice in the pop-up window.
6. View
6.1 Customize Toolbar
Right-click on the toolbar to open the Customize menu:
You can open the Customize window from the View -> Customize toolbar menu as
well.
Use the first tab of the Customize window to select how to place and view the
toolbar. You can dock the toolbar top, bottom, left or right or leave it floating on the
screen. To hide the toolbar uncheck Show toolbar. Check Use small icons to reduce
the size of the toolbar and the buttons. Check Show tooltip to display screen tips
when holding the mouse over buttons.
Click the Reset button to restore the default button settings of the application.
Use the second tab of the Customize window to add buttons. Simply drag the button
and drop it on the toolbar.
- 107 -
Right-click on any button on the toolbar to open a pop-up menu with two options:
•
Reset – analogical to the Reset button, loads the default buttons;
•
Delete – deletes the selected button.
6.2 Skin
You can change the skin of all windows and icons in the program by selecting one
of the following options.
6.3 Document Visual Style
Choose the document visual style created with the program by selecting one of the
following options: Classic, Desert Yellow, Forest Green, Volcano Red, Turquoise Blue,
Neutral Grey, Company Logo, The Matrix and Special.
- 108 -
Note:
You can place your own company logo on created documents. To do so, replace the
file logo.bmp in the program directory with your own company logo. The file size must
be 350 x 90 pixels at 96 dpi.
6.4 Toolbar
Enable this option to display the Toolbar on the screen.
You can place the Toolbar anywhere on the screen. When you move the cursor over
the left end of the toolbar, you will be able to drag and drop it on the screen. You can
leave it floating or dock it to the top, bottom, left or right border of the screen.
If you choose to leave the toolbar floating, you can change its width or close it.
The toolbar can contain large or small icons depending on the applied settings.
6.5 Status Bar
Enable this option to display the Status Bar on the screen.
Double-click on Default User to open the Change Active User window. Select user
name from the drop-down list and enter a valid password. This will change the name
of the active user on the Status bar.
Double-click on the current date to open the Calendar window.
Double-click on Default Company to open the Input Company Data window. This
will change the name of the location on the Status bar.
6.6 Window
1. Close Active Window
Use this menu to close the active window. This function is useful when you do not
wish to search for the Close button of the window. You can use it multiple times if
more windows are open.
- 109 -
2. Close All Windows
Use this menu to close all open windows in the application. This function is useful
when you wish to simultaneously close all open windows in the program. The
application remains active.
3. Cascade
Use the Cascade menu to optimize window size and stack windows so that each
window title bar is visible. You can activate a window by clicking on its title bar.
Furthermore, this function allows you to find a hidden window in the application.
4. Tile Windows Horizontally
Use this menu to arrange windows top to bottom on the screen. All title bars are
visible and you can activate each window by clicking on its title bar. This function is
useful if you wish to work with the whole width of the desktop.
5. Tile Windows Vertically
Use this menu to arrange windows left to right on the screen. All title bars are visible
and you can activate each window by clicking on its title bar. Furthermore, this
function allows you to find a hidden window in the application.
6. Restore Default Window Settings
Microinvest Warehouse Pro stores the settings of each window the way the user
left it the last time he used the application - size, window placement, filters, etc. Use
the Restore Default Window Settings function to restore window settings the way
they were after the initial installation of the application.
You need to confirm the operation in the confirmation window.
- 110 -
Introduction to Microinvest Warehouse Pro Light
Microinvest Warehouse Pro Light is a specialized product for automation of
operators’ workstations. The work of cashiers and waiters is covered on a professional
level through a separate and highly specialized application. The need for an additional
product for these activities is determined by the specifics of the field and the support
of a broader set of additional hardware. This module contains a number of specific
requirements for fast and quality servicing, effective work and a number of
operations, accelerating customer servicing processes and generating of reports.
Microinvest Warehouse Pro Light is in the Front Office category, i.e. this is
the application which serves customers directly.
Due to work specifics, Microinvest Warehouse Pro Light introduces additional concepts and expands part of the standard characteristics. Computer requirements
are lower for this application, which allows cheaper computer configurations and reduces the price for the whole system.
Hardware and Software Requirements
3. Hardware requirements:
Minimum
• Processor – Pentium II 500MHz;
• RAM – 128МВ;
• HDD – 10GB.
Recommended:
• 1.2 GHz processor or faster;
• 256МВ RAM or more;
• 20GB hard drive or more;
• Network interface;
• Printer.
4. Software requirements:
Operating System: Windows 98, Windows 2000 SP4, Windows XP SP2,
Windows 2003, Windows Vista;
If you are planning to use SQL databases, you must install an SQL server
(MSDE, MSSQL Server, MySQL or Oracle) on one of the computers.
Work with Servers
Microinvest Warehouse Pro Light works with servers, using the same technology as Microinvest Warehouse Pro. For more information, see the corresponding chapter in this document.
Application Installation
The installation process is similar to the installation of Microinvest Warehouse
Pro. What is particular in this case is that the installation does not require additional
components and is considerably faster. In order to facilitate the procedure, it is necessary that:
• The operation system MS Windows is stable;
- 111 -
•
The date format in Short Date Format is dd.mm.yyyy
The application can be installed from a CD-ROM or through an installation file,
which can be downloaded from our site http://www.microinvest.net.
Installing from CD-ROM or through the Internet
Microinvest Warehouse Pro Light is installed, using the same technology as
Microinvest Warehouse Pro. For more information, see the corresponding chapter
for Microinvest Warehouse Pro in this document.
Possible Problems During Installation
The installation of Microinvest Warehouse Pro Light usually runs smoothly
without any complications. The installation is considerably shorter than the installation
of the main application.
Several problems are possible during installation:
• On a hardware level, there may not be enough free disk space on Local Disk C,
where the application is installed by default. It is recommended to have free
disk space of 1GB or more. Please, provide enough free disk space, in case it is
insufficient.
•
The installation must be performed by a user with administrative access rights
and not by a user with restricted rights, such as User or Guest.
•
If the application will be used with a user account as well, it must be installed
under this account too. The corresponding access rights of this user must be
given, for example transferring of the user in the Power User section.
•
Upon selecting English from the “Language” menu it is possible that illegible
characters appear on the screen. To solve this problem, go to “Control panel”
and select “Regional and Language options”. From the drop-down list select
“English” and from the Advanced button select “English” again.
Licensing of Microinvest Warehouse Pro Light
Licensing of Microinvest Warehouse Pro Light can be done through Hardware license, Online activation, Licensing through the Internet site and Licensing by phone. The technology is the same as with Microinvest Warehouse
Pro and is described in the corresponding instructions for Microinvest Warehouse
Pro in this document. The only difference is that the licensing window is opened by
keyboard shortcut Ctrl+R.
Work in Network
The work in network with Microinvest Warehouse Pro Light is the same as
the work in network with Microinvest Warehouse Pro. The necessary information is
provided in the description of Microinvest Warehouse Pro in this document. All
principles are analogical and there are no differences in the settings or using of the
application compared to Microinvest Warehouse Pro.
- 112 -
II. Starting up with Microinvest Warehouse Pro Light
Microinvest Warehouse Pro Light is a modern system for warehouse management. It is suitable for automation of the workstations of cashiers and operators.
The system is highly optimized for quick and convenient work. Special attention is
paid to customer servicing regarding work speed and management of additional hardware like fiscal printer, cash register, client display, barcode scanner, scales, etc.
1. Open Database
Microinvest Warehouse Pro Light cannot work independently and build an
integral system. This is the so called Front Office and Microinvest Warehouse Pro
Light works only with specific operations like Sales, Orders, Refunds and Customer
Receipts. For this reason you cannot create databases in this application. You must
create them in advance in Microinvest Warehouse Pro.
When you start Microinvest Warehouse Pro Light for the first time, the following message appears:
This is normal, because the application is not set
and there is no connection with the database. Click the
OK button. The application opens a new window:
it is important to select No, because you do not
wish to exit the application. If you click No, the
application opens the Settings window:
This window is completely analogical to the corresponding window in
Microinvest Warehouse Pro and contains the same settings. When you select the
- 113 -
corresponding database or server you must fill in the data in the corresponding fields.
You will find a full description of this window in the section about Microinvest Warehouse Pro in this document.
The system settings are made only upon initial starting of the application. After
that Microinvest Warehouse Pro Light automatically loads the selected database.
III. Work Modes in Microinvest Warehouse Pro Light
Microinvest Warehouse Pro Light has several work modes. The most important ones are:
•
Point of Sale;
•
Restaurant.
The Point of sale mode is suitable for work in supermarkets, stores or fast
food restaurants. In this mode operators can quickly perform sales, payments and
apply the corresponding discounts to customers. The procedure is very simplified –
creating of a bill, closing, payment and then following the same sequence.
The Restaurant mode has a specific interface and is suitable for work in restaurants, coffee shops and other similar shops. This work mode has a technology for
opening of an order, intermediate closing of an order, adding of new items to an existing order and final closing of the order. For these processes the corresponding intermediate notes are issued and data is sent to various kitchen and fiscal printers.
You can start the two work modes of the application by clicking the corresponding icons on the desktop.
The icon of the Point of sale mode is:
The icon of the Restaurant mode is:
Please note that the system setting is common for both and if changes are
made in one of the modes, this affects the application and the other mode as well.
You can open the help system in the two modes by pressing F1. This window contains
a description of the keyboard shortcuts in the application:
- 114 -
As well as the function of the buttons:
- 115 -
1.Point of Sale Mode
This is a special mode for work in supermarkets, stores and fast food restaurants. When you start the application the system parameters are checked and the
main window of the application opens, along with a log in window. Logging in is used
for identification of the user, as well as for loading of the user’s personal commercial
operations and access rights. To log in, select your user name in the first field and
enter your password in the field below (the user account must be created in
Microinvest Warehouse Pro):
When the user login is successfully completed, the application opens the main
window of the Point of Sale mode.
Attention!
When you initially start the application you must enter some additional data.
The application opens the Select location window. You must select a location from
the list. To change the location, use the keyboard or keyboard shortcut Ctrl+J (the
locations list depends on the active database). Then you must select a partner. The
database contains specific information about each partner, as well as price groups and
discounts for him. To select a partner click in the Partner field and select one from
the list.
When Location and Partner are already selected, you can perform sales. The window
has the following appearance:
The upper part of the window contains the application management controls
(buttons and payment fields), whereas:
- 116 -
Suspended save:
This button allows the operator to open a second bill - if the first customer selects
additional items, to be able to serve the second customer. This minimizes servicing
time for a group of customers.
Delete – suspended save:
If for some reason the first customer rejects his order, this button deletes the selected items and a new bill can be opened.
Refund:
Refunding is done when the item has expired or its integrity is broken. Refunding in Microinvest Warehouse Pro Light – Point of Sale is done through standard
item selection, described in this manual. You must complete the refunding items list
and use keyboard shortcut Alt+F9 (this is the keyboard shortcut for saving of refunding). The refunding is completed and the item is saved in the database and the corresponding quantity is returned in the warehouse.
The bottom part of the window contains a table with a list of the selected items
and their parameters.
The point of sale mode can be started in two visual styles:
1.1 Visual Style 1
- 117 -
This visual style is optimized for work with keyboard and mouse. The virtual keyboard adds more convenience during work in this mode.
1.2 Visual Style 2
This visual style is suitable mostly for work with Touch Screen and POS terminals.
The most frequently used functions are brought as buttons, which are optimized
for faster and easier work with the module.
Banknote denomination selection in the Point of Sale mode.
Through the denomination buttons you can
speed up the completion of operations. You
can select a denomination and the application will automatically calculate the change.
The lowest left button is used for mixed
payment. Mixed payment allows entering of selected amounts defined in
Microinvest Warehouse Pro.
- 118 -
1.3 Selecting Items
The main part of the work with the application is the selection of items. You can
do this in several ways – through the keyboard, the mouse, a barcode reader or another device. The various methods for selection of items are optimized for speed.
Selecting items through the keyboard and the Items window
You can select items through the keyboard. The most universal way is by pressing F4 in the items field. This will visualize the items window with a table of all available items and their additional parameters – code, name, price, quantity, etc.
Click the desired item and click the OK button to confirm. To close this window
without selecting an item click the Cancel button. Please note the following:
•
You can select several items at a time. Hold down the Ctrl or Shift key and
click the corresponding rows.
- 119 -
•
Items can be sorted by several criteria. In the drop-down list you can sort
the items by code, name, quantity or price.
•
If you enter symbols or numbers from the keyboard, the application will find
all items, matching the data you have entered.
•
If you check “Filter” you can filter only items, matching the entered symbols.
For example, if you enter “Coca Cola”, the application will display only items
of this company.
•
You can enter a new item by clicking the New button. This is useful when
operators receive a new item which does not exist in the list and they wish
to sell it.
Click the ОК button to close the Items window and transfer the selected items
to the main application window. New rows are added to the table and data for the corresponding items is filled.
Quick item selection through the keyboard
The application features quick item selection methods through the keyboard.
The easiest and most intuitive method is by entering of the item code in the window.
Fill in the item code and press Enter. The application will find the desired item. This
method is quick, easy and convenient for the operators, because they can use only
the num lock keys. There is an additional function for code entering. If you enter an
incomplete or partially matching code, the application will visualize the Items window
and will highlight the row containing the item with the matching code.
You can use the keyboard to enter an item name. If there is a complete match,
the item will be added to the table. If there is a partial match, the application will visualize the Items window will highlight the row containing the item with the matching
name.
Quick item selection through a barcode reader
To enter an item through a barcode reader you must scan the item and if such
code exists, the application will automatically find the item. It is important to know
the following: if you enter a number – for example 5, before you scan the barcode,
the application will enter 5 as quantity of the scanned item. This will save you time,
because rather than looking for the corresponding quantity field, you can do the following: “Enter 5 of this item”.
Item selection through the mouse
Double-click the corresponding field for item selection to open the items list.
Work is analogical to pressing F4 and is described in Selecting items through the keyboard.
Easier Item Selection
For easier and faster item selection you can enter the item code in the Name
field and press Enter :
The application finds the item and adds it to the list with items for sale:
- 120 -
You can enter items through a barcode reader by scanning the item with the
barcode reader.
When the item quantity is insufficient or zero in the location, the number in
the quantity column will be filled in red color. Red color means that you must check
the corresponding value, for example zero quantity, very low price or other special
feature, which you must bear in mind.
1.4 Completing Operations
When all necessary items are selected and the corresponding sale quantities are
entered, you must complete the operation. This can be done in several ways. Each of
them reflects a different payment type and entering of an amount. The universal key
for completing of an operation is F9.
1.5 Adding New Items
If a new item must be added, while the system is working, this is done through
the Select Item menu. Click the New button and in the New Item window enter the
parameters of the new item:
Click OK or press Enter to add the new item to the list. After that you can select and
sell the item in the point of sale. This is useful when a new item arrives and the operators must enter it in the database without the manager or the owner.
1.6 Adding New Partners
When you must work with a new partner, who does not exist in the database,
you must add a new Partner. Use keyboard shortcut Ctrl+N. The application will
open the New Partner window. Fill in the necessary data and click ОК. The partner
will be added to the list.
- 121 -
1.7 Check Prices
This module is developed for convenience in servicing of customers. It allows
you to check the current price of an item. The information is displayed on the screen
and on the client display. You can edit the item price if necessary. To open the Check
Prices window press F12. You can enter the following parameters: code, name, barcode or other identification parameter. For example, you can check item prices by
barcode. Enter the barcode of the item and press Enter (or scan the item directly
with a barcode reader). The item parameters will be visualized on the screen:
1.8 Change Active User
The change of the active user is necessary when the current user finishes work.
It might also be necessary if several users work simultaneously, because in
Microinvest Warehouse Pro Light each user performs operations individually.
To change the active user click the
button or use keyboard shortcut
Ctrl+0. In the Change active user window select a user name and enter a valid
password. Click OK or press Enter to confirm. The active user is changed and the application returns to the main screen.
- 122 -
Besides all standard documents, Microinvest Warehouse Pro Light can issue
invoices, if the corresponding setting is activated and the invoice option is selected.
To do this select the partner by using keyboard shortcut CTRL+P. This will clear the
partner field and you can select a new one from the list. The partner must be frequently used, in order to be visible in Microinvest Warehouse Pro Light.
After you select the partner, you must perform the sale. Instead of a stock receipt the application visualizes an invoice window, analogical to the one in
Microinvest Warehouse Pro
Attention!
Please note that invoice numbers, document date and tax date cannot be
changed.
- 123 -
2. Restaurant Mode
This mode has a more specific interface, which facilitates work in restaurants,
where issuing of “intermediate notes” is necessary.
Attention!
All purchases in Microinvest Warehouse Pro are performed in the location defined with code 100. Thus quantities decrease accurately.
There are three work modes:
Work Mode 1 is oriented towards fast work with the mouse and the keyboard:
Work Mode 2 is oriented towards work with a Touch Screen:
- 124 -
A new feature in Work Mode 2 in Microinvest Warehouse Pro Light – Restaurant
is the adding of item labels. This facilitates the operators and completes the Touch
Screen interface of the restaurant module. The picture files of the items must have a
.JPG extension and must be saved in subfolder Pictures, which must be created in
the installation folder of Microinvest Warehouse Pro Light. Please note that the
names of the JPG files must match the code of the corresponding items. Their resolution depends on the resolution of the Touch Screen - 800x600, 1024x768 или
1280x1024.
For example: The item code of Amstel is 1 –
the name of its picture file must be 1.JPG
The Pictures folder can contain files with an .avi extension. This is an attractive
new feature and allows watching of commercial clips, when the application is in
standby mode (the operator is logged off). This is one of the latest trends in restaurant software and allows playing of sponsors’ commercial clips or advertising of promotions in the restaurant. It is recommended to use smaller size files, i.e. shorter
clips, otherwise this could additionally load the computer and impede the application.
Work Mode 3 is the latest visual style of Microinvest Warehouse Pro Light.
This is a visual editor of tables and is a new advanced system for creation of restaurant models with table position schemes. It facilitates the users’ work and the customers can get a better idea about the restaurant:
- 125 -
After the table scheme is modeled and the user logs in, the application visualizes
the scheme and the user can choose which table to serve.
What is peculiar in the restaurant work mode is that, each time when an operation is completed the application returns to the user identification window. Thus an
- 126 -
unlimited number of operators can work simultaneously and can service many customers on different tables simultaneously. This can be activated or deactivated
through a specific application setting.
When you initially start Microinvest Warehouse Pro Light in Restaurant
mode, a text window appears, where system check is performed whether the database is set for work in restaurant mode. If any of the options are visualized in red color, these parameters must be set in Microinvest Warehouse Pro:
When all database settings are made, the application opens the following window:
When the application is ready for work and the user has logged in, the main
application window is activated:
- 127 -
The upper left part of the window contains items and group buttons. These buttons contain subgroups, which facilitate the work process:
The upper right part of the window contains the following work buttons:
1. Add new order:
Click the button to begin servicing the customer, to add a new order and to select
items from the list. This button is used each time a new customers sits at a table.
When you add a new order and select an item, the order is active till its final closing.
- 128 -
2. Save order:
Click this button when the customer has made an order and it must be prepared in the kitchen or at the bar. This activates the system printers and the corresponding notes for the customer, the bar, the kitchen, etc. are printed. This operation
can be performed multiples times, because this leads to new adding of items to the
selected order. You must perform this operation when the customer wishes to add a
new item to his order.
3. Split active order:
If two or more customers are sitting at one table, but wish to pay separate bills
or if operators change and the first wishes to transfer his active orders to the second.
After the order is split, new intermediate notes and orders for the bar, kitchen
and client are printed.
4. Use this button to close the order:
This button contains various payment types. When you select the payment
type, the application sends data to the active fiscal printer (if connected) and the operations is completed. This closes the order.
- 129 -
Microinvest Warehouse Pro Light has a mechanism for quick reports. You
can activate this function by clicking the following button:
The application opens a specialized window, where you can generate various
reports on fiscal printers, as well as generate user reports and program electronic
scales:
To extract operators
turnover data by date and
time, you must activate
Turnover:
The bottom left part of the
window displays selected
items from one active order:
- 130 -
The bottom right part of the window contains a list of all active orders by tables for
the corresponding operator, that are not yet closed:
Each operator can see only his own orders and cannot see the orders of other
operators. This is made to protect the orders. Owners and managers can see all orders and can edit them. This option allows correction of wrongly input orders or other
data.
Microinvest Warehouse Pro Light is suitable mainly for operators with lower
access level than owners. Reports and data management are done through the main
module Microinvest Warehouse Pro. The main purpose of the application is speeding up of the business process and facilitating of the work.
3. Program Settings
Microinvest Warehouse Pro Light has a powerful settings system for configuring of the application according to specific user needs. To
activate the settings click the
icon or use keyboard
shortcut Ctrl+S. Settings are
visible only to owners or administrators. Users with lower access level cannot open them for
better system protection.
Settings in Restaurant
mode do not affect the work of
the base module Microinvest
Warehouse Pro and are applied for convenience of specific
operators.
The main settings are for
specific activities:
- 131 -
The Cash register tab allows you to work with various peripheral devices and
you can specify what shall be printed on them and in what order:
The above window contains two buttons. The Test –
fiscal device button tests
the connection with the fiscal
device and the Default button restores default settings.
If an additional prin-ter is
selected, the application visualizes the default settings of
the manufacturer depen-ding
on the model. You can define
item groups, which will be
printed on the correspon-ding
device.
In the Special tab you can define the interface, the language and the database
connection type. These settings are thoroughly described in the main application
Microinvest Warehouse Pro. There are no differences or peculiarities in the settings
of Microinvest Warehouse Pro Light
- 132 -
The Special tab contains a Programming hot keys button. This allows you to
customize the keyboard:
The Settings window is displayed on the screen:
- 133 -
After the Settings window is visualized, the desired changes in the application
functions can be done.
In the Main tab you can modify the following settings:
Price format: This setting determines the format of item prices.
Here you can define the number of digits after the decimal point in the item price,
which are displayed, processed and saved. The most frequently used format is 0.00.
This is the default format.
Quantity format: This setting determines the format of item quantities.
Here you can define the number of digits after the decimal point in the item quantity.
Usually, in Point of Sale mode quantity format is 0.000, while in Restaurant mode
quantity format is 0 (only integers are sold, there are no fractions).
Print mode: Use this setting to determine when the application should print the document on a standard Windows printer.
Select Never if you do not wish to print documents;
Select Confirmation if you wish the application to open a print confirmation window;
Select Always if you wish documents to be printed directly.
Print preview. If you enable this option the application will display this document on
the screen before printing. This allows you to check for mistakes, but the work speed
is slower.
Print stock receipt to: Use this function to directly manage matrix printers.
The stock receipt and the invoice can be sent to a different printer, depending on the
setting. Direct management of matrix printers is fast, documents use smaller fonts.
The print method is defined according to the selected value in this field. It is advisable
that this setting is modified only by an expert!
Document copies count: Use this option to determine the number of copies, which
will be printed. Usually one or two copies of the document are printed.
Restrict mode: When this option is enabled, operators cannot exit the application,
cannot change parameters and cannot change application settings. Only an administrator or an owner can exit the application or change the settings.
Auto lock: This is an additional protection for operators upon operation completion.
Enable this option to visualize the Change active user window each time an operation is completed.
Hide items quantity: use this option to hide or display current item quantities in the
items table. If you enable this option, the Quantity column will be hidden and operators will not be able figure the quantity of items in stock. This is done for data protection from operators.
Invoice publishing: This option manages invoice issuing.
If you disable this option invoices will not be issued.
If you enable this option an additional setting will allow you to print invoices upon
completion of a Sales operation.
Add new item: This option permits or prohibits operators to add new items. Enable it
to permit operators to add new items in the items list.
- 134 -
Refund: Enable this option to be able to perform refunding.
Print to cash register: Use this option to manage the cash register.
Select Never if you do not wish to send data to the cash register;
Select Custom to display a confirmation window;
Select Always to automatically send data to the cash register.
Confirm saving data: This option allows you to check data when you exit the application. Enable it to display a confirmation window before data is saved. This eliminated mistakes due to accidental pressing of buttons, because it requires explicit confirmation of the operation before it is saved in the database.
Autocomplete: This option allows automatic completion of items by code or by
name. Enable it if you wish the application to perform an additional search of items
and to automatically complete entered words.
Unlimited barcodes count: Enable this option if you wish to perform search in all
barcodes of the item. This is convenient for items with more than three barcodes, but
work is slower, since a much more extended search is performed.
Items grouping in check: Enable this option if you wish items that were entered
several times in the table to be grouped in the check.
Items grouping in document: Enable this option if you wish to enter items with the
same name in a single row. If the same item is entered, it will not be added in a new
row, but the quantity of the same item will increase.
Mixed payment: If you enable this option, part of the amount can be paid via card
or bank account and the other part - in cash. This allows mixed payment and amounts
are combined in cash, via bank account, via POS terminal and other.
Qtty default: When you enter a new row in the table you can define the quantity
filled in by the application. If you specify a quantity of 1, the application will automatically fill 1 for quantity of each added item.
Check amount: Use this option to define whether the
application should require entering of an amount upon
operation completion. If you enable this option the operation cannot complete if payment amount is zero.
Locations range: If you enable this option, the locations range will be filtered and
only items from the selected locations range will be listed. This is done when there are
two or more floors in a restaurant and the corresponding terminal can manage only
the specified range (in this case – tables).
- 135 -
Items can be grouped according to the user’s needs. This allows only most frequently used items to be visualized.
In the Cash register tab you can manage the following settings for cash registers:
•
Cash register model;
•
Connection parameters for the cash register;
•
Document type and symbol encoding.
In the example below the model of the fiscal device is specified. From the dropdown menu you select the model of the fiscal device and fill in the parameters of the
connection with the computer, which are usually provided in the documentation of the
cash register. Use the same method to set the client display and the electronic
scales.
When you are done with the
settings click the Save button
or press Enter. Settings will
be saved and the application
will restart.
- 136 -
IV. Installation and configuration of SDC device for Rwanda
1. Equipment
Microinvest POS software is compatible with all certified SDC devices and covers
the basic functionalities stated by the RRA.
Sales Data Controller (SDC) is an electronic device connected to Certified Invoicing
System (CIS), designed to receive specific receipt data from CIS, performs data
processing and generates response data which is sent back to CIS for further
actions. Response data provides authenticity of receipt data. SDC also store receipts
by the means of encryption to its own internal memory and enables audit.
In order to have working CIS system, please make sure that you have in front of you
the following equipment:
1. Computer or POS terminal
2. Microinvest Warehouse POS software solution properly installed on the machine/s
3. Receipt Printer
4. SDC device
3. Configuration of the CIS system
1.
2.
3.
4.
On your SDC Device use either the CIS port or PC port.
Use the cables supplied and connect the one for PC communication.
Connect the SDC Device to the computer via Com/Serial port.
Install and configure the connection with the database of Microinvest
Warehouse Pro (the back office) and Microinvest Warehouse Pro Light
following the instructions in the User Manual of the software products or
with the help of the local Microinvest representative – Pergamon Group,
Rwanda (www.pergamongroup.com)
5. Go to Microinvest Warehouse Pro Light, menu Settings -> Special tab
and
select from the field Country: Rwanda and from the Language field: English.
6. Settings of the receipt printer:
Select Hardware Devices tab from the menu Settings in Microinvest Warehouse
Pro Light as shown in Screenshot1.
Then select your receipt printer driver from the first Fiscal/Receipt printer drop
down menu. After that in the bottom part of the window will appear the settings of the
Receipt printer - >
Com/Serial port, Speed etc.
From the first Kitchen Printer drop down menu, select your receipt printer driver >Com/Serial port, Speed etc.
- 137 -
Screenshot1
7. Setting the SDC device:
In Microinvest Warehouse Pro Light Settings window select Hardware tab. Select at the bottom of the list -> Sales Data Controller -> Select your SDC device
configure the com port, speed , MRC numbers as shown in the screenshot below.
Screenshot 2
- 138 -
Before you proceed, press the button Test-sales data controller. If the system is
configured properly, the system will pop up a message for successful completion and
don’t forget to press SAVE button after that. If the device is not successfully connected, the system will pop up a message with the problem.
IV. Help
1. Microinvest Assistant
Microinvest Assistant allows you to view information in ScreenTips about each button
and text field. When the assistant is enabled, the program follows the mouse
movement. To view a ScreenTip describing a specific button, hold the mouse pointer
over the button for about 3 seconds. This function is very convenient when you are
learning how to use the program. Your actual work process, however, will sometimes
be more effective if you disable the assistant
2. Licensing
Use the Register menu to license the application and start using all features of the
product. While licensing, bear in mind that:
1. The license of the purchased product can be used only once on a single
machine.
2. You must be logged in as an administrator.
3. You must keep this window open during the whole registration.
You must read the license agreement and accept it. Select whether you are registering
the program or you are transferring the registration.
Provide your serial number in the office of Microinvest and carefully enter the received license number in the fields below.
If the fields are accurately filled, the program will be registered and you will be able to
use all its features.
- 139 -
3. Documentation
The Documentation is the help system of Microinvest Warehouse Pro and includes
all program modules. It is developed as an interactive document with hyperlinks and
examples. The screenshots display work with actual data.
You can open the help system at any moment by pressing F1. The system will show
you help for the active screen and function.
To navigate through the help use the mouse and the scroll boxes. All active hyperlinks
appear in blue font. In the Contents tab you can see the structure of the program
and you can easily navigate through the menu. In the Index tab you can perform
search by keywords for each window. In the Search tab you can search information
by any word in the text. For example, if you type in the word "lot" and click the List
Topics button, the help system will find all windows containing the word "lot".
4. Check for Updates
The Check for updates window has two fields. Updates are listed on the left, while a
description of the changes is displayed on the right. Use this list to see new and
improved features of the program. All changes are listed in descending order and
contain date, module and change description. The newly created modules are listed in
the same window.
When you click the Update button, the program downloads the latest version from
our site. A new package will be downloaded and saved on your hard drive. You must
install it over the existing application. You will find the package in the Download
folder, which is created in the folder of the application. To update the program you
must use an update code or still be profiting by the free update period. The free
update period starts when you purchase the product. It is recommended to exit the
program while installing the new version
- 140 -
All updated versions are compatible with and can read data from previous versions,
but not always the other way around. To see the differences between your version
and the latest version of the product, which can be downloaded from our site, do the
following:
1. Go to Help/About and check the date and version of your product;
2. Go to our site and activate latest changes;
3. Check for updates of your product. Update the program if you find any new
features you would like to use.
5. Microinvest on the Web
This function will take you to the company site, where you can find additional
information about the program, new modules and auxiliary products, user forum
where you can discuss new features of the products, updates, information about new
features to be developed, solutions for some cases and all resources, available to our
clients.
6. About
This window contains information about the product, version, package date and
license status – Demo version or Registered version.
5. Frequently Asked Questions
5.1. How are databases stored? – If the database is administered using Access, the
application automatically backs up the database, but you can use the File ->
Backup/Restore menu to manually back up the database. The backup files are
saved in the Backup folder of the application directory. You can use an external drive
to store backup files as well.
- 141 -
If the database is stored in one of the servers, automatic backup can only be done
through Microinvest Archi Pro. Only a system administrator can perform a manual
backup.
5.2. What should I do if reports are generated slowly? – If the database is administered using Access and contains large lists, it is recommended to switch to any of
the servers. Another solution is adding more RAM.
5.3. Can I use the application through the Internet? How? – One of the main
features of the application is the possibility of real time work through the Internet.
This feature requires the following: database administration on one of the possible
servers, static IP of the main computer, the port on the main computer is not obstructed by antivirus protection or by the Internet supplier. When working through the
Internet it is recommended that the main computer has enough resources in order to
ensure normal work of remote workstations and that no hindering application are installed on it.
5.4. If the connection fails while the application works through the Internet,
can subordinate workstations continue work? – Yes, but data replication must be
enabled. The support team of Microinvest will determine how to enable this mode as
this depends on the server.
5.5. Can I export data to the accounting application of Microinvest? – Yes.
From the Edit -> Administration menu select Export to Microinvest Delta. A text
file with all data necessary for the accounting application is created. It is not necessary that Microinvest Delta is installed on the same computer as Microinvest
Warehouse Pro. The text file can be sent vie e-mail or an electronic data carrier.
- 142 -
5.6. Can Microinvest Warehouse Pro work with barcodes and barcode
readers? – Definitely yes. One of the main principles of the application is to facilitate
users’ work and this is the reason why Microinvest created Microinvest Barcode
Printer Pro. This application facilitates work with Microinvest Warehouse Pro and
also allows you to create labels with barcodes thus making the business process
easier.
5.7. Can Microinvest Warehouse Pro work with a fiscal printer? – The latest
trend in the organization of a point of sale is the creation of complex solutions.
Microinvest has created the auxiliary product Microinvest FPServer, which allows
direct connection of the warehouse application to all Bulgarian fiscal and peripheral
device such as scales, client displays, POS printers, etc.
5.8. Can Microinvest Warehouse Pro perform highly loaded operations? –
Microinvest Warehouse Pro Light allows conveyer work. You can complete a sale
in maximum three operations. If a barcode reader is attached to the computer, this
could speed up servicing of customers and processing of a larger number of items.
5.9. Can Microinvest Warehouse Pro work in restaurants? – Microinvest created and developed Microinvest Warehouse Pro Light to meet its customers needs
and also created a module of the application, which is specifically intended for restaurants and facilitates the staff. The interface of this application is in compliance with
the latest trends in restaurant applications. It facilitates users, speeds up the process
and optimizes the work of the restaurant. Microinvest also created Microinvest
Warehouse Pro Mobile for mobile devices of Pocket PC type. This application allows
highest quality servicing in restaurants.
5.10. Does the application work with lot numbers? Does it trace best before
dates and serial numbers of items? – A large number of Microinvest Warehouse
Pro users use this work method. To enable the work method with lots you must open
Tools –> Settings – Special. Thus you will enable additional features and fields in
the application and you will be able to work with lot numbers. This work mode is in
compliance with the normative legislation in the country. Best before dates can be
traced through a flexible reports system. Serial numbers can be traced as well, but
when you work with serial numbers you must select the “Select Lots” work mode.
Thus you will be able to choose the serial number of the article which will be sold.
- 143 -
5.11. Does the application support other languages? – Yes, Microinvest Warehouse Pro supports the following languages: Bulgarian, English, German, Russian,
Romanian, Turkish, Albanian, Greek and Serbian, with the trend to add others. You
can change the language of the application from Settings -> Other – Language.
- 144 -
- 145 -
Microinvest Склад Pro
для Windows
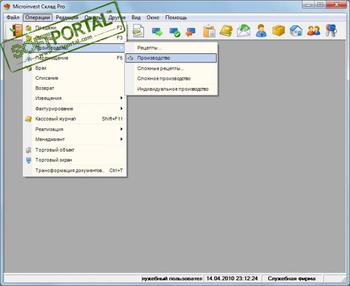
Microinvest Склад Pro — товароучетная система для комплексной автоматизации «сетевых» и розничных структур: магазинов, складов, ресторанов, сауны, аптек, автомоек и т.д. Выполняет функцию Back-Office, охватывает движение товаров, операции и отчеты на предприятии. Мощная система учета и аналитики дает владельцу полную информацию для контроля и управления. Поддерживает фискальное и нефискальное торговое оборудование от всех производителей. Система рассчитана на большие нагрузки и высокую скорость работы. Поддерживается работа с 5 типами баз данных: Access, MSDE, MYSQL, MSSQL и Oracle.
Microinvest Склад Pro позволяет автоматизировать рабочие места любого сотрудника: от оператора и технолога до бухгалтера и владельца предприятия. Для каждой категории пользователей определяется набор прав и интерфейсов.
Подключаемое торговое оборудование: официантские станции, кассовые станции, POS-терминалы, фискальные регистраторы, стандартные принтеры печати, принтеры печати штрихкодов, весы, сканеры, устройства проверки цены, ценники и др.
Возможности:
- Работа в режиме клиент-сервер + Репликация данных;
- Древовидные структуры справочников;
- Совместимый интерфейс и отличный графический стиль;
- Наличие графических отчетов;
- Комплексная система управления бизнесом с уровнями доступа и большим количеством пользователей;
- Распределенная сетевая топология, удаленный доступ и синхронизация;
- WEB интерфейс и администрирование;
- Импорт/экспорт данных из MS Excel;
- Связь с 1С;
- Связь с мобильными устройствами и ТСД;
- Возможность редакции любой операции;
- Возможность работы с партиями и серийными номерами;
- Возможность прослеживания оплаты;
- Возможность работы с валютами и объектами;
- Возможность отслеживания серийных номеров, сроков гарантии и т.д.;
- Печать ценников и этикеток со штрих-кодами.
Для активации программы требуется подключение к сети Интернет
![]()
Что нового в Microinvest Склад Pro 3.07.059?
- со списком изменений можно ознакомиться здесь: http://microinvest.su/SoftwareProducts/ChangeLog?productID=1
ТОП-сегодня раздела «Складской учет»
 Мини-Торг 3.4
Мини-Торг — удобная бесплатная торгово-складская программа для автоматизации розничной и…
 Диста ERP Free 5.111.0.1
Диста ERP Free — бесплатная программа для склада и торговли. Это облегченный вариант коммерческих версий системы Диста ERP…
 Учет товара 2.0
Программа Учет товара предназначена для организации учета поступаемого и продаваемого товара в магазине с несколькими отделами…
 Движение товара 2.1.720
Движение товара — программа, которая предназначена для учета движения товаров на складах магазинов разного вида направленности…
Отзывы о программе Microinvest Склад Pro
Денис про Microinvest Склад Pro 3.07.059 [07-11-2021]
Программа хорошая, но постоянно вылезают «косяки», вынуждающие обновлять ПО, а это 1000р-1200р. Служба поддержки вообще не работает.
В итоге за такие деньги проблемы никто не решит.
| | Ответить
Нуршат про Microinvest Склад Pro 3.07.059 [02-11-2021]
Здравствуйте! Я работаю с 2015 года, вроде нормально но часто в остатке на минус уходят товары ..до сих пор не понятно почему
| | Ответить
Боби про Microinvest Склад Pro 3.07.059 [23-09-2021]
Ужас а не программа. После 1с-это просто жесть, одни нервы. Склад считает не корректно, остатки не совпадают. С документом поработать приходится 7 раз открывать. Не обновляет а сразу закрывает программу. Не высвечивает данные(нал,б.н, острочка и многое другое). Не советую никому-эту программу.
| | Ответить
Ольга в ответ Боби про Microinvest Склад Pro 3.07.059 [11-01-2022]
Полностью согласна!
Не программа, а УЖАС какой то!
1 | | Ответить
Лариса про Microinvest Склад Pro 3.07.059 [18-08-2021]
Программа может и хорошая, не можем точно сейчас оценить, так как представитель в нашем городе вообще ужасный ООО Софт сервис (ИП Маркин) эти две организации один человек. Много говорит, но все не по существу, берет деньги за обучение, а не учит, а проводит обзор по программе, о её возможностях. Во время обучения если задаёшь вопрос, говорит это потом, отдельно. Вобщем сейчас не можем наладить производство в программе. Задаём Сергею вопрос, как распечатать или посмотреть что то, он говорит платите деньги!!! На вопрос, ведь вы должны научить нас работать в вашей программе. Бросает трубки. ВОБЩЕМ, ЛУЧШЕ В Г. Пермь не связывайтесь с данным человеком!!! Высказывание денег!!! Лучше R-keepr или aiko
| | Ответить
Борис про Microinvest Склад Pro 3.07.059 [03-04-2021]
Все отзывы фейковые. Лучше комплекса Микроинвест нет. Внедряется за 3 дня без обучения. С 2011 года работаем. И внедряли и работаем без привлечения специалистов и айтишников. Попробуйте-ка на 1с.
| | Ответить