Приветствую Вас на сайте Info-Comp.ru! Сегодня мы с Вами подробно рассмотрим функционал одного очень популярного инструмента для работы с Microsoft SQL Server — графической среды SQL Server Management Studio (SSMS).

Заметка! Обзор инструментов для работы с Microsoft SQL Server.
Содержание
- Что такое SQL Server Management Studio
- Основной функционал SQL Server Management Studio
- Подключение к службам SQL Server
- Обозреватель объектов
- Обозреватель шаблонов
- Редактор SQL кода
- Просмотр плана выполнения запроса
- Обозреватель решений
- Конструктор таблиц
- Конструктор баз данных (Диаграммы баз данных)
- Конструктор запросов и представлений
- Просмотр свойств объектов
- Мастер создания скриптов
- Управление безопасностью SQL Server
- Присоединение и отсоединение баз данных
- Создание резервных копий баз данных и восстановление баз данных из архива
- Создание связанных серверов (Linked Server)
- Монитор активности SQL Server
- Настройка репликации баз данных
- Профилировщик XEvent
SQL Server Management Studio (SSMS) – это бесплатная графическая среда, включающая набор инструментов для разработки сценариев на T-SQL и управления инфраструктурой Microsoft SQL Server.
Среда SQL Server Management Studio – это основной, стандартный и полнофункциональный инструмент для работы с Microsoft SQL Server, разработанный компанией Microsoft, который предназначен как для разработчиков, так и для администраторов SQL Server.
С помощью SSMS Вы можете разрабатывать базы данных, выполнять инструкции T-SQL, а также администрировать Microsoft SQL Server.
Если в Ваши задачи входит полное сопровождение Microsoft SQL Server, начиная от создания баз данных, написания SQL запросов, создания хранимых процедур и функций, и заканчивая администрированием SQL Server, включая управление безопасностью, то основным Вашим инструментом будет как раз среда SQL Server Management Studio.
Среда SQL Server Management Studio реализована только под Windows, поэтому если Вам нужен инструмент для работы с Microsoft SQL Server, который будет работать на других платформах, например, на Linux или macOS, то Вам следует использовать инструмент Azure Data Studio, который также является официальным инструментом, разработанным компанией Microsoft.
Заметка! Сравнение Azure Data Studio с SQL Server Management Studio (SSMS).
Основной функционал SQL Server Management Studio
Теперь давайте рассмотрим функционал и возможности среды SQL Server Management Studio, иными словами, какие именно действия и операции мы можем выполнять, используя данный инструмент.
Сначала давайте посмотрим на общий перечень возможностей, которые нам предоставляет среда SQL Server Management Studio, а затем более подробно рассмотрим каждый пункт из этого перечня.
Подключение к службам SQL Server
Обозреватель объектов
Обозреватель шаблонов
Редактор SQL кода
Просмотр плана выполнения запроса
Обозреватель решений
Конструктор таблиц
Конструктор баз данных (Диаграммы баз данных)
Конструктор запросов и представлений
Просмотр свойств объектов
Мастер создания скриптов
Управление безопасностью SQL Server
Присоединение и отсоединение баз данных
Создание резервных копий баз данных и восстановление баз данных из архива
Создание связанных серверов (Linked Server)
Монитор активности SQL Server
Настройка репликации баз данных
Профилировщик XEvent
Заметка! Список и расшифровка версий Microsoft SQL Server.
Подключение к службам SQL Server
С помощью SQL Server Management Studio мы можем подключаться не только к ядру СУБД, но и к другим компонентам SQL Server, например, к службам Analysis Services (SSAS), Integration Services (SSIS) и Reporting Services (SSRS).
Таким образом, мы можем управлять объектами служб Analysis Services, например, выполнять их резервное копирование и обработку, создавать скрипты для служб Analysis Services и выполнять другие операции.
Также используя Management Studio мы можем управлять пакетами SSIS, например, выполнять импорт и экспорт пакетов.
Кроме этого SSMS позволяет администрировать службы Reporting Services, т.е. управлять ролями, заданиями и так далее.
Заметка! Не удается подключиться к Microsoft SQL Server по сети.
Обозреватель объектов
Обозреватель объектов среды SQL Server Management Studio – это графический пользовательский интерфейс для просмотра и управления объектами в каждом экземпляре SQL Server.
Обозреватель объектов Management Studio предоставляет интерфейс, в котором структура объектов сервера представлена в очень удобном иерархическом виде, напоминает что-то вроде файловой системы Windows, т.е. папки, подпапки, файлы и т.д.
В случае если «Обозреватель объектов» скрыт или Вы его случайно закрыли, то для того, чтобы его отобразить, можно использовать меню «Вид -> Обозреватель объектов», хотя по умолчанию он отображен, так как это, наверное, основной компонент среды SQL Server Management Studio.

Таким образом, с помощью обозревателя объектов мы легко можем посмотреть, какие базы данных, таблицы, функции, хранимые процедуры и другие объекты есть на SQL Server, включая пользователей, связанные серверы и так далее.
Заметка! Чем отличаются функции от хранимых процедур в Microsoft SQL Server.
Обозреватель шаблонов
Шаблоны в SQL Server Management Studio – это файлы, содержащие стандартный SQL код, который предназначен для создания объектов на SQL Server.
Иными словами, это готовые SQL скрипты, содержащие заголовки SQL инструкций, в которые всего лишь необходимо подставить свои данные, например, имена объектов, чтобы создать тот или иной объект на SQL Server.
Обозреватель шаблонов Management Studio позволяет просматривать и использовать доступные шаблоны.
Открыть «Обозреватель шаблонов» можно из меню «Вид -> Браузер шаблонов».

Таким образом, мы можем использовать шаблоны для создания или изменения таких объектов как:
- Базы данных
- Таблицы
- Представления
- Индексы
- Функции
- Хранимые процедуры
- Триггеры
- И другие объекты SQL Server
Кроме этого, для часто выполняемых задач мы можем создать свои собственные пользовательские шаблоны, для случаев когда нет подходящего встроенного шаблона, и тем самым упростить и ускорить выполнение таких задач.
Редактор SQL кода
Основное назначение среды SQL Server Management Studio – это, конечно же, разработка, выполнение и отладка кода на T-SQL, иными словами, написание и выполнение SQL запросов и инструкций. Поэтому SSMS обладает современным и продвинутым редактором SQL кода, который поддерживает технологию IntelliSense, т.е. автодополнение, например, Вы начинаете писать первые буквы объекта, а редактор сам дописывает его, точнее, показывает возможные варианты окончания.
Кроме этого у редактора есть подсветка синтаксиса и другие полезные возможности.
Заметка! Как включить нумерацию строк кода в SQL Server Management Studio.
Чтобы открыть редактор SQL кода в среде Management Studio, необходимо на панели инструментов нажать на кнопку «Создать запрос». Именно здесь пишутся и выполняются все SQL запросы и инструкции к базам данных.

Просмотр плана выполнения запроса
План выполнения запроса – это последовательность операций, выполняемых внутри SQL Server, которые необходимы для получения результата SQL запроса.
Прежде чем выполнить SQL запрос SQL Server должен проанализировать инструкции и определить наиболее эффективный способ доступа к данным.
Этот анализ выполняется компонентом, который называется «Оптимизатор запросов». Входные данные оптимизатора запросов как раз и являются планом выполнения запроса.
SQL Server Management Studio позволяет просматривать план выполнения запроса и тем самым выявлять наиболее ресурсоемкие операции в запросе с целью оптимизации скорости выполнения этого запроса.
Чтобы показать план выполнения запроса, необходимо на панели нажать на иконку «Показать предлагаемый план выполнения».
Заметка! Visual Studio Code (VS Code) для разработки на Transact-SQL.
Обозреватель решений
Решение в SQL Server Management Studio – это набор из одного или нескольких взаимосвязанных проектов.
Проекты в SQL Server Management Studio – это контейнеры для организации взаимосвязанных файлов, например, файлов с SQL инструкциями, которые используются при разработке того или иного функционала в базах данных.
Обозреватель решений в Management Studio создан как раз для того, чтобы управлять всеми решениями и проектами.
Открыть «Обозреватель решений» можно из меню «Вид -> Обозреватель решений».
Таким образом, с помощью «Обозревателя решений» мы можем все свои SQL скрипты сгруппировать в проект, тем самым систематизировать все файлы и иметь к ним более удобный доступ.
Конструктор таблиц
Конструктор таблиц – это визуальный инструмент для разработки таблиц в базах данных.
С помощью конструктора таблиц SQL Server Management Studio можно создавать, редактировать и удалять:

- Таблицы
- Столбцы
- Ключи
- Индексы
- Связи
- Ограничения
Чтобы запустить «Конструктор таблиц», необходимо щелкнуть правой кнопкой мыши по контейнеру «Таблицы» в обозревателе объектов, и выбрать пункт «Создать -> Таблица».
Таким образом, благодаря функционалу конструктора таблиц мы может создавать и редактировать таблицы базы данных, при этом даже не используя язык SQL.
Конструктор баз данных (Диаграммы баз данных)
Конструктор баз данных — это визуальный инструмент для разработки баз данных, который позволяет конструировать и визуализировать базу данных, с которой установлено соединение.
Конструктор баз данных можно использовать для создания, редактирования и удаления таблиц, столбцов, ключей, индексов, связей и ограничений.
Кроме этого конструктор позволяет визуализировать базу данных, т.е. создать ER-диаграмму базы данных. Можно создать как одну, так и несколько диаграмм, иллюстрирующих некоторые или все имеющиеся в ней таблицы, столбцы, ключи и связи.
Чтобы запустить конструктор баз данных и создать диаграмму базы данных, необходимо в обозревателе объектов щелкнуть правой кнопкой мыши по контейнеру «Диаграммы баз данных» и выбрать пункт «Создать диаграмму базы данных».

Заметка! Нормализация баз данных простыми словами.
Конструктор запросов и представлений
Конструктор запросов и представлений – это визуальный инструмент для разработки запросов и представлений.
В данном конструкторе доступно 4 панели:
- Панель диаграмм – на ней в графическом виде представлен запрос, т.е. какие таблицы и столбцы задействованы в запросе;
- Панель критериев – на ней Вы задаете параметры запроса, например, указываете, какие столбцы будут задействованы в запросе, как отфильтровать данные, как упорядочивать результаты и т.д;
- Панель SQL – здесь запрос отображается в виде SQL инструкций, где Вы можете в случае необходимости внести изменения на языке SQL;
- Панель результатов – она показывает результаты выполнения запроса.
Таким образом, с помощью данного конструктора можно конструировать запросы к базе данных, при этом используя только мышку.
Чтобы открыть конструктор запросов, необходимо в редакторе запросов щелкнуть правой кнопкой мыши в любом месте и выбрать пункт «Создать запрос в редакторе», кстати, можно выделить существующий SQL запрос, если он есть, и точно также создать запрос в редакторе, в этом случае конструктор автоматически визуализирует данный SQL запрос.
Чтобы открыть конструктор представлений, необходимо в обозревателе щелкнуть правой кнопкой мыши по нужному представлению и выбрать пункт «Разработка».
Заметка! Как установить SQL Server Data Tools (SSDT) и что это такое.
Просмотр свойств объектов
Среда SQL Server Management Studio позволяет просматривать и изменять свойства объектов SQL Server в обозревателе объектов.
Практически у каждого объекта на SQL Server есть свойства, которые как раз и можно изменить с помощью графических инструментов среды SQL Server Management Studio или просто посмотреть.
Например, для редактирования свойств базы данных необходимо в обозревателе объектов выбрать базу, щелкнуть по ней правой кнопкой мыши и выбрать «Свойства».
Заметка! Знакомство с Oracle Database Express Edition (XE) – что это такое?
Мастер создания скриптов
В SQL Server Management Studio есть очень полезный функционал, который позволяет сгенерировать скрипт создания объектов базы данных, чтобы, например, использовать этот скрипт на другом экземпляре SQL Server для создания точно таких же объектов.
SQL скрипт объекта базы данных – это SQL инструкция, с помощью которой создается этот объект, сохраненная в текстовом файле.
С помощью данного мастера мы можем очень легко сгенерировать SQL скрипт создания практически любого объекта на SQL Server.
Такой скрипт может включать:
- Инструкции создания таблиц (CREATE);
- Инструкции добавления данных (INSERT);
- Определение представлений, функций, хранимых процедур, триггеров;
- Определение ограничений и индексов;
- И другие SQL инструкции.
Такие SQL скрипты могут быть очень полезны администраторам или разработчикам, например, для того, чтобы в случае необходимости иметь возможность быстро восстановить объекты базы данных с помощью этих скриптов, или для того, чтобы передать эти SQL скрипты другому администратору, разработчику или заказчику, чтобы он создал подобные объекты на своем экземпляре SQL Server.
Таким образом, с помощью данного мастера мы можем создать некий дамп базы данных, содержащий SQL скрипты создания объектов этой базы данных и наполнения их данными.
Заметка! Как сгенерировать SQL скрипт создания объектов и данных в Microsoft SQL Server?
Управление безопасностью SQL Server
Среда SQL Server Management Studio позволяет не только разрабатывать и выполнять T-SQL код, но управлять SQL сервером, в частности управлять безопасностью сервера.
С помощью SSMS можно создавать имена входа на сервер, пользователей баз данных, а также настраивать доступ к объектам сервера.
Для управления безопасностью на уровне сервера необходимо зайти в контейнер «Безопасность», для управления безопасностью базы данных необходимо зайти в одноимённый контейнер на уровне базы данных.
Присоединение и отсоединение баз данных
В среде SQL Server Management Studio есть визуальный инструмент для отсоединения и присоединения баз данных (detach, attach). Таким образом, если у Вас возникла необходимость, например, отсоединить базу данных и перенести ее на другой сервер, то это можно очень легко сделать с помощью SSMS.
Чтобы отсоединить базу данных, необходимо щелкнуть правой кнопкой по нужной базе данных и выбрать пункт «Задачи -> Отсоединить».
Чтобы присоединить базу данных, необходимо вызвать контекстное меню у контейнера «Базы данных» и выбрать пункт «Присоединить».
Заметка! Отсоединение и присоединение баз данных в Microsoft SQL Server (Detach и Attach).
Создание резервных копий баз данных и восстановление баз данных из архива
С помощью SQL Server Management Studio можно, используя графический интерфейс, создавать резервные копии баз данных, а также восстанавливать базы из этих резервных копий.
Чтобы создать резервную копию базы данных, нужно кликнуть правой кнопкой мыши по необходимой базе данных и в меню выбрать «Задачи -> Создать резервную копию», для восстановления базы данных из резервной копии — пункт «Задачи -> Восстановить».
Создание связанных серверов (Linked Server)
В SQL Server Management Studio кроме всего прочего есть графические инструменты для создания связанных серверов.
Монитор активности SQL Server
Монитор активности – это инструмент, который отображает сведения о текущих процессах в SQL Server.
С помощью данного монитора мы можем отслеживать активность на сервере, например, мы можем видеть, какие SQL запросы и инструкции в данный момент выполняются, какие пользователи подключены к SQL Server и так далее.
Для запуска монитора активности необходимо щелкнуть правой кнопкой мыши по серверу в обозревателе объектов и выбрать пункт «Монитор активности» или кликнуть на иконку на панели инструментов.
Монитор активности представляет собой окно с развертываемыми панелями, которые отображают: общие сведения в виде графиков, процессы, ожидающие ресурсы, ввод-вывод в файл данных, последние ресурсоемкие запросы и активные ресурсоемкие запросы.
Заметка! Установка SQL Server Management Studio (SSMS) на Windows 10.
Настройка репликации баз данных
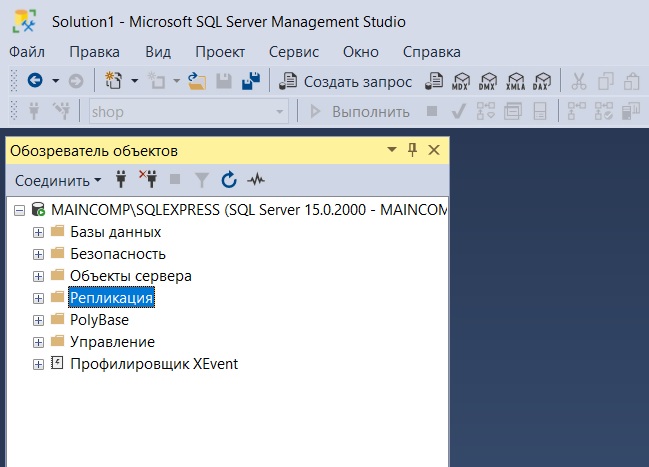
В среде SQL Server Management Studio есть графический инструмент для настройки репликации баз данных.
В обозревателе объектов контейнер так и называется «Репликация».
Профилировщик XEvent
Профилировщик XEvent – это компонент SQL Server Management Studio, который отображает динамическое окно просмотра расширенных событий.
Профилировщик позволяет получить быстрый доступ к динамическому потоковому представлению диагностических событий в SQL Server, например, с целью выявления различных проблем.
Заметка! Курсы по Transact-SQL для начинающих.
Вот мы с Вами и рассмотрели основные возможности и функционал среды SQL Server Management Studio, конечно же, есть и другой полезный функционал, однако уместить все в одной статье не получится, поэтому на сегодня это все, надеюсь, материал был Вам интересен и полезен, пока!
| title | description | author | ms.author | ms.reviewer | ms.date | ms.service | ms.subservice | ms.topic | ms.custom | f1_keywords | helpviewer_keywords | ||||
|---|---|---|---|---|---|---|---|---|---|---|---|---|---|---|---|
|
SQL Server Management Studio (SSMS) |
Learn details about SQL Server Management Studio (SSMS) and what SSMS can do, including how to manage Analysis Services Solutions. |
markingmyname |
maghan |
randolphwest |
03/30/2023 |
sql |
ssms |
overview |
intro-overview |
sql13.ssms.viewhelp.f1 |
|
What is SQL Server Management Studio (SSMS)?
[!INCLUDE SQL Server ASDB, ASDBMI, ASDW]
SQL Server Management Studio (SSMS) is an integrated environment for managing any SQL infrastructure. Use SSMS to access, configure, manage, administer, and develop all components of [!INCLUDE ssnoversion-md], Azure SQL Database, Azure SQL Managed Instance, SQL Server on Azure VM, and Azure Synapse Analytics. SSMS provides a single comprehensive utility that combines a broad group of graphical tools with many rich script editors to provide access to [!INCLUDE ssnoversion-md] for developers and database administrators of all skill levels.
- Download SQL Server Management Studio (SSMS)
- Download SQL Server Developer
- Download Visual Studio
:::image type=»content» source=»media/sql-server-management-studio-ssms/ssms.png» alt-text=»Screenshot of SQL Server Management Studio.»:::
SQL Server Management Studio components
| Description | Component |
|---|---|
| Use Object Explorer to view and manage all of the objects in one or more instances of [!INCLUDE ssnoversion-md]. | Object Explorer |
| Use Template Explorer to build and manage files of boilerplate text that you use to speed the development of queries and scripts. | Template Explorer |
| Use the deprecated Solution Explorer to build projects used to manage administration items such as scripts and queries. | Solution Explorer |
| Use the visual design tools included in [!INCLUDEssManStudio] to build queries, tables, and diagram databases. | Visual Database Tools |
| Use the [!INCLUDEssManStudio] language editors to interactively build and debug queries and scripts. | Query and Text Editors |
SQL Server Management Studio for business intelligence
To access, configure, manage, and administer [!INCLUDEssASnoversion], Integration Services, and Reporting Services, use SSMS. Although all three business intelligence technologies rely on SSMS, the administrative tasks associated with each of these technologies are slightly different.
[!NOTE]
To create and modify Analysis Services, Reporting Services, and Integration Services solutions, use [!INCLUDEssBIDevStudioFull], not SSMS. [!INCLUDEssBIDevStudioFull] is a development environment that is based on Microsoft[!INCLUDEvsprvs].
Manage Analysis Services solutions using SQL Server Management Studio
SSMS enables you to manage [!INCLUDEssASnoversion] objects, such as performing back-ups and processing objects.
[!INCLUDEssManStudio] provides an [!INCLUDEssASnoversion] Script project in which you develop and save scripts written in Multidimensional Expressions (MDX), Data Mining Extensions (DMX), and XML for Analysis (XMLA). You use [!INCLUDEssASnoversion] Scripts projects to perform management tasks or re-create objects, such as database and cubes, on [!INCLUDEssASnoversion] instances. For example, you can develop an XMLA script in an [!INCLUDEssASnoversion] Script project that creates new objects directly on an existing [!INCLUDEssASnoversion] instance. The [!INCLUDEssASnoversion] Scripts projects can be saved as part of a solution and integrated with source code control.
For more information about how to use SSMS, see Developing and Implementing Using SQL Server Management Studio.
Manage Integration Services solutions using SQL Server Management Studio
SSMS enables you to use the Integration Services service to manage packages and monitor running packages. You can also use [!INCLUDEssManStudio] to organize packages into folders, run packages, import and export packages, migrate Data Transformation Services (DTS) packages, and upgrade Integration Services packages.
Manage Reporting Services projects using SQL Server Management Studio
Use SSMS to enable Reporting Services features, administer the server and databases, and manage roles and jobs.
You manage shared schedules by using the Shared Schedules folder, and manage report server databases (ReportServer, ReportServerTempDB). You also create a RSExecRole in the master system database when you move a report server database to a new or different [!INCLUDE ssde-md]. For more information about these tasks, see the following articles:
- Reporting Services in SSMS
- Administer a Report Server database
- Create the RSExecRole
You also manage the server by enabling and configuring various features, setting server defaults, and managing roles and jobs. For more information about these tasks, see the following articles:
- Set Report Server properties
- Create, delete, or modify a role
- Enabling and disabling client-side printing for Reporting Services
Non-English language versions of SQL Server Management Studio
The block on mixed languages setup has been lifted. You can install SSMS German on a French Windows. If the OS language doesn’t match the SSMS language, the user needs to change the language under Tools > Options > International Settings. Otherwise, SSMS shows the English UI.
For more information about different locale with previous versions, reference Install non-English language versions of SSMS.
Support policy for SSMS
- Starting with SSMS 17.0, the SQL Tools team has adopted the Microsoft Modern Lifecycle Policy.
- Read the original Modern Lifecycle Policy announcement. For more information, see Modern Policy FAQs.
- For information on diagnostic data collection and feature usage, see the SQL Server privacy supplement.
Cross-platform tool
[!INCLUDEssms-azure-data-studio-mention]
[!INCLUDEget-help-options]
Next steps
For more information about SSMS, common tasks, and related tools, see the following articles:
- Install non-English language versions of SSMS
- Connect to and query a SQL Server instance
- Writing Transact-SQL Statements
- Azure Data Studio
You’re not alone if you’ve ever felt overwhelmed working with SQL Server Management Studios (SMSS). Figuring out how to use all features SMSS offers can be tricky. But take it easy. This tutorial is just what you need to get started.
In this tutorial, you’ll learn the basics of working with SSMS, like connecting to a server, running queries, and creating databases.
Read on and take your SQL server management skills to the next level!
Prerequisites
This tutorial will be a hands-on demonstration. If you’d like to follow along, be sure you have the following.
- A Windows machine – This tutorial uses Windows 10, but later versions will also work.
- MySQL Server installed on your machine – You can use Microsoft SQL Server Express, a free, lightweight version of SQL Server.
- A MySQL database server to connect to (local machine or a remote server).
Downloading and Installing SQL Server Management Studio (SSMS)
SSMS is a free integrated environment for managing any SQL infrastructure, from SQL Server to Azure SQL Database. SMSS provides a GUI to manage databases and objects on your server.
But before running queries or creating databases, you’ll first have to ensure SSMS is installed correctly. So write and test queries, and create and alter database schema on your local machine or in the cloud.
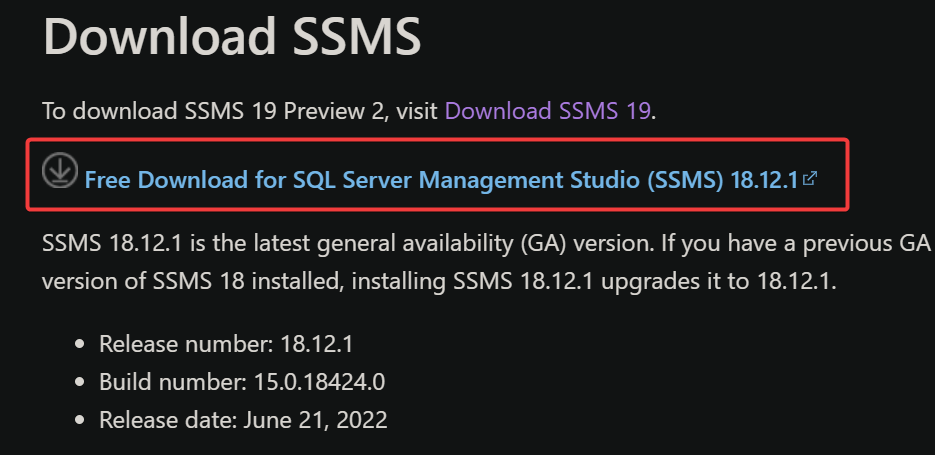
1. Open your favorite web browser, and head to SMSS’s download page.
2. Scroll down to the Download SSMS section and click the Free Download for SQL Server Management Studio (SSMS) hyperlink to start the download.
The file’s size is about 700MB, so the download process might take a few minutes to complete, depending on your internet connection.
3. Double-click the downloaded file to launch the SSMS installer.
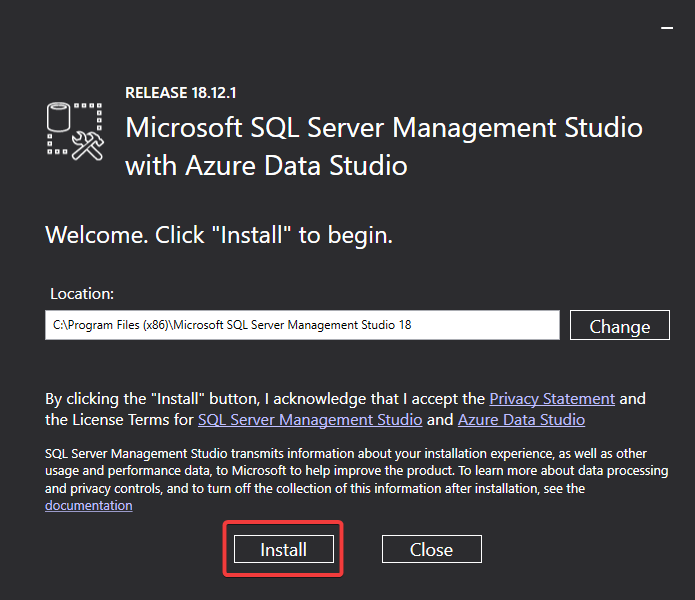
4. Finally, click Install to start the installation process.
You can change the default installation directory if you want, but the default location is fine for most users.
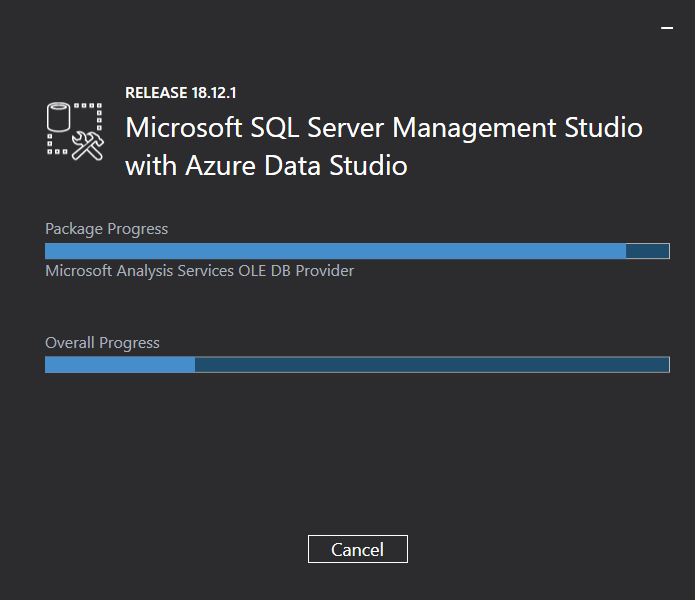
SSMS loads, extracts, and installs the required files, which may take a few minutes.
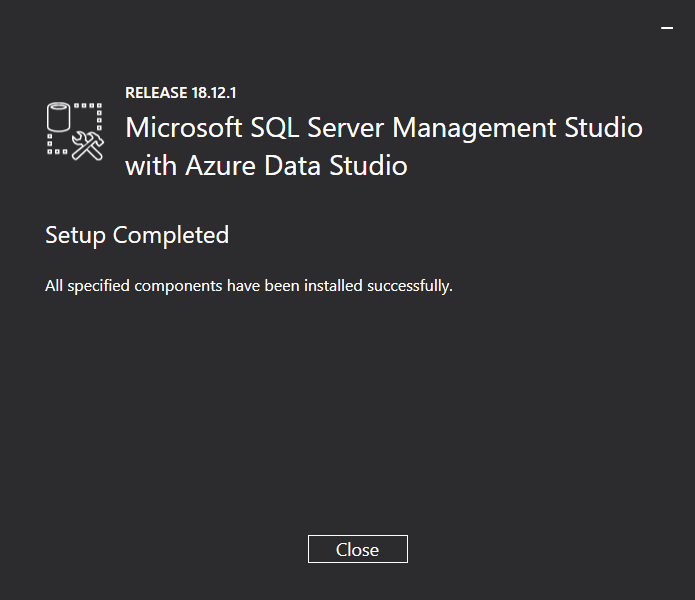
Once the installation completes, you’ll see the Setup Completed screen below.
Congratulations! You’ve successfully installed SSMS on your machine.
Verifying the MySQL Server is Running, and TCP/IP Port is Open
You’ve just installed SSMS, but you need to connect to a database server before you can do SQL server management. For this tutorial, you’ll connect to a MySQL server via SSMS.
Trying to connect to a MySQL server at the moment would be a stretch. So, first things first. Ensure your MySQL server is running and your TCP/IP port is open.
1. Open a PowerShell as administrator for elevated privileges.
2. Next, run the following ping command to verify your TCP/IP port is open. Replace your-ip with your MySQL database server’s IP address.
The ping responses in the output below indicate your MySQL database server is reachable.
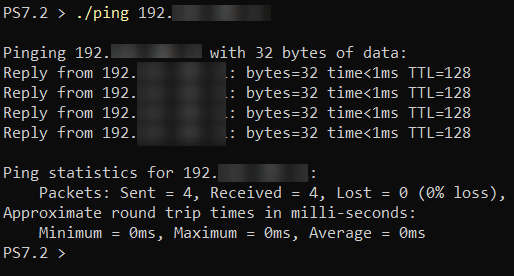
If you get a Request timed out error, like the one below, your database server is unreachable, and you need to check your network configuration.

3. Finally, run the below commands to check if the MySQL database server is running.
# Gets running services that contain the words "sql server"
Get-Service | Where {$_.status -eq 'running' -and $_.DisplayName -match "sql server*"}
# Verifies the MySQL (MSSQL15) folder exists
Get-ChildItem -Path "C:Program FilesMicrosoft SQL Servermssql*" -Recurse -Include Errorlog |select-string "SQL Server is now ready for client connections.” 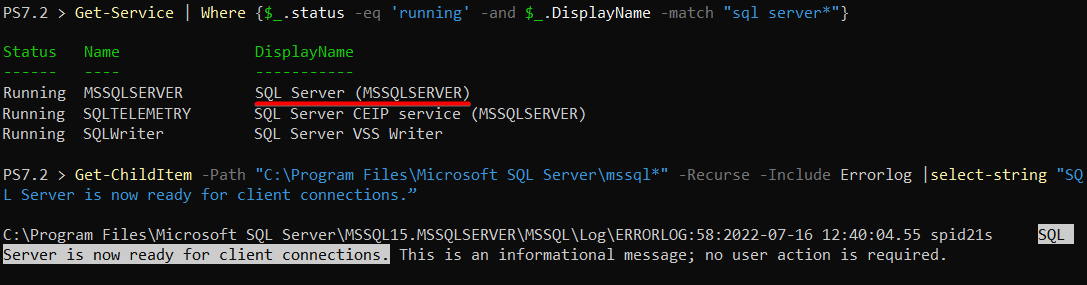
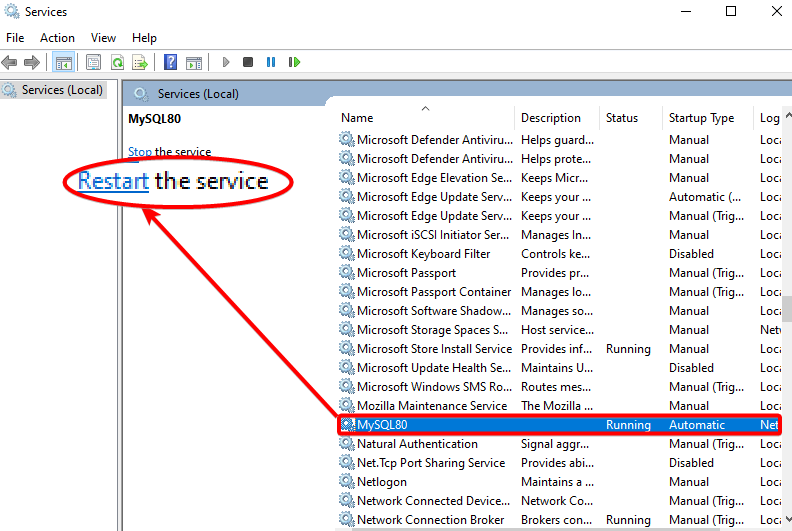
If the database engine service isn’t running, launch the Windows Services, and restart the service, as shown below.
Connecting to the MySQL Database Server
Your MySQL database server is running, and that’s a good start. But the server doesn’t do much right now. To manage SQL databases, you’ll need to connect to your database server via SSMS.
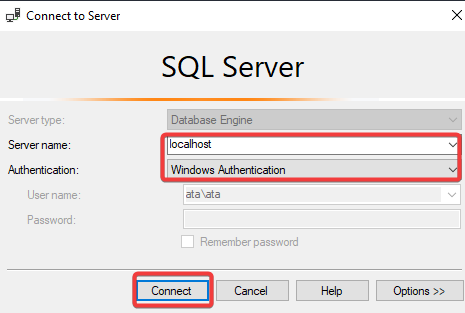
Open SSMS, and you’ll be greeted with the Connect to Server dialog box shown below the first time you launch the tool.
Connect to your MySQL database server with the following:
- Server name – Input your MySQL database server’s IP address or hostname. If you’re running SSMS on the same machine as your database server, you can put localhost as the server name instead.
- Authentication – Select Windows Authentication to connect to the database server using Windows Authentication, which is more secure.
- Click the Connect button to connect to the database server.
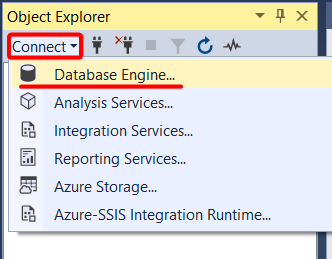
If you didn’t get the Connect to Server dialog box, click the Connect button (top-left) under the Object Explorer pane, and select Database Engine.
The Object Explorer is a tree view control that lets you browse objects in your database server — like File Explorer.
Once connected to the database server, you’ll see the Object Explorer populate with your database server and various objects within each database.

Creating a New Database
After connecting to your database server, it’s time to fill it up with databases and tables and insert data into tables. Having a central location (database) for all your data makes data fetching quicker when you need it.
To create a new database using SSMS:
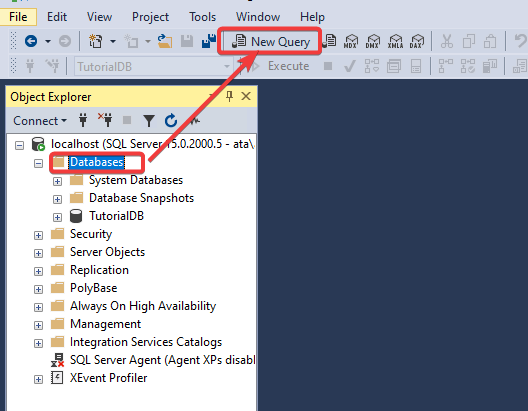
1. In the Object Explorer panel, select the Databases node and click New Query at the toolbar, which opens a new query window (step two).
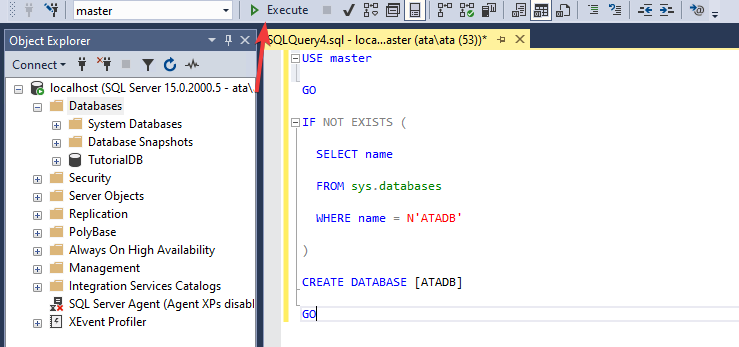
2. In the query window, enter the following T-SQL snippet, which checks if a database with the name ATADB already exists.
If the database exists, the statement does nothing. But if the database doesn’t exist, the statement creates a new database named ATADB.
-- Use the master database.
USE master

GO

-- Check if a database named ATADB exists.
IF NOT EXISTS (

  SELECT name

  FROM sys.databases

  WHERE name = N'ATADB'

  -- If the ATADB database exists, do nothing.
)

-- If the ATADB database doesn't exist, create the database.
CREATE DATABASE [ATADB]

GO
3. Press F5 or click Execute to run the query, as shown below.
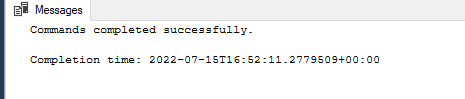
After running the query, you’ll see a message that says Command(s) completed successfully if the database is created successfully. The Completion time is the time SSMS took to execute the query and create the database.
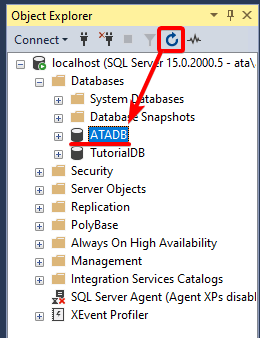
4. Finally, click on the refresh icon in the Object Explorer panel, and you’ll see the newly created database ATADB.
Creating a New Table
You’ve just created a database and know what’s next — a table. A table lets you store data, organized in columns and tables.
To create a new table in SSMS:
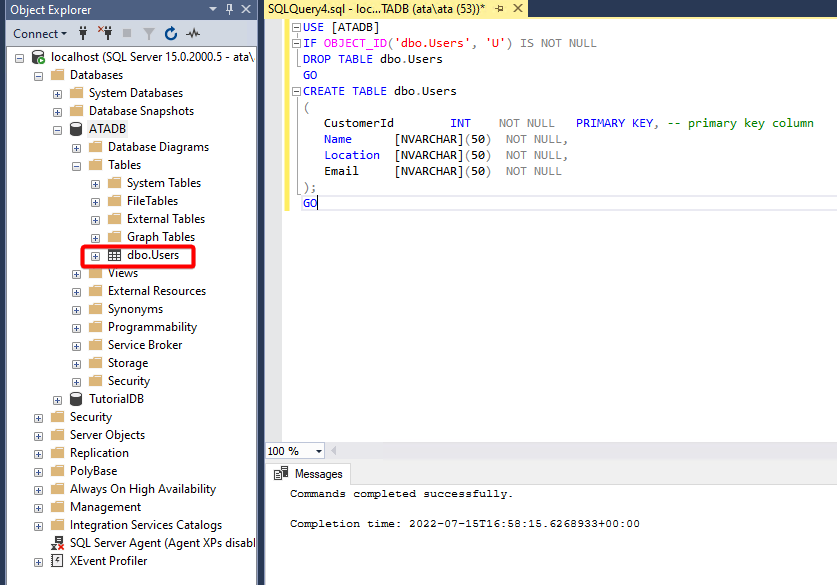
1. Copy and paste the following SQL snippet into the query window, which creates a table called Users in the ATADB database. This table will have four columns: CustomerId, Name, Location, and Email.
The first column (CustomerId) is the primary key of the table. A primary key is a column that uniquely identifies each row in the table. The other columns are just regular data columns.
Notice a data type associated with each column:
- The
CustomerIdcolumn is anINTdata type used for storing whole numbers.
- The Name, Location, and Email columns are all NVARCHAR data types that store text data.
-- Use the ATADB database
USE [ATADB]
-- Check if the Users table
IF OBJECT_ID ('dbo.Users', 'U') IS NOT NULL
-- If the Users table exists, delete the table
DROP TABLE dbo.Users

GO

-- Create the Users table if it doesn't exist
CREATE TABLE dbo.Users

(
  -- Primary key column
  CustomerId INT NOT NULL PRIMARY KEY,
  -- Regular columns
  Name [NVARCHAR](50) NOT NULL,
  Location [NVARCHAR](50) NOT NULL,
  Email [NVARCHAR](50) NOT NULL
);

GO
2. Execute the query to create the Users table if it doesn’t exist.
3. Lastly, click on the refresh icon again in the Object Explorer panel to see the newly created table (Users).
Inserting Data Into a Table
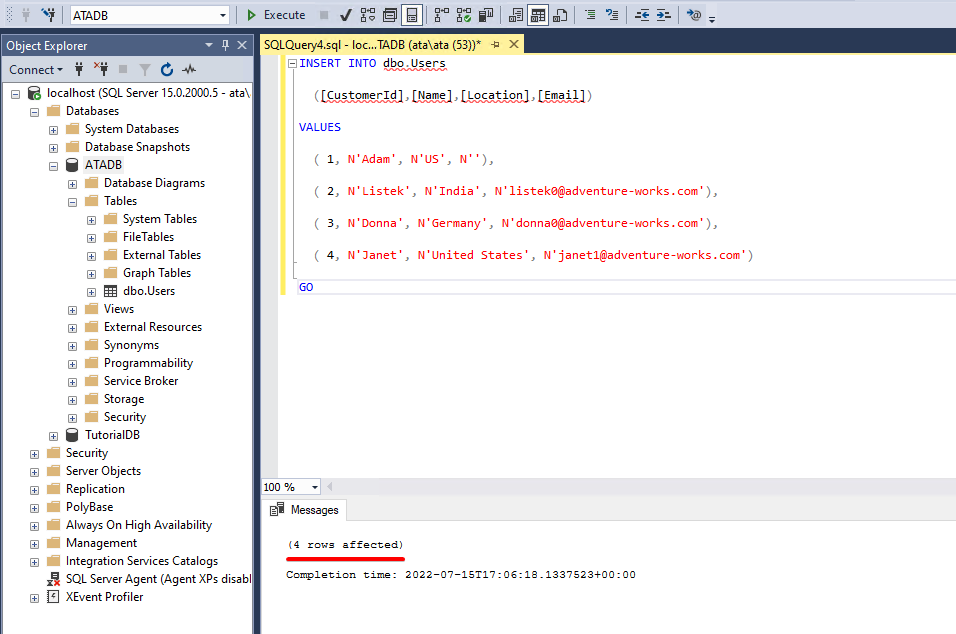
An empty table wouldn’t be useful, so why not insert data into your newly-created Users table? Inserting data into a table is just like copying and pasting text to a sheet’s cells. But with SSMS, you use the INSERT INTO query instead.
Populate the SQL snippet below to the query window to INSERT data INTO the Users table on each column respectively.
-- Insert data into the columns in the Users table
INSERT INTO dbo.Users

  ([CustomerId],[Name],[Location],[Email])

-- Set the values to add to the Users table
VALUES

  ( 1, N'Adam', N'US', N''),
  ( 2, N'Listek', N'India', N'[email protected]'),
  ( 3, N'Donna', N'Germany', N'[email protected]'),
  ( 4, N'Janet', N'United States', N'[email protected]')

GO
Execute the query and see SSMS inserts data into the Users table.
You can see below that the message says 4 rows affected. Jump to the following step to see the actual data.
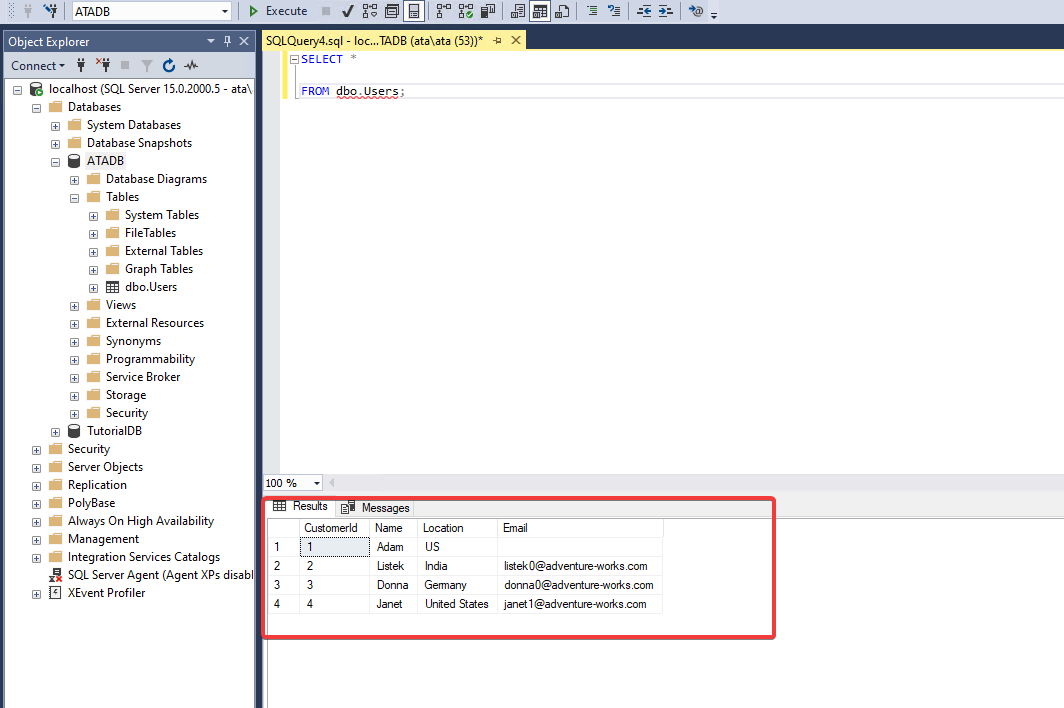
Querying Data From a Table
You’ve successfully inserted data to your Users table, but how do you verify that? Execute an SQL snippet to view the actual data inserted into your Users table.
Put the following SQL snippet into the query window. This query will SELECT all (*) of the columns and rows from the Users table.
Execute the query, and you’ll see the data from the Users table in the results pane, as shown below.
Conclusion
In this tutorial, you’ve learned how to install and use SQL Server Management Studio (SSMS) to create a database and table. You’ve inserted data into a table and realized how SSMS makes your life easier managing data in your database by verifying data in an actual table.
Why not use pre-built templates to quickly create databases to build on this newfound knowledge? Or perhaps create shortcut key bindings to work with SSMS easier?
In the big picture, you need to:
- Download the free Microsoft SQL Server Management Studio and install it, accepting the defaults
- Connect to your SQL Server
- Create a low-privileged login so that you don’t accidentally drop objects
- Learn to switch back & forth between the low-privileged account and your regular one
Let’s get started!
1. Download and install SSMS (but not on the server itself)
The first step is really easy: go here to get the latest version of SSMS and install it. If you already have a version of SSMS, the installer will automatically update it to the latest version. It doesn’t matter what version of SQL Server you’re running in production: as long as you’re running a currently supported version of SQL Server (2012 & newer as of this writing), you always wanna run the latest version of SSMS, which will include a ton of bug fixes.
Do this installation on your desktop or laptop, not on the SQL Server itself. Over time, you’ll learn that running SSMS (as with any other app) on the SQL Server itself will slow it down. You wouldn’t remote desktop into the SQL Server and start playing Fortnite, now, would you? Don’t answer that. You probably would. You’re the kind of person who reads this blog, after all, and I … let’s just stop there. Install SSMS on your desktop.
2. Connect to your SQL Server
After launching SSMS, you get a connection dialog:

Server name – the DNS name or IP address where your SQL Server answers connection requests. This is usually the same as the server name itself, but if you have fancier setups like named instances or non-default port numbers, you’ll need to specify those here.
Authentication – probably Windows, try that first. If that fails, you either don’t have access to the server, or it’s configured with SQL authentication. You might have a username & password on a post-it note somewhere, like from the person who installed it, and it might have a username of “sa”. In that case, go ahead and use that for now. In the next step, we’ll set you up a low-privilege account.
Click Connect, and you’ll be handsomely rewarded with a window that looks like this:

At this point, you’re able to do … all kinds of dangerous things, actually. We need to fix that so you don’t do something stupid.
3. Create yourself a low-privileged login.
Start a new query by clicking File, New, Database Engine Query, or right-click on the SQL Server name and click New Query:

You’ll get an empty new-query window. Copy/paste the below into your new query window so we can find out if you have Windows-only authentication turned on:
|
SELECT SERVERPROPERTY(‘IsIntegratedSecurityOnly’) |
If the result is 1, that means your SQL Server only allows Windows logins. In that case, I deeply apologize, but I’m not covering that yet in the scope of this blog post.
If the result is 0, good news! You can create SQL logins. To do that, copy/paste the below into your new-query window, and note that you have some changes to make:
|
USE [master] GO CREATE LOGIN [brent_readonly] WITH PASSWORD=N‘changeme’, DEFAULT_DATABASE=[tempdb], CHECK_EXPIRATION=ON, CHECK_POLICY=ON GO GRANT VIEW SERVER STATE TO [brent_readonly]; GO |
Change brent_readonly to be whatever username you want: typically your regular username, but append _readonly to it so you know that it’s your less-privileged account. Note that you have to change “brent_readonly” in two places.
Change the password from “changeme” to whatever you want.
If you get an error that says:
|
Msg 15118, Level 16, State 1, Line 3 Password validation failed. The password does not meet the operating system policy requirements because it is not complex enough. |
Then you need to use a more complex password.
Finally, let’s make sure the new login can’t write anything in your existing databases. Copy/paste this in, change brent_readonly to your login name (note that it’s in 3 places), and run it:
|
sp_msforeachdb ‘USE [?]; CREATE USER [brent_readonly] FOR LOGIN [brent_readonly]; ALTER ROLE [db_denydatawriter] ADD MEMBER [brent_readonly];’ |
That only affects the databases you have in place today. If someone restores a database into this environment, you’ll be able to write to it. If you’ve got some time and you’re willing to roll up your sleeves a little, here’s how to deny writes in all new databases long term.
4. Learn to switch back & forth between accounts.
Now that you have a low-privileged account, you’re going to want to use this by default when you connect into SQL Servers with Management Studio. This helps prevent you accidentally causing a resume-generating event.
Close SSMS, and reopen it again. This time, at the connection dialog:

Choose SQL Server authentication because we created a new SQL login, and then type in your low-privileged username and password. Click Connect, and you’re now working a little more safely, without the superpowers of your regular domain login.
If you do need to switch over to your regular high-permission account, you could close SSMS entirely and reopen it, but there’s an easier way. To change accounts for the current query window, click the change-connection button at the top right. It looks like a plug/unplug button:

That’ll give you the connect-to-server dialog box. Note that the login change only affects the currently open query window: that’s the safest way to minimize the damage. Then, as soon as you’re done doing high-permissions stuff, close that window, and you’re back to your regular low-permission stuff.
Next steps for learning
Now that you have an account that’s safe to use for learning, here are a few next steps of tools to explore on how to get to know your SQL Server better.
- How I Configure SQL Server Management Studio – my setup tips
- sp_Blitz – totally free health check script that warns you about dangerous things in your SQL Server that may present problems later
- How to do a health check – my free process for writing up a SQL Server’s health and performance issues