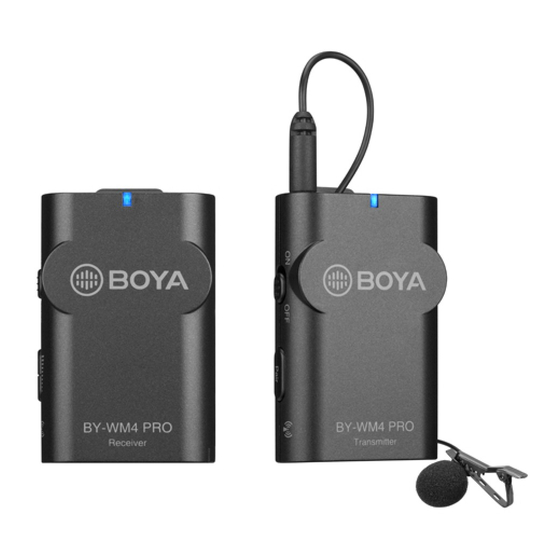
![]() ПО-WM4 PRO
ПО-WM4 PRO
Двухканальный цифровой беспроводной микрофон

Инструкция по эксплуатации
Благодарим вас за покупку BOYA BY-WM4 PRO!
BY-WM4 PRO предназначен для видеооператоров с ограниченным бюджетом и любителей видео.
Характеристика:
- Двухканальный беспроводной приемник
- Цифровой диапазон частот 2.4 ГГц
- Сверхчистый звук записи
- Совместимость со смартфонами, цифровыми зеркальными фотокамерами, потребительскими видеокамерами, ПК и т. Д.
- Легкий и компактный для удобной переноски
- Всенаправленный петличный микрофон
- Жесткий футляр в комплекте
- В комплект входят стандартное крепление для башмака камеры и зажим
- Рабочий диапазон до 60 м (197 футов) (без препятствий)
- Питание осуществляется от двух батареек AAA для передатчика и приемника.
BY-WM4 Pro-K1 состоит из одного нательного передатчика (TX4 Pro), портативного приемника (RX4 Pro) и следующих принадлежностей к ним:

BY-WM4 Pro-K2 состоит из двух нательных передатчиков (TX4 Pro), портативного приемника (RX4 Pro) и следующих принадлежностей к ним:

Передатчик (TX4 Pro)
 Вход для микрофона
— Подключите сюда входящий в комплект петличный микрофон.
— Полностью вставьте штекер 3.5 мм микрофона и убедитесь, что он встал на место.- Линейный вход
- Индикатор питания
1) Светодиод питания мигает синим, когда устройство включено.
2) Светодиод питания светится красным при низком уровне мощности.
Дополнительные сведения о светодиодных индикаторах см. Ниже:
Статус Получатель передатчик Передатчик и приемник подключены. Остается синим Постоянно мигает
каждые 2.5 секунд.Передатчик и приемник отключаются. Мигает непрерывно каждые 1 секунду. Мигает непрерывно каждые 1 секунду. Приемник выключен (передатчик все еще включен) от Мигает синим Блок передатчика выключен (приемник все еще включен) Мигает синим от Малая мощность Мигает красным - Выключение / включение питания
- пара
Эта кнопка предназначена для подключения сигналов.
Подробнее см. «Как подключить передатчик и приемник» на стр. 11.
- Антенна
Пожалуйста, не прикасайтесь сюда во время использования, иначе это повлияет на сигнал. - Батарейный отсек
Вмещает две батарейки AAA. Для получения дополнительной информации см. «Установка батарей» на стр. 9. - Клип
Для получения дополнительной информации см. «Установка или удаление зажима» на странице 13.
 Вход для микрофона
Приемник (RX4 Pro)

- Разъем для наушников (стерео мини-джек диаметром 3.5 мм)
Чтобы контролировать выход ресивера, подключите к этому разъему наушники.
НОТА:
Не подключайте наушники к монофоническому мини-разъему.
Это может привести к короткому замыканию выхода наушников и искажению звука. - LINE OUT (аудиовыход) Джек
— Для использования смартфона, планшета или Mac Подключите сюда один конец (штекер под углом 90 °) прилагаемого стереофонического мини-кабеля TRRS 3.5 мм, а другой конец (прямой штекер) к смартфону.
— Для фотоаппаратов, видеокамер, аудиомагнитофонов и других устройств записи звука и видео.
Подключите сюда один конец прилагаемого стереофонического мини-выходного кабеля TRS 3.5 мм, а другой конец — к камере. - Индикатор питания
Для получения дополнительной информации см. «Индикатор питания» на стр. 5. - Выключение / включение питания
- Объем +/-
Нажмите эти кнопки, чтобы установить уровень ослабления входного сигнала. - Антенна

Пожалуйста, не прикасайтесь сюда во время использования, иначе это повлияет на сигнал. - Батарейный отсек
Вмещает две батарейки AAA.
Для получения дополнительной информации см. «Установка батарей» на стр. 9. - Клип
Для получения дополнительной информации см. «Установка или удаление зажима» на странице 13. - Адаптер для крепления обуви
Какая разница?
- Разъем TRRS 3.5 мм
— Для смартфонов, планшетов, Mac или ноутбуков с комбинированным разъемом для наушников / микрофона
- Разъем TRS 3.5 мм
— Для фотоаппаратов, видеокамер, аудиомагнитофонов и других аудио / видео записывающих устройств.


Как его использовать
Вставьте батарейки в передатчик и приемник.
- И передатчик, и приемник требуют двух батареек размера AAA.
- Сдвиньте и снимите крышку батарейного отсека передатчика.
- Вставьте две батарейки.
- Закройте крышку батарейного отсека.
- Выполните шаги 2–4, чтобы вставить батарею в приемник.

Подключение передатчика и приемника с помощью микрофона к смартфону, планшету, Mac или ноутбуку с комбинированным разъемом для наушников / микрофона.
Получатель
- Установите приемник на смартфон, планшет, Mac или ноутбук.
- С помощью кабеля TRRS вставьте разъем 3.5 мм (прямой штекер) в аудиоразъем вашего смартфона.
- Вставьте штекер соединительного кабеля под углом 90 ° в гнездо «LINE OUT» ресивера.
- Вставьте наушники в приемник »
 ”Для мониторинга звука, если вам нужно.
 - Установите переключатель питания в положение ON (светодиодный индикатор загорится синим).
Внимание: Пожалуйста, не перепутайте вилки, подробности см. В разделе «В чем разница» на странице 8.

 ПРИМЕЧАНИЕ:
Не все устройства Android поддерживают внешний микрофон при съемке видео, и вам может потребоваться загрузить стороннее приложение и настроить источник звука в качестве внешнего микрофона.
Подключение передатчиков и приемника
Если передатчики и приемники отключаются, выполните следующие действия:
Перед отправкой с завода будет установлено соединение между передатчиками и приемниками.
- Включите приемник и передатчики.
- Нажмите кнопки «+» и «-» на 3 секунды для приемника и одновременно нажмите «Pair» одного передатчика на 3 секунды.
- Когда передатчик и приемник подключены, свет приемника останется синим, свет передатчиков будет мигать каждые 2.5 секунды.
- Повторите шаг 2 для другого передатчика.
В противном случае световые индикаторы приемника и передатчиков будут непрерывно мигать каждую 1 секунду, затем повторите 1–4 шага еще раз.
Использование микрофона с фотоаппаратами, видеокамерами, аудиомагнитофонами и другими устройствами для записи звука и видео.
Получатель
- Установите приемник на камеры, видеокамеры, аудиомагнитофоны и другие аудио / видео записывающие устройства.
- С помощью кабеля TRS вставьте разъем 3.5 мм в аудиоразъем камеры.
- Вставьте другой конец соединительного кабеля в гнездо «LINE OUT» ресивера.
- Вставьте наушники в приемник »
 ”Для мониторинга звука, если вам нужно.
 - Установите переключатель питания в положение ON (светодиодный индикатор загорится синим).
Внимание: не перепутайте аудиокабели, подробности см. В разделе «В чем разница на стр. 8».

Установить микрофон
- Зажим устанавливается на микрофон перед отправкой с завода.
- И передатчик, и приемник имеют зажим, что означает, что вы можете установить их в любом месте.
- Отрегулируйте направление микрофона ко рту, поворачивая микрофон.

Если приемник необходимо установить на горячий / холодный башмак камеры, выполните следующие действия:
- Сдвиньте зажим вправо.

- Установите крепление для холодного башмака в нужное положение.

- Приемник установлен на башмак камеры с подогревом / холодом


| RF модуляция: | GFSK (Гаусс-частотная манипуляция) |
| Диапазон частот: | 2.4 ГГц (2405–2478 МГц) |
| Частотная характеристика: | 351-1z-14 кГц ± 3 дБ |
| Сигнал / шум: | 84 дБ или более |
| Искажение: | 0.05% или менее (3252,1 кГц, выходная мощность 65 мВт) |
| Уровень выходного сигнала: | 3ннВт |
| Выходной уровень наушников: | 3252,65mW |
| Чувствительность приема: | -90 дБ +/- 3 дБ / OdB = 1 В / Па, 1 кГц |
| Разъем аудиовхода: | Мини-джек 3.5 мм |
| Рабочий диапазон: | 60 м (197 футов) (без препятствий) |
| Требования к питанию: | 3 В постоянного тока (две батареи размера AAA) |
| Потребляемая мощность: | Передатчик: 3 В / 70 мА |
| Приемник: 3 В / 70 мА | |
| Габаритные размеры: | Приемник: 45x70x35 мм (1.8 * 2.8 * 1.4 дюйма) |
| Передатчик: 45x70x35 мм (1.8 * 2.8 * 1.4 дюйма) | |
| Вес: | Ресивер: 47 г (1.7 унции) |
| Передатчик: 47 г (1.7 унций) |
ВНИМАНИЕ!
- Используйте наш оригинальный аудиокабель, который оборудован, он более совместим с беспроводным микрофоном и улучшает звук.
- Приведенное число является приблизительным значением, которое применяется, когда между передатчиком и приемником нет препятствий. Это расстояние будет варьироваться в зависимости от металлических предметов, людей и других препятствий, а также от силы сигнала.
- Срок службы батареи может варьироваться в зависимости от типа используемой батареи.
ВАЖНАЯ ИНФОРМАЦИЯ
- Если вы не собираетесь использовать беспроводной микрофон в течение длительного времени, извлеките батареи из передатчика и приемника.
- Не касайтесь петличного микрофона, передатчика и приемника во время записи, так как это вызовет запись шума.
- Не позволяйте передатчику приближаться к высокимtage оборудования или устройств, излучающих сильные электромагнитные поля, в противном случае шум может быть записан.
- Не используйте и не оставляйте передатчик и приемник в жарких влажных местах.
- Не оставляйте приемник прикрепленным к камере при хранении камеры в чемодане.
- Не используйте одновременно передатчик и приемник.
ПРЕДУПРЕЖДЕНИЕ
- Храните беспроводной микрофон в недоступном для детей месте.
- Никогда не используйте протекающие батареи и никогда не подвергайте батареи чрезмерному нагреву или огню.
ОБСЛУЖИВАНИЕ
- Не прикасайтесь к устройству мокрыми руками или ногами.
- Очищайте оборудование только способом, описанным в инструкции по эксплуатации.
- Следите за тем, чтобы оборудование не упало. Убедитесь, что устройство правильно закреплено и надежно закреплено. Если устройство упало на пол, перед повторным включением его должен проверить квалифицированный электрик.
- Если оборудование повреждено или неисправно, или если вы заметили обжигающий запах:
Немедленно отключите подачу электроэнергии, вынув батареи. Не эксплуатируйте прибор с поврежденным корпусом, не ремонтируйте прибор самостоятельно. Ремонт устройства выполнял только квалифицированный электрик? - Всегда поддерживайте устройство в хорошем состоянии, как указано в данной инструкции по эксплуатации.
- Не вскрывайте устройство.
ПРЕДУПРЕЖДЕНИЕ
ЗАЯВЛЕНИЕ FCC:
Это устройство соответствует требованиям части 15 правил FCC.
Эксплуатация возможна при соблюдении следующих двух условий:
- Это устройство не должно вызывать вредных помех, и
- Это устройство должно принимать любые помехи, включая помехи, которые могут вызвать сбои в работе.
Внимание!
Изменения или модификации, прямо не одобренные стороной, ответственной за соответствие, могут лишить пользователя права на эксплуатацию оборудования.
ПРИМЕЧАНИЕ:
Это оборудование было протестировано и признано соответствующим ограничениям для цифровых устройств класса B в соответствии с частью 15 правил FCC. Эти ограничения разработаны для обеспечения разумной защиты от вредных помех при установке в жилых помещениях. Это оборудование генерирует, использует и может излучать радиочастотную энергию и, если оно установлено и используется не в соответствии с инструкциями, может создавать вредные помехи для радиосвязи. Однако нет гарантии, что помехи не возникнут при конкретной установке. Если это оборудование действительно создает недопустимые помехи для приема радио или телевидения, что можно определить путем включения и выключения оборудования, пользователю рекомендуется попытаться устранить помехи одним или несколькими из следующих способов:
Изменить ориентацию или местоположение приемной антенны.
Увеличьте расстояние между оборудованием и приемником.
Подключить оборудование к розетке в цепи, отличной от той, к которой подключен приемник.
Обратиться за помощью к дилеру или опытному радио / ТВ технику.
Предупреждение RF:
Устройство было проверено на соответствие общим требованиям к воздействию радиочастотного излучения. Устройство можно использовать в условиях переносного воздействия без ограничений.
www.boya-mic.com
ШЭНЬЧЖЭНЬ ЦЗЯЙЗ ФОТО ПРОМЫШЛЕННАЯ., ООО.
Логотип BOYA — это торговая марка, зарегистрированная и принадлежащая
Шэньчжэнь Jiayz Photo Industrial., Ltd.
ПРАВО НА КОПИРОВАНИЕ 2010-2020
Эл. почта: sales@boya-mic.com
www.boya-mic.com / www.jiayz.com
Документы / Ресурсы
 |
Двухканальный цифровой беспроводной микрофон BOYA BY-WM4 PRO [pdf] Инструкция по эксплуатации BY-WM4 PRO, двухканальный цифровой беспроводной микрофон |
 |
Двухканальный цифровой беспроводной микрофон BOYA BY-WM4 PRO [pdf] Инструкция по эксплуатации WM4PRORXU, 2ARN3-WM4PRORXU, 2ARN3WM4PRORXU, BY-WM4 PRO Двухканальный цифровой беспроводной микрофон, Двухканальный цифровой беспроводной микрофон, Цифровой беспроводной микрофон, Беспроводной микрофон, Микрофон |
 |
Двухканальный цифровой беспроводной микрофон BOYA BY-WM4 PRO [pdf] Инструкция по эксплуатации WM4PRORXD, 2ARN3-WM4PRORXD, 2ARN3WM4PRORXD, BY-WM4 PRO Двухканальный цифровой беспроводной микрофон, Двухканальный цифровой беспроводной микрофон |
Рекомендации

ВОКАЛЬНЫЕ ПРОЕКТЫ
Посмотреть инструкция для BOYA BY-WM4 PRO K2 бесплатно. Руководство относится к категории микрофоны, 2 человек(а) дали ему среднюю оценку 7.1. Руководство доступно на следующих языках: английский. У вас есть вопрос о BOYA BY-WM4 PRO K2 или вам нужна помощь? Задайте свой вопрос здесь
Не можете найти ответ на свой вопрос в руководстве? Вы можете найти ответ на свой вопрос ниже, в разделе часто задаваемых вопросов о BOYA BY-WM4 PRO K2.
Инструкция BOYA BY-WM4 PRO K2 доступно в русский?
Не нашли свой вопрос? Задайте свой вопрос здесь
-
Contents
-
Table of Contents
-
Troubleshooting
-
Bookmarks
Quick Links
BY-WM4 PRO
Dual-Channel Digital Wireless Microphone
Related Manuals for Boya BY-WM4 PRO
Summary of Contents for Boya BY-WM4 PRO
-
Page 1
BY-WM4 PRO Dual-Channel Digital Wireless Microphone… -
Page 2
DSLR cameras, consumer camcorders, PCs etc. The BY-WM4 PRO system is suitable for a wide range of wireless applications such as interviews, mobile journalisms, reporting, vloggings, podcasts and more. The BY-WM4 PRO system is a expandable evolution… -
Page 3
BY-WM4 Pro consists of one body-pack transmitter(TX4 Pro), a portable receiver (RX4 Pro), and their accessories as following: Transmitter(TX4 Pro) Receiver(RX4 Pro) Lavalier/lapel microphone 3.5mm to TRS audio output cable 3.5mm to TRRS audio output cable Cold-shoe mount Wind screen… -
Page 4
BY-WM4 Pro-K2 consists of two body-pack transmitters(TX4 Pro), a portable receiver (RX4 Pro), and their accessories as following: Transmitter(TX4 Pro) x2 Receiver(RX4 Pro) Lavalier/lapel microphone x2 3.5mm to TRS audio output cable 3.5mm to TRRS audio output cable Cold-shoe mount… -
Page 5
BY-WM4 Pro-K3 is specially designed for Lightning iOS Devices. It consists of one body-pack transmitter (TX4 Pro), wireless receiver with a Lightning connector (BY-WM4 PRO RXD),and their accessories as following: Receiver(BY-WM4 PRO RXD) Transmitter(TX4 Pro) Lavalier/lapel microphone Wind screen Microphone Holder clip… -
Page 6
BY-WM4 Pro-K4 is specially designed for Lightning iOS Devices. It consists of two body-pack transmitter (TX4 Pro), wireless receiver with a Lightning connector (BY-WM4 PRO RXD),and their accessories as following: Receiver(BY-WM4 PRO RXD) Transmitter(TX4 Pro) x2 Lavalier/lapel microphone x2 Wind screen x2… -
Page 7
BY-WM4 Pro-K5 specially designed for Andriod and other Type-C devices. It consists of one body-pack transmitter (TX4 Pro), wireless receiver with a USB Type-C connector (BY-WM4 PRO RXU),and their accessories as following: Receiver(BY-WM4 PRO RXU) Transmitter(TX4 Pro) Lavalier/lapel microphone Wind screen… -
Page 8
BY-WM4 Pro-K6 specially designed for Andriod and other Type-C devices. It consists of two body-pack transmitter (TX4 Pro), wireless receiver with a USB Type-C connector (BY-WM4 PRO RXU),and their accessories as following: Receiver(BY-WM4 PRO RXU) Transmitter(TX4 Pro) x2 Lavalier/lapel microphone x2… -
Page 9
Transmitter (TX4 Pro) ① ② ③ ⑧ ④ ⑤ ⑥ ⑦ 1. Microphone input — Connect the supplied lavalier microphone here. — Fully insert the microphone’s 3.5mm plug and make sure it clicks into place. 2. Line In 3. Power LED 1) The power LED flash blue when the unit is on. -
Page 10
For more details about LED indicator, please refer to as following: Status Receiver Transmitter Flashes continually The transmitter and the receiver connects. Stays blue every 2.5 seconds. Flashes continually Flashes continually The transmitter and the receiver disconnects. every 1 second. every 1 second. -
Page 11
Receiver (RX4 Pro) ② ⑨ ① ③ ⑧ ④ ⑤ ⑥ ⑦ 1. Earphone Jack (3.5mm diameter stereo mini jack) To monitor the receiver output, connect the headphones to this connector. NOTE: Do not connect headphones with a monaural mini jack. This may lead to short-circuiting of the headphone output, resulting in distorted sound output. -
Page 12
— For cameras, camcorders, audio recorders and other audio/Video recording devices. Connect one end of the supplied TRS stereo 3.5mm mini output cable here, and the other end to camera. 3. Power LED For more details, please see “Power LED” on page 7. 4. -
Page 13
What’s difference? 3.5 mm TRRS connector — For Smartphone, tablet, Mac or laptop with combo headphone/Mic jack Connect to Receiver “LINE OUT” Connect to Smartphone SMARTPHONE MICROPHONE 3.5 mm TRS connector — For cameras, camcorders, audio recorders and other audio/video recording devices. -
Page 14
How to use it Installing batteries 1. Both transmitter and receiver requires two AAA size batteries. 2. Slide and remove the transmitter’s battery compartment cover. 3. Insert two pieces of batteries. 4. Close the battery compartment cover. 5. Do the same ways as step 2 to 4 to insert battery into receiver. -
Page 15
Connecting the transmitter and receiver Using the microphone with smartphone, tablet, Mac or laptop with combo headphone/Mic jack. Receiver 1. Mount receiver to Smartphone, tablet, Mac or laptop. 2. Using TRRS cable, plug the 3.5 mm connector(straight plug) into the audio jack of your smartphone. 3. -
Page 16
How to connect transmitter and receiver? Before leaving factory, the connection of transmitters and receiver will be established. If transmitters and receiver disconnect, please follow below steps: 1. Turn on the receiver and the transmitters. 2. Press the button “+” and “-“ for 3 seconds for receiver and press «Pair»… -
Page 17
Using the microphone with cameras, camcorders, audio recorders and other audio/video recording devices. Receiver 1. Mount receiver to cameras, camcorders, audio recorders and other audio/video recording devices. 2. Using TRS cable, plug the 3.5 mm connector into the audio jack of your camera. 3. -
Page 18
Installing or uninstalling clip 1. Clip is mounted on the microphone before leaving factory. 2. Both transmitter and receiver include clip, that means you can mount them in any place you want. 3. Adjust the direction of the microphone to your mouth by rotating the Microphone. -
Page 19
2. Push the cold shoe mount on the position. 3. Mounted receiver onto camera hot/cold shoe… -
Page 20
BY-WM4 PRO RXD 2.4GHz Wireless Receiver For iOS devices… -
Page 21
Receiver (BY-WM4 PRO RXD) ③ ② ④ ⑤ ⑥ ① ⑦ 1. Headphone Jack (3.5mm diameter stereo mini jack) To monitor the receiver output, connect the headphones to this connector. NOTE: Do not connect headphones with a monaural mini jack. -
Page 22
2. Power LED For more details about LED indicator, please refer to as following: Status Receiver Transmitter The indicator won’t light up Flashes continually The transmitter and the receiver connects. until you turn on every 2.5 seconds. the audio/video app. Flashes continually Flashes continually The transmitter and the receiver disconnects. -
Page 23
Set Up Guide 1. Plug the BY-WM4 PRORXD directly into the lightning port of smartphone. 2. Open the audio/video app on mobile device, then the indicator of receiver should be light up. 3. The Power LED flashes slowly waiting for connecting with the transmitter. -
Page 24
Connecting the transmitter and the Receiver Before leaving factory, the connection of transmitters and receiver will be established. If transmitters and receiver disconnect, please follow below steps: 1.Turn on the transmitter and plug the receiver into smartphone. 2. Long press the pair bottom of receiver with pair pin, the indicator of receiver will flash quickly when entering paring mode. -
Page 25
BY-WM4 PRO RXU 2.4GHz Wireless Receiver For Android and other Type-C devices… -
Page 26
Receiver (BY-WM4 PRO RXU) ③ ② ④ ⑤ ⑥ ① ⑦ 1. Headphone Jack (3.5mm diameter stereo mini jack) To monitor the receiver output, connect the headphones to this connector. NOTE: Do not connect headphones with a monaural mini jack. -
Page 27
2. Power LED For more details about LED indicator, please refer to as following: Status Receiver Transmitter Flashes continually The transmitter and the receiver connects. Stays blue every 2.5 seconds. Flashes continually Flashes continually The transmitter and the receiver disconnects. every 1 second. -
Page 28
Set Up Guide 1. Plug the BY-WM4 PRO RXU directly into the lightning port of smartphone. 2. The Power LED flashes slowly waiting for connecting with the transmitter. -
Page 29
Connecting the transmitter and the Receiver Before leaving factory, the connection of transmitters and receiver will be established. If transmitters and receiver disconnect, please follow below steps: 1.Turn on the transmitter and plug the receiver into smartphone. 2. Long press the pair bottom of receiver with pair pin, the indicator of receiver will flash quickly when entering paring mode. -
Page 30
Troubleshooting If you have any problem using the BY-WM4 Pro components, use the following checklist. If any problem persist, please consult our local dealer, or contact us directly. Status Cause Measure The batteries of BY-WM4 PRO Replace the batteries with TX exhausted. -
Page 31
• Up to 60m (197ft) operation range (without obstacle) • Monitoring sound by 3.5mm headphone output • Master volume control • Selectable stereo and mono mode (For BY-WM4 PRO RXD/RXU only) • Omnidirectional lavalier microphone • Standard camera shoe mount and clip included (For BY-WM4 PRO/BY-WM4 PRO-K2 only) •… -
Page 32
TX4 Pro/RX4 Pro: 3V DC (Two AAA size batteries) Power requirements: BY-WM4 PRO RXD: Supplied by iOS device BY-WM4 PRO RXU: Supplied by USB Type-C device BY-WM4 PRO RXD: Apple MFi Certified Lightning Connector Plug: BY-WM4 PRO RXU: USB Type-C Connector Receiver:3V/70mA Transmitter: 3V/70mA… -
Page 33
CAUTION 1.Please use our original audio signal cable which is equipped, it’s more compatible with the wireless microphone, and make the sound better. 2.The figure given is only the approximate value that applies when there are no obstructions between the transmitter and receiver. -
Page 34
MAINTENANCE • Do not operate the device with wet hands or feet. • Clean the equipment only in the way described in the instructions for use. • Take care to prevent the equipment from dropping down.Make sure that the device is properly fastened and reliably mounted. -
Page 35
Warning: Changes or modifications not expressly approved by the party responsible for compliance could void the user’s authority to operate the equipment. NOTE: This equipment has been tested and found to comply with the limits for a Class B digital device, pursuant to Part 15 of the FCC Rules.
View a manual of the BOYA BY-WM4 PRO K2 below. All manuals on ManualsCat.com can be viewed completely free of charge. By using the ‘Select a language’ button, you can choose the language of the manual you want to view.

MANUALSCAT | EN
Question & answers
Have a question about the BOYA BY-WM4 PRO K2 but cannot find the answer in the user manual? Perhaps the users of ManualsCat.com can help you answer your question. By filling in the form below, your question will appear below the manual of the BOYA BY-WM4 PRO K2. Please make sure that you describe your difficulty with the BOYA BY-WM4 PRO K2 as precisely as you can. The more precies your question is, the higher the chances of quickly receiving an answer from another user. You will automatically be sent an e-mail to inform you when someone has reacted to your question.
Ask a question about the BOYA BY-WM4 PRO K2
Page: 1
BY-WM4 PRO
Dual-Channel Digital Wireless Microphone
Page: 2
Thank you for purchasing BOYA BY-WM4 PRO system!
Designed for videographers on a limited budgetand
video hobbyists, BY-WM4 PRO is a new generation
2.4GHz wireless microphone system, dual-Channel
for capturing audio with dual subjects to your
smartphones, tablets, DSLR cameras, consumer
camcorders, PCs etc.
The BY-WM4 PRO system is suitable for a wide range
of wireless applications such as interviews, mobile
journalisms, reporting, vloggings, podcasts and more.
The BY-WM4 PRO system is a expandable evolution
system that allows the user to mix and match
different kinds of receivers while using with the
TX4 Pro transmitter.
Instruction Manual
1
Page: 3
2
BY-WM4 Pro consists of one body-pack
transmitter(TX4 Pro), a portable receiver
(RX4 Pro), and their accessories as
following:
Transmitter(TX4 Pro) Receiver(RX4 Pro)
Lavalier/lapel microphone 3.5mm to TRS audio output cable
3.5mm to TRRS audio output cable
Microphone Holder clip
Wind screen
Cold-shoe mount
Page: 4
3
BY-WM4 Pro-K2 consists of two body-pack
transmitters(TX4 Pro), a portable receiver
(RX4 Pro), and their accessories as
following:
Transmitter(TX4 Pro) x2 Receiver(RX4 Pro)
Lavalier/lapel microphone x2 3.5mm to TRS audio output cable
3.5mm to TRRS audio output cable
Microphone Holder clip (x2)
Wind screen (x2)
Cold-shoe mount
Page: 5
4
BY-WM4 Pro-K3 is specially designed for
Lightning iOS Devices.
It consists of one body-pack transmitter
(TX4 Pro), wireless receiver with a Lightning
connector (BY-WM4 PRO RXD),and their
accessories as following:
Receiver(BY-WM4 PRO RXD) Transmitter(TX4 Pro)
Lavalier/lapel microphone
Microphone Holder clip
Wind screen
Pairing Pin
Page: 6
5
BY-WM4 Pro-K4 is specially designed for
Lightning iOS Devices.
It consists of two body-pack transmitter
(TX4 Pro), wireless receiver with a Lightning
connector (BY-WM4 PRO RXD),and their
accessories as following:
Receiver(BY-WM4 PRO RXD) Transmitter(TX4 Pro) x2
Lavalier/lapel microphone x2
Microphone Holder clip x2
Wind screen x2
Pairing Pin
Page: 7
6
BY-WM4 Pro-K5 specially designed for
Andriod and other Type-C devices.
It consists of one body-pack transmitter
(TX4 Pro), wireless receiver with a USB
Type-C connector (BY-WM4 PRO RXU),and
their accessories as following:
Receiver(BY-WM4 PRO RXU) Transmitter(TX4 Pro)
Lavalier/lapel microphone
Microphone Holder clip
Wind screen
Pairing Pin
Page: 8
7
BY-WM4 Pro-K6 specially designed for
Andriod and other Type-C devices.
It consists of two body-pack transmitter
(TX4 Pro), wireless receiver with a USB
Type-C connector (BY-WM4 PRO RXU),and
their accessories as following:
Receiver(BY-WM4 PRO RXU) Transmitter(TX4 Pro) x2
Lavalier/lapel microphone x2
Microphone Holder clip x2
Wind screen x2
Pairing Pin
Page: 9
① ②
③
④
⑧
⑤
⑥
⑦
8
1. Microphone input
— Connect the supplied lavalier microphone here.
— Fully insert the microphone’s 3.5mm plug and
make sure it clicks into place.
2. Line In
3. Power LED
1) The power LED flash blue when the unit is on.
2) The power LED glows red when low power.
Transmitter (TX4 Pro)
Page: 10
Please don’t touch here during using, otherwise, it
will effect signal.
7. Battery compartment
Accommodates two pieces of AAA batteries.
For more details, please see “Installing batteries”
on page 11.
For more details, please see “Installing or
uninstalling clip” on page 15.
8. Clip
9
For more details about LED indicator, please refer to
as following:
Status Receiver Transmitter
Stays blue
Flashes continually
every 1 second.
Flashes in blue
Flashes in red
Low power
Off
Flashes in blue
Off
Flashes continually
every 2.5 seconds.
The transmitter and the receiver connects.
The transmitter and the receiver disconnects.
Receiver unit is turned OFF(Transmitter is still ON)
Transmitter unit is turned OFF(Receiver is still ON)
Flashes continually
every 1 second.
4. Power OFF/ON
5. Pair
This botton is for connecting signal.
For details, please see “How to connect transmitter
and receiver” on page 13.
6. Antenna
Page: 11
1. Earphone Jack
(3.5mm diameter stereo mini jack)
To monitor the receiver output, connect the
headphones to this connector.
NOTE:
Do not connect headphones with a monaural mini jack.
This may lead to short-circuiting of the headphone
output, resulting in distorted sound output.
2. LINE OUT (audio output) Jack
②
①
③
④
⑤
⑥
⑦
⑧
Receiver (RX4 Pro)
10
— For using smartphone, tablet or Mac
Connect one end (90° plug) of the supplied
TRRS stereo 3.5mm mini output cable here, and
the other end (straight plug) to smartphone.
⑨
Page: 12
Please don’t touch here during using, otherwise, it
will effect signal.
— For cameras, camcorders, audio recorders and
other audio/Video recording devices.
Connect one end of the supplied TRS stereo 3.5mm
mini output cable here, and the other end to camera.
3. Power LED
For more details, please see “Power LED” on page 7.
4. Power OFF/ON
Press these buttons to set the attenuation level of
the input signal.
6. Antenna
7. Battery compartment
Accommodates two pieces of AAA batteries.
For more details, please see “Installing batteries”
on page 11.
8. Clip
For more details, please see “Installing or
uninstalling clip” on page 15.
9.Shoe mount adapter
11
5. Volume +/-
Page: 13
What’s difference?
MICROPHONE SMARTPHONE
3.5 mm TRS connector
2
— For cameras, camcorders, audio recorders and
other audio/video recording devices.
3.5 mm TRRS connector
— For Smartphone, tablet, Mac or laptop with
combo headphone/Mic jack
1
Connect to
Receiver “LINE OUT”
Connect to Smartphone
12
Page: 14
How to use it
Installing batteries
1. Both transmitter and receiver requires two AAA size
batteries.
2. Slide and remove the transmitter’s battery
compartment cover.
3. Insert two pieces of batteries.
4. Close the battery compartment cover.
5. Do the same ways as step 2 to 4 to insert battery
into receiver.
13
Page: 15
Connecting the transmitter and receiver
Using the microphone with smartphone, tablet,
Mac or laptop with combo headphone/Mic jack.
Receiver
14
1. Mount receiver to Smartphone, tablet, Mac or laptop.
2. Using TRRS cable, plug the 3.5 mm connector(straight
plug) into the audio jack of your smartphone.
3. Insert the 90° plug of the connecting cable into
the receiver “LINE OUT” jack.
4. Insert earphone into receiver “ ” for monitoring
Sound if you need.
5. Slider the power ON/OFF switch to ON position ( the
LED indicator will light in blue)
Caution: Please do not mix up plug, for details, please
refer to” What’s difference” on page 8.
NOTE:
Not all Android devices support external microphone
when taking video, and you may need to download a
third-party app and set up sound source as external
microphone.
Page: 16
How to connect transmitter and receiver?
15
If transmitters and receiver disconnect, please follow
below steps:
Otherwise, the light for receiver and transmitters will
flash continually every 1 second, then try 1-4 steps
again.
Before leaving factory, the connection of transmitters
and receiver will be established.
1. Turn on the receiver and the transmitters.
2. Press the button “+” and “-“ for 3 seconds for
receiver and press «Pair» of one transmitter for 3
seconds at the same time.
3. When transmitter and receiver connects, the light
of receiver will stay blue, the light of transmitters
will flash every 2.5 seconds.
4. Repeat step 2 for the other transmitter.
Page: 17
Using the microphone with cameras, camcorders,
audio recorders and other audio/video recording
devices.
Receiver
16
1. Mount receiver to cameras, camcorders, audio
recorders and other audio/video recording devices.
2. Using TRS cable, plug the 3.5 mm connector into the
audio jack of your camera.
3. Insert the other end of the connecting cable into
the receiver “LINE OUT” jack.
4. Insert earphone into receiver “ ” for monitoring
Sound if you need.
5. Slider the power ON/OFF switch to ON position ( the
LED indicator will light in blue)
Caution: Please do not mix up audio cable, for details,
please refer to” What’s difference on page 8”.
Page: 18
17
Installing or uninstalling clip
1. Clip is mounted on the microphone before leaving
factory.
2. Both transmitter and receiver include clip, that means
you can mount them in any place you want.
3. Adjust the direction of the microphone to your mouth
by rotating the Microphone.
If receiver need to be mounted onto camera hot/cold
shoe, please follow below steps:
1. Push the clip to right side.
Page: 19
18
2. Push the cold shoe mount on the position.
3. Mounted receiver onto camera hot/cold shoe
Page: 20
19
BY-WM4 PRO RXD
2.4GHz Wireless Receiver
For iOS devices
Page: 21
NOTE:
Do not connect headphones with a monaural mini jack.
This may lead to short-circuiting of the headphone
output, resulting in distorted sound output.
20
Receiver (BY-WM4 PRO RXD)
1. Headphone Jack
(3.5mm diameter stereo mini jack)
To monitor the receiver output, connect the
headphones to this connector.
①
②
③
④
⑤
⑥
⑦
Page: 22
21
Press these buttons to set the attenuation level
of the input signal.
For more details, please see “Connecting the
transmitter and the receiver” on page 21.
For more details about LED indicator, please refer to
as following:
Status Receiver Transmitter
The indicator
won’t light up
until you turn on
the audio/video
app.
Flashes continually
every 1 second.
Flashes in blue
Low power
Flashes quickly in blue light
The transmitter and the receiver waits for pairing
Off
Flashes in red
/
Flashes in blue
Off
Flashes continually
every 2.5 seconds.
The transmitter and the receiver connects.
The transmitter and the receiver disconnects.
Receiver unit is turned OFF(Transmitter is still ON)
Transmitter unit is turned OFF(Receiver is still ON)
Flashes continually
every 1 second.
6. M/S Switch
5. Pair Bottom
7. Built-In Internal Antenna
2. Power LED
3. Lightning Connector
4. Volume +/-
Page: 23
Set Up Guide
22
1. Plug the BY-WM4 PRORXD directly into the lightning
port of smartphone.
2. Open the audio/video app on mobile device, then
the indicator of receiver should be light up.
3. The Power LED flashes slowly waiting for connecting
with the transmitter.
Page: 24
NOTE:
1) Please adjust the monitoring audio volume of RXD
before recording.
Connecting the transmitter and the Receiver
23
1.Turn on the transmitter and plug the receiver
into smartphone.
2. Long press the pair bottom of receiver with pair
pin, the indicator of receiver will flash quickly
when entering paring mode.
Before leaving factory, the connection of transmitters
and receiver will be established.
If transmitters and receiver disconnect, please follow
below steps:
3.Long press the pair button on the side of the
transmitter entering the pairing mode.
4.When the transmitter and receiver connected, the
light of receiver stays blue, and transmitter flashes
every 2.5 seconds.
Otherwise, the light of receiver and transmitter will
flash continually every 1 second, then try 1-3 steps
again.
Page: 25
24
BY-WM4 PRO RXU
2.4GHz Wireless Receiver
For Android and other Type-C devices
Page: 26
①
②
③
④
⑤
⑥
NOTE:
Do not connect headphones with a monaural mini jack.
This may lead to short-circuiting of the headphone
output, resulting in distorted sound output.
25
Receiver (BY-WM4 PRO RXU)
1. Headphone Jack
(3.5mm diameter stereo mini jack)
To monitor the receiver output, connect the
headphones to this connector.
⑦
Page: 27
26
For more details about LED indicator, please refer to
as following:
Status Receiver Transmitter
Flashes continually
every 1 second.
Flashes in blue
Low power
Flashes quickly in blue light
The transmitter and the receiver waits for pairing
Off
Flashes in red
/
Flashes in blue
Off
Flashes continually
every 2.5 seconds.
The transmitter and the receiver connects.
The transmitter and the receiver disconnects.
Receiver unit is turned OFF(Transmitter is still ON)
Transmitter unit is turned OFF(Receiver is still ON)
Flashes continually
every 1 second.
Stays blue
2. Power LED
Press these buttons to set the attenuation level
of the input signal.
For more details, please see “Connecting the
transmitter and the receiver” on page 26.
6. M/S Switch
5. Pair Bottom
7. Built-In Internal Antenna
3. USB Type-C Connector
4. Volume +/-
Page: 28
Set Up Guide
27
1. Plug the BY-WM4 PRO RXU directly into the lightning
port of smartphone.
2. The Power LED flashes slowly waiting for connecting
with the transmitter.
Page: 29
NOTE:
1) Please adjust the monitoring audio volume of RXU
before recording.
Connecting the transmitter and the Receiver
28
1.Turn on the transmitter and plug the receiver
into smartphone.
2. Long press the pair bottom of receiver with pair
pin, the indicator of receiver will flash quickly
when entering paring mode.
Before leaving factory, the connection of transmitters
and receiver will be established.
If transmitters and receiver disconnect, please follow
below steps:
3.Long press the pair button on the side of the
transmitter entering the pairing mode.
4.When the transmitter and receiver connected, the
light of receiver stays blue, and transmitter flashes
every 2.5 seconds.
Otherwise, the light of receiver and transmitter will
flash continually every 1 second, then try 1-3 steps
again.
Page: 30
29
Troubleshooting
If you have any problem using the BY-WM4 Pro
components, use the following checklist. If any problem
persist, please consult our local dealer, or contact us
directly.
Status Cause Measure
The units does
not turn on.
The batteries
become drained
quickly.
There is
no sound.
The sound
is weak.
There is distortion
in the sound.
The batteries of BY-WM4 PRO
TX exhausted.
The Power LED of BY-WM4 PRO
RXD doesn’t light up while
connecting with the iOS devices.
The Power LED of BY-WM4 PRO
RXU doesn’t light up while
connecting with the Android
devices.
The BY-WM4 Pro components
is being used under extremely
cold conditions.
The BY-WM4 Pro components
is being used under extremely
hot conditions.
The transmitter and receiver
are not in pairing mode.
The batteries drain quickly under
extremely cold conditions.
The batteries drain quickly under
extremely hot conditions.
Please refer to the Connecting
the transmitter and the Receiver.
The input level of the receiver
is low.
The input level of the receiver
is inappropriate.
Headphones with a monaural
mini jack is used.
The input level of the transmitter
is low. Adjust the audio output
level on the transmitter. Keep this
level as high as possible without
distortion to reach best Sound
and Noise Ratio.
Adjust the audio output level on
the transmitter. Keep this level
as high as possible without
distortion to reach best Sound
and Noise Ratio.
Use the headphones with a
stereo mini jack.
There do not have a good
connection with the lavalier.
There do not have a good
connection with the earphone.
Please try to reconnect it again.
Please try to reconnect it again.
The receiver hasn’t get a well
connection with the devices.
Please try to reconnect it again .
Open the audio/video app on
mobile device, then the indicator
of receiver should be light up.
Replace the batteries with
new ones.
Too much
ambience is
being picked up.
When using an omnidirectional
microphone like the one
included with this system, the
microphone may be picking up
too much ambience.
Make sure the microphone is as
close as to the subject as possible.
Page: 31
30
Feature:
• Ideal for Youtubes, vloggings, facebooks, podcasts,
mobile journalisms and more
• Digital 2.4 GHz frequency band
• Dual-Channel wireless receiver
• Ultracompact and miniature-size for receiver
• Super-clear recording sound
• Up to 60m (197ft) operation range (without obstacle)
• Monitoring sound by 3.5mm headphone output
• Master volume control
• Selectable stereo and mono mode
(For BY-WM4 PRO RXD/RXU only)
• Omnidirectional lavalier microphone
• Standard camera shoe mount and clip included
(For BY-WM4 PRO/BY-WM4 PRO-K2 only)
• Hard case included
• Compatible with smartphones, DSLR cameras,
consumer camcorders, PCs etc
(For BY-WM4 PRO/BY-WM4 PRO-K2 only)
• Compatible with smartphones,tablets, laptops
(For BY-WM4 PRO-K3/K5 only)
BY-WM4 Pro System
Status Cause Measure
The audio is noisy
or distorted. This
can include
dropouts, white
noise, bursts,
pops and clicks.
RF interference
RF signal is weak.
There can be a lot of RF interference
outdoors.
Try moving indoors, where there is
less RF interference.
Overhead telephone lines,
fluorescent lighting, and metal
fences can all cause interference.
Turn off all nearby computers and
mobile phones.
Make sure there is an unobstructed
line of sight between the transmitter
and the receiver.
Keep in mind that your body,
clothes, and onstage sets are
possible obstructions.
Make sure the receiver and the
transmitter are within 197′ (60m)
range. If there are obstructions, you
may need to move closer.
Page: 32
31
BY-WM4 Pro System
Specifications:
RF Modulation:
Frequency band:
Frequency response:
Signal/Noise:
Distortion:
RF output level:
Earphone output level:
Reception sensitivity:
Audio input connector:
Operation range:
Power requirements:
Plug:
Consumption power:
Dimensions:
Weight:
GFSK (Gauss frequency Shift Keying)
2.4 GHz (2405-2478MHz)
35Hz-14KHz±3dB
84dB or more
0.05% or less (32Ω,1 KHz,65mW output)
3mW
32Ω,65mW
-90dB +/- 3dB / 0dB=1V/Pa, 1kHz
3.5mm mini jack
60m (197ft) (without obstacle)
TX4 Pro/RX4 Pro: 3V DC (Two AAA size batteries)
BY-WM4 PRO RXD: Supplied by iOS device
BY-WM4 PRO RXU: Supplied by USB Type-C device
BY-WM4 PRO RXD: Apple MFi Certified Lightning Connector
BY-WM4 PRO RXU: USB Type-C Connector
Receiver:3V/70mA Transmitter: 3V/70mA
TX4 Pro/RX4 Pro: 45x70x35mm (1.8×2.8×1.4”)
BY-WM4 PRO RXD: 82×30.7×12mm (3.2×1.2×0.5”)
BY-WM4 PRO RXU: 82×30.7×12mm (3.2×1.2×0.5”)
TX4 Pro/RX4 Pro: 47g (1.7 oz)
BY-WM4 PRO RXD: 12g (0.4oz)
BY-WM4 PRO RXU: 9.5g (0.3oz)
Page: 33
32
CAUTION
1.Please use our original audio signal cable which is
equipped, it’s more compatible with the wireless
microphone, and make the sound better.
2.The figure given is only the approximate value that
applies when there are no obstructions between the
transmitter and receiver. This distance will vary
depending on metal objects, people and other
obstructions and on the signal strength.
3.Battery life may vary depending on the type of
battery used.
IMPORTANT
• If you do not intend to use the wireless microphone
for a long period time, please remove the batteries
from both the transmitter and receiver.
• Do not touch the lavalier/lapel microphone,
transmitter and receiver while recording, as this will
cause noise to be recorded.
• Do not let the transmitter close to high-voltage
equipment or to devices that emit strong electrom-
agnetic fields, otherwise, it may cause the noise to
be recorded.
• Do not use or leave the transmitter and receiver in
hot, humid places.
• Do not leave the receiver attached to the camera
when storing the camera in a case.
• Do not mix up to use the transmitter and receiver.
WARNING
• Keep the wireless microphone out of the reach of
children.
• Never use leaking batteries and never expose
batteries to excessive heat or fire.
Page: 34
33
MAINTENANCE
• Do not operate the device with wet hands or feet.
• Clean the equipment only in the way described in
the instructions for use.
• Take care to prevent the equipment from dropping
down.Make sure that the device is properly fastened
and reliably mounted. If the device has dropped down
on the floor have it inspected by a skilled electrician
before you switch it on again.
• Should the equipment be damaged or defective,or if
you notice a scorching smell:
Interrupt the electric power supply immediately by
removing the batteries.Do not operate the device
with a damaged housing,do not repair the device
yourself. Have the device only repaired by a skilled
electrician.
• Always keep your device in good condition,as
specified in these in-structions for use.
• Do not open the device.
WARNING
FCC STATEMENT :
This device complies with Part 15 of the FCC Rules.
Operation is subject to the following two conditions:
(1) This device may not cause harmful interference, and
(2) This device must accept any interference received,
including interference that may cause undesired operation.
Page: 35
34
Warning:
Changes or modifications not expressly approved by the
party responsible for compliance could void the user’s
authority to operate the equipment.
NOTE:
This equipment has been tested and found to comply
with the limits for a Class B digital device, pursuant to
Part 15 of the FCC Rules. These limits are designed to
provide reasonable protection against harmful interfer-
ence in a residential installation.
This equipment generates uses and can radiate radio
frequency energy and, if not installed and used in
accordance with the instructions, may cause harmful
interference to radio communications. However, there is
no guarantee that interference will not occur in a partic-
ular installation. If this equipment does cause harmful
interference to radio or television reception, which can
be determined by turning the equipment off and on, the
user is encouraged to try to correct the interference by
one or more of the following measures:
Reorient or relocate the receiving antenna.
Increase the separation between the equipment and receiver.
Connect the equipment into an outlet on a circuit different from
that to which the receiver is connected.
Consult the dealer or an experienced radio/TV technician for help.
RF warning statement:
The device has been evaluated to meet general RF
exposure requirement. The device can be used in
portable exposure condition without restriction
Для ознакомления с инструкцией необходимо нажать на ссылку «ЗАГРУЗИТЬ», чтобы скачать pdf файл. Если есть кнопка «ПРОСМОТР», то можно просто посмотреть документ онлайн.
Для удобства, Вы можете сохранить данную страницу с файлом руководства по эксплуатации в свой список «избранное» прямо на сайте (доступно для зарегистрированных пользователей).
Смотрите инструкцию для похожих моделей:

Вы можете задать вопрос посетителям сайта по модели BOYA BY-WM4. Если Вы являетесь её пользователем, то пожалуйста оставьте, по возможности развёрнутый отзыв:
- Обзор
- Характеристики
- Отзывы (0)
Разработанный для видеооператоров с ограниченным бюджетом и любителей видеосъёмки BY-WM4 Pro представляет собой 2,4ГГц двухканальный беспроводной микрофон нового поколения, с возможностью записи двух источником звука прямо на смартфоны, планшеты, камеры DSLR, видеокамеры, ПК и пр.
Основные Характеристики:
- Двухканальный Беспроводной Приёмник
- Цифровой 2,4ГГц Диапазон Частот
- Сверхчёткая запись звука
- Подходит для работы со смартфонами, DSLR камерами, любительскими камерами, ПК и пр.
- Лёгкий по весу и компактный для переноски
- Всенаправленный петличный микрофон
- Жёсткий чехол в комплекте
- Стандартный адаптер на башмак камеры и зажим в комплекте
- Рабочий диапазон 60 м (без препятствий)
- Питание от двух батареек типа ААА для передатчика и приёмника
Технические характеристики:
| РЧ модуляция: | GFSK (Гауссова частотная манипуляция) |
| Частотный диапазон: | 2,4ГГц (2405-2478МГц) |
| Частотная характеристика: | 35Гц-14КГц±3дБ |
| Сигнал/Шум: | 84дБ или более |
| Искажение: | 0,05% или менее (32Ω, 1КГц, 65мВт выход) |
| РЧ выходной уровень: | 3мВт |
| Выходной уровень в наушнике: | 32Ω, 65мВт |
| Чувствительность приема: | -90 дБ +/- 3 дБ / 0 дБ = 1 В / Па, 1 кГц |
| Аудиоразъем: | 3,5мм мини-Джэк |
| Рабочий диапазон: | 60м (без препятствий) |
| Требования к питанию: | 3В DC (две батарейки типа ААА) |
| Потребляемая мощность: | Передатчик: 3В/70мА |
| Приёмник: 3В/ 70мА | |
| Размеры: | Приёмник: 45х70х35 мм |
| Передатчик: 45х70х35 мм | |
| Вес: | Приёмник: 47г |
| Передатчик: 47г |
Комплектация:
- Передатчик (TX4 Pro) 2х
- Приёмник (RX4 Pro)
- Петличный/на отворот пиджака микрофон 2х
- Кабель для аудио выхода c разъёмами 3,5мм – TRS
- Кабель для аудио выхода c разъёмами 3,5мм – TRRS
- Адаптер на башмак
- Ветрозащита 2х
- Микрофонный Зажим-Держатель 2х
- Жесткий кейс для хранения
- Инструкция на русском языке.
| Тип микрофона | Беспроводной |
| Подключение к iPhone | Через переходник |
| Подключение к Type-C | Через переходник |
| Производитель | Boya |
| Гарантия, месяцев | 12 мес. |
| Страна производства | Китай |
Отзывов нет
C этим товаром покупают
Быстрый просмотр

-6%
Хит!
Быстрый просмотр

-34%
Быстрый просмотр
")
-15%
Хит!
Быстрый просмотр

-38%
Быстрый просмотр
