- Manuals
- Brands
- MIMAKI Manuals
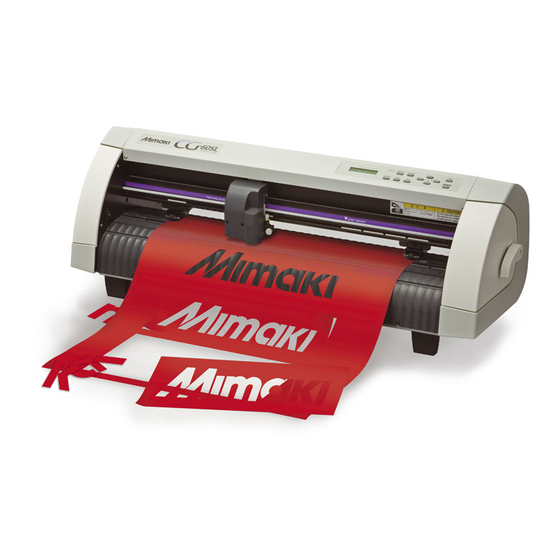
- Plotter
- CG-60SL
- Operation manual
-
Contents
-
Table of Contents
-
Bookmarks
Quick Links
MIMAKI ENGINEERING CO., LTD.
TKB Gotenyama Building, 5-9-41, Kitashinagawa, Shinagawa-ku,
Tokyo 141-0001, Japan
Phone: +81-3-5420-8671 Fax: +81-3-5420-8687
D201617-13
URL: http: // www.mimaki. co. jp/
Related Manuals for MIMAKI CG-60SL
Summary of Contents for MIMAKI CG-60SL
-
Page 1
MIMAKI ENGINEERING CO., LTD. TKB Gotenyama Building, 5-9-41, Kitashinagawa, Shinagawa-ku, Tokyo 141-0001, Japan Phone: +81-3-5420-8671 Fax: +81-3-5420-8687 D201617-13 URL: http: // www.mimaki. co. jp/… -
Page 2: Table Of Contents
TABLE OF CONTENS CAUTION …………….. v CAUTION ……………. v Requests …………….. v FCC Statement (USA) …………. v Interference to televisions and radios ……v About media …………..v Foreword …………….. vi On This Operation manual ……….vi Features …………….vii Safety Precautions …………viii Pictorial signs …………..
-
Page 3
Loading a sheet of media ……..2-11 Loading a leaf sheet (cut sheet) ……2-14 How to Place the Roll Sheet ……..2-16 Test cutting (plotting) ……….. 2-18 Cutting (plotting) ……….. 2-19 Setting the origin …………. 2-19 Start cutting (plotting) ……….2-20 Turning the power off ……….. -
Page 4
Miscellaneous Settings ……… 3-34 Switch the display language ……..3-34 Other Convenient Settings ……..3-35 Reset the setting values to the initial state….3-41 CHAPTER 4 In Case of Trouble Before taking a phenomenon as a trouble ….4-2 Troubles for which error messages are given on the LCD …………. -
Page 6: Caution
• In the case where MIMAKI-recommended cable is not used for connection of this device, limits provided by FCC rules can be exceeded.To prevent this, use of MIMAKI-recommended cable is essential for the connection of this plotter.
-
Page 7: Foreword
Be sure to read this Operation manual carefully, before starting to operate the plotter. On This Operation manual • This Operation manual describes the operation and maintenance of CG-60SL cutting plotter (hereinafter referred to as the plotter). • Please read and fully understand this Operation manual before putting the machine into service. It is also necessary to keep this peration manual on hand.
-
Page 8: Features
Features The features of the plotter are described below. Together with the method of operation of the plotter explained in this manual, they help you understand how to use the machine properly. Two Clamp Pressure Modes Changeover Mechanism The sheet clamp system incorporate two clamp pressure modes changeover mechanism to widen the available sheet size range.
-
Page 9: Safety Precautions
Safety Precautions Pictorial signs Pictorial signs are used in this Operation manual for safe operation and for prevention of damage to the plotter. Pictorial signs and their meanings are given below. Read and fully understand before reading the text. Example of pictorial signs Failure to observe the instructions given with this symbol can result in death or serious injuries to personnel.
-
Page 10
WARNING Do not disassemble or remodel the plotter. Handling of the power cable • Never disassemble or remodel the plotter. • Use the supplied power cable. Take care Disassembly or remodeling can result in an not to damage, break or work upon the electric shock breakdown… -
Page 11
Safety Precautions CAUTION Be careful with the movable parts Sheets • Do not touch the rolling grit roller; • Straighten sheet media, otherwise, you may hurt your fingers or tear significantly curled, before using it for off your finger nails. printing. -
Page 12: Safety Labels
Safety Labels A safety label is stuck on the plotter body. The label informs the user of possible risks associated with the machine. Be sure to understand the correct meaning of the safety label to avoid danger. If the safety label is illegible due to stains or has come off, purchase a new one from your local distributor or our office.
-
Page 13: How To Read This Operation Manual
How to Read This Operation Manual This manual provides the explanation about the displayed characters and used keys on the “Display Panel” in addition to the operation procedures. Proceed operations confirming them while using. This explains the out- line of functions. These are what we want you to know in advance.
-
Page 14
xiii… -
Page 15
CHAPTER 1 Before Use This chapter describes the parts name and setting procedures before use. Checking the accessories ……..1-2 Configuration and function ……..1-3 The Front …………..1-3 The Rear …………..1-3 Operation Panel …………1-4 Tray …………….1-5 Carriage ………….. -
Page 16: Checking The Accessories
Checking the accessories The articles illustrated below are supplied with your plotter as accessories. Check them for correct quantities and appearance. If you find any problem, please contact your distributor. Main unit Cutter blade Cutter holder (for Vinyl) (Provided withblade) Ball-point pen Ball-point pen adapter Roll-placing table…
-
Page 17: Configuration And Function
Configuration and function The Front Carriage Operation panel The carriage carries the pen and The plotter is operated and functions are set moves it up and down.( P.1-5) on the operation panel.( P.1-4) Power switch The switch turn on/off the power.( P.2-7, 2-21) Clamp lever…
-
Page 18: Operation Panel
Operation Panel Display panel FUNCTION The display panel indicates tool conditions such as Use this key to enter function setting mode. speed, pressure and offset, tool coordinates, functions and error messages. JOG Key Each of these arrow keys shifts the carriage or sheet in the direction of the arrow or changes SHEET SET settings.(…
-
Page 19: Tray
Configuration and function Tray Small tools, such as a retractable knife, may be placed on the tray. Tray • However, keep a retractable knife or any other cutter out of reach of children since it can be dangerous. • Do not put any heavy object on the tray; otherwise, the cover may deform and come in contact with the carriage.
-
Page 20: Pinch Rollers And Grit Rollers
Pinch rollers and grit rollers Align the pinch roller to the width of the sheet to be set, and move it to an appropriate position of the grit roller. The movement range of the pinch roller is as shown below. Move the pinch roller guessing the pinch roller guide marks as the measure.
-
Page 21: Selecting The Clamp Pressure
Configuration and function Selecting the clamp pressure The clamp pressure can be changed in two levels using the clamp pressure lever. Select the higher or lower level of the clamp pressure that matches the sheet to be used. High mode Low mode Lower the clamp pressure lever.
-
Page 22: Pen Line Rubber
Configuration and function Pen line rubber Plotting and cutting are performed on the pen line rubber If you want to perform POUNCING and dotted line cutting, install the pen line. pen line rubber When performing POUNCING or HALF CUT. Remove the pen line rubber. pen line rubber (1) Insert the flathead screwdriver or equivalent tool into the gap shown in the above illustration.
-
Page 23: Connecting The Cables
(1) Set the CD supplied with FineCut into the disk drive. (2) Click [CD-ROM Contents] on the menu. (3) Open [usb11_installguid(en).pdf] for the plotter used in [Mimaki USB1.1 Driver] folder. Connector ports This plotter uses the USB connector for connection to the host computer.
-
Page 24: Menu Mode
Menu mode This plotter is provided with the following four modes: < NOT-READY > mode The plotter is in this mode until the media is detected. The keys other than the key are effective. REMOTE < LOCAL > mode The plotter enters this mode after the sheet detection. All the keys are effective.
-
Page 25
CHAPTER 2 Basic Operations This chapter describes the procedures and settings ranging from tool installation to cutting (plotting) operation. Operation flow …………2-2 Installing a tool …………2-3 Using a cutter …………2-3 How to Install a Ballpoint Pen ……..2-6 Turning the power on………. -
Page 26: Operation Flow
Operation flow Installing a tool See «Installing a tool» ( P.2-3) Turning the power on See «Turning the power on» P.2-7) Setting the tool See «Setting the tool conditions» P.2-8) conditions Loading a sheet of media See «Loading a sheet of media» P.2-11) Test cutting (plotting) See «Test cutting (plotting)»…
-
Page 27: Installing A Tool
Installing a tool For this device, you can use the following tools. Cutter : Select this to cut the image printed on a sheet and to create the cut letters with the cutting sheet. : Select this to “trial-write” for confirming how to actually cut. Pen (rollerball) Pouncing Pin (option) : Select this to sketch the cutting line.
-
Page 28
Adjusting the protrusion of the cutter blade Adjust the cutter blade according to the types of the cutters and the sheet for use. After adjusting the protrusion of the cutter blade, set the cutting conditions and conduct test cutting to check the cutting quality. -
Page 29
Installing a tool How to install the cutter • Install the cutter to the tool holder of the carriage.Be sure to insert the cutter all the way in the tool holder. Collar Inset the cutter into the tool holder. • Push the brim of the cutter against the holder. Fix the cutter holder. -
Page 30: How To Install A Ballpoint Pen
Installing a tool How to Install a Ballpoint Pen • When you want to use a commercially available ballpoint pen, you must use the pen of 8mm to 9mm in diameter. Image quality may depend on the pen. (Recommended ballpoint pen: the one available from Pentel Co., Ltd. with the product No.: K105-A, K105-GA) •…
-
Page 31: Turning The Power On
Turning the power on • Before turning the power on, check that the pinch rollers have been raised. • Be sure to turn on the host computer before turning on the plotter. If this order is not correctly followed, the plotter can malfunction. •…
-
Page 32: Setting The Tool Conditions
Setting the tool conditions You must set the tool conditions adjusting to your use. Kinds of the Tool Conditions The kinds of the tool conditions include cutting, plotting and pouncing conditions. See P.2-8 for the way of setting tool conditions. Kinds Description This is the tool conditions for using the cutter.
-
Page 33: Set The Tool Conditions
Setting the tool conditions Set the Tool Conditions. Press the key several times to TOOL C U T 2 0 8 0 0 . 3 0 select a tool condition for setting. • The tool conditions include [CUT1 to CUT5], plotting condition (PEN), POUNCING condition, and cutting condition (HALF).
-
Page 34
Setting the tool conditions Press the key or ENTER/HOLD C U T 2 1 0 0 0 . 3 5 jog key to secure the setting value. • If you have selected the plotting condition (PEN) in the Step 1, consider SPEED: 40cm/s and PRESSURE: 60 to 80g as the reference value. -
Page 35: Loading A Sheet Of Media
Loading a sheet of media Either a leaf sheet (cut sheet) or a roll sheet can be loaded on the plotter. The pinch rollers and grit rollers hold the sheet in position. Locate the pinch rollers so that they match the sheet to be used. Pinch roller Clamp lever Grit roller…
-
Page 36
Maximum cutting area The maximum cutting area (the area in which cutting (plotting) is permitted) varies depending on the location of pinch rollers and that of the origin. The white portion of the illustration shown below represents the maximum cutting area. ( P. 3.65) An area where cutting is not permitted is called a “non-plotting area”. -
Page 37
Loading a sheet of media Method of detecting a sheet When a sheet of media is set, the following two displays will appear alternately on the LCD panel. Align to the direction of the set sheet, and press the jog keys R O L L <… -
Page 38: Loading A Leaf Sheet (Cut Sheet)
Loading a leaf sheet (cut sheet) Press the key to switch to SHEET SET R O L L < > L E A F NOT READY mode. • You need not to do so if it’s already in the NOT READY mode.
-
Page 39
Loading a sheet of media to select “LEAF”. Press the jog key • «Sheet detection»( P.2-12) :In the case the sheet is loaded from the rear • :In the case the sheet is loaded from the front Displays the detected Start detecting the sheet. -
Page 40: How To Place The Roll Sheet
How to Place the Roll Sheet If you want to use the roll sheet, you must mount the roll-placing table. Raise the clamp lever. Lay down the roll-placing table, fitting to the width of the roll sheet. • As the roll-placing table has a magnet, just attach it to the device and it is fixed.
-
Page 41
Loading a sheet of media Install the sheet support to the roll table as shown in illustration. Sheet Support Press the jog key to select [ROLL]. • «Sheet detection» ( P.2-12) : In the case the sheet is loaded from the rear •… -
Page 42: Test Cutting (Plotting)
Test cutting (plotting) Execute test cutting (plotting) to confirm the tool conditions. In the test cutting, the plotter cuts two squares. • When the cutter blade is worn and dull, you can use it temporarily by enhancing the value of PRESSURE.
-
Page 43: Cutting (Plotting)
Cutting (plotting) You can start cutting (plotting) after completion of setting up a tool, loading a sheet and setting the tool conditions. • Check the following settings before executing cutting (plotting). Setting of the origin ( P.2-19) Setting of the command origin ( P.3-36) Switching between commands ( P.3-36)
-
Page 44: Start Cutting (Plotting)
Cutting (plotting) Start cutting (plotting) After completion of setting the origin, C U T 1 R E M O T E press the key. REMOTE • The display changes to REMOTE. Send the data to the plotter. C U T 1 1 3 5 6 K B •…
-
Page 45: Turning The Power Off
Turning the power off When plotting is completed, press the “ O ” side of the power switch to turn the power off. • Once the power is turned off, wait at least five seconds before turning the power on again. Confirm that the plotter is not receiving C U T 1 R E M O T E…
-
Page 46
2-22… -
Page 47
CHAPTER 3 Useful Function This chapter describes the setting procedures of each functions, and how to operate the plotter usefully. Functions in the Jog Mode….3-2 Output the received data by the ASCII code [ASCII DUMP] ……3-28 Setting the origin ……… 3-2 Set each device number for USB Two-point axis alignment ….. -
Page 48: Functions In The Jog Mode
Functions in the Jog Mode Press the jog key in the local mode, and then you can enter the jog mode, where you can perform the following settings. Reference Function names Contents page Setting the origin Set the point from which the plotter will start cutting (plotting). P.3-2 Two-point axis If a ruled sheet is set, align the horizontal and vertical axes with the…
-
Page 49: Two-Point Axis Alignment
Functions in the Jog Mode Two-point axis alignment If a ruled sheet is set, align the horizontal and vertical axes with the Compensation point appropriate lines on the sheet. Correct the axial inclination (θ) by setting a compensation point in combination with the origin.
-
Page 50: Cutting Area
Cutting area Set the area in which the plotter performs cutting (plotting). The area that has a diagonal line extending from the origin to a given UL (upper left) point is the available cutting Point UL area. The cutting area setting will be cleared by performing sheet detection again.
-
Page 51: Digitization Operation
Functions in the Jog Mode Digitization operation The coordinates of the plotted figure relative to the origin are displayed on the host computer. Upon receiving the digitization command (DP;) from the host computer, the plotter is ready for digitization operation. To conduct digitization, install a sheet with patterns to select points on it.
-
Page 52: Set The Distance Compensation
Set the distance compensation When cutting is to be performed along a long length, the cut length may significantly differ from the data value, depending on the thickness of the sheet. Additionally, the diameter difference between the grit rollers may cause a significant difference in the sheet feeding distance between the right side and the left side. This function compensates those differences.
-
Page 53
Set the distance compensation Setting procedure Press the key in the local mode. TOOL C U T 1 0 5 0 0 . 3 0 • Tool conditions are displayed with the cursor blinking at the [SPEED] value. Press the jog key C U T 1 0 5 0 0 . -
Page 54
Change the reference length in the B direction (horizontal direction) with the jog key • If you change the reference length in the B direction, the distance compensation value (B) will be cleared. Press the key to determine ENTER/HOLD D R A W S H I F T = 0 m m the reference length in the B direction. -
Page 55
Set the distance compensation If the reference value and the measured A R = 1 . 0 A L = 0 . 0 value differ from each other, change the compensation value with the jog Press the key to determine ENTER/HOLD A L =… -
Page 56: Perform Multiple Cuttings
Perform Multiple Cuttings This function performs cutting (plotting) for the received data on two or more sheets.(Maximum 999 cuttings) The origin at executing the multiple sheet cutting. Copy interval (Manual setting) The origin at terminating the multiple sheet cutting (Automatically established) •…
-
Page 57
Perform Multiple Cuttings • If the multiple sheet cutting is executed immediately after cutting in the remote mode, cutting (plotting) will be overlapped. To avoid this trouble, be sure to set the new origin. • While the plotter is executing the multiple sheet cutting, it ignores data sent from the computer. •… -
Page 58: Expand The Cutting (Plotting) Area
Expand the cutting (plotting) area You can reduce the dead space to expand cut (picture drawing) area (EXPANDS function). Each of the right and left non-plotting areas is reduced by 10 mm. EXPANDS: OFF EXPANDS: ON Pinch roller (left) Pinch roller (right) When the sheet is set in the rear Set the EXPANDS function to ON.
-
Page 59
Expand the cutting (plotting) area Press the key. ENTER/HOLD E X P A N D S : O F F the jog keyPress key to E X P A N D S : O N select “ON.” Press the key. ENTER/HOLD Press the key twice for terminating this function. -
Page 60: Switch The Cutting (Plotting) Direction
Switch the cutting (plotting) direction This function sets the location of origin and direction of the axes of coordinates according to the application software to be used.(ROTATION 機能) Rotating function : OFF Rotating function : ON • After the sheet detection, the Origin Origin carriage will stop at the origin.
-
Page 61
Switch the cutting (plotting) direction Press the key. ENTER/HOLD Press the key twice for terminating this function. Coordinate system The plotter has four different coordinate systems established by combinations of the sheet setting direction and the rotation of the coordinate axes. <… -
Page 62: Perform Division Cut
Perform DIVISION CUT. Setting the DIVISION CUT allows you to divide and cut data larger You can divide and cut the part than the sheet width (DIVISION CUT function). that runs off the edge. • With the DVISION CUT function, you can use the Overlap following convenient functions too.
-
Page 63
Perform DIVISION CUT. Press the to select “ON.” D I V I S I O N c u t : O N Press the key. ENTER/HOLD F R A M E C U T : O F F Press the jog key to select F R A M E C U T… -
Page 64: Cut Data Via Division Cut
Perform DIVISION CUT. Cut Data via DIVISION CUT. Send data from the host computer to the plotter. Available area Origin • If the data exceeds the available cutting area, the display shown at right will appear. O F F S C A L E When cutting completes, the plotter * * D I V I S I O N * * X X s…
-
Page 65: Change The Cutting (Plotting) Order
Change the cutting (plotting) order You can reorder or sort the cut data that has been sent from the host computer to change the order for cutting (SORTING function). Suppose that there is data that you want to cut just like drawing a picture with a single stroke, according the order in which data is sent from application software.
-
Page 66: Set Sorting
Set SORTING . Press the key in the local FUNCTION D A T A C L E A R < E N T > mode. Press the jog key to select S E T < E N T > [SET UP] . Press the key.
-
Page 67
Change the cutting (plotting) order Press the jog key to select A R E A 5 0 0 the setting of [AREA] . • Setting values : OFF or 10 to 5,100cm (in 10cm increment) Press the key for setting, and press the key. -
Page 68: Sorting Sequence
Change the cutting (plotting) order Sorting sequence Data transmission is started. C U T 1 2 K B • The size of unprocessed data in the receiver buffer is displayed. • Cutting is not performed. The processed line segments are stored in the sorting buffer. After completion of data transmission, P L O T the display shows the waiting time for…
-
Page 69: Other Useful Functions
Other Useful Functions Feed the paper Before starting cutting (plotting), feed the sheet manually by the length to be used. In addition, by feeding the sheet beforehand, you can check for a skew of the sheet or prevent skew while cutting (plotting) the long data. •…
-
Page 70: Hold
HOLD If a sheet goes out of alignment while long data is being Data after the correction cut (picture-drawn), you can temporarily hold the cut for of sheet displacement fixing the misalignment of the sheet. Cut before the sheet misalignment is fixed. Press the key during the sheet ENTER/HOLD…
-
Page 71: Data Clear — Discontinue Plotting
Other Useful Functions DATA CLEAR — Discontinue Plotting — Execute the DATA CLEAR function to discontinue cutting (plotting) for data. If you do not perform DATA CLEAR, the plotter will perform cutting for the received data when it is returned to the remote mode.
-
Page 72: Perform Sample Cut To Find Out The Cause Of Cutting Error
Perform SAMPLE CUT to Find out the Cause of Cutting Error. In case that normal data cutting cannot be performed etc., perform SAMPLE“Cut” cutting with the sample stored in this plotter to find out the cause of cutting error. • Execution of SAMPLE CUT will clear the data in the SAMPLE“Logo”…
-
Page 73: Output The Setting List
Other Useful Functions Output the Setting List You can keep this plotted sheet for your future reference or transmit this document by facsimile when you contact your local distributor for maintenance. Set a A4-size discard sheet in a longitudinal direction ( P.2-14) , and replace the tool with “pen”…
-
Page 74: Output The Received Data By The Ascii Code [Ascii Dump]
Output the received data by the ASCII code [ASCII DUMP] This function makes the host computer send data to the plotter, makes the plotter plot the communication conditions of the interface through which it receives the data, and makes the plotter plot the data in ASCII format.
-
Page 75: Set Each Device Number For Usb Connection
Other Useful Functions Set each device number for USB connection When two and more plotters are connected to a host computer with USB cables, give different plotter numbers to the plotters, respectively. Press the key in the local FUNCTION D A T A C L E A R <…
-
Page 76: Perform Cutting A Dotted Line
Perform cutting a dotted line When cutting the sheet according to data, the plotter cuts Cutter the design in broken lines without cutting it out. Sheet • For the broken-line cutting, use the cutter (model: SPB-0001, a set of three cemented carbide blades) that is optionally available.
-
Page 77
Other Useful Functions Press the key. ENTER/HOLD H A L F l e n g t h : 0 . 5 m m Press the jog key to select H A L F l e n g t h : 2 . 5 m m the length of half cutting. -
Page 78: Perform Plotting With Perforated Lines
Perform plotting with perforated lines You can use a pin to perforate along the outline of data (POUNCING function). You can mark the perforated sheet with a marker pen, spray or others to use it for positioning of construction and hand-written signboard. When POUNCING Tool : You must use an optional pouncing pin (Model number OPTC0095 : POUNCING…
-
Page 79
Other Useful Functions Set POUNCING function. Press the key in the local FUNCTION D A T A C L E A R < E N T > mode. Press the jog key to select S E T < E N T > [SET UP] . -
Page 80: Miscellaneous Settings
Miscellaneous Settings Switch the display language You can select the display language from the following seven kinds (it is set to “English” when you purchase this plotter). Languages you can select : Japanese、English、German、French、Spanish、Italian、Portuguese Press the key in the local FUNCTION D A T A C L E A R <…
-
Page 81: Other Convenient Settings
Miscellaneous Settings Other Convenient Settings Change the settings according to your use. Press the key in the local FUNCTION D A T A C L E A R < E N T > mode. Press the jog key to select S E T <…
-
Page 82
Setting List Function Outline Setting values name This is to automatically switch the command AUTO according to the command specifications of the receiving data. Command Switch the unit of moving amount This is selected when the plotter receives the Switching specified by a command. -
Page 83
Miscellaneous Settings Function Outline Setting values name 0.1mm 0.1mm movement per jog key operation (set in mm) 1.0mm 1.0mm movement per jog key operation (set in mm) This is to set the moving amount of Jog Step carriage and sheet via the jog key. 1/16inch 1/16inch movement per jog key operation (set in inch) -
Page 84
Cutting Mode Select “QUALITY” in any of the following cases: • Characters whose sizes are 10 mm or less are to be cut • Picture patterns or characters that have many sharp corners are to be cut • Minute cutting is to be performed However, the edges of finished patterns may be rugged if the data sent from the host computer is too complicated. -
Page 85
Miscellaneous Settings Priority Setting of priority is available with MGL-II c commands.Specifically, setting of priority is applied to the following commands. Pen selection command Pen lowering speed setting command Pen lifting speed setting command Acceleration setting command Pen pressure setting command FS;、ZF;… -
Page 86
Dummy Cutting The plotter executes dummy cutting in front of the pinch roller that is located on the side closer to the current location of the carriage. Set the dummy cut function to OFF if you do not want to dummy-cut Pinch Roller the sheet that is to be used with characters cut out. -
Page 87: Reset The Setting Values To The Initial State
Miscellaneous Settings Reset the setting values to the initial state. Press the key in the local FUNCTION D A T A C L E A R < E N T > mode. Press the jog key to select S E T <…
-
Page 88
3-42… -
Page 89
CHAPTER 4 In Case of Trouble This chapter describes the actions to be taken when the plotter develops any trouble or displays an error message. Before taking a phenomenon as a trouble..4-2 Troubles for which error messages are given on the LCD …………. -
Page 90: Before Taking A Phenomenon As A Trouble
Before taking a phenomenon as a trouble Take appropriate remedies according to the table below. If still the problem cannot be solved, contact MIMAKI or its dealer. Phenomenon Cause Remedy Connect the power cable to the The power cable is not Power does not turn on.
-
Page 91
Before taking a phenomenon as a trouble Phenomenon Cause Remedy When a long leaf sheet is to be cut, take care not to bend the sheet while feeding or cutting it and do not put any extra load on The sheet was bent and came the sheet. -
Page 92: Troubles For Which Error Messages Are Given On The Lcd
Troubles for which error messages are given on the LCD Error message Error messages are shown as error numbers. Take an appropriate remedy according to the table below. And if the remedy does not work, contact your distributer or an sales office of MIMAKI. Error message Cause Remedy…
-
Page 93
An overcurrent error in the motor in appears, contact your distributor or a ERR43 B CURRENT the sheet width direction was sales office of MIMAKI. detected. Turn the power off once and turn it on again. The plotter has failed to detect the… -
Page 94: Status Message
Status message The messages given below appear in the remote mode. They do not indicate errors but require an appropriate action. Message Cause Remedy A press on the key will cause REMOTE CUT1 * REMOTE * The plotter is in the remote mode. the plotter to enter the local mode.
-
Page 95
If the same message appears, contact REMOTE turning the power on. your distributor or a sales office of MIMAKI. Cutting cannot be continued, since roll End of the sheet is detected while sheet has ended. detecting a mark or cutting roll sheet. -
Page 97
CHAPTER 5 Appendix The appendix describes the replacement procedure for the cutter blade and the specifications of the plotter. Specifications of the main unit ……5-2 Repeatability condition ……….5-3 Cutter blade…………5-4 Replacing the cutter blade ……… 5-4 Adjusting the cutter blade ………. 5-5 Replacing the blade of any cutter other than that supplied with the plotter ………. -
Page 98: Specifications Of The Main Unit
The image quality is not guaranteed because the pen tip position differs depending on the pen in use. *7: With the USB connection, the ESC type commands among the MGL-llc commands cannot be used. *8: The values are based on MIMAKI’s measurement conditions.
-
Page 99: Repeatability Condition
Specifications of the main unit Repeatability condition Plotter conditions • When using a exclusive roll-placing table. • The clamp pressure must be set to “HIGH” . • The specified repeatability may not be guaranteed depending on the material of the sheet to be cut or ink jet media, Sheet setting conditions •…
-
Page 100: Cutter Blade
If the cutter blade is chipped or blunt, replace it with a new one. (Accessorry parts number) New cutter blades (low-pressure blade set for PVC sheets: Model SPB-0030) are available from your distributor or MIMAKI’s sales office. Lock nut Loosen the lock nut, and pull the Adjusting knob adjusting knob out of the holder.
-
Page 101: Adjusting The Cutter Blade
Cutter blade Adjusting the cutter blade After the completion of adjustment, be sure to set cutting conditions and perform test cutting to check the cutting quality. Lock nut Remove the cutter holder, and loosen the lock nut. 」 Adjusting knob Turn the adjusting knob to adjust the protruding amount of the cutter blade.
-
Page 102: Note Slip
Note slip When changing the sheet for cutting (plotting), distance correction may be required depending on the sheet thickness. ( P.3-6) In that case, the following note slip is useful to note down the sheet name and the distance correction value. Sheet Name: Sheet Name: Sheet Name:…
-
Page 103: Function Flowchart
Function Flowchart Functions invoked with the specific keys REMOTE Key: CUT 1 2 0 0 5 0 0 . 3 0 CUT 1 * REMOT E * Local mode SHEET SET Key: CUT 1 2 0 0 5 0 0 . 3 0 ROL L <…
-
Page 104
TOOL Key (Settings of Tool conditions) : CUT 1 * REMOT E * CUT 1 2 0 0 5 0 0 . 3 0 Remote mode Present tool setting CUT 1 2 0 0 5 0 0 . 3 0 CUT 1 2 0 0 5 0 0 . -
Page 105: Functions Invoked With The Jog Mode (Jog Keys)
Function Flowchart Functions invoked with the jog mode (jog keys) Setting an origin CUT 1 2 0 0 5 0 0 . 3 0 0 . 0 0 . 0 5 . 0 1 0 . 0 Local mode A = * * * * B = * * * * * * OR I G I N * * Cutting area…
-
Page 106: Functions
Functions CUT 1 2 0 0 5 0 0 . 3 0 DAT A C L EAR < ENT > Local mode SQUARE CUT < ENT > N o . COP I ES < ENT > N o . COP I ES I NT ERVA L 1 ~…
-
Page 107
Function Flowchart Enable to setting [DIVISIONcut] is [ON] FRAME CUT : OF F MARK CUT : OF F ON , OFF ON , OFF Enable to setting [HALF CUT] is [ON] HA L F c u t PRESS : HA L F l e n g t h : 0 . 5mm CUT L ENGTH : 1 0mm 0 ~ 300… -
Page 108
Followed Followed SET UP < ENT > POUNC I NG < e n t > POUNC I NG : OF F ON , OFF PR I OR I T Y < e n t > PR I OR I T Y : OF F ON , OFF D I S T ANCE… -
Page 109
Function Flowchart Enable to setting [SORTING] is [ON] AUTO F EED : ON AREA : OF F ON , OFF OFF , 10 ~ 5100 5-13… -
Page 110
Function Flowchart Followed SAMP L E CUT < ENT > L I S T < ENT > ASC I I DUMP < ENT > D I SP L AY < ENT > D I SP L AY : E n g l i s h Japanese , English German , French Spanish , Italian… -
Page 111
D201617-13-12012008… -
Page 112
Printed in Japan © MIMAKI ENGINEERING CO., LTD.2008 FW : 1.70…
-
Boris
Инструкция Mimaki CG-60 SR
Добрый день.
Купил режущий плоттер Mimaki CG-60 SR
А есть ли в природе нормальный мануал на него в электронном или печатном виде?
Тот, что предлагается на сайте Гельветики приходится дополнительно переводить с русского на русский.
Надеюсь, можно сказать, на чудо.
Если есть у кого, посьба поделиться или подскажите где приобрести.
-
Boris
Сообщение Boris » 08 ноя 2011 23:24
Спасибо огромное!
-
ChePpolino
Сообщение ChePpolino » 10 ноя 2011 16:00
изучайте!
-
Волков СВ
- Новичок

- Сообщения: 31
- Зарегистрирован: 02 авг 2012 17:00
- Последний визит: 01 окт 2020 09:10
- Изменить репутацию:
Репутация:
Голосов: 2 - Откуда: Москва

Сообщение Волков СВ » 12 окт 2012 13:20
изучим, благодарствую
-
Serz
Сообщение Serz » 15 май 2013 13:36
Добрый день!!!подскажите!!!Каретка не видит левый ролик на сумма д120
-
zeus78
Сообщение zeus78 » 15 июл 2013 07:50
Спасибо, хорошая инструкция! 
-
Dmitrys
- Постоянный участник
- Сообщения: 194
- Зарегистрирован: 28 сен 2012 11:59
- Последний визит: 15 май 2023 10:59
- Изменить репутацию:
Репутация: нет - Откуда: Орел

Сообщение Dmitrys » 16 мар 2015 13:00
Но с этой удобнее eng.mimaki.co.jp/archives/032/201301/CG60SR_Operation_D201611_V1.6.pdf
p/s может кто знает как настроить яркость дисплея, что-то вдруг совсем просел, еле-еле чиферки видно
-
mawl
- Новичок
- Сообщения: 6
- Зарегистрирован: 28 фев 2017 15:55
- Последний визит: 10 май 2017 12:19
- Изменить репутацию:
Репутация: нет - Откуда: СПб
Re: Инструкция Mimaki CG-60 SR
Сообщение mawl » 01 мар 2017 09:53
DmitrysПриветствую, случайно скачанной инструкции ни у кого нет? Ссылка не активная, если есть пришлите на почту
eldi@mail.ru
— премного благодарен!
-
Dmitrys
- Постоянный участник
- Сообщения: 194
- Зарегистрирован: 28 сен 2012 11:59
- Последний визит: 15 май 2023 10:59
- Изменить репутацию:
Репутация: нет - Откуда: Орел
Re: Инструкция Mimaki CG-60 SR
Сообщение Dmitrys » 02 мар 2017 11:56
Вернуться в «Режущие плоттеры MIMAKI»
Кто сейчас на конференции
Сейчас этот форум просматривают: нет зарегистрированных пользователей и 0 гостей
-
Сервис и гарантия
Гарантия
Политика конфиденциальности
Послепродажное обслуживание
Консультации специалистов
Возврат и замена товара
Рассмотрение претензий
Отзывы покупателей
-
Вопросы и помощь
Руководство для нового покупателя
Ценовая политика
Расшифровка сокращений
Доставка
Как оплатить
-
Информация о компании
Новости и спец. предложения
Кто мы
Наши контакты
-
Моя учетная запись
Войти/Зарегистрироваться
Моя учетная запись
Моя корзина заказов
Зарегистрировать E-mail для получения новостной рассылки
Новые поступления, скидки, акции и подарки
Поиск>>
www.sign-in-russia.com, является крупнейшим онлайн-поставщиком рекламной продукции и оборудования, специализируется на предоставлении полного спектра товаров ADТакже, наша компания является уполномоченным сервисным центром Китайской Ассоциации Струйной Печати (China Inkjet Printing Association). Наши офисы находятся в 6 странах по всему миру. Наша продукция охватывает все области рынка рекламных товаров. Мы работаем в соответствии с международными Стандартами качества, и в настоящее время, мы имеем возможность предложить Вам больше чем 9 000 товаров. Так как мы осуществляем централизованные закупки, вся продукция имеет конкурентоспособную цена.
-
Драйверы
5
-
Инструкции по эксплуатации
1

Mimaki CG-60SR инструкция по эксплуатации
(144 страницы)
- Языки:Английский
-
Тип:
PDF -
Размер:
5.97 MB
Просмотр
На NoDevice можно скачать инструкцию по эксплуатации для Mimaki CG-60SR. Руководство пользователя необходимо для ознакомления с правилами установки и эксплуатации Mimaki CG-60SR. Инструкции по использованию помогут правильно настроить Mimaki CG-60SR, исправить ошибки и выявить неполадки.