 Пульт дистанционного управления MINN KOTA Ulterra i-Pilot
 ПУЛЬТ ДИСТАНЦИОННОГО УПРАВЛЕНИЯ КРАТКОЕ СПРАВОЧНОЕ РУКОВОДСТВО
 ПУЛЬТ ДИСТАНЦИОННОГО УПРАВЛЕНИЯ КРАТКОЕ СПРАВОЧНОЕ РУКОВОДСТВО
РУЧНОЕ УПРАВЛЕНИЕ
СЛЕДЫ
СПОТ-БЛОКИРОВКА
- Стоянка на месте
Включает Spot-Lock и записывает его в ячейку памяти.
- Стоянка на месте Recall Вызов Spot-Lock из памяти и включение Spot-Lock.

КРУИЗ-КОНТРОЛЬ/АВТОПИЛОТ

- Скорость вращения двигателя
- Уровень сигнала GPS
- Удаленная батарея
- Низкая укладка/развертывание
- Опора вкл./выкл.
- Скорость GPS
- Состояние аккумуляторной батареи двигателя
- Блокировка клавиатуры
- Запись трека включена
- Отследить, чтобы начать
- Spot-Lock вкл.
- Трек до конца
- Место в памяти
- Круиз-контроль включен
- Автопилот/расширенный автопилот включен
РАЗВЕРТЫВАНИЕ МОТОРА
- Дважды нажмите кнопку укладки/развертывания на пульте дистанционного управления.
- Значок складывания/развертывания будет мигать на дистанционном ЖК-дисплее до тех пор, пока двигатель не будет полностью развернут.
ПОДРЕЗКА МОТОРА
При запущенном двигателе нажмите кнопку триммера вверх/вниз на пульте дистанционного управления, чтобы настроить двигатель в нужном направлении.
ХРАНЕНИЕ ДВИГАТЕЛЯ
- Нажмите кнопку укладки/развертывания на пульте дистанционного управления.
- Значок укладки/развертывания будет мигать на удаленном ЖК-дисплее до тех пор, пока двигатель не будет полностью сложен.
ЗАМОК ЗАПИСИ
- Нажмите кнопку Стоянки на месте на пульте дистанционного управления.
- Значок ячейки памяти будет мигать на удаленном ЖК-дисплее в течение трех секунд, позволяя вам выбрать ячейку памяти, нажимая кнопки увеличения или уменьшения скорости. Повторное нажатие кнопки Spot-Lock или ожидание в течение трех секунд принимает местоположение памяти.
ОТКЛЮЧЕНИЕ SPOT-LOCK
Чтобы отключить Spot-Lock, нажмите любую из этих кнопок: Prop On/Off, Steer Right, Steer Left, Speed Up, Speed Down или Spot-Lock.
ПОВТОРНО ВКЛЮЧИТЕ СОХРАНЕННОЕ МЕСТО ЗАБЛОКИРОВКИ
- Вручную наведите лодку в пределах четверти мили от сохраненного местоположения Spot-Lock. Из соображений безопасности i-Pilot не будет повторно задействовать сохраненное местоположение Spot-Lock на расстоянии более четверти мили.
- Нажмите кнопку Spot-Lock Recall на пульте дистанционного управления.
- Значок ячейки памяти будет мигать на удаленном ЖК-дисплее в течение трех секунд, позволяя вам выбрать ячейку памяти, нажимая кнопки увеличения или уменьшения скорости. Повторное нажатие кнопки Spot-Lock Recall или ожидание в течение трех секунд принимает местоположение памяти.
СПОТ-БЛОКИРОВКА ПОБЕГ
Если кнопка Spot-Lock была случайно нажата, нажмите кнопку Record Pause/Escape или любую кнопку ручной навигации в течение трех секунд, чтобы отменить команду.
ВКЛЮЧЕНИЕ КРУИЗ-КОНТРОЛЯ
- Нажмите кнопку круиз-контроля на пульте дистанционного управления.
- Текущая скорость GPS будет мигать, отображая вашу текущую скорость как целевую скорость GPS на удаленном ЖК-дисплее в течение трех секунд.
- Нажимайте кнопки увеличения или уменьшения скорости, чтобы увеличить или уменьшить заданную скорость, или нажмите кнопку круиз-контроля еще раз, чтобы немедленно включить круиз-контроль.
ОТКЛЮЧИТЬ КРУИЗ-КОНТРОЛЬ
Нажатие кнопки круиз-контроля отключает круиз-контроль.
РЕГУЛИРОВКА ЗАДАННОЙ СКОРОСТИ ПРИ ВКЛЮЧЕННОМ КРУИЗ-КОНТРОЛЕ
При включенном круиз-контроле нажимайте кнопки увеличения или уменьшения скорости, чтобы отрегулировать заданную скорость с шагом 0.1 мили в час.
ПРИВЛЕЧЕНИЕ РАСШИРЕННЫХ АВТОПИЛОТОВ И АВТОПИЛОТОВ
- Чтобы включить расширенный автопилот, нажмите кнопку автопилота один раз. Чтобы включить автопилот, нажмите и удерживайте кнопку автопилота в течение двух секунд.
- На удаленном ЖК-дисплее будет отображаться значок Advanced AutoPilot или AutoPilot.
- Чтобы отрегулировать желаемый курс, вручную направьте двигатель на новый курс.
- Пилот зафиксирует новый курс.
ЗАПИСЬ ДОРОЖКИ
- Нажмите кнопку записи на пульте дистанционного управления.
- Значок ячейки памяти будет мигать на удаленном ЖК-дисплее в течение трех секунд, позволяя вам выбрать ячейку памяти, нажимая кнопки увеличения или уменьшения скорости. Повторное нажатие кнопки «Запись» или ожидание в течение трех секунд принимает ячейку памяти.
- Значок REC будет отображаться на удаленном ЖК-дисплее. Помните, что это будет начальная точка на трассе.
- Ведите лодку по нужному пути или курсу. Во время записи трека можно использовать автопилот и/или круиз-контроль.
- Нажмите кнопку записи на пульте еще раз, чтобы остановить запись. Запись завершится автоматически, если для трека будет достигнут предел расстояния в две мили или если будет нажата одна из следующих кнопок: Spot-Lock, Spot-Lock Recall, Track to End или Track to Start.
ПАУЗА И ВОЗОБНОВЛЕНИЕ ЗАПИСИ
- Во время записи дорожки нажмите кнопку Record Pause/Escape.
- Значок записи будет мигать на удаленном ЖК-дисплее.
- i-Pilot приостановил запись трека.
- Если судно переместится дальше, чем на четверть мили от того места, где была нажата кнопка «Запись Пауза/Выход», записанный трек будет завершен и сохранен в ранее выбранной ячейке памяти.
- Когда будете готовы возобновить запись, проведите лодку прямо перед тем местом, где была нажата кнопка «Пауза записи/Выход». Невыполнение этого требования может привести к нестабильному воспроизведению дорожки.
- Нажмите кнопку Пауза записи/Выход.
- Значок записи перестанет мигать на удаленном ЖК-дисплее.
- i-Pilot теперь снова записывает и добавляет к треку, который был приостановлен.
ВОСПРОИЗВЕДЕНИЕ ДОРОЖКИ (ДОРОЖКА НАЧАЛА / ДОРОЖКА ДО КОНЦА)
- Вручную наведите лодку в пределах четверти мили от сохраненного пути. Из соображений безопасности i-Pilot не будет повторно задействовать сохраненный маршрут на расстоянии более четверти мили.
- Нажмите кнопку Track to Start или Track to End на пульте дистанционного управления.
- Значок ячейки памяти будет мигать на удаленном ЖК-дисплее в течение трех секунд, что позволит вам выбрать ячейку памяти, нажав кнопку увеличения или уменьшения скорости. Повторное нажатие кнопки, нажатой в шаге 2, или ожидание в течение трех секунд принимает ячейку памяти.
- Отрегулируйте скорость двигателя до желаемого значения, чтобы автоматически включаться и перемещаться по треку.
ЗАПИСЬ, ТРЕК ДО КОНЦА И ТРЕК ДО НАЧАЛА/ВЫХОД
Если случайно нажата кнопка «Запись», «Отслеживание до начала» или «Отслеживание до конца», нажмите кнопку «Пауза записи/Выход» в течение трех секунд на пульте дистанционного управления, чтобы отменить команду.
Документы / Ресурсы
- Manuals
- Brands
- MINN KOTA Manuals
- Remote Control
- i-Pilot
- Owner’s manual
-
Contents
-
Table of Contents
-
Troubleshooting
-
Bookmarks
Quick Links
Related Manuals for MINN KOTA i-Pilot
Summary of Contents for MINN KOTA i-Pilot
-
Page 1
OWNER’S MANUAL… -
Page 2: Serial Number
Intuitive features and wireless control help to accurately position your boat and improve your bait presentation. i-Pilot navigates and positions your boat for you, so you can focus on fishing.
-
Page 3: Table Of Contents
SPOT-LOCK ……………………….15 How Spot-Lock Works ………………….15 Spot-Lock Functions ……………………. 15 CRUISE CONTROL ……………………18 i-Pilot with Cruise Control ………………….18 Working with Cruise Control ………………..19 HIGH SPEED BYPASS ……………………. 21 Motor Speed and High Speed Bypass …………….. 21 Controlling High Speed Bypass………………..21 AUTOPILOT ……………………….23…
-
Page 4: Safety Considerations
WARNING When the motor is being controlled by the i-Pilot navigation system, the Controller will continue to perform the last task it was assigned, even when the remote is not powered on. Be sure to know how to power the motor «on» and «off», and always be alert for unexpected motor movement, such as a turning propeller, even when the remote is powered «off».
-
Page 5: Warranty
Minn Kota Limited Two-Year Warranty on the Entire Product JOME warrants to the original retail purchaser only that the purchaser’s new Minn Kota i-Pilot® or i-Pilot® Link™ Wireless GPS Trolling System Accessory will be materially free from defects in materials and workmanship appearing within two (2) years after the date of purchase. JOME will (at its option) either repair or replace, free of charge, any parts found by JOME to be defective during the term of this warranty.
-
Page 6: Features
Speed Up Home Steer Right Speed Down AutoPilot Prop On/Off Steer Left High Speed Bypass GO TO Spot-Lock Cruise Control i-Pilot Control Head Control Head Pair Button Ulterra Ultrex Riptide Ulterra PowerDrive Riptide PowerDrive Terrova Riptide Terrova NOTE: Specifications subject to change without notice. This diagram is for reference only and may differ from your actual product.
-
Page 7: Remote Buttons
REMOTE BUTTONS REMOTE BUTTONS MENU CONTROL BUTTONS Home Pressing this button will always bring you to the Home Screen. Press to accept menu selections. Press to power remote on. Press and hold for 3 seconds to power remote off. Left Softkey & Right Softkey Buttons change function based on the mode of operation and which screen is presently displayed.
-
Page 8: Header & Iconography
HEADER & ICONOGRAPHY HEADER 10:50 A GPS Signal Strength 10:50 A Shows the level of GPS signal strength. If no bars appear, the system has not yet acquired a GPS fix. Time Motor Motor Battery Battery 10:50 A Displays motor battery level when prop is disengaged. GPS Signal Remote Strength…
-
Page 9: Display Screen
DISPLAY SCREEN SAMPLE SCREENS Become familiar with some of the display screens used on the i-Pilot remote interface. iTracks Spot-Locks 10:50 A 10:50 A IT01 9:51 AM APR 27 SL01 9:51 AM APR 01 DIST 0.46 sm BRG 86° DIST 40 ft BRG 86°…
-
Page 10: Getting Started
Navigation i-Pilot uses GPS satellite signals as well as compass data to know where it is, where its heading and the direction the motor is pointing. Since i-Pilot depends on GPS satellite signals for navigation, a minimum GPS signal of one bar is required in order for GPS navigation controls to be enabled.
-
Page 11: System Startup
Fluctuating temperatures can lead to battery damage, such as capacity loss, leakage or rupture of batteries. Damaged batteries may damage your remote. Minn Kota recommends removing batteries from the remote when it is not expected to be used for extended periods of time, or for long-term storage, to avoid remote damage from the batteries.
-
Page 12
10:50 A display screen will turn on. A message about the safe and prudent operation of your vessel. i-Pilot operation will appear on the display screen. This product does not relieve you from the Use the Right Softkey to select OK. -
Page 13: Audio Modes
AUDIO MODES The i-Pilot controller in the Control Head contains an internal speaker which can be configured to work in two different audio modes. The unit is factory set to Audio Mode 2. Review the modes below to determine what audio patterns are caused by conditions in each audio mode.
-
Page 14
AUDIO MODES c. Use the Left Softkey to select the Options Options Options menu. Autopilot Mode Language d. Use the Menu Up and Menu Down buttons Arrival Mode Time to find the Audio Mode menu. Use the Ok Prop Auto On Units button to select it. -
Page 15: Spot-Lock
Arrival Circle, it will adjust the motor speed to zero. Outside forces such as wind and current will cause If i-Pilot sees the motor is outside of the circle, it will control the boat to move around the Arrival Circle. Spot-…
-
Page 16
BRG 43° SL04 7:34 AM APR 01 DIST 138 ft BRG 12° Back iTracks Due to safety reasons, i-Pilot will not re-engage a saved Spot-Lock location greater than a quarter mile away. 16 | minnkotamotors.com ©2016 Johnson Outdoors Marine Electronics, Inc. -
Page 17
Spot-Lock Jog Spot-Lock Jog is a feature that is only available when the i-Pilot controller is paired with a Heading Sensor. For information on the Heading Sensor, go to the «Heading Sensor» section of this manual. a. To engage Spot-Lock Jog, first engage… -
Page 18: Cruise Control
WITH CRUISE CONTROL During regular operation of the i-Pilot navigational system, the user can control prop speed. The controller will communicate the speed over ground to the remote and the remote will display it. The speed over ground is the speed that the boat is traveling and will vary based on environmental factors such as wind and current, even if the prop speed remains the same.
-
Page 19: Working With Cruise Control
CRUISE CONTROL WORKING WITH CRUISE CONTROL Engaging Cruise Control a. Press the Cruise Control button on the remote. 10:50 A b. The Target Speed will appear on the display screen. Press the Speed Down or Speed Up TARGET TARGET buttons to adjust the Target Speed. NOTE: If the Prop is not turning, be sure to Record…
-
Page 20
CRUISE CONTROL Jump To or Set a Cruise Control Preset a. To jump to or set a Cruise Control Preset, first 10:50 A 10:50 A engage Cruise Control. b. Use the Speed Down or Speed Up buttons TARGET TARGET TARGET TARGET to change the Target Speed. -
Page 21: High Speed Bypass
HIGH SPEED BYPASS MOTOR SPEED AND HIGH SPEED BYPASS The Motor Speed with High Speed Bypass is set to 10 when engaged and returns to the previously set speed when disengaged. WARNING Watch for a turning propeller when High Speed Bypass is engaged. A turning propeller can cause injury. High Speed Bypass will automatically turn the prop on to Speed 10, even if the engagement is accidental.
-
Page 22
HIGH SPEED BYPASS Disengaging High Speed Bypass a. When High Speed Bypass is engaged, press the 10:50 A 10:50 A High Speed Bypass button on the remote to disengage High Speed Bypass. NOTE: Manually adjusting the speed below speed 10 will also disengage High Speed Bypass. -
Page 23: Autopilot
WITH AUTOPILOT When in AutoPilot, i-Pilot keeps the trolling motor pointed in the direction you want to go. Each time the wind or water current moves the boat off course, the AutoPilot senses the change and steers itself back to the original heading. The AutoPilot direction is set every time a steering change is made.
-
Page 24: Working With Autopilot
The Legacy AutoPilot or Advanced AutoPilot icon will display on the screen. c. To adjust the desired heading, manually steer 114° 120° the motor to the new heading. i-Pilot will automatically lock onto the new heading. Options System Options…
-
Page 25
AUTOPILOT To Set the Default AutoPilot Mode AutoPilot has two modes: 1. Legacy — This method of heading tracking does not take into account external forces such as a side wind or currents, which can allow side drift. 2. Advanced — Advanced AutoPilot not only uses compass heading but also GPS signal data to correct for cross winds, current and other external forces to keep the boat on an intended course. -
Page 26: Itracks
UNDERSTANDING iTRACKS The i-Pilot system can be used to record sets of points that make up an iTrack. When recording an iTrack, i-Pilot starts to record GPS position data in the form of Track Points. The very first Track Point recorded is called the Start, and the last point recorded is called the End.
-
Page 27: Working With Itracks
TRACKS WORKING WITH iTRACKS Recording An iTrack a. Use the Menu Up or Menu Down buttons iTracks 10:50 A until the menu at the bottom of the display screen IT01 9:51 AM APR 27 DIST 2.88 sm BRG 86° shows the Record menu. IT02 9:35 AM APR 14…
-
Page 28
WARNING NOTE: If there are no Spot-Locks or iTracks in range, Due to safety reasons, i-Pilot will not re-engage a saved the remote will state there are none in range. iTrack greater than a quarter mile away. c. Use the Menu Up… -
Page 29: Itrack Arrival Modes
TRACKS iTRACK ARRIVAL MODES iTrack has three Arrival Modes: 1. Off — Once the boat has completed navigating the iTrack, the Prop will turn off. Off is the default Arrival Mode. 2. Spot-Lock — After the boat has completed navigating the iTrack, the system will go into Spot-Lock at the point where the iTrack is completed.
-
Page 30: Heading Sensor
The Minn Kota Heading Sensor provides boat heading information to a Bluetooth compatible i-Pilot equipped Minn Kota motor. It contains a compass that senses the boat’s heading. The heading is used by the i-Pilot system for navigation features such as Spot-Lock Jog.
-
Page 31: Installation
2. Pairing — The Heading Sensor can be paired with i-Pilot. While the Heading Sensor is attempting to pair, the LED will flash on and off twice per second for up to 20 seconds. If the Heading Sensor is successfully paired, normal operation will begin.
-
Page 32
HEADING SENSOR TOOLS AND RESOURCES REQUIRED • Drill • #2 Screwdriver • Awl or similar marking tool • 1/4” Drill Bit • 9/64” Drill Bit • Marine-grade Silicone INSTALLATION MOUNTING OPTIONS There are two options to install the Heading Sensor. Determine if the Power Cable for the Heading Sensor will pass below the mounting surface. -
Page 33
HEADING SENSOR e. Position the sensor so that the arrow on the Keel of Boat Arrow to cover is pointed toward the front of the boat in Front the direction of travel. The arrow needs to be Screw Holes parallel with the keel of the boat. CAUTION Failure to align the Heading Sensor correctly will result in incorrect compass readings. -
Page 34
HEADING SENSOR ITEM(S) NEEDED #1 x 2 h. Apply a marine-grade silicone caulk or sealant to both #8 — 18×1-1/2 screws (Item #1) as needed Screw to protect your boat from water damage. Using a #2 Screwdriver, mount the Heading Screw Sensor to the mounting location using the two screws. -
Page 35
HEADING SENSOR c. Double check the position of the Heading Sensor Screw so that the arrow on the cover is pointed toward Arrow to Holes Front the front of the boat in the direction of travel. The arrow needs to be parallel with the Keel of Boat keel of the boat. -
Page 36
HEADING SENSOR h. Using a #2 Screwdriver, mount the Heading Sensor to the mounting location using the two Screw screws. Hand tighten only. CAUTION Screw If the mounting surface is thin or made of a lightweight material, the mounting surface may need to be reinforced in order to support the Heading Sensor. -
Page 37: Working With The Heading Sensor
As quickly as possible, begin to hold the Pair button on the i-Pilot Control Head. e. The i-Pilot Control Head will emit a beep pattern when the Heading Sensor is successfully paired. Pair Release the Pair button on the Control Head.
-
Page 38
The Heading Sensor calibration is initiated using either the i-Pilot or i-Pilot Link remote. Refer to the Owner’s Manual for your motor if you are unsure of the i-Pilot system that comes with your motor. The process of calibrating the Heading Sensor must occur while your boat is on the water. -
Page 39
HEADING SENSOR d. On the i-Pilot remote, use the Menu Up System 10:50 A Menu Down buttons to find the System menu About at the bottom of the display screen. Update So ware e. Use the Right Softkey to select the System Pair menu. -
Page 40
Offset will be a perfect 0° degrees. Knowing that installations are never perfect, the Heading Offset can be set on the i-Pilot remote to compensate for the difference between the two. Heading Offset has the ability to correct the difference in measurement in a range between +30°… -
Page 41: Motor Controls
MOTOR CONTROLS To Toggle the Prop Auto On a. Press the Home button. 10:50 A 10:50 A b. Use the Menu Up and Menu Down buttons to find the Options menu at the bottom of the display screen. c. Use the Left Softkey to select the Options menu.
-
Page 42
Boat Scale. Thrust requirements are determined by the size and weight of your boat. Minn Kota suggests selecting a trolling motor with at least 2 lbs. of thrust for every 100 lbs. of boat weight when the boat is fully loaded with fuel, people, tackle, etc. This guide is established under normal lake fishing conditions and should be used as a general guide to determine how ideally the thrust of your trolling motor is matched to the weight of your boat. -
Page 43
MOTOR CONTROLS e. Use the Menu Up and Menu Down buttons Boat Scale to scroll to +2, +1, 0, -1, or -2. Use the Ok button to select the option highlighted. The circle to the right of the selected Boat Scale will become solid when selected. Back Close Deploying the Motor… -
Page 44
MOTOR CONTROLS Stowing the Motor a. Press the Home button. 10:50 A 10:50 A b. Use the Menu Up and Menu Down buttons to find the Stow menu at the bottom of the display screen. NOTE: The Stow menu at the bottom of the Record Lock Trim… -
Page 45
MOTOR CONTROLS Adjusting Trim a. Press the Home button. 10:50 A 10:50 A b. Use the Menu Up and Menu Down buttons to find the Trim menu at the bottom of the display screen. c. Use the Left Softkey to select the Trim menu. Trim Stow Record… -
Page 46: Remote Controls
REMOTE CONTROLS To Adjust the Backlight Brightness a. Press the Home button. 10:50 A 10:50 A b. Use the Menu Up and Menu Down buttons to find the Options menu at the bottom of the display screen. c. Use the Left Softkey to select the Options menu.
-
Page 47
REMOTE CONTROLS To Adjust the Backlight Timeout a. Press the Home button. 10:50 A 10:50 A b. Use the Menu Up and Menu Down buttons to find the Options menu at the bottom of the display screen. c. Use the Left Softkey to select the Options menu. -
Page 48
About Boat Scale CAUTION Update So ware Sensor Cal Pair Sensor O set Boat Scale Restore Defaults This will restore the i-Pilot’s factory settings! Back Close Back Close e. Use the Left Softkey to select the Restore option. CAUTION Caution: This Will Restore the Remote’s… -
Page 49
REMOTE CONTROLS c. Use the Left Softkey to select the Options Options Options menu. Sort Order Autopilot Mode d. Use the Menu Up and Menu Down buttons Backlight Arrival Mode to find the Language menu. Use the Ok button Auto O Prop Auto On to select it. -
Page 50
REMOTE CONTROLS e. Use the Menu Up and Menu Down buttons Units — Distance Units to find the Distance menu. Use the Ok button or sm Distance to select it. m or km Speed Use the Menu Up and Menu Down buttons or nm to scroll to the desired unit of measurement. -
Page 51: Change The Time Zone
REMOTE CONTROLS Change the Time Format a. Press the Home button. 10:50 A 10:50 A b. Use the Menu Up and Menu Down buttons to find the Options menu at the bottom of the display screen. Record Lock Options System c.
-
Page 52
REMOTE CONTROLS c. Use the Left Softkey to select the Options Options Options menu. Autopilot Mode Backlight d. Use the Menu Up and Menu Down buttons Arrival Mode Auto O to find the Time menu. Use the Ok button to Prop Auto On Language select it. -
Page 53
REMOTE CONTROLS e. Use the Menu Up and Menu Down buttons Time Time to find the Daylight Savings menu. 12-Hour 12-Hour Use the Ok button to toggle the check box On 24-Hour 24-Hour and Off. Time Zone Time Zone Daylight Savings Daylight Savings NOTE: The displayed time will be adjusted for… -
Page 54
Auto O 15 Minutes WARNING 30 Minutes 60 Minutes When the motor is being controlled by the i-Pilot system, 90 Minutes the controller will continue to perform the last task it was Back Close assigned, even when the remote is not powered «on». -
Page 55
REMOTE CONTROLS To Lock and Unlock the Remote a. Press the Home button. 10:50 A 10:50 A b. Use the Menu Up and Menu Down buttons to find the Lock menu at the bottom of the display screen. NOTE: For all motors except the Ulterra Record Lock Unlock… -
Page 56: I-Pilot App
Specifications subject to change without notice. This diagram is for reference only and may differ from your actual app interface. i-Pilot app will only work with i-Pilot enabled motors. Be sure that you download the correct app as other Minn Kota apps will not work with your motor.
-
Page 57
The App Update Indicator is only available when an update to the app is available. This icon will not appear when the app is up-to-date. This icon is for updates to the app only. For updates to the controller, refer to the «i-Pilot Software Update»… -
Page 58
WARNING The person operating the i-Pilot app is under the same responsibility of operation as if they were operating the i-Pilot either through the remote or any other manner. All safety considerations and precautions for motor operation must be heeded and abide by. -
Page 59: Launching The App & Demo Mode
-PILOT APP LAUNCHING THE APP & DEMO MODE Launching the app when it is not paired with the motor will allow you to try it out. Every time the app is launched, you must agree with the disclaimer in order to continue. Become familiar with the app screens in order to understand how to operate your motor with the app.
-
Page 60: Getting Started
Once you have successfully installed the app and verified installation, close the app to begin the pairing process. a. On the device you intend to pair with the i-Pilot Control Head — Ulterra & Riptide Ulterra controller, turn Bluetooth «on».
-
Page 61
-PILOT APP Update the i-Pilot App NOTE: It is important to keep the i-Pilot App up-to-date, because all updates to the i-Pilot remote and controller are communicated through the app. a. Open the i-Pilot app on the device. Check to see if the App Update Indicator icon in the upper right hand corner is present. -
Page 62
Check Remote and Controller Software Version The i-Pilot App on the device communicates with the i-Pilot controller, which is in the Control Head of the paired motor. When the App is communicating with a controller, the About screen will display the current version of the app and information about the versions of software in the controller. -
Page 63
-PILOT APP Update the i-Pilot Controller In order to update the i-Pilot controller, the i-Pilot app on the NOTE: The i-Pilot remote must be updated from the device should first be updated. To update the app, please refer controller, using the remote. Complete any remote to the «Update the i-Pilot App»… -
Page 64: Service & Maintenance
SERVICE & MAINTENANCE BATTERY REPLACEMENT TOOLS AND RESOURCES REQUIRED • #1 Phillips Screwdriver INSTALLATION a. Disconnect the Motor from the battery or make 10:50 A sure that the Remote is out of range from the receiver before replacing the remote batteries. b.
-
Page 65: I-Pilot Software
Be sure that the software in the Controller is updated before updating the remote. Please see 10:50 A 10:50 A the «i-Pilot App» section of this manual on how to update the Controller. NOTE: The software update for the remote will come from the Controller.
-
Page 66: Pairing A Remote With A Controller
PAIRING A REMOTE An i-Pilot controller may pair up to 3 remotes. These three remotes can be a combination is standard i-Pilot remotes and Micro remotes. Any additional remotes can be paired using the following steps. Once the maximum number of remotes have been paired, the controller will start replacing a new remote with the oldest paired remote in memory.
-
Page 67
SERVICE & MAINTENANCE c. Use the Right Softkey to select the System System System menu. About About d. Use the Menu Up and Menu Down buttons Update So ware Update So ware to find the Pair option. Pair Pair Boat Scale Boat Scale e. -
Page 68: General Maintenance
4. i-Pilot won’t let me turn on certain features like: Advanced AutoPilot, Record, GO TO, Cruise Control or Spot-Lock. • Verify that the GPS Signal Strength icon on the LCD shows at least one bar. If there are no bars, i-Pilot will not allow these GPS-based features to be enabled.
-
Page 69: Frequently Asked Questions
Orders after 12 noon central time will ship the next business day if in stock. Frequently Asked Questions We have FAQs available on our website to help answer all of your Minn Kota questions. Visit minnkotamotors.com click on “Frequently Asked Questions”…
-
Page 70: Compliance Statements
Minn Kota motors are not subject to the disposal regulations EAG-VO (electric devices directive) that implements the WEEE directive. Nevertheless never dispose of your Minn Kota motor in a garbage bin but at the proper place of collection of your local town council.
-
Page 71: Fcc Compliance
• Maximum RF power transmitted: +10 dBm TRADEMARKS Minn Kota®, Riptide®, i-Pilot®, AutoPilot™, CoPilot™, Link™, PowerDrive™, Terrova™, Ulterra™ are trademarked by or registered trademarks of Johnson Outdoors Marine Electronics, Inc. The Bluetooth® word mark and logos are registered trademarks owned by Bluetooth SIG, Inc. and any use of such marks by Johnson Outdoors Inc is under license.
-
Page 72: Parts Diagram & Parts List
POWERDRIVE, RIPTIDE POWERDRIVE, TERROVA, RIPTIDE TERROVA, ULTERRA, RIPTIDE ULTERRA & ULTREX The parts diagram and parts list provides Minn Kota® WEEE compliance disassembly instructions. For more information about where you should dispose of your waste equipment for recycling and recovery and/or your European Union member state requirements, please contact your dealer or distributor from which your product was purchased.
-
Page 73
PARTS DIAGRAM & PARTS LIST Remote & Heading Sensor Parts List Assembly Part # Description Quantity 2994075 REMOTE ASY, IPILOT 2996400 HEADING SENSOR ASSEMBLY 2882557 CASE BTM, WINDOW ASM & VENT DCL 2886423 BATTERY DOOR, SEAL, SCREW KIT Item Part # Description Quantity 2373443… -
Page 74
PARTS DIAGRAM & PARTS LIST i-PILOT CONTROL HEAD Control Head Parts Diagram Ultrex, Terrova & Riptide Terrova PowerDrive & Riptide PowerDrive Ulterra & Riptide Ulterra 74 | minnkotamotors.com ©2016 Johnson Outdoors Marine Electronics, Inc. -
Page 75
DECAL, CTRL BOX SIDE BT SW *SALTWATER* *RIPTIDE ULTERRA* *RIPTIDE TERROVA* DECAL, DOMED IPILOT FW *FRESHWATER* *ULTERRA* *I-PILOT* *POWERDRIVE* *ULTREX* 2395520 *TERROVA* DECAL, DOMED IPILOT SW *SALTWATER* *RIPTIDE ULTERRA* *I-PILOT* *RIPTIDE TERROVA* 2395521 *RIPTIDE POWERDRIVE* CTRL HEAD ASY, IPILOT 1.6 ULT *FRESHWATER* *ULTERRA* ✖… -
Page 76: Minnkotamotors.com
Stop buying new batteries and start taking care of the ones you’ve got. Many chargers can actually damage your battery over time – creating shorter run times and shorter overall life. Digitally controlled Minn Kota chargers are designed to provide the fastest charge that protect and extend battery life.
This manual is also suitable for:
I-pilot
|
Detail Specifications: 822/822882-ipilot.pdf file (09 Dec 2022) |
Accompanying Data:
MINN KOTA i-Pilot Boating Equipment, Fishing Equipment PDF Owner’s Manual (Updated: Friday 9th of December 2022 06:02:22 PM)
Rating: 4.4 (rated by 91 users)
Compatible devices: POWERDRIVE V2 / RIPTIDE SP FOOT PEDAL, 1866160, talon, Riptide Ulterra, RAPTOR, DeckHand DH40, RIPTIDE ST, MICRO REMOTE.
Recommended Documentation:
Text Version of Owner’s Manual
(Ocr-Read Summary of Contents, UPD: 09 December 2022)
-
30, 30 | minnkotamotors.com ©2016 Johnson Outdoors Marine Electronics, Inc. HEADING SENSOR HEADING SENSOR FEATURES Become familiar with the features of the Heading Sensor to maximize the capabilities it offers. Power Cable Screw Hole Screw Hole Arrow for Placement Pair Button/LED HEADING SENSOR FUNCTIONS The Minn Kota Heading Sensor provides boat heading information to a Bluetooth…
-
75, MINN KOTA i-Pilot minnkotamotors.com | 75 ©2016 Johnson Outdoors Marine Electronics, Inc. PARTS DIAGRAM & PARTS LIST Assembly Part # Description Quantity C 2770204 COVER KIT, IPLT 1.6 TRV,ULTREX *TERROVA* *ULTREX* *FRESHWATER* 1 D 2770207 COVER KIT, IPLT 1.6 RT TERROVA *RIPTIDE TERROVA* *SALTWATER* 1 E 2770202 COVER KIT, IPLT 1.6 POWERDRIVE *POWERDRIVE* *FRESHWATER* 1 F 2770203 COVER KIT,IPLT 1.6 R…
-
26, 26 | minnkotamotors.com ©2016 Johnson Outdoors Marine Electronics, Inc. TRACKS UNDERSTANDING iTRACKS The i-Pilot system can be used to record sets of points that make up an iTrack. When recording an iTrack, i-Pilot starts to record GPS position data in the form of Track Points. The very first Track Point recorded is called the Start, and the last point recorded is ca…
-
5, minnkotamotors.com | 5 ©2016 Johnson Outdoors Marine Electronics, Inc. WARRANTY WARRANTY ON MINN KOTA I-PILOT® AND I-PILOT® LINK™ WIRELESS GPS TROLLING SYSTEM ACCESSORY Johnson Outdoors Marine Electronics, Inc. (“JOME”) extends the following limited warranty to the original retail purchaser only. Warranty coverage is not transferable. Minn Kota Limited Tw…
-
34, 34 | minnkotamotors.com ©2016 Johnson Outdoors Marine Electronics, Inc. HEADING SENSOR 5 ITEM(S) NEEDED #1 x 2 Installation for No Access Under the Mounting Location h. Apply a marine-grade silicone caulk or sealant to both #8 — 18×1-1/2 screws (Item #1) as needed to protect your boat from water damage. i. Using a #2 Screwdriver, mount the Heading Sensor to the mounting location using the…
-
41, minnkotamotors.com | 41 ©2016 Johnson Outdoors Marine Electronics, Inc. MOTOR CONTROLS a. Press the Home button. b. Use the Menu Up and Menu Down buttons to find the Options menu at the bottom of the display screen. c. Use the Left Softkey to select the Options menu. d. In the Options menu, use the Menu Up and Menu Down buttons to find …
-
72, MINN KOTA i-Pilot 72 | minnkotamotors.com ©2016 Johnson Outdoors Marine Electronics, Inc. PARTS DIAGRAM & PARTS LIST Remote & Heading Sensor Parts Diagram i-PILOT POWERDRIVE, RIPTIDE POWERDRIVE, TERROVA, RIPTIDE TERROVA, ULTERRA, RIPTIDE ULTERRA & ULTREX i-PILOT REMOTE & HEADING SENSOR The parts diagram and parts list provides Minn Kota® WEEE compliance disassembly instructions. For …
-
54, 54 | minnkotamotors.com ©2016 Johnson Outdoors Marine Electronics, Inc. REMOTE CONTROLS a. Press the Home button. b. Use the Menu Up and Menu Down buttons to find the Options menu at the bottom of the display screen. 1 1a 1b Set the Remote Auto Off c. Use the Left Softkey to select the Options menu. d. Use the Menu Up and Menu Down buttons to find the Auto Off menu.…
-
6, 6 | minnkotamotors.com ©2016 Johnson Outdoors Marine Electronics, Inc. FEATURES NOTE: Specifications subject to change without notice. This diagram is for reference only and may differ from your actual product. Left Softkey Right Softkey Menu Up Menu Down Ok Speed Up Speed Down Prop On/Off Steer Left Steer Right High Speed Bypass Spot-Lock Display Scr…
-
62, MINN KOTA i-Pilot 62 | minnkotamotors.com ©2016 Johnson Outdoors Marine Electronics, Inc. -PILOT APP Check Remote and Controller Software Version a. From the i-Pilot app Home screen, press the Menu icon. b. In the Menu screen, select the About option. c. The About screen will appear showing the version of the i-Pilot app on the device, the version of i-Pilot software in the con…
Recommended Instructions:
CT-12, GoGear SA075, MS3846VRL, M630, NBR125P, RADIUS 3000


-
www.necdisplay.comNEC MultiSync® X461UN 46” ultra-narrow, professional-grade LCD display ideal for video wall applicationsLarge-Screen LCDRevolutionize your video walls. The ultra-narrow bezel of the 46” NEC MultiSync X461UN allows for a screen-to-screen distance between two neighboring displays of a mere 7.3mm, a near 450% improvement over NEC’s previous generation large-scr …
X461UN — MultiSync — 46″ LCD Flat Panel Display 2
-
ERONE433MINIAM1A-GeneralinformationTheradiocontrolERONE433MINIhasbeendesignedforthecontrolofautomaticclosingsystemsandanti-burglarsystemsthankstoitsveryhighsecuritycodingsystem.(KeeLoq®Hoppingcode).Thecodesentbythetransmitterchangesateachactivation,avoidinganyscanningandcopyingrisk.Aspecialalgorithmallowstokeepsyncronysedtransmitterandreceiver.Theoperatingfrequencyisam …
433 MINI AM 2
-
� …
TSU3000 52
-
P112/24V DCCONTROLLER RGBW REMOTE RGBWP1Batteries2xAAA 1,5VP2max 10AP7(PL) Kanlux SA, ul. Objazdowa 1-3, 41-922 Radzionków (CZ) Distributor: Kanlux s.r.o., Sadová 618, 738 01 Frýdek-Místek (SK) Distributor: Kanlux s.r.o., Zlatovská 2179/28 911 05 Trencín (HU) Forgalmazza: Kanlux Kft., 9026 Győr, Bácsai út 153/b (UA) ТОВ «КАНЛЮКС», 08130, Київська обл� …
Controller RGBW 2
Additional Information:
Operating Impressions, Questions and Answers:
Посмотреть инструкция для Minn Kota i-Pilot бесплатно. Руководство относится к категории без категории, 1 человек(а) дали ему среднюю оценку 7.3. Руководство доступно на следующих языках: английский. У вас есть вопрос о Minn Kota i-Pilot или вам нужна помощь? Задайте свой вопрос здесь
Не можете найти ответ на свой вопрос в руководстве? Вы можете найти ответ на свой вопрос ниже, в разделе часто задаваемых вопросов о Minn Kota i-Pilot.
Инструкция Minn Kota i-Pilot доступно в русский?
Не нашли свой вопрос? Задайте свой вопрос здесь
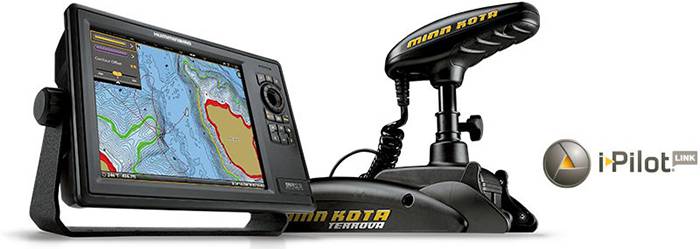
Электромоторы Minn Kota, оснащенные i-Pilot Link: Ulterra, Terrova, PowerDrive V2, Pontoon, Riptide ST и SP Riptide, совместимы с большинством эхолотов Humminbird, имеющих Ethernet — вход. Ознакомиться с полным списком совместимых моделей эхолотов Humminbird можно здесь.
Управление с пульта ДУ или эхолота Humminbird
Система i-Pilot Link превращает ваш эхолот HUMMINBIRD в центральный командный пункт. С его помощью можно контролировать свой двигатель, устанавливать и возвращаться к якорным точкам, трекам, путевым точкам, следовать контурам и многое другое. Вы можете делать почти всё с помощью вашего эхолота Humminbird, как и с пульта ДУ, но при этом видеть отображение всех функций на большом экране эхолота.
Функция Spot-Lock
Используйте функцию Spot-Lock (электронный якорь) чтобы лодка оставалась на месте рыбалки, вне зависимости от волн, ветра и течения. Если лодка будет дрейфовать более 1,5 метров (5 футов) от заданной точки, то i-Pilot Link активирует троллинговый двигатель, чтобы вернуть лодку автоматически в заданную точку. Используйте функцию «Go To» на пульте дистанционного управления Link или вашего эхолота Humminbird и ваш электромотор Minn Kota автоматически доставит вас в любую, ранее записанную, Spot-Lock точку или путевую точку. В памяти i-Pilot Link с эхолотом Humminbird сохраняется 2500 Spot-Lock и путевых точек. В памяти i-Pilot Link без эхолота Humminbird сохраняется 16 Spot-Lock и путевых точек.
The Contour & Contour Offset
Выберите нужную изобату (изобата — контурная изолиния на географической карте или плане, соединяющая точки одинаковых глубин водоёма (озера, моря)), обозначенную на карте Navionics или AutoChart и система автоматически поведет вашу лодку по этому контуру. Вы будете двигаться по заданной глубине в любом направлении, до тех пор, пока вы не установите другой маршрут. Система позволяет воспользоваться функцией Contour Offset (смещение от контура) — следует выбрать изобату нужной глубины или береговую линию и задать, как далеко от заданного контура вы хотите быть (смещение до 100 метров). Система будет автоматически держать лодку на заданном расстоянии от указанного контура. Примечание: необходима поддержка функции i-Pilot Link навигационной картой. Ищите логотип i-Pilot Link на упаковке.
Функции «Go To» и BackTrack
Функция позволяет автоматически вернуться в любую ранее сохраненную точку или трек. Нажатием одной клавиши выберите точку или трек и троллинговый мотор Minn Kota доставит вас обратно. BackTrack позволяет изменять текущий трек, записанный в качестве iTrack. При выборе функции BackTrack, I-Pilot Link установит начальную точку в текущей позиции лодки, создаст iTrack поверх текущего трека в обратном направлении и автоматически поведёт по нему.
CoPilot и Круиз-контроль
Функция «Круиз-контроль» позволяет точно выбрать и регулировать скорость лодки, чтобы создать оптимальную скорость для троллинга при лове рыбы. Фактическая скорость отображается на ЖК-дисплее, система позволяет выставить скорость движения с шагом 0,1 миля в час (0,19 км/ч). С помощью легендарных функций Minn Kota CoPilot, вы можете контролировать скорость, рулевой механизм и вкл / выкл. Беспроводной пульт дистанционного управления i-Pilot позволит вам управлять мотором и ловить рыбу из любого места на лодке.
Расширенный AutoPilot
Система AutoPilot электромотора Minn Kota, с помощью встроенного GPS-приемника позволяет вести судно по заданному курсу. Просто направьте головку двигателя в нужном направлении и нажмите кнопку. Встроенный GPS-приемник будет держать лодку в на курсе с непревзойденной точностью, несмотря на ветер, волны и боковой дрейф. Курс может быть скорректирован в любой момент для повышения точности движения к заданной точке.
Беспроводной пульт с цветным ЖК-дисплеем
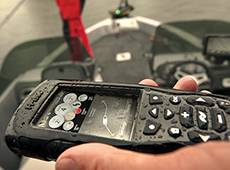
Беспроводной пульт с полноцветным ЖК-дисплеем отображает текущие включенные функции, пользовательские меню, уровень сигнала GPS, состояние мотора и уровень заряда батареи. Пульт ДУ работает от аккумулятора, полностью водонепроницаемый и плавает. Система Link I-Pilot электромотора Minn Kota поддерживает работу с нескольких пультов ДУ для дополнительного удобства, включая новый Micro Remote.
Маршруты
Создайте свой собственный маршрут, используя ранее записанные Spot-Lock и путевые точки. Задайте созданный маршрут на пульте или эхолоте Humminbird и i-Pilot Link автоматически переместит лодку в любом направлении.