Introduction
Money Manager Ex (MMEX) is a personal money
management system,
for any one starting out in keeping track of their money, and their
spending habits. Based on simple principles, thus allowing anyone
with little, to no knowledge of finance and general book keeping,
to successfully manage their money. MMEX does this by attempting to
models the real financial world, to help us (the user) maintain our
personal finances. The Money Manager EX Software, is Open Source,
and free to use.
The primary goal of MMEX is to simplify the process of tracking
financial information, in an easy to use program that can be used
as regular as necessary, to help us keep track of where our money
comes from and more importantly, where our money goes, in order to
make better financial decisions for our future.
Think of Money Manager Ex as a computer checkbook which enables
you to balance your accounts, organize, manage and generate reports
for your finances.
It is also a great way to keep abreast of your financial worth.
The purpose of this manual is to give you (the user) some basic
instructions for using MMEX. This instruction manual will evolve as
the program evolves. So check the help system with each update and
see what’s new and how to better utilize MMEX.
Working towards better Financial Health
Becoming organized financially requires some amount of
discipline. Financial management can become complicated when there
is no clear understanding of how much money we are getting,
regarded as income as opposed to our expenses which is how much
money we spend.
Debt usually results when our cash flow is
restricted because our expenses exceed our income. Then we need to
borrow money to maintain our cash flow to enable us to purchase our
necessary items.
The first step towards better Financial Health, is to maintain
good financial records. It is only when we have a clear
understanding of where our money goes, that we can make an informed
decision of where to cut back on our expenses when our cash flow
becomes tight. If we do need to borrow money, we can then better
manage our debts as well.
Did you realize you spent $600 in buying DVD movies last year?
How many times did you watch them? Do you think now that the $600
would have been better spent on the unexpected maintenance on the
auto that came up yesterday? Of course there is no right or wrong
answer to how you should spend your money. After all, it is you who
earned that money and the right to spend it whichever way you see
fit. But you can always make your money work harder for you.
Here’s where personal finance software comes in. They help
you slice/dice the financial data to give you better insight into what
is going on. Always remember the software can only be as good as
the data it has to process. Garbage In Garbage Out. But if you have
started thinking of even using Personal finance software, you are
well on your way to making every dollar count.
Read on how to work with Money Manager Ex.
Money Manager Ex Concepts
Money Manager EX models the real world to help us maintain our
personal finances.
Generally we receive money from someone for a service we
provide, or a product that we sell. This is regarded as a Income or
as a Deposit to our system. When we purchase an item or use a
service, the money that we spend is regarded as an expense or
Withdrawal to our system. In MMEX, the people that give us money or
receive our money are regarded as the Payees of the system.
As we hopefully do not spend all the money we receive, we would
obviously need a place to keep our money. This is generally, some
financial institution, or several institutions or in our pocket.
MMEX tags these places as Accounts.
When we spend or receive money, we see this as a
transaction, and the reason for our income or expense is our
category. There will be times where we need to transfer money from
one place to another, such as a withdrawal from an ATM, and this
type of transaction is known as a transfer.
This can be simplified as shown in the following diagram:
One other important thing to consider is the currency we use to
perform the transactions.
With all of these things to keep track of, MMEX uses a database
to store and connect all these entities together.
Recommendations
The database that MMEX generates, known as the .mmb file,
becomes an important file for you to maintain. Depending on
circumstances, security features such as encryption can be
employed, which is recognized as a . This is where we can.emb file
attach a password to the database, and will require a password
every time MMEX is opened.
As with any computer system, the data we produce is important to
us, and therefore need to safeguard against system malfunction.
MMEX has a backup system where it can produce a dated copy when the
database is opened, and/or produce a dated copy of the database
when changes have been detected. Up to 4 backups are maintained for
each database when the system is initialized and/or when system
changes have been detected, and the system shuts down.
- Always backup your
.mmbor.embdatabase file regularly. - Always keep backup copies on other devices to protect against hardware failure.
-
When upgrading to a new version of MMEX, make sure you
backup your.mmbor.embdatabase file before doing so. - Use the Menu Tools → Options…
to set up the level of backup required.
Creating a New Database
When MMEX initially starts up, it will attempt to load the last
database that was opened. If no database existed, the user is
presented with the option to either open an existing database, or
create a new one.
If you need to create a new database file, from the Menu, select
File → New Database.
This will prompt you to specify a new name for your .mmb
database file, at the location you specify. Your new database file
is now created and the New Database Wizard will be displayed to
help you initialize the new database and assist in creating your
first account.
The New Database Wizard will request you to set the Base
Currency and a User Name.
MMEX comes with a default set of currencies which you can use,
to correspond to your countries currency settings. New accounts
will then use this Base Currency setting as the default. This
allows accounts from different countries to reflect the value in
the base currency.
To help identify the purpose of the database, a User Name is
requested. This is optional, as it is only used as a title on the
Home Page, and in reports.
Both these settings can later be changed if required by
selecting the menu: Tools → Options.
The database name will be displayed on the title bar which helps
remind you which database file is open.
The new
.mmb database file is not encrypted.
Creating New Accounts
When creating a new database file, you will automatically be
requested to create a new account.
To manually create a new account, from the Menu, Select
Accounts → New Account.
This will bring up the Add Account Wizard. The wizard will
assist in collecting the important information of the Name and Type
of Account. The Type of Account is not changeable, but the name can
changed when editing account information.
Name of the Account: This is a required field. The
recommendation is to name your accounts uniquely and in relation to
real world accounts. Example: With CitiBank, we have a Savings
account and a credit card Visa account. You could name your
accounts as CitiBank Savings
and Citibank Visa
.
Type of Account: MMEX supports several types of accounts.
- Checking Account
-
This is the most common type of account used for MMEX, and
can handle most common account types, such as checking
accounts, savings accounts, and credit card accounts. Also
known as Bank Account, and supports three kinds of
transactions. These are withdrawal, deposit and transfers. - Term Accounts
-
Similar to Checking Accounts with the exception that they
appear in their own section on the home page and can be shown
or hidden for normal day usage. For a better explanation see
the account setup example. -
These kinds of accounts cover specialized accounts such as Cash
Term Accounts, Bank Mortgage accounts, Loan accounts, or
investment accounts with regular income or expenditure that you
need to keep track of. These accounts have their own balance
section on the Home Page. These accounts also, supports three
kinds of transactions. - Investment Account
-
The other type of account that MMEX supports is an
Investment Account. This type of account allows you to track
stock/bonds/mutual funds investments and possibly other
investments you may own.
To properly setup accounts, you should have balance information
for the accounts you want to add to MMEX. You can get this
information from your most recent bank, investment and credit card
statements. To track additional information about this account,
optionally you can enter your account details such as Account
Number, Held At, Website, Contact info and Access Info. You can
enter additional notes about the account in the notes field.
Most accounts have some kind of balance in them, for example say
in a credit card account, you have a current balance of $2304.67,
you could put that value in the initial balance field. Going
forward you only need to add transactions beyond that date when you
had the balance.
The Account Status can be set to Open or Closed. Closed
accounts are just that. They are no longer active. Setting this
status is just a way to de-clutter your view in your tree view
navigation pane. Permanent settings are made by changing the View
Options on the Menu, Tools →
Options, you can hide the closed
accounts. See Tips on Navigation Tree.
Currency: This is initially set to the database Base Currency
setting which was initially set when creating the database. You can
set the currency that is associated with this account and can be
different to the base currency.
The exchange rate for the currency can be changed using the
menu: Tools → Organize Currency.
Example: You live in the USA using US Dollars, and have an
Italian bank account using the Euro. Most of your accounts are in
USD. What is the real value of your Italian bank account? By
changing the exchange rate for the Italian Euro, you can get the
correct value of your accounts.
You also can mark accounts as a Favorite Account>. This again
is used to change the accounts that are visible in the navigation
bar. See Tips on Navigation Tree.
Account Setup Example
We have a savings account with $1250, a check account with $500,
a MasterCard owing $250, a Visa Card owing $475, a home mortgage
loan of $230,965 and an education fund to send the children to
college in the future currently at $5000 earning interest.
We would set up the following accounts:
| Account Type | Account Name | Initial Balance |
|---|---|---|
| Check/Savings | Savings | $1,250.00 |
| Check | $500.00 | |
| MasterCard | -$250.00 | |
| Visa Card | -$475.00 | |
| Term | Home Mortgage | -$230,965.00 |
| Education Fund | $5,000.00 |
On the Home Page the balances would be $1025 for Bank accounts,
and $-225,965 for Term Accounts
When a payment is made from your Savings Account to your
MasterCard with a Transfer Transaction the balance on the home page
remains the same. When a payment is made from your savings to your
home mortgage, the balance on the home page will reflect the
payment. Now you can determine the amount of money you have on a
day to day basis. Regular payments can also be set up from your
savings account to your mortgage account using Recurring Transactions.
Tips on Navigation Tree
-
Expand/Contract any account branches
using the +/- nodes on the navigation tree. -
Using a mouse Right-Click on
any account namein the Navigation
tree, will allow all
accounts or only favorite accounts to be shown, temporarily
changing the permanent settings, as well as other useful
options. -
This views can be temporarily changed to show or hide the
appropriate section.
To make the change permanent, change the options using the menu:
Tools → Options →
View Options.
Editing Account Information
Once you have created an account, you can edit any of the
account information fields in the following ways:
-
Using menu Accounts → Edit Account
: The list of account will be displayed where the
required account is selected. -
Selecting the account name in the navigation panel:
Right click to bring up the pop-up menu and select
Edit Account.
This will bring up the account information dialog where the
required fields can be changed.
Edit the account details then use the OK
button to save the account information.
Creating New Transactions
Once you have created a new account, and selected the required
account from the navigation tree, or the home page, the displayed
account can have new transactions added as follows:
-
Using the New button at the bottom of
the Account View screen -
By selecting an existing transaction and using the mouse
Right-Click, and select the appropriate action on the pop-up
menu screen.
New/Edit Transaction Dialog
This dialog box will appear for new transactions. Use this
dialog to enter the following details:
- Date
- This is generally the date of the transaction.
Defaults to current day and can be changed. - Status
- The default is None, but can be changed to
Reconciled by the options settings. - Type
-
Transaction Types:
- Withdrawal
- is one where one makes a payment and is an expense.
- Deposit
- is one where money is received and is an income.
- Transfer
- is one where a withdrawal is made from one
account and is deposited into another account.
This type of transaction is not included in Income/Expense
calculations.
- Amount
- Enter the amount for the transaction. The second amount
field is associated with the Advanced Check-box and will be
activated only for Transfer transactions. - Advanced
- For a transfer transaction, when the
amount in the From Account is different to the To Account,
the difference is recorded in the separate fields. This can be used to allow for currency rate changes. - Transaction Status
-
- Unreconciled
- When you enter a transaction, it initially is
in the state of Unreconciled. Which means the transaction has
not been reconciled with your bank/credit card company’s
balance. - Reconciled
- Once the transaction is checked and verified
with a credit card company’s balance information, it can be
marked as reconciled. - Void
- If you entered a transaction that later became
invalid or you canceled the transaction, instead of deleting
the transaction you can also mark it as void so you have a
record of the transaction. - Flag For Follow Up
- This status marks transactions as
needing more action. For example, you receive a balance
statement from the financial institution and you notice that
the transaction amount is different between what you recorded
and what is in the statement. You can mark it as flag for
follow up so that you can followup with the financial
institution. - Duplicate
- The status will be automatically be changed to
duplicate if it is recognized as such.
- Payee
- This is a person or an organization to whom the money
goes or comes from. - Clicking the payee button opens up the payee dialog. You
can select the payee from that dialog or create a new payee for
immediate use. - Category
-
Category selects the kind of expense/income for the transaction.
- Clicking the category button opens up the category dialog.
You can select the category from the dialog or create a new
category for immediate use. - Split
- This check-box will activate the Split Transactions Dialog
- Split Transactions allows multiple categories to be
recorded for a single transaction. - Can allow a transaction to have Income and Expense
categories recorded as deposit and withdrawals, provided the
overall transaction type is observed and remains positive, for
Deposit and Withdrawal transactions. - Transaction number
- This field to enter any kind of number
associated with the transaction like check number. - Notes
- This field can be used to record any special notes with
regards to the transaction. The button under Notes can be used to
select commonly used field notes.
Editing and Updating Transactions
Editing existing transactions can be achieved in a number of
ways:
-
By selecting the transaction and then clicking the Edit
button. - Double-clicking the selected transaction.
- Pressing Enter on the selection.
Any of these actions will open the transaction dialog box
containing the details of the selected transaction. Make the
changes and click OK to save the changes.
Transaction Filtering in Accounts
Transactions can be filtered by either fixed filters or, by
using the Transaction Filter in the Account View. This will allow
the user to limit the visible transactions to those defined by the
appropriate filter. These filtered transactions can then be easily
selected and individually modified.
These visible transactions can also be deleted in bulk if so
desired.
Reconciling and Balancing Transactions
- Unreconciled Transactions
- This means that they have not been verified with the
statement from the financial institution. - Reconciled Transactions
- A transaction can be considered reconciled when the details
of the transaction match that from the financial institution.
In MMEX, reconciled and unreconciled transactions are shown by
different icons. When bank details are not checked against a bank
statement, the user can select to set the default as Reconciled
when creating transactions in the Options settings.
Flagging transactions for followup
Some transactions might have some issues that you want to follow
up on. Mark these as with status of flag for followup. This is
indicated in MMEX with a different icon.
Custom Colors
The user can specify 7 custom colors in the color section of the options dialog.
In the checking/term panel, pressing Ctrl+1
through Ctrl+7 sets the transaction entry
color to the user specified custom color.
Pressing Ctrl+0 will change it back
to the mmex default transaction color.
Searching for Information
Finding Transactions
The MMEX provides several utilities to help users find specific transactions.
The Notes field of transactions can be searched from the
account view. At the bottom of the transaction listing in the account view,
input your search query in the text box to the right of the magnifying glass.
Click the magnifying glass or press the Enter key to
search the transactions in that account.The search is case sensitive.
Finding Payees
In order to find particular payees, open Payee Management using the menu item:
Tools → Organize Payees .
In the payee management window, use the search field at the bottom to type your
query. The search is not case-sensitive, and as you type the payee list will be
filtered with any matches.
If you do not know the exact name or spelling of a payee, you can use the
? (question mark) wildcard as a substitute for a single
character, or the * (asterisk) wildcard as a substitute
for one or more characters.
Examples:
- Searching Cit? will find Citi but not
Citizens - Searching Mar* will find both Mary and
Margaret
Working with Currencies
MMEX can be used in many countries, MMEX need to consider the
currency for the country of use. When creating a new database, the
Base Currency is set to the currency used in the user’s country.
If the user’s currency setting is not listed in the default
currencies, the user can create their own currency Listing.
MMEX allows us to work with more than one currency. Each account
has its own currency setting, and will default to the base
currency. When we set accounts with different currencies, the
transactions we create in these accounts will reflect the currency
of the account.
You can manage Currencies by using the menu item:
Tools → Organize Currency.
Add a new Currency:
- Use the Add button in the Currency Dialog
- Provide a suitable name for your new currency.
Note: This name is not changeable, but the currency can be
deleted if not being used. - Adjust the currency values in the Currency Manager.
- Use the Update button to save the changes
before closing.
When more than one currency is being used, the Conversion to needs to be set. This will allow the value of the
Base Rate
currency to properly reflect the value at the base rate.
To allow Automatic Currency update, the Currency Symbol needs
to be set for the particular currency being used.
Working with Categories
Categories indicate the reason an expenditure is made or an
income is received.
A Category is generally used to record Income or Expenses.
Because MMEX allows us to transfer money between accounts, it is
also recommended to use categories to record transfers. This will
allow us to determine what money is being transferred for a
specific reason, such as a repayment to a loan. This will not be
seen as an income or expense in the overall picture. Using the same
category for an income and an expense will upset balance
figures.
Example: If we want to record the the value of running a car, we
would set up the following:
- Category: Car
- Subcategories:
- Fuel
- Maintenance
- Registration
- Insurance
- Fuel Reimbursed
The first 4 subcategories are used to record expenses. If we are
reimbursed for fuel costs for any reason, we would need to use Fuel
Reimbursed as an Income subcategory. This would then allow us to
determine the correct amount we are spending on fuel to run the
car. This will become clearer when we are using Budgets.
Split Categories
When adding a new transaction, we can use more that one category
to record a transaction. This is known as a split category.
The overall split category transaction is either a withdrawal or
a deposit. Although the categories within the split, need to
reflect the overall transaction type, each category can be
classified as a withdrawal or deposit within the split.
Split categories can easily be viewed for a transaction by using
a pop-up menu selection when a split category entry exists.
Managing Our Categories
You can manage Categories by using the menu item:
Tools → Organize Categories.
Once the category dialog opens, you can add new categories and
subcategories.
To Add a new Category:
- Select Categories at the root of the tree (At the top)
- Type the new category name into the text box
- Use the the Add button
- The new category will appear at the bottom, and will be resorted
when the dialog box is re-opened.
To Add a new Subcategory:
- Select the category that you wish the subcategory to belong to
- Type the new subcategory name into the text box
- Press the Add button
You can also change the names by selecting the
category/subcategory in the list, modify the name in the text box,
then use the Edit button. Use a similar action
to delete the category/subcategory in the list.
Ensure that no transactions use this category/subcategory
combination. This can be done by:
- Editing the transaction and changing the category/subcategory.
- Deleting the transaction using this category/subcategory.
-
Using the menu item: Tools →
Relocation of… → Categories,
where you can move all categories of a particular
name to an alternate category/subcategory combination.
This would then make the category free so it can then be deleted.
Working with Payees
Payees are the people or institutions that give us money, or
the people or institutions who we pay, for our goods and services.
You can manage Payees by using the menu item:
Tools → Organize Payees.
Once the payee dialog opens you can add new payees, edit or
delete existing payees.
To Add a new Payee:
- Enter the name of the payee in the Filter Payees box
- Use the Add button
You can also select the payee in the list, then use the
Edit or Delete
button to perform the required action.
To delete a payee, ensure that no transactions use this payee.
This can be done by:
- Editing the transaction and changing the payee.
- Deleting the transaction using this payee.
-
By using the menu item: Tools →
Relocation of… → Payees,
where you can move all payees of a particular name to an
alternate name.
This would then make the payee free so it can then be deleted.
Importing financial data
Importing from WebApp
MMEX has a light WebApp that can be installed on every PHP
webserver like NAS, shared hosting or other PHP local installation.
You can download all needed files from
WebApp project page.
To start-up WebApp you only have to:
- unzip file in a folder on your webserver or upload files through FTP
-
rename
htaccess.txtin.htaccess(on Windows you need to do
it fromCMDand rename command) - enable
PDO_SQLiteif needed
Then simply open your browser to the folder URL, fill first
settings and insert correct URL and GUID in MMEX settings
(import/export tab).
Now at every start-up MMEX will contact WebApp for new
transaction that will be downloaded and imported in desktop
database.
All main transaction linked settings will be automatically
synced to WebApp, in this way you can have all your account and
payees ready to use inserting new transaction.
Importing From QIF Files
Quicken Interchange Format (QIF) is an open specification for
reading and writing financial data to media (i.e. files). A QIF
file typically has the following structure:
!Type:type identifier string
[single character line code]Literal String Data
...
^
[single character line code]Literal String Data
...
^
Each record ends with a ^ (caret).
See example QIF transaction:
!Type:Bank Header
D6/ 1/94 Date
T-1,000.00 Amount
N1005 number
PBank Of Mortgage Payee
^ End of transaction
QIF is older than Open Financial Exchange (OFX).
The inability to
reconcile imported transactions against the current account
information is one of the primary shortcomings of QIF. It is
commonly supported by financial institutions to supply
down-loadable information to account holders.
MMEX can import transactions from specific types of QIF formats
into an account (you can find the type of QIF by opening in a text editor)
- !Type:Bank
- Bank account transactions
- !Type:Cash
- Cash account transactions
- !Type:CCard
- Credit card account transactions
After importing from QIF, all transactions will
have a Follow Flag as it its status. You can mark all
transactions with this flag using the bulk status setting commands
using the right click menu in the account view.
Importing From Universal CSV Format
To alleviate the problem of users having to pre-format their
bank transaction CSV files into the fixed format MMEX requires,
MMEX also allows users to import CSV files where the order of
fields is completely freeform.
To use this importer, select the
account you want to import into and then select the order of fields
in the CSV file by picking and choosing from the list of possible
fields. MMEX will now import the CSV file using the format
information specified by the user.
MMEX can import from a wide
variety of formats. One of them is a fixed format CSV file. This
file format exactly matches the CSV format that MMEX can export. So
it can be useful to move data from one .mmb database file to
another .mmb database file. To easily see the format of the CSV
file, you can try exporting an account to a CSV file and then
analyzing the format created.
The CSV field options are as follows:
- Date
- Date of the transaction
(in the format specified in
Tools → Options… →
General) - Payee
- To whom the transaction was made. In the case of a transfer
transaction, this indicates the name of the account from which the
transfer was made or to the account the transfer was made. - Amount (+/-)
- The transaction amount. If it is a positive value it is a deposit,
negative value is a withdrawal (there is an option to reverse this) - Category
- The category of the transaction
- SubCategory
- The subcategory of the transaction
- Notes
- Transaction Notes
- Number
- Transaction number
- Withdrawal
- A positive amount that is considered as a withdrawal. Do not use
if specifying Amount (+/-) - Deposit
- A positive amount that is considered as a deposit. Do not use if
specifying Amount (+/-) - Don’t Care
- Ignore this field
When creating your CSV file be sure that you remove the
commas from your deposits and withdrawals. This can be done
easily through a program such as Excel or OpenOffice Calc.
After importing from QIF, all transactions will
have a Follow Flag as it its status. You can mark all
transactions with this flag using the bulk status setting commands
using the right click menu in the account view.
Importing From XML File
Importing from XML for recognizes XML file in Excel format
named XML Spreadsheet 2003
in Excel. This is the recommended
import method if required to import transactions from Excel.
Method of import and field selection is same as importing from CSV.
Exporting data
Exporting to CSV Files
MMEX can export to a fixed format CSV file. This file format
exactly matches the CSV format that MMEX can import. So it can be
useful to move data from one .mmb database file to another .mmb
database file. To easily see the format of the CSV file, you can
try exporting an account to a CSV file and then analyzing the
format created.
The general format is as follows:
- Date
- Date of the transaction
(displayed in the format specified in
Tools → Options… →
General) - Payee
- To whom the transaction was made. In the case of a transfer
transaction, this indicates the name of the account from which the
transfer was made or to the account the transfer was made. - Transaction Type
- This can either be Withdrawal or Deposit
- Amount
- The transaction amount as a positive value
- Category
- The category of the transaction
- SubCategory
- The subcategory of the transaction if any (otherwise blank)
- Notes
- Transaction Notes
Exporting to XML Files
MMEX can export to an XML file. The XML format is compliant with
Excel and can be read by it. The general format is the same as CSV.
Exporting to QIF Files
MMEX can export an account to a file of the QIF format. This format
can also be used by MMEX to reload into an account.
Recurring Transactions
Recurring Transactions are special transactions that we set up in order to have
the transaction entered into the data base at some future date.
These transactions generally occur at regular intervals, such as
the payment of a bill.
These transactions:
-
Are displayed as Upcoming Transactions on the Home Page within
15 days of the due date. - Can be set up to activate automatically on the due date.
-
Can be set up to activate manually — allowing the user to
adjust the amount, payee, category, status and date on
the due date if required.
Recurring Transactions can be accessed from the navigation tree
or from the menu item Tools →
Recurring Transactions. This will
display the Recurring Transactions page.
To create a new transaction, use the New
button:
-
Set up the Recurring Transactions Details,
defining which.
account the transaction will go to when the transaction is
entered- Select the Repeats as daily, weekly etc.
- Schedule transaction
- Repeats: In x Days/Months
- Set the Start date of the activity.
- Set the period in days or months depending on
the selection. - Changes to the period will reactivate the
Next button. Once
the transaction has been entered, the activity
becomes inactive. - Use the Next button
to advance the date to the occurrence Date.
- Repeats: Every x Days/Months
- Set the date of the Next Occurrence.
-
Enter the number of times this will occur into Payments Left.
No number means: repeat indefinitely.
- Repeats: In x Days/Months
-
Define if user will be prompted to confirm entering transaction
on the due date. -
Set up the Transaction Details section, similar to creating
new transactions.
Stocks and Shares
MMEX allows you to track Stocks and Shares. The total Stocks are
added to your total financial worth.
Further details refer to
Stocks, Shares and Share Dividend Management in MMEX
Asset Management
MMEX allows you to track fixed assets like cars, houses, land
and others. Each asset can have its value appreciate by a certain
rate per year, depreciate by a certain rate per year, or not change
in value.
The total assets are added to your total financial worth.
Assets are accessed via the Tools →
Assets or via the Navigation Menu.
Assets are created in the Asset Management window.
- A new asset will allow the creation of an asset account.
- A new asset will also create a new transaction to the Asset
Account or any other account.
Asset transactions are added to an asset and tied to an
account.
- New Asset Transactions are achieved by selecting the Asset and
adding a transaction. - Editing an Asset transaction is achieved by editing the
transaction from the account the Asset transaction resides. - Normal transactions can be associated with an asset when an Asset
Account is created. - Asset Transactions can be treated as Income/expense or as
transfers depending on the state of the «Transfer» check box.
Budgeting
Budgeting in MMEX
Reports
MMEX allows a variety of reports.
Select the appropriate report under the Reports node in the
navigation tree. Some reports require some user input, some do not.
Financial Year Reports
These reports generally do not start at the beginning of the
calendar year, and appear as branches of the main report titles.
These reports cover:
- Previous Financial Year.
- Current Financial Year.
The start date can be changed by the user to start on any day of
any month, within a 12 month period by using the menu
Tools → Options →
General.
Transaction Reports
This allows the user to generate specific reports based
on user selected criteria.
A Transaction Report is generally used to
locate specific transactions made within Bank or Term type accounts.
This report can also be used to display specific details for
a particular account.
For a Transaction Report, the resulting list of transactions can
be printed or saved as a HTML file.
Transfer transactions in Transaction Reports
Since a transfer transaction is a withdrawal from one account and
a deposit to another account, a transaction report done on multiple
accounts loses the reference point for determining whether
the transaction is a deposit or withdrawal.
When a transaction report is used for a specific account, it
will generate a report that will match the account details. The
reference point for transfers in known for this report, which will
reflect in the report having correct balances displayed.
Cash flow Reports
This report projects the amount of funds available, based on
future commitments.
The report will use the Recurring Transactions for the various accounts,
and reflect forward 10 years on a monthly basis. This becomes a
prediction of the amount of money that may be available each month
based on current payments.
General Report Manager
General Report Manager
Printing reports
MMEX supports printing of all reports that can be viewed.
Once you view a report, you can print the report using the
File → Print… menu.
MMEX Options
You can modify some run time behavior of MMEX by changing the
options in the Options Dialog.
Access from the menu with Tools →
Options.
General Panel
- User Name
- This field is used as a title on the Home Page, and on Reports.
- Leaving this field blank, will remove the Home Page and
Report titles. - Base Currency
- The base currency setting is used to set the
currency of the database. Individual accounts will use
this as the default, but can be changed if different
currencies as required. - Date Format
- The date format setting is used to control how dates
should be displayedand also how dates should be parsed
when importing QIF, CSV files. - Financial Year
- Sets the start Day and Month for a Financial Year
period, as opposed to a calendar year. This is used in
Budgets and Reports. - Use Original date…
- Activate to use the date of the transaction date when
using paste transaction, in account view. - Use Transaction Sound…
- Activate to plays a sound when a transaction is entered.
View Options Panel
- Transactions Visible
- This determines which transactions are seen as default
in the Account View. - HTML scale factor
- This will set the font size being used on the Home Page and
in Reports. - User Colors
- Allows the user to modify colors in MMEX to suit his/her
style.
Network Panel
- WebApp settings
- Set URL and GUID of your WebApp installation to allow
data sync. Parameters can be found in WebApp Guide
page.
Others Panel
- Stock Quote Web Page
- This URL is used by the Refresh button on the Stock
Investments page. This URL is also used by the New/Edit
Stock dialog, to display the web page for the listed stock.
The default is yahoo finance. Alternatively other sites can
be used if necessary. - New Transaction Dialog Settings
- Changes the default settings for the New/Edit
Transactions Dialog - Database Backup
- Sets the way the backups are performed when MMEX starts.
- Create a new backup when MMEX Start
- This copies the database to a new file with today’s
date, when MMEX Starts. - The file will not be over written when MMEX starts
up again. When there are more that 4 backup files,
the oldest file is deleted. - Backup database on exit
- When MMEX shuts down, the existing database will be
copied to a backup database file for that day when
changes to the database have been detected. When
changes are made on the same day, the existing
backup is over written. When there are more that 4
backup files, the oldest file is deleted.
- CSV Delimiter
- This is used as the delimiting character when parsing
CSV files. This is useful to modify from the default
, when dealing with currencies that use
, to denote decimal points in amounts.
Frequently Asked Questions
How can I contribute?
You can contribute by:
- Reporting bugs
- Translating to your language
- Helping spread the word
- If you are a C++ or JS expert, by helping extend MMEX developing code.
-
If you are really very happy because you saved a lot of
money by using MMEX, you can donate to the MMEX project.
What’s the reason for the EX in the name of the software?
Originally I developed a personal finance software called Money
Manager. It was written in .NET and more of a learning exercise
than serious software development. It grew far beyond the original
design. The software was frozen and work began on a new version
which had a similar user interface and features, but written in
C++.
Usually Microsoft names their second version of their improved
software APIs with an Ex extension as in doSomething() and
doSomethingEx(). So I just followed the model and tacked on a ‘Ex’
to the end.
Is the .mmb format proprietary?
No, .mmb file is not proprietary.
MMEX uses SQLite databases to store user data. That
means that the .mmb file is a regular SQLite database.
SQLite is one of the smallest, free relational database
systems around and there are tons of tools to open and
access SQLite databases. SQLiteSpy and
SQLite Browser
are two such utilities. Once you open the database using these tools,
you can do anything you want with the data.
Is my data safe?
Yes. Your data is completely safe.
The data is self contained on your PC, (or USB stick if
you have made it portable). To further protect your data,
encryption can now be added. This applies a password to
your database file, and can only be opened by MMEX or any
other software if you have the correct password.
Can MMEX run from a USB Key?
Yes.
MMEX is a portable application which means ability to run
without installation, for example, from USB flash drive. If MMEX
finds mmexini.db3 in its folder, it assumes portable
mode. Copy mmex’s files to USB Key and copy yours
mmexini.db3 to mmex’s folder on that drive.
To make MMEX portable:
- on Windows (assume
F:is USB flash drive)- Copy
C:Program FilesMoneyManagerExto
F: - Copy
%APPDATA%MoneyManagerExmmexini.db3to
F:MoneyManagerEx - Copy your database file to any folder on
F:
- Copy
- on Unix (assume
/media/diskis mounted USB flash drive)- Compile MMEX from sources as usually, and run the
following commands:make install prefix=/media/disk cp ~/.mmex/mmexini.db3 /media/disk/mmex/share/mmex
- or copy MMEX which has already installed in
/usr:cp /usr/bin/mmex /media/disk/mmex/bin cp /usr/share/mmex /media/disk/mmex/share cp /usr/share/doc/mmex /media/disk/mmex/share/doc cp ~/.mmex/mmexini.db3 /media/disk/mmex/share/mmex
- Compile MMEX from sources as usually, and run the
How do I know MMEX is not trying to steal my sensitive financial information?
Generally, with any closed source program, you have to depend
upon the vendor’s word regarding safety of the data. But with MMEX
being open source, you can verify this claim yourself.
Even if you are not a C++ expert, you can rest assured that anyone
can access the source code at any time and verify the legitimacy of
MMEX’s intentions.
MMEX does connect to the internet only to send anonymous usage
statistics or when checking for an update.
Here is a sample of data that MMEX will send:
| Version | Operating System | Language | Country | Resolution | Start Time | End Time |
|---|---|---|---|---|---|---|
| 1.3.0 Portable | Windows 8 (build 9200), 64-bit edition | english | United States | 1366×768 | 2014-05-01 09:00:00 | 2014-05-01 09:01:30 |
How do I print account statements using MMEX?
To print a statement with transactions from any arbitrary set of
criteria, use the Transaction Filter to select the transactions you
want and then do a print from the File →
Print… menu.
The Transaction Filter is accessed from Reports
→ Transaction Reports on the Navigation Tree,
or from the Quick Navigation buttons in the top left hand corner of MMEX.
О необходимости записывать свои расходы и доходы говорят многие экономисты в различных статьях и на форумах. Без этого невозможно в полной мере оценить сколько мы зарабатываем и сколько тратим. А главное — именно запись наших расходов поможет понять на чем можно сэкономить.
А вы ведете подробный учёт?
Я скачала программу Money Manager с забавной хрюшей на эмблеме почти 1.5 года назад. Это был сложный для меня период в денежном отношении, и я вычленяла ресурсы для экономии.
Сейчас подробно расскажу о моих тратах и доходах, потому что только так можно рассказать насколько удобна данная программа. Скачивала я их несколько, но остановилась в итоге именно на этой.
Итак, дано: семья из 3х человек. Собственно, я сама и двое детей: 8 и 2 лет.
Доход.
Можно добавлять и корректировать как вам угодно статьи доходов. У меня они такие:
- з/п (работаю на частичной занятости 24 часа),
- бонусы с сайтов типа Айрекоменд или Дзен,
- карманные деньги от моей мамы или других родственников (как подарки на праздники, например),
- редкие алименты.
В программе все данные вношу как они есть, что бы до копейки учитывать поступление денежных средств. Для примера подобрала вам месяц с алиментами и без них:

Доход за июль 2019 года

Доход за май 2019 года
В мае з/п больше, потому что это был последний месяц, когда я получала пособие на ребенка до 1.5 лет (а это было 10 641 руб.).
Расходы.
Так же программа изначально предлагала самые основные статьи расходов, типа продукты или бытовые расходы. Постепенно довела его до удобного мне количества. Из месяца в месяц траты примерно одинаковы.
Так же приведу данные за июль и май 2019 года:

Расход за июль 2019 года

Расход за май 2019 года
Традиционно тройку лидеров по расходам занимают питание, коммунальные платежи и кредиты. На них я точно знаю сколько денег трачу. После сентября прибавились школьные расходы на канцелярию и питание. Остальное обычно по мелочи.
Как видите, по соотношению доходов и расходов у меня получается примерно одинаково. В конце месяца подгоняю баланс под 0, загоняя лишние рубли на кредитную карту. Осталось ещё чуть-чуть и на одно кредитной обязательство у меня станет меньше?. Кстати, для кредитных платежей можно настроить ежемесячно повторящийся платеж. У меня их два:

Указаны дата для списания, с какого кошелька списываем и на какие нужды. Удобно. Иногда только даты коррелирую в зависимости от графика платежей.
Вкладка с моими кошельками
Первоначально всё затевалось ради этого: точно знать сколько денег на какой моей карте. А их у меня очень много.
Вот то, что происходит в моих финансах в настоящий момент

Мои кошельки
Ни много, ни мало. Из всех этих денег в реальности точно знаю куда их потратить, поэтому баланс на данный момент в плюсе, а в реальности — нулевой. С них уже «кутить» не пойду, подожду аванс.
Как выглядит ежедневное отражение расходов?
Управление программой на уровне интуиции очень простое. Достаточно знать из какого кошелька произведена оплата, на какие цели и в какой сумме. Получится список наподобии этого:

Ежедневные записи
Просто и понятно, правда?
Так я учитываю полностью свой семейный бюджет, отслеживая куда и сколько я трачу. Справедливости ради могу сказать, что в принципе не трачу много на вещи, которые мне не пригодятся. Нет. Таких трат вообще не помню у себя.
Частый вопрос, который возникает у многих: как можно тратить на питание 8-12 тысяч рублей ежемесячно? Не вот так. Я покупаю детям и йогурты, и конфеты, и яблоки. В холодильнике у меня всегда есть молоко, яйца, сыр, сливочное масло. В чем же секрет? В моих детях. Им не нужны никакие изыски на кухне. Чаще всего просят картошку в любом виде, макароны или суп из картошки и макарон))) Поэтому и мяса трачу мало: для супа или пожарить иногда.
Я крайне редко из еды покупаю колбасные изделия (для окрошки если только), сладкие напитки.
А ещё учитывайте, что в течение недели старший ребенок питается в школе и на продленке, а я — три раза в неделю ем на работе, у нас отличная льготная столовая.
Теперь и вы знаете о программе Money Manager. Её несомненные плюсы:
- Простота использования. Разберется даже ребенок.
- Резервая копия сохраняется на Гугл, при поломке телефона данные не потеряются полностью.
- Есть возможность пользоваться этой программой на компьютере.
- Вы всегда будете знать сколько денег на ваших счетах.
- Первые месяцы я была очень удивлена сколько зарабатываю и трачу в месяц. Думала на деле не больше 15 т.р., ан нет.
Программу рекомендую.
- Introduction
- [[Concepts]]
- [[Database]]
- [[Cloud Synchronization]]
- Entities
- Accounts
- Categories
- Currencies
- Payees
- [[Transactions]]
- [Account Transactions List](Account Transactions List)
- Void transaction
- Delete transaction
- Transfers
- [Transaction Status Filter](Transaction Status Filter)
- [[Recurring Transactions]]
- Transaction Filter
- Asset Allocation
- [[Settings]]
- [[FAQ]]
- [[Search]]
Introduction
MoneyManagerEx for Android is a port of the PC/Desktop personal finance application, currently available for Windows, Mac OSX and LINUX. It maintains the best features of its sisters’ Desktop applications, while adding mobility and synchronization.
The primary goal of MoneyManagerEx and MoneyManagerEx for Android is to simplify the process of tracking financial information, in an easy to use program that can be used as regular as necessary, to help us keep track of where our money comes from and more importantly, where our money goes, in order to make better financial decisions for our future.
Think of MoneyManagerEx and MoneyManagerEx for Android as a computer checkbook which enables you to balance your accounts, organize, manage and generate reports for your finances.
With MoneyManagerEx for Android, and synchronization via Dropbox, you can keep under control your finances, no matter where you will find.
Accounts
What is an Account in MoneyManagerEx for Android? Account is all places where we keep the money, such as banks, several institutions or even our pockets.
To create a new account, from the menu, Manage → Account → Add (+)
Name of the Account: This is a required field. The recommendation is to name your accounts uniquely and in relation to real world accounts. Example: With CitiBank, we have a Savings account and a credit card Visa account. You could name your accounts as «CitiBank Savings» and “Citibank Visa”.
Type of Account:
- “Checking” Account: This is the most common type of account such as checking accounts, savings accounts, and credit card accounts. It supports three types of operations: deposit, withdrawal and transfer.
- «Term» Account: This kinds of accounts cover specialized accounts such as Cash Term Accounts, Bank Mortgage accounts, Loan accounts, or investment accounts with regular income or expenditure that you need to keep track of.
To keep track of more information on the accounts, you can insert the optional details of the account, such as account number, address, website, contact information and access. You can also enter additional notes on the account in the ‘Notes’.
For a correct management you must have the correct balance for the account you are entering, and this information must be entered in the «Initial Balance». Later to keep the account balance is sufficient to add the transactions that take place gradually over the date of the opening balance entered.
The Status of the account can be set to «Open» or «Closed». Closed accounts are those no longer active. The setting of this state is only one way to simplify the vision. When you start the application displays all the Accounts, but you can make it visible only open account by setting «View open accounts» (Manage → Settings → Display)
Currency: You can set the currency associated with the account and can be different to the base currency. The exchange rate of the currency can be changed using the menu: Manage → Currency
Once you have created an account, you can edit any of the account information fields using the menu: Manage → Account. A list of your accounts will appear, and holding on an account you can choose to edit or delete it.
Payees
What is Payee for MoneyManagerEx for Android? The payee is a subject (person, company or organization) to whom the money goes or comes from.
You can manage the Payees from main menu: Manage → Payee
To add a new Payee, click Add (+), and in the dialog, enter the name of the Payee.
To edit or delete a Payee hold on the desired Payee will open a context menu with the possible operations.
Transaction Filter
MoneyManagerEx for Android allows you to search for transactions by setting the criteria, such as from date to date, all transactions of an account, transactions by state, by amount or notes.
Money Manager
Знакомство
«Money Manager – это полезная программа, помогающая управлять личными денежными ресурсами. Она предоставляет возможность контролировать доходы, расходы, общий денежный поток помесячно и формирует статистические данные».
Добавим, что программа обладает системой двойной записи, дружит с дебетовыми и кредитными картами, а также обладает загадочной «Бухгалтерской книгой II PC». Что это и для чего это нужно – нам и предстоит разобраться.
| Оценка в Google Play (бесплатная/платная версии) |
4.4/4.4 |
| Совместимость приложения с другими версиями ОС Android |
2.3 или более поздняя |
| Размер дистрибутива |
12 Мбайт/ 13 Мбайт |
| Версия приложения |
2.8.3 |
| Покупки в приложении |
От 33.62 руб. до 69.00 руб. за единицу |
Основные функции:
- Функция доступа с ПК
- Применение системы двойной записи
- Управление бюджетами
- Управление кредитными и дебетовыми картами
- Использование пароля
- Переводы и повторяющиеся операции
- Удобная статистика
- Избранное
- Копирование/восстановление данных
- Выбор даты начала отчётного месяца
- Калькулятор, который всегда под рукой
- Возможность использования подкатегорий
- Функция поиска по содержимому
Особенности платной версии:
- Нет рекламы
- Неограниченное количество активов (10 ограниченной в бесплатной версии)
- Бухгалтерская книга II PC
рекомендации
Дешевая 4070 MSI — надо брать
Ищем PHP-программиста для апгрейда конфы
RTX 3070 за 45 тр в Регарде
4080 Gigabyte Gaming дешево в Регарде
3070 Gigabyte дешевле 50 тр в Ситилинке
Компьютеры от 10 тр в Ситилинке
<b>13900K</b> в Регарде по СТАРОМУ курсу 62
Много 4080 от 100тр — цены в рублях не растут
3060 дешевле 30тр цена — как при курсе 68
13700K дешевле 40 тр в Регарде
Разрешения:
Покупки через приложение
История использования устройства и приложений
- Получение данных о запущенных приложениях
SMS
- Просмотр SMS и MMS
- Прием MMS
- Прием WAP-сообщений
- Прием SMS
Фото/мультимедиа/файлы
- Изменение/удаление данных на USB-накопителе
- Просмотр данных на USB-накопителе
Данные о Wi-Fi-подключении
- Просмотр подключений Wi-Fi
Идентификатор устройства и данные о вызовах
- Получение данных о статусе телефона
Другое
- Проверка лицензии Google Play
- Неограниченный доступ к Интернету
- Запуск при включении устройства
- Управление функцией вибросигнала
- Просмотр сетевых подключений
- Предотвращение переключения устройства в спящий режим
| Интерфейс |
Средне |
| Возможность самостоятельной настройки |
Хорошо |
| Максимальная нагрузка на систему (CPU/RAM) |
0%/ 79 Мбайт |
| Поддержка нескольких валют |
Есть |
| Управление |
Средне |
| Планировщик |
Есть |
| Несколько кошельков |
Есть |
| Защита паролем |
Есть |
| Резервное копирование |
Есть |
| Стабильность |
Хорошо |
| Веб-интерфейс |
Нет (PC-версия) |
| Работа с облаком |
Есть |
Настройка
После приятного и удобного в обращении интерфейса Monefy, начальный экран Money Manager сразу разочаровывает. Иконки и кнопки ну очень небольшого размера и периодически, как черт из табакерки, выскакивает полноэкранная реклама.
В самом верху можно посмотреть доходы, расходы и баланс. Ниже идут графики (список, календарная сетка) на дни, недели, месяцы, итоговый баланс и поиск по счетам.
В самом низу четыре иконки: операции, где мы сейчас и находимся, график, активы и настройки. С графиков и активами ровно, как с операциями мы разберемся при тестировании, а сейчас попробуем поковыряться в настройках.
Итак, здесь мы можем управлять своими активами, то есть создавать новые и редактировать существующие. Например, в группе счетов можно изменить кредитную линию, инвестиции, страхование, то есть не настроить данные, а просто поменять название счета. Не устраивает текущие имена – создаем свои.
Непосредственно в активах можно вбить состояние счетов на текущий момент. Например «положить деньги» в кошелек или на карту. В этом нет ничего необычного: сумма, имя, краткая заметка и ползунок, активирующий отображение «итого по карте». Если у вас не очень с арифметикой или денег очень много, то в окне набора цифр есть встроенный калькулятор. В общем, ничего удивительного.
Можно проанализировать удаленные активы, что опять-таки полезно, если их у вас много. Есть «трансфер расходов», который переводимые на сберегательные счета, инвестиции, выделяемые на оплату страховок или погашение ссуды будет отмечать, как расходы на вкладке операции.
Следующий пункт меню – категории. Здесь все как у всех, то есть добавляем/редактируем категории для расходов и доходов. Можно активировать подкатегории, что несомненно полезно. Главное, не забыть, что насоздавали.
Ниже идет бюджет, а это уже интересно. Итак, создаем бюджет на июнь, так как другого месяца нам не предложили. Надо отметить, что это дело довольно удобно, то есть выбираем снизу категории, а потом просто указываем сумму. Получается простенький список на текущий месяц. Неужели нет долгосрочного планирования или в свете последних мировых событий это уже не актуально?
Переходим к основным настройкам. Здесь определяем начало отчетного месяца (любое разумное число), активируем переходящий остаток, выбираем валюту (ее много и ограничений нет). Кстати, автоматического обновления курсов валют нет. Все происходит вручную, поэтому нет вообще никакого смысла заморачиваться по этому поводу. Также можно инвертировать цвета расходов и доходов, настроить верхний кнопки операций и включить быстрое добавление на панели уведомлений в системе.
В последнем случае понадобится премиум-аккаунт, который помимо этого открывает неограниченное количество активов, убирает аккаунт, а также открывает доступ к PC-версии. Да, за PC-версию можно и заплатить, но лучше за всем этим обратиться к Finance PM.
Также можно назначить четырехзначный пароль и активировать резервное копирование. Бэкап реализован с помощью Google Drive. Есть экспорт БД на электронную почту, а также импорт данных из .txt и .csv. Неплохо, что хоть это бесплатно. Кстати, приложение неплохо поняло бэкап Finance PM, что только радует. Вот собственно и все настройки.
Сначала у нас сложилось впечатление, что эта программа ориентирована больше на истинных финансистов, чем на обычного пользователя, которому нужен бюджет «на коленке». Большинство настроек по делу, но к премиум-функциям можно причислить только PC-версию, которая просто дублирует отчеты программы. Проще было бы создать веб-интерфейс и не заморачиваться с отдельной программой. Что ж, теперь посмотрим на аппетиты программы.
Тестирование
Money Manager потребляет не сказать, что много, но и немало для подобных программ – 79 Мбайт ОЗУ при нулевой нагрузке на процессор. Приложение совместимо с Android 2.3 и выше, весит 12 Мбайт до и 18 Мбайт после установки.
А вот с разрешениями напутано. Реализована работа с SMS (?), автозапуск и просмотр подключений по Wi-Fi, хотя последнее разрешение можно отнести к синхронизации с PC.
Теперь пробежимся по основным функциям программы. Итак, у нас есть актив, а значит можно и посмотреть график на год или месяц (кнопка в самом низу экрана). Вверху видим все наши операции по дням, неделям и месяцам, а также итоговый отчет. Также можно посмотреть разницу по счетам.
В правом верхнем углу добавляем доход. Для этого можно выбрать дату, счет зачисления (+ источник дохода, например, пенсия). Далее вбиваем сумму и описание. Та же песня с расходом только выбираем счет списания и соответствующую категорию. Перевод между счетами осуществляется по классической схеме.
Теперь все текущие операции можно посмотреть на главном экране в одном списке. В вкладке «итого» сравниваем наши расходы и оставшийся бюджет.
Внизу можно посмотреть круговую диаграмму всех расходов и доходов, а также линейный график поступления активов (за предыдущий, текущий и будущий период) в соответствующей вкладке. Для финансиста такой подход безусловно порадует глаз.
Также стоит отметить, что потребление ресурсов не увеличилось, а процессор вообще отдыхал «всю дорогу». Баги, вылеты и подвисания – это не к Money Manager.
Выводы
Money Manager нельзя назвать провальной программой, так как все, что нужно для контроля расходов, она предоставляет. Из особенностей можно назвать только PC-версию, но целесообразность ее установки так и осталась под вопросом. С моей точки зрения особого смысла в этом нет.
Все бы ничего, если бы не запутанное управление и очень маленькие функциональные клавиши, которые сводят на нет планирование и учет расходов на ходу. В общем, перед нами финансовый менеджер средней руки для всех, кто хочет видеть движение средств в графиках.
Разработчик: Realbyte Inc.
Категория: Финансы
Средняя оценка приложения: 4,6
Количество оценок: 101581
Цена: Бесплатно
Сайт приложения:
Приложение Money Manager от Realbyte Inc. на Android от разработчика Realbyte Inc.. Money Manager – это полезная программа, помогающая управлять личными денежными рессурсами. Отзывы пользователей. Более 101581 скачиваний
Еще больше приложений тематики «Финансы» вы можете найти в специальном разделе.
Скачать на Google Play
Содержание
- 1 Описание приложения
- 2 Как установить Money Manager — приложение на Android
- 3 Дополнительная информация
- 4 Что нового в последних версиях
- 5 Отзывы пользователей
- 6 Контакты
Описание приложения
Money Manager – это полезная программа, помогающая управлять личными денежными рессурсами. Она предоставляет возможность контролировать доходы, расходы, общий денежный поток помесячно и формирует статистические данные.
? Функция доступа с ПК
Используя подключение Wi-fi, Вы можете редактировать и сортировать операции, категории доходов и расходов, группы счетов и другие данные прямо на экране Вашего компьютера. При помощи этой функции Вы можете отслеживать изменения ваших доходов и расходов, просматривая графики на Вашем ПК.
? Применение системы двойной записи
В отличие от приложений, учитывающих только доходы и расходы, в Money Manager стало возможным эффективное управление активами: доходы и расходы отражаются в состоянии Ваших счетов и других активов.
? Управление бюджетами
Вы можете планировать бюджеты по отдельным категориям и легко отслеживать расходы по ним с помощью удобной и понятной инфографики.
? Управление кредитными и дебетовыми картами
Укажите дату погашения задолженности по карте, и вы сможете проверить сумму предстоящей оплаты и остаток по карте на вкладке ‘Активы’. Возможно настроить автоматическое перечисление средств на карту.
? Использование пароля
Вы можете включить защитный код для доступа к приложению для безопасного управления Вашими срествами.
? Переводы и повторяющиеся операции
Вы можете переводить средства между активами, что делает управление ими более удобным. Так же вы можете оптимизировать управление зарплатами, рассроченными платежами и выплатами по кредитам, создавая повторяющиеся операции.
? Удобная статистика
В любой момент времени Вы можете отследить распределение Ваших доходов и расходов по категориям, изучить графики изменения состояния активов, отследить доходы, расходы по каждому активу.
? Избранное
Добавляйте часто используемые операции в ‘Избранное’ для лёгкого доступа к ним!
? Копирование/восстановление данных
Вы можете осуществлять резервное копирование данных и отправлять их по e-mail, восстанавливать данные из файлов, из iPhoneб экспортировать данные в таблицу Excel.
? Другие функции
— Выбор даты начала отчётного месяца
— Калькулятор, который всегда под рукой
— Возможность использования подкатегорий
— Функция поиска по содержимому
? Платная версия ?
— Убрать рекламу
— Неограниченное количество активов ( 10 ограниченной бесплатной версии )
— Бухгалтерская книга II PC ( http://youtu.be/5S4S3EQ3AZE )
При использовании Wifi, возможно корректирование, упорядочивание и поиск данных в удобной бухгалтерской книге сохраненной в телефон через компьютер. Удобный поиск данных по срокам позволяет удобно упорядочить и посмотреть данные активов по большим и малым классификациям.
Как установить Money Manager — приложение на Android
- Шаг 1. Вам необходимо завести учетную запись Google
- Шаг 2. Необходимо авторизоваться в вашей новой учетной записи
- Шаг 3. Перейти на страницу приложения Google Play для телефонов на Android
- Шаг 4. Ознакомиться с условиями и нажать «Установить».
Дополнительная информация
Контент для продажи: От 33,62 руб. до 199,00 руб. за единицу
Обновлено: 25 ноября 2017 г.
Возрастные ограничения: 3+
Количество установок: 1 000 000–5 000 000
Текущая версия: Зависит от устройства
Требуемая версия Android: Зависит от устройства
Интерактивные элементы: Цифровые покупки
Наличие рекламы: есть
Скачать на Google Play
Что нового в последних версиях
3.7.x
Бюджет подкатегории добавлен
Начальный день месяца — добавление выходных дней
График бюджета улучшен
Пользовательская добавленная валюта добавлена
Другие исправления ошибок.
3.6.x
Функция отпечатка пальца добавлена
Активы функции ежедневное накопление добавленное количество
Функция Эссет группировка добавлена
Расходы по перечислению — функция статистики добавлена
Другие исправления ошибок
Отзывы пользователей
Автор: Александра Старикова
Оценка пользователя: 4 из 5
Отзыв: Приложение очень хорошее. Удобное и простое. Единственный минус — при переводе средств с одного счета на другой проблема, если меняется валюта. Пользователь не может сконвертировать по своему курсу. Есть галочка Сбор, но это не то. Я хочу иметь возможность снимать 100грн с одного счёта, а класть 10$ на другой.
Автор: Ольга Вязовская
Оценка пользователя: 3 из 5
Отзыв: На втором месяце стал глючить, при создании записи РАСХОД в другой валюте в Активах сумму прибавляет, а не вычитает. Соответственно ДОХОД вычитает, а не прибавляет. А потом и в основной валюте тоже проводит операции наоборот. Перед тем, как дебет/крелит поменялись местами, делала корректировку по счету в банке. Корректировка в основной валюте
Автор: marina borisova
Оценка пользователя: 4 из 5
Отзыв: Функция отпечатка пальца??? Где искать сие чудо? После обновления нет такого,ну или не нашла. А в целом приложение очень удобное. Хочешь добавляй,хочешь исправляй,все доступно и понятно.
Автор: Семья Пушистиков
Оценка пользователя: 2 из 5
Отзыв: После обновления перестало копировать и отправлять екселевский формат на почту. При пробе отправить выдает отправить на вайбер!!!(( при этом отправляет не ексель а непонятный формат!!(((( Очень не удобно стало!!!
Автор: Евгений Литвиненко
Оценка пользователя: 4 из 5
Отзыв: Отличное приложение. Удобно и интуитивно понятно. Ничего лишнего для ведения домашнего бюджета. Есть выгрузка в Exel, синхронизация с облаком, необходимые отчеты, можно вести записи на компьютере через браузер. Не хватает разделения транзакций как в anMoney. (Чек из Супермаркета обычно не только с продуктами. Вручную все это высчитывать не очень удобно)
Автор:
Оценка пользователя: 5 из 5
Отзыв: Все нравится, но почему-то не могу зайти в приложение, пишет не установлено, в приложение могу попасть только с этой странички. Устраните проблемку.
Скачать на Google Play
Контакты
Электронная почта: [email protected]
Адрес: 8th floor, Yeoksam-Ro 114, Gangnam-gu, Seoul, Korea Realbyte Inc.
Наверняка у всех была такая ситуация, когда в конце месяца мы не можем вспомнить куда ушли все наши доходы… Особенно сложно с этим тем, кто думает, что нужно просто «больше зарабатывать» — ведь больше заработав, вы также больше и потратите. Я не буду объяснять зачем вам нужен учёт финансов, каждый должен прийти к этому сам. Или не прийти 🙂 Сегодня мы рассмотрим одну из лучших бесплатных программ для учёта личных финансов Money Manager Ex.
Итак, Money Manager Ex это бесплатная программа с открытым исходным кодом, работающая на всех современных операционных системах, по учёту денег. Она не только поможет вам организовать денежные потоки, но ещё и покажет когда, куда и на что они ушли.
Главные функции
- Простой и интуитивный интерфейс
- Учёт наличных, банковских счетов, кредитных карт, вкладов, инвестиций, ценных бумаг, любых расходов
- Напоминания о повторяющихся событиях, платежах и т.п.
- Бюджетирование и прогноз денежных потоков
- Удобные отчёты с графиками и диаграммами
- Импорт данных из популярных форматов CSV, QIF
- Не требует установки: можно запускать с USB флешки
- Использует популярную базу данных SQLite с AES шифрованием
- Интерфейс программы переведён на 24 языка
- Синхронизация с мобильными устройствами
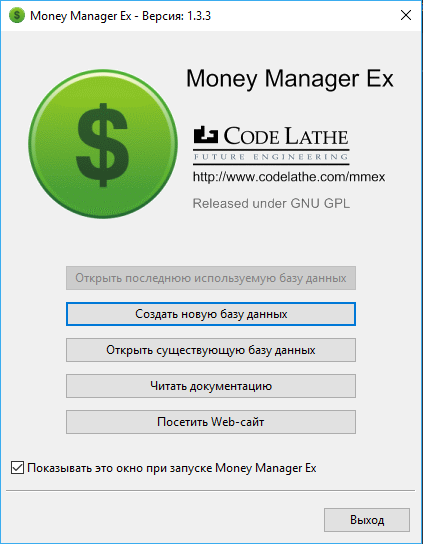
После установки программа встречает нас таким окном запуска:
в котором мы можем создать новую базу или открыть созданную ранее.
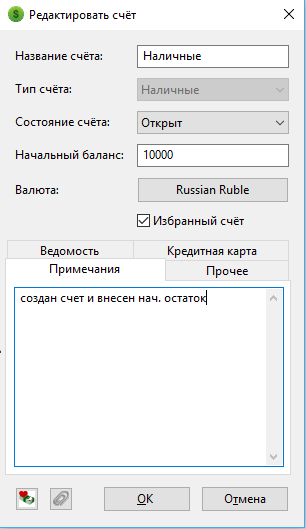
После создания базы мастер задаёт еще несколько вопросов: имя пользователя, основная валюта учёта. Также сразу нужно создать счёт, я выбрал тип «Наличные» и задал начальный остаток у него:
Готово!
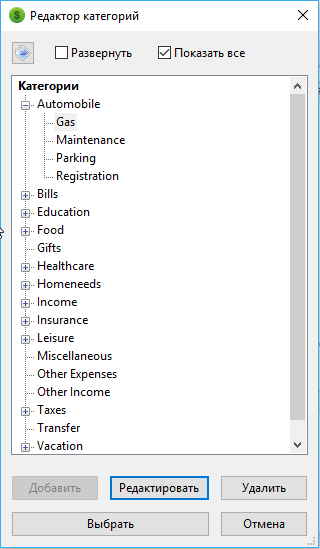
В программе уже внесён порядочный список категорий для доходов/расходов, но мы можем как отредактировать его, так и создать свою иерархию категорий «с нуля»:
Android
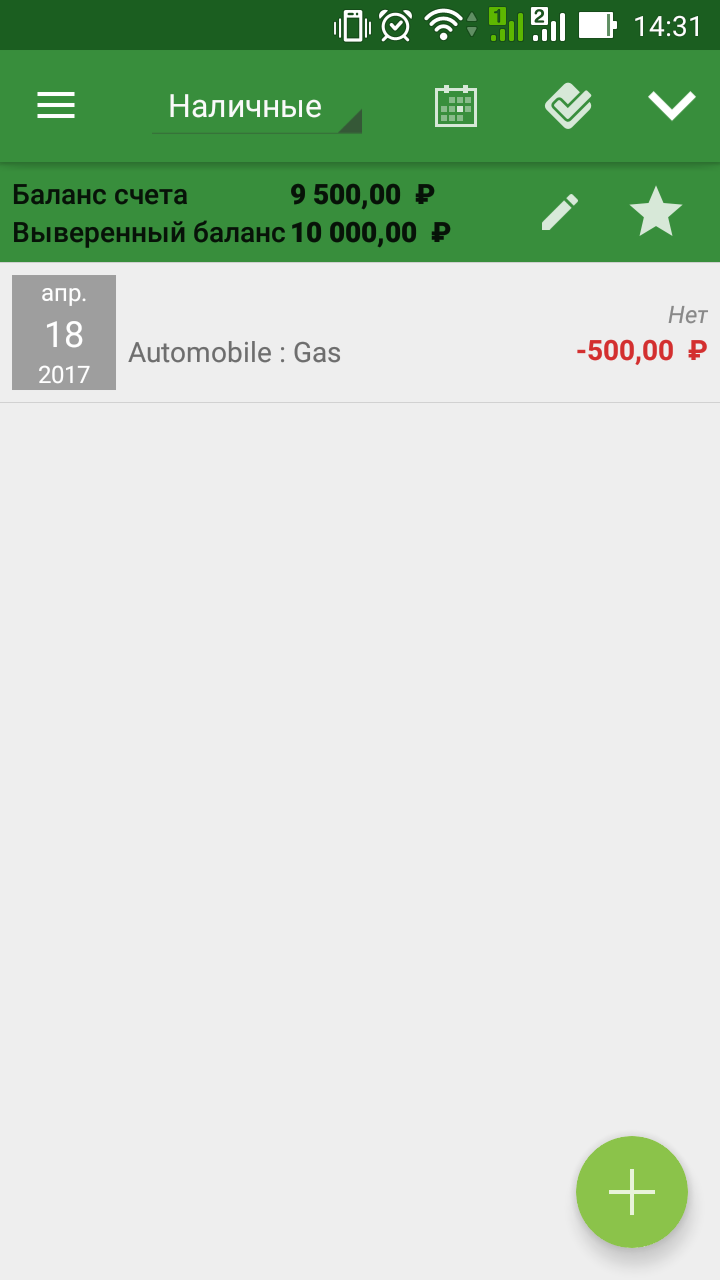
Параллельно скачаем и установим приложение на Android:
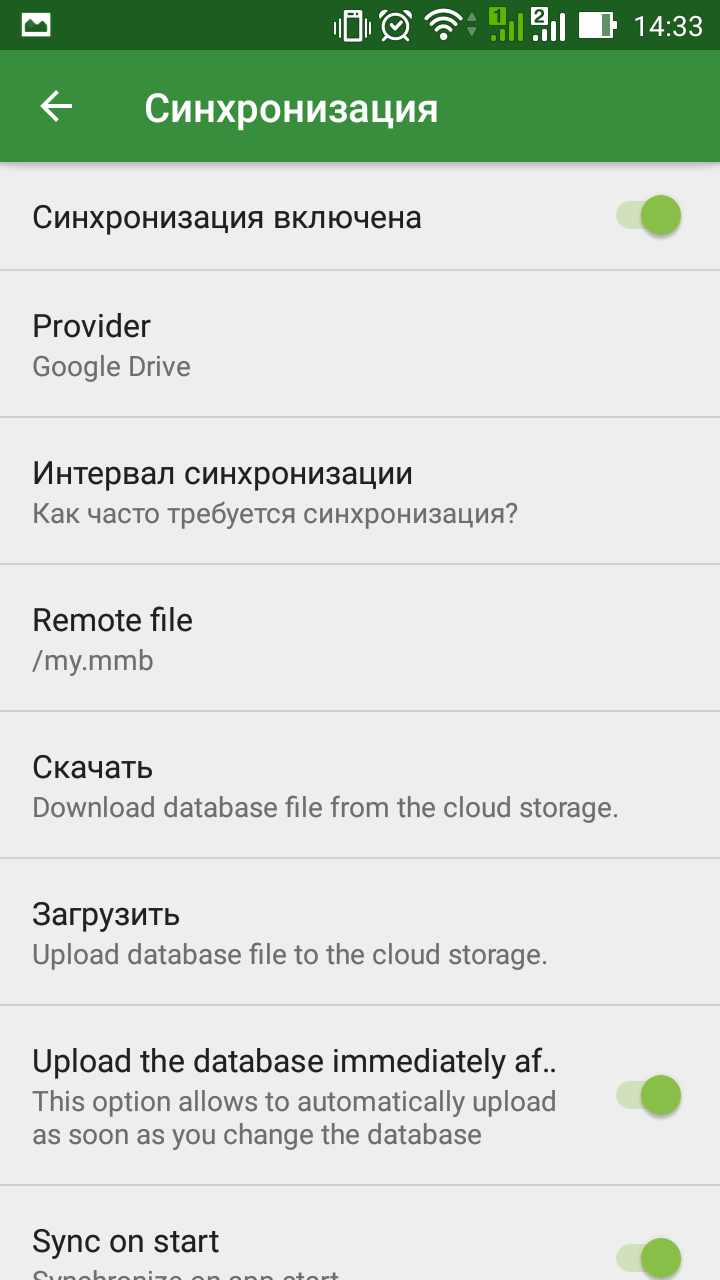
Синхронизация включается в настройках и позволяет выбрать облачный сервис для хранения файла данных среди Dropbox, OneDrive, Google Drive, Box:
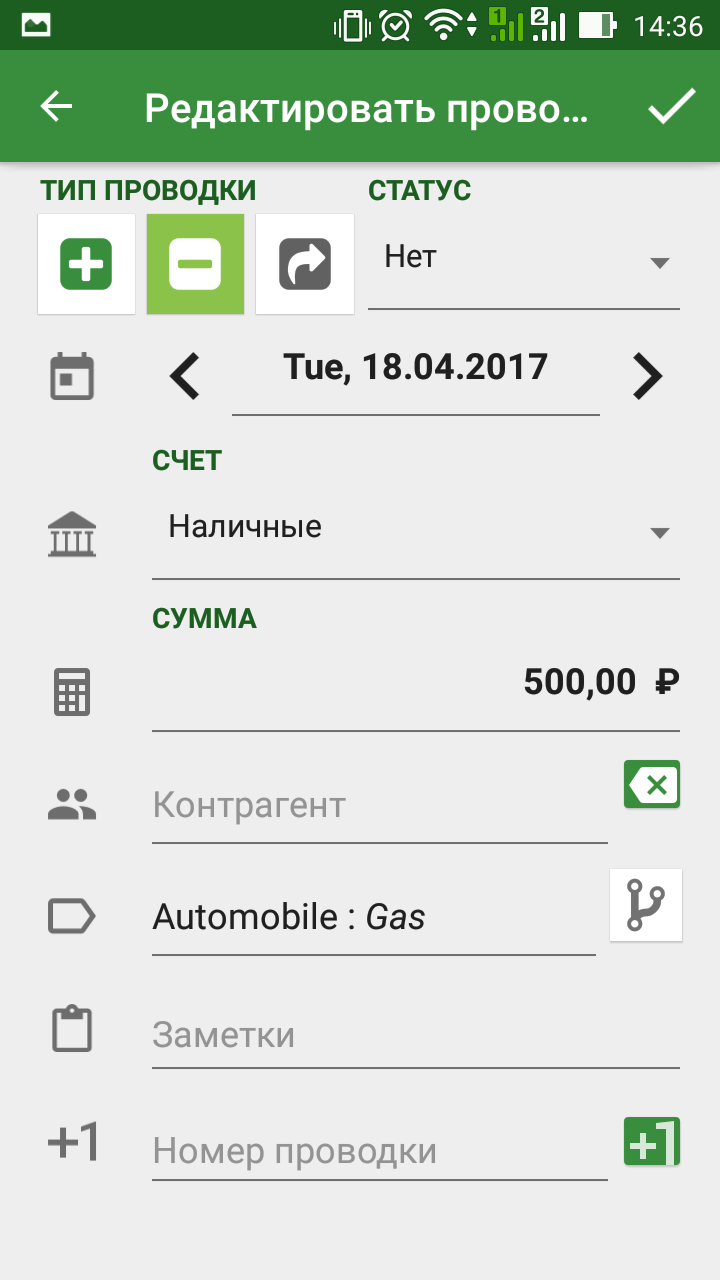
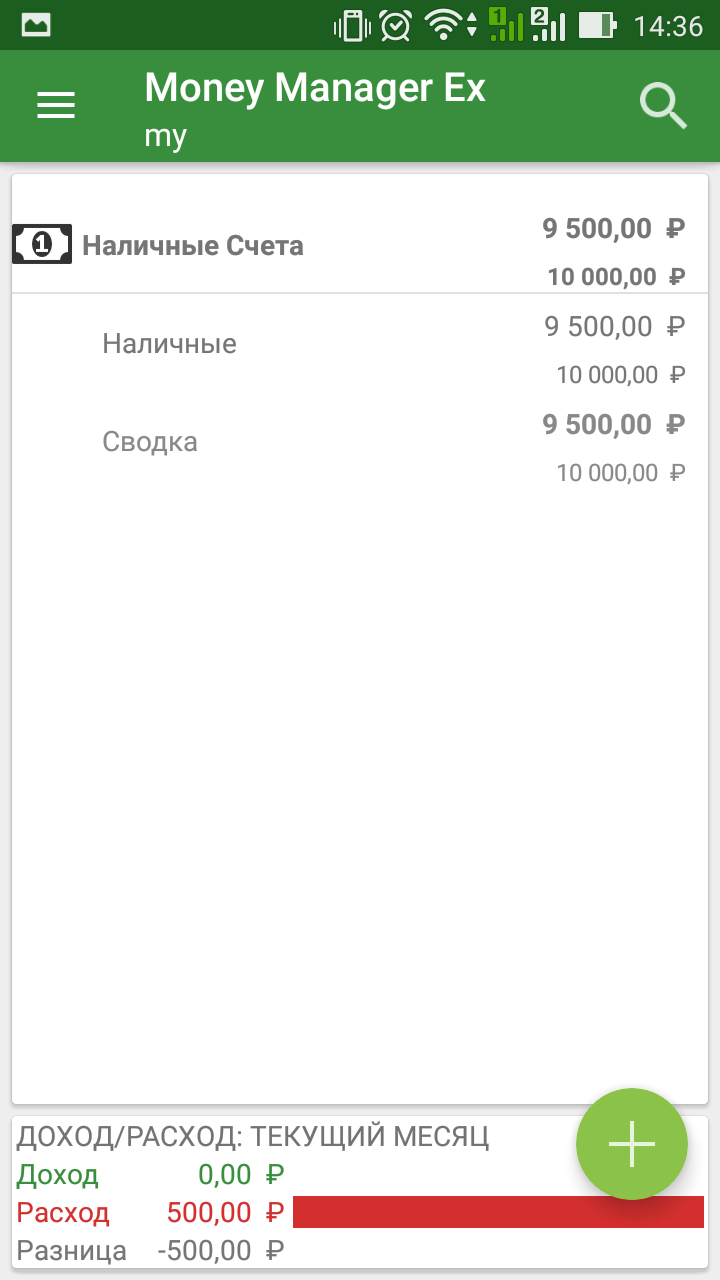
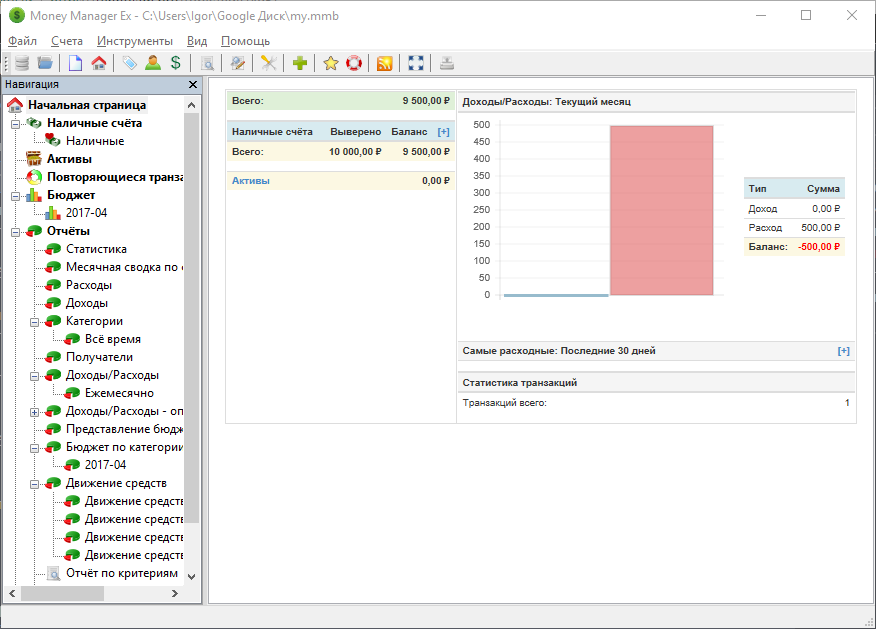
Внесём расход на телефоне, нажмём «Синхронизировать» и у нас автоматом все транзакции появятся на компьютере.
Бюджеты
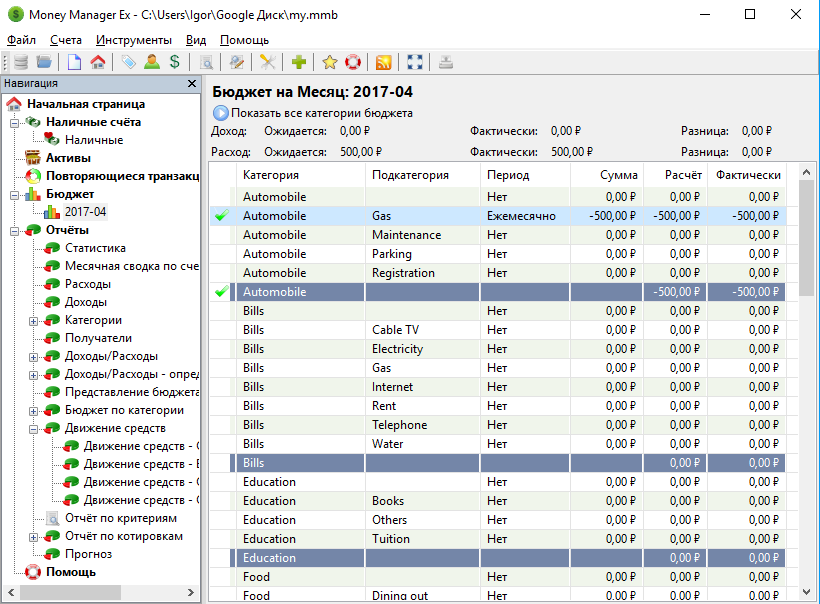
В программе можно вести несколько бюджетов. Бюджет в данном случае это план доходов и расходов. Вы можете превышать запланированные суммы, в этом приложении нет жёсткого контроля за планом доходов/расходов. Идея такая: вы создаёте план расхода, периодически сверяетесь с ним и сами принимаете решение о необходимости какой-либо покупки. Программа — ваш помощник, но не надзиратель!
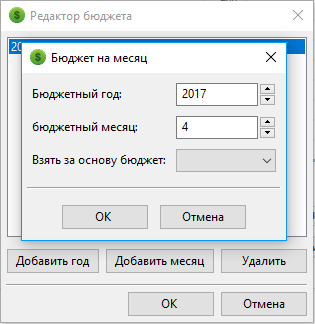
Итак, создадим бюджет на месяц:
Перейдём в раздел Бюджетирование и заполним нужные нам категории, в данном примере я задал сумму расходов на бензин:
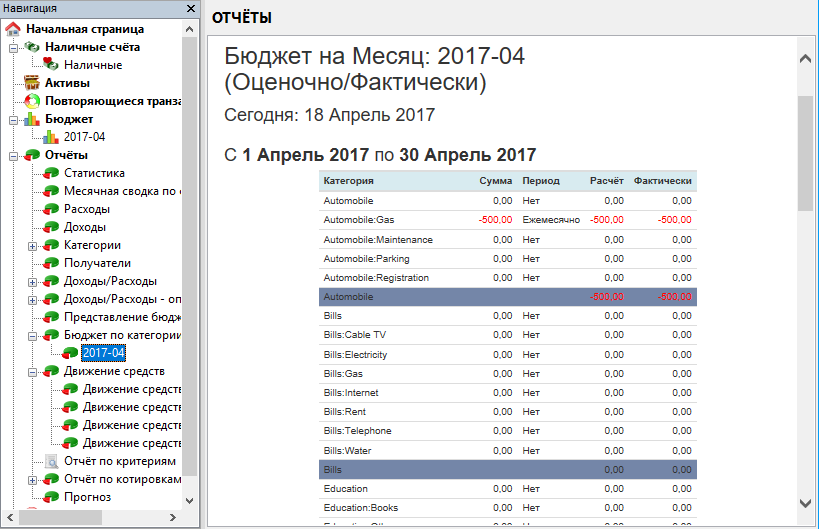
Теперь откроем отчет «Бюджет по категории» и проверим, нет ли у нас перерасхода:
Отчёты
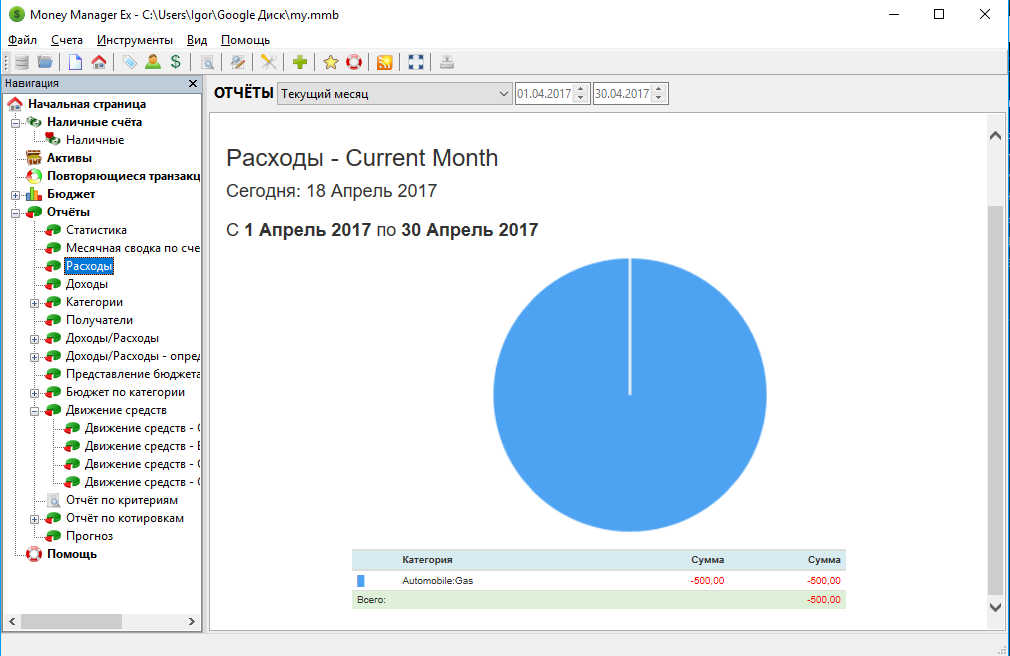
В программе есть очень много отчётов (при этом есть возможность создавать свой отчет «с нуля») — мы о них поговорим в следующий раз. А пока просто приведу пример отчёта о расходах:
Заключение
Money Manager Ex — очень мощная программа по учёту личных денег. Сегодня мы только бегло рассмотрели интерфейс и основные возможности. Попробуйте её в деле и поделитесь своим мнением о ней!
Присоединяйтесь к чату, где мы обсуждаем различные методики учёта личных финансов: https://t.me/moneysaver 🙂
2 572
Оглавление:
- Обзор Money Manager Ex
Если управление вашими финансами будет неустойчивым, но ваши финансы не так велики, чтобы нанять бухгалтера, чтобы управлять им, тогда Money Manager Ex это программное обеспечение для вас. Хорошей новостью является то, что Money Manger — бесплатное программное обеспечение с открытым исходным кодом для Windows 10/8/7, и оно довольно прост в использовании. Плохие новости, ну, он не может оплатить ваши счета! Money Manager Ex — это программное обеспечение для Windows, которое помогает легко управлять финансами. Вы можете управлять своим личным, а также бизнес-финансами с помощью этого приложения. Он может свободно использовать программное обеспечение. Это программное обеспечение с открытым исходным кодом и кросс-платформенным финансированием создает обзор вашей финансовой ценности. Проще говоря, Money Manager Ex в первую очередь отслеживает ваши деньги, например, когда и как идут деньги. Большинство функций Money Manager Ex — это те, которые вы всегда ожидаете от типичного программного обеспечения для финансирования. Он управляет всеми вашими финансами, и тем не менее, он по-прежнему прост и удобен для пользователя, и именно поэтому он заслуживает похвалы пользователей. Вот некоторые важные функции, которые предлагает Money Manger Ex: Запуск этого финансового программного обеспечения довольно просто. Просто загрузите установочный файл и запустите настройку. После выбора нужного языка приложение начинает свою фактическую работу. Если вы первый раз используете Money Manager Ex, выберите » Создать новую базу данных «. После того, как вы начнете использовать приложение, вы можете выбрать другие параметры, такие как ‘ Открыть последнюю открытую базу данных‘ или же ‘ Открыть существующую базу данных ‘. Для получения дополнительной информации о приложении вы можете нажать кнопку ‘ Прочитать документацию‘ или же «Посетите сайт для получения дополнительной информации» опции. Когда вы нажимаете Создать новую базу данных, Money Manager Ex создает .mmb файл. После создания MMB-файла открывается программа Money Manager Ex Новый мастер базы данных, Этот шаг появляется только для пользователей в первый раз, так как пользователям необходимо выбрать валюту для своей финансовой базы данных. Затем выберите тип учетной записи как проверка, Срок или же инвестиции, Когда вы создаете эту учетную запись, открывается панель мониторинга, где вы можете увидеть несколько параметров, таких как банковские счета (которые вы создали), «Активы», «Повторяющиеся транзакции» и «Настройка бюджета». Резюме Money Manager Ex В целом, Money Manager Ex — полезное финансовое программное обеспечение. Несмотря на то, что он прост в использовании, вы можете чувствовать себя истощенным, используя его, поскольку вам нужно постоянно обновлять данные и делать точные данные, если вы хотите дать вам истинное и справедливое представление о ваших финансах. Вы можете получить его из своего главная страница. Вы также можете проверить еще несколько бесплатных программ для управления финансами и финансами.Обзор Money Manager Ex
Начальный учебник по Money Manager Ex


