hp-detect-load-my-device-portlet
![]()
Действия
- ${title}
Загрузка…
hp-product-information-portlet
![]()
Действия
- ${title}
Загрузка…
У вас уже есть учетная запись HP? Выберите продукты, которыми вы владеете.
Войти
/
Зарегистрироваться
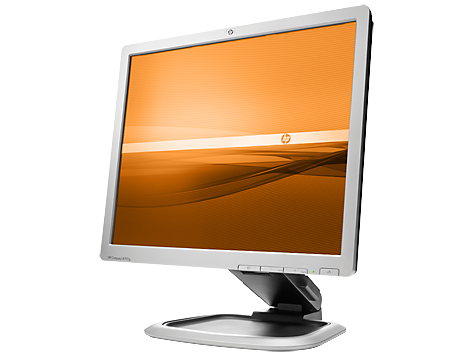
Монитор HP Compaq LA1951g 19″ LCD
Выбрать другие серии продуктов
![]()
Добавить этот продукт в личную панель


Этот продукт был добавлен в личную панель
hp-product-builder-portlet
![]()
Действия
- ${title}
Загрузка…
hp-pdp-secondary-navigation-portlet
![]()
Действия
- ${title}
Загрузка…
hp-promotion-tiles-portlet
![]()
Действия
- ${title}
Загрузка…
hp-country-locator-portlet
![]()
Действия
- ${title}
Загрузка…
Страна/регион:

Казахстан
hp-product-warranty-check
![]()
Действия
- ${title}
Загрузка…

-
Contents
-
Table of Contents
-
Troubleshooting
-
Bookmarks
Quick Links
HP LA1751g and LA1951g LCD Monitors
User Guide
Related Manuals for HP Compaq LA1951G
Summary of Contents for HP Compaq LA1951G
-
Page 1
HP LA1751g and LA1951g LCD Monitors User Guide… -
Page 2
© 2009 Hewlett-Packard Development Company, L.P. Microsoft, Windows, and Windows Vista are either trademarks or registered trademarks of Microsoft Corporation in the United States and/or other countries. All other product names mentioned herein may be trademarks of their respective companies. Hewlett-Packard Company shall not be liable for technical or editorial errors or omissions contained herein or for incidental or… -
Page 3: About This Guide
About This Guide This guide provides information on setting up the monitor, installing drivers, using the on-screen display menu, troubleshooting and technical specifications. WARNING! Text set off in this manner indicates that failure to follow directions could result in bodily harm or loss of life.
-
Page 4
About This Guide ENWW… -
Page 5: Table Of Contents
Table of contents 1 Product Features HP LCD Monitors … 1 2 Safety and Maintenance Guidelines Important Safety Information … 3 Maintenance Guidelines … 4 Cleaning the Monitor … 4 Shipping the Monitor … 4 3 Setting Up the Monitor Unfolding the Monitor Pedestal Base …
-
Page 6
Using the On-Screen Display Menu … 20 Using the HP Display Assistant Utility … 25 Identifying Monitor Conditions … 25 Sleep Timer Mode … 26 HP Display LiteSaver … 27 Installing the HP Display LiteSaver Software … 27 sRGB Support … 28 Changing the Color Temperature … -
Page 7
Disposal of Waste Equipment by Users in Private Household in the European Union … 41 Chemical Substances … 41 HP Recycling Program … 41 Restriction of Hazardous Substances (RoHS) … 41 Turkey EEE Regulation … 42 Appendix D LCD Monitor Quality and Pixel Policy… -
Page 8
viii ENWW… -
Page 9: Product Features
USB cable provided to connect the monitor’s USB hub to the USB connector on the computer ● Accessory rail on monitor to accept optional mounted devices, such as an HP speaker bar ● Plug and play capability if supported by the system ●…
-
Page 10
● Software and documentation CD that includes monitor drivers and product documentation ● Energy saver feature to meet requirements for reduced power consumption ● Energy Star qualified ● Intelligent Management AssetControl ● Compliant with the following regulated specifications: ◦ European Union CE Directives ◦… -
Page 11: Safety And Maintenance Guidelines
Safety and Maintenance Guidelines Important Safety Information A power cord is included with the monitor. If another cord is used, use only a power source and connection appropriate for this monitor. For information on the correct power cord set to use with the…
-
Page 12: Maintenance Guidelines
These chemicals may damage the monitor. Shipping the Monitor Keep the original packing box in a storage area. You may need it later if you move or ship the monitor. Chapter 2 Safety and Maintenance Guidelines ENWW…
-
Page 13: Setting Up The Monitor
Setting Up the Monitor To set up the monitor, ensure that the power is turned off to the monitor, computer system, and other attached devices, then follow the instructions below. Unfolding the Monitor Pedestal Base NOTE: The monitor is shipped with the base attached in a folded-flat position. To begin using the monitor, you must unfold the base and place the monitor in an upright position.
-
Page 14: Setting Up The Monitor Unfolding The Monitor Pedestal Base
Function Connects the AC power cord to the monitor. Connects optional USB devices to the monitor. Connects the USB hub cable to the monitor’s USB hub connector and to a host USB port/hub. Connects the DVI-D cable to the monitor.
-
Page 15: Connecting The Signal And Power Cables
On-Screen Display (OSD) feature by pressing the ● For analog operation, use the VGA signal cable provided. Connect the VGA signal cable to the VGA connector on the rear of the monitor and the other end to the VGA connector on the computer. ●…
-
Page 16: Connecting Usb Devices
Cable Management Use the cable management feature to secure and hide your cables when viewed from the front. After connecting the cables to the monitor models, place the cables through the cable management channels on the sides of the monitor base.
-
Page 17: Adjusting The Monitor
Adjusting the Monitor NOTE: Your monitor model may look different than the model in the following illustrations. Tilt the monitor’s panel forward or backward to set it to a comfortable eye level. Figure 3-7 Tilting the Monitor Swivel the monitor to the left or right for the best viewing angle.
-
Page 18
Adjust the monitor’s height so that it is parallel to your eye height for a comfortable viewing position. Figure 3-9 Adjusting the Height Pivot the monitor clockwise from landscape to portrait orientation viewing to adapt to your application. Figure 3-10… -
Page 19: Turning On The Monitor
To avoid burn-in image damage on the monitor screen, you should always activate a screen saver application or turn off the monitor when it is not in use for a prolonged period of time. Image retention is a condition that may occur on all LCD screens. Monitors with a “burned-in image”…
-
Page 20: Using The Accessory Rails
The monitor features accessory rails on the rear that can be used to mount optional devices, such as the HP speaker bar, to attach to the LCD. Refer to the documentation included with the optional device for detailed mounting instructions.
-
Page 21: Removing The Monitor Pedestal Base
Removing the Monitor Pedestal Base You can remove the monitor panel from the pedestal base to install the panel on a wall, a swing arm, or other mounting fixture. CAUTION: Before beginning to disassemble the monitor, be sure the monitor is turned off and the power and signal cables are both disconnected.
-
Page 22: Mounting The Monitor
Remove the monitor panel from the pedestal base. Refer to Base on page 13 To attach the monitor to a swing arm, insert four 10mm screws through the holes on the swing arm plate and into the mounting holes on the monitor.
-
Page 23: Locating The Rating Labels
Figure 3-14 Locating the Rating Labels Installing a Cable Lock You can secure the monitor to a fixed object with an optional cable lock available from HP. NOTE: For more information on HP accessories, go to http://www.hp.com/go/options. ENWW…
-
Page 24: Operating The Monitor
● additional software for the monitor model NOTE: If the monitor does not include a CD, the .INF and .ICM files can be downloaded from the HP monitors support Web site. See The Information File The .INF file defines monitor resources used by Microsoft Windows operating systems to ensure monitor compatibility with the computer’s graphics adapter.
-
Page 25: Installing The .Inf And .Icm Files
Refer to the Monitor Driver Software Readme file on the CD. Downloading from the Worldwide Web To download the latest version of .INF and .ICM files from the HP monitors support Web site: Refer to http://www.hp.com/support…
-
Page 26
Chapter 4 Operating the Monitor button on the monitor front panel. Menu button, then select Image Control from the OSD Main Menu. button on the monitor front panel to produce a stable, centered image. in this chapter. ENWW… -
Page 27: Front Panel Controls
VGA or DVI (select models have input select function). Power LED Green = Fully powered. Amber = Sleep mode. Flashing Amber = Sleep Timer mode. Power Turns the monitor on or off. Front Panel Controls…
-
Page 28: Adjusting The Monitor Settings
Adjusting the Monitor Settings The monitor settings can be adjusted from the On-Screen Display (OSD) menu or from the HP Display Assistant utility. Using the On-Screen Display Menu Use the On-Screen Display (OSD) to adjust the screen image based on your viewing preferences. To…
-
Page 29: Osd Menu Selections
Adjusts the position of the screen image up and down. Custom Scaling Selects the method on how displayed information on the monitor will be formatted. Select: ● Fill to Screen — image fills the entire screen and may look distorted or elongated because of non- proportional scaling of height and width ●…
-
Page 30
The range is 5 – 60 seconds. The factory default is 30 seconds. Rotate OSD Rotates the OSD menus and messages to support the monitor’s pivot feature. The choices are Landscape and Portrait. Selects the OSD and power management features of the monitor. -
Page 31
Settings refresh rate for the monitor. Serial Number Reports the serial number of the monitor. The serial number is needed if contacting HP technical support. FW Version Reports the firmware version of the monitor. Backlight Hours Reports the total hours of backlight operation. -
Page 32: Optimizing Digital Conversion
When using the controls, you will obtain the best results by using the auto-adjustment pattern software utility provided on the CD. When adjusting the Clock and Clock Phase values, if the monitor images become distorted, continue adjusting the values until the distortion disappears. To restore the factory settings, select Yes from the Factory Reset menu in the on-screen display.
-
Page 33: Using The Hp Display Assistant Utility
Using the HP Display Assistant Utility HP Display Assistant, included on the software and documentation CD, is a software utility that guides you through the tuning process with easy to understand instructions and background patterns designed for each monitor control. It provides: ●…
-
Page 34: Sleep Timer Mode
Theft Mode Enabled—Indicates that theft deterrence mode has been activated. Theft deterrence is an optional feature that can be set up in HP Display Assistant. Theft deterrence mode is triggered if both the power and display cables have been disconnected from the monitor, the monitor is reconnected to a different computer, and the theft deterrence PIN number is not entered within the elapsed time.
-
Page 35: Hp Display Litesaver
On Time activates or a monitor button is pressed. HP Display LiteSaver HP Display LiteSaver is a software application, available on the CD, that increases monitor life and saves energy. It allows you to place the monitor into its low power sleep mode at predefined times by shutting down or reducing power to most internal circuits.
-
Page 36: Srgb Support
Status Cancel Help Exit View HP Display LiteSaver Readme on the CD for additional information on how to configure HP Display LiteSaver. sRGB Support The monitor is designed to support sRGB for color management, which adapts to the color standards used in the image technology industry.
-
Page 37: Installing The Srgb Icm File For Microsoft Windows Vista
Select the sRGB Color Space Profile.icm file, then click the Add button To activate a color profile for the monitor, you must set it as the Default Monitor Profile. Select sRGB Color Space Profile, then click Set as Default button.
-
Page 38: Appendix A Troubleshooting
Video cable is improperly Connect the video cable properly. Refer to Chapter connected. Setting Up the Monitor on page 5 information. Screen blanking is active. Press any key on the keyboard or move the mouse to inactivate the screen blanking utility.
-
Page 39
The Activity Extension time The default Activity Extension value is set to 10 has not elapsed. minutes. The HP Display LiteSaver will wait to detect no input or movement from the keyboard or mouse for 10 consecutive minutes after the Display Off time has passed, before the monitor enters into low- power mode. -
Page 40: Online Technical Support
For the online access to technical support information, self-solve tools, online assistance, community forums of IT experts, broad mutlivendor knowledge base, monitoring and diagnostic tools, go to http://www.hp.com/support Preparing to Call Technical Support If you cannot solve a problem using the troubleshooting tips in this section, you may need to call technical support.
-
Page 41: Appendix B Technical Specifications
Technical Specifications NOTE: All performance specifications are provided by the component manufacturers. Performance specifications represent the highest specification of all HP’s component manufacturers’ typical level specifications for performance and actual performance may vary either higher or lower. LA1751g Model Table B-1…
-
Page 42: La1951G Model
Table B-1 LA1751g Specifications (continued) Power Source Altitude: Operating Storage Power Consumption (maximum) Input Terminal LA1951g Model Table B-2 LA1951g Specifications Display Type Viewable Image Size Tilt Swivel Maximum Weight (Unpacked) Dimensions (include base) Height Depth Width Maximum Graphic Resolution Optimum Graphic Resolution Text Mode Dot Pitch…
-
Page 43: Recognizing Preset Display Resolutions
It this occurs, you may need to readjust the parameters of the monitor screen by using the on-screen display. Your changes can be made to any or all of these modes and saved in memory. The monitor automatically stores the new setting, then recognized the new mode just as it does a preset mode. In addition to the factory preset modes, there are 15 user modes that can be entered and stored.
-
Page 44: Energy Saver Feature
When the monitor is in the reduced power state, the monitor will utilize less than 1 watt of power. There is a brief warm up period before the monitor will return to its normal operating mode.
-
Page 45: Appendix C Agency Regulatory Notices
Agency Regulatory Notices Federal Communications Commission Notice This equipment has been tested and found to comply with the limits for a Class B digital device, pursuant to Part 15 of the FCC Rules. These limits are designed to provide reasonable protection against harmful interference in a residential installation.
-
Page 46: Canadian Notice
Hewlett Packard Company P. O. Box 692000, Mail Stop 530113 Houston, Texas 77269-2000 Or, call 1-800-HP-INVENT (1-800 474-6836) For questions regarding this FCC declaration, contact: Hewlett Packard Company P. O. Box 692000, Mail Stop 510101 Houston, Texas 77269-2000 Or, call (281) 514-3333 To identify this product, refer to the Part, Series, or Model number found on the product.
-
Page 47: German Ergonomics Notice
0.75 mm² or 18 AWG, and the length of the cord must be between 6 feet (1.8 m) and 12 feet (3.6 m). If you have questions about the type of power cord to use, contact an authorized HP service provider.
-
Page 48: Product Environmental Notices
STAR Power Management Web site at http://www.energystar.gov/powermanagement. Materials Disposal This HP product contains mercury in the fluorescent lamp in the display LCD that might require special handling at end-of-life. Disposal of this material can be regulated because of environmental considerations. For disposal or recycling information, contact the local authorities or the Electronic Industries Alliance (EIA) http://www.eiae.org.
-
Page 49: Union
Chemical Substances HP is committed to providing our customers with information about the chemical substances in our products as needed to comply with legal requirements such as REACH (Regulation EC No 1907/2006 of the European Parliament and Council). A chemical information report for this product can be found at http//www.hp.com/go/reach.
-
Page 50: Turkey Eee Regulation
11363-2006 11363-2006 Turkey EEE Regulation In Conformity with the EEE Regulation EEE Yönetmeliğine Uygundur Appendix C Agency Regulatory Notices ENWW…
-
Page 51: Lcd Monitor Quality And Pixel Policy
This is common to all LCD displays used in products supplied by all vendors and is not specific to the HP LCD. These imperfections are caused by one or more defective pixels or sub-pixels.
-
Драйверы
2
-
Инструкции по эксплуатации
1

HP Compaq LA1951g 19-inch LCD Monitor инструкция по эксплуатации
(1 страница)
- Языки:Английский
-
Тип:
PDF -
Размер:
221.82 KB
Просмотр
На NoDevice можно скачать инструкцию по эксплуатации для HP Compaq LA1951g 19-inch LCD Monitor. Руководство пользователя необходимо для ознакомления с правилами установки и эксплуатации HP Compaq LA1951g 19-inch LCD Monitor. Инструкции по использованию помогут правильно настроить HP Compaq LA1951g 19-inch LCD Monitor, исправить ошибки и выявить неполадки.
В представленном списке руководства для конкретной модели Монитора — HP LA1951g. Вы можете скачать инструкции к себе на компьютер или просмотреть онлайн на страницах сайта бесплатно или распечатать.
В случае если инструкция на русском не полная или нужна дополнительная информация по этому устройству, если вам нужны
дополнительные файлы: драйвера, дополнительное руководство пользователя (производители зачастую для каждого
продукта делают несколько различных документов технической помощи и руководств), свежая версия прошивки, то
вы можете задать вопрос администраторам или всем пользователям сайта, все постараются оперативно отреагировать
на ваш запрос и как можно быстрее помочь. Ваше устройство имеет характеристики:Тип: ЖК-монитор, Диагональ: 19″, Разрешение: 1280×1024 (5:4), Тип ЖК-матрицы: TFT TN, Шаг точки по горизонтали: 0.294 мм, Шаг точки по вертикали: 0.294 мм, полные характеристики смотрите в следующей вкладке.
Для многих товаров, для работы с HP LA1951g могут понадобиться различные дополнительные файлы: драйвера, патчи, обновления, программы установки. Вы можете скачать онлайн эти файлы для конкретнй модели HP LA1951g или добавить свои для бесплатного скачивания другим посетителями.
Если вы не нашли файлов и документов для этой модели то можете посмотреть интсрукции для похожих товаров и моделей, так как они зачастую отличаются небольшим изменениями и взаимодополняемы.
Обязательно напишите несколько слов о преобретенном вами товаре, чтобы каждый мог ознакомиться с вашим отзывом или вопросом. Проявляйте активность что как можно бльше людей смогли узнать мнение настоящих людей которые уже пользовались HP LA1951g.
Основные и самые важные характеристики модели собраны из надежных источников и по характеристикам можно найти похожие модели.
| Общие характеристики | |
| Тип | ЖК-монитор |
| Диагональ | 19″ |
| Разрешение | 1280×1024 (5:4) |
| Тип ЖК-матрицы | TFT TN |
| Экран | |
| Шаг точки по горизонтали | 0.294 мм |
| Шаг точки по вертикали | 0.294 мм |
| Яркость | 250 кд/м2 |
| Контрастность | 1000:1 |
| Время отклика | 5 мс |
| Область обзора | по горизонтали: 160?; по вертикали: 160? |
| Покрытие экрана | антистатическое, антибликовое |
| Сигнал | |
| Частота обновления | строк: 24-83 кГц; кадров: 50-77 Гц |
| Полоса пропускания | 140 МГц |
| Подключение | |
| Входы | DVI-D (HDCP), VGA (D-Sub) |
| Интерфейсы | USB Type A x2 |
| USB-концентратор | есть, количество портов: 2 |
| Версия USB | USB 2.0 |
| Питание | |
| Блок питания | встроенный |
| Потребляемая мощность | при работе: 44 Вт, в режиме ожидания: 1 Вт, в спящем режиме: 0.50 Вт |
| Дополнительно | |
| Стандарты | экологический: MPR-II, TCO 5.0; Plug&Play: VESA DDC2B; DDC/CI; PC2001; энергосбережения: EPA Energy Star 5.0 |
| Регулировка по высоте | есть |
| Поворот на 90 градусов | есть |
| Настенное крепление | есть, 100×100 мм |
| Размеры, вес | 414x378x301 мм, 7.30 кг |
Здесь представлен список самых частых и распространенных поломок и неисправностей у Мониторов. Если у вас такая поломка то вам повезло, это типовая неисправность для HP LA1951g и вы можете задать вопрос о том как ее устранить и вам быстро ответят или же прочитайте в вопросах и ответах ниже.
| Название поломки | Описание поломки | Действие |
|---|---|---|
| Тонкие Полосы На Весь Экран | ||
| Монитор Сам По Себе Выключается | ||
| Не Реагирует На Кнопки Управления | ||
| Слетела Прошивка | ||
| Не Достаточная Яркость Монитора | Не Хватает Регулировки Яркости Монитора | |
| Pm17Te | Не Включается | |
| Не Включается | ||
| Сенсорные Кнопки | Не Работают Сенсорные Кнопки | |
| Dvi Неработает | Не Работает Через Dvi Вход После Поломки Видеокарты | |
| Сначала Выключался Потом Включался, А Теперь Не Включается | ||
| Видимость Сехала В Право | Нажал Шото На Мониторе | |
| Нет Звуза | ||
| Нет Изображения | Поломка Заключается В Том, Что При Ключении И Подключении Vga Кабеля Монитор Не Выдает Изображения, А Лишь Несколько Раз Мигает Белым Экраном И Потом Так И Светит Белым Экраном Не Показывая Изображения, Подскажите Куда Копать? Вся Аппаратная Линия В Поряд | |
| Нет Разрешения | ||
| Hp S2231A | Не Светится Индикатор Включения,Экран Тёмный.при Этом Лампы Светятся,Питание На T-Con Поступает,Напряжения На T-Con Есть. | |
| Раздвоение Картинки | Нижняя Часть Экрана, Почти Половина, Повторяет Картинку Верхней Части Монитора, Разделено Полосой И Низ Моргает |
В нашей базе сейчас зарегестрированно 18 353 сервиса в 513 города России, Беларусии, Казахстана и Украины.

ORBIT SERVICE
⭐
⭐
⭐
⭐
⭐
Адресс:
2-ая Владимирская ул., д. 19
Телефон:
79160019279
Сайт:
n/a
Время работы
Время работы не указано
ASUS
⭐
⭐
⭐
⭐
⭐
Адресс:
Зеленый проспект, д.81
Телефон:
74999630187
Сайт:
n/a
Время работы
Время работы не указано
CЕРВИСНЫЙ ЦЕНТР TOSHIBA
⭐
⭐
⭐
⭐
⭐
Адресс:
Дубравная улица, 43
Телефон:
74999630237
Сайт:
n/a
Время работы
Время работы не указано
RSS
⭐
⭐
⭐
⭐
⭐
Адресс:
1-й Гончарный пер., д. 4, стр. 3
Телефон:
74952762211
Сайт:
n/a
Время работы
Будни: с 0900 до 2100
Суббота: с 1000 до 1800
Воскресенье: выходной
СЕРВИС ЦЕНТР MUSIC-FIX MUSIC-FIX.RU
⭐
⭐
⭐
⭐
⭐
Адресс:
Южнопортовая 7
Телефон:
74993905854
Сайт:
n/a
Время работы
Будни: с 1000 до 2100
Суббота: с 1400 до 1900
Воскресенье: с 1400 до 1900

PDF инструкция · 51 страниц(ы) английский
инструкцияHP LA1951g

HP LA1751g and LA1951g LCD Monitors
User Guide
Посмотреть инструкция для HP LA1951g бесплатно. Руководство относится к категории мониторы, 1 человек(а) дали ему среднюю оценку 7.5. Руководство доступно на следующих языках: английский. У вас есть вопрос о HP LA1951g или вам нужна помощь? Задайте свой вопрос здесь
- Product Features
- Safety and Maintenance Guidelines
- Setting Up the Monitor
- Operating the Monitor
- Troubleshooting
- Technical Specifications
- Agency Regulatory Notices
- LCD Monitor Quality and Pixel Policy
Главная
| HP | |
| LA1951g | 577993-001 | |
| монитор | |
| 0729063531633, 0884962221006, 0884962221167, 0884962221174, 5711045359071 | |
| английский | |
| Руководство пользователя (PDF) |
Экран
| Диагональ экрана | 19 « |
| Время отклика | 5 ms |
| Яркость дисплея (типичная) | 250 cd/m² |
| Разрешение экрана | 1280 x 1024 пикселей |
| Технолигия дисплея | LED |
| Контрастность (типичная) | 1000:1 |
| Контрастность (динамическая) | — |
| Угол обзора по горизонтали | 160 ° |
| Угол обзора по вертикали | 160 ° |
| Количество цветов экрана | 16,78 миллионов цветов |
| Размер точки | 0.294 x 0.294 mm |
| Горизонтальная частота сканирования | 24 — 83 kHz |
| Вертикальная частота сканирования | 50 — 77 Hz |
| Форматное соотношение | 5:4 |
| Видимая область экрана по горизонтали | 378 mm |
| Видимая область экрана по вертикали | 303 mm |
| Разделенная Г/В синхронизация | Да |
| 3D | — |
| Тип HD | — |
| Поддерживаемые разрешения | 720 x 400,1024 x 768 (XGA),1280 x 1024 (SXGA),640 x 480 (VGA),800 x 600 (SVGA) |
| Поверхность дисплея | — |
| Собственное форматное соотношение | 5:4 |
| Тип матрицы | TN |
| Сенсорный экран | Нет |
Прочие свойства
| Дисплей | ЖК |
| Встроенный TV-тюнер | Нет |
Порты и интерфейсы
| HDCP | — |
| Количество портов VGA (D-Sub) | 1 |
| Порт DVI | Да |
| Количество портов DVI-D | 1 |
| Количество HDMI портов | 0 |
| Количество выходных портов USB Type-A | 2 |
| Версия USB хаба | 2.0 |
Мультимедиа
| Встроенные колонки | Нет |
| Встроенная камера | Нет |
Дизайн
| Цвет товара | Черный |
| Позиционирование на рынке | — |
| Страна производства | Китай |
Тонкий клиент
| Тонкий клиент установлен | Нет |
Эргономика
| Слот кабельной блокировки | Да |
| крепление VESA | Да |
| Крепление VESA | 100 x 100 mm |
| Вращение | Да |
| Диапазон углов поворота | -45 — 45 ° |
| Регулировка угла наклона | Да |
| Угол наклона | -5 — 35 ° |
| Регулировка высоты | Да |
| Настройка высоты | 130 mm |
| Вращение вокруг оси | Да |
| Угол вращения вокруг оси | 0 — 90 ° |
| Plug & Play | Да |
Энергопитание
| Входящее напряжение сети | 100 — 230 V |
| Частота входящего переменного тока | 50 — 60 Hz |
| Максимальное потребление энергии | 33 W |
| Потребляемая мощность (в режим ожидания) | — W |
| Потребляемая мощность (в обычном режиме) | 21 W |
| Потребляемая мощность (выкл.) | 0.5 W |
Устойчивость
| Сертификаты устойчивого развития | EPEAT Gold, ENERGY STAR |
Вес и размеры
| Ширина (без подставки) | 414 mm |
| Глубина (без подставки) | 58 mm |
| Высота (без подставки) | 347 mm |
| Вес (без подставки) | 4500 g |
| Ширина с подставкой | 414 mm |
| Глубина с подставкой | 301 mm |
| Высота с подставкой | 378 mm |
| Вес (со стойкой) | 7300 g |
показать больше
Не можете найти ответ на свой вопрос в руководстве? Вы можете найти ответ на свой вопрос ниже, в разделе часто задаваемых вопросов о HP LA1951g.
Каковы размеры экрана монитор?
Какой размер экрана HP LA1951g?
Какое разрешение экрана дисплея HP LA1951g?
Инструкция HP LA1951g доступно в русский?
Не нашли свой вопрос? Задайте свой вопрос здесь