Для ознакомления с инструкцией необходимо нажать на ссылку «ЗАГРУЗИТЬ», чтобы скачать pdf файл. Если есть кнопка «ПРОСМОТР», то можно просто посмотреть документ онлайн.
Для удобства, Вы можете сохранить данную страницу с файлом руководства по эксплуатации в свой список «избранное» прямо на сайте (доступно для зарегистрированных пользователей).
Смотрите инструкцию для похожих моделей:

Вы можете задать вопрос посетителям сайта по модели PHILIPS HD3037/03. Если Вы являетесь её пользователем, то пожалуйста оставьте, по возможности развёрнутый отзыв:
Philips
Внимание! Текст в этом документе был распознан автоматически. Для просмотра оригинальной страницы Вы можете воспользоваться режимом «Оригинал».
Эта инструкция подходит к следующим моделям:
HD3036
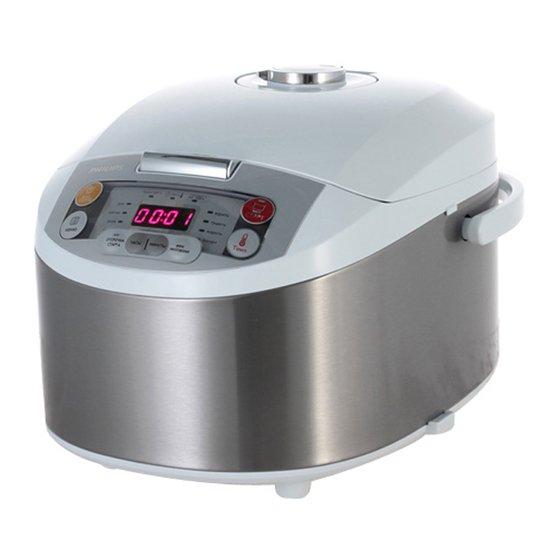
PHILIPS HD3037 Мультиварка

Ваша мультиварка
Поздравляем с покупкой и добро пожаловать в Philips! Чтобы в полной мере воспользоваться поддержкой, которую предлагает Philips, зарегистрируйте свой продукт на сайте www.Philips.com/welcome.
Комплектация (рис. 1)

| Основное меню мультиварки | Паровая корзина |
| Совок риса | Половник |
| Измерительная чашка | Шнур питания |
| Руководство пользователя | Брошюра по технике безопасности |
| Гарантийный талон | Буклет с рецептами |
| Кремнеземные перчатки |
Болееview (рис. 2)

| ① | Крышка | ⑥ | Розетка |
| ② | Внутренний горшок | ⑦ | Нагревательный элемент |
| ③ | Кнопка открывания крышки | ⑧ | Индикация уровня воды |
| ④ | Панель управления | ⑨ | Ручка плиты |
| ⑤ | Основной корпус | ⑩ | Съемная крышка для выхода пара |
Контролируетview (рис. 3)

|
⑪ |
Функции приготовления |
⑯ |
Часовая кнопка |
|
⑫ |
Монитор |
⑰ |
Кнопка минут |
|
⑬ |
Кнопка выключения/подогрева |
⑱ |
Кнопка времени приготовления |
|
⑭ |
Кнопка меню |
⑲ |
Кнопка температуры |
|
⑮ |
Кнопка предустановки |
⑳ |
Кнопка Пуск |
Функции надview
| суррогатного материнства | Регулирование температуры | Температура (Примерно) | Тимбе регулирование | Время по умолчанию |
| Рис | Нет | 135 ° C | Нет | 40 минут |
| Рисотто | Нет | 135 ° C | Нет | 40 минут |
| Плов | Нет | 135 ° C | Нет | 40 минут |
| джем | Нет | 90 ° C | 1-4 часов | 2 часа |
| Кипятить | Нет | 95 ° C | 5-30 минут | 30 минут |
| тушеное мясо | Нет | 90 ° C | 20 минут-10 часа | 1 час |
| жарить | Нет | 150 ° C | 5-59 минут | 42 минут |
| йогурт | Нет | 40 ° C | 6-12 часов | 8 часа |
| Разогреть | Нет | 90 ° C | 8-25 минут | 25 минут |
| Печь | Да | 40, 60, 80, 100, 120, 150, 180°С | 20 минут -2 часов | 45 минут |
| пар | Нет | 95 ° C | 5 минут -2 часов | 30 минут |
| Тёплые | Нет | 73 ° C | Включается автоматически после завершения функций (кроме йогурта) |
Использование мультиварки
Перед первым использованием
- Выньте все принадлежности из внутреннего горшка. Удалите лист между внутренней чашей и нагревательным элементом.
- Тщательно очистите части мультиварки перед первым использованием мультиварки (см. главу «Чистка»).
- Добавьте половину кастрюли воды во внутреннюю кастрюлю, закройте крышку и включите источник питания. Выберите функцию кипячения; загорится индикатор Кипячение.
- После того, как вода закипит в течение 5 минут, нажмите кнопку «Выкл./Подогрев».
- Отключите прибор от сети, подождите, пока кастрюля остынет, и вылейте воду.
![]() Внимание
Внимание
- Перед началом использования убедитесь, что все детали полностью высохли.
мультиварка.
Подготовка перед приготовлением (рис. 4)

Перед использованием мультиварки необходимо выполнить следующие приготовления:
- Отмерьте рис с помощью прилагаемой мерной чашки.
- Тщательно промойте рис.
- Положите предварительно промытый рис во внутреннюю кастрюлю.
- Добавьте воды до уровня, указанного на шкале внутри внутренней кастрюли, который соответствует количеству использованных чашек риса. Затем разгладьте поверхность риса.
- Нажмите кнопку открывания крышки, чтобы открыть крышку.
- Насухо протрите внутреннюю кастрюлю снаружи, затем поместите ее в мультиварку. Проверьте, правильно ли соприкасается внутренняя чаша с нагревательным элементом.
- Закройте крышку мультиварки и вставьте вилку в розетку.
![]() Внимание
Внимание
- Убедитесь, что внутренняя чаша снаружи сухая и чистая, и что
на нагревательном элементе или магнитном выключателе нет посторонних остатков. - Не превышайте указанный объем и не превышайте максимальный объем воды.
уровень, указанный во внутренней кастрюле, так как это может привести к переполнению мультиварки.
![]() Функции
Функции
- Уровень, отмеченный внутри внутреннего бака, является всего лишь индикатором. Вы всегда можете отрегулировать уровень воды для разных сортов риса и по своему усмотрению. Не превышайте максимальное количество, указанное на внутренней стороне внутренней емкости.
- Помимо указания уровня воды, вы также можете добавить рис и воду в соотношении 1: 1–1.2 для приготовления риса.
- Для 4 чашек риса уровень воды должен достигать отметки «4» во внутренней кастрюле.
Приготовление риса или макарон (рис. 5)

- Следуйте инструкциям в разделе «Подготовка перед приготовлением».
- Нажимайте кнопку меню (Меню), пока не будет выбрана функция приготовления риса/макаронных изделий (Рис/Паста).
- Нажмите кнопку пуска (Start), чтобы начать приготовление.
- По окончании приготовления вы услышите несколько звуковых сигналов, а индикатор выбранной функции приготовления погаснет.
- Мультиварка автоматически перейдет в режим поддержания тепла.
⮑ Загорается индикатор поддержания тепла.
![]() Функции
Функции
- Вы можете нажать кнопку отмены (Выкл./Подогрев), чтобы отключить функцию поддержания тепла.
- Для выключения необходимо отключить прибор от сети.
- Время приготовления по умолчанию составляет 40 минут и не регулируется.
- Температура для этой программы составляет приблизительно 135°C.
Приготовление ризотто (рис. 6)

- Поместите продукты и ингредиенты во внутреннюю чашу.
- Выполните шаги 6 и 7 раздела «Подготовка к приготовлению».
- Нажимайте кнопку меню (Меню), пока не будет выбрана функция приготовления ризотто (Ризотто).
- Нажмите кнопку пуска (Start), чтобы начать приготовление.
- По окончании приготовления вы услышите несколько звуковых сигналов, а индикатор выбранной функции приготовления погаснет.
- Мультиварка автоматически перейдет в режим поддержания тепла.
⮑ Загорается индикатор поддержания тепла
![]() Функции
Функции
- Вы можете нажать кнопку отмены (Выкл./Подогрев), чтобы отключить функцию поддержания тепла.
- Для выключения необходимо отключить прибор от сети.
- Время приготовления по умолчанию составляет 40 минут и не регулируется.
- Температура для этой программы составляет приблизительно 135°C.
Приготовление плова (рис. 6)
- Хорошо взбейте продукты и ингредиенты для плова.
- Выполните шаги 6 и 7 раздела «Подготовка к приготовлению».
- Нажимайте кнопку меню (Меню), пока не будет выбрана функция приготовления плова (Плов).
- Нажмите кнопку пуска (Start), чтобы начать приготовление.
- По окончании приготовления вы услышите несколько звуковых сигналов, а индикатор выбранной функции приготовления погаснет.
- Мультиварка автоматически перейдет в режим поддержания тепла.
- Загорается индикатор поддержания тепла.
![]() Функции
Функции
- Для выключения необходимо отключить прибор от сети.
- Время приготовления по умолчанию составляет 40 минут и не регулируется.
- Температура для этой программы составляет приблизительно 135°C.
Варка варенья (рис. 7)

- Поместите продукты и ингредиенты во внутреннюю чашу.
- Выполните шаги 6 и 7 раздела «Подготовка к приготовлению».
- Нажимайте кнопку меню (Menu) до тех пор, пока не будет выбрана функция приготовления варенья (Jam).
- Нажмите кнопку времени приготовления (время приготовления), и на дисплее начнет мигать единица измерения часов.
- Нажмите кнопку часов (Hr.), чтобы установить желаемую единицу измерения часов.
- После того, как единица часов установлена, снова нажмите кнопку времени приготовления (Время приготовления), и на дисплее начнет мигать единица измерения минут.
- Нажмите кнопку минут (Min.), чтобы установить желаемую единицу измерения минут.
- Нажмите кнопку пуска (Start), чтобы начать приготовление.
- По окончании приготовления вы услышите несколько звуковых сигналов, а индикатор выбранной функции приготовления погаснет.
- Мультиварка автоматически перейдет в режим поддержания тепла.
⮑ Загорается индикатор поддержания тепла.
![]() Функции
Функции
- Вы можете нажать кнопку отмены (Выкл./Подогрев), чтобы отключить функцию поддержания тепла.
- Для выключения необходимо отключить прибор от сети.
- Время приготовления по умолчанию составляет 2 часа. Вы можете выбрать время приготовления от 1 до 4 часов.
- Температура для этой программы составляет приблизительно 90°C.
Кипячение (рис. 


- Поместите продукты и ингредиенты во внутреннюю чашу.
- Выполните шаги 6 и 7 раздела «Подготовка к приготовлению».
- Нажмите кнопку меню (Меню), пока не будет выбрана функция кипячения (Кипячение).
- Нажмите кнопку времени приготовления (Время приготовления), и на дисплее начнут мигать единицы минут.
- Нажмите кнопку минут (Min.), чтобы установить желаемую единицу измерения минут.
- Нажмите кнопку пуска (Start), чтобы начать приготовление.
- По окончании приготовления вы услышите несколько звуковых сигналов, а индикатор выбранной функции приготовления погаснет.
- Мультиварка автоматически перейдет в режим поддержания тепла.
⮑ Загорается индикатор поддержания тепла.
![]() Внимание
Внимание
- Время приготовления начинается после того, как вода закипит, и время
отображается в виде обратного отсчета.
![]() Функции
Функции
- Вы можете нажать кнопку отмены (Выкл./Подогрев), чтобы отключить функцию поддержания тепла.
- Для выключения необходимо отключить прибор от сети.
- Время приготовления по умолчанию составляет 30 минут. Вы можете выбрать время приготовления от 5 до 30 минут.
- Температура для этой программы составляет приблизительно 95°C.
Тушение (рис. 9)

- Поместите продукты и ингредиенты во внутреннюю чашу.
- Выполните шаги 6 и 7 раздела «Подготовка к приготовлению».
- Нажимайте кнопку меню (Меню), пока не будет выбрана функция тушения (Тушение).
- Нажмите кнопку времени приготовления (время приготовления), и на дисплее начнет мигать единица измерения часов.
- Нажмите кнопку часов (Hr.), чтобы установить желаемую единицу измерения часов.
- После того, как единица часов установлена, снова нажмите кнопку времени приготовления (Время приготовления), и на дисплее начнет мигать единица измерения минут.
- Нажмите кнопку минут (Min.), чтобы установить желаемую единицу измерения минут.
- Нажмите кнопку пуска (Start), чтобы начать приготовление.
- По окончании приготовления вы услышите несколько звуковых сигналов, а индикатор выбранной функции приготовления погаснет.
- Мультиварка автоматически перейдет в режим поддержания тепла.
⮑ Загорается индикатор поддержания тепла.
![]() Функции
Функции
- Вы можете нажать кнопку отмены (Выкл./Подогрев), чтобы отключить функцию поддержания тепла.
- Для выключения необходимо отключить прибор от сети.
- Время приготовления по умолчанию составляет 1 час. Вы можете выбрать время приготовления от 20 минут до 10 часов.
- Температура для этой программы составляет приблизительно 90°C.
Жарка (рис. 10)

- Поместите продукты и ингредиенты во внутреннюю емкость.
- Выполните шаг 6 раздела «Подготовка к приготовлению».
- Вставьте вилку в розетку.
- Нажимайте кнопку меню (Menu), пока не будет выбрана функция жарки (Fry).
- Нажмите кнопку времени приготовления (Время приготовления), и на дисплее начнут мигать единицы минут.
- Нажмите кнопку минут (Min.), чтобы установить желаемую единицу измерения минут.
- Нажмите кнопку пуска (Start), чтобы начать приготовление.
- Во время приготовления постоянно помешивайте продукты лопаткой.
- По окончании приготовления вы услышите несколько звуковых сигналов, а индикатор выбранной функции приготовления погаснет.
- Мультиварка автоматически перейдет в режим поддержания тепла.
⮑ Загорается индикатор поддержания тепла.
![]() Внимание
Внимание
- Эта функция должна работать при открытой крышке.
- Эту функцию нельзя использовать для жарки во фритюре, а количество масла не должно превышать отметку «2».
![]() Функции
Функции
- Для выключения необходимо отключить прибор от сети.
- Время приготовления по умолчанию составляет 42 минут. Вы можете выбрать время приготовления от 5 до 59 минут.
- Температура для этой программы составляет приблизительно 150°C.
Приготовление йогурта (рис. 11)

Метод 1:
- Хорошо взбейте ингредиенты для йогурта и поместите их в стеклянную емкость.
- Поместите стеклянную емкость во внутренний горшок. Убедитесь, что емкость герметична.
- Налейте немного воды во внутреннюю емкость. Убедитесь, что половина контейнера погружена в воду.
- Выполните шаги 6 и 7 раздела «Подготовка к приготовлению».
- Нажимайте кнопку меню (Меню), пока не будет выбрана функция приготовления йогурта (Йогурт).
- Нажмите кнопку времени приготовления (время приготовления), и на дисплее начнет мигать единица измерения часов.
- Нажмите кнопку часов (Hr.), чтобы установить желаемую единицу измерения часов.
- После того, как единица часов установлена, снова нажмите кнопку времени приготовления (Время приготовления), и на дисплее начнет мигать единица измерения минут.
- Нажмите кнопку минут (Min.), чтобы установить желаемую единицу измерения минут.
- Нажмите кнопку пуска (Start), чтобы начать приготовление.
- По окончании приготовления вы услышите несколько звуковых сигналов, а индикатор выбранной функции приготовления погаснет.
- Мультиварка автоматически перейдет в режим ожидания.
Способ доставки 2:
- В кастрюлю влить 1 л пастеризованного молока (молоко должно быть комнатной температуры) и добавить натуральный йогурт (180-200 г). Перемешайте молоко и йогурт.
- Закройте крышку и выберите функцию приготовления йогурта. Программа запускается автоматически.
- Если вы хотите фруктовый йогурт, добавьте фрукты (например, 200 г нарезанной клубники) за 30 минут до окончания программы.
- Отключите прибор.
![]() Функции
Функции
- Отключать мультиварку от сети можно сразу после окончания приготовления.
- Для выключения необходимо отключить прибор от сети.
- Время приготовления по умолчанию составляет 8 часов. Вы можете выбрать время приготовления от 6 до 12 часов.
- Температура для этой программы составляет приблизительно 40°C.
Подогрев (рис. 12)

- Разрыхлите охлажденное блюдо и равномерно распределите его во внутренней емкости.
- Налейте немного воды на блюдо, чтобы оно не стало слишком сухим. Количество воды зависит от объема блюда.
- Выполните шаги 6 и 7 раздела «Подготовка к приготовлению».
- Нажимайте кнопку меню (Menu), пока не будет выбрана функция подогрева (Reheat).
- Нажмите кнопку времени приготовления (Время приготовления), и на дисплее начнут мигать единицы минут.
- Нажмите кнопку минут (Min.), чтобы установить желаемую единицу измерения минут.
- Нажмите кнопку пуска (Start), чтобы начать приготовление.
- По окончании процесса приготовления вы услышите несколько звуковых сигналов, а индикатор выбранной функции приготовления погаснет.
- Мультиварка автоматически перейдет в режим поддержания тепла.
⮑ Загорается индикатор поддержания тепла
![]() Функции
Функции
- Вы можете нажать кнопку отмены (Выкл./Подогрев), чтобы отключить функцию поддержания тепла.
- Для выключения необходимо отключить прибор от сети.
- Время приготовления по умолчанию составляет 25 минут. Вы можете выбрать время приготовления от 8 до 25 минут.
- Температура для этой программы составляет приблизительно 90°C.
Выпечка (рис. 13)

- Поместите продукты и ингредиенты во внутреннюю чашу.
- Выполните шаг 6 раздела «Подготовка к приготовлению».
- Вставьте вилку в розетку.
![]() Внимание
Внимание
- При выпечке пирога держите крышку закрытой во время приготовления. Выпечка пирога при 130°C и 45 минут обычно обеспечивает наилучший результат приготовления.
- При выпечке других продуктов, кроме торта, крышка должна быть открыта во время приготовления.
приготовление
- Нажимайте кнопку меню (Меню), пока не будет выбрана функция выпечки (Выпечка).
- Нажмите кнопку времени приготовления (время приготовления), и на дисплее начнет мигать единица измерения часов.
- Нажмите кнопку часов (Hr.), чтобы установить желаемую единицу измерения часов.
- После того, как единица часов установлена, снова нажмите кнопку времени приготовления (Время приготовления), и на дисплее начнет мигать единица измерения минут.
- Нажмите кнопку минут (Min.), чтобы установить желаемую единицу измерения минут.
- Нажмите кнопку температуры (Температура), и на дисплее начнет мигать температура приготовления по умолчанию.
- Нажмите кнопку температуры (Температура), чтобы установить желаемую температуру выпечки.
- Нажмите кнопку пуска (Start), чтобы начать приготовление.
- Когда выпечка закончится, вы услышите несколько звуковых сигналов, а индикатор выбранной функции погаснет.
- Мультиварка автоматически перейдет в режим поддержания тепла.
⮑ Загорается индикатор поддержания тепла.
![]() Функции
Функции
- При извлечении внутренней чаши из мультиварки используйте кухонную перчатку или тряпку, так как внутренняя чаша будет очень горячей.
- Для выключения необходимо отключить прибор от сети.
- Время приготовления по умолчанию составляет 45 минут. Вы можете выбрать время приготовления от 20 минут до 2 часов.
- Температура приготовления по умолчанию составляет 60°C. Доступные варианты температуры: 40°C, 60°C, 80°C, 100°C, 120°C, 150°C и 180°C.
Пропаривание (рис. 14)

- Отмерьте несколько стаканов воды мерным стаканом.
- Налейте воду во внутреннюю емкость.
- Поместите паровую корзину во внутреннюю кастрюлю.
- Поместите продукты в корзину для пара.
- Закройте крышку мультиварки и вставьте вилку в розетку.
- Нажимайте кнопку меню (Меню), пока не будет выбрана функция приготовления на пару (Приготовление на пару).
- Нажмите кнопку времени приготовления (время приготовления), и на дисплее начнет мигать единица измерения часов.
- Нажмите кнопку часов (Hr.), чтобы установить желаемую единицу измерения часов.
- После того, как единица часов установлена, снова нажмите кнопку времени приготовления (Время приготовления), и на дисплее начнет мигать единица измерения минут.
- Нажмите кнопку минут (Min.), чтобы установить желаемую единицу измерения минут.
- Нажмите кнопку пуска (Start), чтобы начать приготовление.
- Когда приготовление на пару закончится, вы услышите несколько звуковых сигналов, а индикатор выбранной функции приготовления погаснет.
- Мультиварка автоматически перейдет в режим поддержания тепла.
⮑ Загорается индикатор поддержания тепла. - Откройте крышку и осторожно достаньте продукты, приготовленные на пару, из тарелки или паровой корзины.
![]() Внимание
Внимание
- Время приготовления начинается, как только вода закипит, и время отображается в виде обратного отсчета.
- При извлечении продуктов, приготовленных на пару, из паровой корзины используйте кухонную перчатку или тряпку, так как тарелка и паровая корзина будут очень горячими.
- При одновременном приготовлении риса и продуктов на пару убедитесь, что отмеряете количество риса, чтобы оставалось достаточно места для лотка для приготовления на пару.
- Уровень воды должен быть между 2 и 4 уровнями воды, отмеченными внутри горшка.
![]() Функции
Функции
- Вы можете нажать кнопку отмены (Выкл./Подогрев), чтобы отключить функцию поддержания тепла.
- Для выключения необходимо отключить прибор от сети.
- Время приготовления на пару по умолчанию составляет 30 минут. Вы можете выбрать время приготовления от 5 минут до 2 часов.
- Температура для этой программы составляет приблизительно 95°C.
Заданное время для отложенного приготовления (рис. 15)

Вы можете установить отложенное время приготовления в различных режимах приготовления.
Предустановленный таймер доступен от 10 минут до 24 часов.
- Выполните шаги 6 и 7 раздела «Подготовка к приготовлению».
- Нажимайте кнопку меню (Меню), пока не будет выбрана нужная функция приготовления.
- Нажмите кнопку предустановленного времени (Preset).
⮑Предустановленный таймер начнет мигать на дисплее. - Нажмите кнопку часов (Hr.) и кнопку минут (Min.), чтобы установить предустановленное время.
- Нажмите кнопку запуска (Старт), чтобы подтвердить установленное время.
- Приготовление будет завершено по истечении заданного времени. Вы услышите несколько звуковых сигналов, и индикатор выбранной функции приготовления погаснет.
- Мультиварка автоматически перейдет в режим поддержания тепла.
⮑ Загорается индикатор поддержания тепла.
![]() Внимание
Внимание
- Предустановленный таймер недоступен в режимах жарки (Fry) и выпечки (Bake).
![]() Функции
Функции
- После установки предустановленного времени вы можете нажать кнопку отмены (Выкл./Подогрев), чтобы деактивировать предустановленную функцию.
- Для выключения необходимо отключить прибор от сети.
- Вы можете нажать кнопку отмены (Выкл./Подогрев), чтобы отключить функцию поддержания тепла.
Режим поддержания тепла
Мультиварка позволяет легко управлять режимом поддержания тепла.
- После выбора функции приготовления с помощью кнопки меню (Меню), если нажать кнопку пуск (Начинать) напрямую, загорится индикатор поддержания тепла. По окончании приготовления мультиварка сразу переключится в режим поддержания тепла.
- После выбора функции приготовления с помощью кнопки меню (Меню), если сначала нажать кнопку поддержания тепла, а затем кнопку запуска (Старт), индикатор поддержания тепла погаснет. После окончания приготовления мультиварка перейдет в режим ожидания.
![]() Внимание
Внимание
- За исключением функции приготовления йогурта, все функции приготовления позволяют продукту перейти в режим поддержания тепла (Выкл./Подогрев).
- В режиме ожидания вы можете нажать кнопку поддержания тепла (Выкл./Тепло), чтобы войти в режим поддержания тепла.
- В режиме поддержания тепла вы можете нажать кнопку поддержания тепла (Выкл./Тепло), чтобы войти в режим ожидания.
![]() Функции
Функции
- Для выключения необходимо отключить прибор от сети.
- Температура для этой программы составляет приблизительно 73°C.
Очистка и техническое обслуживание
![]() Внимание
Внимание
- Перед чисткой мультиварки отключите ее от сети.
- Подождите, пока мультиварка достаточно остынет, прежде чем чистить ее.
Для всех поверхностей
Внутри внешней крышки и основного корпуса:
- Протрите с отжатой и дamp ткань.
- Обязательно удалите все остатки пищи, прилипшие к мультиварке. Нагревательный элемент:
- Протрите с отжатой и дamp ткань.
- Удалите остатки пищи отжатой иamp ткань или зубочистки
Наружное освещение
Поверхность внешней крышки и снаружи основного корпуса:
- Протрите тканью damped с мыльной водой.
- Для протирания панели управления используйте только мягкую и сухую ткань.
- Обязательно удалите все остатки пищи вокруг кнопок управления.
Аксессуары
Совок для риса, половник для супа, внутренняя кастрюля, паровая корзина и крышка для выхода пара:
- Замочите в горячей воде и протрите губкой.
Окружающая среда
Не выбрасывайте прибор вместе с обычными бытовыми отходами по окончании срока его службы, а сдайте его в официальный пункт сбора для переработки. Делая это, вы можете помочь сохранить окружающую среду.
Характеристики
| Номер модели | HD3037 |
| Номинальная выходная мощность | 980W |
| Номинальная мощность | 5.0L |
| Объем риса | 1.8L |
Решение Проблем
Если вы столкнулись с проблемами при использовании мультиварки, перед обращением в сервисную службу проверьте следующие пункты. Если решить проблему не удается, обратитесь в центр поддержки потребителей Philips в вашей стране.
| Проблема | Решения |
| Индикатор на кнопке не горит. | Есть проблема с подключением. Проверьте, правильно ли подключен шнур питания к плите и плотно ли вставлена вилка в розетку. |
| Неисправна лампа. Отнесите прибор к дилеру Philips или в авторизованный сервисный центр Philips. | |
| Дисплей не работает. | Мультиварка не подключена к сети. Если нет источника питания, функция резервного питания при сбое питания не работает, и дисплей не работает. |
| Батарея дисплея разряжена. Отнесите прибор дилеру Philips или в авторизованный Philips сервисный центр для замены батареи. | |
| Рис не приготовлен. | Не хватает воды. Добавьте воды в соответствии со шкалой на внутренней стороне кастрюли. |
| Вы не нажали кнопку пуска (Старт), чтобы начать приготовление. | |
| Перед включением мультиварки убедитесь, что на нагревательном элементе и внешней поверхности внутренней чаши нет посторонних остатков. | |
| Поврежден нагревательный элемент или деформирована внутренняя чаша. Отнесите плиту дилеру Philips или в авторизованный сервисный центр Philips. | |
| Плита не переключается в режим поддержания тепла автоматически. | Неисправен регулятор температуры. Отнесите прибор дилеру Philips или в авторизованный сервисный центр Philips. |
| Рис подгорел. | Вы не промыли рис должным образом. Промойте рис, пока вода не станет прозрачной. |
| Во время приготовления из мультиварки выливается вода. | Убедитесь, что вы добавляете воду до уровня, указанного на шкале внутри внутренней кастрюли, который соответствует количеству использованных чашек риса. |
| Следите за тем, чтобы вода не превышала следующую отметку на шкале, так как это может привести к переполнению прибора во время приготовления. | |
| Торт получается слишком твердым. | Пожалуйста, используйте смесь для торта и следуйте инструкциям, приведенным в руководстве пользователя. |
| Я не могу выбрать нужную функцию приготовления. | Нажимайте кнопку меню (Меню) несколько раз, чтобы выбрать нужную функцию, как показано на светодиодном индикаторе. |
| Рис плохо пахнет после варки | Промойте внутреннюю кастрюлю теплой водой и небольшим количеством моющего средства. |
| После приготовления убедитесь, что колпачок для выпуска пара, внутренняя крышка и внутренняя чаша тщательно очищены. | |
| На дисплее появляется сообщение об ошибке (E1, E2, E3 или E4). | В мультиварке возникла неисправность. Отнесите прибор дилеру Philips или в авторизованный сервисный центр Philips. |
Технические характеристики могут быть изменены без предварительного уведомления
© 2013 Koninklijke Philips NV
Все права защищены.
HD3037_UM_CEE_V2.0_130904 
Документы / Ресурсы
Рекомендации

Регистрация продукта | Филипс
- Manuals
- Brands
- Philips Manuals
- Rice Cooker
- HD3037/03
- Service manual
-
Contents
-
Table of Contents
-
Troubleshooting
-
Bookmarks
Quick Links
Product information
Features
Published by Philips Consumer Lifestyle Printed in China Copy Right Reserved
1
HD3037/03
HD3037/03
Technical information
Rice Cooker
Subject to modification
Related Manuals for Philips HD3037/03
Summary of Contents for Philips HD3037/03
-
Page 1
Rice Cooker HD3037/03 HD3037/03 Technical information Product information Features Published by Philips Consumer Lifestyle Printed in China Copy Right Reserved Subject to modification… -
Page 2
HD3037Exploded View… -
Page 3
HD3037 Parts List 序 物料描述 物料编码 12NC English Description 号 deco ring for steam valve 装饰圈 996510050233 620202900098 蒸汽阀盖 996510050227 Cover for steam valve 620202110157 蒸汽阀座 996510050194 base for steam valve 620202110159 sealing ring for steam 蒸汽阀密封圈 996510064115 660400000041 valve 面盖 996510050196 top cover 620202050151 上盖发热传感组件 996510057874 top sensor 610201040038 Mound layer for spring of 996510057175 铰链弹簧压条 620203900054 gemel Panel for keeping warm 保温座板 996510057868 620203020061 … -
Page 4
Circuit Diagram: Temperature limiter wire Power board Control Heating board element Main Top sensor thermostat… -
Page 5
四、拆卸步骤: 2、separate steam valve cover from steam 1、remove steam valve valve base 3、remove four screw on the base 4、separate base from house 6、pull out top sensor 5、take out socket from base… -
Page 6
拆卸步骤: 7、remove screws on the cover of gemel. 8、remove cover of gemel 9、remove top cover assembly 10、separate top cover from inner cover with a spatula. 12、detach pressed layer of warm keeping board 11、remove top cover… -
Page 7
拆卸步骤: 14、separate from inner cover , sealing ring 13、remove screws on the warm keeping board and warm keeping board 15、pull out terminal of socket 16、pull out terminal of power board 17、fasten terminal of heating element with 18、remove screws used to fix main pliers and remove screws on heating element thermostat and detach main thermostat. with screwdriver… -
Page 8
拆卸步骤: 19、remove screws used to fix heating element 20、remove screws used to fix power board and take down heating element. bracket. 21、pull up flat cable of display board . 22、remove screws used to fix power board 24、detach screws used to fix control board 23、detach control board bracket… -
Page 9
拆卸步骤: 25、perk the salient point of outer pan 26、rotate outer pan and take it out 27、push the outer shell 28、detach outer shell 30、detach control panel 29、separate control panel from outer shell… -
Page 10
拆卸步骤: 31、take down button for opening cover… -
Page 11: Troubleshooting
Troubleshooting Fault Reason Solution 1.No power supply is outputted from the Check the power supply of the socket by socket having another appliance connected 2.Power cord being open circuit Check the power cord by replacing it with the a same one 3.The plug isn’t fully connected Insert the plug completely to ensure a fully connecting…
-
Page 12
Troubleshooting Fault Reason Solution Cook with right rice & water proportion 1.Inner pot is overloaded referring to the instruction manual 2.Difference in rice quality Change for another type of rice 4. Spilled rice or porridge 3.Rice isn’t well rinsed Rinse the rice 4.Top sensor malfunctions Repalce top sensor 5.Top sensor is losened…

English
1 Your multicooker
Congratulations on your purchase, and welcome to Philips!
To fully benefit from the support that Philips offers, register your
product at www.Philips.com/welcome.
2 What’s in the box (fig. 1)
Multicooker main unit
Steam basket
Rice scoop
Soup ladle
Measuring cup
Power cord
User manual
Safety leaflet
Warranty card
Recipe booklet
Silica gloves
3 Overview (fig. 2)
a
Lid
f
Power socket
b
Inner pot
g
Heating element
c
Lid release button
h
Water level indications
d
Control panel
i
Cooker handle
e
Main body
j
Detachable steam vent cap
Controls overview (fig. 3)
k
Cooking functions
p
Hour button
l
Display
q
Minute button
m
Off/Warm button
r
Cooking time button
n
Menu button
s
Temperature button
o
Preset button
t
Start button
Functions overview
Program
Temperature
regulation
Temperature
(Approximately)
Time regulation Default time
Rice
No
135°C
No
40 minutes
Risotto
No
135°C
No
40 minutes
Pilaf
No
135°C
No
40 minutes
Jam
No
90°C
1-4 hours
2 hours
Boil
No
95°C
5-30 minutes
30 minutes
Stew
No
90°C
20 minutes-10
hours
1 hour
Fry
No
150°C
5-59 minutes
42 minutes
Yogurt
No
40°C
6-12 hours
8 hours
Reheat
No
90°C
8-25 minutes
25 minutes
Bake
Yes
40, 60, 80, 100,
120, 150, 180°C
20 minutes -2
hours
45 minutes
Steam
No
95°C
5 minutes -2
hours
30 minutes
Warm
No
73°C
Turn on automaticlly after functions
finished (excluding Yogurt)
4 Using the multicooker
Before first use
1 Take out all the accessories from the inner pot. Remove the sheet
between the inner pot and the heating element.
2 Clean the parts of the multicooker thoroughly before using the
multicooker for the first time (see chapter ‘Cleaning’).
3 Add a half pot full of water in the inner pot, close the lid and plug in
the power supply. Select the boiling funtion; the Boil indicator lights up.
4 After water boils for 5 minutes, press the Off/Warm button.
5 Unplug the appliance, wait until the pot has cooled and pour out
the water.
Note
•
Make sure all parts are completely dry before you start using the
multicooker.
Preparations before cooking (fig. 4)
Before using the multicooker, you need to follow below preparations:
1 Measure the rice using the measuring cup provided.
2 Wash the rice thoroughly.
3 Put the pre-washed rice in the inner pot.
4 Add water to the level indicated on the scale inside the inner pot
that corresponds to the number of cups of rice used. Then smooth
the rice surface.
5 Press the lid release button to open the lid.
6 Wipe the outside of the inner pot dry, then put it in the
multicooker. Check if the inner pot is in proper contact with the
heating element.
7 Close the lid of the multicooker, and put the plug in the power socket.
Note
•
Make sure that the outside of the inner pot is dry and clean, and that
there is no foreign residue on the heating element or the magnetic switch.
•
Do not exceed the volume indicated nor exceed the maximum water
level indicated in the inner pot, as this may cause the multicooker to
overflow.
Tip
•
The level marked inside the inner pot is just an indication. You
can always adjust the water level for different types of rice and
your own preference. Do not exceed the maximum quantities
indicated on the inside of the inner pot.
•
Besides following the water level indications, you may also add
rice and water at 1:1-1.2 ratio for rice cooking.
•
For 4 cups of rice, the water level should reach the “4” mark in
the inner pot.
Cooking rice or pasta (fig. 5)
1 Follow the steps in “Preparations before cooking”.
2 Press the menu button (Menu) until the rice/pasta cooking
function (Rice/Pasta) is selected.
3 Press the start button (Start) to start cooking.
4 When the cooking is finished, you will hear a few beeps and the
selected cooking function light will be off.
5 The multicooker will be in keep-warm mode automatically.
»
The keep-warm indicator lights up.
Tip
•
You can press the cancel button (Off/Warm) to turn off the
keep-warm function.
•
To switch off, you need to unplug the appliance.
•
The default cooking time is 40 minutes, and is not adjustable.
•
Temperature for this program is approximately 135°C.
Cooking risotto (fig. 6)
1 Put food and ingredients in the inner pot.
2 Follow steps 6 and 7 in “Preparations before cooking”.
3 Press the menu button (Menu) until the risotto cooking function
(Risotto) is selected.
4 Press the start button (Start) to start cooking.
5 When the cooking is finished, you will hear a few beeps and the
selected cooking function light will be off.
6 The multicooker will be in keep-warm mode automatically.
»
The keep-warm indicator lights up.
Tip
•
You can press the cancel button (Off/Warm) to turn off the
keep-warm function.
•
To switch off, you need to unplug the appliance.
•
The default cooking time is 40 minutes, and is not adjustable.
•
Temperature for this program is approximately 135°C.
Cooking pilaf (fig. 6)
1 Whisk the food and ingredients for the pilaf well.
2 Follow steps 6 and 7 in “Preparations before cooking”.
3 Press the menu button (Menu) until the pilaf cooking function
(Pilaf) is selected.
4 Press the start button (Start) to start cooking.
5 When the cooking is finished, you will hear a few beeps and the
selected cooking function light will be off.
6 The multicooker will be in keep-warm mode automatically.
7 The keep-warm indicator lights up.
Tip
•
You can press the cancel button (Off/Warm) to turn off the
keep-warm function.
•
To switch off, you need to unplug the appliance.
•
The default cooking time is 40 minutes, and is not adjustable.
•
Temperature for this program is approximately 135°C.
Cooking jam (fig. 7)
1 Put food and ingredients in the inner pot.
2 Follow steps 6 and 7 in “Preparations before cooking”.
3 Press the menu button (Menu) until the jam cooking function
(Jam) is selected.
4 Press the cooking time button (Cooking time), and the hour unit
starts flashing on the display.
5 Press the hour button (Hr.) to set a desired hour unit.
6 After the hour unit is set, press the cooking time button (Cooking
time) again, and the minute unit starts flashing on the display.
7 Press the minute button (Min.) to set a desired minute unit.
Tip
•
You can press the cancel button (Off/Warm) to turn off the
keep-warm function.
•
To switch off, you need to unplug the appliance.
•
The default cooking time is 1 hour. You can select the cooking
time between 20 minutes to 10 hours.
•
Temperature for this program is approximately 90°C.
Frying (fig. 10)
1 Put food and ingredients into the inner pot.
2 Follow step 6 in “Preparations before cooking”.
3 Put the plug in the power socket.
4 Press the menu button (Menu) until the frying function (Fry) is
selected.
5 Press the cooking time button (Cooking time), and the minute
unit starts flashing on the display.
6 Press the minute button (Min.) to set a desired minute unit.
7 Press the start button (Start) to start cooking.
8 During cooking, stir the food constantly using a spatula.
9 When the cooking is finished, you will hear a few beeps and the
selected cooking function light will be off.
10 The multicooker will be in keep-warm mode automatically.
»
The keep-warm indicator lights up.
Note
•
This function must be operated with the lid opened.
•
This function may be not used for deep fry, and the amount of oil may not
exceed marking “2“.
Tip
•
To switch off, you need to unplug the appliance.
•
The default cooking time is 42 minutes. You can select the
cooking time between 5 to 59 minutes.
•
Temperature for this program is approximately 150°C.
Making yogurt (fig. 11)
Method 1:
1 Whisk the ingredients for the yogurt well and put them in a glass
container.
2 Put the glass container in the inner pot. Make sure that the
container is sealed.
3 Pour some water in the inner pot. Make sure that half of the
container is immersed in water.
4 Follow steps 6 and 7 in “Preparations before cooking”.
5 Press the menu button (Menu) until the yogurt making function
(Yogurt) is selected.
6 Press the cooking time button (Cooking time), and the hour unit
starts flashing on the display.
7 Press the hour button (Hr.) to set a desired hour unit.
8 After the hour unit is set, press the cooking time button (Cooking
time) again, and the minute unit starts flashing on the display.
9 Press the minute button (Min.) to set a desired minute unit.
10 Press the start button (Start) to start cooking.
11 When the cooking is finished, you will hear a few beeps and the
selected cooking function light will be off.
12 The multicooker will be in standby mode automatically.
8 Press the start button (Start) to start cooking.
9 When the cooking is finished, you will hear a few beeps and the
selected cooking function light will be off.
10 The multicooker will be in keep-warm mode automatically.
»
The keep-warm indicator lights up.
Tip
•
You can press the cancel button (Off/Warm) to turn off the
keep-warm function.
•
To switch off, you need to unplug the appliance.
•
The default cooking time is 2 hours. You can select the cooking
time from 1 to 4 hours.
•
Temperature for this program is approximately 90°C.
Boiling (fig.
1 Put the food and ingredients in the inner pot.
2 Follow steps 6 and 7 in “Preparations before cooking”.
3 Press the menu button (Menu) unitl the boiling function (Boil) is
selected.
4 Press the cooking time button (Cooking time), and the minute
unit starts flashing on the display.
5 Press the minute button (Min.) to set a desired minute unit.
6 Press the start button (Start) to start cooking.
7 When the cooking is finished, you will hear a few beeps and the
selected cooking function light will be off.
8 The multicooker will be in keep-warm mode automatically.
»
The keep-warm indicator lights up.
Note
•
The cooking time begins once the water is boiling, and the time is
displayed as a countdown.
Tip
•
You can press the cancel button (Off/Warm) to turn off the
keep-warm function.
•
To switch off, you need to unplug the appliance.
•
The default cooking time is 30 minutes. You can select the
cooking time between 5 to 30 minutes.
•
Temperature for this program is approximately 95°
C.
Stewing (fig. 9)
1 Put the food and ingredients in the inner pot.
2 Follow steps 6 and 7 in “Preparations before cooking”.
3 Press the menu button (Menu) until the stewing function (Stew)
is selected.
4 Press the cooking time button (Cooking time), and the hour unit
starts flashing on the display.
5 Press the hour button (Hr.) to set a desired hour unit.
6 After the hour unit is set, press the cooking time button (Cooking
time) again, and the minute unit starts flashing on the display.
7 Press the minute button (Min.) to set a desired minute unit.
8 Press the start button (Start) to start cooking.
9 When the cooking is finished, you will hear a few beeps and the
selected cooking function light will be off.
10 The multicooker will be in keep-warm mode automatically.
»
The keep-warm indicator lights up.
Method 2:
1 Pour 1 L of pasteurized milk into the pot (milk should be room
temperature) and add natural yogurt (180-200 g). Stir the milk
and yogurt.
2 Close the lid and select the yogurt-making function. Program starts
automatically.
3 If you want fruit yogurt, add fruits (eg. 200 g of cut strawberries)
30 minutes before the end of the program.
4 Unplug the appliance.
Tip
•
You can unplug the multicooker immediately after the cooking
is finished.
•
To switch off, you need to unplug the appliance.
•
The default cooking time is 8 hours. You can select the cooking
time between 6 to 12 hours.
•
Temperature for this program is approximately 40°C.
Reheating (fig. 12)
1 Loosen the cooled dish and evenly distribute it in the inner pot.
2 Pour some water onto the dish to prevent it from becoming too
dry. The quantity of the water depends on the amount of dish.
3 Follow steps 6 and 7 in “Preparations before cooking”.
4 Press the menu button (Menu) until the reheating function
(Reheat) is selected.
5 Press the cooking time button (Cooking time), and the minute unit
starts flashing on the display.
6 Press the minute button (Min.) to set a desired minute unit.
7 Press the start button (Start) to start cooking.
8 When the cooking process is finished, you will hear a few beeps
and the selected cooking function light will be off.
9 The multicooker will be in keep-warm mode automatically.
»
The keep-warm indicator lights up.
Tip
•
You can press the cancel button (Off/Warm) to turn off the
keep-warm function.
•
To switch off, you need to unplug the appliance.
•
The default cooking time is 25 minutes. You can select the
cooking time between 8 to 25 minutes..
•
Temperature for this program is approximately 90°C.
Baking (fig. 13)
1 Put the food and ingredients in the inner pot.
2 Follow step 6 in “Preparations before cooking”.
3 Put the plug in the power socket.
Note
•
When baking cake, keep the lid closed during cooking. Baking cake at
130°C and by 45 minutes usually delivers best cooking result.
•
When baking food other than cake, the lid must be opened during
cooking.
1 Press the menu button (Menu) until the baking function (Bake)
is selected.
2 Press the cooking time button (Cooking time), and the hour unit
starts flashing on the display.
3 Press the hour button (Hr.) to set a desired hour unit.
4 After the hour unit is set, press the cooking time button (Cooking
time) again, and the minute unit starts flashing on the display.
5 Press the minute button (Min.) to set a desired minute unit.
6 Press the temperature button (Temperature), and the default
cooking temperature starts flashing on the display.
7 Press the temperature button (Temperature) to set a desired
baking temperature.
8 Press the start button (Start) to start cooking.
9 When the baking is finished, you will hear a few beeps and the
selected function light will be off.
10 The multicooker will be in keep-warm mode automatically.
»
The keep-warm indicator lights up.
Tip
•
When removing the inner pot from the multicooker, use a
kitchen glove or a cloth, as the inner pot will be very hot.
•
To switch off, you need to unplug the appliance.
•
The default cooking time is 45 minutes. You can select the
cooking time between 20 minutes to 2 hours.
•
The default cooking temperature is 60°C. The available
temperature options are 40°C, 60°C, 80°C, 100°C, 120°C,
150°C, and 180°C.
Steaming (fig. 14)
1 Measure a few cups of water with the measuring cup.
2 Pour the water into the inner pot.
3 Put the steam basket into the inner pot.
4 Put the food into the steam basket.
5 Close the lid of the multicooker, and put the plug in the power
socket.
6 Press the menu button (Menu) until the steaming function
(Steaming) is selected.
7 Press the cooking time button (Cooking time), and the hour unit
starts flashing on the display.
8 Press the hour button (Hr.) to set a desired hour unit.
9 After the hour unit is set, press the cooking time button (Cooking
time) again, and the minute unit starts flashing on the display.
10 Press the minute button (Min.) to set a desired minute unit.
11 Press the start button (Start) to start cooking.
12 When the steaming is finished, you will hear a few beeps and the
selected cooking function light will be off.
13 The multicooker will be in keep-warm mode automatically.
»
The keep-warm indicator lights up.
14 Open the lid and carefully take out the steamed food from the
plate or the steam basket.
Note
•
The cooking time begins once the water is boiling, and the time is
displayed as a countdown.
•
When removing the steamed food from the steam basket, use a kitchen
glove or a cloth, as the plate and steam basket will be very hot.
•
When you cook rice and steam food at the same time, make sure you
measure out an amount of rice that leaves enough room for the steam tray.
•
Water level should be between 2 and 4 water level marked inside inner pot.
Fry
Specifications are subject to change without notice
© 2013 Koninklijke Philips N.V.
All rights reserved.
HD3037_UM_CEE_V2.0_130904
HD3037
Register your product and get support at
www.philips.com/welcome
Always there to help you
Question?
Contact
Philips
www.philips.com/welcome
Safety leaflet
www.philips.com/welcome
User manual
www.philips.com/welcome
Warranty
4
1
Rice/ Pasta
Reheat
Bake
Steam
Boil
Stew
Fry
Yogurt
Risotto
Pilaf
Jam
3
2
5
6
7
8
9
12
11
10
13
a
b
d
e
f
g
h
j
c
i
k
l
m
n
o
p
q
r
s
t
Rice/ Pasta
Jam
Boil
Stew
Yogurt
Bake
14
15
Steam
Rice/ Pasta
Pilaf
Jam
Boil
Stew
Yogurt
Reheat
Steam
EN
User manual
BG
Ръководство за потребителя
CS
Příručka pro uživatele
ET Kasutusjuhend
HR
Korisnički priručnik
HU Felhasználói kézikönyv
LT
Vartotojo vadovas
LV
Lietotāja rokasgrāmata
PL
Instrukcja obsługi
RO
Manual de utilizare
RU
Руководство пользователя
SK
Príručka užívateľa
SL
Uporabniški priročnik
Pilaf
Reheat
www.philips.com/welcome
Recipe