
Specifications are subject to change without notice
© 2013 Koninklijke Philips Electronics N.V.
All rights reserved.
HD3058_UM_RU_V1.0_130510
HD3058
Register your product and get support at
www.philips.com/welcome
Always there to help you
Question?
Contact
Philips
English
1
Your multi-cooker
Congratulations on your purchase, and welcome to Philips!
To fully benefit from the support that Philips offers, register your
product at www.Philips.com/welcome.
2
What’s in the box (fig.1)
Multi-cooker main unit
Steamer
Rice scoop
Soup ladle
Measuring cup
Silicon gloves
User manual
Safety leaflet
Recipe
Warranty
card
3 Overview
a
Detachable steam vent cap
g
Cooker handle
b
Lid release button
h
Water level indications
c
Control panel
i
Inner pot
d
Heating element
j
Sealing ring
e
Main body
k
Top lid
f
Power socket
Controls overview
l
Cooking functions
s
Decrease button
m
Power indicator
t
Temperature button
n
Keep-warm button
u
Preset button
o
Menu button
v
Start/Off button
p
Cooking time button
w
Preset indicator
q
Increase button
x
Keep-warm indicator
r
Display
Functions overview
Functions
Default
cooking time
Adjustable cooking
time
Preset time
Rice (
рис
)
30 — 40
Minutes
/
1 — 24
Hours
Pilaf (
плов
)
30 — 40
Minutes
/
1 — 24
Hours
Congee (
каша
)
10 Minutes
5 — 120 Minutes
1 — 24
Hours
Yogurt (
йогурт
)
8 Hours
6 — 12 Hours
1 — 24
Hours
Fry (
жарить
)
15 Minutes
5 — 60 Minutes
/
Stew (
тушить
)
1 Hour
20 Minutes — 10
Hours
1 — 24
Hours
Bake (
печь
)
45 Minutes
20 — 120 Minutes
1 — 24
Hours
Manual (
свой
выбор
)
2 Hours
5 Minutes — 10
Hours
1 — 24
Hours
4
Using the multi-cooker
Before first use
1
Take out all the accessories from the inner pot. Remove the
packaging material of the inner pot.
2
Clean the parts of the multi-cooker thoroughly before using it for
the first time (see chapter ‘Cleaning and Maintenance’).
Note
•
Make sure all parts are completely dry before you start using the multi-
cooker.
Preparations before cooking (fig.2)
Before using the multi-cooker, you need to follow below preparations:
1
Measure the rice using the measuring cup provided.
2
Wash the rice thoroughly.
3
Put the pre-washed rice in the inner pot.
4
Add water to the level indicated on the scale inside the inner pot
that corresponds to the number of cups of rice used. Then smooth
the rice surface.
5
Press the lid release button to open the lid.
6
Wipe the outside of the inner pot dry, then put it in the multi-
cooker.
7
Close the lid of the multi-cooker, and put the plug in the power
socket.
Note
•
Each cup of uncooked rice normally gives 2 bowls of cooked rice. 1 cup of
rice is approximately 180ml.
•
The level marked inside the inner pot is just an indication. You can always
adjust the water level for different types of rice and your own preference.
•
Make sure that the outside of the inner pot is clean and dry, and that
there is no foreign residue on the heating element or the magnetic switch.
Rice cooking (fig.3)
1
Follow the steps in “Preparations before cooking”.
2
Press the menu button (
МЕНЮ
) until the rice cooking function
(
рис
) is selected.
3
Press and hold the start button (
СТАРТ/ВЫКЛ
) for 3 seconds to
start cooking.
4
When the cooking is finished, you will hear 4 beeps and the
selected cooking function light will be off.
5
The multi-cooker will be in keep-warm mode automatically.
»
The keep-warm (
ПОДОГРЕВ
) indicator lights up.
Note
•
After the cooking has started, you can press and hold the Start/Off button
(
СТАРТ/ВЫКЛ
) for 3 seconds to deactivate the cooking process, and the
multi-cooker will be in standby mode.
•
The default cooking time is 30 to 40 minutes, and is not adjustable.
Pilaf cooking (fig.4)
1
Whisk the food and ingredients for the pilaf well.
2
Follow steps 6 and 7 in “Preparations before cooking”.
3
Press the menu button (
МЕНЮ
) until the pilaf cooking function
(
плов
) is selected.
4
Press and hold the start button (
СТАРТ/ВЫКЛ
) for 3 seconds to
start cooking.
5
When the cooking is finished, you will hear 4 beeps and the
selected cooking function light will be off.
6
The multi-cooker will be in keep-warm mode automatically.
»
The keep-warm (
ПОДОГРЕВ
) indicator lights up.
Note
•
After the cooking has started, you can press and hold the Start/Off button
(
СТАРТ/ВЫКЛ
) for 3 seconds to deactivate the cooking process, and the
multi-cooker will be in standby mode.
•
The default cooking time is 30 to 40 minutes, and is not adjustable.
Cooking congee (fig.5)
1
Follow the steps in “Preparations before cooking”.
2
Press the menu button (
МЕНЮ
) until the congee function (
каша
)
is selected.
3
Press the cooking time button (
ВРЕМЯ ПРИГОТОВЛЕНИЯ
), and
the hour unit starts flashing on the display.
4
Press the increase (
+
) or decrease (
—
) button to set the hour unit.
5
After the hour unit is set, press the cooking time button (
ВРЕМЯ
ПРИГОТОВЛЕНИЯ
) again, and the minute unit starts flashing on
the display.
6
Press the increase (
+
) or decrease (
—
) button to set the minute
unit.
7
Press and hold the start button (
СТАРТ/ВЫКЛ
) for 3 seconds to
start cooking.
8
When the cooking is finished, you will hear 4 beeps and the
selected cooking function light will be off.
9
The multi-cooker will be in keep-warm mode automatically.
»
The keep-warm (
ПОДОГРЕВ
) indicator lights up.
Note
•
After the cooking has started, you can press and hold the Start/Off button
(
СТАРТ/ВЫКЛ
) for 3 seconds to deactivate the cooking process, and the
multi-cooker will be in standby mode.
•
Do not exceed the volume indicated nor exceed the maximum water
level indicated in the inner pot, as this may cause the multi-cooker to
overflow.
•
It is normal to find the congee stickier if it is left in keep-warm mode for
too long.
•
If the voltage is unstable at the area you live, it is possible that the multi-
cooker overflows.
•
The default cooking time is 10 minutes. You can select the cooking time
between 5 minutes to 2 hours.
•
The cooking time will not start counting down until the water
temperature reaches 90°C.
Stewing (fig.8)
1
Put the food and ingredients in the inner pot.
2
Follow steps 6 and 7 in “Preparations before cooking”.
3
Press the menu button (
МЕНЮ
) until the stewing function
(
тушить
) is selected.
4
Press the cooking time button (
ВРЕМЯ ПРИГОТОВЛЕНИЯ
), and
the hour unit starts flashing on the display.
5
Press the increase (
+
) or decrease button (
—
) to set the hour unit.
6
After the hour unit is set, press the cooking time button (
ВРЕМЯ
ПРИГОТОВЛЕНИЯ
) again, and the minute unit starts flashing on
the display.
7
Press the increase (
+
) or decrease (
—
) button to set the minute unit.
8
Press and hold the start button (
СТАРТ/ВЫКЛ
) for 3 seconds to
start cooking.
9
When the cooking is finished, you will hear 4 beeps and the
selected cooking function light will be off.
10
The multi-cooker will be in keep-warm mode automatically.
»
The keep-warm (
ПОДОГРЕВ
) indicator lights up.
Note
•
After the cooking has started, you can press and hold the Start/Off button
(
СТАРТ/ВЫКЛ
) for 3 seconds to deactivate the cooking process, and the
multi-cooker will be in standby mode.
•
The default cooking time is 1 hour. You can select the cooking time
between 20 minutes to 10 hours.
Baking (fig.9)
1
Put the food and ingredients in the inner pot.
2
Follow step 6 in “Preparations before cooking”.
3
Put the plug in the power socket.
Note
•
When baking cake, keep the lid closed during cooking. Baking cake at
130°C and by 45 minutes usually delivers best cooking result.
•
When baking food other than cake, the lid must be opened during
cooking.
4
Press the menu button (
МЕНЮ
) until the baking function (
печь
)
is selected.
5
Press the cooking time button (
ВРЕМЯ ПРИГОТОВЛЕНИЯ
), and
the hour unit starts flashing on the display.
6
Press the increase (
+
) or decrease button (
—
) to set the hour unit.
7
After the hour unit is set, press the cooking time button (
ВРЕМЯ
ПРИГОТОВЛЕНИЯ
) again, and the minute unit starts flashing on
the display.
8
Press the increase (
+
) or decrease button (
—
) to set the minute unit.
9
Press the temperature button (
ТЕМП.
), and the default cooking
temperature starts flashing on the display.
10
Press the increase (
+
) or decrease (
—
) button to choose a desired
baking temperature.
11
Press and hold the start button (
СТАРТ/ВЫКЛ
) for 3 seconds to
start the baking process.
12
When the baking is finished, you will hear4 beeps and the selected
cooking function light will be off.
13
The multi-cooker will be in keep-warm mode automatically.
»
The keep-warm (
ПОДОГРЕВ
) indicator lights up.
Making Yogurt (fig.6)
1
Whisk the ingredients for the yogurt well and put them in a glass
container.
2
Put the glass container in the inner pot. Make sure that the
container is sealed.
3
Pour some water in the inner pot. Make sure that half of the
container is immersed in water.
4
Follow steps 6 and 7 in “Preparations before cooking”.
5
Press the menu button (
МЕНЮ
) until the yogurt function
(
йогурт
) is selected.
6
Press the cooking time button (
ВРЕМЯ ПРИГОТОВЛЕНИЯ
), and
the hour unit starts flashing on the display.
7
Press the increase (
+
) or decrease button (
—
) to set the hour unit.
8
After the hour unit is set, press the cooking time button (
ВРЕМЯ
ПРИГОТОВЛЕНИЯ
) again, and the minute unit starts flashing on
the display.
9
Press the increase (
+
) or decrease button (
—
) to set the minute
unit.
10
Press and hold the start button (
СТАРТ/ВЫКЛ
) for 3 seconds to
start cooking.
11
When the cooking is finished, you will hear 4 beeps and the
selected cooking function light will be off.
12
The multi-cooker will be in standby mode automatically.
Note
•
After the cooking has started, you can press and hold the Start/Off button
(
СТАРТ/ВЫКЛ
) for 3 seconds to deactivate the cooking process, and the
multi-cooker will be in standby mode.
•
The default cooking time is 8 hours. You can select the cooking time
between 6 to 12 hours.
Frying (fig.7)
1
Put food and ingredients into the inner pot.
2
Follow step 6 in “Preparations before cooking”.
3
Put the plug in the power socket.
4
Press the menu button (
МЕНЮ
) until the fry function (
жарить
)
is selected.
5
Press the cooking time button (
ВРЕМЯ ПРИГОТОВЛЕНИЯ
), and
the minute unit starts flashing on the display.
6
Press the increase (
+
) or decrease button (
—
) to set the required
cooking time.
7
Press the start button (
СТАРТ/ВЫКЛ
) for 3 seconds to start
cooking.
8
During cooking, stir the food constantly using a spatula.
9
When the cooking is finished, you will hear 4 beeps and the
selected cooking function light will be off.
10
The multi-cooker will be in keep-warm mode automatically.
»
The keep-warm indicator lights up.
Note
•
Do not close the top lid when cooking in the fry mode.
•
After the cooking has started, you can press and hold the Start/Off button
(
СТАРТ/ВЫКЛ
) for 3 seconds to deactivate the cooking process, and the
multi-cooker will be in standby mode.
•
The default cooking time is 15 minutes. You can select the cooking time
between 5 to 60 minutes.
Note
•
When removing the inner pot from the multi-cooker, use a kitchen glove
or a cloth, as the inner pot will be very hot.
•
After the cooking has started, you can press and hold the Start/Off button
(
СТАРТ/ВЫКЛ
) for 3 seconds to deactivate the cooking process, and the
multi-cooker will be in standby mode.
•
The default cooking time is 45 minutes. You can select the cooking time
from 20 minutes to 2 hours.
•
The default cooking temperature is 100°C. You can select the temperature
between 40°C to 160°C.
Manual (fig.10)
You may use the manual mode to cook food with more control over
the cooking time and temperature.
1
Follow the steps in “Preparations before cooking”.
2
Press the menu button (
МЕНЮ
) until the manual function (
свой
выбор
) is selected.
3
Press the cooking time button (
ВРЕМЯ ПРИГОТОВЛЕНИЯ
), and
the hour unit starts flashing on the display.
4
Press the increase (
+
) or decrease (
—
) button to set the hour unit.
5
After the hour unit is set, press the cooking time button (
ВРЕМЯ
ПРИГОТОВЛЕНИЯ
) again, and the minute unit starts flashing on
the display.
6
Press the increase (
+
) or decrease (
—
) button to set the minute
unit.
7
Press the temperature button, and the default cooking
temperature starts flashing on the display.
8
Press the increase (
+
) or decrease (
—
) button to set the desired
cooking temperature.
9
Press and hold the start button (
СТАРТ/ВЫКЛ
) for 3 seconds to
start cooking.
10
When the cooking is finished, you will hear 4 beeps and the
selected cooking function light will be off.
11
The multi-cooker will be in keep-warm mode automatically.
»
The keep-warm (
ПОДОГРЕВ
) indicator lights up.
Note
•
After the cooking has started, you can press and hold the Start/Off button
(
СТАРТ/ВЫКЛ
) for 3 seconds to deactivate the cooking process, and the
multi-cooker will be in standby mode.
•
The default cooking time is 2 hours. You can select the cooking time
between 5 minutes to 10 hours.
•
The default cooking temperature is 100°C. You can select the temperature
between 40°C to 160°C.
•
In manual (
свой выбор
) mode, when cooking at a temperature higher
than 100°C, the top lid must be opened during cooking.
Keep-warm mode
The multi-cooker provides you with easy control over the keep-warm
mode.
•
After you have selected the cooking function using the menu
button (
МЕНЮ
), if you press the start button (
СТАРТ/ВЫКЛ
)
for 3 seconds directly, the keep-warm indicator will light up. After
the cooking is finished, the multi-cooker will switch to keep-warm
mode directly.
•
After you have selected the cooking function using the menu
button (
МЕНЮ
), if you press the keep-warm button first, and then
the start button (
СТАРТ/ВЫКЛ
) for 3 seconds, the keep-warm
indicator will be off. After the cooking is finished, the multi-cooker
will be in standby mode.
Note
•
In standby mode, you can press the keep-warm button (
ПОДОГРЕВ
) to
enter keep-warm mode.
•
In keep-warm mode, you can press the keep-warm button (
ПОДОГРЕВ
)
to enter standby mode.
Preset time for delayed cooking (fig.11)
You can preset the delayed cooking time for different cooking modes.
1
Follow steps 6 and 7 in “Preparations before cooking”.
2
Press the menu button (
МЕНЮ
) until your preferred cooking
function is selected.
3
Press the preset time button (
ОТСРОЧКА
), and the hour unit
starts flashing on the display.
4
Press the increase (
+
) or decrease (
—
) button to set the hour unit.
5
After the hour unit is set, press the preset time button
(
ОТСРОЧКА
) again, and the minute unit starts flashing on the
display.
6
Press the increase (
+
) or decrease (
—
) button to set the minute
unit.
7
Press the start button (
СТАРТ/ВЫКЛ
) for 3 seconds to confirm
the preset timer.
8
The cooking process will be finished when the preset time has
elapsed. You will hear 4 beeps and the selected cooking function
light will be off.
9
The multi-cooker will be in keep-warm mode automatically.
»
The keep- warm (
ПОДОГРЕВ
) indicator lights up.
Note
•
The preset function is not available in fry mode (
жарить
).
•
The preset button is not responsive in standby mode.
•
The default preset time is 4 hours. You can select the preset time between
1 to 24 hours.
Setting up child lock (fig.12)
To protect your child from using the multi-cooker, you may set up the
child lock function.
•
Press and hold the preset button (
ОТСРОЧКА
) for 3 seconds to
enter the child lock mode.
»
The child lock icon appears on the display.
•
To unlock, press and hold the preset button (
ОТСРОЧКА
) for 3
seconds again, and the child lock icon disappears.
EN User manual
RU Руководство пользователя
2
1
3
7
8
9
12
10
11
4
5
6
3
a
b
c
d
e
f
h
i
j
k
www.philips.com/welcome
User manual
www.philips.com/welcome
Safety leaflet
www.philips.com/welcome
Warranty
www.philips.com/welcome
Recipe
g
n
l
m
o
p
q
s
r
t
u
v
w
x
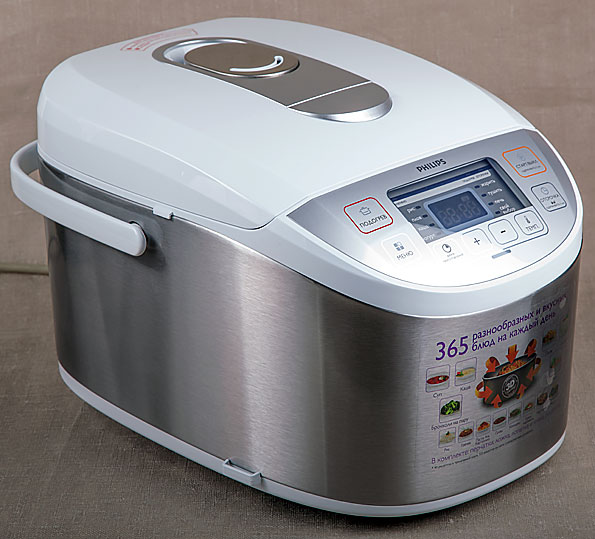
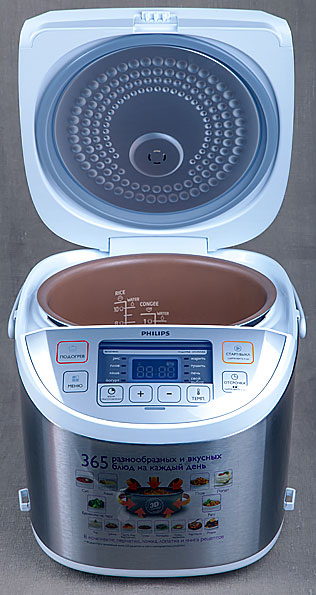
Добрый день. Мы представляем современную, мощную мультиварку указанной модели. Среди достоинств данной мультиварки следует отметить современный дизайн, сенсорное управление, богатую комплектацию, три-Д нагрев, функцию отложенной готовки, функцию защиты от детей, автоматические программы с возможностью выбора времени и температуры готовки.
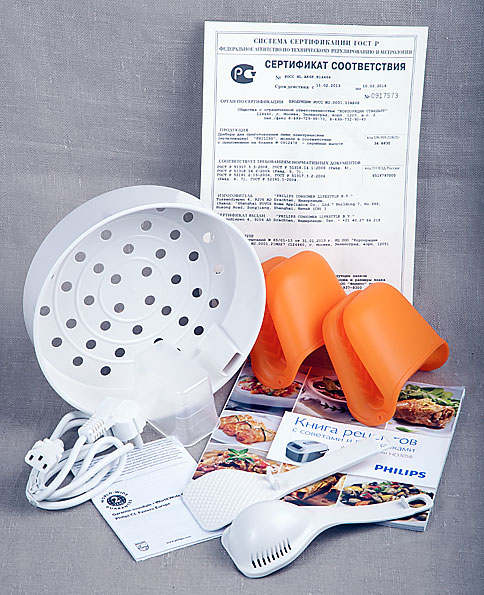
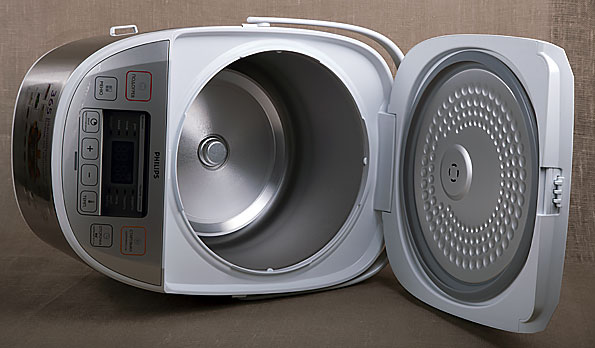
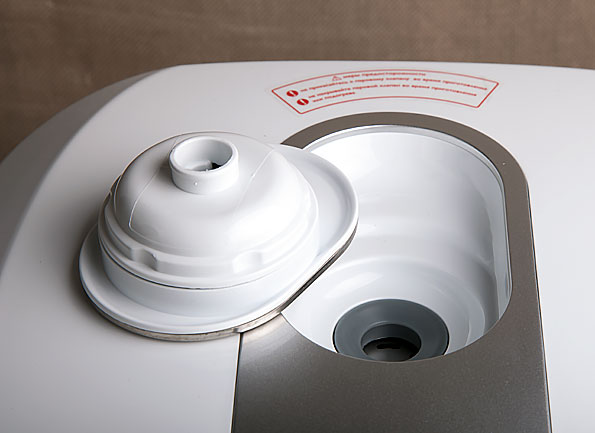
К мультиварке прилагается большой набор аксессуаров. Перед нами мерный стаканчик, половник и ложка для помешивания, контейнер для варки на пару, шнур питания и силиконовые прихватки. Есть инструкция и гарантийный талон. Нам понравилась книга рецептов. Блюда на все вкусы. Но главной ценностью любой мультиварки конечно является чаша, здесь она с толстыми стенками, антипригарным покрытием и делениями. Мультиварка легко переносится за ручку, Сверху мы видим съемный клапан для выхода пара, Спереди расположены дисплей и кнопки управления. Сбоку очень удобный держатель для ложек. Ручек у чаши нет, пользуйтесь прихватками. Верхняя крышка тоже сильно нагревается. Силиконовая прокладка требует нежного обращения. В крышке есть отверстие для выхода пара. Очень важно чашу держать в чистоте. Внутри мы видим нагревательный элемент с кнопкой-датчиком. Здесь нужна особая чистота. Можно переходить к готовке. Половник и ложка не будут пачкать стол т.к. имеют удобные подставки. Производитель рекомендует сначала заложить все продукты, и уже потом вставлять вилку в розетку. Включилась.
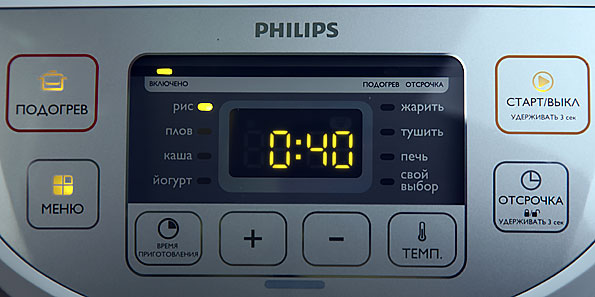
Познакомимся с управлением. Кнопок много, но разобраться с ними очень легко.
Кнопка старт, она же выключение, держим 3 секунды.
Кнопка отсрочки старта, она же защита от детей, если держим 3 секунды. Подержали, загорелся замочек, все кнопки заблокированы. Выключается аналогично.
Кнопки перехода в режим изменения времени и температуры готовки. А этими как раз и меняем время и температуру. Правда, такие изменения работают не во всех программах.
Кнопка подогрева. Очень многогранная кнопка. И конечно кнопка Меню. Ей выбираем одну из 8 программ.
Познакомимся с программами поподробнее. Первые две — Рис и Плов имеют фиксированные время, которое указано на дисплее и температуру готовки. Менять их нельзя. Держим Старт, и мультиварка переходит в режим нагрева, т.е. подготовки, готовка еще не началась. Ждите, когда загорится индикатор и появится время. Снова держим Старт — отменяем готовку.
Следующие 4 программы предлагают нам свое время готовки, но его мы можем поменять. Для Каши, например от 5 минут до 2-х часов. Теперь старт. Включился режим подготовки.
Тушить можем от 20 минут до 10 часов. А мы выбрали по умолчанию 1 час. Теперь отсрочим готовку. В инструкции это названо отсрочкой старта, что логически не совсем верно. Помните — вы выбираете время, через которое блюдо будет готово. Жмем Отсрочка и получаем первое предложение — 4 часа. Выбрали 6 часов и стартуем. Видите, готовка не началась и горит индикатор Отсрочка. А вот через 6 часов оно будет уже готово. Поэтому время отсрочки никогда не будет меньше времени готовки, так как показывается время до окончания процесса готовки. В следующих 2-х программах можно менять не только время, но и температуру готовки. Печь, а точнее выпечка. Соглашаемся с 45-ю минутами и меняем температуру. Останавливаемся на 70-ти градусах. Старт. Никакой подготовки, сразу в работу.
Программа Свой выбор имеет самые широкие настройки. Меняем 2 часа готовки на 1 час. Меняем 4 часа ожидания готового блюда на 7 часов и наконец меняем температуру со 100 градусов на 150. Старт. Обратный отсчет пошел. После окончания готовки во всех программах, кроме йогурта, мультиварка переходит в режим поддержания тепла, это примерно 75-80 градусов. Но здесь есть функция отмены этого перехода. Перед стартом нажимаем кнопку подогрев, как бы гасим ее и все. А можно наоборот, подогреть холодное блюдо. Без всяких программ нажимаем подогрев. Выключаем так же.
Уход за мультиваркой. Для очистки мультиварки используйте щадящие методы. Чашу можно мыть в посудомоечной машине, клапан легко вынимается и разбирается. Советуем все мыть после каждой готовки.
Оглавление
- Технические характеристики
- Комплектация
- Подготовка к эксплуатации
- Приготовление еды
- Уход за мультиваркой
- Удобство управления
- Общие впечатления
Модель неудивительно похожа на многие другие мультиварки своего ценового сегмента. Никаких внешних отличительных черт, бросающихся в глаза «фишек». В общем, просто бытовой прибор. В своей предыдущей инкарнации она явно была рисоваркой, что объясняет многие странные мелочи, вроде невозможности самостоятельно запрограммировать время на рецептах с участием упомянутой крупы. Даже ложка именуется в инструкции «ложка для риса» — а все остальное ею, видимо, ни-ни.
В приданое к устройству прилагаются силиконовые перчатки для изъятия чаши — это всегда приятное дополнение. Тем более, что у внутренней кастрюли нет собственных ручек для удобного вынимания ее из кожуха. Режимов у мультиварки не очень много — необходимое и достаточное количество. Есть программа для изготовления йогурта. Есть режим «Свой выбор», дающий возможность готовить на низких температурах.
Технические характеристики
| Общие характеристики | |
| Производитель | Philips |
| Наименование модели | Philips HD3058 |
| Тип | мультиварка |
| Потребляемая мощность | 980 Вт |
| Материал корпуса | комбинированный |
| Цвет корпуса | белый/стальной |
| Объем чаши | 5 л (полезный объем 3,1 л)* |
| Материал чаши | алюминиевый сплав |
| Покрытие чаши | антипригарное покрытие Whitford |
| Управление | |
| Тип управления | электронное |
| Тип кнопок | мембранные |
| Дисплей | монохромный ЖК |
| Поддержание температуры | есть, с возможностью отменить автоподогрев |
| Отложенный старт | до 24 часов |
| Дополнительные функции | |
| функция «Свой выбор» | |
| функция блокировки от детей | |
| Масса и габариты | |
| Коробка (Ш×В×Г) | 38×45×35 см |
| Вес в упаковке | 6,4 кг |
| Устройство (Ш×В×Г) | 29×24×38 |
| Вес | 4,3 кг |
* Результат наших собственных измерений: объем воды, который находится в чаше, если ее залить до отметки максимума. Иногда производитель не указывает явным образом максимально допустимое заполнение, в этих случаях мы заливаем воду до максимально высокой отметки из всех, что присутствуют на чаше.
Комплектация:
- мультиварка
- чаша
- шнур питания
- контейнер-пароварка
- черпак
- ложка
- мерный стакан
- книга рецептов
- инструкция
- силиконовые перчатки
Подготовка к эксплуатации
Инструкция к мультиварке подразумевает под этим процессом первую варку риса. Мы же подошли к вопросу дедовским способом: протерли нагревательный элемент, чашу и крышку мягкой влажной тряпкой, вытерли насухо, сделали первой прогон с водой и лимоном. В последующей эксплуатации мультиварка пластиком не пахла.
Приготовление еды
В первую очередь мы, как обычно, проверяем устройство на умение приготовить килограмм мужской еды без сложных манипуляций. В этот раз выбираем лимскую фасоль.
Лимская фасоль с беконом и мясным фаршем
Это, конечно, не рагу, которое следует просто сложить набором порезанных ингредиентов внутрь мультиварки, после чего включить нужный режим. Фасоль нужно предварительно вымочить, потом выварить, бекон и фарш обжарить, и только после этого можно жать кнопку «сделать килограмм еды».
С обжариванием мультиварка справляется нормально. Не хуже электроплиты. По времени — примерно так же. Тушение тоже проходит ожидаемым образом, фасоль мягкая.
Вердикт дегустаторов. Именно такое блюдо, какое ожидаешь получить, положив фасоль с мясом тушиться в мультиварку. Бекон делает рецепт интереснее. Если вы любите иметь дома много сытной еды — это хороший вариант.
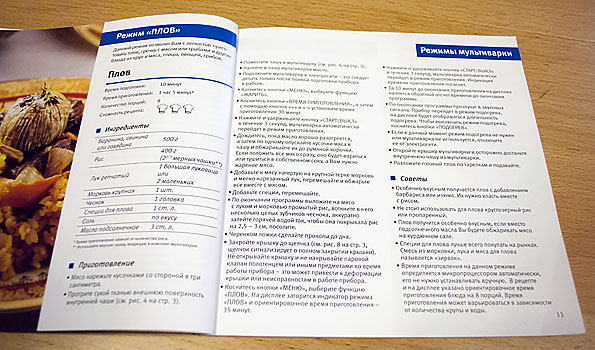
Судя по форумам, мультиварка (любая) воспринимается владельцами в том числе и как агрегат для приготовления плова. Наша команда более не могла игнорировать этот факт. Следующим тестовым блюдом стал плов.
Плов с бараниной
Стоит отдать должное книге рецептов — она довольно подробно и почти достоверно описывает приготовление плова. В следующих за описанием действий советах рассказывает про зирвак и предлагает жарить его на курдючном сале.
Продолжаем экспериментировать с жаркой в мультиварке. Курдюк вытапливается отлично, зирвак тоже готовится нормально. Единственный недостаток — небольшой диаметр чаши: в казане ворочать зажарку и распределять ее по дну все же удобнее.
Самое веселое начинается, когда наступает время самостоятельной работы мультиварки. Плов она и по дефолтному программному времени, и по рецепту готовит 30 минут. Ощущение, что этого периода, пожалуй, будет мало, не покидало Штирлица до сигнала о завершении работы программы. Рис вверху плова был сухой и твердый, а внизу — наоборот. Команда решила довериться чувствам и, добавив воды, поставить прибор еще на час. Но не тут-то было: умная мультиварка не дает возможности проявлять излишнюю инициативу в том, что касается риса. Пришлось ставить на полчаса, потом перемешивать плов (иначе нижний слой грозил превратиться в рисовый пудинг) и снова ставить на полчаса. Через три итерации экспериментаторы сочли блюдо готовым.
Вердикт дегустаторов. Несмотря на то, что рис частично развалился, блюдо получилось вполне достойным. Но это, учитывая возню с программой, скорее заслуга продуктов, чем мультиварки. Группа экспериментаторов осталась при своем мнении, что плов лучше готовить более традиционными способами.
Следующий наш тест — выпечка. Выбрали из книги рецептов яблочный пирог по принципу «довольно просто готовить».
Яблочный пирог
Это блюдо у одной дружественной экспериментаторам бабушки называется «Гости на пороге». Именно по той причине, что быстро и просто готовится. Самая большая проблема — достать готовый пирог из чаши.
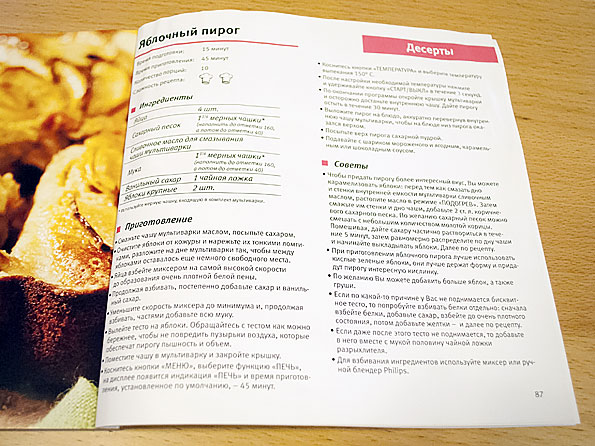 Выпекать все изделия, кроме тортов, инструкцией предписывается с открытой крышкой, что заставляет экспериментаторов все 40 минут с любопытством наблюдать приготовление пирога.
Вердикт дегустаторов. За установленное время пирог нормально пропекся и не пригорел к дну чаши. Но внешне выглядел не как вершина кондитерского искусства: кривоватый, белесый. Хорошо, что гостей на пороге не было.
Уход за мультиваркой
Возможность мыть чашу в посудомойке в инструкции не обозначена. Крышка несъемная, неразборная (за исключением парового клапана). Контейнера для сбора конденсата нет. Эти пункты не добавляют удобства в уходе за изделием, но не сильно усложняют жизнь. К тому же антипригарное покрытие чаши позволяет легко отмывать ее вручную.
Удобство управления
Режимы
У Philips HD3058 довольно стандартный набор режимов.
- Рис
- Плов
- Каша
- Йогурт
- Жарить
- Тушить
- Печь
- Свой выбор
Режим «Свой выбор» позволяет установить время приготовления и температуру в диапазоне от 40 до 160 градусов. Режимы «Рис» и «Плов», как указано в инструкции, определяют время приготовления автоматически, в зависимости от типа риса. Судя по всему, в приборе установлен датчик выпаривания, в зависимости от показаний которого и рассчитывается время и температура приготовления. Как показал наш опыт с пловом, работает эта система не очень точно.
Дисплей и кнопки
Интерфейс достаточно простой, интуитивно понятный. Кнопки с легким ходом, без «проскакивания». Philips, впрочем, считает, что управление у этой мультиварки сенсорное. Нашей команде так не показалось. Режимы выбираются на дисплее с помощью кнопки «Меню». Кнопку «Старт/Выкл» следует удерживать три секунды. Удерживаемая таким же образом кнопка «Отсрочка» включает блокировку от детей. Очень любезно со стороны разработчиков было написать это прямо на кнопках. Индикатор работы режима — постоянно горящая лампочка над надписью «включено» на дисплее. Если режим не включен, лампочка мигает. Не самый удобный способ индикации, на наш взгляд.
Таймер
На режимах, автоматически рассчитывающих время приготовления («Плов», «Рис») обратный отсчет времени включается только на последних минутах. В остальное время по экрану бегает змейка. Это, судя по отзывам в сети, огорчает немногочисленных комментаторов тестируемой модели. Таймер отсрочки по умолчанию выставлен на 4 часа. Вообще же управление отсрочкой старта организовано не самым удобным для пользователя образом. В мультиварке нет встроенных часов, поэтому, чтобы иметь приготовленное блюдо к определенному часу, придется самостоятельно совершить арифметические действия. Нужное количество часов и минут следует запрограммировать, нажав кнопку «Отсрочка» и оперируя после этого кнопками «+» и «−». На всех режимах, кроме «Плов» и «Рис», время приготовления можно менять в заданном диапазоне (например, «Выпечка»: от 20 до 120 минут).
Сигналы работы
Сигнал о завершении работы программы — четырехкратный довольно громкий писк. Звук хорошо слышен из другого помещения. Сигналы о том, в каком статусе находится в данный момент мультиварка — горящая лампочка над соответствующим текстом на экране (наверху дисплея плашка, на ней обозначено «включено», «подогрев», «отсрочка», вверху какой-нибудь из этих надписей теплится маленький неприметный огонек). Есть иконки, обозначающие включенную блокировку и включенный режим приготовления (любой).
Температура
Минимальная возможная температура — 40 градусов (в мультиварке можно готовить кисломолочные продукты и, при наличии вакуумизатора, блюда су вид). Максимальная указанная температура — 160 градусов. На коробке, как и на большинстве мультиварочных упаковок, заявлено «3D-приготовление», что в лучшем случае означает наличие маломощных нагревателей в кожухе и крышке изделия. Наш случай в этом контексте самым лучшим не является: тэн один, под чашей.
Инструкция
Мануал к этой модели является классическим образцом для аргументации в теме «почему никто не читает мануалы». Инструкция сделана в виде несколько раз сфальцованного листа, наподобие тех, что вложены в коробки с лекарственными препаратами. Такой вид инструкции обычно оправдан необходимостью экономить место, что при размере коробки этой мультиварки выглядит по меньшей мере забавно. Чтобы найти часть, написанную на русском языке, приходится потратить какое-то время и какие-то нервы. Уверенности в том, что язык, обозначенный авторами инструкции как русский, мы знаем на уровне носителя, у нас тоже не возникло. Пункты вроде «5. Откройте крышку мультиварки с помощью кнопки открывания крышки. 6. Насухо протрите внешнюю поверхность внутренней чаши, затем поместите ее в мультиварку» вызывают древнерусскую тоску. Раздел «Подготовка к работе» на самом деле учит нас варить рис. Режим «Каша», как считает инструкция, подразумевает приготовление исключительно китайской каши конжи. Разделы, описывающие работу режимов, постоянно апеллируют к номерам последних пунктов раздела «Подготовка к работе». К середине чтения становится понятно, что лучше бы выучить эти пункты наизусть.
Книга рецептов
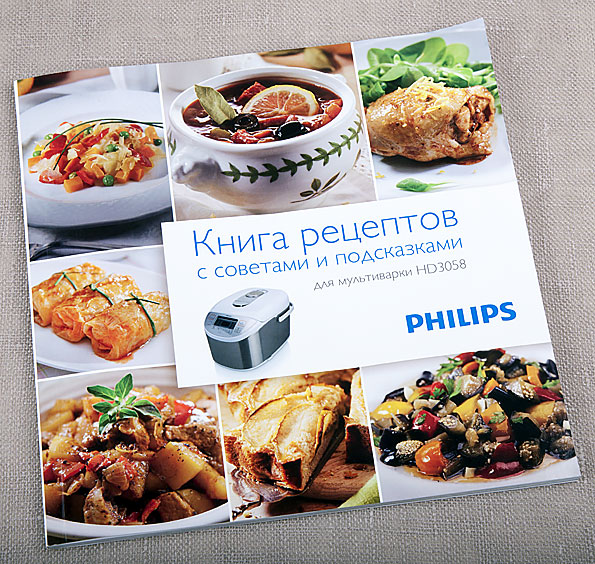
Довольно красочная, с забавными «советами» (один из них мы приводили в описании опыта с пловом). Рецептов всего 40, большинство из них довольно простые, дефлопе готовить не предлагают. На коробке от мультиварки написано: «365 рецептов на каждый день», и под этим воодушевляющим слоганом — расшифровка: «*40 — в книге рецептов, 325 — на сайте». На указанной странице — народное кулинарное творчество, припечатанное сверху брендом производителя нашей подопытной.
Чаша
 Изнутри чаши есть риски, объясняющие нам по-английски, сколько нужно лить воды на определенный объем риса. Для тех, кто часто варит рис, это должно быть удобно.
Покрытие Whitford заявлено как «специальное антипригарное покрытие золотистого цвета для легкости очистки». Стоит заметить, что уход за внутренней кастрюлей действительно прост. Снаружи чаша покрыта черным напылением Whitford для сохранения тепла.
К Philips HD3058 подходят чаши от многих других мультиварок того же изготовителя. У Philips аксессуары к этим бытовым приборам вообще почти не отличаются от модели к модели.
Общие выводы
Перед нами стандартная рисоварка с добавлением некоторого количества функций, дающих устройству возможность позиционироваться в качестве мультиварки. Все режимы работают исправно за исключением некоторых раздражающих программных особенностей, о которых мы упоминали в обзоре.
У чаши очень неплохое антипригарное покрытие. Тэн довольно мощный, обжарка продуктов происходит легко и приятно для пользователя. О модели пока очень мало отзывов, поэтому мы не обладаем информацией о том, как ведет себя устройство при длительном использовании. По всем параметрам это «крепкий середнячок». Разве что, стоит заметить, мультиварки такого качества и таких программных возможностей бывают и дешевле. Впрочем, в более дешевых моделях возрастает количество досадных недоразумений.
Мы знаем, что многие любители мультиварочной кулинарии приобретают не по одной модели. Philips HD3058 — прибор, который представляется нам в роли «второй мульти», говоря языком форумов. Дополнительная конфорка с удовлетворительным количеством функций.
По материалам сайта http://www.ixbt.com
Вот некоторые отзывы (см. Яндекс)
Достоинства:
Красивый дизайн,легкое удобное управление,функция свой выбор(в других МВ называется мультиповар),приятный негромкий звук сигналов,чаша качественная,хорошо моется,можно мыть в посудомоечной машине,адекватная цена- 4470руб.( в интернет-магазине.)
Недостатки:
нет емкости для сбора конденсата
Комментарий:
Купила 2 дня назад.Пробовала приготовить за это время омлет,твор.запеканку,жаркое,молочные каши,бисквит,фаршированные перцы.
Режимов много.Молочная каша не сбегает и не пригорает( в пред. мультиварке весь прибор и стол были»уделаны»,если не караулить).
Омлет получается пышный вкусный.Бисквит тоже получ.высоким.Запеканка творож.чуть подгорела,наверное, надо температуру и время выпечки уменьшить.Перцы получились очень вкусные с обалденным ароматом.Выбирала очень долго,отзывов в инете очень мало по этой модели.Пока все очень нравится,до этого брала попользоваться МВ др.фирмы у родителей-земля и небо! Жалею,что не задумывалась о покупке чуть раньше,когда ребенок был грудной-реальная экономия сил,времени и меньше грязной посуды.Думаю купить вторую чашу т.к приходится готовить первое и второе одновременно. «Змейка»бегает только,когда идет процесс подготовки и обратный отчет времени есть. Резюмируя:очень довольна!
Достоинства:
Легкое управление, хорошо готовит
Недостатки:
Не нашла
Комментарий:
В моей жизни была и раскрученная мультиварка Панасоник, и недорогая Vitesse. На мой взгляд Филипс лучше. Плов не пригорает, но и остается сочным. Программы хорошие. Готовить одно удовольствие!
За счет 3D-распределения тепла, в этой мультиварке все готовится быстрее, чем в том же Панасонике.
На программе жарки мясо действительно получается с корочкой.
Управление легкое, удобно, что все кнопки находятся не на боковой стенке, а наверху, не нужно наклоняться, чтобы настроить программу
Достоинства:
Красивый дизайн, качественный материал чаши, минимум необходимых функций, программа «Свой выбор», возможность отключить автоподогрев.
Недостатки:
Нет обратного отсчета времени при приготовлении.
Комментарий:
Почти купила эту мультиварку. В последний момент заметила, что когда включаешь программу, вместо обратного отсчета времени на дисплее просто бегают полосочки (типа змейки). Т.е. через какое-то время нельзя посмотреть, сколько осталось до конца готовки. Мелочь, а неудобно.
-
Инструкции по эксплуатации
1

Philips HD3058/03 инструкция по эксплуатации
(2 страницы)
- Языки:Русский
-
Тип:
PDF -
Размер:
2.65 MB -
Описание:
Мультиварка
Просмотр
На NoDevice можно скачать инструкцию по эксплуатации для Philips HD3058/03. Руководство пользователя необходимо для ознакомления с правилами установки и эксплуатации Philips HD3058/03. Инструкции по использованию помогут правильно настроить Philips HD3058/03, исправить ошибки и выявить неполадки.
Комментарий
Купила, довольна. Отличный выбор за свои деньги. До этого пользовалась мультиваркой компании мулинекс через 8 месяцев пришла в негодность
Катерина
Комментарий
очень понравилась мультиварка, только немного пахнет пластмаской, буду надеяться что со временем пройдет. Меню очень понятное.
Юлия Губина
Достоинства
Легкое управление, хорошо готовит.
Комментарий
В моей жизни была и раскрученная мультиварка Панасоник, и недорогая Vitesse. На мой взгляд Филипс лучше. Плов не пригорает, но и остается сочным. Программы хорошие. Готовить одно удовольствие! За счет 3D-распределения тепла, в этой мультиварке все готовится быстрее, чем в том же Панасонике.
На программе жарки мясо действительно получается с корочкой.
Управление легкое, удобно, что все кнопки находятся не на боковой стенке, а наверху, не нужно наклоняться, чтобы настроить программу.
Алексей Невзоров
Достоинства
3D-Нагрев, большая, легко моющаяся чаша, удобное управление.
Комментарий
Стильная мультиварка от Philips со множеством функций и отличной книгой рецептов. Варю в ней супы — до покупки никогда не варил, получаются отлично. В восторге от режима «жарить». Чаша легко моется. Стильный дизайн с использованием нержавейки. Рекомендую для покупки.
Specifications are subject to change without notice
© 2013 Koninklijke Philips Electronics N.V.
All rights reserved.
HD3058_UM_RU_V1.0_130510
HD3058
Register your product and get support at
www.philips.com/welcome
Always there to help you
Question?
Contact
Philips
English
1
Your multi-cooker
Congratulations on your purchase, and welcome to Philips!
To fully benefit from the support that Philips offers, register your
product at www.Philips.com/welcome.
2
What’s in the box (fig.1)
Multi-cooker main unit
Steamer
Rice scoop
Soup ladle
Measuring cup
Silicon gloves
User manual
Safety leaflet
Recipe
Warranty
card
3 Overview
a
Detachable steam vent cap
g
Cooker handle
b
Lid release button
h
Water level indications
c
Control panel
i
Inner pot
d
Heating element
j
Sealing ring
e
Main body
k
Top lid
f
Power socket
Controls overview
l
Cooking functions
s
Decrease button
m
Power indicator
t
Temperature button
n
Keep-warm button
u
Preset button
o
Menu button
v
Start/Off button
p
Cooking time button
w
Preset indicator
q
Increase button
x
Keep-warm indicator
r
Display
Functions overview
Functions
Default
cooking time
Adjustable cooking
time
Preset time
Rice (рис)
30 — 40
Minutes
/
1 — 24
Hours
Pilaf (плов)
30 — 40
Minutes
/
1 — 24
Hours
Congee (каша)
10 Minutes
5 — 120 Minutes
1 — 24
Hours
Yogurt (йогурт)
8 Hours
6 — 12 Hours
1 — 24
Hours
Fry (жарить)
15 Minutes
5 — 60 Minutes
/
Stew (тушить)
1 Hour
20 Minutes — 10
Hours
1 — 24
Hours
Bake (печь)
45 Minutes
20 — 120 Minutes
1 — 24
Hours
Manual (свой
выбор)
2 Hours
5 Minutes — 10
Hours
1 — 24
Hours
4
Using the multi-cooker
Before first use
1 Take out all the accessories from the inner pot. Remove the
packaging material of the inner pot.
2 Clean the parts of the multi-cooker thoroughly before using it for
the first time (see chapter ‘Cleaning and Maintenance’).
Note
•
Make sure all parts are completely dry before you start using the multi-
cooker.
Preparations before cooking (fig.2)
Before using the multi-cooker, you need to follow below preparations:
1 Measure the rice using the measuring cup provided.
2 Wash the rice thoroughly.
3 Put the pre-washed rice in the inner pot.
4 Add water to the level indicated on the scale inside the inner pot
that corresponds to the number of cups of rice used. Then smooth
the rice surface.
5 Press the lid release button to open the lid.
6 Wipe the outside of the inner pot dry, then put it in the multi-
cooker.
7 Close the lid of the multi-cooker, and put the plug in the power
socket.
Note
•
Each cup of uncooked rice normally gives 2 bowls of cooked rice. 1 cup of
rice is approximately 180ml.
•
The level marked inside the inner pot is just an indication. You can always
adjust the water level for different types of rice and your own preference.
•
Make sure that the outside of the inner pot is clean and dry, and that
there is no foreign residue on the heating element or the magnetic switch.
Rice cooking (fig.3)
1 Follow the steps in “Preparations before cooking”.
2 Press the menu button (МЕНЮ) until the rice cooking function
(рис) is selected.
3 Press and hold the start button (СТАРТ/ВЫКЛ) for 3 seconds to
start cooking.
4 When the cooking is finished, you will hear 4 beeps and the
selected cooking function light will be off.
5 The multi-cooker will be in keep-warm mode automatically.
»
The keep-warm (ПОДОГРЕВ) indicator lights up.
Note
•
After the cooking has started, you can press and hold the Start/Off button
(СТАРТ/ВЫКЛ) for 3 seconds to deactivate the cooking process, and the
multi-cooker will be in standby mode.
•
The default cooking time is 30 to 40 minutes, and is not adjustable.
Pilaf cooking (fig.4)
1 Whisk the food and ingredients for the pilaf well.
2 Follow steps 6 and 7 in “Preparations before cooking”.
3 Press the menu button (МЕНЮ) until the pilaf cooking function
(плов) is selected.
4 Press and hold the start button (СТАРТ/ВЫКЛ) for 3 seconds to
start cooking.
5 When the cooking is finished, you will hear 4 beeps and the
selected cooking function light will be off.
6 The multi-cooker will be in keep-warm mode automatically.
»
The keep-warm (ПОДОГРЕВ) indicator lights up.
Note
•
After the cooking has started, you can press and hold the Start/Off button
(СТАРТ/ВЫКЛ) for 3 seconds to deactivate the cooking process, and the
multi-cooker will be in standby mode.
•
The default cooking time is 30 to 40 minutes, and is not adjustable.
Cooking congee (fig.5)
1 Follow the steps in “Preparations before cooking”.
2 Press the menu button (МЕНЮ) until the congee function (каша)
is selected.
3 Press the cooking time button (ВРЕМЯ ПРИГОТОВЛЕНИЯ), and
the hour unit starts flashing on the display.
4 Press the increase (+) or decrease (-) button to set the hour unit.
5 After the hour unit is set, press the cooking time button (ВРЕМЯ
ПРИГОТОВЛЕНИЯ) again, and the minute unit starts flashing on
the display.
6 Press the increase (+) or decrease (-) button to set the minute
unit.
7 Press and hold the start button (СТАРТ/ВЫКЛ) for 3 seconds to
start cooking.
8 When the cooking is finished, you will hear 4 beeps and the
selected cooking function light will be off.
9 The multi-cooker will be in keep-warm mode automatically.
»
The keep-warm (ПОДОГРЕВ) indicator lights up.
Note
•
After the cooking has started, you can press and hold the Start/Off button
(СТАРТ/ВЫКЛ) for 3 seconds to deactivate the cooking process, and the
multi-cooker will be in standby mode.
•
Do not exceed the volume indicated nor exceed the maximum water
level indicated in the inner pot, as this may cause the multi-cooker to
overflow.
•
It is normal to find the congee stickier if it is left in keep-warm mode for
too long.
•
If the voltage is unstable at the area you live, it is possible that the multi-
cooker overflows.
•
The default cooking time is 10 minutes. You can select the cooking time
between 5 minutes to 2 hours.
•
The cooking time will not start counting down until the water
temperature reaches 90°C.
Stewing (fig.8)
1 Put the food and ingredients in the inner pot.
2 Follow steps 6 and 7 in “Preparations before cooking”.
3 Press the menu button (МЕНЮ) until the stewing function
(тушить) is selected.
4 Press the cooking time button (ВРЕМЯ ПРИГОТОВЛЕНИЯ), and
the hour unit starts flashing on the display.
5 Press the increase (+) or decrease button (-) to set the hour unit.
6 After the hour unit is set, press the cooking time button (ВРЕМЯ
ПРИГОТОВЛЕНИЯ) again, and the minute unit starts flashing on
the display.
7 Press the increase (+) or decrease (-) button to set the minute unit.
8 Press and hold the start button (СТАРТ/ВЫКЛ) for 3 seconds to
start cooking.
9 When the cooking is finished, you will hear 4 beeps and the
selected cooking function light will be off.
10 The multi-cooker will be in keep-warm mode automatically.
»
The keep-warm (ПОДОГРЕВ) indicator lights up.
Note
•
After the cooking has started, you can press and hold the Start/Off button
(СТАРТ/ВЫКЛ) for 3 seconds to deactivate the cooking process, and the
multi-cooker will be in standby mode.
•
The default cooking time is 1 hour. You can select the cooking time
between 20 minutes to 10 hours.
Baking (fig.9)
1 Put the food and ingredients in the inner pot.
2 Follow step 6 in “Preparations before cooking”.
3 Put the plug in the power socket.
Note
•
When baking cake, keep the lid closed during cooking. Baking cake at
130°C and by 45 minutes usually delivers best cooking result.
•
When baking food other than cake, the lid must be opened during
cooking.
4 Press the menu button (МЕНЮ) until the baking function (печь)
is selected.
5 Press the cooking time button (ВРЕМЯ ПРИГОТОВЛЕНИЯ), and
the hour unit starts flashing on the display.
6 Press the increase (+) or decrease button (-) to set the hour unit.
7 After the hour unit is set, press the cooking time button (ВРЕМЯ
ПРИГОТОВЛЕНИЯ) again, and the minute unit starts flashing on
the display.
8 Press the increase (+) or decrease button (-) to set the minute unit.
9 Press the temperature button (ТЕМП.), and the default cooking
temperature starts flashing on the display.
10 Press the increase (+) or decrease (-) button to choose a desired
baking temperature.
11 Press and hold the start button (СТАРТ/ВЫКЛ) for 3 seconds to
start the baking process.
12 When the baking is finished, you will hear4 beeps and the selected
cooking function light will be off.
13 The multi-cooker will be in keep-warm mode automatically.
»
The keep-warm (ПОДОГРЕВ) indicator lights up.
Making Yogurt (fig.6)
1 Whisk the ingredients for the yogurt well and put them in a glass
container.
2 Put the glass container in the inner pot. Make sure that the
container is sealed.
3 Pour some water in the inner pot. Make sure that half of the
container is immersed in water.
4 Follow steps 6 and 7 in “Preparations before cooking”.
5 Press the menu button (МЕНЮ) until the yogurt function
(йогурт) is selected.
6 Press the cooking time button (ВРЕМЯ ПРИГОТОВЛЕНИЯ), and
the hour unit starts flashing on the display.
7 Press the increase (+) or decrease button (-) to set the hour unit.
8 After the hour unit is set, press the cooking time button (ВРЕМЯ
ПРИГОТОВЛЕНИЯ) again, and the minute unit starts flashing on
the display.
9 Press the increase (+) or decrease button (-) to set the minute
unit.
10 Press and hold the start button (СТАРТ/ВЫКЛ) for 3 seconds to
start cooking.
11 When the cooking is finished, you will hear 4 beeps and the
selected cooking function light will be off.
12 The multi-cooker will be in standby mode automatically.
Note
•
After the cooking has started, you can press and hold the Start/Off button
(СТАРТ/ВЫКЛ) for 3 seconds to deactivate the cooking process, and the
multi-cooker will be in standby mode.
•
The default cooking time is 8 hours. You can select the cooking time
between 6 to 12 hours.
Frying (fig.7)
1 Put food and ingredients into the inner pot.
2 Follow step 6 in “Preparations before cooking”.
3 Put the plug in the power socket.
4 Press the menu button (МЕНЮ) until the fry function (жарить)
is selected.
5 Press the cooking time button (ВРЕМЯ ПРИГОТОВЛЕНИЯ), and
the minute unit starts flashing on the display.
6 Press the increase (+) or decrease button (-) to set the required
cooking time.
7 Press the start button (СТАРТ/ВЫКЛ) for 3 seconds to start
cooking.
8 During cooking, stir the food constantly using a spatula.
9 When the cooking is finished, you will hear 4 beeps and the
selected cooking function light will be off.
10 The multi-cooker will be in keep-warm mode automatically.
»
The keep-warm indicator lights up.
Note
•
Do not close the top lid when cooking in the fry mode.
•
After the cooking has started, you can press and hold the Start/Off button
(СТАРТ/ВЫКЛ) for 3 seconds to deactivate the cooking process, and the
multi-cooker will be in standby mode.
•
The default cooking time is 15 minutes. You can select the cooking time
between 5 to 60 minutes.
Note
•
When removing the inner pot from the multi-cooker, use a kitchen glove
or a cloth, as the inner pot will be very hot.
•
After the cooking has started, you can press and hold the Start/Off button
(СТАРТ/ВЫКЛ) for 3 seconds to deactivate the cooking process, and the
multi-cooker will be in standby mode.
•
The default cooking time is 45 minutes. You can select the cooking time
from 20 minutes to 2 hours.
•
The default cooking temperature is 100°C. You can select the temperature
between 40°C to 160°C.
Manual (fig.10)
You may use the manual mode to cook food with more control over
the cooking time and temperature.
1 Follow the steps in “Preparations before cooking”.
2 Press the menu button (МЕНЮ) until the manual function (свой
выбор) is selected.
3 Press the cooking time button (ВРЕМЯ ПРИГОТОВЛЕНИЯ), and
the hour unit starts flashing on the display.
4 Press the increase (+) or decrease (-) button to set the hour unit.
5 After the hour unit is set, press the cooking time button (ВРЕМЯ
ПРИГОТОВЛЕНИЯ) again, and the minute unit starts flashing on
the display.
6 Press the increase (+) or decrease (-) button to set the minute
unit.
7 Press the temperature button, and the default cooking
temperature starts flashing on the display.
8 Press the increase (+) or decrease (-) button to set the desired
cooking temperature.
9 Press and hold the start button (СТАРТ/ВЫКЛ) for 3 seconds to
start cooking.
10 When the cooking is finished, you will hear 4 beeps and the
selected cooking function light will be off.
11 The multi-cooker will be in keep-warm mode automatically.
»
The keep-warm (ПОДОГРЕВ) indicator lights up.
Note
•
After the cooking has started, you can press and hold the Start/Off button
(СТАРТ/ВЫКЛ) for 3 seconds to deactivate the cooking process, and the
multi-cooker will be in standby mode.
•
The default cooking time is 2 hours. You can select the cooking time
between 5 minutes to 10 hours.
•
The default cooking temperature is 100°C. You can select the temperature
between 40°C to 160°C.
•
In manual (свой выбор) mode, when cooking at a temperature higher
than 100°C, the top lid must be opened during cooking.
Keep-warm mode
The multi-cooker provides you with easy control over the keep-warm
mode.
•
After you have selected the cooking function using the menu
button (МЕНЮ), if you press the start button (СТАРТ/ВЫКЛ)
for 3 seconds directly, the keep-warm indicator will light up. After
the cooking is finished, the multi-cooker will switch to keep-warm
mode directly.
•
After you have selected the cooking function using the menu
button (МЕНЮ), if you press the keep-warm button first, and then
the start button (СТАРТ/ВЫКЛ) for 3 seconds, the keep-warm
indicator will be off. After the cooking is finished, the multi-cooker
will be in standby mode.
Note
•
In standby mode, you can press the keep-warm button (ПОДОГРЕВ) to
enter keep-warm mode.
•
In keep-warm mode, you can press the keep-warm button (ПОДОГРЕВ)
to enter standby mode.
Preset time for delayed cooking (fig.11)
You can preset the delayed cooking time for different cooking modes.
1 Follow steps 6 and 7 in “Preparations before cooking”.
2 Press the menu button (МЕНЮ) until your preferred cooking
function is selected.
3 Press the preset time button (ОТСРОЧКА), and the hour unit
starts flashing on the display.
4 Press the increase (+) or decrease (-) button to set the hour unit.
5 After the hour unit is set, press the preset time button
(ОТСРОЧКА) again, and the minute unit starts flashing on the
display.
6 Press the increase (+) or decrease (-) button to set the minute
unit.
7 Press the start button (СТАРТ/ВЫКЛ) for 3 seconds to confirm
the preset timer.
8 The cooking process will be finished when the preset time has
elapsed. You will hear 4 beeps and the selected cooking function
light will be off.
9 The multi-cooker will be in keep-warm mode automatically.
»
The keep- warm (ПОДОГРЕВ) indicator lights up.
Note
•
The preset function is not available in fry mode (жарить).
•
The preset button is not responsive in standby mode.
•
The default preset time is 4 hours. You can select the preset time between
1 to 24 hours.
Setting up child lock (fig.12)
To protect your child from using the multi-cooker, you may set up the
child lock function.
•
Press and hold the preset button (ОТСРОЧКА) for 3 seconds to
enter the child lock mode.
»
The child lock icon appears on the display.
•
To unlock, press and hold the preset button (ОТСРОЧКА) for 3
seconds again, and the child lock icon disappears.
EN User manual
RU Руководство пользователя
2
1
3
7
8
9
12
10
11
4
5
6
3
a
b
c
d
e
f
h
i
j
k
www.philips.com/welcome
User manual
www.philips.com/welcome
Safety leaflet
www.philips.com/welcome
Warranty
www.philips.com/welcome
Recipe
g
n
l
m
o
p
q
s
r
t
u
v
w
x