Configuration and Use Manual
P/N 20000326, Rev. EC
November 2016
Micro Motion
®
Model 2700
Transmitter with
F
OUNDATION™
fieldbus
Configuration and Use Manual
Contents
Chapter 1 Before You Begin . . . . . . . . . . . . . . . . . . . . . . . . . . . . . . . . . . . . . 1
1.1
1.2
1.3
1.4
1.5
1.6
Overview . . . . . . . . . . . . . . . . . . . . . . . . . . . . . . . . . . . . . . . . . . . . . . . . . . . . . . . . . . . 1
Safety . . . . . . . . . . . . . . . . . . . . . . . . . . . . . . . . . . . . . . . . . . . . . . . . . . . . . . . . . . . . . 1
Flowmeter documentation . . . . . . . . . . . . . . . . . . . . . . . . . . . . . . . . . . . . . . . . . . . . . . 1
Communication tools. . . . . . . . . . . . . . . . . . . . . . . . . . . . . . . . . . . . . . . . . . . . . . . . . . 1
Out-of-service mode . . . . . . . . . . . . . . . . . . . . . . . . . . . . . . . . . . . . . . . . . . . . . . . . . . 2
Planning the configuration. . . . . . . . . . . . . . . . . . . . . . . . . . . . . . . . . . . . . . . . . . . . . . 2
Chapter 2 Startup . . . . . . . . . . . . . . . . . . . . . . . . . . . . . . . . . . . . . . . . . . . . 5
2.1
2.2
2.3
2.4
2.5
2.6
2.7
Overview . . . . . . . . . . . . . . . . . . . . . . . . . . . . . . . . . . . . . . . . . . . . . . . . . . . . . . . . . . . 5
Applying power . . . . . . . . . . . . . . . . . . . . . . . . . . . . . . . . . . . . . . . . . . . . . . . . . . . . . . 5
Assigning function block channels . . . . . . . . . . . . . . . . . . . . . . . . . . . . . . . . . . . . . . . 6
Configuring the integrator function block. . . . . . . . . . . . . . . . . . . . . . . . . . . . . . . . . . . 9
Configuring pressure compensation . . . . . . . . . . . . . . . . . . . . . . . . . . . . . . . . . . . . . 10
2.5.1
Pressure compensation values . . . . . . . . . . . . . . . . . . . . . . . . . . . . . . . . 11
2.5.2
2.5.3
Enabling pressure compensation. . . . . . . . . . . . . . . . . . . . . . . . . . . . . . . 11
Configuring a pressure source. . . . . . . . . . . . . . . . . . . . . . . . . . . . . . . . . 12
Configuring temperature compensation . . . . . . . . . . . . . . . . . . . . . . . . . . . . . . . . . . 13
2.6.1
Enabling external temperature compensation . . . . . . . . . . . . . . . . . . . . . 13
2.6.2
Configuring a temperature source . . . . . . . . . . . . . . . . . . . . . . . . . . . . . . 14
Zeroing the flowmeter . . . . . . . . . . . . . . . . . . . . . . . . . . . . . . . . . . . . . . . . . . . . . . . . 16
2.7.1
2.7.2
2.7.3
Preparing for the zeroing procedure . . . . . . . . . . . . . . . . . . . . . . . . . . . . 17
Zero procedure . . . . . . . . . . . . . . . . . . . . . . . . . . . . . . . . . . . . . . . . . . . . 17
Restoring zero values . . . . . . . . . . . . . . . . . . . . . . . . . . . . . . . . . . . . . . . 20
Chapter 3 Calibration . . . . . . . . . . . . . . . . . . . . . . . . . . . . . . . . . . . . . . . . 23
3.1
3.2
3.3
3.4
3.5
3.6
Overview . . . . . . . . . . . . . . . . . . . . . . . . . . . . . . . . . . . . . . . . . . . . . . . . . . . . . . . . . . 23
Characterization, Smart Meter Verification, meter validation, and calibration . . . . . . 23
3.2.1
3.2.2
Characterization. . . . . . . . . . . . . . . . . . . . . . . . . . . . . . . . . . . . . . . . . . . . 23
Smart Meter Verification . . . . . . . . . . . . . . . . . . . . . . . . . . . . . . . . . . . . . 24
3.2.3
3.2.4
Meter validation and meter factors. . . . . . . . . . . . . . . . . . . . . . . . . . . . . . 24
Calibration . . . . . . . . . . . . . . . . . . . . . . . . . . . . . . . . . . . . . . . . . . . . . . . . 24
3.2.5
Comparison and recommendations . . . . . . . . . . . . . . . . . . . . . . . . . . . . . 25
Performing a characterization . . . . . . . . . . . . . . . . . . . . . . . . . . . . . . . . . . . . . . . . . . 25
3.3.1
3.3.2
Characterization parameters . . . . . . . . . . . . . . . . . . . . . . . . . . . . . . . . . . 25
How to characterize . . . . . . . . . . . . . . . . . . . . . . . . . . . . . . . . . . . . . . . . . 28
Performing Smart Meter Verification . . . . . . . . . . . . . . . . . . . . . . . . . . . . . . . . . . . . . 29
3.4.1
Preparing for the Smart Meter Verification test . . . . . . . . . . . . . . . . . . . . 29
3.4.2
3.4.3
3.4.4
Running the Smart Meter Verification test . . . . . . . . . . . . . . . . . . . . . . . . 29
Reading and interpreting Smart Meter Verification test results . . . . . . . . 35
Setting up automatic or remote execution of the Smart Meter Verification test 40
Performing meter validation. . . . . . . . . . . . . . . . . . . . . . . . . . . . . . . . . . . . . . . . . . . . 42
Performing a density calibration . . . . . . . . . . . . . . . . . . . . . . . . . . . . . . . . . . . . . . . . 44
3.6.1
Preparing for density calibration . . . . . . . . . . . . . . . . . . . . . . . . . . . . . . . 45
Configuration and Use Manual
iii
Contents
3.7
3.6.2
Density calibration procedures . . . . . . . . . . . . . . . . . . . . . . . . . . . . . . . . 45
Performing a temperature calibration . . . . . . . . . . . . . . . . . . . . . . . . . . . . . . . . . . . . 50
Chapter 4 Configuration. . . . . . . . . . . . . . . . . . . . . . . . . . . . . . . . . . . . . . . 53
4.1
4.2
4.3
4.4
4.5
4.6
Overview . . . . . . . . . . . . . . . . . . . . . . . . . . . . . . . . . . . . . . . . . . . . . . . . . . . . . . . . . . 53
Configuration map. . . . . . . . . . . . . . . . . . . . . . . . . . . . . . . . . . . . . . . . . . . . . . . . . . . 53
Configuring standard volume flow measurement for gas . . . . . . . . . . . . . . . . . . . . . 54
4.3.1
Configuring gas density . . . . . . . . . . . . . . . . . . . . . . . . . . . . . . . . . . . . . . 55
Changing the measurement units . . . . . . . . . . . . . . . . . . . . . . . . . . . . . . . . . . . . . . . 57
Creating special measurement units. . . . . . . . . . . . . . . . . . . . . . . . . . . . . . . . . . . . . 63
Configuring the petroleum measurement application (API feature) . . . . . . . . . . . . . 66
4.6.1
About the petroleum measurement application . . . . . . . . . . . . . . . . . . . . 66
4.7
4.6.2
Configuration procedure . . . . . . . . . . . . . . . . . . . . . . . . . . . . . . . . . . . . . 68
Configuring the concentration measurement application . . . . . . . . . . . . . . . . . . . . . 71
4.7.1
4.7.2
About the concentration measurement application . . . . . . . . . . . . . . . . . 71
Configuration procedure . . . . . . . . . . . . . . . . . . . . . . . . . . . . . . . . . . . . . 74
4.8
4.9
Changing the linearization . . . . . . . . . . . . . . . . . . . . . . . . . . . . . . . . . . . . . . . . . . . . 74
Changing the output scale . . . . . . . . . . . . . . . . . . . . . . . . . . . . . . . . . . . . . . . . . . . . 75
4.10
Changing process alarms . . . . . . . . . . . . . . . . . . . . . . . . . . . . . . . . . . . . . . . . . . . . . 76
4.10.1
Alarm values . . . . . . . . . . . . . . . . . . . . . . . . . . . . . . . . . . . . . . . . . . . . . . 76
4.10.2
4.10.3
Alarm priorities . . . . . . . . . . . . . . . . . . . . . . . . . . . . . . . . . . . . . . . . . . . . 77
Alarm hysteresis . . . . . . . . . . . . . . . . . . . . . . . . . . . . . . . . . . . . . . . . . . . 77
4.11
Configuring status alarm severity . . . . . . . . . . . . . . . . . . . . . . . . . . . . . . . . . . . . . . . 79
4.12
Changing the damping values . . . . . . . . . . . . . . . . . . . . . . . . . . . . . . . . . . . . . . . . . 81
4.12.1
Damping and volume measurement . . . . . . . . . . . . . . . . . . . . . . . . . . . . 82
4.13
Changing slug flow limits and duration . . . . . . . . . . . . . . . . . . . . . . . . . . . . . . . . . . . 83
4.14
Configuring cutoffs . . . . . . . . . . . . . . . . . . . . . . . . . . . . . . . . . . . . . . . . . . . . . . . . . . 84
4.14.1
Cutoffs and volume flow . . . . . . . . . . . . . . . . . . . . . . . . . . . . . . . . . . . . . 85
4.15
Changing the flow direction parameter . . . . . . . . . . . . . . . . . . . . . . . . . . . . . . . . . . . 86
4.16
Changing device settings . . . . . . . . . . . . . . . . . . . . . . . . . . . . . . . . . . . . . . . . . . . . . 87
4.17
Configuring sensor parameters. . . . . . . . . . . . . . . . . . . . . . . . . . . . . . . . . . . . . . . . . 88
4.18
Changing the display functionality . . . . . . . . . . . . . . . . . . . . . . . . . . . . . . . . . . . . . . 89
4.18.1
4.18.2
4.18.3
4.18.4
Enabling and disabling display functions . . . . . . . . . . . . . . . . . . . . . . . . . 89
Changing the scroll rate. . . . . . . . . . . . . . . . . . . . . . . . . . . . . . . . . . . . . . 92
Changing the update period . . . . . . . . . . . . . . . . . . . . . . . . . . . . . . . . . . 93
Changing the display password . . . . . . . . . . . . . . . . . . . . . . . . . . . . . . . . 94
4.18.5
4.18.6
Changing the display variables and precision . . . . . . . . . . . . . . . . . . . . . 97
Changing the display language . . . . . . . . . . . . . . . . . . . . . . . . . . . . . . . . 98
4.19
Configuring write-protect mode. . . . . . . . . . . . . . . . . . . . . . . . . . . . . . . . . . . . . . . . 100
4.20
Enabling LD Optimization . . . . . . . . . . . . . . . . . . . . . . . . . . . . . . . . . . . . . . . . . . . . 102
Chapter 5 Operation . . . . . . . . . . . . . . . . . . . . . . . . . . . . . . . . . . . . . . . . 105
5.1
5.2
5.3
5.4
5.5
Overview . . . . . . . . . . . . . . . . . . . . . . . . . . . . . . . . . . . . . . . . . . . . . . . . . . . . . . . . . 105
Viewing process variables. . . . . . . . . . . . . . . . . . . . . . . . . . . . . . . . . . . . . . . . . . . . 105
5.2.1
5.2.2
Viewing API process variables . . . . . . . . . . . . . . . . . . . . . . . . . . . . . . . 106
Viewing concentration measurement process variables . . . . . . . . . . . . 107
Simulation mode . . . . . . . . . . . . . . . . . . . . . . . . . . . . . . . . . . . . . . . . . . . . . . . . . . . 107
5.3.1
Fieldbus simulation mode . . . . . . . . . . . . . . . . . . . . . . . . . . . . . . . . . . . 107
5.3.2
Sensor simulation mode . . . . . . . . . . . . . . . . . . . . . . . . . . . . . . . . . . . . 108
Responding to alarms . . . . . . . . . . . . . . . . . . . . . . . . . . . . . . . . . . . . . . . . . . . . . . . 109
5.4.1
5.4.2
Viewing alarms . . . . . . . . . . . . . . . . . . . . . . . . . . . . . . . . . . . . . . . . . . . 109
Acknowledging alarms. . . . . . . . . . . . . . . . . . . . . . . . . . . . . . . . . . . . . . 112
Using the totalizers and inventories . . . . . . . . . . . . . . . . . . . . . . . . . . . . . . . . . . . . 113
iv
Model 2700 Transmitters with F
OUNDATION
™
fieldbus
Contents
5.5.1
5.5.2
Viewing the totalizers and inventories . . . . . . . . . . . . . . . . . . . . . . . . . . 113
Controlling the totalizers and inventories . . . . . . . . . . . . . . . . . . . . . . . . 115
Chapter 6 Troubleshooting . . . . . . . . . . . . . . . . . . . . . . . . . . . . . . . . . . . . 119
6.1
6.2
6.3
6.4
6.5
6.6
6.7
Overview . . . . . . . . . . . . . . . . . . . . . . . . . . . . . . . . . . . . . . . . . . . . . . . . . . . . . . . . . 119
Guide to troubleshooting topics. . . . . . . . . . . . . . . . . . . . . . . . . . . . . . . . . . . . . . . . 119
Transmitter does not operate. . . . . . . . . . . . . . . . . . . . . . . . . . . . . . . . . . . . . . . . . . 119
Transmitter does not communicate . . . . . . . . . . . . . . . . . . . . . . . . . . . . . . . . . . . . . 120
6.4.1
National Instruments basic information . . . . . . . . . . . . . . . . . . . . . . . . . 120
Zero or calibration failure. . . . . . . . . . . . . . . . . . . . . . . . . . . . . . . . . . . . . . . . . . . . . 120
AI block configuration error . . . . . . . . . . . . . . . . . . . . . . . . . . . . . . . . . . . . . . . . . . . 120
Output problems . . . . . . . . . . . . . . . . . . . . . . . . . . . . . . . . . . . . . . . . . . . . . . . . . . . 121
6.7.1
6.7.2
6.7.3
6.7.4
Damping. . . . . . . . . . . . . . . . . . . . . . . . . . . . . . . . . . . . . . . . . . . . . . . . . 124
Flow cutoff . . . . . . . . . . . . . . . . . . . . . . . . . . . . . . . . . . . . . . . . . . . . . . . 124
Output scale. . . . . . . . . . . . . . . . . . . . . . . . . . . . . . . . . . . . . . . . . . . . . . 124
Characterization. . . . . . . . . . . . . . . . . . . . . . . . . . . . . . . . . . . . . . . . . . . 124
6.7.5
6.7.6
Calibration . . . . . . . . . . . . . . . . . . . . . . . . . . . . . . . . . . . . . . . . . . . . . . . 124
Fieldbus network power conditioner . . . . . . . . . . . . . . . . . . . . . . . . . . . 124
6.8
6.9
6.7.7
Linearization . . . . . . . . . . . . . . . . . . . . . . . . . . . . . . . . . . . . . . . . . . . . . 124
EEPROM Checksum Error . . . . . . . . . . . . . . . . . . . . . . . . . . . . . . . . . . . . . . . . . . . 125
Status alarms . . . . . . . . . . . . . . . . . . . . . . . . . . . . . . . . . . . . . . . . . . . . . . . . . . . . . 125
6.10
Diagnosing wiring problems . . . . . . . . . . . . . . . . . . . . . . . . . . . . . . . . . . . . . . . . . . 128
6.10.1
6.10.2
6.10.3
6.10.4
Checking the power-supply wiring . . . . . . . . . . . . . . . . . . . . . . . . . . . . . 128
Checking the sensor-to-transmitter wiring . . . . . . . . . . . . . . . . . . . . . . . 129
Checking the grounding . . . . . . . . . . . . . . . . . . . . . . . . . . . . . . . . . . . . . 129
Checking the communication wiring . . . . . . . . . . . . . . . . . . . . . . . . . . . 129
6.11
Checking slug flow . . . . . . . . . . . . . . . . . . . . . . . . . . . . . . . . . . . . . . . . . . . . . . . . . 129
6.12
Restoring a working configuration. . . . . . . . . . . . . . . . . . . . . . . . . . . . . . . . . . . . . . 130
6.13
Checking the test points . . . . . . . . . . . . . . . . . . . . . . . . . . . . . . . . . . . . . . . . . . . . . 130
6.13.1
Obtaining the test points . . . . . . . . . . . . . . . . . . . . . . . . . . . . . . . . . . . . 130
6.13.2
6.13.3
6.13.4
6.13.5
Evaluating the test points. . . . . . . . . . . . . . . . . . . . . . . . . . . . . . . . . . . . 131
Excessive drive gain . . . . . . . . . . . . . . . . . . . . . . . . . . . . . . . . . . . . . . . 131
Erratic drive gain . . . . . . . . . . . . . . . . . . . . . . . . . . . . . . . . . . . . . . . . . . 132
Low pickoff voltage. . . . . . . . . . . . . . . . . . . . . . . . . . . . . . . . . . . . . . . . . 132
6.14
Checking the core processor . . . . . . . . . . . . . . . . . . . . . . . . . . . . . . . . . . . . . . . . . 133
6.14.1
Exposing the core processor . . . . . . . . . . . . . . . . . . . . . . . . . . . . . . . . . 133
6.14.2
6.14.3
Checking the core processor LED . . . . . . . . . . . . . . . . . . . . . . . . . . . . . 134
Core processor resistance test . . . . . . . . . . . . . . . . . . . . . . . . . . . . . . . 135
6.15
Checking sensor coils and RTD . . . . . . . . . . . . . . . . . . . . . . . . . . . . . . . . . . . . . . . 136
6.15.1
9-wire remote or remote core processor with remote transmitter installation
6.15.2
136
4-wire remote or integral installation . . . . . . . . . . . . . . . . . . . . . . . . . . . 137
Appendix A PlantWeb Alerts . . . . . . . . . . . . . . . . . . . . . . . . . . . . . . . . . . . . 141
A.1
A.2
A.3
PlantWeb Alerts explained . . . . . . . . . . . . . . . . . . . . . . . . . . . . . . . . . . . . . . . . . . . 141
Setting PlantWeb Alerts . . . . . . . . . . . . . . . . . . . . . . . . . . . . . . . . . . . . . . . . . . . . . 141
Using PlantWeb Alerts . . . . . . . . . . . . . . . . . . . . . . . . . . . . . . . . . . . . . . . . . . . . . . 143
Appendix B Model 2700 transducer blocks reference . . . . . . . . . . . . . . . . . . . 147
B.1
B.2
Overview . . . . . . . . . . . . . . . . . . . . . . . . . . . . . . . . . . . . . . . . . . . . . . . . . . . . . . . . . 147
B.1.1
Transducer block names . . . . . . . . . . . . . . . . . . . . . . . . . . . . . . . . . . . . 147
MEASUREMENT transducer block parameters . . . . . . . . . . . . . . . . . . . . . . . . . . . 147
Configuration and Use Manual
v
Contents
B.3
B.4
B.5
B.6
B.7
B.8
CALIBRATION transducer block parameters . . . . . . . . . . . . . . . . . . . . . . . . . . . . . 156
DIAGNOSTICS transducer block parameters . . . . . . . . . . . . . . . . . . . . . . . . . . . . . 160
DEVICE INFORMATION transducer block parameters . . . . . . . . . . . . . . . . . . . . . 174
LOCAL DISPLAY transducer block parameters . . . . . . . . . . . . . . . . . . . . . . . . . . . 177
API transducer block parameters . . . . . . . . . . . . . . . . . . . . . . . . . . . . . . . . . . . . . . 182
CONCENTRATION MEASUREMENT transducer block parameters . . . . . . . . . . . 186
Appendix C Model 2700 Resource Block Reference . . . . . . . . . . . . . . . . . . . . 193
C.1
C.2
Resource block parameters . . . . . . . . . . . . . . . . . . . . . . . . . . . . . . . . . . . . . . . . . . 193
Resource block views . . . . . . . . . . . . . . . . . . . . . . . . . . . . . . . . . . . . . . . . . . . . . . . 203
Appendix D Flowmeter installation types and components . . . . . . . . . . . . . . . 207
D.1
D.2
D.3
Installation diagrams . . . . . . . . . . . . . . . . . . . . . . . . . . . . . . . . . . . . . . . . . . . . . . . . 207
Component diagrams . . . . . . . . . . . . . . . . . . . . . . . . . . . . . . . . . . . . . . . . . . . . . . . 207
Wiring and terminal diagrams . . . . . . . . . . . . . . . . . . . . . . . . . . . . . . . . . . . . . . . . . 207
Appendix 2 Connecting with the Field Communicator. . . . . . . . . . . . . . . . . . . 213
2.1
2.2
2.3
Overview . . . . . . . . . . . . . . . . . . . . . . . . . . . . . . . . . . . . . . . . . . . . . . . . . . . . . . . . . 213
Viewing the device descriptions . . . . . . . . . . . . . . . . . . . . . . . . . . . . . . . . . . . . . . . 213
Connecting to a transmitter. . . . . . . . . . . . . . . . . . . . . . . . . . . . . . . . . . . . . . . . . . . 213
Appendix 3 Connecting with ProLink II. . . . . . . . . . . . . . . . . . . . . . . . . . . . . 215
3.1
3.2
3.3
3.4
3.5
Overview . . . . . . . . . . . . . . . . . . . . . . . . . . . . . . . . . . . . . . . . . . . . . . . . . . . . . . . . . 215
Requirements . . . . . . . . . . . . . . . . . . . . . . . . . . . . . . . . . . . . . . . . . . . . . . . . . . . . . 215
ProLink II configuration upload/download . . . . . . . . . . . . . . . . . . . . . . . . . . . . . . . . 215
Connecting from a PC to a Model 2700 transmitter . . . . . . . . . . . . . . . . . . . . . . . . 216
3.4.1
Connecting to the service port. . . . . . . . . . . . . . . . . . . . . . . . . . . . . . . . 216
ProLink II language . . . . . . . . . . . . . . . . . . . . . . . . . . . . . . . . . . . . . . . . . . . . . . . . . 218
Appendix 4 Using the display . . . . . . . . . . . . . . . . . . . . . . . . . . . . . . . . . . . 219
4.1
4.2
4.3
4.4
4.5
Overview . . . . . . . . . . . . . . . . . . . . . . . . . . . . . . . . . . . . . . . . . . . . . . . . . . . . . . . . . 219
Components . . . . . . . . . . . . . . . . . . . . . . . . . . . . . . . . . . . . . . . . . . . . . . . . . . . . . . 219
Using the optical switches. . . . . . . . . . . . . . . . . . . . . . . . . . . . . . . . . . . . . . . . . . . . 219
Using the display. . . . . . . . . . . . . . . . . . . . . . . . . . . . . . . . . . . . . . . . . . . . . . . . . . . 220
4.4.1
4.4.2
4.4.3
4.4.4
Display language . . . . . . . . . . . . . . . . . . . . . . . . . . . . . . . . . . . . . . . . . . 220
Viewing process variables . . . . . . . . . . . . . . . . . . . . . . . . . . . . . . . . . . . 220
Using display menus . . . . . . . . . . . . . . . . . . . . . . . . . . . . . . . . . . . . . . . 221
Display password. . . . . . . . . . . . . . . . . . . . . . . . . . . . . . . . . . . . . . . . . . 221
4.4.5
Entering floating-point values with the display . . . . . . . . . . . . . . . . . . . . 222
Abbreviations . . . . . . . . . . . . . . . . . . . . . . . . . . . . . . . . . . . . . . . . . . . . . . . . . . . . . 224
Appendix 5 NE53 history . . . . . . . . . . . . . . . . . . . . . . . . . . . . . . . . . . . . . . 225
5.1
Software change history . . . . . . . . . . . . . . . . . . . . . . . . . . . . . . . . . . . . . . . . . . . . . 225
vi
Model 2700 Transmitters with F
OUNDATION
™
fieldbus
Contents
Configuration and Use Manual
vii
viii
Model 2700 Transmitters with F
OUNDATION
™
fieldbus
Chapter 1
Before You Begin
1.1
Overview
This manual describes the procedures required to start, configure, use, maintain, and troubleshoot
Micro Motion
®
Model 2700 transmitters with F
OUNDATION
™
fieldbus.
Many procedures assume your transmitter is connected to an enhanced core processor. Some procedures may function differently or be unavailable if your transmitter is not connected to an enhanced core processor.
1.2
Safety
Safety messages are provided throughout this manual to protect personnel and equipment. Read each safety message carefully before proceeding to the next step.
1.3
Flowmeter documentation
Table 1-1
Flowmeter documentation resources
Topic
Installing the sensor
Installing the transmitter
F
OUNDATION
fieldbus function block reference documentation
Document
Sensor installation manual
Micro Motion Model 1700 and Model 2700 Transmitters:
Installation Manual
F
OUNDATION
Fieldbus Blocks
(available via the Rosemount web site at http://www.rosemount.com)
1.4
Communication tools
Most of the procedures described in this manual require the use of a communication tool. Three communication tools are referred to in this manual:
• Fieldbus host – There are a number of available fieldbus hosts. In this manual, the Field
Communicator is assumed to be the host. Other hosts, such as DeltaV, provide functionality that is very similar to that of the Communicator. Basic information on the Field Communicator
is provided in Appendix 2. For more information, refer to the Field Communicator
documentation, which is available online (www.fieldcommunicator.com).
All fieldbus hosts require appropriate device description (DD) files in order to communicate with and configure the transmitter. DD files are available from the Products section of the
Micro Motion web site (www.micromotion.com).
Configuration and Use Manual
1
Before You Begin
•
ProLink II – Basic information on ProLink II is provided in Appendix 3.
IMPORTANT: The Model 2700 FOUNDATION fieldbus transmitter works with ProLink III. The procedures in this document are for ProLink II. For information about configuration using ProLink
III, refer to the Model 2700 configuration manual, available on the Micro Motion web site
(www.micromotion.com).
•
Display – Basic information on using the display is provided in Appendix 4.
1.5
Out-of-service mode
Fieldbus function blocks may need to be placed in Out-of-service (O/S) mode before you modify their parameters. The procedures in this manual assume that, if necessary, function blocks have been put in
O/S mode prior to starting the procedure, and that they will be placed back in service (i.e., Auto mode) after the procedure is complete.
ProLink II automatically handles function block modes.
1.6
Planning the configuration
The ISA configuration worksheet at the end of this chapter provides a place to record information about your flowmeter (transmitter and sensor) and your application. This information will affect your configuration options as you work through this manual. Fill out the configuration worksheet and refer to it during configuration. You may need to consult with transmitter installation or application process personnel to obtain the required information.
2
Model 2700 Transmitters with F
OUNDATION
™
fieldbus
Before You Begin
Configuration and Use Manual
3
FIELDBUS INSTRUMENT DATA SHEET
NO BY DATE REVISION
SHEET
SPEC. NO.
CONTRACT
REQ. — P.O.
BY CHK’D
OF
REV.
DATE
APPR.
1 Meter Tag No.
2 Service
11
12
13
14
7
8
9
10
5
6
3 Location
4
FLUID
PIPE
DATA
Calibrated Flow Range, Units
Max Velocity, Units
Min. Flow
Min. Pressure
Min. Temp.
Max. Flow
Max. Pressure
Max. Temp.
Spec. Gravity or Density (max)
Velocity (max)
Operating Flow
Operating Press.
Operating Temp.
OPERATING
CONDITIONS
27
28
29
30
23
24
25
26
31
32
33
34
35
19
20
21
22
15
16
17
18
FLOW
SENSOR
Pipe Material
Pipe Size Upstream/Dnstream
Schedule
Special Insulator
Process Connections
Approval
Wetted Parts
Mass Flow Accuracy @ Max
Density Accuracy @ All Rates
Pressure Drop @ Max Flow
Calibration Type
Cal. Rate Cal. Units
Custom Calibration Points
Dens. for Vol.to Mass Conv.
Spec. Unit Text Totalizer Text
Base Flow Unit Base Time Unit
Conversion Factor
Warning
Instrument Tag Number
48
49
50
51
44
45
46
47
40
41
42
43
36
37
38
39
TRANS.
Transmitter Style
Mass Unit
Dens. Unit
Volume Unit
Temp. Unit
Display
Safety
Conduit Adapters
Type
Input Signal
Baud Rate
Physical Media
Power Supply
Power Cons. on FF Bus
Input Voltage
Device Class
Min. VCRs
Electrical Class
Device Function Block Fixed Type
Resource Block (RB)
Transducer Block (TB)
Analog Input Block (AI)
Analog Output Block (AO)
Electronic microprocessor based
F
OUNDATION
fieldbus™ H1 ISA.50.02 IEC-61158
31.25 Kbps
Twisted pair wires, (H1) compliant
9–32 VDC, bus powered, 4 wires
11.5 milliamps maximum
Model 2700: 18–100 VDC or 85–265 VAC
Link master
20
FISCO
F
OUNDATION
Exec. time
Exec. time
ITK 4.60 minimum
Other
fieldbus™ FF-891/FF-892 compliant
18 ms
18 ms
FUNCTION
BLOCKS
52
53
54
55
56
57
Discrete Input Block
Discrete output Block
PID Block (PID)
Integrator Block (INT)
Instantiable Function Blocks
Transducer Block Type
Exec. time
Exec. time
Exec. time
Exec. time
Model 2700: DO/DI
Measurement TB
Local Display TB
Enhanced Density TB
16 ms
16 ms
20 ms
18 ms
DIAGNOSTICS 58
NOTES:
Diagnostic TB
1 – The vendor must provide the Device Description according with the firmware revision of the field device.
2 – It is mandatory to provide the Capability Format File for each type of device.
3 – All devices must show F
OUNDATION
™ logo.
Calibration TB
Device Information TB
API TB
FOR REFERENCE ONLY. NOT FOR
ISSUE.
Chapter 2
Startup
2.1
Overview
This chapter describes the procedures you should perform the first time you start up the flowmeter.
You do not need to use these procedures every time you cycle power to the flowmeter.
The procedures in this section will enable you to:
•
Apply power to the flowmeter (Section 2.2)
•
Check the analog input (AI) function blocks channels and change if required (Section 2.3)
•
Check the integrator (INT) function block mode and configure if required (Section 2.4)
•
Configure pressure compensation (optional) (Section 2.5)
•
Configure temperature compensation (optional) (Section 2.6)
•
Zero the flowmeter (optional) (Section 2.7)
• 1. Check the Analog Output (AO) function Block channels and change if required —
(Section 2.3)
• 2. Check the Discrete Input (DI) Function Block channels and change if required —
(Section 2.3)
• 3. Check the Discrete Output (DO) Function Block channels and change if required —
(Section 2.3)
Note: All procedures provided in this chapter assume that you have established communication with
the transmitter and that you are complying with all applicable safety requirements. See Appendices 2
and 3.
2.2
Applying power
Before you apply power to the flowmeter, close and tighten all housing covers.
WARNING
Operating the flowmeter without covers in place creates electrical hazards that can cause death, injury, or property damage.
Make sure safety barrier partition and covers for the field-wiring, circuit board compartments, electronics module, and housing are in place before applying power to the transmitter.
Turn on the electrical power at the power supply. The flowmeter will automatically perform diagnostic routines. If the transmitter has a display, the status LED will turn green and begin to flash when the transmitter has finished its startup diagnostics.
Configuration and Use Manual
5
Startup
Note: If this is the initial startup, or if power has been off long enough to allow components to reach ambient temperature, the flowmeter is ready to receive process fluid approximately one minute after power-up. However, it may take up to ten minutes for the electronics in the flowmeter to reach thermal equilibrium. During this warm-up period, you may observe minor measurement instability or inaccuracy.
2.3
Assigning function block channels
The four AI function blocks and the AO function block may be assigned to one transducer block
channel each. The default channel configuration for each block is shown in Table 2-1.
Table 2-1
Default channel configuration
Block
AI 1
AI 2
AI 3
AI 4
AO
AO
DO
DI
Default channel
1 (mass flow)
2 (temperature)
3 (density)
4 (volume flow)
6 (pressure)
7 (Temperature)
8 (Start Sensor Zero)
9 (Forward/Reverse Indication
)
Units
l/s psi
°C g/s
°C g/cm
3
If you need to change the channel configuration you must use a fieldbus host. Refer to Figure 2-1 and
Table 2-2.
Figure 2-1
Assigning function block channels – Fieldbus host
AI or AO
AI Channel or AO Channel
Transducer Scale: Units Index
Output Scale: Units Index
AI Channel
AO Channel
– Set to the transducer block channel this block should report.
– Set to the transducer block channel this block should report.
Transducer Scale: Units Index – Change the units (if necessary).
Output Scale: Units Index – If you change the units for Transducer Scale: Units Index, then change the units here as well to match.
6
Model 2700 Transmitters with F
OUNDATION
™
fieldbus
Startup
DI or DO
DI Channel or DO Channel
DI Channel
DO Channel
– Set to the transducer block channel this block should report.
– Set to the transducer block channel this block should report.
Configuration and Use Manual
7
Startup
Table 2-2
Available transducer block channels
Channel number
31
32
33
34
35
36
27
28
29
30
23
24
25
26
1
2
20
21
22
3
4
5
13
(2)
14
(2)
15
(2)
16
(2)
17
(2)
18
(2)
19
(3)
6
7
(1)
8
(1)
9
(1)
10
(1)
11
(1)
12
(2)
Process variable
Mass Flow
Temperature
Density
Volume Flow
Drive Gain
Pressure
API Corr Density
API Corr Volume Flow
API Avg Corr Density
API Avg Corr Temp
API CTL
ED Ref Density
ED Specific Gravity
ED Std Vol Flow
ED Net Mass Flow
ED Net Vol Flow
ED Conc
ED Baume
Std Gas Volume Flow
Temperature
SNS Actual Flow Direction
SNS ZeroInProgress
SYS AnalogOutputFault
SNS MVFailed
Start Sensor Zero
Reset Mass Total
Reset Volume Total
Reset API Reference (Standard) Volume Total
Reset All Process Totals (not Inv)
Reset ED Reference Volume Total
Reset ED Net Mass Total
Reset ED Net Volume Total
Start/Stop All Totals (includes Inv)
Increment ED Curve
Reset Gas Standard Volume Total
Start Meter Verification in Continuous
Measurement Mode
(1) Channels 7 through 11 are not selectable unless the petroleum measurement application is enabled.
(2) Channels 12 through 18 are not selectable unless the concentration measurement application is enabled.
(3) Channel 19 is selectable only if gas standard volume measurement is enabled (see Section 4.3).
Function block
Analog Input
Analog Input
Analog Input
Analog Input
Analog Input
Analog Output
Discrete Input
Discrete Input
Discrete Input
Discrete Input
Discrete Output
Discrete Output
Discrete Output
Discrete Output
Discrete Output
Discrete Output
Analog Input
Analog Input
Analog Input
Analog Input
Analog Input
Analog Output
Analog Input
Analog Input
Analog Input
Analog Input
Analog Input
Analog Input
Analog Input
Analog Input
Discrete Output
Discrete Output
Discrete Output
Discrete Output
Discrete Output
Discrete Output
8
Model 2700 Transmitters with F
OUNDATION
™
fieldbus
Startup
2.4
Configuring the integrator function block
The behavior of the INT function block can be configured in two ways:
• Mode – The INT function block mode can be configured as:
Standard, which provides standard fieldbus INT function block behavior
—
Any of the values in Table 2-3, which cause the INT function block to pass through the
specified totalizer value from the MEASUREMENT transducer block
• Resetting – The INT function block can be configured for manual or automatic resetting when a setpoint is reached.
You can only configure the INT function block using a fieldbus host (Figures 2-2 and 2-3).
Figure 2-2
Configuring INT function block mode – Fieldbus host
MEASUREMENT
Integrator FB Configuration
Integrator FB Configuration
– Set to the desired INT function block mode (see Table 2-3).
Table 2-3
INT function block modes
This mode:
Standard
Internal mass total
Internal volume total
Internal mass inventory
Internal volume inventory
Internal gas volume total
Internal gas volume inventory
Internal API volume total
Internal API volume inventory
Internal CM standard volume total
Internal CM standard volume inventory
Internal CM net mass total
Reports the value of this parameter:
Transducer block
None
MEASUREMENT
MEASUREMENT
MEASUREMENT
MEASUREMENT
MEASUREMENT
MEASUREMENT
PETROLEUM
MEASUREMENT
PETROLEUM
MEASUREMENT
CONCENTRATION
MEASUREMENT
CONCENTRATION
MEASUREMENT
CONCENTRATION
MEASUREMENT
Parameter
None — standard F
OUNDATION
fieldbus
INT block behavior
Mass Total: Value
Volume Total: Value
Mass Inventory: Value
Volume Inventory: Value
Gas Volume Total: Value
Gas Vol Inventory: Value
API Corr Volume Total: Value
API Corr Vol Inventory: Value
CM Std Volume Total: Value
CM Std Vol Inventory: Value
CM Net Mass Total: Value
Configuration and Use Manual
9
Startup
Table 2-3
INT function block modes
This mode:
Internal CM net mass inventory
Internal CM net volume total
Internal CM net volume inventory
Reports the value of this parameter:
Transducer block
CONCENTRATION
MEASUREMENT
CONCENTRATION
MEASUREMENT
CONCENTRATION
MEASUREMENT
Parameter
CM Net Mass Inventory: Value
CM Net Volume Total: Value
CM Net Vol Inventory: Value
Figure 2-3
Configuring manual or automatic resetting – Fieldbus host
INT
Integration Type
Total Setpoint
Integration Type – Set to manual or automatic resetting.
Total Setpoint – For automatic resetting, the value at which the totalizer will be reset.
2.5
Configuring pressure compensation
Due to process pressure change away from calibration pressure, there can be a change in sensor flow and density sensitivity. This change is called pressure effect. Pressure compensation corrects for these changes.
Not all sensors and applications require pressure compensation. Contact Micro Motion Customer
Service before you configure pressure compensation.
Configuring pressure compensation requires three steps:
1. Determining pressure compensation values (Section 2.5.1)
2. Enabling pressure compensation (Section 2.5.2)
3. Selecting a pressure source (Section 2.5.3)
10
Model 2700 Transmitters with F
OUNDATION
™
fieldbus
Startup
2.5.1
Pressure compensation values
You need the following values for pressure compensation:
•
Fixed or current pressure —
• Flow calibration pressure — The pressure at which the flowmeter was calibrated. Refer to the calibration document shipped with your sensor. If the data is unavailable, use 20 psi (1.4 bar).
• Flow factor — The flow factor is the percent change in flow rate per psi. Consult the product data sheet for your sensor for this value. You will need to reverse the sign of the flow factor.
For example, if the flow factor in the product data sheet is –0.001% per psi, the pressure compensation flow factor would be +0.001% per psi.
• Density factor — The density factor is the change in fluid density, in g/cm
3
per psi. Consult the product data sheet for your sensor for this value. You will need to reverse the sign of the density factor. For example, if the density factor in the product data sheet is –0.00004 g/cm
3 per psi, the pressure compensation flow factor would be +0.00004 g/cm
3
per psi.
2.5.2
Enabling pressure compensation
You can enable pressure compensation with a fieldbus host or ProLink II. You will need the values of
the three pressure compensation values from Section 2.5.1.
Figure 2-4
Pressure compensation – Fieldbus host
CALIBRATION
Pressure Comp
Flow Factor
Density Factor
Flowcal Pressure
Pressure Comp – Set to Enable.
Flow Factor
Density Factor
– Set to the specified value (in percent per psi) from the sensor product data sheet
(reverse the sign).
– Set to the specified value (in g/cm
3
per psi) from the sensor product data sheet
(reverse the sign).
Flowcal Pressure – Set to the pressure at which the sensor was calibrated.
Figure 2-5
Pressure compensation – ProLink II
1. Enable and configure the pressure compensation for your transmitter by navigating to View >
Preferences.
2. Select Enable External Pressure Compensation.
3. Select Apply.
4. Navigate to ProLink > Configuration.
5. Select the Pressure tab.
Configuration and Use Manual
11
Startup
6. Enter the following values:
• Flow factor
• Dens factor
• Cal pressure
7. Select Apply.
2.5.3
Configuring a pressure source
You will need to choose one of two sources for pressure data:
• Analog Output function block — This option allows you to poll for pressure data from an external pressure source.
• Fixed pressure data — This option uses a known, constant pressure value.
Note: If you configure a fixed pressure value, ensure that it is accurate. If you configure polling for pressure, ensure that the external pressure measurement device is accurate and reliable.
Using the Analog Output function block
You must use a fieldbus host to set up the AO function block. To set up the AO function block as a pressure source, connect the AI block of the pressure measurement device to the AO block of the
transmitter (Figure 2-6).
Figure 2-6
External pressure source – Fieldbus host
AO Channel
Process Value Scale: Units Index
AI AO
Cascade
Input
Output
AO Channel – If changed from the default, reset to Pressure (value = 6).
Process Value Scale: Units Index – Change the units to match the pressure sensing device.
Using fixed pressure data
You can set up fixed pressure data with a fieldbus host (Figure 2-7) or ProLink II (Figure 2-8). You
must enable external pressure compensation before you can set the fixed pressure value (see
Section 2.5.2).
12
Model 2700 Transmitters with F
OUNDATION
™
fieldbus
Startup
Figure 2-7
Fixed pressure data – Fieldbus host
CALIBRATION
Pressure: Value
Pressure: Value – Set to the appropriate fixed pressure value.
Figure 2-8
Fixed pressure data – ProLink II
Apply
2.6
Configuring temperature compensation
External temperature compensation can be used with the petroleum measurement application or the concentration measurement application:
• If external temperature compensation is enabled, an external temperature value (or a fixed temperature value), rather than the temperature value from the Coriolis sensor, is used in petroleum measurement or concentration measurement calculations only. The temperature value from the Coriolis sensor is used for all other calculations.
• If external temperature compensation is disabled, the temperature value from the Coriolis sensor is used in all calculations.
Configuring temperature compensation requires two steps:
1. Enabling external temperature compensation (Section 2.6.1)
2. Configuring a temperature source (Section 2.6.2)
2.6.1
Enabling external temperature compensation
You can enable temperature compensation with a fieldbus host (Figure 2-9) or ProLink II
(Figure 2-10).
Configuration and Use Manual
13
Startup
Figure 2-9
Temperature compensation – Fieldbus host
CALIBRATION
Enable Temperature Compensation
Enable Temperature Compensation – Set to Enable.
Figure 2-10
Temperature compensation – ProLink II
14
2.6.2
Configuring a temperature source
You will need to choose one of two sources for temperature data:
• Analog Output function block — This option allows you to poll for temperature data from an external temperature source.
• Fixed temperature value — This option uses a known, constant temperature value.
Note: If you configure a fixed temperature value, ensure that it is accurate. If you configure polling for temperature, ensure that the external temperature measurement device is accurate and reliable.
Using the Analog Output function block
You must use a fieldbus host to set up the AO function block. To set up the AO function block as a temperature source, connect the AI block of the temperature measurement device to the AO block of
the transmitter (Figure 2-11).
Model 2700 Transmitters with F
OUNDATION
™
fieldbus
Startup
Figure 2-11
External temperature source – Fieldbus host
AO Channel
Process Value Scale: Units Index
AI AO
Cascade
Input
Output
AO Channel – Set to External Temperature
(value = 20).
Process Value Scale: Units Index – Change the units to match the temperature sensing device.
Using fixed temperature data
You can set up fixed temperature data with a fieldbus host (Figure 2-12) or ProLink II (Figure 2-13).
You must enable external temperature compensation before you can set the fixed temperature value
(see Section 2.6.1).
Figure 2-12
Fixed temperature data – Fieldbus host
CALIBRATION
External Temperature: Value
External Temperature: Value – Set to the appropriate fixed temperature value.
Figure 2-13
Fixed temperature data – ProLink II
ProLink >
Configuration
Enter value in External
Temperature box
Temperature tab
Apply
Configuration and Use Manual
15
Startup
2.7
Zeroing the flowmeter
Zeroing the flowmeter establishes the flowmeter’s point of reference when there is no flow. The meter was zeroed at the factory, and should not require a field zero. However, you may wish to perform a field zero to meet local requirements or to confirm the factory zero.
When you zero the flowmeter, you may need to adjust the zero time parameter. Zero time is the length of time the transmitter takes to determine its zero-flow reference point. The default zero time is
20 seconds.
• A long zero time may produce a more accurate zero reference but is more likely to result in zero failure. This is due to the increased possibility of noisy flow, which causes incorrect calibration.
• A short zero time is less likely to result in a zero failure but may produce a less accurate zero reference.
For most applications, the default zero time is appropriate.
Note: Do not zero the flowmeter if a high severity alarm is active. Correct the problem, then zero the
flowmeter. You may zero the flowmeter if a low severity alarm is active. See Section 5.4 for
information about responding to alarms.
16
Model 2700 Transmitters with F
OUNDATION
™
fieldbus
Startup
2.7.1
Preparing for the zeroing procedure
To prepare for the zeroing procedure:
1. Apply power to the flowmeter. Allow the flowmeter to warm up for approximately 20 minutes.
2. Run the process fluid through the sensor until the sensor temperature reaches the normal process operating temperature.
3. Close the shutoff valve downstream from the sensor.
4. Ensure that the sensor is completely filled with fluid and the flow through the sensor has completely stopped.
CAUTION
If fluid is flowing through the sensor, the sensor zero calibration may be inaccurate, resulting in inaccurate process measurement.
To improve the sensor zero calibration and measurement accuracy, ensure that process flow through the sensor has completely stopped.
2.7.2
Zero procedure
You can perform the zero procedure with a fieldbus host (Figure 2-14), the display (Figure 2-15), or
ProLink II (Figure 2-16). If the zero procedure fails, see Section 6.5 for troubleshooting information.
Configuration and Use Manual
17
Startup
Figure 2-14
Zeroing – Fieldbus host
CALIBRATION
Zero Calibration
Zero Calibration – Method parameter that initiates the procedure below.
Zero Calibration
Set flow to zero
Next
Next
Adjust the zero time
Next
Calibration in progress
Next
18
Model 2700 Transmitters with F
OUNDATION
™
fieldbus
Startup
Figure 2-15
Zeroing – Display
Scroll and Select simultaneously for 4 seconds
Scroll
OFF-LINE MAINT
Select
Scroll
ZERO
Select
CAL ZERO
Select
ZERO/YES?
Select
………………….
• See Section 6.5 for
troubleshooting.
CAL FAIL
Troubleshoot
Select
ZERO
Scroll
EXIT
CAL PASS
Configuration and Use Manual
19
Startup
Figure 2-16
Zeroing – ProLink II
ProLink >
Calibration >
Zero Calibration
Modify zero time if required
Perform Auto Zero
Calibration in Progress
LED turns red
Wait until Calibration in
Progress LED turns green
Red
Troubleshoot
Calibration
Failure LED
Green
Done
• See Section 6.5 for troubleshooting.
• As long as you do not disconnect ProLink II from the transmitter, you can restore the prior zero result.
2.7.3
Restoring zero values
ProLink II has the ability to restore a prior zero result as long as you have not exited the zeroing screen.
In addition, if the transmitter is connected to an enhanced core processor, you will be able to restore
the factory zero. Restoring the factory zero can be accomplished using a fieldbus host (Figure 2-17),
ProLink II (Figure 2-18), or the display (Figure 2-19).
20
Model 2700 Transmitters with F
OUNDATION
™
fieldbus
Startup
Figure 2-17
Restoring factory zero – Fieldbus host
DIAGNOSTIC
Restore Factory Zero
Restore Factory Zero – Set this parameter to Restore.
Figure 2-18
Restoring factory zero – ProLink II
ProLink >
Calibration >
Zero Calibration
Restore Factory Zero
Configuration and Use Manual
21
Startup
Figure 2-19
Restoring factory zero – Display
Scroll and Select simultaneously for 4 seconds
Scroll
OFF-LINE MAINT
Select
Scroll
ZERO
Select
CAL ZERO
Scroll
RESTORE ZERO
Scroll
EXIT
Select
Current zero display
Scroll
Factory zero display
Scroll
RESTORE ZERO
Scroll
RESTORE EXIT
Scroll Select
Select
RESTORE ZERO/YES?
No
Scroll
Select
Yes
22
Model 2700 Transmitters with F
OUNDATION
™
fieldbus
Chapter 3
Calibration
3.1
Overview
This chapter describes the following procedures:
•
Characterization (Section 3.3)
•
Smart Meter Verification (Section 3.4)
•
Meter validation and adjusting meter factors (Section 3.5)
•
Density calibration (Section 3.6)
•
Temperature calibration (Section 3.7)
Note: All procedures provided in this chapter assume that you have established communication with
the transmitter and that you are complying with all applicable safety requirements. See Appendices 2
and 3.
3.2
Characterization, Smart Meter Verification, meter validation, and calibration
There are four procedures:
•
Characterization—adjusts the transmitter to compensate for the unique traits of the sensor with which it is paired
• Smart Meter Verification—establishing confidence in the sensor’s performance by analyzing secondary variables that are highly correlated with flow and density calibration factors
• Meter validation—confirming performance by comparing the sensor’s measurements to a primary standard
• Calibration—establishing the relationship between a process variable (flow, density, or temperature) and the signal produced by the sensor
Meter validation, characterization, and calibration are available on all Model 2700 transmitters. Smart
Meter Verification is available only if the Smart Meter Verification option was ordered with the transmitter.
These four procedures are discussed and compared in Sections 3.2.1 through 3.2.5. Before performing
any of these procedures, review these sections to ensure that you will be performing the appropriate procedure for your purposes.
3.2.1
Characterization
Characterizing the flowmeter adjusts the transmitter to compensate for the unique traits of the sensor it is paired with. Characterization parameters (sometimes called “calibration factors”) describe the sensor’s sensitivity to flow, density, and temperature.
Configuration and Use Manual
23
Calibration
If the transmitter and the sensor were ordered together as a Coriolis flowmeter, then the flowmeter has already been characterized. Under some circumstances (typically when pairing a sensor and transmitter together for the first time), you may need to re-enter characterization data. If you are unsure about whether you should characterize your flowmeter, contact Micro Motion Customer
Service.
3.2.2
Smart Meter Verification
Smart Meter Verification evaluates the structural integrity of the sensor tubes by comparing current tube stiffness to the stiffness measured at the factory. Stiffness is defined as the load per unit deflection, or force divided by displacement. Because a change in structural integrity changes the sensor’s response to mass and density, this value can be used as an indicator of measurement performance. Changes in tube stiffness are typically caused by erosion, corrosion, or tube damage.
Smart Meter Verification does not affect measurement in any way. Micro Motion recommends performing Smart Meter Verification at regular intervals.
3.2.3
Meter validation and meter factors
Meter validation compares a measurement value reported by the transmitter with an external measurement standard. Meter validation requires one data point.
Note: For meter validation to be useful, the external measurement standard must be more accurate than the sensor. See the sensor’s product data sheet for its accuracy specification.
If the transmitter’s mass flow, volume flow, or density measurement is significantly different from the external measurement standard, you may want to adjust the corresponding meter factor. A meter factor is the value by which the transmitter multiplies the process variable value. The default meter factors are
1.0
, resulting in no difference between the data retrieved from the sensor and the data reported externally.
Meter factors are typically used for proving the flowmeter against a weights and measures standard.
You may need to calculate and adjust meter factors periodically to comply with regulations.
3.2.4
Calibration
The flowmeter measures process variables based on fixed points of reference. Calibration adjusts those points of reference. Three types of calibration can be performed:
•
Zero (see Section 2.7)
• Density calibration
• Temperature calibration
Density and temperature calibration require two data points (low and high) and an external measurement for each. Calibration produces a change in the offset and/or the slope of the line that represents the relationship between process density and the reported density value, or the relationship between process temperature and the reported temperature value.
Note: For density or temperature calibration to be useful, the external measurements must be accurate.
Flowmeters are calibrated at the factory, and normally do not need to be calibrated in the field.
Calibrate the flowmeter only if you must do so to meet regulatory requirements. Contact Micro
Motion before calibrating your flowmeter.
24
Model 2700 Transmitters with F
OUNDATION
™
fieldbus
Calibration
Note: Micro Motion recommends using meter validation and meter factors, rather than calibration, to prove the meter against a regulatory standard or to correct measurement error.
3.2.5
Comparison and recommendations
When choosing among Smart Meter Verification, meter validation, and calibration, consider the following factors:
• Process and measurement interruption
Smart Meter Verification provides an option that allows process measurement to continue during the test.
Meter validation for density does not interrupt the process. However, meter validation for mass flow or volume flow requires process down-time for the length of the test.
Calibration requires process down-time. In addition, density and temperature calibration require replacing the process fluid with low-density and high density fluids, or low-temperature and high-temperature fluids. Zero calibration requires stopping flow through the sensor.
• External measurement requirements
Smart Meter Verification does not require external measurements.
Zero calibration does not require external measurements.
Density calibration, temperature calibration, and meter validation require external measurements. For good results, the external measurement must be highly accurate.
• Measurement adjustment
Smart Meter Verification is an indicator of sensor condition, but does not change flowmeter internal measurement in any way.
Meter validation does not change flowmeter internal measurement in any way. If you decide to adjust a meter factor as a result of a meter validation procedure, only the reported measurement is changed—the base measurement is not changed. You can always reverse the change by returning the meter factor to its previous value.
Calibration changes the transmitter’s interpretation of process data, and accordingly changes the base measurement. If you perform a zero calibration, you can return to the factory zero (or, if using ProLink II, the previous zero). However, if you perform a density calibration or a temperature calibration, you cannot return to the previous calibration factors unless you have manually recorded them.
Micro Motion recommends obtaining the Smart Meter Verification transmitter option and performing
Smart Meter Verification on a regular basis.
3.3
Performing a characterization
Characterizing a flowmeter involves entering parameters that are printed on the sensor tag.
3.3.1
Characterization parameters
The characterization parameters that must be entered depend on the sensor type: “T-Series” or
“Other,” as listed in Table 3-1. The “Other” category includes all Micro Motion sensors except
T-Series.
Configuration and Use Manual
25
Calibration
The characterization parameters are provided on the sensor tag. The format of the sensor tag varies
depending on your sensor’s date of purchase. See Figures 3-1 and 3-2 for illustrations of newer and
older sensor tags.
Table 3-1
Sensor calibration parameters
Characterization data
FCF
FT
FTG
FFQ
DTG
DFQ1
DFQ2
K1
K2
FD
D1
D2
Temp coeff (DT)
(2)
Flow cal
Fieldbus parameter
K1
K2
FD
D1
D2
Temperature Coefficient
Flow Calibration Factor
Flow Calibration Factor
Temperature Coefficient for Flow
T-Series Flow TG Coeff
T-Series Flow FQ Coeff
T-Series Density TG Coeff
T-Series Density FQ Coeff 1
T-Series Density FQ Coeff 2
(1) See the section entitled “Density calibration factors.”
(2) On some sensor tags, shown as TC.
(3) See the section entitled “Flow calibration values.”
T-Series
x x x x x x
Sensor type
Other
x
(1)
x
(1) x
(1) x
(1) x
(1) x
(1)
x
(3) x x x x x x x
Figure 3-1
Sample calibration tags – All sensors except T-Series
Newer tag Older tag
19.0005.13
12502142824.44
0.0010
0.9980
12502.000
14282.000
4.44000
310
19.0005.13
12500142864.44
26
Model 2700 Transmitters with F
OUNDATION
™
fieldbus
Calibration
Figure 3-2
Sample calibration tags – T-Series sensors
Newer tag Older tag
Density calibration factors
If your sensor tag does not show a D1 or D2 value:
• For D1, enter the Dens A or D1 value from the calibration certificate. This value is the line-condition density of the low-density calibration fluid. Micro Motion uses air.
• For D2, enter the Dens B or D2 value from the calibration certificate. This value is the line-condition density of the high-density calibration fluid. Micro Motion uses water.
If your sensor tag does not show a K1 or K2 value:
•
For K1, enter the first 5 digits of the density calibration factor. In the sample tag in Figure 3-1,
this value is shown as 12500.
• For K2, enter the second 5 digits of the density calibration factor. In the sample tag in
Figure 3-1, this value is shown as 14286.
If your sensor does not show an FD value, contact Micro Motion customer service.
If your sensor tag does not show a DT or TC value, enter the last 3 digits of the density calibration
factor. In the sample tag in Figure 3-1, this value is shown as 4.44.
Flow calibration values
Two separate values are used to describe flow calibration: a 6-character FCF value and a 4-character
FT value. Both values contain decimal points. During characterization, these are entered as a single
10-character string that includes two decimal points. In ProLink II, this value is called the Flowcal parameter; in the Communicator, it is called the FCF for T-Series sensors, and Flowcal for other sensors.
To obtain the required value:
• For older T-Series sensors, concatenate the FCF value and the FT value from the sensor tag, as shown below.
Flow FCF X.XXXX
FT X.XX
• For newer T-Series sensors, the 10-character string is represented on the sensor tag as the FCF value. The value should be entered exactly as shown, including the decimal points. No concatenation is required.
• For all other sensors, the 10-character string is represented on the sensor tag as the Flow Cal value. The value should be entered exactly as shown, including the decimal points. No concatenation is required.
Configuration and Use Manual
27
Calibration
3.3.2
How to characterize
To characterize the flowmeter, enter data from the sensor’s calibration tag into the transmitter
memory. You can characterize the transmitter with a fieldbus host (Figure 3-3) or ProLink II software
(Figure 3-4).
Note: You must configure the sensor type before you enter the characterization parameters.
Figure 3-3
Characterization – Fieldbus host
DEVICE
INFORMATION
Sensor Type Code
Sensor Type Code – Set to Curved Tube or Straight Tube to match sensor type.
28
CALIBRATION
*
*
– Set each of the fieldbus parameters shown in Table 3-1 to the value of the associated sensor data
printed on the sensor’s calibration tag.
Figure 3-4
Characterization – ProLink II
ProLink >
Configuration
Device
• Sensor type
Straight tube
Flow
Density
T Series Config
Sensor type?
Flow
Density
Curved tube
Model 2700 Transmitters with F
OUNDATION
™
fieldbus
Calibration
3.4
Performing Smart Meter Verification
Note: To use Smart Meter Verification, the transmitter must be paired with an enhanced core processor, and the Smart Meter Verification option must be purchased for the transmitter.
3.4.1
Preparing for the Smart Meter Verification test
The Smart Meter Verification procedure can be performed on any process fluid. It is not necessary to match factory conditions.
During the test, process conditions must be stable. To maximize stability:
• Maintain a constant temperature and pressure.
• Avoid changes to fluid composition (e.g., two-phase flow, settling, etc.).
• Maintain a constant flow. For higher test certainty, stop flow.
If stability varies outside test limits, the Smart Meter Verification procedure will be aborted. Verify the stability of the process and retry the test.
Transmitter configuration
Smart Meter Verification is not affected by any parameters configured for flow, density, or temperature. It is not necessary to change the transmitter configuration.
Control loops and process measurement
If the transmitter outputs will be set to Last Measured Value or Fault during the test, the outputs will be fixed for two minutes. Disable all control loops for the duration of the test, and ensure that any data reported during this period is handled appropriately.
3.4.2
Running the Smart Meter Verification test
To run a Smart Meter Verification test, refer to the procedures shown in Figures 3-5, 3-6, 3-7, and 3-8.
Configuration and Use Manual
29
Calibration
Figure 3-5
Smart Meter Verification – Fieldbus host
DIAGNOSTIC
Start On-Line Smart Meter Verification
Start On-Line Smart
Meter Verification
– Method parameter that initiates the procedure below.
Step 1
Set output state (optional)
Step 2
Start/abort procedure
Step 3
Check current algorithm state
Manual abort (optional)
Step 8
Check abort code
Running?
No (=0)
Step 5
Check algorithm abort state
Yes (>0)
Step 4
Read percent complete
No (<16)
Able to complete?
Yes (=16)
CAUTION
No (>0) Within limits?
Yes (=0)
Step 7
Check outlet stiffness
No (>0)
Step 6
Check inlet stiffness
Within limits?
Yes (=0)
PASS
30
Model 2700 Transmitters with F
OUNDATION
™
fieldbus
Calibration
Table 3-2
Fieldbus host interface for Smart Meter Verification
Step number Step description
1
2
3
4
5
6
7
8
Parameters
Set output state
Start/abort procedure
Read abort code
Block: Diagnostic
Index: 55
Value:
• 0: Last measured value (default)
• 1: Fault
Block: Diagnostic
Index: 54 (Start/Stop Meter Verification)
• 0: Abort
• 1: Start
• 6: Start in Continue Measurement mode
(1)
Check current algorithm state Block: Diagnostic
Index: 57
Read percent complete Block: Diagnostic
Index: 60 (Progress)
Check algorithm abort state
Check inlet stiffness
Block: Diagnostic
Index: 59
Block: Diagnostic
Index: 61
• 0: Within uncertainty limit
• 1: Outside uncertainty limit
Check outlet stiffness Block: Diagnostic
Index: 62
• 0: Within uncertainty limit
• 1: Outside uncertainty limit
Block: Diagnostic
Index: 58
Codes: See Table 3-3
(1) Setting Index 85 (Start On-Line Smart Meter Verification) to 1 is equivalent to setting Index 54 to 6.
Configuration and Use Manual
31
Calibration
Figure 3-6
Smart Meter Verification – ProLink II
Tools >
Meter Verification >
Run Meter Verification
Verify configuration parameters
Next
Enter descriptive data
(optional)
Next
View Previous Results
No
Configuration Changed or Zero Changed?
Yes
View details (optional)
Select output behavior
Start Meter Verification
———————
Yes
Rerun test?
Fail
No
Test result
Abort
Pass
Next
Back
Test result chart
Next
Report
Finish
32
Model 2700 Transmitters with F
OUNDATION
™
fieldbus
Calibration
Figure 3-7
Smart Meter Verification – Display
Scroll and Select simultaneously for 4 seconds
Scroll
ENTER METER VERFY
Select
RUN VERFY
Select
Scroll
RESULTS READ
Select
Scroll
SCHEDULE VERFY
Select
Scroll
EXIT
Scroll Select
Configuration and Use Manual
33
Calibration
Figure 3-8
Smart Meter Verification – Display
CONTINUE MEASR
Select
Scroll
RUN VERFY
Select
OUTPUTS
Select
FAULT
Select
Scroll
EXIT
Scroll
LAST VALUE
Select
Scroll
ARE YOU SURE/YES?
Select
. . . . . . . . . . . . . . .
x%
Select
SENSOR ABORT/YES?
Scroll Select
PASS VERFY
Scroll
RESULTS VIEW/YES?
Scroll Select
To Runcount
(see Results Read)
Pass Test result
Fail
CAUTION VERFY
Scroll
Abort
ABORTED VERFY
Scroll
Abort Type
Scroll
RERUN/YES?
Yes No
Correct condition
Scroll
To Enter Meter Verfy
Select
EXIT
34
Model 2700 Transmitters with F
OUNDATION
™
fieldbus
Calibration
3.4.3
Reading and interpreting Smart Meter Verification test results
Pass/Fail/Abort
When the Smart Meter Verification test is completed, the result will be reported as Pass, Fail/Caution
(depending on the tool you are using), or Abort:
• Pass – The test result is within the specification uncertainty limit. In other words, the stiffness of the left and right pickoffs match the factory values plus or minus the specification uncertainty limit. If transmitter zero and configuration match factory values, the sensor will meet factory specifications for flow and density measurement. It is expected that meters will pass Smart Meter Verification every time the test is run.
• Fail/Caution – The test result is not within the specification uncertainty limit. Micro Motion recommends that you immediately repeat the Smart Meter Verification test. If you previously set outputs to Continue Measurement, change the setting to Last Measured Value or Fault.
If the meter passes the second test, the first Fail/Caution result can be ignored.
If the meter fails the second test, the flow tubes may be damaged. Use your process knowledge to determine the possibilities for damage and the appropriate actions for each.
These actions might include removing the meter from service and physically inspecting the tubes. At minimum, you should perform a flow validation and a density calibration.
• Abort – A problem occurred with the Smart Meter Verification test (e.g., process instability).
Abort codes are listed in Table 3-3, and suggested actions are provided for each code.
Table 3-3
Smart Meter Verification abort codes
Abort code
1
3
5
8
13
14
15
Other
Description
User-initiated abort
Frequency drift
High drive gain
Unstable flow
No factory reference data for Smart
Meter Verification test performed on air
No factory reference data for Smart
Meter Verification test performed on water
No configuration data for Smart Meter
Verification
General abort
Suggested action
None required. Wait for 15 seconds before starting another test.
Ensure that temperature, flow, and density are stable, and rerun the test.
Ensure that flow is stable, minimize entrained gas, and rerun the test.
Review the suggestions for stable flow in Section 3.4.1
and rerun the test.
Contact Micro Motion customer service and provide the abort code.
Contact Micro Motion customer service and provide the abort code.
Contact Micro Motion customer service and provide the abort code.
Repeat the test. If the test aborts again, contact
Micro Motion customer service and provide the abort code.
Configuration and Use Manual
35
Calibration
Detailed test data with ProLink II
For each test, the following data is stored on the transmitter:
• Powered-on seconds at the time of the test
• Test result
• Stiffness of the left and right pickoffs, shown as percentage variation from the factory value. If the test aborted, 0 is stored for these values.
• Abort code, if applicable
ProLink II stores additional descriptive information for each test in a database on the local PC, including:
• Timestamp from the PC clock
• Current flowmeter identification data
• Current flow and density configuration parameters
• Current zero values
• Current process values for mass flow rate, volume flow rate, density, temperature, and external pressure
• (Optional) User-entered customer and test descriptions
If you run a Smart Meter Verification test from ProLink II, ProLink II first checks for new test results on the transmitter and synchronizes the local database if required. During this step, ProLink II displays the following message:
Synchronizing x out of y
Please wait
Note: If you request an action while synchronization is in process, ProLink II displays a message asking whether or not you want to complete synchronization. If you choose No, the ProLink II database may not include the latest test results from the transmitter.
Test results are available at the end of each test, in the following forms:
•
A test result chart (see Figure 3-9).
• A test report that includes the descriptive information for the current test, the test result chart, and background information about Smart Meter Verification. You can export this report to an
HTML file or print it to the default printer.
Note: To view the chart and the report for previous tests without running a test, click View Previous
Test Results and Print Report from the first Smart Meter Verification panel. See Figure 3-9. Test
reports are available only for tests initiated from ProLink II.
36
Model 2700 Transmitters with F
OUNDATION
™
fieldbus
Calibration
Figure 3-9
Test result chart
Initiated from the display or other tool
Initiated from ProLink II
The test result chart shows the results for all tests in the ProLink II database, plotted against the specification uncertainty limit. The inlet stiffness and the outlet stiffness are plotted separately. This helps to distinguish between local and uniform changes to the sensor tubes.
This chart supports trend analysis, which can be helpful in detecting meter problems before they become severe.
Configuration and Use Manual
37
Calibration
Note the following:
• The test result chart may not show all test results, and test counters may not be continuous.
ProLink II stores information about all tests initiated from ProLink II and all tests available on the transmitter when the test database is synchronized. However, the transmitter stores only the twenty most recent test results. To ensure a complete result set, always use ProLink II to initiate the tests, or synchronize the ProLink II database before overwriting occurs.
• The chart uses different symbols to differentiate between tests initiated from ProLink II and tests initiated using a different tool. A test report is available only for tests that were initiated from ProLink II.
• You can double-click the chart to manipulate the presentation in a variety of ways (change titles, change fonts, colors, borders and gridlines, etc.), and to export the data to additional formats (including “to printer”).
• You can export this chart to a CSV file for use in external applications.
Detailed test data with the display
For each Smart Meter Verification test, the following data is stored on the transmitter:
• Powered-on seconds at the time of the test
• Test result
• Stiffness of the left and right pickoffs, shown as percentage variation from the factory value. If the test aborted, 0 is stored for these values.
• Abort code, if applicable
To view this data, see Figures 3-6 and 3-10.
38
Model 2700 Transmitters with F
OUNDATION
™
fieldbus
Calibration
Figure 3-10
Smart Meter Verification test data – Display
RESULTS READ
Select
RUNCOUNT
x
PASS
Select
xx L STF%
Select
xx R STF%
Select
Pass
Select
Result type
Fail
CAUTION
Select
xx L STF%
Select
xx R STF%
Select
xx SEC
Abort
Abort Type
Select
Scroll
To Runcount
x-1
RESULTS MORE?
Select Scroll
To Run Verfy
Configuration and Use Manual
39
Calibration
3.4.4
Setting up automatic or remote execution of the Smart Meter Verification test
There are two ways to execute a Smart Meter Verification test automatically:
• Set up a one-time automatic execution
• Set up a recurring execution
To set up a one-time automatic execution, set up a recurring execution, view the number of hours until the next scheduled test, or delete a schedule:
With ProLink II, choose
Tools > Meter Verification > Schedule Meter Verification
.
—
With the display, see Figures 3-6 and 3-11.
With a fieldbus host, Smart Meter Verification scheduling resides in the Diagnostic
transducer block. See Figure 3-12.
Note the following:
• If you are setting up a one-time automatic execution, specify the start time as a number of hours from the present time. For example, if the present time is 2:00 and you specify 3.5 hours, the test will be initiated at 5:30.
• If you are setting up a recurring execution, specify the number of hours to elapse between executions. The first test will be initiated when the specified number of hours has elapsed, and testing will be repeated at the same interval until the schedule is deleted. For example, if the present time is 2:00 and you specify 2 hours, the first test will be initiated at 4:00, the next at
6:00, and so on.
• If you delete the schedule, both the one-time execution and the recurring execution settings are deleted.
40
Model 2700 Transmitters with F
OUNDATION
™
fieldbus
Calibration
Figure 3-11
Smart Meter Verification scheduler – Display
SCHEDULE VERFY
Select
No Schedule set?
SCHED IS OFF
Scroll
Yes
TURN OFF SCHED/YES?
Scroll
HOURS LEFT
Scroll Select
xx HOURS
Select
Select
Schedule deleted
SET NEXT
Select
xx HOURS
Scroll
SAVE/YES?
No Yes
Select
Scroll
SET RECUR
Select
xx HOURS
Scroll
SAVE/YES?
No Yes
Select
Scroll
Scroll
EXIT
Select
Configuration and Use Manual
41
Calibration
Figure 3-12
Smart Meter Verification scheduler – Fieldbus host
DIAGNOSTIC
Time Until First Run
Time Between Each Run
Time Until Next Run
Time Until First Run
Time Between
Each Run
Time Until Next Run
– Number of hours to wait before starting Smart Meter Verification
– Number of hours to wait between each Smart Meter Verification test, after the first test is completed
– Number of hours until the next Smart Meter Verification test begins
3.5
Performing meter validation
To perform meter validation, measure a sample of the process fluid and compare the measurement with the flowmeter’s reported value.
Use the following formula to calculate a meter factor:
NewMeterFactor = ConfiguredMeterFactor
ActualTransmitterMeasurement
Valid values for meter factors range from
0.8
to
1.2
. If the calculated meter factor exceeds these limits, contact Micro Motion customer service.
Example
The flowmeter is installed and proved for the first time. The flowmeter mass measurement is 250.27 lb; the reference device measurement is
250 lb. A mass flow meter factor is determined as follows:
MassFlowMeterFactor = 1
250.27
= 0.9989
The first mass flow meter factor is 0.9989.
One year later, the flowmeter is proved again. The flowmeter mass measurement is 250.07 lb; the reference device measurement is
250.25 lb. A new mass flow meter factor is determined as follows:
MassFlowMeterFactor = 0.9989
250.25
——————
250.07
= 0.9996
The new mass flow meter factor is 0.9996.
You can adjust meter factors with a fieldbus host (Figure 3-13), ProLink II (Figure 3-14), or the
display (Figure 3-15).
42
Model 2700 Transmitters with F
OUNDATION
™
fieldbus
Calibration
Figure 3-13
Meter factors – Fieldbus host
MEASUREMENT
Mass Meter Factor
Volume Meter Factor
Density Meter Factor
Mass Meter Factor – Set to the meter factor for mass flow.
Volume Meter Factor – Set to the meter factor for volume flow.
Density Meter Factor – Set to the meter factor for density.
Figure 3-14
Meter factors – ProLink II
ProLink >
Configuration
Flow tab
Set values:
• Mass Factor
• Dens Factor
• Vol Factor
Apply
Configuration and Use Manual
43
Calibration
Figure 3-15
Meter factors – Display
Scroll and Select simultaneously for 4 seconds
Scroll
OFF-LINE MAINT
Select
Scroll
CONFG
Select
Scroll
Scroll
MTR F
Select
FACTOR MASS
Scroll
FACTOR VOL
Scroll
FACTOR DENS
Scroll
EXIT
3.6
Performing a density calibration
Density calibration includes the following calibration points:
• All sensors:
D1 calibration (low-density)
D2 calibration (high-density)
• T-Series sensors only:
D3 calibration (optional)
D4 calibration (optional)
For T-Series sensors, the optional D3 and D4 calibrations could improve the accuracy of the density measurement. If you choose to perform the D3 and D4 calibrations:
• Do not perform the D1 or D2 calibrations.
• Perform the D3 calibration if you have one calibrated fluid.
• Perform both the D3 and D4 calibrations if you have two calibrated fluids (other than air and water).
The calibrations that you choose must be performed without interruption, in the order listed here.
Note: Before performing the calibration, record your current calibration parameters. If you are using
ProLink II, you can do this by saving the current configuration to a file on the PC. If the calibration fails, restore the known values.
44
Model 2700 Transmitters with F
OUNDATION
™
fieldbus
Calibration
3.6.1
Preparing for density calibration
Before beginning density calibration, review the requirements in this section.
Sensor requirements
During density calibration, the sensor must be completely filled with the calibration fluid, and flow through the sensor must be at the lowest rate allowed by your application. This is usually accomplished by closing the shutoff valve downstream from the sensor, then filling the sensor with the appropriate fluid.
Density calibration fluids
D1 and D2 density calibration require a D1 (low density) fluid and a D2 (high density) fluid. You may use air and water. If you are calibrating a T-Series sensor, the D1 fluid must be air and the D2 fluid must be water.
CAUTION
For T-Series sensors, the D1 calibration must be performed on air and the
D2 calibration must be performed on water.
For D3 density calibration, the D3 fluid must meet the following requirements:
• Minimum density of 0.6 g/cm
3
• Minimum difference of 0.1 g/cm
3
between the density of the D3 fluid and the density of water.
The density of the D3 fluid may be either greater or less than the density of water.
For D4 density calibration, the D4 fluid must meet the following requirements:
• Minimum density of 0.6 g/cm
3
• Minimum difference of 0.1 g/cm
3
between the density of the D4 fluid and the density of the D3 fluid. The density of the D4 fluid must be greater than the density of the D3 fluid.
• Minimum difference of 0.1 g/cm
3
between the density of the D4 fluid and the density of water.
The density of the D4 fluid may be either greater or less than the density of water
3.6.2
Density calibration procedures
To perform a D1 and D2 density calibration:
•
With a fieldbus host, see Figure 3-16.
•
With ProLink II, see Figure 3-17.
Configuration and Use Manual
45
Calibration
Figure 3-16
D1 and D2 calibration – Fieldbus host
CALIBRATION
Low Density Calibration
High Density Calibration
Low Density Calibration – Method parameter that initiates the D1 procedure below.
High Density Calibration Method parameter that initiates the D2 procedure below.
Close shutoff valve downstream from sensor
D1 calibration
Low Density Calibration
• If calibration fails, see
Section 6.5 for
troubleshooting information.
Next
Fill sensor completely with low-density fluid
Next
Enter the density of the calibration fluid
Next
Calibration in progress
D2 calibration
High Density Calibration
Next
Fill sensor completely with high-density fluid
Next
Enter the density of the calibration fluid
Next
Calibration in progress
Finish
46
Model 2700 Transmitters with F
OUNDATION
™
fieldbus
Calibration
Figure 3-17
D1 and D2 calibration – ProLink II
Close shutoff valve downstream from sensor
D1 calibration
Fill sensor with D1 fluid
ProLink Menu >
Calibration >
Density cal – Point 1
Enter density of D1 fluid
Do Cal
Calibration in Progress light turns red
Calibration in Progress light turns green
Close
D2 calibration
Fill sensor with D2 fluid
ProLink Menu >
Calibration >
Density cal – Point 2
Enter density of D2 fluid
Do Cal
Calibration in Progress light turns red
Calibration in Progress light turns green
Close
Done
Configuration and Use Manual
47
Calibration
Figure 3-18
D3 (or D3 and D4) calibration (T-Series only) – Fieldbus host
CALIBRATION
D3 Density Calibration
D4 Density Calibration
D3 Density Calibration – Method parameter that initiates the D3 procedure below.
D4 Density Calibration Method parameter that initiates the D4 procedure below.
D4 calibration
D4 Density Calibration
Close shutoff valve downstream from sensor
D3 calibration
D3 Density Calibration
• If calibration fails, see
Section 6.5 for
troubleshooting information.
Next
Fill sensor completely with D3 fluid
Next
Enter the density of the calibration fluid
Next
Calibration in progress
Next
Fill sensor completely with D4 fluid
Next
Enter the density of the calibration fluid
Next
Calibration in progress
Finish Finish
48
Model 2700 Transmitters with F
OUNDATION
™
fieldbus
Calibration
Figure 3-19
D3 (or D3 and D4) calibration – ProLink II
Close shutoff valve downstream from sensor
D3 calibration
Fill sensor with D3 fluid
ProLink Menu >
Calibration >
Density cal – Point 3
D4 calibration
Fill sensor with D4 fluid
Enter density of D3 fluid
Do Cal
Calibration in Progress light turns red
Calibration in Progress light turns green
Close
ProLink Menu >
Calibration >
Density cal – Point 4
Enter density of D4 fluid
Do Cal
Calibration in Progress light turns red
Calibration in Progress light turns green
Close
Done
Done
• If calibration fails, see
Section 6.5 for troubleshooting
information.
Configuration and Use Manual
49
Calibration
3.7
Performing a temperature calibration
Temperature calibration is a two-point procedure: temperature offset calibration and temperature slope calibration. The entire procedure must be completed without interruption.
You can calibrate for temperature with a fieldbus host or ProLink II.
Figure 3-20
Temperature calibration – Fieldbus host
CALIBRATION
Temp Low Calibration
Temp High Calibration
Temp Low Calibration – Method parameter that initiates the low-temperature procedure below.
Temp High Calibration Method parameter that initiates the high-temperature procedure below.
50
Temp Low Calibration
Next
Fill sensor completely with low-temperature fluid
Allow sensor to achieve equilibrium
Enter the temperature of the calibration fluid
Next
Calibration in progress
Temp High Calibration
Next
Fill sensor completely with high-temperature fluid
Allow sensor to achieve equilibrium
Enter the temperature of the calibration fluid
Next
Calibration in progress
• If calibration fails,
see Section 6.5 for
troubleshooting information.
Finish
Model 2700 Transmitters with F
OUNDATION
™
fieldbus
Calibration
Figure 3-21
Temperature calibration – ProLink II
Temperature Offset calibration
Fill sensor with lowtemperature fluid
Wait until sensor achieves thermal equilibrium
ProLink Menu >
Calibration >
Temp offset cal
Enter temperature of lowtemperature fluid
Do Cal
Calibration in Progress light turns red
Calibration in Progress light turns green
Close
Temperature Slope calibration
Fill sensor with hightemperature fluid
Wait until sensor achieves thermal equilibrium
ProLink Menu >
Calibration >
Temp slope cal
Enter temperature of hightemperature fluid
Do Cal
Calibration in Progress light turns red
Calibration in Progress light turns green
Close
Done
• If calibration fails, see
Section 6.5 for troubleshooting
information.
Configuration and Use Manual
51
52
Model 2700 Transmitters with F
OUNDATION
™
fieldbus
Chapter 4
Configuration
4.1
Overview
This chapter describes how to change the operating settings of the transmitter.
Note: All procedures provided in this chapter assume that you have established communication with
the transmitter and that you are complying with all applicable safety requirements. See Appendices 2
and 3.
4.2
Configuration map
Use this configuration map to guide you through a complete or partial configuration of the transmitter.
Table 4-1
Configuration map
Topic
Gas standard volume
Measurement units
Special measurement units
Petroleum measurement application
Concentration measurement application
Linearization
Output scale
Process alarms
Alarm severity
Damping
Slug flow
Cutoffs
Flow direction
Device settings
Sensor parameters
Display functionality
PlantWeb Alert timeout
Write-protect mode
LD Optimization
Fieldbus host
x x x x x x x x x x x x x x x x x x
Method
ProLink II
x x x x x x x x x x x x x x x x
Display
x x x x
4.18
4-54
4.19
4.20
4.14
4.15
4.16
4.17
4.10
4.11
4.12
4.13
4.6
4.7
4.8
4.9
Section
4.3
4.4
4.5
Configuration and Use Manual
53
Configuration
4.3
Configuring standard volume flow measurement for gas
Two types of volume flow measurement are available:
• Liquid volume (the default)
• Gas standard volume
Only one type of volume flow measurement can be performed at a time (i.e., if liquid volume flow measurement is enabled, gas standard volume flow measurement is disabled, and vice versa).
Different sets of volume flow measurement units are available, depending on which type of volume flow measurement is enabled. If you want to use a gas volume flow unit, additional configuration is required.
Note: If you will use the petroleum measurement application or the concentration measurement application, liquid volume flow measurement is required.
Gas standard volume flow can be configured with a fieldbus host or ProLink II. In either case, you must:
• Enable gas standard volume flow
• Specify the standard density (density at reference conditions) of your gas
•
Select the measurement unit to use (see Section 4.4)
•
Set the low flow cutoff value (see Section 4.14)
Note: The display will allow you to select a volume measurement unit from the set available for the configured volume flow type, but it will not allow you to configure gas standard volume flow.
Figure 4-1
GSV – Fieldbus host
MEASUREMENT
Enable Gas Standard Volume
Enable Gas Standard Volume – Set to Enable to set volume flow to use gas standard volume. Set to
Disable to use liquid volume flow.
54
Model 2700 Transmitters with F
OUNDATION
™
fieldbus
Configuration
Figure 4-2
GSV – ProLink II
ProLink >
Configuration
Flow tab
Set Vol Flow Type to
Std Gas Volume
Apply
4.3.1
Configuring gas density
You have two choices for entering the standard density of the gas you are going to measure (i.e., the density of the gas at reference conditions):
• If you know the standard density, you can enter that value into the transmitter. For optimal standard volume measurement accuracy, be sure the standard density you enter is correct and fluid composition is stable. You can enter the gas density with a fieldbus host or ProLink II.
• If you do not know the standard density of the gas, and you are using ProLink II, you can use the Gas Wizard. The Gas Wizard can calculate the standard density of the gas that you are measuring.
Figure 4-3
Gas density – Fieldbus host
MEASUREMENT
Gas Density
Gas Density – Set to the standard density of the gas you are going to measure.
Configuration and Use Manual
55
Configuration
Figure 4-4
Gas density – ProLink II
ProLink >
Configuration
Flow tab
Set Std Gas Density to the appropriate value
Apply
Figure 4-5
Gas Wizard – ProLink II
ProLink >
Configuration
Flow tab
Gas Wizard
Gas listed in
Choose Gas list?
No
Select Enter Other
Gas Property
Yes
Select Choose Gas
Select your gas from the list
Select gas description method:
• Molecular weight
• Specific gravity compared to air
• Density
Provide required information
Next
Enter new values for temperature and pressure
Reference values correct?
No
Change Reference
Conditions
Yes
Next
Finish
56
Model 2700 Transmitters with F
OUNDATION
™
fieldbus
Configuration
4.4
Changing the measurement units
The transmitter stores measurement units in three different places: the MEASUREMENT transducer block, the AI blocks, and the AO block. If you configure the measurement units in the AI or AO blocks, the MEASUREMENT block will be automatically updated. However, if you configure the units only in the MEASUREMENT block, the AI and AO blocks will not be updated. This results in the following behaviors:
• Because ProLink II and the display store and retrieve the units stored in the MEASUREMENT block, configuring units using ProLink II or the display will not update the AI and AO blocks.
Affected AI and AO blocks will get a configuration error if units are changed in the
MEASUREMENT block but not in the AI or AO block.
• Configuring the units in the MEASUREMENT block with a fieldbus host will produce the same results as if the units had been changed using ProLink II or the display (i.e., the related
AI or AO blocks will get a configuration error unless their units are also changed).
• Configuring the units in an AI or AO block using a fieldbus host will cause the units in
ProLink II and on the display to be updated correctly.
Measurement units can be changed with a fieldbus host, ProLink II, and the display. Refer to Tables
4-2 through 4-7 for complete lists of the units you can set for each process variable.
Note: When the transmitter is configured for liquid volume flow, only liquid volume units are
available (Table 4-3). When the transmitter is configured for gas volume flow, only gas volume units
are available (Table 4-4).
Note: Changing the measurement units for a process variable automatically changes the associated totalizer units as well. For example, setting the mass flow units to g/s will automatically set the mass totalizer unit to grams.
Figure 4-6
Changing measurement units – Fieldbus host
AI
Transducer Scale: Units Index
Transducer Scale: Units Index – Set to the desired measurement units.
AO
Process Value Scale: Units Index
Process Value Scale: Units Index – Set to the desired measurement units.
Configuration and Use Manual
57
Configuration
Figure 4-7
Changing measurement units – ProLink II
ProLink >
Configuration
Density tab Flow tab Temperature tab
Select unit from Dens
Units list
Select unit from Vol
Flow Units
(1)
list
Select unit from Mass
Flow Units list
Select unit from
Temp Units list
Apply Apply Apply
(1) If volume flow type is configured to gas standard volume, this list will appear as Std gas vol flow units.
Note: You must also change the units in the appropriate AI block. Failure to do so will cause the AI block to get a configuration error.
58
Model 2700 Transmitters with F
OUNDATION
™
fieldbus
Configuration
Figure 4-8
Changing measurement units – Display
Scroll and Select simultaneously for 4 seconds
Scroll
OFF-LINE MAINT
Select
Scroll
CONFG
Select Select
UNITS
MASS
Scroll
VOL
(1)
Scroll
DENS
Scroll
TEMP
Scroll
PRESS
(1) If volume flow type is configured to gas standard volume, this list will appear as GSV.
Note: You must also change the units in the appropriate AI block. Failure to do so will cause the
AI block to get a configuration error.
Table 4-2
Mass flow measurement units
Fieldbus host
g/s g/min g/h kg/s kg/min kg/h kg/d t/min t/h
Mass flow unit
ProLink II
g/s g/min g/hr kg/s kg/min kg/hr kg/day mTon/min mTon/hr
Display
G/S
G/MIN
G/H
KG/S
KG/MIN
KG/H
KG/D
T/MIN
T/H
Configuration and Use Manual
Unit description
Grams per second
Grams per minute
Grams per hour
Kilograms per second
Kilograms per minute
Kilograms per hour
Kilograms per day
Metric tons per minute
Metric tons per hour
59
Configuration
Table 4-2
Mass flow measurement units (continued)
Fieldbus host
t/d lb/s lb/min lb/h lb/d
STon/min
STon/h
STon/d
LTon/h
LTon/d
Mass flow unit
ProLink II
mTon/day lbs/s lbs/min lbs/hr lbs/day sTon/min sTon/hr sTon/day lTon/hr lTon/day
Display
T/D
LB/S
LB/MIN
LB/H
LB/D
ST/MIN
ST/H
ST/D
LT/H
LT/D
Unit description
Metric tons per day
Pounds per second
Pounds per minute
Pounds per hour
Pounds per day
Short tons (2000 pounds) per minute
Short tons (2000 pounds) per hour
Short tons (2000 pounds) per day
Long tons (2240 pounds) per hour
Long tons (2240 pounds) per day
Fieldbus host
CFS
CFM
CFH ft
3
/d m
3
/s m
3
/min m
3
/h m
3
/d gal/s
GPM gal/h gal/d
Mgal/d
L/s
L/min
L/h
ML/d
ImpGal/s
ImpGal/min
ImpGal/h
ImpGal/d bbl/s bbl/min bbl/h
Table 4-3
Volume flow measurement units – Liquid
Volume flow unit
ProLink II
ft3/sec ft3/min ft3/hr ft3/day m3/sec m3/min m3/hr m3/day
US gal/sec
US gal/min
US gal/hr
US gal/d mil US gal/day l/sec l/min l/hr mil l/day
Imp gal/sec
Imp gal/min
Imp gal/hr
Imp gal/day barrels/sec barrels/min barrels/hr
Display
CUFT/S
CUF/MN
CUFT/H
CUFT/D
M3/S
M3/MIN
M3/H
M3/D
USGPS
USGPM
USGPH
USGPD
MILG/D
L/S
L/MIN
L/H
MILL/D
UKGPS
UKGPM
UKGPH
UKGPD
BBL/S
BBL/MN
BBL/H
Unit description
Cubic feet per second
Cubic feet per minute
Cubic feet per hour
Cubic feet per day
Cubic meters per second
Cubic meters per minute
Cubic meters per hour
Cubic meters per day
U.S. gallons per second
U.S. gallons per minute
U.S. gallons per hour
U.S. gallons per day
Million U.S. gallons per day
Liters per second
Liters per minute
Liters per hour
Million liters per day
Imperial gallons per second
Imperial gallons per minute
Imperial gallons per hour
Imperial gallons per day
Barrels per second
(1)
Barrels per minute
(1)
Barrels per hour
(1)
60
Model 2700 Transmitters with F
OUNDATION
™
fieldbus
Configuration
Table 4-3
Volume flow measurement units – Liquid (continued)
Volume flow unit
Fieldbus host ProLink II
bbl/d barrels/day
Bbl (US Beer)/d Beer barrels/sec
Bbl (US Beer)/min Beer barrels/min
Bbl (US Beer)/h
Bbl (US Beer)/d
Beer barrels/hr
Beer barrels/day
(1) Unit based on oil barrels (42 U.S. gallons).
(2) Unit based on U.S. beer barrels (31 U.S. gallons).
Display
BBL/D
BBBL/S
BBBL/MN
BBBL/H
BBBL/D
Unit description
Barrels per day
(1)
Beer barrels per second
(2)
Beer barrels per minute
(2)
Beer barrels per hour
(2)
Beer barrels per day
(2)
Fieldbus host
Nm
3
/s
Nm
3
/min
Nm
3
/h
Nm
3
/d
NL/s
NL/min
NL/h
NL/d
SCFM
SCFH
Sm
3
/s
Sm
3
/min
Sm
3
/h
Sm
3
/d
SL/s
SL/min
SL/h
SL/d
Table 4-4
Volume flow measurement units – Gas
Volume flow unit
ProLink II
Nm3/sec
Nm3/min
Nm3/hr
Nm3/day
NLPS
NLPM
NLPH
NLPD
SCFM
SCFH
Sm3/S
Sm3/min
Sm3/hr
Sm3/day
SLPS
SLPM
SLPH
SLPD
Display
NM3/S
NM3/MN
NM3/H
NM3/D
NLPS
NLPM
NLPH
NLPD
SCFM
SCFH
SM3/S
SM3/MN
SM3/H
SM3/D
SLPS
SLPM
SLPH
SLPD
Table 4-5
Density measurement units
Fieldbus host
g/cm
3 g/L g/ml kg/L
Density unit
ProLink II
g/cm3 g/l g/ml kg/l
Display
G/CM3
G/L
G/ML
KG/L
Unit description
Normal cubic meters per second
Normal cubic meters per minute
Normal cubic meters per hour
Normal cubic meters per day
Normal liter per second
Normal liter per minute
Normal liter per hour
Normal liter per day
Standard cubic feet per minute
Standard cubic feet per hour
Standard cubic meters per second
Standard cubic meters per minute
Standard cubic meters per hour
Standard cubic meters per day
Standard liter per second
Standard liter per minute
Standard liter per hour
Standard liter per day
Unit description
Grams per cubic centimeter
Grams per liter
Grams per milliliter
Kilograms per liter
Configuration and Use Manual
61
Configuration
Table 4-5
Density measurement units (continued)
Fieldbus host
kg/m
3 lb/gal lb/ft
3 lb/in
3
STon/yd
3 degAPI
SGU
Density unit
ProLink II
kg/m3 lbs/Usgal lbs/ft3 lbs/in3 sT/yd3 degAPI
SGU
Display
KG/M3
LB/GAL
LB/CUF
LB/CUI
ST/CUY
D API
SGU
Unit description
Kilograms per cubic meter
Pounds per U.S. gallon
Pounds per cubic foot
Pounds per cubic inch
Short ton per cubic yard
Degrees API
Specific gravity unit (not temperature corrected)
Table 4-6
Temperature measurement units
Fieldbus host
°
C
°
F
°
R
K
Temperature unit
ProLink II
°
C
°
F
°
R
°
K
Display
°
C
°
F
°
R
°
K
Unit description
Degrees Celsius
Degrees Fahrenheit
Degrees Rankine
Kelvin
Although pressure units are listed in the following table, the transmitter does not measure pressure.
These units are for configuring external pressure compensation. Refer to Section 2.5.
Table 4-7
Pressure measurement units
Pressure unit
ftH20 (
68
°
F
) inH2O (4°C) inH20 ( 68 ° F ) mmH2O (4°C) mmH20 (
68
°
F
) inHg (
0
°
C
) mmHg ( 0 ° C ) psi bar mbar g/cm
2 kg/cm
2
Pa
MPa
Fieldbus host ProLink II
Ft Water
@ 68
°
F
In Water
@ 4
°
C
In Water @ 68 ° F mm Water
@ 4
°
C mm Water
@ 68
°
F
In Mercury
@ 0
°
C mm Mercury @ 0 ° C
PSI bar millibar g/cm2 kg/cm2 pascals megapascals
Display
FTH2O
INW4C
INH2O mmW4C mmH2O
INHG mmHG
PSI
BAR mBAR
G/SCM
KG/SCM
PA
MPA
Unit description
Feet water @ 68 °F
Inches water @ 4 °C
Inches water @ 68 °F
Millimeters water @ 4 °C
Millimeters water @ 68 °F
Inches mercury @ 0 °C
Millimeters mercury @ 0 °C
Pounds per square inch
Bar
Millibar
Grams per square centimeter
Kilograms per square centimeter
Pascals
Megapascals
62
Model 2700 Transmitters with F
OUNDATION
™
fieldbus
Configuration
Table 4-7
Pressure measurement units (continued)
Pressure unit
Fieldbus host ProLink II
kPa torr atm
Kilopascals
Torr @ 0C atms
Display
KPA
TORR
ATM
Unit description
Kilopascals
Torr @ 0 °C
Atmospheres
4.5
Creating special measurement units
If you need to use a non-standard unit of measure, you can create special measurement units. There are two methods available for creating special units:
• Using the special unit features of the MEASUREMENT transducer block. This method is described in this section.
• Using the Transducer Scale, Output Scale, and Linearization parameters of an AI function
block. This method is not described in this section. Refer to Sections 4.8 and 4.9, and the
F
OUNDATION
Fieldbus Blocks manual, available from the Rosemount web site
(www.rosemount.com), for information about creating special units using this method.
The MEASUREMENT transducer block supports one special unit for mass flow, one special measurement unit for liquid volume flow, and one special unit for gas volume flow. Special measurement units consist of:
• Base unit — A combination of:
Base mass or base volume unit — A standard measurement unit that the transmitter already recognizes (e.g., kg, m
3
)
Base time unit — A unit of time that the transmitter already recognizes
(e.g., seconds, days)
• Conversion factor — The number by which the base unit will be divided to convert to the special unit
• Special unit — A non-standard volume-flow or mass-flow unit of measure that you want to be reported by the transmitter.
The terms above are related by the following formulae:
= y Special units
Conversion factor = x Base units y Special units
To create a special unit, you must:
1. Identify the simplest base volume or mass and base time units for your special unit. For example, to create the special volume flow unit pints per minute, the simplest base units are gallons per minute: a.
Base volume unit: gallon b.
Base time unit: minute
Configuration and Use Manual
63
Configuration
2. Calculate the conversion factor:
1 gallon per minute
0.125
8 pints per minute
=
3. Name the new special mass-flow or volume-flow measurement unit and its corresponding totalizer measurement unit: a.
Special volume-flow measurement unit name: pint/min b.
Volume totalizer measurement unit name: pints
Note: Special measurement unit names can be up to 8 characters long, but only the first 5 characters appear on the display.
Special units can be created with a fieldbus host or with ProLink II.
Figure 4-9
Special units for mass flow – Fieldbus host
MEASUREMENT
Mass flow special units base
Mass flow special units time
Mass flow special units conv
Mass flow special units str
Mass Tot/Inv Special Unit Str
Mass flow special units base
Mass flow special units time
Mass flow special units conv
Mass flow special units str
Mass Tot/Inv Special Unit Str
– Set to a mass unit.
– Set to a unit of time.
– Set to the conversion factor. When this parameter equals 1, the transmitter will use normal mass units. When this parameter is not equal to 1, the transmitter will use special mass units.
– Set to the name of the special unit. Unit names can be up to 8 characters in length (although only the first 5 are displayed).
– Set to the name of the special totalizer unit. Unit names can be up to 8 characters in length (although only the first 5 are displayed).
64
Model 2700 Transmitters with F
OUNDATION
™
fieldbus
Configuration
Figure 4-10
Special units for liquid volume flow – Fieldbus host
MEASUREMENT
Vol flow special units base
Vol flow special units time
Vol flow special units conv
Vol flow special units str
Volume Tot/Inv Special Unit Str
Vol flow special units base
Vol flow special units time
Vol flow special units conv
Vol flow special units str
Volume Tot/Inv Special Unit Str
– Set to a liquid volume unit.
– Set to a unit of time.
– Set to the conversion factor. When this parameter equals 1, the transmitter will use normal liquid volume units. When this parameter is not equal to 1, the transmitter will use special liquid volume units.
– Set to the name of the special unit. Unit names can be up to 8 characters in length (although only the first 5 are displayed).
– Set to the name of the special totalizer unit. Unit names can be up to 8 characters in length (although only the first 5 are displayed).
Figure 4-11
Special units for gas volume flow – Fieldbus host
MEASUREMENT
Std Gas Vol Flow Special Units Base
Std Gas Vol Flow Special Units Time
Std Gas Vol Flow Special Units Factor
Std Gas Vol Flow Special Units Text
Std Gas Vol Total Special Units Text
Std Gas Vol Flow Special Units Base – Set to a gas volume unit.
Std Gas Vol Flow Special Units Time – Set to a unit of time.
Std Gas Vol Flow Special Units Factor – Set to the conversion factor. When this parameter equals 1, the transmitter will use normal gas volume units. When this parameter is not equal to 1, the transmitter will use special gas volume units.
Std Gas Vol Flow Special Units Text – Set to the name of the special unit. Unit names can be up to 8 characters in length (although only the first 5 are displayed).
Std Gas Vol Total Special Units Text – Set to the name of the special totalizer unit. Unit names can be up to 8 characters in length (although only the first 5 are displayed).
Configuration and Use Manual
65
Configuration
Figure 4-12
Special mass and volume units – ProLink II
ProLink >
Configuration
(1) These labels are slightly different when volume flow is configured for gas standard volume: Base Gas Vol
Unit, Base Gas Vol Time, Gas Vol Flow Conv Fact,
Gas Vol Flow Text, and Gas Vol Total Text.
Special Units tab
Special mass unit
Set the base, time, and conversion factor:
• Base Mass Unit
• Base Mass Time
• Mass Flow Conv Fact
Special volume unit
Set the base, time, and conversion factor:
• Base Vol Unit
(1)
• Base Vol Time
(1)
• Vol Flow Conv Fact
(1)
Set the unit names:
• Mass Flow Text
• Mass Total Text
Set the unit names:
• Vol Flow Text
(1)
• Vol Total Text
(1)
Apply
4.6
Configuring the petroleum measurement application (API feature)
The API parameters determine the values that will be used in API-related calculations. The API parameters are available only if the petroleum measurement application is enabled on your transmitter.
Note: The petroleum measurement application requires liquid volume measurement units. If you plan to use API process variables, ensure that liquid volume flow measurement is specified. See
Section 4.3.
4.6.1
About the petroleum measurement application
Some applications that measure liquid volume flow or liquid density are particularly sensitive to temperature factors, and must comply with American Petroleum Institute (API) standards for measurement. The petroleum measurement application enables Correction of Temperature on volume
of Liquids, or CTL.
66
Model 2700 Transmitters with F
OUNDATION
™
fieldbus
Configuration
Terms and definitions
The following terms and definitions are relevant to the petroleum measurement application:
• API – American Petroleum Institute
• CTL – Correction of Temperature on volume of Liquids. The CTL value is used to calculate the VCF value
• TEC – Thermal Expansion Coefficient
• VCF – Volume Correction Factor. The correction factor to be applied to volume process variables. VCF can be calculated after CTL is derived
CTL derivation methods
There are two derivation methods for CTL:
• Method 1 is based on observed density and observed temperature.
• Method 2 is based on a user-supplied reference density (or thermal expansion coefficient, in some cases) and observed temperature.
Petroleum Measurement reference tables
Reference tables are organized by reference temperature, CTL derivation method, liquid type, and density unit. The table selected here controls all the remaining options.
• Reference temperature:
If you specify a 5x, 6x, 23x, or 24x table, the default reference temperature is 60 °F, and cannot be changed.
If you specify a 53x or 54x table, the default reference temperature is 15 °C. However, you can change the reference temperature, as recommended in some locations (for example, to
14.0 or 14.5 °C).
• CTL derivation method:
If you specify an odd-numbered table (5, 23, or 53), CTL will be derived using method 1 described above.
If you specify an even-numbered table (6, 24, or 54), CTL will be derived using method 2 described above.
• The letters A, B, C, or D that are used to terminate table names define the type of liquid that the table is designed for:
A tables are used with generalized crude and JP4 applications.
B tables are used with generalized products.
C tables are used with liquids with a constant base density or known thermal expansion coefficient.
D tables are used with lubricating oils.
• Different tables use different density units:
Degrees API
Relative density (SG)
Base density (kg/m
3
)
Table 4-8 summarizes these options.
Configuration and Use Manual
67
Configuration
Table 4-8
Petroleum Measurement reference temperature tables
Table
5A
5B
5D
23A
23B
23D
53A
53B
53D
6C
24C
54C
CTL derivation method
Method 1
Method 1
Method 1
Method 1
Method 1
Method 1
Method 1
Method 1
Method 1
Base temperature
60 °F, non-configurable
60 °F, non-configurable
60 °F, non-configurable
60 °F, non-configurable
60 °F, non-configurable
60 °F, non-configurable
15 °C, configurable
15 °C, configurable
15 °C, configurable
Method 2
Method 2
Method 2
60 °F, non-configurable
60 °F, non-configurable
15 °C, configurable
Density unit and range
Degrees API
0 to +100
0 to +85
–10 to +40
Base density Relative density
0.6110 to 1.0760
0.6535 to 1.0760
0.8520 to 1.1640
610 to 1075 kg/m
3
653 to 1075 kg/m
3
825 to 1164 kg/m
3
Reference temperature
60 °F
60 °F
15 °C
Supports
Degrees API
Relative density
Base density in kg/m
3
4.6.2
Configuration procedure
The PM configuration parameters are listed and defined in Table 4-9.
Table 4-9
Petroleum Measurement parameters
Variable
Table type
User defined TEC
(1)
Temperature units
(2)
Density units
Reference temperature
Description
Specifies the table that will be used for reference temperature and reference density unit. Select
the table that matches your requirements. See Petroleum Measurement reference tables.
Thermal expansion coefficient. Enter the value to be used in CTL calculation.
Read-only. Displays the unit used for reference temperature in the reference table.
Read-only. Displays the unit used for reference density in the reference table.
Read-only unless Table Type is set to 53x or 54x. If configurable:
• Specify the reference temperature to be used in CTL calculation.
• Enter reference temperature in °C.
(1) Configurable if Table Type is set to 6C, 24C, or 54C.
(2) In most cases, the temperature unit used by the PM reference table should also be the temperature unit configured for the transmitter
to use in general processing. To configure the temperature unit, see Section 4.4.
68
Model 2700 Transmitters with F
OUNDATION
™
fieldbus
Configuration
Setting the table type
You can set the PM table type with a fieldbus host or ProLink II.
Figure 4-13
Petroleum Measurement table type – Fieldbus host
Petroleum
Measurement
PM Table Type
PM Table Type – Set to the desired table type.
Figure 4-14
Petroleum Measurement table type – ProLink II
ProLink >
Configuration
API Setup tab
Select table type from the API Table Type list
Apply
Setting the reference temperature
For the temperature value to be used in CTL calculation, you can use the temperature data from the sensor, or you can configure external temperature compensation to use either a static temperature value or temperature data from an external temperature device.
• To use temperature data from the sensor, no action is required.
•
To configure external temperature compensation, see Section 2.6.
You can set the reference temperature using a fieldbus host or ProLink II.
Configuration and Use Manual
69
Configuration
Figure 4-15
Petroleum Measurement reference temperature – Fieldbus host
Petroleum
Measurem
PM Reference Temp
PM Reference Temp – Set to the desired temperature (in the currently-configured temperature units).
Figure 4-16
Petroleum Measurement reference temperature – ProLink II
ProLink >
Configuration
API Setup tab
Enter the reference temperature in the User
defined reference
temperature list
Apply
Setting the thermal expansion coefficient
If the CTL derivation method for the API table type is method 2, you need to set the thermal expansion coefficient (TEC). You can set a user-defined TEC with a fieldbus host or ProLink II.
Figure 4-17
TEC – Fieldbus host
Petroleum
Measurement
User Defined TEC
User Defined TEC – Set to the desired thermal expansion coefficient.
70
Model 2700 Transmitters with F
OUNDATION
™
fieldbus
Configuration
Figure 4-18
Petroleum Measurement – ProLink II
ProLink >
Configuration
API Setup tab
Enter a coefficient in the
User defined TEC box
Apply
4.7
Configuring the concentration measurement application
Micro Motion sensors provide direct measurements of density, but not of concentration. The concentration measurement application calculates concentration measurement process variables, such as concentration or density at reference temperature, from density process data, appropriately corrected for temperature.
Note: For a detailed description of the concentration measurement application, see the manual
entitled Micro Motion Enhanced Density Application: Theory, Configuration, and Use.
Note: The concentration measurement application requires liquid volume measurement units. If you plan to use concentration measurement process variables, ensure that liquid volume flow
measurement is specified. See Section 4.3.
4.7.1
About the concentration measurement application
The concentration measurement calculation requires a concentration measurement curve, which specifies the relationship between temperature, concentration, and density for the process fluid being measured. Micro Motion supplies a set of six standard concentration measurement curves (see
Table 4-10). If none of these curves is appropriate for your process fluid, you can configure a custom
curve or purchase a custom curve from Micro Motion.
The derived variable, specified during configuration, controls the type of concentration measurement that will be produced. Each derived variable allows the calculation of a subset of concentration
measurement process variables (see Table 4-11). The available concentration measurement process
variables can be used in process control, just as mass flow rate, volume flow rate, and other process variables are used. For example, an event can be defined on a concentration measurement process variable.
• For all standard curves, the derived variable is Mass Conc (Dens).
•
For custom curves, the derived variable may be any of the variables listed in Table 4-11.
The transmitter can hold up to six curves at any given time, but only one curve can be active (used for measurement) at a time. All curves that are in transmitter memory must use the same derived variable.
Configuration and Use Manual
71
Configuration
Table 4-10
Standard curves and associated measurement units
Name
Deg Balling
Deg Brix
Deg Plato
HFCS 42
HFCS 55
HFCS 90
Description
Curve represents percent extract, by mass, in solution, based on °Balling. For example, if a wort is 10 °Balling and the extract in solution is 100% sucrose, the extract is 10% of the total mass.
Curve represents a hydrometer scale for sucrose solutions that indicates the percent by mass of sucrose in solution at a given temperature. For example, 40 kg of sucrose mixed with 60 kg of water results in a 40 °Brix solution.
Curve represents percent extract, by mass, in solution, based on °Plato. For example, if a wort is
10 °Plato and the extract in solution is 100% sucrose, the extract is 10% of the total mass.
Curve represents a hydrometer scale for HFCS 42
(high fructose corn syrup) solutions that indicates the percent by mass of HFCS in solution.
Curve represents a hydrometer scale for HFCS 55
(high fructose corn syrup) solutions that indicates the percent by mass of HFCS in solution.
Curve represents a hydrometer scale for HFCS 90
(high fructose corn syrup) solutions that indicates the percent by mass of HFCS in solution.
Density unit Temperature unit
g/cm
3
°F g/cm
3
°C g/cm
3
°F g/cm
3
°C g/cm
3
°C g/cm
3
°C
Table 4-11
Derived variables and available process variables
Derived variable – ProLink II label and definition
Density @ Ref
Density at reference temperature
Mass/unit volume, corrected to a given reference temperature
SG
Specific gravity
The ratio of the density of a process fluid at a given temperature to the density of water at a given temperature. The two given temperature conditions do not need to be the same.
Mass Conc (Dens)
Mass concentration derived from reference density
The percent mass of solute or of material in suspension in the total solution, derived from reference density
Mass Conc (SG)
Mass concentration derived from specific gravity
The percent mass of solute or of material in suspension in the total solution, derived from specific gravity
Density at reference temperature x
Standard volume flow rate x x x x x x x
Available process variables
Specific gravity
Concentration Net mass flow rate x x x x x x
Net volume flow rate
72
Model 2700 Transmitters with F
OUNDATION
™
fieldbus
Configuration
Table 4-11
Derived variables and available process variables (continued)
Derived variable – ProLink II label and definition
Volume Conc (Dens)
Volume concentration derived from reference density
The percent volume of solute or of material in suspension in the total solution, derived from reference density
Density at reference temperature x x
Volume Conc (SG)
Volume concentration derived from specific gravity
The percent volume of solute or of material in suspension in the total solution, derived from specific gravity
Conc (Dens)
Concentration derived from reference density
The mass, volume, weight, or number of moles of solute or of material in suspension in proportion to the total solution, derived from reference density
Conc (SG)
Concentration derived from specific gravity
The mass, volume, weight, or number of moles of solute or of material in suspension in proportion to the total solution, derived from specific gravity x x
Available process variables
Standard volume flow rate x
Specific gravity
Concentration Net mass flow rate x x x x x x x x x
Net volume flow rate x x
Configuration and Use Manual
73
Configuration
4.7.2
Configuration procedure
Complete configuration instructions for the concentration measurement application are provided in the manual entitled Micro Motion Enhanced Density Application: Theory, Configuration, and Use.
Note: The concentration measurement manual uses ProLink II as the standard configuration tool for the concentration measurement application. Because the fieldbus parameters are very similar to the
ProLink II labels, you can follow the instructions for ProLink II and adapt them to your host. All of the parameters related to the concentration measurement application can be found in the
CONCENTRATION MEASUREMENT transducer block (see Appendix B).
The typical configuration procedure simply sets up the concentration measurement application to use a standard curve. The following steps are required:
1. Set the transmitter’s density measurement unit to match the unit used by the curve (as listed in
Table 4-10).
2. Set the transmitter’s temperature measurement unit to match the unit used by the curve (as
listed in Table 4-10).
3. Set the derived variable to Mass Conc (Dens).
4. Specify the active curve.
4.8
Changing the linearization
Linearization translates a process variable into different measurement units and onto a new scale.
Output scaling and linearization relate to each other in the following way:
• When the linearization parameter of an AI block is set to Direct, the AI block reports process variables directly from the MEASUREMENT transducer block. The transmitter is shipped with all AI blocks set to Direct linearization by default.
• When the linearization parameter of an AI block is set to Indirect, the value from the
MEASUREMENT transducer block is converted according to the Output Scale parameters
(see Section 4.9).
In addition, the AI block output is converted according to the Transducer Scale parameters, but with a 1/x transformation, i.e., if the upper bound of the Transducer Scale is set to 50%, the output will be doubled.
Indirect linearization can be used along with Output Scale and Transducer Scale to create
special measurement units. Refer Section 4.9 and to the F
OUNDATION
Fieldbus Blocks manual, available from the Rosemount web site (www.rosemount.com), for information about creating special units using this method.
• When the linearization parameter of an AI block is set to Indirect square root, the AI block reports the square root of the scaled output. In general, indirect square root linearization is not useful for Coriolis meters.
You can change the linearization setting only with a fieldbus host.
74
Model 2700 Transmitters with F
OUNDATION
™
fieldbus
Configuration
Figure 4-19
Linearization – Fieldbus host
AI
Linearization Type
Linearization Type – Set to the desired linearization value.
4.9
Changing the output scale
The AI function blocks can be configured to scale their output. The output scale is established by defining a process variable value at 0% of scale and at 100% of scale. The output of the AI block will be translated to a value between these two limits.
Note: Although it is possible to set the Output Scale: Units Index parameter to a value different from the Transducer Scale: Units Index parameter, this has no effect on output. The Output Scale: Units
Index parameter is primarily useful as a label.
The output scale is a function of the AI blocks, and is only used when linearization is set to Indirect
(see Section 4.8). If you choose to use output scaling, note that it has no effect on the process values
found in the MEASUREMENT transducer block. This results in the following behaviors:
• ProLink II and the display use the process values in the MEASUREMENT transducer block.
Therefore, the output of a scaled AI block may differ from the value reported by other communication tools.
• Slug flow and flow cutoffs are configured in the MEASUREMENT block. Therefore, output scaling has no effect on the behavior of the transmitter with regard to slug flow or flow cutoffs.
Example
To create a special unit for pints per second, the AI block assigned to channel 4 (volume) can be configured as follows:
• Transducer Scale: Units Index = gal/s
• Transducer Scale: EU at 0% = 0
• Transducer Scale: EU at 100% = 100
• Output Scale: Units Index = pints
• Output Scale: EU at 0% = 0
• Output Scale: EU at 100% = 800
• Linearization Type = Indirect
AI:Out
16 pints/s
Volume Flow:Value
2 gal/s
Display
2 gal/s
Configuration and Use Manual
75
Configuration
You can change the output scale only with a fieldbus host (Figure 4-20).
Figure 4-20
Output scaling – Fieldbus host
AI
Output Scale: EU at 0%
Output Scale: EU at 100%
Output Scale: EU at 0% – Set to process variable value at 0% of scale, in the configured units.
Output Scale: EU at 100% – Set to process variable value at 100% of scale, in the configured units.
4.10
Changing process alarms
The transmitter sends process alarms to indicate that a process value has exceeded its user-defined limits. The transmitter maintains four alarm values for each process variable. Each alarm value has a priority associated with it. In addition, the transmitter has an alarm hysteresis function to prevent erratic alarm reports.
Note: Process alarms are only posted through the AI function block and are NOT shown on the display or in ProLink II.
4.10.1
Alarm values
The process alarm values are the limits for process variables. Whenever a process variable exceeds a process alarm value, the transmitter broadcasts an alarm to the fieldbus network.
Each AI function block has four process alarm values: high alarm, high-high alarm, low alarm, and low-low alarm.
Figure 4-21
Alarm values
High-high alarm
High alarm
Normal process range
Low alarm
Low-low alarm
You can change the alarm values only with a fieldbus host.
76
Model 2700 Transmitters with F
OUNDATION
™
fieldbus
Configuration
Figure 4-22
Alarm values – Fieldbus host
AI
High High Limit
High Limit
Low Limit
Low Low Limit
High High Limit – Set to the value for the high-high alarm.
High Limit
Low Limit
– Set to the value for the high alarm.
– Set to the value for the low alarm.
Low Low Limit – Set to the value for the low-low alarm.
4.10.2
Alarm priorities
Each process alarm is assigned an alarm priority. A process alarm priority is a number from 0 to 15.
Higher numbers indicate higher alarm priorities. These values are for fieldbus network management and do not affect transmitter operation.
You can change the process alarm priority values only with a fieldbus host.
Figure 4-23
Alarm priorities – Fieldbus host
AI
High High Priority
High Priority
Low Priority
Low Low Priority
High High Priority – Set to the priority for the high-high alarm.
High Priority – Set to the priority for the high alarm.
Low Priority – Set to the priority for the low alarm.
Low Low Priority – Set to the priority for the low-low alarm.
4.10.3
Alarm hysteresis
The alarm hysteresis value is a percentage of the output scale. After a process alarm is created, the transmitter will not create new alarms unless the process first returns to a value within the range of the
alarm hysteresis percentage. Figure 4-24 shows the transmitter’s alarm behavior with an alarm
hysteresis value of 50%.
Configuration and Use Manual
77
Configuration
Note the following about hysteresis:
• A low hysteresis value allows the transmitter to broadcast a new alarm every time or nearly every time the process variable crosses over the alarm limit.
• A high hysteresis value prevents the transmitter from broadcasting new alarms unless the process variable first returns to a value sufficiently below the high alarm limit or above the low alarm limit.
Figure 4-24
High versus low alarm hysteresis values
New alarms
not created
New alarm created here
HIGH ALARM
Alarm created
Hysteresis value
LOW ALARM
You can change the alarm hysteresis value only with a fieldbus host.
Figure 4-25
Alarm hysteresis – Fieldbus host
AI
Alarm Hysteresis
Alarm Hysteresis – Set to the desired percentage of output scale, where scale is defined by either the
Transducer Scale or Output Scale values.
78
Model 2700 Transmitters with F
OUNDATION
™
fieldbus
Configuration
Alarm code
A017
A018
A019
A020
A021
A025
A026
A028
A031
A032
A033
A034
A102
A008
A009
A010
A011
A012
A013
A014
A016
A001
A002
A003
A004
A005
A006
4.11
Configuring status alarm severity
Status alarm severity does not affect the fieldbus alarm system (see Figure 4.10). The main function of
status alarm severity in the Model 2700 with F
OUNDATION
fieldbus transmitter is to control the
behavior of the display. See Section 5.4 for information about how the display indicates the severity of
alarms.
The severity level of some alarms can be reclassified. For example:
• The default severity level for Alarm A020 (calibration factors unentered) is
Fault
, but you can reconfigure it to either
Informational
or
Ignore
.
• The default severity level for Alarm A102 (drive over-range) is
Informational
, but you can reconfigure it to either
Ignore
or
Fault
.
A list of all status alarms and default severity levels is shown in the following table. (For more information on status alarms, including possible causes and troubleshooting suggestions, see
Section 6.9.)
Table 4-12
Status alarms and severity levels
Description
(E)EPROM Checksum Error (CP)
RAM Error (CP)
Sensor Failure
Temperature Sensor Failure
Input Overrange
Not Configured
Density Overrange
Transmitter Initializing/warming Up
Calibration Failure
Cal Fail — Too Low
Cal Fail — Too High
Cal Fail — Too Noisy
Transmitter Failed
Line RTD Temperature Out-of-Range
Meter RTD Temperature Out-of-Range
(E)EPROM Checksum Error
RAM or ROM Test Error
Calibration Factors Unentered
Incorrect Sensor Type (K1)
Protected Boot Sector Fault (CP)
Sensor/Transmitter Communication Error
Core Processor Write Failure
Low Power
Smart Meter Verification In Progress and Outputs Fixed
Sensor OK/Tubes Stopped by Process
Smart Meter Verification Failed
Drive Overrange/Partially Full Tube
Default severity
Fault
Fault
Fault
Fault
Fault
Fault
Fault
Fault
Fault
Fault
(1)
Fault
Informational
Informational
Fault
Ignore
Fault
Fault
Fault
Fault
Fault
Fault
Fault
Fault
Fault
Fault
Fault
Fault
Configurable
No
No
Yes
Yes
Yes
No
No
No
No
Yes
No
No
Yes
Yes
Yes
No
Yes
Yes
Yes
No
Yes
No
No
Yes
No
Yes
Yes
Configuration and Use Manual
79
Configuration
Table 4-12
Status alarms and severity levels (continued)
Alarm code
A103
A104
A105
A106
A107
A116
A117
A120
A121
A128
A129
A131
A132
Description
Default severity
Data Loss Possible (Tot and Inv) Informational
Calibration-in-Progress Informational
(2)
Slug Flow
AI/AO Simulation Active
Informational
Informational
Power Reset Occurred
API: Temperature Outside Standard Range
API: Density Outside Standard Range
CM: Unable to Fit Curve Data
CM: Extrapolation Alarm
Factory configuration data invalid
Factory configuration data checksum invalid
Smart Meter Verification In Progress
Simulation Mode Active
Informational
Informational
Informational
Informational
Informational
Informational
Fault
Informational
Informational
Configurable
Yes
Yes
No
Yes
Yes
Yes
Yes
Yes
No
Yes
Yes
Yes
No
(1) The severity changes automatically based on the configured output state of a Smart Meter Verification test. If the output state is set to Last Measured Value (LMV), the alarm severity will be Informational. If the output state is set to Fault, the alarm severity will be
Fault.
(2) Can be set to either Informational or Ignore, but cannot be set to Fault.
Alarm severity can be configured with a fieldbus host or ProLink II. Some configurable alarms can be set to either Informational or Ignore, but not to Fault.
Figure 4-26
Alarm severity – Fieldbus host
DIAGNOSTICS
Alarm Index
Alarm Severity
Alarm Index – Select an alarm for which you want to modify the severity. (You must write to the transmitter before the Alarm Severity parameter becomes available.)
Alarm Severity – Select a severity for the alarm indicated by the Alarm Index parameter.
80
Model 2700 Transmitters with F
OUNDATION
™
fieldbus
Configuration
Figure 4-27
Alarm severity – ProLink II
ProLink >
Configuration
Select an alarm from the Alarm list
Alarm tab
Select a severity from the Severity list
Apply
4.12
Changing the damping values
A damping value is a period of time, in seconds, over which the process variable value will change to reflect 63% of the change in the actual process. Damping helps the transmitter smooth out small, rapid measurement fluctuations.
• A high damping value makes the output appear to be smoother because the output must change slowly.
• A low damping value makes the output appear to be more erratic because the output changes more quickly.
Damping can be configured for flow, density, and temperature using a fieldbus host or ProLink II.
Note: There is also a damping parameter in each AI block called Process Value Filter Time. In order to avoid having two (potentially conflicting) damping values, you should set damping values only in the MEASUREMENT transducer block. The Process Value Filter Time parameter for each AI block should be set to 0.
When you specify a new damping value, it is automatically rounded down to the nearest valid
damping value. Valid damping values are listed in Table 4-13.
Note: For gas applications, Micro Motion recommends a minimum flow damping value of 2.56.
Before setting the damping values, review Section 4.12.1 for information on how the damping values
affect other transmitter measurements.
Table 4-13
Valid damping values
Process variable
Flow (mass and volume)
Density
Temperature
Valid damping values
0, 0.04, 0.08, 0.16, … 40.96
0, 0.04, 0.08, 0.16, … 40.96
0, 0.6, 1.2, 2.4, 4.8, … 76.8
Configuration and Use Manual
81
Configuration
Figure 4-28
Damping – Fieldbus host
MEASUREMENT
Flow Damping
Density Damping
Temperature Damping
Flow Damping
Density Damping
– Set to the desired damping value for mass flow and volume flow measurement.
– Set to the desired damping value for density measurement.
Temperature Damping – Set to the desired damping value for temperature measurement.
Figure 4-29
Damping – ProLink II
ProLink >
Configuration
Flow tab Density tab Temperature tab
Enter a damping value in the Flow Damp box
Enter a damping value in the Dens Damping box
Enter a damping value in the Temp Damping box
Apply Apply Apply
4.12.1
Damping and volume measurement
When configuring damping values, note the following:
• Liquid volume flow is derived from mass and density measurements; therefore, any damping applied to mass flow and density will affect liquid volume measurement.
• Gas standard volume flow is derived from mass flow measurement, but not from density measurement. Therefore, only damping applied to mass flow will affect gas standard volume measurement.
Be sure to set damping values accordingly.
82
Model 2700 Transmitters with F
OUNDATION
™
fieldbus
Configuration
4.13
Changing slug flow limits and duration
Slugs—gas in a liquid process or liquid in a gas process—occasionally appear in some applications.
The presence of slugs can significantly affect the process density reading. The slug flow parameters can help the transmitter suppress extreme changes in process variables, and can also be used to identify process conditions that require correction.
Slug flow parameters are as follows:
• Low slug flow limit — the point below which a condition of slug flow will exist. Typically, this is the lowest density you expect to observe for your process. The default value is 0.0 g/cm
3
.
The valid range is 0.0–10.0 g/cm
3
.
• High slug flow limit — the point above which a condition of slug flow will exist. Typically, this is the highest density you expect to observe for your process. The default value is
5.0 g/cm
3
. The valid range is 0.0–10.0 g/cm
3
.
• Slug flow duration — the number of seconds the transmitter waits for a slug flow condition to clear. If the transmitter detects slug flow, it will post a slug flow alarm and hold its last
“pre-slug” flow rate until the end of the slug flow duration. If slugs are still present after the slug flow duration has expired, the transmitter will report a flow rate of zero. The default value for slug flow duration is 0.0 seconds. The valid range is 0.0–60.0 seconds.
Note: Raising the low slug flow limit or lowering the high slug flow limit will increase the possibility that slug flow conditions will be detected by the transmitter.
Note: The slug flow limits must be entered in g/cm
3
, even if another unit has been configured for density. Slug flow duration must be entered in seconds.
Slug flow can be configured using a fieldbus host or ProLink II.
Figure 4-30
Slug flow settings – Fieldbus host
DIAGNOSTICS
Slug Low Limit
Slug High Limit
Slug Duration
Slug Low Limit – Set to the density below which a condition of slug flow will exist.
Slug High Limit – Set to the density above which a condition of slug flow will exist.
Slug Duration – Set to the number of seconds to wait for a slug flow condition to clear before a slug flow alarm is posted.
Configuration and Use Manual
83
Configuration
Figure 4-31
Slug flow settings – ProLink II
ProLink >
Configuration
Density tab
Set the density limits:
• Slug Low Limit
• Slug High Limit
Set the slug flow duration in the Slug
Duration box
Apply
4.14
Configuring cutoffs
Cutoffs are user-defined values below which the transmitter reports a value of zero for the specified process variable. Cutoffs can be set for mass flow, volume flow, gas standard volume flow, and density.
The following table lists the default values and relevant comments for each cutoff. See Section 4.14.1
for information on how the cutoffs interact with other transmitter measurements.
Table 4-14
Cutoff default values and comments
Cutoff
Mass
Liquid volume
Default value Comments
0.0 g/s
0.0 L/s
0.0 SCFM
Micro Motion recommends a mass flow cutoff value of 0.2% of the sensor’s maximum flow rate for standard operation, and 2.5% of the sensor’s maximum flow rate for empty-full-empty batching.
The lower limit for volume flow cutoff is 0. The upper limit for volume flow cutoff is the sensor’s flow calibration factor, in L/s, multiplied by 0.2.
No limit Gas standard volume flow
Density 0.2 g/cm
3
The range for density cutoff is 0.0–0.5 g/cm
3
Cutoffs can be configured with a fieldbus host or ProLink II.
84
Model 2700 Transmitters with F
OUNDATION
™
fieldbus
Configuration
Figure 4-32
Cutoffs – Fieldbus host
MEASUREMENT
Mass Flow Cutoff
Vol Flow Cutoff
Std Gas Vol Flow Cutoff
Density Cutoff
Mass Flow Cutoff
Vol Flow Cutoff
– Set to the desired mass flow cutoff value.
– Set to the desired (liquid) volume flow cutoff value.
Std Gas Vol Flow Cutoff – Set to the desired (gas) volume flow cutoff value.
Density Cutoff – Set to the desired density cutoff value.
Figure 4-33
Cutoffs – ProLink II
ProLink >
Configuration
Flow tab Density tab
Enter values in the Mass
Flow Cutoff or Volume
Flow Cutoff
(1)
boxes
Enter a value in the
Density Cutoff box
Apply Apply
(1) When volume flow is configured for gas standard volume, this box is labeled
Std gas vol flow cutoff.
4.14.1
Cutoffs and volume flow
If liquid volume flow is enabled:
• The density cutoff is applied to the volume flow calculation. Accordingly, if the density drops below its configured cutoff value, the volume flow rate will go to zero.
• The mass flow cutoff is not applied to the volume flow calculation. Even if the mass flow drops below the cutoff, and therefore the mass flow indicators go to zero, the volume flow rate will be calculated from the actual mass flow process variable.
If gas standard volume flow is enabled, neither the mass flow cutoff nor the density cutoff is applied to the volume flow calculation.
Configuration and Use Manual
85
Configuration
4.15
Changing the flow direction parameter
The flow direction parameter controls how the transmitter reports flow rate and how flow is added to or subtracted from the totalizers.
• Forward (positive) flow moves in the direction of the arrow on the sensor.
• Reverse (negative) flow moves in the direction opposite of the arrow on the sensor.
Options for flow direction include:
• Forward Flow
• Reverse Flow
• Bi-directional
• Absolute Value
• Negate/Forward Only
• Negate/Bi-directional
The effect of each of these options is shown in the following table.
Table 4-15
Transmitter behavior for each flow direction value
Forward flow Reverse flow
Flow direction value
Forward only
Reverse only
Bi-directional
Absolute value
Negate/forward only
Negate/bi-directional
Flow totals
Increase
No change
Increase
Increase
No change
Decrease
Flow values on display or via digital comm.
Read positive
Read positive
Read positive
Read positive
(1)
Read negative
Read negative
Flow totals
No change
Increase
Decrease
Increase
Increase
Increase
Flow values on display or via digital comm.
Read negative
Read negative
Read negative
Read positive
(1)
Read positive
Read positive
(1) Refer to the digital communications status bits for an indication of whether flow is positive or negative.
You can change the flow direction parameter with a fieldbus host or ProLink II.
Figure 4-34
Flow direction parameter – Fieldbus host
MEASUREMENT
Flow Direction
Flow Direction
– Set to the desired value (refer to Flow direction value in Table 4-15).
86
Model 2700 Transmitters with F
OUNDATION
™
fieldbus
Configuration
Figure 4-35
Flow direction parameter – ProLink II
ProLink >
Configuration
Flow tab
Select a value from the Flow Direction list
Apply
See Table 4-15 for flow
direction values.
4.16
Changing device settings
The device settings are used to describe the flowmeter components. The following information can be entered:
• Tag
• Message
• Date
These parameters are for user convenience and network management. They are not used in transmitter processing, and are not required.
You can set the tag with a fieldbus host by using the host’s tagging features. You can set the tag,
message, and date with ProLink II (Figure 4-36).
CAUTION
Setting the software tag via ProLink II will cause the transmitter to restart.
Configuration and Use Manual
87
Configuration
Figure 4-36
Device settings – ProLink II
ProLink >
Configuration
Device (Fieldbus) tab
Enter information in the boxes provided
Apply
If you are entering a date, use the left and right arrows at the top of the calendar shown in ProLink II to select the year and month, then click on a date.
4.17
Configuring sensor parameters
The sensor parameters are used to describe the sensor component of your flowmeter. These sensor parameters are not used in transmitter processing, and are not required:
• Serial number
• Sensor material
• Liner material
• Flange
You can configure the sensor parameters with a fieldbus host or ProLink II.
Figure 4-37
Sensor parameters – Fieldbus host
DEVICE
INFORMATION
Sensor Serial Number
Sensor Material
Liner Material
Flange
Sensor Serial Number – Enter the sensor serial number.
Sensor Material Select the sensor material.
Liner Material Select the liner material.
Flange Select the flange.
88
Model 2700 Transmitters with F
OUNDATION
™
fieldbus
Configuration
Figure 4-38
Sensor parameters – ProLink II
ProLink >
Configuration
Select the liner material from the
Liner Matl list
Sensor tab
Enter the sensor serial number in the
Sensor s/n box
Select the sensor serial material from the Sensor Matl list
Select the flange from the Flange list
Apply
4.18
Changing the display functionality
You can restrict the display functionality or change the variables that are shown on the display.
4.18.1
Enabling and disabling display functions
Table 4-16
Display functions and parameters
Display function
Totalizer reset
(1)
Fieldbus parameter Display code Enabled Disabled
Totalizer start/stop
Auto scroll
(2)
Offline menu
Alarm menu
Totalizer reset
Totalizer start/stop
Auto scroll
Offline menu
Alarm menu
TOTAL RESET
TOTAL STOP
AUTO SCRLL
Resetting mass and volume totalizers is permitted.
Resetting mass and volume totalizers is not possible.
Operator can start and stop totalizers from the display.
Display automatically scrolls through each process variable.
DISPLAY OFFLN Operator has access to the offline menu.
DISPLAY ALARM Operator has access to alarm menu.
Operator cannot start or stop totalizers.
Operator must Scroll to view process variables.
No access to the offline menu.
No access to the alarm menu.
ACK all alarms
Offline password
(3)
ACK all alarms
Offline password
DISPLAY ACK
CODE OFFLN
Operator can acknowledge all current alarms at once.
Password required for offline menu. See
Section 4.18.4
Alarms must be acknowledged individually.
Offline menu accessible without a password.
Configuration and Use Manual
89
Configuration
Table 4-16
Display functions and parameters (continued)
Display function
Display backlight
Status LED blinking
Fieldbus parameter
Display backlight
Status LED blinking
Display code
DISPLAY BKLT
Not accessible via the display
Enabled
Display backlight is ON.
Status LED will blink when there are unacknowledged alarms active.
Password required for alarms menu.
Disabled
Display backlight is OFF.
Status LED will not blink.
Alarm password
(3)
Alarm password CODE ALARM Alarm menu accessible without a password.
(1) If the petroleum measurement application is installed on your transmitter, the display password is always required to start, stop, or reset a totalizer, even if neither password is enabled. If the petroleum measurement application is not installed, the display password is never required for these functions, even if one of the display passwords is enabled.
(2) If enabled, you may want to configure Scroll Rate. See Section 4.18.2.
(3) If enabled, the display password must also be configured. See Section 4.18.4.
Note the following:
• If you use the display to disable access to the off-line menu, the off-line menu will disappear as soon as you exit the menu system. If you want to re-enable access, you must use a different method (e.g., ProLink II).
• If you are using the display to configure the display:
You must enable Auto Scroll before you can configure Scroll Rate.
You must enable the off-line password before you can configure the password.
You can enable and disable the display parameters with a fieldbus host, ProLink II, or the display.
Figure 4-39
Display functions – Fieldbus host
LOCAL DISPLAY
*
*
– Refer to the fieldbus parameters in Table 4-16. Each parameter can be set to Enabled or Disabled.
90
Model 2700 Transmitters with F
OUNDATION
™
fieldbus
Configuration
Figure 4-40
Display functions – ProLink II
ProLink >
Configuration
Display tab
Enable or disable functions using the checkboxes
Apply
Configuration and Use Manual
91
Configuration
Figure 4-41
Display functions – Display
Scroll and Select simultaneously for 4 seconds
Scroll
OFF-LINE MAINT
Select
Scroll
CONFG
TOTALS RESET
Scroll
TOTALS STOP
Scroll
DISPLAY OFFLN
(1)
Select
UNITS
Scroll
DISPLAY ALARM
Scroll
DISPLAY
Select Scroll
DISPLAY ACK
Scroll
AUTO SCRLL
(2)
Scroll
CODE OFFLN
(3)
Scroll
CODE ALARM
(3)
Scroll
DISPLAY BKLT
Scroll
EXIT
(1) If you disable access to the offline menu, the offline menu will disappear as soon as you exit. To re-enable access, you must use a fieldbus host or ProLink II.
(2) If Auto Scroll is enabled, a Scroll Rate screen is displayed immediately after the Auto Scroll screen.
(3) If either password is enabled, a Change Code screen will be displayed so that the password can be configured.
4.18.2
Changing the scroll rate
The scroll rate is used to control the speed of scrolling when auto scroll is enabled. Scroll rate defines how long each display variable will be shown on the display. The time period is defined in seconds
(e.g., if scroll rate is set to 10, each display variable will be shown on the display for 10 seconds). The valid range is from 0 to 10 seconds.
You can change the scroll rate with a fieldbus host or ProLink II.
92
Model 2700 Transmitters with F
OUNDATION
™
fieldbus
Configuration
Figure 4-42
Scroll rate – Fieldbus host
LOCAL DISPLAY
Display Scroll Rate
Display Scroll Rate – Set to the number of seconds each variable should be displayed.
Figure 4-43
Scroll rate – ProLink II
ProLink >
Configuration
Display tab
Enter number of seconds in Auto
Scroll Rate box
Apply
4.18.3
Changing the update period
The update period (or display rate) parameter controls how often the display is refreshed with current data. The default is 200 milliseconds. The range is 100 to 10000 milliseconds. The update period value applies to all displayed process variables.
You can change the update period with a fieldbus host, ProLink II, or the display.
Figure 4-44
Update period – Fieldbus host
LOCAL DISPLAY
Update rate
Update Rate – Set to the number of milliseconds between updates to the display (100 to 10000, default is 200).
Configuration and Use Manual
93
Configuration
Figure 4-45
Update period – ProLink II
ProLink >
Configuration
Display tab
Enter a value between 100 and
10000 milliseconds in the Update Period box
Apply
Figure 4-46
Update period – Display
Scroll and Select simultaneously for 4 seconds
Scroll
OFF-LINE MAINT
Select
Scroll
CONFG
Select
UNITS
Scroll
Select
DISPLAY
TOTALS RESET
Scroll
DISPLAY RATE
Select
Enter a value between
100 and 10000 milliseconds
4.18.4
Changing the display password
The display password is a numeric code that can contain up to four digits. It is used for both the
off-line menu password and the alarm menu password. See Section 4.4.4 for information on how the
two passwords are implemented.
94
Model 2700 Transmitters with F
OUNDATION
™
fieldbus
Configuration
If you are using the display, you must enable either the off-line password or the alarm screen
password before you can configure the password (see Section 4.18.1).
Note: If the petroleum measurement application is installed on your transmitter, the display password is always required to start, stop, or reset a totalizer, even if neither password is enabled. If the petroleum measurement application is not installed, the display password is never required for these functions, even if one of the passwords is enabled.
You can change the password with a fieldbus host, Prolink II, or the display.
Figure 4-47
Display password – Fieldbus host
LOCAL DISPLAY
Display Offline Password
Display Offline Password – Enter a 4-digit password between 0000 and 9999.
Figure 4-48
Display password – ProLink II
ProLink >
Configuration
Display tab
Enter a 4-digit password in the
Offline Password
box
Apply
Configuration and Use Manual
95
Configuration
Figure 4-49
Display password – Display
Scroll and Select simultaneously for 4 seconds
Scroll
OFF-LINE MAINT
Select
Scroll
CONFG
Select
UNITS
Scroll
DISPLAY
Select
Scroll
CODE OFFLN
(1)
Scroll
CHANGE CODE
Select
(1) Select CODE OFFLN to enable the display password. This will enable the CHANGE
CODE option, which is used to set the display password.
Enter a new password.
96
Model 2700 Transmitters with F
OUNDATION
™
fieldbus
Configuration
4.18.5
Changing the display variables and precision
The display can scroll through up to 15 process variables in any order. You can select the process variables you wish to see and the order in which they should appear.
Additionally, you can configure display precision for each display variable. Display precision controls the number of digits to the right of the decimal place. The range of the display precision is 0 to 5.
Note: If you change the volume flow type from Liquid Volume to Gas Standard Volume (see
Section 4.3), any display variables configured for volume flow will change automatically to GSV flow.
Likewise, if you change the volume flow type from Gas Standard Volume to Liquid Volume, any display variables configured for GSV flow will change automatically to volume flow.
Table 4-17 shows an example of a display variable configuration. Notice that you can repeat variables,
and you can choose a value of “None.” The actual appearance of each process variable on the display
is described in Appendix 4.
Table 4-17
Example of a display variable configuration
Display variable
Display variable 1
Display variable 2
Display variable 3
Display variable 4
Display variable 5
Display variable 6
Display variable 7
Display variable 8
Display variable 9
Display variable 10
Display variable 11
Display variable 12
Display variable 13
Display variable 14
Display variable 15
Process variable
Mass flow
Volume flow
Density
Mass flow
Volume flow
Mass totalizer
Mass flow
Temperature
Volume flow
Volume totalizer
Density
Temperature
None
None
None
You can change the display variables and precision with a fieldbus host or ProLink II.
Configuration and Use Manual
97
Configuration
Figure 4-50
Display variables – Fieldbus host
LOCAL DISPLAY
Display Variable 1 through Display Variable 15
Number of Decimals
Display Variable 1…15
– Set each parameter to an available process variable.
Number of Decimals – Set to the number of decimal places to be shown on the display.
Figure 4-51
Display variables – ProLink II
ProLink >
Configuration
Display tab
Select a process variable from each drop-down list
Enter a value in the
Number of Decimals
box
Apply
4.18.6
Changing the display language
The display can be configured to use any of the following languages for data and menus:
• English
• French
• German
• Spanish
The display language can be configured using a fieldbus host, ProLink II, or the display.
98
Model 2700 Transmitters with F
OUNDATION
™
fieldbus
Configuration
Figure 4-52
Display language – Fieldbus host
LOCAL DISPLAY
Language
Language – Set to the desired display language.
Figure 4-53
Display language – ProLink II
ProLink >
Configuration
Display tab
Select a language from the Display
Language list
Apply
Configuration and Use Manual
99
Configuration
Figure 4-54
Display language – Display
Scroll and Select simultaneously for 4 seconds
Scroll
OFF-LINE MAINT
Select
Scroll
CONFG
Select
UNITS
Scroll
DISPLAY
Select
TOTALS RESET
Scroll
DISPLAY LANG
Select
ENG
Scroll
FREN
Scroll
GER
Scroll
SPAN
4.19
Configuring write-protect mode
When the transmitter is in write-protect mode, the configuration data stored in the transmitter and core processor cannot be changed until write-protect mode is disabled.
You can configure write-protect mode with a fieldbus host, ProLink II, or the display.
Figure 4-55
Write-protect mode – Fieldbus host
100
Model 2700 Transmitters with F
OUNDATION
™
fieldbus
Configuration
Figure 4-56
Write-protect mode – ProLink II
ProLink >
Configuration
Device (Fieldbus) tab
Select the Enable
Write Protection
checkbox
Apply
Figure 4-57
Write-protect mode – Display
Scroll and Select simultaneously for 4 seconds
Scroll
OFF-LINE MAINT
Select
Scroll
CONFIG LOCK
Select
ENABL/DISABL
Configuration and Use Manual
101
Configuration
4.20
Enabling LD Optimization
LD Optimization is a special compensation is that is specifically for hydrocarbon liquids. LD
Optimization should not be used with any other process fluids. LD Optimization is available only with certain large sensor sizes. If your sensor can benefit from LD Optimization, the enable/disable option will appear in ProLink II or on the display.
CAUTION
If you send the transmitter to a calibration facility to perform a water calibration, either during startup or any time thereafter, LD Optimization must be disabled. When you have completed the calibration, re-enable LD
Optimization.
To enable LD Optimization, see Figures 4-58 and 4-59.
Figure 4-58
LD Optimization – ProLink II
102
Model 2700 Transmitters with F
OUNDATION
™
fieldbus
Configuration
Figure 4-59
LD Optimization – Display
Scroll and Select simultaneously for 4 seconds
Scroll
OFF-LINE MAINT
Select
Scroll
CONFG
Select
Scroll
Scroll
MTR F
Select
FACTOR LD
Select
LD OPT
Configuration and Use Manual
103
Configuration
104
Model 2700 Transmitters with F
OUNDATION
™
fieldbus
Chapter 5
Operation
5.1
Overview
This section describes how to use the transmitter in everyday operation. The procedures in this section will enable you to use a fieldbus host, the display, or ProLink II to:
•
View process variables (Section 5.2)
•
Use simulation mode (Section 5.3)
•
Respond to alarms (Section 5.4)
•
Use the totalizers and inventories (Section 5.5)
Note: All procedures provided in this chapter assume that you have established communication with
the transmitter and that you are complying with all applicable safety requirements. See Appendices 2
and 3.
5.2
Viewing process variables
Process variables include measurements such as mass flow rate, volume flow rate, mass total, volume total, temperature, density, and drive gain.
You can view process variables with a fieldbus host, the display, or ProLink II.
With a fieldbus host
The transmitter has four fieldbus AI function blocks. Each AI function block reports the value of one process variable, the associated units of measure, and a status value that indicates measurement quality. For more information on the function blocks, refer to the F
OUNDATION
Fieldbus Blocks manual, available at the Rosemount web site (www.rosemount.com).
To view a process variable, select the AI function block that measures that variable, and read the Out
parameter. The output of AI blocks may be influenced by output scaling (see Section 4.9).
You can also view each process variable by reading the MEASUREMENT transducer block parameter for each process variable. The following table lists the process variables that correspond to each MEASUREMENT transducer block parameter.
Configuration and Use Manual
105
Operation
Table 5-1
Process variable parameters in the MEASUREMENT transducer block
Process variable
Mass-flow rate
Volume-flow rate
Temperature
Density
Gas standard volume
(1)
Transducer block parameter
Mass Flow: Value
Volume Flow: Value
Temperature: Value
Density: Value
Gas Volume Flow Rate: Value
(1) Gas standard volume is not available if either the petroleum measurement application or the concentration measurement application is enabled.
With the display
Refer to Appendix 4 for a detailed explanation of how to use the display to view process variables.
The process variables shown by the display may need to be configured. Refer to Section 4.18.5.
With ProLink II software
To view process variables with ProLink II, choose
ProLink > Process Variables
.
5.2.1
Viewing API process variables
You can view petroleum measurement (API) process variables with a fieldbus host, the display, or
ProLink II.
With a fieldbus host
If an AI function block has been configured to use one of the petroleum measurement (API) variable
channels (see Section 2.3), you can select that AI block and read its Out parameter.
You can also view all of the petroleum measurement (API) variables by examining their parameters in the petroleum measurement (API) transducer block.
Table 5-2
Petroleum Measurement process variables by API transducer block parameter
API process variable
Temperature corrected density
Temperature corrected (standard) volume flow
Batch weighted average density
Batch weighted average temperature
API transducer block parameter
API Corr Density: Value
API Corr Volume Flow: Value
API Ave Density: Value
API Ave Temperature: Value
106
Model 2700 Transmitters with F
OUNDATION
™
fieldbus
Operation
With the display
Refer to Appendix 4 for a detailed explanation of how to use the display to view process variables.
The process variables shown by the display may need to be configured. Refer to Section 4.18.5.
With ProLink II software
To view API process variables with ProLink II software, choose
ProLink > API Process Variables
.
5.2.2
Viewing concentration measurement process variables
You can view concentration measurement (CM) process variables with a fieldbus host, the display, or
ProLink II.
With a fieldbus host
If an AI function block has been configured to use one of the CM variable channels (see Section 2.3),
you can select that AI block and read its Out parameter.
You can also view all of the CM variables by examining their parameters in the CONCENTRATION
MEASUREMENT transducer block.
Table 5-3
CM process variables by CONCENTRATION MEASUREMENT transducer block parameter
CM process variable
Density at reference
Density (fixed specific gravity units)
Standard volume flow rate
Net mass flow rate
Concentration
CONCENTRATION MEASUREMENT transducer block parameter
CM Density At Ref: Value
CM Density SG: Value
CM Std Volume Flow: Value
CM Net Mass Flow: Value
CM Concentration: Value
With the display
Refer to Appendix 4 for a detailed explanation of how to use the display to view process variables.
The process variables shown by the display may need to be configured. Refer to Section 4.18.5.
With ProLink II software
To view CM process variables with ProLink II, choose
ProLink > CM Process Variables
.
5.3
Simulation mode
The transmitter has two simulation modes:
• Fieldbus simulation mode
• Sensor simulation mode
5.3.1
Fieldbus simulation mode
The transmitter has a “simulate enable” switch that causes the transmitter to function in simulation mode as defined in the F
OUNDATION
fieldbus function block specification. This switch is software-selectable via a fieldbus host or ProLink II.
Configuration and Use Manual
107
Operation
Figure 5-1
Fieldbus simulation mode – Fieldbus host
DEVICE
INFORMATION
Simulate Mode
Simulate Mode – Set to Enabled to activate simulation mode.
Figure 5-2
Fieldbus simulation mode – ProLink II
ProLink >
Configuration
Device (Fieldbus) tab
Select Simulate
Mode
Apply
5.3.2
Sensor simulation mode
Sensor simulation mode causes simulated values to be substituted for actual process data from the sensor. Sensor simulation mode can be enabled only with ProLink II.
108
Model 2700 Transmitters with F
OUNDATION
™
fieldbus
Operation
Figure 5-3
Sensor simulation mode – ProLink II
ProLink >
Configuration
Sensor Simulation tab
Select a wave form for mass flow, density, and temperature from the
Wave Form lists
Select Enable
Simulation Mode
Fixed wave
Triangular or sine wave
Enter a value in the
Fixed Value box
Enter period in the
Period box
Enter minimum and maximum amplitude in the Minimum and
Maximum boxes
Apply
5.4
Responding to alarms
The transmitter broadcasts alarms when a process variable exceeds its defined limits or the transmitter
detects a fault condition. For instructions regarding all the possible alarms, see Section 6.9.
5.4.1
Viewing alarms
You can view alarms with a fieldbus host, the display, or ProLink II software.
With a fieldbus host
The transmitter sets its fieldbus output status to bad or uncertain whenever an alarm condition occurs.
A PlantWeb Alert may also be posted. (See Appendix A for information about PlantWeb Alerts.)
When the output status is bad or uncertain, you can view an alarm by reading the following alarm parameters:
• Each AI function block contains a parameter called Block Error that contains the alarm bits for that AI block.
• The DIAGNOSTICS transducer block contains four parameters named Alarm Status 1 through Alarm Status 4. Each of these parameters has a short list of alarm bits (see
Appendix B).
Configuration and Use Manual
109
Operation
With the display
The display reports alarms in two ways:
• With a status LED, which reports only that one or more alarms has occurred
• Through the alarm queue, which reports each specific alarm
Note: If access to the alarm menu from the display has been disabled (see Section 4.18), then the
display will not list alarm codes in an alarm queue and the status LED will not flash. The status LED will indicate status using solid green, yellow, or red.
Figure 5-4
Display alarm menu
Status LED
110
Table 5-4
Priorities reported by the status LED
Status LED state
Green
Flashing green
(1)
Yellow
Flashing yellow
(1)
Red
Flashing red
(1)
Alarm priority
No alarm—normal operating mode
Unacknowledged corrected condition
Acknowledged low severity alarm
Unacknowledged low severity alarm
Acknowledged high severity alarm
Unacknowledged high severity alarm
(1) If the LED blinking option is turned off (see Section 4.18.1), the status LED will flash only during calibration. It will not
flash to indicate an unacknowledged alarm.
Alarms in the alarm queue are arranged according to priority.
Model 2700 Transmitters with F
OUNDATION
™
fieldbus
Operation
Figure 5-5
Viewing and acknowledging alarms – Display
Scroll and Select simultaneously for 4 seconds
SEE ALARM
Select
Yes
ACK ALL
(1)
No
Select Scroll
EXIT
Select Scroll
Alarm code
Yes
Active/ unacknowledged alarms?
No
NO ALARM
Scroll Select
ACK
Select
Yes No
Scroll
Scroll
EXIT
(1) ACK ALL will appear only if it has been enabled.
See Section 5.4.
Configuration and Use Manual
111
Operation
With ProLink II
ProLink II provides two ways to view alarm information:
• Choose
ProLink > Status
. This window shows the current status of all possible alarms, independent of configured alarm severity. The alarms are divided into three categories:
Critical, Informational, and Operational. To view the indicators in a category, click on the associated tab. A tab is red if one or more status indicators in that category is active. On each tab, currently active alarms are shown by red indicators.
• Choose
ProLink > Alarm Log
. This window lists all active alarms, and all inactive but unacknowledged Fault and Informational alarms. (The transmitter automatically filters out
Ignore alarms.) A green indicator means “inactive but unacknowledged” and a red indicator means “active.” Alarms are organized into two categories: High Priority and Low Priority.
Note: The location of alarms in the Status and Alarm Log windows are not affected by the configured
alarm severity (see Section 4.11). Alarms in the Status window are predefined as Critical,
Informational, or Operational. Alarms in the Alarm Log window are predefined as High Priority or
Low Priority.
5.4.2
Acknowledging alarms
You can acknowledge alarms using ProLink II or the display. For transmitters with a display, access to the alarm menu can be enabled or disabled, and a password may be required. If access to the alarm menu is enabled, the operator may be disallowed from acknowledging all alarms simultaneously (the
Ack All?
function). See Section 4.18.1 for information on controlling these functions.
If the LED blinking option has been turned off, the status LED will not flash to indicate unacknowledged alarms. Alarms can still be acknowledged.
To acknowledge alarms using the display:
1. Activate and hold
Scroll
and
Select
simultaneously until the words
SEE ALARM
appear on
the screen. See Figure 5-4.
2.
Select
.
3. If the words
NO ALARM
appear, go to Step 8.
4. If you want to acknowledge all alarms: a.
Scroll until the word
ACK
appears by itself. The word
ACK
begins to alternate with the word
ALL?
.
b.
Select
.
Note: If the “acknowledge all alarms” feature has been disabled (see Section 4.18.1, then you must
acknowledge each alarm individually. See Step 5.
5. If you want to acknowledge a single alarm: a.
Scroll until the alarm you want to acknowledge appears.
b.
Select. The word
ALARM
begins to alternate with the word
ACK
.
c.
Select to acknowledge the alarm.
6. If you want to acknowledge another alarm, go to Step 3.
7. If you do NOT want to acknowledge any more alarms, go to Step 8.
8. Scroll until the word
EXIT
appears.
9.
Select
.
112
Model 2700 Transmitters with F
OUNDATION
™
fieldbus
Operation
To acknowledge alarms using ProLink II:
1. Click
ProLink > Alarm Log
. Entries in the alarm log are divided into two categories: High
Priority and Low Priority, corresponding to the default Fault and Information alarm severity levels. Within each category:
• All active alarms are listed with a red status indicator.
• All alarms that are “cleared but unacknowledged” are listed with a green status indicator.
2. For each alarm that you want to acknowledge, select the
ACK
checkbox.
5.5
Using the totalizers and inventories
The totalizers keep track of the total amount of mass or volume measured by the transmitter over a period of time. The totalizers can be viewed, started, stopped, and reset.
The inventories track the same values as the totalizers but can be reset separately. Because the inventories and totals are reset separately, you can use the inventories to keep a running total of mass or volume across multiple totalizer resets.
5.5.1
Viewing the totalizers and inventories
You can view the current value of the mass totalizer, volume totalizer, mass inventory, and volume inventory with a fieldbus host, the display, or ProLink II.
With a fieldbus host
If you have set up the INT function block to report the status of one of the internal totalizers or
inventories (see Section 2.4), you can simply read the Out parameter of the INT function block.
You can also view any of the internal totalizers or inventories by inspecting their respective transducer block parameters.
Table 5-5
Totalizer and inventory parameter names
Totalizer/inventory
Mass totalizer
Volume totalizer
Mass inventory
Volume Inventory
Reference volume gas total
(1)
Reference volume gas inventory
(1)
Temperature corrected volume total
Temperature corrected volume inventory
Standard volume total
(2)
Standard volume inventory
(2)
Net mass total
(2)
Transducer block
MEASUREMENT
MEASUREMENT
MEASUREMENT
MEASUREMENT
MEASUREMENT
MEASUREMENT
API
API
CONCENTRATION
MEASUREMENT
CONCENTRATION
MEASUREMENT
CONCENTRATION
MEASUREMENT
Parameter name
Mass Total: Value
Volume Total: Value
Mass Inventory: Value
Volume Inventory: Value
Gas Volume Total: Value
Gas Volume Inventory: Value
API Corr Volume Total: Value
API Corr Vol Inventory: Value
CM Std Volume Total: Value
CM Std Vol Inventory: Value
CM Net Mass Total: Value
Configuration and Use Manual
113
Operation
Table 5-5
Totalizer and inventory parameter names (continued)
Totalizer/inventory
Net mass inventory
(2)
Net volume total
(2)
Net volume inventory
(2)
Transducer block
CONCENTRATION
MEASUREMENT
CONCENTRATION
MEASUREMENT
CONCENTRATION
MEASUREMENT
Parameter name
CM Net Mass Inventory: Value
CM Net Volume Total: Value
CM Net Vol Inventory: Value
(1) Not valid when the petroleum measurement or concentration measurement applications are active.
(2) Not all of these totals are available at one time. The available totals depend on the concentration measurement application configuration.
With the display
You cannot view totalizers or inventories with the display unless the display has been configured to
show them. Refer to Section 4.18.5.
1. To view totalizer values,
Scroll
until the process variable
TOTAL
appears and the units of measure are:
• For the mass totalizer, mass units (e.g., kg, lb)
• For the volume totalizer, volume units (e.g., gal, cuft)
• For petroleum measurement or concentration measurement totalizers, the mass or volume unit alternating with the process variable (e.g.,
TCORR
or
NET M
) (see Table 4-1).
See Figure 5-6. Read the current value from the top line of the display.
2. To view inventory values,
Scroll
until the process variable
TOTAL
appears and:
• For the mass inventory, the word
MASSI
(Mass Inventory) begins to alternate with the units of measure
• For the volume inventory, the word
LVOLI
(Line Volume Inventory) begins to alternate with the units of measure
• For petroleum measurement or concentration measurement inventories, the mass or volume unit alternating with the process variable (e.g.,
TCORI
or
NET VI
) (see Table 4-1).
Read the current value from the top line of the display.
114
Model 2700 Transmitters with F
OUNDATION
™
fieldbus
Operation
Figure 5-6
Display totalizer
Process variable
Current value
Scroll
optical switch
Units of measure
Select
optical switch
With ProLink II
To view the current value of the totalizers and inventories with ProLink II, choose:
•
ProLink > Process Variables
to view standard totalizers and inventories
•
ProLink > API Process Variables
to view API totalizers and inventories
•
ProLink > CM Process Variables
to view CM totalizers and inventories
5.5.2
Controlling the totalizers and inventories
Table 5-6
Totalizer and inventory control methods
Function Name
Stop all totalizers and inventories
Start all totalizers and inventories
Reset mass or volume totalizer only
Reset API totalizer only
Reset CM totalizer only
Reset all totalizers
Reset all inventories
Reset individual inventories
Fieldbus host
Yes
Yes
Yes
Yes
Yes
Yes
Yes
Yes
ProLink II
Yes
Yes
Yes
No
Yes
Yes
Yes
(3)
Yes
(3)
Display
(1)
Yes
Yes
Yes
(2)
Yes
(2)
Yes
(2)
No
No
No
(1) These display functions may be enabled or disabled. See Section 4.18.
(2) This function is available only if the corresponding totalizer is configured as a display variable (see Section 4.18.5).
(3) If enabled in the ProLink II preferences.
With a fieldbus host
If you have set up the INT function block to report the status of one of the internal totalizers (i.e., not
Standard mode) (see Section 2.4), you can reset that totalizer by selecting the INT function block and
setting the OP_CMD_INT method parameter to Reset.
Configuration and Use Manual
115
Operation
You can also control the internal totalizers directly by using the method parameters shown in the following table.
Table 5-7
Totalizer/inventory control – Fieldbus host
To accomplish this
Stop all totalizers and inventories
Start all totalizers and inventories
Reset mass totalizer
Reset volume totalizer
Reset gas volume totalizer
Reset API totalizer
Reset CM standard volume totalizer
Reset CM net mass totalizer
Reset CM net volume totalizer
Reset mass inventory
Reset volume inventory
Reset gas volume inventory
Reset API inventory
Reset CM standard volume inventory
Reset CM net mass inventory
Reset CM net volume inventory
Simultaneously reset all totalizers
Simultaneously reset all inventories
Select this transducer block
MEASUREMENT
MEASUREMENT
MEASUREMENT
MEASUREMENT
MEASUREMENT
API
CONCENTRATION
MEASUREMENT
CONCENTRATION
MEASUREMENT
CONCENTRATION
MEASUREMENT
MEASUREMENT
MEASUREMENT
MEASUREMENT
API
CONCENTRATION
MEASUREMENT
CONCENTRATION
MEASUREMENT
CONCENTRATION
MEASUREMENT
MEASUREMENT
MEASUREMENT
And use this method parameter
Stop All Totals
Start Totals
Reset Mass Total
Reset Volume Total
Reset Gas Standard Volume Total
Reset API Volume Total
Reset CM Std Volume Total
Reset CM Net Mass Total
Reset CM Net Volume Total
Reset Mass Inventory
Reset Volume Inventory
Reset Gas Standard Volume Inventory
Reset API Inventory
Reset CM Volume Inventory
Reset CM Net Mass Inventory
Reset CM Net Volume Inventory
Reset Totalizers
Reset Inventories
116
With ProLink II
To control CM totalizers and inventories, choose
ProLink > CM Totalizer Control
. To control all other totalizer and inventory functions, choose
ProLink > Totalizer Control
.
To reset inventories using ProLink II, you must first enable this capability. To enable inventory reset using ProLink II:
1. Choose
View > Preferences
.
2. Select the
Enable Inventory Totals Reset
checkbox.
3. Click
Apply
.
With the display
Figure 5-7 shows how you can control the totalizers and inventories with the display.
• Starting or stopping totalizers and inventories will start or stop all totalizers and inventories simultaneously.
• Resetting totalizers resets only the totalizer for which the reset is selected. Inventories cannot be reset using the display.
Model 2700 Transmitters with F
OUNDATION
™
fieldbus
Operation
Figure 5-7
Display menu — controlling totalizers and inventories
Process variable display
Scroll
Mass total display
(1)
Scroll
Volume total display
(1)
API total
(1)(2)
ED total
(1)(2)
Select
RESET
(3)
Select
RESET YES?
Select
Yes No
Scroll
Scroll
STOP/START
(4)
Select
STOP/START YES?
Select
Yes No
Scroll
Scroll
EXIT
(1) Displayed only if configured as a display variable (see Section 4.18.5).
(2) The petroleum measurement application or concentration measurement application must be enabled.
(3) The display must be configured to allow totalizer resetting (see Section 4.18).
(4) The display must be configured to allow stopping and starting (see Section 4.18).
Configuration and Use Manual
117
118
Model 2700 Transmitters with F
OUNDATION
™
fieldbus
Chapter 6
Troubleshooting
6.1
Overview
This section describes guidelines and procedures for troubleshooting the flowmeter. The information in this section will enable you to:
• Categorize the problem
• Determine whether you are able to correct the problem
• Take corrective measures (if possible)
Note: All procedures provided in this chapter assume that you have established communication with
the transmitter and that you are complying with all applicable safety requirements. See Appendices 2
and 3.
6.2
Guide to troubleshooting topics
Table 6-1
Troubleshooting topics
Topic
Transmitter does not operate
Transmitter does not communicate
Zero or calibration failure
AI block configuration error
Output problems
Lost static data alarm
Status alarms
Diagnosing wiring problems
Checking slug flow
Restoring a working configuration
Checking the test points
Checking the core processor
Checking sensor coils and RTD
Section
Section 6.3
Section 6.4
Section 6.5
Section 6.6
Section 6.7
Section 6.8
Section 6.9
Section 6.10
Section 6.11
Section 6.12
Section 6.13
Section 6.14
Section 6.15
6.3
Transmitter does not operate
If the transmitter is receiving power but all blocks are out of service, see Section 6.8.
If the transmitter is not receiving power and cannot communicate over the network or display, then
perform all of the procedures under Section 6.10. If the wiring checks do not indicate a problem with
electrical connections, contact the Micro Motion Customer Service Department.
Configuration and Use Manual
119
Troubleshooting
6.4
Transmitter does not communicate
If the transmitter fails to communicate:
• Make sure that the entire fieldbus network is grounded only once (individual segments should not be grounded).
•
Perform the procedures under Section 6.10.4.
• If you are using a National Instruments
®
Configurator, perform the procedures under
Section 6.4.1.
• Verify the software version by reading the display at power up.
• Verify the transmitter has fieldbus software loaded into it. At power up, the local display will briefly flash the revision level. For revision 1.0, 1.0 is displayed. For other revisions, x.x F is displayed.
6.4.1
National Instruments basic information
To verify the Dlme Basic Info:
1. Launch the National Instruments Interface Configuration Utility.
2. Select the appropriate port, usually
Port 0
.
3. Click
Edit
.
4. Click
Advanced
.
5. Verify the following information:
•
Slot Time
equals 7
•
Max Response Delay
equals 3
•
Min Inter-Pdu Delay
equals 6
6.5
Zero or calibration failure
If a zero or calibration procedure fails, the transmitter will send one or more status alarms indicating
the cause of failure. Refer to Table 6-3 for descriptions of status alarms and possible remedies.
6.6
AI block configuration error
Configuring the measurement units with ProLink II or the display can cause the transmitter’s AI blocks to get a configuration error unless the AI blocks are also configured for the same measurement units. This is because ProLink II and the display set measurement units in the MEASUREMENT transducer block, not in the AI block. Therefore, if the units have been configured with ProLink II or the display, the AI blocks must be separately configured to match.
See Section 4.4 for more information about configuring measurement units.
120
Model 2700 Transmitters with F
OUNDATION
™
fieldbus
Troubleshooting
6.7
Output problems
Micro Motion suggests that you make a record of the process variables listed below, under normal operating conditions. This will help you recognize when the process variables are unusually high or low.
• Flow rate
• Density
• Temperature
• Tube frequency
• Pickoff voltage
• Drive gain
For troubleshooting, check the process variables under both normal flow and tubes-full no-flow conditions. Except for flow rate, you should see little or no change between flow and no-flow conditions. If you see a significant difference, record the values and contact Micro Motion Customer
Service for assistance.
Unusual values for process variables may indicate a variety of different problems.
Table 6-2
Output problems and possible remedies
Symptom
AI block fault
No output or incorrect process variable
Steady non-zero flow rate under no-flow conditions
Cause Possible remedies
Measurement units mismatch Make sure the Transducer Scale: Units
Index parameter matches the units specified in the transducer block for that process variable.
AI Channel parameter set incorrectly Verify the AI Channel parameter in the AI block matches the correct transducer block measurement channels.
Correct the piping.
Misaligned piping (especially in new installations)
Open or leaking valve Check or correct the valve mechanism.
Bad sensor zero
Bad flow calibration factor
Rezero the flowmeter. See Section 2.7.
Verify characterization. See Section 6.7.4.
Configuration and Use Manual
121
Troubleshooting
Table 6-2
Output problems and possible remedies (continued)
Symptom
Erratic non-zero flow rate under no-flow conditions
Erratic non-zero flow rate when flow is steady
Cause Possible remedies
Wiring problem
Incorrectly grounded 9-wire cable
(only in 9-wire remote and remote core processor with remote transmitter installations)
Noise in fieldbus wiring
Verify all sensor-to-transmitter wiring and ensure the wires are making good contact. Refer to the installation manual.
Verify 9-wire cable installation.
Refer to the installation manual.
Verify that the wiring is properly shielded against noise. Refer to the installation manual.
See Section 6.7.6.
Incorrectly set or bad power conditioner
Vibration in pipeline at rate close to sensor frequency
Leaking valve or seal
Inappropriate measurement unit
Inappropriate damping value
Slug flow
Plugged flow tube
Check the environment and remove the source of vibration.
Check pipeline.
Check measurement units using a fieldbus host.
Check damping. See Section 6.7.1.
See Section 6.11.
Check drive gain and frequency. Purge the flow tubes.
Moisture in sensor junction box (only for 9-wire remote and remote core processor with remote transmitter installations)
Mounting stress on sensor
Sensor cross-talk
Improper sensor grounding
Open junction box and allow it to dry. Do not use contact cleaner. When closing, ensure integrity of gaskets and O-rings, and grease all O-rings.
Check sensor mounting. Ensure that:
• Sensor is not being used to support pipe.
• Sensor is not being used to correct misaligned pipe.
• Sensor is not too heavy for pipe.
Check environment for sensor with similar
(±0.5 Hz) tube frequency.
Check the sensor grounding. Refer to the installation manual.
Incorrect sensor orientation
Output wiring problem
Inappropriate measurement unit
Inappropriate damping value
Excessive or erratic drive gain
Slug flow
Plugged flow tube
Wiring problem
Not all orientations work with all process fluids. See the installation manual for your sensor.
Verify fieldbus wiring.
Check measurement units using a fieldbus tool.
Check damping. See Section 6.7.1.
See Sections 6.13.3 and 6.13.4.
See Section 6.11.
Check drive gain and tube frequency.
Purge the flow tubes. Sensor may need to be replaced.
Verify all sensor-to-transmitter wiring and ensure the wires are making good contact. Refer to the installation manual.
122
Model 2700 Transmitters with F
OUNDATION
™
fieldbus
Troubleshooting
Table 6-2
Output problems and possible remedies (continued)
Symptom
Inaccurate flow rate
Cause
Bad flow calibration factor
Inappropriate measurement unit
Bad sensor zero
Bad density calibration factors
Bad flowmeter grounding
Slug flow
Incorrectly set linearization
Wiring problem
Inaccurate density reading Problem with process fluid
Bad density calibration factors
Wiring problem
Bad flowmeter grounding
Slug flow
Sensor cross-talk
Plugged flow tube
Temperature reading significantly different from process temperature
RTD failure
Incorrect calibration factors
Temperature reading slightly different from process temperature
Incorrect calibration factors
Unusually high density reading Plugged flow tube
Unusually low density reading
Unusually high tube frequency
Unusually low tube frequency
Incorrect K2 value
Slug flow
Incorrect K2 value
Sensor erosion
Plugged flow tube
Unusually low pickoff voltages
Unusually high drive gain
Several possible causes
Several possible causes
Possible remedies
Verify characterization. See Section 6.7.4.
Check measurement units using a fieldbus host.
Rezero the flowmeter. See Section 2.7.
Verify characterization. See Section 6.7.4.
See Section 6.10.3.
See Section 6.11.
See Section 6.7.7.
Verify all sensor-to-transmitter wiring and ensure the wires are making good contact. Refer to the installation manual.
Use standard procedures to check quality of process fluid.
Verify characterization. See Section 6.7.4.
Verify all sensor-to-transmitter wiring and ensure the wires are making good contact. Refer to the installation manual.
See Section 6.10.3.
See Section 6.11.
Check environment for sensor with similar
(±0.5 Hz) tube frequency.
Check drive gain and tube frequency.
Purge the flow tubes. Sensor may need to be replaced.
Check for alarm conditions and follow troubleshooting procedure for indicated alarm.
Perform temperature calibration. See
Section 3.7.
Verify characterization. See Section 6.7.4.
Perform temperature calibration. See
Section 3.7.
Verify characterization. See Section 6.7.4.
Check drive gain and tube frequency.
Purge the flow tubes. Sensor may need to be replaced.
Verify characterization. See Section 6.7.4.
See Section 6.11.
Verify characterization. See Section 6.7.4.
Contact Micro Motion Customer Service.
Check drive gain and tube frequency.
Purge the flow tubes. Sensor may need to be replaced.
See Section 6.13.5.
See Section 6.13.3.
Configuration and Use Manual
123
Troubleshooting
6.7.1
Damping
An incorrectly set damping value may make the transmitter’s output appear too sluggish or too jumpy.
Adjust the Flow Damping, Temperature Damping, and Density Damping parameters in the
MEASUREMENT transducer block to achieve the damping effect you want. See Section 4.12.
Other damping problems
If the transmitter appears to be applying damping values incorrectly or the damping effects do not appear to be changed by adjustments to the damping parameters in the MEASUREMENT transducer block, then the Process Value Filter Time parameter in an AI function block may be improperly set.
Inspect each AI function block, and ensure that the Process Value Filter Time parameter is set to zero.
6.7.2
Flow cutoff
If the transmitter is sending an output of zero unexpectedly, then one of the cutoff parameters may be
set incorrectly. See Section 4.14 for more information about configuring cutoffs.
6.7.3
Output scale
An incorrectly configured output scale can cause the transmitter to report unexpected output levels.
Verify that the Transducer Scale and Output Scale values are set up correctly for each AI block. See
Section 4.9.
6.7.4
Characterization
Incorrect characterization parameters can cause the transmitter to send unexpected output values.
However, you should suspect an incorrect characterization only in specific circumstances (e.g., pairing the transmitter and sensor together for the first time, replacing the core processor). Refer to
Section 3.3 for more information about characterization.
6.7.5
Calibration
Improper calibration may cause the transmitter to send unexpected output values. However, you should suspect an improper calibration only if the transmitter has been field-calibrated recently. Refer
to Section 3.2.4 for more information about calibration.
Note: Micro Motion recommends using meter factors, rather than calibration, to prove the meter against a regulatory standard or to correct measurement error. Contact Micro Motion before
calibrating your flowmeter. Refer to Section 3.5 for information about meter factors.
6.7.6
Fieldbus network power conditioner
An incorrectly set or bad power conditioner can cause inappropriate communication from the transmitter. For the MTL power conditioner, the red switch (dual redundancy) should be set to Normal
Mode. The yellow switch (termination) should be set to Termination In. If you suspect further problems with the power conditioner, contact Micro Motion Customer Service for assistance.
6.7.7
Linearization
The linearization parameter in each AI function block can affect the transmitter’s output. Verify that
the Linearization Type parameter is set correctly. See Section 4.8.
124
Model 2700 Transmitters with F
OUNDATION
™
fieldbus
Troubleshooting
6.8
EEPROM Checksum Error
After performing an EEPROM initialization (Initialize NVM) using the Micro Motion Load Utility, the resource block may be out of service.
Use Reset Processor method of the Micro Motion Load Utility to reset all resource blocks and function blocks are initialize.
6.9
Status alarms
Status alarms are reported by a fieldbus host, the display, and ProLink II.
Table 6-3
Status alarms and remedies
Alarm code
A001
Description
(E)EPROM Checksum Error (CP)
A002
A003
A004
A005
A006
A008
RAM Error (CP)
Sensor Failure
Temperature Sensor Failure
Input Overrange
Not Configured
Density Overrange
Possible remedies
Cycle power to the transmitter.
The flowmeter might need service. Contact Micro Motion
Customer Service.
Cycle power to the transmitter.
The flowmeter might need service. Contact Micro Motion
Customer Service.
Check the test points. See Section 6.13.
Check the sensor coils. See Section 6.15.
Check wiring to sensor. See Section 6.10.2.
Check for slug flow. See Section 6.11.
Check sensor tubes.
Check the test points. See Section 6.13.
Check the sensor coils. See Section 6.15.
Check wiring to sensor. See Section 6.10.2.
Verify process temperature range is within limits for sensor and transmitter.
Verify flowmeter characterization. See Section 6.7.4.
Contact Micro Motion Customer Service.
Check the test points. See Section 6.13.
Check the sensor coils. See Section 6.15.
Verify process conditions.
Verify that transmitter is configured to use appropriate
measurement units. See Section 4.4.
Verify flowmeter characterization. See Section 6.7.4.
Re-zero the flowmeter. See Section 2.7.
Check the characterization. Specifically, verify the FCF
and K1 values. See Section 3.3.
Contact Micro Motion Customer Service.
Check the test points. See Section 6.13.
Check the sensor coils. See Section 6.15.
Check for air in flow tubes, tubes not filled, foreign material in tubes, coating in tubes.
Verify characterization. See Section 6.7.4.
Configuration and Use Manual
125
Troubleshooting
Table 6-3
Status alarms and remedies (continued)
Alarm code
A009
Description
Transmitter Initializing/warming Up
A010
A011
A012
A013
A014
A016
A017
A018
A019
A020
A021
A025
Calibration Failure
Cal — Too Low
Cal — Too High
Cal — Too Noisy
Transmitter Failed
Line RTD Temperature Out-of-Range
Meter RTD Temperature Out-of-Range
(E)EPROM Checksum Error
RAM or ROM Test Error
Calibration Factors Unentered
Incorrect Sensor Type (K1)
Protected Boot Sector Fault (CP)
Possible remedies
Allow the transmitter to warm up. The error should disappear from the status words once the transmitter is ready for normal operation. If alarm does not clear, make sure sensor is completely full or completely empty. Verify sensor configuration and transmitter wiring to sensor
(refer to installation manual).
If alarm appears during zero, ensure there is no flow through the sensor, then retry.
Cycle power to the flowmeter, then retry.
Ensure there is no flow through sensor, then retry.
Cycle power to the flowmeter, then retry.
Ensure there is no flow through sensor, then retry.
Cycle power to the flowmeter, then retry.
Remove or reduce sources of electromechanical noise, then attempt the calibration or zero procedure again.
Possible sources of noise include:
• Mechanical pumps
• Electrical interference
• Vibration effects from nearby machinery
Cycle power to the flowmeter, then retry.
Cycle power to the transmitter.
The transmitter might need service. Contact Micro Motion
Customer Service.
Check the test points. See Section 6.13.
Check the sensor coils. See Section 6.15.
Check wiring to sensor. Refer to installation manual.
Make sure the appropriate sensor type is configured.
See Section 3.3.1.
Contact Micro Motion Customer Service.
Check the test points. See Section 6.13.
Check the sensor coils. See Section 6.15.
Contact Micro Motion Customer Service.
Cycle power to the transmitter.
The transmitter might need service. Contact Micro Motion
Customer Service.
Cycle power to the transmitter.
The transmitter might need service. Contact Micro Motion
Customer Service.
Check the characterization. Specifically, verify the FCF
value. See Section 3.3.
Check the characterization. Specifically, verify the K1
value. See Section 3.3.
Cycle power to the meter.
The transmitter might need service. Contact
Micro Motion Customer Service.
126
Model 2700 Transmitters with F
OUNDATION
™
fieldbus
Troubleshooting
A106
A107
A116
A117
A120
A121
A128
Table 6-3
Status alarms and remedies (continued)
Alarm code
A026
A028
A031
A032
A033
A034
A035
A102
A103
A104
A105
A0129
Description
Sensor/Transmitter Communication Error
Core Processor Write Failure
Low Power
Smart Meter Verification In Progress and
Outputs Fixed
Sensor OK / Tubes Stopped by Process
Smart Meter Verification Failed
Smart Meter Verification Aborted
Drive Overrange/Partially Full Tube
Data Loss Possible (Tot and Inv)
Possible remedies
Check wiring between transmitter and core processor
(see Section 6.10.2). The wires may be swapped. After
swapping wires, cycle power to the flowmeter.
Check for noise in wiring or transmitter environment.
Check core processor LED. See Section 6.14.2.
Perform the core processor resistance test. See
Section 6.14.3.
Cycle power to the meter.
The transmitter might need service. Contact
Micro Motion Customer Service.
The core processor is not receiving enough power.
Check the power supply to the transmitter, and check power wiring between the transmitter and the core processor (4-wire remote installations only).
Allow the procedure to complete.
If desired, abort the procedure and restart with outputs set to Continue Measurement.
No signal from LPO or RPO, suggesting that sensor tubes are not vibrating. Verify process. Check for air in the flow tubes, tubes not filled, foreign material in tubes, or coating in tubes.
Rerun the test. If the test fails again, see Section 3.4.3.
If desired, read the abort code. See Section 3.4.3, and
perform the appropriate action.
Excessive or erratic drive gain. See Section 6.13.3.
Check the sensor coils. See Section 6.15.
Cycle power to the transmitter.
The transmitter might need service. Contact Micro Motion
Customer Service.
Calibration-in-Progress
Slug Flow
AI/AO Simulation Active
Allow the flowmeter to complete calibration.
Allow slug flow to clear from the process.
See Section 6.11.
Disable simulation mode. See Section 5.3.1.
Power Reset Occurred No action is necessary.
API: Temperature Outside Standard Range Contact Micro Motion Customer Service.
API: Density Outside Standard Range
CM: Unable to Fit Curve Data
Contact Micro Motion Customer Service.
Contact Micro Motion Customer Service.
CM: Extrapolation Alarm
Factory configuration data invalid
Contact Micro Motion Customer Service.
Cycle power to the transmitter.
The flowmeter might need service. Contact Micro Motion
Customer Service.
Factory configuration data checksum invalid Cycle power to the transmitter.
The flowmeter might need service. Contact Micro Motion
Customer Service.s
Configuration and Use Manual
127
Troubleshooting
Table 6-3
Status alarms and remedies (continued)
Alarm code
A131
Description
Smart Meter Verification In Progress
A132 Simulation Mode Active (sensor)
Possible remedies
Allow the procedure to complete.
If desired, abort the procedure and restart with outputs set to Fault.
Disable sensor simulation mode. See Section 5.3.2.
6.10
Diagnosing wiring problems
Use the procedures in this section to check the transmitter installation for wiring problems.
Installation procedures are provided in the Model 1700 and Model 2700 Transmitters: Installation
Manual.
WARNING
Removing the wiring compartment covers in explosive atmospheres while the power is on can cause an explosion.
Before removing the field wiring compartment cover in explosive atmospheres, shut off the power and wait five minutes.
6.10.1
Checking the power-supply wiring
To check the power-supply wiring:
1. Verify that the correct external fuse is used. An incorrect fuse can limit current to the transmitter and keep it from initializing.
2. Power down the transmitter.
3. If the transmitter is in a hazardous area, wait five minutes.
4. Ensure that the power supply wires are connected to the correct terminals. Refer to the installation manual.
5. Verify that the power-supply wires are making good contact and are not clamped to the wire insulation.
6. Inspect the voltage label on the inside of the field-wiring compartment. Verify that the voltage supplied to the transmitter matches the voltage specified on the label.
7. Use a voltmeter to test the voltage at the transmitter’s power supply terminals. Verify that it is within specified limits. For DC power, you may need to size the cable. Refer to the installation manual.
128
Model 2700 Transmitters with F
OUNDATION
™
fieldbus
Troubleshooting
6.10.2
Checking the sensor-to-transmitter wiring
Note: This does not apply to flowmeters with an integrally mounted transmitter.
To check the sensor-to-transmitter wiring, verify that:
• The transmitter is connected to the sensor according to the wiring information provided in the installation manual.
• The wires are making good contact with the terminals.
• For 4-wire connections, the mating connector between the core processor and the transmitter is securely plugged into its socket.
If the wires are incorrectly connected:
1. Power down the transmitter.
2. Wait five minutes before opening the transmitter compartment if the transmitter is in a hazardous area.
3. Correct the wiring.
4. Restore power to the transmitter.
6.10.3
Checking the grounding
The sensor and the transmitter must be grounded. If the core processor is installed as part of the transmitter or the sensor, it is grounded automatically. If the core processor is installed separately, it must be grounded separately. Refer to the installation manual.
6.10.4
Checking the communication wiring
To check the communication wiring, verify that:
• Communication wires and connections meet F
OUNDATION
fieldbus wiring standards.
• Wires are connected according to instructions provided in the installation manual.
• Wires are making good contact with the terminals.
6.11
Checking slug flow
The dynamics of slug flow are described in Section 4.13. If the transmitter is reporting a slug flow
alarm, first check the process and possible mechanical causes for the alarm:
• Actual changes in process density
• Cavitation or flashing
• Leaks
• Sensor orientation — sensor tubes should normally be down when measuring liquids, and up when measuring gases. Refer to the sensor documentation for more information about orientation.
If there are no mechanical causes for the slug flow alarm, the slow flow limits and duration may be set too high or too low. The high limit is set by default to 5.0 g/cm
3
, and the low limit is set by default to
0.0 g/cm
3
. Lowering the high limit or raising the low limit will cause the transmitter to be more sensitive to changes in density. If you expect occasional slug flow in your process, you may need to increase the slug flow duration. A longer slug flow duration will make the transmitter more tolerant of slug flow.
Configuration and Use Manual
129
Troubleshooting
6.12
Restoring a working configuration
At times it may be easier to start from a known working configuration than to troubleshoot the existing configuration. To do this, you can:
• Restore a configuration file saved via ProLink II, if one is available. In ProLink II, choose
File > Send to Xmtr from File
.
• Restore the factory configuration (transmitter must be connected to an enhanced core processor).
Neither of these methods will restore all of the transmitter’s configuration. For example, neither method will restore the configuration of the AI, AO, and INT blocks. Using the restore factory configuration option will also not restore such things as the configuration of the display.
Figure 6-1
Restore factory configuration
ProLink >
Configuration
Device (Fieldbus) tab
Restore Factory
Configuration
6.13
Checking the test points
You can diagnose sensor failure or overrange status alarms by checking the flowmeter test points. The
test points include left and right pickoff voltages, drive gain, and tube frequency.
6.13.1
Obtaining the test points
You can obtain the test points with a fieldbus host or ProLink II.
With a fieldbus host
The test points are a set of clearly-named parameters in the DIAGNOSTIC transducer block:
• Left pickoff voltage
• Right pickoff voltage
• Tube frequency
• Drive Gain: Value
With ProLink II
To obtain the test points with ProLink II:
1. Choose
ProLink > Diagnostic Information
.
2. Write down the value you find in the
Tube Frequency
box, the
Left Pickoff
box, the
Right
Pickoff
box, and the
Drive Gain
box.
130
Model 2700 Transmitters with F
OUNDATION
™
fieldbus
Troubleshooting
6.13.2
Evaluating the test points
Use the following guidelines to evaluate the test points:
•
If the drive gain is at 100%, refer to Section 6.13.3.
•
If the drive gain is unstable, refer to Section 6.13.4.
•
If the value for the left or right pickoff does not equal the appropriate value from Table 6-4,
based on the sensor flow tube frequency, refer to Section 6.13.5.
•
If the values for the left and right pickoffs equal the appropriate values from Table 6-4, based
on the sensor flow tube frequency, contact Micro Motion Customer Service for assistance.
Table 6-4
Sensor pickoff values
Sensor model
(1)
ELITE Model CMF sensors
Model CMF400 I.S.
Model CMF400 with booster amplifier
Model D, DL, and DT sensors
Model F025, F050, and F100 sensors
Model F200 sensors (compact case)
Model F200 sensors (standard case)
Model H025, H050, and H100 sensors
Model H200 sensors
Model R025, R050, or R100 sensor
Model R200 sensor
Micro Motion T-Series sensors
Pickoff value
3.4 mV peak to peak per Hz based on flow tube frequency
2.7 mV peak to peak per Hz based on flow tube frequency
3.4 mV peak to peak per Hz based on flow tube frequency
3.4 mV peak to peak per Hz based on flow tube frequency
3.4 mV peak to peak per Hz based on flow tube frequency
2.0 mV peak to peak per Hz based on flow tube frequency
3.4 mV peak to peak per Hz based on flow tube frequency
3.4 mV peak to peak per Hz based on flow tube frequency
2.0 mV peak to peak per Hz based on flow tube frequency
3.4 mV peak to peak per Hz based on flow tube frequency
2.0 mV peak to peak per Hz based on flow tube frequency
0.5 mV peak to peak per Hz based on flow tube frequency
(1) If your sensor model is not listed, contact Micro Motion Customer Support.
6.13.3
Excessive drive gain
Table 6-5
Excessive drive gain causes and solutions
Cause
Excessive slug flow
Plugged flow tube
Cavitation or flashing
Solution
Eliminate slugs.
Change the sensor orientation.
Purge the flow tubes. Sensor may need to be replaced.
Increase inlet or back pressure at the sensor.
If a pump is located upstream from the sensor, increase the distance between the pump and sensor.
Contact Micro Motion Customer Service.
Drive board or module failure, cracked flow tube, or sensor imbalance
Mechanical binding at sensor
Open drive or left pickoff sensor coil
Flow rate out of range
Incorrect sensor characterization
Ensure sensor is free to vibrate.
Contact Micro Motion Customer Service.
Ensure flow rate is within sensor limits.
Verify characterization. See Section 3.3.
Configuration and Use Manual
131
Troubleshooting
6.13.4
Erratic drive gain
Table 6-6
Erratic drive gain causes and solutions
Cause
Wrong K1 characterization constant for sensor
Solution
Re-enter the K1 characterization constant. See
Section 3.3.
Contact Micro Motion Customer Service.
Polarity of pick-off reversed or polarity of drive reversed
Slug flow
Foreign material caught in flow tubes
Verify flow tubes are completely filled with process fluid, and that slug flow limits and duration are properly
configured. See Section 6.11.
Purge flow tubes. Sensor may need to be replaced.
6.13.5
Low pickoff voltage
Table 6-7
Low pickoff voltage causes and solutions
Cause
Faulty wiring runs between the sensor and core processor
Process flow rate beyond the limits of the sensor
Slug flow
No tube vibration in sensor
Process beyond the limits of the sensor
Moisture in the sensor electronics
The sensor is damaged
Solution
Refer to the sensor manual and the transmitter installation manual.
Verify that the process flow rate is not out of range of the sensor
Verify the flow tubes are completely filled with process fluid, and that slug flow limits and duration are properly
configured. See Section 6.11.
Check for plugging.
Ensure sensor is free to vibrate (no mechanical binding).
Verify wiring.
Test coils at sensor. See Section 6.15.
Verify that the process flow rate is not out of range of the sensor.
Eliminate the moisture in the sensor electronics.
Contact Micro Motion Customer Service.
132
Model 2700 Transmitters with F
OUNDATION
™
fieldbus
Troubleshooting
6.14
Checking the core processor
Two core processor procedures are available:
• You can check the core processor LED. The core processor has an LED that indicates different flowmeter conditions.
• You can perform the core processor resistance test to check for a damaged core processor.
For both tests you will need to expose the core processor.
6.14.1
Exposing the core processor
Follow these procedures to expose the core processor.
1. Determine your installation type. See Appendix D.
2. If you have a 4-wire remote installation or a remote core processor with remote transmitter installation, simply remove the core processor lid. The core processor is intrinsically safe and can be opened in all environments.
3. If you have an integral installation: a.
Loosen the four cap screws that fasten the transmitter to the base (Figure 6-2).
b.
Rotate the transmitter counter-clockwise so that the cap screws are in the unlocked position.
c.
Gently lift the transmitter straight up, disengaging it from the cap screws. Do not disconnect or damage the wires that connect the transmitter to the core processor.
4. If you have a 9-wire remote installation: a.
Remove the end-cap.
b.
Inside the core processor housing, loosen the three screws that hold the core processor mounting plate in place. Do not remove the screws. Rotate the mounting plate so that the screws are in the unlocked position.
c.
Holding the tab on the mounting plate, slowly lower the mounting plate so that the top of the core processor is visible. Do not disconnect or damage the wires that connect the core processor to the transmitter.
Figure 6-2
Integral installation components
Transmitter
Core processor
4 × cap screws
When reassembling components, take care not to pinch or stress the wires. Grease all O-rings.
Configuration and Use Manual
133
Troubleshooting
6.14.2
Checking the core processor LED
Do not shut off power to the transmitter when checking the core processor LED. To check the core processor LED:
1. Expose the core processor according to the instructions in Section 6.14.1.
2. Check the core processor LED against the conditions listed in Table 6-8 (standard core processor) or Table 6-9 (enhanced core processor).
Table 6-8
Standard core processor LED behavior, flowmeter conditions, and remedies
LED behavior
1 flash per second
(75% off, 25% on)
1 flash per second
(25% off, 75% on)
Solid on
Condition
Normal operation
Slug flow
Possible remedy
No action required
See Section 6.11.
3 rapid flashes followed by a pause
Zero or calibration in progress
If zero or calibration procedure is in progress, no action is required. If these procedures are not in progress, contact Micro
Motion Customer Service.
Check power supply to transmitter. See Section 6.10.1.
Core processor receiving between
11.5 and 5 volts
Sensor not recognized
Check wiring between transmitter and sensor (9-wire remote installation or remote core processor with remote transmitter installation). Refer to the installation manual.
Verify characterization. See Section 3.3.
Improper configuration
Broken pin between sensor and core processor
4 flashes per second Fault condition
OFF Core processor receiving less than
5 volts
Contact Micro Motion Customer Service.
Core processor internal failure
Check alarm status.
Verify power supply wiring to core processor. Refer to the installation manual.
If status LED is lit, transmitter is receiving power. Check voltage across terminals 1 (VDC+) and 2 (VDC–) in core processor.
Normal reading is approximately 14 VDC. If reading is normal, internal core processor failure is possible — contact Micro Motion
Customer Service. If reading is 0, internal transmitter failure is possible — contact Micro Motion Customer Service. If reading is less than 1 VDC, verify power supply wiring to core processor.
Wires may be switched. Refer to the installation manual.
If status LED is not lit, transmitter is not receiving power. Check power supply. If power supply is operational, internal transmitter, display, or LED failure is possible. Contact Micro Motion Customer
Service.
Contact Micro Motion Customer Service.
134
Table 6-9
Enhanced core processor LED behavior, meter conditions, and remedies
LED behavior
Solid green
Flashing yellow
Solid yellow
Condition
Normal operation
Zero in progress
Low severity alarm
Possible remedy
No action required.
If calibration is in progress, no action required. If no calibration is in progress, contact Micro Motion.
Check alarm status.
Model 2700 Transmitters with F
OUNDATION
™
fieldbus
Troubleshooting
Table 6-9
Enhanced core processor LED behavior, meter conditions, and remedies (continued)
LED behavior
Solid red
Flashing red (80% on,
20% off)
Condition
High severity alarm
Tubes not full
Flashing red (50% on,
50% off)
Flashing red (50% on,
50% off, skips every
4th)
OFF
Electronics failed
Sensor failed
Core processor receiving less than 5 volts
Possible remedy
Check alarm status.
If alarm A105 (slug flow) is active, see Section 6.11.
If alarm A033 (tubes not full) is active, verify process. Check for air in the flow tubes, tubes not filled, foreign material in tubes, or coating in tubes.
Contact Micro Motion.
Contact Micro Motion.
Core processor internal failure
• Verify power supply wiring to core processor
.
Refer to
Appendix D for diagrams.
• If transmitter status LED is lit, transmitter is receiving power.
Check voltage across terminals 1 (VDC+) and 2 (VDC–) in core processor. If reading is less than 1 VDC, verify power supply wiring to core processor. Wires may be switched.
See Section 6.10.1. Otherwise, contact Micro Motion.
• If transmitter status LED is not lit, transmitter is not
receiving power. Check power supply. See Section 6.10.1.
If power supply is operational, internal transmitter, display, or LED failure is possible. Contact Micro Motion.
Contact Micro Motion.
6.14.3
Core processor resistance test
To perform the core processor resistance test:
1. Disconnect power to the transmitter and core processor.
2. Expose the core processor according to the instructions in Section 6.14.1.
3. Measure the resistance across the following terminal pairs:
• The resistance across terminals 3 and 4 (RS-485A and RS-485B) should be 40–50 kohms.
• The resistance across terminals 2 and 3 (VDC– and RS-485A) should be 20–25 kohms.
• The resistance across terminals 2 and 4 (VDC– and RS-485B) should be 20–25 kohms.
If any of the resistance measurements are lower than specified, the core processor may not be able to communicate with a transmitter or remote host. Contact Micro Motion Customer Service.
Configuration and Use Manual
135
Troubleshooting
6.15
Checking sensor coils and RTD
Problems with sensor coils can cause several alarms, including sensor failure and a variety of out-of-range conditions. Checking the sensor coils involves testing the terminal pairs and testing for shorts to case.
6.15.1
9-wire remote or remote core processor with remote transmitter installation
If you have a 9-wire remote or a remote core processor with remote transmitter installation:
1. Power down the transmitter.
2. If the transmitter is in a hazardous area, wait five minutes.
3. Remove the end-cap from the core processor housing.
4. Unplug the terminal blocks from the terminal board.
5. Using a digital multimeter (DMM), check the circuits listed in the following table by placing the DMM leads on the unplugged terminal blocks for each terminal pair.
Table 6-10
Circuit terminal pairs
Circuit
Drive coil
Left pickoff coil (LPO)
Right pickoff coil (RPO)
Resistance temperature detector (RTD)
Lead length compensator (LLC) (All sensors except CMF400 IS and T-Series)
Composite RTD (T-Series only)
Fixed resistor (CMF400 IS only)
Test terminal pair
Brown to red
Green to white
Blue to gray
Yellow to violet
Yellow to orange
6. There should be no open circuits (i.e., no infinite resistance readings). The LPO and RPO readings should be the same or very close (±5 ohms). If there are any unusual readings, repeat the coil measurement tests at the sensor junction box to eliminate the possibility of faulty cable. The readings for each coil pair should match at both ends.
If the cable is faulty, replace the cable.
7. Leave the core processor terminal blocks disconnected. At the sensor, remove the lid of the junction box and test each sensor terminal for a short to case by placing one DMM lead on the terminal and the other lead on the sensor case. With the DMM set to its highest range, there should be infinite resistance on each lead. If there is any resistance at all, there is a short to case.
136
Model 2700 Transmitters with F
OUNDATION
™
fieldbus
Troubleshooting
8. Test the terminal pairs as follows:
• Brown against all other terminals except Red
• Red against all other terminals except Brown
• Green against all other terminals except White
• White against all other terminals except Green
• Blue against all other terminals except Gray
• Gray against all other terminals except Blue
• Orange against all other terminals except Yellow and Violet
• Yellow against all other terminals except Orange and Violet
• Violet against all other terminals except Yellow and Orange
Note: D600 sensors and CMF400 sensors with booster amplifiers have different terminal pairs.
Contact Micro Motion Customer Service for assistance.
There should be infinite resistance for each pair. If there is any resistance at all, there is a short between terminals.
9. Check for possible causes and solutions.
Table 6-11
Sensor and cable short to case possible causes and remedies
Possible cause
Moisture inside the sensor junction box
Liquid or moisture inside the sensor case
Internally shorted feedthrough (sealed passage for wiring from sensor to sensor junction box)
Faulty cable
Improper wire termination
Solution
Make sure that the junction box is dry and no corrosion is present.
Contact Micro Motion.
Contact Micro Motion.
Replace cable.
Verify wire terminations inside sensor junction box. See the
Micro Motion 9-Wire Flowmeter Cable Preparation and
Installation Guide or the sensor documentation.
10. If the problem is not resolved, contact Micro Motion Customer Service.
Note: When reassembling the meter components, be sure to grease all O-rings.
6.15.2
4-wire remote or integral installation
If you have a 4-wire remote installation or an integral installation:
1. Power down the transmitter.
2. If the transmitter is in a hazardous environment, wait five minutes.
3. If you have a 4-wire remote installation, remove the core processor lid.
4. If you have an integral installation: a.
Loosen the four cap screws that fasten the transmitter to the base (Figure 6-2).
b.
Rotate the transmitter counter-clockwise so that the cap screws are in the unlocked position.
c.
Gently lift the transmitter straight up, disengaging it from the base.
Note: You have the option of disconnecting the 4-wire cable or leaving it connected.
Configuration and Use Manual
137
Troubleshooting
5. If you have a standard core processor, loosen the captive screw (2,5 mm) at the center of the core processor. Carefully remove the core processor from the sensor by grasping it and lifting it straight up. Do not twist or rotate the core processor.
6. If you have an enhanced core processor, loosen the two captive screws (2,5 mm) that hold the core processor in the housing. Gently lift the core processor out of the housing, then disconnect the sensor cable from the feedthrough pins. Do not damage the feedthrough pins.
CAUTION
If the core processor (feedthrough) pins are bent, broken, or damaged in any way, the core processor will not operate.
To avoid damage to the core processor (feedthrough) pins:
• Do not twist or rotate the core processor when lifting it.
• When replacing the core processor (or sensor cable) on the pins, be sure to align the guide pins and mount the core processor (or sensor cable) carefully.
7. Use a digital multimeter (DMM) to check the resistance across the right and left pickoff coils.
See Figure 6-3. Neither pair should be an open circuit (i.e., infinite resistance). The resistance
values should be the same or very close (±5 ohms).
8. Use the DMM to check the resistance across the RTD and LLC (lead length compensation)
circuits. See Figure 6-3. Neither pair should be an open circuit (i.e., infinite resistance).
9. Test for a ground to case by checking the resistance between each pin and the sensor case.
With the DMM set to its highest range, there should be infinite resistance on each lead. If there is any resistance at all, there is a short to case.
If a short to case is indicated, check for moisture or corrosion. If you are unable to determine the source of the problem, contact Micro Motion Customer Service.
10. Test for shorts across terminals by testing resistance across the following terminal pairs (see
Figures 6-3 and 6-4). There should be infinite resistance in each case. If there is any resistance
at all, there is a short between the terminals.
• Brown against all other terminals except Red
• Red against all other terminals except Brown
• Green against all other terminals except White
• White against all other terminals except Green
• Blue against all other terminals except Gray
• Gray against all other terminals except Blue
• Orange against all other terminals except Yellow and Violet
• Yellow against all other terminals except Orange and Violet
• Violet against all other terminals except Yellow and Orange
Note: D600 sensors and CMF400 sensors with booster amplifiers have different terminal pairs.
Contact Micro Motion Customer Service for assistance.
If a short between terminals is indicated, contact Micro Motion Customer Service.
138
Model 2700 Transmitters with F
OUNDATION
™
fieldbus
Troubleshooting
Figure 6-3
Sensor pins – Standard core processor
Right pickoff
( – )
Lead length compensator
(1)
( + )
Right pickoff
( + )
Left pickoff
( – )
Resistance temperature detector return /
Lead length compensator
(common)
Left pickoff
( + )
Resistance temperature detector
( + )
Drive
( – )
Drive
( + )
(1) LLC for all sensors except T-Series and CMF400 I.S. For T-Series sensors, functions as composite RTD. For CMF400 I.S. sensors, functions as fixed resistor.
Figure 6-4
Sensor pins – Enhanced core processor
Drive – Drive +
Return for RTD, LLC, composite RTD, or fixed resistor
RTD +
LLC / Composite RTD /
Fixed resistor
(1)
Right pickoff +
Left pickoff –
Left pickoff + Right pickoff –
(1) Lead length compensator (LLC) for all sensors except T-Series, CMF400 I.S., and F300. For T-Series sensors, functions as composite RTD. For CMF400 I.S. and F300 sensors, functions as fixed resistor.
Note: The pins are shown as they appear while looking at the feedthrough on the sensor.
Configuration and Use Manual
139
Troubleshooting
Reinstalling the core processor
If you removed the core processor, replace the core processor according to the instructions below.
1. If you have a standard core processor: a.
Align the three guide pins on the bottom of the core processor with the corresponding holes in the base of the core processor housing.
b.
Carefully mount the core processor on the pins, taking care not to bend any pins.
2. If you have an enhanced core processor: a.
Plug the sensor cable onto the feedthrough pins, being careful not to bend or damage any pins.
b.
Replace the core processor in the housing.
3. Tighten the captive screw(s) to 6 to 8 in-lbs (0,7 to 0,9 N-m) of torque.
4. If you have a 4-wire remote installation, replace the core processor lid.
5. If you have an integral installation: a.
Gently lower the transmitter onto the base, inserting the cap screws into the slots. Do not pinch or stress the wires.
b.
Rotate the transmitter clockwise so that the cap screws are in the locked position.
c.
Tighten the cap screws, torquing to 20 to 30 in-lbs (2,3 to 3,4 N-m).
Note: When reassembling the flowmeter components, grease all O-rings.
140
Model 2700 Transmitters with F
OUNDATION
™
fieldbus
Appendix A
PlantWeb Alerts
A.1
PlantWeb Alerts explained
Intelligent Emerson field devices (such as the Micro Motion Model 2700 with F
OUNDATION
fieldbus) possess advanced diagnostic features. PlantWeb Alerts help operators take control of this diagnostic information by informing the operator of device issues and providing support guidance for dealing with these issues.
PlantWeb Alerts are divided into three categories:
• Advisory – Allow maintenance to address a problem before it impacts operations. These alerts are presented to maintenance personnel as an aid to maintenance planning.
• Maintenance – Indicate a malfunction has occurred (or is about to occur), and what the effects might be.
• Failed – Indicate a failure has occurred which renders the device inoperative.
A.2
Setting PlantWeb Alerts
Table A-1
Setting PlantWeb Alerts
PlantWeb
Alert
Density out of range
What the alert is detecting
The measured density has exceeded the sensor defined limits.
Default alert category
Failed
Related parameters (and defaults) Guidelines for setting
D1, D2, K1, K2, FD,
DTC, Tube Frequency,
Drive Gain, LPO,
RPO, process density
Process flow rate
Refer to Section 3.2.1 for
characterization information.
Mass flow out of range
Calibration failed
The measured mass flow has exceeded the sensor defined limits.
The calibration attempted by the user failed.
Failed
Failed
Tube not full
Slug flow
Drive out of range
There is no signal from the left or right pickoffs.
Failed
Entrained gas in a liquid process or condensation in a gas process has caused the density to exceed the configured slug limits.
The drive needed to operate the sensors has exceeded the optimal point.
Maintenance
Maintenance
Process flow rate, process density, process temperature
Tube Frequency, Drive
Gain, LPO, RPO, process density
Slug Low Limit (0.0),
Slug High Limit (5.0),
Slug Duration (1.0),
Drive Gain, process density
Drive Gain, LPO,
RPO, process density
See Section 6.5.
Refer to Sections 4.13 and
6.11 for more information
about slug flow.
Configuration and Use Manual
141
PlantWeb Alerts
Table A-1
Setting PlantWeb Alerts (continued)
PlantWeb
Alert
API: Process variable out of range
Sensor not responding
What the alert is detecting
The process temperature or density is outside the
API-defined extrapolation limits.
The sensor is not functioning properly.
Default alert category
Maintenance
Failed
Related parameters (and defaults)
None
LPO, RPO, Live Zero,
Drive Gain, Tube
Frequency
Line RTD, Meter RTD, process temperature
Sensor temperature out of range
Transmitter not characterized
CM: Unable to fit curve data
Either the temperature reading from the RTD on the sensor tube or sensor case is outside the normal operating limits.
The transmitter has not had the proper flow or density calibration parameters entered from the sensor tag or flow calibration sheet.
The data entered as inputs to the curve fit yield unacceptable errors in the fit.
The Smart Meter
Verification procedure has unexpectedly failed.
Smart Meter
Verification failed
Smart Meter
Verification aborted
CM:
Extrapolation alarm
Calibration in progress
Sensor simulate active
Electronics failure Device
The Smart Meter
Verification procedure was aborted by the user.
The process temperature or process density is outside the user-defined extrapolation limits.
There is a calibration (zero, density, temperature, or
Meter Verification) in progress. If Meter
Verification is in progress, the outputs are held at last measured value.
Sensor simulate mode is active.
Electronics failure ASIC
Transmitter initializing/ warming up
The core processor or transmitter has experienced either an
EEPROM, RAM, boot sector or real-timer interrupt failure.
Transmitter RAM Error,
Manufacturing Block checksum fail
The transmitter is undergoing its initial startup routines.
Failed
Failed
Failed
Maintenance
Maintenance
Maintenance
Advisory
Advisory
Failed
Failed
Failed
K1, K2, FCF
Process density, process temperature
Guidelines for setting
Refer to Section 3.3 for
characterization information.
CM curve parameters
Refer to Section 4.7.
None
None
None
None
None
None
142
Model 2700 Transmitters with F
OUNDATION
™
fieldbus
PlantWeb Alerts
Table A-1
Setting PlantWeb Alerts (continued)
PlantWeb
Alert
What the alert is detecting
Core processor/ transmitter communication failure
ECP low power
There is a communication failure between the core processor and the transmitter.
The enhanced core processor is not receiving enough power.
Possible data loss
Electronics failure Hornet
The core processor was unable to successfully store the totalizers on the last power down.
Perform Restart Processor.
If problem persists, call
Micro Motion
NV Memory
Failure
Perform Restart Processor.
If problem persists, call
Micro Motion
Check function Check Transducer Block
Mode
Factory configuration checksum invalid
Factory configuration invalid
Factory configuration data check sum is failed. The data might be corrupted.
The Factory configuration data is changed.You can save the current configuration as factory configuration
Default alert category
Failed
Failed
Maintenance
Failed
Failed
Advisory
Failed
Advisory
Related parameters (and defaults)
None
None
None
None
Failed
Advisory
Failed
Advisory
Guidelines for setting
Refer to Product Data Sheet for transmitter power requirements.
Temperature over range missing.
A.3
Using PlantWeb Alerts
Table A-2 shows information required for using PlantWeb Alerts with the Micro Motion Model 2700
with F
OUNDATION
fieldbus. Table A-3 shows the status of AI and AO block outputs under various
combinations of transducer block modes and PlantWeb Alerts.
Configuration and Use Manual
143
PlantWeb Alerts
Table A-2
Using PlantWeb Alerts
PlantWeb
Alert
What the Alert is detecting
Default alert category Effect on device
Recommended action/help
Density out of range
Mass flow out of range
Calibration failed
Tube not full
Slug flow
Drive out of range
API: Process variable out of range
The measured density has exceeded the sensor defined limits.
The measured mass flow has exceeded the sensor defined limits.
The zero or density calibration attempted by the user failed.
There is no signal from the left or right pickoffs.
The process temperature or density is outside the
API-defined extrapolation limits.
Failed Density measurement unavailable.
Mass flow measurement unavailable.
Measurements are wrong or erratic.
Entrained gas in a liquid process or condensation in a gas process has caused the density to exceed the configured slug limits.
Maintenance Measurements may be incorrect. If temporary or expected, this can be ignored.
The drive needed to operate the sensors has exceeded the optimal point.
Failed
Failed
Failed
Maintenance
Maintenance
Device may not be properly calibrated or zeroed.
Flowmeter continues to function normally, but there may be a problem.
API measurements may be incorrect.
• Check for partially filled or blocked flow tubes.
• Check process to ensure density is correct.
• Verify all characterization parameters are correct, especially density factors.
• Perform a density calibration.
• Check process to ensure mass flow is correct.
• Verify characterization parameters are correct.
• Zero the flowmeter.
• If zeroing, verify there is no flow.
• If performing an FD cal, verify there is sufficient flow.
• Cycle power to the transmitter, then try recalibrating the transmitter.
• Eliminate mechanical noise.
Check for air in the flow tubes, tubes not filled, foreign material in tubes, or coating in tubes.
In a liquid process, check process for cavitation, flashing or leaks. In a gas process, check temperature and pressure to verify gas is not condensing. If slug condition occurred while batching, actual product delivered may not match target. Monitor density and try to resolve process problems. If slug condition persists, reconfigure slug limits and/or slug timeout.
• Purge the flow tubes
• Increase inlet or back pressure at the sensor
• Change sensor orientation
• If no other alert is active, this condition can be ignored.
Check the API configuration.
144
Model 2700 Transmitters with F
OUNDATION
™
fieldbus
PlantWeb Alerts
Table A-2
Using PlantWeb Alerts (continued)
PlantWeb
Alert
Sensor not responding
Sensor temperature out of range
What the Alert is detecting
The sensor is not functioning properly.
Default alert category
Failed
Either the temperature reading from the RTD on the sensor tube or sensor case is outside the normal operating limits.
Failed
Effect on device
Recommended action/help
Incorrect or unusable data.
Bad temperature reading. This may adversely affect CM and
API variables.
Measurements may be incorrect.
This CM curve is not usable.
• Check sensor wiring.
• Check test points.
• Purge flow tubes.
• Verify characterization parameters are correct.
• Check sensor wiring.
There may be an open or short lead length compensator or an open or short RTD in the sensor. If open or short is at transmitter, repair. If open or short is at sensor, return to Micro
Motion.
• Verify process fluid temperature is within sensor specifications.
Check the characterization.
Specifically, verify the Flow
Cal Factors, K1 and K2 values.
Check the curve data.
Transmitter not characterized
CM: Unable to fit curve data
The transmitter has not had the proper flow or density calibration parameters entered from the sensor tag or flow calibration sheet.
The data entered as inputs to the curve fit yield unacceptable errors in the fit.
The meter verification routine is in progress.
Meter verification in progress
CM: Extrapolation alarm
The process temperature or process density is outside the user-defined extrapolation limits.
Calibration in progress
There is a calibration (zero, density, temperature, or meter verification) in progress.
Failed
Failed
Failed Outputs held at last measured values.
Maintenance CM variables may be incorrect or unusable.
Advisory
Sensor simulate active
Transmitter initializing/ warming up
Electronics failure Device
Sensor simulate mode is active.
The transmitter is undergoing its initial startup routines.
Advisory
Failed
Failed
Wait until meter verification routine is complete.
Check enhanced density configuration data.
If meter verification is in progress, the outputs are held at last measured values.
Otherwise, no effect.
Outputs are fixed.
Allow the calibration to complete.
Temporary unavailability.
A valid measurement cannot be calculated until the startup phase is complete.
None
Disable sensor simulate mode.
Allow the transmitter to warm up. The error should go away when the transmitter is ready for normal operation.
Electronics failure Hornet
The core processor or transmitter has experienced either an EEPROM, RAM, boot sector or real-timer interrupt failure.
Perform Restart Processor.
If problem persists, call
Micro Motion
Failed None
Configuration and Use Manual
145
PlantWeb Alerts
Table A-2
Using PlantWeb Alerts (continued)
PlantWeb
Alert
Core processor/ transmitter communication failure
ECP low power
What the Alert is detecting
There is a communication failure between the core processor and the transmitter.
The enhanced core processor is not receiving enough power.
Default alert category
Failed
Failed
Effect on device
Inoperable.
Inoperable.
Possible data loss
Electronics failure Hornet
NV Memory
Failure
Check function
Factory configuration checksum invalid
Factory configuration invalid
The core processor was unable to successfully store the totalizers on the last power down.
Maintenance Potential loss of information. The core processor must rely on the totals that were previously saved in the device up to 2 hours before the power was lost.
Failed None Perform Restart Processor.
If problem persists, call
Micro Motion
NV memory data check sum invalid. NV data might be corrupt.
Check Transducer Block
Mode
Failed
Advisory
Failed
Advisory
Perform Restart Processor.
If problem persists, call
Micro Motion
The Factory configuration data is changed.You can save the current configuration as factory configuration
Failed
Advisory
Recommended action/help
Verify the wiring between the transmitter and the core processor. Cycle power to the transmitter. If the problem persists, contact Micro Motion.
Check the power supply to the transmitter. Check the wiring between the transmitter and the core processor.
Contact Micro Motion for a transmitter software upgrade.
Table A-3
AI / AO block status
Transducer block mode (Actual)
OOS
Man
Auto
Auto
Auto
Auto
Active PlantWeb Alerts
No effect
No effect
Fail
Maint., no Fail
Advisory only
None
AI / AO status
Bad
Bad
Bad
Uncertain
Good
Good
AI / AO substatus
Device failure
Non-specific
Non-specific
Non-specific
Non-specific
Non-specific
146
Model 2700 Transmitters with F
OUNDATION
™
fieldbus
Appendix B
Model 2700 transducer blocks reference
B.1
Overview
The Micro Motion Model 2700 transmitter has seven separate transducer blocks.
B.1.1
Transducer block names
Throughout this manual, the transducer blocks are referred to by their tag (e.g., MEASUREMENT).
Fieldbus hosts that do not support the use of tags as block names will instead show the name
TRANSDUCER followed by a numeric code. Table B-1 shows the relationship between transducer
block tag names and codes, and gives the table number where the parameters and views are described in this appendix.
Table B-1
Transducer block tag names, code names, and table numbers
Tag name Code Name
MEASUREMENT TB 1200
CALIBRATION TB 1400
Transducer 1200
Transducer 1400
DIAGNOSTICS TB 1600 Transducer 1600
DEVICE INFORMATION TB 1800 Transducer 1800
LOCAL DISPLAY TB 2000
API TB 2200
Transducer 2000
Transducer 2200
ENHANCED DENSITY TB 2400 Transducer 2400
Parameters
Table B-2
Table B-4
Table B-6
Table B-8
Table B-10
Table B-12
Table B-14
Views
Table B-3
Table B-5
Table B-7
Table B-9
Table B-11
Table B-13
Table B-15
B.2
MEASUREMENT transducer block parameters
Following are the parameters (Table B-2) and views (Table B-3) for the MEASUREMENT transducer
block.
Configuration and Use Manual
147
Model 2700 transducer blocks reference
Table B-2
MEASUREMENT transducer block parameters
0
1
2
3
4
5
6
7
Parameter Mnemonic
Standard FF Parameters
BLOCK_STRUCTURE
ST_REV
TAG_DESC
STRATEGY
ALERT_KEY
MODE_BLK
BLOCK_ERR
XD_ERROR
Definition
Beginning of the transducer block
Message
Type
VARIABLE
Data Type/
Structure
(size in bytes)
DS_64(5) N/A S N/A
The revision level of the static data associated with the function block.
Incremented with each write of static store.
The user description of the intended application of the block.
The strategy field can be used to identify grouping of blocks.
This data is not checked or processed by the block.
The identification number of the plant unit. This information may be used in the host for sorting alarms, etc.
The actual, target, permitted and normal modes of the block.
VARIABLE Unsigned16
(2)
N/A
STRING OCTET
STRING
(32)
VARIABLE Unsigned16
(2)
N/A
VARIABLE Unsigned8
(1)
RECORD DS-69 (4)
N/A
N/A
N/A
This parameter reflects the error status associated with the hardware or software components associated with a block.
Used for all config,
H/W, connection failure or system problems in the block.
STRING BIT
STRING (2)
VARIABLE Unsigned8
(1)
N/A
N/A
S
S
S
S mix
D/20
D
0
YES Spaces “
YES
YES
YES
—
—
0
0
Auto
1
1
8
9
Process Variables Data
MFLOW
MFLOW_UNITS
Mass Flow Rate
Standard or special mass flow rate unit
VARIABLE
ENUM
DS-65 (5)
Unsigned16
(2)
R-0247
-0248
D/20
R-0039 S
0
YES g/s
Enumerated List of Values
R/W
(OOS or
Auto)
R
N/A
N/A
R/W
(OOS or
Auto)
R/W
(OOS or
Auto)
R/W
(OOS or
Auto)
R/W
(OOS or
Auto)
R
Any 32 Characters
N/A
1 to 255
See section 2/6 of
FF-891
See section 4.8 of
FF-903
R 18 = Process
Error
19 = Configuration
Error
20 = Electronics
Failure
21 = Sensor
Failure
1318
R N/A
R/W
(OOS)
1318 = g/s
1319 = g/min
1320 = g/hr
1322 = kg/s
1323 = kg/min
1324 = kg/hr
1325 = kg/day
1327 = t/min
1328 = t/h
1329 = t/d
1330 = lb/s
1331 = lb/min
1332 = lb/hr
1333 = lb/day
1335 = Ston/min
1336 = Ston/hr
1337 = Ston/day
1340 = Lton/hr
1341 = Lton/day
253 = Special units
148
Model 2700 Transmitters with F
OUNDATION
™
fieldbus
Model 2700 transducer blocks reference
Table B-2
MEASUREMENT transducer block parameters (continued)
10 MFLOW_SPECIAL_UNI
11
Parameter Mnemonic
T_BASE
MFLOW_SPECIAL_UNI
T_TIME
Definition
Base Mass Unit
Base time unit for special mass unit
Message
Type
ENUM
ENUM
Data Type/
Structure
(size in bytes)
Unsigned16
(2)
Unsigned16
(2)
R-132
R-133
S
S
12
13
14
15
MFLOW_SPECIAL_UNI
T_CONV
MFLOW_SPECIAL_UNI
T_STR
TEMPERATURE
TEMPERATURE_UNITS
Special mass unit conversion factor
Special mass flow unit string
Temperature
Temperature Unit
VARIABLE
ENUM
FLOAT (4)
STRING VISIBLE
STRING (8)
VARIABLE DS-65 (5)
R-237 —
238
R-52 —
55
S
S
R-0251
— 0252
D/20
Unsigned16
(2)
R-0041 S
YES 1
YES NONE
–
YES
C
1001
16
17
18
DENSITY
DENSITY_UNITS
VOL_FLOW
Density
Density Unit
Volume flow rate
VARIABLE
ENUM
DS-65 (5)
Unsigned16
(2)
R-0249
— 0250
D/20
R-0040 S
–
YES g/cm
3
VARIABLE DS-65 (5) R-0253
-0254
D/20
YES
YES g s
–
1089
1054
1.0
NONE
R/W
(OOS)
R/W
(OOS)
Enumerated List of Values
1089 = Grams
1088 = Kilograms
1092 = Metric
Tons
1094 = Pounds
1095 = Short tons
1096 = long tons
1058 = Minutes
1054 = Seconds
1059 = Hours
1060 = Days
N/A R/W
(OOS)
R/W
(OOS)
R
Any 8 characters
N/A
1100
R/W
(OOS)
R
1000 = K
1001 = Deg C
1002 = Deg F
1003 = Deg R
N/A
R/W
(OOS)
R
1097 = kg/m3
1100 = g/cm3
1103 = kg/L
1104 = g/ml
1105 = g/L
1106 = lb/in3
1107 = lb/ft3
1108 = lb/gal
1109 = Ston/yd3
1113 = DegAPI
1114 = SGU
N/A
Configuration and Use Manual
149
Model 2700 transducer blocks reference
Table B-2
MEASUREMENT transducer block parameters (continued)
20
21
Parameter Mnemonic
VOL_SPECIAL_UNIT_B
ASE
VOL
_SPECIAL_UNIT_TIME
Definition
19 VOLUME_FLOW_UNITS Standard or special volume flow rate unit
Base Volume Unit
Base time unit for special volume unit
Message
Type
ENUM
ENUM
ENUM
Data Type/
Structure
(size in bytes)
Unsigned16
(2)
R-
0042
S
Unsigned16
(2)
R -133 S
Unsigned16
(2)
R — 134 S
22
26
VOL
_SPECIAL_UNIT_CONV
23 VOL
_SPECIAL_UNIT_STR
24 MASS_TOT_INV_SPECI
AL_ STR
25 VOLUME_TOT_INV_
SPECIAL_ STR
FLOW_DAMPING
27 TEMPERATURE_DAMPI
NG
28 DENSITY_DAMPING
29 MFLOW_M_FACTOR
Special volume unit conversion factor
Special volume unit string
Special mass total and inventory unit string
Special volume total and inventory unit string
Flow rate (Mass and
Volume) internal damping (seconds)
Temperature internal damping (seconds)
Density internal damping (seconds)
Mass Rate Factor
VARIABLE FLOAT (4)
STRING
STRING
STRING
VISIBLE
STRING (8)
VISIBLE
STRING(8)
VISIBLE
STRING (8)
VARIABLE FLOAT (4)
VARIABLE FLOAT (4)
VARIABLE FLOAT (4)
VARIABLE FLOAT (4)
R — 239
— 240
S
R — 60 —
63
R -56 —
59
R -64 —
67
S
S
S
R-189
-190
R-191
-192
R 193
-194
R-279-
0280
S
S
S
S
YES
YES
YES
YES
YES
YES
NONE
NONE
YES NONE
YES l/s
1 s
1
0.8
1351
1038
1054
1.0
NONE
NONE
NONE
R/W
(OOS)
R/W
(OOS)
R/W
(OOS)
Enumerated List of Values
1347 = m3/s
1348 = m 3/min
1349 = m3/hr
1350 = m3/day
1351 = L/s
1352 = L/min
1353 = L/hr
1355 = Ml/day
1356 = CFS
1357 = CFM
1358 = CFH
1359 = ft3/day /
Standard cubic
ft. per day
1362 = gal/s
1363 = GPM
1364 = gal/hour
1365 = gal/day
1366 = Mgal/day
1367 = ImpGal/s
1368 =
ImpGal/min
1369 = ImpGal/hr
1370 = Impgal/day
1371 = bbl/s
1372 = bbl/min
1373 = bbl/hr
1374 = bbl/day
1631 = barrel (US
Beer) per
day
1632 = barrel (US
Beer) per
hour
1633 = barrel (US
Beer) per
minute
1634 =barrel (US
Beer) per
Second
253 = Special units
1048 = Gallons
1038 = Liters
1049 = Imperial
Gallons
1043 = Cubic Feet
1034 = Cubic
Meters
1051 = Barrels
1058 = Minutes
1054 = Seconds
1059 = Hours
1060 = Days
N/A R/W
(OOS)
R/W
(OOS)
R/W
(OOS)
R/W
(OOS)
Any 8 characters
Any 4 characters
Any 4 characters
0.8
R/W
(OOS)
N/A
YES
YES
YES
4.8
1.6
1.0
4.8
1.6
1.0
R/W
(OOS)
R/W
(OOS)
R/W
(OOS)
N/A
N/A
N/A
150
Model 2700 Transmitters with F
OUNDATION
™
fieldbus
Model 2700 transducer blocks reference
Table B-2
MEASUREMENT transducer block parameters (continued)
30
31
45
46
Parameter Mnemonic
DENSITY_M_FACTOR
VOL_M_FACTOR
START_STOP_TOTALS
RESET_TOTALS
Definition
Density Factor
Volume Rate Factor
32 MASS_LOW_CUT
33 VOLUME_FLOW_LOW_
CUTOFF
34 DENSITY_LOW_CUTOF
F
35 FLOW_DIRECTION
Mass flow cutoff for internal totalizers
Volume flow cutoff for internal totalizers
Density cutoff for internal totalizers
Flow direction
Message
Type
Data Type/
Structure
(size in bytes)
VARIABLE
VARIABLE
VARIABLE
VARIABLE
FLOAT (4)
FLOAT (4)
FLOAT (4)
FLOAT (4)
R-283
-284
R-281-
282
R-195 —
196
R-197-
198
S
S
S
S
VARIABLE
ENUM
FLOAT (4)
Unsigned16
(2)
R-149-
150
S
R-0017 S
YES 1.0
YES 1.0
YES 0.0
YES 0.0
YES 0.2
YES 0
36
37
38
39
40
41
42
43
HIGH_MASS_LIMIT
HIGH_TEMP_LIMIT
HIGH_DENSITY_LIMIT
HIGH_VOLUME_LIMIT
LOW_MASS_LIMIT
LOW_TEMP_LIMIT
LOW_DENSITY_LIMIT
LOW_VOLUME_LIMIT
High mass flow limit of sensor
High Temperature limit of sensor
High density limit of sensor (g/cc)
High volume flow limit of sensor
Low mass flow limit of sensor
Low Temperature limit of sensor
Low density limit of sensor (g/cc)
Low volume flow limit of sensor
VARIABLE FLOAT (4)
VARIABLE FLOAT (4)
VARIABLE FLOAT (4)
VARIABLE FLOAT (4)
VARIABLE FLOAT (4)
VARIABLE FLOAT (4)
VARIABLE FLOAT (4)
VARIABLE FLOAT (4)
Totalizers
44 INTEGRATOR_FB_CON
FIG
Configuration of
Integrator Function
Block
ENUM Unsigned16
(2)
S
S
S
S
S
S
S
S
R-1511 S
R-165-
166
R-167-
168
R-169-
170
R-171-
172
R-173-
174
R-175-
176
R-177-
178
R-179-
180
YES 0
Calc
Calc
Calc
Calc
Calc
Calc
Calc
Calc
0
Start/Stop all
Totalizers
Reset all Totals
VARIABLE DS-66 (2)
VARIABLE DS-66 (2)
C — 2
C — 3 —
YES
YES
1
0
1.0
1.0
0.0
0.0
0.2
0
R
R
R
R
R
R
Enumerated List of Values
N/A R/W
(OOS)
R/W
(OOS)
R/W
(OOS)
R/W
(OOS)
R/W
(OOS)
R/W
(Any)
R
N/A
N/A
N/A
N/A
0 = Forward Only
1 = Reverse Only
2 = Bi-Directional
3 = Absolute Value
4 =
Negate/Forward
Only
5 = Negate/Bi-Dir
N/A
R N/A
N/A
N/A
N/A
N/A
N/A
N/A
0
0
R/W
(Any)
R/W
(Any)
R/W
(Any)
0 = Standard
1 = Internal Mass
Total
2 = Internal Vol
Total
3 = Internal Mass
Inv.
4 = Internal Vol
Inv.
5 = Int Gas Vol Tot
6 = Int Gas Vol Inv
7 = Int API Vol Tot
8 = Int API Vol Inv
9 = Int ED Std Vol
Tot
10= Int ED Std Vol
Inv
11= Int ED Net
Mass Tot
12= Int ED Net
Mass Inv
13= Int ED Net Vol
Tot
14= Int ED Net Vol
Inv
Value part of
DS-66
0 = Stop Totals
1 = Start Totals
Value part of
DS-66
1 = Reset
Configuration and Use Manual
151
Model 2700 transducer blocks reference
Table B-2
MEASUREMENT transducer block parameters (continued)
48
Parameter Mnemonic
47 RESET_INVENTORIES
RESET_MASS_TOTAL
49 RESET_VOLUME_TOTA
L
55 VOLUME_TOT_INV_UNI
TS
Definition
Reset all Inventories
Reset Mass Total
Reset Volume Total
Standard or special volume total or mass inventory unit.
Message
Type
METHOD
VARIABLE
ENUM
Data Type/
Structure
(size in bytes)
Unsigned16
(2)
VARIABLE DS-66 (2)
DS-66 (2)
Unsigned16
(2)
C — 4
C — 56
C — 57
R-0046
—
—
—
50
51
52
53
MASS_TOTAL
VOLUME_TOTAL
MASS_INVENTORY
VOLUME_INVENTORY
Mass Total
Volume Total
Mass Inventory
Volume Inventory
54 MASS_TOT_INV_UNITS Standard or special mass total and mass inventory unit
VARIABLE DS-65 (5) R-0259
-0260
D/20
VARIABLE
VARIABLE
DS-65 (5)
DS-65 (5)
R-0261
-0262
R-0263
-0264
D/20
D/20
VARIABLE
ENUM
DS-65 (5) R-0265
-0266
D/20
Unsigned16
(2)
R-0045 S
S
YES
YES
YES
0
0
0
–
–
–
– g
1l
0
0
0
R
R
R
R
Enumerated List of Values
1 = Reset R/W
(Any)
R/W
(Any)
R/W
(Any)
R
Value part of
DS-66
1 = Reset
Value part of
DS-66
1 = Reset
N/A
N/A
N/A
R
N/A
1088 = Kg
1089 = g
1092 = metric tons
1094 = lbs
1095 = short tons
1096 = long tons
253 = Special units
1034 = m3
1036 = cm3
1038 = l
1043 = ft3
1048 = gal
1049 = ImpGal
1051 = bbl
253 = Special units.
Gas Process Variables
56 GSV_Gas_Dens
57
58
59
60
GSV_Vol_Flow
GSV_Vol_Tot
GSV_Vol_Inv
SNS_EnableGSV
Gas Density used to calculate Reference
Volume Gas Flow and
Totals
Reference Volume
Gas Flow Rate (not valid when API or CM is enabled)
Reference Volume
Gas Total (not valid when API or CM is enabled)
Reference Volume
Gas Inventory (not valid when API or CM is enabled)
VARIABLE
VARIABLE
VARIABLE
VARIABLE
Enable/Disable Gas
Standard Volume Flow and Totals
ENUM
FLOAT (4)
DS-65 (5)
DS-65 (5)
DS-65 (5)
Unsigned16
(2)
R-0453
-0454
R-0455
-0456
R-0457
-0458
R-0459
-0460
C-78
S
D/20
D/20
D/20
S
YES 0.00120
5
0.0012
05
–
–
–
YES 0 0
R/W
(OOS)
N/A
R
R
R
N/A
N/A
N/A
R/W
(OOS)
0 = disabled (liquid)
1 = enabled (gas)
152
Model 2700 Transmitters with F
OUNDATION
™
fieldbus
Model 2700 transducer blocks reference
Table B-2
MEASUREMENT transducer block parameters (continued)
61
62
63
64
65
66
67
68
69
70
Parameter Mnemonic
SNS_GSV_FlowUnits
SNS_GSV_TotalUnits
SNS_GSVflowBaseUnit
SNS_GSVflowBaseTime
SNS_GSVflowFactor
SNS_GSVflowText
SNS_GSVtotText
SNS_GSV_FlowCutoff
SNS_ResetGSVolTotal
SNS_ResetAPIGSVInv
Definition
Gas Standard Volume
Flow Engineering
Units
Gas Standard Volume
Total and Inventory
Engineering Units
Base Gas Standard
Volume Unit
Base time unit for special gas standard volume unit.
Message
Type
ENUM
ENUM
ENUM
ENUM
Reset Gas Standard
Volume Inventory
Method
Data Type/
Structure
(size in bytes)
Unsigned16
(2)
Unsigned16
(2)
Unsigned16
(2)
Unsigned16
(2)
R-2601
R-2602
R-2603
R-2604
S
S
S
S
Unsigned16
(2)
C-194 S
YES
YES
YES
SCFM
SCF
SCF min
1360
1058
Enumerated List of Values
R/W
(OOS)
R
R/W
(OOS)
R/W
(OOS)
R/W
(OOS)
1356 = SCFS
1359 = SCFD
1360 = SCFM
1361 = SCFH
1522 = Nm3/s
1523 = Nm3/m
1524 = Nm3/h
1525 = Nm3/d
1527 = Sm3/s
1528 = Sm3/m
1529 = Sm3/h
1530 = Sm3/d
1532 = NL/s
1533 = NL/m
1534 = NL/h
1535 = NL/d
1537 = SL/s
1538 = SL/m
1539 = SL/h
1540 = SL/d
253 = Special units.
1053 = SCF
1521 = Nm3
1526 = Sm3
1531 = NL
1536 = SL
253 = Special units
1521 = Normal cubic meter
1531 = Normal liter
1053 = Standard cubic ft
1536 = Standard liter
1526 = Standard cu meter
1058 = Minutes
1054 = Seconds
1059 = Hours
1060 = Days
N/A Special gas standard volume unit conversion factor
Special gas standard volume unit string
Special gas standard volume total and inventory unit string
Gas Standard Volume
Low Flow Cutoff
Reset Gas Standard
Volume Total
VARIABLE FLOAT (4)
STRING
STRING
VISIBLE
STRING (8)
VISIBLE
STRING (8)
VARIABLE FLOAT (4)
VARIABLE DS-66 (2)
R-2605
— 2606
S
R-2607
— 2610
S
R-2611
— 2614
S
R-461-
462
C-63
S
SS
YES 1
YES
YES
YES —
NONE
NONE
YES –
YES –
1.0
NONE
NONE
R/W
(OOS)
R/W
(OOS)
Any 8 characters
Any 4 characters
0
0
0
R/W
(OOS)
R/W
(Any)
R/W
(Any)
Must be >=0.0
Value part of
DS-66
1 = Reset
1 = Reset
Configuration and Use Manual
153
Model 2700 transducer blocks reference
Table B-2
MEASUREMENT transducer block parameters (continued)
71
72
73
Parameter Mnemonic
Other 4.0 additions
SNS_ResetMassInventory
SNS_ResetVolumeInventory
v7.0 Additions
SNS_ActualFlowDirection
Definition
Reset Mass Inventory
Reset Volume Inventory
Indicates whether flow is moving in the forward or reverse direction
Message
Type
Method
Method
Data Type/
Structure
(size in bytes)
Unsigned16
(2)
Unsigned16
(2)
VARIABLE DS-66 (2)
C-192
C-193
R422/B it #4
—
S
S
YES 0
YES 0
0
0
0
Enumerated List of Values
R/W
(Any)
R/W
(Any)
1 = Reset
1 = Reset
R Value part of
DS-66
0 = Forward or
Zero Flow
1 = Reverse Flow
0
3
4
1
2
5
6
7
20
21
22
23
16
17
18
19
24
25
26
12
13
14
15
8
9
10
11
Table B-3
MEASUREMENT transducer block views
OD
Index Parameter Mnemonic
Standard FF Parameters
BLOCK_STRUCTURE
ST_REV
TAG_DESC
STRATEGY
ALERT_KEY
MODE_BLK
BLOCK_ERR
XD_ERROR
Process Variables Data
MFLOW
MFLOW_UNITS
MFLOW_SPECIAL_UNIT_BASE
MFLOW_SPECIAL_UNIT_TIME
MFLOW_SPECIAL_UNIT_CONV
MFLOW_SPECIAL_UNIT_STR
TEMPERATURE
TEMPERATURE_UNITS
DENSITY
DENSITY_UNITS
VOL_FLOW
VOL_FLOW_UNITS
VOL_SPECIAL_UNIT_BASE
VOL _SPECIAL_UNIT_TIME
VOL _SPECIAL_UNIT_CONV
VOL _SPECIAL_UNIT_STR
MASS_TOT_INV_SPECIAL_ STR
VOLUME_TOT_INV_ SPECIAL_ STR
FLOW_DAMPING
View 1 View 2 View 3 View 4
2
5
5
5
4
2
1
5
2
2
2
2
2
4
2
5
5
5
4
2
1
5
2
2
1
4
8
2
2
8
8
4
8
2
2
154
Model 2700 Transmitters with F
OUNDATION
™
fieldbus
Model 2700 transducer blocks reference
51
52
53
54
55
47
48
49
50
44
45
46
66
67
68
69
62
63
64
65
70
71
56
57
58
59
60
61
Table B-3
MEASUREMENT transducer block views (continued)
32
33
34
35
28
29
30
31
OD
Index
27
40
41
42
43
36
37
38
39
VOLUME_TOTAL
MASS_INVENTORY
VOLUME_INVENTORY
MASS_TOT_INV_UNITS
VOLUME_TOT_INV_UNITS
Gas Process Variables
GSV_Gas_Dens
GSV_Vol_Flow
GSV_Vol_Tot
GSV_Vol_Inv
SNS_EnableGSV
SNS_GSV_FlowUnits
SNS_GSV_TotalUnits
SNS_GSVflowBaseUnit
SNS_GSVflowBaseTime
SNS_GSVflowFactor
SNS_GSVflowText
SNS_GSVtotText
SNS_GSV_FlowCutoff
SNS_ResetGSVolTotal
SNS_ResetAPIGSVInv
SNS_ResetMassInventory
Parameter Mnemonic
TEMPERATURE_DAMPING
DENSITY_DAMPING
MFLOW_M_FACTOR
DENSITY_M_FACTOR
VOL_M_FACTOR
MASS_LOW_CUT
VOLUME_LOW_CUT
DENSITY_LOW_CUT
FLOW_DIRECTION
HIGH_MASS_LIMIT
HIGH_TEMP_LIMIT
HIGH_DENSITY_LIMIT
HIGH_VOLUME_LIMIT
LOW_MASS_LIMIT
LOW_TEMP_LIMIT
LOW_DENSITY_LIMIT
LOW_VOLUME_LIMIT
Totalizers
INTEGRATOR_FB_CONFIG
START_STOP_TOTALS
RESET_TOTALS
RESET_INVENTORIES
RESET_MASS_TOTAL
RESET_VOLUME_TOTAL
MASS_TOTAL
View 1
5
5
5
5
5
5
5
2
2
2
2
2
4
4
2
4
4
4
4
4
4
View 2
4
4
4
4
4
4
4
4
4
2
2
2
2
2
2
View 3 View 4
5
5
5
5
5
5
5
2
4
2
2
2
2
8
8
2
Configuration and Use Manual
155
Model 2700 transducer blocks reference
Table B-3
MEASUREMENT transducer block views (continued)
OD
Index
72
73
Parameter Mnemonic
SNS_ResetVolumeInventory
SNS_ActualFlowDirection
Totals
View 1
64
View 2
2
2
110
View 3 View 4
64 85
B.3
CALIBRATION transducer block parameters
Following are the parameters (Table B-4) and views (Table B-5) for the CALIBRATION transducer
block.
Table B-4
CALIBRATION transducer block parameters
0
1
2
3
4
5
6
7
Parameter Mnemonic
Standard FF Parameters
BLOCK_STRUCTURE
ST_REV
TAG_DESC
STRATEGY
ALERT_KEY
MODE_BLK
BLOCK_ERR
XD_ERROR
Definition
Beginning of the transducer block
Message
Type
VARIABLE
Data Type/
Structure
(size in bytes)
DS_64 (5) N/A
The revision level of the static data associated with the function block.
Incremented with each write of static store.
The user description of the intended application of the block.
The strategy field can be used to identify grouping of blocks.
This data is not checked or processed by the block.
The identification number of the plant unit. This information may be used in the host for sorting alarms, etc.
The actual, target, permitted and normal modes of the block.
VARIABLE Unsigned16
(2)
N/A
STRING OCTET
STRING
(32)
VARIABLE Unsigned16
(2)
N/A
VARIABLE Unsigned8
(1)
RECORD DS-69 (4)
N/A
N/A
N/A
This parameter reflects the error status associated with the hardware or software components associated with a block.
Used for all config,
H/W, connection failure or system problems in the block.
STRING BIT
STRING (2)
VARIABLE Unsigned8
(1)
N/A
N/A
S
S
S
N/A
0
S
S
Yes Spaces “
“
Yes 0 0
1
Enumerated List of Values
R/W
(OOS or
Auto)
R
N/A
N/A
R/W
(OOS or
Auto)
R/W
(OOS or
Auto)
R/W
(OOS or
Auto)
Any 32 Characters
N/A
1 to 255 mix Yes Auto
D/20 —
11 R/W
(OOS or
Auto)
R
See section 2/6 of
FF-891
See section 4.8 of
FF-903
D
Yes 0
R 18 = Process
Error
19 = Configuration
Error
20 = Electronics
Failure
21 = Sensor
Failure
8
Calibration
MASS_FLOW_GAIN Flow calibration factor VARIABLE FLOAT (4) R-407
– 408
S Yes 1.0
1.0
R/W
(OOS)
N/A
156
Model 2700 Transmitters with F
OUNDATION
™
fieldbus
Model 2700 transducer blocks reference
Table B-4
CALIBRATION transducer block parameters (continued)
9
Parameter Mnemonic Definition
MASS_FLOW_T_COMP Temperature coefficient for flow
10 ZERO_CAL Perform auto zero
11
12
13
14
15
16
ZERO_TIME
ZERO_STD_DEV
ZERO_OFFSET
ZERO_FAILED_VAULE
LOW_DENSITY_CAL
HIGH_DENSITY_CAL
Maximum zeroing time VARIABLE Unsigned16
(2)
Standard deviation of auto zero
Present flow signal offset at zero flow in
sec
VARIABLE FLOAT (4)
VARIABLE FLOAT (4)
R-0136 S
R-0231
-232
R-233-
234
S
S
Value of the zero if the zero cal failed
Perform low density calibration
Perform high-density calibration
VARIABLE
METHOD
METHOD
FLOAT (4) R-0235
-0236
C-0013 —
S
Unsigned16
(2)
Unsigned16
(2)
C-0014 —
17 FLOWING_DENSITY_C
AL
18
19
D3_DENSITY_CAL
D4_DENSITY_CAL
Perform flowing-density calibration
Perform third point calibration
Perform fourth point calibration
20 K1
21
22
23
24
25
K2
FD
K3
K4
D1
Density calibration constant 1 (msec)
Density calibration constant 2 (msec)
Flowing Density calibration constant
Density calibration constant 3 (
sec)
Density calibration constant 4 (
sec)
Density 1 (g/cc)
26 D2
27 FD_VALUE
28 D3
Density 2 (g/cc)
METHOD Unsigned16
(2)
C-0018 —
METHOD
METHOD
Unsigned16
(2)
Unsigned16
(2)
C-0044 —
C-0045 —
VARIABLE FLOAT (4)
VARIABLE
VARIABLE
VARIABLE
VARIABLE
VARIABLE
VARIABLE
FLOAT (4)
FLOAT (4)
FLOAT (4)
FLOAT (4)
FLOAT (4)
FLOAT (4)
Flowing Density (g/cc) VARIABLE FLOAT (4)
Density 3 (g/cc) VARIABLE FLOAT (4)
R-159-
160
R-161-
162
R303-3
04
S
S
S
R-0503 S
R-0519 S
R-0155
-0156
R-0157
-0158
R277-2
78
S
S
S
S
29 D4 Density 4 (g/cc) VARIABLE FLOAT (4)
30 DENS_T_COEFF Density temperature coefficient
31
32
T_FLOW_TG_COEFF
T_FLOW_FQ_COEFF
T-Series: Flow TG
Coefficient (FTG)
T-Series: Flow FQ
Coefficient (FFQ)
33 T_DENSITY_TG_COEFF T-Series: Density TG
Coefficient (DTG)
34 T_DENSITY_FQ_COEFF
1
T-Series: Density FQ
Coefficient #1 (DFQ1)
35 T_DENSITY_FQ_COEFF
2
T-Series: Density FQ
Coefficient #2 (DFQ2)
VARIABLE FLOAT (4)
VARIABLE FLOAT (4)
VARIABLE FLOAT (4)
VARIABLE FLOAT (4)
VARIABLE FLOAT (4)
VARIABLE FLOAT (4)
R-511
R-0163
-164
R-505
R-507
R-513
R-515
S
S
S
S
S
S
R-517 S
Message
Type
Data Type/
Structure
(size in bytes)
VARIABLE FLOAT (4)
VARIABLE DS-66 (2)
R-409-
410
C-0005 —
S Yes
Yes
Yes
5.13
0
20
0
5.12
0
20
Enumerated List of Values
N/A R/W
(OOS)
R/W
(OOS)
Value part of
DS-66
0 = Abort Zero Cal
1 = Start Zero Cal
N/A R/W
(OOS)
R N/A
R/W
(OOS)
R
N/A
N/A
0
0
Yes
Yes
Yes
Yes
Yes
Yes
Yes 50000
Yes
Yes
Yes
Yes
Yes
Yes
Yes
Yes
Yes
Yes
Yes
Yes
Yes
Yes
0
0
0
0
0
1000
0
0
0
0
1
0
0
0
4.44
0
0
0
0
0
0
0
0
R/W
(OOS)
R/W
(OOS)
R/W
(any)
0 = None
1 = Start Cal
0x0000 = None
0x0001 = Start
Cal
0 = None
1 = Start Cal
0
0
7000.
00
1100
0.0
0
0
0
0
1.0
0
0
0
4.44
0
0
0
0
0
R/W
(OOS)
R/W
(OOS)
R/W
(OOS)
R/W
(OOS)
R/W
(Any)
R/W
(OOS)
R/W
(OOS)
R/W
(OOS)
R/W
(OOS)
R/W
(OOS)
R/W
(OOS)
R/W
(OOS)
R/W
(OOS)
R/W
(OOS)
0 = None
1 = Start Cal
R/W
(OOS)
0x0000 = None
0x0001 = Start
Cal
N/A R/W
(OOS)
R/W
(OOS)
R/W
(OOS)
N/A
N/A
N/A
N/A
N/A
N/A
N/A
N/A
N/A
N/A
N/A
N/A
N/A
N/A
N/A
Configuration and Use Manual
157
Model 2700 transducer blocks reference
Table B-4
CALIBRATION transducer block parameters (continued)
36
37
38
39
40
Parameter Mnemonic
TEMP_LOW_CAL
TEMP_HIGH_CAL
TEMP_VALUE
TEMP_OFFSET
TEMP_SLOPE
Definition
Perform temperature calibration at the low point (point 1)
Perform temperature calibration at the high point 2)
Temperature Value for temp calibrations (in degC)
Temperature calibration offset
Temperature calibration slope
Message
Type
METHOD
METHOD
Data Type/
Structure
(size in bytes)
Unsigned16
(2)
Unsigned16
(2)
VARIABLE FLOAT (4)
VARIABLE FLOAT (4)
VARIABLE FLOAT (4)
C-15
C — 16
R —
151-15
2
R-0413
-414
R-0411
-0412
—
—
S
S
S
Pressure Compensation
41 PRESSURE Pressure
42 PRESSURE_UNITS Pressure Unit
Yes
Yes
Yes
Yes
Yes
0
0
0
0.0
0
VARIABLE
ENUM
DS-65 (5)
Unsigned16
(2)
R-0451
-452
D/20
R-0044 S
0
Yes psi
43 EN_PRESSURE_COMP Enable/Disable
Pressure
Compensation
44 PRESSURE_FACTOR_
FLOW
45 PRESSURE_FACTOR_
DENS
46 PRESSURE_FLOW_CA
L
Pressure correction factor for flow
Pressure correction factor for density
Flow calibration pressure
Temperature Compensation
47 SNS_EnableExtTemp Enable/Disable
Temperature
Compensation
ENUM Unsigned16
(2)
C-0082 S
VARIABLE FLOAT (4)
VARIABLE
VARIABLE
Method
FLOAT (4)
FLOAT (4)
Unsigned16
(2)
R-267-
268
R-269-
270
R-271-
272
S
S
S
C-0086 S
Yes 0
Yes 1
Yes 1
Yes 1
Yes 0
0
0
0
0
1.0
Enumerated List of Values
R/W
(OOS)
0 = None
1 = Start Cal
R/W
(OOS)
0 = None
1 = Start Cal
R/W
(OOS)
N/A
R /W
(OOS)
N/A
R/W
(OOS)
N/A
R/W
(any)
1141 R/W
(OOS)
0 R/W
(OOS)
N/A
1148 = inch water
@ 68F / inch [email protected]
1156 = inch HG @
0C
1154 = ft water @
68F
1151 = mm water
@ 68F
1158 = mm HG @
0C
1141 = psi
1137 = bar
1138 = millibar
1144 = g/cm2
1145 = kg/cm2
1130 = pascals
1132 = Mega pascals
1133 = kilopascals
1139 = torr @ 0C
1140 = atmospheres
1147 = Inches water @
4 degrees
Celsius
1150 = Millimeters
water @ 4
degrees
Celsius
0= disabled
1 = enabled
1
1
1
R/W
(OOS)
R/W
(OOS)
R/W
(OOS)
N/A
N/A
N/A
0 R/W
(OOS)
0= disabled
1 = enabled
158
Model 2700 Transmitters with F
OUNDATION
™
fieldbus
Model 2700 transducer blocks reference
Table B-4
CALIBRATION transducer block parameters (continued)
Parameter Mnemonic Definition
48 SNS_ExternalTempInput External Temperature
Message
Type
Data Type/
Structure
(size in bytes)
VARIABLE DS-66 (2) R421/B it #14
—
v7.0 Additions
49 SNS_ZeroInProgress VARIABLE DS-65 (5) Indicates whether a zero calibration, density calibration or temperature calibration is running.
S
0
3
4
1
2
5
6
7
20
21
22
23
16
17
18
19
12
13
14
15
8
9
10
11
24
25
26
27
28
29
Table B-5
CALIBRATION transducer block views
OD
Index Parameter Mnemonic
Standard FF Parameters
BLOCK_STRUCTURE
ST_REV
TAG_DESC
STRATEGY
ALERT_KEY
MODE_BLK
BLOCK_ERR
XD_ERROR
Calibration
MASS_FLOW_GAIN
MASS_FLOW_T_COMP
ZERO_CAL
ZERO_TIME
ZERO_STD_DEV
ZERO_OFFSET
ZERO_FAILED_VAULE
LOW_DENSITY_CAL
HIGH_DENSITY_CAL
FLOWING_DENSITY_CAL
D3_DENSITY_CAL
D4_DENSITY_CAL
K1
K2
FD
K3
K4
D1
D2
FD_VALUE
D3
D4
0
0
R/W
(Any)
Enumerated List of Values
R Value part of
DS-66
0 = Not Running
1 = Calibration
Running
View 1 View 2 View 3 View 4
2
4
2
1
2
4
4
4
4
4
4
4
4
4
4
2
2
2
2
2
2
2
4
4
2
4
4
4
4
2
1
2
2
1
Configuration and Use Manual
159
Model 2700 transducer blocks reference
41
42
43
44
45
46
Table B-5
CALIBRATION transducer block views (continued)
35
36
37
38
31
32
33
34
39
40
OD
Index
30
47
48
49
Parameter Mnemonic
DENS_T_COEFF
T_FLOW_TG_COEFF
T_FLOW_FQ_COEFF
T_DENSITY_TG_COEFF
T_DENSITY_FQ_COEFF1
T_DENSITY_FQ_COEFF2
TEMP_LOW_CAL
TEMP_HIGH_CAL
TEMP_VALUE
TEMP_OFFSET
TEMP_SLOPE
Pressure Compensation
PRESSURE
PRESSURE_UNITS
EN_PRESSURE_COMP
PRESSURE_FACTOR_FLOW
PRESSURE_FACTOR_DENS
PRESSURE_FLOW_CAL
Temperature Compensation
SNS_EnableExtTemp
SNS_ExternalTempInput
v7.0 Additions
SNS_ZeroInProgress
Totals
View 1
5
5
19
2
2
102
2
4
4
2
4
4
4
4
View 2
4
View 3
4
4
5
2
34
View 4
2
4
4
4
19
B.4
DIAGNOSTICS transducer block parameters
Table B-6
DIAGNOSTICS transducer block parameters
0
Parameter Mnemonic
Standard FF Parameters
BLOCK_STRUCTURE
Definition
Beginning of the transducer block
1 ST_REV
2 TAG_DESC
Message
Type
Data Type/
Structure
(size in bytes)
VARIABLE DS_64 (5) N/A
The revision level of the static data associated with the function block.
Incremented with each write of static store.
The user description of the intended application of the block.
VARIABLE Unsigned16
(2)
N/A
STRING OCTET
STRING
(32)
N/A
S
S
N/A
0
R/W
(OOS or
Auto)
R
Enumerated List of Values
N/A
N/A
S Yes Spaces »
«
R/W
(OOS or
Auto)
Any 32 Characters
160
Model 2700 Transmitters with F
OUNDATION
™
fieldbus
Model 2700 transducer blocks reference
Table B-6
DIAGNOSTICS transducer block parameters (continued)
8
9
3
Parameter Mnemonic
STRATEGY
4
5
6
7
ALERT_KEY
MODE_BLK
BLOCK_ERR
XD_ERROR
Slug Flow Setup
SLUG_TIME
SLUG_LOW_LIMIT
10 SLUG_HIGH_LIMIT
11
Alarm Status
ALARM1_STATUS
Definition
The strategy field can be used to identify grouping of blocks.
This data is not checked or processed by the block.
The identification number of the plant unit. This information may be used in the host for sorting alarms, etc.
The actual, target, permitted and normal modes of the block.
Message
Type
VARIABLE
Data Type/
Structure
(size in bytes)
Unsigned16
(2)
VARIABLE Unsigned8(
1)
RECORD DS-69 (4)
N/A
N/A
N/A
This parameter reflects the error status associated with the hardware or software components associated with a block.
Used for all config,
H/W, connection failure or system problems in the block.
STRING BIT
STRING (2)
VARIABLE Unsigned8(
1)
N/A
N/A
Slug duration
(seconds)
Low Density limit
(g/cc)
High Density limit
(g/cc)
Status Word 1
S
S
Yes
Yes
0
0
0
1
R/W
(OOS or
Auto)
Enumerated List of Values
N/A
R/W
(OOS or
Auto)
1 to 255 mix Yes Auto
D/20 —
01 R/W
(OOS or
Auto)
R
See section 2/6 of
FF-891
See section 4.8 of
FF-903
D —
VARIABLE
VARIABLE
FLOAT (4)
FLOAT (4)
VARIABLE FLOAT (4)
R-0141-
142
R-201-2
02
R-199-2
00
S
S
S
Yes 0.0
Yes 0.0
Yes 5.0
ENUM BIT
STRING (2)
N/A D/20 —
R
0.0
0.0
5.0
R/W
(Any)
R/W
(Any)
R/W
(Any)
N/A
N/A
N/A
18 = Process
Error
19 = Configuration
Error
20 = Electronics
Failure
21 = Sensor
Failure
R 0x0001 =
Transmitter Fail
0x0002 = Sensor
Fail
0x0004 =
EEPROM error
(CP)
0x0008 = RAM error (CP)
0x0010= Boot Fail
(CP)
0x0020 = Uncofig
– FloCal
0x0040 = Uncofig
– K1
0x0080 = Input
Overrange
0x0100 = Temp.
Overrange
0x0200 = Dens.
Overrange
0x0400 = RTI
Failure
0x0800 = Cal
Failed
0x1000= Xmitter
Init
0x2000 =
Sns/Xmitter comm fault
0x4000 = Other
Failure
0x8000 = Xmitter
Not Characterized
Configuration and Use Manual
161
Model 2700 transducer blocks reference
Table B-6
DIAGNOSTICS transducer block parameters (continued)
12
Parameter Mnemonic
ALARM2_STATUS
Definition
Status Word 2
Message
Type
ENUM
Data Type/
Structure
(size in bytes)
BIT
STRING (2)
N/A D/20 —
13 ALARM3_STATUS Status Word 3 ENUM BIT
STRING (2)
N/A D/20 —
R
R
Enumerated List of Values
0x0001 = Drive
Overrange
0x0002 = Slug
Flow
0x0004 = Cal in
Progress
0x0008 = Data
Loss Possible
0x0010 = Upgrade
Series 2000
0x0020 =
Simulation Mode
0x0040 = Meter
Verify warn
0x0080 =
Warming Up
0x0100 = Power
Reset
0x0200 = Reverse
Flow
0x0400 = AI/AO
Simulation Active
0x0800 = Not
Used
0x1000= Not
Used
0x2000 = Not
Used
0x4000 = Not
Used
0x8000 = Not
Used
0x0001 = Line
RTD Over
0x0002 = Meter
RTD Over
0x0004 = CP
Exception
0x0008 = API:
Temp OOL
0x0010=
API:Density OOL
0x0020 = ED:
Unable to fit curve data
0x0040 = ED:
Extrapolation alarm
0x0080 = Not
Used
0x0100 =
EEPROM err
(2700)
0x0200 = RAM err
(2700)
0x0400 = Factory
Config err
0x0800 = Low
Power
0x1000= Tube not full
0x2000 = Meter
Verify fault
0x4000 = Not
Used
0x8000 = Not
Used
162
Model 2700 Transmitters with F
OUNDATION
™
fieldbus
Model 2700 transducer blocks reference
Table B-6
DIAGNOSTICS transducer block parameters (continued)
14
15
Parameter Mnemonic
ALARM4_STATUS
FAULT_LIMIT
Definition
Status Word 4
Fault Limit Code
Message
Type
ENUM
ENUM
Data Type/
Structure
(size in bytes)
BIT
STRING (2)
D/20
Unsigned16
(2)
R-124 S
—
5
16 LAST_MEASURED_VALUE
_FAULT_TIMEOUT
Last Measured Value
Fault Timeout
VARIABLE Unsigned16 R-314 S Yes 0 0
R
R/W
(OOS)
R/W
(Any)
Enumerated List of Values
0x0001 = Cal Fail:
Low
0x0002 = Cal Fail:
High
0x0004 = Cal Fail:
Noisy
0x0008 = Auto
Zero IP
0x0010= D1 IP
0x0020 = D2 IP
0x0040 = FD IP
0x0080 = Temp slope IP
0x0100 = Temp offset IP
0x0200 = D3 IP
0x0400 = D4 IP
0x0800 = 1 —
Factory configuration invalid
0x1000= 1 —
Factory configuration
data checksum invalid
0x2000 = Core
EEPROM DB corrupt
0x4000 = Core
EEPROM Totals corrupt
0x8000 = Core
EEPROM
Program corrupt
0 = Upscale
1 = Downscale
2 = Zero
3 = NAN
4 = Flow goes to zero
5 = None
N/A
Configuration and Use Manual
163
Model 2700 transducer blocks reference
Table B-6
DIAGNOSTICS transducer block parameters (continued)
17
Parameter Mnemonic
ALARM_INDEX
Definition
Alarm Index
164
Message
Type
ENUM
Data Type/
Structure
(size in bytes)
Unsigned16
(2)
N/A S Yes 0 1 R/W
(Any)
Enumerated List of Values
19 = RAM Error
20 = Unconfig K1
21 = Incorrect
Sensor
22 = Core
EEPROM DB
Corrupt
23 = Core
EEPROM Totals
Corrupt
24 = Core
EEPROM
Promram Corrupt
25 = Boot Failed
(CP)
26 = Sns/Xmitter comm error
27 = N/A
28 = CP
Exception
29-30 = N/A
31 = Low Power
32 = Meter
Verification in
Progress
33 = Tube Stoped in process
34 = Meter
Verification Failed
35 = Meter
Verification
Aborted
0 = N/A
1 = EEPROM
Error (CP)
2 = RAM Error
(CP)
3 = Sensor Fail
4 = Temp.
Overrange
5 = Input
Overrange
6 = Xmitter Not
Characterized
7 = N/A
8 = Dens.
Overrange
9 = Xmitter Init
10 = Cal Failed
11 = Cal Failed:
Low
12 = Cal Failed:
High
13 = Cal Failed:
Noisy
14 = Transmitter
Failed
15 = N/A
16 = Line RTD
Over
17 = Meter RTD
Over
18 = EEPROM
Checksum Error
36-41 = N/A
42 = Drive
Overrange
43 = Data Loss
Possible
44 = Cal in
Progress
45 = Slug Flow
46 = N/A
47 = Power Reset
48-55 = N/A
60 = ED: Unable to fit curve data
56 = API: Temp
OOL
57 = API:Density
OOL
58-59 = N/A
72 = Simulation
Mode
Model 2700 Transmitters with F
OUNDATION
™
fieldbus
Model 2700 transducer blocks reference
Table B-6
DIAGNOSTICS transducer block parameters (continued)
Parameter Mnemonic Definition
Message
Type
Data Type/
Structure
(size in bytes)
18
19
20
21
22
23
24
25
26
27
28
29
30
31
32
33
34
ALARM_SEVERITY Alarm Severity ENUM Unsigned16
(2)
R-1238 with
R-1237
= OD
17
S
Diagnostics
DRIVE_GAIN
TUBE_FREQUENCY
LIVE_ZERO
LEFT_PICKUP_VOLTAGE
RIGHT_PICKUP_VOLTAGE
Drive Gain
Raw Tube Period
Live Zero (Mass Flow)
Left Pickoff Voltage
Right Pickoff Voltage
VARIABLE
VARIABLE
VARIABLE
VARIABLE
VARIABLE
DS-65 (50)
FLOAT (4)
FLOAT (4)
FLOAT (4)
FLOAT (4)
BOARD_TEMPERATURE
ELECT_TEMP_MAX
ELECT_TEMP_MIN
ELECT_TEMP_AVG
Board Temperature
(degC)
Maximum electronics temperature
Minimum electronics temperature
Average electronics temperature
SENSOR_TEMP_MAX
SENSOR_TEMP_MIN
Maximum sensor temperature
Minimum sensor temperature
SENSOR_TEMP_AVG Average sensor temperature
RTD_RESISTANCE_CABLE 9-wire cable RTD
Resistance (ohms)
RTD_RESISTANCE_
METER
CP_POWER_CYCLE
Meter RTD Resistance
(ohms)
Number of core processor power cycles
Meter Fingerprinting
MFP_SAVE_FACTORY Save Factory Cal
Meter Fingerprint
VARIABLE FLOAT (4)
VARIABLE FLOAT (4)
VARIABLE FLOAT (4)
VARIABLE FLOAT (4)
VARIABLE FLOAT (4)
VARIABLE FLOAT (4)
VARIABLE FLOAT (4)
VARIABLE FLOAT (4)
VARIABLE FLOAT (4)
VARIABLE Unsigned16
(2)
ENUM Unsigned16
(2)
R-291-2
92
R-285-2
86
R-293-2
94
R-287-2
8
R-289-2
90
R-383-3
84
R-463
D/20
D/20
D/20
D/20
D/20
D/20
D/20
R-465
R-467
R-435-4
36
R-437-4
38
R-439-4
40
R-469
R-475
R-497
C — 39
D/20
D/20
D/20
D/20
D/20
D/20
D/20
D
S
Yes 0
–
–
–
–
–
–
–
–
–
–
–
–
–
–
–
Yes 0
35 MFP_RESET_STATS Yes 0
36
37
EN_MFP
MFP_UNITS
Reset Meter Current
Fingerprint Statistics
ENUM
Enable/Disable Meter
Fingerprinting
Meter Fingerprint in SI
(0) or English (1) units
ENUM
ENUM
Unsigned16
(2)
C — 40 S
Unsigned16
(2)
Unsigned16
(2)
C — 74 S
R — 625 S
Yes
Yes
1
0
2
Enumerated List of Values
61 = ED:
Extrapolation
Alarm
62-67 = N/A
68 = Factory
Config Invalid
69 = Factory
Config Checksum
Invalid
70 = N/A
71 = Meter
Verification In progress
R/W
(OOS)
0 = Ignore
1 = Info
2 = Fault
0
0
1
0
N/A
N/A
N/A
N/A
N/A
N/A
N/A
N/A
N/A
N/A
N/A
N/A
N/A
N/A
N/A
R
R
R
R
R
R
R
R
R
R
R
R
R
R
R
R/W
(Any)
R/W
(Any)
R/W
(Any)
R/W
(Any)
0x0000 = no action
0x0001 = save
0x0000 = no action
0x0001 = reset
0x0000 = disabled
0x0001 = enabled
0x0000 = SI
0x0001 = English
Configuration and Use Manual
165
Model 2700 transducer blocks reference
Table B-6
DIAGNOSTICS transducer block parameters (continued)
38
Parameter Mnemonic
MFP_TV_INDEX
Definition
Meter Fingerprint
Transmitter Variable
Index
Message
Type
Data Type/
Structure
(size in bytes)
VARIABLE Unsigned16
(2)
N/A S Yes 0
39 MFP_TYPE
40 MFP_TV_INST
41 MFP_TV_AVG
42 MFP_TV_STD_DEV
43 MFP_TV_MAX
44 MFP_TV_MIN
45
v4.0 Additions
DIAG_FEATURE_KEY
Fingerprint Type ENUM Unsigned16
(2)
N/A S
Transmitter Variable,
Instantaneous (only valid for Current print)
Transmitter Variable,
Average (1-min rolling)
Transmitter Variable,
Std Dev (1-min rolling)
Transmitter Variable,
Maximum (since last statistics reset)
Transmitter Variable,
Minimum (since last statistics reset)
VARIABLE FLOAT (4)
VARIABLE FLOAT (4)
VARIABLE FLOAT (4)
VARIABLE FLOAT (4)
VARIABLE FLOAT (4)
R-629-6
30
D
R-631-6
32
R-633-6
34
R-635-6
36
D
D
D
R-637-6
38
D
Enabled Features STRING BIT
STRING (2)
R-5000 S
Yes 0
–
–
–
–
–
–
0
0
R
R
R
R/W
(Any)
R/W
(Any)
Enumerated List of Values
0 = Mass Flow
Rate
1 = Temperature
3 = Density
5 = Volume Flow
Rate
46 = Raw Tube
Frequency
47 = Drive Gain
48 = Case
Temperature
49 = LPO
Amplitude
50 = RPO
Amplitude
51 = Board
Temperature
52 = Input Voltage
54 = Live Zero
0 = Current
1 = Factory Cal
2 = Installation
3 = Last Zero
R
R
46
47
48
49
50
SYS_PowerOnTimeSec Power on time
(Seconds since last reset)
Input Voltage (Volts)
VARIABLE
UnsignedI3
2 (4)
VARIABLE FLOAT (4)
R-2625-
2626
D
SNS_InputVoltage
SNS_TargetAmplitude Actual Target
Amplitude (mV/Hz)
(Pre 700 2.1, Actual &
Override)
SNS_CaseRTDRes Case RTD Resistance
(ohms)
SYS_RestoreFactoryConfig Restore Factory
Configuration
VARIABLE FLOAT (4)
R-385-3
86
R-395-3
96
D
D
VARIABLE
Method
FLOAT (4)
Unsigned16
(2)
R-473-4
74
D
C-0247 S
51 SNS_FlowZeroRestore
52 SNS_AutoZeroFactory
Restore Factory Zero
Factory flow signal offset at zero flow
(units of
Sec)
Method Unsigned16
(2)
C-243 S
VARIABLE FLOAT (4) R –
2673-26
74
S
–
–
Yes 0
Yes 0
–
–
–
R
R
R
R
0x0000 = standard
0x0010 = Meter
Verify.
0x0080 = PID
0x0800 = Enh.
Density
0x1000 = API
N/A
N/A
N/A
0
R N/A
R/W
(OOS)
R/W
(OOS)
R
0x0000 = no action
0x0001 = Restore
0x0000 = no action
0x0001 = Restore
N/A
166
Model 2700 Transmitters with F
OUNDATION
™
fieldbus
Model 2700 transducer blocks reference
Table B-6
DIAGNOSTICS transducer block parameters (continued)
53
Parameter Mnemonic
SYS_ResetPowerOnTime
54 FRF_EnableFCFValidation
Definition
Reset power-on time
Start/Stop Meter
Verification
Message
Type
Method
Data Type/
Structure
(size in bytes)
Unsigned16
(2)
C-242
Method
S
Unsigned16
(2)
R-3000 S
Yes 0
Yes 0
55
56
57
58
59
60
FRF_FaultAlarm
FRF_StiffnessLimit
FRF_AlgoState
FRF_AbortCode
FRF_StateAtAbort
FRF_Progress
61 FRF_StiffOutLimLpo
62 FRF_StiffOutLimRpo
The state of the outputs when the meter verification routine is running.
The setpoint of the stiffness limit.
Represents percentage.
The current state of the meter verification routine.
The reason the meter verification routine aborted.
ENUM
VARIABLE FLOAT (4)
ENUM
Unsigned16
(2)
R –
3147-31
48
S
VARIABLE Unsigned16
(2)
R-3001 S
Unsigned16
(2)
R-3093
R-3002
S
S
Yes 0
Yes 0
–
–
The state of the meter verification routine when it aborted.
Progress (%
Complete)
Is the LPO Stiffness out of limits?
Is the RPO Stiffness out of limits?
VARIABLE Unsigned16
(2)
R-3003
VARIABLE Unsigned16
(2)
R —
3004
VARIABLE Unsigned16
(2)
R —
3005
S
VARIABLE Unsigned16
(2)
R-3020 S
S
S
–
–
–
–
0
0
0
R/W
(Any)
R/W
(OOS)
R/W
(Any)
Enumerated List of Values
0x0000 = no action
0x0001 = Reset
0 = Disabled
1 = Full Meter
Verification
(including current calibrations)
2 =Factory Air
Verification
3 =Factory Water
Verification
4 =Special debug mode
5 =Abort
6 =Background
Meter Verification
(no current cal)
7 = Single Point
Baseline (takes the place of factory air and factory water)
0=Last Value
0.04
R/W
(Any)
R
R
R
R
R
R
N/A
N/A
N/A
1 through 18
0=No error
1=Manual Abort
2=Watchdog
Timeout
3=Frequency Drift
4=High Peak
Drive Voltage
5=High Drive
Current Standard
Deviation
6=High Drive
Current Mean
Value
7=Drive loop reported error
8=High Delta T
Standard
Deviation
9=High Delta T
Value
10=State Running
1 through 18
Configuration and Use Manual
167
Model 2700 transducer blocks reference
Table B-6
DIAGNOSTICS transducer block parameters (continued)
63
64
65
66
67
68
Parameter Mnemonic
FRF_StiffnessLpo_mean
FRF_StiffnessRpo_mean
FRF_Damping_meanR –
3109-3110 with 3100=0
FRF_MassLpo_mean
FRF_MassRpo_mean
FRF_StiffnessLpo_stddev
69 FRF_StiffnessRpo_stddev
70
71
72
73
74
75
76
77
FRF_Damping_stddev
FRF_MassLpo_stddev
FRF_MassRpo_stddev
FRF_StiffnessLpo_air
FRF_StiffnessRpo_air
FRF_Damping_air
FRF_MassLpo_air
FRF_MassRpo_air
Definition
The current LPO stiffness calculated as a mean
Message
Type
Data Type/
Structure
(size in bytes)
VARIABLE FLOAT (4)
The current RPO stiffness calculated as a mean
The current damping calculated as a mean
The current LPO mass calculated as a mean
The current RPO mass calculated as a mean
The current LPO stiffness calculated as a standard deviation
The current RPO stiffness calculated as a standard deviation
The current damping calculated as a standard deviation
The current LPO mass calculated as a standard deviation
The current RPO mass calculated as a standard deviation
The LPO stiffness calculated as a mean during Factory Cal of
Air
The RPO stiffness calculated as a mean during Factory Cal of
Air
The damping calculated as a mean during Factory Cal of
Air
The LPO mass calculated as a mean during Factory Cal of
Air
The RPO mass calculated as a mean during Factory Cal of
Air
VARIABLE
VARIABLE
VARIABLE
VARIABLE
VARIABLE
VARIABLE
VARIABLE
VARIABLE
VARIABLE
VARIABLE
VARIABLE
VARIABLE
VARIABLE
VARIABLE
FLOAT (4)
FLOAT (4)
FLOAT (4)
FLOAT (4)
FLOAT (4)
FLOAT (4)
FLOAT (4)
FLOAT (4)
FLOAT (4)
FLOAT (4)
FLOAT (4)
FLOAT (4)
FLOAT (4)
FLOAT (4)
R –
3105-31
06 with
3100=2
R –
3107-31
08 with
3100=2
R –
3109-31
10 with
3100=2
R –
3107-31
08 with
3100=1
R –
3109-31
10 with
3100=1
R –
3101 –
3102 with
3100=2
R –
3103-31
04 with
3100=2
R –
3109-31
10 with
3100=0
R –
3101 –
3102 with
3100=1
R –
3103-31
04 with
3100=1
R –
3105-31
06 with
3100=1
R –
3101 –
3102 with
3100=0
R –
3103-31
04 with
3100=0
R –
3105-31
06 with
3100=0
R –
3107-31
08 with
3100=0
S
S
S
S
S
S
S
S
S
S
S
S
S
S
S
168
–
–
–
–
–
–
–
–
–
–
–
–
–
–
–
R
Enumerated List of Values
N/A
R N/A
R N/A
R N/A
R N/A
R N/A
R N/A
R N/A
R N/A
R N/A
R N/A
R N/A
R N/A
R N/A
R N/A
Model 2700 Transmitters with F
OUNDATION
™
fieldbus
Model 2700 transducer blocks reference
Table B-6
DIAGNOSTICS transducer block parameters (continued)
78
Parameter Mnemonic
FRF_StiffnessLpo_water
79 FRF_StiffnessRpo_water
80
81
82
83
FRF_Damping_water
FRF_MassLpo_water
FRF_MassRpo_water
ALERT_TIMEOUT
84
v5.0 Additions
FRF_FCFValidCounter
Definition
The LPO stiffness calculated as a mean during Factory Cal of
Water
The RPO stiffness calculated as a mean during Factory Cal of
Water
The damping calculated as a mean during Factory Cal of
Water
The LPO mass calculated as a mean during Factory Cal of
Water
The RPO mass calculated as a mean during Factory Cal of
Water
Alert Timeout
Message
Type
Data Type/
Structure
(size in bytes)
VARIABLE
VARIABLE
VARIABLE
VARIABLE
FLOAT (4)
FLOAT (4)
FLOAT (4)
FLOAT (4)
R –
3101 –
3102 with
3100=3
R –
3103-31
04 with
3100=3
R –
3105-31
06 with
3100=3
R –
3107-31
08 with
3100=3
VARIABLE FLOAT (4) R –
3109-31
10 with
3100=3
VARIABLE Unsigned16
(2)
R —
1512
S
S
S
S
S
S
–
–
–
–
–
Yes 0
0 Counts the number of times the Meter
Verification algorithm has run successfully.
VARIABLE Unsigned16
(2)
R-3017 S
85
V6.0 Additions
FRF_StartMeterVer 0 Start On-Line Meter
Verification (Equivalent to Reg 3000=6)
VARIABLE DS-66 (2) Coil 190 S
86
87
88
89
90
FRF_MV_Index
FRF_MV_Counter
FRF_MV_Status
FRF_MV_Time
FRF_MV_LPO_Norm
FCF Datalog Index
(0-19, 0 = most recent run)
FCF Datalog Item 1:
Run Number
FCF Datalog Item 2:
Status (Bit7 = FCF pass/fail, Bits6-4 = state, Bits3-0 = Abort code) Abort States are compressed to fit in 3 bits
FCF Datalog Item 3:
Time Initiated
FCF Datalog Item 4:
LPO Normalized Data
VARIABLE Unsigned16
(2)
2984
VARIABLE Unsigned16
(2)
2985
VARIABLE Unsigned16
(2)
2986
VARIABLE Unsigned32
(4)
VARIABLE FLOAT (4)
2987-29
88
2989-29
90
S
S
S
S
S
—
—
—
—
0
R
R
R
R
R
0 R/W
(Any)
0 to 300 sec
R N./A
RW
(Any)
RW
(Any)
Value part of
DS-66
0 = no action
1 = Start Meter
Verification in continue measurement mode
N/A
R N/A
R N/A
R
R
Enumerated List of Values
N/A
N/A
N/A
N/A
N/A
N/A
N/A
91
92
FRF_MV_RPO_Norm
FRF_DriveCurr
FCF Datalog Item 5:
RPO Normalized Data
Drive Current
VARIABLE
VARIABLE
FLOAT (4)
FLOAT (4)
2991-29
92
3113-31
14
S
S —
R N/A
RW
(Any)
N/A
Configuration and Use Manual
169
Model 2700 transducer blocks reference
Table B-6
DIAGNOSTICS transducer block parameters (continued)
93
94
95
96
97
98
99
Parameter Mnemonic
FRF_DL_T
Definition
Delta T
FRF_Temp Temperature
FRF_Density Density
FRF_DriveFreq
FRF_LpoFilt
FRF_RpoFilt
FRF_DataSetSelIndex
Drive Frequency
LPO Filter
RPO Filter
FCF Verification Data
Set Selection
Message
Type
Data Type/
Structure
(size in bytes)
VARIABLE FLOAT (4) 3115-31
16
VARIABLE 3117-31
18
VARIABLE 3119-31
20
VARIABLE FLOAT (4) 3121-31
22
VARIABLE
VARIABLE
FLOAT (4)
FLOAT (4)
3123-31
24
3125-31
26
VARIABLE Unsigned16
(2)
Unsigne d16 (2)
S
S
S
S
S
S
S
V7.0 Changes — Moved from Calibration TB
100 FRF_MV_FirstRun_Time FCF Timers: Time
Until First Run in
Hours ( Applicable only if Meter
Verification Feature is
Enabled)
VARIABLE FLOAT (4)
101 FRF_MV_Elapse_Time FCF Time VARIABLE FLOAT (4) between each run after the first run initiated in hours (
Applicable only if
Meter Verification is
Enabled)
102 FRF_MV_Time_Left FCF FLOAT (4)
Until Next Run in
Hours
103 FRF_ToneLevel VARIABLE FLOAT (4) Frf Tone Level (mA)
(Applicable only if
Meter Verification is
Enabled)
104 FRF_DriveFreq
105
106
107
FRF_BlCoeff
FRF_DriveTarget
FRF_DrivePCoeff
Tone Ramp Time
(Seconds) (Applicable only if Meter
Verification is enabled)
BL Coef. ( Applicable only if Meter
Verification feature is enabled)
FRF Drive Target
(Applicable only if
Meter Verification
Feature is Enabled)
FRF Drive P
Coefficient (Applicable only if Meter
Verification Feature is
Enabled)
VARIABLE FLOAT (4)
VARIABLE
VARIABLE
VARIABLE
FLOAT (4)
FLOAT (4)
FLOAT (4)
2993-29
94
S
2995-29
96
2997-29
98
3083-30
84
3085-30
86
3087-30
88
3089-30
90
3091-30
92
S
S
S
S
S
S
S
170
—
—
—
—
—
—
—
—
—
—
—
—
—
—
—
R N/A
RW
(OOS)
N/A
RW
(OOS)
N/A
RW
(OOS)
N/A
RW
(OOS)
N/A
RW
(OOS)
N/A
Enumerated List of Values
N/A RW
(Any)
R N/A
RW
(OOS)
RW
(OOS)
RW
(OOS)
RW
(OOS)
RW
(Any)
N/A
N/A
N/A
N/A
0=Current Data
Means
1=Current Data
Std Deviations
2=Factory Cal of
Air Means
3=Factory Cal of
Water Means
4=Running average data
5=Standard Error of the Estimate
RW
(Any)
N/A
RW
(Any)
N/A
Model 2700 Transmitters with F
OUNDATION
™
fieldbus
Model 2700 transducer blocks reference
Table B-6
DIAGNOSTICS transducer block parameters (continued)
108
109
110
111
Parameter Mnemonic
FRF_ToneSpacingMult
FRF_Freq_DriftLimit
FRF_Max_Current_mA
FRF_KFQ2
Definition
Tone Spacing
Multiplier (Applicable only if Meter
Verification Feature is
Enabled)
Frequency Drift Limit
(Applicable only if
Meter Verification
Feature is Enabled)
Max Sensor Current
(Applicable only if
Meter Verification
Feature is Enabled
KFQ2 Linear Density
Correction for Stiffness
Value
Message
Type
Data Type/
Structure
(size in bytes)
VARIABLE FLOAT (4)
VARIABLE FLOAT (4)
VARIABLE FLOAT (4)
VARIABLE FLOAT (4)
3159-31
60
3161-31
62
S
S
3163-31
64
S
3165-31
66
S
v7.0 Additions
112 SYS_AnalogOutput_Fault Indicates whether there is a critical fault present
VARIABLE DS-66 (2) —
113 SNS_MV_Failed Indicates whether
Meter Verification
Failed
VARIABLE DS-66 (2) R433/Bi t #14
—
—
—
—
0
0
0
RW
(OOS)
Enumerated List of Values
N/A
RW
(OOS)
N/A
RW
(OOS)
N/A
RW
(Any)
N/A
R
R
Value part of
DS-66
0 = No Critical
Fault
1 = Critical Fault
Present
Value part of
DS-66
0 = Meter
Verification did not
Fail
1 = Meter
Verification Failed
0
3
4
1
2
5
6
7
Table B-7
DIAGNOSTICS transducer block views
OD
Index
11
12
13
14
8
9
10
Parameter Mnemonic
Standard FF Parameters
BLOCK_STRUCTURE
ST_REV
TAG_DESC
STRATEGY
ALERT_KEY
MODE_BLK
BLOCK_ERR
XD_ERROR
Slug Flow Setup
SLUG_TIME
SLUG_LOW_LIMIT
SLUG_HIGH_LIMIT
Alarm Status
ALARM1_STATUS
ALARM2_STATUS
ALARM3_STATUS
ALARM4_STATUS
View 1
2
2
2
2
2
4
2
1
View 2
2
View 3 View 4
2
4
2
1
2
2
2
2
2
4
4
4
2
1
View 4_1 View 4_2
2 2
Configuration and Use Manual
171
Model 2700 transducer blocks reference
172
31
32
33
27
28
29
30
23
24
25
26
19
20
21
22
38
39
40
41
34
35
36
37
42
43
44
53
54
55
56
57
58
49
50
51
52
45
46
47
48
Table B-7
DIAGNOSTICS transducer block views (continued)
16
17
18
OD
Index
15
MFP_TV_INDEX
MFP_TYPE
MFP_TV_INST
MFP_TV_AVG
MFP_TV_STD_DEV
MFP_TV_MAX
MFP_TV_MIN
v4.0 Additions
DIAG_FEATURE_KEY
SYS_PowerOnTimeSec
SNS_InputVoltage
SNS_TargetAmplitude
SNS_CaseRTDRes
SYS_RestoreFactoryConfig
SNS_FlowZeroRestore
SNS_AutoZeroFactory
SYS_ResetPowerOnTime
FRF_EnableFCFValidation
FRF_FaultAlarm
FRF_StiffnessLimit
FRF_AlgoState
FRF_AbortCode
Parameter Mnemonic
FAULT_LIMIT_CODE
LAST_MEASURED_VALUE_FAULT_TIMEOUT
ALARM_INDEX
ALARM_SEVERITY
Diagnostics
DRIVE_GAIN
TUBE_FREQUENCY
LIVE_ZERO
LEFT_PICKOFF_VOLTAGE
RIGHT_PICKOFF_VOLTAGE
BOARD_TEMPERATURE
ELECT_TEMP_MAX
ELECT_TEMP_MIN
ELECT_TEMP_AVG
SENSOR_TEMP_MAX
SENSOR_TEMP_MIN
SENSOR_TEMP_AVG
RTD_RESISTANCE_CABLE
RTD_RESISTANCE_METER
CP_POWER_CYCLE
Meter Fingerprinting
MFP_SAVE_FACTORY
MFP_RESET_STATS
EN_MFP
MFP_UNITS
View 1
5
2
4
2
2
2
2
View 2
2
2
View 3 View 4
4
4
4
4
4
4
4
4
4
4
4
2
4
4
4
4
4
4
4
4
4
4
5
4
2
2
2
4
2
2
2
2
2
2
View 4_1 View 4_2
2
2
Model 2700 Transmitters with F
OUNDATION
™
fieldbus
Model 2700 transducer blocks reference
FRF_FCFValidCounter
FRF_StartMeterVer
FRF_MV_Index
FRF_MV_Counter
FRF_MV_Status
FRF_MV_Time
FRF_MV_LPO_Norm
FRF_MV_RPO_Norm
FRF_DriveCurr
FRF_DL_T
FRF_Temp
FRF_Density
FRF_DriveFreq
FRF_LpoFilt
FRF_RpoFilt
FRF_DataSetSelIndex
FRF_MV_FirstRun_Time
FRF_MV_Elapse_Time
FRF_MV_Time_Left
FRF_Density
FRF_ToneRampTime
FRF_BlCoeff
Parameter Mnemonic
FRF_StateAtAbort
FRF_Progress
FRF_StiffOutLimLpo
FRF_StiffOutLimRpo
FRF_StiffnessLpo_mean
FRF_StiffnessRpo_mean
FRF_Damping_mean
FRF_MassLpo_mean
FRF_MassRpo_mean
FRF_StiffnessLpo_stddev
FRF_StiffnessRpo_stddev
FRF_Damping_stddev
FRF_MassLpo_stddev
FRF_MassRpo_stddev
FRF_StiffnessLpo_air
FRF_StiffnessRpo_air
FRF_Damping_air
FRF_MassLpo_air
FRF_MassRpo_air
FRF_StiffnessLpo_water
FRF_StiffnessRpo_water
FRF_Damping_water
FRF_MassLpo_water
FRF_MassRpo_water
ALERT_TIMEOUT
Table B-7
DIAGNOSTICS transducer block views (continued)
96
97
98
99
92
93
94
95
88
89
90
91
84
85
86
87
100
101
102
103
104
105
80
81
82
83
76
77
78
79
72
73
74
75
68
69
70
71
64
65
66
67
60
61
62
63
OD
Index
59
View 1 View 2
2
View 3 View 4
4
4
4
4
4
4
4
4
4
4
4
4
4
4
4
4
4
4
4
2
4
2
2
View 4_1 View 4_2
2
2
4
4
4
4
4
4
4
4
4
4
2
4
2
2
2
4
4
4
4
4
4
Configuration and Use Manual
173
Model 2700 transducer blocks reference
Table B-7
DIAGNOSTICS transducer block views (continued)
OD
Index
106
107
108
109
110
111
112
113
Parameter Mnemonic
FRF_DriveTarget
FRF_DrivePCoeff
FRF_ToneSpacingMult
FRF_Freq_DriftLimit
FRF_Max_Current_mA
FRF_KFQ2
SYS_AnalogOutput_Fault
SNS_MV_Failed
Totals
View 1
22
View 2
2
2
26
View 3 View 4
112 39
View 4_1 View 4_2
4
4
4
4
4
4
96 100
B.5
DEVICE INFORMATION transducer block parameters
Table B-8
DEVICE INFORMATION transducer block parameters
0
Parameter Mnemonic
Standard FF Parameters
BLOCK_STRUCTURE
1
2
3
4
5
6
ST_REV
TAG_DESC
STRATEGY
ALERT_KEY
MODE_BLK
BLOCK_ERR
Definition
Beginning of the transducer block
Message
Type
VARIABLE
Data Type/
Structure
(size in bytes)
DS_64 (5) N/A
The revision level of the static data associated with the function block.
Incremented with each write of static store.
The user description of the intended application of the block.
The strategy field can be used to identify grouping of blocks.
This data is not checked or processed by the block.
The identification number of the plant unit. This information may be used in the host for sorting alarms, etc.
The actual, target, permitted and normal modes of the block.
VARIABLE Unsigned16
(2)
N/A
STRING OCTET
STRING
(32)
VARIABLE Unsigned16
(2)
N/A
VARIABLE Unsigned8
(1)
RECORD DS-69 (4)
N/A
N/A
N/A
This parameter reflects the error status associated with the hardware or software components associated with a block.
STRING BIT
STRING (2)
N/A
S
S
S
S
S
D/20
Yes
Yes
Yes
—
N/A
0
Spaces
0
0 mix Yes Auto
Enumerated List of Values
»
«
R/W
(OOS or
Auto)
0 R/W
(OOS or
Auto)
Any 32 Characters
N/A
1
01
R/W
(OOS or
Auto)
R
N/A
N/A
R/W
(OOS or
Auto)
R/W
(OOS or
Auto)
R
1 to 255
See section 2/6 of
FF-891
See section 4.8 of
FF-903
174
Model 2700 Transmitters with F
OUNDATION
™
fieldbus
Model 2700 transducer blocks reference
Table B-8
DEVICE INFORMATION transducer block parameters (continued)
7
16
17
Parameter Mnemonic
XD_ERROR
SENSOR_TYPE_CODE
SENSOR_MATERIAL
Definition
Used for all config,
H/W, connection failure or system problems in the block.
Sensor type code
Sensor Material
Message
Type
Data Type/
Structure
(size in bytes)
VARIABLE Unsigned8
(1)
N/A D
8
9
Transmitter Data
SERIAL_NUMBER
OPTION_BOARD_CODE
Serial number of this device
Code of the Output
Option Board
VARIABLE Unsigned32
(4)
ENUM Unsigned16
(2)
R-48-4
9
R-113
8
S
S
10
11
12
13
14
15
18
700_SW_REV
2700_SW_REV
CEQ_NUMBER
DESCRIPTION
Sensor Data
SENSOR_SN
SENSOR_TYPE
SENSOR_LINER
Model 700 Transmitter software revision
Model 2700
Transmitter software revision
Model 2700
Transmitter CEQ
Number
User Text
VARIABLE Unsigned16
(2)
R-113
7
VARIABLE Unsigned16
(2)
R-120
0
VARIABLE Unsigned16
(2)
R-500
5
STRING OCTET
STRING
(16)
R-96-1
03
S
S
S
S
Sensor serial number
Sensor type (i.e. F200,
CMF025)
VARIABLE Unsigned32
(4)
STRING VISIBLE
STRING
(16)
R-012
7-128
R-042
5
S
S
Liner Material
ENUM
ENUM
ENUM
Unsigned16
(2)
R-113
9
Unsigned16
(2)
R-013
0
S
S
Unsigned16
(2)
R-013
1
S
R
Enumerated List of Values
18 = Process
Error
19 = Configuration
Error
20 = Electronics
Failure
21 = Sensor
Failure
Yes 0
20
0
S/W
Rev
S/W
Rev
S/W
Rev
R
Yes “CONFI
GURE
XMTR”
“CON
FIGU
RE
XMT
R”
R / W
(Any)
R/W
(Any)
R
0
R
0 = None
2 = Foundation
Fieldbus (LC302 board)
20 = Foundation
Fieldbus (Hornet board)
N/A
R N/A
N/A
Yes 0 0
@
@
@
@
@
@
@
@
@”
“@
@
@
@
@
@
@
Yes 0
“@@@
@@@
@@@
@@@
@@@
@”
0
Yes 253 253
Yes 253
R/W
(Any)
R
0
253
R/W
R/W
(Any)
R/W
(Any)
0 = Curve Tube
1 = Straight Tube
3 = Hastelloy
C-22
4 = Monel
5 = Tantalum
6 = Titanium
19 = 316L stainless steel
23 = Inconel
252 = Unknown
253 = Special
10 = PTFE
(teflon)
11 = Halar
16 = Tefzel
251 = None
252 = Unknown
253 = Special
Configuration and Use Manual
175
Model 2700 transducer blocks reference
Table B-8
DEVICE INFORMATION transducer block parameters (continued)
19
Parameter Mnemonic
SENSOR_END
Definition
Flange Type
Message
Type
ENUM
Data Type/
Structure
(size in bytes)
Unsigned16
(2)
R-012
9
S Yes 253
20
21
22
MASS_MIN_RANGE
TEMP_MIN_RANGE
HIGH_DENSITY_LIMIT
Mass flow minimum range
Temperature minimum range
High density limit of sensor (g/cc)
23 VOLUME_MIN_RANGE Volume flow minimum range
24 SNS_PuckDeviceTypeCode Device Type for the attached Core
Processor
25 AI_SIMULATE_MODE AI Simulate Mode
26
27
SNS_HartDeviceID
SYS_DeviceType
Core Processor
Unique ID
Transmitter Device
Type
VARIABLE FLOAT (4)
VARIABLE FLOAT (4)
VARIABLE FLOAT (4)
VARIABLE FLOAT
ENUM Unsigned16
(2)
R-181-
182
R-183-
184
R-187-
188
R-116
2
S
S
S
S
S
ENUM Unsigned16
(2)
C-84 S
VARIABLE Unsigned32
(4)
VARIABLE Unsigned16
(2)
R-118
7-1188
S
R-120 S
Yes 0
0
43
Calc
Calc
Calc
—
Calc
253
0
R
R
R/W
(Any)
R
Enumerated List of Values
0 = ANSI 150
1 = ANSI 300
2 = ANSI 600
5 = PN 40
7 = JIS 10K
8 = JIS 20K
9 = ANSI 900
10 = Sanitary
Clamp Fitting
11 = Union
12 = PN 100
251 = None
252 = Unknown
253 = Special
N/A
R/W
R
N/A
N/A
N/A
40 = 700 (CP)
50 = 800 (ECP)
R/W
(Any)
R
0 = disabled
1 = enabled
N/A
R N/A
176
5
6
3
4
0
1
2
7
8
9
10
11
12
13
Table B-9
DEVICE INFORMATION transducer block views
OD
Index
14
Parameter Mnemonic
Standard FF Parameters
BLOCK_STRUCTURE
ST_REV
TAG_DESC
STRATEGY
ALERT_KEY
MODE_BLK
BLOCK_ERR
XD_ERROR
Transmitter Data
SERIAL_NUMBER
OPTION_BOARD_CODE
700_SW_REV
2700_SW_REV
CEQ_NUMBER
DESCRIPTION
Sensor Data
SENSOR_SN
View 1
2
4
2
1
View 2 View 3
2
4
2
2
2
4
2
4
2
1
View 4
2
2
1
2
16
Model 2700 Transmitters with F
OUNDATION
™
fieldbus
Model 2700 transducer blocks reference
Table B-9
DEVICE INFORMATION transducer block views (continued)
20
21
22
23
16
17
18
19
24
25
26
27
OD
Index
15
Parameter Mnemonic
SENSOR_TYPE
SENSOR_TYPE_CODE
SENSOR_MATERIAL
SENSOR_LINER
SENSOR_END
MASS_MIN_RANGE
TEMP_MIN_RANGE
DENSITY_MIN_RANGE
VOLUME_MIN_RANGE
SNS_PuckDeviceTypeCode
AI_SIMULATE_MODE
SNS_HartDeviceID
SYS_DeviceType
Totals
View 1
9
View 2
16
View 3
9
4
2
2
2
73
4
4
4
4
2
2
2
2
View 4
16
B.6
LOCAL DISPLAY transducer block parameters
Following are the parameters (Table B-10) and views (Table B-11) for the LOCAL DISPLAY
transducer block.
Table B-10
LOCAL DISPLAY transducer block parameters
1 ST_REV
2 TAG_DESC
3 STRATEGY
4 ALERT_KEY
5 MODE_BLK
Message
Type
Data Type/
Structure
(size in bytes)
0
Parameter Mnemonic
Standard FF Parameters
BLOCK_STRUCTURE
Definition
Beginning of the transducer block
VARIABLE DS_64 (5) N/A
The revision level of the static data associated with the function block.
Incremented with each write of static store.
The user description of the intended application of the block.
The strategy field can be used to identify grouping of blocks.
This data is not checked or processed by the block.
The identification number of the plant unit. This information may be used in the host for sorting alarms, etc.
The actual, target, permitted and normal modes of the block.
VARIABLE Unsigned16
(2)
STRING OCTET
STRING
(32)
VARIABLE Unsigned16
(2)
N/A
VARIABLE Unsigned8
(1)
RECORD DS-69 (4)
N/A
N/A
N/A
N/A
S
S mix
N/A
0
R/W
(OOS or
Auto)
R
Enumerated List of Values
N/A
N/A
S
S
Yes Spaces »
«
R/W
(OOS or
Auto)
Yes 0 0 R/W
(OOS or
Auto)
Any 32 Characters
N/A
S Yes 0 1 R/W 1 to 255
Auto 01 R/W See section 2/6 of
FF-891
Configuration and Use Manual
177
Model 2700 transducer blocks reference
Table B-10
LOCAL DISPLAY transducer block parameters (continued)
6
Parameter Mnemonic
BLOCK_ERR
7 XD_ERROR
Definition
This parameter reflects the error status associated with the hardware or software components associated with a block.
Used for all config,
H/W, connection failure of system problems in the block.
Message
Type
STRING
Data Type/
Structure
(size in bytes)
BIT
STRING (2)
VARIABLE Unsigned8
(1)
N/A
N/A
D/20 R
Enumerated List of Values
See section 4.8 of
FF-903
D R 18 = Process
Error
19 = Configuration
Error
20 = Electronics
Failure
21 = Sensor
Failure
8
9
LDO
EN_LDO_TOT_RESET
EN_LDO_TOT_START_STO
P
Enable/Disable LDO
Totalizer Reset
Enable/Disable LDO
Totalizer Start/Stop option
Enable/Disable LDO
Auto Scroll Feature
ENUM
ENUM
Unsigned16
(2)
Unsigned16
(2)
C-0094
C-0091
S
S
10 EN_LDO_AUTO_SCROLL ENUM Unsigned16
(2)
C-0095 S
C-0096 S 11 EN_LDO_OFFLINE_MENU Enable/Disable LDO
Offline Menu Feature
12 EN_LDO_OFFLINE_PWD Enable/Disable LDO
Offline Password
13 EN_LDO_ALARM_MENU Enable/Disable LDO
Alarm Menu
14 EN_LDO_ACK_ALL_ALARMS Enable/Disable LDO
Acknowledge All alarms feature
15 LDO_OFFLINE_PWD LDO offline password
16
17
18
LDO_SCROLL_RATE
LDO_BACKLIGHT_ON
UI_Language Display language selection
ENUM
ENUM
ENUM
ENUM
Unsigned16
(2)
Unsigned16
(2)
Unsigned16
(2)
Unsigned16
(2)
LDO Scroll rate
VARIABLE Unsigned16
(2)
VARIABLE Unsigned16
(2)
LDO Backlight Control ENUM
ENUM
Unsigned16
(2)
Unsigned16
(2)
C-0097 S
S
S
S
S
S
S
19 LDO_VAR_1_CODE Display the Variable associated with the code on the LDO
ENUM Unsigned16
(2)
S
Yes 0
Yes 1
Yes 0
Yes 1
Yes 1
Yes
Yes
0
0
Yes 1234
Yes 1
Yes 1
Yes 0
Yes 0
1
0
0
0
1
1
0
R/W
(Any)
R/W
0 = Disable
1 = Enable
0 = Disable
1 = Enable
R/W
R/W
R/W
R/W
R/W
(Any)
0 = Disable
1 = Enable
0 = Disable
1 = Enable
0x0000 = disabled
0x0001 = enabled
0x0000 = disabled
0x0001 = enabled
0x0000 = disabled
0x0001 = enabled
1234 R/W
(Any)
1 R/W
(Any)
1
0
R/W
(Any)
R/W
(Any)
0 R/W
(Any)
—
0 — 9999
0 = off
1 = on
0 = English
1 = German
2 = French
3 = Reserved
4 = Spanish
Same as
LDO_VAR_2_CO
DE
178
Model 2700 Transmitters with F
OUNDATION
™
fieldbus
Model 2700 transducer blocks reference
Table B-10
LOCAL DISPLAY transducer block parameters (continued)
Parameter Mnemonic
20 LDO_VAR_2_CODE
Definition
Display the Variable associated with the code on the LDO
Message
Type
ENUM
Data Type/
Structure
(size in bytes)
Unsigned16
(2)
21 LDO_VAR_3_CODE
22 LDO_VAR_4_CODE
Display the Variable associated with the code on the LDO
Display the Variable associated with the code on the LDO
ENUM
ENUM
Unsigned16
(2)
Unsigned16
(2)
Configuration and Use Manual
S Yes 2
S Yes 5
S Yes 6
5
6
2 R/W
(Any)
R/W
(Any)
R/W
(Any)
Enumerated List of Values
Inventory
26 = ED: Net Mass
Flow
27 = ED: Net Mass
Total
28 = ED: Net Mass
Inv
29 = ED: Net Vol
Flow Rate
30 = ED: Net Vol
Total
31 = ED: Net Vol
Inventory
32 = ED:
Concentration
33 = API: CTL
46 = Raw Tube
Frequency
47 = Drive Gain
48 = Case
Temperature
49 = LPO
Amplitude
50 = RPO
Amplitude
51 = Board
Temperature
52 = NA
53 = Ext. Input
Pressure
54 = NA
55 = Ext. Input
0 = Mass Flow
Rate
1 = Temperature
2 = Mass Total
3 = Density
4 = Mass Inventory
5 = Volume Flow
Rate
6 = Volume Total
7 = Volume
Inventory
15 = API: Corr
Density
16 = API: Corr Vol
Flow
17 = API: Corr Vol
Total
18 = API: Corr Vol
Inv
19 = API: Avg
Density
20 = API: Avg
Temp
21 = ED: Density
At Ref
22 = ED: Density (
SGU)
23 = ED: Std Vol
Flow Rate
24 = ED: Std Vo
Total
25 = ED: Std Vol
Temp
56 = ED: Density
(Baume)
62 = Gas Std Vol
Flow
63 = Gas Std Vol
Total
64 = Gat Std Vol
Inventory
69 = Live Zero
251 = None
Same as
LDO_VAR_2_CO
DE
Same as
LDO_VAR_2_CO
DE
179
Model 2700 transducer blocks reference
Table B-10
LOCAL DISPLAY transducer block parameters (continued)
23
24
25
26
27
28
29
30
31
32
33
34
Parameter Mnemonic
LDO_VAR_5_CODE
LDO_VAR_6_CODE
LDO_VAR_7_CODE
LDO_VAR_8_CODE
LDO_VAR_9_CODE
LDO_VAR_10_CODE
LDO_VAR_11_CODE
LDO_VAR_12_CODE
LDO_VAR_13_CODE
LDO_VAR_14_CODE
LDO_VAR_15_CODE
FBUS_UI_ProcVarIndex
Definition
Message
Type
Display the Variable associated with the code on the LDO
Display the Variable associated with the code on the LDO
Display the Variable associated with the code on the LDO
Display the Variable associated with the code on the LDO
ENUM
ENUM
ENUM
ENUM
Display the Variable associated with the code on the LDO
Display the Variable associated with the
Display the Variable associated with the
Display the Variable associated with the
Display the Variable associated with the
Display the Variable associated with the
Display the Variable associated with the code on the LDO
ENUM
ENUM
ENUM
ENUM
ENUM
ENUM
ENUM
Process Variable Code ENUM
Data Type/
Structure
(size in bytes)
Unsigned16
(2)
Unsigned16
(2)
Unsigned16
(2)
Unsigned16
(2)
Unsigned16
(2)
Unsigned16
(2)
Unsigned16
(2)
Unsigned16
(2)
Unsigned16
Unsigned16
Unsigned16
Unsigned16
(2)
35 UI_NumDecimals The number of digits displayed to the right of the decimal point for the process variable selected with index 34
36 UI_UpdatePeriodmsec
37 UI_EnableStatusLedBlinking Enable/Disable
Display Status LED
Blinking
38 UI_EnableAlarmPassword
The period in milliseconds in which the display is updated
Enable/Disable
Display Alarm Screen
Password
VARIABLE Unsigned16
(2)
VARIABLE Unsigned16
(2)
ENUM
ENUM
Unsigned16
(2)
Unsigned16
(2)
0
3
4
1
2
5
Table B-11
LOCAL DISPLAY transducer block views
OD
Index Parameter Mnemonic
Standard FF Parameters
BLOCK_STRUCTURE
ST_REV
TAG_DESC
STRATEGY
ALERT_KEY
MODE_BLK
180
S Yes 3
S Yes 1
S Yes 251
S Yes 251
S Yes 251
S
S
S
S
S
S
Yes 251
Yes 251
Yes 251
Yes 251
Yes 251
Yes 251
S Yes 0
S Yes 4
3
1
251
251
251
251
251
251
251
251
251
0
4
R/W
(Any)
R/W
(Any)
R/W
(Any)
R/W
(Any)
R/W
(Any)
R/W
(Any)
R/W
(Any)
R/W
(Any)
R/W
(Any)
R/W
(Any)
R/W
Any)
R/W
(Any)
R/W
(Any)
Enumerated List of Values
Same as
LDO_VAR_2_CO
DE
Same as
LDO_VAR_2_CO
DE
Same as
LDO_VAR_2_CO
DE
Same as
LDO_VAR_2_CO
DE
Same as
LDO_VAR_2_CO
DE
Same as
LDO_VAR_2_CO
Same as
LDO_VAR_2_CO
Same as
LDO_VAR_2_CO
Same as
LDO_VAR_2_CO
Same as
LDO_VAR_2_CO
Same as
LDO_VAR_2_CO
DE
Same as
LDO_VAR_2_CO
DE
0 to 5
S Yes 200
S
S
Yes
Yes
1
0
200 R/W
(Any)
100 to 10000
1
0
R/W
(Any)
0 = Disable
1 = Enable
R/W
(Any)
0 = Disable
1 = Enable
View 1 View 2 View 3 View 4
2 2 2 2
2
1
4 4
Model 2700 Transmitters with F
OUNDATION
™
fieldbus
Model 2700 transducer blocks reference
33
34
35
36
29
30
31
32
37
38
25
26
27
28
21
22
23
24
17
18
19
20
13
14
15
16
8
9
10
11
12
Table B-11
LOCAL DISPLAY transducer block views (continued)
6
7
OD
Index Parameter Mnemonic
BLOCK_ERR
XD_ERROR
LDO
EN_LDO_TOT_RESET
EN_LDO_TOT_START_STOP
EN_LDO_AUTO_SCROLL
EN_LDO_OFFLINE_MENU
EN_LDO_OFFLINE_PWD
EN_LDO_ALARM_MENU
EN_LDO_ACK_ALL_ALARMS
LDO_OFFLINE_PWD
LDO_SCROLL_RATE
LDO_BACKLIGHT_ON
UI_Language
LDO_VAR_1_CODE
LDO_VAR_2_CODE
LDO_VAR_3_CODE
LDO_VAR_4_CODE
LDO_VAR_5_CODE
LDO_VAR_6_CODE
LDO_VAR_7_CODE
LDO_VAR_8_CODE
LDO_VAR_9_CODE
LDO_VAR_10_CODE
LDO_VAR_11_CODE
LDO_VAR_12_CODE
LDO_VAR_13_CODE
LDO_VAR_14_CODE
LDO_VAR_15_CODE
FBUS_UI_ProcVarIndex
UI_NumDecimals
UI_UpdatePeriodmsec
UI_EnableStatusLedBlinking
UI_EnableAlarmPassword
Totals
View 1
2
1
9
2
4
View 2 View 3
2
1
9
View 4
2
2
2
2
2
2
2
2
2
2
65
2
2
2
2
2
2
2
2
2
2
2
2
2
2
2
2
2
2
2
2
Configuration and Use Manual
181
Model 2700 transducer blocks reference
B.7
API transducer block parameters
Following are the parameters (Table B-12) and views (Table B-13) for the API transducer block.
Table B-12
API transducer block parameters
8
9
0
Parameter Mnemonic
Standard FF Parameters
BLOCK_STRUCTURE
Definition
Beginning of the transducer block
1 ST_REV
2
3
4
5
6
7
TAG_DESC
STRATEGY
ALERT_KEY
MODE_BLK
BLOCK_ERR
XD_ERROR
Message
Type
VARIABLE
Data Type/
Structure
DS_64 (5) N/A
The revision level of the static data associated with the function block.
Incremented with each write of static store.
The user description of the intended application of the block.
The strategy field can be used to identify grouping of blocks.
This data is not checked or processed by the block.
The identification number of the plant unit. This information may be used in the host for sorting alarms, etc.
The actual, target, permitted and normal modes of the block.
VARIABLE Unsigned16
(2)
N/A
STRING OCTET
STRING
(32)
VARIABLE Unsigned16
(2)
N/A
VARIABLE Unsigned8
(1)
RECORD DS-69 (4)
N/A
N/A
N/A
This parameter reflects the error status associated with the hardware or software components associated with a block.
Used for all config,
H/W, connection failure or system problems in the block.
STRING BIT
STRING (2)
VARIABLE Unsigned8
(1)
N/A
N/A
S
S
D
R/W
(OOS or
Auto)
R
Enumerated List of Values
N/A
N/A
S
S
Yes
Yes
Spaces »
«
R/W
(OOS or
Auto)
0 0 R/W
(OOS or
Auto)
Any 32 Characters
N/A
S Yes 0 1 R/W
(OOS or
Auto)
1 to 255 mix Yes Auto
D/20 —
01 R/W
(OOS or
Auto)
R
See section 2/6 of
FF-891
See section 4.8 of
FF-903
—
N/A
0
R
API Process Variables
API_Corr_Density
API_Corr_Vol_Flow
10 API_Ave_Corr_Density
11 API_Ave_Corr_Temp
12 API_CTL
13 API_Corr_Vol_Total
Temp Corrected
Density
Temp Corrected
(Standard) Volume
Flow
Batch Weighted
Average Density
Batch Weighted
Average Temperature
CTL
VARIABLE DS-65 (5)
VARIABLE DS-65 (5)
VARIABLE DS-65 (5)
VARIABLE DS-65 (5)
VARIABLE DS-65 (5)
Temp Corrected
(Standard) Volume
Total
VARIABLE DS-65 (5)
R-0325
-326
R-0331
-332
D/20
D/20
R-0337
-338
R-339-
340
R-0329
-330
R-0333
-0334
D/20
D/20
D/20
D/20
–
–
–
–
–
–
R
R
R
R
R
R
N/A
N/A
N/A
N/A
18 = Process
Error
19 = Configuration
Error
20 = Electronics
Failure
21 = Sensor
Failure
N/A
N/A
182
Model 2700 Transmitters with F
OUNDATION
™
fieldbus
Model 2700 transducer blocks reference
Table B-12
API transducer block parameters (continued)
Parameter Mnemonic
14 API_Corr_Vol_Inv
15 API_Reset_Vol_Total
Definition
Temp Corrected
(Standard) Volume
Inventory
Reset API Reference
Volume Total
Message
Type
Data Type/
Structure
VARIABLE DS-65 (5)
VARIABLE DS-65 (5)
R-0335
-336
D/20
C-0058 —
–
Yes
(1)
–
R
Enumerated List of Values
N/A
0 R/W
(Any)
Value part of
DS-66
0 = No effect
1 = Reset
16
17
18
19
20
21
API Setup Data
EN_API
API_Ref_Temp
API_TEC
API_Table_Type
API_FEATURE_KEY
Enable/Disable API
API Reference Temp
API Thermal
Expansion Coeff
API 2540 CTL Table
Type
Enabled Features
SNS_ResetAPIGSVInv Reset
Inventory
ENUM
STRING
Method
Unsigned16
(2)
BIT
STRING (2)
C-72 S
VARIABLE
VARIABLE
ENUM
FLOAT (4)
FLOAT (4)
Unsigned16
(2)
R-0319
-0320
R-0323
-0324
S
S
R-0351 S
S
Unsigned16
(2)
C-0194 S
Yes 0
Yes
(1)
15
Yes
(1)
0.001
Yes
(1)
81
Yes
(1)
—
0
0 R/W
(OOS)
15.0
R/W
(OOS)
0.001
R/W
(OOS)
81 R/W
(OOS)
0
R
R/W
(Any)
0 = disabled
1 = enabled
17 = Table 5A
18= Table 5B
19= Table 5D
36= Table 6C
49= Table 23A
50= Table 23B
51= Table 23D
68= Table 24C
81 = Table 53A
82 = Table 53B
83 = Table 53D
100 = Table 54C
0x0000 = standard
0x0800 = Meter
Verifi.
0x0080 = PID (Not
Applicable)
0x0008 = Enh.
Density
0x0010 = API
0 = No effect
1 = Reset
Configuration and Use Manual
183
Model 2700 transducer blocks reference
Table B-12
API transducer block parameters (continued)
Parameter Mnemonic
22 API_TEMPERATURE_U
NITS
Definition
Temperature Unit
23 API_DENSITY_UNITS Density Unit
Message
Type
ENUM
Data Type/
Structure
Unsigned16
(2)
R-0041 S
ENUM Unsigned16
(2)
R-0040 S
24 API_VOL_FLOW_UNITS Standard or special volume flow rate unit
ENUM Unsigned16
(2)
R-0042 S
C
g/cm
3
1/s
R
R
R
Enumerated List of Values
1000 = K
1001 = Deg C
1002 = Deg F
1003 = Deg R
1097 = kg/m3
1100 = g/cm3
1103 = kg/L
1104 = g/ml
1105 = g/L
1106 = lb/in3
1107 = lb/ft3
1108 = lb/gal
1109 = Ston/yd3
1113 = DegAPI
1114 = SGU
1347 = m3/s
1348 = m 3/min
1349 = m3/hr
1350 = m3/day
1351 = L/s
1352 = L/min
1353 = L/hr
1355 = Ml/day
1356 = CFS
1357 = CFM
1358 = CFH
1359 = ft3/day /
Standard cubic
ft. per day
1362 = gal/s
1363 = GPM
1364 = gal/hour
1365 = gal/day
1366 = Mgal/day
1367 = ImpGal/s
1368 =
ImpGal/min
1369 = ImpGal/hr
1370 = Impgal/day
1371 = bbl/s
1372 = bbl/min
1373 = bbl/hr
1374 = bbl/day
1631 = barrel (US
Beer) per
day
1632 = barrel (US
Beer) per
hour
1633 = barrel (US
Beer) per
minute
1634 =barrel (US
Beer) per
Second
253 = Special units
(1) Writable only if the API feature is enabled.
184
Model 2700 Transmitters with F
OUNDATION
™
fieldbus
Model 2700 transducer blocks reference
6
7
4
5
2
3
0
1
11
12
13
14
8
9
10
15
16
17
18
19
20
21
22
23
24
Table B-13
API transducer block views
OD
Index Parameter Mnemonic
Standard FF Parameters
BLOCK_STRUCTURE
ST_REV
TAG_DESC
STRATEGY
ALERT_KEY
MODE_BLK
BLOCK_ERR
XD_ERROR
View 1
2
4
2
1
View 2
2
API Process Variables
API_Corr_Density
API_Corr_Vol_Flow
API_Ave_Corr_Density
API_Ave_Corr_Temp
API_CTL
API_Corr_Vol_Total
API_Corr_Vol_Inv
API_TEMPERATURE_UNITS
API_DENSITY_UNITS
API_VOL_FLOW_UNITS
Totals
5
5
5
5
5
5
5
API_Reset_Vol_Total
API Setup Data
EN_API
API_Ref_Temp
2
API_TEC
API_Table_Type
API_FEATURE_KEY
SNS_ResetAPIGSVInv 2
44
2
2
2
12
View 3
2
44
5
5
5
5
5
5
5
4
2
1
View 4
4
2
2
2
4
2
2
1
19
Configuration and Use Manual
185
Model 2700 transducer blocks reference
B.8
CONCENTRATION MEASUREMENT transducer block parameters
Table B-14
CONCENTRATION MEASUREMENT transducer block parameters
0
Parameter Mnemonic
Standard FF Parameters
BLOCK_STRUCTURE
Definition
Beginning of the transducer block
1 ST_REV
2
3
4
5
6
7
TAG_DESC
STRATEGY
ALERT_KEY
MODE_BLK
BLOCK_ERR
XD_ERROR
Message
Type
Data Type/
Structure
(size in bytes)
VARIABLE DS_64 (5) N/A
The revision level of the static data associated with the function block.
Incremented with each write of static store.
The user description of the intended application of the block.
The strategy field can be used to identify grouping of blocks.
This data is not checked or processed by the block.
The identification number of the plant unit. This information may be used in the host for sorting alarms, etc.
The actual, target, permitted and normal modes of the block.
VARIABLE Unsigned16
(2)
N/A
STRING OCTET
STRING
(32)
VARIABLE Unsigned16
(2)
N/A
VARIABLE Unsigned8
(1)
RECORD DS-69 (4)
N/A
N/A
N/A
This parameter reflects the error status associated with the hardware or software components associated with a block.
Used for all config,
H/W, connection failure or system problems in the block.
STRING BIT
STRING (2)
VARIABLE Unsigned8
(1)
N/A
8
9
CM Process Variables
CM_Ref_Dens
CM_Spec_Grav
10 CM_Std_Vol_Flow
11 CM_Net_Mass_Flow
12 CM_Net_Vol_Flow
13 CM_Conc
14 CM_Baume
CM Totals
15 CM_Std_Vol_Total
16 CM_Std_Vol_Inv
Density At Reference
Density (Fixed SG
Units)
Standard Volume Flow
Rate
VARIABLE DS-65 (5)
Net Mass Flow Rate VARIABLE DS-65 (5)
Net Volume Flow Rate VARIABLE DS-65 (5)
Concentration VARIABLE DS-65 (5)
Density (Fixed Baume
Units)
Standard Volume Total
Standard Volume
Inventory
VARIABLE
VARIABLE
VARIABLE
VARIABLE
DS-65 (5)
DS-65 (5)
DS-65 (5)
DS-65 (5)
VARIABLE DS-65 (5)
S
S
D
R-963
R-965
D/20
D/20
R-967 D/20
R-973
R-979
R-985
R-987
D/20
D/20
D/20
D/20
R-969
R-971
D/20
D/20
—
N/A
0
Enumerated List of
Values
S
S
Yes
Yes
Spaces
0
»
«
R/W
(OOS or
Auto)
0 R/W
(OOS or
Auto)
Any 32 Characters
N/A
S Yes 0 1 mix
D/20
Yes
—
Auto 01
R/W
(OOS or
Auto)
1 to 255
R/W
(OOS or
Auto)
R
See section 2/6 of
FF-891
See section 4.8 of
FF-903
–
–
–
–
–
–
–
–
–
R/W
(OOS or
Auto)
R
R
R
R
R
R
R
R
R
R
R
N/A
N/A
18 = Process Error
19 = Configuration
Error
20 = Electronics
Failure
21 = Sensor Failure
N/A
N/A
N/A
N/A
N/A
N/A
N/A
N/A
N/A
186
Model 2700 Transmitters with F
OUNDATION
™
fieldbus
Model 2700 transducer blocks reference
Table B-14
CONCENTRATION MEASUREMENT transducer block parameters (continued)
Parameter Mnemonic
17 CM_Net_Mass_Total
18 CM_Net_Mass_Inv
19 CM_Net_Vol_Total
20 CM_Net_Vol_Inv
21 CM_Reset_Std_Vol_Total
22 CM_Reset_Net_Mass_Tot al
23 CM_Reset_Net_Vol_Total
Definition
Net Mass Total
Net Mass Inventory
Net Volume Total
Net Volume Inventory
Reset CM Standard
Volume Total
Reset CM Net Mass
Total
Reset CM Net Volume
Total
Message
Type
Data Type/
Structure
(size in bytes)
VARIABLE DS-65 (5)
VARIABLE DS-65 (5)
VARIABLE DS-65 (5)
VARIABLE DS-65 (5)
VARIABLE DS-66 (2)
VARIABLE
VARIABLE
DS-66 (2)
DS-66 (2)
R-975
R-977
R-981
R-983
C-59
C-60
C-61
CM Setup Data
24 EN_CM ENUM Unsigned16
(2)
25
26
CM_Curve_Lock
CM_Mode
Enable/Disable
Concentration
Measurement
Lock Concentration
Measurement Tables
Concentration
Measurement Mode
ENUM
ENUM
Unsigned16
(2)
Unsigned16
(2)
C-85
R-524
—
S
S
S
—
—
D/20
D/20
D/20
D/20
0
Yes
(1)
0
Yes
(1)
0
Yes
(1)
0
–
–
–
–
0
0
27 CM_Active_Curve Active Calculation
Curve
VARIABLE Unsigned16
(2)
R-523
28
29
30
31
CM_Curve_Index
CM_Temp_Index
CM_Conc_Index
CM_Temp_ISO
Curve Configuration
Index (n)
Curve n
Temperature
Isotherm Index (x-axis)
Curve n
Concentration
Index (y-axis)
Curve n
(6×5)
Temperature Isotherm
Value (x-axis) x
VARIABLE Unsigned16
(2)
VARIABLE Unsigned16
(2)
VARIABLE Unsigned16
(2)
VARIABLE FLOAT (4) R-531
32 CM_Dens_At_Temp_ISO
33 CM_Dens_At_Temp_Coeff Curve n
(6×5) Coeff @
Temperature
Isotherm
X
,
Concentration
Y
34 CM_Conc_Label_55
Curve n
(6×5) Density
@ Temperature
Isotherm
X
,
Concentration
Y
Curve n
(6×5)
Concentration
Y
Value
(Label for y-axis)
35 CM_Dens_At_Conc Curve n
(5×1) Density at Concentration
Y
(at
Ref Temp)
36 CM_Dens_At_Conc_Coeff Curve n
(5×1) Coeff at
Concentration
Y
Temp)
(at Ref
37 CM_Conc_Label_51 Curve n
(5×1)
Concentration
Y
(y-axis)
Value
VARIABLE FLOAT (4)
VARIABLE
VARIABLE
VARIABLE
VARIABLE
VARIABLE
FLOAT (4)
FLOAT (4)
FLOAT (4)
FLOAT (4)
FLOAT (4)
R-533
R-535
R-537
R-539
R-541
R-543
S
S
S
S
S
S
S
S
S
S
S
Yes
(1)
0
Yes
(1)
0
Yes
(1)
0
Yes
(1)
0
Yes
(1)
0
Yes
(1)
0
Yes
(1)
0
Yes
(1)
0
Yes
(1)
0
Yes
(1)
0
Yes
(1)
0
0
0
0
0
0
0
0
0.0
0.0
R
R
R
R
R/W
(Any)
R/W
(Any)
R/W
(Any)
Enumerated List of
Values
N/A
N/A
N/A
N/A
Value part of DS-66
1 = Reset
Value part of DS-66
1 = Reset
Value part of DS-66
1 = Reset
R/W
(OOS)
0x0000 = disabled
0x0001 = enabled
R/W
(Any)
R/W
(Any)
R/W
(Any)
R/W
(Any)
R/W
(OOS)
R/W
(OOS)
R/W
(OOS)
0x0000 = not locked
0x0001 = locked
0 = None
1= Dens @ Ref Temp
2= Specific Gravity
3= Mass Conc (Dens)
4=Mass Conc (SG)
5= Volume Conc
(Dens)
6= Volume Conc (SG)
7= Concentration
(Dens)
8 = Concentration
(SG)
0 through 5
0 through 5
0 through 5
0 through 5
R/W
(OOS)
0.0
R/W
(OOS)
0.0
0.0
0.0
0.0
R/W
(OOS)
R/W
(OOS)
R/W
(OOS)
R/W
(OOS)
Configuration and Use Manual
187
Model 2700 transducer blocks reference
Table B-14
CONCENTRATION MEASUREMENT transducer block parameters (continued)
38
45
46
Parameter Mnemonic
CM_Ref_Temp
Definition
Curve n
Reference
Temperature
39 CM_SG_Water_Ref_Temp Curve n
SG Water
Reference
Temperature
40 CM_SG_Water_Ref_Dens Curve n
SG Water
Reference Density
41 CM_Slope_Trim
42 CM_Slope_Offset
43 CM_Extrap_Alarm_Limit
44 CM_Curve_Name
47
48
49
CM_Max_Fit_Order
CM_Fit_Results
CM_Conc_Unit_Code
CM_Expected_Acc
CM_FEATURE_KEY
Curve n
Message
Type
Data Type/
Structure
(size in bytes)
VARIABLE FLOAT (4) R-545 S
VARIABLE FLOAT (4) R-547 S
VARIABLE FLOAT (4) R-549 S
VARIABLE FLOAT (4) R-551 S
Curve n
Offset Trim VARIABLE FLOAT (4) R-553 S
Curve n
Extrapolation
Alarm Limit: %
Curve n
ASCII String –
Name of Curve – 12 chars supported
Maximum Fit Order for
5×5 curve
VARIABLE FLOAT (4)
VARIABLE VISIBLE
STRING
(12)
VARIABLE Unsigned16
(2)
R-555
R-557-5
62
R-564
S
S
S
Curve n
Curve Fit
Results
ENUM Unsigned16
(2)
R-569 S
Curve n
Concentration
Units Code
Curve n
Slope Trim
Curve Fit
Expected Accuracy
Enabled Features
ENUM
VARIABLE
STRING
Unsigned16
(2)
R-570 S
FLOAT(4)
BIT
STRING (2)
R-571 S
R-5000 S
Enumerated List of
Values
Yes
(1)
0 0.0
R/W
(OOS)
Yes
(1)
0 4.0
R/W
(OOS)
Yes
(1)
0 1.0
R/W
(OOS)
Yes
(1)
0
Yes
(1)
3
1.0
Yes
(1)
Yes
(1)
Yes
(1)
0
5
0.0
5.0
“””Empty
Curve”
“Empty
Curve”
R/W
(OOS)
R/W
(Any)
R/W
(Any)
3
R/W
(OOS)
Shall accept > 0.8
Yes
(1)
0
1343
0
1343
R/W
(OOS)
R
R/W
(OOS)
2, 3, 4, 5 (Shall accept only enum values)
0 = Good
1 = Poor
2 = Failed
3 = Empty
1110 = Degrees
Twaddell
1426= Degrees Brix
1111= Deg Baume
(heavy)
1112= Deg Baume
(light)
1343=% sol/wt
1344=% sol/vol
1427= Degrees
Balling
1428= Proof Per
Volume
1429 = Proof Per mass
1346 = Percent Plato
R
R 0x0000 = standard
0x0800 = Meter
Verifi.
0x0080 = PID (Not
Applicable)
0x0008 = Enh.
Density
0x0010 = API
50
v4.0 Additions
SNS_ResetCMVolInv
51 SNS_ResetCMNetMassIn v
52 SNS_ResetCMNetVolInv
53 SNS_CM_ResetFlag
Reset CM Volume
Inventory
Reset CM Net Mass
Inventory
Reset CM Net Volume
Inventory
Reset All
Concentration
Measurement Curve
Information
Method
Method
Method
Method
Unsigned16
(2)
C-0195 S
Unsigned16
(2)
C-0196 S
Unsigned16
(2)
Unsigned16
(2)
C-0197 S
C-249 S
Yes
(1)
0
Yes
(1)
0
Yes
(1)
0
Yes
(1)
0
0
0
0
0
R/W
(Any)
R/W
(Any)
R/W
(Any)
R/W
(OOS)
0 = No effect
1 = Reset
0 = No effect
1 = Reset
0 = No effect
1 = Reset
1 = Reset
188
Model 2700 Transmitters with F
OUNDATION
™
fieldbus
Model 2700 transducer blocks reference
Table B-14
CONCENTRATION MEASUREMENT transducer block parameters (continued)
Parameter Mnemonic
54 SNS_CM_EnableDensLow
Extrap
55 SNS_CM_EnableDensHig hExtrap
56 SNS_CM_EnableTempLo wExtrap
57 SNS_CM_EnableTempHig hExtrap
Definition
Enable Low Density
Extrapolation Alarm
Enable High Density
Extrapolation Alarm
Enable Low
Temperature
Extrapolation Alarm
Enable High
Temperature
Extrapolation Alarm
Message
Type
ENUM
ENUM
ENUM
ENUM
v6.0 Additions
58 CM_TEMPERATURE_
UNITS
Temperature Unit ENUM
Data Type/
Structure
(size in bytes)
Unsigned16
(2)
C-250
Unsigned16
(2)
C-251
Unsigned16
(2)
C-252
Unsigned16
(2)
C-253
S
S
S
S
Unsigned16
(2)
R-0041 S
Yes
(1)
0
Yes
(1)
0
Yes
(1)
0
Yes
(1)
0
C°
59 CM_DENSITY_UNITS Density Unit ENUM Unsigned16
(2)
R-0040 S g/cm
3
1
1
1
1
R/W
(Any)
R/W
(Any)
R/W
(Any)
Enumerated List of
Values
1 = Enable
1 = Enable
1 = Enable
R/W
(Any)
1 = Enable
60 CM_VOL_FLOW_UNITS Standard or special volume flow rate unit
ENUM Unsigned16
(2)
R- 0042 S l/s
R
R
R
1000 = K
1001 = Deg C
1002 = Deg F
1003 = Deg R
1097 = kg/m3
1100 = g/cm3
1103 = kg/L
1104 = g/ml
1105 = g/L
1106 = lb/in3
1107 = lb/ft3
1108 = lb/gal
1109 = Ston/yd3
1113 = DegAPI
1114 = SGU
1347 = m3/s
1348 = m 3/min
1349 = m3/hr
1350 = m3/day
1351 = L/s
1352 = L/min
1353 = L/hr
1355 = Ml/day
1356 = CFS
1357 = CFM
1358 = CFH
1359 = ft3/day /
Standard cubic ft. per day
1362 = gal/s
1363 = GPM
1364 = gal/hour
1365 = gal/day
1366 = Mgal/day
1367 = ImpGal/s
1368 = ImpGal/min
1369 = ImpGal/hr
1370 = Impgal/day
1371 = bbl/s
1372 = bbl/min
1373 = bbl/hr
1374 = bbl/day
1631 = barrel (US
Beer) per day
1632 = barrel (US
Beer) per hour
1633 = barrel (US
Beer) per minute
Configuration and Use Manual
189
Model 2700 transducer blocks reference
Table B-14
CONCENTRATION MEASUREMENT transducer block parameters (continued)
Parameter Mnemonic Definition
Message
Type
Data Type/
Structure
(size in bytes)
v7.0 Additions
61 CM_Increment_Curve Increment the Active
Curve to the next one.
VARIABLE DS-66 (2) —
(1) Writable only if the API feature is enabled.
0
Enumerated List of
Values
1634 =barrel (US
Beer) per Second
253 = Special units
R/W
(Any)
Value part of DS-66
0 = None
1 = Increment
190
15
16
17
18
19
20
21
22
23
4
5
2
3
0
1
6
7
Table B-15
CONCENTRATION MEASUREMENT transducer block views
OD
Index View 1
8
9
10
11
12
13
14
24
25
26
Parameter Mnemonic
Standard FF Parameters
BLOCK_STRUCTURE
ST_REV
TAG_DESC
STRATEGY
ALERT_KEY
MODE_BLK
BLOCK_ERR
XD_ERROR
CM Process Variables
CM_Ref_Dens
CM_Spec_Grav
CM_Std_Vol_Flow
CM_Net_Mass_Flow
CM_Net_Vol_Flow
CM_Conc
CM_Baume
CM Totals
CM_Std_Vol_Total
CM_Std_Vol_Inv
CM_Net_Mass_Total
CM_Net_Mass_Inv
CM_Net_Vol_Total
CM_Net_Vol_Inv
CM_Reset_Std_Vol_Total
CM_Reset_Net_Mass_Total
CM_Reset_Net_Vol_Total
CM Setup Data
EN_CM
CM_CURVE_LOCK
CM_Mode
2
5
5
5
5
5
5
5
5
5
5
5
5
5
4
2
1
View 2
2
2
2
2
View 3
2
5
5
5
5
5
5
5
4
2
1
5
5
5
5
5
5
View 4
2
2
2
2
2
1
Model 2700 Transmitters with F
OUNDATION
™
fieldbus
Model 2700 transducer blocks reference
50
51
52
53
54
55
56
57
Table B-15
CONCENTRATION MEASUREMENT transducer block views (continued)
58
59
60
44
45
46
47
48
49
40
41
42
43
36
37
38
39
32
33
34
35
28
29
30
31
OD
Index
27
61
Parameter Mnemonic
CM_Active_Curve
CM_Curve_Index
CM_Temp_Index
CM_Conc_Index
CM_Temp_ISO
CM_Dens_At_Temp_ISO
CM_Dens_At_Temp_Coeff
CM_Conc_Label_55
CM_Dens_At_Conc
CM_Dens_At_Conc_Coeff
CM_Conc_Label_51
CM_Ref_Temp
CM_SG_Water_Ref_Temp
CM_SG_Water_Ref_Dens
CM_Slope_Trim
CM_Slope_Offset
CM_Extrap_Alarm_Limit
CM_Curve_Name
CM_Max_Fit_Order
CM_Fit_Results
CM_Conc_Unit_Code
CM_Expected_Acc
CM_FEATURE_KEY
v4.0 Additions
SNS_ResetCMVolInv
SNS_ResetCMNetMassInv
SNS_ResetCMNetVolInv
SNS_CM_ResetFlag
SNS_CM_EnableDensLowExtrap
SNS_CM_EnableDensHighExtrap
SNS_CM_EnableTempLowExtrap
SNS_CM_EnableTempHighExtrap
v6.0 Additions
CM_TEMPERATURE_UNITS
CM_DENSITY_UNITS
CM_VOL_FLOW_UNITS
v6.0 Additions
CM_Increment_Curve
Totals
View 1
74
View 2
2
2
2
2
2
2
2
2
2
26
View 3
2
76
4
2
2
2
2
2
4
4
4
4
2
4
2
2
View 4
2
4
4
4
4
4
4
4
4
12
2
99
Configuration and Use Manual
191
Model 2700 transducer blocks reference
192
Model 2700 Transmitters with F
OUNDATION
™
fieldbus
Appendix C
Model 2700 Resource Block Reference
C.1
Resource block parameters
Table C-1
Resource block parameters
0
1
2
3
4
5
6
7
8
9
Parameter Mnemonic
Standard FF Parameters
BLOCK_STRUCTURE
ST_REV
TAG_DESC
STRATEGY
ALERT_KEY
MODE_BLK
BLOCK_ERR
Definition
Message
Type
Data Type/
Structure Size
Beginning of the resource block
VARIABLE DS_64 5
The revision level of the static data associated with the function block.
Incremented with each write of static store.
VARIABLE Unsigned16 2
The user description of the intended application of the block.
STRING OCTET
STRING
32
The strategy field can be used to identify grouping of blocks. This data is not checked or processed by the block.
The identification number of the plant unit. This information may be used in the host for sorting alarms, etc.
VARIABLE
VARIABLE
The actual, target, permitted and normal modes of the block.
RECORD
This parameter reflects the error status associated with the hardware or software components associated with a block.
STRING
Unsigned16
Unsigned8
DS-69
BIT STRING
2
1
4
2
S
S
S
S
S mix
D/20 —
N/A R/W
0 R
Spac es
R/W
0
0
R/W
R/W
Auto R/W
R
RS_STATE
TEST_RW
DD_RESOURCE
Contains the operational state of the Function Block
Application.
VARIABLE Unsigned8
Read/write test parameter
— used only for conformance testing.
RECORD
String identifying the tag of the resource which contains the Device
Description for this resource.
STRING
DS-85
OCTET
STRING
1
112
32
D/20
D/20
S
—
0
Spac es
R
R
R
Enumerated List of
Values
N/A
N/A
Any 32 Characters
N/A
0 to 255
See section 2.6 of FF-891 1.0
bit 0 = Other bit 1 = Block Config Error bit 3 = Simulate Active bit 6 = Maintenance Soon bit 7 = Input Failure bit 8 = Output Failure bit 9 = Memory Failure bit 11 = Lost NV Data bit 13 = Maintenance Now bit 15 = Out of Service
0 = Invalid State
1 = Start/Restart
2 = Initialization
3 = On-Line Linking
4 = On-Line
5 = Standby
6 = Failure
1.0
1.0
1.0
Any 32 Characters
1.0
1.0
1.0
1.0
1.0
1.0
Configuration and Use Manual
193
Model 2700 Resource Block Reference
Table C-1
Resource block parameters continued
10
Parameter Mnemonic
MANUFAC_ID
11
12
13
14
15
16
17
DEV_TYPE
DEV_REV
DD_REV
(1)
(1)
GRANT_DENY
HARD_TYPES
RESTART
FEATURES
Definition
Message
Type
Data Type/
Structure Size
Manufacturer identification number — used by an interface device to locate the DD file for the resource.
ENUM
Manufacturer’s model number associated with the resource — used by interface devices to locate the DD file for the resource.
ENUM
Unsigned32
Unsigned16
Manufacturer revision number associated with the resource — used by an interface device to locate the DD file for the resource.
VARIABLE Unsigned8
Revision of the DD associated with the resource — used by an interface device to locate the DD file for the resource.
VARIABLE
Options for controlling access of host computer and local control panels to operating, tuning and alarm parameters of the block.
RECORD
Unsigned8
DS-70
The types of hardware available as channel numbers.
ENUM
Allows a manual restart to be initiated. Several degrees of restart are possible.
ENUM
Used to show supported resource block options.
ENUM
Bit String
Unsigned8
Bit String
4
2
1
1
2
2
1
2
S
S
S
S
S
S
D
S
18
19
20
21
22
FEATURE_SEL
CYCLE_TYPE
CYCLE_SEL
MIN_CYCLE_T
MEMORY_SIZE
Used to select resource block options.
Identifies the block execution methods available for this resource.
Used to select the block execution method for this resource.
ENUM
ENUM
ENUM
Bit String
Bit String
Bit String
2
2
2
Time duration of the shortest cycle interval of which the resource is capable. Measured in 1/32 millisecond.
VARIABLE Unsigned32 4
Available configuration memory in the empty resource in Kbytes. To be checked before attempting a download.
VARIABLE Unsigned16 2
S
S
S
S
S
0x00
0310
R
0x20
00
R
4
1
0.0
R/W
0x80 R
8
R
R
R
Enumerated List of
Values
0x000310 = Micro Motion
0x2000 = 2700
0x80 = SCALAR_INPUT
1.0
1.0
1.0
1.0
1.0
1.0
1 R/W
|
0x10
0x20
|
0x40
|
0x80
R
0x10 R/W
1 = Run
2 = Restart resource
3 = Restart with defaults
4 = Restart processor
0x0010 = SoftWriteLock
0x0020 = FailSafe
0x0040 = Report
0x0080 = Unicode
1.0
1.0
0x80
|
0x40
0
8000
R
RW
R
0x0010 = SoftWriteLock
0x0020 = FailSafe
0x0040 = Report
0x0080 = Unicode
0x0080 = CycleScheduled
0x0040 = BlockComplete
1.0
1.0
0x0080 = CycleScheduled
0x0040 = BlockComplete
1.0
1.0
1.0
194
Model 2700 Transmitters with F
OUNDATION
™
fieldbus
Model 2700 Resource Block Reference
Table C-1
Resource block parameters continued
23
Parameter Mnemonic
NV_CYCLE_T
24
25
26
27
28
29
30
31
32
33
34
FREE_SPACE
FREE_TIME
SHED_RCAS
SHED_ROUT
FAULT_STATE
SET_FSTATE
CLR_FSTATE
MAX_NOTIFY
LIM_NOTIFY
CONFIRM_TIME
WRITE_LOCK
Definition
Message
Type
Data Type/
Structure Size
Minimum time interval in
1/32 millisec specified by the manufacturer for writing copies of NV parameters to non-volatile memory. Zero means it will never be automatically copied. At the end of
NV_CYCLE_TIME, only those parameters which have changed (as defined by the manufacturer) need to be updated in NVRAM
VARIABLE Unsigned32 4
VARIABLE Float 4 Percent of memory available for further configuration. Zero in a preconfigured resource.
Percent of the block processing time that is free to process additional blocks.
VARIABLE Float 4
Time duration in 1/32 millisec at which to give up on computer writes to function block RCas locations. Shed from
RCas shall never happen when SHED_RCAS = 0.
VARIABLE Unsigned32 4
Time duration in 1/32 millisec at which to give up on computer writes to function block ROut locations. Shed from Rout shall never happen when
SHED_ROUT = 0.
VARIABLE Unsigned32 4
Unsigned8 1 Condition set by loss of communication to an output block, fault promoted to an output block or a physical contact. When Fault State condition is set, Then output function blocks will perform their FSTATE actions.
ENUM
Allows the Fault State condition to be manually initiated by selecting Set.
Writing a Clear to this parameter will clear the device fault state if the field condition, if any, has cleared.
ENUM
ENUM
Unsigned8
Unsigned8
1
1
Maximum number of unconfirmed notify messages possible.
Maximum number of unconfirmed alert notify messages allowed.
VARIABLE
VARIABLE
Unsigned8
Unsigned8
1
1
The time in 1/32 millisec the resource will wait for confirmation of receipt of a report before trying again.
Retry shall not happen when
CONFIRM_TIME = 0.
VARIABLE Unsigned32 4
If locked, no writes from anywhere are allowed, except to clear
WRITE_LOCK. Block inputs will continue to be updated.
ENUM Unsigned8 1
S
D
D
S
S
N
D
D
S
S
S
S
—
—
31,68
0,000
R
6400
00
R/W
6400
00
R/W
1
1
1
5
5
6400
00
R/W
1
R
R
R
R/W
R/W
R
R/W
R/W
Enumerated List of
Values
0-100 Percent
0-100 Percent
1 = Clear
2 = Active
1 = Off
2 = Set
1 = Off
2 = Set
0 to MAX_NOTIFY
1 = Unlocked
2 = Locked
1.0
1.0
1.0
1.0
1.0
1.0
1.0
1.0
1.0
1.0
1.0
1.0
Configuration and Use Manual
195
Model 2700 Resource Block Reference
Table C-1
Resource block parameters continued
35
Parameter Mnemonic
UPDATE_EVT
36
37
38
39
40
41
42
BLOCK_ALM
ALARM_SUM
ACK_OPTION
WRITE_PRI
WRITE_ALM
ITK_VER
FD_VER
Definition
Message
Type
Data Type/
Structure Size
This alert is generated by any change to the static data.
RECORD
The block alarm is used for all configuration, hardware, connection failure or system problems in the block. The cause of the alert is entered in the subcode field. The first alert to become active will set the Active status in the
Status attribute. As soon as the Unreported status is cleared by the alert reporting task, another block alert may be reported without clearing the Active status, if the subcode has changed.
RECORD
The current alert status, unacknowledged states, unreported states, and disabled states of the alarms associated with the function block.
RECORD
Selection of whether alarms associated with the block will be automatically acknowledged.
ENUM
DS-73
DS-72
DS-74
Bit String
1/4
13
8
2
Priority of the alarm generated by clearing the write lock.
VARIABLE
This alert is generated if the write lock parameter is cleared.
RECORD
Unsigned8
DS-72
1
1/3
Major revision number of the interoperability test case used in certifying this device as interoperable.
The format and range of the version number is defined and controlled by the Fieldbus Foundation.
Note: The value of this parameter will be zero (o) if the device has not been registered as interoperable by the FF.
VARIABLE Unsigned16 2
A parameter equal to the value of the major version of the Field Diagnostics specification that this device was designed to.
Unsigned16 2
D
D mix
S
S
D
S
S
—
—
—
—
—
0
0
5
R
R/W
R/W
R/W
R/W
R/W
R
RO
Enumerated List of
Values
0 = Auto Ack Disabled
1 = Auto Ack Enabled
0 to 15
1.0
1.0
1.0
1.0
1.0
1.0
3.0
7.0
196
Model 2700 Transmitters with F
OUNDATION
™
fieldbus
Model 2700 Resource Block Reference
Table C-1
Resource block parameters continued
43
Parameter Mnemonic
FD_FAIL_ACTIVE
Definition
This parameter reflects the error conditions that are being detected as active as selected for this category. It is a bit string, so that multiple conditions may be shown.
Message
Type
Data Type/
Structure
Bit String
Size
4 D
44
45
46
FD_OFFSPEC_ACTIVE This parameter reflects the error conditions that are being detected as active as selected for this category. It is a bit string, so that multiple conditions may be shown.
FD_MAINT_ACTIVE This parameter reflects the error conditions that are being detected as active as selected for this category. It is a bit string, so that multiple conditions may be shown.
FD_CHECK_ACTIVE This parameter reflects the error conditions that are being detected as active as selected for this category. It is a bit string, so that multiple conditions may be shown.
Bit String
Bit String
Bit String
4
4
4
D —
D
D —
—
RO
RO
Enumerated List of
Values
0x00000001 = Check
Function
0x00000002 = Calibration in Progress
0x00000008 = Sensor
Simulation Active
0x00000010 = Slug Flow
0x00000020 = Meter
Verification Aborted
0x00000040 = Meter
Verification Failed
0x00000080 =
Extrapolation Alert
0x00000100 = PM:
Temperature or Density
Overrange
0x00000200 = Drive
Overrange
0x00000400 = Data Loss
Possible (Totals)
0x00001000 = Calibration
Failure
0x00002000 = Transmitter
Not Characterized
0x00004000 = CM:
Unable to Fit Curve Data
0x00008000 =
Temperature Overrange
0x00010000 = No Left
Pickoff/Right Pickoff
Signal
0x00020000 = Density
Overrange
0x00040000 = Mass Flow
Overrange
0x00080000 = No Sensor
Response
0x00100000 = Low Power
0x00200000 = Sensor
Communication Failure
0x00400000 = NV
Memory Failure
0x00800000 = Transmitter
Initializing/Warming Up
0x01000000 = Electronics
Failure — Hornet
0x02000000 = Electronics
Failure — Device
0x04000000 = Factory configuration invalid
0x08000000 = Factory configuration checksum invalid
7.0
Same as OD Index 43 7.0
RO
RO
Same as OD Index 43
Same as OD Index 43
7.0
7.0
Configuration and Use Manual
197
Model 2700 Resource Block Reference
Table C-1
Resource block parameters continued
47
Parameter Mnemonic
FD_FAIL_MAP
48
49
50
51
52
53
FD_OFFSPEC_MAP
FD_MAINT_MAP
FD_CHECK_MAP
FD_FAIL_MASK
FD_OFFSPEC_MASK
FD_MAINT_MASK
Definition
This parameter maps conditions to be detected as active for this alarm category. Thus the same condition may be active in all, some, or none of the 4 alarm categories.
This parameter maps conditions to be detected as active for this alarm category. Thus the same condition may be active in all, some, or none of the 4 alarm categories.
This parameter maps conditions to be detected as active for this alarm category. Thus the same condition may be active in all, some, or none of the 4 alarm categories.
This parameter maps conditions to be detected as active for this alarm category. Thus the same condition may be active in all, some, or none of the 4 alarm categories.
This parameter allows the user to suppress any single or multiple conditions that are active, in this category, from being broadcast to the host through the alarm parameter. A bit equal to
‘1’ will mask i.e. inhibit the broadcast of a condition, and a bit equal to ‘0’ will unmask i.e. allow broadcast of a condition.
Message
Type
Data Type/
Structure
Bit String
Bit String
Bit String
Bit String
Bit String
Bit String
Bit String
Size
4
4
4
4
4
4
4
S
S
S
S
S
S
S
—
—
—
—
—
—
—
RW
(OS/
AUTO)
Enumerated List of
Values
Same as OD Index 43 7.0
RW
(OS/
AUTO)
Same as OD Index 43 7.0
RW
(OS/
AUTO)
Same as OD Index 43 7.0
RW
(OS/
AUTO)
Same as OD Index 43 7.0
RW
(OS/
AUTO)
Same as OD Index 43 7.0
RW
(OS/
AUTO)
Same as OD Index 43 7.0
RW
(OS/
AUTO)
Same as OD Index 43 7.0
198
Model 2700 Transmitters with F
OUNDATION
™
fieldbus
Model 2700 Resource Block Reference
Table C-1
Resource block parameters continued
54
Parameter Mnemonic
FD_CHECK_MASK
55 FD_FAIL_ALM
56 FD_OFFSPEC_ALM
57 FD_MAINT_ALM
58 FD_CHECK_ALM
59 FD_FAIL_PRI
60 FD_OFFSPEC_PRI
61 FD_MAINT_PRI
62 FD_CHECK_PRI
63 FD_SIMULATE
Definition
This parameter allows the user to suppress any single or multiple conditions that are active, in this category, from being broadcast to the host through the alarm parameter. A bit equal to
‘1’ will mask i.e. inhibit the broadcast of a condition, and a bit equal to ‘0’ will unmask i.e. allow broadcast of a condition.
This parameter is used primarily to broadcast a change in the associated active conditions, which are not masked, for this alarm category to a Host
System
.
Message
Type
This parameter is used primarily to broadcast a change in the associated active conditions, which are not masked, for this alarm category to a Host
System.
This parameter is used primarily to broadcast a change in the associated active conditions, which are not masked, for this alarm category to a Host
System.
This parameter is used primarily to broadcast a change in the associated active conditions, which are not masked, for this alarm category to a Host
System.
This parameter allows the user to specify the priority of this alarm category.
This parameter allows the user to specify the priority of this alarm category.
This parameter allows the user to specify the priority of this alarm category.
This parameter allows the user to specify the priority of this alarm category.
This parameter allows the conditions to be manually supplied when simulation is enabled. When simulation is disabled both the diagnostic simulate value and the diagnostic value track the actual conditions. The simulate jumper is required for simulation to be enabled and while simulation is enabled the recommended action will show that simulation is active.
Data Type/
Structure
Bit String
Size
4
DS-87
DS-87
DS-87
DS-87
Unsigned8
Unsigned8
Unsigned8
Unsigned8
DS-89
15
15
15
15
1
1
1
1
9
S
D
D
D
D
S
S
S
S
D
—
—
—
—
—
RW
(OS/
AUTO)
Enumerated List of
Values
Same as OD Index 43
RW
(OS/
AUTO)
RW
(OS/
AUTO)
RW
(OS/
AUTO)
RW
(OS/
AUTO)
0 RW
(OS/
AUTO)
0
0
RW
(OS/
AUTO)
RW
(OS/
AUTO)
0 RW
(OS/
AUTO) disab led
RW
(OS/
AUTO)
7.0
7.0
7.0
7.0
7.0
7.0
7.0
7.0
7.0
7.0
Configuration and Use Manual
199
Model 2700 Resource Block Reference
Table C-1
Resource block parameters continued
64
65
66
67
68
Parameter Mnemonic Definition
Message
Type
Data Type/
Structure Size
FD_RECOMMEN_ACT This parameter is a device enumerated summarization of the most severe condition or conditions detected. The
DD help should describe by enumerated action, what should be done to alleviate the condition or conditions. 0 is defined as
Not Initialized, 1 is defined as No Action Required, all others defined by manuf.
FD_EXTENDED_ACTIVE An optional parameter or parameters to allow the user finer detail on conditions causing an active condition in the
FD_*_ACTIVE parameters.
FD_EXTENDED_MAP An optional parameter or parameters to allow the user finer control on enabling conditions contributing to the conditions in
FD_*_ACTIVE parameters.
Unsigned16
Bit String
Bit String
EPM Parameters
COMPATIBILITY_REV This parameter is used when replacing field devices. The correct value of this parameter is the
DEV_REV value of the replaced device.
HARDWARE_REVISION Hardware revision of that hardware unsigned8
VARIABLE unsigned8
2
4
4
4
1
D
D
S
D
S
69 SOFTWARE_REV
70 PD_TAG
Software revision of source code which has resource block in it.
PD tag description of device
Visible
String
Visible
String
32
32
S
S
71
72
DEV_STRING
DEV_OPTIONS
73 OUTPUT_BOARD_SN
74 FINAL_ASSY_NUM
75
76
DOWNLOAD_MODE
HEALTH_INDEX
This is used to load new licensing into the device.
The value can be written but will always read back with a value of 0.
Indicates which miscellaneous device licensing options are enabled.
Output board serial number.
The same final assembly number placed on the neck label.
Gives access to the boot block code for over the wire downloads
VARIABLE Array of unsigned32
ENUM bit string
VARIABLE unsigned32 4
VARIABLE unsigned32 4 unsigned8
32
4
1
Parameter representing the overall health of the device, 100 being perfect.
VARIABLE Unsigned8 1
S
S
S
S
S
D —
—
—
0 RO
RO
RW
R
Set on
Build
Set on
Build
R
R
Copy of
MIB
PD_
TAG
R
0 R/W
0
0
0
R/W
R
R/W
R
R
Enumerated List of
Values
Same as OD Index 77
Same as OD Index 43
Same as OD Index 43
0x00000001 = Download
1 — 100
7.0
7.0
7.0
7.0
7.0
7.0
7.0
1.0
7.0
1.0
1.0
1.0
3.0
200
Model 2700 Transmitters with F
OUNDATION
™
fieldbus
Model 2700 Resource Block Reference
Table C-1
Resource block parameters continued
77
78
Parameter Mnemonic
FAILED_PRI
RECOMMENDED_ACTI
ON
Definition
Message
Type
Data Type/
Structure Size
Designates the alarming priority of the
FAILED_ALM and also used as switch b/w FD and legacy PWA. If value is greater than or equal to
1 then PWA alerts will be active in device else device will have FD alerts.
Enumerated list of recommended actions displayed with a device alert.
VARIABLE unsigned8
VARIABLE unsigned16
1
2
S
D —
0 R/W
Enumerated List of
Values
0 — 15
R 0 = Uninitialized
1 = No action
6 = Factory configuration checksum invalid
7 = Factory configuration invalid
8 = Electronics Failure —
Device
9 = Replace the Fieldbus
Electronics Module
Assembly
10 = Transmitter
Initializing/Warming Up
11 = Reset the Device then Download the Device
Configuration
12 = Sensor
Communication Failure
13 = Low Power
14 = No Sensor Response
15 = Mass Flow
Overrange
16 = Density Overrange
17 = No Left Pickoff/Right
Pickoff Signal
18 = Temperature
Overrange
19 = CM: Unable to Fit
Curve Data
20 = Transmitter Not
Characterized
21 = Calibration Failure
23 = Data Loss Possible
(Totals)
24 = Drive Overrange
25 = PM: Temperature or
Density Overrange
26 = Extrapolation Alert
27 = Meter Verification
Failed
28 = Meter Verification
Aborted
29 = Slug Flow
30 = Sensor Simulation
Active
32 = Allow the procedure to complete
33 = Check Transducer
Block Mode
34 = Simulation Active
39 = Simulated — Factory configuration checksum invalid
40 = Simulated — Factory configuration invalid
41 = Simulated —
Electronics Failure —
Device
42 = Simulated — Replace the Fieldbus Electronics
Module Assembly
43 = Simulated —
Transmitter
Initializing/Warming Up
44 = Simulated — Reset the Device then Download the Device Configuration
45 = Simulated — Sensor
Communication Failure
46 = Simulated — Low
Power
47 = Simulated — No
Sensor Response
3.0
Configuration and Use Manual
201
Model 2700 Resource Block Reference
Table C-1
Resource block parameters continued
79
80
81
82
83
84
85
Parameter Mnemonic
FAILED_ALM
MAINT _ALM
ADVISE _ALM
FAILED_ENABLE
FAILED_MASK
FAILED_ACTIVE
MAINT_PRI
Definition
Message
Type
Data Type/
Structure Size
R/W
Enumerated List of
Values
48 = Simulated — Mass
Flow Overrange
49 = Simulated — Density
Overrange+
50 = Simulated — No Left
Pickoff/Right Pickoff
Signal
51 = Simulated —
Temperature Overrange
52 = Simulated — CM:
Unable to Fit Curve Data
53 = Simulated —
Transmitter Not
Characterized
54 = Simulated —
Calibration Failure
56 = Simulated — Data
Loss Possible (Totals)
57 = Simulated — Drive
Overrange
58 = Simulated — PM:
Temperature or Density
Overrange
59 = Simulated —
Extrapolation Alert
60 = Simulated — Meter
Verification Failed
61 = Simulated — Meter
Verification Aborted
62 = Simulated — Slug
Flow
63 = Simulated — Sensor
Simulation Active
65 = Simulated — Allow the procedure to complete
66 = Simulated — Check
Transducer Block Mode
3.0
3.0
Alarm indicating a failure within a device which makes the device non-operational.
RECORD DS-71
Alarm indicating the device needs maintenance soon. If the condition is ignored, the device will eventually fail.
Alarm indicating advisory alarms. These conditions do not have a direct impact on the process or device integrity.
RECORD
RECORD
Enabled FAILED_ALM alarm conditions.
Corresponds bit for bit to the FAILED_ACTIVE.A bit on means that the corresponding alarm condition is enabled and will be detected. A bit off means the corresponding alarm condition is disabled and will not be detected.
ENUM
DS-71
DS-71 bit string
Mask of Failure Alarm.
Corresponds bit for bit to the FAILED_ACTIVE. A bit on means that the failure is masked out from alarming.
ENUM
Enumerated list of advisory conditions within a device. All open bits are free to be used as appropriate for each specific device.
ENUM
Designates the alarming priority of the
MAINT_ALM.
bit string bit string
VARIABLE unsigned8
13
13
13
4
4
4
1
D
D
D
S
S
D
S
—
—
—
R/W
R/W
0 R
0 R
0 R
Same as OD Index 43
Same as OD Index 43
Same as OD Index 43
0 R/W 0 — 15
3.0
3.0
3.0
3.0
3.0
3.0
202
Model 2700 Transmitters with F
OUNDATION
™
fieldbus
Model 2700 Resource Block Reference
Table C-1
Resource block parameters continued
86
87
88
89
90
91
92
Parameter Mnemonic
MAINT_ENABLE
MAINT _MASK
MAINT _ACTIVE
ADVISE_PRI
ADVISE_ENABLE
ADVISE _MASK
ADVISE _ACTIVE
Definition
Message
Type
Data Type/
Structure
Enabled MAINT_ALM alarm conditions.
Corresponds bit for bit to the MAINT_ACTIVE. A bit on means that the corresponding alarm condition is enabled and will be detected. A bit off means the corresponding alarm condition is disabled and will not be detected.
ENUM
Mask of Maintenance
Alarm. Corresponds bit for bit to the MAINT_ACTIVE.
A bit on means that the failure is masked out from alarming.
ENUM bit string bit string
Enumerated list of advisory conditions within a device. All open bits are free to be used as appropriate for each specific device
ENUM
Designates the alarming priority of the
ADVISE_ALM.
bit string
VARIABLE unsigned8 bit string Enabled ADVISE_ALM alarm conditions.
Corresponds bit for bit to the ADVISE_ACTIVE. A bit on means that the corresponding alarm condition is enabled and will be detected. A bit off means the corresponding alarm condition is disabled and will not be detected.
ENUM
Mask of Advisory
Alarm.Corresponds bit for bit to the
ADVISE_ACTIVE. A bit on means that the failure is masked out from alarming.
ENUM bit string
Enumerated list of advisory conditions within a device. All open bits are free to be used as appropriate for each specific device
ENUM bit string
Size
4
4
4
1
4
4
4
S
S
D
S
S
S
D
0
0
0
0
0
0
0
R
R
R
R/W
R
R
R
Enumerated List of
Values
Same as OD Index 43
Same as OD Index 43
Same as OD Index 43
0 — 15
Same as OD Index 43
Same as OD Index 43
Same as OD Index 43
3.0
3.0
3.0
3.0
3.0
3.0
3.0
(1) The initial value is based on transmitter software version 4.0. If the transmitter contains a later version of software, the initial value may be different.
C.2
Resource block views
Table C-2 lists the views for the resource block. The Fieldbus Foundation defines the views as:
• View 1 – View object defined to access the dynamic operating parameters of a block
• View 2 – View object defined to access the static operating parameters of a block.
• View 3 – View object defined to access all the dynamic parameters of a block.
• View 4 – View object defined to access static parameters not included in View 2.
The number in the cell represents the size of the parameter in bytes. Each view can only contain a total of 122 bytes of data. Each view must start with ST_REV.
Configuration and Use Manual
203
Model 2700 Resource Block Reference
Table C-2
Resource block views
38
39
40
41
34
35
36
37
30
31
32
33
26
27
28
29
42
43
44
45
46
22
23
24
25
18
19
20
21
14
15
16
17
10
11
12
13
8
9
6
7
4
5
2
3
OD
Index
1
SHED_RCAS
SHED_ROUT
FAULT_STATE
SET_FSTATE
CLR_FSTATE
MAX_NOTIFY
LIM_NOTIFY
CONFIRM_TIME
WRITE_LOCK
UPDATE_EVT
BLOCK_ALM
ALARM_SUM
ACK_OPTION
WRITE_PRI
WRITE_ALM
ITK_VER
FD_VER
FD_FAIL_ACTIVE
FD_OFFSPEC_ACTIVE
FD_MAINT_ACTIVE
FD_CHECK_ACTIVE
Parameter Mnemonic
ST_REV
TAG_DESC
STRATEGY
ALERT_KEY
MODE_BLK
BLOCK_ERR
RS_STATE
TEST_RW
DD_RESOURCE
MANUFAC_ID
DEV_TYPE
DEV_REV
DD_REV
GRANT_DENY
HARD_TYPES
RESTART
FEATURES
FEATURE_SEL
CYCLE_TYPE
CYCLE_SEL
MIN_CYCLE_T
MEMORY_SIZE
NV_CYCLE_T
FREE_SPACE
FREE_TIME
204
4
4
4
4
View 1
2
View 2
2
View 3
2
View 3_1
2
View 4
2
View 4_1 View 4_2
2 2
2
1
4
2
1
4
2
1
2
2
2
2
2
1
1
4
2
2
4
2
4
4
4
4
4
4
1 1
1
1
4
1
8 8
2
2
2
1
4
4
4
4
Model 2700 Transmitters with F
OUNDATION
™
fieldbus
Model 2700 Resource Block Reference
Table C-2
Resource block views continued
84
85
86
87
80
81
82
83
76
77
78
79
72
73
74
75
88
89
90
91
92
68
69
70
71
64
65
66
67
60
61
62
63
56
57
58
59
52
53
54
55
48
49
50
51
OD
Index
47
View 1
2
4
DEV_OPTIONS
OUTPUT_BOARD_SN
FINAL_ASSY_NUM
DOWNLOAD_MODE
HEALTH_INDEX
FAILED_PRI
RECOMMENDED_ACTION
FAILED_ALM
MAINT _ALM
ADVISE _ALM
FAILED_ENABLE
FAILED_MASK
FAILED_ACTIVE
MAINT_PRI
MAINT_ENABLE
MAINT _MASK
MAINT _ACTIVE
ADVISE_PRI
ADVISE_ENABLE
ADVISE _MASK
ADVISE _ACTIVE
Totals
Parameter Mnemonic
FD_FAIL_MAP
FD_OFFSPEC_MAP
FD_MAINT_MAP
FD_CHECK_MAP
FD_FAIL_MASK
FD_OFFSPEC_MASK
FD_MAINT_MASK
FD_CHECK_MASK
FD_FAIL_ALM
FD_OFFSPEC_ALM
FD_MAINT_ALM
FD_CHECK_ALM
FD_FAIL_PRI
FD_OFFSPEC_PRI
FD_MAINT_PRI
FD_CHECK_PRI
FD_SIMULATE
FD_RECOMMEN_ACT
FD_EXTENDED_ACTIVE
FD_EXTENDED_MAP
COMPATIBILITY_REV
HARDWARE_REVISION
SOFTWARE_REV
PD_TAG
DEV_STRING
44
View 2 View 3 View 3_1 View 4
4
4
4
4
4
4
4
4
View 4_1 View 4_2
30
9
2
4
1
54
2
4
4
4
16
1
1
1
1
4
73
4
4
4
32
32
78
1
1
4
4
1
4
4
4
4
29
Configuration and Use Manual
205
Model 2700 Resource Block Reference
206
Model 2700 Transmitters with F
OUNDATION
™
fieldbus
Appendix D
Flowmeter installation types and components
D.1
Installation diagrams
Model 2700 transmitters can be installed in four different ways:
• Integral
• 4-wire remote
• 9-wire remote
• Remote core processor with remote transmitter
See Figure D-1.
D.2
Component diagrams
Figure D-2 shows the transmitter and core processor components in integral installations.
Figure D-3 shows the transmitter components in 4-wire remote installations and remote core
processor with remote transmitter installations.
Figure D-4 shows the transmitter/core processor assembly in 9-wire remote installations.
In remote core processor with remote transmitter installations, the core processor is installed
stand-alone. See Figure D-5.
D.3
Wiring and terminal diagrams
In 4-wire remote and remote core processor with remote transmitter installations, a 4-wire cable is
used to connect the core processor to the transmitter’s mating connector. See Figure D-6.
In 9-wire remote installations, a 9-wire cable is used to connect the junction box on the sensor to the
terminals on the transmitter/core processor assembly. See Figure D-8.
Figure D-9 shows the transmitter’s power supply terminals.
Figure D-9 shows the output terminals for the Model 2700 transmitter.
Configuration and Use Manual
207
Flowmeter installation types and components
Figure D-1
Installation types
Integral
Transmitter
Core processor
(standard only)
Sensor
4-wire remote
Transmitter
Sensor
208
9-wire remote
Core processor
(standard or enhanced)
Sensor
Remote core processor with remote transmitter
Sensor
Junction box
Junction box
4-wire cable
Transmitter
Core processor
(standard only)
9-wire cable
Transmitter
4-wire cable
Core processor
(standard only)
9-wire cable
Model 2700 Transmitters with F
OUNDATION
™
fieldbus
Flowmeter installation types and components
Figure D-2
Transmitter and core processor components – Integral installations
Transmitter
Transition ring
4 X Cap screws (4 mm)
Base
Core processor
Sensor
Figure D-3
Transmitter components, junction end-cap removed – 4-wire remote and remote core processor with remote transmitter installations
–
Ground lug
Main enclosure
Conduit opening for 4-wire cable
Mounting bracket
4 X Cap screws
(4 mm)
Junction end-cap
Junction housing
Mating connector
Mating connector socket
Configuration and Use Manual
209
Flowmeter installation types and components
Figure D-4
Transmitter/core processor assembly exploded view – 9-wire remote installations
Transmitter
Core processor
4 X Cap screws (4 mm)
Core processor housing
Conduit opening for 9-wire cable
Mounting bracket
End-cap
Figure D-5
Remote core processor components
Conduit opening for 4-wire cable
Conduit opening for 9-wire cable
Mounting bracket
Core processor lid
4 X Cap screws (4 mm)
Core processor housing
End-cap
210
Model 2700 Transmitters with F
OUNDATION
™
fieldbus
Flowmeter installation types and components
Figure D-6
4-wire cable between Model 2700 transmitter and standard core processor
Core processor terminals
User-supplied or factory-supplied 4-wire cable
VDC+ (Red)
RS-485/B (Green)
Mating connector
(transmitter)
RS-485/A (White)
VDC– (Black)
Figure D-7
4-wire cable between Model 2700 transmitter and enhanced core processor
Core processor terminals
User-supplied or factory-supplied 4-wire cable
RS-485/A (White)
RS-485/B (Green)
Mating connector
(transmitter)
VDC– (Black)
VDC+ (Red)
Configuration and Use Manual
211
Flowmeter installation types and components
Figure D-8
9-wire cable between sensor junction box and core processor
9-wire cable
to sensor junction box
9-wire terminal connections
(core processor)
Black
(Drains from all wire sets)
Green
White
Brown
Violet
Yellow
Black
Brown
Red
Blue
Gray
Orange
Violet
Yellow
Plug and socket
Mounting screw
Ground screw
Red
Green
White
Blue
Gray
Orange
Figure D-9
Output and power supply terminals
Fieldbus terminals
2
1
9 (–, N)
10 (+, L)
Equipment ground
7
Service port
8
212
Model 2700 Transmitters with F
OUNDATION
™
fieldbus
Appendix 2
Connecting with the Field Communicator
2.1
Overview
The Field Communicator is a handheld configuration and management tool for F
OUNDATION fieldbus-compatible devices, including the Micro Motion Model 2700 transmitter. This appendix provides basic information for connecting the Field Communicator to your transmitter.
The instructions in this manual assume that users are already familiar with the Communicator and can perform the following tasks:
• Turn on the Communicator
• Navigate the Communicator menus
• Transmit and receive configuration information between the Communicator and F
OUNDATION fieldbus-compatible devices
• Use the alpha keys to type information
If you are unable to perform the tasks listed above, consult the Communicator manual before attempting to use the Communicator. The documentation is available on the Micro Motion web site
(www.micromotion.com).
Note: In this manual, procedures identified as performed with a fieldbus host can be accomplished with a Field Communicator.
2.2
Viewing the device descriptions
To access all of the features of the Model 2700 transmitter with F
OUNDATION
fieldbus, the Field
Communicator must have the correct device description (DD). DD files are available in the Products section of the Micro Motion web site (www.micromotion.com).
To view the Model 2700 device descriptions that are installed on your Field Communicator:
1. In the Foundation fieldbus application menu, choose
Utility
, then
Available Device
Descriptions List
.
2. Expand the
Micro Motion, Inc.
branch, then expand the
2000
branch.
3. If you do not have a
Dev Rev 6
device description installed, you will need to obtain it in order to use the functionality described in this manual. Contact Micro Motion.
2.3
Connecting to a transmitter
The Field Communicator can be connected directly to a fieldbus segment. Figures 2-1 and 2-2
illustrate two examples for connecting the Communicator to a segment.
Configuration and Use Manual
213
Connecting with the Field Communicator
Figure 2-1
Bench connection example
Transmitter
Terminator
+
–
+ –
+
–
Connection block
+
–
Terminator
Communicator
+
–
Fieldbus power conditioner
24 VDC power supply
Figure 2-2
Field connection example
Transmitters
Fieldbus power conditioner
Fieldbus host control system
24 VDC power supply
Terminator
+
–
Fieldbus junction box
Terminator
Communicator
214
Model 2700 Transmitters with F
OUNDATION
™
fieldbus
Appendix 3
Connecting with ProLink II
3.1
Overview
ProLink II is a Windows-based configuration and management tool for Micro Motion transmitters. It provides complete access to transmitter functions and data.
This chapter provides basic information for connecting ProLink II to your transmitter. The following topics and procedures are discussed:
•
Requirements (see Section 3.2)
•
Configuration upload/download (see Section 3.3)
•
Connecting to a Model 2700 transmitter (see Section 3.4)
The instructions in this manual assume that users are already familiar with ProLink software. For more information on using ProLink, see the ProLink User manual.
3.2
Requirements
To use ProLink II with a Model 2700 transmitter, you will need:
• An RS-485 to RS-232 signal converter, to convert the PC port’s signal to the signal used by the transmitter. For computers without serial ports, certain USB to RS-232 converters can be used in conjunction with the RS-232 to RS-485 converter. Both types of converter are available from Micro Motion.
• 25-pin to 9-pin adapter (if required by your PC)
Note: If you are using the enhanced core processor and you connect directly to the core processor’s
RS-485 terminals (see Appendix D) instead of to the transmitter, ProLink II v2.4 or later is required.
This connection type is sometimes used for troubleshooting.
3.3
ProLink II configuration upload/download
ProLink II provides a configuration upload/download function which allows you to save configuration sets to your PC. This allows:
• Easy backup and restore of transmitter configuration
• Easy replication of configuration sets
Micro Motion recommends that all transmitter configurations be downloaded to a PC as soon as the configuration is complete.
To access the configuration upload/download function:
1. Connect ProLink II to your transmitter as described in this chapter.
Configuration and Use Manual
215
Connecting with ProLink II
2. From the
File
menu:
• To save a configuration file to a PC, use the
Load from Xmtr to File
option.
• To restore or load a configuration file to a transmitter, use the
Send to Xmtr from File
option.
3.4
Connecting from a PC to a Model 2700 transmitter
You can temporarily connect a PC to the transmitter’s service port. The service port is located within the transmitter wiring compartment, beneath the intrinsic safety cover.
Figure 3-1
Service port
Intrinsic safety cover
216
Service port (7,8)
3.4.1
Connecting to the service port
To temporarily connect to the service port, which is located in the non-intrinsically safe power-supply compartment:
1. Attach the signal converter to the serial or USB port of your PC, using a 25-pin to 9-pin adapter if required.
2. Open the cover to the intrinsically safe wiring compartment.
WARNING
Opening the wiring compartment in a hazardous area can cause an explosion.
Because the wiring compartment must be open to make this connection, the service port should be used only for temporary connections, for example, for configuration or troubleshooting purposes.
When the transmitter is in an explosive atmosphere, do not use the service port to connect to the transmitter.
3. Open the power supply compartment.
Model 2700 Transmitters with F
OUNDATION
™
fieldbus
Connecting with ProLink II
WARNING
Opening the power supply compartment can expose the operator to electric shock.
To avoid the risk of electric shock, do not touch the power supply wires or terminals while using the service port.
4. Connect the signal converter leads to the service port terminals.
Figure 3-2
Connecting to the service port
RS-485B
RS-485A
Service port
25 to 9 pin serial port adapter (if necessary)
RS-485 to RS-232 signal converter
5. Start ProLink II. Choose
Connection > Connect to Device
. In the screen that appears, specify:
•
Protocol
: Service Port
•
COM Port
: as appropriate for your PC
All other parameters are set to service port required values and cannot be changed.
6. Click
Connect
.
7. If an error message appears: a.
Swap the leads between the two service port terminals and try again.
b.
Ensure that you are using the correct COM port.
c.
Check all the wiring between the PC and the transmitter.
Configuration and Use Manual
217
Connecting with ProLink II
3.5
ProLink II language
ProLink II can be configured for the following languages:
• English
• French
• German
To configure the ProLink II language, choose
Tools > Options
. In this manual, English is used as the
ProLink II language.
218
Model 2700 Transmitters with F
OUNDATION
™
fieldbus
Appendix 4
Using the display
4.1
Overview
This appendix describes the basic use of the display and provides a menu tree for the display. You can use the menu tree to locate and perform display commands quickly.
Note that Model 2700 transmitters can be ordered with or without displays. Not all configuration and use functions are available through the display. If you need the added functionality, or if your transmitter does not have a display, you must use either a fieldbus host or ProLink II.
4.2
Components
Figure 4-1 illustrates the display components.
Figure 4-1
Display components
Current value
Process variable line
Indicator light
Scroll optical switch
Units of measure
Select optical switch
4.3
Using the optical switches
The
Scroll
and
Select
optical switches are used to navigate the display menus. To activate an optical switch, touch the lens in front of the optical switch or move your finger over the optical switch close to the lens. There are two optical switch indicators: one for each switch. When an optical switch is activated, the associated optical switch indicator is a solid red.
Configuration and Use Manual
219
Using the display
CAUTION
Attempting to activate an optical switch by inserting an object into the opening can damage the equipment.
To avoid damage to the optical switches, do not insert an object into the openings.
Use your fingers to activate the optical switches.
4.4
Using the display
The display can be used to view process variable data or to access the transmitter menus for configuration or maintenance.
4.4.1
Display language
The display can be configured for the following languages:
• English
• French
• Spanish
• German
Due to software and hardware restrictions, some English words and terms may appear in the non-English display menus. For a list of the codes and abbreviations used on the display, see
Table 4-1.
For information on configuring the display language, see Section 4.18.6.
In this manual, English is used as the display language.
4.4.2
Viewing process variables
In ordinary use, the
Process variable
line on the LCD panel shows the configured display variables, and the
Units of measure
line shows the measurement unit for that process variable.
•
See Section 4.18.5 for information on configuring the display variables.
•
See Table 4-1 for information on the codes and abbreviations used for display variables.
If more than one line is required to describe the display variable, the
Units of measure
line alternates between the measurement unit and the additional description. For example, if the LCD panel is displaying a mass inventory value, the
Units of measure
line alternates between the measurement unit (for example,
G
) and the name of the inventory (for example,
MASSI
).
Auto Scroll may or may not be enabled:
• If Auto Scroll is enabled, each configured display variable will be shown for the number of seconds specified for Scroll Rate.
• Whether Auto Scroll is enabled or not, the operator can manually scroll through the configured display variables by activating
Scroll
.
For more information on using the display to manage totalizers and inventories, see Chapter 5.
220
Model 2700 Transmitters with F
OUNDATION
™
fieldbus
Using the display
4.4.3
Using display menus
Note: The display menu system provides access to basic transmitter functions and data. It does not provide access to all functions and data. To access all functions and data, use a fieldbus host or
ProLink II
To enter the display menu system:
1. Activate
Scroll
and
Select
simultaneously.
2. Hold
Scroll
and
Select
until the words
SEE ALARM
or
OFF-LINE MAINT
appear.
Note: Access to the display menu system may be enabled or disabled. If disabled, the OFF-LINE
MAINT option does not appear. For more information, see Section 4.18.1.
If no optical switch activity occurs for two minutes, the transmitter will exit the off-line menu system and return to the process variable display.
To move through a list of options, activate
Scroll
.
To select from a list or to enter a lower-level menu, scroll to the desired option, then activate
Select
. If a confirmation screen is displayed:
• To confirm the change, activate
Select
.
• To cancel the change, activate
Scroll
.
To exit a menu without making any changes:
• Use the
EXIT
option if available.
• Otherwise, activate
Scroll
at the confirmation screen.
4.4.4
Display password
A password can be used to control access to either the off-line maintenance menu, the alarm menu, or both. The same code is used for both:
• If both passwords are enabled, the user must enter the password to access the top-level off-line menu. The user can then access either the alarm menu or the off-line maintenance menu without re-entering the password.
• If only one password is enabled, the user can access the top-level off-line menu, but will be prompted for the password when he or she attempts to access the alarm menu or the off-line maintenance menu (depending on which password is enabled). The user can access the other menu without a password.
• If neither password is enabled, the user can access all parts of the off-line menu without a password.
For information about enabling and setting the display password, refer to Section 4.18.
Note: If the petroleum measurement application is installed on your transmitter, the display password is always required to start, stop, or reset a totalizer, even if neither password is enabled. If the petroleum measurement application is not installed, the display password is never required for these functions, even if one of the passwords is enabled.
If a password is required, the word
CODE?
appears at the top of the password screen. Enter the digits of the password one at a time by using
Scroll
to choose a number and
Select
to move to the next digit.
If you encounter the display password screen but do not know the password, wait 30 seconds without activating any of the display optical switches. The password screen will timeout automatically and you will be returned to the previous screen.
Configuration and Use Manual
221
Using the display
4.4.5
Entering floating-point values with the display
Certain configuration values, such as meter factors or output ranges, are entered as floating-point values. When you first enter the configuration screen, the value is displayed in decimal notation (as
shown in Figure 4-2) and the active digit is flashing.
Figure 4-2
Numeric values in decimal notation
SX.XXXX
Sign
For positive numbers, leave this space blank. For negative numbers, enter a minus sign (–).
Digits
Enter a number (maximum length: eight digits, or seven digits and a minus sign).
Maximum precision is four.
222
To change the value:
1.
Select
to move one digit to the left. From the leftmost digit, a space is provided for a sign. The sign space wraps back to the rightmost digit.
2.
Scroll
to change the value of the active digit:
1
becomes
2
,
2
becomes
3
, …,
9
becomes
0
,
0
becomes
1
. For the rightmost digit, an
E
option is included to switch to exponential notation.
To change the sign of a value:
1.
Select
to move to the space that is immediately left of the leftmost digit.
2. Use
Scroll
to specify – (for a negative value) or [blank] (for a positive value).
In decimal notation, you can change the position of the decimal point up to a maximum precision of four (four digits to the right of the decimal point). To do this:
1.
Select
until the decimal point is flashing.
2.
Scroll.
This removes the decimal point and moves the cursor one digit to the left.
3.
Select
to move one digit to the left. As you move from one digit to the next, a decimal point will flash between each digit pair.
4. When the decimal point is in the desired position,
Scroll.
This inserts the decimal point and moves the cursor one digit to the left.
To change from decimal to exponential notation (see Figure 4-3):
1.
Select
until the rightmost digit is flashing.
2.
Scroll
to
E
, then
Select
. The display changes to provide two spaces for entering the exponent.
3. To enter the exponent: a.
Select
until the desired digit is flashing.
b.
Scroll
to the desired value. You can enter a minus sign (first position only), values between 0 and 3 (for the first position in the exponent), or values between 0 and 9 (for the second position in the exponent).
c.
Select
.
Note: When switching between decimal and exponential notation, any unsaved edits are lost. The system reverts to the previously saved value.
Note: While in exponential notation, the positions of the decimal point and exponent are fixed.
Model 2700 Transmitters with F
OUNDATION
™
fieldbus
Using the display
Figure 4-3
Numeric values in exponential notation
SX.XXXEYY
Sign
Digit (0–9)
Digits
Enter a four-digit number; three digits must fall to the right of the decimal point.
E
Exponent indicator
Sign or Digit (0–3)
To change from exponential to decimal notation:
1.
Select
until the
E
is flashing.
2.
Scroll
to
d
.
3.
Select
. The display changes to remove the exponent.
To exit the menu:
• If the value has been changed,
Select
and
Scroll
simultaneously until the confirmation screen is displayed.
—
Select
to apply the change and exit.
—
Scroll
to exit without applying the change.
• If the value has not been changed,
Select
and
Scroll
simultaneously until the previous screen is displayed.
Configuration and Use Manual
223
Using the display
4.5
Abbreviations
The display uses a number of abbreviations. Table 4-1 lists the abbreviations used by the display.
Table 4-1 Display codes and abbreviations
Abbreviation
FAC Z
FCF
FLDIR
GSV
GSV F
GSV I
GSV T
INTERN
LANG
LOCK
ACK ALARM
ACK ALL
ADDR
AUTO SCRLL
AVE_D
AVE_T
BRD_T
BKLT
CAL
CHANGE CODE
CODE
CONC
CONFG
CORE
CUR Z
DENS
DGAIN
DISBL
DRIVE%
DSPLY
ENABL
ENABLE ACK
ENABLE ALARM
ENABLE AUTO
ENABLE OFFLN
ENABLE PASSW
ENABLE RESET
ENABLE START
EXT_P
EXT_T
EXTRN
Definition
Acknowledge alarm
Acknowledge all alarms
Address
Auto scroll
Average density
Average temperature
Board temperature
Backlight
Calibrate
Change display password
Display password
Concentration
Configure (or configuration)
Core processor
Current zero
Density
Drive gain
Disable
Drive gain
Display
Enable
Enable the ACK ALL function
Enable the alarm menu
Enable auto scroll
Enable the offline menu
Enable the display password
Enable resetting of totals
Enable stopping/starting of totals
External pressure
External temperature
External
Factory zero
Flow calibration factor
Flow direction
Gas standard volume
Gas standard volume flow
Gas standard volume inventory
Gas standard volume total
Internal
Language
Write protect
Abbreviation
PASSW
PRESS
PWRIN r.
RDENS
RPO_A
SGU
SIM
SPECL
STD M
STD V
STDVI
TCDENS
TCORI
TCORR
TCVOL
TEMPR
TUBEF
VER
VERFY
VFLOW
VOL
WRPRO
WTAVE
XMTR
LPO_A
LVOLI
LZERO
MAINT
MASS
MASSI
MFLOW
MSMT
MTR F
MTR_T
NET M
NET V
NETMI
NETVI
OFFLN
Definition
Left pickoff amplitude
Volume inventory
Live zero flow
Maintenance
Mass flow
Mass inventory
Mass flow
Measurement
Meter factor
Case temperature (T-Series only)
CM net mass flow rate
CM net volume flow rate
CM net mass inventory
CM net volume inventory
Offline
Password
Pressure
Input voltage
Revision
Density at reference temperature
Right pickoff amplitude
Specific gravity units
Simulated
Special
Standard mass flow rate
Standard volume flow rate
Standard volume inventory
Temperature-corrected density
Temperature-corrected inventory
Temperature-corrected total
Temperature-corrected volume
Temperature
Raw tube frequency
Version
Verify
Volume flow
Volume flow
Write protect
Weighted average
Transmitter
224
Model 2700 Transmitters with F
OUNDATION
™
fieldbus
Appendix 5
NE53 history
This appendix documents the change history of the Model 2700 transmitter with F
OUNDATION fieldbus software.
5.1
Software change history
Operating instructions are English versions. Instructions in other languages have different part numbers but matching revision letters.
Table 5-1.
Software version 1.0
Date Changes to software
09/2000 Initial product release
Operating instructions
20000326 Rev. A
Table 5-2.
Software version 2.0
Date Changes to software
Operating instructions
06/2001 Software expansion:
• Support to configure the process variable units for mass flow, volume flow, density and temperature from the display.
Software adjustment:
• Clarified the interaction of the digital fault setting and the last measured value timeout.
Feature additions:
• Backup link active scheduler (LAS)
• PID function block
• Analog output function block for pressure compensation
• Support for pressure compensation to the transducer block
• Drive gain as a selectable channel for AI blocks
• Ability to enable fieldbus simulate mode through the service port
20000326 Rev. B
Table 5-3.
Software version 2.2
Date Changes to software
02/2002 Software adjustments:
• Improved handling of RS-485 communication via the service port
• Improved display
Feature additions:
• Protections against low power conditions
Configuration and Use Manual
Operating instructions
20000326 Rev. C
225
NE53 history
Table 5-4.
Software version 3.x
Date Changes to software
07/2004 Software expansions:
• Software version information available via the display or Modbus
• Totalizers can be disabled in addition to start/stop
• Doubled the number of virtual communication relationships (VCRs)
Software adjustments:
• Improved handling of AI block status when slug flow is detected
• Some fieldbus parameters made persistent across power resets
• Introduced finer-grained control over operator access to display functions
Feature additions:
• Petroleum measurement application
• Gas standard volume functionality
• Enhanced density application
• Support for enabling fieldbus simulation mode via the display
• Support for 32-character tagnames configurable via Modbus
• Support for Analog Input Block configurable via Modbus
Operating instructions
20000326 Rev. D
Table 5-5.
Software version 4.0
Date Changes to software
06/2007 Software expansions:
• Temperature and density units added to API transducer block
• Additional configuration ability for the display
Feature additions:
• Configurable alarm severity
• Additional support for gas standard volume functionality
• Meter verification as an option
• Multiple display language selections
• PlantWeb Alerts II
• Ability to enable simulate mode through the Device Information Transducer Block
• Default value for AI1 block: mass flow in g/s
• Default value for AI2 block: temperature in °C
• Default value for AI3 block: density in g/cm
3
• Default value for AI4 block: volume flow in l/s
Operating instructions
20000326 Rev. E
Table 5-6.
Software version 5.0
Date Changes to software
01/2008 Software adjustments:
• Improved handling of Gas Standard Volume cutoffs
• Improved local display functionality for API and concentration measurement variables
Feature additions:
• Support for Meter Verification AMS Snap-On
• Extra security for local display off-line menu access
Operating instructions
20000326 Rev. EA
226
Model 2700 Transmitters with F
OUNDATION
™
fieldbus
NE53 history
Table 5-7.
Software version 5.1
Date Changes to software
03/2009 Software adjustments:
• Resolved non-volatile memory (NVM) reliability issue present in version 4.0 and 5.0 software
Operating instructions
20000326 Rev. EA
Table 5-8.
Software version 6.0
Date Changes to software
06/2010 Software adjustments:
• Smart Meter Verification
• Improved representation of gas volume on local display
• Harmonized behavior of gas volume density parameter with other gas
• standard volume parameters
Operating instructions
20000326 Rev. EA
Configuration and Use Manual
227
Table 5-9.
Software version 7.0
Date Changes to software
Operating instructions
01/2013 Software adjustments:
• Release of new firmware and hardware for MVD 2700 transmitter with Foundation
Fieldbus tested for ITK6.0.1. The version of new firmware is 7.00 and hardware revision is ‘AA’.
Feature additions:
• Two Analog Output (AO) function blocks. One AO block can be assigned to Pressure
Compensation Variable Channel where as other AO block can be assigned to any of the Transducer Block Compensation Variable Channels
• One Discrete Input (DI) and one Discrete Output (DO) function block
• One channel for temperature compensated data in transducer block
• Additional channels in the transducer block for Discrete Output variables. The following variables can be assigned to Discrete Output Block.
— Start Sensor Zero
— Reset Mass Total
— Reset API Reference (Standard) Volume Total
— Reset All Totals
— Reset ED Reference Volume Total
— Reset ED Net Mass Total
— Reset ED Net Volume Total
— Start/Stop All Totals
— Increment ED Curve
— Reset Gas Standard Volume Total
— Start Meter Verification in Continuous Measurement Mode
• Live software download through FOUNDATION Fieldbus segment is supported
• PlantWeb Field Diagnostic (FD) is supported –t he diagnostic information is based on
NAMUR NE 107 standard. AMS v12 will be supporting NE 107
• Link Master Functionality is supported
• The following functionality:
— Auto commission
— Auto replacement
• The following alarms:
— A128 = Transmitter Factory configuration data invalid
— A129 = Transmitter factory configuration data checksum invalid
• Fault Disconnection Electronics (FDE)
• Support for the following Function Blocks:
— Resource Block = 1
— Transducer Block = 1
— Analog Input Blocks = 4
— Analog Output Blocks = 2
— Discrete Input Block = 1
— Discrete Output Block = 1
— PID Block = 1
— Integrator Block = 1
20020223 Rev. AA
Table 5-10. Software version 7.1
Date Changes to software
09/2013 Firmware adjustments:
• Release adds support for new IR detector hardware on the display
Operating instructions
20020223 Rev. AA
228
Model 2700 Transmitters with F
OUNDATION
™
fieldbus
NE53 history
Table 5-11. Software version 7.20
Date Changes to firmware
01/2014 Firmware adjustments:
• Fixes BAD-PV reporting at the fieldbus host
Operating instructions
20020223 Rev. AA
Table 5-12. Software version 8.0
Date Changes to firmware
01/2013 Firmware adjustments:
• When the Integrator function block is set for internal mass total, the RESET_IN stops the total but does not reset the internal total
• The XD_ERROR parameter has incorrect values in every transducer block
• PlantWeb alerts are inconsistent and duplicated
• Six Micro Motion alerts are not mapped to PlantWeb alerts
• In auto mode, it is not possible to abort Smart Meter Verification
• Device Descriptor shows wrong default value
• The Smart Meter Verification count is not incremented when the test is initiated from coil 190
• “Loading SW” message is not shown on display while upgrading firmware in device
Feature additions:
• Support added for Compact Density Meter (CDM), Fork Density Meter (FDM), and
Fork Viscosity Meter (FVM) — supported as core processors
• FOUNDATION Fieldbus stack upgraded to TH6.04
• Plantweb alerts are replaced by NE107 field diagnostics
• The following new channels added for Analog Input (AI) function block to support the
CDM, FDM, and FVM:
— User-Defined Calculations (Channel No 37)
— Sensor Time Period (Upper) (Channel No 38)
— Sensor Time Period (Channel No 39)
— Tube-Case Temperature Differential (Channel No 40)
— Dynamic Viscosity (Channel No 41)
— Kinematic Viscosity (Channel No 42)
— Base Viscosity (Channel No 43)
— Quality Factor (Channel No 44)
— Velocity (Channel No 45)
— CCAI (Channel No 46)
— CII (Channel No 47)
• Support for the following function blocks:
— Analog Input Blocks = 4 (Execution time 19 msec each)
— Analog Output Blocks = 2 (Execution time 18 msec each)
— Discrete Input Block = 1 (Execution time 16 msec)
— Discrete Output Block = 1 (Execution time 16 msec)
— PID Block = 1 (Execution time 20 msec)
— Integrator Block = 1 (Execution time 18 msec)
Operating instructions
20020223 Rev. AA
Configuration and Use Manual
229
NE53 history
230
Model 2700 Transmitters with F
OUNDATION
™
fieldbus
*20000326*
20000326
Rev. EC
2016
Micro Motion Inc. USA
Worldwide Headquarters
7070 Winchester Circle
Boulder, Colorado 80301
T +1 303-527-5200
T +1 800-522-6277
F +1 303-530-8459
www.micromotion.com
Micro Motion Europe
Emerson Automation Solutions
Neonstraat 1
6718 WX Ede
The Netherlands
T +31 (0) 704136666
F +31 (0) 318 495 556
www.micromotion.nl
Micro Motion Asia
Emerson Automation Solutions
1 Pandan Crescent
Singapore 128461
Republic of Singapore
T +65 6777-8211
F +65 6770-8003
Micro Motion United Kingdom
Emerson Automation Solutions
Emerson Process Management Limited
Horsfield Way
Bredbury Industrial Estate
Stockport SK6 2SU U.K.
T +44 0870 240 1978
F +44 0800 966 181
Micro Motion Japan
Emerson Automation Solutions
1-2-5, Higashi Shinagawa
Shinagawa-ku
Tokyo 140-0002 Japan
T +81 3 5769-6803
F +81 3 5769-6844
©2016 Micro Motion, Inc. All rights reserved.
The Emerson logo is a trademark and service mark of Emerson
Electric Co. Micro Motion, ELITE, ProLink, MVD and MVD Direct
Connect marks are marks of one of the Emerson Automation
Solutions family of companies. All other marks are property of their respective owners.
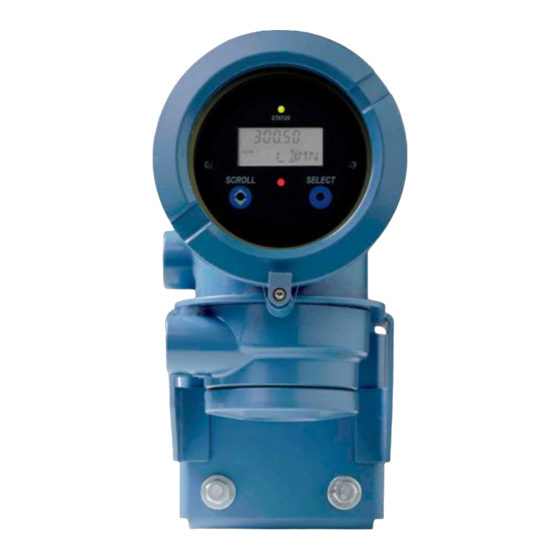
-
Contents
-
Table of Contents
-
Troubleshooting
-
Bookmarks
Quick Links
Configuration and Use Manual
MMI-20019048, Rev AB
March 2018
®
Micro Motion
Model 2700 Transmitters with
Intrinsically Safe Outputs
Configuration and Use Manual
Related Manuals for Emerson Micro Motion 2700
Summary of Contents for Emerson Micro Motion 2700
-
Page 1
Configuration and Use Manual MMI-20019048, Rev AB March 2018 ® Micro Motion Model 2700 Transmitters with Intrinsically Safe Outputs Configuration and Use Manual… -
Page 2
Micro Motion employees. Micro Motion will not accept your returned equipment if you fail to follow Micro Motion procedures. Return procedures and forms are available on our web support site at www.emerson.com, or by phoning the Micro Motion Customer Service department. -
Page 3: Table Of Contents
Contents Contents Part I Getting started Chapter 1 Before you begin ………………….3 About this manual ……………………. 3 Transmitter model code …………………… 3 Communications tools and protocols ……………….. 4 Additional documentation and resources ………………4 Chapter 2 Quick start ……………………5 Power up the transmitter …………………..5 Check meter status ……………………5 2.2.1…
-
Page 4
Contents 4.5.2 Configure two-phase flow parameters …………….43 4.5.3 Configure Density Damping ………………45 4.5.4 Configure Density Cutoff ………………..46 Configure temperature measurement ………………47 4.6.1 Configure Temperature Measurement Unit …………..47 4.6.2 Configure Temperature Damping …………….48 4.6.3 Effect of Temperature Damping on process measurement ……….. 48 4.6.4 Configure Temperature Input ……………… -
Page 5
Contents Configure the transmitter channels ………………… 87 Configure the mA Output ………………….88 6.2.1 Configure mA Output Process Variable ……………. 88 6.2.2 Configure Lower Range Value (LRV) and Upper Range Value (URV) …….91 6.2.3 Configure AO Cutoff …………………93 6.2.4 Configure Added Damping ……………….94 6.2.5 Configure mA Output Fault Action and mA Output Fault Level …….. -
Page 6
Contents Use Smart Meter Verification (SMV) ………………140 9.2.1 SMV requirements …………………. 140 9.2.2 SMV test preparation ………………..140 9.2.3 Run SMV ……………………141 9.2.4 View test data ………………….145 9.2.5 Schedule automatic execution of the SMV test …………149 Use PVR, TBR, and TMR ………………….152 9.3.1 PVR, TBR, and TMR applications ……………… -
Page 7
Contents 10.22 Check Frequency Output Fault Action ………………198 10.23 Check Flow Direction …………………… 199 10.24 Check the cutoffs ……………………199 10.25 Check for two-phase flow (slug flow) ………………199 10.26 Check the drive gain ……………………200 10.26.1 Collect drive gain data ………………..201 10.27 Check the pickoff voltage …………………. -
Page 8
Contents Micro Motion Model 2700 Transmitters with Intrinsically Safe Outputs… -
Page 9: Part I Getting Started
Getting started Part I Getting started Chapters covered in this part: • Before you begin • Quick start Configuration and Use Manual…
-
Page 10
Getting started Micro Motion Model 2700 Transmitters with Intrinsically Safe Outputs… -
Page 11: Before You Begin
Before you begin Before you begin Topics covered in this chapter: • About this manual • Transmitter model code • Communications tools and protocols • Additional documentation and resources About this manual This manual helps you configure, commission, use, maintain, and troubleshoot Micro Motion Model 2700 transmitters with intrinsically safe outputs.
-
Page 12: Communications Tools And Protocols
Smart Wireless THUM Adapter. Use of AMS or the Smart Wireless THUM Adapter is not discussed in this manual. For more information on the Smart Wireless THUM Adapter, refer to the documentation available at www.emerson.com. Additional documentation and resources Topic…
-
Page 13: Chapter 2 Quick Start
Quick start Quick start Topics covered in this chapter: • Power up the transmitter • Check meter status • Make a startup connection to the transmitter • Verify mass flow measurement • Verify the zero Power up the transmitter The transmitter must be powered up for all configuration and commissioning tasks, or for process measurement.
-
Page 14: Transmitter Status Reported By Led
Quick start Wait approximately 10 seconds for the power-up sequence to complete. Immediately after power-up, the transmitter runs through diagnostic routines and checks for error conditions. During the power-up sequence, Alert A009 is active. This alert should clear automatically when the power-up sequence is complete. Check the status LED on the transmitter.
-
Page 15: Make A Startup Connection To The Transmitter
Quick start Make a startup connection to the transmitter For all configuration tools except the display, you must have an active connection to the transmitter to configure the transmitter. Identify the connection type to use, and follow the instructions for that connection type in the appropriate appendix.
-
Page 16: Terminology Used With Zero Verification And Zero Calibration
Quick start • The zero is required by site procedures. • The stored zero value fails the zero verification procedure. Procedure Allow the flowmeter to warm up for at least 20 minutes after applying power. Run the process fluid through the sensor until the sensor temperature reaches the normal process operating temperature.
-
Page 17
Quick start Term Definition Prior Zero The zero value stored in the transmitter at the time a field zero calibration is begun. May be the factory zero or a previous field zero. Manual Zero The zero value stored in the transmitter, typically obtained from a zero calibration procedure. -
Page 18
Quick start Micro Motion Model 2700 Transmitters with Intrinsically Safe Outputs… -
Page 19: Part Ii Configuration And Commissioning
Configuration and commissioning Part II Configuration and commissioning Chapters covered in this part: • Introduction to configuration and commissioning • Configure process measurement • Configure device options and preferences • Integrate the meter with the control system Complete the configuration •…
-
Page 20
Configuration and commissioning Micro Motion Model 2700 Transmitters with Intrinsically Safe Outputs… -
Page 21: Introduction To Configuration And Commissioning
Introduction to configuration and commissioning Introduction to configuration and commissioning Topics covered in this chapter: • Configuration flowchart • Default values and ranges • Enable access to the off-line menu of the display • Disable write-protection on the transmitter configuration •…
-
Page 22
Introduction to configuration and commissioning Figure 3-1: Configuration flowchart Configure device options and Test and move to production Configure process measurement preferences Configure mass flow Test or tune transmitter Configure display measurement using sensor simulation parameters Configure volume flow meaurement Configure fault handling Back up transmitter parameters… -
Page 23: Default Values And Ranges
Introduction to configuration and commissioning Default values and ranges Section D.1 to view the default values and ranges for the most commonly used parameters. Enable access to the off-line menu of the display Display OFF-LINE MAINT > OFF-LINE CONFG > DISPLAY ProLink III Device Tools >…
-
Page 24: Set The Hart Lock
Introduction to configuration and commissioning Set the HART lock If you plan to use a HART connection to configure the device, you can lock out all other HART masters. If you do this, other HART masters will be able to read data from the device but will not be able to write data to the device.
-
Page 25
Introduction to configuration and commissioning Important You cannot restore factory configurations with a 700 core. Restoring the factory configuration is not a common action. You may want to contact customer support to see if there is a preferred method to resolve any issues. Configuration and Use Manual… -
Page 26
Introduction to configuration and commissioning Micro Motion Model 2700 Transmitters with Intrinsically Safe Outputs… -
Page 27: Configure Process Measurement
Configure process measurement Configure process measurement Topics covered in this chapter: • Configure mass flow measurement • Configure volume flow measurement for liquid applications • Configure GSV flow measurement • Configure Flow Direction • Configure density measurement • Configure temperature measurement •…
-
Page 28
Configure process measurement If the measurement unit you want to use is not available, you can define a special measurement unit. Options for Mass Flow Measurement Unit The transmitter provides a standard set of measurement units for Mass Flow Measurement Unit, plus one user-defined special measurement unit. -
Page 29
Configure process measurement Define a special measurement unit for mass flow Display Not available ProLink III Device Tools > Configuration > Process Measurement > Flow > Special Units Field Communicator Configure > Manual Setup > Measurements > Special Units > Mass Special Units Overview A special measurement unit is a user-defined unit of measure that allows you to report process data, totalizer data, and inventory data in a unit that is not available in the… -
Page 30: Configure Flow Damping
Configure process measurement a. 1 lb/sec = 16 oz/sec b. Mass Flow Conversion Factor = 1 ÷ 16 = 0.0625 Set Mass Flow Conversion Factor to 0.0625. Set Mass Flow Label to oz/sec. Set Mass Total Label to oz. 4.1.2 Configure Flow Damping Display Not available…
-
Page 31: Configure Mass Flow Cutoff
Configure process measurement Effect of flow damping on volume measurement Flow damping affects volume measurement for liquid volume data. Flow damping also affects volume measurement for gas standard volume data. The transmitter calculates volume data from the damped mass flow data. Interaction between Flow Damping and mA Output Damping In some circumstances, both Flow Damping and mA Output Damping are applied to the…
-
Page 32: Configure Volume Flow Measurement For Liquid Applications
Configure process measurement Interaction between Mass Flow Cutoff and mA Output Cutoff Mass Flow Cutoff defines the lowest mass flow value that the transmitter will report as measured. mA Output Cutoff defines the lowest flow rate that will be reported via the mA output.
-
Page 33: Configure Volume Flow Type For Liquid Applications
Configure process measurement Restriction You cannot implement both liquid volume flow and gas standard volume flow at the same time. Choose one or the other. Note If you need to switch from gas standard volume to liquid volume, polling for base density will automatically be disabled.
-
Page 34
Configure process measurement Overview Volume Flow Measurement Unit specifies the unit of measurement that will be displayed for the volume flow rate. The unit used for the volume total and volume inventory is based on this unit. Prerequisites Before you configure Volume Flow Measurement Unit, be sure that Volume Flow Type is set to Liquid. -
Page 35
Configure process measurement Label Unit description Display ProLink III Field Communicator l/hr Liters per hour MILL/D mil l/day ML/d Million liters per day UKGPS Imp gal/sec Impgal/s Imperial gallons per second UKGPM Imp gal/min Impgal/min Imperial gallons per minute Imperial gallons per hour UKGPH Imp gal/hr Impgal/h… -
Page 36: Configure Volume Flow Cutoff
Configure process measurement Base Volume Unit is the existing volume unit that the special unit will be based on. Specify Base Time Unit. Base Time Unit is the existing time unit that the special unit will be based on. Calculate Volume Flow Conversion Factor as follows: a.
-
Page 37
Configure process measurement The default value for Volume Flow Cutoff is 0.0 l/sec (liters per second). The lower limit is Interaction between Volume Flow Cutoff and mAO Cutoff Volume Flow Cutoff defines the lowest liquid volume flow value that the transmitter will report as measured. -
Page 38: Configure Gsv Flow Measurement
Configure process measurement Configure GSV flow measurement The gas standard volume (GSV) flow measurement parameters control how volume flow is measured and reported in a gas application. Restriction You cannot implement both liquid volume flow and gas standard volume flow at the same time. Choose one or the other.
-
Page 39
Configure process measurement Overview The Standard Density of Gas value is the gas density at standard reference conditions. Use it to convert the measured mass flow data to volume flow at reference conditions. Prerequisites Ensure that Density Measurement Unit is set to the measurement unit you want to use for Standard Density of Gas. -
Page 40: Configure Gas Standard Volume Flow Unit
Configure process measurement Set Polling Control n as one of the following options: The n is the value you selected in the Polling Slot field. If there is another master, and if that master is primary, then set this field to secondary.
-
Page 41
Configure process measurement For polling, the first transmitter (master) requests density from a second transmitter (slave) via HART communications. Special units for GSV are allowed on the master side, but the device being polled (slave) cannot have special units set for density, otherwise the master will reject the base density and report an A115: No External Input or Polled Data Alert. -
Page 42
Configure process measurement Label Unit description Display ProLink III Field Communicator SLPD SLPD SLPD Standard liters per day SPECL special Special Special measurement unit Define a special measurement unit for gas standard volume flow Display Not available ProLink III Device Tools > Configuration > Process Measurement > Flow > Special Units Field Communicator Configure >… -
Page 43: Configure Gas Standard Volume Flow Cutoff
Configure process measurement The special measurement unit is stored in the transmitter. You can configure the transmitter to use the special measurement unit at any time. Example: Defining a special measurement unit for gas standard volume flow You want to measure gas standard volume flow in thousands of standard cubic feet per minute.
-
Page 44: Configure Flow Direction
Configure process measurement Gas Standard Volume Flow Cutoff affects both the gas standard volume flow values reported via outputs and the gas standard volume flow values used in other transmitter behavior (e.g., events defined on gas standard volume flow). mA Output Cutoff affects only flow values reported via the mA Output. Example: Cutoff interaction with mA Output Cutoff lower than Gas Standard Volume Flow Cutoff Configuration:…
-
Page 45: Options For Flow Direction
Configure process measurement Overview Flow Direction controls how forward flow and reverse flow affect flow measurement and reporting. Flow Direction is defined with respect to the flow arrow on the sensor: • Forward flow (positive flow) moves in the direction of the flow arrow on the sensor. •…
-
Page 46
Configure process measurement Effect of Flow Direction on mA Outputs Flow Direction affects how the transmitter reports flow values via the mA Outputs. The mA Outputs are affected by Flow Direction only if mA Output Process Variable is set to a flow variable. -
Page 47
Configure process measurement Figure 4-2: Effect of Flow Direction on the mA Output: Lower Range Value < 0 Flow Direction = Forward Flow Direction = Reverse, Negate Forward Flow Direction = Absolute Value, Bidirectional, Negate Bidirectional Reverse flow Forward flow Reverse flow Forward flow Reverse flow… -
Page 48
Configure process measurement • Under conditions of forward flow, for flow rates between 0 and +100 g/sec, the mA Output varies between 12 mA and 20 mA in proportion to (the absolute value of) the flow rate. • Under conditions of forward flow, if (the absolute value of) the flow rate equals or exceeds 100 g/sec, the mA Output is proportional to the flow rate up to 20.5 mA, and will be level at 20.5 mA at higher flow rates. -
Page 49
Configure process measurement Table 4-1: Effect of the flow direction parameter and actual flow direction on Frequency Outputs (continued) Actual flow direction Flow Direction setting Forward Zero flow Reverse Negate Bidirectional Hz > 0 0 Hz Hz > 0 Effect of flow direction on Discrete Outputs The flow direction parameter affects the Discrete Output behavior only if Discrete Output Source is set to Flow Direction. -
Page 50: Configure Density Measurement
Configure process measurement Table 4-3: Effect of the flow direction on flow values (continued) Actual flow direction Flow Direction setting Forward Zero flow Reverse Negate Bidirectional Negative Positive (1) Refer to the digital communications status bits for an indication of whether flow is positive or negative. Effect of flow direction on flow totals Flow direction affects how flow totals and inventories are calculated.
-
Page 51: Configure Two-Phase Flow Parameters
Configure process measurement Options for Density Measurement Unit The transmitter provides a standard set of measurement units for Density Measurement Unit. Different communications tools may use different labels. Label Unit description Display ProLink III Field Communicator Specific gravity Grams per cubic centimeter G/CM3 g/cm3 g/Cucm…
-
Page 52
Configure process measurement Gas entrainment can cause your process density to drop temporarily. To reduce the occurrence of two-phase flow alerts that are not significant to your process, set Two-Phase Flow Low Limit slightly below your expected lowest process density. You must enter Two-Phase Flow Low Limit in g/cm³, even if you configured another unit for density measurement. -
Page 53: Configure Density Damping
Configure process measurement If Two-Phase Flow Timeout is set to 0.0 seconds, the outputs that represent flow rate will report a flow rate of 0 as soon as two-phase flow is detected. 4.5.3 Configure Density Damping Display Not available ProLink III Device Tools >…
-
Page 54: Configure Density Cutoff
Configure process measurement The value you enter is automatically rounded off to the nearest valid value. The valid values for Density Damping depend on the setting of Update Rate. Update Rate setting Valid damping values Normal 0.0, 0.2, 0.4, 0.8, 1.6, 3.2, 6.4, 12.8, 25.6, 51.2 Special 0.0, 0.04, 0.08, 0.16, 0.32, 0.64, 1.28, 2.56, 5.12, 10.24, 20.48, 40.96…
-
Page 55: Configure Temperature Measurement
Configure process measurement Effect of Density Cutoff on volume measurement Density Cutoff affects liquid volume measurement. If the density value goes below Density Cutoff, the volume flow rate is reported as 0. Density Cutoff does not affect gas standard volume measurement. Gas standard volume values are always calculated from the value configured for Standard Gas Density or polled value if configured for polled base density.
-
Page 56: Configure Temperature Damping
Configure process measurement 4.6.2 Configure Temperature Damping Display Not available ProLink III Device Tools > Configuration > Temperature Field Communicator Configure > Manual Setup > Measurements > Temperature > Temp Damping Overview Temperature Damping controls the amount of damping that will be applied to the line temperature value, when the on-board temperature data is used (RTD).
-
Page 57: Configure Temperature Input
Configure process measurement Temperature compensation Temperature compensation adjusts process measurement to compensate for the effect of temperature on the sensor tubes. Petroleum measurement Temperature Damping affects petroleum measurement process variables only if the transmitter is configured to use temperature data from the sensor. If an external temperature value is used for petroleum measurement, Temperature Damping does not affect petroleum measurement process variables.
-
Page 58
Configure process measurement Prerequisites You will need API documentation for the API table that you select. Depending on your API table, you may need to know the thermal expansion coefficient (TEC) for your process fluid. You must know the reference temperature that you want to use. Procedure Choose Device Tools >… -
Page 59: Set Up Temperature Data For Petroleum Measurement Using Prolink Iii
Configure process measurement b. Verify that the referred density range of the selected table is adequate for your application. If you chose a C table, enter Thermal Expansion Coefficient (TEC) for your process fluid. Set Reference Temperature to the temperature to which density will be corrected in referred density calculations.
-
Page 60: Configure Petroleum Measurement Using The Field Communicator
Configure process measurement Option Description Setup Polling The meter polls an external de- a. Set Line Temperature Source to Poll for External Value. vice for temperature data. This b. Set Polling Slot to an available slot. data will be available in addi- c.
-
Page 61
Configure process measurement a. Open the Petroleum Measurement Source menu and select the API table number. Depending on your choice, you may be prompted to enter a reference temperature or a thermal expansion coefficient. b. Enter the API table letter. These two parameters uniquely specify the API table. -
Page 62: Api Tables Supported By The Petroleum Measurement Application
Configure process measurement 4.7.4 API tables supported by the petroleum measurement application The API tables listed here are supported by the petroleum measurement application. Table name Process fluid CTL source data Reference temperature Density unit Generalized crude and Observed density and 60 °F (non-configurable) Degrees API observed temperature…
-
Page 63: Set Up Concentration Measurement
Configure process measurement Restriction These tables are not appropriate for the following process fluids: propane and propane mixes, butane and butane mixes, butadiene and butadiene mixes, isopentane, LNG, LPG, NGL, ethylene, propylene, cyclohexane, aeromatics, asphalts, and road tars. Set up concentration measurement This section guides you through loading and setting up a concentration matrix used for measurement.
-
Page 64
Configure process measurement Important • All concentration matrices on your transmitter must use the same derived variable. If you are using one of the standard matrices from Micro Motion, set Derived Variable to Mass Concentration (Density). If you are using a custom matrix, see the reference information for your matrix. -
Page 65: Configure Concentration Measurement Using The Field Communicator
Configure process measurement Set Temperature Source to the method that the transmitter will use to obtain temperature data. Option Description The transmitter will poll an external temperature device, us- Poll for external value ing HART protocol over the primary mA output. The transmitter will use the temperature data from the sen- sor.
-
Page 66
Configure process measurement Choose Online > Configure > Manual Setup > Measurements > Temperature and set Temperature Unit to match the temperature unit used by your matrix. Choose Online > Configure > Manual Setup > Measurements and click Concentration Measurement. Enable or disable matrix switching, as desired. -
Page 67: Standard Matrices For The Concentration Measurement Application
Configure process measurement Option Setup A user-configured a. Choose Online > Configure > Manual Setup > Measurements . static temperature b. Click External Inputs. value c. Click Next. d. Enable External Temperature. e. Set Correction Temperature to the value to be used. Polling for tempera- a.
-
Page 68: Derived Variables And Calculated Process Variables
Configure process measurement If the standard matrices are not appropriate for your application, you can build a custom matrix or purchase a custom matrix from Micro Motion. Temperature Matrix name Description Density unit unit Derived variable Deg Balling °F Mass Concentration Matrix represents percent extract, by g/cm (Density)
-
Page 69
Configure process measurement Calculated process variables Density at reference Standard Derived tempera- volume Specific Concen- Net mass volume Variable Description ture flow rate gravity tration flow rate flow rate ✓ ✓ Density Mass/unit volume, cor- at Reference rected to a given refer- ence temperature ✓… -
Page 70: Configure Pressure Compensation
Not all sensors or applications require pressure compensation. The pressure effect for a specific sensor model can be found in the product data sheet located at www.emerson.com. If you are uncertain about implementing pressure compensation, contact customer service. Prerequisites You will need the flow factor, density factor, and calibration pressure values for your sensor.
-
Page 71
Configure process measurement The calibration pressure is the pressure at which your sensor was calibrated, and defines the pressure at which there is no pressure effect. If the data is unavailable, enter 20 PSI. Enter Flow Factor for your sensor. The flow factor is the percent change in the flow rate per PSI. -
Page 72: Configure Pressure Compensation Using The Field Communicator
Configure process measurement If you want to use digital communications, click Apply, then perform the necessary host programming and communications setup to write pressure data to the transmitter at appropriate intervals. Postrequisites If you are using an external pressure value, verify the setup by checking the External Pressure value displayed in the Inputs area of the main window.
-
Page 73: Options For Pressure Measurement Unit
Configure process measurement Option Setup Polling for pressure a. Ensure that the primary mA Output has been wired to support HART polling. b. Choose Online > Configure > Manual Setup > Measurements > External Pressure/Temperature > External Polling . c. Set Poll Control to Poll As Primary Host or Poll as Secondary Host. d.
-
Page 74
Configure process measurement Label Unit description Display ProLink III Field Communicator mBAR millibar mbar Millibar G/SCM g/cm2 g/Sqcm Grams per square centimeter KG/SCM kg/cm2 kg/Sqcm Kilograms per square centimeter Pascals pascals Kilopascals Kilopascals Megapascals Megapascals Torr @ 0 °C TORR Torr @ 0°C torr Atmospheres… -
Page 75: Configure Device Options And Preferences
Configure device options and preferences Configure device options and preferences Topics covered in this chapter: • Configure the transmitter display • Enable or disable operator actions from the display • Configure security for the display menus • Configure response time parameters •…
-
Page 76
Configure device options and preferences Overview You can control the process variables and diagnostic variables shown on the display, and the order in which they appear. The display can scroll through up to 15 variables in any order you choose. In addition, you can repeat variables or leave slots unassigned. Restrictions •… -
Page 77: Configure The Number Of Decimal Places (Precision) Shown On The Display
Configure device options and preferences Configure Display Variable 1 to track the primary mA Output Display OFF-LINE MAINT > OFF-LINE CONFG > DISPLY > VAR 1 ProLink III Device Tools > Configuration > Transmitter Display > Display Security Field Communicator Not available Overview You can configure Display Variable 1 to track mA Output Process Variable for the primary mA Output.
-
Page 78: Configure The Refresh Rate Of Data Shown On The Display
Configure device options and preferences For temperature and density process variables, the default value is 2 decimal places. For all other variables, the default value is 4 decimal places. The range is 0 to 5. The lower the precision, the greater the change must be for it to be reflected on the display. Do not set the precision too low or too high to be useful.
-
Page 79: Enable Or Disable The Display Backlight
Configure device options and preferences Option Description Disabled (de- The display shows Display Variable 1 and does not scroll automatically. The operator can move to the next display variable at any time using Scroll. fault) If you enabled Auto Scroll, set Scroll Rate as desired. The default value is 10 seconds.
-
Page 80: Enable Or Disable Operator Actions From The Display
Configure device options and preferences Enable or disable operator actions from the display You can configure the transmitter to let the operator perform specific actions using the display. • Enable or disable Totalizer Start/Stop from the display (Section 5.2.1) • Enable or disable Totalizer Reset from the display (Section 5.2.2) •…
-
Page 81: Enable Or Disable Totalizer Reset From The Display
Configure device options and preferences 5.2.2 Enable or disable Totalizer Reset from the display Display OFF-LINE MAINT > OFF-LINE CONFG > DISPLAY > TOTALS RESET ProLink III Device Tools > Configuration > Totalizer Control Methods Field Communicator Configure > Manual Setup > Display > Display Variable Menu Features > Totalizer Reset Overview You can configure whether or not the operator is able to reset totalizers from the display.
-
Page 82: Configure Security For The Display Menus
Configure device options and preferences Procedure Ensure that the alert menu is accessible from the display. To acknowledge alerts from the display, operators must have access to the alert menu. Enable or disable Acknowledge All Alerts as desired. Option Description Enabled (default) Operators can use a single display command to acknowledge all alerts at once.
-
Page 83: Configure Response Time Parameters
Configure device options and preferences Option Description Disabled Operator cannot access the alert menu. Note The transmitter status LED changes color to indicate that there are active alerts, but does not show specific alerts. To require a password for access to the maintenance section of the off-line menu and the Smart Meter Verification menu, enable or disable Off-Line Password.
-
Page 84: Configure Update Rate
Configure device options and preferences 5.4.1 Configure Update Rate Display Not available ProLink III Device Tools > Configuration > Process Measurement > Response > Update Rate Field Communicator Configure > Manual Setup > Measurements > Update Rate Overview Update Rate controls the rate at which process data is polled and process variables are calculated.
-
Page 85
Configure device options and preferences Effects of Update Rate = Special Incompatible features and functions Special mode is not compatible with the following features and functions: • Enhanced events. Use basic events instead. • All calibration procedures. • Zero verification. •… -
Page 86: Configure Response Time
Configure device options and preferences 5.4.2 Configure Response Time Display Not available ProLink III Device Tools > Configuration > Process Measurement > Response > Response Time Field Communicator Not available Overview Response Time is used to apply a different algorithm to the calculation of process variables from the raw process data.
-
Page 87: Configure Fault Timeout
Configure device options and preferences 5.5.1 Configure Fault Timeout Display Not available ProLink III Device Tools > Configuration > Fault Processing Field Communicator Configure > Alert Setup > Alert Severity > Fault Timeout Overview Fault Timeout controls the delay before fault actions are performed. Restriction Fault Timeout is applied only to the following alerts (listed by Status Alert Code): A003, A004, A005, A008, A016, A017, A033.
-
Page 88
Configure device options and preferences Use the default settings for Status Alert Severity unless you have a specific requirement to change them. Procedure Select a status alert. For the selected status alert, set Status Alert Severity as desired. Option Description Fault Actions when fault is detected: •… -
Page 89
Configure device options and preferences Table 5-2: Status alerts and Status Alert Severity (continued) Alert code Status message Default severity Notes Configurable? Fault A009 Transmitter Initializing/ Warming Up A010 Calibration Failure Fault A011 Zero Calibration Failed: Fault A012 Zero Calibration Failed: Fault High Fault… -
Page 90
Configure device options and preferences Table 5-2: Status alerts and Status Alert Severity (continued) Alert code Status message Default severity Notes Configurable? Meter Verification Aborted Fault A035 Applies only to transmitters with Smart Meter Verification. A100 mA Output 1 Saturated Informational Can be set to either Informational or Ignore, but cannot be set to Fault. -
Page 91: Configure Informational Parameters
Configure device options and preferences Table 5-2: Status alerts and Status Alert Severity (continued) Alert code Status message Default severity Notes Configurable? Informational A121 Extrapolation Alarm (Con- Applies only to transmitters with centration) the concentration measurement application. A131 Meter Verification in Pro- Informational Applies only to transmitters with gress: Outputs to Last…
-
Page 92: Configure Sensor Material
Configure device options and preferences 5.6.2 Configure Sensor Material Display Not available ProLink III Device Tools > Configuration > Informational Parameters > Sensor Field Communicator Configure > Manual Setup > Info Parameters > Sensor Information > Tube Wetted Mate- rial Overview Sensor Material lets you store the type of material used for your sensor’s wetted parts in transmitter memory.
-
Page 93: Configure Descriptor
Configure device options and preferences Overview Sensor Flange Type lets you store your sensor’s flange type in transmitter memory. This parameter is not used in processing and is not required. Procedure Obtain your sensor’s flange type from the documents shipped with your sensor, or from a code in the sensor model number.
-
Page 94: Configure Date
Configure device options and preferences 5.6.7 Configure Date Display Not available ProLink III Device Tools > Configuration > Informational Parameters > Transmitter Field Communicator Configure > Manual Setup > Info Parameters > Transmitter Info > Date Overview Date lets you store a static date (not updated by the transmitter) in transmitter memory. This parameter is not used in processing and is not required.
-
Page 95: Integrate The Meter With The Control System
Integrate the meter with the control system Integrate the meter with the control system Topics covered in this chapter: • Configure the transmitter channels • Configure the mA Output • Configure the Frequency Output • Configure the Discrete Output • Configure events •…
-
Page 96: Configure The Ma Output
Integrate the meter with the control system Postrequisites For each channel that you configured, perform or verify the corresponding input or output configuration. When the configuration of a channel is changed, the channel’s behavior will be controlled by the configuration that is stored for the selected input or output type, and the stored configuration may not be appropriate for your process.
-
Page 97
Integrate the meter with the control system • If you are using the HART variables, be aware that changing the configuration of mA Output Process Variable will change the configuration of the HART Primary Variable (PV). • If you are using the HART variables, be aware that changing the configuration of mA Output Process Variable will change the configuration of the HART Primary Variable (PV) and/or the HART Secondary Variable (SV). -
Page 98
Integrate the meter with the control system Table 6-2: Petroleum measurement mA Output process variables Label Process variable Display ProLink III Field Communicator Average corrected density AVE D Average Density TC Avg Dens Average temperature AVE T Average Temperature TC Avg Temp Temperature-corrected TCVOL Volume Flow Rate at Reference… -
Page 99: Configure Lower Range Value (Lrv) And Upper Range Value (Urv)
Integrate the meter with the control system Table 6-5: PVR mA Output process variables (continued) Label Process variable Display ProLink III Field Communicator Corrected water flow WTR60 Water Flow Rate At Reference Water Flow Rate at Reference Shrinkage factor corrected SFOIL SF Oil Flow Rate At Line Shrinkage Factor Oil Flow Rate…
-
Page 100
Integrate the meter with the control system Ensure that the measurement unit for the configured process variable has been set as desired. Procedure Set LRV and URV as desired. • LRVis the value of mA Output Process Variable represented by an output of 4 mA. The default value for LRV depends on the setting of mA Output Process Variable. -
Page 101: Configure Ao Cutoff
Integrate the meter with the control system Table 6-6: Default values for Lower Range Value (LRV) and Upper Range Value (URV) (continued) Process variable Concentration 100% Baume Specific gravity 6.2.3 Configure AO Cutoff Display Not available ProLink III Device Tools > Configuration > I/O > Outputs > mA Output Field Communicator •…
-
Page 102: Configure Added Damping
Integrate the meter with the control system Example: Cutoff interaction Configuration: • mA Output Process Variable = Mass Flow Rate • Frequency Output Process Variable = Mass Flow Rate • AO Cutoff = 10 g/sec • Mass Flow Cutoff = 15 g/sec Result: If the mass flow rate drops below 15 g/sec, all outputs representing mass flow will report zero flow.
-
Page 103
Integrate the meter with the control system Added Damping affects the reporting of mA Output Process Variable through the mA Output only. It does not affect the reporting of that process variable via any other method (e.g., a Frequency Output or digital communications), or the value of the process variable used in calculations. -
Page 104: Configure Ma Output Fault Action And Ma Output Fault Level
Integrate the meter with the control system • mA Output Damping = 2 seconds Result: A change in the mass flow rate will be reflected in the mA Output over a time period that is greater than 3 seconds. The exact time period is calculated by the transmitter according to internal algorithms which are not configurable.
-
Page 105: Configure The Frequency Output
Integrate the meter with the control system Options for mA Output Fault Action and mA Output Fault Level Option mA Output behavior mA Output Fault Level Upscale Goes to the configured fault level Default: 22.0 mA Range: 21.0 to 24.0 mA Downscale (default) Goes to the configured fault level Default: 3.2 mA…
-
Page 106
Integrate the meter with the control system Prerequisites If you plan to configure the output to report volume flow, ensure that you have set Volume Flow Type as desired: Liquid or Gas Standard Volume. If you plan to configure an output to report a concentration measurement process variable, ensure that the concentration measurement application is configured so that the desired variable is available. -
Page 107: Configure Frequency Output Polarity
Integrate the meter with the control system Table 6-10: Concentration measurement FO process variables (continued) Label Process variable Display ProLink III Field Communicator Standard volume flow rate STD V Volume Flow Rate at Reference ED Std Vol flo Temperature Table 6-11: Fuel consumption FO process variables Label Process variable…
-
Page 108: Configure Frequency Output Scaling Method
Integrate the meter with the control system Polarity option Reference voltage (OFF) Pulse voltage (ON) Active Low As determined by power supply, pull-up resistor, and load. See the installation manual for your transmitter. 6.3.3 Configure Frequency Output Scaling Method Display OFF-LINE MAINT >…
-
Page 109: Configure Frequency Output Fault Action And Frequency Output Fault Level
Integrate the meter with the control system If you specify Frequency=Flow, you must provide values for Rate Factor and Frequency Factor: Rate Factor The maximum flow rate that you want the Frequency Output to report. Frequency A value calculated as follows: Factor RateFactor FrequencyFactor =…
-
Page 110: Configure The Discrete Output
Integrate the meter with the control system The default value is 15000 Hz. The range is 10 to 15000 Hz. Options for Frequency Output Fault Action Table 6-12: Options for Frequency Output Fault Action Label Frequency Output behavior Upscale Goes to configured Upscale value: •…
-
Page 111: Configure Discrete Output Source
Integrate the meter with the control system 6.4.1 Configure Discrete Output Source Display OFF-LINE MAINT > OFF-LINE CONFG > IO > CH B > SET DO > DO SRC ProLink III Device Tools > Configuration > I/O > Outputs > Discrete Output Field Communicator Configure >…
-
Page 112
Integrate the meter with the control system Important If you assign Flow Switch to the Discrete Output, you should also configure Flow Switch Variable, Flow Switch Setpoint, and Hysteresis. Related information Configure an enhanced event Fault indication with the Discrete Output Configure Flow Switch parameters Display OFF-LINE MAINT >… -
Page 113: Configure Discrete Output Polarity
Integrate the meter with the control system 6.4.2 Configure Discrete Output Polarity Display OFF-LINE MAINT > OFF-LINE CONFG > IO > CH B > SET DO > DO POLAR ProLink III Device Tools > Configuration > I/O > Outputs > Discrete Output Field Communicator Configure >…
-
Page 114: Configure Events
Integrate the meter with the control system Note For some faults only: If Fault Timeout is set to a non-zero value, the transmitter will not implement the fault action until the timeout has elapsed. CAUTION! Do not use Discrete Output Fault Action as a fault indicator. If you do, you may not be able to distinguish a fault condition from a normal operating condition.
-
Page 115: Configure A Basic Event
Integrate the meter with the control system • Enhanced event model 6.5.1 Configure a basic event Display Not available ProLink III Device Tools > Configuration > Events > Basic Events Field Communicator Not available Overview A basic event is used to provide notification of process changes. A basic event occurs (is ON) if the real-time value of a user-specified process variable moves above (HI) or below (LO) a user-defined setpoint.
-
Page 116
Integrate the meter with the control system Overview An enhanced event is used to provide notification of process changes and, optionally, to perform specific transmitter actions if the event occurs. An enhanced event occurs (is ON) if the real-time value of a user-specified process variable moves above (HI) or below (LO) a user-defined setpoint, or in range (IN) or out of range (OUT) with respect to two user- defined setpoints. -
Page 117: Configure Digital Communications
Integrate the meter with the control system Options for Enhanced Event Action Label Action Display ProLink III Field Communicator Standard None (default) NONE None None Start sensor zero START ZERO Start Sensor Zero Perform auto zero Start/stop all totalizers START STOP Start/Stop All Totalization Start/stop totals Reset mass total…
-
Page 118: Configure Hart/Bell 202 Communications
Integrate the meter with the control system Note The service port responds automatically to a wide range of connection requests. It is not configurable. 6.6.1 Configure HART/Bell 202 communications HART/Bell 202 communications parameters support HART communications with the transmitter’s primary mA terminals over a HART/Bell 202 network. Configure basic HART parameters Basic HART parameters include the HART address, HART tags, and the operation of the primary mA Output.
-
Page 119
Integrate the meter with the control system Important If you use ProLink III to set HART Address to 0, the program automatically enables mA Output Action. If you use ProLink III to set HART Address to any other value, the program automatically disables mA Output Action. -
Page 120
Integrate the meter with the control system • If you set Burst Mode Output to send four user-specified variables, set the four process variables to be sent in each burst. • If you set Burst Mode Output to any other option, ensure that the HART variables are set as desired. -
Page 121
Integrate the meter with the control system Table 6-13: Standard HART process variables (continued) Process variable Primary Varia- Secondary Third Variable Fourth Varia- ble (PV) Variable (SV) (TV) ble (QV ) ✓ Mass Inventory ✓ Mass Total ✓ Meter Temperature (T-Series) ✓… -
Page 122
Integrate the meter with the control system Table 6-15: Concentration measurement HART process variables (continued) Process variable Primary Varia- Secondary Third Variable Fourth Varia- ble (PV) Variable (SV) (TV) ble (QV ) ✓ CM Standard Volume Total Table 6-16: Fuel consumption HART process variables Process variable Primary Varia- Secondary… -
Page 123
Integrate the meter with the control system Table 6-18: TMR-only HART process variables Process variable Primary Varia- Secondary Third Variable Fourth Varia- ble (PV) Variable (SV) (TV) ble (QV ) ✓ ✓ ✓ Remediated Mass Flow ✓ Remediated Mass Total ✓… -
Page 124: Configure Digital Communications Fault Action
Integrate the meter with the control system 6.6.2 Configure Digital Communications Fault Action Display Not available ProLink III Device Tools > Configuration > Fault Processing Field Communicator Configure > Alert Setup > I/O Fault Actions > Comm Fault Action Overview Digital Communications Fault Actionspecifies the values that will be reported via digital communications if the device encounters an internal fault condition.
-
Page 125
Integrate the meter with the control system Label ProLink III Field Communicator Description Not a Number Not-a-Number • Process variables are reported as IEEE NAN. • Drive gain is reported as measured. • Modbus scaled integers are reported as Max Int. -
Page 126
Integrate the meter with the control system Micro Motion Model 2700 Transmitters with Intrinsically Safe Outputs… -
Page 127: Complete The Configuration
Complete the configuration Complete the configuration Topics covered in this chapter: • Test or tune the system using sensor simulation • Back up transmitter configuration • Enable write-protection on the transmitter configuration Test or tune the system using sensor simulation Use sensor simulation to test the system’s response to a variety of process conditions, including boundary conditions, problem conditions, or alert conditions, or to tune the loop.
-
Page 128: Sensor Simulation
Complete the configuration Option Required values Sine Period Minimum Maximum For density, set Wave Form as desired and enter the required values. Option Required values Fixed Fixed Value Sawtooth Period Minimum Maximum Sine Period Minimum Maximum For temperature, set Wave Form as desired and enter the required values. Option Required values Fixed…
-
Page 129: Back Up Transmitter Configuration
Complete the configuration • All mass flow rate, temperature, and density values displayed or reported via outputs or digital communications • The mass total and mass inventory values • All volume calculations and data, including reported values, volume totals, and volume inventories •…
-
Page 130
Complete the configuration Overview If the transmitter is write-protected, the configuration is locked and nobody can change it until it is unlocked. This prevents accidental or unauthorized changes to the transmitter configuration parameters. Micro Motion Model 2700 Transmitters with Intrinsically Safe Outputs… -
Page 131: Part Iii Operations, Maintenance, And Troubleshooting
Operations, maintenance, and troubleshooting Part III Operations, maintenance, and troubleshooting Chapters covered in this part: • Transmitter operation • Measurement support • Troubleshooting Configuration and Use Manual…
-
Page 132
Operations, maintenance, and troubleshooting Micro Motion Model 2700 Transmitters with Intrinsically Safe Outputs… -
Page 133: Chapter 8 Transmitter Operation
Transmitter operation Transmitter operation Topics covered in this chapter: • Record the process variables • View process variables • View transmitter status using the status LED • View and acknowledge status alerts • Read totalizer and inventory values • Start and stop totalizers and inventories •…
-
Page 134: View Process Variables
Transmitter operation View process variables Display Scroll to the desired process variable. If AutoScroll is enabled, you can wait until the process variable is displayed. See Section 8.2.1 for more information. ProLink III View the desired variable on the main screen under Process Variables. See Section 8.2.2 for more information.
-
Page 135: View Process Variables And Other Data Using Prolink Iii
Transmitter operation Figure 8-1: Transmitter display features A. Status LED B. Display (LCD panel) C. Process variable D. Scroll optical switch E. Optical switch indicator: turns red when either Scroll or Select is activated F. Select optical switch G. Unit of measure for process variable H.
-
Page 136: View Transmitter Status Using The Status Led
Transmitter operation • To view a more complete set of process variables, plus the current state of the outputs, choose Service Tools > Variables. View transmitter status using the status LED The status LED shows the current alert condition of the transmitter. The status LED is located on the face of the transmitter.
-
Page 137: View And Acknowledge Status Alerts
Transmitter operation Table 8-1: Transmitter status reported by status LED (continued) LED state Description Recommendation Flashing red (if ena- One or more high-severity alerts are active A high-severity alert condition affects meas- bled) and have not been acknowledged. urement accuracy and output behavior. Re- solve the alert condition before continuing.
-
Page 138
Transmitter operation Figure 8-2: Using the display to view and acknowledge the status alerts Scroll and Select simultaneously for 4 seconds SEE ALARM Select Is ACK ALL enabled? ACK ALL Select Scroll EXIT Select Scroll Active/ unacknowledged alarms? Alarm code NO ALARM Scroll Select… -
Page 139: View And Acknowledge Alerts Using Prolink Iii
Transmitter operation Postrequisites • To clear the following alerts, you must correct the problem, acknowledge the alert, then power-cycle the transmitter: A001, A002, A010, A011, A012, A013, A018, A019, A022, A023, A024, A025, A028, A029, A031. • For all other alerts: If the alert is inactive when it is acknowledged, it will be removed from the list.
-
Page 140: View Alerts Using The Field Communicator
Transmitter operation If the alert is active when it is acknowledged, it will be removed from the list when the alert condition clears. Related information Alert data in transmitter memory 8.4.3 View alerts using the Field Communicator You can view a list containing all alerts that are active, or inactive but unacknowledged. •…
-
Page 141: Read Totalizer And Inventory Values
Transmitter operation Transmitter action if condition occurs Alert data structure Contents Clearing Recent Alerts 50 most recent alert postings or alert clearings Not cleared; maintained across transmitter power cycles Read totalizer and inventory values Display To read a totalizer or inventory value from the display, it must be configured as a display variable.
-
Page 142: Start And Stop Totalizers And Inventories Using The Display
Transmitter operation Important Totalizers and inventories are started or stopped as a group. When you start any totalizer, all other totalizers and all inventories are started simultaneously. When you stop any totalizer, all other totalizers and all inventories are stopped simultaneously. You cannot start or stop inventories directly.
-
Page 143: Reset Totalizers
Transmitter operation Reset totalizers Display Section 8.7.1. ProLink III Device Tools > Totalizer Control > Totalizer and Inventories > Reset Mass Total Device Tools > Totalizer Control > Totalizer and Inventories > Reset Volume Total Device Tools > Totalizer Control > Totalizer and Inventories > Reset Gas Total Device Tools >…
-
Page 144: Reset Inventories
Transmitter operation Reset and Yes? alternately flash beneath the current totalizer value. 5. Select again to confirm. 6. Scroll to EXIT. 7. Select. • To reset the volume totalizer: 1. Scroll until the volume totalizer value appears. 2. Select. Exit displays beneath the current totalizer value. 3.
-
Page 145
Transmitter operation Overview When you reset an inventory, the transmitter sets its value to 0. It does not matter whether the inventory is started or stopped. If the inventory is started, it continues to track process measurement. Mass and volume inventory totals cannot be set separately. They can only be reset together simultaneously. -
Page 146
Transmitter operation Micro Motion Model 2700 Transmitters with Intrinsically Safe Outputs… -
Page 147: Chapter 9 Measurement Support
Measurement support Measurement support Topics covered in this chapter: • Options for measurement support • Use Smart Meter Verification (SMV) • Use PVR, TBR, and TMR • Piecewise linearization (PWL) for calibrating gas meters • Use the fuel consumption application •…
-
Page 148: Use Smart Meter Verification (Smv)
Measurement support Use Smart Meter Verification (SMV) You can run an SMV test, view and interpret the results, and set up automatic execution. 9.2.1 SMV requirements To use SMV, the transmitter must be paired with an enhanced core processor. Table 9-1 for the minimum version of the transmitter, enhanced core processor, and communication tool needed to support SMV.
-
Page 149: Run Smv
Measurement support SMV has an output mode called Continuous Measurement that allows the transmitter to keep measuring while the test is in progress. If you choose to run the test in Last Measured Value or Fault modes instead, the transmitter outputs will be held constant for the two minute duration of the test.
-
Page 150
Measurement support Option Description Last Value During the test, all outputs will report the last measured value of their as- signed process variable. The test will run for approximately 140 seconds. While the test is in progress, dots traverse the display and test progress is shown. Postrequisites View the test results and take any appropriate actions. -
Page 151
Measurement support SMV flowchart: Running a test using the display Figure 9-2: Running an SMV test using the display RUN VERFY Select OUTPUTS EXIT Scroll Select CONTINUE MEASR FAULT LAST VALUE EXIT Scroll Scroll Scroll Select Select Select ARE YOU SURE/YES? Select . -
Page 152
Measurement support You may need to wait a few seconds while ProLink III synchronizes its database with the transmitter data. Enter any desired information on the Test Definition screen, and click Next. All information on this screen is optional. Choose the desired output behavior. Option Description Continue Measur-… -
Page 153: View Test Data
Measurement support Postrequisites View the test results and take any appropriate actions. 9.2.4 View test data You can view the results of the current test. You can also view results from previous tests. Important You can view previous test results and see detailed test reports only if SMV is licensed. The transmitter stores the following information about the previous twenty SMV tests: •…
-
Page 154
Measurement support Figure 9-3: SMV – Top-level menu Scroll and Select simultaneously for 4 seconds Scroll ENTER METER VERFY Select RUN VERFY RESULTS READ SCHEDULE VERFY EXIT Scroll Scroll Scroll Select Select Select Scroll Select b. Scroll to Results Read and press Select. The runcount of the most recent test is displayed. -
Page 155
Measurement support SMV flowchart: Viewing test results using the display Figure 9-4: Viewing SMV test results using the display RESULTS READ Select RUNCOUNT x Select Scroll Pass Result type Abort Fail xx HOURS xx HOURS xx HOURS Select Select Select PASS FAIL Abort Type… -
Page 156
Measurement support Procedure Choose Device Tools > Diagnostics > Meter Verification and click Previous Test Results. The chart shows test results for all tests stored in the ProLink III database. (Optional) Click Next to view and print a test report. (Optional) Click Export Data to CSV File to save the data to a file on your PC. -
Page 157: Schedule Automatic Execution Of The Smv Test
Measurement support Table 9-3: SMV abort codes Code Description Recommended actions User-initiated abort None required. Wait 15 seconds before starting an- other test. Frequency drift Ensure that temperature, flow, and density are sta- ble, and rerun the test. High drive gain Ensure that flow is stable, minimize entrained gas, and rerun the test.
-
Page 158
Measurement support Figure 9-5: SMV – Top-level menu Scroll and Select simultaneously for 4 seconds Scroll ENTER METER VERFY Select RUN VERFY RESULTS READ SCHEDULE VERFY EXIT Scroll Scroll Scroll Select Select Select Scroll Select Scroll to Schedule Verfy and press Select. To schedule a single test or the first test in recurring execution: a. -
Page 159
Measurement support SMV flowchart: Scheduling test execution using the display Figure 9-6: Scheduling SMV test execution using the display SCHEDULE VERFY Select Schedule set? SCHED IS OFF TURN OFF SCHED/YES? Scroll Scroll Select Schedule deleted HOURS LEFT Scroll Select xx HOURS Select SET NEXT SET RECUR… -
Page 160: Use Pvr, Tbr, And Tmr
Measurement support To schedule recurring execution, specify a value for Hours Between Recurring Runs. To disable scheduled execution: • To disable execution of a single scheduled test, set Hours Until Next Run to 0. • To disable recurring execution, set Hours Between Recurring Runs to 0. •…
-
Page 161: Pvr, Tbr, And Tmr Applications
Measurement support 9.3.1 PVR, TBR, and TMR applications PVR, TBR, and TMR are applications designed to provide more accurate process data in the presence of multiple phases. For example, if bubbles are present in the process fluid, or the process fluid is flashing, the volume measurements are often incorrect. Production Volume Reconciliation (PVR) •…
-
Page 162: Piecewise Linearization (Pwl) For Calibrating Gas Meters
PWL does not apply when measuring liquid flow. When better accuracy is required over the published gas measurement specifications, an Emerson-approved independent gas laboratory can calibrate gas up to 10 PWL adjustment points.
-
Page 163: Zero The Meter
Measurement support Standard process variables Standard and differential process variables Supply transmitter Return transmitter HART cable Engine Supply sensor Return sensor Storage tank Zero the meter Zeroing the meter establishes a baseline for process measurement by analyzing the sensor’s output when there is no flow through the sensor tubes. Prerequisites Verify the zero and prepare the meter using the procedures in Section…
-
Page 164: Validate The Meter
Measurement support Tool Path Field Communicator Service Tools > Maintenance > Zero Calibration > Perform Auto Zero If necessary, modify Zero Time. Zero Time controls the amount of time the transmitter takes to determine its zero-flow reference point. The default Zero Time is 20 seconds. For most applications, the default Zero Time is appropriate.
-
Page 165
Measurement support Important To adjust volume flow, you must set the meter factor for volume flow. Setting a meter factor for mass flow and a meter factor for density will not produce the desired result. The volume flow calculations are based on original mass flow and density values, before the corresponding meter factors have been applied. -
Page 166: Alternate Method For Calculating The Meter Factor For Volume Flow
Measurement support The new meter factor for mass flow is 0.9996. 9.7.1 Alternate method for calculating the meter factor for volume flow The alternate method for calculating the meter factor for volume flow is used to avoid the difficulties that may be associated with the standard method. This alternate method is based on the fact that volume is inversely proportional to density.
-
Page 167: Perform A D1 And D2 Density Calibration Using Prolink Iii
Measurement support Use meter validation and meter factors, rather than calibration, to prove the meter against a regulatory standard or to correct measurement error. Prerequisites • During density calibration, the sensor must be completely filled with the calibration fluid, and flow through the sensor must be at the lowest rate allowed by your application.
-
Page 168: Perform A D1 And D2 Density Calibration Using The Field Communicator
Measurement support Postrequisites If you disabled LD Optimization before the calibration procedure, re-enable it. 9.8.2 Perform a D1 and D2 density calibration using the Field Communicator Read the Prerequistes on page 159 if you have not already done so. See the following figure. Micro Motion Model 2700 Transmitters with Intrinsically Safe Outputs…
-
Page 169: Perform A D3 And D4 Density Calibration (T-Series Sensors Only)
Measurement support Postrequisites If you disabled LD Optimization before the calibration procedure, re-enable it. Perform a D3 and D4 density calibration (T- Series sensors only) For T-Series sensors, the optional D3 and D4 calibration could improve the accuracy of the density measurement if the density of your process fluid is less than 0.8 g/cm or greater than 1.2 g/cm…
-
Page 170: Perform A D3 Or D3 And D4 Density Calibration Using Prolink Iii
Measurement support • Perform both the D3 and D4 calibrations if you have two calibrated fluids (other than air and water). The calibrations must be performed without interruption, in the order shown. Make sure that you are prepared to complete the process without interruption.
-
Page 171: Perform A D3 Or D3 And D4 Density Calibration Using The Field Communicator
Measurement support Figure 9-7: D3 or D3 and D4 density calibration using ProLink III Close shutoff valve downstream from sensor D3 Calibration D4 Calibration Fill sensor with D3 fluid Fill sensor with D4 fluid Device Tools > Device Tools > Calibration >…
-
Page 172: Perform Temperature Calibration
Measurement support Figure 9-8: D3 or D3 and D4 density calibration using the Field Communicator D3 Calibration D4 Calibration Close shutoff valve Fill sensor with D3 fluid Fill sensor with D4 fluid downstream from sensor On-Line Menu > Service Tools > Service Tools >…
-
Page 173: Perform Temperature Calibration Using The Display
Measurement support Prerequisites The temperature calibration is a two-part procedure: temperature offset calibration and temperature slope calibration. The two parts must be performed without interruption, in the order shown. Ensure that you are prepared to complete the process without interruption. You will need a low-temperature calibration fluid and a high-temperature calibration fluid.
-
Page 174
Measurement support Temperature Offset Calibration Temperature Slope Calibration Fill sensor with Fill sensor with low-temperature fluid high-temperature fluid Wait until sensor achieves Wait until sensor achieves thermal equilibrium thermal equilibrium Device Tools > Device Tools > Calibration > Calibration > Temperature Calibration >… -
Page 175: Perform Temperature Calibration Using The Field Communicator
Measurement support 9.10.3 Perform temperature calibration using the Field Communicator Temperature Offset calibration Temperature Slope calibration Fill sensor with low- Fill sensor with high- temperature fluid temperature fluid Wait until sensor achieves Wait until sensor achieves thermal equilibrium thermal equilibrium Service Tools >…
-
Page 176
Measurement support Micro Motion Model 2700 Transmitters with Intrinsically Safe Outputs… -
Page 177: Chapter 10 Troubleshooting
Troubleshooting Troubleshooting Topics covered in this chapter: • Status LED states • Status alerts, causes, and recommendations • Locate a device using the HART 7 Squawk feature • Flow measurement problems • Density measurement problems • Temperature measurement problems • Milliamp output problems •…
-
Page 178: Status Led States
Troubleshooting 10.1 Status LED states The status LED on the transmitter indicates whether or not alerts are active. If alerts are active, view the alert list to identify the alerts, then take appropriate action to correct the alert condition. Your transmitter has a status LED only if it has a display. If the transmitter has a display and LED Blinking is disabled, the status LED does not flash to indicate an unacknowledged alert.
-
Page 179
Troubleshooting Alert num- Alert title Possible cause Recommended actions A002 RAM Error (Core Pro- The core processor has experienced • Cycle power to the meter. cessor) a memory error. • Replace the core processor. • Contact customer support. A003 No Sensor Response The transmitter is not receiving one •… -
Page 180
Troubleshooting Alert num- Alert title Possible cause Recommended actions A008 Density Overrange The line density is greater than • If other alerts are present, resolve those 10 g/cm (10000 kg/m alert conditions first. If the current alert persists, continue with the recommen- ded actions. -
Page 181
Troubleshooting Alert num- Alert title Possible cause Recommended actions A011 Zero Calibration Many possible causes, such as too • Verify that there is no flow through the Failed: Low much flow, especially reverse flow, sensor, cycle power to the meter, then through the sensor during a calibra- retry the procedure. -
Page 182
Troubleshooting Alert num- Alert title Possible cause Recommended actions A017 Sensor Case Tem- The values computed for the resist- • Check your process conditions against perature (RTD) Fail- ance of the meter and case RTDs the values reported by the device. Tem- are outside limits. -
Page 183
Troubleshooting Alert num- Alert title Possible cause Recommended actions A020 Calibration Factors Some calibration factors have not • Verify all of the characterization or cali- Missing been entered or are incorrect. bration parameters. See the sensor tag or the calibration sheet for your meter. •… -
Page 184
Troubleshooting Alert num- Alert title Possible cause Recommended actions A026 Sensor/Transmitter The transmitter has lost communi- • Check the wiring between the sensor Communications cation with the core processor. and the transmitter. Failure There may be a problem with the •… -
Page 185
Troubleshooting Alert num- Alert title Possible cause Recommended actions A033 Insufficient Pickoff The signal from the sensor pick- • Check for air in the flow tubes, tubes Signal off(s) is insufficient. This suggests not filled, foreign material in the tubes, that the sensor tubes or vibrating coating in the tubes, or other process elements are not vibrating. -
Page 186
Troubleshooting Alert num- Alert title Possible cause Recommended actions A102 Drive Overrange The drive power (current/voltage) is • Check the drive gain and the pickoff at its maximum. voltage. • Check the wiring between the sensor and the transmitter. • Verify that internal wiring is secure and that there are no internal electrical problems. -
Page 187
Troubleshooting Alert num- Alert title Possible cause Recommended actions A108 Basic Event 1 On The process has triggered Basic • No action required. Event 1. • Review event configuration if you be- lieve the event was triggered errone- ously. A109 Basic Event 2 On The process has triggered Basic •… -
Page 188
Troubleshooting Alert num- Alert title Possible cause Recommended actions A117 Density Overrange The measured density is outside the • Check your process conditions against (Petroleum) range of the API table. the values reported by the device. • Verify the configuration of the petrole- um measurement application and rela- ted parameters. -
Page 189: Locate A Device Using The Hart 7 Squawk Feature
Troubleshooting 10.3 Locate a device using the HART 7 Squawk feature The Squawk feature causes the device to show a specific pattern on its display. You can use this to locate or identify a device. Restriction The Squawk feature is available only with HART 7 connections from the Field Communicator. It is not available with ProLink III.
-
Page 190
Troubleshooting Problem Possible causes Recommended actions Erratic non-zero flow • Leaking valve or seal • Verify that the sensor orientation is appro- rate at no-flow condi- • Two-phase flow priate for your application (refer to the tions • Plugged or coated sensor tube sensor installation manual). -
Page 191: Density Measurement Problems
Troubleshooting Problem Possible causes Recommended actions Inaccurate flow rate • Wiring problem • Check the wiring between the sensor and or batch total • Inappropriate measurement unit the transmitter. • Incorrect flow calibration factor • Verify that the measurement units are con- •…
-
Page 192: Temperature Measurement Problems
Troubleshooting Problem Possible causes Recommended actions Unusually high densi- • Plugged or coated sensor tube • Ensure that all of the calibration parame- ty reading • Incorrect density calibration factors ters have been entered correctly. See the • Incorrect temperature measurement sensor tag or the calibration sheet for your •…
-
Page 193: Milliamp Output Problems
Troubleshooting Problem Possible causes Recommended actions Temperature reading • Sensor temperature not yet equalized • If the error is within the temperature speci- slightly different from • Sensor leaking heat fication for the sensor, there is no prob- process temperature lem.
-
Page 194
Troubleshooting Table 10-2: Milliamp output problems and recommended actions (continued) Problem Possible causes Recommended actions Loop test failed • Output not powered • Verify that the output loop is powered ex- • Power supply problem ternally. • Wiring problem • If applicable, check the output wiring to •… -
Page 195: Frequency Output Problems
Troubleshooting Table 10-2: Milliamp output problems and recommended actions (continued) Problem Possible causes Recommended actions Consistently incorrect • Loop problem • Check the mA Output trim. mA measurement • Output not trimmed correctly • Verify that the measurement units are con- •…
-
Page 196: Using Sensor Simulation For Troubleshooting
Troubleshooting 10.9 Using sensor simulation for troubleshooting When sensor simulation is enabled, the transmitter reports user-specified values for basic process variables. This allows you to reproduce various process conditions or to test the system. You can use sensor simulation to help distinguish between legitimate process noise and externally caused variation.
-
Page 197: Check Sensor-To-Transmitter Wiring
Troubleshooting Ensure that the power supply wires are connected to the correct terminals. Ensure that the power supply wires are making good contact, and are not clamped to the wire insulation. Inspect the voltage label inside the wiring compartment. The voltage supplied to the transmitter should match the voltage specified on the label.
-
Page 198: Check Grounding
Troubleshooting Verify that the wires are making good contact with the terminals. Check the continuity of all wires from the transmitter to the sensor. 10.12 Check grounding A sensor and the transmitter must be grounded. If the core processor is installed as part of the transmitter or the sensor, it is grounded automatically.
-
Page 199
Troubleshooting b. Read the mA current at the receiving device and compare it to the transmitter output. The readings do not need to match exactly. If the values are slightly different, you can correct the discrepancy by trimming the output. c. -
Page 200: Perform Loop Tests Using Prolink Iii
Troubleshooting Postrequisites • If the mA Output readings are within 20 microamps of the expected values, you can correct this discrepancy by trimming the output. • If the discrepancy between the mA Output readings is greater than 20 microamps, or if at any step the reading was faulty, verify the wiring between the transmitter and the remote device, and try again.
-
Page 201: Perform Loop Tests Using The Field Communicator
Troubleshooting c. Click Fix FO. d. Read the frequency signal at the receiving device and compare it to the transmitter output. e. Click UnFix FO. Test the Discrete Output(s). a. Choose Device Tools > Diagnostics > Testing > Discrete Output Test. b.
-
Page 202
Troubleshooting e. Read the mA current at the receiving device and compare it to the transmitter output. The readings do not need to match exactly. If the values are slightly different, you can correct the discrepancy by trimming the output. f. -
Page 203: Trim Ma Output
Troubleshooting 10.14 Trim mA output Trimming an mA output calibrates the transmitter’s mA output to the receiving device. If the current trim value is inaccurate, the transmitter will under-compensate or over- compensate the output. 10.14.1 Trim mA output using ProLink III Trimming the mA output establishes a common measurement range between the transmitter and the device that receives the mA output.
-
Page 204: Check The Hart Communication Loop
Troubleshooting Check the trim results. If any trim result is less than −20 microamps or greater than +20 microamps, contact customer service. 10.15 Check the HART communication loop If you cannot establish or maintain HART communications, the HART loop may be wired incorrectly.
-
Page 205: Check Hart Burst Mode
Troubleshooting When HART Address is changed, some configuration tools will automatically change mA Output Action. Always verify mA Output Action after setting or changing HART Address. Procedure Set HART Address as appropriate for your HART network. The default address is 0. This is the recommended value unless the transmitter is in a multidrop network.
-
Page 206: Check For Radio Frequency Interference (Rfi)
Troubleshooting Restriction For some status alerts, Alert Severity is not configurable. If there are no active fault conditions, continue troubleshooting. 10.20 Check for radio frequency interference (RFI) The transmitter’s Frequency Output or Discrete Output can be affected by radio frequency interference (RFI).
-
Page 207: Check Flow Direction
Troubleshooting Restriction For some status alerts, Alert Severity is not configurable. If there are no active fault conditions, continue troubleshooting. 10.23 Check Flow Direction If Flow Direction is set inappropriately for your process, the transmitter may report flow data that is not appropriate for your requirements. The Flow Direction parameter interacts with actual flow direction to affect flow values, flow totals and inventories, and output behavior.
-
Page 208: Check The Drive Gain
Troubleshooting Check the process for cavitation, flashing, or leaks. Monitor the density of your process fluid output under normal process conditions. Check the settings of Two-Phase Flow Low Limit, Two-Phase Flow High Limit, and Two-Phase Flow Timeout. You can reduce the occurrence of two-phase flow alerts by setting Two-Phase Flow Low Limit to a lower value, Two-Phase Flow High Limit to a higher value, or Two-Phase Flow Timeout to a higher value.
-
Page 209: Collect Drive Gain Data
Troubleshooting Table 10-4: Possible causes and recommended actions for excessive (saturated) drive gain (continued) Possible cause Recommended actions Plugged sensor tube Check the pickoff voltages (see Section 10.27). If either of them are close to zero (but neither is zero), plugged tubes may be the source of your prob- lem.
-
Page 210: Collect Pickoff Voltage Data
Troubleshooting To know whether your pickoff voltage is unusually low, you must collect pickoff voltage data during the problem condition and compare it to pickoff voltage data from a period of normal operation. Drive gain and pickoff voltage are inversely proportional. As drive gain increases, pickoff voltages decrease and vice versa.
-
Page 211: Check For Internal Electrical Problems
Troubleshooting 10.28 Check for internal electrical problems Shorts between sensor terminals or between the sensor terminals and the sensor case can cause the sensor to stop working. Possible cause Recommended action Moisture inside the sensor junction Ensure that the junction box is dry and no corrosion is present.
-
Page 212
Troubleshooting Table 10-7: Coils and test terminal pairs (continued) Coil Sensor model Terminal colors Resistance temperature detector Yellow to violet (RTD) Lead length compensator (LLC) All except T-Series and CMF400 Yellow to orange (see note) Composite RTD All CMFSs, T-Series, H300, and Yellow to orange F300 Fixed resistor (see note) -
Page 213: Check The Core Processor Led
Troubleshooting h. Test the yellow terminal against all other terminals except the orange and violet ones. i. Test the violet terminal against all other terminals except the yellow and orange ones. There should be infinite resistance for each pair. If there is any resistance at all, there is a short between terminals.
-
Page 214
Troubleshooting Figure 10-1: Integral installation components A. Transmitter B. Transition ring C. 4 x cap screws (4 mm) D. Base E. Core processor b. Rotate the transmitter counter-clockwise so that the cap screws are in the unlocked position. c. Gently lift the transmitter straight up, disengaging it from the cap screws. Important Do not disconnect or damage the wires that connect the transmitter to the core processor. -
Page 215
Troubleshooting Figure 10-2: 9-wire remote installation components A. Transmitter B. Core processor C. 4 x cap screws (4 mm) D. End cap b. Inside the core processor housing, loosen the three screws that hold the core processor mounting plate in place. Do not remove the screws. -
Page 216: Core Processor Led States
Troubleshooting Postrequisites To return to normal operation: • For a 4-wire remote installation or a remote core processor with remote transmitter installation, replace the core processor lid. • For an integral installation: 1. Without pinching or stretching the wires, lower the transmitter onto the base, inserting the cap screws into the slots.
-
Page 217
Troubleshooting Table 10-8: Standard core processor LED states (continued) LED state Description Recommended actions Core processor receiving less • Verify power supply wiring to core processor. than 5 volts • If transmitter status LED is lit, transmitter is re- ceiving power. Check voltage across terminals 1 (VDC+) and 2 (VDC–) in core processor. -
Page 218: Perform A 700 Core Processor Resistance Test
Troubleshooting Table 10-9: Enhanced core processor LED states (continued) LED state Description Recommended action Core processor internal failure The meter requires factory service. 10.30 Perform a 700 core processor resistance test Note You can perform a resistance test only on a 700 core processor. Procedure Power down the transmitter.
-
Page 219
Troubleshooting c. Gently lift the transmitter straight up, disengaging it from the cap screws. If you have a 9-wire remote installation: a. Remove the end-cap. Figure 10-3: 9-wire remote installation components A. Transmitter B. Core processor C. 4 x cap screws (4 mm) D. -
Page 220
Troubleshooting Measure the resistance between core processor terminal pairs 3–4, 2–3, and 2–4. Terminal pair Function Expected resistance 3–4 RS-485/A and RS-485/B 40 kΩ to 50 kΩ 2–3 VDC– and RS-485/A 20 kΩ to 25 kΩ 2–4 VDC– and RS-485/B 20 kΩ… -
Page 221: Appendix A Using The Transmitter Display
Using the transmitter display Appendix A Using the transmitter display Topics covered in this appendix: • Components of the transmitter interface • Use the optical switches • Access and use the display menu system • Display codes for process variables •…
-
Page 222: Use The Optical Switches
Using the transmitter display Figure A-1: Transmitter interface Status LED Display (LCD panel) Process variable Scroll optical switch Optical switch indicator Select optical switch Unit of measure for process variable Current value of process variable Use the optical switches Use the optical switches on the transmitter interface to control the transmitter display. The transmitter has two optical switches: Scroll and Select.
-
Page 223: Access And Use The Display Menu System
Using the transmitter display Table A-1: Optical switch indicator and optical switch states Optical switch indicator State of optical switches Solid red One optical switch is activated. Flickering red Both optical switches are activated. Access and use the display menu system The display menu system is used to perform various configuration, administrative, and maintenance tasks.
-
Page 224: Enter A Floating-Point Value Using The Display
Using the transmitter display Use the Scroll and Select optical switches to navigate to your destination in the display menu system. • Use Scroll to move through a list of options. • Use Select to choose the current option. If Scroll flashes on the display, activate the Scroll optical switch, then the Select optical switch, and then the Scroll optical switch again.
-
Page 225
Using the transmitter display Procedure • To change the value: 1. Activate Select until the digit you want to change is active (flashing). Select moves the cursor one position to the left. From the leftmost position, Select moves the cursor to the rightmost digit. 2. -
Page 226
Using the transmitter display If the displayed value is the same as the value in transmitter memory, you will be returned to the previous screen. If the displayed value is not the same as the value in transmitter memory, SAVE/ YES? flashes on the display. -
Page 227: Display Codes For Process Variables
Using the transmitter display d. Activate Scroll until the desired character is displayed. e. Activate Select to move the cursor one digit to the left. f. Activate Scroll until the desired character is displayed. g. Activate Select to move the cursor one digit to the left. h.
-
Page 228: Codes And Abbreviations Used In Display Menus
Using the transmitter display Table A-2: Display codes for process variables (continued) Code Definition Comment or reference LZERO Live zero flow MASSI Mass inventory MTR_T Case temperature (T-Series sensors only) NET M Net mass flow rate Concentration measurement application only NET V Net volume flow rate Concentration measurement application only…
-
Page 229
Using the transmitter display Table A-3: Codes and abbreviations used in display menus (continued) Code or abbrevia- tion Definition Comment or reference AUTO SCRLL Auto Scroll BKLT Backlight B LIGHT Calibrate CH A Channel A CHANGE PASSW Change password Change the password or passcode required for or passcode access to display functions CHANGE CODE… -
Page 230
Using the transmitter display Table A-3: Codes and abbreviations used in display menus (continued) Code or abbrevia- tion Definition Comment or reference EXTRN External FAC Z Factory zero Flow calibration factor FLDIR Flow direction FL SW Flow switch FLSWT Frequency Output FO FREQ Frequency factor FO RATE… -
Page 231
Using the transmitter display Table A-3: Codes and abbreviations used in display menus (continued) Code or abbrevia- tion Definition Comment or reference QUAD Quadrature Revision SCALE Scaling method SFM60 Shrinkage factor PVR applications only corrected volume of mix at 60F SFO60 Shrinkage Fac Corr PVR applications only… -
Page 232
Using the transmitter display Micro Motion Model 2700 Transmitters with Intrinsically Safe Outputs… -
Page 233: Appendix B Using Prolink Iii With The Transmitter
In most ProLink III installations, the manual is installed with the ProLink III program. Additionally, the ProLink III manual is available on the documentation CD or at www.emerson.com. ProLink III features and functions ProLink III offers complete transmitter configuration and operation functions. ProLink III also offers a number of additional features and functions, including: •…
-
Page 234: Connect With Prolink Iii
Using ProLink III with the transmitter • The ability to connect to and view information for more than one device • A guided connection wizard These features are documented in the ProLink III manual. They are not documented in the current manual.
-
Page 235: Connect With Prolink Iii To The Service Port
Using ProLink III with the transmitter • You cannot make concurrent Modbus connections if the connections use the same terminals. You can make concurrent Modbus connections if the connections use different terminals. B.2.2 Connect with ProLink III to the service port CAUTION! If the transmitter is in a hazardous area, do not use a service port connection.
-
Page 236: Make A Hart/Bell 202 Connection
Using ProLink III with the transmitter Figure B-1: Connection to service port A. PC B. Signal converter C. Service port terminal 7 (RS-485/A) D. Service port terminal 8 (RS-485/B) E. Transmitter, with wiring compartment and power supply compartment opened Note This figure shows a serial port connection.
-
Page 237
Using ProLink III with the transmitter CAUTION! If the transmitter is in a hazardous area, do not connect directly to the transmitter terminals. Connecting directly to the transmitter terminals requires opening the wiring compartment, and opening the wiring compartment while the transmitter is powered up could cause an explosion. -
Page 238
Using ProLink III with the transmitter Figure B-2: Connection to transmitter terminals – A. Computer B. Signal converter Ω resistance C. 250–600 D. Transmitter, with wiring compartment and power supply compartment opened E. External power supply Note This figure shows a serial port connection. USB connections are also supported. The signal converter must be connected across a resistance of 250–600 Ω. -
Page 239
Using ProLink III with the transmitter Figure B-3: Supply voltage and resistance requirements 1000 Operating range Supply voltage VDC (volts) Note To connect to a point in the local HART loop: a. Attach the leads from the signal converter to any point in the loop. b. -
Page 240
Using ProLink III with the transmitter Figure B-4: Connection over local loop – A. PC B. Signal converter C. Any combination of resistors R1, R2, and R3 as necessary to meet HART communication resistance requirements D. DCS or PLC E. Transmitter, with wiring compartment and power supply compartment opened F. -
Page 241
Using ProLink III with the transmitter Figure B-5: Supply voltage and resistance requirements 1000 Operating range Supply voltage VDC (volts) Note To connect over a HART multidrop network: a. Attach the leads from the signal converter to any point on the network. b. -
Page 242
Using ProLink III with the transmitter Figure B-6: Connection over multidrop network A. Signal converter Ω resistance B. 250–600 C. Devices on the network D. Master device Start ProLink III. Choose Connect to Physical Device. Set Protocol to HART Bell 202. HART/Bell 202 connections use standard connection parameters. -
Page 243
Using ProLink III with the transmitter Option Description Primary Use this setting if no other primary host is on the network. The Field Communicator is a secondary host. Click Connect. Need help? If an error message appears: • Verify the HART address of the transmitter, or poll HART addresses 1–15. •… -
Page 244
Using ProLink III with the transmitter Micro Motion Model 2700 Transmitters with Intrinsically Safe Outputs… -
Page 245: Appendix C Using A Field Communicator With The Transmitter
If you are unable to perform these tasks, consult the Field Communicator manual before attempting to use the Field Communicator. The Field Communicator manual is available on the documentation CD or at www.emerson.com. Device descriptions (DDs) In order for the Field Communicator to work with your device, the appropriate device…
-
Page 246: Connect With The Field Communicator
Using a Field Communicator with the transmitter Field Communicator menus and messages Many of the menus in this manual start with the On-Line menu. Ensure that you are able to navigate to the On-Line menu. As you use the Field Communicator with a Micro Motion transmitter, you will see a number of messages and notes.
-
Page 247
Using a Field Communicator with the transmitter Figure C-1: Field Communicator connection to transmitter terminals A. Field Communicator Ω resistance B. 250–600 C. External power supply D. Transmitter, with wiring compartment and power supply compartment opened To connect to a point in the local HART loop, attach the leads from the Field Communicator to any point in the loop and add resistance as necessary. -
Page 248
Using a Field Communicator with the transmitter Figure C-3: Field Communicator connection to multidrop network A. Field Communicator B. Devices on the network C. External power supply (may be provided by the PLC) Ω resistance (may be provided by the PLC) D. -
Page 249: Appendix D Default Values And Ranges
Default values and ranges Appendix D Default values and ranges Default values and ranges The default values and ranges represent the typical factory transmitter configuration. Depending on how the transmitter was ordered, certain values may have been configured at the factory and are not represented in the default values and ranges. Table D-1: Transmitter default values and ranges Type…
-
Page 250
Default values and ranges Table D-1: Transmitter default values and ranges (continued) Type Parameter Default Range Comments Volume factor Density Density damping 1.6 sec 0.0 – 51.2 sec User-entered value is corrected to nearest valid value in a list of preset values. -
Page 251
Default values and ranges Table D-1: Transmitter default values and ranges (continued) Type Parameter Default Range Comments Special units Base mass unit Base mass time Mass flow conversion factor Base volume unit Base volume time Volume flow conversion factor Variable map- Primary variable Mass flow ping… -
Page 252
Default values and ranges Table D-1: Transmitter default values and ranges (continued) Type Parameter Default Range Comments 0.00 g/cm Read-only. LSL is calculated based on the sensor size and characterization parameters. 10.00 g/cm Read only. USL is calculated based on the sensor size and characterization parameters. -
Page 253
Default values and ranges Table D-1: Transmitter default values and ranges (continued) Type Parameter Default Range Comments Frequency Output polarity Active high Last measured value timeout 0.0 seconds 0.0 – 60.0 sec Discrete Out- Source Flow direction Fault Indicator None Power Internal Polarity… -
Page 254
Default values and ranges Micro Motion Model 2700 Transmitters with Intrinsically Safe Outputs… -
Page 255: Appendix E Transmitter Components And Installation Wiring
Transmitter components and installation wiring Appendix E Transmitter components and installation wiring Topics covered in this appendix: • Installation types • Power supply terminals and ground • Input/output (I/O) wiring terminals Installation types The transmitter was ordered and shipped to be installed in one of several possible configurations.
-
Page 256
Transmitter components and installation wiring Figure E-2: High-temperature meters with factory connection The transmitter is shipped with a flexible connection factory installed between the sensor and the transmitter. The transmitter must be dismounted from its shipping location (spot-welded to the sensor case) and then mounted separately. -
Page 257
Transmitter components and installation wiring Figure E-4: Remote core processor with remote sensor installation The transmitter, core processor, and sensor are all mounted separately. The 4-wire connection between the transmitter and core processor must be field wired. The 9-wire connection between the core processor and the sensor must be field wired. -
Page 258: Power Supply Terminals And Ground
Transmitter components and installation wiring Power supply terminals and ground Figure E-5: Power supply wiring terminals Warning flap Equipment ground Power supply wiring terminals (9 and 10) Micro Motion Model 2700 Transmitters with Intrinsically Safe Outputs…
-
Page 259: Input/Output (I/O) Wiring Terminals
Transmitter components and installation wiring Input/output (I/O) wiring terminals Figure E-6: I/O wiring terminals mA/HART Frequency Output or Discrete Output mA Output Configuration and Use Manual…
-
Page 260
Transmitter components and installation wiring Micro Motion Model 2700 Transmitters with Intrinsically Safe Outputs… -
Page 261: Appendix F Ne 53 History
NE 53 history Appendix F NE 53 history NE 53 history Important Not all features and capabilities described in this section may apply to your transmitter or configuration. August 2000, Version 1.x Modification type Change Expansion Added writing of the device tag using Modbus Adjustment Improved communication handling with the HART Tri-Loop prod- Feature…
-
Page 262
NE 53 history December 2001, version 3.x Modification type Change Expansion • Added support for the configurable I/O option board • Software version information available via the display or Modbus • Configurable density cutoff • Additional HART variables can be assigned to QV •… -
Page 263
NE 53 history September 2006, version 5.x Modification type Change Expansion • Discrete Output assignable as a flow switch • Discrete Output fault indication configurability • Discrete Input support for multiple action assignments • Added support for querying the display LED status via Mod- •… -
Page 264
NE 53 history Modification type Change Feature • Configurable hysteresis for flow switch • Field Verification Zero added to support Weights & Measures application • Transmitter firmware checksum and core processor firmware checksum assignable as display variables and viewable in Pro- Link February 2018, version 8.x Modification type… -
Page 265
NE 53 history Modification type Change Adjustment • Sensors that are not straight tube sensors are now correctly identified • The mA Output fixed alert is now set • The Factory Configuration Invalid status bit is now set cor- rectly when connected to a 700 core processor — as the 700 core processor does not support saving and restoring the fac- tory configuration •… -
Page 266
NE 53 history Modification type Change An AMS Field Device did not respond message no longer displays when the concentration offset is con- figured even though the value was changed When the volume flow type is changed, the new setting is updated from the transmitter without having to rescan the device Feature… -
Page 267
NE 53 history Configuration and Use Manual… -
Page 268
© 2018 Micro Motion, Inc. All rights reserved. The Emerson logo is a trademark and service mark of Emerson Electric Co. Micro Motion, ELITE, ProLink, MVD and MVD Direct Connect marks are marks of one of the Emerson Automation Solutions family of companies. All other marks are property of their respective owners.
-
Page 1
Configuration and Use Manual P/N 20000327, Rev. FB June 2011 ® Micro Motion Model 2700 Transmitter with PROFIBUS-PA Configuration and Use Manual… -
Page 2
© 2011 Micro Motion, Inc. All rights reserved. The Emerson logo is a trademark and service mark of Emerson Electric Co. Micro Motion, ELITE, ProLink, MVD and MVD Direct Connect are marks of one of the Emerson Process Management family of companies. All other trademarks are property of their… -
Page 3: Table Of Contents
Contents Chapter 1 Before You Begin ……..1 Overview .
-
Page 4
Contents Performing meter validation ……… . . 35 Performing zero calibration . -
Page 5
Contents Viewing transmitter status and alarms ……..86 5.7.1 With the display . -
Page 6
Contents Appendix B Using the Display ……..121 Overview . -
Page 7
Contents Appendix G NE53 History ……..189 Overview . -
Page 8
viii Model 2700 Transmitter with PROFIBUS-PA… -
Page 9: Chapter 1 Before You Begin
Chapter 1 Before You Begin Overview This chapter provides an orientation to the use of this manual, and includes a configuration overview flowchart and a pre-configuration worksheet. This manual describes the procedures required to start, ® configure, use, maintain, and troubleshoot Micro Motion Model 2700 transmitters with PROFIBUS-PA.
-
Page 10: Profibus-Pa Functionality
Before You Begin PROFIBUS-PA functionality The transmitter supports the following methods of configuration and operation: • Configuration methods: ® Device description (EDD) for use with a PROFIBUS configuration tool such as Siemens ® Simatic Process Device Manager (PDM). In this manual, the term “EDD” is used to refer to this type of configuration.
-
Page 11: Communication Tools
Before You Begin Table 1-1 Obtaining version information (continued) Component Tool Method Core processor software With ProLink II Not available With EDD Not available With display OFF-LINE MAINT > VER ProLink II With ProLink II Help > About ProLink II GSD version Text editor Open file V3x_057A.gsd or PA139742.GSD and…
-
Page 12: Planning The Configuration
Before You Begin Planning the configuration Refer to the configuration overview flowchart in Figure 1-1 to plan transmitter configuration. In general, perform configuration steps in the order shown here. Note: Depending on your installation and application, some configuration tasks may be optional. Note: This manual provides information on topics that are not included in the configuration overview flowchart, e.g., using the transmitter, troubleshooting, and calibration procedures.
-
Page 13: Pre-Configuration Worksheet
Before You Begin Pre-configuration worksheet The pre-configuration worksheet provides a place to record information about your flowmeter and your application. This information will affect your configuration options as you work through this manual. You may need to consult with transmitter installation or application process personnel to obtain the required information.
-
Page 14: Flowmeter Documentation
• In Europe: In the U.K., phone 0870 240 1978 (toll-free) In other locations, phone +31 (0) 318 495 555 (The Netherlands) Customers outside the U.S.A. can also email Micro Motion customer service at: flow.support@emerson.com. Model 2700 Transmitter with PROFIBUS-PA…
-
Page 15: Chapter 2 Startup
Chapter 2 Startup Overview This chapter describes the procedures you should perform the first time you start the flowmeter. You do not need to use these procedures every time you cycle power to the flowmeter. The procedures in this section will enable you to: •…
-
Page 16: Setting The Node Address
Startup Setting the node address The factory default setting for the node address is 126. To set the node address: • With the display, choose OFF-LINE MAINT > CONFG > ADDRESS PBUS • With ProLink II, choose ProLink > Configuration > Device (Profibus) > Profibus Address •…
-
Page 17
Startup Table 2-2 Process variables by transducer block channel (continued) 12 (0x0C) 51 (0x33) 0x0C33 Concentration measurement – net volume flow 12 (0x0C) 52 (0x34) 0x0C34 Concentration measurement – concentration 12 (0x0C) 53 (0x35) 0x0C35 Concentration measurement – Baume To configure the AI function block channels: •… -
Page 18: Setting The I/O Mode
Startup Setting the I/O mode The transmitter can function in two different I/O modes: Profile-specific and Manufacturer-specific. The factory default is Manufacturer-specific. The two modes control which function blocks are available for use, and whether the format of the status byte is “classic” or “condensed.” (See Appendix D for more information on the format of the status byte.) •…
-
Page 19: Overriding The Status Byte Format
Startup Note: Set the I/O mode in the Physical Block before loading the GSD file. Table 2-4 PROFIBUS GSD file names Identification number GSD file name Profile specific PA139742.GSD Manufacturer specific V3x_057A.gsd 2.5.1 Overriding the status byte format Each I/O mode has a default status byte format – classic or condensed. To override this default: •…
-
Page 20
Startup Figure 2-4 Configuring totalizer function block mode MMI Coriolis Flow > Function Block Totalizer 1 > Totalizer 2 > Totalizer 3 > Totalizer 4 > Parameter Parameter Parameter Parameter Integrator Function Block Selection Bus parameters Block: Totalizer 1 (Slot 4) Index 52 (set to Mode value from table) Block: Totalizer 1 (Slot 4) Index 52 (set to Mode value from table) -
Page 21: Configuring Pressure Compensation
Startup Configuring pressure compensation Due to process pressure change away from calibration pressure, there can be a change in sensor flow and density sensitivity. This change is called pressure effect. Pressure compensation corrects for these changes. Not all sensors and applications require pressure compensation. Contact Micro Motion Customer Service before you configure pressure compensation.
-
Page 22: Enabling Pressure Compensation
Startup 2.7.2 Enabling pressure compensation To enable pressure compensation, see the menu flowcharts in Figure 2-5. You will need the three pressure compensation values from Section 2.7.1. Figure 2-5 Enabling pressure compensation Bus parameters Enable pressure Block: Transducer Block 1 (Slot 11) comp.
-
Page 23: Configuring A Pressure Source
Startup 2.7.3 Configuring a pressure source You will need to choose one of two sources for pressure data: • Analog Output function block – This option allows you to poll for pressure data from an external pressure source. • Fixed pressure data – This option uses a known, constant pressure value. Note: If you configure a fixed pressure value, ensure that it is accurate.
-
Page 24: Configuring Temperature Compensation
Startup Figure 2-7 Configuring an AO function block for pressure compensation – Bus parameters Block: Transducer Block 1 (Slots 11) Configure channel Index 121 (AO Compensation), value = 1 Block: Analog Output Block (Slots 9 and 10) Configure channel Index 37 (IN channel), value = 0x0b72 Index 38 (OUT channel), value = 0x0b72 Configuring temperature compensation External temperature compensation can be used with the petroleum measurement application or the…
-
Page 25: Configuring A Temperature Source
Startup 2.8.2 Configuring a temperature source External temperature data is reported through an analog output (AO) function block. The transmitter has two AO blocks, each of which can be assigned to a compensation variable channel. To configure an AO function block for temperature compensation: •…
-
Page 26
Model 2700 Transmitter with PROFIBUS-PA… -
Page 27: Chapter 3 Calibration
Chapter 3 Calibration Overview This chapter describes the following procedures: • Characterization (Section 3.3) • Smart Meter Verification (Section 3.4) • Meter validation and adjusting meter factors (Section 3.5) • Zero calibration (Section 3.6) • Density calibration (Section 3.7) • Temperature calibration (Section 3.8) Note: All procedures provided in this chapter assume that you have established communication with the transmitter and that you are complying with all applicable safety requirements.
-
Page 28: Characterization
Calibration 3.2.1 Characterization Characterizing the flowmeter adjusts the transmitter to compensate for the unique traits of the sensor it is paired with. Characterization parameters (sometimes called “calibration factors”) describe the sensor’s sensitivity to flow, density, and temperature. If the transmitter and the sensor were ordered together as a Coriolis flowmeter, then the flowmeter has already been characterized.
-
Page 29: Comparison And Recommendations
Calibration Zero calibration requires only that flow through the sensor is stopped. Flowmeters are calibrated at the factory, and normally do not need to be calibrated in the field. Calibrate the flowmeter only if you must do so to meet regulatory requirements. Contact Micro Motion before calibrating your flowmeter.
-
Page 30: Performing A Characterization
Calibration Performing a characterization Characterizing a flowmeter involves entering parameters that are printed on the sensor tag. 3.3.1 Characterization parameters The characterization parameters that must be entered depend on the sensor type: “T-Series” or “Other,” as listed in Table 3-1. The “Other” category includes all Micro Motion sensors except T-Series.
-
Page 31
Calibration Figure 3-1 Sample calibration tags – All sensors except T-Series Newer tag Older tag 19.0005.13 12502142824.44 12502.000 19.0005.13 0.0010 0.9980 14282.000 12500142864.44 4.44000 Figure 3-2 Sample calibration tags – T-Series sensors Newer tag Older tag Density calibration factors If your sensor tag does not show a D1 or D2 value: •… -
Page 32: How To Characterize
Calibration Flow calibration values Two separate values are used to describe flow calibration: a 6-character FCF value (including one decimal point) and a 4-character FT value (including one decimal point). During characterization, these are entered as a single 10-character string that includes two decimal points. In ProLink II, this value is called the Flowcal parameter.
-
Page 33
Calibration Figure 3-3 Characterizing the flowmeter ProLink II ProLink > MMI Coriolis Flow > Configuration Transducer Block Device tab Flow tab Calibration > Device Information Density Sensor Type Enter values from sensor tag Sensor Type Code Enter values from • Curved Tube sensor tag •… -
Page 34: Performing Smart Meter Verification
Calibration Performing Smart Meter Verification Note: To use Smart Meter Verification, the transmitter must be paired with an enhanced core processor, and the Smart Meter Verification option must be purchased for the transmitter. 3.4.1 Preparing for the Smart Meter Verification test The Smart Meter Verification procedure can be performed on any process fluid.
-
Page 35
Calibration Figure 3-4 Smart Meter Verification – EDD Device > Meter Verification Start/Abort Meter Verification Start Meter Verification Abort Meter Verification Select Alarm Manual Abort by Meter verification Last Value End User error Fault Mode Continue measurement Start Meter Verification Meter Verification in Enable MV Progress… -
Page 36
Calibration Figure 3-5 Smart Meter Verification – bus parameters Step 1 Set output state (optional) Step 2 Manual abort (optional) Start/abort procedure Step 3 Check current algorithm state Step 4 Running? Yes (>0) Read percent complete No (=0) Step 8 Step 5 Check abort code Check algorithm abort state… -
Page 37
Calibration Table 3-2 PROFIBUS parameters for Smart Meter Verification Step number Step description Parameters Set output state Block: Transducer block 1 Index: 182 Value: • 0: Last measured value (default) • 1: Fault Start/abort procedure Block: Transducer block 1 Index: 72 (Start/Stop Meter Verification) •… -
Page 38
Calibration Figure 3-6 Smart Meter Verification – ProLink II Tools > Meter Verification > Run Meter Verification Verify configuration View Previous Results parameters Next Enter descriptive data (optional) Next Configuration Changed or Zero Changed? View details (optional) Select output behavior Start Meter Verification ——————— Fail… -
Page 39: Reading And Interpreting Smart Meter Verification Test Results
Calibration 3.4.3 Reading and interpreting Smart Meter Verification test results Pass/Fail/Abort When the Smart Meter Verification test is completed, the result will be reported as Pass, Fail/Caution (depending on the tool you are using), or Abort: • Pass – The test result is within the specification uncertainty limit. In other words, the stiffness of the left and right pickoffs match the factory values plus or minus the specification uncertainty limit.
-
Page 40
Calibration Detailed test data with ProLink II For each test, the following data is stored on the transmitter: • Powered-on seconds at the time of the test • Test result • Stiffness of the left and right pickoffs, shown as percentage variation from the factory value. If the test aborted, 0 is stored for these values. -
Page 41
Calibration Figure 3-7 Test result chart Initiated from ProLink II Initiated from the display or other tool The test result chart shows the results for all tests in the ProLink II database, plotted against the specification uncertainty limit. The inlet stiffness and the outlet stiffness are plotted separately. This helps to distinguish between local and uniform changes to the sensor tubes. -
Page 42: Setting Up Automatic Or Remote Execution Of The Smart Meter Verification Test
Calibration Note the following: • The test result chart may not show all test results, and test counters may not be continuous. ProLink II stores information about all tests initiated from ProLink II and all tests available on the transmitter when the test database is synchronized. However, the transmitter stores only the twenty most recent test results.
-
Page 43: Performing Meter Validation
Calibration Performing meter validation To perform meter validation: 1. Determine the meter factor(s) to use. You may set any combination of the mass flow, volume flow, and density meter factors. Note that all three meter factors are independent: • The mass flow meter factor affects only the value reported for mass flow. •…
-
Page 44
Calibration Example The flowmeter is installed and proved for the first time. The flowmeter mass measurement is 250.27 lb; the reference device measurement is 250 lb. A mass flow meter factor is determined as follows: × —————— — MeterFactor 0.9989 MassFlow 250.27 The first mass flow meter factor is 0.9989. -
Page 45: Performing Zero Calibration
Calibration Performing zero calibration Zeroing the flowmeter establishes the flowmeter’s point of reference when there is no flow. The meter was zeroed at the factory, and should not require a field zero. However, you may wish to perform a field zero to meet local requirements or to confirm the factory zero. When you zero the flowmeter, you may need to adjust the zero time parameter.
-
Page 46
Calibration Figure 3-9 Zeroing procedure – EDD Calibration > Zero Cal Modify zero time if desired Zero in progress Start Zero Cal Zeroing success Troubleshoot Execute Stop flow through sensor Figure 3-10 Zeroing procedure – Bus parameters Modify zero time Block: Transducer Block 1 (Slot 11) (if desired) Index 83 (zero time) -
Page 47: Performing Density Calibration
Calibration Figure 3-11 Zeroing procedure – ProLink II ProLink > Calibration > Zero Calibration Modify zero time if required Perform Auto Zero Calibration in Progress LED turns red Wait until Calibration in Progress LED turns green Calibration Green Failure LED Done Troubleshoot Performing density calibration…
-
Page 48: Preparing For Density Calibration
Calibration Note: Before performing the calibration, record your current calibration parameters. If you are using ProLink II, you can do this by saving the current configuration to a file on the PC. If the calibration fails, restore the known values. 3.7.1 Preparing for density calibration Before beginning density calibration, review the requirements in this section.
-
Page 49
Calibration Figure 3-12 D1 and D2 density calibration – EDD Calibration > Density Cal D1 calibration D2 calibration Fill sensor with D1 Fill sensor with D2 fluid fluid D1 = density of D1 D2 = density of D2 fluid fluid Start Lo Density Cal Start Hi Density Cal Execute… -
Page 50
Calibration Figure 3-14 D1 and D2 density calibration – ProLink II D1 Calibration D2 Calibration Close shutoff valve Fill sensor with D1 fluid Fill sensor with D2 fluid downstream from sensor ProLink Menu > ProLink Menu > Calibration > Calibration > Density cal –… -
Page 51
Calibration Figure 3-15 D3 or D3-and-D4 density calibration – EDD Calibration > T-Series Density Cal D3 calibration D4 calibration Fill sensor with D3 Fill sensor with D4 fluid fluid D3 = density of D3 D4 = density of D4 fluid fluid Start D3 Density Cal Start D4 Density Cal… -
Page 52: Performing Temperature Calibration
Calibration Figure 3-17 D3 or D3-and-D4 density calibration – ProLink II D3 Calibration D4 Calibration Close shutoff valve Fill sensor with D3 fluid Fill sensor with D4 fluid downstream from sensor ProLink Menu > ProLink Menu > Calibration > Calibration > Density cal –…
-
Page 53
Calibration Figure 3-18 Temperature calibration – ProLink II Temperature Offset calibration Temperature Slope calibration Fill sensor with low-temperature fluid Fill sensor with high-temperature fluid Wait until sensor achieves thermal Wait until sensor achieves thermal equilibrium equilibrium ProLink Menu > ProLink Menu > Calibration >… -
Page 54
Model 2700 Transmitter with PROFIBUS-PA… -
Page 55: Configuration
Chapter 4 Configuration Overview This section describes how to change the operating settings of the transmitter. Note: All procedures provided in this chapter assume that you have established communication with the transmitter and that you are complying with all applicable safety requirements. See Appendix C or the documentation for your PROFIBUS host or configuration tool.
-
Page 56: Configuring Standard Volume Flow Measurement For Gas
Configuration Configuring standard volume flow measurement for gas Two types of volume flow measurement are available: • Liquid volume (the default) • Gas standard volume Only one type of volume flow measurement can be performed at a time (i.e., if liquid volume flow measurement is enabled, gas standard volume flow measurement is disabled, and vice versa).
-
Page 57
Configuration Figure 4-1 Enabling and configuring gas standard volume – EDD Enabling GSV Configuring GSV MMI Coriolis Flow > MMI Coriolis Flow > Transducer Block > Transducer Block > Measurement > Measurement > Process Variable > Process Variable > Volume Flow Type Volume Flow Gas Std Density Set Volume Flow Type to… -
Page 58
Configuration Figure 4-3 Enabling and configuring gas standard volume – ProLink II ProLink > Configuration Gas in Enter Other Gas Gas Wizard Choose Gas Flow tab Property list? Select method: Set Vol Flow Type to Std Gas Volume Molecular Weight Specific Gravity Compared to Air Select gas from… -
Page 59: Changing The Measurement Units
Configuration Changing the measurement units The transmitter is able to store measurement units in two different places: in the transducer block and in the AI blocks. These two units locations are independent and can be set to different values. This affects configuration in the following ways: •…
-
Page 60
Configuration Table 4-3 Volume flow measurement units – Liquid Volume flow unit ProLink II Display Unit description ft3/sec CUFT/S Cubic feet per second ft3/min CUF/MN Cubic feet per minute ft3/hr CUFT/H Cubic feet per hour ft3/day CUFT/D Cubic feet per day m3/sec M3/S Cubic meters per second… -
Page 61
Configuration Table 4-4 Volume flow measurement units – Gas (continued) Volume flow unit ProLink II Display Unit description Nm3/day NM3/D Normal cubic meters per day NL/s NLPS NLPS Normal liter per second NL/m NLPM NLPM Normal liter per minute NL/h NLPH NLPH Normal liter per hour… -
Page 62
Configuration Table 4-6 Temperature measurement units Temperature unit PROFIBUS-PA ProLink II Display Unit description ° ° ° Degrees Celsius ° ° ° Degrees Fahrenheit ° ° ° Degrees Rankine ° ° Kelvin Although pressure units are listed in Table 4-7, the transmitter does not measure pressure. These units are for configuring external pressure compensation. -
Page 63: Configuring The Petroleum Measurement Application
Configuration Configuring the petroleum measurement application The petroleum measurement parameters determine the values that will be used in petroleum measurement-related calculations. The petroleum measurement parameters are available only if the petroleum measurement application is enabled on your transmitter. Note: The petroleum measurement application requires liquid volume measurement units. If you plan to use petroleum measurement process variables, ensure that liquid volume flow measurement is specified.
-
Page 64
Configuration Petroleum measurement reference tables Reference tables are organized by reference temperature, CTL derivation method, liquid type, and density unit. The table selected here controls all the remaining options. • Reference temperature: If you specify a 5x, 6x, 23x, or 24x table, the default reference temperature is 60 °F, and cannot be changed. -
Page 65: Configuration Procedure
Configuration Table 4-8 Petroleum measurement reference temperature tables Density unit and range derivation Table method Base temperature Degrees API Base density Relative density Method 1 60 °F, non-configurable 0 to +100 Method 1 60 °F, non-configurable 0 to +85 Method 1 60 °F, non-configurable –10 to +40 Method 1…
-
Page 66
Configuration Figure 4-4 Setting the petroleum measurement table type Bus parameters MMI Coriolis Flow > Block: Transducer Block 2 (Slot 12) Table type Transducer Block > Index 40 (API2540 CTL table type) ProLink II API2540 CTL Table Type ProLink > Configuration Select table type from the API Table Type… -
Page 67: Configuring The Concentration Measurement Application
Configuration Configuring the concentration measurement application Micro Motion sensors provide direct measurements of density, but not of concentration. The concentration measurement application calculates process variables such as concentration or density at reference temperature, using density process data appropriately corrected for temperature. Note: For a detailed description of the concentration measurement application, see the manual entitled Micro Motion Enhanced Density Application: Theory, Configuration, and Use.
-
Page 68
Configuration Table 4-10 Standard curves and associated measurement units (continued) Name Description Density unit Temperature unit HFCS 42 Curve represents a hydrometer scale for HFCS 42 g/cm °C (high fructose corn syrup) solutions that indicates the percent by mass of HFCS in solution. HFCS 55 Curve represents a hydrometer scale for HFCS 55 g/cm… -
Page 69: Configuration Procedure
Configuration Table 4-11 Derived variables and available process variables (continued) Available process variables Density at Standard Specific Concentration Net Derived variable – ProLink II label reference volume gravity mass volume and definition temperature flow rate flow rate flow rate ✓ ✓…
-
Page 70: Changing The Output Scale
Configuration Changing the output scale The AI function blocks can be configured to scale their output. The output scale is established by defining a process variable value at 0% of scale and at 100% of scale. The output of the AI block will be translated to a value between these two limits.
-
Page 71: Changing Process Alarms
Configuration Changing process alarms The transmitter uses process alarms to indicate that a process value has exceeded its user-defined limits. The transmitter maintains four alarm values for each process variable. In addition, the transmitter has an alarm hysteresis function to prevent erratic alarm reports. Note: Process alarms are only posted through the AI function blocks and totalizer blocks and are not shown on the display or in ProLink II.
-
Page 72
Configuration Figure 4-8 Changing alarm values Bus parameters Model 2700 Transmitter with PROFIBUS-PA… -
Page 73: Alarm Hysteresis
Configuration 4.9.2 Alarm hysteresis The alarm hysteresis value is a percentage of the output scale. After a process alarm is created, the transmitter will not create new alarms unless the process first returns to a value within the range of the alarm hysteresis percentage.
-
Page 74: Configuring Status Alarm Severity
Configuration 4.10 Configuring status alarm severity The severity level of some status alarms can be reclassified. For example: • The default severity level for Alarm A020 (calibration factors unentered) is Fault, but you can reconfigure it to either Informational or Ignore. •…
-
Page 75
Configuration Table 4-12 Status alarms and severity levels (continued) Default Alarm code Index severity Configurable Description A103 Data loss possible Informational A104 Calibration in progress Informational A105 Slug flow Informational A107 Power reset occurred Informational A116 API temperature outside standard range Informational A117 API density out of limits… -
Page 76: Changing The Damping Values
Configuration 4.11 Changing the damping values A damping value is a period of time, in seconds, over which the process variable value will change to reflect 63% of the change in the actual process. Damping helps the transmitter smooth out small, rapid measurement fluctuations.
-
Page 77
Configuration Figure 4-12 Changing the damping values Bus parameters Block: Transducer Block 1 (Slot 11) Index 33 (flow damping) Damping Index 34 (temperature damping) Index 35 (density damping) ProLink II ProLink > Configuration Flow tab Density tab Temperature tab Enter a damping value in the Enter a damping value in the Enter a damping value in the Flow Damp box… -
Page 78: Damping And Volume Measurement
Configuration When you specify a new damping value, it is automatically rounded down to the nearest valid damping value. Valid damping values are listed in Table 4-13. Table 4-13 Valid damping values Process variable Valid damping values Flow (mass and volume) 0, 0.04, 0.08, 0.16, …
-
Page 79: Configuring Cutoffs
Configuration Figure 4-13 Configuring slug flow limits and duration ProLink II MMI Coriolis Flow > ProLink > Transducer Block Configuration Calibration Slug Limit Density tab Set the density limits: Slug Duration Slug Low Limit Slug High Limit • Slug Low Limit •…
-
Page 80
Configuration Figure 4-14 Configuring cutoffs MMI Coriolis Flow > Transducer Block > Measurement > Process Variable Mass Flow Volume Flow Density Volume Flow Low Mass Flow Low Cutoff Density Cutoff Cutoff Notes: ProLink II (1) When Gas Standard Volume is configured, this option will be ProLink >… -
Page 81: Changing The Measurement Mode Parameter
Configuration 4.14 Changing the measurement mode parameter The measurement mode parameter defines how the flow is added to or subtracted from the totalizers. • Forward flow moves in the direction of the arrow on the sensor. • Reverse flow moves in the direction opposite from the arrow on the sensor. Table 4-15 shows the possible values for the measurement mode parameter and the transmitter’s behavior when the flow is positive or negative.
-
Page 82: Configuring Sensor Parameters
Configuration 4.15 Configuring sensor parameters The sensor parameters are used to describe the sensor component of your flowmeter. These sensor parameters are not used in transmitter processing, and are not required: • Serial number • Sensor material • Liner material •…
-
Page 83: Configuring The Display
Configuration 4.16 Configuring the display You can restrict the display functionality or change the variables that are shown on the display. 4.16.1 Enabling and disabling display functions Each display function and its associated parameter are listed in Table 4-16. Table 4-16 Display functions and parameters Display Display function…
-
Page 84
Configuration Figure 4-17 Configuring the display – EDD menus Figure 4-18 Configuring the display – bus parameters Block: Transducer Block 1 (Slot 11) Index 220 (Totalizer reset) Index 221 (Totalizer start/stop) Index 222 (Auto scroll enabled/disabled) Index 223 (Offline menu enabled/disabled) Index 224 (Offline password enabled/disabled) Display options Index 225 (Alarm menu enabled/disabled) -
Page 85: Changing The Scroll Rate
Configuration 4.16.2 Changing the scroll rate The scroll rate is used to control the speed of scrolling when auto scroll is enabled. Scroll rate defines how long each display variable will be shown on the display. The time period is defined in seconds (e.g., if scroll rate is set to 10, each display variable will be shown on the display for 10 seconds).
-
Page 86: Changing The Display Variables And Precision
Configuration 4.16.6 Changing the display variables and precision The display can scroll through up to 15 process variables in any order. You can select the process variables you wish to see and the order in which they should appear. Additionally, you can configure display precision for each display variable. Display precision controls the number of digits to the right of the decimal place.
-
Page 87
Configuration Figure 4-20 Changing the display variables and precision ProLink II ProLink > Configuration For each display variable, select a process variable from the list Display tab Enter a precision in the Number of Decimals box Apply Bus parameters Block: Transducer Block 1 (Slot 11) Display variables Indices 232 through 246 Block: Transducer Block 1 (Slot 11) -
Page 88: Enabling Ld Optimization
Configuration 4.17 Enabling LD Optimization LD Optimization is a special compensation is that is specifically for hydrocarbon liquids. LD Optimization should not be used with any other process fluids. LD Optimization is available only with certain large sensor sizes. If your sensor can benefit from LD Optimization, the enable/disable option will appear in ProLink II or on the display.
-
Page 89
Configuration Figure 4-22 LD Optimization – Display Scroll and Select simultaneously for 4 seconds Scroll OFF-LINE MAINT Select Scroll CONFG Select FACTOR LD Scroll Select Select Scroll LD OPT MTR F Configuration and Use Manual… -
Page 90
Model 2700 Transmitter with PROFIBUS-PA… -
Page 91: Chapter 5 Operation
Chapter 5 Operation Overview This chapter describes how to use the transmitter in everyday operation. The following topics and procedures are discussed: • Using the I&M functions (Section 5.2) • Recording process variables (Section 5.3) • Viewing process variables (Section 5.4) •…
-
Page 92: Viewing Process Variables
Operation Record the following process variables: • Flow rate • Density • Temperature • Tube frequency • Pickoff voltage • Drive gain To view these values, refer to Section 5.4. Viewing process variables Process variables include measurements such as mass flow rate, volume flow rate, temperature, and density.
-
Page 93: With Prolink Ii
Operation 5.4.2 With ProLink II The Process Variables window opens automatically when you first connect to the transmitter. This window displays current values for the standard process variables (mass, volume, density, temperature, external pressure, and external temperature). If you have closed the Process Variables window, select ProLink >…
-
Page 94: Accessing Diagnostic Information With A Profibus Host
Operation Figure 5-1 Sensor simulation mode – ProLink II ProLink > Configuration Select a wave form for mass flow, density, and temperature from the Wave Form lists Sensor Simulation tab Triangular or Select Enable Fixed wave sine wave Simulation Mode Enter a value in the Enter period in the Fixed Value box…
-
Page 95: With Prolink Ii
Operation The status LED is located at the top of the display (Figure 5-2). The status LED can be in one of six possible states, as listed in Table 5-1. The procedure for responding to alarms is shown in Figure B-5. Figure 5-2 Status LED Status LED…
-
Page 96: With Edd
Operation Note: The location of alarms in the Status and Alarm Log windows is not affected by the configured alarm severity (see Section 4.10). Alarms in the Status window are predefined as Critical, Informational, or Operational. Alarms in the Alarm Log window are predefined as High Priority or Low Priority.
-
Page 97
Operation Table 5-2 Totalizer and inventory display unit names Totalizer/inventory Unit name on display Mass total Mass unit Mass inventory Mass unit alternating with MASSI Volume total (liquid) Volume unit Volume inventory (liquid) Volume unit alternating with LVOLI Gas standard volume total Volume unit Gas standard volume inventory Volume unit alternating with… -
Page 98: Controlling The Totalizers And Inventories
Operation With EDD To view the current value of the totalizers and inventories: • For standard mass, liquid standard volume, and gas standard volume, select View > Process and then select . (If the transmitter is configured to use Variables > Totalizer Mass Volume gas standard volume, then…
-
Page 99
Operation With Prolink II To control concentration measurement totalizers and inventories, choose ProLink > CM Totalizer Control . To control all other totalizer and inventory functions, choose ProLink > Totalizer Control To reset inventories using ProLink II, you must first enable this capability. To enable inventory reset using ProLink II: 1. -
Page 100
Model 2700 Transmitter with PROFIBUS-PA… -
Page 101: Troubleshooting
Chapter 6 Troubleshooting Overview This section describes guidelines and procedures for troubleshooting the flowmeter. The information in this section will enable you to: • Categorize the problem • Determine whether you are able to correct the problem • Take corrective measures (if possible) Note: All procedures provided in this chapter assume that you have established communication with the transmitter and that you are complying with all applicable safety requirements.
-
Page 102: Transmitter Does Not Communicate
Troubleshooting Transmitter does not communicate If the transmitter does not appear to be communicating on the network, then: • Make sure the PROFIBUS network has proper termination. • Check the PROFIBUS wiring between the transmitter and the DP/PA coupler, and between the DP/PA coupler and the host system.
-
Page 103: Output Problems
Troubleshooting Output problems Micro Motion suggests that you make a record of the process variables listed below, under normal operating conditions. This will help you recognize when the process variables are unusually high or low. • Flow rate • Density •…
-
Page 104
Troubleshooting Table 6-3 Output problems and possible remedies (continued) Symptom Cause Possible remedies Erratic non-zero flow rate under Wiring problem Verify all sensor-to-transmitter wiring and no-flow conditions ensure the wires are making good contact. Refer to the installation manual. Incorrectly grounded 9-wire cable Verify 9-wire cable installation. -
Page 105
Troubleshooting Table 6-3 Output problems and possible remedies (continued) Symptom Cause Possible remedies Inaccurate flow rate Bad flow cal factor Verify characterization. See Section 6.7.4. Inappropriate measurement unit Check measurement units using a PROFIBUS host or configuration tool. Bad sensor zero Rezero the flowmeter. -
Page 106: Damping
Troubleshooting 6.7.1 Damping An incorrectly set damping value may make the transmitter’s output appear too sluggish or too jumpy. Adjust the damping parameters in the transducer block to achieve the damping effect you want. See Section 4.11. Other damping problems If the transmitter appears to be applying damping values incorrectly or the damping effects do not appear to be changed by adjustments to the damping parameters, then the AI PV Filter Time parameter in an AI function block may be improperly set.
-
Page 107: Status Alarms
Troubleshooting Status alarms Status alarms are reported by a PROFIBUS host, the display, and ProLink II software. Remedies for the alarm states appear in Table 6-4. Note: Some status alarms will cause all of the function blocks (AI, AO, and totalizer) to change to Out of Service mode.
-
Page 108
Troubleshooting Table 6-4 Status alarms and remedies (continued) Display code Description Possible remedies A010 Calibration failure If alarm appears during zero, ensure there is no flow through the sensor, then retry. Cycle power to the flowmeter, then retry. A011 Calibration too low Ensure there is no flow through sensor, then retry. -
Page 109
Troubleshooting Table 6-4 Status alarms and remedies (continued) Display code Description Possible remedies A028 Sensor/transmitter write failure Cycle power to the meter. The flowmeter might need service. Contact Micro Motion Customer Service. A030 Hardware/software incompatible The loaded software is not compatible with the programmed board type. -
Page 110: Diagnosing Wiring Problems
Troubleshooting Diagnosing wiring problems Use the procedures in this section to check the transmitter installation for wiring problems. Installation procedures are provided in the manual entitled Model 1700 and Model 2700 Transmitters: Installation Manual. Removing the wiring compartment covers in explosive atmospheres while the power is on can cause an explosion.
-
Page 111: Checking The Grounding
Troubleshooting 6.9.3 Checking the grounding The sensor and the transmitter must be grounded. If the core processor is installed as part of the transmitter or the sensor, it is grounded automatically. If the core processor is installed separately, it must be grounded separately. Refer to the installation manual. 6.9.4 Checking the communication wiring To check the communication wiring, verify that:…
-
Page 112: Checking The Test Points
Troubleshooting 6.12 Checking the test points You can diagnose sensor failure or overrange status alarms by checking the flowmeter test points. The test points include left and right pickoff voltages, drive gain, and tube frequency. 6.12.1 Obtaining the test points You can obtain the test points with the PROFIBUS EDD, PROFIBUS bus parameters, or ProLink II.
-
Page 113: Excessive Drive Gain
Troubleshooting Table 6-6 Sensor pickoff values (continued) Sensor model Pickoff value Model F200 sensors 2.0 mV peak to peak per Hz based on flow tube frequency Model H025, H050, and H100 sensors 3.4 mV peak to peak per Hz based on flow tube frequency Model H200 sensors 2.0 mV peak to peak per Hz based on flow tube frequency Model R025, R050, or R100 sensor…
-
Page 114: Low Pickoff Voltage
Troubleshooting 6.12.5 Low pickoff voltage The causes and possible solutions of low pickoff voltage are listed in Table 6-9. Table 6-9 Low pickoff voltage causes and solutions Cause Solution Faulty wiring runs between the sensor and core Refer to the sensor manual and transmitter installation processor manual.
-
Page 115: Checking The Core Processor
Troubleshooting 6.13 Checking the core processor Two core processor procedures are available: • You can check the core processor LED. The core processor has an LED that indicates different flowmeter conditions. • You can perform the core processor resistance test to check for a damaged core processor. For both tests you will need to expose the core processor.
-
Page 116: Checking The Core Processor Led
Troubleshooting 6.13.2 Checking the core processor LED Do not shut off power to the transmitter when checking the core processor LED. To check the core processor LED: 1. Expose the core processor according to the instructions in Section 6.13.1. 2. Check the core processor LED against the conditions listed in Table 6-10 (standard core processor) or Table 6-11 (enhanced core processor).
-
Page 117: Core Processor Resistance Test
Troubleshooting Table 6-11 Enhanced core processor LED behavior, meter conditions, and remedies (continued) LED behavior Condition Possible remedy Solid red High severity alarm Check alarm status. Flashing red (80% on, Tubes not full If alarm A105 (slug flow) is active, see Section 6.10. 20% off) If alarm A033 (tubes not full) is active, verify process.
-
Page 118: Checking Sensor Coils And Rtd
Troubleshooting 6.14 Checking sensor coils and RTD Problems with sensor coils can cause several alarms, including sensor failure and a variety of out-of-range conditions. Checking the sensor coils involves testing the terminal pairs and testing for shorts to the case. 6.14.1 9-wire remote or remote core processor with remote transmitter installation If you have a 9-wire remote or a remote core processor with remote transmitter installation:…
-
Page 119: 4-Wire Remote Or Integral Installation
Troubleshooting 8. Test the terminal pairs as follows: • Brown against all other terminals except Red • Red against all other terminals except Brown • Green against all other terminals except White • White against all other terminals except Green •…
-
Page 120
Troubleshooting 5. If you have a standard core processor, loosen the captive screw (2,5 mm) at the center of the core processor. Carefully remove the core processor from the sensor by grasping it and lifting it straight up. Do not twist or rotate the core processor. 6. -
Page 121
Troubleshooting Figure 6-2 Sensor pins – Standard core processor Right pickoff ( – ) Right pickoff Lead length compensator ( + ) ( + ) Left pickoff ( – ) Resistance temperature detector return / Lead length compensator (common) Left pickoff ( + ) Resistance temperature detector Drive… -
Page 122
Troubleshooting Reinstalling the core processor If you removed the core processor, replace the core processor according to the instructions below. 1. If you have a standard core processor: a. Align the three guide pins on the bottom of the core processor with the corresponding holes in the base of the core processor housing. -
Page 123: Appendix A Flowmeter Installation Types And Components
Appendix A Flowmeter Installation Types and Components Overview This appendix provides illustrations of different flowmeter installations and components for the Model 2700 transmitter. Installation diagrams Model 2700 transmitters can be installed in four different ways (see Figure A-1): • Integral •…
-
Page 124
Flowmeter Installation Types and Components Figure A-1 Installation types Transmitter Integral Core processor (standard only) Sensor 4-wire remote Transmitter Sensor 4-wire cable Core processor (standard or enhanced) Transmitter 9-wire remote Sensor Core processor (standard only) 9-wire cable Junction box Transmitter Remote core processor with remote transmitter 4-wire cable… -
Page 125
Flowmeter Installation Types and Components Figure A-2 Transmitter and core processor components — Integral installations Transmitter Transition ring Core processor 4 X Cap screws (4 mm) Base Sensor Figure A-3 Transmitter components, junction end-cap removed — 4-wire remote and remote core processor with remote transmitter installations –… -
Page 126
Flowmeter Installation Types and Components Figure A-4 Transmitter/core processor assembly exploded view — 9-wire remote installations Transmitter Core processor 4 X Cap screws (4 mm) Core processor housing Conduit opening for 9-wire cable End-cap Mounting bracket Figure A-5 Remote core processor components Core processor lid 4 X Cap screws (4 mm) Conduit opening… -
Page 127
Flowmeter Installation Types and Components Figure A-6 4-wire cable between Model 2700 transmitter and standard core processor Core processor User-supplied or Mating connector terminals factory-supplied 4-wire cable (transmitter) VDC+ (Red) RS-485/B (Green) RS-485/A (White) VDC– (Black) Figure A-7 4-wire cable between Model 2700 transmitter and enhanced core processor Core processor User-supplied or Mating connector… -
Page 128
Flowmeter Installation Types and Components Figure A-8 9-wire cable between sensor junction box and core processor 9-wire cable 9-wire terminal connections (core processor) Ground screw Black Black to sensor junction box (Drains from all wire sets) Brown Violet Green Green White Yellow White… -
Page 129: Appendix B Using The Display
Appendix B Using the Display Overview This appendix describes the basic use of the display and provides a menu tree for the display. You can use the menu tree to locate and perform display commands quickly. Note that Model 2700 transmitters can be ordered with or without displays. Not all configuration and use functions are available through the display.
-
Page 130: Using The Optical Switches
Using the Display Using the optical switches optical switches are used to navigate the display menus. To activate an optical Scroll Select switch, touch the lens in front of the optical switch or move your finger over the optical switch close to the lens.
-
Page 131: Using Display Menus
Using the Display B.4.3 Using display menus Note: The display menu system provides access to basic transmitter functions and data. It does not provide access to all functions and data. To access all functions and data, use a PROFIBUS host, PROFIBUS configuration tool, or ProLink II To enter the display menu system: 1.
-
Page 132: Entering Floating-Point Values With The Display
Using the Display B.4.5 Entering floating-point values with the display Certain configuration values, such as meter factors or output ranges, are entered as floating-point values. When you first enter the configuration screen, the value is displayed in decimal notation (as shown in Figure B-2) and the active digit is flashing.
-
Page 133
Using the Display Figure B-3 Numeric values in exponential notation SX.XXXEYY Sign Digit (0–9) Digits Enter a four-digit Sign or Digit (0–3) number; three digits must fall to the right of the decimal point. Exponent indicator To change from exponential to decimal notation: until the is flashing. -
Page 134: Abbreviations
Using the Display Abbreviations The display uses a number of abbreviations. Table B-1 lists the abbreviations used by the display. Table B-1 Display codes and abbreviations Abbreviation Definition Abbreviation Definition ACK ALARM Acknowledge alarm LPO_A Left pickoff amplitude ACK ALL Acknowledge all alarms LVOLI Volume inventory…
-
Page 135: Display Menus
Using the Display Display menus Figures B-4 through B-16 show the commands accessible through the display. Figure B-4 Display menu – Main Scroll and Select simultaneously for 4 seconds ENTER SEE ALARM Scroll Scroll OFF-LINE MAINT METER/VERFY Figure B-5 Display menu – Alarms SEE ALARM Select ACK ALL…
-
Page 136
Using the Display Figure B-6 Display menu – Smart Meter Verification: Run verification ENTER METER/VERFY Select RUN VERFY RESULTS READ SCHEDULE VERFY Scroll Scroll Select OUTPUTS Select CONTINUE MEASR Scroll FAULT Scroll LAST VALUE Select Select Select ARE YOU SURE/YES? Select . -
Page 137
Using the Display Figure B-7 Display menu – Smart Meter Verification: Read results ENTER METER/VERFY Select RUN VERFY RESULTS READ SCHEDULE VERFY Scroll Scroll Select RUNCOUNT x Select Scroll Pass Result type Abort Fail xx HOURS xx HOURS xx HOURS Select Select Select… -
Page 138
Using the Display Figure B-8 Display menu – Smart Meter Verification: Scheduling ENTER METER/VERFY Select RUN VERFY RESULTS READ SCHEDULE VERFY Scroll Scroll Select Schedule set? SCHED IS OFF TURN OFF SCHED/YES? Scroll Scroll Select Schedule deleted SET NEXT SET RECUR Scroll HOURS LEFT Select… -
Page 139
Using the Display Figure B-10 Display menu – Off-line Maintenance: Configuration OFF-LINE MAINT Select SWREV Scroll CONFG Scroll ZERO Scroll SENSOR VERFY Select UNITS Scroll MTR F Scroll DISPLAY Scroll ADDRESS PBUS Scroll IDENT SEL Scroll CONFIG AI Scroll CONFIG AO Scroll CONFIG TOT Figure B-11… -
Page 140
Using the Display Figure B-13 Display menu – Off-line Maiintenance: Configuration: Display DISPLAY Select TOTALS RESET Scroll TOTALS STOP Scroll DISPLAY OFFLN Scroll DISPLAY ALARM Scroll DISPLAY ACK Scroll AUTO SCRLL Scroll SCROLL RATE Scroll CODE OFFLN Scroll CODE ALARM Scroll CHANGE CODE Scroll… -
Page 141
Using the Display Figure B-15 Display menu – Off-line Maintenance: Configuration: AO blocks CONFG AO Select AO1 INCH Scroll AO1 PV UNITS Scroll AO1 OUTCH Scroll AO1 OUT UNITS Scroll AO2 INCH Scroll AO2 PV UNITS Scroll AO2 OUTCH Scroll AO2 OUT UNITS Figure B-16 Display menu –… -
Page 142
Using the Display Figure B-17 Display menu – Off-line Maintenance: Zeroing OFF-LINE MAINT Select SWREV Scroll CONFG Scroll ZERO Scroll SENSOR VERFY Select CAL ZERO …………………. Select ZERO/YES? CAL FAIL CAL PASS Select Model 2700 Transmitter with PROFIBUS-PA… -
Page 143: Appendix C Connecting With Prolink Ii
Appendix C Connecting with ProLink II Overview The instructions in this manual assume that users are already familiar with ProLink II software and can perform the following tasks: • Start and navigate in ProLink II software • Establish communication between ProLink II software and compatible devices •…
-
Page 144: Connecting To The Service Port
Connecting with ProLink II C.2.1 Connecting to the service port To temporarily connect to the service port, which is located in the non-intrinsically safe power-supply compartment: 1. Open the cover to the intrinsically safe wiring compartment. Opening the wiring compartment in a hazardous area can cause an explosion. The service port should only be used for temporary connections.
-
Page 145: Appendix Dprofibus-Pa Status Byte
Appendix D PROFIBUS-PA Status Byte Overview This appendix describes the status byte reported by the transmitter to a PROFIBUS host. The output of each AI, AO, and totalizer function block is a 5-byte package: four bytes of process information and one byte indicating measurement quality, also called the status byte. The format of the status byte depends on whether the transmitter is configured for classic mode or condensed mode.
-
Page 146
PROFIBUS-PA Status Byte Table D-3 Sub-status format – Uncertain status Bits Meaning Comment 0000 Non-specific TRUE if the following alarm codes are active: A005, A008, A010, A011, A012, A013, A021, A033, or A102. 0011 Initial value TRUE if the following alarm codes are active: A006 or A120. -
Page 147: Condensed-Mode Status Byte Format
PROFIBUS-PA Status Byte Condensed-mode status byte format Table D-7 describes the format of the status byte when the transmitter is configured for condensed mode. Refer to the PROFIBUS Specification Profile for Process Control Devices Version v3.01 December 2004 and the PROFIBUS Specification June 2005 Amendment 2 to the PROFIBUS Profile for Process Control Devices v3.01, Condensed Status and Diagnostic Messages v1.0 for additional information.
-
Page 148
PROFIBUS-PA Status Byte Table D-7 Condensed-mode status byte format (continued) Expanded status Condensed status Alarms Totalizer Fail Safe: UC_NON_SPECIFIC C_UNCERTAINC_SUBSTITUTE_SET Failsafe – (0x40) (0x4B) MEMORY mode UC_INITIAL_VAL (0x4C) C_UNCERTAIN_INITIAL_VALUE (0x4F) When reset or preset totals. UC_SUBSTITUTE_VAL (0x48) C_UNCERTAIN_SUBSTITUTE_SET (0x4B) AO failsafe active. -
Page 149: Appendix E Slave Diagnostic Response Bytes
Appendix E Slave Diagnostic Response Bytes Overview This appendix describes the diagnostic bytes reported by the transmitter to a PROFIBUS host. There are two sets of diagnostic bytes sent: • Bytes 1–6 conform to the standard PROFIBUS specification. • Byte 7 is the extended diagnostic header byte. •…
-
Page 150
Slave Diagnostic Response Bytes Table E-2 Byte 2 Indication Slave must be parameterized Static diagnostic: master requesting diagnostics until bit is reset This bit is always set to 1 Response monitoring/watchdog (1 = ON; 0 = OFF) Slave is in freeze mode (1 = ON; 0 = OFF) Slave is in sync mode (1 = ON;… -
Page 151
Slave Diagnostic Response Bytes Table E-5 Byte 5 Indication Ident number (MSB) (1) The identification number will be 0x9742 when in profile-specific I/O mode and 0x057A when in manufacturing-specific I/O mode. Refer to Section 2.5 for information about I/O modes. Table E-6 Byte 6 Indication… -
Page 152
Slave Diagnostic Response Bytes Table E-8 Byte 8 Indication Status type = manufacturer-specific (32 decimal, 0x20 hex) Identifier for status—always set to 1 Table E-9 Byte 9 Indication Slot number of physical block (per Profile 3.01 this is 0) Table E-10 Byte 10 Indication Error appears (when any new alarm is activated) -
Page 153
Slave Diagnostic Response Bytes Table E-11 Byte 11 Indication Reserved (always set to 0) Reserved (always set to 0) Reserved (always set to 0)—Not used Reserved (always set to 0) Reserved (always set to 0) Reserved (always set to 0) Reserved (always set to 0) Reserved (always set to 0) Table E-12… -
Page 154
Slave Diagnostic Response Bytes Table E-14 Byte 14 Indication Reserved (always set to 0) Reserved (always set to 0) Reserved (always set to 0) Reserved (always set to 0) Reserved (always set to 0) Reserved (always set to 0) Reserved (always set to 0) Extension available Table E-15 Byte 15… -
Page 155
Slave Diagnostic Response Bytes Table E-17 Byte 17 Indication Line RTD temperature out-of-range (A016) Meter RTD temperature out-of-range (A017) Reserved Reserved Calibration factors unentered (A020) Unrecognized/unentered sensor type (A021) Reserved Reserved Table E-18 Byte 18 Indication Reserved Reserved Sensor/xmtr communication failure (A026) Reserved Sensor/xmtr write failure (A028) Internal communication failure (A029) -
Page 156
Slave Diagnostic Response Bytes Table E-20 Byte 20 Indication Reserved Reserved Drive overrange/partially full tube (A102) Data loss possible (A103) Calibration in progress (A104) Slug flow (A105) Reserved Power reset occurred (A107) Table E-21 Byte 21 Indication Reserved Reserved Reserved Reserved Reserved Reserved… -
Page 157
Slave Diagnostic Response Bytes Table E-23 Byte 23 Indication Reserved Reserved Reserved Reserved Reserved Reserved Reserved Meter verification info alarm (A131) Table E-24 Byte 24 Indication Simulation mode active (A132) Reserved Reserved Reserved Reserved Reserved Reserved Reserved Configuration and Use Manual… -
Page 158
Model 2700 Transmitter with PROFIBUS-PA… -
Page 159: Appendix F Model 2700 Profibus Block Parameters
Appendix F Model 2700 PROFIBUS Block Parameters Overview This appendix describes the block parameters of the Model 2700 transmitter with PROFIBUS-PA. Slot identification Table F-1 shows the slot assignment for blocks. Table F-1 Block slot assignment Slot Assigned block Physical block Analog input block 1 Analog input block 2 Analog input block 3…
-
Page 160
Model 2700 PROFIBUS Block Parameters Table F-2 Physical block parameters (continued) Index Parameter Mnemonic Definition Message Data Type/ Size Store Default Access Enumerated List of Modbus Type Structure /Rate Value Values / Range Register / (HZ) Coil ALERT_KEY This parameter contains the SIMPLE Unsigned8 identification number of the plant… -
Page 161: Physical Block Object
Model 2700 PROFIBUS Block Parameters Table F-2 Physical block parameters (continued) Index Parameter Mnemonic Definition Message Data Type/ Size Store Default Access Enumerated List of Modbus Type Structure /Rate Value Values / Range Register / (HZ) Coil COND_STATUS_DIAG Condensed Status Diagnostics Simple Unsigned-8 0: Status and…
-
Page 162: Physical Block Views
Model 2700 PROFIBUS Block Parameters F.3.2 Physical block views Table F-4 shows the physical block views. Table F-4 Physical block views Parameter Mnemonic View 1 View 2 View 3 View 4 Index Standard Parameters BLOCK_OBJECT ST_REV TAG_DESC STRATEGY ALERT_KEY TARGET_MODE MODE_BLK ALARM_SUM Overall sum of bytes in View Object…
-
Page 163
Model 2700 PROFIBUS Block Parameters Table F-5 Transducer block 1 parameters (continued) Index Parameter Mnemonic Definition Message Data Type/ Size Store Default Access Enumerated List of Modbus Type Structure /Rate Value Values / Range Register / (HZ) Coil CALIBR_FACTOR Gain compensation value for the SIMPLE Float R-0407… -
Page 164
Model 2700 PROFIBUS Block Parameters Table F-5 Transducer block 1 parameters (continued) Index Parameter Mnemonic Definition Message Data Type/ Size Store Default Access Enumerated List of Modbus Type Structure /Rate Value Values / Range Register / (HZ) Coil DENSITY_UNITS Selected unit code for DENSITY, SIMPLE Unsigned16 1103… -
Page 165
Model 2700 PROFIBUS Block Parameters Table F-5 Transducer block 1 parameters (continued) Index Parameter Mnemonic Definition Message Data Type/ Size Store Default Access Enumerated List of Modbus Type Structure /Rate Value Values / Range Register / (HZ) Coil SNS_VolTotalUnits Standard or special volume total ENUM Unsigned16 0000 = None… -
Page 166
Model 2700 PROFIBUS Block Parameters Table F-5 Transducer block 1 parameters (continued) Index Parameter Mnemonic Definition Message Data Type/ Size Store Default Access Enumerated List of Modbus Type Structure /Rate Value Values / Range Register / (HZ) Coil CALIBRATION BLOCK SNS_FlowCalTempCoeff Temperature coefficient for flow VARIABLE… -
Page 167
Model 2700 PROFIBUS Block Parameters Table F-5 Transducer block 1 parameters (continued) Index Parameter Mnemonic Definition Message Data Type/ Size Store Default Access Enumerated List of Modbus Type Structure /Rate Value Values / Range Register / (HZ) Coil SNS_EnablePresComp Enable/Disable Pressure ENUM Unsigned 8 0x00 = disabled… -
Page 168
Model 2700 PROFIBUS Block Parameters Table F-5 Transducer block 1 parameters (continued) Index Parameter Mnemonic Definition Message Data Type/ Size Store Default Access Enumerated List of Modbus Type Structure /Rate Value Values / Range Register / (HZ) Coil EMPTY Alarm Status PA_StatusWords1 Status Word 1 ENUM… -
Page 169
Model 2700 PROFIBUS Block Parameters Table F-5 Transducer block 1 parameters (continued) Index Parameter Mnemonic Definition Message Data Type/ Size Store Default Access Enumerated List of Modbus Type Structure /Rate Value Values / Range Register / (HZ) Coil PA_StatusWords5 Status Word 5 ENUM BIT_ENUM D/20… -
Page 170
Model 2700 PROFIBUS Block Parameters Table F-5 Transducer block 1 parameters (continued) Index Parameter Mnemonic Definition Message Data Type/ Size Store Default Access Enumerated List of Modbus Type Structure /Rate Value Values / Range Register / (HZ) Coil UNI_Alarm_Index Alarm Index ENUM Unsigned8 0 = Reserved… -
Page 171
Model 2700 PROFIBUS Block Parameters Table F-5 Transducer block 1 parameters (continued) Index Parameter Mnemonic Definition Message Data Type/ Size Store Default Access Enumerated List of Modbus Type Structure /Rate Value Values / Range Register / (HZ) Coil Diagnostics SNS_DriveGain Drive Gain RECORD —-… -
Page 172
Model 2700 PROFIBUS Block Parameters Table F-5 Transducer block 1 parameters (continued) Index Parameter Mnemonic Definition Message Data Type/ Size Store Default Access Enumerated List of Modbus Type Structure /Rate Value Values / Range Register / (HZ) Coil FRF_AbortCode Abort Code ENUM 0=No error R-3002… -
Page 173
Model 2700 PROFIBUS Block Parameters Table F-5 Transducer block 1 parameters (continued) Index Parameter Mnemonic Definition Message Data Type/ Size Store Default Access Enumerated List of Modbus Type Structure /Rate Value Values / Range Register / (HZ) Coil EMPTY EMPTY EMPTY EMPTY EMPTY… -
Page 174
Model 2700 PROFIBUS Block Parameters Table F-5 Transducer block 1 parameters (continued) Index Parameter Mnemonic Definition Message Data Type/ Size Store Default Access Enumerated List of Modbus Type Structure /Rate Value Values / Range Register / (HZ) Coil 22= CM: Density (Fixed SG Units) 23= CM: Standard Volume Flow Rate… -
Page 175
Model 2700 PROFIBUS Block Parameters Table F-5 Transducer block 1 parameters (continued) Index Parameter Mnemonic Definition Message Data Type/ Size Store Default Access Enumerated List of Modbus Type Structure /Rate Value Values / Range Register / (HZ) Coil 78= Not used 79= Not used 80= Not used 81= Not used… -
Page 176
Model 2700 PROFIBUS Block Parameters Table F-5 Transducer block 1 parameters (continued) Index Parameter Mnemonic Definition Message Data Type/ Size Store Default Access Enumerated List of Modbus Type Structure /Rate Value Values / Range Register / (HZ) Coil 51 = Board Temperature 52 = Input Voltage 53 = Ext. -
Page 177
Model 2700 PROFIBUS Block Parameters Table F-5 Transducer block 1 parameters (continued) Index Parameter Mnemonic Definition Message Data Type/ Size Store Default Access Enumerated List of Modbus Type Structure /Rate Value Values / Range Register / (HZ) Coil UI_ProcessVariables Display the Variable#2 ENUM Unsigned16 0 = Mass Flow Rate… -
Page 178: Transducer Block 1 Object
Model 2700 PROFIBUS Block Parameters Table F-5 Transducer block 1 parameters (continued) Index Parameter Mnemonic Definition Message Data Type/ Size Store Default Access Enumerated List of Modbus Type Structure /Rate Value Values / Range Register / (HZ) Coil UI_ProcessVariables Display the Variable#7 ENUM Unsigned16 Same as…
-
Page 179: And Diagnosis) Views
Model 2700 PROFIBUS Block Parameters Table F-6 Transducer block 1 object Slot/Index Element name Data type Size in bytes Value Slot 11/Index 0 Reserved Unsigned 8 250 (default) Block_Object Unsigned 8 Parent_Class Unsigned 8 Class Unsigned 8 DD_Refrence Unsigned 32 00 ,00, 00, 00 (reserved) DD_Revision Unsigned 16…
-
Page 180: Transducer Block 2 (Device Information, Api, Cm) Parameters
Model 2700 PROFIBUS Block Parameters F.4.3 Transducer block 2 (device information, API, CM) parameters Table F-8 shows the parameters for transducer block 2. Table F-8 Transducer block 2 parameters Index Parameter Mnemonic Definition Message Type Data Type/ Size Store Default Acce Enumerated List of Modbus…
-
Page 181
Model 2700 PROFIBUS Block Parameters Table F-8 Transducer block 2 parameters (continued) Index Parameter Mnemonic Definition Message Type Data Type/ Size Store Default Acce Enumerated List of Modbus Structure /Rate Value Values / Range Register / Coil (HZ) SNS_FlangeType Flange Type ENUM Unsigned16 0 = ANSI 150… -
Page 182
Model 2700 PROFIBUS Block Parameters Table F-8 Transducer block 2 parameters (continued) Index Parameter Mnemonic Definition Message Type Data Type/ Size Store Default Acce Enumerated List of Modbus Structure /Rate Value Values / Range Register / Coil (HZ) SNS_API2540TableType API 2540 CTLTable Type ENUM Unsigned16 API_… -
Page 183
Model 2700 PROFIBUS Block Parameters Table F-8 Transducer block 2 parameters (continued) Index Parameter Mnemonic Definition Message Type Data Type/ Size Store Default Acce Enumerated List of Modbus Structure /Rate Value Values / Range Register / Coil (HZ) SNS_ED_CurveLock Lock Enhanced Density ENUM Unsigned8 0x00 = not locked… -
Page 184: Transducer Block 2 Object
Model 2700 PROFIBUS Block Parameters Table F-8 Transducer block 2 parameters (continued) Index Parameter Mnemonic Definition Message Type Data Type/ Size Store Default Acce Enumerated List of Modbus Structure /Rate Value Values / Range Register / Coil (HZ) SNS_ED_ConcUnitCode Curven Concentration Units ENUM Unsigned16 —-…
-
Page 185: Transducer Block 2 (Device Information, Api, Cm) Views
Model 2700 PROFIBUS Block Parameters F.4.5 Transducer block 2 (device information, API, CM) views Table F-10 shows the views for transducer block 2. Table F-10 Transducer block 2 views Parameter Mnemonic View 1 View 2 View 3 View 4 Index Standard Parameters BLOCK_OBJECT ST_REV…
-
Page 186
Model 2700 PROFIBUS Block Parameters Table F-11 I & M parameters (continued) Index Sub-Index Parameter Mnemonic Definition Message Type Data Type/ Size Store/ Default Access Modbus Structure Rate Value mera Register / Coil (HZ) List Valu PROFILE_ID –Profile type VARIABLE Unsigned16 0x9700 Hard Coded… -
Page 187: Ai Function Block Parameters
Model 2700 PROFIBUS Block Parameters F.4.7 AI function block parameters Table F-12 shows the parameters for the AI function blocks. Table F-12 AI function block parameters Index Parameter Mnemonic Definition Message Data Type/ Size Store Default Access Enumerated List of Modbus Type Structure…
-
Page 188
Model 2700 PROFIBUS Block Parameters Table F-12 AI function block parameters (continued) Index Parameter Mnemonic Definition Message Data Type/ Size Store Default Access Enumerated List of Modbus Type Structure /Rate Value Values / Range Register / (HZ) Coil ALARM_HYS Hysteresis SIMPLE FLOAT 0.5%… -
Page 189: Analog Input Block Objects
Model 2700 PROFIBUS Block Parameters F.4.8 Analog input block objects Table F-13 shows the analog input block objects. Table F-13 Analog input block objects Slot/Index Element name Data type Size in bytes Value Slot 11/Index 0 Reserved Unsigned 8 250 (default) Block_Object Unsigned 8 02 (function block)
-
Page 190: Ao Function Block Parameters
Model 2700 PROFIBUS Block Parameters F.4.10 AO function block parameters Table F-15 lists the parameters for the AO function blocks. Table F-15 AO function block parameters Index Parameter Mnemonic Definition Message Data Type/ Size Store Default Access Enumerated List of Modbus Type Structure…
-
Page 191
Model 2700 PROFIBUS Block Parameters Table F-15 AO function block parameters (continued) Index Parameter Mnemonic Definition Message Data Type/ Size Store Default Access Enumerated List of Modbus Type Structure /Rate Value Values / Range Register / Coil (HZ) IN_CHANNEL Reference to the active SIMPLE Unsigned16 R-2297… -
Page 192: Analog Output Block Objects
Model 2700 PROFIBUS Block Parameters Table F-15 AO function block parameters (continued) Index Parameter Mnemonic Definition Message Data Type/ Size Store Default Access Enumerated List of Modbus Type Structure /Rate Value Values / Range Register / Coil (HZ) RESERVED RESERVED RESERVED RESERVED AO BLOCK VIEW 1…
-
Page 193: Totalizer Block Parameters
Model 2700 PROFIBUS Block Parameters Table F-17 AO function block views ST_REV TAG_DESC STRATEGY ALERT_KEY TARGET_MODE MODE_BLK ALARM_SUM Overall sum of bytes in View Object Parameter Mnemonic View 1 View 2 View 3 View 4 Index Standard Parameters READBACK POS_D CHECK_BACK Overall sum of bytes in View Object 10+13…
-
Page 194
Model 2700 PROFIBUS Block Parameters Table F-18 Totalizer block parameters (continued) Index Parameter Mnemonic Definition Message Data Type/ Size Store Default Access Enumerated List of Modbus Type Structure /Rate Value Values / Range Register / (HZ) Coil RESERVED Totalizer Function Block Standard Parameters TOTAL The Function Block RECORD… -
Page 195: Totalizer Block Objects
Model 2700 PROFIBUS Block Parameters Table F-18 Totalizer block parameters (continued) Index Parameter Mnemonic Definition Message Data Type/ Size Store Default Access Enumerated List of Modbus Type Structure /Rate Value Values / Range Register / (HZ) Coil RESERVED Totalizer Selection Selection of Totalizer SIMPLE Unsigned8…
-
Page 196
Model 2700 PROFIBUS Block Parameters Table F-20 Totalizer function block views Parameter Mnemonic View 1 View 2 View 3 View 4 Index Standard Parameters BLOCK_OBJECT ST_REV TAG_DESC STRATEGY ALERT_KEY TARGET_MODE MODE_BLK ALARM_SUM Overall sum of bytes in View Object Parameter Mnemonic View 1 View 2 View 3… -
Page 197: Appendix G Ne53 History
Appendix G NE53 History Overview This appendix documents the change history of the Model 2700 transmitter with PROFIBUS-PA software. Software change history Table G-1 describes the change history of the transmitter software. Operating instructions are English versions. Instructions in other languages have different part numbers but matching revision letters. Table G-1 Transmitter software change history Software…
-
Page 198
20000327 Rev. FA Improved EDD more closely matches ProLink II. Added petroleum measurement application. Added enhanced density application. Improved consistency with other Micro Motion 2700 transmitters. Feature additions Added compatibility with enhanced core processor. Added gas standard volume measurement. Added configurable alarm severity. -
Page 199: Index
Index Core processor 116, 117, 118 Address LED 108 node address 8 sensor pins 113 AI function block terminals 119, 120 channels 8, 9 troubleshooting 107 Alarm log 87 Customer service 6 Alarm menu password 123 Cutoffs 71 Alarms 63, 86, 99 display codes 99 high 63 Damping 68…
-
Page 200
Index Meter factors 19, 20, 35 EDD 2, 3 Meter verification Engineering units 51 See Smart Meter Verification Errors Micro Motion customer service 6 see Alarms Exponential notation 125 Node address 8 Fault configuring alarms for 66 Off-line password 77, 123 Flanges 74 Operation 83 Flow calibration values 24… -
Page 201
Index Transducer block Safety 1 channels 8, 9, 12 Scale 62 meter factor parameters 36 Scroll rate 77 Transmitter components 117, 118 Sensor material 74 Transmitter startup 7 Serial number 74 Troubleshooting 93 Service port 135, 136 calibration failure 94 Simulation mode drive gain 105 sensor 85… -
Page 202
Model 2700 Transmitter with PROFIBUS-PA… -
Page 204
+31 (0) 318 495 555 +65 6777-8211 +31 (0) 318 495 556 +65 6770-8003 Micro Motion United Kingdom Micro Motion Japan Emerson Process Management Limited Emerson Process Management Horsfield Way 1-2-5, Higashi Shinagawa Bredbury Industrial Estate Shinagawa-ku Stockport SK6 2SU U.K.