-
Contents
-
Table of Contents
-
Troubleshooting
-
Bookmarks
Quick Links
Related Manuals for Monarch NICE3000
Summary of Contents for Monarch NICE3000
-
Page 2: Table Of Contents
3.2 Use of the LED Operation Panel ………………18 3.3 CTB Board ……………………20 3.4 Display Board (MCTC-HCB)……………….22 3.5 CCB Board ……………………29 Chapter 4 Use of the NICE3000 …………….32 4.1 Wiring Diagrams Under Default Parameter Settings …………32 4.2 Description of Shaft Signals ……………….33 4.3 Typical Commissioning ………………..35 Chapter 5 Function Code Table …………….
-
Page 4
Overview… -
Page 5: Chapter 1 Overview
Brief NICE3000 Instruction Manual Chapter 1 Overview To facilitate the users who use the NICE3000 control system for the first time to understand how to commission the control system as quickly as possible, this manual briefly describes the specifications, wiring, common parameter setting, and common commissioning of the NICE3000.
-
Page 6
Product Information… -
Page 7: Chapter 2 Product Information
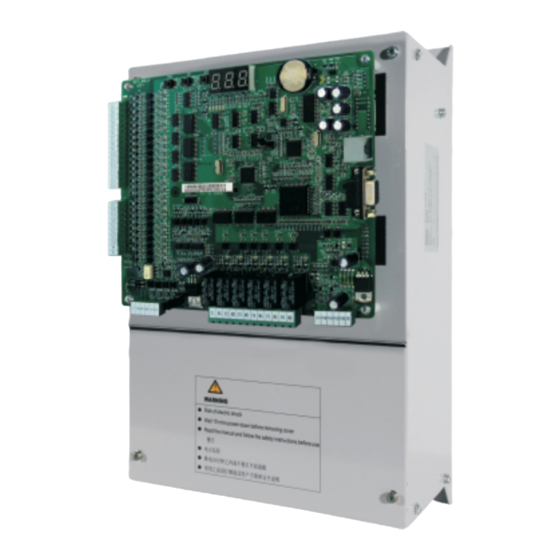
2.2 Mounting Dimensions The NICE3000 controller has three sizes: SIZE-C, SIZE-D, and SIZE-E, as shown in the following figure. SIZE-F is a customized model with different appearances but the same installation mode. The following figure and table show the appearance and physical dimensions of the NICE3000 controller.
-
Page 8
45 kW Note 1. The NICE3000 controller of other power ratings, such as above 45 kW is rarely applied in the elevator, and therefore, specifications are not provided here. For future detail on the options and availability, please contact Monarch. -
Page 9: Electrical Specifications
Product Information Brief NICE3000 Instruction Manual 2.3 Electrical Specifications Table 2-2 NICE3000 models and electrical specifications Power Input Current Output Motor Power System Model Capacity (kVA) Current (A) (kW) AC supply voltage: single-phase 220 V, range: –15% to 20% NICE-L-A/B-2002 13.2…
-
Page 10
3. Select the proper controller output current based on the motor rated current. Ensure that the controller output current is equal to or greater than the motor rated current. Table 2-3 Technical specifications of the NICE3000 Item Specification… -
Page 11
Product Information Brief NICE3000 Instruction Manual Item Specification Providing 57 protections such as: • Power-on short circuit detection • Protection at power phase loss and output phase loss Fault protection • Over-current protection • Door machine fault protection • Encoder protection •… -
Page 12: Braking Resistor
Brief NICE3000 Instruction Manual Product Information 2.4 Braking Resistor The models of 30 kW or below have a built-in braking unit, and you only need to connect an external braking resistor between PB and + terminals. For models above 30 kW, you need to install a braking unit and a braking resistor externally.
-
Page 13: Terminal Descriptions
ER OK COPHOP MDBUS CN12 RJ45 MCTC-MCB The NICE3000 provides a keypad with three keys and three 7-segment LEDs for display, and five LED status indicators. The NICE3000 also supports the external LED operation panel. Table 2-6 Terminal description and specifications…
-
Page 14
Brief NICE3000 Instruction Manual Product Information Mark Code Terminal Name Function Description Normally-open (NO), maximum current Y1/M1 to Y6/ Relay output and voltage rating: 5A, 250 VAC. The functions are set in F5-26 to F5-31. 15V/PGM/ Encoder interface for Connecting the incremental encoder… -
Page 16
Component Description… -
Page 17: Chapter 3 Component Description
Component Description Brief NICE3000 Instruction Manual Chapter 3 Component Description 3.1 Onboard Keypad Description The onboard keypad consists of three 7-segment LEDs and three buttons. You can query information about the controller and enter simple commands on the keypad. The following figure shows the appearance of the keypad.
-
Page 18
Brief NICE3000 Instruction Manual Component Description The function code groups displayed on the keypad are described as follows: 1. F0: display of floor and running direction The F0 menu is displayed on the keypad by default upon power-on. The first 7-segment LED indicates the running direction, while the last two 7-segment LEDs indicate the current floor of the elevator. -
Page 19: Use Of The Led Operation Panel
0 automatically. 3.2 Use of the LED Operation Panel The LED operation panel is connected to the RJ45 interface of the NICE3000 controller by means of an 8-core flat cable. You can modify the function parameters, monitor the working status, and run or stop the NICE3000 controller by using the LED operation panel.
-
Page 20
Brief NICE3000 Instruction Manual Component Description Unit Indicators ■ indicates OFF, and indicates ON. Hz: unit of frequency A: unit of current V: unit of voltage RPM: unit of rotational speed %: percentage Keys on the Operation Panel ■ Table 3-1 Keys on the operation panel… -
Page 21: Ctb Board
3.3 CTB Board The car top board (MCTC-CTB) is the elevator car control board of the NICE3000 controller. It consists of eight DI terminals, one AI terminal, and nine relay output terminals. The CTB can communicate with the CCB and HCB. The following figure shows the structure and size of the CTB.
-
Page 22
Brief NICE3000 Instruction Manual Component Description Type Terminal Name Description 24 VDC power supply to the +24V/COM 24 V power supply (communication Modbus with the HCB) MOD+/MOD- Communication with the HCB communication CN6 (AI) Ai-M Load cell signal input 0–10 VDC… -
Page 23: Display Board (Mctc-Hcb)
floor and running direction for the hall. This board can also be used as car display board. Monarch provides many types of display boards. The following describes only a few common types. If you need other types, please contact Monarch.
-
Page 24
Brief NICE3000 Instruction Manual Component Description Figure 3-5 Appearance of HCB-H Figure 3-6 Size of HCB-H 22.9 mm 4.2 mm Φ MCTC-HCB-H DOWN 34.3 mm 56.0 mm 22.5 mm 70.0 mm — 23 -… -
Page 25
Component Description Brief NICE3000 Instruction Manual The following table describes the input and output terminals. Table 3-4 Input and output terminals of HCB-H Terminal Name Function Interface for the elevator locking switch and up arrival indicator Pins 2 and 3 are for switch input. Pin 1 and 4 are power supply for the up arrival indicator. -
Page 26
Brief NICE3000 Instruction Manual Component Description Figure 3-8 Size of HCB-R1 3.5 mm Φ 22.8 mm MCTC-HCB-R1 6.7 mm 56.0 mm UP DOWN ST XF 10 mm 70 mm The following table describes the input and output terminals. Table 3-5 Input and output terminals of HCB-R1… -
Page 27
Component Description Brief NICE3000 Instruction Manual 3.4.3 HCB-D2 (Ultrathin Segment LED Display Board) The following figures show the appearance and size of HCB-D2. Figure 3-9 Appearance of HCB-D2 Figure 3-10 Size of HCB-D2 3.5 mm Φ 49 mm 56.0 mm UP DOWN ST XF 70.0 mm… -
Page 28
Brief NICE3000 Instruction Manual Component Description The following table describes the input and output terminals. Table 3-6 Input and output terminals of HCB-D2 Terminal Name Function Interface for the up call button and indicator Pins 2 and 3 are for up call input. Pins 1 and 4 are power supply for the up call indicator. -
Page 29
Component Description Brief NICE3000 Instruction Manual Figure 3-12 Size of HCB-U1 3-5.5 mm 4.5 mm Φ 53.0 mm 60.0 mm 9.4 mm 79.2 mm 16.9 mm The following table describes the input and output terminals. Table 3-7 Input and output terminals of HCB-U1… -
Page 30: Ccb Board
Brief NICE3000 Instruction Manual Component Description 3.5 CCB Board The car call board (MCTC-CCB) is another interface between users and the control system. Each CCB comprises 24 inputs and 22 outputs, including 16 floor buttons and 8 functional signals. The CCB mainly collects button calls and outputs signals of the button call indicators.
-
Page 31
Component Description Brief NICE3000 Instruction Manual The following table describes the input and output terminals. Table 3-8 Input and output terminals of the CCB Interface Pins 2 and 3 Pins 1 and 4 Remarks Floor 1 button input Floor 1 display output… -
Page 32
Use of the NICE3000… -
Page 33: Chapter 4 Use Of The Nice3000
Chapter 4 Use of the NICE3000 4.1 Wiring Diagrams Under Default Parameter Settings 4.1.1 Electric Wiring of the NICE3000 The following figure shows the electric wiring diagram of the NICE3000. Figure 4-1 Electric wiring diagram of the NICE3000 24 V…
-
Page 34: Description Of Shaft Signals
Brief NICE3000 Instruction Manual Use of the NICE3000 Note The above wiring diagram shows the default I/O function setting of group F5. The braking resistor is connected to PB and +. 4.1.2 Recommended CTB Wiring and Parameter Setting The following wiring diagram shows the default function setting of the CTB. You can change the input polarity (NO/NC) of the CTB terminals in F5-25.
-
Page 35
4.2.3 Leveling Switch The NICE3000 system allows the use of 1 to 3 leveling switches. If only one leveling sensor is used, the corresponding function code which is used for input of leveling signal is allocated with function 03 (NO input of door zone signal). -
Page 36: Typical Commissioning
You need to add two re-leveling switches if applying the door pre-open function. In this case, you need to increase the length of the flag properly. For details on the door pre-open module, contact Monarch or local agent for more information. 4.3 Typical Commissioning 4.3.1 Check Before Commissioning…
-
Page 37
Use of the NICE3000 Brief NICE3000 Instruction Manual R, S, T, U, V, W Input and output terminals of the controller and power supply for switches Brake power coils and wiring terminals of the braking resistor Nodes of various control signals… -
Page 38
4.3.2 Commissioning at Inspection Speed To implement accurate control on the motor, motor auto-tuning must be performed before the use of the NICE3000. Ensure that the installation and wiring satisfy the safety requirements and technical specifications before the auto-tuning. No-load Auto-tuning ■… -
Page 39
Use of the NICE3000 Brief NICE3000 Instruction Manual Then, set F1-12 (Encoder lines per revolution) based on the encoder nameplate. Remove the load from the motor completely. Set F1-11 to 2 (No-load auto-tuning). «TUNE» is displayed on the operation panel. Release the brake manually and press on the operation panel. -
Page 40
Brief NICE3000 Instruction Manual Use of the NICE3000 • 0: SIN/COS encoder • 1: UVW encoder F1-12 (Encoder lines per revolution) If applying the Heidenhain ECN 1313 or 413 encoder with the MD32PG5 card, set F1- 00 to 0. Enter the motor nameplate parameters correctly. -
Page 41
Use of the NICE3000 Brief NICE3000 Instruction Manual To perform with-load auto-tuning for asynchronous motor, do as follows: Set F0-01 (Command source selection) to 0 (Operation panel control) and press STOP on the operation panel to reset the current faults. -
Page 42
Brief NICE3000 Instruction Manual Use of the NICE3000 To perform with-load auto-tuning for PMSM, do as follows: Check the motor power cables and encoder wiring. Ensure that the motor’s UVW power cables are connected to the controller’s UVW terminals properly, and the encoder’s AB, UVW or CDZ signal cables are connected to the AB, UVW or CDZ terminals of the PG card properly. -
Page 43
Use of the NICE3000 Brief NICE3000 Instruction Manual Note After the motor auto-tuning is complete, the system prohibits inspection running for 8s and saves parameters during the time. 4.3.3 Summary of Commissioning at Inspection Speed Asynchronous Motor Auto-tuning Process ■… -
Page 44
Brief NICE3000 Instruction Manual Use of the NICE3000 PMSM Auto-tuning Process ■ Figure 4-4 Auto-tuning process of the PMSM Set F0-01 to 1 to restore Set F0-01 to 0 (No-load tuning ) distance control . or 1 (With-load tuning ) Resume the rope . -
Page 45
(F0-00 = 1, F0-01 = 1). 4. The top floor number (F6-00) and bottom floor number (F6-01) are set correctly. 5. The NICE3000 system is not in the fault alarm state. If there is a fault at the moment, STOP press to reset the fault. -
Page 46
Brief NICE3000 Instruction Manual Use of the NICE3000 For a faster system response, increase the proportional gain and reduce the integral gain. Be aware that a fast system response causes system oscillation. Figure 4-5 Relationship between switchover frequencies PI regulation… -
Page 47
Use of the NICE3000 Brief NICE3000 Instruction Manual Function Parameter Setting Range Default Description Code Name It specifies the time required from when the system outputs the open signal to when the Brake release 0.200s F3-19 0.000–1.000s brake is completely released. -
Page 48
Brief NICE3000 Instruction Manual Use of the NICE3000 Function Parameter Name Setting Range Default Code 0: Pre-torque invalid 1: Load cell pre-torque F8-01 Pre-torque selection compensation 2: Automatic pre-torque compensation Pre-torque offset 0.0%–100.0% 50.0% F8-02 Zero servo current coefficient 0.20%–50.0% 15.0%… -
Page 49
Use of the NICE3000 Brief NICE3000 Instruction Manual Mechanical Construction ■ The mechanical construction affecting the riding comfort involves the guide rail, guide shoe, steel rope, installation of the brake, balance of the car and the resonance caused by the car, guild rail and motor. -
Page 50
Figure 4-7 Monitoring the door open and close limit signals 4.3.7 Password Setting The NICE3000 controller provides the parameter password protection function. Here gives an example of changing the password into 12345, as shown in the following figure. Figure 4-8 Example of changing the password… -
Page 51
Use of the NICE3000 Brief NICE3000 Instruction Manual In the password protection unlocked status, you can change the password at any time. The last input number will be the user password. If you want to disable the password protection function, enter the correct password and then set FP-00 to 0. -
Page 52
Function Code Table… -
Page 53: Chapter 5 Function Code Table
Function Code Table Brief NICE3000 Instruction Manual Chapter 5 Function Code Table Function Parameter Name Setting Range Default Code Group F0: Basic parameters 0: Sensorless flux vector control F0-00 Control mode (SFVC) 1:Closed-loop vector control (CLVC) 0: Operation panel control…
-
Page 54
Brief NICE3000 Instruction Manual Function Code Table Function Parameter Name Setting Range Default Code 0: No operation 1: With-load auto-tuning F1-11 Auto-tuning mode selection 2: No-load auto-tuning 3: Shaft auto-tuning F1-12 Encoder lines per revolution 0–10000 1024 F1-13 Encoder fault detection time 0.0–10.0s… -
Page 55
Function Code Table Brief NICE3000 Instruction Manual Function Parameter Name Setting Range Default Code F3-13 Position of down slow-down 1 0.00–300.00 m 0.00 m F3-14 Position of up slow-down 2 0.00–300.00 m 0.00 m F3-15 Position of down slow-down 2 0.00–300.00 m… -
Page 56
Brief NICE3000 Instruction Manual Function Code Table Function Parameter Name Setting Range Default Code F5-01 X1 function selection NO input: 01–31 00: No function F5-02 X2 function selection 01: Up leveling signal F5-03 X3 function selection 02: Down leveling signal… -
Page 57
Function Code Table Brief NICE3000 Instruction Manual Function Parameter Name Setting Range Default Code F5-13 X13 function selection NC input: 33–63 33: Up leveling signal F5-14 X14 function selection 34: Down leveling signal F5-15 X15 function selection 35: Door zone signal… -
Page 58
Brief NICE3000 Instruction Manual Function Code Table Function Parameter Name Setting Range Default Code F5-25 CTB input type selection 0–255 The NO/NC setting of terminals X1 to X8 on the CTB is listed in the following table. Terminal Parameter Name… -
Page 59
Function Code Table Brief NICE3000 Instruction Manual Function Parameter Name Setting Range Default Code F5-32 Communication status display Figure 5-1 Communication status display CANbus Modbus for hall call at each floor The upmost left 7-segment LED is expressed by 0–9, and used for CAN communication monitoring. -
Page 60
Brief NICE3000 Instruction Manual Function Code Table Function Parameter Name Setting Range Default Code F5-34 F5-35 Segment Indication Segment Indication Light curtain 1 Up leveling signal Light curtain 2 Down leveling signal Door 1 open limit Door zone signal Door 2 open limit… -
Page 61
Function Code Table Brief NICE3000 Instruction Manual Function Parameter Name Setting Range Default Code Door machine 1 light curtain Door open button display Door machine 2 light curtain Door close button display Door open delay button Brake feedback 2 display… -
Page 62
Brief NICE3000 Instruction Manual Function Code Table Function Parameter Name Setting Range Default Code • Bit0: Dispersed waiting • Bit1: Reserved • Bit2: Parallel implemented at monitoring port • Bit4: Door not open at power-on if F6-09 Parallel selection elevator-locked signal is enabled •… -
Page 63
Function Code Table Brief NICE3000 Instruction Manual Function Parameter Name Setting Range Default Code Time-based floor service 2 F6-22 00.00–23.59 (hour.minute) 00.00 start time Time-based floor service 2 end F6-23 00.00–23.59 (hour.minute) 00.00 time Floor 1 of time-based floor F6-24 0–65535 (floors 1–16) -
Page 64
Brief NICE3000 Instruction Manual Function Code Table Function Parameter Name Setting Range Default Code F8-05 Current car load 0–1023 F8-06 Car no-load load 0–1023 F8-07 Car full-load load 0–1023 0: Disabled F8-08 Anti-nuisance function 1: Enabled (load cell sensor required) -
Page 65
Function Code Table Brief NICE3000 Instruction Manual Function Parameter Name Setting Range Default Code Group FB: Door function parameters FB-00 Number of door machine (s) 1–2 FB-01 CTB software 0–99 Service floor 1 of door machine FB-02 0–65535 (floors 1–16) 65535 Service floor 2 of door machine… -
Page 66
Brief NICE3000 Instruction Manual Function Code Table Function Parameter Name Setting Range Default Code FC-02 Over-load protection coefficient 0.50–10.00 1.00 FC-03 Over-load alarm coefficient 50–100% FC-04 Opposite door selection 1–10 The first two digits indicate the floor and the last two digits indicate the fault code. -
Page 67
Function Code Table Brief NICE3000 Instruction Manual Function Parameter Name Setting Range Default Code FC-31 Latest fault time (hour/minute) 00.00–23.59 00.00 Group FD: Communication parameters 0–5: 9600 bps FD-00 Baud rate setting 6: 19200 bps 7: 38400 bps 0: No check-out, data format <8,N,2>… -
Page 68
Brief NICE3000 Instruction Manual Overiew Function Parameter Name Setting Range Default Code FE-08 Floor 8 corresponding display 06: display 6 1908 07: display 7 FE-09 Floor 9 corresponding display 1909 08: display 8 FE-10 Floor 10 corresponding display 0100 09: display 9… -
Page 69
Overview Brief NICE3000 Instruction Manual Function Parameter Name Setting Range Default Code • Bit0: Attendant function • Bit1: Returning to base floor at fire emergency • Bit2: Re-leveling function • Bit3: Pre-open function • Bit4: Removal of stuck hall calls •… -
Page 70
Function Parameter Name Setting Range Default Code • Bit1: Door open holding at door open limit • Bit2: Not output door close signal at door close limit • Bit3: Detecting door close limit in inspection mode • Bit4: Auto reset for running and brake contactor stuck •… -
Page 72
System Application… -
Page 73: Chapter 6 System Application
6.1 Parallel Mode and Group Mode 6.1.1 Parameter Setting The NICE3000 has the parallel control function. Two NICE3000 controllers can exchange the elevator information by means of CAN or RS485 communication, coordinating response of the two elevators to hall calls and improving the elevator efficiency.
-
Page 74
Brief NICE3000 Instruction Manual System Application Figure 6-1 Parallel connection by means of CAN communication Elevator Elevator PRG UP SET PRG UP SET CAN communication port CAN communication port connecting CTB of elevator 1# connecting CTB of elevator 2# UP button… -
Page 75
Figure 6-2 Parallel connection at the monitoring port 6.1.4 Setting of Physical Floors Physical floors, relative to the NICE3000 control system, are defined by the installation position of the leveling flag. The floor (such as the ground floor) at which the lowest leveling flag is installed corresponds to physical floor 1. -
Page 76: Emergency Evacuation At Power Failure
Uninterrupted power supply (UPS) • Shorting PMSM stator Here we first introduce the implementation through the NICE3000’s shorting PMSM stator scheme, which can save energy and improve safety. 6.2.1 Shorting PMSM Stator Shorting PMSM stator means shorting phases UVW of the PMSM, which produces resistance to restrict movement of the elevator car.
-
Page 77
System Application Brief NICE3000 Instruction Manual Figure 6-3 Wiring of the independent shorting PMSM stator contactor Safety circuit SW: RUN contactor 110 VAC FX: shorting PMSM stator contactor 24 V NICE3000 Motor Then set the related parameters as follows: Table 6-3 Parameter setting under the shorting PMSM stator scheme… -
Page 78
Brief NICE3000 Instruction Manual System Application The following figure shows various contacts of the contactors. Figure 6-5 Various contacts of the contactors Phase Safety sequence relay contactor 110 V Safety circuit Emergency 24 V feedback 62 72 53 61 5 13 71 81 The UPS power is recommended in the following table. -
Page 79: Opposite Door Control
System Application Brief NICE3000 Instruction Manual 6.3 Opposite Door Control Set related parameters according to the following table. Table 6-6 Parameter setting for opposite door control Opposite Door Parameter Setting Function Description Control Mode FE-33 BIT15 = 0: The hall call buttons of both door sides are connected…
-
Page 80
Brief NICE3000 Instruction Manual System Application Opposite Door Parameter Setting Function Description Control Mode This control mode applies to double call boards, double operation panels and two CCBs connected in serial. The hall call DIP switch address of the front door is set based on floor (1-15). -
Page 82
Troubleshooting… -
Page 83: Chapter 7 Troubleshooting
Chapter 7 Troubleshooting 7.1 Description of Fault Levels The NICE3000 has more than 60 pieces of alarm information and protective functions. It monitors various input signals, running conditions and feedback signals. If a fault occurs, the relevant protective function acts and the system displays the fault code.
-
Page 84: Fault Information And Troubleshooting
Brief NICE3000 Instruction Manual Troubleshooting 7.2 Fault Information and Troubleshooting If an alarm is reported, the system performs corresponding processing based on the fault level. You can handle the fault according to the possible causes described in the following table.
-
Page 85
Troubleshooting Brief NICE3000 Instruction Manual Fault Name Possible Causes Solution Level Code 8. Check whether the balance coefficient is correct. 9. Check whether the encoder wirings are correct. For asynchronous motor, perform SFVC and compare the current to judge whether the encoder works properly. -
Page 86
Brief NICE3000 Instruction Manual Troubleshooting Fault Name Possible Causes Solution Level Code 1. The input voltage is too high. 2. The braking Over-voltage resistance is too during large, or the braking 4. Check whether the cable deceleration unit fails. connecting the braking resistor 3. -
Page 87
Troubleshooting Brief NICE3000 Instruction Manual Fault Name Possible Causes Solution Level Code 1. The output wiring 1. Check the wiring. of the main circuit is Power output 2. Check whether the contactor loose. phase loss at the output side is normal. -
Page 88
Brief NICE3000 Instruction Manual Troubleshooting Fault Name Possible Causes Solution Level Code 1. Check whether F1-00 is set 1. Check whether correctly. the encoder model 2. Check the encoder wiring. matches the motor. 3. Check whether the encoder 2. The encoder wiring is normal. -
Page 89
The CPU is CPU abnormal right two pins of J9 are shorted. abnormal. 2. Contact the agent or Monarch to replace the control board. 1. The feedback speed is 1.15 times of the maximum 1. Check whether the encoder running speed. -
Page 90
Brief NICE3000 Instruction Manual Troubleshooting Fault Name Possible Causes Solution Level Code 1. Upon power-on, E35 is reported when the flag height is detected to be 0 or the RUN contactor is detected to keep open. • Check whether the down slow-down switch is valid. -
Page 91
Troubleshooting Brief NICE3000 Instruction Manual Fault Name Possible Causes Solution Level Code 1. The RUN contactor feedback is valid 1. Check whether the feedback when the elevator contact of the contactor acts starts up. properly. 2. The feedback 2. Check whether the feedback… -
Page 92
Brief NICE3000 Instruction Manual Troubleshooting Fault Name Possible Causes Solution Level Code 1. Check the status of the safety circuit switches. 2. Check whether the external power supply is normal. Safety circuit The safety circuit 3. Check whether the safety breaking signal breaks off. -
Page 93
1. Check the communication cable connection. Feedback from the communication 2. Check whether the 24 V CTB is abnormal. abnormal power supply of the NICE3000 is normal. 1. Check the communication cable connection. 2. Check whether the 24 V Feedback from the communication power supply of the NICE3000 HCB is abnormal. -
Page 94
Brief NICE3000 Instruction Manual Troubleshooting Fault Name Possible Causes Solution Level Code The door does not open to the limit Stop at another Check the door open limit at the current floor landing floor signal. when the elevator runs automatically. -
Page 95
Troubleshooting Brief NICE3000 Instruction Manual — 94 -… -
Page 96
The Product Warranty Card is not re-issued. Please keep the card and present it to the maintenance personnel when asking for maintenance. If there is any problem during the service, contact Monarch’s agent or Monarch directly. This agreement shall be interpreted by Suzhou MONARCH Control Technology Co., Ltd. -
Page 97
Product Warranty Card Add. of unit: Name of unit: Contact person: Customer information P.C.: Tel.: Product model: Body barcode (Attach here): Product information Name of agent: (Maintenance time and content): Failure information Maintenance personnel:…
Содержание
- 1 ВВЕДЕНИЕ
- 2 ПЕРЕЧЕНЬ СИГНАЛОВ
- 3 РАЗМЕЩЕНИЕ И МОНТАЖ
- 4 СХЕМЫ
- 5 НАСТРОЙКА ПРОГРАММНОГО ОБЕСПЕЧЕНИЯ
- 5.1 ОРС-сервер
- 5.1.1 Табличные данные
- 5.2 АСУД.SCADA
- 5.1 ОРС-сервер
ВВЕДЕНИЕ
Подключение станции осуществляется c помощью концентратора КСЛ-RS.
Станцией комплектуются, например: лифты Эльбрус (Чебоксары)
ПЕРЕЧЕНЬ СИГНАЛОВ
Перечень сигналов см. в описании лифтов BLT
РАЗМЕЩЕНИЕ И МОНТАЖ

К одному концентратору КСЛ-RS может быть подключена только 1 станция Nice-3000 New
Для подключения используется КПЛ исполнение 7
По-умолчанию, СУЛ работает по шине диспетчеризации на скорости 38400.
В случае проблем в обмене данными, следует проверить настройку скорости с помощью штатного Пульта-настройки, параметр FD-00 (уточнить по документации на СУЛ), значение:
- 0 — 9600
- 1 — 38400
Параметр FD-02 — локальный адрес, должен быть установлен в 1.
СХЕМЫ
- Подключение КСЛ-RS к Nice-3000 New
НАСТРОЙКА ПРОГРАММНОГО ОБЕСПЕЧЕНИЯ
Общую последовательность настройки программного обеспечения смотри в описании КСЛ-RS.
ОРС-сервер
В адресном пространстве добавить КСЛ-RS и один Лифт.
Для Лифта — оставить настройки по умолчанию.
Табличные данные
АСУД.SCADA
- Печать
Страницы: 1 … 11 12 [13] 14 15 … 30 Вниз

Тема: SJEC. Контроллер NICE 3000 (Прочитано 88654 раз)
0 Пользователей и 3 Гостей просматривают эту тему.
SJec Nice3000 new.
Охрана шахты подключена через кнопки вызова, параметр Fd-07 = 5. Если открыть дверь в ручную то лифт останавливается и уходит в ошибку по цепи безопасности(Err42), после закрытие двери цепь собирается и лифт снова в нормальной работе. Т.е. проникновение в шахту не регистрируется, хотя должен остаться в ошибке после закрытия дверей. Похоже проблема в настройках, как настроить охрану шахты?

Записан
Если выходит ошибка 42, то у вас не включена функция охраны шахты для России (должна выходить ошибка 80 при срабатывании охраны шахты). Включение/отключение функции — бит 8 параметра F6-42. Подключение контактов выключателя ДШ — JP2 на LOP на каждом этаже (по стандарту, но есть варианты). И не забывайте: должно быть на каждом ДШ по два выключателя (один — в цепи безопасности, другой — цепи охраны шахты). Если это тот же лифт, что и в первом вашем сообщении, то тут надо смотреть, куда у вас подключены выключатели ДШ по охране шахты, так как JP2 у вас используется для замка паркинга (Fd-08=1). Другими словами, возможно необходима дополнительная плата HCB-B для сохранения функции паркинга, но могу ошибаться, так как не знаю вашу комплектацию платами.
Выключатели замков ДШ по цепи безопасности проводами доходят до MCB на назначенный вход контроля ДШ (F5-37 или F5-38 или F5-39 равный 5), сигналы выключателей ДШ по охране шахты через этажную плату (плату кнопок вызова) по CAN-шине в MCB. Соответственно, необходимо определиться, куда подается сигнал с выключателей охраны шахты и проверить назначение функции для данной этажной платы/платы вызова для данного входа.
« Последнее редактирование: Ноябрь 07, 2019, 09:06:13 от alex-chlm »
Записан
Уважай лифты: они делают твою жизнь комфортнее
спасибо
Спасибо за ответ. Ошибка 42( или 43). Все выкл. охраны сидят на JP1 в кнопках, на JP2 сидит парковка на первом этаже(Fd07=5,Fd08=1). В бите 8 в F6-42 стоит 1, сразу стояла, пробовали менять на 0, реакции никакой.
В теме есть сообщения, что может быть прошивка не та, похоже на такой случай…
Связались с китайцами, ждем ответа.
Записан
Посмотрел свой новый Монарховский толмут: голова вскипела. JP1 — интерфейс для подключения замка лифта(2:3 пины) и индикатора прибытия вверх (1:4 пины). JP2 — интерфейс для подключения выключателя «Пожарная опасность» (2:3 пины) и индикатора прибытия вниз (1:4 пины). Походу совсем спецпрошивка идет заводская, так как переназначают функцию на JP.
В параметрах F6-40, F6-41, F6-42 есть резервные биты, которые по спецпрошивкам (скорее всего) используются для вкл/откл спецфункций.
Мне китайцы присылали такое уведомление (яндекс перевод):
«Функция бита bit 8 параметра F6-42 используется специально для российского рынка (активация).
1. JP2 на LOP каждой точной остановки используется для проверки замка двери (изначально использовалась для противопожарной защиты).
Ошибка 80: когда лифт в нормальной работе, ошибка 80 сообщает об открытой двери шахты.
Если закрыты все двери шахты, за исключением двери этажа точной остановки кабины, контроллер автоматически сбрасывает ошибку Е80.
Примечание: сигналы JP2 от LOP без соединений будут автоматически исключены.»
Но в книге бит 8 F6-42 связан с функцией определения ВКО/ВКЗ. Видно каждый завод по своему задает назначение битов данных параметров в прошивке. Возможно просто в другом параметре/бите нужно включать, а может и прошивка другая требуется.
« Последнее редактирование: Ноябрь 07, 2019, 16:06:29 от alex-chlm »
Записан
Уважай лифты: они делают твою жизнь комфортнее
спасибо
Пришел ответ от китайцев:
FD-08 = 10 и контакт охраны посадить на JP2
A1-08 bit 2 = 1
Сделали, все заработало, только охрану оставили на JP1 как было, и изменили FD-07 на 10…
Такого нету ни в английском варианте мануала, ни в русском….
Записан
спасибо
По описанию Nice3000: китайский инженер сказал, что есть две инструкции: одна — для простых наладчиков/инженеров лифтовых заводов, другая — для разработчиков. Поэтому в нашей не все параметры указаны. Так же завод запретил оставлять «балалайку» на объекте: для обслуги достаточно тех кнопок, которые стоят на MCB, а с пульта легко привести лифт » в негодность».
« Последнее редактирование: Ноябрь 15, 2019, 10:23:17 от alex-chlm »
Записан
Уважай лифты: они делают твою жизнь комфортнее
Nice 300 new. При снятии сигнала пожарной опасности лифт возвращается в режим нормальной работы, как настроить чтобы лифт оставался в пожарном режиме? Пока механик не сбросить…
Записан
Зачем Вам это? Или вы путаете режим «Пожарная опасность» с режимом «Перевозка пожарных подразделений». Это совершенно разные режимы.
Записан
Уважай лифты: они делают твою жизнь комфортнее
Может и путаю…  У нас два лифта-близнеца. У обоих пожарка сидит на 23 входе(F5-23), у обоих одинаковые параметры, оба по сигналу на 23 вход уходят на первый этаж, но один после снятия сигнала продолжает стоять, а другой возвращается в нормальную работу. Специально так не настраивали, возможно с завода где-то биты разные стоят… А с начала оба лифта не выходили из режима при снятии сигнала, просто один лифт чудным образом стал выходить в нормальный режим, хотя никаких настроек не меняли. Режима ППП в лифте нет, т.е. нет кнопки или ключа в кабине для его активации…
Записан
Нет, значит не путаете. По правилам (если память не подводит), из режима «Пожарная опасность» допускается возврат в «Автоматический режим» после снятия сигнала на входе от пожарной сигнализации, а вот после режима «Перевозка пожарных подразделений» электромеханик обязан проверить лифт на отсутствие повреждений.
Глянул толмут — в описании нет бита автоматического возврата. Значит только звонок на завод: других вариантов не вижу
Записан
Уважай лифты: они делают твою жизнь комфортнее
спасибо
Nice 300 new. При снятии сигнала пожарной опасности лифт возвращается в режим нормальной работы, как настроить чтобы лифт оставался в пожарном режиме? Пока механик не сбросить…
Вколхозить релюшку на крайний случай с самоподпиткой. Если решений грамотней не найдется
Записан
«Вколхозить релюшку» — подсудно. Монтаж систем противопожарной сигнализации и автоматики имеют право осуществлять только организации, имеющие лицензию МЧС.
P.S.: не так страшен дурак как дурак с инициативой (народная мудрость)
Записан
Уважай лифты: они делают твою жизнь комфортнее
Если есть MDKE6 можно скачать параметры и закачать
Записан
Профессиональный монтаж оборудования и пуско-наладочные работы, выполняются квалифицированными специалистами.
Сервис-тул есть. Откуда параметры скачать, обращаться к китайцам?
Записан
Ну если MDKE6 есть, нажми одновременно кнопки вверх и вниз на несколько секунд войдёшь в дополнительные параметры U. Дальше вроде U05- 01скачат с MCU и U05-02 закачать в MCU
Записан
Профессиональный монтаж оборудования и пуско-наладочные работы, выполняются квалифицированными специалистами.
- Печать
Страницы: 1 … 11 12 [13] 14 15 … 30 Вверх
Главная » INOVANCE » Руководство пользователя встроенного контроллера лифта серии INOVANCE NICE3000mew
Содержание скрывать
1
Руководство пользователя встроенного контроллера лифта серии INOVANCE NICE3000mew
2
Похожие сообщения
Руководство пользователя встроенного контроллера лифта серии INOVANCE NICE3000mew
View Fullscreen
Похожие сообщения
-

Руководство пользователя расширения контроллера лифта серии DMP X1
ПРЕДВАРИТЕЛЬНАЯ УСТАНОВКА Расширение контроллера лифта серии DMP X1 Предупреждение. Этот модуль расширения управления лифтом не может быть установлен без…
-
Руководство пользователя контроллера LoRa серии Milesight UC500
Контроллер LoRa серии UC500
-
Контроллер полива серии Smartline SL1600 Руководство пользователя
Руководство пользователя контроллера полива Smartline SL1600 — Загрузить [оптимизировано] Руководство пользователя контроллера полива Smartline SL1600 -…
-
Руководство по установке встроенных вытяжек AEG DGR9962HB серии 9000
Руководство по установке встроенных вытяжек серии 9962 DGR9000HB Встроенные вытяжки серии 9962 DGR9000HB ВСТРОЕННЫЕ ВЫТЯЖКИ СЕРИИ 9000 Комплект DGR9962HB…


Оставить комментарий
Ваш электронный адрес не будет опубликован. Обязательные поля помечены * *
КОММЕНТАРИЙ *
Имя и фамилия
Эл. адрес
Cайт
Сохраните мое имя, адрес электронной почты и веб-сайт в этом браузере для следующего комментария.
В гугле я нашёл все…
И параметры редактировал
[Типичное применение системы и настройка Руководство по эксплуатации NICE3000
2) Авто-настройка шахты
a) Проверьте системы безопасности и дверной привод.
b) Переведите системы в тестовый режим.
c) Поместите кабину на уровень нижнего этажа и освободите переключатель тяги
d) Введите значение функций F6-00, F6-01, а также убедитесь, что значение функции F4-01 составляет 1.
e) При переключении режима с помощью клавиш UP и ENTER открывается меню функции F-7, и дисплей показывает «0». Нажмите UP, чтобы изменить 0 на 1, нажмите ENTER, и система начнет процесс авто-настройки на тестовой скорости. Затем процесс замедлится, авто-настройка будет закончена и будет установлено значение функции F3-08. В случае неудачной авто-настройки система выдаст ошибку: E35. В случае появления ошибки E45, проверьте параметры группы F3.
f) Проверьте параметры F3-12~F3-17,F4-04~F4-65 и убедитесь, что внесены данные об этаже.]
все сделал но ошибка вываливается сразу как подаю команду F-7=1