
Быстрая доставка
по России
Бесплатная доставка
по Москве при заказе
от 8000 руб.
0 отзывов /
Написать отзыв
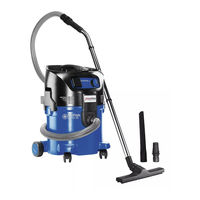
- Модель: ATTIX 50-21 XC
- Производитель: Nilfisk
-
Артикул: 107403510
-
Гарантия: 1 год
- Наличие: Под заказ
Промышленный пылесос Nilfisk ATTIX 50-21 XC является идеальным выбором для самых требовательных клиентов, которым часто требуется уборка. Он является просто идеальным промышленным пылесосом для бетонной пыли по весьма привлекательной цене.
Улучшенный эргономичный дизайн обеспечивает функциональную и комфортную работу – эффективное и надежное решение. ATTIX 50 способен решить практически все основные задачи вашей компании будь то уборка в цеху, на производстве или в гараже. Системы очистки фильтра Push&Clean и XtremeClean поддерживают высокую силу всасывания и тем самым гарантируют впечатляющий результат уборки. Дизайн предусматривает место для хранения электрического кабеля, аксессуаров и инструмента – всё, что нужно, будет у вас под рукой. Увеличенные габариты ATTIX 50 дают возможность работать дольше без опорожнения контейнера. А широкий модельный ряд позволяет выбрать идеальный пылесос для решения необходимых именно вам задач. Например, если ваша деятельность связана со строительством и есть необходимость в уборке бетонной пыли, обязательно купите этот промышленный пылесос для бетонной пыли, и он окажется просто незаменимым для эффективного решения подобного рода задач. Эксплуатационные издержки сведены к минимуму благодаря моющемуся многоразовому PET-фильтру из флисовой ткани, а низкий уровень шума позволяет оградить от неудобств находящихся рядом людей.
Данная модель для дополнительного удобства имеют встроенную розетку – теперь, если вам нужно включить электроинструмент, в удлинителе не возникнет необходимости. Система автоматического старта/остановки подойдет тем, кто использует пылесос параллельно с ручными электроинструментами: просто включите или выключите инструмент и промышленный пылесос для уборки бетонной пыли включится или выключится вместе с ним. Аксессуар Airbox выполняет аналогичные функции при работе с пневматическим инструментом.
Преимущества:
- Низкий уровень работы шума благодаря системе SilentPower: впечатляющая мощность, которую видно, но не слышно
- Универсальная система крепления аксессуаров MultiFit
- Моющийся PET-фильтр из флисовой ткани (эффективность фильтрации – минимум 99,9%)
- Место для хранения аксессуаров и инструмента
- Антистатическая система
ГАБАРИТЫ Д Х Ш Х В (ММ)
450x380x750
ПИТАНИЕ (В/~/ГЦ/А)
230/1/50-60/16
РАБОЧИЙ УРОВЕНЬ ШУМА (ДБ-А)
59
СИСТЕМА ОЧИСТКИ ФИЛЬТРА
XtremeClean
ТИП ОСНОВНОГО ФИЛЬТРА
PET Nano
Плоский фильтр PET NANO M-CLASS — 2 Шт — 1 шт.
Шланг универсальный D36X4000MM EVA — 1 шт.
Адаптер для инструмента D27 — 1 шт.
Удлинительная труба 36 2х500мм — 1 шт.
Промышленная напольная насадка 36X400MM с щетиной — 1 шт.
Насадка 300XO36MM — 1 шт.
-
Инструкция по эксплуатации: Nilfisk ATTIX 50-21 XC (pdf, 3MB)
Нет отзывов о данном товаре.
Написать отзыв
Обнаружив ошибку или неточность в тексте или описании товара, выделите ее и нажмите Shift+Enter.
Заказ в 1 клик
Официальный магазин Nilfisk © 2010 — 2023

- Manuals
- Brands
- Nilfisk-ALTO Manuals
- Vacuum Cleaner
- ATTIX 50 XC
Manuals and User Guides for Nilfisk-ALTO ATTIX 50 XC. We have 10 Nilfisk-ALTO ATTIX 50 XC manuals available for free PDF download: Operating Instructions Manual, Quick Start Manual
Nilfisk-ALTO ATTIX 50 XC Operating Instructions Manual (32 pages)
Brand: Nilfisk-ALTO
|
Category: Vacuum Cleaner
|
Size: 10.66 MB
Table of Contents
-
Operating Instructions
1
-
Table of Contents
3
-
Important Safety Instructions
4
-
Description
9
-
Operating Elements
9
-
Operating Panel
10
-
-
Before Starting the
11
-
Assembling the Vacuum Cleaner
11
-
Taking Accessories out of the Packaging
11
-
Attaching the Suction Pipe Holder to the Suction Pipe
11
-
Before Starting the Cleaner
11
-
Insert the Safety Filter Bag «H
12
-
Inserting the Filter Bag «M
13
-
-
Control / Operation
15
-
Connections
15
-
Connecting the Suction Hose
15
-
Electrical Connection
15
-
Switching on the Vacuum Cleaner
15
-
Switch „ 0-I
15
-
Switch „ Auto-0-I
15
-
-
Suction Power Control
16
-
Auto-On/Off-Operation — «Auto» Switch Position
16
-
Cleaning the Filter Element
17
-
Cleaning the Filter Element » Push&Clean System » (ATTIX 30- / 50-XX PC)
17
-
Cleaning the Filter Element » Xtremeclean » (ATTIX 30- / 50-XX XC)
17
-
Check the Volume Flow Monitor
17
-
Acoustic Warning
17
-
Techniques
18
-
Picking up Dry Substances
18
-
Picking up Liquids
18
-
Switching the Vacuum Cleaner off and Storage
19
-
Maintenance Plan
20
-
Maintenance Work
20
-
Emptying the Dirt Tank
20
-
Replacing the Safety Filter Bag «H
21
-
Replacing the Filter Bag «M
22
-
Replacing the Disposal Bag «M
23
-
Replacing Filter Element «H» (Push & Clean System)
24
-
Replacing Filter Element «H» (Xtreme Clean System)
25
-
Replacing Filter Element «M» (Push & Clean System)
26
-
Replacing Filter Element «M» (Xtremeclean System)
27
-
-
Troubleshooting
28
-
Further Information
29
-
Guarantee
29
-
Tests and Approvals
29
-
EC Declaration of Conformity
29
-
Technical Data
30
-
Optional Accessories
30
-
Advertisement

Nilfisk-ALTO ATTIX 50 XC Operating Instructions Manual (29 pages)
Vacuum cleaner for wet and dry operation
Brand: Nilfisk-ALTO
|
Category: Vacuum Cleaner
|
Size: 6.09 MB
Table of Contents
-
Table of Contents
2
-
Important Safety Instructions
3
-
Description
8
-
Operating Elements
8
-
Operating Panel
9
-
Before Starting the
10
-
-
Before Starting the Cleaner
10
-
Assembling the Vacuum Cleaner
10
-
Taking Accessories out of the Packaging
10
-
Attaching the Suction Pipe Holder to the Suction Pipe
10
-
Insert the Safety Filter Bag «H
11
-
Inserting the Filter Bag «M
12
-
-
Control / Operation
14
-
Connections
14
-
Connecting the Suction Hose
14
-
Electrical Connection
14
-
Switching on the Vacuum Cleaner
14
-
Switch „ 0-I
14
-
Switch „ Auto-0-I
14
-
-
Suction Power Control
15
-
Auto-On/Off-Operation — «Auto» Switch Position
15
-
Cleaning the Filter Element
16
-
Cleaning the Filter Element » Push&Clean System » (ATTIX 30- / 50-XX PC)
16
-
Cleaning the Filter Element » Xtremeclean » (ATTIX 30- / 50-XX XC)
16
-
Check the Volume Flow Monitor
16
-
Acoustic Warning
16
-
-
Applications and
17
-
Techniques
17
-
Picking up Dry Substances
17
-
Picking up Liquids
17
-
Switching the Vacuum Cleaner off and Storage
18
-
Maintenance Plan
19
-
Maintenance Work
19
-
Emptying the Dirt Tank
19
-
Replacing the Safety Filter Bag «H
20
-
Replacing the Filter Bag «M
21
-
Replacing the Disposal Bag «M
22
-
Replacing Filter Element «H» (Push & Clean System)
23
-
Replacing Filter Element «H» (Xtreme Clean System)
24
-
Replacing Filter Element «M» (Push & Clean System)
25
-
Replacing Filter Element «M» (Xtremeclean System)
26
-
-
Troubleshooting
27
-
Further Information
28
-
Recycling the Cleaner
28
-
Guarantee
28
-
Tests and Approvals
28
-
EC Declaration of Conformity
28
-
Technical Data
29
-
Optional Accessories
29
-
Nilfisk-ALTO ATTIX 50 XC Operating Instructions Manual (26 pages)
Brand: Nilfisk-ALTO
|
Category: Vacuum Cleaner
|
Size: 1.42 MB
Table of Contents
-
Operating Instructions
1
-
Table of Contents
3
-
1 Important Safety Instructions
4
-
2 Description
8
-
Operating Elements
8
-
Operating Panel
9
-
-
3 Before Starting the Cleaner
10
-
Assembling the Vacuum Cleaner
10
-
Taking Accessories out of the Packaging
10
-
Attaching the Suction Pipe Holder to the Suction Pipe
10
-
Loadiing and Inserting the Battery (ATTIX 30-01 PC BATT)
10
-
Inserting the Filter Bag
11
-
-
4 Control / Operation
13
-
Connections
13
-
Connecting the Suction Hose
13
-
Electrical Connection
13
-
Switching on the Vacuum Cleaner
13
-
Switch „ 0-I
13
-
Switch „ Auto-0-I
13
-
-
Suction Power Control
14
-
Auto-On/Off-Operation — «Auto» Switch Position
14
-
Cleaning the Filter Element
15
-
Cleaning the Filter Element » Push&Clean System » (ATTIX 30- / 40- / 50-XX PC)
15
-
Cleaning the Filter Element » Xtremeclean » (ATTIX 30- / 40- / 50-XX XC)
15
-
-
5 Applications and
16
-
Techniques
16
-
Picking up Dry Substances
16
-
Picking up Liquids
16
-
Switching the Vacuum Cleaner off and Storage
17
-
After Finishing Work
17
-
Maintenance Plan
18
-
Maintenance Work
18
-
Emptying the Dirt Tank
18
-
Replacing the Filter Bag
19
-
Replacing the Disposal Bag
20
-
Replacing Filter Element (Push & Clean System)
21
-
Replacing Filter Element (Xtremeclean System)
22
-
-
8 Troubleshooting
23
-
9 Further Information
24
-
Recycling the Cleaner
24
-
Guarantee
24
-
Tests and Approvals
24
-
EC Declaration of Conformity
24
-
Technical Data
25
-
Optional Accessories
25
-
Advertisement
Nilfisk-ALTO ATTIX 50 XC Operating Instructions Manual (26 pages)
Nilfisk-ALTO Vacuum Cleaner
Brand: Nilfisk-ALTO
|
Category: Vacuum Cleaner
|
Size: 3.68 MB
Table of Contents
-
Table of Contents
3
-
1 Important Safety Instructions
4
-
2 Description
8
-
Operating Elements
8
-
Operating Panel
9
-
-
3 Before Starting the Cleaner
10
-
Assembling the Vacuum Cleaner
10
-
Taking Accessories out of the Packaging
10
-
Attaching the Suction Pipe Holder to the Suction Pipe
10
-
Inserting the Filter Bag
11
-
-
4 Control / Operation
13
-
Connections
13
-
Connecting the Suction Hose
13
-
Electrical Connection
13
-
Switching on the Vacuum Cleaner
13
-
Switch „ 0-I
13
-
Switch „ Auto-0-I
13
-
Suction Power Control
14
-
-
All Parts Available from
14
-
Auto-On/Off-Operation — «Auto» Switch Position
14
-
Cleaning the Filter Element
15
-
Cleaning the Filter Element » Push&Clean System » (ATTIX 30- / 40- / 50-XX PC)
15
-
-
Www.sparesgiant.com
15
-
Cleaning the Filter Element » Xtremeclean
15
-
(ATTIX 30- / 40- / 50-XX XC)
15
-
-
-
-
5 Applications and
16
-
Techniques
16
-
Picking up Dry Substances
16
-
Picking up Liquids
16
-
Switching the Vacuum Cleaner off and Storage
17
-
Maintenance Plan
18
-
Maintenance Work
18
-
Emptying the Dirt Tank
18
-
Replacing the Filter Bag
19
-
Replacing the Disposal Bag
20
-
Replacing Filter Element (Push & Clean System)
21
-
Replacing Filter Element (Xtremeclean System)
22
-
-
-
8 Troubleshooting
23
-
9 Further Information
24
-
Recycling the Cleaner
24
-
Guarantee
24
-
Tests and Approvals
24
-
EC Declaration of Conformity
24
-
Technical Data
25
-
Optional Accessories
25
-

Nilfisk-ALTO ATTIX 50 XC Operating Instructions Manual (32 pages)
Brand: Nilfisk-ALTO
|
Category: Vacuum Cleaner
|
Size: 5.76 MB
Table of Contents
-
Operating Instructions
1
-
Table of Contents
3
-
Important Safety Instructions
4
-
Description
9
-
Before Starting the Cleaner
11
-
Control / Operation
15
-
After Finishing Work
19
-
Maintenance
20
-
Troubleshooting
28
-
Further Information
29
-
Technical Data
31
-
Optional Accessories
31
Nilfisk-ALTO ATTIX 50 XC Quick Start Manual (28 pages)
Brand: Nilfisk-ALTO
|
Category: Vacuum Cleaner
|
Size: 3.15 MB
Table of Contents
-
This Document
14
-
Important Safety Instructions
14
-
Indicaciones Importantes de Seguridad
18
-
Fuentes de Peligro
19
-
Consignes de Sécurité Importantes
22
-
Sources de Danger
23
-
Warranty
27

Nilfisk-ALTO ATTIX 50 XC Quick Start Manual (20 pages)
Nilfisk-ALTO Vacuum Cleaner Quick Start Guide
Brand: Nilfisk-ALTO
|
Category: Vacuum Cleaner
|
Size: 2.56 MB

Nilfisk-ALTO ATTIX 50 XC Quick Start Manual (20 pages)
Nilfisk-ALTO Vacuum Cleaner Quick Start Guide
Brand: Nilfisk-ALTO
|
Category: Vacuum Cleaner
|
Size: 2.66 MB
Nilfisk-ALTO ATTIX 50 XC Quick Start Manual (20 pages)
Nilfisk ALTO Vacuum Cleaners Quick Start Guide
Brand: Nilfisk-ALTO
|
Category: Vacuum Cleaner
|
Size: 2.56 MB
Nilfisk-ALTO ATTIX 50 XC Quick Start Manual (16 pages)
Nilfisk-ALTO Vacuum Cleaner User Manual
Brand: Nilfisk-ALTO
|
Category: Vacuum Cleaner
|
Size: 2.33 MB
Advertisement
Related Products
-
Nilfisk-ALTO ATTIX 50-21 PC EC
-
Nilfisk-ALTO ATTIX 50 H
-
Nilfisk-ALTO ATTIX 50 PC
-
Nilfisk-ALTO ATTIX 50 HEPA
-
Nilfisk-ALTO ATTIX 50 AS/E XC
-
Nilfisk-ALTO ATTIX 50-21 PC CLEAN ROOM
-
Nilfisk-ALTO ATTIX 50- 01 PC
-
Nilfisk-ALTO ATTIX 50-01 PC
-
Nilfisk-ALTO ATTIX 550-01
-
Nilfisk Alto ATTIX 5
Nilfisk-ALTO Categories
Pressure Washer
![]()
Vacuum Cleaner
Floor Machine
Scrubber
Steam Cleaner
More Nilfisk-ALTO Manuals
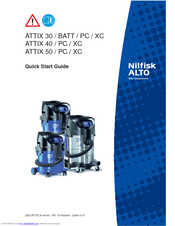
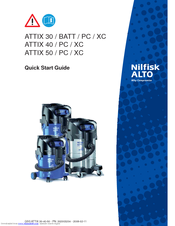
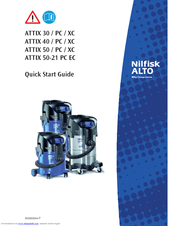
ATTIX 30 / PC / XC ATTIX 40 / PC / XC ATTIX 50 / PC / XC ATTIX 50-21 PC EC Operating Instructions 107400397 D
ATTIX 30-40-50 ATTIX 30 1 9 8 7 2 3 6 5 4 ATTIX 50 ATTIX 40
ATTIX 30-40-50 Содержание 1 русский Важные указания по технике безопасности ………………………………………………………………………………..2 2 Описание 2.1 2.2 Назначение ……………………………………………………………….6 Панель управления
ATTIX 30-40-50 русский 1 Важные указания по безопасности Маркировка указаний Перед вводом машины в эксплуатацию обязательно прочтите этот документ и храните его по рукой. ОПАСНОСТЬ Опасность, которая непосредственно повлечет за собой тяжелое и необратимое травмирование или смерть. ПРЕДУПРЕЖДЕНИЕ
ATTIX 30-40-50 Транспортировка 1. Перед транспортировкой закрыть все защелки емкости для мусора. Не опрокидывать пылесос, если в емкости для мусора имеется жидкость. 2. Не поднимать пылесос крюком крана. Хранение 1. Хранить машину в сухом и защищенном от мороза месте. Электрическое подсоединение 1.
ATTIX 30-40-50 русский Источники опасности Электрическая часть ОПАСНОСТЬ Находящиеся под напряжением детали в верхней части пылесоса. Соприкосновение с деталями, находящимися под напряжением, повлечет за собой тяжелое 1. травмирование или травмирование со смертельным исходом. 2. Ни в коем случае не
ATTIX 30-40-50 Всасывание жидкостей русский ОСТОРОЖНО Всасывание жидкостей. Не разрешается всасывать пылесосом воспламеняющиеся жидкости 1. Перед всасыванием жидкостей необходимо принципиально удалить фильтр-мешок/мешок для удаления и проверить работу поплавка или ограничения уровня воды. 2.
ATTIX 30-40-50 русский 2 Описание 2.1 Назначение 1 2 3 4 5 6 7 8 9 Ручка с направляющей для намотки соединительного шнура Место крепления держателя всасывающей трубы Удерживающий зажим Ролик Емкость для мусора Входной фитинг Выключатель Гнездо пылесоса 1) Кнопка для очистки фильтра 1) ATTIX 30 1 9
ATTIX 30-40-50 русский 2.2 Панель управления ATTIX 30- / 40- / 50-01 ATTIX 30- / 40- / 50-11 auto ATTIX 30- / 40- / 50-21 ATTIX 30-01 PC BATT 1) Специальные принадлежности для различных вариантов модели Перевод оригинального руководства по эксплуатации 469
ATTIX 30-40-50 русский 3 Перед вводом в эксплуатацию 3.1 Сборка пылесоса 3.1.1 Вынуть принадлежности из упаковки A A 3.1.2 Закрепление держателя на всасывающей трубе 1) 1. Вынуть пылесос и принадлежности из упаковки. 2. Штекер для подсоединения к сети еще не должен быть вставлен. 3. Открыть
ATTIX 30-40-50 русский 3. По окончании зарядки (светится индикация 100 %) вынуть батарею из зарядного устройства. 4. Вставить батарею в пылесос и зафиксировать ее, опустив ручку для ношения батареи. 3.3 Установка фильтрамешка A A 1. Штекер для подсоединения к сети еще не должен быть вставлен. 2.
ATTIX 30-40-50 русский 4. Крепко насадить муфту фильтра-мешка на впускной фитинг. A A 472 1) 5. Установить верхнюю часть пылесоса. 6. Закрыть удерживающие зажимы (A). Соблюдать правильное защелкивание удерживающих зажимов. Специальные принадлежности для различных вариантов модели Перевод
ATTIX 30-40-50 4 Обслуживание / эксплуатация русский 4.1 Подсоединения 4.1.1 Подсоединить всасывающий шланг 1. Подсоединить щий шланг. 4.1.2 Электрическое подсоединение 1. Следить за тем, чтобы пылесос был выключен. 2. Штекер подсоединительного шнура вставить в розетку с защитными контактами,
ATTIX 30-40-50 русский 4.2.3 Регулировка мощности всасывания 1) Положение выключателя Функция Регулировка мощности всасывания позволяет точный подбор мощности всасывания для различных видов работ по всасыванию. auto 4.2.4 Режим работы AutoOn/Off – положение выключателя “auto” 1) 1. Выключить
ATTIX 30-40-50 4.3 Очистка фильтрующего элемента 4.3.1 Очистка фильтрующего элемента (ATTIX 30- / 40- / 50-xx PC) русский Filter Cleaning System Только при всасывании без фильтра-мешка и без вставного тканевого фильтра. Если мощность всасывания снижается: 1. Повернуть выключатель в положение «I»
ATTIX 30-40-50 русский 5 Области применения и методы работы 5.1 Методы работы Дополнительные принадлежности, всасывающие сопла и всасывающие шланги могут, если ими правильно пользоваться, усилить эффективность очистки и снизить затраты на очистку. Эффективная очистка достигается в результате
ATTIX 30-40-50 6 После окончания работ 6.1 Пылесос выключить и поставить на хранение A C B 1) Специальные принадлежности для различных вариантов модели Перевод оригинального руководства по эксплуатации русский 1. Выключить пылесос и вынуть штекер шнура для подключения к сети из розетки. 2. Намотать
ATTIX 30-40-50 русский 7 Техническое обслуживание 7.1 План технического обслуживания по окончании работ при необходимости 7.2.1 Опорожнение емкости для мусора 7.2.2 Замена фильтра-мешка 7.2.3 Замена мешка для отходов 7.2.4 Замена фильтрующего элемента (Push&Clean) 7.2.5 Замена фильтрующего
ATTIX 30-40-50 7.2.2 Замена фильтрамешка A A B 1. Выключить пылесос и вынуть штекер шнура для подключения к сети из розетки. 2. Открыть удерживающие зажимы (A) и снять верхнюю часть пылесоса. Извлечение фильтра-мешка: 4. Осторожно снять муфту фильтра-мешка (B) со впускного фитинга (C). 5. Закрыть
ATTIX 30-40-50 русский 7.2.3 Замена мешка для отходов A A Извлечение мешка для удаления: 3. Завязать мешок для удаления шнуром (B). 4. Осторожно снять муфту мешка для удаления со впускного фитинга (C). 5. Закрыть муфту мешка для удаления (D) задвижкой. 6. Утилизировать мешок для удаления согласно
ATTIX 30-40-50 7.2.4 Замена фильтрующего элемента (Push & Clean System) Ни в коем случае не эксплуатировать пылесос без фильтра! A A Удаление фильтрующего элемента: 3. Повернуть зажимную шайбу фильтра против часовой стрелки и снять ее. 4. Осторожно снять фильтрующий элемент. 5. Почистить уплотнение
ATTIX 30-40-50 русский 7.2.5 Замена фильтрующего элемента (XtremeClean System) Ни в коем случае не эксплуатировать пылесос без фильтра! A A 1. Выключить пылесос и вынуть штекер шнура для подключения к сети из розетки. 2. Открыть удерживающие зажимы (A) и снять верхнюю часть пылесоса. Удаление
ATTIX 30-40-50 8 Устранение неисправностей Неисправность ‡ ‡ ‡ Мотор не работает Мотор не работает в автоматическом режиме 1) пониженная мощность всасывания Причина русский Устранение > Сработал предохранитель соединительной розетки сети • Включить предохранитель сети > Сработала защита от
ATTIX 30-40-50 русский 9 Прочее 9.1 Отдать машину на рисайклинг Отработавшую машину немедленно перевести в непригодное состояние. 1. Вынуть штекер из розетки и перерезать шнур для подсоединения к сети. 2. Не выбрасывать электроприборы в бытовой мусор! Согласно Европейской директиве 2002/96/EG по
ATTIX 30-40-50 9.5 Технические данные русский ATTIX 30 / 40 / 50 EU Voltage V Mains frequency Hz Fuse A Power consumptionIEC W CH / DK GB 230 50-21 PC EC GB 110V US FR AU/NZ ZA EU 110 120 230 230 / 240 230 230 16 15 230 50 / 60 16 10 60 13 1200 50 16 1000 50/60 16 13 16 1200 1100 ATTIX 30-01 30-01
http://www.nilfisk-alto.com HEAD QUARTER DENMARK Nilfisk-Advance Group Sognevej 25 DK-2605 Brøndby Tel.: (+45) 4323 8100 E-mail: mail.com@nilfisk-advance.com SALES COMPANIES ARGENTINA Nilfisk-Advance srl. Edificio Central Park Herrera 1855, Office 604 Ciudad Autónoma de Buenos Aires Tel.: (+54) 11
Operating instructions
ATTIX 30 / PC / XC
ATTIX 40 / PC / XC
ATTIX 50 / PC / XC
ATTIX 50-21 PC EC
107400397 E
ATTIX 30-40-50
6
5
4
9
8
7
ATTIX 40
ATTIX 30
1
2
3
ATTIX 50
ATTIX 30-40-50
Contents
instructions
2 Description
3 Before starting the cleaner
………………………………………………………………………………..2
4 Control / Operation
3.1 Assembling the vacuum cleaner…………………………………….8
3.1.1 Taking accessories out of the packaging
1)
………………………8
3.1.2 Attaching the suction pipe holder to the suction pipe
1)
……..8
3.2 Inserting the filter bag ………………………………………………….9
4.1.1 Connecting the suction hose ……………………………………….11
4.1.2 Electrical connection ………………………………………………….11
4.2 Switching on the vacuum cleaner …………………………………11
4.2.1 Switch „ 0-I “
1)
…………………………………………………………..11
4.2.2 Switch „ auto-0-I “
1)
……………………………………………………11
4.2.3 Suction power control
1)
………………………………………………12
4.2.4 Auto-On/Off-Operation — «auto» switch position
1)
……………12
4.3 Cleaning the filter element ………………………………………….13
4.3.1 Cleaning the filter element » Push&Clean System »
(ATTIX 30- / 40- / 50-xx PC) ………………………………………..13
4.3.2 Cleaning the filter element » XtremeClean »
(ATTIX 30- / 40- / 50-xx XC) ………………………………………..13
methods
6 After using the cleaner
7 Maintenance
5.1.1 Picking up dry substances…………………………………………..14
5.1.2 Picking up liquids ……………………………………………………….14
6.1 Switching the vacuum cleaner off and storage ……………….15
8 Troubleshooting
7.2.1 Emptying the dirt tank ………………………………………………..16
7.2.2 Replacing the filter bag ……………………………………………….17
7.2.3 Replacing the disposal bag ………………………………………..18
7.2.4 Replacing filter element (Push & Clean System) ……………19
7.2.5 Replacing filter element (XtremeClean System) …………….20
………………………………………………………………………………21
9.1 Recycling the cleaner …………………………………………………22
9.3 Tests and approvals……………………………………………………22
9.4 EC declaration of conformity ……………………………………….22
1)
Optional accessories / Option depending on model
Original Instruction
1
ATTIX 30-40-50
1 Important safety instructions
Symbols used to mark instructions
Prior to using the appliance for the first time, be sure to read this document through and keep it ready to hand.
DANGER
Danger that leads directly to serious or irreversible injuries, or even death.
WARNING
Danger that can lead to serious injuries or even death.
CAUTION
Danger that can lead to minor injuries and damage.
The appliance must
• only be used by persons, who have been instructed in its correct usage and explicitly commissioned with the task of operating it
• only be operated under supervision
• This machine is not intended for use by persons (including children) with reduced physical, sensory or mental capabilities, or lack of experience and knowledge.
• Children shall be supervised to make sure that they do not play with the appliance.
1. Do not use any unsafe work techniques.
2. Never use the vacuum cleaner without a filter.
3. Switch off the appliance and disconnect the mains plug in the following situations:
— Prior to cleaning and servicing
— Prior to replacing components
— Prior to changing over the appliance
— If foam develops or liquid emerges
Besides the operating instructions and the binding accident prevention regulations valid in the country of use, observe recognised regulations for safety and proper use.
Purpose and intended use
The appliance is suitable for picking up dry, non-flammable dust and liquids.
The appliance is suitable for commercial use, such as e.g. in
• Hotels, Schools, Hospitals, Factories, Shops, Offices, Hire shops
Any other use is considered as improper use. The manufacturer accepts no liability for any damage resulting from such use. The risk for such use is borne solely by the user.
Proper use also includes proper operation, servicing and repairs as specified by the manufacturer.
2 1) Optional accessories / Option depending on model
Original Instruction
Transport
Storage
Electrical connection
Extension lead
Warranty
Tests and approvals
ATTIX 30-40-50
1. Before transporting the dirt tank, close all the locks.
2. Do not tilt the cleaner if there is liquid in the dirt tank.
3. Do not use a crane hook to lift the cleaner.
1. Store the appliance in a dry place, protected from frost.
1. It is recommended that the vacuum cleaner should be connected via a residual current circuit breaker.
2. Arrange the electrical parts (sockets, plugs and couplings) and lay down the extension lead so that the protection class is maintained.
3. Connectors and couplings of power supply cords and extension leads must be watertight.
1. As an extension lead, only use the version specified by the manufacturer or one of a higher quality.
2. When using an extension lead, check the minimum cross-sections of the cable:
Cable length
up to 20 m
20 to 50 m
< 16 A
1.5 mm
2
2.5 mm
2
Cross section
< 25 A
2.5 mm
2
4.0 mm
2
Our general conditions of business are applicable with regard to the guarantee.
Unauthorised modifications to the appliance, the use of incorrect brushes in addition to using the appliance in a way other than for the intended purpose exempt the manufacturer from any liability for the resulting damage.
Electrical tests must be per formed in accordance with the provisions of safety regulations (BGV A3) and to DIN VDE 0701 Part 1 and Part
3. In ac cord ance with DIN VDE 0702 these tests must be performed at regular intervals and after repairs or modifications.
1)
Optional accessories / Option depending on model
Original Instruction
3
ATTIX 30-40-50
Risks
Electrical components
DANGER
Electric shock due to faulty mains connecting lead.
Touching a faulty mains connecting lead can result in serious or even fatal injuries.
1. Do not damage the mains power lead (e.g. by driving over it, pulling or crushing it).
2. Regularly check whether the power cord is damaged or shows signs of ageing.
3. Have the faulty mains connecting lead replaced by your
Nilfisk-Alto service representative or a qualified electrician prior to using the appliance again.
DANGER
The upper section of the vacuum cleaner contains live components.
Contact with live components leads to serious or even fatal injuries.
1. Never spray water on to the upper section of the vacuum cleaner.
CAUTION
Appliance socket *) .
The appliance socket is only designed for the purposes defined in the operating instructions. The connection of different appliances can result in damage.
1. Prior to plugging in an appliance, always switch off the vacuum cleaner and the appliance that is to be connected.
2. Read the operating instructions to the appliance to be connected and observe the safety notes contained in these.
CAUTION
Damage due to unsuitable mains voltage.
The appliance can be damaged as a result of being connected to an unsuitable mains voltage.
1. Ensure that the voltage shown on the rating plate corresponds to the voltage of the local mains power supply.
4 1) Optional accessories / Option depending on model
Original Instruction
Picking up liquids
Hazardous materials
Spare parts and accessories
Emptying dirt tank
ATTIX 30-40-50
CAUTION
Picking up liquids.
Do not pick up flammable liquids.
1. Before liquids are picked up, always remove the filter bag/ waste bag and check that the float 1) or the water level limit 1) works properly.
2. The use of a separate filter element or filter screen is recommended.
3. If foam appears, stop work immediately and empty the tank.
WARNING
Hazardous materials.
Vacuuming up hazardous materials can lead to serious or even fatal injuries
1. The following materials must not be picked up by the vacuum cleaner:
— hazardous dust
— hot materials (burning cigarettes, hot ash, etc.)
— flammable, explosive, aggressive liquids (e.g. petrol, solvents, acids, alkalis, etc.)
— flammable, explosive dust (e.g. magnesium or aluminium dust, etc.)
CAUTION
Spare parts and accessories.
The use of non-genuine spare parts and accessories can impair the safety of the appliance.
1. Only use spare parts and accessories from Nilfisk-Alto.
2. Use only the brushes supplied with the vacuum cleaner or specified in the operating manual.
CAUTION
Picking up environmentally hazardous materials.
Materials picked up can present a hazard to the environment.
1. Dispose of the dirt in accordance with legal regulations.
1)
Optional accessories / Option depending on model
Original Instruction
5
ATTIX 30-40-50
2 Description
6
5
4
9
8
7
1 Handle with receptacle for electrical lead
2 Fixing point for suction pipe holder
3 Retaining clamp
4 Castor
5 Dirt tank
6 Inlet fitting
7 Applicance switch
8 Appliance socket
1)
9 Operating knob for filter cleaning
1)
ATTIX 30
1
2
3
ATTIX 40
ATTIX 50
6 1) Optional accessories / Option depending on model
Original Instruction
ATTIX 30-40-50
1)
Optional accessories / Option depending on model
Original Instruction
ATTIX 30- / 40- / 50-01
ATTIX 30- / 40- / 50-11
auto
ATTIX 30- / 40- / 50-21
7
ATTIX 30-40-50
3 Before starting the cleaner
vacuum cleaner
3.1.1 Taking accessories out of the packaging
1)
A
3.1.2 Attaching the suction pipe holder to the suction pipe
1)
1.
2.
A
1. Take vacuum cleaner and accessories out of the packaging.
2. The mains plug should not yet be inserted into a socket.
4. Open the retaining clamps
(A) and remove the upper section of the vacuum cleaner.
5. Take the accessories
1)
out of the dirt tank and the packaging.
1. Attach the suction pipe holder to the suction pipe.
3.
8 1) Optional accessories / Option depending on model
Original Instruction
ATTIX 30-40-50
3.2 Inserting the filter bag
A
A
1. The mains plug should not yet be inserted into a socket.
2. Open the retaining clamps
(A) and remove the upper sec-tion of the vacuum cleaner.
3. Insert the filter bag into the dirt tank.
1)
Optional accessories / Option depending on model
Original Instruction
9
ATTIX 30-40-50
4. Press the filter bag connection firmly on to the inlet fitting.
A A
5. Attach the upper section of the vacuum cleaner.
6. Close the retaining clamps
(A ). Ensure that the retaining clamps fit properly.
10 1) Optional accessories / Option depending on model
Original Instruction
4 Control / Operation
4.1 Connections
4.1.1 Connecting the suction hose
1. Connect the suction hose.
ATTIX 30-40-50
4.1.2 Electrical connection
The operating voltage shown on the rating plate must corres pond to the voltage of the mains power supply.
4.2 Switching on the vacuum cleaner
4.2.1 Switch „ 0-I “
1)
4.2.2 Switch „ auto-0-I “
1)
auto
1)
Optional accessories / Option depending on model
Original Instruction
1. Ensure that the cleaner is switched off.
2. Insert the power cord into a properly installed and fused socket with earthing contact.
Switch position
0
I
Function
Off
On
Switch position
0 auto
I
Function
Off
Auto On/Off
On / manual mode
11
ATTIX 30-40-50
4.2.3 Suction power control
1)
auto
4.2.4 Auto-On/Off-Operation
— «auto» switch position
1)
The vacuum cleaner is switched on and off by the power tool connected.
Dirt is picked up from the source of dust immediately.
To comply with regulations, only approved dust producing tools should be connected.
The maximum power consumption of the connected electrical appliance is stated in section «Technical data».
Before switching the switch to position „auto“, ensure that the tool connected to the appliance socket is switched off.
auto
Switch position
Function
The suction power control switch allows precise adaptation of the suction power for different cleaning tasks.
1. Switch off the vacuum cleaner.
2. Switch off the power tool.
3. Connect the power tool and the vacuum cleaner with a suction hose.
4. Insert the plug of the power tool into the tool socket on the operating panel of the vacuum cleaner.
5. Switch on the vacuum cleaner. Switch in «auto» position.
6. Switch on the power tool. The vacuum cleaner motor starts when the connected power tool is switched on.
When the power tool is switched off, the vacuum cleaner continues to run for a short moment so that any dust in the suction hose is conveyed to the filter bag.
12 1) Optional accessories / Option depending on model
Original Instruction
ATTIX 30-40-50
4.3 Cleaning the filter element
4.3.1 Cleaning the filter element
» Push&Clean System »
(ATTIX 30- / 40- / 50-xx PC)
Only for vacuum cleaning without a filter bag and without a cloth insert filter.
Filter Cleaning System
4.3.2 Cleaning the filter element » XtremeClean »
(ATTIX 30- / 40- / 50-xx XC)
Only for vacuum cleaning without a cloth insert filter.
If suction performance drops:
1. Turn switch to position «I» (maximum suction power).
2. Close the nozzles or suction hose opening with the palm of your hand.
3. Press the button to start filter cleaning three times. The resulting stream of air removes attached dust from the slats of the filter elements.
10 sec.
To ensure that suction performance is always at its best, the filter element is automatically cleaned during operation. We recommend complete cleaning if the filter element becomes extremely dirty.
1. Switch off the vacuum cleaner
2. Close the nozzles or suction hose opening with the palm of your hand.
3. Turn the switch to position „I“ and let the cleaner operate for approx. 10 seconds with the suction hose opening closed.
1)
Optional accessories / Option depending on model
Original Instruction
13
ATTIX 30-40-50
5 Applications and techniques
5.1 Techniques
If used correctly, additional accessories, suction nozzles and suction hoses can enhance the cleaning action and reduce the cleaning effort.
Effective cleaning is achieved if you follow just a few guidelines in combination with your own practical experience in special fields.
Here are some basic tips.
5.1.1 Picking up dry substances
Before picking up dry substances, always ensure that a filter bag is inserted in the tank (see section «Accessories» for order number).
Disposal of the picked up material is then simple and hygienic.
After picking up liquids, the filter element is wet. A damp filter element clogs more quickly when dry substances are picked up. For this reason the filter element should be washed and dried or replaced by a dry element before dry substances are picked up.
5.1.2 Picking up liquids
Before liquids are picked up, always remove the filter bag/disposal bag.
The use of a separate filter element or filter screen is recommended.
Does not apply to XC machines.
If foam appears, stop work immediately and empty the tank.
To reduce the amount of foam, use foam killer Nilfisk-Alto Foam Stop
(see section «Accessories» for order number).
14 1) Optional accessories / Option depending on model
Original Instruction
ATTIX 30-40-50
6 After finishing work
6.1 Switching the vacuum cleaner off and storage
A
C
B
1. Switch off the cleaner and pull the mains plug out of the socket.
2. Wind up the power cord onto the handle (A). Begin winding up the cord at the cleaner end and not the plug end to prevent the power cord from tangling up.
3. Empty the dirt tank and clean the vacuum cleaner.
4. After picking up liquids: Store the upper section of the vacuum cleaner separately so that the filter element can dry.
5. Hang the suction hose with the floor nozzle (B) in the brackets and pack the accessories (C) away.
6. Store the cleaner in a dry room where it is protected from unauthorized use.
1)
Optional accessories / Option depending on model
Original Instruction
15
ATTIX 30-40-50
7 Maintenance
7.2.1
Emptying dirt tank
7.2.2
Replacing the filter bag
7.2.3
Replacing the disposal bag
7.2.4
Replacing filter element (Push&Clean)
7.2.5
Replacing filter element (XtremeClean)
After finishing work
When required
7.2.1 Emptying the dirt tank
After emptying the tank: clean the rim of the tank and the seals in the intermediate ring and the upper section of cleaner before refitting them.
If the seal or groove is dirty or damaged, the suction performance will be reduced.
Before reinserting the suction hose: clean the inlet fitting and hose collar.
A A
1. Switch off the vacuum cleaner and pull the mains plug out of the socket.
2. Open the retaining clamps (A) and remove the upper section of the vacuum cleaner.
3. Tip out the collected dirt.
4. Dispose of the dirt in accordance with legal regulations.
16
A A
5. Attach the upper section of the vacuum cleaner.
6. Close the retaining clamps
(B). Ensure that the retaining clamps fit properly.
1) Optional accessories / Option depending on model
Original Instruction
7.2.2 Replacing the filter bag
A
A
A
ATTIX 30-40-50
1. Switch off the vacuum cleaner and pull the mains plug out of the socket.
2. Open the retaining clamps
(A) and remove the upper section of the vacuum cleaner.
B D
C
Removing the filter bag:
3. Carefully remove the filter bag connection from the inlet fitting (C).
4. Close the filter bag connection (D) with the slider.
5. Dispose of the filter bag in accordance with legal regulations.
Inserting the filter bag:
6. Clean the dirt tank.
7. Insert the filter bag in the dirt tank.
new filter bag firmly on to the inlet fitting (C).
A
9. Attach the upper section of the vacuum cleaner.
(B). Ensure that the retaining clamps fit properly.
1)
Optional accessories / Option depending on model
Original Instruction
17
ATTIX 30-40-50
7.2.3 Replacing the disposal bag
A A
1. Switch off the vacuum cleaner and pull the mains plug out of the socket.
2. Open the retaining clamps
(A) and remove the upper section of the vacuum cleaner.
C
B
D
E
Removing the disposal bag:
3. Close the disposal bag with string (B).
4. Carefully remove the filter bag connection from the inlet fitting (C).
5. Close the disposal bag connection (D) with the slider.
6. Dispose of the disposal bag in accordance with legal regulations.
Inserting the disposal bag:
7. Clean the dirt tank.
8. Insert the disposal bag into the dirt tank.
9. Check that the ventilation holes (E) remain inside the dirt tank.
10. Press the bush of the new filter bag firmly on to the inlet fitting.
11. Fold the top edge of the disposal bag over the rim of the dirt tank.
A
A
12. Attach the upper section of the vacuum cleaner.
(A). Ensure that the retaining clamps fit properly.
18 1) Optional accessories / Option depending on model
Original Instruction
7.2.4 Replacing filter element
(Push & Clean System)
Never use the vacuum clean er without a filter.
A
A
B
A
ATTIX 30-40-50
1. Switch off the vacuum cleaner and pull the mains plug out of the socket.
2. Open the retaining clamps
(A) and remove the upper section of the vacuum cleaner.
Removing the filter element:
3. Turn the filter holder anticlockwise and remove it .
4. Carefully remove the filter element.
5. Clean the filter seal (B).
Check it for damage and replace it if necessary.
Inserting the filter element:
6. Fit the filter holder and turn it clockwise to secure it.
7. Fit the filter holder and turn it clockwise to secure it.
ter element in accordance with legal regulations.
A
9. Attach the upper section of the vacuum cleaner.
(A). Ensure that the retaining clamps fit properly.
1)
Optional accessories / Option depending on model
Original Instruction
19
ATTIX 30-40-50
7.2.5 Replacing filter element
(XtremeClean System)
Never use the vacuum clean er without a filter.
A
B
B
C
D
B
A
1. Switch off the vacuum cleaner and pull the mains plug out of the socket.
2. Open the retaining clamps
(A) and remove the upper section of the vacuum cleaner.
Removing the filter elements:
3. Open fi lter tension part (B).
4. Remove carefully the cassettes with fi lter elements.
Inserting the filter elements:
5. Insert new fi lter elements (C) into the cassettes (D).
6. Attach the cassettes with the fi lter elements onto the upper section of the vacuum cleaner.
7. Fix the fi lter tension part (B).
ter elements in accordance with legal regulations.
A A
9. Attach the upper section of the vacuum cleaner.
(A). Ensure that the retaining clamps fit properly.
20 1) Optional accessories / Option depending on model
Original Instruction
ATTIX 30-40-50
8 Troubleshooting
Fault
‡ Motor does not start
‡
‡
Motor does not run in automatic mode
1)
Reduced suction power
‡
‡
No suction power during wet cleaning
Voltage fluctuations
Cause
> Fuse of the mains socket has blown.
> Overload protection switch has tripped.
> Motor is faulty.
> Power tool/pneumatic tool is defective or not connected properly.
> The power rating of the electrical tool is too low.
•
•
•
Remedy
Connect mains fuse.
• Switch off the vacuum cleaner and allow it to cool for approx.
5 minutes. If the cleaner cannot be started again, contact the Nilfisk-Alto service department.
• Have motor changed by
Nilfisk-Alto Service.
Check that the power tool works or that the plug is inserted correctly.
Note that minimum power rating is P>40W
> Suction power selected with suction power control
1)
is too low.
• Set suction power in accordance with section
„Setting suction power“.
> Clogged suction hose/nozzle.
• Clean suction hose/nozzle
> Tank, disposal bag or filter bag is full.
• See «Emptying tank» or
«Replacing disposal bag, filter bag» sections.
> Filter element is clogged.
• See section „Cleaning filter element“ and „Replacing filter element“.
• Replace seal.
> Seal between tank and upper section of vacuum cleaner is faulty or missing.
> Cleaning mechanism is defective.
• Contact Nilfisk-Alto Service.
> Tank is full. • Switch off the cleaner. Empty the tank.
> Impedance of power supply is too high.
• Connect the cleaner to another socket closer to the fuse box.
Voltage fluctuations over
7% should not occur if the impedance at the transfer point is
0.15 .
1)
Optional accessories / Option depending on model
Original Instruction
21
ATTIX 30-40-50
9 Further information
9.1 Recycling the cleaner
9.2 Guarantee
Make the old cleaner unusable immediately.
1. Unplug the cleaner.
2. Cut the power cord.
3. Do not discard of electrical appliances with household waste.
As specified in European Directive 2002/96/EC on old electrical and electronic appliances, used electrical goods must be collected separately and recycled ecologically. Contact your local authorities or your nearest dealer for further information.
Our general conditions of business are applicable with regard to the guarantee.
Unauthorised modifications to the appliance, the use of incorrect brushes in addition to using the appliance in a way other than for the intended purpose exempt the manufacturer from any liability for the resulting damage.
9.3 Tests and approvals
Electrical tests must be performed in accordance with the provisions of safety regulations (BGV A3) and to DIN VDE 0701 Part 1 and Part
3. In accordance with DIN VDE 0702 these tests must be performed at regular intervals and after repairs or modifications.
The vacuum cleaner has been approved in accordance with IEC/EN
60335-2-69.
9.4 EC declaration of conformity
22
EU Declaration of Conformity
Product:
Type:
The design of the unit corre sponds to the following pertinent regulations:
Applied harmonised standards:
Applied national standards and technical specifications:
Vacuum cleaner for wet and dry operation
ATTIX 30 / 40 / 50
EC Machine Directive 2006/42/EC.
EC EMC Directive 2004/108/EC
EC — RoHS Directive 2011/65/EC
EN 60335-1: 2012
EN 60335-2-69: 2009
EN 55014-1: 2006+A1: 2009+A2: 2011
EN 55014-2: 1997+A1: 2001+A2: 2008
EN 61000-3-2: 2006+A1: 2009+A2: 2009
EN 61000-3-3: 2008
DIN EN 60335-2-69:2010
Name and address of the person autho rised to compile the technical fi le:
Anton Sørensen
General Manager, Technical Operations EAPC
Nilfisk-Advance A/S
Sognevej 25
DK-2605 Brøndby
Identity and signature of the person empowered to draw up the declaration on behalf of the manufacturer:
Anton Sørensen
General Manager, Technical Operations EAPC
Place and date of the declaration:
Nilfisk-Advance A/S
Sognevej 25
DK-2605 Brøndby
Hadsund, 04-04-2013
1) Optional accessories / Option depending on model
Original Instruction
ATTIX 30-40-50
Voltage
Mains frequency
Fuse
Power consumption
IEC
V
Hz
A
W
EU
16
CH / DK
230
10
ATTIX 30 / 40 / 50
GB 230
50 / 60
13
GB 110V
110
16
1200 1000
US
120
60
15
FR
230
16
AU/NZ
230 / 240
50
16
1200
ZA
230
13
50-21 PC EC
EU
230
50/60
16
1100
ATTIX
30-01
30-01 PC
40-01 PC 50-01 PC
30-11 PC
30-21 PC
30-21 XC
40-21 PC
40-21 XC
50-21 PC
51-21 XC
50-21
PC EC
Connected load for appliance socket
Total connected load
W
W
—
1200
1000 (GB 110, US)
2400
1750 (GB 110)
600 (US)
3600
2750 (GB 110)
1440 (US)
2400
3500
Air flow rate
(max.)
Vacuum m3/h l/min mbar/ hPA kPa dB(A)
+/-2
222/3700
192/3200 (GB 110, US)
250 / 25
230 / 23 (GB 110, US)
261
3600
230 /
23
Sound pressure
IEC 704
62
Sound level dB(A)
+/-2
59
Vibration
ISO 5349
Power cord: Length m/s² ≤ 2,5
Power cord: Type
1. (EU, AU)
2. (GB 110V)
3. (ZA, GB
230V)
4. (CH)
6. (US)
3. (EU, GB
230V)
4. (CH)
2. (GB 110V)
3. (EU, DK, ZA,
GB 230V)
4. (CH)
6. (US)
II
7,5
3. (EU, GB
230V, DK,
AU)
5. (GB 110V)
4. (CH)
6. (US)
3. (EU, AU)
4. (CH)
3. (EU, GB 230V,
DK, AU)
5. (GB 110V)
6. (US)
Protection class
Type of protection
(splash water protected)
Radio interference level
Tank volume
Width
Depth l mm mm
30
360
37
440
47
360
IPX4
EN 55014-1
30
360
450
37
440
I
47
360
Height
Weight mm kg
600
10
740
13
750
11
600
10 (PC)
11 (XC)
740
12 (PC)
14 (XC)
11 (PC)
12 (XC)
1) H05RR-F 2×0.75 2) H05BQ-F 2×1.0 3)H05RR-F 3G1,5 4) H05RR-F 3G1,0 5) H07BQ-F 3G2,5 6) SJTW-A AWG 16/3
750
3. (EU)
11
Description
Fleece filter bag Attix 30 (5 pcs.)
Fleece filter bag Attix 40, 50 (5 pcs.)
Disposal bag Attix 30, 40, 50 (5 pcs.)
Zylindrical filter element PC
Flat filter element XC (2 Stück)
Cloth insert filter Attix 30
Cloth insert filter Attix 50
Nilfisk-Alto-Foam-Stop (6x1l)
1)
Optional accessories / Option depending on model
Original Instruction
Order No.
302004000
302004004
302000728
302000461
302002842
302000525
302000606
8469
23
HEAD QUARTER
DENMARK
Nilfi sk-Advance A/S
Sognevej 25
DK-2605 Brøndby
Tel.: (+45) 4323 8100 www.nilfi sk-advance.com
SALES COMPANIES
ARGENTINA
Nilfi sk-Advance srl.
Herrera 1855, 6 fl oor, Of. A-604
ZC 1293 – Ciudad Autónoma de Buenos Aires – Argentina www.nilfi sk-alto.com
AUSTRALIA
Nilfi sk-ALTO
Unit 1, 13 Bessemer Street Blacktown
NSW 2148 Australia www.nilfi sk-alto.com.au
AUSTRIA
Nilfi sk-ALTO
Geschäftsbereich der Nilfi sk-Advance GmbH
Metzgerstraße 68
A-5101 Bergheim/Salzburg www.nilfi sk-alto.at
BELGIUM
Nilfi sk-Advance NV/SA
Riverside Business Park
Boulevard Internationalelaan 55
Bâtiment C3/C4 Gebouw
Bruxelles 1070 Brussel www.nilfi sk.be
CHILE
Nilfi sk-Advance S.A.
San Alfonso 1462, Santiago www.nilfi sk.com
CHINA
Nilfi sk-Advance Cleaning Equipment
(Shanghai) Co Ltd.
No. 4189, Yindu Road
Xinzhuang Industrial Park
Shanghai 201108 www.nilfi sk.cn
CZECH REPUBLIC
Nilfi sk-Advance s.r.o.
Do Certous 1
VGP Park Horní Pocernice, Budova H2
CZ-190 00 Praha 9 www.nilfi sk.cz
DENMARK
Nilfi sk-ALTO Danmark
Industrivej 1
Hadsund, DK-9560 www.nilfi sk-alto.dk
FINLAND
Nilfi sk-Advance OY Ab
Koskelontie 23E
Espoo, FI-02920 www.nilfi sk.fi
FRANCE
Nilfi sk-Advance SAS
Division ALTO
BP 246
91944 Courtaboeuf Cedex www.alto-fr.com
GERMANY
Nilfi sk-ALTO
Geschäftsbereich der Nilfi sk-Advance AG
Guido-Oberdorfer-Straße 10
89287 Bellenberg www.nilfi sk-alto.de
GREECE
Nilfi sk-Advance A.E.
8, Thoukididou Str.
Argiroupoli,Athens, GR-164 52 www.nilfi sk.gr
HOLLAND
Nilfi sk-Advance B.V.
Versterkerstraat 5
1322 AN ALMERE www.nilfi sk.nl
HONG KONG
Nilfi sk-Advance Ltd.
2001 HK Worsted Mills Ind’l Bldg.
31-39 Wo Tong Tsui St.
Hong Kong, Kwai Chung, N.T.
www.nilfi sk.com
HUNGARY
Nilfi sk-Advance Kereskedelmi Kft.
H-2310 Szigetszentmiklós-Lakihegy
II. Rákóczi Ferenc út 10.
www.nilfi sk.hu
INDIA
Nilfi sk-Advance India Limited
Pramukh Plaza, ‘B’ Wing, 4th fl oor, Unit No. 403
Cardinal Gracious Road, Chakala
Andheri (East), Mumbai 400 099 www.nilfi sk.com
IRELAND
Nilfi sk-Advance
1 Stokes Place
St. Stephen’s Green
Dublin 2, Ireland www.nilfi sk-alto.ie
ITALY
Nilfi sk-Advance S.p.A.
Strada Comunale Della Braglia, 18
Guardamiglio, Lombardia, I-26862 www.nilfi sk.it
JAPAN
Nilfi sk-Advance Inc.
1-6-6 Kita-Shinyokohama
Kouhoku-Ku
Yokohama 223-0059 www.nilfi sk-advance.co.jp
KOREA
NIlfi sk-Advance Korea
471-4, Kumwon B/D 2F,
Gunja-Dong, Gwangjin-Gu, Seoul www.nilfi sk-advance.kr
MALAYSIA
Nilfi sk-Advance Sdn Bhd
SD 33, Jalan KIP 10
Taman Perindustrian KIP
Sri Damansara
52200 Kuala Lumpur
Malaysia www.nilfi sk.com
MEXICO
Nilfi sk Advance de Mexico S. de R.L. de C.V.
Agustin M. Chavez 1, PB-004
Col. Centro Ciudad Santa Fe
C.P. 01210 México, D.F.
www.nilfi sk-advance.com.mx
NEW ZEALAND
Nilfi sk-Advance NZ Ltd
Danish House
6 Rockridge Avenue
Penrose Auckland NZ 1135 www.nilfi sk.com.au
NORWAY
Nilfi sk-Advance AS
Bjørnerudvejen 24
Oslo, N-1266 www.nilfi sk-alto.no
PERU
Nilfi sk-Advance S.A.C.
Calle Boulevard 162, Of. 703, Lima 33- Perú
Lima www.nilfi sk.com
POLAND
Nilfi sk-Advance Sp. z.o.o ul. 3-go Maja 8, Bud. B4
Pruszków, PL-05-800 www.nilfi sk-alto.pl
PORTUGAL
Nilfi sk-Advance, Lda.
Sintra Business Park
Zona Industrial Da Abrunheira
Edifi cio 1, 1o A
Sintra, P-2710-089 www.nilfi sk.pt
RUSSIA
Nilfi sk-Advance LLC
Vyatskaya str. 27, bld. 7, 1st fl oor
Moscow, 127015 www.nilfi sk.ru
SOUTH AFRICA
WAP South Africa (Pty) Ltd
12 Newton Street
1620 Spartan, Kempton Park www.wap.co.za
SINGAPORE
Den-Sin
22 Tuas Avenue 2
Singapore www.nilfi sk.com
SPAIN
Nilfi sk-Advance, S.A.
Torre D’Ara
Passeig del Rengle, 5 Plta.10ª
Mataró, E-0830222 www.nilfi sk.es
SWEDEN
Nilfi sk-Advance AB
Taljegårdsgatan 4
431 53 Mölndal
Website: www.nilfi sk-alto.se
SWITZERLAND
NA Sondergger AG
Nilfi sk-ALTO Generalvertretung
Mühlestrasse 10
CH-9100 Herisau www.nilfi sk-alto.ch
TAIWAN
Nilfi sk-Advance Ltd.
Taiwan Branch (H.K.)
No. 5, Wan Fang Road, Taipei www.nilfi sk-advance.com.tw
THAILAND
Nilfi sk-Advance Co. Ltd.
89 Soi Chokechai-Ruammitr
Viphavadee-Rangsit Road
Jomphol, Jatuchak
Bangkok 10900 www.nilfi sk.com
TURKEY
Nilfi sk-Advance Prof. Tem. Ek. Tic. A.S.
Serifali Mh. Bayraktar Bulv. Sehit Sk. No:7
Ümraniye, Istanbul 34775 www.nilfi sk.com.tr
UNITED KINGDOM
Nilfi sk-ALTO
Bowerbank Way, Gilwilly Industrial Estate
Penrith, Cumbria
GB-CA11 9BQ www.nilfi sk-alto.co.uk
UNITED ARAB EMIRATES
Nilfi sk-Advance Middle East Branch
SAIF-Zone, P. O. Box 122298
Sharjah www.nilfi sk.com
USA
Nilfi sk-Advance
14600 21st Ave. North
Plymouth MN 55447-3408 www.nilfi sk-alto.us
Nilfi sk-Advance, Inc.
Industrial Vacuum Division
740 Hemlock Road, Suite 100
Morgantown, PA 19543 www.nilfi sk-alto.us
VIETNAM
Nilfi sk-Advance Co., Ltd.
No.51 Doc Ngu Str. Lieu Giai Ward
Ba Dinh Dist. Hanoi www.nilfi sk.com
(скачивание инструкции бесплатно)
Формат файла: PDF
Доступность: Бесплатно как и все руководства на сайте. Без регистрации и SMS.
Дополнительно: Чтение инструкции онлайн

ATTIX 30 / PC / XC
ATTIX 40 / PC / XC
ATTIX 50 / PC / XC
ATTIX 50-21 PC EC
Operating Instructions
107400397 D
Страница:
(1 из 26)
навигация

1

2

3

4

5

6

7

8

9

10

11

12

13

14

15

16

17

18

19

20

21

22

23

24

25

26
Оглавление инструкции
- Страница 1 из 27
ATTIX 30 / PC / XC ATTIX 40 / PC / XC ATTIX 50 / PC / XC ATTIX 50-21 PC EC Operating Instructions 107400397 D - Страница 2 из 27
ATTIX 30-40-50 ATTIX 30 1 9 8 7 2 3 6 5 4 ATTIX 50 ATTIX 40 - Страница 3 из 27
ATTIX 30-40-50 Содержание 1 русский Важные указания по технике безопасности ………………………………………………………………………………..2 2 Описание 2.1 2.2 Назначение ……………………………………………………………….6 Панель управления - Страница 4 из 27
ATTIX 30-40-50 русский 1 Важные указания по безопасности Маркировка указаний Перед вводом машины в эксплуатацию обязательно прочтите этот документ и храните его по рукой. ОПАСНОСТЬ Опасность, которая непосредственно повлечет за собой тяжелое и необратимое травмирование или смерть. ПРЕДУПРЕЖДЕНИЕ - Страница 5 из 27
ATTIX 30-40-50 Транспортировка 1. Перед транспортировкой закрыть все защелки емкости для мусора. Не опрокидывать пылесос, если в емкости для мусора имеется жидкость. 2. Не поднимать пылесос крюком крана. Хранение 1. Хранить машину в сухом и защищенном от мороза месте. Электрическое подсоединение 1. - Страница 6 из 27
ATTIX 30-40-50 русский Источники опасности Электрическая часть ОПАСНОСТЬ Находящиеся под напряжением детали в верхней части пылесоса. Соприкосновение с деталями, находящимися под напряжением, повлечет за собой тяжелое 1. травмирование или травмирование со смертельным исходом. 2. Ни в коем случае не - Страница 7 из 27
ATTIX 30-40-50 Всасывание жидкостей русский ОСТОРОЖНО Всасывание жидкостей. Не разрешается всасывать пылесосом воспламеняющиеся жидкости 1. Перед всасыванием жидкостей необходимо принципиально удалить фильтр-мешок/мешок для удаления и проверить работу поплавка или ограничения уровня воды. 2. - Страница 8 из 27
ATTIX 30-40-50 русский 2 Описание 2.1 Назначение 1 2 3 4 5 6 7 8 9 Ручка с направляющей для намотки соединительного шнура Место крепления держателя всасывающей трубы Удерживающий зажим Ролик Емкость для мусора Входной фитинг Выключатель Гнездо пылесоса 1) Кнопка для очистки фильтра 1) ATTIX 30 1 9 - Страница 9 из 27
ATTIX 30-40-50 русский 2.2 Панель управления ATTIX 30- / 40- / 50-01 ATTIX 30- / 40- / 50-11 auto ATTIX 30- / 40- / 50-21 ATTIX 30-01 PC BATT 1) Специальные принадлежности для различных вариантов модели Перевод оригинального руководства по эксплуатации 469 - Страница 10 из 27
ATTIX 30-40-50 русский 3 Перед вводом в эксплуатацию 3.1 Сборка пылесоса 3.1.1 Вынуть принадлежности из упаковки A A 3.1.2 Закрепление держателя на всасывающей трубе 1) 1. Вынуть пылесос и принадлежности из упаковки. 2. Штекер для подсоединения к сети еще не должен быть вставлен. 3. Открыть - Страница 11 из 27
ATTIX 30-40-50 русский 3. По окончании зарядки (светится индикация 100 %) вынуть батарею из зарядного устройства. 4. Вставить батарею в пылесос и зафиксировать ее, опустив ручку для ношения батареи. 3.3 Установка фильтрамешка A A 1. Штекер для подсоединения к сети еще не должен быть вставлен. 2. - Страница 12 из 27
ATTIX 30-40-50 русский 4. Крепко насадить муфту фильтра-мешка на впускной фитинг. A A 472 1) 5. Установить верхнюю часть пылесоса. 6. Закрыть удерживающие зажимы (A). Соблюдать правильное защелкивание удерживающих зажимов. Специальные принадлежности для различных вариантов модели Перевод - Страница 13 из 27
ATTIX 30-40-50 4 Обслуживание / эксплуатация русский 4.1 Подсоединения 4.1.1 Подсоединить всасывающий шланг 1. Подсоединить щий шланг. 4.1.2 Электрическое подсоединение 1. Следить за тем, чтобы пылесос был выключен. 2. Штекер подсоединительного шнура вставить в розетку с защитными контактами, - Страница 14 из 27
ATTIX 30-40-50 русский 4.2.3 Регулировка мощности всасывания 1) Положение выключателя Функция Регулировка мощности всасывания позволяет точный подбор мощности всасывания для различных видов работ по всасыванию. auto 4.2.4 Режим работы AutoOn/Off – положение выключателя “auto” 1) 1. Выключить - Страница 15 из 27
ATTIX 30-40-50 4.3 Очистка фильтрующего элемента 4.3.1 Очистка фильтрующего элемента (ATTIX 30- / 40- / 50-xx PC) русский Filter Cleaning System Только при всасывании без фильтра-мешка и без вставного тканевого фильтра. Если мощность всасывания снижается: 1. Повернуть выключатель в положение «I» - Страница 16 из 27
ATTIX 30-40-50 русский 5 Области применения и методы работы 5.1 Методы работы Дополнительные принадлежности, всасывающие сопла и всасывающие шланги могут, если ими правильно пользоваться, усилить эффективность очистки и снизить затраты на очистку. Эффективная очистка достигается в результате - Страница 17 из 27
ATTIX 30-40-50 6 После окончания работ 6.1 Пылесос выключить и поставить на хранение A C B 1) Специальные принадлежности для различных вариантов модели Перевод оригинального руководства по эксплуатации русский 1. Выключить пылесос и вынуть штекер шнура для подключения к сети из розетки. 2. Намотать - Страница 18 из 27
ATTIX 30-40-50 русский 7 Техническое обслуживание 7.1 План технического обслуживания по окончании работ при необходимости 7.2.1 Опорожнение емкости для мусора 7.2.2 Замена фильтра-мешка 7.2.3 Замена мешка для отходов 7.2.4 Замена фильтрующего элемента (Push&Clean) 7.2.5 Замена фильтрующего - Страница 19 из 27
ATTIX 30-40-50 7.2.2 Замена фильтрамешка A A B 1. Выключить пылесос и вынуть штекер шнура для подключения к сети из розетки. 2. Открыть удерживающие зажимы (A) и снять верхнюю часть пылесоса. Извлечение фильтра-мешка: 4. Осторожно снять муфту фильтра-мешка (B) со впускного фитинга (C). 5. Закрыть - Страница 20 из 27
ATTIX 30-40-50 русский 7.2.3 Замена мешка для отходов A A Извлечение мешка для удаления: 3. Завязать мешок для удаления шнуром (B). 4. Осторожно снять муфту мешка для удаления со впускного фитинга (C). 5. Закрыть муфту мешка для удаления (D) задвижкой. 6. Утилизировать мешок для удаления согласно - Страница 21 из 27
ATTIX 30-40-50 7.2.4 Замена фильтрующего элемента (Push & Clean System) Ни в коем случае не эксплуатировать пылесос без фильтра! A A Удаление фильтрующего элемента: 3. Повернуть зажимную шайбу фильтра против часовой стрелки и снять ее. 4. Осторожно снять фильтрующий элемент. 5. Почистить уплотнение - Страница 22 из 27
ATTIX 30-40-50 русский 7.2.5 Замена фильтрующего элемента (XtremeClean System) Ни в коем случае не эксплуатировать пылесос без фильтра! A A 1. Выключить пылесос и вынуть штекер шнура для подключения к сети из розетки. 2. Открыть удерживающие зажимы (A) и снять верхнюю часть пылесоса. Удаление - Страница 23 из 27
ATTIX 30-40-50 8 Устранение неисправностей Неисправность ‡ ‡ ‡ Мотор не работает Мотор не работает в автоматическом режиме 1) пониженная мощность всасывания Причина русский Устранение > Сработал предохранитель соединительной розетки сети • Включить предохранитель сети > Сработала защита от - Страница 24 из 27
ATTIX 30-40-50 русский 9 Прочее 9.1 Отдать машину на рисайклинг Отработавшую машину немедленно перевести в непригодное состояние. 1. Вынуть штекер из розетки и перерезать шнур для подсоединения к сети. 2. Не выбрасывать электроприборы в бытовой мусор! Согласно Европейской директиве 2002/96/EG по - Страница 25 из 27
ATTIX 30-40-50 9.5 Технические данные русский ATTIX 30 / 40 / 50 EU Voltage V Mains frequency Hz Fuse A Power consumptionIEC W CH / DK GB 230 50-21 PC EC GB 110V US FR AU/NZ ZA EU 110 120 230 230 / 240 230 230 16 15 230 50 / 60 16 10 60 13 1200 50 16 1000 50/60 16 13 16 1200 1100 ATTIX 30-01 30-01 - Страница 26 из 27
http://www.nilfisk-alto.com HEAD QUARTER DENMARK Nilfisk-Advance Group Sognevej 25 DK-2605 Brøndby Tel.: (+45) 4323 8100 E-mail: mail.com@nilfisk-advance.com SALES COMPANIES ARGENTINA Nilfisk-Advance srl. Edificio Central Park Herrera 1855, Office 604 Ciudad Autónoma de Buenos Aires Tel.: (+54) 11 - Страница 27 из 27