| This article includes terminology or recommendations that are popular in the meta game, and is subject to change. |
This article includes terminology, conventions, or recommendations that are popular in the meta game, and is subject to change.
| This article may need cleanup to meet quality standards. |
This article may need cleanup to meet quality standards.
Please help improve this if you can. The Discussion page may contain suggestions.
Reason: «Information on Temperature out of date (Feb 2019)«
This is a community-written Starting Guide for One Hour One Life.
More detailed step-by-step tutorials are available on the Town Guide and Eve Guide pages.
Introduction[]
One Hour One Life (OHOL) is a collaborative survival game where players have 60 minutes to live an entire life from birth to old age. Players are continually spawned as the children of other players, and the overall objective is to help one’s family lineage last as many generations as possible.
A lineage begins when an original Eve establishes a primitive village. As multiple generations pass, players develop more advanced technology and deplete the natural resources around a settlement. Villages are constantly threatened by starvation, wild animals, infertility, and even crime. One question is always at stake: can one tiny village defeat the odds and grow into a flourishing city? Or will everything collapse and crumble to chaos?
To address these challenges, the player community has evolved unofficial guidelines, conventions, and meta strategies to increase the chances that a settlement survives. Several components to the meta game are universally accepted and considered common knowledge by the existing player base. This guide explains meta terminology and essential concepts that players are likely to encounter while playing the game.
OHOL is a game with a steep learning curve, so it is absolutely normal for beginners to feel overwhelmed. Over 2000 craftable objects exist in the game, and few players learn everything. Instead, OHOL is a game about active learning, experimenting, and teaching. As a result, don’t be shy about asking your in-game «mom» for help, and remember to teach the next generation everything you know!
Controls[]
Movement and Actions[]
One Hour One Life primarily uses the mouse buttons to control the player character. Most actions are performed using a <left-click>, such as moving the character. <Left-click> is also used for interacting with objects, picking up items, crafting, and eating. <Right-click> is used to drop items, switch items, remove items from containers, and to use weapons.
The <space-bar> can be held down to prevent the camera from moving.
Speech[]
The <enter> key is used to open a speech box into which messages can be typed.
The maximum length of a message that can be typed depends on the player character’s age. A baby can only type 1 symbol, and a 60-year-old elder can type 60 symbols. The maximum message length increases by one symbol every minute, then increases in childhood, and levels out as an adult. Speech from players outside of the family lineage is automatically scrambled into a garbled foreign language. As different families talk to each other, they’ll gradually overcome this language barrier.
Certain special phrases have unique game behavior. There are phrases for naming oneself or children, granting property rights, and cursing disruptive troll players who abuse the game. For example:
- «MY NAME IS DOE» — Sets the player’s family name to «DOE», if the player does not already have a family name.
- «YOUR NAME IS TOM» — Sets an unnamed baby’s name to «TOM».
- «CURSE MARY SUE» — Curses the player named «MARY SUE».
Console Commands[]
See main article: Console Commands
The speech box can also be used to type various console commands by starting with a <forward-slash> («/»).
Console commands can be used for making emotes, searching for crafting recipes, and performing suicide as a baby.
User Interface[]
Age and Time[]
See main article: Life Stages
Players age one year for each minute that passes in the game. If a player survives until age 60, they die of old age.
Age impacts the length of messages a player can write, the size of the Food Meter, and limits the types of activities a player can perform as a child.
Food Meter[]

See main article: Food Meter
The bottom left of the screen is occupied by the Food Meter. Each box on the Food Meter is called a «pip.» If the Food Meter is depleted, the player character will starve. Eating food restores the Food Meter.
The size of the Food Meter changes according to age. At birth, the Food Meter contains four pips and increases by one pip per minute until it reaches a maximum of 20 pips during adulthood (age 25-39). During old age, the Food Meter begins to shrink again. At three pips, the player character will die of old age.
The rate that the Food Meter drains ranges from 4 to 20 seconds per pip, depending on the temperature, with an additional 20 seconds possible for being in an enclosed building. At temperature extremes, players consume food 5 times faster than being at the optimal temperature. As a result, it is recommended for players to obtain or craft clothes as soon as possible to reduce overall food consumption. The current amount of food consumption can be seen at any time by hovering over the temperature meter.
Yum Bonus[]
See main article: Yum Bonus
Eating a «chain» of new («yum») foods builds the Yum Multiplier. Each time a new food is eaten, the Yum Multiplier is added to the Yum Bonus. The Yum Bonus is a slowly decaying hidden Food Meter that stores extra free food value. The regular Food Meter will not decline as long as a Yum Bonus is active.
Experienced players are able to «chain» the Yum Multiplier to high values, maintain a positive Yum Bonus, and thus reduce the amount of food they need to eat by drastic amounts. It is highly recommended that players eat a large variety of foods as much as possible, since eating new foods gives extra caloric value. Starvation is the most common cause of death in One Hour One Life, so repetitively eating the same food is often inefficient and wasteful.
The Food Guide provides an overview on how to identify and eat the most efficient foods.
Temperature Meter[]
![]()
See main article: Temperature
The bottom right of the screen is occupied by the Temperature Meter. An arrow at the midpoint represents an optimal temperature.
Temperature affects the rate that food is drained from the Food Meter. Extreme temperatures drain food up to 5 times faster than being at an optimal temperature. Consequently, players are highly recommended to obtain and wear clothes as quickly as possible. The current amount of food consumption can be seen at any time by hovering over the temperature meter.
Many factors contribute to temperature: biome, fire, clothing, floors, buildings, and disease.
Clothing insulates against temperature extremes by slowing the rate that the temperature meter changes. Crossing directly from a cold biome to a hot biome can cause the temperature meter to spike to an extreme.
Game Mechanics[]
Tutorial[]
See also: Tutorial Guide
The first time the game is played, the player will be spawned in the tutorial.
The tutorial covers the game controls, food, temperature, clothes, yum bonus, crafting, names, and curses. The player must start a fire and light a torch in order to complete the tutorial. An optional section at the end of the tutorial allows for the player to experiment with crafting and smithing with a limited set of materials.
Spawning[]
In the main game, players will spawn as the child of another player, or rarely, as an «Eve».
The spawning algorithm is random, with certain factors influencing the fertility of mothers. In most circumstances, a player will spawn in an established settlement typically classified by its technology level (e.g. village, town, city).
During infancy, players are helpless and must depend on their mother for breast milk. It is common practice for babies to say F when they need food (typically around 1-2 pips on the food meter).
If a baby does not wish to play, they can type the console command: /die to suicide with sudden infant death. It is poor etiquette for babies to suicide by running away from their mothers, as this prevents the mother from giving birth to another child for a period of time. This is troublesome in small villages or declining towns, because the lack of female babies can cause a family to go extinct. The /die command is preferred because it resets the birth cooldown timer for the mother, and prevents your life from affecting their genetic score.
Family Specialty[]
Skin tone isn’t merely for appearance or language barriers, it also affects which extreme biome you specialize in. It’s impossible to interact with any items or features outside your specialty biome, and characters will drop any item they’re holding if they attempt to enter.
- Black-skinned families are adapted to Desert biomes. Horses are found here, which are important for long distance travel, trade, and harvesting.
- Pale skinned and red-haired families are adapted to Tundra biomes. Your town can’t progress technologically without the oil that Tarry Spots provide here.
- Brown-skinned families are adapted to Jungle biomes. Various edible flora can only grow here, as well as the all-important Rubber Tree (for tires).
- Pale-skinned and blond-haired families have no biome specialty. However, they are polylingual from the start, allowing them to communicate easily with other families for trade and cooperation.
Lives[]
As of Version 244, the number of lives a player gets per day is limited. A new player starts with 48 lives, then earns one new life every 5 minutes if they are not already at 48 lives. These regenerate if you are playing. So you can’t just fully regenerate your 48-life buffer overnight whilst you are sleeping.
Eve[]
An Eve is the first player within the family. For more information about being an Eve, scroll down to the section of ‘life as an eve’ or see the Eve wiki page.
In terms of spawning as an eve, this can be achieved in one of three ways:
- Wait until you naturally spawn as an eve; this way is by far the least efficient, but allows the player to experience other lives in the meantime.
- Becoming a «Pseudo-Eve»; a «pseudo-eve» is when a player from a pre-existing family deserts the family and/or its main base, and starts afresh in the wild. Pseudo-Eves cannot choose their own name, or start their own «official» family tree.
- Joining a new server. A method described by steam user Averest demonstrates how to join a fresh server, as a guaranteed eve. In the game’s main menu settings, the player can input a server address to join when they spawn. Empty servers and their addresses can be found here.
Naming[]
It is possible, and recommended, to choose a family name as an Eve. This can be accomplished by using one of a variety of phrases, such as «I am X», where X is the desired family name. You will then be styled as «Eve X». In addition, it is possible to give first names to your children by using phrases such as «You are NAME» while holding them. Your children will then be styled as «NAME X». You can name children and adults as well if they do not have a name. Just stand near them and say «You are NAME» but they will not receive your family name, only a first name. Should you have a daughter but fail to name her she will no longer be able to pass your family name onto her own children (though she will still be considered to be related to you along with her children, if any). Names are selected according to external lists (first and last) and should you select a name that is not on the list the game will automatically select a similar one.
A link to view Family Trees can be accessed on the game’s main menu and at the top of the official OHOL website.
See also: Names • Lineage Ban
Crafting[]
In One Hour One Life, the player can craft a variety of different items which will aid them and their family for generations to come. To find out how to craft an item, type /[item name] in the ingame chat or ask a fellow player. For more information on crafting, see the Crafting wiki page.
Child-bearing and Parenting[]
If you are female you can give birth at any time from the age of 14 to the age of 40, it is possible to give first names to your children by using phrases such as «You are NAME» while holding them. Children are unable to interact with items until the age of 3 making it the player’s responsibility to feed and clothe the child if clothing is available. Females can feed children breast milk if they are still fertile by picking up the child, but be warned this will cost the females food meter to deplete. Holding a baby continuously when fertile will keep them full without depleting your food meter.
Property[]
Curses[]
For information on curses, see the Curse wiki page
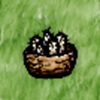
Death[]
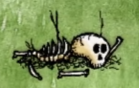
Death is a tragic thing to happen. The best i can say before you die atleast help your civilization. It does not matter what you do you will always die sometime. Dying leaves behind a Bone Pile— and bone piles can be buried using a Shovel, producing a Grave.
The World[]
The Server[]
Biomes[]
Biomes are zones where only certain resources spawn. A basic understanding is useful in locating early-game food and materials to craft tools, as well to avoid dangerous animals. Note that this list is incomplete, focusing only on the resources you will be using early on, and that some of these items may be found in more than one biome. For more complete list, see the Biomes page.
— Grasslands have berries, milkweed, burdock, onion, garlic, the early trees you’ll need, and soil.
— Yellow prairies have rabbits, wheat, teosinte, and wild carrots.
— Swamps have tule reeds, goose ponds, and clay. Watch out for boars.
— Badlands have rocks and flint. Watch out for bears and wolves.
— Tundra biomes have seals and rocks. These areas are cold and will lower a player’s temperature. It may be better to avoid tundra in early game if you can.
— Deserts have cacti, flint and rocks. These areas are hot and will raise a player’s temperature. Watch out for snakes.
— Jungles have bananas but also mosquitos. These areas are warm and will raise a player’s temperature.


Non-renewable Resources[]
Renewable Resources[]
Natural Spring[]
Stacking a total of ten Stone on a Natural Spring will create a Well Site, this also unlocks iron to the east and west, and locks well sites in a square, four in each direction. Be sure to gather the 4 iron from each iron vein. Using a shovel on it at that point will create a Shallow Well, and regenerate any iron sites affected.
Wild Animals[]
More often than not, you will die of starvation, however there are other ways to die in OHOL. Certain animals, including some domesticated animals, are dangerous. Encountering a hostile animal (by occupying the same space as a resting hostile animal, or while running), will result in the player being wounded, and eventual death if not treated.
Wolves, snakes, and boars move erratically, usually away from the player, and are confined to their biome, but still present a danger (especially when hidden in thick forests). Unlike other wildlife, Bears actively pursue players in their vicinity, and will follow a player across biomes, presenting a risk to an entire village. Mosquitos will not immediately kill a player (unless bit several times), but the Yellow Fever they give will affect your temperature and food gauge, making it more likely that you will die of starvation.
Other players, too, can be dangerous when they are armed (sometimes entirely by accident).
Tutorial and Recipes[]
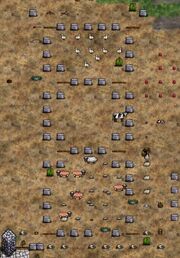
The tutorial is a basic introduction to the game, accessed on the login screen of the game. It will instruct you on the basic mechanics of the game, and give you time to experiment in a closed environment. In order to finish the tutorial, you must light the «tutorial torch» near the end of the passageway. This requires knowledge of fire.
Much vital information is omitted from the tutorial, some of which can be accessed by using the inbuilt recipe index. Holding an item in game, will make a set of related recipes appear in the bottom right corner of the game interface. These can be scrolled through using tab, and z+tab to go back. Ctrl+tab makes bigger page jumps. Furthermore, if you type «/» into the speech box, followed by an item name, e.g. «/Rope», it will only show recipes used to craft that item. Entering «/» will clear the search function again. The search function is limited, and can be difficult to use when lots is happening on screen, but can still come in handy.
The information that cannot be gleaned from the tutorial or the recipe index can be discovered through gameplay, observing or asking other players, or (as a last resort) can be found in this wiki and at Onetech. Additionally, you can try asking for help on the forums. The wiki, tech-tree and forums can all be accessed via links at the top of the game’s official website
Life as a Baby[]
Most of the time, you will spawn as a baby. You have few hunger pips and are completely helpless, totally reliant on your mother or other adult women. You should expect to die frequently, and be abandoned or otherwise neglected fairly often. This is normal and should not be taken personally. Settlements must carefully manage their populations or risk starvation and, in the case of Eve mothers, the burden of caring for babies is great.
To raise your chances of survival, stay close to your mother (unless she instructs otherwise), stay a balanced temperature if you can, and tell her when you reach approximately 2 hunger pips (Most commonly communicated by typing ‘F’ for ‘food’). Follow her, or remain still when appropriate so she can easily pick up you when required. Picking you up requires the mother to sacrifice 1 pip of her hunger bar, so avoid jumping out of her arms (by clicking or trying to move) while she carries you. In the first minute of life, you will be unable to jump from your mother’s arms.
If your mother neglects you, you might be lucky enough to have an older sibling or another family member who is willing to feed you. Show your appreciation by following their directions. Note that only young women can breastfeed you. Old women or males cannot breastfeed. However, any player who can pick up objects can feed babies by clicking on them while holding a piece of food.
Above all, do not get discouraged by death — just keep respawning until you are born to a mother who can care for you. Or spawn as an Eve.
Life as an Eve[]
Sometimes you will spawn as a 14-year-old woman, known as an Eve. You will be naked, most-likely in the middle of no-where, and soon other players will begin spawning as your babies (assuming you are not playing entirely by yourself). To feed your baby you must pick it up at a cost to your own hunger gauge. Holding a baby will keep its hunger gauge maxed out at no additional penalty to yourself, but you are unable to pick up or interact with anything else. There is an internal cooldown that attempts to space out births, but, since it is semi-random, you may have many children in quick succession or no children for minutes at a time.
Your goal is to find a food source before you starve, then ultimately to find a good base location to build a future for yourself and any children you have. Most early-game food sources can be found in the grasslands. Your best bet is to search for berry bushes. These can be supplemented with various other non-renewable wild food until you get a farm going. Beware, food doesn’t last forever!
A good base location tends to be at the intersection between multiple different biomes, with plenty of resources, and iron to the east or west. Your temperature and Yum Bonus will influence the rate at which you give birth. If you are at an ideal temperature and have a high yum chain, you are more likely to have a baby. Choosing a good location will also make your babies more likely to stay, and will improve the overall likelihood that your bloodline will survive many generations. Naming yourself is another step you can take to increase your chances. Don’t take it personally if your babies run away or die in your arms (often they may just be trying to return to a past life). Focus on learning and practicing what you can in each life. If you mess up, you can always start afresh in the next life.
For more detailed information on ‘Eve-ing’ see the Eve page.
General rules for beginners[]
1. Clutter is death.
Although you will need to stockpile various resources throughout your play, be mindful of clutter, especially around Gooseberry farms and Smithing areas. If there are no empty tiles, you will either be unable to drop whatever you are holding, or you will just switch items with the one on the ground. Many a character has starved because they could not free their hands to pick a berry. In addition, you will soon learn that you cannot click on items behind other characters. With this in mind, avoid standing in front of items that another player is working on, such as the forge.
2. Aim for balanced temperature — Wastes less food.
The rate at which you starve is influenced by your character’s temperature. If your meter is in the center, you will waste less food than if it is at extreme heat or extreme cold. When you are a baby, you can improve your chances by finding an optimal temperature tile. And if you contract Yellow Fever (which dangerously raises your temperature), you should avoid warm tiles and ideally find a snow biome tile to counteract the effects.
3. Eat small foods when young.
There are various food items in OHOL, each of which replenish different amounts. When you are young, and have only a few food bars, you should only eat foods with small values, such as Popcorn (3 bars) and Gooseberries (5 bars). This ensures that you do not waste food by overeating. Later, when you have more bars, you can move on to bigger foods such as Pies (7 — 20 bars per bite depending on the variety). Eating a variety of foods as an adult will also increase your Yum Bonus. As an adult you will also have an overflow capacity, so don’t be afraid to eat when almost full when you are no longer a child.
4. Soil and water on languishing berry bushes.
One of the first things you will learn is farming gooseberries, which is vital to the survival of a town. This task is usually assigned to children so that they can work while staying close to food. Here’s the basics: Bushes that need attention will be a brown colour. Mouse-over a bush to read its state. Languishing bushes need a bowl of soil, and dry bushes need a bowl of water. Bigger clumps of dirt can be picked up with a basket, and you may need to get water out of a Deep Well or Cistern with a bucket. If you are having trouble, watch or ask other players.
Tip: A common mistake new players make is planting too many bushes. Tending gooseberries is very resource intensive, and relying too heavily on berry bushes will cause the town to collapse. Once a town has 40-60 bushes, it is unnecessary, and even detrimental, to plant more. Also, be sure to leave paths down the middle of your berry patch to allow a place to put down bowls etc.
5. Tools break — Don’t overuse them. Till piles of soil to save iron if it is scarce.
Certain tools have a limited number of uses until they break. Using steel tools efficiently is especially important since the iron nerf. Shovels are vital for the Compost cycle and generally should not be wasted on digging graves (see Bones page for full explanation). A Hoe can be used more efficiently by only tilling piles of dirt (see Hoe page for full explanation). If iron is plentiful, till one basket of soil twice to save water instead.
6. Name your babies, and don’t overfeed them
Remember to name your babies; It is important to be able to identify other characters, to keep track of griefers and to curse them (See the Names page for a full explanation). If you set up your named baby at an ideal temperature, you won’t have to feed them as often. Picking up a baby costs you one food bar, so if you pick them up too often, you will waste food. To avoid this, get the baby to say «F» when they are at two bars, and wait until then to pick them up. Alternatively, you can just keep holding the baby at no extra cost to yourself.
7. Hunt and snare animals only when they are in families
Rabbit Hole vs Rabbit Family Hole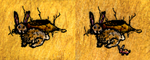
Rabbit holes snared without babies will take an hour longer to regenerate. Additionally, killing Mouflon, Boars and Bison in their family form will allow domestication of the baby. In general therefore, it is better to kill wild animals in their family form.
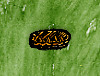
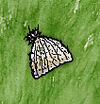
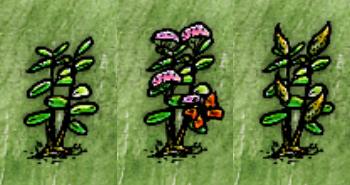
8. Harvest milkweed when fruiting for seeds
Milkweed stages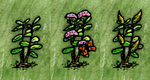
Harvest milkweed when it is fruiting (fruiting milkweed will have yellow pods, not purple flowers) in order to collect seeds from the debris. Fruiting debris lasts for 10 minutes while young and flowering debris only last for 1 minute but give no seeds. (Note: Milkweed no longer regenerate from fruiting debris).
Most seeds now decay if not stored in a Clay Bowl. Make sure to save seeds for the next batch.
9. Use clay wisely
Unlike most resources, clay is non-renewable. You can only collect them from clay pits and one extra by digging up a clay pit with a shovel. Once you have used up all the clay in the area, you will need to travel further and further in order to collect more.
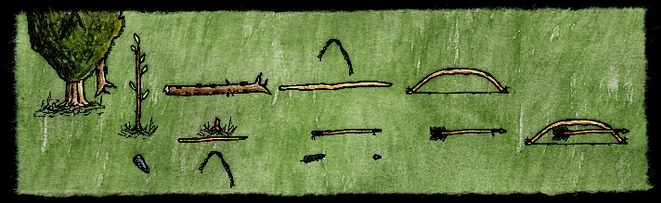
10. Straight Branches
Straight branches are vital for a town’s survival, especially in the beginning of a family in Eve camps. You must try to preserve the straight branches and not use them in cases where there are other alternatives, such as for kindling. Even if you walk past a straight branch on a tree, it is always a good thing to pick it and set it down, resetting the respawn timer and hopefully leaving the next person who discovers that tree with an extra straight branch. Avoid cutting down useful trees if you can avoid it.
11. Canada Goose Pond
Geese lay eggs, give feathers for arrows, and can be killed for meat when present at the pond. But geese will permanently be removed from ponds if the goose is shot, or the pond is completely emptied or overfilled. It shouldn’t discourage you from emptying ponds for wells but it is always a good strategy to keep at least one goose pond intact. Geese and their eggs can also be farmed if you save at least one egg, and place it in some sheep dung.
12. Gooseberries
It is a common myth that the last berry should be left on a domestic bush. Unlike the previous behavior of wild bushes, the berries do not regenerate one-by-one every 10 minutes, but take 8 minutes to respawn all at once- and only after adding soil and water to an empty bush, in which case it is better to take the last berry in order to replace the berries sooner. The same is true now for wild bushes, but a bowl of water is required to make them regenerate.
13. Pay attention to carrot crops
Seeding carrots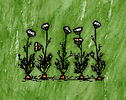
After you water carrots, it will take 4 minutes to become mature carrots. But if you do not pick them, after 5 minutes the carrots that remain in the soil plot will go to seed and when harvested will give you more carrot seeds instead of carrots, with a tile providing enough seeds for 7 tiles. If you need carrots, then make sure to watch them and pick them before they turn.
Keep in mind rule number one; if you have several carrot seeds already, picking five seeding rows will just result in more clutter. Use your discretion.
14. Leave one woolly sheep
When tending your sheep pen, DO NOT kill the last sheep. Additionally, it is standard to keep at least one sheep, or Domestic Mouflon, or fed lamb, in order to produce lambs. Shorn sheep will not produce lambs and must be fed to re-grow their wool. So it is more cost-effective to designate shorn sheep to be killed for mutton, and produce more wool and dung by feeding lambs instead.
-

Domestic Mouflon with Lamb
-

Domestic Sheep with Lamb


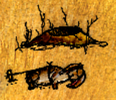
15. Shave sheep before skinning
When you kill a woolly sheep, it will keep its wool. You can still shave the dead sheep with shears to get fleece that can be used to make thread. Skinning it with a knife will give you a sheep skin which has comparatively limited uses.
-

-

Shorn dead sheep with wool
-

Skinned sheep with hide


Resource Respawns[]
Fruiting Barrel Cactus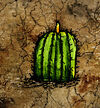
- Water, wildlife, the harvesting of wild berry bushes, cactus fruits, and tree branches does not require the same special consideration, as these resources will always eventually respawn, although may be finite in the short-term (objects can take between 15 to 60 minutes, to regenerate), though wild berry bushes require a bowl of water to regenerate.
- As of update 207, Carrot Seed Heads will decay after 5 minutes, so use your discretion when eating wild carrots. Burdock are early food sources that cannot be cultivated, provide no seeds, and do not respawn.
- As of update 213, wild onions can be planted in Deep Tilled Row to be cultivated.
- Fertile Soil Pits are also finite. However, it is possible to craft soil via compost later in the game.
Next stage[]
Now that you’ve mastered the basics, here are some topics to consider pursuing:
- Fire • Farming • Animals • Compost • Cooking • Baking • Clothes • Smithing • Tools • Medical Treatment • Building
For a more detailed guide on how to survive and thrive in early settlements, see the Eve page.
References[]
Yooovbro i hate you
Crafting in One Hour One Life allows players to produce tools, food and clothing out of the materials they’ve gathered. These crafted objects will help the player survive in the wild and build a village. However, some objects have a limited life span and can break with use or deteriorate over time.
Most crafting is done by picking up one object, then clicking it on another object (Note: In certain recipes, it matters which is the held object). Some objects will change over time, such as a Barrel Cactus regenerating cactus fruit over time. Or a Backpack decaying into a tattered backpack. Other recipes require various tools and multiple steps to complete.
Onetech is an up-to-date resource for searching ingredients and recipes, as well as tech-trees for crafting. It can also be accessed via the link at the top of the One Hour One Life website
Also see: Starting Guide, Farming, Cooking, Smithing, Building, Medical Treatment
Tools[]

Basic tools can be made from gathering natural materials from the wild. Like tree branches, plants and stone. More advanced tools require a variety of objects to craft. Others may need knowledge of smithing.
Food[]
Some raw food can be eaten directly, or must be cooked using various tools and appliances such as Hot Coals or an Adobe Oven.
Farming[]
Farming involves domesticating wild plants or animals. Plant crops are acquired by taking seeds or cuttings from wild plants. They require fertile soil, water, and often extra steps to grow. Ponds can be further upgraded into Shallow Well and Deep Well. Soil can be obtained from naturally occurring Fertile Soil Deposits, or produced via composting.
Hunting/Trapping[]

Wild animals can be killed using certain tools to harvest their products, and their babies taken to domesticate for farming. The most basic form of hunting is using a snare to catch rabbits. In most circumstances, it is better to kill animals in their family form.
Fire-making[]

Fire is used in cooking, keeping babies warm, smithing, and crafting several other objects.
See Fire for full guide.
Building[]
Building loosely refers to crafting structures, such as an Adobe Kiln, as well as roads and rooms. They are indicators of an advanced civilization.
Wood[]
- Fence
- Pine Door
- Boards
- Wooden Chest
- Wooden Floor
- Wooden Door
- Iron Mine
Adobe[]
- Adobe
- Adobe Wall
- Adobe Wall(corner)
Stone[]
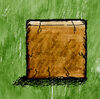
- Cut Stones
- Stone Block
- Stone Wall
- Stone Floor
- Bell Tower
Smithing[]
Smithing refers broadly to crafting objects in a Adobe Kiln or Forge. This is usually done with clay, Iron Ore or Gold Flakes as a base material, and requires kindling or charcoal, and a source of fire. Objects that can be made include tools, rails, lock and keys, crowns, dice and bells
Clothes[]
Clothes are wearable items made from rabbit furs, wool, and other materials. They influence a player’s temperature by an insulation percentage and in cold biomes can extend the time in which the hunger meter depletes.
Some purely cosmetic clothing such as Toque Blanche and crowns provide zero insulation. Other items, such as Backpack and aprons provide a carrying capacity, allowing a player to store up to five items on their body plus an additional carried item. Wool clothing can be dyed red or blue. Uniquely, Old Boot is not crafted, but can be fished from an Ice Hole using a Baited Fishing Pole.
Medicine[]
Medical Treatment uses crafted items to heal wounds inflicted by animals or other players.

This will just be a quick list of important recipes for getting started, along with some helpful hints.
Basic Components and Recipes
- + : combinding items
- * : onto item
- -> : result
Round Stone
- Useful as a tool, and turning into other tools.
- Stone * Big Hard Rock -> Sharp Stone
Milkweed
If harvested at the fruiting(yellow fruit on it). Gives milkweed stalk.
Milkweed Stalk x2 -> Thread
Thread x2 -> Rope
Straight Branch
Can be found on trees.
Sharp Stone * Straight Branch -> Long Straight Shaft
Sharp Stone * Long Straight Shaft -> Short Shaft
Small Curved Branch
Can be found on trees.
Sharp Stone * Small Curved Branch -> Small Curved Shaft
Rope + Small Curved Shaft -> Bow Drill Bow
Short Shaft + Bow Drill Bow
Flint

Flint, common in grassland and badlands.
Sharp Stone * Flint -> Flint Chips
Flint Ship * Long Straight Shaft -> Wooden Tongs
Tule Reeds
Plants found in swamps.
Sharp Stone * Tule Reeds -> Reed Bundle
Reed Bundle x2 -> Basket
Clay Pit

Common in swamp biome, only source of clay. Contain 5 clay, one more with shovel.
Clay + Reed Bundle -> Adobe
Stone * Clay -> Wet Clay Bowl
Sapling

Plant found in grasslands.
Sharp Stone * Sapling -> Skewer
Round Stone * Skewer -> Home Marker
Home Marker acts as a compass for you to find your way back.
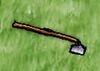
Stone Hatchet

Tool needed for fire making, by being able to make kindling.
Rope + Short Staff -> Tied Short Shaft
Sharp Stone + Tied Short Shaft -> Stone Hatchet
Kindling

Needed for fires. Can be made from branches, wood, or dead plants.
Stone Hatchet * branch/wood/dead plants -> kindling
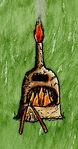
Adobe Kiln
3 Adobe (Reed Bundle + Clay) x3


Adobe Oven Base (Round Stone * Adobe)


Adobe Kiln (Adobe * Oven Base) then (Adobe * Oven)

Fire
- Use Fire Bow Drill on Long Straight Shaft.
- Use leaf (from maple tree) on that Long Straight Shaft to collect the ember on the leaf.
- Use that ember leaf on Tinder (from Juniper Tree).
- After 5 seconds Smoldering Tinder turns into Burning Tinder.
- Add Kindling to burning tinder.
Can transfer fire to other kindling by using a Long Straight Shaft on a current fire, then using that on new kindling.
- Place Kindling in Kiln and transfer fire to it.
- Use Wooden Tongs and pick up a Wet Clay Bowl.
- Use that on Kiln to create a Clay Bowl.
- Clay Bowl can be used to water crops.
Farming
This is a guide designed for first time players of One Hour One Life to get started as quickly and painlessly as possible.
Tutorial and server selection
Complete the tutorial. When the game offers death via the room full of rattlesnakes, dont take it. Keep playing until you die of old age at least once. Try picking up various items and go through the full tab list of recipes.
Go here in a web browser http://onehouronelife.com/reflector/server.php?action=report and find an empty server.
In the main menu settings, check custom server box and enter the url of the empty server. They are all in the format of serverX.onehouronelife.com where X is the number of the official server.
1. Explore
Find a small round stone, sharpen it on a big hard rock, then keep it with you at all times during this phase.
Berries, bananas, wild onion and fruiting cactus can be picked with your bare hand. Carrots and burdock must be cut with your sharp stone before you can eat them.
Badlands and swamps generally have no food you can use til later game. Deserts have cactus, but fruiting cactus are very rare. Green grasslands, Yellow Praries, and Jungles are the places you need to be if you need to eat, preferably you are already there before you even reach half food bar. Praries tend to have less food then green grasslands, and jungles are more dangerous.
Before you move on to the settle phase, you need to find 2 reed bundles in the swamp, cut them with your sharp stone, move them from the spot you cut them, then combine then to make a basket. Put your sharp stone in the basket, then fill the other 2 spots with extra food. From this point on, if your basket is ever empty of food, make it a priority to find more, even if you are nearly full on your food bar.
2. Settle
During this phase, you are looking for a very large plot of green grassland with several berry bushes/onion/burdock, milkweed, trees with hanging branches, fertile soil piles, and a few saplings. It must also be near to a decent sized swamp and at least a small yellow prarie.
Use your sharp stone to cut a sapling and pick up the skewer, put it in your basket with the sharp stone. Find a round stone and put in your basket as well.
The exact center of your home camp should be very near a goose pond for a source of water, and a juniper tree and maple tree for fire starting. Place the skewer on the ground and hammer it in with the round stone. You now have a home marker and can always find your camp no matter how far you wander.
Now that you have a camp, keep in mind a few of the rules of short term village sustainability. Try not to pick the last berry from a wild berry bush, as one berry will respawn every 10 minutes or so, but picking the last berry will kill the bush. If you need to cut a wild carrot to eat it, use your bare hand to pick the carrot seed first and drop it on the ground first before you cut the plant. Try to pick milkweed when they are fruiting, set down the milkweed stalk, then click the pile of milkweed debris and drop a few milkweed seeds on the ground.
If you are inexperienced, don’t try to raise a child until you reach at LEAST the end of this phase. Apologize and tell the baby you are new, and move on.
3. Fire and pottery
Make sure you are full on food and have a bit extra in your basket. Leave the basket behind in your camp, and find 4 straight branches from maple trees and one curved branch. You can pick these with your bare hands from maple trees and poplar trees. Then collect at least 2 more branches from either those trees or yew trees. Bring all these back to your camp. These 3 trees occur almost entirely in the green grasslands.
Use your sharp rock on a flint stone to create pile of flint. Pick up a flint chip with your bare hand and put it the basket. Bring back 1-2 flint chips to your camp.
Use the sharp stone once on 4 of the straight branches to create 4 long shafts. Use the sharp stone once on 2 of those long shafts to create 2 short shafts. Use the flint chip once on 1 of those long shafts to create wooden tongs. Use the sharp stone once on the curved branch to create curved shaft.
Take your basket and search for milkweed in the green grasslands. Pick it with your bare hand, and put it in your basket. You must combine 2 milk weed stalks on the ground to make a thread, and 2 threads to make a rope. Once you have 2 ropes in camp, you can continue onto the next step.
Find another round stone and sharpen it on a big hard rock, then bring it back to your camp. You should have 2 sharp rocks 1 flint chip, and 1 round stone in camp at this point.
Combine one rope with a short shaft to create a tied short shaft, and combine the other rope with the curved shaft to create a bow drill bow. Pick up the remaining short shaft and combine it with the bow drill bow to create a fire bow drill. Combine the extra sharp stone with the tied short shaft to create a hatchet.
Use the hatchet on 2 of your remaining branches to create 2 piles of kindling. You should have a fire bow drill, a long straight shaft, and 2 piles of kindling at this point.
Take your basket and sharp rock and go to the swamp. Set the basket down and pick up 2 piles of clay with your hands, putting them in your basket. Find tule reeds and cut them with your sharp stone. Set a ball of clay on empty ground, pick the reed bundle up and combine them with the clay to make adobe. Put the adobe in your basket and bring it back to your camp. Repeat until you have 3-4 adobe.
Fill your basket with more clay from the swamp, leaving the piles in camp until you have 4-6 clay.
-Use a round stone on 1 of the adobe to create an adobe oven base. Use the round stone once on the regular clay balls to create a wet clay bowl. Use the round stone on a wet clay bowl to create a wet clay plate. You should have at least 2 wet clay bowls and plates at this point.
Take another adobe and place it on the adobe oven base to create an adobe oven. Use another adobe on the oven to create an adobe kiln.
Collect a leaf from a maple tree with your bare hand. You need to pick the straight branch first if the tree has one. Collect juniper tinder from a juniper tree with your bare hand. Bring the leaf and tinder back to camp.
Use the fire bow drill on the long straight shaft to light it. Take the leaf and use it on the smoking straight shaft to light the leaf, then use the leaf on the juniper tinder to light the tinder. Take a pile of kindling and place it on the smoking tinder to create a small fast fire.
Put the remaining pile of kindling in the adobe kiln, pick up the long straight shaft and use it on the small fast fire to create a firebrand. Use the fire brand on the adobe kiln to light the kiln.
You need to work quickly at this point to fire all your bowls and plates before the kiln goes out. Pick up your wooden tongs and left click a bowl or plate to pick it up. Left click the kiln to fire the clay plate/bowl, then right click the ground to drop the finished bowl/plate. Repeat til all of your pottery has been fired.
4. Farming
Use an empty basket on a fertile soil pile to pick it up, then dump it in your camp. Get 2 baskets full. The basket will carry small 3 piles of soil but you want to form piles of 2 for best efficiency, so use a clay bowl to pick up 1 small pile and seperate it, then do the same with the other large basket pile, dumping the bowl of soil on the first small pile you seperated. You should have 3 seperate piles of 2 small piles of soil now.
Gather a few extra skewers. You can make a stone hoe instead, but this requires rope and a long straight branch and is only somewhat more durable than skewers, so skewers are cheaper and easier to start farming with.
Use the skewer on the piles of soil to create a deep tilled row.
Pick a gooseberry and use a flint on it to create a gooseberry seed. Place the seed in a deep tilled row.
Use an empty clay bowl on a goose pond to fill it with water. Dump the water on the soil with the planted gooseberry seed. Goose ponds have 3 visible water levels, and will refill over time unless you fully drain them, so try and find a different pond if the pond looks almost empty.
If you pick the last gooseberry from a domestic gooseberry bush, it will turn brown after a few minutes. Use a clay bowl to pick up one small pile of soil and place on the languishing or dying gooseberry bush to save it from death. Then at your leisure, water the bush with another bowl of water to start growth of more berries.
After you have several planted and watered gooseberry sprouts, pick a carrot seed from a wild carrot with your hand and plant it directly into a deep tilled row. Water with clay bowl as usual. Carrots require more care than gooseberries. After about 4 minutes, they will turn into a row of carrots. You can pick all of the carrots now, or wait another 5 minutes and they will go seed, yielding no carrots but several more seeds.
Once you have a thriving berry and carrot farm, you can move on to planting wheat seeds and milkweed seeds in a similar way to carrot seeds. Pick the milkweed plants only when they are in the fruiting stage unless you have several milkweed seeds laying around, to keep a slow supply of milkweed stalks flowing into your village. Wheat seeds can be picked freely from farmed ripe wheat to expand the production of your wheat farm.
Cut the wheat with a sharp stone, then use a straight or curved branch on it to thresh it, seperating the grain from the straw. The straw may be used with clay for more adobe, and 2 bundles of straw may be combined to make more baskets for better storage/organization or for your kids’ usage.
5. Advanced skills
At this point, you should have a decently thriving farm and can accept babies freely. With a properly maintained farm, your village will survive until your children run out of nearby fertile soil, water, branches, etc. If you were playing on an empty custom server, and another child was born to you, you can die of old age and will likely respawn into your village. Alternatively, you may uncheck the custom server box in settings and start playing the game the way the developer originally intended. The next skills to learn are cooking, trapping of rabbits with slings, sewing clothing, farming of advanced cooking crops such beans, squash, etc, and lastly, smithing.
More of this sort of thing:
Overview
Всем привет, в данном руководстве я расскажу как пройти обучение.Сразу скажу, что когда вы купили игру One Hour One Life, попасть к другим игрокам нельзя, пока вы не пройдёте обучение, даже если вы будете заходить в обучение, а потом выходить в главное меню.И да необязательно останавливаться перед каждой подсказкой и выполнять то или иное задание.Самое главное пройти последнее задание: поджечь факел.Но если вам не жалко времени, я вам расскажу про каждое задание подробно, или можете просто перейти на последний пункт и выполнить задание=)
Появление на свет
Вот вы и загрузились в обучении.
Для того чтобы ходить нажимайте левую кнопку мыши.

Открывание двери
Подойдите к двери и нажмите на неё левой кнопкой мыши, чтобы открыть её.

Питание
Чтобы съесть ягоду, надо подойти к ягодному кусту и нажать на него левой кнопкой мыши.

Когда вы взяли ягоду, надо навести на себя курсор мыши и нажать левую кнопку мыши.

Таким образом вы питаетесь.
“Как взять палку?” и немного о крафте
Чтобы взять палку надо нажать на неё левой кнопкой мыши.

Когда вы взяли палку нажимайте на Tab и у вас появиться рецепт того или иного предмета, для которого нужна эта палка.

P.S. Для того чтобы вернуться на предыдущий рецепт крафта нужна нажать комбинацию клавиш Z и Tab.Чтобы пролистать крафт на 5 страниц вперёд, сделайте комбинацию клавиш Ctrl и Tab.
Как заточить камень?
Чтобы заточить камень, нужно взять его в руку и нажать на левую кнопку мышки о большой камень, но вы ещё его не выкидывайте, он вам ещё понадобится

“Съедобные бонусы”
Чем более разнообразную еду вы будете съедать, тем больше очков сытости добавят в ваш счётчик пищи.Если вы будете питаться однообразно, то над ваш счётчиком пищи припишется слово “Meh”, которое убирает бонусы.
Как сделать корзину?
Когда вы нашли два камыша, то срезайте их тем острым камнем, который вы тогда наточили.

Далее берите один срезаный камыш и нажмите левой кнопкой мыши по второму камышу.

Так вы сделали корзину.Корзина вмещает себя до трёх вещей.

Заморозка камеры
Чтобы “зафризить” камеру нужно зажать пробел.
Одежда.
Когда вам холодно или жарко то вы быстрее голодаете.В холодных районах носите одежду, а в жарких лучше снять.


Чтобы надеть одежду надо взять её в руки, затем нажать на себя левой кнопкой мыши.
Чтобы снять одежду нажмите левой кнопкой мыши на ту одежду которую вы сейчас носите.
Немного о игровом чате и некоторых командах.
Чтобы начать писать в чат нажмите Enter.К сожалению игра поддерживает только английскую раскладку, поэтому писать русскими буквами не получится.Также хочу отметить проблему с игровым возрастом.Когда вы заспавнились ребёнком, вы не сможете писать целиком слова, только по одной букве, но когда вы подрастаете, увеличивается и ваш размер предложения.Максимальный возраст 60 лет, соответственно максимум символов в конце игры будет 59.(т.к в 60 вы сразу умрёте)
А также с помощью стрелок вверх(↑) и вниз(↓) появляется история набранных вами сообщений.(очень удобно кстати)
Сейчас немного о коммандах:
В игре присутсвуют эмоции.Чтобы их активировать,нужно написать через / определённую комманду.
/HAPPY
/SAD
/ANGRY
/MAD
/JOY
/DEVIOUS
/BLUSH
/ILL
/SHOCK
/HUBBA
/HMPH
/LOVE
/YOOHOO
/OREALLY
Также присутствует функция назвать себя/своего ребёнка.(Внимание:вы не сможете назвать себя или своего ребёнка если:
-Тебе или ребёнку уже дали имя
-Ребёнок, которому не дали имя мёртв)
Если ты сразу заспавнился Евой, то ты можешь написать фамилию следующими командами:
CALL ME EVE X
CALL ME X
I AM EVE X
I’M EVE X
IM EVE X
I AM CALLED EVE X
I AM NAMED EVE X
I AM CALLED X
I AM NAMED X
I AM X
I’M X
IM X
MY NAME IS EVE X
MY NAME IS X
P.S вместо X должна быть ваша фамилия.
Если ты играешь за женщину и у тебя родился ребёнок, то ты можешь его назвать следующими командами:
YOU ARE CALLED X
YOU ARE NAMED X
YOU ARE X
YOU’RE X
YOURE X
YOUR NAME IS X
I NAME YOU X
I CALL YOU X
P.S вместо X должно быть имя ребёнка.
Проклятие
Если вас или кого-то ударили ножом или выстрелили из лука, и если убийство было специально подстроено то надо проклинать того человека.Для этого есть следующие команды:
CURSE X
I CURSE X
I CURSE YOU X
CURSE YOU X
P.S вместо X имя того человека, который совершил убийство.
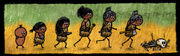
Если человека много раз прокляли то он попадает в Ослиный город.
Ослиный город-это спавн с очень низкой популяцией.(в общем лучше там не быть, сам там не бывал, поэтому не знаю каково это)=P
И другие команды:
/die-умереть (команда работает, когда вы появились ребёнком, но иногда не срабатывает.Команда нужна, если вы не хотите жить в этом поселении)
/fps-появляется счётчик частоты кадров.
/ping-отображает ваш пинг.
/DISCONNECT-отключиться
Финал
Итак мы добрались до последнего задания-надо поджечь факел.Сначало ничего непонятно, сейчас объясню.
Внимание:в коробку со змеями не идти, пока не выполним задание.
Сначала нужно сделать каменный топор.Чтобы сделать каменный топор, нам потребуется:
-Острый камень
-Верёвка
-Маленькая палочка
Если у вас остался тот острый камень то используйте его, если нету, то делайте новый.Верёвка делается из двух ниток, а нитка делается из двух стебельков.
Рядом с кустом ягод растут цветы, вот они то нам и нужны

Срываем их и держа в руке один стебель, нажимаем левой кнопкой мыши на другой стебель.

Мы сделали нитку.

Срываем остальные цветы и делаем ещё одну нитку.
В итоге у нас есть две нитки.

Теперь берём нитку в руку и нажимаем левой кнопкой мыши на вторую нитку.
Мы сделали верёвку.

Остаётся дело за малым.
Находим камень, затачиваем.

Теперь держа острый камень в руках, нажимаем два раза по палке.
Мы получили маленькую палочку.
Теперь берём верёвку в руку и наматываем на палочку левой кнопкой мыши.

Берём острый камень и прикрепляем к обмотанной палке.

Мы получили каменный топор.

Теперь берём в руки топор, подходим к любой палке и раскалываем её нажав левую кнопку мыши.
Мы получили опилки.

Берём опилки, кидаем их в горящие угли.Мы разожгли костёр.

Дальше берём лежащую палку(обтёсанную)и подносим к костру, нажав левой кнопкой мыши.
Конец палки разгорелся.Подносим к факелу и он зажигается.

Поздравляю, вы прошли обучение! Теперь можете заходить в коробку со змеями и умирать.
Когда ты умрёшь и нажмёшь “Login” то сможешь играть уже с игроками.
А ну ка…
Спасибо большое что посмотрел моё руководство!
Если тебе оно понравилось поставь лайк и добавь в избранное пожалуйста;3
Это моё первое руководство поэтому не ругайте, а лучше напишите про что мне следующее руководство писать:Про одежду или про то “как развести костёр?”
Если заметили ошибки то исправьте в комментариях.
Удачи, и до скорого!
А и ещё хорошей игры…^-^