УСТРОЙСТВО РАДИОПРИЕМНОЕ
O NKYO
NKYO
ТX-NR717
(РУКОВОДСТВО ПО ЭКСПЛУАТАЦИИ)
Вы приобрели устройство радиоприемное производства компании «ОНКИО САУНД ЭНД ВИЖН КОРПОРЕЙШЕН», Япония. Данная модель является аудио/видео ресивером (декодер/усилитель/тюнер) и предназначена для декодирования и усиления аудио сигналов, коммутации видеосигналов и приема радиопередач в домашних аудио/видео системах. Эти изделия широко известны в кругах истинных ценителей высококлассного звука. Их качество и безопасность подтверждены множеством тестов, проведенных как зарубежными, так и российскими испытательными лабораториями.
Изготовитель в течение 3 лет (срок службы) после выпуска данного изделия обеспечивает наличие комплектующих в целях возможности проведения ремонта и технического обслуживания, по истечении которого эксплуатация и техническое обслуживание продолжаются в соответствии с действующими нормативными документами. Изделие остается безопасным для жизни, здоровья человека и окружающей среды в течение всего срока эксплуатации. Гарантийный срок — 1 год.
Информация о Российской сертификации
| № сертификата
соответствия |
Орган по
сертифи-кации |
Нормативные документы | Наименование сертифицированной продукции | Срок действия сертификата |
| POCC JP.АЯ46.B05465 | OC
«РосТест-Москва» |
ГОСТ P МЭК 60065-2009,
ГОСТ 5651-89 (Табл.1 (поз.11), Табл.2 (поз.6,7)), ГОСТ 22505-97, ГОСТ Р 51515-99 ГОСТ Р 51317.3.2-2006 (Разд. 6,7), ГОСТ Р 51317.3.3-2008 |
Устройства радиоприемные | 10.05.2012 – 12.03.2015 |
Основные технические характеристики
Cм. в конце инструкции
ВНИМАНИЕ: Если Вы приобрели аудиоаппаратуру надлежащего качества, то, по Российским законам, она не подлежит возврату или обмену на аналогичный товар других размера, формы и т.д.
Тоттори Онкио Корпорейшн
243 Сююки, Кураёси-си, Тоттори 682, Япония
Tottory Onkyo Corporation
243 Shuuki, Kurayoshi-shi, Tottori 682, Japan
Стр.1
AV РЕСИВЕР
ONKYO TX-NR717
ИНСТРУКЦИЯ ПО ЭКСПЛУАТАЦИИ
СОДЕРЖАНИЕ (краткое)
Стр.
Введение и инструкции по безопасности 2
Содержание 6
Подсоединения 12
Включение и основные операции 20
Дополнительные операции 48
Управление другими компонентами 73
Приложение 80
Путеводитель по интернет-радио
Коды пульта ДУ
Стр. 2
ПРЕДОСТЕРЕЖЕНИЕ:
ДЛЯ СНИЖЕНИЯ ОПАСНОСТИ ВОЗГОРАНИЯ ИЛИ ПОРАЖЕНИЯ ЭЛЕКТРИЧЕСКИМ ТОКОМ НЕ ПОДВЕРГАЙТЕ ДАННЫЙ АППАРАТ ВОЗДЕЙСТВИЮ ДОЖДЯ ИЛИ ВЛАГИ.
ВНИМАНИЕ
ДЛЯ УМЕНЬШЕНИЯ ОПАСНОСТИ ПОРАЖЕНИЯ ЭЛЕКТРИЧЕСКИМ ТОКОМ НЕ СНИМАЙТЕ ВЕРХНЮЮ И ЗАДНЮЮ ПАНЕЛЬ. ВНУТРИ НЕТ ЧАСТЕЙ, ДОСТУПНЫХ ДЛЯ ОБСЛУЖИВАНИЯ ПОЛЬЗОВАТЕЛЮ. ДОВЕРЬТЕ ОБСЛУЖИВАНИЕ КВАЛИФИЦИРОВАННОМУ МАСТЕРУ.
ВНИМАНИЕ
Опасность поражения электрическим током
Не открывать
Изображение молнии в равностороннем треугольнике предупреждает пользователя о наличии внутри корпуса изделия неизолированного напряжения, величина которого может создавать опасность поражения человека электрическим током.
Изображение восклицательного знака в равностороннем треугольнике предупреждает пользователя о наличии в сопровождающей аппарат документации важных инструкций по эксплуатации и техническому обслуживанию.
Инструкции по безопасности
- Прочтите эти инструкции.
- Сохраните эти инструкции.
- Обращайте внимание на все предостережения.
- Следуйте всем инструкциям.
- Не используйте этот аппарат вблизи воды.
- Производите очистку только сухой тканью.
- Не блокируйте вентиляционные отверстия. Инсталлируйте в соответствии с рекомендациями изготовителя.
- Аппарат следует размещать вдали от источников тепла, таких как радиаторы, тепловые завесы, печи или другие приборы (включая усилители), которые выделяют тепло.
- Не разбирайте поляризованную сетевую вилку или вилку с заземлением, предназначенные для повышения безопасности. Поляризованная вилка имеет две контактные пластины, из которых одна шире другой. Вилка с заземлением имеет две контактные пластины и один контактный штырь для заземления. Если вилка не подходит к Вашей розетке, обратитесь к электрику, чтобы он заменил розетку устаревшей конструкции.
- Шнуры питания должны прокладываться таким образом, чтобы на них не наступали и не задевали какими-либо предметами, особенно вблизи вилок, розеток и мест выхода шнура из корпуса аппарата.
- Используйте только те аксессуары, которые рекомендованы изготовителем.
- Используйте только те тележки, стойки, кронштейны и столы, которые рекомендованы изготовителем или продаются вместе с аппаратом. Тележку с установленным аппаратом следует перемещать осторожно, иначе она может опрокинуться.
- Если аппарат не будет использоваться длительное время, а также на время грозы, выньте вилку шнура питания из розетки электросети.
- См. 15.
- Повреждения, требующие технического обслуживания
Выньте вилку шнура питания аппарата из розетки электросети и обратитесь к квалифицированному мастеру в случае, если:
а) Повреждены шнур питания или вилка;
b) Внутрь аппарата попали посторонние предметы или жидкость;
c) Аппарат попал под дождь;
d) Аппарат не работает должным образом при выполнении инструкций по эксплуатации. Пользуйтесь только указанными в инструкциях по эксплуатации органами управления, так как неправильное выполнение прочих регулировок может привести к повреждениям, устранение которых потребует сложного ремонта с привлечением высококвалифицированного персонала.
e) Аппарат уронили или повредили другим способом.
f) Произошли заметные изменения рабочих характеристик аппарата.
- Попадание внутрь предметов и жидкостей
Никогда не вставляйте какие-либо предметы внутрь корпуса через отверстия, так как они могут коснуться точек под опасным для жизни напряжением или вызвать короткое замыкание, что может привести к возгоранию или поражению электрическим током.
Не допускайте попадания на аппарат капель или брызг. Не ставьте на аппарат сосуды с жидкостью, например, вазы.
Не ставьте на аппарат свечи и другие горящие предметы.
- Избавляясь от использованных элементов питания, помните о защите окружающей среды.
- Если аппарат встраивается в замкнутый объем, например, стойку, необходимо обеспечить достаточную вентиляцию. Сверху и по бокам аппарата должно оставаться не менее 20 см свободного пространства, а позади – не менее 10 см. Задний край полки или панели, находящейся над аппаратом, должен не доходить до стены или задней панели на 10 см, чтобы теплый воздух мог подниматься вверх, как в печной трубе.
Стр. 3
Предостережения
- Запись материала, охраняемого авторским правом
Запись материала, охраняемого авторским правом, с любыми целями, кроме личного пользования, незаконна без разрешения владельца авторского права.
- Сетевой плавкий предохранитель
Плавкий предохранитель размещен внутри устройства и не может быть заменен пользователем. Если Вам не удается включить устройство , обратитесь к дилеру ONKYO.
- Уход
Время от времени стирайте пыль с корпуса устройства мягкой тканью. При более значительных загрязнениях смочите мягкую ткань слабым водным раствором мягкого моющего средства. Непосредственно после очистки вытрите аппарат досуха чистой тканью. Не пользуйтесь абразивным полотном, спиртом или другими химическими растворителями, поскольку они могут повредить отделку или стереть надписи на панели.
- Питание
ПРЕДОСТЕРЕЖЕНИЕ
ПЕРЕД ПЕРВЫМ ПОДКЛЮЧЕНИЕМ АППАРАТА К РОЗЕТКЕ ЭЛЕКТРОСЕТИ ВНИМАТЕЛЬНО ПРОЧТИТЕ СЛЕДУЮЩИЙ РАЗДЕЛ.
Напряжение электросети зависит от страны или региона. Убедитесь в том, что напряжение электросети в том регионе, где будет использоваться этот аппарат, соответствует напряжению, указанному на задней панели (например, 230 В перем. тока, 50 Гц или 120 В перем. тока, 60 Гц).
Штеккер сетевого кабеля используется для отключения этого прибора от источника питания переменного тока. Убедитесь, что этот штеккер легко доступен в любое время.
Для моделей с кнопкой [POWER], или с обеими кнопками [POWER] и [ON/STANDBY]:
Нажатие на кнопку [POWER] для выбора выключения OFF не полностью отключает этот прибор. Если намереваетесь не использовать данный прибор длительное время, отключите сетевой шнур от розетки переменного тока.
Для моделй с кнопкой только [ON/STANDBY]:
Нажатие на кнопку [ON/STANDBY] для выбора режима STANDBY не полностью отключает этот прибор. Если намереваетесь не использовать данный прибор длительное время, отключите сетевой шнур от розетки переменного тока.
5. Предотвращение потери слуха
Излишнее звуковое давление от вставных или накладных наушников может привести к потере слуха.
6. Предупреждение о воздействие тепла на батареи
Батареи (батарейный блок или установленные батареи) не должны подвергаться воздействию излишнего тепла, такого как солнечный свет, огонь и т.п.
7. Никогда не касайтесь этого прибора мокрыми руками – Никогда не беритесь за этот прибор или его сетевой шнур, пока ваши руки мокрые или влажные. Если внутрь этого прибора попадает вода или другая жидкость, проверьте его у вашего дилера Onkyo.
8. Замечания относительно обращения
Если вам необходимо перевозить этот прибор, используйте оригинальную упаковку, чтобы упаковать так, это было сделано при первоначальной покупке.
Не оставляйте резиновые или пластмассовые предметы на этом приборе длительное время, поскольку они могут оставить следы на корпусе.
При длительной эксплуатации, верхняя и задняя панели прибора могут стать теплыми. Это является нормальной работой.
Если вы не используете этот прибор длительное время, он может работать не должным образом при следующем включении, поэтому используйте его время от времени.
Для моделей, продаваемых в США
Информация Федеральной комиссии связи (FCC) США для пользователя
ПРЕДОСТЕРЕЖЕНИЕ:
Внесение пользователем изменений или модификаций, прямо не одобренных стороной, ответственной за обеспечение соответствия требованиям FCC, может привести к тому, что пользователь будет лишен права использования данного оборудования.
ПРИМЕЧАНИЕ:
Это устройство было протестировано, и результаты тестирования подтвердили его соответствие ограничениям, установленным Частью 15 правил FCC для цифровых устройств Класса В. Эти ограничения введены для обеспечения необходимой защиты от помех при использовании в домашних условиях.
Это устройство генерирует, использует и может излучать электромагнитную энергию в радиочастотном диапазоне спектра и при установке с нарушением изложенных рекомендаций может создавать помехи радиосвязи. Однако, невозможно гарантировать, что в какой-либо конкретной ситуации помехи не возникнут. Если данное устройство все-таки создает помехи радио- или телевизионному приему (что можно проверить, выключив и включив его), то пользователю рекомендуется попытаться ослабить помехи, приняв любые из перечисленных ниже мер:
— Переориентировать или перенести в другое место приемную антенну.
— Разнести подальше друг от друга данное устройство и радио- или телевизионный приемник.
— Включить данное устройство в розетку, отличную от той, в которую включен радио- или телевизионный приемник.
— Проконсультироваться у местного дилера или опытного специалиста по теле- и радиооборудованию.
Стр. 4
Для моделей, продаваемых в Канаде
ПРИМЕЧАНИЕ: ДАННОЕ ЦИФРОВОЕ УСТРОЙСТВО КЛАССА B СООТВЕТСТВУЕТ КАНАДСКОМУ СТАНДАРТУ ICES-003.
Для моделей, снабженных шнуром питания с поляризованной вилкой:
ПРЕДОСТЕРЕЖЕНИЕ: ВО ИЗБЕЖАНИЕ ПОРАЖЕНИЯ ЭЛЕКТРИЧЕСКИМ ТОКОМ СОВМЕСТИТЕ ШИРОКИЙ НОЖЕВОЙ КОНТАКТ ПОЛЯРИЗОВАННОЙ ВИЛКИ С ШИРОКИМ ЩЕЛЕВЫМ РАЗЪЕМОМ РОЗЕТКИ И ВСТАВЬТЕ ВИЛКУ ДО УПОРА.
Модели для Великобритании
Замена или установка сетевого штекера переменного тока на сетевой шнур этого прибора должна быть выполнена только квалифицированным обслуживающим персоналом.
ВАЖНО
Провода в сетевом шнуре имеют цветовую маркировку в соответствии со следующим кодом:
Синий: Нейтраль
Коричневый: Фаза
Поскольку цвета проводов в сетевом шнуре этого прибора могут не соответствовать цветовой маркировке, идентифицирующей выводы в вашем штекере, выполните следующие действия:
Синий провод должен быть подсоединен к выводу с черной маркировкой или буквой N.
Коричневый провод должен быть подсоединен к выводу с красной маркировкой или буквой L.
ВАЖНО
Штекер оснащен соответствующим предохранителем. Если предохранитель подлежит замене, предохранитель для замены должен соответствовать ASTA или BSI – DS1362 и иметь тот же самый паспортный ток, который указан на штекере. Проверьте маркировку ASTA или BSI на корпусе предохранителя.
Если штекер сетевого шнура не подходит к вашим стенным розеткам, отрежьте его и оснастите шнур подходящим штекером. Установите надлежащий предохранитель в штекер.
Для европейских моделей
Декларация соответствия
Мы,
КОМПАНИЯ ONKYO EUROPE ELECTRONICS GmbH LIEGNITZERSTRASSE 6, 82194 GROEBENZELL, GERMANY, с полной ответственностью заявляем о том, что изделие компании ONKYO, описанное в настоящем Руководстве по эксплуатации, соответствует перечисленным ниже техническим стандартам, таким как EN60065, EN55013, EN55020 и EN61000-3-2, -3-3.
GROEBENZELL, GERMANY
К. МИЯГИ
ONKYO EUROPE ELECTRONICS GmbH
Стр. 5
Поставляемые аксессуары
Убедитесь, что в комплект поставки аппарата входят следующие аксессуары:
Комнатная FM антенна (стр. 19)
Рамочная АМ антенна (стр. 19)
Сетевой шнур (модели для Тайваня) (стр. 19)
Наклейки на кабели для акустических систем (стр. 13)
Микрофон для настройки АС (стр. 36)
Пульт ДУ (RC-836M) и два элемента питания (типа АА/R6)
(Примечание для Китая: батареи для пульта в комплект поставки не входят).
Краткое руководство по быстрой настройке
*В каталогах и на упаковке, буква в конце названия изделия указывает на его цвет. Параметры и функциональные возможности не зависят от цвета.
УСТАНОВКА БАТАРЕЙ
Примечания:
- Если пульт ДУ не работает надлежащим образом, замените оба элемента питания одновременно.
- Не используйте вместе новый и старый элементы питания или элементы питания различных типов.
- Если пульт не будет использоваться в течение длительного времени, извлеките элементы питания во избежание утечки и коррозии.
- Немедленно извлекайте разряженные элементы питания во избежание утечки и коррозии.
НАЦЕЛИВАНИЕ ПУЛЬТА ДУ
Чтобы использовать пульт ДУ, направьте его на датчик дистанционного управления AV-ресивера, как показано ниже.
Надписи на рисунке:
Сенсор дистанционного управления AV ресивер Примерно 5 м
Благодарим Вас за покупку A/V ресивера производства компании Onkyo. Пожалуйста, перед выполнением соединений и включением питания внимательно прочтите это руководство. Следуя инструкциям, приведенным в данном руководстве, Вы обеспечите оптимальную работу нового A/V ресивера и получите максимальное удовольствие от прослушивания. Пожалуйста, сохраняйте это руководство для последующих справок.
Стр. 6
СОДЕРЖАНИЕ
| Введение и инструкции по безопасности | |
| Важные инструкции по безопасности | 2 |
| Меры предосторожности | 3 |
| Поставляемые аксессуары | 5 |
| Содержание | 6 |
| Основные характеристики | 7 |
| Передняя и задняя панель | 8 |
| Пульт дистанционного управления | 11 |
| Подсоединения | |
| Подсоединение AV-ресивера | 12 |
| Подсоединение акустических систем | 12 |
| Об AV соединениях | 14 |
| Подсоединение компонентов с HDMI | 16 |
| Подсоединение внешних компонентов | 17 |
| Подсоединение компонентов Onkyo с RI шиной | 18 |
| Подсоединение антенн | 19 |
| Подсоединение сетевого шнура | 19 |
| Включение и основные операции | |
| Включение и выключение AV-ресивера | 20 |
| Включение | 20 |
| Выключение | 20 |
| Первоначальная настройка | 21 |
| Выбор языка, используемого в экранных меню для настройки | 21 |
| Audyssey 2EQ: автоматическая настройка акустических систем | 21 |
| Подсоединение источников | 22 |
| Настройка режимов пульта | 22 |
| Сетевые соединения | 22 |
| Завершение первоначальной настройки | 22 |
| Воспроизведение | 23 |
| Воспроизведение с подсоединенного входного источника | 23 |
| Контроль содержимого USB или сетевых устройств | 24 |
| Обозначения пиктограмм на дисплее | 25 |
| Воспроизведение iPod/iPhone/iPhone через USB | 25 |
| Воспроизведение записей с USB устройств | 26 |
| Прослушивание интернет-радио через vTuner | 27 |
| Регистрация других интернет-радиостанций | 28 |
| Изменение раскладки пиктограмм в меню сетевых сервисов | 28 |
| Воспроизведение музыкальных файлов с сервера | 29 |
| Удаленное воспроизведение | 30 |
| Прослушивание AM/FM радио | 31 |
| Воспроизведение аудио и видео с различных источников | 34 |
| Использование основных функций | 35 |
| Использование автоматической настройки акустических систем | 35 |
| Использование режимов прослушивания | 38 |
| Использование меню Home | 45 |
| Использование таймера отключения (сна) | 46 |
| Установка яркости дисплея | 46 |
| Вывод информации об источнике на дисплей | 46 |
| Изменение отображения входов на дисплее | 46 |
| Выбор размещения акустических систем | 47 |
| Использование режима «Весь дом» (Whole House) | 47 |
| Приглушение звука ресивера | 47 |
| Использование наушников | 47 |
| Более сложные операции | |
| Экранные меню настройки | 48 |
| Использование процедуры быстрой настройки Quick Setup | 48 |
| Использование аудио установок Quick Setup | 49 |
| Использование меню установок Setup (Home) | 51 |
| Об индикаторе HYBRID STANDBY | 52 |
| Пункты меню установок Setup | 52 |
| Назначение входов/выходов | 53 |
| Настройка акустических систем | 55 |
| Настройка аудио режимов | 58 |
| Настройка источников | 60 |
| Назначение режимов прослушивания для входных источников | 63 |
| Разнообразные настройки | 65 |
| Настройка аппаратуры | 66 |
| Настройка пульта | 69 |
| Настройка блокировки (замка) | 69 |
| Мультизонные режимы | 70 |
| Мультизонные подсоединения | 70 |
| Управление компонентами в Зонах | 71 |
| Использование пульта ДУ в Зонах и комплекты для мультирумного управления | 72 |
| Управление другими компонентами | |
| Воспроизведение iPod/iPhone/iPhone через док-станцию Onkyo | 73 |
| Использование док-станции Onkyo | 73 |
| Управление iPod/iPhone/iPhone | 74 |
| Управление другими компонентами | 75 |
| Заранее запрограммированные коды команд пульта | 75 |
| Поиск кодов команд пульта | 75 |
| Ввод кодов в пульт ДУ | 76 |
| Переназначение разноцветных кнопок | 76 |
| Коды для компонентов Onkyo, подключенных по RI | 77 |
| Сброс установок кнопок REMOTE MODE пульта ДУ | 77 |
| Переустановка пульта ДУ | 77 |
| Управление другими компонентами | 77 |
| Приложение | |
| Возможные неисправности | 80 |
| Обновление прошивки фирменного ПО | 86 |
| Советы по подсоединению и пути видео сигналов | 90 |
| Использование RIHD-совместимых телевизора, плеера или рекордера | 93 |
| Об интерфейсе HDMI | 95 |
| Сетевые функции (NET/USB) | 96 |
| Информация о лицензиях и торговых марках | 99 |
| Технические характеристики | 100 |
Для сброса всех установок ресивера, включите его и, удерживая в нажатом состоянии кнопку CBL/SAT, нажмите кнопку STANDBY/ON (см. стр. 80).
Стр. 7
Основные достоинства
Усилитель
- 110 Вт на канал, на 8 Ом (FTC)
- 170 Вт на канал, на 6 Ом (IEC),
- 185 Вт на канал, на 6 Ом (JEITA)
- Технология усиления WRAT — Wide Range Amplifier Technology (расширенный диапазон частот 5 Гц – 100 кГц)
- Схема оптимальной регулировки громкости
- H.C.P.S. (источник питания с большим выходным током) и мощным силовым трансформатором
- Трехкаскадная схема усиления с обратными дарлингтоновскими транзисторами
Обработка сигналов
- Сертификация THX Select 2 Plus
- Масштабирование видео сигналов HDMI (до 4k совместимость) с помощью процессора Qdeo™
- HDMI (с каналом возврата аудио сигнала — Audio Return Channel, и трехмерным видео — 3D с поддержкой Deep Color, x.v. Color, Lip Sync, DTS-HD Master Audio, DTS-HD High Resolution Audio, Dolby TrueHD, Dolby Digital Plus, DSD и Multi-CH PCM)
- Декодирование Dolby Pro Logic IIz и Audyssey DSX™
- Немасштабирующая конфигурация (сложение цифровых сигналов без потери точности)
- Память режимов прослушивания A-Form
- Режим Direct
- Режим Pure Audio
- Алгоритм Music Optimiser для восстановления сжатых музыкальных файлов
- Цифроаналоговые преобразователи (ЦАП) 192 кГц/24 бит
- Мощная, высокоточная 32-разрядная цифровая обработка сигналов DSP процессором
- Схема подавления джиттера
Соединения
- 8 HDMI входов (1 на передней панели) и 2 выхода
- Шина Onkyo RIHD для системного управления
- 5 цифровых аудио входов (2 оптических, 3 коаксиальных)
- Коммутация компонентных видео сигналов (2 входа и 1 выход)
- Винтовые колоночные клеммы, совместимые с разъемами -«бананами» *
* Использование разъемов «бананов» для подсоединения колонок в Европе запрещено.
- Мощный выход на Зону 2/3
- Возможность би-ампинга — подключения по двухканальной усилительной схеме (Bi-Amp) для фронтальных левой и правой акустических систем FL/FR с использованием выходов на верхнюю левую и правую акустические системы FHL/FHR
- Аналоговый видео вход RGB (D-Sub 15) для сигналов с компьютера PC
- Прием интернет-радиостанций
- Сетевое воспроизведение потоковых аудио файлов
- Два USB порта (Front/Rear) для накопителей данных с USB интерфейсом и моделей iPod®/iPhone® (с возможностью вывода обложек альбомов)
*Только USB порт на передней панели совместим с iPod/iPhone
- Вход AUX Front на передней панели с возможностью приема сигналов MHL
Прочее
- 40 предварительных настроек AM/FM
- Система Audyssey 2EQ для коррекции акустики помещения
- Система Audyssey Dynamic EQ для коррекции тонкомпенсации
- Система Audyssey Dynamic Volume для поддержания оптимальной громкости и динамического диапазона
- Регулировка частоты раздела кроссовера (разделительного фильтра) (40/50/60/80/100/120/150/200 Гц)
- Функция управления синхронизацией звука и видео A/V Sync (до 800 мс)
- Функция Auto Standby – авто перехода в режим ожидания
- Экранное меню настройки по HDMI
- Запрограммированный пульт ДУ, совместимый с RI
Стр. 8
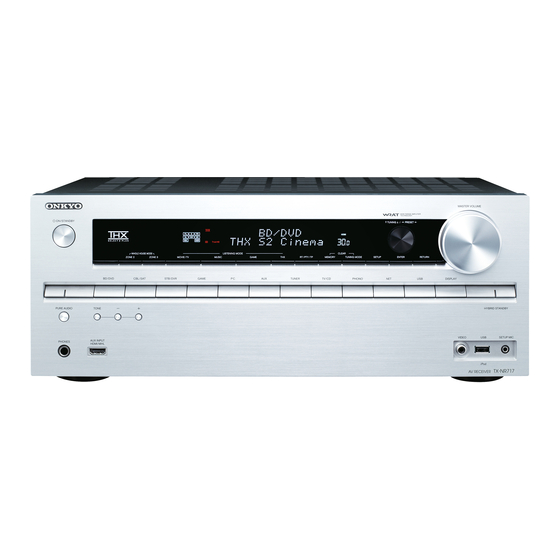
ПЕРЕДНЯЯ И ЗАДНЯЯ ПАНЕЛЬ
Передняя панель
(Модели для Северной Америки и Тайваня)
(рисунок)
В скобках показан номер страницы с подробными инструкциями.
- Кнопка ON / STANDBY (20)
- Кнопки ZONE 2 и ZONE 3 (47, 71)
- Датчик дистанционного управления (5)
- Дисплей (9)
- Кнопки LISTENING MODE (38)
- Кнопка DIMMER (Модели для Северной Америки и Тайваня) (46)
- Кнопка MEMORY (32)
- Кнопка TUNING MODE (32)
- Кнопка SETUP (51)
- Кнопки TUNING (31), PRESET (32), стрелок курсора и кнопка ENTER
- Кнопка RETURN
- Кнопка MASTER VOLUME (23)
- Кнопка PURE AUDIO и индикатор (38)
- Гнездо PHONES (47)
- Вход AUX INPUT HDMI/MHL (16)
- Кнопки TONE и TONE LEVEL (49)
- Кнопки селектора входов (23)
- Кнопка DISPLAY (46)
- Вход VIDEO (17)
- USB порт (17)
- Гнездо SETUP MIC (36)
- Индикатор HYBRID STANDBY (52)
- Кнопка RT/PTY/TP (33) (Европейская, австралийская и азиатские модели)
Стр. 9
ДИСПЛЕЙ
В скобках указаны номера страниц с подробными инструкциями
(1) Индикаторы акустических систем/каналов Speaker/channel
(2) Индикатор Z2 (Zone 2) (71)
(3) Индикатор Z3 (Zone 3) (71)
(4) Индикаторы режима прослушивания и формата источника (38)
(5) Индикатор M.Opt (50)
(6) Индикаторы PLAY , PAUSE и курсора (25)
(7) Индикатор NET (27-29, 31, 69)
(8) Индикаторы настройки тюнера
Индикатор RDS (33) (кроме моделей для Северной Америки и Тайваня)
Индикатор AUTO (32)
Индикатор TUNED (32)
Индикатор FM STEREO (32)
(9) Индикаторы входов (90)
Индикатор HDMI (66)
Индикатор DIGITAL
Индикатор ANALOG
(10) Индикатор Bi AMP
(11) Индикатор Audyssey (35, 60)
Индикатор Dynamic EQ (60)
Индикатор Dynamic Vol (61)
(12) Индикатор наушников HEADPHONE (47)
(13) Область сообщений
(14) Индикатор MUTING (47)
(15) Индикатор уровня громкости Volume level
(16) Индикатор USB (25, 26)
(17) Индикатор SLEEP (46)
Стр. 10
ЗАДНЯЯ ПАНЕЛЬ
(Североамериканская модель)
(Европейская, австралийская, азиатская и тайваньская модели)
1 Разъем дистанционного управления по шине RI
2 Порт USB
3 Порт ETHERNET
4 Разъемы композитного видео и аналогового аудио (BD/DVD IN, CBL/SAT IN, STB/DVR IN, GAME IN, PC IN, TV/CD IN и PHONO IN)
5 Разъемы HDMI IN и HDMI OUT (HDMI OUT MAIN и HDMI OUT SUB)
6 Разъем MONITOR OUT V
7 Разъемы COMPONENT VIDEO IN и MONITOR OUT
8 Разъем IR IN
Сетевой шнур (Североамериканская, европейская, австралийская и азиатские модели)
9 Разъем ZONE 2 12V TRIGGER OUT
10 Разъем ZONE 2/ZONE 3 LINE OUT
11 Разъемы FM антенна и АМ антенна
12 Разъем PC IN
13 Сетевой шнур (Североамериканская модель)
14 Разъемы DIGITAL IN COAXIAL и OPTICAL
15 Винт заземления GND
16 Разъемы PRE OUT
(FRONT L/R, CENTER, SURR L/R, SB/FH/FW* L/R, SUBWOOFER)
* SB···Surround Back, FH···Front High, FW···Front Wide
17 Клеммы SPEAKERS для подсоединения комплекта АС SPEAKERS (FRONT L/R, CENTER, SURR L/R, SURR BACK L/R, FRONT HIGH /ZONE 3 L/R и FRONT WIDE/ZONE 2 L/R)
18 Разъем AC INLET (Европейская, австралийская, азиатская и тайваньская модели)
См. стр. 12 – 19 «Подсоединение AV-ресивера» для получения информации по подключению.
Стр. 11
Пульт дистанционного управления
Использование пульта ДУ для управления AV-ресивером
Для управления ресивером, нажмите кнопку RECEIVER на пульте, чтобы выбрать режим ресивера.
Вы можете также с пульта управлять Blu-ray/DVD-проигрывателем, CD-проигрывателем и другими компонентами Onkyo.
См. стр. 76 «Ввод кодов в пульт» для получения более подробной информации.
В скобках указаны номера страниц с подробными инструкциями.
- Кнопка RECEIVER (20).
- Кнопки REMOTE MODE/INPUT SELECTOR (23)
- Кнопка SP LAYOUT (47)
- Кнопки со стрелками курсора и ENTER
- Кнопка Q SETUP (48)
- Кнопки LISTENING MODE (38).
- Кнопка DIMMER (46).
- Кнопка DISPLAY (46)
- Кнопка MUTING (47)
- Кнопки VOL ▲/▼ (23)
- Кнопка RETURN.
- Кнопка HOME (45)
- Кнопка SLEEP (46)
Кнопки, используемые при управления тюнером
Для управления тюнером AV-ресивера, нажмите кнопку TUNER (или RECEIVER).
Вы можете выбрать диапазон АМ или FM, нажимая последовательно на кнопку TUNER.
- Кнопки стрелок курсора ▲/▼ (32)
- Кнопка D.TUN (32)
- Кнопка DISPLAY.
- Кнопка CH + / — (32)
- Цифровые кнопки (32).
Стр.12
Подсоединение AV ресивера
Подсоединение ваших акустических систем

У С Т Р О Й С Т В О
Р А Д И О П Р И Е М Н О Е
O N K Y O
Т X — N R 7 1 7
( Р У К О В О Д С Т В О П О Э К С П Л У А Т А Ц И И )
Вы приобрели устройство радиоприемное производства компании «ОНКИО САУНД ЭНД ВИЖН
КОРПОРЕЙШЕН», Япония. Данная модель является аудио/видео ресивером
(декодер/усилитель/тюнер) и предназначена для декодирования и усиления аудио сигналов,
коммутации видеосигналов и приема радиопередач в домашних аудио/видео системах. Эти
изделия широко известны в кругах истинных ценителей высококлассного звука. Их качество и
безопасность подтверждены множеством тестов, проведенных как зарубежными, так и
российскими испытательными лабораториями.
Изготовитель в течение 3 лет (срок службы) после выпуска данного изделия обеспечивает
наличие комплектующих в целях возможности проведения ремонта и технического
обслуживания, по истечении которого эксплуатация и техническое обслуживание
продолжаются в соответствии с действующими нормативными документами. Изделие остается
безопасным для жизни, здоровья человека и окружающей среды в течение всего срока
эксплуатации. Гарантийный срок — 1 год.
Информация о Российской сертификации
№
сертификата
соответствия
Орган по
сертифи-
кации
Нормативные документы
Наименование
сертифицирова
нной продукции
Срок
действия
сертифика
та
POCC
JP.АЯ46.B054
65
OC
«РосТест-
Москва»
ГОСТ P МЭК 60065-2009,
ГОСТ 5651-89 (Табл.1 (поз.11),
Табл.2 (поз.6,7)), ГОСТ 22505-97,
ГОСТ Р 51515-99
ГОСТ Р 51317.3.2-2006 (Разд. 6,7),
ГОСТ Р 51317.3.3-2008
Устройства
радиоприемны
е
10.05.2012
–
12.03.2015
Основные технические характеристики
Cм. в конце инструкции
ВНИМАНИЕ: Если Вы приобрели аудиоаппаратуру надлежащего качества, то, по
Российским законам, она не подлежит возврату или обмену на аналогичный товар
других размера, формы и т.д.
Т о т т о р и О н к и о К о р п о р е й ш н
2 4 3 С ю ю к и , К у р а ё с и — с и , Т о т т о р и 6 8 2 , Я п о н и я
АЯ 46
-
Contents
-
Table of Contents
-
Troubleshooting
-
Bookmarks
Quick Links
AV RECEIVER
TX-NR717
Instruction Manual
Contents
Table of Contents …………………………………….6
Connections ………………………………………….12
Controlling Other Components……………….73
Appendix ……………………………………………….80
Internet Radio Guide
Remote Control Codes
E
n
Related Manuals for Onkyo TX-NR717
Summary of Contents for Onkyo TX-NR717
-
Page 1: Table Of Contents
Contents AV RECEIVER Safety Information and Introduction ….2 TX-NR717 Table of Contents ………..6 Connections ……….12 Turning On & Basic Operations….20 Instruction Manual Advanced Operations ……..48 Controlling Other Components….73 Appendix …………80 Internet Radio Guide Remote Control Codes…
-
Page 2: Safety Information And Introduction
Important Safety Instructions exposed to rain or moisture, does not operate normally, Leave 20 cm (8″) of free space at the top and sides and 1. Read these instructions. or has been dropped. 10 cm (4″) at the rear. The rear edge of the shelf or 2.
-
Page 3: Precautions
• If you do not use this unit for a long time, it may not requirements printed on the unit’s rear panel (e.g., AC…
-
Page 4
MATCH WIDE BLADE OF PLUG TO WIDE SLOT, If the power cord’s plug is not suitable for your socket FULLY INSERT. outlets, cut it off and fit a suitable plug. Fit a suitable fuse Modèle pour les Canadien in the plug. -
Page 5: Supplied Accessories
• If the remote controller doesn’t work reliably, try replacing the batteries. • Don’t mix new and old batteries or different types of batteries. • If you intend not to use the remote controller for a long time, remove the batteries to prevent damage from leakage or corrosion.
-
Page 6: Table Of Contents
Audyssey 2EQ: Auto Setup……..21 About the HYBRID STANDBY Indicator ….52 Source Connection…………22 Setup Menu Items…………. 52 To reset the AV receiver to its factory defaults, turn it Remote Mode Setup ……….22 Input/Output Assign ……….53 on and, while holding down CBL/SAT, press Network Connection……….22…
-
Page 7: Features
Safety Information and Introduction Features Connections • 8 HDMI Inputs (1 on front panel) and 2 Outputs Amplifier • Onkyo p for System Control • 5 Digital Inputs (2 Optical/3 Coaxial) • 110 Watts/Channel @ 8 ohms (FTC) • Component Video Switching (2 Inputs/1 Output) •…
-
Page 8: Front & Rear Panels
(North American and Taiwanese models) (European, Australian and Asian models) f g h i j k For detailed information, see the pages in parentheses. j TUNING q/w (32), PRESET e/r (32), cursor and t USB port (17) ENTER buttons a 8ON/STANDBY button (20)
-
Page 9
Safety Information and Introduction Display For detailed information, see the pages in parentheses. i Input indicators (91) a Speaker/channel indicators HDMI indicator (67) b Z2 (Zone 2) indicator (71) DIGITAL indicator ANALOG indicator c Z3 (Zone 3) indicator (71) j Bi AMP indicator… -
Page 10
(BD/DVD IN, CBL/SAT IN, STB/DVR IN, GAME o GND screw IN, PC IN, TV/CD IN and PHONO IN) p PRE OUT jacks e HDMI IN and HDMI output (HDMI OUT MAIN and (FRONT L/R, CENTER, SURR L/R, HDMI OUT SUB) jacks SB/FH/FW… -
Page 11: Remote Controller
■ Controlling the tuner To control the AV receiver’s tuner, press TUNER (or RECEIVER). You can select AM or FM by pressing TUNER repeatedly. a q/w buttons (32) b D.TUN button (32) c DISPLAY button d CH +/– button (32)
-
Page 12: Connections
2 3 4 5 6 7 7 7 8 8 9 9 9 10 11 speakers Front speakers ✔ ✔ ✔ ✔ ✔ ✔ ✔ ✔ ✔ ✔ ✔ ✔ ✔ ✔ ✔ ✔ ✔ ✔ ✔ ✔ ✔ ✔ ✔ ✔ ✔ ✔ ✔ ✔…
-
Page 13
(+) side of each speaker cable in accordance with the table above. Then all you need to do is to match the color of each label to the corresponding speaker terminal. • Don’t connect more than one cable to each speaker terminal. -
Page 14
You can connect the powered subwoofer with two SUBWOOFER PRE OUT jacks respectively. The same signal is output from each jack. • If your subwoofer is unpowered and you’re using an external amplifier, connect the subwoofer pre out jack to an input on the amplifier. En-14… -
Page 15: About Av Connections
• The AV receiver’s optical digital jacks have shutter-type covers Blu-ray Disc/ a display device (also called D-Sub or D-subminiature). that open when an optical plug is inserted and close when it’s DVD player Game console removed. Push plugs in all the way.
-
Page 16: Connecting Components With Hdmi
Satellite/cable set-top box, etc. • In the case of Blu-ray Disc/DVD players, if no sound is output or the TV is set to another input source, this may result in no ✔ despite following the above-mentioned procedure, set your Blu- Set top box/digital video recorder, etc.
-
Page 17: Connecting Your Components
See “Connection Tips and Video Signal Path” for more The on-screen menus appear only on a TV that is connected to HDMI OUT MAIN. If your TV is connected to other information (➔ page 90).
-
Page 18: Connecting Onkyo Ri Components
(➔ page 17). Do not connect the AV receiver’s USB port to a USB port on Make the u connection (see the illustration). your computer. Music on your computer cannot be played through the AV receiver in this way.
-
Page 19: Connecting The Antennas
Note equipment. • Once your AV receiver is ready for use, you’ll need to tune into a radio station and position the antenna to achieve the best possible • Never disconnect the power cord from the AV receiver while the reception.
-
Page 20: Turning On & Basic Operations
Receiver Press 8ON/STANDBY on the front panel. To ensure smooth operation, here’s a few easy steps to help you configure the AV receiver before you use it for the very first time. These settings only need to be made 8ON/STANDBY Press RECEIVER followed by 8RECEIVER on the once.
-
Page 21: Connections
The automatic speaker setup is performed The on-screen menus appear only on a TV that is • Pressing HOME will close the setup wizard. To restart the initial following instructions on screen. Refer to step 2 connected to HDMI OUT MAIN.
-
Page 22: Source Connection
Remote Mode Setup network checking. This step checks the connection of source components. With this step, you can enter remote control codes for the The checking is complete when the message components you want to operate. “Successfully connected.” appears at the middle of Use q/w to select one of the following options, and the screen.
-
Page 23: Playback
• The time until the screen saver activates itself can be changed (➔ page 66). in the “Screen Saver” setting • “Controlling Other Components” (➔ page • The screen will return to its previous state if the AV receiver is To adjust the volume, use VOL q/w. operated. En-23…
-
Page 24: Controlling Contents Of Usb Or Network Devices
(➔ page 75). Pressing this button twice selects the previous song. Note • The buttons you can use will differ depending on the devices and This button fast-reverses the current song. media used for playback. This button pauses playback. SEARCH You can toggle between the playback screen and the list screen during playback.
-
Page 25: Understanding Icons On The Display
USB device from the USB port. Repeat receiver cannot read the iPod/iPhone. • If you connect an iPod or iPhone to the USB port, no sound will be output from the headphones jack. Shuffle • When connecting your iPod/iPhone with a USB cable, we recommend you use an official USB cable from Apple Inc.
-
Page 26: Playing A Usb Device
(➔ page 96). • “Network/USB Features” • In this mode, video contents are not displayed, even if they are input from the VIDEO jack on the AV receiver’s front panel. Press USB repeatedly to select the “USB(Front)” or “USB(Rear)” input.
-
Page 27: Listening To Vtuner Internet Radio
NET on the remote controller. You can search for stations by categories such as genre or 1. Press MENU with the station selected or while a location. The AV receiver is preinstalled with this service.
-
Page 28: Registering Other Internet Radio
• If you want to add a new station directly from “My Favorites”, Internet radio station, you may not be able to listen to some Press NET.
-
Page 29: Playing Music Files On A Server
Service” in the Home menu. This section explains how to configure Windows Media network. Player 11 so that the AV receiver can play the music files Use q/w/e/r to select “DLNA”, and press ENTER. stored on your computer. Windows Media Player 12 Setup Use q/w to select a server, and then press ENTER.
-
Page 30: Playing Music Files On A Shared Folder
Media Player 12 library. receiver will not be reflected in the “Remote playback” window. • If this option is not available, verify that “View by:” is set to • On the “Stream” menu, confirm that “Allow remote control “Category”. of my Player…” is checked.
-
Page 31: Listening To Am/Fm Radio
• With this setting, everyone is allowed to access the folder. Use q/w to select a server, and then press ENTER. If you want to assign a user name and password to the folder, make the corresponding settings for “Permissions”…
-
Page 32
CH +/–. the frequency of the radio station. TUNED For example, to tune to 87.5 (FM), press 8, 7, 5 or 8, AUTO • You can also use the remote controller’s number buttons to 7, 5, 0. -
Page 33
This is not a malfunction. If the current radio station is broadcasting TP (Traffic available. • If the signal from an RDS station is weak, RDS data may be Program), “[TP]” will appear on the AV receiver’s displayed intermittently or not at all. -
Page 34: Playing Audio And Video From Separate Sources
Playing Audio and Video from Separate Type Display Sources None None You can listen to the audio of one input source while News reports News watching the video of another. This function takes Current affairs Affairs advantage of the fact that when an audio-only input source…
-
Page 35: Using Basic Functions
With the supplied calibrated microphone, Audyssey 2EQ ® or other devices. Turn off the cell phone (even if it is not in use) automatically determines the number of speakers microphone tip pointed directly at the ceiling using a or place it away from all audio electronics.
-
Page 36
Disconnect the speaker setup microphone. Note When prompted, repeat step 6. • The on-screen menus appear only on a TV that is connected to HDMI OUT MAIN. If your TV is connected to other Use q/w to select an option, and then press ENTER. -
Page 37
Ambient noise is too high. • “Equalizer Settings” (➔ page Note Retry • Please note that THX recommends any THX main speakers be set Cancel to “80Hz(THX)”. If you set up your speakers using Audyssey 2EQ Room Correction and Speaker Setup, please Error message… -
Page 38: Using The Listening Modes
MOVIE/TV Source Information” (➔ page 46). d e Surround speakers • While a pair of headphones is connected, you can select the Subwoofer(s) following listening modes: Pure Audio, Mono, Direct, and g h Surround back speakers Stereo. i j Front high speakers…
-
Page 39
Pressing RECEIVER followed by SP (speaker layout) This is 5.1-channel surround sound. This surround repeatedly allows you to select the speakers you want to use: system has five main channels of sound and a sixth front high, front wide, or surround back. However, the subwoofer channel (called the point-one channel). -
Page 40
Full Mono In this mode, all speakers output the same sound in mono, so the sound you hear is the F u l M o n o same regardless of where you are within the listening room. -
Page 41
Input Speaker Source Layout Listening Mode Description Input Speaker In this mode, audio from the input source is Source Layout D XCN output without surround-sound processing. Pure Audio In this mode, the display and video circuitry D T S The speaker configuration (presence of… -
Page 42
Use this mode with video games, especially impression. Starting with a 5.1 system those that bear the Dolby Pro Logic II logo. Audyssey DSX first adds Wide channels • Dolby PLIIx Movie for the biggest impact on envelopment. -
Page 43
• Dolby Pro Logic IIx Movie + THX Surround back speaker output depends on Cinema the source material and the selected listening • Dolby Pro Logic IIx Music + THX Music mode. The combination of Dolby Pro Logic IIx • THX Cinema… -
Page 44
• DTS Neo:6 + THX Games The AV receiver can input the DSD signal from HDMI IN. Depending on the player, setting the The combination of DTS Neo:6 and THX output on the player side to PCM might bring better sound. -
Page 45: Using The Home Menu
The Home menu will be superimposed on the TV If you want to use the Internet radio services, use screen. • If no video signals are present, the thumbnails will be filled in q/w/e/r to select the desired service. Pressing black.
-
Page 46: Using The Sleep Timer
The sleep time can be set from 90 to 10 minutes in 10 Press TV/CD or GAME. minute steps. “TV/CD” or “GAME” appears on the AV receiver’s The SLEEP indicator lights on the AV receiver’s…
-
Page 47: Selecting Speaker Layout
Stereo, unless it’s already set to Stereo, Mono, and you’re listening through your TV speakers. Direct, or Pure Audio. • If you connect an iPod or iPhone to the USB port on the AV receiver, no sound will be output from the headphones jack. En-47…
-
Page 48: Advanced Operations
I n p u t A u d i o V i d e o I n f o r m a t i o n L i s t e n i n g M o d e En-48…
-
Page 49: Using The Audio Settings Of Quick Setup
You can adjust the volume of each speaker while listening when any of the THX listening modes is selected, with • These settings are not available in either of the following cases: “Loudness Plus” set to “On” or “Preserve THX Settings” set –…
-
Page 50
DTS-HD Master Audio, DTS Express, DSD, Dolby EX, are met: • The Late Night function is set to “Off” when the AV receiver is Dolby Pro Logic IIz Height, Dolby PLIIx Movie, DTS – Room Correction and Speaker Setup is completed. Note that set to standby. -
Page 51: Using The Setup Menu (Home)
• The time until the screen saver activates itself can be changed RECEIVER in the “Screen Saver” setting (➔ page 66). • The screen will return to its previous state if the AV receiver is operated. a Main Menu ENTER b Sub Menu…
-
Page 52: About The Hybrid Standby Indicator
Picture Adjust Audio Selector Listening Mode Preset BD/DVD Note (➔ page CBL/SAT • If Zones are turned on or, if a mobile device connected to the STB/DVR Front Input (MHL) is charging, the HYBRID STANDBY indicator won’t light. GAME TUNER TV/CD…
-
Page 53: Input/Output Assign
HDMI4 ■ case select anything other than “1080p/24”. Monitor Out HDMI5 • If the “Monitor Out” setting is set to “Sub”, this setting is fixed Main: FRONT (Fixed) to “Through”. Select this if your TV is connected to HDMI OUT •…
-
Page 54
In this case, if you want to use the • If you assign “- — — — -” to an input selector that is currently coaxial or optical audio input, make the appropriate selection in selected in “HDMI Through”… -
Page 55: Speaker Setup
When the “Powered Zone 3” setting is set to “Yes” and connected and a crossover frequency for each speaker. • When bi-amping is used, the AV receiver is able to drive up to 5.1 Zone 3 is turned on, this setting cannot be selected.
-
Page 56
55). “Speaker Configuration” cannot be selected sounds from the front left, right, and center channels to • When the “Powered Zone 2” setting is set to “Yes” and Zone 2 1ch: the subwoofer. is turned on, the surround back and front high speakers cannot be Select if only one surround back speaker L is used. -
Page 57
Advanced Operations ■ • When the “Powered Zone 2” setting is set to “Yes” and Zone 2 Use q to select “Channel”, and then use e/r to is turned on, the surround back and front high speakers cannot be select another speaker. -
Page 58: Audio Adjust
If you’re not using any surround back speakers, these mode should be set to ON when there are THX Media settings apply to Dolby Pro Logic II, not Dolby Pro Logic Director™…
-
Page 59
• If the “Powered Zone 2/3” setting is set to “Yes” and Zone 2/3 is The DTS Neo:6 Music listening mode creates 6-channel only the center speaker. (If you’re not using a center turned on, this setting cannot be selected. -
Page 60: Source Setup
Audyssey ® to one of the two available settings. sounds the way it was created at any volume level — not just at reference level. The tone for each speaker is set automatically by Front left speaker Front right speaker ■…
-
Page 61
(5 dB, 10 dB, A/V Sync Audyssey Dynamic EQ works well by itself. However, if and 15 dB) that can be selected when the mix level of the Audyssey 2EQ is on, the two technologies work in content is not within the standard. -
Page 62
Press CLR on the remote controller to delete all the characters you have input. 4-4. Name Edit BD/DVD Name • To name a radio preset, use TUNER to select AM or FM, and Zoom: – then select the preset (➔ page 32). -
Page 63
With this setting, you can reduce noise appearing on the settings to be suitable for the movie or game screen by one If the “Game Mode” setting is set to “On”, this setting is fixed screen. Select the desired level. -
Page 64: Listening Mode Preset
You can set priorities of audio output when there are both Note digital and analog inputs. To be continued • The setting will be reset to “Off” when you change the setting in Note “Audio Selector”. • This setting can be made only for an input source that is assigned to HDMI IN, COAXIAL IN, or OPTICAL IN.
-
Page 65: Miscellaneous
PCM digital (CD, Note DVD, etc.) audio signal is played. • If the absolute value is set to 82, “82.0Ref” will appear on the Note display and the THX indicator will flash. • For the “AUX” input selector, only “PCM” is available.
-
Page 66: Hardware Setup
With this preference, you can specify the volume setting to be used each time the AV receiver is turned on. This preference determines whether operation details are To use the same volume level that was used when the AV Main Menu Hardware Setup displayed on-screen when an AV receiver function is receiver was turned off, select “Last”.
-
Page 67
BD/DVD, CBL/SAT, STB/DVR, GAME, PC, AUX, TV/CD, PHONO: Note Selects the input source for which the HDMI • If “On” is selected and the audio can be output from the TV, the Through function is enabled. Turn this setting on to allow -compatible AV receiver will output no sound through its speakers. -
Page 68
IP), you’ll need to configure these settings yourself, in (with “Sub Window” set to “Single”) • This setting is fixed to “- — — -” when the “HDMI which case, a knowledge of Ethernet networking is Upper Left, Upper Right, Lower Left, Lower Right Control(RIHD)”… -
Page 69: Remote Controller Setup
( Note Note • If you do change the AV receiver’s remote ID, be sure to change the remote controller to the same ID (see below), otherwise, you • When set to “On”, the power consumption slightly increases in won’t be able to control it with the remote controller.
-
Page 70: Multi Zone
To use this setup, you must activate the Powered Zone 2/3 setting (➔ page 55). Zone 2 AV receiver Receiver/ integrated amp Zone 3 Zone 3 Receiver/ integrated amp Note • With this setup, the volume of Zone 2/3 is controlled by the AV receiver. En-70…
-
Page 71: Controlling Multi Zone Components
Zone 2 will make that component To select the same source as the main room’s, press turn on or off as the AV receiver turns on or off the Zone 2. ZONE 2 or ZONE 3 twice. “Zone 2 Selector:…
-
Page 72: Using The Remote Controller In Zone And Multiroom Control Kits
Zone • “AUX” cannot be selected as input sources for Zone 2/3. • When “AUX” is the input source of Main room and Zone 2/3 is Signal flow set to share the same source, no sound will be output from The miniplug cable from the connecting block should be Zone 2/3.
-
Page 73: Controlling Other Components
• If you do adjust the volume control on your iPod/iPhone while When you turn on the AV receiver, the RI Dock and it’s inserted in the RI Dock, be careful that it’s not set too loud iPod/iPhone turn on automatically. In addition, when RI before you reconnect your headphones.
-
Page 74: Controlling Your Ipod/Iphone
Dock on or off. Also, your iPod/iPhone may not respond the With the RI Control first time you press this button, in which case you should press Make an u connection and enter the remote control code it again. This is because the remote controller transmits the On 81993 (with u).
-
Page 75: Controlling Other Components
The following REMOTE MODE buttons are preprogrammed with remote control codes for controlling Use q/w to select “Remote Controller Setup”, and the components listed. You do not need to enter a remote then press ENTER. control code to control these components.
-
Page 76: Entering Remote Control Codes
Note Within 30 seconds, use the number buttons to enter • If any other button than the colored buttons is pressed, the the 5-digit remote control code. operation will be cancelled. The remote indicator flashes twice.
-
Page 77: Remote Control Codes For Onkyo Components Connected Via Ri
Resetting the REMOTE MODE Buttons For details on entering a remote control code for other components that are out of view, in a rack, for example. components, see “Entering Remote Control Codes” You can reset a REMOTE MODE button to its default (➔…
-
Page 78
Use the following remote control codes: D (Blue) 32910/33101/33501/31612: g Number: 1 to 9, 0 Blu-ray Disc/DVD player with p Number: +10 The p supported by the AV receiver is the CEC system control function of the HDMI standard. En-78… -
Page 79
Number: +10 Note ■ Cassette tape deck operation • With some components, certain buttons may not work as expected, and some may not work at all. Available buttons • See “Controlling Your iPod/iPhone” about the operation of e 1, t (Reverse… -
Page 80: Appendix
HDMI outputs. If your TV is ■ There’s no sound, or it’s very quiet If you have any trouble using the AV receiver, look for a connected to other video outputs, use the AV solution in this section. If you can’t resolve the issue receiver’s display when changing settings.
-
Page 81
■ The front high, front wide and surround back Can’t get 6.1/7.1 playback If the input signal format is set to “PCM” or “DTS”. speakers produce no sound Set it to “Off”. If no surround back speakers, front wide speakers and —… -
Page 82
About DTS signals The on-screen information does not appear If your TV is connected to the HDMI output, select “- — — — -” in the “HDMI Input” setting to watch When DTS program material ends and the DTS —… -
Page 83
Try resetting your iPod/iPhone. — code. between tracks. Make sure to set the same ID on both the AV receiver ■ There’s no video ■ iPod/iPhone doesn’t work properly and remote controller. -
Page 84
AUX (front) input, the power consumption in standby This can be caused by a malfunction in your speaker — allocate the same IP address to the AV receiver, so if mode will increase. unit. Check if the unit produces normal sounds. -
Page 85
(➔ page 54). wall outlet, wait at least five seconds, and then plug it If the video source is connected to COMPONENT back in. VIDEO IN, select the relevant input selector, and assign it to “IN1”. -
Page 86: Firmware Update
• If the USB device is partitioned, each section will be treated as an iPod/iPhone, USB or servers, etc. independent device. • If the USB device contains a lot of data, the AV receiver may take a while to read it. To be continued •…
-
Page 87
Please wait until it becomes operable. -10, The Ethernet cable was not detected. Select “Update via NET” and press ENTER. Reconnect the cable properly. Note that this option will not be available if there is no -11, -13, -21, Internet connection error. -
Page 88
During the update process, the on-screen display may ONKAVR****_************.zip • Never plug or unplug an HDMI cable or a USB device during the disappear depending on the updated program. When Unzip the downloaded file. The following five files update process. -
Page 89
Appendix Troubleshooting Case 1: 2-1, Nisshin-cho, Neyagawa-shi, OSAKA 572-8540, JAPAN If an error occurs, “Error!! *-**” is displayed on the AV http://www.onkyo.com/ receiver’s display. (Alpha-numeric characters on the front The Americas display are denoted by asterisks.) Refer to the following 18 Park Way, Upper Saddle River, N.J. -
Page 90: Connection Tips And Video Signal Path
HDMI OUT MAIN. If your TV is through their respective input signals as they are. output). connected to other video outputs, use the AV • To by-pass the upconversion, set the “Picture Mode” setting to Video Signal Flow Chart receiver’s display when changing settings. “Direct”…
-
Page 91
■ Signal Selection Audio Connection Formats If signals are present at more than one input, the inputs will be selected automatically in the following order of priority: Audio components can be connected by using any of the HDMI, component video, composite video. -
Page 92
Supported resolutions: [3840 × 2160 24/25/30 Hz], [4096 × 2160 24 Hz] When video signals of personal computers connected to PC IN are output from HDMI OUT SUB, they may not display properly on some TVs. Supported resolutions for HDMI OUT SUB. -
Page 93: Using An Rihd-Compatible Tv, Player, Or Recorder
CEC (Consumer Electronics Control), which allows Players/Recorders • You can set on the menu screen of the TV to either output system control over HDMI and is part of the HDMI the audio from the speakers connected to the AV •…
-
Page 94
1. Turn on the power for all connected components. on the player models.) 2. Turn off the power of the TV, and confirm that the • Even if you set to output audio on the TV speakers, audio HDMI power of the connected components is turned off… -
Page 95: About Hdmi
PC are not supported. DSD and Multichannel PCM. • The HDMI audio signal (sampling rate, bit length, etc.) may be restricted by the connected source component. If the picture is poor or there’s no sound from a component connected via HDMI, check its setup.
-
Page 96: Network/Usb Features
68). network is recommended. Although it’s possible to play • The AV receiver does not support PPPoE settings, so if you have The following diagram shows how you can connect the AV music on a computer that’s connected to the network a PPPoE-type Internet connection, you must use a PPPoE- receiver to your home network.
-
Page 97
Storage” will be displayed. Modem: 28.8 kbps • The computer or media server must be on the same • If you connect a USB hard disk drive to the AV receiver’s USB Sound card: 16-bit sound card network as the AV receiver. -
Page 98
WAV files contain uncompressed PCM digital audio. • The sampling rate of 2.8224 MHz is supported. For server playback and playback from a USB device, the • Sampling rates of 8 kHz, 11.025 kHz, 12 kHz, 16 kHz, ■ Dolby True HD (.vr/.mlp/.VR/.MLP) AV receiver supports the following music file formats. -
Page 99: License And Trademark Information
Please note that the use of this accessory with iPod or iPhone may affect wireless performance. Apple TV is a trademark of Apple Inc., registered in the U.S. and other countries. En-99…
-
Page 100: Specifications
12 V Trigger Out Frequency Response 5 Hz — 100 kHz/+1 dB, –3 dB (Direct mode) Input IN 1, IN 2, IN 3, IN 4, IN 5, IN 6, IN 7, Tone Control Characteristics Specifications and features are subject to change AUX INPUT ±10 dB, 50 Hz (BASS)
-
Page 101
Appendix Memo En-101… -
Page 102
Appendix Memo En-102… -
Page 103
Appendix Memo En-103… -
Page 104
The Coach House 81A High Street, Marlow, Buckinghamshire, SL7 1AB, UK Tel: +44-(0)1628-473-350 Fax: +44-(0)1628-401-700 Unit 1033, 10/F, Star House, No 3, Salisbury Road, Tsim Sha Tsui Kowloon, Hong Kong. Tel: 852-2429-3118 Fax: 852-2428-9039 http://www.onkyochina.com/ 1301, 555 Tower, No.555 West NanJin Road, Jin an, Shanghai, China 200041, Tel: 86-21-52131366 Fax: 86-21-52130396 http://www.cn.onkyo.com/… -
Page 105
AV receiver. Using Last.fm Internet Radio ……5 Select the desired service and press ENTER. • Some of the services don’t allow the use of multiple user The top page of the selected service appears. accounts. -
Page 106: Pandora ® Internet Radio -Getting Started (U.s. Only)
Don’t play the song for a month: your account and stations you can return to your If you are tired of a song, you can put the song to sleep Onkyo receiver and press enter to begin listening to and Pandora will not play it for one month.
-
Page 107: Using Rhapsody (U.s. Only)
Use q/w to select a channel, and press ENTER or Search: 1 to start playback. Use q/w to select “Sign in to your account” and then You can search for music by Artist, Album, or Track. Playback starts and the playback screen appears.
-
Page 108: Using The Siriusxm Internet Radio (North American Only)
Setup. If you don’t know your username or password, www.sirius.com). Be sure to read this agreement before many days are left in your trial. After the trial period call Sirius XM at (888) 539-7474 for assistance. you purchase your subscription. Sirius, XM and all related expires, if you want to continue listening to the service, marks and logos are trademarks of Sirius XM Radio Inc.
-
Page 109: Using Last.fm Internet Radio
Last.fm is a music service that learns what you love… Tracks”, “Library” and “Neighbours”. If you have the existing Last.fm account, you can sign Your new Onkyo AV receiver is very clever. If you have a Account Info: in to your account to select “Sign in to your free Last.fm account, it will keep track of all the songs…
-
Page 110: Using Slacker Personal Radio
Using Internet Radio You can control the tracks with the buttons on the Using Slacker Personal Radio remote control. If you do not have an account, create one on the Enabled buttons: 1, 3, 2, 6 Slacker website (www.slacker.com) with your ■…
-
Page 111: Using Mp3Tunes
Using Internet Radio Playing Contents on the AV Receiver Using MP3tunes Use q/w to select a track and press ENTER or 1 to start playback. Listen to your music collection on your home stereo in A playback screen appears. complete digital fidelity without a personal computer plus •…
-
Page 112
Remarque Utilisation de SiriusXM Internet Radio Les éléments de menu suivants s’affichent : • Les services disponibles peuvent varier en fonction de la région. (Amérique du Nord uniquement) …. 4 Add new user : Remove this user : Appuyez sur NET. -
Page 113: Pandora ® Internet Radio -Pour Commencer (États-Unis Uniquement)
à votre récepteur Onkyo et appuyez Si vous en avez assez d’une chanson, vous pouvez sur entrée pour écouter votre webradio Pandora mettre la chanson « au repos » et Pandora ne la lira PANDORA, le logo PANDORA, et l’habillage personnalisée.
-
Page 114: Utilisation De Rhapsody (Etats-Unis Uniquement)
à la liste My Favorites. consultez « Utilisation de plusieurs comptes » (➔ page Conseil L’identification peut être réalisée à partir de l’écran « Users ». • Vous pouvez supprimer des pistes, des albums et des canaux Rhapsody marqués de My Library. Fr-3…
-
Page 115: Utilisation De Siriusxm Internet Radio (Amérique Du Nord Uniquement)
Saisissez votre nom utilisateur et votre mot de passe (voir www.sirius.com). Assurez-vous de lire cet accord le nombre de jours restants dans votre essai. Une fois la dans l’écran clavier suivant ou dans Configuration avant d’acquérir votre abonnement. Sirius, XM et tous les période d’essai expirée, si vous souhaitez continuer à…
-
Page 116: Utilisation De La Webradio Last.fm
Vous pouvez lire des pistes des tags les mieux évalués. Tag Radio : Personal Station : Funk polonaise ? Death pop ? Pensez à un style et nous Vous pouvez lire des pistes de votre station vous divertirons avec pendant des heures.
-
Page 117: Utilisation De Slacker Personal Radio
Vous pouvez contrôlez les pistes avec les touches sur Utilisation de Slacker Personal Radio la télécommande. Si vous ne possédez pas de compte, créez-en un à Boutons activés : 1, 3, 2, 6 partir du site Web de Slacker (www.slacker.com) à…
-
Page 118
Uso de Rhapsody (sólo EE.UU.)….3 Pulse MENU cuando aparezca la pantalla de Nota usuarios. • Los servicios disponibles pueden variar de una región a otra. Aparecerán los siguientes elementos del menú: Uso de SiriusXM Internet Radio (solo Add new user: Norteamérica) ……….. -
Page 119: Pandora ® Internet Radio -Primeros Pasos (Solo Ee.uu.)
Delete this station: Pandora ® Internet Radio Utilice q/w para seleccionar la emisora en la lista de emisoras y luego pulse ENTER. Esto eliminará de forma permanente una emisora de –Primeros pasos (solo EE.UU.) su cuenta de Pandora. Toda la información sobre sus Se inicia la reproducción y aparece la pantalla de…
-
Page 120: Uso De Rhapsody (Sólo Ee.uu.)
Marca las emisoras de Rhapsody que se están reproduciendo actualmente. Add to My Favorites: Añade una canción, emisora o lista de reproducción a la lista Mis favoritos. Consejo • Puede eliminar las canciones, los álbumes y las emisoras de Rhapsody marcados de Mi biblioteca. Es-3…
-
Page 121: Uso De Siriusxm Internet Radio (Solo Norteamérica)
Lea atentamente este acuerdo antes de aparece a continuación o en la configuración web. Si muestra los días que quedan de la prueba. Una vez que comprar la suscripción. Sirius, XM y todas las marcas y no sabe su nombre de usuario o la contraseña, llame a…
-
Page 122: Uso De Last.fm Internet Radio
Utilice q/w para seleccionar “Sign in to your account”, y luego pulse ENTER. Puede reproducir pistas de “Recently Listened Last.fm es un servicio musical que sabe lo que le gusta… Tracks”, “Library” y “Neighbours”. Si ya tiene una cuenta de Last.fm, puede acceder a ella Su nuevo receptor de AV Onkyo es muy inteligente.
-
Page 123: Uso De Slacker Personal Radio
Puede controlar las pistas con los botones del Uso de Slacker Personal Radio mando a distancia. Si no tiene una cuenta, cree una en el sitio web de Botones activados: 1, 3, 2, 6 Slacker (www.slacker.com) con su ordenador. ■…
-
Page 124
Y1203-2 SN 29401189B (C) Copyright 2012 Onkyo Sound & Vision Corporation Japan. All rights reserved. * 2 9 4 0 1 1 8 9 B *… -
Page 125
If it flashes, verify that the Ethernet cable is firmly connected to the AV receiver. Select the desired service and press ENTER. • Some of the services don’t allow the use of multiple user The top page of the selected service appears. accounts. -
Page 126
Last.fm is a music service that learns what you love… Tracks”, “Library” and “Neighbours”. If you have the existing Last.fm account, you can sign Your new Onkyo AV receiver is very clever. If you have a Account Info: in to your account to select “Sign in to your free Last.fm account, it will keep track of all the songs… -
Page 127
Die oberste Seite des ausgewählten Services erscheint. Nutzerkonten zu. • Sie können bis zu 10 Nutzerkonten speichern. • Um zwischen den Konten umzuschalten, müssen Sie sich zuerst aus Ihrem aktuellen Konto ausloggen und sich dann wieder auf dem „Users“ Bildschirm einloggen. -
Page 128
Sender wiedergeben („Your Library“, „Your Die aktuellen Nutzungspreise und umfassende Infos sind Neighbourhood“ und „Your Recommendations“). unter www.last.fm/subscribe erhältlich Y1112-1 SN 29401229 (C) Copyright 2012 Onkyo Sound & Vision Corporation Japan. All rights reserved. * 2 9 4 0 1 2 2 9 *… -
Page 129
• Besides, it is not possible to add new codes to the existing remote controller presets. • Though the provided remote control codes are correct at the time of printing, they are subject to change by the manufacturer. -
Page 130
• Cuando hay múltiples códigos relacionados con un fabricante, pruebe a introducirlos uno a uno • Quand il y a de multiples codes liés à un fabricant, essayez-les et entrez-les un par un jusqu’à ce hasta que coincida con su componente. -
Page 131
“Remote Mode” e tasto “Display”. Beispiel „Remote Mode“ (Fernbedienungsmodus)-Taste und „Display“-Taste. Note: Hinweise: • I codici di controllo del telecomando non possono essere inseriti per [RECEIVER] e i tasti multi • Der Fernbedienungscode kann nicht [RECEIVER] und der Multi-Zonen-Taste zugeordnet werden. zona. -
Page 132
Genom att ange en kod från fjärrkontrollkodlistan, kan du aktivera relevanta REMOTE MODE/Remote-indicator eenmaal traag knipperen. förvalda kanaler för den utrustningen. • När det finns flera olika koder för en tillverkare ska du försöka att ange dem en och en tills de Opmerkingen: stämmer överens med din utrustning. -
Page 133
• [RECEIVER (接收机)] 和多区域按钮不能输入遥控编码。 • [RECEIER] (接收機)和多區域按鈕不能輸入遙控編碼。 • 只能为 [TV (电视)] 输入电视遥控编码。 • 您只能為 [TV] (電視)輸入電視遙控編碼。 • 除 [RECEIVER (接收机)]、[TV (电视)] 和多区域按钮外,不能为 REMOTE MODE (遥 • 除 [RECEIVER] (接收機) 、[TV] (電視)和多區域按鈕外,您可針對 REMOTE MODE 控模式)按钮指定任何类别的遥控编码。 但是,这些按钮仍可用作输入选择器按钮,因 (遙控模式)按鈕指定任何類別的遙控編碼。 但是,這些按鈕仍可用作為輸入選擇器按 此,选择与设备所要连接的输入端对应的 REMOTE MODE(遥控模式) 按钮。 例如,如果… -
Page 134
Remote Control Codes Dedicated Onkyo Receiver Cable Set Top Box Cable Set Top Box Cable/PVR Combination Default 62503 mio TV 02802 Toshiba 01509 Samsung 01877 Zone 2 62506 Motorola 01376, 00858, 01562, 01582 Scientific Atlanta 01877, 01982 01982, 01998, 02378… -
Page 135
70157 Zonda 70157 Technology Revox 40029 Onkyo 71817 Cairn 70157 CD-R Sansui 40029 Optimus 70000, 70032 California Audio Labs 70029, 70303 Denon 70626, 70766 Sony 40243 Panasonic 70029, 70303 Cambridge 70157 70072 Thorens 40029 Philips 70626, 70157 Cambridge Audio 70157… -
Page 136
Remote Control Codes Accessory Satellite Set Top Box Satellite Set Top Box Satellite Set Top Box Polk Audio 82228 Amstrad 00847, 01175, 01662, 01413, 01567 Durabrand 01284 01693 Chess 01334, 01626 Echostar 00775, 00853, 01323, Ansonic 02418 01409, 02527 Video — Accessory… -
Page 137
Remote Control Codes Satellite Set Top Box Satellite Set Top Box Satellite Set Top Box Satellite Set Top Box Hama 01567 Leiko 01626 Pace 00847, 00853, 00887, Sat Industrie 01611 01175, 01323, 01356, Hanseatic 01100 Lemon 01334 SAT+ 01409 01423, 01662, 01693,… -
Page 138
Remote Control Codes Satellite Set Top Box Satellite Set Top Box SAT/PVR Combination SAT/PVR Combination Star 00887 00642 BskyB 01175, 01662 Schneider 01206 Stream System 01300 00879, 01356 Bush 01645 Sedea Electronique 01206 Strong 00853, 00879, 01284, United 01251, 01626, 02418… -
Page 139
Remote Control Codes Television Television Television Television Akai 10178, 10556, 10037, Basic Line 10556, 10037, 10668, Casio 10037 Dick Smith 10698 10714, 10715, 10208, 11037 Electronics Cathay 10037 11675 Baur 10037, 10195, 10512 Digatron 10037 10037 Akiba 10037 Beaumark 10178… -
Page 140
Remote Control Codes Television Television Television Television Erres 10037 Genesis 10037 Hisense 10556, 10508, 10208, 10037 11363, 12098 10171 Genexxa 10037 11709 Hitachi 10150, 10178, 10037, 10037 10171, 11864, 11886 Jinfeng 10208 10634, 11037, 10508, Euroman 10037 Godrej 11585 Jinxing… -
Page 141
Remote Control Codes Television Television Television Television Lifetec 10037, 10714, 10668, Medion 10556, 10037, 10714, Naiko 10037 Onix 10698 11037, 12001 10668, 11037, 10698, Nakimura 10037 Onkyo 11807, 13100, 13500 10512, 11248, 11585, Linsar 11585 National 10508, 10208 11667, 11709… -
Page 142
Remote Control Codes Television Television Television Television Phoenix 10037 Reflex 10037, 10668, 11037 Sei-Sinudyne 10037 SunBriteTV 11610 Phonola 10556, 10037 Relisys 11585 Serie Dorada 10178 Sungoo 11248 Pioneer 10037, 10698, 10512, Remotec 10171, 10037 Shanghai 10208 Sunny 10037 11457, 11636, 12171… -
Page 143
Remote Control Codes Television Television Television Technosonic 10556, 10625, 10499, Toyoda 11709 11365, 12098 Humax 20739 11324 TRANS-continents 10556, 10037, 10668, Walker 11667 Panasonic 20614, 20616 Techvision 11709 11037 Waltham 10037, 10668, 11037 Philips 20739 Techwood 11037, 11667 Transonic 10037, 10698, 10512,… -
Page 144
31354, 32056, 32084, Go Video 30741 32434, 32689 C-Tech 31152 Luxman 30573 GoldStar 30741 Pioneer 30571, 30142, 30631, California Audio Labs 30490 Luxor 30713 31571, 32442, 32860 Goodmans 30713, 31152 Cambridge Audio 32808 Magnavox 30503, 30539, 30646, Polk Audio 30539… -
Page 145
Remote Control Codes Blu-ray Disc Radionette 30741 Sylvania 30630, 30675 Yamaha 30490, 30539, 30646, Sony 31516, 32180 30817, 31354, 32298, Radiotone 30713 Symphonic 30675 Sylvania 30675 32299 30522, 30571, 32213, Tamashi 31394 Toshiba 32551, 32705, 33157 Zenith 30503, 30741 32587… -
Page 146
Remote Control Codes DVD-R TV/DVD Combination Victor 31597 Magnavox 12372 Yamaha 30646 Matsui 11037, 30713 Zenith 30741 Medion 12719 Nordmende 12001 HD-DVD Odys 12719 Integra 32901, 33104 33504 Panasonic 12170 30741 Philips 11454, 10556, 11394, 30539 Microsoft 32083 Powerpoint 10698… -
Page 147
Remote Control Codes Memo… -
Page 148
Y1112-1 SN 29401094 (C) Copyright 2012 ONKYO SOUND & VISION CORPORATION Japan. All rights reserved. * 2 9 4 0 1 0 9 4 *…
Инструкцию для Onkyo TX-NR 717 Black на русском языке, в формате pdf можно скачать с нашего сайта. Наш каталог предоставляем Вам инструкцию производителя фирмы Onkyo, которая была взята из открытых источников. Ознакомившись с руководством по эксплуатации от Onkyo, Вы на все 100% и правильно сможете воспользоваться всеми функциями устройства.
Для сохранения инструкции «Ресивер Onkyo TX-NR 717 Black» на русском языке на вашем компьютере либо телефоне, нажмите кнопку «Скачать инструкцию». Если активна кнопка «Инструкция онлайн», то Вы можете просмотреть документ (manual), в своём браузере онлайн.
Если у Вас нет возможности скачать инструкцию по эксплуатации либо просмотреть её, Вы можете поделиться ссылкой на эту страницу в социальных сетях и при удобном моменте скачать инструкцию. Либо добавьте эту страницу в закладки Вашего браузера, нажав кнопку «Добавить страницу в закладки браузера».
Усилители Onkyo TX-NR717 — инструкция пользователя по применению, эксплуатации и установке на русском языке. Мы надеемся, она поможет вам решить возникшие у вас вопросы при эксплуатации техники.
Вы можете скачать инструкцию к Onkyo TX-NR717 по ссылке ниже, если не хотите ждать загрузки. Если остались вопросы, задайте их в комментариях после инструкции.
«Загружаем инструкцию», означает, что нужно подождать пока файл загрузится и можно будет его читать онлайн. Некоторые инструкции очень большие и время их появления зависит от вашей скорости интернета.
Остались вопросы?
Не нашли свой ответ в руководстве или возникли другие проблемы? Задайте свой вопрос в форме ниже с подробным описанием вашей ситуации, чтобы другие люди и специалисты смогли дать на него ответ. Если вы знаете как решить проблему другого человека, пожалуйста, подскажите ему


Часто задаваемые вопросы

Как посмотреть инструкцию к Onkyo TX-NR717?
Необходимо подождать полной загрузки инструкции в сером окне на данной странице или скачать кликнув по специальной кнопке.
Руководство на русском языке?
Все наши руководства представлены на русском языке или схематично, поэтому вы без труда сможете разобраться с вашей моделью
Как можно распечатать инструкцию?
Скачайте ее по специальной кнопке над формой чтения на ваше устройства и отправьте на печать.