Ультразвуковые увлажнители воздуха Timberk серии Wizard: UL 03
Ультразвуковые увлажнители воздуха Timberk серии Beauty: UL 16M/E
Ультразвуковые увлажнители воздуха Timberk серии Melon: UL 31M/E
Ультразвуковые увлажнители воздуха Timberk серии Nature: UL 34M/E
Ультразвуковые увлажнители воздуха Timberk серии Harmony: UL 43E
Ультразвуковые увлажнители воздуха Timberk серии Albus: UL 23E/35E
Ультразвуковые увлажнители воздуха Timberk серии Daisy: UL 42E
Ультразвуковые увлажнители воздуха Timberk серии Bonica Smart: UL 32E
Ультразвуковые увлажнители воздуха Timberk серии Bonica: UL 32E
Ультразвуковые увлажнители воздуха Timberk серии Bonica: UL 32M
Ультразвуковые увлажнители воздуха Timberk серии Beauty Art: UL 16M/E
Ультразвуковые увлажнители воздуха Timberk серии Steamy: UL 37M/E
Ультразвуковые увлажнители воздуха Timberk серии H2O Art: UL 15M/38M
Воздухоочистители настольные Timberk серии Spotless: FL70 SF
Воздухоочистители напольные Timberk серии Cloud: FL250 SF
Воздухоочистители с электростатическим фильтром Timberk серии Edelweiss 2.0: FL700 MF
Воздухоочистители с электростатическим фильтром Timberk серии Edelweiss 1.0: FL600 MF
Осушители воздуха Timberk серии Compact: P40E
Осушители воздуха Timberk серии Dry Expert: P41E/P42E/P43E
Мойки воздуха Timberk серии Yoga: H3 D
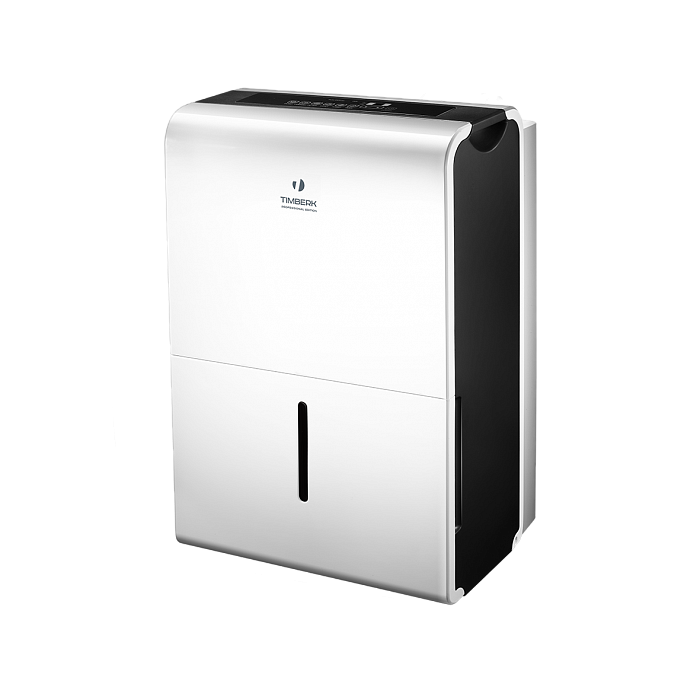
Осушитель воздуха Timberk DH TIM 20 E7 серебристый

440 Вт, 20 л/сутки, бак — 3 л, гигростат, ионизация
подробнее

21 1
Код товара: 1065533
-
Инструкции по эксплуатации
1

TIMBERK DH TIM 30 E9 инструкция по эксплуатации
(32 страницы)
- Языки:Русский
-
Тип:
PDF -
Размер:
3.81 MB -
Описание:
Осушитель воздуха
Просмотр
На NoDevice можно скачать инструкцию по эксплуатации для TIMBERK DH TIM 30 E9. Руководство пользователя необходимо для ознакомления с правилами установки и эксплуатации TIMBERK DH TIM 30 E9. Инструкции по использованию помогут правильно настроить TIMBERK DH TIM 30 E9, исправить ошибки и выявить неполадки.
-
Contents
-
Table of Contents
-
Troubleshooting
-
Bookmarks
Quick Links
Instruction manual
Руководство по эксплуатации
Электрический
осушитель для изме-
нения
влажности воздуха
Модели/Models:
Руководство по эксплуатации включает в себя гарантийный талон
Outlook of devices, aslo colour scores can be revised without any
special advance notices.
Производитель вправе менять внешний вид прибора и цвето-
вую гамму прибора без специального уведомления.
Electric dehumidifier
DH TIM 30 E9
DH TIM 40 E9
DH TIM 50 E9
Chapters
Summary of Contents for Timberk DH TIM 30 E9
-
Главная
-
Климатическое оборудование
-
Осушители
- Серия Dry Master II: E9
Архивная модель
![]()
Застраховано
- Класс электрозащиты
- I class
- Производительность по осушению, л/сутки
- 30 一 50
Подтверждено лабораторией качества
О приборе
- Описание
- Технические характеристики
Преимущества прибора
- Абсолютное управление относительной влажностью от 35 до 85% – SWC Sensomatic
- Эффективное осушение воздуха до 50 литров в сутки
- Шумоизоляцонное покрытие внутренних компонентов системы теплообмена
Основные характеристики
- Дисплей с индикатором текущего и заданного уровня влажности
- Автоматическое управление уровнем влажности
- Сверхнизкий уровень шума
- Индикатор очистки фильтра
- Функция комфортного осушения
- Автоматическое размораживание
- Таймер вкл/выкл прибора
- Индикатор заполнения бака
- Автоматическое отключение при наполнении бака
- Автоматический повторный запуск
- 2 способа отвода конденсата: в бак или через трубку в подготовленный дренаж
Модель
DH TIM 30 E9
DH TIM 40 E9
DH TIM 50 E9
Объём бака для сбора конденсата, л
3
6
6
Номинальная потребляемая мощность, Вт
465
560
775
Номинальная сила тока, А
2.5
2.7
3.6
Номинальное напряжение питания, В/Гц
220~/50
220~/50
220~/50
Диапазон рабочих температур, °С
+5 ~ +35
+5 ~ +35
+5 ~ +35
Класс влагозащиты
IPX0
IPX0
IPX0
Класс электрозащиты
I class
I class
I class
Расход воздуха, м³/ч
210/180
345/320
345/320
Производительность по осушению, л/сутки
30
40
50
Тип хладагента
R410A
R410A
R410A
Количество хладагента, г
220
190
290
Уровень шума, Дб(А)
54/52
52/51
52/51
Вес (нетто), кг
15.3
18.1
19.8
Вес (брутто), кг
16.4
19.5
21.2
Размеры прибора, мм
500x386x260
616x392x282
616x392x282
Размеры упаковки, мм
537x420x297
657x427x327
657x427x327
Сфера применения
Осушители Timberk призваны создавать комфортную атмосферу в вашем доме. Осушение воздуха до 10 литров в сутки. Осушитель серии T-DH10-P40E – помогает создавать и поддерживать благоприятный микроклимат, противодействуя излишней влажности.
 Loading…
![]()
Instruction manual Руководство по эксплуатации
|
Электрический |
Electric dehumidifier |
|
|
осушитель для изме- |
||
|
нения |
||
|
влажности воздуха |
||
|
Модели/Models: |
DH TIM 30 E9 |
|
DH TIM 40 E9 |
|
|
DH TIM 50 E9 |
Руководство по эксплуатации включает в себя гарантийный талон
Outlook of devices, aslo colour scores can be revised without any special advance notices.
Производитель вправе менять внешний вид прибора и цветовую гамму прибора без специального уведомления.

|
CONTENTS |
||
|
1. |
Important information……………………………………………………………… |
2 |
|
2. |
Safeguards……………………………………………………………………………. |
3 |
|
3. |
Specifications………………………………………………………………………… |
3 |
|
4. |
Appliance description……………………………………………………………… |
4 |
|
5. |
Delivery set…………………………………………………………………………… |
5 |
|
6. |
Appliance control…………………………………………………………………… |
5 |
|
7. |
Maintenance…………………………………………………………………………. |
7 |
|
8. |
Troubleshooting……………………………………………………………………… |
9 |
|
9. |
Transportatiom and storage…………………………………………………….. |
10 |
|
10. Service life…………………………………………………………………………… |
10 |
|
|
11. Utilization rules…………………………………………………………………….. |
10 |
Dear customer!
We thank you for your happy choice and buying of a electric dehumidifier TIMBERK. It will serve you for a long time.
Is intended for dehydration of air in domestic premises
1. IMPORTANT INFORMATION
Is intended for dehydration of air in domestic premises the appliance is designed for air cooling in domestic premises. The manufacturer reserves the right to introduce changes in design, configuration and processing of the article with a view to improve its properties without any prior notification of customers. There may be some misprints in text and digital notations of the present manual. If after reading of this manual you have any questions concerning work and operation of the appliance, please, refer to a shop assistant or to a specialized service center for further explanations.
The article has a label with all the needed technical data and other useful information about the appliance. Use the appliance only for its intended purpose indicated in this manual.
2 www.timberk.com • Electric drier for changing of air humidity

|
2. SAFEGUARDS |
3. SPECIFICATIONS |
|
1.DON’T CLOSE VENTS! Make sure that vent inlet and outlet are free.
2.Don’t insert foreign objects in air-outlet grille of the drier. It is very dangerous, since the fan revolves at high speed.
3.Install the appliance only on a horizontal surface to avoid water leakage.
4.Don’t install the appliance in the following locations:
—where it is exposed to direct sunlight;
—near sources of open flame;
—near other working heating appliances;
—where the appliance may be exposed to water splashes or steam.
5.Don’t use the appliance in explosive or corrosive environment. Don’t keep petrol and other volatile flammable liquids near the drier – it’s very dangerous!
6.Don’t use the appliance only for drying (reducing of humidity level) of air in domestic premises.
7.Clean the filter occasionally to ensure efficient work of the appliance.
8.To ensure reliable work of the compressor, don’t incline the appliance.
9.To avoid electric shock, a damaged power cord should be replaced only in authorized service centers by qualified specialists.
10.Connect the appliance only to 220-230V~50Hz network. If needed, find out characteristics of your network from power suppliers
Specifications are shown in table below.
|
Model |
DH TIM 30 E9 |
DH TIM 40 E9 |
DH TIM 50 E9 |
|
|
Capacity of draining (L/d) |
30 |
40 |
50 |
|
|
Water tank volume (L) |
3 |
6 |
6 |
|
|
Rated power consumption (W) |
465 |
560 |
775 |
|
|
Power supply, V/Hz |
220~/50 |
220~/50 |
220~/50 |
|
|
Rated power current (A) |
2,5 |
2,7 |
3,6 |
|
|
Air circulation m3/h |
210/180 |
345/320 |
345/320 |
|
|
Noise level dB(A) |
54/52 |
52/51 |
52/51 |
|
|
Refrigerant |
R410A |
R410A |
R410A |
|
|
Electrical protection class |
I class |
I class |
I class |
|
|
Degree of protection against |
IPX0 |
IPX0 |
IPX0 |
|
|
moisture |
||||
|
Filling of Freon, g |
220 |
190 |
290 |
|
|
Operating temperature range: |
5-35 |
5-35 |
5-35 |
|
|
° C |
||||
|
Net weight (kg) |
15,3 |
18,1 |
19,8 |
|
|
Gross weight (kg) |
16,4 |
19,5 |
21,2 |
|
|
Net dimensions (mm) |
386x260x500 |
392x282x616 |
392x282x616 |
|
|
Packing dimensions (mm) |
420x297x537 |
427x327x657 |
427x327x657 |
|
www.timberk.com • Electric drier for changing of air humidity 3

4. APPLIANCE DESCRIPTION
Identification of parts
Fig. 3.
Accessories:(placed in the water bucket of the unit)
|
Fig. 1. |
Fig. 2. |
||
|
1. |
Control panel |
1. |
Continuous drain hose outlet |
|
2. |
Panel |
2. |
Caster |
|
3. |
Water bucket |
3. |
Power Cord and plug |
|
4. |
Water level window |
4. |
Power cord buckle (placed in |
|
5. |
Handle (both sides) |
the water bucket, used only when |
|
|
storing the unit. Installed as shown |
|||
|
Fig.3a)) |
|||
|
5. |
Pump drain hose outlet(some |
||
|
models without) |
|||
|
6. |
Air outlet grille |
||
|
7. |
Air filter |
NOTE:
All the pictures in the manual are for explanation purposes only.Your unit may be slightly different.The actual shape shall prevail.The operations and functions are the same.
Fig. 4.
Positioning the unit
A dehumidifier operating in a basement will have little or no effect in drying an adjacent enclosed storage area, such as a closet, unless here is adequate circulation of air in and out of the area.
•Do not use outdoors.
•This dehumidifer is intended for indoor residential applications only. This dehumidifier should not be used for commercial or industrial applications.
•Place the dehumidifier on a smooth, level floor strong enough to support the unit with a full bucket of water.
•Allow at least 20cm of air space on all sides of the unit for good air circulation.
•Place the unit in an area where the temperature will not fall below 5OC(41OF). The coils can become covered with frost at temperatures below 5OC(41OF), which may reduce performance.
•Place the unit away from the clothes dryer, heater or radiator.
•Use the unit to prevent moisture damage anywhere books or valuables are stored.
4 www.timberk.com • Electric drier for changing of air humidity

•Use the dehumidifier in a basement to help prevent moisture damage.
•The dehumidifier must be operated in an enclosed area to be most effective.
•Close all doors, windows and other outside openings to the room.
Fig. 5.
Casters(Install at four points on the bottom of unit)
•Casters can only move laterally.
•Do not force casters to move over carpet, nor move the unit with water in the bucket. (The unit may tip over and spill water.)
•Do not connect the dehumidifier to a multiple socket outlet, which is also being used for other electrical appliances.
•Select a suitable location, making sure you have easy access to an electrical outlet.
•Plug the unit into a electrical socket-outlet with earth connection.
•Make sure the Water bucket is correctly fitted otherwise the unit will not operate properly.
NOTE:
When the water in the bucket reaches to a certain level,please be careful to move the machine to avoid it falling down.
5. DELIVERY SET
Completed set of the appliance:
Appliance (air drier) — 1 piece
Appliance packing — 1 piece
User manual and Guarantee slip -1 piece
NOTE:
Casters is optional,some models without.
When using the unit
•When first using the dehumidifier, operate the unit continuously 24 hours. Make sure the plastic cover on the continuous drain hose outlet install stightly properly so there are no leaks.
•This unit is designed to operate with a working environment between 5OC/41OF and 35OC/95OF.
•If the unit has been switched off and needs to beswitched on again quickly, allow approximately three minutes for the correct operation to resume.
6. APPLIANCE CONTROL
NOTE:
The control panel of the unit you purchased may be slightly different according to the models.
www.timberk.com • Electric drier for changing of air humidity 5

Fig. 5.
Indicator lights
When you push the button to change operation modes, the unit will make a beep sound to indicate that it is changing modes.
1.COMFORT Pad (optional)
Press to activate the comfort dehumidifying operation.
NOTE:
On this operation,the unit can not be set humidity level.
2.FILTER Pad
The check filter feature is a reminder to clean the Air Filter for more efficient operation. The Filter light(Clean filter l ight) will illuminate after 250 hours of operation. To reset after cleaning the filter, press the Filter pad and the light will go off.
3.CONTINUE Pad
Press to activate the continuous dehumidifying operation.
4.TURBO Pad
Control the fan speed. Press to select either High or Normal fan speed. Set the fan control to High for maximum moisture removal. When the humidity has been reduced and quiet operation is preferred, set the fan control to Normal.
5.Timer Pad
Press to initiate the Auto start and Auto stop feature, in conjuction with the and key pads.
6.«  » / «
» / «  »: Up/Down Pads
•Humidity Set Control Pads
The humidity level can be set within a range of 35%RH(Relative Humidity) to 85%RH(Relative Humidity) in 5% increments.
For drier air, press the «  » pad and set to a lower percent value(%). For damper air, press the «
  » pad and set a higher percent value(%).
• TIMER Set Control Pads
Use the Up/Down pads to set the Auto start and Auto stop time from
0.0 to 24.
7.Power Pad
Press to turn the dehumidifier on and off.
8.Display
Shows the set % humidity level from 35% to 85% or auto start/stop time (0~24) while setting, then shows the actual ( ± 5% accuracy) room % humidity level in a range of RH(Relative Humidity) to 90%RH(Relative Humidity).
Error Codes and Protection Code:
ASHumidity sensor error – Unplug the unit and plug it back in. If error repeats, call for service.
ESTube Temperature sensor of the evaporator error— Unplug the unit and plug it back in. If error repeats, call for service.
P2Bucket is full or bucket is not in right position— Empty the bucket and replace it in the right position.(only available for the uint with no pump feature.)
P2Bucket is full – Empty the bucket.(only available for the unit with pump feature.) 30%
ECRefrigerant leakage detection – With this new technology, the display area will appear EC when the unit detects refrigerant leakage ,call for service.
E3Unit malfunction – Unplug the unit and plug it back in. If error repeats, call for service.
EbBucket is removed or not in right position— Replace the bucket in the right position.(only available for the unit with pump feature.)
6 www.timberk.com • Electric drier for changing of air humidity

Other features
Bucket Full Light
Glows when the bucket is ready to be emptied, or when the bucket is removed or not replaced in the proper position.
Auto Shut OFF
The dehumidifier huts off when the bucket is full, or when the bucket is removed or not replaced in the proper position.When the setting humidity is reached, the unit will be shut off automatically. For some models,the fan motor will continue operating.
Auto Defrost
When frost builds up on the evaporator coils, the compressor will cycle off and the fan will continue to run until the frost disappears.
Wait 3 minutes before resuming operation
After the unit has stopped, it can not be restart opertation in the first 3 minutes. This is to protect the unit. Operation will automatically start after
3 minutes.
Check filter feature
The system starts to count the time once the fan motor operates. The check filter feature can be only activated when the accumulated operation time achieves 250 hours or more. The Reset light(Clean filter indicator light) flashes at one time per second, after finishing clean the air filter, press the Filter pad and the Reset light(Clean filter indicator light) goes off.
Auto-Restart(on some models)
If the unit breaks off unexpectedly due to the power cut, it will restart with the previous function setting automatically when the power resumes.
Setting the Timer
•When the unit is on, first press the Timer button, the Timer Off indicator light illuminates. It indicates the Auto Stop program is initiated. Press it again the Time On indecator light illuminates.It indicates the Auto Start is initiated.
•When the unit is off, first press the Timer button, the TIMER ON indicator light illuminates. It indicates the Auto Start program is initiated. Press it again the Time Off indecator light illuminates.It indicates the Auto Stop is initiated.
•Press or hold the UP or DOWN pad to change the Auto time by 0.5 hour increments, up to 10 hours, then at 1 hour increments up to 24 hours. The
control will count down the time remaining until start.
•The selected time will register in 5 seconds and the system will automatically revert back to display the previous humidity setting.
•When the Auto start & Auto stop times are set, within the same program sequence, TIMER ON OFF indicator lights illuminate identifying both ON and OFF times are now programmed.
•Turning the unit ON or OFF at any time or adjusting the timer setting to 0.0 will cancel the Auto Start/Stop function.
•When LED display window displays the code of P2, the Auto Start/Stop function will also be cancelled.
7. MAINTENANCE
There are two ways to remove collected water.
1. Use the bucket
•When the unit is off,if the bucket is full, the Full indicator light will light.
•When the unit is on,if the bucket is full, the compressor and the fan turn off, and the Full indicator light will light, the digital display shows P2.
•Slowly pull out the bucket. Grip the left and right handles securely, and carefully pull out straight so water does not spill. Do not put the bucket on the floor because the bottom of the bucket is uneven. Otherwise the bucket will fall and cause the water to spill.
•Throw away the water and replace the bucket. The bucket must be in right place and securely seated for the dehumidifier to operate.
•The machine will re-start when the bucket is restored in its correct position.
Fig. 6
www.timberk.com • Electric drier for changing of air humidity 7

NOTE:
• When you remove the bucket, do not touch any parts inside of the unit. Doing so may damage the product. Be sure to push the bucket gently all the way into the unit. Banging the bucket against anything or failing to push it in securely may cause the unit not to operate.
•If the pump hose drops when you remove the bucket (see Fig.7),you must reinstall the pump hose properly to the unit before replace the bucket into the unit (see Fig.8).
•When you remove the bucket,if there is some water in the unit you must dry it.
•When the unit is on, if the bucket is removed, the compressor and the fan turn off, then the unit will beep 8 times and the digital display shows Eb.
•When the unit is off, if the bucket is removed, the unit will beep 8 times and the digital display shows Eb.
Fig. 7
Fig. 8
2. Continuous draining
•Water can be automatically emptied into a floor drain by attaching the unit with a water hose (Id≥ 5/16 , not included) with a female threaded end (ID:M=1 , not included) 8
•Remove the plastic cover from the back drain outlet of the unit and set aside, then insert the drain hose through the drain outlet of the unit and lead the drain hose to the floor drain or a suitable drainage facility. (See. Fig.9 and Fig.10)
•When you remove the plastic cover, if there is some water in the back drain outlet of the unit you must dry it. Make sure the hose is secure so there are no leaks and the end of the hose is level or down to let the water flow smoothly.
•Direct the hose toward the drain,making sure that there are no kinks that will stop the warter flowing.
•Select the desired humidity setting and fan speed on the unit for continuous draining to start.
NOTE:
When the continuous drain feature is not being used, remove the drain hose from the outlet and attach the rubber plug back to the drain outlet.
Care and cleaning of the dehumidifier
Turn the dehumidifier off and remove the plug from the wall outlet before cleaning.
1. Clean the Grille and Case
•Use water and a mild detergent. Do not use bleach or abrasives.
•Do not splash water directly onto the main unit. Doing so may cause an electrical shock, cause the insulation to deteriorate, or cause the unit to rust.
•The air intake and outlet grilles get soiled easily, so use a vacuum attachment or brush to clean.
2. Clean the bucket
Every few weeks, clean the bucket to prevent growth of mold, mildew and bacteria. Partially fill the bucket with clean water and add a little mild detergent. Swish it around in the bucket, empty and rinse.
8 www.timberk.com • Electric drier for changing of air humidity

NOTE:
Do not use a dishwasher to clean the bucket. After clean, the bucket must be in place and securely seated for the dehumidifier to operate.
3. Clean the air filter
•Remove the filter every two weeks based on normal operating conditions.
•To remove the filter, pull filter outwards (See Fig.14).
•Wash the filter with clean water then dry.
•Re-install the filter,replace Bucket.
CAUTION!
DO NOT operate the dehumidifier without a filter because dirt and lint will clog it and reduce performance.
Fig. 11
4. When not using the unit for long time periods
•After turning off the unit, wait one day before emptying the tank.
•Clean the main unit, bucket and air filter.
•Wrap the cord and bundle it with the band (see Fig.8).
•Cover the unit with a plastic bag.
•Store the unit upright in a dry, well-ventilated place.
8. TROUBLESHOOTING
Before calling for service, review the chart below first yourself.
|
Problem |
What to check |
|
|
• Make sure the dehumidifier s plug is pushed completely into |
||
|
the outlet. |
||
|
Unit does not start |
• Check the house fuse/circuit breaker box. |
|
|
• Dehumidifier has reached its preset level or bucket is full. |
||
|
• Water bucket is not in the proper position. |
||
|
• Did not allow enough time to remove the moisture. |
||
|
• Make sure there are no curtains, blinds or furniture blocking |
||
|
the front or back of the dehumidifier. |
||
|
Dehumidifier does |
• The humidity selector may not be set low enough. |
|
|
not dry the air as it |
• Check that all doors, windows and other openings are |
|
|
should |
securely closed. |
|
|
• Room temperature is too low, below 5 C(41 F). |
||
|
• There is a kerosene heater or something giving off water |
||
|
vapor in the room. |
||
|
The unit makes a |
• The air filter is clogged. |
|
|
loud noise when |
• The unit is tilted instead of upright as it should be. |
|
|
operating |
• The floor surface is not level. |
|
|
Frost appears on the |
This is normal. The dehumidifier has Auto defrost feature. |
|
|
coils |
||
|
• Hose to connector or hose connection may be loose. |
||
|
Water on floor |
• Intend to use the bucket to collect water, but the back drain |
|
|
plug is removed. |
||
|
ES, AS,P2,EC ,Eb |
These are error codes and protection code. See the CONTROL |
|
|
and E3 appear in the |
PADS ON THE DEHUMIDIFIER section. |
|
|
display |
||
|
The pump operation |
Clean the filter of the pump. |
|
|
Check the pump hose does not link or block. |
||
|
on light blinks at 1Hz |
||
|
Empty the water of the bucket. |
||
www.timberk.com • Electric drier for changing of air humidity 9

9. TRANSPORTATIOM AND STORAGE
|
Temperature |
From -30° to +50° |
||||
|
requirements* |
Transportation and |
||||
|
storage |
|||||
|
Humidity |
From 15% to 85% |
||||
|
requirements* |
(without a condensate) |
||||
We are exploring new technologies and we constantly improving the quality of our products. That’s why specifications, design and accessories are subject to change without any specific notice.
* This product must have storage in dry, well-ventilated space of warehouse at the temperature not lower than -30°
10.SERVICE LIFE
Service life of the appliance is 10 years provided that the respective installation and operation rules are observed.
Date of the conditioner manufacture is shown in a serial number of the device. For more details, please, ask a shop assistant.
11. UTILIZATION RULES
Upon expiration of the service life, the appliance should be utilized in accordance with norms, regulations and procedures effective in the place of utilization.
10 www.timberk.com • Electric drier for changing of air humidity
- Home
- Brands
- Timberk
- Dehumidifier
- DH TIM 30 E9
- Instruction Manual
Manual for Timberk DH TIM 30 E9 Dehumidifier (32 pages)
Specifications:
|
Timberk DH TIM 30 E9: Read PDF Manual Online
Accompanying Data:
Timberk DH TIM 30 E9 Dehumidifier PDF Instruction Manual (Updated: Monday 20th of March 2023 02:25:57 AM)
Rating: 4.2 (rated by 55 users)
Compatible devices: H30, R2-ION8L, DH TIM 10 E5, D 410, UCDH8000-20, DM32EK, LAF 10, DH TIM 20 E7.
Recommended Documentation:
Timberk DH TIM 30 E9: Text of Instruction Manual
(Ocr-Read Version Summary of Contents, UPD: 20 March 2023)
-
27, www.timberk.сom • гарантийный талон 27 №№ Дата выполнения работ Перечень выполненных работ Наименование СЦ Ф.И.О. Исполнителя подпись печать Профилактическое обслуживание изделия. (Заполняется специалист…
-
11, 1. ВАЖНАЯ ИНФОРМАЦИЯ СОДЕРЖАНИЕ* Прибор предназначен для осушения воздуха в бытовых помещениях. Производитель оставляет за собой право без предварительного уве- домления покупателя вносить изменения в…
-
10, www.timberk.com • Electric drier for changing of air humidity 10 10.SERVICE LIFE 11. UTILIZATION RULES Service life of the appliance is 10 years provided that the respective installation and operation rules are observed. Date of the conditioner manufacture is shown in a serial number of the device. For more details, please, ask a shop assistant. Upon expiration of the service life, the applia…
-
30, В целях информирования покупа- телей техники Timberk, мы допол- нительно сообщаем, что русский является государственным языком в следующих государствах: • в Российской Федерации • в Республике Белару…
-
24, www.timberk.сom • гарантийный талон 24 Бланк гарантийного талона. Заполняется фирмой-продавцом Изделие Модель Серийный номер Дата продажи Фирма-продавец Адрес фирмы продавца Телефон фирмы продавца Пе�…
-
29, Уважаемый покупатель! Timberk предоставляет вам специальный сервис в рамках программы клиентской поддержки. Теперь вы всегда сможете заказать и оформить доставку на запасные части и расходные материалы, необход…
-
7, www.timberk.com • Electric drier for changing of air humidity 7 7. MAINTENANCE There are two ways to remove collected water. 1. Use the bucket • When the unit is off,if the bucket is full, the Full indicator light will light. • When the unit is on,if the bucket is full, the compressor and the fan turn off, and the Full indicator light will light, the digital display sho…
-
16, тания и снова подключите. Если ошибка появляется снова, обратитесь в службу поддержки. ES – Ошибка датчика температуры трубки испарителя – Отключите устройство от сети питания и снова подключите. Если о�…
-
12, 1.НЕ ЗАКРЫВАЙТЕ ВЕНТИЛЯЦИОННЫЕ ОТВЕРСТИЯ! Убедитесь, что входное и выходное вентиляционное отверстие свободно. 2. Не засовывайте посторонние предметы в воздуховыпускную ре- шетку осушителя. Это очень опас�…
-
6, www.timberk.com • Electric drier for changing of air humidity 6 Indicator lights When you push the button to change operation modes, the unit will make a beep sound to indicate that it is changing modes. 1. COMFORT Pad (optional) Press to activate the comfort dehumidifying operation. 2. FILTER Pad The check filter feature is a reminder to clean the Air Filter for more efficie…
-
25, www.timberk.сom • гарантийный талон 25 Отрывной талон«А» Отрывной талон«Б» Отрывной талон«В» Отрывной талон«Г» Заполняется фирмой-продавцом Заполняется фирмой-продавцом Заполняется фирмой-продавцом З�…
-
4, www.timberk.com • Electric drier for changing of air humidity 4 4. APPLIANCE DESCRIPTION 1. Control panel 2. Panel 3. Water bucket 4. Water level window 5. Handle (both sides) 1. Continuous drain hose outlet 2. Caster 3. Power Cord and plug 4. Power cord buckle (placed in the water bucket, used only when storing the unit. Installed as shown Fig.3a)) 5. Pump drain hose outlet(some models wi…
DOC-ac9626f6:
Timberk DH TIM 30 E9: Recommended Instructions
JB400DP1WW, VAA-FMT1-TR, 12710 14710, Saw, MemoryFrame MF-8000, dx2700 — Microtower PC


-
Owner’s Use and Care GuideGuide d’utilisation et soin de PropriètaireModel • ModèleDDR5009REE • DDR6009REE • DDR7009REEPORTABLE DEHUMIDIFIERTable of contents . . . . . . . . . . . . . . . . . . . . . . . . . . . . . . . . . . . . . . . . . . . . . . . . . 1DÉSHUMIDIFICATEUR PORTATIFTable des matières . . . . . . . . . . . . . . . . . . . . . . . . . . …
DDR7009REE 28
-
110485K (07-01839) F413 1 Legend Brands, Inc. Owner’s Manual Revolution LGR Dehumidifier F413 LEGEND BRANDS, INC. 15180 Josh Wilson Road, Burlington, WA 98233 Phone: 800-932-3030 Fax: 360-757-7950 Revo.LegendBrandsRestoration.com The Dri-Eaz® Revolution LGR Dehumidifier reduces humidity in enclosed environments by removing wa-ter vapor from the air. The Revo …
Dri-Eaz F413 18
-
WM80 OWNERS MANUAL Page 1 of 10 Drawing No. :- TPC313 Issue :- 1 Date :- 08/05/07 EBAC MODEL WM80 INDUSTRIAL DEHUMIDIFIER OWNER’S MANUAL …
10284GL-US 10
-
DH 716, DH 720 BG ИЗСУЧАВАЧ НА ВЪЗДУХ ИНСТРУКЦИЯ ЗА УПОТРЕБА CZ ODVLHČOVAČ VZDUCHU NÁVOD K OBSLUZE DE LUFTENTFEUCHTER BEDIENUNGSANLEITUNG DK LUFTAFFUGTER BETJENINGSVEJLEDNING EE ÕHUKUIVATI KASUTAMISJUHEND ES DESHUMIDIFICADOR DE AIRE MANUAL DE INSTRUCCIONES FI ILMAN KUIVAIN KÄYTTÖOHJE FR DÉSHUMIDIFICATEUR D’AIR NOT …
DH-716 30
-
Model 1730A Compact DehumidifierOwner’s Manual CAUTION1. Do not use solvents or cleaners on or near the display or circuit board. 2. Unplug the dehumidifier before servicing. Sudden operation may cause personal injury or property damage. PRINCIPLE OF OPERATIONYour Aprilaire® Whole-Home Dehumidifier installs as part of your home’s central heating and cooling system, removing excess moistu …
1730A 4
-
DEHUMIDIFIERSLHD65EBL• 65 Pint Capacity• Electronic Controls• 2 Fan Speeds• Automatic Humidistat Control• Automatic Shut-Off System• Automatic Defrost Control• Low Temperature Operation• Removable Bucket• External Drain Connector• Washable Air Filter• Easy-Roll Casters• Energy StarLHD65EBLLGusa.comROOM AIRAn ENERGYSTAR®qualified model rem …
LHD65EBL 2
-
Quality ■Innovation ■StyleDehumidifierDéhumidificateurDehumidificadorUser Manual HDN455E/HDN655EGuide de l’UtilisateurHDN455E/HDN655EManual del UsuarioHDN455E/HDN655EBefore operating this dehumidifier, please read these instructions completely. …
HDN655E — 65 Pint Capacity Dehumidifier 13
-
SERVICE DEPARTMENT: (724) 746-1100REFRIGERATEDTYPECOMPRESSEDAIR DRYERSINSTRUCTION MANUALRNC SeriesModels: RNC100, RNC125, RNC150, RNC200, RNC250, RNC300, RNC400, RNC500, RNC600, RNC7505002737 Rev. B 02/0918-2-670 RNC100-750 New Platform 1st Edition33F………………….39F 1C…………………..4C CONTENTSGENERAL SAFETY INFORMATION ……………… …
RNC Series 24
-
TROTEC® GmbH & Co. KG • Grebbener Straße 7 • D-52525 Heinsberg Tel.: +49 (0) 24 52 / 962 — 400 • Fax: +49 (0) 24 52 / 962 — 200www.trotec.de • E-Mail: [email protected] 30 S Bedienungsanleitung Luftentfeuchter A — 1 Operating manual dehumidifier B — 1 Mode d’emploi déshumidificateur C — 1Hava kurut …
TTK 30 S 28
-
YDT1/T2101221 (0)SERVICE MANUALMIDEA DEHUMIDIFIERT1 SERIESFactory Model Sale ModelEU-CF0.3BD/N3-T1(A3) MDT1-08DMN3-QA3EU-CFK0.3BD/N3-T1(A3) MDT1-08DKN3-QA3EU-CFZ0.3BD/N3-T1(A3) MDT1-08DEN3-QA3EU-CF0.4BD/N3-T1(A3) MDT1-10DMN3-QA3EU-CFK0.4BD/N3-T1(A3) MDT1-10DKN3-QA3EU-CFZ0.4BD/N3-T1(A3) MDT1-10DEN3-QA3EU-CFK0.6BD/N3-T1(A3) MDT1-16DKN3-QA3EU-CFZ0.6BD/N3-T1(A3) MDT1 …
MDT1-08DMN3-QA3 28
Additional Information:
Popular Right Now:
Operating Impressions, Questions and Answers: