René Bakker, Stefan Bedorf, Michiel Beijen, Shawn Beasley, Hauke Böttcher,
Jens Bothe, Udo Bretz, Martin Edenhofer, Carlos Javier García, Martin
Gruner, Manuel Hecht, Christopher Kuhn, André Mindermann, Marc Nilius, Elva
María Novoa, Henning Oschwald, Martha Elia Pascual, Thomas Raith, Carlos
Fernando Rodríguez, Stefan Rother, Rolf Schmidt, Burchard Steinbild, Michael
Thiessmeier, Daniel Zamorano.
Эта работа защищена авторским правом OTRS AG.
Это руководство может быть скопировано целиком или частично, при условии,
что это уведомление об авторских правах будет включено в каждую копию.
Исходный код этого документа можно найти на github, в репозитории doc-admin.
UNIX является зарегистрированной торговой маркой компании X/Open Company
Limited. Linux является зарегистрированной торговой маркой Линуса Торвальдса
(Linus Torvalds).
MS-DOS, Windows, Windows 95, Windows 98, Windows NT, Windows 2000, Windows
XP, Windows 2003, Windows Vista и Windows 7 являются зарегистрированными
торговыми марками Корпорации Microsoft (Microsoft Corporation). Другими
торговыми марками и зарегистрированными торговыми марками есть: SUSE и YaST
компании SUSE Linux GmbH, Red Hat и Fedora являются зарегистрированными
торговыми марками компании Red Hat, Inc. Mandrake является
зарегистрированной торговой маркой компании MandrakeSoft, SA. Debian
является зарегистрированной торговой маркой организации Software in the
Public Interest, Inc. MySQL и логотип MySQL являются зарегистрированными
торговыми марками корпорации Oracle Corporation и/или ее филиалов.
Все торговые марки используются без гарантий их свободного использования и,
возможно, являются зарегистрированными торговыми марками.
OTRS AG, по существу, следует обозначениям производителей. Другие продукты,
упомянутые в этом руководстве, могут быть торговыми марками соответствующих
производителей.
Данная статья предназначена для тех, кто искал подробное и понятное руководство о том, как настроить OTRS (Open-source Ticket Request System).
В этом руководстве мы будем рассматривать тот случай, когда у вас уже есть сервер, и на него уже произведена установка OTRS.
Узнать о том, как установить OTRS на Ubuntu Server, вы можете прочитав мое руководство “Установка OTRS на Ubuntu Server”.
В этом руководстве OTRS будет настраиваться для работы в компании, где есть департамент информационных технологий, который осуществляет поддержку пользователей, администрирование серверов и разработку программного обеспечения. Заявки будут регистрироваться по средствам электронной почты, телефонных звонков и через личный кабинет OTRS. Новые заявки будут попадать на первую линию поддержки к специалистам по поддержке пользователей. Затем заявки могут передаваться на вторую линию поддержки, если проблему не удается решить на первой линии или требуется экспертное мнение специалистов по администрированию серверов. В дальнейшем, заявки могут быть переданы программистам на третью линию поддержки, например, если требуется доработать программный код.
Каждый пользователь, сделавший запрос на поддержку, будет получать подробные уведомления о том, в каком статусе находится его заявка, а также пользователь сможет контролировать процесс исполнения заявки в личном кабинете. В свою очередь специалисты департамента информационных технологий тоже будут получать уведомления, которые помогут им оперативно реагировать на заявки пользователей.
Модель использования OTRS в данном руководстве может отличаться от той, которую вы планируете использовать в вашей организации. Основная цель этого руководства — познакомить вас с функционалом системы на примере настройки OTRS для одной крупной компании численностью свыше 1500 человек.
После успешной авторизации в OTRS перейдите на вкладку “Администрирование”.
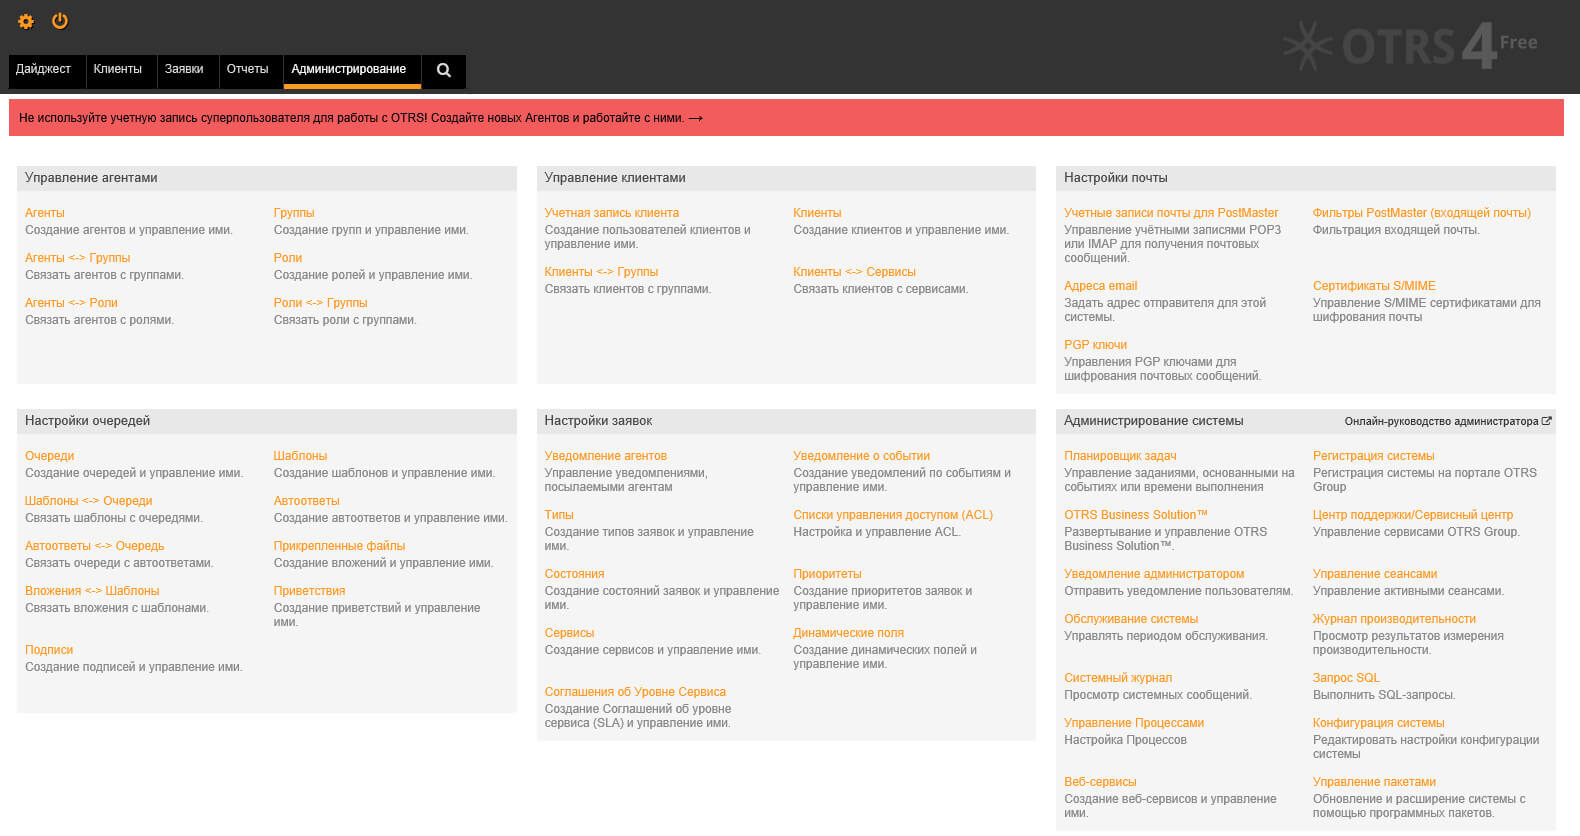
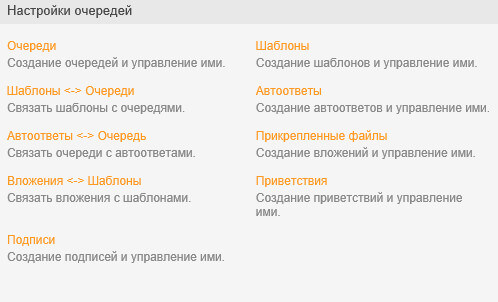
На вкладке “Администрирование” находим раздел “Настройки очередей”.

Нажимаем на кнопку “Очереди”.

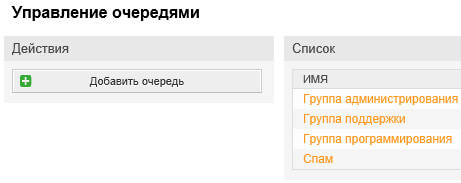
В разделе “Управление очередями” выбираем “Postmaster”.
Меняем имя очереди “Postmaster” на “Группа поддержки”.
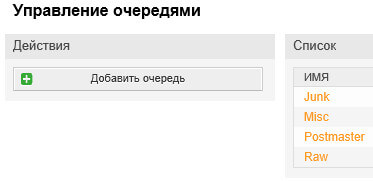
Далее ничего менять не нужно. Остальные настройки для очереди “Группа поддержки” будут рассматриваться позже.
Нажимаем на кнопку “Отправить”.

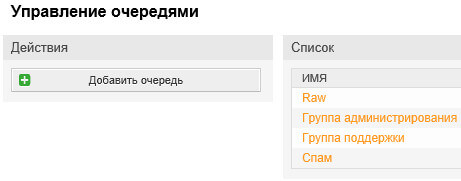
Вернувшись в раздел “Управление очередями” можно увидеть измененную очередь.
Теперь настроим возможность принимать заявки по электронной почте.
Обратите внимание, для возможности регистрировать новые заявки по электронной почте, вам необходимо знать логин и пароль от почтового ящика, на который будут приходить новые заявки, а также в настройках вашего почтового ящика должно быть указано “Удалять письма с сервера, когда письма загружаются с помощью POP”.
По умолчанию OTRS забирает письма из почтового ящика для регистрации заявок каждые десять минут.
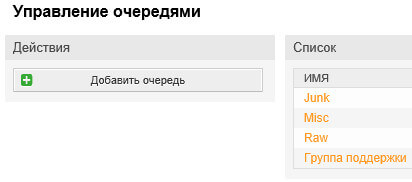
На вкладке “Администрирование” находим раздел “Настройки почты”.
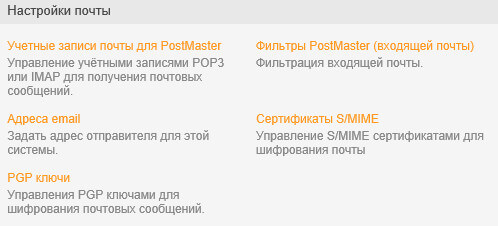
Нажимаем кнопку “Учетные записи почты для PostMaster”.

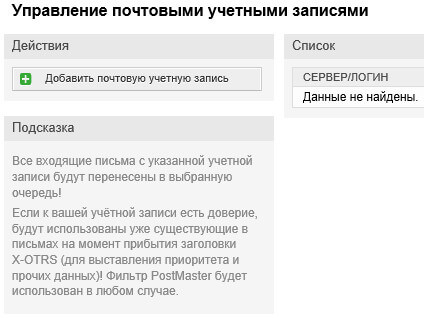
В разделе “Управление почтовыми учетными записями” нажимаем кнопку “Добавить почтовую учетную запись”.
В данном руководстве в качестве почтового сервиса используется Google Apps. Если вы используете другой почтовый сервис, то настройки будут отличаться от тех, что представлены в этом руководстве.
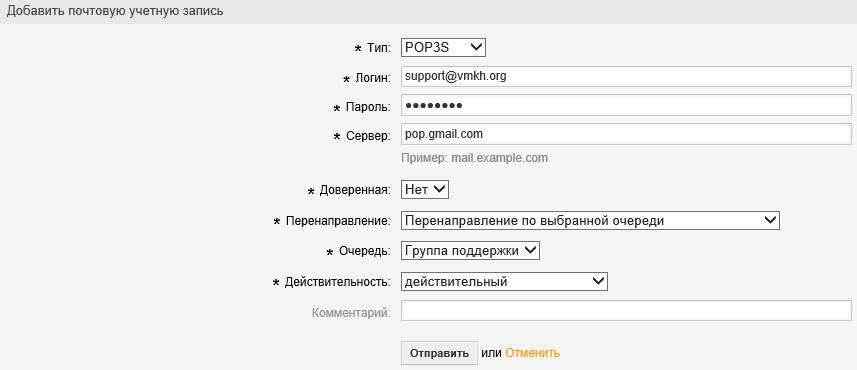
Далее в разделе “Тип” выбираем “POP3S”, затем указываем логин и пароль от почтового ящика, на который будут приходить новые заявки. В поле “Сервер” указываем сервер входящей электронной почты. Теперь в пункте “Перенаправление” выбираем “Перенаправление по выбранной очереди”.
В разделе “Очередь” выбираем “Группа поддержки”, так как все новые заявки должны направляться на первую линию поддержки к специалистам, которые осуществляют поддержку пользователей.
Нажимаем кнопку “Отправить”.
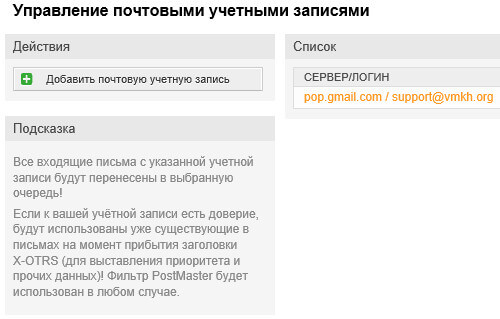
Вернувшись в раздел “Управление почтовыми учетными записями” можно увидеть добавленную почтовую учетную запись.
Теперь настроим системный адрес электронной почты. От него OTRS будет рассылать письма.
На вкладке “Администрирование” находим раздел “Настройки почты”.

Нажимаем кнопку “Адреса email”.

В разделе “Управление системными адресами электронной почты” выбираем электронный адрес otrs@localhost.
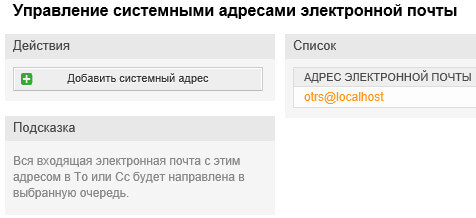
Меняем “otrs@localhost” на тот адрес электронной почты, на который будут приходить новые заявки. Выбираем отображаемое имя, например, “Служба ИТ-поддержки”. Далее указываем очередь “Группа поддержки”.
Нажимаем кнопку “Отправить”.
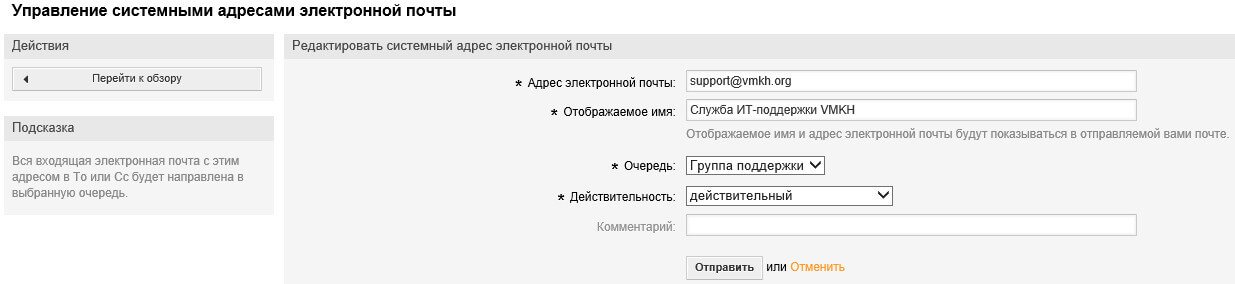
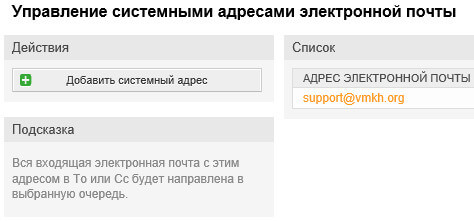
Вернувшись в раздел “Управление системными адресами электронной почты” можно увидеть измененный системный адрес электронной почты.
Теперь настроим возможность отправлять сообщения от того же электронного почтового ящика на который будут приходить новые заявки.
В данном руководстве в качестве почтового сервиса используется Google Apps. Если вы используете другой почтовый сервис, то настройки будут отличаться от тех, что представлены в этом руководстве.
На вкладке “Администрирование” находим раздел “Администрирование системы”.

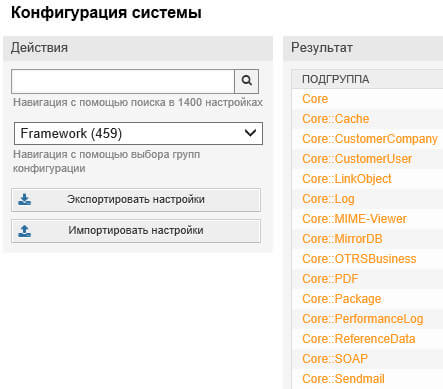
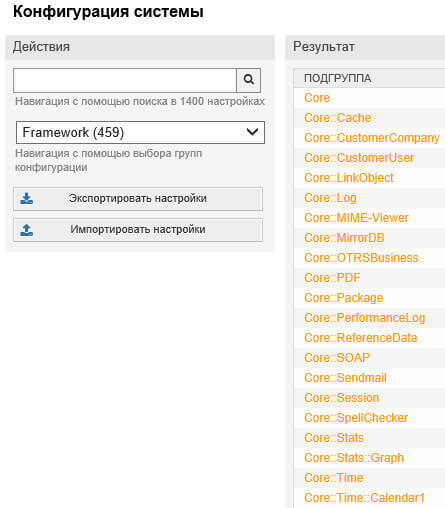
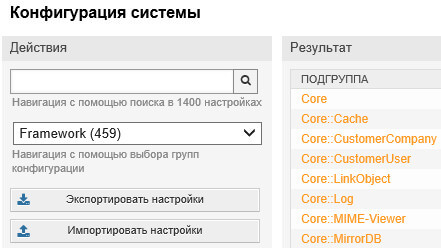
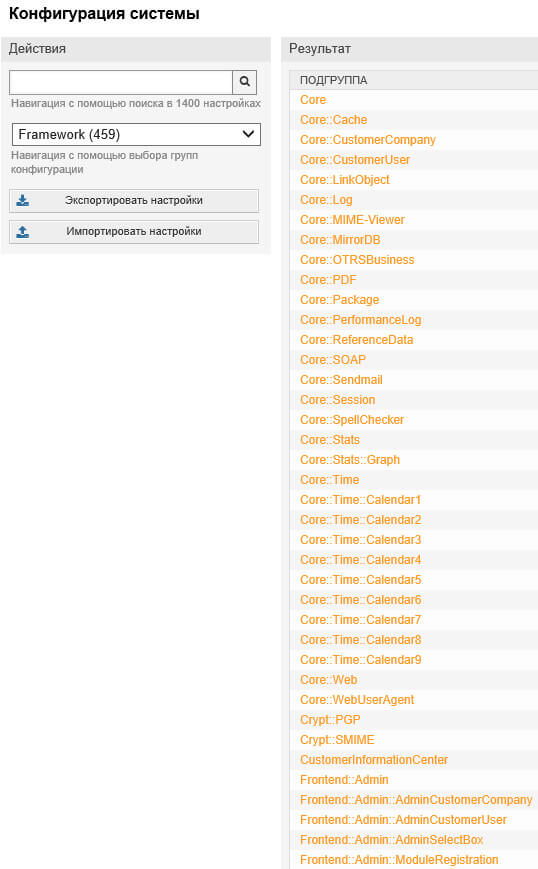
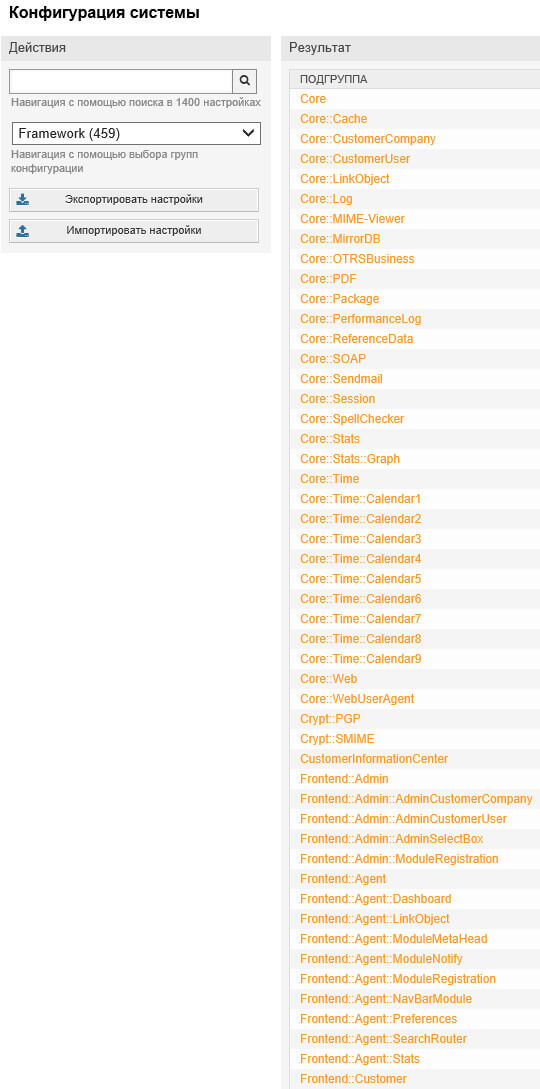
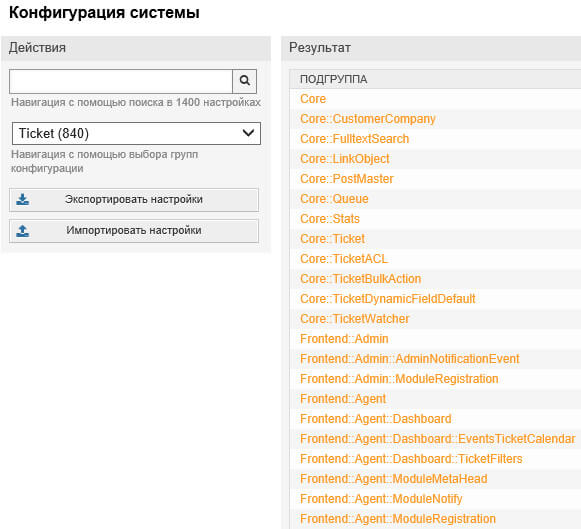
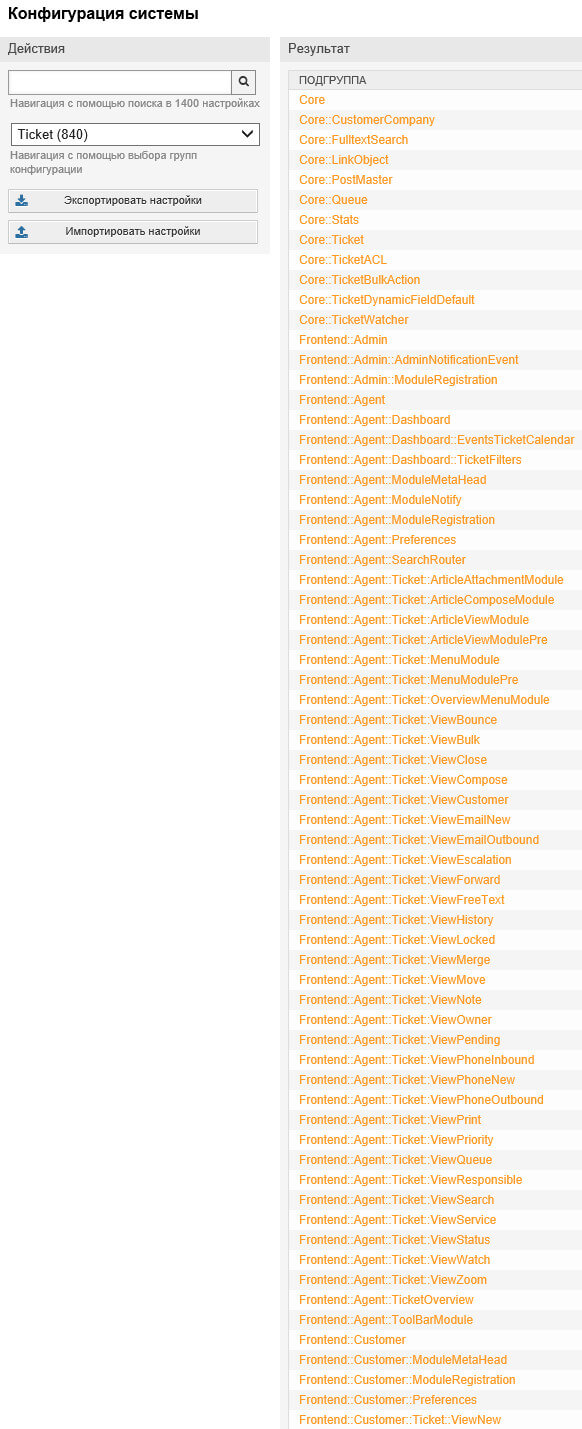
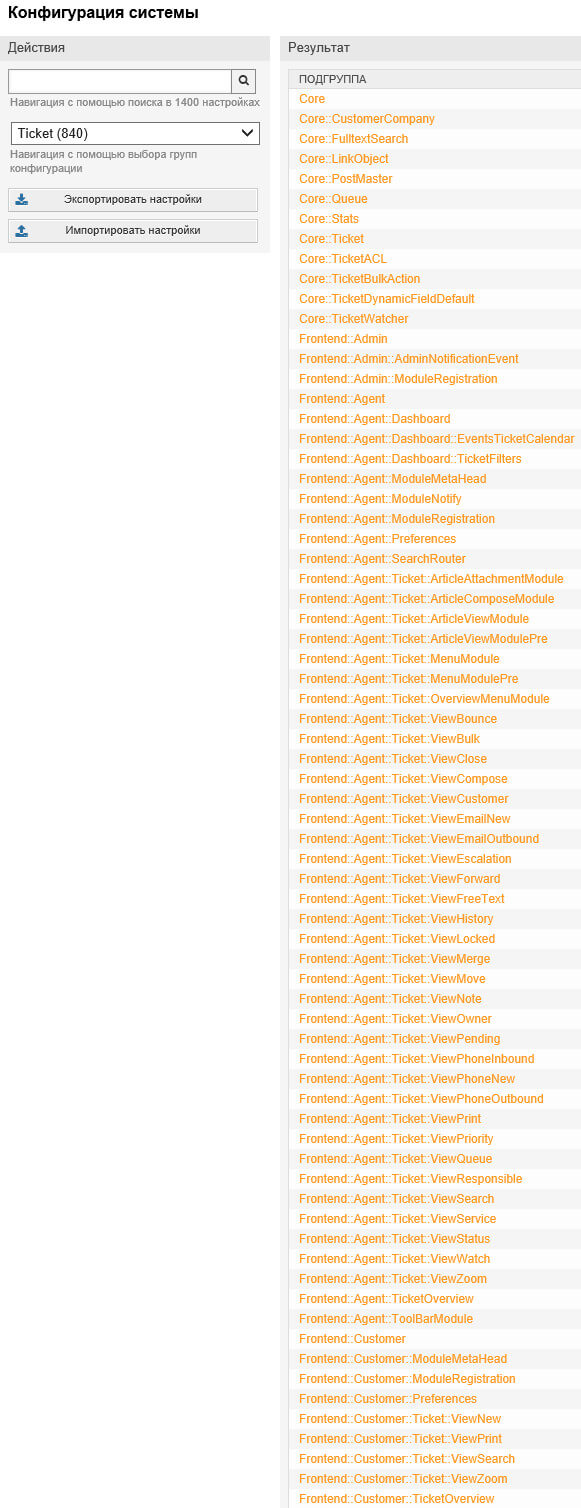
Нажимаем кнопку “Конфигурация системы”.

В разделе “Конфигурация системы” выбираем группу “Framework” затем выбираем подгруппу “Core::Sendmail”.
В пункте “SendmailModule” выбираем “SMTPS”
В пункте “SendmailModule::Host” указываем сервер исходящей электронной почты.
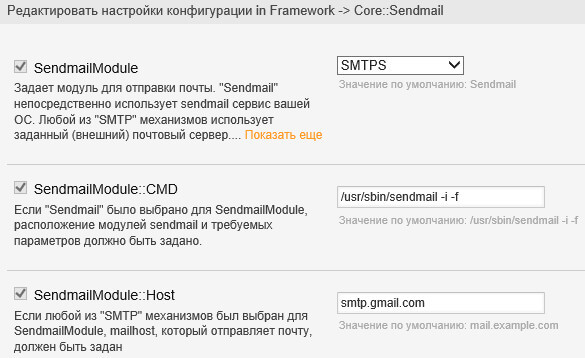
В поле “SendmailModule::Port” указываем порт сервера исходящей почты.
В поле “SendmailModule::AuthUser” указываем логин, а в поле “SendmailModule::AuthPassword” указываем пароль от почтового ящика на который будут приходить новые заявки.
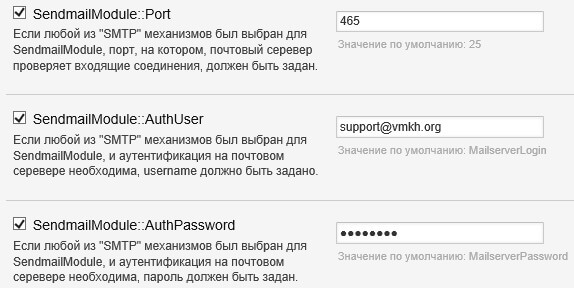
В поле “SendmailNotificationEnvelopeFrom” указываем системный адрес электронной почты.
Нажимаем кнопку “Обновить”.

Теперь настроим временной промежуток, в который будет осуществляться работа департамента информационных технологий.
На вкладке “Администрирование” находим раздел “Администрирование системы”.

Нажимаем кнопку “Конфигурация системы”.

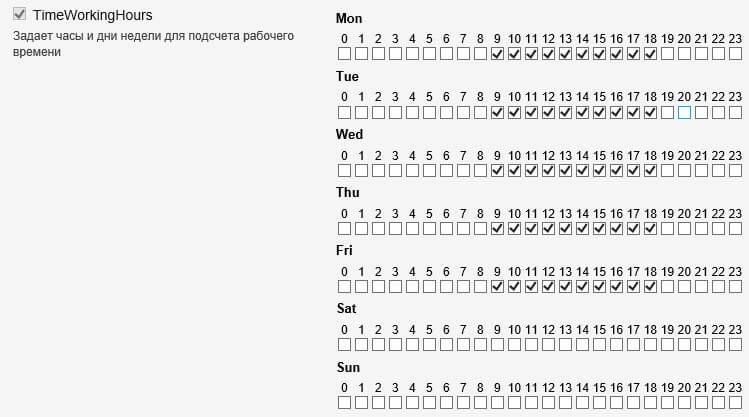
В разделе “Конфигурация системы” выбираем группу “Framework” затем выбираем подгруппу “Core::Time”.

Далее выбираем общие рабочее часы. В данном руководстве рассматривается тот случай, когда поддержка осуществляется с 9:00 до 18:00.
Нажимаем кнопку “Обновить”.
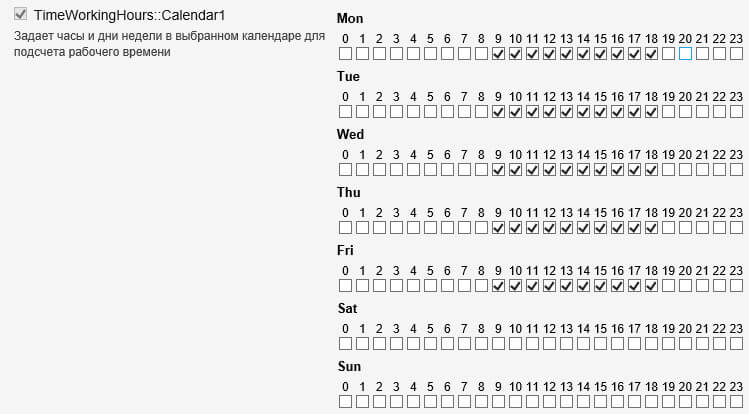
В разделе “Конфигурация системы” выбираем группу “Framework” затем выбираем подгруппу «Core::Time::Calendar1».
Указываем имя календаря. В данном руководстве рассматривается тот случай, когда поддержка осуществляется 5 дней в неделю по 8 часов в день.

Далее выбираем рабочее часы для календаря. В данном руководстве рассматривается тот случай, когда поддержка осуществляется с 9:00 до 18:00.
Нажимаем кнопку “Обновить”.
Теперь необходимо добавить группы для последующего разграничения прав доступа.
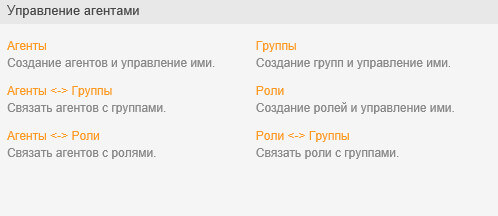
На вкладке “Администрирование” находим раздел “Управление агентами”.

Нажимаем кнопку “Группы”.

В разделе “Управление группами” нажимаем кнопку “Добавить группу”.
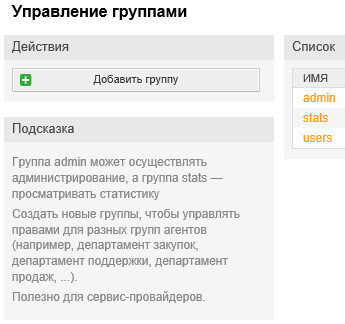
Указываем имя новой группы “basic_admin”.
В эту группу будут добавлены специалисты, которым необходимо иметь ограниченные административные права в OTRS.
Нажимаем кнопку “Отправить”.

Связываем группу с администратором OTRS.
Устанавливаем все галочки и нажимаем кнопку “Отправить”.

Добавляем новую группу и указываем имя “helpdesk_queue”.
Эта группа предназначается для очереди “Группа поддержки”.
Нажимаем кнопку “Отправить”.

Связываем группу с администратором OTRS.
Устанавливаем все галочки и нажимаем кнопку “Отправить”.

Добавляем новую группу и указываем имя “admin_queue”.
Эта группа предназначается для очереди “Группа администрирования”.
Нажимаем кнопку “Отправить”.

Связываем группу с администратором OTRS.
Устанавливаем все галочки и нажимаем кнопку “Отправить”.

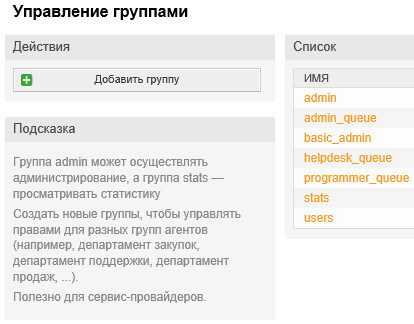
Добавляем новую группу и указываем имя “programmer_queue”.
Эта группа предназначается для очереди “Группа программирования”.
Нажимаем кнопку “Отправить”.

Связываем группу с администратором OTRS.
Устанавливаем все галочки и нажимаем кнопку “Отправить”.

Вернувшись в раздел “Управление группами” можно увидеть добавленные группы.
Теперь настроим ответы, при помощи которых специалисты смогут отвечать на заявки пользователей в OTRS.
На вкладке “Администрирование” находим раздел “Настройки очередей”.

Нажимаем кнопку “Шаблоны”.

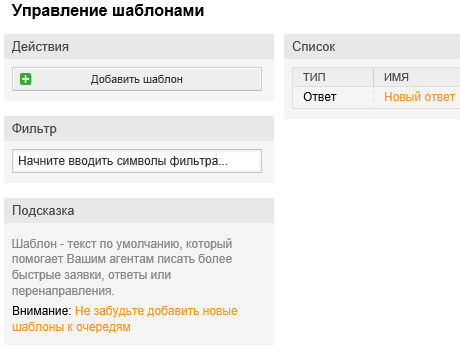
В разделе “Управление шаблонами” удаляем ответ “test answer”.
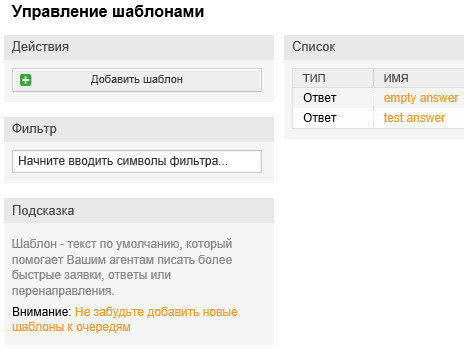
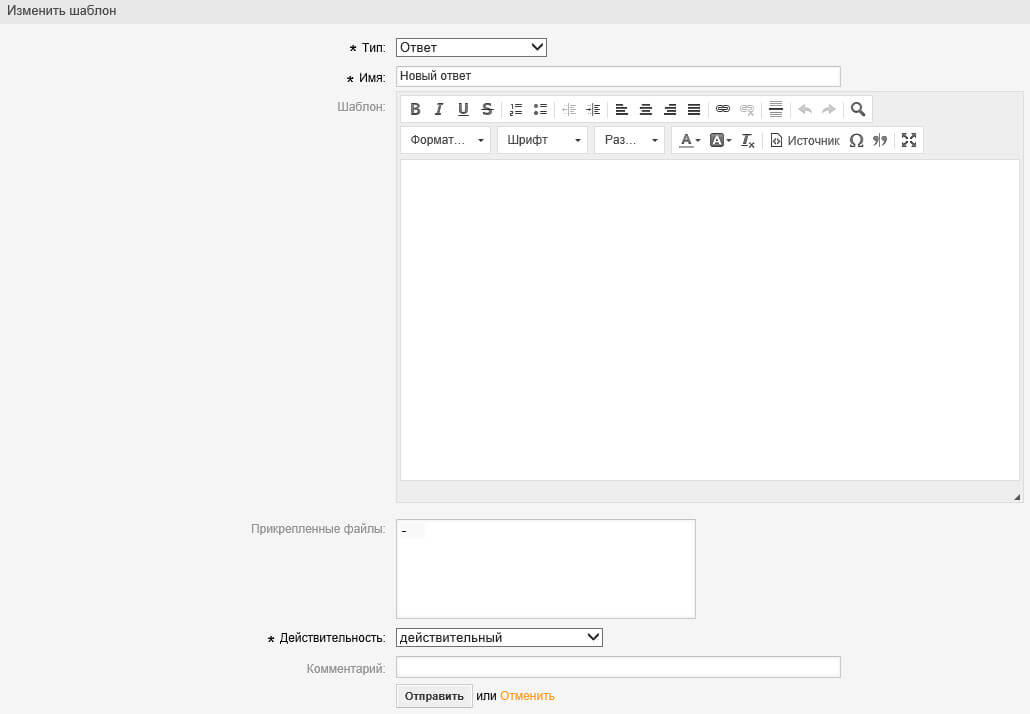
Теперь в разделе “Управление шаблонами” выбираем “empty answer”.
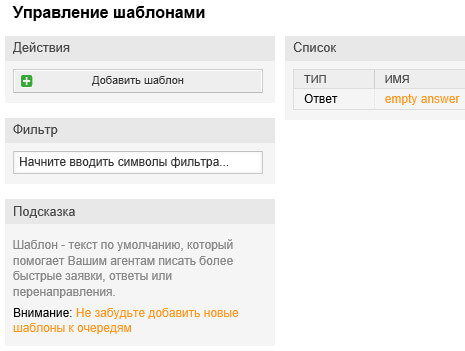
Меняем имя ответа на “Новый ответ”.
Поле ответ оставляем пустым.
Нажимаем кнопку “Отправить”.
Вернувшись в раздел “Управление шаблонами” можно увидеть измененный ответ.
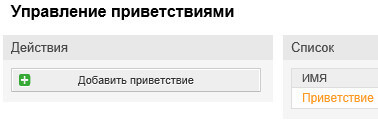
Теперь настроим приветствие, которое будет отображаться в ответах специалистов.
На вкладке “Администрирование” находим раздел “Настройки очередей”.

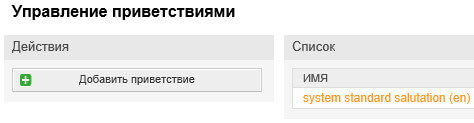
Нажимаем кнопку “Приветствия”.

В разделе “Управление приветствиями” выбираем “system standart salutation (en)”.
Меняем имя приветствия “system standart salutation (en)” на “Приветствие”.
В поле “Приветствие” указываем желаемое приветствие.
Нажимаем кнопку “Отправить”.
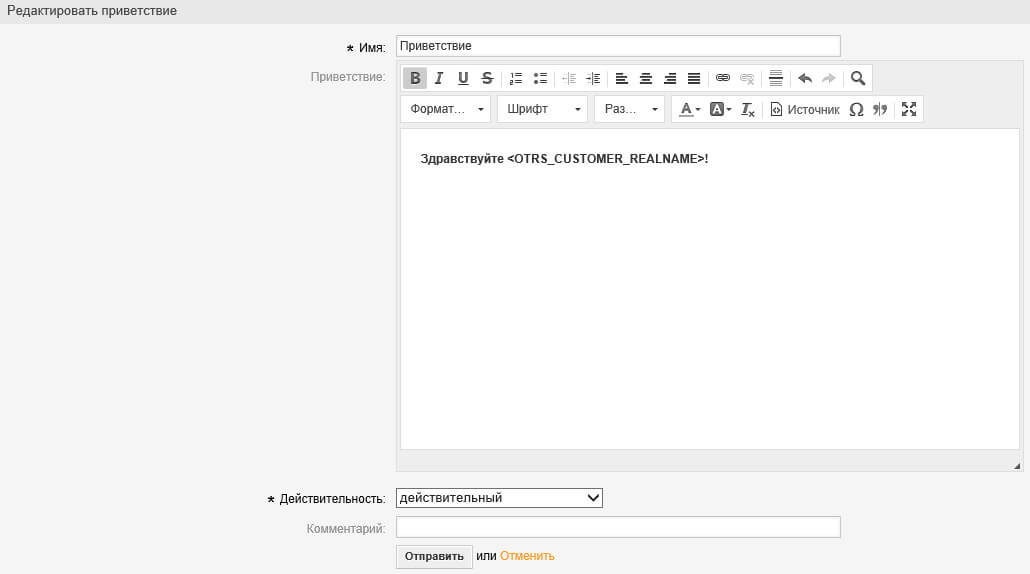
Вернувшись в раздел “Управление приветствиями” можно увидеть измененное приветствие.
Теперь настроим подпись, которая будет отображаться в ответах специалистов.
На вкладке “Администрирование” находим раздел “Настройки очередей”.

Нажимаем кнопку “Подписи”.

В разделе “Управление подписями” выбираем “system standart signature (en)”.
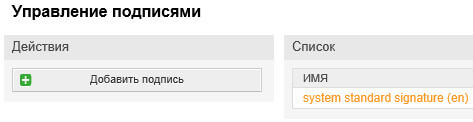
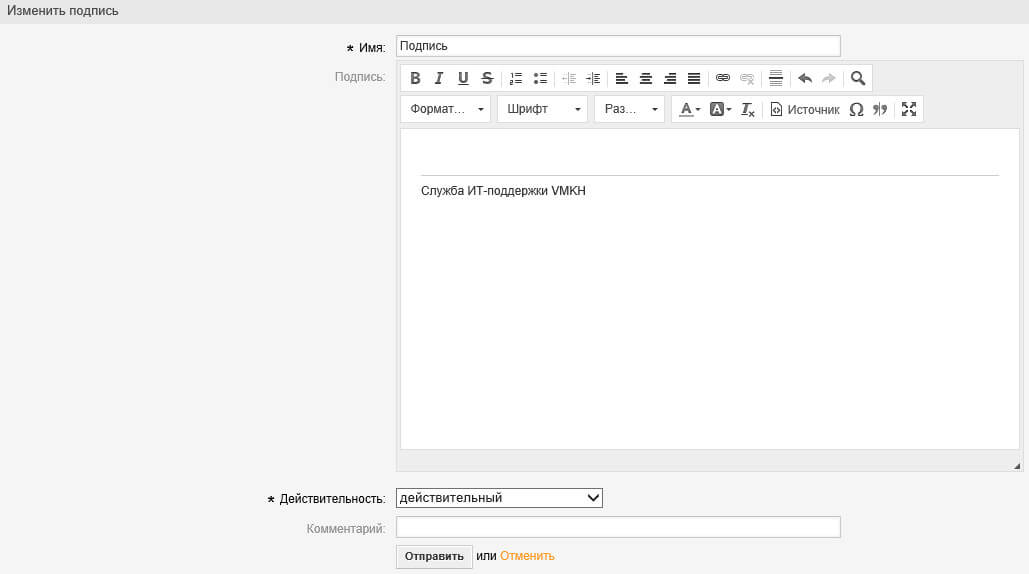
Меняем имя подписи “system standart signature (en)” на “Подпись”.
В поле “Подпись” указываем желаемую подпись.
Нажимаем кнопку “Отправить”.
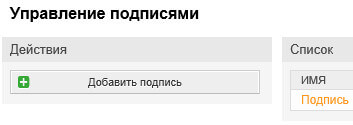
Вернувшись в раздел “Управление подписями” можно увидеть измененную подпись.
Теперь настроим очереди.
На вкладке “Администрирование” находим раздел “Настройки очередей”.

Нажимаем кнопку “Очереди”.

В разделе “Управление очередями” выбираем “Junk”.

Меняем имя очереди “Junk” на “Спам”. Далее выбираем группу “users” и в пункте “Параметры повторных ответов” выбираем “Отвергнуть”. Таким образом возвращать заявки в работу для этой очереди запрещено.
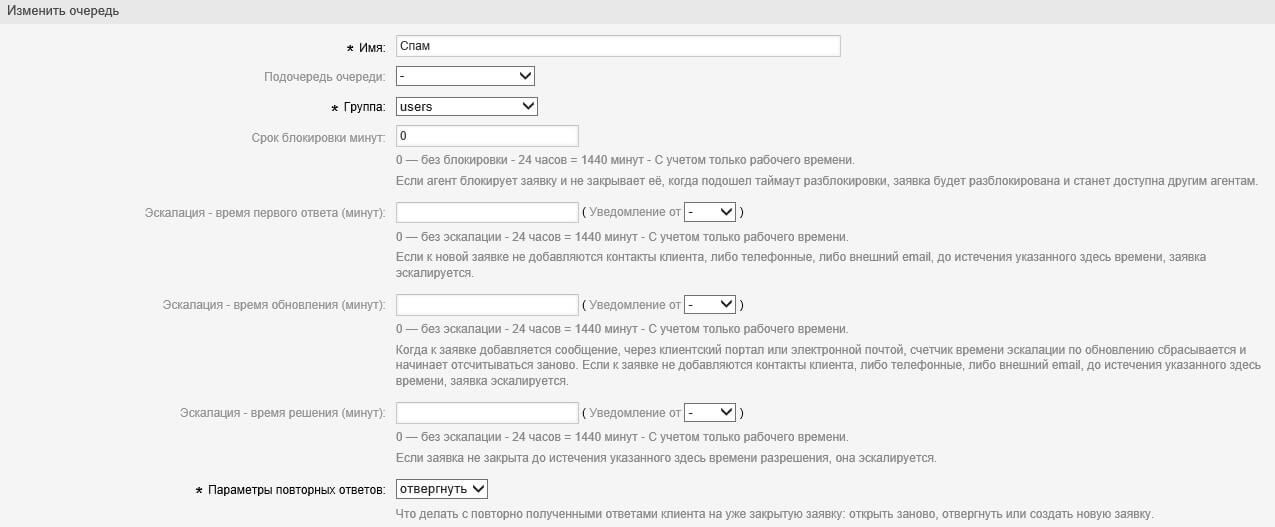
Далее в пункте “Календарь” выбираем ранее отредактированный «Calendar 1».
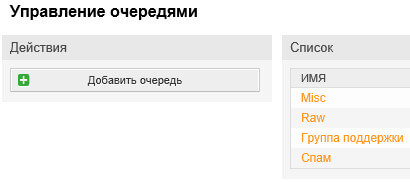
Нажимаем кнопку “Отправить”.

В разделе “Управление очередями” выбираем “Misc”.
Меняем имя очереди “Misc” на “Группа администрирования”. Далее выбираем группу “admin_queue” и в пункте “Параметры повторных ответов” выбираем “Возможно”. Таким образом возвращать заявки в работу для этой очереди разрешено.
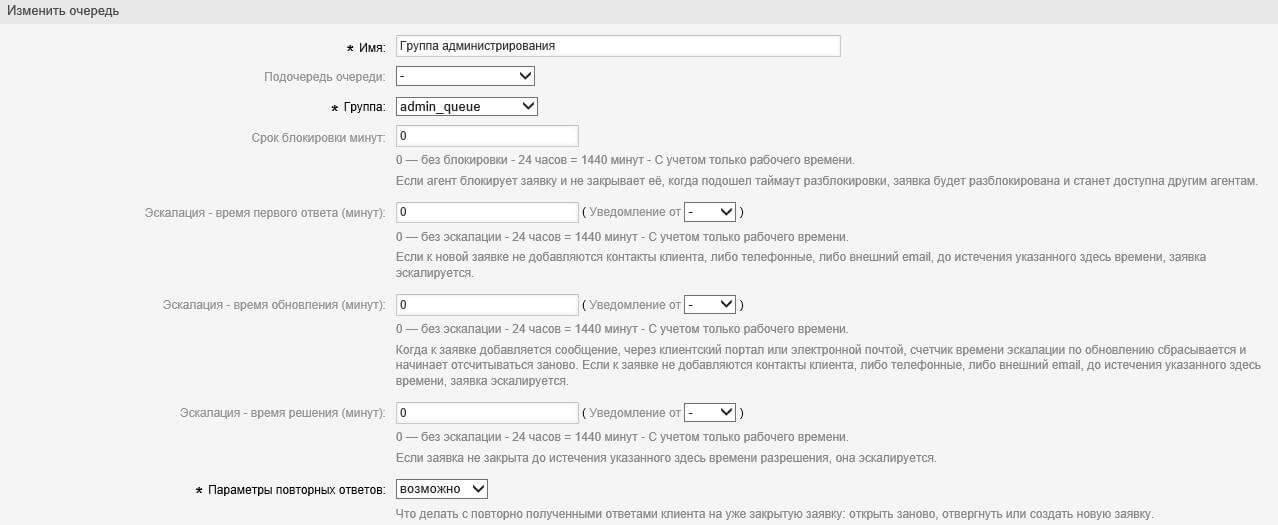
Далее в пункте “Календарь” выбираем ранее отредактированный «Calendar 1».
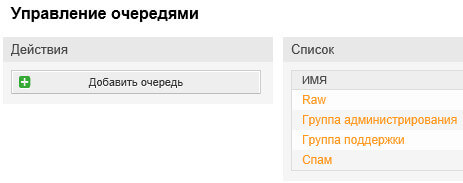
Нажимаем кнопку “Отправить”.

В разделе “Управление очередями” выбираем “Группа поддержки”.
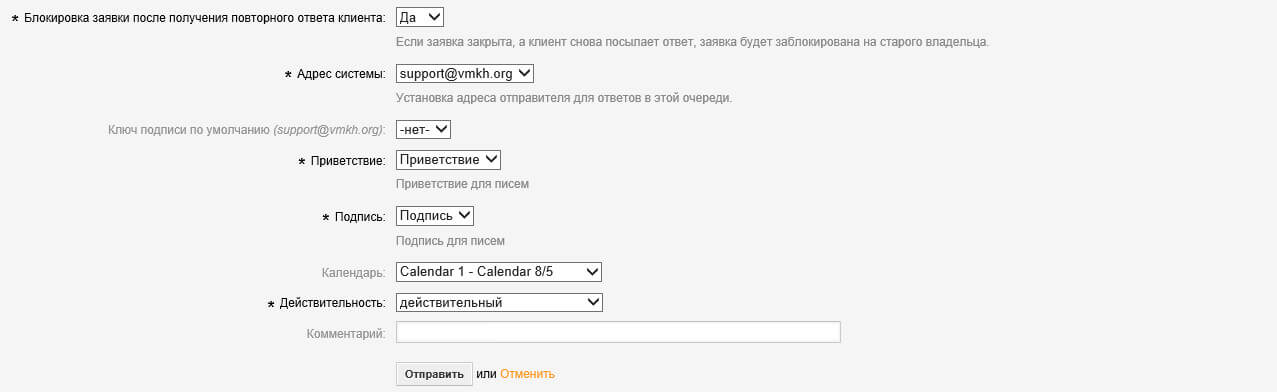
Далее выбираем группу “helpdesk_queue” и в пункте “Параметры повторных ответов” выбираем “Возможно”. Таким образом возвращать заявки в работу для этой очереди разрешено.
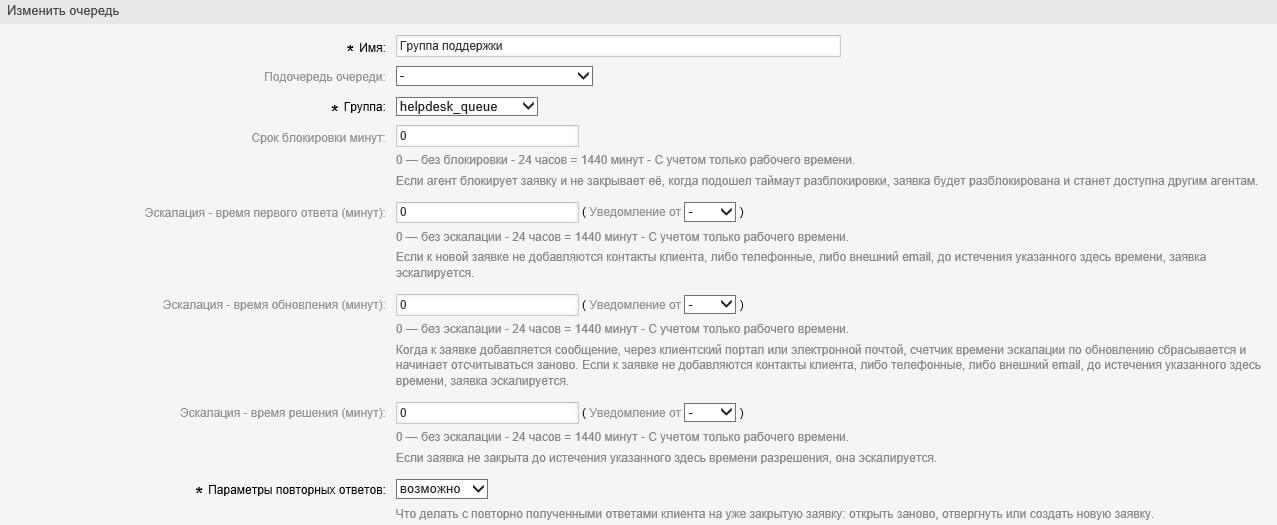
Далее в пункте “Календарь” выбираем ранее отредактированный «Calendar 1».
Нажимаем кнопку “Отправить”.
В разделе “Управление очередями” выбираем “Raw”.
Меняем имя очереди “Raw” на “Группа программирования”. Далее выбираем группу “programmer_queue” и в пункте “Параметры повторных ответов” выбираем “Возможно”. Таким образом возвращать заявки в работу для этой очереди разрешено.
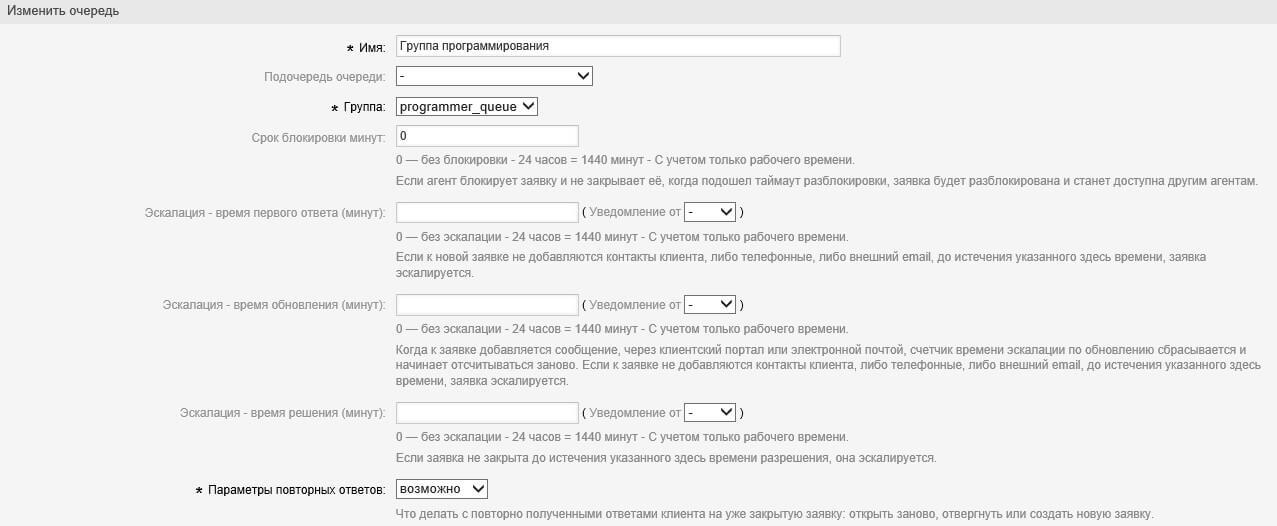
Далее в пункте “Календарь” выбираем ранее отредактированный «Calendar 1».
Нажимаем кнопку “Отправить”.

Вернувшись в раздел “Управление очередями” можно увидеть измененные очереди.
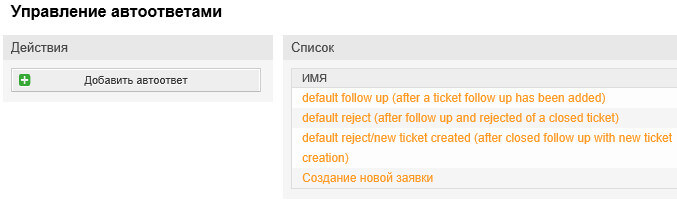
Теперь настроим автоответ, который будет приходить пользователю в случае регистрации новой заявки.
На вкладке “Администрирование” находим раздел “Настройки очередей”.
Нажимаем кнопку “Автоответы”.

В разделе “Управление автоответами” выбираем “default reply (after new ticket has been created)”.
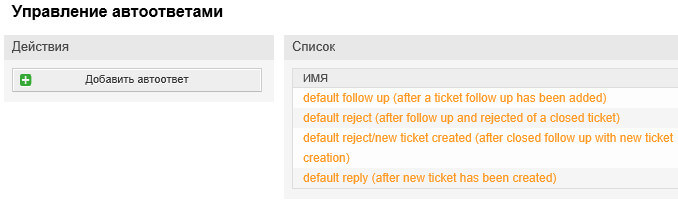
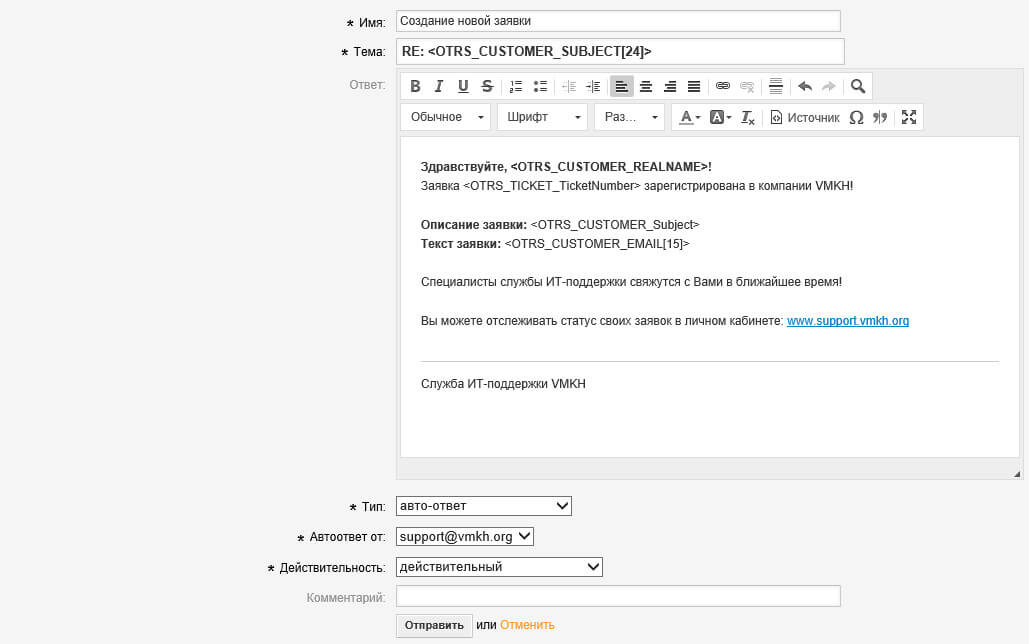
Меняем имя автоответа “default reply (after new ticket has been created)” на “Создание новой заявки”.
В поле «Ответ» указываем желаемый автоответ.
Нажимаем кнопку “Отправить”.
Вернувшись в раздел “Управление автоответами” можно увидеть измененный автоответ.
Теперь привяжем атоответ к очередям.
На вкладке “Администрирование” находим раздел “Настройки очередей”.

Нажимаем кнопку “Автоответы <.> Очередь”.

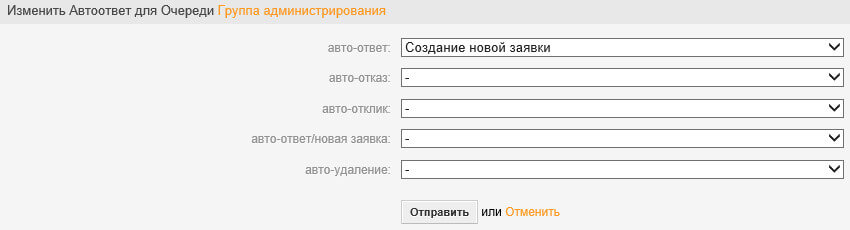
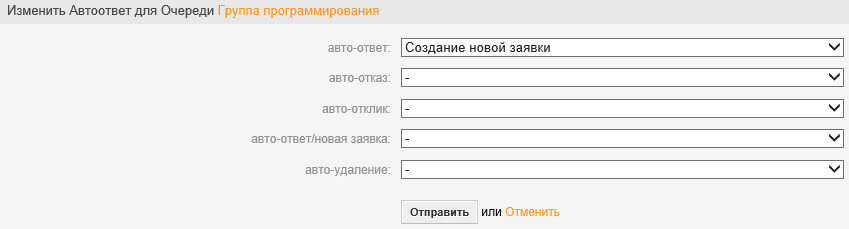
В разделе “Связь Очереди с Автоответами” выбираем очередь “Группа администрирования”.
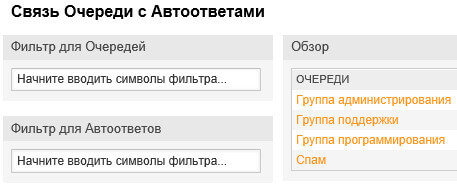
Далее выбираем пункт “авто-ответ” и выбираем автоответ “Создание новой заявки”.
Нажимаем кнопку “Отправить”.
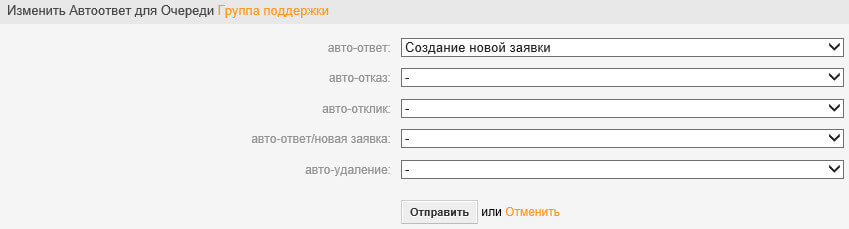
Теперь добавляем автоответ для очереди “Группа поддержки”.
Выбираем пункт “авто-ответ” и выбираем автоответ “Создание новой заявки”.
Нажимаем кнопку “Отправить”.
Теперь добавляем автоответ для очереди “Группа программирования”.
Выбираем пункт “авто-ответ” и выбираем автоответ “Создание новой заявки”.
Нажимаем кнопку “Отправить”.
Теперь необходимо изменить логин и пароль администратора OTRS.
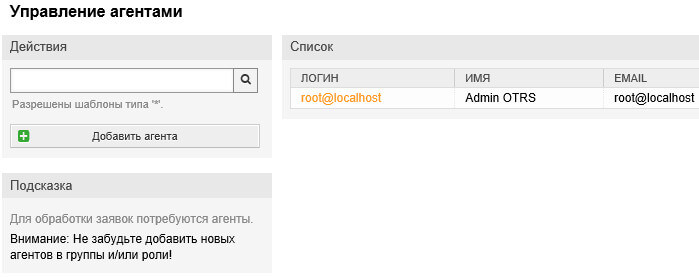
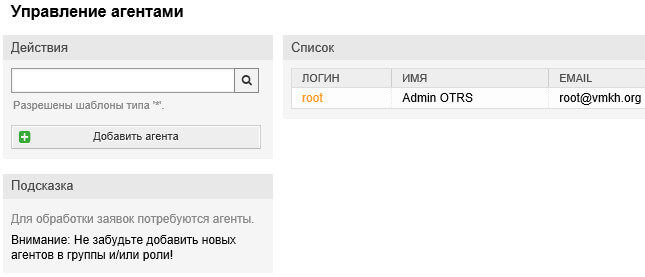
На вкладке “Администрирование” находим раздел “Управление агентами”.
Нажимаем кнопку “Агенты”.

Выбираем учетную запись root@localhost.
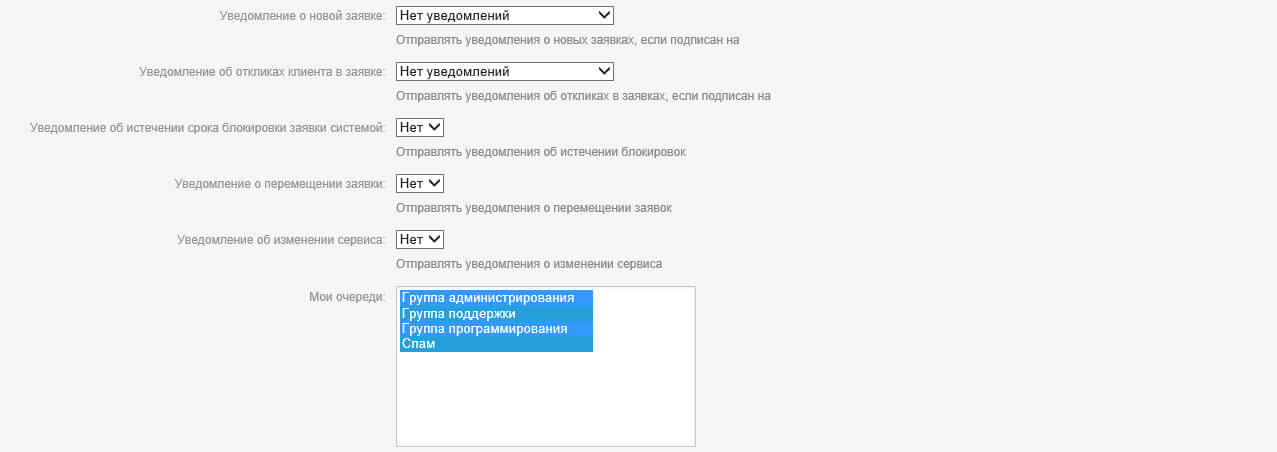
Меняем логин “root@localhost” на “root”. В поле “Пароль” необходимо указать надежный пароль. Затем в поле “Email” укажите адрес электронной почты администратора OTRS.

Теперь в разделе “Мои очереди” нужно выбрать все очереди, так как учетная запись администратора OTRS будет иметь доступ ко всем очередям.
Нажимаем кнопку “Отправить”.
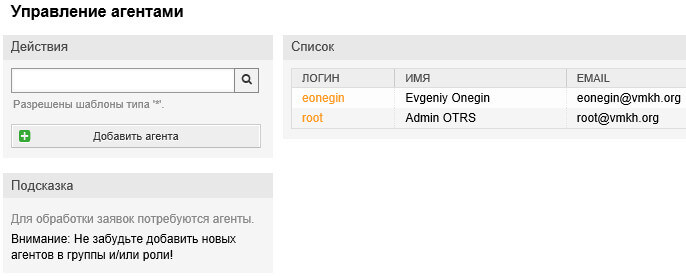
Вернувшись в раздел “Управление агентами” можно увидеть измененную учетную запись администратора OTRS.
Теперь добавим учетную запись для специалиста по технической поддержке пользователей.
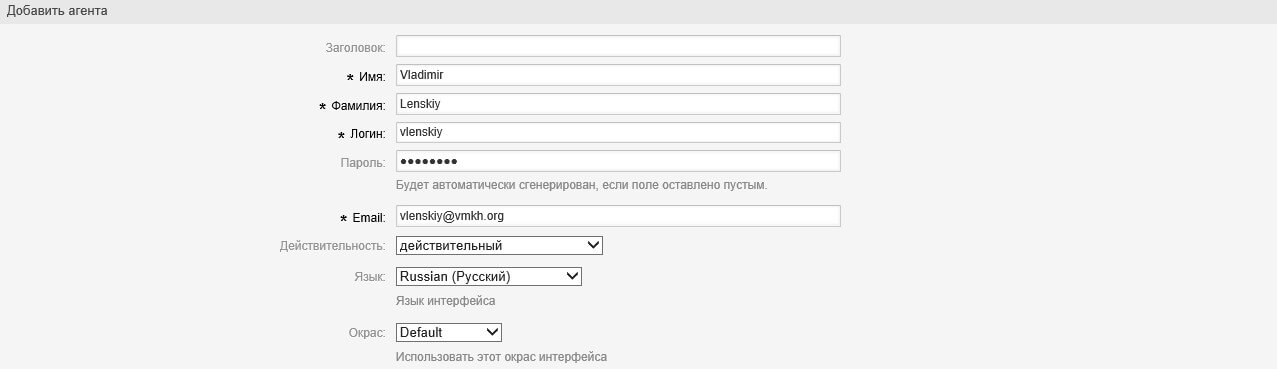
Нажимаем кнопку “Добавить агента”.
Указываем имя, фамилию, логин, пароль и email для нового специалиста OTRS.

Далее включаем все уведомления, чтобы специалист мог оперативно реагировать на новые события в OTRS.
В пункте “Время обновления обзора” выбираем “2 минуты”.
В поле комментарий необходимо указать номер телефона по которому можно связаться со специалистом.
Нажимаем кнопку “Отправить”.

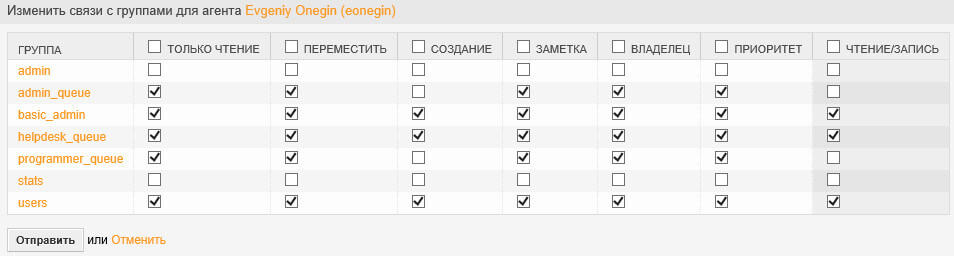
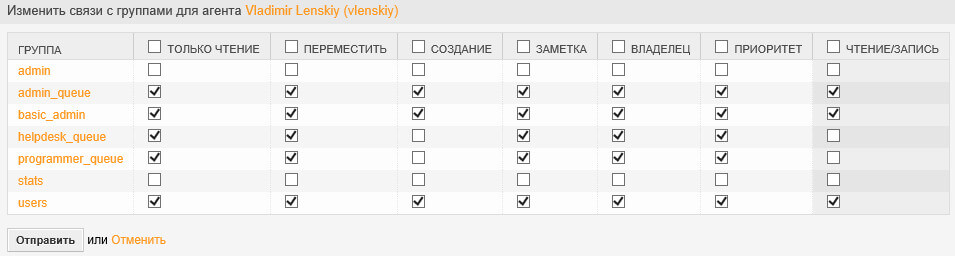
Связываем специалиста с группами.
Так как новый специалист будет отвечает за техническую поддержку пользователей устанавливаем все галочки для группы “helpdesk_queue”. Также проставляем все галочки для группы “basic_admin” и “users”.
Для групп “admin_queue” и “programmer_queue” устанавливаем все галочки кроме значений “Создание” и “Чтение/Запись”. Таким образом специалист по технической поддержке пользователей не сможет создавать новые заявки в очередях “Группа администрирования” и “Группа программирования”, но сможет перемещать в эти очереди существующие заявки.
Для групп “admin” и “stats” устанавливать галочки не нужно, так как данный пользователь не будет доступа к администрированию и отчетам OTRS.
Нажимаем кнопку “Отправить”.
Далее в разделе “Управление агентами” выбираем учетную запись для специалиста по технической поддержке пользователей.

Теперь в разделе “Мои очереди” нужно выбрать очередь “Группа поддержки”, так как вы добавили учетную запись для специалиста по технической поддержке пользователей.
Нажимаем кнопку “Отправить”.

Теперь добавим учетную запись для специалиста по администрированию серверов.
Нажимаем кнопку “Добавить агента”.
Указываем имя, фамилию, логин, пароль и email для нового пользователя OTRS.
Далее включаем все уведомления, чтобы специалист мог оперативно реагировать на новые события в OTRS.
В пункте “Время обновления обзора” выбираем “2 минуты”.
В поле комментарий необходимо указать номер телефона по которому можно связаться со специалистом.
Нажимаем кнопку “Отправить”.

Связываем специалиста с группами.
Так как новый специалист будет отвечает за администрирование серверов устанавливаем все галочки для группы “admin_queue”. Также проставляем все галочки для группы” basic_admin” и “users”.
Для групп “helpdesk_queue” и “programmer_queue” устанавливаем все галочки кроме значений “Создание” и “Чтение/Запись”. Таким образом специалист по администрированию серверов не сможет создавать новые заявки в очередях “Группа поддержки” и “Группа программирования”, но сможет перемещать в эти очереди существующие заявки.
Для групп “admin” и “stats” устанавливать галочки не нужно, так как данный пользователь не будет доступа к администрированию и отчетам OTRS.
Нажимаем кнопку “Отправить”.
Далее в разделе “Управление агентами” выбираем учетную запись для специалиста по администрированию серверов.

Теперь в разделе “Мои очереди” нужно выбрать очередь “Группа администрирования”, так как вы добавили учетную запись для специалиста по администрированию серверов.
Нажимаем кнопку “Отправить”.

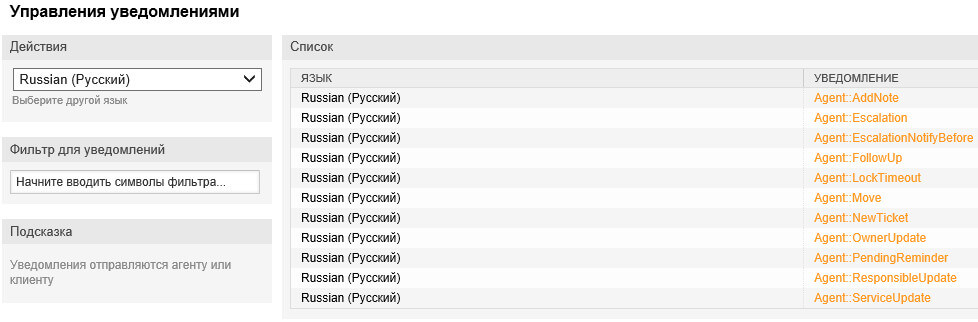
Теперь настроим уведомления для специалистов.
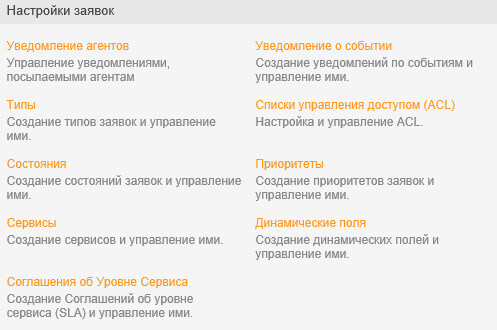
На вкладке “Администрирование” находим раздел “Настройки заявок”.

Нажимаем кнопку “Уведомление агентов”.

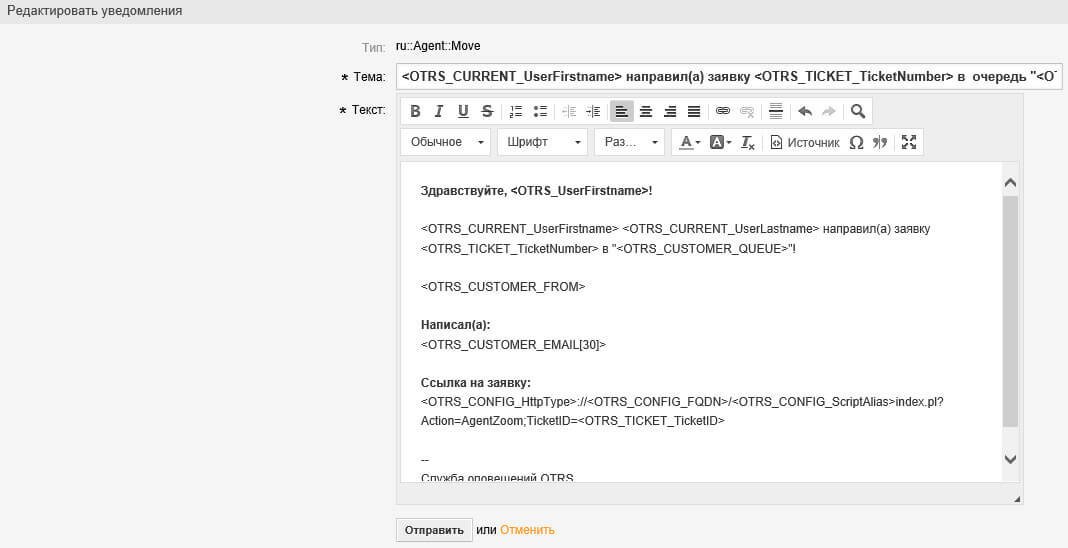
В разделе “Управление уведомлениями” меняем стандартный текст уведомлений на свой для каждого уведомления.
В уведомлении “ru::Agent::AddNote” указываем желаемую тему и текст уведомления.
Это уведомление будет приходить специалистам в случае добавления новой заметки к заявке.
Нажимаем кнопку “Отправить”.

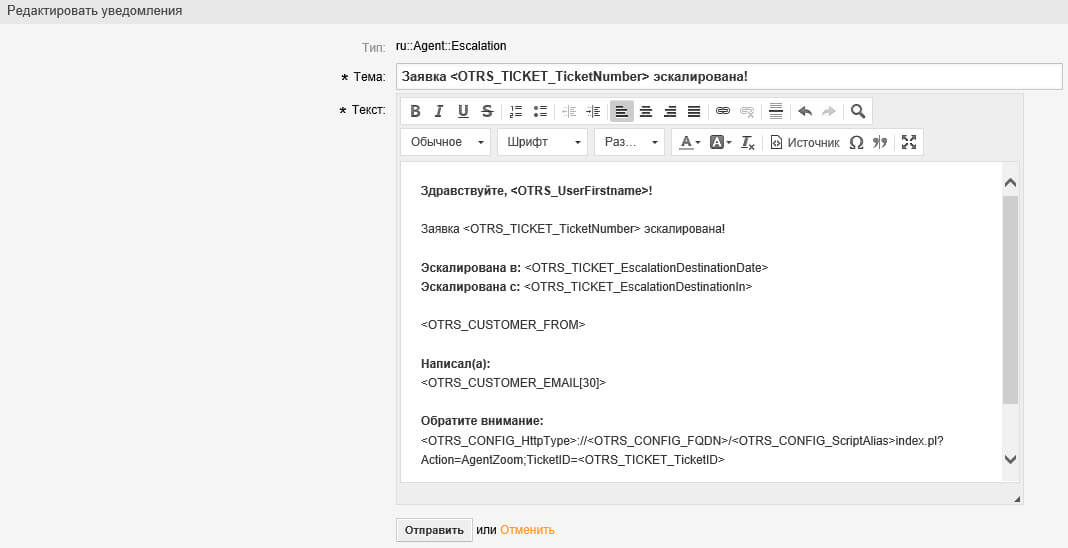
В уведомлении “ru::Agent::Escalation” указываем желаемую тему и текст уведомления.
Это уведомление будет приходить специалистам в случае если заявка эскалирована (закончилось отведенное время на решение заявки).
Нажимаем кнопку “Отправить”.
В уведомлении “ru::Agent::EscalationNotifyBefore” указываем желаемую тему и текст уведомления.
Это уведомление будет приходить специалистам в случае если заявка скоро будет эскалирована (заканчивается отведенное время на решение заявки).
Нажимаем кнопку “Отправить”.

В уведомлении “ru::Agent::FollowUp” указываем желаемую тему и текст уведомления.
Это уведомление будет приходить специалистам в случае если пользователь не согласен с решением по заявке и вернул ее в работу.
Нажимаем кнопку “Отправить”.

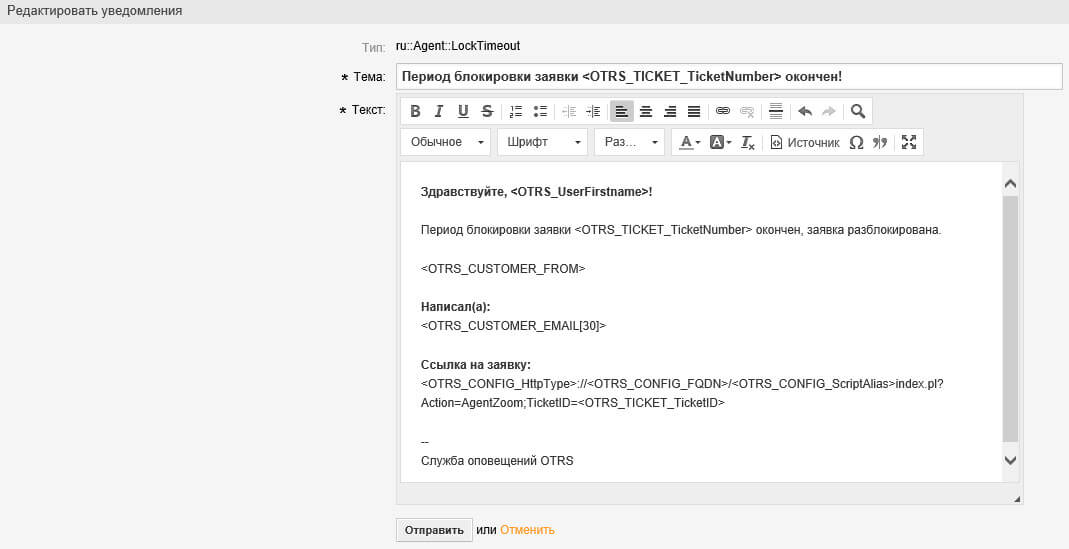
В уведомлении “ru::Agent::LockTimeout” указываем желаемую тему и текст уведомления.
Это уведомление будет приходить специалистам в случае если срок блокировки заявки окончен.
Нажимаем кнопку “Отправить”.
В уведомлении “ru::Agent::Move” указываем желаемую тему и текст уведомления.
Это уведомление будет приходить специалистам в случае если кто-то из специалистов направил заявку в другую очередь.
Нажимаем кнопку “Отправить”.
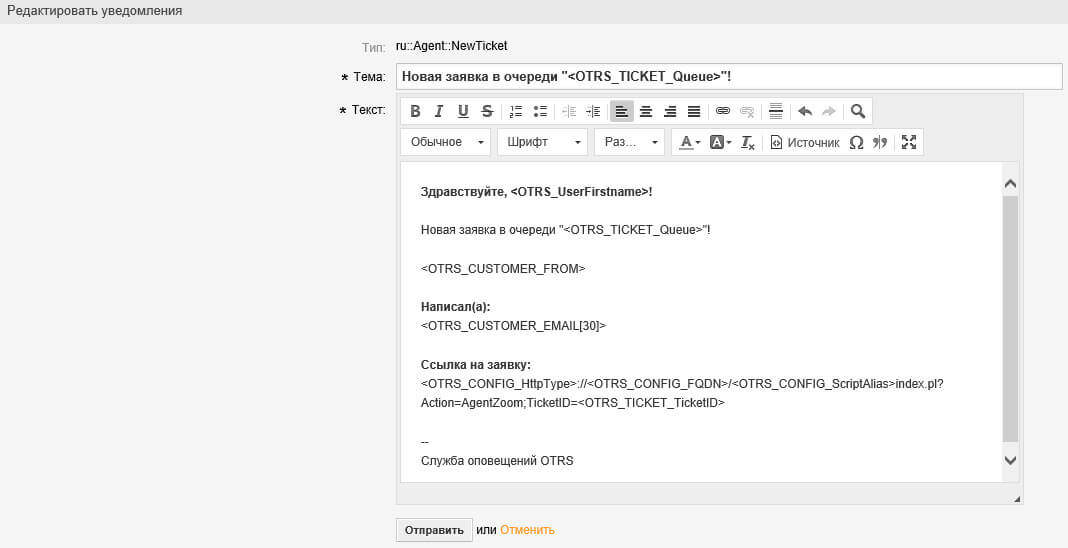
В уведомлении “ru::Agent::NewTicket” указываем желаемую тему и текст уведомления.
Это уведомление будет приходить специалистам в случае если в очереди появится новая заявка.
Нажимаем кнопку “Отправить”.
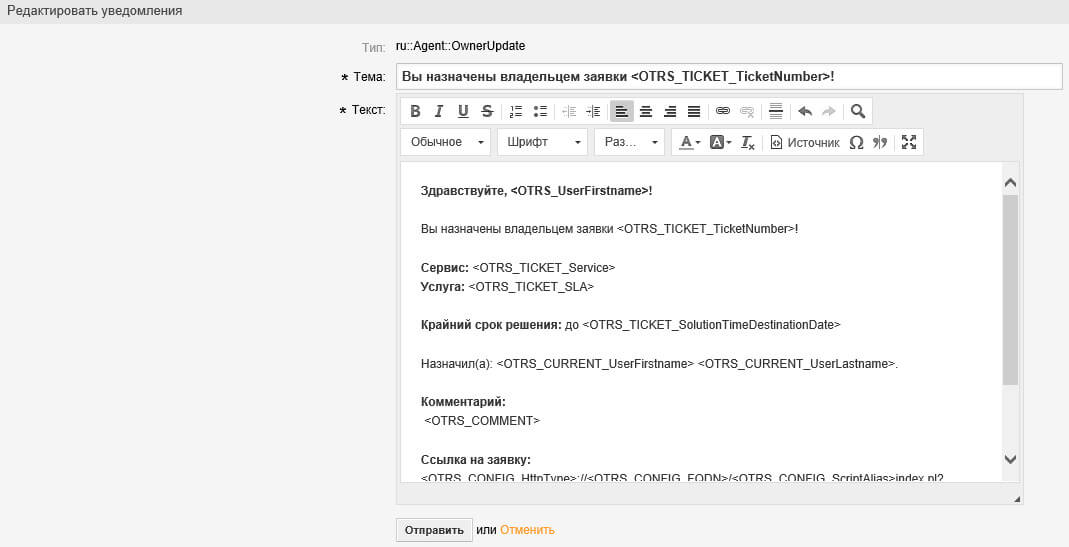
В уведомлении “ru::Agent::OwnerUpdate” указываем желаемую тему и текст уведомления.
Это уведомление будет приходить специалистам в случае если специалист назначен владельцем заявки.
Нажимаем кнопку “Отправить”.
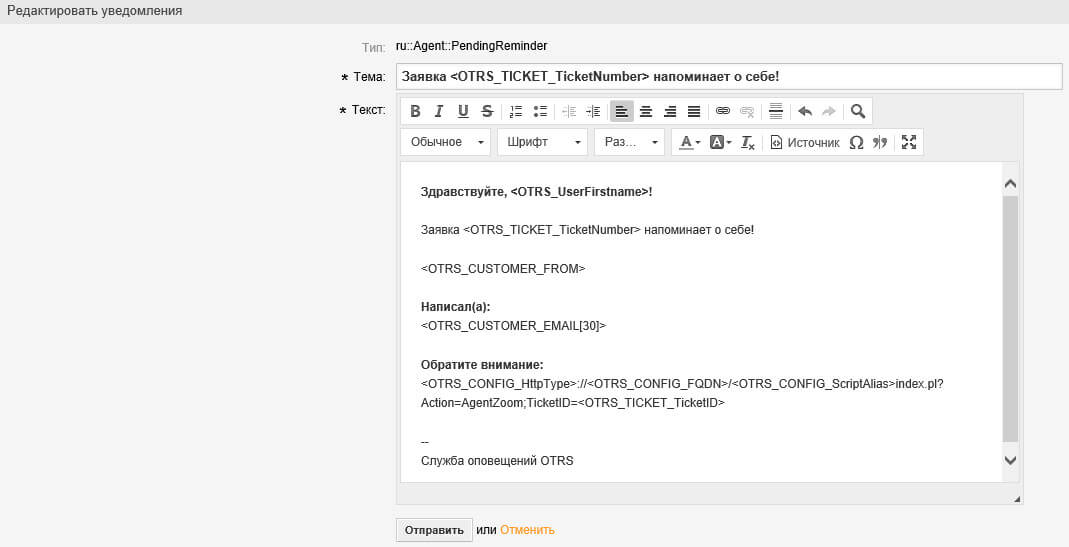
В уведомлении “ru::Agent::PendingReminder” указываем желаемую тему и текст уведомления.
Это уведомление будет приходить специалистам в случае если было настроено напоминание о заявке.
Нажимаем кнопку “Отправить”.
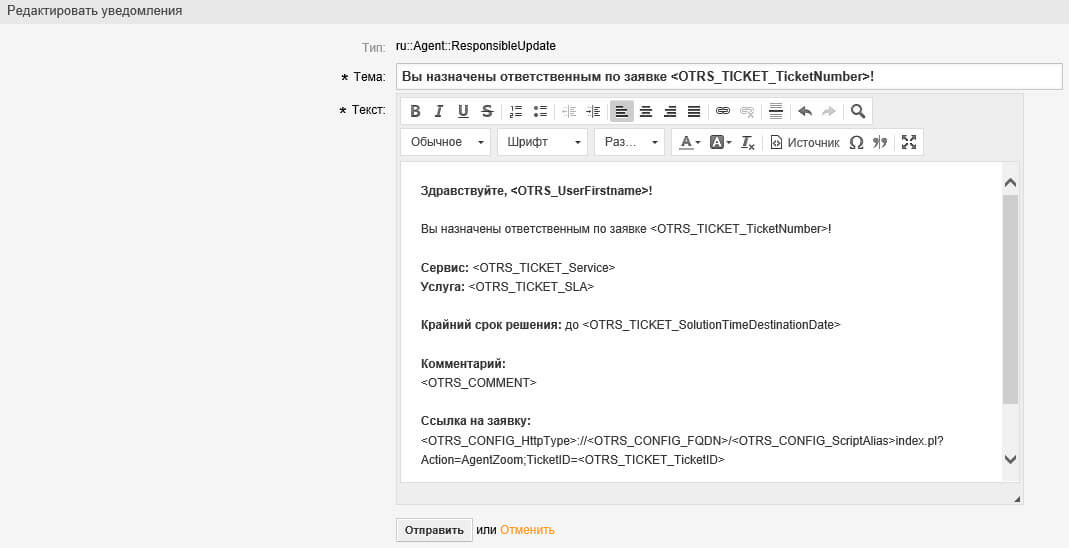
В уведомлении “ru::Agent::ResponsibleUpdate” указываем желаемую тему и текст уведомления.
Это уведомление будет приходить специалистам в случае если специалист назначен ответственным по заявке.
Нажимаем кнопку “Отправить”.
Теперь настроим уведомления для пользователей в случае если специалист принял заявку к рассмотрению или закрыл ее.
На вкладке “Администрирование” находим раздел “Настройки заявок”.

Нажимаем кнопку “Уведомление о событии”.

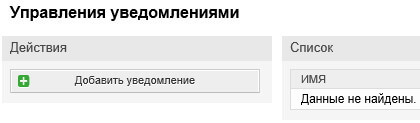
В разделе “Управления уведомлениями” нажимаем кнопку “Добавить уведомление”.
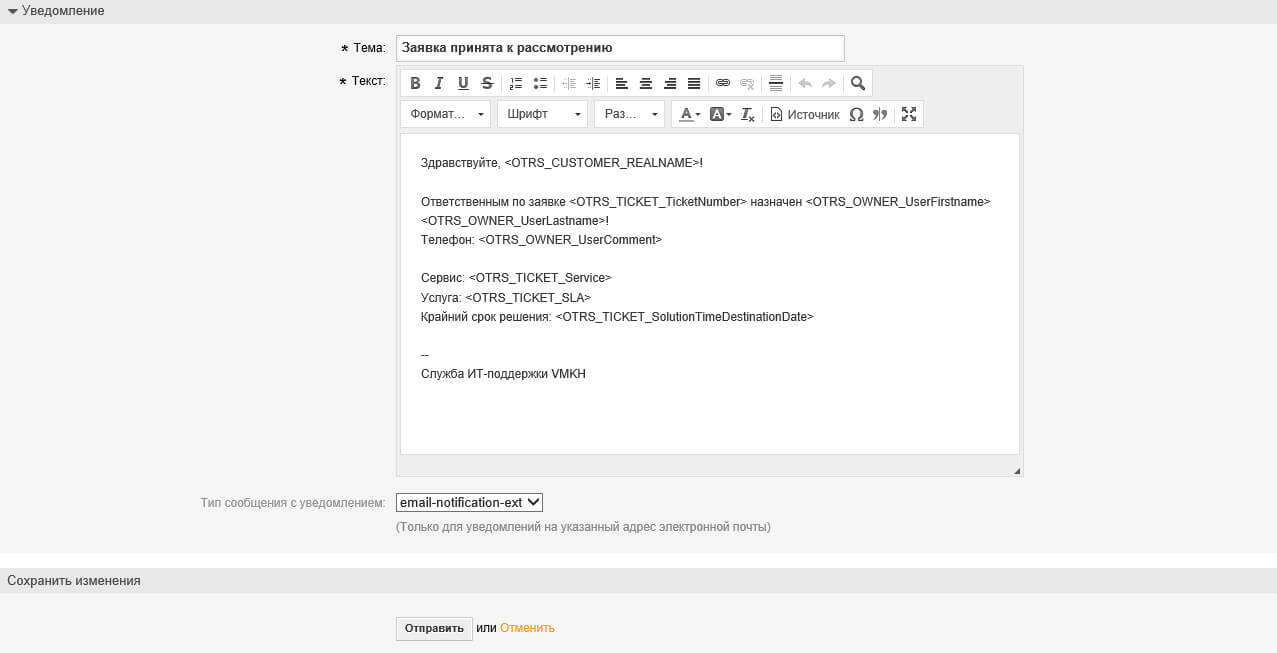
В поле “Имя” указываем “Заявка принята к рассмотрению”.
В пункте “Получат группы” выбираем “Клиент”.
Далее в пункте “Событие” выбираем “TicketOwnerUpdate” и “TicketResponsibleUpdate”.

В разделе “Уведомление” указываем желаемую тему и текст уведомления.
Нажимаем кнопку “Отправить”.
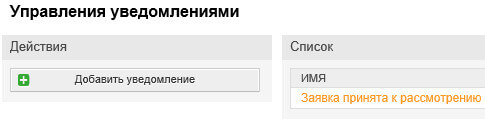
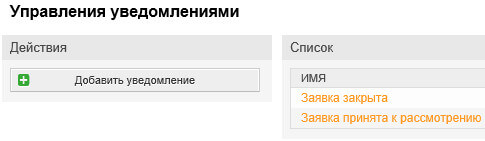
Вернувшись в раздел “Управления уведомлениями” можно увидеть добавленные уведомления.
Нажимаем кнопку “Добавить уведомление”.
В поле “Имя” указываем “Заявка закрыта”.
В пункте “Получат группы” выбираем “Клиент”.
Далее в пункте “Событие” выбираем “TicketStateUpdate”.
В пункте “Состояние” выбираем “Закрыта успешно”.
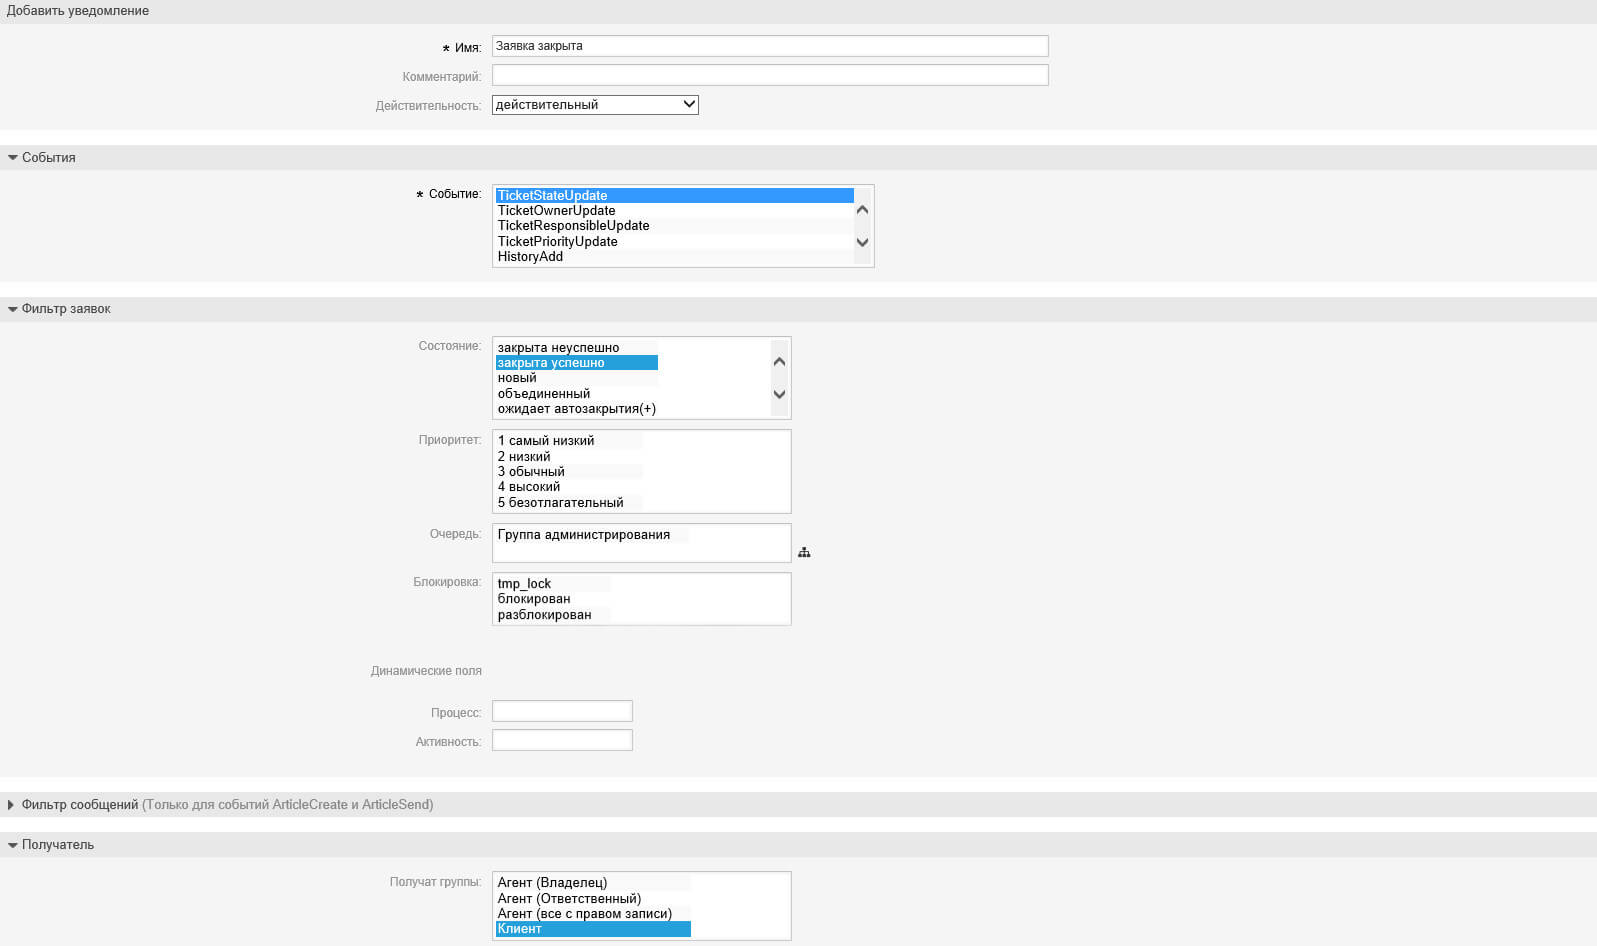
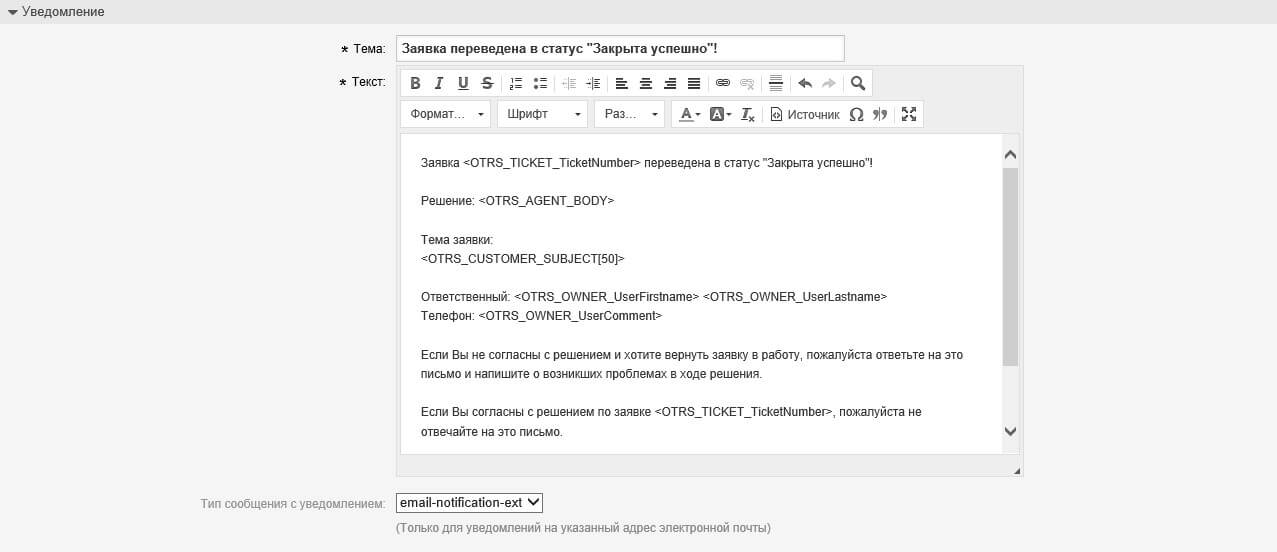
В разделе “Уведомление” указываем желаемую тему и текст уведомления.
Нажимаем кнопку “Отправить”.
Вернувшись в раздел “Управления уведомлениями” можно увидеть добавленные уведомления.
На вкладке “Администрирование” находим раздел “Администрирование системы”.

Нажимаем кнопку “Конфигурация системы”.

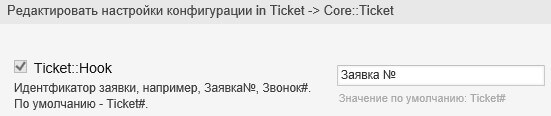
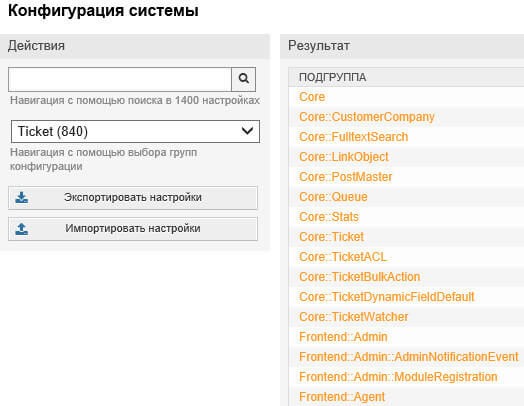
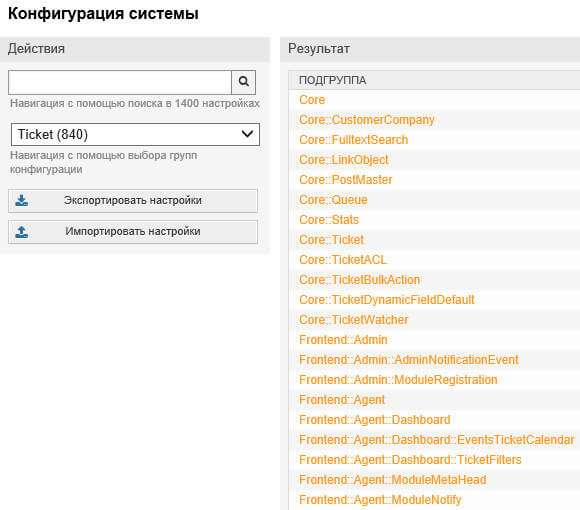
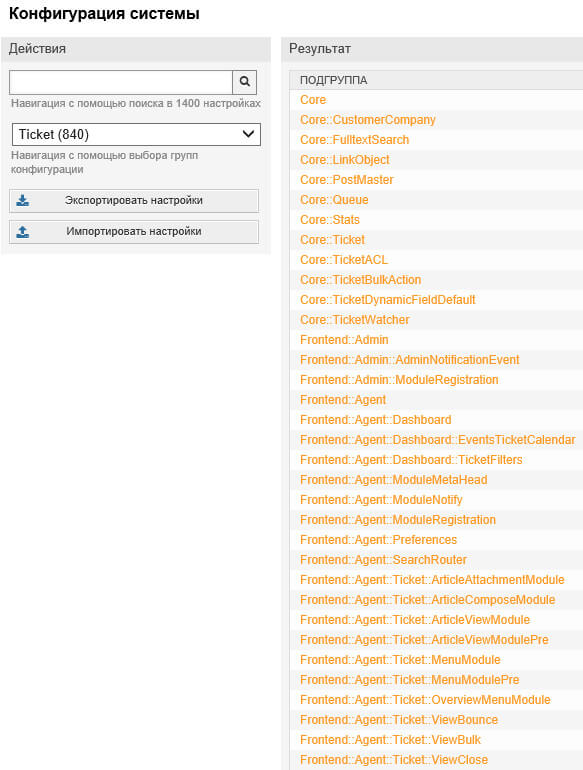
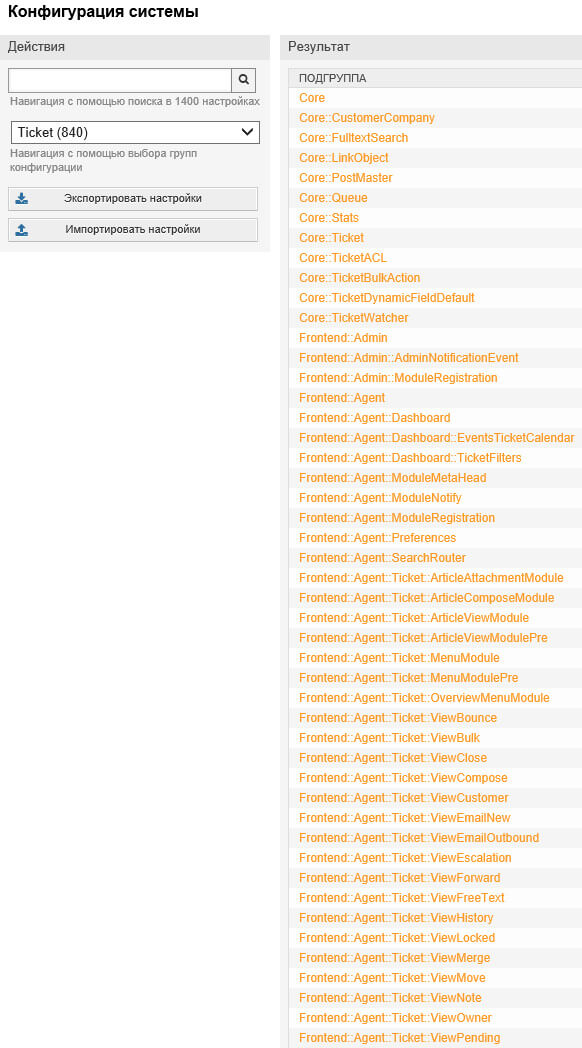
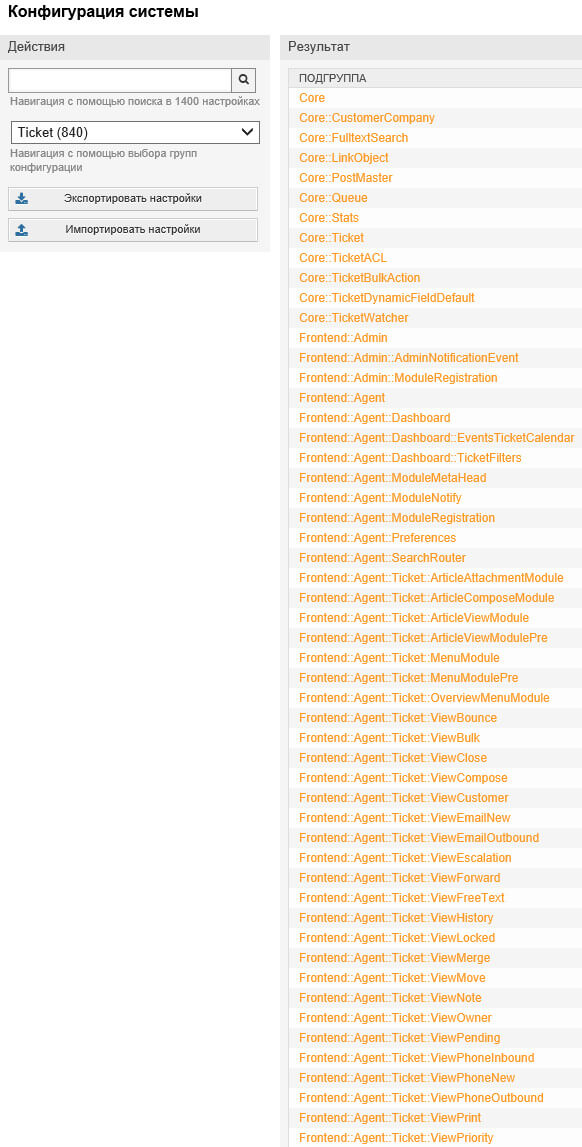
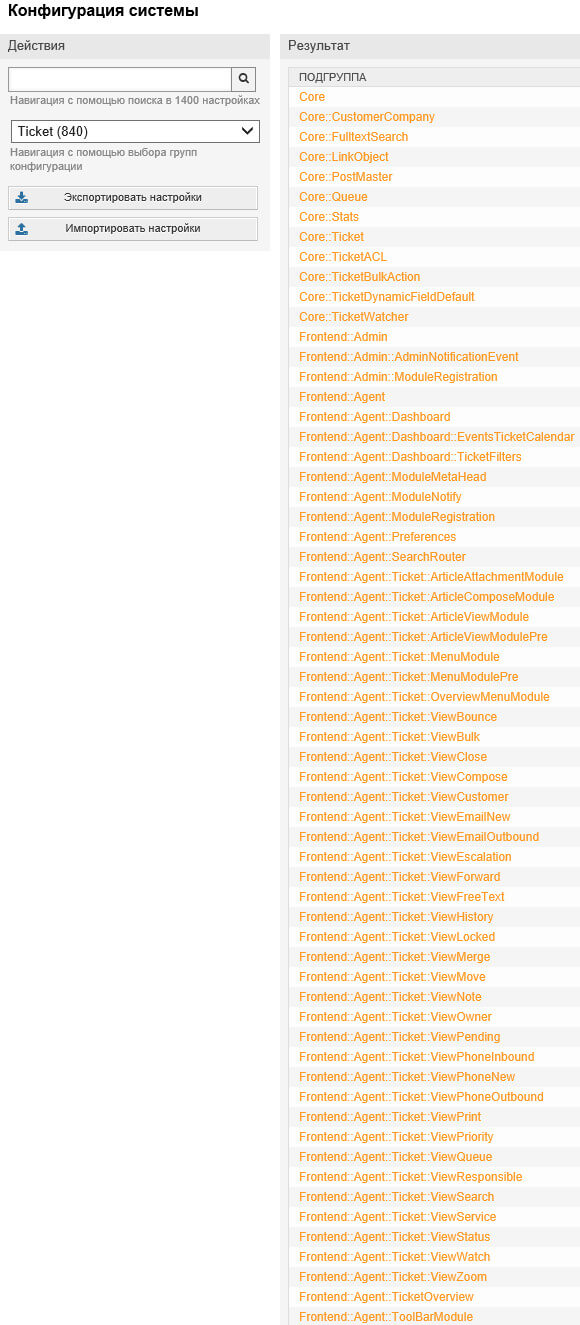
Далее в разделе “Конфигурация системы” выбираем группу “Ticket” затем выбираем подгруппу “Core::Ticket”.
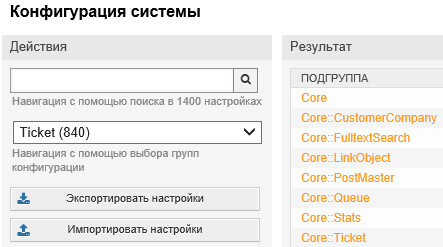
В пункте “Ticket::Hook” указываем “Заявка №”.
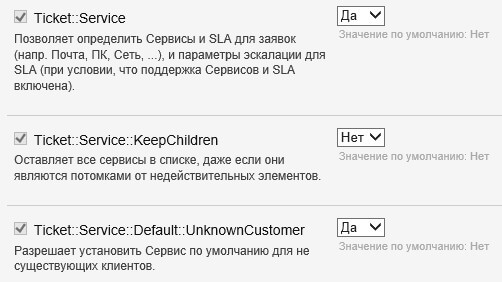
Далее в пункте “Ticket::Service” и “Ticket::Service::Default::UnknownCustomer” выбираем “Да”.
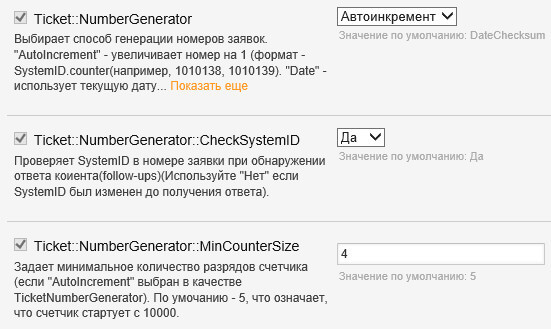
Теперь в пункте “Ticket::NumberGenerator” выбираем “Автоинкремент”.
В поле “Ticket::NumberGenerator::MinCounterSize” указываем “4”.
Нажимаем кнопку “Обновить”.
Теперь добавим сервис.
На вкладке “Администрирование” находим раздел “Настройки заявок”.

Нажимаем кнопку “Сервисы”.

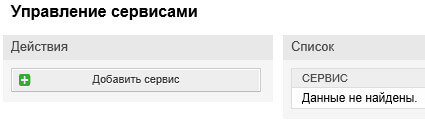
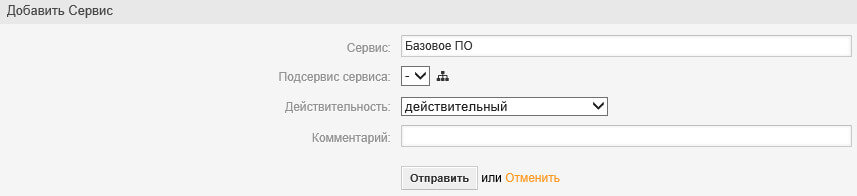
В разделе “Управление сервисами” нажимаем кнопку “Добавить сервис”.
Далее в поле “Сервис” указываем “Базовое ПО”.
Нажимаем кнопку “Отправить”.
Вернувшись в раздел “Управление сервисами” можно увидеть добавленный сервис.

Теперь добавим SLA и привяжем его к сервису.
На вкладке “Администрирование” находим раздел “Настройки заявок”.
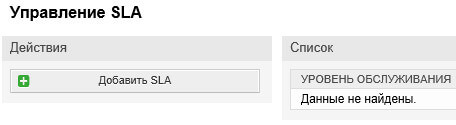
Нажимаем кнопку “Соглашения об Уровне Сервиса”.

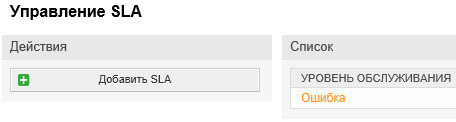
В разделе “Управление SLA” нажимаем кнопку “Добавить SLA”.
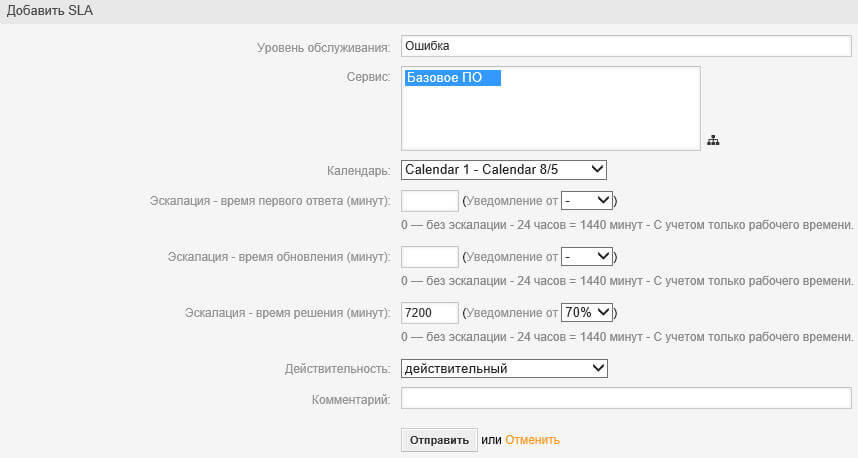
В поле “Уровень обслуживания” указываем имя для нового SLA.
Далее в пункте “Сервис” выбираем сервис, к которому необходимо привязать новый SLA.
В пункте “Календарь” выбираем ранее отредактированный «Calendar 1».
Теперь в поле “Эскалация — время решения (минут)” указываем сколько минут отведено на решение поэтому SLA. В следующем пункте “Уведомления от” выбираем “70%”.
Нажимаем кнопку “Отправить”.
Вернувшись в раздел “Управление SLA” можно увидеть добавленный SLA.
Далее необходимо добавить задание, которое позволит автоматически блокировать разблокированные заявки. Это необходимо для назначения заявки на специалиста в случае если пользователь вернул заявку в работу.
Затем добавим задания, которые позволят автоматически перемещать заявки назначенные на специалиста по технической поддержке пользователей в очередь “Группа поддержки”, а назначенные заявки на специалиста по администрированию серверов в очередь “Группа администрирования”. Таким образом заявки будут упорядоченны.
На вкладке “Администрирование” находим раздел “Администрирование системы”.
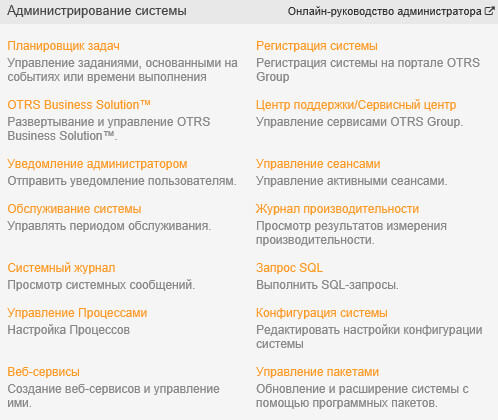
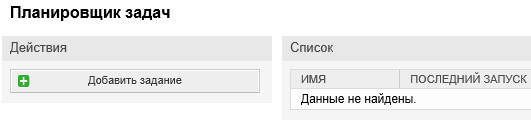
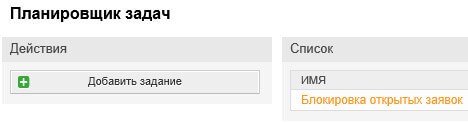
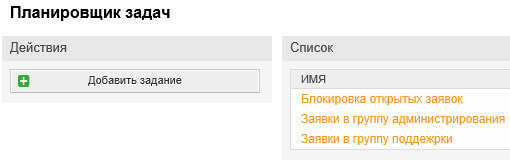
Нажимаем кнопку “Планировщик задач”.

В разделе “Планировщик задач” нажимаем кнопку “Добавить задание”.
В разделе “Настройка задания” в поле “Имя задания” указываем имя для нового задания.
Далее в пункте “Запускать в минуты” выбираем “10”.
В пункте “Запускать в часы” выбираем все значения.
В пункте “Запускать в дни” выбираем все значения.
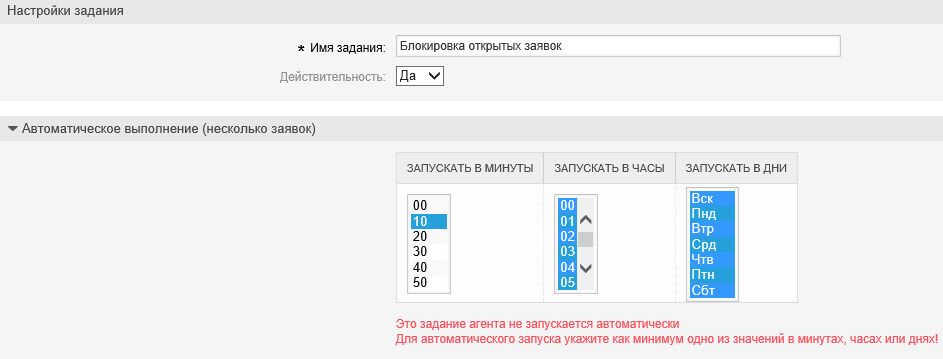
В разделе “Выбрать заявки” в пункте “Состояние” выбираем “Открытый”.
В пункте “Блокировка заявки” выбираем “Разблокирован”.
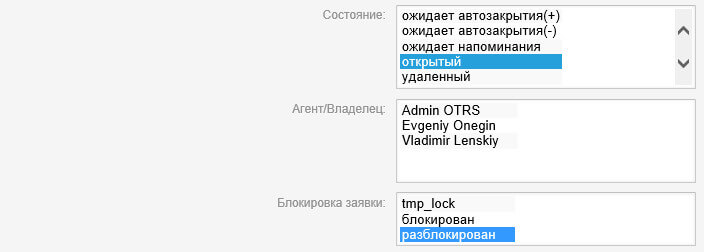
Далее в разделе “Обновить/добавить атрибуты заявки” в пункте “Установить новое состояние блокировки” выбираем “Блокирован”.
Нажимаем кнопку “Отправить”, а затем нажимаем кнопку “Запустить задачу”.

Вернувшись в раздел “Планировщик задач” можно увидеть добавленные задания.
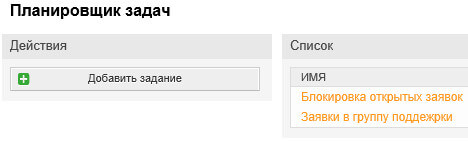
Теперь добавим задание для очереди “Группа поддержки”.
Нажимаем кнопку “Добавить задание”.
В разделе “Настройка задания” в поле “Имя задания” указываем имя для нового задания.
Далее в пункте “Запускать в минуты” выбираем “20”.
В пункте “Запускать в часы” выбираем все значения.
В пункте “Запускать в дни” выбираем все значения.
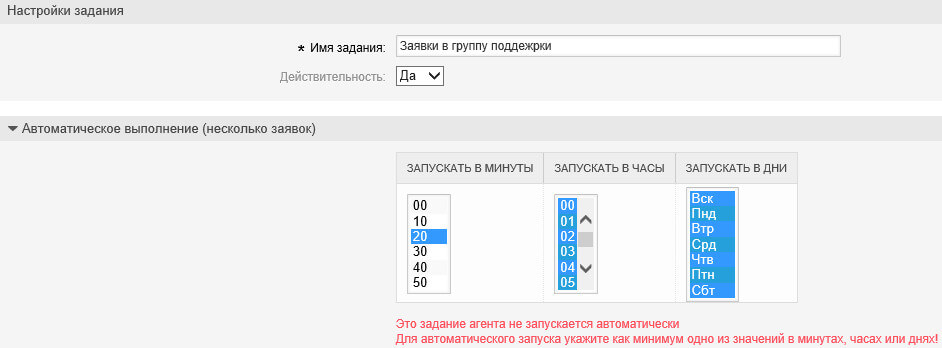
В разделе “Выбрать заявки” в пункте “Агент/Владелец” выбираем специалиста по технической поддержке пользователей.

В разделе “Обновить/добавить атрибуты заявки” в пункте “Установить новую очередь” выбираем “Группа поддержки”.
Нажимаем кнопку “Отправить”, а затем нажимаем кнопку “Запустить задачу”.

Вернувшись в раздел “Планировщик задач” можно увидеть добавленные задания.
Теперь добавим задание для очереди “Группа администрирования”.
Нажимаем кнопку “Добавить задание”.
В разделе “Настройка задания” в поле “Имя задания” указываем имя для нового задания.
Далее в пункте “Запускать в минуты” выбираем “30”.
В пункте “Запускать в часы” выбираем все значения.
В пункте “Запускать в дни” выбираем все значения.
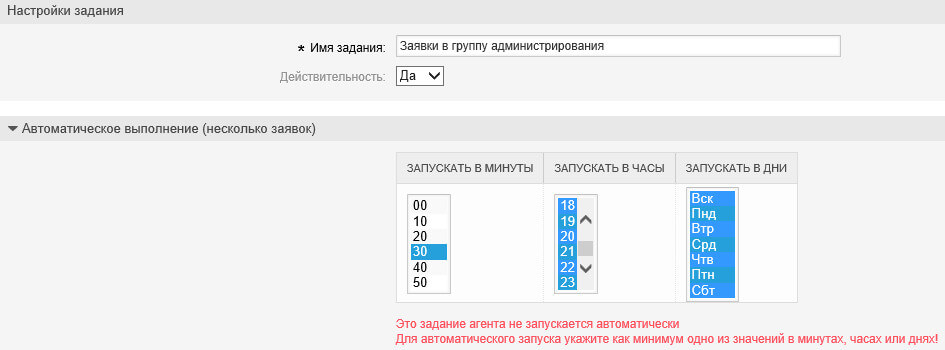
В разделе “Выбрать заявки” в пункте “Агент/Владелец” выбираем специалиста по администрированию серверов.

В разделе “Обновить/добавить атрибуты заявки” в пункте “Установить новую очередь” выбираем “Группа администрирования”.
Нажимаем кнопку “Отправить”, а затем нажимаем кнопку “Запустить задачу”.

Вернувшись в раздел “Планировщик задач” можно увидеть добавленные задания.
На вкладке “Администрирование” находим раздел “Администрирование системы”.

Нажимаем кнопку “Конфигурация системы”.

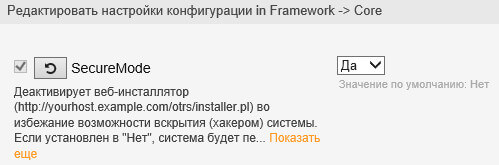
Далее в разделе “Конфигурация системы” выбираем группу “Framework” затем выбираем подгруппу “Core”.
В пункте “SecureMode” выбираем “Да”.
В поле “ProductName” указываем “OTRS”.
В поле “SystemID” указываем “10”.
Далее в поле “FQDN” указываем полное доменное имя системы.

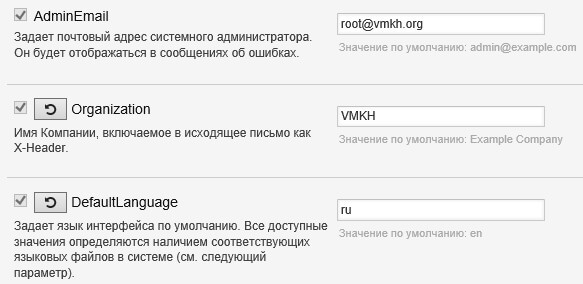
В пункте “AdminEmail” указываем адрес электронной почты администратора OTRS.
В пункте “Organization” указываем название вашей организации.
В пункте “DefaultLanguage” указываем “ru”.
Нажимаем кнопку “Обновить”.
Теперь выдаем права на определенные разделы на вкладке “Администрирование” для пользователей, состоящих в группе “basic_admin”. Таким образом все специалисты не являющиеся администраторами системы получат только необходимые им права.
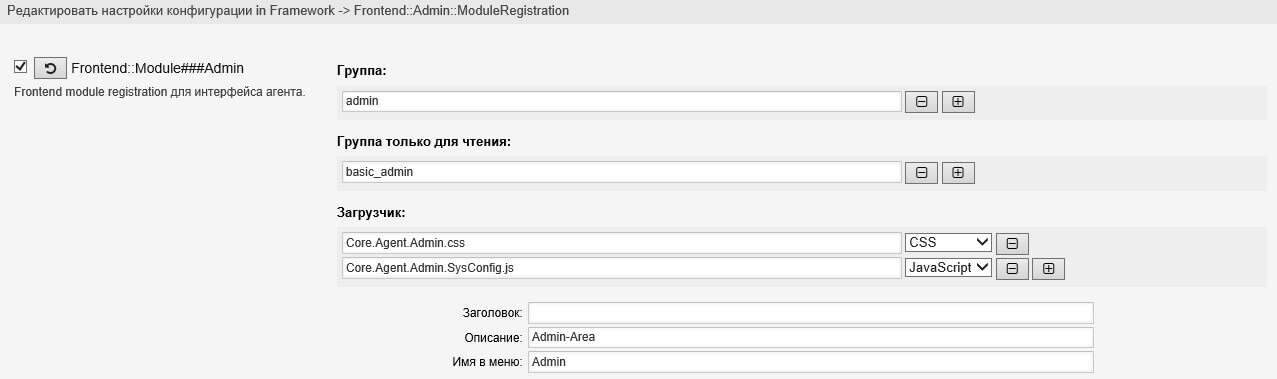
В разделе “Конфигурация системы” выбираем группу “Framework” затем выбираем подгруппу “Frontend::Admin::ModuleRegistration”.
В пункте “Frontend::Module###Admin” в разделе “Группа только для чтения” указываем “basic_admin”.
В пункте “Frontend::Module###AdminCustomerUser” в разделе “Группа только для чтения” указываем “basic_admin”.

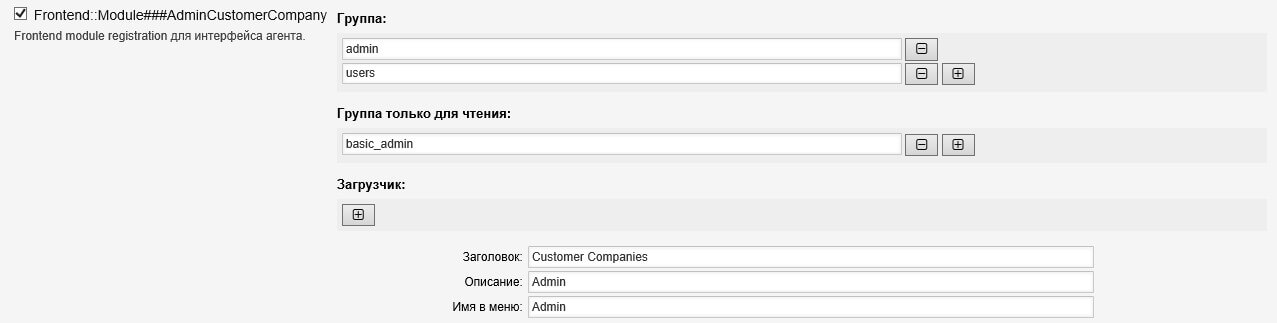
В пункте “Frontend::Module###AdminCustomerCompany” в разделе “Группа только для чтения” указываем “basic_admin”.
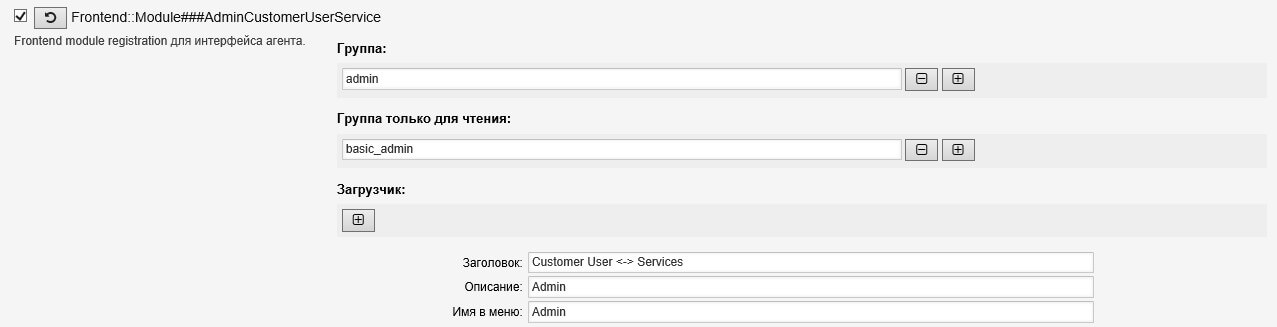
В пункте “Frontend::Module###AdminCustomerUserService” в разделе “Группа только для чтения” указываем “basic_admin”.
Нажимаем кнопку “Обновить”.
Теперь запрещаем возможность пользователям самим регистрироваться в системе, но даем им возможность восстановить пароль от OTRS. Затем указываем тему и текст для оповещений на запрос пароля и на получение пароля.
В разделе “Конфигурация системы” выбираем группу “Framework” затем выбираем подгруппу “Frontend::Customer”.
В пункте “CustomerHeadline” укажите название вашей компании.

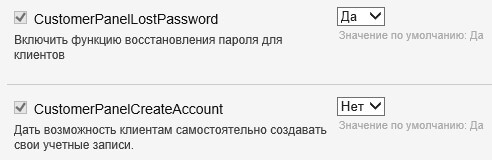
В пункте “CustomerPanelLostPassword” выбираем “Да”.
В пункте “CustomerPanelCreateAccount” выбираем “Нет”.
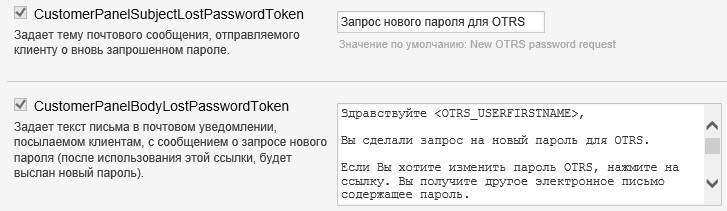
В пункте “CustomerPanelSubjectLostPasswordToken” указываем тему оповещения для запроса пароля.
В пункте “CustomerPanelBodyLostPasswordToken” указываем текст оповещения для запроса пароля.
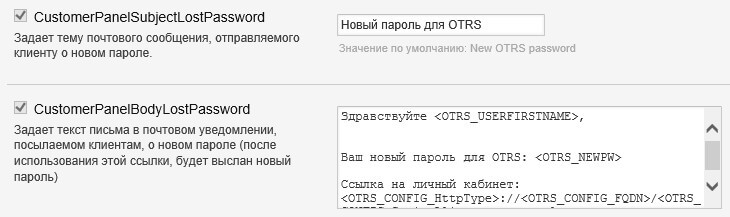
В пункте “CustomerPanelSubjectLostPassword” указываем тему оповещения для получения пароля.
В пункте “CustomerPanelBodyLostPassword” указываем текст оповещения для получения пароля.
Нажимаем кнопку “Обновить”.
В разделе “Конфигурация системы” выбираем группу “Ticket” затем выбираем подгруппу “Core::PostMaster”.

В пункте “PostmasterDefaultQueue” указываем “Группа поддержки”.
Нажимаем кнопку “Обновить”.

Теперь включим возможность специалистам наблюдать за заявками. Таким образом специалисты смогут получать уведомления об изменениях в заявках коллег.
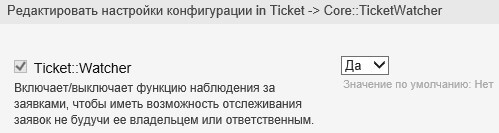
Далее в разделе “Конфигурация системы” выбираем группу “Ticket” затем выбираем подгруппу “Core::TicketWatcher”.

В пункте “Ticket::Watcher” выбираем “Да”.
Нажимаем кнопку “Обновить”.
Теперь укажем единицу измерения рабочего времени.
В разделе “Конфигурация системы” выбираем группу “Ticket” затем выбираем подгруппу “Frontend::Agent”.
В пункте “Ticket::Frontend::TimeUnits” указываем “(минуты)”.
Нажимаем кнопку “Обновить”.

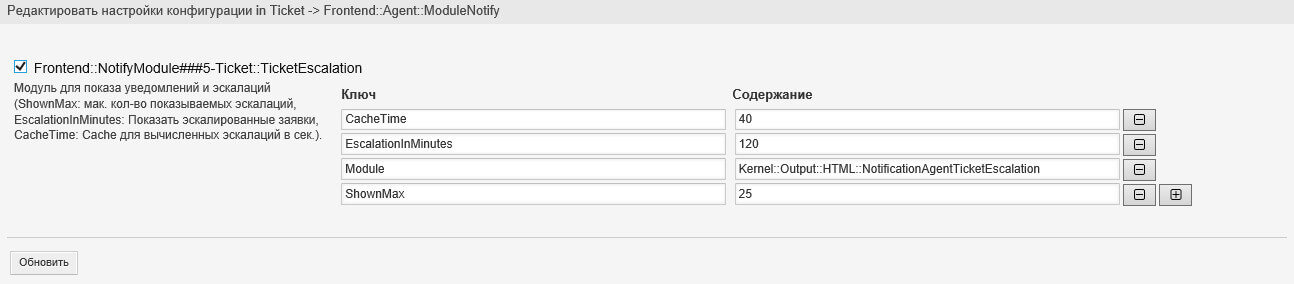
Далее в разделе “Конфигурация системы” выбираем группу “Ticket” затем выбираем подгруппу “Frontend::Agent::ModuleNotify”.
Ставим галочку на пункте “Frontend::NotifyModule###5-Ticket::TicketEscalation”.
Нажимаем кнопку “Обновить”.
Теперь уберем лишние пункты из меню просмотра заявки, чтобы специалисты могли работать с заявками максимально комфортно.
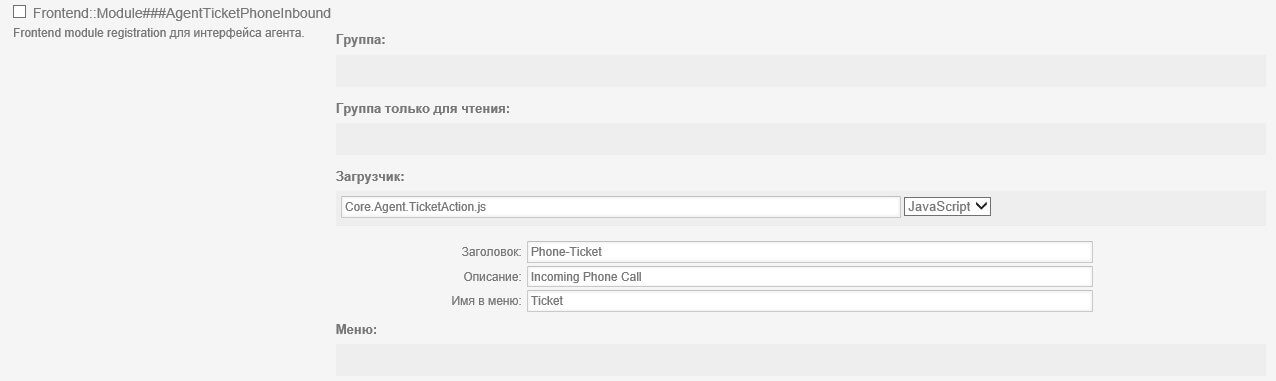
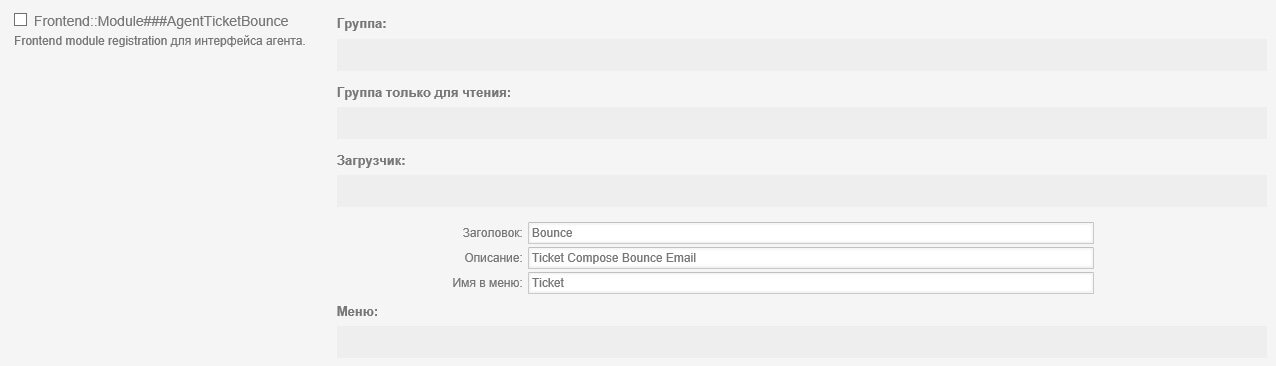
В разделе “Конфигурация системы” выбираем группу “Ticket” затем выбираем подгруппу “Frontend::Agent::ModuleRegistration”.
Снимаем галочку с пункта “Frontend::Module###AgentTicketPhoneOutbound”.

Снимаем галочку с пункта “Frontend::Module###AgentTicketPhoneInbound”.
Снимаем галочку с пункта “Frontend::Module###AgentTicketEmail”.

Снимаем галочку с пункта “Frontend::Module###AgentTicketBounce”.
Нажимаем кнопку “Обновить”.
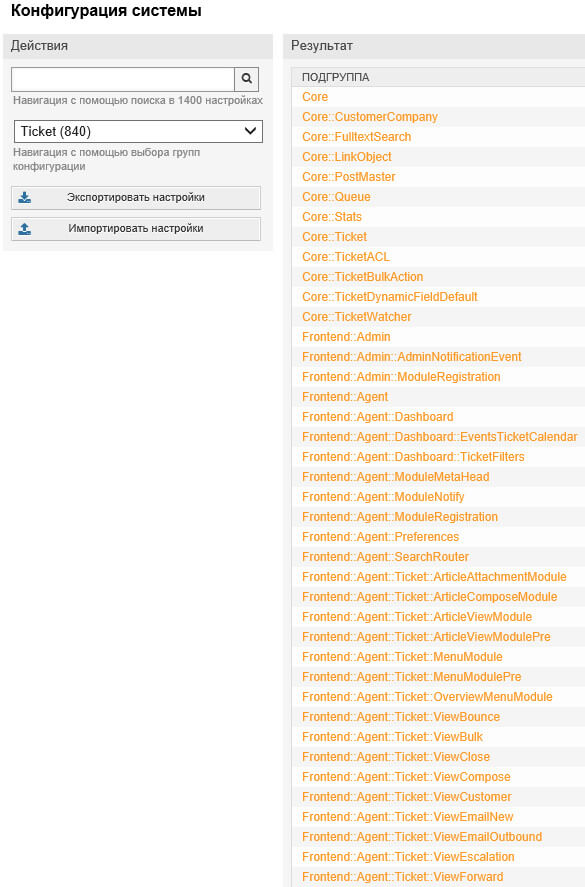
Далее в разделе “Конфигурация системы” выбираем группу “Ticket” затем выбираем подгруппу “Frontend::Agent::Ticket::ViewClose”.
В пункте “Ticket::Frontend::AgentTicketClose###Service” выбираем “Да”.
Нажимаем кнопку “Обновить”.

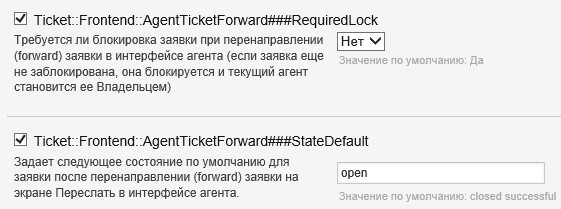
Далее в разделе “Конфигурация системы” выбираем группу “Ticket” затем выбираем подгруппу “Frontend::Agent::Ticket::ViewForward”.
В пункте “Ticket::Frontend::AgentTicketForward###RequiredLock” выбираем “Нет”.
В пункте “Ticket::Frontend::AgentTicketForward###StateDefault” указываем “open”.
Нажимаем кнопку “Обновить”.
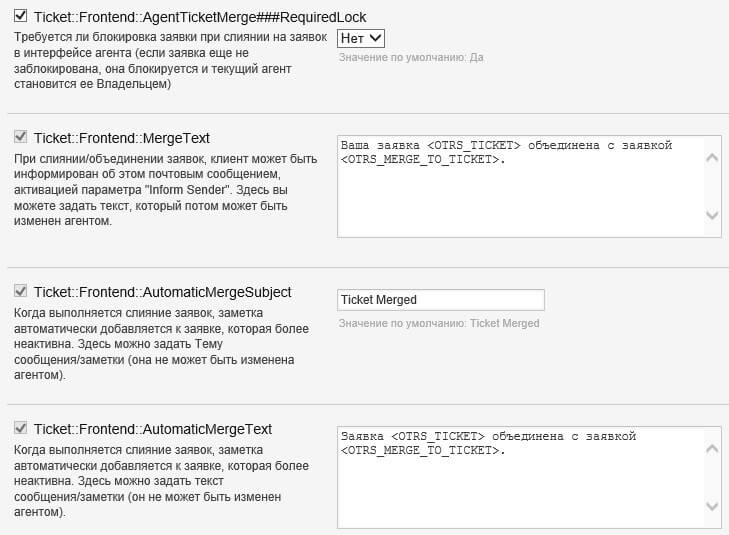
Далее в разделе “Конфигурация системы” выбираем группу “Ticket” затем выбираем подгруппу “Frontend::Agent::Ticket::ViewMerge”.
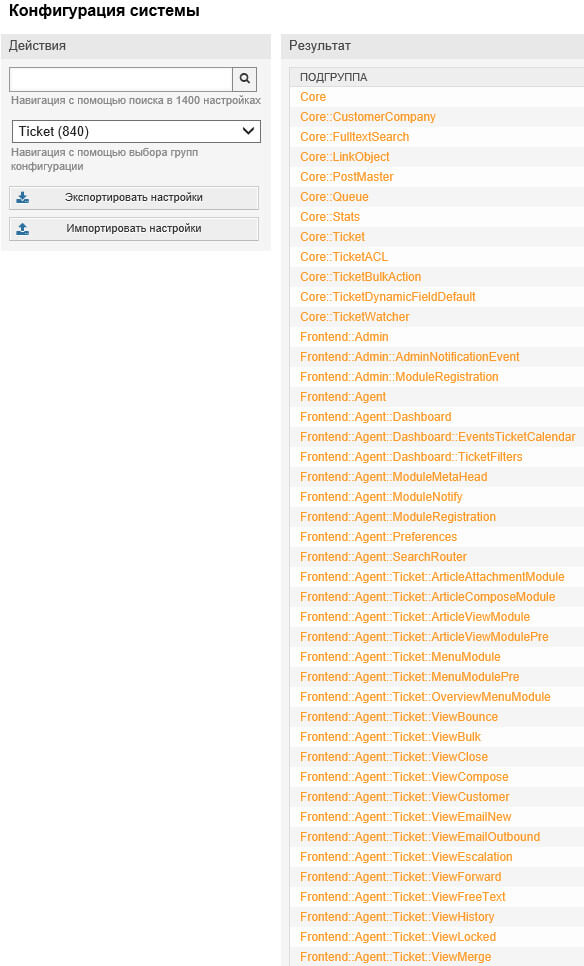
В пункте “Ticket::Frontend::AgentTicketMerge###RequiredLock” выбираем “Нет”.
В пункте “Ticket::Frontend::MergeText” указываем текст оповещения об объединении заявки.
Далее в пункте “Ticket::Frontend::AutomaticMergeText” указываем текст заметки об объединении заявки.
Нажимаем кнопку “Обновить”.
Далее в разделе “Конфигурация системы” выбираем группу “Ticket” затем выбираем подгруппу “Frontend::Agent::Ticket::ViewOwner”.

В пункте “Ticket::Frontend::AgentTicketOwner###Service” выбираем “Да”.
Теперь в пункте “Ticket::Frontend::AgentTicketOwner###Queue” выбираем “Да”.

В пункте “Ticket::Frontend::AgentTicketOwner###Note” выбираем “Нет”.
Нажимаем кнопку “Обновить”.

Далее в разделе “Конфигурация системы” выбираем группу “Ticket” затем выбираем подгруппу “Frontend::Agent::Ticket::ViewPending”.
В пункте “Ticket::Frontend::AgentTicketPending###RequiredLock” выбираем “Нет”.
Нажимаем кнопку “Обновить”.

Далее в разделе “Конфигурация системы” выбираем группу “Ticket” затем выбираем подгруппу “Frontend::Agent::Ticket::ViewPriority”.
В пункте “Ticket::Frontend::AgentTicketPriority###RequiredLock” выбираем “Нет”.

В пункте “Ticket::Frontend::AgentTicketPriority###Note” выбираем “Нет”.
Нажимаем кнопку “Обновить”.

Теперь включим дополнительные кнопки для работы с заявками, которые появятся в левом верхнем углу экрана.
В разделе “Конфигурация системы” выбираем группу “Ticket” затем выбираем подгруппу “Frontend::Agent::ToolBarModule”.
Ставим галочку на пункте “Frontend::ToolBarModule###1-Ticket::AgentTicketQueue”.
Далее ставим галочку на пункте “Frontend::ToolBarModule###2-Ticket::AgentTicketStatus”.
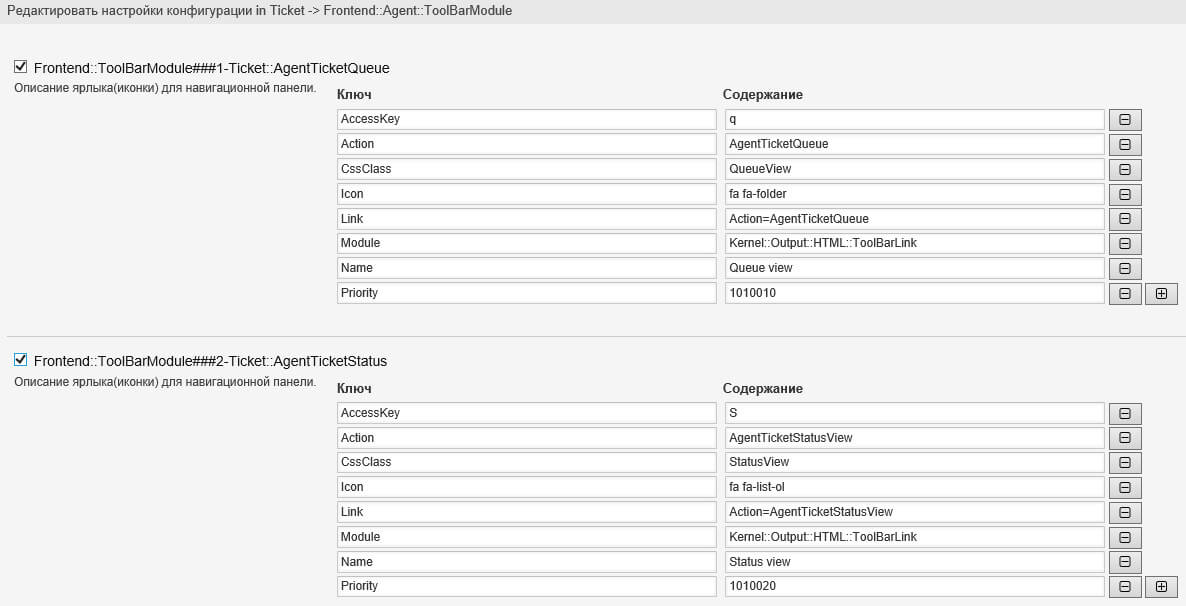
Ставим галочку на пункте “Frontend::ToolBarModule###3-Ticket::AgentTicketEscalation”.
Теперь ставим галочку на пункте “Frontend::ToolBarModule###4-Ticket::AgentTicketPhone”.
Нажимаем кнопку “Обновить”.

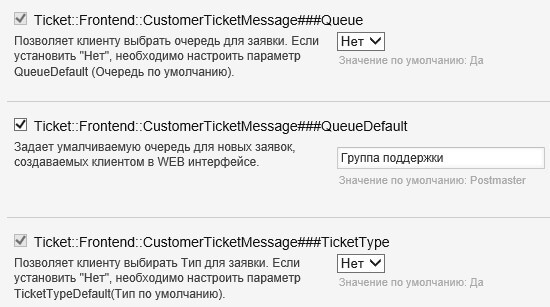
Теперь уберем лишние пункты из личного кабинета пользователя, чтобы он мог отправить заявку максимально комфортно.
В разделе “Конфигурация системы” выбираем группу “Ticket” затем выбираем подгруппу “Frontend::Customer::TicketViewNew”.
В пункте “Ticket::Frontend::CustomerTicketMessage###Queue” выбираем “Нет”.
В пункте “Ticket::Frontend::CustomerTicketMessage###QueueDefault” указываем “Группа поддержки”.
Теперь в пункте “Ticket::Frontend::CustomerTicketMessage###TicketType” выбираем “Нет”.
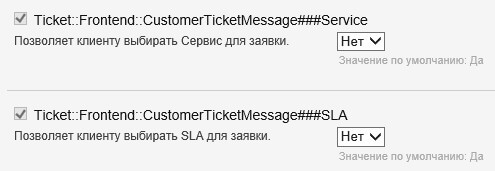
Далее в пункте “Ticket::Frontend::CustomerTicketMessage###Service” выбираем “Нет”.
В пункте “Ticket::Frontend::CustomerTicketMessage###SLA” выбираем “Нет”.
Нажимаем кнопку “Обновить”.
Теперь предоставим возможность пользователям видеть в их личном кабинете кто является владельцем их заявок.
В разделе “Конфигурация системы” выбираем группу “Ticket” затем выбираем подгруппу “Frontend::Customer::TicketOverView”.
В пункте “Ticket::Frontend::CustomerTicketOverView###Owner” выбираем “Да”.
Нажимаем кнопку “Обновить”.

По умолчанию OTRS забирает письма из почтового ящика для регистрации заявок каждые десять минут. Уменьшим интервал до двух минут.
Для этого необходимо подключиться к серверу OTRS по протоколу SSH.
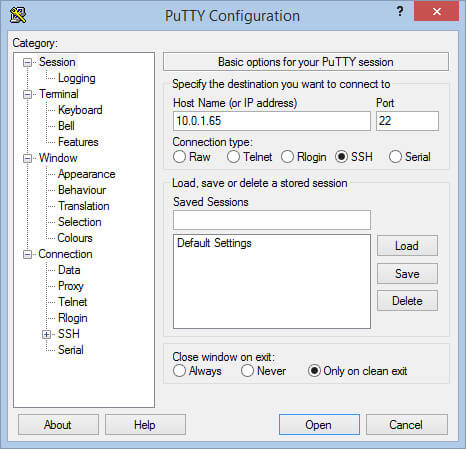
В данном руководстве для подключения к серверу по SSH будет использоваться программа PuTTY.
Запускаем PuTTY и в поле “Host Name (or IP address)” указываем IP-адрес сервера и нажимаем кнопку “Open”.
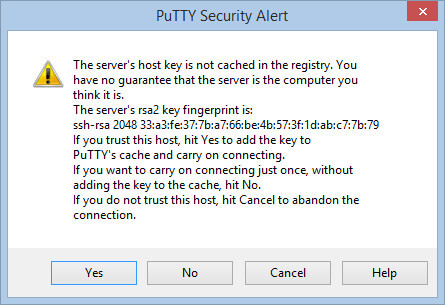
Далее необходимо подтвердить доверие серверу к которому мы подключаемся.
Нажимаем кнопку “Yes”.
Далее необходимо авторизоваться на сервере.
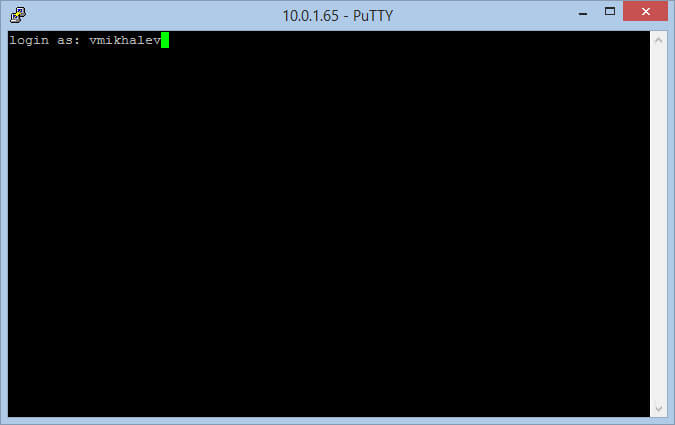
Получим полноценные права с помощью команды:
sudo su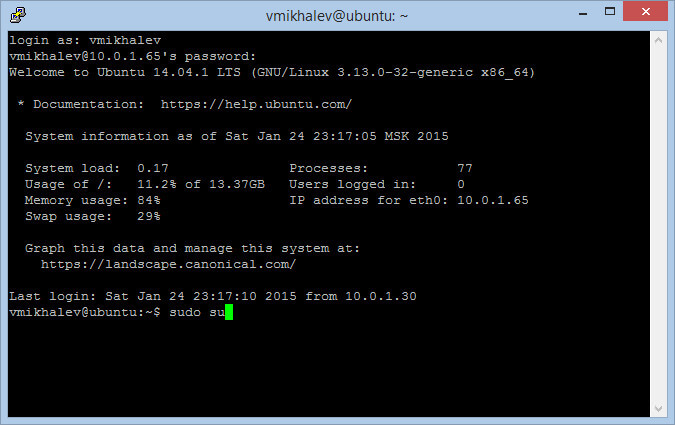
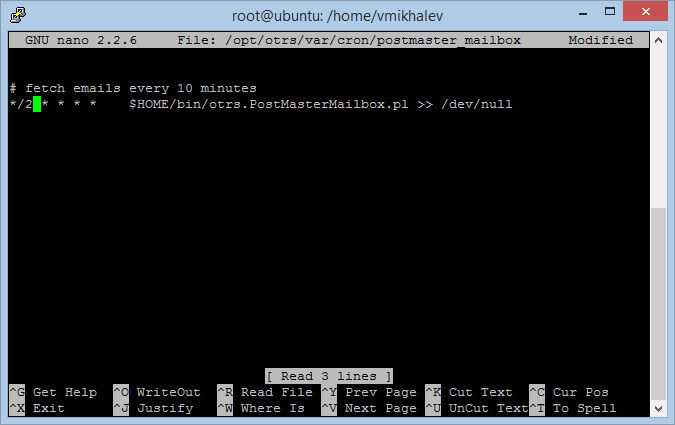
Выполняем команду:
nano /opt/otrs/var/cron/postmaster_mailbox
Меняем “10” на “2”.
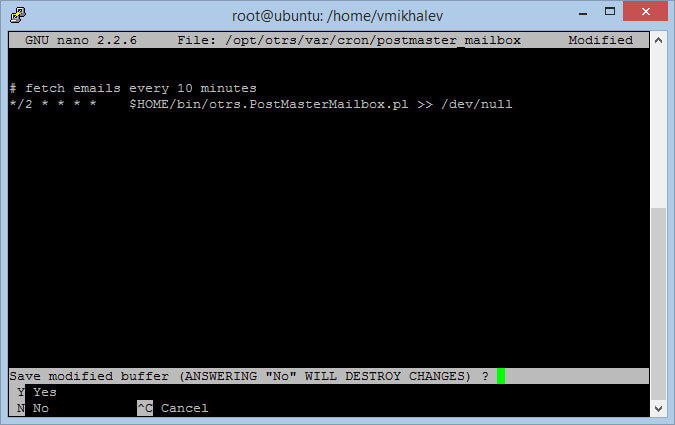
Для того чтобы сохранить изменения в файле “postmaster_mailbox” нажимаем “Ctrl+X”.
Теперь необходимо подтвердить сохранение изменений.
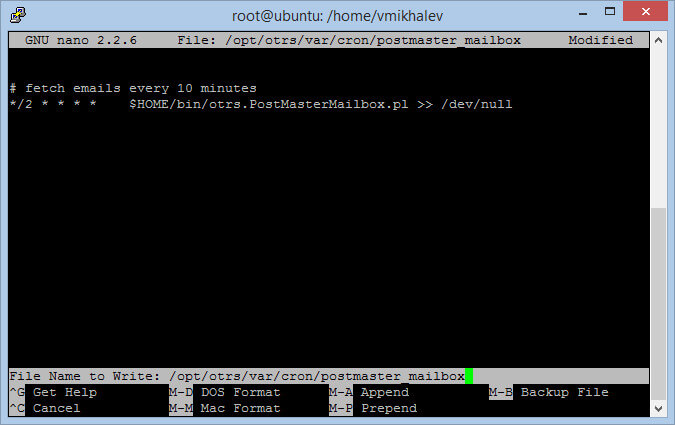
Нажимаем кнопку “y”.
Нажимаем кнопку “Enter”.
Перезагружаем сервер с помощью команды:
reboot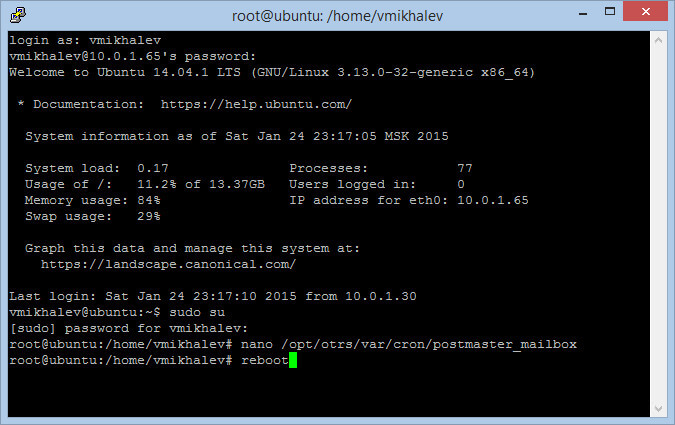
Настройка OTRS завершена.
Теперь специалисты, которые осуществляют поддержку пользователей, администрирование серверов и разработку программного обеспечения смогут принимать и обрабатывать заявки пользователей.

OTRS 3.0 — РуководствоАдминистратора

OTRS 3.0 — Руководство АдминистратораCopyright © 2003-2011 OTRS Group
René Bakker, Stefan Bedorf, Michiel Beijen, Shawn Beasley, Hauke Böttcher, Jens Bothe, Udo Bretz, Martin Edenhofer, Carlos JavierGarcía, Martin Gruner, Manuel Hecht, Christopher Kuhn, André Mindermann, Marc Nilius, Elva María Novoa, Henning Oschwald,Martha Elia Pascual, Thomas Raith, Carlos Fernando Rodríguez, Stefan Rother, Burchard Steinbild, Daniel Zamorano.
Эта работа защищена авторским правом OTRS AG.
Это руководство может быть скопировано целиком или частично, при условии, что это уведомление об авторских правах будетвключено в каждую копию.
The source code of this document can be found at source.otrs.org [http://source.otrs.org/viewvc.cgi/doc-admin/].
UNIX является зарегистрированной торговой маркой компании X/Open Company Limited. Linux является зарегистрированнойторговой маркой Линуса Торвальдса (Linus Torvalds).
MS-DOS, Windows, Windows 95, Windows 98, Windows NT, Windows 2000, Windows XP, Windows 2003, Windows Vista и Windows7 являются зарегистрированными торговыми марками Корпорации Microsoft (Microsoft Corporation). Другими торговымимарками и зарегистрированными торговыми марками есть: SUSE и YaST компании SUSE Linux GmbH, Red Hat и Fedoraявляются зарегистрированными торговыми марками компании Red Hat, Inc. Mandrake является зарегистрированной торговоймаркой компании MandrakeSoft, SA. Debian является зарегистрированной торговой маркой организации Software in the PublicInterest, Inc. MySQL и логотип MySQL являются зарегистрированными торговыми марками корпорации Oracle Corporation и/или ее филиалов.
Все торговые марки используются без гарантий их свободного использования и, возможно, являются зарегистрированнымиторговыми марками.
OTRS AG, по существу, следует обозначениям производителей. Другие продукты, упомянутые в этом руководстве, могут бытьторговыми марками соответствующих производителей.

iii
СодержаниеПредисловие …………………………………………………………………………………………………… xi1. Системы Обработки Заявок — Основы ……………………………………………………………… 1
Что такое система обработки заявок и зачем она нужна? ……………………………….. 1Что такое заявка? …………………………………………………………………………………….. 2
2. OTRS — Открытая Система Обработки Заявок ………………………………………………….. 3Основы ……………………………………………………………………………………………………. 3Особенности и функциональные возможности ……………………………………………… 3
Новые возможности OTRS 3.0 …………………………………………………………….. 6Новые возможности OTRS 2.4 …………………………………………………………….. 7Новые возможности OTRS 2.3 …………………………………………………………… 10Новые возможности OTRS 2.2 …………………………………………………………… 12Новые возможности OTRS 2.1 …………………………………………………………… 13
Требования к апаратному и програмному обеспечению ………………………………… 14Комюнити ………………………………………………………………………………………………. 15Коммерческая Поддержка и Услуги для OTRS …………………………………………….. 16
3. Установка ………………………………………………………………………………………………….. 17Самый простой способ — установка из готовых бинарных пакетов …………………… 17
Установка из rpm-пакетов на сервер под управлением Suse Linux ……………. 17Установка OTRS в операционной системе CentOS ………………………………… 19Установка OTRS в операционной системе Debian …………………………………. 19Установка OTRS на системе Ubuntu ……………………………………………………. 19Установка OTRS на операционной системе Microsoft Windows ………………… 19
Установка из исходных кодов (Linux, Unix) ………………………………………………….. 20Подготовка к установке из исходных кодов ………………………………………….. 20Установка Perl-модулей …………………………………………………………………….. 21Настройка веб-сервера Apache ………………………………………………………….. 24Настройка базы данных ……………………………………………………………………. 25Настрой планировщика задач (cron jobs) для OTRS ………………………………. 31
Обновление OTRS-фреймворка ………………………………………………………………… 35Обновление с помощью Windows Installer ……………………………………………………. 40
4. Первые шаги ……………………………………………………………………………………………… 41Веб-интерфейс для агентов ……………………………………………………………………… 41Пользовательский веб-интерфейс ……………………………………………………………… 41Общедоступный веб-интерфейс ………………………………………………………………… 42Первое применение …………………………………………………………………………………. 43Веб-интерфейс — обзор ……………………………………………………………………………. 43Что такое очередь? …………………………………………………………………………………. 45Пользовательские настройки ……………………………………………………………………. 46
5. Панель управления OTRS ……………………………………………………………………………. 49Основы ………………………………………………………………………………………………….. 49Агенты, Группы и Роли …………………………………………………………………………….. 49
Агенты ……………………………………………………………………………………………. 49Группы ……………………………………………………………………………………………. 50Роли ………………………………………………………………………………………………. 54
Клиенты и Группы Клиентов ……………………………………………………………………… 58Клиенты ………………………………………………………………………………………….. 58Группы Клиентов ……………………………………………………………………………… 59
Очереди ………………………………………………………………………………………………… 61Приветствия, подписи, вложения и ответы ………………………………………………….. 63
Приветсвтия ……………………………………………………………………………………. 63Подписи …………………………………………………………………………………………. 64

OTRS 3.0 — РуководствоАдминистратора
iv
Вложения ……………………………………………………………………………………….. 66Ответы ……………………………………………………………………………………………. 68
Авто ответы ……………………………………………………………………………………………. 70Адреса электронной почты ……………………………………………………………………….. 73Уведомления …………………………………………………………………………………………… 74SMIME …………………………………………………………………………………………………… 76PGP ………………………………………………………………………………………………………. 77Состояния ……………………………………………………………………………………………… 78SysConfig ……………………………………………………………………………………………….. 79Использование почтовый ящиков ………………………………………………………………. 80Фильтрация входящих сообщений ……………………………………………………………… 80Выполнение автоматизированных заданий с помощью GenericAgent ……………….. 84Эллектронная почта администратора …………………………………………………………. 85Управление сеансами ………………………………………………………………………………. 85Системный журнал ………………………………………………………………………………….. 86SQL запросы ………………………………………………………………………………………….. 87Менеджер пакетов ………………………………………………………………………………….. 88
6. Настройка Системы …………………………………………………………………………………….. 89Конфигурационные файлы OTRS ……………………………………………………………… 89Настройка системы через графический веб-интерфейс ………………………………… 89
7. Отправка / получение электронной почты ……………………………………………………….. 91Отправка почты ………………………………………………………………………………………. 91
через Sendmail (по умолчанию) ………………………………………………………….. 91Через SMTP-сервер или smarthost ……………………………………………………… 91
Получение сообщений электронной почты …………………………………………………… 91Учетные записи электронной почты настраиваемые через графическийпользовательский интерфейс OTRS …………………………………………………… 91Через командную строку программы и например, procmail(otrs.PostMaster.pl) ……………………………………………………………………………. 93Получение электронной почты по протоколу POP3 или IMAP и обработкадля otrs.PostMaster.pl ………………………………………………………………………… 94Фильтрация/рассылка модулями OTRS/PostMaster (для более сложнойдиспетчеризации) …………………………………………………………………………….. 94
8. Функции связанные с временем ……………………………………………………………………. 96Настройка периода рабочего времени, празников и часовых поясов ……………….. 96
Бизнес Время ………………………………………………………………………………….. 96Праздники с фиксированными датами ………………………………………………… 96TimeVacationDaysOneTime …………………………………………………………………. 96
Автоматические Разблокировки …………………………………………………………………. 979. Ответственность за Заявку & Наблюдение за Заявкой …………………………………….. 98
Ответственность за Заявку ………………………………………………………………………. 98Просмотр Заявок …………………………………………………………………………………….. 99
10. Настройка экспорта в PDF ……………………………………………………………………….. 10111. Использование внешних хранилищ данных ………………………………………………….. 102
Данные клиентов …………………………………………………………………………………… 102Пользовательский бэк-енд ………………………………………………………………………. 102
База Данных (По умолчанию) …………………………………………………………… 102LDAP …………………………………………………………………………………………….. 106Использование больше чем одного хранилища информации с OTRS ………. 109
Хранилища (бэк-енды) для аутентификации Агентов и Клиентов …………………… 113Хранилища данных (бэк-енды) для аутентификации Агентов …………………. 113Хранилища информации для аутентификации (проверки подлинности)клиентов ……………………………………………………………………………………….. 116
Настройка самостоятельной регистрации клиента ……………………………………… 118

OTRS 3.0 — РуководствоАдминистратора
v
Настройка веб-интерфейса ……………………………………………………………… 118Отображения клиентов ……………………………………………………………………. 118Настройка таблицы customer_user в Базе Данных OTRS (DB) ……………….. 120
12. Состояния ………………………………………………………………………………………………. 122Предопределенные состояния …………………………………………………………………. 122
Новая ……………………………………………………………………………………………. 122Открытая ………………………………………………………………………………………. 122Ожидание с напоминанием ……………………………………………………………… 122Ожидание авто-закрытие — ………………………………………………………………. 122Ожидание авто-закрытие+ ………………………………………………………………. 122Обьедененные ……………………………………………………………………………….. 122Закрыта Успешно …………………………………………………………………………… 122Закрыта Неудачно ………………………………………………………………………….. 123
Настраиваемы состояния ……………………………………………………………………….. 12313. Изменение приоритетов заявки …………………………………………………………………. 12614. Создание своих собственных тем (шаблонов) ………………………………………………. 12715. Локализайия интерфейса OTRS ………………………………………………………………… 12816. PGP ………………………………………………………………………………………………………. 12917. S/MIME ………………………………………………………………………………………………….. 13318. Списки Контроля Доступа (ACLs) ………………………………………………………………. 13719. Stats-модуль ……………………………………………………………………………………………. 141
Обработка модуля агентом ……………………………………………………………………… 141Обзор …………………………………………………………………………………………… 142Создание и просмотр отчетов ………………………………………………………….. 142Редактировать / Создать новый ……………………………………………………….. 145Импорт ………………………………………………………………………………………….. 150
Администрирование модуля статистики OTRS администратором. …………………. 151Настройки полномочий, Групп и Ролей ………………………………………………. 151SysConfig ………………………………………………………………………………………. 151
Администрирование модуля статистики системным администратором ……………. 152Таблица базы данных ……………………………………………………………………… 152Список файлов ………………………………………………………………………………. 152Кэширование …………………………………………………………………………………. 153otrs.GenerateStats.pl ………………………………………………………………………… 153Автоматическое создание статистики с помощью планировщика заданий -Cronjob ………………………………………………………………………………………….. 153Статическая статистика …………………………………………………………………… 153Использование устаревших данных статической статистики ………………….. 154Статистика по умолчанию ………………………………………………………………… 154
20. Дополнительные приложения ……………………………………………………………………. 155FAQ (Часто Задаваемые Вопросы) …………………………………………………………… 155
21. Настройка Производительности ………………………………………………………………… 156OTRS …………………………………………………………………………………………………… 156
TicketIndexModule …………………………………………………………………………… 156TicketStorageModule ………………………………………………………………………… 156Архивирование Заявок ……………………………………………………………………. 157
База данных …………………………………………………………………………………………. 158MySQL ………………………………………………………………………………………….. 158PostgreSQL ……………………………………………………………………………………. 158
Веб-сервер …………………………………………………………………………………………… 159Предустановленное соединение с базой данных …………………………………. 159Предварительно загруженные модули — startup.pl ………………………………… 159Перезагрузка Perl-модулей во время обновления с диска ……………………… 159Выбор Правильной Стратегии ………………………………………………………….. 159

OTRS 3.0 — РуководствоАдминистратора
vi
mod_gzip/mod_deflate ………………………………………………………………………. 15922. Резервное копирование системы ……………………………………………………………….. 160
Резервное копирование ………………………………………………………………………….. 160Восстановление …………………………………………………………………………………….. 160
A. Дополнительные ресурсы ………………………………………………………………………….. 162Домашняя страница OTRS.org ………………………………………………………………… 162Списки рассылки …………………………………………………………………………………… 162Трекинг ошибок …………………………………………………………………………………….. 163Коммерческая поддержка ……………………………………………………………………….. 164
B. Configuration Options Reference …………………………………………………………………… 165Framework …………………………………………………………………………………………….. 165
Core ……………………………………………………………………………………………… 165Core::LinkObject ………………………………………………………………………………. 175Core::Log ……………………………………………………………………………………….. 176Core::MIME-Viewer ………………………………………………………………………….. 178Core::MirrorDB ………………………………………………………………………………… 179Core::PDF ………………………………………………………………………………………. 180Core::Package ………………………………………………………………………………… 184Core::PerformanceLog ………………………………………………………………………. 186Core::SOAP ……………………………………………………………………………………. 187Core::Sendmail ……………………………………………………………………………….. 187Core::Session …………………………………………………………………………………. 190Core::SpellChecker …………………………………………………………………………… 195Core::Stats ……………………………………………………………………………………… 196Core::Stats::Graph ……………………………………………………………………………. 197Core::Time ……………………………………………………………………………………… 202Core::Time::Calendar1 ………………………………………………………………………. 207Core::Time::Calendar2 ………………………………………………………………………. 210Core::Time::Calendar3 ………………………………………………………………………. 213Core::Time::Calendar4 ………………………………………………………………………. 216Core::Time::Calendar5 ………………………………………………………………………. 220Core::Time::Calendar6 ………………………………………………………………………. 223Core::Time::Calendar7 ………………………………………………………………………. 226Core::Time::Calendar8 ………………………………………………………………………. 229Core::Time::Calendar9 ………………………………………………………………………. 233Core::Web ……………………………………………………………………………………… 236Core::WebUserAgent ………………………………………………………………………… 251Crypt::PGP …………………………………………………………………………………….. 251Crypt::SMIME ………………………………………………………………………………….. 254Frontend::Admin::AdminCustomerUser …………………………………………………. 255Frontend::Admin::ModuleRegistration …………………………………………………… 255Frontend::Agent ………………………………………………………………………………. 269Frontend::Agent::Dashboard ………………………………………………………………. 275Frontend::Agent::ModuleMetaHead ………………………………………………………. 279Frontend::Agent::ModuleNotify ……………………………………………………………. 279Frontend::Agent::ModuleRegistration ……………………………………………………. 281Frontend::Agent::NavBarModule ………………………………………………………….. 287Frontend::Agent::Preferences ……………………………………………………………… 288Frontend::Agent::SearchRouter …………………………………………………………… 294Frontend::Agent::Stats ………………………………………………………………………. 294Frontend::Customer ………………………………………………………………………….. 298Frontend::Customer::Auth ………………………………………………………………….. 307Frontend::Customer::ModuleMetaHead …………………………………………………. 315Frontend::Customer::ModuleNotify ……………………………………………………….. 315

OTRS 3.0 — РуководствоАдминистратора
vii
Frontend::Customer::ModuleRegistration ………………………………………………. 316Frontend::Customer::Preferences ………………………………………………………… 318Frontend::Public ………………………………………………………………………………. 322Frontend::Public::ModuleRegistration ……………………………………………………. 322
Ticket …………………………………………………………………………………………………… 323Core::ArticleFreeText ………………………………………………………………………… 323Core::FulltextSearch …………………………………………………………………………. 327Core::LinkObject ………………………………………………………………………………. 328Core::PostMaster …………………………………………………………………………….. 329Core::Stats ……………………………………………………………………………………… 341Core::Ticket ……………………………………………………………………………………. 343Core::TicketACL ………………………………………………………………………………. 361Core::TicketBulkAction ………………………………………………………………………. 361Core::TicketFreeText ………………………………………………………………………… 362Core::TicketFreeTextDefault ……………………………………………………………….. 388Core::TicketFreeTime ……………………………………………………………………….. 395Core::TicketWatcher …………………………………………………………………………. 402Frontend::Admin::ModuleRegistration …………………………………………………… 402Frontend::Agent ………………………………………………………………………………. 413Frontend::Agent::CustomerSearch ……………………………………………………….. 422Frontend::Agent::Dashboard ………………………………………………………………. 424Frontend::Agent::ModuleMetaHead ………………………………………………………. 428Frontend::Agent::ModuleNotify ……………………………………………………………. 428Frontend::Agent::ModuleRegistration ……………………………………………………. 428Frontend::Agent::Preferences ……………………………………………………………… 444Frontend::Agent::SearchRouter …………………………………………………………… 451Frontend::Agent::Ticket::ArticleAttachmentModule …………………………………… 451Frontend::Agent::Ticket::ArticleComposeModule ……………………………………… 452Frontend::Agent::Ticket::ArticleViewModule ……………………………………………. 453Frontend::Agent::Ticket::ArticleViewModulePre ……………………………………….. 454Frontend::Agent::Ticket::MenuModule …………………………………………………… 454Frontend::Agent::Ticket::MenuModulePre ………………………………………………. 463Frontend::Agent::Ticket::ViewBounce ……………………………………………………. 467Frontend::Agent::Ticket::ViewBulk ……………………………………………………….. 469Frontend::Agent::Ticket::ViewClose ……………………………………………………… 472Frontend::Agent::Ticket::ViewCompose …………………………………………………. 480Frontend::Agent::Ticket::ViewCustomer ………………………………………………… 485Frontend::Agent::Ticket::ViewEmailNew ………………………………………………… 485Frontend::Agent::Ticket::ViewEscalation ………………………………………………… 490Frontend::Agent::Ticket::ViewForward …………………………………………………… 491Frontend::Agent::Ticket::ViewFreeText ………………………………………………….. 494Frontend::Agent::Ticket::ViewHistory …………………………………………………….. 502Frontend::Agent::Ticket::ViewMailbox …………………………………………………… 503Frontend::Agent::Ticket::ViewMerge …………………………………………………….. 505Frontend::Agent::Ticket::ViewMove ………………………………………………………. 506Frontend::Agent::Ticket::ViewNote ……………………………………………………….. 509Frontend::Agent::Ticket::ViewOwner …………………………………………………….. 517Frontend::Agent::Ticket::ViewPending …………………………………………………… 525Frontend::Agent::Ticket::ViewPhoneNew ……………………………………………….. 533Frontend::Agent::Ticket::ViewPhoneOutbound ………………………………………… 538Frontend::Agent::Ticket::ViewPriority …………………………………………………….. 543Frontend::Agent::Ticket::ViewQueue …………………………………………………….. 551Frontend::Agent::Ticket::ViewResponsible ……………………………………………… 553Frontend::Agent::Ticket::ViewSearch ……………………………………………………. 562

OTRS 3.0 — РуководствоАдминистратора
viii
Frontend::Agent::Ticket::ViewStatus …………………………………………………….. 580Frontend::Agent::Ticket::ViewZoom ……………………………………………………… 581Frontend::Agent::TicketOverview …………………………………………………………. 584Frontend::Agent::ToolBarModule …………………………………………………………. 585Frontend::Customer ………………………………………………………………………….. 590Frontend::Customer::ModuleMetaHead …………………………………………………. 592Frontend::Customer::ModuleRegistration ………………………………………………. 592Frontend::Customer::Preferences ………………………………………………………… 596Frontend::Customer::Ticket::ViewNew ………………………………………………….. 597Frontend::Customer::Ticket::ViewSearch ……………………………………………….. 604Frontend::Customer::Ticket::ViewZoom …………………………………………………. 607Frontend::Queue::Preferences …………………………………………………………….. 611Frontend::SLA::Preferences ……………………………………………………………….. 612Frontend::Service::Preferences …………………………………………………………… 612
C. Благодарности …………………………………………………………………………………………. 614D. GNU Free Documentation License ………………………………………………………………… 616
0. PREAMBLE ……………………………………………………………………………………….. 6161. APPLICABILITY AND DEFINITIONS ……………………………………………………….. 6162. VERBATIM COPYING ………………………………………………………………………….. 6173. COPYING IN QUANTITY ……………………………………………………………………… 6174. MODIFICATIONS ………………………………………………………………………………… 6185. COMBINING DOCUMENTS …………………………………………………………………… 6196. COLLECTIONS OF DOCUMENTS ………………………………………………………….. 6197. AGGREGATION WITH INDEPENDENT WORKS ……………………………………….. 6208. TRANSLATION …………………………………………………………………………………… 6209. TERMINATION …………………………………………………………………………………… 62010. FUTURE REVISIONS OF THIS LICENSE ………………………………………………. 620How to use this License for your documents …………………………………………………. 621

ix
Список таблиц3.1. Perl-модули, необходимые для работы OTRS ………………………………………………… 213.2. Описание некоторых сценариев планировщика задач cron job. ………………………… 325.1. Предопределенные групы, доступны для новой (только что) установленнойсистемы OTRS ……………………………………………………………………………………………….. 515.2. Права, связанные с OTRS-группами ……………………………………………………………. 535.3. События для Автоматических ответов ………………………………………………………… 725.4. Функции различных X-OTRS-заголовков ………………………………………………………. 81A.1. Списки рассылки ……………………………………………………………………………………. 162

x
Список примеров5.1. Сортирование спама в определенную очередь …………………………………………….. 837.1. .fetchmailrc ……………………………………………………………………………………………….. 947.2. Пример задания для модуля фильтрацииKernel::System::PostMaster::Filter::Match ……………………………………………………………… 957.3. Пример задания для модуля фильтрации Kernel::System::PostMaster::Filter::CMD…………………………………………………………………………………………………………………….. 9511.1. Настройка клиентского хранилища базы данных (DB) …………………………………. 10211.2. Хранение Заявок Компании в базе данных DB ………………………………………….. 10611.3. Настройка LDAP в качестве клиентского бэк-енда ……………………………………… 10611.4. Использование заявок Компании с LDAP-бэкэндом ……………………………………. 10911.5. Использование больше чем одного пользовательского хранилища данных сOTRS ………………………………………………………………………………………………………….. 10911.6. Проверка подлинности агентов путем использования Базы Данных (DB) вкачестве хранилища информации. …………………………………………………………………… 11311.7. Проверка подлинности агентов при использовании LDAP в качествехранилища данных ………………………………………………………………………………………… 11311.8. Аутентификация Агентов с помощью HTTPBasic ………………………………………… 11511.9. Аутентификация (проверка подлинности) агентов с использованием Radius-сервера в качестве хранилища информации …………………………………………………….. 11511.10. Аутентификация Клиента в Базе Данных ………………………………………………… 11611.11. Аутентификация пользователей с помощью LDAP-бэкэнда ………………………… 11611.12. Аутентификация клиентов с помощью HTTPBasic …………………………………….. 11711.13. Аутентификация клиентов с использованием Radius …………………………………. 11718.1. Списки прав доступа (ACL) позволяют перемещать в очереди только заявки сприоритетом 5. …………………………………………………………………………………………….. 13718.2. Списки прав доступа (ACL) делают невозможным закрытие заявок в очередиraw и скрывают кнопку «закрыть». …………………………………………………………………… 13718.3. Списки прав доступа (ACL) удаляют статус для всех агентво и предоставляютего для групп. ………………………………………………………………………………………………. 13819.1. Определение значения серии — один из элементов …………………………………….. 14919.2. Определение значения серии — один из элементов ……………………………………. 149

xi
ПредисловиеЭта книга предназначена для использования OTRS-администраторами. Он такжепослужит хорошим справочником для новичков OTRS.
В следующих главах описывается установка, настройка и администрирование программыOTRS. В первой трети текста описываются ключевые функциональные возможностипрограмного обеспечения, в то время как остальной текст является ссылкой на полныйнабор настраиваемых параметров.
Эта книга и дальше находится в стадии разработки и совершенствуется с выходомновых версий продукта. Чтобы сделать это справочное руководство более качественным,полным и точным нам нужна обратная связь с вами. Пожалуйста, напишите нам, еслизаметите отсутствие некоторых разделов в этой книге, если некоторые вещи обьясняютсянедостаточно хорошо или, если просто видите орфографические, граматические ошибкиили опечатки. Мы будем признательны за любой вид обратной связи, которую можноосуществить посредством нашей системы отслеживания ошибок, которая находится поадресу http://bugs.otrs.org [http://bugs.otrs.org]. Заранее благодарим вас за помощь!

1
Глава 1. Системы Обработки Заявок -ОсновыВ этой главе дается краткий обзор идеи заявок в целом, и систем обработки заявок, в частности.Краткий пример иллюстрирует преимущества использования системы обработки заявок.
Что такое система обработки заявок и зачемона нужна?
Следующий пример показывает, что собой являет система обработки заявок и как можносэкономить много времени и денег, используя подобную систему в своей компании.
Давайте представим, что Максим занимается производством видеомагнитофонов. Максимполучает много писем от клиентов, которые нуждаются в помощи по устройству. Спустянесколько дней, у него нету свободного времени чтобы оперативно ответить на всеписьма клиентов или хотя бы просмотреть их. Некоторые клиенты не хотят долго ждать ипишут второе письмо с тем же вопросом. Все письма, содержащие просьбы о поддержкехранятся в одном почтовом ящике. Запросы не сортируются и Максим отвечает на письмапользуясь обычной программой для работы с электронной почтой.
Поскольку Максим не успевает быстро дать ответ на все письма, его инженеры: Андрей иАлександр берутся помочь Максиму. Для работы с почтой Андрей и Александр используютодин и тот же почтовый ящик, который хранит все письма клиентов. Они ничего неподозревают о том, что Максим получил два одинаковых письма с вопросом о помощиот отчаявшегося клиента. Временами они оба отвечают на один и тот же запрос, иклиент получает два различных ответа. Более того, Максим не имеет представления осодержимом этих ответов. Также он не знает подробностей большинства проблем егоклиентов и о том как они решаются, какие проблемы возникают чаще всего, а также,сколько времени и денег он должен потратить на поддержку клиентов.
На собрании коллега рассказывает Максиму о системах обработки заявок и как онимогут решить его проблемы с поддержкой клиентов. После поиска информации вИнтернете, Максим принимает решение установить Open Ticket Request System (OTRS)- Открытую Систему Обработки Заявок (далее просто OTRS) на компьютере, которыйбудет доступен из веб как для клиентов компании так и для ее сотрудников. С этогомомента, запросы клиентов больше не приходят на частный почтовый ящик Максима,теперь они направляются на почтовый ящик, который используется для OTRS. Системаобработки заявок (OTRS) подключена к этому почтовому ящику и автоматически сохраняетвсе запросы в своей базе данных. Система генерирует авто-ответ для каждого новогозапроса и отправляет его клиенту, так что теперь клиент может быть уверен в том, что егозапрос поступил в обработку и ответ будет дан в ближайшее время. Для каждого запросаOTRS создает прямую ссылку — номер заявки. Теперь клиенты довольны, они получаютбыстрый ответ на свою заявку и им уже нет никакого смысла писать повтороне письмо стем же вопросом. Максим, Андрей и Александр могут спокойно отвечать на поступившыезапросы используя обычный веб-браузер для работы с OTRS. Также, следует отметитьтот факт, что ни одно сообщение клиента не будет отредактировано дважды, посколькусистема автоматически блокирует заявку, для которой создается ответ.
Давайте представим что г-н Гришко делает запрос в компанию Максима и его сообщениеобрабатывается системой OTRS. Александр дает краткий ответ на его вопрос. Но у г-

Системы ОбработкиЗаявок — Основы
2
на Гришко есть дополнительный вопрос и на следующий день он отвечает на письмоАлександра. Поскольку у Александра и своих дел хватает, на письмо г-на Гришкоотвечает Максим. Способность OTRS хранить историю позволяет Максиму просмотретьвсю цепочку переписки по этому запросу и написать более подробный ответ г-ну Гришко. Г-н Гришко, в свою очередь, даже не догадывается, что в процесс общения были вовлеченыдва разных человека, он доволен советами относительно решения своей проблемы,которые пришли в последнеем сообщении от Максима.
Конечно, это всего лишь краткий обзор функциональных возможностей и особеностейсистем обработки заявок. Но в случае, если в вашу компанию приходит множествозапросов от клиентов через письма электронной почты и телефонные звонки и онидолжны обрабатываться в разное время, — система обработки заявок поможет существенносэкономить время и деньги, позволит структурировать всю систему поддержки клиентов,сделать более прозрачным процесс обмена информацией между клиентами и компаниями,что неотменно приведет к повышению эффективности как для клиентов так и дляобслуживающего персонала и позитивно скажется на финансовом положении компании.
Что такое заявка?Заявка очень похожа на медицинскую карточку пациента больницы. Медицинскаякарточка создается, когда пациент посещает больницу впервые, все важные данные опациенте, такие как: личные данные, информация о состоянии его здоровья, медицинскомосмотре записываются в медицинскую карточку. С каждым новым визитом пациента вбольницу, каждый из лечащих врачей добавляет в медицинскую карточку информациюо состоянии пациента, истории болезни и, используемые для лечения лекарственныепрепараты. Таким образом другие лечащие врачи и медсестры могут видеть, подробнуюкартину состояния пациента. Когда пациент выздоровел и выписался из больницы,медицинская карточка закрывается и вся информация передается в архив.
Системы обработки заявок, такие как OTRS, обрабатывают заявки как обыкновенныеемейлы (email). Когда клиент посылает запрос, система создает новую заявку, чтосравнимо с открытием новой медицинской карточки пациента больницы. Ответ вэтой новой заявке можно сравнить с записью лечащего врача в медицинскойкарточке, свидетельствующей о изменении состояния здоровья пациента. Заявкасчитается закрытой, когда клиенту отправлен ответ или если заявка закрыта системойавтоматически. Если клиент отправляет ответ на уже закрытую заявку, она будетзаново открыта системой и в нее будет добавлена новая информация. Чтобы сохранитьцелосность всех данных, хранящихся в системе, каждая заявка хранится и архивируетсявместе со всей информацией. Поскольку заявки обрабатываются как обыкновенныесообщения электронной почты — вместе с ними также будут сохранены все вложения иконтекстные аннотации. Конечно же, такая полезная информация как примечания, даты,данные о нанятых работниках, рабочее время необходимое для работы с заявкой и т.дтакже сохраняется системой. Все заявки могут быть отсортированы в соответствующемпорядке, также можно с легкостью производить поиск всей необходимой информации.

3
Глава 2. OTRS — Открытая СистемаОбработки ЗаявокВ этой главе описываются характерные особенности и функциональные возможности ОткрытойСистемы Обработки Заявок (OTRS). Здесь вы найдете полезную информацию о том, какоеоборудование и програмное обеспечение необходимо для функционирования OTRS. Также, в этойглаве рассказывается о том, как получить коммерческую поддержку системы OTRS (на случай, есливы в ней нуждаетесь), а также, каким образом можно связаться с комьюнити.
ОсновыОткрытая Система Обработки Заявок (OTRS) является веб-приложением, которое можнозапускать в окне любого HTML-совместимого веб-браузера. Для того, чтобы системаодинаково правильно работала в веб-браузерах мобильных телефонов и других мобильныхустройств, веб-интерфейс OTRS не содержит динамического контента, такого как,например, Flash или Java-аплеты. Для успешной работы с OTRS не нужно устанавливатьникаких специальных операционных систем; единственное что потребуется — HTML-браузер.
OTRS разделен на несколько компонентов. Главным компонентом всей системыявляется OTRS-фреймворк, в котором содержатся все основные функции приложения исистема обработки заявок. Веб-интерфейс vOTRS-фреймворка позволяет устанавливатьдополнительные приложения, такие как, например, менеджер рассылок, контентменеджер, файл-менеджер, веб-календарь а также инструментальные средства длямониторинга информации о состоянии системы.
Особенности и функциональныевозможности
OTRS обладает широким набором функций. В следующем списке приводится обзорфункциональных возможностей основного компонента — OTRS-фреймворка.
Особенности и функциональные возможности OTRS
• Веб-интерфейс:
• Простое и интуитивно понятное управление из окна веб-браузера.
• Поскольку на страницах системы не используется динамическое содержимое,наподобе Flash или Java-апплетов, веб-интерфейс будет одинаково хорошо работатьв большинстве существующих на сегодняшний день веб-браузерах, в том числе и веб-браузерах мобильных телефонов и других мобильных устройствах.
• Существует возможность администрирования системы через веб-интерфейс.
• Существует встроенный веб-интерфейс для обработки клиентских запросовсотрудниками/агентами системы.

OTRS — Открытая СистемаОбработки Заявок
4
• Клиентам доступен веб-интерфейс для создания новых заявок, проверки состояниясуществующих, написания ответов на старые заявки а также поиска их собственныхзаявок.
• В веб-интерфейсе предусмотрена поддержка различных шаблонов (тем); такжесуществует возможность интеграции своих собственных шаблонов.
• Поддержка многих языков.
• Настраиваемые шаблоны вывода (DTL).
• Входящие и выходящие сообщения эллектронной почты могут содержатьмногочисленные вложения.
• Почтовый интерфейс:
• Поддержка почтовых вложений (поддержка MIME).
• Автоматическое преобразование HTML в обычные текстовые сообщения (это сделанодля улучшения безопасности в случае получения сообщений с потенциально опаснымсодержанием, а также для поддержки более быстрого поиска).
• Почтовые сообщения могут быть отфильтрованы несколькими способами: с помощьюсистемных X-OTRS-заголовков или используя различные почтовые ящики, напримердля спам-сообщений.
• Поддержка PGP, создание и импорт собственных ключей, подписка и шифрованиеисходящей почты, возможность просмотра подписаных и зашифрованных сообщений.
• Поддерживается просмотр и шифрование S/MIME-сообщений, обработка S/MIME-сертификатов.
• Автоматические ответы (автоответы) на сообщения клиентов, настраиваемые длякаждой очереди.
• Уведомления агентов по электронной почте о новых, последующих илиразблокированых заявках.
• Follow-ups by references or In-Reply-To header entries.
• Заявки:
• Удобный шаблон для просмотра информации в очереди, беглый обзор новых заявокв очереди.
• Заявки могут быть заблокированы.
• Создание собственных шаблонов автоответов.
• Создание собственных автоответчиков, настраиваемых для каждой очереди.
• История заявки, просмотр всех событий определенной заявки (изменения состоянийзаявки, ответов, заметок и т.д.).
• Шаблон «Версия для печати» для заявок.

OTRS — Открытая СистемаОбработки Заявок
5
• Добавление собственных (внутренних или внешних) примечаний к заявке (текста ивложений).
• Просмотр подробной информации о заявке.
• Для заявок можно определять списки контроля доступа (ACL-Access Control List).
• Пересылка заявок на другие почтовые адреса.
• Перемещение заявок между очередями.
• Установка/Изменение приоритета заявки.
• Подсчет рабочего времени, необходимого для работы с каждой заявкой.
• Для заявки можно определить предстоящие задачи.
• Одно и то же действие можно совершать одновременно над несколькими заявками.
• «GenericAgent» позволяет совершать автоматические и синхронные действия надзаявками.
• Полнотекстовый поиск по всем заявкам и экспорт результатов в PDF.
• Система:
• OTRS работает во многих операционных системах (Linux, Solaris, AIX, FreeBSD,OpenBSD, Mac OS 10.x, Microsoft Windows).
• Поддержка ASP (поддержка активных служб).
• Предусмотрена возможность связывания нескольких объектов, например заявок изаписей в FAQ-системе.
• Для хранения данных о клиентах предусмотрена возможность интеграции внешнихисточников данных, используя AD, eDirectory или OpenLDAP.
• Установка собственных идентификаторов заявки, например Звонок№, Заявка№ илиЗапрос№.
• Интеграция своего собственного счетчика заявок.
• Центральный OTRS-фреймворк поддерживает работу с различными СУБД, такимикак MySQL, PostgreSQL, Oracle, DB2.
• Фреймворк для создания статистики.
• Полная поддержка utf-8 (на уровне всей системы).
• Аутентификация пользователей (агентов и клиентов) может быть реализована спомощью базы данных, LDAP, HTTP Auth или Radius.
• Поддержка учетных записей пользователей, групп пользователей и ролей.
• Поддержка различных уровней доступа к отдельным компонентам системы илиочередям.

OTRS — Открытая СистемаОбработки Заявок
6
• Интеграция стандартных текстов ответа.
• Поддержка под-очередей.
• Для каждой очереди можно определить собственные фразы приветствия и подписи.
• Уведомления администраторов по электронной почте.
• Получение информации об обновлениях по электронной почте или через веб-интерфейс.
• Эскалация заявок.
• Поддержка различных часовых поясов.
• Простая интеграция собственных дополнений и приложений с помощью OTRS API.
• Простое создание собственных пользовательских интерфейсов, как это напримерделается в графической оконной с-ме X11 (X-Window) операционной системы UNIX,консоли и т.п.
Новые возможности OTRS 3.0Контекст
• Существенно переработан графический интерфейс пользователя. Теперь, благодаряпереходу к более мощным и современным технологиям, таким как Ajax, xHTML, CSSприложение стало более динамическим и ориентированным на конечного пользователя.
Новый индикатор оповещения о новой Заявке/Статье.
• Эта новая функция была реализована для заявок и статей. Это позволяет агенту сразуже увидеть, есть ли изменения в определенной заявке или статье, проверить новые инепрочитанные статьи. Вы получаете выгоду от повышения прозрачности и снижениявремени отклика.
Оптимизированный Полнотекстовый Поиск
• Новая функция поиска позволяет более гибко производить поиск по имеющейсяинформации. Опции нового поиска позволяют задать диапазон как в виде простойстроки так и в виде сложных многострочных логических операций, включаяя различныеоператоры. Таким образом вы получаете полностью настраиваемый поиск, способныйудовлетворить потребности самого требовательного пользователя.
Новый шаблон для просмотра подробной информации о заявке.
• Редизайн, базирующийся на технологии Ajax предоставляет агентам возможность врежиме реального времени просматривать сложные, связанные между собой структурыданных, при этом сохраняя без изменений текущую рабочую среду. Выиграш от этогонововведения заключается в повышении удобства пользования системой в целом иувеличении эффективности всего рабочего процеса.

OTRS — Открытая СистемаОбработки Заявок
7
Обзор заявок
• Еще в OTRS 2.4 для повышения интерактивности приложения был оптимизированспособ отображения заявок. В зависимости от вариантов использования ипредпочтений ваших агентов, они могут с легкостью изменить способ отображениязаявок в соответствии с их собственными потребностями. При отображенииинформации возможны варианты с различным уровнем детализации: минимальный,средний, максимальный.
Доступность
• В процессе редизайна системы, во внимание были приняты признанные во всем мирестандарты WCAG и WAI-ARIA, которые позволяют пользователям с ограниченнымивозможностями, лучше взаимодействовать со службой технической поддержки OTRS.Требования раздела 508, Закона США о Реабилитации (датированный 1973 г) такжеподдерживаются системой.
Новый Пользовательский Интерфейс
• Пользовательский веб-интерфейс можно интегрировать в локальную сеть (интранет)вашей организации и полностью интегрировать с реструктурированной службойподдержки клиентов.
Функция Архивирования
• OTRS 3.0 предлагает новую функцию архивации, которая существенно сокращает времяпоисковых запросов и ускоряет вывод результатов поиска.
Новые возможности OTRS 2.4Переход на лицензионное соглашение AGPL третьей версии (AGPLv.3)
• Почему AGPL вместо GPL? — AGPL и GPL идентичны, за одним единственнымисключением: для SaaS-решений (SaaS — решения, которые используют сервис-ориентированную архитектуру) «Авторское Лево» (Авторское Право) реализовано болееэффективно именно в AGPL — а не в GPL. Принимая во внимание растущий мирSaaS-решений, ((otrs)) стремится к тому, чтобы будущие разработки и в дальнейшемвозвращались к сообществу OTRS. Это является главной причиной перехода на AGPL.
Почему третья версия (v.3) вместо второй? — вторая версия GPL «морально устаревает»и, особенно в США, имеет различные правовые неопределенности. По мнению ((otrs))GPL v.3 сохранила в себе «дух» GPL v.2 и в то же время была создана с учетомновых потребностей. ((otrs)) рассматривает GPL v.3, а особенно AGPL v.3, как наиболеесбалансированную Открытую «Копилефт» Лицензию среди всех существующих насегодняшний день, предлагающую Защиту авторских прав владельцев и пользователейи обеспечивающую лучшую правовую безопасность без нарушений законодательства.
Новая Панель Управления
• Интегрированная Панель Управления была создана в связи с неоходимостьюперсонализированного представления полезной информации на системном уровне и в

OTRS — Открытая СистемаОбработки Заявок
8
режиме реального времени. Также существует возможность создавать подключаемыемодули для отображения контента из собственных расширений наряду с отображениемстандартного контента. Стандартные плагины:
• Заявки (новые и открытые) за последние 24, 48 и 72 часа.
• Календарь, включающий краткий обзор предстоящих событий (эскалации,автоматические разблокировки, и т.п.)
• Общесистемный обзор распределения заявок внутри очередей
• Время первого ответа (Время/Решение)
• Интеграция RSS
Новый Стандарт Отчетов
• OTRS 2.4 предоставляет новые отчеты:
• Созданные Заявки
• Закрытые Заявки
• SLA Анализ
• Время, которое необходимо выделить на одного пользователя/очередь
• Анализ времени решения требуемого на одного пользователя/очередь
• Анализ времени отклика требуемого на одного клиента/очередь
Новая функция «Ведущая/Ведомая Заявка»
• Функция «Ведущая/Ведомая Заявка» позволяет связать воедино несколько похожихзаявок, и обрабатывать их вместе. Как только проблема будет решена, закрываетсятолько «Ведущая» заявка, все остальные (ведомые) будут закрыты системойавтоматически, а текст, с решением проблемы для «Ведущей» заявки будет разослан всемвладельцам «Ведомых» заявок.
Доступен новый тип ссылок «Ведомая». Все заявки этого типа унаследуют действия отсвоей «Ведущей» заявки:
• Изменение состояния
• Email-ответы
• Изменения в полях FreeText
• Примечания
• Задержка изменения
• Изменения приоритета
• Изменение владельца

OTRS — Открытая СистемаОбработки Заявок
9
• Изменение обязательств
Электронная почта поддерживает «обогащенный текст»/HTML(WYSIWYG)
• Теперь, благодаря этой функции, появилась возможность писать письма, заметкии уведомления в расширенном (обогащенном) текстовом формате (HTML-формате).Используя WYSIWYG-редактор (Что видишь, То и Получаешь), можно с легкостью писатьтексты, форматировать их и даже встраивать изображения.
Новая функция «Вне офиса»
• Благодаря новой функции «Вне оффиса» все пользователи системы имеют возможностьпоставить в известность своих колег (в т.ч. саму систему OTRS) о времени ихотсутсвия в оффисе. Функция «Вне оффиса» активна в период времени, установленныйпользователем. Активация этой функции имеет следующий эффект:
В списках выбора, которые используются для назначения владельца или ответственногоучасника, время отсутствия и его продолжительность отображаются за именемпользователя.
Если агенту, в период его отсутствия, приходит новый отклик от клиента, — тозаявка разблокируется автоматически, а всем агентам из этой очереди отсылаетсяуведомление. Это позволяет немедленно реагировать на вопросы клиента другимсотрудникам службы технической поддержки.
Новые шаблоны отображения заявок с возможностью выполнениягруповых действий
• Гибкость и удобство представления (подачи) информации является обязательнымусловием.С помощью трех шаблонов отображения заявок: Упрощенный/Обычный/Расшыренный, каждый агент имеет возможность простым щелчком мыши (посоответствующей иконке), фактически «на лету», изменить способ отображенияинформации (отображение очередей, статусов т.д.). Такая гибкость предоставляетвысокий уровень индивидуализации и адаптации пользователей к любой оперативнойситуации.
Функция груповых операций интегрированна во все шаблоны отображения заявок(напомним, что груповые действия позволяют обрабатывать несколько заявокодновременно).
Почтовый Фильтр автоматически распознает поступающиесообщения в случае внутренних пересылок
• В настоящее время, email-ответы на перенаправленные статьи поступают в OTRS каквнешние емейлы. Проблема заключается в том, что клиенты могуть просматриватьответы на эти статьи используя графический веб-интерфейс пользователя. Несмотряна то, что все же есть возможность классифицировать емейлы приходящие из всегодомена, и обрабатывать их как внутренние — это только откладывает проблему в «долгийящик» , не решая ее. Кроме этого, такой шаг не позволяет должным образом обслуживатьклиентов (определенного домена), так как клиент больше не имеет возможностиотслеживать заявки через свой пользовательский интерфейс. Используя эту новуюфункцию можно отследить email-ответы, а также, базируясь на типе оригинальнойстатьи, автоматически определить внутренние/внешние емейлы.

OTRS — Открытая СистемаОбработки Заявок
10
Настраиваемые уведомления, базирующиеся на событиях
• Для достижения большей эффективности и гибкости системы уведомлений, механизмрассылки был тщательно изучен и заново переработан. Новая система позволяетобмениватся сообщениями между клиентами и агентами, или удаленными почтовымиадресами на основе происходящих событий.
Таким образом, клиенту можно просто сообщить о закрытии заявки. Или, например,когда VIP-клиент создает заявку, сообщение может быть отправлено на определенныйадрес. События (т.е Создание Заявки, Изменение Состояния Заявки, ИзменениеПриоритета Заявки, Создание Статьи) и все извесные переменные сообщений (такиекак, например, <OTRS_TICKET_TicketNumber> <OTRS_TICKET_Priority>), можно легковыбирать для создания сообщений через веб-интерфейс.
Права «Только Для Чтения» и Предупреждения для просматриваемыхЗаявок
• В текущем релизе OTRS-пользователям предоставлена новая возможность создаватьсвои собственные Списки Просматриваемых Заявок. Эта функция распостраняетсяна заявки, помеченные пользователем как «подписанные». Выигрыш от такогонововведения заключается в том, что пользователи больше не будут терять свои спискизаявок, а смогут всегда «держать их под рукой», просматривая отдельным списком. Доэтого времени функция «Только Для Чтения» позволяла агентам просматривать заявки,на которые они подписались, только в том случае, если они находились в очереди,для которой агент имеет права «Только для Чтения». С этого момента, функция «Толькодля чтения» позволяет агентам всегда иметь права «только для чтения» для заявок, накоторые они подписались, даже в том случае, если заявка будет перемещена в другуюочередь, к которой у них нету доступа. Используя меню «Персональные настройки»,каждый агент может настроить функцию «Оповещения», для определения того, следуетли получать уведомления о заявках, которые получает владелец или ответственныйучасник. Это позволяет активно отслеживать наблюдаемые заявки.
Безопасный SMTP
• OTRS может получать и отправлять письма несколькими способами. В OTRS 2.3 былиреализованы все доступные на сегодня способы получения писем (POP3, POP3S, IMAP,IMAPS). До сих пор было только два вариана для отправки электронной: используялокальный Почтовый Агент (Mail Transfer Agent, например Sendmail, Postfix и т. д.)или используя SMTP. SMTPS (Безопасный SMTP) был внедрен в OTRS 2.4.x с цельюподдержки растущих стандартов безопасности.
Новые возможности OTRS 2.3Производительность
• Усовершенствование базы данных и кода привело к увеличению общего приростапроизводительности на 20%.
• Была добавлена поддержка индексированного полнотекстового поиска. Функция по-умолчанию отключена, поскольнку требует много дополнительного места на жесткомдиске. Ожидаемый прирост производительности составляет 50%
• За счет использования технологии AJAX существенно снижено количество повторныхперезагрузок страниц.

OTRS — Открытая СистемаОбработки Заявок
11
• Вместо пересчета времени эскалации, во время выполнения приложения в реальномвремени, пересчет ведется только в случае наступления тех или инных событий в системеOTRS. Затем время эскалации хранится в объекте заявки, что предоставляет прямойдоступ внешним инструментам сбора статистики о времени эскалации и конечно жеприводит к значительному улучшению производительности всей системы.
Функции поиска
• Поддержка логических выражений: поиск по заявкам, пользователям и ЧАВО-системе(Часто Задаваемые Вопросы и Ответы), поддерживается использование логическихвыражений, включая операторы И, ИЛИ и ! (логическое отрицание), а такжегрупирование выражений с помощью скобок.
• Поиск заявок по номерам, используя OpenSearch (OpenSearch формат).
• Поиск заявок по заголовкам, как в агентской форме поиска заявок, так и сиспользованием объекта GenericAgent.
• Поиск заявок по времени закрытия заявки, с использованием агентской формы поиска,или с помощью объекта GenericAgent.
Перемещение и просмотр подробной информации о заявке
• Отображение статей в Развернутом/Сокращенном виде: шаблон для отображениястатей позволяет выводить все статьи сразу. Текущаяя статья будет оставатся в фокусе,вместе с тем же, будут отображатся предыдущие и следующие статьи.
• Структурное дерево статей — Дерево статей теперь отображается в виде таблицы.
• Реализована поддержка печати статей.
• Название связанных заявок отображается при наведении на него указателя мыши.
• Объединенные заявки отображаются перечеркнутыми.
• Во время перемещения заявки с использованием маски (маски перемещения заявки)можно прикрепить несколько файлов.
Возможности FreeText и FreeTime
• При разделении заявки, все данные из FreeText и FreeTime-полей будут автоматическископированы в соответствующие поля новой заявки.
• Поля Free Time могут быть указаны как обязательные.
• URL-адрес может быть настроен таким образом, чтобы принимать значение поляFreeText и отображать его в качестве URL-ссылки на заявку.
• В добавку к стандартным заголовкам электронной почты добавлены собственныезаголовки X-OTRS-TicketTime и X-OTRS-FollowUp-TicketTime.
Поддержка IMAP, IMAPS и POP3S
• В OTRS 2.3 дополнительно к POP3, POP3S, для извлечения почты из почтового агента(MTA — Mail Transfer Agent) используется также IMAP и IMAPS.

OTRS — Открытая СистемаОбработки Заявок
12
Безопасность
• В случае потери пароля, OTRS отправляет пользователю емейл со ссылкой для «сбросапароля». После нажатия на эту ссылку, новый пароль тут же отсылается обратно, наемейл пользователя.
Уведомления и эскалации
• Все агенты, имеющие права разрешающие чтение определенной очереди могут бытьвыбраны для рассылки уведомлений.
• Был добавлен шаблон для отображения эскалации. Он позволяет отображать всезаявки, отсортированные по времени, которое осталось до эскалации.
Новые возможности OTRS 2.2Новые возможности OTRS 2.2
• Поддержка услуг и Соглашений об Уровне Сервиса (SLA): Как важный шаг напути к становлению средств управления ИТ-услугами, в OTRS 2.2 добавлены новыеатрибуты «Сервис» и «Соглашение об Уровне Сервиса» (SLA — Service Level Agreement).Во время создания новой заявки, клиент может выбрать как Cервис (например,услуги электронной почты) так и связанные SLA-соглашения. SLA атрибуты: «Времяответа», «Время обновления», «Время решения». Эти атрибуты используются ИТ-службойкомпании для уведомления и эскалации заявки и удовлетворения существующихсоглашений об уровне обслуживания (SLA). Сервис и SLA-связанная информация можетбыть использована в заголовках входящих сообщений электронной почты.
• Собственные типы заявок: Управление типами заявок через веб-интерфейсадминистратора. Теперь уже нету необходимости использовать FreeText-поля для этойцели. С этого момента поля FreeText больше не используются для классификациизаявок. Эта функция также появится в темплейтах для вывода/распечатки информациио агентах и клиентах, а также может быть изменена с помощью веб-интерфейсаадминистратора.
• Поддержка нескольких источников аутентификации: Добавлена поддержка несколькихисточников аутентификации агентов и клиентов. Благодаря использованию этойфункции, теперь есть возможность интегрировать несколько надежных источниковаутентификации. Если для первого источника, к примеру для LDAP проверка не прошла,- качестве другого источника можно использовать, например, базу данных SQL.
• Поддержка различных способов шифрования паролей: Поддерживаемые иразрешенные типы аутентификации для агенов и/или клиентов есть:
• unix_crypt()
• md5()
• plain()
По умолчанию используется метод шифрования ‘unix_crypt()’. Администратор можетбез труда переключится с unix_crypt() на md5() , путем изменения соответствующихпараметров конфигурации.

OTRS — Открытая СистемаОбработки Заявок
13
• Изменена внутренняя структура CustomerUser: в базе данных OTRS информацияо пользователе (CustomerUser) реструктуризована и разбира на объекты»CustomerCompany» и «CustomerUser». Теперь, атрибуты, связанные с компанией,такие как например «название компании», «адрес компании» управляются отдельно отатрибутов конкретного контакта, таких как, например, имя, фамилия, номер телефонаи др.
Эта информация будет отображатся как обычная информация о пользователе.
• Расширенный OPM-Формат: Теперь OPM-пакеты поставляются с дополнительнымописанием. Вводная страница будет информировать пользователя о новыхвозможностях и давать краткий обзор с описанием последующих шагов, которыенеобходимо выполнить после успешной установки пакетов.
• PostMaster-админ-интерфейс: Развитие привело к более подробному определениюадресов электронной почты, распознаваемых PostMaster-фильтром.
• Усовершенствованый SysConfig: Производительность была значительно увеличена засчет внутренней реструктуризации SysConfig. Более быстрый просмотр и сохранениестраниц приводит к существенной экономии времени во время процесса настройки.
Новые возможности OTRS 2.1Новые возможности OTRS 2.1
• Стабильная поддержка Microsoft SQL Server: начиная с этой версии, OTRSпредоставляет интерфейс для сервера баз данных MS SQL. OTRS поддерживает всепопулярные операционные системы, такие как Linux, Windows, UNIX, Mac OS X и т.д.,а также все самые распостраненные серверы баз данных, такие как MS SQL, MySQL,PostgreSQL, Oracle and DB2.
• Много-функциональное приложение Календарь: упрощает работу в различных регионахс различными часовыми поясами, Рабочие часы могут быть установлены в соответствии счасовым поясом. В зависимотсти от региона можно указывать время каникул, празников,выходных дней.
• Новый модуль статистики: Полностью переработана система статистики, котораяпозволяет создать практический любой тип отчета прямо из веб-интерфейса .Мощный и в то же время удобный для использования Мастер поможет легковыполнить все задания. Также OTRS имеет возможность в автоматическомрежиме периодически отправлять необходимые Отчеты на заранее определенныйсписок адресов электронной почты. Функции экспорта/импорта позволяют сохранятьстатистическую информацию между различными инсталяциями OTRS. Таким образом,всегда есть возможность определить и проверить свои статистические данные передтем, как загружать их в рабочую систему.
• Оптимизированная Синхронизация полномочий от службы каталогов LDAP: упрощаетподключение всех известных служб каталогов LDAP, таких как Microsoft Active Directory,OpenLDAP, Novell eDirectory, Oracle Internet Directory, и т. д. Эта полезная функцияпозволяет сэкономить много времени и сил при поддержке системы полномочий влокальной базе данных OTRS.
• PDF-генератор: Теперь в OTRS имеется поддержка вывода отчетов, статиски а такжерезультатов поиска заявок и подробной информации о заявке в PDF-формат.

OTRS — Открытая СистемаОбработки Заявок
14
• ЧАВО-модуль был полностью переделан, вынесен из центрального фреймворка итеперь может быть установлен в качестве дополнительного модуля. Новый ЧАВО-модуль предлагает оптимизированную функцию расширенного поиска, более удобноеадминистрирование статей, улучшенные навигационные возможности а также средствадля оценки отдельных статей.
• Мониторинг под-заказов и поддержка иерархической структуры команды: новаяфункция, такая как «Руководитель Заявки» и «Наблюдатель»Группа поддержкиподдерживает иерархические структуры: с помощью вновь введен мониторинги отчетность функций на билеты, позволит упростить обработку билеты вструктурированных команд. Отчетность позволяет агенту для доставки владениебилет, но по-прежнему сохраняют за собой все права на запись билет. функциимониторинга позволяет осуществление деятельности, за билет, не будучи владельцемсамого билета.Мониторинг под-заявок и поодержка иерархической структуры команды:Новая функция, такая как «Руководитель заявки» и Группа поддержки поддерживаетиерархические структуры: с помощью вновь введен мониторинг и отчетность функций набилеты, позволит упростить обработку билеты в структурированных команд. Отчетностьпозволяет агенту для доставки владение билет, но по-прежнему сохраняют за собой всеправа на запись билет. функции мониторинга позволяет осуществление деятельности,за билет, не будучи владельцем самого билета.Отслеживание к югу от заказов иподдержки иерархической Команда-структуры: новые возможности, как руководительбилетов и билетов сайте поддержки работы в иерархических групп и позволяютопределять и направлять работу пакеты временно в другой сервисный центр. Хотябилетов руководитель позволяет авторизованным членам Группы направлять билетовна другую службу агента, не теряя право редактировать этот билет Билет Watcherпозволяет вам отслеживать билет пассивный на основе отдельного перечня.
• Улучшено обнаружение Follow-Up: В дополнение к поиску номера заявки в темесообщения, OTRS также проверяет наличие номера заявки в теле письма и даже в текстевложеных файлов. Цель этой новой функции — автоматически назначать (приписывать)входящие запросы инцидентам, которые уже существуют в системе, причем делать этогораздо быстрее, чем раньше.
Требования к апаратному и програмномуобеспечению
OTRS может быть установлен на многих операционных системах. OTRS работает не толькона Linux и других UNIX-подобных ОС (таких как например, OpenBSD или FreeBSD), нотакже и на всех платформах Microsoft Windows. Для работы OTRS не требуется какихнибудь специальных требований к оборудованию. Мы рекомендуем использовать машины,с процессором, как минимум 2 ГГц Xeon, 2 Гб Оперативной памяти и 160 Гб свободногопространства на жестком диске.
Если вы хотите использовать OTRS, вам потребуются некоторые другие компонентыпрограмного обеспечения. Основные требования к програмному обеспечению: веб-сервери сервер баз данных, рабочая среда для выполнения Perl с некоторыми дополнительнымимодулями. Веб-сервер и Perl должны быть установлены на той же машине что и OTRS. Базаданных может быть установлена на локальной машине или же на другом хосте.
В качестве веб-сервера, мы рекомендуем использовать apache 2. Это связано с тем, что егомодуль mod_perl позволяет существенным образом улучшить производительность OTRS.Если у вас нету возможности использовать Apache в качестве веб-сервера, OTRS можетработать на любом другом веб-сервере, поддерживающем выполнение Perl-скриптов.

OTRS — Открытая СистемаОбработки Заявок
15
В качестве базы данных, можно использовать MySQL, PostgreSQL, Oracle, MSSQL илиDB2. В случае использования MySQL в качестве сервера базы данных — есть возможностьзадать некоторые настройки посредством веб-интерфейса, при установке системы.
Для Perl, мы рекомендуем использовать по крайней мере версию 5.8.8. Также вам будутнужны дополнительные модули, которые могут быть установлены как при установке самогоPerl и CPAN так и с помощью менеджера пакетов вашей операционной системы (rpm, yast,apt-get).
Требования к програмному обеспечению
Perl
• Perl 5.8.8 или выше
Веб-сервер
• Apache2 + mod_perl2 или выше (рекомендуется, mod_perl он действительно быстрее!)
• Веб-сервер с поддержкой CGI-интерфейса (CGI-интерфейс не рекомендуется)
• IIS 6 или выше
Базы данных
• MySQL 4.1 или выше
• PostgreSQL 8.0 или выше
• Oracle 10g или выше
• DB2 8 или выше
• MSSQL 2000 или выше
Раздел руководства Установка Perl-модулей более подробно описывает как можнонастроить модули, необходимые для работы OTRS.
Если для установки OTRS используются бинарные пакеты, собраные специально под вашуоперационную систему, то все необходимые модули языка Perl уже включены. Если нет, -используйте менеджер пакетов вашей операционной системы (например (rpm, Windows-Инсталлятор) для установки всех необходимых модулей.
КомюнитиOTRS имеет большое сообщество пользователей. По ссылке списки рассылкипользователи и разработчики обсуждают OTRS, общаются на различные темы, связанныес системой обработки заявок. Также есть возможность обсуждать вопросы, касающиесяустановки, настройки, использования, локализации и разработки приложения. Ошибки,замеченные в програмном обеспечении отправляйте по ссылке система мониторингаошибок . Ни одно сообщение не останется без внимания, все они гарантировано будутрасмотрены соответствующими разработчиками.
Домашняя страница OTRS-сообщества: http://www.otrs.org [http://www.otrs.org] (см.Рис 2.1ниже).

OTRS — Открытая СистемаОбработки Заявок
16
Рисунок 2.1. Домашняя страница OTRS-комьюнити.
Коммерческая Поддержка и Услуги дляOTRS
Для OTRS также доступна коммерческая поддержка. Доступные варианты можно найтина сайте компании OTRS Group по адресу http://www.otrs.com/en/solutions/ [http://www.otrs.com/en/solutions/] .
OTRS Group предоставляет услуги подписки, поддержки, настройки, консультации иобучения для OTRS Help Desk [http://www.otrs.com/en/products/help-desk/] и OTRSITSM [http://www.otrs.com/en/products/itsm/]. Она также предоставляет Издание ЛучшаяПрактика [http://www.otrs.com/solutions/]. С помощью этого издания OTRS Group помогаеторганизациям разрабатывать, внедрять и оптимизировать OTRS для каждой уникальнойокружающей среды. Кроме того OTRS Group предоставляет размещение версии, включаяяOTRS OnDemand [http://www.otrs.com/en/solutions/ondemand/] and Managed OTRS [http://www.otrs.com/en/solutions/managed-otrs/].
Более подробную информацию о компании OTRS Group можно найти по ссылке http://www.otrs.com [http://www.otrs.com] . Также с нами можно связаться по емейлу отделпродаж otrs.com [mailto:[email protected]] .

17
Глава 3. УстановкаВ этой главе описывается установка и базовая конфигурация главного OTRS-фреймворка. Здесь вынайдете информацию об установке OTRS из исходных кодов или из бинарных пакетов, напримерRPM, или с помощью Windows-инсталлятора.
В этой главе рассматриваются такие вопросы как: конфигурация веб-сервера и сервера базыданных, интефейса между OTRS и базой данных, установка дополнительных Perl-модулей, установкасоответствующих прав доступа для OTRS, настройка планировщика задач cron jobs для OTRS иосновных параметров в конфигурационных файлах.
Следуйте подробным шагам этой главы чтобы установить OTRS на своем сервере. Потом можноиспользовать его веб-интерфейс чтобы войти в систему и производить администрирование.
Самый простой способ — установка изготовых бинарных пакетов
Самый простой и удобный способ установки OTRS — использовать готовые (встроенные)пакеты, которые можно найти и загрузить перейдя по ссылке http://www.otrs.org[http://www.otrs.org]. В следующих разделах описывается установка OTRS из готовых(встроенных) или бинарных пакетов, специально собраных для операционных систем:SUSE, Debian и Microsoft Windows. В случае если нету возможности использовать готовые(встроенные) пакеты — установку придется производить вручную.
Установка из rpm-пакетов на сервер под управлениемSuse Linux
В этом разделе описывается установка встроенных RPM пакетов на дистрибутив SUSELinux. Мы протестировали все SLES и OpenSUSE релизы, доступные на данный момент.Перед началом установки перейдите по адресу http://www.otrs.org/downloads [http://www.otrs.org/downloads] и убедитесь нету ли новых OTRS RPM пакетов, доступных дляскачивания. Всегда старайтесь использовать только самые новые RPM пакеты.
Для установки OTRS используйте конфигурационную утилиту yast (yast2), команднуюстроку иrpm. Так как для работы OTRS необходимы Perl-модули, которые по умолчаниюне устанавливаются в системе SUSE, мы всегда рекомендуем использовать менеджерпакетов yast, поскольку он позволяет автоматически разрешать конфлиткы и зависимостимежду пакетами.
Если вы решили устанавливать OTRS из командной строки используя rpm, первое, чтонужно сделать — это вручную установить все необходимые Perl-модули. Предположим,что вы загрузили файл otrs.rpm в директорию /tmp. Чтобы начать установку OTRSнеобходимо выполнить команду, из Сценария 3.1.
Примечание: Если вы проводите установку на SLES9 (SUSE Linux Enterprise ServerBy Novell) или OES (Open Enterprise Server), прочтите пожалуйста инструкции,находящиеся по адресу http://faq.otrs.org/otrs/public.pl?FAQID=49 , они помогут в установкеотсутсвтующих perl-GD пакетов.

Установка
18
linux:~ # rpm -i /tmp/otrs-xxx.rpmotrs ##################################################Check OTRS user (/etc/passwd)… otrs exists.
Next steps:
[SuSEconfig] Execute ‘SuSEconfig’ to configure the web server.
[start Apache and MySQL] Execute ‘rcapache restart’ and ‘rcmysql start’ in case they don’t run.
[install the OTRS database] Use a web browser and open this link: http://localhost/otrs/installer.pl
[OTRS services] Start OTRS ‘rcotrs start-force’ (rcotrs {start|stop|status|restart|start-force|stop-force}).
Have fun!
Your OTRS Team http://otrs.org/
linux:~ #
Сценарий 3.1. Команда для установки OTRS.
После установки RPM-пакета OTRS, нужно запустить SuSEconfig так, как это показано вСценарии 3.2.
linux:~ # SuSEconfigStarting SuSEconfig, the SuSE Configuration Tool…Running in full featured mode.Reading /etc/sysconfig and updating the system…Executing /sbin/conf.d/SuSEconfig.aaa_at_first…Executing /sbin/conf.d/SuSEconfig.apache…Including /opt/otrs/scripts/apache-httpd.include.confExecuting /sbin/conf.d/SuSEconfig.bootsplash…Executing /sbin/conf.d/SuSEconfig.doublecheck…Executing /sbin/conf.d/SuSEconfig.guile…Executing /sbin/conf.d/SuSEconfig.hostname…Executing /sbin/conf.d/SuSEconfig.ispell…Executing /sbin/conf.d/SuSEconfig.perl…Executing /sbin/conf.d/SuSEconfig.permissions…Executing /sbin/conf.d/SuSEconfig.postfix…Setting up postfix local as MDA…Setting SPAM protection to «off»…Executing /sbin/conf.d/SuSEconfig.profiles…Finished.

Установка
19
linux:~ #
Сценарий 3.2. Запуск команды SuSEconfig.
Установка OTRS завершена. Чтобы новые изменения, касающиеся конфигурации OTRS,вступили в силу — перезагрузите веб-сервер используя команду из Сценария 3.3.
linux:~ # rcapache restartShutting down httpd doneStarting httpd [ PERL ] donelinux:~ #
Сценарий 3.3. Перезапуск веб-сервера.
Следующим шагом является установка базы данных OTRS, как это сделать, читайте здесьраздел 3.2.4.
Установка OTRS в операционной системе CentOSПодробные инструкции по установке OTRS в операционной системеCentOS можно найти на сайте OTRS Wiki по адресу http://wiki.otrs.org/index.php?title=Installation_of_OTRS_3.0b1_on_CentOS_5.5 [http://wiki.otrs.org/index.php?title=Installation_of_OTRS_3.0b1_on_CentOS_5.5]. Обратите внимание, что этирекомендации также применимы и к другим системам, в часности к RedHat.
Установка OTRS в операционной системе DebianПодробную информацию по установке OTRS в операционной системеDebian можно найти на сайте OTRS Wiki по адресу http://wiki.otrs.org/index.php?title=Installation_on_Debian_5.04_lenny [http://wiki.otrs.org/index.php?title=Installation_on_Debian_5.04_lenny] .
Установка OTRS на системе UbuntuПодробную информацию по установке OTRS в операционной системеUbuntu можно найти на сайте OTRS Wiki по адресу http://wiki.otrs.org/index.php?title=Installation_on_Ubuntu_Lucid_Lynx_(10.4) [http://wiki.otrs.org/index.php?title=Installation_on_Ubuntu_Lucid_Lynx_(10.4)] ..
Установка OTRS на операционной системе MicrosoftWindows
Устанавливать OTRS в операционной системе Microsoft Windows очень легко ипросто. Перейдя по ссылке http://www.otrs.org/downloads/ [http://www.otrs.org/downloads/] загрузите последнюю версию установщика для Win32-платформы и сохраните файлна жестком диске компьютера. Затем просто запустите установочный файл и выполнитевсе шаги, предложеные мастером установки. После этого можно войти в OTRS справами администратора и сконфигурировать систему под свои требования. Используйтелогин [email protected] и пароль root, чтобы войти в систему с правами администратора.(Примечание: логин [email protected] и пароль root прописаны в системе по умолчанию).

Установка
20
ВниманиеПостарайтесь как можно быстрее изменить пароль для аккаунта ‘[email protected]’.
ВажноWin32-инсталлятор содержит все компоненты, необходимые для работы OTRS:веб-сервер Apache, сервер баз данных MySQL, Perl (со всеми необходимымимодулями), а также планировщик задач для WindowsCron. Именно по этой причине,OTRS необходимо устанавливать на Windows-системах, которые еще не содержатустановленого веб-сервера Apache или другого, а также сервера баз данныхMySQL.
Установка из исходных кодов (Linux, Unix)Подготовка к установке из исходных кодов
Если вы решили устанавливать OTRS из исходных кодов, перейдите по ссылке http://www.otrs.org/downloads/ [http://www.otrs.org/downloads/] и загрузите архив с исходнымикодами в любом удобном для вас формате: .tar.gz, .tar.bz2, или .zip
Распакуйте архив (например с помощью команды tar) в каталог /opt а затем переименуйтекаталог otrs-3.0 на otrs (см. ниже Сценарий 3.4).
linux:/opt# tar xf /tmp/otrs-3.0.tar.gzlinux:/opt# mv otrs-3.0 otrslinux:/opt# lsotrslinux:/opt#
Script 3.4. Установка OTRS, первые шаги.
OTRS не должен выполнятся с правами администратора (root rights). На следующем шагеустановки для OTRS необходимо добавить нового пользователя. Домашняя директориянового пользователя должна находится в каталоге /opt/otrs. Если веб-сервер неработает с теми правами что и новый пользователь ‘otrs’ (а именно так и есть в большинствесистем), то его нужно добавить в группу пользователей веб-сервера (см ниже Сценарий3.5 ).
linux:/opt# useradd -r -d /opt/otrs/ -c ‘OTRS user’ otrslinux:/opt# usermod -G nogroup otrslinux:/opt#
Сценарий 3.5. Добавление нового пользователя ‘otrs’ и добавление его в группу.
Затем нужно скопировать некоторые конфигурационные файлы (точнеедемонстрационные копии конфигурационных файлов), которые позже будутиспользоваться системой. Файлы находятся в каталоге /opt/otrs/Kernel и /opt/otrs/Kernel/Config и имеют расширение (суффикс) .dist (см. ниже Сценарий 3.6).
linux:/opt# cd otrs/Kernel/linux:/opt/otrs/Kernel# cp Config.pm.dist Config.pm

Установка
21
linux:/opt/otrs/Kernel# cd Configlinux:/opt/otrs/Kernel/Config# cp GenericAgent.pm.dist GenericAgent.pm
Сценарий 3.6. Копирование демонстрационных копий конфигурационных файлов
На завершающем этапе установки OTRS необходимо установить соответствующие правадоступа к файлам. Для этого используйте сценарий otrs.SetPermissions.pl, находящийсяв директории bin домашнего каталога пользователя ‘otrs’. Скрипт можно вызвать соследующими параметрами:
otrs.SetPermissions.pl { Home directory of the OTRS user } { —otrs-user= OTRSuser } { —web-user= Web server user } [ —otrs-group= Group of the OTRS user ] [ —web-group= Group of the web server user ]
Если ваш веб-сервер работает с теми же правами что и пользователь ‘otrs’, то командаустановки надлежащих прав доступа будет выглядеть так: otrs.SetPermissions.pl /opt/otrs —otrs-user=otrs —web-user=otrs. На SUSE-системах веб-сервер работает с правамипользователя ‘wwwrun’. На Debian-системах — ‘www-data’. Для установки надлежащих правдоступа используйте команду otrs.SetPermissions.pl /opt/otrs —otrs-user=otrs —web-user=wwwrun —otrs-group=nogroup —web-group=www.
Установка Perl-модулейИсходя из Таблицы 3-1. для работы OTRS необходимо установить некоторыедополнительные модули Perl. При установке OTRS из исходных кодов, эти модулипридется установить вручную. Конечно же это намного проще сделать используяменеджер пакетов, который прилагается к вашему Linux-дистрибутиву (yast, apt-get)или, как описано в этом разделе, использовать оболочку Perl shell и CPAN. Есливы используете ActiveState Perl, например, на Windows, то можно использовать PPM,встроенный менеджер пакетов Perl (Perl Package Manager). Мы рекомендуем использоватьменеджер пакетов, если это возможно.
Таблица 3.1. Perl-модули, необходимые для работы OTRSНазвание ОписаниеDBI Устанавливает подключение к базе данных
приложения.DBD::mysql Содержит специальные функции для
подключения к серверу базы данных MySQL(только в случае, использования серверабазы данных MySQL)
DBD::pg Содержит специальные функции дляподключение к серверу базы данныхPostgreSQL (требуется только в случаеиспользования PostgreSQL в качествесервера базы данных).
Digest::MD5 Позволяет использовать алгоритм MD5.CSS::Minifier Уменьшение размера CSS-файла и запись
выходного потока напрямую в другой файл.Crypt::PasswdMD5 Обеспечение криптографических
возможностей на основе алгоритмахеширования MD5

Установка
22
Название ОписаниеMIME::Base64 Кодирование / декодирование Base64-
кодированных строк, например длявложений электронной почты.
JavaScript:Minifier Уменьшение размера JavaScript-файла изапись выходного потока напрямую в другойфайл.
Net::DNS Perl-интерфейс для DNS (Domain NameSystem — системы доменных имен).
LWP::UserAgent Обработка HTTP-запросов.Net::LDAP Perl-интерфейс к LDAP-каталогу (только в
случае использования LDAP в качествехранилища данных).
GD Интерфейс к графической библиотеке GD(требуется только в том случае, еслиустановлен модуль статистики OTRS).
GD::Text, GD::Graph, GD::Graph::lines,GD::Text::Align
Еще более широкий набор текстовыхи графических инструментов дляграфической библиотеки GD (требуетсятолько в том случае, если установлен модульстатистики OTRS).
PDF::API2, Compress::Zlib Эти модули необходимы для генерацииотчетов, результатов поиска, информации озаявке в формате PDF.
Используйте команду otrs.CheckModules.pl, чтобы проверить, какие модули необходимоустановить. Этот сценарий находится в директории bin домашнего каталогоапользователя ‘otrs’ (см. ниже Сценарий 3.7).
Пожалуйста, обратите внимание на то, что некоторые модули не являются обязательными.
linux:~# cd /opt/otrs/bin/linux:/opt/otrs/bin# ./otrs.CheckModules.pl o CGI……………………….ok (v3.49) o Crypt::PasswdMD5……………ok (v1.3) o CSS::Minifier………………ok (v0.01) o Date::Format……………….ok (v2.24) o Date::Pcalc………………..ok (v1.2) o DBI……………………….ok (v1.609) o DBD::mysql…………………ok (v4.013) o Digest::MD5………………..ok (v2.36_01) o Encode::HanExtra……………ok (v0.23) o GD………………………..ok (v2.44) o GD::Text………………..ok (v0.86) o GD::Graph……………….ok (v1.44) o GD::Graph::lines…………ok (v1.15) o GD::Text::Align………….ok (v1.18) o IO::Scalar…………………ok (v2.110) o IO::Wrap…………………..ok (v2.110) o JavaScript::Minifier………..ok (v1.05)

Установка
23
o JSON………………………ok (v2.21) o JSON::PP………………..ok (v2.27003) o JSON::XS………………..Not installed! (Optional — Install it for faster AJAX/JavaScript handling.) o LWP::UserAgent……………..ok (v5.829) o Mail::Internet……………..ok (v2.06) o Mail::POP3Client……………ok (v2.18 ) o IO::Socket::SSL………….ok (v1.31) o MIME::Base64……………….ok (v3.07_01) o MIME::Tools………………..ok (v5.428) o Net::DNS…………………..ok (v0.65) o Net::POP3………………….ok (v2.29) o Net::IMAP::Simple…………..ok (v1.1916) o Net::IMAP::Simple::SSL……ok (v1.3) o Net::SMTP………………….ok (v2.31) o Authen::SASL…………….ok (v2.15) o Net::SMTP::SSL…………..ok (v1.01) o Net::LDAP………………….ok (v0.4001) o PDF::API2………………….ok (v0.73) o Compress::Zlib…………..ok (v2.008) o SOAP::Lite…………………ok (v0.712) o Text::CSV………………….ok (v1.18) o Text::CSV_PP…………….ok (v1.26) o Text::CSV_XS…………….Not installed! (Optional — Optional, install it for faster CSV handling.) o XML::Parser………………..ok (v2.36)linux:/opt/otrs/bin#
Сценарий 3.7. Проверка необходимых модулей.
Для установки недостающих модулей старайтесь использовать менеджер управленияпакетами, входящий в дистрибутив Linux. Таким образом, в случае выхода обновленийили новых решений по обеспечению большей безопасности, пакеты будут обновлятсяавтоматически. Чтобы узнать как установить дополнительные пакеты обратитесь кдокументации, которая поставляется вместе с дистрибутивом вашей операционнойсистемы. Если модуль (соответствующая версия) не доступен из репозитория пакетов,его всегда можно установить используя CPAN, Comprehensive Perl Archive Network(всеобъемлющую сеть архивов Perl).
Для установки любого из выше описанных модулей через CPAN, нужно выполнить командуperl -e shell -MCPAN. Оболочка Perl запустится в интерактивном режиме и модуль CPANбудет загружен. Если CPAN уже сконфигурирован, то с помощью команды install «имямодуля» (install module_name) можно начинать установку необходимых модулей. CPANавтоматически отслеживает зависимости между Perl-модулями и тут же оповещает, какиееще модули нужно установить.
Также, после изменений в директории /opt/otrs выполните эти две команды perl -cwbin/cgi-bin/index.pl и perl -cw bin/otrs.PostMaster.pl. Если результатом выполнения обеихкоманд будет «syntax OK», значит Perl установлен правильно (см. ниже Сценарий 3.8).
linux:~# cd /opt/otrslinux:/opt/otrs# perl -cw bin/cgi-bin/index.plcgi-bin/installer.pl syntax OKlinux:/opt/otrs# perl -cw bin/otrs.PostMaster.pl

Установка
24
otrs.PostMaster.pl syntax OKlinux:/opt/otrs#
Сценарий 3.8. Проверка синтаксиса.
Настройка веб-сервера ApacheВ этом разделе описывается базовая конфигурация веб-сервера Apache с модулемmod_cgi, необходимым для работы OTRS. Веб-сервер должен поддерживать выполнениеCGI-сценариев. OTRS не будет работать если нету возможности выполнять Perl-сценарии.Поэтому проверьте настройки в конфигурационных файлах веб-сервера и убедитесть втом, что строка, отвечающая за загрузку CGI-модуля не закоментирована. Если вы видитечто-то вроде следующего, значит CGI-модуль уже загружен и используется.
LoadModule cgi_module /usr/lib/apache2/modules/mod_cgi.so
Для простого и удобного доступа к веб-интерфейсу OTRS через короткий адрес, нужноиспользовать Alias и ScriptAlias. Большинство установок Apache имеют директориюconf.d. Очень часто в Linux-системах эта директория находится в /etc/apacheили /etc/apache2. Войдите в систему с правами администратора (под root-ом), затем перейдите в диреторию conf.d и скопируйте соответствующий шаблонконфигурационного файла /opt/otrs/scripts/apache2-httpd.include.conf вфайл otrs.conf, который находится в каталоге настроек Apache.
Перезагрузите веб-сервер, чтобы новые настройки вступили в силу. На большинствесистем запустить/перезагрузить веб-сервер можно с помощью команды /etc/init.d/apache2restart (см. ниже Сценарий 3.11 ).
linux:/etc/apache2/conf.d# /etc/init.d/apache2 restartForcing reload of web server: Apache2.linux:/etc/apache2/conf.d#
Сценарий 3.11. Перезапуск веб-сервера.
Теперь веб-сервер полностью настроен для работы OTRS.
Для увеличения производительности можно установить mod_perl, отключить и неиспользовать модуль mod_cgi, а затем, сконфигурировать веб-сервер Apache наиспользование модуля mod_perl следующим образом:
Чтобы воспользоваться этой функцией убедитесь в том, что модуль mod_perl установлени загружен. В связи с структурой сценария запуска, сервер не удастся запустить еслимодуль mod_perl загружен/скомпилирован неправильно или если он дальше продолжаетработать. С технической точки зрения, вы все же можете оставить модуль mod_cgiработать, но делать это не нужно.
Чтобы проверить загружен ли этот модуль, поищите файл mod_perl.so в каталоге /etc/apache* (см. ниже Сценарий 3.12).
#:/ grep -Rn mod_perl.so /etc/apache*
Сценарий 3.12. Поиск mod_perl.
Когда вы используете соответствующий сценарий запуска, приведенный выше и модульзагружен, то сценарий /opt/otrs/scripts/apache2-perl-startup.pl может использоваться длязагрузки perl-модулей в память только один раз, что существенно экономит время загрузкии повышает производительность системы в целом.

Установка
25
Настройка базы данныхСамый простой способ — использование веб-инсталлятора(работает только с MySQL)
Если в качестве базы данных используется MySQL, то можно воспользоваться веб-инсталлятором OTRS: http://localhost/otrs/installer.pl [http://localhost/otrs/installer.pl] .
Когда запустится веб-инсталлятор, выполните, пожалуйста, следующие шаги дляустановки системы:
1. Проверьте информацию о OTRS-офисах и нажмите кнопку Далее (см. ниже Рис 3.1 ).
Рисунок 3.1. Экран приветствия.
2. Прочитайте соглашения лицензии GNU Affero General Public License (см. ниже Рисунок3.2) и примите их, нажав на соответствующую кнопку внизу страницы.

Установка
26
Рисунок 3.2. GNU Affero General Public License.
3. Введите имя пользователя и пароль администратора, DNS-имя компьютера на которомнаходится OTRS и тип используемой СУБД. После этого, проверьте настройки (см. нижеРисунок 3.3 ).
Рисунок 3.3. Первоначальная настройка базы данных.
Если проверка прошла успешно, вы будете уведомлены. Чтобы продолжить, нажмитекнопку OK (см. ниже Рисунок 3.4).
Рисунок 3.4. Уведомление об успешной проверке.
4. Создайте нового пользователя базы данных, выберите имя базы данных и нажмитекнопку ‘Далее’ (см. ниже Рисунок 3.5).
ВниманиеИспользовать пароли по умолчанию, — не очень хорошая идея. Изменитепожалуйста пароль по умолчанию для базы данных OTRS!

Установка
27
Рисунок 3.5. Настройки базы данных.
Если база данных и пользователь базы данных были успешно созданы, вы получитеуведомление, как это показанно на Рисунке 3.6. Нажмите кнопку ‘Далее’ для перехода кследующему этапу установки.
Рисунок 3.6. Уведомление о успешной установке базы данных.
5. Укажите все необходимые настройки системы и нажмите кнопку ‘Дальше’ (см. нижеРисунок 3.7 ).

Установка
28
Рисунок 3.7. Настройки системы.
6. Если хотите, можно указать необходимые данные для настройки входящей и выходящейпочты, можете пропустить этот шаг, нажав кнопку в нижней части экрана (см. Рисунок 3.8ниже).
Рисунок 3.8. Настройка электронной почты.
7. Чтобы новые конфигурационные параметры вступили в силу, перезапустите OTRS, какэто показано в Сценарии 3.13.
linux:~ # rcotrs restart-forceShutting down OTRS Disable /opt/otrs/bin/otrs.PostMaster.pl … done.no crontab for otrs Shutting down cronjobs … failed!Shutting down OTRS (completely)

Установка
29
Shutting down Apache … done. Shutting down MySQL … done. doneStarting OTRS (completely) Starting Apache … done. Starting MySQL … done.Starting OTRS Checking Apache … done. Checking MySQL … done. Checking database connect… (It looks Ok!). Enable /opt/otrs/bin/otrs.PostMaster.pl … done. Checking otrs spool dir… done. Creating cronjobs (source /opt/otrs/var/cron/*) … done.
—>> http://linux.example.com/otrs/index.pl <<— done donelinux:~ #
Сценарий 3.13. Перезапуск службы OTRS.
Поздравляем! Установка OTRS завершена и можно начинать работу с системой (см. нижеРисунок 3.9). Для входа в веб-интерфейс OTRS, откройте веб-браузер и наберите вадресной строке http://localhost/otrs/index.pl [http://localhost/otrs/index.pl]. Чтобы войти всистему OTRS с правами администратора, используйте логин ‘[email protected]’ и пароль’root’. Затем вы можете настроить систему в соответствии с вашими требованиями.
ВниманиеПостарайтесь как можно быстрее изменить пароль для аккаунта ‘[email protected]’.
Рисунок 3.9. Заключительные шаги для установки OTRS.

Установка
30
Установка базы данных OTRS вручную.Если вы не можете воспользоваться веб-инсталлятором для установки базы данныхOTRS, то ее нужно установить вручную. Сценарий с SQL-инструкциями для созданияи настройки базы данных находится в директории scripts/database домашенегокаталога пользователя ‘otrs’ (см. ниже Сценарий 3.14).
linux:~# cd /opt/otrs/scripts/database/linux:/opt/otrs/scripts/database# lsotrs-initial_insert.db2.sql otrs-schema.mysql.sqlotrs-schema.oracle.sqlotrs-initial_insert.mssql.sql otrs-schema-post.db2.sqlotrs-initial_insert.mysql.sql otrs-schema.postgresql.sqlotrs-initial_insert.oracle.sqlotrs-initial_insert.postgresql.sql otrs-schema-post.mssql.sqlotrs-initial_insert.xml otrs-schema-post.mysql.sqlotrs-schema.db2.sql otrs-schema-post.oracle.sql otrs-schema-post.postgresql.sqlotrs-schema.mssql.sql otrs-schema.xmllinux:/opt/otrs/scripts/database#
Сценарий 3.14. Файлы, необходимые для создания и настройки базы данных.
При установке базы данных, для различных СУБД существует свой, определенныйпорядок обработки .sql-файлов.
Создание базы данных OTRS вручную, шаг за шагом1. Создание базы данных: Используя интерфейс базы данных или свой любимый
менеджер баз даных, создайте базу данных, которую планируете использовать дляOTRS.
2. Создание таблиц: Используя файлы otrs-schema.DatabaseType.sql (например otrs-schema.oracle.sql, otrs-schema.postgresql.sql) можно создать таблицы в базеданных для OTRS.
3. Установка исходных данных системы: Чтобы OTRS работал должным образом,необходимо установить некоторые исходные системные данные (напримерразличные состояния заявок, типы заявок и уведомлений). В зависимостиот типа выбраной вами базы данных используйте один из следующихфайлов otrs-initial_insert.mysql.sql, otrs-initial_insert.db2.sql,otrs-initial_insert.oracle.sql, otrs-initial_insert.postgresql.sql илиotrs-initial_insert.mssql.sql .
4. Создание связей между таблицами: Последний шаг — создание связей междуразличными таблицами базы данных OTRS Для этого используйте файл otrs-schema-post.DatabaseType.sql (например otrs-schema-oracle.post.sql, otrs-schema-post.postgresql.sql).
После завершения установки базы данных необходимо проверить и установитьсоответствующие права доступа для базы данных OTRS. Сделать это необходимотак, чтобы только один пользователь имел соответствующие права доступа. Настройкаправ доступа отличается в зависимости от выбраного вами сервера базы данных идолжна производится с помощью графического интерфейса базы данных или с помощьюпрограммы клиента.

Установка
31
Если база данных и права доступа настроены правильно, то на следующем этапе еенужно подключить к OTRS. Откройте файл Kernel/Config.pm, находящийся в домашнемкаталоге пользователя ‘otrs’ и измените параметры в соответствии с вашими требованиямитак, как это показанно в Сценарии 3.15.
# DatabaseHost # (The database host.) $Self->{‘DatabaseHost’} = ‘localhost’;
# Database # (The database name.) $Self->{Database} = ‘otrs’;
# DatabaseUser # (The database user.) $Self->{DatabaseUser} = ‘otrs’;
# DatabasePw # (The password of database user.) $Self->{DatabasePw} = ‘some-pass’;
Сценарий 3.15. «Подгоняемые» параметры
Настрой планировщика задач (cron jobs) для OTRSДля правильной работы системы OTRS необходим планировщик задач (cron jobs).Планировщик задач (cron jobs) должен запускаться с теми же правами, что и модули OTRS.Именно по этому cron jobs должен быть внесен в crontab-файл пользователя ‘otrs’.
Все сценарии с cron jobs находятся в директории var/cron домашнего каталогапользователя ‘otrs’ (см. ниже Сценарий 3.16 ).
linux:~# cd /opt/otrs/var/cronlinux:/opt/otrs/var/cron# lsaaa_base.dist generic_agent.dist rebuild_ticket_index.distcache.dist pending_jobs.dist session.distfetchmail.dist postmaster.dist unlock.distgeneric_agent-database.dist postmaster_mailbox.distlinux:/opt/otrs/var/cron#
Сценарий 3.16. Файлы, необходимые для создания заданий планировщика задач (cronjobs).
Эти сценарии имеют расширение ‘.dist’. Их нужно скопироваь в соответствующие файлыбез расширения. Если вы работаете в оболочке bash, то можете воспользоваться командойиз Сценария 3.17.
linux:/opt/otrs/var/cron# for foo in *.dist; do cp $foo `basename $foo .dist`; done

Установка
32
linux:/opt/otrs/var/cron# lsaaa_base generic_agent-database.dist rebuild_ticket_indexaaa_base.dist generic_agent.dist rebuild_ticket_index.distcache pending_jobs sessioncache.dist pending_jobs.dist session.distfetchmail postmaster unlockfetchmail.dist postmaster.dist unlock.distgeneric_agent postmaster_mailboxgeneric_agent-database postmaster_mailbox.distlinux:/opt/otrs/var/cron#
Сценарий 3.17. Копирование и переименование всех файлов, необходимых для созданиязаданий планировщика задач (cron jobs).
В Таблице 3-2 приводятся различные задания cron jobs.
Таблица 3.2. Описание некоторых сценариев планировщика задачcron job.
Сценарий Назначениеaaa_base Определяет основные настройки для
crontab пользователя ‘otrs’.cache Удаляет из диска устаревшие
(«просроченные») кэш-записи. Очищает кэш-погрузчик для CSS и JavaScript файлов.
fetchmail Этот сценарий может быть использованв том случае, если новые емейлы будутпоступать в систему обработки заявок черезfetchmail.
generic_agent Выполняет задания из GenericAgent,которые не сохраняются в базе данных, а всобственных конфиг-файлах.
generic_agent-database Выполняет задания из GenericAgent,которые хранятся в базе данных.
pending_jobs Проверяет систему на наличие заявок,ожидающих решения, закрывает ихили отсылает напоминание, если этонеобходимо.
postmaster Проверяет очередь сообщений системыобработки заявок, и доставляет тесообщения, которые находятся в этойочереди.
postmaster_mailbox Получает почту с POP3-счетов, которыебыли указаны в админке, в разделе»Учетные записи PostMaster».
rebuild_ticket_index Восстанавливает индекс заявки, чтозначительно повышает скорость просмотразаявок в разделе QueueView.

Установка
33
Сценарий Назначениеsession Удаляет старые и больше не используемые
ID-сессий (session IDs).unlock Открывает заявки, которые были ранее
заблокированы в системе.
Чтобы настроить все задания cron jobs используйте скрипт bin/Cron.sh, которыйнаходится в домашнем каталоге пользователя ‘otrs’. При запуске, скрипту нужно передатьодин из трех параметров, указывающий на выполняемое действие: создание, удаление,переустановка заданий. Допустимы следующие параметры:
Cron.sh { start } { stop } { restart } [ OTRS user ]
Посокольку задания планировщика cron jobs должны быть установлены в crontab-файлепользователя ‘otrs’, то нужно залогинится как пользователь ‘otrs’. Если вы вошли в системукак суперпользователь (с правами администратора) и хотите изменить пользователя- используйте команду su otrs. Для установки заданий cron jobs выполните командыприведенные ниже, в Сценарии 3.18.
ВниманиеОбратите внимание, что при использовании файла Cron.sh другие задания,установленные в crontab-файле для пользователя ‘otrs’ будут перезаписаны илиудалены. Внесите все необходимые изменения в файл Cron.sh, чтобы сохранитьдругие crontab-задания.
linux:/opt/otrs/var/cron# cd /opt/otrs/bin/linux:/opt/otrs/bin# su otrslinux:~/bin$ ./Cron.sh start/opt/otrs/binCron.sh — start/stop OTRS cronjobsCopyright (C) 2001-2009 OTRS AG, http://otrs.org/(using /opt/otrs) donelinux:~/bin$ exitexitlinux:/opt/otrs/bin#
Сценарий 3.18. Установка cron jobs.
Команда crontab -l -u otrs, которую можно запускать с правами администратора,отображает содержание crontab-файла пользователя ‘otrs’, так что можно легко проверитьправильность расположения всех записей (см. ниже Сценарий 3.19).
linux:/opt/otrs/bin# crontab -l -u otrs# —# cron/aaa_base — base crontab package# Copyright (C) 2001-2011 OTRS AG, http://otrs.org/# —# This software comes with ABSOLUTELY NO WARRANTY.# —# Who gets the cron emails?MAILTO=»[email protected]»

Установка
34
# —# cron/cache — delete expired cache# Copyright (C) 2001-2011 OTRS AG, http://otrs.org/# This software comes with ABSOLUTELY NO WARRANTY.# —# delete expired cache weekly (Sunday mornings)20 0 * * 0 $HOME/bin/otrs.CacheDelete.pl —expired >> /dev/null30 0 * * 0 $HOME/bin/otrs.LoaderCache.pl -o delete >> /dev/null
# —# cron/fetchmail — fetchmail cron of the OTRS# Copyright (C) 2001-2011 OTRS AG, http://otrs.org/# —# This software comes with ABSOLUTELY NO WARRANTY.# —# fetch every 5 minutes emails via fetchmail#*/5 * * * * /usr/bin/fetchmail -a >> /dev/null
# —# cron/generic_agent — otrs.GenericAgent.pl cron of the OTRS# Copyright (C) 2001-2011 OTRS AG, http://otrs.org/# —# —# This software comes with ABSOLUTELY NO WARRANTY.# —# start generic agent every 20 minutes*/20 * * * * $HOME/bin/GenericAgent.pl >> /dev/null# example to execute GenericAgent.pl on 23:00 with# Kernel::Config::GenericAgentMove job file#0 23 * * * $HOME/bin/otrs.GenericAgent.pl -c «Kernel::Config::GenericAgentMove» >> /dev/null# —# cron/generic_agent — GenericAgent.pl cron of the OTRS# Copyright (C) 2001-2011 OTRS AG, http://otrs.org/# —# This software comes with ABSOLUTELY NO WARRANTY.# —# start generic agent every 10 minutes*/10 * * * * $HOME/bin/otrs.GenericAgent.pl -c db >> /dev/null# —# cron/pending_jobs — pending_jobs cron of the OTRS# Copyright (C) 2001-2011 OTRS AG, http://otrs.org/# —# This software comes with ABSOLUTELY NO WARRANTY.# —# check every 120 min the pending jobs45 */2 * * * $HOME/bin/otrs.PendingJobs.pl >> /dev/null# —# cron/postmaster — postmaster cron of the OTRS# Copyright (C) 2001-2011 OTRS AG, http://otrs.org/# —# This software comes with ABSOLUTELY NO WARRANTY.# —# check daily the spool directory of OTRS

Установка
35
#10 0 * * * * test -e /etc/init.d/otrs & /etc/init.d/otrs cleanup >> /dev/null; test -e /etc/rc.d/init.d/otrs && /etc/rc.d/init.d/otrs cleanup >> /dev/null10 0 * * * $HOME/bin/otrs.CleanUp.pl >> /dev/null# —# cron/postmaster_mailbox — postmaster_mailbox cron of the OTRS# Copyright (C) 2001-2011 OTRS AG, http://otrs.org/# —# This software comes with ABSOLUTELY NO WARRANTY.# —# fetch emails every 10 minutes*/10 * * * * $HOME/bin/otrs.PostMasterMailbox.pl >> /dev/null# —# cron/rebuild_ticket_index — rebuild ticket index for OTRS# Copyright (C) 2001-2011 OTRS AG, http://otrs.org/# —# This software comes with ABSOLUTELY NO WARRANTY.# —# just every day01 01 * * * $HOME/bin/otrs.RebuildTicketIndex.pl >> /dev/null
# —# cron/session — delete old session ids of the OTRS# Copyright (C) 2001-2011 OTRS AG, http://otrs.org/# —# This software comes with ABSOLUTELY NO WARRANTY.# —# delete every 120 minutes old/idle session ids55 */2 * * * $HOME/bin/otrs.DeleteSessionIDs.pl —expired >> /dev/null
# —# cron/unlock — unlock old locked ticket of the OTRS# Copyright (C) 2001-2011 OTRS AG, http://otrs.org/# —# This software comes with ABSOLUTELY NO WARRANTY.# —# unlock every hour old locked tickets35 * * * * $HOME/bin/otrs.UnlockTickets.pl —timeout >> /dev/null
linux:/opt/otrs/bin#
Сценарий 3.19. Файл Crontab.
Обновление OTRS-фреймворкаЭти инструкции предназначены для тех, кто обновляет OTRS 2.4 до версии 3.0, их можноприменять при обновлении системы из RPM так и в случае использования исходных кодов(тарболов).
Если вы используете более старую версию OTRS, то сначала выполните обновление доверсии 2.4 (1.1->1.2->1.3->2.0->2.1->2.2->2.3->2.4->3.0 …).
Если вы хотите сделать «patch level upgrade», который является обновлением OTRS,например, с версии 3.0.3 до 3.0.4, то можете пропустить шаги 8, 9, 10, and 13 — 16.

Установка
36
1. Остановите все соответствующие службы.
в т.ч. (зависящие от использующихся услуг):
shell> /etc/init.d/cron stopshell> /etc/init.d/postfix stopshell> /etc/init.d/apache stop
2. Сделайте резервные копии всех данных из $OTRS_HOME (по умолчаниюOTRS_HOME=/opt/otrs):
• Kernel/Config.pm
• Kernel/Config/GenericAgent.pm
• Kernel/Config/Files/ZZZAuto.pm
• var/*
3. Резервное копирование базы данных.
4. Если есть возможность, сначала попробуйте произвести установку на отдельномтестовом компьютере.
5. Установка нового релиза (из tar-архива или с помощью RPM-пакетов).
• С помощью тарбола (tarball):
shell> cd /optshell> tar -xzf otrs-x.x.x.tar.gzshell> ln -s otrs-x.x.x otrs
Восстановите старые конфигурационные файлы.
• Kernel/Config.pm
• Kernel/Config/GenericAgent.pm
• Kernel/Config/Files/ZZZAuto.pm
• С помощью RPM-пакетов:
shell> rpm -Uvh otrs-x.x.x.-01.rpm
В этом случае обновление из RPM автоматически восстанавливает старыеконфигурационные файлы.
6. Собственные темы
Примечание: Темы OTRS 2.4 и OTRS 3.0 являются НЕ совместимыми, так что неиспользуйте старые темы. Темы расположены в каталоге $OTRS_HOME/Kernel/Output/HTML/*/*.dtl (default: OTRS_HOME=/opt/otrs).

Установка
37
7. Установка прав доступа к файлам.
В случае использования тарбола (tarball), выполните
shell> cd /opt/otrs/shell> bin/otrs.SetPermissions.pl
с правами, необходимыми для установки системы.
8. Примените изменения к базе данных (часть 1/2):
shell> cd /opt/otrs/
# MySQL:shell> cat scripts/DBUpdate-to-3.0.mysql.sql | mysql -p -f -u root otrs# PostgreSQL:shell> cat scripts/DBUpdate-to-3.0.postgresql.sql | psql otrs
9. Запустите сценарий перемещения (как пользователь ‘otrs’, а НЕ root):
Сценарий перемещения (миграции) нужно запускать для перемещения некоторыхданных из старой базы данных в новую. Пожалуйста, запустите:
shell> scripts/DBUpdate-to-3.0.pl
10.Примените изменения к базе данных (часть 2/2):
# MySQL:shell> cat scripts/DBUpdate-to-3.0-post.mysql.sql | mysql -p -f -u root otrs# PostgreSQL:shell> cat scripts/DBUpdate-to-3.0-post.postgresql.sql | psql otrs
11.Обновите конфигурацию системы и удалите все данные из кэша. Пожалуйста, введите:
shell> bin/otrs.RebuildConfig.plshell> bin/otrs.DeleteCache.pl
12.Перезапустите сервисы.
в т.ч. (зависящие от использующихся услуг):
shell> /etc/init.d/cron startshell> /etc/init.d/postfix startshell> /etc/init.d/apache start

Установка
38
13.Проверьте возможные проблемы с кодировкой:
В OTRS 3.0, кодировка по умолчанию была изменена с «iso-8859-1» на «utf-8».
Это каснется вас только в том случае, если вы не указали кодировку в файле Kernel/Config.pm (все установки, которые были произведены с помощью веб-инсталлятораимеют пользовательские настройки) или, если вы не изменили кодировку по умолчаниюв AdminSysConfig.
Если у вас возникли проблемы с новой кодировкой, добавьте эту строку в файл Kernel/Config.pm:
$Self->{‘DefaultCharset’} = ‘iso-8859-1’;
В общем, «UTF-8» это только рекомендованный набор символов для работы OTRS, ипереключение на «ISO-8859-1» будет работать также хорошо.
Примечание: Мы настоятельно рекомендуем обновить все установленные на сегоднясистемы OTRS, в которых нету поддержки UTF-8 до версии 3.0. Все другие кодировкисчитаются устаревшыми.
OTRS 3.1 будет испольвать исключительно UTF-8 в качестве внутренней кодировки.
14.Check for Custom Frontend Module Registrations
Начиная с OTRS 3.0, модули приложений могут иметь свои собственные CSS-стили и/или JavaScript-сценарии. Это является частью так называемого интерфейсного модулярегистрации новых модулей в SysConfig. Такой подход может вызвать проблемыпри обновлении, так ка, по умолчанию, конфигурационные настройки интерфейсногомодуля, которые были изменены локально не будут получать обновлений.
Чтобы убедиться что ничего не пострадало, пожалуйста, проверьте файл Kernel/Config/Files/ZZZAuto.pm. Особое внимание обратите на такие записи, какнапример:
$Self->{‘Frontend::Module’}->{‘AgentStats’} = { … };
Эти настройки должны быть сброшены в значения по умолчанию в Admin -> SysConfig(в данном случае: ‘Frontend::Module###AgentStats’) с помощью небольшой кнопки»Сбросить», которая находится рядом с флажком «Активизировать».Таким образом,настройки будут сброшены в соответствии с новыми, специфическими настройкамимодуля и больше не будут появляться в Kernel/Config/Files/ZZZAuto.pm. Еслинеобходимо, в будущем, вы сможете настроить эти параметры заново.
Такая же процедура должна быть выполнена для настройки»Frontend::ToolBarModule###1-Ticket::TicketSearchFulltext», поскольку он такжеиспользует CSS-стили, конкретного модуля. Вы можете смело пропустить этот шаг, еслив вашей системе эти настройки не активированы.
15.Check for customized PreferencesGroups entries

Установка
39
With OTRS 3.0, there were a few corrections in PreferencesGroups configuration entries.Notably, the keys ‘Activ’ and ‘Colum’ were changed to ‘Active’ and ‘Column’, respectively. Youonly need to take action if you have customized such settings on your system, otherwise theywill be updated automatically.
To check if you are affected, please look at the file Kernel/Config/Files/ZZZAuto.pmand look for entries like:
$Self->{‘CustomerPreferencesGroups’}->{‘RefreshTime’} = { ‘Activ’ => ‘0’, ‘Colum’ => ‘Frontend’, ‘Data’ => { » => ‘off’, ’10’ => ’10 minutes’, ’15’ => ’15 minutes’, ‘2’ => ‘ 2 minutes’, ‘5’ => ‘ 5 minutes’, ‘7’ => ‘ 7 minutes’ }, ‘Desc’ => ‘Select your QueueView refresh time.’, ‘Label’ => ‘QueueView refresh time’, ‘Module’ => ‘Kernel::Output::HTML::PreferencesGeneric’, ‘PrefKey’ => ‘UserRefreshTime’, ‘Prio’ => ‘4000’ };
This needs to be changed as follows:
$Self->{‘CustomerPreferencesGroups’}->{‘RefreshTime’} = { ‘Active’ => ‘0’, ‘Column’ => ‘Frontend’, ‘Data’ => { » => ‘off’, ’10’ => ’10 minutes’, ’15’ => ’15 minutes’, ‘2’ => ‘ 2 minutes’, ‘5’ => ‘ 5 minutes’, ‘7’ => ‘ 7 minutes’ }, ‘Desc’ => ‘Select your QueueView refresh time.’, ‘Label’ => ‘QueueView refresh time’, ‘Module’ => ‘Kernel::Output::HTML::PreferencesGeneric’, ‘PrefKey’ => ‘UserRefreshTime’, ‘Prio’ => ‘4000’ };
16.Переименование пользовательских полей в базе данных
Поле ‘Приветствие’, встроенное в клиентскую базу данных было переименовано в болееподходящее ‘Заголовок’. Если для клиентов используется встроенная база данных,

Установка
40
и вы изменили конфигурацию, например, добавили новые поля в таблицу клиентовили включили поддержку для Компаний Клиентов, необходимо изменить правилапреобразования (mapping) в Kernel/Config.pm:
Измените эту строку с:
[ ‘UserSalutation’, ‘Salutation’, ‘salutation’, 1, 0, ‘var’, », 0 ],
на:
[ ‘UserTitle’, ‘Title’, ‘title’, 1, 0, ‘var’, », 0 ],
Пожалуйста, обратите винмание на то, что это также можетповлиять на любые приветствия или шаблоны, в которых используетсястрока <OTRS_*_UserSalutation>. Если вы использовали эту строку Ииспользуете встроенную таблицу клиентов, пожалуйста, замените ее на<OTRS_CURRENT_UserTitle>.
17.Дополнительно: Помечайте Заявки как Прочитанные
В OTRS 3.0 появилась новая возможность: Новые заявки и новые статьи, которые Агентеще не читал, выделены как ‘непрочитанные’. Все заявки, которые были созданны передобновлением OTRS до версии 3.0 будут помечены как ‘непрочитанные’. Если вам ненравиться такой подход, воспользуйтесь специальным скриптом, чтобы пометить всезаявки и статьи как прочитанные для всех агентов, которые имеют права на чтениеэтих заявок. Обратите внимание, что для работы этого сценария может потребоватьсянекоторое время!
shell> bin/otrs.MarkTicketAsSeen.pl
18.Молодцы!
Обновление с помощью Windows InstallerВ настоящее время нету механизма автоматического обновления копии OTRS, котораябыла установлена с использованием инсталлятора Windows (Windows Installer). Восновном, процесс обновления состоит из таких шагов: архивирование базы данных и всейфайловой системы, деинсталяция OTRS, установка новой версии, восстановление базыданных и запуск процедуры обновления (если она необходима).
Обновление подробно описано по ссылке FAQ# 4200351 [http://faq.otrs.org/otrs/public.pl?Action=PublicFAQ;ItemID=351], также по ссылке YouTube video [http://www.youtube.com/watch?v=sf0R-reMTWc] можно найти достаточно информативное видео.

41
Глава 4. Первые шагиВ этой главе приводится общий обзор OTRS и структура веб-интерфейса. Дается обьяснениетаким терминам как: агенты, клиенты и администраторы. В этом разделе вы войдете в систему справами OTRS-администратора и более внимательно ознакомитесь с настройками пользователей,доступными для каждого из типов аккаунта.
Веб-интерфейс для агентовАгентский веб-интерфейс позволяет агентам отвечать на вопросы клиентов, создаватьновые заявки для клиентов и агентов, создавать заявки на основе телефонных звонковклиентов, писать и редактировать записи FAQ-модуля, редактировать данные клиентов итак далее.
Предположим, что OTRS доступен по ссылке http://www.example.com [http://www.example.com/], таким образом, агенты и OTRS-администраторы могут войти в OTRSнабрав в строке браузера следующий URL-адрес: http://www.example.com/otrs/index.pl[http://www.example.com/otrs/index.pl] (см. ниже Рисунок 4.1).
Рисунок 4.1. Агентский интерфейс, экран входа.
Пользовательский веб-интерфейсВ OTRS клиенты имеют отдельный веб-интерфейс, с помощью этого веб-интерфейса онимогут создавать новые учетные записи, просматривать собственные заявки, создавать иредактировать заявки, изменять настройки своей учетной записи и т.д.
Используя выше приведенный пример, страница входа для клиентов будет доступна поссылке http://www.example.com/otrs/customer.pl [http://www.example.com/otrs/customer.pl](см. ниже Рисунок 4.2).

Первые шаги
42
Рисунок 4.2. Пользовательский веб-интерфейс, страница входа.
Общедоступный веб-интерфейсВ дополнение к веб-интерфейсу для агентов и пользователей, OTRS имеет открытый веб-интерфейс (см. ниже Рисунок 4.3), доступ к которому возможен посредством FAQ-модуля(который устанавливается отдельно). Он предоставляет открытый доступ к FAQ-системеи позволяет пользователям без авторизации искать информацию.
В нашем примере общий веб-интерфейс будет доступен перейдя по ссылке: http://www.example.com/otrs/faq.pl [http://www.example.com/otrs/faq.pl] , http://www.example.com/otrs/public.pl [http://www.example.com/otrs/public.pl]
Рисунок 4.3. Общий веб-интерфейс.

Первые шаги
43
Первое применениеПерейдите к странице входа, как это описано в разделе Агентский веб-интерфейс .Введите имя пользователя и пароль. Ввиду того что после новой установки в системе нетуни одного зарегистрированного пользователя, войдите с правами OTRS-администратора,используя для этого имя пользователя ‘[email protected]’ и пароль ‘root’.
ВниманиеДанные доступа этого аккаунта действительны для каждой копииновоустановленной системы OTRS. Именно по этой причине пароль OTRS-администратора необходимо изменить как можно быстрее. Это можно сделатьпосле входа в систему с правами администратора перейдя по ссылке preferences.
Если не хотите входить в систему с правами OTRS-администратора, просто введите имяи пароль своего обычного агентского аккаунта.
В случае потери пароля всегда можно отправить запрос в систему для его восстановления.Для этого просто нажмите на ссылку, которая находится под кнопкой Вход, введитеадрес своей электронной почты, который вы указали в настройках своего OTRS-аккаунтаи нажмите кнопку Отправить (см. ниже Рисунок 4.4).
Рисунок 4.4. Запрос на восстановление пароля.
Веб-интерфейс — обзорПосле входа в систему открывается страница Панели Управления (см. ниже Рисунок4.5). Панель управления полностью настраиваемая. В ней отображаются вашизаблокированные заявки, она предоставляет возможность просматривать: очереди,статусы и эскалации, сохранять опции для создания новых заявок, создаваемых на основетелефонных звонков и электронных писем. Также она предоставляет краткую сводку поновым, ожидающим, эскалированым и открытым заявкам.

Первые шаги
44
Рисунок 4.5. Панель управления веб-интерфейса агентов
Для большей ясности, общий веб-интерфейс разделен на несколько частей (областей).В верхней части окна отображается строка с общей информацией: имя пользователя,кнопка выхода, иконки, отображающие количество заблокированных заявок (позволяютпрямой доступ к ним), ссылки для создания новой заявки на основе телефонного звонкаили сообщения электронной почты. Также есть иконки для перехода к очереди, просмотраинформации о статусах и эскалациях.
Под иконками находится навигационная строка. Она показывает меню, позволяющиепереходить к разным модулям системы и позволяет выполнять некоторые глобальныедействия. При нажатии на кнопку Панель Управления вы перейдете на страницу ПанелиИнструментов, которая по умолчанию отображается после входа в сисетму. Если нажатьссылку меню Заявки, откроется подменю, предлагающее различные действия, допустимыенад заявками: создание новой заявки (на основе телефонного звонка или сообщенияэлектронной почты), поиск конкретных заявок. Кнопка Статистика также является частьюменю и позволяет просматривать существующую статистическую информацию, создатьновую а также производить импорт существующей статистики. Кнопка Клиенты позволяетперейти на страницу Управления Клиентами. Для администрирования системы нажмитекнопку Администрирование. На этой странице можно создавать аккаунты для другихагентов, очереди и т.д. Для поиска заявок используйте кнопку Поиск.
Если установлены дополнительные приложения, такие как, например, ФайловыйМенеджер или Менеджер Емейл-Рассылки, кнопки для запуска этих приложений будуттакже отображатся.
Красная полоса, которая находится под панелью навигации предназначена дляотображения различных системных сообщений. Если войти в систему с правами OTRS-администратора, будет выведено сообщение о том, что в системе не следует работать справами администратора.
Под названием раздела, в котором вы находитесь в данный момент, есть несколькоподразделов (каждый из них находится в отдельном блоке), которые можно перетаскиватьи перемещать в пределах блока или перенести их в другое место.
В левой колонке находится информация о заявках: напоминания, эскалации, новые илиоткрытые. В каждой из категорий можно просматривать все заявки, к которым у васесть доступ, сколько заявок заблокировано и сколько находится в «Мои Очереди». «Мои

Первые шаги
45
Очереди» — очередь, которая определяется в настройках пользовательского аккаунтапредпочтения. Она используется в том случае, когда нужно отслеживать заявки сопределенными параметрами (характеристиками).
В правой колонке есть кнопка «Настройки». Нажмите на нее, чтобы увидетьразличные настройки, как это показано на Рисунке 4.6. Вы можете установить илиотменить отдельные опции настройки и сохранить изменения. Этот раздел являетсяфиксированным, так что вы не сможете свободно перемещать его по экрану.
Рисунок 4.6. Настройки «Приборной панели».
Ниже, под настройками, можно увидеь раздел с статистическим графиком по заявкам запоследние 7 дней. Ниже располагается секция, в которой отображаются ПредстоящиеСобытия и новости OTRS.
В нижней части экрана отображается «футер» сайта (см. ниже Рисунок 4.7). Он содержитпраямые ссылки на оффициальный сайт OTRS или ссылку для перехода на началостраницы.
Figure 4.7. Нижний колонтитул.
Что такое очередь?На физическом уровне для почтового ящика создается специальный файл (иногда егоеще называют почтовый спул), в который помещаются и хранятся все сообщения. Новыесообщения электронной почты просто добавляются в конец этого файла. Почтоваяпрограмма, которая используется для чтения и написания писем (такие программы ещеназываются пользовательскими почтовыми агентами — MUA (Mail User Agent) читает этотфайл и отображает его содержимое.
Очереди OTRS можно сравнить с Inbox-файлом, в котором хранятся входящие сообщенияэлектронной почты, так как в них тоже может хранится множество сообщений. Очередиимеют много функций, схожих с теми, которые присущи Inbox-файлу. Как агенты так ипользователи, все должны помнить о том, в какой очереди содержится заявка. Агентымогут открывать, редактировать заявки, размещенные в очереди, а также, перемещать ихиз одной очереди в другую. Но зачем перемещать заявки?

Первые шаги
46
Чтобы обьяснить это с более практической точки зрения давайте вспомним пример скомпанией Максима, которая была описана в разделе пример системы обработки заявок.Максим установил OTRS чтобы избавится от существующего хаоса в системе поддержки ипредоставить возможность своей команде лучше управлять службой поддержки клиентов,покупающих видеомагнитофоны.
На данный момент достаточно одной очереди, чтобы хранить в ней все запросы клиетов.Но через некоторое время Максим решает начать продажи DVD-магнитофонов. Теперьу клиентов есть вопросы касающиеся не только видеомагнитофонов, но и вопросыотносительно нового продукта. С течением времени в очередь, ранее созданую Максимом,начинает приходить все больше и больше писем и управлятся с ними становится всетруднее и труднее.
Однажды Максим принимает решение немного оптимизировать структуру системыподдержки и добавляет две новых очереди. Таким образом в системе используется ужетри очереди. Новые заявки, только поступившие в систему хранятся в очереди «raw». Двеновые очереди: одна для хранения заявок касающихся видеомагнитофонов и другая — дляdvd-магнитофонов.
Максим просит Маргариту просматривать очередь «raw» и сортировать емейлы либов очередь «видеомагнитофоны» или в «dvd-магнитофоны», в зависимости от того, чтозапросил клиент. Андрей имееть доступ только к очереди «видеомагнитофоны», а Сергейможет отвечать на заявки из очереди «dvd-магнитофоны». Маким имеет возможностьредактировать заявки, находящиеся во всех очередях.
OTRS поддерживает управление доступом для пользователей, групп и ролей, такимобразом можно очень легко настроить очереди, которые доступны только для некторыхучетных записей. Чтобы все запросы приходили в различные очереди, Максим можетиспользовать правила фильтрации. Иначе, если используются два различных email-адреса, Маргарита будет сортировать и направлять в другие очереди только те заявки,которые не были отсортированы автоматически.
Сортировка входящих сообщений в различные очереди позволяет сохранять системуподдержки в структурированном и аккуратном виде. Поскольку ваши агенты находятсяв разных группах и имеют различные права для доступа к очередям, система можетбыть оптимизирована еще больше. Очереди могут быть использованы для определенияструктуры всей компании а также для определения рабочего потока процессов. Максимможет к примеру создать еще одну очередь и назвать ее «продажи», которая будетсодержать подочереди «запросы», «предложения», «заказы», «оплаты» и т.д. Такой подходпоможет Максиму структурировать и оптимизировать процесс работы с транзакциями.
Чем лучше структурированна система поддержки, тем меньше времени требуется дляразличных задач. Это приводит к уменьшению рабочего времени, соответственно и куменьшению денежных затрат. Очереди могут помочь оптимизировать бизнес-процесывашей компании.
Пользовательские настройкиПользователи OTRS, такие как: клиенты, агенты и OTRS-администраторы могут настроитьсвои учетные записи в соответствии с их потребностями. Агенты могут открыть страницус настройками аккаунта кликнув ссылку с именем пользователя, которая находится вверхнем правом углу веб-интерфейса (см. ниже Рисунок 4.8), а клиенты должны нажатьссылку «Предпочтения» (см. ниже Рисунок 4.9).

Первые шаги
47
Рисунок 4.8. Пользовательские настройки агентов.
Агент можен настраивать три различных категории настроек: профиль пользователя,настройки электронной почты и другие параметры. Возможности по умолчанию:
Профиль пользователя
• Изменение текущего пароля.
• Выбор языка интерфейса.
• Переключение между темами интерфейса.
• Изменение темы веб-интерфейса.
• Активация и настройка функции «время вне оффиса».
Настройки электронной почты
• Выберите события, при наступлении которых, система должна отсылать уведомленияагентам на их емейлы.
Другие настройки
• В меню «Мои Очереди» выберите те очедеди, которые хотите отслеживать болеевнимательно.
• Установите время обновления страницы для шаблона отображения очередей.
• Выберите страницу, которая должна отображатся после создания заявки.

Первые шаги
48
Рисунок 4.8. Пользовательские предпочтения клиентов.
Клиент может выбрать язык веб-интерфейса системы, изменять время обновлениястраницы в шаблоне просмотра очередей, выбирать максимальное количествоотображаемых заявок. Кроме этого также можно установить новый пароль.

49
Глава 5. Панель управления OTRSОсновы
Администраторы используют страницу администрирования веб-интерфейса OTRS длянастройки системы — добавления агентов, клиентов и очередей, заявок и настройки почты,установки дополнительных пакетов, таких как FAQ (ЧАВО) и ITSM и многое другое.
Агенты, входящие в группу admin могут получить доступ к админке, нажав на кнопкуАдминистрирование на панели навигации (см. ниже Рисунок 5.1). Остальные агенты небудут видеть эту ссылку.
Рисунок 5.1. Страница OTRS-администратора.
Агенты, Группы и РолиАгенты
Нажав на ссылку Агенты вы получите доступ к странице управления пользователями OTRS(см. ниже Рисунок 5.2). Администраторы могут добавлять, изменять или деактивироватьаккаунты агентов. Администраторы также могут управлять пользовательскиминастройками агентов, например изменять язык их веб-интерфейса, настройкиуведомлений.
ЗамечаниеУчетная запись (аккаунт) агента может быть деактивирована, но не удалена.Деактивация осуществляется путем установки параметра Действительный взначение не действительный или не действительный-временно.

Панель управления OTRS
50
Рисунок 5.2. Управление Агентами.
Чтобы создать агента, нажмите на кнопку «Добавить агента», введите все необходимыеданные и нажмите кнопку Отправить, которая находится в нижней части экрана, как этопоказано на Рисунке 5.3.
Рисунок 5.3. Добавление нового агента.
После того, как новая учетная запись агента создана, его нужно сделать членом однойили нескольких груп или ролей. За дополнительной информацией о группах и роляхобращайтесь к разделу Группы и Роли данной главы.
ГруппыКаждая учетная запись агента должна принадлежать по крайней мере к одной группе илироли. После установки системы есть три предопределенных групы, которые приведены вТаблице 5-1.

Панель управления OTRS
51
Таблица 5.1. Предопределенные групы, доступны для новой (толькочто) установленной системы OTRS
Группа Описаниеadmin Допускается для выполнения
административных задач в системе.stats Компетентные для генерации статистики и
доступа к модулю статистики OTRS.users Агенты должны входить в эту группу с
правами для чтения и записи. Тогда онисмогут получить доступ ко всем функциямсистемы обработки заявок.
ЗамечаниеВ новой установке OTRS, группа users изначально пуста. Агент ‘[email protected]’ поумолчанию принадлежит к группам admin и stats.
Чтобы перейти на страницу управления группами, нажмите в панели администрированияссылку Группы (см. ниже Рисунок 5.4).
Рисунок 5.4. Управление групами.
ЗамечаниеКак в случае с агентами, группа в OTRS может быть только деактивирована, но неудалена. Деактивация осуществляется путем установки флага Действительный взначение не действительный или не действительный-временно.
Чтобы добавить агента в группу, или изменить приналежность агентов к группе,используйте ссылку на Панели Управления Агенты <-> Группы (см. ниже Рисунок 5.5).

Панель управления OTRS
52
Рисунок 5.5. Управление группами.
Приводится обзор всех групп и агентов. Для поиска той или иной сущности можноиспользовать фильтры. Если вы хотите изменить группы, в которые входит определенныйагент, просто нажмите на его имя (см. ниже Рисунок 5.6). Для изменениия агентов,связанных с группой просто нажмите на название нужной группы (см. ниже Рисунок 5.7).
Рисунок 5.6. Изменение группы, к которой принадлежит агент.

Панель управления OTRS
53
Рисунок 5.7. Изменение агентов, входящих в определенную группу.
Каждая группа имеет набор прав, связанный с ней и, каждый агент, член этойгруппы может иметь некоторую собственную комбинацию прав. Список разрешений/правпоказано в Таблице 5-2.
Таблица 5.2. Права, связанные с OTRS-группами
Права Описаниеro Права «только для чтения» заявок, записей
и очередей этой группы.move into Права для перемещения заявок или
записей между очередями или для области,принадлежащей группе.
create Права для создания заявок или записей вочередях или области группы.
owner Права для изменения владельца заявок илизаписей в очередях принадлежащих этойгруппе.
priority Права для изменения приоритета заявокили записей в очереди или области,принадлежащей этой группе.
rw Полный доступ к заявкам или записям вочереди или области, принадлежащей кэтой группе.
ЗамечаниеПо умолчанию, СписокОчередей (QueueView) отображает только заявки вочередях, к которым агент имеет права rw, т.е к заявкам, с которыми он долженработать. Если вы хотите изменить это поведение, вы можете установить параметрTicket::Frontend::AgentTicketQueue###ViewAllPossibleTickets в значение Да.

Панель управления OTRS
54
РолиРоли являются мощным средством для простого и быстрого управления правами доступамножества агентов. Они особенно полезны для больших и сложных систем поддержки,с большим количеством агентов, групп и очередей. В приведенном ниже примереобьясняется как и когда они могут использоваться.
Давайте представим, что у нас есть система, в которой зарегистрированно 100 агентов,90 из них имеют доступ только к очереди «поддержка», в которой хранятся все запросыо поддержке. Очередь «поддержка» содержит несколько под очередей. Остальные 10агентов имеют права доступа ко всем очередям, существующим в системе. Эти 10 агентовработают с заявками, просматривают «raw»-очередь и перемещают спам-сообщения вочередь «junk».
В один день компания открывает новый отдел для продажи товаров. Запрос/принятиезаказа, подтверждение, счета и т.д. должны быть обработаны, и некоторые из агентовкомпании должны делать это используя OTRS. Разным агентам нужно предоставитьдоступ к очередям, которые планируется создать.
Поскольку изменения вручную прав доступа для разных агентов займет много времени,то для определения различных уровней доступа можно создать роли. Затем, агенты могутбыть добавлены к одной или нескольким ролям, таким образом их права будут измененыавтоматически. Если будет создана новая учетная запись агента, ее также можно слегкостью добавить к одной или нескольким ролям.
ЗамечаниеРоли действительно полезны для управления большими OTRS-системами.Однако, используя роли, нужно проявлять осторожность. Смешивание Агентавходящего в группу с Агентом входящим в Роль может сделать схему контролясложной для понимания и управления. Если вы решили использовать толькороли и отключить опцию Агенты <-> Группы в Панели Администрирования,то это можно сделать изменив параметр Frontend::Module###AdminUserGroup вSysConfig. Помните, это действие не удалит существующих Агентов из Групп, вкоторых они находятся!
Для управления ролями перейдите по ссылке Роли в Панели Администрирования (см. нижеРисунок 5.8).

Панель управления OTRS
55
Рисунок 5.8. Управление Ролями.
ЗамечаниеКак в случае с агентом и группами, однажды созданные роли могутбыть деактивированы, но не удалены. Чтобы отключить, установите опциюДействительный в значение не действительный или не действительный-временно.
Приведен обзор всех ролей в системе. Нажмите на имя роли, чтобы отредактироватьее настройки. По умолчанию, в новой, только что установленной системе OTRS нетупредопределенных ролей. Чтобы создать новую, нажмите кнопку «Добавить роль», введитевсе необходимые данные и нажмите кнопку Отправить (см. ниже Рисунок 5.9).
Рисунок 5.9. Добавление новой роли.
Чтобы получить список всех ролей и агентов в системе, перейдите по ссылке Роли <->Агенты в Панели Администрирования. Также, для поиска конкретного элемента можноиспользовать фильтры. Если необходимо изменить роли связанные с определенным

Панель управления OTRS
56
агентом, просто кликните на имя агента (см. ниже Рисунок 5.10). Чтобы изменить агентов,связанных с ролью, нажмите на роль, которую нужно отредактировать (см. ниже Рисунок5.11).
Figure 5.10. Изменение Ролей, связанных с Агентом.
Figure 5.11. Изменение Агентов, связанных с конкретной Ролью.
Чтобы получить список всех ролей и групп системы, перейдите по ссылке Роли <-> Группына Панели Управления. На экране появится страница, приведенная ниже на Рисунке 5.12.Для поиска конкретного элемента также можно использовать фильтры.

Панель управления OTRS
57
Figure 5.12. Управление отношениями Роли-Группы.
Чтобы определить различные права доступа для роли, нажмите на имя роли или группы(см. ниже Рисунок 5.13 и 5.14, соответственно).
Рисунок 5.13. Изменение связти между Группой и Ролью.

Панель управления OTRS
58
Рисунок 5.14. Изменение отношения Роли к Группе.
Клиенты и Группы КлиентовКлиенты
OTRS поддерживает различные типы пользователей. Используя ссылку «Клиенты» (спомощью навигационной панели, или на странице Панели Управления), можно управлятьучетными записями клиентов (см. ниже Рисунок 5.14), которые могут войти в системуиспользуя Пользовательский веб-интерфейс (customer.pl). Используя этот интерфейсклиенты могут создавать и просматривать свои заявки. Важно помнить что клиентынеобходимы в системе для хранения истории заявок.
Рисунок 5.14. Управление клиентами.
Нажав на имя клиента, по зарегистрированным клиентам можно производить поиск,редактировать их данные. Также есть возможность изменить клиентский back-end, заболее подробной информацией обращайтесь к главе внешние хранилища данных.

Панель управления OTRS
59
Чтобы создать новую учетную запись клиента, нажмите кнопку «Добавить клиента» (см.ниже Рисунок 5.15). Некоторые поля являются обязательными, т.е они должи содержатьданные, поэтому если вы оставите их пустыми, они будут выделены красным цветом.
Рисунок 5.14. Добавление клиента.
Клиент может получить доступ к системе путем ввода логина и пароля. CustomerID нужендля идентификации клиента и его заявок. Поскольку адресс электронной почты являетсяуникальным, его можно использовать в качестве уникального идетнтификатора (ID).
ЗамечаниеКак и в случае с агентами, группами и ролями, система не позволяет удалятьклиентов, а только деактивировать их, установив опцию Действительный взначение недействительный или недействительный-временно.
Группы КлиентовКлиенты также могут быть добавлены в группу, что может быть полезно, если выхотите обьеденить нескольких клиентов той же компании для доступа к одной илинескольким очередям. Сначала создайте группу, в которую будут входить клиенты, дляэтого перейдите по ссылке Модуль Управления Группами . Затем добавьте очереди ивыберите новую группу для этих очередей.
Следующим шагом будет включение поддержки клиентов группы. Это можно сделатьиспользуя конфигурационный параметр CustomerGroupSupport в SysConfig. Используяпараметр CustomerGroupAlwaysGroups можно указать группы по умолчанию, к которымбудет принадлежать новый пользователь, таким образом каждая новая учетная записьбудет добавлятся в эту группу.
Перейдя по ссылке «Клиенты <-> Группы» вы можете управлять отношениями конкретногопользователя к разным группам (см. ниже Рисунок 5.15).

Панель управления OTRS
60
Рисунок 5.15. Управление отношениями Клиент-Группа.
Для определения различных групп, в которые должен входить клиент, и наоборот,нажмите на соответствующее имя пользователя или группы (см. ниже Рисунок 5.16 и 5.17,соответственно).
Рисунок 5.16. Изменение связи между Группой и Клиентом.

Панель управления OTRS
61
Рисунок 5.17. Изменение связи между Клиентом и Группой.
ОчередиИспользуя ссылку «Очереди», находящуюся в Панели Администрирования, можетеуправлять очередями системы (см. ниже Рисунок 5.18). В новой, только установленнойсистеме OTRS существует 4 предопределенных очереди: Junk, Misc, Postmaster иRaw. Если не используются ранее определенные фильтры и правила, все входящиесообщения сохраняются в очереди «Raw». Очередь «Junk» используется для храненияспам-сообщений.
Рисунок 5.18. Управление очередями.
Здесь можно добавлять и корректировать очереди (см. ниже Рисунок 5.19). Можноопределить группу, которая должна использовать очередь. Также очередь можноустановить как под-очередь уже существующей очереди.

Панель управления OTRS
62
Рисунок 5.19. Добавление новой очереди.
Для очереди можно определить время разблокировки — если агент заблокировалзаявку и не закрыл ее до истечения времени блокировки, заявка будет автоматическиразблокирована и доступна для других агентов.
Есть три типа настроек эскалации времени, которые могут быть связаны на уровнеочередей:
Эскалация — Время Первого Отклика
• После создания заявки, если истекает оговоренное время без какой-либо связи склиентом как по электронной почте так и по телефону, — заявка будет эскалирована.
Эскалация — Время обновления
• Если какой-нибудь клиент прислал ответ на заявку по электронной почте или изменилее через пользовательский портал, время эскалации будет обнулено. Если до истечениявремени ожидания контакта с клиентом небыло, заявка эскалируется.
Эскалация — Время решения
• Если до истечения оговореного времени заявка не закрыта — она эскалируется.
Используя опцию ‘Ticket lock after a follow-up’, можно определить будет ли заявкаустановлена в значение ‘заблокирована’ для старого владельца, если она была закрытаа потом открыта заново. Такое поведение гарантирует, что последующая заявка будетобрабатываться агентом, который работал с этой заявкой ранее.
Параметром системный адрес определяется адресс электронной почты, который будетиспользоваться для исходящих заявок этой очереди. Также, для ответов по электроннойпочте, есть возможность ассоциировать (связать) очереди с приветствиями и подписями.За более подробной информацией перейдите по ссылке адреса электронной почты ,приветствия и подписи .

Панель управления OTRS
63
ЗамечаниеКак в случае с агентами, группами и клиентами, очереди не могут бытьудалены, а только отключены, путем установки опции «Действительная» в значениенедействительная или недействительная-временно.
Приветствия, подписи, вложения и ответыПриветсвтия
Приветствие это текстовый модуль для ответа. Приветствия могут быть связаны с однойили многими очередями, как это описанов в разделе очереди. Приветствия используютсяс очередями только в том случае, эсли на заявку из этой очереди уже дали ответ. Дляуправления различными приветствиями в системе воспользуйтесь ссылкой «Приветствия»в панели администрирования (см. ниже Рисунок 5.20).
Рисунок 5.20. Управление приветсвиями.
После установки в системе есть одно предопределенное приветствие: «system standardsalutation (en)».
Чтобы создать новое приветствие, нажмите на кнопку «Добавить приветсвие», введитенеобходимые данные и нажмите кнопку «Отправить» (см. ниже Рисунок 5.21).

Панель управления OTRS
64
Рисунок 5.21. Добавление нового приветствия.
В приветствиях можно использовать переменные. Когда вы отвечаете на заявку, именапеременных будут заменены на их значения.
Различные переменные, которые можно использовать в ответах приведены в нижней частиэкрана приветствия. Если вы используете, например, переменную <OTRS_LAST_NAME>то в ответ будет включена фамилия отправителя заявки.
ЗамечаниеКак и в случае с другими сущностями системы OTRS, приветствия не можноудалять, только деактивировать их, установив параметр Действительный взначение не действительный или не действительный-временно.
ПодписиДругим текстовым модулем являются подписи. Подписи могут быть связаны с очередями,как это описано в разделе очереди. Как только подпись связана с очередью она будетвключена в текст ответа каждой заявки, входящей в эту очередь. Перейдя по ссылке»Подписи» в Панели Администрирования, можно упарвлять подписями системы (см. нижеРисунок 5.22).

Панель управления OTRS
65
Рисунок 5.22. Управление подписями.
В новой, только установленной системе OTRS есть одна предустановленная подпись:»system standard signature (en)».
Чтобы создать новую подпись, нажмите кнопку «Добавить подпись», введите всенеобходимы данные и нажмите кнопку «Отправить» (см. ниже Рисунок 5.23).
Рисунок 5.23. Добавление новой подписи.
Как и приветствия, подписи также могут содержать динамический контент, например, имяи фамилию агента, который отвечает на заявку, а также могут использоваться переменныедля замены текста подписи каждой заявки. Переменные, которые можно использоватьищите в нижней части страницы с подписями. Если вы, к примеру, включаете переменную<OTRS_LAST_NAME> то она будет заменена фамилией агента, который отвечает назаявку.

Панель управления OTRS
66
ЗамечаниеКак и в случае с приветствиями, подписи не могут быть удалены, толькодеактивированы путем установки параметра Действительный в значения недействительный или не действительный-временно.
ВложенияПри желании к ответу можно добавить одно или несколько вложений. Если ответ выбран,вложения будут прикреплены к сообщению. При необходимости, непосредственно передотправкой ответа клиенту, агент может удалить вложения.
Используя ссылку «Вложения» на Панели Администрирования, можно загрузить вложенияв базу данных системы (см. ниже Рисунок 5.24).
Рисунок 5.24. Управление вложениями.
Чтобы создать новое вложение, нажмите кнопку «Добавить вложение», введите всюнеобходимую информацию и нажмите кнопку «Отправить» (см. Рисунок 5.25 ниже).

Панель управления OTRS
67
Рисунок 5.25. Добавление нового вложения.
Когда вложение уже сохранено, его можно связать с одним илл несколькими ответами.Для этого перейдите по ссылке «Вложение <-> Ответы» в Панели Администрирования (см.ниже Рисунок 5.26).
Рисунок 5.26. Связывание Вложений с Ответами.
Чтобы связать различные вложения с конкретным ответом и наоборот, нажмите наназвание соответствующего ответа или вложения (см. ниже Рисунки 5.27 и 5.28,соответственно).
Рисунок 5.27. Изменение связей между Вложением и Ответом.

Панель управления OTRS
68
Рисунок 5.28. Изменение связи между Ответом и Вложением.
ОтветыВ OTRS можно определить ответы для того, чтобы быстрее отвечать на заявки и както стандартизировать вид ответов. Ответ может быть связан с одной или несколькимиочередями и наоборот. Для того чтобы можно было быстро использовать заранеезаготовленные ответы, различные ответы отображаются в очереди «Мои Очереди», внизупод каждой заявкой.
На новой, только установленной системе OTRS, для каждой очереди определен ответ поумолчанию — «пустой ответ». Перейдя по ссылке «Ответы» откроется страница управленияОтветами (см. ниже Рисунок 5.29).
Рисунок 5.29. Управление ответами.
Чтобы создать новый ответ, нажмите кнопку «Добавить ответ», введите необходимыеданные и нажмите кнопку Отправить (см. ниже Рисунок 5.30).

Панель управления OTRS
69
Рисунок 5.30. Добавление нового ответа.
Чтобы добавить/удалить ответы для одной или нескольких очередей, используйте ссылку»Ответы <-> Очереди» в Панели Администрирования (см. ниже Рисунок 5.31). Также, чтобыполучить информацию о той или иной сущности, можно воспользоваться фильтрами.
Рисунок 5.31. Управление Отношениями Ответ-Очередь.
Чтобы определить различные ответы для очереди и наоборот, нажмите насоответствующий ответ или очередь (см. ниже Рисунко 5.32 и 5.33, соответственно).

Панель управления OTRS
70
Рисунок 5.32. Изменение связи между Очередью и Ответом.
Рисунок 5.33. Изменение связи между Ответом и Очередью.
Структура ответа понятна на интуитивном уровне. Она состоит из приветствия, котороеассоциируется с очередью, потом идет текст ответа, затем цытируемый текст заявки и,наконец, подпись, связанная с очередью.
Авто ответыOTRS позволяет отсылать клиентам автоматические ответы при наступлении в системеопределенных событий, таких как создание заявки в определенной очереди, прием вобработку новых заявок, закрытие или отказ от заявки и т.д. Для управления ответамииспользуйте ссылку «Авто ответы» на Панели Администрирования (см. ниже Рисунок 5.34).

Панель управления OTRS
71
Рисунок 5.34. Управление Автоматическими ответами (авто-ответами).
Чтобы создать новый авто-ответ, нажмите на кнопку «Добавить авто-ответ», введитенеобходимые данные и нажмите кнопку «Отправить» (см. ниже Рисунок 5.35).
Рисунок 5.35. Добавление Автоматического ответа (автоответа).
Как и в случае с подписями и приветствиями, тема и текст авто ответа может бытьсгенерирована с помощью переменных. Если, например, в текст (тело) авто ответа вставитьпеременную <OTRS_CUSTOMER_EMAIL[5]> , то первые 5 строк текста из письма клиентубудут вставлены в авто ответ. Более подробную информацию о допустимых переменных,которые можно использовать можно найти в нижней части экрана, как это показано наРисунке 5.35.
Для каждого авто-ответа можно указать специальное событе, при наступлении которогоэтот авто-ответ будет отсылатся. Предопределенные события, доступные после новойустановки приведены в Таблицу 5-3.

Панель управления OTRS
72
Таблица 5.3. События для Автоматических ответов
Название Описаниеauto reply Создание заявки в определенной очереди.auto reply/new ticket Открытие уже закрытой заявки, например
если клиент отвечает на определеннуюзаявку.
auto follow up Прием входящих заявок.auto reject Автоматический отказ от заявки,
сделаннный системой.auto remove Удаление заявко, завершенных системой.
ЗамечаниеКак и в случае с другими сущностями OTRS, Авто ответы также не могутбыть удалены, только деактивированы путем установки опции Действительный взначения не действительный или не действительный-временно.
Чтобы добавить авто ответ к очереди, используйте ссылку «Авто Ответы <-> Очереди»в Панели Администрирования (см. ниже Рисунок 5.36). Все системные событияотображаются для каждой очереди и авто ответ с тем же событием может быть выбранили удален используя список.
Рисунок 5.36. Управление связью Очередь-Автоматический ответ.
Чтобы определить различные авто ответы для очереди, нажмите на соответствующее имяочереди (см. ниже Рисунок 5.37). Также есть возможность редактировать тот или иннойавто ответ, чтобы сделать это, кликните на ответ и внесите необходимые изменения, таккак будто создаете новый авто ответ.

Панель управления OTRS
73
Рисунок 5.37. Изменение связи между Автоматическим Ответом и Очередью.
Адреса электронной почтыЧтобы OTRS мог отсылать емейлы, нужен действительный адресс электронной почты,который будет использоваться системой. OTRS способен работать с несколькимиадресами электронной почты поскольку большинство систем использует больше одногопочтового ящика. Очередь может быть связана с несколькими емейл-адресами и наоборот.При создании очереди можно установить адресс электронной почты, который будетиспользоваться для исходящих писем. Для управления всеми адресами электронной почтысистемы перейдите по ссылке «Email-адреса» в Панели Администрирования (см. нижеРисунок 5.38).
Рисунок 5.38. Управление Системными Адресами Электронной Почты.
При создании нового почтового адреса (см. ниже Рисунок 5.39) можно выбрать очередьили под-очередь, которая должна быть связана с этим адресом. Эта ссылка (связь)

Панель управления OTRS
74
позволяет системе сортировать входящие сообщения по полю «Кому» и разместить заявкув нужную (правильную) очередь.
Рисунок 5.39. Добавление адреса электронной почты системы.
ЗамечаниеКак и другие сущности OTRS, емейл адреса не могут быть удалены, толькодеактивированы, установив опцию Действительный в значение не действительныйили не действительный-временно.
УведомленияOTRS позволяет отправлять уведомления агентам и клиентам при наступлении в системеопределенных событий. Агенты могут выбрать системные события для своих собственныхуведомлений перейдя по ссылке предпочтения
Используя ссылку «Уведомления Агентов» в Панели Администрирования можно управлятьуведомлениями системы (см. ниже Рисунок 5.40). Используя фильтры можно быстро найтинеобходимую информацию.

Панель управления OTRS
75
Рисунок 5.40. Управление уведомлениями.
Также есть возможность настроить тему и текст уведомления. Выберите из спискауведомление, которое необходимо изменить и его содержимое будет загружено дляредактирования (см. Рисунок 5.41). Пожалуйста, обратите внимание, что уведомление стем же именем доступно для каждого из языков.
Рисунок 5.41. Настройка уведомлений.
Как в случае с подписями и приветствиями, используя специальные переменные можноавтоматически создавать контент для уведомлений. В нижней части экрана приводитсяполный список этих переменных см. ниже Рисунок 5.41.
Также есть возможность создавать уведомления основаные на системных событиях.Можно подробно указать когда и кому такое уведомление будет отправлено. Выбратьможно из большого количества параметров, таких как: группа(ы) получателя, агент(ы),роль(и), адресс(а) электронной почты, тип события, который генерирует уведомление, типзаявки, состояние, приоритет, очередь, блокировка, сервис, SLA и т.д.

Панель управления OTRS
76
Чтобы увидеть список всех событий, основаных на уведомлениях, нажмите на ссылку»Уведомления (События)» в Панели Администрирования (см. Рисунок 5.42).
Рисунок 5.42. Управления Уведомлениями, базирующихся на Событиях.
Как показано на Рисунке 5.42, можно создать новое уведомление нажав на кнопку»Добавить (см. Рисунок 5.43).
Рисунок 5.43. Регистрация Уведомления, основаного на Событии.
Обратите внимание, что содержимое уведомления, которое базируется на событии такжеможет быть создано динамически, используя специальные переменные, приведенные всписке, в нижней часте экрана, как это показано на Рисунке 5.43.
SMIMEOTRS может обрабатывать входящие S/MIME-кодированные сообщения и подписыватьисходящие сообщения электронной почты. Перед тем как использовать эту возможность,

Панель управления OTRS
77
ее необходимо активировать и настроить путем изменения некоторых параметровконфигурации в файле SysConfig.
Ссылка «S/MIME Certificates» на Панели Управления OTRS позволяет управлять вашими S/MIME сертификатами (см. ниже Рисунок 5.44). Можно добавлять или удалять сертификатыа также производить поиск в SMIME-данных.
Рисунок 5.44. Управление S/MIME.
PGPOTRS обрабатывает PGP-ключи, которые позволяют кодировать/декодировать сообщенияи подписывать исходящие сообщения. Перед использованием этой функции еенеобходимо активировать и изменить соответствующие конфигурационные параметры вфайле SysConfig.
Используя ссылку «PGP-ключи» на Панели Управления OTRS, можно управлять ключамипользователя, который желает использвоать PGP вместе с OTRS (см. ниже Рисунок5.45), например локальный пользователь OTRS или пользователь веб-сервера. Также естьвозможность добавлять,удалять ключи и подписи, производить поиск по ключам.

Панель управления OTRS
78
Рисунок 5.45. Управление PGP.
СостоянияИспользуя ссылку «Состояния» на Панели Управления OTRS, можно управлять различнмистатусами заявок, которые вы хотите использовать в системе (см. ниже Рисунок 5.46).
Рисунок 5.46. Управление состоянимями.
После установки в системе будут следующие предустановленные состояния:
• закрыта успешно
• закрыта неуспешно
• обьедененные
• новая
• открытая

Панель управления OTRS
79
• ожидание авто закрытие+
• ожидание авто закрытие-
• ожидание напоминание
• удаленная
Каждое состояние связано с типом, который нужно указать когда создается новоесостояние. По умолчанию есть такие типы состояний:
• закрытая
• обьедененные
• новая
• открытая
• ожидание авто
• ожидание напоминание
• удаленная
SysConfigСсылка SysConfig — указывает на мест,о где хранится большинство конфигурационныепараметров OTRS.
Чтобы загрузить графический интерфейс для конфигурации системы, перейдите поссылке «SysConfig» в Панели Администрирования (см. ниже Рисунок 5.47). В системуможно как загружать собственные конфигурационные файлы, так и архивироватьтекущие настройки в файл. Почти все конфигурационные параметры OTRS-фреймворкаи дополнительно установленных приложений могут быть просмотрены и измененыпосредством веб-интерфейса. Поскольку все конфигурационные параметры хранятся вгруппах и подгруппах, то можно быстро переходить между различными параметрами.Также можно осуществлять полнотекстовый поиск по всем конфигурационнымпараметрам.

Панель управления OTRS
80
Рисунок 5.47. Графический интерфейс для настройки системы (SysConfig).
Более подробно графический интерфейс для настройки системы рассматривается в главе»Настройка системы через веб-интерфейс» .
Использование почтовый ящиковЕсть несколько возможных вариантов доставки новых сообщений (писем электроннойпочты) в систему обработки заявок. Одним из них является модуль otrs.PostMaster.pl, который напрямую помещает письма в систему. Другой способ — это использованиепочтовых ящиков, управляемых посредством веб-интерфейса. Перейдя по ссылке»Почтовые ящики PostMaster» в Панели Администрирования, OTRS загружает консоль дляуправления почтовыми ящиками (см. ниже Рисунок 5.48). OTRS поддерживает почтовыепротоколы: POP3, POP3S, IMAP и IMAPS.
Рисунок 5.48. Управление почтовыми ящиками.
За более подробной информацией обращайтесь к разделу Почтовые аккаунты PostMaster.
Фильтрация входящих сообщенийOTRS имеет возможность фильтрации входящих сообщений, входящие сообщениябудут отсортированы в очереди автоматически, спам-сообщения будут перемещены вопределенную очередь. Не имеет значения какой способ используется для получениязаявок в систему: PostMaster.pl или почтовые ящики (емейлы). Используя ссылку»PostMaster Filter» в Панели Администрирования можно создать правила фильтрации (см.ниже Рисунок 5.49).

Панель управления OTRS
81
Рисунок 5.49. Управление фильтрами PostMaster.
Фильтр состоит из одного или нескольких критериев, которые должны совпадать сопределенными действиями, которые выполняются над емейлами. Критерии фильтрацииможно определить для заголовков или тела сообщения электронной почты, например,для поиска конкретных записей в заголовке или теле сообщения, также можноиспользовать регулярные выражения. Все действия для правила фильтрации вызываютсяX-OTRS заголовковками, которые вставляются при совпадении критерия поиска. Системаобработки заявок оценивает X-OTRS заголовки и вызывает специальыне действия.X-OTRS заголовки могут быть использованы для сортировки входящих сообщенийв определенную очередь, для изменения приоритета сообщения или игнорированиясообщения и отказа доставлять его в систему. В Таблице 5-4 приводится список доступныхX-OTRS заголовков и их значение
Примечание: Вы также можете использовать X-OTRS-Followup-* заголовки дляпоследующих писем.
Таблица 5.4. Функции различных X-OTRS-заголовков
Название Возможные значения: ОписаниеX-OTRS-Priority: 1 очень низкий, 2 низкий,
3 нормальный, 4 высокий, 5очень высокой
Устанавливает приоритетзаявки.
X-OTRS-Queue: Название очереди в системе. Устанавливает очередь,из которой заявкадолжна быть распределена.Если установлены X-OTRS-заголовки, все остальныеправила фильтрации,пытающиеся распределитьзаявку в определеннойочереди игнорируются.
X-OTRS-Lock: блокировать,разблокировать
Устанавливает состояниеблокирования заявки.

Панель управления OTRS
82
Название Возможные значения: ОписаниеX-OTRS-Ignore: Yes или True Если этот X-OTRS заголовок
установлен в «Yes», входящиесообщения будут полностьюигнорироватся и никогда непопадут в систему.
X-OTRS-State: новая, открытая, закрытаяуспешно, закрытаянеуспешно, …
Устанавливает следующеесостояние заявки.
X-OTRS-State-PendingTime: например 2010-11-2000:00:00
Устанавливает времяожидания для заявки (вытакже можете отправитьсостояние ожидания спомощью X-OTRS-State).
X-OTRS-Type: по умолчанию (в зависимостиот настроек)
Устанавливает тип заявки(если активированаподдержка Ticket::Type).
X-OTRS-Service: (в зависимости от настроек) Устанавливает службузаявки (если активированаподдержка Ticket::Service).
X-OTRS-SLA: (в зависимости от настроек) Устанавливает SLA длязаявки (если активированаподдержка Ticket::Service).
X-OTRS-CustomerUser: CustomerUser Устанавливает клиентскогопользователя для заявки.
X-OTRS-CustomerNo: CustomerNo Устанавливает IDпользователя для заявки.
X-OTRS-ArticleKey(1|2|3): Дополнительныйинформационный ключ длястатьи.
Сохраняет дополнительнуюключевую информацию длястатьи.
X-OTRS-ArticleValue(1|2|3): Дополнительноеинформационное значениедля статьи.
Сохраняет дополнительнуюинформацию для статьи.
X-OTRS-SenderType: агент, система, клиент Устанавливает типотправителя заявки.
X-OTRS-ArticleType: email-external, email-internal,email-notification-ext, email-notification-int, phone, fax,sms, webrequest, note-internal, note-external, note-report
Устанавливает тип статьидля входящих заявок.
X-OTRS-TicketKey(1|2|…|8): Дополнительныйинформационный ключ длязаявки
Сохраняет дополнительныеключевые поля для заявки.
X-OTRS-TicketValue(1|2|…|8):
Дополнительноеинформационное поле длязаявки.
Сохраняет дополнительноеинформационное поле длязаявки.

Панель управления OTRS
83
Название Возможные значения: ОписаниеX-OTRS-Loop: True Если этот X-OTRS заголовок
установлен, то отправителюсообщение недоставляетсяни одного автоматическогоответа (защита отзацыкливания).
Для каждого правила фильтрации нужно указать имя. Критерии фильтрации можноуказать в разделе «Условия Фильтрации». Выберите из списка «Заголовок 1», «Заголовок2» и так далее для части сообщеония, где нужно производить поиск и в правой частиукажите значения необходимые для фильтрации. В разделе «Установки Email Заголовков»можно указать действия, которые будут выполняться при совпадении правил фильтрации.Также можно выбрать «Заголовок 1», «Заголовок 2» и так длаее для X-OTRS-заголовков иустановить их значения (см. ниже Рисунок 5.50).
Рисунок 5.50. Добавление фильтров PostMaster.
Пример 5.1. Сортирование спама в определенную очередь
Полезные правила фильтрации помогают OTRS автоматически сортировал почтупомеченую как спам с инструментом обнаружения спама, таких как SpamAssassin, в»Нежелательная» очередь. SpamAssassin добавляет «X-Spam-Flag» заголовок для каждогопроверить почту. Если письмо помечено как спам, заголовков установлена в «да». Таккритерии фильтра будет «X-Spam-Flag: Yes». Чтобы создать правило фильтрации с этимкритериям можно вставить имя, например «спам-почты». Также выбрать в разделе «Матч»для «Заголовок 1» из списка «X-Spam-Flag:». Вставить «Да» в качестве значения дляэтого заголовка. Теперь критерии фильтра указан. Чтобы убедиться, что все спам-письмавстанет в «Нежелательная» очереди выбрать в разделе «Установить» для «Заголовок 1″»X-OTRS-очереди:» запись. Укажите «Нежелательная» в качестве значения для этогозаголовка. Наконец добавить новые правила фильтрации, чтобы активировать его наследующий новых сообщениях в системе.
Есть дополнительные модули, которые можно использовать для более подробнойфильтрации входящих сообщений. Эти модули будут полезны для больших и сложныхсистем.

Панель управления OTRS
84
Выполнение автоматизированных заданий спомощью GenericAgent
GenericAgent является инструментом для автоматического выполнения задач. Если бы егонебыло, то эти задачи пришлось бы выполнять живому человеку — агенту. GenericAgent,например, может закрывать или перемещать заявки, отправлять уведомления дляэскалированных заявок и т.д.
Перейдите по ссылке «GenericAgent» в Панели Управления (см. ниже Рисунок 5.51).Откроется таблица со списком автоматизированных заданий. Их можно редактировать,переключив способ вызова на ручной, или удалить.
Рисунок 5.51. Список заданий для GenericAgent.
Нажмите кнопку «Добавить работу», чтобы создать новое задание. Сначала нужно указатьимя задания, а также время, когда оно должно быть выполнено. Также можно установитьновые свойства и выбрать различные критерии для заявок (см. ниже Рисунок 5.52).

Панель управления OTRS
85
Рисунок 5.52. Создание заданий для GenericAgent.
По завершению создания заданий, будут отображены все заявки, затронутые этимзаданием. Этот список поможет проверить правильность выполнения задания. На этомэтапе не происходит никаких изменений в заявках. Задание будет активировано толькопосле его сохранения в списке заданий.
Эллектронная почта администратораOTRS администраторы могут отсылать сообщения определенному пользователю илигруппе. Переход по ссылке «Уведомления Администратора» в Панели Администрированияоткрывает страницу, на которой можно указать агентов и группы, которые должны бытьоповещены (см. ниже Рисунок 5.53).
Рисунок 5.53. Оповещения Администратором.
Можно указать отправителя, тему и текст уведомления. Также можно выбрать агентов,группы и роли, которые должны получить сообщение.
Управление сеансамиПерейдя по ссылке «Управление Сеансами» в панели управления вы можете увидеть всехзарегистрированных в системе пользователей (см. ниже Рисунок 5.54).

Панель управления OTRS
86
Рисунок 5.54. Управление Сеансами.
Выводится статистика о всех активных сессиях, например, сколько агентов и клиентоввошли в систему, количество активных сессий. Кликнув на ссылку «Удалить эту сессию»,которая находится в правой части списка, можно удалить ту или инную сессию. Такжеможно воспользоваться ссылкой Удалить все сессии, что может быть полезно чтобыотключить систему. Также можно просмотреть подробную информацию о каждой сессии(см. ниже Рисунок 5.55).
Рисунок 5.55. Подробная информация о сессии.
Системный журналПерейдя по ссылке «Системный журнал» в Панели Администрирования можно просмотретьзаписи в системном журнале, отсортированные в обратном хронологическом порядке (см.ниже Рисунок 5.56).

Панель управления OTRS
87
Рисунок 5.56. Системный журнал.
Каждая строка в журнале содержит: время, приоритет, компонент системы инепосредственно саму запись.
ЗамечаниеСистемный журнал доступен только через веб-интерфейс на Linux/UNIX системах.В Windows-системах, журнал можно увидеть, октрыв в текстовом редакторе файл[install_dir]otrsvarlogotrs.log.
SQL запросыСсылка «SQL Box» в Панели Администрирования открывает окно, которое позволяетнапрямую делать запрсоы к таблицам базы данных системы OTRS (см. ниже Рисунок 5.57).Разрешается делать только запросы на выборку данных, изменять данные с помощьюзапросов нельзя.

Панель управления OTRS
88
Рисунок 5.57. SQL-запросы.
Менеджер пакетовИспользуя ссылку «Менеджер пакетов» в Панели Администрирования, можноустанавливать и управлять пакетами, которые расширяют функциональные возможностиOTRS (см. ниже Рисунок 5.58). Перейдите по ссылке Дополнительные приложения чтобывыбрать раздел для обсуждения расширений, которые доступны из OTRS хранилищ.
Рисунок 5.58. Менеджер пакетов.
Менеджер Пакетов позволяет просмотреть пакеты расширения OTRS вместе с номерамиих версий, установленные на сервере в данный момент.
Пакеты можно установить из удаленного хоста, для этого, в разделе Онлайн Репозиторийнужно выбрать репозиторий и нажать кнопку Обновить информацию из репозитория.Все доступные пакеты будут отображены в соответствующей таблице. В правой частистраницы отображаются доступные пакеты. Чтобы установить пакет, нажмите на ссылкуУстановить. После установки пакет будет отображаться в разделе Local Repository.
Для обновления установленных пакетов можно воспользоваться списком доступныхпакетов из он-лайн репозитории. В колонке «действие» для каждого из пакетов, которыйимеет более высокую версию (чем установленная сейчас) нажмите кнопку Обновить.Просто нажмите на кнопку «Обновить», и новый пакет будет обновлен.
В некоторых случаях, например, когда ваша OTRS-система не подключена к Интернету,можно установить пакеты, которые были заранее загружены на локальный диск. Нажмитекнопку Обзор на боковой панели и выберите. orm-файл на жестком диске. НажмитеОткрыть , а затем Установить пакет. После установки пакет отображается в разделеЛокальный Репозиторий. Проделайте те же действия для того чтобы обновить ужеустановленный пакет.
В особых случаях, можно настроить Менеджер Пакетов, например, дляиспльзования прокси-сервера, или локального репозитория. перейдя по ссылкеFramework:Core::Package, просто посмотрите на имеющиеся варианты в файле SysConfig.

89
Глава 6. Настройка СистемыКонфигурационные файлы OTRS
Все конфигурационные файлы OTRS хранятся в директории Kernel и ееподдиректориях. Нет необходимости изменять другие файлы кроме Kernel/Config.pm,потому что остальные файлы будут изменены, после обновления системы. Простоскопируйте конфигурационные параметры из других файлов в Kernel/Config.pm иизмените их в соответствии с вашими потребностями. Этот файл никогда не будет затронутво время обновления, так что настройки, которые вы произвели вручную будут сохранены.
Файл Kernel/Config/Defaults.pm содержит параметры конфигурации главногофреймворка OTRS. Он определяет все основные параметры системы, конфигурацияэлектронной почты, подключения к базе данных, кодировка по умолчанию,язык интерфейса. Файл Kernel/Config/Files/Ticket.pm содержит всеконфигурационные параметры системы обработки заявок.
В каталоге Kernel/Config/Files есть некоторые другие файлы, которые передаются,когда запускается страница входа в OTRS. Если установлены дополнительныеприложения, такие как FAQ (ЧАВО) или Менеджер Файлов, то их конфигурационныефайлы также могут быть найдеты по указанному пути.
Если веб-интерфейс OTRS доступен — все .xml-файлы из директории Kernel/Config/Files анализируются в алфавитном порядке, затем подгружаются настройки главногофреймворка и дополнительных приложений. В последствии, будут вычислены настройкив двух файлах Kernel/Config/Files/ZZZAAuto.pm и Kernel/Config/Files/ZZZAuto.pm. Оба файла используются графическим веб-интерфейсом конфигурациисистемы и никогда не должны редактироваться вручную. Последним оцениваетсяфайл Kernel/Config.pm, который содержит индивидуальные настройки и параметрыконфигурации изменяемые вручную. Чтение конфигурционных файлов в таком порядкегарантирует, что специфические параметры вашей конфигурации будут использованысистемой.
Настройка системы через графический веб-интерфейс
Начиная с второй версии (OTRS 2.0) и в последующих версиях, с помощьюграфического веб-интерфейса для настройки системы можно легко изменить почти всеконфигурационные параметры центального фреймворка и дополнительно установленныхмодулей . Чтобы запустить новый конфигурационный инструмент войдите в систему какOTRS-администратор и перейдите по ссылке SysConfig в Панели Администрирования (см.ниже Рисунок 6.1).

Настройка Системы
90
Рисунок 6.1. Графический интерфейс для настройки системы.
Поскольку в настоящее время в OTRS имеется больше 600 параметров конфигурации, естьнесколько различных способов быстрого доступа к специфическим настройкам. Используяполнотекстовый поиск можно просмотреть все конфигурационные параметры на предметсовпадения с определенным ключевым словом. Полнотекстовый поиск ищет совпаденияне только в названиях конфигурационных параметров, но также и в их описаниях. Этопозволяет найти тот или инной элемент даже в том случае если его название неизвесно.
Кроме этого, все параметры конфигурации отсортированы по основным группам иподгруппам. Главная группа представляет собой приложение соостоящие из подгрупп»Framework» для главного OTRS-фреймворка, «Ticket» для системы обработки заявок,»FAQ» — для системы ответов и вопросов и так далее. Подгруппы могут быть доступны еслиприложение выбирается из списка групп «Выборор групп» кнопка нажата.
Каждый параметр конфигурации может быть «включен» или «выключен» с помощьюфлажка. Если параметр «выключен» (флажок не выбран) система будет игнорировать этотпараметр или использовать настройки по умолчанию. Также, воспользовавшиь кнопкой»Восстановить» можно переключится между измененным значением конфигурационногопараметра и его значением по умолчанию.
Если нужно сохранить все изменения, внесенные в конфигурацию системы, например, длябыстрой настройки новой установки, можно воспользоваться кнопкой «Экспортироватьнастройки», которая создаст .pm-файл. Чтобы восстановиь свои собственные настройки,нажмите кнопку «Импортировать настройки» и выберите .pm-файл с настройкамисозданными ранее.
ЗамечаниеИз за соображений безопасности, параметры конфигурации соединения с базойданых не могут быть изменены в SysConfig. Их нужно установлены вручную в файлеKernel/Config.pm.

91
Глава 7. Отправка / получениеэлектронной почтыОтправка почтычерез Sendmail (по умолчанию)
OTRS может отправлять сообщения электронной почты через Sendmail [http://www.sendmail.org/], Postfix [http://www.postfix.org/], Qmail [http://www.qmail.org] or Exim[http://www.exim.org]). По умолчанию используется Sendmail, он должен работать приустановки системы «из коробки».
Параметры sendmail можно настроить через графический веб-интерфейс дляконфигурации (Framework::Core::Sendmail)
Через SMTP-сервер или smarthostOTRS может отсылать сообщения электронной почты через SMTP ( Simple Mail TransferProtocol / RFC 821 [http://www.ietf.org/rfc/rfc821.txt]) или Secure SMTP. Возможно вызахотите использовать эту опцию на не-unix-системах (например на Windows).
Параметры настройки SMTP-сервера могут быть сконфигурированны через SysConfig(Framework::Core::Sendmail). Если у вас нету SMTPS в качестве опции, значит выпропустили установку соответствующих Perl-модулей. В таком случае, обратитесьпожалуйста к этой «Установка Perl-модулей необходимых для работы OTRS» инструкции.
Получение сообщений электронной почтыУчетные записи электронной почты настраиваемыечерез графический пользовательский интерфейсOTRS
OTRS позволяет получать сообщения электронной почты через почтовые аккаунты POP3,POP3S, IMAP, и IMAPS.
Для настройки почтовых аккаунтов воспользуйтесь ссылкой «Почтовые АккаунтыPostMaster» на странице администрирования.
Если создан новый почтовый аккаунт/ящик (см. ниже Рисунок 7.1), то нужно еще указатьимя его почтового сервера, логин и пароль. Также, необходимо выбрать тип почтовогосервера: POP3, POP3S, IMAP или IMAPS. Если в опциях не видно типа сервера, которыйнужно использовать, значит вы не установили в системе все необходимые Perl-модули. Втаком случае, за более подробной информацией обратитесь к инструкции «Установка Perl-модулей, необходимых для работы OTRS».

Отправка / получениеэлектронной почты
92
Рисунок 7.1. Добавление учетной записи электронной почты.
Если для опции «Trusted» выбрано значение «Да», будут оцениваться и выполнятсялюбые X-OTRS-заголовки, присоединенные к входящему сообщению. Поскольку X-OTRS-заголовок может выполнять некоторые действия в системе обработки заявок, то дляизвесных отправителей опцию Trusted нужно установить только в значение Да. X-OTRS-заголовки используюся в OTRS модулем фильтрации . Более подробно X-OTRS заголовкирассматриваются в этой таблице. Любые созданные и выполненные правила фильтрациинезависимы от параметров настроки Trusted.
Можно контролировать распределением входящих сообщений, если они должнысортироватся по очередях или содержимому поля «Кому». Если для Диспетчеризациивыбрана опция «Диспетчеризация по выбранной очереди», то все входящие сообщениябудут отсортированы в указанной очереди. В таком случае адресс, с которого отправилисообщение не учитывается. Если для диспетчеризации выбрана опция «Диспетчеризацияемейлов по полю Кому», система для входящих емейлов проверяет, связана ли этаочередь с адресом электронной почты в поле Кому. Перейдя по ссылке УправлениеE-mail-адресами в Панели Администрирования, можно связать определенный адресс сочередью. Если не найдено никакой связи между адресом в поле «Кому» то сообщениебудет сохранятся в системе в «Raw» очереди, которая есть PostmasterDefaultQueue поумолчанию после установки системы.
Все данные для учетных записей электронной почты сохраняются в базе данных OTRS.Скрипт otrs.PostMasterMailbox.pl, который находится в директории bin вашейсистемы OTRS, использует настройки в базе данных и получает почту. Вы можетевыполнить файл ./bin/otrs.PostMasterMailbox.pl вручную чтобы проверить что всеваши настройки почты работают правильно.
Для обычной установки, с помощью файла заданий cron job postmaster_mailboxвыборка емейлов будет выполнятся каждые 10 минут. Для получения дополнительнойинформации об изменении заданий планировщика задач cron jobs, обратитесь к главе»Настройка пралировщика задач cron jobs для OTRS».
ЗамечаниеПри получении почты OTRS удаляет почту с POP или IMAP сервера. Нетутакой опции, которая бы позволяла хранить копию сообщения на сервере.

Отправка / получениеэлектронной почты
93
Если вы все же хотите чтобы такая возможность присутствовала, скорей всегонужно воспользоваться правилами переадресации на почтовый сервер. Оратитесьпожалуйста к документации по вашему почтовому серверу.
Через командную строку программы и например,procmail (otrs.PostMaster.pl)
Если для получения электронной почты в OTRS нету возможности использовать учетныезаписи, то эту проблему можно решить с помощью программы командной строки bin/otrs.PostMaster.plОна принимает сообщения электронной почты через STDIN инаправляет их непосредственно в OTRS. Это значит что емейлы будут доступны в OTRSкогда MDA (Mail Delivery Agent — Агент доставки почты) выполняет эту программу.
Для тестирования bin/otrs.PostMaster.pl без MDA, выполните команду приведеннуюв листинге Сценария 7.1.
linux:/opt/otrs# cd binlinux:/opt/otrs/bin# cat ../doc/sample_mails/test-email-1.box | ./otrs.PostMaster.pllinux:/opt/otrs/bin#
Сценарий 7.1. Тестирование PostMaster без MDA.
Если сообщения электронной почты отображаются в QueueView, значит вашы настройкиработают.
Procmail — это очень распостраненный фильтр электронной почты в среде Linux. Онустанавливается на большинстве систем. Если нет, перейдите по ссылке procmailhomepage [http://www.procmail.org/].
Для настройки procmail для OTRS (требуется сконфигурированный транспортныйагент MTA, например sendmail, postfix, exim or qmail), используйте файл~otrs/.procmailrc.dist, скопируйте его в .procmailrc а затем добавьте строкиприведенные в Сценарии 7.2.
SYS_HOME=$HOMEPATH=/bin:/usr/bin:/usr/local/bin# —# Pipe all email into the PostMaster process.# —:0  $SYS_HOME/bin/otrs.PostMaster.pl
Сценарий 7.2. Настройка procmail для OTRS.
Все емейлы отсылаемые локальному OTRS-пользователю будут обрабатываться bin/otrs.PostMaster.pl и потом отображаться в QueueView.

Отправка / получениеэлектронной почты
94
Получение электронной почты по протоколу POP3или IMAP и обработка для otrs.PostMaster.pl
Для того чтобы получить электронную почту с вашего почтового сервера через POP3 илиIMAP и сохранить ее на компьютере на котором установлен OTRS, для локального аккаунтаили в procmail, перейдите по ссылке fetchmail [http://fetchmail.berlios.de/].
ЗамечаниеРаботающий и сконфигурированный SMTP необходим для работы OTRS.
Можно использовать файл .fetchmailrc.dist в домашней директории OTRS ископировать его в .fetchmailrc. Изменить его в соответствии с вашими требованиями(см. ниже Пример 7-1).
Пример 7.1. .fetchmailrc
#poll (mailserver) protocol POP3 user (user) password (password) is (localuser)poll mail.example.com protocol POP3 user joe password mama is otrs
Не забудьте установить.fetchmailrc to 710 («chmod 710 .fetchmailrc»)!
Из Листинга 7-1 выше, .fetchmailrc , все емейлы будут перенаправлены в локальныйOTRS-аккаунт, если выполнена команда fetchmail -a. Установите эту команду впланировщике задач cronjob если хотите извлекать емейлы постоянно.
Фильтрация/рассылка модулями OTRS/PostMaster(для более сложной диспетчеризации)
Если вы используете метод bin/otrs.PostMaster.pl или bin/otrs.PostMasterMailbox.pl, то смодулем фильтрации PostMaster можно вставить или модифицировать X-OTRS заголовок.С помощью X-OTRS-заголовков, система обработки заявок может вызывать некоторыедействия для входящих сообщений, сортировать их в определенные очереди, или,например, изменять приоритет или ID-клиента. Более подробную информацию о X-OTRS-заголовках можно найти в главе добавление аккаунтов электронной почты в ПанелиАдминистрирования.
Есть некоторые предустановленные модули фильтрации:
ЗамечаниеНазвание задания (например $Self->{‘PostMaster::PreFilterModule’}->{‘JobName’})должно быть уникальным!
Kernel::System::PostMaster::Filter::Match модуль по умолчанию для проверки совпадениязаголовков определенных емейлов (например «От», «Кому», «Тема», …). Он можетустанавливать новые заголовки email (например X-OTRS-Ignore: да или X-OTRS-Queue:spam) если совпадают правила совпадения. Задания из Примера 7-2 могут бытьпрописаны в Kernel/Config.pm

Отправка / получениеэлектронной почты
95
Пример 7.2. Пример задания для модуля фильтрацииKernel::System::PostMaster::Filter::Match
# Job Name: 1-Match # (block/ignore all spam email with From: [email protected]) $Self->{‘PostMaster::PreFilterModule’}->{‘1-Match’} = { Module => ‘Kernel::System::PostMaster::Filter::Match’, Match => { From => ‘[email protected]’, }, Set => { ‘X-OTRS-Ignore’ => ‘yes’, }, }; # Job Name: 2-Match # (sort emails with From: [email protected] and Subject: **ORDER** # into queue ‘Order’) $Self->{‘PostMaster::PreFilterModule’}->{‘2-Match’} = { Module => ‘Kernel::System::PostMaster::Filter::Match’, Match => { To => ‘[email protected]’, Subject => ‘**ORDER**’, }, Set => { ‘X-OTRS-Queue’ => ‘Order’, }, };
Kernel::System::PostMaster::Filter::CMD модуль по умолчанию для получения емейловдля внешних команд. Вывод передается в STDOUT и если результат истинна, тоустанавливается новый заголовок (например X-OTRS-Ignore: да или X-OTRS-Queue:spam). Пример 7-3 может быть использован в Kernel/Config.pm
Пример 7.3. Пример задания для модуля фильтрацииKernel::System::PostMaster::Filter::CMD
# Job Name: 5-SpamAssassin # (SpamAssassin example setup, ignore spam emails) $Self->{‘PostMaster::PreFilterModule’}->{‘5-SpamAssassin’} = { Module => ‘Kernel::System::PostMaster::Filter::CMD’, CMD => ‘/usr/bin/spamassassin | grep -i «X-Spam-Status: yes»‘, Set => { ‘X-OTRS-Ignore’ => ‘yes’, }, };
Конечно, также есть возможность разработки своих собственных PostMaster-модулейфильтрации.

96
Глава 8. Функции связанные свременемНастройка периода рабочего времени,празников и часовых поясов
Некоторые функции в OTRS, например, как эскалация и автоматическая разблокировказаявок зависят от правильной настройки параметра «рабочее время», часовыхпоясов и праздников. Все эти настройки можно определить перейдя по ссылкеинтерфейс SysConfig в Framework > Core::Time. Перейдя по ссылке Framework >Core::Time::Calendar1, которая находится подFramework > Core::Time::Calendar9 можнотакже указать различные, заранее установленные «наборы рабочего времени», празникови часовых поясов. Перейдя по ссылке настройки очереди можно определить Календари.Для этого также можно использовать SLA-уровни. Например можно создать различныеSLA-схемы: 5 x 8 рабочих часов для стандартного SLA, но и вместе с тем создать другойкалендарь: 7 x 24 — «Золотой SLA»; также можно иметь отдельный календарь для очереди’Support-USA’, с часовыми поясами, различающимися с очередью ‘Support-Japan’. В OTRSможно создавать до 99 различных календарей.
Бизнес ВремяНастройте рабочее время для системы в SysConfig Framework >Core::Time::TimeWorkingHours или для определенного календаря в его конфигурации.Проверьте обозначения для пунктов 8, 9, 10 … 17 соответствующих часам от 8 AM — 6 PM.
Заявки эскалируются, уведомления для эскалированных и ожидающих заявокотправляются и заявки разблокируются только в рабочее время.
Праздники с фиксированными датамиПразники, которые с каждым годом не приходятся на фиксированный день, такие какНовый год или четвертое Июля могут быть указаны в Отпускные дни или в соответсвтующемразделе календаря 1-9.
Заявки не будт эскалироваться, ни разблокироваться в сроки, определенные как»Специально зарезервированные дни».
ЗамечаниеПо умолчанию, OTRS работает по Немецким выходным.
TimeVacationDaysOneTimeПразники, такие как Пасха, которые ежегодно не имеют фиксированной даты могут бытьуказаны в Отпускные дни (One-Time) .
Заявки не будут эскалироваться и не будут разблокироваться в период времениопределенный как TimeVacationDaysOneTime.

Функции связанные с временем
97
ЗамечаниеOTRS поставляется без единого предустановленного One-Time-праздника. Этоозначает, что во время настройки системы OTRS, нужно самостоятельно добавитьпразники, такие как Пасха, День Благодарения.
Автоматические РазблокировкиЗаблокированные заявки могут быть разблокированы системой автоматически. Эта опцияможет быть полезной, если, например, агент заблокировал заявки, которые нужнообработать, но не работал с ними по определенной причине, например был в отпуске.Чтобы убедится в том, что заблокированные заявки не будут забыты и их обработаютдругие агенты, автоматическая разблокировка разблокирует заблокированные заявки приистечении определенного времени.
Перейдя по ссылке настройки очереди для каждой заявки можно установитьколичество времени, при истечении которого она будет разблокирована. Модуль,bin/otrs.UnlockTickets.pl, который периодически вызывается как заданиепланировщика задач cron job, выполняет автоматическую разблокировку заявок.
Уведомления о разблокированных заявках отсылаются только тем агентам, которыедобавили очередь с разблокированными заявками в «Мои очереди», и активировали всвоих настройках функцию уведомлений о разблокированных заявоках.
Заявки будут заблокированы в том случае, если выполнятся следующие условия:
• Для очереди в которой хранится заявка определяется время разблокировки .
• Заявке присвоен статус заблокирована.
• Заявке присвоен статус открыатая.
Если агент добавляет в заявку новую статью — таймер разблокировки будет сброшен. Онможет быть любым из следующих типов: внешний-email, телефон, факс, смс, или внешнеепримечание.
Кроме этого, если последняя статья в заявке создана агентом, и клиент добавляет ещеодну, либо через веб-интерфейс либо по электронной почте, таймер разблокировки такжебудет сброшен.
Последнее событие, которое будет сбрасывать таймер разблокировки, когда заявкапередается другому агенту.

98
Глава 9. Ответственность за Заявку &Наблюдение за Заявкой
Начиная с OTRS 2.1 и выше, в дополнение к владельцу заявки можно определитьответственного за нее человека. Кроме того, все мероприятия, связанные с заявкой могутпросматриваться не только владельцем но другими людьми. Ети две возможности системыреализваны с помощью функций TicketResponsible и TicketWatcher и также позволяютрабатать в рамках иерархической структуры команды.
Ответственность за ЗаявкуФункция ответственности за заявку способствует ее полной обработки еагентом, которыйне является владельцем заявки. Таким образом агент, который заблокировал заявку можетпередать ее другому агенту, который не является владельцем заявки, для того, чтобывторой просто дал ответ на вопрос. После того как запрос был рассмотрен, первый агентможет снять ответственность за заявку с второго агента.
С помощью параметров конфигурации Ticket::Responsible, можно активировать функциюответственности за заявку. Это приведет к появлению на экране трех дополнительныхиконок/значков.
Ответственность за заявку может быть назначена после открытия ее содержимого,нажав ссылку «Ответственность», соответсвующего меню в шаблоне просмотра подробнойинформации о заявке агентского веб-интерфейса (см. ниже Рисунок 9.1).
Рисунок 9.1. Изменение Ответственного за заявку в шаблоне просмотра подробной инф.о заявке.
После нажатия на кнопку «Ответственность», откроется всплывающее окно для измененияответственности этой заявки (см. ниже Рисунок 9.2). Этот шаблон/диалог также может бытьиспользован для отправки сообщения новому агенту, который будет нести ответственностьза эту заявку.

Ответственность за Заявку& Наблюдение за Заявкой
99
Рисунок 9.2. Всплывающий диалог для изменения ответственного за заявку.
Если активирована функция ответственности за заявку, то в шаблоне Ответственность,агентского веб-интерфейса OTRS можно просмотреть список всех заявок, за которыеагент несет ответственность.
Просмотр ЗаявокНачиная с OTRS 2.1 и выше с помощью функции TicketWatcher, выбранные агенты, такиекак, например, руководители могут просматривать определенные заявки без их обработки.
Функция TicketWatcher может быть активирована с помощью параметра конфигурацииTicket::Watcher, после чего в панели инструментов появлятся новые ссылки. ИспользуяTicket::WatcherGroup можно определить одну или несколько групп пользователей справами просмотра заявок.
Для того чтобы смотреть заявку, перейдите к шаблону просмотра подробной информациио заявке и нажмите ссылку «Подписатся» в меню заявки (см. ниже Рисунок 9.3).
Figure 9.3. Подписка на просмотр подробной информации о заявке.
Если вы больше не хотите просматривать определенную заявку, перейдите к шаблонупросмотра подробной информации заявки и нажмите кнопку «Отменить подписку» в менюзаявки (см. ниже Рисунок 9.4).

Ответственность за Заявку& Наблюдение за Заявкой
100
Рисунок 9.4. Отказ от подписи на заявку в шаблоне просмотра подробной информации озаявке.
Как только активирована функция «просмотр заявок», то список всех просматриваемыхзаявок будет доступен в шаблоне Watched View (см. ниже Рисунок 9.5).
Рисунок 9.5. Шаблон для просматриваемых заявок.

101
Глава 10. Настройка экспорта в PDFВ этом разделе приводится настройка опций для экспорта данных из OTRS в PDF.
Нажатие кнопки Распечатать из любой точки интерфейса OTRS приведет к генерацииPDF-файла. Используя конфигурационный параметр PDF можно изменить такоеповедение, заменив его на HTML.
Чтобы изменить внешний вид файлов, сгенерированных системой OTRS, можно создатьсвой собственный логотип и добавить его перейдя по ссылке PDF::LogoFile. Чтобыопределить стандартный размер страниц генерируемых pdf-файлов (DIN-A4 or Letter)воспользуйтесь ссылкой PDF::PageSize. Чтобы указать максимальное количество страницpdf-файла используйте ссылку PDF::MaxPage. Эта настройка может быть полезна когдапользователь ошибочно генерирует файл большого размера.
Для генерации pdf-файлов должны быть проинсталированы Perl-модули CPAN: PDF::API2и Compress::Zlib. В большинстве дистрибутивов они доступны в виде пакетов и могут бытьлегко установлены с помощью соответсвтующего менедежера пакетов. В случае, еслиэто не возможно, они должны быть установлены с помощью CPAN. За дополнительнойинформацией об установке Perl-модулей, обратитесь к главе «Установка Perl-модулей».

102
Глава 11. Использование внешниххранилищ данныхДанные клиентов
OTRS работает с различными атрибутами данных клиентов, такими как имя пользователя,адрес электронной почты, номер телефона и т.д. Эти атрибуты отображаются в обеихфронтэндах, для Агентов и Клиентов. Они также используются для проверки подлинностиклиентов.
Данные клиентов, которые используются и отображаются в OTRS очень легконастраиваются. Несмотря на это следующая информация будет всегда необходима дляпроверки подлинности клиента:
• Вход пользователей
• Адресс электронной почты
• ID Клиента
Используйте параметры конфигурации приведенные в Сценарии 11.1 в файле Kernel/Config.pm если нужно выводить информацию о клиентах в агентском веб-интерфейсе.
# Ticket::Frontend::CustomerInfo* # (show customer info on Compose (Phone and Email), Zoom and # Queue view) $Self->{‘Ticket::Frontend::CustomerInfoCompose’} = 1; $Self->{‘Ticket::Frontend::CustomerInfoZoom’} = 1; $Self->{‘Ticket::Frontend::CustomerInfoQueue’} = 0;
Сценарий 11.1. Конфигурационные параметры Kernel/Config.pm.
Пользовательский бэк-ендВы можете использоваь два типа хранилища информации клиентов: Базу Данных DB иLDAP. Если у вас уже есть другой бэк-енд для хранения пользовательской информации(например SAP), также есть возможность написать модуль для использования этойфункции.
База Данных (По умолчанию)В Примере 11-1 приведена конфигурация базы данных, которая использует данныеклиента, хранящиеся в базе данных OTRS.
Пример 11.1. Настройка клиентского хранилища базы данных (DB)
# CustomerUser (customer database backend and settings)$Self->{CustomerUser} = { Name => ‘Database Datasource’, Module => ‘Kernel::System::CustomerUser::DB’,

Использование внешниххранилищ данных
103
Params => { # if you want to use an external database, add the required settings# DSN => ‘DBI:odbc:yourdsn’,# DSN => ‘DBI:mysql:database=customerdb;host=customerdbhost’,# User => »,# Password => », Table => ‘customer_user’, # if your frontend is unicode and the charset of your # customer database server is iso-8859-1, use these options.# SourceCharset => ‘iso-8859-1’,# DestCharset => ‘utf-8’,
# CaseSensitive will control if the SQL statements need LOWER() # function calls to work case insensitively. Setting this to # 1 will improve performance dramatically on large databases. CaseSensitive => 0, },# customer unique idCustomerKey => ‘login’,
# customer #CustomerID => ‘customer_id’,CustomerValid => ‘valid_id’, CustomerUserListFields => [‘first_name’, ‘last_name’, ’email’], CustomerUserSearchFields => [‘login’, ‘last_name’, ‘customer_id’], CustomerUserSearchPrefix => », CustomerUserSearchSuffix => ‘*’, CustomerUserSearchListLimit => 250, CustomerUserPostMasterSearchFields => [’email’], CustomerUserNameFields => [‘title’,’first_name’,’last_name’], CustomerUserEmailUniqCheck => 1,# # show not own tickets in customer panel, CompanyTickets# CustomerUserExcludePrimaryCustomerID => 0,# # generate auto logins# AutoLoginCreation => 0,# AutoLoginCreationPrefix => ‘auto’,# # admin can change customer preferences# AdminSetPreferences => 1,# # cache time to live in sec. — cache any database queries# CacheTTL => 0,# # just a read only source# ReadOnly => 1, Map => [ # note: Login, Email and CustomerID needed! # var, frontend, storage, shown (1=always,2=lite), required, storage-type, http-link, readonly, http-link-target [ ‘UserTitle’, ‘Title’, ‘title’, 1, 0, ‘var’, », 0 ],

Использование внешниххранилищ данных
104
[ ‘UserFirstname’, ‘Firstname’, ‘first_name’, 1, 1, ‘var’, », 0 ], [ ‘UserLastname’, ‘Lastname’, ‘last_name’, 1, 1, ‘var’, », 0 ], [ ‘UserLogin’, ‘Username’, ‘login’, 1, 1, ‘var’, », 0 ], [ ‘UserPassword’, ‘Password’, ‘pw’, 0, 0, ‘var’, », 0 ], [ ‘UserEmail’, ‘Email’, ’email’, 1, 1, ‘var’, », 0 ],
# [ ‘UserEmail’, ‘Email’, ’email’, 1, 1, ‘var’, ‘$Env{«CGIHandle»}?Action=AgentTicketCompose&ResponseID=1&TicketID=$Data{«TicketID»}&ArticleID=$Data{«ArticleID»}’, 0 ], [ ‘UserCustomerID’, ‘CustomerID’, ‘customer_id’, 0, 1, ‘var’, », 0 ],
# [ ‘UserCustomerIDs’, ‘CustomerIDs’, ‘customer_ids’, 1, 0, ‘var’, », 0 ], [ ‘UserPhone’, ‘Phone’, ‘phone’, 1, 0, ‘var’, », 0 ], [ ‘UserFax’, ‘Fax’, ‘fax’, 1, 0, ‘var’, », 0 ], [ ‘UserMobile’, ‘Mobile’, ‘mobile’, 1, 0, ‘var’, », 0 ], [ ‘UserStreet’, ‘Street’, ‘street’, 1, 0, ‘var’, », 0 ], [ ‘UserZip’, ‘Zip’, ‘zip’, 1, 0, ‘var’, », 0 ], [ ‘UserCity’, ‘City’, ‘city’, 1, 0, ‘var’, », 0 ], [ ‘UserCountry’, ‘Country’, ‘country’, 1, 0, ‘var’, », 0 ], [ ‘UserComment’, ‘Comment’, ‘comments’, 1, 0, ‘var’, », 0 ], [ ‘ValidID’, ‘Valid’, ‘valid_id’, 0, 1, ‘int’, », 0 ], ], # default selections Selections => { UserTitle => { ‘Mr.’ => ‘Mr.’, ‘Mrs.’ => ‘Mrs.’, }, },};
If you want to customize the customer data, change the column headers or add new ones tothe customer_user table in the OTRS database. As an example, Script 11.2 shows how to adda new field for room number.
linux:~# mysql -pEnter password:

Использование внешниххранилищ данных
105
Welcome to the MySQL monitor. Commands end with ; or g.Your MySQL connection id is 116 to server version: 5.0.18-Debian_7-log
Type ‘help;’ or ‘h’ for help. Type ‘c’ to clear the buffer.
mysql> use otrs;Reading table information for completion of table and column namesYou can turn off this feature to get a quicker startup with -A
Database changedmysql> ALTER TABLE customer_user ADD room VARCHAR (250);Query OK, 1 rows affected (0.01 sec)Records: 1 Duplicates: 0 Warnings: 0
mysql> quitByelinux:~#
Сценарий 11.2. Добавление поля «комната» в таблицу customer_user table.
Теперь добавьте новый столбец в MAP-масив в Kernel/Config.pm, как это показано вСценарии 11.3.
# var, frontend, storage, shown (1=always,2=lite), required, storage-type, http-link, readonly […] [ ‘UserRoom’, ‘Room’, ‘room’, 0, 1, ‘var’, », 0 ],
Сценарий 11.3. Добавление поля «комната» в файл Kernel/Config.pm.
Всю эту информацию можно также отредактировать воспользовавшись ссылкой Клиенты.
Клиент с несколькими идентификаторами (Заявки Компании)Одному клиенту можно назначить больше одного клиентского идентификатора (CustomerID). Это может быть полезно, если клиенту необходимо получить доступ к заявкам другихклиентов, например, руководитель хочет посмотреть заявки своих помощников. Есликлиент может получить доступ к заявкам другого клиента, то используется особенностьOTRS «заявки компании». Заявки компании могут быть доступны перейдя по ссылке»Заявки Компании» в клиентской панели управления.
Для использованя заявок компании, новый столбец с идентификатором (IDs), которыйдолжен быть доступен для клиента, должен быть добавлен в таблицу customer_user базыданных OTRS (см. ниже Сценарий 11.4).
linux:~# mysql -pEnter password:Welcome to the MySQL monitor. Commands end with ; or g.Your MySQL connection id is 124 to server version: 5.0.18-Debian_7-log
Type ‘help;’ or ‘h’ for help. Type ‘c’ to clear the buffer.

Использование внешниххранилищ данных
106
mysql> use otrs;Reading table information for completion of table and column namesYou can turn off this feature to get a quicker startup with -A
Database changedmysql> ALTER TABLE customer_user ADD customer_ids VARCHAR (250);Query OK, 1 rows affected (0.02 sec)Records: 1 Duplicates: 0 Warnings: 0
mysql> quitByelinux:~#
Сценарий 11.4. Добавление поля customer_ids в таблицу customer_user.
Теперь новый столбец должен быть добавлен в MAP-массив в Kernel/Config.pm, какэто показано в Сценарии 11.5.
# var, frontend, storage, shown (1=always,2=lite), required, storage-type, http-link, readonly […] [ ‘UserCustomerIDs’, ‘CustomerIDs’, ‘customer_ids’, 1, 0, ‘var’, », 0 ],
Сценарий 11.5. Добавление поля UserCustomerIDs в Kernel/Config.pm.
Теперь, новый столбец для мульти-идентификатора ( IDs) клиента можно редактировать спомощью веб-интерфейса Агента, в разделе управления клиентами.
Для того, чтобы убедится что один клиент имеет доступ к заявкам других клиентовнужно добавить идентификаторы (IDs) этих пользователей в новое поле для несколькихидентификаторов клиента. Каждый идентификатор (ID) должен быть отделен точкой сзапятой (см. ниже Пример 11-2).
Пример 11.2. Хранение Заявок Компании в базе данных DBКлиенты А, Б и Ц созданы в вашей системе и А хочет иметь доступ к заявкам Б иЦ используя клиентскую панель. Б и Ц не должны иметь доступа к заявкам другихпользователей.
Для реализации этой структуры, измените таблицу customer_user и маппинг(преобразование) в Kernel/Config.pm как это показано выше. С помощью ПанелиАдминистрирования или используя ссылку Клиенты в веб-интерфейсе Агента загрузитенастройки пользователя А. Если настройки отображаются, добавьте значения «Б;Ц;» вполе для CustomerIDs.
LDAPЕсли у вас есть LDAP-каталог, в котором хранятся данные о клиентах, его можноиспользовать в OTRS, в качестве хранилища данных о клиентах, как это показано вПримере 11-3.
Пример 11.3. Настройка LDAP в качестве клиентского бэк-енда

Использование внешниххранилищ данных
107
# CustomerUser# (customer ldap backend and settings)$Self->{CustomerUser} = { Name => ‘LDAP Data Source’, Module => ‘Kernel::System::CustomerUser::LDAP’, Params => { # ldap host Host => ‘bay.csuhayward.edu’, # ldap base dn BaseDN => ‘ou=seas,o=csuh’, # search scope (one|sub) SSCOPE => ‘sub’, # The following is valid but would only be necessary if the # anonymous user does NOT have permission to read from the LDAP tree UserDN => », UserPw => », # in case you want to add always one filter to each ldap query, use # this option. e. g. AlwaysFilter => ‘(mail=*)’ or AlwaysFilter => ‘(objectclass=user)’ AlwaysFilter => », # if both your frontend and your LDAP are unicode, use this: SourceCharset => ‘utf-8’, DestCharset => ‘utf-8’, # if your frontend is unicode and the charset of your # ldap server is iso-8859-1, use these options. # SourceCharset => ‘iso-8859-1’, # DestCharset => ‘utf-8’, # Net::LDAP new params (if needed — for more info see perldoc Net::LDAP) Params => { port => 389, timeout => 120, async => 0, version => 3, }, }, # customer unique id CustomerKey => ‘uid’, # customer # CustomerID => ‘mail’, CustomerUserListFields => [‘cn’, ‘mail’], CustomerUserSearchFields => [‘uid’, ‘cn’, ‘mail’], CustomerUserSearchPrefix => », CustomerUserSearchSuffix => ‘*’, CustomerUserSearchListLimit => 250, CustomerUserPostMasterSearchFields => [‘mail’], CustomerUserNameFields => [‘givenname’, ‘sn’], # show not own tickets in customer panel, CompanyTickets CustomerUserExcludePrimaryCustomerID => 0, # add an ldap filter for valid users (expert setting)# CustomerUserValidFilter => ‘(!(description=locked))’,

Использование внешниххранилищ данных
108
# administrator can’t change customer preferences AdminSetPreferences => 0,# # cache time to live in sec. — cache any database queries# CacheTTL => 0, Map => [ # note: Login, Email and CustomerID are mandatory! # var, frontend, storage, shown (1=always,2=lite), required, storage-type, http-link, readonly [ ‘UserTitle’, ‘Title’, ‘title’, 1, 0, ‘var’, », 0 ], [ ‘UserFirstname’, ‘Firstname’, ‘givenname’, 1, 1, ‘var’, », 0 ], [ ‘UserLastname’, ‘Lastname’, ‘sn’, 1, 1, ‘var’, », 0 ], [ ‘UserLogin’, ‘Username’, ‘uid’, 1, 1, ‘var’, », 0 ], [ ‘UserEmail’, ‘Email’, ‘mail’, 1, 1, ‘var’, », 0 ], [ ‘UserCustomerID’, ‘CustomerID’, ‘mail’, 0, 1, ‘var’, », 0 ],# [ ‘UserCustomerIDs’, ‘CustomerIDs’, ‘second_customer_ids’, 1, 0, ‘var’, », 0 ], [ ‘UserPhone’, ‘Phone’, ‘telephonenumber’, 1, 0, ‘var’, », 0 ], [ ‘UserAddress’, ‘Address’, ‘postaladdress’, 1, 0, ‘var’, », 0 ], [ ‘UserComment’, ‘Comment’, ‘description’, 1, 0, ‘var’, », 0 ], ],};
Если дополнительные атрибуты клиента хранятся в LDAP-каталоге, например, имяруководителя, номер мобильного телефона, или отдела, и если эту информациюнужно отобразить в OTRS, просто расширьте MAP-массив в файле Kernel/Config.pmзаписями для этих атрибутов, как показано в Сценарии 11.6.
# var, frontend, storage, shown (1=always,2=lite), required, storage-type, http-link, readonly […] [ ‘UserPhone’, ‘Phone’, ‘telephonenumber’, 1, 0, ‘var’, », 0 ],
Сценарий 11.6. Добавление нового поля в файл Kernel/Config.pm.
Клиент с несколькими идентификаторами (Заявки Компании)При использовании LDAP-бэкэнда клиенту можно присвоить больше одного клиентскогоайди (Customer ID). Для использования заявок компании, в LDAP-директорию нужнодобавить новое поле, которое содержит доступные агенту идентификаторы (IDs).
Если в LDAP-каталоге было созадно новое поле, его также нужно добавить в MAP-массивв Kernel/Config.pm, как это показано в Сценарии 11.7.

Использование внешниххранилищ данных
109
# var, frontend, storage, shown (1=always,2=lite), required, storage-type, http-link, readonly […] [ ‘UserCustomerIDs’, ‘CustomerIDs’, ‘customer_ids’, 1, 0, ‘var’, », 0 ],
Сценарий 11.7. Подстановка новых полей в Kernel/Config.pm file.
Клиентские идентификаторы (IDs) можно редактировать напрямую в LDAP-директории.OTRS может только считать информацию из LDAP, но не записывать.
Чтобы убедтися что клиент имеет доступ к заявкам других клиентов, добавьтеидентификаторы (IDs) клиентов, к заявкам которых нужен доступ, к новому полю вашейLDAP-директории. Каждый идентификатор ID должен быть отделен точнкой с запятой (см.ниже Рисунок 11-4).
Пример 11.4. Использование заявок Компании с LDAP-бэкэндом
Клиенты А, Б и Ц созданны в вашей системе и А хочет иметь доступ к заявкам Б и Ц черезпанель клиента. Б и Ц не должны иметь доступа к другим пользователям.
Для реализации этой установки измените LDAP-директорию и маппинг (mapping) вKernel/Config.pm, как это показано выше. Затем добавьте в вашей LDAP-директориизначения «Б;Ц;» в поле для CustomerIDs, для клиента «А».
Использование больше чем одного хранилищаинформации с OTRS
Если в OTRS нужно использовать больше одного источника данных о клиентах (напримерLDAP и базу данных), конфигурационный параметр CustomerUser должен быть расширенчислом, например «CustomerUser1», «CustomerUser2» (см. ниже Пример 11-5).
Пример 11.5. Использование больше чем одного пользовательскогохранилища данных с OTRS
В следующем примере показано применение конфигурации как для LDAP так и для базыданных клиентского бэкэнда с OTRS.
# 1. Customer user backend: DB# (customer database backend and settings)$Self->{CustomerUser1} = { Name => ‘Customer Database’, Module => ‘Kernel::System::CustomerUser::DB’, Params => { # if you want to use an external database, add the # required settings# DSN => ‘DBI:odbc:yourdsn’,# DSN => ‘DBI:mysql:database=customerdb;host=customerdbhost’,# User => »,# Password => », Table => ‘customer_user’,

Использование внешниххранилищ данных
110
}, # customer unique id CustomerKey = ‘login’, # customer # CustomerID = ‘customer_id’, CustomerValid = ‘valid_id’, CustomerUserListFields => [‘first_name’, ‘last_name’, ’email’], CustomerUserSearchFields => [‘login’, ‘last_name’, ‘customer_id’], CustomerUserSearchPrefix => », CustomerUserSearchSuffix => ‘*’, CustomerUserSearchListLimit => 250, CustomerUserPostMasterSearchFields => [’email’], CustomerUserNameFields => [‘title’,’first_name’,’last_name’], CustomerUserEmailUniqCheck => 1,# # show not own tickets in customer panel, CompanyTickets# CustomerUserExcludePrimaryCustomerID => 0,# # generate auto logins# AutoLoginCreation => 0,# AutoLoginCreationPrefix => ‘auto’,# # admin can change customer preferences# AdminSetPreferences => 1,# # cache time to live in sec. — cache any database queries# CacheTTL => 0,# # just a read only source# ReadOnly => 1, Map => [
# note: Login, Email and CustomerID needed! # var, frontend, storage, shown (1=always,2=lite), required, storage-type, http-link, readonly, http-link-target [ ‘UserTitle’, ‘Title’, ‘title’, 1, 0, ‘var’, », 0 ], [ ‘UserFirstname’, ‘Firstname’, ‘first_name’, 1, 1, ‘var’, », 0 ], [ ‘UserLastname’, ‘Lastname’, ‘last_name’, 1, 1, ‘var’, », 0 ], [ ‘UserLogin’, ‘Username’, ‘login’, 1, 1, ‘var’, », 0 ], [ ‘UserPassword’, ‘Password’, ‘pw’, 0, 0, ‘var’, », 0 ], [ ‘UserEmail’, ‘Email’, ’email’, 1, 1, ‘var’, », 0 ], [ ‘UserCustomerID’, ‘CustomerID’, ‘customer_id’, 0, 1, ‘var’, », 0 ], [ ‘UserPhone’, ‘Phone’, ‘phone’, 1, 0, ‘var’, », 0 ], [ ‘UserFax’, ‘Fax’, ‘fax’, 1, 0, ‘var’, », 0 ], [ ‘UserMobile’, ‘Mobile’, ‘mobile’, 1, 0, ‘var’, », 0 ], [ ‘UserStreet’, ‘Street’, ‘street’, 1, 0, ‘var’, », 0 ], [ ‘UserZip’, ‘Zip’, ‘zip’, 1, 0, ‘var’, », 0 ],

Использование внешниххранилищ данных
111
[ ‘UserCity’, ‘City’, ‘city’, 1, 0, ‘var’, », 0 ], [ ‘UserCountry’, ‘Country’, ‘country’, 1, 0, ‘var’, », 0 ], [ ‘UserComment’, ‘Comment’, ‘comments’, 1, 0, ‘var’, », 0 ], [ ‘ValidID’, ‘Valid’, ‘valid_id’, 0, 1, ‘int’, », 0 ], ], # default selections Selections => { UserTitle => { ‘Mr.’ => ‘Mr.’, ‘Mrs.’ => ‘Mrs.’, }, },};
# 2. Customer user backend: LDAP# (customer ldap backend and settings)$Self->{CustomerUser2} = { Name => ‘LDAP Datasource’, Module => ‘Kernel::System::CustomerUser::LDAP’, Params => { # ldap host Host => ‘bay.csuhayward.edu’, # ldap base dn BaseDN => ‘ou=seas,o=csuh’, # search scope (one|sub) SSCOPE => ‘sub’,# # The following is valid but would only be necessary if the# # anonymous user does NOT have permission to read from the LDAP tree UserDN => », UserPw => », # in case you want to add always one filter to each ldap query, use # this option. e. g. AlwaysFilter => ‘(mail=*)’ or AlwaysFilter => ‘(objectclass=user)’ AlwaysFilter => », # if both your frontend and your LDAP are unicode, use this:# SourceCharset => ‘utf-8’,# DestCharset => ‘utf-8’, # if your frontend is e. g. iso-8859-1 and the character set of your # ldap server is utf-8, use these options:# SourceCharset => ‘utf-8’,# DestCharset => ‘iso-8859-1’,
# Net::LDAP new params (if needed — for more info see perldoc Net::LDAP) Params => { port => 389, timeout => 120,

Использование внешниххранилищ данных
112
async => 0, version => 3, }, }, # customer unique id CustomerKey => ‘uid’, # customer # CustomerID => ‘mail’, CustomerUserListFields => [‘cn’, ‘mail’], CustomerUserSearchFields => [‘uid’, ‘cn’, ‘mail’], CustomerUserSearchPrefix => », CustomerUserSearchSuffix => ‘*’, CustomerUserSearchListLimit => 250, CustomerUserPostMasterSearchFields => [‘mail’], CustomerUserNameFields => [‘givenname’, ‘sn’], # show not own tickets in customer panel, CompanyTickets CustomerUserExcludePrimaryCustomerID => 0, # add a ldap filter for valid users (expert setting)# CustomerUserValidFilter => ‘(!(description=locked))’, # admin can’t change customer preferences AdminSetPreferences => 0, Map => [ # note: Login, Email and CustomerID needed! # var, frontend, storage, shown (1=always,2=lite), required, storage-type, http-link, readonly [ ‘UserTitle’, ‘Title’, ‘title’, 1, 0, ‘var’, », 0 ], [ ‘UserFirstname’, ‘Firstname’, ‘givenname’, 1, 1, ‘var’, », 0 ], [ ‘UserLastname’, ‘Lastname’, ‘sn’, 1, 1, ‘var’, », 0 ], [ ‘UserLogin’, ‘Username’, ‘uid’, 1, 1, ‘var’, », 0 ], [ ‘UserEmail’, ‘Email’, ‘mail’, 1, 1, ‘var’, », 0 ], [ ‘UserCustomerID’, ‘CustomerID’, ‘mail’, 0, 1, ‘var’, », 0 ],# [ ‘UserCustomerIDs’, ‘CustomerIDs’, ‘second_customer_ids’, 1, 0, ‘var’, », 0 ], [ ‘UserPhone’, ‘Phone’, ‘telephonenumber’, 1, 0, ‘var’, », 0 ], [ ‘UserAddress’, ‘Address’, ‘postaladdress’, 1, 0, ‘var’, », 0 ], [ ‘UserComment’, ‘Comment’, ‘description’, 1, 0, ‘var’, », 0 ], ],};
Есть возможность интегрировать до 10 различных пользовательских бэк-эндов.Используйте интерфейс управления клиентами в OTRS, чтобы просматривать иредактировать данные о них (при условии наличия прав для записи).

Использование внешниххранилищ данных
113
Хранилища (бэк-енды) для аутентификацииАгентов и Клиентов
OTRS предлагает опцию для проверки подлинности агентов и клиентов с использованиемразличных хранилищ данных (бэкендов).
Хранилища данных (бэк-енды) для аутентификацииАгентовБаза Данных (DB, по умаолчанию)
В качестве бэк-энда для аутентификации агентов в OTRS, по умолчанию, используетсябаза данных. Чтобы добавлять агентов, редактировать данные о них, перейдите настраницу Панель Администрирования и нажмите ссылку Интерфейс для управленияагентами (см. ниже Пример 11.6).
Пример 11.6. Проверка подлинности агентов путем использованияБазы Данных (DB) в качестве хранилища информации.
$Self->{‘AuthModule’} = ‘Kernel::System::Auth::DB’;
LDAPЕсли данные всех ваших агентов хранятся в LDAP-директории, то для аутентификациипользователей в OTRS можно использовать LDAP-модуль (см. ниже Пример 11-7). Этотмодуль имеет права только на чтение дерева LDAP-каталогов, что означает что нетувозможности редактировать данные пользователей используя ссылку веб-интерфейс дляуправления пользователями .
Пример 11.7. Проверка подлинности агентов при использовании LDAPв качестве хранилища данных
# This is an example configuration for an LDAP auth. backend.# (Make sure Net::LDAP is installed!)$Self->{‘AuthModule’} = ‘Kernel::System::Auth::LDAP’;$Self->{‘AuthModule::LDAP::Host’} = ‘ldap.example.com’;$Self->{‘AuthModule::LDAP::BaseDN’} = ‘dc=example,dc=com’;$Self->{‘AuthModule::LDAP::UID’} = ‘uid’;
# Check if the user is allowed to auth in a posixGroup# (e. g. user needs to be in a group xyz to use otrs)$Self->{‘AuthModule::LDAP::GroupDN’} = ‘cn=otrsallow,ou=posixGroups,dc=example,dc=com’;$Self->{‘AuthModule::LDAP::AccessAttr’} = ‘memberUid’;# for ldap posixGroups objectclass (just uid)# $Self->{‘AuthModule::LDAP::UserAttr’} = ‘UID’;# for non ldap posixGroups objectclass (with full user dn)# $Self->{‘AuthModule::LDAP::UserAttr’} = ‘DN’;

Использование внешниххранилищ данных
114
# The following is valid but would only be necessary if the# anonymous user do NOT have permission to read from the LDAP tree$Self->{‘AuthModule::LDAP::SearchUserDN’} = »;$Self->{‘AuthModule::LDAP::SearchUserPw’} = »;
# in case you want to add always one filter to each ldap query, use# this option. e. g. AlwaysFilter => ‘(mail=*)’ or AlwaysFilter => ‘(objectclass=user)’$Self->{‘AuthModule::LDAP::AlwaysFilter’} = »;
# in case you want to add a suffix to each login name, then# you can use this option. e. g. user just want to use user but# in your ldap directory exists [email protected]# $Self->{‘AuthModule::LDAP::UserSuffix’} = ‘@domain.com’;
# Net::LDAP new params (if needed — for more info see perldoc Net::LDAP)$Self->{‘AuthModule::LDAP::Params’} = { port => 389, timeout => 120, async => 0, version => 3,};
Параметры конфигурации приведенные в Сценарии 11.8 могут быть использованы длясинхронизации пользовательских данных из LDAP-каталога в локальную базу данныхOTRS. Это уменьшает количество запросов к LDAP-серверу и ускоряет проверкуподлинности в OTRS. Синхронизация данных завершена, когда агент аутентифицируетсявпервые. Несмотря на то, что данные могут быть синхронизированны в локальной базеданных OTRS, LDAP-каталог является последней инстанцией для проверки подлинностипользователей, таким образом пользователи, не активные для дерева каталогов LDAP немогут пройти аутентификацию в OTRS, дате в том случае, когда данные о пользователеуже хранятся в базе данных OTRS. Данные агентов в LDAP-директории не могут бытьотредактированы с помощью веб-интерфейса OTRS, так что управление данными должноосуществлятся непосредственно в дереве каталогов LDAP.
# agent data sync against ldap$Self->{‘AuthSyncModule’} = ‘Kernel::System::Auth::Sync::LDAP’;$Self->{‘AuthSyncModule::LDAP::Host’} = ‘ldap://ldap.example.com/’;$Self->{‘AuthSyncModule::LDAP::BaseDN’} = ‘dc=otrs, dc=org’;$Self->{‘AuthSyncModule::LDAP::UID’} = ‘uid’;$Self->{‘AuthSyncModule::LDAP::SearchUserDN’} = ‘uid=sys, ou=user, dc=otrs, dc=org’;$Self->{‘AuthSyncModule::LDAP::SearchUserPw’} = ‘some_pass’;$Self->{‘AuthSyncModule::LDAP::UserSyncMap’} = { # DB -> LDAP UserFirstname => ‘givenName’, UserLastname => ‘sn’, UserEmail => ‘mail’,};[…]
# AuthSyncModule::LDAP::UserSyncInitialGroups

Использование внешниххранилищ данных
115
# (sync following group with rw permission after initial create of first agent# login)$Self->{‘AuthSyncModule::LDAP::UserSyncInitialGroups’} = [ ‘users’,];
Сценарий 11.8. Синхронизация пользовательских данных из LDAP-директориив базуданных OTRS.
HTTPBasicAuth-аутентификация для АгентовЕсли вы хотите реализовать решение «single sign on» для всех агентов, вы можетеиспользовать базовую аунентификацию (для всех систем) и HTTPBasicAuth-модуль дляOTRS (см. ниже Пример 11-8).
Пример 11.8. Аутентификация Агентов с помощью HTTPBasic
# This is an example configuration for an apache ($ENV{REMOTE_USER})# auth. backend. Use it if you want to have a singe login through# apache http-basic-auth$Self->{‘AuthModule’} = ‘Kernel::System::Auth::HTTPBasicAuth’;
# Note:## If you use this module, you should use as fallback# the following configuration settings if the user is not authorized# apache ($ENV{REMOTE_USER})$Self->{LoginURL} = ‘http://host.example.com/not-authorised-for-otrs.html’;$Self->{LogoutURL} = ‘http://host.example.com/thanks-for-using-otrs.html’;
RadiusПараметры конфигурации приведенные в Примере 11-9 могут быть использованы дляаутентификации агентов с использованием Radius-сервера.
Пример 11.9. Аутентификация (проверка подлинности) агентов сиспользованием Radius-сервера в качестве хранилища информации
# This is example configuration to auth. agents against a radius server$Self->{‘AuthModule’} = ‘Kernel::System::Auth::Radius’;$Self->{‘AuthModule::Radius::Host’} = ‘radiushost’;$Self->{‘AuthModule::Radius::Password’} = ‘radiussecret’;

Использование внешниххранилищ данных
116
Хранилища информации для аутентификации(проверки подлинности) клиентовБаза Данных (По умолчанию)
Для аутентификации клиентов в OTRS, по умолчанию, используется база данных.Используя базу данных в качестве хранилища, все данные клиентов можно редактироватьчерез веб-интерфейс OTRS (см. ниже Пример 11-10).
Пример 11.10. Аутентификация Клиента в Базе Данных
# This is the auth. module againt the otrs db$Self->{‘Customer::AuthModule’} = ‘Kernel::System::CustomerAuth::DB’;$Self->{‘Customer::AuthModule::DB::Table’} = ‘customer_user’;$Self->{‘Customer::AuthModule::DB::CustomerKey’} = ‘login’;$Self->{‘Customer::AuthModule::DB::CustomerPassword’} = ‘pw’;#$Self->{‘Customer::AuthModule::DB::DSN’} = «DBI:mysql:database=customerdb;host=customerdbhost»;#$Self->{‘Customer::AuthModule::DB::User’} = «some_user»;#$Self->{‘Customer::AuthModule::DB::Password’} = «some_password»;
LDAPЕсли у вас есть LDAP-каталог со всеми данными о клиентах, можно использовать модульLDAP для аутентификации клиентов в OTRS (см. Пример 11-11 ниже). Поскольку этотмодуль имеет права только для чтения для данных из LDAP-бэкенда, то нету возможностиизменить данные клиента через веб.
Пример 11.11. Аутентификация пользователей с помощью LDAP-бэкэнда
# This is an example configuration for an LDAP auth. backend.# (make sure Net::LDAP is installed!)$Self->{‘Customer::AuthModule’} = ‘Kernel::System::CustomerAuth::LDAP’;$Self->{‘Customer::AuthModule::LDAP::Host’} = ‘ldap.example.com’;$Self->{‘Customer::AuthModule::LDAP::BaseDN’} = ‘dc=example,dc=com’;$Self->{‘Customer::AuthModule::LDAP::UID’} = ‘uid’;
# Check if the user is allowed to auth in a posixGroup# (e. g. user needs to be in a group xyz to use otrs)$Self->{‘Customer::AuthModule::LDAP::GroupDN’} = ‘cn=otrsallow,ou=posixGroups,dc=example,dc=com’;$Self->{‘Customer::AuthModule::LDAP::AccessAttr’} = ‘memberUid’;# for ldap posixGroups objectclass (just uid)$Self->{‘Customer::AuthModule::LDAP::UserAttr’} = ‘UID’;# for non ldap posixGroups objectclass (full user dn)#$Self->{‘Customer::AuthModule::LDAP::UserAttr’} = ‘DN’;
# The following is valid but would only be necessary if the# anonymous user does NOT have permission to read from the LDAP tree

Использование внешниххранилищ данных
117
$Self->{‘Customer::AuthModule::LDAP::SearchUserDN’} = »;$Self->{‘Customer::AuthModule::LDAP::SearchUserPw’} = »;
# in case you want to add always one filter to each ldap query, use# this option. e. g. AlwaysFilter => ‘(mail=*)’ or AlwaysFilter => ‘(objectclass=user)’$Self->{‘Customer::AuthModule::LDAP::AlwaysFilter’} = »;
# in case you want to add a suffix to each customer login name, then# you can use this option. e. g. user just want to use user but# in your ldap directory exists [email protected]#$Self->{‘Customer::AuthModule::LDAP::UserSuffix’} = ‘@domain.com’;
# Net::LDAP new params (if needed — for more info see perldoc Net::LDAP)$Self->{‘Customer::AuthModule::LDAP::Params’} = { port => 389, timeout => 120, async => 0, version => 3,};
HTTPBasicAuth аутентификация для клиентовЕсли для пользователей нужно внедрить «single sign on»-решение, можно использоватьбазовую, HTTPBasic аутентификацию (для всех систем) и использовать модульHTTPBasicAuth с OTRS (больше не нужно логинится в OTRS). См. ниже Пример 11-12.
Пример 11.12. Аутентификация клиентов с помощью HTTPBasic
# This is an example configuration for an apache ($ENV{REMOTE_USER})# auth. backend. Use it if you want to have a singe login through# apache http-basic-auth$Self->{‘Customer::AuthModule’} = ‘Kernel::System::CustomerAuth::HTTPBasicAuth’;
# Note:# If you use this module, you should use the following# config settings as fallback, if user isn’t login through# apache ($ENV{REMOTE_USER})$Self->{CustomerPanelLoginURL} = ‘http://host.example.com/not-authorised-for-otrs.html’;$Self->{CustomerPanelLogoutURL} = ‘http://host.example.com/thanks-for-using-otrs.html’;
RadiusНастройки приведенные в примере 11-13 могут быть использованы для аутентификацииваших клиентов с помощью Radius-сервера.
Пример 11.13. Аутентификация клиентов с использованием Radius

Использование внешниххранилищ данных
118
# This is a example configuration to auth. customer against a radius server$Self->{‘Customer::AuthModule’} = ‘Kernel::System::Auth::Radius’;$Self->{‘Customer::AuthModule::Radius::Host’} = ‘radiushost’;$Self->{‘Customer::AuthModule::Radius::Password’} = ‘radiussecret’;
Настройка самостоятельной регистрацииклиента
Есть возможность настроить самостоятельную регистрацию новых клиентов, доступнуючерез панель customer.pl. Можно добавить новые дополнительные или обязательные поля,такие как номер комнаты, адрес или состояние.
В следующем примере показано каким образом можно указать обязательные длязаполнения поля в базе данных клиентов, в данном случае, для хранения номера клиента.
Настройка веб-интерфейсаДля отображения нового поля для номера комнаты в веб-интерфейсе пользователя(customer.pl), нужно внести изменения в .dtl-файл, который отвечает зашаблон этого интерфейса. Отредактируйте файл Kernel/Output/HTML/Standard/CustomerLogin.dtl добавив новые поля после строки 80 (см. ниже Сценарий 11.9).
[…]<div class=»NewLine»> <label for=»Room»>$Text{«Room{CustomerUser}»}</label> <input title=»$Text{«Room Number»}» name=»Room» type=»text» id=»UserRoom» maxlength=»50″ /></div>[…]
Сценарий 11.9. Отображение новых полей в веб-интерфейсе.
Отображения клиентовНа следующем этапе, нужно внести изменения в маппинг (mapping), рассширив егоновым элементом — номером комнаты. Чтобы убедится что изменения не потеряютсяпосле обновления, установите настройкы «CustomerUser» из файла Kernel/Config/Defaults.pm в файл Kernel/Config.pm. Теперь измените MAP-массив, добавив новоеполе — номер комнаты, как это показано ниже в Сценарии 11.10.
# CustomerUser# (customer database backend and settings)$Self->{CustomerUser} = { Name => ‘Database Backend’, Module => ‘Kernel::System::CustomerUser::DB’, Params => { # if you want to use an external database, add the # required settings# DSN => ‘DBI:odbc:yourdsn’,

Использование внешниххранилищ данных
119
# DSN => ‘DBI:mysql:database=customerdb;host=customerdbhost’,# User => »,# Password => », Table => ‘customer_user’, }, # customer unique id CustomerKey => ‘login’, # customer # CustomerID => ‘customer_id’, CustomerValid => ‘valid_id’, CustomerUserListFields => [‘first_name’, ‘last_name’, ’email’],# CustomerUserListFields => [‘login’, ‘first_name’, ‘last_name’, ‘customer_id’, ’email’], CustomerUserSearchFields => [‘login’, ‘last_name’, ‘customer_id’], CustomerUserSearchPrefix => », CustomerUserSearchSuffix => ‘*’, CustomerUserSearchListLimit => 250, CustomerUserPostMasterSearchFields => [’email’], CustomerUserNameFields => [‘title’, ‘first_name’, ‘last_name’], CustomerUserEmailUniqCheck => 1,# # show not own tickets in customer panel, CompanyTickets# CustomerUserExcludePrimaryCustomerID => 0,# # generate auto logins# AutoLoginCreation => 0,# AutoLoginCreationPrefix => ‘auto’,# # admin can change customer preferences# AdminSetPreferences => 1,# # cache time to live in sec. — cache database queries# CacheTTL => 0,# # just a read only source# ReadOnly => 1, Map => [
# note: Login, Email and CustomerID needed! # var, frontend, storage, shown (1=always,2=lite), required, storage-type, http-link, readonly, http-link-target [ ‘UserTitle’, ‘Title’, ‘title’, 1, 0, ‘var’, », 0 ], [ ‘UserFirstname’, ‘Firstname’, ‘first_name’, 1, 1, ‘var’, », 0 ], [ ‘UserLastname’, ‘Lastname’, ‘last_name’, 1, 1, ‘var’, », 0 ], [ ‘UserLogin’, ‘Username’, ‘login’, 1, 1, ‘var’, », 0 ], [ ‘UserPassword’, ‘Password’, ‘pw’, 0, 0, ‘var’, », 0 ], [ ‘UserEmail’, ‘Email’, ’email’, 1, 1, ‘var’, », 0 ], [ ‘UserCustomerID’, ‘CustomerID’, ‘customer_id’, 0, 1, ‘var’, », 0 ], [ ‘UserPhone’, ‘Phone’, ‘phone’, 1, 0, ‘var’, », 0 ], [ ‘UserFax’, ‘Fax’, ‘fax’, 1, 0, ‘var’, », 0 ],

Использование внешниххранилищ данных
120
[ ‘UserMobile’, ‘Mobile’, ‘mobile’, 1, 0, ‘var’, », 0 ], [ ‘UserRoom’, ‘Room’, ‘room’, 1, 0, ‘var’, », 0 ], [ ‘UserStreet’, ‘Street’, ‘street’, 1, 0, ‘var’, », 0 ], [ ‘UserZip’, ‘Zip’, ‘zip’, 1, 0, ‘var’, », 0 ], [ ‘UserCity’, ‘City’, ‘city’, 1, 0, ‘var’, », 0 ], [ ‘UserCountry’, ‘Country’, ‘country’, 1, 0, ‘var’, », 0 ], [ ‘UserComment’, ‘Comment’, ‘comments’, 1, 0, ‘var’, », 0 ], [ ‘ValidID’, ‘Valid’, ‘valid_id’, 0, 1, ‘int’, », 0 ], ], # default selections Selections => { UserTitle => { ‘Mr.’ => ‘Mr.’, ‘Mrs.’ => ‘Mrs.’, }, },};
Сценарий 11.10. Внесение изменений в map-массив.
Настройка таблицы customer_user в Базе ДанныхOTRS (DB)
Последним шагом является добавление нового столбца с номером комнаты в таблицуcustomer_user базы данных OTRS (см. ниже Сценарий 11.11). В этой колонке будетхранится информация для номера комнаты.
linux:~# mysql -pEnter password:Welcome to the MySQL monitor. Commands end with ; or g.Your MySQL connection id is 6 to server version: 5.0.18-Debian_7-log
Type ‘help;’ or ‘h’ for help. Type ‘c’ to clear the buffer.
mysql> use otrs;Reading table information for completion of table and column namesYou can turn off this feature to get a quicker startup with -A
Database changedmysql> ALTER TABLE customer_user ADD room VARCHAR (200);Query OK, 3 rows affected (0.01 sec)Records: 3 Duplicates: 0 Warnings: 0
mysql> quit

Использование внешниххранилищ данных
121
Byelinux:~#
Сценарий 11.11. Добавление новой колонки в таблицу customer_user.
Теперь новое поле для номера комнаты должно отображатся в customer.pl панели. Когдановые клиенты будут регистрировать аккаунт, им нужно будет вписать номер комнаты.Если для работы OTRS используется Apache и модуль mod_perl, то чтобы новые изменениявступили в силу нужно перезапустить веб-сервер.

122
Глава 12. СостоянияПредопределенные состояния
OTRS позволяет изменять предопределенные состояния заявок и их типы, а такжедобавлять новые. Для состояния важны два атрибута: имя (state-name) и тип (state-type).
Предустановленные состояния в OTRS: «закрыто успешно», «закрыто неудачно»,»обьеденено», «новая», «открытая», «в ожидании с автозакрытием+», «в ожидании савтозакрытием-«, «в ожидании с напоминанием», «удаленная».
НоваяЗаявки находятся в этом состоянии, когда они создаются на основе входящих сообщенийэлектронной почты.
ОткрытаяЭто состояние по умолчанию для заявок, которые присвоены очередям или агентам.
Ожидание с напоминаниемПосле того как время ожидания истекло, владелец заявки будет получать напоминание наэлектронную почту. Если заявка не закрыта, то напоминание о заявке будет отправленовсем агентам в очереди. Напоминание о заявках будет отправлено только в рабочее времяи будет повторятся каждые 24-часа, пока агент не изменит состояние заявки. Время,которое заявка проведет с таким статусом будет добавлено к времени эскалации.
Ожидание авто-закрытие -Если время ожидания вышло, заявки с этим статусом будут установлены в «Закрытыенеуспешно». Время, проведенное заявкой в этом статусе будет добавлено к времениэскалации.
Ожидание авто-закрытие+Если вышло время ожидания, заявки с этим статусом будут установлены в «ЗакрытоУспешно». Время, проведенное заявкой в этом статусе будет добавлено к времениэскалации.
ОбьедененныеЭто состояние для заявок, которые были объеденены с другими заявками.
Закрыта УспешноЭто конечное состояние для заявок, которые были решены успешно. В зависимости отконфигурации, у вас будет или не будет возможности заново открыть ранее закрытыезаявки.

Состояния
123
Закрыта НеудачноЭто конечное состояние для заявок которые НЕ были успешно решены. В зависимостиот конфигурации, у вас будет или не будет возможности заново открыть ранее закрытыезаявки.
Настраиваемы состоянияКаждое состояние имеет название (state-name) и тип (state-type). Чтобы создать новоесостояние перейдите по ссылке Состояния на Панели Администрирования и нажмитекнопку «Добавить состояние». Можно свободно выбирать имя нового состояния. Типысостояний не могут изменятся посредством веб-интерфейса. Если нужно добавить новыетипы или изменить существующие, — все изменения придется делать напрямую в базеданных. Предустановленные типы состояний не могут быть изменены, поскольку этоможет привести к непредсказуемым результатам. Например, расчет эскалации и фунцияразблокирования основаны на конкретных типах состояний.
Используя эту страницу можно добавить новое состояние или же изменить название ужесуществующего. Если состояние «новый» было изменено посредством веб-интерфейса, тоэто изменение также должно быть настроено в файле Kernel/Config.pm или с помощьюинтерфейса SysConfig. Чтобы убедится что OTRS правильно работает с измененнымсостоянием «новый» нужно модифицировать настройки приведенные в Сценарии 12.1.
[…] # PostmasterDefaultState # (The default state of new tickets.) [default: new] $Self->{PostmasterDefaultState} = ‘new’;
# CustomerDefaultState # (default state of new customer tickets) $Self->{CustomerDefaultState} = ‘new’; […]
Сценарий 12.1. Изменение параметров настройки в Kernel/Config.pm.
Если нужно добавить новый тип состояния, то это можно сделать с помощью клиентскойпрограммы управления базами данных, изменив таблицу ticket_state_type базы данныхOTRS, как это показано в Сценарии 12.2.
linux:~# mysql -pEnter password:Welcome to the MySQL monitor. Commands end with ; or g.Your MySQL connection id is 23 to server version: 5.0.16-Debian_1-log
Type ‘help;’ or ‘h’ for help. Type ‘c’ to clear the buffer.
mysql> use otrs;Reading table information for completion of table and column namesYou can turn off this feature to get a quicker startup with -A
Database changed

Состояния
124
mysql> insert into ticket_state_type (name,comments) values (‘own’,’Ownstate type’);Query OK, 1 row affected (0.00 sec)
mysql> quitByelinux:~#
Script 12.2. Изменение базы данных OTRS.
На данный момент можно использовать новый тип состояния, который вы только чтосоздали. Как только состояние будет связано с этим новым типом состояния, то чтобыубедится что новое состояние используется и работает коректно нужно также изменитьнастройки OTRS. Используя SysConfig внесите изменения в следующие опции:
Ticket -> Frontend::Agent::Ticket::ViewPhoneNew > AgentTicketPhone###StateDefault -определить следующее состояние по умолчанию для новых заявок созданных на основетелефонного звонка.
Ticket -> Frontend::Agent::Ticket::ViewPhoneNew > AgentTicketPhone###StateType — дляопределения последующих доступных состояний для новых заявок, созданных на основетелефонного звонка.
Ticket -> Frontend::Agent::Ticket::ViewEmailNew > AgentTicketEmail###StateDefault -установка последующих следующих состояний для заявок созданных на базе сообщенийэлектронной почты.
Ticket -> Frontend::Agent::Ticket::ViewEmailNew > AgentTicketEmail###StateType — дляопределения последующих доступных состояний для новых заявок созданных на базесообщений электронной почты.
Ticket -> Frontend::Agent::Ticket::ViewPhoneOutbound > AgentTicketPhoneOutbound###State- для определения последующих доступных состояний для новых заявок созданных на базеновых телефонных статей.
Ticket -> Frontend::Agent::Ticket::ViewPhoneOutbound >AgentTicketPhoneOutbound###StateType — для определения последующих доступныхсостояний для новых заявок созданных на базе новых телефонных статей.
Ticket:Frontend::Agent::Ticket::ViewMove:Ticket::DefaultNextMoveStateType — дляопределения последующих доступных состояний для перемещенных заявок.
Ticket -> Frontend::Agent::Ticket::ViewBounce > StateDefault — для определенияпоследующих доступных состояний для «подпрыгивающих» заявок.
Ticket -> Frontend::Agent::Ticket::ViewBounce > StateType — для определения последующихдоступных состояний для экранов с отказами.
Ticket -> Frontend::Agent::Ticket::ViewBulk > StateDefault — для определенияпрдеопределенных последующих состояний для груповых действий.
Ticket -> Frontend::Agent::Ticket::ViewBulk > StateType — для определенияпрдеопределенных последующих состояний для экрана груповых действий
Ticket -> Frontend::Agent::Ticket::ViewClose > StateDefault — для определенияпрдеопределенных последующих состояний после закрытия заявки

Состояния
125
Ticket -> Frontend::Agent::Ticket::ViewClose > StateType — для определенияпрдеопределенных последующих состояний для страницы закрытия.
Ticket -> Frontend::Agent::Ticket::ViewCompose > StateDefault — для определенияпрдеопределенных последующих состояний для Compose-страницы
Ticket -> Frontend::Agent::Ticket::ViewCompose > StateType — для определенияпрдеопределенных последующих состояний для Compose-страницы.
Ticket -> Frontend::Agent::Ticket::ViewForward > StateDefault — для определенияпрдеопределенных последующих состояний после перенаправления заявки.
Ticket -> Frontend::Agent::Ticket::ViewForward > StateType — для определенияпрдеопределенных последующих состояний для страници перенаправления.
Ticket -> Frontend::Agent::Ticket::ViewForward > StateDefault — для определенияпрдеопределенных последующих состояний для страницы free-text.
Ticket -> Frontend::Agent::Ticket::ViewForward > StateType — для определенияпрдеопределенных последующих состояний для free text-страницы.
Ticket -> Core::PostMaster > PostmasterDefaultState — для определения прдеопределенныхпоследующих состояний для заявок, созданых с сообщений электронной почты.
Ticket -> Core::PostMaster > PostmasterFollowUpState — для определенияпрдеопределенных последующих состояний для заявок после последующих, которыедолжны быть сохранены.
Ticket -> Core::PostMaster > PostmasterFollowUpStateClosed — для определения состояниязаявок, после того как придет новый ответ на уже закрытую заявку.
Ticket -> Core::Ticket > ViewableStateType — для определения состояний, которые будутотображатся в различных местах системы, напримерв в Queueview.
Ticket -> Core::Ticket > UnlockStateType — для определения типов состояний дляразблокированых заявок.
Ticket -> Core::Ticket > PendingReminderStateType — для определения типов состояний длязаявок с напоминанием.
Ticket -> Core::Ticket > PendingAutoStateType — для определения типов состояний дляожидающих заявок.
Ticket -> Core::Ticket > StateAfterPending — для определения состояния заявкиустановленой в Таймере Авто-Ожидания, если время для настроенного состояния истекло.

126
Глава 13. Изменение приоритетовзаявки
OTRS поставляется с пятью предустановлеными уровнями приоритетов, которые можноизменить перейдя по ссылке «Приоритеты» на Панели Администрирования. При созданиинастраиваемого списка приоритетов, пожалуйста помните, что они сортируются валфавитном порядке. Также OTRS сортирует заявки в QueueView по их внутреннемуномеру (ID).
ЗамечаниеКак и в случае с другими сущностями OTRS, приоритеты не могут быть удалены,а только деактивированы путем установки параметра Действительный в значениене действительный или не действительный-временно.
ВажноЕсли был создан новый приоритет, или был изменен уже существующий, то можнотакже произвести изменения некоторых параметров в SysConfig:
• Ticket:Core::Postmaster::PostmasterDefaultPriority — определяетпредустановленный приоритет для всех входящих сообщений электроннойпочты.
• Ticket:Frontend::Agent:Ticket::ViewPhoneNew:Priority — определяетпредустановленный приоритет для новых Заявок созданных на основеТелефонных Звонков.
• Ticket:Frontend::Agent:Ticket::ViewEmailNew:Priority — определяетпредустановленый приоритет на странице с новыми Email-Заявками для агентов.
• Ticket:Frontend::Customer:Ticket::ViewNew:PriorityDefault — определяетпредустановленные приоритеты для страцицы Новые Заявки впользовательском веб-интерфейсе.

127
Глава 14. Создание своихсобственных тем (шаблонов)
Для OTRS можно создавать свои собственные темы и использовать в качестве веб-интерфейса тот шаблон, который вам нравится больше всего. Для создания собственнойтемы нужно настроить шаблоны вывода под свои нужды.
More information on the syntax and structure of output templates can be found in the DeveloperManual at http://doc.otrs.org, especialy in the chapter on templates [http://doc.otrs.org/developer/3.0/en/html/hacking.html#TemplatingMechanism].
В качестве примера, выполните следующие шаги для создания новой темы, котораяназывается «Компания»:
1. Создайте директорию и назовите ее Kernel/Output/HTML/Company и скопируйтевсе файлы, которые хотите изменить, из Kernel/Output/HTML/Standard в новуюдиректорию.
ВажноКопируйте только те файлы, которые вы действительно планируете изменять.OTRS автоматически получит недостающие файлы из Стандартной темы. Наболее позних этапах такой подход позволит сделать модернизацию болеепростой.
2. Настройте файлы в директории Kernel/Output/HTML/Company и изментите шаблоныпо своему вкусу.
3. Чтобы активировать новую тему, перейдите по ссылке Frontend::Themes и добавьте еев SysConfig.
Теперь новая тема должна быть доступна. Вы можете выбрать эту тему перейдя по ссылкепредпочтения.
ВниманиеНе изменяйте файлы темы, поставляемой с OTRS, поскольку эти изменения будутутеряны после обновления. Создавайте свои собственные темы только путемвыполнения шагов, описанных выше.

128
Глава 15. Локализайия интерфейсаOTRS
OTRS предлагает многоязычную поддержку для своего веб-интерфейса.
Procedures for localization for the OTRS framework, steps to be followed to create a newlanguage translation, as well as procedures for translation customizations, can be found in the»Language Translations» [http://doc.otrs.org/developer/3.0/en/html/contributing.html#translate]chapter from the developer manual on http://doc.otrs.org.

129
Глава 16. PGPOTRS емеет возможность подписывать или шифровать исходящие сообщения с помощьюPGP. Также, могут быть расшифрованы вохдящие шифрованные сообщения. Шифрованиеи дешифрование осуществляется с помощью GPL-инструмента GnuPG. Чтобы установитьGnuPG для OTRS, нужно проделать следующие действия:
1. Установка GnuPG с помощью менеджера пакетов вашей операционной системы.
2. Настройте GnuPG для использования с OTRS. Для GnuPG и приватного ключа нужносоздать необходимые директории. В командной строки для пользователя ‘otrs’ нужновыполнить команду из Сценария 16.1.
linux:~# su otrs linux:/root$ cd linux:~$ pwd /opt/otrs linux:~$ gpg —gen-key gpg (GnuPG) 1.4.2; Copyright (C) 2005 Free Software Foundation, Inc. This program comes with ABSOLUTELY NO WARRANTY. This is free software, and you are welcome to redistribute it under certain conditions. See the file COPYING for details.
gpg: directory `/opt/otrs/.gnupg’ created gpg: new configuration file `/opt/otrs/.gnupg/gpg.conf’ created gpg: WARNING: options in `/opt/otrs/.gnupg/gpg.conf’ are not yet active during t his run gpg: keyring `/opt/otrs/.gnupg/secring.gpg’ created gpg: keyring `/opt/otrs/.gnupg/pubring.gpg’ created Please select what kind of key you want: (1) DSA and Elgamal (default) (2) DSA (sign only) (5) RSA (sign only) Your selection? 1 DSA keypair will have 1024 bits. ELG-E keys may be between 1024 and 4096 bits long. What keysize do you want? (2048) Requested keysize is 2048 bits Please specify how long the key should be valid. 0 = key does not expire <n> = key expires in n days <n>w = key expires in n weeks <n>m = key expires in n months <n>y = key expires in n years Key is valid for? (0) Key does not expire at all Is this correct? (y/N) y
You need a user ID to identify your key; the software constructs the user ID

PGP
130
from the Real Name, Comment and Email Address in this form: «Heinrich Heine (Der Dichter) <[email protected]>»
Real name: Ticket System Email address: [email protected] Comment: Private PGP Key for the ticket system with address [email protected] You selected this USER-ID: «Ticket System (Private PGP Key for the ticket system with address [email protected] le.com) <[email protected]>»
Change (N)ame, (C)omment, (E)mail or (O)kay/(Q)uit? O You need a Passphrase to protect your secret key.
Passphrase: secret Repeat passphrase: secret
We need to generate a lot of random bytes. It is a good idea to perform some other action (type on the keyboard, move the mouse, utilize the disks) during the prime generation; this gives the random number generator a better chance to gain enough entropy. ++++++++++.+++++++++++++++++++++++++….+++++.+++++…+++++++++++++++++++++++++. +++++++++++++++++++++++++.+++++.+++++.+++++++++++++++++++++++++>++++++++++>+++++ …….>+++++<+++++…………………………..+++++
Not enough random bytes available. Please do some other work to give the OS a chance to collect more entropy! (Need 280 more bytes)
++++++++++.+++++..++++++++++..+++++….++++++++++++++++++++.+++++++++++++++.++++ ++++++++++++++++++++++++++.++++++++++.+++++++++++++++.++++++++++.+++++++++++++++ ..+++++>.+++++….>+++++……………………………………………….. …………………………………………………..>+++++<+++++……… ………….+++++^^^ gpg: /opt/otrs/.gnupg/trustdb.gpg: trustdb created gpg: key 7245A970 marked as ultimately trusted public and secret key created and signed.
gpg: checking the trustdb gpg: 3 marginal(s) needed, 1 complete(s) needed, PGP trust model gpg: depth: 0 valid: 1 signed: 0 trust: 0-, 0q, 0n, 0m, 0f, 1u pub 1024D/7245A970 2006-02-03 Key fingerprint = 2ED5 BC36 D2B6 B055 7EE1 5833 1D7B F967 7245 A970

PGP
131
uid Ticket System (Private pgp key for ticket system with addre ss [email protected]) <[email protected]> sub 2048g/52B97069 2006-02-03
linux:~$
Сценарий 16.1. Настройка GnuPG.
Как показано в сценарии 16.1, настройки по умолчанию могут быть применены длябольшинства из необходимых параметров. Правильно должны быть указаны толькопароль и значения для владельца ключа.
3. Теперь OTRS готов для использования PGP. Через Панель Администрированияоткройте интерфейс SysConfig и найдите ссылку «PGP». Из результатов поискавыберите подгруппу Crypt::PGP.
На странице с PGP-настройками, PGP должен быть активирован для OTRS (перваяопция). Также нужно установить ипроверить путь к gpg-программе.
Следующим нужно изменить конфигурационный параметр (PGP::Options). Используяэти конфигурационные настройки можно определить параметры, которые будутиспользоваться для каждого вызова gpg пользователем ‘otrs’. Каталог сконфигурационными файлами для GnuPG является очень важным. В примереиспользуется /opt/otrs/.gnupg. Эта директоиря была создана на первом шагеконфигурации PGP.
Используя следующий конфигурационный параметр (PGP::Key::Password), можноуказать пары для ключей ID и их пароли для собственных закрытых ключей. Посколькупартнеры извне пишут зашифрованные сообщения в систему заявок используя вашпубличный ключ, OTRS может расшифровать эти сообщения с помощью ID/паролейуказаных здесь.
Как получить идентификатор вашего собственного закрытого ключа? ID вашегособственного закрытого идентификатора отображается во время генерации (см. вышешаг 1). Также есть возможность получить ID, указав команду из Сценария 16.2вызванную с правами пользователя ‘otrs’:
linux:~# su otrs linux:/root$ cd linux:~$ pwd /opt/otrs linux:~$ gpg —list-keys /opt/otrs/.gnupg/pubring.gpg —————————- pub 1024D/7245A970 2006-02-03 uid Ticket System (Private pgp key for ticket system with address [email protected]) <[email protected]> sub 2048g/52B97069 2006-02-03
linux:~$

PGP
132
Сценарий 16.2. Получение ID вашего собственного приватного ключа.
Идентификатор (ID) закрытого ключа можно найти в строке, которая начинается с «sub».Это шестнадцатеричное представление строки, длиной в восемь символов, например»52B97069″. Пароль, который нужно указать для этого ключа в системе обработки заявоктакой же как данные при генерации ключей.
После того, как эти данные были введены, нажмите кнопку «Обновить» чтобы сохранитьнастройки. Теперь OTRS готов принимать и расшифровывать зашифрованныесообщения.
4. И наконец, нужно импортировать открытый ключ клиента. Это гарантирует, чтозашифрованные сообщения могут быть отправлены этому клиенту. Есть два способаимпортировать открытый ключ клиента.
Первый способ — указать открытый ключ клиента в веб-интерфейсе управленияклиентами.
Вторая возможность заключается в определении ключей посредством настройки PGP,которая доступна через Панель Администрирования. В правой стороне этой страницыотображаются все импортированные открытые ключи клиентов. После того как PGPактивирован и сконфигурирован, здесь также должен отображатся ваш собственныйоткрытый ключ. В левой части страницы настроек PGP можно производить поиск поключам. Также, новый открытый ключ может быть загружен в систему из файла.
Файлы с открытым ключем, которые нужно импортировать в OTRS должнысоответствовать файлам ключей GnuPGP. В большинстве случаев, ключ сохраняется вфайле как «ASCII armored key». OTRS позволяет работать с этим форматом.

133
Глава 17. S/MIMEНа первый взгляд, S/MIME-шифрование кажется более сложным чем PGP. Прежде всегодля OTRS нужно создать Центр Сертификации — Certification Authority (CA). Последующиепроцедуры очень похожи на те, которые вы выполняли для PGP: настроить OTRS,установить собственные сертификаты, импортировать другие открытые сертификаты(если необходимо), и т.д.
В большинстве случаев настройка S/MIME производится за пределами веб-интерфейсаOTRS, и должана осуществлятся в оболочке операционной системы с правамипользователя ‘otrs’. MIME конфигурация под Linux основана yа SSL (OpenSSL). Поэтому,сначала проверьте установлен ли в вашей системе пакет OpenSSL. OpenSSL-пакетсодержит скрипт, который называется CA.pl, для создания сертификата, все наиболееважные шаги, нужно проделать именно с ним. Для упрощения процедуры узнайте, гдев файловой системе находится сценарий CA.pl и введите путь к его местоположению впеременную путей оболочки (см. ниже Сценарий 17.1).
[email protected]:~> rpm -ql openssl | grep CA/usr/share/ssl/misc/[email protected]:~> export PATH=$PATH:/usr/share/ssl/[email protected]:~> which CA.pl/usr/share/ssl/misc/[email protected]:~> mkdir tmp; cd [email protected]:~/tmp>
Сценарий 17.1. Настройка S/MIME.
Сценарий 17.1 показывает, что была создана нова временная директория ~/tmp, в которойхранятся сгенерированные сертификаты.
Для создания сертификата, проделайте следующие операции в командной строке(предположим, что OTRS-администратор должен создать SSL-сертификат с цельютестирования и обучения. В случае, если у вас уже есть SSL-сертификат для шифрования,используйте его и пропустите следующие шаги):
1. Создание собственного Центра Сертификации (Certification Authority) для SSL. Выдолжны подтвердить запрос на собственный SSL-сертификат (см. ниже Рисунок 17.2).
[email protected]:~/tmp> CA.pl -newcaCA certificate filename (or enter to create)
Making CA certificate …Generating a 1024 bit RSA private key…++++++……++++++writing new private key to ‘./demoCA/private/cakey.pem’Enter PEM pass phrase:Verifying — Enter PEM pass phrase:——You are about to be asked to enter information that will be incorporatedinto your certificate request.

S/MIME
134
What you are about to enter is what is called a Distinguished Name or a DN.There are quite a few fields but you can leave some blankFor some fields there will be a default value,If you enter ‘.’, the field will be left blank.——Country Name (2 letter code) [AU]:DEState or Province Name (full name) [Some-State]:OTRS-stateLocality Name (eg, city) []:OTRS-townOrganization Name (eg, company) [Internet Widgits Pty Ltd]:Your companyOrganizational Unit Name (eg, section) []:Common Name (eg, YOUR name) []:OTRS AdminEmail Address []:[email protected]@linux:~/tmp> ls -la demoCA/total 8-rw-r—r— 1 otrs otrs 1330 2006-01-08 17:54 cacert.pemdrwxr-xr-x 2 otrs otrs 48 2006-01-08 17:53 certsdrwxr-xr-x 2 otrs otrs 48 2006-01-08 17:53 crl-rw-r—r— 1 otrs otrs 0 2006-01-08 17:53 index.txtdrwxr-xr-x 2 otrs otrs 48 2006-01-08 17:53 newcertsdrwxr-xr-x 2 otrs otrs 80 2006-01-08 17:54 private-rw-r—r— 1 otrs otrs 17 2006-01-08 17:54 [email protected]:~/tmp>
Сценарий 17.2. Создание Центра Сертификации (Certification Authority) для SSL.
2. Создание запроса сертификата (см. ниже Сценарий 17.3).
[email protected]:~/tmp> CA.pl -newreqGenerating a 1024 bit RSA private key……………………………………++++++….++++++writing new private key to ‘newreq.pem’Enter PEM pass phrase:Verifying — Enter PEM pass phrase:——You are about to be asked to enter information that will be incorporatedinto your certificate request.What you are about to enter is what is called a Distinguished Name or a DN.There are quite a few fields but you can leave some blankFor some fields there will be a default value,If you enter ‘.’, the field will be left blank.——Country Name (2 letter code) [AU]:DEkeyreturnState or Province Name (full name) [Some-State]:OTRS-stateLocality Name (eg, city) []:OTRS-townOrganization Name (eg, company) [Internet Widgits Pty Ltd]:Your companyOrganizational Unit Name (eg, section) []:

S/MIME
135
Common Name (eg, YOUR name) []:OTRS adminEmail Address []:[email protected]
Please enter the following ‘extra’ attributesto be sent with your certificate requestA challenge password []:An optional company name []:Request (and private key) is in [email protected]:~/tmp> ls -latotal 4drwxr-xr-x 6 otrs otrs 232 2006-01-08 17:54 demoCA-rw-r—r— 1 otrs otrs 1708 2006-01-08 18:04 [email protected]:~/tmp>
Сценарий 17.3. Создание запроса сертификаата.
3. Подпись запроса сертификата. Запрос сертификата может быть подписан, и такимобразом сертифицирован вашим собственным центром сертификации (CA), что болееправдоподобно, чем использование других, внешних CA (см. ниже Сценарий 17.4).
[email protected]:~/tmp> CA.pl -signreqUsing configuration from /etc/ssl/openssl.cnfEnter pass phrase for ./demoCA/private/cakey.pem:Check that the request matches the signatureSignature okCertificate Details: Serial Number: fd:85:f6:9f:14:07:16:c8 Validity Not Before: Jan 8 17:04:37 2006 GMT Not After : Jan 8 17:04:37 2007 GMT Subject: countryName = DE stateOrProvinceName = OTRS-state localityName = OTRS-town organizationName = Your Company commonName = OTRS administrator emailAddress = [email protected] X509v3 extensions: X509v3 Basic Constraints: CA:FALSE Netscape Comment: OpenSSL Generated Certificate X509v3 Subject Key Identifier: 01:D9:1E:58:C0:6D:BF:27:ED:37:34:14:D6:04:AC:C4:64:98:7A:22 X509v3 Authority Key Identifier: keyid:10:4D:8D:4C:93:FD:2C:AA:9A:B3:26:80:6B:F5:D5:31:E2:8E:DB:A8 DirName:/C=DE/ST=OTRS-state/L=OTRS-town/O=Your Company/ CN=OTRS admin/[email protected]

S/MIME
136
serial:FD:85:F6:9F:14:07:16:C7
Certificate is to be certified until Jan 8 17:04:37 2007 GMT (365 days)Sign the certificate? [y/n]:y
1 out of 1 certificate requests certified, commit? [y/n]yWrite out database with 1 new entriesData Base UpdatedSigned certificate is in [email protected]:~/tmp>
Сценарий 17.4. Подпись запроса сертификата.
4. Создание своего собственного сертификата, и все данные собираются с ним, используязапрос сертификата (см. ниже Сценарий 17.5).
[email protected]:~/tmp> CA.pl -pkcs12 «OTRS Certificate»Enter pass phrase for newreq.pem:Enter Export Password:Verifying — Enter Export Password:[email protected]:~/tmp> ls -latotal 12drwxr-xr-x 6 otrs otrs 328 2006-01-08 18:04 demoCA-rw-r—r— 1 otrs otrs 3090 2006-01-08 18:13 newcert.p12-rw-r—r— 1 otrs otrs 3791 2006-01-08 18:04 newcert.pem-rw-r—r— 1 otrs otrs 1708 2006-01-08 18:04 [email protected]:~/tmp>
Сценарий 17.5. Создание нового сертификата.
Теперь эти операции выполнены, установка S/MIME в OTRS должена быть завершена.
Эта часть установки осуществляется в Панели Администрирования, выбрав ссылку»SMIME». В случае, если в OTRS нету поддержки S/MIME, маска указывает администраторуудобные ссылки чтобы активировать поддержку S/MIME.
Используя группу «Crypt::SMIME» в SysConfig, также можно включить и настроитьподдержку S/MIME.
Здесь можно активировать поддержку S/MIME, определить пути для команд OpenSSL, идиректории для сертификатов. Файл ключей должен хранится в директории, указаннойздесь. В противном случае OpenSSL не будет их использовать.
Следующим шагом, который следует выполнить — перейти по ссылке Настройка S/MIME вПанели Администрирования. Здесь можно импортировать закрытые ключи OTRS-системыи открытые ключи других партнеров. Введите публичный ключ, который был создан идобавлен в OTRS в начале этого раздела.
Перейдя по ссылке Инструменты администрирования клиентов можно импортировать всеоткрытые S/MIME ключи партнеров по общению.

137
Глава 18. Списки Контроля Доступа(ACLs)
Начиная с OTRS 2.0 и выше, Списки Контроля Доступа (Access Control Lists — ACLs) могутбыть использованы для управления доступом к заявкам, модулям, очередям и т.д илидля влияния на заявки (закрытие, перемещение и т.д) в определенных ситуациях. Спискиправ доступа (ACLs) могут быть использованы в дополнение к существующей системеправ доступа на основе ролей и групп. Использование ACLs, для отображения рабочихпроцесов может быть основано на атрибутах заявки.
Списки прав доступа (ACLs) не могут быть созданы используя Интерфейс SysConfig, адолжны быть напрямую введены в файл Kernel/Config.pm. Примеры можно найти ниже(Пример 18-1, 18-2 и 18-3):
Пример 18.1. Списки прав доступа (ACL) позволяют перемещать вочереди только заявки с приоритетом 5.
# ticket acl $Self->{TicketAcl}->{‘ACL-Name-2’} = { # match properties Properties => { # current ticket match properties Ticket => { Queue => [‘Raw’], Priority => [‘5 very high’], } }, # return possible options (white list) Possible => { # possible ticket options (white list) Ticket => { Queue => [‘Alert’], }, }, };
Пример 18.2. Списки прав доступа (ACL) делают невозможнымзакрытие заявок в очереди raw и скрывают кнопку «закрыть».
$Self->{TicketAcl}->{‘ACL-Name-1’} = { # match properties Properties => { # current ticket match properties Ticket => { Queue => [‘Raw’], } }, # return possible options (white list) Possible => {

Списки КонтроляДоступа (ACLs)
138
# possible ticket options (white list) Ticket => { State => [‘new’, ‘open’, ‘pending reminder’], }, # possible action options Action => { AgentTicketLock => 1, AgentTicketZoom => 1, AgentTicketClose => 0, AgentTicketPending => 1, AgentTicketNote => 1, AgentTicketHistory => 1, AgentTicketPriority => 1, AgentTicketFreeText => 1, AgentTicketHistory => 1, AgentTicketCompose => 1, AgentTicketBounce => 1, AgentTicketTicketPrint => 1, AgentTicketForward => 1, AgentTicketTicketLink => 1, AgentTicketPrint => 1, AgentTicketPhone => 1, AgentTicketCustomer => 1, AgentTicketOwner => 1, }, }, };
Пример 18.3. Списки прав доступа (ACL) удаляют статус для всехагентво и предоставляют его для групп.
$Self->{TicketAcl}->{‘ACL-Name-5’} = { # match properties Properties => { # current ticket match properties (match always) }, # return possible options PossibleNot => { # possible ticket options Ticket => { State => [‘closed successful’], }, }, };
В Сценарии 18.1 представлен список всех параметров, которые могут быть использованыдля списка прав доступа (ACLs).
# ticket acl $Self->{TicketAcl}->{‘ACL-Name-Test’} = { # match properties Properties => {

Списки КонтроляДоступа (ACLs)
139
# current action match properties Frontend => { Action => [‘AgentTicketPhone’, ‘AgentTicketEmail’], }, # current user match properties User => { Group_rw => [ ‘hotline’, ], }, # current user match properties Ticket => { Queue => [‘Raw’], State => [‘new’, ‘open’], Priority => [‘some priority’], Lock => [‘lock’], CustomerID => [‘some id’], CustomerUserID => [‘some id’], TicketFreeKey1 => [‘some key’], TicketFreeKey2 => [‘some key’], # … TicketFreeKey8 => [‘some key’], TicketFreeText1 => [‘some value’], TicketFreeText2 => [‘some value’], # … TicketFreeText8 => [‘some value’], } }, # return possible options (white list) Possible => { # possible ticket options (white list) Ticket => { Queue => [‘Hotline’, ‘Koordination’], State => => [‘some state’], Priority => [‘5 very high’], TicketFreeKey1 => [‘some key’], TicketFreeKey2 => [‘some key’], # … TicketFreeKey8 => [‘some key’], TicketFreeText1 => [‘some value’], TicketFreeText2 => [‘some value’], # … TicketFreeText8 => [‘some value’], }, # possible action options (white list) Action => { AgentTicketLock => 1, AgentTicketZoom => 1, AgentTicketClose => 1, AgentTicketPending => 0, AgentTicketNote => 1, AgentTicketHistory => 0, AgentTicketPriority => 1, AgentTicketFreeText => 0,

Списки КонтроляДоступа (ACLs)
140
AgentTicketHistory => 1, AgentTicketCompose => 1, AgentTicketBounce => 1, AgentTicketTicketPrint => 0, AgentTicketForward => 1, AgentTicketTicketLink => 1, AgentTicketPrint => 1, AgentTicketPhone => 1, AgentTicketCustomer => 1, AgentTicketOwner => 0, }, }, # remove options (black list) PossibleNot => { # possible ticket options (black list) Ticket => { Queue => [‘Hotline’, ‘Koordination’], State => [‘closed’, ‘removed’], }, }, };
Сценарий 18.1. Допустимые параметры для списка прав доступа (ACLs).

141
Глава 19. Stats-модульМодуль статистики OTRS дает возможность оперативно отслеживать статистику исоздавать пользовательские отчеты, связанные с использованием OTRS. Система OTRSиспользует общеупотребляемый термин «stat» для обозначения отчетов с различнымипоказателями.
Правильная настройка модуля статистики OTRS связана с множеством различныхусловий. К ним относятся различные модули системы OTRS, подлежащие оценке,настройки прав доступа пользователей, признаки, которые должны быть рассчитаны иуровень их сложности, легкость настройки модуля статистики, скорость и эффективностьвычислений, поддержка множества вариантов вывода информации.
Статистические элементы, такие как например файлы, которые дополняютфункциональные возможности модуля статистики для конкретых требований, могут бытьинтегрированы для подсчета сложной статистики.
Обработка модуля агентомКогда вы вошли в систему как агент, в навигационной панели будет отображатся ссылка»Статистика». Этот раздел имеет множество различных подменю, как это показано наРисунке 19.1.
Рисунок 19.1. Опции меню Статистика.
Различные варианты представленные в меню статистики:
• Overview. Предоставляет список различных предварительно сконфигурированныхотчетов.
• Новая. Требуются права rw.
• Импорт. Требуются rw-права.

Stats-модуль
142
ОбзорВыберите ссылку «Статистика» на панели навигации, а затем подменю «Обзор». Наоткрывшейся странице будет представлен список всех предварительно настроеныхотчетов, которые агент уже может использовать (см. ниже Рисунок 19.2).
Рисунок 19.2. Обзор стандартных отчетов.
Для каждого из отчетов, перечисленных в Обзоре предоставлена следующаяинформация:
• Stat#. Уникальный номер отчета.
• Заголовок. Заголовок отчета.
• Объект. Объект, который используется для генерации статистики. В случае статическойстатистики не отображается ни один объект, поскольку в ее генерации динамическиеобъекты не участвуют.
• Описание. Краткое описание отчета.
Когда модуль статистики установлен, он поставлятся с несколькими предустановленнымиотчетами, выборочно встроенными в систему. Они приведены в виде списка на странице»Обзор». Если список слишком большой и не помещается на одну страницу, у агента естьвозможность просматривать другие страницы. Список отчетов может быть отсортированпо своему вкусу, путем нажатия на желаемый заголовок столбца в списке. Чтобы создатьконкретный отчет, нажмите на соответствующие stat-номер, связанный с отчетом. Врезультате откроется интерфейс просмотра отчета.
Создание и просмотр отчетовПользовательский интерфейс предоставляет параметры настройки статистики (см. нижеРисунок 19.3).

Stats-модуль
143
Рисунок 19.3. Просмотр определенного отчета.
Параметры конфигурации для конкретного отчета могут быть установлены путем выбораряда возможных опций. Как автор отчета так и другие пользователи с соответсвтующимиправами доступа могут создавать настройки.
На странице отображается следующее:
• Возможные действия:
• Перейти к обзору. Ссылка, ведущая обратно к Просмотру списка отчетов.
• Редактировать. Редактировать имеющуюся структуру отчета (требуются права длячтения и записи, rw).
• Удалить. Удалить текущий отчет (требуются права для чтения и записи, rw).
• Экспортировать настройки. Экспортировать настройки отчета с помощью загрузкифайла (требуются права для чтения и записи, rw).
Традиционно: функции Экспорт и Импорт позволяют создавать и тестировать отчетыта тестовых системах с их легкой дальнейшей интеграцией в производственнуюсистему.
• Подробности отчета:
• Отчет#. Номер отчета.
• Заголовок. Заголовок отчета.
• Объект. Объект, который используется для создания отчета.
• Описание. Описание цели отчета.
• Формат. Выходной формат отчета. В зависимости от конфигурации, можно выбратьодин из следующих форматов вывода:
• CSV.
• Печать.

Stats-модуль
144
• Графические линии.
• Столбцовая диаграмма.
• Диаграмма.
• Точечная диаграмма.
• Точечно-линейная диаграмма.
• Диаграмма
• Круговая «пирожок»-диаграмма.
• Размер в пикселях. Размер графиков/диаграмм в пикселях. Эта опция доступна тольков том случае, если в настройках отчета разрешены графики. Все часто используемыеграфические размеры настраиваются OTRS-администратором в SysConfig. Затем,во время настройки отчета, агент может выбрать необходимый формат из всехдоступных.
• Количество строк. Указывает когда отчет заменяется колонкой, чьи ячейки содержатсумму соответствующих строк.
• Количество колонок. Указывает когда отчет заменяется строкой, чьи ячейки содержатсумму соответствующих колонок.
• Кэш. Указывает когда сгенерированный отчет кэшируется в файловой системе.
• Действительный. Может быть установлен в значение «недействительный» если покакой то причине отчет временно не должен запускаться. Кнопка «Старт» в нижнейчасти правой панели больше не отображается. Таким образом отчет не может бытьсоздан.
• Создан. Время создания отчета.
• Создан (кем). Имя агента, который создал отчет.
• Изменен. Время последней модификации отчета.
• Изменен кем. Имя агента, который последним внес изменения в отчет.
• X-axis. Используя эту функцию, агент может переключать x и y axes (только в томслучае, если эта опция активирована OTRS-администратором).
• Общая информация сопровождается информацией о самом отчете. Есть дваразличных шаблона просмотра отчета (или статистики):
• Шаблон просмотра статической статистики. Создатели (генераторы) статическихотчетов могут быть интегрированыв модуль статистики (см. ниже Рисунок 19.4).

Stats-модуль
145
Рисунок 19.4. Просмотр статического отчета.
• Шаблон для просмотра динамического отчета (см. ниже Рисунок 19.3 ). Есть дваразличных способа отображения:
• Неизменяемые настройки. Создатель отчета не имеет прав для изменения этихполей.
• Изменяемые настройки. Параметры конфигурации таких отчетов могут бытьизменены агентом.
Нажатие кнопки «Пуск» (в нижней части экрана) является последним шагом при созданииотчета. Есть две возможные причины, когда эта кнопка не будет отображаться:
1. Отчет был установлен недействительным и, таким образом отключен.
2. Отчет был настроен не аккуратно и, следовательно, не может выполнятся. В этом случаенеобходимую информацию можно найти в разделе уведомлений OTRS (внизу, поднавигационной панелью).
Если настройки на странице Просмотр неверны, эта страница отображается опять, посленажатия кнопки «Пуск» и информация о введеных неверных данных будет выведена вразделе уведомлений.
Редактировать / Создать новыйАгенты, которые имеют права на запись, могут редактировать настройки существующегоотчета, запустив пользовательский веб-интерфейс модуля статистики. В качествеальтернативы они могут создать новый отчет. Соответствующие страницы могут бытьзапущены следующим образом:
1. Редактировать: Используя кнопку «Редактировать» в шаблоне просмотра статистики.
2. Новый: Используя ссылку «Новый» в меню Статистика навигационной панели, или кнопку»Добавить» на странице Просмотр.
Статистика редактируется с помощью мастера в четыре этапа:

Stats-модуль
146
1. Общие технические условия.
2. Определение элементов для X-axis.
3. Спецификация значений ряда.
4. Выбор ограничений для отчета.
Шаги с 2-4 необходимы только для создания отчетов с динамической статистикой. Длястатической статистики требуется только общая информация (пункт 1).
Информация о том, как обрабатывать страницу приводится на каждом из этих экранов,ниже панели «Действия» панели Подсказок.
Если введены неправильные данные, предыдущий пользовательский интерфейсотображатеся заново, на этот раз уже с информацией о неправильных входныхданных. Эта информация отображается в OTRS в разделе уведомлений. Следующийпользовательский веб-интерфейс для ввода отображатеся только в том случае, если всеполя формы заполнены правильно.
1. Общие технические условия. Это первая страница мастера Редактирования (см. нижеРисунок 19.5).
Рисунок 19.5. Редактирование общих спецификаций отчета.
На странице приведенной на Рисунке 19.5 есть большое количество общихспецификаций и настроек, которые можно редактировать:
• Заголовок. Должны в сжатой форме отражать назначение (цель).
• Описание. Более подробная информация об отчете, типах конфигурационныхпараметров и т.д.
• Динамический объект. Если установленная система OTRS предоставляет различныединамические объекты, один из них может быть выбран. Объекты отвечаюттребованиям отдельных модулей.
• Static file. Обычно эта возможность не отображается до тех пор, пока отображаютсястатические файлы, назначеные отчету. Если «Статический файл» отображается,позже, очень важно поставить галочку в поле и выбрать режим генерации

Stats-модуль
147
(динамический с динамический объектом или статический с файлом). Если выбранстатический файл, пользовательский веб-интерфейс 2-4 не отображается какстатический файл содержащий все необходимые настройки.
• Настройки прав доступа. Содействие ограничению групп (и, следовательно, агентов),которые позже могут просматривать и генерировать предварительные отчеты. Такимобразом, различные отчеты могут быть выделена для различных отделов и рабочихгрупп, которые в них нуждаются. Можно выделить одину статистику для различныхгрупп.
Пример 1: Выбрана «stats» группа. Отчет доступен для просмотра для всехпользователей имеющих по крайней мере права на группу «stats . Этот доступ доступенпо умолчанию.
Пример 2: Была выбрана группа под названием «продажи». Все пользователи,имеющие права ro (read only) к этой группе могут выдеть статистику в режимепросмотра э генерировать ее. Однако отчет не будет доступен для просмотра другимпользователям.
• Формат. Формат отображения статистики. В зависимости от конфигурации, могутбыть выбраны следующие один или несколько форматов:
• CSV.
• Печать.
• graph-lines.
• graph-bars.
• graph-hbars.
• graph-points.
• graph-lines-points.
• graph-area.
• graph-pie.
• Размер графика. Выберите размер диаграммы в пикселях. Этот выбор необходимтолько в том случае, если графический формат вывода был выбран в «Формат».Все графические размеры, которые можно использовать определяются в OTRSв SysConfig. При настройке отчета, агент может предварительно выбрать всесоответствующие форматы.
• Количество строк. Указывает когда отчет заменяется колонкой, чьи ячейки содержатсумму соответствующих строк.
• Сумма столбцов. Указывает когда отчет заменяется строкой, чье ячейки содержатсумму соответствующих строк.
• Кэш. Указывает на то, что созданный отчет должен кэшироваться в файловой системе.Это позволяет существенно экономить вычислительные мощности и время, но должноиспользоваться только в том случае если содержание отчета больше не будетизменятся.

Stats-модуль
148
Кэширование автоматически прекращается, если отчет не содержит временныхобозначений, или когда временные обозначения указывают на будущее.
В случае редактирования закэшированного отчета удаляются все закэшированныеданные.
• Действительный. Устанавливается в значение «недействительный» если ранеесконфигурированный отчет по какой то причине не должен выполнятся. Кнопка»Статистика» также не отображатеся в правом нижнем углу блока. Отчет больше негенерируется.
2. Определение элементов для X-axis. Это конфигурация для элементов, которыеиспользуются для описания X-axis или, если используются таблицы, имя столбцаприменяется для X-axis (см. ниже Рисунок 19.6).
Рисунок 19.6. Определение элементов для X-axis.
Во-первых, элемент выбирается с помощью опционального поля. Потом нужно выбратьдва или более атрибутов элемента. Если выбраных атрибутов нету, используются всеатрибуты, в том числе и те, которые были добавлены после конфигурации отчета.
Если отключена настройка «Фиксированный», агент, генерирующий отчет, можетизменить атрибуты соответствующего элемента в меню «Вид» пользовательского веб-интерфейса.
Элементы времени отличаются от периодов времени. Тип и число элементов зависит отиспользующихся динамических обьектов и сильно зависит от этого.
Если все входные данные введены правильно, нажатие кнопки «Следующий шаг»открывает форму «Серия значений». Кроме этого, есть возможность заново вернутьсяк редактированию предыдуших разделов.
3. Спецификация серии значений.
На третьем шаге настройки отчета нужно определить серию значений (см. ниже Рисунок19.7). Позже они будут представлены в форме графиков или различных серий втабличном виде.

Stats-модуль
149
Рисунок 19.7. Определение значений серии.
Если выбран определенный элемент, каждый выбранный атрибут будет соответствоватьзначеню серии (см. ниже Пример 19-1).
Пример 19.1. Определение значения серии — один из элементов
Элемент Очередь:
• Серия значений 1 = Raw
• Значение серии 2 = Junk
• ….
Если для формирования значения ряда, выбрано два элемента, каждый выбраныйатрибут первого элемента комбинируется с атрибутом второго элемента (см. нижеРисунок 19-2).
Пример 19.2. Определение значения серии — один из элементов
Элемент 1 очередь, Элемент 2 статус:
• Значение создания 1 = Raw — открыть
• Серия значений 2 = Raw — успешно закрыта
• Серия значений 3 = Junk — открыто
• Серия значений 4 = Junk — успешно закрыто
Выбор из трех или более элементов не допускается.
Кроме этого эти условия распостраняются и на выбор атрибутов и флажок «Основные»как для «X-axis»:

Stats-модуль
150
• Если для элемента не выбрано никаких атрибутов, то используются все атрибуты,включая и те, которые были добавлены после настройки отчета.
• Если параметр «Фиксированный» отключен, агент, который создает отчет можетизменять атрибуты соответствующих элементов.
4. Установка ограничений отчета. Это четвертый и последний этап конфигурации (см. нижеРисунок 19.8). Ограничения служат для ограничения результатов выбранных критериев.В ряде случаев не должно быть никаких ограничений.
Рисунок 19.8. Определение ограничений.
После установки всех ограничей, конфигурация отчета завершается нажатием кнопки»Готово».
ИмпортДля доступа к пользовательскому интерфейсу Импорта (см. ниже Рисунок 19.9) перейдитепо ссылке «Статистика», а затем выберите «Импорт». Альтернативный способ — на странице»Обзор» нажать кнопку Импорт, это приведет к тому же результату, но для этого действиятребуются права для чтения и записи «RW».

Stats-модуль
151
Рисунок 19.9. Пользовательский веб-интерфейс для Импорта.
Очень удобная функция, значительно облегчает импорт статистики, особенно в сочетаниис возможностями модуля экспорта. Статистику можно создать и протестировать натестовых системах, а затем импортировать в реальную систему.
Импорт осуществляется путем простой загрузки файла. После этого, для импортастатистики, автоматически открывается пользовательский интерфейс «Вид».
Администрирование модуля статистикиOTRS администратором.
Этот раздел предоставляет информацию о задачах и функциях администратора OTRS,который работает с модулем статистики.
Настройки полномочий, Групп и РолейНет новых очередей и/или групп, созданых при установке модуля статистики.
В конфигурации по умолчанию модуль регистрации дает всем агентам группы «статистика»права доступа к модулю статистики.
Доступ в соответствии с разрешенными настройками:
• rw. Разрешает настройку статистики и отчетов.
• ro. Разрешает генерацию предварительно сконфигурированной статистики и отчетов.
OTRS-администратор самостоятельно определяет когда агенты с правами для генерациипредварительно настроенных отчетов выделяются в ro-права для группы «статистика», илиесли их соответствующие группы добавляются в модуль регистрации в SysConfig.
SysConfigГруппы SysConfig Framework:Core::Stats, Framework:Core::Stats::Graph andFramework:Frontend::Agent::Stats содержат все параметры конфигурации базового

Stats-модуль
152
набора из модуля статистики. Больше того, конфигурационный параметр $Self->{‘Frontend::Module’}->{‘AgentStats’} управляют организацией и регистрацией модулеи ииконкой в модуле статистики.
Администрирование модуля статистикисистемным администратором
Как правило, системного администратора не требуется для эксплуатации, настройки иобслуживания модуля статистики. Однако, немного справочной информации дано длясистемного администартора в этой точке.
ЗамечаниеПути к файлам см. в подкаталогах домашнего каталога OTRS (в большинствеслучаев /opt/otrs).
Таблица базы данныхВключены все конфигурационные параметры отчета и управляются в XML и,следовательно, хранятся в таблице базы данных «xml_storage». Другие модули, конкенткоторых хранится в xml-формате также используют эту таблицу.
Список файловСледующие файлы необходимы для коректной работы модуля статистики:
• Kernel/System/Stats.pm
• Kernel/Modules/AgentStats.pm
• Kernel/System/CSV.pm
• Kernel/Output/HTML/Standard/AgentStatsOverview.dtl
• Kernel/Output/HTML/Standard/AgentStatsDelete.dtl
• Kernel/Output/HTML/Standard/AgentStatsEditSpecification.dtl
• Kernel/Output/HTML/Standard/AgentStatsEditRestrictions.dtl
• Kernel/Output/HTML/Standard/AgentStatsEditXaxis.dtl
• Kernel/Output/HTML/Standard/AgentStatsEditValueSeries.dtl
• Kernel/Output/HTML/Standard/AgentStatsImport.dtl
• Kernel/Output/HTML/Standard/AgentStatsPrint.dtl
• Kernel/Output/HTML/Standard/AgentStatsView.dtl
• Kernel/System/Stats/Dynamic/Ticket.pm
• bin/otrs.GenerateStats.pl

Stats-модуль
153
КэшированиеРезультаты статистики должны быть сохранены в кэше или не могут быть установлены вконфигурации. Кэшированые результаты отчетов хранятся в файлах в каталоге var/tmpустановленной системы OTRS (в большинстве случаев /opt/otrs/var/tmp).
Кэшированная статистика может быть распознана с помощью префикса «Stats».
В случае потери данных системе не будет принесено серьезного ущерба. При вызовемодуля статистики в следующий раз, в случае если он не обнаружит файл, отчетсгенерируется заново. Конечно, это может занять немного больше времени.
otrs.GenerateStats.plЭтот файл хранится в директории bin. Он позволяет генерировать статистику прямо изкомандрной строки.
В качестве примера смотрите вызов Сценария 19.1 из командной строки.
bin> perl otrs.GenerateStats.pl -n 10004 -o /output/dir
Сценарий 19.1. Создание отчета из командной строки.
Отчет из конфигурации статистики «Stat# 10004» генерируется и хранится в csv-форматев директории /output/dir.
Сгенерированный отчет также быть отправлен по электронной почте. Более подробнуюинформацию можно получить выполнив команду из Сценария 19.2.
bin> perl otrs.GenerateStats.pl —help
Сценарий 19.2. Получение информации о файле otrs.GenerateStats.pl.
Автоматическое создание статистики с помощьюпланировщика заданий — Cronjob
Очевидным является тот факт, что в действительности, нету необходимости генерироватьотчеты вручную, из командной строки, так как модудь статистики имеет удобныйграфический веб-интерфейс пользователя. Однако, создание отчетов вручную имеетсмысл в сочетании с Cronjob.
Представьте себе следующую ситуацию: Каждый первый день месяца, руководителиотделов хотят получать отчет за последний месяц. Объединив cronjob с командой запускасценария в командной строке, статистика может отправляться им по электронной почтеавтоматически.
Статическая статистикаМодуль статистики облегчает генерацию статической статистики. Для каждой статическойстатистики создается отдельный файл, в котором точто определено его содержание.

Stats-модуль
154
Таким образом может быть сгенерирована очень сложная статистика. Главнымнедостатком является то, что этот способ есть не очень гибким.
Файлы хранятся в директории Kernel/System/Stats/Static/.
Использование устаревших данных статическойстатистики
Прежние версии OTRS 1.3 и 2.0 уже позволяли генерировать отчеты. Различные отчетыдля OTRS версии 1.3 и 2.0 которые были специально разработаны для удовлетворенияпотребностей клиентов могут быть использованы в более позних версиях OTRS.
Файлы должны быть просто перемещены из Kernel/System/Stats/ в Kernel/System/Stats/Static/. Кроме этого имя пакета соответствующего сценария должен бытьзаменен на «::Static».
В следующем примере показано как изменяется первый путь.
package Kernel::System::Stats::AccountedTime;
package Kernel::System::Stats::Static::AccountedTime;
Статистика по умолчанию»Не всегда нужно изобретать велосипед…»
Модуль статистики предоставляет различные предустановленные отчеты.Предустановленные отчеты, которые могут заинтересовать всех OTRS пользователейможно в будущем добавить в модуль статистики. Предустановленные отчеты хранится вмодуле статистики в xml-формате в директории scripts/test/sample/.

155
Глава 20. ДополнительныеприложенияДля разширения функциональности OTRS-фреймворка, можно также установить дополнительныепакеты приложений. Это можно сделать с помощью менеджера пакетов из ПанелиАдминистрирования, который загружает приложения из онлайн репозитория и управляетзависимостями между этими пакетами. Также приложения можно установить из локальных файлов.
FAQ (Часто Задаваемые Вопросы)FAQ — это компонент Базы Знаний. Он позволяет редактировать и просматривать статьи.Статьи можно просматривать и ограничивать для агентов, клиентов и пользователей илианонимных пользователей. Также они могут быть структурированы по группам и бытьнаписаны на различных языках.

156
Глава 21. НастройкаПроизводительностиНиже представлен перечень различных техник, которые можно использовать для получениямаксимально возможной производительности системы OTRS: настройка, кодирование,использование памяти и многое другое.
OTRSЕсть несколько возможных вариантов улучшения производительности OTRS.
TicketIndexModuleЕсть два типа хранилища информации для хранения индексов заявок:
• Kernel::System::Ticket::IndexAccelerator::RuntimeDB (по умолчанию), «на лету» генерируетиз таблицы заявок шаблон просмотра для каждой очереди. Пока в системе не больше60, 000 открытых заявок, проблем с производительностью не будет.
• Kernel::System::Ticket::IndexAccelerator::StaticDB — один из самых мощных модулей,его следует использовать, когда у вас еть больше 80.000 открытых заявок. Ониспользует дополнительную таблицу ticket_index, которая работает как обычный шаблон.Используйте bin/otrs.RebuildTicketIndex.pl для получения начального индексапосле создания хранилища информации.
Вы можете изменить IndexAccelerator через SysConfig.
TicketStorageModuleСуществует два различных хранилица для хранения заявок/статей:
• Настройте Kernel::System::Ticket::ArticleStorageDB (по умолчанию) для хранениявложений, и т.д. в базе данных. Примечание: Не используйте его для больших наборовданных.
Pro: Если пользователь вашего веб-сервера не является пользователем ‘otrs’,используйте этот модуль, чтобы избежать проблем с правами доступа.
Противопоказания: Не совсем целесообразно хранить вложения в базе данных. Будьтеосторожны, при храненении больших объектов. Настройте конфигурационный параметрMySQL «set-variable=max_allowed_packet=8M» для хранения объектов размером 8 MB (поумолчанию это 2M).
• Configure Kernel::System::Ticket::ArticleStorageFS для хранения вложений и т.д. влокальной файловой системе. Примечание: Рекомендовано при больших установках.
Pro: Это быстро!
Противопоказания: Пользователь веб-сервера должен быть пользователем ‘otrs’. Крометого, если у вас есть несколько серверов, нужно убедиться в том, что файловая системаразделяется между этими серверами. Так что разместите его на общедоступный NFS-ресурс или SAN, или же используйте аналогичные решения.

Настройка Производительности
157
Примечание: можно переключаться с одного бэк-енда на другой «на лету». Бэк-энды можно переключить в SysConfig и замем запустить в командной строке утилитуotrs.ArticleStorageSwitch.pl, чтобы внести статьи из базы данных в файловуюсистему и наоборот. Можно использовать опциии -s и -d для указания источника иконечный бэк-эенд. Обратите внимание, что весь процесс может занять много времени, взависимости от количества статей, которые у вас есть и доступной мощности процессораи/или пропускной способности сети.
shell> bin/otrs.ArticleStorageSwitch.pl -s ArticleStorageDB -d ArticleStorageFS
Сценарий 21.1 Перемещение хранилища данных с базы данных на файловую систему.
Архивирование ЗаявокПоскольку OTRS может использоваться в качестве системы аудита доказательств, тоудаление закрытых заявко не очень хорошая идея. Именно по этому мы реализовалифункцию архивирования заявок.
Заявки, которые удовлетворяют определенным критериям, могут быть отмечены как»архивированные». При обычном поиске заявок или при поиске заявок с помощью заданияGeneric Agent, они будут недоступны. Сама собой система не имеет дела с огромнымколичеством заявок, до тех пор, пока не принимается во внимание «последняя» заявка. Этоможет означать огромный прирост производительности на больших системах.
Для использования функции архивации выполните следующие действия:
1. Включение архивирование системы в SysConfig
В Панели Администрирования перейдите в SysConfig и выберите группуЗаявка. В Core::Ticket найдите опцию Ticket::ArchiveSystem, по умолчаниюустановленную в значение «нет». Измените значение этой настройки на «да» и сохранитеизменения.
2. Определение работы GenericAgent
В Панели Администратора выберите GenericAgent и добавьте новое задание (работу).
a. Настройки Задания
Введите имя для работы архивирования, и выберите надлежащие опции дляпланирования этой работы.
b. Ticket Filter
Фильтр заявок производит поиск заявок, которые отвечают выбраным критериям.Хорошей идеей будет заархивировать закрытые заявки, которые были закрыты занесколько месяцев до этого.
c. Действия над заявками
В этой части установите поле «Архивировать выбранные заявки» в «архив заявок».
d. Сохранить работу
В конце страницы у вас будет возможность сохранить работу (задание).

Настройка Производительности
158
e. Обработанные заявки
Система отобразит все заявки, которые будут заархивированы при выполнениизадания Generic Agent-ом.
3. Поиск Заявок
При поиске заявок, система по умолчанию производит поиск среди не архивированныхзаявок. Установите критерий поиска «поиск в архивах», если нужно чтобы поискпроисходил также и в архивированых заявках.
База данныхРешения зависят от используемой базы данных. Изучайте документацию к используемойбазе данных или же обратитесь за помощью к администратору.
MySQLЕсли для MySQL-таблиц используется MyISAM (а по умолачанию так и есть) и из таблицыбыла удалена большая часть данных, или же производилось множество действий надтаблицей, которая содержит строки переменной длины (таблицы, которые содержат полятипов VARCHAR, BLOB или TEXT), то нужно дефрагментировать таблицу, или другимисловами выполнить команду «оптимизировать».
Нужно попытаться сделать это, если сервер mysqld использует много процессорноговремени. Оптимизация таблиц ticket_history и article (см ниже Сценарий 21.2).
shell$ mysql -u user -p databasemysql$ optimize table ticket;mysql$ optimize table ticket_history;mysql$ optimize table article;
Сценарий 21.2. Оптимизация таблиц базы данных.
PostgreSQLPostgreSQL лучше настраивается путем изменений в файле postgresql.conf которыйнаходится в директории с установленым PostgreSQL. За советом, как это сделать следитев следующих статьсях:
• http://www.revsys.com/writings/postgresql-performance.html [http://www.revsys.com/writings/postgresql-performance.html]
• http://varlena.com/GeneralBits/Tidbits/perf.html [http://varlena.com/GeneralBits/Tidbits/perf.html]
• http://varlena.com/GeneralBits/Tidbits/annotated_conf_e.html [http://varlena.com/GeneralBits/Tidbits/annotated_conf_e.html]
Если производительность остается на неудовлетворительном уровне, мы предлагаем вамприсоединится к спискам рассылки «PostgreSQL Performance» ( http://www.postgresql.org/community/lists/ ) и задавать вопросы именно там. Люди в этом списке рассылке оченьдружелюбны а всегада постараются вам помочь.

Настройка Производительности
159
Веб-серверКонечно же нужно использовать mod_perl 2.0 ( http://perl.apache.org/ ). Он быстрее (~ * 100)чем «чистый» cgi. Но он требует больше оперативной памяти (RAM).
Предустановленное соединение с базой данныхПри запуске веб-сервера можно иметь заранее установленное соединение с базойданных. Такой подход существенно сэкономит время (см. README.webserver).
Предварительно загруженные модули — startup.plЧтобы все работало быстрее и занимало меньше памяти используйте сценарий запускаscripts/apache2-perl-startup.pl для предварительной загрузки/компиляции Perlмодулей на сервере с mod_perl (см. README.webserver).
Перезагрузка Perl-модулей во время обновления сдиска
По умолчанию Apachee::Reload используется в scripts/apache2-httpd.include.conf. Отключивего вы получите больше 8% прироста скорости. Не забудьте перезапустить веб-сервер,если устанавливаете модули через OTRS Package Manager, или устанавливаете любыезначения в SysConfig или в Kernel/Config.pm. Важно: это также будет означать, что увас не будет возможности использовать OTRS Package Manager через пользовательскийвеб-интерфейс. В таком случае необходимо воспользоваться командной строкой — bin/otrs.PackageManager.pl.
Выбор Правильной СтратегииЕсли у вас действительно большая система, более 1 000 новых заявок в день и болше 40агентов, то хорошей идеей будет почитать статью «Выбор Правильной Стратегии» (http://perl.apache.org/docs/1.0/guide/strategy.html ).
mod_gzip/mod_deflateИспользуйте mod_deflate для Apache2, если у вас «слабая» полоса пропускания . Призагрузке html-страницы размером в 45к, mod_gzip/mod_deflate сожмет ее и страница будетзанимать около 7к. Недостатком такого подхода является дополнительная нагрузка насервер.

160
Глава 22. Резервное копированиесистемы
В этой главе описывается резервное копирование и восстановление данных OTRS.
Резервное копированиеЕсть два типа данных для резервного копирования: файлы приложения (например, файлыв /opt/otrs) и данные, хранящиеся в базе данных.
Для упрощения создния резервных копий, сценарий scripts/backup.pl включен вкаждую инсталяцию OTRS. Он позволяет создавать резервную копию всех важных данных(см. ниже Сценарий 22.1 ).
linux:/opt/otrs# cd scripts/linux:/opt/otrs/scripts# ./backup.pl —helpbackup.pl <Revision 1.1> — backup scriptCopyright (c) 2001-2005 Martin Edenhofer <[email protected]>usage: backup.pl -d /data_backup/ [-c bzip2|gzip] [-r 30] [-t nofullbackup]linux:/opt/otrs/scripts#
Сценарий 22.1. Получене помощи о механизме резервного копированиия OTRS.
Для создания резервной копии выполните команду, приведенную в Сценарии 22.2:
linux:/opt/otrs/scripts# ./backup.pl -d /backup/Backup /backup//2010-09-07_14-28/Config.tar.gz … doneBackup /backup//2010-09-07_14-28/Application.tar.gz … doneDump MySQL rdbms … doneCompress SQL-file… donelinux:/opt/otrs/scripts#
Сценарий 22.2.Создание резервной копии.
Все данные хранятся в директории /backup/2010-09-07_14-28/ (см. ниже Сценарий22.3). Кроме того данные сохранены в файле с расширением .tar.gz.
linux:/opt/otrs/scripts# ls /backup/2010-09-07_14-28/Application.tar.gz Config.tar.gz DatabaseBackup.sql.gzlinux:/opt/otrs/scripts#
Сценарий 22.3. Проверка файлов резервной копии.
ВосстановлениеДля восстановления резервной копии, сохраненные данные приложения должны бытьзаписаны обратно в каталог установки, например /opt/otrs. База данных также должнабыть восстановлена.

Резервное копирование системы
161
Сценарий scripts/restore.pl (см. ниже Сценарий 22.4), который упрощает процессвосстановления и поставляется с каждой install-версией OTRS. Поддерживаются СУБДMySQL и PostgreSQL.
linux:/opt/otrs/scripts# ./restore.pl —helprestore.pl <Revision 1.1> — restore scriptCopyright (c) 2001-2005 Martin Edenhofer <[email protected]>usage: restore.pl -b /data_backup/<TIME>/ -d /opt/otrs/linux:/opt/otrs/scripts#
Сценарий 22.4. Получение справки о механизме восстановления.
Данные, которые хранятся в директориии /backup/2010-09-07_14-28/, могут бытьвосстановлены с помощью команды, приведенной в Сценарии 22.5 при условии что OTRSустановлен в /opt/otrs.
linux:/opt/otrs/scripts# ./restore.pl -b /backup/2010-09-07_14-28 -d /opt/otrs/Restore /backup/2010-09-07_14-28//Config.tar.gz …Restore /backup/2010-09-07_14-28//Application.tar.gz …create MySQLdecompresses SQL-file …cat SQL-file into MySQL databasecompress SQL-file…linux:/opt/otrs/scripts#
Сценарий 22.5. Восстановление данных OTRS.

162
Приложение A. Дополнительныересурсы
Мы стараеся снабжать вас самой последней информацией об OTRS и предоставляем вамвозможность оставить нам свой отзыв.
Домашняя страница OTRS.orgДомашняя страница нашего проекта находится по адресу http://www.otrs.org/ (см. нижеРисунок A-1) .
Рисунок A-1. Домашняя страница OTRS.
Списки рассылкиВ Таблице А-1 приведен полний список рассылки для сообщества.
Таблица A.1. Списки рассылки
Название Описание Домашняя страница[email protected] Низкий трафик, на
английском языке, дляобъявлений о новых релизахOTRS и решениях обезопасности.
http://lists.otrs.org/cgi-bin/listinfo/announce [http://lists.otrs.org/cgi-bin/listinfo/announce]
[email protected] От среднего до высокогосписка трафика, наанглийском языке, гдевы можете найти все
http://lists.otrs.org/cgi-bin/listinfo/otrs [http://lists.otrs.org/cgi-bin/listinfo/otrs]

Дополнительные ресурсы
163
Название Описание Домашняя страницавиды вопросов, касающихсяподдержки и продукта.
[email protected] От среднего до большогосписка трафка, на немецкомязыке, где вы можетенайти все виды впоросов,касающихся поддержки ипродукта.
http://lists.otrs.org/cgi-bin/listinfo/otrs-de [http://lists.otrs.org/cgi-bin/listinfo/otrs-de]
[email protected] Средний трафик наанглийском языке, гдеOTRS-разработчикиобсуждают различные планыи вопросы реализации.
http://lists.otrs.org/cgi-bin/listinfo/dev [http://lists.otrs.org/cgi-bin/listinfo/dev]
[email protected] Низкий список трафика,на немецком языке, совсеми видами вопросов,касающихся документациипродукта.
http://lists.otrs.org/cgi-bin/listinfo/doc-de [http://lists.otrs.org/cgi-bin/listinfo/doc-de]
[email protected] Небольшое количествопользователей наанглийском языке свопросамиинтернационализации илокализации. Если вы естьили только хотите статьпереводчиком проекта OTRSили имеете проблемы содним из наших приложений,это именно то место, кудавам нужно.
http://lists.otrs.org/cgi-bin/listinfo/i18n [http://lists.otrs.org/cgi-bin/listinfo/i18n]
[email protected] Большой список трафикадля входящих сообщеий вформате CVS.
http://lists.otrs.org/cgi-bin/listinfo/cvs-log [http://lists.otrs.org/cgi-bin/listinfo/cvs-log]
Чтобы подписаться на любой из этих списков рассылки перейдите по ссылке: http://lists.otrs.org/.
Трекинг ошибокЧтобы сообщить об ошибке перейдите по ссылке http://bugs.otrs.org/ (см. ниже Рисунок A-2).Пожалуйста, обратите внимание на разницу между ошибкой и вопросом о конфигурации.Вопросы о конфигурации это проблемы, с которыми вы сталкиваететесь при создании инастройке системы, или же это общие вопросы по использованию OTRS. Отчет об ошибкедолжен отправлятся только для найденых ошибок которые относятся к исходному кодуOTRS или относятся к проблемам усовершенствования OTRS. Все отчеты об ошибках будутприветствоваться.

Дополнительные ресурсы
164
Рисунок A-2. Трекинг ошибок.
По вопросам конфигурации используйте ссылку коммерческая поддержка, котораядоступна на сайте OTRS.com [http://www.otrs.com/en/support/], или же публичные спискирассылки.
Вы поможете нам улучшить продукт если сообщите об ошибке. Мы ценним ваш вклад!
Коммерческая поддержкаFor services (support, consulting, development, and training) you can contact the companybehind OTRS, OTRS AG. They have offices in Germany, USA, Mexico, the Netherlands andother countries. Look at their website for contact information: http://www.otrs.com/en/corporate-navigation/contact/

165
Приложение B. Configuration OptionsReferenceFrameworkCoreSecureMode
Description ValueDescription: Disables the web installer (http://yourhost.example.com/otrs/
installer.pl), to prevent the system from being hijacked. If set to «No»,the system can be reinstalled and the current basic configuration willbe used to pre-populate the questions within the installer script. Ifnot active, it also disables the GenericAgent, PackageManager andSQL Box (to avoid the use of destructive queries, such as DROPDATABASE, and also to steal user passwords).
Group: FrameworkSubGroup: CoreValid: 1Required: 1Config-Setting:
$Self->{‘SecureMode’} = ‘0’;
Frontend::DebugMode
Description ValueDescription: Enables or disable the debug mode over frontend interface.Group: FrameworkSubGroup: CoreValid: 1Required: 0Config-Setting:
$Self->{‘Frontend::DebugMode’} = ‘0’;
ConfigLevel
Description ValueDescription: Sets the configuration level of the administrator. Depending on the
config level, some sysconfig options will be not shown. The config levelsare in in ascending order: Expert, Advanced, Beginner. The higher theconfig level is (e.g. Beginner is the highest), the less likely is it that the

Configuration Options Reference
166
Description Valueuser can accidentally configure the system in a way that it is not usableany more.
Group: FrameworkSubGroup: CoreValid: 1Required: 1Config-Setting:
$Self->{‘ConfigLevel’} = ‘100’;
ProductName
Description ValueDescription: Defines the name of the application, shown in the web interface, tabs
and title bar of the web browser.Group: FrameworkSubGroup: CoreValid: 1Required: 1Config-Setting:
$Self->{‘ProductName’} = ‘OTRS’;
SystemID
Description ValueDescription: Defines the system identifier. Every ticket number and http session
string contain this ID. This ensures that only tickets which belong to yoursystem will be processed as follow-ups (useful when communicatingbetween two instances of OTRS).
Group: FrameworkSubGroup: CoreValid: 1Required: 1Config-Setting:
$Self->{‘SystemID’} = ’10’;
FQDN
Description ValueDescription: Defines the fully qualified domain name of the system. This setting is
used as a variable, OTRS_CONFIG_FQDN which is found in all formsof messaging used by the application, to build links to the tickets withinyour system.
Group: Framework

Configuration Options Reference
167
Description ValueSubGroup: CoreValid: 1Required: 1Config-Setting:
$Self->{‘FQDN’} = ‘yourhost.example.com’;
HttpType
Description ValueDescription: Defines the type of protocol, used by ther web server, to serve the
application. If https protocol will be used instead of plain http, it must bespecified it here. Since this has no affect on the web server’s settings orbehavior, it will not change the method of access to the application and,if it is wrong, it will not prevent you from logging into the application.This setting is used as a variable, OTRS_CONFIG_HttpType which isfound in all forms of messaging used by the application, to build linksto the tickets within your system.
Group: FrameworkSubGroup: CoreValid: 1Required: 1Config-Setting:
$Self->{‘HttpType’} = ‘http’;
ScriptAlias
Description ValueDescription: Sets the prefix to the scripts folder on the server, as configured
on the web server. This setting is used as a variable,OTRS_CONFIG_ScriptAlias which is found in all forms of messagingused by the application, to build links to the tickets within the system.
Group: FrameworkSubGroup: CoreValid: 1Required: 1Config-Setting:
$Self->{‘ScriptAlias’} = ‘otrs/’;
AdminEmail
Description ValueDescription: Defines the system administrator’s email address. It will be displayed in
the error screens of the application.

Configuration Options Reference
168
Description ValueGroup: FrameworkSubGroup: CoreValid: 1Required: 1Config-Setting:
$Self->{‘AdminEmail’} = ‘[email protected]’;
Organization
Description ValueDescription: If configured, all emails sent by the application will contain an X-Header
with this organization or company name.Group: FrameworkSubGroup: CoreValid: 1Required: 1Config-Setting:
$Self->{‘Organization’} = ‘Example Company’;
DefaultCharset
Description ValueDescription: Sets the default charset for the web interface to use (should represent
the charset used to create the database or, in some cases, thedatabase management system being used). «utf-8» is a good choicefor environments expecting many charsets. You can specify anothercharset here (i.e. «iso-8859-1»). Please be sure that you will not bereceiving foreign emails, or text, otherwise this could lead to problems.
Group: FrameworkSubGroup: CoreValid: 1Required: 1Config-Setting:
$Self->{‘DefaultCharset’} = ‘utf-8’;
DefaultLanguage
Description ValueDescription: Defines the default front-end language. All the possible values are
determined by the available language files on the system (see the nextsetting).
Group: Framework

Configuration Options Reference
169
Description ValueSubGroup: CoreValid: 1Required: 1Config-Setting:
$Self->{‘DefaultLanguage’} = ‘en’;
DefaultUsedLanguages
Description ValueDescription: Defines all the languages that are available to the application. The
Key/Content pair links the front-end display name to the appropriatelanguage PM file. The «Key» value should be the base-name of the PMfile (i.e. de.pm is the file, then de is the «Key» value). The «Content» valueshould be the display name for the front-end. Specify any own-definedlanguage here (see the developer documentation http://doc.otrs.org/ formore infomation). Please remember to use the HTML equivalents fornon-ASCII characters (i.e. for the German oe = o umlaut, it is necessaryto use the ö symbol).
Group: FrameworkSubGroup: CoreValid: 1Required: 1Config-Setting:
$Self->{‘DefaultUsedLanguages’} = { ‘ar_SA’ => ‘Arabic (Saudi Arabia)’, ‘bg’ => ‘Bulgarian (Български)’, ‘cs’ => ‘Czech (Česky)’, ‘ct’ => ‘Català’, ‘da’ => ‘Dansk’, ‘de’ => ‘Deutsch’, ‘el’ => ‘Greek (Ελληνικά)’, ‘en’ => ‘English (United States)’, ‘en_CA’ => ‘English (Canada)’, ‘en_GB’ => ‘English (United Kingdom)’, ‘es’ => ‘Español’, ‘es_MX’ => ‘Español (México)’, ‘et’ => ‘Eesti’, ‘fa’ => ‘Persian (فارسى)’, ‘fi’ => ‘Suomi’, ‘fr’ => ‘Français’, ‘hi’ => ‘Hindi’, ‘hr’ => ‘Hrvatski’, ‘hu’ => ‘Magyar’, ‘it’ => ‘Italiano’, ‘ja’ => ‘Japanese (日本語)’,

Configuration Options Reference
170
Description Value ‘lt’ => ‘Lietuvi? kalba’, ‘lv’ => ‘Latvijas’, ‘nb_NO’ => ‘Norsk bokmål’, ‘nl’ => ‘Nederlands’, ‘pl’ => ‘Polski’, ‘pt’ => ‘Português’, ‘pt_BR’ => ‘Português Brasileiro’, ‘ru’ => ‘Russian (Русский)’, ‘sk_SK’ => ‘Slovak (Slovenčina)’, ‘sr_Cyrl’ => ‘Serbian Cyrillic (??????)’, ‘sr_Latn’ => ‘Serbian Latin (Srpski)’, ‘sv’ => ‘Svenska’, ‘tr’ => ‘Türkçe’, ‘uk’ => ‘Ukrainian (Українська)’, ‘vi_VN’ => ‘Vietnam (ViɆt Nam)’, ‘zh_CN’ => ‘Chinese (Sim.) (简体中文)’, ‘zh_TW’ => ‘Chinese (Tradi.) (正體中文)’};
DefaultTheme
Description ValueDescription: Defines the default front-end (HTML) theme to be used by the agents
and customers. The default themes are Standard and Lite. If you like,you can add your own theme. Please refer the administrator manuallocated at http://doc.otrs.org/.
Group: FrameworkSubGroup: CoreValid: 1Required: 1Config-Setting:
$Self->{‘DefaultTheme’} = ‘Standard’;
DefaultTheme::HostBased
Description ValueDescription: It is possible to configure different themes, for example to distinguish
between agents and customers, to be used on a per-domain basiswithin the application. Using a regular expression (regex), you canconfigure a Key/Content pair to match a domain. The value in «Key»should match the domain, and the value in «Content» should be a validtheme on your system. Please see the example entries for the properform of the regex.
Group: Framework

Configuration Options Reference
171
Description ValueSubGroup: CoreValid: 0Required: 0Config-Setting:
$Self->{‘DefaultTheme::HostBased’} = { ‘host1\.example\.com’ => ‘SomeTheme1’, ‘host2\.example\.com’ => ‘SomeTheme2’};
CheckMXRecord
Description ValueDescription: Makes the application check the MX record of email addresses before
sending an email or submitting a telephone or email ticket.Group: FrameworkSubGroup: CoreValid: 1Required: 1Config-Setting:
$Self->{‘CheckMXRecord’} = ‘1’;
CheckMXRecord::Nameserver
Description ValueDescription: Defines the address of a dedicated DNS server, if necessary, for the
«CheckMXRecord» look-ups.Group: FrameworkSubGroup: CoreValid: 0Required: 0Config-Setting:
$Self->{‘CheckMXRecord::Nameserver’} = ‘ns.example.com’;
CheckEmailAddresses
Description ValueDescription: Makes the application check the syntax of email addresses.Group: FrameworkSubGroup: CoreValid: 1

Configuration Options Reference
172
Description ValueRequired: 1Config-Setting:
$Self->{‘CheckEmailAddresses’} = ‘1’;
CheckEmailValidAddress
Description ValueDescription: Defines a regular expression that excludes some addresses from the
syntax check (if «CheckEmailAddresses» is set to «Yes»). Please entera regex in this field for email addresses, that aren’t syntactically valid,but are necessary for the system (i.e. «[email protected]»).
Group: FrameworkSubGroup: CoreValid: 1Required: 1Config-Setting:
$Self->{‘CheckEmailValidAddress’} = ‘^([email protected]|[email protected])$’;
CheckEmailInvalidAddress
Description ValueDescription: Defines a regular expression that filters all email addresses that should
not be used in the application.Group: FrameworkSubGroup: CoreValid: 1Required: 1Config-Setting:
$Self->{‘CheckEmailInvalidAddress’} = ‘@(example)\.(..|…)$’;
CGILogPrefix
Description ValueDescription: Specifies the text that should appear in the log file to denote a CGI script
entry.Group: FrameworkSubGroup: CoreValid: 1Required: 1Config-Setting:

Configuration Options Reference
173
Description Value $Self->{‘CGILogPrefix’} = ‘OTRS-CGI’;
DemoSystem
Description ValueDescription: Runs the system in «Demo» mode. If set to «Yes», agents can change
preferences, such as selection of language and theme via the agentweb interface. These changes are only valid for the current session. Itwill not be possible for agents to change their passwords.
Group: FrameworkSubGroup: CoreValid: 1Required: 1Config-Setting:
$Self->{‘DemoSystem’} = ‘0’;
SwitchToUser
Description ValueDescription: Allows the administrators to login as other users, via the users
administration panel.Group: FrameworkSubGroup: CoreValid: 1Required: 1Config-Setting:
$Self->{‘SwitchToUser’} = ‘0’;
NotificationSenderName
Description ValueDescription: Specifies the name that should be used by the application when
sending notifications. The sender name is used to build the completedisplay name for the notification master (i.e. «OTRS NotificationMaster» [email protected]). Notifications are messages such asen::Customer::QueueUpdate or en::Agent::Move.
Group: FrameworkSubGroup: CoreValid: 1Required: 1Config-Setting:
$Self->{‘NotificationSenderName’} = ‘OTRS Notification Master’;

Configuration Options Reference
174
NotificationSenderEmail
Description ValueDescription: Specifies the email address that should be used by the application when
sending notifications. The email address is used to build the completedisplay name for the notification master (i.e. «OTRS Notification Master»[email protected]). You can use the OTRS_CONFIG_FQDNvariable as set in your configuation, or choose another email address.Notifications are messages such as en::Customer::QueueUpdate oren::Agent::Move.
Group: FrameworkSubGroup: CoreValid: 1Required: 1Config-Setting:
$Self->{‘NotificationSenderEmail’} = ‘[email protected]<OTRS_CONFIG_FQDN>’;
System::Customer::Permission
Description ValueDescription: Defines the standard permissions available for customers within the
application. If more permissions are needed, you can enter them here.Permissions must be hard coded to be effective. Please ensure, whenadding any of the afore mentioned permissions, that the «rw» permissionremains the last entry.
Group: FrameworkSubGroup: CoreValid: 1Required: 1Config-Setting:
$Self->{‘System::Customer::Permission’} = [ ‘ro’, ‘rw’];
LanguageDebug
Description ValueDescription: Debugs the translation set. If this is set to «Yes» all strings (text) without
translations are written to STDERR. This can be helpful when you arecreating a new translation file. Otherwise, this option should remain setto «No».
Group: FrameworkSubGroup: CoreValid: 0

Configuration Options Reference
175
Description ValueRequired: 0Config-Setting:
$Self->{‘LanguageDebug’} = ‘0’;
Secure::DisableBanner
Description ValueDescription: If enabled, the OTRS version tag will be removed from the HTTP
headers.Group: FrameworkSubGroup: CoreValid: 0Required: 0Config-Setting:
$Self->{‘Secure::DisableBanner’} = ‘0’;
Core::LinkObjectLinkObject::ViewMode
Description ValueDescription: Determines the way the linked objects are displayed in each zoom
mask.Group: FrameworkSubGroup: Core::LinkObjectValid: 1Required: 1Config-Setting:
$Self->{‘LinkObject::ViewMode’} = ‘Simple’;
LinkObject::Type###Normal
Description ValueDescription: Defines the link type ‘Normal’. If the source name and the target name
contain the same value, the resulting link is a non-directional one;otherwise, the result is a directional link.
Group: FrameworkSubGroup: Core::LinkObjectValid: 1Required: 1Config-Setting:
$Self->{‘LinkObject::Type’}->{‘Normal’} = {

Configuration Options Reference
176
Description Value ‘SourceName’ => ‘Normal’, ‘TargetName’ => ‘Normal’};
LinkObject::Type###ParentChild
Description ValueDescription: Defines the link type ‘ParentChild’. If the source name and the target
name contain the same value, the resulting link is a non-directional one;otherwise, the result is a directional link.
Group: FrameworkSubGroup: Core::LinkObjectValid: 1Required: 1Config-Setting:
$Self->{‘LinkObject::Type’}->{‘ParentChild’} = { ‘SourceName’ => ‘Parent’, ‘TargetName’ => ‘Child’};
LinkObject::TypeGroup###0001
Description ValueDescription: Defines the link type groups. The link types of the same group cancel
one another. Example: If ticket A is linked per a ‘Normal’ link with ticketB, then these tickets could not be additionally linked with link of a’ParentChild’ relationship.
Group: FrameworkSubGroup: Core::LinkObjectValid: 1Required: 0Config-Setting:
$Self->{‘LinkObject::TypeGroup’}->{‘0001’} = [ ‘Normal’, ‘ParentChild’];
Core::LogLogModule
Description ValueDescription: Defines the log module for the system. «File» writes all messages in
a given logfile, «SysLog» uses the syslog daemon of the system, e.g.syslogd.

Configuration Options Reference
177
Description ValueGroup: FrameworkSubGroup: Core::LogValid: 1Required: 1Config-Setting:
$Self->{‘LogModule’} = ‘Kernel::System::Log::SysLog’;
LogModule::SysLog::Facility
Description ValueDescription: If «SysLog» was selected for LogModule, a special log facility can be
specified.Group: FrameworkSubGroup: Core::LogValid: 1Required: 1Config-Setting:
$Self->{‘LogModule::SysLog::Facility’} = ‘user’;
LogModule::SysLog::LogSock
Description ValueDescription: If «SysLog» was selected for LogModule, a special log sock can be
specified (on solaris you may need to use ‘stream’).Group: FrameworkSubGroup: Core::LogValid: 1Required: 1Config-Setting:
$Self->{‘LogModule::SysLog::LogSock’} = ‘unix’;
LogModule::SysLog::Charset
Description ValueDescription: If «SysLog» was selected for LogModule, the charset that should be
used for logging can be specified.Group: FrameworkSubGroup: Core::LogValid: 1Required: 1

Configuration Options Reference
178
Description ValueConfig-Setting:
$Self->{‘LogModule::SysLog::Charset’} = ‘iso-8859-1’;
LogModule::LogFile
Description ValueDescription: If «file» was selected for LogModule, a logfile must be specified. If the
file doesn’t exist, it will be created by the system.Group: FrameworkSubGroup: Core::LogValid: 1Required: 1Config-Setting:
$Self->{‘LogModule::LogFile’} = ‘/tmp/otrs.log’;
LogModule::LogFile::Date
Description ValueDescription: Adds a suffix with the actual year and month to the OTRS log file. A
logfile for every month will be created.Group: FrameworkSubGroup: Core::LogValid: 1Required: 1Config-Setting:
$Self->{‘LogModule::LogFile::Date’} = ‘0’;
Core::MIME-ViewerMIME-Viewer###application/excel
Description ValueDescription: Specifies the path to the converter that allows the view of Microsoft
Excel files, in the web interface.Group: FrameworkSubGroup: Core::MIME-ViewerValid: 0Required: 0Config-Setting:
$Self->{‘MIME-Viewer’}->{‘application/excel’} = ‘xlhtml’;

Configuration Options Reference
179
MIME-Viewer###application/mswordDescription ValueDescription: Specifies the path to the converter that allows the view of Microsoft
Word files, in the web interface.Group: FrameworkSubGroup: Core::MIME-ViewerValid: 0Required: 0Config-Setting:
$Self->{‘MIME-Viewer’}->{‘application/msword’} = ‘wvWare’;
MIME-Viewer###application/pdfDescription ValueDescription: Specifies the path to the converter that allows the view of PDF
documents, in the web interface.Group: FrameworkSubGroup: Core::MIME-ViewerValid: 0Required: 0Config-Setting:
$Self->{‘MIME-Viewer’}->{‘application/pdf’} = ‘pdftohtml -stdout -i’;
MIME-Viewer###text/xmlDescription ValueDescription: Specifies the path to the converter that allows the view of XML files, in
the web interface.Group: FrameworkSubGroup: Core::MIME-ViewerValid: 0Required: 0Config-Setting:
$Self->{‘MIME-Viewer’}->{‘text/xml’} = ‘<OTRS_CONFIG_Home>/scripts/tools/xml2html.pl’;
Core::MirrorDBCore::MirrorDB::DSN
Description ValueDescription: If you want to use a mirror database for agent ticket fulltext search or
to generate stats, specify the DSN to this database.

Configuration Options Reference
180
Description ValueGroup: FrameworkSubGroup: Core::MirrorDBValid: 0Required: 0Config-Setting:
$Self->{‘Core::MirrorDB::DSN’} = ‘DBI:mysql:database=mirrordb;host=mirrordbhost’;
Core::MirrorDB::User
Description ValueDescription: If you want to use a mirror database for agent ticket fulltext search
or to generate stats, the user to authenticate to this database can bespecified.
Group: FrameworkSubGroup: Core::MirrorDBValid: 0Required: 0Config-Setting:
$Self->{‘Core::MirrorDB::User’} = ‘some_user’;
Core::MirrorDB::Password
Description ValueDescription: If you want to use a mirror database for agent ticket fulltext search or
to generate stats, the password to authenticate to this database can bespecified.
Group: FrameworkSubGroup: Core::MirrorDBValid: 0Required: 0Config-Setting:
$Self->{‘Core::MirrorDB::Password’} = ‘some_password’;
Core::PDFPDF
Description ValueDescription: Enables PDF output. The CPAN module PDF::API2 is required, if not
installed, PDF output will be disabled.

Configuration Options Reference
181
Description ValueGroup: FrameworkSubGroup: Core::PDFValid: 1Required: 1Config-Setting:
$Self->{‘PDF’} = ‘1’;
PDF::LogoFile
Description ValueDescription: Specifies the path of the file for the logo in the page header (gif|jpg|png,
700 x 100 pixel).Group: FrameworkSubGroup: Core::PDFValid: 1Required: 1Config-Setting:
$Self->{‘PDF::LogoFile’} = ‘<OTRS_CONFIG_Home>/var/logo-otrs.png’;
PDF::PageSize
Description ValueDescription: Defines the standard size of PDF pages.Group: FrameworkSubGroup: Core::PDFValid: 1Required: 1Config-Setting:
$Self->{‘PDF::PageSize’} = ‘a4’;
PDF::MaxPages
Description ValueDescription: Defines the maximum number of pages per PDF file.Group: FrameworkSubGroup: Core::PDFValid: 1Required: 1Config-Setting:
$Self->{‘PDF::MaxPages’} = ‘100’;

Configuration Options Reference
182
PDF::TTFontFile###Proportional
Description ValueDescription: Defines the path and TTF-File to handle proportional font in PDF
documents.Group: FrameworkSubGroup: Core::PDFValid: 1Required: 1Config-Setting:
$Self->{‘PDF::TTFontFile’}->{‘Proportional’} = ‘DejaVuSans.ttf’;
PDF::TTFontFile###ProportionalBold
Description ValueDescription: Defines the path and TTF-File to handle bold proportional font in PDF
documents.Group: FrameworkSubGroup: Core::PDFValid: 1Required: 1Config-Setting:
$Self->{‘PDF::TTFontFile’}->{‘ProportionalBold’} = ‘DejaVuSans-Bold.ttf’;
PDF::TTFontFile###ProportionalItalic
Description ValueDescription: Defines the path and TTF-File to handle italic proportional font in PDF
documents.Group: FrameworkSubGroup: Core::PDFValid: 0Required: 0Config-Setting:
$Self->{‘PDF::TTFontFile’}->{‘ProportionalItalic’} = ‘DejaVuSans-Oblique.ttf’;
PDF::TTFontFile###ProportionalBoldItalic
Description ValueDescription: Defines the path and TTF-File to handle bold italic proportional font in
PDF documents.

Configuration Options Reference
183
Description ValueGroup: FrameworkSubGroup: Core::PDFValid: 1Required: 1Config-Setting:
$Self->{‘PDF::TTFontFile’}->{‘ProportionalBoldItalic’} = ‘DejaVuSans-BoldOblique.ttf’;
PDF::TTFontFile###Monospaced
Description ValueDescription: Defines the path and TTF-File to handle monospaced font in PDF
documents.Group: FrameworkSubGroup: Core::PDFValid: 1Required: 1Config-Setting:
$Self->{‘PDF::TTFontFile’}->{‘Monospaced’} = ‘DejaVuSansMono.ttf’;
PDF::TTFontFile###MonospacedBold
Description ValueDescription: Defines the path and TTF-File to handle bold monospaced font in PDF
documents.Group: FrameworkSubGroup: Core::PDFValid: 0Required: 0Config-Setting:
$Self->{‘PDF::TTFontFile’}->{‘MonospacedBold’} = ‘DejaVuSansMono-Bold.ttf’;
PDF::TTFontFile###MonospacedItalic
Description ValueDescription: Defines the path and TTF-File to handle italic monospaced font in PDF
documents.Group: FrameworkSubGroup: Core::PDFValid: 0

Configuration Options Reference
184
Description ValueRequired: 0Config-Setting:
$Self->{‘PDF::TTFontFile’}->{‘MonospacedItalic’} = ‘DejaVuSansMono-Oblique.ttf’;
PDF::TTFontFile###MonospacedBoldItalic
Description ValueDescription: Defines the path and TTF-File to handle bold italic monospaced font in
PDF documents.Group: FrameworkSubGroup: Core::PDFValid: 0Required: 0Config-Setting:
$Self->{‘PDF::TTFontFile’}->{‘MonospacedBoldItalic’} = ‘DejaVuSansMono-BoldOblique.ttf’;
Core::PackagePackage::FileUpload
Description ValueDescription: Enables file upload in the package manager frontend.Group: FrameworkSubGroup: Core::PackageValid: 1Required: 1Config-Setting:
$Self->{‘Package::FileUpload’} = ‘1’;
Package::RepositoryRoot
Description ValueDescription: Defines the location to get online repository list for additional packages.
The first available result will be used.Group: FrameworkSubGroup: Core::PackageValid: 1Required: 0Config-Setting:

Configuration Options Reference
185
Description Value $Self->{‘Package::RepositoryRoot’} = [ ‘http://ftp.otrs.org/pub/otrs/misc/packages/repository.xml’, ‘http://otrs.org/repository.xml’];
Package::RepositoryList
Description ValueDescription: Defines the list of online repositories. Another installations can be used
as repository, for example: Key=»http://example.com/otrs/public.pl?Action=PublicRepository;File=» and Content=»Some Name».
Group: FrameworkSubGroup: Core::PackageValid: 0Required: 0Config-Setting:
$Self->{‘Package::RepositoryList’} = { ‘ftp://ftp.example.com/pub/otrs/misc/packages/’ => ‘[Example] ftp://ftp.example.com/’};
Package::RepositoryAccessRegExp
Description ValueDescription: Defines the IP regular expression for accessing the local repository.
You need to enable this to have access to your local repository and thepackage::RepositoryList is required on the remote host.
Group: FrameworkSubGroup: Core::PackageValid: 0Required: 0Config-Setting:
$Self->{‘Package::RepositoryAccessRegExp’} = ‘127\.0\.0\.1’;
Package::Timeout
Description ValueDescription: Sets the timeout (in seconds) for package downloads. Overwrites
«WebUserAgent::Timeout».Group: FrameworkSubGroup: Core::PackageValid: 1

Configuration Options Reference
186
Description ValueRequired: 1Config-Setting:
$Self->{‘Package::Timeout’} = ’15’;
Package::Proxy
Description ValueDescription: Fetches packages via proxy. Overwrites «WebUserAgent::Proxy».Group: FrameworkSubGroup: Core::PackageValid: 0Required: 0Config-Setting:
$Self->{‘Package::Proxy’} = ‘http://proxy.sn.no:8001/’;
Core::PerformanceLogPerformanceLog
Description ValueDescription: Enables performance log (to log the page response time). It will affect
the system performance. Frontend::Module###AdminPerformanceLogmust be enabled.
Group: FrameworkSubGroup: Core::PerformanceLogValid: 1Required: 0Config-Setting:
$Self->{‘PerformanceLog’} = ‘0’;
PerformanceLog::File
Description ValueDescription: Specifies the path of the file for the performance log.Group: FrameworkSubGroup: Core::PerformanceLogValid: 1Required: 1Config-Setting:
$Self->{‘PerformanceLog::File’} = ‘<OTRS_CONFIG_Home>/var/log/Performance.log’;

Configuration Options Reference
187
PerformanceLog::FileMax
Description ValueDescription: Defines the maximum size (in MB) of the log file.Group: FrameworkSubGroup: Core::PerformanceLogValid: 1Required: 1Config-Setting:
$Self->{‘PerformanceLog::FileMax’} = ’25’;
Core::SOAPSOAP::User
Description ValueDescription: Defines the username to access the SOAP handle (bin/cgi-bin/rpc.pl).Group: FrameworkSubGroup: Core::SOAPValid: 0Required: 0Config-Setting:
$Self->{‘SOAP::User’} = ‘some_user’;
SOAP::Password
Description ValueDescription: Defines the password to access the SOAP handle (bin/cgi-bin/rpc.pl).Group: FrameworkSubGroup: Core::SOAPValid: 0Required: 0Config-Setting:
$Self->{‘SOAP::Password’} = ‘some_pass’;
Core::SendmailSendmailModule
Description ValueDescription: Defines the module to send emails. «Sendmail» directly uses the
sendmail binary of your operating system. Any of the «SMTP»

Configuration Options Reference
188
Description Valuemechanisms use a specified (external) mailserver. «DoNotSendEmail»doesn’t send emails and it is useful for test systems.
Group: FrameworkSubGroup: Core::SendmailValid: 1Required: 1Config-Setting:
$Self->{‘SendmailModule’} = ‘Kernel::System::Email::Sendmail’;
SendmailModule::CMD
Description ValueDescription: If «Sendmail» was selected as SendmailModule, the location of the
sendmail binary and the needed options must be specified.Group: FrameworkSubGroup: Core::SendmailValid: 1Required: 1Config-Setting:
$Self->{‘SendmailModule::CMD’} = ‘/usr/sbin/sendmail -i -f’;
SendmailModule::Host
Description ValueDescription: If any of the «SMTP» mechanisms was selected as SendmailModule,
the mailhost that sends out the mails must be specified.Group: FrameworkSubGroup: Core::SendmailValid: 1Required: 1Config-Setting:
$Self->{‘SendmailModule::Host’} = ‘mail.example.com’;
SendmailModule::Port
Description ValueDescription: If any of the «SMTP» mechanisms was selected as SendmailModule, the
port where your mailserver is listening for incoming connections mustbe specified.
Group: Framework

Configuration Options Reference
189
Description ValueSubGroup: Core::SendmailValid: 0Required: 0Config-Setting:
$Self->{‘SendmailModule::Port’} = ’25’;
SendmailModule::AuthUser
Description ValueDescription: If any of the «SMTP» mechanisms was selected as SendmailModule,
and authentication to the mail server is needed, an username must bespecified.
Group: FrameworkSubGroup: Core::SendmailValid: 0Required: 0Config-Setting:
$Self->{‘SendmailModule::AuthUser’} = ‘MailserverLogin’;
SendmailModule::AuthPassword
Description ValueDescription: If any of the «SMTP» mechanisms was selected as SendmailModule,
and authentication to the mail server is needed, a password must bespecified.
Group: FrameworkSubGroup: Core::SendmailValid: 0Required: 0Config-Setting:
$Self->{‘SendmailModule::AuthPassword’} = ‘MailserverPassword’;
SendmailBcc
Description ValueDescription: Sends all outgoing email via bcc to the specified address. Please use
this only for backup reasons.Group: FrameworkSubGroup: Core::SendmailValid: 1

Configuration Options Reference
190
Description ValueRequired: 0Config-Setting:
$Self->{‘SendmailBcc’} = »;
SendmailNotificationEnvelopeFrom
Description ValueDescription: If set, this address is used as envelope from header in outgoing
notifications. If no address is specified, the envelope from header isempty.
Group: FrameworkSubGroup: Core::SendmailValid: 0Required: 0Config-Setting:
$Self->{‘SendmailNotificationEnvelopeFrom’} = »;
SendmailEncodingForce
Description ValueDescription: Forces encoding of outgoing emails (7bit|8bit|quoted-printable|
base64).Group: FrameworkSubGroup: Core::SendmailValid: 0Required: 0Config-Setting:
$Self->{‘SendmailEncodingForce’} = ‘base64’;
Core::SessionSessionModule
Description ValueDescription: Defines the module used to store the session data. With «DB» the
frontend server can be splitted from the db server. «FS» is faster.Group: FrameworkSubGroup: Core::SessionValid: 1Required: 1Config-Setting:

Configuration Options Reference
191
Description Value $Self->{‘SessionModule’} = ‘Kernel::System::AuthSession::DB’;
SessionName
Description ValueDescription: Defines the name of the session key. E.g. Session, SessionID or OTRS.Group: FrameworkSubGroup: Core::SessionValid: 1Required: 1Config-Setting:
$Self->{‘SessionName’} = ‘Session’;
SessionCheckRemoteIP
Description ValueDescription: Turns on the remote ip address check. It should be set to «No» if the
application is used, for example, via a proxy farm or a dialup connection,because the remote ip address is mostly different for the requests.
Group: FrameworkSubGroup: Core::SessionValid: 1Required: 1Config-Setting:
$Self->{‘SessionCheckRemoteIP’} = ‘1’;
SessionDeleteIfNotRemoteID
Description ValueDescription: Deletes a session if the session id is used with an invalid remote IP
address.Group: FrameworkSubGroup: Core::SessionValid: 1Required: 1Config-Setting:
$Self->{‘SessionDeleteIfNotRemoteID’} = ‘1’;
SessionMaxTime
Description ValueDescription: Defines the maximal valid time (in seconds) for a session id.

Configuration Options Reference
192
Description ValueGroup: FrameworkSubGroup: Core::SessionValid: 1Required: 1Config-Setting:
$Self->{‘SessionMaxTime’} = ‘57600’;
SessionMaxIdleTime
Description ValueDescription: Sets the inactivity time (in seconds) to pass before a session is killed
and a user is loged out.Group: FrameworkSubGroup: Core::SessionValid: 1Required: 1Config-Setting:
$Self->{‘SessionMaxIdleTime’} = ‘21600’;
SessionDeleteIfTimeToOld
Description ValueDescription: Deletes requested sessions if they have timed out.Group: FrameworkSubGroup: Core::SessionValid: 1Required: 1Config-Setting:
$Self->{‘SessionDeleteIfTimeToOld’} = ‘1’;
SessionUseCookie
Description ValueDescription: Makes the session management use html cookies. If html cookies are
disabled or if the client browser disabled html cookies, then the systemwill work as usual and append the session id to the links.
Group: FrameworkSubGroup: Core::SessionValid: 1Required: 1Config-Setting:

Configuration Options Reference
193
Description Value $Self->{‘SessionUseCookie’} = ‘1’;
SessionUseCookieAfterBrowserCloseDescription ValueDescription: Stores cookies after the browser has been closed.Group: FrameworkSubGroup: Core::SessionValid: 1Required: 1Config-Setting:
$Self->{‘SessionUseCookieAfterBrowserClose’} = ‘0’;
SessionCSRFProtectionDescription ValueDescription: Protection against CSRF (Cross Site Request Forgery) exploits (for
more info see http://en.wikipedia.org/wiki/Cross-site_request_forgery).Group: FrameworkSubGroup: Core::SessionValid: 1Required: 1Config-Setting:
$Self->{‘SessionCSRFProtection’} = ‘1’;
SessionDirDescription ValueDescription: If «FS» was selected for SessionModule, a directory where the session
data will be stored must be specified.Group: FrameworkSubGroup: Core::SessionValid: 1Required: 1Config-Setting:
$Self->{‘SessionDir’} = ‘<OTRS_CONFIG_Home>/var/sessions’;
SessionTableDescription ValueDescription: If «DB» was selected for SessionModule, a table in database where
session data will be stored must be specified.

Configuration Options Reference
194
Description ValueGroup: FrameworkSubGroup: Core::SessionValid: 1Required: 1Config-Setting:
$Self->{‘SessionTable’} = ‘sessions’;
SessionTableID
Description ValueDescription: If «DB» was selected for SessionModule, a column for the identifiers in
session table must be specified.Group: FrameworkSubGroup: Core::SessionValid: 1Required: 1Config-Setting:
$Self->{‘SessionTableID’} = ‘session_id’;
SessionTableValue
Description ValueDescription: If «DB» was selected for SessionModule, a column for the values in
session table must be specified.Group: FrameworkSubGroup: Core::SessionValid: 1Required: 1Config-Setting:
$Self->{‘SessionTableValue’} = ‘session_value’;
SessionSaveLoginPasswd
Description ValueDescription: Saves the login and password on the session table in the database, if
«DB» was selected for SessionModule.Group: FrameworkSubGroup: Core::SessionValid: 1Required: 1Config-Setting:

Configuration Options Reference
195
Description Value $Self->{‘SessionSaveLoginPasswd’} = ‘0’;
CustomerPanelSessionNameDescription ValueDescription: Defines the name of the key for customer sessions.Group: FrameworkSubGroup: Core::SessionValid: 1Required: 1Config-Setting:
$Self->{‘CustomerPanelSessionName’} = ‘CSID’;
Core::SpellCheckerSpellChecker
Description ValueDescription: Enables spell checker support.Group: FrameworkSubGroup: Core::SpellCheckerValid: 1Required: 1Config-Setting:
$Self->{‘SpellChecker’} = ‘0’;
SpellCheckerBinDescription ValueDescription: Install ispell or aspell on the system, if you want to use a spell checker.
Please specify the path to the aspell or ispell binary on your operatingsystem.
Group: FrameworkSubGroup: Core::SpellCheckerValid: 1Required: 1Config-Setting:
$Self->{‘SpellCheckerBin’} = ‘/usr/bin/ispell’;
SpellCheckerDictDefaultDescription ValueDescription: Defines the default spell checker dictionary.

Configuration Options Reference
196
Description ValueGroup: FrameworkSubGroup: Core::SpellCheckerValid: 1Required: 1Config-Setting:
$Self->{‘SpellCheckerDictDefault’} = ‘english’;
SpellCheckerIgnore
Description ValueDescription: Defines a default list of words, that are ignored by the spell checker.Group: FrameworkSubGroup: Core::SpellCheckerValid: 1Required: 1Config-Setting:
$Self->{‘SpellCheckerIgnore’} = [ ‘www’, ‘webmail’, ‘https’, ‘http’, ‘html’, ‘rfc’];
Core::StatsStats::StatsHook
Description ValueDescription: Sets the stats hook.Group: FrameworkSubGroup: Core::StatsValid: 1Required: 1Config-Setting:
$Self->{‘Stats::StatsHook’} = ‘Stat#’;
Stats::StatsStartNumber
Description ValueDescription: Start number for statistics counting. Every new stat increments this
number.

Configuration Options Reference
197
Description ValueGroup: FrameworkSubGroup: Core::StatsValid: 1Required: 1Config-Setting:
$Self->{‘Stats::StatsStartNumber’} = ‘10000’;
Stats::MaxXaxisAttributes
Description ValueDescription: Defines the default maximum number of X-axis attributes for the time
scale.Group: FrameworkSubGroup: Core::StatsValid: 0Required: 0Config-Setting:
$Self->{‘Stats::MaxXaxisAttributes’} = ‘1000’;
Core::Stats::GraphStats::Graph::t_margin
Description ValueDescription: Specifies the top margin of the chart.Group: FrameworkSubGroup: Core::Stats::GraphValid: 1Required: 1Config-Setting:
$Self->{‘Stats::Graph::t_margin’} = ’10’;
Stats::Graph::l_margin
Description ValueDescription: Specifies the left margin of the chart.Group: FrameworkSubGroup: Core::Stats::GraphValid: 1Required: 1Config-Setting:

Configuration Options Reference
198
Description Value $Self->{‘Stats::Graph::l_margin’} = ’10’;
Stats::Graph::b_marginDescription ValueDescription: Specifies the bottom margin of the chart.Group: FrameworkSubGroup: Core::Stats::GraphValid: 1Required: 1Config-Setting:
$Self->{‘Stats::Graph::b_margin’} = ’10’;
Stats::Graph::r_marginDescription ValueDescription: Specifies the right margin of the chart.Group: FrameworkSubGroup: Core::Stats::GraphValid: 1Required: 1Config-Setting:
$Self->{‘Stats::Graph::r_margin’} = ’20’;
Stats::Graph::bgclrDescription ValueDescription: Specifies the background color of the picture.Group: FrameworkSubGroup: Core::Stats::GraphValid: 1Required: 1Config-Setting:
$Self->{‘Stats::Graph::bgclr’} = ‘white’;
Stats::Graph::transparentDescription ValueDescription: Makes the picture transparent.Group: FrameworkSubGroup: Core::Stats::GraphValid: 1

Configuration Options Reference
199
Description ValueRequired: 1Config-Setting:
$Self->{‘Stats::Graph::transparent’} = ‘0’;
Stats::Graph::fgclr
Description ValueDescription: Specifies the border color of the chart.Group: FrameworkSubGroup: Core::Stats::GraphValid: 1Required: 1Config-Setting:
$Self->{‘Stats::Graph::fgclr’} = ‘black’;
Stats::Graph::boxclr
Description ValueDescription: Specifies the background color of the chart.Group: FrameworkSubGroup: Core::Stats::GraphValid: 1Required: 1Config-Setting:
$Self->{‘Stats::Graph::boxclr’} = ‘white’;
Stats::Graph::accentclr
Description ValueDescription: Specifies the border color of the legend.Group: FrameworkSubGroup: Core::Stats::GraphValid: 1Required: 1Config-Setting:
$Self->{‘Stats::Graph::accentclr’} = ‘black’;
Stats::Graph::legendclr
Description ValueDescription: Specifies the text color of the legend.Group: Framework

Configuration Options Reference
200
Description ValueSubGroup: Core::Stats::GraphValid: 1Required: 1Config-Setting:
$Self->{‘Stats::Graph::legendclr’} = ‘black’;
Stats::Graph::textclr
Description ValueDescription: Specifies the text color of the chart (e. g. caption).Group: FrameworkSubGroup: Core::Stats::GraphValid: 1Required: 1Config-Setting:
$Self->{‘Stats::Graph::textclr’} = ‘black’;
Stats::Graph::dclrs
Description ValueDescription: Defines the colors for the graphs.Group: FrameworkSubGroup: Core::Stats::GraphValid: 1Required: 1Config-Setting:
$Self->{‘Stats::Graph::dclrs’} = [ ‘red’, ‘green’, ‘blue’, ‘yellow’, ‘black’, ‘purple’, ‘orange’, ‘pink’, ‘marine’, ‘cyan’, ‘lgray’, ‘lblue’, ‘lyellow’, ‘lgreen’, ‘lred’, ‘lpurple’, ‘lorange’, ‘lbrown’

Configuration Options Reference
201
Description Value];
Stats::Graph::line_widthDescription ValueDescription: Defines the boldness of the line drawed by the graph.Group: FrameworkSubGroup: Core::Stats::GraphValid: 1Required: 1Config-Setting:
$Self->{‘Stats::Graph::line_width’} = ‘1’;
Stats::Graph::legend_placementDescription ValueDescription: Defines the placement of the legend. This should be a two letter key
of the form: ‘B[LCR]|R[TCB]’. The first letter indicates the placement(Bottom or Right), and the second letter the alignment (Left, Right,Center, Top, or Bottom).
Group: FrameworkSubGroup: Core::Stats::GraphValid: 1Required: 1Config-Setting:
$Self->{‘Stats::Graph::legend_placement’} = ‘BC’;
Stats::Graph::legend_spacingDescription ValueDescription: Defines the spacing of the legends.Group: FrameworkSubGroup: Core::Stats::GraphValid: 1Required: 1Config-Setting:
$Self->{‘Stats::Graph::legend_spacing’} = ‘4’;
Stats::Graph::legend_marker_widthDescription ValueDescription: Defines the width of the legend.Group: Framework

Configuration Options Reference
202
Description ValueSubGroup: Core::Stats::GraphValid: 1Required: 1Config-Setting:
$Self->{‘Stats::Graph::legend_marker_width’} = ’12’;
Stats::Graph::legend_marker_heightDescription ValueDescription: Defines the height of the legend.Group: FrameworkSubGroup: Core::Stats::GraphValid: 1Required: 1Config-Setting:
$Self->{‘Stats::Graph::legend_marker_height’} = ‘8’;
Core::TimeTimeInputFormat
Description ValueDescription: Defines the date input format used in forms (option or input fields).Group: FrameworkSubGroup: Core::TimeValid: 1Required: 1Config-Setting:
$Self->{‘TimeInputFormat’} = ‘Option’;
TimeShowAlwaysLongDescription ValueDescription: Shows time in long format (days, hours, minutes), if set to «Yes»; or in
short format (days, hours), if set to «No».Group: FrameworkSubGroup: Core::TimeValid: 1Required: 1Config-Setting:
$Self->{‘TimeShowAlwaysLong’} = ‘0’;

Configuration Options Reference
203
TimeZoneDescription ValueDescription: Sets the system time zone (required a system with UTC as system
time). Otherwise this is a diff time to the local time.Group: FrameworkSubGroup: Core::TimeValid: 0Required: 0Config-Setting:
$Self->{‘TimeZone’} = ‘+0’;
TimeZoneUserDescription ValueDescription: Sets the user time zone per user (required a system with UTC as system
time and UTC under TimeZone). Otherwise this is a diff time to the localtime.
Group: FrameworkSubGroup: Core::TimeValid: 1Required: 0Config-Setting:
$Self->{‘TimeZoneUser’} = ‘0’;
TimeZoneUserBrowserAutoOffsetDescription ValueDescription: Sets the user time zone per user based on java script / browser time
zone offset feature at login time.Group: FrameworkSubGroup: Core::TimeValid: 1Required: 0Config-Setting:
$Self->{‘TimeZoneUserBrowserAutoOffset’} = ‘1’;
CalendarWeekDayStartDescription ValueDescription: Define the start day of the week for the date picker.Group: FrameworkSubGroup: Core::TimeValid: 1

Configuration Options Reference
204
Description ValueRequired: 1Config-Setting:
$Self->{‘CalendarWeekDayStart’} = ‘1’;
TimeVacationDays
Description ValueDescription: Adds the permanent vacation days. Please use single digit pattern for
numbers from 1 to 9 (instead of 01 — 09).Group: FrameworkSubGroup: Core::TimeValid: 1Required: 1Config-Setting:
$Self->{‘TimeVacationDays’} = { ‘1’ => { ‘1’ => ‘New Year’s Day’ }, ’12’ => { ’24’ => ‘Christmas Eve’, ’25’ => ‘First Christmas Day’, ’26’ => ‘Second Christmas Day’, ’31’ => ‘New Year’s Eve’ }, ‘5’ => { ‘1’ => ‘International Workers’ Day’ }};
TimeVacationDaysOneTime
Description ValueDescription: Adds the one time vacation days. Please use single digit pattern for
numbers from 1 to 9 (instead of 01 — 09).Group: FrameworkSubGroup: Core::TimeValid: 1Required: 1Config-Setting:
$Self->{‘TimeVacationDaysOneTime’} = { ‘2004’ => { ‘1’ => { ‘1’ => ‘test’ } }};

Configuration Options Reference
205
TimeWorkingHours
Description ValueDescription: Defines the hours and week days to count the working time.Group: FrameworkSubGroup: Core::TimeValid: 1Required: 1Config-Setting:
$Self->{‘TimeWorkingHours’} = { ‘Fri’ => [ ‘8’, ‘9’, ’10’, ’11’, ’12’, ’13’, ’14’, ’15’, ’16’, ’17’, ’18’, ’19’, ’20’ ], ‘Mon’ => [ ‘8’, ‘9’, ’10’, ’11’, ’12’, ’13’, ’14’, ’15’, ’16’, ’17’, ’18’, ’19’, ’20’ ], ‘Sat’ => [], ‘Sun’ => [], ‘Thu’ => [ ‘8’, ‘9’, ’10’, ’11’, ’12’, ’13’, ’14’, ’15’,

Configuration Options Reference
206
Description Value ’16’, ’17’, ’18’, ’19’, ’20’ ], ‘Tue’ => [ ‘8’, ‘9’, ’10’, ’11’, ’12’, ’13’, ’14’, ’15’, ’16’, ’17’, ’18’, ’19’, ’20’ ], ‘Wed’ => [ ‘8’, ‘9’, ’10’, ’11’, ’12’, ’13’, ’14’, ’15’, ’16’, ’17’, ’18’, ’19’, ’20’ ]};
TimeShowCompleteDescription
Description ValueDescription: Shows time use complete description (days, hours, minutes), if set to
«Yes»; or just first letter (d, h, m), if set to «No».Group: FrameworkSubGroup: Core::TimeValid: 1Required: 1Config-Setting:
$Self->{‘TimeShowCompleteDescription’} = ‘0’;

Configuration Options Reference
207
Core::Time::Calendar1TimeZone::Calendar1Name
Description ValueDescription: Defines the name of the calendar number 1.Group: FrameworkSubGroup: Core::Time::Calendar1Valid: 1Required: 1Config-Setting:
$Self->{‘TimeZone::Calendar1Name’} = ‘Calendar Name 1’;
TimeZone::Calendar1Description ValueDescription: Defines the time zone of the calendar number 1, which can be assigned
later to a specific queue.Group: FrameworkSubGroup: Core::Time::Calendar1Valid: 1Required: 1Config-Setting:
$Self->{‘TimeZone::Calendar1’} = ‘0’;
TimeVacationDays::Calendar1Description ValueDescription: Adds the permanent vacation days for the calendar number 1. Please
use single digit pattern for numbers from 1 to 9 (instead of 01 — 09).Group: FrameworkSubGroup: Core::Time::Calendar1Valid: 1Required: 1Config-Setting:
$Self->{‘TimeVacationDays::Calendar1’} = { ‘1’ => { ‘1’ => ‘New Year’s Day’ }, ’12’ => { ’24’ => ‘Christmas Eve’, ’25’ => ‘First Christmas Day’, ’26’ => ‘Second Christmas Day’, ’31’ => ‘New Year’s Eve’ }, ‘5’ => {

Configuration Options Reference
208
Description Value ‘1’ => ‘International Workers’ Day’ }};
TimeVacationDaysOneTime::Calendar1Description ValueDescription: Adds the one time vacation days for the calendar number 1. Please use
single digit pattern for numbers from 1 to 9 (instead of 01 — 09).Group: FrameworkSubGroup: Core::Time::Calendar1Valid: 1Required: 1Config-Setting:
$Self->{‘TimeVacationDaysOneTime::Calendar1’} = { ‘2004’ => { ‘1’ => { ‘1’ => ‘test’ } }};
TimeWorkingHours::Calendar1Description ValueDescription: Defines the hours and week days of the calendar number 1, to count
the working time.Group: FrameworkSubGroup: Core::Time::Calendar1Valid: 1Required: 1Config-Setting:
$Self->{‘TimeWorkingHours::Calendar1’} = { ‘Fri’ => [ ‘8’, ‘9’, ’10’, ’11’, ’12’, ’13’, ’14’, ’15’, ’16’, ’17’, ’18’, ’19’, ’20’ ],

Configuration Options Reference
209
Description Value ‘Mon’ => [ ‘8’, ‘9’, ’10’, ’11’, ’12’, ’13’, ’14’, ’15’, ’16’, ’17’, ’18’, ’19’, ’20’ ], ‘Sat’ => [], ‘Sun’ => [], ‘Thu’ => [ ‘8’, ‘9’, ’10’, ’11’, ’12’, ’13’, ’14’, ’15’, ’16’, ’17’, ’18’, ’19’, ’20’ ], ‘Tue’ => [ ‘8’, ‘9’, ’10’, ’11’, ’12’, ’13’, ’14’, ’15’, ’16’, ’17’, ’18’, ’19’, ’20’ ], ‘Wed’ => [ ‘8’, ‘9’, ’10’, ’11’,

Configuration Options Reference
210
Description Value ’12’, ’13’, ’14’, ’15’, ’16’, ’17’, ’18’, ’19’, ’20’ ]};
Core::Time::Calendar2TimeZone::Calendar2Name
Description ValueDescription: Defines the name of the calendar number 2.Group: FrameworkSubGroup: Core::Time::Calendar2Valid: 1Required: 1Config-Setting:
$Self->{‘TimeZone::Calendar2Name’} = ‘Calendar Name 2’;
TimeZone::Calendar2Description ValueDescription: Defines the time zone of the calendar number 2, which can be assigned
later to a specific queue.Group: FrameworkSubGroup: Core::Time::Calendar2Valid: 1Required: 1Config-Setting:
$Self->{‘TimeZone::Calendar2’} = ‘0’;
TimeVacationDays::Calendar2Description ValueDescription: Adds the permanent vacation days for the calendar number 2. Please
use single digit pattern for numbers from 1 to 9 (instead of 01 — 09).Group: FrameworkSubGroup: Core::Time::Calendar2Valid: 1

Configuration Options Reference
211
Description ValueRequired: 1Config-Setting:
$Self->{‘TimeVacationDays::Calendar2’} = { ‘1’ => { ‘1’ => ‘New Year’s Day’ }, ’12’ => { ’24’ => ‘Christmas Eve’, ’25’ => ‘First Christmas Day’, ’26’ => ‘Second Christmas Day’, ’31’ => ‘New Year’s Eve’ }, ‘5’ => { ‘1’ => ‘International Workers’ Day’ }};
TimeVacationDaysOneTime::Calendar2Description ValueDescription: Adds the one time vacation days for the calendar number 2. Please use
single digit pattern for numbers from 1 to 9 (instead of 01 — 09).Group: FrameworkSubGroup: Core::Time::Calendar2Valid: 1Required: 1Config-Setting:
$Self->{‘TimeVacationDaysOneTime::Calendar2’} = { ‘2004’ => { ‘1’ => { ‘1’ => ‘test’ } }};
TimeWorkingHours::Calendar2Description ValueDescription: Defines the hours and week days of the calendar number 2, to count
the working time.Group: FrameworkSubGroup: Core::Time::Calendar2Valid: 1Required: 1Config-Setting:
$Self->{‘TimeWorkingHours::Calendar2’} = { ‘Fri’ => [

Configuration Options Reference
212
Description Value ‘8’, ‘9’, ’10’, ’11’, ’12’, ’13’, ’14’, ’15’, ’16’, ’17’, ’18’, ’19’, ’20’ ], ‘Mon’ => [ ‘8’, ‘9’, ’10’, ’11’, ’12’, ’13’, ’14’, ’15’, ’16’, ’17’, ’18’, ’19’, ’20’ ], ‘Sat’ => [], ‘Sun’ => [], ‘Thu’ => [ ‘8’, ‘9’, ’10’, ’11’, ’12’, ’13’, ’14’, ’15’, ’16’, ’17’, ’18’, ’19’, ’20’ ], ‘Tue’ => [ ‘8’, ‘9’, ’10’, ’11’, ’12’,

Configuration Options Reference
213
Description Value ’13’, ’14’, ’15’, ’16’, ’17’, ’18’, ’19’, ’20’ ], ‘Wed’ => [ ‘8’, ‘9’, ’10’, ’11’, ’12’, ’13’, ’14’, ’15’, ’16’, ’17’, ’18’, ’19’, ’20’ ]};
Core::Time::Calendar3TimeZone::Calendar3Name
Description ValueDescription: Defines the name of the calendar number 3.Group: FrameworkSubGroup: Core::Time::Calendar3Valid: 1Required: 1Config-Setting:
$Self->{‘TimeZone::Calendar3Name’} = ‘Calendar Name 3’;
TimeZone::Calendar3Description ValueDescription: Defines the time zone of the calendar number 3, which can be assigned
later to a specific queue.Group: FrameworkSubGroup: Core::Time::Calendar3Valid: 1

Configuration Options Reference
214
Description ValueRequired: 1Config-Setting:
$Self->{‘TimeZone::Calendar3’} = ‘0’;
TimeVacationDays::Calendar3
Description ValueDescription: Adds the permanent vacation days for the calendar number 3. Please
use single digit pattern for numbers from 1 to 9 (instead of 01 — 09).Group: FrameworkSubGroup: Core::Time::Calendar3Valid: 1Required: 1Config-Setting:
$Self->{‘TimeVacationDays::Calendar3’} = { ‘1’ => { ‘1’ => ‘New Year’s Day’ }, ’12’ => { ’24’ => ‘Christmas Eve’, ’25’ => ‘First Christmas Day’, ’26’ => ‘Second Christmas Day’, ’31’ => ‘New Year’s Eve’ }, ‘5’ => { ‘1’ => ‘International Workers’ Day’ }};
TimeVacationDaysOneTime::Calendar3
Description ValueDescription: Adds the one time vacation days for the calendar number 3. Please use
single digit pattern for numbers from 1 to 9 (instead of 01 — 09).Group: FrameworkSubGroup: Core::Time::Calendar3Valid: 1Required: 1Config-Setting:
$Self->{‘TimeVacationDaysOneTime::Calendar3’} = { ‘2004’ => { ‘1’ => { ‘1’ => ‘test’ } }};

Configuration Options Reference
215
TimeWorkingHours::Calendar3
Description ValueDescription: Defines the hours and week days of the calendar number 3, to count
the working time.Group: FrameworkSubGroup: Core::Time::Calendar3Valid: 1Required: 1Config-Setting:
$Self->{‘TimeWorkingHours::Calendar3’} = { ‘Fri’ => [ ‘8’, ‘9’, ’10’, ’11’, ’12’, ’13’, ’14’, ’15’, ’16’, ’17’, ’18’, ’19’, ’20’ ], ‘Mon’ => [ ‘8’, ‘9’, ’10’, ’11’, ’12’, ’13’, ’14’, ’15’, ’16’, ’17’, ’18’, ’19’, ’20’ ], ‘Sat’ => [], ‘Sun’ => [], ‘Thu’ => [ ‘8’, ‘9’, ’10’, ’11’, ’12’, ’13’, ’14’,

Configuration Options Reference
216
Description Value ’15’, ’16’, ’17’, ’18’, ’19’, ’20’ ], ‘Tue’ => [ ‘8’, ‘9’, ’10’, ’11’, ’12’, ’13’, ’14’, ’15’, ’16’, ’17’, ’18’, ’19’, ’20’ ], ‘Wed’ => [ ‘8’, ‘9’, ’10’, ’11’, ’12’, ’13’, ’14’, ’15’, ’16’, ’17’, ’18’, ’19’, ’20’ ]};
Core::Time::Calendar4TimeZone::Calendar4Name
Description ValueDescription: Defines the name of the calendar number 4.Group: FrameworkSubGroup: Core::Time::Calendar4Valid: 1Required: 1Config-Setting:

Configuration Options Reference
217
Description Value $Self->{‘TimeZone::Calendar4Name’} = ‘Calendar Name 4’;
TimeZone::Calendar4Description ValueDescription: Defines the time zone of the calendar number 4, which can be assigned
later to a specific queue.Group: FrameworkSubGroup: Core::Time::Calendar4Valid: 1Required: 1Config-Setting:
$Self->{‘TimeZone::Calendar4’} = ‘0’;
TimeVacationDays::Calendar4Description ValueDescription: Adds the permanent vacation days for the calendar number 4. Please
use single digit pattern for numbers from 1 to 9 (instead of 01 — 09).Group: FrameworkSubGroup: Core::Time::Calendar4Valid: 1Required: 1Config-Setting:
$Self->{‘TimeVacationDays::Calendar4’} = { ‘1’ => { ‘1’ => ‘New Year’s Day’ }, ’12’ => { ’24’ => ‘Christmas Eve’, ’25’ => ‘First Christmas Day’, ’26’ => ‘Second Christmas Day’, ’31’ => ‘New Year’s Eve’ }, ‘5’ => { ‘1’ => ‘International Workers’ Day’ }};
TimeVacationDaysOneTime::Calendar4Description ValueDescription: Adds the one time vacation days for the calendar number 4. Please use
single digit pattern for numbers from 1 to 9 (instead of 01 — 09).Group: FrameworkSubGroup: Core::Time::Calendar4

Configuration Options Reference
218
Description ValueValid: 1Required: 1Config-Setting:
$Self->{‘TimeVacationDaysOneTime::Calendar4’} = { ‘2004’ => { ‘1’ => { ‘1’ => ‘test’ } }};
TimeWorkingHours::Calendar4Description ValueDescription: Defines the hours and week days of the calendar number 4, to count
the working time.Group: FrameworkSubGroup: Core::Time::Calendar4Valid: 1Required: 1Config-Setting:
$Self->{‘TimeWorkingHours::Calendar4’} = { ‘Fri’ => [ ‘8’, ‘9’, ’10’, ’11’, ’12’, ’13’, ’14’, ’15’, ’16’, ’17’, ’18’, ’19’, ’20’ ], ‘Mon’ => [ ‘8’, ‘9’, ’10’, ’11’, ’12’, ’13’, ’14’, ’15’, ’16’, ’17’, ’18’,

Configuration Options Reference
219
Description Value ’19’, ’20’ ], ‘Sat’ => [], ‘Sun’ => [], ‘Thu’ => [ ‘8’, ‘9’, ’10’, ’11’, ’12’, ’13’, ’14’, ’15’, ’16’, ’17’, ’18’, ’19’, ’20’ ], ‘Tue’ => [ ‘8’, ‘9’, ’10’, ’11’, ’12’, ’13’, ’14’, ’15’, ’16’, ’17’, ’18’, ’19’, ’20’ ], ‘Wed’ => [ ‘8’, ‘9’, ’10’, ’11’, ’12’, ’13’, ’14’, ’15’, ’16’, ’17’, ’18’, ’19’, ’20’ ]};

Configuration Options Reference
220
Core::Time::Calendar5TimeZone::Calendar5Name
Description ValueDescription: Defines the name of the calendar number 5.Group: FrameworkSubGroup: Core::Time::Calendar5Valid: 1Required: 1Config-Setting:
$Self->{‘TimeZone::Calendar5Name’} = ‘Calendar Name 5’;
TimeZone::Calendar5Description ValueDescription: Defines the time zone of the calendar number 5, which can be assigned
later to a specific queue.Group: FrameworkSubGroup: Core::Time::Calendar5Valid: 1Required: 1Config-Setting:
$Self->{‘TimeZone::Calendar5’} = ‘0’;
TimeVacationDays::Calendar5Description ValueDescription: Adds the permanent vacation days for the calendar number 5. Please
use single digit pattern for numbers from 1 to 9 (instead of 01 — 09).Group: FrameworkSubGroup: Core::Time::Calendar5Valid: 1Required: 1Config-Setting:
$Self->{‘TimeVacationDays::Calendar5’} = { ‘1’ => { ‘1’ => ‘New Year’s Day’ }, ’12’ => { ’24’ => ‘Christmas Eve’, ’25’ => ‘First Christmas Day’, ’26’ => ‘Second Christmas Day’, ’31’ => ‘New Year’s Eve’ }, ‘5’ => {

Configuration Options Reference
221
Description Value ‘1’ => ‘International Workers’ Day’ }};
TimeVacationDaysOneTime::Calendar5Description ValueDescription: Adds the one time vacation days for the calendar number 5. Please use
single digit pattern for numbers from 1 to 9 (instead of 01 — 09).Group: FrameworkSubGroup: Core::Time::Calendar5Valid: 1Required: 1Config-Setting:
$Self->{‘TimeVacationDaysOneTime::Calendar5’} = { ‘2004’ => { ‘1’ => { ‘1’ => ‘test’ } }};
TimeWorkingHours::Calendar5Description ValueDescription: Defines the hours and week days of the calendar number 5, to count
the working time.Group: FrameworkSubGroup: Core::Time::Calendar5Valid: 1Required: 1Config-Setting:
$Self->{‘TimeWorkingHours::Calendar5’} = { ‘Fri’ => [ ‘8’, ‘9’, ’10’, ’11’, ’12’, ’13’, ’14’, ’15’, ’16’, ’17’, ’18’, ’19’, ’20’ ],

Configuration Options Reference
222
Description Value ‘Mon’ => [ ‘8’, ‘9’, ’10’, ’11’, ’12’, ’13’, ’14’, ’15’, ’16’, ’17’, ’18’, ’19’, ’20’ ], ‘Sat’ => [], ‘Sun’ => [], ‘Thu’ => [ ‘8’, ‘9’, ’10’, ’11’, ’12’, ’13’, ’14’, ’15’, ’16’, ’17’, ’18’, ’19’, ’20’ ], ‘Tue’ => [ ‘8’, ‘9’, ’10’, ’11’, ’12’, ’13’, ’14’, ’15’, ’16’, ’17’, ’18’, ’19’, ’20’ ], ‘Wed’ => [ ‘8’, ‘9’, ’10’, ’11’,

Configuration Options Reference
223
Description Value ’12’, ’13’, ’14’, ’15’, ’16’, ’17’, ’18’, ’19’, ’20’ ]};
Core::Time::Calendar6TimeZone::Calendar6Name
Description ValueDescription: Defines the name of the calendar number 6.Group: FrameworkSubGroup: Core::Time::Calendar6Valid: 1Required: 1Config-Setting:
$Self->{‘TimeZone::Calendar6Name’} = ‘Calendar Name 6’;
TimeZone::Calendar6Description ValueDescription: Defines the time zone of the calendar number 6, which can be assigned
later to a specific queue.Group: FrameworkSubGroup: Core::Time::Calendar6Valid: 1Required: 1Config-Setting:
$Self->{‘TimeZone::Calendar6’} = ‘0’;
TimeVacationDays::Calendar6Description ValueDescription: Adds the permanent vacation days for the calendar number 6. Please
use single digit pattern for numbers from 1 to 9 (instead of 01 — 09).Group: FrameworkSubGroup: Core::Time::Calendar6Valid: 1

Configuration Options Reference
224
Description ValueRequired: 1Config-Setting:
$Self->{‘TimeVacationDays::Calendar6’} = { ‘1’ => { ‘1’ => ‘New Year’s Day’ }, ’12’ => { ’24’ => ‘Christmas Eve’, ’25’ => ‘First Christmas Day’, ’26’ => ‘Second Christmas Day’, ’31’ => ‘New Year’s Eve’ }, ‘5’ => { ‘1’ => ‘International Workers’ Day’ }};
TimeVacationDaysOneTime::Calendar6Description ValueDescription: Adds the one time vacation days for the calendar number 6. Please use
single digit pattern for numbers from 1 to 9 (instead of 01 — 09).Group: FrameworkSubGroup: Core::Time::Calendar6Valid: 1Required: 1Config-Setting:
$Self->{‘TimeVacationDaysOneTime::Calendar6’} = { ‘2004’ => { ‘1’ => { ‘1’ => ‘test’ } }};
TimeWorkingHours::Calendar6Description ValueDescription: Defines the hours and week days of the calendar number 6, to count
the working time.Group: FrameworkSubGroup: Core::Time::Calendar6Valid: 1Required: 1Config-Setting:
$Self->{‘TimeWorkingHours::Calendar6’} = { ‘Fri’ => [

Configuration Options Reference
225
Description Value ‘8’, ‘9’, ’10’, ’11’, ’12’, ’13’, ’14’, ’15’, ’16’, ’17’, ’18’, ’19’, ’20’ ], ‘Mon’ => [ ‘8’, ‘9’, ’10’, ’11’, ’12’, ’13’, ’14’, ’15’, ’16’, ’17’, ’18’, ’19’, ’20’ ], ‘Sat’ => [], ‘Sun’ => [], ‘Thu’ => [ ‘8’, ‘9’, ’10’, ’11’, ’12’, ’13’, ’14’, ’15’, ’16’, ’17’, ’18’, ’19’, ’20’ ], ‘Tue’ => [ ‘8’, ‘9’, ’10’, ’11’, ’12’,

Configuration Options Reference
226
Description Value ’13’, ’14’, ’15’, ’16’, ’17’, ’18’, ’19’, ’20’ ], ‘Wed’ => [ ‘8’, ‘9’, ’10’, ’11’, ’12’, ’13’, ’14’, ’15’, ’16’, ’17’, ’18’, ’19’, ’20’ ]};
Core::Time::Calendar7TimeZone::Calendar7Name
Description ValueDescription: Defines the name of the calendar number 7.Group: FrameworkSubGroup: Core::Time::Calendar7Valid: 1Required: 1Config-Setting:
$Self->{‘TimeZone::Calendar7Name’} = ‘Calendar Name 7’;
TimeZone::Calendar7Description ValueDescription: Defines the time zone of the calendar number 7, which can be assigned
later to a specific queue.Group: FrameworkSubGroup: Core::Time::Calendar7Valid: 1

Configuration Options Reference
227
Description ValueRequired: 1Config-Setting:
$Self->{‘TimeZone::Calendar7’} = ‘0’;
TimeVacationDays::Calendar7
Description ValueDescription: Adds the permanent vacation days for the calendar number 7. Please
use single digit pattern for numbers from 1 to 9 (instead of 01 — 09).Group: FrameworkSubGroup: Core::Time::Calendar7Valid: 1Required: 1Config-Setting:
$Self->{‘TimeVacationDays::Calendar7’} = { ‘1’ => { ‘1’ => ‘New Year’s Day’ }, ’12’ => { ’24’ => ‘Christmas Eve’, ’25’ => ‘First Christmas Day’, ’26’ => ‘Second Christmas Day’, ’31’ => ‘New Year’s Eve’ }, ‘5’ => { ‘1’ => ‘International Workers’ Day’ }};
TimeVacationDaysOneTime::Calendar7
Description ValueDescription: Adds the one time vacation days for the calendar number 7. Please use
single digit pattern for numbers from 1 to 9 (instead of 01 — 09).Group: FrameworkSubGroup: Core::Time::Calendar7Valid: 1Required: 1Config-Setting:
$Self->{‘TimeVacationDaysOneTime::Calendar7’} = { ‘2004’ => { ‘1’ => { ‘1’ => ‘test’ } }};

Configuration Options Reference
228
TimeWorkingHours::Calendar7
Description ValueDescription: Defines the hours and week days of the calendar number 7, to count
the working time.Group: FrameworkSubGroup: Core::Time::Calendar7Valid: 1Required: 1Config-Setting:
$Self->{‘TimeWorkingHours::Calendar7’} = { ‘Fri’ => [ ‘8’, ‘9’, ’10’, ’11’, ’12’, ’13’, ’14’, ’15’, ’16’, ’17’, ’18’, ’19’, ’20’ ], ‘Mon’ => [ ‘8’, ‘9’, ’10’, ’11’, ’12’, ’13’, ’14’, ’15’, ’16’, ’17’, ’18’, ’19’, ’20’ ], ‘Sat’ => [], ‘Sun’ => [], ‘Thu’ => [ ‘8’, ‘9’, ’10’, ’11’, ’12’, ’13’, ’14’,

Configuration Options Reference
229
Description Value ’15’, ’16’, ’17’, ’18’, ’19’, ’20’ ], ‘Tue’ => [ ‘8’, ‘9’, ’10’, ’11’, ’12’, ’13’, ’14’, ’15’, ’16’, ’17’, ’18’, ’19’, ’20’ ], ‘Wed’ => [ ‘8’, ‘9’, ’10’, ’11’, ’12’, ’13’, ’14’, ’15’, ’16’, ’17’, ’18’, ’19’, ’20’ ]};
Core::Time::Calendar8TimeZone::Calendar8Name
Description ValueDescription: Defines the name of the calendar number 8.Group: FrameworkSubGroup: Core::Time::Calendar8Valid: 1Required: 1Config-Setting:

Configuration Options Reference
230
Description Value $Self->{‘TimeZone::Calendar8Name’} = ‘Calendar Name 8’;
TimeZone::Calendar8Description ValueDescription: Defines the time zone of the calendar number 8, which can be assigned
later to a specific queue.Group: FrameworkSubGroup: Core::Time::Calendar8Valid: 1Required: 1Config-Setting:
$Self->{‘TimeZone::Calendar8’} = ‘0’;
TimeVacationDays::Calendar8Description ValueDescription: Adds the permanent vacation days for the calendar number 8. Please
use single digit pattern for numbers from 1 to 9 (instead of 01 — 09).Group: FrameworkSubGroup: Core::Time::Calendar8Valid: 1Required: 1Config-Setting:
$Self->{‘TimeVacationDays::Calendar8’} = { ‘1’ => { ‘1’ => ‘New Year’s Day’ }, ’12’ => { ’24’ => ‘Christmas Eve’, ’25’ => ‘First Christmas Day’, ’26’ => ‘Second Christmas Day’, ’31’ => ‘New Year’s Eve’ }, ‘5’ => { ‘1’ => ‘International Workers’ Day’ }};
TimeVacationDaysOneTime::Calendar8Description ValueDescription: Adds the one time vacation days for the calendar number 8. Please use
single digit pattern for numbers from 1 to 9 (instead of 01 — 09).Group: FrameworkSubGroup: Core::Time::Calendar8

Configuration Options Reference
231
Description ValueValid: 1Required: 1Config-Setting:
$Self->{‘TimeVacationDaysOneTime::Calendar8’} = { ‘2004’ => { ‘1’ => { ‘1’ => ‘test’ } }};
TimeWorkingHours::Calendar8Description ValueDescription: Defines the hours and week days of the calendar number 8, to count
the working time.Group: FrameworkSubGroup: Core::Time::Calendar8Valid: 1Required: 1Config-Setting:
$Self->{‘TimeWorkingHours::Calendar8’} = { ‘Fri’ => [ ‘8’, ‘9’, ’10’, ’11’, ’12’, ’13’, ’14’, ’15’, ’16’, ’17’, ’18’, ’19’, ’20’ ], ‘Mon’ => [ ‘8’, ‘9’, ’10’, ’11’, ’12’, ’13’, ’14’, ’15’, ’16’, ’17’, ’18’,

Configuration Options Reference
232
Description Value ’19’, ’20’ ], ‘Sat’ => [], ‘Sun’ => [], ‘Thu’ => [ ‘8’, ‘9’, ’10’, ’11’, ’12’, ’13’, ’14’, ’15’, ’16’, ’17’, ’18’, ’19’, ’20’ ], ‘Tue’ => [ ‘8’, ‘9’, ’10’, ’11’, ’12’, ’13’, ’14’, ’15’, ’16’, ’17’, ’18’, ’19’, ’20’ ], ‘Wed’ => [ ‘8’, ‘9’, ’10’, ’11’, ’12’, ’13’, ’14’, ’15’, ’16’, ’17’, ’18’, ’19’, ’20’ ]};

Configuration Options Reference
233
Core::Time::Calendar9TimeZone::Calendar9Name
Description ValueDescription: Defines the name of the calendar number 9.Group: FrameworkSubGroup: Core::Time::Calendar9Valid: 1Required: 1Config-Setting:
$Self->{‘TimeZone::Calendar9Name’} = ‘Calendar Name 9’;
TimeZone::Calendar9Description ValueDescription: Defines the time zone of the calendar number 9, which can be assigned
later to a specific queue.Group: FrameworkSubGroup: Core::Time::Calendar9Valid: 1Required: 1Config-Setting:
$Self->{‘TimeZone::Calendar9’} = ‘0’;
TimeVacationDays::Calendar9Description ValueDescription: Adds the permanent vacation days for the calendar number 9. Please
use single digit pattern for numbers from 1 to 9 (instead of 01 — 09).Group: FrameworkSubGroup: Core::Time::Calendar9Valid: 1Required: 1Config-Setting:
$Self->{‘TimeVacationDays::Calendar9’} = { ‘1’ => { ‘1’ => ‘New Year’s Day’ }, ’12’ => { ’24’ => ‘Christmas Eve’, ’25’ => ‘First Christmas Day’, ’26’ => ‘Second Christmas Day’, ’31’ => ‘New Year’s Eve’ }, ‘5’ => {

Configuration Options Reference
234
Description Value ‘1’ => ‘International Workers’ Day’ }};
TimeVacationDaysOneTime::Calendar9Description ValueDescription: Adds the one time vacation days for the calendar number 9. Please use
single digit pattern for numbers from 1 to 9 (instead of 01 — 09).Group: FrameworkSubGroup: Core::Time::Calendar9Valid: 1Required: 1Config-Setting:
$Self->{‘TimeVacationDaysOneTime::Calendar9’} = { ‘2004’ => { ‘1’ => { ‘1’ => ‘test’ } }};
TimeWorkingHours::Calendar9Description ValueDescription: Defines the hours and week days of the calendar number 9, to count
the working time.Group: FrameworkSubGroup: Core::Time::Calendar9Valid: 1Required: 1Config-Setting:
$Self->{‘TimeWorkingHours::Calendar9’} = { ‘Fri’ => [ ‘8’, ‘9’, ’10’, ’11’, ’12’, ’13’, ’14’, ’15’, ’16’, ’17’, ’18’, ’19’, ’20’ ],

Configuration Options Reference
235
Description Value ‘Mon’ => [ ‘8’, ‘9’, ’10’, ’11’, ’12’, ’13’, ’14’, ’15’, ’16’, ’17’, ’18’, ’19’, ’20’ ], ‘Sat’ => [], ‘Sun’ => [], ‘Thu’ => [ ‘8’, ‘9’, ’10’, ’11’, ’12’, ’13’, ’14’, ’15’, ’16’, ’17’, ’18’, ’19’, ’20’ ], ‘Tue’ => [ ‘8’, ‘9’, ’10’, ’11’, ’12’, ’13’, ’14’, ’15’, ’16’, ’17’, ’18’, ’19’, ’20’ ], ‘Wed’ => [ ‘8’, ‘9’, ’10’, ’11’,

Configuration Options Reference
236
Description Value ’12’, ’13’, ’14’, ’15’, ’16’, ’17’, ’18’, ’19’, ’20’ ]};
Core::WebFrontend::WebPath
Description ValueDescription: Defines the URL base path of icons, CSS and Java Script.Group: FrameworkSubGroup: Core::WebValid: 1Required: 1Config-Setting:
$Self->{‘Frontend::WebPath’} = ‘/otrs-web/’;
Frontend::ImagePath
Description ValueDescription: Defines the URL image path of icons for navigation.Group: FrameworkSubGroup: Core::WebValid: 1Required: 1Config-Setting:
$Self->{‘Frontend::ImagePath’} = ‘<OTRS_CONFIG_Frontend::WebPath>skins/Agent/default/img/’;
Frontend::CSSPath
Description ValueDescription: Defines the URL CSS path.Group: FrameworkSubGroup: Core::Web

Configuration Options Reference
237
Description ValueValid: 1Required: 1Config-Setting:
$Self->{‘Frontend::CSSPath’} = ‘<OTRS_CONFIG_Frontend::WebPath>css/’;
Frontend::JavaScriptPath
Description ValueDescription: Defines the URL java script path.Group: FrameworkSubGroup: Core::WebValid: 1Required: 1Config-Setting:
$Self->{‘Frontend::JavaScriptPath’} = ‘<OTRS_CONFIG_Frontend::WebPath>js/’;
Frontend::RichText
Description ValueDescription: Uses richtext for viewing and editing: articles, salutations, signatures,
standard responses, auto responses and notifications.Group: FrameworkSubGroup: Core::WebValid: 1Required: 1Config-Setting:
$Self->{‘Frontend::RichText’} = ‘1’;
Frontend::RichTextPath
Description ValueDescription: Defines the URL rich text editor path.Group: FrameworkSubGroup: Core::WebValid: 1Required: 1Config-Setting:
$Self->{‘Frontend::RichTextPath’} = ‘<OTRS_CONFIG_Frontend::WebPath>js/thirdparty/ckeditor-3.4.2/’;

Configuration Options Reference
238
Frontend::RichTextWidthDescription ValueDescription: Defines the width for the rich text editor component. Enter number
(pixels) or percent value (relative).Group: FrameworkSubGroup: Core::WebValid: 1Required: 1Config-Setting:
$Self->{‘Frontend::RichTextWidth’} = ‘620’;
Frontend::RichTextHeightDescription ValueDescription: Defines the =hHeight for the rich text editor component. Enter number
(pixels) or percent value (relative).Group: FrameworkSubGroup: Core::WebValid: 1Required: 1Config-Setting:
$Self->{‘Frontend::RichTextHeight’} = ‘320’;
Frontend::RichText::DefaultCSSDescription ValueDescription: Defines the default CSS used in rich text editors.Group: FrameworkSubGroup: Core::WebValid: 1Required: 1Config-Setting:
$Self->{‘Frontend::RichText::DefaultCSS’} = ‘font-family:Geneva,Helvetica,Arial,sans-serif; font-size: 12px;’;
DefaultViewNewLineDescription ValueDescription: Automated line break in text messages after x number of chars.Group: FrameworkSubGroup: Core::WebValid: 1

Configuration Options Reference
239
Description ValueRequired: 1Config-Setting:
$Self->{‘DefaultViewNewLine’} = ’90’;
DefaultViewLinesDescription ValueDescription: Sets the number of lines that are displayed in text messages (e.g. ticket
lines in the QueueZoom).Group: FrameworkSubGroup: Core::WebValid: 1Required: 1Config-Setting:
$Self->{‘DefaultViewLines’} = ‘6000’;
Frontend::AnimationEnabledDescription ValueDescription: Turns on the animations used in the GUI. If you have problems with
these animations (e.g. performance issues), you can turn them off here.Group: FrameworkSubGroup: Core::WebValid: 1Required: 1Config-Setting:
$Self->{‘Frontend::AnimationEnabled’} = ‘1’;
AttachmentDownloadTypeDescription ValueDescription: Allows choosing between showing the attachments of a ticket in the
browser (inline) or just make them downloadable (attachment).Group: FrameworkSubGroup: Core::WebValid: 1Required: 1Config-Setting:
$Self->{‘AttachmentDownloadType’} = ‘attachment’;
WebMaxFileUploadDescription ValueDescription: Defines the maximal size (in bytes) for file uploads via the browser.

Configuration Options Reference
240
Description ValueGroup: FrameworkSubGroup: Core::WebValid: 1Required: 1Config-Setting:
$Self->{‘WebMaxFileUpload’} = ‘16777216’;
WebUploadCacheModuleDescription ValueDescription: Selects the module to handle uploads via the web interface. «DB» stores
all uploads in the database, «FS» uses the file system.Group: FrameworkSubGroup: Core::WebValid: 1Required: 1Config-Setting:
$Self->{‘WebUploadCacheModule’} = ‘Kernel::System::Web::UploadCache::DB’;
Frontend::Output::FilterText###AAAURLDescription ValueDescription: Defines the filter that processes the text in the articles, in order to
highlight URLs.Group: FrameworkSubGroup: Core::WebValid: 1Required: 0Config-Setting:
$Self->{‘Frontend::Output::FilterText’}->{‘AAAURL’} = { ‘Module’ => ‘Kernel::Output::HTML::OutputFilterTextURL’};
Frontend::ThemesDescription ValueDescription: Activates the available themes on the system. Value 1 means active,
0 means inactive.Group: FrameworkSubGroup: Core::WebValid: 1

Configuration Options Reference
241
Description ValueRequired: 0Config-Setting:
$Self->{‘Frontend::Themes’} = { ‘Lite’ => ‘0’, ‘Standard’ => ‘1’};
Frontend::Output::FilterText###OutputFilterTextAutoLinkDescription ValueDescription: Defines a filter to process the text in the articles, in order to highlight
predefined keywords.Group: FrameworkSubGroup: Core::WebValid: 0Required: 0Config-Setting:
$Self->{‘Frontend::Output::FilterText’}->{‘OutputFilterTextAutoLink’} = { ‘Module’ => ‘Kernel::Output::HTML::OutputFilterTextAutoLink’};
Frontend::Output::OutputFilterTextAutoLink###CVEDescription ValueDescription: Defines a filter for html output to add links behind CVE numbers. The
element Image allows two input kinds. At once the name of an image(e.g. faq.png). In this case the OTRS image path will be used. Thesecond possiblity is to insert the link to the image.
Group: FrameworkSubGroup: Core::WebValid: 0Required: 0Config-Setting:
$Self->{‘Frontend::Output::OutputFilterTextAutoLink’}->{‘CVE’} = { ‘RegExp’ => [ ‘(CVE|CAN)\-(\d{3,4})\-(\d{2,6})’ ], ‘URL1’ => { ‘Description’ => ‘Mitre’, ‘Image’ => ‘http://cve.mitre.org/favicon.ico’, ‘Target’ => ‘_blank’, ‘URL’ => ‘http://cve.mitre.org/cgi-bin/cvename.cgi?name=<MATCH1>-<MATCH2>-<MATCH3>’

Configuration Options Reference
242
Description Value }, ‘URL2’ => { ‘Description’ => ‘Google’, ‘Image’ => ‘http://www.google.de/favicon.ico’, ‘Target’ => ‘_blank’, ‘URL’ => ‘http://google.com/search?q=<MATCH1>-<MATCH2>-<MATCH3>’ }, ‘URL3’ => { ‘Description’ => ‘US-CERT NVD’, ‘Image’ => ‘http://nvd.nist.gov/favicon.ico’, ‘Target’ => ‘_blank’, ‘URL’ => ‘http://nvd.nist.gov/nvd.cfm?cvename=<MATCH1>-<MATCH2>-<MATCH3>’ }};
Frontend::Output::OutputFilterTextAutoLink###BugtraqDescription ValueDescription: Defines a filter for html output to add links behind bugtraq numbers.
The element Image allows two input kinds. At once the name of animage (e.g. faq.png). In this case the OTRS image path will be used.The second possiblity is to insert the link to the image.
Group: FrameworkSubGroup: Core::WebValid: 0Required: 0Config-Setting:
$Self->{‘Frontend::Output::OutputFilterTextAutoLink’}->{‘Bugtraq’} = { ‘RegExp’ => [ ‘Bugtraq[\s\w\t]*?ID[\s\w\t]*?:[\s\w\t]*?(\d{2,8})’, ‘Bugtraq[\s\w\t]*?ID[\s\w\t]*?(\d{2,8})’, ‘Bugtraq[\s\w\t]*?:[\s\w\t]*?(\d{2,8})’, ‘Bugtraq[\s\w\t]*?(\d{2,8})’, ‘BID[\s\w\t]*?:[\s\w\t]*?(\d{2,8})’, ‘BID[\s\w\t]*?(\d{2,8})’ ], ‘URL1’ => { ‘Description’ => ‘Security Focus’, ‘Image’ => ‘http://www.securityfocus.com/favicon.ico’, ‘Target’ => ‘_blank’, ‘URL’ => ‘http://www.securityfocus.com/bid/<MATCH1>/info’ },

Configuration Options Reference
243
Description Value ‘URL2’ => { ‘Description’ => ‘Google’, ‘Image’ => ‘http://www.google.de/favicon.ico’, ‘Target’ => ‘_blank’, ‘URL’ => ‘http://google.com/search?q=<MATCH>’ }};
Frontend::Output::OutputFilterTextAutoLink###MSBulletins
Description ValueDescription: Defines a filter for html output to add links behind MSBulletin numbers.
The element Image allows two input kinds. At once the name of animage (e.g. faq.png). In this case the OTRS image path will be used.The second possiblity is to insert the link to the image.
Group: FrameworkSubGroup: Core::WebValid: 0Required: 0Config-Setting:
$Self->{‘Frontend::Output::OutputFilterTextAutoLink’}->{‘MSBulletins’} = { ‘RegExp’ => [ ‘MS[^A-Za-z]{0,5}(\d\d).?(\d{2,4})’ ], ‘URL1’ => { ‘Description’ => ‘Microsoft Technet’, ‘Image’ => ‘http://www.microsoft.com/favicon.ico’, ‘Target’ => ‘_blank’, ‘URL’ => ‘http://www.microsoft.com/technet/security/bulletin/MS<MATCH1>-<MATCH2>.mspx’ }, ‘URL2’ => { ‘Description’ => ‘Google’, ‘Image’ => ‘http://www.google.de/favicon.ico’, ‘Target’ => ‘_blank’, ‘URL’ => ‘http://google.com/search?q=MS<MATCH1>-<MATCH2>’ }};
Frontend::Output::OutputFilterTextAutoLink###Setting1
Description ValueDescription: Define a filter for html output to add links behind a defined string. The
element Image allows two input kinds. At once the name of an image

Configuration Options Reference
244
Description Value(e.g. faq.png). In this case the OTRS image path will be used. Thesecond possiblity is to insert the link to the image.
Group: FrameworkSubGroup: Core::WebValid: 0Required: 0Config-Setting:
$Self->{‘Frontend::Output::OutputFilterTextAutoLink’}->{‘Setting1’} = { ‘RegExp’ => [ ‘RegExp’ ], ‘URL1’ => { ‘Description’ => ‘Description’, ‘Image’ => ‘right-small.png’, ‘Target’ => ‘_blank’, ‘URL’ => ‘URL’ }, ‘URL2’ => { ‘Description’ => ‘Description’, ‘Image’ => ‘Image’, ‘Target’ => ‘_blank’, ‘URL’ => ‘URL’ }};
Frontend::Output::OutputFilterTextAutoLink###Setting2Description ValueDescription: Defines a filter for html output to add links behind a defined string. The
element Image allows two input kinds. At once the name of an image(e.g. faq.png). In this case the OTRS image path will be used. Thesecond possiblity is to insert the link to the image.
Group: FrameworkSubGroup: Core::WebValid: 0Required: 0Config-Setting:
$Self->{‘Frontend::Output::OutputFilterTextAutoLink’}->{‘Setting2’} = { ‘RegExp’ => [ ‘RegExp’ ], ‘URL1’ => { ‘Description’ => ‘Description’, ‘Image’ => ‘right-small.png’,

Configuration Options Reference
245
Description Value ‘Target’ => ‘_blank’, ‘URL’ => ‘URL’ }, ‘URL2’ => { ‘Description’ => ‘Description’, ‘Image’ => ‘Image’, ‘Target’ => ‘_blank’, ‘URL’ => ‘URL’ }, ‘URL3’ => { ‘Description’ => ‘Description’, ‘Image’ => ‘Image’, ‘Target’ => ‘_blank’, ‘URL’ => ‘URL’ }};
Loader::Enabled::CSS
Description ValueDescription: If enabled, OTRS will deliver all CSS files in minified form. WARNING:
If you turn this off, there will likely be problems in IE 7, because it cannotload more than 32 CSS files.
Group: FrameworkSubGroup: Core::WebValid: 1Required: 1Config-Setting:
$Self->{‘Loader::Enabled::CSS’} = ‘1’;
Loader::Enabled::JS
Description ValueDescription: If enabled, OTRS will deliver all JavaScript files in minified form.Group: FrameworkSubGroup: Core::WebValid: 1Required: 1Config-Setting:
$Self->{‘Loader::Enabled::JS’} = ‘1’;
Loader::Agent::CommonCSS###000-Framework
Description ValueDescription: List of CSS files to always be loaded for the agent interface.

Configuration Options Reference
246
Description ValueGroup: FrameworkSubGroup: Core::WebValid: 1Required: 1Config-Setting:
$Self->{‘Loader::Agent::CommonCSS’}->{‘000-Framework’} = [ ‘Core.Reset.css’, ‘Core.Default.css’, ‘Core.Header.css’, ‘Core.OverviewControl.css’, ‘Core.OverviewSmall.css’, ‘Core.OverviewMedium.css’, ‘Core.OverviewLarge.css’, ‘Core.Footer.css’, ‘Core.PageLayout.css’, ‘Core.Form.css’, ‘Core.Table.css’, ‘Core.Widget.css’, ‘Core.WidgetMenu.css’, ‘Core.TicketDetail.css’, ‘Core.Tooltip.css’, ‘Core.Dialog.css’, ‘Core.Print.css’];
Loader::Agent::CommonCSS::IE7###000-Framework
Description ValueDescription: List of IE7-specific CSS files to always be loaded for the agent interface.Group: FrameworkSubGroup: Core::WebValid: 1Required: 1Config-Setting:
$Self->{‘Loader::Agent::CommonCSS::IE7’}->{‘000-Framework’} = [ ‘Core.Default.IE7.css’, ‘Core.Header.IE7.css’, ‘Core.OverviewControl.IE7.css’, ‘Core.OverviewSmall.IE7.css’, ‘Core.OverviewMedium.IE7.css’, ‘Core.OverviewLarge.IE7.css’, ‘Core.PageLayout.IE7.css’, ‘Core.Form.IE7.css’, ‘Core.Widget.IE7.css’, ‘Core.WidgetMenu.IE7.css’, ‘Core.Tooltip.IE7.css’,

Configuration Options Reference
247
Description Value ‘Core.Dialog.IE7.css’, ‘Core.TicketDetail.IE7.css’, ‘Core.Table.IE7.css’];
Loader::Agent::CommonCSS::IE8###000-Framework
Description ValueDescription: List of IE8-specific CSS files to always be loaded for the agent interface.Group: FrameworkSubGroup: Core::WebValid: 1Required: 1Config-Setting:
$Self->{‘Loader::Agent::CommonCSS::IE8’}->{‘000-Framework’} = [ ‘Core.OverviewSmall.IE8.css’];
Loader::Agent::CommonJS###000-Framework
Description ValueDescription: List of JS files to always be loaded for the agent interface.Group: FrameworkSubGroup: Core::WebValid: 1Required: 1Config-Setting:
$Self->{‘Loader::Agent::CommonJS’}->{‘000-Framework’} = [ ‘thirdparty/json/json2.js’, ‘thirdparty/jquery-1.4.4/jquery.js’, ‘thirdparty/jquery-ui-1.8.7/jquery-ui.js’, ‘thirdparty/jquery-validate-1.7/jquery.validate.js’, ‘thirdparty/stacktrace/stacktrace.js’, ‘Core.JavaScriptEnhancements.js’, ‘Core.Debug.js’, ‘Core.Data.js’, ‘Core.Config.js’, ‘Core.Exception.js’, ‘Core.JSON.js’, ‘Core.AJAX.js’, ‘Core.UI.js’, ‘Core.UI.IE7Fixes.js’, ‘Core.UI.Accordion.js’, ‘Core.UI.Datepicker.js’,

Configuration Options Reference
248
Description Value ‘Core.UI.Resizable.js’, ‘Core.UI.Table.js’, ‘Core.UI.Accessibility.js’, ‘Core.UI.RichTextEditor.js’, ‘Core.UI.Dialog.js’, ‘Core.UI.ActionRow.js’, ‘Core.UI.Popup.js’, ‘Core.Form.js’, ‘Core.Form.ErrorTooltips.js’, ‘Core.Form.Validate.js’, ‘Core.App.js’, ‘Core.Agent.js’, ‘Core.Agent.Search.js’];
Loader::Customer::CommonCSS###000-Framework
Description ValueDescription: List of CSS files to always be loaded for the customer interface.Group: FrameworkSubGroup: Core::WebValid: 1Required: 1Config-Setting:
$Self->{‘Loader::Customer::CommonCSS’}->{‘000-Framework’} = [ ‘Core.Reset.css’, ‘Core.Default.css’, ‘Core.Form.css’, ‘Core.Dialog.css’, ‘Core.Tooltip.css’, ‘Core.Login.css’, ‘Core.Control.css’, ‘Core.Table.css’, ‘Core.TicketZoom.css’, ‘Core.Print.css’];
Loader::Customer::CommonCSS::IE6###000-Framework
Description ValueDescription: List of IE6-specific CSS files to always be loaded for the customer
interface.Group: FrameworkSubGroup: Core::WebValid: 1Required: 1

Configuration Options Reference
249
Description ValueConfig-Setting:
$Self->{‘Loader::Customer::CommonCSS::IE6’}->{‘000-Framework’} = [ ‘Core.IE6.css’, ‘Core.Tooltip.IE6.css’];
Loader::Customer::CommonCSS::IE7###000-FrameworkDescription ValueDescription: List of IE7-specific CSS files to always be loaded for the customer
interface.Group: FrameworkSubGroup: Core::WebValid: 1Required: 1Config-Setting:
$Self->{‘Loader::Customer::CommonCSS::IE7’}->{‘000-Framework’} = [ ‘Core.IE7.css’, ‘Core.Tooltip.IE7.css’, ‘Core.Dialog.IE7.css’];
Loader::Customer::CommonCSS::IE8###000-FrameworkDescription ValueDescription: List of IE8-specific CSS files to always be loaded for the customer
interface.Group: FrameworkSubGroup: Core::WebValid: 1Required: 1Config-Setting:
$Self->{‘Loader::Customer::CommonCSS::IE8’}->{‘000-Framework’} = [];
Loader::Customer::CommonJS###000-FrameworkDescription ValueDescription: List of JS files to always be loaded for the customer interface.Group: FrameworkSubGroup: Core::WebValid: 1Required: 1

Configuration Options Reference
250
Description ValueConfig-Setting:
$Self->{‘Loader::Customer::CommonJS’}->{‘000-Framework’} = [ ‘thirdparty/jquery-1.4.4/jquery.js’, ‘thirdparty/jquery-validate-1.7/jquery.validate.js’, ‘thirdparty/jquery-ui-1.8.7/jquery-ui.js’, ‘thirdparty/stacktrace/stacktrace.js’, ‘Core.Debug.js’, ‘Core.Data.js’, ‘Core.Exception.js’, ‘Core.App.js’, ‘Core.JavaScriptEnhancements.js’, ‘Core.Config.js’, ‘Core.UI.js’, ‘Core.UI.IE7Fixes.js’, ‘Core.UI.Accessibility.js’, ‘Core.UI.Dialog.js’, ‘Core.UI.RichTextEditor.js’, ‘Core.UI.Datepicker.js’, ‘Core.UI.Popup.js’, ‘Core.Form.js’, ‘Core.Form.ErrorTooltips.js’, ‘Core.Form.Validate.js’, ‘Core.Customer.js’];
Loader::Agent::DefaultSelectedSkinDescription ValueDescription: The agent skin’s InternalName which should be used in the agent
interface. Please check the available skins in Frontend::Agent::Skins.Group: FrameworkSubGroup: Core::WebValid: 1Required: 1Config-Setting:
$Self->{‘Loader::Agent::DefaultSelectedSkin’} = ‘default’;
Loader::Customer::SelectedSkin::HostBasedDescription ValueDescription: It is possible to configure different skins, for example to distinguish
between diferent customers, to be used on a per-domain basis withinthe application. Using a regular expression (regex), you can configurea Key/Content pair to match a domain. The value in «Key» should matchthe domain, and the value in «Content» should be a valid skin on yoursystem. Please see the example entries for the proper form of the regex.

Configuration Options Reference
251
Description ValueGroup: FrameworkSubGroup: Core::WebValid: 0Required: 0Config-Setting:
$Self->{‘Loader::Customer::SelectedSkin::HostBased’} = { ‘host1\.example\.com’ => ‘Someskin1’, ‘host2\.example\.com’ => ‘Someskin2’};
Core::WebUserAgentWebUserAgent::Timeout
Description ValueDescription: Sets the timeout (in seconds) for http/ftp downloads.Group: FrameworkSubGroup: Core::WebUserAgentValid: 1Required: 1Config-Setting:
$Self->{‘WebUserAgent::Timeout’} = ’15’;
WebUserAgent::Proxy
Description ValueDescription: Defines the connections for http/ftp, via a proxy.Group: FrameworkSubGroup: Core::WebUserAgentValid: 0Required: 0Config-Setting:
$Self->{‘WebUserAgent::Proxy’} = ‘http://proxy.sn.no:8001/’;
Crypt::PGPPGP
Description ValueDescription: Enables PGP support. When PGP support is enabled for signing and
securing mail, it is HIGHLY recommended that the web server be run

Configuration Options Reference
252
Description Valueas the OTRS user. Otherwise, there will be problems with the privilegeswhen accessing .gnupg folder.
Group: FrameworkSubGroup: Crypt::PGPValid: 1Required: 1Config-Setting:
$Self->{‘PGP’} = ‘0’;
PGP::Bin
Description ValueDescription: Defines the path to PGP binary.Group: FrameworkSubGroup: Crypt::PGPValid: 1Required: 1Config-Setting:
$Self->{‘PGP::Bin’} = ‘/usr/bin/gpg’;
PGP::Options
Description ValueDescription: Sets the options for PGP binary.Group: FrameworkSubGroup: Crypt::PGPValid: 1Required: 1Config-Setting:
$Self->{‘PGP::Options’} = ‘—homedir /opt/otrs/.gnupg/ —batch —no-tty —yes’;
PGP::Key::Password
Description ValueDescription: Sets the password for private PGP key.Group: FrameworkSubGroup: Crypt::PGPValid: 1Required: 1

Configuration Options Reference
253
Description ValueConfig-Setting:
$Self->{‘PGP::Key::Password’} = { ‘488A0B8F’ => ‘SomePassword’, ‘D2DF79FA’ => ‘SomePassword’};
PGP::TrustedNetwork
Description ValueDescription: Set this to yes if you trust in all your public and private pgp keys, even
if they are not certified with a trusted signature.Group: FrameworkSubGroup: Crypt::PGPValid: 1Required: 0Config-Setting:
$Self->{‘PGP::TrustedNetwork’} = ‘0’;
PGP::Log
Description ValueDescription: Configure your own log text for PGP.Group: FrameworkSubGroup: Crypt::PGPValid: 1Required: 1Config-Setting:
$Self->{‘PGP::Log’} = { ‘BADSIG’ => ‘The PGP signature with the keyid has not been verified successfully.’, ‘ERRSIG’ => ‘It was not possible to check the PGP signature, this may be caused by a missing public key or an unsupported algorithm.’, ‘EXPKEYSIG’ => ‘The PGP signature was made by an expired key.’, ‘GOODSIG’ => ‘Good PGP signature.’, ‘KEYREVOKED’ => ‘The PGP signature was made by a revoked key, this could mean that the signature is forged.’, ‘NODATA’ => ‘No valid OpenPGP data found.’, ‘NO_PUBKEY’ => ‘No public key found.’, ‘REVKEYSIG’ => ‘The PGP signature was made by a revoked key, this could mean that the signature is forged.’, ‘SIGEXPIRED’ => ‘The PGP signature is expired.’, ‘SIG_ID’ => ‘Signature data.’,

Configuration Options Reference
254
Description Value ‘TRUST_UNDEFINED’ => ‘This key is not certified with a trusted signature!.’, ‘VALIDSIG’ => ‘The PGP signature with the keyid is good.’};
Crypt::SMIMESMIME
Description ValueDescription: Enables S/MIME support.Group: FrameworkSubGroup: Crypt::SMIMEValid: 1Required: 1Config-Setting:
$Self->{‘SMIME’} = ‘0’;
SMIME::Bin
Description ValueDescription: Defines the path to open ssl binary. It may need a HOME env
($ENV{HOME} = ‘/var/lib/wwwrun’;).Group: FrameworkSubGroup: Crypt::SMIMEValid: 1Required: 1Config-Setting:
$Self->{‘SMIME::Bin’} = ‘/usr/bin/openssl’;
SMIME::CertPath
Description ValueDescription: Specifies the directory where SSL certificates are stored.Group: FrameworkSubGroup: Crypt::SMIMEValid: 1Required: 1Config-Setting:
$Self->{‘SMIME::CertPath’} = ‘/etc/ssl/certs’;

Configuration Options Reference
255
SMIME::PrivatePath
Description ValueDescription: Specifies the directory where private SSL certificates are stored.Group: FrameworkSubGroup: Crypt::SMIMEValid: 1Required: 1Config-Setting:
$Self->{‘SMIME::PrivatePath’} = ‘/etc/ssl/private’;
Frontend::Admin::AdminCustomerUserAdminCustomerUser::RunInitialWildcardSearch
Description ValueDescription: Runs an initial wildcard search of the existing customer users when
accessing the AdminCustomerUser module.Group: FrameworkSubGroup: Frontend::Admin::AdminCustomerUserValid: 1Required: 1Config-Setting:
$Self->{‘AdminCustomerUser::RunInitialWildcardSearch’} = ‘1’;
Frontend::Admin::ModuleRegistrationFrontend::Module###Admin
Description ValueDescription: Frontend module registration for the agent interface.Group: FrameworkSubGroup: Frontend::Admin::ModuleRegistrationValid: 1Required: 0Config-Setting:
$Self->{‘Frontend::Module’}->{‘Admin’} = { ‘Description’ => ‘Admin-Area’, ‘Group’ => [ ‘admin’

Configuration Options Reference
256
Description Value ], ‘Loader’ => { ‘CSS’ => [ ‘Core.Agent.Admin.css’ ], ‘CSS_IE7’ => [ ‘Core.Agent.AdminIE7.css’ ], ‘JavaScript’ => [ ‘Core.Agent.Admin.SysConfig.js’ ] }, ‘NavBar’ => [ { ‘AccessKey’ => ‘a’, ‘Block’ => ‘ItemArea’, ‘Description’ => », ‘Link’ => ‘Action=Admin’, ‘LinkOption’ => », ‘Name’ => ‘Admin’, ‘NavBar’ => ‘Admin’, ‘Prio’ => ‘10000’, ‘Type’ => ‘Menu’ } ], ‘NavBarModule’ => { ‘Module’ => ‘Kernel::Output::HTML::NavBarModuleAdmin’ }, ‘NavBarName’ => ‘Admin’, ‘Title’ => »};
Frontend::Module###AdminInitDescription ValueDescription: Frontend module registration for the agent interface.Group: FrameworkSubGroup: Frontend::Admin::ModuleRegistrationValid: 1Required: 0Config-Setting:
$Self->{‘Frontend::Module’}->{‘AdminInit’} = { ‘Description’ => ‘Admin’, ‘Group’ => [ ‘admin’ ], ‘NavBarName’ => », ‘Title’ => ‘Init’};

Configuration Options Reference
257
Frontend::Module###AdminUser
Description ValueDescription: Frontend module registration for the agent interface.Group: FrameworkSubGroup: Frontend::Admin::ModuleRegistrationValid: 1Required: 0Config-Setting:
$Self->{‘Frontend::Module’}->{‘AdminUser’} = { ‘Description’ => ‘Create and manage agents.’, ‘Group’ => [ ‘admin’ ], ‘NavBarModule’ => { ‘Block’ => ‘Agent’, ‘Description’ => ‘Create and manage agents.’, ‘Module’ => ‘Kernel::Output::HTML::NavBarModuleAdmin’, ‘Name’ => ‘Agents’, ‘Prio’ => ‘100’ }, ‘NavBarName’ => ‘Admin’, ‘Title’ => ‘Agents’};
Frontend::Module###AdminGroup
Description ValueDescription: Frontend module registration for the agent interface.Group: FrameworkSubGroup: Frontend::Admin::ModuleRegistrationValid: 1Required: 0Config-Setting:
$Self->{‘Frontend::Module’}->{‘AdminGroup’} = { ‘Description’ => ‘Admin’, ‘Group’ => [ ‘admin’ ], ‘NavBarModule’ => { ‘Block’ => ‘Agent’, ‘Description’ => ‘Create and manage groups.’, ‘Module’ => ‘Kernel::Output::HTML::NavBarModuleAdmin’, ‘Name’ => ‘Groups’, ‘Prio’ => ‘150’ },

Configuration Options Reference
258
Description Value ‘NavBarName’ => ‘Admin’, ‘Title’ => ‘Groups’};
Frontend::Module###AdminUserGroup
Description ValueDescription: Frontend module registration for the agent interface.Group: FrameworkSubGroup: Frontend::Admin::ModuleRegistrationValid: 1Required: 0Config-Setting:
$Self->{‘Frontend::Module’}->{‘AdminUserGroup’} = { ‘Description’ => ‘Admin’, ‘Group’ => [ ‘admin’ ], ‘NavBarModule’ => { ‘Block’ => ‘Agent’, ‘Description’ => ‘Link agents to groups.’, ‘Module’ => ‘Kernel::Output::HTML::NavBarModuleAdmin’, ‘Name’ => ‘Agents <-> Groups’, ‘Prio’ => ‘200’ }, ‘NavBarName’ => ‘Admin’, ‘Title’ => ‘Agents <-> Groups’};
Frontend::Module###AdminCustomerUser
Description ValueDescription: Frontend module registration for the agent interface.Group: FrameworkSubGroup: Frontend::Admin::ModuleRegistrationValid: 1Required: 0Config-Setting:
$Self->{‘Frontend::Module’}->{‘AdminCustomerUser’} = { ‘Description’ => ‘Edit Customers’, ‘Group’ => [ ‘admin’, ‘users’

Configuration Options Reference
259
Description Value ], ‘GroupRo’ => [ » ], ‘Loader’ => { ‘JavaScript’ => [ ‘Core.Agent.TicketAction.js’ ] }, ‘NavBar’ => [ { ‘AccessKey’ => ‘c’, ‘Block’ => ‘ItemArea’, ‘Description’ => », ‘Link’ => ‘Action=AdminCustomerUser;Nav=Agent’, ‘LinkOption’ => », ‘Name’ => ‘Customers’, ‘NavBar’ => ‘Customers’, ‘Prio’ => ‘9000’, ‘Type’ => ‘Menu’ } ], ‘NavBarModule’ => { ‘Block’ => ‘Customer’, ‘Description’ => ‘Create and manage customers.’, ‘Module’ => ‘Kernel::Output::HTML::NavBarModuleAdmin’, ‘Name’ => ‘Customers’, ‘Prio’ => ‘300’ }, ‘NavBarName’ => ‘Customers’, ‘Title’ => ‘Customers’};
Frontend::Module###AdminCustomerCompanyDescription ValueDescription: Frontend module registration for the agent interface.Group: FrameworkSubGroup: Frontend::Admin::ModuleRegistrationValid: 1Required: 0Config-Setting:
$Self->{‘Frontend::Module’}->{‘AdminCustomerCompany’} = { ‘Description’ => ‘Admin’, ‘Group’ => [ ‘admin’,

Configuration Options Reference
260
Description Value ‘users’ ], ‘GroupRo’ => [ » ], ‘NavBar’ => [ { ‘AccessKey’ => ‘c’, ‘Block’ => ‘ItemArea’, ‘Description’ => », ‘Link’ => ‘Action=AdminCustomerCompany;Nav=Agent’, ‘LinkOption’ => », ‘Name’ => ‘Companies’, ‘NavBar’ => ‘Companies’, ‘Prio’ => ‘9100’, ‘Type’ => ‘Menu’ } ], ‘NavBarModule’ => { ‘Block’ => ‘Customer’, ‘Description’ => ‘Create and manage companies.’, ‘Module’ => ‘Kernel::Output::HTML::NavBarModuleAdmin’, ‘Name’ => ‘Customer Companies’, ‘Prio’ => ‘310’ }, ‘NavBarName’ => ‘Admin’, ‘Title’ => ‘Customer Companies’};
Frontend::Module###AdminCustomerUserGroupDescription ValueDescription: Frontend module registration for the agent interface.Group: FrameworkSubGroup: Frontend::Admin::ModuleRegistrationValid: 1Required: 0Config-Setting:
$Self->{‘Frontend::Module’}->{‘AdminCustomerUserGroup’} = { ‘Description’ => ‘Admin’, ‘Group’ => [ ‘admin’ ], ‘NavBarModule’ => { ‘Block’ => ‘Customer’, ‘Description’ => ‘Link customers to groups.’,

Configuration Options Reference
261
Description Value ‘Module’ => ‘Kernel::Output::HTML::NavBarModuleAdmin’, ‘Name’ => ‘Customers <-> Groups’, ‘Prio’ => ‘400’ }, ‘NavBarName’ => ‘Admin’, ‘Title’ => ‘Customers <-> Groups’};
Frontend::Module###AdminCustomerUserService
Description ValueDescription: Frontend module registration for the agent interface.Group: FrameworkSubGroup: Frontend::Admin::ModuleRegistrationValid: 1Required: 0Config-Setting:
$Self->{‘Frontend::Module’}->{‘AdminCustomerUserService’} = { ‘Description’ => ‘Admin’, ‘Group’ => [ ‘admin’ ], ‘NavBarModule’ => { ‘Block’ => ‘Customer’, ‘Description’ => ‘Link customers to services.’, ‘Module’ => ‘Kernel::Output::HTML::NavBarModuleAdmin’, ‘Name’ => ‘Customers <-> Services’, ‘Prio’ => ‘500’ }, ‘NavBarName’ => ‘Admin’, ‘Title’ => ‘Customers <-> Services’};
Frontend::Module###AdminRole
Description ValueDescription: Frontend module registration for the agent interface.Group: FrameworkSubGroup: Frontend::Admin::ModuleRegistrationValid: 1Required: 0Config-Setting:
$Self->{‘Frontend::Module’}->{‘AdminRole’} = {

Configuration Options Reference
262
Description Value ‘Description’ => ‘Admin’, ‘Group’ => [ ‘admin’ ], ‘NavBarModule’ => { ‘Block’ => ‘Agent’, ‘Description’ => ‘Create and manage roles.’, ‘Module’ => ‘Kernel::Output::HTML::NavBarModuleAdmin’, ‘Name’ => ‘Roles’, ‘Prio’ => ‘600’ }, ‘NavBarName’ => ‘Admin’, ‘Title’ => ‘Role’};
Frontend::Module###AdminRoleUser
Description ValueDescription: Frontend module registration for the agent interface.Group: FrameworkSubGroup: Frontend::Admin::ModuleRegistrationValid: 1Required: 0Config-Setting:
$Self->{‘Frontend::Module’}->{‘AdminRoleUser’} = { ‘Description’ => ‘Admin’, ‘Group’ => [ ‘admin’ ], ‘NavBarModule’ => { ‘Block’ => ‘Agent’, ‘Description’ => ‘Link agents to roles.’, ‘Module’ => ‘Kernel::Output::HTML::NavBarModuleAdmin’, ‘Name’ => ‘Agents <-> Roles’, ‘Prio’ => ‘700’ }, ‘NavBarName’ => ‘Admin’, ‘Title’ => ‘Roles <-> Agents’};
Frontend::Module###AdminRoleGroup
Description ValueDescription: Frontend module registration for the agent interface.Group: Framework

Configuration Options Reference
263
Description ValueSubGroup: Frontend::Admin::ModuleRegistrationValid: 1Required: 0Config-Setting:
$Self->{‘Frontend::Module’}->{‘AdminRoleGroup’} = { ‘Description’ => ‘Admin’, ‘Group’ => [ ‘admin’ ], ‘NavBarModule’ => { ‘Block’ => ‘Agent’, ‘Description’ => ‘Link roles to groups.’, ‘Module’ => ‘Kernel::Output::HTML::NavBarModuleAdmin’, ‘Name’ => ‘Roles <-> Groups’, ‘Prio’ => ‘800’ }, ‘NavBarName’ => ‘Admin’, ‘Title’ => ‘Roles <-> Groups’};
Frontend::Module###AdminSMIME
Description ValueDescription: Frontend module registration for the agent interface.Group: FrameworkSubGroup: Frontend::Admin::ModuleRegistrationValid: 1Required: 0Config-Setting:
$Self->{‘Frontend::Module’}->{‘AdminSMIME’} = { ‘Description’ => ‘Admin’, ‘Group’ => [ ‘admin’ ], ‘NavBarModule’ => { ‘Block’ => ‘Email’, ‘Description’ => ‘Manage S/MIME certificates for email encryption.’, ‘Module’ => ‘Kernel::Output::HTML::NavBarModuleAdmin’, ‘Name’ => ‘S/MIME Certificates’, ‘Prio’ => ‘1100’ }, ‘NavBarName’ => ‘Admin’, ‘Title’ => ‘S/MIME Management’};

Configuration Options Reference
264
Frontend::Module###AdminPGP
Description ValueDescription: Frontend module registration for the agent interface.Group: FrameworkSubGroup: Frontend::Admin::ModuleRegistrationValid: 1Required: 0Config-Setting:
$Self->{‘Frontend::Module’}->{‘AdminPGP’} = { ‘Description’ => ‘Admin’, ‘Group’ => [ ‘admin’ ], ‘NavBarModule’ => { ‘Block’ => ‘Email’, ‘Description’ => ‘Manage PGP keys for email encryption.’, ‘Module’ => ‘Kernel::Output::HTML::NavBarModuleAdmin’, ‘Name’ => ‘PGP Keys’, ‘Prio’ => ‘1200’ }, ‘NavBarName’ => ‘Admin’, ‘Title’ => ‘PGP Key Management’};
Frontend::Module###AdminMailAccount
Description ValueDescription: Frontend module registration for the agent interface.Group: FrameworkSubGroup: Frontend::Admin::ModuleRegistrationValid: 1Required: 0Config-Setting:
$Self->{‘Frontend::Module’}->{‘AdminMailAccount’} = { ‘Description’ => ‘Admin’, ‘Group’ => [ ‘admin’ ], ‘NavBarModule’ => { ‘Block’ => ‘Email’, ‘Description’ => ‘Manage POP3 or IMAP accounts to fetch email from.’, ‘Module’ => ‘Kernel::Output::HTML::NavBarModuleAdmin’,

Configuration Options Reference
265
Description Value ‘Name’ => ‘PostMaster Mail Accounts’, ‘Prio’ => ‘100’ }, ‘NavBarName’ => ‘Admin’, ‘Title’ => ‘Mail Account’};
Frontend::Module###AdminPostMasterFilter
Description ValueDescription: Frontend module registration for the agent interface.Group: FrameworkSubGroup: Frontend::Admin::ModuleRegistrationValid: 1Required: 0Config-Setting:
$Self->{‘Frontend::Module’}->{‘AdminPostMasterFilter’} = { ‘Description’ => ‘Admin’, ‘Group’ => [ ‘admin’ ], ‘NavBarModule’ => { ‘Block’ => ‘Email’, ‘Description’ => ‘Filter incoming emails.’, ‘Module’ => ‘Kernel::Output::HTML::NavBarModuleAdmin’, ‘Name’ => ‘PostMaster Filters’, ‘Prio’ => ‘200’ }, ‘NavBarName’ => ‘Admin’, ‘Title’ => ‘PostMaster Filters’};
Frontend::Module###AdminEmail
Description ValueDescription: Frontend module registration for the agent interface.Group: FrameworkSubGroup: Frontend::Admin::ModuleRegistrationValid: 1Required: 0Config-Setting:
$Self->{‘Frontend::Module’}->{‘AdminEmail’} = { ‘Description’ => ‘Admin’, ‘Group’ => [ ‘admin’

Configuration Options Reference
266
Description Value ], ‘NavBarModule’ => { ‘Block’ => ‘System’, ‘Description’ => ‘Send notifications to users.’, ‘Module’ => ‘Kernel::Output::HTML::NavBarModuleAdmin’, ‘Name’ => ‘Admin Notification’, ‘Prio’ => ‘400’ }, ‘NavBarName’ => ‘Admin’, ‘Title’ => ‘Admin-Email’};
Frontend::Module###AdminSession
Description ValueDescription: Frontend module registration for the agent interface.Group: FrameworkSubGroup: Frontend::Admin::ModuleRegistrationValid: 1Required: 0Config-Setting:
$Self->{‘Frontend::Module’}->{‘AdminSession’} = { ‘Description’ => ‘Admin’, ‘Group’ => [ ‘admin’ ], ‘NavBarModule’ => { ‘Block’ => ‘System’, ‘Description’ => ‘Manage existing sessions.’, ‘Module’ => ‘Kernel::Output::HTML::NavBarModuleAdmin’, ‘Name’ => ‘Session Management’, ‘Prio’ => ‘500’ }, ‘NavBarName’ => ‘Admin’, ‘Title’ => ‘Session Management’};
Frontend::Module###AdminPerformanceLog
Description ValueDescription: Frontend module registration for the agent interface.Group: FrameworkSubGroup: Frontend::Admin::ModuleRegistrationValid: 1

Configuration Options Reference
267
Description ValueRequired: 0Config-Setting:
$Self->{‘Frontend::Module’}->{‘AdminPerformanceLog’} = { ‘Description’ => ‘Admin’, ‘Group’ => [ ‘admin’ ], ‘Loader’ => { ‘CSS’ => [ ‘Core.Agent.Admin.PerformanceLog.css’ ] }, ‘NavBarModule’ => { ‘Block’ => ‘System’, ‘Description’ => ‘View performance benchmark results.’, ‘Module’ => ‘Kernel::Output::HTML::NavBarModuleAdmin’, ‘Name’ => ‘Performance Log’, ‘Prio’ => ‘550’ }, ‘NavBarName’ => ‘Admin’, ‘Title’ => ‘Performance Log’};
Frontend::Module###AdminLog
Description ValueDescription: Frontend module registration for the agent interface.Group: FrameworkSubGroup: Frontend::Admin::ModuleRegistrationValid: 1Required: 0Config-Setting:
$Self->{‘Frontend::Module’}->{‘AdminLog’} = { ‘Description’ => ‘Admin’, ‘Group’ => [ ‘admin’ ], ‘NavBarModule’ => { ‘Block’ => ‘System’, ‘Description’ => ‘View system log messages.’, ‘Module’ => ‘Kernel::Output::HTML::NavBarModuleAdmin’, ‘Name’ => ‘System Log’, ‘Prio’ => ‘600’ }, ‘NavBarName’ => ‘Admin’,

Configuration Options Reference
268
Description Value ‘Title’ => ‘System Log’};
Frontend::Module###AdminSelectBox
Description ValueDescription: Frontend module registration for the agent interface.Group: FrameworkSubGroup: Frontend::Admin::ModuleRegistrationValid: 1Required: 0Config-Setting:
$Self->{‘Frontend::Module’}->{‘AdminSelectBox’} = { ‘Description’ => ‘Admin’, ‘Group’ => [ ‘admin’ ], ‘NavBarModule’ => { ‘Block’ => ‘System’, ‘Description’ => ‘Execute SQL statements.’, ‘Module’ => ‘Kernel::Output::HTML::NavBarModuleAdmin’, ‘Name’ => ‘SQL Box’, ‘Prio’ => ‘700’ }, ‘NavBarName’ => ‘Admin’, ‘Title’ => ‘SQL Box’};
Frontend::Module###AdminPackageManager
Description ValueDescription: Frontend module registration for the agent interface.Group: FrameworkSubGroup: Frontend::Admin::ModuleRegistrationValid: 1Required: 0Config-Setting:
$Self->{‘Frontend::Module’}->{‘AdminPackageManager’} = { ‘Description’ => ‘Software Package Manager’, ‘Group’ => [ ‘admin’ ], ‘NavBarModule’ => { ‘Block’ => ‘System’,

Configuration Options Reference
269
Description Value ‘Description’ => ‘Update and extend your system with software packages.’, ‘Module’ => ‘Kernel::Output::HTML::NavBarModuleAdmin’, ‘Name’ => ‘Package Manager’, ‘Prio’ => ‘1000’ }, ‘NavBarName’ => ‘Admin’, ‘Title’ => ‘Package Manager’};
Frontend::AgentAgentLogo
Description ValueDescription: The logo shown in the header of the agent interface. The URL to the
image must be a relative URL to the skin image directory.Group: FrameworkSubGroup: Frontend::AgentValid: 1Required: 0Config-Setting:
$Self->{‘AgentLogo’} = { ‘StyleHeight’ => ’67px’, ‘StyleRight’ => ’38px’, ‘StyleTop’ => ‘-4px’, ‘StyleWidth’ => ‘244px’, ‘URL’ => ‘skins/Agent/default/img/logo_bg.png’};
AgentLoginLogo
Description ValueDescription: The logo shown on top of the login box of the agent interface. The URL
to the image must be relative URL to the skin image directory.Group: FrameworkSubGroup: Frontend::AgentValid: 0Required: 0Config-Setting:
$Self->{‘AgentLoginLogo’} = { ‘StyleHeight’ => ‘100px’, ‘URL’ => ‘skins/Agent/default/img/loginlogo_default.png’};

Configuration Options Reference
270
LoginURLDescription ValueDescription: Defines an alternate URL, where the login link refers to.Group: FrameworkSubGroup: Frontend::AgentValid: 0Required: 0Config-Setting:
$Self->{‘LoginURL’} = ‘http://host.example.com/login.html’;
LogoutURLDescription ValueDescription: Defines an alternate URL, where the logout link refers to.Group: FrameworkSubGroup: Frontend::AgentValid: 0Required: 0Config-Setting:
$Self->{‘LogoutURL’} = ‘http://host.example.com/thanks-for-using-otrs.html’;
PreApplicationModule###AgentInfoDescription ValueDescription: Defines a useful module to load specific user options or to display news.Group: FrameworkSubGroup: Frontend::AgentValid: 0Required: 0Config-Setting:
$Self->{‘PreApplicationModule’}->{‘AgentInfo’} = ‘Kernel::Modules::AgentInfo’;
InfoKeyDescription ValueDescription: Defines the key to be checked with Kernel::Modules::AgentInfo module.
If this user preferences key is true, the message is accepted by thesystem.
Group: FrameworkSubGroup: Frontend::AgentValid: 0

Configuration Options Reference
271
Description ValueRequired: 0Config-Setting:
$Self->{‘InfoKey’} = ‘wpt22’;
InfoFileDescription ValueDescription: File that is displayed in the Kernel::Modules::AgentInfo module, if
located under Kernel/Output/HTML/Standard/AgentInfo.dtl.Group: FrameworkSubGroup: Frontend::AgentValid: 0Required: 0Config-Setting:
$Self->{‘InfoFile’} = ‘AgentInfo’;
LostPasswordDescription ValueDescription: Activates lost password feature for agents, in the agent interface.Group: FrameworkSubGroup: Frontend::AgentValid: 1Required: 1Config-Setting:
$Self->{‘LostPassword’} = ‘1’;
ShowMotdDescription ValueDescription: Shows the message of the day on login screen of the agent interface.Group: FrameworkSubGroup: Frontend::AgentValid: 1Required: 1Config-Setting:
$Self->{‘ShowMotd’} = ‘0’;
NotificationSubjectLostPasswordTokenDescription ValueDescription: Defines the subject for notification mails sent to agents, with token about
new requested password.

Configuration Options Reference
272
Description ValueGroup: FrameworkSubGroup: Frontend::AgentValid: 1Required: 1Config-Setting:
$Self->{‘NotificationSubjectLostPasswordToken’} = ‘New OTRS password request’;
NotificationBodyLostPasswordTokenDescription ValueDescription: Defines the body text for notification mails sent to agents, with token
about new requested password (after using this link the new passwordwill be sent).
Group: FrameworkSubGroup: Frontend::AgentValid: 1Required: 1Config-Setting:
$Self->{‘NotificationBodyLostPasswordToken’} = ‘Hi <OTRS_USERFIRSTNAME>,
You or someone impersonating you has requested to change your OTRSpassword.
If you want to do this, click on the link below. You will receive another email containing the password.
<OTRS_CONFIG_HttpType>://<OTRS_CONFIG_FQDN>/<OTRS_CONFIG_ScriptAlias>index.pl?Action=LostPassword;Token=<OTRS_TOKEN>
If you did not request a new password, please ignore this email. ‘;
NotificationSubjectLostPasswordDescription ValueDescription: Defines the subject for notification mails sent to agents, about new
password.Group: FrameworkSubGroup: Frontend::AgentValid: 1

Configuration Options Reference
273
Description ValueRequired: 1Config-Setting:
$Self->{‘NotificationSubjectLostPassword’} = ‘New OTRS password’;
NotificationBodyLostPasswordDescription ValueDescription: Defines the body text for notification mails sent to agents, about new
password (after using this link the new password will be sent).Group: FrameworkSubGroup: Frontend::AgentValid: 1Required: 1Config-Setting:
$Self->{‘NotificationBodyLostPassword’} = ‘Hi <OTRS_USERFIRSTNAME>,
Here’s your new OTRS password.
New password: <OTRS_NEWPW>
You can log in via the following URL:
<OTRS_CONFIG_HttpType>://<OTRS_CONFIG_FQDN>/<OTRS_CONFIG_ScriptAlias>index.pl ‘;
OpenMainMenuOnHoverDescription ValueDescription: If enabled, the first level of the main menu opens on mouse hover
(instead of click only).Group: FrameworkSubGroup: Frontend::AgentValid: 1Required: 1Config-Setting:
$Self->{‘OpenMainMenuOnHover’} = ‘0’;
Loader::Agent::Skin###000-defaultDescription ValueDescription: Default skin for interface.Group: Framework

Configuration Options Reference
274
Description ValueSubGroup: Frontend::AgentValid: 1Required: 0Config-Setting:
$Self->{‘Loader::Agent::Skin’}->{‘000-default’} = { ‘Description’ => ‘This is the default orange — black skin.’, ‘HomePage’ => ‘www.otrs.org’, ‘InternalName’ => ‘default’, ‘VisibleName’ => ‘Default’};
Loader::Agent::Skin###001-ivoryDescription ValueDescription: Balanced white skin by Felix Niklas.Group: FrameworkSubGroup: Frontend::AgentValid: 1Required: 0Config-Setting:
$Self->{‘Loader::Agent::Skin’}->{‘001-ivory’} = { ‘Description’ => ‘Balanced white skin by Felix Niklas’, ‘HomePage’ => ‘www.felixniklas.de’, ‘InternalName’ => ‘ivory’, ‘VisibleName’ => ‘Ivory’};
Loader::Agent::Skin###001-slimDescription ValueDescription: Experimental «Slim» skin which tries to save screen space for power
users.Group: FrameworkSubGroup: Frontend::AgentValid: 1Required: 0Config-Setting:
$Self->{‘Loader::Agent::Skin’}->{‘001-slim’} = { ‘Description’ => ‘Experimental «Slim» skin which tries to save screen space for power users.’, ‘HomePage’ => ‘www.otrs.org’, ‘InternalName’ => ‘slim’, ‘VisibleName’ => ‘Slim’

Configuration Options Reference
275
Description Value};
Loader::Agent::DefaultSelectedSkin::HostBasedDescription ValueDescription: It is possible to configure different skins, for example to distinguish
between diferent agents, to be used on a per-domain basis within theapplication. Using a regular expression (regex), you can configure aKey/Content pair to match a domain. The value in «Key» should matchthe domain, and the value in «Content» should be a valid skin on yoursystem. Please see the example entries for the proper form of the regex.
Group: FrameworkSubGroup: Frontend::AgentValid: 0Required: 0Config-Setting:
$Self->{‘Loader::Agent::DefaultSelectedSkin::HostBased’} = { ‘host1\.example\.com’ => ‘SomeSkin1’, ‘host2\.example\.com’ => ‘SomeSkin2’};
Frontend::Agent::DashboardDashboardBackend###0000-ProductNotify
Description ValueDescription: Defines the parameters for the dashboard backend. «Group» is used
to restrict access to the plugin (e. g. Group: admin;group1;group2;).»Default» indicates if the plugin is enabled by default or if the user needsto enable it manually. «CacheTTLLocal» defines the cache expirationperiod in minutes for the plugin.
Group: FrameworkSubGroup: Frontend::Agent::DashboardValid: 1Required: 0Config-Setting:
$Self->{‘DashboardBackend’}->{‘0000-ProductNotify’} = { ‘Block’ => ‘ContentLarge’, ‘CacheTTLLocal’ => ‘1440’, ‘Default’ => ‘1’, ‘Description’ => ‘News about OTRS releases!’, ‘Group’ => ‘admin’, ‘Module’ => ‘Kernel::Output::HTML::DashboardProductNotify’,

Configuration Options Reference
276
Description Value ‘Title’ => ‘Product News’, ‘URL’ => ‘http://otrs.org/product.xml’};
DashboardBackend###0400-UserOnline
Description ValueDescription: Defines the parameters for the dashboard backend. «Limit» defines
the number of entries displayed by default. «Group» is used to restrictaccess to the plugin (e. g. Group: admin;group1;group2;). «Default»indicates if the plugin is enabled by default or if the user needs to enableit manually. «CacheTTLLocal» defines the cache expiration period inminutes for the plugin.
Group: FrameworkSubGroup: Frontend::Agent::DashboardValid: 1Required: 0Config-Setting:
$Self->{‘DashboardBackend’}->{‘0400-UserOnline’} = { ‘Block’ => ‘ContentSmall’, ‘CacheTTLLocal’ => ‘5’, ‘Default’ => ‘0’, ‘Description’ => », ‘Filter’ => ‘Agent’, ‘Group’ => », ‘IdleMinutes’ => ’60’, ‘Limit’ => ’10’, ‘Module’ => ‘Kernel::Output::HTML::DashboardUserOnline’, ‘ShowEmail’ => ‘1’, ‘SortBy’ => ‘UserLastname’, ‘Title’ => ‘Online’};
DashboardBackend###0410-RSS
Description ValueDescription: Defines the parameters for the dashboard backend. «Limit» defines
the number of entries displayed by default. «Group» is used to restrictaccess to the plugin (e. g. Group: admin;group1;group2;). «Default»indicates if the plugin is enabled by default or if the user needs toenable it manually. «CacheTTL» indicates the cache expiration periodin minutes for the plugin.
Group: FrameworkSubGroup: Frontend::Agent::DashboardValid: 1

Configuration Options Reference
277
Description ValueRequired: 0Config-Setting:
$Self->{‘DashboardBackend’}->{‘0410-RSS’} = { ‘Block’ => ‘ContentSmall’, ‘CacheTTL’ => ‘360’, ‘Default’ => ‘1’, ‘Description’ => », ‘Group’ => », ‘Limit’ => ‘6’, ‘Module’ => ‘Kernel::Output::HTML::DashboardRSS’, ‘Title’ => ‘OTRS News’, ‘URL’ => ‘http://otrs.org/rss/’};
DashboardBackend###0200-Image
Description ValueDescription: Defines the parameters for the dashboard backend. «Group» is used
to restrict access to the plugin (e. g. Group: admin;group1;group2;).»Default» indicates if the plugin is enabled by default or if the user needsto enable it manually. «CacheTTL» indicates the cache expiration periodin minutes for the plugin.
Group: FrameworkSubGroup: Frontend::Agent::DashboardValid: 0Required: 0Config-Setting:
$Self->{‘DashboardBackend’}->{‘0200-Image’} = { ‘Block’ => ‘ContentLarge’, ‘Default’ => ‘1’, ‘Description’ => ‘Some picture description!’, ‘Group’ => », ‘Height’ => ‘140’, ‘Link’ => ‘http://otrs.org/’, ‘LinkTitle’ => ‘http://otrs.org/’, ‘Module’ => ‘Kernel::Output::HTML::DashboardImage’, ‘Title’ => ‘A picture’, ‘URL’ => ‘http://www.otrs.com/uploads/pics/jointhecommunity_02.jpg’, ‘Width’ => ‘198’};
DashboardBackend###0210-MOTD
Description ValueDescription: Shows the message of the day (MOTD) in the agent dashboard.
«Group» is used to restrict access to the plugin (e. g. Group:

Configuration Options Reference
278
Description Valueadmin;group1;group2;). «Default» indicates if the plugin is enabled bydefault or if the user needs to enable it manually.
Group: FrameworkSubGroup: Frontend::Agent::DashboardValid: 0Required: 0Config-Setting:
$Self->{‘DashboardBackend’}->{‘0210-MOTD’} = { ‘Block’ => ‘ContentLarge’, ‘Default’ => ‘1’, ‘Group’ => », ‘Module’ => ‘Kernel::Output::HTML::DashboardMOTD’, ‘Title’ => ‘Message of the Day’};
DashboardBackend###0300-IFrameDescription ValueDescription: Defines the parameters for the dashboard backend. «Group» is used
to restrict access to the plugin (e. g. Group: admin;group1;group2;).»Default» indicates if the plugin is enabled by default or if the user needsto enable it manually. «CacheTTL» indicates the cache expiration periodin minutes for the plugin.
Group: FrameworkSubGroup: Frontend::Agent::DashboardValid: 0Required: 0Config-Setting:
$Self->{‘DashboardBackend’}->{‘0300-IFrame’} = { ‘Align’ => ‘left’, ‘Block’ => ‘ContentLarge’, ‘Default’ => ‘1’, ‘Description’ => ‘Some description!’, ‘Frameborder’ => ‘1’, ‘Group’ => », ‘Height’ => ‘800’, ‘Link’ => ‘http://otrs.org/’, ‘LinkTitle’ => ‘OTRS.org/’, ‘Marginheight’ => ‘5’, ‘Marginwidth’ => ‘5’, ‘Module’ => ‘Kernel::Output::HTML::DashboardIFrame’, ‘Scrolling’ => ‘auto’, ‘Title’ => ‘A Website’, ‘URL’ => ‘http://www.otrs.org/’, ‘Width’ => ‘1024’};

Configuration Options Reference
279
Frontend::Agent::ModuleMetaHeadFrontend::HeaderMetaModule###1-Refresh
Description ValueDescription: Defines the module to generate html refresh headers of html sites.Group: FrameworkSubGroup: Frontend::Agent::ModuleMetaHeadValid: 1Required: 1Config-Setting:
$Self->{‘Frontend::HeaderMetaModule’}->{‘1-Refresh’} = { ‘Module’ => ‘Kernel::Output::HTML::HeaderMetaRefresh’};
Frontend::Agent::ModuleNotifyFrontend::NotifyModule###1-CharsetCheck
Description ValueDescription: Module to inform agents, via the agent interface, about the used
charset. A notification is displayed, if the default charset is not used,e.g. in tickets.
Group: FrameworkSubGroup: Frontend::Agent::ModuleNotifyValid: 1Required: 1Config-Setting:
$Self->{‘Frontend::NotifyModule’}->{‘1-CharsetCheck’} = { ‘Module’ => ‘Kernel::Output::HTML::NotificationCharsetCheck’};
Frontend::NotifyModule###2-UID-Check
Description ValueDescription: Defines the module to display a notification in the agent interface, if
the system is used by the admin user (normally you shouldn’t work asadmin).
Group: Framework

Configuration Options Reference
280
Description ValueSubGroup: Frontend::Agent::ModuleNotifyValid: 1Required: 1Config-Setting:
$Self->{‘Frontend::NotifyModule’}->{‘2-UID-Check’} = { ‘Module’ => ‘Kernel::Output::HTML::NotificationUIDCheck’};
Frontend::NotifyModule###3-ShowAgentOnline
Description ValueDescription: Defines the module that shows all the currently logged in agents in the
agent interface.Group: FrameworkSubGroup: Frontend::Agent::ModuleNotifyValid: 0Required: 0Config-Setting:
$Self->{‘Frontend::NotifyModule’}->{‘3-ShowAgentOnline’} = { ‘IdleMinutes’ => ’60’, ‘Module’ => ‘Kernel::Output::HTML::NotificationAgentOnline’, ‘ShowEmail’ => ‘1’};
Frontend::NotifyModule###4-ShowCustomerOnline
Description ValueDescription: Defines the module that shows all the currently loged in customers in
the agent interface.Group: FrameworkSubGroup: Frontend::Agent::ModuleNotifyValid: 0Required: 0Config-Setting:
$Self->{‘Frontend::NotifyModule’}->{‘4-ShowCustomerOnline’} = { ‘IdleMinutes’ => ’60’, ‘Module’ => ‘Kernel::Output::HTML::NotificationCustomerOnline’, ‘ShowEmail’ => ‘1’};

Configuration Options Reference
281
Frontend::Agent::ModuleRegistrationFrontend::Module###Logout
Description ValueDescription: Frontend module registration for the agent interface.Group: FrameworkSubGroup: Frontend::Agent::ModuleRegistrationValid: 1Required: 0Config-Setting:
$Self->{‘Frontend::Module’}->{‘Logout’} = { ‘Description’ => ‘Logout’, ‘NavBarName’ => », ‘Title’ => »};
Frontend::Module###AgentDashboard
Description ValueDescription: Frontend module registration for the agent interface.Group: FrameworkSubGroup: Frontend::Agent::ModuleRegistrationValid: 1Required: 0Config-Setting:
$Self->{‘Frontend::Module’}->{‘AgentDashboard’} = { ‘Description’ => ‘Agent Dashboard’, ‘Loader’ => { ‘JavaScript’ => [ ‘thirdparty/flot-0.6/excanvas.js’, ‘thirdparty/flot-0.6/jquery.flot.js’, ‘Core.UI.Chart.js’, ‘Core.UI.DnD.js’, ‘Core.Agent.Dashboard.js’ ] }, ‘NavBar’ => [ { ‘AccessKey’ => ‘d’, ‘Block’ => ‘ItemArea’, ‘Description’ => », ‘Link’ => ‘Action=AgentDashboard’, ‘LinkOption’ => », ‘Name’ => ‘Dashboard’, ‘NavBar’ => ‘Dashboard’,

Configuration Options Reference
282
Description Value ‘Prio’ => ’50’, ‘Type’ => ‘Menu’ } ], ‘NavBarName’ => ‘Dashboard’, ‘Title’ => »};
Frontend::Module###AgentPreferences
Description ValueDescription: Frontend module registration for the agent interface.Group: FrameworkSubGroup: Frontend::Agent::ModuleRegistrationValid: 1Required: 0Config-Setting:
$Self->{‘Frontend::Module’}->{‘AgentPreferences’} = { ‘Description’ => ‘Agent Preferences’, ‘NavBarName’ => ‘Preferences’, ‘Title’ => »};
Frontend::Module###PictureUpload
Description ValueDescription: Frontend module registration for the agent interface.Group: FrameworkSubGroup: Frontend::Agent::ModuleRegistrationValid: 1Required: 1Config-Setting:
$Self->{‘Frontend::Module’}->{‘PictureUpload’} = { ‘Description’ => ‘Picture upload module’, ‘NavBarName’ => ‘Ticket’, ‘Title’ => ‘Picture-Upload’};
Frontend::Module###AgentSpelling
Description ValueDescription: Frontend module registration for the agent interface.Group: Framework

Configuration Options Reference
283
Description ValueSubGroup: Frontend::Agent::ModuleRegistrationValid: 1Required: 0Config-Setting:
$Self->{‘Frontend::Module’}->{‘AgentSpelling’} = { ‘Description’ => ‘Spell checker’, ‘Loader’ => { ‘JavaScript’ => [ ‘Core.Agent.TicketAction.js’ ] }, ‘NavBarName’ => », ‘Title’ => ‘Spell Checker’};
Frontend::Module###SpellingInline
Description ValueDescription: Frontend module registration for the agent interface.Group: FrameworkSubGroup: Frontend::Agent::ModuleRegistrationValid: 1Required: 0Config-Setting:
$Self->{‘Frontend::Module’}->{‘SpellingInline’} = { ‘Description’ => ‘Spell checker’, ‘NavBarName’ => », ‘Title’ => ‘Spell Checker’};
Frontend::Module###AgentBook
Description ValueDescription: Frontend module registration for the agent interface.Group: FrameworkSubGroup: Frontend::Agent::ModuleRegistrationValid: 1Required: 0Config-Setting:
$Self->{‘Frontend::Module’}->{‘AgentBook’} = { ‘Description’ => ‘Address book of CustomerUser sources’, ‘Loader’ => {

Configuration Options Reference
284
Description Value ‘JavaScript’ => [ ‘Core.Agent.TicketAction.js’ ] }, ‘NavBarName’ => », ‘Title’ => ‘Address Book’};
Frontend::Module###AgentLinkObject
Description ValueDescription: Frontend module registration for the agent interface.Group: FrameworkSubGroup: Frontend::Agent::ModuleRegistrationValid: 1Required: 0Config-Setting:
$Self->{‘Frontend::Module’}->{‘AgentLinkObject’} = { ‘Description’ => ‘Link Object’, ‘NavBarName’ => », ‘Title’ => ‘Link Object’};
Frontend::Module###AgentInfo
Description ValueDescription: Frontend module registration for the agent interface.Group: FrameworkSubGroup: Frontend::Agent::ModuleRegistrationValid: 1Required: 0Config-Setting:
$Self->{‘Frontend::Module’}->{‘AgentInfo’} = { ‘Description’ => ‘Generic Info module’, ‘NavBarName’ => », ‘Title’ => ‘Info’};
Frontend::Module###AgentSearch
Description ValueDescription: Frontend module registration for the agent interface.Group: Framework

Configuration Options Reference
285
Description ValueSubGroup: Frontend::Agent::ModuleRegistrationValid: 1Required: 0Config-Setting:
$Self->{‘Frontend::Module’}->{‘AgentSearch’} = { ‘Description’ => ‘Global Search Module’, ‘NavBarName’ => », ‘Title’ => ‘Search’};
CustomerFrontend::Module###SpellingInline
Description ValueDescription: Frontend module registration for the customer interface.Group: FrameworkSubGroup: Frontend::Agent::ModuleRegistrationValid: 1Required: 0Config-Setting:
$Self->{‘CustomerFrontend::Module’}->{‘SpellingInline’} = { ‘Description’ => ‘Spell checker’, ‘NavBarName’ => », ‘Title’ => ‘Spell Checker’};
Frontend::Module###AgentHTMLReference
Description ValueDescription: Frontend module registration for the agent interface.Group: FrameworkSubGroup: Frontend::Agent::ModuleRegistrationValid: 1Required: 0Config-Setting:
$Self->{‘Frontend::Module’}->{‘AgentHTMLReference’} = { ‘Description’ => ‘HTML Reference’, ‘Group’ => [ ‘users’ ], ‘GroupRo’ => [ ‘users’ ], ‘Loader’ => {

Configuration Options Reference
286
Description Value ‘CSS’ => [ ‘Core.Agent.HTMLReference.css’ ] }, ‘NavBarName’ => », ‘Title’ => ‘HTML Reference’};
Frontend::Module###AgentStatsDescription ValueDescription: Frontend module registration for the agent interface.Group: FrameworkSubGroup: Frontend::Agent::ModuleRegistrationValid: 1Required: 0Config-Setting:
$Self->{‘Frontend::Module’}->{‘AgentStats’} = { ‘Description’ => ‘Stats’, ‘Group’ => [ ‘stats’ ], ‘GroupRo’ => [ ‘stats’ ], ‘Loader’ => { ‘JavaScript’ => [ ‘Core.Agent.Stats.js’ ] }, ‘NavBar’ => [ { ‘AccessKey’ => », ‘Block’ => ‘ItemArea’, ‘Description’ => », ‘Link’ => ‘Action=AgentStats;Subaction=Overview’, ‘LinkOption’ => », ‘Name’ => ‘Statistics’, ‘NavBar’ => ‘Stats’, ‘Prio’ => ‘8500’, ‘Type’ => ‘Menu’ }, { ‘AccessKey’ => », ‘Block’ => », ‘Description’ => ‘Overview’, ‘GroupRo’ => [ ‘stats’ ],

Configuration Options Reference
287
Description Value ‘Link’ => ‘Action=AgentStats;Subaction=Overview’, ‘LinkOption’ => », ‘Name’ => ‘Overview’, ‘NavBar’ => ‘Stats’, ‘Prio’ => ‘100’, ‘Type’ => » }, { ‘AccessKey’ => », ‘Block’ => », ‘Description’ => ‘New’, ‘Group’ => [ ‘stats’ ], ‘Link’ => ‘Action=AgentStats;Subaction=Add’, ‘LinkOption’ => », ‘Name’ => ‘New’, ‘NavBar’ => ‘Stats’, ‘Prio’ => ‘200’, ‘Type’ => » }, { ‘AccessKey’ => », ‘Block’ => », ‘Description’ => ‘Import’, ‘Group’ => [ ‘stats’ ], ‘Link’ => ‘Action=AgentStats;Subaction=Import’, ‘LinkOption’ => », ‘Name’ => ‘Import’, ‘NavBar’ => ‘Stats’, ‘Prio’ => ‘300’, ‘Type’ => » } ], ‘NavBarName’ => ‘Stats’, ‘Title’ => ‘Stats’};
Frontend::Agent::NavBarModuleFrontend::NavBarModule###6-CustomerCompany
Description ValueDescription: Frontend module registration (disable company link if no company
feature is used).Group: Framework

Configuration Options Reference
288
Description ValueSubGroup: Frontend::Agent::NavBarModuleValid: 1Required: 0Config-Setting:
$Self->{‘Frontend::NavBarModule’}->{‘6-CustomerCompany’} = { ‘Module’ => ‘Kernel::Output::HTML::NavBarCustomerCompany’};
Frontend::Agent::PreferencesPreferencesTableValue
Description ValueDescription: Defines the name of the column to store the data in the preferences
table.Group: FrameworkSubGroup: Frontend::Agent::PreferencesValid: 1Required: 1Config-Setting:
$Self->{‘PreferencesTableValue’} = ‘preferences_value’;
PreferencesTableUserID
Description ValueDescription: Defines the name of the column to store the user identifier in the
preferences table.Group: FrameworkSubGroup: Frontend::Agent::PreferencesValid: 1Required: 1Config-Setting:
$Self->{‘PreferencesTableUserID’} = ‘user_id’;
PreferencesView
Description ValueDescription: Sets the display order of the different items in the preferences view.Group: Framework

Configuration Options Reference
289
Description ValueSubGroup: Frontend::Agent::PreferencesValid: 1Required: 1Config-Setting:
$Self->{‘PreferencesView’} = [ ‘User Profile’, ‘Email Settings’, ‘Other Settings’];
PreferencesGroups###Password
Description ValueDescription: Defines the config parameters of this item, to be shown in the
preferences view.Group: FrameworkSubGroup: Frontend::Agent::PreferencesValid: 1Required: 0Config-Setting:
$Self->{‘PreferencesGroups’}->{‘Password’} = { ‘Active’ => ‘1’, ‘Area’ => ‘Agent’, ‘Column’ => ‘User Profile’, ‘Label’ => ‘Change password’, ‘Module’ => ‘Kernel::Output::HTML::PreferencesPassword’, ‘PasswordMaxLoginFailed’ => ‘0’, ‘PasswordMin2Characters’ => ‘0’, ‘PasswordMin2Lower2UpperCharacters’ => ‘0’, ‘PasswordMinSize’ => ‘0’, ‘PasswordNeedDigit’ => ‘0’, ‘PasswordRegExp’ => », ‘Prio’ => ‘0500’};
PreferencesGroups###SpellDict
Description ValueDescription: Defines the config parameters of this item, to be shown in the
preferences view. Take care to maintain the dictionaries installed in thesystem in the data section.
Group: FrameworkSubGroup: Frontend::Agent::PreferencesValid: 0

Configuration Options Reference
290
Description ValueRequired: 0Config-Setting:
$Self->{‘PreferencesGroups’}->{‘SpellDict’} = { ‘Active’ => ‘1’, ‘Column’ => ‘User Profile’, ‘Data’ => { ‘deutsch’ => ‘Deutsch’, ‘english’ => ‘English’ }, ‘DataSelected’ => ‘english’, ‘Key’ => ‘Default spelling dictionary’, ‘Label’ => ‘Spelling Dictionary’, ‘Module’ => ‘Kernel::Output::HTML::PreferencesGeneric’, ‘PrefKey’ => ‘UserSpellDict’, ‘Prio’ => ‘2000’};
PreferencesGroups###Comment
Description ValueDescription: Defines the config parameters of this item, to be shown in the
preferences view.Group: FrameworkSubGroup: Frontend::Agent::PreferencesValid: 1Required: 0Config-Setting:
$Self->{‘PreferencesGroups’}->{‘Comment’} = { ‘Active’ => ‘0’, ‘Block’ => ‘Input’, ‘Column’ => ‘Other Settings’, ‘Data’ => ‘$Env{«UserComment»}’, ‘Key’ => ‘Comment’, ‘Label’ => ‘Comment’, ‘Module’ => ‘Kernel::Output::HTML::PreferencesGeneric’, ‘PrefKey’ => ‘UserComment’, ‘Prio’ => ‘6000’};
PreferencesGroups###FreeText
Description ValueDescription: Defines the config parameters of this item, to be shown in the
preferences view.Group: Framework

Configuration Options Reference
291
Description ValueSubGroup: Frontend::Agent::PreferencesValid: 0Required: 0Config-Setting:
$Self->{‘PreferencesGroups’}->{‘FreeText’} = { ‘Active’ => ‘1’, ‘Block’ => ‘Input’, ‘Column’ => ‘Other Settings’, ‘Data’ => ‘$Env{«UserFreeText»}’, ‘Key’ => ‘Example for free text’, ‘Label’ => ‘Example for free text’, ‘Module’ => ‘Kernel::Output::HTML::PreferencesGeneric’, ‘PrefKey’ => ‘UserFreeText’, ‘Prio’ => ‘7000’};
PreferencesGroups###Language
Description ValueDescription: Defines the config parameters of this item, to be shown in the
preferences view.Group: FrameworkSubGroup: Frontend::Agent::PreferencesValid: 1Required: 0Config-Setting:
$Self->{‘PreferencesGroups’}->{‘Language’} = { ‘Active’ => ‘1’, ‘Column’ => ‘User Profile’, ‘Key’ => ‘Frontend language’, ‘Label’ => ‘Language’, ‘Module’ => ‘Kernel::Output::HTML::PreferencesLanguage’, ‘PrefKey’ => ‘UserLanguage’, ‘Prio’ => ‘1000’};
PreferencesGroups###Skin
Description ValueDescription: Defines the config parameters of this item, to be shown in the
preferences view.Group: FrameworkSubGroup: Frontend::Agent::PreferencesValid: 1

Configuration Options Reference
292
Description ValueRequired: 0Config-Setting:
$Self->{‘PreferencesGroups’}->{‘Skin’} = { ‘Active’ => ‘1’, ‘Column’ => ‘User Profile’, ‘Key’ => ‘Wear this frontend skin’, ‘Label’ => ‘Skin’, ‘Module’ => ‘Kernel::Output::HTML::PreferencesSkin’, ‘PrefKey’ => ‘UserSkin’, ‘Prio’ => ‘2000’};
PreferencesGroups###Theme
Description ValueDescription: Defines the config parameters of this item, to be shown in the
preferences view.Group: FrameworkSubGroup: Frontend::Agent::PreferencesValid: 1Required: 0Config-Setting:
$Self->{‘PreferencesGroups’}->{‘Theme’} = { ‘Active’ => ‘1’, ‘Column’ => ‘User Profile’, ‘Key’ => ‘Frontend theme’, ‘Label’ => ‘Theme’, ‘Module’ => ‘Kernel::Output::HTML::PreferencesTheme’, ‘PrefKey’ => ‘UserTheme’, ‘Prio’ => ‘3000’};
PreferencesGroups###OutOfOffice
Description ValueDescription: Defines the config parameters of this item, to be shown in the
preferences view.Group: FrameworkSubGroup: Frontend::Agent::PreferencesValid: 1Required: 0Config-Setting:
$Self->{‘PreferencesGroups’}->{‘OutOfOffice’} = { ‘Active’ => ‘1’,

Configuration Options Reference
293
Description Value ‘Block’ => ‘OutOfOffice’, ‘Column’ => ‘User Profile’, ‘Key’ => », ‘Label’ => ‘Out Of Office Time’, ‘Module’ => ‘Kernel::Output::HTML::PreferencesOutOfOffice’, ‘PrefKey’ => ‘UserOutOfOffice’, ‘Prio’ => ‘4000’};
PreferencesGroups###TimeZone
Description ValueDescription: Defines the config parameters of this item, to be shown in the
preferences view.Group: FrameworkSubGroup: Frontend::Agent::PreferencesValid: 1Required: 0Config-Setting:
$Self->{‘PreferencesGroups’}->{‘TimeZone’} = { ‘Active’ => ‘1’, ‘Column’ => ‘User Profile’, ‘Key’ => ‘Time Zone’, ‘Label’ => ‘Time Zone’, ‘Module’ => ‘Kernel::Output::HTML::PreferencesTimeZone’, ‘PrefKey’ => ‘UserTimeZone’, ‘Prio’ => ‘5000’};
PreferencesGroups###CSVSeparator
Description ValueDescription: Gives end users the possibility to override the separator character for
CSV files, defined in the translation files.Group: FrameworkSubGroup: Frontend::Agent::PreferencesValid: 0Required: 0Config-Setting:
$Self->{‘PreferencesGroups’}->{‘CSVSeparator’} = { ‘Active’ => ‘1’, ‘Column’ => ‘Other Settings’, ‘Data’ => {

Configuration Options Reference
294
Description Value » => », ‘,’ => ‘,’, ‘;’ => ‘;’, ‘\t’ => ‘tab’, ‘|’ => ‘|’ }, ‘DataSelected’ => ‘0’, ‘Desc’ => ‘Select the separator character used in CSV files (stats and searches). If you don’t select a separator here, the default separator for your language will be used.’, ‘Key’ => ‘CSV Separator’, ‘Label’ => ‘CSV Separator’, ‘Module’ => ‘Kernel::Output::HTML::PreferencesGeneric’, ‘PrefKey’ => ‘UserCSVSeparator’, ‘Prio’ => ‘4000’};
Frontend::Agent::SearchRouterFrontend::SearchDefault
Description ValueDescription: Search backend default router.Group: FrameworkSubGroup: Frontend::Agent::SearchRouterValid: 1Required: 0Config-Setting:
$Self->{‘Frontend::SearchDefault’} = ‘Action=AgentTicketSearch;Subaction=AJAX’;
Frontend::Agent::StatsStats::SearchPageShown
Description ValueDescription: Defines the default maximum number of search results shown on the
overview page.Group: FrameworkSubGroup: Frontend::Agent::StatsValid: 1Required: 1Config-Setting:

Configuration Options Reference
295
Description Value $Self->{‘Stats::SearchPageShown’} = ’20’;
Stats::DefaultSelectedDynamicObject
Description ValueDescription: Defines the default selection at the drop down menu for dynamic objects
(Form: Common Specification).Group: FrameworkSubGroup: Frontend::Agent::StatsValid: 1Required: 1Config-Setting:
$Self->{‘Stats::DefaultSelectedDynamicObject’} = ‘Ticket’;
Stats::DefaultSelectedPermissions
Description ValueDescription: Defines the default selection at the drop down menu for permissions
(Form: Common Specification).Group: FrameworkSubGroup: Frontend::Agent::StatsValid: 1Required: 1Config-Setting:
$Self->{‘Stats::DefaultSelectedPermissions’} = [ ‘stats’];
Stats::DefaultSelectedFormat
Description ValueDescription: Defines the default selection at the drop down menu for stats format
(Form: Common Specification). Please insert the format key (seeStats::Format).
Group: FrameworkSubGroup: Frontend::Agent::StatsValid: 1Required: 1Config-Setting:
$Self->{‘Stats::DefaultSelectedFormat’} = [ ‘Print’, ‘CSV’

Configuration Options Reference
296
Description Value];
Stats::SearchLimit
Description ValueDescription: Defines the search limit for the stats.Group: FrameworkSubGroup: Frontend::Agent::StatsValid: 1Required: 1Config-Setting:
$Self->{‘Stats::SearchLimit’} = ‘500’;
Stats::Format
Description ValueDescription: Defines all the possible stats output formats.Group: FrameworkSubGroup: Frontend::Agent::StatsValid: 1Required: 1Config-Setting:
$Self->{‘Stats::Format’} = { ‘CSV’ => ‘CSV’, ‘GD::Graph::area’ => ‘graph-area’, ‘GD::Graph::bars’ => ‘graph-bars’, ‘GD::Graph::hbars’ => ‘graph-hbars’, ‘GD::Graph::lines’ => ‘graph-lines’, ‘GD::Graph::linespoints’ => ‘graph-lines-points’, ‘GD::Graph::pie’ => ‘graph-pie’, ‘GD::Graph::points’ => ‘graph-points’, ‘Print’ => ‘Print’};
Stats::GraphSize
Description ValueDescription: Sets the size of the statistic graph.Group: FrameworkSubGroup: Frontend::Agent::StatsValid: 1Required: 1Config-Setting:
$Self->{‘Stats::GraphSize’} = {

Configuration Options Reference
297
Description Value ‘1200×800’ => ‘1200×800’, ‘1600×1200’ => ‘1600×1200’, ‘800×600’ => ‘800×600’};
Stats::TimeType
Description ValueDescription: Sets the time type which should be shown.Group: FrameworkSubGroup: Frontend::Agent::StatsValid: 1Required: 1Config-Setting:
$Self->{‘Stats::TimeType’} = ‘Extended’;
Stats::ExchangeAxis
Description ValueDescription: Allows agents to exchange the axis of a stat if they generate one.Group: FrameworkSubGroup: Frontend::Agent::StatsValid: 0Required: 0Config-Setting:
$Self->{‘Stats::ExchangeAxis’} = ‘0’;
Stats::UseAgentElementInStats
Description ValueDescription: Allows agents to generate individual-related stats.Group: FrameworkSubGroup: Frontend::Agent::StatsValid: 0Required: 0Config-Setting:
$Self->{‘Stats::UseAgentElementInStats’} = ‘0’;
Stats::CustomerIDAsMultiSelect
Description ValueDescription: Shows all the customer identifiers in a multi-select field (not useful if
you have a lot of customer identifiers).

Configuration Options Reference
298
Description ValueGroup: FrameworkSubGroup: Frontend::Agent::StatsValid: 1Required: 0Config-Setting:
$Self->{‘Stats::CustomerIDAsMultiSelect’} = ‘1’;
Frontend::CustomerCustomerHeadline
Description ValueDescription: The headline shown in the customer interface.Group: FrameworkSubGroup: Frontend::CustomerValid: 1Required: 1Config-Setting:
$Self->{‘CustomerHeadline’} = ‘Example Company Support’;
CustomerLogo
Description ValueDescription: The logo shown in the header of the customer interface. The URL to
the image must be a relative URL to the skin image directory.Group: FrameworkSubGroup: Frontend::CustomerValid: 0Required: 0Config-Setting:
$Self->{‘CustomerLogo’} = { ‘StyleHeight’ => ’50px’, ‘StyleRight’ => ’25px’, ‘StyleTop’ => ‘2px’, ‘StyleWidth’ => ‘135px’, ‘URL’ => ‘skins/Customer/default/img/logo.png’};
CustomerPanelUserID
Description ValueDescription: Defines the user identifier for the customer panel.

Configuration Options Reference
299
Description ValueGroup: FrameworkSubGroup: Frontend::CustomerValid: 1Required: 1Config-Setting:
$Self->{‘CustomerPanelUserID’} = ‘1’;
CustomerGroupSupport
Description ValueDescription: Activates support for customer groups.Group: FrameworkSubGroup: Frontend::CustomerValid: 1Required: 1Config-Setting:
$Self->{‘CustomerGroupSupport’} = ‘0’;
CustomerGroupAlwaysGroups
Description ValueDescription: Defines the groups every customer user will be in (if
CustomerGroupSupport is enabled and you don’t want to manage everyuser for these groups).
Group: FrameworkSubGroup: Frontend::CustomerValid: 1Required: 1Config-Setting:
$Self->{‘CustomerGroupAlwaysGroups’} = [ ‘users’];
CustomerPanelLoginURL
Description ValueDescription: Defines an alternate login URL for the customer panel..Group: FrameworkSubGroup: Frontend::CustomerValid: 0Required: 0Config-Setting:

Configuration Options Reference
300
Description Value $Self->{‘CustomerPanelLoginURL’} = ‘http://host.example.com/cgi-bin/login.pl’;
CustomerPanelLogoutURLDescription ValueDescription: Defines an alternate logout URL for the customer panel.Group: FrameworkSubGroup: Frontend::CustomerValid: 0Required: 0Config-Setting:
$Self->{‘CustomerPanelLogoutURL’} = ‘http://host.example.com/cgi-bin/login.pl’;
Frontend::CustomerUser::Item###1-GoogleMapsDescription ValueDescription: Defines a customer item, which generates a google maps icon at the
end of a customer info block.Group: FrameworkSubGroup: Frontend::CustomerValid: 1Required: 0Config-Setting:
$Self->{‘Frontend::CustomerUser::Item’}->{‘1-GoogleMaps’} = { ‘Attributes’ => ‘UserStreet;UserCity;UserCountry;’, ‘CSS’ => ‘Core.Agent.CustomerUser.GoogleMaps.css’, ‘CSSClass’ => ‘GoogleMaps’, ‘Module’ => ‘Kernel::Output::HTML::CustomerUserGeneric’, ‘Required’ => ‘UserStreet;UserCity;’, ‘Target’ => ‘_blank’, ‘Text’ => ‘Location’, ‘URL’ => ‘http://maps.google.com/maps?z=7&q=’};
Frontend::CustomerUser::Item###2-GoogleDescription ValueDescription: Defines a customer item, which generates a google icon at the end of
a customer info block.Group: Framework

Configuration Options Reference
301
Description ValueSubGroup: Frontend::CustomerValid: 0Required: 0Config-Setting:
$Self->{‘Frontend::CustomerUser::Item’}->{‘2-Google’} = { ‘Attributes’ => ‘UserFirstname;UserLastname;’, ‘CSS’ => ‘Core.Agent.CustomerUser.Google.css’, ‘CSSClass’ => ‘Google’, ‘Module’ => ‘Kernel::Output::HTML::CustomerUserGeneric’, ‘Required’ => ‘UserFirstname;UserLastname;’, ‘Target’ => ‘_blank’, ‘Text’ => ‘Google’, ‘URL’ => ‘http://google.com/search?q=’};
Frontend::CustomerUser::Item###2-LinkedIn
Description ValueDescription: Defines a customer item, which generates a LinkedIn icon at the end
of a customer info block.Group: FrameworkSubGroup: Frontend::CustomerValid: 0Required: 0Config-Setting:
$Self->{‘Frontend::CustomerUser::Item’}->{‘2-LinkedIn’} = { ‘Attributes’ => ‘UserFirstname;UserLastname;’, ‘CSS’ => ‘Core.Agent.CustomerUser.LinkedIn.css’, ‘CSSClass’ => ‘LinkedIn’, ‘Module’ => ‘Kernel::Output::HTML::CustomerUserGeneric’, ‘Required’ => ‘UserFirstname;UserLastname;’, ‘Target’ => ‘_blank’, ‘Text’ => ‘LinkedIn’, ‘URL’ => ‘http://www.linkedin.com/commonSearch?type=people&keywords=’};
Frontend::CustomerUser::Item###3-XING
Description ValueDescription: Defines a customer item, which generates a XING icon at the end of a
customer info block.Group: Framework

Configuration Options Reference
302
Description ValueSubGroup: Frontend::CustomerValid: 0Required: 0Config-Setting:
$Self->{‘Frontend::CustomerUser::Item’}->{‘3-XING’} = { ‘Attributes’ => ‘UserFirstname;UserLastname;’, ‘CSS’ => ‘Core.Agent.CustomerUser.Xing.css’, ‘CSSClass’ => ‘Xing’, ‘Module’ => ‘Kernel::Output::HTML::CustomerUserGeneric’, ‘Required’ => ‘UserFirstname;UserLastname;’, ‘Target’ => ‘_blank’, ‘Text’ => ‘XING’, ‘URL’ => ‘https://www.xing.com/app/search?op=search;keywords=’};
CustomerPanelPreApplicationModule###CustomerAccept
Description ValueDescription: This module and its PreRun() function will be executed, if defined, for
every request. This module is useful to check some user options or todisplay news about new applications.
Group: FrameworkSubGroup: Frontend::CustomerValid: 0Required: 0Config-Setting:
$Self->{‘CustomerPanelPreApplicationModule’}->{‘CustomerAccept’} = ‘Kernel::Modules::CustomerAccept’;
CustomerPanel::InfoKey
Description ValueDescription: Defines the key to check with CustomerAccept. If this user preferences
key is true, then the message is accepted by the system.Group: FrameworkSubGroup: Frontend::CustomerValid: 0Required: 0Config-Setting:
$Self->{‘CustomerPanel::InfoKey’} = ‘CustomerAccept1’;

Configuration Options Reference
303
CustomerPanel::InfoFile
Description ValueDescription: Defines the path of the shown info file, that is located under Kernel/
Output/HTML/Standard/CustomerAccept.dtl.Group: FrameworkSubGroup: Frontend::CustomerValid: 0Required: 0Config-Setting:
$Self->{‘CustomerPanel::InfoFile’} = ‘CustomerAccept’;
CustomerPanelLostPassword
Description ValueDescription: Activates lost password feature for customers.Group: FrameworkSubGroup: Frontend::CustomerValid: 1Required: 1Config-Setting:
$Self->{‘CustomerPanelLostPassword’} = ‘1’;
CustomerPanelCreateAccount
Description ValueDescription: Enables customers to create their own accounts.Group: FrameworkSubGroup: Frontend::CustomerValid: 1Required: 1Config-Setting:
$Self->{‘CustomerPanelCreateAccount’} = ‘1’;
CustomerPanelSubjectLostPasswordToken
Description ValueDescription: Defines the subject for notification mails sent to customers, with token
about new requested password.Group: FrameworkSubGroup: Frontend::Customer

Configuration Options Reference
304
Description ValueValid: 1Required: 1Config-Setting:
$Self->{‘CustomerPanelSubjectLostPasswordToken’} = ‘New OTRS password request’;
CustomerPanelBodyLostPasswordToken
Description ValueDescription: Defines the body text for notification mails sent to customers, with token
about new requested password (after using this link the new passwordwill be sent).
Group: FrameworkSubGroup: Frontend::CustomerValid: 1Required: 1Config-Setting:
$Self->{‘CustomerPanelBodyLostPasswordToken’} = ‘Hi <OTRS_USERFIRSTNAME>,
You or someone impersonating you has requested to change your OTRSpassword.
If you want to do this, click on this link. You will receive another email containing the password.
<OTRS_CONFIG_HttpType>://<OTRS_CONFIG_FQDN>/<OTRS_CONFIG_ScriptAlias>customer.pl?Action=CustomerLostPassword;Token=<OTRS_TOKEN>
If you did not request a new password, please ignore this email. ‘;
CustomerPanelSubjectLostPassword
Description ValueDescription: Defines the subject for notification mails sent to customers, about new
password.Group: FrameworkSubGroup: Frontend::CustomerValid: 1Required: 1Config-Setting:

Configuration Options Reference
305
Description Value $Self->{‘CustomerPanelSubjectLostPassword’} = ‘New OTRS password’;
CustomerPanelBodyLostPassword
Description ValueDescription: Defines the body text for notification mails sent to customers, about new
password (after using this link the new password will be sent).Group: FrameworkSubGroup: Frontend::CustomerValid: 1Required: 1Config-Setting:
$Self->{‘CustomerPanelBodyLostPassword’} = ‘Hi <OTRS_USERFIRSTNAME>,
New password: <OTRS_NEWPW>
<OTRS_CONFIG_HttpType>://<OTRS_CONFIG_FQDN>/<OTRS_CONFIG_ScriptAlias>customer.pl ‘;
CustomerPanelSubjectNewAccount
Description ValueDescription: Defines the subject for notification mails sent to customers, about new
account.Group: FrameworkSubGroup: Frontend::CustomerValid: 1Required: 1Config-Setting:
$Self->{‘CustomerPanelSubjectNewAccount’} = ‘New OTRS Account!’;
CustomerPanelBodyNewAccount
Description ValueDescription: Defines the body text for notification mails sent to customers, about new
account.Group: FrameworkSubGroup: Frontend::CustomerValid: 1

Configuration Options Reference
306
Description ValueRequired: 1Config-Setting:
$Self->{‘CustomerPanelBodyNewAccount’} = ‘Hi <OTRS_USERFIRSTNAME>,
You or someone impersonating you has created a new OTRS account foryou.
Full name: <OTRS_USERFIRSTNAME> <OTRS_USERLASTNAME>User name: <OTRS_USERLOGIN>Password : <OTRS_USERPASSWORD>
You can log in via the following URL. We encourage you to change your passwordvia the Preferences button after logging in.
<OTRS_CONFIG_HttpType>://<OTRS_CONFIG_FQDN>/<OTRS_CONFIG_ScriptAlias>customer.pl ‘;
Loader::Customer::Skin###000-default
Description ValueDescription: Default skin for OTRS 3.0 interface.Group: FrameworkSubGroup: Frontend::CustomerValid: 1Required: 0Config-Setting:
$Self->{‘Loader::Customer::Skin’}->{‘000-default’} = { ‘Description’ => ‘This is the default orange — black skin for OTRS 3.0.’, ‘HomePage’ => ‘www.otrs.org’, ‘InternalName’ => ‘default’, ‘VisibleName’ => ‘Default’};
Loader::Customer::SelectedSkin
Description ValueDescription: The customer skin’s InternalName which should be used in
the customer interface. Please check the available skins inFrontend::Customer::Skins.
Group: FrameworkSubGroup: Frontend::Customer

Configuration Options Reference
307
Description ValueValid: 1Required: 1Config-Setting:
$Self->{‘Loader::Customer::SelectedSkin’} = ‘default’;
Frontend::Customer::AuthCustomer::AuthModule
Description ValueDescription: Defines the module to authenticate customers.Group: FrameworkSubGroup: Frontend::Customer::AuthValid: 1Required: 1Config-Setting:
$Self->{‘Customer::AuthModule’} = ‘Kernel::System::CustomerAuth::DB’;
Customer::AuthModule::DB::CryptType
Description ValueDescription: If «DB» was selected for Customer::AuthModule, the crypt type of
passwords must be specified.Group: FrameworkSubGroup: Frontend::Customer::AuthValid: 1Required: 1Config-Setting:
$Self->{‘Customer::AuthModule::DB::CryptType’} = ‘md5’;
Customer::AuthModule::DB::Table
Description ValueDescription: If «DB» was selected for Customer::AuthModule, the name of the table
where your customer data should be stored must be specified.Group: FrameworkSubGroup: Frontend::Customer::AuthValid: 1Required: 1

Configuration Options Reference
308
Description ValueConfig-Setting:
$Self->{‘Customer::AuthModule::DB::Table’} = ‘customer_user’;
Customer::AuthModule::DB::CustomerKey
Description ValueDescription: If «DB» was selected for Customer::AuthModule, the name of the column
for the CustomerKey in the customer table must be specified.Group: FrameworkSubGroup: Frontend::Customer::AuthValid: 1Required: 1Config-Setting:
$Self->{‘Customer::AuthModule::DB::CustomerKey’} = ‘login’;
Customer::AuthModule::DB::CustomerPassword
Description ValueDescription: If «DB» was selected for Customer::AuthModule, the column name for
the CustomerPassword in the customer table must be specified.Group: FrameworkSubGroup: Frontend::Customer::AuthValid: 1Required: 1Config-Setting:
$Self->{‘Customer::AuthModule::DB::CustomerPassword’} = ‘pw’;
Customer::AuthModule::DB::DSN
Description ValueDescription: If «DB» was selected for Customer::AuthModule, the DSN for the
connection to the customer table must be specified.Group: FrameworkSubGroup: Frontend::Customer::AuthValid: 0Required: 0Config-Setting:
$Self->{‘Customer::AuthModule::DB::DSN’} = ‘DBI:mysql:database=customerdb;host=customerdbhost’;

Configuration Options Reference
309
Customer::AuthModule::DB::UserDescription ValueDescription: If «DB» was selected for Customer::AuthModule, a username to connect
to the customer table can be specified.Group: FrameworkSubGroup: Frontend::Customer::AuthValid: 0Required: 0Config-Setting:
$Self->{‘Customer::AuthModule::DB::User’} = ‘some_user’;
Customer::AuthModule::DB::PasswordDescription ValueDescription: If «DB» was selected for Customer::AuthModule, a password to connect
to the customer table can be specified.Group: FrameworkSubGroup: Frontend::Customer::AuthValid: 0Required: 0Config-Setting:
$Self->{‘Customer::AuthModule::DB::Password’} = ‘some_password’;
Customer::AuthModule::DB::TypeDescription ValueDescription: If «DB» was selected for Customer::AuthModule, a database driver
(normally autodetection is used) can be specified.Group: FrameworkSubGroup: Frontend::Customer::AuthValid: 0Required: 0Config-Setting:
$Self->{‘Customer::AuthModule::DB::Type’} = ‘mysql’;
Customer::AuthModule::HTTPBasicAuth::ReplaceDescription ValueDescription: If «HTTPBasicAuth» was selected for Customer::AuthModule, you can
specify to strip leading parts of user names (e. g. for domains likeexample_domainuser to user).

Configuration Options Reference
310
Description ValueGroup: FrameworkSubGroup: Frontend::Customer::AuthValid: 0Required: 0Config-Setting:
$Self->{‘Customer::AuthModule::HTTPBasicAuth::Replace’} = ‘example_domain\\’;
Customer::AuthModule::HTTPBasicAuth::ReplaceRegExpDescription ValueDescription: If «HTTPBasicAuth» was selected for Customer::AuthModule, you can
specify (by using a RegExp) to strip parts of REMOTE_USER (e. g. forto remove trailing domains). RegExp-Note, $1 will be the new Login.
Group: FrameworkSubGroup: Frontend::Customer::AuthValid: 0Required: 0Config-Setting:
$Self->{‘Customer::AuthModule::HTTPBasicAuth::ReplaceRegExp’} = ‘^(.+?)@.+?$’;
Customer::AuthModule::LDAP::HostDescription ValueDescription: If «LDAP» was selected for Customer::AuthModule, the LDAP host can
be specified.Group: FrameworkSubGroup: Frontend::Customer::AuthValid: 0Required: 0Config-Setting:
$Self->{‘Customer::AuthModule::LDAP::Host’} = ‘ldap.example.com’;
Customer::AuthModule::LDAP::BaseDNDescription ValueDescription: If «LDAP» was selected for Customer::AuthModule, the BaseDN must
be specified.Group: FrameworkSubGroup: Frontend::Customer::Auth

Configuration Options Reference
311
Description ValueValid: 0Required: 0Config-Setting:
$Self->{‘Customer::AuthModule::LDAP::BaseDN’} = ‘dc=example,dc=com’;
Customer::AuthModule::LDAP::UIDDescription ValueDescription: If «LDAP» was selected for Customer::AuthModule, the user identifier
must be specified.Group: FrameworkSubGroup: Frontend::Customer::AuthValid: 0Required: 0Config-Setting:
$Self->{‘Customer::AuthModule::LDAP::UID’} = ‘uid’;
Customer::AuthModule::LDAP::GroupDNDescription ValueDescription: If «LDAP» was selected for Customer::Authmodule, you can check if the
user is allowed to authenticate because he is in a posixGroup, e.g. userneeds to be in a group xyz to use OTRS. Specify the group, who mayaccess the system.
Group: FrameworkSubGroup: Frontend::Customer::AuthValid: 0Required: 0Config-Setting:
$Self->{‘Customer::AuthModule::LDAP::GroupDN’} = ‘cn=otrsallow,ou=posixGroups,dc=example,dc=com’;
Customer::AuthModule::LDAP::AccessAttrDescription ValueDescription: If «LDAP» was selected for Customer::AuthModule, you can specify
access attributes here.Group: FrameworkSubGroup: Frontend::Customer::AuthValid: 0Required: 0Config-Setting:

Configuration Options Reference
312
Description Value $Self->{‘Customer::AuthModule::LDAP::AccessAttr’} = ‘memberUid’;
Customer::AuthModule::LDAP::UserAttr
Description ValueDescription: If «LDAP» was selected for Customer::AuthModule, user attributes
can be specified. For LDAP posixGroups use UID, for non LDAPposixGroups use full user DN.
Group: FrameworkSubGroup: Frontend::Customer::AuthValid: 0Required: 0Config-Setting:
$Self->{‘Customer::AuthModule::LDAP::UserAttr’} = ‘UID’;
Customer::AuthModule::LDAP::SearchUserDN
Description ValueDescription: If «LDAP» was selected for Customer::AuthModule and your users have
only anonymous access to the LDAP tree, but you want to searchthrough the data, you can do this with a user who has access to theLDAP directory. Specify the username for this special user here.
Group: FrameworkSubGroup: Frontend::Customer::AuthValid: 0Required: 0Config-Setting:
$Self->{‘Customer::AuthModule::LDAP::SearchUserDN’} = ‘cn=binduser,ou=users,dc=example,dc=com’;
Customer::AuthModule::LDAP::SearchUserPw
Description ValueDescription: If «LDAP» was selected for Customer::AuthModule and your users have
only anonymous access to the LDAP tree, but you want to searchthrough the data, you can do this with a user who has access to theLDAP directory. Specify the password for this special user here.
Group: FrameworkSubGroup: Frontend::Customer::AuthValid: 0Required: 0

Configuration Options Reference
313
Description ValueConfig-Setting:
$Self->{‘Customer::AuthModule::LDAP::SearchUserPw’} = ‘some_password’;
Customer::AuthModule::LDAP::AlwaysFilter
Description ValueDescription: If «LDAP» was selected, you can add a filter to each LDAP query, e.g.
(mail=*), (objectclass=user) or (!objectclass=computer).Group: FrameworkSubGroup: Frontend::Customer::AuthValid: 0Required: 0Config-Setting:
$Self->{‘Customer::AuthModule::LDAP::AlwaysFilter’} = ‘(!objectclass=computer)’;
Customer::AuthModule::LDAP::UserSuffix
Description ValueDescription: If «LDAP» was selected for Customer::AuthModule and if you want to
add a suffix to every customer login name, specifiy it here, e. g. youjust want to write the username user but in your LDAP directory [email protected]
Group: FrameworkSubGroup: Frontend::Customer::AuthValid: 0Required: 0Config-Setting:
$Self->{‘Customer::AuthModule::LDAP::UserSuffix’} = ‘@domain.com’;
Customer::AuthModule::LDAP::Params
Description ValueDescription: If «LDAP» was selected for Customer::AuthModule and special
paramaters are needed for the Net::LDAP perl module, you can specifythem here. See «perldoc Net::LDAP» for more information about theparameters.
Group: FrameworkSubGroup: Frontend::Customer::AuthValid: 0

Configuration Options Reference
314
Description ValueRequired: 0Config-Setting:
$Self->{‘Customer::AuthModule::LDAP::Params’} = { ‘async’ => ‘0’, ‘port’ => ‘389’, ‘timeout’ => ‘120’, ‘version’ => ‘3’};
Customer::AuthModule::LDAP::DieDescription ValueDescription: If «LDAP» was selected for Customer::AuthModule, you can specify
if the applications will stop if e. g. a connection to a server can’t beestablished due to network problems.
Group: FrameworkSubGroup: Frontend::Customer::AuthValid: 1Required: 0Config-Setting:
$Self->{‘Customer::AuthModule::LDAP::Die’} = ‘1’;
Customer::AuthModule::Radius::HostDescription ValueDescription: If «Radius» was selected for Customer::AuthModule, the radius host
must be specified.Group: FrameworkSubGroup: Frontend::Customer::AuthValid: 0Required: 0Config-Setting:
$Self->{‘Customer::AuthModule::Radius::Host’} = ‘radiushost’;
Customer::AuthModule::Radius::PasswordDescription ValueDescription: If «Radius» was selected for Customer::AuthModule, the password to
authenticate to the radius host must be specified.Group: FrameworkSubGroup: Frontend::Customer::AuthValid: 0Required: 0

Configuration Options Reference
315
Description ValueConfig-Setting:
$Self->{‘Customer::AuthModule::Radius::Password’} = ‘radiussecret’;
Customer::AuthModule::Radius::Die
Description ValueDescription: If «Radius» was selected for Customer::AuthModule, you can specify
if the applications will stop if e. g. a connection to a server can’t beestablished due to network problems.
Group: FrameworkSubGroup: Frontend::Customer::AuthValid: 1Required: 0Config-Setting:
$Self->{‘Customer::AuthModule::Radius::Die’} = ‘1’;
Frontend::Customer::ModuleMetaHeadCustomerFrontend::HeaderMetaModule###1-Refresh
Description ValueDescription: Defines the module to generate html refresh headers of html sites, in
the customer interface.Group: FrameworkSubGroup: Frontend::Customer::ModuleMetaHeadValid: 1Required: 1Config-Setting:
$Self->{‘CustomerFrontend::HeaderMetaModule’}->{‘1-Refresh’} = { ‘Module’ => ‘Kernel::Output::HTML::HeaderMetaRefresh’};
Frontend::Customer::ModuleNotifyCustomerFrontend::NotifyModule###1-ShowAgentOnline
Description ValueDescription: Defines the module that shows the currently loged in agents in the
customer interface.Group: Framework

Configuration Options Reference
316
Description ValueSubGroup: Frontend::Customer::ModuleNotifyValid: 0Required: 0Config-Setting:
$Self->{‘CustomerFrontend::NotifyModule’}->{‘1-ShowAgentOnline’} = { ‘IdleMinutes’ => ’60’, ‘Module’ => ‘Kernel::Output::HTML::NotificationAgentOnline’, ‘ShowEmail’ => ‘1’};
CustomerFrontend::NotifyModule###1-ShowCustomerOnline
Description ValueDescription: Defines the module that shows the currently loged in customers in the
customer interface.Group: FrameworkSubGroup: Frontend::Customer::ModuleNotifyValid: 0Required: 0Config-Setting:
$Self->{‘CustomerFrontend::NotifyModule’}->{‘1-ShowCustomerOnline’} = { ‘Module’ => ‘Kernel::Output::HTML::NotificationCustomerOnline’, ‘ShowEmail’ => ‘1’};
Frontend::Customer::ModuleRegistrationCustomerFrontend::Module###Logout
Description ValueDescription: Frontend module registration for the customer interface.Group: FrameworkSubGroup: Frontend::Customer::ModuleRegistrationValid: 1Required: 0Config-Setting:
$Self->{‘CustomerFrontend::Module’}->{‘Logout’} = { ‘Description’ => ‘Logout of customer panel’, ‘NavBarName’ => », ‘Title’ => »

Configuration Options Reference
317
Description Value};
CustomerFrontend::Module###CustomerPreferencesDescription ValueDescription: Frontend module registration for the customer interface.Group: FrameworkSubGroup: Frontend::Customer::ModuleRegistrationValid: 1Required: 0Config-Setting:
$Self->{‘CustomerFrontend::Module’}->{‘CustomerPreferences’} = { ‘Description’ => ‘Customer preferences’, ‘NavBarName’ => », ‘Title’ => ‘Preferences’};
CustomerFrontend::Module###CustomerAcceptDescription ValueDescription: Frontend module registration for the customer interface.Group: FrameworkSubGroup: Frontend::Customer::ModuleRegistrationValid: 1Required: 0Config-Setting:
$Self->{‘CustomerFrontend::Module’}->{‘CustomerAccept’} = { ‘Description’ => ‘To accept login infos’, ‘NavBarName’ => », ‘Title’ => ‘Info’};
CustomerFrontend::Module###PictureUploadDescription ValueDescription: Frontend module registration for the customer interface.Group: FrameworkSubGroup: Frontend::Customer::ModuleRegistrationValid: 1Required: 1Config-Setting:
$Self->{‘CustomerFrontend::Module’}->{‘PictureUpload’} = {

Configuration Options Reference
318
Description Value ‘Description’ => ‘Picture upload module’, ‘NavBarName’ => ‘Ticket’, ‘Title’ => ‘Picture-Upload’};
Frontend::Customer::PreferencesPreferencesTable
Description ValueDescription: Defines the name of the table, where the customer preferences are
stored.Group: FrameworkSubGroup: Frontend::Customer::PreferencesValid: 1Required: 1Config-Setting:
$Self->{‘PreferencesTable’} = ‘user_preferences’;
PreferencesTableKey
Description ValueDescription: Defines the column to store the keys for the preferences table.Group: FrameworkSubGroup: Frontend::Customer::PreferencesValid: 1Required: 1Config-Setting:
$Self->{‘PreferencesTableKey’} = ‘preferences_key’;
CustomerPreferences
Description ValueDescription: Defines the parameters for the customer preferences table.Group: FrameworkSubGroup: Frontend::Customer::PreferencesValid: 1Required: 1Config-Setting:
$Self->{‘CustomerPreferences’} = { ‘Module’ => ‘Kernel::System::CustomerUser::Preferences::DB’,

Configuration Options Reference
319
Description Value ‘Params’ => { ‘Table’ => ‘customer_preferences’, ‘TableKey’ => ‘preferences_key’, ‘TableUserID’ => ‘user_id’, ‘TableValue’ => ‘preferences_value’ }};
CustomerPreferencesView
Description ValueDescription: Sets the order of the different items in the customer preferences view.Group: FrameworkSubGroup: Frontend::Customer::PreferencesValid: 1Required: 1Config-Setting:
$Self->{‘CustomerPreferencesView’} = [ ‘User Profile’, ‘Other Settings’];
CustomerPreferencesGroups###Password
Description ValueDescription: Defines all the parameters for this item in the customer preferences.Group: FrameworkSubGroup: Frontend::Customer::PreferencesValid: 1Required: 0Config-Setting:
$Self->{‘CustomerPreferencesGroups’}->{‘Password’} = { ‘Active’ => ‘1’, ‘Area’ => ‘Customer’, ‘Column’ => ‘Other Settings’, ‘Label’ => ‘Change password’, ‘Module’ => ‘Kernel::Output::HTML::PreferencesPassword’, ‘PasswordMin2Characters’ => ‘0’, ‘PasswordMin2Lower2UpperCharacters’ => ‘0’, ‘PasswordMinSize’ => ‘0’, ‘PasswordNeedDigit’ => ‘0’, ‘PasswordRegExp’ => », ‘Prio’ => ‘1000’};

Configuration Options Reference
320
CustomerPreferencesGroups###Language
Description ValueDescription: Defines all the parameters for this item in the customer preferences.Group: FrameworkSubGroup: Frontend::Customer::PreferencesValid: 1Required: 0Config-Setting:
$Self->{‘CustomerPreferencesGroups’}->{‘Language’} = { ‘Active’ => ‘1’, ‘Column’ => ‘User Profile’, ‘Key’ => ‘Your language’, ‘Label’ => ‘Interface language’, ‘Module’ => ‘Kernel::Output::HTML::PreferencesLanguage’, ‘PrefKey’ => ‘UserLanguage’, ‘Prio’ => ‘2000’};
CustomerPreferencesGroups###Theme
Description ValueDescription: Defines all the parameters for this item in the customer preferences.Group: FrameworkSubGroup: Frontend::Customer::PreferencesValid: 1Required: 0Config-Setting:
$Self->{‘CustomerPreferencesGroups’}->{‘Theme’} = { ‘Active’ => ‘0’, ‘Column’ => ‘User Profile’, ‘Key’ => ‘Select your frontend Theme.’, ‘Label’ => ‘Theme’, ‘Module’ => ‘Kernel::Output::HTML::PreferencesTheme’, ‘PrefKey’ => ‘UserTheme’, ‘Prio’ => ‘1000’};
CustomerPreferencesGroups###TimeZone
Description ValueDescription: Defines all the parameters for this item in the customer preferences.

Configuration Options Reference
321
Description ValueGroup: FrameworkSubGroup: Frontend::Customer::PreferencesValid: 1Required: 0Config-Setting:
$Self->{‘CustomerPreferencesGroups’}->{‘TimeZone’} = { ‘Active’ => ‘1’, ‘Column’ => ‘User Profile’, ‘Key’ => ‘Time Zone’, ‘Label’ => ‘Time Zone’, ‘Module’ => ‘Kernel::Output::HTML::PreferencesTimeZone’, ‘PrefKey’ => ‘UserTimeZone’, ‘Prio’ => ‘5000’};
CustomerPreferencesGroups###PGP
Description ValueDescription: Defines all the parameters for this item in the customer preferences.Group: FrameworkSubGroup: Frontend::Customer::PreferencesValid: 1Required: 0Config-Setting:
$Self->{‘CustomerPreferencesGroups’}->{‘PGP’} = { ‘Active’ => ‘1’, ‘Column’ => ‘Other Settings’, ‘Key’ => ‘PGP Key Upload’, ‘Label’ => ‘PGP Key’, ‘Module’ => ‘Kernel::Output::HTML::PreferencesPGP’, ‘PrefKey’ => ‘UserPGPKey’, ‘Prio’ => ‘10000’};
CustomerPreferencesGroups###SMIME
Description ValueDescription: Defines all the parameters for this item in the customer preferences.Group: FrameworkSubGroup: Frontend::Customer::PreferencesValid: 1Required: 0

Configuration Options Reference
322
Description ValueConfig-Setting:
$Self->{‘CustomerPreferencesGroups’}->{‘SMIME’} = { ‘Active’ => ‘1’, ‘Column’ => ‘Other Settings’, ‘Key’ => ‘S/MIME Certificate Upload’, ‘Label’ => ‘S/MIME Certificate’, ‘Module’ => ‘Kernel::Output::HTML::PreferencesSMIME’, ‘PrefKey’ => ‘UserSMIMEKey’, ‘Prio’ => ‘11000’};
Frontend::PublicPublicFrontend::CommonParam###Action
Description ValueDescription: Defines the default value for the action parameter for the public
frontend. The action parameter is used in the scripts of the system.Group: FrameworkSubGroup: Frontend::PublicValid: 1Required: 1Config-Setting:
$Self->{‘PublicFrontend::CommonParam’}->{‘Action’} = ‘PublicDefault’;
Frontend::Public::ModuleRegistrationPublicFrontend::Module###PublicDefault
Description ValueDescription: Frontend module registration for the agent interface.Group: FrameworkSubGroup: Frontend::Public::ModuleRegistrationValid: 1Required: 0Config-Setting:
$Self->{‘PublicFrontend::Module’}->{‘PublicDefault’} = { ‘Description’ => ‘PublicDefault’, ‘NavBarName’ => », ‘Title’ => ‘PublicDefault’};

Configuration Options Reference
323
PublicFrontend::Module###PublicRepository
Description ValueDescription: Frontend module registration for the agent interface.Group: FrameworkSubGroup: Frontend::Public::ModuleRegistrationValid: 1Required: 0Config-Setting:
$Self->{‘PublicFrontend::Module’}->{‘PublicRepository’} = { ‘Description’ => ‘PublicRepository’, ‘NavBarName’ => », ‘Title’ => ‘PublicRepository’};
TicketCore::ArticleFreeTextArticleFreeKey1
Description ValueDescription: Defines the free key field number 1 for articles to add a new article
attribute.Group: TicketSubGroup: Core::ArticleFreeTextValid: 0Required: 0Config-Setting:
$Self->{‘ArticleFreeKey1’} = { ‘Work1’ => ‘Work1’};
ArticleFreeKey1::DefaultSelection
Description ValueDescription: Defines the default selection of the free key field number 1 for articles
(if more than one option is provided).Group: TicketSubGroup: Core::ArticleFreeTextValid: 0Required: 0Config-Setting:

Configuration Options Reference
324
Description Value $Self->{‘ArticleFreeKey1::DefaultSelection’} = »;
ArticleFreeText1
Description ValueDescription: Defines the free text field number 1 for articles to add a new article
attribute.Group: TicketSubGroup: Core::ArticleFreeTextValid: 0Required: 0Config-Setting:
$Self->{‘ArticleFreeText1’} = { » => ‘-‘, ‘Bugfix’ => ‘Bugfix’, ‘Consulting’ => ‘Consulting’, ‘Research’ => ‘Research’};
ArticleFreeText1::DefaultSelection
Description ValueDescription: Defines the default selection of the free text field number 1 for articles
(if more than one option is provided).Group: TicketSubGroup: Core::ArticleFreeTextValid: 0Required: 0Config-Setting:
$Self->{‘ArticleFreeText1::DefaultSelection’} = ‘Research’;
ArticleFreeKey2
Description ValueDescription: Defines the free key field number 2 for articles to add a new article
attribute.Group: TicketSubGroup: Core::ArticleFreeTextValid: 0Required: 0Config-Setting:

Configuration Options Reference
325
Description Value $Self->{‘ArticleFreeKey2’} = { ‘Work2’ => ‘Work2’};
ArticleFreeKey2::DefaultSelection
Description ValueDescription: Defines the default selection of the free key field number 2 for articles
(if more than one option is provided).Group: TicketSubGroup: Core::ArticleFreeTextValid: 0Required: 0Config-Setting:
$Self->{‘ArticleFreeKey2::DefaultSelection’} = »;
ArticleFreeText2
Description ValueDescription: Defines the free text field number 2 for articles to add a new article
attribute.Group: TicketSubGroup: Core::ArticleFreeTextValid: 0Required: 0Config-Setting:
$Self->{‘ArticleFreeText2’} = { » => ‘-‘, ‘Bugfix’ => ‘Bugfix’, ‘Consulting’ => ‘Consulting’, ‘Research’ => ‘Research’};
ArticleFreeText2::DefaultSelection
Description ValueDescription: Defines the default selection of the free text field number 2 for articles
(if more than one option is provided).Group: TicketSubGroup: Core::ArticleFreeTextValid: 0Required: 0Config-Setting:

Configuration Options Reference
326
Description Value $Self->{‘ArticleFreeText2::DefaultSelection’} = ‘Research’;
ArticleFreeKey3Description ValueDescription: Defines the free key field number 3 for articles to add a new article
attribute.Group: TicketSubGroup: Core::ArticleFreeTextValid: 0Required: 0Config-Setting:
$Self->{‘ArticleFreeKey3’} = { ‘Work3’ => ‘Work3’};
ArticleFreeKey3::DefaultSelectionDescription ValueDescription: Defines the default selection of the free key field number 3 for articles
(if more than one option is provided).Group: TicketSubGroup: Core::ArticleFreeTextValid: 0Required: 0Config-Setting:
$Self->{‘ArticleFreeKey3::DefaultSelection’} = »;
ArticleFreeText3Description ValueDescription: Defines the free text field number 3 for articles to add a new article
attribute.Group: TicketSubGroup: Core::ArticleFreeTextValid: 0Required: 0Config-Setting:
$Self->{‘ArticleFreeText3’} = { » => ‘-‘, ‘Bugfix’ => ‘Bugfix’, ‘Consulting’ => ‘Consulting’, ‘Research’ => ‘Research’

Configuration Options Reference
327
Description Value};
ArticleFreeText3::DefaultSelectionDescription ValueDescription: Defines the default selection of the free text field number 3 for articles
(if more than one option is provided).Group: TicketSubGroup: Core::ArticleFreeTextValid: 0Required: 0Config-Setting:
$Self->{‘ArticleFreeText3::DefaultSelection’} = ‘Research’;
Core::FulltextSearchTicket::SearchIndexModule
Description ValueDescription: Helps to extend your articles full-text search (From, To, Cc, Subject and
Body search). Runtime will do full-text searches on live data (it worksfine for up to 50.000 tickets). StaticDB will strip all articles and will buildan index after article creation, increasing fulltext searches about 50%.To create an initial index use «bin/otrs.RebuildFulltextIndex.pl».
Group: TicketSubGroup: Core::FulltextSearchValid: 1Required: 1Config-Setting:
$Self->{‘Ticket::SearchIndexModule’} = ‘Kernel::System::Ticket::ArticleSearchIndex::RuntimeDB’;
Ticket::SearchIndex::AttributeDescription ValueDescription: Configures the full-text index. Execute «bin/otrs.RebuildFulltextIndex.pl»
in order to generate a new index.Group: TicketSubGroup: Core::FulltextSearchValid: 1Required: 1Config-Setting:
$Self->{‘Ticket::SearchIndex::Attribute’} = {

Configuration Options Reference
328
Description Value ‘WordCountMax’ => ‘1000’, ‘WordLengthMax’ => ’30’, ‘WordLengthMin’ => ‘3’};
Ticket::EventModulePost###98-ArticleSearchIndexDescription ValueDescription: Builds an article index right after the article’s creation.Group: TicketSubGroup: Core::FulltextSearchValid: 1Required: 0Config-Setting:
$Self->{‘Ticket::EventModulePost’}->{’98-ArticleSearchIndex’} = { ‘Event’ => ‘(ArticleCreate|ArticleUpdate)’, ‘Module’ => ‘Kernel::System::Ticket::Event::ArticleSearchIndex’};
Core::LinkObjectLinkObject::PossibleLink###0200
Description ValueDescription: Links 2 tickets with a «Normal» type link.Group: TicketSubGroup: Core::LinkObjectValid: 1Required: 0Config-Setting:
$Self->{‘LinkObject::PossibleLink’}->{‘0200’} = { ‘Object1’ => ‘Ticket’, ‘Object2’ => ‘Ticket’, ‘Type’ => ‘Normal’};
LinkObject::PossibleLink###0201Description ValueDescription: Links 2 tickets with a «ParentChild» type link.Group: TicketSubGroup: Core::LinkObjectValid: 1

Configuration Options Reference
329
Description ValueRequired: 0Config-Setting:
$Self->{‘LinkObject::PossibleLink’}->{‘0201’} = { ‘Object1’ => ‘Ticket’, ‘Object2’ => ‘Ticket’, ‘Type’ => ‘ParentChild’};
Core::PostMasterPostmasterMaxEmails
Description ValueDescription: Maximal auto email responses to own email-address a day (Loop-
Protection).Group: TicketSubGroup: Core::PostMasterValid: 1Required: 1Config-Setting:
$Self->{‘PostmasterMaxEmails’} = ’40’;
PostMasterMaxEmailSize
Description ValueDescription: Maximal size in KBytes for mails that can be fetched via POP3/POP3S/
IMAP/IMAPS (KBytes).Group: TicketSubGroup: Core::PostMasterValid: 1Required: 1Config-Setting:
$Self->{‘PostMasterMaxEmailSize’} = ‘16384’;
PostMasterReconnectMessage
Description ValueDescription: The «bin/PostMasterMailAccount.pl» will reconnect to POP3/POP3S/
IMAP/IMAPS host after the specified count of messages.Group: TicketSubGroup: Core::PostMasterValid: 1Required: 1

Configuration Options Reference
330
Description ValueConfig-Setting:
$Self->{‘PostMasterReconnectMessage’} = ’20’;
LoopProtectionModuleDescription ValueDescription: Default loop protection module.Group: TicketSubGroup: Core::PostMasterValid: 1Required: 1Config-Setting:
$Self->{‘LoopProtectionModule’} = ‘Kernel::System::PostMaster::LoopProtection::DB’;
LoopProtectionLogDescription ValueDescription: Path for the log file (it only applies if «FS» was selected for
LoopProtectionModule and it is mandatory).Group: TicketSubGroup: Core::PostMasterValid: 1Required: 1Config-Setting:
$Self->{‘LoopProtectionLog’} = ‘<OTRS_CONFIG_Home>/var/log/LoopProtection’;
PostmasterAutoHTML2TextDescription ValueDescription: Converts HTML mails into text messages.Group: TicketSubGroup: Core::PostMasterValid: 1Required: 1Config-Setting:
$Self->{‘PostmasterAutoHTML2Text’} = ‘1’;
PostmasterFollowUpSearchInReferencesDescription ValueDescription: Executes follow up checks on In-Reply-To or References headers for
mails that don’t have a ticket number in the subject.

Configuration Options Reference
331
Description ValueGroup: TicketSubGroup: Core::PostMasterValid: 1Required: 1Config-Setting:
$Self->{‘PostmasterFollowUpSearchInReferences’} = ‘0’;
PostmasterFollowUpSearchInBody
Description ValueDescription: Executes follow up mail body checks in mails that don’t have a ticket
number in the subject.Group: TicketSubGroup: Core::PostMasterValid: 1Required: 1Config-Setting:
$Self->{‘PostmasterFollowUpSearchInBody’} = ‘0’;
PostmasterFollowUpSearchInAttachment
Description ValueDescription: Executes follow up mail attachments checks in mails that don’t have a
ticket number in the subject.Group: TicketSubGroup: Core::PostMasterValid: 1Required: 1Config-Setting:
$Self->{‘PostmasterFollowUpSearchInAttachment’} = ‘0’;
PostmasterFollowUpSearchInRaw
Description ValueDescription: Executes follow up plain/raw mail checks in mails that don’t have a ticket
number in the subject.Group: TicketSubGroup: Core::PostMasterValid: 1Required: 1

Configuration Options Reference
332
Description ValueConfig-Setting:
$Self->{‘PostmasterFollowUpSearchInRaw’} = ‘0’;
PostmasterUserID
Description ValueDescription: Specifies user id of the postmaster data base.Group: TicketSubGroup: Core::PostMasterValid: 1Required: 1Config-Setting:
$Self->{‘PostmasterUserID’} = ‘1’;
PostmasterDefaultQueue
Description ValueDescription: Defines the postmaster default queue.Group: TicketSubGroup: Core::PostMasterValid: 1Required: 1Config-Setting:
$Self->{‘PostmasterDefaultQueue’} = ‘Raw’;
PostmasterDefaultPriority
Description ValueDescription: Defines the default priority of new tickets.Group: TicketSubGroup: Core::PostMasterValid: 1Required: 1Config-Setting:
$Self->{‘PostmasterDefaultPriority’} = ‘3 normal’;
PostmasterDefaultState
Description ValueDescription: Defines the default state of new tickets.Group: Ticket

Configuration Options Reference
333
Description ValueSubGroup: Core::PostMasterValid: 1Required: 1Config-Setting:
$Self->{‘PostmasterDefaultState’} = ‘new’;
PostmasterFollowUpStateDescription ValueDescription: Defines the state of a ticket if it gets a follow-up.Group: TicketSubGroup: Core::PostMasterValid: 1Required: 1Config-Setting:
$Self->{‘PostmasterFollowUpState’} = ‘open’;
PostmasterFollowUpStateClosedDescription ValueDescription: Defines the state of a ticket if it gets a follow-up and the ticket was
already closed.Group: TicketSubGroup: Core::PostMasterValid: 0Required: 0Config-Setting:
$Self->{‘PostmasterFollowUpStateClosed’} = ‘open’;
PostmasterFollowUpOnUnlockAgentNotifyOnlyToOwnerDescription ValueDescription: Sends agent follow-up notification only to the owner, if a ticket is
unlocked (the default is to send the notification to all agents).Group: TicketSubGroup: Core::PostMasterValid: 1Required: 1Config-Setting:
$Self->{‘PostmasterFollowUpOnUnlockAgentNotifyOnlyToOwner’} = ‘0’;

Configuration Options Reference
334
PostmasterX-Header
Description ValueDescription: Defines all the X-headers that should be scanned.Group: TicketSubGroup: Core::PostMasterValid: 1Required: 1Config-Setting:
$Self->{‘PostmasterX-Header’} = [ ‘From’, ‘To’, ‘Cc’, ‘Reply-To’, ‘ReplyTo’, ‘Subject’, ‘Message-ID’, ‘Message-Id’, ‘Resent-To’, ‘Resent-From’, ‘Precedence’, ‘Mailing-List’, ‘List-Id’, ‘List-Archive’, ‘Errors-To’, ‘References’, ‘In-Reply-To’, ‘X-Loop’, ‘X-Spam-Flag’, ‘X-Spam-Status’, ‘X-Spam-Level’, ‘X-No-Loop’, ‘X-Priority’, ‘Importance’, ‘X-Mailer’, ‘User-Agent’, ‘Organization’, ‘X-Original-To’, ‘Delivered-To’, ‘Envelope-To’, ‘Return-Path’, ‘X-OTRS-Loop’, ‘X-OTRS-Info’, ‘X-OTRS-Priority’, ‘X-OTRS-Queue’, ‘X-OTRS-Lock’, ‘X-OTRS-Ignore’, ‘X-OTRS-State’, ‘X-OTRS-State-PendingTime’, ‘X-OTRS-Type’, ‘X-OTRS-Service’,

Configuration Options Reference
335
Description Value ‘X-OTRS-SLA’, ‘X-OTRS-CustomerNo’, ‘X-OTRS-CustomerUser’, ‘X-OTRS-ArticleKey1’, ‘X-OTRS-ArticleKey2’, ‘X-OTRS-ArticleKey3’, ‘X-OTRS-ArticleValue1’, ‘X-OTRS-ArticleValue2’, ‘X-OTRS-ArticleValue3’, ‘X-OTRS-SenderType’, ‘X-OTRS-ArticleType’, ‘X-OTRS-TicketKey1’, ‘X-OTRS-TicketKey2’, ‘X-OTRS-TicketKey3’, ‘X-OTRS-TicketKey4’, ‘X-OTRS-TicketKey5’, ‘X-OTRS-TicketKey6’, ‘X-OTRS-TicketKey7’, ‘X-OTRS-TicketKey8’, ‘X-OTRS-TicketKey9’, ‘X-OTRS-TicketKey10’, ‘X-OTRS-TicketKey11’, ‘X-OTRS-TicketKey12’, ‘X-OTRS-TicketKey13’, ‘X-OTRS-TicketKey14’, ‘X-OTRS-TicketKey15’, ‘X-OTRS-TicketKey16’, ‘X-OTRS-TicketValue1’, ‘X-OTRS-TicketValue2’, ‘X-OTRS-TicketValue3’, ‘X-OTRS-TicketValue4’, ‘X-OTRS-TicketValue5’, ‘X-OTRS-TicketValue6’, ‘X-OTRS-TicketValue7’, ‘X-OTRS-TicketValue8’, ‘X-OTRS-TicketValue9’, ‘X-OTRS-TicketValue10’, ‘X-OTRS-TicketValue11’, ‘X-OTRS-TicketValue12’, ‘X-OTRS-TicketValue13’, ‘X-OTRS-TicketValue14’, ‘X-OTRS-TicketValue15’, ‘X-OTRS-TicketValue16’, ‘X-OTRS-TicketTime1’, ‘X-OTRS-TicketTime2’, ‘X-OTRS-TicketTime3’, ‘X-OTRS-TicketTime4’, ‘X-OTRS-TicketTime5’, ‘X-OTRS-TicketTime6’, ‘X-OTRS-FollowUp-Priority’, ‘X-OTRS-FollowUp-Queue’, ‘X-OTRS-FollowUp-Lock’,

Configuration Options Reference
336
Description Value ‘X-OTRS-FollowUp-State’, ‘X-OTRS-FollowUp-State-PendingTime’, ‘X-OTRS-FollowUp-Type’, ‘X-OTRS-FollowUp-Service’, ‘X-OTRS-FollowUp-SLA’, ‘X-OTRS-FollowUp-ArticleKey1’, ‘X-OTRS-FollowUp-ArticleKey2’, ‘X-OTRS-FollowUp-ArticleKey3’, ‘X-OTRS-FollowUp-ArticleValue1’, ‘X-OTRS-FollowUp-ArticleValue2’, ‘X-OTRS-FollowUp-ArticleValue3’, ‘X-OTRS-FollowUp-SenderType’, ‘X-OTRS-FollowUp-ArticleType’, ‘X-OTRS-FollowUp-TicketKey1’, ‘X-OTRS-FollowUp-TicketKey2’, ‘X-OTRS-FollowUp-TicketKey3’, ‘X-OTRS-FollowUp-TicketKey4’, ‘X-OTRS-FollowUp-TicketKey5’, ‘X-OTRS-FollowUp-TicketKey6’, ‘X-OTRS-FollowUp-TicketKey7’, ‘X-OTRS-FollowUp-TicketKey8’, ‘X-OTRS-FollowUp-TicketKey9’, ‘X-OTRS-FollowUp-TicketKey10’, ‘X-OTRS-FollowUp-TicketKey11’, ‘X-OTRS-FollowUp-TicketKey12’, ‘X-OTRS-FollowUp-TicketKey13’, ‘X-OTRS-FollowUp-TicketKey14’, ‘X-OTRS-FollowUp-TicketKey15’, ‘X-OTRS-FollowUp-TicketKey16’, ‘X-OTRS-FollowUp-TicketValue1’, ‘X-OTRS-FollowUp-TicketValue2’, ‘X-OTRS-FollowUp-TicketValue3’, ‘X-OTRS-FollowUp-TicketValue4’, ‘X-OTRS-FollowUp-TicketValue5’, ‘X-OTRS-FollowUp-TicketValue6’, ‘X-OTRS-FollowUp-TicketValue7’, ‘X-OTRS-FollowUp-TicketValue8’, ‘X-OTRS-FollowUp-TicketValue9’, ‘X-OTRS-FollowUp-TicketValue10’, ‘X-OTRS-FollowUp-TicketValue11’, ‘X-OTRS-FollowUp-TicketValue12’, ‘X-OTRS-FollowUp-TicketValue13’, ‘X-OTRS-FollowUp-TicketValue14’, ‘X-OTRS-FollowUp-TicketValue15’, ‘X-OTRS-FollowUp-TicketValue16’, ‘X-OTRS-FollowUp-TicketTime1’, ‘X-OTRS-FollowUp-TicketTime2’, ‘X-OTRS-FollowUp-TicketTime3’, ‘X-OTRS-FollowUp-TicketTime4’, ‘X-OTRS-FollowUp-TicketTime5’, ‘X-OTRS-FollowUp-TicketTime6’];

Configuration Options Reference
337
PostMaster::PreFilterModule###1-Match
Description ValueDescription: Module to filter and manipulate incoming messages. Block/ignore all
spam email with From: [email protected] address.Group: TicketSubGroup: Core::PostMasterValid: 0Required: 0Config-Setting:
$Self->{‘PostMaster::PreFilterModule’}->{‘1-Match’} = { ‘Match’ => { ‘From’ => ‘[email protected]’ }, ‘Module’ => ‘Kernel::System::PostMaster::Filter::Match’, ‘Set’ => { ‘X-OTRS-Ignore’ => ‘yes’ }, ‘StopAfterMatch’ => ‘0’};
PostMaster::PreFilterModule###2-Match
Description ValueDescription: Module to filter and manipulate incoming messages. Get a 4 digit
number to ticket free text, use regex in Match e. g. From => ‘(.+?)@.+?’, and use () as [***] in Set =>.
Group: TicketSubGroup: Core::PostMasterValid: 0Required: 0Config-Setting:
$Self->{‘PostMaster::PreFilterModule’}->{‘2-Match’} = { ‘Match’ => { ‘Subject’ => ‘SomeNumber:(\d\d\d\d)’ }, ‘Module’ => ‘Kernel::System::PostMaster::Filter::Match’, ‘Set’ => { ‘X-OTRS-TicketKey-1’ => ‘SomeNumber’, ‘X-OTRS-TicketValue-1’ => ‘[***]’ }, ‘StopAfterMatch’ => ‘0’};

Configuration Options Reference
338
PostMaster::PreFilterModule###3-NewTicketReject
Description ValueDescription: Blocks all the incoming emails that do not have a valid ticket number in
subject with From: @example.com address.Group: TicketSubGroup: Core::PostMasterValid: 0Required: 0Config-Setting:
$Self->{‘PostMaster::PreFilterModule’}->{‘3-NewTicketReject’} = { ‘Match’ => { ‘From’ => ‘@example.com’ }, ‘Module’ => ‘Kernel::System::PostMaster::Filter::NewTicketReject’, ‘Set’ => { ‘X-OTRS-Ignore’ => ‘yes’ }, ‘StopAfterMatch’ => ‘0’};
PostMaster::PreFilterModule::NewTicketReject::Sender
Description ValueDescription: Defines the sender for rejected emails.Group: TicketSubGroup: Core::PostMasterValid: 0Required: 0Config-Setting:
$Self->{‘PostMaster::PreFilterModule::NewTicketReject::Sender’} = ‘[email protected]’;
PostMaster::PreFilterModule::NewTicketReject::Subject
Description ValueDescription: Defines the subject for rejected emails.Group: TicketSubGroup: Core::PostMasterValid: 1Required: 1Config-Setting:

Configuration Options Reference
339
Description Value $Self->{‘PostMaster::PreFilterModule::NewTicketReject::Subject’} = ‘Email Rejected’;
PostMaster::PreFilterModule::NewTicketReject::BodyDescription ValueDescription: Defines the body text for rejected emails.Group: TicketSubGroup: Core::PostMasterValid: 1Required: 1Config-Setting:
$Self->{‘PostMaster::PreFilterModule::NewTicketReject::Body’} = ‘Dear Customer,
Unfortunately we could not detect a valid ticket numberin your subject, so this email can’t be processed.
Please create a new ticket via the customer panel.
Thanks for your help!
Your Helpdesk Team’;
PostMaster::PreFilterModule###4-CMDDescription ValueDescription: CMD example setup. Ignores emails where external CMD returns some
output on STDOUT (email will be piped into STDIN of some.bin).Group: TicketSubGroup: Core::PostMasterValid: 0Required: 0Config-Setting:
$Self->{‘PostMaster::PreFilterModule’}->{‘4-CMD’} = { ‘CMD’ => ‘/usr/bin/some.bin’, ‘Module’ => ‘Kernel::System::PostMaster::Filter::CMD’, ‘Set’ => { ‘X-OTRS-Ignore’ => ‘yes’ }};

Configuration Options Reference
340
PostMaster::PreFilterModule###5-SpamAssassinDescription ValueDescription: Spam Assassin example setup. Ignores emails that are marked with
SpamAssassin.Group: TicketSubGroup: Core::PostMasterValid: 0Required: 0Config-Setting:
$Self->{‘PostMaster::PreFilterModule’}->{‘5-SpamAssassin’} = { ‘CMD’ => ‘/usr/bin/spamassassin | grep -i «X-Spam-Status: yes»‘, ‘Module’ => ‘Kernel::System::PostMaster::Filter::CMD’, ‘Set’ => { ‘X-OTRS-Ignore’ => ‘yes’ }};
PostMaster::PreFilterModule###6-SpamAssassinDescription ValueDescription: Spam Assassin example setup. Moves marked mails to spam queue.Group: TicketSubGroup: Core::PostMasterValid: 0Required: 0Config-Setting:
$Self->{‘PostMaster::PreFilterModule’}->{‘6-SpamAssassin’} = { ‘CMD’ => ‘/usr/bin/spamassassin | grep -i «X-Spam-Status: yes»‘, ‘Module’ => ‘Kernel::System::PostMaster::Filter::CMD’, ‘Set’ => { ‘X-OTRS-Queue’ => ‘spam’ }};
PostMaster::PreFilterModule###000-MatchDBSourceDescription ValueDescription: Module to use database filter storage.Group: TicketSubGroup: Core::PostMaster

Configuration Options Reference
341
Description ValueValid: 1Required: 1Config-Setting:
$Self->{‘PostMaster::PreFilterModule’}->{‘000-MatchDBSource’} = { ‘Module’ => ‘Kernel::System::PostMaster::Filter::MatchDBSource’};
PostMaster::PostFilterModule###000-FollowUpArticleTypeCheckDescription ValueDescription: Module to check if arrived emails should be marked as email-internal
(because of original forwared internal email it college). ArticleType andSenderType define the values for the arrived email/article.
Group: TicketSubGroup: Core::PostMasterValid: 1Required: 0Config-Setting:
$Self->{‘PostMaster::PostFilterModule’}->{‘000-FollowUpArticleTypeCheck’} = { ‘ArticleType’ => ’email-internal’, ‘Module’ => ‘Kernel::System::PostMaster::Filter::FollowUpArticleTypeCheck’, ‘SenderType’ => ‘customer’};
SendNoAutoResponseRegExpDescription ValueDescription: If this regex matches, no message will be send by the autoresponder.Group: TicketSubGroup: Core::PostMasterValid: 1Required: 1Config-Setting:
$Self->{‘SendNoAutoResponseRegExp’} = ‘(MAILER-DAEMON|postmaster|abuse)@.+?\..+?’;
Core::StatsStats::DynamicObjectRegistration###Ticket
Description ValueDescription: Module to generate ticket statistics.

Configuration Options Reference
342
Description ValueGroup: TicketSubGroup: Core::StatsValid: 1Required: 0Config-Setting:
$Self->{‘Stats::DynamicObjectRegistration’}->{‘Ticket’} = { ‘Module’ => ‘Kernel::System::Stats::Dynamic::Ticket’};
Stats::DynamicObjectRegistration###TicketListDescription ValueDescription: Determines if the statatistics module may generate ticket lists.Group: TicketSubGroup: Core::StatsValid: 1Required: 0Config-Setting:
$Self->{‘Stats::DynamicObjectRegistration’}->{‘TicketList’} = { ‘Module’ => ‘Kernel::System::Stats::Dynamic::TicketList’};
Stats::DynamicObjectRegistration###TicketAccountedTimeDescription ValueDescription: Module to generate accounted time ticket statistics.Group: TicketSubGroup: Core::StatsValid: 1Required: 0Config-Setting:
$Self->{‘Stats::DynamicObjectRegistration’}->{‘TicketAccountedTime’} = { ‘Module’ => ‘Kernel::System::Stats::Dynamic::TicketAccountedTime’};
Stats::DynamicObjectRegistration###TicketSolutionResponseTimeDescription ValueDescription: Module to generate ticket solution and response time statistics.

Configuration Options Reference
343
Description ValueGroup: TicketSubGroup: Core::StatsValid: 1Required: 0Config-Setting:
$Self->{‘Stats::DynamicObjectRegistration’}->{‘TicketSolutionResponseTime’} = { ‘Module’ => ‘Kernel::System::Stats::Dynamic::TicketSolutionResponseTime’};
Core::TicketTicket::Hook
Description ValueDescription: The identifier for a ticket, e.g. Ticket#, Call#, MyTicket#. The default is
Ticket#.Group: TicketSubGroup: Core::TicketValid: 1Required: 1Config-Setting:
$Self->{‘Ticket::Hook’} = ‘Ticket#’;
Ticket::HookDivider
Description ValueDescription: The divider between TicketHook and ticket number. E.g ‘: ‘.Group: TicketSubGroup: Core::TicketValid: 1Required: 1Config-Setting:
$Self->{‘Ticket::HookDivider’} = »;
Ticket::SubjectSize
Description ValueDescription: Max size of the subjects in an email reply.Group: TicketSubGroup: Core::Ticket

Configuration Options Reference
344
Description ValueValid: 1Required: 1Config-Setting:
$Self->{‘Ticket::SubjectSize’} = ‘100’;
Ticket::SubjectRe
Description ValueDescription: The text at the beginning of the subject in an email reply, e.g. RE, AW,
or AS.Group: TicketSubGroup: Core::TicketValid: 1Required: 1Config-Setting:
$Self->{‘Ticket::SubjectRe’} = ‘Re’;
Ticket::SubjectFwd
Description ValueDescription: The text at the beginning of the subject when an email is forwarded,
e.g. FW, Fwd, or WG.Group: TicketSubGroup: Core::TicketValid: 1Required: 1Config-Setting:
$Self->{‘Ticket::SubjectFwd’} = ‘Fwd’;
Ticket::SubjectFormat
Description ValueDescription: The format of the subject. ‘Left’ means ‘[TicketHook#:12345]
Some Subject’, ‘Right’ means ‘Some Subject [TicketHook#:12345]’,’None’ means ‘Some Subject’ and no ticket number. In thelast case you should enable PostmasterFollowupSearchInRawor PostmasterFollowUpSearchInReferences to recognize followupsbased on email headers and/or body.
Group: TicketSubGroup: Core::TicketValid: 1Required: 1Config-Setting:

Configuration Options Reference
345
Description Value $Self->{‘Ticket::SubjectFormat’} = ‘Left’;
Ticket::CustomQueue
Description ValueDescription: Name of custom queue. The custom queue is a queue selection of your
preferred queues and can be selected in the preferences settings.Group: TicketSubGroup: Core::TicketValid: 1Required: 1Config-Setting:
$Self->{‘Ticket::CustomQueue’} = ‘My Queues’;
Ticket::NewArticleIgnoreSystemSender
Description ValueDescription: Ignore article with system sender type for new article feature (e. g. auto
responses or email notifications).Group: TicketSubGroup: Core::TicketValid: 1Required: 1Config-Setting:
$Self->{‘Ticket::NewArticleIgnoreSystemSender’} = ‘0’;
Ticket::ChangeOwnerToEveryone
Description ValueDescription: Changes the owner of tickets to everyone (useful for ASP). Normally
only agent with rw permissions in the queue of the ticket will be shown.Group: TicketSubGroup: Core::TicketValid: 1Required: 1Config-Setting:
$Self->{‘Ticket::ChangeOwnerToEveryone’} = ‘0’;
Ticket::Responsible
Description ValueDescription: Enables ticket responsible feature, to keep track of a specific ticket.

Configuration Options Reference
346
Description ValueGroup: TicketSubGroup: Core::TicketValid: 1Required: 0Config-Setting:
$Self->{‘Ticket::Responsible’} = ‘0’;
Ticket::ResponsibleAutoSet
Description ValueDescription: Automatically sets the owner of a ticket as the responsible for it (if ticket
responsible feature is enabled).Group: TicketSubGroup: Core::TicketValid: 1Required: 0Config-Setting:
$Self->{‘Ticket::ResponsibleAutoSet’} = ‘1’;
Ticket::Type
Description ValueDescription: Allows defining new types for ticket (if ticket type feature is enabled).Group: TicketSubGroup: Core::TicketValid: 1Required: 1Config-Setting:
$Self->{‘Ticket::Type’} = ‘0’;
Ticket::Service
Description ValueDescription: Allows defining services and SLAs for tickets (e. g. email, desktop,
network, …), and escalation attributes for SLAs (if ticket service/SLAfeature is enabled).
Group: TicketSubGroup: Core::TicketValid: 1Required: 1Config-Setting:
$Self->{‘Ticket::Service’} = ‘0’;

Configuration Options Reference
347
Ticket::ArchiveSystemDescription ValueDescription: Activates the ticket archive system to have a faster system by moving
some tickets out of the daily scope. To search for these tickets, thearchive flag has to be enabled in the ticket search.
Group: TicketSubGroup: Core::TicketValid: 1Required: 1Config-Setting:
$Self->{‘Ticket::ArchiveSystem’} = ‘0’;
Ticket::NumberGeneratorDescription ValueDescription: Selects the ticket number generator module. «AutoIncrement»
increments the ticket number, the SystemID and the counter are usedwith SystemID.counter format (e.g. 1010138, 1010139). With «Date» theticket numbers will be generated by the current date, the SystemID andthe counter. The format looks like Year.Month.Day.SystemID.counter(e.g. 200206231010138, 200206231010139). With «DateChecksum»the counter will be appended as checksum to the string of dateand SystemID. The checksum will be rotated on a daily basis.The format looks like Year.Month.Day.SystemID.Counter.CheckSum(e.g. 2002070110101520, 2002070110101535). «Random» generatesrandomized ticket numbers in the format «SystemID.Random» (e.g.100057866352, 103745394596).
Group: TicketSubGroup: Core::TicketValid: 1Required: 1Config-Setting:
$Self->{‘Ticket::NumberGenerator’} = ‘Kernel::System::Ticket::Number::DateChecksum’;
Ticket::NumberGenerator::MinCounterSizeDescription ValueDescription: Sets the minimal ticket counter size (if «AutoIncrement» was selected
as TicketNumberGenerator). Default is 5, this means the counter startsfrom 10000.
Group: TicketSubGroup: Core::TicketValid: 1Required: 1

Configuration Options Reference
348
Description ValueConfig-Setting:
$Self->{‘Ticket::NumberGenerator::MinCounterSize’} = ‘5’;
Ticket::NumberGenerator::CheckSystemIDDescription ValueDescription: Checks the SystemID in ticket number detection for follow-ups (use
«No» if SystemID has been changed after using the system).Group: TicketSubGroup: Core::TicketValid: 1Required: 1Config-Setting:
$Self->{‘Ticket::NumberGenerator::CheckSystemID’} = ‘1’;
Ticket::CounterLogDescription ValueDescription: Log file for the ticket counter.Group: TicketSubGroup: Core::TicketValid: 1Required: 1Config-Setting:
$Self->{‘Ticket::CounterLog’} = ‘<OTRS_CONFIG_Home>/var/log/TicketCounter.log’;
Ticket::IndexModuleDescription ValueDescription: IndexAccelerator: to choose your backend TicketViewAccelerator
module. «RuntimeDB» generates each queue view on the fly fromticket table (no performance problems up to approx. 60.000 tickets intotal and 6.000 open tickets in the system). «StaticDB» is the mostpowerful module, it uses an extra ticket-index table that works like aview (recommended if more than 80.000 and 6.000 open tickets arestored in the system). Use the script «bin/otrs.RebuildTicketIndex.pl» forinitial index update.
Group: TicketSubGroup: Core::TicketValid: 1Required: 1Config-Setting:

Configuration Options Reference
349
Description Value $Self->{‘Ticket::IndexModule’} = ‘Kernel::System::Ticket::IndexAccelerator::RuntimeDB’;
Ticket::StorageModule
Description ValueDescription: Saves the attachments of articles. «DB» stores all data in the database
(not recommended for storing big attachments). «FS» stores the dataon the filesystem; this is faster but the webserver should run under theOTRS user. You can switch between the modules even on a systemthat is already in production without any loss of data.
Group: TicketSubGroup: Core::TicketValid: 1Required: 1Config-Setting:
$Self->{‘Ticket::StorageModule’} = ‘Kernel::System::Ticket::ArticleStorageDB’;
ArticleDir
Description ValueDescription: Specifies the directory to store the data in, if «FS» was selected for
TicketStorageModule.Group: TicketSubGroup: Core::TicketValid: 1Required: 1Config-Setting:
$Self->{‘ArticleDir’} = ‘<OTRS_CONFIG_Home>/var/article’;
Ticket::EventModulePost###100-ArchiveRestore
Description ValueDescription: Restores a ticket from the archive (only if the event is a state change,
from closed to any open available state).Group: TicketSubGroup: Core::TicketValid: 1Required: 0Config-Setting:
$Self->{‘Ticket::EventModulePost’}->{‘100-ArchiveRestore’} = {

Configuration Options Reference
350
Description Value ‘Event’ => ‘TicketStateUpdate’, ‘Module’ => ‘Kernel::System::Ticket::Event::ArchiveRestore’};
Ticket::EventModulePost###110-AcceleratorUpdateDescription ValueDescription: Updates the ticket index accelerator.Group: TicketSubGroup: Core::TicketValid: 1Required: 0Config-Setting:
$Self->{‘Ticket::EventModulePost’}->{‘110-AcceleratorUpdate’} = { ‘Event’ => ‘TicketStateUpdate|TicketQueueUpdate|TicketLockUpdate’, ‘Module’ => ‘Kernel::System::Ticket::Event::TicketAcceleratorUpdate’};
Ticket::EventModulePost###120-ForceOwnerResetOnMoveDescription ValueDescription: Resets and unlocks the owner of a ticket if it was moved to another
queue.Group: TicketSubGroup: Core::TicketValid: 0Required: 0Config-Setting:
$Self->{‘Ticket::EventModulePost’}->{‘120-ForceOwnerResetOnMove’} = { ‘Event’ => ‘TicketQueueUpdate’, ‘Module’ => ‘Kernel::System::Ticket::Event::ForceOwnerReset’};
Ticket::EventModulePost###130-ForceStateChangeOnLockDescription ValueDescription: Forces to choose a different ticket state (from current) after lock action.
Define the current state as key, and the next state after lock action ascontent.
Group: Ticket

Configuration Options Reference
351
Description ValueSubGroup: Core::TicketValid: 0Required: 0Config-Setting:
$Self->{‘Ticket::EventModulePost’}->{‘130-ForceStateChangeOnLock’} = { ‘Event’ => ‘TicketLockUpdate’, ‘Module’ => ‘Kernel::System::Ticket::Event::ForceState’, ‘new’ => ‘open’};
Ticket::EventModulePost###140-ResponsibleAutoSet
Description ValueDescription: Automatically sets the responsible of a ticket (if it is not set yet) after
the first owner update.Group: TicketSubGroup: Core::TicketValid: 1Required: 0Config-Setting:
$Self->{‘Ticket::EventModulePost’}->{‘140-ResponsibleAutoSet’} = { ‘Event’ => ‘TicketOwnerUpdate’, ‘Module’ => ‘Kernel::System::Ticket::Event::ResponsibleAutoSet’};
Ticket::EventModulePost###150-TicketPendingTimeReset
Description ValueDescription: Sets the PendingTime of a ticket to 0 if the state is changed to a non-
pending state.Group: TicketSubGroup: Core::TicketValid: 1Required: 0Config-Setting:
$Self->{‘Ticket::EventModulePost’}->{‘150-TicketPendingTimeReset’} = { ‘Event’ => ‘TicketStateUpdate’, ‘Module’ => ‘Kernel::System::Ticket::Event::TicketPendingTimeReset’};

Configuration Options Reference
352
Ticket::EventModulePost###500-NotificationEventDescription ValueDescription: Sends the notifications which are configured in the admin interface
under «Notfication (Event)».Group: TicketSubGroup: Core::TicketValid: 1Required: 0Config-Setting:
$Self->{‘Ticket::EventModulePost’}->{‘500-NotificationEvent’} = { ‘Event’ => », ‘Module’ => ‘Kernel::System::Ticket::Event::NotificationEvent’, ‘Transaction’ => ‘1’};
Ticket::EventModulePost###900-EscalationIndexDescription ValueDescription: Updates the ticket escalation index after a ticket attribute got updated.Group: TicketSubGroup: Core::TicketValid: 1Required: 0Config-Setting:
$Self->{‘Ticket::EventModulePost’}->{‘900-EscalationIndex’} = { ‘Event’ => ‘TicketSLAUpdate|TicketQueueUpdate|TicketStateUpdate|TicketCreate|ArticleCreate’, ‘Module’ => ‘Kernel::System::Ticket::Event::TicketEscalationIndex’};
Ticket::EventModulePost###910-ForceUnlockOnMoveDescription ValueDescription: Forces to unlock tickets after being moved to another queue.Group: TicketSubGroup: Core::TicketValid: 1Required: 0Config-Setting:
$Self->{‘Ticket::EventModulePost’}->{‘910-ForceUnlockOnMove’} = {

Configuration Options Reference
353
Description Value ‘Event’ => ‘TicketQueueUpdate’, ‘Module’ => ‘Kernel::System::Ticket::Event::ForceUnlock’};
Ticket::EventModulePost###920-TicketArticleNewMessageUpdate
Description ValueDescription: Update Ticket «Seen» flag if every article got seen or a new Article got
created.Group: TicketSubGroup: Core::TicketValid: 1Required: 0Config-Setting:
$Self->{‘Ticket::EventModulePost’}->{‘920-TicketArticleNewMessageUpdate’} = { ‘Event’ => ‘ArticleCreate|ArticleFlagSet’, ‘Module’ => ‘Kernel::System::Ticket::Event::TicketNewMessageUpdate’};
Ticket::CustomModule###001-CustomModule
Description ValueDescription: Overloads (redefines) existing functions in Kernel::System::Ticket.
Used to easily add customizations.Group: TicketSubGroup: Core::TicketValid: 0Required: 0Config-Setting:
$Self->{‘Ticket::CustomModule’}->{‘001-CustomModule’} = ‘Kernel::System::Ticket::Custom’;
Ticket::ViewableSenderTypes
Description ValueDescription: Defines the default viewable sender types of a ticket (default: customer).Group: TicketSubGroup: Core::TicketValid: 1Required: 1Config-Setting:

Configuration Options Reference
354
Description Value $Self->{‘Ticket::ViewableSenderTypes’} = [ »customer»];
Ticket::ViewableLocks
Description ValueDescription: Defines the viewable locks of a ticket. Default: unlock, tmp_lock.Group: TicketSubGroup: Core::TicketValid: 1Required: 1Config-Setting:
$Self->{‘Ticket::ViewableLocks’} = [ »unlock», »tmp_lock»];
Ticket::ViewableStateType
Description ValueDescription: Defines the valid state types for a ticket.Group: TicketSubGroup: Core::TicketValid: 1Required: 1Config-Setting:
$Self->{‘Ticket::ViewableStateType’} = [ ‘new’, ‘open’, ‘pending reminder’, ‘pending auto’];
Ticket::UnlockStateType
Description ValueDescription: Defines the valid states for unlocked tickets. To unlock tickets the script
«bin/otrs.UnlockTickets.pl» can be used.Group: TicketSubGroup: Core::TicketValid: 1Required: 1Config-Setting:

Configuration Options Reference
355
Description Value $Self->{‘Ticket::UnlockStateType’} = [ ‘new’, ‘open’];
Ticket::PendingNotificationOnlyToOwner
Description ValueDescription: Sends reminder notifications of unlocked ticket after reaching the
reminder date (only sent to ticket owner).Group: TicketSubGroup: Core::TicketValid: 1Required: 1Config-Setting:
$Self->{‘Ticket::PendingNotificationOnlyToOwner’} = ‘0’;
Ticket::PendingNotificationNotToResponsible
Description ValueDescription: Disables sending reminder notifications to the responsible agent of a
ticket (Ticket::Responsible needs to be activated).Group: TicketSubGroup: Core::TicketValid: 1Required: 1Config-Setting:
$Self->{‘Ticket::PendingNotificationNotToResponsible’} = ‘0’;
Ticket::PendingReminderStateType
Description ValueDescription: Defines the state type of the reminder for pending tickets.Group: TicketSubGroup: Core::TicketValid: 1Required: 1Config-Setting:
$Self->{‘Ticket::PendingReminderStateType’} = [ ‘pending reminder’];

Configuration Options Reference
356
Ticket::PendingAutoStateTypeDescription ValueDescription: Determines the possible states for pending tickets that changed state
after reaching time limit.Group: TicketSubGroup: Core::TicketValid: 1Required: 1Config-Setting:
$Self->{‘Ticket::PendingAutoStateType’} = [ ‘pending auto’];
Ticket::StateAfterPendingDescription ValueDescription: Defines which states should be set automatically (Content), after the
pending time of state (Key) has been reached.Group: TicketSubGroup: Core::TicketValid: 1Required: 1Config-Setting:
$Self->{‘Ticket::StateAfterPending’} = { ‘pending auto close+’ => ‘closed successful’, ‘pending auto close-‘ => ‘closed unsuccessful’};
System::PermissionDescription ValueDescription: Standard available permissions for agents within the application. If more
permissions are needed, they can be entered here. Permissions mustbe defined to be effective. Some other good permissions have alsobeen provided built-in: note, close, pending, customer, freetext, move,compose, responsible, forward, and bounce. Make sure that «rw» isalways the last registered permission.
Group: TicketSubGroup: Core::TicketValid: 1Required: 1Config-Setting:
$Self->{‘System::Permission’} = [ ‘ro’, ‘move_into’,

Configuration Options Reference
357
Description Value ‘create’, ‘note’, ‘owner’, ‘priority’, ‘rw’];
Ticket::Permission###1-OwnerCheckDescription ValueDescription: Module to check the owner of a ticket.Group: TicketSubGroup: Core::TicketValid: 1Required: 0Config-Setting:
$Self->{‘Ticket::Permission’}->{‘1-OwnerCheck’} = { ‘Granted’ => ‘1’, ‘Module’ => ‘Kernel::System::Ticket::Permission::OwnerCheck’, ‘Required’ => ‘0’};
Ticket::Permission###2-ResponsibleCheckDescription ValueDescription: Module to check the agent responsible of a ticket.Group: TicketSubGroup: Core::TicketValid: 1Required: 0Config-Setting:
$Self->{‘Ticket::Permission’}->{‘2-ResponsibleCheck’} = { ‘Granted’ => ‘1’, ‘Module’ => ‘Kernel::System::Ticket::Permission::ResponsibleCheck’, ‘Required’ => ‘0’};
Ticket::Permission###3-GroupCheckDescription ValueDescription: Module to check if a user is in a special group. Access is granted, if the
user is in the specified group and has ro and rw permissions.

Configuration Options Reference
358
Description ValueGroup: TicketSubGroup: Core::TicketValid: 1Required: 0Config-Setting:
$Self->{‘Ticket::Permission’}->{‘3-GroupCheck’} = { ‘Granted’ => ‘1’, ‘Module’ => ‘Kernel::System::Ticket::Permission::GroupCheck’, ‘Required’ => ‘0’};
Ticket::Permission###4-WatcherCheck
Description ValueDescription: Module to check the watcher agents of a ticket.Group: TicketSubGroup: Core::TicketValid: 1Required: 0Config-Setting:
$Self->{‘Ticket::Permission’}->{‘4-WatcherCheck’} = { ‘Granted’ => ‘1’, ‘Module’ => ‘Kernel::System::Ticket::Permission::WatcherCheck’, ‘Required’ => ‘0’};
CustomerTicket::Permission###1-GroupCheck
Description ValueDescription: Module to check the group permissions for the access to customer
tickets.Group: TicketSubGroup: Core::TicketValid: 1Required: 0Config-Setting:
$Self->{‘CustomerTicket::Permission’}->{‘1-GroupCheck’} = { ‘Granted’ => ‘0’, ‘Module’ => ‘Kernel::System::Ticket::CustomerPermission::GroupCheck’,

Configuration Options Reference
359
Description Value ‘Required’ => ‘1’};
CustomerTicket::Permission###2-CustomerUserIDCheck
Description ValueDescription: Grants access, if the customer ID of the ticket matches the customer
user’s ID and the customer user has group permissions on the queuethe ticket is in.
Group: TicketSubGroup: Core::TicketValid: 1Required: 0Config-Setting:
$Self->{‘CustomerTicket::Permission’}->{‘2-CustomerUserIDCheck’} = { ‘Granted’ => ‘1’, ‘Module’ => ‘Kernel::System::Ticket::CustomerPermission::CustomerUserIDCheck’, ‘Required’ => ‘0’};
CustomerTicket::Permission###3-CustomerIDCheck
Description ValueDescription: Module to check customer permissions.Group: TicketSubGroup: Core::TicketValid: 1Required: 0Config-Setting:
$Self->{‘CustomerTicket::Permission’}->{‘3-CustomerIDCheck’} = { ‘Granted’ => ‘1’, ‘Module’ => ‘Kernel::System::Ticket::CustomerPermission::CustomerIDCheck’, ‘Required’ => ‘0’};
Ticket::DefineEmailFrom
Description ValueDescription: Defines how the From field from the emails (sent from answers and
email tickets) should look like.Group: Ticket

Configuration Options Reference
360
Description ValueSubGroup: Core::TicketValid: 1Required: 1Config-Setting:
$Self->{‘Ticket::DefineEmailFrom’} = ‘SystemAddressName’;
Ticket::DefineEmailFromSeparator
Description ValueDescription: Defines the separator between the agents real name and the given
queue email address.Group: TicketSubGroup: Core::TicketValid: 1Required: 1Config-Setting:
$Self->{‘Ticket::DefineEmailFromSeparator’} = ‘via’;
CustomerNotifyJustToRealCustomer
Description ValueDescription: Sends customer notifications just to the mapped customer. Normally, if
no customer is mapped, the latest customer sender gets the notification.Group: TicketSubGroup: Core::TicketValid: 1Required: 1Config-Setting:
$Self->{‘CustomerNotifyJustToRealCustomer’} = ‘0’;
AgentSelfNotifyOnAction
Description ValueDescription: Specifies if an agent should receive email notification of his own actions.Group: TicketSubGroup: Core::TicketValid: 1Required: 1Config-Setting:

Configuration Options Reference
361
Description Value $Self->{‘AgentSelfNotifyOnAction’} = ‘0’;
Core::TicketACLTicket::Acl::Module###1-Ticket::Acl::Module
Description ValueDescription: ACL module that allows closing parent tickets only if all its children are
already closed («State» shows which states are not available for theparent ticket until all child tickets are closed).
Group: TicketSubGroup: Core::TicketACLValid: 0Required: 0Config-Setting:
$Self->{‘Ticket::Acl::Module’}->{‘1-Ticket::Acl::Module’} = { ‘Module’ => ‘Kernel::System::Ticket::Acl::CloseParentAfterClosedChilds’, ‘State’ => [ ‘closed successful’, ‘closed unsuccessful’ ]};
TicketACL::Default::Action
Description ValueDescription: Default ACL values for ticket actions.Group: TicketSubGroup: Core::TicketACLValid: 1Required: 1Config-Setting:
$Self->{‘TicketACL::Default::Action’} = {};
Core::TicketBulkActionTicket::Frontend::BulkFeature
Description ValueDescription: Enables ticket bulk action feature for the agent frontend to work on more
than one ticket at a time.Group: Ticket

Configuration Options Reference
362
Description ValueSubGroup: Core::TicketBulkActionValid: 1Required: 1Config-Setting:
$Self->{‘Ticket::Frontend::BulkFeature’} = ‘1’;
Ticket::Frontend::BulkFeatureGroup
Description ValueDescription: Enables ticket bulk action feature only for the listed groups.Group: TicketSubGroup: Core::TicketBulkActionValid: 0Required: 0Config-Setting:
$Self->{‘Ticket::Frontend::BulkFeatureGroup’} = [ ‘admin’, ‘users’];
Core::TicketFreeTextTicketFreeKey1
Description ValueDescription: Defines the free key field number 1 for tickets to add a new ticket
attribute.Group: TicketSubGroup: Core::TicketFreeTextValid: 0Required: 0Config-Setting:
$Self->{‘TicketFreeKey1’} = { ‘Product’ => ‘Product’};
TicketFreeKey1::DefaultSelection
Description ValueDescription: Defines the default selection of the free key field number 1 for tickets
(if more than one option is provided).Group: TicketSubGroup: Core::TicketFreeText

Configuration Options Reference
363
Description ValueValid: 0Required: 0Config-Setting:
$Self->{‘TicketFreeKey1::DefaultSelection’} = »;
TicketFreeText1
Description ValueDescription: Defines the free text field number 1 for tickets to add a new ticket
attribute.Group: TicketSubGroup: Core::TicketFreeTextValid: 0Required: 0Config-Setting:
$Self->{‘TicketFreeText1’} = { » => ‘-‘, ‘Notebook’ => ‘Notebook’, ‘PC’ => ‘PC’, ‘Phone’ => ‘Phone’};
TicketFreeText1::DefaultSelection
Description ValueDescription: Defines the default selection of the free text field number 1 for tickets
(if more than one option is provided).Group: TicketSubGroup: Core::TicketFreeTextValid: 0Required: 0Config-Setting:
$Self->{‘TicketFreeText1::DefaultSelection’} = ‘Notebook’;
TicketFreeText1::Link
Description ValueDescription: Defines the http link for the free text field number 1 for tickets (it will be
used in every ticket view).Group: TicketSubGroup: Core::TicketFreeTextValid: 0

Configuration Options Reference
364
Description ValueRequired: 0Config-Setting:
$Self->{‘TicketFreeText1::Link’} = ‘http://some.example.com/handle?query=$LQData{«TicketFreeText1»}’;
TicketFreeKey2
Description ValueDescription: Defines the free key field number 2 for tickets to add a new ticket
attribute.Group: TicketSubGroup: Core::TicketFreeTextValid: 0Required: 0Config-Setting:
$Self->{‘TicketFreeKey2’} = { ‘Product’ => ‘Product’};
TicketFreeKey2::DefaultSelection
Description ValueDescription: Defines the default selection of the free key field number 2 for tickets
(if more than one option is provided).Group: TicketSubGroup: Core::TicketFreeTextValid: 0Required: 0Config-Setting:
$Self->{‘TicketFreeKey2::DefaultSelection’} = »;
TicketFreeText2
Description ValueDescription: Defines the free text field number 2 for tickets to add a new ticket
attribute.Group: TicketSubGroup: Core::TicketFreeTextValid: 0Required: 0Config-Setting:
$Self->{‘TicketFreeText2’} = {

Configuration Options Reference
365
Description Value » => ‘-‘, ‘Notebook’ => ‘Notebook’, ‘PC’ => ‘PC’, ‘Phone’ => ‘Phone’};
TicketFreeText2::DefaultSelection
Description ValueDescription: Defines the default selection of the free text field number 2 for tickets
(if more than one option is provided).Group: TicketSubGroup: Core::TicketFreeTextValid: 0Required: 0Config-Setting:
$Self->{‘TicketFreeText2::DefaultSelection’} = ‘Notebook’;
TicketFreeText2::Link
Description ValueDescription: Defines the http link for the free text field number 2 for tickets (it will be
used in every ticket view).Group: TicketSubGroup: Core::TicketFreeTextValid: 0Required: 0Config-Setting:
$Self->{‘TicketFreeText2::Link’} = ‘http://some.example.com/handle?query=$LQData{«TicketFreeText2»}’;
TicketFreeKey3
Description ValueDescription: Defines the free key field number 3 for tickets to add a new ticket
attribute.Group: TicketSubGroup: Core::TicketFreeTextValid: 0Required: 0Config-Setting:
$Self->{‘TicketFreeKey3’} = {

Configuration Options Reference
366
Description Value ‘Product’ => ‘Product’};
TicketFreeKey3::DefaultSelection
Description ValueDescription: Defines the default selection of the free key field number 3 for tickets
(if more than one option is provided).Group: TicketSubGroup: Core::TicketFreeTextValid: 0Required: 0Config-Setting:
$Self->{‘TicketFreeKey3::DefaultSelection’} = »;
TicketFreeText3
Description ValueDescription: Defines the free text field number 3 for ticket to add a new ticket
attribute.Group: TicketSubGroup: Core::TicketFreeTextValid: 0Required: 0Config-Setting:
$Self->{‘TicketFreeText3’} = { » => ‘-‘, ‘Notebook’ => ‘Notebook’, ‘PC’ => ‘PC’, ‘Phone’ => ‘Phone’};
TicketFreeText3::DefaultSelection
Description ValueDescription: Defines the default selection of the free text field number 3 for tickets
(if more than one option is provided).Group: TicketSubGroup: Core::TicketFreeTextValid: 0Required: 0Config-Setting:
$Self->{‘TicketFreeText3::DefaultSelection’} = ‘Notebook’;

Configuration Options Reference
367
TicketFreeText3::LinkDescription ValueDescription: Defines the http link for the free text field number 3 for tickets (it will be
used in every ticket view).Group: TicketSubGroup: Core::TicketFreeTextValid: 0Required: 0Config-Setting:
$Self->{‘TicketFreeText3::Link’} = ‘http://some.example.com/handle?query=$LQData{«TicketFreeText3»}’;
TicketFreeKey4Description ValueDescription: Defines the free key field number 4 for tickets to add a new ticket
attribute.Group: TicketSubGroup: Core::TicketFreeTextValid: 0Required: 0Config-Setting:
$Self->{‘TicketFreeKey4’} = { ‘Product’ => ‘Product’};
TicketFreeKey4::DefaultSelectionDescription ValueDescription: Defines the default selection of the free key field number 4 for tickets
(if more than one option is provided).Group: TicketSubGroup: Core::TicketFreeTextValid: 0Required: 0Config-Setting:
$Self->{‘TicketFreeKey4::DefaultSelection’} = »;
TicketFreeText4Description ValueDescription: Defines the free text field number 4 for tickets to add a new ticket
attribute.

Configuration Options Reference
368
Description ValueGroup: TicketSubGroup: Core::TicketFreeTextValid: 0Required: 0Config-Setting:
$Self->{‘TicketFreeText4’} = { » => ‘-‘, ‘Notebook’ => ‘Notebook’, ‘PC’ => ‘PC’, ‘Phone’ => ‘Phone’};
TicketFreeText4::DefaultSelection
Description ValueDescription: Defines the default selection of the free text field number 4 for tickets
(if more than one option is provided).Group: TicketSubGroup: Core::TicketFreeTextValid: 0Required: 0Config-Setting:
$Self->{‘TicketFreeText4::DefaultSelection’} = ‘Notebook’;
TicketFreeText4::Link
Description ValueDescription: Defines the http link for the free text field number 4 for tickets (it will be
used in every ticket view).Group: TicketSubGroup: Core::TicketFreeTextValid: 0Required: 0Config-Setting:
$Self->{‘TicketFreeText4::Link’} = ‘http://some.example.com/handle?query=$LQData{«TicketFreeText4»}’;
TicketFreeKey5
Description ValueDescription: Defines the free key field number 5 for tickets to add a new ticket
attribute.

Configuration Options Reference
369
Description ValueGroup: TicketSubGroup: Core::TicketFreeTextValid: 0Required: 0Config-Setting:
$Self->{‘TicketFreeKey5’} = { ‘Product’ => ‘Product’};
TicketFreeKey5::DefaultSelectionDescription ValueDescription: Defines the default selection of the free key field number 5 for tickets
(if more than one option is provided).Group: TicketSubGroup: Core::TicketFreeTextValid: 0Required: 0Config-Setting:
$Self->{‘TicketFreeKey5::DefaultSelection’} = »;
TicketFreeText5Description ValueDescription: Defines the free text field number 5 for tickets to add a new ticket
attribute.Group: TicketSubGroup: Core::TicketFreeTextValid: 0Required: 0Config-Setting:
$Self->{‘TicketFreeText5’} = { » => ‘-‘, ‘Notebook’ => ‘Notebook’, ‘PC’ => ‘PC’, ‘Phone’ => ‘Phone’};
TicketFreeText5::DefaultSelectionDescription ValueDescription: Defines the default selection of the free text field number 5 for tickets
(if more than one option is provided).Group: Ticket

Configuration Options Reference
370
Description ValueSubGroup: Core::TicketFreeTextValid: 0Required: 0Config-Setting:
$Self->{‘TicketFreeText5::DefaultSelection’} = ‘Notebook’;
TicketFreeText5::Link
Description ValueDescription: Defines the http link for the free text field number 5 for tickets (it will be
used in every ticket view).Group: TicketSubGroup: Core::TicketFreeTextValid: 0Required: 0Config-Setting:
$Self->{‘TicketFreeText5::Link’} = ‘http://some.example.com/handle?query=$LQData{«TicketFreeText5»}’;
TicketFreeKey6
Description ValueDescription: Defines the free key field number 6 for tickets to add a new ticket
attribute.Group: TicketSubGroup: Core::TicketFreeTextValid: 0Required: 0Config-Setting:
$Self->{‘TicketFreeKey6’} = { ‘Product’ => ‘Product’};
TicketFreeKey6::DefaultSelection
Description ValueDescription: Defines the default selection of the free key field number 6 for tickets
(if more than one option is provided).Group: TicketSubGroup: Core::TicketFreeTextValid: 0

Configuration Options Reference
371
Description ValueRequired: 0Config-Setting:
$Self->{‘TicketFreeKey6::DefaultSelection’} = »;
TicketFreeText6
Description ValueDescription: Defines the free text field number 6 for tickets to add a new ticket
attribute.Group: TicketSubGroup: Core::TicketFreeTextValid: 0Required: 0Config-Setting:
$Self->{‘TicketFreeText6’} = { » => ‘-‘, ‘Notebook’ => ‘Notebook’, ‘PC’ => ‘PC’, ‘Phone’ => ‘Phone’};
TicketFreeText6::DefaultSelection
Description ValueDescription: Defines the default selection of the free text field number 6 for tickets
(if more than one option is provided).Group: TicketSubGroup: Core::TicketFreeTextValid: 0Required: 0Config-Setting:
$Self->{‘TicketFreeText6::DefaultSelection’} = ‘Notebook’;
TicketFreeText6::Link
Description ValueDescription: Defines the http link for the free text field number 6 for tickets (it will be
used in every ticket view).Group: TicketSubGroup: Core::TicketFreeTextValid: 0Required: 0

Configuration Options Reference
372
Description ValueConfig-Setting:
$Self->{‘TicketFreeText6::Link’} = ‘http://some.example.com/handle?query=$LQData{«TicketFreeText6»}’;
TicketFreeKey7
Description ValueDescription: Defines the free key field number 7 for tickets to add a new ticket
attribute.Group: TicketSubGroup: Core::TicketFreeTextValid: 0Required: 0Config-Setting:
$Self->{‘TicketFreeKey7’} = { ‘Product’ => ‘Product’};
TicketFreeKey7::DefaultSelection
Description ValueDescription: Defines the default selection of the free key field number 7 for tickets
(if more than one option is provided).Group: TicketSubGroup: Core::TicketFreeTextValid: 0Required: 0Config-Setting:
$Self->{‘TicketFreeKey7::DefaultSelection’} = »;
TicketFreeText7
Description ValueDescription: Defines the free text field number 7 for tickets to add a new ticket
attribute.Group: TicketSubGroup: Core::TicketFreeTextValid: 0Required: 0Config-Setting:
$Self->{‘TicketFreeText7’} = { » => ‘-‘,

Configuration Options Reference
373
Description Value ‘Notebook’ => ‘Notebook’, ‘PC’ => ‘PC’, ‘Phone’ => ‘Phone’};
TicketFreeText7::DefaultSelection
Description ValueDescription: Defines the default selection of the free text field number 7 for tickets
(if more than one option is provided).Group: TicketSubGroup: Core::TicketFreeTextValid: 0Required: 0Config-Setting:
$Self->{‘TicketFreeText7::DefaultSelection’} = ‘Notebook’;
TicketFreeText7::Link
Description ValueDescription: Defines the http link for the free text field number 7 for tickets (it will be
used in every ticket view).Group: TicketSubGroup: Core::TicketFreeTextValid: 0Required: 0Config-Setting:
$Self->{‘TicketFreeText7::Link’} = ‘http://some.example.com/handle?query=$LQData{«TicketFreeText7»}’;
TicketFreeKey8
Description ValueDescription: Defines the free key field number 8 for tickets to add a new ticket
attribute.Group: TicketSubGroup: Core::TicketFreeTextValid: 0Required: 0Config-Setting:
$Self->{‘TicketFreeKey8’} = { ‘Product’ => ‘Product’

Configuration Options Reference
374
Description Value};
TicketFreeKey8::DefaultSelection
Description ValueDescription: Defines the default selection of the free key field number 8 for tickets
(if more than one option is provided).Group: TicketSubGroup: Core::TicketFreeTextValid: 0Required: 0Config-Setting:
$Self->{‘TicketFreeKey8::DefaultSelection’} = »;
TicketFreeText8
Description ValueDescription: Defines the free text field number 8 for tickets to add a new ticket
attribute.Group: TicketSubGroup: Core::TicketFreeTextValid: 0Required: 0Config-Setting:
$Self->{‘TicketFreeText8’} = { » => ‘-‘, ‘Notebook’ => ‘Notebook’, ‘PC’ => ‘PC’, ‘Phone’ => ‘Phone’};
TicketFreeText8::DefaultSelection
Description ValueDescription: Defines the default selection of the free text field number 8 for tickets
(if more than one option is provided).Group: TicketSubGroup: Core::TicketFreeTextValid: 0Required: 0Config-Setting:
$Self->{‘TicketFreeText8::DefaultSelection’} = ‘Notebook’;

Configuration Options Reference
375
TicketFreeText8::LinkDescription ValueDescription: Defines the http link for the free text field number 8 for tickets (it will be
used in every ticket view).Group: TicketSubGroup: Core::TicketFreeTextValid: 0Required: 0Config-Setting:
$Self->{‘TicketFreeText8::Link’} = ‘http://some.example.com/handle?query=$LQData{«TicketFreeText8»}’;
TicketFreeKey9Description ValueDescription: Defines the free key field number 9 for tickets to add a new ticket
attribute.Group: TicketSubGroup: Core::TicketFreeTextValid: 0Required: 0Config-Setting:
$Self->{‘TicketFreeKey9’} = { ‘Product’ => ‘Product’};
TicketFreeKey9::DefaultSelectionDescription ValueDescription: Defines the default selection of the free key field number 9 for tickets
(if more than one option is provided).Group: TicketSubGroup: Core::TicketFreeTextValid: 0Required: 0Config-Setting:
$Self->{‘TicketFreeKey9::DefaultSelection’} = »;
TicketFreeText9Description ValueDescription: Defines the free text field number 9 for tickets to add a new ticket
attribute.

Configuration Options Reference
376
Description ValueGroup: TicketSubGroup: Core::TicketFreeTextValid: 0Required: 0Config-Setting:
$Self->{‘TicketFreeText9’} = { » => ‘-‘, ‘Notebook’ => ‘Notebook’, ‘PC’ => ‘PC’, ‘Phone’ => ‘Phone’};
TicketFreeText9::DefaultSelection
Description ValueDescription: Defines the default selection of the free text field number 9 for tickets
(if more than one option is provided).Group: TicketSubGroup: Core::TicketFreeTextValid: 0Required: 0Config-Setting:
$Self->{‘TicketFreeText9::DefaultSelection’} = ‘Notebook’;
TicketFreeText9::Link
Description ValueDescription: Defines the http link for the free text field number 9 for tickets (it will be
used in every ticket view).Group: TicketSubGroup: Core::TicketFreeTextValid: 0Required: 0Config-Setting:
$Self->{‘TicketFreeText9::Link’} = ‘http://some.example.com/handle?query=$LQData{«TicketFreeText9»}’;
TicketFreeKey10
Description ValueDescription: Defines the free key field number 10 for tickets to add a new ticket
attribute.

Configuration Options Reference
377
Description ValueGroup: TicketSubGroup: Core::TicketFreeTextValid: 0Required: 0Config-Setting:
$Self->{‘TicketFreeKey10’} = { ‘Product’ => ‘Product’};
TicketFreeKey10::DefaultSelection
Description ValueDescription: Defines the default selection of the free key field number 10 for tickets
(if more than one option is provided).Group: TicketSubGroup: Core::TicketFreeTextValid: 0Required: 0Config-Setting:
$Self->{‘TicketFreeKey10::DefaultSelection’} = »;
TicketFreeText10
Description ValueDescription: Defines the free text field number 10 for tickets to add a new ticket
attribute.Group: TicketSubGroup: Core::TicketFreeTextValid: 0Required: 0Config-Setting:
$Self->{‘TicketFreeText10’} = { » => ‘-‘, ‘Notebook’ => ‘Notebook’, ‘PC’ => ‘PC’, ‘Phone’ => ‘Phone’};
TicketFreeText10::DefaultSelection
Description ValueDescription: Defines the default selection of the free text field number 10 for tickets
(if more than one option is provided).

Configuration Options Reference
378
Description ValueGroup: TicketSubGroup: Core::TicketFreeTextValid: 0Required: 0Config-Setting:
$Self->{‘TicketFreeText10::DefaultSelection’} = ‘Notebook’;
TicketFreeText10::Link
Description ValueDescription: Defines the http link for the free text field number 10 for tickets (it will
be used in every ticket view).Group: TicketSubGroup: Core::TicketFreeTextValid: 0Required: 0Config-Setting:
$Self->{‘TicketFreeText10::Link’} = ‘http://some.example.com/handle?query=$LQData{«TicketFreeText10»}’;
TicketFreeKey11
Description ValueDescription: Defines the free key field number 11 for tickets to add a new ticket
attribute.Group: TicketSubGroup: Core::TicketFreeTextValid: 0Required: 0Config-Setting:
$Self->{‘TicketFreeKey11’} = { ‘Product’ => ‘Product’};
TicketFreeKey11::DefaultSelection
Description ValueDescription: Defines the default selection of the free key field number 11 for tickets
(if more than one option is provided).Group: TicketSubGroup: Core::TicketFreeText

Configuration Options Reference
379
Description ValueValid: 0Required: 0Config-Setting:
$Self->{‘TicketFreeKey11::DefaultSelection’} = »;
TicketFreeText11
Description ValueDescription: Defines the free text field number 11 for tickets to add a new ticket
attribute.Group: TicketSubGroup: Core::TicketFreeTextValid: 0Required: 0Config-Setting:
$Self->{‘TicketFreeText11’} = { » => ‘-‘, ‘Notebook’ => ‘Notebook’, ‘PC’ => ‘PC’, ‘Phone’ => ‘Phone’};
TicketFreeText11::DefaultSelection
Description ValueDescription: Defines the default selection of the free text field number 11 for tickets
(if more than one option is provided).Group: TicketSubGroup: Core::TicketFreeTextValid: 0Required: 0Config-Setting:
$Self->{‘TicketFreeText11::DefaultSelection’} = ‘Notebook’;
TicketFreeText11::Link
Description ValueDescription: Defines the http link for the free text field number 11 for tickets (it will
be used in every ticket view).Group: TicketSubGroup: Core::TicketFreeText

Configuration Options Reference
380
Description ValueValid: 0Required: 0Config-Setting:
$Self->{‘TicketFreeText11::Link’} = ‘http://some.example.com/handle?query=$LQData{«TicketFreeText11»}’;
TicketFreeKey12
Description ValueDescription: Defines the free key field number 12 for tickets to add a new ticket
attribute.Group: TicketSubGroup: Core::TicketFreeTextValid: 0Required: 0Config-Setting:
$Self->{‘TicketFreeKey12’} = { ‘Product’ => ‘Product’};
TicketFreeKey12::DefaultSelection
Description ValueDescription: Defines the default selection of the free key field number 12 for tickets
(if more than one option is provided).Group: TicketSubGroup: Core::TicketFreeTextValid: 0Required: 0Config-Setting:
$Self->{‘TicketFreeKey12::DefaultSelection’} = »;
TicketFreeText12
Description ValueDescription: Defines the free text field number 12 for tickets to add a new ticket
attribute.Group: TicketSubGroup: Core::TicketFreeTextValid: 0Required: 0

Configuration Options Reference
381
Description ValueConfig-Setting:
$Self->{‘TicketFreeText12’} = { » => ‘-‘, ‘Notebook’ => ‘Notebook’, ‘PC’ => ‘PC’, ‘Phone’ => ‘Phone’};
TicketFreeText12::DefaultSelection
Description ValueDescription: Defines the default selection of the free text field number 12 for tickets
(if more than one option is provided).Group: TicketSubGroup: Core::TicketFreeTextValid: 0Required: 0Config-Setting:
$Self->{‘TicketFreeText12::DefaultSelection’} = ‘Notebook’;
TicketFreeText12::Link
Description ValueDescription: Defines the http link for the free text field number 12 for tickets (it will
be used in every ticket view).Group: TicketSubGroup: Core::TicketFreeTextValid: 0Required: 0Config-Setting:
$Self->{‘TicketFreeText12::Link’} = ‘http://some.example.com/handle?query=$LQData{«TicketFreeText12»}’;
TicketFreeKey13
Description ValueDescription: Defines the free key field number 13 for tickets to add a new ticket
attribute.Group: TicketSubGroup: Core::TicketFreeTextValid: 0

Configuration Options Reference
382
Description ValueRequired: 0Config-Setting:
$Self->{‘TicketFreeKey13’} = { ‘Product’ => ‘Product’};
TicketFreeKey13::DefaultSelection
Description ValueDescription: Defines the default selection of the free key field number 13 for tickets
(if more than one option is provided).Group: TicketSubGroup: Core::TicketFreeTextValid: 0Required: 0Config-Setting:
$Self->{‘TicketFreeKey13::DefaultSelection’} = »;
TicketFreeText13
Description ValueDescription: Defines the free text field number 13 for tickets to add a new ticket
attribute.Group: TicketSubGroup: Core::TicketFreeTextValid: 0Required: 0Config-Setting:
$Self->{‘TicketFreeText13’} = { » => ‘-‘, ‘Notebook’ => ‘Notebook’, ‘PC’ => ‘PC’, ‘Phone’ => ‘Phone’};
TicketFreeText13::DefaultSelection
Description ValueDescription: Defines the default selection of the free text field number 13 for tickets
(if more than one option is provided).Group: TicketSubGroup: Core::TicketFreeTextValid: 0

Configuration Options Reference
383
Description ValueRequired: 0Config-Setting:
$Self->{‘TicketFreeText13::DefaultSelection’} = ‘Notebook’;
TicketFreeText13::Link
Description ValueDescription: Defines the http link for the free text field number 13 for tickets (it will
be used in every ticket view).Group: TicketSubGroup: Core::TicketFreeTextValid: 0Required: 0Config-Setting:
$Self->{‘TicketFreeText13::Link’} = ‘http://some.example.com/handle?query=$LQData{«TicketFreeText13»}’;
TicketFreeKey14
Description ValueDescription: Defines the free key field number 14 for tickets to add a new ticket
attribute.Group: TicketSubGroup: Core::TicketFreeTextValid: 0Required: 0Config-Setting:
$Self->{‘TicketFreeKey14’} = { ‘Product’ => ‘Product’};
TicketFreeKey14::DefaultSelection
Description ValueDescription: Defines the default selection of the free key field number 14 for tickets
(if more than one option is provided).Group: TicketSubGroup: Core::TicketFreeTextValid: 0Required: 0Config-Setting:

Configuration Options Reference
384
Description Value $Self->{‘TicketFreeKey14::DefaultSelection’} = »;
TicketFreeText14
Description ValueDescription: Defines the free text field number 14 for tickets to add a new ticket
attribute.Group: TicketSubGroup: Core::TicketFreeTextValid: 0Required: 0Config-Setting:
$Self->{‘TicketFreeText14’} = { » => ‘-‘, ‘Notebook’ => ‘Notebook’, ‘PC’ => ‘PC’, ‘Phone’ => ‘Phone’};
TicketFreeText14::DefaultSelection
Description ValueDescription: Defines the default selection of the free text field number 14 for tickets
(if more than one option is provided).Group: TicketSubGroup: Core::TicketFreeTextValid: 0Required: 0Config-Setting:
$Self->{‘TicketFreeText14::DefaultSelection’} = ‘Notebook’;
TicketFreeText14::Link
Description ValueDescription: Defines the http link for the free text field number 14 for tickets (it will
be used in every ticket view).Group: TicketSubGroup: Core::TicketFreeTextValid: 0Required: 0Config-Setting:

Configuration Options Reference
385
Description Value $Self->{‘TicketFreeText14::Link’} = ‘http://some.example.com/handle?query=$LQData{«TicketFreeText14»}’;
TicketFreeKey15
Description ValueDescription: Defines the free key field number 15 for tickets to add a new ticket
attribute.Group: TicketSubGroup: Core::TicketFreeTextValid: 0Required: 0Config-Setting:
$Self->{‘TicketFreeKey15’} = { ‘Product’ => ‘Product’};
TicketFreeKey15::DefaultSelection
Description ValueDescription: Defines the default selection of the free key field number 15 for tickets
(if more than one option is provided).Group: TicketSubGroup: Core::TicketFreeTextValid: 0Required: 0Config-Setting:
$Self->{‘TicketFreeKey15::DefaultSelection’} = »;
TicketFreeText15
Description ValueDescription: Defines the free text field number 15 for tickets to add a new ticket
attribute.Group: TicketSubGroup: Core::TicketFreeTextValid: 0Required: 0Config-Setting:
$Self->{‘TicketFreeText15’} = { » => ‘-‘,

Configuration Options Reference
386
Description Value ‘Notebook’ => ‘Notebook’, ‘PC’ => ‘PC’, ‘Phone’ => ‘Phone’};
TicketFreeText15::DefaultSelection
Description ValueDescription: Defines the default selection of the free text field number 15 for tickets
(if more than one option is provided).Group: TicketSubGroup: Core::TicketFreeTextValid: 0Required: 0Config-Setting:
$Self->{‘TicketFreeText15::DefaultSelection’} = ‘Notebook’;
TicketFreeText15::Link
Description ValueDescription: Defines the http link for the free text field number 15 for tickets (it will
be used in every ticket view).Group: TicketSubGroup: Core::TicketFreeTextValid: 0Required: 0Config-Setting:
$Self->{‘TicketFreeText15::Link’} = ‘http://some.example.com/handle?query=$LQData{«TicketFreeText15»}’;
TicketFreeKey16
Description ValueDescription: Defines the free key field number 16 for tickets to add a new ticket
attribute.Group: TicketSubGroup: Core::TicketFreeTextValid: 0Required: 0Config-Setting:
$Self->{‘TicketFreeKey16’} = { ‘Product’ => ‘Product’

Configuration Options Reference
387
Description Value};
TicketFreeKey16::DefaultSelection
Description ValueDescription: Defines the default selection of the free key field number 16 for tickets
(if more than one option is provided).Group: TicketSubGroup: Core::TicketFreeTextValid: 0Required: 0Config-Setting:
$Self->{‘TicketFreeKey16::DefaultSelection’} = »;
TicketFreeText16
Description ValueDescription: Defines the free text field number 16 for tickets to add a new ticket
attribute.Group: TicketSubGroup: Core::TicketFreeTextValid: 0Required: 0Config-Setting:
$Self->{‘TicketFreeText16’} = { » => ‘-‘, ‘Notebook’ => ‘Notebook’, ‘PC’ => ‘PC’, ‘Phone’ => ‘Phone’};
TicketFreeText16::DefaultSelection
Description ValueDescription: Defines the default selection of the free text field number 16 for tickets
(if more than one option is provided).Group: TicketSubGroup: Core::TicketFreeTextValid: 0Required: 0Config-Setting:
$Self->{‘TicketFreeText16::DefaultSelection’} = ‘Notebook’;

Configuration Options Reference
388
TicketFreeText16::LinkDescription ValueDescription: Defines the http link for the free text field number 16 for tickets (it will
be used in every ticket view).Group: TicketSubGroup: Core::TicketFreeTextValid: 0Required: 0Config-Setting:
$Self->{‘TicketFreeText16::Link’} = ‘http://some.example.com/handle?query=$LQData{«TicketFreeText16»}’;
Core::TicketFreeTextDefaultTicket::EventModulePost###TicketFreeFieldDefault
Description ValueDescription: Event module registration. For more performance you can define a
trigger event (e. g. Event => TicketCreate). This is only possible if allTicketFreeField elements need the same event.
Group: TicketSubGroup: Core::TicketFreeTextDefaultValid: 0Required: 0Config-Setting:
$Self->{‘Ticket::EventModulePost’}->{‘TicketFreeFieldDefault’} = { ‘Module’ => ‘Kernel::System::Ticket::Event::TicketFreeFieldDefault’, ‘Transaction’ => ‘1’};
Ticket::TicketFreeFieldDefault###Element1Description ValueDescription: Configures a default TicketFreeField setting. «Counter» defines the free
text field which should be used, «Key» is the TicketFreeKey, «Value»is the TicketFreeText and «Event» defines the trigger event. Pleasecheck the developer manual (http://doc.otrs.org/), chapter «Ticket EventModule».
Group: TicketSubGroup: Core::TicketFreeTextDefaultValid: 0Required: 0

Configuration Options Reference
389
Description ValueConfig-Setting:
$Self->{‘Ticket::TicketFreeFieldDefault’}->{‘Element1’} = { ‘Counter’ => ‘1’, ‘Event’ => ‘TicketCreate’, ‘Key’ => ‘TicketType’, ‘Value’ => ‘Default’};
Ticket::TicketFreeFieldDefault###Element2
Description ValueDescription: Configures a default TicketFreeField setting. «Counter» defines the free
text field which should be used, «Key» is the TicketFreeKey, «Value» isthe TicketFreeText and «Event» defines the trigger event.
Group: TicketSubGroup: Core::TicketFreeTextDefaultValid: 0Required: 0Config-Setting:
$Self->{‘Ticket::TicketFreeFieldDefault’}->{‘Element2’} = { ‘Counter’ => », ‘Event’ => », ‘Key’ => », ‘Value’ => »};
Ticket::TicketFreeFieldDefault###Element3
Description ValueDescription: Configures a default TicketFreeField setting. «Counter» defines the free
text field which should be used, «Key» is the TicketFreeKey, «Value» isthe TicketFreeText and «Event» defines the trigger event.
Group: TicketSubGroup: Core::TicketFreeTextDefaultValid: 0Required: 0Config-Setting:
$Self->{‘Ticket::TicketFreeFieldDefault’}->{‘Element3’} = { ‘Counter’ => », ‘Event’ => », ‘Key’ => », ‘Value’ => »};

Configuration Options Reference
390
Ticket::TicketFreeFieldDefault###Element4Description ValueDescription: Configures a default TicketFreeField setting. «Counter» defines the free
text field which should be used, «Key» is the TicketFreeKey, «Value» isthe TicketFreeText and «Event» defines the trigger event.
Group: TicketSubGroup: Core::TicketFreeTextDefaultValid: 0Required: 0Config-Setting:
$Self->{‘Ticket::TicketFreeFieldDefault’}->{‘Element4’} = { ‘Counter’ => », ‘Event’ => », ‘Key’ => », ‘Value’ => »};
Ticket::TicketFreeFieldDefault###Element5Description ValueDescription: Configures a default TicketFreeField setting. «Counter» defines the free
text field which should be used, «Key» is the TicketFreeKey, «Value» isthe TicketFreeText and «Event» defines the trigger event.
Group: TicketSubGroup: Core::TicketFreeTextDefaultValid: 0Required: 0Config-Setting:
$Self->{‘Ticket::TicketFreeFieldDefault’}->{‘Element5’} = { ‘Counter’ => », ‘Event’ => », ‘Key’ => », ‘Value’ => »};
Ticket::TicketFreeFieldDefault###Element6Description ValueDescription: Configures a default TicketFreeField setting. «Counter» defines the free
text field which should be used, «Key» is the TicketFreeKey, «Value» isthe TicketFreeText and «Event» defines the trigger event.
Group: TicketSubGroup: Core::TicketFreeTextDefaultValid: 0

Configuration Options Reference
391
Description ValueRequired: 0Config-Setting:
$Self->{‘Ticket::TicketFreeFieldDefault’}->{‘Element6’} = { ‘Counter’ => », ‘Event’ => », ‘Key’ => », ‘Value’ => »};
Ticket::TicketFreeFieldDefault###Element7Description ValueDescription: Configures a default TicketFreeField setting. «Counter» defines the free
text field which should be used, «Key» is the TicketFreeKey, «Value» isthe TicketFreeText and «Event» defines the trigger event.
Group: TicketSubGroup: Core::TicketFreeTextDefaultValid: 0Required: 0Config-Setting:
$Self->{‘Ticket::TicketFreeFieldDefault’}->{‘Element7’} = { ‘Counter’ => », ‘Event’ => », ‘Key’ => », ‘Value’ => »};
Ticket::TicketFreeFieldDefault###Element8Description ValueDescription: Configures a default TicketFreeField setting. «Counter» defines the free
text field which should be used, «Key» is the TicketFreeKey, «Value» isthe TicketFreeText and «Event» defines the trigger event.
Group: TicketSubGroup: Core::TicketFreeTextDefaultValid: 0Required: 0Config-Setting:
$Self->{‘Ticket::TicketFreeFieldDefault’}->{‘Element8’} = { ‘Counter’ => », ‘Event’ => », ‘Key’ => », ‘Value’ => »};

Configuration Options Reference
392
Ticket::TicketFreeFieldDefault###Element9Description ValueDescription: Configures a default TicketFreeField setting. «Counter» defines the free
text field which should be used, «Key» is the TicketFreeKey, «Value» isthe TicketFreeText and «Event» defines the trigger event.
Group: TicketSubGroup: Core::TicketFreeTextDefaultValid: 0Required: 0Config-Setting:
$Self->{‘Ticket::TicketFreeFieldDefault’}->{‘Element9’} = { ‘Counter’ => », ‘Event’ => », ‘Key’ => », ‘Value’ => »};
Ticket::TicketFreeFieldDefault###Element10Description ValueDescription: Configures a default TicketFreeField setting. «Counter» defines the free
text field which should be used, «Key» is the TicketFreeKey, «Value» isthe TicketFreeText and «Event» defines the trigger event.
Group: TicketSubGroup: Core::TicketFreeTextDefaultValid: 0Required: 0Config-Setting:
$Self->{‘Ticket::TicketFreeFieldDefault’}->{‘Element10’} = { ‘Counter’ => », ‘Event’ => », ‘Key’ => », ‘Value’ => »};
Ticket::TicketFreeFieldDefault###Element11Description ValueDescription: Configures a default TicketFreeField setting. «Counter» defines the free
text field which should be used, «Key» is the TicketFreeKey, «Value» isthe TicketFreeText and «Event» defines the trigger event.
Group: TicketSubGroup: Core::TicketFreeTextDefaultValid: 0

Configuration Options Reference
393
Description ValueRequired: 0Config-Setting:
$Self->{‘Ticket::TicketFreeFieldDefault’}->{‘Element11’} = { ‘Counter’ => », ‘Event’ => », ‘Key’ => », ‘Value’ => »};
Ticket::TicketFreeFieldDefault###Element12
Description ValueDescription: Configures a default TicketFreeField setting. «Counter» defines the free
text field which should be used, «Key» is the TicketFreeKey, «Value» isthe TicketFreeText and «Event» defines the trigger event.
Group: TicketSubGroup: Core::TicketFreeTextDefaultValid: 0Required: 0Config-Setting:
$Self->{‘Ticket::TicketFreeFieldDefault’}->{‘Element12’} = { ‘Counter’ => », ‘Event’ => », ‘Key’ => », ‘Value’ => »};
Ticket::TicketFreeFieldDefault###Element13
Description ValueDescription: Configures a default TicketFreeField setting. «Counter» defines the free
text field which should be used, «Key» is the TicketFreeKey, «Value» isthe TicketFreeText and «Event» defines the trigger event.
Group: TicketSubGroup: Core::TicketFreeTextDefaultValid: 0Required: 0Config-Setting:
$Self->{‘Ticket::TicketFreeFieldDefault’}->{‘Element13’} = { ‘Counter’ => », ‘Event’ => », ‘Key’ => », ‘Value’ => »

Configuration Options Reference
394
Description Value};
Ticket::TicketFreeFieldDefault###Element14Description ValueDescription: Configures a default TicketFreeField setting. «Counter» defines the free
text field which should be used, «Key» is the TicketFreeKey, «Value» isthe TicketFreeText and «Event» defines the trigger event.
Group: TicketSubGroup: Core::TicketFreeTextDefaultValid: 0Required: 0Config-Setting:
$Self->{‘Ticket::TicketFreeFieldDefault’}->{‘Element14’} = { ‘Counter’ => », ‘Event’ => », ‘Key’ => », ‘Value’ => »};
Ticket::TicketFreeFieldDefault###Element15Description ValueDescription: Configures a default TicketFreeField setting. «Counter» defines the free
text field which should be used, «Key» is the TicketFreeKey, «Value» isthe TicketFreeText and «Event» defines the trigger event.
Group: TicketSubGroup: Core::TicketFreeTextDefaultValid: 0Required: 0Config-Setting:
$Self->{‘Ticket::TicketFreeFieldDefault’}->{‘Element15’} = { ‘Counter’ => », ‘Event’ => », ‘Key’ => », ‘Value’ => »};
Ticket::TicketFreeFieldDefault###Element16Description ValueDescription: Configures a default TicketFreeField setting. «Counter» defines the free
text field which should be used, «Key» is the TicketFreeKey, «Value» isthe TicketFreeText and «Event» defines the trigger event.

Configuration Options Reference
395
Description ValueGroup: TicketSubGroup: Core::TicketFreeTextDefaultValid: 0Required: 0Config-Setting:
$Self->{‘Ticket::TicketFreeFieldDefault’}->{‘Element16’} = { ‘Counter’ => », ‘Event’ => », ‘Key’ => », ‘Value’ => »};
Core::TicketFreeTimeTicketFreeTimeKey1
Description ValueDescription: Defines the free time key field number 1 for tickets.Group: TicketSubGroup: Core::TicketFreeTimeValid: 1Required: 1Config-Setting:
$Self->{‘TicketFreeTimeKey1’} = ‘Time1’;
TicketFreeTimeOptional1
Description ValueDescription: Defines whether the free time field number 1 is optional or not.Group: TicketSubGroup: Core::TicketFreeTimeValid: 1Required: 1Config-Setting:
$Self->{‘TicketFreeTimeOptional1’} = ‘1’;
TicketFreeTimeDiff1
Description ValueDescription: Defines the difference from now (in seconds) of the free time field
number 1’s default value.Group: Ticket

Configuration Options Reference
396
Description ValueSubGroup: Core::TicketFreeTimeValid: 0Required: 0Config-Setting:
$Self->{‘TicketFreeTimeDiff1’} = ‘0’;
TicketFreeTimePeriod1
Description ValueDescription: Defines the years (in future and in past) which can get selected in free
time field number 1.Group: TicketSubGroup: Core::TicketFreeTimeValid: 0Required: 0Config-Setting:
$Self->{‘TicketFreeTimePeriod1’} = { ‘YearPeriodFuture’ => ‘5’, ‘YearPeriodPast’ => ‘5’};
TicketFreeTimeKey2
Description ValueDescription: Defines the free time key field number 2 for tickets.Group: TicketSubGroup: Core::TicketFreeTimeValid: 1Required: 1Config-Setting:
$Self->{‘TicketFreeTimeKey2’} = ‘Time2’;
TicketFreeTimeOptional2
Description ValueDescription: Defines whether the free time field number 2 is optional or not.Group: TicketSubGroup: Core::TicketFreeTimeValid: 1Required: 1Config-Setting:
$Self->{‘TicketFreeTimeOptional2’} = ‘1’;

Configuration Options Reference
397
TicketFreeTimeDiff2
Description ValueDescription: Defines the difference from now (in seconds) of the free time field
number 2’s default value.Group: TicketSubGroup: Core::TicketFreeTimeValid: 0Required: 0Config-Setting:
$Self->{‘TicketFreeTimeDiff2’} = ‘0’;
TicketFreeTimePeriod2
Description ValueDescription: Defines the years (in future and in past) which can get selected in free
time field number 2.Group: TicketSubGroup: Core::TicketFreeTimeValid: 0Required: 0Config-Setting:
$Self->{‘TicketFreeTimePeriod2’} = { ‘YearPeriodFuture’ => ‘5’, ‘YearPeriodPast’ => ‘5’};
TicketFreeTimeKey3
Description ValueDescription: Defines the free time key field number 3 for tickets.Group: TicketSubGroup: Core::TicketFreeTimeValid: 1Required: 1Config-Setting:
$Self->{‘TicketFreeTimeKey3’} = ‘Time3’;
TicketFreeTimeOptional3
Description ValueDescription: Defines whether the free time field number 3 is optional or not.Group: Ticket

Configuration Options Reference
398
Description ValueSubGroup: Core::TicketFreeTimeValid: 1Required: 1Config-Setting:
$Self->{‘TicketFreeTimeOptional3’} = ‘1’;
TicketFreeTimeDiff3
Description ValueDescription: Defines the difference from now (in seconds) of the free time field
number 3’s default value.Group: TicketSubGroup: Core::TicketFreeTimeValid: 0Required: 0Config-Setting:
$Self->{‘TicketFreeTimeDiff3’} = ‘0’;
TicketFreeTimePeriod3
Description ValueDescription: Defines the years (in future and in past) which can get selected in free
time field number 3.Group: TicketSubGroup: Core::TicketFreeTimeValid: 0Required: 0Config-Setting:
$Self->{‘TicketFreeTimePeriod3’} = { ‘YearPeriodFuture’ => ‘5’, ‘YearPeriodPast’ => ‘5’};
TicketFreeTimeKey4
Description ValueDescription: Defines the free time key field number 4 for tickets.Group: TicketSubGroup: Core::TicketFreeTimeValid: 1Required: 1Config-Setting:

Configuration Options Reference
399
Description Value $Self->{‘TicketFreeTimeKey4’} = ‘Time4’;
TicketFreeTimeOptional4Description ValueDescription: Defines whether the free time field number 4 is optional or not.Group: TicketSubGroup: Core::TicketFreeTimeValid: 1Required: 1Config-Setting:
$Self->{‘TicketFreeTimeOptional4’} = ‘1’;
TicketFreeTimeDiff4Description ValueDescription: Defines the difference from now (in seconds) of the free time field
number 4’s default value.Group: TicketSubGroup: Core::TicketFreeTimeValid: 0Required: 0Config-Setting:
$Self->{‘TicketFreeTimeDiff4’} = ‘0’;
TicketFreeTimePeriod4Description ValueDescription: Defines the years (in future and in past) which can get selected in free
time field number 4.Group: TicketSubGroup: Core::TicketFreeTimeValid: 0Required: 0Config-Setting:
$Self->{‘TicketFreeTimePeriod4’} = { ‘YearPeriodFuture’ => ‘5’, ‘YearPeriodPast’ => ‘5’};
TicketFreeTimeKey5Description ValueDescription: Defines the free time key field number 5 for tickets.

Configuration Options Reference
400
Description ValueGroup: TicketSubGroup: Core::TicketFreeTimeValid: 1Required: 1Config-Setting:
$Self->{‘TicketFreeTimeKey5’} = ‘Time5’;
TicketFreeTimeOptional5Description ValueDescription: Defines whether the free time field number 5 is optional or not.Group: TicketSubGroup: Core::TicketFreeTimeValid: 1Required: 1Config-Setting:
$Self->{‘TicketFreeTimeOptional5’} = ‘1’;
TicketFreeTimeDiff5Description ValueDescription: Defines the difference from now (in seconds) of the free time field
number 5’s default value.Group: TicketSubGroup: Core::TicketFreeTimeValid: 0Required: 0Config-Setting:
$Self->{‘TicketFreeTimeDiff5’} = ‘0’;
TicketFreeTimePeriod5Description ValueDescription: Defines the years (in future and in past) which can get selected in free
time field number 5.Group: TicketSubGroup: Core::TicketFreeTimeValid: 0Required: 0Config-Setting:
$Self->{‘TicketFreeTimePeriod5’} = { ‘YearPeriodFuture’ => ‘5’, ‘YearPeriodPast’ => ‘5’

Configuration Options Reference
401
Description Value};
TicketFreeTimeKey6Description ValueDescription: Defines the free time key field number 6 for tickets.Group: TicketSubGroup: Core::TicketFreeTimeValid: 1Required: 1Config-Setting:
$Self->{‘TicketFreeTimeKey6’} = ‘Time6’;
TicketFreeTimeOptional6Description ValueDescription: Defines whether the free time field number 6 is optional or not.Group: TicketSubGroup: Core::TicketFreeTimeValid: 1Required: 1Config-Setting:
$Self->{‘TicketFreeTimeOptional6’} = ‘1’;
TicketFreeTimeDiff6Description ValueDescription: Defines the difference from now (in seconds) of the free time field
number 6’s default value.Group: TicketSubGroup: Core::TicketFreeTimeValid: 0Required: 0Config-Setting:
$Self->{‘TicketFreeTimeDiff6’} = ‘0’;
TicketFreeTimePeriod6Description ValueDescription: Defines the years (in future and in past) which can get selected in free
time field number 6.Group: TicketSubGroup: Core::TicketFreeTime

Configuration Options Reference
402
Description ValueValid: 0Required: 0Config-Setting:
$Self->{‘TicketFreeTimePeriod6’} = { ‘YearPeriodFuture’ => ‘5’, ‘YearPeriodPast’ => ‘5’};
Core::TicketWatcherTicket::Watcher
Description ValueDescription: Enables or disables the ticket watcher feature, to keep track of tickets
without being the owner nor the responsible.Group: TicketSubGroup: Core::TicketWatcherValid: 1Required: 1Config-Setting:
$Self->{‘Ticket::Watcher’} = ‘0’;
Ticket::WatcherGroup
Description ValueDescription: Enables ticket watcher feature only for the listed groups.Group: TicketSubGroup: Core::TicketWatcherValid: 0Required: 0Config-Setting:
$Self->{‘Ticket::WatcherGroup’} = [ ‘admin’, ‘users’];
Frontend::Admin::ModuleRegistrationFrontend::Module###AdminQueue
Description ValueDescription: Frontend module registration for the agent interface.Group: Ticket

Configuration Options Reference
403
Description ValueSubGroup: Frontend::Admin::ModuleRegistrationValid: 1Required: 0Config-Setting:
$Self->{‘Frontend::Module’}->{‘AdminQueue’} = { ‘Description’ => ‘Admin’, ‘Group’ => [ ‘admin’ ], ‘NavBarModule’ => { ‘Block’ => ‘Queue’, ‘Description’ => ‘Create and manage queues.’, ‘Module’ => ‘Kernel::Output::HTML::NavBarModuleAdmin’, ‘Name’ => ‘Queues’, ‘Prio’ => ‘100’ }, ‘NavBarName’ => ‘Admin’, ‘Title’ => ‘Queue’};
Frontend::Module###AdminResponse
Description ValueDescription: Frontend module registration for the agent interface.Group: TicketSubGroup: Frontend::Admin::ModuleRegistrationValid: 1Required: 0Config-Setting:
$Self->{‘Frontend::Module’}->{‘AdminResponse’} = { ‘Description’ => ‘Admin’, ‘Group’ => [ ‘admin’ ], ‘NavBarModule’ => { ‘Block’ => ‘Queue’, ‘Description’ => ‘Create and manage response templates.’, ‘Module’ => ‘Kernel::Output::HTML::NavBarModuleAdmin’, ‘Name’ => ‘Responses’, ‘Prio’ => ‘200’ }, ‘NavBarName’ => ‘Admin’, ‘Title’ => ‘Response’};

Configuration Options Reference
404
Frontend::Module###AdminQueueResponsesDescription ValueDescription: Frontend module registration for the agent interface.Group: TicketSubGroup: Frontend::Admin::ModuleRegistrationValid: 1Required: 0Config-Setting:
$Self->{‘Frontend::Module’}->{‘AdminQueueResponses’} = { ‘Description’ => ‘Admin’, ‘Group’ => [ ‘admin’ ], ‘NavBarModule’ => { ‘Block’ => ‘Queue’, ‘Description’ => ‘Link responses to queues.’, ‘Module’ => ‘Kernel::Output::HTML::NavBarModuleAdmin’, ‘Name’ => ‘Responses <-> Queues’, ‘Prio’ => ‘300’ }, ‘NavBarName’ => ‘Admin’, ‘Title’ => ‘Responses <-> Queues’};
Frontend::Module###AdminAutoResponseDescription ValueDescription: Frontend module registration for the agent interface.Group: TicketSubGroup: Frontend::Admin::ModuleRegistrationValid: 1Required: 0Config-Setting:
$Self->{‘Frontend::Module’}->{‘AdminAutoResponse’} = { ‘Description’ => ‘Admin’, ‘Group’ => [ ‘admin’ ], ‘NavBarModule’ => { ‘Block’ => ‘Queue’, ‘Description’ => ‘Create and manage responses that are automatically sent.’, ‘Module’ => ‘Kernel::Output::HTML::NavBarModuleAdmin’, ‘Name’ => ‘Auto Responses’,

Configuration Options Reference
405
Description Value ‘Prio’ => ‘400’ }, ‘NavBarName’ => ‘Admin’, ‘Title’ => ‘Auto Responses’};
Frontend::Module###AdminQueueAutoResponse
Description ValueDescription: Frontend module registration for the agent interface.Group: TicketSubGroup: Frontend::Admin::ModuleRegistrationValid: 1Required: 0Config-Setting:
$Self->{‘Frontend::Module’}->{‘AdminQueueAutoResponse’} = { ‘Description’ => ‘Admin’, ‘Group’ => [ ‘admin’ ], ‘NavBarModule’ => { ‘Block’ => ‘Queue’, ‘Description’ => ‘Link queues to auto responses.’, ‘Module’ => ‘Kernel::Output::HTML::NavBarModuleAdmin’, ‘Name’ => ‘Auto Responses <-> Queues’, ‘Prio’ => ‘500’ }, ‘NavBarName’ => ‘Admin’, ‘Title’ => ‘Queues <-> Auto Responses’};
Frontend::Module###AdminAttachment
Description ValueDescription: Frontend module registration for the agent interface.Group: TicketSubGroup: Frontend::Admin::ModuleRegistrationValid: 1Required: 0Config-Setting:
$Self->{‘Frontend::Module’}->{‘AdminAttachment’} = { ‘Description’ => ‘Admin’, ‘Group’ => [

Configuration Options Reference
406
Description Value ‘admin’ ], ‘NavBarModule’ => { ‘Block’ => ‘Queue’, ‘Description’ => ‘Create and manage attachments.’, ‘Module’ => ‘Kernel::Output::HTML::NavBarModuleAdmin’, ‘Name’ => ‘Attachments’, ‘Prio’ => ‘600’ }, ‘NavBarName’ => ‘Admin’, ‘Title’ => ‘Attachment’};
Frontend::Module###AdminResponseAttachment
Description ValueDescription: Frontend module registration for the agent interface.Group: TicketSubGroup: Frontend::Admin::ModuleRegistrationValid: 1Required: 0Config-Setting:
$Self->{‘Frontend::Module’}->{‘AdminResponseAttachment’} = { ‘Description’ => ‘Admin’, ‘Group’ => [ ‘admin’ ], ‘NavBarModule’ => { ‘Block’ => ‘Queue’, ‘Description’ => ‘Link attachments to responses templates.’, ‘Module’ => ‘Kernel::Output::HTML::NavBarModuleAdmin’, ‘Name’ => ‘Attachments <-> Responses’, ‘Prio’ => ‘700’ }, ‘NavBarName’ => ‘Admin’, ‘Title’ => ‘Attachments <-> Responses’};
Frontend::Module###AdminSalutation
Description ValueDescription: Frontend module registration for the agent interface.Group: Ticket

Configuration Options Reference
407
Description ValueSubGroup: Frontend::Admin::ModuleRegistrationValid: 1Required: 0Config-Setting:
$Self->{‘Frontend::Module’}->{‘AdminSalutation’} = { ‘Description’ => ‘Admin’, ‘Group’ => [ ‘admin’ ], ‘NavBarModule’ => { ‘Block’ => ‘Queue’, ‘Description’ => ‘Create and manage salutations.’, ‘Module’ => ‘Kernel::Output::HTML::NavBarModuleAdmin’, ‘Name’ => ‘Salutations’, ‘Prio’ => ‘800’ }, ‘NavBarName’ => ‘Admin’, ‘Title’ => ‘Salutations’};
Frontend::Module###AdminSignature
Description ValueDescription: Frontend module registration for the agent interface.Group: TicketSubGroup: Frontend::Admin::ModuleRegistrationValid: 1Required: 0Config-Setting:
$Self->{‘Frontend::Module’}->{‘AdminSignature’} = { ‘Description’ => ‘Admin’, ‘Group’ => [ ‘admin’ ], ‘NavBarModule’ => { ‘Block’ => ‘Queue’, ‘Description’ => ‘Create and manage signatures.’, ‘Module’ => ‘Kernel::Output::HTML::NavBarModuleAdmin’, ‘Name’ => ‘Signatures’, ‘Prio’ => ‘900’ }, ‘NavBarName’ => ‘Admin’,

Configuration Options Reference
408
Description Value ‘Title’ => ‘Signatures’};
Frontend::Module###AdminSystemAddress
Description ValueDescription: Frontend module registration for the agent interface.Group: TicketSubGroup: Frontend::Admin::ModuleRegistrationValid: 1Required: 0Config-Setting:
$Self->{‘Frontend::Module’}->{‘AdminSystemAddress’} = { ‘Description’ => ‘Admin’, ‘Group’ => [ ‘admin’ ], ‘NavBarModule’ => { ‘Block’ => ‘Email’, ‘Description’ => ‘Set sender email addresses for this system.’, ‘Module’ => ‘Kernel::Output::HTML::NavBarModuleAdmin’, ‘Name’ => ‘Email Addresses’, ‘Prio’ => ‘300’ }, ‘NavBarName’ => ‘Admin’, ‘Title’ => ‘System address’};
Frontend::Module###AdminNotification
Description ValueDescription: Frontend module registration for the agent interface.Group: TicketSubGroup: Frontend::Admin::ModuleRegistrationValid: 1Required: 0Config-Setting:
$Self->{‘Frontend::Module’}->{‘AdminNotification’} = { ‘Description’ => ‘Admin’, ‘Group’ => [ ‘admin’ ], ‘NavBarModule’ => {

Configuration Options Reference
409
Description Value ‘Block’ => ‘Ticket’, ‘Description’ => ‘Create and manage notifications that are sent to agents.’, ‘Module’ => ‘Kernel::Output::HTML::NavBarModuleAdmin’, ‘Name’ => ‘Agent Notifications’, ‘Prio’ => ‘400’ }, ‘NavBarName’ => ‘Admin’, ‘Title’ => ‘Agent Notifications’};
Frontend::Module###AdminNotificationEventDescription ValueDescription: Frontend module registration for the agent interface.Group: TicketSubGroup: Frontend::Admin::ModuleRegistrationValid: 1Required: 0Config-Setting:
$Self->{‘Frontend::Module’}->{‘AdminNotificationEvent’} = { ‘Description’ => ‘Admin’, ‘Group’ => [ ‘admin’ ], ‘NavBarModule’ => { ‘Block’ => ‘Ticket’, ‘Description’ => ‘Create and manage event based notifications.’, ‘Module’ => ‘Kernel::Output::HTML::NavBarModuleAdmin’, ‘Name’ => ‘Notifications (Event)’, ‘Prio’ => ‘400’ }, ‘NavBarName’ => ‘Admin’, ‘Title’ => ‘Notifications (Event)’};
Frontend::Module###AdminServiceDescription ValueDescription: Frontend module registration for the agent interface.Group: TicketSubGroup: Frontend::Admin::ModuleRegistrationValid: 1Required: 0

Configuration Options Reference
410
Description ValueConfig-Setting:
$Self->{‘Frontend::Module’}->{‘AdminService’} = { ‘Description’ => ‘Admin’, ‘Group’ => [ ‘admin’ ], ‘NavBarModule’ => { ‘Block’ => ‘Ticket’, ‘Description’ => ‘Create and manage services.’, ‘Module’ => ‘Kernel::Output::HTML::NavBarModuleAdmin’, ‘Name’ => ‘Services’, ‘Prio’ => ‘900’ }, ‘NavBarName’ => ‘Admin’, ‘Title’ => ‘Services’};
Frontend::Module###AdminSLADescription ValueDescription: Frontend module registration for the agent interface.Group: TicketSubGroup: Frontend::Admin::ModuleRegistrationValid: 1Required: 0Config-Setting:
$Self->{‘Frontend::Module’}->{‘AdminSLA’} = { ‘Description’ => ‘Admin’, ‘Group’ => [ ‘admin’ ], ‘NavBarModule’ => { ‘Block’ => ‘Ticket’, ‘Description’ => ‘Create and manage Service Level Agreements (SLAs).’, ‘Module’ => ‘Kernel::Output::HTML::NavBarModuleAdmin’, ‘Name’ => ‘Service Level Agreements’, ‘Prio’ => ‘1000’ }, ‘NavBarName’ => ‘Admin’, ‘Title’ => ‘Service Level Agreements’};
Frontend::Module###AdminTypeDescription ValueDescription: Frontend module registration for the agent interface.

Configuration Options Reference
411
Description ValueGroup: TicketSubGroup: Frontend::Admin::ModuleRegistrationValid: 1Required: 0Config-Setting:
$Self->{‘Frontend::Module’}->{‘AdminType’} = { ‘Description’ => ‘Admin’, ‘Group’ => [ ‘admin’ ], ‘NavBarModule’ => { ‘Block’ => ‘Ticket’, ‘Description’ => ‘Create and manage ticket types.’, ‘Module’ => ‘Kernel::Output::HTML::NavBarModuleAdmin’, ‘Name’ => ‘Types’, ‘Prio’ => ‘700’ }, ‘NavBarName’ => ‘Admin’, ‘Title’ => ‘Types’};
Frontend::Module###AdminState
Description ValueDescription: Frontend module registration for the agent interface.Group: TicketSubGroup: Frontend::Admin::ModuleRegistrationValid: 1Required: 0Config-Setting:
$Self->{‘Frontend::Module’}->{‘AdminState’} = { ‘Description’ => ‘Admin’, ‘Group’ => [ ‘admin’ ], ‘NavBarModule’ => { ‘Block’ => ‘Ticket’, ‘Description’ => ‘Create and manage ticket states.’, ‘Module’ => ‘Kernel::Output::HTML::NavBarModuleAdmin’, ‘Name’ => ‘States’, ‘Prio’ => ‘800’ }, ‘NavBarName’ => ‘Admin’, ‘Title’ => ‘States’

Configuration Options Reference
412
Description Value};
Frontend::Module###AdminPriority
Description ValueDescription: Frontend module registration for the agent interface.Group: TicketSubGroup: Frontend::Admin::ModuleRegistrationValid: 1Required: 0Config-Setting:
$Self->{‘Frontend::Module’}->{‘AdminPriority’} = { ‘Description’ => ‘Admin’, ‘Group’ => [ ‘admin’ ], ‘NavBarModule’ => { ‘Block’ => ‘Ticket’, ‘Description’ => ‘Create and manage ticket priorities.’, ‘Module’ => ‘Kernel::Output::HTML::NavBarModuleAdmin’, ‘Name’ => ‘Priorities’, ‘Prio’ => ‘850’ }, ‘NavBarName’ => ‘Admin’, ‘Title’ => ‘Priorities’};
Frontend::Module###AdminGenericAgent
Description ValueDescription: Frontend module registration for the agent interface.Group: TicketSubGroup: Frontend::Admin::ModuleRegistrationValid: 1Required: 0Config-Setting:
$Self->{‘Frontend::Module’}->{‘AdminGenericAgent’} = { ‘Description’ => ‘Admin’, ‘Group’ => [ ‘admin’ ], ‘NavBarModule’ => { ‘Block’ => ‘System’,

Configuration Options Reference
413
Description Value ‘Description’ => ‘Manage periodic tasks.’, ‘Module’ => ‘Kernel::Output::HTML::NavBarModuleAdmin’, ‘Name’ => ‘GenericAgent’, ‘Prio’ => ‘300’ }, ‘NavBarName’ => ‘Admin’, ‘Title’ => ‘GenericAgent’};
Frontend::AgentTicket::Frontend::PendingDiffTime
Description ValueDescription: Time in seconds that gets added to the actual time if setting a pending-
state (default: 86400 = 1 day).Group: TicketSubGroup: Frontend::AgentValid: 1Required: 1Config-Setting:
$Self->{‘Ticket::Frontend::PendingDiffTime’} = ‘86400’;
Ticket::Frontend::ListTypeDescription ValueDescription: Shows existing parent/child queue lists in the system in the form of a
tree or a list.Group: TicketSubGroup: Frontend::AgentValid: 1Required: 1Config-Setting:
$Self->{‘Ticket::Frontend::ListType’} = ‘tree’;
Ticket::Frontend::TextAreaEmailDescription ValueDescription: Permitted width for compose email windows.Group: TicketSubGroup: Frontend::AgentValid: 1Required: 1

Configuration Options Reference
414
Description ValueConfig-Setting:
$Self->{‘Ticket::Frontend::TextAreaEmail’} = ’82’;
Ticket::Frontend::TextAreaNoteDescription ValueDescription: Permitted width for compose note windows.Group: TicketSubGroup: Frontend::AgentValid: 1Required: 1Config-Setting:
$Self->{‘Ticket::Frontend::TextAreaNote’} = ’78’;
Ticket::Frontend::InformAgentMaxSizeDescription ValueDescription: Max size (in rows) of the informed agents box in the agent interface.Group: TicketSubGroup: Frontend::AgentValid: 1Required: 1Config-Setting:
$Self->{‘Ticket::Frontend::InformAgentMaxSize’} = ‘3’;
Ticket::Frontend::InvolvedAgentMaxSizeDescription ValueDescription: Max size (in rows) of the involved agents box in the agent interface.Group: TicketSubGroup: Frontend::AgentValid: 1Required: 1Config-Setting:
$Self->{‘Ticket::Frontend::InvolvedAgentMaxSize’} = ‘3’;
Ticket::Frontend::CustomerInfoComposeDescription ValueDescription: Shows the customer user information (phone and email) in the compose
screen.

Configuration Options Reference
415
Description ValueGroup: TicketSubGroup: Frontend::AgentValid: 1Required: 1Config-Setting:
$Self->{‘Ticket::Frontend::CustomerInfoCompose’} = ‘1’;
Ticket::Frontend::CustomerInfoComposeMaxSize
Description ValueDescription: Max size (in characters) of the customer information table (phone and
email) in the compose screen.Group: TicketSubGroup: Frontend::AgentValid: 1Required: 1Config-Setting:
$Self->{‘Ticket::Frontend::CustomerInfoComposeMaxSize’} = ’22’;
Ticket::Frontend::CustomerInfoZoom
Description ValueDescription: Shows the customer user’s info in the ticket zoom view.Group: TicketSubGroup: Frontend::AgentValid: 1Required: 1Config-Setting:
$Self->{‘Ticket::Frontend::CustomerInfoZoom’} = ‘1’;
Ticket::Frontend::CustomerInfoZoomMaxSize
Description ValueDescription: Maximum size (in characters) of the customer information table in the
ticket zoom view.Group: TicketSubGroup: Frontend::AgentValid: 1

Configuration Options Reference
416
Description ValueRequired: 1Config-Setting:
$Self->{‘Ticket::Frontend::CustomerInfoZoomMaxSize’} = ’22’;
Ticket::Frontend::CustomerInfoQueueMaxSize
Description ValueDescription: Maximum size (in characters) of the customer info table in the queue
view.Group: TicketSubGroup: Frontend::AgentValid: 1Required: 1Config-Setting:
$Self->{‘Ticket::Frontend::CustomerInfoQueueMaxSize’} = ’18’;
Ticket::Frontend::AccountTime
Description ValueDescription: Activates time accounting.Group: TicketSubGroup: Frontend::AgentValid: 1Required: 1Config-Setting:
$Self->{‘Ticket::Frontend::AccountTime’} = ‘1’;
Ticket::Frontend::TimeUnits
Description ValueDescription: Sets the prefered time units (e.g. work units, hours, minutes).Group: TicketSubGroup: Frontend::AgentValid: 1Required: 1Config-Setting:
$Self->{‘Ticket::Frontend::TimeUnits’} = ‘ (work units)’;

Configuration Options Reference
417
Ticket::Frontend::NeedAccountedTime
Description ValueDescription: Defines if time accounting is mandatory in the agent interface.Group: TicketSubGroup: Frontend::AgentValid: 1Required: 1Config-Setting:
$Self->{‘Ticket::Frontend::NeedAccountedTime’} = ‘0’;
Ticket::Frontend::BulkAccountedTime
Description ValueDescription: Defines if time accounting must be set to all tickets in bulk action.Group: TicketSubGroup: Frontend::AgentValid: 1Required: 1Config-Setting:
$Self->{‘Ticket::Frontend::BulkAccountedTime’} = ‘1’;
Ticket::Frontend::NeedSpellCheck
Description ValueDescription: Defines if composed messages have to be spell checked in the agent
interface.Group: TicketSubGroup: Frontend::AgentValid: 1Required: 1Config-Setting:
$Self->{‘Ticket::Frontend::NeedSpellCheck’} = ‘0’;
Ticket::Frontend::NewOwnerSelection
Description ValueDescription: Shows an owner selection in phone and email tickets in the agent
interface.Group: Ticket

Configuration Options Reference
418
Description ValueSubGroup: Frontend::AgentValid: 1Required: 1Config-Setting:
$Self->{‘Ticket::Frontend::NewOwnerSelection’} = ‘1’;
Ticket::Frontend::NewResponsibleSelection
Description ValueDescription: Show a responsible selection in phone and email tickets in the agent
interface.Group: TicketSubGroup: Frontend::AgentValid: 1Required: 1Config-Setting:
$Self->{‘Ticket::Frontend::NewResponsibleSelection’} = ‘1’;
Ticket::Frontend::NewQueueSelectionType
Description ValueDescription: Defines the receipent target of the phone ticket and the sender of the
email ticket («Queue» shows all queues, «SystemAddress» displays allsystem addresses) in the agent interface.
Group: TicketSubGroup: Frontend::AgentValid: 1Required: 1Config-Setting:
$Self->{‘Ticket::Frontend::NewQueueSelectionType’} = ‘Queue’;
Ticket::Frontend::NewQueueSelectionString
Description ValueDescription: Determines the strings that will be shown as receipent (To:) of the phone
ticket and as sender (From:) of the email ticket in the agent interface.For Queue as NewQueueSelectionType «<Queue>» shows the namesof the queues and for SystemAddress «<Realname> <<Email>>» showsthe name and email of the receipent.
Group: Ticket

Configuration Options Reference
419
Description ValueSubGroup: Frontend::AgentValid: 1Required: 1Config-Setting:
$Self->{‘Ticket::Frontend::NewQueueSelectionString’} = ‘<Queue>’;
Ticket::Frontend::NewQueueOwnSelection
Description ValueDescription: Determines which options will be valid of the recepient (phone ticket)
and the sender (email ticket) in the agent interface.Group: TicketSubGroup: Frontend::AgentValid: 0Required: 0Config-Setting:
$Self->{‘Ticket::Frontend::NewQueueOwnSelection’} = { ‘1’ => ‘First Queue!’, ‘2’ => ‘Second Queue!’};
Ticket::Frontend::ShowCustomerTickets
Description ValueDescription: Shows customer history tickets in AgentTicketPhone, AgentTicketEmail
and AgentTicketCustomer.Group: TicketSubGroup: Frontend::AgentValid: 1Required: 1Config-Setting:
$Self->{‘Ticket::Frontend::ShowCustomerTickets’} = ‘1’;
NewTicketInNewWindow::Enabled
Description ValueDescription: If enabled, TicketPhone and TicketEmail will be open in new windows.Group: TicketSubGroup: Frontend::Agent

Configuration Options Reference
420
Description ValueValid: 1Required: 1Config-Setting:
$Self->{‘NewTicketInNewWindow::Enabled’} = ‘0’;
CustomerDBLink
Description ValueDescription: Defines an external link to the database of the customer (e.g. ‘http://
yourhost/customer.php?CID=$Data{«CustomerID»}’ or »).Group: TicketSubGroup: Frontend::AgentValid: 1Required: 1Config-Setting:
$Self->{‘CustomerDBLink’} = ‘$Env{«CGIHandle»}?Action=AgentTicketCustomer;TicketID=$Data{«TicketID»}’;
CustomerDBLinkTarget
Description ValueDescription: Defines the target attribute in the link to external customer database.
E.g. ‘target=»cdb»‘.Group: TicketSubGroup: Frontend::AgentValid: 1Required: 1Config-Setting:
$Self->{‘CustomerDBLinkTarget’} = »;
Frontend::CommonObject###QueueObject
Description ValueDescription: Path of the file that stores all the settings for the QueueObject object
for the agent interface.Group: TicketSubGroup: Frontend::AgentValid: 1Required: 1Config-Setting:
$Self->{‘Frontend::CommonObject’}->{‘QueueObject’} = ‘Kernel::System::Queue’;

Configuration Options Reference
421
Frontend::CommonObject###TicketObjectDescription ValueDescription: Path of the file that stores all the settings for the TicketObject for the
agent interface.Group: TicketSubGroup: Frontend::AgentValid: 1Required: 1Config-Setting:
$Self->{‘Frontend::CommonObject’}->{‘TicketObject’} = ‘Kernel::System::Ticket’;
Frontend::CommonParam###ActionDescription ValueDescription: Defines the default used Frontend-Module if no Action parameter given
in the url on the agent interface.Group: TicketSubGroup: Frontend::AgentValid: 1Required: 1Config-Setting:
$Self->{‘Frontend::CommonParam’}->{‘Action’} = ‘AgentDashboard’;
Frontend::CommonParam###QueueIDDescription ValueDescription: Default queue ID used by the system in the agent interface.Group: TicketSubGroup: Frontend::AgentValid: 1Required: 1Config-Setting:
$Self->{‘Frontend::CommonParam’}->{‘QueueID’} = ‘0’;
Frontend::CommonParam###TicketIDDescription ValueDescription: Default ticket ID used by the system in the agent interface.Group: TicketSubGroup: Frontend::Agent

Configuration Options Reference
422
Description ValueValid: 1Required: 1Config-Setting:
$Self->{‘Frontend::CommonParam’}->{‘TicketID’} = »;
Frontend::Agent::CustomerSearchTicket::Frontend::CustomerSearchAutoComplete###Active
Description ValueDescription: Enables or disables the autocomplete feature for the customer search
in the agent interface.Group: TicketSubGroup: Frontend::Agent::CustomerSearchValid: 1Required: 1Config-Setting:
$Self->{‘Ticket::Frontend::CustomerSearchAutoComplete’}->{‘Active’} = ‘1’;
Ticket::Frontend::CustomerSearchAutoComplete###MinQueryLength
Description ValueDescription: Sets the minimum number of characters before autocomplete query is
sent.Group: TicketSubGroup: Frontend::Agent::CustomerSearchValid: 1Required: 1Config-Setting:
$Self->{‘Ticket::Frontend::CustomerSearchAutoComplete’}->{‘MinQueryLength’} = ‘2’;
Ticket::Frontend::CustomerSearchAutoComplete###QueryDelay
Description ValueDescription: Delay time between autocomplete queries in milliseconds.Group: TicketSubGroup: Frontend::Agent::CustomerSearchValid: 1

Configuration Options Reference
423
Description ValueRequired: 1Config-Setting:
$Self->{‘Ticket::Frontend::CustomerSearchAutoComplete’}->{‘QueryDelay’} = ‘100’;
Ticket::Frontend::CustomerSearchAutoComplete###TypeAhead
Description ValueDescription: Activates TypeAhead for the autocomplete feature, that enables users
to type in whatever speed they desire, without losing any information.Often this means that keystrokes entered will not be displayed on thescreen immediately.
Group: TicketSubGroup: Frontend::Agent::CustomerSearchValid: 1Required: 1Config-Setting:
$Self->{‘Ticket::Frontend::CustomerSearchAutoComplete’}->{‘TypeAhead’} = ‘false’;
Ticket::Frontend::CustomerSearchAutoComplete###MaxResultsDisplayed
Description ValueDescription: Sets the number of search results to be displayed for the autocomplete
feature.Group: TicketSubGroup: Frontend::Agent::CustomerSearchValid: 1Required: 1Config-Setting:
$Self->{‘Ticket::Frontend::CustomerSearchAutoComplete’}->{‘MaxResultsDisplayed’} = ’20’;
Ticket::Frontend::CustomerSearchAutoComplete::DynamicWidth
Description ValueDescription: Determines if the search results container for the autocomplete feature
should adjust its width dynamically.Group: TicketSubGroup: Frontend::Agent::CustomerSearchValid: 1

Configuration Options Reference
424
Description ValueRequired: 1Config-Setting:
$Self->{‘Ticket::Frontend::CustomerSearchAutoComplete::DynamicWidth’} = ‘1’;
Frontend::Agent::DashboardDashboardBackend###0100-TicketPendingReminder
Description ValueDescription: Parameters for the dashboard backend of the ticket pending reminder
overview of the agent interface . «Limit» is the number of entries shownby default. «Group» is used to restrict the access to the plugin (e.g. Group: admin;group1;group2;). «Default» determines if the pluginis enabled by default or if the user needs to enable it manually.»CacheTTLLocal» is the cache time in minutes for the plugin.
Group: TicketSubGroup: Frontend::Agent::DashboardValid: 1Required: 0Config-Setting:
$Self->{‘DashboardBackend’}->{‘0100-TicketPendingReminder’} = { ‘Attributes’ => ‘TicketPendingTimeOlderMinutes=1;StateType=pending reminder;SortBy=PendingTime;OrderBy=Down;’, ‘Block’ => ‘ContentLarge’, ‘CacheTTLLocal’ => ‘0.5’, ‘Default’ => ‘1’, ‘Description’ => ‘All tickets with a reminder set where the reminder date has been reached’, ‘Filter’ => ‘Locked’, ‘Group’ => », ‘Limit’ => ’10’, ‘Module’ => ‘Kernel::Output::HTML::DashboardTicketGeneric’, ‘Permission’ => ‘rw’, ‘Time’ => ‘UntilTime’, ‘Title’ => ‘Reminder Tickets’};
DashboardBackend###0110-TicketEscalationDescription ValueDescription: Parameters for the dashboard backend of the ticket escalation overview
of the agent interface . «Limit» is the number of entries shown bydefault. «Group» is used to restrict the access to the plugin (e. g. Group:

Configuration Options Reference
425
Description Valueadmin;group1;group2;). «Default» determines if the plugin is enabled bydefault or if the user needs to enable it manually. «CacheTTLLocal» isthe cache time in minutes for the plugin.
Group: TicketSubGroup: Frontend::Agent::DashboardValid: 1Required: 0Config-Setting:
$Self->{‘DashboardBackend’}->{‘0110-TicketEscalation’} = { ‘Attributes’ => ‘TicketEscalationTimeOlderMinutes=1;SortBy=EscalationTime;OrderBy=Down;’, ‘Block’ => ‘ContentLarge’, ‘CacheTTLLocal’ => ‘0.5’, ‘Default’ => ‘1’, ‘Description’ => ‘All escalated tickets’, ‘Filter’ => ‘All’, ‘Group’ => », ‘Limit’ => ’10’, ‘Module’ => ‘Kernel::Output::HTML::DashboardTicketGeneric’, ‘Permission’ => ‘rw’, ‘Time’ => ‘EscalationTime’, ‘Title’ => ‘Escalated Tickets’};
DashboardBackend###0120-TicketNewDescription ValueDescription: Parameters for the dashboard backend of the new tickets overview of
the agent interface. «Limit» is the number of entries shown by default.»Group» is used to restrict the access to the plugin (e. g. Group:admin;group1;group2;). «Default» determines if the plugin is enabled bydefault or if the user needs to enable it manually. «CacheTTLLocal» isthe cache time in minutes for the plugin.
Group: TicketSubGroup: Frontend::Agent::DashboardValid: 1Required: 0Config-Setting:
$Self->{‘DashboardBackend’}->{‘0120-TicketNew’} = { ‘Attributes’ => ‘StateType=new;’, ‘Block’ => ‘ContentLarge’, ‘CacheTTLLocal’ => ‘0.5’, ‘Default’ => ‘1’, ‘Description’ => ‘All new tickets, these tickets have not been worked on yet’,

Configuration Options Reference
426
Description Value ‘Filter’ => ‘All’, ‘Group’ => », ‘Limit’ => ’10’, ‘Module’ => ‘Kernel::Output::HTML::DashboardTicketGeneric’, ‘Permission’ => ‘rw’, ‘Time’ => ‘Age’, ‘Title’ => ‘New Tickets’};
DashboardBackend###0130-TicketOpenDescription ValueDescription: Parameters for the dashboard backend of the ticket pending reminder
overview of the agent interface. «Limit» is the number of entries shownby default. «Group» is used to restrict the access to the plugin (e.g. Group: admin;group1;group2;). «Default» determines if the pluginis enabled by default or if the user needs to enable it manually.»CacheTTLLocal» is the cache time in minutes for the plugin.
Group: TicketSubGroup: Frontend::Agent::DashboardValid: 1Required: 0Config-Setting:
$Self->{‘DashboardBackend’}->{‘0130-TicketOpen’} = { ‘Attributes’ => ‘StateType=open;’, ‘Block’ => ‘ContentLarge’, ‘CacheTTLLocal’ => ‘0.5’, ‘Default’ => ‘1’, ‘Description’ => ‘All open tickets, these tickets have already been worked on, but need a response’, ‘Filter’ => ‘All’, ‘Group’ => », ‘Limit’ => ’10’, ‘Module’ => ‘Kernel::Output::HTML::DashboardTicketGeneric’, ‘Permission’ => ‘rw’, ‘Time’ => ‘Age’, ‘Title’ => ‘Open Tickets / Need to be answered’};
DashboardBackend###0250-TicketStatsDescription ValueDescription: Parameters for the dashboard backend of the ticket stats of the
agent interface. «Limit» is the number of entries shown by default.»Group» is used to restrict the access to the plugin (e. g. Group:admin;group1;group2;). «Default» determines if the plugin is enabled by

Configuration Options Reference
427
Description Valuedefault or if the user needs to enable it manually. «CacheTTLLocal» isthe cache time in minutes for the plugin.
Group: TicketSubGroup: Frontend::Agent::DashboardValid: 1Required: 0Config-Setting:
$Self->{‘DashboardBackend’}->{‘0250-TicketStats’} = { ‘Block’ => ‘ContentSmall’, ‘CacheTTL’ => ’30’, ‘Closed’ => ‘1’, ‘Created’ => ‘1’, ‘Default’ => ‘1’, ‘Group’ => », ‘Module’ => ‘Kernel::Output::HTML::DashboardTicketStatsGeneric’, ‘Permission’ => ‘rw’, ‘Title’ => ‘7 Day Stats’};
DashboardBackend###0260-TicketCalendarDescription ValueDescription: Parameters for the dashboard backend of the ticket calendar of the
agent interface. «Limit» is the number of entries shown by default.»Group» is used to restrict the access to the plugin (e. g. Group:admin;group1;group2;). «Default» determines if the plugin is enabled bydefault or if the user needs to enable it manually. «CacheTTLLocal» isthe cache time in minutes for the plugin.
Group: TicketSubGroup: Frontend::Agent::DashboardValid: 1Required: 0Config-Setting:
$Self->{‘DashboardBackend’}->{‘0260-TicketCalendar’} = { ‘Block’ => ‘ContentSmall’, ‘CacheTTL’ => ‘2’, ‘Default’ => ‘1’, ‘Group’ => », ‘Limit’ => ‘6’, ‘Module’ => ‘Kernel::Output::HTML::DashboardCalendar’, ‘OwnerOnly’ => », ‘Permission’ => ‘rw’, ‘Title’ => ‘Upcoming Events’};

Configuration Options Reference
428
Frontend::Agent::ModuleMetaHeadFrontend::HeaderMetaModule###2-TicketSearch
Description ValueDescription: Module to generate html OpenSearch profile for short ticket search in
the agent interface.Group: TicketSubGroup: Frontend::Agent::ModuleMetaHeadValid: 1Required: 0Config-Setting:
$Self->{‘Frontend::HeaderMetaModule’}->{‘2-TicketSearch’} = { ‘Action’ => ‘AgentTicketSearch’, ‘Module’ => ‘Kernel::Output::HTML::HeaderMetaTicketSearch’};
Frontend::Agent::ModuleNotifyFrontend::NotifyModule###5-Ticket::TicketEscalation
Description ValueDescription: Module to show notifications and escalations (ShownMax: max. shown
escalations, EscalationInMinutes: Show ticket which will escalation in,CacheTime: Cache of calculated escalations in seconds).
Group: TicketSubGroup: Frontend::Agent::ModuleNotifyValid: 0Required: 0Config-Setting:
$Self->{‘Frontend::NotifyModule’}->{‘5-Ticket::TicketEscalation’} = { ‘CacheTime’ => ’40’, ‘EscalationInMinutes’ => ‘120’, ‘Module’ => ‘Kernel::Output::HTML::NotificationAgentTicketEscalation’, ‘ShownMax’ => ’25’};
Frontend::Agent::ModuleRegistrationFrontend::Module###AgentTicketQueue
Description ValueDescription: Frontend module registration for the agent interface.

Configuration Options Reference
429
Description ValueGroup: TicketSubGroup: Frontend::Agent::ModuleRegistrationValid: 1Required: 0Config-Setting:
$Self->{‘Frontend::Module’}->{‘AgentTicketQueue’} = { ‘Description’ => ‘Overview of all open Tickets’, ‘Loader’ => { ‘CSS’ => [ ‘Core.AgentTicketQueue.css’ ] }, ‘NavBar’ => [ { ‘AccessKey’ => ‘o’, ‘Block’ => », ‘Description’ => ‘Overview of all open Tickets’, ‘Link’ => ‘Action=AgentTicketQueue’, ‘LinkOption’ => », ‘Name’ => ‘Queue view’, ‘NavBar’ => ‘Ticket’, ‘Prio’ => ‘100’, ‘Type’ => » }, { ‘AccessKey’ => ‘t’, ‘Block’ => ‘ItemArea’, ‘Description’ => », ‘Link’ => ‘Action=AgentTicketQueue’, ‘LinkOption’ => », ‘Name’ => ‘Tickets’, ‘NavBar’ => ‘Ticket’, ‘Prio’ => ‘200’, ‘Type’ => ‘Menu’ } ], ‘NavBarName’ => ‘Ticket’, ‘Title’ => ‘QueueView’};
Frontend::Module###AgentTicketPhoneDescription ValueDescription: Frontend module registration for the agent interface.Group: TicketSubGroup: Frontend::Agent::ModuleRegistrationValid: 1

Configuration Options Reference
430
Description ValueRequired: 0Config-Setting:
$Self->{‘Frontend::Module’}->{‘AgentTicketPhone’} = { ‘Description’ => ‘Create new phone picket’, ‘Loader’ => { ‘JavaScript’ => [ ‘Core.Agent.CustomerSearch.js’, ‘Core.Agent.TicketAction.js’ ] }, ‘NavBar’ => [ { ‘AccessKey’ => ‘n’, ‘Block’ => », ‘Description’ => ‘Create new phone ticket (inbound)’, ‘Link’ => ‘Action=AgentTicketPhone’, ‘LinkOption’ => », ‘Name’ => ‘New phone ticket’, ‘NavBar’ => ‘Ticket’, ‘Prio’ => ‘200’, ‘Type’ => » } ], ‘NavBarName’ => ‘Ticket’, ‘Title’ => ‘New phone ticket’};
Frontend::Module###AgentTicketPhoneOutbound
Description ValueDescription: Frontend module registration for the agent interface.Group: TicketSubGroup: Frontend::Agent::ModuleRegistrationValid: 1Required: 0Config-Setting:
$Self->{‘Frontend::Module’}->{‘AgentTicketPhoneOutbound’} = { ‘Description’ => ‘Phone Call’, ‘Loader’ => { ‘JavaScript’ => [ ‘Core.Agent.TicketAction.js’ ] }, ‘NavBarName’ => ‘Ticket’, ‘Title’ => ‘Phone-Ticket’};

Configuration Options Reference
431
Frontend::Module###AgentTicketEmailDescription ValueDescription: Frontend module registration for the agent interface.Group: TicketSubGroup: Frontend::Agent::ModuleRegistrationValid: 1Required: 0Config-Setting:
$Self->{‘Frontend::Module’}->{‘AgentTicketEmail’} = { ‘Description’ => ‘Create new email ticket’, ‘Loader’ => { ‘JavaScript’ => [ ‘Core.Agent.CustomerSearch.js’, ‘Core.Agent.TicketAction.js’ ] }, ‘NavBar’ => [ { ‘AccessKey’ => ‘e’, ‘Block’ => », ‘Description’ => ‘Create new email ticket and send this out (outbound)’, ‘Link’ => ‘Action=AgentTicketEmail’, ‘LinkOption’ => », ‘Name’ => ‘New email ticket’, ‘NavBar’ => ‘Ticket’, ‘Prio’ => ‘210’, ‘Type’ => » } ], ‘NavBarName’ => ‘Ticket’, ‘Title’ => ‘New email ticket’};
Frontend::Module###AgentTicketSearchDescription ValueDescription: Frontend module registration for the agent interface.Group: TicketSubGroup: Frontend::Agent::ModuleRegistrationValid: 1Required: 0Config-Setting:
$Self->{‘Frontend::Module’}->{‘AgentTicketSearch’} = { ‘Description’ => ‘Search Ticket’, ‘NavBar’ => [

Configuration Options Reference
432
Description Value { ‘AccessKey’ => ‘s’, ‘Block’ => », ‘Description’ => ‘Search Tickets’, ‘Link’ => ‘Action=AgentTicketSearch’, ‘LinkOption’ => ‘onclick=»window.setTimeout(function(){Core.Agent.Search.OpenSearchDialog(‘AgentTicketSearch’);}, 0); return false;»‘, ‘Name’ => ‘Search’, ‘NavBar’ => ‘Ticket’, ‘Prio’ => ‘300’, ‘Type’ => » } ], ‘NavBarName’ => ‘Ticket’, ‘Title’ => ‘Search’};
Frontend::Module###AgentTicketMailbox
Description ValueDescription: Frontend module registration for the agent interface.Group: TicketSubGroup: Frontend::Agent::ModuleRegistrationValid: 1Required: 0Config-Setting:
$Self->{‘Frontend::Module’}->{‘AgentTicketMailbox’} = { ‘Description’ => ‘compat module for AgentTicketMailbox to AgentTicketLockedView’, ‘NavBarName’ => ‘Ticket’, ‘Title’ => »};
Frontend::Module###AgentTicketLockedView
Description ValueDescription: Frontend module registration for the agent interface.Group: TicketSubGroup: Frontend::Agent::ModuleRegistrationValid: 1Required: 0Config-Setting:
$Self->{‘Frontend::Module’}->{‘AgentTicketLockedView’} = {

Configuration Options Reference
433
Description Value ‘Description’ => ‘Locked Tickets’, ‘NavBarName’ => ‘Ticket’, ‘Title’ => ‘Locked Tickets’};
Frontend::Module###AgentTicketResponsibleView
Description ValueDescription: Frontend module registration for the agent interface.Group: TicketSubGroup: Frontend::Agent::ModuleRegistrationValid: 1Required: 0Config-Setting:
$Self->{‘Frontend::Module’}->{‘AgentTicketResponsibleView’} = { ‘Description’ => ‘Responsible Tickets’, ‘NavBarName’ => ‘Ticket’, ‘Title’ => ‘Responsible Tickets’};
Frontend::Module###AgentTicketWatchView
Description ValueDescription: Frontend module registration for the agent interface.Group: TicketSubGroup: Frontend::Agent::ModuleRegistrationValid: 1Required: 0Config-Setting:
$Self->{‘Frontend::Module’}->{‘AgentTicketWatchView’} = { ‘Description’ => ‘Watched Tickets’, ‘NavBarName’ => ‘Ticket’, ‘Title’ => ‘Watched Tickets’};
Frontend::Module###AgentCustomerSearch
Description ValueDescription: Frontend module registration for the agent interface.Group: TicketSubGroup: Frontend::Agent::ModuleRegistrationValid: 1

Configuration Options Reference
434
Description ValueRequired: 0Config-Setting:
$Self->{‘Frontend::Module’}->{‘AgentCustomerSearch’} = { ‘Description’ => ‘AgentCustomerSearch’, ‘NavBarName’ => ‘Ticket’, ‘Title’ => ‘AgentCustomerSearch’};
Frontend::Module###AgentTicketStatusViewDescription ValueDescription: Frontend module registration for the agent interface.Group: TicketSubGroup: Frontend::Agent::ModuleRegistrationValid: 1Required: 0Config-Setting:
$Self->{‘Frontend::Module’}->{‘AgentTicketStatusView’} = { ‘Description’ => ‘Overview of all open tickets’, ‘NavBar’ => [ { ‘AccessKey’ => ‘v’, ‘Block’ => », ‘Description’ => ‘Overview of all open Tickets.’, ‘Link’ => ‘Action=AgentTicketStatusView’, ‘LinkOption’ => », ‘Name’ => ‘Status view’, ‘NavBar’ => ‘Ticket’, ‘Prio’ => ‘110’, ‘Type’ => » } ], ‘NavBarName’ => ‘Ticket’, ‘Title’ => ‘Status view’};
Frontend::Module###AgentTicketEscalationViewDescription ValueDescription: Frontend module registration for the agent interface.Group: TicketSubGroup: Frontend::Agent::ModuleRegistrationValid: 1Required: 0

Configuration Options Reference
435
Description ValueConfig-Setting:
$Self->{‘Frontend::Module’}->{‘AgentTicketEscalationView’} = { ‘Description’ => ‘Overview of all escalated tickets’, ‘NavBar’ => [ { ‘AccessKey’ => ‘e’, ‘Block’ => », ‘Description’ => ‘Overview Escalated Tickets’, ‘Link’ => ‘Action=AgentTicketEscalationView’, ‘LinkOption’ => », ‘Name’ => ‘Escalation view’, ‘NavBar’ => ‘Ticket’, ‘Prio’ => ‘120’, ‘Type’ => » } ], ‘NavBarName’ => ‘Ticket’, ‘Title’ => ‘Escalation view’};
Frontend::Module###AgentZoom
Description ValueDescription: Frontend module registration for the agent interface.Group: TicketSubGroup: Frontend::Agent::ModuleRegistrationValid: 1Required: 0Config-Setting:
$Self->{‘Frontend::Module’}->{‘AgentZoom’} = { ‘Description’ => ‘compat module for AgentZoom to AgentTicketZoom’, ‘NavBarName’ => ‘Ticket’, ‘Title’ => »};
Frontend::Module###AgentTicketZoom
Description ValueDescription: Frontend module registration for the agent interface.Group: TicketSubGroup: Frontend::Agent::ModuleRegistrationValid: 1Required: 0

Configuration Options Reference
436
Description ValueConfig-Setting:
$Self->{‘Frontend::Module’}->{‘AgentTicketZoom’} = { ‘Description’ => ‘Ticket Zoom’, ‘Loader’ => { ‘JavaScript’ => [ ‘thirdparty/jquery-tablesorter-2.0.5/jquery.tablesorter.js’, ‘Core.UI.Table.Sort.js’, ‘Core.Agent.TicketZoom.js’ ] }, ‘NavBarName’ => ‘Ticket’, ‘Title’ => ‘Zoom’};
Frontend::Module###AgentTicketAttachmentDescription ValueDescription: Frontend module registration for the agent interface.Group: TicketSubGroup: Frontend::Agent::ModuleRegistrationValid: 1Required: 0Config-Setting:
$Self->{‘Frontend::Module’}->{‘AgentTicketAttachment’} = { ‘Description’ => ‘To download attachments’, ‘NavBarName’ => ‘Ticket’, ‘Title’ => »};
Frontend::Module###AgentTicketPlainDescription ValueDescription: Frontend module registration for the agent interface.Group: TicketSubGroup: Frontend::Agent::ModuleRegistrationValid: 1Required: 0Config-Setting:
$Self->{‘Frontend::Module’}->{‘AgentTicketPlain’} = { ‘Description’ => ‘Ticket plain view of an email’, ‘NavBarName’ => ‘Ticket’, ‘Title’ => ‘Plain’};

Configuration Options Reference
437
Frontend::Module###AgentTicketNoteDescription ValueDescription: Frontend module registration for the agent interface.Group: TicketSubGroup: Frontend::Agent::ModuleRegistrationValid: 1Required: 0Config-Setting:
$Self->{‘Frontend::Module’}->{‘AgentTicketNote’} = { ‘Description’ => ‘Ticket Note’, ‘Loader’ => { ‘JavaScript’ => [ ‘Core.Agent.TicketAction.js’ ] }, ‘NavBarName’ => ‘Ticket’, ‘Title’ => ‘Note’};
Frontend::Module###AgentTicketMergeDescription ValueDescription: Frontend module registration for the agent interface.Group: TicketSubGroup: Frontend::Agent::ModuleRegistrationValid: 1Required: 0Config-Setting:
$Self->{‘Frontend::Module’}->{‘AgentTicketMerge’} = { ‘Description’ => ‘Ticket Merge’, ‘NavBarName’ => ‘Ticket’, ‘Title’ => ‘Merge’};
Frontend::Module###AgentTicketPendingDescription ValueDescription: Frontend module registration for the agent interface.Group: TicketSubGroup: Frontend::Agent::ModuleRegistrationValid: 1Required: 0Config-Setting:

Configuration Options Reference
438
Description Value $Self->{‘Frontend::Module’}->{‘AgentTicketPending’} = { ‘Description’ => ‘Ticket Pending’, ‘Loader’ => { ‘JavaScript’ => [ ‘Core.Agent.TicketAction.js’ ] }, ‘NavBarName’ => ‘Ticket’, ‘Title’ => ‘Pending’};
Frontend::Module###AgentTicketWatcher
Description ValueDescription: Frontend module registration for the agent interface.Group: TicketSubGroup: Frontend::Agent::ModuleRegistrationValid: 1Required: 0Config-Setting:
$Self->{‘Frontend::Module’}->{‘AgentTicketWatcher’} = { ‘Description’ => ‘A TicketWatcher Module’, ‘NavBarName’ => ‘Ticket-Watcher’, ‘Title’ => ‘Ticket-Watcher’};
Frontend::Module###AgentTicketPriority
Description ValueDescription: Frontend module registration for the agent interface.Group: TicketSubGroup: Frontend::Agent::ModuleRegistrationValid: 1Required: 0Config-Setting:
$Self->{‘Frontend::Module’}->{‘AgentTicketPriority’} = { ‘Description’ => ‘Ticket Priority’, ‘Loader’ => { ‘JavaScript’ => [ ‘Core.Agent.TicketAction.js’ ] }, ‘NavBarName’ => ‘Ticket’, ‘Title’ => ‘Priority’

Configuration Options Reference
439
Description Value};
Frontend::Module###AgentTicketLockDescription ValueDescription: Frontend module registration for the agent interface.Group: TicketSubGroup: Frontend::Agent::ModuleRegistrationValid: 1Required: 0Config-Setting:
$Self->{‘Frontend::Module’}->{‘AgentTicketLock’} = { ‘Description’ => ‘Ticket Lock’, ‘NavBarName’ => ‘Ticket’, ‘Title’ => ‘Lock’};
Frontend::Module###AgentTicketMoveDescription ValueDescription: Frontend module registration for the agent interface.Group: TicketSubGroup: Frontend::Agent::ModuleRegistrationValid: 1Required: 0Config-Setting:
$Self->{‘Frontend::Module’}->{‘AgentTicketMove’} = { ‘Description’ => ‘Ticket Move’, ‘Loader’ => { ‘JavaScript’ => [ ‘Core.Agent.TicketAction.js’ ] }, ‘NavBarName’ => ‘Ticket’, ‘Title’ => ‘Move’};
Frontend::Module###AgentTicketHistoryDescription ValueDescription: Frontend module registration for the agent interface.Group: TicketSubGroup: Frontend::Agent::ModuleRegistrationValid: 1

Configuration Options Reference
440
Description ValueRequired: 0Config-Setting:
$Self->{‘Frontend::Module’}->{‘AgentTicketHistory’} = { ‘Description’ => ‘Ticket History’, ‘NavBarName’ => ‘Ticket’, ‘Title’ => ‘History’};
Frontend::Module###AgentTicketOwnerDescription ValueDescription: Frontend module registration for the agent interface.Group: TicketSubGroup: Frontend::Agent::ModuleRegistrationValid: 1Required: 0Config-Setting:
$Self->{‘Frontend::Module’}->{‘AgentTicketOwner’} = { ‘Description’ => ‘Ticket Owner’, ‘Loader’ => { ‘JavaScript’ => [ ‘Core.Agent.TicketAction.js’ ] }, ‘NavBarName’ => ‘Ticket’, ‘Title’ => ‘Owner’};
Frontend::Module###AgentTicketResponsibleDescription ValueDescription: Frontend module registration for the agent interface.Group: TicketSubGroup: Frontend::Agent::ModuleRegistrationValid: 1Required: 0Config-Setting:
$Self->{‘Frontend::Module’}->{‘AgentTicketResponsible’} = { ‘Description’ => ‘Ticket Responsible’, ‘Loader’ => { ‘JavaScript’ => [ ‘Core.Agent.TicketAction.js’ ] },

Configuration Options Reference
441
Description Value ‘NavBarName’ => ‘Ticket’, ‘Title’ => ‘Responsible’};
Frontend::Module###AgentTicketComposeDescription ValueDescription: Frontend module registration for the agent interface.Group: TicketSubGroup: Frontend::Agent::ModuleRegistrationValid: 1Required: 0Config-Setting:
$Self->{‘Frontend::Module’}->{‘AgentTicketCompose’} = { ‘Description’ => ‘Ticket Compose email Answer’, ‘Loader’ => { ‘JavaScript’ => [ ‘Core.Agent.CustomerSearch.js’, ‘Core.Agent.TicketAction.js’ ] }, ‘NavBarName’ => ‘Ticket’, ‘Title’ => ‘Compose’};
Frontend::Module###AgentTicketBounceDescription ValueDescription: Frontend module registration for the agent interface.Group: TicketSubGroup: Frontend::Agent::ModuleRegistrationValid: 1Required: 0Config-Setting:
$Self->{‘Frontend::Module’}->{‘AgentTicketBounce’} = { ‘Description’ => ‘Ticket Compose Bounce Email’, ‘NavBarName’ => ‘Ticket’, ‘Title’ => ‘Bounce’};
Frontend::Module###AgentTicketForwardDescription ValueDescription: Frontend module registration for the agent interface.

Configuration Options Reference
442
Description ValueGroup: TicketSubGroup: Frontend::Agent::ModuleRegistrationValid: 1Required: 0Config-Setting:
$Self->{‘Frontend::Module’}->{‘AgentTicketForward’} = { ‘Description’ => ‘Ticket Forward Email’, ‘Loader’ => { ‘JavaScript’ => [ ‘Core.Agent.CustomerSearch.js’, ‘Core.Agent.TicketAction.js’ ] }, ‘NavBarName’ => ‘Ticket’, ‘Title’ => ‘Forward’};
Frontend::Module###AgentTicketCustomer
Description ValueDescription: Frontend module registration for the agent interface.Group: TicketSubGroup: Frontend::Agent::ModuleRegistrationValid: 1Required: 0Config-Setting:
$Self->{‘Frontend::Module’}->{‘AgentTicketCustomer’} = { ‘Description’ => ‘Ticket Customer’, ‘Loader’ => { ‘JavaScript’ => [ ‘Core.Agent.CustomerSearch.js’, ‘Core.Agent.TicketAction.js’ ] }, ‘NavBarName’ => ‘Ticket’, ‘Title’ => ‘Customer’};
Frontend::Module###AgentTicketClose
Description ValueDescription: Frontend module registration for the agent interface.Group: TicketSubGroup: Frontend::Agent::ModuleRegistration

Configuration Options Reference
443
Description ValueValid: 1Required: 0Config-Setting:
$Self->{‘Frontend::Module’}->{‘AgentTicketClose’} = { ‘Description’ => ‘Ticket Close’, ‘Loader’ => { ‘JavaScript’ => [ ‘Core.Agent.TicketAction.js’ ] }, ‘NavBarName’ => ‘Ticket’, ‘Title’ => ‘Close’};
Frontend::Module###AgentTicketFreeText
Description ValueDescription: Frontend module registration for the agent interface.Group: TicketSubGroup: Frontend::Agent::ModuleRegistrationValid: 1Required: 0Config-Setting:
$Self->{‘Frontend::Module’}->{‘AgentTicketFreeText’} = { ‘Description’ => ‘Ticket FreeText’, ‘Loader’ => { ‘JavaScript’ => [ ‘Core.Agent.TicketAction.js’ ] }, ‘NavBarName’ => ‘Ticket’, ‘Title’ => ‘Free Fields’};
Frontend::Module###AgentTicketPrint
Description ValueDescription: Frontend module registration for the agent interface.Group: TicketSubGroup: Frontend::Agent::ModuleRegistrationValid: 1Required: 0Config-Setting:

Configuration Options Reference
444
Description Value $Self->{‘Frontend::Module’}->{‘AgentTicketPrint’} = { ‘Description’ => ‘Ticket Print’, ‘NavBarName’ => ‘Ticket’, ‘Title’ => ‘Print’};
Frontend::Module###AgentTicketBulkDescription ValueDescription: Frontend module registration for the agent interface.Group: TicketSubGroup: Frontend::Agent::ModuleRegistrationValid: 1Required: 0Config-Setting:
$Self->{‘Frontend::Module’}->{‘AgentTicketBulk’} = { ‘Description’ => ‘Ticket bulk module’, ‘Loader’ => { ‘JavaScript’ => [ ‘Core.Agent.TicketAction.js’ ] }, ‘NavBarName’ => ‘Ticket’, ‘Title’ => ‘Bulk-Action’};
Frontend::Agent::PreferencesPreferencesGroups###NewTicketNotify
Description ValueDescription: Parameters for the NewTicketNotify object in the preferences view of
the agent interface.Group: TicketSubGroup: Frontend::Agent::PreferencesValid: 1Required: 0Config-Setting:
$Self->{‘PreferencesGroups’}->{‘NewTicketNotify’} = { ‘Active’ => ‘1’, ‘Column’ => ‘Email Settings’, ‘Data’ => { ‘0’ => ‘No’, ‘1’ => ‘Yes’

Configuration Options Reference
445
Description Value }, ‘DataSelected’ => ‘0’, ‘Desc’ => ‘Send me a notification if there is a new ticket in «My Queues».’, ‘Key’ => ‘Send new ticket notifications’, ‘Label’ => ‘New ticket notification’, ‘Module’ => ‘Kernel::Output::HTML::PreferencesGeneric’, ‘PrefKey’ => ‘UserSendNewTicketNotification’, ‘Prio’ => ‘1000’};
PreferencesGroups###FollowUpNotifyDescription ValueDescription: Parameters for the FollowUpNotify object in the preference view of the
agent interface.Group: TicketSubGroup: Frontend::Agent::PreferencesValid: 1Required: 0Config-Setting:
$Self->{‘PreferencesGroups’}->{‘FollowUpNotify’} = { ‘Active’ => ‘1’, ‘Column’ => ‘Email Settings’, ‘Data’ => { ‘0’ => ‘No’, ‘1’ => ‘Yes’ }, ‘DataSelected’ => ‘0’, ‘Desc’ => ‘Send me a notification if a customer sends a follow up and I’m the owner of the ticket or the ticket is unlocked and is in one of my subscribed queues.’, ‘Key’ => ‘Send ticket follow up notifications’, ‘Label’ => ‘Ticket follow up notification’, ‘Module’ => ‘Kernel::Output::HTML::PreferencesGeneric’, ‘PrefKey’ => ‘UserSendFollowUpNotification’, ‘Prio’ => ‘2000’};
PreferencesGroups###LockTimeoutNotifyDescription ValueDescription: Parameters for the LockTimeoutNotify object in the preference view of
the agent interface.Group: Ticket

Configuration Options Reference
446
Description ValueSubGroup: Frontend::Agent::PreferencesValid: 1Required: 0Config-Setting:
$Self->{‘PreferencesGroups’}->{‘LockTimeoutNotify’} = { ‘Active’ => ‘1’, ‘Column’ => ‘Email Settings’, ‘Data’ => { ‘0’ => ‘No’, ‘1’ => ‘Yes’ }, ‘DataSelected’ => ‘0’, ‘Desc’ => ‘Send me a notification if a ticket is unlocked by the system.’, ‘Key’ => ‘Send ticket lock timeout notifications’, ‘Label’ => ‘Ticket lock timeout notification’, ‘Module’ => ‘Kernel::Output::HTML::PreferencesGeneric’, ‘PrefKey’ => ‘UserSendLockTimeoutNotification’, ‘Prio’ => ‘3000’};
PreferencesGroups###MoveNotify
Description ValueDescription: Parameters for the MoveNotify object in the preference view of the
agent interface.Group: TicketSubGroup: Frontend::Agent::PreferencesValid: 1Required: 0Config-Setting:
$Self->{‘PreferencesGroups’}->{‘MoveNotify’} = { ‘Active’ => ‘1’, ‘Column’ => ‘Email Settings’, ‘Data’ => { ‘0’ => ‘No’, ‘1’ => ‘Yes’ }, ‘DataSelected’ => ‘0’, ‘Desc’ => ‘Send me a notification if a ticket is moved into one of «My Queues».’, ‘Key’ => ‘Send ticket move notifications’, ‘Label’ => ‘Ticket move notification’, ‘Module’ => ‘Kernel::Output::HTML::PreferencesGeneric’,

Configuration Options Reference
447
Description Value ‘PrefKey’ => ‘UserSendMoveNotification’, ‘Prio’ => ‘4000’};
PreferencesGroups###WatcherNotify
Description ValueDescription: Parameters for the WatcherNotify object in the preference view of the
agent interface.Group: TicketSubGroup: Frontend::Agent::PreferencesValid: 1Required: 0Config-Setting:
$Self->{‘PreferencesGroups’}->{‘WatcherNotify’} = { ‘Active’ => ‘1’, ‘Column’ => ‘Email Settings’, ‘Data’ => { ‘0’ => ‘No’, ‘1’ => ‘Yes’ }, ‘DataSelected’ => ‘0’, ‘Desc’ => ‘Send me the same notifications for my watched tickets that the ticket owners will get.’, ‘Key’ => ‘Send ticket watch notifications’, ‘Label’ => ‘Ticket watch notification’, ‘Module’ => ‘Kernel::Output::HTML::PreferencesTicketWatcher’, ‘PrefKey’ => ‘UserSendWatcherNotification’, ‘Prio’ => ‘5000’};
PreferencesGroups###CustomQueue
Description ValueDescription: Parameters for the CustomQueue object in the preference view of the
agent interface.Group: TicketSubGroup: Frontend::Agent::PreferencesValid: 1Required: 0Config-Setting:
$Self->{‘PreferencesGroups’}->{‘CustomQueue’} = { ‘Active’ => ‘1’, ‘Column’ => ‘Other Settings’,

Configuration Options Reference
448
Description Value ‘Desc’ => ‘Your queue selection of your favourite queues. You also get notified about those queues via email if enabled.’, ‘Key’ => ‘My Queues’, ‘Label’ => ‘My Queues’, ‘Module’ => ‘Kernel::Output::HTML::PreferencesCustomQueue’, ‘Permission’ => ‘ro’, ‘Prio’ => ‘1000’};
PreferencesGroups###RefreshTime
Description ValueDescription: Parameters for the RefreshTime object in the preference view of the
agent interface.Group: TicketSubGroup: Frontend::Agent::PreferencesValid: 1Required: 0Config-Setting:
$Self->{‘PreferencesGroups’}->{‘RefreshTime’} = { ‘Active’ => ‘1’, ‘Column’ => ‘Other Settings’, ‘Data’ => { ‘0’ => ‘off’, ’10’ => ’10 minutes’, ’15’ => ’15 minutes’, ‘2’ => ‘ 2 minutes’, ‘5’ => ‘ 5 minutes’, ‘7’ => ‘ 7 minutes’ }, ‘DataSelected’ => ‘0’, ‘Desc’ => ‘If enabled, the QueueView will automatically refresh after the specified time.’, ‘Key’ => ‘Refresh QueueView after’, ‘Label’ => ‘QueueView Refresh Time’, ‘Module’ => ‘Kernel::Output::HTML::PreferencesGeneric’, ‘PrefKey’ => ‘UserRefreshTime’, ‘Prio’ => ‘2000’};
PreferencesGroups###TicketOverviewSmallPageShown
Description ValueDescription: Parameters for the pages (in which the tickets are shown) of the small
ticket overview.

Configuration Options Reference
449
Description ValueGroup: TicketSubGroup: Frontend::Agent::PreferencesValid: 1Required: 0Config-Setting:
$Self->{‘PreferencesGroups’}->{‘TicketOverviewSmallPageShown’} = { ‘Active’ => ‘0’, ‘Column’ => ‘Other Settings’, ‘Data’ => { ’10’ => ’10’, ’15’ => ’15’, ’20’ => ’20’, ’25’ => ’25’, ’30’ => ’30’, ’35’ => ’35’ }, ‘DataSelected’ => ’25’, ‘Key’ => ‘Ticket limit per page for Ticket Overview «Small»‘, ‘Label’ => ‘Ticket Overview «Small» Limit’, ‘Module’ => ‘Kernel::Output::HTML::PreferencesGeneric’, ‘PrefKey’ => ‘UserTicketOverviewSmallPageShown’, ‘Prio’ => ‘8000’};
PreferencesGroups###TicketOverviewMediumPageShown
Description ValueDescription: Parameters for the pages (in which the tickets are shown) of the medium
ticket overview.Group: TicketSubGroup: Frontend::Agent::PreferencesValid: 1Required: 0Config-Setting:
$Self->{‘PreferencesGroups’}->{‘TicketOverviewMediumPageShown’} = { ‘Active’ => ‘0’, ‘Column’ => ‘Other Settings’, ‘Data’ => { ’10’ => ’10’, ’15’ => ’15’, ’20’ => ’20’, ’25’ => ’25’, ’30’ => ’30’, ’35’ => ’35’

Configuration Options Reference
450
Description Value }, ‘DataSelected’ => ’20’, ‘Key’ => ‘Ticket limit per page for Ticket Overview «Medium»‘, ‘Label’ => ‘Ticket Overview «Medium» Limit’, ‘Module’ => ‘Kernel::Output::HTML::PreferencesGeneric’, ‘PrefKey’ => ‘UserTicketOverviewMediumPageShown’, ‘Prio’ => ‘8100’};
PreferencesGroups###TicketOverviewPreviewPageShownDescription ValueDescription: Parameters for the pages (in which the tickets are shown) of the ticket
preview overview.Group: TicketSubGroup: Frontend::Agent::PreferencesValid: 1Required: 0Config-Setting:
$Self->{‘PreferencesGroups’}->{‘TicketOverviewPreviewPageShown’} = { ‘Active’ => ‘0’, ‘Column’ => ‘Other Settings’, ‘Data’ => { ’10’ => ’10’, ’15’ => ’15’, ’20’ => ’20’, ’25’ => ’25’, ’30’ => ’30’, ’35’ => ’35’ }, ‘DataSelected’ => ’15’, ‘Key’ => ‘Ticket limit per page for Ticket Overview «Preview»‘, ‘Label’ => ‘Ticket Overview «Preview» Limit’, ‘Module’ => ‘Kernel::Output::HTML::PreferencesGeneric’, ‘PrefKey’ => ‘UserTicketOverviewPreviewPageShown’, ‘Prio’ => ‘8200’};
PreferencesGroups###CreateNextMaskDescription ValueDescription: Parameters for the CreateNextMask object in the preference view of
the agent interface.

Configuration Options Reference
451
Description ValueGroup: TicketSubGroup: Frontend::Agent::PreferencesValid: 1Required: 0Config-Setting:
$Self->{‘PreferencesGroups’}->{‘CreateNextMask’} = { ‘Active’ => ‘1’, ‘Column’ => ‘Other Settings’, ‘Data’ => { » => ‘CreateTicket’, ‘AgentTicketZoom’ => ‘TicketZoom’ }, ‘DataSelected’ => », ‘Key’ => ‘Show this screen after I created a new ticket’, ‘Label’ => ‘Screen after new ticket’, ‘Module’ => ‘Kernel::Output::HTML::PreferencesGeneric’, ‘PrefKey’ => ‘UserCreateNextMask’, ‘Prio’ => ‘3000’};
Frontend::Agent::SearchRouterFrontend::Search###Ticket
Description ValueDescription: Search backend router.Group: TicketSubGroup: Frontend::Agent::SearchRouterValid: 1Required: 0Config-Setting:
$Self->{‘Frontend::Search’}->{‘Ticket’} = { ‘^AgentTicket’ => ‘Action=AgentTicketSearch;Subaction=AJAX’};
Frontend::Agent::Ticket::ArticleAttachmentModuleTicket::Frontend::ArticleAttachmentModule###1-Download
Description ValueDescription: Shows a link to download article attachments in the zoom view of the
article in the agent interface.

Configuration Options Reference
452
Description ValueGroup: TicketSubGroup: Frontend::Agent::Ticket::ArticleAttachmentModuleValid: 1Required: 1Config-Setting:
$Self->{‘Ticket::Frontend::ArticleAttachmentModule’}->{‘1-Download’} = { ‘Module’ => ‘Kernel::Output::HTML::ArticleAttachmentDownload’};
Ticket::Frontend::ArticleAttachmentModule###2-HTML-Viewer
Description ValueDescription: Shows a link to access article attachments via a html online viewer in
the zoom view of the article in the agent interface.Group: TicketSubGroup: Frontend::Agent::Ticket::ArticleAttachmentModuleValid: 1Required: 1Config-Setting:
$Self->{‘Ticket::Frontend::ArticleAttachmentModule’}->{‘2-HTML-Viewer’} = { ‘Module’ => ‘Kernel::Output::HTML::ArticleAttachmentHTMLViewer’};
Frontend::Agent::Ticket::ArticleComposeModuleTicket::Frontend::ArticleComposeModule###1-SignEmail
Description ValueDescription: Module to compose signed messages (PGP or S/MIME).Group: TicketSubGroup: Frontend::Agent::Ticket::ArticleComposeModuleValid: 1Required: 1Config-Setting:
$Self->{‘Ticket::Frontend::ArticleComposeModule’}->{‘1-SignEmail’} = { ‘Module’ => ‘Kernel::Output::HTML::ArticleComposeSign’

Configuration Options Reference
453
Description Value};
Ticket::Frontend::ArticleComposeModule###2-CryptEmailDescription ValueDescription: Module to crypt composed messages (PGP or S/MIME).Group: TicketSubGroup: Frontend::Agent::Ticket::ArticleComposeModuleValid: 1Required: 1Config-Setting:
$Self->{‘Ticket::Frontend::ArticleComposeModule’}->{‘2-CryptEmail’} = { ‘Module’ => ‘Kernel::Output::HTML::ArticleComposeCrypt’};
Frontend::Agent::Ticket::ArticleViewModuleTicket::Frontend::ArticleViewModule###1-PGP
Description ValueDescription: Agent interface article notification module to check PGP.Group: TicketSubGroup: Frontend::Agent::Ticket::ArticleViewModuleValid: 1Required: 1Config-Setting:
$Self->{‘Ticket::Frontend::ArticleViewModule’}->{‘1-PGP’} = { ‘Module’ => ‘Kernel::Output::HTML::ArticleCheckPGP’};
Ticket::Frontend::ArticleViewModule###1-SMIMEDescription ValueDescription: Agent interface module to check incoming emails in the Ticket-Zoom-
View if the S/MIME-key is available and true.Group: TicketSubGroup: Frontend::Agent::Ticket::ArticleViewModuleValid: 1Required: 1Config-Setting:

Configuration Options Reference
454
Description Value $Self->{‘Ticket::Frontend::ArticleViewModule’}->{‘1-SMIME’} = { ‘Module’ => ‘Kernel::Output::HTML::ArticleCheckSMIME’};
Frontend::Agent::Ticket::ArticleViewModulePreTicket::Frontend::ArticlePreViewModule###1-PGP
Description ValueDescription: Agent interface article notification module to check PGP.Group: TicketSubGroup: Frontend::Agent::Ticket::ArticleViewModulePreValid: 1Required: 1Config-Setting:
$Self->{‘Ticket::Frontend::ArticlePreViewModule’}->{‘1-PGP’} = { ‘Module’ => ‘Kernel::Output::HTML::ArticleCheckPGP’};
Ticket::Frontend::ArticlePreViewModule###1-SMIMEDescription ValueDescription: Agent interface article notification module to check S/MIME.Group: TicketSubGroup: Frontend::Agent::Ticket::ArticleViewModulePreValid: 1Required: 1Config-Setting:
$Self->{‘Ticket::Frontend::ArticlePreViewModule’}->{‘1-SMIME’} = { ‘Module’ => ‘Kernel::Output::HTML::ArticleCheckSMIME’};
Frontend::Agent::Ticket::MenuModuleTicket::Frontend::MenuModule###000-Back
Description ValueDescription: Shows a link in the menu to go back in the ticket zoom view of the agent
interface.

Configuration Options Reference
455
Description ValueGroup: TicketSubGroup: Frontend::Agent::Ticket::MenuModuleValid: 1Required: 0Config-Setting:
$Self->{‘Ticket::Frontend::MenuModule’}->{‘000-Back’} = { ‘Action’ => », ‘Description’ => ‘Back’, ‘Link’ => ‘$Env{«LastScreenOverview»};TicketID=$QData{«TicketID»}’, ‘Module’ => ‘Kernel::Output::HTML::TicketMenuGeneric’, ‘Name’ => ‘Back’, ‘PopupType’ => », ‘Target’ => »};
Ticket::Frontend::MenuModule###100-LockDescription ValueDescription: Shows a link in the menu to lock/unlock tickets in the ticket zoom view
of the agent interface.Group: TicketSubGroup: Frontend::Agent::Ticket::MenuModuleValid: 1Required: 0Config-Setting:
$Self->{‘Ticket::Frontend::MenuModule’}->{‘100-Lock’} = { ‘Action’ => ‘AgentTicketLock’, ‘Module’ => ‘Kernel::Output::HTML::TicketMenuLock’, ‘Name’ => ‘Lock’, ‘Target’ => »};
Ticket::Frontend::MenuModule###200-HistoryDescription ValueDescription: Shows a link in the menu to access the history of a ticket in the ticket
zoom view of the agent interface.Group: TicketSubGroup: Frontend::Agent::Ticket::MenuModuleValid: 1Required: 0

Configuration Options Reference
456
Description ValueConfig-Setting:
$Self->{‘Ticket::Frontend::MenuModule’}->{‘200-History’} = { ‘Action’ => ‘AgentTicketHistory’, ‘Description’ => ‘Shows the ticket history!’, ‘Link’ => ‘Action=AgentTicketHistory;TicketID=$QData{«TicketID»}’, ‘Module’ => ‘Kernel::Output::HTML::TicketMenuGeneric’, ‘Name’ => ‘History’, ‘PopupType’ => ‘TicketHistory’, ‘Target’ => »};
Ticket::Frontend::MenuModule###210-Print
Description ValueDescription: Shows a link in the menu to print a ticket or an article in the ticket zoom
view of the agent interface.Group: TicketSubGroup: Frontend::Agent::Ticket::MenuModuleValid: 1Required: 0Config-Setting:
$Self->{‘Ticket::Frontend::MenuModule’}->{‘210-Print’} = { ‘Action’ => ‘AgentTicketPrint’, ‘Description’ => ‘Print this ticket!’, ‘Link’ => ‘Action=AgentTicketPrint;TicketID=$QData{«TicketID»}’, ‘LinkParam’ => ‘target=»print»‘, ‘Module’ => ‘Kernel::Output::HTML::TicketMenuGeneric’, ‘Name’ => ‘Print’, ‘PopupType’ => ‘TicketAction’, ‘Target’ => »};
Ticket::Frontend::MenuModule###300-Priority
Description ValueDescription: Shows a link in the menu to see the priority of a ticket in the ticket zoom
view of the agent interface.Group: TicketSubGroup: Frontend::Agent::Ticket::MenuModuleValid: 1Required: 0

Configuration Options Reference
457
Description ValueConfig-Setting:
$Self->{‘Ticket::Frontend::MenuModule’}->{‘300-Priority’} = { ‘Action’ => ‘AgentTicketPriority’, ‘Description’ => ‘Change the ticket priority!’, ‘Link’ => ‘Action=AgentTicketPriority;TicketID=$QData{«TicketID»}’, ‘Module’ => ‘Kernel::Output::HTML::TicketMenuGeneric’, ‘Name’ => ‘Priority’, ‘PopupType’ => ‘TicketAction’, ‘Target’ => »};
Ticket::Frontend::MenuModule###310-FreeText
Description ValueDescription: Shows a link in the menu to add a free text field in the ticket zoom view
of the agent interface.Group: TicketSubGroup: Frontend::Agent::Ticket::MenuModuleValid: 1Required: 0Config-Setting:
$Self->{‘Ticket::Frontend::MenuModule’}->{‘310-FreeText’} = { ‘Action’ => ‘AgentTicketFreeText’, ‘Description’ => ‘Change the ticket free fields!’, ‘Link’ => ‘Action=AgentTicketFreeText;TicketID=$QData{«TicketID»}’, ‘Module’ => ‘Kernel::Output::HTML::TicketMenuGeneric’, ‘Name’ => ‘Free Fields’, ‘PopupType’ => ‘TicketAction’, ‘Target’ => »};
Ticket::Frontend::MenuModule###320-Link
Description ValueDescription: Shows a link in the menu that allows linking a ticket with another object
in the ticket zoom view of the agent interface.Group: TicketSubGroup: Frontend::Agent::Ticket::MenuModuleValid: 1Required: 0

Configuration Options Reference
458
Description ValueConfig-Setting:
$Self->{‘Ticket::Frontend::MenuModule’}->{‘320-Link’} = { ‘Action’ => ‘AgentLinkObject’, ‘Description’ => ‘Link this ticket to other objects!’, ‘Link’ => ‘Action=AgentLinkObject;SourceObject=Ticket;SourceKey=$QData{«TicketID»}’, ‘Module’ => ‘Kernel::Output::HTML::TicketMenuGeneric’, ‘Name’ => ‘Link’, ‘PopupType’ => ‘TicketAction’, ‘Target’ => »};
Ticket::Frontend::MenuModule###400-Owner
Description ValueDescription: Shows a link in the menu to see the owner of a ticket in the ticket zoom
view of the agent interface.Group: TicketSubGroup: Frontend::Agent::Ticket::MenuModuleValid: 1Required: 0Config-Setting:
$Self->{‘Ticket::Frontend::MenuModule’}->{‘400-Owner’} = { ‘Action’ => ‘AgentTicketOwner’, ‘Description’ => ‘Change the ticket owner!’, ‘Link’ => ‘Action=AgentTicketOwner;TicketID=$QData{«TicketID»}’, ‘Module’ => ‘Kernel::Output::HTML::TicketMenuGeneric’, ‘Name’ => ‘Owner’, ‘PopupType’ => ‘TicketAction’, ‘Target’ => »};
Ticket::Frontend::MenuModule###410-Responsible
Description ValueDescription: Shows a link in the menu to see the responsible agent of a ticket in the
ticket zoom view of the agent interface.Group: TicketSubGroup: Frontend::Agent::Ticket::MenuModuleValid: 1

Configuration Options Reference
459
Description ValueRequired: 0Config-Setting:
$Self->{‘Ticket::Frontend::MenuModule’}->{‘410-Responsible’} = { ‘Action’ => ‘AgentTicketResponsible’, ‘Description’ => ‘Change the ticket responsible!’, ‘Link’ => ‘Action=AgentTicketResponsible;TicketID=$QData{«TicketID»}’, ‘Module’ => ‘Kernel::Output::HTML::TicketMenuResponsible’, ‘Name’ => ‘Responsible’, ‘PopupType’ => ‘TicketAction’, ‘Target’ => »};
Ticket::Frontend::MenuModule###420-Customer
Description ValueDescription: Shows a link in the menu to see the customer who requested the ticket
in the ticket zoom view of the agent interface.Group: TicketSubGroup: Frontend::Agent::Ticket::MenuModuleValid: 1Required: 0Config-Setting:
$Self->{‘Ticket::Frontend::MenuModule’}->{‘420-Customer’} = { ‘Action’ => ‘AgentTicketCustomer’, ‘Description’ => ‘Change the ticket customer!’, ‘Link’ => ‘Action=AgentTicketCustomer;TicketID=$QData{«TicketID»}’, ‘Module’ => ‘Kernel::Output::HTML::TicketMenuGeneric’, ‘Name’ => ‘Customer’, ‘PopupType’ => ‘TicketAction’, ‘Target’ => »};
Ticket::Frontend::MenuModule###420-Note
Description ValueDescription: Shows a link in the menu to add a note in the ticket zoom view of the
agent interface.Group: TicketSubGroup: Frontend::Agent::Ticket::MenuModule

Configuration Options Reference
460
Description ValueValid: 1Required: 0Config-Setting:
$Self->{‘Ticket::Frontend::MenuModule’}->{‘420-Note’} = { ‘Action’ => ‘AgentTicketNote’, ‘Description’ => ‘Add a note to this ticket!’, ‘Link’ => ‘Action=AgentTicketNote;TicketID=$QData{«TicketID»}’, ‘Module’ => ‘Kernel::Output::HTML::TicketMenuGeneric’, ‘Name’ => ‘Note’, ‘PopupType’ => ‘TicketAction’, ‘Target’ => »};
Ticket::Frontend::MenuModule###430-MergeDescription ValueDescription: Shows a link in the menu that allows merging tickets in the ticket zoom
view of the agent interface.Group: TicketSubGroup: Frontend::Agent::Ticket::MenuModuleValid: 1Required: 0Config-Setting:
$Self->{‘Ticket::Frontend::MenuModule’}->{‘430-Merge’} = { ‘Action’ => ‘AgentTicketMerge’, ‘Description’ => ‘Merge this ticket!’, ‘Link’ => ‘Action=AgentTicketMerge;TicketID=$QData{«TicketID»}’, ‘Module’ => ‘Kernel::Output::HTML::TicketMenuGeneric’, ‘Name’ => ‘Merge’, ‘PopupType’ => ‘TicketAction’, ‘Target’ => »};
Ticket::Frontend::MenuModule###440-PendingDescription ValueDescription: Shows a link in the menu to set a ticket as pending in the ticket zoom
view of the agent interface.Group: TicketSubGroup: Frontend::Agent::Ticket::MenuModuleValid: 1

Configuration Options Reference
461
Description ValueRequired: 0Config-Setting:
$Self->{‘Ticket::Frontend::MenuModule’}->{‘440-Pending’} = { ‘Action’ => ‘AgentTicketPending’, ‘Description’ => ‘Set this ticket to pending!’, ‘Link’ => ‘Action=AgentTicketPending;TicketID=$QData{«TicketID»}’, ‘Module’ => ‘Kernel::Output::HTML::TicketMenuGeneric’, ‘Name’ => ‘Pending’, ‘PopupType’ => ‘TicketAction’, ‘Target’ => »};
Ticket::Frontend::MenuModule###448-Watch
Description ValueDescription: Shows a link in the menu for subscribing / unsubscribing from a ticket
in the ticket zoom view of the agent interface.Group: TicketSubGroup: Frontend::Agent::Ticket::MenuModuleValid: 1Required: 0Config-Setting:
$Self->{‘Ticket::Frontend::MenuModule’}->{‘448-Watch’} = { ‘Action’ => ‘AgentTicketWatcher’, ‘Module’ => ‘Kernel::Output::HTML::TicketMenuTicketWatcher’, ‘Name’ => ‘Watch’, ‘Target’ => »};
Ticket::Frontend::MenuModule###450-Close
Description ValueDescription: Shows a link in the menu to close a ticket in the ticket zoom view of
the agent interface.Group: TicketSubGroup: Frontend::Agent::Ticket::MenuModuleValid: 1Required: 0Config-Setting:
$Self->{‘Ticket::Frontend::MenuModule’}->{‘450-Close’} = {

Configuration Options Reference
462
Description Value ‘Action’ => ‘AgentTicketClose’, ‘Description’ => ‘Close this ticket!’, ‘Link’ => ‘Action=AgentTicketClose;TicketID=$QData{«TicketID»}’, ‘Module’ => ‘Kernel::Output::HTML::TicketMenuGeneric’, ‘Name’ => ‘Close’, ‘PopupType’ => ‘TicketAction’, ‘Target’ => »};
Ticket::Frontend::MenuModule###460-Delete
Description ValueDescription: Shows a link in the menu to delete a ticket in the ticket zoom
view of the agent interface. Additional access control to show or notshow this link can be done by using Key «Group» and Content like»rw:group1;move_into:group2″.
Group: TicketSubGroup: Frontend::Agent::Ticket::MenuModuleValid: 0Required: 0Config-Setting:
$Self->{‘Ticket::Frontend::MenuModule’}->{‘460-Delete’} = { ‘Action’ => ‘AgentTicketMove’, ‘Description’ => ‘Delete this ticket!’, ‘Link’ => ‘Action=AgentTicketMove;TicketID=$Data{«TicketID»};DestQueue=Delete’, ‘Module’ => ‘Kernel::Output::HTML::TicketMenuGeneric’, ‘Name’ => ‘Delete’, ‘PopupType’ => », ‘Target’ => »};
Ticket::Frontend::MenuModule###470-Spam
Description ValueDescription: Shows a link to set a ticket as spam in the ticket zoom view
of the agent interface. Additional access control to show or notshow this link can be done by using Key «Group» and Content like»rw:group1;move_into:group2″.
Group: TicketSubGroup: Frontend::Agent::Ticket::MenuModuleValid: 0Required: 0

Configuration Options Reference
463
Description ValueConfig-Setting:
$Self->{‘Ticket::Frontend::MenuModule’}->{‘470-Spam’} = { ‘Action’ => ‘AgentTicketMove’, ‘Description’ => ‘Mark as Spam!’, ‘Link’ => ‘Action=AgentTicketMove;TicketID=$Data{«TicketID»};DestQueue=Delete’, ‘Module’ => ‘Kernel::Output::HTML::TicketMenuGeneric’, ‘Name’ => ‘Spam’, ‘PopupType’ => », ‘Target’ => »};
Frontend::Agent::Ticket::MenuModulePreTicket::Frontend::PreMenuModule###100-Lock
Description ValueDescription: Shows a link in the menu to lock / unlock a ticket in the ticket overviews
of the agent interface.Group: TicketSubGroup: Frontend::Agent::Ticket::MenuModulePreValid: 1Required: 0Config-Setting:
$Self->{‘Ticket::Frontend::PreMenuModule’}->{‘100-Lock’} = { ‘Action’ => ‘AgentTicketLock’, ‘Module’ => ‘Kernel::Output::HTML::TicketMenuLock’, ‘Name’ => ‘Lock’, ‘PopupType’ => », ‘Target’ => »};
Ticket::Frontend::PreMenuModule###200-Zoom
Description ValueDescription: Shows a link in the menu to zoom a ticket in the ticket overviews of the
agent interface.Group: TicketSubGroup: Frontend::Agent::Ticket::MenuModulePreValid: 1Required: 0Config-Setting:

Configuration Options Reference
464
Description Value $Self->{‘Ticket::Frontend::PreMenuModule’}->{‘200-Zoom’} = { ‘Action’ => ‘AgentTicketZoom’, ‘Description’ => ‘Look into a ticket!’, ‘Link’ => ‘Action=AgentTicketZoom;TicketID=$QData{«TicketID»}’, ‘Module’ => ‘Kernel::Output::HTML::TicketMenuGeneric’, ‘Name’ => ‘Zoom’, ‘PopupType’ => », ‘Target’ => »};
Ticket::Frontend::PreMenuModule###210-History
Description ValueDescription: Shows a link in the menu to see the history of a ticket in every ticket
overview of the agent interface.Group: TicketSubGroup: Frontend::Agent::Ticket::MenuModulePreValid: 1Required: 0Config-Setting:
$Self->{‘Ticket::Frontend::PreMenuModule’}->{‘210-History’} = { ‘Action’ => ‘AgentTicketHistory’, ‘Description’ => ‘Shows the ticket history!’, ‘Link’ => ‘Action=AgentTicketHistory;TicketID=$QData{«TicketID»}’, ‘Module’ => ‘Kernel::Output::HTML::TicketMenuGeneric’, ‘Name’ => ‘History’, ‘PopupType’ => ‘TicketHistory’, ‘Target’ => »};
Ticket::Frontend::PreMenuModule###300-Priority
Description ValueDescription: Shows a link in the menu to set the priority of a ticket in every ticket
overview of the agent interface.Group: TicketSubGroup: Frontend::Agent::Ticket::MenuModulePreValid: 1Required: 0Config-Setting:

Configuration Options Reference
465
Description Value $Self->{‘Ticket::Frontend::PreMenuModule’}->{‘300-Priority’} = { ‘Action’ => ‘AgentTicketPriority’, ‘Description’ => ‘Change the ticket priority!’, ‘Link’ => ‘Action=AgentTicketPriority;TicketID=$QData{«TicketID»}’, ‘Module’ => ‘Kernel::Output::HTML::TicketMenuGeneric’, ‘Name’ => ‘Priority’, ‘PopupType’ => ‘TicketAction’, ‘Target’ => »};
Ticket::Frontend::PreMenuModule###420-Note
Description ValueDescription: Shows a link in the menu to add a note to a ticket in every ticket overview
of the agent interface.Group: TicketSubGroup: Frontend::Agent::Ticket::MenuModulePreValid: 1Required: 0Config-Setting:
$Self->{‘Ticket::Frontend::PreMenuModule’}->{‘420-Note’} = { ‘Action’ => ‘AgentTicketNote’, ‘Description’ => ‘Add a note to this ticket!’, ‘Link’ => ‘Action=AgentTicketNote;TicketID=$QData{«TicketID»}’, ‘Module’ => ‘Kernel::Output::HTML::TicketMenuGeneric’, ‘Name’ => ‘Note’, ‘PopupType’ => ‘TicketAction’, ‘Target’ => »};
Ticket::Frontend::PreMenuModule###440-Close
Description ValueDescription: Shows a link in the menu to close a ticket in every ticket overview of
the agent interface.Group: TicketSubGroup: Frontend::Agent::Ticket::MenuModulePreValid: 1Required: 0Config-Setting:

Configuration Options Reference
466
Description Value $Self->{‘Ticket::Frontend::PreMenuModule’}->{‘440-Close’} = { ‘Action’ => ‘AgentTicketClose’, ‘Description’ => ‘Close this ticket!’, ‘Link’ => ‘Action=AgentTicketClose;TicketID=$QData{«TicketID»}’, ‘Module’ => ‘Kernel::Output::HTML::TicketMenuGeneric’, ‘Name’ => ‘Close’, ‘PopupType’ => ‘TicketAction’, ‘Target’ => »};
Ticket::Frontend::PreMenuModule###445-Move
Description ValueDescription: Shows a link in the menu to move a ticket in every ticket overview of
the agent interface.Group: TicketSubGroup: Frontend::Agent::Ticket::MenuModulePreValid: 1Required: 0Config-Setting:
$Self->{‘Ticket::Frontend::PreMenuModule’}->{‘445-Move’} = { ‘Action’ => ‘AgentTicketMove’, ‘Description’ => ‘Change queue!’, ‘Module’ => ‘Kernel::Output::HTML::TicketMenuMove’, ‘Name’ => ‘Move’};
Ticket::Frontend::PreMenuModule###450-Delete
Description ValueDescription: Shows a link in the menu to delete a ticket in every ticket overview
of the agent interface. Additional access control to show or notshow this link can be done by using Key «Group» and Content like»rw:group1;move_into:group2″.
Group: TicketSubGroup: Frontend::Agent::Ticket::MenuModulePreValid: 0Required: 0Config-Setting:
$Self->{‘Ticket::Frontend::PreMenuModule’}->{‘450-Delete’} = { ‘Action’ => ‘AgentTicketMove’,

Configuration Options Reference
467
Description Value ‘Description’ => ‘Delete this ticket!’, ‘Link’ => ‘Action=AgentTicketMove;TicketID=$Data{«TicketID»};DestQueue=Delete’, ‘Module’ => ‘Kernel::Output::HTML::TicketMenuGeneric’, ‘Name’ => ‘Delete’, ‘PopupType’ => », ‘Target’ => »};
Ticket::Frontend::PreMenuModule###460-Spam
Description ValueDescription: Shows a link in the menu to set a ticket as spam in every ticket
overview of the agent interface. Additional access control to show ornot show this link can be done by using Key «Group» and Content like»rw:group1;move_into:group2″.
Group: TicketSubGroup: Frontend::Agent::Ticket::MenuModulePreValid: 0Required: 0Config-Setting:
$Self->{‘Ticket::Frontend::PreMenuModule’}->{‘460-Spam’} = { ‘Action’ => ‘AgentTicketMove’, ‘Description’ => ‘Mark as Spam!’, ‘Link’ => ‘Action=AgentTicketMove;TicketID=$Data{«TicketID»};DestQueue=Delete’, ‘Module’ => ‘Kernel::Output::HTML::TicketMenuGeneric’, ‘Name’ => ‘Spam’, ‘PopupType’ => », ‘Target’ => »};
Frontend::Agent::Ticket::ViewBounceTicket::Frontend::AgentTicketBounce###Permission
Description ValueDescription: Required permissions to use the ticket bounce screen in the agent
interface.Group: TicketSubGroup: Frontend::Agent::Ticket::ViewBounceValid: 1Required: 1

Configuration Options Reference
468
Description ValueConfig-Setting:
$Self->{‘Ticket::Frontend::AgentTicketBounce’}->{‘Permission’} = ‘bounce’;
Ticket::Frontend::AgentTicketBounce###RequiredLock
Description ValueDescription: Defines if a ticket lock is required in the ticket bounce screen of the
agent interface (if the ticket isn’t locked yet, the ticket gets locked andthe current agent will be set automatically as its owner).
Group: TicketSubGroup: Frontend::Agent::Ticket::ViewBounceValid: 1Required: 0Config-Setting:
$Self->{‘Ticket::Frontend::AgentTicketBounce’}->{‘RequiredLock’} = ‘1’;
Ticket::Frontend::AgentTicketBounce###StateDefault
Description ValueDescription: Defines the default next state of a ticket after being bounced, in the
ticket bounce screen of the agent interface.Group: TicketSubGroup: Frontend::Agent::Ticket::ViewBounceValid: 1Required: 0Config-Setting:
$Self->{‘Ticket::Frontend::AgentTicketBounce’}->{‘StateDefault’} = ‘closed successful’;
Ticket::Frontend::AgentTicketBounce###StateType
Description ValueDescription: Defines the next state of a ticket after being bounced, in the ticket
bounce screen of the agent interface.Group: TicketSubGroup: Frontend::Agent::Ticket::ViewBounceValid: 1Required: 1Config-Setting:
$Self->{‘Ticket::Frontend::AgentTicketBounce’}->{‘StateType’} = [

Configuration Options Reference
469
Description Value ‘open’, ‘closed’];
Ticket::Frontend::BounceText
Description ValueDescription: Defines the default ticket bounced notification for customer/sender in
the ticket bounce screen of the agent interface.Group: TicketSubGroup: Frontend::Agent::Ticket::ViewBounceValid: 1Required: 1Config-Setting:
$Self->{‘Ticket::Frontend::BounceText’} = ‘Your email with ticket number «<OTRS_TICKET>» is bounced to «<OTRS_BOUNCE_TO>». Contact this address for further information.’;
Frontend::Agent::Ticket::ViewBulkTicket::Frontend::AgentTicketBulk###RequiredLock
Description ValueDescription: Automatically lock and set owner to current Agent after selecting for an
Bulk Action.Group: TicketSubGroup: Frontend::Agent::Ticket::ViewBulkValid: 1Required: 0Config-Setting:
$Self->{‘Ticket::Frontend::AgentTicketBulk’}->{‘RequiredLock’} = ‘1’;
Ticket::Frontend::AgentTicketBulk###Owner
Description ValueDescription: Sets the ticket owner in the ticket bulk screen of the agent interface.Group: TicketSubGroup: Frontend::Agent::Ticket::ViewBulkValid: 1Required: 0

Configuration Options Reference
470
Description ValueConfig-Setting:
$Self->{‘Ticket::Frontend::AgentTicketBulk’}->{‘Owner’} = ‘1’;
Ticket::Frontend::AgentTicketBulk###Responsible
Description ValueDescription: Sets the responsible agent of the ticket in the ticket bulk screen of the
agent interface.Group: TicketSubGroup: Frontend::Agent::Ticket::ViewBulkValid: 1Required: 0Config-Setting:
$Self->{‘Ticket::Frontend::AgentTicketBulk’}->{‘Responsible’} = ‘1’;
Ticket::Frontend::AgentTicketBulk###State
Description ValueDescription: If a note is added by an agent, sets the state of a ticket in the ticket bulk
screen of the agent interface.Group: TicketSubGroup: Frontend::Agent::Ticket::ViewBulkValid: 1Required: 0Config-Setting:
$Self->{‘Ticket::Frontend::AgentTicketBulk’}->{‘State’} = ‘1’;
Ticket::Frontend::AgentTicketBulk###StateType
Description ValueDescription: Defines the next state of a ticket after adding a note, in the ticket bulk
screen of the agent interface.Group: TicketSubGroup: Frontend::Agent::Ticket::ViewBulkValid: 1Required: 1Config-Setting:
$Self->{‘Ticket::Frontend::AgentTicketBulk’}->{‘StateType’} = [ ‘open’,

Configuration Options Reference
471
Description Value ‘closed’, ‘pending reminder’, ‘pending auto’];
Ticket::Frontend::AgentTicketBulk###StateDefault
Description ValueDescription: Defines the default next state of a ticket after adding a note, in the ticket
bulk screen of the agent interface.Group: TicketSubGroup: Frontend::Agent::Ticket::ViewBulkValid: 0Required: 0Config-Setting:
$Self->{‘Ticket::Frontend::AgentTicketBulk’}->{‘StateDefault’} = ‘open’;
Ticket::Frontend::AgentTicketBulk###Priority
Description ValueDescription: Shows the ticket priority options in the ticket bulk screen of the agent
interface.Group: TicketSubGroup: Frontend::Agent::Ticket::ViewBulkValid: 1Required: 0Config-Setting:
$Self->{‘Ticket::Frontend::AgentTicketBulk’}->{‘Priority’} = ‘1’;
Ticket::Frontend::AgentTicketBulk###PriorityDefault
Description ValueDescription: Defines the default ticket priority in the ticket bulk screen of the agent
interface.Group: TicketSubGroup: Frontend::Agent::Ticket::ViewBulkValid: 0Required: 0Config-Setting:
$Self->{‘Ticket::Frontend::AgentTicketBulk’}->{‘PriorityDefault’} = ‘3 normal’;

Configuration Options Reference
472
Ticket::Frontend::AgentTicketBulk###ArticleTypeDefault
Description ValueDescription: Defines the default type of the note in the ticket bulk screen of the agent
interface.Group: TicketSubGroup: Frontend::Agent::Ticket::ViewBulkValid: 1Required: 0Config-Setting:
$Self->{‘Ticket::Frontend::AgentTicketBulk’}->{‘ArticleTypeDefault’} = ‘note-internal’;
Ticket::Frontend::AgentTicketBulk###ArticleTypes
Description ValueDescription: Specifies the different note types that will be used in the system.Group: TicketSubGroup: Frontend::Agent::Ticket::ViewBulkValid: 1Required: 0Config-Setting:
$Self->{‘Ticket::Frontend::AgentTicketBulk’}->{‘ArticleTypes’} = { ‘note-external’ => ‘1’, ‘note-internal’ => ‘1’, ‘note-report’ => ‘0’};
Frontend::Agent::Ticket::ViewCloseTicket::Frontend::AgentTicketClose###Permission
Description ValueDescription: Required permissions to use the close ticket screen in the agent
interface.Group: TicketSubGroup: Frontend::Agent::Ticket::ViewCloseValid: 1Required: 1Config-Setting:
$Self->{‘Ticket::Frontend::AgentTicketClose’}->{‘Permission’} = ‘close’;

Configuration Options Reference
473
Ticket::Frontend::AgentTicketClose###RequiredLockDescription ValueDescription: Defines if a ticket lock is required in the close ticket screen of the agent
interface (if the ticket isn’t locked yet, the ticket gets locked and thecurrent agent will be set automatically as its owner).
Group: TicketSubGroup: Frontend::Agent::Ticket::ViewCloseValid: 1Required: 0Config-Setting:
$Self->{‘Ticket::Frontend::AgentTicketClose’}->{‘RequiredLock’} = ‘1’;
Ticket::Frontend::AgentTicketClose###TicketTypeDescription ValueDescription: Sets the ticket type in the close ticket screen of the agent interface
(Ticket::Type needs to be activated).Group: TicketSubGroup: Frontend::Agent::Ticket::ViewCloseValid: 1Required: 0Config-Setting:
$Self->{‘Ticket::Frontend::AgentTicketClose’}->{‘TicketType’} = ‘0’;
Ticket::Frontend::AgentTicketClose###ServiceDescription ValueDescription: Sets the service in the close ticket screen of the agent interface
(Ticket::Service needs to be activated).Group: TicketSubGroup: Frontend::Agent::Ticket::ViewCloseValid: 1Required: 0Config-Setting:
$Self->{‘Ticket::Frontend::AgentTicketClose’}->{‘Service’} = ‘0’;
Ticket::Frontend::AgentTicketClose###OwnerDescription ValueDescription: Sets the ticket owner in the close ticket screen of the agent interface.Group: Ticket

Configuration Options Reference
474
Description ValueSubGroup: Frontend::Agent::Ticket::ViewCloseValid: 1Required: 0Config-Setting:
$Self->{‘Ticket::Frontend::AgentTicketClose’}->{‘Owner’} = ‘0’;
Ticket::Frontend::AgentTicketClose###OwnerMandatoryDescription ValueDescription: Sets if ticket owner must be selected by the agent.Group: TicketSubGroup: Frontend::Agent::Ticket::ViewCloseValid: 1Required: 0Config-Setting:
$Self->{‘Ticket::Frontend::AgentTicketClose’}->{‘OwnerMandatory’} = ‘0’;
Ticket::Frontend::AgentTicketClose###ResponsibleDescription ValueDescription: Sets the responsible agent of the ticket in the close ticket screen of the
agent interface.Group: TicketSubGroup: Frontend::Agent::Ticket::ViewCloseValid: 1Required: 0Config-Setting:
$Self->{‘Ticket::Frontend::AgentTicketClose’}->{‘Responsible’} = ‘0’;
Ticket::Frontend::AgentTicketClose###StateDescription ValueDescription: If a note is added by an agent, sets the state of a ticket in the close
ticket screen of the agent interface.Group: TicketSubGroup: Frontend::Agent::Ticket::ViewCloseValid: 1Required: 0Config-Setting:
$Self->{‘Ticket::Frontend::AgentTicketClose’}->{‘State’} = ‘1’;

Configuration Options Reference
475
Ticket::Frontend::AgentTicketClose###StateTypeDescription ValueDescription: Defines the next state of a ticket after adding a note, in the close ticket
screen of the agent interface.Group: TicketSubGroup: Frontend::Agent::Ticket::ViewCloseValid: 1Required: 1Config-Setting:
$Self->{‘Ticket::Frontend::AgentTicketClose’}->{‘StateType’} = [ ‘closed’];
Ticket::Frontend::AgentTicketClose###StateDefaultDescription ValueDescription: Defines the default next state of a ticket after adding a note, in the close
ticket screen of the agent interface.Group: TicketSubGroup: Frontend::Agent::Ticket::ViewCloseValid: 1Required: 0Config-Setting:
$Self->{‘Ticket::Frontend::AgentTicketClose’}->{‘StateDefault’} = ‘closed successful’;
Ticket::Frontend::AgentTicketClose###NoteDescription ValueDescription: Allows adding notes in the close ticket screen of the agent interface.Group: TicketSubGroup: Frontend::Agent::Ticket::ViewCloseValid: 1Required: 0Config-Setting:
$Self->{‘Ticket::Frontend::AgentTicketClose’}->{‘Note’} = ‘1’;
Ticket::Frontend::AgentTicketClose###SubjectDescription ValueDescription: Sets the default subject for notes added in the close ticket screen of
the agent interface.

Configuration Options Reference
476
Description ValueGroup: TicketSubGroup: Frontend::Agent::Ticket::ViewCloseValid: 1Required: 0Config-Setting:
$Self->{‘Ticket::Frontend::AgentTicketClose’}->{‘Subject’} = ‘$Text{«Close»}’;
Ticket::Frontend::AgentTicketClose###BodyDescription ValueDescription: Sets the default body text for notes added in the close ticket screen of
the agent interface.Group: TicketSubGroup: Frontend::Agent::Ticket::ViewCloseValid: 1Required: 0Config-Setting:
$Self->{‘Ticket::Frontend::AgentTicketClose’}->{‘Body’} = »;
Ticket::Frontend::AgentTicketClose###InvolvedAgentDescription ValueDescription: Shows a list of all the involved agents on this ticket, in the close ticket
screen of the agent interface.Group: TicketSubGroup: Frontend::Agent::Ticket::ViewCloseValid: 0Required: 0Config-Setting:
$Self->{‘Ticket::Frontend::AgentTicketClose’}->{‘InvolvedAgent’} = ‘0’;
Ticket::Frontend::AgentTicketClose###InformAgentDescription ValueDescription: Shows a list of all the possible agents (all agents with note permissions
on the queue/ticket) to determine who should be informed about thisnote, in the close ticket screen of the agent interface.
Group: TicketSubGroup: Frontend::Agent::Ticket::ViewCloseValid: 0Required: 0

Configuration Options Reference
477
Description ValueConfig-Setting:
$Self->{‘Ticket::Frontend::AgentTicketClose’}->{‘InformAgent’} = ‘0’;
Ticket::Frontend::AgentTicketClose###ArticleTypeDefaultDescription ValueDescription: Defines the default type of the note in the close ticket screen of the
agent interface.Group: TicketSubGroup: Frontend::Agent::Ticket::ViewCloseValid: 1Required: 0Config-Setting:
$Self->{‘Ticket::Frontend::AgentTicketClose’}->{‘ArticleTypeDefault’} = ‘note-internal’;
Ticket::Frontend::AgentTicketClose###ArticleTypesDescription ValueDescription: Specifies the different note types that will be used in the system.Group: TicketSubGroup: Frontend::Agent::Ticket::ViewCloseValid: 1Required: 0Config-Setting:
$Self->{‘Ticket::Frontend::AgentTicketClose’}->{‘ArticleTypes’} = { ‘note-external’ => ‘0’, ‘note-internal’ => ‘1’, ‘note-report’ => ‘0’};
Ticket::Frontend::AgentTicketClose###PriorityDescription ValueDescription: Shows the ticket priority options in the close ticket screen of the agent
interface.Group: TicketSubGroup: Frontend::Agent::Ticket::ViewCloseValid: 0Required: 0Config-Setting:
$Self->{‘Ticket::Frontend::AgentTicketClose’}->{‘Priority’} = ‘0’;

Configuration Options Reference
478
Ticket::Frontend::AgentTicketClose###PriorityDefault
Description ValueDescription: Defines the default ticket priority in the close ticket screen of the agent
interface.Group: TicketSubGroup: Frontend::Agent::Ticket::ViewCloseValid: 0Required: 0Config-Setting:
$Self->{‘Ticket::Frontend::AgentTicketClose’}->{‘PriorityDefault’} = ‘3 normal’;
Ticket::Frontend::AgentTicketClose###Title
Description ValueDescription: Shows the title fields in the close ticket screen of the agent interface.Group: TicketSubGroup: Frontend::Agent::Ticket::ViewCloseValid: 1Required: 0Config-Setting:
$Self->{‘Ticket::Frontend::AgentTicketClose’}->{‘Title’} = ‘0’;
Ticket::Frontend::AgentTicketClose###TicketFreeText
Description ValueDescription: Ticket free text options shown in the close ticket screen of the agent
interface. Possible settings: 0 = Disabled, 1 = Enabled, 2 = Enabledand required.
Group: TicketSubGroup: Frontend::Agent::Ticket::ViewCloseValid: 1Required: 0Config-Setting:
$Self->{‘Ticket::Frontend::AgentTicketClose’}->{‘TicketFreeText’} = { ‘1’ => ‘0’, ’10’ => ‘0’, ’11’ => ‘0’, ’12’ => ‘0’, ’13’ => ‘0’, ’14’ => ‘0’, ’15’ => ‘0’,

Configuration Options Reference
479
Description Value ’16’ => ‘0’, ‘2’ => ‘0’, ‘3’ => ‘0’, ‘4’ => ‘0’, ‘5’ => ‘0’, ‘6’ => ‘0’, ‘7’ => ‘0’, ‘8’ => ‘0’, ‘9’ => ‘0’};
Ticket::Frontend::AgentTicketClose###TicketFreeTime
Description ValueDescription: Ticket free time options shown in the close ticket screen of the agent
interface. Possible settings: 0 = Disabled, 1 = Enabled, 2 = Enabledand required.
Group: TicketSubGroup: Frontend::Agent::Ticket::ViewCloseValid: 1Required: 0Config-Setting:
$Self->{‘Ticket::Frontend::AgentTicketClose’}->{‘TicketFreeTime’} = { ‘1’ => ‘0’, ‘2’ => ‘0’, ‘3’ => ‘0’, ‘4’ => ‘0’, ‘5’ => ‘0’, ‘6’ => ‘0’};
Ticket::Frontend::AgentTicketClose###ArticleFreeText
Description ValueDescription: Article free text options shown in the close ticket screen of the agent
interface. Possible settings: 0 = Disabled, 1 = Enabled, 2 = Enabledand required.
Group: TicketSubGroup: Frontend::Agent::Ticket::ViewCloseValid: 1Required: 0Config-Setting:
$Self->{‘Ticket::Frontend::AgentTicketClose’}->{‘ArticleFreeText’} = { ‘1’ => ‘0’, ‘2’ => ‘0’,

Configuration Options Reference
480
Description Value ‘3’ => ‘0’};
Ticket::Frontend::AgentTicketClose###HistoryType
Description ValueDescription: Defines the history type for the close ticket screen action, which gets
used for ticket history in the agent interface.Group: TicketSubGroup: Frontend::Agent::Ticket::ViewCloseValid: 1Required: 0Config-Setting:
$Self->{‘Ticket::Frontend::AgentTicketClose’}->{‘HistoryType’} = ‘AddNote’;
Ticket::Frontend::AgentTicketClose###HistoryComment
Description ValueDescription: Defines the history comment for the close ticket screen action, which
gets used for ticket history in the agent interface.Group: TicketSubGroup: Frontend::Agent::Ticket::ViewCloseValid: 1Required: 0Config-Setting:
$Self->{‘Ticket::Frontend::AgentTicketClose’}->{‘HistoryComment’} = ‘%%Close’;
Frontend::Agent::Ticket::ViewComposeTicket::Frontend::AgentTicketCompose###Permission
Description ValueDescription: Required permissions to use the ticket compose screen in the agent
interface.Group: TicketSubGroup: Frontend::Agent::Ticket::ViewComposeValid: 1Required: 1Config-Setting:
$Self->{‘Ticket::Frontend::AgentTicketCompose’}->{‘Permission’} = ‘compose’;

Configuration Options Reference
481
Ticket::Frontend::AgentTicketCompose###RequiredLock
Description ValueDescription: Defines if a ticket lock is required in the ticket compose screen of the
agent interface (if the ticket isn’t locked yet, the ticket gets locked andthe current agent will be set automatically as its owner).
Group: TicketSubGroup: Frontend::Agent::Ticket::ViewComposeValid: 1Required: 0Config-Setting:
$Self->{‘Ticket::Frontend::AgentTicketCompose’}->{‘RequiredLock’} = ‘1’;
Ticket::Frontend::AgentTicketCompose###StateDefault
Description ValueDescription: Defines the default next state of a ticket if it is composed / answered in
the ticket compose screen of the agent interface.Group: TicketSubGroup: Frontend::Agent::Ticket::ViewComposeValid: 1Required: 0Config-Setting:
$Self->{‘Ticket::Frontend::AgentTicketCompose’}->{‘StateDefault’} = ‘open’;
Ticket::Frontend::AgentTicketCompose###StateType
Description ValueDescription: Defines the next possible states after composing / answering a ticket in
the ticket compose screen of the agent interface.Group: TicketSubGroup: Frontend::Agent::Ticket::ViewComposeValid: 1Required: 1Config-Setting:
$Self->{‘Ticket::Frontend::AgentTicketCompose’}->{‘StateType’} = [ ‘open’, ‘closed’, ‘pending auto’, ‘pending reminder’];

Configuration Options Reference
482
Ticket::Frontend::ResponseFormatDescription ValueDescription: Defines the format of responses in the ticket compose
screen of the agent interface ($QData{«OrigFrom»} is From 1:1,$QData{«OrigFromName»} is only realname of From).
Group: TicketSubGroup: Frontend::Agent::Ticket::ViewComposeValid: 1Required: 1Config-Setting:
$Self->{‘Ticket::Frontend::ResponseFormat’} = ‘$QData{«Salutation»}$QData{«StdResponse»}$QData{«Signature»}
$TimeShort{«$QData{«Created»}»} — $QData{«OrigFromName»} $Text{«wrote»}:$QData{«Body»}’;
Ticket::Frontend::QuoteDescription ValueDescription: Defines the used character for email quotes in the ticket compose
screen of the agent interface.Group: TicketSubGroup: Frontend::Agent::Ticket::ViewComposeValid: 1Required: 0Config-Setting:
$Self->{‘Ticket::Frontend::Quote’} = ‘>’;
Ticket::Frontend::ComposeAddCustomerAddressDescription ValueDescription: Adds customers email addresses to recipients in the ticket compose
screen of the agent interface.Group: TicketSubGroup: Frontend::Agent::Ticket::ViewComposeValid: 1Required: 1Config-Setting:
$Self->{‘Ticket::Frontend::ComposeAddCustomerAddress’} = ‘1’;

Configuration Options Reference
483
Ticket::Frontend::ComposeReplaceSenderAddress
Description ValueDescription: Replaces the original sender with current customer’s email address on
compose answer in the ticket compose screen of the agent interface.Group: TicketSubGroup: Frontend::Agent::Ticket::ViewComposeValid: 1Required: 1Config-Setting:
$Self->{‘Ticket::Frontend::ComposeReplaceSenderAddress’} = ‘0’;
Ticket::Frontend::ComposeExcludeCcRecipients
Description ValueDescription: Uses Cc recipients in reply Cc list on compose an email answer in the
ticket compose screen of the agent interface.Group: TicketSubGroup: Frontend::Agent::Ticket::ViewComposeValid: 1Required: 1Config-Setting:
$Self->{‘Ticket::Frontend::ComposeExcludeCcRecipients’} = ‘0’;
Ticket::Frontend::AgentTicketCompose###TicketFreeText
Description ValueDescription: Ticket free text options shown in the ticket compose screen of the agent
interface. Possible settings: 0 = Disabled, 1 = Enabled, 2 = Enabledand required.
Group: TicketSubGroup: Frontend::Agent::Ticket::ViewComposeValid: 1Required: 0Config-Setting:
$Self->{‘Ticket::Frontend::AgentTicketCompose’}->{‘TicketFreeText’} = { ‘1’ => ‘0’, ’10’ => ‘0’, ’11’ => ‘0’, ’12’ => ‘0’,

Configuration Options Reference
484
Description Value ’13’ => ‘0’, ’14’ => ‘0’, ’15’ => ‘0’, ’16’ => ‘0’, ‘2’ => ‘0’, ‘3’ => ‘0’, ‘4’ => ‘0’, ‘5’ => ‘0’, ‘6’ => ‘0’, ‘7’ => ‘0’, ‘8’ => ‘0’, ‘9’ => ‘0’};
Ticket::Frontend::AgentTicketCompose###TicketFreeTime
Description ValueDescription: Ticket free time options shown in the ticket compose screen of the agent
interface. Possible settings: 0 = Disabled, 1 = Enabled, 2 = Enabledand required.
Group: TicketSubGroup: Frontend::Agent::Ticket::ViewComposeValid: 1Required: 0Config-Setting:
$Self->{‘Ticket::Frontend::AgentTicketCompose’}->{‘TicketFreeTime’} = { ‘1’ => ‘0’, ‘2’ => ‘0’, ‘3’ => ‘0’, ‘4’ => ‘0’, ‘5’ => ‘0’, ‘6’ => ‘0’};
Ticket::Frontend::AgentTicketCompose###ArticleFreeText
Description ValueDescription: Article free text options shown in the ticket compose screen of the agent
interface. Possible settings: 0 = Disabled, 1 = Enabled, 2 = Enabledand required.
Group: TicketSubGroup: Frontend::Agent::Ticket::ViewComposeValid: 1Required: 0Config-Setting:

Configuration Options Reference
485
Description Value $Self->{‘Ticket::Frontend::AgentTicketCompose’}->{‘ArticleFreeText’} = { ‘1’ => ‘0’, ‘2’ => ‘0’, ‘3’ => ‘0’};
Frontend::Agent::Ticket::ViewCustomerTicket::Frontend::AgentTicketCustomer###Permission
Description ValueDescription: Required permissions to change the customer of a ticket in the agent
interface.Group: TicketSubGroup: Frontend::Agent::Ticket::ViewCustomerValid: 1Required: 1Config-Setting:
$Self->{‘Ticket::Frontend::AgentTicketCustomer’}->{‘Permission’} = ‘customer’;
Ticket::Frontend::AgentTicketCustomer###RequiredLock
Description ValueDescription: Defines if a ticket lock is required to change the customer of a ticket in
the agent interface (if the ticket isn’t locked yet, the ticket gets lockedand the current agent will be set automatically as its owner).
Group: TicketSubGroup: Frontend::Agent::Ticket::ViewCustomerValid: 1Required: 0Config-Setting:
$Self->{‘Ticket::Frontend::AgentTicketCustomer’}->{‘RequiredLock’} = ‘0’;
Frontend::Agent::Ticket::ViewEmailNewTicket::Frontend::AgentTicketEmail###Priority
Description ValueDescription: Sets the default priority for new email tickets in the agent interface.Group: Ticket

Configuration Options Reference
486
Description ValueSubGroup: Frontend::Agent::Ticket::ViewEmailNewValid: 1Required: 1Config-Setting:
$Self->{‘Ticket::Frontend::AgentTicketEmail’}->{‘Priority’} = ‘3 normal’;
Ticket::Frontend::AgentTicketEmail###ArticleType
Description ValueDescription: Sets the default article type for new email tickets in the agent interface.Group: TicketSubGroup: Frontend::Agent::Ticket::ViewEmailNewValid: 1Required: 1Config-Setting:
$Self->{‘Ticket::Frontend::AgentTicketEmail’}->{‘ArticleType’} = ’email-external’;
Ticket::Frontend::AgentTicketEmail###SenderType
Description ValueDescription: Sets the default sender type for new email tickets in the agent interface.Group: TicketSubGroup: Frontend::Agent::Ticket::ViewEmailNewValid: 1Required: 1Config-Setting:
$Self->{‘Ticket::Frontend::AgentTicketEmail’}->{‘SenderType’} = ‘agent’;
Ticket::Frontend::AgentTicketEmail###Subject
Description ValueDescription: Sets the default subject for new email tickets (e.g. ’email Outbound’) in
the agent interface.Group: TicketSubGroup: Frontend::Agent::Ticket::ViewEmailNewValid: 1Required: 1Config-Setting:

Configuration Options Reference
487
Description Value $Self->{‘Ticket::Frontend::AgentTicketEmail’}->{‘Subject’} = »;
Ticket::Frontend::AgentTicketEmail###Body
Description ValueDescription: Sets the default text for new email tickets in the agent interface.Group: TicketSubGroup: Frontend::Agent::Ticket::ViewEmailNewValid: 1Required: 1Config-Setting:
$Self->{‘Ticket::Frontend::AgentTicketEmail’}->{‘Body’} = »;
Ticket::Frontend::AgentTicketEmail###StateDefault
Description ValueDescription: Sets the default next ticket state, after the creation of an email ticket in
the agent interface.Group: TicketSubGroup: Frontend::Agent::Ticket::ViewEmailNewValid: 1Required: 1Config-Setting:
$Self->{‘Ticket::Frontend::AgentTicketEmail’}->{‘StateDefault’} = ‘open’;
Ticket::Frontend::AgentTicketEmail###StateType
Description ValueDescription: Determines the next possible ticket states, after the creation of a new
email ticket in the agent interface.Group: TicketSubGroup: Frontend::Agent::Ticket::ViewEmailNewValid: 1Required: 1Config-Setting:
$Self->{‘Ticket::Frontend::AgentTicketEmail’}->{‘StateType’} = [ ‘open’, ‘pending auto’, ‘pending reminder’, ‘closed’

Configuration Options Reference
488
Description Value];
Ticket::Frontend::AgentTicketEmail###TicketFreeText
Description ValueDescription: Ticket free text options shown in the email ticket screen of the agent
interface. Possible settings: 0 = Disabled, 1 = Enabled, 2 = Enabledand required.
Group: TicketSubGroup: Frontend::Agent::Ticket::ViewEmailNewValid: 1Required: 0Config-Setting:
$Self->{‘Ticket::Frontend::AgentTicketEmail’}->{‘TicketFreeText’} = { ‘1’ => ‘0’, ’10’ => ‘0’, ’11’ => ‘0’, ’12’ => ‘0’, ’13’ => ‘0’, ’14’ => ‘0’, ’15’ => ‘0’, ’16’ => ‘0’, ‘2’ => ‘0’, ‘3’ => ‘0’, ‘4’ => ‘0’, ‘5’ => ‘0’, ‘6’ => ‘0’, ‘7’ => ‘0’, ‘8’ => ‘0’, ‘9’ => ‘0’};
Ticket::Frontend::AgentTicketEmail###TicketFreeTime
Description ValueDescription: Ticket free time options shown in the email ticket screen of the agent
interface. Possible settings: 0 = Disabled, 1 = Enabled, 2 = Enabledand required.
Group: TicketSubGroup: Frontend::Agent::Ticket::ViewEmailNewValid: 1Required: 0Config-Setting:
$Self->{‘Ticket::Frontend::AgentTicketEmail’}->{‘TicketFreeTime’} = { ‘1’ => ‘0’,

Configuration Options Reference
489
Description Value ‘2’ => ‘0’, ‘3’ => ‘0’, ‘4’ => ‘0’, ‘5’ => ‘0’, ‘6’ => ‘0’};
Ticket::Frontend::AgentTicketEmail###ArticleFreeText
Description ValueDescription: Article free text options shown in the email ticket screen of the agent
interface. Possible settings: 0 = Disabled, 1 = Enabled, 2 = Enabledand required.
Group: TicketSubGroup: Frontend::Agent::Ticket::ViewEmailNewValid: 1Required: 0Config-Setting:
$Self->{‘Ticket::Frontend::AgentTicketEmail’}->{‘ArticleFreeText’} = { ‘1’ => ‘0’, ‘2’ => ‘0’, ‘3’ => ‘0’};
Ticket::Frontend::AgentTicketEmail###HistoryType
Description ValueDescription: Defines the history type for the email ticket screen action, which gets
used for ticket history in the agent interface.Group: TicketSubGroup: Frontend::Agent::Ticket::ViewEmailNewValid: 1Required: 1Config-Setting:
$Self->{‘Ticket::Frontend::AgentTicketEmail’}->{‘HistoryType’} = ‘EmailAgent’;
Ticket::Frontend::AgentTicketEmail###HistoryComment
Description ValueDescription: Defines the history comment for the email ticket screen action, which
gets used for ticket history in the agent interface.Group: TicketSubGroup: Frontend::Agent::Ticket::ViewEmailNew

Configuration Options Reference
490
Description ValueValid: 1Required: 1Config-Setting:
$Self->{‘Ticket::Frontend::AgentTicketEmail’}->{‘HistoryComment’} = »;
Frontend::Agent::Ticket::ViewEscalationTicket::Frontend::AgentTicketEscalationView###ViewableTicketsPage
Description ValueDescription: Shows all open tickets (even if they are locked) in the escalation view
of the agent interface.Group: TicketSubGroup: Frontend::Agent::Ticket::ViewEscalationValid: 1Required: 1Config-Setting:
$Self->{‘Ticket::Frontend::AgentTicketEscalationView’}->{‘ViewableTicketsPage’} = ’50’;
Ticket::Frontend::AgentTicketEscalationView###SortBy::Default
Description ValueDescription: Defines the default ticket attribute for ticket sorting in the escalation view
of the agent interface.Group: TicketSubGroup: Frontend::Agent::Ticket::ViewEscalationValid: 1Required: 1Config-Setting:
$Self->{‘Ticket::Frontend::AgentTicketEscalationView’}->{‘SortBy::Default’} = ‘EscalationTime’;
Ticket::Frontend::AgentTicketEscalationView###Order::Default
Description ValueDescription: Defines the default ticket order (after priority sort) in the escalation view
of the agent interface. Up: oldest on top. Down: latest on top.Group: TicketSubGroup: Frontend::Agent::Ticket::ViewEscalation

Configuration Options Reference
491
Description ValueValid: 1Required: 1Config-Setting:
$Self->{‘Ticket::Frontend::AgentTicketEscalationView’}->{‘Order::Default’} = ‘Up’;
Frontend::Agent::Ticket::ViewForwardTicket::Frontend::AgentTicketForward###Permission
Description ValueDescription: Required permissions to use the ticket forward screen in the agent
interface.Group: TicketSubGroup: Frontend::Agent::Ticket::ViewForwardValid: 1Required: 1Config-Setting:
$Self->{‘Ticket::Frontend::AgentTicketForward’}->{‘Permission’} = ‘forward’;
Ticket::Frontend::AgentTicketForward###RequiredLock
Description ValueDescription: Defines if a ticket lock is required in the ticket forward screen of the
agent interface (if the ticket isn’t locked yet, the ticket gets locked andthe current agent will be set automatically as its owner).
Group: TicketSubGroup: Frontend::Agent::Ticket::ViewForwardValid: 1Required: 0Config-Setting:
$Self->{‘Ticket::Frontend::AgentTicketForward’}->{‘RequiredLock’} = ‘1’;
Ticket::Frontend::AgentTicketForward###StateDefault
Description ValueDescription: Defines the default next state of a ticket after being forwarded, in the
ticket forward screen of the agent interface.Group: TicketSubGroup: Frontend::Agent::Ticket::ViewForward

Configuration Options Reference
492
Description ValueValid: 1Required: 0Config-Setting:
$Self->{‘Ticket::Frontend::AgentTicketForward’}->{‘StateDefault’} = ‘closed successful’;
Ticket::Frontend::AgentTicketForward###StateTypeDescription ValueDescription: Defines the next possible states after forwarding a ticket in the ticket
forward screen of the agent interface.Group: TicketSubGroup: Frontend::Agent::Ticket::ViewForwardValid: 1Required: 0Config-Setting:
$Self->{‘Ticket::Frontend::AgentTicketForward’}->{‘StateType’} = [ ‘open’, ‘closed’, ‘pending reminder’, ‘pending auto’];
Ticket::Frontend::AgentTicketForward###ArticleTypeDefaultDescription ValueDescription: Defines the default type of forwarded message in the ticket forward
screen of the agent interface.Group: TicketSubGroup: Frontend::Agent::Ticket::ViewForwardValid: 1Required: 0Config-Setting:
$Self->{‘Ticket::Frontend::AgentTicketForward’}->{‘ArticleTypeDefault’} = ’email-external’;
Ticket::Frontend::AgentTicketForward###ArticleTypesDescription ValueDescription: Specifies the different article types that will be used in the system.Group: TicketSubGroup: Frontend::Agent::Ticket::ViewForwardValid: 1

Configuration Options Reference
493
Description ValueRequired: 0Config-Setting:
$Self->{‘Ticket::Frontend::AgentTicketForward’}->{‘ArticleTypes’} = [ ’email-external’, ’email-internal’];
Ticket::Frontend::AgentTicketForward###TicketFreeText
Description ValueDescription: Ticket free text options shown in the ticket forward screen of the agent
interface. Possible settings: 0 = Disabled, 1 = Enabled, 2 = Enabledand required.
Group: TicketSubGroup: Frontend::Agent::Ticket::ViewForwardValid: 1Required: 0Config-Setting:
$Self->{‘Ticket::Frontend::AgentTicketForward’}->{‘TicketFreeText’} = { ‘1’ => ‘0’, ’10’ => ‘0’, ’11’ => ‘0’, ’12’ => ‘0’, ’13’ => ‘0’, ’14’ => ‘0’, ’15’ => ‘0’, ’16’ => ‘0’, ‘2’ => ‘0’, ‘3’ => ‘0’, ‘4’ => ‘0’, ‘5’ => ‘0’, ‘6’ => ‘0’, ‘7’ => ‘0’, ‘8’ => ‘0’, ‘9’ => ‘0’};
Ticket::Frontend::AgentTicketForward###TicketFreeTime
Description ValueDescription: Ticket free time options shown in the ticket forward screen of the agent
interface. Possible settings: 0 = Disabled, 1 = Enabled, 2 = Enabledand required.
Group: TicketSubGroup: Frontend::Agent::Ticket::ViewForward

Configuration Options Reference
494
Description ValueValid: 1Required: 0Config-Setting:
$Self->{‘Ticket::Frontend::AgentTicketForward’}->{‘TicketFreeTime’} = { ‘1’ => ‘0’, ‘2’ => ‘0’, ‘3’ => ‘0’, ‘4’ => ‘0’, ‘5’ => ‘0’, ‘6’ => ‘0’};
Ticket::Frontend::AgentTicketForward###ArticleFreeText
Description ValueDescription: Article free text options shown in the ticket phone outbound screen of
the agent interface. Possible settings: 0 = Disabled, 1 = Enabled, 2 =Enabled and required.
Group: TicketSubGroup: Frontend::Agent::Ticket::ViewForwardValid: 1Required: 0Config-Setting:
$Self->{‘Ticket::Frontend::AgentTicketForward’}->{‘ArticleFreeText’} = { ‘1’ => ‘0’, ‘2’ => ‘0’, ‘3’ => ‘0’};
Frontend::Agent::Ticket::ViewFreeTextTicket::Frontend::AgentTicketFreeText###Permission
Description ValueDescription: Required permissions to use the ticket free text screen in the agent
interface.Group: TicketSubGroup: Frontend::Agent::Ticket::ViewFreeTextValid: 1Required: 1Config-Setting:
$Self->{‘Ticket::Frontend::AgentTicketFreeText’}->{‘Permission’} = ‘rw’;

Configuration Options Reference
495
Ticket::Frontend::AgentTicketFreeText###RequiredLock
Description ValueDescription: Defines if a ticket lock is required in the ticket free text screen of the
agent interface (if the ticket isn’t locked yet, the ticket gets locked andthe current agent will be set automatically as its owner).
Group: TicketSubGroup: Frontend::Agent::Ticket::ViewFreeTextValid: 1Required: 0Config-Setting:
$Self->{‘Ticket::Frontend::AgentTicketFreeText’}->{‘RequiredLock’} = ‘0’;
Ticket::Frontend::AgentTicketFreeText###TicketType
Description ValueDescription: Sets the ticket type in the ticket free text screen of the agent interface
(Ticket::Type needs to be activated).Group: TicketSubGroup: Frontend::Agent::Ticket::ViewFreeTextValid: 1Required: 0Config-Setting:
$Self->{‘Ticket::Frontend::AgentTicketFreeText’}->{‘TicketType’} = ‘1’;
Ticket::Frontend::AgentTicketFreeText###Service
Description ValueDescription: Sets the service in the ticket free text screen of the agent interface
(Ticket::Service needs to be activated).Group: TicketSubGroup: Frontend::Agent::Ticket::ViewFreeTextValid: 1Required: 0Config-Setting:
$Self->{‘Ticket::Frontend::AgentTicketFreeText’}->{‘Service’} = ‘1’;
Ticket::Frontend::AgentTicketFreeText###Owner
Description ValueDescription: Sets the ticket owner in the ticket free text screen of the agent interface.

Configuration Options Reference
496
Description ValueGroup: TicketSubGroup: Frontend::Agent::Ticket::ViewFreeTextValid: 1Required: 0Config-Setting:
$Self->{‘Ticket::Frontend::AgentTicketFreeText’}->{‘Owner’} = ‘0’;
Ticket::Frontend::AgentTicketFreeText###OwnerMandatoryDescription ValueDescription: Sets if ticket owner must be selected by the agent.Group: TicketSubGroup: Frontend::Agent::Ticket::ViewFreeTextValid: 1Required: 0Config-Setting:
$Self->{‘Ticket::Frontend::AgentTicketFreeText’}->{‘OwnerMandatory’} = ‘0’;
Ticket::Frontend::AgentTicketFreeText###ResponsibleDescription ValueDescription: Sets the responsible agent of the ticket in the ticket free text screen of
the agent interface.Group: TicketSubGroup: Frontend::Agent::Ticket::ViewFreeTextValid: 1Required: 0Config-Setting:
$Self->{‘Ticket::Frontend::AgentTicketFreeText’}->{‘Responsible’} = ‘0’;
Ticket::Frontend::AgentTicketFreeText###StateDescription ValueDescription: If a note is added by an agent, sets the state of a ticket in the ticket free
text screen of the agent interface.Group: TicketSubGroup: Frontend::Agent::Ticket::ViewFreeTextValid: 1Required: 0Config-Setting:

Configuration Options Reference
497
Description Value $Self->{‘Ticket::Frontend::AgentTicketFreeText’}->{‘State’} = ‘0’;
Ticket::Frontend::AgentTicketFreeText###StateTypeDescription ValueDescription: Defines the next state of a ticket after adding a note, in the ticket free
text screen of the agent interface.Group: TicketSubGroup: Frontend::Agent::Ticket::ViewFreeTextValid: 1Required: 1Config-Setting:
$Self->{‘Ticket::Frontend::AgentTicketFreeText’}->{‘StateType’} = [ ‘open’, ‘closed’, ‘pending reminder’, ‘pending auto’];
Ticket::Frontend::AgentTicketFreeText###StateDefaultDescription ValueDescription: Defines the default next state of a ticket after adding a note, in the ticket
free text screen of the agent interface.Group: TicketSubGroup: Frontend::Agent::Ticket::ViewFreeTextValid: 0Required: 0Config-Setting:
$Self->{‘Ticket::Frontend::AgentTicketFreeText’}->{‘StateDefault’} = ‘open’;
Ticket::Frontend::AgentTicketFreeText###NoteDescription ValueDescription: Allows adding notes in the ticket free text screen of the agent interface.Group: TicketSubGroup: Frontend::Agent::Ticket::ViewFreeTextValid: 1Required: 0Config-Setting:
$Self->{‘Ticket::Frontend::AgentTicketFreeText’}->{‘Note’} = ‘0’;

Configuration Options Reference
498
Ticket::Frontend::AgentTicketFreeText###SubjectDescription ValueDescription: Defines the default subject of a note in the ticket free text screen of the
agent interface.Group: TicketSubGroup: Frontend::Agent::Ticket::ViewFreeTextValid: 1Required: 0Config-Setting:
$Self->{‘Ticket::Frontend::AgentTicketFreeText’}->{‘Subject’} = ‘$Text{«Note»}’;
Ticket::Frontend::AgentTicketFreeText###BodyDescription ValueDescription: Defines the default body of a note in the ticket free text screen of the
agent interface.Group: TicketSubGroup: Frontend::Agent::Ticket::ViewFreeTextValid: 1Required: 0Config-Setting:
$Self->{‘Ticket::Frontend::AgentTicketFreeText’}->{‘Body’} = »;
Ticket::Frontend::AgentTicketFreeText###InvolvedAgentDescription ValueDescription: Shows a list of all the involved agents on this ticket, in the ticket free
text screen of the agent interface.Group: TicketSubGroup: Frontend::Agent::Ticket::ViewFreeTextValid: 0Required: 0Config-Setting:
$Self->{‘Ticket::Frontend::AgentTicketFreeText’}->{‘InvolvedAgent’} = ‘0’;
Ticket::Frontend::AgentTicketFreeText###InformAgentDescription ValueDescription: Shows a list of all the possible agents (all agents with note permissions
on the queue/ticket) to determine who should be informed about thisnote, in the ticket free text screen of the agent interface.

Configuration Options Reference
499
Description ValueGroup: TicketSubGroup: Frontend::Agent::Ticket::ViewFreeTextValid: 0Required: 0Config-Setting:
$Self->{‘Ticket::Frontend::AgentTicketFreeText’}->{‘InformAgent’} = ‘0’;
Ticket::Frontend::AgentTicketFreeText###ArticleTypeDefault
Description ValueDescription: Defines the default type of the note in the ticket free text screen of the
agent interface.Group: TicketSubGroup: Frontend::Agent::Ticket::ViewFreeTextValid: 1Required: 0Config-Setting:
$Self->{‘Ticket::Frontend::AgentTicketFreeText’}->{‘ArticleTypeDefault’} = ‘note-internal’;
Ticket::Frontend::AgentTicketFreeText###ArticleTypes
Description ValueDescription: Specifies the different note types that will be used in the system.Group: TicketSubGroup: Frontend::Agent::Ticket::ViewFreeTextValid: 1Required: 0Config-Setting:
$Self->{‘Ticket::Frontend::AgentTicketFreeText’}->{‘ArticleTypes’} = { ‘note-external’ => ‘1’, ‘note-internal’ => ‘1’, ‘note-report’ => ‘0’};
Ticket::Frontend::AgentTicketFreeText###Priority
Description ValueDescription: Shows the ticket priority options in the ticket free text screen of the agent
interface.Group: Ticket

Configuration Options Reference
500
Description ValueSubGroup: Frontend::Agent::Ticket::ViewFreeTextValid: 0Required: 0Config-Setting:
$Self->{‘Ticket::Frontend::AgentTicketFreeText’}->{‘Priority’} = ‘0’;
Ticket::Frontend::AgentTicketFreeText###PriorityDefaultDescription ValueDescription: Defines the default ticket priority in the ticket free text screen of the
agent interface.Group: TicketSubGroup: Frontend::Agent::Ticket::ViewFreeTextValid: 0Required: 0Config-Setting:
$Self->{‘Ticket::Frontend::AgentTicketFreeText’}->{‘PriorityDefault’} = ‘3 normal’;
Ticket::Frontend::AgentTicketFreeText###TitleDescription ValueDescription: Shows the title fields in the ticket free text screen of the agent interface.Group: TicketSubGroup: Frontend::Agent::Ticket::ViewFreeTextValid: 1Required: 0Config-Setting:
$Self->{‘Ticket::Frontend::AgentTicketFreeText’}->{‘Title’} = ‘1’;
Ticket::Frontend::AgentTicketFreeText###TicketFreeTextDescription ValueDescription: Ticket free text options shown in the ticket free text screen of the agent
interface. Possible settings: 0 = Disabled, 1 = Enabled, 2 = Enabledand required.
Group: TicketSubGroup: Frontend::Agent::Ticket::ViewFreeTextValid: 1Required: 0Config-Setting:

Configuration Options Reference
501
Description Value $Self->{‘Ticket::Frontend::AgentTicketFreeText’}->{‘TicketFreeText’} = { ‘1’ => ‘1’, ’10’ => ‘0’, ’11’ => ‘0’, ’12’ => ‘0’, ’13’ => ‘0’, ’14’ => ‘0’, ’15’ => ‘0’, ’16’ => ‘0’, ‘2’ => ‘1’, ‘3’ => ‘1’, ‘4’ => ‘1’, ‘5’ => ‘0’, ‘6’ => ‘0’, ‘7’ => ‘0’, ‘8’ => ‘0’, ‘9’ => ‘0’};
Ticket::Frontend::AgentTicketFreeText###TicketFreeTime
Description ValueDescription: Ticket free time options shown in the ticket free text screen of the agent
interface. Possible settings: 0 = Disabled, 1 = Enabled, 2 = Enabledand required.
Group: TicketSubGroup: Frontend::Agent::Ticket::ViewFreeTextValid: 1Required: 0Config-Setting:
$Self->{‘Ticket::Frontend::AgentTicketFreeText’}->{‘TicketFreeTime’} = { ‘1’ => ‘0’, ‘2’ => ‘0’, ‘3’ => ‘0’, ‘4’ => ‘0’, ‘5’ => ‘0’, ‘6’ => ‘0’};
Ticket::Frontend::AgentTicketFreeText###ArticleFreeText
Description ValueDescription: Article free text options shown in the ticket free text screen of the agent
interface. Possible settings: 0 = Disabled, 1 = Enabled, 2 = Enabledand required.
Group: Ticket

Configuration Options Reference
502
Description ValueSubGroup: Frontend::Agent::Ticket::ViewFreeTextValid: 1Required: 0Config-Setting:
$Self->{‘Ticket::Frontend::AgentTicketFreeText’}->{‘ArticleFreeText’} = { ‘1’ => ‘0’, ‘2’ => ‘0’, ‘3’ => ‘0’};
Ticket::Frontend::AgentTicketFreeText###HistoryTypeDescription ValueDescription: Defines the history type for the ticket free text screen action, which gets
used for ticket history.Group: TicketSubGroup: Frontend::Agent::Ticket::ViewFreeTextValid: 1Required: 0Config-Setting:
$Self->{‘Ticket::Frontend::AgentTicketFreeText’}->{‘HistoryType’} = ‘AddNote’;
Ticket::Frontend::AgentTicketFreeText###HistoryCommentDescription ValueDescription: Defines the history comment for the ticket free text screen action, which
gets used for ticket history.Group: TicketSubGroup: Frontend::Agent::Ticket::ViewFreeTextValid: 1Required: 0Config-Setting:
$Self->{‘Ticket::Frontend::AgentTicketFreeText’}->{‘HistoryComment’} = ‘%%FreeText’;
Frontend::Agent::Ticket::ViewHistoryTicket::Frontend::HistoryOrder
Description ValueDescription: Shows the ticket history (reverse ordered) in the agent interface.Group: Ticket

Configuration Options Reference
503
Description ValueSubGroup: Frontend::Agent::Ticket::ViewHistoryValid: 1Required: 1Config-Setting:
$Self->{‘Ticket::Frontend::HistoryOrder’} = ‘normal’;
Frontend::Agent::Ticket::ViewMailboxTicket::Frontend::AgentTicketLockedView###SortBy::Default
Description ValueDescription: Defines the default ticket attribute for ticket sorting in the locked ticket
view of the agent interface.Group: TicketSubGroup: Frontend::Agent::Ticket::ViewMailboxValid: 1Required: 1Config-Setting:
$Self->{‘Ticket::Frontend::AgentTicketLockedView’}->{‘SortBy::Default’} = ‘Age’;
Ticket::Frontend::AgentTicketLockedView###Order::DefaultDescription ValueDescription: Defines the default ticket order in the ticket locked view of the agent
interface. Up: oldest on top. Down: latest on top.Group: TicketSubGroup: Frontend::Agent::Ticket::ViewMailboxValid: 1Required: 1Config-Setting:
$Self->{‘Ticket::Frontend::AgentTicketLockedView’}->{‘Order::Default’} = ‘Up’;
Ticket::Frontend::AgentTicketResponsibleView###SortBy::DefaultDescription ValueDescription: Defines the default ticket attribute for ticket sorting in the responsible
view of the agent interface.Group: TicketSubGroup: Frontend::Agent::Ticket::ViewMailbox

Configuration Options Reference
504
Description ValueValid: 1Required: 1Config-Setting:
$Self->{‘Ticket::Frontend::AgentTicketResponsibleView’}->{‘SortBy::Default’} = ‘Age’;
Ticket::Frontend::AgentTicketResponsibleView###Order::Default
Description ValueDescription: Defines the default ticket order in the responsible view of the agent
interface. Up: oldest on top. Down: latest on top.Group: TicketSubGroup: Frontend::Agent::Ticket::ViewMailboxValid: 1Required: 1Config-Setting:
$Self->{‘Ticket::Frontend::AgentTicketResponsibleView’}->{‘Order::Default’} = ‘Up’;
Ticket::Frontend::AgentTicketWatchView###SortBy::Default
Description ValueDescription: Defines the default ticket attribute for ticket sorting in the watch view of
the agent interface.Group: TicketSubGroup: Frontend::Agent::Ticket::ViewMailboxValid: 1Required: 1Config-Setting:
$Self->{‘Ticket::Frontend::AgentTicketWatchView’}->{‘SortBy::Default’} = ‘Age’;
Ticket::Frontend::AgentTicketWatchView###Order::Default
Description ValueDescription: Defines the default ticket order in the watch view of the agent interface.
Up: oldest on top. Down: latest on top.Group: TicketSubGroup: Frontend::Agent::Ticket::ViewMailboxValid: 1Required: 1

Configuration Options Reference
505
Description ValueConfig-Setting:
$Self->{‘Ticket::Frontend::AgentTicketWatchView’}->{‘Order::Default’} = ‘Up’;
Frontend::Agent::Ticket::ViewMergeTicket::Frontend::AgentTicketMerge###Permission
Description ValueDescription: Required permissions to use the ticket merge screen of a zoomed ticket
in the agent interface.Group: TicketSubGroup: Frontend::Agent::Ticket::ViewMergeValid: 1Required: 1Config-Setting:
$Self->{‘Ticket::Frontend::AgentTicketMerge’}->{‘Permission’} = ‘rw’;
Ticket::Frontend::AgentTicketMerge###RequiredLockDescription ValueDescription: Defines if a ticket lock is required in the ticket merge screen of a zoomed
ticket in the agent interface (if the ticket isn’t locked yet, the ticket getslocked and the current agent will be set automatically as its owner).
Group: TicketSubGroup: Frontend::Agent::Ticket::ViewMergeValid: 1Required: 0Config-Setting:
$Self->{‘Ticket::Frontend::AgentTicketMerge’}->{‘RequiredLock’} = ‘1’;
Ticket::Frontend::MergeTextDescription ValueDescription: When tickets are merged, the customer can be informed per email by
setting the check box «Inform Sender». In this text area, you can definea pre-formatted text which can later be modified by the agents.
Group: TicketSubGroup: Frontend::Agent::Ticket::ViewMergeValid: 1Required: 1Config-Setting:

Configuration Options Reference
506
Description Value $Self->{‘Ticket::Frontend::MergeText’} = ‘Your email with ticket number «<OTRS_TICKET>» is merged to «<OTRS_MERGE_TO_TICKET>».’;
Ticket::Frontend::AutomaticMergeTextDescription ValueDescription: When tickets are merged, a note will be added automatically to the ticket
which is no longer active. In this text area you can define this text (Thistext cannot be changed by the agent).
Group: TicketSubGroup: Frontend::Agent::Ticket::ViewMergeValid: 1Required: 1Config-Setting:
$Self->{‘Ticket::Frontend::AutomaticMergeText’} = ‘Merged Ticket <OTRS_TICKET> to <OTRS_MERGE_TO_TICKET>.’;
Frontend::Agent::Ticket::ViewMoveTicket::Frontend::MoveType
Description ValueDescription: Determines if the list of possible queues to move to ticket into should be
displayed in a dropdown list or in a new window in the agent interface.If «New Window» is set you can add a move note to the ticket.
Group: TicketSubGroup: Frontend::Agent::Ticket::ViewMoveValid: 1Required: 1Config-Setting:
$Self->{‘Ticket::Frontend::MoveType’} = ‘form’;
Ticket::Frontend::AgentTicketMove###StateDescription ValueDescription: Allows to set a new ticket state in the move ticket screen of the agent
interface.Group: TicketSubGroup: Frontend::Agent::Ticket::ViewMoveValid: 1Required: 0Config-Setting:

Configuration Options Reference
507
Description Value $Self->{‘Ticket::Frontend::AgentTicketMove’}->{‘State’} = ‘1’;
Ticket::DefaultNextMoveStateTypeDescription ValueDescription: Defines the next state of a ticket after being moved to another queue,
in the move ticket screen of the agent interface.Group: TicketSubGroup: Frontend::Agent::Ticket::ViewMoveValid: 1Required: 1Config-Setting:
$Self->{‘Ticket::DefaultNextMoveStateType’} = [ ‘open’, ‘closed’];
Ticket::Frontend::AgentTicketMove###PriorityDescription ValueDescription: Shows the ticket priority options in the move ticket screen of the agent
interface.Group: TicketSubGroup: Frontend::Agent::Ticket::ViewMoveValid: 0Required: 0Config-Setting:
$Self->{‘Ticket::Frontend::AgentTicketMove’}->{‘Priority’} = ‘0’;
Ticket::Frontend::AgentTicketMove###TicketFreeTextDescription ValueDescription: Ticket free text options shown in the move ticket screen of the agent
interface. Possible settings: 0 = Disabled, 1 = Enabled, 2 = Enabledand required.
Group: TicketSubGroup: Frontend::Agent::Ticket::ViewMoveValid: 1Required: 0Config-Setting:
$Self->{‘Ticket::Frontend::AgentTicketMove’}->{‘TicketFreeText’} = { ‘1’ => ‘0’,

Configuration Options Reference
508
Description Value ’10’ => ‘0’, ’11’ => ‘0’, ’12’ => ‘0’, ’13’ => ‘0’, ’14’ => ‘0’, ’15’ => ‘0’, ’16’ => ‘0’, ‘2’ => ‘0’, ‘3’ => ‘0’, ‘4’ => ‘0’, ‘5’ => ‘0’, ‘6’ => ‘0’, ‘7’ => ‘0’, ‘8’ => ‘0’, ‘9’ => ‘0’};
Ticket::Frontend::AgentTicketMove###TicketFreeTimeDescription ValueDescription: Ticket free time options shown in the move ticket screen of the agent
interface. Possible settings: 0 = Disabled, 1 = Enabled, 2 = Enabledand required.
Group: TicketSubGroup: Frontend::Agent::Ticket::ViewMoveValid: 1Required: 0Config-Setting:
$Self->{‘Ticket::Frontend::AgentTicketMove’}->{‘TicketFreeTime’} = { ‘1’ => ‘0’, ‘2’ => ‘0’, ‘3’ => ‘0’, ‘4’ => ‘0’, ‘5’ => ‘0’, ‘6’ => ‘0’};
Ticket::Frontend::AgentTicketMove###SubjectDescription ValueDescription: Sets the default subject for notes added in the ticket move screen of
the agent interface.Group: TicketSubGroup: Frontend::Agent::Ticket::ViewMoveValid: 1Required: 0Config-Setting:

Configuration Options Reference
509
Description Value $Self->{‘Ticket::Frontend::AgentTicketMove’}->{‘Subject’} = ‘$Text{«Change Queue»}’;
Ticket::Frontend::AgentTicketMove###BodyDescription ValueDescription: Sets the default body text for notes added in the ticket move screen of
the agent interface.Group: TicketSubGroup: Frontend::Agent::Ticket::ViewMoveValid: 1Required: 0Config-Setting:
$Self->{‘Ticket::Frontend::AgentTicketMove’}->{‘Body’} = »;
Frontend::Agent::Ticket::ViewNoteTicket::Frontend::AgentTicketNote###Permission
Description ValueDescription: Required permissions to use the ticket note screen in the agent
interface.Group: TicketSubGroup: Frontend::Agent::Ticket::ViewNoteValid: 1Required: 1Config-Setting:
$Self->{‘Ticket::Frontend::AgentTicketNote’}->{‘Permission’} = ‘note’;
Ticket::Frontend::AgentTicketNote###RequiredLockDescription ValueDescription: Defines if a ticket lock is required in the ticket note screen of the agent
interface (if the ticket isn’t locked yet, the ticket gets locked and thecurrent agent will be set automatically as its owner).
Group: TicketSubGroup: Frontend::Agent::Ticket::ViewNoteValid: 1Required: 0Config-Setting:
$Self->{‘Ticket::Frontend::AgentTicketNote’}->{‘RequiredLock’} = ‘0’;

Configuration Options Reference
510
Ticket::Frontend::AgentTicketNote###TicketTypeDescription ValueDescription: Sets the ticket type in the ticket note screen of the agent interface
(Ticket::Type needs to be activated).Group: TicketSubGroup: Frontend::Agent::Ticket::ViewNoteValid: 1Required: 0Config-Setting:
$Self->{‘Ticket::Frontend::AgentTicketNote’}->{‘TicketType’} = ‘0’;
Ticket::Frontend::AgentTicketNote###ServiceDescription ValueDescription: Sets the service in the ticket note screen of the agent interface
(Ticket::Service needs to be activated).Group: TicketSubGroup: Frontend::Agent::Ticket::ViewNoteValid: 1Required: 0Config-Setting:
$Self->{‘Ticket::Frontend::AgentTicketNote’}->{‘Service’} = ‘0’;
Ticket::Frontend::AgentTicketNote###OwnerDescription ValueDescription: Sets the ticket owner in the ticket note screen of the agent interface.Group: TicketSubGroup: Frontend::Agent::Ticket::ViewNoteValid: 1Required: 0Config-Setting:
$Self->{‘Ticket::Frontend::AgentTicketNote’}->{‘Owner’} = ‘0’;
Ticket::Frontend::AgentTicketNote###OwnerMandatoryDescription ValueDescription: Sets if ticket owner must be selected by the agent.Group: TicketSubGroup: Frontend::Agent::Ticket::ViewNote

Configuration Options Reference
511
Description ValueValid: 1Required: 0Config-Setting:
$Self->{‘Ticket::Frontend::AgentTicketNote’}->{‘OwnerMandatory’} = ‘0’;
Ticket::Frontend::AgentTicketNote###ResponsibleDescription ValueDescription: Sets the responsible agent of the ticket in the ticket note screen of the
agent interface.Group: TicketSubGroup: Frontend::Agent::Ticket::ViewNoteValid: 1Required: 0Config-Setting:
$Self->{‘Ticket::Frontend::AgentTicketNote’}->{‘Responsible’} = ‘0’;
Ticket::Frontend::AgentTicketNote###StateDescription ValueDescription: If a note is added by an agent, sets the state of a ticket in the ticket note
screen of the agent interface.Group: TicketSubGroup: Frontend::Agent::Ticket::ViewNoteValid: 1Required: 0Config-Setting:
$Self->{‘Ticket::Frontend::AgentTicketNote’}->{‘State’} = ‘0’;
Ticket::Frontend::AgentTicketNote###StateTypeDescription ValueDescription: Defines the next state of a ticket after adding a note, in the ticket note
screen of the agent interface.Group: TicketSubGroup: Frontend::Agent::Ticket::ViewNoteValid: 1Required: 1Config-Setting:
$Self->{‘Ticket::Frontend::AgentTicketNote’}->{‘StateType’} = [

Configuration Options Reference
512
Description Value ‘open’, ‘closed’, ‘pending reminder’, ‘pending auto’];
Ticket::Frontend::AgentTicketNote###StateDefault
Description ValueDescription: Defines the default next state of a ticket after adding a note, in the ticket
note screen of the agent interface.Group: TicketSubGroup: Frontend::Agent::Ticket::ViewNoteValid: 0Required: 0Config-Setting:
$Self->{‘Ticket::Frontend::AgentTicketNote’}->{‘StateDefault’} = ‘open’;
Ticket::Frontend::AgentTicketNote###Note
Description ValueDescription: Allows adding notes in the ticket note screen of the agent interface.Group: TicketSubGroup: Frontend::Agent::Ticket::ViewNoteValid: 1Required: 0Config-Setting:
$Self->{‘Ticket::Frontend::AgentTicketNote’}->{‘Note’} = ‘1’;
Ticket::Frontend::AgentTicketNote###Subject
Description ValueDescription: Sets the default subject for notes added in the ticket note screen of the
agent interface.Group: TicketSubGroup: Frontend::Agent::Ticket::ViewNoteValid: 1Required: 0Config-Setting:
$Self->{‘Ticket::Frontend::AgentTicketNote’}->{‘Subject’} = ‘$Text{«Note»}’;

Configuration Options Reference
513
Ticket::Frontend::AgentTicketNote###BodyDescription ValueDescription: Sets the default body text for notes added in the ticket note screen of
the agent interface.Group: TicketSubGroup: Frontend::Agent::Ticket::ViewNoteValid: 1Required: 0Config-Setting:
$Self->{‘Ticket::Frontend::AgentTicketNote’}->{‘Body’} = »;
Ticket::Frontend::AgentTicketNote###InvolvedAgentDescription ValueDescription: Shows a list of all the involved agents on this ticket, in the ticket note
screen of the agent interface.Group: TicketSubGroup: Frontend::Agent::Ticket::ViewNoteValid: 0Required: 0Config-Setting:
$Self->{‘Ticket::Frontend::AgentTicketNote’}->{‘InvolvedAgent’} = ‘0’;
Ticket::Frontend::AgentTicketNote###InformAgentDescription ValueDescription: Shows a list of all the possible agents (all agents with note permissions
on the queue/ticket) to determine who should be informed about thisnote, in the ticket note screen of the agent interface.
Group: TicketSubGroup: Frontend::Agent::Ticket::ViewNoteValid: 0Required: 0Config-Setting:
$Self->{‘Ticket::Frontend::AgentTicketNote’}->{‘InformAgent’} = ‘0’;
Ticket::Frontend::AgentTicketNote###ArticleTypeDefaultDescription ValueDescription: Defines the default type of the note in the ticket note screen of the agent
interface.

Configuration Options Reference
514
Description ValueGroup: TicketSubGroup: Frontend::Agent::Ticket::ViewNoteValid: 1Required: 0Config-Setting:
$Self->{‘Ticket::Frontend::AgentTicketNote’}->{‘ArticleTypeDefault’} = ‘note-internal’;
Ticket::Frontend::AgentTicketNote###ArticleTypesDescription ValueDescription: Specifies the different note types that will be used in the system.Group: TicketSubGroup: Frontend::Agent::Ticket::ViewNoteValid: 1Required: 0Config-Setting:
$Self->{‘Ticket::Frontend::AgentTicketNote’}->{‘ArticleTypes’} = { ‘note-external’ => ‘1’, ‘note-internal’ => ‘1’, ‘note-report’ => ‘0’};
Ticket::Frontend::AgentTicketNote###PriorityDescription ValueDescription: Shows the ticket priority options in the ticket note screen of the agent
interface.Group: TicketSubGroup: Frontend::Agent::Ticket::ViewNoteValid: 0Required: 0Config-Setting:
$Self->{‘Ticket::Frontend::AgentTicketNote’}->{‘Priority’} = ‘0’;
Ticket::Frontend::AgentTicketNote###PriorityDefaultDescription ValueDescription: Defines the default ticket priority in the ticket note screen of the agent
interface.Group: TicketSubGroup: Frontend::Agent::Ticket::ViewNote

Configuration Options Reference
515
Description ValueValid: 0Required: 0Config-Setting:
$Self->{‘Ticket::Frontend::AgentTicketNote’}->{‘PriorityDefault’} = ‘3 normal’;
Ticket::Frontend::AgentTicketNote###Title
Description ValueDescription: Shows the title fields in the ticket note screen of the agent interface.Group: TicketSubGroup: Frontend::Agent::Ticket::ViewNoteValid: 1Required: 0Config-Setting:
$Self->{‘Ticket::Frontend::AgentTicketNote’}->{‘Title’} = ‘0’;
Ticket::Frontend::AgentTicketNote###TicketFreeText
Description ValueDescription: Ticket free text options shown in the ticket note screen of the agent
interface. Possible settings: 0 = Disabled, 1 = Enabled, 2 = Enabledand required.
Group: TicketSubGroup: Frontend::Agent::Ticket::ViewNoteValid: 1Required: 0Config-Setting:
$Self->{‘Ticket::Frontend::AgentTicketNote’}->{‘TicketFreeText’} = { ‘1’ => ‘0’, ’10’ => ‘0’, ’11’ => ‘0’, ’12’ => ‘0’, ’13’ => ‘0’, ’14’ => ‘0’, ’15’ => ‘0’, ’16’ => ‘0’, ‘2’ => ‘0’, ‘3’ => ‘0’, ‘4’ => ‘0’, ‘5’ => ‘0’, ‘6’ => ‘0’, ‘7’ => ‘0’, ‘8’ => ‘0’,

Configuration Options Reference
516
Description Value ‘9’ => ‘0’};
Ticket::Frontend::AgentTicketNote###TicketFreeTimeDescription ValueDescription: Ticket free time options shown in the ticket note screen of the agent
interface. Possible settings: 0 = Disabled, 1 = Enabled, 2 = Enabledand required.
Group: TicketSubGroup: Frontend::Agent::Ticket::ViewNoteValid: 1Required: 0Config-Setting:
$Self->{‘Ticket::Frontend::AgentTicketNote’}->{‘TicketFreeTime’} = { ‘1’ => ‘0’, ‘2’ => ‘0’, ‘3’ => ‘0’, ‘4’ => ‘0’, ‘5’ => ‘0’, ‘6’ => ‘0’};
Ticket::Frontend::AgentTicketNote###ArticleFreeTextDescription ValueDescription: Article free text options shown in the ticket note screen of the agent
interface. Possible settings: 0 = Disabled, 1 = Enabled, 2 = Enabledand required.
Group: TicketSubGroup: Frontend::Agent::Ticket::ViewNoteValid: 1Required: 0Config-Setting:
$Self->{‘Ticket::Frontend::AgentTicketNote’}->{‘ArticleFreeText’} = { ‘1’ => ‘0’, ‘2’ => ‘0’, ‘3’ => ‘0’};
Ticket::Frontend::AgentTicketNote###HistoryTypeDescription ValueDescription: Defines the history type for the ticket note screen action, which gets
used for ticket history in the agent interface.

Configuration Options Reference
517
Description ValueGroup: TicketSubGroup: Frontend::Agent::Ticket::ViewNoteValid: 1Required: 0Config-Setting:
$Self->{‘Ticket::Frontend::AgentTicketNote’}->{‘HistoryType’} = ‘AddNote’;
Ticket::Frontend::AgentTicketNote###HistoryCommentDescription ValueDescription: Defines the history comment for the ticket note screen action, which
gets used for ticket history in the agent interface.Group: TicketSubGroup: Frontend::Agent::Ticket::ViewNoteValid: 1Required: 0Config-Setting:
$Self->{‘Ticket::Frontend::AgentTicketNote’}->{‘HistoryComment’} = ‘%%Note’;
Frontend::Agent::Ticket::ViewOwnerTicket::Frontend::AgentTicketOwner###Permission
Description ValueDescription: Required permissions to use the ticket owner screen of a zoomed ticket
in the agent interface.Group: TicketSubGroup: Frontend::Agent::Ticket::ViewOwnerValid: 1Required: 1Config-Setting:
$Self->{‘Ticket::Frontend::AgentTicketOwner’}->{‘Permission’} = ‘owner’;
Ticket::Frontend::AgentTicketOwner###RequiredLockDescription ValueDescription: Defines if a ticket lock is required in the ticket owner screen of a zoomed
ticket in the agent interface (if the ticket isn’t locked yet, the ticket getslocked and the current agent will be set automatically as its owner).
Group: TicketSubGroup: Frontend::Agent::Ticket::ViewOwner

Configuration Options Reference
518
Description ValueValid: 1Required: 0Config-Setting:
$Self->{‘Ticket::Frontend::AgentTicketOwner’}->{‘RequiredLock’} = ‘0’;
Ticket::Frontend::AgentTicketOwner###TicketTypeDescription ValueDescription: Sets the ticket type in the ticket owner screen of a zoomed ticket in the
agent interface (Ticket::Type needs to be activated).Group: TicketSubGroup: Frontend::Agent::Ticket::ViewOwnerValid: 1Required: 0Config-Setting:
$Self->{‘Ticket::Frontend::AgentTicketOwner’}->{‘TicketType’} = ‘0’;
Ticket::Frontend::AgentTicketOwner###ServiceDescription ValueDescription: Sets the service in the ticket owner screen of a zoomed ticket in the
agent interface (Ticket::Service needs to be activated).Group: TicketSubGroup: Frontend::Agent::Ticket::ViewOwnerValid: 1Required: 0Config-Setting:
$Self->{‘Ticket::Frontend::AgentTicketOwner’}->{‘Service’} = ‘0’;
Ticket::Frontend::AgentTicketOwner###OwnerDescription ValueDescription: Sets the ticket owner in the ticket owner screen of a zoomed ticket in
the agent interface.Group: TicketSubGroup: Frontend::Agent::Ticket::ViewOwnerValid: 1Required: 0Config-Setting:
$Self->{‘Ticket::Frontend::AgentTicketOwner’}->{‘Owner’} = ‘1’;

Configuration Options Reference
519
Ticket::Frontend::AgentTicketOwner###OwnerMandatory
Description ValueDescription: Sets if ticket owner must be selected by the agent.Group: TicketSubGroup: Frontend::Agent::Ticket::ViewOwnerValid: 1Required: 0Config-Setting:
$Self->{‘Ticket::Frontend::AgentTicketOwner’}->{‘OwnerMandatory’} = ‘1’;
Ticket::Frontend::AgentTicketOwner###Responsible
Description ValueDescription: Sets the responsible agent of the ticket in the ticket owner screen of a
zoomed ticket in the agent interface.Group: TicketSubGroup: Frontend::Agent::Ticket::ViewOwnerValid: 1Required: 0Config-Setting:
$Self->{‘Ticket::Frontend::AgentTicketOwner’}->{‘Responsible’} = ‘0’;
Ticket::Frontend::AgentTicketOwner###State
Description ValueDescription: If a note is added by an agent, sets the state of the ticket in the ticket
owner screen of a zoomed ticket in the agent interface.Group: TicketSubGroup: Frontend::Agent::Ticket::ViewOwnerValid: 1Required: 0Config-Setting:
$Self->{‘Ticket::Frontend::AgentTicketOwner’}->{‘State’} = ‘0’;
Ticket::Frontend::AgentTicketOwner###StateType
Description ValueDescription: Defines the next state of a ticket after adding a note, in the ticket owner
screen of a zoomed ticket in the agent interface.Group: Ticket

Configuration Options Reference
520
Description ValueSubGroup: Frontend::Agent::Ticket::ViewOwnerValid: 1Required: 1Config-Setting:
$Self->{‘Ticket::Frontend::AgentTicketOwner’}->{‘StateType’} = [ ‘open’, ‘pending reminder’, ‘pending auto’];
Ticket::Frontend::AgentTicketOwner###StateDefaultDescription ValueDescription: Defines the default next state of a ticket after adding a note, in the ticket
owner screen of a zoomed ticket in the agent interface.Group: TicketSubGroup: Frontend::Agent::Ticket::ViewOwnerValid: 1Required: 0Config-Setting:
$Self->{‘Ticket::Frontend::AgentTicketOwner’}->{‘StateDefault’} = ‘open’;
Ticket::Frontend::AgentTicketOwner###NoteDescription ValueDescription: Allows adding notes in the ticket owner screen of a zoomed ticket in
the agent interface.Group: TicketSubGroup: Frontend::Agent::Ticket::ViewOwnerValid: 1Required: 0Config-Setting:
$Self->{‘Ticket::Frontend::AgentTicketOwner’}->{‘Note’} = ‘1’;
Ticket::Frontend::AgentTicketOwner###SubjectDescription ValueDescription: Sets the default subject for notes added in the ticket owner screen of a
zoomed ticket in the agent interface.Group: TicketSubGroup: Frontend::Agent::Ticket::ViewOwner

Configuration Options Reference
521
Description ValueValid: 1Required: 0Config-Setting:
$Self->{‘Ticket::Frontend::AgentTicketOwner’}->{‘Subject’} = ‘$Text{«Owner Update»}!’;
Ticket::Frontend::AgentTicketOwner###Body
Description ValueDescription: Sets the default body text for notes added in the ticket owner screen of
a zoomed ticket in the agent interface.Group: TicketSubGroup: Frontend::Agent::Ticket::ViewOwnerValid: 1Required: 0Config-Setting:
$Self->{‘Ticket::Frontend::AgentTicketOwner’}->{‘Body’} = »;
Ticket::Frontend::AgentTicketOwner###InvolvedAgent
Description ValueDescription: Shows a list of all the involved agents on this ticket, in the ticket owner
screen of a zoomed ticket in the agent interface.Group: TicketSubGroup: Frontend::Agent::Ticket::ViewOwnerValid: 0Required: 0Config-Setting:
$Self->{‘Ticket::Frontend::AgentTicketOwner’}->{‘InvolvedAgent’} = ‘0’;
Ticket::Frontend::AgentTicketOwner###InformAgent
Description ValueDescription: Shows a list of all the possible agents (all agents with note permissions
on the queue/ticket) to determine who should be informed about thisnote, in the ticket owner screen of a zoomed ticket in the agent interface.
Group: TicketSubGroup: Frontend::Agent::Ticket::ViewOwnerValid: 0Required: 0Config-Setting:

Configuration Options Reference
522
Description Value $Self->{‘Ticket::Frontend::AgentTicketOwner’}->{‘InformAgent’} = ‘0’;
Ticket::Frontend::AgentTicketOwner###ArticleTypeDefault
Description ValueDescription: Defines the default type of the note in the ticket owner screen of a
zoomed ticket in the agent interface.Group: TicketSubGroup: Frontend::Agent::Ticket::ViewOwnerValid: 1Required: 0Config-Setting:
$Self->{‘Ticket::Frontend::AgentTicketOwner’}->{‘ArticleTypeDefault’} = ‘note-internal’;
Ticket::Frontend::AgentTicketOwner###ArticleTypes
Description ValueDescription: Specifies the different note types that will be used in the system.Group: TicketSubGroup: Frontend::Agent::Ticket::ViewOwnerValid: 1Required: 0Config-Setting:
$Self->{‘Ticket::Frontend::AgentTicketOwner’}->{‘ArticleTypes’} = { ‘note-external’ => ‘0’, ‘note-internal’ => ‘1’, ‘note-report’ => ‘0’};
Ticket::Frontend::AgentTicketOwner###Priority
Description ValueDescription: Shows the ticket priority options in the ticket owner screen of a zoomed
ticket in the agent interface.Group: TicketSubGroup: Frontend::Agent::Ticket::ViewOwnerValid: 0Required: 0Config-Setting:
$Self->{‘Ticket::Frontend::AgentTicketOwner’}->{‘Priority’} = ‘0’;

Configuration Options Reference
523
Ticket::Frontend::AgentTicketOwner###PriorityDefaultDescription ValueDescription: Defines the default ticket priority in the ticket owner screen of a zoomed
ticket in the agent interface.Group: TicketSubGroup: Frontend::Agent::Ticket::ViewOwnerValid: 0Required: 0Config-Setting:
$Self->{‘Ticket::Frontend::AgentTicketOwner’}->{‘PriorityDefault’} = ‘3 normal’;
Ticket::Frontend::AgentTicketOwner###TitleDescription ValueDescription: Shows the title fields in the ticket owner screen of a zoomed ticket in
the agent interface.Group: TicketSubGroup: Frontend::Agent::Ticket::ViewOwnerValid: 1Required: 0Config-Setting:
$Self->{‘Ticket::Frontend::AgentTicketOwner’}->{‘Title’} = ‘0’;
Ticket::Frontend::AgentTicketOwner###TicketFreeTextDescription ValueDescription: Ticket free text options shown in the ticket owner screen of a zoomed
ticket in the agent interface. Possible settings: 0 = Disabled, 1 =Enabled, 2 = Enabled and required.
Group: TicketSubGroup: Frontend::Agent::Ticket::ViewOwnerValid: 1Required: 0Config-Setting:
$Self->{‘Ticket::Frontend::AgentTicketOwner’}->{‘TicketFreeText’} = { ‘1’ => ‘0’, ’10’ => ‘0’, ’11’ => ‘0’, ’12’ => ‘0’, ’13’ => ‘0’, ’14’ => ‘0’, ’15’ => ‘0’,

Configuration Options Reference
524
Description Value ’16’ => ‘0’, ‘2’ => ‘0’, ‘3’ => ‘0’, ‘4’ => ‘0’, ‘5’ => ‘0’, ‘6’ => ‘0’, ‘7’ => ‘0’, ‘8’ => ‘0’, ‘9’ => ‘0’};
Ticket::Frontend::AgentTicketOwner###TicketFreeTime
Description ValueDescription: Ticket free time options shown in the ticket owner screen of a zoomed
ticket in the agent interface. Possible settings: 0 = Disabled, 1 =Enabled, 2 = Enabled and required.
Group: TicketSubGroup: Frontend::Agent::Ticket::ViewOwnerValid: 1Required: 0Config-Setting:
$Self->{‘Ticket::Frontend::AgentTicketOwner’}->{‘TicketFreeTime’} = { ‘1’ => ‘0’, ‘2’ => ‘0’, ‘3’ => ‘0’, ‘4’ => ‘0’, ‘5’ => ‘0’, ‘6’ => ‘0’};
Ticket::Frontend::AgentTicketOwner###ArticleFreeText
Description ValueDescription: Article free text options shown in the ticket owner screen of a zoomed
ticket in the agent interface. Possible settings: 0 = Disabled, 1 =Enabled, 2 = Enabled and required.
Group: TicketSubGroup: Frontend::Agent::Ticket::ViewOwnerValid: 1Required: 0Config-Setting:
$Self->{‘Ticket::Frontend::AgentTicketOwner’}->{‘ArticleFreeText’} = { ‘1’ => ‘0’, ‘2’ => ‘0’,

Configuration Options Reference
525
Description Value ‘3’ => ‘0’};
Ticket::Frontend::AgentTicketOwner###HistoryType
Description ValueDescription: Defines the history type for the ticket owner screen action, which gets
used for ticket history in the agent interface.Group: TicketSubGroup: Frontend::Agent::Ticket::ViewOwnerValid: 1Required: 0Config-Setting:
$Self->{‘Ticket::Frontend::AgentTicketOwner’}->{‘HistoryType’} = ‘AddNote’;
Ticket::Frontend::AgentTicketOwner###HistoryComment
Description ValueDescription: Defines the history comment for the ticket owner screen action, which
gets used for ticket history in the agent interface.Group: TicketSubGroup: Frontend::Agent::Ticket::ViewOwnerValid: 1Required: 0Config-Setting:
$Self->{‘Ticket::Frontend::AgentTicketOwner’}->{‘HistoryComment’} = ‘%%Owner’;
Frontend::Agent::Ticket::ViewPendingTicket::Frontend::AgentTicketPending###Permission
Description ValueDescription: Required permissions to use the ticket pending screen of a zoomed
ticket in the agent interface.Group: TicketSubGroup: Frontend::Agent::Ticket::ViewPendingValid: 1Required: 1Config-Setting:
$Self->{‘Ticket::Frontend::AgentTicketPending’}->{‘Permission’} = ‘pending’;

Configuration Options Reference
526
Ticket::Frontend::AgentTicketPending###RequiredLockDescription ValueDescription: Defines if a ticket lock is required in the ticket pending screen of a
zoomed ticket in the agent interface (if the ticket isn’t locked yet, theticket gets locked and the current agent will be set automatically as itsowner).
Group: TicketSubGroup: Frontend::Agent::Ticket::ViewPendingValid: 1Required: 0Config-Setting:
$Self->{‘Ticket::Frontend::AgentTicketPending’}->{‘RequiredLock’} = ‘1’;
Ticket::Frontend::AgentTicketPending###TicketTypeDescription ValueDescription: Sets the ticket type in the ticket pending screen of a zoomed ticket in
the agent interface (Ticket::Type needs to be activated).Group: TicketSubGroup: Frontend::Agent::Ticket::ViewPendingValid: 1Required: 0Config-Setting:
$Self->{‘Ticket::Frontend::AgentTicketPending’}->{‘TicketType’} = ‘0’;
Ticket::Frontend::AgentTicketPending###ServiceDescription ValueDescription: Sets the service in the ticket pending screen of a zoomed ticket in the
agent interface (Ticket::Service needs to be activated).Group: TicketSubGroup: Frontend::Agent::Ticket::ViewPendingValid: 1Required: 0Config-Setting:
$Self->{‘Ticket::Frontend::AgentTicketPending’}->{‘Service’} = ‘0’;
Ticket::Frontend::AgentTicketPending###OwnerDescription ValueDescription: Sets the ticket owner in the ticket pending screen of a zoomed ticket
in the agent interface.

Configuration Options Reference
527
Description ValueGroup: TicketSubGroup: Frontend::Agent::Ticket::ViewPendingValid: 1Required: 0Config-Setting:
$Self->{‘Ticket::Frontend::AgentTicketPending’}->{‘Owner’} = ‘0’;
Ticket::Frontend::AgentTicketPending###OwnerMandatoryDescription ValueDescription: Sets if ticket owner must be selected by the agent.Group: TicketSubGroup: Frontend::Agent::Ticket::ViewPendingValid: 1Required: 0Config-Setting:
$Self->{‘Ticket::Frontend::AgentTicketPending’}->{‘OwnerMandatory’} = ‘0’;
Ticket::Frontend::AgentTicketPending###ResponsibleDescription ValueDescription: Sets the responsible agent of the ticket in the ticket pending screen of
a zoomed ticket in the agent interface.Group: TicketSubGroup: Frontend::Agent::Ticket::ViewPendingValid: 1Required: 0Config-Setting:
$Self->{‘Ticket::Frontend::AgentTicketPending’}->{‘Responsible’} = ‘0’;
Ticket::Frontend::AgentTicketPending###StateDescription ValueDescription: If a note is added by an agent, sets the state of the ticket in the ticket
pending screen of a zoomed ticket in the agent interface.Group: TicketSubGroup: Frontend::Agent::Ticket::ViewPendingValid: 1Required: 0Config-Setting:

Configuration Options Reference
528
Description Value $Self->{‘Ticket::Frontend::AgentTicketPending’}->{‘State’} = ‘1’;
Ticket::Frontend::AgentTicketPending###StateType
Description ValueDescription: Defines the next state of a ticket after adding a note, in the ticket pending
screen of a zoomed ticket in the agent interface.Group: TicketSubGroup: Frontend::Agent::Ticket::ViewPendingValid: 1Required: 1Config-Setting:
$Self->{‘Ticket::Frontend::AgentTicketPending’}->{‘StateType’} = [ ‘pending reminder’, ‘pending auto’];
Ticket::Frontend::AgentTicketPending###StateDefault
Description ValueDescription: Defines the default next state of a ticket after adding a note, in the ticket
pending screen of a zoomed ticket in the agent interface.Group: TicketSubGroup: Frontend::Agent::Ticket::ViewPendingValid: 1Required: 0Config-Setting:
$Self->{‘Ticket::Frontend::AgentTicketPending’}->{‘StateDefault’} = ‘pending reminder’;
Ticket::Frontend::AgentTicketPending###Note
Description ValueDescription: Allows adding notes in the ticket pending screen of a zoomed ticket in
the agent interface.Group: TicketSubGroup: Frontend::Agent::Ticket::ViewPendingValid: 1Required: 0Config-Setting:
$Self->{‘Ticket::Frontend::AgentTicketPending’}->{‘Note’} = ‘1’;

Configuration Options Reference
529
Ticket::Frontend::AgentTicketPending###SubjectDescription ValueDescription: Sets the default subject for notes added in the ticket pending screen of
a zoomed ticket in the agent interface.Group: TicketSubGroup: Frontend::Agent::Ticket::ViewPendingValid: 1Required: 0Config-Setting:
$Self->{‘Ticket::Frontend::AgentTicketPending’}->{‘Subject’} = ‘$Text{«Pending»}!’;
Ticket::Frontend::AgentTicketPending###BodyDescription ValueDescription: Sets the default body text for notes added in the ticket pending screen
of a zoomed ticket in the agent interface.Group: TicketSubGroup: Frontend::Agent::Ticket::ViewPendingValid: 1Required: 0Config-Setting:
$Self->{‘Ticket::Frontend::AgentTicketPending’}->{‘Body’} = »;
Ticket::Frontend::AgentTicketPending###InvolvedAgentDescription ValueDescription: Shows a list of all the involved agents on this ticket, in the ticket pending
screen of a zoomed ticket in the agent interface.Group: TicketSubGroup: Frontend::Agent::Ticket::ViewPendingValid: 0Required: 0Config-Setting:
$Self->{‘Ticket::Frontend::AgentTicketPending’}->{‘InvolvedAgent’} = ‘0’;
Ticket::Frontend::AgentTicketPending###InformAgentDescription ValueDescription: Shows a list of all the possible agents (all agents with note permissions
on the queue/ticket) to determine who should be informed about thisnote, in the ticket pending screen of a zoomed ticket in the agentinterface.

Configuration Options Reference
530
Description ValueGroup: TicketSubGroup: Frontend::Agent::Ticket::ViewPendingValid: 0Required: 0Config-Setting:
$Self->{‘Ticket::Frontend::AgentTicketPending’}->{‘InformAgent’} = ‘0’;
Ticket::Frontend::AgentTicketPending###ArticleTypeDefault
Description ValueDescription: Defines the default type of the note in the ticket pending screen of a
zoomed ticket in the agent interface.Group: TicketSubGroup: Frontend::Agent::Ticket::ViewPendingValid: 1Required: 0Config-Setting:
$Self->{‘Ticket::Frontend::AgentTicketPending’}->{‘ArticleTypeDefault’} = ‘note-internal’;
Ticket::Frontend::AgentTicketPending###ArticleTypes
Description ValueDescription: Specifies the different note types that will be used in the system.Group: TicketSubGroup: Frontend::Agent::Ticket::ViewPendingValid: 1Required: 0Config-Setting:
$Self->{‘Ticket::Frontend::AgentTicketPending’}->{‘ArticleTypes’} = { ‘note-external’ => ‘0’, ‘note-internal’ => ‘1’, ‘note-report’ => ‘0’};
Ticket::Frontend::AgentTicketPending###Priority
Description ValueDescription: Shows the ticket priority options in the ticket pending screen of a
zoomed ticket in the agent interface.Group: Ticket

Configuration Options Reference
531
Description ValueSubGroup: Frontend::Agent::Ticket::ViewPendingValid: 0Required: 0Config-Setting:
$Self->{‘Ticket::Frontend::AgentTicketPending’}->{‘Priority’} = ‘0’;
Ticket::Frontend::AgentTicketPending###PriorityDefault
Description ValueDescription: Defines the default ticket priority in the ticket pending screen of a
zoomed ticket in the agent interface.Group: TicketSubGroup: Frontend::Agent::Ticket::ViewPendingValid: 0Required: 0Config-Setting:
$Self->{‘Ticket::Frontend::AgentTicketPending’}->{‘PriorityDefault’} = ‘3 normal’;
Ticket::Frontend::AgentTicketPending###Title
Description ValueDescription: Shows the title fields in the ticket pending screen of a zoomed ticket in
the agent interface.Group: TicketSubGroup: Frontend::Agent::Ticket::ViewPendingValid: 1Required: 0Config-Setting:
$Self->{‘Ticket::Frontend::AgentTicketPending’}->{‘Title’} = ‘0’;
Ticket::Frontend::AgentTicketPending###TicketFreeText
Description ValueDescription: Ticket free text options shown in the ticket pending screen of a zoomed
ticket in the agent interface. Possible settings: 0 = Disabled, 1 =Enabled, 2 = Enabled and required.
Group: TicketSubGroup: Frontend::Agent::Ticket::ViewPendingValid: 1Required: 0

Configuration Options Reference
532
Description ValueConfig-Setting:
$Self->{‘Ticket::Frontend::AgentTicketPending’}->{‘TicketFreeText’} = { ‘1’ => ‘0’, ’10’ => ‘0’, ’11’ => ‘0’, ’12’ => ‘0’, ’13’ => ‘0’, ’14’ => ‘0’, ’15’ => ‘0’, ’16’ => ‘0’, ‘2’ => ‘0’, ‘3’ => ‘0’, ‘4’ => ‘0’, ‘5’ => ‘0’, ‘6’ => ‘0’, ‘7’ => ‘0’, ‘8’ => ‘0’, ‘9’ => ‘0’};
Ticket::Frontend::AgentTicketPending###TicketFreeTime
Description ValueDescription: Ticket free time options shown in the ticket pending screen of a zoomed
ticket in the agent interface. Possible settings: 0 = Disabled, 1 =Enabled, 2 = Enabled and required.
Group: TicketSubGroup: Frontend::Agent::Ticket::ViewPendingValid: 1Required: 0Config-Setting:
$Self->{‘Ticket::Frontend::AgentTicketPending’}->{‘TicketFreeTime’} = { ‘1’ => ‘0’, ‘2’ => ‘0’, ‘3’ => ‘0’, ‘4’ => ‘0’, ‘5’ => ‘0’, ‘6’ => ‘0’};
Ticket::Frontend::AgentTicketPending###ArticleFreeText
Description ValueDescription: Article free text options shown in the ticket pending screen of a zoomed
ticket in the agent interface. Possible settings: 0 = Disabled, 1 =Enabled, 2 = Enabled and required.

Configuration Options Reference
533
Description ValueGroup: TicketSubGroup: Frontend::Agent::Ticket::ViewPendingValid: 1Required: 0Config-Setting:
$Self->{‘Ticket::Frontend::AgentTicketPending’}->{‘ArticleFreeText’} = { ‘1’ => ‘0’, ‘2’ => ‘0’, ‘3’ => ‘0’};
Ticket::Frontend::AgentTicketPending###HistoryTypeDescription ValueDescription: Defines the history type for the ticket pending screen action, which gets
used for ticket history in the agent interface.Group: TicketSubGroup: Frontend::Agent::Ticket::ViewPendingValid: 1Required: 0Config-Setting:
$Self->{‘Ticket::Frontend::AgentTicketPending’}->{‘HistoryType’} = ‘AddNote’;
Ticket::Frontend::AgentTicketPending###HistoryCommentDescription ValueDescription: Defines the history comment for the ticket pending screen action, which
gets used for ticket history in the agent interface.Group: TicketSubGroup: Frontend::Agent::Ticket::ViewPendingValid: 1Required: 0Config-Setting:
$Self->{‘Ticket::Frontend::AgentTicketPending’}->{‘HistoryComment’} = ‘%%Pending’;
Frontend::Agent::Ticket::ViewPhoneNewTicket::Frontend::AgentTicketPhone###Priority
Description ValueDescription: Sets the default priority for new phone tickets in the agent interface.

Configuration Options Reference
534
Description ValueGroup: TicketSubGroup: Frontend::Agent::Ticket::ViewPhoneNewValid: 1Required: 1Config-Setting:
$Self->{‘Ticket::Frontend::AgentTicketPhone’}->{‘Priority’} = ‘3 normal’;
Ticket::Frontend::AgentTicketPhone###ArticleType
Description ValueDescription: Sets the default article type for new phone tickets in the agent interface.Group: TicketSubGroup: Frontend::Agent::Ticket::ViewPhoneNewValid: 1Required: 1Config-Setting:
$Self->{‘Ticket::Frontend::AgentTicketPhone’}->{‘ArticleType’} = ‘phone’;
Ticket::Frontend::AgentTicketPhone###SenderType
Description ValueDescription: Sets the default sender type for new phone ticket in the agent interface.Group: TicketSubGroup: Frontend::Agent::Ticket::ViewPhoneNewValid: 1Required: 1Config-Setting:
$Self->{‘Ticket::Frontend::AgentTicketPhone’}->{‘SenderType’} = ‘customer’;
Ticket::Frontend::AgentTicketPhone###Subject
Description ValueDescription: Sets the default subject for new phone tickets (e.g. ‘Phone call’) in the
agent interface.Group: TicketSubGroup: Frontend::Agent::Ticket::ViewPhoneNewValid: 1Required: 1Config-Setting:

Configuration Options Reference
535
Description Value $Self->{‘Ticket::Frontend::AgentTicketPhone’}->{‘Subject’} = »;
Ticket::Frontend::AgentTicketPhone###BodyDescription ValueDescription: Sets the default note text for new telephone tickets. E.g ‘New ticket via
call’ in the agent interface.Group: TicketSubGroup: Frontend::Agent::Ticket::ViewPhoneNewValid: 1Required: 1Config-Setting:
$Self->{‘Ticket::Frontend::AgentTicketPhone’}->{‘Body’} = »;
Ticket::Frontend::AgentTicketPhone###StateDefaultDescription ValueDescription: Sets the default next state for new phone tickets in the agent interface.Group: TicketSubGroup: Frontend::Agent::Ticket::ViewPhoneNewValid: 1Required: 1Config-Setting:
$Self->{‘Ticket::Frontend::AgentTicketPhone’}->{‘StateDefault’} = ‘open’;
Ticket::Frontend::AgentTicketPhone###StateTypeDescription ValueDescription: Determines the next possible ticket states, after the creation of a new
phone ticket in the agent interface.Group: TicketSubGroup: Frontend::Agent::Ticket::ViewPhoneNewValid: 1Required: 1Config-Setting:
$Self->{‘Ticket::Frontend::AgentTicketPhone’}->{‘StateType’} = [ ‘open’, ‘pending auto’, ‘pending reminder’, ‘closed’];

Configuration Options Reference
536
Ticket::Frontend::AgentTicketPhone###TicketFreeText
Description ValueDescription: Ticket free text options shown in the phone ticket screen of the agent
interface. Possible settings: 0 = Disabled, 1 = Enabled, 2 = Enabledand required.
Group: TicketSubGroup: Frontend::Agent::Ticket::ViewPhoneNewValid: 1Required: 0Config-Setting:
$Self->{‘Ticket::Frontend::AgentTicketPhone’}->{‘TicketFreeText’} = { ‘1’ => ‘0’, ’10’ => ‘0’, ’11’ => ‘0’, ’12’ => ‘0’, ’13’ => ‘0’, ’14’ => ‘0’, ’15’ => ‘0’, ’16’ => ‘0’, ‘2’ => ‘0’, ‘3’ => ‘0’, ‘4’ => ‘0’, ‘5’ => ‘0’, ‘6’ => ‘0’, ‘7’ => ‘0’, ‘8’ => ‘0’, ‘9’ => ‘0’};
Ticket::Frontend::AgentTicketPhone###TicketFreeTime
Description ValueDescription: Ticket free time options shown in the phone ticket screen of the agent
interface. Possible settings: 0 = Disabled, 1 = Enabled, 2 = Enabledand required.
Group: TicketSubGroup: Frontend::Agent::Ticket::ViewPhoneNewValid: 1Required: 0Config-Setting:
$Self->{‘Ticket::Frontend::AgentTicketPhone’}->{‘TicketFreeTime’} = { ‘1’ => ‘0’, ‘2’ => ‘0’, ‘3’ => ‘0’, ‘4’ => ‘0’,

Configuration Options Reference
537
Description Value ‘5’ => ‘0’, ‘6’ => ‘0’};
Ticket::Frontend::AgentTicketPhone###ArticleFreeTextDescription ValueDescription: Article free text options shown in the phone ticket screen of the agent
interface. Possible settings: 0 = Disabled, 1 = Enabled, 2 = Enabledand required.
Group: TicketSubGroup: Frontend::Agent::Ticket::ViewPhoneNewValid: 1Required: 0Config-Setting:
$Self->{‘Ticket::Frontend::AgentTicketPhone’}->{‘ArticleFreeText’} = { ‘1’ => ‘0’, ‘2’ => ‘0’, ‘3’ => ‘0’};
Ticket::Frontend::AgentTicketPhone###HistoryTypeDescription ValueDescription: Defines the history type for the phone ticket screen action, which gets
used for ticket history in the agent interface.Group: TicketSubGroup: Frontend::Agent::Ticket::ViewPhoneNewValid: 1Required: 1Config-Setting:
$Self->{‘Ticket::Frontend::AgentTicketPhone’}->{‘HistoryType’} = ‘PhoneCallCustomer’;
Ticket::Frontend::AgentTicketPhone###HistoryCommentDescription ValueDescription: Defines the history comment for the phone ticket screen action, which
gets used for ticket history in the agent interface.Group: TicketSubGroup: Frontend::Agent::Ticket::ViewPhoneNewValid: 1Required: 1Config-Setting:

Configuration Options Reference
538
Description Value $Self->{‘Ticket::Frontend::AgentTicketPhone’}->{‘HistoryComment’} = »;
Ticket::Frontend::AgentTicketPhone###SplitLinkTypeDescription ValueDescription: Sets the default link type of splitted tickets in the agent interface.Group: TicketSubGroup: Frontend::Agent::Ticket::ViewPhoneNewValid: 1Required: 0Config-Setting:
$Self->{‘Ticket::Frontend::AgentTicketPhone’}->{‘SplitLinkType’} = { ‘Direction’ => ‘Target’, ‘LinkType’ => ‘ParentChild’};
Frontend::Agent::Ticket::ViewPhoneOutboundTicket::Frontend::AgentTicketPhoneOutbound###Permission
Description ValueDescription: Required permissions to use the ticket phone outbound screen in the
agent interface.Group: TicketSubGroup: Frontend::Agent::Ticket::ViewPhoneOutboundValid: 1Required: 1Config-Setting:
$Self->{‘Ticket::Frontend::AgentTicketPhoneOutbound’}->{‘Permission’} = ‘phone’;
Ticket::Frontend::AgentTicketPhoneOutbound###RequiredLockDescription ValueDescription: Defines if a ticket lock is required in the ticket phone outbound screen
of the agent interface (if the ticket isn’t locked yet, the ticket gets lockedand the current agent will be set automatically as its owner).
Group: TicketSubGroup: Frontend::Agent::Ticket::ViewPhoneOutboundValid: 1Required: 0Config-Setting:

Configuration Options Reference
539
Description Value $Self->{‘Ticket::Frontend::AgentTicketPhoneOutbound’}->{‘RequiredLock’} = ‘1’;
Ticket::Frontend::AgentTicketPhoneOutbound###ArticleTypeDescription ValueDescription: Defines the default type of the note in the ticket phone outbound screen
of the agent interface.Group: TicketSubGroup: Frontend::Agent::Ticket::ViewPhoneOutboundValid: 1Required: 1Config-Setting:
$Self->{‘Ticket::Frontend::AgentTicketPhoneOutbound’}->{‘ArticleType’} = ‘phone’;
Ticket::Frontend::AgentTicketPhoneOutbound###SenderTypeDescription ValueDescription: Defines the default sender type for phone tickets in the ticket phone
outbound screen of the agent interface.Group: TicketSubGroup: Frontend::Agent::Ticket::ViewPhoneOutboundValid: 1Required: 1Config-Setting:
$Self->{‘Ticket::Frontend::AgentTicketPhoneOutbound’}->{‘SenderType’} = ‘agent’;
Ticket::Frontend::AgentTicketPhoneOutbound###SubjectDescription ValueDescription: Defines the default subject for phone tickets in the ticket phone
outbound screen of the agent interface.Group: TicketSubGroup: Frontend::Agent::Ticket::ViewPhoneOutboundValid: 1Required: 1Config-Setting:
$Self->{‘Ticket::Frontend::AgentTicketPhoneOutbound’}->{‘Subject’} = ‘$Text{«Phone call»}!’;

Configuration Options Reference
540
Ticket::Frontend::AgentTicketPhoneOutbound###BodyDescription ValueDescription: Defines the default note body text for phone tickets in the ticket phone
outbound screen of the agent interface.Group: TicketSubGroup: Frontend::Agent::Ticket::ViewPhoneOutboundValid: 1Required: 1Config-Setting:
$Self->{‘Ticket::Frontend::AgentTicketPhoneOutbound’}->{‘Body’} = »;
Ticket::Frontend::AgentTicketPhoneOutbound###StateDescription ValueDescription: Defines the default ticket next state after adding a phone note in the
ticket phone outbound screen of the agent interface.Group: TicketSubGroup: Frontend::Agent::Ticket::ViewPhoneOutboundValid: 1Required: 0Config-Setting:
$Self->{‘Ticket::Frontend::AgentTicketPhoneOutbound’}->{‘State’} = ‘closed successful’;
Ticket::Frontend::AgentTicketPhoneOutbound###StateTypeDescription ValueDescription: Next possible ticket states after adding a phone note in the ticket phone
outbound screen of the agent interface.Group: TicketSubGroup: Frontend::Agent::Ticket::ViewPhoneOutboundValid: 1Required: 1Config-Setting:
$Self->{‘Ticket::Frontend::AgentTicketPhoneOutbound’}->{‘StateType’} = [ ‘open’, ‘pending auto’, ‘pending reminder’, ‘closed’];

Configuration Options Reference
541
Ticket::Frontend::AgentTicketPhoneOutbound###TicketFreeText
Description ValueDescription: Ticket free text options shown in the ticket phone outbound screen of
the agent interface. Possible settings: 0 = Disabled, 1 = Enabled, 2 =Enabled and required.
Group: TicketSubGroup: Frontend::Agent::Ticket::ViewPhoneOutboundValid: 1Required: 0Config-Setting:
$Self->{‘Ticket::Frontend::AgentTicketPhoneOutbound’}->{‘TicketFreeText’} = { ‘1’ => ‘0’, ’10’ => ‘0’, ’11’ => ‘0’, ’12’ => ‘0’, ’13’ => ‘0’, ’14’ => ‘0’, ’15’ => ‘0’, ’16’ => ‘0’, ‘2’ => ‘0’, ‘3’ => ‘0’, ‘4’ => ‘0’, ‘5’ => ‘0’, ‘6’ => ‘0’, ‘7’ => ‘0’, ‘8’ => ‘0’, ‘9’ => ‘0’};
Ticket::Frontend::AgentTicketPhoneOutbound###TicketFreeTime
Description ValueDescription: Ticket free time options shown in the ticket phone outbound screen of
the agent interface. Possible settings: 0 = Disabled, 1 = Enabled, 2 =Enabled and required.
Group: TicketSubGroup: Frontend::Agent::Ticket::ViewPhoneOutboundValid: 1Required: 0Config-Setting:
$Self->{‘Ticket::Frontend::AgentTicketPhoneOutbound’}->{‘TicketFreeTime’} = { ‘1’ => ‘0’, ‘2’ => ‘0’,

Configuration Options Reference
542
Description Value ‘3’ => ‘0’, ‘4’ => ‘0’, ‘5’ => ‘0’, ‘6’ => ‘0’};
Ticket::Frontend::AgentTicketPhoneOutbound###ArticleFreeText
Description ValueDescription: Article free text options shown in the ticket phone outbound screen of
the agent interface. Possible settings: 0 = Disabled, 1 = Enabled, 2 =Enabled and required.
Group: TicketSubGroup: Frontend::Agent::Ticket::ViewPhoneOutboundValid: 1Required: 0Config-Setting:
$Self->{‘Ticket::Frontend::AgentTicketPhoneOutbound’}->{‘ArticleFreeText’} = { ‘1’ => ‘0’, ‘2’ => ‘0’, ‘3’ => ‘0’};
Ticket::Frontend::AgentTicketPhoneOutbound###HistoryType
Description ValueDescription: Defines the history type for the ticket phone outbound screen action,
which gets used for ticket history in the agent interface.Group: TicketSubGroup: Frontend::Agent::Ticket::ViewPhoneOutboundValid: 1Required: 1Config-Setting:
$Self->{‘Ticket::Frontend::AgentTicketPhoneOutbound’}->{‘HistoryType’} = ‘PhoneCallAgent’;
Ticket::Frontend::AgentTicketPhoneOutbound###HistoryComment
Description ValueDescription: Defines the history comment for the ticket phone outbound screen
action, which gets used for ticket history in the agent interface.Group: Ticket

Configuration Options Reference
543
Description ValueSubGroup: Frontend::Agent::Ticket::ViewPhoneOutboundValid: 1Required: 1Config-Setting:
$Self->{‘Ticket::Frontend::AgentTicketPhoneOutbound’}->{‘HistoryComment’} = »;
Frontend::Agent::Ticket::ViewPriorityTicket::Frontend::AgentTicketPriority###Permission
Description ValueDescription: Required permissions to use the ticket priority screen of a zoomed ticket
in the agent interface.Group: TicketSubGroup: Frontend::Agent::Ticket::ViewPriorityValid: 1Required: 1Config-Setting:
$Self->{‘Ticket::Frontend::AgentTicketPriority’}->{‘Permission’} = ‘priority’;
Ticket::Frontend::AgentTicketPriority###RequiredLock
Description ValueDescription: Defines if a ticket lock is required in the ticket priority screen of a zoomed
ticket in the agent interface (if the ticket isn’t locked yet, the ticket getslocked and the current agent will be set automatically as its owner).
Group: TicketSubGroup: Frontend::Agent::Ticket::ViewPriorityValid: 1Required: 0Config-Setting:
$Self->{‘Ticket::Frontend::AgentTicketPriority’}->{‘RequiredLock’} = ‘1’;
Ticket::Frontend::AgentTicketPriority###TicketType
Description ValueDescription: Sets the ticket type in the ticket priority screen of a zoomed ticket in the
agent interface (Ticket::Type needs to be activated).Group: Ticket

Configuration Options Reference
544
Description ValueSubGroup: Frontend::Agent::Ticket::ViewPriorityValid: 1Required: 0Config-Setting:
$Self->{‘Ticket::Frontend::AgentTicketPriority’}->{‘TicketType’} = ‘0’;
Ticket::Frontend::AgentTicketPriority###Service
Description ValueDescription: Sets the service in the ticket priority screen of a zoomed ticket in the
agent interface (Ticket::Service needs to be activated).Group: TicketSubGroup: Frontend::Agent::Ticket::ViewPriorityValid: 1Required: 0Config-Setting:
$Self->{‘Ticket::Frontend::AgentTicketPriority’}->{‘Service’} = ‘0’;
Ticket::Frontend::AgentTicketPriority###Owner
Description ValueDescription: Sets the ticket owner in the ticket priority screen of a zoomed ticket in
the agent interface.Group: TicketSubGroup: Frontend::Agent::Ticket::ViewPriorityValid: 1Required: 0Config-Setting:
$Self->{‘Ticket::Frontend::AgentTicketPriority’}->{‘Owner’} = ‘0’;
Ticket::Frontend::AgentTicketPriority###OwnerMandatory
Description ValueDescription: Sets if ticket owner must be selected by the agent.Group: TicketSubGroup: Frontend::Agent::Ticket::ViewPriorityValid: 1Required: 0Config-Setting:

Configuration Options Reference
545
Description Value $Self->{‘Ticket::Frontend::AgentTicketPriority’}->{‘OwnerMandatory’} = ‘0’;
Ticket::Frontend::AgentTicketPriority###ResponsibleDescription ValueDescription: Sets the responsible agent of the ticket in the ticket priority screen of a
zoomed ticket in the agent interface.Group: TicketSubGroup: Frontend::Agent::Ticket::ViewPriorityValid: 1Required: 0Config-Setting:
$Self->{‘Ticket::Frontend::AgentTicketPriority’}->{‘Responsible’} = ‘0’;
Ticket::Frontend::AgentTicketPriority###StateDescription ValueDescription: If a note is added by an agent, sets the state of the ticket in the ticket
priority screen of a zoomed ticket in the agent interface.Group: TicketSubGroup: Frontend::Agent::Ticket::ViewPriorityValid: 1Required: 0Config-Setting:
$Self->{‘Ticket::Frontend::AgentTicketPriority’}->{‘State’} = ‘0’;
Ticket::Frontend::AgentTicketPriority###StateTypeDescription ValueDescription: Defines the next state of a ticket after adding a note, in the ticket priority
screen of a zoomed ticket in the agent interface.Group: TicketSubGroup: Frontend::Agent::Ticket::ViewPriorityValid: 1Required: 1Config-Setting:
$Self->{‘Ticket::Frontend::AgentTicketPriority’}->{‘StateType’} = [ ‘open’, ‘pending reminder’, ‘pending auto’];

Configuration Options Reference
546
Ticket::Frontend::AgentTicketPriority###StateDefault
Description ValueDescription: Defines the default next state of a ticket after adding a note, in the ticket
priority screen of a zoomed ticket in the agent interface.Group: TicketSubGroup: Frontend::Agent::Ticket::ViewPriorityValid: 1Required: 0Config-Setting:
$Self->{‘Ticket::Frontend::AgentTicketPriority’}->{‘StateDefault’} = ‘open’;
Ticket::Frontend::AgentTicketPriority###Note
Description ValueDescription: Allows adding notes in the ticket priority screen of a zoomed ticket in
the agent interface.Group: TicketSubGroup: Frontend::Agent::Ticket::ViewPriorityValid: 1Required: 0Config-Setting:
$Self->{‘Ticket::Frontend::AgentTicketPriority’}->{‘Note’} = ‘1’;
Ticket::Frontend::AgentTicketPriority###Subject
Description ValueDescription: Sets the default subject for notes added in the ticket priority screen of
a zoomed ticket in the agent interface.Group: TicketSubGroup: Frontend::Agent::Ticket::ViewPriorityValid: 1Required: 0Config-Setting:
$Self->{‘Ticket::Frontend::AgentTicketPriority’}->{‘Subject’} = ‘$Text{«Priority Update»}!’;
Ticket::Frontend::AgentTicketPriority###Body
Description ValueDescription: Sets the default body text for notes added in the ticket priority screen
of a zoomed ticket in the agent interface.

Configuration Options Reference
547
Description ValueGroup: TicketSubGroup: Frontend::Agent::Ticket::ViewPriorityValid: 1Required: 0Config-Setting:
$Self->{‘Ticket::Frontend::AgentTicketPriority’}->{‘Body’} = »;
Ticket::Frontend::AgentTicketPriority###InvolvedAgent
Description ValueDescription: Shows a list of all the involved agents on this ticket, in the ticket priority
screen of a zoomed ticket in the agent interface.Group: TicketSubGroup: Frontend::Agent::Ticket::ViewPriorityValid: 0Required: 0Config-Setting:
$Self->{‘Ticket::Frontend::AgentTicketPriority’}->{‘InvolvedAgent’} = ‘0’;
Ticket::Frontend::AgentTicketPriority###InformAgent
Description ValueDescription: Shows a list of all the possible agents (all agents with note permissions
on the queue/ticket) to determine who should be informed about thisnote, in the ticket priority screen of a zoomed ticket in the agentinterface.
Group: TicketSubGroup: Frontend::Agent::Ticket::ViewPriorityValid: 0Required: 0Config-Setting:
$Self->{‘Ticket::Frontend::AgentTicketPriority’}->{‘InformAgent’} = ‘0’;
Ticket::Frontend::AgentTicketPriority###ArticleTypeDefault
Description ValueDescription: Defines the default type of the note in the ticket priority screen of a
zoomed ticket in the agent interface.Group: TicketSubGroup: Frontend::Agent::Ticket::ViewPriority

Configuration Options Reference
548
Description ValueValid: 1Required: 0Config-Setting:
$Self->{‘Ticket::Frontend::AgentTicketPriority’}->{‘ArticleTypeDefault’} = ‘note-internal’;
Ticket::Frontend::AgentTicketPriority###ArticleTypesDescription ValueDescription: Specifies the different note types that will be used in the system.Group: TicketSubGroup: Frontend::Agent::Ticket::ViewPriorityValid: 1Required: 0Config-Setting:
$Self->{‘Ticket::Frontend::AgentTicketPriority’}->{‘ArticleTypes’} = { ‘note-external’ => ‘0’, ‘note-internal’ => ‘1’, ‘note-report’ => ‘0’};
Ticket::Frontend::AgentTicketPriority###PriorityDescription ValueDescription: Shows the ticket priority options in the ticket priority screen of a zoomed
ticket in the agent interface.Group: TicketSubGroup: Frontend::Agent::Ticket::ViewPriorityValid: 1Required: 0Config-Setting:
$Self->{‘Ticket::Frontend::AgentTicketPriority’}->{‘Priority’} = ‘1’;
Ticket::Frontend::AgentTicketPriority###PriorityDefaultDescription ValueDescription: Defines the default ticket priority in the ticket priority screen of a zoomed
ticket in the agent interface.Group: TicketSubGroup: Frontend::Agent::Ticket::ViewPriorityValid: 0Required: 0

Configuration Options Reference
549
Description ValueConfig-Setting:
$Self->{‘Ticket::Frontend::AgentTicketPriority’}->{‘PriorityDefault’} = ‘3 normal’;
Ticket::Frontend::AgentTicketPriority###TitleDescription ValueDescription: Shows the title fields in the ticket priority screen of a zoomed ticket in
the agent interface.Group: TicketSubGroup: Frontend::Agent::Ticket::ViewPriorityValid: 1Required: 0Config-Setting:
$Self->{‘Ticket::Frontend::AgentTicketPriority’}->{‘Title’} = ‘0’;
Ticket::Frontend::AgentTicketPriority###TicketFreeTextDescription ValueDescription: Ticket free text options shown in the ticket priority screen of a zoomed
ticket in the agent interface. Possible settings: 0 = Disabled, 1 =Enabled, 2 = Enabled and required.
Group: TicketSubGroup: Frontend::Agent::Ticket::ViewPriorityValid: 1Required: 0Config-Setting:
$Self->{‘Ticket::Frontend::AgentTicketPriority’}->{‘TicketFreeText’} = { ‘1’ => ‘0’, ’10’ => ‘0’, ’11’ => ‘0’, ’12’ => ‘0’, ’13’ => ‘0’, ’14’ => ‘0’, ’15’ => ‘0’, ’16’ => ‘0’, ‘2’ => ‘0’, ‘3’ => ‘0’, ‘4’ => ‘0’, ‘5’ => ‘0’, ‘6’ => ‘0’, ‘7’ => ‘0’, ‘8’ => ‘0’, ‘9’ => ‘0’};

Configuration Options Reference
550
Ticket::Frontend::AgentTicketPriority###TicketFreeTimeDescription ValueDescription: Ticket free time options shown in the ticket priority screen of a zoomed
ticket in the agent interface. Possible settings: 0 = Disabled, 1 =Enabled, 2 = Enabled and required.
Group: TicketSubGroup: Frontend::Agent::Ticket::ViewPriorityValid: 1Required: 0Config-Setting:
$Self->{‘Ticket::Frontend::AgentTicketPriority’}->{‘TicketFreeTime’} = { ‘1’ => ‘0’, ‘2’ => ‘0’, ‘3’ => ‘0’, ‘4’ => ‘0’, ‘5’ => ‘0’, ‘6’ => ‘0’};
Ticket::Frontend::AgentTicketPriority###ArticleFreeTextDescription ValueDescription: Article free text options shown in the ticket priority screen of a zoomed
ticket in the agent interface. Possible settings: 0 = Disabled, 1 =Enabled, 2 = Enabled and required.
Group: TicketSubGroup: Frontend::Agent::Ticket::ViewPriorityValid: 1Required: 0Config-Setting:
$Self->{‘Ticket::Frontend::AgentTicketPriority’}->{‘ArticleFreeText’} = { ‘1’ => ‘0’, ‘2’ => ‘0’, ‘3’ => ‘0’};
Ticket::Frontend::AgentTicketPriority###HistoryTypeDescription ValueDescription: Defines the history type for the ticket priority screen action, which gets
used for ticket history in the agent interface.Group: TicketSubGroup: Frontend::Agent::Ticket::ViewPriorityValid: 1

Configuration Options Reference
551
Description ValueRequired: 0Config-Setting:
$Self->{‘Ticket::Frontend::AgentTicketPriority’}->{‘HistoryType’} = ‘AddNote’;
Ticket::Frontend::AgentTicketPriority###HistoryCommentDescription ValueDescription: Defines the history comment for the ticket priority screen action, which
gets used for ticket history in the agent interface.Group: TicketSubGroup: Frontend::Agent::Ticket::ViewPriorityValid: 1Required: 0Config-Setting:
$Self->{‘Ticket::Frontend::AgentTicketPriority’}->{‘HistoryComment’} = ‘%%Priority’;
Frontend::Agent::Ticket::ViewQueueTicket::Frontend::AgentTicketQueue###StripEmptyLines
Description ValueDescription: Strips empty lines on the ticket preview in the queue view.Group: TicketSubGroup: Frontend::Agent::Ticket::ViewQueueValid: 1Required: 1Config-Setting:
$Self->{‘Ticket::Frontend::AgentTicketQueue’}->{‘StripEmptyLines’} = ‘0’;
Ticket::Frontend::AgentTicketQueue###ViewAllPossibleTicketsDescription ValueDescription: Shows all both ro and rw queues in the queue view.Group: TicketSubGroup: Frontend::Agent::Ticket::ViewQueueValid: 1Required: 1Config-Setting:
$Self->{‘Ticket::Frontend::AgentTicketQueue’}->{‘ViewAllPossibleTickets’} = ‘0’;

Configuration Options Reference
552
Ticket::Frontend::AgentTicketQueue###HighlightAge1Description ValueDescription: Sets the age in minutes (first level) for highlighting queues that contain
untouched tickets.Group: TicketSubGroup: Frontend::Agent::Ticket::ViewQueueValid: 1Required: 1Config-Setting:
$Self->{‘Ticket::Frontend::AgentTicketQueue’}->{‘HighlightAge1’} = ‘1440’;
Ticket::Frontend::AgentTicketQueue###HighlightAge2Description ValueDescription: Sets the age in minutes (second level) for highlighting queues that
contain untouched tickets.Group: TicketSubGroup: Frontend::Agent::Ticket::ViewQueueValid: 1Required: 1Config-Setting:
$Self->{‘Ticket::Frontend::AgentTicketQueue’}->{‘HighlightAge2’} = ‘2880’;
Ticket::Frontend::AgentTicketQueue###BlinkDescription ValueDescription: Activates a blinking mechanism of the queue that contains the oldest
ticket.Group: TicketSubGroup: Frontend::Agent::Ticket::ViewQueueValid: 1Required: 0Config-Setting:
$Self->{‘Ticket::Frontend::AgentTicketQueue’}->{‘Blink’} = ‘1’;
Ticket::Frontend::AgentTicketQueue###QueueSortDescription ValueDescription: Sorts the tickets (ascendingly or descendingly) when a single queue
is selected in the queue view and after the tickets are sorted bypriority. Values: 0 = ascending (oldest on top, default), 1 = descending(youngest on top). Use the QueueID for the key and 0 or 1 for value.

Configuration Options Reference
553
Description ValueGroup: TicketSubGroup: Frontend::Agent::Ticket::ViewQueueValid: 0Required: 0Config-Setting:
$Self->{‘Ticket::Frontend::AgentTicketQueue’}->{‘QueueSort’} = { ‘3’ => ‘0’, ‘7’ => ‘1’};
Ticket::Frontend::AgentTicketQueue###SortBy::DefaultDescription ValueDescription: Defines the default sort criteria for all queues displayed in the queue
view, after sort by priority is done.Group: TicketSubGroup: Frontend::Agent::Ticket::ViewQueueValid: 1Required: 1Config-Setting:
$Self->{‘Ticket::Frontend::AgentTicketQueue’}->{‘SortBy::Default’} = ‘Age’;
Ticket::Frontend::AgentTicketQueue###Order::DefaultDescription ValueDescription: Defines the default sort order for all queues in the queue view, after
priority sort.Group: TicketSubGroup: Frontend::Agent::Ticket::ViewQueueValid: 1Required: 1Config-Setting:
$Self->{‘Ticket::Frontend::AgentTicketQueue’}->{‘Order::Default’} = ‘Up’;
Frontend::Agent::Ticket::ViewResponsibleTicket::Frontend::AgentTicketResponsible###Permission
Description ValueDescription: Required permissions to use the ticket responsible screen in the agent
interface.

Configuration Options Reference
554
Description ValueGroup: TicketSubGroup: Frontend::Agent::Ticket::ViewResponsibleValid: 1Required: 1Config-Setting:
$Self->{‘Ticket::Frontend::AgentTicketResponsible’}->{‘Permission’} = ‘responsible’;
Ticket::Frontend::AgentTicketResponsible###RequiredLock
Description ValueDescription: Defines if a ticket lock is required in the ticket responsible screen of the
agent interface (if the ticket isn’t locked yet, the ticket gets locked andthe current agent will be set automatically as its owner).
Group: TicketSubGroup: Frontend::Agent::Ticket::ViewResponsibleValid: 1Required: 0Config-Setting:
$Self->{‘Ticket::Frontend::AgentTicketResponsible’}->{‘RequiredLock’} = ‘0’;
Ticket::Frontend::AgentTicketResponsible###TicketType
Description ValueDescription: Sets the ticket type in the ticket responsible screen of the agent interface
(Ticket::Type needs to be activated).Group: TicketSubGroup: Frontend::Agent::Ticket::ViewResponsibleValid: 1Required: 0Config-Setting:
$Self->{‘Ticket::Frontend::AgentTicketResponsible’}->{‘TicketType’} = ‘0’;
Ticket::Frontend::AgentTicketResponsible###Service
Description ValueDescription: Sets the service in the ticket responsible screen of the agent interface
(Ticket::Service needs to be activated).

Configuration Options Reference
555
Description ValueGroup: TicketSubGroup: Frontend::Agent::Ticket::ViewResponsibleValid: 1Required: 0Config-Setting:
$Self->{‘Ticket::Frontend::AgentTicketResponsible’}->{‘Service’} = ‘0’;
Ticket::Frontend::AgentTicketResponsible###Owner
Description ValueDescription: Sets the ticket owner in the ticket responsible screen of the agent
interface.Group: TicketSubGroup: Frontend::Agent::Ticket::ViewResponsibleValid: 1Required: 0Config-Setting:
$Self->{‘Ticket::Frontend::AgentTicketResponsible’}->{‘Owner’} = ‘0’;
Ticket::Frontend::AgentTicketResponsible###OwnerMandatory
Description ValueDescription: Sets if ticket owner must be selected by the agent.Group: TicketSubGroup: Frontend::Agent::Ticket::ViewResponsibleValid: 1Required: 0Config-Setting:
$Self->{‘Ticket::Frontend::AgentTicketResponsible’}->{‘OwnerMandatory’} = ‘0’;
Ticket::Frontend::AgentTicketResponsible###Responsible
Description ValueDescription: Sets the responsible agent of the ticket in the ticket responsible screen
of the agent interface.Group: TicketSubGroup: Frontend::Agent::Ticket::ViewResponsible

Configuration Options Reference
556
Description ValueValid: 1Required: 0Config-Setting:
$Self->{‘Ticket::Frontend::AgentTicketResponsible’}->{‘Responsible’} = ‘1’;
Ticket::Frontend::AgentTicketResponsible###State
Description ValueDescription: If a note is added by an agent, sets the state of a ticket in the ticket
responsible screen of the agent interface.Group: TicketSubGroup: Frontend::Agent::Ticket::ViewResponsibleValid: 1Required: 0Config-Setting:
$Self->{‘Ticket::Frontend::AgentTicketResponsible’}->{‘State’} = ‘0’;
Ticket::Frontend::AgentTicketResponsible###StateType
Description ValueDescription: Defines the next state of a ticket after adding a note, in the ticket
responsible screen of the agent interface.Group: TicketSubGroup: Frontend::Agent::Ticket::ViewResponsibleValid: 1Required: 1Config-Setting:
$Self->{‘Ticket::Frontend::AgentTicketResponsible’}->{‘StateType’} = [ ‘open’, ‘pending reminder’, ‘pending auto’];
Ticket::Frontend::AgentTicketResponsible###StateDefault
Description ValueDescription: Defines the default next state of a ticket after adding a note, in the ticket
responsible screen of the agent interface.

Configuration Options Reference
557
Description ValueGroup: TicketSubGroup: Frontend::Agent::Ticket::ViewResponsibleValid: 1Required: 0Config-Setting:
$Self->{‘Ticket::Frontend::AgentTicketResponsible’}->{‘StateDefault’} = ‘open’;
Ticket::Frontend::AgentTicketResponsible###Note
Description ValueDescription: Allows adding notes in the ticket responsible screen of the agent
interface.Group: TicketSubGroup: Frontend::Agent::Ticket::ViewResponsibleValid: 1Required: 0Config-Setting:
$Self->{‘Ticket::Frontend::AgentTicketResponsible’}->{‘Note’} = ‘1’;
Ticket::Frontend::AgentTicketResponsible###Subject
Description ValueDescription: Sets the default subject for notes added in the ticket responsible screen
of the agent interface.Group: TicketSubGroup: Frontend::Agent::Ticket::ViewResponsibleValid: 1Required: 0Config-Setting:
$Self->{‘Ticket::Frontend::AgentTicketResponsible’}->{‘Subject’} = ‘$Text{«Responsible Update»}!’;
Ticket::Frontend::AgentTicketResponsible###Body
Description ValueDescription: Sets the default body text for notes added in the ticket responsible
screen of the agent interface.Group: Ticket

Configuration Options Reference
558
Description ValueSubGroup: Frontend::Agent::Ticket::ViewResponsibleValid: 1Required: 0Config-Setting:
$Self->{‘Ticket::Frontend::AgentTicketResponsible’}->{‘Body’} = »;
Ticket::Frontend::AgentTicketResponsible###InvolvedAgent
Description ValueDescription: Shows a list of all the involved agents on this ticket, in the ticket
responsible screen of the agent interface.Group: TicketSubGroup: Frontend::Agent::Ticket::ViewResponsibleValid: 0Required: 0Config-Setting:
$Self->{‘Ticket::Frontend::AgentTicketResponsible’}->{‘InvolvedAgent’} = ‘0’;
Ticket::Frontend::AgentTicketResponsible###InformAgent
Description ValueDescription: Shows a list of all the possible agents (all agents with note permissions
on the queue/ticket) to determine who should be informed about thisnote, in the ticket responsible screen of the agent interface.
Group: TicketSubGroup: Frontend::Agent::Ticket::ViewResponsibleValid: 0Required: 0Config-Setting:
$Self->{‘Ticket::Frontend::AgentTicketResponsible’}->{‘InformAgent’} = ‘0’;
Ticket::Frontend::AgentTicketResponsible###ArticleTypeDefault
Description ValueDescription: Defines the default type of the note in the ticket responsible screen of
the agent interface.Group: Ticket

Configuration Options Reference
559
Description ValueSubGroup: Frontend::Agent::Ticket::ViewResponsibleValid: 1Required: 0Config-Setting:
$Self->{‘Ticket::Frontend::AgentTicketResponsible’}->{‘ArticleTypeDefault’} = ‘note-internal’;
Ticket::Frontend::AgentTicketResponsible###ArticleTypes
Description ValueDescription: Specifies the different note types that will be used in the system.Group: TicketSubGroup: Frontend::Agent::Ticket::ViewResponsibleValid: 1Required: 0Config-Setting:
$Self->{‘Ticket::Frontend::AgentTicketResponsible’}->{‘ArticleTypes’} = { ‘note-external’ => ‘0’, ‘note-internal’ => ‘1’, ‘note-report’ => ‘0’};
Ticket::Frontend::AgentTicketResponsible###Priority
Description ValueDescription: Shows the ticket priority options in the ticket responsible screen of the
agent interface.Group: TicketSubGroup: Frontend::Agent::Ticket::ViewResponsibleValid: 0Required: 0Config-Setting:
$Self->{‘Ticket::Frontend::AgentTicketResponsible’}->{‘Priority’} = ‘0’;
Ticket::Frontend::AgentTicketResponsible###PriorityDefault
Description ValueDescription: Defines the default ticket priority in the ticket responsible screen of the
agent interface.

Configuration Options Reference
560
Description ValueGroup: TicketSubGroup: Frontend::Agent::Ticket::ViewResponsibleValid: 0Required: 0Config-Setting:
$Self->{‘Ticket::Frontend::AgentTicketResponsible’}->{‘PriorityDefault’} = ‘3 normal’;
Ticket::Frontend::AgentTicketResponsible###Title
Description ValueDescription: Shows the title fields in the ticket responsible screen of the agent
interface.Group: TicketSubGroup: Frontend::Agent::Ticket::ViewResponsibleValid: 1Required: 0Config-Setting:
$Self->{‘Ticket::Frontend::AgentTicketResponsible’}->{‘Title’} = ‘1’;
Ticket::Frontend::AgentTicketResponsible###TicketFreeText
Description ValueDescription: Ticket free text options shown in the ticket responsible screen of the
agent interface. Possible settings: 0 = Disabled, 1 = Enabled, 2 =Enabled and required.
Group: TicketSubGroup: Frontend::Agent::Ticket::ViewResponsibleValid: 1Required: 0Config-Setting:
$Self->{‘Ticket::Frontend::AgentTicketResponsible’}->{‘TicketFreeText’} = { ‘1’ => ‘0’, ’10’ => ‘0’, ’11’ => ‘0’, ’12’ => ‘0’, ’13’ => ‘0’, ’14’ => ‘0’, ’15’ => ‘0’, ’16’ => ‘0’,

Configuration Options Reference
561
Description Value ‘2’ => ‘0’, ‘3’ => ‘0’, ‘4’ => ‘0’, ‘5’ => ‘0’, ‘6’ => ‘0’, ‘7’ => ‘0’, ‘8’ => ‘0’, ‘9’ => ‘0’};
Ticket::Frontend::AgentTicketResponsible###TicketFreeTime
Description ValueDescription: Ticket free time options shown in the ticket responsible screen of the
agent interface. Possible settings: 0 = Disabled, 1 = Enabled, 2 =Enabled and required.
Group: TicketSubGroup: Frontend::Agent::Ticket::ViewResponsibleValid: 1Required: 0Config-Setting:
$Self->{‘Ticket::Frontend::AgentTicketResponsible’}->{‘TicketFreeTime’} = { ‘1’ => ‘0’, ‘2’ => ‘0’, ‘3’ => ‘0’, ‘4’ => ‘0’, ‘5’ => ‘0’, ‘6’ => ‘0’};
Ticket::Frontend::AgentTicketResponsible###ArticleFreeText
Description ValueDescription: Article free text options shown in the ticket responsible screen of the
agent interface. Possible settings: 0 = Disabled, 1 = Enabled, 2 =Enabled and required.
Group: TicketSubGroup: Frontend::Agent::Ticket::ViewResponsibleValid: 1Required: 0Config-Setting:
$Self->{‘Ticket::Frontend::AgentTicketResponsible’}->{‘ArticleFreeText’} = {

Configuration Options Reference
562
Description Value ‘1’ => ‘0’, ‘2’ => ‘0’, ‘3’ => ‘0’};
Ticket::Frontend::AgentTicketResponsible###HistoryType
Description ValueDescription: Defines the history type for the ticket responsible screen action, which
gets used for ticket history in the agent interface.Group: TicketSubGroup: Frontend::Agent::Ticket::ViewResponsibleValid: 1Required: 0Config-Setting:
$Self->{‘Ticket::Frontend::AgentTicketResponsible’}->{‘HistoryType’} = ‘AddNote’;
Ticket::Frontend::AgentTicketResponsible###HistoryComment
Description ValueDescription: Defines the history comment for the ticket responsible screen action,
which gets used for ticket history in the agent interface.Group: TicketSubGroup: Frontend::Agent::Ticket::ViewResponsibleValid: 1Required: 0Config-Setting:
$Self->{‘Ticket::Frontend::AgentTicketResponsible’}->{‘HistoryComment’} = ‘%%Responsible’;
Frontend::Agent::Ticket::ViewSearchTicket::Frontend::AgentTicketSearch###ExtendedSearchCondition
Description ValueDescription: Allows extended search conditions in ticket search of the agent
interface. With this feature you can search w. g. with this kind ofconditions like «(key1&&key2)» or «(key1||key2)».
Group: TicketSubGroup: Frontend::Agent::Ticket::ViewSearch

Configuration Options Reference
563
Description ValueValid: 1Required: 1Config-Setting:
$Self->{‘Ticket::Frontend::AgentTicketSearch’}->{‘ExtendedSearchCondition’} = ‘1’;
Ticket::Frontend::AgentTicketSearch###SearchLimit
Description ValueDescription: Maximum number of tickets to be displayed in the result of a search in
the agent interface.Group: TicketSubGroup: Frontend::Agent::Ticket::ViewSearchValid: 1Required: 1Config-Setting:
$Self->{‘Ticket::Frontend::AgentTicketSearch’}->{‘SearchLimit’} = ‘2000’;
Ticket::Frontend::AgentTicketSearch###SearchPageShown
Description ValueDescription: Number of tickets to be displayed in each page of a search result in the
agent interface.Group: TicketSubGroup: Frontend::Agent::Ticket::ViewSearchValid: 1Required: 1Config-Setting:
$Self->{‘Ticket::Frontend::AgentTicketSearch’}->{‘SearchPageShown’} = ’40’;
Ticket::Frontend::AgentTicketSearch###SearchViewableTicketLines
Description ValueDescription: Number of lines (per ticket) that are shown by the search utility in the
agent interface.Group: TicketSubGroup: Frontend::Agent::Ticket::ViewSearchValid: 1Required: 1Config-Setting:

Configuration Options Reference
564
Description Value $Self->{‘Ticket::Frontend::AgentTicketSearch’}->{‘SearchViewableTicketLines’} = ’10’;
Ticket::Frontend::AgentTicketSearch###TicketFreeText
Description ValueDescription: Ticket free text options shown in the ticket search of the agent interface.
Possible settings: 0 = Disabled, 1 = Enabled, 2 = Enabled and required.Group: TicketSubGroup: Frontend::Agent::Ticket::ViewSearchValid: 1Required: 0Config-Setting:
$Self->{‘Ticket::Frontend::AgentTicketSearch’}->{‘TicketFreeText’} = { ‘1’ => ‘1’, ’10’ => ‘0’, ’11’ => ‘0’, ’12’ => ‘0’, ’13’ => ‘0’, ’14’ => ‘0’, ’15’ => ‘0’, ’16’ => ‘0’, ‘2’ => ‘1’, ‘3’ => ‘0’, ‘4’ => ‘0’, ‘5’ => ‘0’, ‘6’ => ‘0’, ‘7’ => ‘0’, ‘8’ => ‘0’, ‘9’ => ‘0’};
Ticket::Frontend::AgentTicketSearch###TicketFreeTime
Description ValueDescription: Ticket free time options shown in the ticket search of the agent interface.
Possible settings: 0 = Disabled, 1 = Enabled.Group: TicketSubGroup: Frontend::Agent::Ticket::ViewSearchValid: 1Required: 0Config-Setting:
$Self->{‘Ticket::Frontend::AgentTicketSearch’}->{‘TicketFreeTime’} = { ‘1’ => ‘0’,

Configuration Options Reference
565
Description Value ‘2’ => ‘0’, ‘3’ => ‘0’, ‘4’ => ‘0’, ‘5’ => ‘0’, ‘6’ => ‘0’};
Ticket::Frontend::AgentTicketSearch###SortBy::Default
Description ValueDescription: Defines the default ticket attribute for ticket sorting of the ticket search
result of the agent interface.Group: TicketSubGroup: Frontend::Agent::Ticket::ViewSearchValid: 1Required: 1Config-Setting:
$Self->{‘Ticket::Frontend::AgentTicketSearch’}->{‘SortBy::Default’} = ‘Age’;
Ticket::Frontend::AgentTicketSearch###Order::Default
Description ValueDescription: Defines the default ticket order in the ticket search result of the agent
interface. Up: oldest on top. Down: latest on top.Group: TicketSubGroup: Frontend::Agent::Ticket::ViewSearchValid: 1Required: 1Config-Setting:
$Self->{‘Ticket::Frontend::AgentTicketSearch’}->{‘Order::Default’} = ‘Down’;
Ticket::Frontend::AgentTicketSearch###SearchArticleCSVTree
Description ValueDescription: Exports the whole article tree in search result (it can affect the system
performance).Group: TicketSubGroup: Frontend::Agent::Ticket::ViewSearchValid: 1Required: 1Config-Setting:

Configuration Options Reference
566
Description Value $Self->{‘Ticket::Frontend::AgentTicketSearch’}->{‘SearchArticleCSVTree’} = ‘0’;
Ticket::Frontend::AgentTicketSearch###SearchCSVDataDescription ValueDescription: Data used to export the search result in CSV format.Group: TicketSubGroup: Frontend::Agent::Ticket::ViewSearchValid: 1Required: 1Config-Setting:
$Self->{‘Ticket::Frontend::AgentTicketSearch’}->{‘SearchCSVData’} = [ ‘TicketNumber’, ‘Age’, ‘Created’, ‘Closed’, ‘FirstLock’, ‘FirstResponse’, ‘State’, ‘Priority’, ‘Queue’, ‘Lock’, ‘Owner’, ‘UserFirstname’, ‘UserLastname’, ‘CustomerID’, ‘CustomerName’, ‘From’, ‘Subject’, ‘AccountedTime’, ‘TicketFreeKey1’, ‘TicketFreeText1’, ‘TicketFreeKey2’, ‘TicketFreeText2’, ‘TicketFreeKey3’, ‘TicketFreeText3’, ‘TicketFreeKey4’, ‘TicketFreeText4’, ‘TicketFreeKey5’, ‘TicketFreeText5’, ‘TicketFreeKey6’, ‘TicketFreeText6’, ‘TicketFreeKey7’, ‘TicketFreeText7’, ‘TicketFreeKey8’, ‘TicketFreeText8’, ‘TicketFreeTime1’, ‘TicketFreeTime2’,

Configuration Options Reference
567
Description Value ‘TicketFreeTime3’, ‘TicketFreeTime4’, ‘TicketFreeTime5’, ‘TicketFreeTime6’, ‘ArticleTree’, ‘SolutionInMin’, ‘SolutionDiffInMin’, ‘FirstResponseInMin’, ‘FirstResponseDiffInMin’];
Ticket::Frontend::AgentTicketSearch###ArticleCreateTime
Description ValueDescription: Includes article create times in the ticket search of the agent interface.Group: TicketSubGroup: Frontend::Agent::Ticket::ViewSearchValid: 1Required: 0Config-Setting:
$Self->{‘Ticket::Frontend::AgentTicketSearch’}->{‘ArticleCreateTime’} = ‘0’;
Ticket::Frontend::AgentTicketSearch###Defaults###Fulltext
Description ValueDescription: Defines the default shown ticket search attribute for ticket search
screen.Group: TicketSubGroup: Frontend::Agent::Ticket::ViewSearchValid: 1Required: 0Config-Setting:
$Self->{‘Ticket::Frontend::AgentTicketSearch’}->{‘Defaults’}->{‘Fulltext’} = »;
Ticket::Frontend::AgentTicketSearch###Defaults###TicketNumber
Description ValueDescription: Defines the default shown ticket search attribute for ticket search
screen.Group: TicketSubGroup: Frontend::Agent::Ticket::ViewSearchValid: 0

Configuration Options Reference
568
Description ValueRequired: 0Config-Setting:
$Self->{‘Ticket::Frontend::AgentTicketSearch’}->{‘Defaults’}->{‘TicketNumber’} = »;
Ticket::Frontend::AgentTicketSearch###Defaults###Title
Description ValueDescription: Defines the default shown ticket search attribute for ticket search
screen.Group: TicketSubGroup: Frontend::Agent::Ticket::ViewSearchValid: 0Required: 0Config-Setting:
$Self->{‘Ticket::Frontend::AgentTicketSearch’}->{‘Defaults’}->{‘Title’} = »;
Ticket::Frontend::AgentTicketSearch###Defaults###From
Description ValueDescription: Defines the default shown ticket search attribute for ticket search
screen.Group: TicketSubGroup: Frontend::Agent::Ticket::ViewSearchValid: 0Required: 0Config-Setting:
$Self->{‘Ticket::Frontend::AgentTicketSearch’}->{‘Defaults’}->{‘From’} = »;
Ticket::Frontend::AgentTicketSearch###Defaults###To
Description ValueDescription: Defines the default shown ticket search attribute for ticket search
screen.Group: TicketSubGroup: Frontend::Agent::Ticket::ViewSearchValid: 0Required: 0Config-Setting:
$Self->{‘Ticket::Frontend::AgentTicketSearch’}->{‘Defaults’}->{‘To’} = »;

Configuration Options Reference
569
Ticket::Frontend::AgentTicketSearch###Defaults###Cc
Description ValueDescription: Defines the default shown ticket search attribute for ticket search
screen.Group: TicketSubGroup: Frontend::Agent::Ticket::ViewSearchValid: 0Required: 0Config-Setting:
$Self->{‘Ticket::Frontend::AgentTicketSearch’}->{‘Defaults’}->{‘Cc’} = »;
Ticket::Frontend::AgentTicketSearch###Defaults###Subject
Description ValueDescription: Defines the default shown ticket search attribute for ticket search
screen.Group: TicketSubGroup: Frontend::Agent::Ticket::ViewSearchValid: 0Required: 0Config-Setting:
$Self->{‘Ticket::Frontend::AgentTicketSearch’}->{‘Defaults’}->{‘Subject’} = »;
Ticket::Frontend::AgentTicketSearch###Defaults###Body
Description ValueDescription: Defines the default shown ticket search attribute for ticket search
screen.Group: TicketSubGroup: Frontend::Agent::Ticket::ViewSearchValid: 0Required: 0Config-Setting:
$Self->{‘Ticket::Frontend::AgentTicketSearch’}->{‘Defaults’}->{‘Body’} = »;
Ticket::Frontend::AgentTicketSearch###Defaults###CustomerID
Description ValueDescription: Defines the default shown ticket search attribute for ticket search
screen.

Configuration Options Reference
570
Description ValueGroup: TicketSubGroup: Frontend::Agent::Ticket::ViewSearchValid: 0Required: 0Config-Setting:
$Self->{‘Ticket::Frontend::AgentTicketSearch’}->{‘Defaults’}->{‘CustomerID’} = »;
Ticket::Frontend::AgentTicketSearch###Defaults###CustomerUserLogin
Description ValueDescription: Defines the default shown ticket search attribute for ticket search
screen.Group: TicketSubGroup: Frontend::Agent::Ticket::ViewSearchValid: 0Required: 0Config-Setting:
$Self->{‘Ticket::Frontend::AgentTicketSearch’}->{‘Defaults’}->{‘CustomerUserLogin’} = »;
Ticket::Frontend::AgentTicketSearch###Defaults###StateIDs
Description ValueDescription: Defines the default shown ticket search attribute for ticket search
screen.Group: TicketSubGroup: Frontend::Agent::Ticket::ViewSearchValid: 0Required: 0Config-Setting:
$Self->{‘Ticket::Frontend::AgentTicketSearch’}->{‘Defaults’}->{‘StateIDs’} = [];
Ticket::Frontend::AgentTicketSearch###Defaults###QueueIDs
Description ValueDescription: Defines the default shown ticket search attribute for ticket search
screen.Group: TicketSubGroup: Frontend::Agent::Ticket::ViewSearchValid: 0

Configuration Options Reference
571
Description ValueRequired: 0Config-Setting:
$Self->{‘Ticket::Frontend::AgentTicketSearch’}->{‘Defaults’}->{‘QueueIDs’} = [];
Ticket::Frontend::AgentTicketSearch###Defaults###TicketCreateTimePoint
Description ValueDescription: Default data to use on attribute for ticket search screen. Example:
«TicketCreateTimePointFormat=year;TicketCreateTimePointStart=Last;TicketCreateTimePoint=2;».Group: TicketSubGroup: Frontend::Agent::Ticket::ViewSearchValid: 0Required: 0Config-Setting:
$Self->{‘Ticket::Frontend::AgentTicketSearch’}->{‘Defaults’}->{‘TicketCreateTimePoint’} = »;
Ticket::Frontend::AgentTicketSearch###Defaults###TicketCreateTimeSlot
Description ValueDescription: Default data to use on attribute for ticket search screen. Example:
«TicketCreateTimeStartYear=2010;TicketCreateTimeStartMonth=10;TicketCreateTimeStartDay=4;TicketCreateTimeStopYear=2010;TicketCreateTimeStopMonth=11;TicketCreateTimeStopDay=3;».Group: TicketSubGroup: Frontend::Agent::Ticket::ViewSearchValid: 0Required: 0Config-Setting:
$Self->{‘Ticket::Frontend::AgentTicketSearch’}->{‘Defaults’}->{‘TicketCreateTimeSlot’} = »;
Ticket::Frontend::AgentTicketSearch###Defaults###TicketChangeTimePoint
Description ValueDescription: Defines the default shown ticket search attribute for ticket search
screen.Group: TicketSubGroup: Frontend::Agent::Ticket::ViewSearchValid: 0Required: 0Config-Setting:
$Self->{‘Ticket::Frontend::AgentTicketSearch’}->{‘Defaults’}->{‘TicketChangeTimePoint’} = »;

Configuration Options Reference
572
Ticket::Frontend::AgentTicketSearch###Defaults###TicketChangeTimeSlot
Description ValueDescription: Defines the default shown ticket search attribute for ticket search
screen.Group: TicketSubGroup: Frontend::Agent::Ticket::ViewSearchValid: 0Required: 0Config-Setting:
$Self->{‘Ticket::Frontend::AgentTicketSearch’}->{‘Defaults’}->{‘TicketChangeTimeSlot’} = »;
Ticket::Frontend::AgentTicketSearch###Defaults###TicketCloseTimePoint
Description ValueDescription: Defines the default shown ticket search attribute for ticket search
screen.Group: TicketSubGroup: Frontend::Agent::Ticket::ViewSearchValid: 0Required: 0Config-Setting:
$Self->{‘Ticket::Frontend::AgentTicketSearch’}->{‘Defaults’}->{‘TicketCloseTimePoint’} = »;
Ticket::Frontend::AgentTicketSearch###Defaults###TicketCloseTimeSlot
Description ValueDescription: Defines the default shown ticket search attribute for ticket search
screen.Group: TicketSubGroup: Frontend::Agent::Ticket::ViewSearchValid: 0Required: 0Config-Setting:
$Self->{‘Ticket::Frontend::AgentTicketSearch’}->{‘Defaults’}->{‘TicketCloseTimeSlot’} = »;
Ticket::Frontend::AgentTicketSearch###Defaults###ArticleCreateTimePoint
Description ValueDescription: Defines the default shown ticket search attribute for ticket search
screen.

Configuration Options Reference
573
Description ValueGroup: TicketSubGroup: Frontend::Agent::Ticket::ViewSearchValid: 0Required: 0Config-Setting:
$Self->{‘Ticket::Frontend::AgentTicketSearch’}->{‘Defaults’}->{‘ArticleCreateTimePoint’} = »;
Ticket::Frontend::AgentTicketSearch###Defaults###ArticleCreateTimeSlot
Description ValueDescription: Defines the default shown ticket search attribute for ticket search
screen.Group: TicketSubGroup: Frontend::Agent::Ticket::ViewSearchValid: 0Required: 0Config-Setting:
$Self->{‘Ticket::Frontend::AgentTicketSearch’}->{‘Defaults’}->{‘ArticleCreateTimeSlot’} = »;
Ticket::Frontend::AgentTicketSearch###Defaults###SearchInArchive
Description ValueDescription: Defines the default shown ticket search attribute for ticket search
screen.Group: TicketSubGroup: Frontend::Agent::Ticket::ViewSearchValid: 0Required: 0Config-Setting:
$Self->{‘Ticket::Frontend::AgentTicketSearch’}->{‘Defaults’}->{‘SearchInArchive’} = »;
Ticket::Frontend::AgentTicketSearch###Defaults###TicketFreeTime1
Description ValueDescription: Defines the default shown ticket search attribute for ticket search
screen.Group: TicketSubGroup: Frontend::Agent::Ticket::ViewSearchValid: 0

Configuration Options Reference
574
Description ValueRequired: 0Config-Setting:
$Self->{‘Ticket::Frontend::AgentTicketSearch’}->{‘Defaults’}->{‘TicketFreeTime1’} = »;
Ticket::Frontend::AgentTicketSearch###Defaults###TicketFreeTime2
Description ValueDescription: Defines the default shown ticket search attribute for ticket search
screen.Group: TicketSubGroup: Frontend::Agent::Ticket::ViewSearchValid: 0Required: 0Config-Setting:
$Self->{‘Ticket::Frontend::AgentTicketSearch’}->{‘Defaults’}->{‘TicketFreeTime2’} = »;
Ticket::Frontend::AgentTicketSearch###Defaults###TicketFreeTime3
Description ValueDescription: Defines the default shown ticket search attribute for ticket search
screen.Group: TicketSubGroup: Frontend::Agent::Ticket::ViewSearchValid: 0Required: 0Config-Setting:
$Self->{‘Ticket::Frontend::AgentTicketSearch’}->{‘Defaults’}->{‘TicketFreeTime3’} = »;
Ticket::Frontend::AgentTicketSearch###Defaults###TicketFreeTime4
Description ValueDescription: Defines the default shown ticket search attribute for ticket search
screen.Group: TicketSubGroup: Frontend::Agent::Ticket::ViewSearchValid: 0Required: 0Config-Setting:
$Self->{‘Ticket::Frontend::AgentTicketSearch’}->{‘Defaults’}->{‘TicketFreeTime4’} = »;

Configuration Options Reference
575
Ticket::Frontend::AgentTicketSearch###Defaults###TicketFreeTime5
Description ValueDescription: Defines the default shown ticket search attribute for ticket search
screen.Group: TicketSubGroup: Frontend::Agent::Ticket::ViewSearchValid: 0Required: 0Config-Setting:
$Self->{‘Ticket::Frontend::AgentTicketSearch’}->{‘Defaults’}->{‘TicketFreeTime5’} = »;
Ticket::Frontend::AgentTicketSearch###Defaults###TicketFreeText1
Description ValueDescription: Defines the default shown ticket search attribute for ticket search
screen.Group: TicketSubGroup: Frontend::Agent::Ticket::ViewSearchValid: 0Required: 0Config-Setting:
$Self->{‘Ticket::Frontend::AgentTicketSearch’}->{‘Defaults’}->{‘TicketFreeText1’} = [];
Ticket::Frontend::AgentTicketSearch###Defaults###TicketFreeText2
Description ValueDescription: Defines the default shown ticket search attribute for ticket search
screen.Group: TicketSubGroup: Frontend::Agent::Ticket::ViewSearchValid: 0Required: 0Config-Setting:
$Self->{‘Ticket::Frontend::AgentTicketSearch’}->{‘Defaults’}->{‘TicketFreeText2’} = [];
Ticket::Frontend::AgentTicketSearch###Defaults###TicketFreeText3
Description ValueDescription: Defines the default shown ticket search attribute for ticket search
screen.

Configuration Options Reference
576
Description ValueGroup: TicketSubGroup: Frontend::Agent::Ticket::ViewSearchValid: 0Required: 0Config-Setting:
$Self->{‘Ticket::Frontend::AgentTicketSearch’}->{‘Defaults’}->{‘TicketFreeText3’} = [];
Ticket::Frontend::AgentTicketSearch###Defaults###TicketFreeText4
Description ValueDescription: Defines the default shown ticket search attribute for ticket search
screen.Group: TicketSubGroup: Frontend::Agent::Ticket::ViewSearchValid: 0Required: 0Config-Setting:
$Self->{‘Ticket::Frontend::AgentTicketSearch’}->{‘Defaults’}->{‘TicketFreeText4’} = [];
Ticket::Frontend::AgentTicketSearch###Defaults###TicketFreeText5
Description ValueDescription: Defines the default shown ticket search attribute for ticket search
screen.Group: TicketSubGroup: Frontend::Agent::Ticket::ViewSearchValid: 0Required: 0Config-Setting:
$Self->{‘Ticket::Frontend::AgentTicketSearch’}->{‘Defaults’}->{‘TicketFreeText5’} = [];
Ticket::Frontend::AgentTicketSearch###Defaults###TicketFreeText6
Description ValueDescription: Defines the default shown ticket search attribute for ticket search
screen.Group: TicketSubGroup: Frontend::Agent::Ticket::ViewSearchValid: 0

Configuration Options Reference
577
Description ValueRequired: 0Config-Setting:
$Self->{‘Ticket::Frontend::AgentTicketSearch’}->{‘Defaults’}->{‘TicketFreeText6’} = [];
Ticket::Frontend::AgentTicketSearch###Defaults###TicketFreeText7
Description ValueDescription: Defines the default shown ticket search attribute for ticket search
screen.Group: TicketSubGroup: Frontend::Agent::Ticket::ViewSearchValid: 0Required: 0Config-Setting:
$Self->{‘Ticket::Frontend::AgentTicketSearch’}->{‘Defaults’}->{‘TicketFreeText7’} = [];
Ticket::Frontend::AgentTicketSearch###Defaults###TicketFreeText8
Description ValueDescription: Defines the default shown ticket search attribute for ticket search
screen.Group: TicketSubGroup: Frontend::Agent::Ticket::ViewSearchValid: 0Required: 0Config-Setting:
$Self->{‘Ticket::Frontend::AgentTicketSearch’}->{‘Defaults’}->{‘TicketFreeText8’} = [];
Ticket::Frontend::AgentTicketSearch###Defaults###TicketFreeText9
Description ValueDescription: Defines the default shown ticket search attribute for ticket search
screen.Group: TicketSubGroup: Frontend::Agent::Ticket::ViewSearchValid: 0Required: 0Config-Setting:
$Self->{‘Ticket::Frontend::AgentTicketSearch’}->{‘Defaults’}->{‘TicketFreeText9’} = [];

Configuration Options Reference
578
Ticket::Frontend::AgentTicketSearch###Defaults###TicketFreeText10
Description ValueDescription: Defines the default shown ticket search attribute for ticket search
screen.Group: TicketSubGroup: Frontend::Agent::Ticket::ViewSearchValid: 0Required: 0Config-Setting:
$Self->{‘Ticket::Frontend::AgentTicketSearch’}->{‘Defaults’}->{‘TicketFreeText10’} = [];
Ticket::Frontend::AgentTicketSearch###Defaults###TicketFreeText11
Description ValueDescription: Defines the default shown ticket search attribute for ticket search
screen.Group: TicketSubGroup: Frontend::Agent::Ticket::ViewSearchValid: 0Required: 0Config-Setting:
$Self->{‘Ticket::Frontend::AgentTicketSearch’}->{‘Defaults’}->{‘TicketFreeText11’} = [];
Ticket::Frontend::AgentTicketSearch###Defaults###TicketFreeText12
Description ValueDescription: Defines the default shown ticket search attribute for ticket search
screen.Group: TicketSubGroup: Frontend::Agent::Ticket::ViewSearchValid: 0Required: 0Config-Setting:
$Self->{‘Ticket::Frontend::AgentTicketSearch’}->{‘Defaults’}->{‘TicketFreeText12’} = [];
Ticket::Frontend::AgentTicketSearch###Defaults###TicketFreeText13
Description ValueDescription: Defines the default shown ticket search attribute for ticket search
screen.

Configuration Options Reference
579
Description ValueGroup: TicketSubGroup: Frontend::Agent::Ticket::ViewSearchValid: 0Required: 0Config-Setting:
$Self->{‘Ticket::Frontend::AgentTicketSearch’}->{‘Defaults’}->{‘TicketFreeText13’} = [];
Ticket::Frontend::AgentTicketSearch###Defaults###TicketFreeText14
Description ValueDescription: Defines the default shown ticket search attribute for ticket search
screen.Group: TicketSubGroup: Frontend::Agent::Ticket::ViewSearchValid: 0Required: 0Config-Setting:
$Self->{‘Ticket::Frontend::AgentTicketSearch’}->{‘Defaults’}->{‘TicketFreeText14’} = [];
Ticket::Frontend::AgentTicketSearch###Defaults###TicketFreeText15
Description ValueDescription: Defines the default shown ticket search attribute for ticket search
screen.Group: TicketSubGroup: Frontend::Agent::Ticket::ViewSearchValid: 0Required: 0Config-Setting:
$Self->{‘Ticket::Frontend::AgentTicketSearch’}->{‘Defaults’}->{‘TicketFreeText15’} = [];
Ticket::Frontend::AgentTicketSearch###Defaults###TicketFreeText16
Description ValueDescription: Defines the default shown ticket search attribute for ticket search
screen.Group: TicketSubGroup: Frontend::Agent::Ticket::ViewSearchValid: 0

Configuration Options Reference
580
Description ValueRequired: 0Config-Setting:
$Self->{‘Ticket::Frontend::AgentTicketSearch’}->{‘Defaults’}->{‘TicketFreeText16’} = [];
Ticket::Frontend::CustomerTicketSearch###SearchArticleCSVTree
Description ValueDescription: Exports the whole article tree in search result (it can affect the system
performance).Group: TicketSubGroup: Frontend::Agent::Ticket::ViewSearchValid: 1Required: 1Config-Setting:
$Self->{‘Ticket::Frontend::CustomerTicketSearch’}->{‘SearchArticleCSVTree’} = ‘0’;
Frontend::Agent::Ticket::ViewStatusTicket::Frontend::AgentTicketStatusView###ViewableTicketsPage
Description ValueDescription: Shows all open tickets (even if they are locked) in the status view of
the agent interface.Group: TicketSubGroup: Frontend::Agent::Ticket::ViewStatusValid: 1Required: 1Config-Setting:
$Self->{‘Ticket::Frontend::AgentTicketStatusView’}->{‘ViewableTicketsPage’} = ’50’;
Ticket::Frontend::AgentTicketStatusView###SortBy::Default
Description ValueDescription: Defines the default ticket attribute for ticket sorting in the status view of
the agent interface.Group: TicketSubGroup: Frontend::Agent::Ticket::ViewStatusValid: 1Required: 1

Configuration Options Reference
581
Description ValueConfig-Setting:
$Self->{‘Ticket::Frontend::AgentTicketStatusView’}->{‘SortBy::Default’} = ‘Age’;
Ticket::Frontend::AgentTicketStatusView###Order::Default
Description ValueDescription: Defines the default ticket order (after priority sort) in the status view of
the agent interface. Up: oldest on top. Down: latest on top.Group: TicketSubGroup: Frontend::Agent::Ticket::ViewStatusValid: 1Required: 1Config-Setting:
$Self->{‘Ticket::Frontend::AgentTicketStatusView’}->{‘Order::Default’} = ‘Down’;
Frontend::Agent::Ticket::ViewZoomTicket::Frontend::PlainView
Description ValueDescription: Shows a link to see a zoomed email ticket in plain text.Group: TicketSubGroup: Frontend::Agent::Ticket::ViewZoomValid: 1Required: 1Config-Setting:
$Self->{‘Ticket::Frontend::PlainView’} = ‘0’;
Ticket::Frontend::ZoomExpand
Description ValueDescription: Shows all the articles of the ticket (expanded) in the zoom view.Group: TicketSubGroup: Frontend::Agent::Ticket::ViewZoomValid: 1Required: 1Config-Setting:
$Self->{‘Ticket::Frontend::ZoomExpand’} = ‘0’;

Configuration Options Reference
582
Ticket::Frontend::ZoomExpandSortDescription ValueDescription: Shows the articles sorted normally or in reverse, under ticket zoom in
the agent interface.Group: TicketSubGroup: Frontend::Agent::Ticket::ViewZoomValid: 1Required: 1Config-Setting:
$Self->{‘Ticket::Frontend::ZoomExpandSort’} = ‘normal’;
Ticket::ZoomAttachmentDisplayCountDescription ValueDescription: Shows a count of icons in the ticket zoom, if the article has attachments.Group: TicketSubGroup: Frontend::Agent::Ticket::ViewZoomValid: 1Required: 1Config-Setting:
$Self->{‘Ticket::ZoomAttachmentDisplayCount’} = ’20’;
Ticket::ZoomTimeDisplayDescription ValueDescription: Displays the accounted time for an article in the ticket zoom view.Group: TicketSubGroup: Frontend::Agent::Ticket::ViewZoomValid: 0Required: 0Config-Setting:
$Self->{‘Ticket::ZoomTimeDisplay’} = ‘0’;
Ticket::Frontend::TicketArticleFilterDescription ValueDescription: Activates the article filter in the zoom view to specify which articles
should be shown.Group: TicketSubGroup: Frontend::Agent::Ticket::ViewZoomValid: 1

Configuration Options Reference
583
Description ValueRequired: 1Config-Setting:
$Self->{‘Ticket::Frontend::TicketArticleFilter’} = ‘0’;
Ticket::Frontend::HTMLArticleHeightDefault
Description ValueDescription: Set the default height (in pixels) of inline HTML articles in
AgentTicketZoom.Group: TicketSubGroup: Frontend::Agent::Ticket::ViewZoomValid: 1Required: 1Config-Setting:
$Self->{‘Ticket::Frontend::HTMLArticleHeightDefault’} = ‘100’;
Ticket::Frontend::HTMLArticleHeightMax
Description ValueDescription: Set the maximum height (in pixels) of inline HTML articles in
AgentTicketZoom.Group: TicketSubGroup: Frontend::Agent::Ticket::ViewZoomValid: 1Required: 1Config-Setting:
$Self->{‘Ticket::Frontend::HTMLArticleHeightMax’} = ‘2500’;
Ticket::Frontend::ZoomRichTextForce
Description ValueDescription: Show article as rich text even if rich text writing is disabled.Group: TicketSubGroup: Frontend::Agent::Ticket::ViewZoomValid: 1Required: 1Config-Setting:
$Self->{‘Ticket::Frontend::ZoomRichTextForce’} = ‘0’;

Configuration Options Reference
584
Frontend::Agent::TicketOverviewTicket::Frontend::Overview###Small
Description ValueDescription: Allows having a small format ticket overview (CustomerInfo => 1 —
shows also the customer information).Group: TicketSubGroup: Frontend::Agent::TicketOverviewValid: 1Required: 0Config-Setting:
$Self->{‘Ticket::Frontend::Overview’}->{‘Small’} = { ‘CustomerInfo’ => ‘1’, ‘Module’ => ‘Kernel::Output::HTML::TicketOverviewSmall’, ‘Name’ => ‘Small’, ‘NameShort’ => ‘S’};
Ticket::Frontend::OverviewSmall###ColumnHeaderDescription ValueDescription: Shows either the last customer article’s subject or the ticket title in the
small format overview.Group: TicketSubGroup: Frontend::Agent::TicketOverviewValid: 1Required: 0Config-Setting:
$Self->{‘Ticket::Frontend::OverviewSmall’}->{‘ColumnHeader’} = ‘LastCustomerSubject’;
Ticket::Frontend::Overview###MediumDescription ValueDescription: Allows having a medium format ticket overview (CustomerInfo => 1 —
shows also the customer information).Group: TicketSubGroup: Frontend::Agent::TicketOverviewValid: 1Required: 0Config-Setting:
$Self->{‘Ticket::Frontend::Overview’}->{‘Medium’} = {

Configuration Options Reference
585
Description Value ‘CustomerInfo’ => ‘0’, ‘Module’ => ‘Kernel::Output::HTML::TicketOverviewMedium’, ‘Name’ => ‘Medium’, ‘NameShort’ => ‘M’, ‘TicketActionsPerTicket’ => ‘0’};
Ticket::Frontend::Overview###PreviewDescription ValueDescription: Shows a preview of the ticket overview (CustomerInfo => 1 — shows
also Customer-Info, CustomerInfoMaxSize max. size in characters ofCustomer-Info).
Group: TicketSubGroup: Frontend::Agent::TicketOverviewValid: 1Required: 0Config-Setting:
$Self->{‘Ticket::Frontend::Overview’}->{‘Preview’} = { ‘CustomerInfo’ => ‘0’, ‘CustomerInfoMaxSize’ => ’18’, ‘DefaultPreViewLines’ => ’25’, ‘DefaultViewNewLine’ => ’90’, ‘Module’ => ‘Kernel::Output::HTML::TicketOverviewPreview’, ‘Name’ => ‘Preview’, ‘NameShort’ => ‘L’, ‘StripEmptyLines’ => ‘0’, ‘TicketActionsPerTicket’ => ‘0’};
Frontend::Agent::ToolBarModuleFrontend::ToolBarModule###1-Ticket::AgentTicketQueue
Description ValueDescription: Toolbar Item for a shortcut.Group: TicketSubGroup: Frontend::Agent::ToolBarModuleValid: 0Required: 0Config-Setting:
$Self->{‘Frontend::ToolBarModule’}->{‘1-Ticket::AgentTicketQueue’} = { ‘AccessKey’ => ‘q’,

Configuration Options Reference
586
Description Value ‘Action’ => ‘AgentTicketQueue’, ‘CssClass’ => ‘QueueView’, ‘Link’ => ‘Action=AgentTicketQueue’, ‘Module’ => ‘Kernel::Output::HTML::ToolBarLink’, ‘Name’ => ‘Queue view’, ‘Priority’ => ‘1010010’};
Frontend::ToolBarModule###2-Ticket::AgentTicketStatusDescription ValueDescription: Toolbar Item for a shortcut.Group: TicketSubGroup: Frontend::Agent::ToolBarModuleValid: 0Required: 0Config-Setting:
$Self->{‘Frontend::ToolBarModule’}->{‘2-Ticket::AgentTicketStatus’} = { ‘AccessKey’ => ‘o’, ‘Action’ => ‘AgentTicketStatusView’, ‘CssClass’ => ‘StatusView’, ‘Link’ => ‘Action=AgentTicketStatusView’, ‘Module’ => ‘Kernel::Output::HTML::ToolBarLink’, ‘Name’ => ‘Status view’, ‘Priority’ => ‘1010020’};
Frontend::ToolBarModule###3-Ticket::AgentTicketEscalationDescription ValueDescription: Toolbar Item for a shortcut.Group: TicketSubGroup: Frontend::Agent::ToolBarModuleValid: 0Required: 0Config-Setting:
$Self->{‘Frontend::ToolBarModule’}->{‘3-Ticket::AgentTicketEscalation’} = { ‘AccessKey’ => ‘w’, ‘Action’ => ‘AgentTicketEscalationView’, ‘CssClass’ => ‘EscalationView’, ‘Link’ => ‘Action=AgentTicketEscalationView’, ‘Module’ => ‘Kernel::Output::HTML::ToolBarLink’, ‘Name’ => ‘Escalation view’, ‘Priority’ => ‘1010030’};

Configuration Options Reference
587
Frontend::ToolBarModule###4-Ticket::AgentTicketPhone
Description ValueDescription: Toolbar Item for a shortcut.Group: TicketSubGroup: Frontend::Agent::ToolBarModuleValid: 0Required: 0Config-Setting:
$Self->{‘Frontend::ToolBarModule’}->{‘4-Ticket::AgentTicketPhone’} = { ‘AccessKey’ => ‘l’, ‘Action’ => ‘AgentTicketPhone’, ‘CssClass’ => ‘PhoneTicket’, ‘Link’ => ‘Action=AgentTicketPhone’, ‘Module’ => ‘Kernel::Output::HTML::ToolBarLink’, ‘Name’ => ‘New phone ticket’, ‘Priority’ => ‘1020010’};
Frontend::ToolBarModule###5-Ticket::AgentTicketEmail
Description ValueDescription: Toolbar Item for a shortcut.Group: TicketSubGroup: Frontend::Agent::ToolBarModuleValid: 0Required: 0Config-Setting:
$Self->{‘Frontend::ToolBarModule’}->{‘5-Ticket::AgentTicketEmail’} = { ‘AccessKey’ => ‘l’, ‘Action’ => ‘AgentTicketEmail’, ‘CssClass’ => ‘EmailTicket’, ‘Link’ => ‘Action=AgentTicketEmail’, ‘Module’ => ‘Kernel::Output::HTML::ToolBarLink’, ‘Name’ => ‘New email ticket’, ‘Priority’ => ‘1020020’};
Frontend::ToolBarModule###6-Ticket::TicketResponsible
Description ValueDescription: Agent interface notification module to see the number of tickets an
agent is responsible for.Group: Ticket

Configuration Options Reference
588
Description ValueSubGroup: Frontend::Agent::ToolBarModuleValid: 1Required: 0Config-Setting:
$Self->{‘Frontend::ToolBarModule’}->{‘6-Ticket::TicketResponsible’} = { ‘CssClass’ => ‘Responsible’, ‘CssClassNew’ => ‘Responsible New’, ‘CssClassReached’ => ‘Responsible Reached’, ‘Module’ => ‘Kernel::Output::HTML::ToolBarTicketResponsible’, ‘Priority’ => ‘1030010’};
Frontend::ToolBarModule###7-Ticket::TicketWatcherDescription ValueDescription: Agent interface notification module to see the number of watched
tickets.Group: TicketSubGroup: Frontend::Agent::ToolBarModuleValid: 1Required: 0Config-Setting:
$Self->{‘Frontend::ToolBarModule’}->{‘7-Ticket::TicketWatcher’} = { ‘CssClass’ => ‘Watcher’, ‘CssClassNew’ => ‘Watcher New’, ‘CssClassReached’ => ‘Watcher Reached’, ‘Module’ => ‘Kernel::Output::HTML::ToolBarTicketWatcher’, ‘Priority’ => ‘1030020’};
Frontend::ToolBarModule###8-Ticket::TicketLockedDescription ValueDescription: Agent interface notification module to check the used charset.Group: TicketSubGroup: Frontend::Agent::ToolBarModuleValid: 1Required: 0Config-Setting:
$Self->{‘Frontend::ToolBarModule’}->{‘8-Ticket::TicketLocked’} = { ‘CssClass’ => ‘Locked’,

Configuration Options Reference
589
Description Value ‘CssClassNew’ => ‘Locked New’, ‘CssClassReached’ => ‘Locked Reached’, ‘Module’ => ‘Kernel::Output::HTML::ToolBarTicketLocked’, ‘Priority’ => ‘1030030’};
Frontend::ToolBarModule###9-Ticket::TicketSearchProfileDescription ValueDescription: Agent interface module to access search profiles via nav bar.Group: TicketSubGroup: Frontend::Agent::ToolBarModuleValid: 0Required: 0Config-Setting:
$Self->{‘Frontend::ToolBarModule’}->{‘9-Ticket::TicketSearchProfile’} = { ‘Block’ => ‘ToolBarSearchProfile’, ‘Description’ => ‘Search-Template’, ‘MaxWidth’ => ’40’, ‘Module’ => ‘Kernel::Output::HTML::ToolBarTicketSearchProfile’, ‘Name’ => ‘Search-Template’, ‘Priority’ => ‘1990010’};
Frontend::ToolBarModule###10-Ticket::TicketSearchFulltextDescription ValueDescription: Agent interface module to access fulltext search via nav bar.Group: TicketSubGroup: Frontend::Agent::ToolBarModuleValid: 0Required: 0Config-Setting:
$Self->{‘Frontend::ToolBarModule’}->{’10-Ticket::TicketSearchFulltext’} = { ‘Block’ => ‘ToolBarSearchFulltext’, ‘CSS’ => ‘Core.Agent.Toolbar.FulltextSearch.css’, ‘Description’ => ‘Fulltext-Search’, ‘Module’ => ‘Kernel::Output::HTML::ToolBarTicketSearchFulltext’, ‘Name’ => ‘Fulltext-Search’, ‘Priority’ => ‘1990020’, ‘Size’ => ’10’};

Configuration Options Reference
590
Frontend::CustomerTicket::Frontend::CustomerTicketOverviewSortable
Description ValueDescription: Controls if customers have the ability to sort their tickets.Group: TicketSubGroup: Frontend::CustomerValid: 1Required: 0Config-Setting:
$Self->{‘Ticket::Frontend::CustomerTicketOverviewSortable’} = »;
Ticket::Frontend::CustomerTicketOverviewCustomEmptyTextDescription ValueDescription: Custom text for the page shown to customers that have no tickets yet.Group: TicketSubGroup: Frontend::CustomerValid: 0Required: 0Config-Setting:
$Self->{‘Ticket::Frontend::CustomerTicketOverviewCustomEmptyText’} = { ‘Button’ => ‘Create your first ticket’, ‘Text’ => ‘Please click the button below to create your first ticket.’, ‘Title’ => ‘Welcome!’};
Frontend::CustomerUser::Item###9-OpenTicketsDescription ValueDescription: Customer item (icon) which shows the open tickets of this customer as
info block.Group: TicketSubGroup: Frontend::CustomerValid: 1Required: 0Config-Setting:
$Self->{‘Frontend::CustomerUser::Item’}->{‘9-OpenTickets’} = { ‘Action’ => ‘AgentTicketSearch’,

Configuration Options Reference
591
Description Value ‘Attributes’ => ‘StateType=Open;’, ‘CSS’ => ‘Core.Agent.CustomerUser.OpenTicket.css’, ‘CSSClassNoOpenTicket’ => ‘NoOpenTicket’, ‘CSSClassOpenTicket’ => ‘OpenTicket’, ‘Module’ => ‘Kernel::Output::HTML::CustomerUserGenericTicket’, ‘Subaction’ => ‘Search’, ‘Target’ => ‘_blank’, ‘Text’ => ‘Open Tickets’};
CustomerFrontend::CommonObject###QueueObjectDescription ValueDescription: Path of the file that stores all the settings for the QueueObject object
for the customer interface.Group: TicketSubGroup: Frontend::CustomerValid: 1Required: 1Config-Setting:
$Self->{‘CustomerFrontend::CommonObject’}->{‘QueueObject’} = ‘Kernel::System::Queue’;
CustomerFrontend::CommonObject###TicketObjectDescription ValueDescription: Path of the file that stores all the settings for the TicketObject for the
customer interface.Group: TicketSubGroup: Frontend::CustomerValid: 1Required: 1Config-Setting:
$Self->{‘CustomerFrontend::CommonObject’}->{‘TicketObject’} = ‘Kernel::System::Ticket’;
CustomerFrontend::CommonParam###ActionDescription ValueDescription: Defines the default used Frontend-Module if no Action parameter given
in the url on the customer interface.Group: TicketSubGroup: Frontend::CustomerValid: 1

Configuration Options Reference
592
Description ValueRequired: 1Config-Setting:
$Self->{‘CustomerFrontend::CommonParam’}->{‘Action’} = ‘CustomerTicketOverView’;
CustomerFrontend::CommonParam###TicketIDDescription ValueDescription: Default ticket ID used by the system in the customer interface.Group: TicketSubGroup: Frontend::CustomerValid: 1Required: 1Config-Setting:
$Self->{‘CustomerFrontend::CommonParam’}->{‘TicketID’} = »;
Frontend::Customer::ModuleMetaHeadCustomerFrontend::HeaderMetaModule###2-TicketSearch
Description ValueDescription: Module to generate html OpenSearch profile for short ticket search in
the customer interface.Group: TicketSubGroup: Frontend::Customer::ModuleMetaHeadValid: 1Required: 0Config-Setting:
$Self->{‘CustomerFrontend::HeaderMetaModule’}->{‘2-TicketSearch’} = { ‘Action’ => ‘CustomerTicketSearch’, ‘Module’ => ‘Kernel::Output::HTML::CustomerHeaderMetaTicketSearch’};
Frontend::Customer::ModuleRegistrationCustomerFrontend::Module###CustomerTicketOverView
Description ValueDescription: Frontend module registration for the customer interface.Group: TicketSubGroup: Frontend::Customer::ModuleRegistration

Configuration Options Reference
593
Description ValueValid: 1Required: 0Config-Setting:
$Self->{‘CustomerFrontend::Module’}->{‘CustomerTicketOverView’} = { ‘Description’ => ‘Overview of customer tickets’, ‘NavBar’ => [ { ‘AccessKey’ => ‘m’, ‘Block’ => », ‘Description’ => ‘My Tickets’, ‘Link’ => ‘Action=CustomerTicketOverView;Subaction=MyTickets’, ‘LinkOption’ => », ‘Name’ => ‘My Tickets’, ‘NavBar’ => », ‘Prio’ => ‘110’, ‘Type’ => » }, { ‘AccessKey’ => ‘c’, ‘Block’ => », ‘Description’ => ‘Company Tickets’, ‘Link’ => ‘Action=CustomerTicketOverView;Subaction=CompanyTickets’, ‘LinkOption’ => », ‘Name’ => ‘Company Tickets’, ‘NavBar’ => », ‘Prio’ => ‘120’, ‘Type’ => » } ], ‘NavBarName’ => ‘Ticket’, ‘Title’ => ‘Overview’};
CustomerFrontend::Module###CustomerTicketMessageDescription ValueDescription: Frontend module registration for the customer interface.Group: TicketSubGroup: Frontend::Customer::ModuleRegistrationValid: 1Required: 0Config-Setting:
$Self->{‘CustomerFrontend::Module’}->{‘CustomerTicketMessage’} = { ‘Description’ => ‘Create tickets’, ‘NavBar’ => [

Configuration Options Reference
594
Description Value { ‘AccessKey’ => ‘n’, ‘Block’ => », ‘Description’ => ‘Create new Ticket’, ‘Link’ => ‘Action=CustomerTicketMessage’, ‘LinkOption’ => », ‘Name’ => ‘New Ticket’, ‘NavBar’ => », ‘Prio’ => ‘100’, ‘Type’ => » } ], ‘NavBarName’ => ‘Ticket’, ‘Title’ => ‘New Ticket’};
CustomerFrontend::Module###CustomerTicketZoom
Description ValueDescription: Frontend module registration for the customer interface.Group: TicketSubGroup: Frontend::Customer::ModuleRegistrationValid: 1Required: 0Config-Setting:
$Self->{‘CustomerFrontend::Module’}->{‘CustomerTicketZoom’} = { ‘Description’ => ‘Ticket zoom view’, ‘Loader’ => { ‘JavaScript’ => [ ‘Core.Customer.TicketZoom.js’, ‘Core.UI.Popup.js’ ] }, ‘NavBarName’ => ‘Ticket’, ‘Title’ => ‘Zoom’};
CustomerFrontend::Module###CustomerTicketPrint
Description ValueDescription: Frontend module registration for the customer interface.Group: TicketSubGroup: Frontend::Customer::ModuleRegistrationValid: 1Required: 0Config-Setting:

Configuration Options Reference
595
Description Value $Self->{‘CustomerFrontend::Module’}->{‘CustomerTicketPrint’} = { ‘Description’ => ‘Customer Ticket Print Module’, ‘NavBarName’ => », ‘Title’ => ‘Print’};
CustomerFrontend::Module###CustomerZoom
Description ValueDescription: Frontend module registration for the customer interface.Group: TicketSubGroup: Frontend::Customer::ModuleRegistrationValid: 1Required: 0Config-Setting:
$Self->{‘CustomerFrontend::Module’}->{‘CustomerZoom’} = { ‘Description’ => ‘compat mod’, ‘NavBarName’ => », ‘Title’ => »};
CustomerFrontend::Module###CustomerTicketAttachment
Description ValueDescription: Frontend module registration for the customer interface.Group: TicketSubGroup: Frontend::Customer::ModuleRegistrationValid: 1Required: 0Config-Setting:
$Self->{‘CustomerFrontend::Module’}->{‘CustomerTicketAttachment’} = { ‘Description’ => ‘To download attachments’, ‘NavBarName’ => », ‘Title’ => »};
CustomerFrontend::Module###CustomerTicketSearch
Description ValueDescription: Frontend module registration for the customer interface.Group: TicketSubGroup: Frontend::Customer::ModuleRegistration

Configuration Options Reference
596
Description ValueValid: 1Required: 0Config-Setting:
$Self->{‘CustomerFrontend::Module’}->{‘CustomerTicketSearch’} = { ‘Description’ => ‘Customer ticket search’, ‘NavBar’ => [ { ‘AccessKey’ => ‘s’, ‘Block’ => », ‘Description’ => ‘Search’, ‘Link’ => ‘Action=CustomerTicketSearch’, ‘LinkOption’ => », ‘Name’ => ‘Search’, ‘NavBar’ => », ‘Prio’ => ‘300’, ‘Type’ => » } ], ‘NavBarName’ => ‘Ticket’, ‘Title’ => ‘Search’};
Frontend::Customer::PreferencesCustomerPreferencesGroups###ShownTickets
Description ValueDescription: Defines all the parameters for the ShownTickets object in the customer
preferences of the customer interface.Group: TicketSubGroup: Frontend::Customer::PreferencesValid: 1Required: 0Config-Setting:
$Self->{‘CustomerPreferencesGroups’}->{‘ShownTickets’} = { ‘Active’ => ‘1’, ‘Column’ => ‘User Profile’, ‘Data’ => { ’15’ => ’15’, ’20’ => ’20’, ’25’ => ’25’, ’30’ => ’30’ }, ‘DataSelected’ => ’25’, ‘Key’ => ‘Tickets per page’, ‘Label’ => ‘Number of displayed tickets’,

Configuration Options Reference
597
Description Value ‘Module’ => ‘Kernel::Output::HTML::PreferencesGeneric’, ‘PrefKey’ => ‘UserShowTickets’, ‘Prio’ => ‘4000’};
CustomerPreferencesGroups###RefreshTimeDescription ValueDescription: Defines all the parameters for the RefreshTime object in the customer
preferences of the customer interface.Group: TicketSubGroup: Frontend::Customer::PreferencesValid: 1Required: 0Config-Setting:
$Self->{‘CustomerPreferencesGroups’}->{‘RefreshTime’} = { ‘Active’ => ‘1’, ‘Column’ => ‘User Profile’, ‘Data’ => { » => ‘off’, ’10’ => ’10 minutes’, ’15’ => ’15 minutes’, ‘2’ => ‘ 2 minutes’, ‘5’ => ‘ 5 minutes’, ‘7’ => ‘ 7 minutes’ }, ‘DataSelected’ => », ‘Key’ => ‘Refresh interval’, ‘Label’ => ‘Ticket overview’, ‘Module’ => ‘Kernel::Output::HTML::PreferencesGeneric’, ‘PrefKey’ => ‘UserRefreshTime’, ‘Prio’ => ‘4000’};
Frontend::Customer::Ticket::ViewNewTicket::Frontend::CustomerTicketMessage###NextScreenAfterNewTicket
Description ValueDescription: Determines the next screen after new customer ticket in the customer
interface.Group: TicketSubGroup: Frontend::Customer::Ticket::ViewNewValid: 1

Configuration Options Reference
598
Description ValueRequired: 1Config-Setting:
$Self->{‘Ticket::Frontend::CustomerTicketMessage’}->{‘NextScreenAfterNewTicket’} = ‘CustomerTicketOverView’;
Ticket::Frontend::CustomerTicketMessage###Priority
Description ValueDescription: Allows customers to set the ticket priority in the customer interface.Group: TicketSubGroup: Frontend::Customer::Ticket::ViewNewValid: 1Required: 1Config-Setting:
$Self->{‘Ticket::Frontend::CustomerTicketMessage’}->{‘Priority’} = ‘1’;
Ticket::Frontend::CustomerTicketMessage###PriorityDefault
Description ValueDescription: Defines the default priority of new customer tickets in the customer
interface.Group: TicketSubGroup: Frontend::Customer::Ticket::ViewNewValid: 1Required: 1Config-Setting:
$Self->{‘Ticket::Frontend::CustomerTicketMessage’}->{‘PriorityDefault’} = ‘3 normal’;
Ticket::Frontend::CustomerTicketMessage###Queue
Description ValueDescription: Allows customers to set the ticket queue in the customer interface. If
this is set to ‘No’, QueueDefault should be configured.Group: TicketSubGroup: Frontend::Customer::Ticket::ViewNewValid: 1Required: 1

Configuration Options Reference
599
Description ValueConfig-Setting:
$Self->{‘Ticket::Frontend::CustomerTicketMessage’}->{‘Queue’} = ‘1’;
Ticket::Frontend::CustomerTicketMessage###QueueDefaultDescription ValueDescription: Defines the default queue for new customer tickets in the customer
interface.Group: TicketSubGroup: Frontend::Customer::Ticket::ViewNewValid: 0Required: 0Config-Setting:
$Self->{‘Ticket::Frontend::CustomerTicketMessage’}->{‘QueueDefault’} = ‘Postmaster’;
Ticket::Frontend::CustomerTicketMessage###ServiceDescription ValueDescription: Allows customers to set the ticket service in the customer interface.Group: TicketSubGroup: Frontend::Customer::Ticket::ViewNewValid: 1Required: 1Config-Setting:
$Self->{‘Ticket::Frontend::CustomerTicketMessage’}->{‘Service’} = ‘1’;
Ticket::Frontend::CustomerTicketMessage###SLADescription ValueDescription: Allows customers to set the ticket SLA in the customer interface.Group: TicketSubGroup: Frontend::Customer::Ticket::ViewNewValid: 1Required: 1Config-Setting:
$Self->{‘Ticket::Frontend::CustomerTicketMessage’}->{‘SLA’} = ‘1’;

Configuration Options Reference
600
Ticket::Frontend::CustomerTicketMessage###StateDefault
Description ValueDescription: Defines the default state of new customer tickets in the customer
interface.Group: TicketSubGroup: Frontend::Customer::Ticket::ViewNewValid: 1Required: 1Config-Setting:
$Self->{‘Ticket::Frontend::CustomerTicketMessage’}->{‘StateDefault’} = ‘new’;
Ticket::Frontend::CustomerTicketMessage###ArticleType
Description ValueDescription: Defines the default type for article in the customer interface.Group: TicketSubGroup: Frontend::Customer::Ticket::ViewNewValid: 1Required: 1Config-Setting:
$Self->{‘Ticket::Frontend::CustomerTicketMessage’}->{‘ArticleType’} = ‘webrequest’;
Ticket::Frontend::CustomerTicketMessage###SenderType
Description ValueDescription: Sender type for new tickets from the customer inteface.Group: TicketSubGroup: Frontend::Customer::Ticket::ViewNewValid: 1Required: 1Config-Setting:
$Self->{‘Ticket::Frontend::CustomerTicketMessage’}->{‘SenderType’} = ‘customer’;
Ticket::Frontend::CustomerTicketMessage###HistoryType
Description ValueDescription: Defines the default history type in the customer interface.

Configuration Options Reference
601
Description ValueGroup: TicketSubGroup: Frontend::Customer::Ticket::ViewNewValid: 1Required: 1Config-Setting:
$Self->{‘Ticket::Frontend::CustomerTicketMessage’}->{‘HistoryType’} = ‘WebRequestCustomer’;
Ticket::Frontend::CustomerTicketMessage###HistoryCommentDescription ValueDescription: Comment for new history entries in the customer interface.Group: TicketSubGroup: Frontend::Customer::Ticket::ViewNewValid: 1Required: 1Config-Setting:
$Self->{‘Ticket::Frontend::CustomerTicketMessage’}->{‘HistoryComment’} = »;
CustomerPanelSelectionTypeDescription ValueDescription: Defines the receipent target of the tickets («Queue» shows all queues,
«SystemAddress» displays all system addresses) in the customerinterface.
Group: TicketSubGroup: Frontend::Customer::Ticket::ViewNewValid: 1Required: 1Config-Setting:
$Self->{‘CustomerPanelSelectionType’} = ‘Queue’;
CustomerPanelSelectionStringDescription ValueDescription: Determines the strings that will be shown as receipent (To:) of the ticket
in the customer interface. For Queue as CustomerPanelSelectionType,»<Queue>» shows the names of the queues, and for SystemAddress,»<Realname> <<Email>>» shows the name and email of the receipent.
Group: TicketSubGroup: Frontend::Customer::Ticket::ViewNew

Configuration Options Reference
602
Description ValueValid: 1Required: 0Config-Setting:
$Self->{‘CustomerPanelSelectionString’} = ‘<Queue>’;
CustomerPanelOwnSelection
Description ValueDescription: Determines which queues will be valid for ticket’s recepients in the
customer interface.Group: TicketSubGroup: Frontend::Customer::Ticket::ViewNewValid: 0Required: 0Config-Setting:
$Self->{‘CustomerPanelOwnSelection’} = { ‘Junk’ => ‘First Queue’, ‘Misc’ => ‘Second Queue’};
CustomerPanel::NewTicketQueueSelectionModule
Description ValueDescription: Module for To-selection in new ticket screen in the customer interface.Group: TicketSubGroup: Frontend::Customer::Ticket::ViewNewValid: 1Required: 1Config-Setting:
$Self->{‘CustomerPanel::NewTicketQueueSelectionModule’} = ‘Kernel::Output::HTML::CustomerNewTicketQueueSelectionGeneric’;
Ticket::Frontend::CustomerTicketMessage###TicketFreeText
Description ValueDescription: Ticket free text options shown in the ticket message screen of the
customer interface. Possible settings: 0 = Disabled, 1 = Enabled, 2 =Enabled and required. NOTE. If you want to display these fields also inthe ticket zoom of the customer interface, you have to enable them inCustomerTicketZoom###AttributesView.
Group: Ticket

Configuration Options Reference
603
Description ValueSubGroup: Frontend::Customer::Ticket::ViewNewValid: 1Required: 0Config-Setting:
$Self->{‘Ticket::Frontend::CustomerTicketMessage’}->{‘TicketFreeText’} = { ‘1’ => ‘0’, ’10’ => ‘0’, ’11’ => ‘0’, ’12’ => ‘0’, ’13’ => ‘0’, ’14’ => ‘0’, ’15’ => ‘0’, ’16’ => ‘0’, ‘2’ => ‘0’, ‘3’ => ‘0’, ‘4’ => ‘0’, ‘5’ => ‘0’, ‘6’ => ‘0’, ‘7’ => ‘0’, ‘8’ => ‘0’, ‘9’ => ‘0’};
Ticket::Frontend::CustomerTicketMessage###TicketFreeTime
Description ValueDescription: Ticket free time options shown in the ticket message screen of the
customer interface. Possible settings: 0 = Disabled, 1 = Enabled, 2 =Enabled and required. NOTE. If you want to display these fields also inthe ticket zoom of the customer interface, you have to enable them inCustomerTicketZoom###AttributesView.
Group: TicketSubGroup: Frontend::Customer::Ticket::ViewNewValid: 1Required: 0Config-Setting:
$Self->{‘Ticket::Frontend::CustomerTicketMessage’}->{‘TicketFreeTime’} = { ‘1’ => ‘0’, ‘2’ => ‘0’, ‘3’ => ‘0’, ‘4’ => ‘0’, ‘5’ => ‘0’, ‘6’ => ‘0’};

Configuration Options Reference
604
Ticket::Frontend::CustomerTicketMessage###ArticleFreeText
Description ValueDescription: Article free text options shown in the ticket message screen of the
customer interface. Possible settings: 0 = Disabled, 1 = Enabled, 2 =Enabled and required. NOTE. If you want to display these fields also inthe ticket zoom of the customer interface, you have to enable them inCustomerTicketZoom###AttributesView.
Group: TicketSubGroup: Frontend::Customer::Ticket::ViewNewValid: 1Required: 0Config-Setting:
$Self->{‘Ticket::Frontend::CustomerTicketMessage’}->{‘ArticleFreeText’} = { ‘1’ => ‘0’, ‘2’ => ‘0’, ‘3’ => ‘0’};
Frontend::Customer::Ticket::ViewSearchTicket::CustomerTicketSearch::SearchLimit
Description ValueDescription: Maximum number of tickets to be displayed in the result of a search in
the customer interface.Group: TicketSubGroup: Frontend::Customer::Ticket::ViewSearchValid: 1Required: 1Config-Setting:
$Self->{‘Ticket::CustomerTicketSearch::SearchLimit’} = ‘5000’;
Ticket::CustomerTicketSearch::SearchPageShown
Description ValueDescription: Number of tickets to be displayed in each page of a search result in the
customer interface.Group: TicketSubGroup: Frontend::Customer::Ticket::ViewSearchValid: 1

Configuration Options Reference
605
Description ValueRequired: 1Config-Setting:
$Self->{‘Ticket::CustomerTicketSearch::SearchPageShown’} = ’40’;
Ticket::CustomerTicketSearch::SortBy::DefaultDescription ValueDescription: Defines the default ticket attribute for ticket sorting in a ticket search of
the customer interface.Group: TicketSubGroup: Frontend::Customer::Ticket::ViewSearchValid: 1Required: 1Config-Setting:
$Self->{‘Ticket::CustomerTicketSearch::SortBy::Default’} = ‘Age’;
Ticket::CustomerTicketSearch::Order::DefaultDescription ValueDescription: Defines the default ticket order of a search result in the customer
interface. Up: oldest on top. Down: latest on top.Group: TicketSubGroup: Frontend::Customer::Ticket::ViewSearchValid: 1Required: 1Config-Setting:
$Self->{‘Ticket::CustomerTicketSearch::Order::Default’} = ‘Down’;
Ticket::Frontend::CustomerTicketSearch###ExtendedSearchConditionDescription ValueDescription: Allows extended search conditions in ticket search of the customer
interface. With this feature you can search w. g. with this kind ofconditions like «(key1&&key2)» or «(key1||key2)».
Group: TicketSubGroup: Frontend::Customer::Ticket::ViewSearchValid: 1Required: 1

Configuration Options Reference
606
Description ValueConfig-Setting:
$Self->{‘Ticket::Frontend::CustomerTicketSearch’}->{‘ExtendedSearchCondition’} = ‘1’;
Ticket::Frontend::CustomerTicketSearch###TicketFreeTextDescription ValueDescription: Ticket free text options shown in the ticket search screen in the
customer interface. Possible settings: 0 = Disabled and 1 = Enabled.Group: TicketSubGroup: Frontend::Customer::Ticket::ViewSearchValid: 1Required: 0Config-Setting:
$Self->{‘Ticket::Frontend::CustomerTicketSearch’}->{‘TicketFreeText’} = { ‘1’ => ‘0’, ’10’ => ‘0’, ’11’ => ‘0’, ’12’ => ‘0’, ’13’ => ‘0’, ’14’ => ‘0’, ’15’ => ‘0’, ’16’ => ‘0’, ‘2’ => ‘0’, ‘3’ => ‘0’, ‘4’ => ‘0’, ‘5’ => ‘0’, ‘6’ => ‘0’, ‘7’ => ‘0’, ‘8’ => ‘0’, ‘9’ => ‘0’};
Ticket::Frontend::CustomerTicketSearch###TicketFreeTimeDescription ValueDescription: Ticket free time options shown in the ticket search screen in the
customer interface. Possible settings: 0 = Disabled and 1 = Enabled.Group: TicketSubGroup: Frontend::Customer::Ticket::ViewSearchValid: 1Required: 0Config-Setting:
$Self->{‘Ticket::Frontend::CustomerTicketSearch’}->{‘TicketFreeTime’} = { ‘1’ => ‘0’,

Configuration Options Reference
607
Description Value ‘2’ => ‘0’, ‘3’ => ‘0’, ‘4’ => ‘0’, ‘5’ => ‘0’, ‘6’ => ‘0’};
Ticket::Frontend::CustomerTicketSearch###SearchCSVData
Description ValueDescription: Data used to export the search result in CSV format.Group: TicketSubGroup: Frontend::Customer::Ticket::ViewSearchValid: 1Required: 1Config-Setting:
$Self->{‘Ticket::Frontend::CustomerTicketSearch’}->{‘SearchCSVData’} = [ ‘TicketNumber’, ‘Age’, ‘Created’, ‘Closed’, ‘State’, ‘Priority’, ‘Lock’, ‘CustomerID’, ‘CustomerName’, ‘From’, ‘Subject’];
Frontend::Customer::Ticket::ViewZoomTicket::Frontend::CustomerTicketZoom###NextScreenAfterFollowUp
Description ValueDescription: Determines the next screen after the follow up screen of a zoomed ticket
in the customer interface.Group: TicketSubGroup: Frontend::Customer::Ticket::ViewZoomValid: 1Required: 1Config-Setting:
$Self->{‘Ticket::Frontend::CustomerTicketZoom’}->{‘NextScreenAfterFollowUp’} = ‘CustomerTicketOverView’;

Configuration Options Reference
608
Ticket::Frontend::CustomerTicketZoom###ArticleType
Description ValueDescription: Defines the default type of the note in the ticket zoom screen of the
customer interface.Group: TicketSubGroup: Frontend::Customer::Ticket::ViewZoomValid: 1Required: 1Config-Setting:
$Self->{‘Ticket::Frontend::CustomerTicketZoom’}->{‘ArticleType’} = ‘webrequest’;
Ticket::Frontend::CustomerTicketZoom###SenderType
Description ValueDescription: Defines the default sender type for tickets in the ticket zoom screen of
the customer interface.Group: TicketSubGroup: Frontend::Customer::Ticket::ViewZoomValid: 1Required: 1Config-Setting:
$Self->{‘Ticket::Frontend::CustomerTicketZoom’}->{‘SenderType’} = ‘customer’;
Ticket::Frontend::CustomerTicketZoom###HistoryType
Description ValueDescription: Defines the history type for the ticket zoom action, which gets used for
ticket history in the customer interface.Group: TicketSubGroup: Frontend::Customer::Ticket::ViewZoomValid: 1Required: 1Config-Setting:
$Self->{‘Ticket::Frontend::CustomerTicketZoom’}->{‘HistoryType’} = ‘FollowUp’;
Ticket::Frontend::CustomerTicketZoom###HistoryComment
Description ValueDescription: Defines the history comment for the ticket zoom action, which gets used
for ticket history in the customer interface.

Configuration Options Reference
609
Description ValueGroup: TicketSubGroup: Frontend::Customer::Ticket::ViewZoomValid: 1Required: 1Config-Setting:
$Self->{‘Ticket::Frontend::CustomerTicketZoom’}->{‘HistoryComment’} = »;
Ticket::Frontend::CustomerTicketZoom###PriorityDescription ValueDescription: Allows customers to change the ticket priority in the customer interface.Group: TicketSubGroup: Frontend::Customer::Ticket::ViewZoomValid: 1Required: 1Config-Setting:
$Self->{‘Ticket::Frontend::CustomerTicketZoom’}->{‘Priority’} = ‘1’;
Ticket::Frontend::CustomerTicketZoom###PriorityDefaultDescription ValueDescription: Defines the default priority of follow up customer tickets in the ticket
zoom screen in the customer interface.Group: TicketSubGroup: Frontend::Customer::Ticket::ViewZoomValid: 1Required: 1Config-Setting:
$Self->{‘Ticket::Frontend::CustomerTicketZoom’}->{‘PriorityDefault’} = ‘3 normal’;
Ticket::Frontend::CustomerTicketZoom###StateDescription ValueDescription: Allows choosing the next compose state for customer tickets in the
customer interface.Group: TicketSubGroup: Frontend::Customer::Ticket::ViewZoomValid: 1Required: 1Config-Setting:

Configuration Options Reference
610
Description Value $Self->{‘Ticket::Frontend::CustomerTicketZoom’}->{‘State’} = ‘1’;
Ticket::Frontend::CustomerTicketZoom###StateDefault
Description ValueDescription: Defines the default next state for a ticket after customer follow up in the
customer interface.Group: TicketSubGroup: Frontend::Customer::Ticket::ViewZoomValid: 1Required: 1Config-Setting:
$Self->{‘Ticket::Frontend::CustomerTicketZoom’}->{‘StateDefault’} = ‘open’;
Ticket::Frontend::CustomerTicketZoom###StateType
Description ValueDescription: Defines the next possible states for customer tickets in the customer
interface.Group: TicketSubGroup: Frontend::Customer::Ticket::ViewZoomValid: 1Required: 1Config-Setting:
$Self->{‘Ticket::Frontend::CustomerTicketZoom’}->{‘StateType’} = [ ‘open’, ‘closed’];
Ticket::Frontend::CustomerTicketZoom###AttributesView
Description ValueDescription: Shows the activated ticket attributes in the customer interface (0 =
Disabled and 1 = Enabled).Group: TicketSubGroup: Frontend::Customer::Ticket::ViewZoomValid: 1Required: 1Config-Setting:
$Self->{‘Ticket::Frontend::CustomerTicketZoom’}->{‘AttributesView’} = {

Configuration Options Reference
611
Description Value ‘ArticleFreeText1’ => ‘0’, ‘ArticleFreeText2’ => ‘0’, ‘ArticleFreeText3’ => ‘0’, ‘Owner’ => ‘0’, ‘Priority’ => ‘1’, ‘Queue’ => ‘1’, ‘Responsible’ => ‘0’, ‘SLA’ => ‘0’, ‘Service’ => ‘0’, ‘State’ => ‘1’, ‘TicketFreeText1’ => ‘0’, ‘TicketFreeText10’ => ‘0’, ‘TicketFreeText11’ => ‘0’, ‘TicketFreeText12’ => ‘0’, ‘TicketFreeText13’ => ‘0’, ‘TicketFreeText14’ => ‘0’, ‘TicketFreeText15’ => ‘0’, ‘TicketFreeText16’ => ‘0’, ‘TicketFreeText2’ => ‘0’, ‘TicketFreeText3’ => ‘0’, ‘TicketFreeText4’ => ‘0’, ‘TicketFreeText5’ => ‘0’, ‘TicketFreeText6’ => ‘0’, ‘TicketFreeText7’ => ‘0’, ‘TicketFreeText8’ => ‘0’, ‘TicketFreeText9’ => ‘0’, ‘TicketFreeTime1’ => ‘0’, ‘TicketFreeTime2’ => ‘0’, ‘TicketFreeTime3’ => ‘0’, ‘TicketFreeTime4’ => ‘0’, ‘TicketFreeTime5’ => ‘0’, ‘TicketFreeTime6’ => ‘0’, ‘Type’ => ‘0’};
Frontend::Queue::PreferencesQueuePreferences###Comment2
Description ValueDescription: Parameters of the example queue attribute Comment2.Group: TicketSubGroup: Frontend::Queue::PreferencesValid: 0Required: 0Config-Setting:
$Self->{‘QueuePreferences’}->{‘Comment2’} = { ‘Block’ => ‘TextArea’, ‘Cols’ => ’50’,

Configuration Options Reference
612
Description Value ‘Desc’ => ‘Define the queue comment 2.’, ‘Label’ => ‘Comment2’, ‘Module’ => ‘Kernel::Output::HTML::QueuePreferencesGeneric’, ‘PrefKey’ => ‘Comment2’, ‘Rows’ => ‘5’};
Frontend::SLA::PreferencesSLAPreferences###Comment2
Description ValueDescription: Parameters of the example SLA attribute Comment2.Group: TicketSubGroup: Frontend::SLA::PreferencesValid: 0Required: 0Config-Setting:
$Self->{‘SLAPreferences’}->{‘Comment2’} = { ‘Block’ => ‘TextArea’, ‘Cols’ => ’50’, ‘Desc’ => ‘Define the sla comment 2.’, ‘Label’ => ‘Comment2’, ‘Module’ => ‘Kernel::Output::HTML::SLAPreferencesGeneric’, ‘PrefKey’ => ‘Comment2’, ‘Rows’ => ‘5’};
Frontend::Service::PreferencesServicePreferences###Comment2
Description ValueDescription: Parameters of the example service attribute Comment2.Group: TicketSubGroup: Frontend::Service::PreferencesValid: 0Required: 0Config-Setting:
$Self->{‘ServicePreferences’}->{‘Comment2’} = { ‘Block’ => ‘TextArea’, ‘Cols’ => ’50’, ‘Desc’ => ‘Define the service comment 2.’, ‘Label’ => ‘Comment2’,

Configuration Options Reference
613
Description Value ‘Module’ => ‘Kernel::Output::HTML::ServicePreferencesGeneric’, ‘PrefKey’ => ‘Comment2’, ‘Rows’ => ‘5’};

614
Приложение C. БлагодарностиOTRS является проектом с открытым кодом и, мы хотим поблагодарить многих людей заих помощь и поддержку. Конечно же следующий список далеко неполный и мы приносимсвои извенения за это! Просто напишите нам, если не наши себя в этом списке.
Следующие люди внесли особый вклад в поект и являются его активными сторонниками:
• Robert Kehl, создавший Win32-инсталлятор для релиза 1.x. Больше тебе спасибо, Robert!
• Torsten Werner, который поддерживаетм Debian-installer для OTRS. Спасибо большое,Torsten, теперь OTRS также доступен для Debian-сообщества.
• Nils Jeppe (зеркало Гамбург, Германия), Bryan Fullerton (зеркало Торонто,Канада), Eberhard Mönkeberg (зеркало Геттинген, Германия), Timo Dreger (зеркалоДюссельдорф, Германия) и Netmonic (зеркало Вена, Австрия), которые поддерживаютзеркальное копии нашего ftp-сервера. Большое спасибо, благодаря вашей помощивсегда есть возможность быстро скачать OTRS!
• Anja Schneider, которая помогает с переводом этого руководства и коррекции ипересмотр немецких текстов. Большое спасибо за вашу помощь и терпение, Anja!
• Через списки рассылки OTRS мы получаем множество идей, советов поусовершенствованию системы, обновления и исправления. Также здесь доступнабольшая поддержка для всех пользователй . Большое спасибо всем людям, которыеучаствуют в наших списках рассылки за вашу активную помощь!
Также мы хотели бы поблагодарить следующих людей:
• Martin Scherbaum
• Carsten Gross
• Harald Müller
• Stefan Schmidt
• Milisav Radmanic
• Uli Hecht
• Norman Walsh
• Heiko Baumann
• Atif Ghaffar
• Pablo Ruiz Garcia
• Dan Rau
• Christoph Kaulich
• Mark Jackson
• Diane Shieh

Благодарности
615
• Bernard Choppy
• Carl Bailey
• Phil Davis
• Edwin D. Vinas
• Lars Müller
• Vladimir Gerdjikov
• Fred van Dijk
• Sebastien Guilbaud
• Wiktor Wodecki
• Arnold Ligtvoet
• Antti Kämäräinen
• Nicolas Goralski
• Gilberto Cezar de Almeida
• Jorge Becerra
• Eddie Urenda
• Stella Power
• Andreas Haase
• Reiner Keller
• Covert Jake
• Moshe Leibovitch
• Bjärn Jacke
• Remo Catelotti
• Alfons Obermeyer
• Michael Rech
• Danie Theron
• Richard Paradies
• Art Powell

616
Приложение D. GNU FreeDocumentation License
Version 1.1, March 2000
Copyright (C) 2000 Free Software Foundation, Inc. 59 Temple Place, Suite330, Boston, MA 02111-1307 USA Everyone is permitted to copy and distributeverbatim copies of this license document, but changing it is not allowed.
PREAMBLEThe purpose of this License is to make a manual, textbook, or other written document «free»in the sense of freedom: to assure everyone the effective freedom to copy and redistribute it,with or without modifying it, either commercially or non-commercially. Secondarily, this Licensepreserves for the author and publisher a way to get credit for their work, while not beingconsidered responsible for modifications made by others.
This License is a kind of «copyleft», which means that derivative works of the document mustthemselves be free in the same sense. It complements the GNU General Public License, whichis a copyleft license designed for free software.
We have designed this License in order to use it for manuals for free software, because freesoftware needs free documentation: a free program should come with manuals providing thesame freedoms that the software does. But this License is not limited to software manuals; itcan be used for any textual work, regardless of subject matter or whether it is published as aprinted book. We recommend this License principally for works whose purpose is instruction orreference.
APPLICABILITY AND DEFINITIONSThis License applies to any manual or other work that contains a notice placed by the copyrightholder saying it can be distributed under the terms of this License. The «Document», below, refersto any such manual or work. Any member of the public is a licensee, and is addressed as «you».
A «Modified Version» of the Document means any work containing the Document or a portion ofit, either copied verbatim, or with modifications and/or translated into another language.
A «Secondary Section» is a named appendix or a front-matter section of the Document, that dealsexclusively with the relationship of the publishers or authors of the Document to the Document’soverall subject (or to related matters), and contains nothing that could fall directly within thatoverall subject. (For example, if the Document is in part a textbook of mathematics, a SecondarySection may not explain any mathematics.) The relationship could be a matter of historicalconnection with the subject or with related matters, or of legal, commercial, philosophical, ethicalor political position regarding them.
The «Invariant Sections» are certain Secondary Sections whose titles are designated, as beingthose of Invariant Sections, in the notice that says that the Document is released under thisLicense.
The «Cover Texts» are certain short passages of text that are listed, as Front-Cover Texts orBack-Cover Texts, in the notice that says that the Document is released under this License.

GNU Free Documentation License
617
A «Transparent» copy of the Document means a machine-readable copy, represented in a formatwhose specification is available to the general public, whose contents can be viewed and editeddirectly and straightforwardly with generic text editors or (for images composed of pixels) genericpaint programs or (for drawings) some widely available drawing editor, and that is suitable forinput to text formatters or for automatic translation to a variety of formats, suitable for input totext formatters. A copy made in an otherwise Transparent file format, whose markup has beendesigned to thwart or discourage subsequent modification by readers is not Transparent. A copythat is not «Transparent» is called «Opaque».
Examples of suitable formats for Transparent copies include: plain ASCII without markup, Texinfoinput format, LaTeX input format, SGML or XML using a publicly available DTD, and standard-conforming simple HTML designed for human modification. Opaque formats include: PostScript,PDF, proprietary formats that can be read and edited only by proprietary word processors, SGMLor XML for which the DTD and/or processing tools are not generally available, and the machine-generated HTML produced by some word processors for output purposes only.
The «Title Page» means, for a printed book, the title page itself, plus such following pages as areneeded to hold, legibly, the material this License requires to appear in the title page. For worksin formats which do not have any title page as such, «Title Page» means the text near the mostprominent appearance of the work’s title, preceding the beginning of the body of the text.
VERBATIM COPYINGYou may copy and distribute the Document in any medium, either commercially or non-commercially, provided that this License, the copyright notices, and the license notice sayingthis License applies to the Document are reproduced in all copies, and that you add no otherconditions whatsoever to those of this License. You may not use technical measures to obstructor control the reading or further copying of the copies you make or distribute. However, you mayaccept compensation in exchange for copies. If you distribute a large enough number of copiesyou must also follow the conditions in section 3.
You may also lend copies, under the same conditions stated above, and you may publicly displaycopies.
COPYING IN QUANTITYIf you publish printed copies of the Document numbering more than 100, and the Document’slicense notice requires Cover Texts, you must enclose the copies in covers that carry, clearly andlegibly, all these Cover Texts: Front-Cover Texts on the front cover, and Back-Cover Texts onthe back cover. Both covers must also clearly and legibly identify you as the publisher of thesecopies. The front cover must present the full title with all words of the title equally prominent andvisible. You may add other material on the covers in addition. Copying with changes limited tothe covers, as long as they preserve the title of the Document and satisfy these conditions, canbe treated as verbatim copying in other respects.
If the required texts for either cover are too voluminous to fit legibly, you should put the first oneslisted (as many as fit reasonably) on the actual cover, and continue the rest onto adjacent pages.
If you publish or distribute Opaque copies of the Document numbering more than 100, youmust either include a machine-readable Transparent copy along with each Opaque copy, orstate in or with each Opaque copy a publicly-accessible computer-network location, containing acomplete Transparent copy of the Document, free of added material, which the general network-using public has access to download anonymously, at no charge, using public-standard networkprotocols. If you use the latter option, you must take reasonably prudent steps, when you begin

GNU Free Documentation License
618
distribution of Opaque copies in quantity, to ensure that this Transparent copy will remain thusaccessible at the stated location, until at least one year after the last time you distribute anOpaque copy (directly or through your agents or retailers) of that edition to the public.
It is requested, but not required, that you contact the authors of the Document well beforeredistributing any large number of copies, to give them a chance to provide you with an updatedversion of the Document.
MODIFICATIONSYou may copy and distribute a Modified Version of the Document under the conditions of sections2 and 3 above, provided that you release the Modified Version under precisely this License, withthe Modified Version filling the role of the Document, thus licensing distribution and modificationof the Modified Version to whoever possesses a copy of it. In addition, you must do these thingsin the Modified Version:
A. Use in the Title Page (and on the covers, if any) a title distinct from that of the Document,and from those of previous versions (which should, if there were any, be listed in the Historysection of the Document). You may use the same title as a previous version if the originalpublisher of that version gives permission.
B. List on the Title Page, as authors, one or more persons or entities responsible for authorshipof the modifications in the Modified Version, together with at least five of the principal authorsof the Document (all of its principal authors, if it has less than five).
C. State on the Title page the name of the publisher of the Modified Version, as the publisher.
D. Preserve all the copyright notices of the Document.
E. Add an appropriate copyright notice for your modifications adjacent to the other copyrightnotices.
F. Include, immediately after the copyright notices, a license notice giving the public permission touse the Modified Version under the terms of this License, in the form shown in the Addendumbelow.
G. Preserve in that license notice the full lists of Invariant Sections and required Cover Textsgiven in the Document’s license notice.
H. Include an unaltered copy of this License.
I. Preserve the section entitled «History», and its title, and add to it an item stating at least thetitle, year, new authors, and publisher of the Modified Version as given on the Title Page. Ifthere is no section entitled «History» in the Document, create one stating the title, year, authors,and publisher of the Document as given on its Title Page, then add an item describing theModified Version, as stated in the previous sentence.
J. Preserve the network location, if any, given in the Document for public access to a Transparentcopy of the Document, and likewise the network locations given in the Document for previousversions it was based on. These may be placed in the «History» section. You may omit anetwork location for a work that was published at least four years before the Document itself,or if the original publisher of the version it refers to gives permission.
K. In any section entitled «Acknowledgements» or «Dedications», preserve the section’s title,and preserve in the section all the substance and tone of each of the contributoracknowledgements and/or dedications given therein.

GNU Free Documentation License
619
L. Preserve all the Invariant Sections of the Document, unaltered in their text and in their titles.Section numbers or the equivalent are not considered part of the section titles.
M.Delete any section entitled «Endorsements». Such a section may not be included in theModified Version.
N. Do not retitle any existing section as «Endorsements» or to conflict in title with any InvariantSection.
If the Modified Version includes new front-matter sections or appendices that qualify asSecondary Sections and contain no material copied from the Document, you may at your optiondesignate some or all of these sections as invariant. To do this, add their titles to the list ofInvariant Sections in the Modified Version’s license notice. These titles must be distinct from anyother section titles.
You may add a section entitled «Endorsements», provided it contains nothing but endorsementsof your Modified Version by various parties—for example, statements of peer review or that thetext has been approved by an organization as the authoritative definition of a standard.
You may add a passage of up to five words as a Front-Cover Text, and a passage of up to 25words as a Back-Cover Text, to the end of the list of Cover Texts in the Modified Version. Onlyone passage of Front-Cover Text and one of Back-Cover Text may be added by (or througharrangements made by) any one entity. If the Document already includes a cover text for thesame cover, previously added by you or by arrangement made by the same entity you are actingon behalf of, you may not add another; but you may replace the old one, on explicit permissionfrom the previous publisher that added the old one.
The author(s) and publisher(s) of the Document do not by this License give permission to usetheir names for publicity for or to assert or imply endorsement of any Modified Version.
COMBINING DOCUMENTSYou may combine the Document with other documents released under this License, underthe terms defined in section 4 above for modified versions, provided that you include in thecombination all of the Invariant Sections of all of the original documents, unmodified, and listthem all as Invariant Sections of your combined work in its license notice.
The combined work need only contain one copy of this License, and multiple identical InvariantSections may be replaced with a single copy. If there are multiple Invariant Sections with thesame name but different contents, make the title of each such section unique by adding at theend of it, in parentheses, the name of the original author or publisher of that section if known,or else a unique number. Make the same adjustment to the section titles in the list of InvariantSections in the license notice of the combined work.
In the combination, you must combine any sections entitled «History» in the various originaldocuments, forming one section entitled «History»; likewise combine any sections entitled»Acknowledgements», and any sections entitled «Dedications». You must delete all sectionsentitled «Endorsements.»
COLLECTIONS OF DOCUMENTSYou may make a collection consisting of the Document and other documents released underthis License, and replace the individual copies of this License in the various documents with a

GNU Free Documentation License
620
single copy that is included in the collection, provided that you follow the rules of this License,for verbatim copying of each of the documents in all other respects.
You may extract a single document from such a collection, and distribute it individually under thisLicense, provided you insert a copy of this License into the extracted document, and follow thisLicense in all other respects regarding verbatim copying of that document.
AGGREGATION WITH INDEPENDENT WORKSA compilation of the Document or its derivatives with other separate and independent documentsor works, in or on a volume of a storage or distribution medium, does not as a whole countas a Modified Version of the Document, provided no compilation copyright is claimed for thecompilation. Such a compilation is called an «aggregate», and this License does not apply tothe other self-contained works thus compiled with the Document, on account of their being thuscompiled, if they are not themselves derivative works of the Document.
If the Cover Text requirement of section 3 is applicable to these copies of the Document, thenif the Document is less than one quarter of the entire aggregate, the Document’s Cover Textsmay be placed on covers that surround only the Document within the aggregate. Otherwise theymust appear on covers around the whole aggregate.
TRANSLATIONTranslation is considered a kind of modification, so you may distribute translations of theDocument under the terms of section 4. Replacing Invariant Sections with translations requiresspecial permission from their copyright holders, but you may include translations of some orall Invariant Sections, in addition to the original versions of these Invariant Sections. You mayinclude a translation of this License provided that you also include the original English version ofthis License. In case of a disagreement between the translation and the original English versionof this License, the original English version will prevail.
TERMINATIONYou may not copy, modify, sublicense, or distribute the Document except as expressly providedfor under this License. Any other attempt to copy, modify, sublicense or distribute the Document isvoid, and will automatically terminate your rights under this License. However, parties who havereceived copies, or rights, from you under this License will not have their licenses terminated solong as such parties remain in full compliance.
FUTURE REVISIONS OF THIS LICENSEThe Free Software Foundation may publish new, revised versions of the GNU FreeDocumentation License from time to time. Such new versions will be similar in spirit to the presentversion, but may differ in detail to address new problems or concerns. See http://www.gnu.org/copyleft/.
Each version of the License is given a distinguishing version number. If the Document specifiesthat a particular numbered version of this License «or any later version» applies to it, you have theoption of following the terms and conditions either of that specified version or of any later versionthat has been published (not as a draft) by the Free Software Foundation. If the Document doesnot specify a version number of this License, you may choose any version ever published (notas a draft) by the Free Software Foundation.

GNU Free Documentation License
621
How to use this License for your documentsTo use this License in a document you have written, include a copy of the License in the documentand put the following copyright and license notices just after the title page:
Copyright (c) YEAR YOUR NAME. Permission is granted to copy, distributeand/or modify this document under the terms of the GNU Free DocumentationLicense, Version 1.1 or any later version published by the Free SoftwareFoundation; with the Invariant Sections being LIST THEIR TITLES, with theFront-Cover Texts being LIST, and with the Back-Cover Texts being LIST. Acopy of the license is included in the section entitled «GNU Free DocumentationLicense».
If you have no Invariant Sections, write «with no Invariant Sections» instead of saying which onesare invariant. If you have no Front-Cover Texts, write «no Front-Cover Texts» instead of «Front-Cover Texts being LIST»; likewise for Back-Cover Texts.
If your document contains nontrivial examples of program code, we recommend releasing theseexamples in parallel under your choice of free software license, such as the GNU General PublicLicense, to permit their use in free software.
![]()
Previous Story
ESXI 7 на Dedicated

Latest from Blog
Установите Web-Server Apache Сохраните изменения и закройте файл. Теперь WebDAV-сервер почти готов к использованию, но для

Нередко возникает изменить уже имеющуюся таблицу, в частности, добавить или удалить столбцы, изменить тип столбцов и

В GitLab вы можете создать новый проект/репозиторий не только через пользовательский интерфейс, но и из командной
![]()
В данной статье я хотел бы описать процесс установки и настройки asterisk на Debian. Asterisk будет

Как быстро закрыть доступ к сайту Начнем с самого простого. У нас есть роутер Mikrotik, утилита
Вступление
https://community.otrs.com [OTRS], также известный как O источник пера T icket R equest S ystem, является службой поддержки и управления ИТ-услугами система. Он обеспечивает единую точку контакта для пользователей, клиентов, ИТ-персонала, ИТ-служб и любых внешних организаций. Программа написана на Perl, поддерживает различные базы данных (MySQL, https://www.postgresql.org/ [ PostgreSQL] и т. Д.) И может интегрироваться с каталогами LDAP.
В этом учебном пособии вы установите OTRS Community Edition на сервер Ubuntu 18.04 и настроите простую систему поддержки, которая позволит вам получать и обрабатывать запросы от ваших клиентов, используя как веб-интерфейс, так и электронную почту.
Предпосылки
Для завершения этого урока вам понадобится следующее:
-
Сервер Ubuntu 18.04, настроенный в соответствии с нашим Initial Руководство по установке сервера для Ubuntu 18.04, включая не Пользователь root с привилегиями sudo и межсетевым экраном, настроенным с помощью
+ ufw +. -
Apache и MySQL установлены на вашем сервере Ubuntu. Следуйте step 1 и 2 данного руководства, чтобы настроить эти ,
-
Полностью зарегистрированное доменное имя. В этом руководстве будет использоваться
+ example.com +. Вы можете приобрести доменное имя на https://namecheap.com [Namecheap], получить его бесплатно на Freenom или использовать регистратор домена по вашему выбору. , -
Обе следующие записи DNS настроены для вашего сервера. Вы можете следовать this вводная информация о DNS DigitalOcean для получения подробной информации о том, как их добавить.
-
Запись A с
++, указывающая на публичный IP-адрес вашего сервера. -
Запись A с
+ www. +, Указывающая на публичный IP-адрес вашего сервера. -
Сертификат TLS / SSL установлен на вашем сервере Ubuntu 18.04 для вашего домена. Вы можете следовать Let’s Encrypt on Ubuntu 18.04 guide к получить бесплатный сертификат TLS / SSL.
-
Агент пересылки почты Postfix настроен, следуя нашему руководству Как установить и настроить Postfix на Ubuntu 18.04.
-
(Необязательно) Специальная Gmail учетная запись с IMAP доступом включен, https: // support .google.com / accounts / answer / 185839? co = GENIE.Platform% 3DDesktop & hl = ru [двухэтапная проверка] и App пароль, сгенерированный с помощью опции * Other (Custom name) *. Когда вы создадите пароль для приложения, запишите его, чтобы вы могли использовать его на шаге 5. Вы будете использовать Gmail для настройки создания билета входящей почты в OTRS, где Gmail будет использоваться в качестве почтового ящика IMAPS. Это всего лишь один из способов настройки входящей почты для OTRS; если вы хотите изучить другие варианты, ознакомьтесь с документацией OTRS.
Шаг 1 — Установка пакета OTRS и модулей Perl
На этом шаге вы установите OTRS и набор модулей Perl, которые увеличат функциональность системы.
OTRS доступен в менеджере пакетов Ubuntu, но the официальная документация предлагает установить OTRS из источника ,
Для этого сначала войдите на сервер Ubuntu как пользователь без полномочий root:
Затем загрузите исходный архив командой + wget +. Для этого урока вы скачаете версию 6.0.19; Вы можете найти последнюю доступную версию на странице OTRS downdownload.
wget http://ftp.otrs.org/pub/otrs/otrs-.tar.gzЗатем распакуйте сжатый файл с помощью + tar +:
Переместите содержимое архива в каталог + / opt / otrs +:
Поскольку OTRS написан на Perl, он использует несколько модулей Perl. Проверьте наличие отсутствующих модулей с помощью сценария + CheckModules.pl +, включенного в OTRS:
sudo /opt/otrs/bin/otrs.CheckModules.plВы увидите вывод, похожий на этот, со списком, какие модули вы уже скачали, а какие отсутствуют:
Output  o Apache::DBI......................FAILED! Not all prerequisites for this module correctly installed.
 o Apache2::Reload..................ok (v0.13)
. . .
 o XML::LibXML......................
 o XML::LibXSLT.....................
 o XML::Parser......................
 o YAML::XS.........................
Некоторые модули нужны только для дополнительных функций, таких как связь с другими базами данных или обработка почты с определенными наборами символов; другие необходимы для работы программы.
Хотя предлагаемые команды для загрузки этих модулей используют + apt-get +, это руководство установит недостающие модули с помощью команды + apt +, которая является рекомендуемой наилучшей практикой для Ubuntu 18.04. Не стесняйтесь пройти через эти модули вручную или используйте следующую команду:
$ sudo apt install libapache2-mod-perl2 libdbd-mysql-perl libtimedate-perl libnet-dns-perl libnet-ldap-perl
   libio-socket-ssl-perl libpdf-api2-perl libsoap-lite-perl libtext-csv-xs-perl
   libjson-xs-perl libapache-dbi-perl libxml-libxml-perl libxml-libxslt-perl libyaml-perl
   libarchive-zip-perl libcrypt-eksblowfish-perl libencode-hanextra-perl libmail-imapclient-perl
   libtemplate-perl libdatetime-perl
Всякий раз, когда вы закончите установку этих модулей, перезапустите скрипт, чтобы убедиться, что все необходимые модули были установлены:
sudo /opt/otrs/bin/otrs.CheckModules.plВаш вывод теперь покажет все установленные модули:
Output...
 o Text::CSV_XS.....................
 o Time::HiRes......................
 o XML::LibXML......................
 o XML::LibXSLT.....................
 o XML::Parser......................
 o YAML::XS.........................
Теперь, когда у вас есть OTRS и его зависимости, установленные на вашем сервере, вы можете настроить OTRS для использования Apache и MySQL.
Шаг 2 — Настройка OTRS, Apache и MySQL сервера
На этом шаге вы создадите системного пользователя для OTRS, а затем настроите сервер Apache и MySQL для работы с OTRS.
Создайте пользователя с именем + otrs + для запуска функций OTRS с помощью команды + useradd +:
sudo useradd -d /opt/otrs -c 'OTRS user' otrs+ -d + устанавливает домашний каталог пользователя как + / opt / otrs +, а + -c + устанавливает + 'OTRS user' + комментарий для описания пользователя.
Затем добавьте + otrs + в группу веб-сервера:
sudo usermod -G www-data otrsOTRS поставляется с файлом конфигурации по умолчанию + / opt / otrs / Kernel / Config.pm.dist +. Активируйте это, скопировав его без расширения имени файла + .dist +:
sudo cp /opt/otrs/Kernel/Config.pm.dist /opt/otrs/Kernel/Config.pmТеперь перейдите в каталог + / opt / otrs +:
Отсюда запустите скрипт + otrs.SetPermissions.pl +. Он обнаружит правильные настройки пользователя и группы и установит права доступа к файлам и каталогам для OTRS.
sudo bin/otrs.SetPermissions.plЭто даст следующий результат:
OutputSetting permissions on /opt/otrsПравильные разрешения теперь установлены.
Затем активируйте файл конфигурации + apache2 + и убедитесь, что он загружен после всех других настроек. Для этого создайте символическую ссылку с префиксом + zzz_ +:
sudo ln -s /opt/otrs/scripts/apache2-httpd.include.conf /etc/apache2/sites-enabled/zzz_otrs.confДля оптимальной работы OTRS требуется несколько модулей Apache. Вы можете активировать их с помощью инструмента + a2enmod +. Хотя некоторые из них уже включены, рекомендуется проверить их все:
sudo a2enmod perl
sudo a2enmod headers
sudo a2enmod deflate
sudo a2enmod filter
Перезагрузите веб-сервер, чтобы применить новые конфигурации:
sudo systemctl restart apache2Прежде чем перейти к следующему шагу и запустить веб-установщик, измените некоторые параметры конфигурации MySQL. Откройте файл конфигурации MySQL в предпочитаемом вами текстовом редакторе. В этом руководстве используется + nano +:
sudo nano /etc/mysql/mysql.conf.d/mysqld.cnfНайдите следующие параметры в разделе + [mysqld] +. Для + max_allowed_packet + и + query_cache_size + измените значения на + 64M + и + 32M + соответственно, как выделено в следующем блоке кода:
/etc/mysql/mysql.conf.d/mysqld.cnf
...
max_allowed_packet      =
thread_stack            = 192K
thread_cache_size       = 8
# This replaces the startup script and checks MyISAM tables if needed
# the first time they are touched
myisam-recover-options  = BACKUP
#max_connections        = 100
#table_open_cache       = 64
#thread_concurrency     = 10
#
# * Query Cache Configuration
#
query_cache_limit       = 1M
query_cache_size        =
...
Это регулирует максимально допустимый размер пакета и размер кэша запроса, чтобы MySQL мог взаимодействовать с OTRS.
Затем добавьте следующие выделенные дополнительные параметры в раздел + [mysqld] + в конце файла:
/etc/mysql/mysql.conf.d/mysqld.cnf
...
# ssl-cert=/etc/mysql/server-cert.pem
# ssl-key=/etc/mysql/server-ikey.pem
Это устанавливает размер файла журнала базы данных, определяет character set and collation и создает строку + init_connect + для установки набор символов при запуске сервера MySQL.
Сохраните и закройте + mysql.conf, нажав` + CTRL + + + X + , затем + Y + и затем + ENTER`. Затем перезапустите сервер MySQL, чтобы применить новые параметры:
sudo systemctl restart mysql.serviceТеперь, когда вы создали пользователя + otrs + и настроили Apache и MySQL для работы с OTRS, вы готовы использовать веб-установщик.
Шаг 3 — Использование веб-установщика
На этом этапе вы настроите параметры базы данных OTRS в веб-браузере и запустите процесс демона OTRS из командной строки.
Откройте + https: /// otrs / installer.pl + в своем любимом веб-браузере, заменив ++ именем вашего домена. Вы увидите экран приветствия с сообщением * Welcome to OTRS 6 * и информацией об офисах OTRS.
изображение: https: //assets.digitalocean.com/articles/cart_66543/First_Screen.png [Экран приветствия OTRS]
Нажмите кнопку «Далее*. На следующем экране будет иметь лицензию на OTRS, которая является GNU General Public License, общей для программ с открытым исходным кодом. Принять, нажав * Принять лицензию и продолжить * после прочтения.
На следующем экране вам будет предложено выбрать тип базы данных. Значения по умолчанию (* MySQL * и * Создать новую базу данных для OTRS *) подходят для вашей настройки, поэтому нажмите * Next * для продолжения.
изображение: https: //assets.digitalocean.com/articles/cart_66543/Database_Selection.png [Выбор базы данных]
На следующем экране введите учетные данные MySQL, которые вы установили во время установки сервера MySQL. Используйте * root * для поля * User *, затем введите созданный вами пароль. Оставьте значение хоста по умолчанию.
Нажмите * Проверить настройки базы данных *, чтобы убедиться, что она работает. Установщик сгенерирует учетные данные для новой базы данных. Нет необходимости запоминать этот сгенерированный пароль.
изображение: https: //assets.digitalocean.com/articles/cart_66543/Database_Check.png [Результат проверки базы данных]
Нажмите * Далее *, чтобы продолжить.
База данных будет создана, и вы увидите успешный результат:
изображение: https: //assets.digitalocean.com/articles/cart_66543/Database_Success.png [Настройка базы данных выполнена успешно]
Нажмите кнопку «Далее*.
Далее укажите следующие обязательные системные настройки:
-
* Системное полное доменное имя *: Полное доменное имя. Замените
+ example.com +на ваше собственное доменное имя. -
* AdminEmail *: адрес электронной почты вашего системного администратора. Сообщения об ошибках с OTRS будут отправляться сюда.
-
* Организация *: название вашей организации.
Оставьте все остальные параметры по умолчанию:
изображение: https: //assets.digitalocean.com/articles/cart_66543/System_Settings.png [Системные настройки]
Нажмите кнопку «Далее*.
Теперь вы попадете на страницу * Mail Configuration *. Чтобы иметь возможность отправлять и получать электронные письма, вам необходимо настроить почтовую учетную запись. Этот урок позаботится об этом позже на шаге 5, поэтому нажмите * Пропустить этот шаг *.
Установка OTRS завершена; Вы увидите страницу * Готово * со ссылкой на панель администратора после * Стартовой страницы * и учетные данные суперпользователя OTRS после этого. Убедитесь, что вы записали сгенерированный пароль для пользователя * root @ localhost * и URL-адрес * стартовой страницы *.
После успешной установки остается только запустить демон OTRS и активировать его + cronjob +.
Откройте терминал, который вы используете для доступа к вашему серверу Ubuntu 18.04. Демон OTRS отвечает за обработку любых асинхронных и повторяющихся задач в OTRS. Запустите его с пользователем + otrs +:
sudo su - otrs -c "/opt/otrs/bin/otrs.Daemon.pl start"Вы увидите следующий вывод:
OutputManage the OTRS daemon process.

Daemon started
В каталоге + / opt / otrs / var / cron / + есть два файла cron по умолчанию. Переместитесь в этот каталог.
Эти файлы cron используются, чтобы убедиться, что демон OTRS запущен. Активируйте их, скопировав их без расширения имени файла + .dist +.
sudo cp aaa_base.dist aaa_base
sudo cp otrs_daemon.dist otrs_daemon
Чтобы запланировать эти задания cron, используйте скрипт + Cron.sh + с пользователем + otrs +:
sudo su - otrs -c "/opt/otrs/bin/Cron.sh start"Вы установили OTRS с помощью веб-установщика и настроили его подключение к базе данных MySQL. Вы также запустили демон OTRS на своем сервере. Далее вы войдете в веб-интерфейс администратора и защитите OTRS.
Шаг 4 — Защита OTRS
На данный момент у вас есть полнофункциональное приложение, но использование учетной записи суперпользователя с OTRS небезопасно. Вместо этого вы создадите новый agent. В OTRS агентами являются пользователи, которые имеют права на различные функции системы. В этом примере вы будете использовать одного агента, который имеет доступ ко всем функциям системы.
Чтобы начать, войдите как * root @ localhost *. Откройте ссылку * Стартовая страница *, которую вы получили на предыдущем шаге. Введите * root @ localhost * для имени пользователя и пароля, который вы скопировали с шага 3, затем нажмите * Login *.
Вы увидите основную панель инструментов. Он содержит несколько виджетов, которые показывают различную информацию о билетах, статистике, новостях и т. Д. Вы можете свободно переставлять их, перетаскивая или переключая их видимость в настройках.
изображение: https: //assets.digitalocean.com/articles/cart_66543/Main_Screen.png [Главный экран]
Сначала создайте нового агента. Для этого перейдите по ссылке, нажав на красное сообщение в верхней части экрана, на котором написано * Не используйте учетную запись Superuser для работы с OTRS 6! Создайте новых агентов и работайте с этими учетными записями. * Это приведет вас к экрану * Управление агентами *.
изображение: https: //assets.digitalocean.com/articles/cart_66543/Agent_Management.png [Управление агентами]
Нажмите кнопку * Добавить агента *. Это приведет вас к экрану * Добавить агента *. Большинство параметров по умолчанию в порядке. Заполните поля имени, фамилии, имени пользователя, пароля и адреса электронной почты. Запишите имя пользователя и пароль для будущего входа. Отправьте форму, нажав кнопку * Сохранить *.
Затем измените групповые отношения для нового агента. Поскольку ваш агент также будет администратором, вы можете предоставить ему полный доступ на чтение и запись ко всем группам. Для этого установите флажок рядом с * RW * полностью справа под * Изменить групповые отношения для агента *.
изображение: https: //assets.digitalocean.com/articles/cart_66543/Change_Group_Relations.png [Изменить групповые отношения]
Наконец, нажмите * Сохранить и закончить *.
Теперь выйдите из системы и войдите снова, используя только что созданную учетную запись. Вы можете найти ссылку * Logout *, нажав на картинку аватара в верхнем левом углу.
изображение: https: //assets.digitalocean.com/articles/cart_66543/Logout_Location.png [Местоположение выхода из системы]
После того, как вы снова вошли в систему, вы можете настроить предпочтения своего агента, нажав * Личные настройки * в меню аватара. Там вы можете изменить свой пароль, выбрать язык интерфейса, настроить уведомления об установке и избранные очереди, изменить обложки интерфейса и т. Д.
После того как вы вошли в систему в качестве нового агента и настроили учетную запись по своему вкусу, следующим шагом будет настройка параметров входящей почты для генерации билетов из входящих писем.
Шаг 5 — Настройка входящей почты
У клиентов есть два способа пересылки новых билетов в OTRS: через клиентский интерфейс или отправив электронное письмо. Для получения сообщений клиента вам необходимо настроить учетную запись POP или IMAP. В этом руководстве вы будете использовать свою выделенную учетную запись Gmail OTRS, которую вы создали в качестве предварительного условия.
Перейдите на вкладку «Администратор», щелкнув * Admin * в верхнем меню. Затем найдите опцию * PostMaster Mail Accounts * и нажмите на нее. Нажмите кнопку * Добавить учетную запись почты *, чтобы настроить новый почтовый ящик.
изображение: https: //assets.digitalocean.com/articles/cart_66543/Add_Mail_Account.png [Добавить учетную запись почты]
На экране * Добавить учетную запись почты * выберите * IMAPS * для * Тип *. Для * Имя пользователя * введите свой адрес Gmail, а для * Пароль * введите пароль приложения, который вы создали для своей учетной записи Gmail, в предварительных условиях. Оставьте все остальные параметры по умолчанию. Нажмите * Сохранить *.
Затем отправьте тестовое электронное письмо с внешней учетной записи электронной почты на выделенную учетную запись OTRS Gmail. Почта будет извлекаться каждые 10 минут демоном OTRS, но вы можете принудительно получить его, нажав ссылку * Получить почту *.
В результате вы увидите новый билет.
изображение: https: //assets.digitalocean.com/articles/cart_66543/Email_Ticket.png [тикет электронной почты]
Теперь вы готовы принимать билеты от клиентов по электронной почте. Далее вы пройдете через процесс создания заявки через клиентский интерфейс.
Шаг 6 — Работа с пользовательским интерфейсом
Второй способ для клиента создать билет — через интерфейс OTRS. На этом шаге вы пройдете этот процесс, чтобы убедиться, что этот метод создания билетов настроен.
Клиентский интерфейс находится по адресу + https: /// otrs / customer.pl +. Перейдите к нему в веб-браузере. Вы можете создать там учетную запись клиента и отправить заявку, используя графический интерфейс.
Используйте ссылку * Зарегистрироваться сейчас *, чтобы открыть форму регистрации.
изображение: https: //assets.digitalocean.com/articles/cart_66543/Create_Account.png [Создать учетную запись]
Заполните форму и нажмите кнопку * Создать *.
Вы увидите сообщение, подобное этому:
New account created. Sent login information to . Please check your email.Проверьте свой почтовый ящик на наличие сообщения от OTRS. Вы увидите сообщение с новыми учетными данными:
Hi ,

You or someone impersonating you has created a new OTRS account for
you.

Full name:
User name:
Password :

You can log in via the following URL. We encourage you to change your password
via the Preferences button after logging in.

http:///otrs/customer.pl
Теперь используйте предоставленные учетные данные для доступа к клиентскому интерфейсу и создания другого тикета. Все новые тикеты, созданные с помощью клиентского интерфейса, сразу же появятся на информационной панели агента:
изображение: https: //assets.digitalocean.com/articles/cart_66543/Customer_Ticket.png [Клиентский билет]
На информационной панели агента вы можете видеть информацию обо всех текущих билетах: их статус (новый, открытый, увеличенный и т. Д.), Их возраст (время, прошедшее с момента получения билета) и тему.
Вы можете нажать на номер билета (в столбце * TICKET # *), чтобы просмотреть его детали. Агент также может выполнить действия с заявкой, например, изменить ее приоритет или состояние, переместить его в другую очередь, закрыть его или добавить заметку.
Вы успешно настроили свою учетную запись OTRS.
Заключение
В этом руководстве вы настроили OTRS и создали тестовые заявки в службу поддержки. Теперь вы можете принимать и обрабатывать запросы от ваших пользователей, используя как веб-интерфейс, так и электронную почту.
Вы можете узнать больше об OTRS, прочитав OTRS Руководство администратора. Если вы хотите узнать больше о том, как использовать MySQL, см. Нашу статью An Введение в запросы в MySQL или изучите https в DigitalOcean: //www.digitalocean.com/products/managed-databases/[Managed Databases product].