
VQT3R12-1
Перед пользованием прочтите, пожалуйста, эту
инструкцию полностью.
Инструкция по эксплуатации
для улучшения характеристик
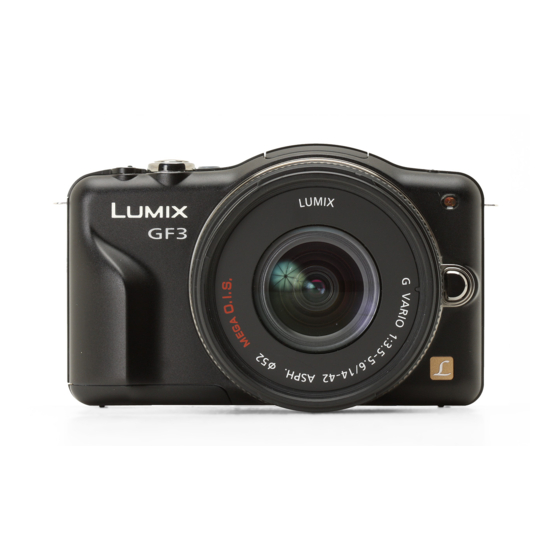
Цифровая фотокамера
Модель №.
DMC-GF3
 06:58
06:58
Видеообзор Фотоаппарата Panasonic Lumix DMC-GF3CEE. Hard News 8.05.2012
 04:31
04:31
Обзор Panasonic Lumix DMC-GF3
 04:22
04:22
Panasonic GF5 — Обзор Недорогой Беззеркалки на Kaddr.com
 07:48
07:48
Как делать крутые фотографии на камеру стоимостью 1000 рублей? Panasonic Lumix GF3
 10:38
10:38
???? КАМЕРА ДЛЯ БЛОГЕРА ЗА 1500Р | Lumix GF3 спустя 10 лет
 10:55
10:55
Panasonic GF3 Hands-on Review
 05:48
05:48
Panasonic Lumix DMC-GF3
 11:06
11:06
Panasonic Lumix GF3 Review — Panasonic GF3 Review
Перед пользованием прочтите, пожалуйста, эту инструкцию пол…
Dmc-gf3
- Изображение
- Текст
VQT3R12-1
Перед пользованием прочтите, пожалуйста, эту
инструкцию полностью.
Инструкция по эксплуатации
для улучшения характеристик
Цифровая фотокамера
Модель №.
DMC-GF3

Содержание Перед использованием Уход за камерой …………..
Страница 2
- Изображение
- Текст


Перед использованием
— 5 —
Перед использованием
Уход за камерой
Не подвергайте камеру воздействию сильной вибрации,
ударных нагрузок или давления.
•
Объектив, монитор ЖКД и внешний корпус могут быть
повреждены в случае использования камеры в следующих
условиях.
Также возможно возникновение неисправностей или
отсутствие записи изображений.
–
Падение камеры или воздействие ударной нагрузки.
–
Нажатие с усилием на объектив или монитор ЖКД.
Данная камера не является пыле-, влаго- и
водонепроницаемой.
Избегайте пользования камерой в местах концентрации
пыли, воды, песка и т. п.
•
Жидкости, песок и прочие посторонние вещества могут
попадать на участки возле объектива, кнопок и т. п.
Необходимо соблюдать особую осторожность, поскольку это
может привести не только к неисправности, но и к
непригодности к ремонту.
–
Места с большим количеством песка или пыли.
–
Места, в которых возможен контакт данной камеры с водой,
например при использовании в дождливый день или на
пляже.
Не касайтесь внутренней части крепления корпуса
цифровой камеры. Поскольку матрица является
высокоточным изделием, это может привести к ее
неисправности или повреждению.
∫ О конденсации (при запотевании объектива
объектива или монитора ЖКД)
•
Конденсат образуется в случае изменения температуры
окружающей среды или влажности. Будьте осторожны при
появлении конденсата, поскольку он приводит к появлению
пятен на объективе и мониторе ЖКД, образованию плесени и
неполадкам камеры.
•
Если произошла конденсация, выключите камеру и оставьте ее
примерно на 2 часа. Конденсат исчезнет сам собой, когда
температура камеры сравняется с температурой окружающей среы.

— 6 —
Перед использованием
Стандартные принадлежности
Перед использованием камеры убедитесь в наличии всех принадлежностей.
•
Дополнительные принадлежности и их форма отличаются в зависимости от страны или
региона приобретения камеры.
Сведения о дополнительных принадлежностях приведены в основной инструкции по
эксплуатации.
•
Блок аккумулятор обозначается в тексте как блок аккумулятора или аккумулятор.
•
Зарядное устройство аккумулятора обозначается в тексте как зарядное устройство
аккумулятора или зарядное устройство.
•
В дальнейшем по тексту карта памяти SD, карта памяти SDHC и карта памяти SDXC
обозначаются как карта.
•
Карта поставляется отдельно.
•
Описание в данной инструкции по эксплуатации основано на сменном объективе
(H-H014).
Информация о таких недоступных функциях, как [СТАБИЛИЗ.]
(P69)
, функция
определения направления
(P30)
, в данной инструкции по эксплуатации приведена на
основе сменных объективов (H-FS014042, H-PS14042).
•
При утере поставляемых принадлежностей обратитесь в ближайший центр
обслуживания. (Принадлежности можно приобрести отдельно.)

Перед использованием
— 7 —
Названия и функции составных частей
∫ Корпус камеры
1
Сенсор
2
Вспышка
(P72)
3
Индикатор автоматического таймера
(P81)
/
Вспомогательная лампочка АФ
(P140)
4
Метка установки объектива
(P14)
5
Крепление
6
Стопорный штифт объектива
7
Кнопка отсоединения объектива
(P13)
8
Кнопка открытия вспышки
(P72)
9
Сенсорная панель/Монитор ЖКД
(P10)
10 Кнопка воспроизведения
(P47
,
51)
11 Кнопка [Q.MENU/Fn]
(P59
,
97)
/
Кнопка удаления/возврата
12 Кнопка [MENU/SET]
(P11
,
57)
13 Диск управления
(P11)
14 Кнопки курсора
(P11)
3/Кнопка компенсации экспозиции
(P39
,
76
,
100
,
101)
1/WB (Баланс белого)
(P92)
2/Кнопка режима AF
(P83)
4/Кнопка [РЕЖИМ ПЕРЕКЛЮЧАТЕЛЯ]
Эта кнопка в режиме записи изображения
позволяет выбирать из следующих вариантов.
Одиночная
(P33)
/Серийная
(P77)
/Автобрекетинг
(P79)
/Автоматический таймер
(P81)
1
2
3
4
5
6
7
8
9 10 11 121314

— 8 —
Перед использованием
15 Ушко для плечевого ремня
(P16)
•
При использовании камеры следует
обязательно прикреплять плечевой
ремень во избежание ее падения.
16 Гнездо [HDMI]
(P164)
17 Гнездо [AV OUT/DIGITAL]
(P164
,
169
,
172
,
174)
18 Микрофон
•
Не закрывайте микрофон пальцами.
19 Кнопка затвора
(P33)
20 Кнопка видеосъемки
(P45)
21 Громкоговоритель
(P64)
•
Не закрывайте динамик пальцами.
22 Метка отсчета фокусного расстояния
(P91)
23 Кнопка интеллектуального
автоматического режима
(P35)
24 Переключатель включения/выключения
камеры
(P26)
25 Индикатор состояния
(P26)
26 Гнездо штатива
(P188)
27 Дверца для ввода карты памяти/
аккумулятора
(P22)
28 Крышка отсека для DC переходника
•
При использовании адаптера
переменного тока убедитесь в том, что
используются разъем постоянного тока
Panasonic (поставляется отдельно) и
сетевой адаптер переменного тока
(поставляется отдельно).
(P178)
29 Рычаг отсоединения
(P22)
15
16
17
22
21
23 24
20
19
18
25
LOCK
OPEN
27 28 29
26

Перед использованием
— 9 —
∫ Объектив
30 Поверхность объектива
31 Кольцо фокусировки
(P89)
32 Точка контакта
33 Метка установки объектива
(P14)
34 Телережим
35 Широкоугольный режим
36 Кольцо трансфокатора
(P71)
37 Рычажок фокусировки
(P89)
Установите рычажок фокусировки в положение A или B.
A
: Фокусировка на объекте, расположенном близко
B
: Фокусироваться на объекте, расположенном далеко
•
Скорость фокусировки изменяется в зависимости от величины
перемещения.
38 Рычажок трансфокатора
(P71)
Переместите рычажок трансфокатора в сторону [T] (телережим)
или [W] (широкоугольный).
[T]: используйте для съемки объектов крупным планом
(телережим)
[W]: используйте для съемки предметов дальним планом
(широкий угол)
•
Скорость масштабирования изменяется в зависимости от диапазона перемещения
рычажка трансфокатора. Скорость масштабирования при записи видео будет ниже
обычной.
H-H014
(LUMIX G 14 мм/F2.5 ASPH.)
H-FS014042
(LUMIX G VARIO 14– 42 мм/F3.5–5.6
ASPH./MEGA O.I.S.)
H-PS14042
(LUMIX G X VARIO PZ 14–42 mm/F3.5–5.6 ASPH./POWER O.I.S.)
32
33
31
30
31 34 35 36
32
33
30
30
32
37
33
38
W
T

— 10 —
Перед использованием
Данная сенсорная панель реагирует на нажатие.
Примечание
•
При использовании имеющейся в продаже защитной пленки
для жидкокристаллических дисплеев следуйте инструкции,
прилагающейся к пленке. (Некоторые защитные пленки для
жидкокристаллических дисплеев могут негативно сказаться
на видимости или эксплуатационных качествах.)
•
Если вы используете имеющуюся в продаже защитную
пленку и заметили, что сенсорная панель плохо реагирует на
нажатие, попробуйте нажимать на нее несколько сильнее.
•
Остерегайтесь случайно надавить на сенсорную панель,
когда держите камеру в руке. Это может повлиять на работу
сенсорной панели.
•
Не нажимайте на монитор ЖКД твердыми заостренными предметами, например,
шариковыми ручками.
•
Не нажимайте ногтями во время управления.
•
Если монитор ЖКД загрязнен, и на нем имеются отпечатки пальцев и т. п., протрите его
сухой мягкой тканью.
•
Не царапайте монитор ЖКД и не нажимайте на него с силой.
•
О значках, выводимых на сенсорной панели, см. в
“
Отображение на мониторе ЖКД
”
на
P179
.
∫ О стилусе
Для операций, требующих точности, или в случае сложности управления пальцами
удобнее использовать стилус (поставляется в комплекте).
•
Используйте только стилус, входящий в комплект поставки.
•
Храните его в недоступном для маленьких детей месте.
Сенсорная панель
Прикосновение к экрану
Коснуться сенсорной панели и отпустить
палец.
Перетаскивание
Движение без прекращения контакта с
сенсорной панелью.
Используйте при выполнении таких
операций, как выбор пиктограмм или
изображений, отображающихся на
сенсорной панели.
•
При выборе функций с помощью
сенсорной панели касайтесь центра
нужного значка.
Используется для перемещения зоны
автофокусировки, работы с полосой
прокрутки и т. п.
Может также использоваться при
воспроизведении для перехода к
следующему изображению.

Комментарии
-
Contents
-
Table of Contents
-
Troubleshooting
-
Bookmarks
Quick Links
Owner’s Manual
for advanced features
Digital Camera
DMC-GF3
Model No.
Before connecting, operating or adjusting this product,
please read the instructions completely.
VQT3Q95
Related Manuals for Panasonic Lumix DMC-GF3
Summary of Contents for Panasonic Lumix DMC-GF3
-
Page 1
Owner’s Manual for advanced features Digital Camera DMC-GF3 Model No. Before connecting, operating or adjusting this product, please read the instructions completely. VQT3Q95… -
Page 2: Table Of Contents
Contents Taking Pictures using the Automatic Function (Intelligent Auto Mode) …..35 Easily adjust and record (Intelligent Auto Plus Mode) ….39 Taking Pictures with Defocus Control Before Use Function………..41 Taking Pictures with Your Favorite Settings Care of the camera ……..5 (Program AE Mode)……..42 Standard Accessories …….6 Recording Motion Picture ……44 Names and Functions of Components..7…
-
Page 3
Taking Pictures by Specifying the Aperture/ • [I.DYNAMIC] Shutter Speed ………100 (Intelligent dynamic range control)..130 • Aperture-priority AE ……100 • [LONG SHTR NR] ……130 • Shutter-priority AE……100 • [SHADING COMP.] ……131 • Manual Exposure Mode ….101 • [EX. TELE CONV.] ……131 Taking Pictures that match the Scene •… -
Page 4
Connecting to other equipment Enjoying 3D pictures ……160 Playing Back Pictures on a TV Screen ..164 Saving the Recorded Still Pictures and Motion Pictures ……..168 • Copy by inserting the SD card into the recorder ……..168 • Copy the playback image using an AV cable ………169 •… -
Page 5: Before Use
Before Use Before Use Care of the camera Do not subject to strong vibration, shock, or pressure. • The lens, LCD monitor, or external case may be damaged if used in following conditions. It may also malfunction or image may not be recorded.
-
Page 6: Standard Accessories
(H-FS014042). • If any accessories are lost, customers in the USA and Puerto Rico should contact Panasonic’s parts department at 1-800-833-9626 and customers in Canada should contact 1-800-99-LUMIX (1-800-995-8649) for further information about obtaining replacement parts.
-
Page 7: Names And Functions Of Components
Before Use Names and Functions of Components ∫ Camera body Sensor Flash (P72) Self-timer indicator (P81)/ AF Assist Lamp (P140) Lens fitting mark (P14) Mount Lens lock pin Lens release button (P13) Flash open button (P72) Touch panel/LCD monitor (P10) 10 Playback button (P47, 11 [Q.MENU/Fn] button (P59, 97)/ Delete/Return button…
-
Page 8
27 Card/Battery door (P22) 28 DC coupler cover OPEN LOCK • When using an AC adaptor, ensure that the Panasonic DC coupler (optional) and AC adaptor (optional) are used. (P178) 29 Release lever (P22) 27 28 29 — 8 -… -
Page 9
Before Use ∫ Lens H-H014 H-FS014042 (LUMIX G 14 mm/F2.5 ASPH.) (LUMIX G VARIO 14– 42 mm/F3.5 – 5.6 ASPH./MEGA O.I.S.) 31 34 35 36 30 Lens surface 31 Focus ring (P89) 32 Contact point 33 Lens fitting mark (P14) 34 Tele 35 Wide 36 Zoom ring… -
Page 10
Before Use Touch Panel This touch panel is a type that detects pressure. Drag Touch the screen A movement without releasing the touch To touch and release the touch panel. panel. Use this to perform tasks such as selecting This is used to move the AF area, operate icons or images displayed on the touch the slide bar, etc. -
Page 11
Before Use Cursor buttons/[MENU/SET] button Pressing the cursor button: Selection of items or setting of values etc., is performed. Pressing [MENU/SET]: Confirmation of setting contents, etc., is performed. This document expresses the up, down, left, and right of the cursor button as follows, or as 3/4/2/1. -
Page 12: About The Lens
For details on the lens used, refer to the website. Refer to catalogues/Web pages for most current information regarding compatible lenses. http://panasonic.jp/support/global/cs/dsc/ (This Site is English only.) Note • The available flash range etc. differs depending on the aperture value of the lens you are using.
-
Page 13: Preparation
Preparation Preparation Changing the Lens By changing the lens, you will increase your picture taking-options and further your enjoyment of the camera. Change the lens using the following procedure. • Check that the camera is turned off. • Change lenses where there is not a lot of dirt or dust. Refer to P183, P184 when dirt or dust gets on the lens.
-
Page 14: Attaching The Lens
Preparation Attaching the lens Preparations: Remove the rear lens cap from the lens. • If the body cap is fitted to the camera, remove it. Align the lens fitting marks B (red marks) and then rotate the lens in the direction of the arrow until it clicks.
-
Page 15
Preparation Attaching the Lens Hood In bright sunlight or backlight, the lens hood will minimize lens flare and ghosting. The lens hood cuts off excess lighting and improves the picture quality. To attach the lens hood (flower shape) that came with the interchangeable lens (H-FS014042) •… -
Page 16: Attaching The Shoulder Strap
Preparation Attaching the Shoulder Strap • We recommend attaching the shoulder strap when using the camera to prevent it from dropping. Pass the shoulder strap through the shoulder strap eyelet on the camera body. A: Shoulder strap eyelet Pass the end of the shoulder strap through the ring in the direction of the arrow and then pass it through the stopper.
-
Page 17: Charging The Battery
To ensure that safe products are used we would recommend that a genuine Panasonic battery pack is used. • Use the dedicated charger and battery.
-
Page 18
Preparation ∫ Charging time Charging time Approx. 180 min • The indicated charging time is for when the battery has been discharged completely. The charging time may vary depending on how the battery has been used. The charging time for the battery in hot/cold environments or a battery that has not been used for a long time may be longer than normal. -
Page 19: Approximate Operating Time And Number Of Recordable Pictures
CIPA is an abbreviation of [Camera & Imaging Products Association]. • Temperature: 23 oC (73.4 F)/Humidity: 50%RH when LCD monitor is on. • Using a Panasonic SD Memory Card (2 GB). • Using the supplied battery. • Starting recording 30 seconds after the camera is turned on.
-
Page 20
Preparation ∫ Recording motion pictures – [AVCHD] (Recording with picture quality set to [FSH]) When the interchangeable lens (H-H014) is used Recordable time Approx. 150 min Actual recordable time Approx. 75 min When the interchangeable lens (H-FS014042) is used Recordable time Approx. -
Page 21
Preparation ∫ Playback When the interchangeable lens (H-H014) is used Playback time Approx. 270 min When the interchangeable lens (H-FS014042) is used Playback time Approx. 250 min Note • The operating times and number of recordable pictures will differ according to the environment and the operating conditions. -
Page 22: Inserting And Removing The Card (Optional)/The Battery
Preparation Inserting and Removing the Card (optional)/the Battery • Check that this unit is turned off. • We recommend using a Panasonic card. Slide the release lever in the direction of the arrow and open the card/battery OPEN LOCK door.
-
Page 23: About The Card
SDXC Memory Card using the SDXC Memory Cards. (48 GB, 64 GB) http://panasonic.net/avc/sdcard/information/SDXC.html • Only the cards with capacity listed left can be used. ¢ SD Speed Class is the speed standard regarding continuous writing. Check via the label on the card, etc.
-
Page 24
Preparation Note • Write-Protect switch provided (When this switch is set to the [LOCK] position, no further data writing, deletion or formatting is possible. The ability to write, delete and format data is restored when the switch is returned to its original position.) •… -
Page 25: Approximate Number Of Recordable Pictures And Available Recording Time
Preparation Approximate number of recordable pictures and available recording time ∫ About the display of the number of recordable pictures and available recording time • Switching between the display of number of recordable pictures and available recording time can be performed in the [REMAINING DISP.] (P141) in the [CUSTOM] menu.
-
Page 26: Setting Date/Time (Clock Set)
Preparation Setting Date/Time (Clock Set) Clock can be set with touch operation only at the time of purchase. To change the clock settings, refer to [CLOCK SET] in the [SETUP] menu (P61). • The clock is not set when the camera is shipped. Turn the camera on.
-
Page 27
Preparation Touch [SET] to set. Touch [SET] in the confirmation screen. Note • The clock setting is maintained for 3 months using the built-in clock battery even without the battery. (Leave the charged battery in the unit for 24 hours to charge the built-in battery.) •… -
Page 28: Basic
Basic Basic Selecting the Recording Mode Press [MENU/SET]. Touch [REC MODE]. • A screen listing the Recording Mode is displayed. • It is also possible to display the screen listing the Recording Mode by touching the Recording Mode icon in Recording Mode.
-
Page 29
Basic ∫ Basic Intelligent Auto Mode (P35) The subjects are recorded using settings automatically selected by the camera. Intelligent Auto Plus Mode (P39) Easily match settings selected by the camera to your preferences and record. Program AE Mode (P42) The subjects are recorded using your own settings. ∫… -
Page 30: Tips For Taking Good Pictures
Basic Tips for taking good pictures • Do not cover the flash, the AF assist lamp A or the microphone B with your fingers or other objects. • Hold the camera gently with both hands, keep your arms still at your side and stand with your feet slightly apart.
-
Page 31: Taking A Still Picture
Basic Recording Mode: Taking a Still picture How to set focus when taking a still picture (AFS/AFC) Select [FOCUS MODE] from the [REC] Mode menu. (P57) Press [MENU/SET] to select the item. • Normally use the [AFS]. “AFS” is an abbreviation of “Auto Focus Single”. Focus is set automatically when the shutter button is pressed halfway.
-
Page 32
Basic Press the shutter button halfway. Focus Mode When the subject is When the subject is not Focus focused focused Focus indication A On Blinks AF area B Green — Sound Beeps 2 times — Focus Mode When the subject is When the subject is not Focus focused… -
Page 33: Taking A Still Picture
Basic Taking a Still picture • Set the drive mode to [ ] by pressing 4( Selecting the Recording Mode. • For details on setting up Recording Mode, refer to P28. Press the shutter button halfway to focus. A Aperture value B Shutter speed •…
-
Page 34: Taking Pictures Using The Touch Shutter Function
Basic Taking pictures using the Touch Shutter function Just by touching the subject to focus, it will focus on the subject and take the picture automatically. Touch [ ] in Recording Mode. • Icon will change to [ ], and taking a picture with the Touch Shutter function becomes possible.
-
Page 35: Taking Pictures Using The Automatic Function (Intelligent Auto Mode)
Basic ñ Recording Mode: Taking Pictures using the Automatic Function (Intelligent Auto Mode) The camera will set the most appropriate settings to match the subject and the recording conditions so we recommend this mode for beginners or those who want to leave the settings to the camera and take pictures easily.
-
Page 36
Basic ∫ Changing the settings Following menus can be set. Menu Item [REC] ¢ [PHOTO STYLE] /[ASPECT RATIO]/[PICTURE SIZE]/ ¢ [QUALITY]/[FACE RECOG.]/[FOCUS MODE]/[STABILIZER] [MOTION PICTURE] [PHOTO STYLE] ¢ /[REC MODE]/[REC QUALITY]/ [FOCUS MODE]/[CONTINUOUS AF]/[WIND CUT] [CUSTOM] [HISTOGRAM]/[GUIDE LINE]/[REMAINING DISP.]/ [TOUCH SETTINGS] [SETUP] [CLOCK SET]/[WORLD TIME]/[BEEP]/[LCD MODE]/ [LANGUAGE]… -
Page 37
Basic ∫ Scene Detection When the camera identifies the optimum scene, the icon of the scene concerned is displayed in blue for 2 seconds, after which its color changes to the usual red. When taking pictures > [i-PORTRAIT] ¦ [i-SCENERY] [i-MACRO] •… -
Page 38
Basic Note • The following functions are activated automatically. – Scene Detection/Backlight Compensation/Face Detection/Auto White Balance/ Intelligent ISO sensitivity control/[QUICK AF]/[RED-EYE REMOVAL]/[I.RESOLUTION]/ [I.DYNAMIC]/[LONG SHTR NR]/[SHADING COMP.]/[FOCUS PRIORITY]/ [AF ASSIST LAMP] • The Backlight Compensation – Backlight refers to when light comes from the back of a subject. In this case, the subject will become dark, so this function compensates the backlight by brightening the whole of the picture automatically. -
Page 39: Easily Adjust And Record (Intelligent Auto Plus Mode)
Basic Recording Mode: Easily adjust and record (Intelligent Auto Plus Mode) The brightness and color optimally set by the camera can be easily matched to your preferences. This mode is useful if you do not like dealing with detailed settings but like the settings made automatically by the camera to match your preferences.
-
Page 40
Basic Setting color Press 1 ( ) to display the setting screen. Touch the slide bar to set. • This will adjust the color of the image from a reddish color to a bluish color. • Setting can also be performed by rotating the control dial. •… -
Page 41: Taking Pictures With Defocus Control Function
Basic Recording Mode: Taking Pictures with Defocus Control Function You can easily set the blurriness of the background while checking the screen. Touch [ ] to display the setting screen. Touch the slide bar to set. • Setting can also be performed by rotating the control dial. Recording of pictures or motion pictures.
-
Page 42: Taking Pictures With Your Favorite Settings (Program Ae Mode)
Basic Recording Mode: Taking Pictures with Your Favorite Settings (Program AE Mode) The camera automatically sets the shutter speed and the aperture value according to the brightness of the subject. You can take pictures with greater freedom by changing various settings in [REC] Mode menu.
-
Page 43
Basic Program Shift In Program AE Mode, you can change the preset aperture value and shutter speed without changing the exposure. This is called Program Shift. You can make the background more blurred by decreasing the aperture value or record a moving subject more dynamically by slowing the shutter speed when taking a picture in Program AE Mode. -
Page 44: Recording Motion Picture
Basic Recording Mode: Recording Motion Picture This can record full high definition motion pictures compatible with the AVCHD format or motion pictures recorded in Motion JPEG. Audio will be recorded in monaural. The functions available when recording motion pictures differ according to the lens you are using, and the operational sound of the lens may be recorded.
-
Page 45: Recording Motion Picture
Basic Recording Motion Picture Recording of motion picture appropriate for each mode is possible. • Screen here is an example of when the Recording Mode is set to [ ] (Program AE Mode). Start recording by pressing the motion picture button.
-
Page 46
Basic Note • Audio will not be recorded for 0.5 seconds after it starts recording if the motion picture button is kept pressed. Release the motion picture button right after you press it. • The operational sound of the zoom or button operation may be recorded when it is operated during the recording of a motion picture. -
Page 47: Playing Back Pictures/Motion Pictures
Basic Playing Back Pictures/Motion Pictures Playing Back Pictures Press [(]. Forward or rewind the image by dragging (P10) the screen horizontally. Forward: drag from right to left Rewind: drag from left to right • It is also possible to forward or rewind the image by pressing 2/1 of the cursor button.
-
Page 48
Basic Displaying multiple screens (Multi Playback) Touch [ • It is possible to switch the playback screen by touching the following icons. – ]: 1 screen – ]: 12 screens – ]: 30 screens – ]: Calendar screen display • Playback screen can also be switched by rotating the control dial. -
Page 49
Basic Displaying Pictures by Recording Date (Calendar Playback) Touch [ ] on the Multi Playback screen. Touch [3]/[4] to select the month to be played back. • If there were no pictures recorded during a month, that month is not displayed. •… -
Page 50: Changing The Information Displayed On The Playback Screen
Basic Using the Playback Zoom Touch the part to enlarge firmly. 1k>2k>4k>8k>16k • You can also enlarge/reduce the picture by rotating the control dial. • When you change the magnification, the zoom position indication A appears for about 1 second. •…
-
Page 51: Playing Back Motion Pictures
Motion pictures in AVCHD format that can be played back on this unit are [AVCHD] motion pictures that were recorded with this unit, AVCHD format (including [AVCHD Lite]) motion pictures recorded with Panasonic digital cameras (LUMIX) only. Press [(]. Select a picture with a Motion Picture icon ([ ]) and then touch [ ] to play back.
-
Page 52
Basic ∫ Operations performed during Motion Picture Playback Display control panel by touching screen. • If no operation is performed for 2 seconds, it will return to original status. Operate control panel by touching. Play/Pause Stop Fast rewind Fast forward Frame-by-frame rewind Frame-by-frame forward (while pausing) -
Page 53: Creating Still Pictures From A Motion Picture
Basic Creating Still Pictures from a Motion Picture You can create a single still picture from a recorded motion picture. Touch [ ] during Motion Picture playback using touch operation. Touch [ • Confirmation screen is displayed. It is executed when [YES] is selected.
-
Page 54: Deleting Pictures
Basic Deleting Pictures Once deleted, pictures cannot be recovered. Press [(]. To delete a single picture Select the picture to be deleted, and then touch Touch [DELETE SINGLE]. • Confirmation screen is displayed. Picture is deleted by selecting [YES]. — 54 -…
-
Page 55
Basic To delete multiple pictures (up to 100) or all the pictures Touch [ Touch [DELETE MULTI] or [DELETE ALL]. • [DELETE ALL] > Confirmation screen is displayed. Picture is deleted by selecting [YES]. • It is possible to delete all pictures except the ones set as favorite when [ALL DELETE EXCEPTÜ] is selected with the [DELETE ALL] set. -
Page 56: Setting The Menu
Basic Setting the Menu When [MENU/SET] is pressed, [REC MODE] A and 5 menus B ([REC], [MOTION PICTURE], [CUSTOM], [SETUP], and [PLAYBACK]) are displayed. In the 5 different menus, there are menus that allow you to setup the recording or playback to your preference, or make it more fun and easier to use the camera.
-
Page 57: Setting Menu Items
Basic Setting menu items • If you set [MENU RESUME] (P143) in the [CUSTOM] menu to [ON], the screen shows the last selected menu item when the camera was turned off. It is set to [ON] at the time of purchase. Press [MENU/SET].
-
Page 58
Basic Select the settings by pressing 3/4 or by rotating the control dial. • The figure on the right is an example of setting [I.DYNAMIC] from [OFF] to [HIGH]. Press [MENU/SET] to set. ∫ Close the menu Press [ ] several times or press the shutter button halfway. ∫… -
Page 59: Setting The Quick Menu
Basic Setting the Quick Menu By using the Quick Menu, some of the menu settings can be easily found. • The features that can be adjusted using Quick Menu are determined by the mode or a display style the camera is in. Items that cannot be used are displayed in gray. [Q.MENU/Fn] button can be used in two ways, as [Q.MENU] (Quick Menu) or as [Fn] (function button).
-
Page 60: Recording Functions
Basic ∫ Change the Quick Menu to your preferred item Up to 10 items to be used can be setup as Quick Menus. Set the menu items depending on the recording conditions, etc. Touch [ Select the menu in the top row and drag it to the bottom row.
-
Page 61: About The Setup Menu
Basic Perform these settings if you need to. About the Setup Menu [CLOCK SET], [ECONOMY] and [AUTO REVIEW] are important items. Check their settings before using them. For details on how to select the [SETUP] menu settings, refer to P57. Setting Date/Time.
-
Page 62
Basic Set the time in your home area and travel destination. You can display the local times at the travel destinations and record them on the pictures you take. After selecting [DESTINATION] or [HOME], press 2/1 to select an area, and press [MENU/SET] to set. •… -
Page 63
Basic Departure date and return date of the travel as well as the name of the travel destination can be set. You can display the number of days that have passed when playing back the pictures and stamp it on the recorded pictures with [TEXT STAMP] (P148). -
Page 64: Control Dial
Basic Adjust the volume of the speaker to any of 7 levels. u [VOLUME] • When you connect the camera to a TV, the volume of the TV speakers does not change. Brightness, color, or red or blue tint of the LCD monitor is adjusted.
-
Page 65
Basic You can conserve the battery life by setting these menus. Also, it will turn off the LCD monitor automatically when not in use to prevent discharge of the battery. p [SLEEP MODE]: The camera is automatically turned off if the camera has not been q [ECONOMY] used for the time selected on the setting. -
Page 66
Basic Select the USB communication system after or before connecting the camera to your PC or your printer with the USB connection cable (supplied). y [SELECT ON CONNECTION]: Select either [PC] or [PictBridge(PTP)] if you connected the x [USB MODE] camera to a PC or a printer supporting PictBridge. -
Page 67
Basic Setup so this unit can be controlled by the remote control of the VIERA equipment by automatically coupling this unit with the VIERA Link compatible equipment using HDMI mini cable (optional). [OFF]: Operation is performed with the buttons on this unit. [VIERA Link] [ON]: Remote control operation of the VIERA Link… -
Page 68
If the card cannot be formatted, please try another card before contacting your nearest Service Center. For Canadian assistance, please call: For USA and Puerto Rico assistance, please call: 1-800-99-LUMIX (1-800-995-8649) or 1-800-211-PANA(7262) or, contact us via the web at: send e-mail to: lumixconcierge@ca.panasonic.com http://www.panasonic.com/contactinfo — 68 -… -
Page 69: Recording
Recording Recording Mode: Recording Optical Image Stabilizer Using one of these modes, jitter during picture taking is detected, and the camera automatically compensates the jitter, enabling jitter-free images to be taken. A lens which supports the stabilizer function is required. –…
-
Page 70
Recording ∫ Preventing jitter (camera shake) When the jitter alert [ ] appears, use [STABILIZER], a tripod or the self-timer (P81). • Shutter speed will be slower particularly in the following cases. Keep the camera still from the moment the shutter button is pressed until the picture appears on the screen. We recommend using a tripod. -
Page 71: Taking Pictures With The Zoom
Recording Recording Mode: Taking Pictures with the Zoom [You can only use the Optical Zoom in [ ], [ ] and the Optical Zoom, the Extended Tele Conversion in [¿] mode.] ∫ Optical Zoom You can zoom-out to record landscapes etc. in wide angle (Wide) or zoom-in to make people and objects appear closer (Tele) by rotating the zoom ring.
-
Page 72: Taking Pictures Using The Flash
Recording Recording Mode: Taking Pictures using the Flash A To open the flash B To close the flash Press the flash until it clicks. • Be sure to close the flash when not in use. • The flash setting is fixed to [Œ] while the flash is closed.
-
Page 73
Recording Item Description of settings The flash is automatically activated when the recording conditions make ‡: AUTO it necessary. The flash is automatically activated when the recording conditions make it necessary. It is activated once before the actual recording to reduce the red-eye AUTO/Red-Eye phenomenon (eyes of the subject appearing red in the picture) and then Reduction… -
Page 74
Recording ∫ Available flash settings by Recording Mode The available flash settings depend on the Recording Mode. (±: Available, —: Not available, ¥: Initial setting of Scene Mode) ‡ ‰ Œ ‡ ‰ Œ ¢ — — — — — —… -
Page 75
Recording ∫ Shutter speed for each flash setting Flash setting Shutter speed (Sec.) Flash setting Shutter speed (Sec.) ‡ ¢1 1/60 to 1/4000th 1 to 1/4000th ‰ ¢2 1/60 to 1/160th 60 to 1/4000th Œ ¢1 This becomes 60 seconds in Shutter-Priority AE Mode. ¢2 This becomes 60 seconds in Shutter-Priority AE Mode and 60 seconds in the Manual Exposure Mode. -
Page 76: Compensating The Exposure
Recording Recording Mode: Compensating the Exposure Use this function when you cannot achieve appropriate exposure due to the difference in brightness between the subject and the background. Look at the following examples. Properly Underexposed Overexposed exposed Compensate the exposure Compensate the exposure towards positive.
-
Page 77: Taking Pictures Using Burst Mode
Recording Recording Mode: Taking Pictures using Burst Mode Pictures are taken continuously while the shutter button is pressed. Press 4 ( Touch burst icon ([ ], etc.). Select and touch the burst speed. (High speed) (Middle speed) (Low speed) Burst speed (pictures/second) Live View during Burst None…
-
Page 78
Recording Touch [SET]. Focus on the subject and take a picture. A When Burst Mode is set to high speed [H]. • Hold down the shutter button fully to activate the Burst Mode. ∫ Focusing in Burst Mode The focus changes depending on the setting for [FOCUS PRIORITY] (P139) in the [CUSTOM] menu and the setting for [FOCUS MODE]… -
Page 79: Taking Pictures Using Auto Bracket
Recording Recording Mode: Taking Pictures using Auto Bracket Maximum of 5 pictures will be recorded with different exposure settings following the Exposure Compensation range every time the shutter button is pressed. With Auto Bracket [STEP]: [3•1/3], [SEQUENCE]: [0/s/r] 1st picture 2nd picture 3rd picture d0 EV…
-
Page 80
Recording ∫ Changing the settings for [ SETTINGS], [STEP] and [SEQUENCE] in Auto Bracket Select [AUTO BRACKET] in the [REC] Mode menu. (P57) Press 3/4 to select [ SETTINGS], [STEP] or [SEQUENCE] and then press [MENU/SET]. Press 3/4 to select the setting and then press [MENU/SET]. Settings Settings Item… -
Page 81: Taking Pictures With The Self-Timer
Recording Recording Mode: Taking Pictures with the Self-timer Press 4 ( Touch self-timer icon ([ ], etc.). Select and touch the time setting for the self timer. Item Settings 10 seconds After 10 seconds the camera takes 3 pictures at about 2 second intervals. 2 seconds Touch [SET].
-
Page 82
Recording Note • Time setting for the self timer can also be set by [SELF-TIMER] in the [REC] Mode menu. • Setting of the time setting for the self timer the [REC] Mode menu is not possible when Intelligent Auto ( ñ… -
Page 83: Taking Pictures With Auto Focus
Recording Recording Mode: Taking Pictures with Auto Focus This allows the focusing method that suits the positions and number of the subjects to be selected. Also, it is possible to set the focus to the subject specified on the touch panel. (Set the [TOUCH AF] of the [TOUCH SETTINGS] in the [CUSTOM] menu to [ON].) Select the mode that matches the recording conditions and the composition.
-
Page 84
Recording About [š] (Face Detection) The camera automatically detects the person’s face. The focus and exposure can then be adjusted to fit that face no matter what portion of the picture it is in. (max. 15 areas) When the camera detects a person’s face, the AF area is displayed. Yellow: When the shutter button is pressed halfway, the frame turns green when the camera is focused. -
Page 85
Recording Setting up [ ] (AF Tracking) Focus and exposure can be adjusted to a specified subject. Focus and exposure will keep on following the subject even if it moves. (Dynamic tracking) ∫ When operating the touch panel You can lock the subject by touching it. •… -
Page 86
Recording About [ ] (23-area-focusing) Up to 23 points for each AF area can be focused. This is effective when the subject is not in the center of the screen. (AF area frame will be same as image aspect ratio setting) Note •… -
Page 87
Recording Setting up position of the AF area/changing size of the AF area • Perform the operation after canceling the touch shutter function. When selecting [š], [Ø] Position and size of the AF area can be changed. Touch the subject. •… -
Page 88
Recording When selecting [ You can set the focus position precisely by enlarging the screen. • The focus position cannot be set at the edge of the screen. Touch the subject. • The assist screen for setting the focus position is enlarged to approximately 5 times original size. -
Page 89: Taking Pictures With Manual Focus
Recording Recording Mode: Taking Pictures with Manual Focus Use this function when you want to fix the focus or when the distance between the lens and the subject is determined and you do not want to activate Auto Focus. Set the [FOCUS MODE] in [REC] Mode menu to [MF]. (P57) Rotate the focus ring on the lens to focus on the subject.
-
Page 90
Recording MF ASSIST ∫ Displaying the MF Assist • This is displayed by rotating the focus ring or touching the screen. (In [MINIATURE EFFECT] in Creative Control Mode, you cannot display by touching the screen) • It can also be displayed by pressing 2 to display the setup screen for the enlarged area, deciding the area to enlarge using the cursor button, and then pressing [MENU/SET]. -
Page 91
Recording Technique for Manual Focus 1 Rotate the focus ring to focus on the subject. 2 Rotate it a little more. 3 Finely focus on the subject by rotating the focus ring slowly in reverse. Note • If you use the zoom function after focusing on the subject, focus on the subject again. •… -
Page 92: Adjusting The White Balance
Recording Recording Mode: Adjusting the White Balance In sunlight, under incandescent lights or in other such conditions where the color of white takes on a reddish or bluish tinge, this item adjusts to the color of white which is closest to what is seen by the eye in accordance with the light source.
-
Page 93
Recording ∫ Auto White Balance Depending on the conditions prevailing when pictures are taken, the pictures may take on a reddish or bluish tinge. Furthermore, when a multiple number of light sources are being used or there is nothing with a color close to white, Auto White Balance may not function properly. -
Page 94
Recording ∫ Setting the White Balance manually Set the White Balance value. Use to match the condition when taking photographs. Select [ ], [ ] and then touch [WHITE SET]. Aim the camera at a sheet of white paper etc. so that the frame in the center is filled by the white object only and then touch [SET]. -
Page 95
Recording ∫ Finely adjusting the White Balance You can finely adjust the White Balance when you cannot acquire the desired hue by setting the White Balance. Select the White Balance and then touch [ADJUST.]. Touch within the frame to finely adjust. •… -
Page 96
Recording ∫ White Balance Bracket Bracket setting is performed based on the adjustment values for the White Balance fine adjustment, and 3 pictures with different colors are automatically recorded when the shutter button is pressed once. Finely adjust the White Balance in step of the “Finely adjusting the White Balance”… -
Page 97: Using The Function Button
Recording Using the function button By assigning functions to the [Fn] (function) button, you can use [AF/ AE LOCK] that allows you to take pictures with fixed exposure or focus, [PREVIEW] that allows you to confirm the effect of aperture and shutter speed, and other functions.
-
Page 98: Fixing The Focus And The Exposure (Af/Ae Lock)
Recording Fixing the Focus and the Exposure (AF/AE Lock) Applicable modes: This is useful when you want to take a picture of a subject outside the AF area or the contrast is too strong and you cannot achieve appropriate exposure. Set [Fn BUTTON SET] in the [CUSTOM] menu to [AF/AE LOCK].
-
Page 99: Confirm The Effects Of Aperture And Shutter Speed (Preview Mode)
Recording Confirm the Effects of Aperture and Shutter Speed (Preview Mode) Applicable modes: The effects of aperture and shutter speed can be checked by using the Preview Mode. • Confirm the effects of aperture: You can check the depth of field (effective focus range) before taking a picture by closing the leaf shutter to the aperture value you set.
-
Page 100: Taking Pictures By Specifying The Aperture/Shutter Speed
Recording ±´² Recording Mode: Taking Pictures by Specifying the Aperture/ Shutter Speed Aperture-priority AE Set the aperture value to a higher number when you want a sharp focus background. Set the aperture value to a lower number when you want a soft focus background. Set Recording Mode to [ •…
-
Page 101: Manual Exposure Mode
Recording Manual Exposure Mode Determine the exposure by manually setting the aperture value and the shutter speed. The Manual Exposure Assistance appears on the lower portion of the screen to indicate the exposure. Set Recording Mode to [ • For details on setting up Recording Mode, refer to P28. Rotate the control dial to set the aperture and shutter speed.
-
Page 102
Recording Note • Aperture or shutter speed can be set by touching [F] (aperture) or [SS] (shutter speed) and then dragging the exposure meter bar in the Quick Menu (P59). • The brightness of the LCD monitor and the recorded pictures may differ. Check the pictures on the playback screen. -
Page 103: Taking Pictures That Match The Scene Being Recorded (Scene Mode)
Recording ¿ Recording Mode: Taking Pictures that match the Scene being recorded (Scene Mode) If you select a Scene Mode to suit the subject and recording conditions, the camera will set optimal exposure, color, and focus, allowing you to record in a manner appropriate to the scene.
-
Page 104: [Soft Skin]
Recording [SOFT SKIN] When taking pictures of people outdoors during the daytime, this mode enables the texture of their skin to appear even softer than with [PORTRAIT]. (It is effective when taking pictures of people from the chest up.) ∫ Technique for Soft Skin Mode To make this mode more effective: 1 Rotate the zoom ring as far as possible to Tele.
-
Page 105: [Peripheral Defocus]
Recording [PERIPHERAL DEFOCUS] This mode makes it easy to pick out the subject on which to focus and blurs the background to make the subject stand out. ∫ Setting the AF area Touch the subject to move the AF area. •…
-
Page 106: [Food]
Recording [FOOD] You can take pictures of food with a natural hue without being affected by the ambient light in restaurants etc. ∫ Technique for Food Mode • We recommend using a tripod and the self-timer. • We recommend setting the flash to [Œ] when you take pictures at close range. Note •…
-
Page 107: [Night Scenery]
Recording [NIGHT SCENERY] This allows you to take vivid pictures of the nightscape. ∫ Technique for Night Scenery Mode • We recommend using a tripod and the Self-timer for taking pictures. Note • The shutter may remain closed after taking the picture. This is due to signal processing and is not a malfunction.
-
Page 108: [Baby1]/[Baby2]
Recording [BABY1]/[BABY2] This takes pictures of a baby with a healthy complexion. When you use the flash, the light from it is weaker than usual. It is possible to set different birthdays and names for [BABY1] and [BABY2]. You can select to have these appear at the time of playback, or have them stamped on the recorded image using [TEXT STAMP] (P148).
-
Page 109: [Pet]
Recording [PET] Select this when you want to take pictures of a pet such as a dog or a cat. You can set your pet’s birthday and name. For information about [AGE] or [NAME], refer to [BABY1]/[BABY2] on P108. [PARTY] Select this when you want to take pictures at a wedding reception, an indoor party etc.
-
Page 110: Taking Pictures With Different Image Effects (Creative Control Mode)
Recording Recording Mode: Taking Pictures with different image effects (Creative Control Mode) You can take pictures with a desired effect by previewing the subject on the LCD monitor (Live View) and setting the desired effect. Set Recording Mode to [ •…
-
Page 111
Recording Adjust the [MINIATURE EFFECT] settings as desired With [MINIATURE EFFECT] you can make the subject stand out by intentionally creating defocused and in-focus portions. You can set the recording orientation (defocus orientation) and the position and size of the in-focus portion. Touch [MINIATURE EFFECT] using Step on P110. -
Page 112
Recording Note • When recording using [MINIATURE EFFECT] – Display of the recording screen will be delayed more than usual and the screen will look as if frames are being dropped. – Auto Focus Mode is fixed to [Ø]. – Burst Mode, Auto Bracket, Defocus Control or Digital Zoom cannot be used. -
Page 113: Taking Pictures In Custom Mode
Recording Recording Mode: Taking Pictures in Custom Mode You can select one of your own custom settings saved with [CUST. SET MEM.] to suit the picture-taking conditions. Initial setting of the Program AE Mode is registered as the custom settings initially. Set Recording Mode to [ •…
-
Page 114: Recording Functions
Recording ∫ Registering Personal Menu Settings (Registering custom settings) It is possible to register up to 3 sets of current camera settings as custom sets. • Set in advance the Recording Mode you wish to save and select the desired menu settings on the camera.
-
Page 115: Taking A Picture With Face Recognition Function
Recording Recording Mode: Recording Taking a Picture with Face Recognition Function Face Recognition is a function which finds a face resembling a registered face and prioritizes focus and exposure automatically. Even if the person is located towards the back or on the end of a line in a group photo, the camera can still take a clear picture. [FACE RECOG.] is initially set to [OFF] on the camera.
-
Page 116
Recording Face Settings You can register information such as names and birthdays for face images of up to 6 people. Registration can be facilitated by taking multiple face images of each person. (up to 3 pictures/registration) ∫ Point of recording when registering the face images (Good example for •… -
Page 117
Recording ∫ Registering face image of new person Select [FACE RECOG.] on the [REC] Mode menu and then press [MENU/SET]. (P57) Press 3/4 to select [MEMORY] and then press [MENU/SET]. Press 3/4/2/1 to select the face recognition frame that is not registered, and then press [MENU/SET]. -
Page 118
Recording Select item with 3/4, and then press [MENU/SET]. • You can register up to 3 face images. Item Description of settings It is possible to register names. Press 4 to select [SET] and then press [MENU/SET]. [NAME] Enter the name. •… -
Page 119
Recording ∫ Change or delete the information for a registered person You can modify the pictures or information of an already registered person. You can also delete the information of the registered person. Select [FACE RECOG.] from the [REC] Mode menu, and then press [MENU/SET]. (P57) Press 4 to select [MEMORY] and press [MENU/SET]. -
Page 120
Recording ∫ Auto Registration When [AUTO REGISTRATION] is set to [ON], the registration screen will display automatically after taking a picture of a face that has a high number of appearances. • Registration screen is displayed after approximately 3 pictures. •… -
Page 121: Entering Text
Recording Entering Text It is possible to enter babies’ and pets’ names and the names of travel destinations when recording. (Only alphabetical characters and symbols can be entered.) Display the entry screen. • You can display the entry screen via the following operations. –…
-
Page 122: Using The [Rec] Mode Menu
Recording Using the [REC] Mode Menu For details on [REC] Mode menu settings, refer to P57. • [PHOTO STYLE], [FOCUS MODE], [METERING MODE], [I.DYNAMIC] and [DIGITAL ZOOM] are common to both the [REC] Mode menu and [MOTION PICTURE] Mode menu. Changing these settings in one of these menus is reflected in other menu.
-
Page 123: [Aspect Ratio]
Recording ∫ Adjusting the picture quality Press 2/1 to select the type of Photo Style. to select the items, and then press Press 3/4 2/1 to adjust. Item Effect Increases the difference between the brightness and the darkness in the picture. [CONTRAST] Decreases the difference between the brightness and the darkness in the picture.
-
Page 124: [Picture Size]
Recording [PICTURE SIZE] Set the number of pixels. The higher the numbers of pixels, the finer the detail of the pictures will appear even when they are printed onto large sheets. Applicable modes: When the aspect ratio is [X]. (12M) 4000k3000 pixels (6M) 2816k2112 pixels…
-
Page 125: [Quality]
Recording [QUALITY] Set the compression rate at which the pictures are to be stored. Applicable modes: A JPEG image in which image quality was given priority. [›] A standard image quality JPEG image. JPEG This is useful for increasing the number of shots without changing the number of pixels.
-
Page 126: [Sensitivity]
Recording [SENSITIVITY] This allows the sensitivity to light (ISO sensitivity) to be set. Setting to a higher figure enables pictures to be taken even in dark places without the resulting pictures coming out dark. Applicable modes: [AUTO]/[ ]/[160]/[200]/[400]/[800]/[1600]/[3200]/[6400] 6400 Recording location When it is light (outdoors) When it is dark (recommended)
-
Page 127: [Iso Limit Set]
Recording [ISO LIMIT SET] It will select optimal ISO sensitivity with set value as limit depending on the brightness of the subject. Applicable modes: [OFF]/[200]/[400]/[800]/[1600] Note • It will work when the [SENSITIVITY] is set to [AUTO] or [ • [ISO LIMIT SET] is disabled during motion picture recording.
-
Page 128: [Quick Af]
Recording [QUICK AF] As long as the camera is held steady, the camera will automatically adjust the focus and focus adjustment will then be quicker when the shutter is pressed. This is useful when you do not want to miss a picture-taking opportunity. Applicable modes: [OFF]/[ON] Note…
-
Page 129: [Flash]
Recording [FLASH] [ ‡ ]/[ ]/[ ‰ ]/[ Note • Refer to for details. [RED-EYE REMOVAL] When Red-Eye Reduction ([ ], [ ], [ ]) is selected, Digital Red-Eye Correction is performed whenever the flash is used. The camera automatically detects red-eye and corrects the picture.
-
Page 130: (Intelligent Dynamic Range Control)
Recording [I.DYNAMIC] (Intelligent dynamic range control) Contrast and exposure will be adjusted automatically when there is a big difference in brightness between the background and subject, to bring the image close to how you see. Applicable modes: [OFF]/[LOW]/[STANDARD]/[HIGH] Note • This feature may be automatically disabled, depending on the lighting conditions.
-
Page 131: [Shading Comp.]
Recording [SHADING COMP.] When the screen periphery darkens as a result of the lens characteristics, you can record pictures with the brightness of the screen periphery corrected. Applicable modes: [OFF]/[ON] Note • This feature may be automatically disabled, depending on the recording conditions. •…
-
Page 132: [Self-Timer]
Recording [SELF-TIMER] Note • Refer to for details. [COLOR SPACE] Set this when you want to correct the color reproduction of the recorded pictures on a PC, printer etc. Applicable modes: [sRGB] Color space is set to sRGB color space. This is widely used in computer related equipment.
-
Page 133: Using The [Motion Picture] Mode Menu
Recording Using the [MOTION PICTURE] Mode Menu For details on [MOTION PICTURE] Mode menu settings, refer to P57. • [PHOTO STYLE], [FOCUS MODE], [METERING MODE], [I.DYNAMIC] and [DIGITAL ZOOM] are common to both the [REC] Mode menu and [MOTION PICTURE] Mode menu. Changing these settings in one of these menus is reflected in other menu.
-
Page 134: [Rec Quality]
(This Site is English only.) • To play back AVCHD motion pictures recorded with this unit on Panasonic Blu-ray Disc Players (DMP-BD30/DMP-BD31/DMP-BD50) it is necessary to update the firmware of the Blu-ray Disc Player. You can download the latest firmware version from the following website.
-
Page 135: [Continuous Af]
Recording [CONTINUOUS AF] [OFF]/[ON] Note • Refer to for details. [EX. TELE CONV.] [OFF]/[ON] Note • Refer to for details. [WIND CUT] This reduces the wind noise in the audio recording. Applicable modes: [OFF]/[LOW]/[STANDARD]/[HIGH] Note • Sound quality will be different than usual when [WIND CUT] is set. •…
-
Page 136: [Mic Level Adj.]
Recording [MIC LEVEL ADJ.] Adjust the sound input level to 4 different levels. Applicable modes: Note • Not available with [MINIATURE EFFECT] in Creative Control Mode. [FLICKER RED.] The shutter speed can be fixed to reduce the flicker or striping in the motion picture. Applicable modes: [OFF]/[1/50]/[1/60]/[1/100]/[1/120] Note…
-
Page 137: Using The [Custom] Menu
Recording Perform these settings if you need to. Using the [CUSTOM] Menu For details on how to select the [CUSTOM] menu settings, refer to P57. [CUST. SET MEM.] • Refer to P114 for details. [Q.MENU/Fn] — • Refer to for details. [Fn BUTTON SET] —…
-
Page 138
Recording This will set the pattern of guide lines displayed when taking a picture. [OFF]/[ Position can be set by dragging the [GUIDE LINE] ] on the guide line (P10). • When it is difficult to move the guide line on the screen edge by touch operation, use the cursor button to set the position. -
Page 139
Recording [AE]/[AF]/[AF/AE] [AF/AE LOCK] • Refer to for details. It will set so no picture can be taken when it is out of focus. [OFF]: This gives priority to the best time to take a picture so you can take a picture when the shutter button is [FOCUS PRIORITY] pressed fully. -
Page 140
Recording AF assist lamp will illuminate the subject when the shutter button is pressed half-way making it easier for the camera to focus when recording in low light conditions. (Larger AF area is displayed [AF ASSIST LAMP] depending on the recording conditions.) [OFF]/[ON] •… -
Page 141
Recording It is possible to set how the [¦] button to toggle to Intelligent Auto ( ) Mode will operate. ñ [SINGLE PRESS] [¦ It will switch to Intelligent Auto ( ) Mode by pressing [¦]. ñ BUTTON SWITCH] [PRESS AND HOLD] It will switch to Intelligent Auto ( ) Mode by pressing [¦] ñ… -
Page 142
Recording Enables/disables the Touch operation The corresponding touch icon is not displayed on the screen when it is set to [OFF]. [TOUCH Q.MENU]: ] (Touch Quick Menu) operation [OFF]/[ON] [DEFOCUS CTRL]: ] (Defocus control) operation [TOUCH SETTINGS] [OFF]/[ON] [TOUCH SHUTTER]: ] (Touch shutter) operation [OFF]/[ON] [TOUCH AF]:… -
Page 143
Recording The last operated menu position is saved even if the camera is turned off. [MENU RESUME] [OFF]/[ON] It will perform optimization of imaging device and image [PIXEL REFRESH] processing. • Imaging device and image processing is optimized when the camera is purchased. Use this function when bright spots that do not exist in the subject get recorded. -
Page 144: Playback/Editing
Playback/Editing Playback/Editing Using the [PLAYBACK] Mode Menu You can use various functions in Playback Mode to rotate pictures, set protection for them etc. • With [TEXT STAMP], [RESIZE], [CROPPING] or [ASPECT CONV.], a new edited picture is created. A new picture cannot be created if there is no free space on the card so we recommend checking that there is free space before editing the picture.
-
Page 145
Playback/Editing ∫ Operations performed during slide show The cursor displayed during playback is the same as 3/4/2/1. Play/Pause Stop ¢ Back to previous picture ¢ Ahead to next picture Control dial Volume adjustment ¢ These operations can be performed only in the Pause Mode or during motion picture playback. -
Page 146: [Playback Mode]
Playback/Editing [PLAYBACK MODE] Playback in [NORMAL PLAY], [PICTURE PLAY], [AVCHD PLAY], [MOTION JPEG PLAY], [3D PLAY], [CATEGORY PLAY] or [FAVORITE PLAY] can be selected. Select [PLAYBACK MODE] on the [PLAYBACK] Mode menu. (P57) Press 3/4 to select the item and then press [MENU/SET]. •…
-
Page 147: [Title Edit]
Playback/Editing [TITLE EDIT] You can add text (comments) to pictures. After text has been registered, it can be stamped in prints using [TEXT STAMP] (P148). Select [TITLE EDIT] on the [PLAYBACK] Mode menu. (P57) Press 3/4 to select [SINGLE] or [MULTI] and then press [MENU/SET]. [SINGLE] [MULTI] Select the picture, and then press…
-
Page 148: [Text Stamp]
Playback/Editing [TEXT STAMP] You can stamp the recording date/time, name, location, travel date or title onto the recorded pictures. Select [TEXT STAMP] on the [PLAYBACK] Mode menu. (P57) Press 3/4 to select [SINGLE] or [MULTI] and then press [MENU/SET]. [SINGLE] [MULTI] Select the picture, and then press [MENU/SET] to set.
-
Page 149
Playback/Editing Press 3/4 to select the settings, and then press [MENU/SET]. Item Setting item [OFF] [W/OTIME]: Stamp the year, month and date. [SHOOTING DATE] [WITHTIME]: Stamp the year, month, day, hour and minutes. [OFF] Name registered in Face Recognition will be stamped. -
Page 150: [Video Divide]
Playback/Editing [VIDEO DIVIDE] Recorded motion picture can be d in two. It is recommended for when you want to divide a part you need with a part you do not need. divide Dividing a motion picture is permanent. Decide before you divide! Select [VIDEO DIVIDE] on the [PLAYBACK] Mode menu.
-
Page 151: [Resize]
Playback/Editing [RESIZE] To allow easy posting to web pages, attachment to e-mail etc., picture size (number of pixels) is reduced. Select [RESIZE] on the [PLAYBACK] Mode menu. (P57) Press 3/4 to select [SINGLE] or [MULTI] and then press [MENU/SET]. Select the picture and size. [SINGLE] setting 1 Press 2/1 to select the picture, and then press [MENU/ SET].
-
Page 152: [Cropping]
Playback/Editing [CROPPING] You can enlarge and then clip the important part of the recorded picture. Select [CROPPING] on the [PLAYBACK] Mode menu. (P57) Press 2/1 to select the picture, and then press [MENU/SET]. Use the control dial and press 3/4/2/1 to select the parts to be cropped. Control dial: 3/4/2/1: Enlargement/Reduction…
-
Page 153: [Aspect Conv.]
Playback/Editing [ASPECT CONV.] You can convert pictures taken with a [W] aspect ratio to a [Y], a [X] or a [ ] aspect ratio. Select [ASPECT CONV.] on the [PLAYBACK] Mode menu. (P57) Press 3/4 to select [Y], [X] or [ ] and then press [MENU/SET].
-
Page 154: [Rotate]/[Rotate Disp.]
Playback/Editing [ROTATE]/[ROTATE DISP.] This mode allows you to automatically display pictures vertically if they were recorded holding the camera vertically or rotate pictures manually in 90o steps. Rotate (The picture is rotated manually) Select [ROTATE] on the [PLAYBACK] Mode menu. (P57) •…
-
Page 155: [Favorite]
Playback/Editing [FAVORITE] You can do the following if a mark has been added to pictures and they have been set as favorites. • Play back the pictures set as favorites only as a slide show. • Play back only the pictures set as favorites. ([FAVORITE PLAY]) •…
-
Page 156: [Print Set]
DPOF compatible photo printer or photo printing store. For details, ask at your photo printing store. For more information visit: http://panasonic.jp/dc/dpof_110/white_e.htm Select [PRINT SET] on the [PLAYBACK] Mode menu. (P57) Press 3/4 to select [SINGLE] or [MULTI] and then press [MENU/SET].
-
Page 157
Playback/Editing ∫ To print the date After setting the number of prints, set/cancel printing with the recording date by pressing • Depending on the photo printing store or the printer, the date may not be printed even if you set to print the date. -
Page 158: [Protect]
Playback/Editing [PROTECT] You can set protection for pictures you do not want to be deleted by mistake. Select [PROTECT] on the [PLAYBACK] Mode menu. (P57) Press 3/4 to select [SINGLE] or [MULTI] and then press [MENU/SET]. [SINGLE] [MULTI] Select the picture, and then press [MENU/SET].
-
Page 159: [Face Rec Edit]
Playback/Editing [FACE REC EDIT] You can clear and replace all information relating to face recognition in selected images. Select [FACE REC EDIT] on the [PLAYBACK] Mode menu. (P57) Press 3/4 to select [REPLACE] or [DELETE] and then press [MENU/SET]. Press 2/1 to select the picture and then press [MENU/SET]. Press 2/1 to select the person and then press [MENU/SET].
-
Page 160: Connecting To Other Equipment
Connecting to other equipment Connecting to other equipment Enjoying 3D pictures Taking 3D pictures Attaching the 3D interchangeable lens (H-FT012; optional) to the camera allows you to take 3D pictures for extra impact. To view 3D pictures, a television that supports 3D is required. 3D picture The image is an illustration.
-
Page 161
Connecting to other equipment ∫ Functions that cannot be used during 3D recording When recording with the 3D interchangeable lens (H-FT012; optional), the following feature will be disabled: (Recording functions) • Auto Focus/Manual Focus operation • Aperture setting • Zoom operation ¢1 •… -
Page 162
3D compatible television with an SD card slot. For current information regarding devices that can playback 3D pictures recorded with this unit, please refer to the below support site. http://panasonic.jp/support/global/cs/dsc/ (This Site is English only.) Preparations: Set the [HDMI MODE] to [AUTO] or [1080i]. (P66) -
Page 163
Connecting to other equipment Note • When a picture recorded in 3D is displayed on the LCD monitor of this unit, it is played back in 2D (conventional image). • A black screen is displayed for a few seconds when switching back and forth playback of 3D pictures and 2D pictures. -
Page 164: Playing Back Pictures On A Tv Screen
Connecting to other equipment Playing Back Pictures on a TV Screen Pictures recorded with this unit can be played back on a TV screen. Preparations: Turn this unit and the TV off. Connect the camera and a TV. HDMI IN A To connect with an AV cable (supplied) B To connect using an HDMI mini cable (optional) 1 Terminals on your TV…
-
Page 165
Proper playback (aspect ratio) will be dependent on the TV used for viewing. • Motion pictures recorded with [AVCHD] can be played back on Panasonic TVs (VIERA) with the AVCHD logo mark. In all other cases, connect the camera to the TV using the AV cable (supplied) and play back the motion picture. -
Page 166
VIERA Link™ is a new name for EZ Sync™. • This function allows you to use your remote control for the Panasonic TV for easy operations when this unit has been connected to a VIERA Link compatible device using a HDMI mini cable (optional) for automatic linked operations. -
Page 167
Available linked operations between this unit and a Panasonic TV are different depending on the types of Panasonic TVs even if they are compatible with VIERA Link. Refer to the operating instructions of the TV for the operations are supported on the TV. -
Page 168: Saving The Recorded Still Pictures And Motion Pictures
File formats that can be used: [JPEG], [AVCHD] It is possible to copy onto Blu-ray disc, DVD disc, or hard disk by inserting an SD card with still pictures and motion pictures recorded by this unit into a Panasonic Blu-ray Disc Recorder or DVD Recorder.
-
Page 169: Copy The Playback Image Using An Av Cable
Connecting to other equipment Copy the playback image using an AV cable File formats that can be used: [AVCHD], [Motion JPEG] Copy images played back with this unit to Blu-ray disc, DVD disc, hard disk, or video using a Blu-ray Disc Recorder, DVD recorder, or video. This can be played back with equipment that is not compatible with high-definition (AVCHD), so it is convenient for distributing copies.
-
Page 170: Copying To A Pc Using «Photofunstudio
Connecting to other equipment Copying to a PC using “PHOTOfunSTUDIO” File formats that can be used: [JPEG], [RAW], [MPO], [AVCHD], [Motion JPEG] It is possible to acquire still pictures and motion pictures recorded in [AVCHD] or [MOTION JPEG] formats, or create conventional standard quality DVD video from the motion picture that was recorded as [AVCHD], using “PHOTOfunSTUDIO”…
-
Page 171: Connecting To A Pc
(Doing so will cause recorded images to be erased so do not choose to format.) If the card is not recognized, please refer to the below support site. http://panasonic.net/avc/sdcard/information/SDXC.html • You can easily print out or mail the pictures you have imported. Use of the “PHOTOfunSTUDIO”…
-
Page 172
Connecting to other equipment Acquiring of still pictures and [MOTION JPEG] motion pictures (other than [AVCHD] motion pictures) Preparations: Turn on the camera and the PC. A USB connection cable (supplied) • Check the directions of the connectors, and plug them straight in or unplug them straight out. (Otherwise the connectors may be bent out of shape which may cause malfunction.) B Align the marks, and insert. -
Page 173
Connecting to other equipment ∫ Viewing the contents of the card using the PC (folder composition) For Windows: A drive ([Removable Disk]) is displayed in [Computer] For Mac: A drive ([LUMIX], [NO_NAME] or [Untitled]) is displayed on the desktop DCIM: Images 1 Folder number 2 Color space… -
Page 174: Printing The Pictures
Connecting to other equipment Printing the Pictures If you connect the camera to a printer supporting PictBridge, you can select the pictures to be printed out and instruct that printing be started on the camera’s LCD monitor. • Some printers can print directly from the card removed from the camera. For details, refer to the operating instructions of your printer.
-
Page 175
Connecting to other equipment Selecting a single picture and printing it Press 2/1 to select the picture and then press [MENU/ PictBridge PictBridge PictBridge 100 _ 0001 100 _ 0001 100 _ 0001 SET]. 0001 PLEASE SELECT THE PICTURE TO PRINT MULTI PRINT MULTI PRINT SELECT… -
Page 176: Print Settings
Connecting to other equipment Print Settings Select and set the items both on the screen in step of the “Selecting a single picture and printing it” and in step of the “Selecting multiple pictures and printing them” procedures. • When you want to print pictures on a paper size or a layout which is not supported by the camera, set [PAPER SIZE] or [PAGE LAYOUT] to [{] and then set the paper size or the layout on the printer.
-
Page 177
Connecting to other equipment ∫ [PAPER SIZE] Item Description of settings Settings on the printer are prioritized. [L/3.5qk5q] 89 mmk127 mm [2L/5qk7q] 127 mmk178 mm [POSTCARD] 100 mmk148 mm [16:9] 101.6 mmk180.6 mm [A4] 210 mmk297 mm [A3] 297 mmk420 mm [10k15cm] 100 mmk150 mm [4qk6q]… -
Page 178: Optional Accessories
PC or printer and use without worrying about the capacity of the battery. To use the AC adaptor, a DC coupler (optional) is required. Note • Always use a genuine Panasonic AC adaptor (optional). • When using an AC adaptor, use the AC cable supplied with the AC adaptor. •…
-
Page 179: Lcd Monitor Display
Others LCD Monitor Display ∫ In recording Recording in Program AE Mode [ ] (Initial setting) Recording Mode (P28) 1 2 3 4 5 6 7 Flash Mode (P72) REC MODE (when recording motion pictures) (P133)/Recording quality (P134) Picture size (P124) Quality (P125)
-
Page 180
Others ∫ In recording (after settings) 24 Custom settings (P114) 25 Extra Tele Conversion (when recording motion pictures) (P71) 26 Extra Tele Conversion (when taking still pictures) (P71) 27 Histogram (P137) STD. STD. STD. 28 Digital Zoom (P71) 29 WIND CUT (P135) 30 Defocus control function (P41) -
Page 181
Others ∫ In playback Playback Mode (P47) : Motion picture playback (P51) 5 6 7 Protected picture (P158) Number of prints (P156) Picture size (P124) 1/26 1/26 1/26 : REC MODE (when recording motion pictures) (P133)/Recording quality (P134) Quality (P125) Battery indication (P19) Picture number/Total pictures… -
Page 182: Cautions For Use
Others Cautions for Use Optimal use of the camera Keep this unit as far away as possible from electromagnetic equipment (such as microwave ovens, TVs, video games etc.). • If you use this unit on top of or near a TV, the pictures and/or sound on this unit may be disrupted by electromagnetic wave radiation.
-
Page 183
Others Cleaning Before cleaning the camera, remove the battery or the DC coupler (optional), or disconnect the power plug from the outlet. Then wipe the camera with a dry soft cloth. • When the camera is soiled badly, it can be cleaned by wiping the dirt off with a wrung wet cloth, and then with a dry cloth. -
Page 184
Others About the LCD monitor • Do not press the LCD monitor with excessive force. Uneven colors may appear on the LCD monitor and it may malfunction. • If the camera is cold when you turn it on, the picture on the LCD monitor will be slightly darker than usual at first. -
Page 185
Others Battery The battery is a rechargeable lithium ion battery. Its ability to generate power comes from the chemical reaction that takes place inside it. This reaction is susceptible to the surrounding temperature and humidity. If the temperature is too high or too low, the operating time of the battery will become shorter. -
Page 186
Others About 3D ∫ About 3D recording With the 3D interchangeable lens attached, do not record a subject at less than the minimum focus distance. • The 3D effects may be more pronounced, and therefore cause tiredness or discomfort. • When the 3D interchangeable lens (H-FT012;… -
Page 187
Information including personal information may be altered or vanish due to erroneous operation, effect of static electricity, accident, malfunction, repair, or other handlings. Please note in advance that Panasonic is not liable in any way for any direct or indirect damage from the alteration or vanishing of information or personal information. -
Page 188
About the picture data • Recorded data may be damaged or lost if the camera breaks down due to inappropriate handling. Panasonic will not be liable for any damage caused due to loss of recorded data. About tripods or unipods •… -
Page 189: Message Display
Others Message Display Confirmation messages or error messages will be displayed on the screen in some cases. The major messages are described below as examples. [THIS PICTURE IS PROTECTED] > Delete the picture after canceling the protect setting. (P158) [THIS PICTURE CANNOT BE DELETED]/[SOME PICTURES CANNOT BE DELETED] •…
-
Page 190
Others [INSERT SD CARD AGAIN]/[TRY ANOTHER CARD] • An error has occurred accessing the card. > Insert the card again. > Insert a different card. [READ ERROR/WRITE ERROR PLEASE CHECK THE CARD] • It has failed to read or write data. >… -
Page 191: Troubleshooting
Others Troubleshooting First, try out the following procedures (P191–201). If the problem is not resolved, it may be improved by selecting [RESET] (P68) on the [SETUP] menu. Battery and power source The camera cannot be operated even when it is turned on. The camera turns off immediately after it is turned on.
-
Page 192
Others The recorded picture is too bright or dark. > Check that the exposure is correctly compensated. (P76) • Is the AE Lock (P98) applied incorrectly? Multiple pictures are taken at one time. > Unset the settings of White Balance Bracket (P96). The subject is not focused properly. -
Page 193
Others Striping or flicker may appear under lighting such as fluorescent lighting and LED lighting fixture. • This is characteristic of MOS sensors which serve as the camera’s pickup sensors. This is not a malfunction. • When you see noticeable flicker or striping while recording a motion picture, you can reduce the flicker or striping by setting up [FLICKER RED.] (P136) and fixing the shutter speed. -
Page 194
Others Motion pictures Recording motion pictures is not possible. • You may not be able to record for a short while after turning the power [ON] when using a large capacity card. Motion picture recording stops in the middle. • Use a card with SD Speed Class with “Class 4”… -
Page 195
• The Optical Image Stabilizer function of the interchangeable lens (H-FS014042) only works correctly with supported cameras. > When older Panasonic digital cameras (DMC-GF1, DMC-GH1, DMC-G1) are used, [STABILIZER] in the [REC] Mode menu (P69) cannot be set to [OFF]. It is recommended to update the firmware of the digital camera at the following website. -
Page 196
Others LCD monitor The LCD monitor is too bright or dark. > Adjust the brightness of the LCD monitor to a proper level. (P64) • Check [LCD MODE] setting. (P64) It may flicker for an instant or the brightness of the screen may change significantly for an instant. -
Page 197
Others Playback The picture being played back is not rotated, or is rotated in an unexpected direction, when displayed. • You can display the pictures without being rotated when [ROTATE DISP.] (P154) is set to [OFF]. • You can rotate pictures with the [ROTATE] function. (P154) •… -
Page 198
• Playback of motion pictures recorded with this unit (Motion JPEG) may not be possible with ¢ other companies’ digital cameras. Also, Panasonic’s digital cameras (LUMIX) may also not be able to play them back. ¢ Introduced prior to December 2008, and FS and LS series introduced in 2009. -
Page 199
The card is not recognized by the PC. (SDXC memory card is used) > Check if your PC is compatible with SDXC memory cards. http://panasonic.net/avc/sdcard/information/SDXC.html > A message prompting to format the card may be displayed when connecting, but do not format. -
Page 200
Others Others The camera makes a noise when turned [ON]. • This is the noise of the Dust Reduction Function working (P183); it is not a malfunction. There is a sound from lens unit. • It is a sound of lens movement or aperture operation when the power is turned [ON] or [OFF], and it is not a malfunction. -
Page 201
Others The file numbers are not recorded consecutively. • When you perform an operation after taking a certain action, the pictures may be recorded in folders with different numbers from the ones used prior to the operation. (P173) The file numbers are recorded with previously used numbers. •… -
Page 202
• Interface are trademarks or registered trademarks of HDMI Licensing LLC in the United States and other countries. HDAVI Control™ is a trademark of Panasonic Corporation. • QuickTime and the QuickTime logo are trademarks or registered trademarks of Apple Inc., •…

Данная инструкция на русском языке предназначена для фотокамеры
Panasonic Lumix DMC-GF3, описывает принцип работы и основные моменты эксплуатации устройства.
Производитель настойчиво рекомендует перед включением фотокамеры
внимательно изучить настоящую инструкцию.
Инструкция для фотокамеры
представлена в формате PDF. Все современные браузеры уже поддерживают данный формат и сложностей с открытием файла возникнуть не должно.
Но если открыть инструкцию все же не удается, то необходимо установить на компьютер программу для чтения PDF файлов, например, Acrobat Reader. Если у вас возникли сложности с открытием инструкции на смартфоне под управлением Android, нужно установить, например, Adobe Acrobat Reader.
Комментарии (0)
Комментарии про другие Фотокамеры
Другие Фотокамеры Panasonic
![]()
- Canon
- Canon EOS
- Canon PowerShot
- Canon IXUS
- Объективы Canon
- Canon аксессуары
- Nikon
- Nikon 1
- Nikon COOLPIX
- Nikon зеркальные камеры
- Nikon аксессуары
- Объективы Nikon
- Fujifilm
- Инструкции Fujifilm X
- Инструкции Fujifilm FinePix
- Инструкции Fujifilm аксессуары
- Инструкции объективы Fujifilm
- Olympus
- Olympus OM-D
- Olympus PEN
- Olympus STYLUS
- Olympus зеркальные камеры
- Объективы Olympus
- Lumix
- Samsung
- Samsung GALAXY Camera
- Samsung Компактные Smart-камеры
- Samsung Smart-камеры NX
- Samsung GX (зеркальная камера)
- Samsung Digimax
- Sony
- Sony Cyber-shot
- Sony α Камеры
- Объективы Sony
- Sony аксессуары
- Pentax
Инструкции для фотоаппаратов, пультов для фотоаппаратов, инструкции для вспышек

Как использовать фотоаппарат Panasonic Lumix DMC-GF3? Изучив это руководство пользователя фотоаппарата Panasonic Lumix DMC-GF3 у Вас не будет таких вопросов. Скачать инструкцию для Panasonic Lumix DMC-GF3 можно по ссылке с сайта.

Скачать инструкцию для Panasonic Lumix DMC-GF3
Copyright © 2014 — 2019. Инструкции для фотоаппаратов и других устройств