
User Guide
Read this User Guide carefully before using the printer
Pantum M5000/M6000 Series
Monochrome Laser MFP
![]()
User Guide
Pantum M5000/M6000 Series
Monochrome Laser MFP
Read this User Guide carefully before using the printer

Preface
Welcome to Pantum series products!
Thank you for choosing to use a Pantum series product!
To protect your vital interests, please read the following statements carefully.
Legal Notice
Trademark
Pantum and Pantum logos are registered trademarks of Zhuhai Seine Technology Co., Ltd.
Microsoft®, Windows®, Windows server® and Windows Vista® are trademarks registered by Microsoft Corporation in the United States and/or other countries/regions.
The ownership of the names of the software in this User Guide belongs to their respective parent companies in accordance with the corresponding license agreement, reference is for illustration only.
All other product and brand names herein may be the registered trademarks, logos, or service marks of their respective owners, reference is for illustration only.
Copyright
The copyright of this User Guide is owned by Zhuhai Seine Technology Co., Ltd.
It is prohibited to copy, translate, modify and transmit this User Guide by any means or in any format without the prior written consent of Zhuhai Seine Technology Co., Ltd.
Version: V 1.1 AF2B-1253-AL0
Disclaimer
For a better user experience, Zhuhai Seine Technology Co., Ltd. reserves the right to make changes to the User Guide. The information contained herein is subject to change without notice.
Users are responsible for any damages arising from a failure to follow this User Guide. Meanwhile, apart from the express warranty made in the product maintenance manual or service commitment, Zhuhai Seine Technology Co., Ltd. does not make any express or implied warranty or guarantee in relation to this User Guide (including typesetting or words).
The copying, printing, scanning (or reproduction by any other means) of this product to create certain documents or images may be prohibited by local laws. If you are uncertain about the legality of using this product to create certain documents or images, you should consult your legal advisor in advance.
I

Safety Precautions
Laser Safety
Laser radiation is harmful to the human body. Since the laser components are completely sealed within the printer, laser radiation will not leak. To avoid laser radiation, please do not disassemble the printer at discretion!
The device is certified as a Class IIIB laser product. Since radiation emitted inside the device is completely confined within protective housings and external covers, the laser beam cannot escape during any phase of normal operation. Do not open the laser unit under any circumstances to avoid exposure to the laser beam.
The following label is attached to the laser components inside the printer.
Safety Warning
Please note the following safety warnings before using the printer:
 Warning
There is a high-voltage current inside the printer. Before cleaning the printer, make sure the power is turned off!
Plugging and unplugging the power cord plug with a wet hand may result in an electric shock.
The fuser unit is hot during and after printing. Touching the fuser unit (the shaded area as shown) may cause burns!
The fuser unit bears a high temperature warning label. Please do not remove or damage this label.
II

Precautions
Precautions before Using the Printer:
1.Read and understand all instructions.
2.Familiarize yourself with the basic principles associated with operating electrical appliances.
3.Comply with all warnings and instructions marked on the equipment or specified in the manual supplied with the equipment.
4.If the operating instructions conflict with the safety information, please refer back to the safety information, as you may have misunderstood the operating instructions. If you cannot resolve the conflicts, please call the Customer Service Hotline or contact a service representative for help.
5.Before cleaning the equipment, remove the power cord from the AC power supply outlet. Do not use liquid or aerosol cleaners.
6.Please make sure that the equipment is put on a stable desktop surface to avoid serious damage caused by the falling of the equipment.
7.Do not put the equipment near a radiator, an air conditioner, or a ventilation pipe.
8.Do not place any articles on top of the power cord. Do not put the equipment in a place where its power cord will be stepped on by people.
9.Outlets and extension cords must not be overloaded. This may reduce performance and could result in fire or electric shock.
10.Do not allow pets to chew on the AC power cord or the computer interface cable.
11.Do not allow sharp objects piercing equipment slot, so as to avoid contact with the high-voltage device, which otherwise may result in fire or electric shock. Take care not to spill liquids onto the equipment.
12.Do not disassemble the equipment so as to avoid the risk of electric shock. Necessary repairs may only be carried out by professional maintenance personnel. Opening or removing the cover could result in an electric shock or other potential hazards. Incorrect disassembly and assembly could also result in an electric shock during future use.
13.If any one of the following occurs, disconnect the equipment from the computer and pull out the power cord from the AC wall socket and contact a professional service person for maintenance:
•Liquid has been spilled into the equipment.
•The equipment has been exposed to rain or water.
•The equipment falls, or the cover is damaged.
•Significant changes in the equipment’s performance.
14.Do not perform adjustments or procedures not described in this document or damage may occur requiring repair by a professional service person.
15.Do not use the equipment in a thunderstorm so as to avoid the risk of an electric shock. If possible, pull out the AC power cord during a thunderstorm.
16.If you continuously print multiple pages, the surface of the tray will become very hot. Take care not to touch this surface, and keep children away from this surface.
17.The apparatus with CLASS 1 construction shall be connected to a mains socket outlet with a protective earthing connection.
18.Please keep this User Guide for future reference.
III

Regulatory Information
This symbol indicates that, at the end of your product’s life, it must not be discarded as domestic waste. Instead, you should dispose of your used equipment at a designated collection point for the recycling of waste electrical and electronic equipment. Ref: EU Directive 2002/96/EC on Waste Electrical and Electronic Equipment (WEEE). Please contact your distributor / supplier for further information.
This product is suitable for indoor use only.
European Community (EC) directives conformity
This product complies with the protection requirements of EC directives 2004/108/ EC and 2006/95/EC on the approximation and harmonization of the laws of the Member States relating to electromagnetic compatibility and safety of electrical equipment designed for use within certain voltage limits.
The manufacturer of this product is: Zhuhai Seine Technology Co., Ltd., No. 63, Mingzhubei Road, Xiangzhou District, Zhuhai City, Guangdong, P.R. China.
A declaration of conformity to the requirements of the Directives is available upon request from an Authorized Representative.
This product satisfies the Class B limits of EN 55022 and safety requirements of EN 60950.
This printer is fully compliant with the RoHS Directive 2009/95/EC and the requirements of the revised Directive 2011/65/EU for managing toxic and hazardous substances.
IV

Table of Contents
|
1. Before Using the Printer…………………………………………………………………………………………………… |
1-2 |
|
1.1. Packing List……………………………………………………………………………………………………………… |
1-2 |
|
1.2. Components of the Printer…………………………………………………………………………………………. |
1-3 |
|
1.3. Overview of the Control Panel…………………………………………………………………………………….. |
1-6 |
|
1.4. Display…………………………………………………………………………………………………………………….. |
1-7 |
|
1.5. Menu Button Settings………………………………………………………………………………………………… |
1-8 |
|
1.6. Toner Cartridge…………………………………………………………………………………………………………. |
1-8 |
|
2. Paper and Media…………………………………………………………………………………………………………….. |
2-2 |
|
2.1. Paper type and sizes…………………………………………………………………………………………………. |
2-2 |
|
2.2. Special Paper…………………………………………………………………………………………………………… |
2-3 |
|
2.3. Loading Paper………………………………………………………………………………………………………….. |
2-4 |
|
2.3.1. Loading into the Automatic Feeder Tray…………………………………………………………………. |
2-4 |
|
2.3.2. Loading into the Manual Feeder Tray…………………………………………………………………….. |
2-6 |
|
2.4. Select Media…………………………………………………………………………………………………………….. |
2-8 |
|
2.5. Loading Media………………………………………………………………………………………………………….. |
2-8 |
|
2.6. Nonprinting Area …………………………………………………………………………………………………….. |
2-10 |
|
3. Installation and Uninstall of the Driver Software.…………………………………………………………………. |
3-2 |
|
3.1. Windows-based Driver.……………………………………………………………………………………………… |
3-2 |
|
3.1.1. Driver Installation………………………………………………………………………………………………… |
3-2 |
|
3.1.2. Driver Uninstall.………………………………………………………………………………………………… |
3-12 |
|
3.2. Mac System-based Driver………………………………………………………………………………………… |
3-15 |
|
3.2.1. Introduction………………………………………………………………………………………………………. |
3-15 |
|
3.2.2. Installation Steps.……………………………………………………………………………………………… |
3-15 |
|
4. General Settings.……………………………………………………………………………………………………………. |
4-2 |
|
4.1. System Settings……………………………………………………………………………………………………….. |
4-2 |
|
4.1.1. Toner Save Settings…………………………………………………………………………………………….. |
4-2 |
|
4.1.2. Language Settings………………………………………………………………………………………………. |
4-3 |
|
4.1.3. Copies……………………………………………………………………………………………………………….. |
4-3 |
|
4.1.4. Power Saving Button…………………………………………………………………………………………… |
4-3 |
|
4.1.5. Restore……………………………………………………………………………………………………………… |
4-4 |
|
4.1.6. View System Information……………………………………………………………………………………… |
4-4 |
|
4.1.7. Test Print……………………………………………………………………………………………………………. |
4-4 |
|
4.1.8. Sleep Time…………………………………………………………………………………………………………. |
4-5 |
|
4.2. Paper Settings………………………………………………………………………………………………………….. |
4-5 |
|
4.2.1. Setting Paper Size………………………………………………………………………………………………. |
4-5 |
|
4.2.2. Setting Paper Type.…………………………………………………………………………………………….. |
4-6 |
|
5. Print………………………………………………………………………………………………………………………………. |
5-2 |
|
5.1. Print Function.………………………………………………………………………………………………………….. |
5-2 |
|
5.2. Opening Help Document……………………………………………………………………………………………. |
5-3 |
|
5.3. Manual Duplex…………………………………………………………………………………………………………. |
5-4 |
|
5.4. Cancel Job………………………………………………………………………………………………………………. |
5-8 |
V

|
6. Scan……………………………………………………………………………………………………………………………… |
6-2 |
|
6.1. Basic Operations………………………………………………………………………………………………………. |
6-2 |
|
6.1.1. Scanning with Control Panel…………………………………………………………………………………. |
6-2 |
|
6.1.2. Scanning with TWAIN………………………………………………………………………………………….. |
6-3 |
|
6.1.3. Cancel Job…………………………………………………………………………………………………………. |
6-3 |
|
6.2. Scan Function………………………………………………………………………………………………………….. |
6-4 |
|
6.2.1. Single Page Scan……………………………………………………………………………………………….. |
6-4 |
|
6.2.2. Merge Scan.………………………………………………………………………………………………………. |
6-4 |
|
6.3. Scan Settings.………………………………………………………………………………………………………….. |
6-6 |
|
6.3.1. Basic Settings…………………………………………………………………………………………………….. |
6-6 |
|
6.3.2. Advanced Settings………………………………………………………………………………………………. |
6-7 |
|
7. Copy……………………………………………………………………………………………………………………………… |
7-2 |
|
7.1. Basic Operations………………………………………………………………………………………………………. |
7-2 |
|
7.1.1. Basic Operations of Copying………………………………………………………………………………… |
7-2 |
|
7.1.2. Cancel Copy Operations………………………………………………………………………………………. |
7-3 |
|
7.2. Copy Function.…………………………………………………………………………………………………………. |
7-3 |
|
7.2.1. Receipt Copy……………………………………………………………………………………………………… |
7-3 |
|
7.2.2. ID Copy……………………………………………………………………………………………………………… |
7-4 |
|
7.3. Copy Settings…………………………………………………………………………………………………………… |
7-5 |
|
8. Routine Maintenance………………………………………………………………………………………………………. |
8-2 |
|
8.1. Cleaning the Printer…………………………………………………………………………………………………… |
8-2 |
|
8.2. Maintenance of the Toner Cartridge…………………………………………………………………………….. |
8-5 |
|
8.2.1. About the Toner Cartridge…………………………………………………………………………………….. |
8-5 |
|
8.2.2. Steps for Replacing the Toner Cartridge…………………………………………………………………. |
8-6 |
|
9. Troubleshooting………………………………………………………………………………………………………………. |
9-2 |
|
9.1. Clearing Jammed Paper…………………………………………………………………………………………….. |
9-2 |
|
9.2. Error Message………………………………………………………………………………………………………….. |
9-5 |
|
9.3. Common Troubleshooting.…………………………………………………………………………………………. |
9-6 |
|
9.3.1. Common Problems……………………………………………………………………………………………… |
9-6 |
|
9.3.2. Software…………………………………………………………………………………………………………….. |
9-8 |
|
9.3.3. Image Defects…………………………………………………………………………………………………….. |
9-8 |
|
10. Product Specification.………………………………………………………………………………………………….. |
10-2 |
|
10.1. Overview……………………………………………………………………………………………………………… |
10-2 |
|
10.2. Scanning Specification…………………………………………………………………………………………… |
10-3 |
|
10.3. Printing Specification……………………………………………………………………………………………… |
10-3 |
|
10.4. Copying Specification…………………………………………………………………………………………….. |
10-3 |
|
10.5. Paper Handling Capacity………………………………………………………………………………………… |
10-3 |
VI

|
1 |
|
|
Before Using the Printer |
|
|
CHAPTER |
|
|
1. Before Using the Printer……………………………………………………………………………………………………… |
2 |
|
1.1. Packing List………………………………………………………………………………………………………………… |
2 |
|
1.2. Components of the Printer……………………………………………………………………………………………. |
3 |
|
1.3. Overview of the Control Panel……………………………………………………………………………………….. |
6 |
|
1.4. Display……………………………………………………………………………………………………………………….. |
7 |
|
1.5. Menu Button Settings…………………………………………………………………………………………………… |
8 |
|
1.6. Toner Cartridge……………………………………………………………………………………………………………. |
8 |
1-1

1. Before Using the Printer
1.1. Packing List
When you open the package, make sure that the following parts are included:
|
Toner cartridge |
1 |
|||||||
|
USB interface cable |
1 |
|||||||
|
Power cord |
1 |
|||||||
|
CD-ROM |
1 |
|||||||
|
Quick Setup Guide |
1 |
|||||||
|
Pantum Warranty |
1 |
|||||||
 Note: • The warranty card may not be included in some regions.
1-2

1.2. Components of the Printer
|Front view (1)
1
2
3
1Cover
2Control Panel
3Output Bin
1-3
![]()
|Front view (2)
1
2
B5
A4
LTR
ID
COPY
3
6
7
1Glass Platen
2Scanning Platform
3Output Tray
4Manual Feed Guide
5Automatic Feed Guide
6Paper Stop
7Feeder Tray
8Automatic Feeder Tray
9Manual Feeder Tray
1-4

|Rear view
1
2
3
4
1USB Interface
2Rear Cover
3Power Switch
4Power Supply Socket
1-5

1.3. Overview of the Control Panel
1 2 3
6 5
 6
6
Cancel
OK
Status
9 10 11 12 13
OK

 8
8
7
1Power Saving Button
2ID Copy Button
3Receipt Copy Button
4LCD Display
5Copies Setting Button
6Direction Buttons (▲ ▼)
7OK Button
8Menu Button
9Copy Button/Indicator
10Scan Button/Indicator
11Status Indicator
12Start Button
13Cancel Button
1-6

|Copy Standby Mode
|ID Copy Standby Mode
|
|Receipt Copy Standby Mode |
100% |
01 |
|
|
Receipt A4 |
|||
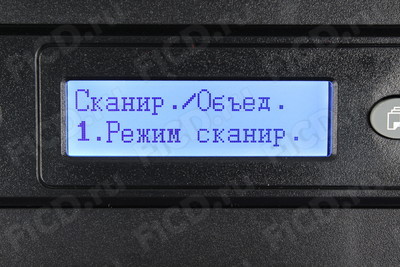
|Single Page Scan Standby Mode
Scan/Merge 1.Scan mode
|N-UP Scan Standby Mode
Scan/Merge 2.Merge mode
1-7

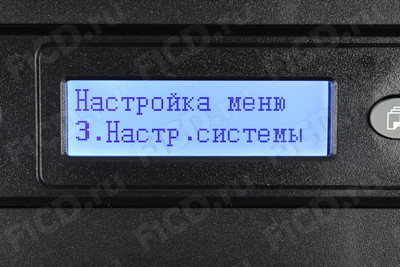
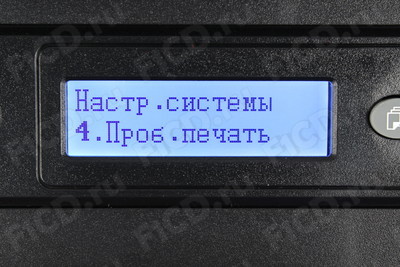
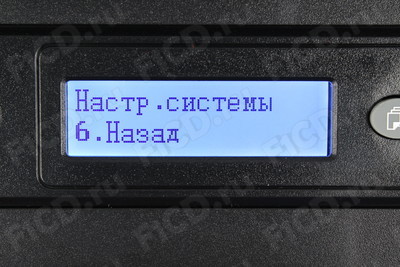
1.5. Menu Button Settings
1.Copy Settings/Scan Settings
2.Paper Settings
3.System Settings
4.System Information
5.Back
1.6. Toner Cartridge
| Outside view of the toner cartridge
|
Type |
Average print volume |
|
Standard-capacity |
About 1500 pages |
|
toner cartridge |
(The above data is based on ISO/IEC 19752 standard) |
|
High-capacity toner |
About 2300 pages |
|
cartridge |
(The above data is based on ISO/IEC 19752 standard) |
 Note: • Subject to change without notice.
•Consumables capacity may vary depending on the different types used.
•The Company does not recommend using consumables other than that of the original Pantum consumables.
•Warranty is void if any damages are caused by using non-Pantum original consumables.
1-8

|
2 |
|
|
Paper and Media |
|
|
CHAPTER |
|
|
2. Paper and Media……………………………………………………………………………………………………………….. |
2 |
|
2.1. Select Paper……………………………………………………………………………………………………………….. |
2 |
|
2.2. Special Paper……………………………………………………………………………………………………………… |
3 |
|
2.3. Loading Paper…………………………………………………………………………………………………………….. |
4 |
|
2.3.1. Loading into the Automatic Feeder Tray……………………………………………………………………. |
4 |
|
2.3.2. Loading into the Manual Feeder Tray……………………………………………………………………….. |
6 |
|
2.4. Select Media……………………………………………………………………………………………………………….. |
8 |
|
2.5. Loading Media…………………………………………………………………………………………………………….. |
8 |
|
2.6. Nonprinting Area and Non-scanning Area……………………………………………………………………… |
10 |
2-1

2.Paper and Media
2.1.Paper type and sizes
|
Media Type |
Plain, Preprinted |
||
|
A4, A5, JIS B5, IS0 B5, A6, Letter, Legal, |
|||
|
Executive, Folio, Oficio, Statement, Japanese |
|||
|
Automatic Feeder |
Media Size |
Postcard, Monarch Env, DL Env, C5 Env, C6 |
|
|
Env, No.10 Env, ZL, Big 16K, Big 32K, 16K, 32K, |
|||
|
Tray |
B6, custom, etc. |
||
|
Media Weight |
60~105g/m² |
||
|
Maximum capacity of |
150 pages, 80g/m² |
||
|
the tray |
|||
|
Media Type |
Plain, Cardstock, Transparency, Envelope, Label, |
||
|
Thick |
|||
|
Manual Feeder |
Media Size |
Width: 75~218mm (2.95-8.58in) |
|
|
Length: 148~360mm (5.82-14.17in) |
|||
|
Tray |
|||
|
Media Weight |
60~163g/m² |
||
|
Maximum tray |
1 page |
||
|
capacity |
|||
 Note: • Extensive use of special paper may affect the service life of the printer.
•Print media that does not meet the standard set out in this User Guide may result in poor print quality, increased paper jams and excessive wear of the printer.
•Properties such as weight, properties, texture and humidity are important factors affecting the printer performance and output quality.
•Please note the following when selecting the print media:
1.Desired print effect: The print media selected should be in line with the requirement of the print tasks.
2.Surface smoothness: The smoothness of the print media may affect the sharpness of the print outcome.
3.Some print media may meet all the standards for use contained herein, but they do not print properly. This may be due to incorrect operation, inappropriate temperature and humidity, or other factors beyond the control of Pantum. Before purchasing large quantities of print media, make sure that the print media meet the specifications specified in this User Guide and work properly in your environment.
4.Using print media that does not meet these specifications may cause damage to the printer.
2-2

2.2. Special Paper
This printer supports using special paper for printing. Special paper includes: labels, envelopes, transparencys, thick papers, etc.
 Note: • When using special paper or print media, be sure to select the appropriate media type and size in the print settings so as to get the best results.
|Please observe the following standards:
|
Type of media |
Correct practices |
Incorrect practices |
|
|
Labels must be put flat when being |
|||
|
used. |
|||
|
Label |
Use a full sheet of labels only. |
Use wrinkled, blistered or damaged |
|
|
There is no guarantee that all the |
labels. |
||
|
labels in the market can work in the |
|||
|
printer. |
|||
|
Use wrinkled, nicked, stuck or |
|||
|
damaged envelopes. |
|||
|
Envelope |
Envelopes should be loaded evenly. |
Use envelopes with clips, snaps, |
|
|
windows, or coated linings. |
|||
|
Use self-adhesive stickers or other |
|||
|
synthetic materials. |
|||
|
Only use transparencies approved |
|||
|
for use in laser printers. |
Use transparent print media that is |
||
|
Transparency |
Transparencies removed from the |
||
|
not suitable for laser printers. |
|||
|
printer should be placed on a flat |
|||
|
surface. |
Only use heavy paper that is
Thick approved for use in laser printers and meets the weight specifications
of this printer.
Use paper that weighs greater than the specification of the media recommended for this printer, unless the paper is approved for use in this printer.
2-3

2.3. Loading Paper
2.3.1. Loading into the Automatic Feeder Tray
a) Open the feeder tray.
b) Slide the automatic feed guides to match both sides of the paper.
c) Raise the output tray to avoid paper slipping and falling.
2-4

d) Load the paper into the automatic feeder tray print-side up.
e) Adjust the paper stop to match the paper size.
 Note: • If the paper loaded into the automatic feeder tray at one time exceeds 150 pages, the paper will jam or will not be fed in.
•When using printed paper, please place the side to be printed (the blank side) facing up.
•When printing on A5 paper, it is recommended that the paper is fed in landscape orientation, which helps extend the toner cartridge life.
2-5
![]()
2.3.2. Loading into the Manual Feeder Tray
a) Open the feeder tray.
b) Slide the manual feed guides to match both sides of the paper.
c) Raise the output tray to avoid the paper from slipping and falling.
2-6

d) Put a piece of paper, envelope or transparency into the manual feeder tray with two hands until the front end of the paper, envelope or transparency contacts the feed roller.
 Note: • When loading paper into the manual feeder tray, the printer will automatically enable the manual feed mode.
•Load the paper into the manual feeder tray print-side up. When loading, the top of the paper first enters into the manual feeder tray.
•Ensure that the paper, envelope or transparency is loaded in straight and in the correct position of the manual feeder tray. Otherwise, it will result in a skewed printout or a paper jam.
e)After the printed page is output from the printer, load another piece of paper according to the above steps to continue printing.
 Warning
After printing, please immediately remove the paper, envelopes and transparencies. Stacking paper or envelopes may cause a paper jam or cause the paper to curl.
2-7

2.4. Select Media
|Paper requirements:
|
Type |
Size |
Quantity |
|
|
Plain, Cardstock, Transparency, |
A4, B5, A5, A6, Letter, Executive |
One piece at a time |
|
|
Envelope, Label, Thick |
|||
2.5. Loading Media
1). Raise the cover.
2). Load the document face down.
2-8

3). Align the manuscript to match the appropriate paper size.
B5 LTR A4
B5
A4
LTR
IDCOPY
4). Gently close the cover.
 Note: Cautions:
•Do not put documents with glue, ink or correction fluid on the glass unless it is completely dry.
•Only use paper designed for laser printers.
•Paper should be clean and free of dust and other contaminants.
•Store unused paper on a flat surface in a dry place
2-9

2.6. Nonprinting Area
The shaded edge indicates the nonprinting area.
A 
|
A |
||||||||||||||||
|
B |
B |
|||||||||||||||
|
Usage |
Paper Size |
Top and bottom |
Left and right |
|||||||||||||
|
margins (A) |
margins (B) |
|||||||||||||||
|
Copy |
A4 |
5mm (0.197in) |
5mm (0.197in) |
|||||||||||||
|
LETTER |
5mm (0.197in) |
5mm (0.197in) |
||||||||||||||
|
Printing |
A4 |
5mm (0.197in) |
5mm (0.197in) |
|||||||||||||
|
LETTER |
5mm (0.197in) |
5mm (0.197in) |
||||||||||||||
2-

|
Installation and Uninstall |
|
|
of Driver Software |
3 |
|
CHAPTER |
|
|
3. Installation and Uninstall of the Driver Software…………………………………………………………………….. |
2 |
|
3.1. Windows-based Driver…………………………………………………………………………………………………. |
2 |
|
3.1.1. Driver Installation ………………………………………………………………………………………………….. |
2 |
|
3.1.2. Driver Uninstall……………………………………………………………………………………………………. |
12 |
|
3.2. Mac System-based Driver ………………………………………………………………………………………….. |
15 |
|
3.2.1. Introduction ………………………………………………………………………………………………………… |
15 |
|
3.2.2. Installation Steps…………………………………………………………………………………………………. |
15 |
3-1

3. Installation and Uninstall of the Driver Software
3.1. Windows-based Driver
3.1.1. Driver Installation
1. Introduction
The driver can be installed using two methods.
•Install the driver with the printer connected to the PC.
•Install the driver first and then connect the printer after the driver installation is completed.
For users of Windows XP and Windows Server 2003: when connecting the equipment for the first time, the Found New Hardware Wizard window will pop up. Please close this window. If this window is not closed, the printer may not be detected, resulting in the installation not being completed.
2. Installation steps
There are two methods for installing the driver software: Install Now and Custom Installation. The specific installation steps are as described below:
1) Install Now
a) Driver Interface
After running the installation CD, the program will run automatically and display the following screen:
The user’s Windows authority will be checked before the installation proceeds. If the user is an administrator, this screen will display. If the user is a non-administrator, the prompt “Insufficient privileges. Please install the Pantum M5000-M6000 Series MFP with administrator privileges.” will pop up.
3-2

b) Installation Language
After the authority is checked the installation proceeds to the next step – Language Selection interface.
c) Installation Settings
Click Next to select the installation method.
 Note: • Install Now installs the printer driver software, the scanner driver software and Pantum Push Scan Manager together.
• The Install Now installs the software to the default path, namely the «System disk:Program Files» directory.
3-3
 Loading…
Мы используем файлы cookie для персонализации содержимого и объявлений, обеспечения работы функций социальных сетей и анализа трафика. Нажимая кнопку «Принять», вы выражаете свое согласие с этим утверждением, а также соглашаетесь предоставлять информацию об использовании вами нашего сайта нашим филиалам. Использование файлов cookie
Нажимая кнопку ‘x’, вы соглашаетесь на использование Cookies
Page 1 — User Guide
User Guide Read this User Guide carefully before using the printer Pantum M5000/M6000 SeriesMonochrome Laser MFP
Page 2 — Legal Notice
1-3 1.2. Components of the Printer|Front view (1)2311 Cover2 Control Panel3 Output Bin
Page 3 — Safety Precautions
1-4 |Front view (2)ID C OPYLTRLTRA4B5B5A41234589671 Glass Platen2 Scanning Platform3 Output Tray4 Manual Feed Guide5 Automatic Feed Guide6 Paper Stop
Page 4 — Precautions
1-5 |Rear view12341 USB Interface2 Rear Cover3 Power Switch4 Power Supply Socket
Page 5 — Regulatory Information
1-6 1.3. Overview of the Control Panel456691011 12 1312378StatusStartCancelScanCopyOKID copyReceipt copyOK1 Power Saving Button2 ID Copy Button3 Recei
Page 6 — Table of Contents
1-7 1.4. Display100 01%T+P A4OK|Copy Standby Mode 100 01%T+P A4|ID Copy Standby Mode 100 01%ID A4|Receipt Copy Standby Mode 100 01%Receipt A4|Single P
Page 7
1-8 1.5. Menu Button Settings1. Copy Settings/Scan Settings2. Paper Settings3. System Settings4. System Information5. Back1.6. Toner Cartridge| Outsid
Page 9 — 1. Before Using the Printer
2-2 2. Paper and Media2.1. Paper type and sizesAutomatic Feeder Tray Media Type Plain, PreprintedMedia SizeA4, A5, JIS B5, IS0 B5, A6, Letter, Legal,
Page 10 —
2-3 2.2. Special PaperThis printer supports using special paper for printing. Special paper includes: labels, envelopes, transparencys, thick papers,
Page 11 —
2-4 2.3. Loading Paper2.3.1. Loading into the Automatic Feeder Traya) Open the feeder tray.b) Slide the automatic feed guides to match both sides of t
Page 12 —
I PrefaceWelcome to Pantum series products!Thank you for choosing to use a Pantum series product!To protect your vital interests, please read the foll
Page 13 — 11 12 13
2-5 d) Load the paper into the automatic feeder tray print-side up.e) Adjust the paper stop to match the paper size.Note: • If the paper loaded into
Page 14 — 1.4. Display
2-6 2.3.2. Loading into the Manual Feeder Traya) Open the feeder tray.b) Slide the manual feed guides to match both sides of the paper.c) Raise the ou
Page 15 — 1.6. Toner Cartridge
2-7 d) Put a piece of paper, envelope or transparency into the manual feeder tray with two hands until the front end of the paper, envelope or transpa
Page 16 — Paper and Media
2-8 2.4. Select Media|Paper requirements:Type Size QuantityPlain, Cardstock, Transparency, Envelope, Label, ThickA4, B5, A5, A6, Letter, Executive On
Page 17 — 2. Paper and Media
2-9 3). Align the manuscript to match the appropriate paper size.B5LTRA4B5 LTR A4ID COPY4). Gently close the cover.Note: Cautions:• Do not put docume
Page 18 — 2.2. Special Paper
2-10 10 2.6. Nonprinting Area The shaded edge indicates the nonprinting area.AABBUsage Paper SizeTop and bottom margins (A)Left and right margins (B)
Page 19 — 2.3. Loading Paper
3-1 3CHAPTERInstallation and Uninstall of Driver Software3. Installation and Uninstall of the Driver Software …
Page 20
3-2 3. Installation and Uninstall of the Driver Software3.1. Windows-based Driver3.1.1. Driver Installation1. IntroductionThe driver can be installed
Page 21
3-3 b) Installation LanguageAfter the authority is checked the installation proceeds to the next step – Language Selection interface.c) Installation S
Page 22
3-4 d) License AgreementClick Install Now button to enter the License Agreement screen. Please carefully read and accept the user license agreement by
Page 23 — 2.5. Loading Media
II Safety PrecautionsLaser Safety Laser radiation is harmful to the human body. Since the laser components are completely sealed within the printer, l
Page 24 — B5 LTR A4
3-5 If the appropriate printer device is detected, it will automatically move to the Copying Files step.If the printer is plugged into the PC the user
Page 25 — 2.6. Nonprinting Area
3-6 g) Driver Installationh) Completing InstallationAfter the driver installation progress bar shows that the installation progress is completed, it w
Page 26 — Installation and Uninstall
3-7 Click the Done button to complete the installation of the printer driver, carry out online product registration which can provide online services
Page 27 — 3.1. Windows-based Driver
3-8 b) Component SelectionClick the Custom Installation button to enter the Element Selection and select the desired components for installation as we
Page 28
3-9 The “I Disagree” radio button is checked in the interface by default, and the Next button is grayed out. To proceed with the installation of the s
Page 29
3-10 10 Please check the device connection and click Try Again.If the printer is not connected, select Continue Installation to enter the Copying Fil
Page 30
3-11 11 f) Driver Installationg) Completing InstallationAfter the driver installation progress bar shows that the installation progress is completed,
Page 31
3-12 12 Click the Done button to complete the installation of the printer driver, carry out online product registration which can provide online serv
Page 32
3-13 13 3. Uninstall Uninstall Element interface.Click OK on the Welcome interface to enter the Uninstall Element interface where you can select the
Page 33
3-14 14 5. Done interfaceAfter the progress bar advancing is completed, it will enter the Done interface.Click Done button, the following window will
Page 34
III PrecautionsPrecautions before Using the Printer:1. Read and understand all instructions.2. Familiarize yourself with the basic principles associ
Page 35 — 3-10 10
3-15 15 3.2. Mac System-based Driver3.2.1. IntroductionMac driver installer is made by using the PackageMaker software that comes with the Mac Syst
Page 36 — 3-11 11
3-16 16 2. License AgreementClick Continue on the above gure to display the contents of the License Agreement, as shown below:Click Continue, it wil
Page 37 — 3.1.2. Driver Uninstall
3-17 17 3. Destination VolumeClick Continue on the above gure to select the installation disk, then the following view will be displayed:4. Installa
Page 38 — 3-13 13
3-18 18 Click Install, the following prompt box will pop up. Only after getting permission from the administrator user can you continue with the inst
Page 39 — 3-14 14
3-19 19 6. SummaryClick Continue on the above gure, then the Installation Complete interface will be displayed; click Restart button to restart the
Page 41 — 3-16 16
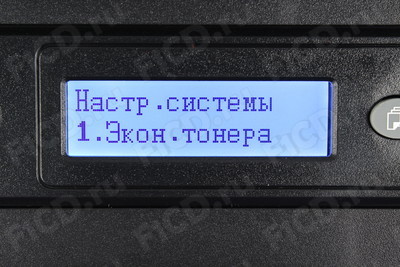
4-2 4. General SettingsThis chapter mainly introduces some general settings of the control panel’s menu. To learn about other buttons and functio
Page 42 — 3-17 17
4-3 5) Press Menu button to exit the menu interface directly or select the last option from each level of menu and press OK button to exit the menu in
Page 43 — 3-18 18
4-4 This is used to help users to set power saving quickly. It can only be operated after exiting all operations. Press down this function button and
Page 44 — 3-19 19
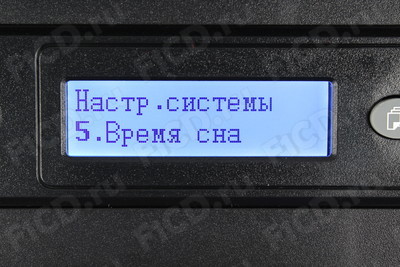
4-5 4.1.8. Sleep TimeSystem setting5.Sleep timeOK1) Press Menu button to enter the menu interface.2) Press direction pad ▲ or ▼ to select 3. System se
Page 45 — General Settings
IV Regulatory InformationThis symbol indicates that, at the end of your product’s life, it must not be discarded as domestic waste. Instead, you shoul
Page 46 — 4. General Settings
4-6 5. Press Menu button to exit the menu interface directly or select the last option from each level of menu and press OK button to exit the menu in
Page 48 — 4.1.7. Test Print
5-2 5. Print5.1. Print FunctionThis printer can achieve the following print functions:Functions DiagramManual Duplex1 2 1Collate321321Reverse Print112
Page 49 — 2.Paper setting
5-3 Note: • You can select the 2×2 Poster printing in N-in-1 to see the poster printing function.• You can open the Printing Preferences and click th
Page 50 — 2.Paper type
5-4 The Help document contains the User Guide for the printer.5.3. Manual Duplex1. The printer driver supports manual duplex.Note: • If the paper is
Page 51
5-5 3. The printing steps are as follows (Only for Windows system):a) Open the document to be printed from the application (such as Notepad), and sele
Page 52 — 5. Print
5-6 c) Click Printing Preferences or Properties button for the print settings.d) Check Manual Duplex in the Basic tab and click OK after completing th
Page 53 — 5.2. Opening Help Document
5-7 f) A window of “Duplex Recovery Tips” will automatically pop up to inform you of the specic operation procedures.g) Remove the printed paper from
Page 54 — 5.3. Manual Duplex
5-8 h) Press OK on the control panel to continue printing.The printer will print all the even pages on the other side of the paper in turn.5.4. Cancel
Page 55
6-1 6CHAPTERScan6. Scan …
Page 56
V Table of Contents1. Before Using the Printer …
Page 57
6-2 6. ScanThis printer offers two types of scanning modes: scanning with the control panel or TWAIN.6.1. Basic Operations6.1.1. Scanning with Control
Page 58 — 5.4. Cancel Job
6-3 6.1.2. Scanning with TWAINPANTUM printer can be selected by other applications to perform scanning with TWAIN.After selecting the printer, the fol
Page 59
6-4 Click the Cancel button on the scanning progress bar interface.6.2. Scan FunctionThis section introduces how to use the control panel to achieve s
Page 60 — 6.1. Basic Operations
6-5 The specific operations are as follows:1. Press Scan button to enter scan status. The control panel defaults to the single page scan mode.Scan/Mer
Page 61 — 6.1.3. Cancel Job
6-6 6.3. Scan Settings6.3.1. Basic SettingsBasic Settings can be used to set Scan Configuration and Variable Size.In Scan Configuration, it can perfor
Page 62 — 1.Scan mode
6-7 6.3.2. Advanced SettingsClick the Advanced Settings tab to perform image adjustment and image processing.For the detailed description of the advan
Page 63
7-1 7CHAPTERCopy7. Copy …
Page 64 — 6.3. Scan Settings
7-2 7. Copy7.1. Basic Operations7.1.1. Basic Operations of Copying1. Put the manuscript into the scanner glass.Note: • During copying, please do not
Page 65 — 6.3.2. Advanced Settings
7-3 3. Press the Start button to start copy.StatusStartCancelScanCopy7.1.2. Cancel Copy OperationsIf you want to cancel the copy operation, please pre
Page 66
7-4 7.2.2. ID CopyID copyReceipt copyPress this button to enter ID Copy mode. It is used to copy ID cards and other two-sided certificates.Procedures
Page 68 — Cancelling
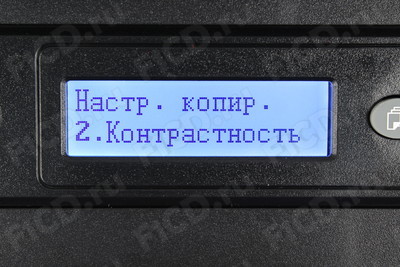
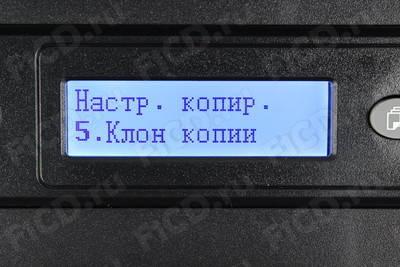
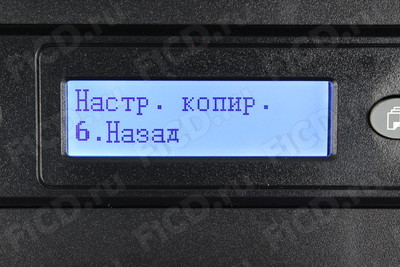
7-5 7.3. Copy Settings100 01%T+P A4OKPress the Menu button to enter the menu interface. The settings of specific functions are shown in the table belo
Page 70 — 7.3. Copy Settings
8-2 8. Routine Maintenance8.1. Cleaning the PrinterNote: • Please use mild detergents.Please clean the printer in accordance with the following steps
Page 71 — Routine Maintenance
8-3 4. Raise the scanning platform until it is locked.5. Open the output bin from the upper right ridge of the concave section.6. Remove the toner car
Page 72 — 8. Routine Maintenance
8-4 Some parts of the printer are still hot within a short time after use. When opening the front cover or rear cover to clean the parts inside the pr
Page 73
8-5 8.2. Maintenance of the Toner Cartridge8.2.1. About the Toner Cartridge1. Use and maintenance of the toner cartridgeFor better print quality, plea
Page 74
8-6 The steps for replacing the toner cartridge are as follows:1. Turn off the printer and raise the scanning platform until it is locked.2. Open the
Page 75 — Cartridge end
8-7 4. Open the package of a new toner cartridge, hold the handle of the toner cartridge and gently shake around 5-6 times, so as to evenly distribute
Page 76
9-1 9CHAPTERTroubleshooting9. Troubleshooting …
Page 77
9-2 9. TroubleshootingPlease read this section carefully. It can help you solve common problems in the printing process. If the problems that arise re
Page 79 — 9. Troubleshooting
9-3 2) Open the output bin by the upper right ridge of the concave section.3) Remove the toner cartridge along the guides.4) Gently draw the jam
Page 80
9-4 5) After removing the jammed paper, insert the toner cartridge into the printer along the guides until you hear a click assuring you that the tone
Page 81
9-5 9.2. Error MessageError Message Cause MeasurePlease Close Output Bin The output bin is not fully closed.Close Output Bin.Toner cartridge is not de
Page 82 — 9.2. Error Message
9-6 9.3. Common Troubleshooting9.3.1. Common ProblemsProblem TypeProblem Cause SolutionProblems in printingPoor print qualitySee 9.3.3 Image Defects f
Page 83 — 9.3. Common Troubleshooting
9-7 Note: • If the problem remains after the above operations, please contact Pantum Customer Service.Problem TypeProblem Cause SolutionProblems with
Page 84 — Customer Service
9-8 9.3.2. SoftwareStatus Recommended SolutionWhen the printer is connected, during the steps from installing to searching for printers, the driver fi
Page 85 — 1 2 3 4 5
9-9 Problem Cause SolutionPA B C Da b c d e1 2 3 4 5Toner spots• The toner cartridge is dirty or leaks toner.• The toner cartridge is damaged.• The pr
Page 86
9-10 10 Problem Cause SolutionBlack background (gray background)• The print media does not meet use specification, such as the media is damp or too r
Page 87 — 9-10 10
9-11 11 Problem Cause SolutionWhole page dark• The toner cartridge is installed incorrectly.• The inside of the toner cartridge is damaged.• Abnormal
Page 89 — Product Specification
1-2 1. Before Using the Printer1.1. Packing ListWhen you open the package, make sure that the following parts are included:Parts Name QuantityPrinter
Page 90 — 10. Product Specification
10-2 10. Product Specification10.1. OverviewFunctions PC monochrome printing, PC colored/monochrome scanning, monochrome copyingMemory 128 MBInterface
03 октября 2014,
Однокрылов Владимир
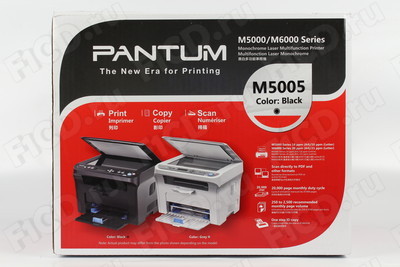
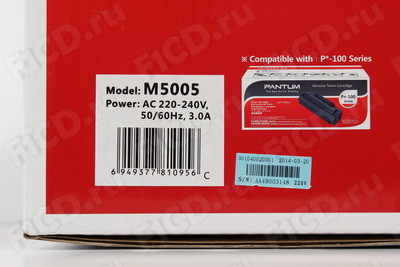
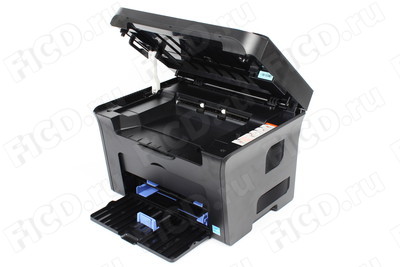
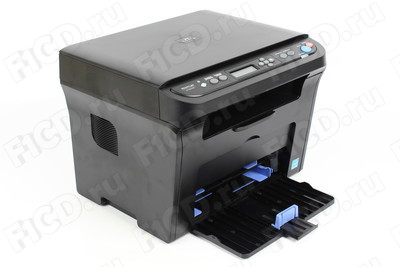
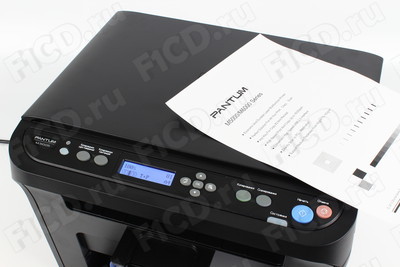
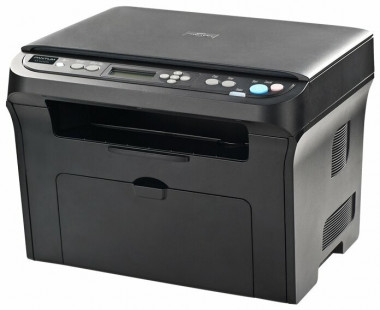
![]() Наш новый обзор посвящён многофункциональному устройству Pantum M5005, сочетающему в себе функции принтера, сканера и копира. Прибор обеспечивает печать на скорости до 16 страниц формата А4 в минуту, поддерживает разрешение печати 1200х600 точек и сканирования – 1200х1200 точек. Лоток для бумаги рассчитан на 150 листов. К компьютеру МФУ подключается по USB. Документы можно сканировать на ПК, на адрес электронной почты, в приложения или в PDF-файл.
Наш новый обзор посвящён многофункциональному устройству Pantum M5005, сочетающему в себе функции принтера, сканера и копира. Прибор обеспечивает печать на скорости до 16 страниц формата А4 в минуту, поддерживает разрешение печати 1200х600 точек и сканирования – 1200х1200 точек. Лоток для бумаги рассчитан на 150 листов. К компьютеру МФУ подключается по USB. Документы можно сканировать на ПК, на адрес электронной почты, в приложения или в PDF-файл.
Содержание
- Комплектация Pantum M5005
- Дизайн и технические характеристики Pantum M5005
- Pantum M5005 в работе
- Pantum M5005: Вывод
- Плюсы Pantum M5005
- Минусы Pantum M5005
- Фотогалерея Pantum M5005
- Отзывы
- Рассказать о статье
- Полезные ссылки
Комплектация Pantum M5005 #
Наш тестовый образец МФУ Pantum M5005 приехал к нам в большой картонной коробке фирменной расцветки.
 Комплект поставки Pantum M5005
В упаковке, помимо самого МФУ, обнаружились:
- USB-кабель с ферритовыми кольцами.
- Кабель питания.
- Документация на русском языке.
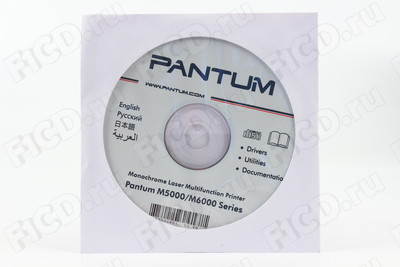
- Диск с драйверами и руководством.
 Комплект поставки Pantum M5005
Производитель не стал урезать комплектацию и приложил USB-кабель для соединения МФУ с компьютером. Весьма приятная забота о пользователе: не придётся бежать за шнуром в ближайший компьютерный магазин.
Дизайн и технические характеристики Pantum M5005 #
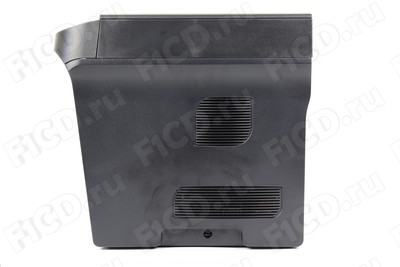
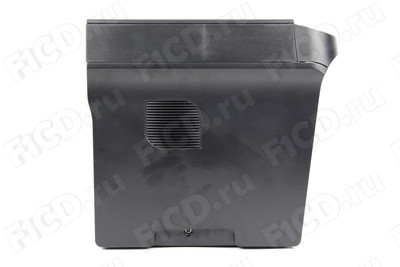
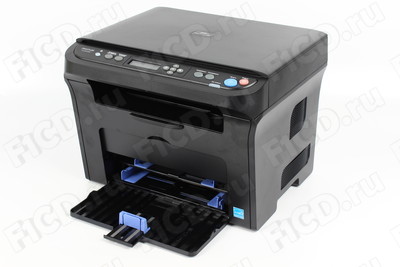
Корпус Pantum M5005 стандартен для многофункциональных устройств – чёрный пластик отлит в сглаженные формы без острых углов. Размеры не такие уж и большие – всего 399x327x299 мм.
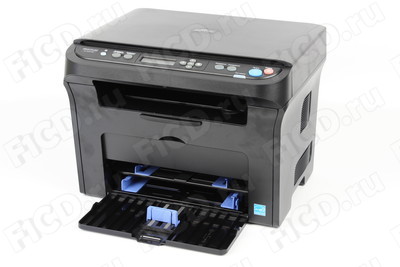
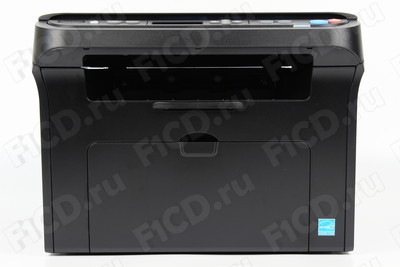 Внешний вид Pantum M5005
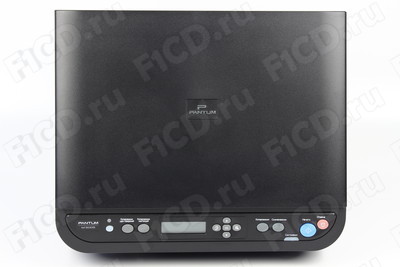
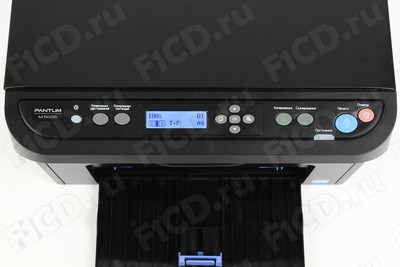
На верхней панели располагаются кнопки управления, светодиод состояния и жидкокристаллический дисплей, на который выводится отлично русифицированное меню функций принтера.
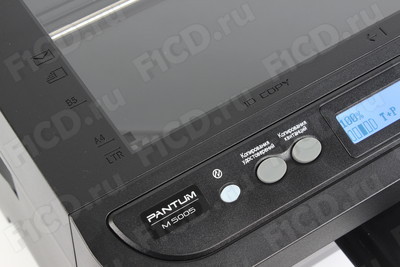
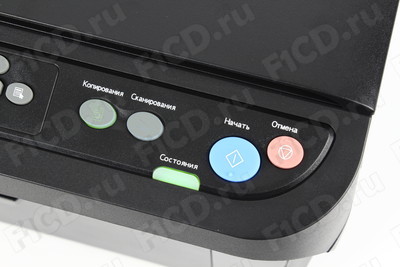
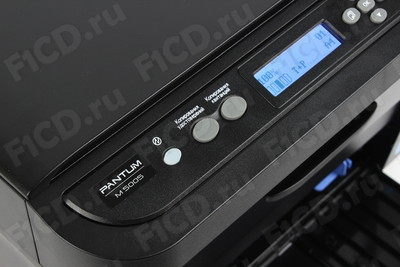
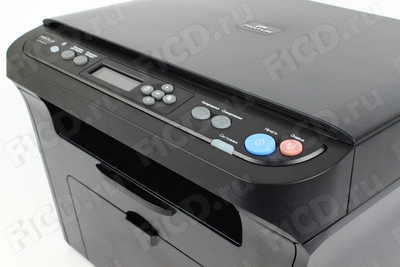 Панель управления Pantum M5005
Кроме управляющих элементов, на верхней плоскости МФУ находится и сканер с довольно тонкой крышкой. Максимальный размер умещающегося на стекле оригинала – 216×297 мм.
 Лоток для бумаги Pantum M5005
Под панелью управления разместился выходной лоток с откидным держателем.
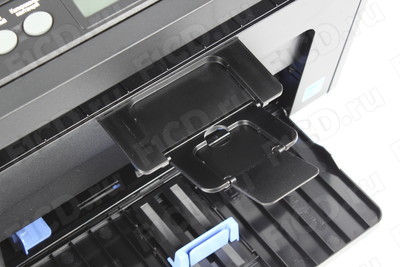 Держатель выходного лотка для бумаги в Pantum M5005
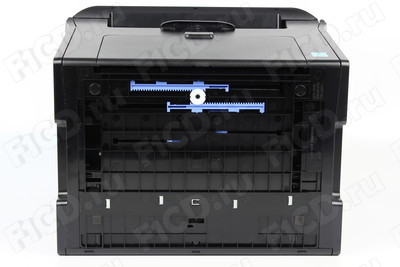
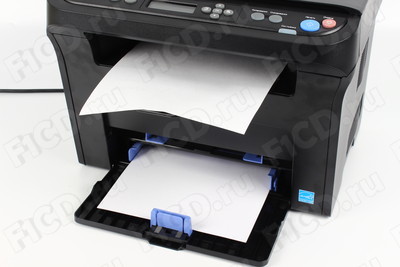
А ещё ниже, под крышкой, находится отдел для бумаги, разделённый на две части: для 150 стандартных листов формата, близкого к А4 и для ручной подачи, например, заготовок квитанций и накладных. Оба имеют регулируемые ограничители.
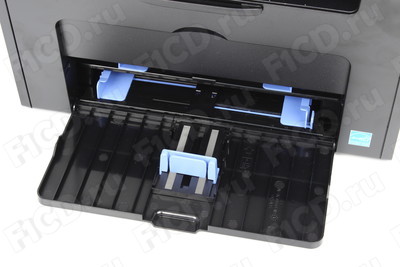 Нижний лоток для бумаги в Pantum M5005
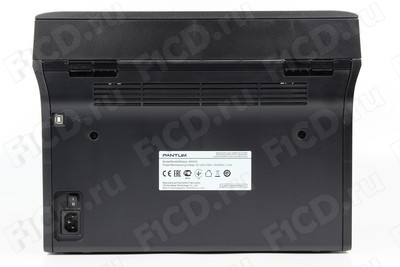
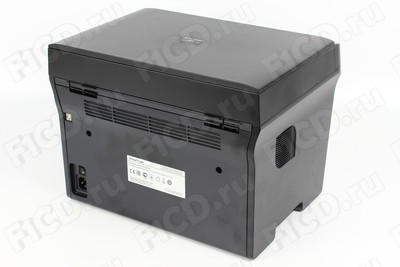
Разъёмов на корпусе всего два – питание и USB 2.0 на задней стенке, а вот отдельного порта для подключения flash-накопителей нет. Тут же находится переключатель питания, хотя он не особенно-то и нужен: абсолютное большинство современных печатных устройств активно сберегает энергию за счёт режима ожидания и автоматического отключения невостребованных функций.

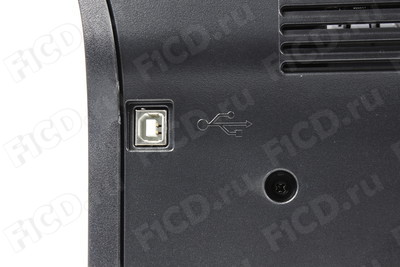 Разъёмы на задней стенке Pantum M5005
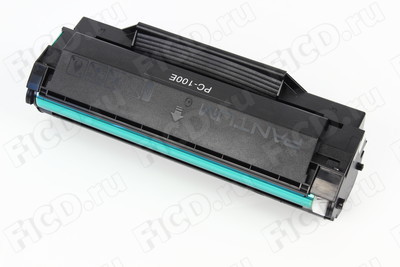
Верхняя панель МФУ, включая блок сканера, легко приподнимается для замены картриджа. Комплектного картриджа должно хватать на 700 страниц при 5-процентном заполнении листа по стандартному методу. Что касается картриджей в рознице, то их ресурс составляет 1500 страниц для стандартного и 2300 страниц для картриджа повышенной ёмкости.
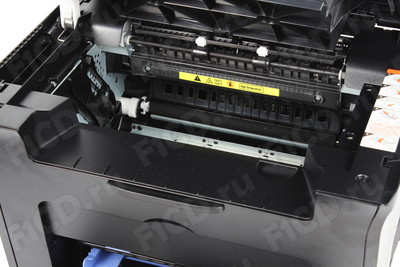 Pantum M5005 в открытом виде
 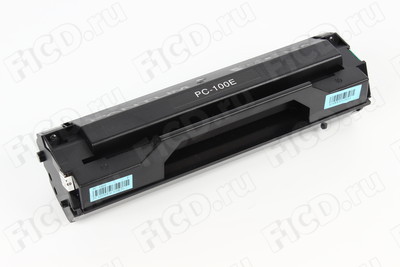 Картридж Pantum M5005
Полный список технических характеристик Pantum M5005 вы можете найти в следующей таблице.
| Характеристики печати | |
| Технология печати | Лазерная электрофотографическая печать |
| Скорость печати (страниц в минуту) | 16 стр/мин (A4) /17 стр/мин (Letter) |
| Разрешение принтера | До 1200×600 точек/дюйм |
| Частота процессора | 300 МГц |
| Память | 128 Мбайт |
| Панель управления | ЖК, двустрочная |
| Месячный объём печати (нагрузка) | 20000 страниц |
| Рекомендованный месячный объём печати | До 5000 страниц |
| Характеристики копирования | |
| Скорость копирования | 16 копий/мин (A4) / 17 копий/мин (Letter) |
| Разрешение копии | 1200×600 точек/дюйм |
| Максимальное количество копий | До 99 |
| Изменение масштаба при копировании | От 50% до 400% |
| Выбор изображения | Текст, изображение, текст + изображение |
| Настройки копирования | Качество копии, светлее/темнее, уменьшить/увеличить, количество копий |
| Новые возможности | Копирование идентификаторов и квитанций за один шаг, копирование нескольких страниц на один лист |
| Характеристики сканирования | |
| Тип сканера | Планшетный |
| Разрешение сканирования | 1200×1200 точек/дюйм |
| Максимальный размер сканирования | 8,5×11,7 дюйма (216×297 мм) |
| Глубина цвета | 24-, 8- или 1-разрядная |
| Режим сканирования | TWAIN, WIA |
| Отправка результатов сканирования | На ПК, на адрес электронной почты, в приложения или в PDF-файл |
| Работа с бумагой, автоматическая подача | |
| Емкость загрузочного лотка | 150 страниц |
| Емкость выходного лотка | 100 страниц |
| Типы материалов для печати | Бумага (обычная, тонкая, плотная), OHP-пленка, почтовая открытка и конверт |
| Форматы материалов для печати | A4, A5, JIS B5, IS0 B5, A6, Letter, Legal, Executive, Folio, Oficio, Statement, японская открытка, конверт Monarch, конверт DL, конверт C5, конверт C6, конверт №10, ZL, большой 16K, большой 32K, 16K, 32K, B6 |
| Плотность материалов для печати | От 60 до 163 г/кв. м |
| Работа с бумагой, ручная подача | |
| Типы материалов для печати | Обычная бумага, бланк, бумага, прозрачная пленка, карточки, этикетка, конверт, крафт-бумага |
| Форматы материалов для печати | От 75×148 мм до 216×356 мм |
| Плотность материалов для печати | От 3×5,8 дюйма до 8,6×14,2 дюйма |
| Емкость загрузочного лотка | 1 страница |
| Общие сведения | |
| Интерфейс | USB 2.0 Hi-Speed |
| Уровень шума | При печати: 54 дБ; в режиме готовности 35 дБ |
| Относительная влажность при рабочем режиме | 20-80% |
| Стандартная потребляемая мощность | 1,7 кВтч /нед. |
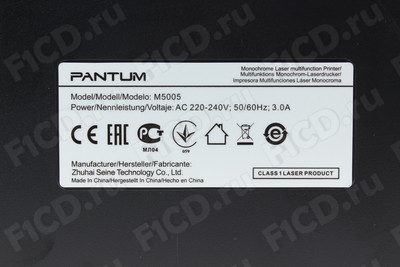
| Мощность модели | 110 ~ 127 В переменного тока (±10%), 60 Гц (±2 Гц), 6 А; 220 ~ 240 В переменного тока (±10%), 50/60 Гц (±2 Гц), 3 А |
| Рабочая температура | 10-32°C |
| Потребляемая мощность | В режиме печати: 355 Вт, в режиме готовности: 38 Вт, в спящем режиме: 4,5 Вт, в отключенном состоянии: 0 Вт |
| Вес (без картриджа) | 8 кг |
| Гарантия | 24 месяца с даты продажи |
| Размеры (Ш x Г x В) | 399x327x299 мм |
| Совместимость с операционными системами | Microsoft Windows Server2003/Server2008/Server2012/XP/Vista/7/8(32 и 64-разрядные версии), Mac OS X 10.4/10.5/10.6/10.7/10.8 |
| Картридж с тонером | Стартовый картридж: 700 страниц Картридж стандартной ёмкости: 1500 страниц Картридж повышенной ёмкости: 2300 страниц |
| Комплект поставки | Принтер; картридж с тонером на 700 страниц; кабель USB-интерфейса; кабель питания; CD-ROM; руководство по быстрой установке. |
Pantum M5005 в работе #
Панель управления Pantum M5005 позволяет выполнять копирование без компьютера и даёт возможность настроить качество печати, количество копий и прочие функции МФУ.
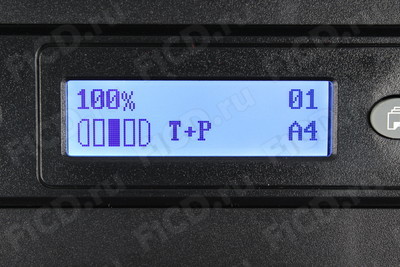

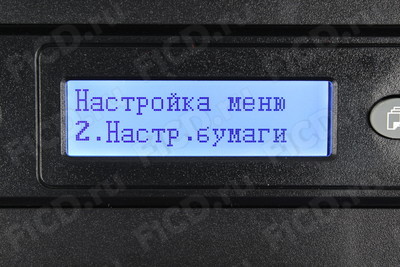
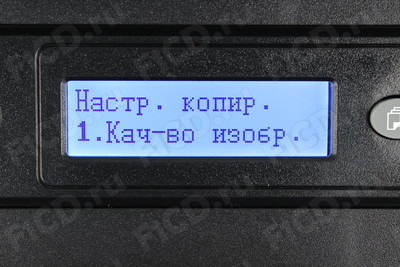
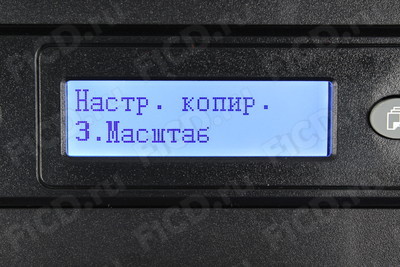
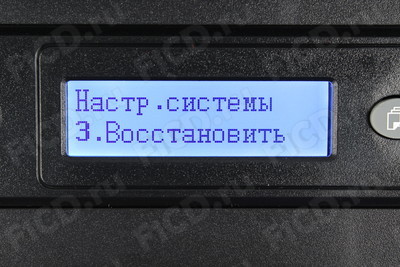 Экранное меню Pantum M5005
Однако для работы с функциями сканирования и печати всё же требуется компьютер и фирменное ПО – как минимум драйвер, но производитель и панель для работы со сканером неплохую соорудил.
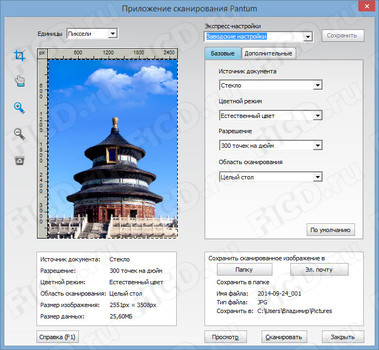
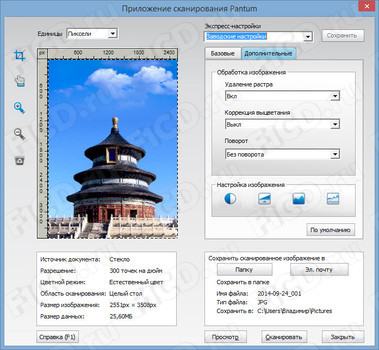
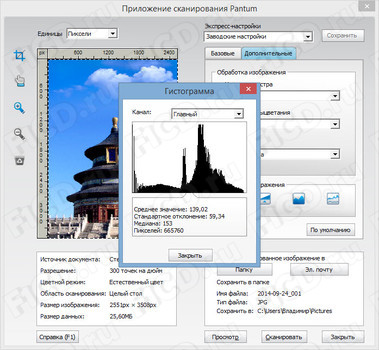
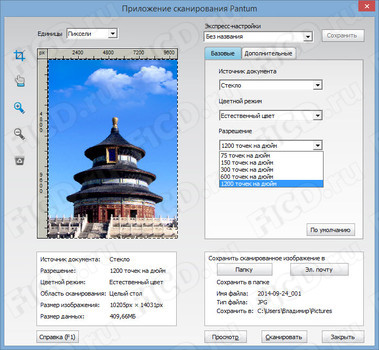 Панель сканирования МФУ Pantum M5005
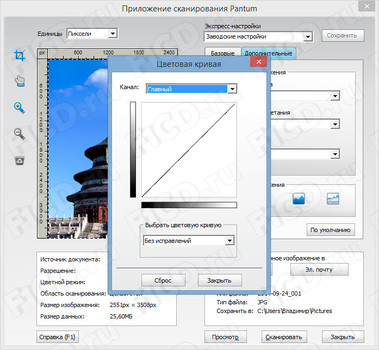
Если же сканировать напрямую с МФУ, то можно задать в диспетчере удаленного сканирования место назначения, а параметры будут применяться из меню настроек самого устройства.
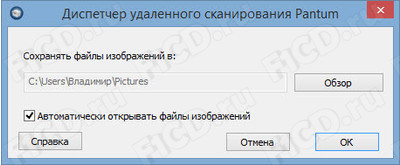
 Диспетчер удаленного сканирования Pantum
Драйвер печати вполне стандартный – можно регулировать разрешение печати, подачу материалов и задавать водяные знаки.
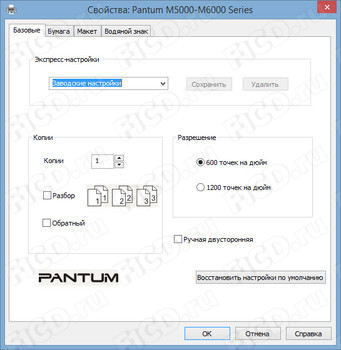
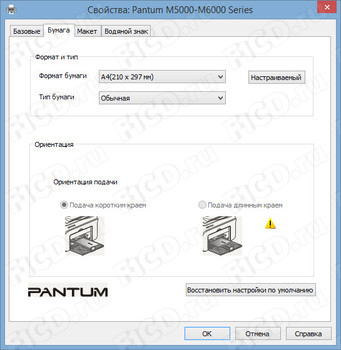
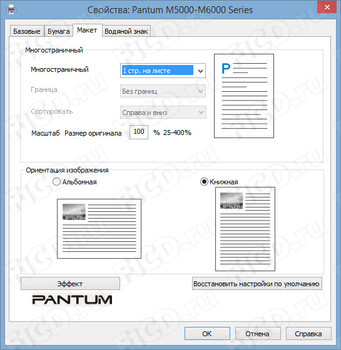
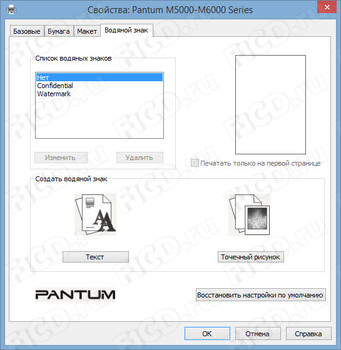 Настройки печати Pantum M5005
Познакомившись с ПО, мы перешли к количественным измерениям. Относительно печати можно отметить следующее:
- Время прогрева составляет 6-7 секунд.
- Первый отпечаток выходит через 10 секунд.
- Скорость печати достигает 15,6 листа в минуту.
Качество печати текста на высоте – в нашем тесте получалось различить текст вплоть до второго кегля. Но из-за невозможности адекватно передавать градиенты и полутона лазерная печать не совсем годится даже для ч/б фотопечати. Зато контрастность на хорошем уровне, да и с графиками принтер справляется отлично.
 Пример печати шрифтов при разрешении 600 точек/дюйм
Есть и повышенное разрешение печати – 1200 точек на дюйм, однако на глаз разницу увидеть весьма сложно.
 Пример печати шрифтов при разрешении 1200 точек/дюйм
Сканеру доступно 1200 dpi без интерполяции при сканировании через компьютер и 600 dpi с самого МФУ, что весьма неплохо. Потери в качестве изображения минимальны – учитывая офисную направленность, Pantum M5005 отлично справится с документами и диаграммами.
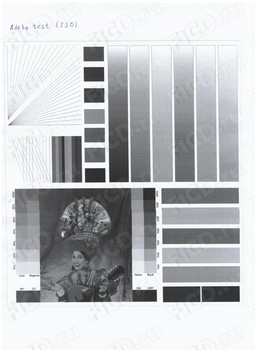
 Примеры сканирования ч/б отпечатков
Скачать полноразмерные примеры отсканированных тестовых документов, напечатанных МФУ, вы можете по следующим ссылкам:
- Пример сканирования тестового документа №1 (печать 600 dpi)
- Пример сканирования тестового документа №2 (печать 600 dpi)
- Пример сканирования тестового документа №2 (печать 1200 dpi)
- Пример сканирования тестового документа №3 (печать 600 dpi)
- Пример сканирования тестового документа №4 (печать 600 dpi)
- Пример сканирования тестового документа №4 (печать 1200 dpi)
- Пример сканирования тестового документа №5 (печать 1200 dpi)
Pantum M5005: Вывод #
Стоимость Pantum M5005 на момент тестирования составляет в среднем 4200 рублей, за которые вы получаете быструю печать без потери в качестве, три режима копирования (стандартный, для квитанций и для удостоверений) и хороший сканер. Однако Wi-Fi и Bluetooth вы в этой модели не найдёте, поэтому для централизованной печати в офисе она не годится – разве что в виде копира.
Цена на расходные элементы при этом составляет 1500 рублей – что на 1500 страниц, что на 2300 страниц. Причём, по заявлению производителя, в Россию текущие и новые модели будут официально поставляться с перезаправляемыми картриджами.
Плюсы Pantum M5005: #
- Быстрая печать.
- Удобная панель управления.
- Качество сборки и удобство конструкции.
Минусы Pantum M5005: #
-
Значительных не обнаружено.
Фотогалерея Pantum M5005 #


Рекомендуем также почитать
- Статья Xerox WorkCentre 3045NI: обзор и тест МФУ для малого офиса
- Статья Brother MFC-J6510DW: обзор сетевого МФУ
- Статья Brother MFC-7860DWR: обзор МФУ с возможностью двусторонней печати
- Статья Обзор МФУ Brother MFC-7360NR: по сети печатаем, сканируем, шлем факсы, все копируем
- Видео:
- Главная
- Принтеры
- Pantum
- Устройствопринтер/сканер/копир
- Тип печатичерно-белая
- Технология печатилазерная
- Размещениенастольный
- Область применениямалый офис
- Количество страниц в месяц20000
- Скорость печати16 стр/мин (ч/б А4)
- Максимальное разрешение для ч/б печати1200×600 dpi
- Максимальный форматA4
- Поддержка стандартовTWAIN, WIA
- Показать все
Перед приобретением Pantum M5005 по самой низкой цене, изучите характеристики, видео обзоры, плюсы и минусы модели, отзывы покупателей.
Цена от 15700 ₽
(на апрель 2021)
Характеристики Pantum M5005
Основные характеристики*
| Устройство | принтер/сканер/копир |
| Тип печати | черно-белая |
| Технология печати | лазерная |
| Размещение | настольный |
| Область применения | малый офис |
| Количество страниц в месяц | 20000 |
Принтер*
| Скорость печати | 16 стр/мин (ч/б А4) |
| Максимальное разрешение для ч/б печати | 1200×600 dpi |
| Максимальный формат | A4 |
Сканер*
| Поддержка стандартов | TWAIN, WIA |
| Максимальный формат оригинала | A4 |
| Тип сканера | планшетный |
| Разрешение сканера | 1200×1200 dpi |
| Максимальный размер сканирования | 216×297 мм |
| Отправка изображения по e-mail | есть |
| Глубина цвета | 24 бит |
Копир*
| Скорость копирования | 16 стр/мин (ч/б А4) |
| Изменение масштаба | 50-400 % |
| Максимальное разрешение копира (ч/б) | 1200×600 dpi |
| Максимальное количество копий за цикл | 99 |
Лотки*
| Емкость лотка ручной подачи | 1 лист. |
| Вывод бумаги | 100 лист. (стандартный) |
| Подача бумаги | 151 лист. (стандартная) |
Расходные материалы*
| Количество картриджей | 1 |
| Ресурс ч/б картриджа/тонера | 1500 страниц |
| Печать на: | карточках, пленках, этикетках, глянцевой бумаге, конвертах, матовой бумаге |
| Плотность бумаги | 60-163 г/м2 |
| Тип картриджа/тонера | стандартный P-110; повышенной емкости P-110H (2300 стр.) |
Память/Процессор*
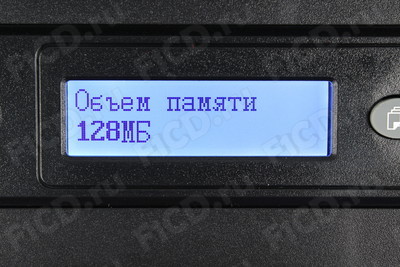
| Частота процессора | 300 МГц |
| Объем памяти | 128 Мб |
Дополнительная информация*
| Вес | 8 кг |
| Потребляемая мощность (при работе) | 355 Вт |
| Габариты (ШхВхГ) | 399x299x327 мм |
| Потребляемая мощность (в режиме ожидания) | 38 Вт |
| Уровень шума в режиме ожидания | 35 дБ |
| Уровень шума при работе | 54 дБ |
| Поддержка ОС | Windows |
* Точные параметры уточняйте на сайте продавца.
Отзывы пользователей о Pantum M5005
если надумали покупать НЕ БЕРИТЕ!
деньги на ветер выкинете и будете мечутся всю его жизнь
этот принтер брали по работе витоги краску пристал завозить магазин а заказывать очень дорого и все по области негде нету только заказы с москвы
Скупой платит дважды, тупой-трижды
Достоинства: их нету
Недостатки: компания которая выпускает настоящие евреи по другому не как не навешаешь
краску только родная продается, а родная она дорогая и чип может зависать и все покупай новую краску и на этот препринт почему та по России почему та очень редкая краска ее просто нету
Ирина Ш.7 лет назад
яндекс маркет
Не скупитесь
Достоинства: Работает не хуже XP и Canon
Недостатки: Хватило на пару заправок, теперь либо новый картридж брать а его цена 50% от цены этого устройства, либо к специалистам обращаться, в любом случае расход денег неоправданый
Гость9 лет назад
яндекс маркет
Смотрели по цене, нужна была МФУ на убой. «Мелкие» как-то хлипко выглядят, а эта пожирнее:)) Canon 4410 сильно дороже, 2 тысячи.разница, купили эту в контору. Один черт все в Китае делаются.
Достоинства: Был приятно удивлен качеством пластика и, в целом, исполнением. На вид и на ощупь «дубовая» в хорошем смысле конструкция. Работает без нареканий пока.
Недостатки: Пожалуй, крупноват. Хотя по мне это даже плюс.

Pantum M5005
Windows 2003/2008/2012/XP/Vista/7/8/8.1/10
Размер: 72 MB
Разрядность: 32/64
Ссылка: Pantum M5005 (или скачайте драйвера тут)
Windows 2003/2008/2012/XP/Vista/7/8/8.1/10
Размер: 90 MB
Разрядность: 32/64
Ссылка: Pantum M5005 (другие драйвер здесь)
Установка драйвера в Windows 10
Принтер, также как и любое подключаемое к компьютеру оборудования, должно сопровождаться установкой дополнительного программного обеспечения. Pantum M5005 не является исключением. Для скачивания ПО можете перейти в первый блок статьи и кликнуть по советующей ссылку.
В дальнейшем необходимо открыть скачанную папку и запустить установщик через файл с названием «Setup».
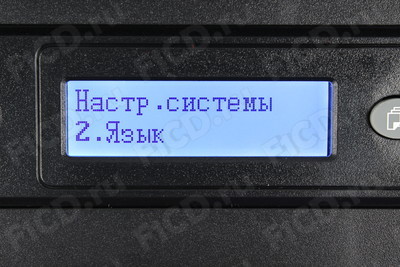
Выставляем язык в выпадающем меню на русский.
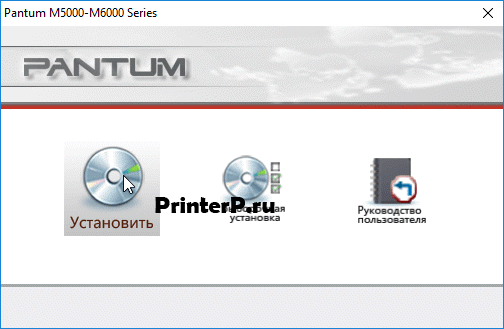
Следующий пункт предлагает 3 варианта выбора:
- Полная установка. Именно она нам и требуется, первичная инсталляция подразумевает полную загрузку всех частей драйвера;
- Выборочная установка. Подходит для опытных пользователей, установщик позволит выборочно отключать компоненты программного обеспечения;
- Руководство пользователя. Полное описания драйвера, руководство по использованию программы и оборудования.
Компания передает лицензию на программное обеспечение физическому или юридическому лицу принимающему ПО. Прочтите условия соглашения и выставьте галочку в графе «Принимаю». Затем кликайте на «Далее».

Установщик позволяет подключить оборудования позже. Автономная установка не накладывает ограничении, так что для удобства выберем её, выбрав пункт «Продолжить установку».

Просим Вас оставить комментарий к этой статье, потому что нам нужно знать – помогла ли Вам статья. Спасибо большое!