Благодарим за выбор продукции компании Peg-Perego!
Содержание
1 Характеристики изделия
2 Важно!
3 Внимание!
4 Установка
5 Пристегивание ребёнка
6 Регулировка подголовника
7 Снятие чехла
8 Уход за обивкой
9 Чистка изделия
10 Сертификация
10Серийные номера
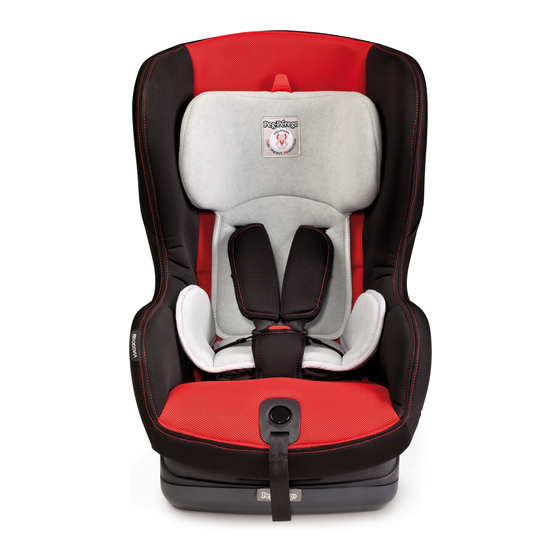
Характеристики изделия
Автокресло, группа 0+, категория «универсальное», крепящееся ремнем безопасности автомобиля
Viaggio 0+1 Switchable устанавливается в автомобиле против направления движения с помощью ремня безопасности автомобиля при условии использования в качестве автомобильного кресла группы 0+ (0-13 кг).

Сертифицировано как соответствующее требованиям европейского стандарта ECE 44/04 для детей весом до 13 кг (от рождения до примерно 1 года).
- Совместимо с большинством автомобильных сидений, однако не со всеми
- Автокресло можно установить правильным образом, если в инструкции к транспортному средству и книжке технического обслуживания указана совместимость с системами пассивной безопасности автомобиля категории «Универсальная» группы 0+
- Это автокресло сертифицировано как «Универсальное» и соответствует более строгим критериям по сравнению с предыдущими моделями, не имевшими такой сертификационной маркировки
- Автокресло можно использовать только в одобренных автомобилях, оборудованных статическими или оснащенными инерционной катушкой трехточечными ремнями безопасности и сертифицированных согласно стандарту ECE №°16 или аналогичным нормативам
- Запрещается использование ремней безопасности с двумя точками крепления или поясных ремней
Автокресло, группа 1, категория «универсальное», крепящееся ремнем безопасности автомобиля
Viaggio 0+1 Switchable устанавливается в автомобиле по направлению движения с помощью ремня безопасности автомобиля при условии использования в качестве автомобильного кресла группы 1 (9-18 кг).

•Сертифицировано согласно европейскому стандарту ECE R44/04 для детей весом от 9 до 18 кг (примерно от 9 месяцев до 4 лет).
• Совместимо с большинством автомобильных сидений, однако не со всеми.
• Автокресло можно установить правильным образом, если в инструкции к транспортному средству и книжке технического обслуживания указана совместимость с системами пассивной безопасности автомобиля категории «Универсальная» группы 1.
• Это автокресло сертифицировано как «Универсальное» и соответствует более строгим критериям по сравнению с предыдущими моделями, не имевшими такой сертификационной маркировки.
Важно!
- Viaggio 0+1 Switchable следует устанавливать против движения при использовании в качестве автокресла группы 0+ и по направлению движения при использовании в качестве автокресла группы 1
- Нельзя устанавливать Viaggio 0+1 Switchable на сиденья автомобиля, расположенные обратно или перпендикулярно направлению движения
- При использовании Viaggio 0+1 Switchable в качестве автокресла группы 0+ на переднем сиденье автомобиля следует отключить переднюю пассажирскую подушку безопасности
- Если детское автокресло установлено на переднем автомобильном сиденье в конфигурации группы 1, рекомендуется размещать его как можно дальше от приборной доски
- Эта модель имеет сквозную серийную нумерацию
- При возникновении проблемы с установкой Viaggio 0+1 Switchable поднимите или снимите подголовник
Внимание!
- Перед эксплуатацией автокресла внимательно прочитайте инструкции и храните их в безопасном месте для использования в дальнейшем. Несоблюдение инструкций при установке автокресла может создать серьезную опасность для вашего ребёнка
Инструкция для автокресла Peg-Perego Viaggio 0+/1 Switchable
- Операции по сборке и установке автокресла Viaggio 0+1 Switchable должны выполнять взрослые.
- Во время сборки и установки ребенок не должен находиться в автокресле.
- Во время поездки ни в коем случае не держите ребёнка на руках и не позволяйте ему находиться на сиденьях автомобиля. При внезапном торможении даже на низкой скорости ребенок легко может выскользнуть, и его может бросить вперед.
- Не вставляйте пальцы в механизмы.
- Уделяйте особое Внимание размещению багажа и других предметов, которые могут травмировать ребёнка в автокресле в случае аварии.
- Не используйте другие методы установки, помимо описанных в данных инструкциях, поскольку это может привести к отсоединению автокресла при аварии.
- Убедитесь, что трехточечный ремень безопасности, используемый для крепления автокресла, имеет надлежащее натяжение и не перекручен. Если ремень подвергался значительной нагрузке во время аварии, его следует заменить.
- Не оставляйте ребёнка в автокресле без присмотра: следите даже за спящим ребенком.
- Запрещается вынимать ребёнка из автокресла в движущемся автомобиле.
- Убедитесь, что автокресло не блокируется движущимися частями сиденья автомобиля или дверью.
- Отрегулируйте высоту и натяжение плечевых лямок, убедитесь в том, что они достаточно натянуты, но не причиняют неудобств ребенку. Проверьте, не перекручен ли ремень безопасности, и не сможет ли ребенок его отстегнуть.
- Это автокресло не предназначено для длительного сна.
- Не оставляйте автокресло в машине под прямыми лучами солнца, поскольку некоторые детали могут нагреться и травмировать нежную кожу ребёнка; прежде чем разместить ребёнка, убедитесь, что сиденье не слишком горячее.
- Не используйте автокресло без тканевой обивки: ее нельзя заменить другой обивкой, которая не одобрена производителем, поскольку обивка является неотъемлемой частью сиденья, Важной для обеспечения безопасности.
- В случае сомнений обратитесь к производителю или продавцу этого автокресла.
- Не удаляйте маркировочные наклейки и нашивки, поскольку это может нарушить соответствие изделия требованиям законодательства.
- Не используйте детское автокресло в таких случаях: оно сломано, отсутствуют компоненты, сиденье приобретено из вторых рук или подвергалось значительным ударным нагрузкам в результате аварии, поскольку это может вести к разрушению его структуры и создавать опасность для ребёнка.
- Не вносите изменения в изделие.
- Для ремонта, замены компонентов и получения информации об изделии обращайтесь в службу послепродажного обслуживания. Контактные данные приведены на последней странице этого руководства.
- Автокресло всегда следует закреплять в автомобиле, даже если в нем не находится ребенок, иначе при экстренном торможении оно может травмировать пассажиров.
- Не используйте автокресло, если с даты, указанной на раме, прошло более семи лет. Естественное старение материалов может нарушить соответствие автокресла требованиям законодательства.
- Не используйте принадлежности, не утвержденные производителем или компетентными органами.
Установка
Крепление ремнями безопасности, Группа 0+
Важно! Для правильной эксплуатации автокресла Viaggio 0+1 Switchable в режиме группы 0+ необходимо выполнить следующие действия: — Разложите из-под сиденья клин для регулирования наклона автокресла. Чтобы разложить его, нажмите на рукоятку и потяните на себя, смещая с основания (стрелки A и B). — Воспользуйтесь рычагом (стрелка C), чтобы перевести автокресло в самое высокое положение.

Автокресло Viaggio 0+1 Switchable имеет надлежащую конструкцию для эксплуатации в качестве автокресла группы 0+.

Установите автокресло Viaggio 0+1 Switchable на сиденье автомобиля против движения, как показано на рисунке. Пропустите автомобильный ремень безопасности между рамой и корпусом автокресла, выполнив нижеприведенные шаги: — сначала вставьте ремень в светло-голубые направляющие ремня (стрелка A); — застегните ремень до щелчка (стрелка B);

Пропустите ремень безопасности в светло-голубой паз для ремня сверху (стрелка С).

Важно! Плотно удерживайте и натягивайте ремень безопасности, чтобы разместить автокресло Viaggio 0+1 Switchable как можно ближе к сиденью автомобиля (стрелка D).
Крепление ремнями безопасности, Группа 1
Важно! Для правильной эксплуатации автокресла Viaggio 0+1 Switchable в качестве изделия группы 1 необходимо: — изменить положение клина для регулирования наклона на основании детского автокресла. Нажмите на рычаг и толкните его вовнутрь, как показано на рисунке.

Установите автокресло Viaggio 0+1 Switchable на сиденье автомобиля по направлению движения, как показано на рисунке.

Чтобы облегчить проведение ремней безопасности автомобиля через заднюю часть автокресла, необходимо перевести его в самое низкое положение с помощью рычага, как показано на рисунке.

Протяните ремень безопасности автомобиля между рамой и корпусом автокресла.

Поясная лямка должна пройти через нижние направляющие, обозначенные красным. Застегните ремень; когда ремень фиксируется, должен прозвучать щелчок.

Убедитесь, что поясная лямка проходит через нижние направляющие, обозначенные красным, и затяните ее.

Установите спинку автокресла назад в вертикальное положение, потянув за ручку под автокреслом (рис. A) и подвинув автокресло, как показано на рисунке (рис. B).

Для завершения процедуры крепления автокресла в автомобиле воспользуйтесь устройством Steady Fix. Откройте зажим и протяните через него диагональную часть ремня, убедившись, что он имеет надлежащее натяжение и не перекручен (рис. A). Закройте предохранительную защелку (рис. B).

Важно! Возьмитесь за ремень безопасности и потяните вверх, чтобы расположить автокресло Viaggio 0+1 Switchable ближе к сиденью автомобиля (рис. C). По завершении процедуры можно изменить наклон автокресла до нужного положения (см. пункт 6)

Пристегивание ребёнка
Прежде чем усаживать ребёнка в автокресло, ослабьте ремни безопасности, нажав на красную кнопку в пряжке лямки, проходящей между ногами.

Поднимите ремни безопасности и пристегните пряжки к эластичным боковым креплениям.

Посадите ребёнка в автокресло и отрегулируйте ремни безопасности на плечах и на поясе ребёнка, как показано на рисунке.

Застегните ремни безопасности, перехлестнув язычки и вставив их в пряжку лямки, проходящей между ногами, до защелкивания на месте.

Ребенок сидит правильно, ремни безопасности застегнуты соответствующим образом.

Для завершения процедуры убедитесь, что плечевые лямки лежат не слишком свободно, потянув за центральный регулировочный ремень, как показано на рисунке. Убедитесь, что ремни безопасности не затянуты слишком плотно.

Важно! Ремни должны быть достаточно ослаблены для того, чтобы можно было вставить палец между ремнем и грудной клеткой ребёнка.
Чтобы ослабить натяжение ремней, нажмите на кнопку в центре детского автокресла и одновременно потяните ремни на себя.

Важно! Беритесь за ремни безопасности под плечевыми накладками и тяните, как показано на рисунке.
Автокресло оснащено дополнительной вставкой, которую можно использовать только для маленьких детей. Уберите ее, когда ребенок подрастет.

Чтобы удалить дополнительную вставку, расстегните ремни безопасности, вытяните их из вставки и выньте лямку, проходящую между ногами, через прорезь в дополнительной вставке.
Важно! Дополнительную вставку следует снимать при использовании Viaggio 0+1 Switchable в качестве автокресла группы 1.
Регулировка подголовника
Подголовник следует отрегулировать так, чтобы он соответствовал росту ребёнка. Имеется 7 положений.
Для перевода подголовника из нижнего положения в более высокое выполните следующие действия: потяните вверх язычок, расположенный в верхней центральной части подголовника. Подголовник будет двигаться вместе с язычком. Для перевода подголовника из верхнего положения в более низкое выполните следующие действия: потяните вверх язычок в верхней центральной части подголовника и одновременно нажмите на подголовник, чтобы опустить его в нужное положение. Закончив, попробуйте подвигать подголовник, чтобы убедиться в его надлежащей фиксации.

Внимание! Не используйте автокресло в качестве изделия группы 0+, не разложив сначала клин для регулирования наклона, как показано для шага 1 A-B (рис. A).

Внимание! Не используйте автокресло в качестве изделия группы 0+, не изменив сначала наклон спинки, как показано для шага 1C (рис. B).
Режим группы 0+: плечевые лямки расположены правильно, если плечи ребёнка находятся чуть выше отверстий для плечевых лямок.

Важно! Лямки не должны находиться слишком высоко или слишком низко относительно плеч ребёнка.

Внимание! Не используйте автокресло в качестве изделия группы 1 с разложенным клином для регулирования наклона.

Режим группы 1: плечевые лямки расположены правильно, если плечи ребёнка находятся немного ниже отверстий для плечевых лямок.

Важно! Лямки не должны находиться слишком высоко или слишком низко относительно плеч ребёнка.

Важно! Автокресло Viaggio 0+1 Switchable имеет 5 различных положений наклона только при использовании в качестве изделия группы 1. Чтобы изменить наклон автокресла, нажмите на рычаг под сиденьем (рис. А) и потяните на себя до нужного положения (рис. B).

Снятие чехла
Чтобы снять обивку автокресла Viaggio 0+1 Switchable, выполните следующие действия:
- Снимите дополнительную вставку, если она имеется (пункт 20)
- Расстегните ремни безопасности (пункт 13)
- Откройте заднюю крышку
Отсоедините ремни безопасности от задней фиксирующей панели.

Отпустите (с задней стороны спинки) ремни безопасности и вытяните их спереди.

Расстегните (с задней стороны спинки) плечевые накладки и стяните их с ремней безопасности спереди.

Вытяните регулировочный ремень через отверстие (рис. C), а затем снимите обивку подголовника, потянув ее вверх (рис. D).

Снизу под корпусом отстегните лямку, проходящую между ногами ребёнка (рис. Е), и вытяните ремень из тканевого чехла лямки, проходящей между ногами (рис. F).

Вытяните ремень через прорезь в ткани и снимите обивку, как показано на рисунке.

Уход за обивкой
- Почистите тканевые детали щеткой, чтобы удалить пыль
- Прежде чем поместить обивку в стиральную машину, выньте пенопластовую прокладку на задней поверхности дополнительной вставки
- При стирке точно следуйте инструкциям на этикетке, вшитой в чехол изделия
- Не использовать хлорный отбеливатель
- Не гладить
- Не подвергать химической чистке. Не удалять пятна растворителями
- Не сушить в сушке
Как установить на место обивку автокресла
Чтобы установить на место обивку автокресла Viaggio 0+1 Switchable, выполните следующие действия:
Снизу протяните ремни безопасности сквозь прорезь в ткани (рис. A).

Вставьте лямку, проходящую между ногами, в соответствующее место обивки (рис. B).
Прикрепите ее к отверстию в раме.

Пристегните язычок к отверстию в лямке, проходящей между ногами.

Надевайте обивку, начиная с сиденья и перемещаясь вверх, обращая Внимание на форму спинки.

Наденьте обивку на подголовник, убедившись, что красная полоска прошла сквозь отверстие в ткани.

Вставьте ремни безопасности в обивку в следующем порядке: начните с пряжек плечевых лямок, а затем займитесь ремнями.

Вытяните ремни и вставьте их в корпус автокресла (ремни в верхнее отверстие, пряжки в нижнее).

Закрепите их в спинке соответствующим образом, как показано на рисунке.

Застегните ремни безопасности спереди (пункт 17).
Важно! Ремни не должны перекручиваться.
Внимание! Центральный регулировочный ремень должен проходить позади пластикового щитка, как показано на рисунке.

Откройте заднюю крышку и прикрепите ремни к задней фиксирующей панели.

- Застегните ремни безопасности впереди (пункт 16)
- Установите на сиденье дополнительную вставку, если ребенок маленький, а кресло используется как изделие группы 0+
Чистка изделия
- Ваше изделие нуждается в несложном уходе. Операции чистки и ухода должны выполнять только взрослые
- Рекомендуется содержать в чистоте все движущиеся части
- Периодически очищайте пластмассовые детали влажной тряпкой, не пользуйтесь растворителями и сходными веществами
- Почистите щеткой тканые части, чтобы удалить пыль
- Не чистите ударопоглощающее устройство из полистирола растворителями или сходными с ними веществами
- Защитите изделие от атмосферных осадков — воды, снега или дождя. Постоянная и продолжительная подверженность солнечным лучам может вызвать изменения цвета многих материалов
- Храните изделие в сухом месте
Сертификация
- В этом параграфе объясняется, как истолковывать сертификационную табличку (оранжевая табличка)
- Это автокресло сертифицировано для крепления в автомобиле только одним образом: с помощью системы крепления с использованием статических или оснащенных инерционной катушкой трехточечных ремней безопасности (маркировка universal (универсальное) означает, что автокресло пригодно для транспортных средств с таким типом ремней безопасности)
- В верхней части таблички указана торговая марка компании-производителя и название изделия
- Буква E в кружке означает, что изделие сертифицировано в Европе, а цифра указывает на страну, предоставившую сертификацию изделия (1: Германия, 2: Франция, 3: Италия, 4: Нидерланды, 11: Великобритания, 24: Республика Ирландия)
- Номер сертификации: если номер начинается с 04, это указывает на соответствие четвертой поправке (действующей в настоящее время) стандарта R44
- Ссылочный стандарт: ECE R44/04
- Заводской серийный номер: согласно условиям сертификации каждое автокресло имеет индивидуальный номер
Серийные номера
Под сиденьем автокресла Viaggio 0+1 Switchable указано его название, дата производства и серийный номер.

Сертификационная табличка изделия Viaggio 0+1 Switchable находится за спинкой.

Дата изготовления ремней. Эту информацию следует указывать в любых претензиях.

- Manuals
- Brands
- Peg-Perego Manuals
- Car Seat
- Viaggio 0+1 Convertibile
- Instructions for use manual
-
Contents
-
Table of Contents
-
Bookmarks
Quick Links
Related Manuals for Peg-Perego Viaggio 0+1 Convertibile
Summary of Contents for Peg-Perego Viaggio 0+1 Convertibile
-
Page 2
Group UNIVERSAL CATEGORY 0-13 Kg BELTED I T• Il seggiolino auto «Viaggio 0+1 Convertibile» viene fissato in auto, in senso opposto al senso di marcia, con la cintura di sicurezza a tre punti, quando viene installato come Gruppo 0+ da 0-13 Kg. E N• The «Viaggio 0+1 Convertible» car seat is a rear-facing car seat with a three-point safety harness when used as a Group 0+ (from birth to 13 Kg) car seat. F R• Le siège-auto «Viaggio 0+1 Convertible» se fixe sur la voiture, dans le sens contraire de la marche, avec le harnais de sécurité à trois points, lorsqu’il est installé comme Groupe 0+ de 0-13 kg. D E• Der Kindersitz «Viaggio 0+1 Klappbar» wird im Auto entgegen der Fahrtrichtung mit dem 3-Punkt-Sicherheitsgurt angebracht, wenn er als Baugruppe 0+ von 0-13 kg installiert wird. E S• La silla de coche «Viaggio 0+1 Convertibile» se fija en el automóvil con el cinturón de seguridad de tres puntos, en sentido opuesto al de marcha, cuando se instala como Grupo 0+ de 0-13 Kg. -
Page 3
Group 1 UNIVERSAL CATEGORY 9-18 Kg BELTED I T• Il seggiolino auto «Viaggio 0+1 Convertibile» viene fissato in auto, in senso di marcia, con la cintura di sicurezza a tre punti, quando viene installato come Gruppo 1 da 9-18 Kg. E N• The «Viaggio 0+1 Convertible» car seat is a forward-facing car seat with three-point safety harness when used as a Group 1 (from 9 to 18 Kg) car seat. F R• Le siège-auto «Viaggio 0+1 Convertible» se fixe sur la voiture, dans le sens de la marche, avec le harnais de sécurité à trois points, lorsqu’il est installé comme Groupe 1 de 9-18 kg. D E• Der Kindersitz «Viaggio 0+1 Klappbar» wird im Auto in Fahrtrichtung mit dem 3-Punkt-Sicherheitsgurt angebracht, wenn er als Baugruppe 1 von 9-18 kg installiert wird. E S• La silla de coche «Viaggio 0+1 Convertibile» se fija en el automóvil con el cinturón de seguridad de tres puntos, en el sentido de marcha, cuando se instala como Grupo 1 de 9 -18 Kg. -
Page 4
gr. 0+… -
Page 5
gr. 1… -
Page 8
gr. 0+… -
Page 9
gr. 0+ gr. 0+ gr. 0+… -
Page 10
gr. 1 gr. 1 gr. 1 gr. 1… -
Page 15: Caratteristiche Prodotto
IT_Italiano Viaggio 0+1 Convertibile Grazie per aver scelto un prodotto Peg-Pérego. Caratteristiche prodotto Seggiolino-auto, Gruppo 0+, categoria “Universale” con cinture • Omologato secondo la normativa Europea UN/ECE R44/04 per bambini di peso da 0 a 13 kg (dalla nascita a 1 anno circa). • Adatto alla maggior parte dei sedili delle autovetture, ma non a tutti. • Il seggiolino-auto può essere correttamente installato se nel manuale d’uso e manutenzione del veicolo è indicata la compatibilità con sistemi di ritenuta “Universali” di Gruppo 0+. • Questo seggiolino-auto è classificato “Universale” secondo criteri di omologazione più severi rispetto ai modelli precedenti che non dispongono dell’ etichetta di omologazione. • Il seggiolino-auto puó essere utilizzato solo su veicoli approvati, dotati di cintura a tre punti statica o con avvolgitore, omologati secondo il regolamento UN/ECE R°16 o normative equivalenti. • Non é consentito usare la cintura a due punti o addominale. 1) BSAZUN00* 2) BRIZUN00* Seggiolino-auto, Gruppo 1, categoria 3) MUCI0082N…
-
Page 16
secondo criteri di omologazione più severi rispetto ai • Non utilizzare metodologie di installazione diverse da modelli precedenti che non dispongono dell’ etichetta quelle indicate; potrebbe esserci il pericolo di distacco di omologazione. dal sedile in caso d’ incidente. • Assicurarsi che la cintura a tre punti del veicolo IMPORTANTE per fissare il seggiolino-auto sia sempre tesa e non • «Viaggio 0+1 Convertibile» deve essere installato attorcigliata, si raccomanda di sostituirla in caso di in senso opposto al senso di marcia quando sollecitazioni eccessive dovute ad un incidente. usato come seggiolino di Gruppo 0+; deve essere • Non lasciare mai incustodito il vostro bambino nel installato in senso di marcia quando usato come seggiolino-auto: sorvegliarlo anche mentre dorme. seggiolino di Gruppo 1. • Se la vettura é in movimento, non togliere mai il • Non installare “Viaggio 0+1 Convertibile” su sedili bambino dal seggiolino-auto. rivolti in direzione opposta al senso di marcia o • Prestare attenzione che il seggiolino-auto non rimanga trasversalmente al senso comune di marcia del veicolo. bloccato da una parte mobile del sedile o da una • Se installato su sedile anteriore nella configurazione portiera. Gruppo 0+, disattivare l’ airbag anteriore. • Regolare l’altezza e la tensione delle cinture verificando • In caso di installazione su sedile anteriore nella che siano aderenti al corpo del bambino senza configurazione Gruppo 1, si raccomanda di… -
Page 17
Istruzioni d’uso assistenza post-vendita. Le varie informazioni sono all’ultima pagina di questo manuale. CATEGORIA UNIVERSALE Belted • Il seggiolino deve essere sempre fissato nel veicolo, Gruppo 1 anche quando non è occupato dal bambino. In caso Aggancio in auto con cinture di sicurezza di frenata improvvisa, potrebbe provocare lesioni agli 5• Applicare il seggiolino Viaggio 0+1 Convertibile sul occupanti del veicolo. sedile dell’auto nel senso di marcia del veicolo, come in • Non utilizzare il seggiolino-auto dopo sette anni dalla figura. data di produzione indicata sulla scocca; a causa del 6• Per facilitare il passaggio sul retro delle cinture di naturale invecchiamento dei materiali potrebbe non sicurezza dell’auto al seggiolino, è necessario reclinare essere più conforme ai sensi di norma. la seduta del seggiolino nella posizione più bassa, • Non utilizzare accessori che non siano approvati dal agendo sulla leva come indicato in figura. costruttore o dalle competenti autorità. 7• Far passare la cintura di sicurezza dell’auto, tra il telaio e la scocca del seggiolino. Istruzioni d’uso 8• La cintura ventrale deve passare nelle cave basse CATEGORIA UNIVERSALE Belted… -
Page 18
spartigambe, fino al click. indicato nel punto 1 A-B (Fig.A). ATTENZIONE: non utilizzare il seggiolino come 1 7• Il bambino posizionato correttamente con i cinturini di Gruppo 0+, senza aver reclinato lo schienale, come sicurezza ben allacciate. 1 8• Per completare l’operazione, far aderire le cinture di indicato nel punto 1C (Fig.B). sicurezza al bambino tirando verso di sé la cintura di 23• Utilizzo come Gruppo 0+: la giusta posizione delle regolazione centrale come in figura, facendo attenzione cinture è quella in cui le spalle del bambino devono a non stringere troppo le cinture ; essere appena sopra al punto di passaggio delle IMPORTANTE: lasciare un minimo di gioco (lo cinture. spessore di un dito tra la cintura e il torace del IMPORTANTE: le cinture non devono essere né 24• bambino). troppo alte, ne troppo basse rispetto alle spalle del 1 9• Per allentare la tensione delle cinture di sicurezza, bambino; premere il bottone posto nel centro del seggiolino- 25• ATTENZIONE: non utilizzare il seggiolino come auto e contemporaneamente tirare le cinture di Gruppo1, con lo scafetto estratto. sicurezza, verso di sè. 6• Utilizzo come Gruppo1: la giusta posizione delle IMPORTANTE: afferrare e tirare i cinturini di cinture è quella in cui le spalle del bambino devono sicurezza sotto gli spallacci, come in figura. essere appena sotto al punto di passaggio delle 2 0• Il seggiolino è dotato di un cuscino riduttore, indicato solo cinture. per il bambino quando è più piccolo. Quando il bambino 7•… -
Page 19: Pulizia Del Prodotto
utilizza il seggiolino come Gruppo 0+. 3 3• far passare il cinturino dall’asola della sacca e rimuovere l’imbottitura, come in figura. Numeri di serie Manutenzione dell’imbottitura 4 2• Viaggio 0+1 Convertibile riporta sotto la seduta informazioni relative a: nome del prodotto, data di Spazzolare le parti in tessuto per allontanare la polvere; produzione e numerazione seriale dello stesso. • Prima di mettere in lavatrice la sacca è necessario sfilare 4 3• Viaggio 0+1 Convertibile riporta dietro lo schienale dal riduttore, sul retro, il cuscinetto in gomma piuma. l’ etichetta di omologazione. • lavare in lavatrice ad una temperatura massima di 30°C 4 4• Data di produzione del cinturino. azione meccanica e centrifugazione ridotta; Questi elementi sono utili al consumatore nel caso in • non candeggiare al cloro; cui il prodotto dovesse presentare delle problematiche. • non stirare; • non lavare a secco; Pulizia del prodotto non smacchiare con solventi; • Il vostro prodotto necessita un minimo di • non asciugare a mezzo di asciugabiancheria a tamburo manutenzione. Le operazioni di pulizia e manutenzione rotativo. devono essere effettuate solo da adulti. • Si raccomanda di tenere pulite tutte le parti in °…
-
Page 20: Features Of The Product
EN_English che ha rilasciato l’omologazione (1: Germania, 2: Francia, 3: Italia, 4: Paesi Bassi, 11: Gran Bretagna e 24: Irlanda). • Numero di omologazione: se inizia con 04 vuol dire Thank you for choosing a Peg-Pérego che è il quarto emendamento (quello attualmente in product. vigore) del regolamento R44. • Normativa di riferimento: UN/ECE R44/04. Features of the product • Numero progressivo di produzione: personalizza ogni Child seat, Group 0+, “Universal” seggiolino, dal rilascio dell’omologazione ognuno è contraddistinto dal proprio numero. category with belts • Homologated in accordance with European standard PEG-PÉREGO S.p.A. UN/ECE R44/04 for children weighing up to 13 kg (from Peg-Pérego S.p.A. è certificata ISO 9001. birth to approximately 1 year). La certificazione offre ai clienti e ai • Compatible with most car seats, though not all. consumatori la garanzia di una • The child seat may be correctly installed if the vehicle’s trasparenza e fiducia nel modo di instruction and maintenance booklet indicates lavorare dell’impresa. Peg Pérego potrà compatibility with «Universal», Groups 0+ and 1 car apportare in qualunque momento restraint systems.
-
Page 21
models, which did not have the homologation label. • Make sure that the three-point seatbelt used to fix the car seat is taut and not twisted. If the belt has been IMPORTANT stretched in an accident it should be replaced. • «Viaggio 0+1 Convertible» must be rear-facing • Do not leave the your child unattended in the seat in when used as a Group 0+ car seat and must be the car: watch your child even when he is asleep. forward-facing if used as a Group 1 car seat. • Never remove the child from the seat when the car is • Do not install “Viaggio 0+1 Convertible” in seats moving. that are not in the direction of travel or are • Check that the child car seat is not blocked by a transversal with respect to the direction of travel. moving part of the seat or a door. • If used as a Group 0+ car seat on the front seat, the • Adjust the height and tension of the belts, checking front airbag must be deactivated. that they are as tight as possible without causing • If the child seat is installed on the front seat in discomfort to the child. Check that the safety belt is not Group 1 configuration, it is advisable to place it as twisted and the child cannot unfasten it. far as possible from the dashboard. • This car seat is designed only for short naps. • This item has a progressive serial number. • Do not leave the car seat in the car if exposed to direct • If you experience problems during the installation sunlight, because some parts could overheat and cause of Viaggio 0+1 Convertible, lift or remove the… -
Page 22
suddenly, it could injure the passengers. the vehicle, as shown in the figure. • Do not use the car seat if more than seven years have 6• To make it easier to pass the vehicle’s safety belts elapsed from the date on the frame. The natural aging through the back of the car seat, it is necessary to recline the seat to the lowest position by operating the of the materials may mean the car seat does not lever, as shown in the figure. comply with the laws on safety any more. 7• Pass the vehicle’s safety belt between the frame and • Do not use accessories that have not been approved of the shell of the car seat. by the manufacturer or competent authorities. 8• The lap belt must pass through the low slots marked in red. Fasten the belt, ensuring that it clicks into place. Instructions for use 9• The figure shows Viaggio 0+1 Convertibile fitted in a UNIVERSAL CATEGORY — Belted vehicle. Group 0+ 1 0• Check that the lap belt has gone through the low slots Fastening with seat belts marked in red and tighten it (Fig. A). 1• For the correct use of the Viaggio 0+1 Convertible car 1 1• To complete the securing procedure in a vehicle, use the Steady Fix device. Open the clip and pass the seat in Group 0+ mode, you must:… -
Page 23
25• WARNING: do not use the child seat as Group 1 IMPORTANT: the belts should be loose enough with the casing extracted. for your finger to fit between the belt and the 2 6• Group 1 mode: the safety belts are correctly child’s chest. positioned if the child’s shoulders are just below the 19• To slacken the safety belts, push the button in the strap holes of the safety belts. middle of the child seat and pull the belts towards you 27• IMPORTANT: the safety belts should not be too at the same time. far above or below the child’s shoulders. IMPORTANT: hold the safety belts under the 28• IMPORTANT: The Viaggio 0+1 Convertible car seat shoulder pads and pull, as shown in the picture. can be reclined in 5 different positions only when it is 20• The car seat has a booster cushion that must be used used as a Group 1 seat. only for very young children. Remove it when the child To recline the seat, press the lever under the seat (fig. is older. A) and pull it towards you to the desired position (fig. • To remove the booster cushion, unfasten the safety B). belts, remove them from the booster and remove the leg-rest through the slot in the booster. How to remove the lining IMPORTANT: the booster cushion must be To remove the lining of the Viaggio 0+1 Convertibile removed when the Viaggio 0+1 Convertible is used child seat: as a Group 1 car seat. • Remove the head hugger, where present (point 20). How to adjust the height of the head • Unfasten the safety straps (point 13). -
Page 24: Serial Numbers
• Do not tumble dry. adults. • Keep all moving parts clean and if necessary lubricate them with light oil. ° • Clean the plastic parts periodically with a damp cloth. Do not use solvents or similar substances. How to replace the lining on the • Brush the fabric parts to remove dust. • Do not clean the polystyrene shock absorbing device Viaggio 0+1 Convertibile car seat with solvents or other similar products. To replace the lining of the Viaggio 0+1 Convertibile • Protect the product from atmospheric agents: child seat: humidity, rain or snow. Extended exposure to sunshine 3 4• From below, slip the safety straps back in through the can cause colour changes in many materials. slit in the fabric (fig. A). • Store the product in a dry environment. • Reinsert the strap into the fabric leg divider (fig. B). 35• Fasten this into the hole in the frame. How to read the approval label 3 6• attach the strip to the attachment point of the leg • This paragraph explains how to interpret the approval divider strap label (orange label). 3 7• thread the lining starting from the seat and moving • This child car seat is approved to be fixed in a car in upwards, paying attention to the shape of the backrest.
-
Page 25
FR_Français at any time to the models described in this publication for technical or commercial reasons. Peg Pérego is at the disposal of its customers and consumers to ensure Merci d’avoir choisi un produit Peg- that all their demands and queries are fully satisfied. It Pérego. is a key part of our policy to ensure we are always aware of our customers’ views and requirements. We Caractéristiques du produit would therefore be very grateful if, after using a Peg Pérego product, you take the time to fill in our Siège-auto, Groupe 0+, catégorie CUSTOMER SATISFACTION QUESTIONNAIRE, making a “Universelle” avec ceintures note of any comments or suggestions you might have. You can find the questionnaire on the Peg Pérego • Homologué conformément à la norme européenne website: www.pegperego.com UN/ECE R44/04 pour enfants de 0 à 13 kg (depuis leur naissance jusqu’à 1 an environ). Peg-Pérego after-sales service • Adapté à la plupart des sièges de voitures, mais pas à tous. If any parts of the item get lost or damaged, only • Le siège-auto peut être correctement installé si dans use genuine Peg Pérego spare parts. For any repairs, le manuel d’instruction et d’entretien du véhicule, replacements, information on the products and sales of la compatibilité avec des systèmes de retenue genuine spare parts and accessories, contact the Peg “Universels” de Groupe 0+ est indiquée. Pérego Assistance Service and state the serial number • Ce siège-auto est classé “Universel” selon les of the product, if present. critères d’homologation les plus stricts par rapport aux modèles précédents qui ne disposent pas de tel. 0039/039/60.88.213 fax 0039/039/33.09.992 l’étiquette d’homologation. -
Page 26
• Ce siège-auto est classé “Universel” selon les critères • Dans la voiture, faire particulièrement attention aux d’homologation les plus stricts par rapport aux bagages ou autres objets qui pourraient blesser l’enfant modèles précédents qui ne disposent pas de l’étiquette dans le siège-auto en cas d’accident. d’homologation. • Ne pas utiliser de méthodes d’installation autres que celles indiquées car il pourrait se détacher du siège en IMPORTANT cas d’accident. • «Viaggio 0+1 Convertible» doit être installé dans le sens • Vérifier que le harnais à trois points du véhicule pour contraire de la marche quand il est utilisé comme siège fixer le siège-auto soit toujours tendu et pas vrillé, il est de Groupe 0+ et doit être installé dans le sens de la recommandé de le remplacer en cas de sollicitations marche quand il est utilisé comme siège de Groupe 1. excessives dues à un accident. • Ne pas installer “Viaggio 0+1 Convertible” sur les sièges • Ne jamais laisser sans surveillance l’enfant dans le installés dans le sens contraire de la marche ou en siège-auto : le surveiller même quand il dort. travers du sens de la marche habituel du véhicule. • Si la voiture est en mouvement, ne jamais enlever • S’il est installé sur le siège avant dans la configuration l’enfant du siège-auto. Groupe 0+, désactiver l’ airbag avant. • Veiller à ce que le siège-auto ne reste pas bloqué par • En cas d’installation sur le siège avant dans la une partie mobile du siège ou une portière. -
Page 27: Instructions D’utilisation
pièces et des informations sur le produit, contacter 4• _ introduire la ceinture dans le point d’ancrage placé le service d’assistance après-vente. Les différentes en haut, de couleur bleu ciel (flèche C). informations se trouvent à la dernière page de ce IMPORTANT : saisir la ceinture et la tirer manuel. vigoureusement pour faire adhérer davantage Viaggio • Le siège-auto doit toujours être fixé dans le véhicule, 0+1 Convertible au siège de la voiture (flèche D). même s’il n’est pas occupé par l’enfant. En cas de freinage à l’improviste, il pourrait blesser les occupants Instructions d’utilisation du véhicule. CATÉGORIE UNIVERSELLE Belted • Ne pas utiliser le siège-auto après sept ans à compter Groupe 1 de la date de production indiquée sur la coque, car en raison du vieillissement naturel des matériaux il Ancrage dans la voiture avec ceintures pourrait ne pas être conforme à la réglementation. de sécurité • Ne pas utiliser d’accessoires qui n’aient pas été agréés par le constructeur ou les autorités compétentes. 5• Placer le siège-auto Viaggio 0+1 Convertible sur le siège de la voiture dans le sens de la marche du Instructions d’utilisation véhicule, comme le montre la figure. 6• Pour faciliter le passage à l’arrière des ceintures de CATÉGORIE UNIVERSELLE Belted sécurité de la voiture, il faut incliner l’assise du siège- Groupe 0+…
-
Page 28
Comment installer l’enfant sur le Pour suivre la croissance de l’enfant, il faut régler la siège-auto Viaggio 0+1 Convertible hauteur de l’appuie-tête par rapport à la taille de l’enfant. Il peut être réglé sur 7 positions. 13• Avant d’installer l’enfant sur le siège-auto, décrocher les 21• Pour passer d’une position basse à une autre plus ceintures de sécurité en appuyant sur le bouton rouge haute : tirer la languette placée en haut au centre de situé sur la boucle de la sangle d’entrejambes l’appuie-tête vers le haut ; l’appuie-tête se soulève 14• Soulever les ceintures de sécurité en accrochant les simultanément. Pour passer d’une position haute à une boucles aux élastiques sur les côtés. autre plus basse : tirer la languette placée en haut au 15• Installer l’enfant et placer les ceintures de sécurité au centre de l’appuie-tête vers le haut et simultanément niveau des épaules et à la taille, comme le montre la pousser l’appuie-tête vers le bas, jusqu’à la position figure. souhaitée. 16• Fixer les ceintures de sécurité en superposant les Une fois l’opération effectuée, essayer de bouger deux sangles et en introduisant la boucle de la sangle l’appuie-tête pour vérifier qu’il soit correctement entrejambes, jusqu’au déclic. ancré. 17• L’enfant correctement placé avec les ceintures de 22• ATTENTION : ne pas utiliser le siège-auto comme sécurité bien attachées Groupe 0+, sans avoir retiré le support ; comme le 18• Pour terminer, faire adhérer les ceintures de sécurité à montre le point 1 A-B (Fig.A). l’enfant en tirant vers soi la sangle de réglage centrale ATTENTION : ne pas utiliser le siège-auto comme comme le montre la figure, en prenant soin de ne pas Groupe 0+, sans avoir incliné le dossier ; comme le trop serrer les ceintures ; montre le point 1C (Fig.B). IMPORTANT : laisser un minimum d’espace (un 23• Utilisation comme Groupe 0+ : la bonne position des doigt d’épaisseur entre la ceinture et le thorax de ceintures est celle pour laquelle les épaules de l’enfant… -
Page 29: Numéros De Série
Comment enlever la housse du siège- 36• accrocher la languette dans le site de l’entrejambes ; 37• enfiler la housse en partant d’abord de l’assise et passer auto ensuite à la partie haute, en faisant attention aux revers Pour enlever la housse du siège-auto Viaggio 0+1 du dossier ; Convertible : 38• Enfiler l’appuie-tête en faisant attention à la languette • enlever, le cas échéant, le réducteur (point 20) ; rouge qui doit passer par la boutonnière du tissu ; • décrocher les sangles de sécurité (point 13) ; 39• introduire les sangles de sécurité dans l’œillet du • ouvrir le couvercle à l’arrière, dossier du siège-auto. 29• décrocher les ceintures de l’étrier arrière ; IMPORTANT : les sangles ne doivent pas être 30• décrocher par le devant les sangles de sécurité (fig. vrillées. A) et enlever les épaulières, en les ouvrant facilement 40• ATTENTION : la sangle de réglage centrale doit grâce au velcro (fig. B). passer derrière le bouclier en plastique comme cela 31• enlever le lacet de l’œillet (fig. C) et ensuite, par le haut, est montré. la housse de l’appuie-tête (fig. D) ; 41• ouvrir le couvercle sur l’arrière et accrocher les 32• décrocher par le dessous de la coque, le crochet de ceintures à l’étrier arrière, l’entrejambes (fig. E) et extraire la sangle du tissu de • accrocher par le devant les ceintures de sécurité (point l’entrejambes (fig. F) ; 16) ; 33• faire passer la sangle par l’œillet du sac et enlever le • appliquer le coussin réducteur si l’enfant est encore rembourrage, comme sur la figure.
-
Page 30
PEG-PÉREGO S.p.A. • Épousseter les éléments en tissu pour chasser la poussière. Peg-Pérego S.p.A. est certifiée ISO 9001. • Ne pas nettoyer le dispositif d’absorption des chocs La certification offre à la clientèle une en polystyrène avec des solvants ou autres produits garantie de transparence et représente similaires. un gage de confiance dans la façon de • Protéger le produit des agents atmosphériques (eau, travailler de l’entreprise. Peg-Pérego se pluie ou neige) ; une exposition continue et prolongée réserve le droit de procéder à tout au soleil peut provoquer la décoloration de nombreux moment à des modifications sur les modèles décrits matériaux. dans cet ouvrage, pour des raisons de nature • Conserver le produit dans un endroit sec. technique ou commerciale. Peg-Pérego est à la disposition de sa clientèle pour satisfaire au mieux Comment lire l’étiquette chacune de ses exigences. En cela, il est très important et précieux pour nous de connaître l’opinion de notre d’homologation clientèle. Nous vous saurions donc gré, après avoir • Cette section explique comment lire l’étiquette utilisé un de nos produits, de remplir le d’homologation (étiquette orange). QUESTIONNAIRE DE SATISFACTION CLIENT, en nous faisant part de toute observation ou suggestion • Ce siège-auto est homologué pour être fixé dans une éventuelle. Vous trouverez ce questionnaire sur notre voiture d’une seule façon : système d’ancrage avec site Internet, à l’adresse www.pegperego.com harnais à trois points statique ou avec enrouleur (l’inscription UNIVERSAL indique que le siège-auto est… -
Page 31
DE_Deutsch • Dieser Kindersitz ist im Vergleich zu den Vorgängermodellen, die nicht über das Zulassungsetikette verfügen, gemäß strengerer Vielen Dank, dass Sie sich für ein Zulassungskriterien als „Universal“ klassifiziert. Produkt Peg-Pérego entschieden haben. WICHTIG • «Viaggio 0+1 Klappbar» muss entgegen der Produktmerkmale Fahrtrichtung installiert werden, wenn er als Kindersitz Autositz, Gruppe 0+, Kategorie der Gruppe 0+ verwendet wird und in Fahrtrichtung, “Universal” mit Sicherheitsgurten wenn er als Kindersitz der Gruppe 1 verwendet wird. • Zugelassen gemäß der europäischen Bestimmung UN/ • “Viaggio 0+1 Klappbar” nicht auf Sitzen installieren, die gegen die Fahrtrichtung gerichtet sind oder quer zur ECE R44/04 für Kinder mit einem Gewicht von 0 bis 13 allgemeinen Fahrtrichtung liegen. kg (ca. von 0 bis 1 Jahren). • Für den Großteil der Fahrzeugsitze geeignet, jedoch • Wird er in der Konfiguration Gruppe 0+ auf dem Vordersitz installiert, den vorderen Airbag deaktivieren. nicht für alle. • Bei der Installation auf dem Vordersitz wird in der • Der Kindersitz kann korrekt installiert werden, wenn in Konfiguration der Baugruppe 1 empfohlen, den der Bedienungs- und Wartungsanleitung des Fahrzeugs Kindersitz so weit wie möglich vom Armaturenbrett zu… -
Page 32
• Im Auto besonders auf Gepäck oder andere Unfall heftigen Beanspruchungen ausgesetzt gewesen Gegenstände achten, die das Kind im Autokindersitz im sein, da er extrem gefährliche strukturelle Schäden davongetragen haben könnte. Fall eines Unfalls verletzen könnten. • Keine anderen als die beschriebenen • Keine Änderungen an dem Produkt anbringen. Installationsmethoden verwenden, da bei einem Unfall • Wegen eventueller Reparaturen, zum Ersetzen von Teilen und wegen Informationen zum Produkt wenden die Gefahr des Lösens vom Sitz besteht. • Vergewissern Sie sich, dass der 3-Punkte-Gurt Sie sich bitte an den Kundendienst. Die verschiedenen des Fahrzeugs zum Befestigen des Kindersitzes Informationen befinden sich auf der letzten Seite dieser stets gespannt und nicht verdreht ist. Im Fall von Anleitung. übermäßigen Beanspruchungen durch einen Unfall • Der Kindersitz muss stets im Fahrzeug befestigt sein, wird empfohlen, diesen zu ersetzen. auch wenn das Kind nicht darin sitzt. Bei plötzlichen • Ihr Kind nie unbeaufsichtigt im Autokindersitz lassen: Bremsungen könnte dieser die Fahrzeuginsassen überwachen Sie es auch, wenn es schläft. verletzen. • Den Kindersitz nach sieben Jahren ab dem auf der • Das Kind nie bei fahrendem Fahrzeug aus dem Autokindersitz heben. Schale angegebenen Herstellungsdatum nicht mehr • Darauf achten, dass der Autokindersitz nicht verwenden. Aufgrund der natürlichen Alterung der Materialien könnte er nicht mehr den geltenden durch einen beweglichen Teil des Sitzes oder eine… -
Page 33
die gewünschte Position gebracht werden (Punkt 6). durchführen: — den Gurt zuerst in der hellblauen Vertiefung Wie das Kind auf den Autokindersitz durchführen (Pfeil A); Viaggio 0+1 Klappbar zu setzen ist — Den Sicherheitsgurt des Autos mit einem Klicken am Sitz befestigen (Pfeil B); 13• Bevor das Kind in den Autokindersitz gesetzt wird, die 4• _ den Gurt in den hellblauen Haken oben einführen (Pfeil C). Sicherheitsgurte durch Drücken des roten Knopfes auf WICHTIG: den Gurt fassen und kräftig ziehen, dem Schloss des Schrittgurts lösen. damit der Viaggio 0+1 Klappbar besser am Autositz 14• Die Sicherheitsgurte nach oben ziehen und die anliegt (Pfeil D). Schnallen in die elastischen Schlaufen einhaken. 15• Das Kind in den Autokindersitz setzen und die Bedienungsanleitung Sicherheitsgurte über den Schultern und in der Taille KATEGORIE UNIVERSAL Belted anlegen, wie in der Abbildung dargestellt. Gruppe 1 16• Die Sicherheitsgurte schließen, indem Sie beide Befestigung im Auto mit Sicherheitsgurten Gurtzungen übereinander legen und bis zum hörbaren Klicken in das Gurtschloss des Schrittgurtes einrasten 5• Den Kindersitz Viaggio 0+1 Klappbar auf dem Sitz lassen. des Fahrzeugs in Fahrtrichtung anbringen wie in der 17• Korrekt sitzendes Kind mit richtig befestigten Abbildung. -
Page 34
Einstellen der Höhe der Kopfstütze Position zu sich gezogen werden (Abb. B). Einstellen der Höhe der Kopfstütze Um sich dem Abziehen des Bezugs Wachstum des Kindes anzupassen, muss die Höhe der Kopfstütze im Verhältnis zur Größe des Kindes Um die Verkleidung des Kindersitzes Viaggio 0+1 angepasst werden. Diese kann auf 7 verschiedene Klappbar zu entfernen: Stufen eingestellt werden. • den Sitzverkleinerer abnehmen, wenn vorhanden 21• U m von einer niedrigen Position auf eine höhere zu (Punkt 20); verstellen: Die Lasche oben in der Mitte der Kopfstütze • die Sicherheitsgurte lösen (Punkt 13); nach oben ziehen; die Kopfstütze wird gleichzeitig • die Abdeckung auf der Rückseite öffnen; angehoben. Um von einer hohen Position auf eine 29• die Gurte vom hinteren Bügel lösen; niedrigere zu verstellen: Die Lasche oben in der Mitte 30• von vorn die Sicherheitsgurte herausziehen (Abb. A) der Kopfstütze nach oben ziehen und gleichzeitig die und von den Schulterpolstern entfernen, die sich dank Kopfstütze bis in die gewünschte Position nach unten des Klettverschlusses leicht öffnen lassen (Abb. B). drücken. 31• den Riemen aus der Öse ziehen (Abb. C) und dann von Nachdem der Vorgang ausgeführt wurde, oben die Kopfstützenverkleidung abziehen (Abb. D); versuchen, die Kopfstütze zu bewegen, um zu 32• von der Unterseite der Sitzschale den Haken des kontrollieren, ob sie korrekt befestigt ist. Schrittgurts (Abb. E) lösen und den Gurt aus dem Stoff 22• A CHTUNG: den Kindersitz nicht als Baugruppe 0+ des Schrittgurts ziehen (Abb. F);… -
Page 35
• den Schrittgurt in das Gewebe des Sacks einführen Produkte verwenden. (Abb. B); • Stoffteile mit einer Bürste von Staub befreien. 35• diesen schließlich in der Öffnung der Sitzschale • Den Stoßdämpfer aus Styropor nie mit Lösungsmitteln befestigen. oder anderen ähnlichen Produkten reinigen. 36• die Lasche des Sicherheitsverschlusses des Schrittgurts • Das Produkt vor Witterung schützen, vor Wasser, Regen befestigen oder Schnee; wird das Produkt wiederholt und über 37• die Polsterung aufziehen, indem bei der Sitzfläche längere Zeit der Sonne ausgesetzt, können die Farben begonnen und dann zum oberen Teil übergegangen vieler Materialien verblassen. wird, wobei auf die Innenseiten der Rückenlehne • Das Produkt trocken aufbewahren. geachtet wird. 38• die Kopfstütze aufsetzen und dabei darauf achten, dass Informationen auf dem Prüfzertifikat die rote Lasche durch den Schlitz im Stoff geführt wird. 39• Die Sicherheitsgurte in die Öse der Rückenlehne des • In diesem Abschnitt erläutern wir, welche Kindersitzes einführen. Informationen Sie dem orangefarbenen Prüfetikett WICHTIG: Die Gurte dürfen nicht verdreht sein. entnehmen können. 40• A CHTUNG: Der mittlere Einstellgurt muss, wie • Dieser Autokindersitz ist für die Befestigung im Auto dargestellt, hinter dem Kunststoffteil verlaufen. auf nur eine Art zugelassen: 41• die Abdeckung auf der Rückseite öffnen und die Gurte Befestigungssystem mit statischen 3-Punkt-… -
Page 36
ES_Español PEG-PÉREGO S.p.A. Peg-Pérego S.p.A. ist gemäß ISO 9001 Le agradecemos haber elegido un zertifiziert. Die Zertifizierung garantiert producto Peg-Pérego. den Kunden und Verbrauchern Transparenz und ermöglicht das Vertrauen in die Arbeitsweise des Características del producto Unternehmens. Peg Pérego kann zu jedem beliebigen Zeitpunkt Änderungen an den in Silla de coche, Grupo 0+, categoría dieser Veröffentlichung beschriebenen Modellen “Universal” con cinturones de seguridad. sowohl aus technischen, als auch aus kommerziellen • Homologado según la normativa Europea UN/ECE Gründen vornehmen. Peg Pérego steht den R44/04 para niños de 0 a 13 Kg. de peso (desde el Verbrauchern zur Verfügung, um deren Anforderungen nacimiento a 1 año aproximadamente). auf das Bestmöglichste gerecht zu werden. Demnach • Adecuada para la mayoría de los asientos de automóvil, ist es ausgesprochen wichtig und wertvoll für uns, über die Meinung unserer Kunden Bescheid zu wissen. Wir pero no para todos. bitten Sie daher, das FORMULAR ÜBER DIE • La silla de coche se puede instalar correctamente si KONSUMENTENZUFRIEDENHEIT auszufüllen, nachdem en el manual de uso y mantenimiento del automóvil Sie unsere Produkte ausprobiert haben. Das Formular… -
Page 37
equipaje y demás objetos que puedan causar lesiones se indica la compatibilidad con sistemas de retén al niño en la silla de coche en caso de accidente. “Universales” del Grupo 1. • No aplicar métodos de instalación diferentes de los • Esta silla de coche está clasificada como “Universal” indicados: la silla podría desprenderse del asiento en según criterios de homologación más estrictos que caso de accidente. los modelos anteriores, que no tienen etiqueta de • Asegurarse de que el cinturón de tres puntos del homologación. automóvil para fijar la silla de coche siempre esté tensado y no retorcido. Se recomienda reemplazarla en IMPORTANTE caso de esfuerzos violentos debidos a un accidente. • «Viaggio 0+1 Convertibile» se debe instalar en el • No dejar al niño en la silla de coche sin vigilancia. sentido opuesto al de marcha cuando se usa como silla Vigilarlo incluso mientras duerme. de Grupo 0+; y en sentido de marcha cuando se usa • Si el automóvil está en movimiento, no retirar al niño como silla de Grupo 1. de la silla de coche. • No instalar “Viaggio 0+1 Convertibile” sobre asientos • Prestar atención para que la silla de coche no quede orientados en la dirección opuesta o transversal al bloqueada por una parte móvil del asiento o una sentido de marcha del automóvil. puerta. • Si se instala en el asiento delantero en la configuración • Regular la altura y la tensión de los cinturones Grupo 0+, desactivar el airbag delantero. -
Page 38: Instrucciones De Uso
• Para reparaciones, sustituciones de componentes asiento, hasta oír el encastre (flecha B); 4 •_ introducir el cinturón de seguridad en el gancho e información sobre el producto, contactar con el servicio de asistencia posventa. Los datos necesarios ubicado arriba, de color azul (flecha C). para ponerse en contacto figuran en la última página IMPORTANTE: tomar el cinturón de seguridad y tirar con fuerza del mismo, para hacer adherir todo de este manual. lo posible Viaggio 0+1 Convertibile al asiento del • La silla siempre debe estar fijada al automóvil, incluso automóvil (flecha D). cuando no está ocupada por el niño. En caso de frenada repentina, podría provocar lesiones a los ocupantes del automóvil. Instrucciones de uso • No utilizar la silla de coche si han transcurrido siete CATEGORÍA UNIVERSAL Belted años desde la fecha de fabricación indicada en el Grupo 1 bastidor; debido al envejecimiento natural de los materiales podría no ser conforme a las normas. Enganche en el automóvil con cinturones • No utilizar accesorios no aprobados por el fabricante o de seguridad por las autoridades competentes. 5• Colocar la silla Viaggio 0+1 Convertibile sobre el asiento del automóvil orientada en el sentido de Instrucciones de uso marcha del mismo, como se muestra en la figura.
-
Page 39
Cómo sentar el niño en la silla de coche que el niño crece, en relación a su altura. Se puede regular en 7 posiciones. Viaggio 0+1 Convertibile 21• Para pasar de una posición baja a una más alta: 13• Antes de sentar al niño en la silla de coche tirar hacia arriba de la lengüeta situada en la parte desenganchar los cinturones de seguridad presionando superior, en el centro del reposacabezas; éste sube el pulsador rojo de la hebilla de la correa separadora de simultáneamente. Para pasar de una posición alta a piernas. una más baja: tirar hacia arriba de la lengüeta situada 14• Levantar las correas de seguridad enganchando las en la parte superior, en el centro del reposacabezas; hebillas a los elásticos laterales. y simultáneamente empujar hacia abajo el 15• Sentar al niño y colocarle las correas de seguridad en reposacabezas hasta la posición deseada. los hombros y la cintura, como en la figura. Concluida la operación, intentar mover el 16• Enganchar las correas de seguridad sobreponiendo los reposacabezas para comprobar que esté dos cinturones e introduciendo la hebilla de la correa enganchado correctamente. Separadora de piernas hasta oír el encastre. 22• ATENCIÓN: no utilizar el asiento como Grupo 0+ sin 17• El niño sentado correctamente con las correas de extraer la base como se indica en el punto 1 A-B (Fig. A). seguridad bien enganchadas. ATENCIÓN: no utilizar el asiento como Grupo 0+ sin 18• Para completar la operación, hacer adherir los reclinar el respaldo como se indica en el punto 1C (Fig. B). cinturones de seguridad al niño, llevando hacia sí 23• Uso como Grupo 0+: la posición correcta de los mismo el cinturón de seguridad central como se cinturones es aquella con los hombros del niño apenas muestra en la figura, prestando atención a no apretar arriba del punto de paso de los cinturones. demasiado los cinturones; 24•… -
Page 40: Números De Serie
• desenganchar las correas de seguridad (punto 13); continuar por la parte superior, prestando atención a • abrir la tapa trasera; las solapas del respaldo. 29• desenganchar los cinturones de seguridad de la brida 38• Calzar el reposacabezas prestando atención a la trasera; lengüeta roja, que debe pasar por la ranura del tejido. 30• quitar por delante las correas de seguridad (fig. A) 39• Pasar las correas de seguridad por la ranura del y extraer los tirantes, los cuales se abren fácilmente respaldo de la silla. gracias al velcro (fig. B). IMPORTANTE: las correas no se deben retorcer. 31• extraer la correa de la ranura (fig. C) y luego desde 40• ATENCIÓN: El cinturón de regulación central debe arriba el revestimiento del reposacabezas (fig. D); pasar por detrás del escudo de plástico, tal y como se muestra. 32• desenganchar por debajo del bastidor el gancho del separador de las piernas (fig. E) y extraer la correa del 41• Abrir la tapa de la parte trasera y enganchar los tejido del separador de las piernas (fig. F); cinturones de seguridad a la brida trasera; 33• pasar la correa por la ranura del saco y quitar el • enganchar por adelante las correas de seguridad acolchado, como en la figura. (punto 16); • colocar el reductor si el niño aún es pequeño y s utiliza Mantenimiento del acolchado la silla como Grupo 0+. Cepillar las partes de tejido para quitar el polvo; Números de serie • Antes de colocar el saco en la lavadora, quitar del reductor, en la parte posterior, el cojín de goma 4 2• Viaggio 0+/1 Convertibile contiene debajo del asiento espuma.
-
Page 41
• Proteger el producto contra agentes atmosféricos empresa. Peg-Pérego podrá aportar en cualquier momento modificaciones a los modelos que se (agua, lluvia o nieve). Una exposición continua y describen en el presente manual por razones técnicas prolongada al sol puede causar cambios de color de o comerciales. Peg-Pérego está a disposición de sus muchos materiales. consumidores para responder satisfactoriamente a sus • Conservar el producto en un lugar seco. exigencias. De ahí que sea fundamental y extremamente importante conocer la opinión de Significado de la etiqueta de nuestros Clientes. Les agradeceríamos por tanto que homologación tras utilizar uno de nuestros productos rellenase, indicando eventuales observaciones o sugerencias, el • Este apartado explica el significado de la etiqueta de CUESTIONARIO DE SATISFACCIÓN DEL CONSUMIDOR homologación (etiqueta naranja). que se halla en nuestra página Web www.pegperego. • Esta silla de coche está homologada para ser fijada de un solo modo en el automóvil: sistema de enganche del cinturón de tres puntos Servicio de asistencia Peg-Pérego estático o enrollable (la inscripción UNIVERSAL Si se pierden o dañan algunas partes del modelo, indica la compatibilidad de la silla de coche en los utilizar únicamente repuestos originales Peg Pérego. automóviles dotados de este tipo de cinturones). Para cualquier reparación, sustitución, información • En la parte superior de la etiqueta figura la marca de la acerca de los productos, venta de repuestos originales empresa fabricante y el nombre del producto. y accesorios, contactar con el Servicio de Asistencia Peg • La letra E dentro de un círculo indica el certificado de Pérego indicando, en caso fuere presente, el número de homologación europea y el número identifica el país…
инструкцияPeg Perego Viaggio 0+1 Switchable

IT Istruzioni d’uso
EN Instructions for use
FR Notice d’emploi
DE Gebrauchsanleitung
ES Instrucciones de uso
BR-PT Instruções para uso
NL Gebruiksaanwijzing
DK Brugsanvisning
FI Käyttöohjeet
CZ Návod na použití
SK Návod na použitie
HU Használati útmutató
SL Navodila za uporabo
RU Инструкции по пользованию
TR Kullanım kılavuzu
HR/SRB/MNE/BiH Upute za uporabu
EL Οδηγιεσ χρησεωσ
AR
CN 使用说明
Посмотреть инструкция для Peg Perego Viaggio 0+1 Switchable бесплатно. Руководство относится к категории автокресла, 4 человек(а) дали ему среднюю оценку 9. Руководство доступно на следующих языках: русский, английский. У вас есть вопрос о Peg Perego Viaggio 0+1 Switchable или вам нужна помощь? Задайте свой вопрос здесь
Главная
| Peg Perego | |
| Viaggio 0+1 Switchable | A5VSW8ROUG | |
| автокресло | |
| 8005475359464 | |
| русский, английский | |
| Руководство пользователя (PDF) |
Свойства
| Группа | 0+/1 |
| Тип крепления пояса | 3-точек |
| Цвет товара | Black, Red |
| Количество положений наклона | 5 |
| Моющийся чехол | Да |
| Съемная крышка | Да |
| Тип стирки | Машинная стирка |
| Максимальная температура стирки | 30 °C |
Вес и размеры
| Вес | 10000 g |
| Ширина | 450 mm |
| Глубина | 580 mm |
| Высота | 615 mm |
показать больше
Не можете найти ответ на свой вопрос в руководстве? Вы можете найти ответ на свой вопрос ниже, в разделе часто задаваемых вопросов о Peg Perego Viaggio 0+1 Switchable.
Какой вес Peg Perego Viaggio 0+1 Switchable?
Безопасно ли ребенку спать в автокресло?
Нужно ли двухлетнему ребенку автокресло в самолете?
Какое место для автокресла самое безопасное?
Какая высота Peg Perego Viaggio 0+1 Switchable?
Какая ширина Peg Perego Viaggio 0+1 Switchable?
Какая толщина Peg Perego Viaggio 0+1 Switchable?
Инструкция Peg Perego Viaggio 0+1 Switchable доступно в русский?
Не нашли свой вопрос? Задайте свой вопрос здесь
Требуется руководство для вашей Peg-Pérego Viaggio 0+1 Switchable Автомобильное кресло? Ниже вы можете просмотреть и загрузить бесплатно руководство в формате PDF. Кроме того, приведены часто задаваемые вопросы, рейтинг изделия и отзывы пользователей, что позволит оптимально использовать ваше изделие. Если это не то руководство, которое вы искали, – свяжитесь с нами.
Ваше устройство неисправно, и в руководстве отсутствует решение? Перейдите в Repair Café для получения бесплатных ремонтных услуг.
Руководство

Рейтинг
Сообщите нам, что вы думаете о Peg-Pérego Viaggio 0+1 Switchable Автомобильное кресло, оставив оценку продукта. Хотите поделиться вашими впечатлениями от данного изделия или задать вопрос? Вы можете оставить комментарий в нижней части страницы.
Довольны ли вы данным изделием Peg-Pérego?
Да Нет
1 проголосовать
Часто задаваемые вопросы
Наша служба поддержки выполняет поиск полезной информации по изделиям и отвечает на часто задаваемые вопросы. Если вы заметили неточность в наших часто задаваемых вопросах, сообщите нам об этом с помощью нашей контактной формы.
Можно ли размещать автокресла Isofix в автомобилях без Isofix? Проверенный
Большинство доступных автокресел Isofix имеют универсальное разрешение на использование ремней безопасности в дополнение к разрешению для конкретного автомобиля. Это позволяет закрепить сиденье ремнями безопасности. Подробности читайте в руководстве по эксплуатации автокресла. Есть автокресла Isofix, которые нельзя закрепить ремнями безопасности.
Это было полезно (643)
Где безопаснее всего размещать детское автокресло? Проверенный
Частично это зависит от модели автомобиля, но теоретически центр заднего сидения является самым безопасным местом. Сидя в центре, ребенок находится дальше всего от боков машины, что обеспечивает его безопасность в случае ДТП. Однако это правило действует только при наличии 3-точечного ремня безопасности. Если имеется только поясной ремень, то безопаснее будет разместить кресло на заднем сидении возле окна.
Это было полезно (602)
Могу ли я использовать автомобильный шептал в самолете? Проверенный
Нет международных правил использования автокресел в самолетах. В зависимости от модели, возможно, автокресло подходит для этого. Разрешено это или нет, зависит от авиакомпании. Всегда обращайтесь в авиакомпанию заранее, чтобы убедиться в этом.
Это было полезно (179)
Можно ли установить все автокресла Isofix во всех автомобилях с Isofix? Проверенный
Нет, есть универсальные и неуниверсальные автокресла Isofix. Неуниверсальное автокресло Isofix можно использовать только в определенных автомобилях. К сиденью прилагается список моделей автомобилей, которые подходят для этого сиденья. Универсальное автокресло Isofix можно использовать только в автомобилях, оборудованных Isofix и точкой крепления Top Tether.
Это было полезно (129)
Как долго мой ребенок может находиться в автокресле? Проверенный
Не позволяйте ребенку сидеть в автокресле дольше 1,5–2 часов в день. Многие современные коляски предлагают возможность прикрепить автокресло сверху, что позволяет быстро перевозить ребенка. Также в этом случае не превышайте 1,5–2 часа в день.
Это было полезно (123)
Что такое Изофикс? Проверенный
Isofix — это международно стандартизованная система для установки автокресел в автомобилях. В машине есть монтажные кронштейны Isofix. Эти кронштейны расположены между спинкой и сиденьем заднего сиденья и соединяются с кузовом автомобиля. Автокресло Isofix оснащено крючками, которые легко прикрепляются к монтажным кронштейнам.
Это было полезно (122)

Table of Contents for Peg-Perego Viaggio 0+1 Convertibile:
-
29 Comment enlever la housse du siège- auto Pour enlever la housse du siège-auto Viaggio 0+1 Convertible : • enlever, le cas échéant, le réducteur (point 20) ; • décrocher les sangles de sécurité (point 13) ; • ouvrir le couvercle à l’arrière, 29• décrocher les ceintures de l’étrier arrière ; 30• décrocher par le devant les sangles de sécurité (fig. A) et enlever les épauliè
-
37 se indica la compatibilidad con sistemas de retén “Universales” del Grupo 1. • Esta silla de coche está clasificada como “Universal” según criterios de homologación más estrictos que los modelos anteriores, que no tienen etiqueta de homologación. IMPORTANTE • «Viaggio 0+1 Convertibile» se debe instalar en el sentido opuesto al de marcha cuando se usa como silla de Grupo 0+; y en sentido de marcha cuando se usa como silla de Grupo 1. • No instalar “Viaggio 0+1 Convertibile” sob
-
B C A D 9 11 12 10
-
16 secondo criteri di omologazione più severi rispetto ai modelli precedenti che non dispongono dell’ etichetta di omologazione. IMPORTANTE • «Viaggio 0+1 Convertibile» deve essere installato in senso opposto al senso di marcia quando usato come seggiolino di Gruppo 0+; deve essere installato in senso di marcia quando usato come seggiolino di Gruppo 1. • Non installare “Viaggio 0+1 Conve
-
19 33• far passare il cinturino dall’asola della sacca e rimuovere l’imbottitura, come in figura. Manutenzione dell’imbottitura Spazzolare le parti in tessuto per allontanare la polvere; • Prima di mettere in lavatrice la sacca è necessario sfilare dal riduttore, sul retro, il cuscinetto in gomma piuma. • lavare in lavatrice ad una temperatura massima di 30°C azione meccanica e centrifugazione rid
-
43 44 41 42 0409
-
1 1 2 3 4 5 6 7 2 3 4 5 6 7 NONO 21 23 OK NONO 22 24 gr. 0+ gr. 0+ gr. 0+
-
18 spartigambe, fino al click. 17• Il bambino posizionato correttamente con i cinturini di sicurezza ben allacciate. 18• Per completare l’operazione, far aderire le cinture di sicurezza al bambino tirando verso di sé la cintura di regolazione centrale come in figura, facendo attenzione a non stringere troppo le cinture ; IMPORTANTE: lasciare un minimo di gioco (lo spessore di un dito tra l
-
18 20 19 17 gr. 0+
-
21 models, which did not have the homologation label. IMPORTANT • «Viaggio 0+1 Convertible» must be rear-facing when used as a Group 0+ car seat and must be forward-facing if used as a Group 1 car seat. • Do not install “Viaggio 0+1 Convertible” in seats that are not in the direction of travel or are transversal with respect to the direction of travel. • If used as a Group 0+ car seat on the fro
-
38 • Para reparaciones, sustituciones de componentes e información sobre el producto, contactar con el servicio de asistencia posventa. Los datos necesarios para ponerse en contacto figuran en la última página de este manual. • La silla siempre debe estar fijada al automóvil, incluso cuando no está ocupada por el niño. En caso de frenada repentina, podría provocar lesiones a los ocupantes del automóvil. • No utilizar la silla de coche si han transcurrido siete años desde
-
22 suddenly, it could injure the passengers. • Do not use the car seat if more than seven years have elapsed from the date on the frame. The natural aging of the materials may mean the car seat does not comply with the laws on safety any more. • Do not use accessories that have not been approved of by the manufacturer or competent authorities. Instructions for use UNIVERSAL CATEGORY — Belted Group 0+ Fastening with seat belts 1• For the correct use of the Viaggio 0+1 Convertible car seat in Group 0+ mode, you mu
Questions, Opinions and Exploitation Impressions:
You can ask a question, express your opinion or share our experience of Peg-Perego Viaggio 0+1 Convertibile device using right now.