- Manuals
- Brands
- Pfaff Manuals
- Sewing Machine
- 1163
- Instruction manual
-
Contents
-
Table of Contents
-
Bookmarks
Quick Links
1163
Instruction Manual
This instruction manual applies to machines from the
following serial numbers onwards:
# 6001000
296-12-18 608/002
Betriebsanleitung engl. 08.04
Related Manuals for Pfaff 1163
Summary of Contents for Pfaff 1163
-
Page 1: Instruction Manual
1163 Instruction Manual This instruction manual applies to machines from the following serial numbers onwards: # 6001000 296-12-18 608/002 Betriebsanleitung engl. 08.04…
-
Page 2
As an alternative to the internet download the adjustment manual can also be ordered in book form under part no. 296-12-18 609/002. The reprinting, copying or translation of PFAFF Instruction Manuals, whether in whole or in part, is only permitted with our previous authorization and with written reference to the source. -
Page 3: Table Of Contents
Danger …………………….. 1 — 4 Proper use ……………………2 — 1 Specifications ………………….3 — 1 PFAFF 1163 ……………………3 — 1 Models and subclasses ………………..3 — 1 Disposal of machine ………………..4 — 1 Transport, packaging and storage …………….5 — 1 Transport to the customer’s premises …………….
-
Page 4: Contents
Contents Contents …………….. Chapter — Page Mounting and commissioning the machine …………. 8 — 1 Mounting ……………………8 — 1 .01.01 Adjusting the table-top height ………………8 — 1 .01.02 Fitting the oil pan ………………….8 — 2 .01.03 Mounting the sewing head ………………. 8 — 3 .01.04 Mounting the balance wheel ………………
-
Page 5: Safety
Safety Safety Directives This machine is constructed in accordance with the European regulations contained in the conformity and manufacturer’s declarations. In addition to this Instruction Manual, also observe all generally accepted, statutory and other regulations and legal requirements and all valid environmental protection regulations! The regionally valid regulations of the social insurance society for occupational accidents or other supervisory organizations are to be strictly adhered to! General notes on safety…
-
Page 6: Safety Symbols
It is the obligation of the user to ensure that none of the safety mechanisms are removed or deactivated. It is the obligation of the user to ensure that only authorized persons operate and work on the machine. Further information can be obtained from your PFAFF agent. 1 — 2…
-
Page 7: Operating And Specialist Personnel
Safety Operating and specialist personnel Operating personnel .05.01 Operating personnel are persons responsible for the equipping, operating and cleaning of the machine as well as for taking care of problems arising in the sewing area. The operating personnel is required to observe the following points and must: always observe the Notes on Safety in the Instruction Manual! never use any working methods which could adversely affect the safety of the machine! not wear loose-fitting clothing or jewelery such as chains or rings!
-
Page 8: Danger
Safety Danger A working area of 1 meter is to be kept free both in front of and behind the machine while it is in operation so that it is always easily accessible. Never reach into the sewing area while sewing! Danger of injury by the needle! Never leave objects on the table while adjusting the machine settings! Objects can become trapped or be slung away! Danger of injury! Fig.
-
Page 9: Proper Use
Proper use Proper use The PFAFF 1163 is a single-needle, high-speed sewing machine with bottom feed. The machine is used to manufacture lockstitch seams in the textile industry. Any and all uses of this machine which have not been approved of by the…
-
Page 10: Specifications
Specifications Specifications PFAFF 1163 Stitch type: ………………..301 (lockstitch) Needle system: ………………….DBx1 Needle size (Nm) in 1/100 mm: …………….80 — 100 Handwheel eff. dia.: ………………..65 mm Clearance under roller presser: …………….6 — 13 mm Clearance width: ………………..262 mm Clearance height: ………………..
-
Page 11: Disposal Of Machine
Disposal of machine Disposal of machine The proper disposal of the machine is the responsibility of the customer. The materials used in the machines are steel, aluminium, brass and various plastics. The electrical equipment consists of plastics and copper. The machine is to be disposed of in accordance with the locally valid environmental protection regulations.
-
Page 12: Transport, Packaging And Storage
Transport, packaging and storage Transport, packaging and storage Transport to the customer’s premises The machines are delivered completely packed. Transport within the customer’s premises The manufacturer bears no liability for transport within the customer’s premises or to the in- dividual locations of use. Make sure that the machines are always transported upright. Disposal of the packaging The packaging of these machines consists of paper, cardboard and VCE fiber.
-
Page 13: Explanation Of The Symbols
Explanation of the symbols Explanation of the symbols In the following section of this Instruction Manual, certain tasks or important pieces of information are accentuated by symbols. The symbols used have the following meanings: Note, information Cleaning, care Lubrication, greasing Servicing, repairing, adjustment, maintenance (only to be carried out by specialist personnel) 6 — 1…
-
Page 14: Controls
Controls Controls On/Off switch Switch the machine on or off by turning main switch 1. Fig. 7 — 01 Pedal 0 = Neutral position 1 = Sewing 2 = Raise presser foot (on machines with automatic presser foot lift –910/93) 3 = Trim thread (on mahcines with thread trimmer –900/93) Fig.
-
Page 15: Lever For Raising The Presser Foot
Controls Lever for raising the presser foot Raise the presser foot by turning lever 1 in the direction of the arrow. Fig. 7 — 03 Knee lever By pressing the knee lever 1 in the direction of the arrow, the presser foot is raised.
-
Page 16: Stitch Length Adjustment Wheel
Controls Stitch length adjustment wheel Turn adjustment wheel 1 to set the required stitch length. Fig. 7 — 05 Reverse stitch key For sewing in the reverse direction, key 1 must be pressed during sewing. Fig. 7 — 06 7 — 3…
-
Page 17: Key On Machine Head
Controls Key on machine head By operating key 1 during sewing, the machines switches to reverse sewing (only on machines with backtacking mechanism –911/93). Fig. 7 — 07 Switch for thread wiper –909/93 The thread wiper can be switched on or off by pressing switch 1.
-
Page 18: Control Panel
The control panels switches on all LCD- segments and the horn automatically for a short time during the power-on phase, after which the lettering PFAFF appears on the display, until the higher-ranking control unit sends commands to the control panel.
-
Page 19
Controls Start backtacks If this key is pressed, the backtacks at the beginning of the seam (start backtacks) are switched on or off. The number of forward stitches (A) or reverse stitches (B) for the start backtacks can be changed by pressing the +/- key underneath. To convert from double backtack to single backtack set the number of stitches for the corresponding seam section at zero. -
Page 20: Mounting And Commissioning The Machine
Mounting and commissioning the machine Mounting and commissioning the machine The machine must only be mounted and commissioned by qualified personnel! All relevant safety regulations are to be observed! If the machine is delivered without a table, be sure that the frame and the table top which you intend to use can hold the weight of the machine and the motor.
-
Page 21: Fitting The Oil Pan
Mounting and commissioning the machine Fitting the oil pan .01.02 Fig. 8 — 02 Insert rubber pads 1 and 2 and fasten them with nails. Attach rubber pad 3 with a suitable adhesive. Fig. 8 — 03 Insert oil pan 4 in the table top cutout. Place magnet 5 in the corresponding recess of the oil pan.
-
Page 22: Mounting The Sewing Head
Mounting and commissioning the machine Mounting the sewing head .01.03 Insert both hinges 1 in the corresponding holes in the bedplate of the sewing head. Insert the sewing head with hinges 1 into the rear rubber pads. Fig. 8 — 04 Mounting the balance wheel .01.04 Fit balance wheel 1 and fasten it with 2…
-
Page 23: Tightening The V-Belt
Mounting and commissioning the machine Tightening the V-belt .01.05 Loosen nut 1 and tighten the V-belt by turning motor mounting 2. Tighten nuts 1. Fig. 8 — 06 Mounting the top V-belt guard .01.06 Fig. 8 — 07 Fasten part 1 of the V-belt guard to part 2 of the V-belt guard with 4 screws. Attach part 2 together with part 1 of the V-belt guard to the machine housing with 4 screws.
-
Page 24: Mounting The Bottom V-Belt Guard
Mounting and commissioning the machine Mounting the bottom V-belt guard .01.07 Align V-belt guard 1 so that the motor pulley and V-belt are run freely. Tighten screw 2. Fig. 8 — 08 Fitting the thread guide .01.08 Fit the tapered thread guide pin 1 into the corresponding hole in the machine housing.
-
Page 25: Mounting The Spool Holder
Mounting and commissioning the machine Mounting the spool holder .01.09 Mount the spool holder as shown in Fig. 8-10. Insert the spool holder into the hole in the table top and fasten it with the nuts enclosed. Fig. 8 — 10 8 — 6…
-
Page 26: Connecting The Plug-In Connections And Earth Cables
Mounting and commissioning the machine Connecting the plug-in connections and earth cables Fig. 8 — 11 Connect all plugs as labelled to the control box 1. Screw the earth cable from the sewing head and the main switch to earth point A. Connect earth point A to earth point B with earth cable 2.
-
Page 27: Commissioning
Mounting and commissioning the machine Commissioning Before commissioning the machine, clean it thoroughly, fill the oil pan with oil and adjust the oil level, see Chapter 10 Care and Maintenance! Examine the machine, in particular the electric cables, for any damage. Have qualified personnel check whether the machine can be operated with the available voltage and whether it is connected properly.
-
Page 28
Mounting and commissioning the machine By pressing the corresponding +/- key, call up parameter «798» and select service level «C», see Chapter 13.09.01 Selecting the user level By pressing the corresponding +/- key, call up parameter «800» (rotation direction of the motor). -
Page 29: Table Top Cutout
Mounting and commissioning the machine Table top cutout 8 — 10…
-
Page 30: Preparation
Preparation Preparation All regulations and instructions in this Instruction Manual are to be observed! Special attention is to be paid to the safety regulations! All preparation work is only to be carried out by appropriately trained personnel. Before all preparation work, the machine is to be separated from the electricity supply by removing the plug from the mains or switching off the On/Off switch! Inserting the needle Switch off the machine!
-
Page 31: Winding The Bobbin Thread / Adjusting The Preliminary Thread Tension
Preparation Winding the bobbin thread / adjusting the preliminary thread tension Fig. 9 — 02 Place empty bobbin 1 on the bobbin winder spindle 2. Thread the thread as shown in Fig. 9.02 and wind it around the bobbin 1 a few times in a clockwise direction.
-
Page 32: Removing/Inserting The Bobbin Case
Preparation Removing/Inserting the bobbin case Switch off the machine! Danger of injury due to unintentional starting of the machine! Removing the bobbin case: Tilt back the machine. Raise latch 1 and remove bobbin case 2. Inserting the bobbin case: Press bobbin case 2 until you feel it snap into the bobbin case base.
-
Page 33: Threading The Needle Thread / Adjusting The Needle Thread Tension
Preparation Threading the needle thread / adjusting the needle thread tension Fig. 9 — 05 Switch off the machine. Danger of injury if the machine is started accidentally! Thread the needle thread as shown in Fig. 9.05. Adjust the needle thread tension by turning adjustment wheel 1. 9 — 4…
-
Page 34: Entering The Start And End Backtacks
Preparation Entering the start and end backtacks Switch on the machine. If necessary switch off the «darning seam» or «counted seam» function, see Chapter 10.01 Darning program or Chapter 10.02 Counted seam. By pressing the corresponding +/- key («A») select the desired value for the number of forward stitches (A) of the start backtack.
-
Page 35: Sewing
Sewing Sewing In the sewing mode all relevant settings for the sewing operation are displayed. Functions can be switched on or off by pressing a key. Values for start and end backtacks or stitch placement can be changed directly. When the machine is switched on, the sewing mode is always activated. Switch on the machine.
-
Page 36: Darning Program
Sewing Darning program 15 15 5 1 The corresponding function can be switched on or off directly with the Darning program key. The «counted seam» function is switched off automatically. Several darning programs with different seam sections A and/or B can be selected. The number of required darning programs can be selected by operating the +/- key 1.
-
Page 37: Error Messages
Sewing Error messages If a fault occurs, the text «ERROR» appears on the display, together with an error code and short instructions. An error message is caused by incorrect settings, faulty elements or seam programs as well as by overload conditions. For an explanation of the error codes see Chapter 13.11 Explanation of the error messages.
-
Page 38: Care And Maintenance
Care and maintenance Care and maintenance Cleaning ………….. daily, several times if in continuous use Checking the oil level …………….. once a month These maintenance intervals are calculated for the average running time of a single shift operation. If the machine is operated more than this, shorter intervals are recommended.
-
Page 39: Checking The Oil Level / Filling In Oil
Danger of crushing between machine head and table top. Only use oil with a mean viscosity of 10.0 mm /s at 40°C and a density of 0.847 g/cm at 15°. We recommend PFAFF sewing machine oil, part no. 280-1-120 105. 11 — 2…
-
Page 40: Adjusting The Lubrication
Care and maintenance Adjusting the lubrication Lubricating the needle head parts .03.01 The needle head parts should be adequately lubricated without oil dripping out of the head part. The amount of oil for lubricating the head parts is adjusted by turning screw 1. Fig.
-
Page 41: Wearing Parts
A detailed parts list for the complete machine is included with the accessories. In case of loss, the parts list can be downloaded from the internet address www.pfaff-industrial.com/de/service/download/index.php3. As an alternati- ve to the internet download the parts lists can also be ordered in book form under part no.
-
Page 42
Wearing parts F GS 527-8 (2x) F GR 1046-8 F GS 528-8 F GR 1049/2-8 12 — 2… -
Page 43
Notice… -
Page 44: Postfach
PFAFF Industrie Maschinen AG Postfach 3020 D-67653 Kaiserslautern Königstr. 154 D-67655 Kaiserslautern Telefon: (0631) 200-0 Telefax: (0631) 17202 E-Mail: info@pfaff-industrial.com…
В настоящее время вы находитесь на странице с руководствами Pfaff швейная машина. Выберите один из продуктов, чтобы сразу перейти к руководству по этому продукту. Не можете найти Pfaff ? Тогда попробуйте вбить в поле поиска Pfaff и модель, чтобы найти нужное руководство Pfaff. На ManualsPDF.ru в настоящее время имеется 388 руководств Pfaff . Самые популярные Pfaff швейная машина:
- Pfaff 1080S
- Pfaff 1222E
- Pfaff 1070S
Последнее добавленное руководство Pfaff было добавлено 2022-11-09, и это Pfaff Performance 5.2.
This Instruction Manual is valid for all models and subclasses listed in the
chapter » Specifications «.
The adjustment manual for the machines can be downloaded free of charge
from the internet address
www.pfaff-industrial.com/de/service/download/index.php3.
As an alternative to the internet download the adjustment manual can also be
ordered in book form under part no. 296-12-18 609/002.
The reprinting, copying or translation of PFAFF Instruction Manuals, whether in whole or in
part, is only permitted with our previous authorization and with written reference to the
source.
PFAFF Industrie Maschinen AG
Postfach 3020
D-67653 Kaiserslautern
Königstr. 154
D-67655 Kaiserslautern
- важно
Первая часть темы находится тут: http://club.osinka.ru/topic-1907
Полезные ссылки любезно предоставленные пользователем sandr
РАЗМЕЩАЮ ФАЙЛЫ С ДОКУМЕНТАЦИЕЙ НА ШВЕЙНЫЕ МАШИНКИ PFAFF ДЛЯ ОБЩЕГО ПОЛЬЗОВАНИЯ.
СКАЧИВАЙТЕ, ОЧЕНЬ ПОЛЕЗНЫЙ И ВСЕОБЪЕМНЫЙ МАТЕРИАЛ ТУТ:
Эксплуатация PFAFF 1213, 1214, 1222
http://ifolder.ru/16463564
Каталог деталей и составных частей PPFAF 2010-2040 (2010, 2014, 2020,2022, 2024,2026, 2027, 2029, 2030, 2034, 2036, 2040, 2042, 2044, 2046):
http://ifolder.ru/16463544
PFAFF 2010-2040 Руководство механика:
http://ifolder.ru/16464003
PFAFF Select 1520, 1530, 1540 Service Manual (руководство механика):
http://ifolder.ru/16463777
Книга PFAFF 1010, 1011, 1014, 1015, 1019, 1025, 1027, 1029, 1035, 1037, 1047, 1067, 1069, 1071, 1118, 1119, (905-947) Руководство механика:
http://ifolder.ru/16463669
|
Alka1567 Рег. |
Lomaster, спасибо за ответ.смазала маслом Бинелли!-начала «крутиться»! зато стала рвать нитку-даже нижнюю вытянуть не могу! первый раз с машинкой такое! а у меня прям шок! и понимаю что сама виновата! перекрутила видно «на сухую» что то… бестолочь я! что теперь сделать? |
|
|
RPE2 Рег. |
Наверное узнать , что такое установочный палец и сетка челнока.) А дальше………….. |
|
|
Alka1567 Рег. |
RPE2, я не механик, к сожалению-мысль о том что нужно что то разобрать приходит- и я в обмороке! я боюсь ужасно, что разбирая что нибудь нечаянно сломаю…а мастера вызывать тоже не хочу-боюсь-вдруг не то сделает, а машинка на гарантии,.. |
|
|
RPE2 Рег. |
Alka1567, По гарантии конечно вам бы в сервис. Далеко? |
|
|
Alka1567 Рег. |
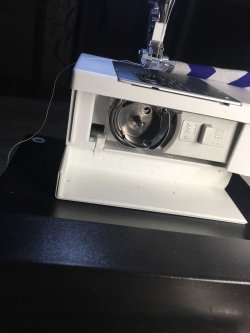
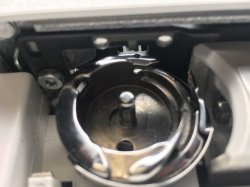
RPE2, сервис в 40 км. и то не сервис, а магазин где покупала…вызвала друга-говорит челночный механизм свернула |
|
|
Alka1567 Рег. |
RPE2,
|
|
|
RPE2 Рег. |
Alka1567, |
|
|
Alka1567 Рег. |
RPE2, а что это? |
|
|
RPE2 Рег. |
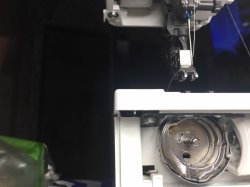
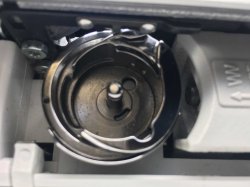
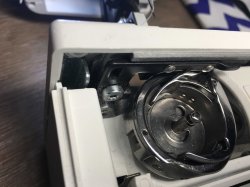
Alka1567, Прям над челноком держит шпуледержатель , провёрнутый в вашем случае https://images.osinka.net/547551/s1500 |
|
|
Alka1567 Рег. |
RPE2, нет, не ушёл. но он любитель и таких не видел машинок. ждёт Ваших слов.
|
|
|
RPE2 Рег. |
Alka1567, https://youtu.be/6ymxNTykkHI?t=177 |
|
|
Alka1567 Рег. |
RPE2, сейчас подойдёт-покажу видео ему(спасибо Вам). фото вроде лучше…а что за сетка?
|
|
|
RPE2 Рег. |
Сетка , она же шпуледержатель , она же провернутая ваша деталь на фото. Наведите фокус на верхнюю часть челнока , прям под игольной пластиной. |
|
|
Alka1567 Рег. |
RPE2, ПОНЯЛИ! СПАСИБО! а как поставить её на место? |
|
|
Alka1567 Рег. |
RPE2,
|
|


- Россия
- Иваново
- Швейное оборудование
- Промышленные швейные машины
PFAFF 1163 Прямострочная машина Б/У в Иваново Ивановской области

Оптовые цены:
от 1 шт. – 10 000 ₽
Компания Швейные Системы — швейное оборудование (Иваново) является зарегистрированным поставщиком на сайте BizOrg.su. Вы можете приобрести товар PFAFF 1163 Прямострочная машина Б/У, расчеты производятся в ₽. Если у вас возникли проблемы при заказе товара, пожалуйста, сообщите об этом нам через форму обратной связи.
Описание товара
Промышленная высокоскоростная швейная машина для лёгких и средних тканей.
Промышленная высокоскоростная швейная машина
для лёгких и средних тканей.
Особенности
∙ Производительная высокоскоростная швейная машина
с высоким количеством оборотов до 5.000 в минуту.
∙ Автоматическая смазка
∙ Простая регулировка длины стежка
∙ Благоприятное соотношение цены и производительности
∙ Аккуратный стежок и постоянная длина стежка
∙ Использование во всех отраслях швейной промышленности
∙ Макс.длина стежка: 4.5 мм
Плдъём лапки 13мм
Pfaff 1163 6/01 BS (220V) — 1 шт
Pfaff 1163 6/01 CSN6 (380V) -4 шт
Характеристики PFAFF 1163 Прямострочной машины Б/У
- — Страна производитель: Германия
Товары, похожие на PFAFF 1163 Прямострочная машина Б/У
Вы можете оформить заявку на «PFAFF 1163 Прямострочная машина Б/У» в компании «Швейные Системы — швейное оборудование» через торговую площадку BizOrg. Цена 10000 руб. (минимальный заказ 1 шт). При необходимости товар доступен для продажи большими партиями по цене 10000.0 руб. — от 1 шт. На сегодня предложение находится в статусе «в наличии».
Плюсы «Швейные Системы — швейное оборудование»
-
специальное предложение по сервису и цене для пользователей площадки BizOrg;
-
своевременное выполнение своих обязательств от компании с рейтингом 3.4;
-
разнообразные способы оплаты.
Ждем Вашего звонка!
Часто задаваемые вопросы
- Как оформить заказ?
Чтобы оформить заказ на «PFAFF 1163 Прямострочная машина Б/У» свяжитесь с компанией «Швейные Системы — швейное оборудование» по контактным данным, которые указаны в правом верхнем углу страницы. Обязательно укажите, что нашли компанию на площадке BizOrg.
- Где посмотреть более полную информацию о компании «Швейные Системы — швейное оборудование»?
Для получения подробных даных о компании перейдите в правом верхнем углу страницы по ссылке-названию компании. Далее перейдите на интересную Вам вкладку с описанием.
- Предложение описано с ошибками, номер телефона не отвечает и т.п.
Если у вас возникли проблемы при работе с «Швейные Системы — швейное оборудование» – сообщите идентификаторы компании (9497) и товара/услуги (3388907) в нашу службу технической поддержки.
Служебная информация
-
«PFAFF 1163 Прямострочная машина Б/У» относится к категории: «Промышленные швейные машины».
-
Предложение появилось на сайте 01.09.2013, дата последнего обновления — 16.11.2013.
-
За все время предложение было просмотрено 4072 раза.
Обращаем ваше внимание на то, что торговая площадка BizOrg.su носит исключительно информационный характер и ни при каких условиях не является публичной офертой.
Заявленная компанией Швейные Системы — швейное оборудование цена товара «PFAFF 1163 Прямострочная машина Б/У» (10 000 ₽) может не быть окончательной ценой продажи. Для получения подробной информации о наличии и стоимости указанных товаров и услуг, пожалуйста, свяжитесь с представителями компании Швейные Системы — швейное оборудование по указанным телефону или адресу электронной почты.
PFAFF 1163 Прямострочная машина Б/У
Вы можете бесплатно скачать инструкции в PDF для Pfaff Швейные машинки.
У нас есть 74 бесплатных инструкций в PDF для 72 Pfaff Швейные машинки.
-
1
-
2
-
3
-
4
-
5
-
9
-
c
-
e
-
h
-
p
-
q