-
Руководства по ремонту
1
-
Инструкции по эксплуатации
2
Языки:

Pioneer VSX-D511-K инструкция по эксплуатации
(78 страниц)
- Языки:Русский
-
Тип:
ZIP -
Размер:
2.44 MB
Просмотр

Pioneer VSX-D511-K инструкция по эксплуатации
(44 страницы)
- Языки:Английский
-
Тип:
PDF -
Размер:
2.66 MB
Просмотр
На NoDevice можно скачать инструкцию по эксплуатации для Pioneer VSX-D511-K. Руководство пользователя необходимо для ознакомления с правилами установки и эксплуатации Pioneer VSX-D511-K. Инструкции по использованию помогут правильно настроить Pioneer VSX-D511-K, исправить ошибки и выявить неполадки.
- Manuals
- Brands
- Pioneer Manuals
- Receiver
- VSX-D511 — Audio/Visual Receiver
Manuals and User Guides for Pioneer VSX-D511 — Audio/Visual Receiver. We have 3 Pioneer VSX-D511 — Audio/Visual Receiver manuals available for free PDF download: Service Manual, Operating Instructions Manual
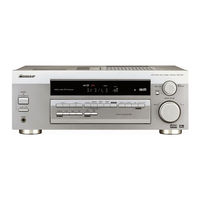
Pioneer VSX-D511 — Audio/Visual Receiver Operating Instructions Manual (68 pages)
Brand: Pioneer
|
Category: Receiver
|
Size: 3.35 MB
Table of Contents
-
English
4
-
Table of Contents
4
-
Before You Start
7
-
Checking What’s in the Box
7
-
Installing the Receiver
7
-
Making Cable Connections
7
-
Loading the Batteries
8
-
Operating Range of Remote Control Unit
8
-
Minute Guide
9
-
Introduction to Home Theater
9
-
Listening to Surround Sound
10
-
Using the Quick Setup
14
-
Connecting up
16
-
Audio/Video Cords
16
-
S-Video Cables
16
-
Digital Audio Cords/Optical Cables
16
-
Connecting Digital Components
17
-
Connecting Audio Components
18
-
Connecting DVD 5.1 Channel Components
18
-
Connecting Video Components
19
-
Connecting Antennas
21
-
FM Wire Antenna
21
-
AM Loop Antenna
21
-
Antenna Snap Connectors
21
-
Using External Antennas
22
-
To Improve FM Reception
22
-
To Improve am Reception
22
-
Connecting the Speakers
23
-
Speaker Terminals
23
-
Hints on Speaker Placement
25
-
Power-Cord Caution
27
-
Operating Other Pioneer Components
27
-
Front Panel
28
-
Display
30
-
Remote Control
33
-
Introduction to Sound Modes
37
-
Stereo/Direct
37
-
Standard Modes
37
-
Advanced Surround Modes
38
-
Choosing the Input Signal
39
-
Using Stereo/Direct
40
-
Listening to Multi-Channel Playback
41
-
Using Advanced Surround
42
-
Using Loudness and Midnight Listening
42
-
使用Loudness(響度)/Midnight(午夜)模式收聽
42
-
Using the Tone Controls
43
-
Playing Other Sources
44
-
Selecting the Multi-Channel Analog Inputs
45
-
Choosing Your Receiver Setup
46
-
Speaker Setting
48
-
Subwoofer Setting
49
-
Crossover Frequency Setting
49
-
LFE Attenuator Setting
50
-
Front Speaker Distance Setting
50
-
Center Speaker Distance Setting
51
-
Surround Speaker Distance Setting
51
-
Dynamic Range Control Setting
52
-
Dual Mono Setting
52
-
Coaxial Digital Input Setting
53
-
Optical Digital Input Setting
53
-
Setting the Relative Volume Level of each Channel
54
-
Listening to the Radio
56
-
Improving FM Stereo Sound
57
-
Saving Station Presets
57
-
Naming Station Presets
58
-
Listening to Station Presets
59
-
Changing the Frequency Step
60
-
Making an Audio or a Video Recording
61
-
Monitoring Your Recording
62
-
Additional Information
63
-
Troubleshooting
63
-
Specifications
66
-
Cleaning the Unit
66
-
-
Spanish
7
-
Comprobación de Los Accesorios Suministrados
7
-
Instalación del Receptor
7
-
Conexión de Los Cables
7
-
檢查附件
7
-
安裝接收機
7
-
進行電纜連接
7
-
Cómo Cargar las Pilas
8
-
Campo Operativo del Mando a Distancia
8
-
裝載電池
8
-
遙控器的有效操作范圍
8
-
Guía en 5 Minutos Introducción al Home Theater
9
-
家庭影院的簡介
9
-
Cómo Escuchar Sonido Surround
10
-
收聽環繞聲
10
-
Cómo Utilizar la Configuración Rápida
14
-
使用快速設置
14
-
Conexiones
16
-
Cables de Audio/Vídeo
16
-
Cables S-Vídeo
16
-
Cables Ópticos/Cables de Audio Digital
16
-
音頻/視頻電纜
16
-
S視頻電纜(僅限 Vsx-D511
16
-
Conexión de Componentes Digitales
17
-
連接數碼設備
17
-
Conexión de Componentes de Audio
18
-
Conexión de Componentes
18
-
DVD 5.1 Canales
18
-
連接音頻設備
18
-
連接DVD 5.1聲道設備
18
-
Conexión de Componentes de Vídeo
19
-
連接視頻設備
19
-
Conexión de Antenas
21
-
Antena de Cable FM
21
-
Antena de Cuadro am
21
-
Conectores Instantáneos de Antena
21
-
連接天線
21
-
Fm線型天線
21
-
Cómo Utilizar Antenas Externas
22
-
Para Mejorar la Recepción de FM
22
-
Para Mejorar la Recepción de am
22
-
使用外部天線
22
-
改善Fm接收
22
-
改善Am接收
22
-
Conexión de Los Altavoces
23
-
Terminales de Los Altavoces
23
-
連接揚聲器
23
-
揚聲器端子
23
-
Consejos sobre la Ubicación de Los Altavoces
25
-
揚聲器放置提示
25
-
Precaución con el Cable de Alimentación
27
-
Funcionamiento de Otros Componentes Pioneer
27
-
電源線注意事項
27
-
操作其他先鋒設備
27
-
Panel Frontal
28
-
控制按鈕和顯示屏
28
-
前面板
28
-
Pantalla
30
-
顯示屏
30
-
Mando a Distancia
33
-
遙控器
33
-
Introducción a Los Modos de Sonido
37
-
Estéreo/Directo
37
-
Modos Estándar
37
-
播放音源
37
-
聲音模式簡介
37
-
立體聲/直接
37
-
標準模式
37
-
Modos Surround Avanzados
38
-
高級環繞聲模式
38
-
Elección de la Señal de Entrada
39
-
選擇輸入信號
39
-
Utilización del Estéreo/Directo
40
-
使用立體聲/直接功能
40
-
Cómo Escuchar una Reproducción Multicanal
41
-
收聽多聲道播放
41
-
Utilización de Los Modos Surround Avanzados
42
-
Utilización del Modo de Audición Loudness y Midnight
42
-
使用高級環繞聲功能
42
-
Utilización de Los Controles del Tono
43
-
使用音調控制功能
43
-
Reproducción de Otras Fuentes
44
-
播放其他音源
44
-
Selección de Entradas Analógicas Multicanal
45
-
選擇多聲道模擬輸入
45
-
Elección de la Configuración de Su Receptor
46
-
設置接收機
46
-
選擇接收機設置
46
-
Ajuste de Los Altavoces
48
-
揚聲器設定
48
-
Ajuste del Realzador de Graves
49
-
Ajuste de la Frecuencia de Corte
49
-
超低音揚聲器設定
49
-
分隔頻率設定
49
-
Ajuste del Atenuador LFE
50
-
Ajuste de la Distancia del Altavoz Frontal
50
-
Lfe 衰減器設定
50
-
前置揚聲器距離設定
50
-
Ajuste de la Distancia del Altavoz Central
51
-
Ajuste de la Distancia del Altavoz Surround
51
-
中置揚聲器距離設定
51
-
環繞聲揚聲器距離設定
51
-
Ajuste del Control de la Gama Dinámica
52
-
Ajuste del Monoaural Dual
52
-
動態范圍控制設定
52
-
雙重單聲道設定
52
-
Ajustes de la Entrada Digital Coaxial
53
-
Ajuste de la Entrada Digital Óptica
53
-
同軸數碼輸入設定
53
-
光學數碼輸入設定
53
-
Cómo Ajustar el Nivel de Volumen Adecuado de cada Canal
54
-
設定各聲道相關音量級
54
-
Cómo Escuchar la Radio
56
-
使用調諧器
56
-
收聽電臺
56
-
Cómo Mejorar el Sonido Estéreo FM
57
-
Cómo Guardar Presintonías
57
-
改善Fm立體聲聲音
57
-
保存預設電臺
57
-
Cómo Nombrar Presintonías
58
-
命名預設電臺
58
-
Cómo Escuchar Presintonías
59
-
收聽預設電臺
59
-
Cómo Cambiar el Intervalo de la Frecuencia
60
-
改變頻率間隔
60
-
Cómo Realizar una Grabación de Audio O de Vídeo
61
-
進行錄製
61
-
進行音頻或視頻錄製
61
-
Supervisión de la Grabación
62
-
監控錄製
62
-
Resolución de Problemas
64
-
故障排除
65
-
Especificaciones
67
-
Limpieza de la Unidad
67
-
本機清潔
68
-
Advertisement
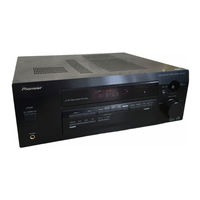
Pioneer VSX-D511 — Audio/Visual Receiver Service Manual (82 pages)
Audio/Video Multi-channel Receiver
Brand: Pioneer
|
Category: Receiver
|
Size: 11.29 MB
Table of Contents
-
Table of Contents
8
-
Safty Information
6
-
Table of Contents
8
-
-
1 Specifications
9
-
2 Exploded Views and Parts List
10
-
Packing
10
-
Exterior Section
12
-
Front Panel Section
14
-
-
3 Block Diagram and Schematic Diagram
16
-
Block Diagram
16
-
Overall Wiring Connection Diagram
18
-
Input(1/4) Assy
20
-
Input(2/4) Assy
22
-
Input(3/4) Assy
24
-
Input(4/4) Assy
26
-
AMP & PRIMARY(1/2), TRANS2 and TRANS3 ASSYS
28
-
AMP & PRIMARY(2/2), REGULATOR, AMP INPUT and TRANS1 ASSYS
30
-
VIDEO, 6CH in and S.VIDEO ASSYS
32
-
FRONT, R.ENCODER and POWER SW ASSYS
34
-
DIGITAL IN, H.P. and KAWA ASSYS
36
-
Fm/Am Tuner Module
38
-
-
4 Pcb Connection Diagram
40
-
TRANS1, TRANS2 and TRANS3 ASSYS
41
-
Input Assy
42
-
-
-
A D.D & Input Assy
45
-
AMP INPUT and AMP ASSYS
46
-
Tel 13942296513
46
-
Www
46
-
Ao y U163
48
-
FRONT, POWER SW, H.P. and R.ENCODER ASSYS
48
-
Q Q
48
-
Tel 13942296513
48
-
Side B
50
-
REGULATOR, HASHIGETA and KAWA ASSYS
52
-
DIGITAL IN, 6CH IN, VIDEO and BOARD to BOARD ASSYS
54
-
Fm/Am Tuner Module
56
-
-
5 Pcb Parts List
57
-
Regulator Assy
59
-
-
6 Adjustment
62
-
7 General Information
63
-
DISASSEMBLY and DIAGNOSI
63
-
Parts
68
-
Display
77
-
-
8 Panel Facilities
79
-
Ao y U163
81
-
Rear Panel
82
-
-
-

Pioneer VSX-D511 — Audio/Visual Receiver Operating Instructions Manual (44 pages)
AUDIO/VIDEO MULTI-CHANNEL RECEIVER
Brand: Pioneer
|
Category: Receiver
|
Size: 2.89 MB
Table of Contents
-
Table of Contents
4
-
1 Before You Start
5
-
Checking What’s in the Box
5
-
Installing the Receiver
5
-
Making Cable Connections
5
-
Loading the Batteries
5
-
Operating Range of Remote Control Unit
5
-
-
5 Minute Guide
6
-
Introduction to Home Theater
6
-
Listening to Surround Sound
7
-
Using the Quick Setup
10
-
-
3 Connecting up
11
-
Audio/Video Cords
11
-
S-Video Cables (VSX-D511 Only)
11
-
Digital Audio Cords/Optical Cables
11
-
Connecting Digital Components
12
-
Connecting Audio Components
12
-
Connecting DVD 5.1 Channel Components
13
-
Connecting Video Components
13
-
Connecting Antennas
14
-
FM Wire Antenna
14
-
AM Loop Antenna
15
-
Antenna Snap Connectors
15
-
-
Using External Antennas
15
-
To Improve FM Reception
15
-
To Improve am Reception
15
-
-
Connecting the Speakers
16
-
Speaker Terminals
16
-
-
Hints on Speaker Placement
17
-
AC Outlet
18
-
Operating Other Pioneer Components
18
-
-
4 Controls and Displays
19
-
Front Panel
19
-
Display
20
-
Remote Control
22
-
-
5 Playing Sources
24
-
Introduction to Sound Modes
24
-
Stereo/Direct
24
-
Standard Modes
24
-
Advanced Surround Modes
24
-
-
Choosing the Input Signal
25
-
Using Stereo/Direct
25
-
Listening to Multi-Channel Playback
26
-
Using Advanced Surround
26
-
Using Loudness and Midnight Listening
26
-
Using the Tone Controls
27
-
Playing Other Sources
27
-
Selecting the Multi-Channel Analog Inputs
28
-
-
6 Setting up Your Receiver
29
-
Choosing Your Receiver Setup
29
-
Speaker Setting
30
-
Subwoofer Setting
30
-
Crossover Frequency Setting
30
-
LFE Attenuator Setting
31
-
Front Speaker Distance Setting
31
-
Center Speaker Distance Setting
31
-
Surround Speaker Distance Setting
31
-
Dynamic Range Control Setting
32
-
Dual Mono Setting
32
-
Coaxial Digital Input Setting
32
-
Optical Digital Input Setting
32
-
-
Setting the Relative Volume Level of each Channel
33
-
-
7 Using the Tuner
34
-
Listening to the Radio
34
-
Improving FM Stereo Sound
34
-
-
Saving Station Presets
35
-
Naming Station Presets
36
-
Listening to Station Presets
36
-
-
8 Making a Recording
37
-
Making an Audio or a Video Recording
37
-
Monitoring Your Recording
37
-
-
-
9 Additional Information
38
-
Troubleshooting
38
-
Specifications
40
-
Advertisement
Advertisement
Related Products
-
Pioneer VSX-D514-K
-
Pioneer VSX-D510-G
-
Pioneer VSX-D510
-
Pioneer VSX-D511-K
-
Pioneer VSX-D511-S
-
Pioneer VSX-D512
-
Pioneer VSX-D512-K
-
Pioneer VSX-D512-S
-
Pioneer VSX-D514-S
-
Pioneer VSX-D510S-G
Pioneer Categories
Car Receiver
Receiver
Amplifier
Stereo Receiver
![]()
DVD Player
More Pioneer Manuals
Не можете найти ответ на свой вопрос в руководстве? Вы можете найти ответ на свой вопрос ниже, в разделе часто задаваемых вопросов о Pioneer VSX-D511.
Когда звук считается слишком громким?
Могут ли устройства разных марок подключаться друг к другу при помощи Bluetooth?
Что такое Bluetooth?
Что такое HDMI?
Как лучше всего выполнять чистку приемник?
Что такое Dolby Atmos?
Инструкция Pioneer VSX-D511 доступно в русский?
Не нашли свой вопрос? Задайте свой вопрос здесь
-
Pioneer VSX-D511 — page 1
AUDIO/VIDEO MULTI-CHANNEL RECEIVER VSX-D411 VSX-D511 Operating Instructions …
-
Pioneer VSX-D511 — page 2
IMPORTANT NOTICE H006AEn The serial number for this equipment is located in the rear panel. Please write this serial number on your enclosed warranty card and keep it in a secure area. This is for your security. Thank you for buying this Pioneer product. Please read through these operating instructions so you will know how to operate your model pro …
-
Pioneer VSX-D511 — page 3
«DTS», “ES” and «DTS Digital Surround» are trademarks of Digital Theater Systems, Inc. Manufactured under license from Dolby Laboratories. “Dolby”, “Pro Logic II” and the double D symbol 2 are trademarks of Dolby Laboratorories. …
-
Pioneer VSX-D511 — page 4
Contents 1 Before you star t Checking what’s in the box …………………………. 5 Installing the receiver …………………………………. 5 Making cable connections ………………………….. 5 Loading the batteries ………………………………….. 5 Operating range of remote control unit ……….. 5 2 5 minute g …
-
Pioneer VSX-D511 — page 5
Befor e you start 01 5 En Checking what’ s in the box Please check that you’ve received the following supplied accessories: • AM loop antenna • FM wire antenna • Dr y cell batteries (AA size IEC R6P) x 2 • Remote control • These operating instructions Installing the receiver Please note the following points: • Do not place object …
-
Pioneer VSX-D511 — page 6
5 minute guide 02 6 En Intr oduction to home theater Y ou are probably used to using stereo equipment to listen to music, but may not be used to home theater systems that give you many more options (such as surround sound) when listening to soundtracks. Home theater refers to the use of multiple audio tracks to create a surround sound effect, makin …
-
Pioneer VSX-D511 — page 7
5 minute guide 02 7 En Listening to Surround Sound This receiver was designed with the easiest possible setup in mind, so with the following quick setup guide, you should have your system hooked up for surround sound in no time at all. In most cases, you can simply leave the receiver in the default settings. 1 Hook up your DVD player . For surround …
-
Pioneer VSX-D511 — page 8
5 minute guide 02 8 En 3 Connect your speakers. A complete setup of six speakers (including the subwoofer) is shown here, but everyone ’ s home setup will var y . Simply connect the speakers you have in the manner shown below . The receiver will work with just two stereo speakers (the front speakers in the diagram) but using at least three speake …
-
Pioneer VSX-D511 — page 9
5 minute guide 02 9 En 4 Plug in the receiver and switch it on, followed by your DVD player , your subwoofer and the TV . Make sure you ’ ve set the video input on your TV to this receiver . Check the manual that came with the TV if you don ’ t know how to do this. Also make sure that DVD/LD is showing in the receiver ’ s display , indicating …
-
Pioneer VSX-D511 — page 10
5 minute guide 02 10 En Using the Quick Setup Y ou can use the Quick Setup to get your system up and running with just a few button presses. The receiver automatically makes the necessary settings after you have selected your speaker setup and room size. If you want to make more specific settings, refer to Choosing your receiver setup on pages 29 t …
-
Pioneer VSX-D511 — page 11
Connecting up 03 11 En Before making or changing the connections, switch off the power and disconnect the power cord fr om the AC outlet. Audio/Video cor ds Use audio/video cords (not supplied) to connect the audio/video components and a video cord to connect the monitor TV . Connect red plugs to R (right), white plugs to L (left), and the yellow p …
-
Pioneer VSX-D511 — page 12
Connecting up 03 12 En Connecting digital components For proper decoding of Dolby Digital/DTS soundtracks, you need to make digital audio connections. Y ou can do this by either coaxial or optical connections (you don ’t need to do both). The quality of these two types of connections is the same, but since some digital components only have one ty …
-
Pioneer VSX-D511 — page 13
Connecting up 03 13 En Connecting video components Connect your video components to the jacks as shown below . R egarding digital video components (like a DVD player), you must use the connections pictured on this page for the video signal, but in order to hear a digital source (like a DVD) you should hook up the audio to a digital input (see page …
-
Pioneer VSX-D511 — page 14
Connecting up 03 14 En FM wire antenna Connect the FM wire antenna and fully extend vertically along a window frame or other suitable area, etc. Connecting antennas Connect the AM loop antenna and the FM wire antenna as shown at right. T o improve reception and sound quality , connect external antennas (see Using external antennas , next page). Alw …
-
Pioneer VSX-D511 — page 15
Connecting up 03 15 En T o impr ove FM reception Connect an external FM antenna. FM UNBAL 75 Ω FM ANTENNA AM LOOP ANTENNA T o impr ove AM reception Connect a 15-18 feet length of vinyl-coated wire to the AM antenna terminal without disconnect- ing the supplied AM loop antenna. For the best possible reception , suspend horizontally outdoors. Outdo …
-
Pioneer VSX-D511 — page 16
Connecting up 03 16 En 1/2 inches 1 T wist around 1/2 inch of bar e wire strands together . 2 Unclip the speaker terminal and insert the wire. 3 Snap shut the speaker terminal to secure. Speaker terminals ª · Connecting the speakers A complete setup of six speakers (including the subwoofer) is shown here, but everyone ’ s home setup will var y …
-
Pioneer VSX-D511 — page 17
Connecting up 03 17 En Hints on speaker placement Speakers are usually designed with a particular placement in mind. Some are designed to be floorstanding, while others should be placed on stands to sound their best. Some should be placed near a wall; others should be placed away from walls. W e have provided a few tips on getting the best sound fr …
-
Pioneer VSX-D511 — page 18
Connecting up 03 18 En Receiver Other Pioneer products with Î mark Operating other Pioneer components By connecting a control cord (optional), you can point the remote controls of other Pioneer components at the receiver ’ s remote sensor . Y ou can also use the remote control from this unit to control a Pioneer DVD player . The remote control s …
-
Pioneer VSX-D511 — page 19
Contr ols and displays 04 19 En 1 ST ANDBY/ON Switches the receiver between on and standby . 2 ST ANDBY indicator Lights when the receiver is in standby mode. 3 ST A TION (+/–) buttons (pages 35–36) Selects station presets when using the tuner . 4 TUNING (+/–) buttons (page 34) Selects the frequency when using the tuner . 5 Remote sensor Rece …
-
Pioneer VSX-D511 — page 20
Contr ols and displays 04 20 En 1 SIGNAL SELECT indicators Lights to indicate the type of input signal assigned for the current component: AUTO : Lights when AUTO signal select is on . DIGIT AL : Lights when a digital audio signal is detected. 2 DIGIT AL : Lights when a Dolby Digital signal is detected. ANALOG : Lights when an analog signal is dete …
-
Pioneer VSX-D511 — page 21
Contr ols and displays 04 21 En 4 2 PRO LOGIC II When the Standard mode of the receiver is on, this lights to indicate P rologic II decoding. 5A T T Lights when INPUT A TT is used to attenuate (reduce) the level of the input signal (can only be used with an analog signal). 6 DIRECT Lights when source direct playback is in use. This function bypasse …
-
Pioneer VSX-D511 — page 22
Contr ols and displays 04 22 En 1 RECEIVER Switches the receiver between on and standby . 2 MIDNIGHT/LOUDNESS (page 26) Use to switch to Midnight or Loudness listening. 3 LISTENING MODE buttons ST ANDARD (page 24, 26, 33) P ress for Standard decoding and to switch between the various P ro Logic II options. Remote Control CD T V /S AT DVD/LD DVD DVD …
-
Pioneer VSX-D511 — page 23
Contr ols and displays 04 23 En 10 T uner controls The TUNING +/ – buttons can be used to find radio frequencies. The ST A TION +/ – buttons can be used to select preset radio stations (pages 35 – 36). BAND (page 34) Use to switch between the AM and FM bands when the tuner is selected. CLASS (pages 35 – 36) Use to switch between the three b …
-
Pioneer VSX-D511 — page 24
Playing sour ces 05 24 En Intr oduction to Sound Modes There are three basic sound options: Stereo/ Direct, Standard or Advanced Surround. Stereo/Dir ect When you select STEREO or DIRECT , you will hear the source through just the front left and right speakers (and possibly your subwoofer depending on your speaker settings). Dolby Digital and DTS m …
-
Pioneer VSX-D511 — page 25
Playing sour ces 05 25 En Expanded This mode is especially designed to give sound depth to stereo sources. The overall effect builds a dynamic and broad sound space, allowing two-channel (stereo) signals to imitate a five speaker sound. Use with Dolby P ro Logic for a stereo surround effect. Y ou can also use with Dolby Digital sources for a wider …
-
Pioneer VSX-D511 — page 26
Playing sour ces 05 26 En Listening to multi-channel playback INPUT SELECTO R CD T V /S AT DVD/LD R E C EIVE R C D-R / VC R / DVR S TANDAR D 1 Switch on the playback component. 2 Switch on the receiver . 3 Select the sour ce you want to playback. Use the INPUT SELECTOR buttons on the remote (or the MUL TI JOG/INPUT SELECTOR dial on the front panel) …
-
Pioneer VSX-D511 — page 27
Playing sour ces 05 27 En • Press MIDNIGHT/LOUDNESS. Each press cycles through the effects as follows: Off Midnight Loudness Y ou can also press MIDNIGHT or LOUDNESS on the front panel. Each press switches the effect on or off . Using the tone controls Depending on what you are listening to, you may want to adjust the bass or treble using the fro …
-
Pioneer VSX-D511 — page 28
Playing sour ces 05 28 En Selecting the multi-channel analog inputs Connect a DVD player with 5.1 channel output to listen to 5.1 channel playback. 1 Select DVD/LD if it is not already selected. Use the INPUT SELECTOR buttons on the remote (or the MUL TI JOG/INPUT SELECTOR dial on the front panel). 2 Press SIGNAL SELECT (fr ont panel) repeatedly to …
-
Pioneer VSX-D511 — page 29
Setting up the receiver 06 29 En Choosing your receiver setup Even though you may already have your system up and running after using the 5 minute guide on pages 6 to 10, you should also be sure to complete the following set up operations to ensure the best possible surround sound. This is particularly important when using Dolby surround. Y ou only …
-
Pioneer VSX-D511 — page 30
Setting up the receiver 06 30 En 4 Use ’ or ‘ to adjust the setting. The setting is entered automatically . 5 Repeat steps 3 and 4 to set other surround modes. 6 When you’re done, pr ess ENTER to exit. The setting display is automatically exited after 20 seconds of inactivity . Speaker setting • Default setting: S (all speakers) Y ou must l …
-
Pioneer VSX-D511 — page 31
Setting up the receiver 06 31 En 100Hz 150Hz 200Hz 100 Hz Sends bass frequencies below 100 Hz to the subwoofer (or L speakers). 150 Hz Sends bass frequencies below 150 Hz to the subwoofer (or L speakers). 200 Hz Sends bass frequencies below 200 Hz to the subwoofer (or L speakers). If all speakers (front, center , and surround) are set to L , the cr …
-
Pioneer VSX-D511 — page 32
Setting up the receiver 06 32 En When S is selected in the speaker setting, the surround distance cannot be set. Dynamic range control setting • Default setting: OFF Dynamic range is the difference between the loudest and softest sounds in any given signal. With this setting, you can compress the dynamic range, so that low level sounds can be hea …
-
Pioneer VSX-D511 — page 33
Setting up the receiver 06 33 En Setting the relative volume level of each channel • Default setting: 0 dB For best surround sound playback, you should set the relative channel levels from the main listening position. Y ou can set seperate levels for each surround mode. 1 Press ST ANDARD. 2 Press TEST TONE to output the test tone. The test tone i …
-
Pioneer VSX-D511 — page 34
Using the tuner 07 34 En Listening to the radio The following steps show you how to tune to FM and AM radio broadcasts using the automatic (search) and manual (step) tuning functions. Once you are tuned to a station you can memorize the frequency for recall later—see Saving station presets on the next page for more on how to do this. TU NIN G BAN …
-
Pioneer VSX-D511 — page 35
Using the tuner 07 35 En Saving station presets If you often listen to a particular radio station, it’s convenient to have the receiver store the frequency for easy recall whenever you want to listen to that station. This saves the effort of manually tuning in each time. This unit can memorize up to 30 stations, stored in three banks, or class …
-
Pioneer VSX-D511 — page 36
Using the tuner 07 36 En Naming station presets For easier identification , you can name your station presets. 1 Choose the station preset you want to name. See Listening to station presets (this page) for how to do this. 2 If you ’ re using the r emote control, press RECEIVER. 3 Press TUNER EDIT . The display shows ST . NAME , then a blinking cu …
-
Pioneer VSX-D511 — page 37
Making Recor dings 08 37 En Making an audio or a video recor ding Y ou can make an audio or a video recording from the built-in tuner , or from an audio or video source connected to the receiver (such as a CD player or TV) through the analog jacks. Y ou will need to connect a CD recorder , tape deck, MD, VCR, or DVR deck to the CD-R/T APE/MD or VCR …
-
Pioneer VSX-D511 — page 38
Additional information 09 38 En T roubleshooting Incorrect operations are often mistaken for trouble and malfunctions. If you think that there is something wrong with this component, check the points below . Sometimes the trouble may lie in another component. Investigate the other components and electrical appliances being used. If the trouble cann …
-
Pioneer VSX-D511 — page 39
Additional information 09 39 En If the unit does not operate normally due to external effects such as static electricity disconnect the power plug from the outlet and insert again to return to normal operating conditions. Problem No sound from surround or center speakers. Noise during playback of a cassette deck. Sound is produced from other compon …
-
Pioneer VSX-D511 — page 40
Additional information 09 40 En Specifications Amplifier Section Continuous average power output of 100 watts* per channel, min., at 8 ohms, from 20 Hz to 20,000 Hz with no more than 0.2 %** total harmonic distortion (front). Continuous Power Output F ront ……………………………….. 100 W per channel (1kHz, 1.0 %, 8 Ω ) Center ……. …
-
Pioneer VSX-D511 — page 41
Additional information 09 41 En Miscellaneous P ower Requirements ……………. AC 120 V , 60 Hz P ower Consumption …………………………… 260 W In Standby ……………………………………………… 1 W AC Outlet ……………… 100 W MAX. (SWITCHED) Dimensions …………………….. 420 (W) x 158 (H) x 393 (D) mm ( …
-
Pioneer VSX-D511 — page 42
Additional information 09 42 En …
-
Pioneer VSX-D511 — page 43
Additional information 09 43 En …
-
Pioneer VSX-D511 — page 44
Published by Pioneer Corporation. Copyright © 2001 Pioneer Corporation. All rights reserved. PIONEER CORPORATION 4-1, Meguro 1-Chome, Meguro-ku, Tokyo 153-8654, Japan PIONEER ELECTRONICS [USA] INC. P.O. BOX 1540, Long Beach, California 90801-1540, U.S.A. PIONEER ELECTRONICS OF CANADA, INC. 300 Allstate Parkway, Markham, Ontario L3R OP2, Canada PIO …
Архив Форума Hi-Fi.ru
По 23-5-2020
Портал Hi-Fi.ru более не предоставляет возможностей и сервисов по общению пользователей
|
Sergey Sergeev Пользователь Сообщений: 3 |
Не посчитайте великим трудом, у кого есть, поделиться инструкцией к Pioneer VSX-D511 на русском? |
|
Алексей В. Иванов Пользователь Сообщений: 46 |
ivaale8 #2 08-05-2003 12:11:39 www.pioneer-eur.com
Там и на русском и на турецком…… |
|
Sergey Sergeev Пользователь Сообщений: 3 |
sergey_bt #3 08-05-2003 19:30:03 Еще раз сенкс — действительно есть!!! |
Архив Форума Hi-Fi.ru
По 23-5-2020
Портал Hi-Fi.ru более не предоставляет возможностей и сервисов по общению пользователей