Установка ресивера
25
Ru
Глава 7:
Установка ресивера
Выбор настройки ресивера
Для обеспечения наивысшего возможного качества объемного звучания обязательно выполните следующие
операции настройки. Это особенно важно при использовании объемного звучания DTS и Dolby. Указанную
настройку необходимо выполнить только один раз (ее повторное выполнение требуется после замены
акустической системы или добавления новых громкоговорителей и т.д.). Подробные сведения по каждому
параметру настройки см. ниже.
1
Нажмите кнопку RECEIVER (РЕСИВЕР) для включения питания.
2
Нажмите кнопку RECEIVER (РЕСИВЕР).
3
Используйте кнопку
или
для выбора параметра, который необходимо настроить.
Самым простым способом является настройка каждого параметра в последовательности, описанной далее и
на следующих страницах. При переключении на дисплее отображается текущее значение каждого параметра.
Настройка громкоговорителей (эта страница)
Укажите количество и тип подключенных громкоговорителей.
Настройка задних громкоговорителей объемного звучания (стр. 26)
Задайте параметры задних громкоговорителей/низкочастотного громкоговорителя объемного звучания.
Настройка низкочастотного громкоговорителя (стр. 26)
Укажите, каким образом используется низкочастотный громкоговоритель.
Настройка частоты разделения (стр. 26)
Определите, какие частоты будут передаваться на низкочастотный громкоговоритель (или
громкоговорители большого размера).
Настройка аттенюатора низкочастотных эффектов (LFE) (стр. 26)
Задайте уровень аттенюатора для канала низкочастотных эффектов (LFE).
Настройка расстояния до левого переднего громкоговорителя (стр. 27)
Укажите расстояние от точки прослушивания до левого переднего громкоговорителя.
Настройка расстояния до центрального громкоговорителя (стр. 27)
Укажите расстояние от точки прослушивания до центрального громкоговорителя.
Настройка расстояния до правого переднего громкоговорителя (стр. 27)
Укажите расстояние от точки прослушивания до правого переднего громкоговорителя.
Настройка расстояния до правого громкоговорителя объемного звучания (стр. 27)
Укажите расстояние от точки прослушивания до правого громкоговорителя объемного звучания.
Настройка расстояния до задних громкоговорителей объемного звучания (стр. 27)
Укажите расстояние от точки прослушивания до задних громкоговорителей объемного звучания.
Настройка расстояния до левого громкоговорителя объемного звучания (стр. 27)
Укажите расстояние от точки прослушивания до левого громкоговорителя объемного звучания.
Настройка расстояния до низкочастотного громкоговорителя (стр. 27)
Укажите расстояние от точки прослушивания до низкочастотного громкоговорителя.
Настройка параметров управления динамическим диапазоном звука (стр. 27)
Выполните сжатие динамического диапазона звуковых дорожек.
Настройка двухканального монофонического звука (стр. 27)
Изолируйте один канал при прослушивании дисков с двухканальным монофоническим кодированием.
Настройка входов компонентного видео (стр. 28)
Укажите, какие компоненты подключены ко входам компонентного видео (см. ниже).
• Настройка входа 1 компонентного видео
• Настройка входа 2 компонентного видео
Параметры цифрового входа (стр. 28)
Укажите, какие компоненты подключены к цифровым входам (см. ниже).
• Настройка для коаксиального цифрового входа 1
• Настройка для коаксиального цифрового входа 2
• Настройка для оптического цифрового входа 1
• Настройка для оптического цифрового входа 2
(только для модели VSX-D814)
Настройка параметров управления SR+ (стр. 28)
Укажите параметры управления плазменным дисплеем Pioneer.
• Настройка режима управления
• Настройка регулятора громкости
• Настройка функции для входа
DVD
• Настройка функции для входа
TV
• Настройка функции для входа
DVR
• Настройка функции для входа
VIDEO
4
Используйте кнопку
или для настройки параметра.
Параметр вводится автоматически.
5
Повторите пп. 3 и 4 для других параметров настройки.
6
По завершении нажмите кнопку ENTER (ВВОД) для выхода.
• Если в течение 3 минут не осуществляются никакие действия, будет выполнен автоматический выход из
экрана настройки.
Настройка громкоговорителей
• Настройка по умолчанию:
FL-CS-SS (если при включении ресивера обнаруживается низкочастотный
громкоговоритель, принимается настройка
FS-CS-SS.)
Индикация
F (П), C (Ц) и S (О), отображаемая на дисплее, соответствует переднему, центральному
громкоговорителям и громкоговорителям объемного звучания, соответственно. Размер громкоговорителя
определяется следующим образом: индикация
L обозначает большие громкоговорители, S — маленькие
громкоговорители и
(звездочка) – если громкоговорители не подсоединены.
• Если размер (диаметр) конусного динамика громкоговорителя превышает 15 см, установите для
громкоговорителя размер
L.
• Если низкочастотный громкоговоритель не используется, рекомендуется установить для передних
громкоговорителей значение
L.
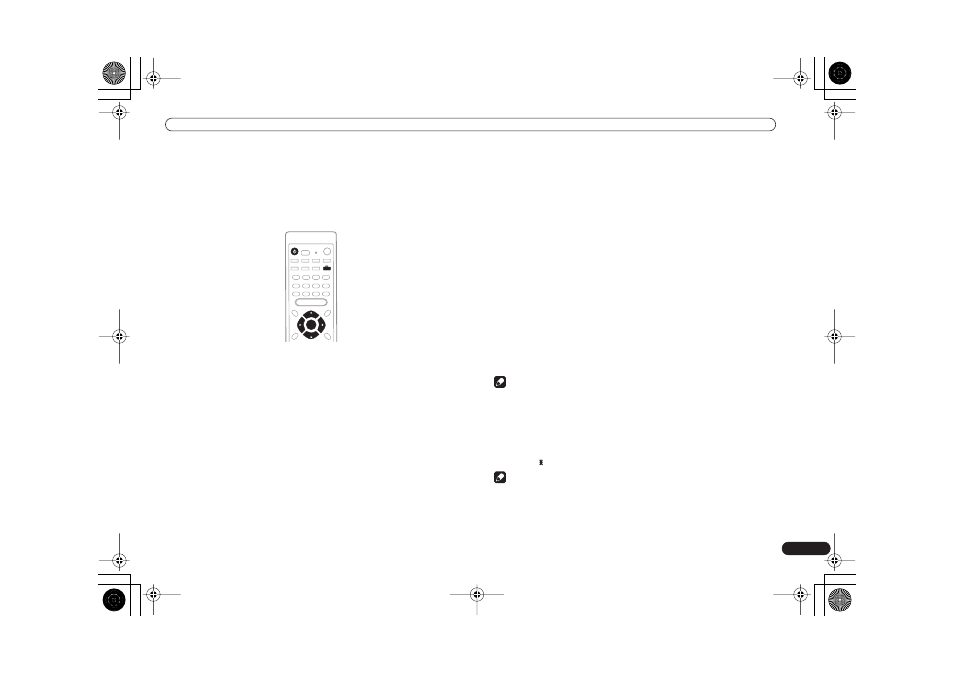
RECEIVER
ENTER
RECEIVER
Примечание
Примечание
VSX-D714_Ru_A5New.book Page 25 Monday, May 24, 2004 9:10 AM

-
Contents
-
Table of Contents
-
Troubleshooting
-
Bookmarks
Quick Links
AUDIO/VIDEO MULTI-CHANNEL
RECEIVER
VSX-D814
VSX-D914
Operating Instructions
Related Manuals for Pioneer VSX-D814
Summary of Contents for Pioneer VSX-D814
-
Page 1
AUDIO/VIDEO MULTI-CHANNEL RECEIVER VSX-D814 VSX-D914 Operating Instructions… -
Page 2
Thank you for buying this Pioneer product. Please read through these operating instructions so you will know how to operate your model properly. After you have finished reading the instructions, put them away in a safe place for future reference. -
Page 3
The lightning flash with arrowhead, within an equilateral triangle, is intended to alert the user to the presence of uninsulated «dangerous voltage» within the product’s enclosure that may be of sufficient magnitude to constitute a risk of electric shock to persons. READ INSTRUCTIONS —… -
Page 4: Table Of Contents
AC outlet ……25 Operating other Pioneer components ..25 Using this receiver with a Pioneer plasma display .
-
Page 5
….. . 50 Using the SR+ mode with a Pioneer plasma display ….. . . 51 08 Using the tuner Listening to the radio . -
Page 6: Before You Start
Before you start Chapter 1: Before you start Checking what’s in the box Please check that you’ve received the following supplied accessories: • AM loop antenna • FM wire antenna • AA/LR6 dry cell batteries x2 • Remote control • These operating instructions •…
-
Page 7: Operating Range Of Remote Control Unit
Before you start • When disposing of used batteries, please comply with governmental regulations or environmental public instruction’s rules that apply in your country or area. Operating range of remote control unit The remote control may not work properly if: •…
-
Page 8: 02 5 Minute Guide
5 minute guide Chapter 2: 5 minute guide Introduction to home theater You are probably used to using stereo equipment to listen to music, but may not be used to home theater systems that give you many more options (such as surround sound) when listening to soundtracks.
-
Page 9: Listening To Surround Sound
5 minute guide Listening to Surround Sound This receiver was designed with the easiest possible setup in mind, so with the following quick setup guide, you should have your system hooked up for surround sound in no time at all. In most cases, you can simply leave the receiver in the default settings.
-
Page 10: Connect Speakers
5 minute guide Connect your speakers. A complete setup of eight speakers (including the subwoofer) is shown here but everyone’s home setup will vary. Simply connect the speakers you have in the manner shown below. The receiver will work with just two stereo speakers (the front speakers in the diagram) but using at least three speakers is recommended, and a complete setup is best.
-
Page 11
5 minute guide • If you select subwoofer (SB SW) in the Surround back speaker setting on page 44 you can hook up a subwoofer instead of speakers to the surround back speaker terminals. Connect the wires just as above (and as shown below), connecting the positive wire to the right channel (+) terminal, and the negative wire to the left channel (–) terminal. -
Page 12: Using The Quick Setup
5 minute guide Using the Quick Setup You can use the Quick Setup to get your system up and running with just a few button presses. The receiver automatically makes the necessary settings after you have selected your speaker setup, room size and listening position.
-
Page 13
5 minute guide Press ENTER. Use the MULTI JOG dial to choose your listening position. You can cycle between the following choices: BACK FWD – If you are nearer to the front speakers than the surround speakers MID – If you are equal distance from the front and surround speakers BACK –… -
Page 14: Quick Surround Sound Setup
Quick surround sound setup Chapter 3: Quick surround sound setup VSX-D914 model only Automatically calibrating your listening area (MCACC) The Multi-Channel Acoustic Calibration (MCACC) system measures the acoustic characteristics of your listening area, taking into account ambient noise, speaker size and distance, and tests for both channel delay and channel level.
-
Page 15
Quick surround sound setup If you see an ERR message in the display, there may be a problem with your mic or the speaker connections. Turn off the power, and check the problem indicated by the ERR message (see below), then try the auto surround setup again. -
Page 16: Connecting Up
Connecting up Chapter 4: Connecting up • Before making or changing any connec- tions, switch off the power and discon- nect the power cord from the AC outlet. Audio/Video cords Use audio/video cords (not supplied) to connect the audio/video components and a video cord to connect the monitor TV.
-
Page 17: Connecting Digital Components
Connecting up Connecting digital components The easiest way to hook up this receiver for surround sound is to use a digital input. You can do this by either coaxial or optical connections (you do not need to do both). The quality of these two types of connections is the same but since some digital components only have one type of digital terminal, it is a matter of matching like with like (for example, the coaxial output from the component to coaxial input on the receiver).
-
Page 18: Connecting Audio Components
Connecting up Connecting audio components To begin set up, connect your analog audio components (such as a cassette deck) to the jacks. For components you want to record with, you need to hook up four plugs to the receiver (a set of stereo inputs and a set of stereo outputs), but for components that only play, you only need to hook up one set of stereo plugs.
-
Page 19: Connecting Video Components
Connecting up Connecting video components Connect your video components to the jacks as shown below. With digital video components (like a DVD player), you must use the connections shown on this page for the video signal, but in order to hear a digital source (like a DVD) you should hook up the audio to a digital input (see page 17).
-
Page 20: Connecting Antennas
Connecting up Connecting antennas Connect the AM loop antenna and the FM wire antenna as shown below. To improve reception and sound quality, connect external antennas (see Using external antennas below). Always make sure that the receiver is switched off and unplugged from the wall outlet before making or changing any connections.
-
Page 21: Connecting The Speakers
Connecting up Connecting the speakers A complete setup of eight speakers (including the subwoofer) is shown below, but everyone’s home setup will vary. Simply connect the speakers you have in the manner shown below. The receiver will work with just two stereo speakers (the front speakers in the diagram) but using at least three speakers is recommended, and a complete setup is best for surround sound.
-
Page 22: Speaker Terminals
Connecting up • When using the speaker on your TV as the center speaker (C), connect the CENTER PREOUT jack on this unit to the audio input jack on your TV. In this case the center speaker shown is unnecessary. •…
-
Page 23
Connecting up • Place the front left and right speakers at equal distances from the TV. • When placing speakers near the TV, we recommend using magnetically shielded speakers to prevent possible interference, such as discoloration of the picture when the TV is switched on. -
Page 24: Connecting Additional Amplifiers
Connecting up Connecting additional amplifiers This receiver has more than sufficient power for any home use, however it is possible to add additional amplifiers to every channel on this receiver. Make the connections shown below to add amplifiers to power your speakers. Always make sure that the receiver is switched off and unplugged from the wall outlet before making or changing any connections.
-
Page 25: Ac Outlet
A damaged power cord can cause a fire or give you an electrical shock. Check the power cord once in a while. When you find it damaged, ask your nearest Pioneer authorized service center or your dealer for a replacement.
-
Page 26: Plasma Display
/LD) / MD PLAY AUDIO • If you connect to a Pioneer plasma display using an SR+ cable, you will need to point the remote control at the plasma display remote sensor to control the receiver. In this case, you won’t be able to to control the receiver using the remote control if you switch the plasma display off.
-
Page 27: Controls And Displays
Controls and displays Chapter 5: Controls and displays Front panel DVD/LD TV/SAT DVR/VCR VIDEO CD-R/ TAPE/MD TUNER STANDBY / ON PHONES STATION TUNER EDIT CLASS BAND MULTI JOG 26 25 24 23 22 21 STANDBY/ON Switches the receiver between on and standby.
-
Page 28
Controls and displays STATION +/– buttons Selects station presets when using the tuner (page 54). 10 TUNING +/– buttons Selects the frequency when using the tuner (page 53). 11 LISTENING MODE buttons STANDARD Press for Standard decoding and to switch between the various Pro Logic IIx and Neo:6 options (page 35). -
Page 29: Display
Controls and displays Display SIGNAL SELECT indicators Lights to indicate the type of input signal assigned for the current component: AUTO Lights when AUTO signal select is on. Depending on the source, this lights when a signal with surround back channel encoding is detected.
-
Page 30
Controls and displays 11 Character display 12 Neo:6 When the (STANDARD) NEO:6 mode of the receiver is on, this lights to indicate NEO:6 processing. 13 ADV.SURR. (Advanced Surround) Lights when one of the Advanced Surround modes has been selected. 14 LOUDNESS Lights when LOUDNESS has been selected. -
Page 31: Remote Control
Controls and displays Remote control INPUT RECEIVER SOURCE SELECT DVD/LD TV/SAT DVR/VCR TV CONT MULTI CONTROL CD-R/TAPE TUNER RECEIVER INPUT ATT FL DIMMER ENTER SETUP D.ACCESS CLASS TOP MENU MENU TUNE DTV MENU MCACC SETUP ENTER BAND T.EDIT TUNE RETURN GUIDE TV CONTROL INPUT…
-
Page 32
Controls and displays GUIDE Displays the guides on a digital TV. CLASS Switches between the three banks (classes) of radio station presets (page 54). MENU Displays the disc menu of DVD-Video discs. It also displays TV and DTV menus. MCACC SETUP (Press RECEIVER first to access) Use to setup your speaker system using Multi-Channel Acoustic Calibration… -
Page 33
Controls and displays The following DVR controls can be accessed by pressing SHIFT: Starts recording. REC STOP Stops recording. HDD/DVD These buttons switch between the hard disk and DVD controls for DVD/HDD recorders. RECEIVER CONTROL buttons STANDARD Press for Standard decoding and to switch between the various Pro Logic IIx and Neo:6 options (page 35). -
Page 34
Controls and displays 13 RECEIVER Switches the remote to control the receiver (used to select the features above the number buttons (INPUT ATT, etc). Also use this button to set up surround sound (page 42, page 49, page 50). 14 MASTER VOLUME +/– Use to set the listening volume. -
Page 35: Listening To Your System
Listening to your system Chapter 6: Listening to your system Listening in surround sound Using this receiver, you can listen to any source in surround sound. However, the options available will depend on your speaker setup and the type of source you’re listening If you connected surround back speakers, see also Using the Surround Back Channel (SB CH) on page 38.
-
Page 36: Listening In Stereo
Listening to your system • ADV. MUSIC – Simulates the acoustic environment of a large concert hall and is suitable for music or musical sources. • TV SURR. – This mode produces surround sound for both mono and stereo TV sources.
-
Page 37: Choosing The Input Signal
Listening to your system • If you switch on Midnight listening, Loud- ness, or the Tone controls when DIRECT is selected, the receiver automatically switches to STEREO. Choosing the input signal • Default setting: AUTO You need to hook up a component to both analog and digital inputs on the rear of the receiver to select between input signals.
-
Page 38: Using The Surround Back Channel
Listening to your system Using the Surround Back Channel (SB CH) • Default setting: SB ON You can have the receiver automatically switch to Dolby Digital EX or DTS-ES decoding for 6.1 encoded sources (SB AUTO), or you can choose to listen to other kinds of sources (for example, 5.1 encoded material) with 6.1 encoding (SB ON).
-
Page 39: Using The Virtual Surround Back
Listening to your system Using the Virtual Surround Back mode (VSB) Selecting this mode allows you to hear a virtual back channel through your surround speakers. For example, you can choose to listen to sources with no surround back channel information (for example, 5.1 encoded material) with emulated 6.1 encoding (VSB ON).
-
Page 40: Using Loudness And Midnight Listening
Listening to your system Using Loudness and Midnight listening The Loudness listening feature can be used to get good bass and treble from music sources at low volume levels. The Midnight listening feature allows you to hear effective surround sound of movies at low volume levels.
-
Page 41: Selecting The Multi-Channel Analog
Listening to your system Selecting the multi-channel analog inputs If you have connected a decoder or a DVD player with multi-channel analog outputs to this receiver (page 18), you must select the analog multi-channel inputs for surround sound playback. ADVANCED STEREO/ SIGNAL MIDNIGHT/…
-
Page 42: Setting Up The Receiver
Refer to the following pages for details on each of the settings. • If you are using the Pioneer S-FCRW730 speaker system, make sure the Subwoofer setting is set to YES and the Speaker setting is set to FS-CS-SS.
-
Page 43: Speaker Setting
• Optical digital input 1 setting • Optical digital input 2 setting SR+ control settings (page 48) Specify how you want to control your Pioneer plasma display. • Control mode setting • Volume control setting Function setting for DVD input •…
-
Page 44: Surround Back Speaker Setting
Setting up the receiver • Cycle through the available choices using and choose a configuration that matches your speaker setup. One of the following configurations should match your setup: FS-CS-SS FL-C -S FL-C -SS FL-C -SL FL-CS-S FL-CS-SS FL-CS-SL Surround back speaker setting •…
-
Page 45: Lfe Attenuator Setting
Setting up the receiver We recommend setting this to 200 Hz if your S speakers are smaller bookshelf-type speakers. • to specify the crossover frequency for your small speakers (100 Hz, 150 Hz or 200 Hz). 100Hz 150Hz 200Hz 100 Hz Sends bass frequencies below 100 Hz to the subwoofer (or L speakers).
-
Page 46: Front Right Speaker Distance Setting
Setting up the receiver • to set the distance of the center speaker from the main listening position (within the range of 0.5 ft. to 45 ft.). • When C is selected in the speaker setting, the center speaker distance can’t be set.
-
Page 47: Dynamic Range Control Setting
Setting up the receiver • to set the distance of the subwoofer from the main listening posi- tion (within the range of 0.5 ft. to 45 ft.). • When NO is selected in the subwoofer setting, the subwoofer distance can’t be set.
-
Page 48: Sr+ Control For Pioneer Plasma
SR+ cable. Note that the number of function settings available will depend on the plasma display you’ve connected. See also Using this receiver with a Pioneer plasma display on page 26 and Using the SR+ mode with a Pioneer plasma display on page 51.
-
Page 49: Manually Calibrating Your Listening
Setting up the receiver Function setting for VIDEO input • VIDEO:1 – VIDEO:5 or TV – Matches the VIDEO function of the receiver with a numbered video input on the plasma display. For example, VIDEO:4 matches the VIDEO input with video input 4 on the plasma display.
-
Page 50: Setting Separate Channel Levels For Listening Modes
Setting up the receiver Specify the distance from the front left speaker to your listening position using then press ENTER. to adjust the delay for each channel in turn, pressing ENTER to go to the next channel when you’re done. Listen to the reference channel and use it to measure the target channel.
-
Page 51: Using The Sr+ Mode With A Pioneer
• Automatic volume muting on the plasma display. See also Using this receiver with a Pioneer plasma display on page 26 for connecting up, and SR+ control for Pioneer plasma displays on page 48 for setting up the receiver.
-
Page 52
Setting up the receiver • The automatic volume muting feature is enabled separately; see SR+ control for Pioneer plasma displays on page 48. (You can also use the System Setup menu to switch the SR+ mode of the receiver.) • If you disconnect the SR+ cable or switch… -
Page 53: Using The Tuner
Using the tuner Chapter 8: Using the tuner Listening to the radio The following steps show you how to tune in to FM and AM radio broadcasts using the automatic (search) and manual (step) tuning functions. If you already know the frequency of the station you want, see Tuning directly to a station below.
-
Page 54: Saving Station Presets
Using the tuner Press D.ACCESS (Direct Access). Use the number buttons to enter the frequency of the radio station. For example, to tune to 106.00 (FM), press 1, 0, 6, 0, 0. If you make a mistake halfway through, press D.ACCESS twice to cancel the frequency and start over.
-
Page 55: Listening To Station Presets
Using the tuner Press T.EDIT (TUNER EDIT). The display shows ST. NAME, then a blinking cursor at the first character position. Input the name you want. Names can be up to four characters long. • Use the MULTI JOG dial (front panel) or the ST +/–…
-
Page 56: Making Recordings Making An Audio Or A Video Recording
Making recordings Chapter 9: Making recordings Making an audio or a video recording You can make an audio or a video recording from the built-in tuner, or from an audio or video source connected to the receiver (such as a CD player or TV). Keep in mind you can’t make a digital recording from an analog source or vice- versa, so make sure the components you are…
-
Page 57: Controlling The Rest Of Your System
Controlling the rest of your system Chapter 10: Controlling the rest of your system Setting the remote to control other components Most components can be assigned to one of the MULTI CONTROL buttons using the component’s manufacturer preset code stored in the remote. However, please note that there are cases where only certain functions may be control- lable after assigning the proper preset code,…
-
Page 58: Programming Signals From Other
ENTER. This should be the manufacturer’s name (for example, P for Pioneer). to select the manufac- turer’s name from the list then press ENTER to select the proper code from the list, then try using this remote control with your component.
-
Page 59: Erasing One Of The Remote Control
Controlling the rest of your system Certain buttons represent operations that cannot be learned from other remote controls. The buttons available are shown below: INPUT RECEIVER SOURCE SELECT DVD/LD TV/SAT DVR/VCR TV CONT MULTI CONTROL CD-R/TAPE TUNER RECEIVER INPUT ATT FL DIMMER DISC ENTER…
-
Page 60: Erasing All Of The Remote Control
Controlling the rest of your system Repeat step 4 to erase other buttons. Press the RECEIVER button when you’re done. Erasing all of the remote control presets This will erase all preset remote control preset codes and (VSX-D914 model only) programmed buttons.
-
Page 61: Controls For Tvs
Controlling the rest of your system Controls for TVs This remote control can control components after entering the proper codes or teaching the receiver the commands (see Setting the remote to control other components on page 57 for more on this). Use the MULTI CONTROL buttons to select the component. Button(s) Function Switches the DTV on or off.
-
Page 62: Controls For Other Components
Controlling the rest of your system Button(s) Function ENTER/ Use to enter a channel. DISC MENU Select different menus from the DTV functions. Select the menu screen. & Press to select or adjust and navigate items on the menu ENTER screen.
-
Page 63
Controlling the rest of your system Button (s) Function Stops playback (on some models, pressing this when the disc is already stopped will cause the disc tray to open). Starts recording. To prevent accidental recording, this button must be pressed twice to take effect (the second press must be within 10 seconds of the first). -
Page 64
Controlling the rest of your system Button (s) Function SUBTITLE Displays/changes the subtitles on multilingual DVDs. Switches to the hard disk controls when using a (SHIFT + DVD/HDD recorder. CH–) Switches to the DVD controls when using a DVD/ (SHIFT + HDD recorder. -
Page 65: Additional Information
Investigate the other components and electrical appliances being used. If the trouble cannot be rectified even after exercising the checks listed below, ask your nearest Pioneer authorized service center or your dealer to carry out repair work. Problem Remedy The power does not turn on.
-
Page 66
Additional information Problem Broadcast stations cannot be selected automatically. No sound from surround or center speakers. No sound from surround back speakers. No sound from subwoofer. Noise during playback of a cassette deck. Sound is produced from other components, but not from LD or DVD player. -
Page 67: Resetting The Main Unit
Additional information Problem Remedy Can’t operate the remote • Replace the batteries (refer to page 6). control. • Operate within 23 feet ( 7 m), 30° of the remote sensor on the front panel (refer to page 7). • Remove the obstacle or operate from another position. •…
-
Page 68: Specifications
VSX-D914 (Front)….110 W (20–20,000 Hz, THD 0.2 %, 8 Ω) VSX-D814 (Front)….100 W (20–20,000 Hz, THD 0.2 %, 8 Ω)
-
Page 69: Cleaning The Unit
Additional information Frequency response DVD/LD, TV/SAT MONITOR . . . 5 Hz to 40 MHz Signal-to-Noise Ratio….55 dB FM Tuner Section Frequency Range..87.5 MHz to 108 MHz Usable Sensitivity .
-
Page 70
Additional information… -
Page 71
253 Alexandra Road, #04-01, Singapore 159936 TEL: 656-472-1111 PIONEER ELECTRONICS AUSTRALIA PTY. LTD. 178-184 Boundary Road, Braeside, Victoria 3195, Australia, TEL: (03) 9586-6300 PIONEER ELECTRONICS DE MEXICO S.A. DE C.V. Blvd.Manuel Avila Camacho 138 10 piso Col.Lomas de Chapultepec, Mexico,D.F. 11000 TEL: 55-9178-4270 <03L00001>…

Страница 12: Рамочная антенна ам, Использование внешних антенн, Speakers, Multi jog, Antenna dvd 5.1ch input, D v d 5.1ch input, Ωantenna в инструкции по эксплуатации Pioneer VSX-D814 RU
Подключение
Подключение к видеоразъему на передней панели
Доступ к видеоразъемам на передней панели обеспечивается с помощью кнопки
VIDEO Здесь расположены стандартные гнезда аудио/видео а также гнездо S-video (в модели VSX-D814 имеется также оптический вход). Подключите их таким же образом как подключаются разъемы на задней панели.
Подключение антенн
Проволочная антенна FM
Подключите проволочную антенну FM и полностью вытяните ее в вертикальном направлении вдоль оконной рамы или в другом подходящем месте где обеспечивается хороший прием.
Рамочная антенна АМ
Использование внешних антенн
Методы улучшения качества приема FM
Улучшение качества приема AM
Подключите рамочную антенну АМ и проволочную антенну FM как показано ниже Для улучшения приема и качества звука подключите внешние антенны (см. раздел
Использование внешних антенн ниже) Всегда выключайте ресивер и отключайте его из электророзетки перед выполнением любых подключений или переключений.
SPEAKERS
S-VIDEO
DIGITAL IN
VIDEO
L AUDIO R
O/ T
SIGNAL SELECT
MIDNIGHT/ LOUDNESS
SB CH MODE
TONE
QUICK SETUP
SETUP MIC
MCACC
VIDEO INPUT
MULTI JOG
VIDEO OUTPUT
DIGITAL OUT
Видеокамера (и т.д.)
DVR/
CONTROL
LOOP
FM UNBAL
MONITOR OUT
MONITOR OUT
SUB WOOFER
SURROUND
CENTER
S-VIDEO
VIDEO
SUB WOOFER
AUDIO
DIGITAL OUT
COAX
COAX
DVR/
SAT)
( D V R V C R )
(DVD
(CD)
PLAY
CD-R
TAPE
FRONT
PREOUT
ASSIGNABLE
DIGITAL IN
ANTENNA
DVD 5.1CH INPUT
S P E A K E R S
D V D
5.1CH
INPUT
Рамочная антенна AМ
Проволочная антенна FM
Соберите антенну и подключите ее к ресиверу Закрепите антенну (если необходимо) и расположите ее в направлении обеспечивающем наилучший прием.
Разъемы антенны с фиксаторами
Скрутите оголенные жилы провода и вставьте их в отверстие а затем зажмите фиксатором.
Подсоедините внешнюю антенну FM диапазона.
Подсоедините провод в виниловой изоляции длиной 5–6 м к гнезду AM антенны не отсоединяя прилагаемую рамочную антенну AM. Для наилучшего качества приема подвесьте ее горизонтально на улице.
10 мм
LOOP
FM UNBAL
ANTENNA
Одноконтактный разьем PAL
коаксиальный кабель
LOOP
FM UNBAL
ANTENNA
Наружная антенна
Внутренняя антенна (провод с виниловой изоляцией)
5–6 м
VSX-D714_Ru_A5New.book Page 12 Monday May 24 2004 9:10 AM
8.8 · 12
PDF инструкция · 75 страниц(ы) английский
инструкцияPioneer VSX-D814

AUDIO/VIDEO MULTI-CHANNEL
RECEIVER
VSX-D514
VSX-D714
VSX-D814
Operating Instructions
VSX_514-814.fm 1 ページ 2004年3月2日 火曜日 午後8時35分
Посмотреть инструкция для Pioneer VSX-D814 бесплатно. Руководство относится к категории приемники, 12 человек(а) дали ему среднюю оценку 8.8. Руководство доступно на следующих языках: английский. У вас есть вопрос о Pioneer VSX-D814 или вам нужна помощь? Задайте свой вопрос здесь
- 01 Before you startChecking what’s in the box . . . . . . . . . . . . 5
- Making cable connections . . . . . . . . . . . . . 5
- Loading the batteries . . . . . . . . . . . . . . . . . 5
- Operating range of remote control unit . . . 6
- 02 5 minute guideIntroduction to home theater . . . . . . . . . . . 7
- Listening to Surround Sound . . . . . . . . . . . 8
- Using the Quick Setup . . . . . . . . . . . . . . . 12
- 03 Connecting upAudio/Video cords . . . . . . . . . . . . . . . . . . 14
- S-video cables . . . . . . . . . . . . . . . . . . . . . 14
- Component video cords . . . . . . . . . . . . . . 14
- Digital audio coaxial cords/Opticalcables . . . . . . . . . . . . . . . . . . . . . . . . . . . 14
- Connecting digital components . . . . . . . . 15
- Connecting audio components . . . . . . . . 16
- Connecting DVD 5.1 channelcomponents . . . . . . . . . . . . . . . . . . . . . . . 17
- Connecting video components. . . . . . . . . 18
- Connecting antennas . . . . . . . . . . . . . . . . 19
- Connecting the speakers(VSX-D514/D714) . . . . . . . . . . . . . . . . . . . 20
- Connecting the speakers (VSX-D814) . . . . 21
- Connecting additional amplifiers . . . . . . . 24
- Operating other Pioneer components . . . 25
- Using this receiver with a Pioneerplasma display . . . . . . . . . . . . . . . . . . . . . 26
- 04 Controls and displaysFront panel (VSX-D514) . . . . . . . . . . . . . . . 27
- Front panel (VSX-D714/D814) . . . . . . . . . . 29
- Display . . . . . . . . . . . . . . . . . . . . . . . . . . . 31
- Remote control . . . . . . . . . . . . . . . . . . . . . 32
- 05 Listening to your systemListening in surround sound . . . . . . . . . . . 36
- Listening in stereo . . . . . . . . . . . . . . . . . . . 38
- Choosing the input signal . . . . . . . . . . . . . 38
- Using the Surround Back Channel(SB CH) . . . . . . . . . . . . . . . . . . . . . . . . . . . 39
- Using the Virtual Surround Back mode(VSB) . . . . . . . . . . . . . . . . . . . . . . . . . . . . . 40
- Using Midnight and Loudness listening . .41
- Using the tone controls . . . . . . . . . . . . . . . 41
- Playing other sources . . . . . . . . . . . . . . . . 42
- Selecting the multichannel analoginputs . . . . . . . . . . . . . . . . . . . . . . . . . . . . 42
- Using the sleep timer . . . . . . . . . . . . . . . . 43
- 06 Setting up the receiverChoosing your receiver setup . . . . . . . . . . 44
- Dynamic range control setting. . . . . . . . 50
- Dual mono setting . . . . . . . . . . . . . . . . . 50
- Component video input settings . . . . . . 50
- Digital input settings . . . . . . . . . . . . . . . 50
- SR+ control for Pioneer plasmadisplays . . . . . . . . . . . . . . . . . . . . . . . . . 51
- Using the SR+ mode with a Pioneerplasma display . . . . . . . . . . . . . . . . . . . . . 54
- 07 Using the tunerListening to the radio . . . . . . . . . . . . . . . . 56
- Improving FM stereo sound . . . . . . . . . . 56
- Tuning directly to a station. . . . . . . . . . . 56
- Naming station presets . . . . . . . . . . . . . 58
- Listening to station presets . . . . . . . . . . 58
- Changing the frequency step . . . . . . . . . . 58
- 08 Making recordingsMaking an audio or a video recording . . . 59
- 09 Controlling the rest of yoursystemSetting the remote to control othercomponents . . . . . . . . . . . . . . . . . . . . . . . 60
- Preset Code List (VSX-D514/D714) . . . . . . . 66
- Preset Code List (VSX-D814) . . . . . . . . . . . 68
- 10 Additional informationTroubleshooting . . . . . . . . . . . . . . . . . . . . 70
- Resetting the main unit . . . . . . . . . . . . . . . 72
- Switching the speaker impedance. . . . . . . 72
- Specifications . . . . . . . . . . . . . . . . . . . . . . 73
Нужна помощь?
У вас есть вопрос о Pioneer а ответа нет в руководстве? Задайте свой вопрос здесь Дай исчерпывающее описание проблемы и четко задайте свой вопрос. Чем детальнее описание проблемы или вопроса, тем легче будет другим пользователям Pioneer предоставить вам исчерпывающий ответ.
Количество вопросов: 0

Главная
| Pioneer | |
| VSX-D814 | |
| приемник | |
| английский | |
| Руководство пользователя (PDF) |
Не можете найти ответ на свой вопрос в руководстве? Вы можете найти ответ на свой вопрос ниже, в разделе часто задаваемых вопросов о Pioneer VSX-D814.
Когда звук считается слишком громким?
Могут ли устройства разных марок подключаться друг к другу при помощи Bluetooth?
Что такое Bluetooth?
Что такое HDMI?
Как лучше всего выполнять чистку приемник?
Что такое Dolby Atmos?
Инструкция Pioneer VSX-D814 доступно в русский?
Не нашли свой вопрос? Задайте свой вопрос здесь
Нет результатов

Pioneer VSX-922
инструкция214 страниц(ы)

Pioneer VSX-923
инструкция226 страниц(ы)

Pioneer VSX-527
инструкция200 страниц(ы)

Pioneer VSX-935
инструкция166 страниц(ы)

Pioneer VSX-322
инструкция86 страниц(ы)

Pioneer VSX-522
инструкция39 страниц(ы)

Pioneer VSX-323
инструкция110 страниц(ы)

Pioneer VSX-528
инструкция204 страниц(ы)

Pioneer VSX-534
инструкция109 страниц(ы)

Pioneer VSX-529
инструкция67 страниц(ы)
Посмотреть все Pioneer руководства Посмотреть все Pioneer приемник руководства
-
Contents
-
Table of Contents
-
Bookmarks
Quick Links
AUDIO/VIDEO MULTI-CHANNEL RECEIVER
VSX-D814-K
VSX-D814-S
THIS MANUAL IS APPLICABLE TO THE FOLLOWING MODEL(S) AND TYPE(S).
Model
Type
VSX-D814-K
MYXJI
VSX-D814-S
MYXJI
For details, refer to «Important symbols for good services».
PIONEER CORPORATION
PIONEER ELECTRONICS (USA) INC. P.O. Box 1760, Long Beach, CA 90801-1760, U.S.A.
PIONEER EUROPE NV Haven 1087, Keetberglaan 1, 9120 Melsele, Belgium
PIONEER ELECTRONICS ASIACENTRE PTE. LTD. 253 Alexandra Road, #04-01, Singapore 159936
PIONEER CORPORATION 2004
DVD/LD
TV/SAT
DVR/VCR
CD-R/
TUNER
CD
TAPE/MD
STANDBY / ON
PHONES
Power Requirement
AC220-230V
AC220-230V
4-1, Meguro 1-chome, Meguro-ku, Tokyo 153-8654, Japan
AUDIO/VIDEO MULTI-CHANNEL RECEIVER
VIDEO
ENTER
AUX
MASTER VOLUME
DOWN
ADVANCED
STEREO/
SIGNAL
MIDNIGHT/
SB CH
MULTI JOG
STATION
TUNING
STANDARD
SURROUND
DIRECT
SELECT
LOUDNESS
SPEAKERS
MODE
TONE
QUICK SETUP
LISTENING MODE
VIDEO INPUT
MCACC
SETUP MIC
DIGITAL IN
S-VIDEO
VIDEO
L AUDIO R
PTY
EON
TUNER EDIT
BAND
MPX
SEARCH
MODE
CLASS
MULTI JOG
VSX-D814-K
VSX-D814
MULTI JOG
UP
ORDER NO.
RRV2929
Remarks
T-ZZK APR. 2004 printed in Japan