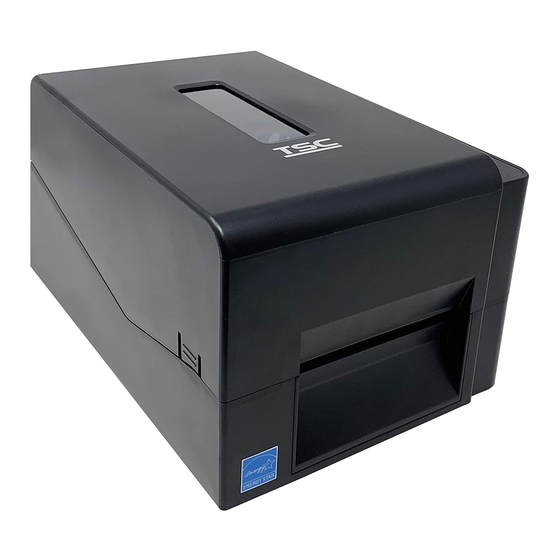
TSC TE200 — популярная модель принтера этикеток. Он поддерживает термотрансферную печать, 8 встроенных шрифтов, командные языки Eltron® и Zebra®. Разрешение печати — 203 dpi, скорость работы — 152,4 мм/с. Подключается к компьютеру при помощи USB 2.0.
Модель можно использовать в розничных магазинах, на складах, в транспортной сфере, а также для работы с маркетплейсами Ozon и Wildberries. Есть 16 МБ оперативной памяти и 8 МБ флэш-памяти. Как настроить принтер этикеток TSC TE200 после покупки, расскажем в этой статье.
Установка и включение принтера
В комплект поставки устройства входят:
- принтер;
- кабель и блок питания;
- шнур USB 2.0;
- вал для риббонов (2 шт.);
- вал дня носителя;
- бумажная втулка для красящей ленты;
- печатная инструкция;
- диск с инструкциями, ПО и драйверами.
Размещать принтер рекомендуется на ровной поверхности — рабочем столе, прилавке и пр. Сперва необходимо убедиться, что тумблер устройства установлен в положение «выкл.», он расположен на задней панели. Затем можно подключить TSC TE200 с помощью сетевого кабеля и блока питания, а также соединить с компьютером при помощи шнура USB. Только после этого оборудование включается путём нажатия тумблера.
Загрузка расходных материалов
Чтобы поместить риббоны в принтер, необходимо:
- поднять крышку устройства, нажав на защёлки по бокам;
- поместить бумажную втулку на вал перемотки ленты;
- установить его сначала правой, а затем левой стороной (стороны подписаны литерами L и R);
- приподнять механизм печатающей головки путём нажатия квадратной зелёной кнопки;
- надеть риббон на другой вал;
- установить внутри устройства шпиндель;
- протянуть конец красящей ленты через термоголовку и закрепить на бумажном сердечнике, расположенном на первом шпинделе;
- повернуть втулку, пока риббон не будет плотно намотан на неё;
- закрыть печатающий механизм и крышку.
Для установки носителя требуется:
- открыть крышку принтера с помощью боковых защёлок;
- надеть рулон этикет-ленты на вал подачи носителя, при необходимости используя переходник;
- разместить вал с рулоном носителя внутри принтера;
- нажатием зелёной кнопки поднять печатающую головку;
- протянуть этикет-ленту через датчик носителя и поместить ее конец на бумагоопорный валик;
- настроить положение направляющих по ширине этикеток;
- опустить печатающий механизм и закрыть крышку оборудования.
Драйверы и ПО
Принтер работает с операционными системами Windows и Oracle Linux. Всё нужное для работы программное обеспечение есть на диске, который входит в комплект поставки. На нём присутствует руководство пользователя и программа BarTender, с помощью которой можно создавать шаблоны этикеток.
Драйверы для устройства можно загрузить с официального сайта производителя. Они находятся в разделе «Поддержка и загрузка» — нужно выбрать тип ПО и указать модель принтера. На сайте также есть различные программы для других моделей производителя TSC.

Настройка принтера TSC TE200
Долгое удерживание кнопки Feed с последующим включением принтера активирует встроенные утилиты для тестирования и настройки печати. Их всего шесть. Узнать, какая именно была запущена, можно по цвету индикатора:
- красный — калибровка датчика зазора/чёрной метки;
- жёлтый (мигающий) — регулировка датчика зазора/чёрной метки;
- зелёный (мигающий) — режим инициализации;
- зелёный/жёлтый — настройте датчик носителя чёрной метки и откалибруйте его;
- красный/жёлтый — настройте датчик зазора в качестве датчика носителя и откалибруйте его;
- зелёный (горящий) — пропуск AUTO.BAS.
Калибровка датчиков
Калибровку датчика зазора/чёрной метки необходимо проводить, если:
- принтер подключен в первый раз;
- произведена замена этикет-ленты;
- выполняется инициализация.
Чтобы провести калибровку, кнопку Feed нужно отпустить в тот момент, когда индикатор начнёт мигать красным.
Регулировка зазора/чёрной метки, самодиагностика и режим дампа
Утилита запускается, когда индикатор мигает жёлтым. В процессе регулировки принтер автоматически определяет длину этикетки, выводит результаты самодиагностики на печать, а затем переходит в режим дампа. Это помогает диагностировать повреждение нагревательных элементов, определить объём свободной памяти, конфигурацию. Чтобы печатать данные в режиме дампа, необходима бумага шириной 100 мм. Для возвращения в стандартный режим принтер нужно перезапустить путём выключения/включения.
Инициализация
Инициализация работает, когда индикатор мигает зелёным. Она необходима для очистки оперативной памяти и сброса оборудования до заводских настроек. При инициализации удаляются все загруженные файлы, а также установленное программное обеспечение.
Настройка датчиков
Датчики можно настроить двумя способами, в зависимости от типа используемого носителя (с чёрными метками или зазорами). Для чёрной метки это поочерёдное мигание индикатора жёлтым/зелёным, для зазора — красным/жёлтым.
Пропуск AUTO.BAS
С помощью командного языка TSPL2 можно автоматически загружать выполняемый файл во flash-память устройства. Это возможно за счёт программы AUTO.BAS — она активируется при включении. Если во время настройки отпустить кнопку Feed в момент, когда индикатор будет непрерывно гореть зеленым, программное обеспечение не будет функционировать.
Инструкция по настройке TSC TE200 с помощью диагностической программы
Чтобы следить за состоянием принтера этикеток и настраивать его, в нём предусмотрена встроенная диагностическая программа Diagnostic tool. С её помощью можно также загружать шрифты и графику. Работа с ней осуществляется через компьютер.
Чтобы настроить печатное оборудование с помощью программы, необходимо:
- найти вкладку «Printer Configuration», выбрать интерфейс подключения устройства к ПК (USB);
- зайти в раздел «Printer Function», выбрать нужные функции;
- для регулировки датчика нужно нажать на первую кнопку в разделе Printer Function и выбрать тип носителя, а затем кликнуть по кнопке «Calibrate» (калибровка).
Распространённые проблемы в работе и их решение
Среди наиболее распространённых неисправностей в работе TSC TE200:
- Не горит индикатор. Проблема может быть в отсутствии питания или неправильном подключении кабеля. Необходимо проверить правильность подключения устройства к электросети.
- Флэш-память переполнена. Необходимо её очистить путём удаления лишних данных.
- Принтер не печатает этикетки. Причин может быть несколько — закончились расходники, риббон и носитель несовместимы между собой или термоголовка загрязнилась/вышла из строя. Необходимо поочерёдно проверить все три варианта.
- Принтер пропускает этикетки в процессе печати. Причиной может быть неправильно установленный размер этикеток, ошибки при калибровке датчика или присутствие на нём загрязнений.
- Этикетки выходят из устройства помятыми. Причина может скрываться в неправильной загрузке риббона — убедитесь, что направляющая носителя задевает края риббона.
- На этикетках присутствует серая полоса. Возможно, печатающая головка или опорный валик загрязнены — в этом случае их нужно будет очистить.
- Данные на этикетках некорректны. Скорее всего, оборудование находится в режиме дампа — чтобы выйти из этого режима, его нужно перезагрузить.
Как видите, установка и настройка принтера этикеток TSC TE200 — задача, требующая времени. При необходимости вы можете обратиться к специалистам, которые помогут быстро настроить устройство, а также оперативно решат любые проблемы с его работой.
-
Contents
-
Table of Contents
-
Troubleshooting
-
Bookmarks
Quick Links
;’RFTGTT5RT12
TE200 Series
Thermal Transfer
Direct Thermal
Desktop Barcode Printers
Series Lists:
User Manual
TE200 / TE300
TE210 / TE310
Related Manuals for TSC Printronix TE200 Series
Summary of Contents for TSC Printronix TE200 Series
-
Page 1
;’RFTGTT5RT12 TE200 Series Thermal Transfer Direct Thermal Desktop Barcode Printers Series Lists: User Manual TE200 / TE300 TE210 / TE310… -
Page 2
All other trademarks are the property of their respective owners. Information in this document is subject to change without notice and does not represent a commitment on the part of TSC Auto ID Technology Co. No part of this manual may be reproduced or transmitted in any form or by any means, for any purpose other than the purchaser’s personal use, without the… -
Page 3: Table Of Contents
Table of Contents 1. Introduction ………………………………….1 1.1 Product Specification ………………………………2 1.1.1 Printer Optional Features …………………………….4 1.1.2 Label Print Module Features (Optional) …………………………5 1.2 General Specification ………………………………6 1.3 Print Specification ………………………………..7 1.4 Ribbon Specification ………………………………7 1.5 Media Specification ………………………………..8 2. Operation Overview ………………………………..9 2.1 Unpacking and Inspection ………………………………9 2.2 Printer Overview ………………………………..
-
Page 4
5. TSC Console ………………………………….26 5.1 Start TSC Console ………………………………. 26 5.2 Setup Ethernet Interface ……………………………… 28 5.3 Set WiFi and Add to TSC Console Interface ………………………… 30 5.4 Initialize the Printer WiFi Setting …………………………..33 5.5 TPH Care ………………………………….34 5.6 Printer Function ……………………………….. -
Page 5: Introduction
This document provides an easy reference for operating this printer. TSC printers include the Windows labeling software for creating your label template. For system integration, the TSPL/TSPL2 printer programming manual or SDKs can be found on TSC website at: https://www.tscprinters.com.
-
Page 6: Product Specification
1.1 Product Specification TE200 TE210 TE310 TE300 (300 (203 dpi (203 dpi Product standard feature (300 dpi dpi model) model) model) model) ○ ○ ○ ○ Thermal transfer printing ○ ○ ○ ○ Direct thermal printing ○ ○ ○ ○ Plastic ○…
-
Page 7
○ ○ 128 MB Flash memory SD card reader (Reserve a PIN connector for updating firmware by card when doing maintenance.) ○ ○ ○ ○ BUZZER ○ ○ ○ ○ One button for feed and pause ○ ○ ○ ○ One LED indicator for 3 colors ®… -
Page 8: Printer Optional Features
1.1.1 Printer Optional Features The printer offers the following optional features. Dealer Factory User options Product option feature options options ○ Extended plate for external roll mount assembly with 3” core label spindle (8.4 OD) ○ Internal Bluetooth v4.0 For TE210/TE310 Series only: ○…
-
Page 9: Label Print Module Features (Optional)
1.1.2 Label Print Module Features (Optional) Resolution 8 dots/mm (203 DPI) 12 dots/mm (300 DPI) 152.4 mm (6”)/second 127 mm (5”)/second Max. print speed 108 mm (4.25”) 105.7 mm (4.16”) Max. print width Print Module 196.0 mm (W) x 161.0 mm (L) x 145.0 mm (H) Physical dimension (7.72”…
-
Page 10: General Specification
Peel-off module Guillotine cutter (full cut and partial cut) Optional External roll mount, media OD. 214 mm (8.4”) with 76.2 mm (3”) core 1.2 General Specification TE200/TE300 TE210/TE310 Physical dimensions 204 mm (W) x 164 mm (H) x 280 mm (L) Weight 2.4kg 2.5kg…
-
Page 11: Print Specification
1.3 Print Specification TE200 TE300 TE210 TE310 Print Specifications (203 dpi model) (300 dpi model) (203 dpi model) (300 dpi model) 203 dots/inch 300 dots/inch 203 dots/inch 300 dots/inch Print head resolution (8 dots/mm) (12 dots/mm) (8 dots/mm) (12 dots/mm) Thermal transfer and direct thermal Printing method Dot size…
-
Page 12: Media Specification
1.5 Media Specification TE200 TE300 TE210 TE310 (203 dpi model) (300 dpi model) (203 dpi model) (300 dpi model) Label roll capacity Max. 5” OD Continuous, die-cut, black mark, fan-fold, notch Media type Outside wound Media wound type Media width 20mm ~ Max.
-
Page 13: Operation Overview
2. Operation Overview 2.1 Unpacking and Inspection This printer has been specially packaged to withstand damage during shipping. Please carefully inspect the packaging and printer upon receiving the bar code printer. Please retain the packaging materials in case you need to reship the printer. …
-
Page 14: Printer Overview
2.2 Printer Overview 2.2.1 Front View Paper exit chute LED indicator Feed/Pause button Top cover open tab…
-
Page 15: Interior View
2.2.2 Interior View Printer top cover Ribbon supply spindle Ribbon supply hub Ribbon rewind hub Ribbon rewind spindle Fixing tabs Media supply spindle Print head release button Print head Media guide adjustment knob Media guide Platen roller Gap sensor Black mark sensor…
-
Page 16: Rear View
2.3.2 Rear View Power switch Power jack socket USB interface (USB 2.0/Hi-Speed mode) USB host (TE210/TE310 Series only) RS-232 interface (TE210/TE310 Series only) Ethernet interface (TE210/TE310 Series only)
-
Page 17: Setup
3. Setup 3.1 Setting up the Printer Plug the power cord into the AC power cord socket at the rear of the printer. Then, plug the other side into a properly grounded power outlet. Connect the printer to the computer with the provided USB cable. Push the power switch on “-”…
-
Page 18: Loading The Ribbon
3.2 Loading the Ribbon Open the printer top cover by pressing the top cover open tabs and pulling up. Open the ribbon access cover and the media cover. Insert the paper core to the ribbon rewind spindle. Note: Please follow the direction when installing the ribbon rewind spindle.
-
Page 19
Push the print head release button to open the print head mechanism. Insert the ribbon to the ribbon spindle. Note: The ribbon spindle can be substituted by insert the ribbon with notches on both sides to the ribbon mechanism directly. Insert the right side of ribbon supply spindle (marked “R”) to the ribbon supply hub first. -
Page 20
Pull the leader of the ribbon through the print head and stick the leader of the ribbon onto the ribbon rewind paper core. Turn the ribbon rewind hub until the ribbon plastic leader is thoroughly wound and the black section of the ribbon covers the print head. -
Page 21: Loading The Media
3.3 Loading the Media Open the printer top cover by pressing the top cover open tabs located on each side of the printer. Insert the paper roll into the media supply spindle and use two fixing tabs to fix the paper roll onto the center of the spindle.
-
Page 22
Push the print head release button to open the print head mechanism. Gap Sensor Black Mark Sensor Note: The black mark sensor position is moveable and the gap sensor is fixed. Please make sure the gap or black mark is at the location where media gap/black mark will pass through for sensing. -
Page 23
Loading path for Media Note: Please calibrate the gap/ black mark sensor when changing media. -
Page 24: External Label Roll Mount Installation (Option)
3.4 External Label Roll Mount Installation (Option) Attach an external paper roll mount on the bottom of the printer. Insert a 3” (or 1”) label spindle into a paper roll. Then, install it on the external paper roll mount. 1” label spindle Feed the media through the rear external label entrance chute.
-
Page 25: Loading Label In Peel-Off Mode (Option)
3.5 Loading Label in Peel-Off Mode (Option) Push the print head release button to open the print Open the printer top head mechanism and feed cover and refer to the media through the chapter 3.3 to install the media sensor. Move the label.
-
Page 26: Loading Label In Cutter Mode (Option)
3.6 Loading Label in Cutter Mode (Option) Refer to chapter 3.3 to Push the print head release install the label and use button to open the print software to set the head mechanism and feed media sensor type and calibrate the selected the media through the sensor.
-
Page 27: Installing The Print Engine (Option)
3.7 Installing the Print Engine (Option) Refer to chapter 3.3 to install the label. Use “TSC Console” to set the media sensor type and calibrate the selected sensor. Then open the printer top cover by pressing the top cover open tabs located on each side of the printer.
-
Page 28: Led And Button Functions
4. LED and Button Functions 4.1 LED Indicator Color Meaning Solid: Power is on and ready to be used. (Green) Flash :System is downloading data or printer is paused. System is clearing data. (Amber) Solid — Printer head open, cutter error. (Red) Flash — Printing error, such as paper empty, paper jam, ribbon empty, or memory error etc.
-
Page 29: Power-On Utilities
4.3 Power-on Utilities Power-on Utilities provides the basic functions and can be activated by below procedures: Turn off the power > Hold the FEED buttons > Open the power > Release the Feed button depending on the color of the LED. Sequences of the settings: LED Colors Green…
-
Page 30: Tsc Console
5. TSC Console TSC Console is a management tool combining the Printer Management, Diagnostic Tool, CommTool and Printer Webpage settings, which enables you to adjust printer’s settings/status; change printers’ settings; download graphics, deploy fonts, graphics, label templates or upgrade the firmware to the group of printers, and send additional commands to printers at the same time ※…
-
Page 31
Select the current interface of the printer. The printer will be added to TSC Console’s interface. Select the printer and set the settings. For more information, please refer to TSC Console User Manual. -
Page 32: Setup Ethernet Interface
5.2 Setup Ethernet Interface Use USB or COM to establish the interface on TSC Console. Double click to enter the Printer Configuration Page > Click Ethernet tab > Check the IP Address.
-
Page 33
Choose Network > Key in the IP Address > Click Discover to establish the Ehternet interface. The notification will pop up > Click OK to close the window > The Ethernert interface will be shown on TSC Console. -
Page 34: Set Wifi And Add To Tsc Console Interface
5.3 Set WiFi and Add to TSC Console Interface Use USB or COM Port to set up the interface. (refer to chp.5.1) Double click to enter the printer configuration page. Click Get to receive printer’s information. …
-
Page 35
For WPA-Personal Fill-in the SSID. Select the Encryption option to WPA-Personal. III. Fill-in the Key. Select DHCP to ON. (For OFF option, please fill-in the IP Address, Subnet Mask and Gateway) After setting, click the Set button. Note: Before setting, the entered field will be shown in yellow for reminding. -
Page 36
After clicking Set button, it’ll pop-up the window tip as below shown. IP address will be shown in the “IP address” field. Note: IP address should be shown within about 5~15 seconds after printer turn on. If not, please refer to steps below to initialize the printer Wi-Fi module settings then to setup it again. -
Page 37: Initialize The Printer Wifi Setting
5.4 Initialize the Printer WiFi Setting Return to the main page of TSC Console. Click Functions to expand the page. Click Wi-Fi Default to initialize the printer Wi-Fi module setting to factory default setting.
-
Page 38: Tph Care
5.5 TPH Care TPH Care provides users to check the condition of the print head and be able to set the dot failure threshold for indicating errors when the threshold is triggered. This option is used to set the This option is used to enable treshhold for unhealthy TPH dot (ON)/ disable (OFF) the TPH number.
-
Page 39: Printer Function
5.6 Printer Function Printer Function could be found in Printer Configuration. “Printer Function” will be shown on the left side of the window. Functions Description Calibrate Sensor Detect media types and the size of the label RTC Setup Synchronize printer with Real Time Clock on PC Factory Default Initialize the printer to default settings Reset Printer…
-
Page 40: Setting Post-Print Action
When the printer is equipped with other opton kits, ex: cutter, peeler, rewinder, please select the mode after finishing the calibration. Follow below procedure to set the post action for the printing: Refer Chp 5.1 to Connect the printer with TSC Console > Double click the printer >…
-
Page 41: Troubleshooting
* Please close the print carriage. * The printer carriage is open. Console shows “Head Open”. — The LED shows “Red (solid)”. — The printer status from TSC * Supply a new ribbon roll. * Running out of ribbon. Console shows “Ribbon End Err.”…
-
Page 42
command line. Memory full * The space of FLASH/DRAM is full. * Delete unused files in the FLASH/DRAM. ( FLASH / DRAM ) * Reload the supply. * Clean the print head. * Ribbon and media is loaded incorrectly * Clean the platen roller. * Dust or adhesive accumulation on the print * Adjust the print density and print speed. -
Page 43
* Ribbon installation is incorrect. * Media installation is incorrect. * Please set the suitable density to have good print quality. Wrinkle problem * Print density is incorrect. * Make sure the label guide touch the edge of the media guide. * Media feeding is incorrect. -
Page 44: Maintenance
7. Maintenance This session presents the clean tools and methods to maintain the printer. For Cleaning Depending on the media used, the printer may accumulate residues (media dust, adhesives, etc.) as a by-product of normal printing. To maintain the best printing quality, you should remove these residues by cleaning the printer periodically. Regularly clean the print head and supply sensors once change a new media to keep the printer at the optimized performance and extend printer life.
-
Page 45
Cleaning Tools Cotton swab Lint-free cloth Brush with soft non-metallic bristles Vacuum cleaner 75% Ethanol (for disinfecting) 99% Isopropyl alcohol (for printhead and platen roller cleaning) Genuine printhead cleaning pen Mild detergent (without chlorine) Cleaning Process: Printer Part Method… -
Page 46: Angency Compliance And Approvals
8. Angency Compliance and Approvals TE200/TE300 Series: EN 55032, Class A EN 55024 EN 60950-1 This is a class A product. In a domestic environment this product may cause radio interference in which case the user may be required to take adequate measures. TE210/TE310 Series: EN 55032, Class B EN 55024…
-
Page 47
This Class A digital apparatus complies with Canadian ICES-003. Cet appareil numérique de la classe A est conform à la norme NMB-003 du Canada. This device complies with Part 15 of the FCC Rules. Operation is subject to the following two conditions: (1) This device may cause harmful interference, and (2) this device must accept any interference received, including interference that may cause undesired operation. -
Page 48
This Class B digital apparatus complies with Canadian ICES-003 Cet appareil numérique de la classe B est conforme à la norme NMB-003 du Canada. TE200/TE300 Series: AS/NZS CISPR 32, Class A TE210/TE310 Series: AS/NZS CISPR 32, Class B UL 60950-1 CSA C22.2 No. -
Page 49
Energy Star for Imaging Equipment Version 2.0 TP TC 004 TP TC 020 IS 13252(Part 1)/ IEC 60950-1 KN 32 KN 35 Note: There may have certification differences in the series models, please refer to product label for accuracy. Important safety instructions: 1. -
Page 50
CAUTION: (For equipment with RTC (CR2032) battery or rechargeable battery pack) Risk of explosion if battery is replaced by an incorrect type. Dispose of used batteries according to the Instructions as below. 1. DO NOT throw the battery in fire. 2. -
Page 51
30mW 5470-5725MHz Hereby, TSC Auto ID Technology Co., Ltd. declares that the radio equipment type [Wi-Fi] IEEE 802.11 a/b/g/n is in compliance with Directive 2014/53/EU The full text of the EU declaration of conformity is available at the following internet address: http:// www.tscprinters.com… -
Page 52
Radio Frequency (RF) Exposure Information The radiated output power of the Wireless Device is below the Industry Canada (IC) radio frequency exposure limits. The Wireless Device should be used in such a manner such that the potential for human contact during normal operation is minimized. This device has been evaluated for and shown compliant with the IC Specific Absorption Rate (“SAR”) limits when installed in specific host products operated in portable exposure conditions. -
Page 53
低功率電波輻射性電機管理辦法第十二條) 低功率射頻電機之使用不得影響飛航安全及干擾合法通信;經發現有干擾現象時,應立即停用,並改善至無干擾時方得繼續使用。 前項合法通信,指依電信法規定作業之無線電通信。低功率射頻電機須忍受合法通信或工業、科學及醫療用電波輻射性電機設備之干 擾。(即低功率電波輻射性電機管理辦法第十四條) BSMI Class A 警語: 這是甲類的資訊產品,在居住的環境使用中時,可能會造成射頻 干擾,在這種情況下,使用者會被要求採取某些適當的對策。 Model Name Resolution Print Speed TE200 series 203 dpi Up to 6 IPS TE300 series 300 dpi Up to 5 IPS… -
Page 54
設備名稱 Equipment name:熱轉式/熱感式條碼印表機, 型號(型式) Type designation (Type): TE200 系列 Restricted substances and its chemical symbols 限用物質及其化學符號 六價鉻 多溴聯苯 多溴二苯醚 單元Unit 鉛 Lead 汞 Mercury 鎘 Cadmium Hexavalent Polybrominated Polybrominated (Pb) (Hg) (Cd) chromium biphenyls diphenyl ethers (PBB) (PBDE) 內外塑膠件 ○ ○… -
Page 55
集成電路-IC ○ ○ ○ ○ ○ ○ 電源供應器 ○ ○ ○ ○ ○ ○ 印字頭 ○ ○ ○ ○ ○ ○ 馬達 ○ ○ ○ ○ ○ 插座 ○ ○ ○ ○ ○ ○ 線材 ○ ○ ○ ○ ○ ○… -
Page 56
For US Model Made for iPhone® XS Max, iPhone XS, iPhone XR, iPhone X, iPhone 8, iPhone 8 Plus, iPhone 7, iPhone 7 Plus, iPhone SE, iPhone 6s, iPhone 6s Plus, iPhone 6, iPhone 6 Plus, iPhone 5s, iPad Pro® 12.9-inch (2nd generation), iPad Pro 10.5-inch, iPad®… -
Page 57: Revise History
9. Revise History Date Content Editor…
Преимущества сервиса Port
Авторизованный сервисный центр для 22 производителей
Услуги по монтажу, настройке, ремонту всего спектра оборудования
Аккредитованные специалисты
Доставка оборудования в сервисный центр
БОЛЬШЕ О СЕРВИСНОМ ЦЕНТРЕ
Обязательная гарантия на услуги
Наша компания является авторизованным сервисным центром, поэтому мы всегда следим за качеством своего обслуживания.Воспользовавшись нашими услугами вы получаете:
Штат специалистов, готовый ответить на вопросы
Бесплатный выезд специалиста
Актуальную документацию по обслуживанию оборудования
БОЛЬШЕ О СЕРВИСНОМ ЦЕНТРЕ
Вам могут быть интересны:
| Разрешение печатающей головки | 8 точек/мм (203 DPI) |
| Метод печати | Термотрансферная печать и прямая термопечать |
| Макс. скорость печати | 152.4 мм (6”)/секунду |
| Макс. ширина печати | 108 мм (4.25“) |
| Макс. длина печати | 2794 мм (110“) |
| Диаметр рулона этикеток | Внешний диаметр 127 мм (5”) |
| Красящая лента (риббон) | — Длина намотки 300 м, макс. ВД 67 мм, сердечник 1” (внешняя намотка) | — Длина намотки 110 м, макс. ВД 40 мм, сердечник 0.5” (внешняя намотка) |
| Ширина красящей ленты (риббона) | 40 мм ~ 110 мм (1.6“ ~ 4.3“) |
| Тип носителя | Непрерывный, высечной, с черной меткой, сложенный гармошкой, перфорированный (намотка наружу) |
| Ширина носителя | 20 ~ 112 мм (0.8“ ~ 4.4“) |
| Толщина носителя | 0.06 ~ 0.19 мм (2.36 ~ 7.48 мила) |
| Диаметр сердечника носителя | 25.4 ~ 38 мм (1“ ~ 1.5“) |
| Корпус | Пластик на основе акрилонитрила, бутадиена и стирола |
| Размеры | 204 мм (Ш) x 164 мм (В) x 280 мм (Г) |
| Вес | 2,4 кг |
| Интерфейсы подключения к ПК | USB 2.0 |
| Питание | От сети. Внешний БП. На входе: AC 100-240V, 2.5A, 50-60Hz На выходе: DC 24V, 2.5A, 60W |
| Выключатель, кнопки, светодиоды | 1 выключатель, 1 кнопка подачи и остановки, 1 светодиод (3 цвета: зеленый, желтый и красный) |
| Датчики | Датчик зазора, Рефлекторный датчик черной метки (перемещаемый), Датчик конца ленты, Датчик открытой печатающей головки |
| Встроенные шрифты | 8 алфавитно-цифровых растровых шрифтов | Генератор шрифтов True Type Monotype Imaging® с одним масштабируемым шрифтом CG Triumvirate Bold Condensed |
| Штрих-коды (линейные, 1D) | Code 128UCC, Code 128 подмножества A, B, C, EAN128, с чередованием 2 из 5, с чередованием 2 из 5 и контрольным символом, Code 39, Code 39 с контрольным символом, Code 93, EAN13, EAN8, UPCA, UPCE, EAN и UPC 2 (5) с дополнительными символами, Codabar, Postn |
| Штрих-коды (двухмерные штрих-коды) | GS1 DataBar, GS1 DataMatrix, Maxicode, AZTEC, PDF417, QR Code, Micro PDF 417 |
| Поворот шрифта, штрих-кода | 90, 180, 270° |
| Язык принтера | TSPL-EZD (совместимость с EPL, ZPL, ZPL II, DPL |
| Условия окружающей среды | Эксплуатация: 5 ~ 40°C, 25 ~ 85% без конденсации Хранение: -40 ~ 60°C, 10 ~ 90% без конденсации |
| Правила безопасности | FCC класс A, CE класс A, C-Tick класс A, UL, cUL, TÜV/ safety, CCC, EAC, CoC, BIS, KC, Energy Star® |
| Сертификаты соответствия | RoHS, REACH, WEEE |
| Заводские опции | Модуль Bluetooth 4.0 |
| Дилерские опции | Нет |
| Пользовательские опции | Внешняя установка рулона: ВД носителя 214 мм (8.4”) с сердечником 76.2 мм (3”) |