- Manuals
- Brands
- HP Manuals
- Switch
- ProCurve Switch 2626
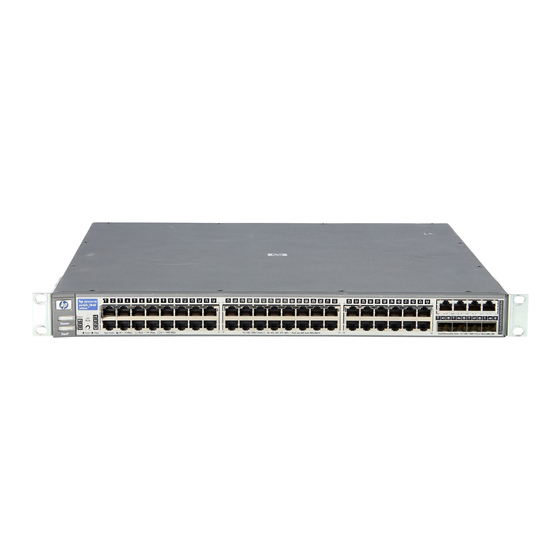
Manuals and User Guides for HP ProCurve Switch 2626. We have 5 HP ProCurve Switch 2626 manuals available for free PDF download: Management And Configuration Manual, Function Manual, Installation And Getting Started Manual, Datasheet
Материал из Xgu.ru
Перейти к: навигация, поиск
| Данная страница находится в разработке. Эта страница ещё не закончена. Информация, представленная здесь, может оказаться неполной или неверной. Если вы считаете, что её стоило бы доработать как можно быстрее, пожалуйста, скажите об этом. |
- Автор: Наташа Самойленко
На этой странице описываются настройки коммутаторов ProCurve.
Настройки описанные на этой странице в большей степени относятся к коммутаторам 3го уровня (3400, 3500, 5300, 5400).
Однако, многие настройки (как правило не относящиеся к 3 уровню) будут аналогичными и на коммутаторах 2го уровня.
Содержание
- 1 Базовые настройки доступа к коммутатору
- 1.1 Базовая настройка доступа к коммутатору
- 1.1.1 Интерфейсы управления коммутатором
- 1.1.2 Настройка IP-адреса и шлюза по умолчанию
- 1.1.3 Пароли на режимы оператора и менеджера
- 1.1.3.1 Удаление паролей
- 1.1.4 Настройка Telnet
- 1.1.5 Настройка доступа к веб-интерфейсу
- 1.1.6 Настройка консоли
- 1.1.7 Настройка терминала
- 1.1.8 Настройка SSH, SSL и авторизованных менеджеров
- 1.2 Management Interface Wizard
- 1.3 SSH-клиент и telnet-клиент
- 1.4 Source-interface
- 1.1 Базовая настройка доступа к коммутатору
- 2 Работа с интерфейсами
- 2.1 Просмотр информации об интерфейсах, задание имен интерфейсам
- 3 Управление конфигурационными файлами и ОС
- 3.1 Просмотр конфигурации и фильтрация вывода
- 3.2 Работа с файлами ОС
- 3.3 Работа с конфигурационными файлами
- 3.4 Custom default config
- 3.5 Работа с несколькими конфигурационными файлами
- 3.6 Резервное копирование конфигурации коммутатора
- 4 Настройка SNTP
- 5 Logging
- 5.1 Просмотр логов коммутатора
- 5.2 Настройка отправки сообщений на сервер
- 6 LLDP и CDP
- 7 VLAN
- 8 Агрегирование каналов (Port aggregation)
- 9 STP
- 10 MESH
- 11 Настройка маршрутизации
- 11.1 Настройка маршрутизации между VLAN
- 11.2 Настройка статических маршрутов
- 11.3 Настройка динамической маршрутизации
- 11.4 Маршрутизация на основе политик (policy-based routing, PBR)
- 12 Настройка QoS
- 13 Настройка Multicast
- 14 UDP Broadcast Forwarding
- 15 Полезные команды
- 16 Дополнительная информация
[править] Базовые настройки доступа к коммутатору
Если приглашение вида:
- sw> — это режим оператора,
- перейти в режим менеджера — enable,
- sw# — это режим менеджера,
- перейти в конфигурационный режим — configure,
- sw(config)# — это конфигурационный режим.
|
|
На коммутаторах ProCurve команды show можно выполнять в конфигурационном режиме и во вложенных конфигурационных режимах. |
Задание имени коммутатора:
sw(config)# hostname sw
[править] Базовая настройка доступа к коммутатору
[править] Интерфейсы управления коммутатором
Различают два метода доступа к коммутатору (такая терминология не часто используется, но встречается и пригодится тем, кто собирается сдавать экзамен для получения первого уровня сертификации AIS):
- in-band — когда управляющий трафик повторяет путь обычных данных (то есть, управляющий трафик идет через те же порты, что и данные),
- out-band — когда управляющий трафик использует выделенный путь.
In-band методы:
- Telnet
- SSH
- SNMP
- HTTP
- HTTPS
Out-band метод:
- Консоль
|
|
На самом деле Out-band методами могут называться и такие методы доступа как SSH, Telnet. Такой термин к этим методам применяется, если управляющий трафик изолирован от обычных данных. Например, выделен в отдельный VLAN. |
У коммутаторов ProCurve есть несколько интерфейсов управления:
- CLI (интерфейс командной строки или командная строка) — к ней можно получить доступ с помощью консоли, Telnet или SSH;
- Меню — псевдографические меню, в которые можно попасть из командной строки:
- Setup — простое меню с ограниченными возможностями, тут можно выполнить только самые базовые настройки,
- Menu — более мощное меню, с широкими возможностями по настройке, просмотру настроек и поведения коммутатора. Возможностей тут меньше, чем в командной строке, но всё же достаточно много. Один из вариантов, когда это меню особо удобно использовать — когда необходимо просмотреть динамическую статистику интерфейсов. Если выполнить команду show из командной строки, то вывод будет показывать срез информации, а в Menu есть возможность просматривать эту статистику в динамике (то есть она будет изменяться в реальном времени);
- Веб-интерфейс — к нему можно получить доступ используя браузер. Возможностей меньше, чем в командной строке, но удобно использовать при отсутствии знаний команд командной строки.
- ProCurve Manager
Зайти в меню Setup для выполнения базовых настроек:
sw# setup
Зайти в меню Menu:
sw# menu
[править] Настройка IP-адреса и шлюза по умолчанию
Для того чтобы можно было управлять коммутатором не только заходя на консоль, но и удаленно, необходимо настроить на нем IP-адрес.
По умолчанию, на коммутаторах ProCurve указано получение IP-адреса по DHCP, но он может быть назначен и административно.
Если коммутатор используется как коммутатор 2го уровня, то IP-адрес настраивается, как правило, в VLAN 1.
Если используется специальный выделенный VLAN для управления сетевыми устройствами, то тогда адрес назначается в этом VLAN.
Если коммутатор используется, как коммутатор 3го уровня (или 2/3), то IP-адреса могут быть во всех VLAN и на любой из них (если нет дополнительных ограничений) можно заходить для управления коммутатором.
Настройка IP-адреса на коммутаторе в VLAN 1:
sw(config)# vlan 1
sw(vlan-1)# ip address 192.168.1.1/24
Или:
sw(config)# vlan 1 ip address 192.168.1.1/24
|
|
На коммутаторах ProCurve, после назначения IP-адреса, к коммутатору есть доступ:
|
Если необходимо удалить настроенный адрес:
sw(config)# vlan 1
sw(vlan-1)# no ip address 192.168.1.1/24
Для того чтобы на коммутатор можно было заходить не только из сети, из которой ему назначен IP-адрес, но и из других сетей, необходимо настроить шлюз по умолчанию.
Настройка шлюза по умолчанию на коммутаторе 2го уровня:
sw(config)# ip default-gateway 192.168.1.100
Если коммутатор 3го уровня (то есть, включена команда ip routing), то шлюз по умолчанию настраивается как статический маршрут.
Настройка шлюза по умолчанию на коммутаторе 3го уровня:
sw(config)# ip route 0.0.0.0 0.0.0.0 192.168.1.100
Посмотреть настройки IP-адреса, маршрут по умолчанию и включен ли ip routing:
sw1(config)# sh ip

 Internet (IP) Service

  IP Routing : Enabled


  Default TTL     : 64
  Arp Age         : 20
  Domain Suffix   :
  DNS server      :

                       |                                            Proxy ARP
  VLAN                 | IP Config  IP Address      Subnet Mask     Std  Local
  -------------------- + ---------- --------------- --------------- ----------
  DEFAULT_VLAN         | Manual     10.0.1.1        255.255.255.0    No    No
  VLAN5                | Disabled
  VLAN12               | Manual     10.12.1.1       255.255.255.0    No    No
  VLAN15               | Manual     10.15.1.1       255.255.255.0    No    No
  VLAN100              | Manual     10.1.100.1      255.255.255.0    No    No
  VLAN101              | Manual     10.1.101.1      255.255.255.0    No    No
  VLAN102              | Manual     10.1.102.1      255.255.255.0    No    No
  VLAN2100             | Disabled


                                    Loopback Interface

  Loopback     | IP Config    IP Address      Subnet Mask
  ------------ + ------------ --------------- ---------------
  lo7          | Manual       10.7.1.1        255.255.255.255
[править] Пароли на режимы оператора и менеджера
Базовые настройки по защите доступа к коммутатору предполагают, как минимум, настройку паролей для уровня менеджера (manager) и оператора (operator).
Синтаксис команды для задания паролей:
password <manager|operator|all|port-access> [user-name <name>] [<hash-type> <password>]
Параметры команды:
- manager — указывает, что будут задаваться параметры для уровня доступа менеджер,
- operator — указывает, что будут задаваться параметры для уровня доступа оператор,
- all — указывает, что будут задаваться параметры для режимов менеджер и оператор,
- port-access — задание пароля оператора для аутентификации по 802.1X,
- user-name — задание имени пользователя для соответствующего режима доступа,
- hash-type — указывает какой алгоритм используется для хеширования пароля:
- plaintext
- sha1
Настройка пароля на режим менеджера:
sw(config)# password manager
New password for Manager: ********
Please retype new password for Manager: ********
|
|
По умолчанию введенные пароли и имена пользователей не видны в конфигурационном файле, так как они хранятся в отдельной зоне на коммутаторе. Для того чтобы они отображались, необходимо ввести команду include-credentials. |
При настройке паролей для менеджера и оператора, имена пользователей задавать не обязательно.
Если имена не заданы, то при доступе к коммутатору, там где требуется введение имени пользователя (например, SSH, HTTP), необходимо оставить имя пустым.
|
|
Настроить имена пользователей можно из CLI и веб-интерфейса. Из интерфейса menu можно настроить пароли, но нельзя имена пользователей. |
Настройка имени пользователя и пароля на режим оператора:
sw(config)# password operator user-name neadmin
New password for Operator: ********
Please retype new password for Operator: ********
Настройка имени пользователя и пароля на режим менеджера:
sw(config)# password manager user-name admin
New password for Manager: ********
Please retype new password for Manager: ********
|
|
На коммутаторах ProCurve нет возможности создавать базу пользователей. Тут есть только два пользователя с различными уровнями привилегий — менеджер и оператор. |
[править] Удаление паролей
Если известен пароль менеджера, то удалить пароли для менеджера и оператора можно так (вместе с паролями удаляются и имена пользователей):
sw(config)# no password all
Удалить пароль менеджера:
sw(config)# no password manager
Удалить пароль оператора:
sw(config)# no password operator
Если пароль менеджера не известен, то для удаления паролей необходимо воспользоваться кнопкой Clear на передней панели. Для обнуления достаточно удерживать её нажатой пару секунд.
Эта функциональность кнопки Clear может быть отключена. Подробнее о передней панели на странице ProCurve Security.
[править] Настройка Telnet
После того как на коммутаторе назначен IP-адрес, в CLI коммутатора можно удаленно заходить используя протокол Telnet.
Посмотреть активные сессии:
sw1(config)# sh telnet

 Telnet Activity

 Source IP Selection: Outgoing Interface

 --------------------------------------------------------
 Session  : **  1
 Privilege: Manager
 From     : Console
 To       :
 --------------------------------------------------------
 Session  :     2
 Privilege: Manager
 From     : 10.12.1.2
 To       :
Оборвать сессию под номером 2:
sw# kill 2
Отключение telnet:
sw(config)# no telnet-server
Проверить включен ли telnet-сервер на коммутаторе:
sw1(config)# sh console

 Console/Serial Link


  Inbound Telnet Enabled [Yes] : Yes
  Web Agent Enabled [Yes] : Yes

  Terminal Type [VT100] : VT100
  Screen Refresh Interval (sec) [3] : 3
  Displayed Events [All] : All
  Baud Rate [speed-sense] : speed-sense
  Flow Control [XON/XOFF] : XON/XOFF
  Session Inactivity Time (min) [0] : 0
[править] Настройка доступа к веб-интерфейсу
После того как на коммутаторе назначен IP-адрес, на веб-интерфейс коммутатора можно удаленно заходить по HTTP.
Для этого достаточно в браузере указать IP-адрес коммутатора и, если указаны, то имя пользователя и пароль.
Настройка безопасного доступа к веб-интерфейсу с использованием SSL описана на странице Доступ к коммутатору ProCurve.
Отключить доступ к веб-интерфейсу коммутатора по HTTP (например, если будет настроен доступ с использованием SSL):
sw(config)# no web-management plaintext
Полностью отключить доступ к веб-интерфейсу:
sw(config)# no web-management
[править] Настройка консоли
console inactivity-timer < 0 | 1 | 5 | 10 | 15 | 20 | 30 | 60 | 120 >
Просмотр настроек консоли:
sw1(config)# sh console

 Console/Serial Link


  Inbound Telnet Enabled [Yes] : Yes
  Web Agent Enabled [Yes] : Yes

  Terminal Type [VT100] : VT100
  Screen Refresh Interval (sec) [3] : 3
  Displayed Events [All] : All
  Baud Rate [speed-sense] : speed-sense
  Flow Control [XON/XOFF] : XON/XOFF
  Session Inactivity Time (min) [0] : 0
[править] Настройка терминала
По умолчанию в коммутаторах размер терминала может быть недостаточным для корректного отображения некоторых команд.
Изменить размеры терминала:
sw1(config)# terminal width 100 length 31
Проверить текущие настройки терминала:
 sw1(config)# sh terminal
  Terminal width: 100 length: 31
[править] Настройка SSH, SSL и авторизованных менеджеров
- Основная страница: Доступ к коммутатору ProCurve
На коммутаторах ProCurve, после назначения IP-адреса, к коммутатору есть доступ:
- к CLI — Telnet,
- к веб-интерфейсу — HTTP.
В обоих случаях информация, которая пересылается между хостом и коммутатором передается в открытом виде.
Более безопасными альтернативами для доступа к коммутатору, являются:
- к CLI — SSH,
- к веб-интерфейсу — HTTPS (SSL).
|
|
Если на коммутаторе включен SSH, то он разрешает одно подключение к консоли и до трёх других сессий (SSH или Telnet). |
Функция авторизованные менеджеры позволяет добавить еще один критерий (кроме паролей на режим менеджера и оператора), который будет проверяться прежде чем будет предоставлен доступ к коммутатору — IP-адреса с которых разрешен доступ к коммутатору.
До запроса пароля на доступ с правами operator или manager, будет учитываться с какого IP-адреса осуществляется доступ к коммутатору.
Доступ будет разрешен только с IP-адресов указанных в команде ip authorized-managers.
Ограничения списка авторизованных менеджеров касаются:
- доступа к коммутатору с помощью Telnet;
- доступа к коммутатору с помощью SSH, HTTP, HTTPS;
- SNMP;
- передачи файлов (конфигурационных и ОС) по TFTP.
[править] Management Interface Wizard
В новых версиях ОС (начиная с K.14.09) появился инструмент Management Interface Wizard, который позволяет в интерактивном режиме настроить различные параметры протоколов использующихся для доступа к коммутатору.
Подробнее о Management Interface Wizard на странице Доступ к коммутатору ProCurve.
[править] SSH-клиент и telnet-клиент
На коммутаторах HP есть SSH-клиент и telnet-клиент для того чтобы можно было с коммутатора зайти, соответственно, по SSH или telnet на другое устройство.
SSH-клиент (с локального коммутатора зайти на другой коммутатор с адресом 192.168.1.1):
switch# ssh xguru@192.168.1.1
Telnet-клиент (с локального коммутатора зайти на другой коммутатор с адресом 192.168.1.1):
switch# telnet 192.168.1.1
[править] Source-interface
На коммутаторе можно задать IP-адрес с которого будут инициироваться сессии таких протоколов:
- RADIUS
- SFlow
- SNTP
- System Logging applications
- TACACS
- Telnet
- TFTP
switch(config)# ip source-interface <radius|sflow|sntp|syslog|tacacs|telnet|tftp|all>
<loopback<id> | vlan <vlan-id> address <ip-address>>
Просмотр информации о source-interface:
sw1(config)# sh ip source-interface

 Source-IP Configuration Information

  Protocol | Admin Selection Policy  IP Interface   IP Address
  -------- + ----------------------- -------------- ---------------
  Tacacs   | Outgoing Interface
  Radius   | Outgoing Interface
  Syslog   | Outgoing Interface
  Telnet   | Configured IP Interface vlan 100
  Tftp     | Outgoing Interface
  Sntp     | Outgoing Interface
  Sflow    | Outgoing Interface
Подробная информация о настроенном интерфейсе:
sw1(config)# sh ip source-interface detail telnet

 Source-IP Detailed Information

  Protocol : Telnet
  Admin Policy           : Configured IP Interface
  Oper Policy            : Configured IP Interface
  Source IP Interface    : vlan 100
  Source IP Address      : 10.1.100.1
  Source Interface State : Up
[править] Работа с интерфейсами
[править] Просмотр информации об интерфейсах, задание имен интерфейсам
sw1(config)# sh interfaces brief a1-a10

 Status and Counters - Port Status

                   | Intrusion                           MDI  Flow Bcast
  Port   Type      | Alert     Enabled Status Mode       Mode Ctrl Limit
  ------ --------- + --------- ------- ------ ---------- ---- ---- -----
  A1     100/1000T | No        Yes     Up     100FDx     MDIX off  0
  A2     100/1000T | No        Yes     Down   1000FDx    Auto off  0
  A3     100/1000T | No        Yes     Up     1000FDx    MDIX off  0
  A4     100/1000T | No        Yes     Down   1000FDx    Auto off  0
  A5     100/1000T | No        Yes     Up     1000FDx    MDI  off  0
  A6     100/1000T | No        Yes     Down   1000FDx    Auto off  0
  A7     100/1000T | No        Yes     Up     1000FDx    MDI  off  0
  A8     100/1000T | No        Yes     Down   1000FDx    Auto off  0
  A9     100/1000T | No        Yes     Down   1000FDx    Auto off  0
  A10    100/1000T | No        Yes     Down   1000FDx    Auto off  0
sw1(config)# sh interfaces

 Status and Counters - Port Counters

                                                                 Flow Bcast
  Port   Total Bytes    Total Frames   Errors Rx    Drops Tx     Ctrl Limit
  ------ -------------- -------------- ------------ ------------ ---- -----
  A1     785,468        5157           0            0            off  0
  A2     0              0              0            0            off  0
  A3     1,089,868      6552           0            0            off  0
  A4     0              0              0            0            off  0
  A5     645,310        5590           0            0            off  0
  A6     0              0              0            0            off  0
  A7     716,878        5635           0            0            off  0
  A8     0              0              0            0            off  0
  A9     0              0              0            0            off  0
  A10    0              0              0            0            off  0
  A11    0              0              0            0            off  0
  A12    0              0              0            0            off  0
sw1(config)# sh interfaces a1

 Status and Counters - Port Counters for port A1

  Name  :
  MAC Address      : 001708-cafbff
  Link Status      : Up
  Totals (Since boot or last clear) :
   Bytes Rx        : 456,543            Bytes Tx        : 330,410
   Unicast Rx      : 2027               Unicast Tx      : 9
   Bcast/Mcast Rx  : 2464               Bcast/Mcast Tx  : 2693
  Errors (Since boot or last clear) :
   FCS Rx          : 0                  Drops Tx        : 0
   Alignment Rx    : 0                  Collisions Tx   : 0
   Runts Rx        : 0                  Late Colln Tx   : 0
   Giants Rx       : 0                  Excessive Colln : 0
   Total Rx Errors : 0                  Deferred Tx     : 0
  Others (Since boot or last clear) :
   Discard Rx      : 0                  Out Queue Len   : 0
   Unknown Protos  : 0
  Rates (5 minute weighted average) :
   Total Rx  (bps) : 368,280            Total Tx  (bps) : 248,904
   Unicast Rx (Pkts/sec) : 0            Unicast Tx (Pkts/sec) : 0
   B/Mcast Rx (Pkts/sec) : 0            B/Mcast Tx (Pkts/sec) : 0
   Utilization Rx  : 00.36 %            Utilization Tx  : 00.24 %
sw1(config)# sh interfaces config

 Port Settings

  Port   Type      | Enabled Mode         Flow Ctrl MDI
  ------ --------- + ------- ------------ --------- ----
  A1     100/1000T | Yes     Auto         Disable   Auto
  A2     100/1000T | Yes     Auto         Disable   Auto
  A3     100/1000T | Yes     Auto         Disable   Auto
  A4     100/1000T | Yes     Auto         Disable   Auto
  A5     100/1000T | Yes     Auto         Disable   Auto
  A6     100/1000T | Yes     Auto         Disable   Auto
  A7     100/1000T | Yes     Auto         Disable   Auto
  A8     100/1000T | Yes     Auto         Disable   Auto
  A9     100/1000T | Yes     Auto         Disable   Auto
sw1(config)# sh interfaces port-utilization
 Status and Counters - Port Utilization

                                 Rx                           Tx
 Port      Mode     | --------------------------- | ---------------------------
                    | Kbits/sec   Pkts/sec  Util  | Kbits/sec  Pkts/sec   Util
 -------- --------- + ---------- ---------- ----- + ---------- ---------- -----
 A1       100FDx    | 344        0          00.34 | 240        0          00.24
 A2       1000FDx   | 0          0          0     | 0          0          0
 A3       1000FDx   | 704        0          00.07 | 3144       0          00.31
 A4       1000FDx   | 0          0          0     | 0          0          0
 A5       1000FDx   | 2384       0          00.23 | 2336       0          00.23
 A6       1000FDx   | 0          0          0     | 0          0          0
 A7       1000FDx   | 2712       0          00.27 | 2752       0          00.27
 A8       1000FDx   | 0          0          0     | 0          0          0
 A9       1000FDx   | 0          0          0     | 0          0          0
 A10      1000FDx   | 0          0          0     | 0          0          0
 A11      1000FDx   | 0          0          0     | 0          0          0
 A12      1000FDx   | 0          0          0     | 0          0          0
Задать имена интерфейсам:
sw(config)# interfaces 1 name perviy
Просмотр заданных имен:
sw# show name
[править] Управление конфигурационными файлами и ОС
[править] Просмотр конфигурации и фильтрация вывода
Посмотреть настройки конкретного VLAN, например, VLAN 100:
sw(config)# sh run vlan 100

Running configuration:

vlan 100
   name "VLAN100"
   ip address 192.168.100.100 255.255.255.0
   ip ospf 192.168.100.100 area backbone
   ip pim-sparse
      ip-addr any
      exit
   vrrp vrid 1
      backup
      virtual-ip-address 192.168.100.1 255.255.255.0
      no virtual-ip-ping
      enable
      exit
   exit
|
|
Эта команда очень удобна так как в выводе sh run настройки разбиваются на несколько частей и их не очень удобно просматривать. Например, в данном примере настройки принадлежности портов VLAN’у и настройки PIM и OSPF находятся в разных частях конфигурационного файла. |
В ProCurve поддерживается фильтрация вывода, хотя в подсказках командной строки эти команды не отображаются.
То есть, если набрать знак вопроса или табуляцию, то команда не продолжится. Но она работает.
Поддерживается фильтр begin (сокращенно beg или b). Отобразить конфигурационный файл начиная со строки в которой встречается слово router:
sw(config)# sh run | beg router
router ospf
   area backbone
   exit
router pim
   exit
router vrrp
router vrrp virtual-ip-ping
snmp-server community "public" unrestricted
vlan 100
   ip ospf 192.168.100.100 area backbone
........
Поддерживается фильтр include (сокращенно inc или i). Отобразить все строки текущей конфигурации в которых встречается слово qos:
sw(config)# sh run | i qos
qos device-priority 10.0.1.1 priority 2
qos device-priority 10.0.1.2 dscp 101000
qos device-priority 10.0.1.5 priority 7
qos device-priority 10.0.1.10 dscp 101110
qos udp-port ipv4 23 priority 4
qos udp-port ipv4 range 1024 2000 priority 1
qos tcp-port ipv4 22 priority 7
qos udp-port ipv4 range 2024 3000 priority 1
qos udp-port ipv4 range 3024 4000 priority 1
qos udp-port ipv4 range 4024 5000 priority 1
qos udp-port ipv4 range 5024 6000 priority 1
qos udp-port ipv4 range 7024 8000 priority 1
qos udp-port ipv4 range 8024 9000 priority 1
qos tcp-port ipv4 23 dscp 001010
qos tcp-port ipv4 80 dscp 101110
qos queue-config 4-queues
Команда sh run structured отображает конфигурацию с другой сортировкой. Например, принадлежность портов VLAN отображается, кроме стандартного, в другом формате.
Стандартное отображение:
sw1# sh run
vlan 100
   name "VLAN100"
   untagged A1
   ip address 10.1.100.1 255.255.255.0
   ip ospf 10.1.100.1 area 0.0.0.7
   exit
vlan 101
   name "VLAN101"
   tagged A3
   ip address 10.1.101.1 255.255.255.0
   ip ospf 10.1.101.1 area backbone
   exit
vlan 102
   name "VLAN102"
   tagged A3
   ip address 10.1.102.1 255.255.255.0
   ip ospf 10.1.102.1 area backbone
   exit
Отображение, которое добавляется при заданом параметре structured:
sw1# sh run structured
....
interface A1
   untagged vlan 100
   exit
interface A2
   untagged vlan 1
   exit
interface A3
   tagged vlan 101-102
   untagged vlan 1
   exit
...
[править] Работа с файлами ОС
У коммутаторов ProCurve есть две области во flash-памяти в которых можно хранить разные ОС:
- primary
- secondary
В этих областях можно хранить только ОС коммутатора, по одной в каждой.
Посмотреть содержимое flash-памяти:
sw1# sh flash
Image             Size (bytes) Date     Version
----------------- ------------ -------- --------------
Primary Image    :    15237597 02/08/13 K.15.10.0009
Secondary Image  :    15237597 02/08/13 K.15.10.0009

Boot ROM Version : K.15.30
Default Boot     : Secondary
Посмотреть какая сейчас версия ОС используется:
sw1# sh version
Image stamp:
 /ws/swbuildm/K_rel_irvine_qaoff/code/build/btm(swbuildm_K_rel_irvine_qaoff_rel_irvine)
                Feb  8 2013 12:09:55
                K.15.10.0009
                7
Boot Image:     Secondary
Копировать нужный софт как secondary image на коммутатор:
switch# copy tftp flash 192.168.1.100 image_name secondary
Перезагрузить коммутатор с secondary image (образ из secondary области будет использоваться после перезагрузки коммутатора до тех пор, пока не будет указан другой):
switch# boot system flash secondary
Указать с какой области будет загружен коммутатор после следующей перезагрузки не перезагружая его сейчас:
switch# boot set-default flash secondary
Копирование образа из secondary в primary:
switch# copy flash flash primary
[править] Работа с конфигурационными файлами
Посмотреть отличаются ли стартовая конфигурация и текущая (команда не выполняет сравнение конфигураций, а просто сообщает отличаются ли они):
sw1# sh config status

Running configuration has been changed and needs to be saved.
Скопировать стартовый конфигурационный файл на TFTP-сервер:
sw# copy startup-config tftp 192.168.1.100 lab1_2_sw4
Удалить стартовый конфигурационный файл:
sw# erase startup-config
|
|
Несмотря на то, что конфигурация коммутатора удалена, пароли для доступа к режиму менеджера и оператора останутся (если они были настроены). Это происходит из-за того, что коммутатор хранит эту информацию отдельно. |
Скопировать файл TFTP-сервера (с TFTP-сервера можно скопировать только в startup конф, в текущую нельзя):
sw# copy tftp startup-config 192.168.1.100 lab1_2_sw4
[править] Custom default config
Default-config это конфигурационный файл, который будет применяться, когда коммутатор обнуляется. Если он не создан, то будут применяться заводские настройки по умолчанию.
Посмотреть файл:
sw# show default-config
Скопировать стартовый конфигурационный файл в default-config:
sw# copy startup-config default-config
Удалить default-config:
sw# erase default-config
Проверить существует ли default-config (последняя строка вывода):
sw1# sh config files

Configuration files:

 id | act pri sec | name
 ---+-------------+------------------------------------------------
  1 |  *   *   *  | sw_4
  2 |             | STP
  3 |             |

====================
A Custom Default Configuration exists.
[править] Работа с несколькими конфигурационными файлами
Только для 53, 54, 35
sw# sh config files
Скопировать конфигурацию на tftp сервер:
sw# copy startup-config tftp 192.168.9.9 sw8_config
Переименовать ее на сервере и скопировать назад на коммутатор:
sw# copy tftp config sec_sw8_config 192.168.9.9 sec_sw8_config
sw# sh config files
Посмотреть скопированный конфиг:
sw# sh config sec_sw8_config
Настроить связь между secondary image и sec_sw8_config файлом:
sw# startup-default secondary config sec_sw8_config
sw# sh config files
Вернуть всё в default настройки:
sw# startup-default secondary config config1
[править] Резервное копирование конфигурации коммутатора
Для резервного копирования конфигурации коммутатора существует возможность использования скриптов на языках perl (Net::Telnet) и Expect. При этом, коммутаторы HP ProCurve обладают возможностью включать на себе сервер tftp. Это позволяет проводить резервное копирование конфигурации коммутатора без использования tftp-сервера, что иногда необходимо.
Для работы скрипта необходимо включить SNMP-протокол на сервере в режиме конфигурирования и описать community с возможностью записи, например так:
snmp-server community mycommunity Unrestricted
Далее показан пример резервного копирования коммутатора (проверено на 4 моделях коммутаторов HP: 2650, 2610-48, 2824, 2610-24g):
#!/bin/sh

set `date +"%Y %m %d %H %M"`

device_name=grp-7
device_ip=10.0.0.7
device_community=mycommunity

snmpset -v 2c -c "$device_community" $device_ip 1.3.6.1.4.1.11.2.14.11.5.1.7.1.5.6.0 i 2
echo "get running-config $1-$2-$3-$device_name.txt"|tftp $device_ip
snmpset -v 2c -c "$device_community" $device_ip 1.3.6.1.4.1.11.2.14.11.5.1.7.1.5.6.0 i 1
Данный скрипт выполняет следующее:
- включает tftp-сервер на коммутаторе
- копирует информацию в файл, в формате <год>-<месяц>-<день>-<имяустройства>.txt
- отключает tftp-сервер на коммутаторе
Таким образом есть возможность быстрого и простого резервного копирования конфигурации коммутатора без использования скриптов для входа на коммутатор.
пример скрипта содержащий цикл (делает backup нескольких коммутаторов).
!/bin/bash
set `date +"%Y %m %d %H %M"`
switch=(
10.0.0.1
10.0.0.2
)
device_community=public

for device_ip in ${switch[@]} ; do
snmpset -v 2c -c "$device_community" $device_ip 1.3.6.1.4.1.11.2.14.11.5.1.7.1.5.6.0 i 2
echo "get running-config $1-$2-$3-$4-$5-$device_ip.txt"|tftp $device_ip
snmpset -v 2c -c "$device_community" $device_ip 1.3.6.1.4.1.11.2.14.11.5.1.7.1.5.6.0 i 1
echo backup creat  $device_ip
done
Пример простого скрипта для резервного копирования с использованием expect (для 5308xl):
#!/usr/bin/expect -f

log_user 0
spawn telnet 10.0.0.1
expect "Press any key to continue" {send "jr"}
expect "HP ProCurve Switch 5308xl>" {send "enabler"}
expect "Username:" {send "adminr"}
expect "Password:" {send "passwordr"}
expect "HP ProCurve Switch 5308xl# " {send "copy startup-config tftp 10.0.0.10 nameconfigr"}
sleep 10
send "exitr"
send "exitr"
expect "Do you want to log out" {send "yr"}
expect eof
[править] Настройка SNTP
Режимы работы SNTP (Simple Network Time Protocol):
- Unicast — в этом режиме необходимо указать адрес SNTP-сервера. Если указаны несколько серверов (максимум можно указать 3 сервера), то коммутатор выбирает к какому обращаться:
- В 3400, 5300 моделях: по IP-адресу — сначала он запрашивает сервер с наименьшим адресом, если тот не отвечает, то у следующего,
- В 3500, 5400 моделях: по указанному приоритету — можно указать приоритет со значением от 1 до 3, сервера будут запрашиваться по порядку в соответствии с приоритетом,
- Broadcast — в этом режиме коммутатор будет получать обновления от первого сервера от которого он получил SNTP-объявление. Сообщения других серверов коммутатор будет отбрасывать до тех пор, пока не пройдет 3 poll-интервала без обновлений.
Просмотр текущего времени на коммутаторе:
sw# show time
Просмотр настроек SNTP:
sw# show sntp
sw# show management
Настройка SNTP в режиме unicast:
sw(config)# sntp unicast
Указание адреса сервера (для 3400, 5300 моделей):
sw(config)# sntp server 192.168.9.9
Указание адреса сервера и приоритета (для 3500, 5400 моделей):
sw(config)# sntp server priority 1 192.168.9.9
Включение SNTP:
sw(config)# timesync sntp
sw(config)# sntp 30
Интервал между отправкой запросов на сервер (по умолчанию 720 секунд):
sw(config)# sntp poll-interval <30-720>
Настройка временной зоны:
sw(config)# time timezone <offset>
пример UTC+3 (Минск, 3х60=180)
sw(config)# time timezone 180
[править] Logging
[править] Просмотр логов коммутатора
На коммутаторах ProCurve может храниться 1000 лог-сообщений.
При корректной перезагрузке коммутатора (если не было выключения по питанию), лог-сообщения событий, которые произошли до перезагрузки, сохраняются.
Посмотреть логи коммутатора (самые старые события будут отображаться первыми):
sw# show log
Посмотреть логи коммутатора в обратном порядке (новые события будут отображаться первыми):
sw# show log -r
Просмотр всех событий, включая те, которые были до перезагрузки:
sw# show logging -a
Просмотр событий в которых встречается слово system:
sw# show logging system
Просмотр событий в которых встречается слово system, включая те, которые были до перезагрузки:
sw# show logging -a system
[править] Настройка отправки сообщений на сервер
На коммутаторах ProCurve можно указать максимум 6 лог-серверов. Сообщения будут отправляться на все указанные сервера.
Настройка отправки сообщений на лог-сервер:
sw(config)# logging 192.168.9.9
Указать уровень severity лог-сообщений, которые будут отправляться на лог-сервер (по умолчанию отправляются все):
sw(config)# logging severity < debug | major | error | warning | info >
sw(config)# logging system-module < system-module >
Указание интерфейса, IP-адрес которого будет использоваться как адрес отправителя в сообщениях коммутатора:
switch(config)# ip source-interface syslog <loopback <id>|vlan <vlan-id> address <ip-address>>
Просмотр информации о source-interface:
switch# show ip source-interface status
[править] LLDP и CDP
- Основная страница: LLDP
- Основная страница: CDP
CDP и LLDP — протоколы канального уровня, которые позволяют сетевым устройствам анонсировать в сеть информацию о себе и о своих возможностях, а также собирать эту информацию о соседних устройствах.
У них есть некоторые отличия, однако основные возможности у них практически одинаковы.
Одно из основных отличий, то что LLDP — стандарт, а CDP — проприетарный протокол Cisco.
Коммутаторы ProCurve поддерживают оба протокола. Однако, LLDP-сообщения они могут и генерировать и принимать, а CDP — только принимать.
[править] VLAN
- Основная страница: VLAN в HP ProCurve
[править] Агрегирование каналов (Port aggregation)
- Основная страница: Агрегирование каналов
Агрегирование каналов — технология, которая позволяет объединить несколько физических каналов в один логический.
Такое объединение позволяет увеличивать пропускную способность канала и увеличить надежность канала.
Агрегирование каналов может быть настроено как между двумя коммутаторами, так и между коммутатором и сервером.
[править] STP
- Основная страница: STP в ProCurve
В зависимости от модели коммутаторы ProCurve поддерживают различные версии протокола Spanning Tree:
- 3400, 5300 — поддерживают RSTP и MSTP,
- 3500, 5400 — поддерживают MSTP.
[править] MESH
- Основная страница: ProCurve Mesh
[править] Настройка маршрутизации
[править] Настройка маршрутизации между VLAN
- Основная страница: VLAN в HP ProCurve
[править] Настройка статических маршрутов
[править] Настройка динамической маршрутизации
- Основная страница: OSPF в ProCurve
- Основная страница: RIP в ProCurve
Коммутаторы ProCurve 3го уровня поддерживают два протокола динамической маршрутизации OSPF и RIP.
Коммутаторы 5400, 3500 и 8200 с версии ОС K.15.06.0006 поддерживают BGP. С большой вероятностью наличия ограничений: ASN только 16 бит, без поддержки IPV6, отсутствие ресурсов для принятия full view.
[править] Маршрутизация на основе политик (policy-based routing, PBR)
Коммутаторы 5400, 3500 и 8200 с версии ОС K.15.06.0006 поддерживают маршрутизацию на основе политик.
Это позволяет маршрутизировать трафик основываясь не только на IP-адресе получателя, но и других критериях, например, IP-адресе отправителя.
Эта функция работает на основе существующего классификатора трафика, который ранее использовался для настройки зеркалирования трафика и правил QoS.
|
|
Информация о функции, параметрах, настройке находится в разделе Classifier-Based Software Configuration документа Advanced Traffic Management Guide (для соответствующей версии ОС). |
Действия доступные в политике PBR:
- настройка значения next-hop (<ipv4 | ipv6> ip next-hop <ipaddr>)
- настройка значения next-hop для пакетов, для которых нет специфического маршрута (<ipv4 | ipv6> ip default-next-hop <ipaddr>)
- настройка исходящего туннельного интерфейса (interface tunnel <tunnel-ID>)
- настройка интерфейса null, который указывает, что пакеты будут отброшены, если к ним не применяются другие действия ранее
Правила работы PBR:
- Для класса могут быть настроены несколько действий, до 8 действий для одного класса
- Если настроено действие интерфейс null, то другие действия для этого класса не могут быть настроены
- Только одно из 8ми возможных действий может быть активно в один момент времени
- Приоритет действий определяется порядком в котором они добавлены в политику
- Действия могут быть добавлены только к классу. Они добавляются в конец списка действий для класса
- Для того чтобы удалить действия примененные к классу, весь класс должен быть удален из политики
- Когда действие становится недоступным (неактивным), например, если настроенный адрес становится недостижимым (для действий next-hop и default-next-hop) или интерфейс находится в состоянии down (для tunnel), политика просматривает следующие действия. Список действий просматривается до тех пор пока не дойдет до правила interface null или конца списка действий. Если достигнут конец списка, то политика не применяется и соответствующий класс обрабатывается без учета PBR.
- Максимальное количество уникальных IP-адресов next-hop и default-next-hop — 256
Пример политики:
sw_5400(config)# class ipv4 TCP_SERV
sw_5400(config-class)# match tcp 10.0.1.0/24 10.0.2.0/24 eq 80
sw_5400(config-class)# match tcp 10.0.1.0/24 10.0.2.0/24 eq 22
sw_5400(config-class)# match tcp 10.0.1.0/24 10.0.2.0/24 eq 23
sw_5400(config-class)# exit
sw_5400(config)# class ipv4 UDP_SERV
sw_5400(config-class)# match udp 10.0.1.0/24 10.0.2.0/24 eq 67
sw_5400(config-class)# match udp 10.0.1.0/24 10.0.2.0/24 eq 68
sw_5400(config-class)# match udp 10.0.1.0/24 10.0.2.0/24 eq 69
sw_5400(config-class)# exit
sw_5400(config)# policy pbr SERVICES
sw_5400(policy-pbr)# class ipv4 TCP_SERV
sw_5400(policy-pbr-class)# action ip next-hop 10.0.3.1
sw_5400(policy-pbr-class)# action interface null
sw_5400(policy-pbr-class)# exit
sw_5400(policy-pbr)# class ipv4 UDP_SERV
sw_5400(policy-pbr-class)# action ip default-next-hop 10.0.4.1
sw_5400(policy-pbr-class)# action interface tunnel 3
sw_5400(policy-pbr-class)# exit
sw_5400(policy-pbr)# exit
sw_5400(config)# vlan 100
sw_5400(vlan-100)# service-policy SERVICES in
|
|
Изменения в классах, которые используются в политике, и в политике можно делать только если политика не применена к интерфейсу. |
Просмотр статистики срабатываний политики:
show statistics policy SERVICES vlan 100 in
Команда отладки (сообщение генерируется когда применяется PBR, когда действие в классе становится неактивным, когда действие в классе становится активным):
debug ip pbr
[править] Настройка QoS
- Основная страница: QoS в HP ProCurve
[править] Настройка Multicast
- Основная страница: Multicast в HP ProCurve
[править] UDP Broadcast Forwarding
Включение глобально UDP Broadcast Forwarding:
ip udp-bcast-forward
Настройка для VLAN адреса получателя:
switch(conf)# ip forward-protocol udp < ip-address > < port-number | port-name >
Параметры port-number:
- dns: Domain Name Service (53)
- ntp: Network Time Protocol (123)
- netbios-ns: NetBIOS Name Service (137)
- netbios-dgm: NetBIOS Datagram Service (138)
- radius: Remote Authentication Dial-In User Service (1812)
- radius-old: Remote Authentication Dial-In User Service (1645)
- rip: Routing Information Protocol (520)
- snmp: Simple Network Management Protocol (161)
- snmp-trap: Simple Network Management Protocol (162)
- tftp: Trivial File Transfer Protocol (69)
- timep: Time Protocol (37)
[править] Полезные команды
redo <number>
repeat <command> count delay
alias <name> "command"
show alias
sh history
show system
fault-finder ...
sw# show management
Скопировать вывод команды show tech в файл на tftp сервер:
sw# copy command-output 'show tech' tftp 192.168.9.9 sho_tech
Управление лампочкой на коммутаторе (по умолчанию мигает или горит 30 минут, можно менять это значение или отключить её командой):
chassislocate <blink|on|off> [<1-1440>]
loop-protect <port>
HP switch protocol — если в анализаторе такое видно, то это протокол стекирования коммутаторов ProCurve.
[править] Дополнительная информация
| |
||
|---|---|---|
| Основы | ProCurve Adaptive Edge | ProCurve ProActive Defense | ProCurve Network Access Control | ProCurve Wireless | |
| Программы | ProCurve Manager | ProCurve Identity Driven Manager | ProCurve Network Immunity Manager | ProCurve Mobility Manager | |
| Устройства | ProCurve Switch | ProCurve Router | ProCurve ONE Module | ProCurve TMS Module | ProCurve NAC 800 | ProCurve Access Point | ProCurve WESM | |
| Настройка | ||
| Безопасность | ProCurve Security | Доступ к коммутатору ProCurve | DHCP snooping | Dynamic ARP Protection | IP Source Guard | Port security | Аутентификация при доступе к сети | 802.1X в ProCurve | Web-аутентификация в ProCurve | MAC-аутентификация в ProCurve | |
| Канальный уровень | CDP | LLDP | VLAN в ProCurve | GVRP | STP в ProCurve | ProCurve Mesh | Агрегирование каналов | Зеркалирование трафика | QinQ | |
| Сетевой уровень | RIP в ProCurve | OSPF в ProCurve | VRRP в ProCurve | XRRP в ProCurve | QoS в ProCurve | Multicast в ProCurve | PIM в ProCurve | |
| Разное | Опция 82 DHCP | SNMP в ProCurve |
-
Contents
-
Table of Contents
-
Troubleshooting
-
Bookmarks
Quick Links
hp procurve
switch 2800 series
installation and
getting started guide
www.hp.com/go/hpprocurve
Related Manuals for HP ProCurve 2824
Summary of Contents for HP ProCurve 2824
-
Page 1
2800 series installation and getting started guide www.hp.com/go/hpprocurve… -
Page 3
HP ProCurve Switch 2800 Series Installation and Getting Started Guide… -
Page 4
The only warranties for HP products and services are set forth in the express warranty statements accompanying such products and services. Nothing herein should be construed as constituting an additional warranty. -
Page 5: Table Of Contents
2. Installing or Removing mini-GBICs ……2-7 3. Verify the Switch Passes Self Test ……2-9 LED Behavior: .
-
Page 6
Downloading New Switch Software ……4-12 HP Customer Support Services ……. . 4-12 Terminal Configuration . -
Page 7
Switch Ports …….. -
Page 8
Consideraciones sobre seguridad ……C-5 Safety Information (Japan) ……..C-6 Safety Information (China) . -
Page 9: Introducing The Switch
10/100/1000Base-T RJ-45 ports, four dual-personality ports—either auto- sensing 10/100/1000Base-T RJ-45 or mini-GBIC. The Switch 2800 Series devices can be connected to an HP ProCurve EPS/RPS (J8168A) and receive full redundant power from that unit. If the internal power supply in the switch fails, the EPS/RPS unit will immediately provide all the…
-
Page 10
In addition, the Switch 2800 Series devices offer full network management capabilities. This chapter describes the HP ProCurve Switch 2824 and Switch 2848, including: ■… -
Page 11: Front Of The Switch
Console port** and indicator LEDs * 10/100/1000Base-T ports have the IEEE Auto MDI/MDI-X feature. Reset and Clear ** On the Switch 2848, the console port is located on the back of the unit. buttons Test, Fan and RPS Power Status LEDs…
-
Page 12
Front of the Switch ■ Four dual-personality ports. Use either the 10/100/1000Base-T RJ-45 connector, or install a supported HP ProCurve mini-GBIC for fiber-optic connections. The RJ-45 connectors support the IEEE Auto MDI/MDI-X feature, which means you can use either straight-through or crossover twisted-pair cables to connect any network device to the switch. -
Page 13: Leds
(orange) Blinking* A fault has occurred on the switch, one of the switch ports, or the fan. The Status LED for the component with the fault will blink simultaneously. If just the Fault LED is blinking, the switch could be attached to an RPS but not receiving power.
-
Page 14
One of the unit’s fans has failed. The switch Fault LED will be blinking simultaneously. RPS Status Normal operation. An HP ProCurve EPS/RPS unit is connected and operating correctly. The EPS/RPS could be powering the unit — see table below. -
Page 15: Led Mode Select Button And Indicator Leds
LED Mode Select Button and Indicator LEDs To optimize the amount of information displayed for each of the switch ports without overwhelming you with LEDs, the Switch 2800 Series devices use a single LED for each port. The operation of this LED is controlled by the LED Mode select button, and the current setting is indicated by the LED Mode indicator LEDs near the button.
-
Page 16: Reset Button
0.5 sec.) • On = 1000 Mbps Reset Button This button is used to reset the switch while it is powered on. This action clears any temporary error conditions that may have occurred and executes the switch self test. Clear Button This button is used for these purposes: ■…
-
Page 17: Back Of The Switch
Console Port This port is used to connect a console to the Switch 2800 Series devices by using the serial cable supplied with the switch. The console port is located on the front of the Switch 2824 and on the back of the Switch 2848. This connection is described under “Connect a Console to the Switch”…
-
Page 18: Switch Features
MDI; if the switch detects that an end-node device is connected to the port, it configures the port as MDI-X.
-
Page 19: Installing The Switch
Installing the Switch The HP ProCurve Switch 2800 Series devices are easy to install. They come with an accessory kit that includes the brackets for mounting the switch in a standard 19-inch telco rack, in an equipment cabinet, and with rubber feet that can be attached so the switch can be securely located on a horizontal surface.
-
Page 20
Installing the Switch Included Parts ■ Power cord, one of the following: Australia/New Zealand China Continental Europe Denmark Japan Switzerland United Kingdom/Hong Kong/Singapore United States/Canada/Mexico 8120-6803 8120-8377 8120-6802 8120-6806 8120-6804 8120-6807 8120-8709 8120-6805… -
Page 21: Installation Procedures
PC to the switch’s console port. At this point, the switch is fully installed. See the rest of this chapter if you need more detailed information on any of these installation steps.
-
Page 22: Installation Precautions
If your installation requires a different power cord than the one supplied ■ with the switch, be sure to use a power cord displaying the mark of the safety agency that defines the regulations for power cords in your country.
-
Page 23: Prepare The Installation Site
Category 5 or better, 100-ohm UTP or shielded twisted-pair (STP) balanced cable. For 1000 Mbps (gigabit) operation, Category 5E cabling or better is recommended. Summary of Cable Types to Use With the Switch Length Limits Twisted-Pair Cables 100 meters Note: The Switch 2800 Series devices are compatible with the IEEE 802.3ab standard…
-
Page 24
Installation Location — Before installing the switch, plan its location and orientation relative to other devices and equipment: • In the front of the switch, leave at least 7.6 cm (3 inches) of space for the twisted-pair and fiber-optic cabling. •… -
Page 25: Installing Or Removing Mini-Gbics
■ HP ProCurve Gigabit-LH-LC mini-GBIC (J4860A) C a u t i o n The HP ProCurve mini-GBICs are Class 1 laser devices. Avoid direct eye exposure to the beam coming from the transmit port. Installing the mini-GBICs: Hold the mini-GBIC by its sides and gently insert it into either of the slots on the switch until the mini-GBIC clicks into place.
-
Page 26
You should disconnect the network cable from the mini-GBIC before removing it from the switch. Depending on when you purchased your HP ProCurve mini-GBIC, it may have either of three different release mechanisms: a plastic tab on the bottom of the mini-GBIC, a plastic collar around the mini-GBIC, or a wire bail. -
Page 27: Verify The Switch Passes Self Test
The Switch 2800 Series devices do not have a power switch. They are powered on when the power cord is connected to the switch and to a power source. For safety, the power outlet should be located near the switch installation.
-
Page 28: Led Behavior
Power and Fault LEDs Switch 2848 Power and Fault LEDs When the switch is powered on, it performs its diagnostic self test. Self test takes approximately 50 seconds to complete. LED Behavior: During the self test: • Initially, all the status, LED Mode and port LEDs are on for most of the duration of the test.
-
Page 29: Mount The Switch
Refer to chapter 4, “Troubleshooting” for diagnostic help. 4. Mount the Switch After the switch passes self test, you are ready to mount the switch in a stable location. The Switch 2800 Series devices can be mounted in these ways: ■…
-
Page 30: Rack Mounting The Switch 2848
The mounting brackets have multiple mounting holes and can be rotated allowing for a wide variety of mounting options. These include mounting the switch so its front face is flush with the face of the rack, or mounting it in a more balanced position as shown in the illustration.
-
Page 31
Installing the Switch Installation Procedures Hold the switch with attached brackets up to the rack and move it vertically until rack holes line up with the bracket holes, then insert and tighten the four number 12-24 screws holding the brackets to the rack. -
Page 32: Rack Mounting The Switch 2824
The mounting brackets have multiple mounting holes and can be rotated allowing for a wide variety of mounting options. These include mounting the switch so its front face is flush with the face of the rack, or mounting it in a more balanced position as shown in the illustration.
-
Page 33
(0.5-inch) pair on both sides of the rack Place the switch in the rack and lower it so the notches in the bottom of the bracket slide onto the screws, then tighten these screws. Lower switch with mounting… -
Page 34
Installing the Switch Installation Procedures Install the other number 12-24 screw into the upper hole in each bracket. Tighten these screws. 2-16… -
Page 35: Horizontal Surface Mounting
Horizontal Surface Mounting Place the switch on a table or other horizontal surface. The switch comes with rubber feet in the accessory kit that can be used to help keep the switch from sliding on the surface. Attach the rubber feet to the four corners on the bottom of the switch within the embossed angled lines.
-
Page 36: Connect The Network Cables
See the table on Network For mini-GBICs ports, and in general for all the switch ports, when a network cable from an active network device is connected to the port, the port LED for that port should go on. If the port LED does not go on when the network…
-
Page 37: Optional) Connect A Redundant Power Supply To The Switch
AC power, or a fault condition. The EPS/RPS is an unmanaged power supply that only provides information by way of LEDs or through the port interfaces to attached devices.
-
Page 38
Power Message Connected Status Nothing Connected Not a valid state — should never happen Switch is connected, RPS is available but not required RPS is powering the connected device Blinking RPS port is in fault mode Blinking Switch is requesting power, RPS can not… -
Page 39
The EPS/RPS monitors the power signal from the switch by detecting that the EPS/RPS is connected to a switch with an EPS/RPS cable. When the power from the switch is no longer detected, the EPS/RPS will turn on and provide power to the switch within 1ms. -
Page 40: Optional) Connect A Console To The Switch
■ the network, and a VT-100 terminal emulator. This method requires that you first configure the switch with an IP address and subnet mask by using either out-of-band console access or through DHCP/Bootp. For more information on IP addressing and on starting a Telnet session, see…
-
Page 41: Direct Console Access
If you want to operate the console using a different configuration, make sure you change the settings on both the terminal and on the switch so they are compatible. Change the switch settings first, save your changes, then change the terminal settings, then reboot the switch and reestablish the console session.
-
Page 42: Sample Network Topologies
Installing the Switch Sample Network Topologies Sample Network Topologies This section shows a few sample network topologies in which the Switch is implemented. For more topology information, see the HP network products World Wide Web site, As a Desktop Switch Power…
-
Page 43: As A Segment Switch
LEGEND: Fast Ethernet cable The Switch also works well as a segment switch. That is, with its high performance, it can be used for interconnecting network segments—simply connect the network hubs that form those segments to the switch, or you can also connect other switches.
-
Page 44
Sample Network Topologies Because the Switch has the “IEEE Auto MDI/MDI-X” features, the connections between the switch and the hubs, and between the switch and end nodes or servers can be through category 5 “straight-through” or “crossover” twisted- pair cable. Category 3 or 4 cable can also be used if the connection is 10 Mbps only. -
Page 45: Connecting To A Backbone Switch
The simpler desktop and segment networks shown in the previous two examples can easily be combined and expanded. For example, you could use an HP ProCurve Switch 5304xl to interconnect each of your smaller switched workgroups to form a larger switched network. All the devices in this network can communicate with each other.
-
Page 46: Stacking The Switch
N o t e In the Backbone Switch illustration, the 1000 Mbps fiber-optic connection between the Switch 2824 and the Switch 5304xl is by way of a Gigabit-SX mini- GBIC installed in the Switch 2824 and connected to a Gigabit-SX Module in the Switch 5304xl.
-
Page 47: The Switch In A Redundant Topology
100/1000Base-T Ports Link Mode Link Mode module J4821A J4821A HP ProCurve Switch 5308xl Fiber cable Installing the Switch module (all ports are HP Auto — MDIX) 100/1000Base-T Ports module 100/1000Base-T Ports module 100/1000Base-T Ports module 100/1000Base-T Ports module 100/1000Base-T Ports module…
-
Page 48
Installing the Switch Sample Network Topologies 2-30… -
Page 49: Configuring The Switch
Configuring the Switch This chapter is a guide for using the console Switch Setup screen to quickly assign an IP (Internet Protocol) address and subnet mask to the switch, set a Manager password, and, optionally, configure other basic features. For more information on using the switch console and the other switch…
-
Page 50: Using The Console Setup Screen
The quickest and easiest way to minimally configure the switch for manage- ment and password protection in your network is to use a direct console connection to the switch, start a console session, and access the Switch Setup screen. Using the method described in the preceding section, connect a terminal device to the switch and display the switch console command (CLI) prompt (the default display).
-
Page 51
Recommended; If you set IP Config to Manual, then enter an IP address Note: The IP address and subnet mask assigned for the switch must be compatible with the IP addressing used in your network. For more information on IP addressing, see the Management and Configuration Guide, which is on the Documentation CD-ROM that came with your switch. -
Page 52: Where To Go From Here
The above procedure configures your switch with a Manager password, IP address, and subnet mask. As a result, with the proper network connections, you can now manage the switch from a PC equipped with Telnet or a web browser interface.
-
Page 53: Using The Ip Address For Remote Switch Management
With the Switch 2800 Series devices, you can use the switch’s IP address to manage the switch from any PC that is on the same subnet as the switch. You can use either a Telnet session or a standard web browser to manage the switch.
-
Page 54
Management and Configuration Guide, which is on the Documentation CD-ROM that came with your switch. An extensive help system is also available for the web browser interface. To access the help system though the subnet on which the switch is installed you must have access to the internet. -
Page 55: Troubleshooting
Connecting to devices that have a fixed full-duplex configuration. The RJ-45 ports are configured as “Auto”. That is, when connecting to attached devices, the switch will operate in one of two ways to determine the link speed and the communication mode (half duplex or full duplex): •…
-
Page 56
Basic Troubleshooting Tips Because the Switch 2800 Series devices behave in this way (in compli- ance with the IEEE 802.3 standard), if a device connected to the switch has a fixed configuration at full duplex, the device will not connect correctly to the switch. -
Page 57
CD-ROM that came with your switch. For more information on possible network problems and their solutions, refer to the technical note “Troubleshooting LAN Performance and Intermittent Connectivity Problems”, which can be found on the HP ProCurve web site, , in the Information Library section. http://www.hp.com/go/hpprocurve… -
Page 58: Diagnosing With The Leds
Troubleshooting Diagnosing with the LEDs Diagnosing with the LEDs Table 3-1 shows LED patterns on the switch and the switch modules that indicate problem conditions. Check in the table for the LED pattern you see on your switch. Refer to the corresponding diagnostic tip on the next few pages.
-
Page 59: Diagnostic Tips
Try power cycling the switch. If the fault indication reoccurs, the switch may have failed. hardware failure Call your HP-authorized LAN dealer, or use the electronic support services from HP to get has occurred. All assistance. See the Customer Support/Warranty booklet for more information.
-
Page 60
➏ The network Try the following procedures: connection is not • For the indicated port, verify both ends of the cabling, at the switch and the connected working device, are connected properly. properly. • Verify the connected device and switch are both powered on and operating correctly. -
Page 61
Use the switch console to see if the port is part of a dynamic trunk (through the LACP improperly feature) or to see if Spanning Tree is enabled on the switch, and to see if the port may configured, or have been put into a “blocking”… -
Page 62: Proactive Networking
Troubleshooting Proactive Networking Proactive Networking The HP ProCurve Switch 2800 Series devices have built-in management capabilities that proactively help you manage your network including: ■ finding and helping you fix the most common network error conditions (for example, faulty network cabling, and non-standard network topolo-…
-
Page 63: Hardware Diagnostic Tests
Checking the Switch LEDs The self test passes if the Fault and Test LEDs on the front of the switch go off after approximately 50 seconds. If these LEDs stay on longer than 60 seconds or begin blinking, there may be a problem with the switch.
-
Page 64: Testing Twisted-Pair Cabling
LAN adapters between which you can run a link-level test or Ping test through the switch, you can use this test to verify that the entire communication path between the two PCs is functioning correctly. See your LAN adapter documentation for more information on running a link test or Ping test.
-
Page 65: Restoring The Factory Default Configuration
(usually disabling them) may result in network connectivity issues. If the switch has a valid configuration, and you are restoring the factory default settings for a reason other than configuration problems, you should save the switch configuration prior to performing the factory default reset.
-
Page 66: Downloading New Switch Software
For more information, see the Management and Configuration Guide, which is on the Documentation CD- ROM that came with your switch. The new switch software would be available on the HP ProCurve web site, http://www.hp.com/go/hpprocurve HP Customer Support Services…
-
Page 67: A Switch Specifications
Switch Specifications Physical Width: Depth: Height: Weight: Electrical The switch automatically adjusts to any voltage between 100-127 and 200-240 volts and either 50 or 60 Hz. AC voltage: Maximum current: Frequency range: Environmental Temperature: Relative humidity: (non-condensing) Maximum altitude: 2824 (J4903A) 2848 (J4904A) 44.3 cm (17.42 in)
-
Page 68: Acoustic
■ UL 60950 Lasers The Gigabit-SX LC mini-GBIC, and the Gigabit-LX LC mini-GBIC, both of which can be installed in the Switch 2800 Series devices, are Class 1 Laser Products. Laser Klasse 1 These mini-GBICs comply with IEC 825-2: 1993.
-
Page 69: B Switch Ports And Network Cables
N o t e Incorrectly wired cabling is the most common cause of problems for LAN communications. HP recommends that you work with a qualified LAN cable installer for assistance with your cabling requirements. Switch Ports The fixed RJ-45 10/100/1000Base-T ports on the switch accept 100-ohm unshielded and shielded twisted-pair cable with RJ-45 connectors as described on the next page.
-
Page 70
Equal-Level Far-End Crosstalk (ELFEXT) and Return Loss. When testing your cabling, be sure to include the patch cables that connect the switch and other end devices to the patch panels on your site. The patch cables are frequently overlooked when testing cable and they must also comply with the cabling standards. -
Page 71: Mode Conditioning Patch Cord For Gigabit-Lx
If you experience a high number of transmission errors on the Gigabit-LX ports, usually CRC or FCS errors, you may need to install one of these patch cords between the Gigabit-LX port in your switch and your multimode fiber- optic network cabling, and between the Gigabit-LX transmission device and the network cabling at the other end of the multimode fiber-optic cable run.
-
Page 72: Installing The Patch Cord
Recommended Patch Cords Hewlett-Packard maintains a list of recommended Mode Conditioning Patch Cords that have been tested and verified to operate correctly with the HP ProCurve Gigabit-LX Transceiver and HP ProCurve Gigabit-LX LC mini-GBIC. The list is on the HP ProCurve web site, Technical Support section.
-
Page 73: Twisted-Pair Cable/Connector Pin-Outs
MDI port. If you connect it to an end node, such as a server or PC, which typically have MDI ports, the Switch 2800 Series device’s port operates as an MDI-X port. In all cases, you can use standard “straight through”…
-
Page 74: Straight-Through Twisted-Pair Cable For 10 Mbps Or 100 Mbps Network Connections
Straight-Through Twisted-Pair Cable for 10 Mbps or 100 Mbps Network Connections Because of the MDI/MDI-X operation of the 10/100 ports on the switch, for all network connections, to PCs, servers or other end nodes, or to hubs or other switches, you can use “straight-through” cables.
-
Page 75: Crossover Twisted-Pair Cable For 10 Mbps Or 100 Mbps Network Connection
Crossover Twisted-Pair Cable for 10 Mbps or 100 Mbps Network Connection The MDI/MDI-X operation of the 10/100 ports on the switch also allows you to use “crossover” cables for all network connections, to PCs, servers or other end nodes, or to hubs or other switches.
-
Page 76: Straight-Through Twisted-Pair Cable For 1000 Mbps Network Connections
Switch Ports and Network Cables Twisted-Pair Cable/Connector Pin-Outs Straight-Through Twisted-Pair Cable for 1000 Mbps Network Connections 1000Base-T connections require that all four pairs of wires be connected. Cable Diagram N o t e Pins 1 and 2 on connector “A” must be wired as a twisted pair to pins 1 and 2 on connector “B”.
-
Page 77: C Safety And Emc Regulatory Statements
These products do not have a power switch; they are powered on when the power cord is plugged in. Documentation reference symbol. If the product is marked with this symbol, refer to the product documentation to get more information about the product.
-
Page 78: Informations Concernant La Sécurité
Safety and EMC Regulatory Statements Informations concernant la sécurité Informations concernant la sécurité WARNING CAUTION Cet appareil est un produit de classe I et possède une borne de mise à la terre. La source d’alimentation principale doit être munie d’une prise de terre de sécurité installée aux bornes du câblage d’entrée, sur le cordon d’alimentation ou le cordon de raccordement fourni avec le produit.
-
Page 79: Hinweise Zur Sicherheit
Hinweise zur Sicherheit Symbol für Dokumentationsverweis. Wenn das Produkt mit diesem Symbol markiert ist, schlagen Sie bitte in der Produktdokumentation nach, um mehr Informationen über das Produkt zu erhalten. WARNING Eine WARNING in der Dokumentation symbolisiert eine Gefahr, die Verletzungen oder sogar Todesfälle verursachen kann. CAUTION CAUTION in der Dokumentation symbolisiert eine Gefahr, die dis Gerät beschädigen kann.
-
Page 80: Considerazioni Sulla Sicurezza
Safety and EMC Regulatory Statements Considerazioni sulla sicurezza Considerazioni sulla sicurezza WARNING CAUTION Questo prodotto è omologato nella classe di sicurezza I ed ha un terminale protettivo di collegamento a terra. Dev’essere installato un collegamento a terra di sicurezza, non interrompibile che vada dalla fonte d’alimentazione principale ai terminali d’entrata, al cavo d’alimentazione oppure al set cavo d’alimentazione fornito con il prodotto.
-
Page 81: Consideraciones Sobre Seguridad
Consideraciones sobre seguridad Símbolo de referencia a la documentación. Si el producto va marcado con este símbolo, consultar la documentación del producto a fin de obtener mayor información sobre el producto. WARNING Una WARNING en la documentación señala un riesgo que podría resultar en lesiones o la muerte.
-
Page 82: Safety Information (Japan
Safety and EMC Regulatory Statements Safety Information (Japan) Safety Information (Japan)
-
Page 83: Safety Information (China
Safety and EMC Regulatory Statements Safety Information (China) Safety Information (China)
-
Page 84: Emc Regulatory Statements
Safety and EMC Regulatory Statements EMC Regulatory Statements EMC Regulatory Statements U.S.A. FCC Class A This equipment has been tested and found to comply with the limits for a Class A digital device, pursuant to Part 15 of the FCC Rules. These limits are designed to provide reasonable protection against interference when the equipment is operated in a commercial environment.
-
Page 85: Korea
Safety and EMC Regulatory Statements EMC Regulatory Statements Korea Taiwan…
-
Page 86: European Community
Hewlett-Packard Company Manufacturer’s Address: 8000 Foothills Blvd Roseville, CA 95747-5502 U.S.A. declares that the product: Product Name: HP ProCurve Switch 2824, HP ProCurve Switch 2848 Model Number: J4903A, J4904A Accessories: J4858A, J4859A, J4860A Regulatory Model Number: RSVLC-0207 conforms to the following Product Specifications:…
-
Page 87
1000Base-T connections, length limitations … 2-5 ports, cables used with … 2-5 AC power connector location on back of switch … 1-9 Act LED … 1-5, 1-8 auto MDI/MDI-X operation … B-6, B-8 MDIX feature … B-5 back of switch description …… -
Page 88
… 3-2 restoring factory defaults … 1-8, 4-11 subnet mask … 3-3 Switch Setup screen … 3-2 connecting the switch to a power source … 2-17 connecting the switch to an EPS/RPS … 2-21 connector specifications … A-2 console checking messages during troubleshooting …… -
Page 89
… 3-1 in-band console access types of … 2-22 included parts … 2-1 installation connecting the switch to a power source … 2-17 horizontal surface mounting … 2-17 location considerations … 2-6 network cable requirements … 2-5 precautions … 2-4 rack or cabinet mounting …… -
Page 90
… 1-3 standards compliance … A-2 types of … 1-3, 2-5 non-standard network cables, effects … 4-2 out-of-band console access … 3-5 parts, included with the switch … 2-1 password configuring … 3-2 passwords deleting with the Clear button … 3-4 if you lose the password …… -
Page 91
… B-6, B-8 subnet mask configuring … 3-3 summary of cables used with the switch … 2-5 of switch installation … 2-3 switch connecting to a power source … 2-17 description … 1-1 downloading new software … 4-12 electrical specifications …… -
Page 92
Technical information in this document is subject to change without notice. ©Copyright 2002, 2003 Hewlett-Packard Development Company, L.P. Reproduction, adaptation, or translation without prior written permission is prohibited except as allowed under the copyright laws. Printed in Singapore August 2003 Manual Part Number 5990-3093 *5990-3093*…
ProCurve Switch 2600 Series
The ProCurve Switch 2600 series is a collection of low-cost, stackable,
multi-layer, managed switches with 48, 24, or 8 auto-sensing 10/100 ports and
dual-personality ports for 10/100/1000 or mini-GBIC connectivity. The ProCurve
Switch 2650-PWR, 2626-PWR, and 2600-8-PWR are IEEE 802.3af-compliant for
Power over Ethernet and provide up to 15.4 W per port. A redundant external
power supply is also available as an accessory.
ProCurve Switch 2600-8-PWR
with Gigabit Uplink (J8762A)
ProCurve Switch 2626 (J4900B)
ProCurve Switch
2626-PWR (J8164A)
ProCurve Switch 2650 (J4899B)
ProCurve Switch
2650-PWR (J8165A)