-
Contents
-
Table of Contents
-
Troubleshooting
-
Bookmarks
Quick Links
Shenzhen Retevis Technology Co.,Ltd
Web: www.retevis.com
E-mail: kam@retevis.com
Related Manuals for Retevis RT95
Summary of Contents for Retevis RT95
-
Page 1
Shenzhen Retevis Technology Co.,Ltd Web: www.retevis.com E-mail: kam@retevis.com… -
Page 2
RT95 UHF/VHF Two Way Radio RT95 Instruction Manual http://radioaficion.com/hamfiles/… -
Page 3
CONTENTS 1.FUNCTIONS & FEATURES …………….1 2.ACCESSORIES ………………… 2 3.INITIAL INSTALLATION …………….3 4.GETTING ACQUAINTED …………….8 5.WORKING MODE ………………11 6.BASIC OPERATIONS ……………… 12 7.FUNCTION MENU ………………16 8.CHANNEL MENU ………………21 9.KEYPAD MENU SETUP …………….25 10.DTMF SETTTING ………………26 11.PROGRAMMING SOFTWARE ………….. -
Page 4: Functions & Features
♦ Automatic power on function; ♦ Main unit and microphone key lock function; ♦ 5Tone signaling for data transfer,alarm, all call, ANI, remote kill, remote waken. ♦ DTMF-ANI or 5Tone-ANI for automatical calling recognition; ♦ Scrambler(Optional). RT95 UHF/VHF Two Way Radio…
-
Page 5: Standard Accessories
2. ACCESSORIES 2.1 Standard Accessories FUNC Microphone Transceiver Pads Mobile Bracket Screws DC Power Cable Adjusting screws non-slip mat Fuse(10A 250V) with Fuse Holder 2.2 Optional Accessories PC cable Car Antenna RT95 UHF/VHF Two Way Radio…
-
Page 6: Mobile Installation
24V battery. Be sure to use a 12V vehicle battery that has sufficient current capacity. If the current to the transceiver is insufficient, the display may darken during transmission, or transmitting output power may drop excessively. RT95 UHF/VHF Two Way Radio…
-
Page 7
♦ Do not directly connect the transceiver to an AC outlet. ♦ Use the supplied DC power cable to connect the transceiver to a regulated power supply. ♦ Do not substitute a cable with smaller gauge wires. RT95 UHF/VHF Two Way Radio… -
Page 8
» If you use the transceiver for a long period when the vehicle battery is not fully charged, or when the engine is OFF, the battery may become discharged, and will not have sufficient reserves to start the vehicle. Avoid using the transceiver in these conditions. RT95 UHF/VHF Two Way Radio… -
Page 9: Antenna Connection
» External speaker adopt double port BTL, please care about the connecting way. The speaker can not connect with the ground, otherwise the speaker will be fault. The wrong connecting way as the following picture. RT95 UHF/VHF Two Way Radio…
-
Page 10
Error Ground 3.4.2 Microphone For voice communications, connect a microphone equipped with an 8-pin modular plug into the modular socket on the front of the main unit. Press irmly on the plug until the locking tab clicks. FUNC Microphone connector http://radioaficion.com/hamfiles/… -
Page 11: Front Panel
Self define key Self define key Self define key Self define key Self define key Function key/ function group key Microphone Jack Channel switch/Push button/Key lock LCD display Display channel/frequency/function setting 4.2 Rear panel EXT SP RT95 UHF/VHF Two Way Radio…
-
Page 12
Functions Antenna connector Connect a 50 ohm antenna Ex-Speaker Jack Connect external speaker Power cable Connect a standard DC power cable 4.3 Display 11 12 13 14 18 19 20 21 22 Functions Displays the self define function when press P1 Displays the self define function when press P2 Displays the self define function when press P3 Displays the self define function when press P4… -
Page 13
When this key is in up position, It is unlock UP/DOWN key, when Lock UP/DOWN this key is in down poisition, UP/DOWN key will be locked MIC Connector Diagram(in the front view of connector) Key Pad Serial Data DOWN MIC GND RT95 UHF/VHF Two Way Radio… -
Page 14: Working Mode
» If transceiver programmed as professional transceiver mode and locked, you can’t return to amateur transceiver mode by manual operation from general setting. 4.Under any mode, the FUNC MENU setting can be changed and saved. RT95 UHF/VHF Two Way Radio…
-
Page 15: Adjusting The Volume
6. BASIC OPERATIONS 6.1 Switching the Power On/Off 1. Power On: in power off state press , the LCD displays » RETEVIS » then will displays current frequency or channel. for 2 seconds, the LCD displays «CLOSING», 2. Power Off: in power on state, press then the LCD display disappears.
-
Page 16
5. Turn the channel knob or microphone [UP]/[DOWN] key to choose the channel number to be stored. 6. Hold the [PX] key defined as V/M function to confirm and store the channel, the channel number stop flash and radio emits a beep sound, the channel is stored successfully. RT95 UHF/VHF Two Way Radio… -
Page 17: Ctcss Scan
LCD displays DCS, long press this key to enter DCS scan, turn channel knob or press microphone [UP]/[DOWN] key can change scan direction. Once finding a matching DCS signaling, it will stop 5 seconds then scan again, press any key to exit DCS scan. RT95 UHF/VHF Two Way Radio…
-
Page 18: Scan Skip
2. Long press [PUSH] button again, the downside LCD displays : Key Unlock, means the keypad is unlocked. » NOTE:When keypad lockout, except key, [PUSH] button and [PTT] key is available, other keys are invalid . RT95 UHF/VHF Two Way Radio…
-
Page 19: Frequency Step Size Setup
2. Press [PUSH] button, the menu value in LCD turns to green color. 3. Turn channel knob to choose wanted setting. Total 9 Channel step size available: 2.5K,5K,6.25K,10K,12.5K,20K,25K, 30K and 50K. 4. Press [PUSH] button or [P3] key to store setting and exit. RT95 UHF/VHF Two Way Radio…
-
Page 20: Display Mode Setup
4. Press [PUSH] button or [P3] key to store setting and exit 7.7 Scan Dwell Time Setup 1. Enter FUNCTION MENU list, choose No.07 function. 2. Press [PUSH] button, the menu value in LCD turns to green color. 3. Turn channel knob to choose wanted setting. RT95 UHF/VHF Two Way Radio…
-
Page 21
2. Press [PUSH] button, the menu value in LCD turns to green color. 3. Turn channel knob to choose brightless level, 1-3 level available. 4. Press [PUSH] button or [P3] key to store setting and exit. RT95 UHF/VHF Two Way Radio… -
Page 22: Pilot Frequency
2. Press [PUSH] button, the menu value in LCD turns to green color. 3. Turn channel knob to choose wanted setting FAIL: Revers display STAN: normal display 4. Press [PUSH] button or [P3] key to store setting and exit. RT95 UHF/VHF Two Way Radio…
-
Page 23
3. Turn channel knob to choose wanted setting ALL: All channel, signaling function setup resume factory default. OPT: All function menu setup resume factory default except CHAN MENU. 4. Press [PUSH] button or [P3] key to store setting and exit RT95 UHF/VHF Two Way Radio… -
Page 24: Channel Menu
5. Press [PUSH] button or [P3] key to store setting and exit. 8.3 HIGH/MID/LOW Power Selection 1. Enter CHAN MENU, choose No.3 function 2. Press [PUSH] button, the menu value in LCD turns to green color RT95 UHF/VHF Two Way Radio…
-
Page 25
CDT:You can hear the calling when receive a matchng carrier and CTCSS or DCS signaling TONE: You can hear the calling when receives matching carrier + optional signaling. C&T: You can hear the calling when receives matching carrier + CTCSS/DCS + optional signaling. RT95 UHF/VHF Two Way Radio… -
Page 26: Frequency Reverse
1. Enter CHAN MENU list, choose No.10 function 2. Press [PUSH] button, the menu value in LCD turns to green color. 3. Turn channel knob to choose wanted setting, press [FUNC] key to set the offset direction. RT95 UHF/VHF Two Way Radio…
-
Page 27: Busy Channel Lockout
4. Press [PUSH] button or [P3] key to store setting and exit 8.14 OWNID (SELF ID ENQUIRY) 1. Enter CHAN MENU list, choose No.14 function; 2. The LCD will display current channel DTMF ID or 5Tone ID. RT95 UHF/VHF Two Way Radio…
-
Page 28: Keypad Menu Setup
[PUSH] button to enter value setting. the menu value in LCD turns to green color 4. Turn channel knob to choose wanted setting. 5. Press [PUSH] button or [P3] key to store setting and exit. RT95 UHF/VHF Two Way Radio…
-
Page 29: Dtmf Settting
300MS: The time for transmit a single DTMF encode and the interval is 300MS, 500MS: The time for transmit a single DTMF encode and the interval is 500MS. 4. Press [PUSH] button or [P3] key to store setting and exit. RT95 UHF/VHF Two Way Radio…
-
Page 30: Programming Software
USB cable. then reinsert USB cable and open software, then rechoose COM Port, it will turn into normal operation. Therefore, please connect transceiver with computer after switching on the transceiver. Don’t restart transceiver power when it is connected with computer. RT95 UHF/VHF Two Way Radio…
-
Page 31: Trouble Shooting
Antenna connector has debris or damaged. Whether set Low power a. Frequency/channel different, pls modify Can not talk with other b. CTCSS/DCS different, pls reset members within the group c. Out of the communication range RT95 UHF/VHF Two Way Radio…
-
Page 32: Specifications
Wide band Narrow band Power Output 25W / 15W / 5W Modulation 16KΦF3E 11KΦF3E Adjacent Channel Power ≥70dB ≥60dB Hum & Noise ≥40dB ≥36dB Spurious Emission ≥60dB ≥60dB Audio Response +1~-3dB(0.3~3KHz) +1~- 3dB(0.3~2.55KHz) Audio Distortion ≤5% RT95 UHF/VHF Two Way Radio…
-
Page 33: Attached Chart
241.8 77.0 110.9 159.8 192.8 250.3 79.7 114.8 162.2 196.6 254.1 Self- 82.5 118.8 165.5 199.5 define 85.4 123.0 167.9 203.5 88.5 127.3 171.3 206.5 91.5 131.8 173.8 210.7 RT95 UHF/VHF Two Way Radio…
-
Page 34
280. 281. 282. 283. 284. 285. 286. 287. 288. 289. 290. 291. 292. 293. 294. 295. 296. 297. 450 298. 299. 300. 301. 302. 303. 304. 305. 460 306. 307. 308. 309. 310. 311. 312. RT95 UHF/VHF Two Way Radio… -
Page 35
479. 480. 481. 482. 483. 484. 485. 486. 487. 488. 489. 490. 491. 492. 493. 494. 495. 496. 497. 498. 499. 500. 501. 502. 503. 504. 505. 506. 507. 508. 509. 510. 511. 512. http://radioaficion.com/hamfiles/ RT95 UHF/VHF Two Way Radio…
NO.
Key
1
Antenna connector
2
Ex-Speaker Jack
3
Power cable
4.3 Display
1
10
2
16
17
3
NO.
Functions
1
Displays the self define function when press P1
2
Displays the self define function when press P2
3
Displays the self define function when press P3
4
Displays the self define function when press P4
5
Displays the self define function when press P5
6
Displays the self define function when press P6
7
Displays the main channel TX or RX status
8
Displays when Automatic power off function is on
9
Displays the main channel field strength
10
Displays main channel number in channel mode
11
Displays when set band width for main channel
12
Displays when main channel set CTCSS/DCS
13
Displays when main channel reverse function is on
14
Displays when main channel offset function is on
15
Displays when main channel is in scan list
16
Displays main channel frequency or name
17
Displays sub channel number in channel mode
18
Displays when setting band width for sub channel
19
Displays when current sub channel set CTCSS/DCS
20
Displays when sub channel reverse function is ON
21
Displays when sub channel offset function is ON
22
Displays when sub channel receive a signal
23
Display sub channel frequency or name
24
Displays signal strength of sub channel
25
Display voltage and menu setting
9
Functions
Connect a 50 ohm antenna
Connect external speaker
Connect a standard DC power cable
7 8
11 12
23
18 19 20 21 22
25
9
13 14
15
24
6
5
4
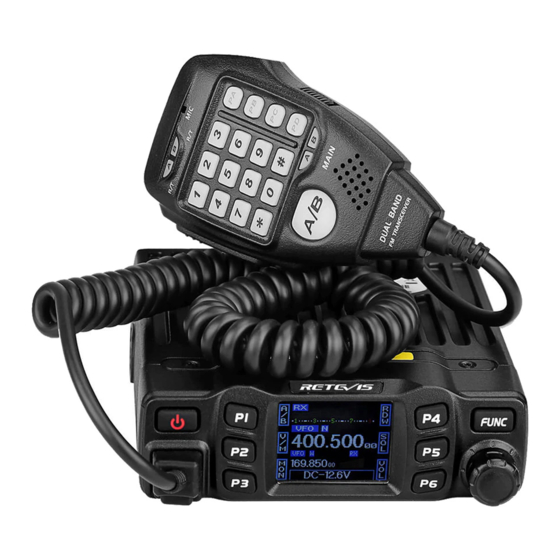
Идем по списку радиостанций который выбрали подписчики ВКонтакте и на YouTube. Обзор на любительскую радиостанцию УКВ диапазона Retevis RT95. Радиостанция урожденная AnyTone AT-778UV и ныне продается под маркой Retevis RT95. Радиостанция работает в диапазонах 2м и 70см, и подходит как для любительских так и для не сложных профессиональных задач. Подробности в видеоролике, но забегая вперед скажу, что станция мне понравилась. Это отличный вариант для начинающего радиолюбителя желающего познакомиться с миром УКВ связи, для работы из автомобиля, через репитеры, и даже спутники.
( 7 оценок, среднее 4.71 из 5 )

✅ Автор и создатель журнала RADIOCHIEF.RU Радиолюбитель (позывной R3XCR). Более 10 лет в сфере гражданской и профессиональной радиосвязи. Пишу и снимаю обзоры на технику связи, а также занимаюсь ремонтом и доработками радиостанций.
Note for Owners:
Guidesimo.com webproject is not a service center of Retevis trademark and does not carries out works for diagnosis and repair of faulty Retevis RT95 equipment. For quality services, please contact an official service center of Retevis company. On our website you can read and download documentation for your Retevis RT95 device for free and familiarize yourself with the technical specifications of device.
More Two-Way Radio Devices:
-
Retevis RT66
Shenzhen Retevis Technology Co., Ltd7/F, 13-C, Zhonghaixin Science & Technology Park, No.12 Ganli 6th Road,Jihua Street, Longgang District, Shenzhen, ChinaWeb: www.retevis.comE-mail: [email protected]: facebook.com/retevisUSRT66Two Way RadioUser’s Manual …
RT66 Two-Way Radio, 14
-
Motorola DTR410 — On-Site Digital Radio
originalsEverythingyou need.Review the extensive featuresof the DTR410. HospitalityExcellent service and customer satisfaction are the keys to loyalty and repeat business. The DTR410 keeps your staff connected, from the front desk and concierge to event planners and maintenance personnel. That means a more productive staff and fast response to guest needs, special events and emergencies.RetailResp …
DTR410 — On-Site Digital Radio Two-Way Radio, 2
-
Midland G-223
http://www.midlandradio.com — 1 -Owner’s ManualModel G-223GMRS/FRS RadioFEATURES22 ChannelsScan22 Key Pad LockCall AlertPower HI/LORoger Beep Tonehttp://www.midlandradio.com — 2 -Use and Care1. Do not use alcohol …
G-223 Two-Way Radio, 6
-
Ega Master MASTEREX 79788
MANUAL DE INSTRUCCIONESOPERATING INSTRUCTIONSESPAÑOL ……………………………2ENGLISH …………………………….8GARANTIA / GUARANTEE … 13RADIO TRANSMISORTWO-WAY RADIOMASTEREX 79788 …
MASTEREX 79788 Two-Way Radio, 18
-
Cobra microTALK PR 950 DX
FPOOperating Instructions for Your Cobra® microTALK®2-WAY RADIO MODEL PR 950 DXInstrucciones operativas delRADIO BIDIRECCIONAL MODELO PR 950 DXCobra®microTALK®Nothing comes close to a Cobra™Nada se compara a Cobra™English, pages 1-18Español, páginas 19-35 …
microTALK PR 950 DX Two-Way Radio, 19
Recommended Documentation:
Table of Contents for Retevis RT95:
-
26 RT95 UHF/VHF Two Way Radio 1. Enter DTMF menu. choose No.1 function 2. Press [PUSH] button, the menu value in LCD turns to green color. 3. Turn channel knob to choose wanted setting. 1-16 total 16 groups DTMF encode for selection. 4. If choosed group is empty, Press PUSH to edit DTMF code, the LCD displays “= = = = = = = =”. 5. Turn channel knob to choose wanted characator, press PUSH to conrm and move to next characat
-
28 RT95 UHF/VHF Two Way Radio 12.1 Default Setting after Resetting 12.2 Trouble Shooting 12. MAINTENANCE Frequency band VHF UHF VFO frequency 145.150MHz 431.150MHz Memory channel — — Offset direction — — Offset frequency 600KHz 5MHz Channel step 10KHz 10KHz CTCSS encode and decode — — CTCSS tone frequency 88.5Hz 88.5Hz DCS encode and decode — — DCS Code 000N 000N Output power HI HI TOT 3 3 APO OFF OFF VOL 28 28 Squelch Level 3 3 Problem Possible Causes and Potential Solutions (1) Power is on, nothing appears on Display + and — polarities of p
-
4 RT95 UHF/VHF Two Way Radio 3.2.2 Fixed Station Operation In order to use this transceiver for xed station operation, you will need a separate 13.8V DC power supply,Please contact local dealer to require. The recommended current capacity of your power supply is 12A. 1.Connect the DC power cable to the regulated DC power supply and ensure that the polarities are correct. (Red: positive, Black: negative). ♦ Do not directly connect the transceiver to an AC outlet. ♦ Use the supplied DC power cable to connect the transceiver to a regulated
-
25 RT95 UHF/VHF Two Way Radio 1. Hold [FUNC] key to enter SELECT MENU interface. 2. Short press [P4] key, [P6] key or turn channel knob to choose menu list. Short press [P5] can fast turn page. 3. Press [PUSH] button to enter MINI KEY menu list. 4. Turn channel knob to choose wanted setting. 5. Short press [PUSH] button to choose wanted keypad group . 6. Short press [P1]~[P6] key to choose wanted self-dene key. 7. Press [FUNC] to conrm and exi
-
3 RT95 UHF/VHF Two Way Radio 3. INITIAL INSTALLATION To install the transceiver, select a safe, convenient location inside your vehicle that minimizes danger to your passengers and yourself while the vehicle is in motion. Consider installing the unit at an appropriate position so that knees or legs will not strike it during sudden braking of your vehicle. Try to pick a well ventilated location that is shielded from dire
-
32 RT95 UHF/VHF Two Way Radio 313. 470 314. 471 315. 472 316. 473 317. 474 318. 475 319. 476 320. 477 321. 500 322. 501 323. 502 324. 503 325. 504 326. 505 327. 506 328. 507 329. 510 330. 511 331. 512 332. 513 333. 514 334. 515 335. 516 336. 517 337. 520 338. 521 339. 522 340. 523 341. 524 342. 525 343. 526 344. 527 345. 530 346. 531 347. 532 348. 533 349. 534 350. 535 351. 536 352. 537 353. 540 354. 541 355. 542 356. 543 357. 544 358. 545 359. 546 360. 547 361. 550 362. 551 363. 552 364. 553 365. 554 366. 555 367. 556 368. 557 369. 560
-
2 RT95 UHF/VHF Two Way Radio 2. ACCESSORIES PC cable Car Antenna Transceiver Screws Microphone Pads Adjusting screws DC Power Cable with Fuse Holder Mobile Bracket non-slip mat Fuse(10A 250V) MIC P1 FUNC P4 P5 P6 P2 P3 2.1 Standard Accessories 2.2 Optional Accessories
-
12 RT95 UHF/VHF Two Way Radio 6. BASIC OPERATIONS 6.1 Switching the Power On/Off 6.2 Adjusting the Volume 6.3 Adjusting Frequency 6.4 Adjust Channel 1. In standby mode, short press the [PX] key programmed as VOL control, the LCD display «VOL:XX», then turn the channel switch to adjust volume level. 2. In standby mode, short press to mute the speaker, the LCD display «AUDIO:MT», short press it again to return last volu
-
1 RT95 UHF/VHF Two Way Radio 1. FUNCTIONS & FEATURES ♦ Adopt superior quality material, better technology and high quality radiator to ensure stable and durable operation; ♦ 180 degree rotatable TFT LCD display; ♦ Full alloy body for heat radiation; ♦ Amateur mode and professional mode for different operation requirement; ♦ Distribute buttons reasonably, convenient for operation; ♦ Separate band width set
-
22 RT95 UHF/VHF Two Way Radio 1. Enter CHAN MENU, choose No.4 function; 2. Press [PUSH] button, the menu value in LCD turns to green color. 3. Turn channel knob to choose wanted setting. 0~99: Total 100 groups 5Tone encode for selection. 4. Press [PUSH] button or [P3] key to store setting and exit. 8.4 5TENC (5TONE ENCODE SELECT) 8.5 T-DEC (Add Optional Signaling) » 5Tone group name and connect shall be programmed by PC software. If the c
-
Instruction Manual RT95 UHF/VHF Two Way Radio RT95 http://radioaficion.com/hamfiles/
-
23 RT95 UHF/VHF Two Way Radio Select suitable bandwidth in accordance with different local conditions 1. Enter CHAN MENU list, choose No.7 function 2. Press [PUSH] button, the menu value in LCD turns to green color. 3. Turn channel knob to choose wanted setting. WID: band width is 25k(Wide band) MID: band width is 20k(Middle band) NAR: band width is 12.5k(Narrow band) 4. Pres
-
27 RT95 UHF/VHF Two Way Radio 11. PROGRAMMING SOFTWARE INSTALLING AND STARTINGSOFTWARE I 1. Click start menu in computer, under “ALL PROGRAMS” menu, choose and click “USB To Com port” in MT500 program, install “USB To Com port” driver by indication. 2. Connect the optional USB Programming cable to USB port in PC with transceiver. 3. Double click MT500 shortcut or click MT500 inprocedure index of start menu, choose serial com port as indicated then click OK to s
-
20 RT95 UHF/VHF Two Way Radio 1. Enter FUNCTION MENU list, choose No.16 function 2. Press [PUSH] button, the menu value in LCD turns to green color 3. Turn channel knob to choose wanted setting. M&H: Turn on Main speaker and microphone speaker. MAIN: Turn on Main speaker. HAND: Turn on microphone speaker 4. Press [PUSH] button or [P3] key to store setting and exit This radio has dissimilar frequency function, when this function is on the frequency in upside of LCD is RX
-
17 RT95 UHF/VHF Two Way Radio This radio has 3 different display: Frequency+Channel and Channel name Tag mode. 1. Enter FUNCTION MENU list, choose No.03 function. 2. Press [PUSH] button, the menu value in LCD turns to green color. 3. Turn channel knob to choose wanted setting. FRQ: Frequency+Channel mode(Amateur transceiver mode) CH: Channel mode(professional transceiver mode) NM: Channel+name mode+ Channel mode(Amateur transceiver mode), If channel not named, it display
Questions, Opinions and Exploitation Impressions:
You can ask a question, express your opinion or share our experience of Retevis RT95 device using right now.