-
Bookmarks
Quick Links
®
Relion
670 series
Bay control REC670
Pre-configured
Product Guide
Related Manuals for ABB REC670
Summary of Contents for ABB REC670
-
Page 1
® Relion 670 series Bay control REC670 Pre-configured Product Guide… -
Page 2: Table Of Contents
5. Hardware description………19 Disclaimer The information in this document is subject to change without notice and should not be construed as a commitment by ABB AB. ABB AB assumes no responsibility for any errors that may appear in this document.
-
Page 3: Application
1. Application single failure in the protection system. 6 x 32 dual directional channels for intertrip REC670 is used for the control, protection and binary signals transfer is available on and monitoring of different types of bays in each included communication card in the power networks.
-
Page 4: Available Functions
Bay control REC670 1MRK 511 192-BEN B Pre-configured Product version: 1.1 Issued: June 2010 2. Available functions ANSI Function description Single Breaker Double brekaer 1 1/2 breaker for (A30) (B30) individual CB (C30) Basic Option Basic Option Basic Option (Qty/…
-
Page 5
Bay control REC670 1MRK 511 192-BEN B Pre-configured Product version: 1.1 Issued: June 2010 ANSI Function description Single Breaker Double brekaer 1 1/2 breaker for (A30) (B30) individual CB (C30) Basic Option Basic Option Basic Option (Qty/ (Qty/ (Qty/ Option… -
Page 6: Functionality
Bay control REC670 1MRK 511 192-BEN B Pre-configured Product version: 1.1 Issued: June 2010 ANSI Function description Single Breaker Double brekaer 1 1/2 breaker for (A30) (B30) individual CB (C30) Basic Option Basic Option Basic Option (Qty/ (Qty/ (Qty/ Option…
-
Page 7
Bay control REC670 1MRK 511 192-BEN B Pre-configured Product version: 1.1 Issued: June 2010 EF4PTOC can be set directional or non- protection can allow the protected circuit to directional independently for each of the steps. operate closer to the thermal limits. -
Page 8
Bay control REC670 1MRK 511 192-BEN B Pre-configured Product version: 1.1 Issued: June 2010 CCRBRF can be single- or three-phase Each function has two steps with definite initiated to allow use with single phase time delay. Reset times for every step can be tripping applications. -
Page 9
Bay control REC670 1MRK 511 192-BEN B Pre-configured Product version: 1.1 Issued: June 2010 Two step residual overvoltage protection SAPTOF is provided with an undervoltage ROV2PTOV calculates the residual voltage blocking. The operation is based on single- from the three-phase voltage input… -
Page 10
Bay control REC670 1MRK 511 192-BEN B Pre-configured Product version: 1.1 Issued: June 2010 CT circuit will mean that the situation will The systems can thus be reconnected after an remain and extremely high voltages will autoreclose or manual closing, which stress the secondary circuit. -
Page 11
Bay control REC670 1MRK 511 192-BEN B Pre-configured Product version: 1.1 Issued: June 2010 bay. Permission to operate is given after IED and is not dependent on any central evaluation of conditions from other functions function. For the station-wide interlocking,… -
Page 12
Bay control REC670 1MRK 511 192-BEN B Pre-configured Product version: 1.1 Issued: June 2010 though the LV CB is open, compensation for such as binary inputs and SPGGIO function a possible capacitor bank on the LV side bay blocks. of a transformer, extensive tap changer… -
Page 13
Bay control REC670 1MRK 511 192-BEN B Pre-configured Product version: 1.1 Issued: June 2010 This unwanted tripping affects the healthy Scheme communication logic for residual line when a fault is cleared on the other line. overcurrent protection ECPSCH This lack of security can result in a total loss To achieve fast fault clearance of earth faults of interconnection between the two buses. -
Page 14
Bay control REC670 1MRK 511 192-BEN B Pre-configured Product version: 1.1 Issued: June 2010 • OR function block. Extension logic package • INVERTER function blocks that inverts the The logic extension block package includes input signal. additional trip matrix logic and configurable logic blocks. -
Page 15
Bay control REC670 1MRK 511 192-BEN B Pre-configured Product version: 1.1 Issued: June 2010 Alarm limits can be set and used as triggers, may be uploaded to PCM600 and further e.g. to generate trip or alarm signals. analysis using the disturbance handling tool. -
Page 16
Bay control REC670 1MRK 511 192-BEN B Pre-configured Product version: 1.1 Issued: June 2010 The event recording information is an Event function integrated part of the disturbance record (Comtrade file). When using a Substation Automation system with LON or SPA communication, time-… -
Page 17
Bay control REC670 1MRK 511 192-BEN B Pre-configured Product version: 1.1 Issued: June 2010 measured values can be supervised with four • Status indication LEDs. settable limits that is low-low limit, low limit, • Alarm indication LEDs, which consist of high limit and high-high limit. -
Page 18
(over LON only). Serial communication, LON Remote communication Existing stations with ABB station bus LON can be extended with use of the optical LON Analog and binary signal transfer to interface. This allows full SA functionality… -
Page 19: Hardware Description
Bay control REC670 1MRK 511 192-BEN B Pre-configured Product version: 1.1 Issued: June 2010 situated at distances <110 km or from the Binary output module BOM IED to optical to electrical converter with G. 703 or G.703E1 interface located on a The binary output module has 24 distances <3 km away.
-
Page 20
Bay control REC670 1MRK 511 192-BEN B Pre-configured Product version: 1.1 Issued: June 2010 Line data communication module LDCM Transformer input module TRM Each module has one optical port, one for The transformer input module is used to each remote end to which the IED galvanically separate and transform the communicates. -
Page 21
Bay control REC670 1MRK 511 192-BEN B Pre-configured Product version: 1.1 Issued: June 2010 xx05000004.vsd IEC05000004 V1 EN Figure 3. Side-by-side mounting Case size 6U, 1/2 x 19” 265.9 223.7 201.1 242.1 252.9 205.7 6U, 3/4 x 19” 265.9 336.0 201.1 242.1… -
Page 22: Connection Diagrams
Bay control REC670 1MRK 511 192-BEN B Pre-configured Product version: 1.1 Issued: June 2010 6. Connection diagrams Table 1. Designations for 1/2 x 19” casing with 1 TRM slot Module Rear Positions BIM, BOM, SOM or IOM X31 and X32 etc. to X51…
-
Page 23
Bay control REC670 1MRK 511 192-BEN B Pre-configured Product version: 1.1 Issued: June 2010 Table 2. Designations for 3/4 x 19” casing with 1 TRM slot Module Rear Positions BIM, BOM, SOM, IOM or X31 and X32 etc. to X101 and X102… -
Page 24
Bay control REC670 1MRK 511 192-BEN B Pre-configured Product version: 1.1 Issued: June 2010 Table 3. Designations for 3/4 x 19” casing with 2 TRM slot Module Rear Positions BIM, BOM, SOM, IOM or X31 and X32 etc. to X71 and… -
Page 25
Bay control REC670 1MRK 511 192-BEN B Pre-configured Product version: 1.1 Issued: June 2010 Table 4. Designations for 1/1 x 19” casing with 1 TRM slot Module Rear Positions BIM, BOM, SOM, X31 and X32 etc. to X161 IOM or MIM… -
Page 26
Bay control REC670 1MRK 511 192-BEN B Pre-configured Product version: 1.1 Issued: June 2010 Table 5. Designations for 1/1 x 19” casing with 2 TRM slots Module Rear Positions BIM, BOM, SOM, X31 and X32 etc. to X131 IOM or MIM… -
Page 27
Bay control REC670 1MRK 511 192-BEN B Pre-configured Product version: 1.1 Issued: June 2010 IEC08000479 BG V1 EN Figure 4. Transformer input module (TRM) ■ Indicates high polarity CT/VT-input designation according to figure AI01 AI02 AI03 AI04 AI05 AI06 AI07… -
Page 28
Bay control REC670 1MRK 511 192-BEN B Pre-configured Product version: 1.1 Issued: June 2010 IEC08000484 BG V1 EN Figure 6. mA input module (MIM) IEC08000480 BG V1 EN Figure 5. Binary input module (BIM). Input contacts named XA corresponds to… -
Page 29
Bay control REC670 1MRK 511 192-BEN B Pre-configured Product version: 1.1 Issued: June 2010 IEC08000477 BG V1 EN Figure 7. Communication interfaces (OEM, LDCM, SLM and HMI) Note to figure Rear communication port SPA/IEC 61850-5-103, ST-connector for glass alt. HFBR Snap-in connector for plastic as ordered Rear communication port LON, ST connector for glass alt. -
Page 30
Bay control REC670 1MRK 511 192-BEN B Pre-configured Product version: 1.1 Issued: June 2010 IEC08000478 BG V1 EN Figure 9. GPS time synchronization module (GSM) IEC08000481 BG V1 EN Figure 10. Binary output module (BOM). Output contacts named XA corresponds to rear position X31, X41, and so on, and output contacts named XB to rear position X32, X42, and so on. -
Page 31
Bay control REC670 1MRK 511 192-BEN B Pre-configured Product version: 1.1 Issued: June 2010 IEC08000482 BG V1 EN Figure 11. Static output module (SOM) IEC08000483 BG V1 EN Figure 12. Binary in/out module (IOM). Input contacts named XA corresponds to rear position X31, X41, and so on, and output contacts named XB to rear position X32, X42, and so on. -
Page 32
Bay control REC670 1MRK 511 192-BEN B Pre-configured Product version: 1.1 Issued: June 2010 BUS WA1 BUS WA2 QB1-OPEN QB1-CLOSE QB2-OPEN QB2-CLOSE -QB1 OPEN QB1 -QB2 CLOSE QB1 OPEN QB2 CLOSE QB2 TRM1:10 MCB-OK TRM1:11 MCB-OK -QA1 CLOSE QA1 CLOSE Reinf… -
Page 33
Bay control REC670 1MRK 511 192-BEN B Pre-configured Product version: 1.1 Issued: June 2010 BUS WA1 QB1-OPEN -QB1 QB1-CLOSE OPEN QB1 CLOSE QB1 -QA1 TRM1:11 MCB-OK CLOSE QA1 CLOSE Reinf MAIN 2 TRIP TRIP QA1 L1,L2,L3 TRIP Reinf QA1-OPEN QA1-CLOSE… -
Page 34
Bay control REC670 1MRK 511 192-BEN B Pre-configured Product version: 1.1 Issued: June 2010 Figure 14. Typical connection diagram for a feeder connected to a double breaker arrangement =1-BU1 QB1 OPEN -QB1 QB1 CLOSE OPEN QB1 CLOSE QB1 =1-QA1 TRM1:10… -
Page 35: Technical Data
Bay control REC670 1MRK 511 192-BEN B Pre-configured Product version: 1.1 Issued: June 2010 7. Technical data General Definitions Reference The specified value of an influencing factor to which are referred the value characteristics of the equipment Nominal The range of values of an influencing quantity (factor) within which, under…
-
Page 36
Bay control REC670 1MRK 511 192-BEN B Pre-configured Product version: 1.1 Issued: June 2010 Table 7. MIM — mA input module Quantity: Rated value: Nominal range: Input resistance = 194 Ohm Input range ± 5, ± 10, ± 20mA 0-5, 0-10, 0-20, 4-20mA Power consumption £… -
Page 37
Bay control REC670 1MRK 511 192-BEN B Pre-configured Product version: 1.1 Issued: June 2010 Binary inputs and outputs Table 10. BIM — Binary input module Quantity Rated value Nominal range Binary inputs RL ± 20% DC voltage, RL 24/40 V 48/60 V RL ±… -
Page 38
Bay control REC670 1MRK 511 192-BEN B Pre-configured Product version: 1.1 Issued: June 2010 Table 12. IOM — Binary input/output module Quantity Rated value Nominal range Binary inputs RL ± 20% DC voltage, RL 24/40 V 48/60 V RL ± 20% 110/125 V RL ±… -
Page 39
Bay control REC670 1MRK 511 192-BEN B Pre-configured Product version: 1.1 Issued: June 2010 Table 14. SOM — Static Output Module (reference standard: IEC 61810-2): Static binary outputs Function of quantity Static binary output trip Rated voltage 48 — 60 VDC… -
Page 40
Bay control REC670 1MRK 511 192-BEN B Pre-configured Product version: 1.1 Issued: June 2010 Table 15. SOM — Static Output module data (reference standard: IEC 61810-2): Electromechanical relay outputs Function of quantity Trip and signal relays Max system voltage 250V AC/DC… -
Page 41
Bay control REC670 1MRK 511 192-BEN B Pre-configured Product version: 1.1 Issued: June 2010 Influencing factors Table 17. Temperature and humidity influence Parameter Reference value Nominal range Influence Ambient +20 °C -10 °C to +55 °C 0.02% /°C temperature, operate… -
Page 42
Bay control REC670 1MRK 511 192-BEN B Pre-configured Product version: 1.1 Issued: June 2010 Type tests according to standards Table 20. Electromagnetic compatibility Test Type test values Reference standards 1 MHz burst disturbance 2.5 kV IEC 60255-22-1, Class III Ring wave immunity test… -
Page 43
Bay control REC670 1MRK 511 192-BEN B Pre-configured Product version: 1.1 Issued: June 2010 Table 21. Insulation Test Type test values Reference standard Dielectric test 2.0 kV AC, 1 min. IEC 60255-5 5 kV, 1.2/50 ms, 0.5 J Impulse voltage test Insulation resistance >100 MW at 500 VDC… -
Page 44
Bay control REC670 1MRK 511 192-BEN B Pre-configured Product version: 1.1 Issued: June 2010 Differential protection Table 25. High impedance differential protection (PDIF, 87) Function Range or value Accuracy Operate voltage (20-400) V ± 1.0% of U for U < U ±… -
Page 45
Bay control REC670 1MRK 511 192-BEN B Pre-configured Product version: 1.1 Issued: June 2010 Table 27. Four step phase overcurrent protection OC4PTOC Function Setting range Accuracy ± 1.0% of I at I £ I Operate current (1-2500)% of lBase ± 1.0% of I at I > I Reset ratio >… -
Page 46
Bay control REC670 1MRK 511 192-BEN B Pre-configured Product version: 1.1 Issued: June 2010 Table 28. Instantaneous residual overcurrent protection EFPIOC Function Range or value Accuracy ± 1.0% of I at I £ I Operate current (1-2500)% of lBase ± 1.0% of I at I > I Reset ratio >… -
Page 47
Bay control REC670 1MRK 511 192-BEN B Pre-configured Product version: 1.1 Issued: June 2010 Table 29. Four step residual overcurrent protection EF4PTOC Function Range or value Accuracy ± 1.0% of I at I £ I Operate current (1-2500)% of lBase ±… -
Page 48
Bay control REC670 1MRK 511 192-BEN B Pre-configured Product version: 1.1 Issued: June 2010 Table 30. Sensitive directional residual overcurrent and power protection SDEPSDE Function Range or value Accuracy ± 1.0% of I at I £ I (0.25-200.00)% of lBase Operate level for 3I ·cosj… -
Page 49
Bay control REC670 1MRK 511 192-BEN B Pre-configured Product version: 1.1 Issued: June 2010 Table 30. Sensitive directional residual overcurrent and power protection SDEPSDE , continued Function Range or value Accuracy Operate time, non 60 ms typically at 0 to 2 x I… -
Page 50
Bay control REC670 1MRK 511 192-BEN B Pre-configured Product version: 1.1 Issued: June 2010 Table 32. Thermal overload protection, two time constants TRPTTR Function Range or value Accuracy Base current 1 and 2 (30–250)% of IBase ± 1.0% of I… -
Page 51
Bay control REC670 1MRK 511 192-BEN B Pre-configured Product version: 1.1 Issued: June 2010 Table 34. Pole discordance protection CCRPLD Function Range or value Accuracy Operate current (0–100)% of IBase ± 1.0% of I Time delay (0.000-60.000) s ± 0.5% ± 10 ms Table 35. -
Page 52
Bay control REC670 1MRK 511 192-BEN B Pre-configured Product version: 1.1 Issued: June 2010 Voltage protection Table 38. Two step undervoltage protection UV2PTUV Function Range or value Accuracy Operate voltage, low and (1–100)% of UBase ± 1.0% of U high step Absolute hysteresis (0–100)% of UBase… -
Page 53
Bay control REC670 1MRK 511 192-BEN B Pre-configured Product version: 1.1 Issued: June 2010 Table 40. Two step residual overvoltage protection ROV2PTOV Function Range or value Accuracy Operate voltage, low and (1-200)% of Ubase ± 1.0% of U at U < U high step ±… -
Page 54
Bay control REC670 1MRK 511 192-BEN B Pre-configured Product version: 1.1 Issued: June 2010 Frequency protection Table 42. Underfrequency protection SAPTUF Function Range or value Accuracy Operate value, start function (35.00-75.00) Hz ± 2.0 mHz Operate time, start function 100 ms typically… -
Page 55
Bay control REC670 1MRK 511 192-BEN B Pre-configured Product version: 1.1 Issued: June 2010 Multipurpose protection Table 45. General current and voltage protection (GAPC) Function Range or value Accuracy Measuring current input phase1, phase2, phase3, PosSeq, NegSeq, 3*ZeroSeq, MaxPh, MinPh, UnbalancePh,… -
Page 56
Bay control REC670 1MRK 511 192-BEN B Pre-configured Product version: 1.1 Issued: June 2010 Table 45. General current and voltage protection (GAPC), continued Function Range or value Accuracy Voltage level where voltage (0.0 — 5.0)% of U ± 1.0% of U… -
Page 57
Bay control REC670 1MRK 511 192-BEN B Pre-configured Product version: 1.1 Issued: June 2010 Table 45. General current and voltage protection (GAPC), continued Function Range or value Accuracy Undervoltage: Critical impulse time 10 ms typically at 2 to 0 x U… -
Page 58
Bay control REC670 1MRK 511 192-BEN B Pre-configured Product version: 1.1 Issued: June 2010 Control Table 48. Synchronizing, synchrocheck and energizing check SESRSYN Function Range or value Accuracy Phase shift, j (-180 to 180) degrees line (0.40-25.000) % of UBase… -
Page 59
Bay control REC670 1MRK 511 192-BEN B Pre-configured Product version: 1.1 Issued: June 2010 Table 49. Autorecloser SMBRREC Function Range or value Accuracy Number of autoreclosing shots 1 — 5 Number of autoreclosing programs Autoreclosing open time: shot 1 — t1 1Ph (0.000-60.000) s… -
Page 60
Bay control REC670 1MRK 511 192-BEN B Pre-configured Product version: 1.1 Issued: June 2010 Table 50. Voltage control TR1ATCC, TR8ATCC, TCMYLTC and TLCYLTC Function Range or value Accuracy Transformer reactance (0.1–200.0)Ω, primary Time delay for lower command (1.0–100.0) s when fast step down mode is… -
Page 61
Bay control REC670 1MRK 511 192-BEN B Pre-configured Product version: 1.1 Issued: June 2010 Table 50. Voltage control TR1ATCC, TR8ATCC, TCMYLTC and TLCYLTC, continued Function Range or value Accuracy Alarm level of active power in (-9999.99–9999.99) MW ± 1.0% of S… -
Page 62
Bay control REC670 1MRK 511 192-BEN B Pre-configured Product version: 1.1 Issued: June 2010 Table 52. Current reversal and weak-end infeed logic for distance protection ZCRWPSCH Function Range or value Accuracy Detection level phase-to- (10-90)% of UBase ± 1.0% of U… -
Page 63
Bay control REC670 1MRK 511 192-BEN B Pre-configured Product version: 1.1 Issued: June 2010 Logic Table 55. Tripping logic SMPPTRC Function Range or value Accuracy Trip action 3-ph, 1/3-ph, 1/2/3-ph Minimum trip pulse length (0.000-60.000) s ± 0.5% ± 10 ms Timers (0.000-60.000) s… -
Page 64
Bay control REC670 1MRK 511 192-BEN B Pre-configured Product version: 1.1 Issued: June 2010 Monitoring Table 58. Measurements CVMMXN Function Range or value Accuracy ± 2.0 mHz Frequency (0.95-1.05) × f ± 0.5% of U Voltage (0.1-1.5) ×U at U£U ±… -
Page 65
Bay control REC670 1MRK 511 192-BEN B Pre-configured Product version: 1.1 Issued: June 2010 Table 61. Disturbance report DRPRDRE Function Range or value Accuracy Pre-fault time (0.05–1.00) s Post-fault time (0.1–10.0) s Limit time (0.5–10.0) s Maximum number of recordings… -
Page 66
Bay control REC670 1MRK 511 192-BEN B Pre-configured Product version: 1.1 Issued: June 2010 Table 63. Event list Function Value Buffer capacity Maximum number of events in 1000 the list Resolution 1 ms Accuracy Depending on time synchronizing Table 64. Indications… -
Page 67
Bay control REC670 1MRK 511 192-BEN B Pre-configured Product version: 1.1 Issued: June 2010 Table 67. Disturbance recorder Function Value Buffer capacity Maximum number of analog inputs Maximum number of binary inputs Maximum number of disturbance reports 100 Maximum total recording time (3.4 s recording time and… -
Page 68
Bay control REC670 1MRK 511 192-BEN B Pre-configured Product version: 1.1 Issued: June 2010 Table 72. SPA communication protocol Function Value Protocol Communication speed 300, 1200, 2400, 4800, 9600, 19200 or 38400 Bd Slave number 1 to 899 Table 73. IEC 60870-5-103 communication protocol… -
Page 69
Bay control REC670 1MRK 511 192-BEN B Pre-configured Product version: 1.1 Issued: June 2010 Remote communication Table 77. Line data communication module Characteristic Range or value Type of LDCM Short range Medium range Long range (LR) (SR) (MR) Type of fibre… -
Page 70
Bay control REC670 1MRK 511 192-BEN B Pre-configured Product version: 1.1 Issued: June 2010 Table 78. Case Material Steel sheet Front plate Steel sheet profile with cut-out for HMI Surface treatment Aluzink preplated steel Finish Light grey (RAL 7035) Table 79. Water and dust protection level according to IEC 60529… -
Page 71
Bay control REC670 1MRK 511 192-BEN B Pre-configured Product version: 1.1 Issued: June 2010 Basic IED functions Table 83. Self supervision with internal event list Data Value Recording manner Continuous, event controlled List size 1000 events, first in-first out Table 84. Time synchronization, time tagging… -
Page 72
Bay control REC670 1MRK 511 192-BEN B Pre-configured Product version: 1.1 Issued: June 2010 Table 87. IRIG-B Quantity Rated value Number of channels IRIG-B Number of channels PPS Electrical connector IRIG-B Optical connector PPS and IRIG-B Type ST Type of fibre 62.5/125 μm multimode fibre… -
Page 73
Bay control REC670 1MRK 511 192-BEN B Pre-configured Product version: 1.1 Issued: June 2010 Table 89. IEC Inverse time characteristics Function Range or value Accuracy Operating characteristic: k = (0.05-999) in steps of 0.01 æ ö ç ÷ × ç… -
Page 74
Bay control REC670 1MRK 511 192-BEN B Pre-configured Product version: 1.1 Issued: June 2010 Table 90. RI and RD type inverse time characteristics Function Range or value Accuracy RI type inverse characteristic k = (0.05-999) in steps of 0.01 IEC 60255-3, class 5 + 40 ms ×… -
Page 75
Bay control REC670 1MRK 511 192-BEN B Pre-configured Product version: 1.1 Issued: June 2010 Table 91. Inverse time characteristics for Two step undervoltage protection (PUVM, 27) Function Range or value Accuracy Type A curve: k = (0.05-1.10) in steps of Class 5 +40 ms 0.01… -
Page 76
Bay control REC670 1MRK 511 192-BEN B Pre-configured Product version: 1.1 Issued: June 2010 Table 92. Inverse time characteristics for Two step overvoltage protection (POVM, 59) Function Range or value Accuracy Type A curve: k = (0.05-1.10) in steps of Class 5 +40 ms 0.01… -
Page 77
Bay control REC670 1MRK 511 192-BEN B Pre-configured Product version: 1.1 Issued: June 2010 Table 93. Inverse time characteristics for Two step residual overvoltage protection (POVM, 59N) Function Range or value Accuracy Type A curve: k = (0.05-1.10) in Class 5 +40 ms steps of 0.01… -
Page 78: Ordering
Exemple code: REC670*1.1-A30-C01D02F01H04-X0-D-C-B-B-A6X0-DAXR-X-XD. Using the code of each position #1-12 specified as REC670*1-2 2-3 3 3 3 3 3 3 3-4 4-5-6-7 7-8-9 9 9-10 10 10 10 10 10 10 10 10 10 10 10 10 10-11 11 11 11 11 11-12 12…
-
Page 79
Bay control REC670 1MRK 511 192-BEN B Pre-configured Product version: 1.1 Issued: June 2010 Software options Notes and Rules No option All fields in the ordering form do not need to be filled in High impedance differential Note: A02 only in A30/B30, A07… -
Page 80
Bay control REC670 1MRK 511 192-BEN B Pre-configured Product version: 1.1 Issued: June 2010 Casing Notes and Rules 1/2 x 19″ case 3/4 x 19″ case 1 TRM slot 3/4 x 19″ case 2 TRM slots 1/1 x 19″ case 1TRM slots 1/1 x 19″… -
Page 81
Bay control REC670 1MRK 511 192-BEN B Pre-configured Product version: 1.1 Issued: June 2010 Binary input/output module, Notes and Rules mA and time synchronizating boards. Note: 1BIM and 1 BOM included. Slot position (rear view) Note: Max 3 positions in 1/2… -
Page 82
Bay control REC670 1MRK 511 192-BEN B Pre-configured Product version: 1.1 Issued: June 2010 Remote end communication, DNP serial comm. Notes and Rules and time synchronization modules Slot position (rear view) Available slots in 1/2 case with 1TRM Note: Max 1 LDCM in 1/2 case Available slots in 3/4 &… -
Page 83
Bay control REC670 1MRK 511 192-BEN B Pre-configured Product version: 1.1 Issued: June 2010 Basic IED functions Self-supervision with internal event list Time and synchronization error Time synchronization Parameter setting groups Test mode functionality Change lock function IED Identifiers Product information… -
Page 84
IED 670 products is described in Multi-breaker/Single or Three Phase trip with 1MRK 512 001-BEN and 1MRK 001024-CA. internal neutral on current circuits (ordering Please refer to the website: www.abb.com/ number RK926 315-BE). substationautomation and ABB Product Multi-breaker/Single or Three Phase trip with Guide >… -
Page 85
Bay control REC670 1MRK 511 192-BEN B Pre-configured Product version: 1.1 Issued: June 2010 External resistor unit for high impedance differential protection High impedance resistor unit 1-ph with resistor 1.8 kOhms and Quantity: RK795101-MA voltage dependent resistor for 20-100V operating voltage High impedance resistor unit 3-ph with resistor 1.8 kOhms and… -
Page 86
Bay control REC670 1MRK 511 192-BEN B Pre-configured Product version: 1.1 Issued: June 2010 User documentation Rule: Specify the number of printed manuals requested Quantity: 1MRK 511 188-UEN Operator’s manual ANSI Quantity: 1MRK 511 188-UUS Technical reference manual Quantity: 1MRK 511 187-UEN… -
Page 87
IEC 61850 Data objects list for IED 670, ver. 1.1 1MRK 500 084-WEN Engineering guide IED 670 products 1MRK 511 179-UEN Communication set-up for RED 670 Differential protection and 670 series 1MRK 505 197-UEN More information can be found on www.abb.com/substationautomation. -
Page 89
Contact us ABB AB Substation Automation Products SE-721 59 Västerås, Sweden Phone +46 (0) 21 32 50 00 +46 (0) 21 14 69 18 www.abb.com/substationautomation…
-
Contents
-
Table of Contents
-
Bookmarks
Quick Links
—
R E L I O N ® 670 SERIES
Bay control REC670
Version 2.1 IEC
Application manual
Related Manuals for ABB Relion REC670
Summary of Contents for ABB Relion REC670
-
Page 1
— R E L I O N ® 670 SERIES Bay control REC670 Version 2.1 IEC Application manual… -
Page 3
Document ID: 1MRK 511 358-UEN Issued: March 2019 Revision: A Product version: 2.1 © Copyright 2016 ABB. All rights reserved… -
Page 4
Copyright This document and parts thereof must not be reproduced or copied without written permission from ABB, and the contents thereof must not be imparted to a third party, nor used for any unauthorized purpose. The software and hardware described in this document is furnished under a license and may be used or disclosed only in accordance with the terms of such license. -
Page 5
This document has been carefully checked by ABB but deviations cannot be completely ruled out. In case any errors are detected, the reader is kindly requested to notify the manufacturer. -
Page 6
(Low-voltage directive 2006/95/EC). This conformity is the result of tests conducted by ABB in accordance with the product standard EN 60255-26 for the EMC directive, and with the product standards EN 60255-1 and EN 60255-27 for the low voltage directive. The… -
Page 7: Table Of Contents
Table of contents Table of contents Section 1 Introduction…………………..17 This manual……………………….17 Intended audience……………………..17 Product documentation……………………18 1.3.1 Product documentation set…………………. 18 1.3.2 Document revision history………………….19 1.3.3 Related documents……………………19 Document symbols and conventions………………20 1.4.1 Symbols……………………….20 1.4.2 Document conventions…………………..21 IEC61850 edition 1 / edition 2 mapping………………21 Section 2 Application………………….
-
Page 8
Table of contents 4.2.2.7 Example how to connect single-phase CT to the IED…………64 4.2.3 Relationships between setting parameter Base Current, CT rated primary current and minimum pickup of a protection IED…………..65 4.2.4 Setting of voltage channels…………………..66 4.2.4.1 Example……………………….66 4.2.4.2 Examples how to connect, configure and set VT inputs for most commonly used VT connections………………….. -
Page 9
Table of contents 7.2.2 Application……………………..105 7.2.3 Setting guidelines……………………106 7.2.3.1 Settings for each step………………….107 7.2.3.2 2nd harmonic restrain………………….110 Instantaneous residual overcurrent protection EFPIOC …………114 7.3.1 Identification……………………..115 7.3.2 Application……………………..115 7.3.3 Setting guidelines……………………115 Four step residual overcurrent protection, (Zero sequence or negative sequence directionality) EF4PTOC ………………….. -
Page 10
Table of contents 7.11 Pole discordance protection CCPDSC………………151 7.11.1 Identification……………………..152 7.11.2 Application……………………..152 7.11.3 Setting guidelines……………………152 7.12 Directional underpower protection GUPPDUP……………. 153 7.12.1 Identification……………………..153 7.12.2 Application……………………..153 7.12.3 Setting guidelines……………………155 7.13 Directional overpower protection GOPPDOP …………….158 7.13.1 Identification……………………..158 7.13.2 Application…………………….. -
Page 11
Table of contents 8.2.2 Application……………………..178 8.2.3 Setting guidelines……………………179 8.2.3.1 Equipment protection, such as for motors, generators, reactors and transformers……………………… 179 8.2.3.2 Equipment protection, capacitors………………179 8.2.3.3 Power supply quality………………….179 8.2.3.4 High impedance earthed systems………………180 8.2.3.5 The following settings can be done for the two step overvoltage protection..180 Two step residual overvoltage protection ROV2PTOV ………… -
Page 12
Table of contents Section 10 Multipurpose protection…………….199 10.1 General current and voltage protection CVGAPC…………..199 10.1.1 Identification……………………..199 10.1.2 Application……………………..199 10.1.2.1 Current and voltage selection for CVGAPC function…………200 10.1.2.2 Base quantities for CVGAPC function…………….202 10.1.2.3 Application possibilities………………….. 202 10.1.2.4 Inadvertent generator energization……………….203 10.1.3 Setting guidelines…………………… -
Page 13
Table of contents 13.1.1 Identification……………………..225 13.1.2 Application……………………..225 13.1.2.1 Synchronizing……………………..225 13.1.2.2 Synchrocheck…………………….. 226 13.1.2.3 Energizing check……………………228 13.1.2.4 Voltage selection……………………228 13.1.2.5 External fuse failure…………………..229 13.1.3 Application examples………………….. 230 13.1.3.1 Single circuit breaker with single busbar…………….230 13.1.3.2 Single circuit breaker with double busbar, external voltage selection……231 13.1.3.3 Single circuit breaker with double busbar, internal voltage selection…… -
Page 14
Table of contents 13.3.1.3 Switches (SXCBR/SXSWI)………………… 261 13.3.1.4 Reservation function (QCRSV and RESIN)…………….. 261 13.3.2 Interaction between modules………………..263 13.3.3 Setting guidelines……………………264 13.3.3.1 Bay control (QCBAY)………………….264 13.3.3.2 Switch controller (SCSWI)…………………265 13.3.3.3 Switch (SXCBR/SXSWI)………………….266 13.3.3.4 Bay Reserve (QCRSV)………………….266 13.3.3.5 Reservation input (RESIN)………………..266 13.4 Interlocking ………………………. -
Page 15
Table of contents 13.5 Voltage control……………………..297 13.5.1 Identification……………………..297 13.5.2 Application……………………..297 13.5.3 Setting guidelines……………………324 13.5.3.1 TR1ATCC or TR8ATCC general settings…………….324 13.5.3.2 TR1ATCC or TR8ATCC Setting group …………….325 13.5.3.3 TCMYLTC and TCLYLTC general settings…………….. 332 13.6 Logic rotating switch for function selection and LHMI presentation SLGAPC….332 13.6.1 Identification…………………….. -
Page 16
Table of contents 14.1.3.6 Intertrip scheme……………………347 14.2 Current reversal and Weak-end infeed logic for distance protection 3-phase ZCRWPSCH ……………………….. 347 14.2.1 Identification……………………..347 14.2.2 Application……………………..348 14.2.2.1 Current reversal logic………………….348 14.2.2.2 Weak-end infeed logic………………….348 14.2.3 Setting guidelines……………………349 14.2.3.1 Current reversal logic…………………. -
Page 17
Table of contents 15.4.1 Logic for group warning WRNCALH………………362 15.4.1.1 Identification………………………362 15.4.1.2 Application……………………..362 15.4.1.3 Setting guidelines……………………362 15.5 Logic for group indication INDCALH………………362 15.5.1 Logic for group indication INDCALH………………362 15.5.1.1 Identification………………………362 15.5.1.2 Application……………………..362 15.5.1.3 Setting guidelines……………………363 15.6 Configurable logic blocks………………….363 15.6.1… -
Page 18
Table of contents 16.1.3 Zero clamping……………………..376 16.1.4 Setting guidelines……………………377 16.1.4.1 Setting examples……………………379 16.2 Gas medium supervision SSIMG………………..385 16.2.1 Identification……………………..385 16.2.2 Application……………………..385 16.3 Liquid medium supervision SSIML………………… 385 16.3.1 Identification……………………..385 16.3.2 Application……………………..386 16.4 Breaker monitoring SSCBR………………….386 16.4.1 Identification……………………..386 16.4.2 Application……………………..386 16.4.3… -
Page 19
Table of contents 17.1 Pulse-counter logic PCFCNT………………….401 17.1.1 Identification……………………..401 17.1.2 Application……………………..401 17.1.3 Setting guidelines……………………401 17.2 Function for energy calculation and demand handling ETPMMTR……..402 17.2.1 Identification……………………..402 17.2.2 Application……………………..402 17.2.3 Setting guidelines……………………403 Section 18 Station communication……………..405 18.1 Communication protocols………………….405 18.2 IEC 61850-8-1 communication protocol………………. -
Page 20
Table of contents 19.1.1 Identification……………………..431 19.1.2 Application……………………..431 19.1.2.1 Communication hardware solutions………………431 19.1.3 Setting guidelines……………………432 Section 20 Security………………….437 20.1 Authority status ATHSTAT………………….437 20.1.1 Application……………………..437 20.2 Self supervision with internal event list INTERRSIG…………..437 20.2.1 Application……………………..437 20.3 Change lock CHNGLCK……………………. 438 20.3.1 Application…………………….. -
Page 21
Table of contents 21.10.1 Application……………………..446 21.10.2 Setting guidelines……………………446 21.11 Signal matrix for analog inputs SMAI………………446 21.11.1 Application……………………..446 21.11.2 Frequency values……………………446 21.11.3 Setting guidelines……………………447 21.12 Test mode functionality TEST………………… 451 21.12.1 Application……………………..451 21.12.1.1 IEC 61850 protocol test mode…………………452 21.12.2 Setting guidelines…………………… -
Page 23: Introduction
1MRK 511 358-UEN A Section 1 Introduction Section 1 Introduction This manual GUID-AB423A30-13C2-46AF-B7FE-A73BB425EB5F v19 The application manual contains application descriptions and setting guidelines sorted per function. The manual can be used to find out when and for what purpose a typical protection function can be used.
-
Page 24: Product Documentation
Section 1 1MRK 511 358-UEN A Introduction Product documentation 1.3.1 Product documentation set GUID-3AA69EA6-F1D8-47C6-A8E6-562F29C67172 v15 Engineering manual Installation manual Commissioning manual Operation manual Application manual Technical manual Communication protocol manual Cyber security deployment guideline IEC07000220-4-en.vsd IEC07000220 V4 EN-US Figure 1: The intended use of manuals throughout the product lifecycle The engineering manual contains instructions on how to engineer the IEDs using the various tools available within the PCM600 software.
-
Page 25: Document Revision History
1MRK 511 358-UEN A Section 1 Introduction The application manual contains application descriptions and setting guidelines sorted per function. The manual can be used to find out when and for what purpose a typical protection function can be used. The manual can also provide assistance for calculating settings. The technical manual contains operation principle descriptions, and lists function blocks, logic diagrams, input and output signals, setting parameters and technical data, sorted per function.
-
Page 26: Document Symbols And Conventions
Section 1 1MRK 511 358-UEN A Introduction 670 series manuals Document numbers Cyber security deployment guideline 1MRK 511 356-UEN Connection and Installation components 1MRK 513 003-BEN Test system, COMBITEST 1MRK 512 001-BEN Document symbols and conventions 1.4.1 Symbols GUID-2945B229-DAB0-4F15-8A0E-B9CF0C2C7B15 v12 The electrical warning icon indicates the presence of a hazard which could result in electrical shock.
-
Page 27: Document Conventions
1MRK 511 358-UEN A Section 1 Introduction 1.4.2 Document conventions GUID-96DFAB1A-98FE-4B26-8E90-F7CEB14B1AB6 v8 • Abbreviations and acronyms in this manual are spelled out in the glossary. The glossary also contains definitions of important terms. • Push button navigation in the LHMI menu structure is presented by using the push button icons.
-
Page 28
Section 1 1MRK 511 358-UEN A Introduction Function block name Edition 1 logical nodes Edition 2 logical nodes BUSPTRC_B8 BUSPTRC BUSPTRC BUSPTRC_B9 BUSPTRC BUSPTRC BUSPTRC_B10 BUSPTRC BUSPTRC BUSPTRC_B11 BUSPTRC BUSPTRC BUSPTRC_B12 BUSPTRC BUSPTRC BUSPTRC_B13 BUSPTRC BUSPTRC BUSPTRC_B14 BUSPTRC BUSPTRC BUSPTRC_B15 BUSPTRC BUSPTRC BUSPTRC_B16… -
Page 29
1MRK 511 358-UEN A Section 1 Introduction Function block name Edition 1 logical nodes Edition 2 logical nodes CBPGAPC CBPLLN0 CBPMMXU CBPMMXU CBPPTRC CBPPTRC HOLPTOV HOLPTOV HPH1PTOV HPH1PTOV PH3PTOC PH3PTUC PH3PTUC PH3PTOC RP3PDOP RP3PDOP CCPDSC CCRPLD CCPDSC CCRBRF CCRBRF CCRBRF CCRWRBRF CCRWRBRF CCRWRBRF… -
Page 30
Section 1 1MRK 511 358-UEN A Introduction Function block name Edition 1 logical nodes Edition 2 logical nodes GENPDIF GENPDIF GENGAPC GENPDIF GENPHAR GENPTRC GOOSEBINRCV BINGREC GOOSEDPRCV DPGREC GOOSEINTLKRCV INTGREC GOOSEINTRCV INTSGREC GOOSEMVRCV MVGREC GOOSESPRCV BINSGREC GOOSEVCTRRCV VCTRGREC GOPPDOP GOPPDOP GOPPDOP PH1PTRC GRPTTR… -
Page 31
1MRK 511 358-UEN A Section 1 Introduction Function block name Edition 1 logical nodes Edition 2 logical nodes LPHD LPHD LPTTR LPTTR LPTTR LT3CPDIF LT3CPDIF LT3CGAPC LT3CPDIF LT3CPHAR LT3CPTRC LT6CPDIF LT6CPDIF LT6CGAPC LT6CPDIF LT6CPHAR LT6CPTRC MVGAPC MVGGIO MVGAPC NS2PTOC NS2LLN0 NS2PTOC NS2PTOC NS2PTRC… -
Page 32
Section 1 1MRK 511 358-UEN A Introduction Function block name Edition 1 logical nodes Edition 2 logical nodes SAPTOF SAPTOF SAPTOF SAPTUF SAPTUF SAPTUF SCCVPTOC SCCVPTOC SCCVPTOC SCILO SCILO SCILO SCSWI SCSWI SCSWI SDEPSDE SDEPSDE SDEPSDE SDEPTOC SDEPTOV SDEPTRC SESRSYN RSY1LLN0 AUT1RSYN AUT1RSYN… -
Page 33
1MRK 511 358-UEN A Section 1 Introduction Function block name Edition 1 logical nodes Edition 2 logical nodes U2RWPTUV GEN2LLN0 PH1PTRC PH1PTRC U2RWPTUV U2RWPTUV UV2PTUV GEN2LLN0 PH1PTRC PH1PTRC UV2PTUV UV2PTUV VDCPTOV VDCPTOV VDCPTOV VDSPVC VDRFUF VDSPVC VMMXU VMMXU VMMXU VMSQI VMSQI VMSQI VNMMXU… -
Page 35: Application
1MRK 511 358-UEN A Section 2 Application Section 2 Application General IED application M13637-3 v12 The IED is used for the control, protection and monitoring of different types of bays in power networks. The IED is especially suitable for applications in control systems where the IEC 61850–8–1 Ed 1 or Ed 2 station bus features of the IED can be fully utilized.
-
Page 36: Main Protection Functions
Section 2 1MRK 511 358-UEN A Application Forcing of binary inputs and outputs is a convenient way to test wiring in substations as well as testing configuration logic in the IEDs. Basically it means that all binary inputs and outputs on the IED I/O modules (BOM, BIM, IOM &…
-
Page 37
1MRK 511 358-UEN A Section 2 Application IEC 61850 ANSI Function description Bay control REC670 (Customized) NS4PTOC 46I2 Four step 1-C51 1-C51 2-C52 2-C53 directional negative phase sequence overcurrent protection SDEPSDE Sensitive directional 1-C16 1–C16 1-C16 1-C16 residual overcurrent and power protection LCPTTR Thermal overload… -
Page 38: Control And Monitoring Functions
Section 2 1MRK 511 358-UEN A Application IEC 61850 ANSI Function description Bay control REC670 (Customized) Frequency protection SAPTUF Underfrequency 6-E01 6-E01 6-E01 6-E01 protection SAPTOF Overfrequency 6-E01 6-E01 6-E01 6-E01 protection SAPFRC Rate-of-change 6-E01 6-E01 6-E01 6-E01 frequency protection FTAQFVR Frequency time 0-12…
-
Page 39
1MRK 511 358-UEN A Section 2 Application IEC 61850 ANSI Function description Bay control REC670 QCBAY Apparatus control 1+5/APC30 1+5/ APC3 LOCREM Handling of LRswitch 1+5/APC30 1+5/ positions APC3 LOCREMCTRL LHMI control of PSTO 1+5/APC30 1+5/ APC3 TR1ATCC Automatic voltage 1-H11 1-H11 1-H11… -
Page 40
Section 2 1MRK 511 358-UEN A Application IEC 61850 ANSI Function description Bay control REC670 Secondary system supervision CCSSPVC Current circuit supervision FUFSPVC Fuse failure supervision VDSPVC Fuse failure supervision 1-G03 1-G03 1-G03 1-G03 based on voltage difference Logic SMPPTRC Tripping logic TMAGAPC Trip matrix logic… -
Page 41
1MRK 511 358-UEN A Section 2 Application IEC 61850 ANSI Function description Bay control REC670 TEIGAPC Elapsed time integrator with limit transgression and overflow supervision INTCOMP Comparator for integer inputs REALCOMP Comparator for real inputs Monitoring CVMMXN, Measurements VMMXU, CMSQI, VMSQI, VNMMXU CMMXU Measurements… -
Page 42
Section 2 1MRK 511 358-UEN A Application IEC 61850 ANSI Function description Bay control REC670 I103EF Function status earth- fault for IEC 60870-5-103 I103FLTPROT Function status fault protection for IEC 60870-5-103 I103IED IED status for IEC 60870-5-103 I103SUPERV Supervison status for IEC 60870-5-103 I103USRDEF Status for user defined… -
Page 43: Communication
1MRK 511 358-UEN A Section 2 Application Configurable logic blocks Q/T Total number of instances ORQT PULSETIMERQT RSMEMORYQT SRMEMORYQT TIMERSETQT XORQT Table 5: Total number of instances for extended logic package Extended configurable logic block Total number of instances GATE PULSETIMER SLGAPC SRMEMORY…
-
Page 44
Section 2 1MRK 511 358-UEN A Application IEC 61850 ANSI Function description Bay control REC670 (Customized) DNPGENTCP DNP3.0 communication general TCP protocol CHSERRS485 DNP3.0 for EIA-485 communication protocol CH1TCP, CH2TCP, DNP3.0 for TCP/IP CH3TCP, CH4TCP communication protocol CHSEROPT DNP3.0 for TCP/IP and EIA-485 communication protocol… -
Page 45
1MRK 511 358-UEN A Section 2 Application IEC 61850 ANSI Function description Bay control REC670 (Customized) OPTICAL103 IEC 60870-5-103 Optical serial communication RS485103 IEC 60870-5-103 serial communication for RS485 AGSAL Generic security application component LD0LLN0 IEC 61850 LD0 LLN0 SYSLLN0 IEC 61850 SYS LLN0 LPHD Physical device… -
Page 46: Basic Ied Functions
Section 2 1MRK 511 358-UEN A Application IEC 61850 ANSI Function description Bay control REC670 (Customized) ZCRWPSCH Current reversal and 1-K01 1-K01 1-K01 1-K01 weak-end infeed logic for distance protection ZCLCPSCH Local acceleration logic 1-K01 1-K01 1-K01 1-K01 ECPSCH Scheme 1-C51 1-C51 1-C52…
-
Page 47
1MRK 511 358-UEN A Section 2 Application IEC 61850 or function Description name AUTHMAN Authority management FTPACCS FTP access with password SPACOMMMAP SPA communication mapping SPATD Date and time via SPA protocol DOSFRNT Denial of service, frame rate control for front port DOSLANAB Denial of service, frame rate control for OEM port AB DOSLANCD… -
Page 49: Configuration
Configuration Introduction SEMOD120082-1 v1 SEMOD120089-4 v8 On request, ABB is available to support the re-configuration work, either directly or to do the design checking. Hardware modules are configured with the hardware configuration tool in the PCM600 engineering platform. The IED is available to be ordered in three different alternatives with the configuration suitable for the application.
-
Page 50: Description Of Configuration Rec670
Section 3 1MRK 511 358-UEN A Configuration Optional functions and optional IO ordered will not be configured at delivery. It should be noted that the standard only includes one binary input and one binary output module and only the key functions such as tripping are connected to the outputs. The required total IO must be calculated and specified at ordering.
-
Page 51: Description Of Configuration A31
1MRK 511 358-UEN A Section 3 Configuration REC670 A30 – Double busbar in single breaker arrangement 12AI (6I + 6U) Control Control Control S CILO S CSWI S XSWI Control Control Control S CILO S CSWI S XSWI WA2_VT VN MMXU WA1_VT Control Control…
-
Page 52: Description Of Configuration B30
Section 3 1MRK 511 358-UEN A Configuration with full control of all apparatuses included, more IO cards are required. Our proposal for a full version with control is to use two binary input modules and one binary output module. REC670 A31 – Bus Coupler Bay arrangement 12AI (6I + 6U) Control Control Control…
-
Page 53: Description Of Configuration C30
1MRK 511 358-UEN A Section 3 Configuration version with control is to use two binary input modules and one or two binary output modules. For systems without Substation Automation a second binary output board might be required. REC670 B30 — Double breaker arrangement 12AI (6I + 6U) Control Control Control…
-
Page 54
Section 3 1MRK 511 358-UEN A Configuration Control, measuring and interlocking is fully configured, including communication with other bays such as other lines and the bus coupler over GOOSE. The following should be noted. The configuration is made with the binary input and binary output boards in the basic IED delivery. -
Page 55
1MRK 511 358-UEN A Section 3 Configuration SEMOD51278-4 v10 Four packages have been defined for following applications: • Single breaker (double or single bus) arrangement (A30) • Bus coupler for double busbar (A31) • Double breaker arrangement (B30) • 1 ½ breaker arrangement for a complete diameter (C30) Optional functions are available in PCM600 Application Configuration Tool and can be configured by the user. -
Page 57: Analog Inputs
1MRK 511 358-UEN A Section 4 Analog inputs Section 4 Analog inputs Introduction SEMOD55003-5 v10 Analog input channels must be configured and set properly in order to get correct measurement results and correct protection operations. For power measuring and all directional and differential functions the directions of the input currents must be defined in order to reflect the way the current transformers are installed/connected in the field ( primary and secondary connections ).
-
Page 58: Example
Section 4 1MRK 511 358-UEN A Analog inputs 4.2.1.1 Example SEMOD55055-11 v4 Usually the L1 phase-to-earth voltage connected to the first VT channel number of the transformer input module (TRM) is selected as the phase reference. The first VT channel number depends on the type of transformer input module.
-
Page 59: Example 2
1MRK 511 358-UEN A Section 4 Analog inputs Line Transformer Line Reverse Forward Definition of direction for directional functions Transformer protection Line protection Setting of current input: Setting of current input: Setting of current input: Set parameter Set parameter Set parameter CTStarPoint with CTStarPoint with CTStarPoint with…
-
Page 60: Example 3
Section 4 1MRK 511 358-UEN A Analog inputs Transformer Line Reverse Forward Definition of direction for directional functions Transformer protection Line protection Setting of current input: Setting of current input: Setting of current input: Set parameter Set parameter Set parameter CTStarPoint with CTStarPoint with CTStarPoint with…
-
Page 61
1MRK 511 358-UEN A Section 4 Analog inputs Transformer Line Forward Reverse Definition of direction for directional Transformer and line functions Line protection Setting of current input: Setting of current input: Set parameter Set parameter CTStarPoint with CTStarPoint with Transformer as Transformer as reference object. -
Page 62
Section 4 1MRK 511 358-UEN A Analog inputs Transformer Line Reverse Forward Definition of direction for directional Transformer and line functions Line protection Setting of current input for line functions: Set parameter CTStarPoint with Line as reference object. Setting of current input Setting of current input Correct setting is for transformer functions:… -
Page 63
1MRK 511 358-UEN A Section 4 Analog inputs Busbar Busbar Protection en06000196.vsd IEC06000196 V2 EN-US Figure 11: Example how to set CTStarPoint parameters in the IED CTStarPoint parameters in two ways. For busbar protection it is possible to set the The first solution will be to use busbar as a reference object. -
Page 64: Examples On How To Connect, Configure And Set Ct Inputs For Most Commonly Used Ct Connections
Section 4 1MRK 511 358-UEN A Analog inputs 4.2.2.4 Examples on how to connect, configure and set CT inputs for most commonly used CT connections SEMOD55055-296 v5 Figure defines the marking of current transformer terminals commonly used around the world: In the SMAI function block, you have to set if the SMAI block is measuring AnalogInputType : Current/ current or voltage.
-
Page 65: Example On How To Connect A Star Connected Three-Phase Ct Set To The Ied
1MRK 511 358-UEN A Section 4 Analog inputs 4.2.2.5 Example on how to connect a star connected three-phase CT set to the SEMOD55055-352 v9 Figure gives an example about the wiring of a star connected three-phase CT set to the IED. It gives also an overview of the actions which are needed to make this measurement available to the built-in protection and control functions within the IED as well.
-
Page 66
Section 4 1MRK 511 358-UEN A Analog inputs These three connections are the links between the three current inputs and the three input channels of the preprocessing function block 4). Depending on the type of functions, which need this current information, more than one preprocessing block might be connected in parallel to the same three physical CT inputs. -
Page 67
1MRK 511 358-UEN A Section 4 Analog inputs In the example in figure 14 case everything is done in a similar way as in the above described example (figure 13). The only difference is the setting of the parameter CTStarPoint of the used current inputs on the TRM (item 2 in the figure): CTprim =600A •… -
Page 68: Example How To Connect Delta Connected Three-Phase Ct Set To The Ied
Section 4 1MRK 511 358-UEN A Analog inputs is the TRM where these current inputs are located. It shall be noted that for all these current inputs the following setting values shall be entered. • CTprim=800A • CTsec=1A • CTStarPoint=FromObject •…
-
Page 69
1MRK 511 358-UEN A Section 4 Analog inputs IL1-IL2 SMAI2 BLOCK AI3P IL2-IL3 REVROT ^GRP2L1 IL3-IL1 ^GRP2L2 ^GRP2L3 ^GRP2N IEC11000027-3-en.vsdx Protected Object IEC11000027 V3 EN-US Figure 16: Delta DAB connected three-phase CT set Where: shows how to connect three individual phase currents from a delta connected three-phase CT set to three CT inputs of the IED. -
Page 70: Example How To Connect Single-Phase Ct To The Ied
Section 4 1MRK 511 358-UEN A Analog inputs Another alternative is to have the delta connected CT set as shown in figure 17: IL1-IL3 SMAI2 BLOCK AI3P REVROT IL2-IL1 ^GRP2L1 ^GRP2L2 IL3-IL2 ^GRP2L3 ^GRP2N IEC11000028-3-en.vsdx Protected Object IEC11000028 V3 EN-US Figure 17: Delta DAC connected three-phase CT set In this case, everything is done in a similar way as in the above described example, except that…
-
Page 71: Relationships Between Setting Parameter Base Current, Ct Rated Primary Current And Minimum Pickup Of A Protection Ied
1MRK 511 358-UEN A Section 4 Analog inputs Protected Object SMAI2 BLOCK AI3P REVROT ^GRP2L1 ^GRP2L2 ^GRP2L3 ^GRP2N IEC11000029-4-en.vsdx IEC11000029 V4 EN-US Figure 18: Connections for single-phase CT input Where: shows how to connect single-phase CT input in the IED. is TRM where these current inputs are located.
-
Page 72: Setting Of Voltage Channels
Section 4 1MRK 511 358-UEN A Analog inputs CTs involved in the protection scheme. The rated CT primary current value is set as parameter CTPrim under the IED TRM settings. For all other protection applications (e.g. generator, shunt reactor, shunt capacitor and IBase parameter equal to the rated transformer protection) it is typically desirable to set current of the protected object.
-
Page 73: Examples On How To Connect A Three Phase-To-Earth Connected Vt To The Ied
1MRK 511 358-UEN A Section 4 Analog inputs (X1) (X1) (X1) (H1) (H1) (H1) (H2) (X2) (H2) (X2) (H2) (X2) en06000591.vsd IEC06000591 V1 EN-US Figure 19: Commonly used markings of VT terminals Where: is the symbol and terminal marking used in this document. Terminals marked with a square indicate the primary and secondary winding terminals with the same (positive) polarity is the equivalent symbol and terminal marking used by IEC (ANSI) standard for phase-to-earth connected VTs…
-
Page 74
Section 4 1MRK 511 358-UEN A Analog inputs SMAI2 BLOCK AI3P REVROT ^GRP2L1 ^GRP2L2 ^GRP2L3 ^GRP2N #Not used IEC06000599-4-en.vsdx IEC06000599 V4 EN-US Figure 20: A Three phase-to-earth connected VT Where: shows how to connect three secondary phase-to-earth voltages to three VT inputs on the IED is the TRM where these three voltage inputs are located. -
Page 75: Example On How To Connect A Phase-To-Phase Connected Vt To The Ied
1MRK 511 358-UEN A Section 4 Analog inputs are three connections made in Signal Matrix Tool (SMT), which connect these three voltage inputs to first three input channels of the preprocessing function block 5). Depending on the type of functions which need this voltage information, more then one preprocessing block might be connected in parallel to these three VT inputs.
-
Page 76
Section 4 1MRK 511 358-UEN A Analog inputs 13.8 13.8 SMAI2 BLOCK AI3P REVROT ^GRP2L1 ^GRP2L2 ^GRP2L3 #Not Used ^GRP2N IEC06000600-5-en.vsdx IEC06000600 V5 EN-US Figure 21: A Two phase-to-phase connected VT Where: shows how to connect the secondary side of a phase-to-phase VT to the VT inputs on the IED is the TRM where these three voltage inputs are located. -
Page 77: Example On How To Connect An Open Delta Vt To The Ied For High Impedance Earthed Or Unearthed Netwoeks
1MRK 511 358-UEN A Section 4 Analog inputs 4.2.4.5 Example on how to connect an open delta VT to the IED for high impedance earthed or unearthed netwoeks SEMOD55055-163 v8 Figure gives an example about the wiring of an open delta VT to the IED for high impedance earthed or unearthed power systems.
-
Page 78: Example How To Connect The Open Delta Vt To The Ied For Low Impedance Earthed Or Solidly Earthed Power Systems
Section 4 1MRK 511 358-UEN A Analog inputs Where: shows how to connect the secondary side of the open delta VT to one VT input on the IED. +3U0 shall be connected to the IED is the TRM where this voltage input is located. It shall be noted that for this voltage input the following setting values shall be entered: ×…
-
Page 79
1MRK 511 358-UEN A Section 4 Analog inputs Ph Ph Ph E (Equation 7) EQUATION1926 V1 EN-US The primary rated voltage of such VT is always equal to UPh-E Therefore, three series connected VT secondary windings will give the secondary voltage equal only to one individual VT secondary winding rating. -
Page 80: Example On How To Connect A Neutral Point Vt To The Ied
Section 4 1MRK 511 358-UEN A Analog inputs Where: shows how to connect the secondary side of open delta VT to one VT input in the IED. +3Uo shall be connected to the IED. is TRM where this voltage input is located. It shall be noted that for this voltage input the following setting values shall be entered: ×…
-
Page 81
1MRK 511 358-UEN A Section 4 Analog inputs In case of a solid earth fault in high impedance earthed or unearthed systems the primary value of Uo voltage will be equal to: (Equation 11) EQUATION1931 V2 EN-US Figure gives an overview of required actions by the user in order to make this measurement available to the built-in protection and control functions within the IED as well. -
Page 82
Section 4 1MRK 511 358-UEN A Analog inputs Where: shows how to connect the secondary side of neutral point VT to one VT input in the IED. shall be connected to the IED. is the TRM or AIM where this voltage input is located. For this voltage input the following setting values shall be entered: VTprim 3.81… -
Page 83: Local Hmi
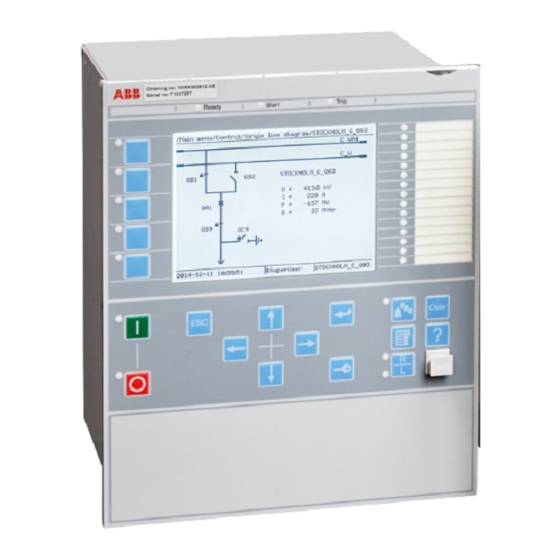
1MRK 511 358-UEN A Section 5 Local HMI Section 5 Local HMI AMU0600442 v14 IEC13000239-2-en.vsd IEC13000239 V2 EN-US Figure 25: Local human-machine interface The LHMI of the IED contains the following elements: • Keypad • Display (LCD) • LED indicators •…
-
Page 84: Display
Section 5 1MRK 511 358-UEN A Local HMI Display GUID-55739D4F-1DA5-4112-B5C7-217AAF360EA5 v10 The LHMI includes a graphical monochrome liquid crystal display (LCD) with a resolution of 320 x 240 pixels. The character size can vary. The amount of characters and rows fitting the view depends on the character size and the view that is shown.
-
Page 85: Leds
1MRK 511 358-UEN A Section 5 Local HMI IEC13000281-1-en.vsd GUID-C98D972D-D1D8-4734-B419-161DBC0DC97B V1 EN-US Figure 27: Function button panel The indication LED panel shows on request the alarm text labels for the indication LEDs. Three indication LED pages are available. IEC13000240-1-en.vsd GUID-5157100F-E8C0-4FAB-B979-FD4A971475E3 V1 EN-US Figure 28: Indication LED panel The function button and indication LED panels are not visible at the same time.
-
Page 86: Keypad
Section 5 1MRK 511 358-UEN A Local HMI three LED groups. The LEDs are lit according to priority, with red being the highest and green the lowest priority. For example, if on one panel there is an indication that requires the green LED to be lit, and on another panel there is an indication that requires the red LED to be lit, the red LED takes priority and is lit.
-
Page 87
1MRK 511 358-UEN A Section 5 Local HMI IEC15000157-1-en.vsd IEC15000157 V1 EN-US Figure 29: LHMI keypad with object control, navigation and command push-buttons and RJ-45 communication port 1…5 Function button Close Open Escape Left Down Right Enter Remote/Local Uplink LED Not in use Multipage Menu… -
Page 88: Local Hmi Functionality
Section 5 1MRK 511 358-UEN A Local HMI IED status LEDs Local HMI functionality 5.4.1 Protection and alarm indication GUID-09CCB9F1-9B27-4C12-B253-FBE95EA537F5 v15 Protection indicators The protection indicator LEDs are Ready, Start and Trip. The start and trip LEDs are configured via the disturbance recorder. The yellow and red status LEDs are configured in the disturbance recorder function, DRPRDRE, by connecting a start or trip signal from the actual function to a BxRBDR binary input function block using the PCM600 and configure the…
-
Page 89: Parameter Management
1MRK 511 358-UEN A Section 5 Local HMI Alarm indicators The 15 programmable three-color LEDs are used for alarm indication. An individual alarm/ status signal, connected to any of the LED function blocks, can be assigned to one of the three LED colors when configuring the IED.
-
Page 90
Section 5 1MRK 511 358-UEN A Local HMI IEC13000280-1-en.vsd GUID-AACFC753-BFB9-47FE-9512-3C4180731A1B V1 EN-US Figure 30: RJ-45 communication port and green indicator LED 1 RJ-45 connector 2 Green indicator LED The default IP address for the IED front port is 10.1.150.3 and the corresponding subnetwork mask is 255.255.255.0. -
Page 91: Differential Protection
1MRK 511 358-UEN A Section 6 Differential protection Section 6 Differential protection High impedance differential protection, single phase HZPDIF IP14239-1 v4 6.1.1 Identification M14813-1 v4 IEC 61850 IEC 60617 ANSI/IEEE C37.2 Function description identification identification device number High impedance differential HZPDIF protection, single phase SYMBOL-CC V2 EN-US…
-
Page 92
Section 6 1MRK 511 358-UEN A Differential protection 3·Id 3·Id 3·Id 3·Id 3·Id IEC05000163-4-en.vsd IEC05000163 V4 EN-US 3·Id Z< 3·Id Z< IEC05000738-3-en.vsd IEC05000738 V3 EN-US Application manual… -
Page 93: The Basics Of The High Impedance Principle
1MRK 511 358-UEN A Section 6 Differential protection Figure 31: Different applications of a 1Ph High impedance differential protection HZPDIF function 6.1.2.1 The basics of the high impedance principle SEMOD54734-153 v9 The high impedance differential protection principle has been used for many years and is well documented in literature publicly available.
-
Page 94
Section 6 1MRK 511 358-UEN A Differential protection calculations are made with the worst situations in mind and a minimum operating voltage U is calculated according to equation > × Rct Rl (Equation 14) EQUATION1531 V1 EN-US where: IF max is the maximum through fault current at the secondary side of the CT is the current transformer secondary winding resistance and is the maximum loop resistance of the circuit at any CT. -
Page 95
1MRK 511 358-UEN A Section 6 Differential protection Table 12: 1 A channels: input with minimum operating down to 40 mA Operating Stabilizing Operating Stabilizing Operating voltage resistor R current level resistor R current level U>Trip ohms ohms 20 V 0.040 A 40 V 1000… -
Page 96
Section 6 1MRK 511 358-UEN A Differential protection in fault current to allow the use of only the AC components of the fault current in the above calculations. The voltage dependent resistor (Metrosil) characteristic is shown in Figure 38. Series resistor thermal capacity SEMOD54734-336 v6 U>Trip /SeriesResistor should… -
Page 97
1MRK 511 358-UEN A Section 6 Differential protection Rres I> Protected Object a) Through load situation b) Through fault situation c) Internal faults IEC05000427-2-en.vsd IEC05000427 V2 EN-US Figure 33: The high impedance principle for one phase with two current transformer inputs Application manual… -
Page 98: Connection Examples For High Impedance Differential Protection
Section 6 1MRK 511 358-UEN A Differential protection 6.1.3 Connection examples for high impedance differential protection GUID-8C58A73D-7C2E-4BE5-AB87-B4C93FB7D62B v5 WARNING! USE EXTREME CAUTION! Dangerously high voltages might be present on this equipment, especially on the plate with resistors. De-energize the primary object protected with this equipment before connecting or disconnecting wiring or performing any maintenance.
-
Page 99: Connections For 1Ph High Impedance Differential Protection Hzpdif
1MRK 511 358-UEN A Section 6 Differential protection Necessary connection for setting resistors. Factory-made star point on a three-phase setting resistor set. The star point connector must be removed for installations with 670 series IEDs. This star point is required for RADHA schemes only. Connections of three individual phase currents for high impedance scheme to three CT inputs in the IED.
-
Page 100: Setting Guidelines
Section 6 1MRK 511 358-UEN A Differential protection 6.1.4 Setting guidelines IP14945-1 v1 M13076-3 v2 The setting calculations are individual for each application. Refer to the different application descriptions below. 6.1.4.1 Configuration M13076-5 v4 The configuration is done in the Application Configuration tool. 6.1.4.2 Settings of protection function M13076-10 v6…
-
Page 101
1MRK 511 358-UEN A Section 6 Differential protection 3·Id IEC05000165-2-en.vsd IEC05000165 V2 EN-US 3·Id IEC05000739-2-en.vsd IEC05000739 V2 EN-US Figure 36: The protection scheme utilizing the high impedance function for the T-feeder Normally this scheme is set to achieve a sensitivity of around 20 percent of the used CT primary rating so that a low ohmic value can be used for the series resistor. -
Page 102
Section 6 1MRK 511 358-UEN A Differential protection It is strongly recommended to use the highest tap of the CT whenever high impedance protection is used. This helps in utilizing maximum CT capability, minimize the secondary fault current, thereby reducing the stability voltage limit. -
Page 103: Tertiary Reactor Protection
1MRK 511 358-UEN A Section 6 Differential protection The magnetizing current is taken from the magnetizing curve for the current transformer cores which should be available. The current value at U>Trip is taken. For the voltage dependent resistor current the peak value of voltage 200 ˣ √2 is used. Then the RMS current is calculated by dividing obtained current value from the metrosil curve with√2.
-
Page 104
Section 6 1MRK 511 358-UEN A Differential protection Setting example It is strongly recommended to use the highest tap of the CT whenever high impedance protection is used. This helps in utilizing maximum CT capability, minimize the secondary fault, thereby reducing the stability voltage limit. Another factor is that during internal faults, the voltage developed across the selected tap is limited by the non-linear resistor but in the unused taps, owing to auto-transformer action, voltages much higher than design limits might be… -
Page 105: Alarm Level Operation
1MRK 511 358-UEN A Section 6 Differential protection dividing obtained current value from the metrosil curve with √2. Use the maximum value from the metrosil curve given in Figure 38. 6.1.4.5 Alarm level operation M16850-196 v6 The 1Ph High impedance differential protection HZPDIF function has a separate alarm level, which can be used to give alarm for problems with an involved current transformer circuit.
-
Page 107: Current Protection
1MRK 511 358-UEN A Section 7 Current protection Section 7 Current protection Instantaneous phase overcurrent protection PHPIOC IP14506-1 v6 7.1.1 Identification M14880-1 v4 Function description IEC 61850 IEC 60617 ANSI/IEEE C37.2 identification identification device number Instantaneous phase overcurrent PHPIOC protection 3-phase output 3I>>…
-
Page 108: Meshed Network Without Parallel Line
Section 7 1MRK 511 358-UEN A Current protection Only detailed network studies can determine the operating conditions under which the highest possible fault current is expected on the line. In most cases, this current appears during three-phase fault conditions. But also examine single-phase-to-earth and two-phase- to-earth conditions.
-
Page 109
1MRK 511 358-UEN A Section 7 Current protection Fault IEC09000023-1-en.vsd IEC09000023 V1 EN-US Figure 40: Through fault current from B to A: I The IED must not trip for any of the two through-fault currents. Hence the minimum theoretical current setting (Imin) will be: ³… -
Page 110: Meshed Network With Parallel Line
Section 7 1MRK 511 358-UEN A Current protection 7.1.3.2 Meshed network with parallel line M12915-34 v6 In case of parallel lines, the influence of the induced current from the parallel line to the protected line has to be considered. One example is given in figure where the two lines are connected to the same busbars.
-
Page 111: Four Step Phase Overcurrent Protection Oc4Ptoc
1MRK 511 358-UEN A Section 7 Current protection Four step phase overcurrent protection OC4PTOC SEMOD129998-1 v7 7.2.1 Identification M14885-1 v5 Function description IEC 61850 IEC 60617 ANSI/IEEE C37.2 identification identification device number Four step phase overcurrent OC4PTOC 51_67 protection 3-phase output TOC-REVA V2 EN-US 7.2.2 Application…
-
Page 112: Setting Guidelines
Section 7 1MRK 511 358-UEN A Current protection to the current pick-up level. This multiplication factor is activated from a binary input signal to the function. Power transformers can have a large inrush current, when being energized. This phenomenon is due to saturation of the transformer magnetic core during parts of the period. There is a risk that inrush current will reach levels above the pick-up current of the phase overcurrent protection.
-
Page 113: Settings For Each Step
1MRK 511 358-UEN A Section 7 Current protection IEC09000636_1_vsd IEC09000636 V1 EN-US Figure 43: Directional function characteristic RCA = Relay characteristic angle ROA = Relay operating angle Reverse Forward 7.2.3.1 Settings for each step M12982-19 v10.1.1 x means step 1, 2, 3 and 4. DirModex : The directional mode of step x .
-
Page 114
Section 7 1MRK 511 358-UEN A Current protection Curve name ANSI Moderately Inverse ANSI/IEEE Definite time ANSI Long Time Extremely Inverse ANSI Long Time Very Inverse ANSI Long Time Inverse IEC Normal Inverse IEC Very Inverse IEC Inverse IEC Extremely Inverse IEC Short Time Inverse IEC Long Time Inverse IEC Definite Time… -
Page 115
1MRK 511 358-UEN A Section 7 Current protection Operate time txMin IMinx Current IEC10000058 IEC10000058 V2 EN-US Figure 44: Minimum operate current and operate time for inverse time characteristics txMin shall be In order to fully comply with the definition of the curve, the setting parameter set to a value equal to the operating time of the selected inverse curve for twenty times the set current pickup value. -
Page 116: 2Nd Harmonic Restrain
Section 7 1MRK 511 358-UEN A Current protection æ ö ç ÷ ç ÷ × IxMult ç ÷ æ ö ç ç ÷ ÷ è è ø ø > (Equation 28) EQUATION1261 V2 EN-US tPRCrvx , tTRCrvx , tCRCrvx : These parameters are used by the customer to create the inverse Technical manual .
-
Page 117
1MRK 511 358-UEN A Section 7 Current protection Current I Line phase current Operate current Reset current The IED does not reset Time t IEC05000203-en-2.vsd IEC05000203 V3 EN-US Figure 45: Operate and reset current for an overcurrent protection The lowest setting value can be written according to equation 29. Im ax ³… -
Page 118
Section 7 1MRK 511 358-UEN A Current protection £ × 0.7 Isc min (Equation 30) EQUATION1263 V2 EN-US where: is a safety factor Iscmin is the smallest fault current to be detected by the overcurrent protection. As a summary the operating current shall be chosen within the interval stated in equation 31. Im ax ×… -
Page 119
1MRK 511 358-UEN A Section 7 Current protection en05000204.wmf IEC05000204 V1 EN-US Figure 46: Fault time with maintained selectivity The operation time can be set individually for each overcurrent protection. To assure selectivity between different protections, in the radial network, there have to be a minimum time difference Dt between the time delays of two protections. -
Page 120: Instantaneous Residual Overcurrent Protection Efpioc
Section 7 1MRK 511 358-UEN A Current protection Feeder I> I> Time axis The fault Protection Breaker at Protection occurs B1 trips B1 opens A1 resets en05000205.vsd IEC05000205 V1 EN-US Figure 47: Sequence of events during fault where: is when the fault occurs is when the trip signal from the overcurrent protection at IED B1 is sent to the circuit breaker.
-
Page 121: Identification
1MRK 511 358-UEN A Section 7 Current protection 7.3.1 Identification M14887-1 v4 Function description IEC 61850 IEC 60617 ANSI/IEEE C37.2 identification identification device number Instantaneous residual overcurrent EFPIOC protection IN>> IEF V1 EN-US 7.3.2 Application M12699-3 v5 In many applications, when fault current is limited to a defined value by the object impedance, an instantaneous earth-fault protection can provide fast and selective tripping.
-
Page 122
Section 7 1MRK 511 358-UEN A Current protection Fault IEC09000023-1-en.vsd IEC09000023 V1 EN-US Figure 49: Through fault current from B to A: I The function shall not operate for any of the calculated currents to the protection. The minimum theoretical current setting (Imin) will be: ³… -
Page 123: Four Step Residual Overcurrent Protection, (Zero Sequence Or Negative Sequence Directionality) Ef4Ptoc
1MRK 511 358-UEN A Section 7 Current protection ³ I m in M A X I (Equation 36) EQUATION287 V1 EN-US Where: and I have been described for the single line case. Considering the safety margins mentioned previously, the minimum setting (Is) is: = 1.3 ×…
-
Page 124
Section 7 1MRK 511 358-UEN A Current protection In many applications several steps with different current operating levels and time delays are needed. EF4PTOC can have up to four, individual settable steps. The flexibility of each step of EF4PTOC is great. The following options are possible: Non-directional/Directional function: In some applications the non-directional functionality is used. -
Page 125: Setting Guidelines
1MRK 511 358-UEN A Section 7 Current protection to the residual current pick-up level. This multiplication factor is activated from a binary input signal ENMULTx to the function. Power transformers can have a large inrush current, when being energized. This inrush current can have residual current components.
-
Page 126
Section 7 1MRK 511 358-UEN A Current protection Protection operate time: 15-60 ms Protection resetting time: 15-60 ms Breaker opening time: 20-120 ms The different characteristics are described in the technical reference manual. tx : Definite time delay for step x . The definite time tx is added to the inverse time when inverse time characteristic is selected. -
Page 127: Common Settings For All Steps
1MRK 511 358-UEN A Section 7 Current protection tResetx : Constant reset time delay in s for step x. HarmBlockx : This is used to enable block of step x from 2 harmonic restrain function. tPCrvx, tACrvx, tBCrvx, tCCrvx : Parameters for user programmable of inverse time characteristic curve.
-
Page 128: 2Nd Harmonic Restrain
Section 7 1MRK 511 358-UEN A Current protection Voltage (3U • or U Current (3I • · ZNpol or 3I ·ZNpol where ZNpol is RNpol + jXNpol), or Dual (dual polarizing, (3U • both currents and voltage, + 3I · ZNpol) or (U ·…
-
Page 129: Switch Onto Fault Logic
1MRK 511 358-UEN A Section 7 Current protection of the two transformers will be in phase opposition. The summation of the two currents will thus give a small 2 harmonic current. The residual fundamental current will however be significant. The inrush current of the transformer in service before the parallel transformer energizing, will be a little delayed compared to the first transformer.
-
Page 130: Line Application Example
Section 7 1MRK 511 358-UEN A Current protection ActivationSOTF : This setting will select the signal to activate SOTF function; CB position open/CB position closed/CB close command . tSOTF : Time delay for operation of the SOTF function. The setting range is 0.000 — 60.000 s in step of 0.001 s.
-
Page 131
1MRK 511 358-UEN A Section 7 Current protection Step 1 M15282-123 v5 This step has directional instantaneous function. The requirement is that overreaching of the protected line is not allowed. One- or two-phase earth-fault or unsymmetric short circuit without earth connection IEC05000150-3-en.vsd IEC05000150 V4 EN-US Figure 55: Step 1, first calculation… -
Page 132
Section 7 1MRK 511 358-UEN A Current protection A higher value of step 1 might be necessary if a big power transformer (Y0/D) at remote bus bar is disconnected. A special case occurs at double circuit lines, with mutual zero-sequence impedance between the parallel lines, see figure 57. -
Page 133
1MRK 511 358-UEN A Section 7 Current protection The residual current, out on the line, is calculated at an operational case with minimal earth- fault current. The requirement that the whole line shall be covered by step 2 can be formulated according to equation 42. -
Page 134: Four Step Directional Negative Phase Sequence Overcurrent Protection Ns4Ptoc
Section 7 1MRK 511 358-UEN A Current protection ³ × × step3 step2 (Equation 44) EQUATION1204 V4 EN-US where: is the chosen current setting for step 2 on the faulted line. step2 Step 4 M15282-177 v4 This step normally has non-directional function and a relatively long time delay. The task for step 4 is to detect and initiate trip for earth faults with large fault resistance, for example tree faults.
-
Page 135
1MRK 511 358-UEN A Section 7 Current protection In many applications several steps with different current operating levels and time delays are needed. NS4PTOC can have up to four, individual settable steps. The flexibility of each step of NS4PTOC function is great. The following options are possible: Non-directional/Directional function: In some applications the non-directional functionality is used. -
Page 136: Setting Guidelines
Section 7 1MRK 511 358-UEN A Current protection 7.5.3 Setting guidelines GUID-460D6C58-598C-421E-AA9E-FD240210A6CC v3 The parameters for Four step negative sequence overcurrent protection NS4PTOC are set via the local HMI or Protection and Control Manager (PCM600). The following settings can be done for the four step negative sequence overcurrent protection: Operation : Sets the protection to On or Off .
-
Page 137
1MRK 511 358-UEN A Section 7 Current protection The different characteristics are described in the Technical Reference Manual (TRM). Ix> : Operation negative sequence current level for step x given in % of IBase . tx : Definite time delay for step x . The definite time tx is added to the inverse time when inverse time characteristic is selected. -
Page 138: Common Settings For All Steps
Section 7 1MRK 511 358-UEN A Current protection For IEC inverse time delay characteristics the possible delay time settings are instantaneous (1) and IEC (2 = set constant time reset). For the programmable inverse time delay characteristics all three types of reset time characteristics are available;…
-
Page 139: Sensitive Directional Residual Overcurrent And Power Protection Sdepsde
1MRK 511 358-UEN A Section 7 Current protection Reverse Area Upol=-U2 AngleRCA Forward Area Iop = I2 IEC10000031-1-en.vsd IEC10000031 V1 EN-US Figure 62: Relay characteristic angle given in degree In a transmission network a normal value of RCA is about 80°. UPolMin : Minimum polarization (reference) voltage % of UBase .
-
Page 140: Application
Section 7 1MRK 511 358-UEN A Current protection 7.6.2 Application SEMOD171959-4 v11 In networks with high impedance earthing, the phase-to-earth fault current is significantly smaller than the short circuit currents. Another difficulty for earth fault protection is that the magnitude of the phase-to-earth fault current is almost independent of the fault location in the network.
-
Page 141: Setting Guidelines
1MRK 511 358-UEN A Section 7 Current protection Phase currents Phase- ground voltages IEC13000013-1-en.vsd IEC13000013 V1 EN-US Figure 63: Connection of SDEPSDE to analog preprocessing function block Overcurrent functionality uses true 3I0, i.e. sum of GRPxL1, GRPxL2 and GRPxL3. For 3I0 to be calculated, connection is needed to all three phase inputs.
-
Page 142
Section 7 1MRK 511 358-UEN A Current protection The fault current, in the fault point, can be calculated as: × phase + × (Equation 47) EQUATION1944 V1 EN-US The impedance Z is dependent on the system earthing. In an isolated system (without neutral point apparatus) the impedance is equal to the capacitive coupling between the phase conductors and earth: ×… -
Page 143
1MRK 511 358-UEN A Section 7 Current protection Source impedance (pos. seq) (pos. seq) (zero seq) Substation A (pos. seq) lineAB,1 (zero seq) lineAB,0 Substation B (pos. seq) lineBC,1 (zero seq) lineBC,0 Phase to earth fault en06000654.vsd IEC06000654 V1 EN-US Figure 64: Equivalent of power system for calculation of setting The residual fault current can be written: phase… -
Page 144
Section 7 1MRK 511 358-UEN A Current protection × (Equation 54) EQUATION1951 V1 EN-US × (Equation 55) EQUATION1952 V1 EN-US The residual power is a complex quantity. The protection will have a maximum sensitivity in the characteristic angle RCA. The apparent residual power component in the characteristic angle, measured by the protection, can be written: ×… -
Page 145
1MRK 511 358-UEN A Section 7 Current protection RCADir ROADir ang(3I ) ang(3U × 3I cos IEC06000648-4-en.vsd IEC06000648 V4 EN-US Figure 65: Characteristic for RCADir equal to 0° RCADir equal to -90° is shown in Figure 66. The characteristic is for … -
Page 146
Section 7 1MRK 511 358-UEN A Current protection RCADir = 0º ROADir = 80º Operate area IEC06000652-3-en.vsd IEC06000652 V3 EN-US Figure 67: Characteristic for RCADir = 0° and ROADir = 80° DirMode is set Forward or Reverse to set the direction of the operation for the directional OpMode . -
Page 147
1MRK 511 358-UEN A Section 7 Current protection SN> is the operate power level for the directional function when OpMode is set 3I03U0Cosfi . The setting is given in % of SBase . The setting should be based on calculation of the active or capacitive earth fault residual power at required sensitivity of the protection. -
Page 148: Thermal Overload Protection, One Time Constant, Celsius/Fahrenheit Lcpttr/Lfpttr
Section 7 1MRK 511 358-UEN A Current protection See chapter “Inverse time characteristics” in Technical Manual for the description of different characteristics tPCrv, tACrv, tBCrv, tCCrv : Parameters for customer creation of inverse time characteristic curve (Curve type = 17). The time characteristic equation is: æ…
-
Page 149: Setting Guideline
1MRK 511 358-UEN A Section 7 Current protection In stressed situations in the power system it can be required to overload lines and cables for a limited time. This should be done while managing the risks safely. The thermal overload protection provides information that makes a temporary overloading of cables and lines possible.
-
Page 150: Thermal Overload Protection, Two Time Constants Trpttr
Section 7 1MRK 511 358-UEN A Current protection Thermal overload protection, two time constants TRPTTR IP14513-1 v4 7.8.1 Identification M14877-1 v2 Function description IEC 61850 IEC 60617 ANSI/IEEE C37.2 identification identification device number Thermal overload protection, two TRPTTR time constants SYMBOL-A V1 EN-US 7.8.2 Application…
-
Page 151: Setting Guideline
1MRK 511 358-UEN A Section 7 Current protection After tripping by the thermal overload protection, the transformer will cool down over time. There will be a time gap before the heat content (temperature) reaches such a level so that the transformer can be taken into service again.
-
Page 152
Section 7 1MRK 511 358-UEN A Current protection DQ — (Equation 61) EQUATION1180 V1 EN-US If the transformer has forced cooling (FOA) the measurement should be made both with and Tau2 and Tau1 . without the forced cooling in operation, giving The time constants can be changed if the current is higher than a set value or lower than a set value. -
Page 153: Breaker Failure Protection Ccrbrf
1MRK 511 358-UEN A Section 7 Current protection Breaker failure protection CCRBRF IP14514-1 v6 7.9.1 Identification M14878-1 v5 Function description IEC 61850 IEC 60617 ANSI/IEEE C37.2 identification identification device number Breaker failure protection, 3-phase CCRBRF 50BF activation and output 3I>BF SYMBOL-U V1 EN-US 7.9.2 Application…
-
Page 154
Section 7 1MRK 511 358-UEN A Current protection CB Pos Check means that a phase current must be larger than the operate level to allow re-trip. (circuit breaker position check) and Contact means re-trip is done when circuit breaker is No CBPos Check means re-trip is done without check of closed (breaker position is used). -
Page 155
1MRK 511 358-UEN A Section 7 Current protection t2 : Time delay of the back-up trip. The choice of this setting is made as short as possible at the same time as unwanted operation must be avoided. Typical setting is 90 – 200ms (also dependent of re-trip timer). -
Page 156: Stub Protection Stbptoc
Section 7 1MRK 511 358-UEN A Current protection when gas pressure is low in a SF6 circuit breaker, of others. After the set time an alarm is given, so that actions can be done to repair the circuit breaker. The time delay for back-up trip is bypassed when the CBFLT is active.
-
Page 157: Setting Guidelines
1MRK 511 358-UEN A Section 7 Current protection IEC05000465 V2 EN-US Figure 69: Typical connection for STBPTOC in 1½-breaker arrangement. 7.10.3 Setting guidelines M12909-3 v5 The parameters for Stub protection STBPTOC are set via the local HMI or PCM600. The following settings can be done for the stub protection. GlobalBaseSel : Selects the global base value group used by the function to define ( IBase ), UBase ) and ( SBase ).
-
Page 158: Identification
Section 7 1MRK 511 358-UEN A Current protection 7.11.1 Identification M14888-1 v4 Function description IEC 61850 IEC 60617 ANSI/IEEE C37.2 identification identification device number Pole discordance protection CCPDSC 52PD SYMBOL-S V1 EN-US 7.11.2 Application M13270-3 v6 There is a risk that a circuit breaker will get discordance between the poles at circuit breaker operation: closing or opening.
-
Page 159: Directional Underpower Protection Guppdup
1MRK 511 358-UEN A Section 7 Current protection CurrSel : Operation of the current based pole discordance protection. Can be set: Off / CB oper monitor / Continuous monitor . In the alternative CB oper monitor the function is activated only directly in connection to breaker open or close command (during 200 ms).
-
Page 160
Section 7 1MRK 511 358-UEN A Current protection When the steam ceases to flow through a turbine, the cooling of the turbine blades will disappear. Now, it is not possible to remove all heat generated by the windage losses. Instead, the heat will increase the temperature in the steam turbine and especially of the blades. -
Page 161: Setting Guidelines
1MRK 511 358-UEN A Section 7 Current protection Underpower protection Overpower protection Operate Operate Line Line Margin Margin Operating point Operating point without without turbine torque turbine torque IEC09000019-2-en.vsd IEC09000019 V2 EN-US Figure 70: Reverse power protection with underpower or overpower protection 7.12.3 Setting guidelines SEMOD172134-4 v7…
-
Page 162
Section 7 1MRK 511 358-UEN A Current protection The function has two stages that can be set independently. OpMode1(2) the function can be set On / Off . With the parameter The function gives trip if the power component in the direction defined by the setting Angle1(2) is smaller than the set pick up power value Power1(2) Power1(2) Angle1(2) -
Page 163
1MRK 511 358-UEN A Section 7 Current protection Operate ° Angle1(2) = 0 Power1(2) en06000556.vsd IEC06000556 V1 EN-US Figure 72: For low forward power the set angle should be 0° in the underpower function TripDelay1(2) is set in seconds to give the time delay for trip of the stage after pick up. Hysteresis1(2) is given in p.u. -
Page 164: Directional Overpower Protection Goppdop
Section 7 1MRK 511 358-UEN A Current protection UAmpComp5, UAmpComp30, UAmpComp100 IAngComp5, IAngComp30, IAngComp100 The angle compensation is given as difference between current and voltage angle errors. The values are given for operating points 5, 30 and 100% of rated current/voltage. The values should be available from instrument transformer test protocols.
-
Page 165
1MRK 511 358-UEN A Section 7 Current protection 2% of rated power. Even if the turbine rotates in vacuum, it will soon become overheated and damaged. The turbine overheats within minutes if the turbine loses the vacuum. The critical time to overheating of a steam turbine varies from about 0.5 to 30 minutes depending on the type of turbine. -
Page 166: Setting Guidelines
Section 7 1MRK 511 358-UEN A Current protection 7.13.3 Setting guidelines SEMOD172150-4 v7 GlobalBaseSel : Selects the global base value group used by the function to define ( IBase ), UBase ) and ( SBase ). Operation : With the parameter Operation the function can be set On / Off . Mode : The voltage and current used for the power measurement.
-
Page 167
1MRK 511 358-UEN A Section 7 Current protection Operate Power1(2) Angle1(2) en06000440.vsd IEC06000440 V1 EN-US Figure 74: Overpower mode Power1(2) gives the power component pick up value in the Angle1(2) direction. The The setting setting is given in p.u. of the generator rated power, see equation 86. Minimum recommended setting is 0.2% of S when metering class CT inputs into the IED are used. -
Page 168
Section 7 1MRK 511 358-UEN A Current protection Angle1(2 ) = 180 Operate Power 1(2) IEC06000557-2-en.vsd IEC06000557 V2 EN-US Figure 75: For reverse power the set angle should be 180° in the overpower function TripDelay1(2) is set in seconds to give the time delay for trip of the stage after pick up. Hysteresis1(2) is given in p.u. -
Page 169: Broken Conductor Check Brcptoc
1MRK 511 358-UEN A Section 7 Current protection IAmpComp5, IAmpComp30, IAmpComp100 UAmpComp5, UAmpComp30, UAmpComp100 IAngComp5, IAngComp30, IAngComp100 The angle compensation is given as difference between current and voltage angle errors. The values are given for operating points 5, 30 and 100% of rated current/voltage. The values should be available from instrument transformer test protocols.
-
Page 170: Identification
Section 7 1MRK 511 358-UEN A Current protection 7.15.1 Identification GUID-67FC8DBF-4391-4562-A630-3F244CBB4A33 v2 Function description IEC 61850 IEC 60617 ANSI/IEEE C37.2 identification identification device number Capacitor bank protection CBPGAPC 7.15.2 Application GUID-5EC8BAEC-9118-49EC-970C-43D6C416640A v1 GUID-BACAE67B-E64B-4963-B323-ECB0B69031B9 v2 Shunt capacitor banks (SCBs) are somewhat specific and different from other power system elements.
-
Page 171
1MRK 511 358-UEN A Section 7 Current protection Rack Capacitor Unit (Can) IEC09000753_1_en.vsd IEC09000753 V1 EN-US Figure 76: Replacement of a faulty capacitor unit within SCB There are four types of the capacitor unit fusing designs which are used for construction of SCBs: Externally fused where an individual fuse, externally mounted, protects each capacitor unit. -
Page 172: Scb Protection
Section 7 1MRK 511 358-UEN A Current protection Additionally, the SCB star point, when available, can be either directly earthed , earthed via impedance or isolated from earth. Which type of SCB earthing is used depends on voltage level, used circuit breaker, utility preference and previous experience. Many utilities have standard system earthing principle to earth neutrals of SCB above 100 kV.
-
Page 173: Setting Guidelines
1MRK 511 358-UEN A Section 7 Current protection Thus, as a general rule, the minimum number of capacitor units connected in parallel within a SCB is such that isolation of one capacitor unit in a group should not cause a voltage unbalance sufficient to place more than 110% of rated voltage on the remaining capacitors of that parallel group.
-
Page 174
Section 7 1MRK 511 358-UEN A Current protection × 1000 200[ MVAr × 3 400[ (Equation 89) IEC09000755 V1 EN-US or on the secondary CT side: 0.578 _ ec 500 1 (Equation 90) IEC09000756 V1 EN-US Note that the SCB rated current on the secondary CT side is important for secondary injection of the function. -
Page 175: Restrike Detection
1MRK 511 358-UEN A Section 7 Current protection QOL> = 130% (of SCB MVAr rating); Reactive power level required for pickup. Selected value gives pickup recommended by international standards. tQOL = 60s ; Time delay for reactive power overload trip Harmonic voltage overload feature: OperationHOL = On ;…
-
Page 176: Application
Section 7 1MRK 511 358-UEN A Current protection 7.16.2 Application GUID-622CDDDD-6D03-430E-A82D-861A4CBE067C v7 A breakdown of the insulation between phase conductors or a phase conductor and earth results in a short-circuit or an earth fault. Such faults can result in large fault currents and may cause severe damage to the power system primary equipment.
-
Page 177: Undervoltage Seal-In
1MRK 511 358-UEN A Section 7 Current protection 7.16.2.3 Undervoltage seal-in GUID-13BE02D3-1322-4075-859B-617CFF608657 v7 In the case of a generator with a static excitation system, which receives its power from the generator terminals, the magnitude of a sustained phase short-circuit current depends on the generator terminal voltage.
-
Page 178: Voltage-Restrained Overcurrent Protection For Generator And Step-Up Transformer
Section 7 1MRK 511 358-UEN A Current protection tMin : Minimum operation time for all inverse time characteristics. At high currents the inverse time characteristic might give a very short operation time. By setting this parameter the operation time of the step can never be shorter than the setting. Operation_UV : it sets On / Off the operation of the under-voltage stage.
-
Page 179: Overcurrent Protection With Undervoltage Seal-In
1MRK 511 358-UEN A Section 7 Current protection tDef_OC = 0.00 s, in order to add no additional delay to the trip time defined by the inverse time characteristic. tMin If required, set the minimum operating time for this curve by using the parameter (default value 0.05 s).
-
Page 181: Voltage Protection
1MRK 511 358-UEN A Section 8 Voltage protection Section 8 Voltage protection Two step undervoltage protection UV2PTUV IP14544-1 v3 8.1.1 Identification M16876-1 v6 Function description IEC 61850 IEC 60617 ANSI/IEEE C37.2 identification identification device number Two step undervoltage protection UV2PTUV 3U<…
-
Page 182: Equipment Protection, Such As For Motors And Generators
Section 8 1MRK 511 358-UEN A Voltage protection There is a very wide application area where general undervoltage functions are used. All voltage related settings are made as a percentage of the global settings base voltage UBase , which normally is set to the primary rated voltage level (phase-to-phase) of the power system or the high voltage equipment under consideration.
-
Page 183
1MRK 511 358-UEN A Section 8 Voltage protection < × UBase kV (Equation 91) EQUATION1447 V1 EN-US and operation for phase-to-phase voltage under: < × (%) UBase(kV) (Equation 92) EQUATION1990 V1 EN-US n = 1 or 2). Therefore, The below described setting parameters are identical for the two steps ( the setting parameters are described only once. -
Page 184: Two Step Overvoltage Protection Ov2Ptov
Section 8 1MRK 511 358-UEN A Voltage protection CrvSatn × > (Equation 93) EQUATION1448 V1 EN-US IntBlkSeln : This parameter can be set to Off , Block of trip , Block all . In case of a low voltage the undervoltage function can be blocked.
-
Page 185: Setting Guidelines
1MRK 511 358-UEN A Section 8 Voltage protection overhead line, transformer flash over fault from the high voltage winding to the low voltage winding and so on). Malfunctioning of a voltage regulator or wrong settings under manual control (symmetrical voltage decrease). Low load compared to the reactive power generation (symmetrical voltage decrease).
-
Page 186: High Impedance Earthed Systems
Section 8 1MRK 511 358-UEN A Voltage protection 8.2.3.4 High impedance earthed systems M13852-19 v5 In high impedance earthed systems, earth-faults cause a voltage increase in the non-faulty phases. Two step overvoltage protection (OV2PTOV) is used to detect such faults. The setting must be above the highest occurring «normal»…
-
Page 187: Two Step Residual Overvoltage Protection Rov2Ptov
1MRK 511 358-UEN A Section 8 Voltage protection tResetn : Reset time for step n if definite time delay is used, given in s. The default value is 25 tnMin : Minimum operation time for inverse time characteristic for step n , given in s. For very high voltages the overvoltage function, using inverse time characteristic, can give very short t1Min longer than the operation operation time.
-
Page 188: Setting Guidelines
Section 8 1MRK 511 358-UEN A Voltage protection connection. The residual voltage can also be calculated internally, based on measurement of the three-phase voltages. In high impedance earthed systems the residual voltage will increase in case of any fault connected to earth. Depending on the type of fault and fault resistance the residual voltage will reach different values.
-
Page 189: Direct Earthed System
1MRK 511 358-UEN A Section 8 Voltage protection occurring «normal» residual voltage, and below the lowest occurring residual voltage during the faults under consideration. A metallic single-phase earth fault causes a transformer neutral to reach a voltage equal to the nominal phase-to-earth voltage. The voltage transformers measuring the phase-to-earth voltages measure zero voltage in the faulty phase.
-
Page 190: Settings For Two Step Residual Overvoltage Protection
Section 8 1MRK 511 358-UEN A Voltage protection IEC07000189 V1 EN-US Figure 80: Earth fault in Direct earthed system 8.3.3.6 Settings for Two step residual overvoltage protection M13853-21 v12 Operation : Off or On UBase (given in GlobalBaseSel ) is used as voltage reference for the voltage. The voltage can be fed to the IED in different ways: The IED is fed from a normal voltage transformer group where the residual voltage is calculated internally from the phase-to-earth voltages within the protection.
-
Page 191
1MRK 511 358-UEN A Section 8 Voltage protection > × UBase kV (Equation 97) IECEQUATION2290 V1 EN-US The setting is dependent of the required sensitivity of the protection and the system earthing. In non-effectively earthed systems the residual voltage can be maximum the rated phase-to- earth voltage, which should correspond to 100%. -
Page 192: Voltage Differential Protection Vdcptov
Section 8 1MRK 511 358-UEN A Voltage protection Voltage differential protection VDCPTOV SEMOD153860-1 v2 8.4.1 Identification SEMOD167723-2 v2 Function description IEC 61850 IEC 60617 ANSI/IEEE C37.2 identification identification device number Voltage differential protection VDCPTOV 8.4.2 Application SEMOD153893-5 v3 The Voltage differential protection VDCPTOV functions can be used in some different applications.
-
Page 193: Setting Guidelines
1MRK 511 358-UEN A Section 8 Voltage protection VDCPTOV function has a block input (BLOCK) where a fuse failure supervision (or MCB tripped) can be connected to prevent problems if one fuse in the capacitor bank voltage transformer set has opened and not the other (capacitor voltage is connected to input U2). It will also ensure that a fuse failure alarm is given instead of a Undervoltage or Differential voltage alarm and/or tripping.
-
Page 194: Loss Of Voltage Check Lovptuv
Section 8 1MRK 511 358-UEN A Voltage protection transformer ratios, different voltage levels e.g. the voltage measurement inside the capacitor bank can have a different voltage level but the difference can also e.g. be used by voltage drop in the secondary circuits. The setting is normally done at site by evaluating the differential RFLx and shall voltage achieved as a service value for each phase.
-
Page 195: Application
1MRK 511 358-UEN A Section 8 Voltage protection 8.5.2 Application SEMOD171876-4 v3 The trip of the circuit breaker at a prolonged loss of voltage at all the three phases is normally used in automatic restoration systems to facilitate the system restoration after a major blackout.
-
Page 197: Frequency Protection
1MRK 511 358-UEN A Section 9 Frequency protection Section 9 Frequency protection Underfrequency protection SAPTUF IP15746-1 v3 9.1.1 Identification M14865-1 v5 Function description IEC 61850 IEC 60617 ANSI/IEEE C37.2 identification identification device number Underfrequency protection SAPTUF f < SYMBOL-P V1 EN-US 9.1.2 Application M13350-3 v4…
-
Page 198: Overfrequency Protection Saptof
Section 9 1MRK 511 358-UEN A Frequency protection The under frequency START value is set in Hz. All voltage magnitude related settings are made as a percentage of a global base voltage parameter. The UBase value should be set as a primary phase-to-phase value.
-
Page 199: Setting Guidelines
1MRK 511 358-UEN A Section 9 Frequency protection 9.2.3 Setting guidelines M14959-3 v7 All the frequency and voltage magnitude conditions in the system where SAPTOF performs its functions must be considered. The same also applies to the associated equipment, its frequency and time characteristic.
-
Page 200: Setting Guidelines
Section 9 1MRK 511 358-UEN A Frequency protection with a low frequency signal, especially in smaller power systems, where loss of a fairly large generator will require quick remedial actions to secure the power system integrity. In such situations load shedding actions are required at a rather high frequency level, but in combination with a large negative rate-of-change of frequency the underfrequency protection can be used at a rather high setting.
-
Page 201: Application
1MRK 511 358-UEN A Section 9 Frequency protection 9.4.2 Application GUID-82CA8336-82BE-42AB-968A-D4F08941C9D0 v3 Generator prime movers are affected by abnormal frequency disturbances. Significant frequency deviations from rated frequency occur in case of major disturbances in the system. A rise of frequency occurs in case of generation surplus, while a lack of generation results in a drop of frequency.
-
Page 202: Setting Guidelines
Section 9 1MRK 511 358-UEN A Frequency protection However, the IEEE/ANSI C37.106-2003 standard «Guide for Abnormal Frequency Protection for Power Generating Plants» provides some examples where the time accumulated within each frequency range is as shown in Figure 84. Prohibited Operation Prohibited Operation Restricted Time Operation Continuous operation…
-
Page 203
1MRK 511 358-UEN A Section 9 Frequency protection IBase and primary voltage UBase are set in the Common base IED values for primary current global base values for settings function GBASVAL. The GlobalBaseSel is used to select GBASVAL for the reference of base values. FTAQFVR used to protect a turbine: Frequency during start-up and shutdown is normally not calculated, consequently the CBCheck enabled. -
Page 205: Section 10 Multipurpose Protection
1MRK 511 358-UEN A Section 10 Multipurpose protection Section 10 Multipurpose protection 10.1 General current and voltage protection CVGAPC IP14552-1 v2 10.1.1 Identification M14886-2 v3 Function description IEC 61850 IEC 60617 ANSI/IEEE C37.2 identification identification device number General current and voltage CVGAPC 2(I>/U<) protection…
-
Page 206: Current And Voltage Selection For Cvgapc Function
Section 10 1MRK 511 358-UEN A Multipurpose protection • Definite time delay for both steps Two overvoltage steps with the following built-in features • Definite time delay or Inverse Time Overcurrent TOC/IDMT delay for both steps Two undervoltage steps with the following built-in features •…
-
Page 207
1MRK 511 358-UEN A Section 10 Multipurpose protection Set value for parameter Comment «CurrentInput” phase3 — phase1 CVGAPC function will measure the current phasor internally calculated as the vector difference between the phase L3 current phasor and phase L1 current phasor ( IL3-IL1) MaxPh-Ph CVGAPC function will measure ph-ph current phasor with the maximum magnitude… -
Page 208: Base Quantities For Cvgapc Function
Section 10 1MRK 511 358-UEN A Multipurpose protection Set value for parameter Comment «VoltageInput» MaxPh-Ph CVGAPC function will measure ph-ph voltage phasor with the maximum magnitude MinPh-Ph CVGAPC function will measure ph-ph voltage phasor with the minimum magnitude UnbalancePh-Ph CVGAPC function will measure magnitude of unbalance voltage, which is internally calculated as the algebraic magnitude difference between the ph-ph voltage phasor with maximum magnitude and ph-ph voltage phasor with minimum magnitude.
-
Page 209: Inadvertent Generator Energization
1MRK 511 358-UEN A Section 10 Multipurpose protection • Special thermal overload protection • Open Phase protection • Unbalance protection Generator protection • 80-95% Stator earth fault protection (measured or calculated 3Uo) • Rotor earth fault protection (with external COMBIFLEX RXTTE4 injection unit) •…
-
Page 210: Setting Guidelines
Section 10 1MRK 511 358-UEN A Multipurpose protection will, with a delay for example 10 s, detect the situation when the generator is not connected to the grid (standstill) and activate the overcurrent function. The overvoltage function will detect the situation when the generator is taken into operation and will disable the overcurrent function.
-
Page 211: Negative Sequence Overcurrent Protection
1MRK 511 358-UEN A Section 10 Multipurpose protection Enable one overcurrent stage (for example, OC1) 10. By parameter CurveType_OC1 select appropriate TOC/IDMT or definite time delayed curve in accordance with your network protection philosophy StartCurr_OC1 to value between 3-10% (typical values) 11.
-
Page 212
Section 10 1MRK 511 358-UEN A Multipurpose protection æ ö ç ÷ è ø (Equation 99) EQUATION1372 V1 EN-US where: is the operating time in seconds of the negative sequence overcurrent IED is the generator capability constant in seconds is the measured negative sequence current is the generator rated current By defining parameter x equal to maximum continuous negative sequence rating of the generator in accordance with the following formula… -
Page 213: Generator Stator Overload Protection In Accordance With Iec Or Ansi Standards
1MRK 511 358-UEN A Section 10 Multipurpose protection When the equation is compared with the equation for the inverse time characteristic of the OC1 it is obvious that if the following rules are followed: set k equal to the generator negative sequence capability value A_OC1 equal to the value 1/x2 B_OC1 = 0.0, C_OC1 =0.0 and P_OC1 =2.0 StartCurr_OC1 equal to the value x…
-
Page 214
Section 10 1MRK 511 358-UEN A Multipurpose protection This formula is applicable only when measured current (for example, positive sequence current) exceeds a pre-set value (typically in the range from 105 to 125% of the generator rated current). By defining parameter x equal to the per unit value for the desired pickup for the overload IED in accordance with the following formula: x = 116% = 1.16 pu (Equation 104) -
Page 215: Open Phase Protection For Transformer, Lines Or Generators And Circuit Breaker Head Flashover Protection For Generators
1MRK 511 358-UEN A Section 10 Multipurpose protection select positive sequence current as measuring quantity for this CVGAPC function make sure that the base current value for CVGAPC function is equal to the generator rated current set k = 37.5 for the IEC standard or k = 41.4 for the ANSI standard A_OC1 = 1/1.162 = 0.7432 C_OC1 = 1/1.162 = 0.7432 B_OC1 = 0.0 and P_OC1 = 2.0…
-
Page 216: Voltage Restrained Overcurrent Protection For Generator And Step-Up Transformer
Section 10 1MRK 511 358-UEN A Multipurpose protection 10.1.3.5 Voltage restrained overcurrent protection for generator and step-up transformer M13088-158 v3 Example will be given how to use one CVGAPC function to provide voltage restrained overcurrent protection for a generator. Let us assume that the time coordination study gives the following required settings: •…
-
Page 217
1MRK 511 358-UEN A Section 10 Multipurpose protection ROADir to value 90 degree Set parameter Set parameter LowVolt_VM to value 5% Enable one overcurrent step (for example, OC1) CurveType_OC1 to value IEC Def. Time 10. Select parameter StartCurr_OC1 to value 38% 11. -
Page 219: Section 11 System Protection And Control
1MRK 511 358-UEN A Section 11 System protection and control Section 11 System protection and control 11.1 Multipurpose filter SMAIHPAC GUID-6B541154-D56B-452F-B143-4C2A1B2D3A1F v1 11.1.1 Identification GUID-8224B870-3DAA-44BF-B790-6600F2AD7C5D v1 Function description IEC 61850 IEC 60617 ANSI/IEEE C37.2 identification identification device number Multipurpose filter SMAIHPAC 11.1.2 Application…
-
Page 220: Setting Guidelines
Section 11 1MRK 511 358-UEN A System protection and control The following figure shoes typical configuration connections required to utilize this filter in conjunction with multi-purpose function as non-directional overcurrent protection. IEC13000179-1-en.vsd IEC13000179 V1 EN-US Figure 86: Required ACT configuration Such overcurrent arrangement can be for example used to achieve the subsynchronous resonance protection for turbo generators.
-
Page 221
1MRK 511 358-UEN A Section 11 System protection and control In order to properly extract the weak subsynchronous signal in presence of the dominating 50Hz signal the SMAI HPAC filter shall be set as given in the following table: Table 25: Proposed settings for SMAIHPAC I_HPAC_31_5Hz: SMAIHPAC:1 ConnectionType… -
Page 222
Section 11 1MRK 511 358-UEN A System protection and control Setting Group1 Operation CurrentInput MaxPh IBase 1000 VoltageInput MaxPh UBase 20.50 OPerHarmRestr I_2ndI_fund 20.0 BlkLevel2nd 5000 EnRestrainCurr RestrCurrInput PosSeq RestrCurrCoeff 0.00 RCADir ROADir LowVolt_VM Setting Group1 Operation_OC1 StartCurr_OC1 30.0 CurrMult_OC1 CurveType_OC1 Programmable tDef_OC1… -
Page 223: Section 12 Secondary System Supervision
1MRK 511 358-UEN A Section 12 Secondary system supervision Section 12 Secondary system supervision 12.1 Current circuit supervision CCSSPVC IP14555-1 v5 12.1.1 Identification M14870-1 v5 Function description IEC 61850 IEC 60617 ANSI/IEEE C37.2 identification identification device number Current circuit supervision CCSSPVC 12.1.2 Application…
-
Page 224: Fuse Failure Supervision Fufspvc
Section 12 1MRK 511 358-UEN A Secondary system supervision Ip>Block is normally set at 150% to block the function during transient The parameter conditions. The FAIL output is connected to the blocking input of the protection function to be blocked at faulty CT secondary circuits.
-
Page 225: Setting Guidelines
1MRK 511 358-UEN A Section 12 Secondary system supervision 12.2.3 Setting guidelines IP15000-1 v1 12.2.3.1 General M13683-3 v5 The negative and zero sequence voltages and currents always exist due to different non- symmetries in the primary system and differences in the current and voltage instrument transformers.
-
Page 226: Zero Sequence Based
Section 12 1MRK 511 358-UEN A Secondary system supervision UBase (Equation 111) EQUATION1519 V5 EN-US where: is the maximal negative sequence voltage during normal operation conditions, plus a margin of 10…20% UBase GlobalBaseSel is the base voltage for the function according to the setting 3I2<…
-
Page 227: Delta U And Delta I
1MRK 511 358-UEN A Section 12 Secondary system supervision 12.2.3.5 Delta U and delta I GUID-02336F26-98C0-419D-8759-45F5F12580DE v7 OpDUDI to On if the delta function shall be in operation. Set the operation mode selector The setting of DU> should be set high (approximately 60% of UBase ) and the current threshold DI<…
-
Page 228: Setting Guidelines
Section 12 1MRK 511 358-UEN A Secondary system supervision and energisation-check function. These functions might mal-operate if there is an incorrect measured voltage due to fuse failure or other kind of faults in voltage measurement circuit. VDSPVC is designed to detect fuse failures or faults in voltage measurement circuit based on comparison of the voltages of the main and pilot fused circuits phase wise.
-
Page 229
1MRK 511 358-UEN A Section 12 Secondary system supervision UBase is available in the Global Base Value groups; the particular Global Base transformer. Value group, that is used by VDSPVC, is set by the setting parameter GlobalBaseSel . Ud>MainBlock and Ud>PilotAlarm should be set low (approximately 30% of The settings UBase ) so that they are sensitive to the fault on the voltage measurement circuit, since the voltage on both sides are equal in the healthy condition. -
Page 231: Section 13 Control
1MRK 511 358-UEN A Section 13 Control Section 13 Control 13.1 Synchrocheck, energizing check, and synchronizing SESRSYN IP14558-1 v4 13.1.1 Identification M14889-1 v4 Function description IEC 61850 IEC 60617 ANSI/IEEE C37.2 identification identification device number Synchrocheck, energizing check, and SESRSYN synchronizing sc/vc SYMBOL-M V1 EN-US…
-
Page 232: Synchrocheck
Section 13 1MRK 511 358-UEN A Control The synchronizing function compensates for the measured slip frequency as well as the circuit breaker closing delay. The phase angle advance is calculated continuously. The calculation of SlipFrequency and the set tBreaker the operation pulse sent in advance is using the measured time.
-
Page 233
1MRK 511 358-UEN A Section 13 Control need for a check of synchronization increases if the meshed system decreases since the risk of the two networks being out of synchronization at manual or automatic closing is greater. The synchrocheck function measures the conditions across the circuit breaker and compares them to set limits. -
Page 234: Energizing Check
Section 13 1MRK 511 358-UEN A Control 13.1.2.3 Energizing check M12310-3 v11 The main purpose of the energizing check function is to facilitate the controlled re-connection of disconnected lines and buses to energized lines and buses. The energizing check function measures the bus and line voltages and compares them to both high and low threshold values.
-
Page 235: External Fuse Failure
(B16I). If the PSTO input is used, connected to the Local-Remote switch on the local HMI, the choice can also be from the station HMI system, typically ABB Microscada through IEC 61850–8–1 communication.
-
Page 236: Application Examples
Section 13 1MRK 511 358-UEN A Control 13.1.3 Application examples M12323-3 v6 The synchronizing function block can also be used in some switchyard arrangements, but with different parameter settings. Below are some examples of how different arrangements are connected to the IED analogue inputs and to the function block SESRSYN. One function block is used per circuit breaker.
-
Page 237: Single Circuit Breaker With Double Busbar, External Voltage Selection
1MRK 511 358-UEN A Section 13 Control 13.1.3.2 Single circuit breaker with double busbar, external voltage selection M12325-3 v8 WA1_VT/ SESRSYN WA2_VT U3PBB1* GRP_OFF U3PBB2* LINE_VT U3PLN1* WA2_MCB WA1_MCB U3PLN2* WA1_MCB/ WA1_MCB / WA2_MCB WA2_MCB UB1OK UB1FF LINE_MCB ULN1OK WA1_VT / WA2_VT ULN1FF LINE_MCB LINE_VT…
-
Page 238: Double Circuit Breaker
Section 13 1MRK 511 358-UEN A Control 13.1.3.4 Double circuit breaker M12329-3 v7 WA1_QA1 SESRSYN WA1_VT U3PBB1* U3PBB2* GRP_OFF LINE_VT U3PLN1* U3PLN2* WA2_ WA1_MCB UB1OK WA1_MCB WA2_MCB UB1FF WA1_MCB LINE_MCB ULN1OK WA1_VT ULN1FF WA2_VT WA1_QA1 WA2_QA1 WA2_QA1 SESRSYN WA2_VT U3PBB1* U3PBB2* GRP_OFF LINE_VT…
-
Page 239
1MRK 511 358-UEN A Section 13 Control Setting parameter CBConfig = 1 ½ bus CB WA1_QA1 WA1_VT SESRSYN U3 PBB1* WA2_VT U3 PBB2* LINE1_VT U3 PLN1* LINE2_VT U3 PLN2* TIE_QA1 B1 QOPEN B1 QCLD WA2_QA1 B2 QOPEN B2 QCLD LINE1_QB9 LN1 QOPEN LN1 QCLD LINE2_QB9… -
Page 240: Setting Guidelines
Section 13 1MRK 511 358-UEN A Control WA1_QA1: • B1QOPEN/CLD = Position of TIE_QA1 breaker and belonging disconnectors • B2QOPEN/CLD = Position of WA2_QA1 breaker and belonging disconnectors • LN1QOPEN/CLD = Position of LINE1_QB9 disconnector • LN2QOPEN/CLD = Position of LINE2_QB9 disconnector •…
-
Page 241
1MRK 511 358-UEN A Section 13 Control General settings Operation : The operation mode can be set On or Off . The setting Off disables the whole function. GblBaseSelBus and GblBaseSelLine These configuration settings are used for selecting one of twelve GBASVAL functions, which then is used as base value reference voltage, for bus and line respectively. -
Page 242
Section 13 1MRK 511 358-UEN A Control Setting of the voltage difference between the line voltage and the bus voltage. The difference is set depending on the network configuration and expected voltages in the two networks running asynchronously. A normal setting is 0.10-0.15 p.u. FreqDiffMin The setting FreqDiffMin is the minimum frequency difference where the systems are defined… -
Page 243
1MRK 511 358-UEN A Section 13 Control Synchrocheck settings OperationSC OperationSC setting Off disables the synchrocheck function and sets the outputs On , the function is AUTOSYOK, MANSYOK, TSTAUTSY and TSTMANSY to low. With the setting in the service mode and the output signal depends on the input conditions. UHighBusSC and UHighLineSC The voltage level settings must be chosen in relation to the bus or line network voltage. -
Page 244: Autorecloser For 1 Phase, 2 Phase And/Or 3 Phase Operation Smbrrec
Section 13 1MRK 511 358-UEN A Control ManEnergDBDL On , manual closing is also enabled when both line voltage and bus If the parameter is set to ULowLineEnerg and ULowBusEnerg respectively, and ManEnerg is set to voltage are below DLLB , DBLL or Both . UHighBusEnerg and UHighLineEnerg The voltage level settings must be chosen in relation to the bus or line network voltage.
-
Page 245: Application
1MRK 511 358-UEN A Section 13 Control 13.2.2 Application M12391-3 v7 Automatic reclosing is a well-established method for the restoration of service in a power system after a transient line fault. The majority of line faults are flashover arcs, which are transient by nature.
-
Page 246
Section 13 1MRK 511 358-UEN A Control To maximize the availability of the power system it is possible to choose single pole tripping and automatic reclosing during single-phase faults and three pole tripping and automatic reclosing during multi-phase faults. Three-phase automatic reclosing can be performed with or without the use of a synchronicity check, and an energizing check, such as dead line or dead busbar check. -
Page 247: Auto-Reclosing Operation Off And On
1MRK 511 358-UEN A Section 13 Control check. In order to limit the stress on turbo-generator sets from Auto-Reclosing onto a permanent fault, one can arrange to combine Auto-Reclosing with a synchrocheck on line terminals close to such power stations and attempt energizing from the side furthest away from the power station and perform the synchrocheck at the local end if the energizing was successful.
-
Page 248: Start Auto-Reclosing And Conditions For Start Of A Reclosing Cycle
Section 13 1MRK 511 358-UEN A Control 13.2.2.2 Start auto-reclosing and conditions for start of a reclosing cycle M12391-94 v4 The usual way to start a reclosing cycle, or sequence, is to start it at selective tripping by line protection by applying a signal to the input START. Starting signals can be either, General Trip signals or, only the conditions for Differential, Distance protection Zone 1 and Distance protection Aided trip.
-
Page 249: Long Trip Signal
1MRK 511 358-UEN A Section 13 Control t1 1Ph will be used. If one of the phase reclosing is selected, the auto-reclosing open time inputs TR2P or TR3P is activated in connection with the start, the auto-reclosing open time for two-phase or three-phase reclosing is used.
-
Page 250: Armode = 1/2Ph , 1-Phase Or 2-Phase Reclosing In The First Shot
Section 13 1MRK 511 358-UEN A Control While any of the auto-reclosing open time timers are running, the output INPROGR is activated. When the «open time» timer runs out, the respective internal signal is transmitted to the output module for further checks and to issue a closing command to the circuit breaker. When a CB closing command is issued the output prepare 3-phase trip is set.
-
Page 251: External Selection Of Auto-Reclose Mode
1MRK 511 358-UEN A Section 13 Control MODEINT (integer) ARMode Type of fault 1st shot 2nd-5th shot 1/2/3ph 1/2ph ..1ph + 1*2ph ….1/2ph + 1*3ph ..1ph + 1*2/3ph ..A start of a new reclosing cycle is blocked during the set “reclaim time” after the selected number of reclosing shots have been made.
-
Page 252: Pulsing Of The Cb Closing Command And Counter
Section 13 1MRK 511 358-UEN A Control 13.2.2.16 Pulsing of the CB closing command and Counter M12391-205 v3 The CB closing command, CLOSECB is given as a pulse with a duration set by parameter tPulse . For circuit-breakers without an anti-pumping function, close pulse cutting can be used. CutPulse=On .
-
Page 253: Evolving Fault
1MRK 511 358-UEN A Section 13 Control In figures the logic shows how a closing Lock-out logic can be designed with the Lock-out relay as an external relay alternatively with the Lock-out created internally with the manual closing going through the Synchro-check function. An example of Lock-out logic. SMBRREC BU-TRIP INHIBIT…
-
Page 254: Automatic Continuation Of The Reclosing Sequence
Section 13 1MRK 511 358-UEN A Control tripping. This signal will, for evolving fault situations be activated a short time after the first trip has reset and will thus ensure that new trips will be three phase. 13.2.2.21 Automatic continuation of the reclosing sequence M12391-223 v4 SMBRREC function can be programmed to proceed to the following reclosing shots (if multiple shots are selected) even if start signals are not received from the protection functions, but the…
-
Page 255
1MRK 511 358-UEN A Section 13 Control breaker failure protection. When the CB open position is set to start SMBRREC, then manual opening must also be connected here. The inhibit is often a combination of signals from external IEDs via the IO and internal functions. An OR gate is then used for the combination. CBPOS and CBREADY These should be connected to binary inputs to pick-up information from the CB. -
Page 256
Section 13 1MRK 511 358-UEN A Control BLKON Used to block the autorecloser for 3-phase operation (SMBRREC) function for example, when certain special service conditions arise. When used, blocking must be reset with BLOCKOFF. BLOCKOFF Used to Unblock SMBRREC function when it has gone to Block due to activating input BLKON or by an unsuccessful Auto-Reclose attempt if the setting BlockByUnsucCl is set to On . -
Page 257
1MRK 511 358-UEN A Section 13 Control PREP3P Prepare three-phase trip is usually connected to the trip block to force a coming trip to be a three-phase one. If the function cannot make a single-phase or two-phase reclosing, the tripping should be three-phase. PERMIT1P Permit single-phase trip is the inverse of PREP3P. -
Page 258
Section 13 1MRK 511 358-UEN A Control While the reclosing of the master is in progress, it issues the signal WFMASTER. A reset delay of one second ensures that the WAIT signal is kept high for the duration of the breaker closing time. -
Page 259: Auto-Recloser Parameter Settings
1MRK 511 358-UEN A Section 13 Control Terminal ‘‘ Master ” Priority = High SMBRREC BLOCKED SETON BLKON INPROGR BLOCKOFF ACTIVE UNSUCCL INHIBIT SUCCL RESET PLCLOST READY START CLOSECB STARTHS PERMIT1P SKIPHS PREP3P THOLHOLD TRSOTF 1PT1 2PT1 CBREADY 3PT1 CBPOS 3PT2 3PT3 SYNC…
-
Page 260
Section 13 1MRK 511 358-UEN A Control M12399-97 v8 Operation The operation of the Autorecloser for 1/2/3-phase operation (SMBRREC) function can be On and Off . The setting ExternalCtrl makes it possible to switch it On or Off using an switched external switch via IO or communication ports. -
Page 261
1MRK 511 358-UEN A Section 13 Control At a setting somewhat longer than the auto-reclosing open time, this facility will not influence the reclosing. A typical setting of tTrip could be close to the auto-reclosing open time. tInhibit , Inhibit resetting delay tInhibit = 5.0 s to ensure reliable interruption and temporary blocking of the A typical setting is tinhibit has been activated. -
Page 262: Apparatus Control Apc
Section 13 1MRK 511 358-UEN A Control UnsucClByCBCheck , Unsuccessful closing by CB check NoCBCheck . The “auto-reclosing unsuccessful” event is then decided by The normal setting is a new trip within the reclaim time after the last reclosing shot. If one wants to get the UNSUCCL (Unsuccessful closing) signal in the case the CB does not respond to the closing UnsucClByCBCheck = CB Check and set tUnsucCl for instance command, CLOSECB, one can set…
-
Page 263
1MRK 511 358-UEN A Section 13 Control Station HMI Station bus Local Local Local Apparatus Apparatus Apparatus Control Control Control breakers disconnectors earthing switches IEC08000227.vsd IEC08000227 V1 EN-US Figure 104: Overview of the apparatus control functions Features in the apparatus control function: •… -
Page 264
Section 13 1MRK 511 358-UEN A Control The signal flow between the function blocks is shown in Figure 105. To realize the reservation function, the function blocks Reservation input (RESIN) and Bay reserve (QCRSV) also are included in the apparatus control function. The application description for all these functions can be found below. -
Page 265: Bay Control (Qcbay)
1MRK 511 358-UEN A Section 13 Control 2 = Remote 2,3,4,5,6 3 = Faulty 4,5,6 4 = Not in use 4,5,6 5 = All 1,2,3,4,5,6 6 = Station 2,4,5,6 7 = Remote 3,4,5,6 PSTO = All, then it is no priority between operator places. All operator places are allowed to operate.
-
Page 266: Switch Controller (Scswi)
Section 13 1MRK 511 358-UEN A Control IEC13000016-2-en.vsd IEC13000016 V2 EN-US Figure 106: APC — Local remote function block 13.3.1.2 Switch controller (SCSWI) M16596-3 v4 SCSWI may handle and operate on one three-phase device or three one-phase switching devices. After the selection of an apparatus and before the execution, the switch controller performs the following checks and actions: •…
-
Page 267: Switches (Sxcbr/Sxswi)
1MRK 511 358-UEN A Section 13 Control In the case when there are three one-phase switches (SXCBR) connected to the switch controller function, the switch controller will «merge» the position of the three switches to the resulting three-phase position. In case of a pole discordance situation, that is, the positions of the one-phase switches are not equal for a time longer than a settable time;…
-
Page 268
Section 13 1MRK 511 358-UEN A Control transferred over the station bus for evaluation in the IED. After the evaluation the operation can be executed with high security. This functionality is realized over the station bus by means of the function blocks QCRSV and RESIN. -
Page 269: Interaction Between Modules
1MRK 511 358-UEN A Section 13 Control The solution in Figure can also be realized over the station bus according to the application example in Figure 109. The solutions in Figure and Figure do not have the same high security compared to the solution in Figure 107, but instead have a higher availability, since no acknowledgment is required.
-
Page 270: Setting Guidelines
Section 13 1MRK 511 358-UEN A Control SMPPTRC SESRSYN Synchronizing (Trip logic) (Synchrocheck & Synchronizer) in progress Trip Synchrocheck QCBAY Operator place (Bay control) selection Open cmd Close cmd Res. req. SCSWI SXCBR (Switching control) Res. granted (Circuit breaker) QCRSV (Reservation) Res.
-
Page 271: Switch Controller (Scswi)
1MRK 511 358-UEN A Section 13 Control LocSta is true, only commands from station level are accepted, otherwise only commands from remote level are accepted. RemoteIncStation has only effect on the IEC61850-8-1 The parameter communication. Further, when using IEC61850 edition 1 communication, the Yes , since the command LocSta is not defined in parameter should be set to IEC61850-8-1 edition 1.
-
Page 272: Switch (Sxcbr/Sxswi)
Section 13 1MRK 511 358-UEN A Control 13.3.3.3 Switch (SXCBR/SXSWI) M16675-3 v7 tStartMove is the supervision time for the apparatus to start moving after a command execution. When the time has expired, the switch function is reset, and a cause-code is given. tIntermediate time the position indication is allowed to be in an intermediate (00) During the state.
-
Page 273: Configuration Guidelines
1MRK 511 358-UEN A Section 13 Control • With basically zero current. The circuit is open on one side and has a small extension. The capacitive current is small (for example, < 5A) and power transformers with inrush current are not allowed. •…
-
Page 274: Application
Section 13 1MRK 511 358-UEN A Control 13.4.2.1 Application M13561-3 v8 The interlocking for line bay (ABC_LINE) function is used for a line connected to a double busbar arrangement with a transfer busbar according to figure 111. The function can also be used for a double busbar arrangement without transfer busbar or a single busbar arrangement with/without transfer busbar.
-
Page 275: Signals From Bus-Coupler
1MRK 511 358-UEN A Section 13 Control QB7OPTR (bay 1) BB7_D_OP QB7OPTR (bay 2) & ..QB7OPTR (bay n-1) VPQB7TR (bay 1) VP_BB7_D VPQB7TR (bay 2) & ..VPQB7TR (bay n-1) EXDU_BPB (bay 1) EXDU_BPB EXDU_BPB (bay 2)
-
Page 276
Section 13 1MRK 511 358-UEN A Control Signal BC12CLTR A bus-coupler connection through the own bus-coupler exists between busbar WA1 and WA2. BC17OPTR No bus-coupler connection through the own bus-coupler between busbar WA1 and WA7. BC17CLTR A bus-coupler connection through the own bus-coupler exists between busbar WA1 and WA7. -
Page 277: Configuration Setting
1MRK 511 358-UEN A Section 13 Control BC12CLTR (sect.1) BC_12_CL DCCLTR (A1A2) >1 & DCCLTR (B1B2) BC12CLTR (sect.2) VPBC12TR (sect.1) VP_BC_12 & VPDCTR (A1A2) VPDCTR (B1B2) VPBC12TR (sect.2) BC17OPTR (sect.1) BC_17_OP & DCOPTR (A1A2) >1 BC17OPTR (sect.2) BC17CLTR (sect.1) BC_17_CL >1 DCCLTR (A1A2) &…
-
Page 278: Interlocking For Bus-Coupler Bay Abc_Bc
Section 13 1MRK 511 358-UEN A Control • QC71_OP = 1 • QC71_CL = 0 • BB7_D_OP = 1 • BC_17_OP = 1 • BC_17_CL = 0 • BC_27_OP = 1 • BC_27_CL = 0 • EXDU_BPB = 1 • VP_BB7_D = 1 •…
-
Page 279: Configuration
1MRK 511 358-UEN A Section 13 Control WA1 (A) WA2 (B) WA7 (C) QB20 en04000514.vsd IEC04000514 V1 EN-US Figure 115: Switchyard layout ABC_BC 13.4.3.2 Configuration M13553-138 v4 The signals from the other bays connected to the bus-coupler module ABC_BC are described below.
-
Page 280
Section 13 1MRK 511 358-UEN A Control QB12OPTR (bay 1) BBTR_OP QB12OPTR (bay 2) & ..QB12OPTR (bay n-1) VPQB12TR (bay 1) VP_BBTR VPQB12TR (bay 2) & ..VPQB12TR (bay n-1) EXDU_12 (bay 1) EXDU_12 EXDU_12 (bay 2) -
Page 281: Signals From Bus-Coupler
1MRK 511 358-UEN A Section 13 Control For a bus-coupler bay in section 1, these conditions are valid: BBTR_OP (sect.1) BBTR_OP DCOPTR (A1A2) & >1 DCOPTR (B1B2) BBTR_OP (sect.2) VP_BBTR (sect.1) VP_BBTR & VPDCTR (A1A2) VPDCTR (B1B2) VP_BBTR (sect.2) EXDU_12 (sect.1) EXDU_12 &…
-
Page 282: Configuration Setting
Section 13 1MRK 511 358-UEN A Control These signals from each bus-section disconnector bay (A1A2_DC) are also needed. For B1B2_DC, corresponding signals from busbar B are used. The same type of module (A1A2_DC) is used for different busbars, that is, for both bus-section disconnector A1A2_DC and B1B2_DC. Signal DCCLTR The bus-section disconnector is closed.
-
Page 283: Interlocking For Transformer Bay Ab_Trafo
1MRK 511 358-UEN A Section 13 Control • QC71_OP = 1 • QC71_CL = 0 If there is no second busbar B and therefore no QB2 and QB20 disconnectors, then the interlocking for QB2 and QB20 are not used. The states for QB2, QB20, QC21, BC_12, BBTR are set to open by setting the appropriate module inputs as follows.
-
Page 284: Signals From Bus-Coupler
Section 13 1MRK 511 358-UEN A Control WA1 (A) WA2 (B) AB_TRAFO QA2 and QC4 are not used in this interlocking en04000515.vsd IEC04000515 V1 EN-US Figure 121: Switchyard layout AB_TRAFO M13566-4 v4 The signals from other bays connected to the module AB_TRAFO are described below. 13.4.4.2 Signals from bus-coupler M13566-6 v4…
-
Page 285: Configuration Setting
1MRK 511 358-UEN A Section 13 Control 13.4.4.3 Configuration setting M13566-22 v5 If there are no second busbar B and therefore no QB2 disconnector, then the interlocking for QB2 is not used. The state for QB2, QC21, BC_12 are set to open by setting the appropriate module inputs as follows.
-
Page 286
Section 13 1MRK 511 358-UEN A Control connection exists between busbars on one bus-section side and if on the other bus-section side a busbar transfer is in progress: Section 1 Section 2 (WA1)A1 (WA2)B1 (WA7)C A1A2_BS ABC_BC ABC_BC B1B2_BS ABC_LINE AB_TRAFO ABC_LINE AB_TRAFO… -
Page 287
1MRK 511 358-UEN A Section 13 Control S1S2OPTR (B1B2) BC12OPTR (sect.1) >1 QB12OPTR (bay 1/sect.2) . . . & & BBTR_OP . . . QB12OPTR (bay n/sect.2) S1S2OPTR (B1B2) BC12OPTR (sect.2) >1 QB12OPTR (bay 1/sect.1) . . . & . . . QB12OPTR (bay n /sect.1) VPS1S2TR (B1B2) VPBC12TR (sect.1) -
Page 288: Configuration Setting
Section 13 1MRK 511 358-UEN A Control S1S2OPTR (A1A2) BC12OPTR (sect.1) >1 QB12OPTR (bay 1/sect.2) . . . & & BBTR_OP . . . QB12OPTR (bay n/sect.2) S1S2OPTR (A1A2) BC12OPTR (sect.2) >1 QB12OPTR (bay 1/sect.1) . . . & . . . QB12OPTR (bay n /sect.1) VPS1S2TR (A1A2) VPBC12TR (sect.1)
-
Page 289: Application
1MRK 511 358-UEN A Section 13 Control 13.4.6.1 Application M13544-3 v7 The interlocking for bus-section disconnector (A1A2_DC) function is used for one bus-section disconnector between section 1 and 2 according to figure 127. A1A2_DC function can be used for different busbars, which includes a bus-section disconnector. WA1 (A1) WA2 (A2) A1A2_DC…
-
Page 290
Section 13 1MRK 511 358-UEN A Control Signal QB1OPTR QB1 is open. QB2OPTR QB2 is open (AB_TRAFO, ABC_LINE). QB220OTR QB2 and QB20 are open (ABC_BC). VPQB1TR The switch status of QB1 is valid. VPQB2TR The switch status of QB2 is valid. VQB220TR The switch status of QB2 and QB20 are valid. -
Page 291
1MRK 511 358-UEN A Section 13 Control QB1OPTR (bay 1/sect.A2) S2DC_OP . . . & ..QB1OPTR (bay n/sect.A2) DCOPTR (A2/A3) VPQB1TR (bay 1/sect.A2) VPS2_DC . . . & ..VPQB1TR (bay n/sect.A2) VPDCTR (A2/A3) EXDU_BB (bay 1/sect.A2) -
Page 292: Signals In Double-Breaker Arrangement
Section 13 1MRK 511 358-UEN A Control QB2OPTR (QB220OTR)(bay 1/sect.B2) S2DC_OP . . . & ..QB2OPTR (QB220OTR)(bay n/sect.B2) DCOPTR (B2/B3) VPQB2TR(VQB220TR) (bay 1/sect.B2) VPS2_DC . . . & ..VPQB2TR(VQB220TR) (bay n/sect.B2) VPDCTR (B2/B3) EXDU_BB (bay 1/sect.B2)
-
Page 293
1MRK 511 358-UEN A Section 13 Control Signal QB1OPTR QB1 is open. QB2OPTR QB2 is open. VPQB1TR The switch status of QB1 is valid. VPQB2TR The switch status of QB2 is valid. EXDU_DB No transmission error from the bay that contains the above information. The logic is identical to the double busbar configuration “Signals in single breaker arrangement”. -
Page 294: Signals In 1 1/2 Breaker Arrangement
Section 13 1MRK 511 358-UEN A Control QB2OPTR (bay 1/sect.B1) S1DC_OP . . . & ..QB2OPTR (bay n/sect.B1) VPQB2TR (bay 1/sect.B1) VPS1_DC . . . & ..VPQB2TR (bay n/sect.B1) EXDU_DB (bay 1/sect.B1) EXDU_BB .
-
Page 295: Interlocking For Busbar Earthing Switch Bb_Es
1MRK 511 358-UEN A Section 13 Control The project-specific logic is the same as for the logic for the double-breaker configuration. Signal S1DC_OP All disconnectors on bus-section 1 are open. S2DC_OP All disconnectors on bus-section 2 are open. VPS1_DC The switch status of disconnectors on bus-section 1 is valid. VPS2_DC The switch status of disconnectors on bus-section 2 is valid.
-
Page 296
Section 13 1MRK 511 358-UEN A Control These signals from each line bay (ABC_LINE), each transformer bay (AB_TRAFO), and each bus- coupler bay (ABC_BC) are needed: Signal QB1OPTR QB1 is open. QB2OPTR QB2 is open (AB_TRAFO, ABC_LINE) QB220OTR QB2 and QB20 are open (ABC_BC) QB7OPTR QB7 is open. -
Page 297
1MRK 511 358-UEN A Section 13 Control QB1OPTR (bay 1/sect.A1) BB_DC_OP . . . & ..QB1OPTR (bay n/sect.A1) DCOPTR (A1/A2) VPQB1TR (bay 1/sect.A1) VP_BB_DC . . . & ..VPQB1TR (bay n/sect.A1) VPDCTR (A1/A2) EXDU_BB (bay 1/sect.A1) -
Page 298
Section 13 1MRK 511 358-UEN A Control QB2OPTR(QB220OTR)(bay 1/sect.B1) BB_DC_OP . . . & ..QB2OPTR (QB220OTR)(bay n/sect.B1) DCOPTR (B1/B2) VPQB2TR(VQB220TR) (bay 1/sect.B1) VP_BB_DC . . . & ..VPQB2TR(VQB220TR) (bay n/sect.B1) VPDCTR (B1/B2) EXDU_BB (bay 1/sect.B1) . -
Page 299: Signals In Double-Breaker Arrangement
1MRK 511 358-UEN A Section 13 Control QB7OPTR (bay 1) BB_DC_OP . . . & ..QB7OPTR (bay n) VPQB7TR (bay 1) VP_BB_DC . . . & ..VPQB7TR (bay n) EXDU_BB (bay 1) EXDU_BB .
-
Page 300: Signals In 1 1/2 Breaker Arrangement
Section 13 1MRK 511 358-UEN A Control is used for different busbars, that is, for both bus-section disconnectors A1A2_DC and B1B2_DC. Signal DCOPTR The bus-section disconnector is open. VPDCTR The switch status of bus-section disconnector DC is valid. EXDU_DC No transmission error from the bay that contains the above information. The logic is identical to the double busbar configuration described in section “Signals in single breaker arrangement”.
-
Page 301: Configuration Setting
1MRK 511 358-UEN A Section 13 Control WA1 (A) WA2 (B) DB_BUS_B DB_BUS_A QB61 QB62 DB_LINE en04000518.vsd IEC04000518 V1 EN-US Figure 148: Switchyard layout double circuit breaker M13584-4 v4 For a double circuit-breaker bay, the modules DB_BUS_A, DB_LINE and DB_BUS_B must be used.
-
Page 302: Application
Section 13 1MRK 511 358-UEN A Control 13.4.9.1 Application M13570-3 v6 The interlocking for 1 1/2 breaker diameter (BH_CONN, BH_LINE_A, BH_LINE_B) functions are used for lines connected to a 1 1/2 breaker diameter according to figure 149. WA1 (A) WA2 (B) BH_LINE_B BH_LINE_A QB61…
-
Page 303: Voltage Control
1MRK 511 358-UEN A Section 13 Control If there is no voltage supervision, then set the corresponding inputs as follows: • VOLT_OFF = 1 • VOLT_ON = 0 13.5 Voltage control SEMOD158732-1 v2 13.5.1 Identification SEMOD173054-2 v5 Function description IEC 61850 IEC 60617 ANSI/IEEE C37.2 identification…
-
Page 304
Section 13 1MRK 511 358-UEN A Control Of these alternatives, the first and the last require communication between the function control blocks of the different transformers, whereas the middle alternative does not require any communication. The voltage control includes many extra features such as possibility to avoid simultaneous tapping of parallel transformers, hot stand by regulation of a transformer within a parallel group, with a LV CB open, compensation for a possible capacitor bank on the LV side bay of a transformer, extensive tap changer monitoring including contact wear and hunting detection,… -
Page 305
1MRK 511 358-UEN A Section 13 Control Measured Quantities SEMOD159053-61 v4 In normal applications, the LV side of the transformer is used as the voltage measuring point. If necessary, the LV side current is used as load current to calculate the line-voltage drop to the regulation point. -
Page 306
Section 13 1MRK 511 358-UEN A Control earth voltage can increase with as much as a factor √3 in case of earth faults in a non-solidly earthed system. The analog input signals are normally common with other functions in the IED for example, protection functions. -
Page 307
1MRK 511 358-UEN A Section 13 Control Umax , TR1ATCC can initiate one or more fast step down If the busbar voltage rises above commands (ULOWER commands) in order to bring the voltage back into the security range Umin , and Umax ). The fast step down function operation can be set in one of the (settings FSDMode . -
Page 308
Section 13 1MRK 511 358-UEN A Control t1=180 t1=150 t1=120 t1=90 t1=60 t1=30 IEC06000488_2_en.vsd IEC06000488 V2 EN-US Figure 152: Inverse time characteristic for TR1ATCC and TR8ATCC t2 , will be used for consecutive commands (commands in the same The second time delay, direction as the first command). -
Page 309
1MRK 511 358-UEN A Section 13 Control IEC06000487-2-en.vsd IEC06000487 V2 EN-US Figure 153: Vector diagram for line voltage drop compensation The calculated load voltage U is shown on the local HMI as value ULOAD under Main menu/ Test/Function status/Control/TransformerVoltageControl(ATCC,90)/TR1ATCC:x/ TR8ATCC:x. Load voltage adjustment SEMOD159053-118 v6 Due to the fact that most loads are proportional to the square of the voltage, it is possible to… -
Page 310
Section 13 1MRK 511 358-UEN A Control Load current I2Base Rated current, LV winding i (corresponding to Constant load voltage adjust. factor for active input LVAConst1, LVAConst2, LVAConst3 and LVAConst4 ) It shall be noted that the adjustment factor is negative in order to decrease the load voltage and positive in order to increase the load voltage. -
Page 311
1MRK 511 358-UEN A Section 13 Control simultaneously, and consequently they will blindly follow the master irrespective of their individual tap positions. Effectively this means that if the tap positions of the followers were harmonized with the master from the beginning, they would stay like that as long as all transformers in the parallel group continue to participate in the parallel control. -
Page 312
Section 13 1MRK 511 358-UEN A Control Load en06000486.vsd IEC06000486 V1 EN-US Figure 155: Parallel transformers with equal rated data. In the reverse reactance method, the line voltage drop compensation is used. The original of the line voltage drop compensation function purpose is to control the voltage at a load point further out in the network. -
Page 313
1MRK 511 358-UEN A Section 13 Control If now the tap position between the transformers will differ, a circulating current will appear, and the transformer with the highest tap (highest no load voltage) will be the source of this circulating current. Figure below shows this situation with T1 being on a higher tap than …T2 …T1… -
Page 314
Section 13 1MRK 511 358-UEN A Control different IEDs. If the functions are located in different IEDs they must communicate via GOOSE interbay communication on the IEC 61850 communication protocol. Complete exchange of TR8ATCC data, analog as well as binary, via GOOSE is made cyclically every 300 ms. The busbar voltage U is measured individually for each transformer in the parallel group by its associated TR8ATCC function. -
Page 315
1MRK 511 358-UEN A Section 13 Control USet values for individual In parallel operation with the circulating current method, different transformers can cause the voltage regulation to be unstable. For this reason, the mean value USet for parallel operating transformers can be automatically calculated and used for the On / Off by setting parameter OperUsetPar . -
Page 316
Section 13 1MRK 511 358-UEN A Control OperHoming DISC on TR8ATCC block is activated by open LV CB. If now the setting parameter On for that transformer, TR8ATCC will act in the following way: • The algorithm calculates the “true” busbar voltage, by averaging the voltage measurements of the other transformers included in the parallel group (voltage measurement of the “disconnected transformer”… -
Page 317
1MRK 511 358-UEN A Section 13 Control If one follower in a master follower parallel group is put in manual mode, still with the setting OperationAdaptOn , the rest of the group will continue in automatic master follower control. The follower in manual mode will of course disregard any possible tapping of the master. However, as one transformer in the parallel group is now exempted from the parallel control, the binary output signal ADAPT on TR8ATCC function block will be activated for the rest of the parallel group. -
Page 318
Section 13 1MRK 511 358-UEN A Control to the load on the LV side, or it may be divided between the LV and the HV side. In the latter case, the part of I that goes to the HV side will divide between the two transformers and it will be measured with opposite direction for T2 and T1. -
Page 319
1MRK 511 358-UEN A Section 13 Control With the four outputs in the function block available, it is possible to do more than just supervise a level of power flow in one direction. By combining the outputs with logical elements in application configuration, it is also possible to cover for example, intervals as well as areas in the P-Q plane. -
Page 320
Section 13 1MRK 511 358-UEN A Control Communication between these TR8ATCCs is made either on the GOOSE interbay communication on the IEC 61850 protocol if TR8ATCC functions reside in different IEDs, or alternatively configured internally in one IED if multiple instances of TR8ATCC reside in the same IED. -
Page 321
1MRK 511 358-UEN A Section 13 Control Manual configuration of VCTR GOOSE data set is required. Note that both data value attributes and quality attributes have to be mapped. The following data objects must be configured: • BusV • LodAIm •… -
Page 322
Section 13 1MRK 511 358-UEN A Control Total Block: Prevents any tap changer operation independently of the control mode (automatic as well as manual). Setting parameters for blocking that can be set in TR1ATCC or TR8ATCC under general settings in PST/local HMI are listed in table 33. Table 33: Blocking settings Setting… -
Page 323
1MRK 511 358-UEN A Section 13 Control Setting Values (Range) Description RevActPartBk(aut Alarm The risk of voltage instability increases as omatically reset) Auto Block transmission lines become more heavily loaded in an attempt to maximize the efficient use of existing generation and transmission facilities. -
Page 324
Section 13 1MRK 511 358-UEN A Control Setting Values (Range) Description TapPosBk Alarm This blocking/alarm is activated by either: (automatically Auto Block The tap changer reaching an end position i.e. one reset/manually Auto&Man Block of the extreme positions according to the reset) LowVoltTap and setting parameters… -
Page 325
1MRK 511 358-UEN A Section 13 Control Table 34: Blocking settings Setting Value (Range) Description On / Off TotalBlock (manually reset) TR1ATCC or TR8ATCC function can be totally blocked via the TotalBlock , setting parameter On / Off from which can be set the local HMI or PST. -
Page 326
Section 13 1MRK 511 358-UEN A Control Table 36: Blockings without setting possibilities Activation Type of blocking Description Disconnected Auto Block Automatic control is blocked for a transformer transformer when parallel control with the circulating current (automatically reset) method is used, and that transformer is disconnected from the LV-busbar. -
Page 327
1MRK 511 358-UEN A Section 13 Control • Under-Voltage • Command error • Position indication error • Tap changer error • Reversed Action • Circulating current • Communication error Master-follower method When the master is blocked, the followers will not tap by themselves and there is consequently no need for further mutual blocking. -
Page 328
Section 13 1MRK 511 358-UEN A Control Tap changer extreme positions SEMOD159053-339 v2 This feature supervises the extreme positions of the tap changer according to the settings LowVoltTap and HighVoltTap . When the tap changer reaches its lowest/highest position, the corresponding ULOWER/URAISE command is prevented in both automatic and manual mode. -
Page 329
1MRK 511 358-UEN A Section 13 Control signal in this case is thus that resetting of TR1ATCC or TR8ATCC can sometimes be made faster, which in turn makes the system ready for consecutive commands in a shorter time. tTCTimeout times out before The second use is to detect a jammed tap changer. -
Page 330: Setting Guidelines
Section 13 1MRK 511 358-UEN A Control The NoOfOperations counter simply counts the total number of operations (incremental counter). Both counters are stored in a non-volatile memory as well as, the times and dates of their last reset. These dates are stored automatically when the command to reset the counter is issued. It is therefore necessary to check that the IED internal time is correct before these counters are reset.
-
Page 331: Tr1Atcc Or Tr8Atcc Setting Group
1MRK 511 358-UEN A Section 13 Control OVPartBk : Selection of action to be taken in case the busbar voltage U Umax . exceeds RevActPartBk : Selection of action to be taken in case Reverse Action has been activated. TapChgBk : Selection of action to be taken in case a Tap Changer Error has been identified. TapPosBk : Selection of action to be taken in case of Tap Position Error, or if the tap changer has reached an end position.
-
Page 332
Section 13 1MRK 511 358-UEN A Control selected to a value near the power transformer’s tap changer voltage step (typically 75 — 125% of the tap changer step). UDeadbandInner : Setting value for one half of the inner deadband, to be set in percent of UBase . -
Page 333
1MRK 511 358-UEN A Section 13 Control method and with no circulation (for example, assume two equal transformers on the same tap position). The load current lags the busbar voltage U with the power factor j and the Rline and Xline is designated j1. argument of the impedance Rline Xline… -
Page 334
Section 13 1MRK 511 358-UEN A Control The effect of changing power factor of the load will be that j2 will no longer be close to -90° resulting in U being smaller or greater than U if the ratio Rline/Xline is not adjusted. Rline and Xline for j = 11°… -
Page 335
1MRK 511 358-UEN A Section 13 Control Load voltage adjustment (LVA) LVAConst1 : Setting of the first load voltage adjustment value. This adjustment of the target USet is given in percent of UBase . value LVAConst2 : Setting of the second load voltage adjustment value. This adjustment of the target USet is given in percent of UBase . -
Page 336
Section 13 1MRK 511 358-UEN A Control P> en06000634_2_en.vsd IEC06000634 V2 EN-US Figure 164: Setting of a negative value for P> P< : When the active power falls below the value given by this setting, the output PLTREV will be tPower . -
Page 337
1MRK 511 358-UEN A Section 13 Control ´ D = ´ ´ Comp a 100% ´ (Equation 129) EQUATION1941 V1 EN-US where: • DU is the deadband setting in percent. • n denotes the desired number of difference in tap position between the transformers, that shall give a voltage deviation U which corresponds to the dead-band setting. -
Page 338: Tcmyltc And Tclyltc General Settings
Section 13 1MRK 511 358-UEN A Control 13.5.3.3 TCMYLTC and TCLYLTC general settings SEMOD171501-150 v7 GlobalBaseSel : Selects the global base value group used by the function to define ( IBase ), UBase ) and ( SBase ). LowVoltTap : This gives the tap position for the lowest LV-voltage. HighVoltTap : This gives the tap position for the highest LV-voltage.
-
Page 339: Identification
1MRK 511 358-UEN A Section 13 Control 13.6.1 Identification SEMOD167845-2 v3 Function description IEC 61850 IEC 60617 ANSI/IEEE C37.2 identification identification device number Logic rotating switch for function SLGAPC selection and LHMI presentation 13.6.2 Application SEMOD114927-4 v6 The logic rotating switch for function selection and LHMI presentation function (SLGAPC) (or the selector switch function block, as it is also known) is used to get a selector switch functionality similar with the one provided by a hardware multi-position selector switch.
-
Page 340: Identification
Section 13 1MRK 511 358-UEN A Control 13.7.1 Identification SEMOD167850-2 v3 Function description IEC 61850 IEC 60617 ANSI/IEEE C37.2 identification identification device number Selector mini switch VSGAPC 13.7.2 Application SEMOD158803-5 v6 Selector mini switch (VSGAPC) function is a multipurpose function used in the configuration tool in PCM600 for a variety of applications, as a general purpose switch.
-
Page 341: Identification
1MRK 511 358-UEN A Section 13 Control 13.8.1 Identification GUID-E16EA78F-6DF9-4B37-A92D-5C09827E2297 v3 Function description IEC 61850 IEC 60617 ANSI/IEEE C37.2 identification identification device number Generic communication function for DPGAPC Double Point indication 13.8.2 Application SEMOD55391-5 v8 Generic communication function for Double Point indication (DPGAPC) function block is used to send double point position indication to other systems, equipment or functions in the substation through IEC 61850-8-1 or other communication protocols.
-
Page 342: Identification
Section 13 1MRK 511 358-UEN A Control 13.9.1 Identification SEMOD176456-2 v3 Function description IEC 61850 IEC 60617 ANSI/IEEE C37.2 identification identification device number Single point generic control 8 signals SPC8GAPC 13.9.2 Application SEMOD176511-4 v4 The Single point generic control 8 signals (SPC8GAPC) function block is a collection of 8 single point commands, designed to bring in commands from REMOTE (SCADA) to those parts of the logic configuration that do not need complicated function blocks that have the capability to receive commands (for example SCSWI).
-
Page 343: Setting Guidelines
1MRK 511 358-UEN A Section 13 Control (for LON).AUTOBITS function block have 32 individual outputs which each can be mapped as a Binary Output point in DNP3. The output is operated by a «Object 12» in DNP3. This object contains parameters for control-code, count, on-time and off-time. To operate an AUTOBITS output point, send a control-code of latch-On, latch-Off, pulse-On, pulse-Off, Trip or Close.
-
Page 344
Section 13 1MRK 511 358-UEN A Control Single command function Configuration logic circuits SINGLECMD Close CB1 CMDOUTy OUTy User- & defined conditions Synchro- check en04000206.vsd IEC04000206 V2 EN-US Figure 167: Application example showing a logic diagram for control of a circuit breaker via configuration logic circuits Figure and figure… -
Page 345: Setting Guidelines
1MRK 511 358-UEN A Section 13 Control Single command function Configuration logic circuits SINGLESMD Device 1 CMDOUTy OUTy & User- defined conditions en04000208.vsd IEC04000208 V2 EN-US Figure 169: Application example showing a logic diagram for control of external devices via configuration logic circuits 13.11.3 Setting guidelines M12448-3 v2…
-
Page 347: Section 14 Scheme Communication
1MRK 511 358-UEN A Section 14 Scheme communication Section 14 Scheme communication 14.1 Scheme communication logic for distance or overcurrent protection ZCPSCH IP15749-1 v3 14.1.1 Identification M14854-1 v4 Function description IEC 61850 IEC 60617 ANSI/IEEE C37.2 identification identification device number Scheme communication logic for ZCPSCH distance or overcurrent protection…
-
Page 348: Delta Blocking Scheme
Section 14 1MRK 511 358-UEN A Scheme communication The blocking scheme is very dependable because it will operate for faults anywhere on the protected line if the communication channel is out of service. On the other hand, it is less secure than permissive schemes because it will trip for external faults within the reach of the tripping function if the communication channel is out of service.
-
Page 349: Permissive Schemes
1MRK 511 358-UEN A Section 14 Scheme communication Inadequate speed or dependability can cause spurious tripping for external faults. Inadequate security can cause delayed tripping for internal faults. Since the blocking signal is initiated by the delta based detection which is very fast the time tCoord can be set to zero seconds, except in cases where the transmission channel is delay slow.
-
Page 350
Section 14 1MRK 511 358-UEN A Scheme communication the fault. There is a certain risk that in case of a trip from an independent tripping zone, the zone issuing the send signal (CS) resets before the overreaching zone has operated at the remote terminal. -
Page 351: Intertrip Scheme
1MRK 511 358-UEN A Section 14 Scheme communication At the permissive overreaching scheme, the send signal (CS) might be issued in parallel both from an overreaching zone and an underreaching, independent tripping zone. The CS signal from the overreaching zone must not be prolonged while the CS signal from zone 1 can be prolonged.
-
Page 352: Setting Guidelines
Section 14 1MRK 511 358-UEN A Scheme communication tCoord should be set to 10-30 ms dependant on type of sending of signals, the timer communication channel. The general requirement for teleprotection equipment operating in intertripping applications is that it should be very secure and very dependable, since both inadequate security and dependability may cause unwanted operation.
-
Page 353: Permissive Underreaching Scheme
1MRK 511 358-UEN A Section 14 Scheme communication 14.1.3.3 Permissive underreaching scheme M13869-25 v4 Operation SchemeType Permissive UR tCoord = 0 ms tSendMin = 0.1 s Unblock tSecurity = 0.035 s 14.1.3.4 Permissive overreaching scheme M13869-34 v4 Operation Scheme type Permissive OR tCoord = 0 ms…
-
Page 354: Application
Section 14 1MRK 511 358-UEN A Scheme communication 14.2.2 Application IP15023-1 v1 14.2.2.1 Current reversal logic M13895-4 v5 If parallel lines are connected to common buses at both terminals, overreaching permissive communication schemes can trip unselectable due to current reversal. The unwanted tripping affects the healthy line when a fault is cleared on the parallel line.
-
Page 355: Setting Guidelines
1MRK 511 358-UEN A Section 14 Scheme communication tripping is achieved. This requires a detection of the fault by an independent tripping zone 1. To avoid sequential tripping as described, and when zone 1 is not available, weak-end infeed tripping logic is used. The weak end infeed function only works together with permissive overreach communication schemes as the carrier send signal must cover the hole line length.
-
Page 356: Local Acceleration Logic Zclcpsch
Section 14 1MRK 511 358-UEN A Scheme communication tPickUpWEI to 10 ms, a short delay is recommended to avoid that spurious carrier received signals will activate WEI and cause unwanted carrier send (ECHO) signals. UPP< and UPN< for the weak-end trip to 70% of the system base Set the voltage criterion UBase .
-
Page 357: Scheme Communication Logic For Residual Overcurrent Protection Ecpsch
1MRK 511 358-UEN A Section 14 Scheme communication × Load LoadCurr Base (Equation 130) EQUATION1320 V1 EN-US where: ILoadmin is the minimum load current on the line during normal operation conditions. tLoadOn is used to increase the security of the loss-of-load function for example to The timer avoid unwanted release due to transient inrush current when energizing the line power tLoadOn has elapsed at…
-
Page 358: Setting Guidelines
Section 14 1MRK 511 358-UEN A Scheme communication With directional comparison in permissive schemes, a short operate time of the protection including a channel transmission time, can be achieved. This short operate time enables rapid autoreclosing function after the fault clearance. During a single-phase reclosing cycle, the autoreclosing device must block the directional comparison earth-fault communication scheme.
-
Page 359: Application
1MRK 511 358-UEN A Section 14 Scheme communication 14.5.2 Application IP15041-1 v1 14.5.2.1 Fault current reversal logic M15285-3 v6 Figure and Figure show a typical system condition, which can result in a fault current reversal. Assume that fault is near the B1 breaker. B1 Relay sees the fault in Zone1 and A1 relay identifies the fault in Zone2.
-
Page 360: Setting Guidelines
Section 14 1MRK 511 358-UEN A Scheme communication Strong Weak source source IEC99000054-3-en.vsd IEC99000054 V3 EN-US Figure 178: Initial condition for weak-end infeed 14.5.3 Setting guidelines IP15042-1 v1 M13933-4 v5 The parameters for the current reversal and weak-end infeed logic for residual overcurrent protection function are set via the local HMI or PCM600.
-
Page 361: Weak-End Infeed
1MRK 511 358-UEN A Section 14 Scheme communication Tele- Tele- Tele- Protection Protection Protection communication Protection Function Function Equipment System Equipment CS initiation to CS from the CR to the CR selection and protection CS propagation, protection communication decision, operate function, operate propagation function, operate…
-
Page 363: Section 15 Logic
1MRK 511 358-UEN A Section 15 Logic Section 15 Logic 15.1 Tripping logic SMPPTRC IP14576-1 v4 15.1.1 Identification SEMOD56226-2 v6 Function description IEC 61850 IEC 60617 ANSI/IEEE C37.2 identification identification device number Tripping logic SMPPTRC I->O SYMBOL-K V1 EN-US 15.1.2 Application M12252-3 v8 All trip signals from the different protection functions shall be routed through the trip logic.
-
Page 364: Three-Phase Tripping
Section 15 1MRK 511 358-UEN A Logic To prevent closing of a circuit breaker after a trip the function can block the closing. The two instances of the SMPPTRC function are identical except, for the name of the function block (SMPPTRC1 and SMPPTRC2). References will therefore only be made to SMPPTRC1 in the following description, but they also apply to SMPPTRC2.
-
Page 365
1MRK 511 358-UEN A Section 15 Logic The inputs are combined with the phase selection logic and the start signals from the phase selector must be connected to the inputs PSL1, PSL2 and PSL3 to achieve the tripping on the respective single-phase trip outputs TRL1, TRL2 and TRL3. -
Page 366: Single-, Two- Or Three-Phase Tripping
Section 15 1MRK 511 358-UEN A Logic 15.1.2.3 Single-, two- or three-phase tripping M14828-15 v3 The single-/two-/three-phase tripping mode provides single-phase tripping for single-phase faults, two-phase tripping for two-phase faults and three-phase tripping for multi-phase faults. The operating mode is always used together with an autoreclosing scheme with setting Program = 1/2/3Ph or Program = 1/3Ph attempt.
-
Page 367: Trip Matrix Logic Tmagapc
1MRK 511 358-UEN A Section 15 Logic tWaitForPHS : Sets a duration after any of the inputs 1PTRZ or 1PTREF has been activated during which a phase selection must occur to get a single phase trip. If no phase selection has been achieved a three-phase trip will be issued after the time has elapsed.
-
Page 368: Application
Section 15 1MRK 511 358-UEN A Logic 15.3.2 Application GUID-70B268A9-B248-422D-9896-89FECFF80B75 v1 Group alarm logic function ALMCALH is used to route alarm signals to different LEDs and/or output contacts on the IED. ALMCALH output signal and the physical outputs allows the user to adapt the alarm signal to physical tripping outputs according to the specific application needs.
-
Page 369: Setting Guidelines
1MRK 511 358-UEN A Section 15 Logic INDCALH output signal IND and the physical outputs allows the user to adapt the indication signal to physical outputs according to the specific application needs. 15.5.1.3 Setting guidelines GUID-7E776D39-1A42-4F90-BF50-9B38F494A01E v2 Operation : On or Off 15.6 Configurable logic blocks IP11009-1 v3…
-
Page 370: Fixed Signal Function Block Fxdsign
Section 15 1MRK 511 358-UEN A Logic IEC09000695_2_en.vsd IEC09000695 V2 EN-US Figure 182: Example designation, serial execution number and cycle time for logic function IEC09000310-1-en.vsd IEC09000310 V1 EN-US Figure 183: Example designation, serial execution number and cycle time for logic function that also propagates timestamp and quality of input signals The execution of different function blocks within the same cycle is determined by the order of their serial execution numbers.
-
Page 371: Application
1MRK 511 358-UEN A Section 15 Logic 15.7.2 Application M15322-3 v11 The Fixed signals function FXDSIGN generates nine pre-set (fixed) signals that can be used in the configuration of an IED, either for forcing the unused inputs in other function blocks to a certain level/value, or for creating certain logic.
-
Page 372: Boolean 16 To Integer Conversion B16I
Section 15 1MRK 511 358-UEN A Logic 15.8 Boolean 16 to Integer conversion B16I SEMOD175715-1 v1 15.8.1 Identification SEMOD175721-2 v2 Function description IEC 61850 IEC 60617 ANSI/IEEE C37.2 identification identification device number Boolean 16 to integer conversion B16I 15.8.2 Application SEMOD175832-4 v4 Boolean 16 to integer conversion function B16I is used to transform a set of 16 binary (logical) signals into an integer.
-
Page 373: Boolean To Integer Conversion With Logical Node Representation, 16 Bit Btigapc
1MRK 511 358-UEN A Section 15 Logic The sum of the numbers in column “Value when activated” when all INx (where 1≤x≤16) are active that is=1; is 65535. 65535 is the highest boolean value that can be converted to an integer by the B16I function block.
-
Page 374: Integer To Boolean 16 Conversion Ib16
Section 15 1MRK 511 358-UEN A Logic Name of input Type Default Description Value when Value when activated deactivated IN12 BOOLEAN Input 12 2048 IN13 BOOLEAN Input 13 4096 IN14 BOOLEAN Input 14 8192 IN15 BOOLEAN Input 15 16384 IN16 BOOLEAN Input 16 32768…
-
Page 375: Integer To Boolean 16 Conversion With Logic Node Representation Itbgapc
1MRK 511 358-UEN A Section 15 Logic Name of input Type Default Description Value when Value when activated deactivated BOOLEAN Input 6 BOOLEAN Input 7 BOOLEAN Input 8 BOOLEAN Input 9 IN10 BOOLEAN Input 10 IN11 BOOLEAN Input 11 1024 IN12 BOOLEAN Input 12…
-
Page 376: Elapsed Time Integrator With Limit Transgression And Overflow Supervision Teigapc
Section 15 1MRK 511 358-UEN A Logic Table 38: Output signals Name of OUTx Type Description Value when Value when activated deactivated OUT1 BOOLEAN Output 1 OUT2 BOOLEAN Output 2 OUT3 BOOLEAN Output 3 OUT4 BOOLEAN Output 4 OUT5 BOOLEAN Output 5 OUT6 BOOLEAN…
-
Page 377: Comparator For Integer Inputs — Intcomp
1MRK 511 358-UEN A Section 15 Logic A resolution of 10 ms can be achieved when the settings are defined within the range 1.00 second ≤ tAlarm ≤ 99 999.99 seconds 1.00 second ≤ tWarning ≤ 99 999.99 seconds. If the values are above this range the resolution becomes lower 99 999.99 seconds ≤…
-
Page 378: Setting Example
Section 15 1MRK 511 358-UEN A Logic 15.13.4 Setting example GUID-13302FD6-1585-42FE-BD6D-44F231982C59 v1 For absolute comparison between inputs: EnaAbs = 1 Set the RefSource = 1 Set the Similarly for Signed comparison between inputs EnaAbs = 0 Set the Set the RefSource = 1 For absolute comparison between input and setting EnaAbs = 1…
-
Page 379: Setting Example
1MRK 511 358-UEN A Section 15 Logic RefSource : This setting is used to select the reference source between input and setting for comparison. REF : The function will take reference value from input REF • SetValue : The function will take reference value from setting SetValue •…
-
Page 380
Section 15 1MRK 511 358-UEN A Logic EqualBandHigh = 5.0 % of reference value EqualBandLow = 5.0 % of reference value . Application manual… -
Page 381: Section 16 Monitoring
1MRK 511 358-UEN A Section 16 Monitoring Section 16 Monitoring 16.1 Measurement GUID-9D2D47A0-FE62-4FE3-82EE-034BED82682A v1 16.1.1 Identification SEMOD56123-2 v7 Function description IEC 61850 IEC 60617 ANSI/IEEE C37.2 identification identification device number Measurements CVMMXN P, Q, S, I, U, f SYMBOL-RR V1 EN-US Phase current measurement CMMXU SYMBOL-SS V1 EN-US…
-
Page 382: Zero Clamping
Section 16 1MRK 511 358-UEN A Monitoring The available measured values of an IED are depending on the actual hardware (TRM) and the logic configuration made in PCM600. All measured values can be supervised with four settable limits that is, low-low limit, low limit, high limit and high-high limit.
-
Page 383: Setting Guidelines
1MRK 511 358-UEN A Section 16 Monitoring Example how CVMMXN is operating: The following outputs can be observed on the local HMI under Monitoring/Servicevalues/ SRV1 Apparent three-phase power Active three-phase power Reactive three-phase power Power factor ILAG I lagging U ILEAD I leading U System mean voltage, calculated according to selected mode…
-
Page 384
Section 16 1MRK 511 358-UEN A Monitoring UGenZeroDb : Minimum level of voltage in % of UBase used as indication of zero voltage (zero point clamping). If measured value is below UGenZeroDb calculated S, P, Q and PF will be zero. IGenZeroDb : Minimum level of current in % of IBase used as indication of zero current (zero IGenZeroDb calculated S, P, Q and PF will be zero. -
Page 385: Setting Examples
1MRK 511 358-UEN A Section 16 Monitoring XLimHyst : Hysteresis value in % of range and is common for all limits. All phase angles are presented in relation to defined reference channel. The parameter PhaseAngleRef defines the reference, see section «». Calibration curves It is possible to calibrate the functions (CVMMXN, CMMXU, VMMXU and VNMMXU) to get class 0.5 presentations of currents, voltages and powers.
-
Page 386
Section 16 1MRK 511 358-UEN A Monitoring Measurement function application for a 110kV OHL SEMOD54481-12 v9 Single line diagram for this application is given in figure 187: 110kV Busbar 600/1 A 110 0,1 110kV OHL IEC09000039-2-en.vsd IEC09000039-1-EN V2 EN-US Figure 187: Single line diagram for 110kV OHL application In order to monitor, supervise and calibrate the active and reactive power as indicated in figure it is necessary to do the following:… -
Page 387
1MRK 511 358-UEN A Section 16 Monitoring Table 40: Settings parameters for level supervision Setting Short Description Selected Comments value PMin Minimum value -100 Minimum expected load PMax Minimum value Maximum expected load PZeroDb Zero point clamping in 0.001% 3000 Set zero point clamping to 45 MW that is, 3% of range of 200 MW… -
Page 388
Section 16 1MRK 511 358-UEN A Monitoring 110kV Busbar 200/1 31,5 MVA 110/36,75/(10,5) kV Yy0(d5) 500/5 L1L2 35 / 0,1kV 35kV Busbar IEC09000040-1-en.vsd IEC09000040-1-EN V1 EN-US Figure 188: Single line diagram for transformer application In order to measure the active and reactive power as indicated in figure 188, it is necessary to do the following: PhaseAngleRef (see section Set correctly all CT and VT and phase angle reference channel… -
Page 389
1MRK 511 358-UEN A Section 16 Monitoring Table 42: General settings parameters for the Measurement function Setting Short description Selected Comment value Operation Operation Off / On Function must be PowAmpFact Amplitude factor to scale 1.000 Typically no scaling is required power calculations PowAngComp Angle compensation for phase… -
Page 390
Section 16 1MRK 511 358-UEN A Monitoring 220kV Busbar 300/1 100 MVA 242/15,65 kV 15 / 0,1kV L1L2 L2L3 100MVA 15,65kV 4000/5 IEC09000041-1-en.vsd IEC09000041-1-EN V1 EN-US Figure 189: Single line diagram for generator application In order to measure the active and reactive power as indicated in figure 189, it is necessary to do the following: PhaseAngleRef (see Set correctly all CT and VT data and phase angle reference channel… -
Page 391: Gas Medium Supervision Ssimg
1MRK 511 358-UEN A Section 16 Monitoring Table 43: General settings parameters for the Measurement function Setting Short description Selected Comment value Operation Operation Off/On Function must be PowAmpFact Amplitude factor to scale 1.000 Typically no scaling is required power calculations PowAngComp Angle compensation for phase Typically no angle compensation is required.
-
Page 392: Application
Section 16 1MRK 511 358-UEN A Monitoring 16.3.2 Application GUID-140AA10C-4E93-4C23-AD57-895FADB0DB29 v5 Liquid medium supervision (SSIML) is used for monitoring the circuit breaker condition. Proper arc extinction by the compressed oil in the circuit breaker is very important. When the level becomes too low, compared to the required value, the circuit breaker operation is blocked to minimize the risk of internal failures.
-
Page 393
1MRK 511 358-UEN A Section 16 Monitoring 100000 50000 20000 10000 5000 2000 1000 Interrupted current (kA) IEC12000623_1_en.vsd IEC12000623 V1 EN-US Figure 190: An example for estimating the remaining life of a circuit breaker Calculation for estimating the remaining life The graph shows that there are 10000 possible operations at the rated operating current and 900 operations at 10 kA and 50 operations at rated fault current. -
Page 394: Setting Guidelines
Section 16 1MRK 511 358-UEN A Monitoring depends on the type of circuit breaker. The energy values were accumulated using the current value and exponent factor for CB contact opening duration. When the next CB opening operation is started, the energy is accumulated from the previous value. The accumulated energy value can be reset to initial accumulation energy value by using the Reset accumulating energy input, RSTIPOW.
-
Page 395: Event Function Event
1MRK 511 358-UEN A Section 16 Monitoring tTrCloseAlm : Setting of alarm level for closing travel time. OperAlmLevel : Alarm limit for number of mechanical operations. OperLOLevel : Lockout limit for number of mechanical operations. CurrExponent : Current exponent setting for energy calculation. It varies for different types of 0.5 to 3.0 .
-
Page 396: Setting Guidelines
Section 16 1MRK 511 358-UEN A Monitoring created from any available signal in the IED that is connected to the Event function (EVENT). The event function block is used for LON and SPA communication. Analog and double indication values are also transferred through EVENT function. 16.5.3 Setting guidelines IP14841-1 v1…
-
Page 397: Application
1MRK 511 358-UEN A Section 16 Monitoring 16.6.2 Application M12152-3 v7 To get fast, complete and reliable information about disturbances in the primary and/or in the secondary system it is very important to gather information on fault currents, voltages and events.
-
Page 398
Section 16 1MRK 511 358-UEN A Monitoring the analog input function blocks (AxRADR), which is used by Fault locator (FL) after estimation by Trip Value Recorder (TVR). Disturbance report function acquires information from both AxRADR and BxRBDR. Disturbance Report AxRADR DRPRDRE Analog signals Trip value rec… -
Page 399: Recording Times
1MRK 511 358-UEN A Section 16 Monitoring Operation M12179-82 v5 The operation of Disturbance report function DRPRDRE has to be set On or Off . If Off is selected, note that no disturbance report is registered, and none sub-function will operate (the only general parameter that influences Event list (EL)).
-
Page 400: Binary Input Signals
Section 16 1MRK 511 358-UEN A Monitoring PostRetrig = Off The function is insensitive for new trig signals during post fault time. PostRetrig = On The function completes current report and starts a new complete report that is, the latter will include: •…
-
Page 401: Sub-Function Parameters
1MRK 511 358-UEN A Section 16 Monitoring OperationM = On , waveform (samples) will also be recorded and reported in graph. NomValueM : Nominal value for input M. OverTrigOpM , UnderTrigOpM : Over or Under trig operation, Disturbance report may trig for On ) or not ( Off ).
-
Page 402: Logical Signal Status Report Binstatrep
Section 16 1MRK 511 358-UEN A Monitoring Minimize the number of recordings: • Binary signals: Use only relevant signals to start the recording that is, protection trip, carrier receive and/or start signals. • Analog signals: The level triggering should be used with great care, since unfortunate settings will cause enormously number of recordings.
-
Page 403: Fault Locator Lmbrflo
1MRK 511 358-UEN A Section 16 Monitoring 16.8 Fault locator LMBRFLO IP14592-1 v2 16.8.1 Identification M14892-1 v3 Function description IEC 61850 IEC 60617 ANSI/IEEE C37.2 identification identification device number Fault locator LMBRFLO 16.8.2 Application M13752-3 v6 The main objective of line protection and monitoring IEDs is fast, selective and reliable operation for faults on a protected line section.
-
Page 404: Connection Of Analog Currents
Section 16 1MRK 511 358-UEN A Monitoring analog inputs are currents and next three are voltages in the observed bay (no parallel line expected since chosen input is set to zero). Use the Parameter Setting tool within PCM600 for changing analog configuration. UL1Gain , UL2Gain and The measured phase voltages can be fine tuned with the parameters UL3Gain to further increase the accuracy of the fault locator.
-
Page 405: Limit Counter L4Ufcnt
1MRK 511 358-UEN A Section 16 Monitoring en07000113-1.vsd IEC07000113 V2 EN-US Figure 194: Example of connection of parallel line IN for Fault locator LMBRFLO 16.9 Limit counter L4UFCNT GUID-22E141DB-38B3-462C-B031-73F7466DD135 v1 16.9.1 Identification GUID-F3FB7B33-B189-4819-A1F0-8AC7762E9B7E v2 Function description IEC 61850 IEC 60617 ANSI/IEEE C37.2 identification identification…
-
Page 406: Setting Guidelines
Section 16 1MRK 511 358-UEN A Monitoring after reaching the maximum count value. It is also possible to set the counter to rollover and indicate the overflow as a pulse, which lasts up to the first count after rolling over to zero. In this case, periodic pulses will be generated at multiple overflow of the function.
-
Page 407: Section 17 Metering
1MRK 511 358-UEN A Section 17 Metering Section 17 Metering 17.1 Pulse-counter logic PCFCNT IP14600-1 v3 17.1.1 Identification M14879-1 v4 Function description IEC 61850 IEC 60617 ANSI/IEEE C37.2 identification identification device number Pulse-counter logic PCFCNT S00947 V1 EN-US 17.1.2 Application M13395-3 v6 Pulse-counter logic (PCFCNT) function counts externally generated binary pulses, for instance pulses coming from an external energy meter, for calculation of energy consumption values.
-
Page 408: Function For Energy Calculation And Demand Handling Etpmmtr
Section 17 1MRK 511 358-UEN A Metering The setting is common for all input channels on BIM, that is, if limit changes are made for inputs not connected to the pulse counter, the setting also influences the inputs on the same board used for pulse counting. 17.2 Function for energy calculation and demand handling ETPMMTR…
-
Page 409: Setting Guidelines
1MRK 511 358-UEN A Section 17 Metering EAFAccPlsQty , EARAccPlsQty , ERFAccPlsQty and ERVAccPlsQty of the energy metering function and then the pulse counter can be set-up to present the correct values by scaling in this function. Pulse counter values can then be presented on the local HMI in the same way and/or sent to the SA (Substation Automation) system through communication where the total energy then is calculated by summation of the energy pulses.
-
Page 411: Section 18 Station Communication
1MRK 511 358-UEN A Section 18 Station communication Section 18 Station communication 18.1 Communication protocols M14815-3 v12 Each IED is provided with a communication interface, enabling it to connect to one or many substation level systems or equipment, either on the Substation Automation (SA) bus or Substation Monitoring (SM) bus.
-
Page 412
Section 18 1MRK 511 358-UEN A Station communication Engineering Station HSI Workstation Gateway Base System Printer KIOSK 3 KIOSK 1 KIOSK 2 IEC09000135_en.v IEC09000135 V1 EN-US Figure 196: SA system with IEC 61850–8–1 M16925-3 v3 Figure 197 shows the GOOSE peer-to-peer communication. Station HSI MicroSCADA Gateway… -
Page 413: Horizontal Communication Via Goose For Interlocking Gooseintlkrcv
1MRK 511 358-UEN A Section 18 Station communication 18.2.2 Horizontal communication via GOOSE for interlocking GOOSEINTLKRCV SEMOD173197-1 v2 PID-415-SETTINGS v5 Table 44: GOOSEINTLKRCV Non group settings (basic) Name Values (Range) Unit Step Default Description Operation Operation Off/On 18.2.3 Setting guidelines SEMOD55317-5 v6 There are two settings related to the IEC 61850–8–1 protocol: Operation User can set IEC 61850 communication to On or Off .
-
Page 414: Iec 61850-8-1 Redundant Station Bus Communication
Section 18 1MRK 511 358-UEN A Station communication is connected to the range output, the logical outputs of the RANGE_XP are changed accordingly. 18.2.6 IEC 61850-8-1 redundant station bus communication GUID-FF43A130-7D2D-4BA3-B51C-80398D73228F v2 18.2.6.1 Identification GUID-00C469E6-00D4-4780-BD0D-426647AB8E0F v3.1.1 Function description LHMI and ACT IEC 61850 IEC 60617 ANSI/IEEE C37.2…
-
Page 415: Setting Guidelines
1MRK 511 358-UEN A Section 18 Station communication Station Control System Redundancy Supervision Data Data Switch A Switch B Data Data Configuration PRPSTATUS =IEC09000758=3=en=Original.vsd IEC09000758 V3 EN-US Figure 198: Redundant station bus 18.2.6.3 Setting guidelines GUID-6AD04F29-9B52-40E7-AA07-6D248EF99FC6 v2 Redundant communication (PRP) is configured in the local HMI under Main menu/ Configuration/Communication/Ethernet configuration/PRP The settings are found in the Parameter Setting tool in PCM600 under IED Configuration/ Communication/Ethernet configuration/PRP.
-
Page 416: Iec 61850-9-2Le Communication Protocol
Section 18 1MRK 511 358-UEN A Station communication IEC10000057-2-en.vsd IEC10000057 V2 EN-US Figure 199: PST screen: PRP Operation is set to On, which affect Rear OEM — Port AB and CD which are both set to PRP 18.3 IEC 61850-9-2LE communication protocol SEMOD172279 v2 18.3.1 Introduction…
-
Page 417
1MRK 511 358-UEN A Section 18 Station communication Set the CD-port to 9–2LE communication using only LHMI. All other settings are also available from PCM600. Factors influencing the accuracy of the sampled values from the merging unit are, for example, anti aliasing filters, frequency range, step response, truncating, A/D conversion inaccuracy, time tagging accuracy etc. -
Page 418: Setting Guidelines
Section 18 1MRK 511 358-UEN A Station communication Station Wide Station Wide SCADA System GPS Clock IEC61850-8-1 Splitter Electrical-to- Optical Converter IEC61850-8-1 110 V Other 1PPS Relays IEC61850-9-2LE Ethernet Switch IEC61850-9-2LE 1PPS Merging Unit Combi Sensor Conventional VT en08000069-3.vsd IEC08000069 V2 EN-US Figure 201: Example of a station configuration with the IED receiving analog values from both classical measuring transformers and merging units.
-
Page 419: Specific Settings Related To The Iec 61850-9-2Le Communication
1MRK 511 358-UEN A Section 18 Station communication 18.3.2.1 Specific settings related to the IEC 61850-9-2LE communication SEMOD166590-24 v5 The process bus communication IEC 61850-9-2LE have specific settings, similar to the analog inputs modules. Besides the names of the merging unit channels (that can be edited only from PCM600, not from the local HMI) there are important settings related to the merging units and time synchronization of the signals: When changing the sending (MU unit) MAC address, a reboot of the IED is…
-
Page 420
Section 18 1MRK 511 358-UEN A Station communication Failure of the MU (sample lost) blocks the sending of binary signals through LDCM. The received binary signals are not blocked and processd normally. →DTT from the remote end is still processed. IEC13000299-1-en.vsd IEC13000299 V1 EN-US Figure 203: MU failed, mixed system… -
Page 421
1MRK 511 358-UEN A Section 18 Station communication Function description IEC 61850 identification Function description IEC 61850 identification Breaker failure CCSRBRF Restricted earth fault REFPDIF protection, single phase protection, low version impedance Current circuit CCSSPVC Two step residual ROV2PTOV supervison overvoltage protection Compensated over- and COUVGAPC… -
Page 422
Section 18 1MRK 511 358-UEN A Station communication Function description IEC 61850 identification Function description IEC 61850 identification Negative sequence LCNSPTOC Local acceleration logic ZCLCPSCH overcurrent protection Negative sequence LCNSPTOV Scheme communication ZCPSCH overvoltage protection logic for distance or overcurrent protection Three phase overcurrent LCP3PTOC Current reversal and… -
Page 423: Setting Examples For Iec 61850-9-2Le And Time Synchronization
1MRK 511 358-UEN A Section 18 Station communication Function description IEC 61850 identification Function description IEC 61850 identification Out-of-step protection OOSPPAM Busbar differential BCZPDIF protection, check zone Busbar differential BDZSGAPC Busbar differential BFPTRC_Fx, (1≤x≤24) protection, dynamic zone protection, single phase selection feeder xx Busbar differential…
-
Page 424
Section 18 1MRK 511 358-UEN A Station communication HwSyncSrc : set to PPS since this is what is generated by the MU (ABB MU) • • AppSynch : set to Synch , since protection functions should be blocked in case of loss of… -
Page 425
1MRK 511 358-UEN A Section 18 Station communication HwSyncSrc : set to PPS/IRIG-B depending on available outputs on the clock • • AppSynch : set to Synch , for blocking protection functions in case of loss of time synchronization SyncAccLevel : could be set to 4us since this correspond to a maximum phase-angle error •… -
Page 426: Lon Communication Protocol
Section 18 1MRK 511 358-UEN A Station communication HwSyncSrc : set to Off • • AppSynch : set to NoSynch . This means that protection functions will not be blocked SyncAccLevel : set to unspecified • Settings in PST in PCM600 under: Hardware/Analog modules/Merging units/MU01 SyncMode : set to NoSynch .
-
Page 427: Multicmdrcv And Multicmdsnd
1MRK 511 358-UEN A Section 18 Station communication Table 46: Specification of the fiber optic connectors Glass fiber Plastic fiber Cable connector ST-connector snap-in connector Cable diameter 62.5/125 m 1 mm Max. cable length 1000 m 10 m Wavelength 820-900 nm 660 nm Transmitted power -13 dBm (HFBR-1414)
-
Page 428: Identification
Section 18 1MRK 511 358-UEN A Station communication 18.4.2.1 Identification GUID-1A6E066C-6399-4D37-8CA5-3074537E48B2 v2 Function description IEC 61850 IEC 60617 ANSI/IEEE C37.2 identification identification device number Multiple command and receive MULTICMDRCV Multiple command and send MULTICMDSND 18.4.2.2 Application M14790-3 v5 The IED provides two function blocks enabling several IEDs to send and receive signals via the interbay bus.
-
Page 429: Setting Guidelines
1MRK 511 358-UEN A Section 18 Station communication The SPA communication is mainly used for the Station Monitoring System. It can include different IEDs with remote communication possibilities. Connection to a computer (PC) can be made directly (if the PC is located in the substation) or by telephone modem through a telephone network with ITU (former CCITT) characteristics or via a LAN/WAN connection.
-
Page 430: Iec 60870-5-103 Communication Protocol
Section 18 1MRK 511 358-UEN A Station communication 18.6 IEC 60870-5-103 communication protocol IP14615-1 v2 18.6.1 Application IP14864-1 v1 M17109-3 v6 TCP/IP Control Center Station HSI Gateway Star coupler IEC05000660-4-en.vsd IEC05000660 V4 EN-US Figure 210: Example of IEC 60870-5-103 communication structure for a substation automation system IEC 60870-5-103 communication protocol is mainly used when a protection IED communicates with a third party control or monitoring system.
-
Page 431
1MRK 511 358-UEN A Section 18 Station communication • Autorecloser ON/OFF • Teleprotection ON/OFF • Protection ON/OFF • LED reset • Characteristics 1 — 4 (Setting groups) • File transfer (disturbance files) • Time synchronization Hardware M17109-59 v1 When communicating locally with a Personal Computer (PC) or a Remote Terminal Unit (RTU) in the station, using the SPA/IEC port, the only hardware needed is:·… -
Page 432
Section 18 1MRK 511 358-UEN A Station communication • Earth fault indications in monitor direction Function block with defined functions for earth fault indications in monitor direction, I103EF. This block includes the FUNCTION TYPE parameter, and the INFORMATION NUMBER parameter is defined for each output signal. •… -
Page 433
1MRK 511 358-UEN A Section 18 Station communication Settings for RS485 and optical serial communication M17109-118 v10 General settings SPA, DNP and IEC 60870-5-103 can be configured to operate on the SLM optical serial port while DNP and IEC 60870-5-103 only can utilize the RS485 port. A single protocol can be active on a given physical port at any time. -
Page 434
Section 18 1MRK 511 358-UEN A Station communication The slave number can be set to any value between 1 and 254. The communication speed, can be set either to 9600 bits/s or 19200 bits/s. RevPolarity : Setting for inverting the light (or not). Standard IEC 60870-5-103 setting is •… -
Page 435
1MRK 511 358-UEN A Section 18 Station communication DRA#-Input IEC103 meaning Private range Private range Private range Private range Private range Private range Private range Private range Private range Private range Private range Private range Private range Private range Private range Private range Private range Private range… -
Page 436: Dnp3 Communication Protocol
Section 18 1MRK 511 358-UEN A Station communication REB 207 Private range REG 150 Private range REQ 245 Private range RES 118 Private range Refer to the tables in the Technical reference manual /Station communication, specifying the information types supported by the communication protocol IEC 60870-5-103. To support the information, corresponding functions must be included in the protection IED.
-
Page 437: Section 19 Remote Communication
1MRK 511 358-UEN A Section 19 Remote communication Section 19 Remote communication 19.1 Binary signal transfer IP12423-1 v2 19.1.1 Identification M14849-1 v2 Function description IEC 61850 IEC 60617 ANSI/IEEE C37.2 identification identification device number Binary signal transfer BinSignReceive Binary signal transfer BinSignTransm 19.1.2 Application…
-
Page 438: Setting Guidelines
Section 19 1MRK 511 358-UEN A Remote communication solutions are aimed for connections to a multiplexer, which in turn is connected to a telecommunications transmission network (for example, SDH or PDH). Multiplexer Multiplexer Telecom. Network *) Converting optical to galvanic G.703 en05000527-2.vsd IEC05000527 V2 EN-US Figure 213: LDCM with an external optical to galvanic converter and a multiplexer…
-
Page 439
1MRK 511 358-UEN A Section 19 Remote communication TerminalNo , but equal to the TerminalNo of the remote end LDCM. In the remote IED the TerminalNo and RemoteTermNo settings are reversed as follows: TerminalNo to 2 and RemoteTermNo to 1 •… -
Page 440
Section 19 1MRK 511 358-UEN A Remote communication Type of LDCM Short range (SR) Short range (SR) Medium range (MR) Long range (LR) Minimum output –21 dBm –13.7 dBm –3.2 dBm –1.3 dBm power Minimum receiver –32.5 dBm –32.5 dBm –30 dBm –30 dBm sensitivity… -
Page 441
1MRK 511 358-UEN A Section 19 Remote communication TransmCurr : This setting decides which of 2 possible local currents that shall be transmitted, or if and how the sum of 2 local currents shall be transmitted, or finally if the channel shall be used as a redundant channel. -
Page 443: Section 20 Security
1MRK 511 358-UEN A Section 20 Security Section 20 Security 20.1 Authority status ATHSTAT SEMOD158575-1 v2 20.1.1 Application SEMOD158527-5 v3 Authority status (ATHSTAT) function is an indication function block, which informs about two events related to the IED and the user authorization: •…
-
Page 444: Change Lock Chnglck
CHNGLCK input. If such a situation would occur in spite of these precautions, then please contact the local ABB representative for remedial action. 20.4 Denial of service DOS 20.4.1…
-
Page 445: Setting Guidelines
1MRK 511 358-UEN A Section 20 Security controlled. Heavy network load might for instance be the result of malfunctioning equipment connected to the network. DOSFRNT, DOSLANAB and DOSLANCD measure the IED load from communication and, if necessary, limit it for not jeopardizing the IEDs control and protection functionality due to high CPU load.
-
Page 447: Section 21 Basic Ied Functions
• IEDProdType The settings are visible on the local HMI , under Main menu/Diagnostics/IED status/Product identifiersand underMain menu/Diagnostics/IED Status/IED identifiers This information is very helpful when interacting with ABB product support (e.g. during repair and maintenance). 21.2.2 Factory defined settings…
-
Page 448: Measured Value Expander Block Range_Xp
Section 21 1MRK 511 358-UEN A Basic IED functions • Describes the firmware version. • The firmware version can be checked from Main menu/Diagnostics/IED status/ Product identifiers • Firmware version numbers run independently from the release production numbers. For every release number there can be one or more firmware versions depending on the small issues corrected in between releases.
-
Page 449: Parameter Setting Groups
1MRK 511 358-UEN A Section 21 Basic IED functions 21.4 Parameter setting groups IP1745-1 v1 21.4.1 Application M12007-6 v9 Six sets of settings are available to optimize IED operation for different power system conditions. By creating and switching between fine tuned setting sets, either from the local HMI or configurable binary inputs, results in a highly adaptable IED that can cope with a variety of power system scenarios.
-
Page 450: Setting Guidelines
Section 21 1MRK 511 358-UEN A Basic IED functions 21.5.3 Setting guidelines M15292-3 v2 Set the system rated frequency. Refer to section «Signal matrix for analog inputs SMAI» description on frequency tracking. 21.6 Summation block 3 phase 3PHSUM SEMOD55968-1 v2 21.6.1 Application SEMOD56004-4 v3…
-
Page 451: Application
1MRK 511 358-UEN A Section 21 Basic IED functions 21.7.2 Application GUID-D58ECA9A-9771-443D-BF84-8EF582A346BF v4 Global base values function (GBASVAL) is used to provide global values, common for all applicable functions within the IED. One set of global values consists of values for current, voltage and apparent power and it is possible to have twelve different sets.
-
Page 452: Setting Guidelines
Section 21 1MRK 511 358-UEN A Basic IED functions 21.9.2 Setting guidelines SEMOD55228-5 v2 There are no setting parameters for the Signal matrix for binary outputs SMBO available to the user in Parameter Setting tool. However, the user must give a name to SMBO instance and SMBO outputs, directly in the Application Configuration tool.
-
Page 453: Setting Guidelines
1MRK 511 358-UEN A Section 21 Basic IED functions SMAI1 SPFCOUT SAPTOF BLOCK G1AI3P U3P* TRIP SAPTOF(1)_TRIP DFTSPFC UL1L2 START BLOCK REVROT G1AI1 BLKDMAGN BLKTRIP PHASEL1 G1AI2 FREQ ^GRP1L1 G1AI4 TRM_40.CH7(U) PHASEL2 ^GRP1L2 PHASEL3 ^GRP1L3 NEUTRAL ^GRP1N IEC10000060-2-en.vsdx IEC10000060 V2 EN-US Figure 214: Connection example ConnectionType is The above described scenario does not work if SMAI setting…
-
Page 454
Section 21 1MRK 511 358-UEN A Basic IED functions ConnectionType : Connection type for that specific instance (n) of the SMAI (if it is The setting Ph-N or Ph-Ph ). Depending on connection type setting the not connected Ph-N or Ph-Ph Ph-Ph connection L1, outputs will be calculated as long as they are possible to calculate. -
Page 455
1MRK 511 358-UEN A Section 21 Basic IED functions Task time group 1 SMAI instance 3 phase group SMAI1:1 SMAI2:2 SMAI3:3 AdDFTRefCh7 SMAI4:4 SMAI5:5 SMAI6:6 SMAI7:7 SMAI8:8 SMAI9:9 SMAI10:10 SMAI11:11 SMAI12:12 Task time group 2 SMAI instance 3 phase group SMAI1:13 AdDFTRefCh4 SMAI2:14… -
Page 456
Section 21 1MRK 511 358-UEN A Basic IED functions SMAI1:13 BLOCK SPFCOUT DFTSPFC AI3P ^GRP1L1 ^GRP1L2 ^GRP1L3 SMAI1:1 ^GRP1N BLOCK SPFCOUT DFTSPFC AI3P ^GRP1L1 ^GRP1L2 ^GRP1L3 ^GRP1N SMAI1:25 BLOCK SPFCOUT DFTSPFC AI3P ^GRP1L1 ^GRP1L2 ^GRP1L3 ^GRP1N IEC07000198-2-en.vsd IEC07000198 V3 EN-US Figure 216: Configuration for using an instance in task time group 1 as DFT reference Assume instance SMAI7:7 in task time group 1 has been selected in the configuration to control the frequency tracking . -
Page 457: Test Mode Functionality Test
1MRK 511 358-UEN A Section 21 Basic IED functions SMAI1:1 BLOCK SPFCOUT DFTSPFC AI3P ^GRP1L1 ^GRP1L2 ^GRP1L3 SMAI1:13 ^GRP1N BLOCK SPFCOUT DFTSPFC AI3P ^GRP1L1 ^GRP1L2 ^GRP1L3 ^GRP1N SMAI1:25 BLOCK SPFCOUT DFTSPFC AI3P ^GRP1L1 ^GRP1L2 ^GRP1L3 ^GRP1N IEC07000199-2-en.vsd IEC07000199 V3 EN-US Figure 217: Configuration for using an instance in task time group 2 as DFT reference.
-
Page 458: Iec 61850 Protocol Test Mode
Section 21 1MRK 511 358-UEN A Basic IED functions 21.12.1.1 IEC 61850 protocol test mode GUID-82998715-6F23-4CAF-92E4-05E1A863CF33 v5 The function block TESTMODE has implemented the extended testing mode capabilities for IEC 61850 Ed2 systems. Operator commands sent to the function block TESTMODE determine the behavior of the functions.
-
Page 459: Setting Guidelines
1MRK 511 358-UEN A Section 21 Basic IED functions the Main menu/Test/Function status/Function group/Function block descriptive name/LN name/Outputs. Beh of a function block is set to Test , the function block is not blocked and all • When the control commands with a test bit are accepted. Beh of a function block is set to Test/blocked , all control commands with a test •…
-
Page 460: Setting Guidelines
Section 21 1MRK 511 358-UEN A Basic IED functions For IEDs using IEC 61850-9-2LE in «mixed mode» a time synchronization from an external clock is recommended to the IED and all connected merging units. The time synchronization from the clock to the IED can be either optical PPS or IRIG-B. For IED’s using IEC 61850-9-2LE from one single MU as analog data source, the MU and IED still needs to be synchronized to each other.
-
Page 461: Process Bus Iec 61850-9-2Le Synchronization
1MRK 511 358-UEN A Section 21 Basic IED functions • • • • IEC 60870-5-103 • The function input to be used for minute-pulse synchronization is called BININPUT. For a Technical Manual . description of the BININPUT settings, see the The system time can be set manually, either via the local HMI or via any of the communication ports.
-
Page 463: Section 22 Requirements
1MRK 511 358-UEN A Section 22 Requirements Section 22 Requirements 22.1 Current transformer requirements IP15171-1 v2 M11609-3 v2 The performance of a protection function will depend on the quality of the measured current signal. Saturation of the current transformers (CTs) will cause distortion of the current signals and can result in a failure to operate or cause unwanted operations of some functions.
-
Page 464: Fault Current
Section 22 1MRK 511 358-UEN A Requirements and low remanence type. The results may not always be valid for non remanence type CTs (TPZ). The performances of the protection functions have been checked in the range from symmetrical to fully asymmetrical fault currents. Primary time constants of at least 120 ms have been considered at the tests.
-
Page 465: General Current Transformer Requirements
CT (TPZ) is not well defined as far as the phase angle error is concerned. If no explicit recommendation is given for a specific function we therefore recommend contacting ABB to confirm that the non remanence type can be used.
-
Page 466: Non-Directional Instantaneous And Definitive Time, Phase And Residual Overcurrent Protection
Section 22 1MRK 511 358-UEN A Requirements æ ö ³ = × × × ç ÷ alreq è ø (Equation 131) EQUATION1380 V2 EN-US where: The primary operate value (A) The rated primary CT current (A) The rated secondary CT current (A) The rated current of the protection IED (A) The secondary resistance of the CT (W) The resistance of the secondary cable and additional load (W).
-
Page 467: Directional Phase And Residual Overcurrent Protection
1MRK 511 358-UEN A Section 22 Requirements If the inverse time delayed function is the only used overcurrent protection function the CTs must have a rated equivalent limiting secondary e.m.f. E that is larger than or equal to the required rated equivalent limiting secondary e.m.f. E below: alreq æ…
-
Page 468: Current Transformer Requirements For Cts According To Other Standards
Section 22 1MRK 511 358-UEN A Requirements æ ö ³ × × ç ÷ alreq k max è ø (Equation 135) EQUATION1078 V2 EN-US where: Maximum primary fundamental frequency current for close-in forward and reverse faults (A) kmax The rated primary CT current (A) The rated secondary CT current (A) The rated current of the protection IED (A) The secondary resistance of the CT (W)
-
Page 469: Current Transformers According To Ansi/Ieee
1MRK 511 358-UEN A Section 22 Requirements » » » > × 0.8 maximum of E knee kneeBS alreq (Equation 137) EQUATION2100 V2 EN-US 22.1.7.3 Current transformers according to ANSI/IEEE M11623-22 v6 Current transformers according to ANSI/IEEE are partly specified in different ways. A rated secondary terminal voltage U is specified for a CT of class C.
-
Page 470: Sntp Server Requirements
Section 22 1MRK 511 358-UEN A Requirements The transient responses for three different standard transient response classes, T1, T2 and T3 are specified in chapter 6.503 of the standard. CVTs according to all classes can be used. The protection IED has effective filters for these transients, which gives secure and correct operation with CVTs.
-
Page 471: Iec 61850-9-2Le Merging Unit Requirements
1MRK 511 358-UEN A Section 22 Requirements • Independent synchronization, asynchronous mapping • The actual SDH port must be set to allow transmission of the master clock from the PDH- system via the SDH-system in transparent mode. • Maximum clock deviation <±50 ppm nominal, <±100 ppm operational •…
-
Page 473: Section 23 Glossary
1MRK 511 358-UEN A Section 23 Glossary Section 23 Glossary M14893-1 v18 Alternating current Actual channel Application configuration tool within PCM600 A/D converter Analog-to-digital converter ADBS Amplitude deadband supervision Analog digital conversion module, with time synchronization Analog input ANSI American National Standards Institute Autoreclosing ASCT Auxiliary summation current transformer…
-
Page 474
Section 23 1MRK 511 358-UEN A Glossary CO cycle Close-open cycle Codirectional Way of transmitting G.703 over a balanced line. Involves two twisted pairs making it possible to transmit information in both directions Command COMTRADE Standard Common Format for Transient Data Exchange format for Disturbance recorder according to IEEE/ANSI C37.111, 1999 / IEC 60255-24 Contra-directional… -
Page 475
1MRK 511 358-UEN A Section 23 Glossary Electromagnetic interference EnFP End fault protection Enhanced performance architecture Electrostatic discharge F-SMA Type of optical fiber connector Fault number Flow control bit; Frame count bit FOX 20 Modular 20 channel telecommunication system for speech, data and protection signals FOX 512/515 Access multiplexer… -
Page 476
Section 23 1MRK 511 358-UEN A Glossary IEEE Institute of Electrical and Electronics Engineers IEEE 802.12 A network technology standard that provides 100 Mbits/s on twisted- pair or optical fiber cable IEEE P1386.1 PCI Mezzanine Card (PMC) standard for local bus modules. References the CMC (IEEE P1386, also known as Common Mezzanine Card) standard for the mechanics and the PCI specifications from the PCI SIG (Special Interest Group) for the electrical EMF (Electromotive force). -
Page 477
1MRK 511 358-UEN A Section 23 Glossary National Control Centre Number of grid faults Numerical module OCO cycle Open-close-open cycle Overcurrent protection Optical Ethernet module OLTC On-load tap changer OTEV Disturbance data recording initiated by other event than start/pick-up Overvoltage Overreach A term used to describe how the relay behaves during a fault condition. -
Page 478
Section 23 1MRK 511 358-UEN A Glossary Short circuit location Station control system SCADA Supervision, control and data acquisition System configuration tool according to standard IEC 61850 Service data unit SELV circuit Safety Extra-Low Voltage circuit type according to IEC60255-27 Small form-factor pluggable (abbreviation) Optical Ethernet port (explanation) Serial communication module. -
Page 479
1MRK 511 358-UEN A Section 23 Glossary Transformer Module. This module transforms currents and voltages taken from the process into levels suitable for further signal processing. Type identification User management tool Underreach A term used to describe how the relay behaves during a fault condition. For example, a distance relay is underreaching when the impedance presented to it is greater than the apparent impedance to the fault applied to the balance point, that is, the set reach. -
Page 482
ABB AB Substation Automation Products SE-721 59 Västerås, Sweden Phone +46 (0) 21 32 50 00 Scan this QR code to visit our website www.abb.com/substationautomation © Copyright 2016 ABB. All rights reserved.
ABB rec670: List of Available Documents
Note for Owners:
Guidesimo.com webproject is not a service center of ABB trademark and does not carries out works for diagnosis and repair of faulty ABB rec670 equipment. For quality services, please contact an official service center of ABB company. On our website you can read and download documentation for your ABB rec670 device for free and familiarize yourself with the technical specifications of device.
More Control Systems Devices:
-
AUMA SAEx 07.2
Multi-turn actuatorsSAEx 07.2 – SAEx 16.2SAREx 07.2 – SAREx 16.2AUMA MATIC AMExC 01.1Special version for Integral Motor ControlsVersion FM/CSAEx (Class/Division System)Assembly, operation, commissioningOperation manual …
SAEx 07.2 Controller, 68
-
Gossen MetraWatt SMARTCONTROL ECS
Installation Instructions SMARTCONTROL | ECS Energy Management System Installation of I/O24 Expansion Module 3-349-595-03 3/5.19 …
SMARTCONTROL ECS Control Unit, 6
-
VTI Instruments Metek EX1202
EX1200 SERIES HIGH-DENSITY SWITCH/MEASURE AND CONTROL SYSTEMS USER’S MANUAL P/N: 82-0127-000 Rev June 7th, 2016 VTI Instruments Corp. 2031 Main Street Irvine, CA 92614-6509 (949) 955-1894 …
Metek EX1202 Control Systems, 159
-
Pilz PNOZ ml1p
— 1 -21 575-01 PNOZ ml1pDas Erweiterungsmodul PNOZ ml1pDas Erweiterungsmodul PNOZ ml1p darf nur an ein Basisgerät (z. B. PNOZ m1p des modularen Sicherheitssystems PNOZmulti) angeschlossen werden. Es dient zur Punkt-zu-Punkt-Verbindung von sicheren virtuellen Ein- und Ausgängen zwischen zwei Basisgeräten. Das modulare Sicherheitssystem PNOZmulti dient dem sicherheitsgerichteten Unterbrechen vo …
PNOZ ml1p I/O Systems, 12
Recommended Documentation:

Summary of Content for ABB 670 Series REC670 2.0 IEC Bay Control Application Manual PDF
Relion 670 series
Bay control REC670 2.0 IEC Application manual
Document ID: 1MRK 511 310-UEN Issued: July 2016
Revision: B Product version: 2.0
Copyright 2014 ABB. All rights reserved
Copyright
This document and parts thereof must not be reproduced or copied without written permission from ABB, and the contents thereof must not be imparted to a third party, nor used for any unauthorized purpose.
The software and hardware described in this document is furnished under a license and may be used or disclosed only in accordance with the terms of such license.
This product includes software developed by the OpenSSL Project for use in the OpenSSL Toolkit. (http://www.openssl.org/)
This product includes cryptographic software written/developed by: Eric Young (eay@cryptsoft.com) and Tim Hudson (tjh@cryptsoft.com).
Trademarks ABB and Relion are registered trademarks of the ABB Group. All other brand or product names mentioned in this document may be trademarks or registered trademarks of their respective holders.
Warranty Please inquire about the terms of warranty from your nearest ABB representative.
Disclaimer
The data, examples and diagrams in this manual are included solely for the concept or product description and are not to be deemed as a statement of guaranteed properties. All persons responsible for applying the equipment addressed in this manual must satisfy themselves that each intended application is suitable and acceptable, including that any applicable safety or other operational requirements are complied with. In particular, any risks in applications where a system failure and/or product failure would create a risk for harm to property or persons (including but not limited to personal injuries or death) shall be the sole responsibility of the person or entity applying the equipment, and those so responsible are hereby requested to ensure that all measures are taken to exclude or mitigate such risks.
This document has been carefully checked by ABB but deviations cannot be completely ruled out. In case any errors are detected, the reader is kindly requested to notify the manufacturer. Other than under explicit contractual commitments, in no event shall ABB be responsible or liable for any loss or damage resulting from the use of this manual or the application of the equipment.
Conformity
This product complies with the directive of the Council of the European Communities on the approximation of the laws of the Member States relating to electromagnetic compatibility (EMC Directive 2004/108/EC) and concerning electrical equipment for use within specified voltage limits (Low-voltage directive 2006/95/EC). This conformity is the result of tests conducted by ABB in accordance with the product standard EN 60255-26 for the EMC directive, and with the product standards EN 60255-1 and EN 60255-27 for the low voltage directive. The product is designed in accordance with the international standards of the IEC 60255 series.
Table of contents
Section 1 Introduction……………………………………………………………19 This manual………………………………………………………………………….. 19 Intended audience…………………………………………………………………. 19 Product documentation……………………………………………………………20
Product documentation set………………………………………………….20 Dokumentennderungsverzeichnis……………………………………… 21 Related documents…………………………………………………………….22
Document symbols and conventions…………………………………………22 Symbols……………………………………………………………………………22 Document conventions……………………………………………………….23 IEC 61850 edition 1 / edition 2 mapping………………………………..24
Section 2 Application…………………………………………………………….33 General IED application…………………………………………………………..33 Main protection functions…………………………………………………………34 Back-up protection functions…………………………………………………… 34 Control and monitoring functions………………………………………………36 Communication………………………………………………………………………40 Basic IED functions……………………………………………………………….. 43
Section 3 Configuration…………………………………………………………45 Introduction……………………………………………………………………………45 Description of configuration REC670……………………………………….. 46
Introduction……………………………………………………………………….46 Description of configuration A30…………………………………….. 46 Description of configuration B30…………………………………….. 47 Description of configuration C30…………………………………….. 49
Section 4 Analog inputs…………………………………………………………53 Introduction……………………………………………………………………………53 Setting guidelines………………………………………………………………….. 53
Setting of the phase reference channel…………………………………53 Example……………………………………………………………………… 54
Setting of current channels………………………………………………….54 Example 1…………………………………………………………………… 55 Example 2…………………………………………………………………… 55 Example 3…………………………………………………………………… 56 Examples on how to connect, configure and set CT inputs for most commonly used CT connections………………………… 60
Table of contents
1 Application manual
Example on how to connect a star connected three-phase CT set to the IED…………………………………………………………..61 Example how to connect delta connected three-phase CT set to the IED………………………………………………………………..66 Example how to connect single-phase CT to the IED………… 69
Setting of voltage channels………………………………………………… 71 Example……………………………………………………………………… 71 Examples how to connect, configure and set VT inputs for most commonly used VT connections………………………………71 Examples on how to connect a three phase-to-earth connected VT to the IED……………………………………………….. 72 Example on how to connect a phase-to-phase connected VT to the IED………………………………………………………………..74 Example on how to connect an open delta VT to the IED for high impedance earthed or unearthed netwoeks………….. 76 Example how to connect the open delta VT to the IED for low impedance earthed or solidly earthed power systems…..79 Example on how to connect a neutral point VT to the IED…..80
Section 5 Local HMI…………………………………………………………….. 83 Display………………………………………………………………………………….84 LEDs…………………………………………………………………………………….86 Keypad………………………………………………………………………………… 86 Local HMI functionality…………………………………………………………… 88
Protection and alarm indication…………………………………………… 88 Parameter management …………………………………………………….89 Front communication………………………………………………………….90
Section 6 Differential protection…………………………………………….. 91 1Ph High impedance differential protection HZPDIF …………………..91
Identification…………………………………………………………………….. 91 Application………………………………………………………………………..91
The basics of the high impedance principle……………………… 93 Connection examples for high impedance differential protection………………………………………………………………………….99
Connections for three-phase high impedance differential protection……………………………………………………………………..99 Connections for 1Ph High impedance differential protection HZPDIF……………………………………………………….100
Setting guidelines……………………………………………………………. 101 Configuration……………………………………………………………… 101 Settings of protection function………………………………………. 102 T-feeder protection……………………………………………………… 102 Tertiary reactor protection……………………………………………. 105 Alarm level operation……………………………………………………108
Table of contents
2 Application manual
Section 7 Current protection…………………………………………………109 Instantaneous phase overcurrent protection 3-phase output PHPIOC ……………………………………………………………………………..109
Identification…………………………………………………………………… 109 Application………………………………………………………………………109 Setting guidelines……………………………………………………………. 110
Meshed network without parallel line…………………………….. 110 Meshed network with parallel line…………………………………. 112
Four step phase overcurrent protection 3-phase output OC4PTOC …………………………………………………………………………. 114
Identification…………………………………………………………………… 114 Application………………………………………………………………………114 Setting guidelines……………………………………………………………. 115
Settings for each step…………………………………………………..117 2nd harmonic restrain…………………………………………………..120
Instantaneous residual overcurrent protection EFPIOC ……………. 126 Identification…………………………………………………………………… 126 Application………………………………………………………………………126 Setting guidelines……………………………………………………………. 126
Four step residual overcurrent protection, (Zero sequence or negative sequence directionality) EF4PTOC ……………………………129
Identification…………………………………………………………………… 129 Application………………………………………………………………………129 Setting guidelines……………………………………………………………. 131
Settings for each step (x = 1, 2, 3 and 4)……………………….. 131 Common settings for all steps………………………………………. 133 2nd harmonic restrain…………………………………………………..135 Parallel transformer inrush current logic………………………….135 Switch onto fault logic…………………………………………………..136 Line application example………………………………………………137
Four step directional negative phase sequence overcurrent protection NS4PTOC ……………………………………………………………142
Identification…………………………………………………………………… 143 Application………………………………………………………………………143 Setting guidelines……………………………………………………………. 144
Settings for each step ………………………………………………….145 Common settings for all steps………………………………………. 148
Sensitive directional residual overcurrent and power protection SDEPSDE …………………………………………………………………………. 149
Identification…………………………………………………………………… 150 Application………………………………………………………………………150 Setting guidelines……………………………………………………………. 151
Table of contents
3 Application manual
Thermal overload protection, one time constant, Celsius/ Fahrenheit LCPTTR/LFPTTR…………………………………………………159
Identification…………………………………………………………………… 160 Application………………………………………………………………………160 Setting guideline………………………………………………………………160
Thermal overload protection, two time constants TRPTTR ………..161 Identification…………………………………………………………………… 162 Application………………………………………………………………………162 Setting guideline………………………………………………………………163
Breaker failure protection 3-phase activation and output CCRBRF 165 Identification…………………………………………………………………… 165 Application………………………………………………………………………165 Setting guidelines……………………………………………………………. 166
Stub protection STBPTOC …………………………………………………… 169 Identification…………………………………………………………………… 169 Application………………………………………………………………………169 Setting guidelines……………………………………………………………. 170
Pole discordance protection CCPDSC……………………………………. 171 Identification…………………………………………………………………… 171 Application………………………………………………………………………171 Setting guidelines……………………………………………………………. 171
Directional underpower protection GUPPDUP…………………………. 172 Identification…………………………………………………………………… 172 Application………………………………………………………………………172 Setting guidelines……………………………………………………………. 174
Directional overpower protection GOPPDOP …………………………..178 Identification…………………………………………………………………… 178 Application………………………………………………………………………178 Setting guidelines……………………………………………………………. 180
Broken conductor check BRCPTOC ……………………………………… 184 Identification…………………………………………………………………… 184 Application………………………………………………………………………184 Setting guidelines……………………………………………………………. 184
Capacitor bank protection CBPGAPC…………………………………….. 185 Identification…………………………………………………………………… 185 Application………………………………………………………………………185
SCB protection…………………………………………………………… 187 Setting guidelines……………………………………………………………. 189
Restrike detection………………………………………………………..191 Voltage-restrained time overcurrent protection VRPVOC………….. 191
Identification…………………………………………………………………… 191 Application………………………………………………………………………192
Base quantities……………………………………………………………192
Table of contents
4 Application manual
Application possibilities……………………………………………….. 193 Undervoltage seal-in…………………………………………………… 193
Setting guidelines……………………………………………………………. 194 Explanation of the setting parameters…………………………….194 Voltage-restrained overcurrent protection for generator and step-up transformer………………………………………………. 195 Overcurrent protection with undervoltage seal-in……………..195
Section 8 Voltage protection……………………………………………….. 197 Two step undervoltage protection UV2PTUV …………………………..197
Identification…………………………………………………………………… 197 Application………………………………………………………………………197 Setting guidelines……………………………………………………………. 198
Equipment protection, such as for motors and generators…198 Disconnected equipment detection……………………………….. 198 Power supply quality ………………………………………………….. 198 Voltage instability mitigation…………………………………………. 198 Backup protection for power system faults………………………198 Settings for Two step undervoltage protection………………… 199
Two step overvoltage protection OV2PTOV …………………………….201 Identification…………………………………………………………………… 201 Application………………………………………………………………………201 Setting guidelines……………………………………………………………. 202
Equipment protection, such as for motors, generators, reactors and transformers……………………………………………. 202 Equipment protection, capacitors………………………………….. 202 Power supply quality…………………………………………………… 202 High impedance earthed systems…………………………………. 203 The following settings can be done for the two step overvoltage protection…………………………………………………. 203
Two step residual overvoltage protection ROV2PTOV …………….. 205 Identification…………………………………………………………………… 205 Application………………………………………………………………………205 Setting guidelines……………………………………………………………. 205
Equipment protection, such as for motors, generators, reactors and transformers……………………………………………. 206 Equipment protection, capacitors………………………………….. 206 Power supply quality…………………………………………………… 206 High impedance earthed systems…………………………………. 206 Direct earthed system…………………………………………………. 207 Settings for Two step residual overvoltage protection……….208
Voltage differential protection VDCPTOV ………………………………..210 Identification…………………………………………………………………… 210 Application………………………………………………………………………210
Table of contents
5 Application manual
Setting guidelines……………………………………………………………. 212 Loss of voltage check LOVPTUV ………………………………………….. 213
Identification…………………………………………………………………… 213 Application………………………………………………………………………214 Setting guidelines……………………………………………………………. 214
Advanced users settings……………………………………………… 214
Section 9 Frequency protection…………………………………………….215 Underfrequency protection SAPTUF ……………………………………… 215
Identification…………………………………………………………………… 215 Application………………………………………………………………………215 Setting guidelines……………………………………………………………. 215
Overfrequency protection SAPTOF ………………………………………..216 Identification…………………………………………………………………… 216 Application………………………………………………………………………217 Setting guidelines……………………………………………………………. 217
Rate-of-change frequency protection SAPFRC ………………………..218 Identification…………………………………………………………………… 218 Application………………………………………………………………………218 Setting guidelines……………………………………………………………. 218
Frequency time accumulation protection function FTAQFVR…….. 219 Identification…………………………………………………………………… 219 Application………………………………………………………………………219 Setting guidelines……………………………………………………………. 221
Section 10 Multipurpose protection…………………………………………223 General current and voltage protection CVGAPC…………………….. 223
Identification…………………………………………………………………… 223 Application………………………………………………………………………223
Current and voltage selection for CVGAPC function…………224 Base quantities for CVGAPC function…………………………….226 Application possibilities……………………………………………….. 227 Inadvertent generator energization……………………………….. 228
Setting guidelines……………………………………………………………. 229 Directional negative sequence overcurrent protection……… 229 Negative sequence overcurrent protection………………………231 Generator stator overload protection in accordance with IEC or ANSI standards………………………………………………… 233 Open phase protection for transformer, lines or generators and circuit breaker head flashover protection for generators…………………………………………………………….. 235 Voltage restrained overcurrent protection for generator and step-up transformer………………………………………………. 236 Loss of excitation protection for a generator…………………… 237
Table of contents
6 Application manual
Section 11 System protection and control………………………………..239 Multipurpose filter SMAIHPAC………………………………………………. 239
Identification…………………………………………………………………… 239 Application………………………………………………………………………239 Setting guidelines……………………………………………………………. 240
Setting example…………………………………………………………..240
Section 12 Secondary system supervision……………………………….245 Current circuit supervision CCSSPVC……………………………………..245
Identification…………………………………………………………………… 245 Application………………………………………………………………………245 Setting guidelines……………………………………………………………. 246
Fuse failure supervision FUFSPVC…………………………………………246 Identification…………………………………………………………………… 246 Application………………………………………………………………………246 Setting guidelines……………………………………………………………. 247
General………………………………………………………………………247 Setting of common parameters…………………………………….. 247 Negative sequence based…………………………………………….248 Zero sequence based…………………………………………………..249 Delta U and delta I ………………………………………………………249 Dead line detection………………………………………………………250
Fuse failure supervision VDSPVC…………………………………………..250 Identification…………………………………………………………………… 250 Application………………………………………………………………………251 Setting guidelines……………………………………………………………. 252
Section 13 Control………………………………………………………………..253 Synchrocheck, energizing check, and synchronizing SESRSYN…253
Identification…………………………………………………………………… 253 Application………………………………………………………………………253
Synchronizing……………………………………………………………..253 Synchrocheck……………………………………………………………..254 Energizing check………………………………………………………… 256 Voltage selection………………………………………………………… 257 External fuse failure……………………………………………………..258
Application examples………………………………………………………..259 Single circuit breaker with single busbar………………………… 260 Single circuit breaker with double busbar, external voltage selection……………………………………………………………………. 260 Single circuit breaker with double busbar, internal voltage selection……………………………………………………………………. 261 Double circuit breaker…………………………………………………. 262
Table of contents
7 Application manual
1 1/2 circuit breaker……………………………………………………..262 Setting guidelines……………………………………………………………. 265
Autorecloser for 1 phase, 2 phase and/or 3 phase operation SMBRREC ………………………………………………………………………….270
Identification…………………………………………………………………… 270 Application………………………………………………………………………270
Auto-reclosing operation OFF and ON……………………………274 Start auto-reclosing and conditions for start of a reclosing cycle…………………………………………………………………………. 274 Start auto-reclosing from CB open information……………….. 274 Blocking of the autorecloser…………………………………………. 275 Control of the auto-reclosing open time for shot 1…………… 275 Long trip signal…………………………………………………………… 275 Maximum number of reclosing shots………………………………276 ARMode=3ph, (normal setting for a single 3 phase shot)…. 276 ARMode=1/2/3ph……………………………………………………….. 276 ARMode=1/2ph, 1-phase or 2-phase reclosing in the first shot……………………………………………………………………………277 ARMode=1ph + 1*2ph, 1-phase or 2-phase reclosing in the first shot………………………………………………………………..277 ARMode=1/2ph + 1*3ph, 1-phase, 2-phase or 3-phase reclosing in the first shot……………………………………………….277 ARMode=1ph + 1*2/3ph, 1-phase, 2-phase or 3-phase reclosing in the first shot……………………………………………….277 External selection of auto-reclose mode………………………… 278 Reclosing reclaim timer……………………………………………….. 279 Pulsing of the CB closing command and Counter…………….279 Transient fault……………………………………………………………..279 Permanent fault and reclosing unsuccessful signal…………. 279 Lock-out initiation……………………………………………………….. 280 Evolving fault……………………………………………………………… 281 Automatic continuation of the reclosing sequence ………….. 281 Thermal overload protection holding the auto-reclosing function back …………………………………………………………….. 282
Setting guidelines……………………………………………………………. 282 Configuration……………………………………………………………… 282 Auto-recloser parameter settings………………………………….. 289
Apparatus control APC…………………………………………………………. 292 Application………………………………………………………………………292
Bay control (QCBAY)………………………………………………….. 295 Switch controller (SCSWI)…………………………………………….296 Switches (SXCBR/SXSWI)……………………………………………297 Reservation function (QCRSV and RESIN)……………………. 298
Interaction between modules……………………………………………..300
Table of contents
8 Application manual
Setting guidelines……………………………………………………………. 302 Bay control (QCBAY)………………………………………………….. 302 Switch controller (SCSWI)…………………………………………….302 Switch (SXCBR/SXSWI)……………………………………………… 303 Bay Reserve (QCRSV)…………………………………………………304 Reservation input (RESIN)…………………………………………… 304
Voltage control……………………………………………………………………..304 Identification…………………………………………………………………… 304 Application………………………………………………………………………304 Setting guidelines……………………………………………………………. 337
TR1ATCC or TR8ATCC general settings………………………..337 TR1ATCC or TR8ATCC Setting group …………………………..338 TCMYLTC and TCLYLTC general settings…………………….. 346
Logic rotating switch for function selection and LHMI presentation SLGAPC………………………………………………………….. 347
Identification…………………………………………………………………… 347 Application………………………………………………………………………348 Setting guidelines……………………………………………………………. 348
Selector mini switch VSGAPC………………………………………………..348 Identification…………………………………………………………………… 349 Application………………………………………………………………………349 Setting guidelines……………………………………………………………. 349
Generic communication function for Double Point indication DPGAPC……………………………………………………………………………. 350
Identification…………………………………………………………………… 350 Application………………………………………………………………………350 Setting guidelines……………………………………………………………. 350
Single point generic control 8 signals SPC8GAPC…………………… 350 Identification…………………………………………………………………… 350 Application………………………………………………………………………350 Setting guidelines……………………………………………………………. 351
AutomationBits, command function for DNP3.0 AUTOBITS………. 351 Identification…………………………………………………………………… 351 Application………………………………………………………………………351 Setting guidelines……………………………………………………………. 352
Single command, 16 signals SINGLECMD……………………………… 352 Identification…………………………………………………………………… 352 Application………………………………………………………………………352 Setting guidelines……………………………………………………………. 354
Interlocking ………………………………………………………………………… 354 Configuration guidelines……………………………………………………356 Interlocking for line bay ABC_LINE …………………………………… 356
Application………………………………………………………………….356 Signals from bypass busbar…………………………………………. 357
Table of contents
9 Application manual
Signals from bus-coupler………………………………………………357 Configuration setting…………………………………………………… 360
Interlocking for bus-coupler bay ABC_BC ………………………….. 361 Application………………………………………………………………….362 Configuration……………………………………………………………… 362 Signals from all feeders………………………………………………..362 Signals from bus-coupler………………………………………………364 Configuration setting…………………………………………………… 366
Interlocking for transformer bay AB_TRAFO ………………………. 367 Application………………………………………………………………….367 Signals from bus-coupler………………………………………………368 Configuration setting…………………………………………………… 368
Interlocking for bus-section breaker A1A2_BS……………………..369 Application………………………………………………………………….369 Signals from all feeders………………………………………………..369 Configuration setting…………………………………………………… 372
Interlocking for bus-section disconnector A1A2_DC ……………. 373 Application………………………………………………………………….373 Signals in single breaker arrangement……………………………373 Signals in double-breaker arrangement…………………………. 376 Signals in 1 1/2 breaker arrangement……………………………. 379
Interlocking for busbar earthing switch BB_ES …………………….380 Application………………………………………………………………….380 Signals in single breaker arrangement……………………………380 Signals in double-breaker arrangement…………………………. 384 Signals in 1 1/2 breaker arrangement……………………………. 385
Interlocking for double CB bay DB ……………………………………. 386 Application………………………………………………………………….386 Configuration setting…………………………………………………… 387
Interlocking for 1 1/2 CB BH ……………………………………………..388 Application………………………………………………………………….388 Configuration setting…………………………………………………… 389
Section 14 Scheme communication………………………………………..391 Scheme communication logic for distance or overcurrent protection ZCPSCH……………………………………………………………… 391
Identification…………………………………………………………………… 391 Application………………………………………………………………………391
Blocking schemes………………………………………………………. 392 Delta blocking scheme………………………………………………… 393 Permissive schemes…………………………………………………… 394 Intertrip scheme…………………………………………………………..397
Setting guidelines……………………………………………………………. 397 Blocking scheme………………………………………………………… 397
Table of contents
10 Application manual
Delta blocking scheme………………………………………………… 398 Permissive underreaching scheme……………………………….. 398 Permissive overreaching scheme…………………………………. 398 Unblocking scheme…………………………………………………….. 398 Intertrip scheme…………………………………………………………..399
Current reversal and Weak-end infeed logic for distance protection 3-phase ZCRWPSCH …………………………………………… 399
Identification…………………………………………………………………… 399 Application………………………………………………………………………399
Current reversal logic………………………………………………….. 399 Weak-end infeed logic………………………………………………….400
Setting guidelines……………………………………………………………. 401 Current reversal logic………………………………………………….. 401 Weak-end infeed logic………………………………………………….402
Local acceleration logic ZCLCPSCH……………………………………….402 Identification…………………………………………………………………… 402 Application………………………………………………………………………402 Setting guidelines……………………………………………………………. 403
Scheme communication logic for residual overcurrent protection ECPSCH …………………………………………………………………………….404
Identification…………………………………………………………………… 404 Application………………………………………………………………………404 Setting guidelines……………………………………………………………. 405
Current reversal and weak-end infeed logic for residual overcurrent protection ECRWPSCH………………………………………..405
Identification…………………………………………………………………… 405 Application………………………………………………………………………405
Fault current reversal logic…………………………………………… 405 Weak-end infeed logic………………………………………………….406
Setting guidelines……………………………………………………………. 407 Current reversal…………………………………………………………..407 Weak-end infeed………………………………………………………… 408
Section 15 Logic…………………………………………………………………..409 Tripping logic common 3-phase output SMPPTRC …………………..409
Identification…………………………………………………………………… 409 Application………………………………………………………………………409
Three-phase tripping ………………………………………………….. 410 Single- and/or three-phase tripping……………………………….. 411 Single-, two- or three-phase tripping……………………………… 412 Lock-out……………………………………………………………………..413 Blocking of the function block………………………………………..413
Setting guidelines……………………………………………………………. 413 Trip matrix logic TMAGAPC………………………………………………….. 414
Table of contents
11 Application manual
Identification…………………………………………………………………… 414 Application………………………………………………………………………414 Setting guidelines……………………………………………………………. 414
Logic for group alarm ALMCALH…………………………………………….415 Identification…………………………………………………………………… 415 Application………………………………………………………………………415 Setting guidelines……………………………………………………………. 415
Logic for group alarm WRNCALH………………………………………….. 415 Identification…………………………………………………………………… 415
Application………………………………………………………………….415 Setting guidelines……………………………………………………….. 415
Logic for group indication INDCALH………………………………………..416 Identification…………………………………………………………………… 416
Application………………………………………………………………….416 Setting guidelines……………………………………………………….. 416
Configurable logic blocks……………………………………………………….416 Application………………………………………………………………………416 Setting guidelines……………………………………………………………. 417
Configuration……………………………………………………………… 417 Fixed signal function block FXDSIGN…………………………………….. 418
Identification…………………………………………………………………… 418 Application………………………………………………………………………418
Boolean 16 to Integer conversion B16I…………………………………… 419 Identification…………………………………………………………………… 419 Application………………………………………………………………………419
Boolean 16 to Integer conversion with logic node representation BTIGAPC…………………………………………………………………………….420
Identification…………………………………………………………………… 420 Application………………………………………………………………………420
Integer to Boolean 16 conversion IB16…………………………………… 421 Identification…………………………………………………………………… 422 Application………………………………………………………………………422
Integer to Boolean 16 conversion with logic node representation ITBGAPC…………………………………………………………………………….423
Identification…………………………………………………………………… 423 Application………………………………………………………………………423
Elapsed time integrator with limit transgression and overflow supervision TEIGAPC……………………………………………………………424
Identification…………………………………………………………………… 424 Application………………………………………………………………………424 Setting guidelines……………………………………………………………. 424
Section 16 Monitoring……………………………………………………………427 Measurement……………………………………………………………………….427
Table of contents
12 Application manual
Identification…………………………………………………………………… 427 Application………………………………………………………………………427 Zero clamping………………………………………………………………….429 Setting guidelines……………………………………………………………. 430
Setting examples…………………………………………………………433 Gas medium supervision SSIMG…………………………………………… 440
Identification…………………………………………………………………… 440 Application………………………………………………………………………440 Setting guidelines……………………………………………………………. 440
Liquid medium supervision SSIML…………………………………………. 441 Identification…………………………………………………………………… 441 Application………………………………………………………………………441 Setting guidelines……………………………………………………………. 441
Breaker monitoring SSCBR……………………………………………………442 Identification…………………………………………………………………… 442 Application………………………………………………………………………442 Setting guidelines……………………………………………………………. 444
Setting procedure on the IED……………………………………….. 445 Event function EVENT…………………………………………………………..446
Identification…………………………………………………………………… 446 Application………………………………………………………………………446 Setting guidelines……………………………………………………………. 446
Disturbance report DRPRDRE………………………………………………. 447 Identification…………………………………………………………………… 447 Application………………………………………………………………………447 Setting guidelines……………………………………………………………. 448
Recording times…………………………………………………………. 451 Binary input signals…………………………………………………….. 451 Analog input signals……………………………………………………. 452 Sub-function parameters……………………………………………… 452 Consideration…………………………………………………………….. 453
Logical signal status report BINSTATREP………………………………. 454 Identification…………………………………………………………………… 454 Application………………………………………………………………………454 Setting guidelines……………………………………………………………. 454
Fault locator LMBRFLO…………………………………………………………455 Identification…………………………………………………………………… 455 Application………………………………………………………………………455 Setting guidelines……………………………………………………………. 455
Connection of analog currents……………………………………… 457 Limit counter L4UFCNT…………………………………………………………457
Identification…………………………………………………………………… 457 Application………………………………………………………………………458
Table of contents
13 Application manual
Setting guidelines……………………………………………………………. 458
Section 17 Metering…………………………………………………………….. 459 Pulse-counter logic PCFCNT………………………………………………… 459
Identification…………………………………………………………………… 459 Application………………………………………………………………………459 Setting guidelines……………………………………………………………. 459
Function for energy calculation and demand handling ETPMMTR 460 Identification…………………………………………………………………… 460 Application………………………………………………………………………460 Setting guidelines……………………………………………………………. 461
Section 18 Station communication………………………………………….463 670 series protocols…………………………………………………………….. 463 IEC 61850-8-1 communication protocol………………………………….. 463
Application IEC 61850-8-1…………………………………………………463 Horizontal communication via GOOSE for interlocking GOOSEINTLKRCV…………………………………………………………..465 Setting guidelines……………………………………………………………. 465 Generic communication function for Single Point indication SPGAPC, SP16GAPC………………………………………………………465
Application………………………………………………………………….465 Setting guidelines……………………………………………………….. 465
Generic communication function for Measured Value MVGAPC………………………………………………………………………..465
Application………………………………………………………………….465 Setting guidelines……………………………………………………….. 466
IEC 61850-8-1 redundant station bus communication………….. 466 Identification………………………………………………………………. 466 Application………………………………………………………………….466 Setting guidelines……………………………………………………….. 467
IEC 61850-9-2LE communication protocol……………………………….468 Introduction……………………………………………………………………..468 Setting guidelines……………………………………………………………. 470
Specific settings related to the IEC 61850-9-2LE communication…………………………………………………………… 471 Loss of communication…………………………………………………471 Setting examples for IEC 61850-9-2LE and time synchronization………………………………………………………….. 475
LON communication protocol………………………………………………… 480 Application………………………………………………………………………480 MULTICMDRCV and MULTICMDSND………………………………. 481
Identification………………………………………………………………. 482 Application………………………………………………………………….482 Setting guidelines……………………………………………………….. 482
Table of contents
14 Application manual
SPA communication protocol………………………………………………… 482 Application………………………………………………………………………482 Setting guidelines……………………………………………………………. 483
IEC 60870-5-103 communication protocol………………………………. 485 Application………………………………………………………………………485
DNP3 Communication protocol……………………………………………… 492 Application………………………………………………………………………492
Section 19 Remote communication…………………………………………493 Binary signal transfer…………………………………………………………….493
Identification…………………………………………………………………… 493 Application………………………………………………………………………493
Communication hardware solutions………………………………. 493 Setting guidelines……………………………………………………………. 494
Section 20 Basic IED functions……………………………………………… 499 Authority status ATHSTAT……………………………………………………. 499
Application………………………………………………………………………499 Change lock CHNGLCK……………………………………………………….. 499
Application………………………………………………………………………499 Denial of service DOS………………………………………………………….. 500
Application………………………………………………………………………500 Setting guidelines……………………………………………………………. 500
IED identifiers TERMINALID…………………………………………………. 501 Application………………………………………………………………………501
Product information PRODINF………………………………………………. 501 Application………………………………………………………………………501 Factory defined settings…………………………………………………… 501
Measured value expander block RANGE_XP………………………….. 502 Identification…………………………………………………………………… 502 Application………………………………………………………………………502 Setting guidelines……………………………………………………………. 503
Parameter setting groups……………………………………………………… 503 Application………………………………………………………………………503 Setting guidelines……………………………………………………………. 503
Rated system frequency PRIMVAL………………………………………… 503 Identification…………………………………………………………………… 504 Application………………………………………………………………………504 Setting guidelines……………………………………………………………. 504
Summation block 3 phase 3PHSUM………………………………………. 504 Application………………………………………………………………………504 Setting guidelines……………………………………………………………. 504
Global base values GBASVAL………………………………………………. 505 Identification…………………………………………………………………… 505
Table of contents
15 Application manual
Application………………………………………………………………………505 Setting guidelines……………………………………………………………. 505
Signal matrix for binary inputs SMBI………………………………………. 505 Application………………………………………………………………………505 Setting guidelines……………………………………………………………. 506
Signal matrix for binary outputs SMBO ………………………………….. 506 Application………………………………………………………………………506 Setting guidelines……………………………………………………………. 506
Signal matrix for mA inputs SMMI………………………………………….. 506 Application………………………………………………………………………506 Setting guidelines……………………………………………………………. 506
Signal matrix for analog inputs SMAI……………………………………… 506 Application………………………………………………………………………507 Frequency values……………………………………………………………. 507 Setting guidelines……………………………………………………………. 508
Test mode functionality TESTMODE……………………………………….513 Application………………………………………………………………………513
IEC 61850 protocol test mode……………………………………….513 Setting guidelines……………………………………………………………. 514
Self supervision with internal event list INTERRSIG…………………. 514 Application………………………………………………………………………514
Time synchronization TIMESYNCHGEN………………………………….515 Application………………………………………………………………………515 Setting guidelines……………………………………………………………. 516
System time………………………………………………………………..516 Synchronization…………………………………………………………..516 Process bus IEC 61850-9-2LE synchronization……………….518
Section 21 Requirements………………………………………………………519 Current transformer requirements………………………………………….. 519
Current transformer classification……………………………………….519 Conditions……………………………………………………………………….520 Fault current…………………………………………………………………… 520 Secondary wire resistance and additional load……………………. 521 General current transformer requirements………………………….. 521 Rated equivalent secondary e.m.f. requirements………………….522
Breaker failure protection…………………………………………….. 522 Non-directional instantaneous and definitive time, phase and residual overcurrent protection………………………………..522 Non-directional inverse time delayed phase and residual overcurrent protection…………………………………………………. 523 Directional phase and residual overcurrent protection……… 524
Current transformer requirements for CTs according to other standards………………………………………………………………………..524
Table of contents
16 Application manual
Current transformers according to IEC 61869-2, class P, PR525 Current transformers according to IEC 61869-2, class PX, PXR (and old IEC 60044-6, class TPS and old British Standard, class X)…………………………………. 525 Current transformers according to ANSI/IEEE………………… 525
Voltage transformer requirements………………………………………….. 526 SNTP server requirements……………………………………………………. 527 Sample specification of communication requirements for the protection and control terminals in digital telecommunication networks…………………………………………………………………………….. 527 IEC 61850-9-2LE Merging unit requirements ………………………….. 528
Section 22 Glossary…………………………………………………………….. 531
Table of contents
17 Application manual
Section 1 Introduction
1.1 This manual
The application manual contains application descriptions and setting guidelines sorted per function. The manual can be used to find out when and for what purpose a typical protection function can be used. The manual can also provide assistance for calculating settings.
1.2 Intended audience
This manual addresses the protection and control engineer responsible for planning, pre-engineering and engineering.
The protection and control engineer must be experienced in electrical power engineering and have knowledge of related technology, such as protection schemes and communication principles.
1MRK 511 310-UEN B Section 1 Introduction
19 Application manual
1.3 Product documentation
1.3.1 Product documentation set
IEC07000220-4-en.vsd
P la
nn in
g &
p ur
ch as
e
E ng
in ee
rin g
In st
al lin
g
C om
m is
si on
in g
O pe
ra tio
n
M ai
nt en
an ce
D ec
om m
is si
on in
g D
ei ns
ta lli
ng &
d is
po sa
l
Application manual
Operation manual
Installation manual
Engineering manual
Communication protocol manual
Cyber security deployment guideline
Technical manual
Commissioning manual
IEC07000220 V4 EN
Figure 1: The intended use of manuals throughout the product lifecycle
The engineering manual contains instructions on how to engineer the IEDs using the various tools available within the PCM600 software. The manual provides instructions on how to set up a PCM600 project and insert IEDs to the project structure. The manual also recommends a sequence for the engineering of protection and control functions, LHMI functions as well as communication engineering for IEC 60870-5-103, IEC 61850 and DNP3.
The installation manual contains instructions on how to install the IED. The manual provides procedures for mechanical and electrical installation. The chapters are organized in the chronological order in which the IED should be installed.
The commissioning manual contains instructions on how to commission the IED. The manual can also be used by system engineers and maintenance personnel for assistance during the testing phase. The manual provides procedures for the checking of external circuitry and energizing the IED, parameter setting and configuration as
Section 1 1MRK 511 310-UEN B Introduction
20 Application manual
well as verifying settings by secondary injection. The manual describes the process of testing an IED in a substation which is not in service. The chapters are organized in the chronological order in which the IED should be commissioned. The relevant procedures may be followed also during the service and maintenance activities.
The operation manual contains instructions on how to operate the IED once it has been commissioned. The manual provides instructions for the monitoring, controlling and setting of the IED. The manual also describes how to identify disturbances and how to view calculated and measured power grid data to determine the cause of a fault.
The application manual contains application descriptions and setting guidelines sorted per function. The manual can be used to find out when and for what purpose a typical protection function can be used. The manual can also provide assistance for calculating settings.
The technical manual contains application and functionality descriptions and lists function blocks, logic diagrams, input and output signals, setting parameters and technical data, sorted per function. The manual can be used as a technical reference during the engineering phase, installation and commissioning phase, and during normal service.
The communication protocol manual describes the communication protocols supported by the IED. The manual concentrates on the vendor-specific implementations.
The point list manual describes the outlook and properties of the data points specific to the IED. The manual should be used in conjunction with the corresponding communication protocol manual.
The cyber security deployment guideline describes the process for handling cyber security when communicating with the IED. Certification, Authorization with role based access control, and product engineering for cyber security related events are described and sorted by function. The guideline can be used as a technical reference during the engineering phase, installation and commissioning phase, and during normal service.
1.3.2 Dokumentennderungsverzeichnis Dokument gendert / am Historie -/Juli 2016 Erste bersetzung von 1MRK 511 310-UEN
Version —
1MRK 511 310-UEN B Section 1 Introduction
21 Application manual
1.3.3 Related documents Documents related to REC670 Identify number Application manual 1MRK 511 310-UEN
Commissioning manual 1MRK 511 312-UEN
Product guide 1MRK 511 313-BEN
Technical manual 1MRK 511 311-UEN
Type test certificate 1MRK 511 313-TEN
670 series manuals Identify number Operation manual 1MRK 500 118-UEN
Engineering manual 1MRK 511 308-UEN
Installation manual 1MRK 514 019-UEN
Communication protocol manual, IEC 60870-5-103
1MRK 511 304-UEN
Communication protocol manual, IEC 61850 Edition 1
1MRK 511 302-UEN
Communication protocol manual, IEC 61850 Edition 2
1MRK 511 303-UEN
Communication protocol manual, LON 1MRK 511 305-UEN
Communication protocol manual, SPA 1MRK 511 306-UEN
Accessories guide 1MRK 514 012-BEN
Cyber security deployment guideline 1MRK 511 309-UEN
Connection and Installation components 1MRK 513 003-BEN
Test system, COMBITEST 1MRK 512 001-BEN
1.4 Document symbols and conventions
1.4.1 Symbols
The electrical warning icon indicates the presence of a hazard which could result in electrical shock.
The warning icon indicates the presence of a hazard which could result in personal injury.
The caution hot surface icon indicates important information or warning about the temperature of product surfaces.
Section 1 1MRK 511 310-UEN B Introduction
22 Application manual
The caution icon indicates important information or warning related to the concept discussed in the text. It might indicate the presence of a hazard which could result in corruption of software or damage to equipment or property.
The information icon alerts the reader of important facts and conditions.
The tip icon indicates advice on, for example, how to design your project or how to use a certain function.
Although warning hazards are related to personal injury, it is necessary to understand that under certain operational conditions, operation of damaged equipment may result in degraded process performance leading to personal injury or death. It is important that the user fully complies with all warning and cautionary notices.
1.4.2 Document conventions
Abbreviations and acronyms in this manual are spelled out in the glossary. The glossary also contains definitions of important terms.
Push button navigation in the LHMI menu structure is presented by using the push button icons. For example, to navigate between the options, use and .
HMI menu paths are presented in bold. For example, select Main menu/Settings.
LHMI messages are shown in Courier font. For example, to save the changes in non-volatile memory, select Yes and press
. Parameter names are shown in italics.
For example, the function can be enabled and disabled with the Operation setting. Each function block symbol shows the available input/output signal.
the character ^ in front of an input/output signal name indicates that the signal name may be customized using the PCM600 software.
the character * after an input signal name indicates that the signal must be connected to another function block in the application configuration to achieve a valid application configuration.
Logic diagrams describe the signal logic inside the function block and are bordered by dashed lines.
1MRK 511 310-UEN B Section 1 Introduction
23 Application manual
Signals in frames with a shaded area on their right hand side represent setting parameter signals that are only settable via the PST or LHMI.
If an internal signal path cannot be drawn with a continuous line, the suffix -int is added to the signal name to indicate where the signal starts and continues.
Signal paths that extend beyond the logic diagram and continue in another diagram have the suffix -cont.
Illustrations are used as an example and might show other products than the one the manual describes. The example that is illustrated is still valid.
1.4.3 IEC 61850 edition 1 / edition 2 mapping Table 1: IEC 61850 edition 1 / edition 2 mapping
Function block name Edition 1 logical nodes Edition 2 logical nodes AEGPVOC AEGGAPC AEGPVOC
AGSAL AGSAL SECLLN0
AGSAL
ALMCALH ALMCALH ALMCALH
ALTIM — ALTIM
ALTMS — ALTMS
ALTRK — ALTRK
BCZSPDIF BCZSPDIF BCZSPDIF
BCZTPDIF BCZTPDIF BCZTPDIF
BDCGAPC SWSGGIO BBCSWI BDCGAPC
BRCPTOC BRCPTOC BRCPTOC
BRPTOC BRPTOC BRPTOC
BTIGAPC B16IFCVI BTIGAPC
BUSPTRC_B1 BUSPTRC BBSPLLN0
BUSPTRC
BUSPTRC_B2 BUSPTRC BUSPTRC
BUSPTRC_B3 BUSPTRC BUSPTRC
BUSPTRC_B4 BUSPTRC BUSPTRC
BUSPTRC_B5 BUSPTRC BUSPTRC
BUSPTRC_B6 BUSPTRC BUSPTRC
BUSPTRC_B7 BUSPTRC BUSPTRC
BUSPTRC_B8 BUSPTRC BUSPTRC
BUSPTRC_B9 BUSPTRC BUSPTRC
BUSPTRC_B10 BUSPTRC BUSPTRC
Table continues on next page
Section 1 1MRK 511 310-UEN B Introduction
24 Application manual
Function block name Edition 1 logical nodes Edition 2 logical nodes BUSPTRC_B11 BUSPTRC BUSPTRC
BUSPTRC_B12 BUSPTRC BUSPTRC
BUSPTRC_B13 BUSPTRC BUSPTRC
BUSPTRC_B14 BUSPTRC BUSPTRC
BUSPTRC_B15 BUSPTRC BUSPTRC
BUSPTRC_B16 BUSPTRC BUSPTRC
BUSPTRC_B17 BUSPTRC BUSPTRC
BUSPTRC_B18 BUSPTRC BUSPTRC
BUSPTRC_B19 BUSPTRC BUSPTRC
BUSPTRC_B20 BUSPTRC BUSPTRC
BUSPTRC_B21 BUSPTRC BUSPTRC
BUSPTRC_B22 BUSPTRC BUSPTRC
BUSPTRC_B23 BUSPTRC BUSPTRC
BUSPTRC_B24 BUSPTRC BUSPTRC
BUTPTRC_B1 BUTPTRC BBTPLLN0
BUTPTRC
BUTPTRC_B2 BUTPTRC BUTPTRC
BUTPTRC_B3 BUTPTRC BUTPTRC
BUTPTRC_B4 BUTPTRC BUTPTRC
BUTPTRC_B5 BUTPTRC BUTPTRC
BUTPTRC_B6 BUTPTRC BUTPTRC
BUTPTRC_B7 BUTPTRC BUTPTRC
BUTPTRC_B8 BUTPTRC BUTPTRC
BZISGGIO BZISGGIO BZISGAPC
BZITGGIO BZITGGIO BZITGAPC
BZNSPDIF_A BZNSPDIF BZASGAPC BZASPDIF BZNSGAPC BZNSPDIF
BZNSPDIF_B BZNSPDIF BZBSGAPC BZBSPDIF BZNSGAPC BZNSPDIF
BZNTPDIF_A BZNTPDIF BZATGAPC BZATPDIF BZNTGAPC BZNTPDIF
BZNTPDIF_B BZNTPDIF BZBTGAPC BZBTPDIF BZNTGAPC BZNTPDIF
Table continues on next page
1MRK 511 310-UEN B Section 1 Introduction
25 Application manual
Function block name Edition 1 logical nodes Edition 2 logical nodes CBPGAPC CBPLLN0
CBPMMXU CBPPTRC HOLPTOV HPH1PTOV PH3PTUC PH3PTOC RP3PDOP
CBPMMXU CBPPTRC HOLPTOV HPH1PTOV PH3PTOC PH3PTUC RP3PDOP
CCPDSC CCRPLD CCPDSC
CCRBRF CCRBRF CCRBRF
CCRWRBRF CCRWRBRF CCRWRBRF
CCSRBRF CCSRBRF CCSRBRF
CCSSPVC CCSRDIF CCSSPVC
CMMXU CMMXU CMMXU
CMSQI CMSQI CMSQI
COUVGAPC COUVLLN0 COUVPTOV COUVPTUV
COUVPTOV COUVPTUV
CVGAPC GF2LLN0 GF2MMXN GF2PHAR GF2PTOV GF2PTUC GF2PTUV GF2PVOC PH1PTRC
GF2MMXN GF2PHAR GF2PTOV GF2PTUC GF2PTUV GF2PVOC PH1PTRC
CVMMXN CVMMXN CVMMXN
D2PTOC D2LLN0 D2PTOC PH1PTRC
D2PTOC PH1PTRC
DPGAPC DPGGIO DPGAPC
DRPRDRE DRPRDRE DRPRDRE
ECPSCH ECPSCH ECPSCH
ECRWPSCH ECRWPSCH ECRWPSCH
EF2PTOC EF2LLN0 EF2PTRC EF2RDIR GEN2PHAR PH1PTOC
EF2PTRC EF2RDIR GEN2PHAR PH1PTOC
EF4PTOC EF4LLN0 EF4PTRC EF4RDIR GEN4PHAR PH1PTOC
EF4PTRC EF4RDIR GEN4PHAR PH1PTOC
EFPIOC EFPIOC EFPIOC
EFRWPIOC EFRWPIOC EFRWPIOC
ETPMMTR ETPMMTR ETPMMTR
FDPSPDIS FDPSPDIS FDPSPDIS
FMPSPDIS FMPSPDIS FMPSPDIS
FRPSPDIS FPSRPDIS FPSRPDIS
Table continues on next page
Section 1 1MRK 511 310-UEN B Introduction
26 Application manual
Function block name Edition 1 logical nodes Edition 2 logical nodes FTAQFVR FTAQFVR FTAQFVR
FUFSPVC SDDRFUF FUFSPVC SDDSPVC
GENPDIF GENPDIF GENGAPC GENPDIF GENPHAR GENPTRC
GOOSEBINRCV BINGREC —
GOOSEDPRCV DPGREC —
GOOSEINTLKRCV INTGREC —
GOOSEINTRCV INTSGREC —
GOOSEMVRCV MVGREC —
GOOSESPRCV BINSGREC —
GOOSEVCTRRCV VCTRGREC —
GOPPDOP GOPPDOP GOPPDOP PH1PTRC
GRPTTR GRPTTR GRPTTR
GSPTTR GSPTTR GSPTTR
GUPPDUP GUPPDUP GUPPDUP PH1PTRC
HZPDIF HZPDIF HZPDIF
INDCALCH INDCALH INDCALH
ITBGAPC IB16FCVB ITBGAPC
L3CPDIF L3CPDIF L3CGAPC L3CPDIF L3CPHAR L3CPTRC
L4UFCNT L4UFCNT L4UFCNT
L6CPDIF L6CPDIF L6CGAPC L6CPDIF L6CPHAR L6CPTRC
LAPPGAPC LAPPLLN0 LAPPPDUP LAPPPUPF
LAPPPDUP LAPPPUPF
LCCRPTRC LCCRPTRC LCCRPTRC
LCNSPTOC LCNSPTOC LCNSPTOC
LCNSPTOV LCNSPTOV LCNSPTOV
LCP3PTOC LCP3PTOC LCP3PTOC
LCP3PTUC LCP3PTUC LCP3PTUC
LCPTTR LCPTTR LCPTTR
LCZSPTOC LCZSPTOC LCZSPTOC
LCZSPTOV LCZSPTOV LCZSPTOV
LD0LLN0 LLN0 —
LDLPSCH LDLPDIF LDLPSCH
Table continues on next page
1MRK 511 310-UEN B Section 1 Introduction
27 Application manual
Function block name Edition 1 logical nodes Edition 2 logical nodes LDRGFC STSGGIO LDRGFC
LEXPDIS LEXPDIS LEXPDIS LEXPTRC
LFPTTR LFPTTR LFPTTR
LMBRFLO LMBRFLO LMBRFLO
LOVPTUV LOVPTUV LOVPTUV
LPHD LPHD
LPTTR LPTTR LPTTR
LT3CPDIF LT3CPDIF LT3CGAPC LT3CPDIF LT3CPHAR LT3CPTRC
LT6CPDIF LT6CPDIF LT6CGAPC LT6CPDIF LT6CPHAR LT6CPTRC
MVGAPC MVGGIO MVGAPC
NS2PTOC NS2LLN0 NS2PTOC NS2PTRC
NS2PTOC NS2PTRC
NS4PTOC EF4LLN0 EF4PTRC EF4RDIR GEN4PHAR PH1PTOC
EF4PTRC EF4RDIR PH1PTOC
O2RWPTOV GEN2LLN0 O2RWPTOV PH1PTRC
O2RWPTOV PH1PTRC
OC4PTOC OC4LLN0 GEN4PHAR PH3PTOC PH3PTRC
GEN4PHAR PH3PTOC PH3PTRC
OEXPVPH OEXPVPH OEXPVPH
OOSPPAM OOSPPAM OOSPPAM OOSPTRC
OV2PTOV GEN2LLN0 OV2PTOV PH1PTRC
OV2PTOV PH1PTRC
PAPGAPC PAPGAPC PAPGAPC
PCFCNT PCGGIO PCFCNT
PH4SPTOC GEN4PHAR OCNDLLN0 PH1BPTOC PH1PTRC
GEN4PHAR PH1BPTOC PH1PTRC
PHPIOC PHPIOC PHPIOC
PRPSTATUS RCHLCCH RCHLCCH SCHLCCH
PSLPSCH ZMRPSL PSLPSCH
PSPPPAM PSPPPAM PSPPPAM PSPPTRC
Table continues on next page
Section 1 1MRK 511 310-UEN B Introduction
28 Application manual
Function block name Edition 1 logical nodes Edition 2 logical nodes QCBAY QCBAY
QCRSV QCRSV QCRSV
REFPDIF REFPDIF REFPDIF
ROTIPHIZ ROTIPHIZ ROTIPHIZ ROTIPTRC
ROV2PTOV GEN2LLN0 PH1PTRC ROV2PTOV
PH1PTRC ROV2PTOV
SAPFRC SAPFRC SAPFRC
SAPTOF SAPTOF SAPTOF
SAPTUF SAPTUF SAPTUF
SCCVPTOC SCCVPTOC SCCVPTOC
SCILO SCILO SCILO
SCSWI SCSWI SCSWI
SDEPSDE SDEPSDE SDEPSDE SDEPTOC SDEPTOV SDEPTRC
SESRSYN RSY1LLN0 AUT1RSYN MAN1RSYN SYNRSYN
AUT1RSYN MAN1RSYN SYNRSYN
SINGLELCCH SCHLCCH
SLGAPC SLGGIO SLGAPC
SMBRREC SMBRREC SMBRREC
SMPPTRC SMPPTRC SMPPTRC
SP16GAPC SP16GGIO SP16GAPC
SPC8GAPC SPC8GGIO SPC8GAPC
SPGAPC SPGGIO SPGAPC
SSCBR SSCBR SSCBR
SSIMG SSIMG SSIMG
SSIML SSIML SSIML
STBPTOC STBPTOC BBPMSS STBPTOC
STEFPHIZ STEFPHIZ STEFPHIZ
STTIPHIZ STTIPHIZ STTIPHIZ
SXCBR SXCBR SXCBR
SXSWI SXSWI SXSWI
T2WPDIF T2WPDIF T2WGAPC T2WPDIF T2WPHAR T2WPTRC
T3WPDIF T3WPDIF T3WGAPC T3WPDIF T3WPHAR T3WPTRC
Table continues on next page
1MRK 511 310-UEN B Section 1 Introduction
29 Application manual
Function block name Edition 1 logical nodes Edition 2 logical nodes TCLYLTC TCLYLTC TCLYLTC
TCSLTC
TCMYLTC TCMYLTC TCMYLTC
TEIGAPC TEIGGIO TEIGAPC TEIGGIO
TEILGAPC TEILGGIO TEILGAPC
TMAGAPC TMAGGIO TMAGAPC
TPPIOC TPPIOC TPPIOC
TR1ATCC TR1ATCC TR1ATCC
TR8ATCC TR8ATCC TR8ATCC
TRPTTR TRPTTR TRPTTR
U2RWPTUV GEN2LLN0 PH1PTRC U2RWPTUV
PH1PTRC U2RWPTUV
UV2PTUV GEN2LLN0 PH1PTRC UV2PTUV
PH1PTRC UV2PTUV
VDCPTOV VDCPTOV VDCPTOV
VDSPVC VDRFUF VDSPVC
VMMXU VMMXU VMMXU
VMSQI VMSQI VMSQI
VNMMXU VNMMXU VNMMXU
VRPVOC VRLLN0 PH1PTRC PH1PTUV VRPVOC
PH1PTRC PH1PTUV VRPVOC
VSGAPC VSGGIO VSGAPC
WRNCALH WRNCALH WRNCALH
ZC1PPSCH ZPCPSCH ZPCPSCH
ZC1WPSCH ZPCWPSCH ZPCWPSCH
ZCLCPSCH ZCLCPLAL ZCLCPSCH
ZCPSCH ZCPSCH ZCPSCH
ZCRWPSCH ZCRWPSCH ZCRWPSCH
ZCVPSOF ZCVPSOF ZCVPSOF
ZGVPDIS ZGVLLN0 PH1PTRC ZGVPDIS ZGVPTUV
PH1PTRC ZGVPDIS ZGVPTUV
ZMCAPDIS ZMCAPDIS ZMCAPDIS
ZMCPDIS ZMCPDIS ZMCPDIS
ZMFCPDIS ZMFCLLN0 PSFPDIS ZMFPDIS ZMFPTRC ZMMMXU
PSFPDIS ZMFPDIS ZMFPTRC ZMMMXU
Table continues on next page
Section 1 1MRK 511 310-UEN B Introduction
30 Application manual
Function block name Edition 1 logical nodes Edition 2 logical nodes ZMFPDIS ZMFLLN0
PSFPDIS ZMFPDIS ZMFPTRC ZMMMXU
PSFPDIS PSFPDIS ZMFPDIS ZMFPTRC ZMMMXU
ZMHPDIS ZMHPDIS ZMHPDIS
ZMMAPDIS ZMMAPDIS ZMMAPDIS
ZMMPDIS ZMMPDIS ZMMPDIS
ZMQAPDIS ZMQAPDIS ZMQAPDIS
ZMQPDIS ZMQPDIS ZMQPDIS
ZMRAPDIS ZMRAPDIS ZMRAPDIS
ZMRPDIS ZMRPDIS ZMRPDIS
ZMRPSB ZMRPSB ZMRPSB
ZSMGAPC ZSMGAPC ZSMGAPC
1MRK 511 310-UEN B Section 1 Introduction
31 Application manual
Section 2 Application
2.1 General IED application
REC670 is used for the control, protection and monitoring of different types of bays in power networks. The IED is especially suitable for applications in control systems where the IEC 6185081 Ed 1 or Ed 2 station bus features of the REC670 can be fully utilized. It is used for station-wide interlocking via GOOSE messages and vertical client-server MMS communication to a local station or remote SCADA operator workplace. This supports the architecture with distributed control IEDs in all bays with high demands on reliability. Redundant communication is obtained through the built-in PRP feature which can be used in star or ringbus architectures. REC670 can be used on all voltage levels. It is suitable for the control of all apparatuses in any type of switchgear arrangement.
The control is performed from remote (SCADA/Station) through the IEC 618508 1 Ed1 or Ed2 station communication or from the built-in multi-display local HMI. Cyber security measures are implemented to secure safe autonomous operation of the protection and control functions even if simultaneous cyber attacks occur. For all common types of switchgear arrangements, there are different pre-configurations for control and interlocking. One REC670 control IED can be used for single bay or multi-bay applications. The control operation is based on the select-before-execute principle to give highest possible security. There are synchrocheck functions available to assist optimal breaker closing at the right instance in synchronous as well as asynchronous networks.
A number of protection functions are available for flexibility in use for different station types and busbar arrangements. To fulfil the user’s application requirements, the REC670 features, for example, up to six instantaneous phase and earth overcurrent functions, 4step directional or non-directional delayed-phase and earth overcurrent functions, thermal overload and frequency functions, two instances of 2step under- and overvoltage functions, autorecloser functions and several different measuring functions. This, together with the multi-display local HMI that can show one or more pages per feeder allows using the REC670 for protection and control for up to six bays in a substation.
The auto-reclose for single-, two-, and/or three-phase reclose includes priority circuits for multi-breaker arrangements. It co-operates with the synchrocheck function with high-speed or delayed reclosing. Several breaker failure functions are available to provide a breaker failure function independent from the protection IEDs, also for a complete one- and a half breaker diameter.
Disturbance recording and fault locator are available to allow independent post-fault analysis after primary disturbances in case of a failure in the protection system.
1MRK 511 310-UEN B Section 2 Application
33 Application manual
Duplex communication channels for transfer of up to 192 intertrip and binary signals are available on each remote-end data communication card (LDCM). Typical applications are the communication between 670series IEDs inside the station or with 670series in a remote station as remote I/O.
REC670 can be used in applications with the IEC 61850-9-2LE process bus with up to six Merging Units (MU).
Logic is prepared with a graphical tool. The advanced logic capability allows special applications such as automatic opening of disconnectors in multi-breaker arrangements, closing of breaker rings, load transfer logics and so on. The graphical configuration tool ensures simple and fast testing and commissioning.
2.2 Main protection functions
2 = number of basic instances 0-3 = option quantities 3-A03 = optional function included in packages A03 (refer to ordering details)
IEC 61850 ANSI Function description Bay control
REC670
R EC
67 0
(A 30
)
R EC
67 0
(A 31
)
R EC
67 0
(B 30
)
R EC
67 0
(C 30
)
Differential protection
HZPDIF 87 1Ph high impedance differential protection
0-6 3-A02 3-A02 3-A02 6-A07
2.3 Back-up protection functions
IEC 61850 ANSI Function description Bay control
REC670
R EC
67 0
(A 30
)
R EC
67 0
(A 31
)
R EC
67 0
(B 30
)
R EC
67 0
(C 30
)
Current protection
PHPIOC 50 Instantaneous phase overcurrent protection
0-6 1-C51 1-C51 2-C52 2-C53
OC4PTOC 51_671) Four step phase overcurrent protection
0-6 1-C51 1-C51 2-C52 2-C53
EFPIOC 50N Instantaneous residual overcurrent protection
0-6 1-C51 1-C51 2-C52 2-C53
Table continues on next page
Section 2 1MRK 511 310-UEN B Application
34 Application manual
IEC 61850 ANSI Function description Bay control
REC670
R EC
67 0
(A 30
)
R EC
67 0
(A 31
)
R EC
67 0
(B 30
)
R EC
67 0
(C 30
)
EF4PTOC 51N 67N2)
Four step residual overcurrent protection
0-6 1-C51 1-C51 2-C52 2-C53
NS4PTOC 46I2 Four step directional negative phase sequence overcurrent protection
0-6 1-C51 1-C51 2-C52 2-C53
SDEPSDE 67N Sensitive directional residual overcurrent and power protection
0-6 1-C16 1C16 1-C16 1-C16
LCPTTR 26 Thermal overload protection, one time constant, Celsius
06 1-C51 1-C51 1-C52 1-C53
LFPTTR 26 Thermal overload protection, one time constant, Fahrenheit
06 1-C51 1-C51 1-C52 1-C53
TRPTTR 49 Thermal overload protection, two time constant
0-6 1-C51 1-C51 1-C52 1-C53
CCRBRF 50BF Breaker failure protection
0-6 1-C51 1-C51 1-C52 1-C53
STBPTOC 50STB Stub protection 0-3
CCPDSC 52PD Pole discordance protection
0-6 1 1 2 3
GUPPDUP 37 Directional underpower protection
0-2 1-C17 1-C17 1-C17 1-C17
GOPPDOP 32 Directional overpower protection
0-2 1-C17 1-C17 1-C17 1-C17
BRCPTOC 46 Broken conductor check
0-1 1 1 1 1
CBPGAPC Capacitor bank protection
0-3
VRPVOC 51V Voltage restrained overcurrent protection
0-3
Voltage protection
UV2PTUV 27 Two step undervoltage protection
0-2 2-D02 2-D02 2-D02 2-D02
OV2PTOV 59 Two step overvoltage protection
0-2 2-D02 2-D02 2-D02 2-D02
ROV2PTOV 59N Two step residual overvoltage protection
0-2 2-D02 2-D02 2-D02 2-D02
VDCPTOV 60 Voltage differential protection
0-6 2 2 2 2
LOVPTUV 27 Loss of voltage check 0-2 1 1 1 2
Frequency protection
Table continues on next page
1MRK 511 310-UEN B Section 2 Application
35 Application manual
IEC 61850 ANSI Function description Bay control
REC670
R EC
67 0
(A 30
)
R EC
67 0
(A 31
)
R EC
67 0
(B 30
)
R EC
67 0
(C 30
)
SAPTUF 81 Underfrequency protection
0-6 6-E01 6-E01 6-E01 6-E01
SAPTOF 81 Overfrequency protection
0-6 6-E01 6-E01 6-E01 6-E01
SAPFRC 81 Rate-of-change frequency protection
0-6 6-E01 6-E01 6-E01 6-E01
FTAQFVR 81A Frequency time accumulation protection
0-12
Multipurpose protection
CVGAPC General current and voltage protection
0-9 4-F01 4-F01 4-F01 4-F01
General calculation
SMAIHPAC Multipurpose filter 0-6
1) 67 requires voltage 2) 67N requires voltage
2.4 Control and monitoring functions
IEC 61850 ANSI Function description Bay control
REC670
R EC
67 0
(A 30
)
R EC
67 0
(A 31
)
R EC
67 0
(B 30
)
R EC
67 0
(C 30
)
Control
SESRSYN 25 Synchrocheck, energizing check and synchronizing
0-6, 0-2 1 1 2 3
SMBRREC 79 Autorecloser 0-6, 0-4 1-H04 1-H04 2-H05 3-H06
APC8 3 Apparatus control for single bay, max 8 apparatuses (1CB) incl. interlocking
1 1 1
APC15 3 Apparatus control for single bay, max 15 apparatuses (2CBs) incl. interlocking
1 1
APC30 3 Apparatus control for up to 6 bays, max 30 apparatuses (6CBs) incl. interlocking
1 1
QCBAY Apparatus control 1+5/APC30 1 1 1 1+5/ APC3
0
Table continues on next page
Section 2 1MRK 511 310-UEN B Application
36 Application manual
IEC 61850 ANSI Function description Bay control
REC670
R EC
67 0
(A 30
)
R EC
67 0
(A 31
)
R EC
67 0
(B 30
)
R EC
67 0
(C 30
)
LOCREM Handling of LRswitch positions 1+5/APC30 1 1 1 1+5/ APC3
0
LOCREMCTRL LHMI control of PSTO 1+5/APC30 1 1 1 1+5/ APC3
0
TR1ATCC 90 Automatic voltage control for tap changer, single control
0-4 1-H11 1-H11 1-H11 2-H16
TR8ATCC 90 Automatic voltage control for tap changer, parallel control
0-4 1-H15 1-H15 1-H15 2-H18
TCMYLTC 84 Tap changer control and supervision, 6 binary inputs
0-4 4 4 4 4
TCLYLTC 84 Tap changer control and supervision, 32 binary inputs
0-4 4 4 4 4
SLGAPC Logic rotating switch for function selection and LHMI presentation
15 15 15 15 15
VSGAPC Selector mini switch 20 20 20 20 20
DPGAPC Generic communication function for Double Point indication
16 16 16 16 16
SPC8GAPC Single point generic control 8 signals
5 5 5 5 5
AUTOBITS AutomationBits, command function for DNP3.0
3 3 3 3 3
SINGLECMD Single command, 16 signals 4 4 4 4 4
VCTRSEND Horizontal communication via GOOSE for VCTR
1 1 1 1 1
GOOSEVCTRRC V
Horizontal communication via GOOSE for VCTR
7 7 7 7 7
I103CMD Function commands for IEC 60870-5-103
1 1 1 1 1
I103GENCMD Function commands generic for IEC 60870-5-103
50 50 50 50 50
I103POSCMD IED commands with position and select for IEC 60870-5-103
50 50 50 50 50
I103IEDCMD IED commands for IEC 60870-5-103
1 1 1 1 1
I103USRCMD Function commands user defined for IEC 60870-5-103
1 1 1 1 1
Secondary system supervision
CCSSPVC 87 Current circuit supervision 0-5 1 1 2 3
FUFSPVC Fuse failure supervision 0-4 3 3 3 3
VDSPVC 60 Fuse failure supervision based on voltage difference
0-4 1-G03 1-G03 1-G03 1-G03
Logic
Table continues on next page
1MRK 511 310-UEN B Section 2 Application
37 Application manual
IEC 61850 ANSI Function description Bay control
REC670
R EC
67 0
(A 30
)
R EC
67 0
(A 31
)
R EC
67 0
(B 30
)
R EC
67 0
(C 30
)
SMPPTRC 94 Tripping logic 1-6 6 6 6 6
TMAGAPC Trip matrix logic 12 12 12 12 12
ALMCALH Logic for group alarm 5 5 5 5 5
WRNCALH Logic for group warning 5 5 5 5 5
INDCALH Logic for group indication 5 5 5 5 5
AND, OR, INV, PULSETIMER, GATE, TIMERSET, XOR, LLD, SRMEMORY, RSMEMORY
Configurable logic blocks 40-280 40-28 0
40-28 0
40-28 0
40-28 0
ANDQT, ORQT, INVERTERQT, XORQT, SRMEMORYQT, RSMEMORYQT, TIMERSETQT, PULSETIMERQT , INVALIDQT, INDCOMBSPQT, INDEXTSPQT
Configurable logic blocks Q/T 0-1
SLGAPC, VSGAPC, AND, OR, PULSETIMER, GATE, TIMERSET, XOR, LLD, SRMEMORY, INV
Extension logic package 0-1
FXDSIGN Fixed signal function block 1 1 1 1 1
B16I Boolean 16 to Integer conversion 18 18 18 18 18
BTIGAPC Boolean 16 to Integer conversion with Logic Node representation
16 16 16 16 16
IB16 Integer to Boolean 16 conversion 18 18 18 18 18
ITBGAPC Integer to Boolean 16 conversion with Logic Node representation
16 16 16 16 16
TEIGAPC Elapsed time integrator with limit transgression and overflow supervision
12 12 12 12 12
Monitoring
CVMMXN, CMMXU, VMMXU, CMSQI, VMSQI, VNMMXU
Measurements 6 6 6 6 6
Table continues on next page
Section 2 1MRK 511 310-UEN B Application
38 Application manual
IEC 61850 ANSI Function description Bay control
REC670
R EC
67 0
(A 30
)
R EC
67 0
(A 31
)
R EC
67 0
(B 30
)
R EC
67 0
(C 30
)
AISVBAS Function block for service value presentation of secondary analog inputs
1 1 1 1 1
EVENT Event function 20 20 20 20 20
DRPRDRE, A1RADR, A2RADR, A3RADR, A4RADR, B1RBDR, B2RBDR, B3RBDR, B4RBDR, B5RBDR, B6RBDR
Disturbance report 1 1 1 1 1
SPGAPC Generic communication function for Single Point indication
64 64 64 64 64
SP16GAPC Generic communication function for Single Point indication 16 inputs
16 16 16 16 16
MVGAPC Generic communication function for Measured Value
24 24 24 24 24
BINSTATREP Logical signal status report 3 3 3 3 3
RANGE_XP Measured value expander block 66 66 66 66 66
SSIMG 63 Gas medium supervision 21 21 21 21 21
SSIML 71 Liquid medium supervision 3 3 3 3 3
SSCBR Circuit breaker monitoring 0-18 3-M13 3-M13 6-M15 9-M17
LMBRFLO Fault locator 0-1 1-M01 1-M01 1-M01 1-M01
I103MEAS Measurands for IEC 60870-5-103 1 1 1 1 1
I103MEASUSR Measurands user defined signals for IEC 60870-5-103
3 3 3 3 3
I103AR Function status auto-recloser for IEC 60870-5-103
1 1 1 1 1
I103EF Function status earth-fault for IEC 60870-5-103
1 1 1 1 1
I103FLTPROT Function status fault protection for IEC 60870-5-103
1 1 1 1 1
I103IED IED status for IEC 60870-5-103 1 1 1 1 1
I103SUPERV Supervison status for IEC 60870-5-103
1 1 1 1 1
I103USRDEF Status for user defiend signals for IEC 60870-5-103
20 20 20 20 20
L4UFCNT Event counter with limit supervision 30 30 30 30 30
Table continues on next page
1MRK 511 310-UEN B Section 2 Application
39 Application manual
IEC 61850 ANSI Function description Bay control
REC670
R EC
67 0
(A 30
)
R EC
67 0
(A 31
)
R EC
67 0
(B 30
)
R EC
67 0
(C 30
)
Metering
PCFCNT Pulse-counter logic 16 16 16 16 16
ETPMMTR Function for energy calculation and demand handling
6 6 6 6 6
2.5 Communication
IEC 61850 ANSI Function description Bay control
REC670 R
EC 67
0 (A
30 )
R EC
67 0
(A 31
R EC
67 0
(B 30
)
R EC
67 0
(C 30
)
Station communication
LONSPA, SPA SPA communication protocol
1 1 1 1 1
ADE LON communication protocol
1 1 1 1 1
HORZCOMM Network variables via LON
1 1 1 1 1
PROTOCOL Operation selection between SPA and IEC 60870-5-103 for SLM
1 1 1 1 1
RS485PROT Operation selection for RS485
1 1 1 1 1
RS485GEN RS485 1 1 1 1 1
DNPGEN DNP3.0 communication general protocol
1 1 1 1 1
DNPGENTCP DNP3.0 communication general TCP protocol
1 1 1 1 1
CHSERRS485 DNP3.0 for EIA-485 communication protocol
1 1 1 1 1
CH1TCP, CH2TCP, CH3TCP, CH4TCP
DNP3.0 for TCP/IP communication protocol
1 1 1 1 1
CHSEROPT DNP3.0 for TCP/IP and EIA-485 communication protocol
1 1 1 1 1
Table continues on next page
Section 2 1MRK 511 310-UEN B Application
40 Application manual
IEC 61850 ANSI Function description Bay control
REC670
R EC
67 0
(A 30
)
R EC
67 0
(A 31
R EC
67 0
(B 30
)
R EC
67 0
(C 30
)
MST1TCP, MST2TCP, MST3TCP, MST4TCP
DNP3.0 for serial communication protocol
1 1 1 1 1
DNPFREC DNP3.0 fault records for TCP/IP and EIA-485 communication protocol
1 1 1 1 1
IEC61850-8-1 Parameter setting function for IEC 61850
1 1 1 1 1
GOOSEINTLKR CV
Horizontal communication via GOOSE for interlocking
59 59 59 59 59
GOOSEBINRCV Goose binary receive 16 16 16 16 16
GOOSEDPRCV GOOSE function block to receive a double point value
64 64 64 64 64
GOOSEINTRCV GOOSE function block to receive an integer value
32 32 32 32 32
GOOSEMVRCV GOOSE function block to receive a measurand value
60 60 60 60 60
GOOSESPRCV GOOSE function block to receive a single point value
64 64 64 64 64
GOOSEVCTRCO NF
GOOSE VCTR configuration for send and receive
1 1 1 1 1
VCTRSEND Horizontal communication via GOOSE for VCTR
1 1 1 1 1
GOOSEVCTRRC V
Horizontal communication via GOOSE for VCTR
7 7 7 7 7
MULTICMDRCV, MULTICMDSND
Multiple command and transmit
60/10 60/10 60/10 60/10 60/10
FRONT, LANABI, LANAB, LANCDI, LANCD
Ethernet configuration of links
1 1 1 1 1
GATEWAY Ethernet configuration of link one
1 1 1 1 1
OPTICAL103 IEC 60870-5-103 Optical serial communication
1 1 1 1 1
RS485103 IEC 60870-5-103 serial communication for RS485
1 1 1 1 1
Table continues on next page
1MRK 511 310-UEN B Section 2 Application
41 Application manual
IEC 61850 ANSI Function description Bay control
REC670
R EC
67 0
(A 30
)
R EC
67 0
(A 31
R EC
67 0
(B 30
)
R EC
67 0
(C 30
)
AGSAL Generic security application component
1 1 1 1 1
LD0LLN0 IEC 61850 LD0 LLN0 1 1 1 1 1
SYSLLN0 IEC 61850 SYS LLN0 1 1 1 1 1
LPHD Physical device information
1 1 1 1 1
PCMACCS IED Configuration Protocol
1 1 1 1 1
SECALARM Component for mapping security events on protocols such as DNP3 and IEC103
1 1 1 1 1
FSTACCS Field service tool access via SPA protocol over ethernet communication
1 1 1 1 1
ACTIVLOG Activity logging parameters
1 1 1 1 1
ALTRK Service Tracking 1 1 1 1 1
SINGLELCCH Single ethernet port link status
1 1 1 1 1
PRPSTATUS Dual ethernet port link status
1 1 1 1 1
Process bus communication IEC 61850-9-2 1)
PRP IEC 62439-3 parallel redundancy protocol (only in F00)
0-1 1-P03 1-P03 1-P03 1-P03
Remote communication
Binary signal transfer receive/transmit
6/36 6/36 6/36 6/36 6/36
Transmission of analog data from LDCM
1 1 1 1 1
Receive binary status from remote LDCM
6/3/3 6/3/3 6/3/3 6/3/3 6/3/3
Scheme communication
ZCPSCH 85 Scheme communication logic for distance or overcurrent protection
0-1 1-K01 1-K01 1-K01 1-K01
ZCRWPSCH 85 Current reversal and weak-end infeed logic for distance protection
0-1 1-K01 1-K01 1-K01 1-K01
Table continues on next page
Section 2 1MRK 511 310-UEN B Application
42 Application manual
IEC 61850 ANSI Function description Bay control
REC670
R EC
67 0
(A 30
)
R EC
67 0
(A 31
R EC
67 0
(B 30
)
R EC
67 0
(C 30
)
ZCLCPSCH Local acceleration logic 0-1 1-K01 1-K01 1-K01 1-K01
ECPSCH 85 Scheme communication logic for residual overcurrent protection
0-1 1-C51 1-C51 1-C52 1-C53
ECRWPSCH 85 Current reversal and weak-end infeed logic for residual overcurrent protection
0-1 1-C51 1-C51 1-C52 1-C53
1) Only included for 9-2LE products
2.6 Basic IED functions
Table 2: Basic IED functions
IEC 61850 or function name
Description
INTERRSIG Self supervision with internal event list
SELFSUPEVLST Self supervision with internal event list
TIMESYNCHGEN Time synchronization module
SYNCHBIN, SYNCHCAN, SYNCHCMPPS, SYNCHLON, SYNCHPPH, SYNCHPPS, SYNCHSNTP, SYNCHSPA, SYNCHCMPPS
Time synchronization
TIMEZONE Time synchronization
DSTBEGIN, DSTENABLE, DSTEND
GPS time synchronization module
IRIG-B Time synchronization
SETGRPS Number of setting groups
ACTVGRP Parameter setting groups
TESTMODE Test mode functionality
CHNGLCK Change lock function
SMBI Signal matrix for binary inputs
SMBO Signal matrix for binary outputs
SMMI Signal matrix for mA inputs
SMAI1 — SMAI20 Signal matrix for analog inputs
3PHSUM Summation block 3 phase
Table continues on next page
1MRK 511 310-UEN B Section 2 Application
43 Application manual
IEC 61850 or function name
Description
ATHSTAT Authority status
ATHCHCK Authority check
AUTHMAN Authority management
FTPACCS FTP access with password
SPACOMMMAP SPA communication mapping
SPATD Date and time via SPA protocol
DOSFRNT Denial of service, frame rate control for front port
DOSLANAB Denial of service, frame rate control for OEM port AB
DOSLANCD Denial of service, frame rate control for OEM port CD
DOSSCKT Denial of service, socket flow control
GBASVAL Global base values for settings
PRIMVAL Primary system values
ALTMS Time master supervision
ALTIM Time management
ALTRK Service tracking
ACTIVLOG Activity logging parameters
FSTACCS Field service tool access via SPA protocol over ethernet communication
PCMACCS IED Configuration Protocol
SECALARM Component for mapping security events on protocols such as DNP3 and IEC103
DNPGEN DNP3.0 communication general protocol
DNPGENTCP DNP3.0 communication general TCP protocol
CHSEROPT DNP3.0 for TCP/IP and EIA-485 communication protocol
MSTSER DNP3.0 for serial communication protocol
OPTICAL103 IEC 60870-5-103 Optical serial communication
RS485103 IEC 60870-5-103 serial communication for RS485
IEC61850-8-1 Parameter setting function for IEC 61850
HORZCOMM Network variables via LON
LONSPA SPA communication protocol
LEDGEN General LED indication part for LHMI
Section 2 1MRK 511 310-UEN B Application
44 Application manual
Section 3 Configuration
3.1 Introduction
On request, ABB is available to support the re-configuration work, either directly or to do the design checking.
Hardware modules are configured with the hardware configuration tool in the PCM600 engineering platform.
The IED is available to be ordered in three different alternatives with the configuration suitable for the application. The control application will normally require adaptation of interlocking signals, mimic adaptation to the specific arrangements etc. as e.g. the availability of earthing switches varies.
The main protection functions are switched Off at delivery. Back-up functions that are not generally used are also set to Off.
The configurations are:
Single-breaker arrangement, single or double busbar. Double bus/double breaker arrangement. One-and-a-half breaker arrangement (one complete diameter).
The number of IO must be ordered to the application where more IO is foreseen to be required in the Double and One-and-a-half breaker arrangement.
The configuration is done for the complete control and measurement in the bays. Interlocking is provided and configured to be default done across bays with GOOSE messaging according to the IEC61850-8-1 standard.
Complete projects are provided with setting, signal matrix, mimic and the application configuration prepared and for single breaker arrangements multiple feeders and the bus coupler configurations are available and can simply be downloaded.
Synchronism check function is included for controlled closing of the circuit breakers.
Disconnectors and earthing switches are proposed and foreseen to be switched double pole to have highest possible security against unnecessary operations due to, for example a single- earth fault in the control circuit.
Protection functions are option and are not configured.
All IEDs can be reconfigured with help of the application configuration tool, being part of the PCM600 platform. This way the IED can be made suitable for special
1MRK 511 310-UEN B Section 3 Configuration
45 Application manual
applications and special logic can be developed i.e. logic for automatic opening of disconnectors and closing ring bays, automatic load transfer from one busbar to the other, and so on.
On request, ABB is available to support the re-configuration work, either directly or to do the design checking.
Optional functions and optional IO ordered will not be configured at delivery. It should be noted that the standard only includes one binary input and one binary output module and only the key functions such as tripping are connected to the outputs in the signal matrix tool. The required total IO must be calculated and specified at ordering.
Optional functions and optional IO ordered will not be configured at delivery. It should be noted that the standard only includes one binary input and one binary output module and only the key functions such as tripping are connected to the outputs. The required total IO must be calculated and specified at ordering.
The configurations are as far as found necessary provided with application comments to explain why the signals have been connected in the special way. This is of course for the special application features created, not for standard functionality.
3.2 Description of configuration REC670
3.2.1 Introduction
3.2.1.1 Description of configuration A30
The configuration of the IED is shown in Figure 2.
This configuration is used in single breaker arrangements with single or double busbar.
Control, measuring and interlocking is fully configured.
The following should be noted. The configuration is made with the binary input and binary output boards in the basic delivery. In many cases this is sufficient, in other cases, for example with full control of all apparatuses included, more IO cards are required. Our proposal for a full version with control is to use two binary input modules and one binary output module.
Section 3 1MRK 511 310-UEN B Configuration
46 Application manual
REC670 A30 Double busbar in single breaker arrangement 12AI (6I + 6U)
QB1
QA1
QB2
QB9
S CILO
3 Control
S CSWI
3 Control
S XSWI
3 Control
S CILO
3 Control
S CSWI
3 Control
S XSWI
3 Control
S CILO
3 Control
S CSWI
3 Control
S XSWI
3 Control
S CILO
3 Control
S CSWI
3 Control
S XSWI
3 Control
DRP RDRE
DFR/SER DR
CV MMXN
MET P/Q
VN MMXU
MET UN
ETP MMTR
MET W/Varh
QC9
SES RSYN
25 SC/VC
Q CBAY
3 Control
Q CRSV
3 Control
R ESIN
3 Control
BRC PTOC
46 Iub>
CC PDSC
52PD PD
Other Functions available from the function library
TCM YLTC
84
LOV PTUV
27 3U<
VDC PTOV
60 Ud>
CCS SPVC
87 INd/I
TCL YLTC
84
NS4 PTOC
46I2 4(I2>)
LC PTTR
26 >
Optional Functions
HZ PDIF
87 Id>
PH PIOC
50 3I>>
OC4 PTOC
51_67 4(3I>)
EF PIOC
50N IN>>
EF4 PTOC
51N_67N 4(IN>)
LF PTTR
26 >
SDE PSDE
67N IN>
UV2 PTUV
27 2(3U<)
SA PTOF
81 f>
OV2 PTOV
59 2(3U>)
GOP PDOP
32 P>
SA PFRC
81 df/dt<>
GUP PDUP
37 P<
TR PTTR
49 >
CV GAPC
2(I>/U<)
ZCRW PSCH
85
LMB RFLO
21FL FL
EC PSCH
85
ZC PSCH
85
TR8 ATCC
90 U
ECRW PSCH
85
TR1 ATCC
90 U
ZCLC PSCH
ROV2 PTOV
59N 2(U0>)
SA PTUF
81 f<
VD SPVC
60 Ud>
S SIMG
63
S SIML
71
SMP PTRC
94 1 0
CC RBRF
50BF 3I>BF
VN MMXU
MET UN
V MMXU
MET U
V MSQI
MET Usqi
C MMXU
MET I
C MSQI
MET Isqi
S CILO
3 Control
S CSWI
3 Control
S XCBR
3 Control
VN MMXU
MET UN
SMB RREC
79 0 1
WA1
WA2
WA2_VT
WA1_VT
LINE_CT
LINE_VT
S SCBR
FUF SPVC
U>/I<
IEC05000837 V3 EN
Figure 2: Configuration diagram for configuration A30
3.2.1.2 Description of configuration B30
The configuration of the IED is shown in Figure 3.
This configuration is used in double breaker arrangements.
1MRK 511 310-UEN B Section 3 Configuration
47 Application manual
Control, measuring and interlocking is fully configured, including communication with other bays such as other lines and the bus coupler over GOOSE.
The following should be noted. The configuration is made with the binary input and binary output boards in the basic IED delivery. In many cases this is sufficient, in other cases e.g. with full control of all apparatuses included more IO cards are required. Our proposal for a full version with control is to use two binary input modules and one or two binary output modules. For systems without Substation Automation a second binary output board might be required.
Section 3 1MRK 511 310-UEN B Configuration
48 Application manual
REC670 B30 — Double breaker arrangement 12AI (6I + 6U)
QB1
QA1
QB61
QB2
QA2
QB62
QB9
S CILO
3 Control
S CSWI
3 Control
S XCBR
3 Control
ETP MMTR
MET W/Varh
BRC PTOC
46 Iub>
CC PSDC
52PD PD
Other Functions available from the function library
TCM YLTC
84
LOV PTUV
27 3U<
VDC PTOV
60 Ud>
CCS RDIF
87 INd/I
TCL YLTC
84
NS4 PTOC
46I2 4(I2>)
Optional Functions
HZ PDIF
87 Id>
PH PIOC
50 3I>>
OC4 PTOC
51_67 4(3I>)
EF PIOC
50N IN>>
EF4 PTOC
51N_67N 4(IN>)
SDE PSDE
67N IN>
UV2 PTUV
27 2(3U<)
SA PTOF
81 f>
OV2 PTOV
59 2(3U>)
GOP PDOP
32 P>
SA PFRC
81 df/dt<>
GUP PDUP
37 P<
CV GAPC
2(I>/U<)
ZCRW PSCH
85
LMB RFLO
21FL FL
EC PSCHZC PSCH
85
TR8 ATCC
90 U
ECRW PSCHTR1 ATCC
90 U
ZCLC PSCH
ROV2 PTOV
59N 2(U0>)
SA PTUF
81 f<
QC9
3 Control
VD SPVC
60 Ud>
S SIMG
63
S SIML
71
CC RBRF
50BF 3I>BF
TR PTTR
49 >
SMB RREC
79 0 1
SMP PTRC
94 1 0
LF PTTR
26 >
LC PTTR
26 >
C MMXU
MET I
C MSQI
MET Isqi
FUF SPVC
U>/I<
WA1
WA2_VT
WA1_VT
WA2
LINE_VT
LINE_CT1
LINE_CT2
S CILO
3 Control
S CSWI
3 Control
S XSWI
3 Control
S CILO
3 Control
S CSWI
3 Control
S XSWI
3 Control
VN MMXU
MET UN
S CILO
3 Control
S CSWI
3 Control
S XCBR
3 Control
VN MMXU
MET UN
VN MMXU
MET UN
V MMXU
MET U
V MSQI
MET Usqi
DRP RDRE
DFR/SER DR
Q CBAY Q CRSV
3 Control
R ESIN
3 Control
S CILO
3 Control
S CSWI
3 Control
S XSWI
3 Control
S CILO
3 Control
S CSWI
3 Control
S XSWI
3 Control
S CILO
3 Control
S CSWI
3 Control
S XSWI
3 Control
S CILO
3 Control
S CSWI
3 Control
S XSWI
3 Control
S SCBR
SES RSYN
25 SC/VC
SES RSYN
25 SC/VC
CV MMXN
MET P/Q
IEC05000838 V3 EN
Figure 3: Configuration diagram for configuration B30
3.2.1.3 Description of configuration C30
The configuration of the IED is shown on Figure 4.
1MRK 511 310-UEN B Section 3 Configuration
49 Application manual
This configuration is used in one-and-a-half breaker arrangements for a full diameter. The configuration can also be used for a section of the diameter with utilization of a part of the apparatuses only.
Control, measuring and interlocking is fully configured, including communication with other bays such as other lines and the bus coupler over GOOSE.
The following should be noted. The configuration is made with the binary input and binary output boards in the basic IED delivery. In many cases this is sufficient, in other cases, for example with full control of all apparatuses included more IO cards are required. Our proposal for a full version with control is to use three binary input modules and two binary output modules. For systems without Substation Automation a second binary output board might be required.
Section 3 1MRK 511 310-UEN B Configuration
50 Application manual
S CILO
3 Control
S CSWI
3 Control
S XSWI
3 Control
S CILO
3 Control
S CSWI
3 Control
S XSWI
3 Control
S CILO
3 Control
S CSWI
3 Control
S XSWI
3 Control
S CILO
3 Control
S CSWI
3 Control
S XSWI
3 Control
S CILO
3 Control
S CSWI
3 Control
S XSWI
3 Control
S CILO
3 Control
S CSWI
3 Control
S XSWI
3 Control
S CILO
3 Control
S CSWI
3 Control
S XSWI
3 Control
S CILO
3 Control
S CSWI
3 Control
S XSWI
3 Control
S CILO
3 Control
S CSWI
3 Control
S XSWI
3 Control
S CILO
3 Control
S CSWI
3 Control
S XSWI
3 Control
DRP RDRE
DFR/SER DR
Q CBAY
3 Control
Q CRSV
03 Control
R ESIN
3 Control
S CILO
3 Control
S CSWI
3 Control
S XCBR
3 Control
S CILO
3 Control
S CSWI
3 Control
S XCBR
3 Control
S CILO
3 Control
S CSWI
3 Control
S XCBR
3 Control
ETP MMTR
MET W/Varh
V MMXU
MET U
REC670C30 Complete one-and a half breaker diameter arrangement 24AI (6I + 6U, 6I+6U)
V MMXU
MET U
BRC PTOC
46 Iub>
CC PDSC
52PD PD
Other Functions available from the function library
TCM YLTC
84
LOV PTUV
27 3U<
VDC PTOV
60 Ud>
CCS SPVC
87 INd/I
TCL YLTC
84
NS4 PTOC
46I2 4(I2>)
LC PTTR
26 >
Optional Functions
HZ PDIF
87 Id>
PH PIOC
50 3I>>
OC4 PTOC
51_67 4(3I>)
EF PIOC
50N IN>>
EF4 PTOC
51N_67N 4(IN>)
LF PTTR
26 >
SDE PSDE
67N IN>
UV2 PTUV
27 2(3U<)
SA PTOF
81 f>
OV2 PTOV
59 2(3U>)
GOP PDOP
32 P>
SA PFRC
81 df/dt<>
GUP PDUP
37 P<
ZCRW PSCH
85
LMB RFLO
21FL FL
EC PSCH
85
ZC PSCH
85
TR8 ATCC
90 U
ECRW PSCH
85
TR1 ATCC
90 U
ZCLC PSCH
ROV2 PTOV
59N 2(U0>)
SA PTUF
81 f<
SMP PTRC
94 1 0
Q CRSV
3 Control
C MMXU
MET I
C MSQI
MET Isqi
C MMXU
MET I
C MSQI
MET Isqi
WA1
WA2_VT
FUF SPVC
U>/I<
V MSQI
MET Usqi
V MSQI
MET Usqi
S SIMG
63
TR PTTR
49 >
CV GAPC
U
SMB RREC
79 0 1
S SIML
71
VD SPVC
60 Ud>
S SCBR
QB1
WA1_QA1
WA1_QB6
LINE1_QC9
QB61
TIE_QA1
QB62
LINE1_QB9
LINE2_QC9
WA2_QB6
LINE2_QB9
WA2_QA1
QB2
WA1_VT
WA1_CT
WA2_CT
LINE2_VT
TIE_CT
LINE1_VT
WA2
SES RSYN
25 SC
SES RSYN
25 SC
SES RSYN
25 SC/VC
VN MMXU
MET UN
ETP MMTR
MET W/Varh
CV MMXN
MET P/Q
FUF SPVC
U>/I<
CV MMXN
MET P/Q
VN MMXU
MET UN
VN MMXU
MET UN
VN MMXU
MET UN
CC RBRF
50BF 3I>BF
IEC05000839 V3 EN
Figure 4: Configuration diagram for configuration C30
1MRK 511 310-UEN B Section 3 Configuration
51 Application manual
Section 4 Analog inputs
4.1 Introduction
Analog input channels must be configured and set properly to get correct measurement results and correct protection operations. For power measuring and all directional and differential functions the directions of the input currents must be defined properly. Measuring and protection algorithms in the IED use primary system quantities. Setting values are in primary quantities as well and it is important to set the data about the connected current and voltage transformers properly.
A reference PhaseAngleRef can be defined to facilitate service values reading. This analog channels phase angle will always be fixed to zero degrees and all other angle information will be shown in relation to this analog input. During testing and commissioning of the IED the reference channel can be changed to facilitate testing and service values reading.
The IED has the ability to receive analog values from primary equipment, that are sampled by Merging units (MU) connected to a process bus, via the IEC 61850-9-2 LE protocol.
The availability of VT inputs depends on the ordered transformer input module (TRM) type.
4.2 Setting guidelines
The available setting parameters related to analog inputs are depending on the actual hardware (TRM) and the logic configuration made in PCM600.
4.2.1 Setting of the phase reference channel
All phase angles are calculated in relation to a defined reference. An appropriate analog input channel is selected and used as phase reference. The parameter PhaseAngleRef defines the analog channel that is used as phase angle reference.
1MRK 511 310-UEN B Section 4 Analog inputs
53 Application manual
4.2.1.1 Example
Usually the L1 phase-to-earth voltage connected to the first VT channel number of the transformer input module (TRM) is selected as the phase reference. The first VT channel number depends on the type of transformer input module.
For a TRM with 6 current and 6 voltage inputs the first VT channel is 7. The setting PhaseAngleRef=7 shall be used if the phase reference voltage is connected to that channel.
4.2.2 Setting of current channels
The direction of a current to the IED is depending on the connection of the CT. Unless indicated otherwise, the main CTs are supposed to be star connected and can be connected with the earthing point to the object or from the object. This information must be set in the IED. The convention of the directionality is defined as follows: A positive value of current, power, and so on means that the quantity has the direction into the object and a negative value means direction out from the object. For directional functions the direction into the object is defined as Forward and the direction out from the object is defined as Reverse. See figure 5
A positive value of current, power, and so on (forward) means that the quantity has a direction towards the object. — A negative value of current, power, and so on (reverse) means a direction away from the object. See figure 5.
Protected Object Line, transformer, etc
ForwardReverse
Definition of direction for directional functions
Measured quantity is positive when flowing
towards the object
e.g. P, Q, I
ReverseForward
Definition of direction for directional functions
e.g. P, Q, I Measured quantity is positive when flowing
towards the object
Set parameter CTStarPoint
Correct Setting is «ToObject»
Set parameter CTStarPoint
Correct Setting is «FromObject» en05000456.vsd
IEC05000456 V1 EN
Figure 5: Internal convention of the directionality in the IED
With correct setting of the primary CT direction, CTStarPoint set to FromObject or ToObject, a positive quantities always flowing towards the object and a direction defined as Forward always is looking towards the object. The following examples show the principle.
Section 4 1MRK 511 310-UEN B Analog inputs
54 Application manual
4.2.2.1 Example 1
Two IEDs used for protection of two objects.
Transformer
protection
Transformer
Line
Line
Setting of current input:
Set parameter
CTStarPoint with
Transformer as
reference object.
Correct setting is
«ToObject»
ForwardReverse
Definition of direction
for directional functions
Line protection
Setting of current input:
Set parameter
CTStarPoint with
Transformer as
reference object.
Correct setting is
«ToObject»
Setting of current input:
Set parameter
CTStarPoint with
Line as
reference object.
Correct setting is
«FromObject»
IEC05000753=IEC05
000753=1=en=Origin
al[1].vsd
IsIs
Ip Ip Ip
IED IED
IEC05000753 V2 EN
Figure 6: Example how to set CTStarPoint parameters in the IED
The figure 6 shows the normal case where the objects have their own CTs. The settings for CT direction shall be done according to the figure. To protect the line the direction of the directional functions of the line protection shall be set to Forward. This means that the protection is looking towards the line.
4.2.2.2 Example 2
Two IEDs used for protection of two objects and sharing a CT.
1MRK 511 310-UEN B Section 4 Analog inputs
55 Application manual
Transformer
protection
Transformer
Line
Setting of current input:
Set parameter
CTStarPoint with
Transformer as
reference object.
Correct setting is
«ToObject»
ForwardReverse
Definition of direction
for directional functions
Line protection
Setting of current input:
Set parameter
CTStarPoint with
Transformer as
reference object.
Correct setting is
«ToObject»
Setting of current input:
Set parameter
CTStarPoint with
Line as
reference object.
Correct setting is
«FromObject»
IED IED
IEC05000460 V2 EN
Figure 7: Example how to set CTStarPoint parameters in the IED
This example is similar to example 1, but here the transformer is feeding just one line and the line protection uses the same CT as the transformer protection does. The CT direction is set with different reference objects for the two IEDs though it is the same current from the same CT that is feeding the two IEDs. With these settings the directional functions of the line protection shall be set to Forward to look towards the line.
4.2.2.3 Example 3
One IED used to protect two objects.
Section 4 1MRK 511 310-UEN B Analog inputs
56 Application manual
Transformer and
Line protection
Transformer
Line
Setting of current input:
Set parameter
CTStarPoint with
Transformer as
reference object.
Correct setting is
«ToObject»
ReverseForward
Definition of direction
for directional
line functions
Setting of current input:
Set parameter
CTStarPoint with
Transformer as
reference object.
Correct setting is
«ToObject»
IED
IEC05000461 V2 EN
Figure 8: Example how to set CTStarPoint parameters in the IED
In this example one IED includes both transformer and line protection and the line protection uses the same CT as the transformer protection does. For both current input channels the CT direction is set with the transformer as reference object. This means that the direction Forward for the line protection is towards the transformer. To look towards the line the direction of the directional functions of the line protection must be set to Reverse. The direction Forward/Reverse is related to the reference object that is the transformer in this case.
When a function is set to Reverse and shall protect an object in reverse direction it shall be noted that some directional functions are not symmetrical regarding the reach in forward and reverse direction. It is in first hand the reach of the directional criteria that can differ. Normally it is not any limitation but it is advisable to have it in mind and check if it is acceptable for the application in question.
If the IED has a sufficient number of analog current inputs an alternative solution is shown in figure 9. The same currents are fed to two separate groups of inputs and the line and transformer protection functions are configured to the different inputs. The CT direction for the current channels to the line protection is set with the line as reference object and the directional functions of the line protection shall be set to Forward to protect the line.
1MRK 511 310-UEN B Section 4 Analog inputs
57 Application manual
Transformer and
Line protection
Transformer
Line
Setting of current input
for transformer functions:
Set parameter
CTStarPoint with
Transformer as
reference object.
Correct setting is
«ToObject»
ForwardReverse
Definition of direction
for directional
line functions
Setting of current input
for transformer functions:
Set parameter
CTStarPoint with
Transformer as
reference object.
Correct setting is
«ToObject»
Setting of current input
for line functions:
Set parameter
CTStarPoint with
Line as
reference object.
Correct setting is
«FromObject»
IED
IEC05000462 V2 EN
Figure 9: Example how to set CTStarPoint parameters in the IED
Section 4 1MRK 511 310-UEN B Analog inputs
58 Application manual
Busbar Protection
Busbar
1
2
2
1
en06000196.vsd
IED
IEC06000196 V2 EN
Figure 10: Example how to set CTStarPoint parameters in the IED
For busbar protection it is possible to set the CTStarPoint parameters in two ways.
The first solution will be to use busbar as a reference object. In that case for all CT inputs marked with 1 in figure 10, set CTStarPoint = ToObject, and for all CT inputs marked with 2 in figure 10, set CTStarPoint = FromObject.
The second solution will be to use all connected bays as reference objects. In that case for all CT inputs marked with 1 in figure 10, set CTStarPoint = FromObject, and for all CT inputs marked with 2 in figure 10, set CTStarPoint = ToObject.
Regardless which one of the above two options is selected busbar differential protection will behave correctly.
1MRK 511 310-UEN B Section 4 Analog inputs
59 Application manual
The main CT ratios must also be set. This is done by setting the two parameters CTsec and CTprim for each current channel. For a 1000/1 A CT the following setting shall be used:
CTprim = 1000 (value in A) CTsec =1 (value in A).
4.2.2.4 Examples on how to connect, configure and set CT inputs for most commonly used CT connections
Figure 11 defines the marking of current transformer terminals commonly used around the world:
In the SMAI function block, you have to set if the SMAI block is measuring current or voltage. This is done with the parameter: AnalogInputType: Current/voltage. The ConnectionType: phase — phase/phase-earth and GlobalBaseSel.
ISec
I P ri
S1 (X1)
P1 (H1)
P2 (H2)
S2 (X2)
P2 (H2)
P1 (H1)
x x
a) b) c)
en06000641.vsd
S2 (X2) S1 (X1)
IEC06000641 V1 EN
Figure 11: Commonly used markings of CT terminals
Where:
a) is symbol and terminal marking used in this document. Terminals marked with a square indicates the primary and secondary winding terminals with the same (that is, positive) polarity
b) and c) are equivalent symbols and terminal marking used by IEC (ANSI) standard for CTs. Note that for these two cases the CT polarity marking is correct!
It shall be noted that depending on national standard and utility practices, the rated secondary current of a CT has typically one of the following values:
1A 5A
Section 4 1MRK 511 310-UEN B Analog inputs
60 Application manual
However in some cases the following rated secondary currents are used as well:
2A 10A
The IED fully supports all of these rated secondary values.
It is recommended to:
use 1A rated CT input into the IED in order to connect CTs with 1A and 2A secondary rating
use 5A rated CT input into the IED in order to connect CTs with 5A and 10A secondary rating
4.2.2.5 Example on how to connect a star connected three-phase CT set to the IED
Figure 12 gives an example about the wiring of a star connected three-phase CT set to the IED. It gives also an overview of the actions which are needed to make this measurement available to the built-in protection and control functions within the IED as well.
For correct terminal designations, see the connection diagrams valid for the delivered IED.
1MRK 511 310-UEN B Section 4 Analog inputs
61 Application manual
L1 IL
1
IL 2
IL 3
L2 L3
Protected Object
CT 600/5 Star Connected
IL1
IL2
IL3
IED
IEC13000002-4-en.vsdx
1 2
3
4
SMAI2
BLOCK
REVROT
^GRP2L1
^GRP2L2
^GRP2L3
^GRP2N
AI3P
AI1
AI2
AI3
AI4
AIN
5
IN
IEC13000002 V4 EN
Figure 12: Star connected three-phase CT set with star point towards the protected object
Where:
1) The drawing shows how to connect three individual phase currents from a star connected three-phase CT set to the three CT inputs of the IED.
2) The current inputs are located in the TRM. It shall be noted that for all these current inputs the following setting values shall be entered for the example shown in Figure12. ‘
CTprim=600A CTsec=5A CTStarPoint=ToObject
Inside the IED only the ratio of the first two parameters is used. The third parameter (CTStarPoint=ToObject) as set in this example causes no change on the measured currents. In other words, currents are already measured towards the protected object.
Table continues on next page
Section 4 1MRK 511 310-UEN B Analog inputs
62 Application manual
3) These three connections are the links between the three current inputs and the three input channels of the preprocessing function block 4). Depending on the type of functions, which need this current information, more than one preprocessing block might be connected in parallel to the same three physical CT inputs.
4) The preprocessing block that has the task to digitally filter the connected analog inputs and calculate:
fundamental frequency phasors for all three input channels harmonic content for all three input channels positive, negative and zero sequence quantities by using the fundamental frequency
phasors for the first three input channels (channel one taken as reference for sequence quantities)
These calculated values are then available for all built-in protection and control functions within the IED, which are connected to this preprocessing function block. For this application most of the preprocessing settings can be left to the default values. If frequency tracking and compensation is required (this feature is typically required only for IEDs installed in power plants), then the setting parameters DFTReference shall be set accordingly. Section SMAI in this manual provides information on adaptive frequency tracking for the signal matrix for analogue inputs (SMAI).
5) AI3P in the SMAI function block is a grouped signal which contains all the data about the phases L1, L2, L3 and neutral quantity; in particular the data about fundamental frequency phasors, harmonic content and positive sequence, negative and zero sequence quantities are available. AI1, AI2, AI3, AI4 are the output signals from the SMAI function block which contain the fundamental frequency phasors and the harmonic content of the corresponding input channels of the preprocessing function block. AIN is the signal which contains the fundamental frequency phasors and the harmonic content of the neutral quantity. In this example GRP2N is not connected so this data is calculated by the preprocessing function block on the basis of the inputs GRPL1, GRPL2 and GRPL3. If GRP2N is connected, the data reflects the measured value of GRP2N.
Another alternative is to have the star point of the three-phase CT set as shown in the figure below:
1MRK 511 310-UEN B Section 4 Analog inputs
63 Application manual
L1 IL
1
IL 2
IL 3
L2 L3
Protected Object
CT 800/1 Star Connected
IL1
IL2
IL3
IED
IEC11000026-4-en.vsdx
4 1 2
3
SMAI2
BLOCK
REVROT
^GRP2L1
^GRP2L2
^GRP2L3
^GRP2N
AI3P
AI1
AI2
AI3
AI4
AIN
5
IN
IEC11000026 V4 EN
Figure 13: Star connected three-phase CT set with its star point away from the protected object
In the example in figure 13 case everything is done in a similar way as in the above described example (figure 12). The only difference is the setting of the parameter CTStarPoint of the used current inputs on the TRM (item 2 in the figure):
CTprim=600A CTsec=5A CTStarPoint=FromObject
Inside the IED only the ratio of the first two parameters is used. The third parameter as set in this example will negate the measured currents in order to ensure that the currents are measured towards the protected object within the IED.
A third alternative is to have the residual/neutral current from the three-phase CT set connected to the IED as shown in the figure below.
Section 4 1MRK 511 310-UEN B Analog inputs
64 Application manual
L1 IL
1
IL 2
IL 3
L2 L3
Protected Object
CT 800/1
Star Connected IL1
IL2
IL3
IN
IED
1
3
4
2
5
IEC06000644-4-en.vsdx
6
SMAI2
BLOCK
REVROT
^GRP2L1
^GRP2L2
^GRP2L3
^GRP2N
AI3P
AI1
AI2
AI3
AI4
AIN
IEC06000644 V4 EN
Figure 14: Star connected three-phase CT set with its star point away from the protected object and the residual/neutral current connected to the IED
Where:
1) The drawing shows how to connect three individual phase currents from a star connected three-phase CT set to the three CT inputs of the IED.
2) shows how to connect residual/neutral current from the three-phase CT set to the fourth inputs in the IED. It shall be noted that if this connection is not made, the IED will still calculate this current internally by vectorial summation of the three individual phase currents.
3) is the TRM where these current inputs are located. It shall be noted that for all these current inputs the following setting values shall be entered.
CTprim=800A CTsec=1A CTStarPoint=FromObject ConnectionType=Ph-N
Inside the IED only the ratio of the first two parameters is used. The third parameter as set in this example will have no influence on the measured currents (that is, currents are already measured towards the protected object).
4) are three connections made in the Signal Matrix tool (SMT), Application configuration tool (ACT), which connects these three current inputs to the first three input channels on the preprocessing function block 6). Depending on the type of functions, which need this current information, more than one preprocessing block might be connected in parallel to these three CT inputs.
Table continues on next page
1MRK 511 310-UEN B Section 4 Analog inputs
65 Application manual
5) is a connection made in the Signal Matrix tool (SMT), Application configuration tool (ACT), which connects the residual/neutral current input to the fourth input channel of the preprocessing function block 6). Note that this connection in SMT shall not be done if the residual/neutral current is not connected to the IED. In that case the pre-processing block will calculate it by vectorial summation of the three individual phase currents.
6) is a Preprocessing block that has the task to digitally filter the connected analog inputs and calculate:
fundamental frequency phasors for all four input channels harmonic content for all four input channels positive, negative and zero sequence quantities by using the fundamental frequency
phasors for the first three input channels (channel one taken as reference for sequence quantities)
These calculated values are then available for all built-in protection and control functions within the IED, which are connected to this preprocessing function block in the configuration tool. For this application most of the preprocessing settings can be left to the default values. If frequency tracking and compensation is required (this feature is typically required only for IEDs installed in the generating stations), then the setting parameters DFTReference shall be set accordingly.
4.2.2.6 Example how to connect delta connected three-phase CT set to the IED
Figure 15 gives an example how to connect a delta connected three-phase CT set to the IED. It gives an overview of the required actions by the user in order to make this measurement available to the built-in protection and control functions in the IED as well.
For correct terminal designations, see the connection diagrams valid for the delivered IED.
Section 4 1MRK 511 310-UEN B Analog inputs
66 Application manual
L1
IL 1
IL 2
IL 3
L2 L3
Protected Object
IED
C T 6
0 0 /5
in D
e lta
D A
B C
o nn
e c te
d
IL1-IL2
IL2-IL3
IL3-IL1
1 2
3 4
IEC11000027-3-en.vsdx
SMAI2
BLOCK
REVROT
^GRP2L1
^GRP2L2
^GRP2L3
^GRP2N
AI3P
AI1
AI2
AI3
AI4
AIN
IEC11000027 V3 EN
Figure 15: Delta DAB connected three-phase CT set
1MRK 511 310-UEN B Section 4 Analog inputs
67 Application manual
Where:
1) shows how to connect three individual phase currents from a delta connected three-phase CT set to three CT inputs of the IED.
2) is the TRM where these current inputs are located. It shall be noted that for all these current inputs the following setting values shall be entered. CTprim=600A CTsec=5A
CTStarPoint=ToObject ConnectionType=Ph-Ph
3) are three connections made in Signal Matrix Tool (SMT), Application configuration tool (ACT), which connect these three current inputs to first three input channels of the preprocessing function block 4). Depending on the type of functions which need this current information, more then one preprocessing block might be connected in parallel to these three CT inputs.
4) is a Preprocessing block that has the task to digitally filter the connected analog inputs and calculate:
fundamental frequency phasors for all three input channels harmonic content for all three input channels positive, negative and zero sequence quantities by using the fundamental frequency
phasors for the first three input channels (channel one taken as reference for sequence quantities)
These calculated values are then available for all built-in protection and control functions within the IED, which are connected to this preprocessing function block. For this application most of the preprocessing settings can be left to the default values. If frequency tracking and compensation is required (this feature is typically required only for IEDs installed in the generating stations) then the setting parameters DFTReference shall be set accordingly.
Another alternative is to have the delta connected CT set as shown in figure 16:
Section 4 1MRK 511 310-UEN B Analog inputs
68 Application manual
L1
IL 1
IL 2
IL 3
L2 L3
Protected Object
IED
C T 8
0 0 /1
in D
e lta
D A
C C
o n n e ct
e d
IL3-IL2
IL2-IL1
IL1-IL3
2
3
4
IEC11000028-3-en.vsdx
SMAI2
BLOCK
REVROT
^GRP2L1
^GRP2L2
^GRP2L3
^GRP2N
AI3P
AI1
AI2
AI3
AI4
AIN
1
IEC11000028 V3 EN
Figure 16: Delta DAC connected three-phase CT set
In this case, everything is done in a similar way as in the above described example, except that for all used current inputs on the TRM the following setting parameters shall be entered:
CTprim=800A
CTsec=1A
CTStarPoint=ToObject ConnectionType=Ph-Ph
It is important to notice the references in SMAI. As inputs at Ph-Ph are expected to be L1L2, L2L3 respectively L3L1 we need to tilt 180 by setting ToObject.
4.2.2.7 Example how to connect single-phase CT to the IED
Figure 17 gives an example how to connect the single-phase CT to the IED. It gives an overview of the required actions by the user in order to make this measurement available to the built-in protection and control functions within the IED as well.
For correct terminal designations, see the connection diagrams valid for the delivered IED.
1MRK 511 310-UEN B Section 4 Analog inputs
69 Application manual
Protected Object
L1 L2 L3
IED
IN P
INS
INS
2
IEC11000029-4-en.vsdx
4
3
C T
1 0
0 0
/1
a)
b)
(+)
(+)
(-)
(-) (+)
(-)
1 SMAI2
BLOCK
REVROT
^GRP2L1
^GRP2L2
^GRP2L3
^GRP2N
AI3P
AI1
AI2
AI3
AI4
AIN
IEC11000029 V4 EN
Figure 17: Connections for single-phase CT input
Where:
1) shows how to connect single-phase CT input in the IED.
2) is TRM where these current inputs are located. It shall be noted that for all these current inputs the following setting values shall be entered. For connection (a) shown in figure 17: CTprim = 1000 A CTsec = 1A CTStarPoint=ToObject For connection (b) shown in figure 17: CTprim = 1000 A CTsec = 1A CTStarPoint=FromObject
3) shows the connection made in SMT tool, which connect this CT input to the fourth input channel of the preprocessing function block 4).
4) is a Preprocessing block that has the task to digitally filter the connected analog inputs and calculate values. The calculated values are then available for all built-in protection and control functions within the IED, which are connected to this preprocessing function block. If frequency tracking and compensation is required (this feature is typically required only for IEDs installed in the power plants) then the setting parameters DFTReference shall be set accordingly.
Section 4 1MRK 511 310-UEN B Analog inputs
70 Application manual
4.2.3 Setting of voltage channels
As the IED uses primary system quantities the main VT ratios must be known to the IED. This is done by setting the two parameters VTsec and VTprim for each voltage channel. The phase-to-phase value can be used even if each channel is connected to a phase-to-earth voltage from the VT.
4.2.3.1 Example
Consider a VT with the following data:
132 110 3 3 kV V
EQUATION2016 V1 EN (Equation 1)
The following setting should be used: VTprim=132 (value in kV) VTsec=110 (value in V)
4.2.3.2 Examples how to connect, configure and set VT inputs for most commonly used VT connections
Figure 18 defines the marking of voltage transformer terminals commonly used around the world.
A (H1)
B (H2)
b (X2)
a (X1)
A (H1)
N (H2)
n (X2)
a (X1)
b) c)
A (H1)
N (H2)
dn (X2)
da (X1)
d)
UPri
+ + USec
a)
en06000591.vsd
IEC06000591 V1 EN
Figure 18: Commonly used markings of VT terminals
Where:
a) is the symbol and terminal marking used in this document. Terminals marked with a square indicate the primary and secondary winding terminals with the same (positive) polarity
b) is the equivalent symbol and terminal marking used by IEC (ANSI) standard for phase-to- earth connected VTs
c) is the equivalent symbol and terminal marking used by IEC (ANSI) standard for open delta connected VTs
d) is the equivalent symbol and terminal marking used by IEC (ANSI) standard for phase-to- phase connected VTs
1MRK 511 310-UEN B Section 4 Analog inputs
71 Application manual
It shall be noted that depending on national standard and utility practices the rated secondary voltage of a VT has typically one of the following values:
100 V 110 V 115 V 120 V 230 V
The IED fully supports all of these values and most of them will be shown in the following examples.
4.2.3.3 Examples on how to connect a three phase-to-earth connected VT to the IED
Figure 19 gives an example on how to connect a three phase-to-earth connected VT to the IED. It as well gives overview of required actions by the user in order to make this measurement available to the built-in protection and control functions within the IED.
For correct terminal designations, see the connection diagrams valid for the delivered IED.
Section 4 1MRK 511 310-UEN B Analog inputs
72 Application manual
L1
IED L2
L3
66
3 110
3
kV
V
1
3
2
66
3 110
3
kV
V
66
3 110
3
kV
V
.
#Not used
5
IEC06000599-4-en.vsdx
4
SMAI2
BLOCK
REVROT
^GRP2L1
^GRP2L2
^GRP2L3
^GRP2N
AI3P
AI1
AI2
AI3
AI4
AIN
IEC06000599 V4 EN
Figure 19: A Three phase-to-earth connected VT
Where:
1) shows how to connect three secondary phase-to-earth voltages to three VT inputs on the IED
2) is the TRM where these three voltage inputs are located. For these three voltage inputs, the following setting values shall be entered: VTprim =66 kV VTsec = 110 V Inside the IED, only the ratio of these two parameters is used. It shall be noted that the ratio of the entered values exactly corresponds to ratio of one individual VT.
66 66 3
110110 3
=
EQUATION1903 V1 EN (Equation 2)
Table continues on next page
1MRK 511 310-UEN B Section 4 Analog inputs
73 Application manual
3) are three connections made in Signal Matrix Tool (SMT), which connect these three voltage inputs to first three input channels of the preprocessing function block 5). Depending on the type of functions which need this voltage information, more then one preprocessing block might be connected in parallel to these three VT inputs.
4) shows that in this example the fourth (that is, residual) input channel of the preprocessing block is not connected in SMT tool. Thus the preprocessing block will automatically calculate 3Uo inside by vectorial sum from the three phase to earth voltages connected to the first three input channels of the same preprocessing block. Alternatively, the fourth input channel can be connected to open delta VT input, as shown in figure 21.
5) is a Preprocessing block that has the task to digitally filter the connected analog inputs and calculate:
fundamental frequency phasors for all four input channels harmonic content for all four input channels positive, negative and zero sequence quantities by using the fundamental frequency
phasors for the first three input channels (channel one taken as reference for sequence quantities)
These calculated values are then available for all built-in protection and control functions within the IED, which are connected to this preprocessing function block in the configuration tool. For this application most of the preprocessing settings can be left to the default values. However the following settings shall be set as shown here: UBase=66 kV (that is, rated Ph-Ph voltage) If frequency tracking and compensation is required (this feature is typically required only for IEDs installed in the generating stations) then the setting parameters DFTReference shall be set accordingly.
4.2.3.4 Example on how to connect a phase-to-phase connected VT to the IED
Figure 20 gives an example how to connect a phase-to-phase connected VT to the IED. It gives an overview of the required actions by the user in order to make this measurement available to the built-in protection and control functions within the IED as well. It shall be noted that this VT connection is only used on lower voltage levels (that is, rated primary voltage below 40 kV).
Section 4 1MRK 511 310-UEN B Analog inputs
74 Application manual
L1
IED
L2
L3
13.8 120
kV V
1
2
#Not Used
13.8 120
kV V
.
5
IEC06000600-5-en.vsdx
4
SMAI2
BLOCK
REVROT
^GRP2L1
^GRP2L2
^GRP2L3
^GRP2N
AI3P
AI1
AI2
AI3
AI4
AIN
3
IEC06000600 V5 EN
Figure 20: A Two phase-to-phase connected VT
Where:
1) shows how to connect the secondary side of a phase-to-phase VT to the VT inputs on the IED
2) is the TRM where these three voltage inputs are located. It shall be noted that for these three voltage inputs the following setting values shall be entered: VTprim=13.8 kV VTsec=120 V Please note that inside the IED only ratio of these two parameters is used.
Table continues on next page
1MRK 511 310-UEN B Section 4 Analog inputs
75 Application manual
3) are three connections made in the Signal Matrix tool (SMT), Application configuration tool (ACT), which connects these three voltage inputs to first three input channels of the preprocessing function block 5). Depending on the type of functions, which need this voltage information, more than one preprocessing block might be connected in parallel to these three VT inputs
4) shows that in this example the fourth (that is, residual) input channel of the preprocessing block is not connected in SMT. Note. If the parameters UL1, UL2, UL3, UN should be used the open delta must be connected here.
5) Preprocessing block has a task to digitally filter the connected analog inputs and calculate:
fundamental frequency phasors for all four input channels harmonic content for all four input channels positive, negative and zero sequence quantities by using the fundamental frequency
phasors for the first three input channels (channel one taken as reference for sequence quantities)
These calculated values are then available for all built-in protection and control functions within the IED, which are connected to this preprocessing function block in the configuration tool. For this application most of the preprocessing settings can be left to the default values. However the following settings shall be set as shown here: ConnectionType=Ph-Ph UBase=13.8 kV If frequency tracking and compensation is required (this feature is typically required only for IEDs installed in the generating stations) then the setting parameters DFTReference shall be set accordingly.
4.2.3.5 Example on how to connect an open delta VT to the IED for high impedance earthed or unearthed netwoeks
Figure 21 gives an example about the wiring of an open delta VT to the IED for high impedance earthed or unearthed power systems. It shall be noted that this type of VT connection presents a secondary voltage proportional to 3U0 to the IED.
In case of a solid earth fault close to the VT location the primary value of 3Uo will be equal to:
3 0 3 3Ph Ph Ph NU U U— -= = EQUATION1921 V3 EN (Equation 3)
The primary rated voltage of an open Delta VT is always equal to UPh-E. Three series connected VT secondary windings gives a secondary voltage equal to three times the individual VT secondary winding rating. Thus the secondary windings of open delta VTs quite often have a secondary rated voltage equal to one third of the rated phase- to-phase VT secondary voltage (110/3V in this particular example).
Figure 21 gives overview of required actions by the user in order to make this measurement available to the built-in protection and control functions within the IED as well.
Section 4 1MRK 511 310-UEN B Analog inputs
76 Application manual
L1
IED L2
L3
6.6
3 110
3
kV
V
+3Uo
6.6
3 110
3
kV
V
6.6
3 110
3
kV
V
1
2
4
3
# Not Used
5
IEC06000601-4-en.vsdx
# Not Used
# Not Used
SMAI2
BLOCK
REVROT
^GRP2L1
^GRP2L2
^GRP2L3
^GRP2N
AI3P
AI1
AI2
AI3
AI4
AIN
IEC06000601 V4 EN
Figure 21: Open delta connected VT in high impedance earthed power system
1MRK 511 310-UEN B Section 4 Analog inputs
77 Application manual
Where:
1) shows how to connect the secondary side of the open delta VT to one VT input on the IED.
+3U0 shall be connected to the IED
2) is the TRM where this voltage input is located. It shall be noted that for this voltage input the following setting values shall be entered:
3 6.6 11.43VTprim kV= =
EQUATION1923 V1 EN (Equation 4)
110 sec 3 110
3 VT V= =
EQUATION1924 V1 EN (Equation 5)
Inside the IED, only the ratio of these two parameters is used. It shall be noted that the ratio of the entered values exactly corresponds to ratio of one individual open delta VT.
6.6 3 6.6 3
110110 3
=
EQUATION1925 V1 EN (Equation 6)
3) shows that in this example the first three input channel of the preprocessing block is not connected in SMT tool or ACT tool.
4) shows the connection made in Signal Matrix Tool (SMT), Application configuration tool (ACT), which connect this voltage input to the fourth input channel of the preprocessing function block 5).
5) is a Preprocessing block that has the task to digitally filter the connected analog input and calculate:
fundamental frequency phasors for all four input channels harmonic content for all four input channels positive, negative and zero sequence quantities by using the fundamental frequency
phasors for the first three input channels (channel one taken as reference for sequence quantities)
These calculated values are then available for all built-in protection and control functions within the IED, which are connected to this preprocessing function block in the configuration tool. For this application most of the preprocessing settings can be left to the default values. If frequency tracking and compensation is required (this feature is typically required only for IEDs installed in the generating stations ) then the setting parameters DFTReference shall be set accordingly.
Section 4 1MRK 511 310-UEN B Analog inputs
78 Application manual
4.2.3.6 Example how to connect the open delta VT to the IED for low impedance earthed or solidly earthed power systems
Figure 22 gives an example about the connection of an open delta VT to the IED for low impedance earthed or solidly earthed power systems. It shall be noted that this type of VT connection presents secondary voltage proportional to 3U0 to the IED.
In case of a solid earth fault close to the VT location the primary value of 3Uo will be equal to:
3 3
Ph Ph Ph E
U Uo U—
-= =
EQUATION1926 V1 EN (Equation 7)
The primary rated voltage of such VT is always equal to UPh-E Therefore, three series connected VT secondary windings will give the secondary voltage equal only to one individual VT secondary winding rating. Thus the secondary windings of such open delta VTs quite often has a secondary rated voltage close to rated phase-to-phase VT secondary voltage, that is, 115V or 115/3V as in this particular example. Figure 22 gives an overview of the actions which are needed to make this measurement available to the built-in protection and control functions within the IED.
1
L1
IED L2
L3
138
3 115
3
kV
V
+3Uo
138
3 115
3
kV
V
138
3 115
3
kV
V
IEC06000602-4-en.vsdx
# Not Used
# Not Used
# Not Used
SMAI2
BLOCK
REVROT
^GRP2L1
^GRP2L2
^GRP2L3
^GRP2N
AI3P
AI1
AI2
AI3
AI4
AIN
2
3
4
5
IEC06000602 V4 EN
Figure 22: Open delta connected VT in low impedance or solidly earthed power system
1MRK 511 310-UEN B Section 4 Analog inputs
79 Application manual
Where:
1) shows how to connect the secondary side of open delta VT to one VT input in the IED.
+3Uo shall be connected to the IED.
2) is TRM where this voltage input is located. It shall be noted that for this voltage input the following setting values shall be entered:
138 3 138
3 VTprim kV= =
EQUATION1928 V1 EN (Equation 
115 sec 3 115
3 VT V= =
EQUATION1929 V1 EN (Equation 9)
Inside the IED, only the ratio of these two parameters is used. It shall be noted that the ratio of the entered values exactly corresponds to ratio of one individual open delta VT.
138 138 3
115115 3
=
EQUATION1930 V1 EN (Equation 10)
3) shows that in this example the first three input channel of the preprocessing block is not connected in SMT tool.
4) shows the connection made in Signal Matrix Tool (SMT), which connect this voltage input to the fourth input channel of the preprocessing function block 4).
5) preprocessing block has a task to digitally filter the connected analog inputs and calculate:
fundamental frequency phasors for all four input channels harmonic content for all four input channels positive, negative and zero sequence quantities by using the fundamental
frequency phasors for the first three input channels (channel one taken as reference for sequence quantities)
These calculated values are then available for all built-in protection and control functions within the IED, which are connected to this preprocessing function block in the configuration tool. For this application most of the preprocessing settings can be left to the default values. If frequency tracking and compensation is required (this feature is typically required only for IEDs installed in the generating stations) then the setting parameters DFTReference shall be set accordingly.
4.2.3.7 Example on how to connect a neutral point VT to the IED
Figure 23 gives an example on how to connect a neutral point VT to the IED. This type of VT connection presents secondary voltage proportional to U0 to the IED.
Section 4 1MRK 511 310-UEN B Analog inputs
80 Application manual
In case of a solid earth fault in high impedance earthed or unearthed systems the primary value of Uo voltage will be equal to:
0 3
Ph Ph Ph E
UU U— -= =
EQUATION1931 V2 EN (Equation 11)
Figure 23 gives an overview of required actions by the user in order to make this measurement available to the built-in protection and control functions within the IED as well.
L1 L2 L3
IED
6.6
3 100
kV
V
R Uo
IEC06000603-4-en.vsdx
# Not Used
# Not Used
# Not Used
Protected Object
SMAI2
BLOCK
REVROT
^GRP2L1
^GRP2L2
^GRP2L3
^GRP2N
AI3P
AI1
AI2
AI3
AI4
AIN
1
2
3
4
5
IEC06000603 V4 EN
Figure 23: Neutral point connected VT
1MRK 511 310-UEN B Section 4 Analog inputs
81 Application manual
Where:
1) shows how to connect the secondary side of neutral point VT to one VT input in the IED.
U0 shall be connected to the IED.
2) is the TRM or AIM where this voltage input is located. For this voltage input the following setting values shall be entered:
6.6 3.81
3 VTprim kV= =
EQUATION1933 V1 EN (Equation 12)
sec 100VT V=
EQUATION1934 V1 EN (Equation 13)
Inside the IED, only the ratio of these two parameters is used. It shall be noted that the ratio of the entered values exactly corresponds to ratio of the neutral point VT.
3) shows that in this example the first three input channel of the preprocessing block is not connected in SMT tool or ACT tool.
4) shows the connection made in Signal Matrix Tool (SMT), Application configuration tool (ACT), which connects this voltage input to the fourth input channel of the preprocessing function block 5).
5) is a preprocessing block that has the task to digitally filter the connected analog inputs and calculate:
fundamental frequency phasors for all four input channels harmonic content for all four input channels positive, negative and zero sequence quantities by using the fundamental frequency
phasors for the first three input channels (channel one taken as reference for sequence quantities)
These calculated values are then available for all built-in protection and control functions within the IED, which are connected to this preprocessing function block in the configuration tool. For this application most of the preprocessing settings can be left to the default values. If frequency tracking and compensation is required (this feature is typically required only for IEDs installed in the generating stations) then the setting parameters DFTReference shall be set accordingly.
Section 4 1MRK 511 310-UEN B Analog inputs
82 Application manual
Section 5 Local HMI
IEC13000239-2-en.vsd
IEC13000239 V2 EN
Figure 24: Local human-machine interface
The LHMI of the IED contains the following elements:
1MRK 511 310-UEN B Section 5 Local HMI
83 Application manual
Keypad Display (LCD) LED indicators Communication port for PCM600
The LHMI is used for setting, monitoring and controlling.
5.1 Display
The LHMI includes a graphical monochrome display with a resolution of 320 x 240 pixels. The character size can vary. The amount of characters and rows fitting the view depends on the character size and the view that is shown.
The display view is divided into four basic areas.
IEC13000063-2-en.vsd
1
3 4
2
IEC13000063 V2 EN
Figure 25: Display layout
1 Path
2 Content
3 Status
4 Scroll bar (appears when needed)
Section 5 1MRK 511 310-UEN B Local HMI
84 Application manual
The function button panel shows on request what actions are possible with the function buttons. Each function button has a LED indication that can be used as a feedback signal for the function button control action. The LED is connected to the required signal with PCM600.
IEC13000281-1-en.vsd
GUID-C98D972D-D1D8-4734-B419-161DBC0DC97B V1 EN
Figure 26: Function button panel
The alarm LED panel shows on request the alarm text labels for the alarm LEDs. Three alarm LED pages are available.
IEC13000240-1-en.vsd
GUID-5157100F-E8C0-4FAB-B979-FD4A971475E3 V1 EN
Figure 27: Alarm LED panel
The function button and alarm LED panels are not visible at the same time. Each panel is shown by pressing one of the function buttons or the Multipage button. Pressing the ESC button clears the panel from the display. Both the panels have dynamic width that depends on the label string length that the panel contains.
1MRK 511 310-UEN B Section 5 Local HMI
85 Application manual
5.2 LEDs
The LHMI includes three protection status LEDs above the display: Ready, Start and Trip.
There are 15 programmable alarm LEDs on the front of the LHMI. Each LED can indicate three states with the colors: green, yellow and red. The alarm texts related to each three-color LED are divided into three pages.
5.3 Keypad
The LHMI keypad contains push-buttons which are used to navigate in different views or menus. The push-buttons are also used to acknowledge alarms, reset indications, provide help and switch between local and remote control mode.
The keypad also contains programmable push-buttons that can be configured either as menu shortcut or control buttons.
Section 5 1MRK 511 310-UEN B Local HMI
86 Application manual
1
18
19
7
6
5
4
3
2
8
20
21
22
17161514131211109
23
24
IEC15000157-2-en.vsd
IEC15000157 V2 EN
Figure 28: LHMI keypad with object control, navigation and command push- buttons and RJ-45 communication port
1…5 Function button
6 Close
7 Open
8 Escape
9 Left
10 Down
11 Up
12 Right
13 Key
14 Enter
15 Remote/Local
16 Uplink LED
17 Not in use
18 Multipage
1MRK 511 310-UEN B Section 5 Local HMI
87 Application manual
19 Menu
20 Clear
21 Help
22 Communication port
23 Programmable indication LEDs
24 IED status LEDs
5.4 Local HMI functionality
5.4.1 Protection and alarm indication
Protection indicators The protection indicator LEDs are Ready, Start and Trip.
The start and trip LEDs are configured via the disturbance recorder. The yellow and red status LEDs are configured in the disturbance recorder function, DRPRDRE, by connecting a start or trip signal from the actual function to a BxRBDR binary input function block using the PCM600 and configure the setting to Off, Start or Trip for that particular signal.
Table 3: Ready LED (green)
LED state Description Off Auxiliary supply voltage is disconnected.
On Normal operation.
Flashing Internal fault has occurred.
Table 4: Start LED (yellow)
LED state Description Off Normal operation.
On A protection function has started and an indication message is displayed. The start indication is latching and must be reset via communication, LHMI or binary input on the LEDGEN component. To open the reset menu on the LHMI, press .
Flashing The IED is in test mode and protection functions are blocked, or the IEC61850 protocol is blocking one or more functions. The indication disappears when the IED is no longer in test mode and blocking is removed. The blocking of functions through the IEC61850 protocol can be reset in Main menu/Test/Reset IEC61850 Mod. The yellow LED changes to either On or Off state depending on the state of operation.
Section 5 1MRK 511 310-UEN B Local HMI
88 Application manual
Table 5: Trip LED (red)
LED state Description Off Normal operation.
On A protection function has tripped. An indication message is displayed if the auto-indication feature is enabled in the local HMI. The trip indication is latching and must be reset via communication, LHMI or binary input on the LEDGEN component. To open the reset menu on the LHMI, press .
Flasing Configuration mode.
Alarm indicators The 15 programmable three-color LEDs are used for alarm indication. An individual alarm/status signal, connected to any of the LED function blocks, can be assigned to one of the three LED colors when configuring the IED.
Table 6: Alarm indications
LED state Description Off Normal operation. All activation signals are off.
On Follow-S sequence: The activation signal is on. LatchedColl-S sequence: The activation signal is on, or it is off but the indication
has not been acknowledged. LatchedAck-F-S sequence: The indication has been acknowledged, but the
activation signal is still on. LatchedAck-S-F sequence: The activation signal is on, or it is off but the indication
has not been acknowledged. LatchedReset-S sequence: The activation signal is on, or it is off but the indication
has not been acknowledged.
Flashing Follow-F sequence: The activation signal is on. LatchedAck-F-S sequence: The activation signal is on, or it is off but the indication
has not been acknowledged. LatchedAck-S-F sequence: The indication has been acknowledged, but the
activation signal is still on.
5.4.2 Parameter management
The LHMI is used to access the relay parameters. Three types of parameters can be read and written.
Numerical values String values Enumerated values
Numerical values are presented either in integer or in decimal format with minimum and maximum values. Character strings can be edited character by character. Enumerated values have a predefined set of selectable values.
1MRK 511 310-UEN B Section 5 Local HMI
89 Application manual
5.4.3 Front communication
The RJ-45 port in the LHMI enables front communication.
The green uplink LED on the left is lit when the cable is successfully connected to the port.
GUID-D71BA06D-3769-4ACB-8A32-5D02EA473326 V1 EN
Figure 29: RJ-45 communication port and green indicator LED
1 RJ-45 connector
2 Green indicator LED
Section 5 1MRK 511 310-UEN B Local HMI
90 Application manual
Section 6 Differential protection
6.1 1Ph High impedance differential protection HZPDIF
6.1.1 Identification
Function description IEC 61850 identification
IEC 60617 identification
ANSI/IEEE C37.2 device number
1Ph High impedance differential protection HZPDIF Id
SYMBOL-CC V2 EN
87
6.1.2 Application
The 1Ph High impedance differential protection function HZPDIF can be used as:
Generator differential protection Reactor differential protection Busbar differential protection Autotransformer differential protection (for common and serial windings only) T-feeder differential protection Capacitor differential protection Restricted earth fault protection for transformer, generator and shunt reactor
windings Restricted earth fault protection
The application is dependent on the primary system arrangements and location of breakers, available CT cores and so on.
1MRK 511 310-UEN B Section 6 Differential protection
91 Application manual
3Id
3IdId
3Id
3Id
G
3Id
IEC05000163-4-en.vsd
IEC05000163 V4 EN
Section 6 1MRK 511 310-UEN B Differential protection
92 Application manual
3Id
Z<
3Id
Z<
IEC05000738-3-en.vsd
IEC05000738 V3 EN
Figure 30: Different applications of a 1Ph High impedance differential protection HZPDIF function
6.1.2.1 The basics of the high impedance principle
The high impedance differential protection principle has been used for many years and is well documented in literature publicly available. Its operating principle provides very good sensitivity and high speed operation. One main benefit offered by the principle is an absolute stability (that is, no operation) for external faults even in the presence of heavy CT saturation. The principle is based on the CT secondary current circulating between involved current transformers and not through the IED due to high impedance in the measuring branch. This stabilizing resistance is in the range of hundreds of ohms and sometimes above one kilo Ohm. When an internal fault occurs the current cannot circulate and is forced through the measuring branch causing relay operation.
It should be remembered that the whole scheme, its built-in components and wiring must be adequately maintained throughout the lifetime of the equipment in order to be able to withstand the high voltage peaks (that is, pulses) which may appear during an internal fault. Otherwise any flash-over in CT secondary circuits or any other part of the scheme may prevent correct operation of the high impedance differential relay for an actual internal fault.
1MRK 511 310-UEN B Section 6 Differential protection
93 Application manual
Id
IEC05000164-2-en.vsd
R
Metrosil
IEC05000164 V3 EN
Figure 31: Example for the high impedance restricted earth fault protection application
For a through fault one current transformer might saturate when the other CTs still will feed current. For such a case a voltage will be developed across the measuring branch. The calculations are made with the worst situations in mind and a minimum operating voltage UR is calculated according to equation 14
( )maxUR IF Rct Rl> + EQUATION1531 V1 EN (Equation 14)
where:
IFmax is the maximum through fault current at the secondary side of the CT
Rct is the current transformer secondary winding resistance and
Rl is the maximum loop resistance of the circuit at any CT.
Section 6 1MRK 511 310-UEN B Differential protection
94 Application manual
The minimum operating voltage has to be calculated (all loops) and the IED function is set higher than the highest achieved value (setting U>Trip). As the loop resistance is the value to the connection point from each CT, it is advisable to do all the CT core summations in the switchgear to have shortest possible loops. This will give lower setting values and also a better balanced scheme. The connection in to the control room can then be from the most central bay.
For an internal fault, all involved CTs will try to feed current through the measuring branch. Depending on the size of current transformer, relatively high voltages will be developed across the series resistor. Note that very high peak voltages can appear. To prevent the risk of flashover in the circuit, a voltage limiter must be included. The voltage limiter is a voltage dependent resistor (Metrosil).
The external unit with stabilizing resistor has a value of either 6800 ohms or 1800 ohms (depending on ordered alternative) with a sliding link to allow adjustment to the required value. Select a suitable value of the resistor based on the UR voltage calculated. A higher resistance value will give a higher sensitivity and a lower value a lower sensitivity of the relay.
The function has a recommended operating current range 40 mA to 1.0A for 1 A inputs and 200 mA to 5A for 5A inputs. This, together with the selected and set value, is used to calculate the required value of current at the set U>Trip and SeriesResitor values.
The CT inputs used for 1Ph High impedance differential protection HZPDIF function, shall be set to have ratio 1:1. So the parameters CTsecx and CTprimx of the relevant channel x of TRM and/or AIM shall be set equal to 1 A by PST in PCM600; The parameter CTStarPointx may be set to ToObject.
The tables 7, 8 below show, the operating currents for different settings of operating voltages and selected resistances. Adjust as required based on tables 7, 8 or to values in between as required for the application.
Minimum ohms can be difficult to adjust due to the small value compared to the total value.
Normally the voltage can be increased to higher values than the calculated minimum U>Trip with a minor change of total operating values as long as this is done by adjusting the resistor to a higher value. Check the sensitivity calculation below for reference.
Table 7: 1 A channels: input with minimum operating down to 20 mA
Operating voltage U>Trip
Stabilizing resistor R ohms
Operating current level 1 A
Stabilizing resistor R ohms
Operating current level 1 A
Stabilizing resistor R ohms
Operating current level 1 A
20 V 1000 0.020 A — — — —
40 V 2000 0.020 A 1000 0.040 A — —
60 V 3000 0.020 A 1500 0.040 A 600 0.100 A
Table continues on next page
1MRK 511 310-UEN B Section 6 Differential protection
95 Application manual
Operating voltage U>Trip
Stabilizing resistor R ohms
Operating current level 1 A
Stabilizing resistor R ohms
Operating current level 1 A
Stabilizing resistor R ohms
Operating current level 1 A
80 V 4000 0.020 A 2000 0.040 A 800 0.100 A
100 V 5000 0.020 A 2500 0.040 A 1000 0.100 A
150 V 6000 0.020 A 3750 0.040 A 1500 0.100 A
200 V 6800 0.029 A 5000 0.040 A 2000 0.100 A
Table 8: 5 A channels: input with minimum operating down to 100 mA
Operating voltage U>Trip
Stabilizing resistor R1 ohms
Operating current level 5 A
Stabilizing resistor R1 ohms
Operating current level 5 A
Stabilizing resistor R1 ohms
Operating current level 5 A
20 V 200 0.100 A 100 0.200 A — —
40 V 400 0.100 A 200 0.200 A 100 0.400
60 V 600 0.100 A 300 0.200 A 150 0.400 A
80 V 800 0.100 A 400 0.200 A 200 0.400 A
100 V 1000 0.100 A 500 0.200 A 250 0.400 A
150 V 1500 0.100 A 750 0.200 A 375 0.400 A
200 V 2000 0.100 A 1000 0.200 A 500 0.400 A
The current transformer saturation voltage must be at least 2 U>Trip to have sufficient operating margin. This must be checked after calculation of U>Trip.
When the R value has been selected and the U>Trip value has been set, the sensitivity of the scheme IP can be calculated. The IED sensitivity is decided by the total current in the circuit according to equation 15.
( )IP n IR Ires lmag= + + EQUATION1747 V1 EN (Equation 15)
where:
n is the CT ratio
IP primary current at IED pickup,
IR IED pickup current (U>Trip/SeriesResistor)
Ires is the current through the voltage limiter and
Imag is the sum of the magnetizing currents from all CTs in the circuit (for example, 4 for restricted earth fault protection, 2 for reactor differential protection, 3-5 for autotransformer differential protection).
It should be remembered that the vectorial sum of the currents must be used (IEDs, Metrosil and resistor currents are resistive). The current measurement is insensitive to DC component in fault current to allow the use of only the AC components of the fault current in the above calculations.
Section 6 1MRK 511 310-UEN B Differential protection
96 Application manual
The voltage dependent resistor (Metrosil) characteristic is shown in Figure 37.
Series resistor thermal capacity The series resistor is dimensioned for 200 W. Preferable the U>Trip2/SeriesResistor should always be lower than 200 W to allow continuous activation during testing. If this value is exceeded, testing should be done with a transient faults.
1MRK 511 310-UEN B Section 6 Differential protection
97 Application manual
I>
R
Rres
Rl
Rct Rct
Rl
UR
a) Through load situation
b) Through fault situation
UR
UR
c) Internal faults
UR
Protected Object
IEC05000427-2-en.vsd
IEC05000427 V2 EN
Figure 32: The high impedance principle for one phase with two current transformer inputs
Section 6 1MRK 511 310-UEN B Differential protection
98 Application manual
6.1.3 Connection examples for high impedance differential protection
WARNING! USE EXTREME CAUTION! Dangerously high voltages might be present on this equipment, especially on the plate with resistors. De-energize the primary object protected with this equipment before connecting or disconnecting wiring or performing any maintenance. The plate with resistors should be provided with a protective cover, mounted in a separate box or in a locked cubicle. National law and standards shall be followed.
6.1.3.1 Connections for three-phase high impedance differential protection
Generator, reactor or busbar differential protection is a typical application for three- phase high impedance differential protection. Typical CT connections for three-phase high impedance differential protection scheme are shown in figure 33.
L1 (A)
L2 (B)
L3 (C)
Protected Object
CT 1200/1 Star/Wye
Connected
L1 (A)
L2 (B)
L3 (C)
CT 1200/1 Star/Wye
Connected
7
8
9 1 01 11 2
1
2
3
4
5
6
AI01 (I)
AI02 (I)
AI03 (I)
AI04 (I)
AI05 (I)
AI06 (I)
7
6
X1
R 4
R 5
R 6
1 2
1 2
1 2
11 12 13 14
U U U R 1
1 3
4
2
1 3
R 2
2
4
1 3
R 3
2
4
1 2 3 4 5 6 7
L1 (A)
L2 (B)
L3 (C) N
3-Ph Plate with Metrosils and Resistors
2
3
5
4
X X
L1 (A)
L2 (B)
L3 (C) N
1
IED
IEC07000193_4_en.vsd
AI3P
AI1
AI2
AI3
AI4
AIN
SMAI2
BLOCK
^GRP2L1
^GRP2L2
^GRP2L3
^GRP2N
TYPE
IEC07000193 V4 EN
Figure 33: CT connections for high impedance differential protection
1MRK 511 310-UEN B Section 6 Differential protection
99 Application manual
Pos Description
1 Scheme earthing point
It is important to insure that only one earthing point exist in this scheme.
2 Three-phase plate with setting resistors and metrosils. Protective earth is a separate 4 mm screw terminal on the plate.
3 Necessary connection for three-phase metrosil set.
4 Position of optional test switch for secondary injection into the high impedance differential IED.
5 Necessary connection for setting resistors.
6 Factory-made star point on a three-phase setting resistor set.
The star point connector must be removed for installations with 670 series IEDs. This star point is required for RADHA schemes only.
7 Connections of three individual phase currents for high impedance scheme to three CT inputs in the IED.
6.1.3.2 Connections for 1Ph High impedance differential protection HZPDIF
Restricted earth fault protection REFPDIF is a typical application for 1Ph High impedance differential protection HZPDIF. Typical CT connections for high impedance based REFPDIF protection scheme are shown in figure 34.
Section 6 1MRK 511 310-UEN B Differential protection
100 Application manual
L1 (A)
L2 (B)
L3 (C)
Protected Object
CT 1500/5 Star/Wye
Connected
7
8
9
10
11
12
1
2
3
4
5
6
AI01 (I)
AI02 (I)
AI03 (I)
AI04 (I)
AI05 (I)
AI06 (I)
6
X1
R 1
1 2
4 5
U R 2
1 3
4
2
1 2 3
N
1-Ph Plate with Metrosil and Resistor
2 3
5
4
N
L1 (A)
L2 (B)
L3 (C)
C T
15 00
/5 1
IEC07000194_4_en.vsd
AI3P
AI1
AI2
AI3
AI4
AIN
SMAI2
BLOCK
^GRP2L1
^GRP2L2
^GRP2L3
^GRP2N
TYPE
IEC07000194 V4 EN
Figure 34: CT connections for restricted earth fault protection
Pos Description
1 Scheme earthing point
Ensure that only one earthing point exists in this scheme.
2 One-phase plate with stabilizing resistor and metrosil. Protective earth is a separate 4 mm screw terminal on the plate.
3 Necessary connection for the metrosil.
4 Position of optional test switch for secondary injection into the high impedance differential IED.
5 Necessary connection for stabilizing resistor.
6 How to connect REFPDIF high impedance scheme to one CT input in IED.
6.1.4 Setting guidelines
The setting calculations are individual for each application. Refer to the different application descriptions below.
6.1.4.1 Configuration
The configuration is done in the Application Configuration tool.
1MRK 511 310-UEN B Section 6 Differential protection
101 Application manual
6.1.4.2 Settings of protection function
Operation: The operation of the high impedance differential function can be switched On or Off.
U>Alarm: Set the alarm level. The sensitivity can roughly be calculated as a certain percentage of the selected Trip level. A typical setting is 10% of U>Trip This alarm stage can be used for scheme CT supervision.
tAlarm: Set the time delay for the alarm. A typical setting is 2-3 seconds.
U>Trip: Set the trip level according to the calculations (see examples below for a guidance). The level is selected with margin to the calculated required voltage to achieve stability. Values can be within 20V — 400V range dependent on the application.
SeriesResistor: Set the value of the used stabilizing series resistor. Calculate the value according to the examples for each application. Adjust the resistor as close as possible to the calculated value. Measure the value achieved and set this value for this parameter.
The value shall always be high impedance. This means for example, for 1A circuits say bigger than 400 ohms (400 VA) and for 5 A circuits say bigger than 100 ohms (2500 VA). This ensures that the current will circulate and not go through the differential circuit at through faults.
That the settings of U>Alarm, U>Trip and SeriesResistor must be chosen such that both U>Alarm/SeriesResistor and U>Trip/ SeriesResistor are >4% of IRated of the used current input. Normally the settings shall also be such that U>Alarm/SeriesResistor and U>Trip/SeriesResistor both gives a value <4*IRated of the used current input. If not, the limitation in how long time the actual current is allowed to persist not to overload the current input must be considered especially during the secondary testing.
6.1.4.3 T-feeder protection
In many busbar arrangements such as one-and a half breaker, ring breaker, mesh corner, there will be a T-feeder from the current transformer at the breakers up to the current transformers in the feeder circuit (for example, in the transformer bushings). It is often required to separate the protection zones that the feeder is protected with one scheme while the T-zone is protected with a separate differential protection scheme. The 1Ph high impedance differential HZPDIF function in the IED allows this to be done efficiently, see Figure 35.
Section 6 1MRK 511 310-UEN B Differential protection
102 Application manual
3Id
IEC05000165-2-en.vsd
IEC05000165 V2 EN
3Id
IEC05000739-2-en.vsd
IEC05000739 V2 EN
Figure 35: The protection scheme utilizing the high impedance function for the T-feeder
1MRK 511 310-UEN B Section 6 Differential protection
103 Application manual
Normally this scheme is set to achieve a sensitivity of around 20 percent of the used CT primary rating so that a low ohmic value can be used for the series resistor.
It is strongly recommended to use the highest tap of the CT whenever high impedance protection is used. This helps in utilizing maximum CT capability, minimize the secondary fault current, thereby reducing the stability voltage limit. Another factor is that during internal faults, the voltage developed across the selected tap is limited by the non- linear resistor but in the unused taps, owing to auto-transformer action, voltages induced may be much higher than design limits.
Setting example Basic data: Current transformer ratio: 2000/1 A
CT Class: 20 VA 5P20
Secondary resistance: 6.2 ohms
Cable loop resistance: <100 m 2.5 mm2 (one way) gives 2 0.8 ohm at 75 C
Max fault current: Equal to switchgear rated fault current 40 kA
Calculation:
EQUATION1207 V2 EN (Equation 16)
Select a setting of U>Trip=200 V.
The current transformer saturation voltage must be at least twice the set operating voltage U>Trip.
( )5 20 6.2 20 524E P V> + =
EQUATION1208 V1 EN (Equation 17)
that is, bigger than 2 U>Trip
Check from the table of selected resistances the required series stabilizing resistor value to use. As this application requires to be so sensitive select SeriesResistor= 2000 ohm, which gives an IED operating current of 100 mA.
Calculate the primary sensitivity at operating voltage using the following equation.
Section 6 1MRK 511 310-UEN B Differential protection
104 Application manual
IP approx A= + + ( ) 2000
1 100 0 20 0 3 10 60 10 275
3
EQUATION1209 V2 EN (Equation 18)
where
100 mA is the current drawn by the IED circuit and
10 mA is the current drawn by each CT just at pickup
20 mA is current drawn by metrosil at pickup
The magnetizing current is taken from the magnetizing curve for the current transformer cores which should be available. The current value at U>Trip is taken. For the voltage dependent resistor current the peak value of voltage 200 2 is used. Then the RMS current is calculated by dividing obtained current value from the metrosil curve with2. Use the value from the maximum metrosil curve given in Figure 37
It can clearly be seen that the sensitivity is not so much influenced by the selected voltage level so a sufficient margin should be used. The selection of the stabilizing resistor and the level of the magnetizing current (mostly dependent of the number of turns) are the most important factors.
6.1.4.4 Tertiary reactor protection
Reactive power equipment (for example shunt reactors and/or shunt capacitors) can be connected to the tertiary winding of the power transformers. The 1Ph High impedance differential protection function HZPDIF can be used to protect the tertiary reactor for phase faults as well as earth faults if the power system of the tertiary winding is direct or low impedance earthed.
1MRK 511 310-UEN B Section 6 Differential protection
105 Application manual
3Id
IEC05000176-3-en.vsd
IEC05000176 V3 EN
Figure 36: Application of the1Ph High impedance differential protection HZPDIF function on a reactor
Setting example
It is strongly recommended to use the highest tap of the CT whenever high impedance protection is used. This helps in utilizing maximum CT capability, minimize the secondary fault, thereby reducing the stability voltage limit. Another factor is that during internal faults, the voltage developed across the selected tap is limited by the non-linear resistor but in the unused taps, owing to auto-transformer action, voltages much higher than design limits might be induced.
Section 6 1MRK 511 310-UEN B Differential protection
106 Application manual
Basic data: Current transformer ratio: 100/5 A (Note: Must be the same at all locations)
CT Class: 10 VA 5P20
Secondary resistance: 0.26 ohms
Cable loop resistance: <50 m 2.5mm2 (one way) gives 1 0.4 ohm at 75 C Note! Only one way as the tertiary power system earthing is limiting the earth-fault current. If high earth-fault current exists use two way cable length.
Max fault current: The maximum through fault current is limited by the reactor reactance and the inrush will be the worst for a reactor for example, 800 A.
Calculation:
UR > + = 800
100 5 0 26 0 4 26 4
/ ( . . ) ,
EQUATION1216 V2 EN (Equation 19)
Select a setting of U>Trip=30 V.
The current transformer saturation voltage must be at least, twice the set operating voltage U>Trip .
U CT Saturation V_ _ .> +
=
10
25 0 26 20 5 66
EQUATION1217 V2 EN (Equation 20)
that is, greater than 2 U>Trip.
Check from the table of selected resistances the required series stabilizing resistor value to use. Since this application requires good sensitivity, select SeriesResistor = 300 ohm, which gives an IED current of 100 mA.
To calculate the sensitivity at operating voltage, refer to equation 21, which gives an acceptable value. A little lower sensitivity could be selected by using a lower resistance value.
IP approx A= + + ( ) 100
5 100 0 5 0 2 100 60 10 5
3
EQUATION1218 V2 EN (Equation 21)
The magnetizing current is taken from the magnetizing curve of the current transformer cores, which should be available. The current value at U>Trip is taken. For the voltage dependent resistor current the peak value of voltage 30 2 is used. Then the RMS current is calculated by dividing obtained current value from the metrosil curve with 2. Use the maximum value from the metrosil curve given in Figure 37.
1MRK 511 310-UEN B Section 6 Differential protection
107 Application manual
6.1.4.5 Alarm level operation
The 1Ph High impedance differential protection HZPDIF function has a separate alarm level, which can be used to give alarm for problems with an involved current transformer circuit. The setting level is normally selected to be around 10% of the operating voltage U>Trip.
As seen in the setting examples above the sensitivity of HZPDIF function is normally high, which means that the function will in many cases operate also for short circuits or open current transformer secondary circuits. However the stabilizing resistor can be selected to achieve sensitivity higher than normal load current and/or separate criteria can be added to the operation, like a check zone. This can be either another IED, with the same HZPDIF function, or be a check about the fault condition, which is performed by an earth overcurrent function or neutral point voltage function.
For such cases where operation is not expected during normal service the alarm output should be used to activate an external shorting of the differential circuit avoiding continuous high voltage in the circuit. A time delay of a few seconds is used before the shorting and alarm are activated. Auxiliary relays with contacts that can withstand high voltage shall be used, like RXMVB types.
The metrosil operating characteristic is given in the following figure.
IEC05000749 V1 EN
Figure 37: Current voltage characteristics for the non-linear resistors, in the range 10-200 V, the average range of current is: 0.0110 mA
Section 6 1MRK 511 310-UEN B Differential protection
108 Application manual
Section 7 Current protection
7.1 Instantaneous phase overcurrent protection 3-phase output PHPIOC
7.1.1 Identification Function description IEC 61850
identification IEC 60617 identification
ANSI/IEEE C37.2 device number
Instantaneous phase overcurrent protection 3-phase output
PHPIOC
3I>>
SYMBOL-Z V1 EN
50
7.1.2 Application
Long transmission lines often transfer great quantities of electric power from production to consumption areas. The unbalance of the produced and consumed electric power at each end of the transmission line is very large. This means that a fault on the line can easily endanger the stability of a complete system.
The transient stability of a power system depends mostly on three parameters (at constant amount of transmitted electric power):
The type of the fault. Three-phase faults are the most dangerous, because no power can be transmitted through the fault point during fault conditions.
The magnitude of the fault current. A high fault current indicates that the decrease of transmitted power is high.
The total fault clearing time. The phase angles between the EMFs of the generators on both sides of the transmission line increase over the permitted stability limits if the total fault clearing time, which consists of the protection operating time and the breaker opening time, is too long.
The fault current on long transmission lines depends mostly on the fault position and decreases with the distance from the generation point. For this reason the protection must operate very quickly for faults very close to the generation (and relay) point, for which very high fault currents are characteristic.
The instantaneous phase overcurrent protection 3-phase output PHPIOC can operate in 10 ms for faults characterized by very high currents.
1MRK 511 310-UEN B Section 7 Current protection
109 Application manual
7.1.3 Setting guidelines
The parameters for instantaneous phase overcurrent protection 3-phase output PHPIOC are set via the local HMI or PCM600.
This protection function must operate only in a selective way. So check all system and transient conditions that could cause its unwanted operation.
Only detailed network studies can determine the operating conditions under which the highest possible fault current is expected on the line. In most cases, this current appears during three-phase fault conditions. But also examine single-phase-to-earth and two-phase-to-earth conditions.
Also study transients that could cause a high increase of the line current for short times. A typical example is a transmission line with a power transformer at the remote end, which can cause high inrush current when connected to the network and can thus also cause the operation of the built-in, instantaneous, overcurrent protection.
OpMode: This parameter can be set to 2 out of 3 or 1 out of 3. The setting controls the minimum number of phase currents that must be larger than the set operate current IP>> for operation. Normally this parameter is set to 1 out of 3and will thus detect all fault types. If the protection is to be used mainly for multi phase faults, 2 out of 3 should be chosen.
IP>>: Set operate current in % of IBase.
StValMult: The operate current can be changed by activation of the binary input ENMULT to the set factor StValMult.
7.1.3.1 Meshed network without parallel line
The following fault calculations have to be done for three-phase, single-phase-to- earth and two-phase-to-earth faults. With reference to figure 38, apply a fault in B and then calculate the current through-fault phase current IfB. The calculation should be done using the minimum source impedance values for ZA and the maximum source impedance values for ZB in order to get the maximum through fault current from A to B.
Section 7 1MRK 511 310-UEN B Current protection
110 Application manual
~ ~ ZA ZBZ L
A B
IED
I fB
Fault
IEC09000022-1-en.vsd
IEC09000022 V1 EN
Figure 38: Through fault current from A to B: IfB
Then a fault in A has to be applied and the through fault current IfA has to be calculated, figure 39. In order to get the maximum through fault current, the minimum value for ZB and the maximum value for ZA have to be considered.
IEC09000023-1-en.vsd
~ ~ ZA ZBZ L
A B
IED
I fA
Fault
IEC09000023 V1 EN
Figure 39: Through fault current from B to A: IfA
The IED must not trip for any of the two through-fault currents. Hence the minimum theoretical current setting (Imin) will be:
Imin MAX IfA IfB,( )
EQUATION78 V1 EN (Equation 22)
A safety margin of 5% for the maximum protection static inaccuracy and a safety margin of 5% for the maximum possible transient overreach have to be introduced. An additional 20% is suggested due to the inaccuracy of the instrument transformers under transient conditions and inaccuracy in the system data.
The minimum primary setting (Is) for the instantaneous phase overcurrent protection 3-phase output is then:
1MRK 511 310-UEN B Section 7 Current protection
111 Application manual
min1.3sI I
EQUATION79 V3 EN (Equation 23)
The protection function can be used for the specific application only if this setting value is equal to or less than the maximum fault current that the IED has to clear, IF in figure 40.
IEC09000024-1-en.vsd
~ ~ ZA ZBZ L
A B
IED
I F
Fault
IEC09000024 V1 EN
Figure 40: Fault current: IF
100 Is
IP IBase
>>=
EQUATION1147 V3 EN (Equation 24)
7.1.3.2 Meshed network with parallel line
In case of parallel lines, the influence of the induced current from the parallel line to the protected line has to be considered. One example is given in figure 41 where the two lines are connected to the same busbars. In this case the influence of the induced fault current from the faulty line (line 1) to the healthy line (line 2) is considered together with the two through fault currents IfA and IfB mentioned previously. The maximal influence from the parallel line for the IED in figure 41 will be with a fault at the C point with the C breaker open.
A fault in C has to be applied, and then the maximum current seen from the IED (IM ) on the healthy line (this applies for single-phase-to-earth and two-phase-to-earth faults) is calculated.
Section 7 1MRK 511 310-UEN B Current protection
112 Application manual
IEC09000025-1-en.vsd
~ ~ ZA ZB
ZL1 A B
I M
Fault
IED
ZL2
M
C Line 1
Line 2
IEC09000025 V1 EN
Figure 41: Two parallel lines. Influence from parallel line to the through fault current: IM
The minimum theoretical current setting for the overcurrent protection function (Imin) will be:
Imin MAX IfA IfB IM, ,( )
EQUATION82 V1 EN (Equation 25)
Where IfA and IfB have been described in the previous paragraph. Considering the safety margins mentioned previously, the minimum setting (Is) for the instantaneous phase overcurrent protection 3-phase output is then:
Is 1.3Imin EQUATION83 V2 EN (Equation 26)
The protection function can be used for the specific application only if this setting value is equal or less than the maximum phase fault current that the IED has to clear.
The IED setting value IP>> is given in percentage of the primary base current value, IBase. The value for IP>> is given from this formula:
100 Is
IP IBase
>>=
EQUATION1147 V3 EN (Equation 27)
1MRK 511 310-UEN B Section 7 Current protection
113 Application manual
7.2 Four step phase overcurrent protection 3-phase output OC4PTOC
7.2.1 Identification Function description IEC 61850
identification IEC 60617 identification
ANSI/IEEE C37.2 device number
Four step phase overcurrent protection 3-phase output
OC4PTOC
TOC-REVA V2 EN
51/67
7.2.2 Application
The Four step phase overcurrent protection 3-phase output OC4PTOC is used in several applications in the power system. Some applications are:
Short circuit protection of feeders in distribution and subtransmission systems. Normally these feeders have radial structure.
Back-up short circuit protection of transmission lines. Back-up short circuit protection of power transformers. Short circuit protection of different kinds of equipment connected to the power
system such as; shunt capacitor banks, shunt reactors, motors and others. Back-up short circuit protection of power generators.
If VT inputs are not available or not connected, setting parameter DirModex (x = step 1, 2, 3 or 4) shall be left to default value Non- directional.
In many applications several steps with different current pick up levels and time delays are needed. OC4PTOC can have up to four different, individual settable, steps. The flexibility of each step of OC4PTOC is great. The following options are possible:
Non-directional / Directional function: In most applications the non-directional functionality is used. This is mostly the case when no fault current can be fed from the protected object itself. In order to achieve both selectivity and fast fault clearance, the directional function can be necessary.
Choice of delay time characteristics: There are several types of delay time characteristics available such as definite time delay and different types of inverse time delay characteristics. The selectivity between different overcurrent protections is normally enabled by co-ordination between the function time delays of the different protections. To enable optimal co-ordination between all overcurrent protections, they should have the same time delay characteristic. Therefore a wide range of
Section 7 1MRK 511 310-UEN B Current protection
114 Application manual
standardized inverse time characteristics are available: IEC and ANSI. It is also possible to tailor make the inverse time characteristic.
Normally it is required that the phase overcurrent protection shall reset as fast as possible when the current level gets lower than the operation level. In some cases some sort of delayed reset is required. Therefore different kinds of reset characteristics can be used.
For some protection applications there can be a need to change the current pick-up level for some time. A typical case is when the protection will measure the current to a large motor. At the start up sequence of a motor the start current can be significantly larger than the rated current of the motor. Therefore there is a possibility to give a setting of a multiplication factor to the current pick-up level. This multiplication factor is activated from a binary input signal to the function.
Power transformers can have a large inrush current, when being energized. This phenomenon is due to saturation of the transformer magnetic core during parts of the period. There is a risk that inrush current will reach levels above the pick-up current of the phase overcurrent protection. The inrush current has a large 2nd harmonic content. This can be used to avoid unwanted operation of the protection. Therefore, OC4PTOC have a possibility of 2nd harmonic restrain if the level of this harmonic current reaches a value above a set percentage of the fundamental current.
The phase overcurrent protection is often used as protection for two and three phase short circuits. In some cases it is not wanted to detect single-phase earth faults by the phase overcurrent protection. This fault type is detected and cleared after operation of earth fault protection. Therefore it is possible to make a choice how many phases, at minimum, that have to have current above the pick-up level, to enable operation. If set 1 of 3 it is sufficient to have high current in one phase only. If set 2 of 3 or 3 of 3 single- phase earth faults are not detected.
7.2.3 Setting guidelines
When inverse time overcurrent characteristic is selected, the operate time of the stage will be the sum of the inverse time delay and the set definite time delay. Thus, if only the inverse time delay is required, it is important to set the definite time delay for that stage to zero.
In version 2.0, a typical starting time delay of 24ms is subtracted from the set trip time delay, so that the resulting trip time will take the internal IED start time into consideration.
The parameters for Four step phase overcurrent protection 3-phase output OC4PTOC are set via the local HMI or PCM600.
The following settings can be done for OC4PTOC.
1MRK 511 310-UEN B Section 7 Current protection
115 Application manual
MeasType: Selection of discrete Fourier filtered (DFT) or true RMS filtered (RMS) signals. RMS is used when the harmonic contents are to be considered, for example in applications with shunt capacitors.
Operation: The protection can be set to Off or On
AngleRCA: Protection characteristic angle set in degrees. If the angle of the fault loop current has the angle RCA the direction to fault is forward.
AngleROA: Angle value, given in degrees, to define the angle sector of the directional function, see figure 42.
IminOpPhSel: Minimum current for phase selection set in % of IBase. This setting should be less than the lowest step setting. Default setting is 7%.
StartPhSel: Number of phases, with high current, required for operation. The setting possibilities are: Not used,1 out of 3, 2 out of 3 and 3 out of 3. Default setting is 1 out of 3.
2ndHarmStab: Operate level of 2nd harmonic current restrain set in % of the fundamental current. The setting range is 5 — 100% in steps of 1%. Default setting is 20%.
Section 7 1MRK 511 310-UEN B Current protection
116 Application manual
Uref
Idir
IEC09000636_1_vsd
1
2
2
3
4
IEC09000636 V1 EN
Figure 42: Directional function characteristic
1. RCA = Relay characteristic angle 2. ROA = Relay operating angle 3. Reverse 4. Forward
7.2.3.1 Settings for each step
x means step 1, 2, 3 and 4.
DirModex: The directional mode of step x. Possible settings are Off/Non-directional/ Forward/Reverse.
Characteristx: Selection of time characteristic for step x. Definite time delay and different types of inverse time characteristics are available according to table 9.
1MRK 511 310-UEN B Section 7 Current protection
117 Application manual
Table 9: Inverse time characteristics
Curve name ANSI Extremely Inverse
ANSI Very Inverse
ANSI Normal Inverse
ANSI Moderately Inverse
ANSI/IEEE Definite time
ANSI Long Time Extremely Inverse
ANSI Long Time Very Inverse
ANSI Long Time Inverse
IEC Normal Inverse
IEC Very Inverse
IEC Inverse
IEC Extremely Inverse
IEC Short Time Inverse
IEC Long Time Inverse
IEC Definite Time
User Programmable
ASEA RI
RXIDG (logarithmic)
The different characteristics are described in Technical reference manual.
I1>MinEd2Set: Minimum settable operating phase current level for step 1 in % of IBase, for 61850 Ed.2 settings
I1>MaxEd2Set: Maximum settable operating phase current level for step 1 in % of IBase, for 61850 Ed.2 settings
I2>MinEd2Set: Minimum settable operating phase current level for step 2 in % of IBase, for 61850 Ed.2 settings
I2>MaxEd2Set: Maximum settable operating phase current level for step 2 in % of IBase, for 61850 Ed.2 settings
I3>MinEd2Set: Minimum settable operating phase current level for step 3 in % of IBase, for 61850 Ed.2 settings
I3>MaxEd2Set: Maximum settable operating phase current level for step 3 in % of IBase, for 61850 Ed.2 settings
I4>MinEd2Set: Minimum settable operating phase current level for step 4 in % of IBase, for 61850 Ed.2 settings
I4>MaxEd2Set: Maximum settable operating phase current level for step 4 in % of IBase, for 61850 Ed.2 settings
Section 7 1MRK 511 310-UEN B Current protection
118 Application manual
Ix>: Operate phase current level for step x given in % of IBase.
tx: Definite time delay for step x. The definite time tx is added to the inverse time when inverse time characteristic is selected.
kx: Time multiplier for inverse time delay for step x.
IMinx: Minimum operate current for step x in % of IBase. Set IMinx below Ix> for every step to achieve ANSI reset characteristic according to standard. If IMinx is set above Ix> for any step the ANSI reset works as if current is zero when current drops below IMinx.
IxMult: Multiplier for scaling of the current setting value. If a binary input signal (enableMultiplier) is activated the current operation level is increase by this setting constant. Setting range: 1.0-10.0
txMin: Minimum operate time for all inverse time characteristics. At high currents the inverse time characteristic might give a very short operation time. By setting this parameter the operation time of the step can never be shorter than the setting. Setting range: 0.000 — 60.000s in steps of 0.001s.
IMinx
Operate time
Current
tx
txMin
IEC10000058
IEC10000058 V2 EN
Figure 43: Minimum operate current and operation time for inverse time characteristics
In order to fully comply with curves definition setting parameter txMin shall be set to the value, which is equal to the operating time of the selected inverse curve for measured current of twenty times the set current pickup value. Note that the operating time value is dependent on the selected setting value for time multiplier kx.
ResetTypeCrvx: The reset of the delay timer can be made in different ways. By choosing setting the possibilities are according to table 10.
1MRK 511 310-UEN B Section 7 Current protection
119 Application manual
Table 10: Reset possibilities
Curve name Curve index no. Instantaneous 1
IEC Reset (constant time) 2
ANSI Reset (inverse time) 3
The delay characteristics are described in the technical reference manual. There are some restrictions regarding the choice of reset delay.
For the definite time delay characteristics the possible delay time settings are instantaneous (1) and IEC (2 = set constant time reset).
For ANSI inverse time characteristics all three types of reset time characteristics are available; instantaneous (1), IEC (2 = set constant time reset) and ANSI (3 = current dependent reset time).
For IEC inverse time characteristics the possible delay time settings are instantaneous (1) and IEC (2 = set constant time reset).
For the customer tailor made inverse time delay characteristics (type 17) all three types of reset time characteristics are available; instantaneous (1), IEC (2 = set constant time reset) and ANSI (3 = current dependent reset time). If the current dependent type is used settings pr, tr and cr must be given.
HarmRestrainx: Enable block of step x from the harmonic restrain function (2nd harmonic). This function should be used when there is a risk if power transformer inrush currents might cause unwanted trip. Can be set Off/On.
tPCrvx, tACrvx, tBCrvx, tCCrvx: Parameters for customer creation of inverse time characteristic curve (Curve type = 17). See equation 28 for the time characteristic equation.
[ ]
>
p
A t s B IxMult
i C
in
= +
—
EQUATION1261 V2 EN (Equation 28)
For more information, refer to the technical reference manual.
tPRCrvx, tTRCrvx, tCRCrvx: Parameters for customer creation of inverse reset time characteristic curve (Reset Curve type = 3). Further description can be found in the technical reference manual.
7.2.3.2 2nd harmonic restrain
Section 7 1MRK 511 310-UEN B Current protection
120 Application manual
If a power transformer is energized there is a risk that the transformer core will saturate during part of the period, resulting in an inrush transformer current. This will give a declining residual current in the network, as the inrush current is deviating between the phases. There is a risk that the phase overcurrent function will give an unwanted trip. The inrush current has a relatively large ratio of 2nd harmonic component. This component can be used to create a restrain signal to prevent this unwanted function.
The settings for the 2nd harmonic restrain are described below.
2ndHarmStab: The rate of 2nd harmonic current content for activation of the 2nd harmonic restrain signal, to block chosen steps. The setting is given in % of the fundamental frequency residual current. The setting range is 5 — 100% in steps of 1%. The default setting is 20% and can be used if a deeper investigation shows that no other value is needed..
HarmRestrainx: This parameter can be set Off/On, to disable or enable the 2nd harmonic restrain.
The four step phase overcurrent protection 3-phase output can be used in different ways, depending on the application where the protection is used. A general description is given below.
The operating current setting of the inverse time protection, or the lowest current step of the definite time protection, must be defined so that the highest possible load current does not cause protection operation. Here consideration also has to be taken to the protection reset current, so that a short peak of overcurrent does not cause operation of the protection even when the overcurrent has ceased. This phenomenon is described in figure 44.
1MRK 511 310-UEN B Section 7 Current protection
121 Application manual
Operate current
Current I
The IED does not reset
Line phase current
Time t
Reset current
IEC05000203-en-2.vsd IEC05000203 V3 EN
Figure 44: Operate and reset current for an overcurrent protection
The lowest setting value can be written according to equation 29.
ImaxIpu 1.2 k
EQUATION1262 V2 EN (Equation 29)
where:
1.2 is a safety factor
k is the resetting ratio of the protection
Imax is the maximum load current
From operation statistics the load current up to the present situation can be found. The current setting must be valid also for some years ahead. It is, in most cases, realistic that the setting values are updated not more often than once every five years. In many cases this time interval is still longer. Investigate the maximum load current that different equipment on the line can withstand. Study components such as line conductors, current transformers, circuit breakers, and disconnectors. The manufacturer of the equipment normally gives the maximum thermal load current of the equipment.
Section 7 1MRK 511 310-UEN B Current protection
122 Application manual
The maximum load current on the line has to be estimated. There is also a demand that all faults, within the zone that the protection shall cover, must be detected by the phase overcurrent protection. The minimum fault current Iscmin, to be detected by the protection, must be calculated. Taking this value as a base, the highest pick up current setting can be written according to equation 30.
Ipu 0.7 Iscmin EQUATION1263 V2 EN (Equation 30)
where:
0.7 is a safety factor
Iscmin is the smallest fault current to be detected by the overcurrent protection.
As a summary the operating current shall be chosen within the interval stated in equation 31.
Imax1.2 Ipu 0.7 Iscmin k
EQUATION1264 V2 EN (Equation 31)
The high current function of the overcurrent protection, which only has a short delay of the operation, must be given a current setting so that the protection is selective to other protection in the power system. It is desirable to have a rapid tripping of faults within as large portion as possible of the part of the power system to be protected by the protection (primary protected zone). A fault current calculation gives the largest current of faults, Iscmax, at the most remote part of the primary protected zone. Considerations have to be made to the risk of transient overreach, due to a possible DC component of the short circuit current. The lowest current setting of the most rapid stage, of the phase overcurrent protection, can be written according to
max1.2 t schighI k I
EQUATION1265 V1 EN (Equation 32)
where:
1.2 is a safety factor
kt is a factor that takes care of the transient overreach due to the DC component of the fault current and can be considered to be less than 1.05
Iscmax is the largest fault current at a fault at the most remote point of the primary protection zone.
The operate times of the phase overcurrent protection has to be chosen so that the fault time is so short that protected equipment will not be destroyed due to thermal overload, at the same time as selectivity is assured. For overcurrent protection, in a radial fed network, the time setting can be chosen in a graphical way. This is mostly used in the case of inverse time overcurrent protection. Figure 45 shows how the time-
1MRK 511 310-UEN B Section 7 Current protection
123 Application manual
versus-current curves are plotted in a diagram. The time setting is chosen to get the shortest fault time with maintained selectivity. Selectivity is assured if the time difference between the curves is larger than a critical time difference.
en05000204.wmf
IEC05000204 V1 EN
Figure 45: Fault time with maintained selectivity
The operation time can be set individually for each overcurrent protection.
To assure selectivity between different protections, in the radial network, there have to be a minimum time difference Dt between the time delays of two protections. The minimum time difference can be determined for different cases. To determine the shortest possible time difference, the operation time of protections, breaker opening time and protection resetting time must be known. These time delays can vary significantly between different protective equipment. The following time delays can be estimated:
Protection operation time:
15-60 ms
Protection resetting time: 15-60 ms
Breaker opening time: 20-120 ms
Section 7 1MRK 511 310-UEN B Current protection
124 Application manual
Example for time coordination Assume two substations A and B directly connected to each other via one line, as shown in the figure 46. Consider a fault located at another line from the station B. The fault current to the overcurrent protection of IED B1 has a magnitude so that the protection will have instantaneous function. The overcurrent protection of IED A1 must have a delayed function. The sequence of events during the fault can be described using a time axis, see figure 46.
I> I>
A1 B1 Feeder
Time axis
t=0 t=t1 t=t2 t=t3 The fault occurs
Protection B1 trips
Breaker at B1 opens
Protection A1 resets
en05000205.vsd
IEC05000205 V1 EN
Figure 46: Sequence of events during fault
where:
t=0 is when the fault occurs
t=t1 is when the trip signal from the overcurrent protection at IED B1 is sent to the circuit breaker. The operation time of this protection is t1
t=t2 is when the circuit breaker at IED B1 opens. The circuit breaker opening time is t2 — t1
t=t3 is when the overcurrent protection at IED A1 resets. The protection resetting time is t3 — t2.
To ensure that the overcurrent protection at IED A1, is selective to the overcurrent protection at IED B1, the minimum time difference must be larger than the time t3. There are uncertainties in the values of protection operation time, breaker opening time and protection resetting time. Therefore a safety margin has to be included. With normal values the needed time difference can be calculated according to equation 33.
1MRK 511 310-UEN B Section 7 Current protection
125 Application manual
40 100 40 40 220t ms ms ms ms msD + + + = EQUATION1266 V1 EN (Equation 33)
where it is considered that:
the operate time of overcurrent protection B1 is 40 ms
the breaker open time is 100 ms
the resetting time of protection A1 is 40 ms and
the additional margin is 40 ms
7.3 Instantaneous residual overcurrent protection EFPIOC
7.3.1 Identification Function description IEC 61850
identification IEC 60617 identification
ANSI/IEEE C37.2 device number
Instantaneous residual overcurrent protection
EFPIOC
IN>>
IEF V1 EN
50N
7.3.2 Application
In many applications, when fault current is limited to a defined value by the object impedance, an instantaneous earth-fault protection can provide fast and selective tripping.
The Instantaneous residual overcurrent EFPIOC, which can operate in 15 ms (50 Hz nominal system frequency) for faults characterized by very high currents, is included in the IED.
7.3.3 Setting guidelines
The parameters for the Instantaneous residual overcurrent protection EFPIOC are set via the local HMI or PCM600.
Some guidelines for the choice of setting parameter for EFPIOC is given.
The setting of the function is limited to the operate residual current to the protection (IN>>).
Section 7 1MRK 511 310-UEN B Current protection
126 Application manual
The basic requirement is to assure selectivity, that is EFPIOC shall not be allowed to operate for faults at other objects than the protected object (line).
For a normal line in a meshed system single phase-to-earth faults and phase-to-phase- to-earth faults shall be calculated as shown in figure 47 and figure 48. The residual currents (3I0) to the protection are calculated. For a fault at the remote line end this fault current is IfB. In this calculation the operational state with high source impedance ZA and low source impedance ZB should be used. For the fault at the home busbar this fault current is IfA. In this calculation the operational state with low source impedance ZA and high source impedance ZB should be used.
~ ~ ZA ZBZ L
A B
IED
I fB
Fault
IEC09000022-1-en.vsd
IEC09000022 V1 EN
Figure 47: Through fault current from A to B: IfB
IEC09000023-1-en.vsd
~ ~ ZA ZBZ L
A B
IED
I fA
Fault
IEC09000023 V1 EN
Figure 48: Through fault current from B to A: IfA
The function shall not operate for any of the calculated currents to the protection. The minimum theoretical current setting (Imin) will be:
Imin MAX IfA IfA,( )
EQUATION284 V1 EN (Equation 34)
A safety margin of 5% for the maximum static inaccuracy and a safety margin of 5% for maximum possible transient overreach have to be introduced. An additional 20%
1MRK 511 310-UEN B Section 7 Current protection
127 Application manual
is suggested due to inaccuracy of instrument transformers under transient conditions and inaccuracy in the system data.
The minimum primary current setting (Is) is:
Is = 1.3 Imin EQUATION285 V3 EN (Equation 35)
In case of parallel lines with zero sequence mutual coupling a fault on the parallel line, as shown in figure 49, should be calculated.
IEC09000025-1-en.vsd
~ ~ ZA ZB
ZL1 A B
I M
Fault
IED
ZL2
M
C Line 1
Line 2
IEC09000025 V1 EN
Figure 49: Two parallel lines. Influence from parallel line to the through fault current: IM
The minimum theoretical current setting (Imin) will in this case be:
I m in M AX IfA I fB IM, ,( )
EQUATION287 V1 EN (Equation 36)
Where:
IfA and IfB have been described for the single line case.
Considering the safety margins mentioned previously, the minimum setting (Is) is:
Is = 1.3 Imin EQUATION288 V3 EN (Equation 37)
Transformer inrush current shall be considered.
The setting of the protection is set as a percentage of the base current (IBase).
Operation: set the protection to On or Off.
Section 7 1MRK 511 310-UEN B Current protection
128 Application manual
IN>>: Set operate current in % of IBase.
StValMult: The operate current can be changed by activation of the binary input ENMULT to the set factor StValMult.
7.4 Four step residual overcurrent protection, (Zero sequence or negative sequence directionality) EF4PTOC
7.4.1 Identification Function description IEC 61850
identification IEC 60617 identification
ANSI/IEEE C37.2 device number
Four step residual overcurrent protection
EF4PTOC 4(IN>)
4 alt4
TEF-REVA V2 EN
51N/67N
7.4.2 Application
The four step residual overcurrent protection EF4PTOC is used in several applications in the power system. Some applications are:
Earth-fault protection of feeders in effectively earthed distribution and subtransmission systems. Normally these feeders have radial structure.
Back-up earth-fault protection of transmission lines. Sensitive earth-fault protection of transmission lines. EF4PTOC can have better
sensitivity to detect resistive phase-to-earth-faults compared to distance protection.
Back-up earth-fault protection of power transformers. Earth-fault protection of different kinds of equipment connected to the power
system such as shunt capacitor banks, shunt reactors and others.
In many applications several steps with different current operating levels and time delays are needed. EF4PTOC can have up to four, individual settable steps. The flexibility of each step of EF4PTOC is great. The following options are possible:
Non-directional/Directional function: In some applications the non-directional functionality is used. This is mostly the case when no fault current can be fed from the protected object itself. In order to achieve both selectivity and fast fault clearance, the directional function can be necessary. This can be the case for earth-fault protection in meshed and effectively earthed transmission systems. The directional residual overcurrent protection is also well suited to operate in teleprotection communication
1MRK 511 310-UEN B Section 7 Current protection
129 Application manual
schemes, which enables fast clearance of earth faults on transmission lines. The directional function uses the polarizing quantity as decided by setting. Voltage polarizing is most commonly used, but alternatively current polarizing where currents in transformer neutrals providing the neutral source (ZN) is used to polarize (IN ZN) the function. Dual polarizing where the sum of both voltage and current components is allowed to polarize can also be selected.
Choice of time characteristics: There are several types of time characteristics available such as definite time delay and different types of inverse time characteristics. The selectivity between different overcurrent protections is normally enabled by co-ordination between the operate time of the different protections. To enable optimal co-ordination all overcurrent protections, to be co-ordinated against each other, should have the same time characteristic. Therefore a wide range of standardized inverse time characteristics are available: IEC and ANSI.
Table 11: Time characteristics
Curve name ANSI Extremely Inverse
ANSI Very Inverse
ANSI Normal Inverse
ANSI Moderately Inverse
ANSI/IEEE Definite time
ANSI Long Time Extremely Inverse
ANSI Long Time Very Inverse
ANSI Long Time Inverse
IEC Normal Inverse
IEC Very Inverse
IEC Inverse
IEC Extremely Inverse
IEC Short Time Inverse
IEC Long Time Inverse
IEC Definite Time
User Programmable
ASEA RI
RXIDG (logarithmic)
It is also possible to tailor make the inverse time characteristic.
Normally it is required that EF4PTOC shall reset as fast as possible when the current level gets lower than the operation level. In some cases some sort of delayed reset is required. Therefore different kinds of reset characteristics can be used.
For some protection applications there can be a need to change the current operating level for some time. Therefore there is a possibility to give a setting of a multiplication
Section 7 1MRK 511 310-UEN B Current protection
130 Application manual
factor INxMult to the residual current pick-up level. This multiplication factor is activated from a binary input signal ENMULTx to the function.
Power transformers can have a large inrush current, when being energized. This inrush current can have residual current components. The phenomenon is due to saturation of the transformer magnetic core during parts of the cycle. There is a risk that inrush current will give a residual current that reaches level above the operating current of the residual overcurrent protection. The inrush current has a large second harmonic content. This can be used to avoid unwanted operation of the protection. Therefore, EF4PTOC has a possibility of second harmonic restrain 2ndHarmStab if the level of this harmonic current reaches a value above a set percentage of the fundamental current.
7.4.3 Setting guidelines
When inverse time overcurrent characteristic is selected, the operate time of the stage will be the sum of the inverse time delay and the set definite time delay. Thus, if only the inverse time delay is required, it is of utmost importance to set the definite time delay for that stage to zero.
In version 2.0, a typical starting time delay of 24ms is subtracted from the set trip time delay, so that the resulting trip time will take the internal IED start time into consideration.
The parameters for the four step residual overcurrent protection, zero or negative sequence direction EF4PTOC are set via the local HMI or PCM600.
The following settings can be done for the four step residual overcurrent protection.
Operation: Sets the protection to On or Off.
7.4.3.1 Settings for each step (x = 1, 2, 3 and 4)
DirModex: The directional mode of step x. Possible settings are Off/Non-directional/ Forward/Reverse.
Characteristx: Selection of time characteristic for step x. Definite time delay and different types of inverse time characteristics are available.
Inverse time characteristic enables fast fault clearance of high current faults at the same time as selectivity to other inverse time phase overcurrent protections can be assured. This is mainly used in radial fed networks but can also be used in meshed networks. In meshed networks the settings must be based on network fault calculations.
1MRK 511 310-UEN B Section 7 Current protection
131 Application manual
To assure selectivity between different protections, in the radial network, there have to be a minimum time difference Dt between the time delays of two protections. The minimum time difference can be determined for different cases. To determine the shortest possible time difference, the operation time of protections, breaker opening time and protection resetting time must be known. These time delays can vary significantly between different protective equipment. The following time delays can be estimated:
Protection operate time: 15-60 ms
Protection resetting time: 15-60 ms
Breaker opening time: 20-120 ms
The different characteristics are described in the technical reference manual.
INx>: Operate residual current level for step x given in % of IBase.
kx: Time multiplier for the dependent (inverse) characteristic for step x.
IMinx: Minimum operate current for step x in % of IBase. Set IMinx below Ix> for every step to achieve ANSI reset characteristic according to standard. If IMinx is set above Ix> for any step then signal will reset at current equals to zero.
INxMult: Multiplier for scaling of the current setting value. If a binary input signal (ENMULTx) is activated the current operation level is increased by this setting constant.
txMin: Minimum operating time for inverse time characteristics. At high currents the inverse time characteristic might give a very short operation time. By setting this parameter the operation time of the step can never be shorter than the setting.
IMinx
Operate time
Current
tx
txMin
IEC10000058
IEC10000058 V2 EN
Figure 50: Minimum operate current and operate time for inverse time characteristics
Section 7 1MRK 511 310-UEN B Current protection
132 Application manual
In order to fully comply with curves definition the setting parameter txMin shall be set to the value which is equal to the operate time of the selected IEC inverse curve for measured current of twenty times the set current pickup value. Note that the operate time value is dependent on the selected setting value for time multiplier kx.
ResetTypeCrvx: The reset of the delay timer can be made in different ways. The possibilities are described in the technical reference manual.
tPCrvx, tACrvx, tBCrvx, tCCrvx: Parameters for user programmable of inverse time characteristic curve. The time characteristic equation is according to equation 38:
[ ] = +
— >
p
A t s B k
i C
in EQUATION1189 V1 EN (Equation 38)
Further description can be found in the technical reference manual.
tPRCrvx, tTRCrvx, tCRCrvx: Parameters for user programmable of inverse reset time characteristic curve. Further description can be found in the technical reference manual.
7.4.3.2 Common settings for all steps
tx: Definite time delay for step x. Used if definite time characteristic is chosen.
AngleRCA: Relay characteristic angle given in degree. This angle is defined as shown in figure 51. The angle is defined positive when the residual current lags the reference voltage (Upol = 3U0 or U2)
1MRK 511 310-UEN B Section 7 Current protection
133 Application manual
Upol = 3U0 or U2
I>Dir
RCA
Operation
en 05000135-4-nsi.vsd
IEC05000135 V4 EN
Figure 51: Relay characteristic angle given in degree
In a normal transmission network a normal value of RCA is about 65. The setting range is -180 to +180.
polMethod: Defines if the directional polarization is from
Voltage (3U0 or U2) Current (3I0 ZNpol or 3I2 ZNpol where ZNpol is RNpol + jXNpol), or both currents and voltage, Dual (dual polarizing, (3U0 + 3I0 ZNpol) or (U2 + I2
ZNpol)).
Normally voltage polarizing from the internally calculated residual sum or an external open delta is used.
Current polarizing is useful when the local source is strong and a high sensitivity is required. In such cases the polarizing voltage (3U0) can be below 1% and it is then necessary to use current polarizing or dual polarizing. Multiply the required set current (primary) with the minimum impedance (ZNpol) and check that the percentage of the phase-to-earth voltage is definitely higher than 1% (minimum 3U0>UPolMin setting) as a verification.
RNPol, XNPol: The zero-sequence source is set in primary ohms as base for the current polarizing. The polarizing voltage is then achieved as 3I0 ZNpol. The ZNpol can be defined as (ZS1-ZS0)/3, that is the earth return impedance of the source behind the protection. The maximum earth-fault current at the local source can be used to calculate the value of ZN as U/(3 3I0) Typically, the minimum ZNPol (3 zero sequence source) is set. Setting is in primary ohms.
Section 7 1MRK 511 310-UEN B Current protection
134 Application manual
When the dual polarizing method is used it is important that the settingINx>or the product 3I0 ZNpol is not greater than 3U0. If so, there is a risk for incorrect operation for faults in the reverse direction.
IPolMin: is the minimum earth-fault current accepted for directional evaluation. For smaller currents than this value the operation will be blocked. Typical setting is 5-10% of IBase.
UPolMin: Minimum polarization (reference) polarizing voltage for the directional function, given in % of UBase/3.
I>Dir: Operate residual current release level in % of IBase for directional comparison scheme. The setting is given in % of IBase and must be set below the lowest INx> setting, set for the directional measurement. The output signals, STFW and STRV can be used in a teleprotection scheme. The appropriate signal should be configured to the communication scheme block.
7.4.3.3 2nd harmonic restrain
If a power transformer is energized there is a risk that the current transformer core will saturate during part of the period, resulting in a transformer inrush current. This will give a declining residual current in the network, as the inrush current is deviating between the phases. There is a risk that the residual overcurrent function will give an unwanted trip. The inrush current has a relatively large ratio of 2nd harmonic component. This component can be used to create a restrain signal to prevent this unwanted function.
At current transformer saturation a false residual current can be measured by the protection. Also here the 2nd harmonic restrain can prevent unwanted operation.
2ndHarmStab: The rate of 2nd harmonic current content for activation of the 2nd harmonic restrain signal. The setting is given in % of the fundamental frequency residual current.
HarmRestrainx: Enable block of step x from the harmonic restrain function.
7.4.3.4 Parallel transformer inrush current logic
In case of parallel transformers there is a risk of sympathetic inrush current. If one of the transformers is in operation, and the parallel transformer is switched in, the asymmetric inrush current of the switched in transformer will cause partial saturation of the transformer already in service. This is called transferred saturation. The 2nd
harmonic of the inrush currents of the two transformers will be in phase opposition. The summation of the two currents will thus give a small 2nd harmonic current. The residual fundamental current will however be significant. The inrush current of the transformer in service before the parallel transformer energizing, will be a little delayed compared to the first transformer. Therefore we will have high 2nd harmonic current initially. After a short period this current will however be small and the normal 2nd harmonic blocking will reset.
1MRK 511 310-UEN B Section 7 Current protection
135 Application manual
en05000136.vsd
Power System
IN>IN>
IEC05000136 V1 EN
Figure 52: Application for parallel transformer inrush current logic
If the BlkParTransf function is activated the 2nd harmonic restrain signal will latch as long as the residual current measured by the relay is larger than a selected step current level. Assume that step 4 is chosen to be the most sensitive step of the four step residual overcurrent protection function EF4PTOC. The harmonic restrain blocking is enabled for this step. Also the same current setting as this step is chosen for the blocking at parallel transformer energizing.
Below the settings for the parallel transformer logic are described.
UseStartValue: Gives which current level that should be used for activation of the blocking signal. This is given as one of the settings of the steps: Step 1/2/3/4. Normally the step having the lowest operation current level should be set.
BlkParTransf: This parameter can be set Off/On, the parallel transformer logic.
7.4.3.5 Switch onto fault logic
In case of energizing a faulty object there is a risk of having a long fault clearance time, if the fault current is too small to give fast operation of the protection. The switch on to fault function can be activated from auxiliary signals from the circuit breaker, either the close command or the open/close position (change of position).
This logic can be used to issue fast trip if one breaker pole does not close properly at a manual or automatic closing.
SOTF and Under Time are similar functions to achieve fast clearance at asymmetrical closing based on requirements from different utilities.
The function is divided into two parts. The SOTF function will give operation from step 2 or 3 during a set time after change in the position of the circuit breaker. The SOTF function has a set time delay. The Under Time function, which has 2nd
harmonic restrain blocking, will give operation from step 4. The 2nd harmonic restrain will prevent unwanted function in case of transformer inrush current. The Under Time function has a set time delay.
Below the settings for switch on to fault logics are described.
Section 7 1MRK 511 310-UEN B Current protection
136 Application manual
SOTF operation mode: This parameter can be set: Off/SOTF/Under Time/SOTF +Under Time.
ActivationSOTF: This setting will select the signal to activate SOTF function; CB position open/CB position closed/CB close command.
tSOTF: Time delay for operation of the SOTF function. The setting range is 0.000 — 60.000 s in step of 0.001 s. The default setting is 0.100 s
StepForSOTF: If this parameter is set on the step 3 start signal will be used as current set level. If set off step 2 start signal will be used as current set level.
t4U: Time interval when the SOTF function is active after breaker closing. The setting range is 0.000 — 60.000 s in step of 0.001 s. The default setting is 1.000 s.
ActUnderTime: Describes the mode to activate the sensitive undertime function. The function can be activated by Circuit breaker position (change) or Circuit breaker command.
tUnderTime: Time delay for operation of the sensitive undertime function. The setting range is 0.000 — 60.000 s in step of 0.001 s. The default setting is 0.300 s
7.4.3.6 Line application example
The Four step residual overcurrent protection EF4PTOC can be used in different ways. Below is described one application possibility to be used in meshed and effectively earthed systems.
The protection measures the residual current out on the protected line. The protection function has a directional function where the polarizing voltage (zero-sequence voltage) is the polarizing quantity.
The polarizing voltage and current can be internally generated when a three-phase set of voltage transformers and current transformers are used.
1MRK 511 310-UEN B Section 7 Current protection
137 Application manual
xx05000149.vsd
IN>
IEC05000149 V1 EN
Figure 53: Connection of polarizing voltage from an open delta
The different steps can be described as follows.
Step 1 This step has directional instantaneous function. The requirement is that overreaching of the protected line is not allowed.
IEC05000150-3-en.vsd
IN
3I0
One- or two-phase earth-fault or unsymmetric short circuit without earth connection
IEC05000150 V4 EN
Figure 54: Step 1, first calculation
Section 7 1MRK 511 310-UEN B Current protection
138 Application manual
The residual current out on the line is calculated at a fault on the remote busbar (one- or two-phase-to-earth fault). To assure selectivity it is required that step 1 shall not give a trip at this fault. The requirement can be formulated according to equation 39.
step1 0I 1.2 3I (remote busbar)
EQUATION1199 V3 EN (Equation 39)
As a consequence of the distribution of zero sequence current in the power system, the current to the protection might be larger if one line out from the remote busbar is taken out of service, see figure 55.
IEC05000151-en-2.vsd
IN >
One- or two-phase-earth-fault
3I0
IEC05000151 V2 EN
Figure 55: Step 1, second calculation. Remote busbar with, one line taken out of service
The requirement is now according to equation 40.
step1 0I 1.2 3I (remote busbar with one line out)
EQUATION1200 V3 EN (Equation 40)
A higher value of step 1 might be necessary if a big power transformer (Y0/D) at remote bus bar is disconnected.
A special case occurs at double circuit lines, with mutual zero-sequence impedance between the parallel lines, see figure 56.
1MRK 511 310-UEN B Section 7 Current protection
139 Application manual
IN >
One phase-to-earth fault
3I0
IEC05000152-en-2.vsd IEC05000152 V2 EN
Figure 56: Step 1, third calculation
In this case the residual current out on the line can be larger than in the case of earth fault on the remote busbar.
step1 0I 1.2 3I EQUATION1201 V3 EN (Equation 41)
The current setting for step 1 is chosen as the largest of the above calculated residual currents, measured by the protection.
Step 2 This step has directional function and a short time delay, often about 0.4 s. Step 2 shall securely detect all earth faults on the line, not detected by step 1.
IN >
One- or two-phase earth-fault
3I0
IEC05000154-en-2.vsd
IEC05000154 V2 EN
Figure 57: Step 2, check of reach calculation
Section 7 1MRK 511 310-UEN B Current protection
140 Application manual
The residual current, out on the line, is calculated at an operational case with minimal earth-fault current. The requirement that the whole line shall be covered by step 2 can be formulated according to equation 42.
step2 0I 0.7 3I (at remote busbar) EQUATION1202 V4 EN (Equation 42)
To assure selectivity the current setting must be chosen so that step 2 does not operate at step 2 for faults on the next line from the remote substation. Consider a fault as shown in Figure 58.
IN >
One phase-to-earth fault
3I0
IN >
3I01
IEC05000155-en-2.vsd
IEC05000155 V3 EN
Figure 58: Step 2, selectivity calculation
A second criterion for step 2 is according to equation 43.
1 1 0
step2 step1 0
3I I .2 I 3I
EQUATION1203 V4 EN (Equation 43)
where:
Istep1 is the current setting for step 1 on the faulted line.
Step 3 This step has directional function and a time delay slightly larger than step 2, often 0.8 s. Step 3 shall enable selective trip of earth faults having higher fault resistance to earth, compared to step 2. The requirement on step 3 is selectivity to other earth-fault protections in the network. One criterion for setting is shown in Figure 59.
1MRK 511 310-UEN B Section 7 Current protection
141 Application manual
IEC05000156-3-en.vsd
IN >
One phase-to- earth fault
3I0
IN >
3I02
IEC05000156 V3 EN
Figure 59: Step 3, Selectivity calculation
1 0 step3 step2
02
3I I .2 I 3I
EQUATION1204 V4 EN (Equation 44)
where:
Istep2 is the chosen current setting for step 2 on the faulted line.
Step 4 This step normally has non-directional function and a relatively long time delay. The task for step 4 is to detect and initiate trip for earth faults with large fault resistance, for example tree faults. Step 4 shall also detect series faults where one or two poles, of a breaker or other switching device, are open while the other poles are closed.
Both high resistance earth faults and series faults give zero-sequence current flow in the network. Such currents give disturbances on telecommunication systems and current to earth. It is important to clear such faults both concerning personal security as well as risk of fire.
The current setting for step 4 is often set down to about 100 A (primary 3I0). In many applications definite time delay in the range 1.2 — 2.0 s is used. In other applications a current dependent inverse time characteristic is used. This enables a higher degree of selectivity also for sensitive earth-fault current protection.
7.5 Four step directional negative phase sequence overcurrent protection NS4PTOC
Section 7 1MRK 511 310-UEN B Current protection
142 Application manual
7.5.1 Identification Function description IEC 61850
identification IEC 60617 identification ANSI/IEEE C37.2
device number Four step negative sequence overcurrent protection
NS4PTOC I2 4
4 alt
IEC10000053 V1 EN
46I2
7.5.2 Application
Four step negative sequence overcurrent protection NS4PTOC is used in several applications in the power system. Some applications are:
Earth-fault and phase-phase short circuit protection of feeders in effectively earthed distribution and subtransmission systems. Normally these feeders have radial structure.
Back-up earth-fault and phase-phase short circuit protection of transmission lines.
Sensitive earth-fault protection of transmission lines. NS4PTOC can have better sensitivity to detect resistive phase-to-earth-faults compared to distance protection.
Back-up earth-fault and phase-phase short circuit protection of power transformers.
Earth-fault and phase-phase short circuit protection of different kinds of equipment connected to the power system such as shunt capacitor banks, shunt reactors and others.
In many applications several steps with different current operating levels and time delays are needed. NS4PTOC can have up to four, individual settable steps. The flexibility of each step of NS4PTOC function is great. The following options are possible:
Non-directional/Directional function: In some applications the non-directional functionality is used. This is mostly the case when no fault current can be fed from the protected object itself. In order to achieve both selectivity and fast fault clearance, the directional function can be necessary. This can be the case for unsymmetrical fault protection in meshed and effectively earthed transmission systems. The directional negative sequence overcurrent protection is also well suited to operate in teleprotection communication schemes, which enables fast clearance of unsymmetrical faults on transmission lines. The directional function uses the voltage polarizing quantity.
Choice of time characteristics: There are several types of time characteristics available such as definite time delay and different types of inverse time characteristics. The selectivity between different overcurrent protections is normally enabled by co-ordination between the operating time of the different protections. To
1MRK 511 310-UEN B Section 7 Current protection
143 Application manual
enable optimal co-ordination all overcurrent relays, to be co-ordinated against each other, should have the same time characteristic. Therefore a wide range of standardized inverse time characteristics are available: IEC and ANSI.
Table 12: Inverse time characteristics
Curve name ANSI Extremely Inverse
ANSI Very Inverse
ANSI Normal Inverse
ANSI Moderately Inverse
ANSI/IEEE Definite time
ANSI Long Time Extremely Inverse
ANSI Long Time Very Inverse
ANSI Long Time Inverse
IEC Normal Inverse
IEC Very Inverse
IEC Inverse
IEC Extremely Inverse
IEC Short Time Inverse
IEC Long Time Inverse
IEC Definite Time
User Programmable
ASEA RI
RXIDG (logarithmic)
There is also a user programmable inverse time characteristic.
Normally it is required that the negative sequence overcurrent function shall reset as fast as possible when the current level gets lower than the operation level. In some cases some sort of delayed reset is required. Therefore different kinds of reset characteristics can be used.
For some protection applications there can be a need to change the current operating level for some time. Therefore there is a possibility to give a setting of a multiplication factor IxMult to the negative sequence current pick-up level. This multiplication factor is activated from a binary input signal ENMULTx to the function.
7.5.3 Setting guidelines
The parameters for Four step negative sequence overcurrent protection NS4PTOC are set via the local HMI or Protection and Control Manager (PCM600).
The following settings can be done for the four step negative sequence overcurrent protection:
Section 7 1MRK 511 310-UEN B Current protection
144 Application manual
Operation: Sets the protection to On or Off.
Common base IED values for primary current (IBase), primary voltage (UBase) and primary power (SBase) are set in Global base values for settings function GBASVAL. GlobalBaseSel: It is used to select a GBASVAL function for reference of base values.
When inverse time overcurrent characteristic is selected, the operate time of the stage will be the sum of the inverse time delay and the set definite time delay. Thus, if only the inverse time delay is required, it is of utmost importance to set the definite time delay for that stage to zero.
In version 2.0, a typical starting time delay of 24ms is subtracted from the set trip time delay, so that the resulting trip time will take the internal IED start time into consideration.
7.5.3.1 Settings for each step
x means step 1, 2, 3 and 4.
DirModeSelx: The directional mode of step x. Possible settings are off/nondirectional/ forward/reverse.
Characteristx: Selection of time characteristic for step x. Definite time delay and different types of inverse time characteristics are available.
Table 13: Inverse time characteristics
Curve name ANSI Extremely Inverse
ANSI Very Inverse
ANSI Normal Inverse
ANSI Moderately Inverse
ANSI/IEEE Definite time
ANSI Long Time Extremely Inverse
ANSI Long Time Very Inverse
ANSI Long Time Inverse
IEC Normal Inverse
IEC Very Inverse
IEC Inverse
IEC Extremely Inverse
IEC Short Time Inverse
Table continues on next page
1MRK 511 310-UEN B Section 7 Current protection
145 Application manual
Curve name IEC Long Time Inverse
IEC Definite Time
User Programmable
ASEA RI
RXIDG (logarithmic)
The different characteristics are described in the Technical Reference Manual (TRM).
Ix>: Operation negative sequence current level for step x given in % of IBase.
tx: Definite time delay for step x. The definite time tx is added to the inverse time when inverse time characteristic is selected. Note that the value set is the time between activation of the start and the trip outputs.
kx: Time multiplier for the dependent (inverse) characteristic.
IMinx: Minimum operate current for step x in % of IBase. Set IMinx below Ix> for every step to achieve ANSI reset characteristic according to standard. If IMinx is set above Ix> for any step the ANSI reset works as if current is zero when current drops below IMinx.
IxMult: Multiplier for scaling of the current setting value. If a binary input signal (ENMULTx) is activated the current operation level is multiplied by this setting constant.
txMin: Minimum operation time for inverse time characteristics. At high currents the inverse time characteristic might give a very short operation time. By setting this parameter the operation time of the step can never be shorter than the setting.
Section 7 1MRK 511 310-UEN B Current protection
146 Application manual
IMinx
Operate time
Current
tx
txMin
IEC10000058
IEC10000058 V2 EN
Figure 60: Minimum operate current and operation time for inverse time characteristics
ResetTypeCrvx: The reset of the delay timer can be made in different ways. By choosing setting there are the following possibilities:
Curve name Instantaneous
IEC Reset (constant time)
ANSI Reset (inverse time)
The different reset characteristics are described in the Technical Reference Manual (TRM). There are some restrictions regarding the choice of reset delay.
For the independent time delay characteristics the possible delay time settings are instantaneous (1) and IEC (2 = set constant time reset).
For ANSI inverse time delay characteristics all three types of reset time characteristics are available; instantaneous (1), IEC (2 = set constant time reset) and ANSI (3 = current dependent reset time).
For IEC inverse time delay characteristics the possible delay time settings are instantaneous (1) and IEC (2 = set constant time reset).
For the programmable inverse time delay characteristics all three types of reset time characteristics are available; instantaneous (1), IEC (2 = set constant time reset) and ANSI (3 = current dependent reset time). If the current dependent type is used settings pr, tr and cr must be given.
tPCrvx, tACrvx, tBCrvx, tCCrvx: Parameters for programmable inverse time characteristic curve. The time characteristic equation is according to equation 38:
1MRK 511 310-UEN B Section 7 Current protection
147 Application manual
[ ] = +
— >
p
A t s B k
i C
in EQUATION1189 V1 EN (Equation 45)
Further description can be found in the Technical reference manual (TRM).
tPRCrvx, tTRCrvx, tCRCrvx: Parameters for customer creation of inverse reset time characteristic curve. Further description can be found in the Technical Reference Manual.
7.5.3.2 Common settings for all steps
x means step 1, 2, 3 and 4.
AngleRCA: Relay characteristic angle given in degrees. This angle is defined as shown in figure 51. The angle is defined positive when the residual current lags the reference voltage (Upol = -U2)
Section 7 1MRK 511 310-UEN B Current protection
148 Application manual
AngleRCA
Forward Area
Iop = I2
Upol=-U2
Reverse Area
IEC10000031-1-en.vsd IEC10000031 V1 EN
Figure 61: Relay characteristic angle given in degree
In a transmission network a normal value of RCA is about 80.
UPolMin: Minimum polarization (reference) voltage % of UBase.
I>Dir: Operate residual current level for directional comparison scheme. The setting is given in % of IBase. The start forward or start reverse signals can be used in a communication scheme. The appropriate signal must be configured to the communication scheme block.
7.6 Sensitive directional residual overcurrent and power protection SDEPSDE
1MRK 511 310-UEN B Section 7 Current protection
149 Application manual
7.6.1 Identification Function description IEC 61850
identification IEC 60617 identification
ANSI/IEEE C37.2 device number
Sensitive directional residual over current and power protection
SDEPSDE — 67N
7.6.2 Application
In networks with high impedance earthing, the phase-to-earth fault current is significantly smaller than the short circuit currents. Another difficulty for earth fault protection is that the magnitude of the phase-to-earth fault current is almost independent of the fault location in the network.
Directional residual current can be used to detect and give selective trip of phase-to- earth faults in high impedance earthed networks. The protection uses the residual current component 3I0 cos , where is the angle between the residual current and the residual voltage (-3U0), compensated with a characteristic angle. Alternatively, the function can be set to strict 3I0 level with a check of angle .
Directional residual power can also be used to detect and give selective trip of phase- to-earth faults in high impedance earthed networks. The protection uses the residual power component 3I0 3U0 cos , where is the angle between the residual current and the reference residual voltage, compensated with a characteristic angle.
A normal non-directional residual current function can also be used with definite or inverse time delay.
A backup neutral point voltage function is also available for non-directional residual overvoltage protection.
In an isolated network, that is, the network is only coupled to earth via the capacitances between the phase conductors and earth, the residual current always has -90 phase shift compared to the residual voltage ( 3U0). The characteristic angle is chosen to -90 in such a network.
In resistance earthed networks or in Petersen coil earthed, with a parallel resistor, the active residual current component (in phase with the residual voltage) should be used for the earth fault detection. In such networks, the characteristic angle is chosen to 0.
As the amplitude of the residual current is independent of the fault location, the selectivity of the earth fault protection is achieved by time selectivity.
When should the sensitive directional residual overcurrent protection be used and when should the sensitive directional residual power protection be used? Consider the following:
Sensitive directional residual overcurrent protection gives possibility for better sensitivity. The setting possibilities of this function are down to 0.25 % of IBase,
Section 7 1MRK 511 310-UEN B Current protection
150 Application manual
1 A or 5 A. This sensitivity is in most cases sufficient in high impedance network applications, if the measuring CT ratio is not too high.
Sensitive directional residual power protection gives possibility to use inverse time characteristics. This is applicable in large high impedance earthed networks, with large capacitive earth fault currents. In such networks, the active fault current would be small and by using sensitive directional residual power protection, the operating quantity is elevated. Therefore, better possibility to detect earth faults. In addition, in low impedance earthed networks, the inverse time characteristic gives better time-selectivity in case of high zero-resistive fault currents.
Phase currents
Phase- ground
voltages
IN
UN
IEC13000013-1-en.vsd
IEC13000013 V1 EN
Figure 62: Connection of SDEPSDE to analog preprocessing function block
Overcurrent functionality uses true 3I0, i.e. sum of GRPxL1, GRPxL2 and GRPxL3. For 3I0 to be calculated, connection is needed to all three phase inputs.
Directional and power functionality uses IN and UN. If a connection is made to GRPxN this signal is used, else if connection is made to all inputs GRPxL1, GRPxL2 and GRPxL3 the internally calculated sum of these inputs (3I0 and 3U0) will be used.
7.6.3 Setting guidelines
The sensitive earth fault protection is intended to be used in high impedance earthed systems, or in systems with resistive earthing where the neutral point resistor gives an earth fault current larger than what normal high impedance gives but smaller than the phase-to-phase short circuit current.
In a high impedance system the fault current is assumed to be limited by the system zero sequence shunt impedance to earth and the fault resistance only. All the series impedances in the system are assumed to be zero.
1MRK 511 310-UEN B Section 7 Current protection
151 Application manual
In the setting of earth fault protection, in a high impedance earthed system, the neutral point voltage (zero sequence voltage) and the earth fault current will be calculated at the desired sensitivity (fault resistance). The complex neutral point voltage (zero sequence) can be calculated as:
phase
0 f
0
U U
3 R 1
Z
=
+
EQUATION1943 V1 EN (Equation 46)
Where
Uphase is the phase voltage in the fault point before the fault,
Rf is the resistance to earth in the fault point and
Z0 is the system zero sequence impedance to earth
The fault current, in the fault point, can be calculated as:
phase
j 0
0 f
3 U I 3I
Z 3 R
= =
+
EQUATION1944 V1 EN (Equation 47)
The impedance Z0 is dependent on the system earthing. In an isolated system (without neutral point apparatus) the impedance is equal to the capacitive coupling between the phase conductors and earth:
phase
0 c
j
3 U Z jX j
I
= — = —
EQUATION1945 V1 EN (Equation 48)
Where
Ij is the capacitive earth fault current at a non-resistive phase-to-earth fault
Xc is the capacitive reactance to earth
In a system with a neutral point resistor (resistance earthed system) the impedance Z0 can be calculated as:
Section 7 1MRK 511 310-UEN B Current protection
152 Application manual
c n 0
c n
jX 3R Z
jX 3R
— =
— +
EQUATION1946 V1 EN (Equation 49)
Where
Rn is the resistance of the neutral point resistor
In many systems there is also a neutral point reactor (Petersen coil) connected to one or more transformer neutral points. In such a system the impedance Z0 can be calculated as:
( ) n n c
0 c n n
n c n n c
9R X X Z jX // 3R // j3X
3X X j3R 3X X = — =
+ —
EQUATION1947 V1 EN (Equation 50)
Where
Xn is the reactance of the Petersen coil. If the Petersen coil is well tuned we have 3Xn = Xc In this case the impedance Z0 will be: Z0 = 3Rn
Now consider a system with an earthing via a resistor giving higher earth fault current than the high impedance earthing. The series impedances in the system can no longer be neglected. The system with a single phase to earth fault can be described as in Figure 63.
1MRK 511 310-UEN B Section 7 Current protection
153 Application manual
Substation A
Substation B
ZlineAB,1 (pos. seq) ZlineAB,0 (zero seq)
ZlineBC,1 (pos. seq) ZlineBC,0 (zero seq)
U0A
U0B
3I0
Phase to earth fault
RN ZT,1 (pos. seq) ZT,0 (zero seq)
Source impedance Zsc (pos. seq)
en06000654.vsd
IEC06000654 V1 EN
Figure 63: Equivalent of power system for calculation of setting
The residual fault current can be written:
phase
0
1 0 f
3U 3I
2 Z Z 3 R =
+ +
EQUATION1948 V1 EN (Equation 51)
Where
Uphase is the phase voltage in the fault point before the fault
Z1 is the total positive sequence impedance to the fault point. Z1 = Zsc+ZT,1+ZlineAB,1+ZlineBC,1
Z0 is the total zero sequence impedance to the fault point. Z0 = ZT,0+3RN+ZlineAB,0+ZlineBC,0
Rf is the fault resistance.
The residual voltages in stations A and B can be written:
( )0 A 0 T,0 NU 3I Z 3R= +
EQUATION1949 V1 EN (Equation 52)
OB 0 T,0 N lineAB,0U 3I (Z 3R Z )= + +
EQUATION1950 V1 EN (Equation 53)
Section 7 1MRK 511 310-UEN B Current protection
154 Application manual
The residual power, measured by the sensitive earth fault protections in A and B will be:
0 A 0A 0S 3U 3I=
EQUATION1951 V1 EN (Equation 54)
0 B 0B 0S 3U 3I=
EQUATION1952 V1 EN (Equation 55)
The residual power is a complex quantity. The protection will have a maximum sensitivity in the characteristic angle RCA. The apparent residual power component in the characteristic angle, measured by the protection, can be written:
0 A ,prot 0A 0 AS 3U 3I cosj=
EQUATION1953 V1 EN (Equation 56)
0 B,prot 0B 0 BS 3U 3I cosj=
EQUATION1954 V1 EN (Equation 57)
The angles A and B are the phase angles between the residual current and the residual voltage in the station compensated with the characteristic angle RCA.
The protection will use the power components in the characteristic angle direction for measurement, and as base for the inverse time delay.
The inverse time delay is defined as:
0 0 inv
0 0
kSN (3I 3U cos (reference))t 3I 3U cos (measured)
j =
j
EQUATION1942 V2 EN (Equation 58)
The function can be set On/Off with the setting of Operation.
Common base IED values for primary current (IBase), primary voltage (UBase) and primary power (SBase) are set in a Global base values for settings function GBASVAL.
GlobalBaseSel: It is used to select a GBASVAL function for reference of base values.
RotResU: It is a setting for rotating the polarizing quantity ( 3U0) by 0 or 180 degrees. This parameter is set to 180 degrees by default in order to inverse the residual voltage ( 3U0) to calculate the reference voltage (-3U0 e-jRCADir). Since the reference voltage is used as the polarizing quantity for directionality, it is important to set this parameter correctly.
With the setting OpMode the principle of directional function is chosen.
1MRK 511 310-UEN B Section 7 Current protection
155 Application manual
With OpMode set to 3I0cosfi the current component in the direction equal to the characteristic angleRCADir has the maximum sensitivity. The characteristic for RCADir is equal to 0 is shown in Figure 64.
= =o o0 , 90RCADir ROADir
03I
j = -0 refang(3I ) ang(3U )
— =0 ref3U U 03I cos j
IEC06000648-4-en.vsd
IEC06000648 V4 EN
Figure 64: Characteristic for RCADir equal to 0
The characteristic is for RCADir equal to -90 is shown in Figure 65.
IEC06000649_3_en.vsd
refU = = 90 , 90RCADir ROADir
03I
03 I cos
= 0(3 ) ( )refang I ang U
03U
IEC06000649 V3 EN
Figure 65: Characteristic for RCADir equal to -90
When OpMode is set to 3U03I0cosfi the apparent residual power component in the direction is measured.
When OpMode is set to 3I0 and fi the function will operate if the residual current is larger than the setting INDir> and the residual current angle is within the sector RCADir ROADir.
Section 7 1MRK 511 310-UEN B Current protection
156 Application manual
The characteristic for this OpMode when RCADir = 0 and ROADir = 80 is shown in figure 66.
-3U0
Operate area
3I0
RCADir = 0
ROADir = 80
IEC06000652-3-en.vsd IEC06000652 V3 EN
Figure 66: Characteristic for RCADir = 0 and ROADir = 80
DirMode is set Forward or Reverse to set the direction of the operation for the directional function selected by the OpMode.
All the directional protection modes have a residual current release level setting INRel> which is set in % of IBase. This setting should be chosen smaller than or equal to the lowest fault current to be detected.
All the directional protection modes have a residual voltage release level setting UNRel> which is set in % of UBase. This setting should be chosen smaller than or equal to the lowest fault residual voltage to be detected.
tDef is the definite time delay, given in s, for the directional residual current protection.
tReset is the time delay before the definite timer gets reset, given in s. With a tReset time of few cycles, there is an increased possibility to clear intermittent earth faults correctly. The setting shall be much shorter than the set trip delay. In case of intermittent earth faults, the fault current is intermittently dropping below the set value during consecutive cycles. Therefore the definite timer should continue for a certain time equal to tReset even though the fault current has dropped below the set value.
The characteristic angle of the directional functions RCADir is set in degrees. RCADir is normally set equal to 0 in a high impedance earthed network with a neutral point resistor as the active current component is appearing out on the faulted feeder only. RCADir is set equal to -90 in an isolated network as all currents are mainly capacitive.
1MRK 511 310-UEN B Section 7 Current protection
157 Application manual
ROADir is Relay Operating Angle. ROADir is identifying a window around the reference direction in order to detect directionality. ROADir is set in degrees. For angles differing more than ROADir from RCADir the function is blocked. The setting can be used to prevent unwanted operation for non-faulted feeders, with large capacitive earth fault current contributions, due to CT phase angle error.
INCosPhi> is the operate current level for the directional function when OpMode is set 3I0Cosfi. The setting is given in % of IBase. The setting should be based on calculation of the active or capacitive earth fault current at required sensitivity of the protection.
SN> is the operate power level for the directional function when OpMode is set 3I03U0Cosfi. The setting is given in % of SBase. The setting should be based on calculation of the active or capacitive earth fault residual power at required sensitivity of the protection.
The input transformer for the Sensitive directional residual over current and power protection function has the same short circuit capacity as the phase current transformers. Hence, there is no specific requirement for the external CT core, i.e. any CT core can be used.
If the time delay for residual power is chosen the delay time is dependent on two setting parameters. SRef is the reference residual power, given in % of SBase. kSN is the time multiplier. The time delay will follow the following expression:
inv 0 0
kSN Sref t
3I 3U cos (measured)j
=
EQUATION1957 V1 EN (Equation 59)
INDir> is the operate current level for the directional function when OpMode is set 3I0 and fi. The setting is given in % of IBase. The setting should be based on calculation of the earth fault current at required sensitivity of the protection.
OpINNonDir> is set On to activate the non-directional residual current protection.
INNonDir> is the operate current level for the non-directional function. The setting is given in % of IBase. This function can be used for detection and clearance of cross- country faults in a shorter time than for the directional function. The current setting should be larger than the maximum single-phase residual current on the protected line.
TimeChar is the selection of time delay characteristic for the non-directional residual current protection. Definite time delay and different types of inverse time characteristics are available:
Table 14: Inverse time characteristics
Curve name ANSI Extremely Inverse
ANSI Very Inverse
ANSI Normal Inverse
Table continues on next page
Section 7 1MRK 511 310-UEN B Current protection
158 Application manual
Curve name ANSI Moderately Inverse
ANSI/IEEE Definite time
ANSI Long Time Extremely Inverse
ANSI Long Time Very Inverse
ANSI Long Time Inverse
IEC Normal Inverse
IEC Very Inverse
IEC Inverse
IEC Extremely Inverse
IEC Short Time Inverse
IEC Long Time Inverse
IEC Definite Time
User Programmable
ASEA RI
RXIDG (logarithmic)
See chapter Inverse time characteristics in Technical Manual for the description of different characteristics
tPCrv, tACrv, tBCrv, tCCrv: Parameters for customer creation of inverse time characteristic curve (Curve type = 17). The time characteristic equation is:
[ ] = +
— >
p
A t s B InMult
i C
in EQUATION1958 V1 EN (Equation 60)
tINNonDir is the definite time delay for the non directional earth fault current protection, given in s.
OpUN> is set On to activate the trip function of the residual over voltage protection.
tUN is the definite time delay for the trip function of the residual voltage protection, given in s.
7.7 Thermal overload protection, one time constant, Celsius/Fahrenheit LCPTTR/LFPTTR
1MRK 511 310-UEN B Section 7 Current protection
159 Application manual
7.7.1 Identification Function description IEC 61850
identification IEC 60617 identification
ANSI/IEEE C37.2 device number
Thermal overload protection, one time constant, Celsius
LCPTTR 26
Thermal overload protection, one time constant, Fahrenheit
LFPTTR 26
7.7.2 Application
Lines and cables in the power system are designed for a certain maximum load current level. If the current exceeds this level the losses will be higher than expected. As a consequence the temperature of the conductors will increase. If the temperature of the lines and cables reaches too high values the equipment might be damaged:
The sag of overhead lines can reach unacceptable value. If the temperature of conductors, for example aluminium conductors, gets too
high the material will be destroyed. In cables the insulation can be damaged as a consequence of the overtemperature.
As a consequence of this phase to phase or phase to earth faults can occur.
In stressed situations in the power system it can be required to overload lines and cables for a limited time. This should be done while managing the risks safely.
The thermal overload protection provides information that makes a temporary overloading of cables and lines possible. The thermal overload protection estimates the conductor temperature continuously, in Celsius or Fahrenheit depending on whether LCPTTR or LFPTTR is chosen. This estimation is made by using a thermal model of the line/cable based on the current measurement.
If the temperature of the protected object reaches a set warning level AlarmTemp, a signal ALARM can be given to the operator. This enables actions in the power system to be taken before dangerous temperatures are reached. If the temperature continues to increase to the trip value TripTemp, the protection initiates trip of the protected line.
7.7.3 Setting guideline
The parameters for the Thermal overload protection, one time constant, Celsius/ Fahrenheit LCPTTR/LFPTTR are set via the local HMI or PCM600.
The following settings can be done for the thermal overload protection.
Operation: Off/On
Section 7 1MRK 511 310-UEN B Current protection
160 Application manual
GlobalBaseSel is used to select a GBASVAL function for reference of base values, primary current (IBase), primary voltage (UBase) and primary power (SBase).
Imult: Enter the number of lines in case the protection function is applied on multiple parallel lines sharing one CT.
IRef: Reference, steady state current, given in % of IBase that will give a steady state (end) temperature rise TRef. It is suggested to set this current to the maximum steady state current allowed for the line/cable under emergency operation (a few hours per year).
TRef: Reference temperature rise (end temperature) corresponding to the steady state current IRef. From cable manuals current values with corresponding conductor temperature are often given. These values are given for conditions such as earth temperature, ambient air temperature, way of laying of cable and earth thermal resistivity. From manuals for overhead conductor temperatures and corresponding current is given.
Tau: The thermal time constant of the protected circuit given in minutes. Please refer to manufacturers manuals for details.
TripTemp: Temperature value for trip of the protected circuit. For cables, a maximum allowed conductor temperature is often stated to be 90C (194F). For overhead lines, the critical temperature for aluminium conductor is about 90 — 100C (194-212F). For a copper conductor a normal figure is 70C (158F).
AlarmTemp: Temperature level for alarm of the protected circuit. ALARM signal can be used as a warning before the circuit is tripped. Therefore the setting shall be lower than the trip level. It shall at the same time be higher than the maximum conductor temperature at normal operation. For cables this level is often given to 65C (149F). Similar values are stated for overhead lines. A suitable setting can be about 15C (59F) below the trip value.
ReclTemp: Temperature where lockout signal LOCKOUT from the protection is released. When the thermal overload protection trips a lock-out signal is activated. This signal is intended to block switch in of the protected circuit as long as the conductor temperature is high. The signal is released when the estimated temperature is below the set value. This temperature value should be chosen below the alarm temperature.
7.8 Thermal overload protection, two time constants TRPTTR
1MRK 511 310-UEN B Section 7 Current protection
161 Application manual
7.8.1 Identification Function description IEC 61850
identification IEC 60617 identification
ANSI/IEEE C37.2 device number
Thermal overload protection, two time constants
TRPTTR
SYMBOL-A V1 EN
49
7.8.2 Application
Transformers in the power system are designed for a certain maximum load current (power) level. If the current exceeds this level the losses will be higher than expected. As a consequence the temperature of the transformer will increase. If the temperature of the transformer reaches too high a value, the equipment might be damaged;
The insulation within the transformer experiences forced ageing. As a consequence of this, the risk of internal phase-to-phase or phase-to-earth faults increases.
There might be hot spots within the transformer, which degrades the paper insulation. It might also cause bubbling in the transformer oil.
In stressed situations in the power system it can be required to overload transformers for a limited time. This should be done without the above mentioned risks. The thermal overload protection provides information and makes temporary overloading of transformers possible.
The permissible load level of a power transformer is highly dependent on the cooling system of the transformer. There are two main principles:
OA: The air is naturally circulated to the coolers without fans and the oil is naturally circulated without pumps.
FOA: The coolers have fans to force air for cooling and pumps to force the circulation of the transformer oil.
The protection can have two sets of parameters, one for non-forced cooling and one for forced cooling. Both the permissive steady state loading level as well as the thermal time constant is influenced by the cooling system of the transformer. The two parameters sets can be activated by the binary input signal COOLING. This can be used for transformers where forced cooling can be taken out of operation, for example at fan or pump faults.
The thermal overload protection estimates the internal heat content of the transformer (temperature) continuously. This estimation is made by using a thermal model of the transformer which is based on current measurement.
If the heat content of the protected transformer reaches a set alarm level a signal can be given to the operator. Two alarm levels are available. This enables preventive
Section 7 1MRK 511 310-UEN B Current protection
162 Application manual
actions in the power system to be taken before dangerous temperatures are reached. If the temperature continues to increase to the trip value, the protection initiates a trip of the protected transformer.
After tripping by the thermal overload protection, the transformer will cool down over time. There will be a time gap before the heat content (temperature) reaches such a level so that the transformer can be taken into service again. Therefore, the function will continue to estimate the heat content using a set cooling time constant. Energizing of the transformer can be blocked until the heat content has reached a set level.
7.8.3 Setting guideline
The parameters for the thermal overload protection, two time constants (TRPTTR) are set via the local HMI or Protection and Control IED Manager (PCM600).
The following settings can be done for the thermal overload protection:
Operation: Off/On
Operation: Sets the mode of operation. Off switches off the complete function.
GlobalBaseSel: Selects the global base value group used by the function to define (IBase), (UBase) and (SBase).
IRef: Reference level of the current given in % of IBase. When the current is equal to IRef the final (steady state) heat content is equal to 1. It is suggested to give a setting corresponding to the rated current of the transformer winding.
IRefMult: If a binary input ENMULT is activated the reference current value can be multiplied by the factor IRefMult. The activation could be used in case of deviating ambient temperature from the reference value. In the standard for loading of a transformer an ambient temperature of 20C is used. For lower ambient temperatures the load ability is increased and vice versa. IRefMult can be set within a range: 0.01 — 10.00.
IBase1: Base current for setting given as percentage of IBase. This setting shall be related to the status with no COOLING input. It is suggested to give a setting corresponding to the rated current of the transformer with natural cooling (OA).
IBase2: Base current for setting given as percentage of IBase. This setting shall be related to the status with activated COOLING input. It is suggested to give a setting corresponding to the rated current of the transformer with forced cooling (FOA). If the transformer has no forced cooling IBase2 can be set equal to IBase1.
Tau1: The thermal time constant of the protected transformer, related to IBase1 (no cooling) given in minutes.
Tau2: The thermal time constant of the protected transformer, related to IBase2 (with cooling) given in minutes.
1MRK 511 310-UEN B Section 7 Current protection
163 Application manual
The thermal time constant should be obtained from the transformer manufacturers manuals. The thermal time constant is dependent on the cooling and the amount of oil. Normal time constants for medium and large transformers (according to IEC 60076-7) are about 2.5 hours for naturally cooled transformers and 1.5 hours for forced cooled transformers.
The time constant can be estimated from measurements of the oil temperature during a cooling sequence (described in IEC 60076-7). It is assumed that the transformer is operated at a certain load level with a constant oil temperature (steady state operation). The oil temperature above the ambient temperature is DQo0. Then the transformer is disconnected from the grid (no load). After a time t of at least 30 minutes the temperature of the oil is measured again. Now the oil temperature above the ambient temperature is DQot. The thermal time constant can now be estimated as:
0ln lno ot
tt = DQ — DQ
EQUATION1180 V1 EN (Equation 61)
If the transformer has forced cooling (FOA) the measurement should be made both with and without the forced cooling in operation, giving Tau2 and Tau1.
The time constants can be changed if the current is higher than a set value or lower than a set value. If the current is high it is assumed that the forced cooling is activated while it is deactivated at low current. The setting of the parameters below enables automatic adjustment of the time constant.
Tau1High: Multiplication factor to adjust the time constant Tau1 if the current is higher than the set value IHighTau1. IHighTau1 is set in % of IBase1.
Tau1Low: Multiplication factor to adjust the time constant Tau1 if the current is lower than the set value ILowTau1. ILowTau1 is set in % of IBase1.
Tau2High: Multiplication factor to adjust the time constant Tau2 if the current is higher than the set value IHighTau2. IHighTau2 is set in % of IBase2.
Tau2Low: Multiplication factor to adjust the time constant Tau2 if the current is lower than the set value ILowTau2. ILowTau2 is set in % of IBase2.
The possibility to change time constant with the current value as the base can be useful in different applications. Below some examples are given:
In case a total interruption (low current) of the protected transformer all cooling possibilities will be inactive. This can result in a changed value of the time constant.
If other components (motors) are included in the thermal protection, there is a risk of overheating of that equipment in case of very high current. The thermal time constant is often smaller for a motor than for the transformer.
Section 7 1MRK 511 310-UEN B Current protection
164 Application manual
ITrip: The steady state current that the transformer can withstand. The setting is given in % of IBase1 or IBase2.
Alarm1: Heat content level for activation of the signal ALARM1. ALARM1 is set in % of the trip heat content level.
Alarm2: Heat content level for activation of the output signal ALARM2. ALARM2 is set in % of the trip heat content level.
ResLo: Lockout release level of heat content to release the lockout signal. When the thermal overload protection trips a lock-out signal is activated. This signal is intended to block switching on of the protected circuit transformer as long as the transformer temperature is high. The signal is released when the estimated heat content is below the set value. This temperature value should be chosen below the alarm temperature. ResLo is set in % of the trip heat content level.
ThetaInit: Heat content before activation of the function. This setting can be set a little below the alarm level. If the transformer is loaded before the activation of the protection function, its temperature can be higher than the ambient temperature. The start point given in the setting will prevent risk of no trip at overtemperature during the first moments after activation. ThetaInit: is set in % of the trip heat content level.
Warning: If the calculated time to trip factor is below the setting Warning a warning signal is activated. The setting is given in minutes.
7.9 Breaker failure protection 3-phase activation and output CCRBRF
7.9.1 Identification Function description IEC 61850
identification IEC 60617 identification
ANSI/IEEE C37.2 device number
Breaker failure protection, 3-phase activation and output
CCRBRF
3I>BF
SYMBOL-U V1 EN
50BF
7.9.2 Application
In the design of the fault clearance system the N-1 criterion is often used. This means that a fault needs to be cleared even if any component in the fault clearance system is faulty. One necessary component in the fault clearance system is the circuit breaker. It is from practical and economical reason not feasible to duplicate the circuit breaker for the protected component. Instead a breaker failure protection is used.
1MRK 511 310-UEN B Section 7 Current protection
165 Application manual
Breaker failure protection, 3-phase activation and output (CCRBRF) will issue a back-up trip command to adjacent circuit breakers in case of failure to trip of the normal circuit breaker for the protected component. The detection of failure to break the current through the breaker is made by means of current measurement or as detection of remaining trip signal (unconditional).
CCRBRF can also give a re-trip. This means that a second trip signal is sent to the protected circuit breaker. The re-trip function can be used to increase the probability of operation of the breaker, or it can be used to avoid back-up trip of many breakers in case of mistakes during relay maintenance and test.
7.9.3 Setting guidelines
The parameters for Breaker failure protection 3-phase activation and output CCRBRF are set via the local HMI or PCM600.
The following settings can be done for the breaker failure protection.
Operation: Off/On
FunctionMode This parameter can be set Current or Contact. This states the way the detection of failure of the breaker is performed. In the mode current the current measurement is used for the detection. In the mode Contact the long duration of breaker position signal is used as indicator of failure of the breaker. The mode Current&Contact means that both ways of detections are activated. Contact mode can be usable in applications where the fault current through the circuit breaker is small. This can be the case for some generator protection application (for example reverse power protection) or in case of line ends with weak end infeed.
RetripMode: This setting states how the re-trip function shall operate. Retrip Off means that the re-trip function is not activated. CB Pos Check (circuit breaker position check) and Current means that a phase current must be larger than the operate level to allow re-trip. CB Pos Check (circuit breaker position check) and Contact means re-trip is done when circuit breaker is closed (breaker position is used). No CBPos Check means re-trip is done without check of breaker position.
Table 15: Dependencies between parameters RetripMode and FunctionMode
RetripMode FunctionMode Description Retrip Off N/A the re-trip function is not
activated
CB Pos Check Current a phase current must be larger than the operate level to allow re-trip
Contact re-trip is done when breaker position indicates that breaker is still closed after re-trip time has elapsed
Current&Contact both methods are used
Table continues on next page
Section 7 1MRK 511 310-UEN B Current protection
166 Application manual
RetripMode FunctionMode Description No CBPos Check Current re-trip is done without check of
breaker position
Contact re-trip is done without check of breaker position
Current&Contact both methods are used
BuTripMode: Back-up trip mode is given to state sufficient current criteria to detect failure to break. For Current operation 2 out of 4 means that at least two currents, of the three-phase currents and the residual current, shall be high to indicate breaker failure. 1 out of 3 means that at least one current of the three-phase currents shall be high to indicate breaker failure. 1 out of 4 means that at least one current of the three- phase currents or the residual current shall be high to indicate breaker failure. In most applications 1 out of 3 is sufficient. For Contact operation means back-up trip is done when circuit breaker is closed (breaker position is used).
IP>: Current level for detection of breaker failure, set in % of IBase. This parameter should be set so that faults with small fault current can be detected. The setting can be chosen in accordance with the most sensitive protection function to start the breaker failure protection. Typical setting is 10% of IBase.
I>BlkCont: If any contact based detection of breaker failure is used this function can be blocked if any phase current is larger than this setting level. If the FunctionMode is set Current&Contact breaker failure for high current faults are safely detected by the current measurement function. To increase security the contact based function should be disabled for high currents. The setting can be given within the range 5 200% of IBase.
IN>: Residual current level for detection of breaker failure set in % of IBase. In high impedance earthed systems the residual current at phase- to-earth faults are normally much smaller than the short circuit currents. In order to detect breaker failure at single- phase-earth faults in these systems it is necessary to measure the residual current separately. Also in effectively earthed systems the setting of the earth-fault current protection can be chosen to relatively low current level. The BuTripMode is set 1 out of 4. The current setting should be chosen in accordance to the setting of the sensitive earth-fault protection. The setting can be given within the range 2 200 % of IBase.
t1: Time delay of the re-trip. The setting can be given within the range 0 60s in steps of 0.001 s. Typical setting is 0 50ms.
t2: Time delay of the back-up trip. The choice of this setting is made as short as possible at the same time as unwanted operation must be avoided. Typical setting is 90 200ms (also dependent of re-trip timer).
The minimum time delay for the re-trip can be estimated as:
_2 1 + + +cbopen BFP reset margint t t t t EQUATION1430 V1 EN (Equation 62)
1MRK 511 310-UEN B Section 7 Current protection
167 Application manual
where:
tcbopen is the maximum opening time for the circuit breaker
tBFP_reset is the maximum time for breaker failure protection to detect correct breaker function (the current criteria reset)
tmargin is a safety margin
It is often required that the total fault clearance time shall be less than a given critical time. This time is often dependent of the ability to maintain transient stability in case of a fault close to a power plant.
Time
The fault occurs
Protection operate time
Trip and Start CCRBRF
Normal tcbopen
Margin
Retrip delay t1 tcbopen after re-trip
tBFPreset
Minimum back-up trip delay t2
Critical fault clearance time for stability
IEC05000479_2_en.vsd
IEC05000479 V2 EN
Figure 67: Time sequence
t2MPh: Time delay of the back-up trip at multi-phase start. The critical fault clearance time is often shorter in case of multi-phase faults, compared to single phase-to-earth faults. Therefore there is a possibility to reduce the back-up trip delay for multi-phase faults. Typical setting is 90 150 ms.
t3: Additional time delay to t2 for a second back-up trip TRBU2. In some applications there might be a requirement to have separated back-up trip functions, tripping different back-up circuit breakers.
tCBAlarm: Time delay for alarm in case of indication of faulty circuit breaker. There is a binary input CBFLT from the circuit breaker. This signal is activated when internal supervision in the circuit breaker detect that the circuit breaker is unable to clear fault. This could be the case when gas pressure is low in a SF6 circuit breaker, of others. After the set time an alarm is given, so that actions can be done to repair the
Section 7 1MRK 511 310-UEN B Current protection
168 Application manual
circuit breaker. The time delay for back-up trip is bypassed when the CBFLT is active. Typical setting is 2.0 seconds.
tPulse: Trip pulse duration. This setting must be larger than the critical impulse time of circuit breakers to be tripped from the breaker failure protection. Typical setting is 200 ms.
7.10 Stub protection STBPTOC
7.10.1 Identification Function description IEC 61850
identification IEC 60617 identification
ANSI/IEEE C37.2 device number
Stub protection STBPTOC
3I>STUB
SYMBOL-T V1 EN
50STB
7.10.2 Application
In a 1-breaker switchyard the line protection and the busbar protection normally have overlap when a connected object is in service. When an object is taken out of service it is normally required to keep the diagonal of the 1-breaker switchyard in operation. This is done by opening the disconnector to the protected object. This will, however, disable the normal object protection (for example the distance protection) of the energized part between the circuit breakers and the open disconnector.
Stub protection STBPTOC is a simple phase overcurrent protection, fed from the two current transformer groups feeding the object taken out of service. The stub protection is only activated when the disconnector of the object is open. STBPTOCenables fast fault clearance of faults at the section between the CTs and the open disconnector.
1MRK 511 310-UEN B Section 7 Current protection
169 Application manual
IEC05000465 V2 EN
Figure 68: Typical connection for STBPTOC in 1-breaker arrangement.
7.10.3 Setting guidelines
The parameters for Stub protection STBPTOC are set via the local HMI or PCM600.
The following settings can be done for the stub protection.
Operation: Off/On
ReleaseMode: This parameter can be set Release or Continuous. With theRelease setting the function is only active when a binary release signal RELEASE into the function is activated. This signal is normally taken from an auxiliary contact (normally closed) of the line disconnector and connected to a binary input RELEASE of the IED. With the settingContinuous the function is activated independent of presence of any external release signal.
I>: Current level for the Stub protection, set in % of IBase. This parameter should be set so that all faults on the stub can be detected. The setting should thus be based on fault calculations.
Section 7 1MRK 511 310-UEN B Current protection
170 Application manual
t: Time delay of the operation. Normally the function shall be instantaneous.
7.11 Pole discordance protection CCPDSC
7.11.1 Identification Function description IEC 61850
identification IEC 60617 identification
ANSI/IEEE C37.2 device number
Pole discordance protection CCPDSC
PD
SYMBOL-S V1 EN
52PD
7.11.2 Application
There is a risk that a circuit breaker will get discordance between the poles at circuit breaker operation: closing or opening. One pole can be open and the other two closed, or two poles can be open and one closed. Pole discordance of a circuit breaker will cause unsymmetrical currents in the power system. The consequence of this can be:
Negative sequence currents that will give stress on rotating machines Zero sequence currents that might give unwanted operation of sensitive earth-
fault protections in the power system.
It is therefore important to detect situations with pole discordance of circuit breakers. When this is detected the breaker should be tripped directly.
Pole discordance protection CCPDSC will detect situation with deviating positions of the poles of the protected circuit breaker. The protection has two different options to make this detection:
By connecting the auxiliary contacts in the circuit breaker so that logic is created, a signal can be sent to the protection, indicating pole discordance. This logic can also be realized within the protection itself, by using opened and close signals for each circuit breaker pole, connected to the protection.
Each phase current through the circuit breaker is measured. If the difference between the phase currents is larger than a CurrUnsymLevel this is an indication of pole discordance, and the protection will operate.
7.11.3 Setting guidelines
The parameters for the Pole discordance protection CCPDSC are set via the local HMI or PCM600.
1MRK 511 310-UEN B Section 7 Current protection
171 Application manual
The following settings can be done for the pole discordance protection.
Operation: Off or On
tTrip: Time delay of the operation.
ContSel: Operation of the contact based pole discordance protection. Can be set: Off/PD signal from CB. If PD signal from CB is chosen the logic to detect pole discordance is made in the vicinity to the breaker auxiliary contacts and only one signal is connected to the pole discordance function. If the Pole pos aux cont. alternative is chosen each open close signal is connected to the IED and the logic to detect pole discordance is realized within the function itself.
CurrSel: Operation of the current based pole discordance protection. Can be set: Off/CB oper monitor/Continuous monitor. In the alternative CB oper monitor the function is activated only directly in connection to breaker open or close command (during 200 ms). In the alternative Continuous monitor function is continuously activated.
CurrUnsymLevel: Unsymmetrical magnitude of lowest phase current compared to the highest, set in % of the highest phase current. Natural difference between phase currents in 1 1/2 breaker installations must be considered. For circuit breakers in 1 1/2 breaker configured switch yards there might be natural unbalance currents through the breaker. This is due to the existence of low impedance current paths in the switch yard. This phenomenon must be considered in the setting of the parameter.
CurrRelLevel: Current magnitude for release of the function in % of IBase.
7.12 Directional underpower protection GUPPDUP
7.12.1 Identification Function description IEC 61850
identification IEC 60617 identification
ANSI/IEEE C37.2 device number
Directional underpower protection GUPPDUP P <
2 SYMBOL-LL V2 EN
37
7.12.2 Application
The task of a generator in a power plant is to convert mechanical energy available as a torque on a rotating shaft to electric energy.
Sometimes, the mechanical power from a prime mover may decrease so much that it does not cover bearing losses and ventilation losses. Then, the synchronous generator
Section 7 1MRK 511 310-UEN B Current protection
172 Application manual
becomes a synchronous motor and starts to take electric power from the rest of the power system. This operating state, where individual synchronous machines operate as motors, implies no risk for the machine itself. If the generator under consideration is very large and if it consumes lots of electric power, it may be desirable to disconnect it to ease the task for the rest of the power system.
Often, the motoring condition may imply that the turbine is in a very dangerous state. The task of the reverse power protection is to protect the turbine and not to protect the generator itself.
Steam turbines easily become overheated if the steam flow becomes too low or if the steam ceases to flow through the turbine. Therefore, turbo-generators should have reverse power protection. There are several contingencies that may cause reverse power: break of a main steam pipe, damage to one or more blades in the steam turbine or inadvertent closing of the main stop valves. In the last case, it is highly desirable to have a reliable reverse power protection. It may prevent damage to an otherwise undamaged plant.
During the routine shutdown of many thermal power units, the reverse power protection gives the tripping impulse to the generator breaker (the unit breaker). By doing so, one prevents the disconnection of the unit before the mechanical power has become zero. Earlier disconnection would cause an acceleration of the turbine generator at all routine shutdowns. This should have caused overspeed and high centrifugal stresses.
When the steam ceases to flow through a turbine, the cooling of the turbine blades will disappear. Now, it is not possible to remove all heat generated by the windage losses. Instead, the heat will increase the temperature in the steam turbine and especially of the blades. When a steam turbine rotates without steam supply, the electric power consumption will be about 2% of rated power. Even if the turbine rotates in vacuum, it will soon become overheated and damaged. The turbine overheats within minutes if the turbine loses the vacuum.
The critical time to overheating a steam turbine varies from about 0.5 to 30 minutes depending on the type of turbine. A high-pressure turbine with small and thin blades will become overheated more easily than a low-pressure turbine with long and heavy blades. The conditions vary from turbine to turbine and it is necessary to ask the turbine manufacturer in each case.
Power to the power plant auxiliaries may come from a station service transformer connected to the secondary side of the step-up transformer. Power may also come from a start-up service transformer connected to the external network. One has to design the reverse power protection so that it can detect reverse power independent of the flow of power to the power plant auxiliaries.
Hydro turbines tolerate reverse power much better than steam turbines do. Only Kaplan turbine and bulb turbines may suffer from reverse power. There is a risk that the turbine runner moves axially and touches stationary parts. They are not always strong enough to withstand the associated stresses.
1MRK 511 310-UEN B Section 7 Current protection
173 Application manual
Ice and snow may block the intake when the outdoor temperature falls far below zero. Branches and leaves may also block the trash gates. A complete blockage of the intake may cause cavitations. The risk for damages to hydro turbines can justify reverse power protection in unattended plants.
A hydro turbine that rotates in water with closed wicket gates will draw electric power from the rest of the power system. This power will be about 10% of the rated power. If there is only air in the hydro turbine, the power demand will fall to about 3%.
Diesel engines should have reverse power protection. The generator will take about 15% of its rated power or more from the system. A stiff engine may require perhaps 25% of the rated power to motor it. An engine that is good run in might need no more than 5%. It is necessary to obtain information from the engine manufacturer and to measure the reverse power during commissioning.
Gas turbines usually do not require reverse power protection.
Figure 69 illustrates the reverse power protection with underpower protection and with overpower protection. The underpower protection gives a higher margin and should provide better dependability. On the other hand, the risk for unwanted operation immediately after synchronization may be higher. One should set the underpower protection (reference angle set to 0) to trip if the active power from the generator is less than about 2%. One should set the overpower protection (reference angle set to 180) to trip if the power flow from the network to the generator is higher than 1%.
Underpower protection Overpower protection
Q Q
P P
Operating point without turbine torque
Margin Margin
Operate Line
Operate Line
Operating point without turbine torque
IEC09000019-2-en.vsd
IEC09000019 V2 EN
Figure 69: Reverse power protection with underpower or overpower protection
7.12.3 Setting guidelines
Operation: With the parameter Operation the function can be set On/Off.
Mode: The voltage and current used for the power measurement. The setting possibilities are shown in table 16.
Section 7 1MRK 511 310-UEN B Current protection
174 Application manual
Table 16: Complex power calculation
Set value Mode Formula used for complex power calculation L1, L2, L3 * * *
1 1 2 2 3 3L L L L L LS U I U I U I= + +
EQUATION1697 V1 EN (Equation 64)
Arone * * 1 2 1 2 3 3L L L L L LS U I U I= —
EQUATION1698 V1 EN (Equation 65)
PosSeq *3 PosSeq PosSeqS U I=
EQUATION1699 V1 EN (Equation 66)
L1L2 * * 1 2 1 2( )L L L LS U I I= —
EQUATION1700 V1 EN (Equation 67)
L2L3 * * 2 3 2 3( )L L L LS U I I= —
EQUATION1701 V1 EN (Equation 68)
L3L1 * * 3 1 3 1( )L L L LS U I I= —
EQUATION1702 V1 EN (Equation 69)
L1 * 1 13 L LS U I=
EQUATION1703 V1 EN (Equation 70)
L2 * 2 23 L LS U I=
EQUATION1704 V1 EN (Equation 71)
L3 * 3 33 L LS U I=
EQUATION1705 V1 EN (Equation 72)
The function has two stages that can be set independently.
With the parameter OpMode1(2) the function can be set On/Off.
The function gives trip if the power component in the direction defined by the setting Angle1(2) is smaller than the set pick up power value Power1(2)
1MRK 511 310-UEN B Section 7 Current protection
175 Application manual
Operate
Angle1(2)
Power1(2)
P
Q
en06000441.vsd
IEC06000441 V1 EN
Figure 70: Underpower mode
The setting Power1(2) gives the power component pick up value in the Angle1(2) direction. The setting is given in p.u. of the generator rated power, see equation 73.
Minimum recommended setting is 0.2% of SN when metering class CT inputs into the IED are used.
3NS UBase IBase=
EQUATION1708 V1 EN (Equation 73)
The setting Angle1(2) gives the characteristic angle giving maximum sensitivity of the power protection function. The setting is given in degrees. For active power the set angle should be 0 or 180. 0 should be used for generator low forward active power protection.
Section 7 1MRK 511 310-UEN B Current protection
176 Application manual
Operate Angle1(2) = 0
Power1(2)
P
Q
en06000556.vsd IEC06000556 V1 EN
Figure 71: For low forward power the set angle should be 0 in the underpower function
TripDelay1(2) is set in seconds to give the time delay for trip of the stage after pick up.
Hysteresis1(2) is given in p.u. of generator rated power according to equation 74.
3NS UBase IBase=
EQUATION1708 V1 EN (Equation 74)
The drop out power will be Power1(2) + Hysteresis1(2).
The possibility to have low pass filtering of the measured power can be made as shown in the formula:
( )1Old CalculatedS k S k S= + —
EQUATION1893 V1 EN (Equation 75)
Where
S is a new measured value to be used for the protection function
Sold is the measured value given from the function in previous execution cycle
SCalculated is the new calculated value in the present execution cycle
k is settable parameter
1MRK 511 310-UEN B Section 7 Current protection
177 Application manual
The value of k=0.92 is recommended in generator applications as the trip delay is normally quite long.
The calibration factors for current and voltage measurement errors are set % of rated current/voltage:
IAmpComp5, IAmpComp30, IAmpComp100
UAmpComp5, UAmpComp30, UAmpComp100
IAngComp5, IAngComp30, IAngComp100
The angle compensation is given as difference between current and voltage angle errors.
The values are given for operating points 5, 30 and 100% of rated current/voltage. The values should be available from instrument transformer test protocols.
7.13 Directional overpower protection GOPPDOP
7.13.1 Identification Function description IEC 61850
identification IEC 60617 identification
ANSI/IEEE C37.2 device number
Directional overpower protection GOPPDOP P >
2 DOCUMENT172362-IMG158942
V2 EN
32
7.13.2 Application
The task of a generator in a power plant is to convert mechanical energy available as a torque on a rotating shaft to electric energy.
Sometimes, the mechanical power from a prime mover may decrease so much that it does not cover bearing losses and ventilation losses. Then, the synchronous generator becomes a synchronous motor and starts to take electric power from the rest of the power system. This operating state, where individual synchronous machines operate as motors, implies no risk for the machine itself. If the generator under consideration is very large and if it consumes lots of electric power, it may be desirable to disconnect it to ease the task for the rest of the power system.
Often, the motoring condition may imply that the turbine is in a very dangerous state. The task of the reverse power protection is to protect the turbine and not to protect the generator itself.
Section 7 1MRK 511 310-UEN B Current protection
178 Application manual
Steam turbines easily become overheated if the steam flow becomes too low or if the steam ceases to flow through the turbine. Therefore, turbo-generators should have reverse power protection. There are several contingencies that may cause reverse power: break of a main steam pipe, damage to one or more blades in the steam turbine or inadvertent closing of the main stop valves. In the last case, it is highly desirable to have a reliable reverse power protection. It may prevent damage to an otherwise undamaged plant.
During the routine shutdown of many thermal power units, the reverse power protection gives the tripping impulse to the generator breaker (the unit breaker). By doing so, one prevents the disconnection of the unit before the mechanical power has become zero. Earlier disconnection would cause an acceleration of the turbine generator at all routine shutdowns. This should have caused overspeed and high centrifugal stresses.
When the steam ceases to flow through a turbine, the cooling of the turbine blades will disappear. Now, it is not possible to remove all heat generated by the windage losses. Instead, the heat will increase the temperature in the steam turbine and especially of the blades. When a steam turbine rotates without steam supply, the electric power consumption will be about 2% of rated power. Even if the turbine rotates in vacuum, it will soon become overheated and damaged. The turbine overheats within minutes if the turbine loses the vacuum.
The critical time to overheating of a steam turbine varies from about 0.5 to 30 minutes depending on the type of turbine. A high-pressure turbine with small and thin blades will become overheated more easily than a low-pressure turbine with long and heavy blades. The conditions vary from turbine to turbine and it is necessary to ask the turbine manufacturer in each case.
Power to the power plant auxiliaries may come from a station service transformer connected to the primary side of the step-up transformer. Power may also come from a start-up service transformer connected to the external network. One has to design the reverse power protection so that it can detect reverse power independent of the flow of power to the power plant auxiliaries.
Hydro turbines tolerate reverse power much better than steam turbines do. Only Kaplan turbine and bulb turbines may suffer from reverse power. There is a risk that the turbine runner moves axially and touches stationary parts. They are not always strong enough to withstand the associated stresses.
Ice and snow may block the intake when the outdoor temperature falls far below zero. Branches and leaves may also block the trash gates. A complete blockage of the intake may cause cavitations. The risk for damages to hydro turbines can justify reverse power protection in unattended plants.
A hydro turbine that rotates in water with closed wicket gates will draw electric power from the rest of the power system. This power will be about 10% of the rated power. If there is only air in the hydro turbine, the power demand will fall to about 3%.
1MRK 511 310-UEN B Section 7 Current protection
179 Application manual
Diesel engines should have reverse power protection. The generator will take about 15% of its rated power or more from the system. A stiff engine may require perhaps 25% of the rated power to motor it. An engine that is well run in might need no more than 5%. It is necessary to obtain information from the engine manufacturer and to measure the reverse power during commissioning.
Gas turbines usually do not require reverse power protection.
Figure 72 illustrates the reverse power protection with underpower IED and with overpower IED. The underpower IED gives a higher margin and should provide better dependability. On the other hand, the risk for unwanted operation immediately after synchronization may be higher. One should set the underpower IED to trip if the active power from the generator is less than about 2%. One should set the overpower IED to trip if the power flow from the network to the generator is higher than 1%.
Underpower IED Overpower IED
Q Q
P P
Operating point without turbine torque
Margin Margin
Operate Line
Operate Line
Operating point without turbine torque
IEC06000315-2-en.vsd IEC06000315 V2 EN
Figure 72: Reverse power protection with underpower IED and overpower IED
7.13.3 Setting guidelines
Operation: With the parameter Operation the function can be set On/Off.
Mode: The voltage and current used for the power measurement. The setting possibilities are shown in table 17.
Table 17: Complex power calculation
Set value Mode Formula used for complex power calculation L1, L2, L3 * * *
1 1 2 2 3 3L L L L L LS U I U I U I= + +
EQUATION1697 V1 EN (Equation 77)
Arone * * 1 2 1 2 3 3L L L L L LS U I U I= —
EQUATION1698 V1 EN (Equation 78)
PosSeq *3 PosSeq PosSeqS U I=
EQUATION1699 V1 EN (Equation 79)
Table continues on next page
Section 7 1MRK 511 310-UEN B Current protection
180 Application manual
Set value Mode Formula used for complex power calculation L1L2 * *
1 2 1 2( )L L L LS U I I= —
EQUATION1700 V1 EN (Equation 80)
L2L3 * * 2 3 2 3( )L L L LS U I I= —
EQUATION1701 V1 EN (Equation 81)
L3L1 * * 3 1 3 1( )L L L LS U I I= —
EQUATION1702 V1 EN (Equation 82)
L1 * 1 13 L LS U I=
EQUATION1703 V1 EN (Equation 83)
L2 * 2 23 L LS U I=
EQUATION1704 V1 EN (Equation 84)
L3 * 3 33 L LS U I=
EQUATION1705 V1 EN (Equation 85)
The function has two stages that can be set independently.
With the parameter OpMode1(2) the function can be set On/Off.
The function gives trip if the power component in the direction defined by the setting Angle1(2) is larger than the set pick up power value Power1(2)
1MRK 511 310-UEN B Section 7 Current protection
181 Application manual
Operate
Angle1(2)
Power1(2)
P
Q
en06000440.vsd
IEC06000440 V1 EN
Figure 73: Overpower mode
The setting Power1(2) gives the power component pick up value in the Angle1(2) direction. The setting is given in p.u. of the generator rated power, see equation 86.
Minimum recommended setting is 0.2% of SN when metering class CT inputs into the IED are used.
3NS UBase IBase=
EQUATION1708 V1 EN (Equation 86)
The setting Angle1(2) gives the characteristic angle giving maximum sensitivity of the power protection function. The setting is given in degrees. For active power the set angle should be 0 or 180. 180 should be used for generator reverse power protection.
Section 7 1MRK 511 310-UEN B Current protection
182 Application manual
Operate Angle1(2 ) = 180 o
Power1(2)
P
Q
IEC06000557-2-en.vsd IEC06000557 V2 EN
Figure 74: For reverse power the set angle should be 180 in the overpower function
TripDelay1(2) is set in seconds to give the time delay for trip of the stage after pick up.
Hysteresis1(2) is given in p.u. of generator rated power according to equation 87.
3NS UBase IBase=
EQUATION1708 V1 EN (Equation 87)
The drop out power will be Power1(2) — Hysteresis1(2).
The possibility to have low pass filtering of the measured power can be made as shown in the formula:
( )1Old CalculatedS k S k S= + —
EQUATION1893 V1 EN (Equation 88)
Where
S is a new measured value to be used for the protection function
Sold is the measured value given from the function in previous execution cycle
SCalculated is the new calculated value in the present execution cycle
k is settable parameter
1MRK 511 310-UEN B Section 7 Current protection
183 Application manual
The value of k=0.92 is recommended in generator applications as the trip delay is normally quite long.
The calibration factors for current and voltage measurement errors are set % of rated current/voltage:
IAmpComp5, IAmpComp30, IAmpComp100
UAmpComp5, UAmpComp30, UAmpComp100
IAngComp5, IAngComp30, IAngComp100
The angle compensation is given as difference between current and voltage angle errors.
The values are given for operating points 5, 30 and 100% of rated current/voltage. The values should be available from instrument transformer test protocols.
7.14 Broken conductor check BRCPTOC
7.14.1 Identification Function description IEC 61850
identification IEC 60617 identification
ANSI/IEEE C37.2 device number
Broken conductor check BRCPTOC — 46
7.14.2 Application
Conventional protection functions can not detect the broken conductor condition. Broken conductor check (BRCPTOC) function, consisting of continuous current unsymmetrical check on the line where the IED connected will give alarm or trip at detecting broken conductors.
7.14.3 Setting guidelines
Broken conductor check BRCPTOC must be set to detect open phase/s (series faults) with different loads on the line. BRCPTOC must at the same time be set to not operate for maximum asymmetry which can exist due to, for example, not transposed power lines.
All settings are in primary values or percentage.
Set IBase (given in GlobalBaseSel) to power line rated current or CT rated current.
Set minimum operating level per phase IP> to typically 10-20% of rated current.
Section 7 1MRK 511 310-UEN B Current protection
184 Application manual
Set the unsymmetrical current, which is relation between the difference of the minimum and maximum phase currents to the maximum phase current to typical Iub> = 50%.
Note that it must be set to avoid problem with asymmetry under minimum operating conditions.
Set the time delay tOper = 5 — 60 seconds and reset time tReset = 0.010 — 60.000 seconds.
7.15 Capacitor bank protection CBPGAPC
7.15.1 Identification Function description IEC 61850
identification IEC 60617
identification ANSI/IEEE C37.2
device number Capacitor bank protection CBPGAPC — —
7.15.2 Application
Shunt capacitor banks (SCBs) are somewhat specific and different from other power system elements. These specific features of SCB are briefly summarized in this section.
A capacitor unit is the building block used for SCB construction. The capacitor unit is made up of individual capacitor elements, arranged in parallel or series connections. Capacitor elements normally consist of aluminum foil, paper, or film-insulated cells immersed in a biodegradable insulating fluid and are sealed in a metallic container. The internal discharge resistor is also integrated within the capacitor unit in order to reduce trapped residual voltage after disconnection of the SCB from the power system. Units are available in a variety of voltage ratings (240V to 25kV) and sizes (2.5kVAr to about 1000kVAr). Capacitor unit can be designed with one or two bushings.
The high-voltage SCB is normally constructed using individual capacitor units connected in series and/or parallel to obtain the required voltage and MVAr rating. Typically the neighboring capacitor units are mounted in racks. Each rack must be insulated from the other by insulators because the can casing within each rack are at a certain potential. Refer figure 75 for an example:
1MRK 511 310-UEN B Section 7 Current protection
185 Application manual
Capacitor Unit (Can)
Rack
IEC09000753_1_en.vsd
IEC09000753 V1 EN
Figure 75: Replacement of a faulty capacitor unit within SCB
There are four types of the capacitor unit fusing designs which are used for construction of SCBs:
Externally fused
where an individual fuse, externally mounted, protects each capacitor unit.
Internally fused
where each capacitor element is fused inside the capacitor unit
Fuseless where SCB is built from series connections of the individual capacitor units (that is, strings) and without any fuses
Unfused where, in contrary to the fuseless configuration, a series or parallel connection of the capacitor units is used to form SCB, still without any fuses
Which type of fusing is used may depend on can manufacturer or utility preference and previous experience.
Section 7 1MRK 511 310-UEN B Current protection
186 Application manual
Because the SCBs are built from the individual capacitor units the overall connections may vary. Typically used SCB configurations are:
1. Delta-connected banks (generally used only at distribution voltages) 2. Single wye-connected banks 3. Double wye-connected banks 4. H-configuration, where each phase is connected in a bridge
Additionally, the SCB star point, when available, can be either directly earthed , earthed via impedance or isolated from earth. Which type of SCB earthing is used depends on voltage level, used circuit breaker, utility preference and previous experience. Many utilities have standard system earthing principle to earth neutrals of SCB above 100 kV.
Switching of SCB will produce transients in power system. The transient inrush current during SCB energizing typically has high frequency components and can reach peak current values, which are multiples of SCB rating. Opening of capacitor bank circuit breaker may produce step recovery voltages across open CB contact, which can consequently cause restrikes upon the first interruption of capacitive current. In modern power system the synchronized CB closing/opening may be utilized in such a manner that transients caused by SCB switching are avoided.
7.15.2.1 SCB protection
IED protection of shunt capacitor banks requires an understanding of the capabilities and limitations of the individual capacitor units and associated electrical equipment. Different types of shunt capacitor bank fusing, configuration or earthing may affect the IED selection for the protection scheme. Availability and placement of CTs and VTs can be additional limiting factor during protection scheme design.
SCB protection schemes are provided in order to detect and clear faults within the capacitor bank itself or in the connected leads to the substation busbar. Bank protection may include items such as a means to disconnect a faulted capacitor unit or capacitor element(s), a means to initiate a shutdown of the bank in case of faults that may lead to a catastrophic failure and alarms to indicate unbalance within the bank.
Capacitor bank outages and failures are often caused by accidental contact by animals. Vermin, monkeys, birds, may use the SCB as a resting place or a landing site. When the animal touches the HV live parts this can result in a flash-over, can rapture or a cascading failures that might cause extensive damages, fire or even total destruction of the whole SCB, unless the bank is sufficiently fitted with protection IEDs.
In addition, to fault conditions SCB can be exposed to different types of abnormal operating conditions. In accordance with IEC and ANSI standards capacitors shall be capable of continuous operation under contingency system and bank conditions, provided the following limitations are not exceeded:
1. Capacitor units should be capable of continuous operation including harmonics, but excluding transients, to 110% of rated IED root-mean-square (RMS) voltage and a crest voltage not exceeding of rated RMS voltage. The capacitor should also
1MRK 511 310-UEN B Section 7 Current protection
187 Application manual
be able to carry 135% of nominal current. The voltage capability of any series element of a capacitor unit shall be considered to be its share of the total capacitor unit voltage capability.
2. Capacitor units should not give less than 100% nor more than 110% of rated reactive power at rated sinusoidal voltage and frequency, measured at a uniform case and internal temperature of 25C.
3. Capacitor units mounted in multiple rows and tiers should be designed for continuous operation for a 24h average temperature of 40 C during the hottest day, or 40 C during the coldest day expected at the location.
4. Capacitor units should be suitable for continuous operation at up to 135% of rated reactive power caused by the combined effects of: Voltage in excess of the nameplate rating at fundamental frequency, but not
over 110% of rated RMS voltage Harmonic voltages superimposed on the fundamental frequency Reactive power manufacturing tolerance of up to 115% of rated reactive
power 5. Capacitor units rated above 600 V shall have an internal discharge device to
reduce the residual voltage to 50 V or less in 5 or 10 minutes (depending on national standard).
Note that capacitor units designed for special applications can exceed these ratings.
Thus, as a general rule, the minimum number of capacitor units connected in parallel within a SCB is such that isolation of one capacitor unit in a group should not cause a voltage unbalance sufficient to place more than 110% of rated voltage on the remaining capacitors of that parallel group. Equally, the minimum number of series connected groups within a SCB is such that complete bypass of one group should not pause voltage higher than 110% of the rated voltage on the remaining capacitors of that serial group. The value of 110% is the maximum continuous overvoltage capability of capacitor units as per IEEE Std 18-1992.
The SCB typically requires the following types of IED protection:
1. Short circuit protection for SCB and connecting leads (can be provided by using PHPIOC, OC4PTOC, CVGAPC, T2WPDIF/T3WPDIF or HZPDIF functions)
2. Earth-fault protection for SCB and connecting leads (can be provided by using EFPIOC, EF4PTOC, CVGAPC, T2WPDIF/T3WPDIF or HZPDIF functions)
3. Current or Voltage based unbalance protection for SCB (can be provided by using EF4PTOC, OC4PTOC, CVGAPC or VDCPTOV functions)
4. Overload protection for SCB 5. Undercurrent protection for SCB 6. Reconnection inhibit protection for SCB 7. Restrike condition detection
CBPGAPC function can be used to provide the last four types of protection mentioned in the above list.
Section 7 1MRK 511 310-UEN B Current protection
188 Application manual
7.15.3 Setting guidelines
This setting example will be done for application as shown in figure 76:
Preprocessing Function Block
Capacitor bank protection function
400kV
CBPGAPCSMAI
200MVAr 400kV
500/1
IED
IEC09000754-1-en.vsd
IEC09000754 V1 EN
Figure 76: Single line diagram for the application example
From figure 76 it is possible to calculate the following rated fundamental frequency current for this SCB:
1000 200[ ] 289 3 400[ ]r
MVArI A kV
= =
IEC09000755 V1 EN (Equation 89)
or on the secondary CT side:
_ ec
289 0.578 500 1r S
AI A= =
IEC09000756 V1 EN (Equation 90)
Note that the SCB rated current on the secondary CT side is important for secondary injection of the function.
The parameters for the Capacitor bank protection function CBPGAPC are set via the local HMI or PCM600. The following settings are done for this function:
General Settings:
Operation =On; to enable the function
1MRK 511 310-UEN B Section 7 Current protection
189 Application manual
IBase =289A; Fundamental frequency SCB rated current in primary amperes. This value is used as a base value for pickup settings of all other features integrated in this function.
Reconnection inhibit feature:
OperationRecIn =On; to enable this feature
IRecnInhibit< =10% (of IBase); Current level under which function will detect that SCB is disconnected from the power system
tReconnInhibit =300s; Time period under which SCB shall discharge remaining residual voltage to less than 5%.
Overcurrent feature:
OperationOC =On; to enable this feature
IOC> =135% (of IBase); Current level for overcurrent pickup. Selected value gives pickup recommended by international standards.
tOC =30s; Time delay for overcurrent trip
Undercurrent feature:
OperationUC =On; to enable this feature
IUC< =70% (of IBase); Current level for undercurrent pickup
tUC =5s; Time delay for undercurrent trip
Undercurrent feature is blocked by operation of Reconnection inhibit feature.
Reactive power overload feature:
OperationQOL =On; to enable this feature
QOL> =130% (of SCB MVAr rating); Reactive power level required for pickup. Selected value gives pickup recommended by international standards.
tQOL =60s; Time delay for reactive power overload trip
Harmonic voltage overload feature:
OperationHOL =On; to enable this feature
Settings for definite time delay step
HOLDTU> =200% (of SCB voltage rating); Voltage level required for pickup
tHOLDT =10s; Definite time delay for harmonic overload trip
Section 7 1MRK 511 310-UEN B Current protection
190 Application manual
Settings for IDMT delay step
HOLIDMTU> =110% (of SCB voltage rating); Voltage level required for pickup of IDMT stage. Selected value gives pickup recommended by international standards.
kHOLIDMT =1.0; Time multiplier for IDMT stage. Selected value gives operate time in accordance with international standards
tMaxHOLIDMT =2000s; Maximum time delay for IDMT stage for very low level of harmonic overload
tMinHOLIDMT =0.1s; Minimum time delay for IDMT stage. Selected value gives operate time in accordance with international standards
7.15.3.1 Restrike detection
Opening of SCBs can be quite problematic for certain types of circuit breakers (CBs). Typically such problems are manifested as CB restrikes.
In simple words this means that the CB is not breaking the current at the first zero crossing after separation of the CB contacts. Instead current is re-ignited and only braked at consecutive current zero crossings. This condition is manifested as high current pulses at the moment of current re-ignition.
To detect this CB condition, the built in overcurrent feature can be used. Simply, any start of the overcurrent feature during breaker normal opening means a restrike. Therefore simple logic can be created in the Application Configuration tool to detect such CB behavior. Such CB condition can be just alarmed, and if required, the built in disturbance recorder can also be triggered.
To create this logic, a binary signal that the CB is going to be opened (but not trip command) shall be made available to the IED.
7.16 Voltage-restrained time overcurrent protection VRPVOC
7.16.1 Identification Function description IEC 61850
identification IEC 60617 identification
ANSI/IEEE C37.2 device number
Voltage-restrained time overcurrent protection
VRPVOC I>/U< 51V
1MRK 511 310-UEN B Section 7 Current protection
191 Application manual
7.16.2 Application
A breakdown of the insulation between phase conductors or a phase conductor and earth results in a short-circuit or an earth fault. Such faults can result in large fault currents and may cause severe damage to the power system primary equipment.
A typical application of the voltage-restrained time overcurrent protection is in the generator protection system, where it is used as backup protection. If a phase-to-phase fault affects a generator, the fault current amplitude is a function of time, and it depends on generator characteristic (reactances and time constants), its load conditions (immediately before the fault) and excitation system performance and characteristic. So the fault current amplitude may decay with time. A voltage- restrained overcurrent relay can be set in order to remain in the picked-up state in spite of the current decay, and perform a backup trip in case of failure of the main protection.
The IED can be provided with a voltage-restrained time overcurrent protection (VRPVOC). The VRPVOC function is always connected to three-phase current and three-phase voltage input in the configuration tool, but it will always measure the maximum phase current and the minimum phase-to-phase voltage.
VRPVOC function module has two independent protection each consisting of:
One overcurrent step with the following built-in features: Selectable definite time delay or Inverse Time IDMT characteristic Voltage restrained/controlled feature is available in order to modify the
start level of the overcurrent stage in proportion to the magnitude of the measured voltage
One undervoltage step with the following built-in feature: Definite time delay
The undervoltage function can be enabled or disabled. Sometimes in order to obtain the desired application functionality it is necessary to provide interaction between the two protection elements within the VRPVOC function by appropriate IED configuration (for example, overcurrent protection with under-voltage seal-in). Sometimes in order to obtain the desired application functionality it is necessary to provide interaction between the two protection elements within the D2PTOC function by appropriate IED configuration (for example, overcurrent protection with under- voltage seal-in).
7.16.2.1 Base quantities
GlobalBaseSel defines the particular Global Base Values Group where the base quantities of the function are set. In that Global Base Values Group:
IBase shall be entered as rated phase current of the protected object in primary amperes.
Section 7 1MRK 511 310-UEN B Current protection
192 Application manual
UBase shall be entered as rated phase-to-phase voltage of the protected object in primary kV.
7.16.2.2 Application possibilities
VRPVOC function can be used in one of the following three applications:
voltage controlled over-current voltage restrained over-current overcurrent protection with under-voltage seal-in.
7.16.2.3 Undervoltage seal-in
In the case of a generator with a static excitation system, which receives its power from the generator terminals, the magnitude of a sustained phase short-circuit current depends on the generator terminal voltage. In case of a nearby multi-phase fault, the generator terminal voltage may drop to quite low level, for example, less than 25%, and the generator fault current may consequently fall below the pickup level of the overcurrent protection. The short-circuit current may drop below the generator rated current after 0.5…1 s. Also, for generators with an excitation system not fed from the generator terminals, a fault can occur when the automatic voltage regulator is out of service. In such cases, to ensure tripping under such conditions, overcurrent protection with undervoltage seal-in can be used.
To apply the VRPVOC function, the configuration is done according to figure 77. As seen in the figure, the pickup of the overcurrent stage will enable the undervoltage stage. Once enabled, the undervoltage stage will start a timer, which causes function tripping, if the voltage does not recover above the set value. To ensure a proper reset, the function is blocked two seconds after the trip signal is issued.
Trip output
OR
OR t
IEC12000183-1-en.vsd
VRPVOC I3P*
U3P*
BLOCK
BLKOC
BLKUV
TRIP
TROC
TRUV
START
STOC
STUV
IEC12000183 V1 EN
Figure 77: Undervoltage seal-in of current start
1MRK 511 310-UEN B Section 7 Current protection
193 Application manual
7.16.3 Setting guidelines
7.16.3.1 Explanation of the setting parameters
In version 2.0, a typical starting time delay of 24ms is subtracted from the set trip time delay, so that the resulting trip time will take the internal IED start time into consideration.
Operation: Set to On in order to activate the function; set to Off to switch off the complete function.
StartCurr: Operation phase current level given in % of IBase.
Characterist: Selection of time characteristic: Definite time delay and different types of inverse time characteristics are available; see Technical Manual for details.
tDef_OC: Definite time delay. It is used if definite time characteristic is chosen; it shall be set to 0 s if the inverse time characteristic is chosen and no additional delay shall be added.
k: Time multiplier for inverse time delay.
tMin: Minimum operation time for all inverse time characteristics. At high currents the inverse time characteristic might give a very short operation time. By setting this parameter the operation time of the step can never be shorter than the setting.
Operation_UV: it sets On/Off the operation of the under-voltage stage.
StartVolt: Operation phase-to-phase voltage level given in % of UBase for the under- voltage stage. Typical setting may be, for example, in the range from 70% to 80% of the rated voltage of the generator.
tDef_UV: Definite time delay. Since it is related to a backup protection function, a long time delay (for example 0.5 s or more) is typically used.
EnBlkLowV: This parameter enables the internal block of the undervoltage stage for low voltage condition; the voltage level is defined by the parameter BlkLowVolt.
BlkLowVolt: Voltage level under which the internal blocking of the undervoltage stage is activated; it is set in % of UBase. This setting must be lower than the setting StartVolt. The setting can be very low, for example, lower than 10%.
VDepMode: Selection of the characteristic of the start level of the overcurrent stage as a function of the phase-to-phase voltage; two options are available: Slope and Step. See Technical Manual for details about the characteristics.
VDepFact: Slope mode: it is the start level of the overcurrent stage given in % of StartCurr when the voltage is lower than 25% of UBase; so it defines the first point of the characteristic (VDepFact*StartCurr/100*IBase ; 0.25*UBase). Step mode: it is
Section 7 1MRK 511 310-UEN B Current protection
194 Application manual
the start level of the overcurrent stage given in % of StartCurr when the voltage is lower than UHighLimit/100*UBase.
UHighLimit: when the measured phase-to-phase voltage is higher than UHighLimit/ 100*UBase, than the start level of the overcurrent stage is StartCurr/100*IBase. In particular, in Slope mode it define the second point of the characteristic (StartCurr/ 100*IBase ; UHighLimit/100*UBase).
7.16.3.2 Voltage-restrained overcurrent protection for generator and step-up transformer
An example of how to use VRPVOC function to provide voltage restrained overcurrent protection for a generator is given below. Let us assume that the time coordination study gives the following required settings:
Inverse Time Over Current IDMT curve: IEC very inverse, with multiplier k=1 Start current of 185% of generator rated current at rated generator voltage Start current 25% of the original start current value for generator voltages below
25% of rated voltage
To ensure proper operation of the function:
1. Set Operation to On 2. Set GlobalBaseSel to the right value in order to select the Global Base Values
Group with UBase and IBase equal to the rated phase-to-phase voltage and the rated phase current of the generator.
3. Connect three-phase generator currents and voltages to VRPVOC in the application configuration.
4. Select Characterist to match the type of overcurrent curves used in the network IEC Very inv.
5. Set the multiplier k = 1 (default value). 6. Set tDef_OC = 0.00 s, in order to add no additional delay to the trip time defined
by the inverse time characteristic. 7. If required, set the minimum operating time for this curve by using the parameter
tMin (default value 0.05 s). 8. Set StartCurr to the value 185%. 9. Set VDepMode to Slope (default value). 10. Set VDepFact to the value 25% (default value). 11. Set UHighLimit to the value 100% (default value).
All other settings can be left at the default values.
7.16.3.3 Overcurrent protection with undervoltage seal-in
To obtain this functionality, the IED application configuration shall include a logic in accordance to figure 77 and, of course, the relevant three-phase generator currents and voltages shall be connected to VRPVOC. Let us assume that, taking into account the
1MRK 511 310-UEN B Section 7 Current protection
195 Application manual
characteristic of the generator, the excitation system and the short circuit study, the following settings are required:
Start current of the overcurrent stage: 150% of generator rated current at rated generator voltage;
Start voltage of the undervoltage stage: 70% of generator rated voltage; Trip time: 3.0 s.
The overcurrent stage and the undervoltage stage shall be set in the following way:
1. Set Operation to On. 2. Set GlobalBaseSel to the right value in order to select the Global Base Values
Group with UBase and IBase equal to the rated phase-to-phase voltage and the rated phase current of the generator.
3. Set StartCurr to the value 150%. 4. Set Characteristic to IEC Def. Time. 5. Set tDef_OC to 6000.00 s, if no trip of the overcurrent stage is required. 6. Set VDepFact to the value 100% in order to ensure that the start value of the
overcurrent stage is constant, irrespective of the magnitude of the generator voltage.
7. Set Operation_UV to On to activate the undervoltage stage. 8. Set StartVolt to the values 70%. 9. Set tDef_UV to 3.0 s. 10. Set EnBlkLowV to Off (default value) to disable the cut-off level for low-voltage
of the undervoltage stage.
The other parameters may be left at their default value.
Section 7 1MRK 511 310-UEN B Current protection
196 Application manual
Section 8 Voltage protection
8.1 Two step undervoltage protection UV2PTUV
8.1.1 Identification Function description IEC 61850
identification IEC 60617 identification
ANSI/IEEE C37.2 device number
Two step undervoltage protection UV2PTUV
3U<
SYMBOL-R-2U-GREATER-THAN V2 EN
27
8.1.2 Application
Two-step undervoltage protection function (UV2PTUV) is applicable in all situations, where reliable detection of low phase voltages is necessary. It is used also as a supervision and fault detection function for other protection functions, to increase the security of a complete protection system.
UV2PTUV is applied to power system elements, such as generators, transformers, motors and power lines in order to detect low voltage conditions. Low voltage conditions are caused by abnormal operation or fault in the power system. UV2PTUV is used in combination with overcurrent protections, either as restraint or in logic «and gates» of the trip signals issued by the two functions. Other applications are the detection of «no voltage» condition, for example, before the energization of a HV line or for automatic breaker trip in case of a blackout. UV2PTUV is also used to initiate voltage correction measures, like insertion of shunt capacitor banks to compensate for reactive load and thereby increasing the voltage. The function has a high measuring accuracy and setting hysteresis to allow applications to control reactive load.
UV2PTUV is used to disconnect apparatuses, like electric motors, which will be damaged when subject to service under low voltage conditions. UV2PTUV deals with low voltage conditions at power system frequency, which can be caused by the following reasons:
1. Malfunctioning of a voltage regulator or wrong settings under manual control (symmetrical voltage decrease).
2. Overload (symmetrical voltage decrease). 3. Short circuits, often as phase-to-earth faults (unsymmetrical voltage decrease).
1MRK 511 310-UEN B Section 8 Voltage protection
197 Application manual
UV2PTUV prevents sensitive equipment from running under conditions that could cause their overheating and thus shorten their life time expectancy. In many cases, it is a useful function in circuits for local or remote automation processes in the power system.
8.1.3 Setting guidelines
All the voltage conditions in the system where UV2PTUV performs its functions should be considered. The same also applies to the associated equipment, its voltage and time characteristic.
There is a very wide application area where general undervoltage functions are used. All voltage related settings are made as a percentage of the global settings base voltage UBase, which normally is set to the primary rated voltage level (phase-to-phase) of the power system or the high voltage equipment under consideration.
The setting for UV2PTUV is normally not critical, since there must be enough time available for the main protection to clear short circuits and earth faults.
Some applications and related setting guidelines for the voltage level are described in the following sections.
8.1.3.1 Equipment protection, such as for motors and generators
The setting must be below the lowest occurring «normal» voltage and above the lowest acceptable voltage for the equipment.
8.1.3.2 Disconnected equipment detection
The setting must be below the lowest occurring «normal» voltage and above the highest occurring voltage, caused by inductive or capacitive coupling, when the equipment is disconnected.
8.1.3.3 Power supply quality
The setting must be below the lowest occurring «normal» voltage and above the lowest acceptable voltage, due to regulation, good practice or other agreements.
8.1.3.4 Voltage instability mitigation
This setting is very much dependent on the power system characteristics, and thorough studies have to be made to find the suitable levels.
8.1.3.5 Backup protection for power system faults
The setting must be below the lowest occurring «normal» voltage and above the highest occurring voltage during the fault conditions under consideration.
Section 8 1MRK 511 310-UEN B Voltage protection
198 Application manual
8.1.3.6 Settings for Two step undervoltage protection
The following settings can be done for Two step undervoltage protection UV2PTUV:
ConnType: Sets whether the measurement shall be phase-to-earth fundamental value, phase-to-phase fundamental value, phase-to-earth RMS value or phase-to-phase RMS value.
Operation: Off or On.
UBase (given in GlobalBaseSel): Base voltage phase-to-phase in primary kV. This voltage is used as reference for voltage setting. UV2PTUV measures selectively phase-to-earth voltages, or phase-to-phase voltage chosen by the setting ConnType. The function will operate if the voltage gets lower than the set percentage of UBase. When ConnType is set to PhN DFT or PhN RMS then the IED automatically divides set value for UBase by 3. UBase is used when ConnType is set to PhPh DFT or PhPh RMS. Therefore, always set UBase as rated primary phase-to-phase voltage of the protected object. This means operation for phase-to-earth voltage under:
(%) ( ) 3
U UBase kV<
EQUATION1447 V1 EN (Equation 91)
and operation for phase-to-phase voltage under:
U (%) UBase(kV)< EQUATION1990 V1 EN (Equation 92)
The below described setting parameters are identical for the two steps (n = 1 or 2). Therefore, the setting parameters are described only once.
Characteristicn: This parameter gives the type of time delay to be used. The setting can be Definite time, Inverse Curve A, Inverse Curve B, Prog. inv. curve. The selection is dependent on the protection application.
OpModen: This parameter describes how many of the three measured voltages that should be below the set level to give operation for step n. The setting can be 1 out of 3, 2 out of 3 or 3 out of 3. In most applications, it is sufficient that one phase voltage is low to give operation. If UV2PTUV shall be insensitive for single phase-to-earth faults, 2 out of 3 can be chosen. In subtransmission and transmission networks the undervoltage function is mainly a system supervision function and 3 out of 3 is selected.
Un<: Set operate undervoltage operation value for step n, given as % of the parameter UBase. The setting is highly dependent of the protection application. It is essential to consider the minimum voltage at non-faulted situations. Normally this voltage is larger than 90% of nominal voltage.
tn: time delay of step n, given in s. This setting is dependent of the protection application. In many applications the protection function shall not directly trip when
1MRK 511 310-UEN B Section 8 Voltage protection
199 Application manual
there is a short circuit or earth faults in the system. The time delay must be coordinated to the short circuit protections.
tResetn: Reset time for step n if definite time delay is used, given in s. The default value is 25 ms.
tnMin: Minimum operation time for inverse time characteristic for step n, given in s. When using inverse time characteristic for the undervoltage function during very low voltages can give a short operation time. This might lead to unselective trip. By setting t1Min longer than the operation time for other protections such unselective tripping can be avoided.
ResetTypeCrvn: This parameter for inverse time characteristic can be set to Instantaneous, Frozen time, Linearly decreased. The default setting isInstantaneous.
tIResetn: Reset time for step n if inverse time delay is used, given in s. The default value is 25 ms.
kn: Time multiplier for inverse time characteristic. This parameter is used for coordination between different inverse time delayed undervoltage protections.
ACrvn, BCrvn, CCrvn, DCrvn, PCrvn: Parameters to set to create programmable under voltage inverse time characteristic. Description of this can be found in the technical reference manual.
CrvSatn: When the denominator in the expression of the programmable curve is equal to zero the time delay will be infinity. There will be an undesired discontinuity. Therefore, a tuning parameter CrvSatn is set to compensate for this phenomenon. In the voltage interval Un< down to Un< (1.0 — CrvSatn/100) the used voltage will be: Un< (1.0 — CrvSatn/100). If the programmable curve is used this parameter must be calculated so that:
0 100
CrvSatnB C — >
EQUATION1448 V1 EN (Equation 93)
IntBlkSeln: This parameter can be set to Off, Block of trip, Block all. In case of a low voltage the undervoltage function can be blocked. This function can be used to prevent function when the protected object is switched off. If the parameter is set Block of trip or Block all unwanted trip is prevented.
IntBlkStValn: Voltage level under which the blocking is activated set in % of UBase. This setting must be lower than the setting Un<. As switch of shall be detected the setting can be very low, that is, about 10%.
tBlkUVn: Time delay to block the undervoltage step n when the voltage level is below IntBlkStValn, given in s. It is important that this delay is shorter than the operate time delay of the undervoltage protection step.
Section 8 1MRK 511 310-UEN B Voltage protection
200 Application manual
8.2 Two step overvoltage protection OV2PTOV
8.2.1 Identification Function description IEC 61850
identification IEC 60617 identification ANSI/IEEE C37.2
device number Two step overvoltage protection OV2PTOV
3U>
SYMBOL-C-2U-SMALLER-THAN V2 EN
59
8.2.2 Application
Two step overvoltage protection OV2PTOV is applicable in all situations, where reliable detection of high voltage is necessary. OV2PTOV is used for supervision and detection of abnormal conditions, which, in combination with other protection functions, increase the security of a complete protection system.
High overvoltage conditions are caused by abnormal situations in the power system. OV2PTOV is applied to power system elements, such as generators, transformers, motors and power lines in order to detect high voltage conditions. OV2PTOV is used in combination with low current signals, to identify a transmission line, open in the remote end. In addition to that, OV2PTOV is also used to initiate voltage correction measures, like insertion of shunt reactors, to compensate for low load, and thereby decreasing the voltage. The function has a high measuring accuracy and hysteresis setting to allow applications to control reactive load.
OV2PTOV is used to disconnect apparatuses, like electric motors, which will be damaged when subject to service under high voltage conditions. It deals with high voltage conditions at power system frequency, which can be caused by:
1. Different kinds of faults, where a too high voltage appears in a certain power system, like metallic connection to a higher voltage level (broken conductor falling down to a crossing overhead line, transformer flash over fault from the high voltage winding to the low voltage winding and so on).
2. Malfunctioning of a voltage regulator or wrong settings under manual control (symmetrical voltage decrease).
3. Low load compared to the reactive power generation (symmetrical voltage decrease).
4. Earth-faults in high impedance earthed systems causes, beside the high voltage in the neutral, high voltages in the two non-faulted phases, (unsymmetrical voltage increase).
OV2PTOV prevents sensitive equipment from running under conditions that could cause their overheating or stress of insulation material, and, thus, shorten their life
1MRK 511 310-UEN B Section 8 Voltage protection
201 Application manual
time expectancy. In many cases, it is a useful function in circuits for local or remote automation processes in the power system.
8.2.3 Setting guidelines
The parameters for Two step overvoltage protection (OV2PTOV) are set via the local HMI or PCM600.
All the voltage conditions in the system where OV2PTOV performs its functions should be considered. The same also applies to the associated equipment, its voltage and time characteristic.
There is a very wide application area where general overvoltage functions are used. All voltage related settings are made as a percentage of a settable base primary voltage, which normally is set to the nominal voltage level (phase-to-phase) of the power system or the high voltage equipment under consideration.
The time delay for the OV2PTOV can sometimes be critical and related to the size of the overvoltage — a power system or a high voltage component can withstand smaller overvoltages for some time, but in case of large overvoltages the related equipment should be disconnected more rapidly.
Some applications and related setting guidelines for the voltage level are given below:
The hysteresis is for overvoltage functions very important to prevent that a transient voltage over set level is not sealed-in due to a high hysteresis. Typical values should be 0.5%.
8.2.3.1 Equipment protection, such as for motors, generators, reactors and transformers
High voltage will cause overexcitation of the core and deteriorate the winding insulation. The setting has to be well above the highest occurring «normal» voltage and well below the highest acceptable voltage for the equipment.
8.2.3.2 Equipment protection, capacitors
High voltage will deteriorate the dielectricum and the insulation. The setting has to be well above the highest occurring «normal» voltage and well below the highest acceptable voltage for the capacitor.
8.2.3.3 Power supply quality
The setting has to be well above the highest occurring «normal» voltage and below the highest acceptable voltage, due to regulation, good practice or other agreements.
Section 8 1MRK 511 310-UEN B Voltage protection
202 Application manual
8.2.3.4 High impedance earthed systems
In high impedance earthed systems, earth-faults cause a voltage increase in the non- faulty phases. Two step overvoltage protection (OV2PTOV) is used to detect such faults. The setting must be above the highest occurring «normal» voltage and below the lowest occurring voltage during faults. A metallic single-phase earth-fault causes the non-faulted phase voltages to increase a factor of 3.
8.2.3.5 The following settings can be done for the two step overvoltage protection
ConnType: Sets whether the measurement shall be phase-to-earth fundamental value, phase-to-phase fundamental value, phase-to-earth RMS value or phase-to-phase RMS value.
Operation: Off/On.
UBase (given in GlobalBaseSel): Base voltage phase to phase in primary kV. This voltage is used as reference for voltage setting. OV2PTOV measures selectively phase-to-earth voltages, or phase-to-phase voltage chosen by the setting ConnType. The function will operate if the voltage gets lower than the set percentage of UBase. When ConnType is set to PhN DFT or PhN RMS then the IED automatically divides set value for UBase by 3. When ConnType is set to PhPh DFT or PhPh RMS then set value for UBase is used. Therefore, always set UBase as rated primary phase-to-phase voltage of the protected object. If phase to neutral (PhN) measurement is selected as setting, the operation of phase-to-earth over voltage is automatically divided by sqrt3. This means operation for phase-to-earth voltage over:
(%) ( ) / 3U UBase kV>
and operation for phase-to-phase voltage over:
U (%) UBase(kV)> EQUATION1993 V1 EN (Equation 95)
The below described setting parameters are identical for the two steps (n = 1 or 2). Therefore the setting parameters are described only once.
Characteristicn: This parameter gives the type of time delay to be used. The setting can be Definite time, Inverse Curve A, Inverse Curve B, Inverse Curve C or I/Prog. inv. curve. The choice is highly dependent of the protection application.
OpModen: This parameter describes how many of the three measured voltages that should be above the set level to give operation. The setting can be 1 out of 3, 2 out of 3, 3 out of 3. In most applications it is sufficient that one phase voltage is high to give operation. If the function shall be insensitive for single phase-to-earth faults 1 out of 3 can be chosen, because the voltage will normally rise in the non-faulted phases at single phase-to-earth faults. In subtransmission and transmission networks the UV function is mainly a system supervision function and 3 out of 3 is selected.
1MRK 511 310-UEN B Section 8 Voltage protection
203 Application manual
Un>: Set operate overvoltage operation value for step n, given as % of UBase. The setting is highly dependent of the protection application. Here it is essential to consider the maximum voltage at non-faulted situations. Normally this voltage is less than 110% of nominal voltage.
tn: time delay of step n, given in s. The setting is highly dependent of the protection application. In many applications the protection function is used to prevent damages to the protected object. The speed might be important for example in case of protection of transformer that might be overexcited. The time delay must be co-ordinated with other automated actions in the system.
tResetn: Reset time for step n if definite time delay is used, given in s. The default value is 25 ms.
tnMin: Minimum operation time for inverse time characteristic for step n, given in s. For very high voltages the overvoltage function, using inverse time characteristic, can give very short operation time. This might lead to unselective trip. By setting t1Min longer than the operation time for other protections such unselective tripping can be avoided.
ResetTypeCrvn: This parameter for inverse time characteristic can be set: Instantaneous, Frozen time, Linearly decreased. The default setting is Instantaneous.
tIResetn: Reset time for step n if inverse time delay is used, given in s. The default value is 25 ms.
kn: Time multiplier for inverse time characteristic. This parameter is used for co- ordination between different inverse time delayed undervoltage protections.
ACrvn, BCrvn, CCrvn, DCrvn, PCrvn: Parameters to set to create programmable under voltage inverse time characteristic. Description of this can be found in the technical reference manual.
CrvSatn: When the denominator in the expression of the programmable curve is equal to zero the time delay will be infinity. There will be an undesired discontinuity. Therefore a tuning parameter CrvSatn is set to compensate for this phenomenon. In the voltage interval Un> up to Un> (1.0 + CrvSatn/100) the used voltage will be: Un> (1.0 + CrvSatn/100). If the programmable curve is used, this parameter must be calculated so that:
0 100
CrvSatnB C — >
EQUATION1448 V1 EN (Equation 96)
HystAbsn: Absolute hysteresis set in % of UBase. The setting of this parameter is highly dependent of the application. If the function is used as control for automatic switching of reactive compensation devices the hysteresis must be set smaller than the voltage change after switching of the compensation device.
Section 8 1MRK 511 310-UEN B Voltage protection
204 Application manual
8.3 Two step residual overvoltage protection ROV2PTOV
8.3.1 Identification Function description IEC 61850
identification IEC 60617 identification
ANSI/IEEE C37.2 device number
Two step residual overvoltage protection
ROV2PTOV
3U0 TRV V1 EN
59N
8.3.2 Application
Two step residual overvoltage protection ROV2PTOV is primarily used in high impedance earthed distribution networks, mainly as a backup for the primary earth- fault protection of the feeders and the transformer. To increase the security for different earth-fault related functions, the residual overvoltage signal can be used as a release signal. The residual voltage can be measured either at the transformer neutral or from a voltage transformer open delta connection. The residual voltage can also be calculated internally, based on measurement of the three-phase voltages.
In high impedance earthed systems the residual voltage will increase in case of any fault connected to earth. Depending on the type of fault and fault resistance the residual voltage will reach different values. The highest residual voltage, equal to three times the phase-to-earth voltage, is achieved for a single phase-to-earth fault. The residual voltage increases approximately to the same level in the whole system and does not provide any guidance in finding the faulted component. Therefore, ROV2PTOV is often used as a backup protection or as a release signal for the feeder earth-fault protection.
8.3.3 Setting guidelines
All the voltage conditions in the system where ROV2PTOV performs its functions should be considered. The same also applies to the associated equipment, its voltage and time characteristic.
There is a very wide application area where general single input or residual overvoltage functions are used. All voltage related settings are made as a percentage of a settable base voltage, which can be set to the primary nominal voltage (phase- phase) level of the power system or the high voltage equipment under consideration.
The time delay for ROV2PTOV is seldom critical, since residual voltage is related to earth-faults in a high impedance earthed system, and enough time must normally be given for the primary protection to clear the fault. In some more specific situations,
1MRK 511 310-UEN B Section 8 Voltage protection
205 Application manual
where the single overvoltage protection is used to protect some specific equipment, the time delay is shorter.
Some applications and related setting guidelines for the residual voltage level are given below.
8.3.3.1 Equipment protection, such as for motors, generators, reactors and transformers
High residual voltage indicates earth-fault in the system, perhaps in the component to which Two step residual overvoltage protection (ROV2PTOV) is connected. For selectivity reasons to the primary protection for the faulted device ROV2PTOV must trip the component with some time delay. The setting must be above the highest occurring «normal» residual voltage and below the highest acceptable residual voltage for the equipment
8.3.3.2 Equipment protection, capacitors
High voltage will deteriorate the dielectric and the insulation. Two step residual overvoltage protection (ROV2PTOV) has to be connected to a neutral or open delta winding. The setting must be above the highest occurring «normal» residual voltage and below the highest acceptable residual voltage for the capacitor.
8.3.3.3 Power supply quality
The setting must be above the highest occurring «normal» residual voltage and below the highest acceptable residual voltage, due to regulation, good practice or other agreements.
8.3.3.4 High impedance earthed systems
In high impedance earthed systems, earth faults cause a neutral voltage in the feeding transformer neutral. Two step residual overvoltage protection ROV2PTOV is used to trip the transformer, as a backup protection for the feeder earth-fault protection, and as a backup for the transformer primary earth-fault protection. The setting must be above the highest occurring «normal» residual voltage, and below the lowest occurring residual voltage during the faults under consideration. A metallic single- phase earth fault causes a transformer neutral to reach a voltage equal to the nominal phase-to-earth voltage.
The voltage transformers measuring the phase-to-earth voltages measure zero voltage in the faulty phase. The two healthy phases will measure full phase-to-phase voltage, as the faulty phase will be connected to earth. The residual overvoltage will be three times the phase-to-earth voltage. See figure 78.
Section 8 1MRK 511 310-UEN B Voltage protection
206 Application manual
IEC07000190 V1 EN
Figure 78: Earth fault in Non-effectively earthed systems
8.3.3.5 Direct earthed system
In direct earthed systems, an earth fault on one phase indicates a voltage collapse in that phase. The two healthy phases will have normal phase-to-earth voltages. The residual sum will have the same value as the remaining phase-to-earth voltage. See figure 79.
1MRK 511 310-UEN B Section 8 Voltage protection
207 Application manual
IEC07000189 V1 EN
Figure 79: Earth fault in Direct earthed system
8.3.3.6 Settings for Two step residual overvoltage protection
Operation: Off or On
UBase (given in GlobalBaseSel) is used as voltage reference for the voltage. The voltage can be fed to the IED in different ways:
1. The IED is fed from a normal voltage transformer group where the residual voltage is calculated internally from the phase-to-earth voltages within the protection. The setting of the analog input is given as UBase=Uph-ph.
2. The IED is fed from a broken delta connection normal voltage transformer group. In an open delta connection the protection is fed by the voltage 3U0 (single input). The Setting chapter in the application manual explains how the analog input needs to be set.
3. The IED is fed from a single voltage transformer connected to the neutral point of a power transformer in the power system. In this connection the protection is fed by the voltage UN=U0 (single input). The Setting chapter in the application manual explains how the analog input needs to be set. ROV2PTOV will measure the residual voltage corresponding nominal phase-to-earth voltage for a high impedance earthed system. The measurement will be based on the neutral voltage displacement.
The below described setting parameters are identical for the two steps (n = step 1 and 2). Therefore the setting parameters are described only once.
Section 8 1MRK 511 310-UEN B Voltage protection
208 Application manual
Characteristicn: Selected inverse time characteristic for step n. This parameter gives the type of time delay to be used. The setting can be, Definite time or Inverse curve A or Inverse curve B or Inverse curve C or Prog. inv. curve. The choice is highly dependent of the protection application.
Un>: Set operate overvoltage operation value for step n, given as % of residual voltage corresponding to UBase:
( ) ( )% 3U UBase kV> IECEQUATION2290 V1 EN (Equation 97)
The setting is dependent of the required sensitivity of the protection and the system earthing. In non-effectively earthed systems the residual voltage can be maximum the rated phase-to-earth voltage, which should correspond to 100%.
In effectively earthed systems this value is dependent of the ratio Z0/Z1. The required setting to detect high resistive earth-faults must be based on network calculations.
tn: time delay of step n, given in s. The setting is highly dependent of the protection application. In many applications, the protection function has the task to prevent damages to the protected object. The speed might be important for example in case of protection of transformer that might be overexcited. The time delay must be co- ordinated with other automated actions in the system.
tResetn: Reset time for step n if definite time delay is used, given in s. The default value is 25 ms.
tnMin: Minimum operation time for inverse time characteristic for step n, given in s. For very high voltages the overvoltage function, using inverse time characteristic, can give very short operation time. This might lead to unselective trip. By setting t1Min longer than the operation time for other protections such unselective tripping can be avoided.
ResetTypeCrvn: Set reset type curve for step n. This parameter can be set: Instantaneous,Frozen time,Linearly decreased. The default setting is Instantaneous.
tIResetn: Reset time for step n if inverse time delay is used, given in s. The default value is 25 ms.
kn: Time multiplier for inverse time characteristic. This parameter is used for co- ordination between different inverse time delayed undervoltage protections.
ACrvn, BCrvn, CCrvn, DCrvn, PCrvn: Parameters for step n, to set to create programmable undervoltage inverse time characteristic. Description of this can be found in the technical reference manual.
CrvSatn: Set tuning parameter for step n. When the denominator in the expression of the programmable curve is equal to zero the time delay will be infinity. There will be an undesired discontinuity. Therefore, a tuning parameter CrvSatn is set to compensate for this phenomenon. In the voltage interval U> up to U> (1.0 +
1MRK 511 310-UEN B Section 8 Voltage protection
209 Application manual
CrvSatn/100) the used voltage will be: U> (1.0 + CrvSatn/100). If the programmable curve is used this parameter must be calculated so that:
0 100
CrvSatnB C — >
EQUATION1448 V1 EN (Equation 98)
HystAbsn: Absolute hysteresis for step n, set in % of UBase. The setting of this parameter is highly dependent of the application.
8.4 Voltage differential protection VDCPTOV
8.4.1 Identification Function description IEC 61850
identification IEC 60617 identification
ANSI/IEEE C37.2 device number
Voltage differential protection VDCPTOV — 60
8.4.2 Application
The Voltage differential protection VDCPTOV functions can be used in some different applications.
Voltage unbalance protection for capacitor banks. The voltage on the bus is supervised with the voltage in the capacitor bank, phase- by phase. Difference indicates a fault, either short-circuited or open element in the capacitor bank. It is mainly used on elements with external fuses but can also be used on elements with internal fuses instead of a current unbalance protection measuring the current between the neutrals of two halfs of the capacitor bank. The function requires voltage transformers in all phases of the capacitor bank. Figure 80 shows some different alternative connections of this function.
Section 8 1MRK 511 310-UEN B Voltage protection
210 Application manual
Ud>L1
Ph L2Ph L3
U1
U2
Ud>L1
Ph L2Ph L3
U1 U2
Ph L3 Ph L2
Single earthed wye
Double wye
IEC06000390_1_en.vsd
IEC06000390 V3 EN
Figure 80: Connection of voltage differential protection VDCPTOV function to detect unbalance in capacitor banks (one phase only is shown)
VDCPTOV function has a block input (BLOCK) where a fuse failure supervision (or MCB tripped) can be connected to prevent problems if one fuse in the capacitor bank voltage transformer set has opened and not the other (capacitor voltage is connected to input U2). It will also ensure that a fuse failure alarm is given instead of a Undervoltage or Differential voltage alarm and/or tripping.
Fuse failure supervision (SDDRFUF) function for voltage transformers. In many application the voltages of two fuse groups of the same voltage transformer or fuse groups of two separate voltage transformers measuring the same voltage can be supervised with this function. It will be an alternative for example, generator units where often two voltage transformers are supplied for measurement and excitation equipment.
The application to supervise the voltage on two voltage transformers in the generator circuit is shown in figure 81.
1MRK 511 310-UEN B Section 8 Voltage protection
211 Application manual
Ud> U1
U2
To Protection
To Excitation
Gen en06000389.vsd
IEC06000389 V1 EN
Figure 81: Supervision of fuses on generator circuit voltage transformers
8.4.3 Setting guidelines
The parameters for the voltage differential function are set via the local HMI or PCM600.
The following settings are done for the voltage differential function.
Operation: Off/On
BlkDiffAtULow: The setting is to block the function when the voltages in the phases are low.
RFLx: Is the setting of the voltage ratio compensation factor where possible differences between the voltages is compensated for. The differences can be due to different voltage transformer ratios, different voltage levels e.g. the voltage measurement inside the capacitor bank can have a different voltage level but the difference can also e.g. be used by voltage drop in the secondary circuits. The setting is normally done at site by evaluating the differential voltage achieved as a service value for each phase. The factor is defined as U2 RFLx and shall be equal to the U1 voltage. Each phase has its own ratio factor.
UDTrip: The voltage differential level required for tripping is set with this parameter. For application on capacitor banks the setting will depend of the capacitor bank
Section 8 1MRK 511 310-UEN B Voltage protection
212 Application manual
voltage and the number of elements per phase in series and parallel. Capacitor banks must be tripped before excessive voltage occurs on the healthy capacitor elements. The setting values required are normally given by the capacitor bank supplier. For other applications it has to be decided case by case. For fuse supervision normally only the alarm level is used.
tTrip: The time delay for tripping is set by this parameter. Normally, the delay does not need to be so short in capacitor bank applications as there is no fault requiring urgent tripping.
tReset: The time delay for reset of tripping level element is set by this parameter. Normally, it can be set to a short delay as faults are permanent when they occur.
For the advanced users following parameters are also available for setting. Default values are here expected to be acceptable.
U1Low: The setting of the undervoltage level for the first voltage input is decided by this parameter. The proposed default setting is 70%.
U2Low: The setting of the undervoltage level for the second voltage input is decided by this parameter. The proposed default setting is 70%.
tBlock: The time delay for blocking of the function at detected undervoltages is set by this parameter.
UDAlarm: The voltage differential level required for alarm is set with this parameter. For application on capacitor banks the setting will depend of the capacitor bank voltage and the number of elements per phase in series and parallel. Normally values required are given by capacitor bank supplier.
For fuse supervision normally only this alarm level is used and a suitable voltage level is 3-5% if the ratio correction factor has been properly evaluated during commissioning.
For other applications it has to be decided case by case.
tAlarm: The time delay for alarm is set by this parameter. Normally, few seconds delay can be used on capacitor banks alarm. For fuse failure supervision (SDDRFUF) the alarm delay can be set to zero.
8.5 Loss of voltage check LOVPTUV
8.5.1 Identification Function description IEC 61850
identification IEC 60617 identification
ANSI/IEEE C37.2 device number
Loss of voltage check LOVPTUV — 27
1MRK 511 310-UEN B Section 8 Voltage protection
213 Application manual
8.5.2 Application
The trip of the circuit breaker at a prolonged loss of voltage at all the three phases is normally used in automatic restoration systems to facilitate the system restoration after a major blackout. Loss of voltage check (LOVPTUV) generates a TRIP signal only if the voltage in all the three phases is low for more than the set time. If the trip to the circuit breaker is not required, LOVPTUV is used for signallization only through an output contact or through the event recording function.
8.5.3 Setting guidelines
Loss of voltage check (LOVPTUV) is in principle independent of the protection functions. It requires to be set to open the circuit breaker in order to allow a simple system restoration following a main voltage loss of a big part of the network and only when the voltage is lost with breakers still closed.
All settings are in primary values or per unit. Set operate level per phase to typically 70% of the global parameter UBase level. Set the time delay tTrip=5-20 seconds.
8.5.3.1 Advanced users settings
For advanced users the following parameters need also to be set. Set the length of the trip pulse to typical tPulse=0.15 sec. Set the blocking time tBlock to block Loss of voltage check (LOVPTUV), if some but not all voltage are low, to typical 5.0 seconds and set the time delay for enabling the function after restoration tRestore to 3 — 40 seconds.
Section 8 1MRK 511 310-UEN B Voltage protection
214 Application manual
Section 9 Frequency protection
9.1 Underfrequency protection SAPTUF
9.1.1 Identification Function description IEC 61850
identification IEC 60617 identification
ANSI/IEEE C37.2 device number
Underfrequency protection SAPTUF
f <
SYMBOL-P V1 EN
81
9.1.2 Application
Underfrequency protection SAPTUF is applicable in all situations, where reliable detection of low fundamental power system frequency is needed. The power system frequency, and the rate of change of frequency, is a measure of the unbalance between the actual generation and the load demand. Low fundamental frequency in a power system indicates that the available generation is too low to fully supply the power demanded by the load connected to the power grid. SAPTUF detects such situations and provides an output signal, suitable for load shedding, generator boosting, HVDC- set-point change, gas turbine start up and so on. Sometimes shunt reactors are automatically switched in due to low frequency, in order to reduce the power system voltage and hence also reduce the voltage dependent part of the load.
SAPTUF is very sensitive and accurate and is used to alert operators that frequency has slightly deviated from the set-point, and that manual actions might be enough. The underfrequency signal is also used for overexcitation detection. This is especially important for generator step-up transformers, which might be connected to the generator but disconnected from the grid, during a roll-out sequence. If the generator is still energized, the system will experience overexcitation, due to the low frequency.
9.1.3 Setting guidelines
All the frequency and voltage magnitude conditions in the system where SAPTUF performs its functions should be considered. The same also applies to the associated equipment, its frequency and time characteristic.
There are two specific application areas for SAPTUF:
1MRK 511 310-UEN B Section 9 Frequency protection
215 Application manual
1. to protect equipment against damage due to low frequency, such as generators, transformers, and motors. Overexcitation is also related to low frequency
2. to protect a power system, or a part of a power system, against breakdown, by shedding load, in generation deficit situations.
The under frequency START value is set in Hz. All voltage magnitude related settings are made as a percentage of a global base voltage parameter. The UBase value should be set as a primary phase-to-phase value.
Some applications and related setting guidelines for the frequency level are given below:
Equipment protection, such as for motors and generators The setting has to be well below the lowest occurring «normal» frequency and well above the lowest acceptable frequency for the equipment.
Power system protection, by load shedding The setting has to be below the lowest occurring «normal» frequency and well above the lowest acceptable frequency for power stations, or sensitive loads. The setting level, the number of levels and the distance between two levels (in time and/or in frequency) depends very much on the characteristics of the power system under consideration. The size of the «largest loss of production» compared to «the size of the power system» is a critical parameter. In large systems, the load shedding can be set at a fairly high frequency level, and the time delay is normally not critical. In smaller systems the frequency START level has to be set at a lower value, and the time delay must be rather short.
The voltage related time delay is used for load shedding. The settings of SAPTUF could be the same all over the power system. The load shedding is then performed firstly in areas with low voltage magnitude, which normally are the most problematic areas, where the load shedding also is most efficient.
9.2 Overfrequency protection SAPTOF
9.2.1 Identification Function description IEC 61850
identification IEC 60617 identification
ANSI/IEEE C37.2 device number
Overfrequency protection SAPTOF
f >
SYMBOL-O V1 EN
81
Section 9 1MRK 511 310-UEN B Frequency protection
216 Application manual
9.2.2 Application
Overfrequency protection function SAPTOF is applicable in all situations, where reliable detection of high fundamental power system frequency is needed. The power system frequency, and rate of change of frequency, is a measure of the unbalance between the actual generation and the load demand. High fundamental frequency in a power system indicates that the available generation is too large compared to the power demanded by the load connected to the power grid. SAPTOF detects such situations and provides an output signal, suitable for generator shedding, HVDC-set- point change and so on. SAPTOF is very sensitive and accurate and can also be used to alert operators that frequency has slightly deviated from the set-point, and that manual actions might be enough.
9.2.3 Setting guidelines
All the frequency and voltage magnitude conditions in the system where SAPTOF performs its functions must be considered. The same also applies to the associated equipment, its frequency and time characteristic.
There are two application areas for SAPTOF:
1. to protect equipment against damage due to high frequency, such as generators, and motors
2. to protect a power system, or a part of a power system, against breakdown, by shedding generation, in over production situations.
The overfrequency start value is set in Hz. All voltage magnitude related settings are made as a percentage of a settable global base voltage parameter UBase. The UBase value should be set as a primary phase-to-phase value.
Some applications and related setting guidelines for the frequency level are given below:
Equipment protection, such as for motors and generators The setting has to be well above the highest occurring «normal» frequency and well below the highest acceptable frequency for the equipment.
Power system protection, by generator shedding The setting must be above the highest occurring «normal» frequency and below the highest acceptable frequency for power stations, or sensitive loads. The setting level, the number of levels and the distance between two levels (in time and/or in frequency) depend very much on the characteristics of the power system under consideration. The size of the «largest loss of load» compared to «the size of the power system» is a critical parameter. In large systems, the generator shedding can be set at a fairly low frequency level, and the time delay is normally not critical. In smaller systems the frequency START level has to be set at a higher value, and the time delay must be rather short.
1MRK 511 310-UEN B Section 9 Frequency protection
217 Application manual
9.3 Rate-of-change frequency protection SAPFRC
9.3.1 Identification Function description IEC 61850
identification IEC 60617 identification
ANSI/IEEE C37.2 device number
Rate-of-change frequency protection SAPFRC
df/dt ><
SYMBOL-N V1 EN
81
9.3.2 Application
Rate-of-change frequency protection (SAPFRC), is applicable in all situations, where reliable detection of change of the fundamental power system voltage frequency is needed. SAPFRC can be used both for increasing frequency and for decreasing frequency. SAPFRC provides an output signal, suitable for load shedding or generator shedding, generator boosting, HVDC-set-point change, gas turbine start up and so on. Very often SAPFRC is used in combination with a low frequency signal, especially in smaller power systems, where loss of a fairly large generator will require quick remedial actions to secure the power system integrity. In such situations load shedding actions are required at a rather high frequency level, but in combination with a large negative rate-of-change of frequency the underfrequency protection can be used at a rather high setting.
9.3.3 Setting guidelines
The parameters for Rate-of-change frequency protection SAPFRC are set via the local HMI or or through the Protection and Control Manager (PCM600).
All the frequency and voltage magnitude conditions in the system where SAPFRC performs its functions should be considered. The same also applies to the associated equipment, its frequency and time characteristic.
There are two application areas for SAPFRC:
1. to protect equipment against damage due to high or too low frequency, such as generators, transformers, and motors
2. to protect a power system, or a part of a power system, against breakdown by shedding load or generation, in situations where load and generation are not in balance.
SAPFRC is normally used together with an overfrequency or underfrequency function, in small power systems, where a single event can cause a large imbalance between load and generation. In such situations load or generation shedding has to
Section 9 1MRK 511 310-UEN B Frequency protection
218 Application manual
take place very quickly, and there might not be enough time to wait until the frequency signal has reached an abnormal value. Actions are therefore taken at a frequency level closer to the primary nominal level, if the rate-of-change frequency is large (with respect to sign).
SAPFRCSTART value is set in Hz/s. All voltage magnitude related settings are made as a percentage of a settable base voltage, which normally is set to the primary nominal voltage level (phase-phase) of the power system or the high voltage equipment under consideration.
SAPFRC is not instantaneous, since the function needs some time to supply a stable value. It is recommended to have a time delay long enough to take care of signal noise. However, the time, rate-of-change frequency and frequency steps between different actions might be critical, and sometimes a rather short operation time is required, for example, down to 70 ms.
Smaller industrial systems might experience rate-of-change frequency as large as 5 Hz/s, due to a single event. Even large power systems may form small islands with a large imbalance between load and generation, when severe faults (or combinations of faults) are cleared — up to 3 Hz/s has been experienced when a small island was isolated from a large system. For more «normal» severe disturbances in large power systems, rate-of-change of frequency is much less, most often just a fraction of 1.0 Hz/s.
9.4 Frequency time accumulation protection function FTAQFVR
9.4.1 Identification Function description IEC 61850
identification IEC 60617 identification
ANSI/ IEEEidentification
Frequency time accumulation protection FTAQFVR f<> 81A
9.4.2 Application
Generator prime movers are affected by abnormal frequency disturbances. Significant frequency deviations from rated frequency occur in case of major disturbances in the system. A rise of frequency occurs in case of generation surplus, while a lack of generation results in a drop of frequency.
The turbine blade is designed with its natural frequency adequately far from the rated speed or multiples of the rated speed of the turbine. This design avoids the mechanical resonant condition, which can lead to an increased mechanical stress on turbine blade. If the ratio between the turbine resonant frequencies to the system operating frequency is nearly equal to 1, mechanical stress on the blades is approximately 300 times the nonresonant operating condition stress values. The stress magnification factor is shown in the typical resonance curve in Figure 82.
1MRK 511 310-UEN B Section 9 Frequency protection
219 Application manual
1.0- + Frequency or Resonant Frequency
Ratio
S tre
ss M
ag ni
fic at
io n
Fa ct
or
IEC12000611-2-en.vsd
50
100
150
200
250
300
IEC12000611 V2 EN
Figure 82: Typical stress magnification factor curve according ANSI/IEEE C37.106-2003 Standard
Each turbine manufactured for different design of blades has various time restriction limits for various frequency bands. The time limits depend on the natural frequencies of the blades inside the turbine, corrosion and erosion of the blade edges and additional loss of blade lifetime during the abnormal operating conditions.
The frequency limitations and their time restrictions for different types of turbines are similar in many aspects with steam turbine limitations. Certain differences in design and applications may result in different protective requirements. Therefore, for different type of turbine systems, different recommendations on the time restriction limits are specified by the manufacturer.
However, the IEEE/ANSI C37.106-2003 standard «Guide for Abnormal Frequency Protection for Power Generating Plants» provides some examples where the time accumulated within each frequency range is as shown in Figure 83.
Section 9 1MRK 511 310-UEN B Frequency protection
220 Application manual
56 0.01 0.1 1 10 100 1000
58Fr eq
ue nc
y (H
z)
Time (Minutes)
Time (Minutes)
Time (Minutes)
Time (Minutes)
IEC13000258-1-en.ai
Continuous operation
Prohibited Operation
60
62
56 0.01 0.1 1 10 100 1000
58Fr eq
ue nc
y (H
z) Continuous operation60
62
56 0.01 0.1 1 10 100 1000
58Fr eq
ue nc
y (H
z) 60
62
Continuous operation
56 0.01 0.1 1 10 100 1000
58Fr eq
ue nc
y (H
z) Continuous operation60
62
Restricted Time Operation
Prohibited Operation
Prohibited Operation
Restricted Time Operation
Restricted Time Operation
Prohibited Operation Prohibited Operation
Prohibited Operation
Prohibited Operation
Restricted Time Operation
Restricted Time Operation Restricted Time Operation
IEC13000258 V1 EN
Figure 83: Examples of time frequency characteristics with various frequency band limits
Another application for the FTAQFVR protection function is to supervise variations from rated voltage-frequency. Generators are designed to accommodate the IEC 60034-3:1996 requirement of continuous operation within the confines of their capability curves over the ranges of +/-5% in voltage and +/-2% in frequency. Operation of the machine at rated power outside these voltage-frequency limits lead to increased temperatures and reduction of insulation life.
9.4.3 Setting guidelines
Among the generator protection functions, the frequency time accumulation protection FTAQFVR may be used to protect the generator as well as the turbine. Abnormal frequencies during normal operation cause material fatigue on turbine blades, trip points and time delays should be established based on the turbine manufactures requirements and recommendations.
Continuous operation of the machine at rated power outside voltage-frequency limits lead to increased rotor temperatures and reduction of insulation life. Setting of extent, duration and frequency of occurrence should be set according to manufactures requirements and recommendations.
1MRK 511 310-UEN B Section 9 Frequency protection
221 Application manual
Setting procedure on the IED The parameters for the frequency time accumulation protection FTAQFVR are set using the local HMI or through the dedicated software tool in Protection and Control Manager (PCM600).
Common base IED values for primary current IBase and primary voltage UBase are set in the global base values for settings function GBASVAL. The GlobalBaseSel is used to select GBASVAL for the reference of base values.
FTAQFVR used to protect a turbine:
Frequency during start-up and shutdown is normally not calculated, consequently the protection function is blocked by CB position, parameter CBCheck enabled. If the generator supply any load when CB is in open position e.g. excitation equipment and auxiliary services this may be considered as normal condition and CBCheck is ignored when the load current is higher then the set value of CurrStartLevel. Set the current level just above minimum load.
EnaVoltCheck set to Disable.
tCont: to be coordinated to the grid requirements.
tAccLimit, FreqHighLimit and FreqLowLimit setting is derived from the turbine manufacturer’s operating requirements, note that FreqLowLimit setting must always be lower than the set value of FreqHighLimit.
FTAQFVR used to protect a generator:
Frequency during start-up and shutdown is normally not calculated, consequently the protection function is blocked by CB position, parameter CBCheck enabled.
CurrStartLevel set to Disable.
EnaVoltCheck set to Enable, voltage and frequency limits set according to the generators manufacturer’s operating requirements. Voltage and frequency settings should also be coordinated with the starting values for over and underexcitation protection.
tCont: to be coordinated to the grid requirements.
tAccLimit, FreqHighLimit and FreqLowLimit setting is derived from the generator manufacturer’s operating requirements.
Section 9 1MRK 511 310-UEN B Frequency protection
222 Application manual
Section 10 Multipurpose protection
10.1 General current and voltage protection CVGAPC
10.1.1 Identification Function description IEC 61850
identification IEC 60617 identification
ANSI/IEEE C37.2 device number
General current and voltage protection CVGAPC 2(I>/U<) —
10.1.2 Application
A breakdown of the insulation between phase conductors or a phase conductor and earth results in a short circuit or an earth fault respectively. Such faults can result in large fault currents and may cause severe damage to the power system primary equipment. Depending on the magnitude and type of the fault different overcurrent protections, based on measurement of phase, earth or sequence current components can be used to clear these faults. Additionally it is sometimes required that these overcurrent protections shall be directional and/or voltage controlled/restrained.
The over/under voltage protection is applied on power system elements, such as generators, transformers, motors and power lines in order to detect abnormal voltage conditions. Depending on the type of voltage deviation and type of power system abnormal condition different over/under voltage protections based on measurement of phase-to-earth, phase-to-phase, residual- or sequence- voltage components can be used to detect and operate for such incident.
The IED can be provided with multiple General current and voltage protection (CVGAPC) protection modules. The function is always connected to three-phase current and three-phase voltage input in the configuration tool, but it will always measure only one current and one voltage quantity selected by the end user in the setting tool.
Each CVGAPC function module has got four independent protection elements built into it.
1. Two overcurrent steps with the following built-in features:
1MRK 511 310-UEN B Section 10 Multipurpose protection
223 Application manual
Definite time delay or Inverse Time Overcurrent TOC/IDMT delay for both steps
Second harmonic supervision is available in order to only allow operation of the overcurrent stage(s) if the content of the second harmonic in the measured current is lower than pre-set level
Directional supervision is available in order to only allow operation of the overcurrent stage(s) if the fault location is in the pre-set direction (Forward or Reverse). Its behavior during low-level polarizing voltage is settable (Non-Directional,Block,Memory)
Voltage restrained/controlled feature is available in order to modify the pick-up level of the overcurrent stage(s) in proportion to the magnitude of the measured voltage
Current restrained feature is available in order to only allow operation of the overcurrent stage(s) if the measured current quantity is bigger than the set percentage of the current restrain quantity.
2. Two undercurrent steps with the following built-in features: Definite time delay for both steps
3. Two overvoltage steps with the following built-in features Definite time delay or Inverse Time Overcurrent TOC/IDMT delay for
both steps 4. Two undervoltage steps with the following built-in features
Definite time delay or Inverse Time Overcurrent TOC/IDMT delay for both steps
All these four protection elements within one general protection function works independently from each other and they can be individually enabled or disabled. However it shall be once more noted that all these four protection elements measure one selected current quantity and one selected voltage quantity (see table 18 and table 19). It is possible to simultaneously use all four-protection elements and their individual stages. Sometimes in order to obtain desired application functionality it is necessary to provide interaction between two or more protection elements/stages within one CVGAPC function by appropriate IED configuration (for example, dead machine protection for generators).
10.1.2.1 Current and voltage selection for CVGAPC function
CVGAPC function is always connected to three-phase current and three-phase voltage input in the configuration tool, but it will always measure only the single current and the single voltage quantity selected by the end user in the setting tool (selected current quantity and selected voltage quantity).
The user can select, by a setting parameter CurrentInput, to measure one of the following current quantities shown in table 18.
Section 10 1MRK 511 310-UEN B Multipurpose protection
224 Application manual
Table 18: Available selection for current quantity within CVGAPC function
Set value for parameter «CurrentInput
Comment
1 phase1 CVGAPC function will measure the phase L1 current phasor
2 phase2 CVGAPC function will measure the phase L2 current phasor
3 phase3 CVGAPC function will measure the phase L3 current phasor
4 PosSeq CVGAPC function will measure internally calculated positive sequence current phasor
5 NegSeq CVGAPC function will measure internally calculated negative sequence current phasor
6 3 ZeroSeq CVGAPC function will measure internally calculated zero sequence current phasor multiplied by factor 3
7 MaxPh CVGAPC function will measure current phasor of the phase with maximum magnitude
8 MinPh CVGAPC function will measure current phasor of the phase with minimum magnitude
9 UnbalancePh CVGAPC function will measure magnitude of unbalance current, which is internally calculated as the algebraic magnitude difference between the current phasor of the phase with maximum magnitude and current phasor of the phase with minimum magnitude. Phase angle will be set to 0 all the time
10 phase1-phase2 CVGAPC function will measure the current phasor internally calculated as the vector difference between the phase L1 current phasor and phase L2 current phasor (IL1-IL2)
11 phase2-phase3 CVGAPC function will measure the current phasor internally calculated as the vector difference between the phase L2 current phasor and phase L3 current phasor (IL2-IL3)
12 phase3-phase1 CVGAPC function will measure the current phasor internally calculated as the vector difference between the phase L3 current phasor and phase L1 current phasor ( IL3-IL1)
13 MaxPh-Ph CVGAPC function will measure ph-ph current phasor with the maximum magnitude
14 MinPh-Ph CVGAPC function will measure ph-ph current phasor with the minimum magnitude
15 UnbalancePh-Ph CVGAPC function will measure magnitude of unbalance current, which is internally calculated as the algebraic magnitude difference between the ph-ph current phasor with maximum magnitude and ph-ph current phasor with minimum magnitude. Phase angle will be set to 0 all the time
The user can select, by a setting parameter VoltageInput, to measure one of the following voltage quantities shown in table 19.
Table 19: Available selection for voltage quantity within CVGAPC function
Set value for parameter «VoltageInput»
Comment
1 phase1 CVGAPC function will measure the phase L1 voltage phasor
2 phase2 CVGAPC function will measure the phase L2 voltage phasor
3 phase3 CVGAPC function will measure the phase L3 voltage phasor
Table continues on next page
1MRK 511 310-UEN B Section 10 Multipurpose protection
225 Application manual
Set value for parameter «VoltageInput»
Comment
4 PosSeq CVGAPC function will measure internally calculated positive sequence voltage phasor
5 -NegSeq CVGAPC function will measure internally calculated negative sequence voltage phasor. This voltage phasor will be intentionally rotated for 180 in order to enable easier settings for the directional feature when used.
6 -3*ZeroSeq CVGAPC function will measure internally calculated zero sequence voltage phasor multiplied by factor 3. This voltage phasor will be intentionally rotated for 180 in order to enable easier settings for the directional feature when used.
7 MaxPh CVGAPC function will measure voltage phasor of the phase with maximum magnitude
8 MinPh CVGAPC function will measure voltage phasor of the phase with minimum magnitude
9 UnbalancePh CVGAPC function will measure magnitude of unbalance voltage, which is internally calculated as the algebraic magnitude difference between the voltage phasor of the phase with maximum magnitude and voltage phasor of the phase with minimum magnitude. Phase angle will be set to 0 all the time
10 phase1-phase2 CVGAPC function will measure the voltage phasor internally calculated as the vector difference between the phase L1 voltage phasor and phase L2 voltage phasor (UL1-UL2)
11 phase2-phase3 CVGAPC function will measure the voltage phasor internally calculated as the vector difference between the phase L2 voltage phasor and phase L3 voltage phasor (UL2-UL3)
12 phase3-phase1 CVGAPC function will measure the voltage phasor internally calculated as the vector difference between the phase L3 voltage phasor and phase L1 voltage phasor (UL3-UL1)
13 MaxPh-Ph CVGAPC function will measure ph-ph voltage phasor with the maximum magnitude
14 MinPh-Ph CVGAPC function will measure ph-ph voltage phasor with the minimum magnitude
15 UnbalancePh-Ph CVGAPC function will measure magnitude of unbalance voltage, which is internally calculated as the algebraic magnitude difference between the ph-ph voltage phasor with maximum magnitude and ph-ph voltage phasor with minimum magnitude. Phase angle will be set to 0 all the time
It is important to notice that the voltage selection from table 19 is always applicable regardless the actual external VT connections. The three-phase VT inputs can be connected to IED as either three phase-to-earth voltages UL1, UL2 & UL3 or three phase-to-phase voltages UL1L2, UL2L3 & UL3L1VAB, VBC and VCA. This information about actual VT connection is entered as a setting parameter for the pre- processing block, which will then take automatically care about it.
10.1.2.2 Base quantities for CVGAPC function
The parameter settings for the base quantities, which represent the base (100%) for pickup levels of all measuring stages shall be entered as setting parameters for every CVGAPC function.
Section 10 1MRK 511 310-UEN B Multipurpose protection
226 Application manual
Base current shall be entered as:
1. rated phase current of the protected object in primary amperes, when the measured Current Quantity is selected from 1 to 9, as shown in table 18.
2. rated phase current of the protected object in primary amperes multiplied by 3 (1.732 x Iphase), when the measured Current Quantity is selected from 10 to 15, as shown in table 18.
Base voltage shall be entered as:
1. rated phase-to-earth voltage of the protected object in primary kV, when the measured Voltage Quantity is selected from 1 to 9, as shown in table 19.
2. rated phase-to-phase voltage of the protected object in primary kV, when the measured Voltage Quantity is selected from 10 to 15, as shown in table 19.
10.1.2.3 Application possibilities
Due to its flexibility the general current and voltage protection (CVGAPC) function can be used, with appropriate settings and configuration in many different applications. Some of possible examples are given below:
1. Transformer and line applications: Underimpedance protection (circular, non-directional characteristic) Underimpedance protection (circular mho characteristic) Voltage Controlled/Restrained Overcurrent protection Phase or Negative/Positive/Zero Sequence (Non-Directional or
Directional) Overcurrent protection Phase or phase-to-phase or Negative/Positive/Zero Sequence over/under
voltage protection Special thermal overload protection Open Phase protection Unbalance protection
2. Generator protection 80-95% Stator earth fault protection (measured or calculated 3Uo) Rotor earth fault protection (with external COMBIFLEX RXTTE4
injection unit) Underimpedance protection Voltage Controlled/Restrained Overcurrent protection Turn-to-Turn & Differential Backup protection (directional Negative
Sequence. Overcurrent protection connected to generator HV terminal CTs looking into generator)
Stator Overload protection Rotor Overload protection Loss of Excitation protection (directional pos. seq. OC protection) Reverse power/Low forward power protection (directional pos. seq. OC
protection, 2% sensitivity) Dead-Machine/Inadvertent-Energizing protection Breaker head flashover protection
1MRK 511 310-UEN B Section 10 Multipurpose protection
227 Application manual
Improper synchronizing detection Sensitive negative sequence generator over current protection and alarm Phase or phase-to-phase or Negative/Positive/Zero Sequence over/under
voltage protection Generator out-of-step detection (based on directional pos. seq. OC) Inadvertent generator energizing
10.1.2.4 Inadvertent generator energization
When the generator is taken out of service, and non-rotating, there is a risk that the generator circuit breaker is closed by mistake.
Three-phase energizing of a generator, which is at standstill or on turning gear, causes it to behave and accelerate similarly to an induction motor. The machine, at this point, essentially represents the subtransient reactance to the system and it can be expected to draw from one to four per unit current, depending on the equivalent system impedance. Machine terminal voltage can range from 20% to 70% of rated voltage, again, depending on the system equivalent impedance (including the block transformer). Higher quantities of machine current and voltage (3 to 4 per unit current and 50% to 70% rated voltage) can be expected if the generator is connected to a strong system. Lower current and voltage values (1 to 2 per unit current and 20% to 40% rated voltage) are representative of weaker systems.
Since a generator behaves similarly to an induction motor, high currents will develop in the rotor during the period it is accelerating. Although the rotor may be thermally damaged from excessive high currents, the time to damage will be on the order of a few seconds. Of more critical concern, however, is the bearing, which can be damaged in a fraction of a second due to low oil pressure. Therefore, it is essential that high speed tripping is provided. This tripping should be almost instantaneous (< 100 ms).
There is a risk that the current into the generator at inadvertent energization will be limited so that the normal overcurrent or underimpedance protection will not detect the dangerous situation. The delay of these protection functions might be too long. The reverse power protection might detect the situation but the operation time of this protection is normally too long.
For big and important machines, fast protection against inadvertent energizing should, therefore, be included in the protective scheme.
The protection against inadvertent energization can be made by a combination of undervoltage, overvoltage and overcurrent protection functions. The undervoltage function will, with a delay for example 10 s, detect the situation when the generator is not connected to the grid (standstill) and activate the overcurrent function. The overvoltage function will detect the situation when the generator is taken into operation and will disable the overcurrent function. The overcurrent function will have a pick-up value about 50% of the rated current of the generator. The trip delay will be about 50 ms.
Section 10 1MRK 511 310-UEN B Multipurpose protection
228 Application manual
10.1.3 Setting guidelines
When inverse time overcurrent characteristic is selected, the operate time of the stage will be the sum of the inverse time delay and the set definite time delay. Thus, if only the inverse time delay is required, it is of utmost importance to set the definite time delay for that stage to zero.
In version 2.0, a typical starting time delay of 24ms is subtracted from the set trip time delay, so that the resulting trip time will take the internal IED start time into consideration.
The parameters for the general current and voltage protection function (CVGAPC) are set via the local HMI or Protection and Control Manager (PCM600).
The overcurrent steps has a IMinx (x=1 or 2 depending on step) setting to set the minimum operate current. Set IMinx below StartCurr_OCx for every step to achieve ANSI reset characteristic according to standard. If IMinx is set above StartCurr_OCx for any step the ANSI reset works as if current is zero when current drops below IMinx.
10.1.3.1 Directional negative sequence overcurrent protection
Directional negative sequence overcurrent protection is typically used as sensitive earth-fault protection of power lines where incorrect zero sequence polarization may result from mutual induction between two or more parallel lines. Additionally, it can be used in applications on underground cables where zero-sequence impedance depends on the fault current return paths, but the cable negative-sequence impedance is practically constant. It shall be noted that directional negative sequence OC element offers protection against all unbalance faults (phase-to-phase faults as well). Care shall be taken that the minimum pickup of such protection function shall be set above natural system unbalance level.
An example will be given, how sensitive-earth-fault protection for power lines can be achieved by using negative-sequence directional overcurrent protection elements within a CVGAPC function.
This functionality can be achieved by using one CVGAPC function. The following shall be done to ensure proper operation of the function:
1. Connect three-phase power line currents and three-phase power line voltages to one CVGAPC instance (for example, GF04)
2. Set CurrentInput to NegSeq (please note that CVGAPC function measures I2 current and NOT 3I2 current; this is essential for proper OC pickup level setting)
3. Set VoltageInput to -NegSeq (please note that the negative sequence voltage phasor is intentionally inverted in order to simplify directionality
1MRK 511 310-UEN B Section 10 Multipurpose protection
229 Application manual
4. Set base current IBase value equal to the rated primary current of power line CTs 5. Set base voltage UBase value equal to the rated power line phase-to-phase
voltage in kV 6. Set RCADir to value +65 degrees (NegSeq current typically lags the inverted
NegSeq voltage for this angle during the fault) 7. Set ROADir to value 90 degree 8. Set LowVolt_VM to value 2% (NegSeq voltage level above which the directional
element will be enabled) 9. Enable one overcurrent stage (for example, OC1) 10. By parameter CurveType_OC1 select appropriate TOC/IDMT or definite time
delayed curve in accordance with your network protection philosophy 11. Set StartCurr_OC1 to value between 3-10% (typical values) 12. Set tDef_OC1 or parameter k when TOC/IDMT curves are used to insure
proper time coordination with other earth-fault protections installed in the vicinity of this power line
13. Set DirMode_OC1 to Forward 14. Set DirPrinc_OC1 to IcosPhi&U 15. Set ActLowVolt1_VM to Block
In order to insure proper restraining of this element for CT saturations during three-phase faults it is possible to use current restraint feature and enable this element to operate only when NegSeq current is bigger than a certain percentage (10% is typical value) of measured PosSeq current in the power line. To do this the following settings within the same function shall be done:
16. Set EnRestrainCurr to On 17. Set RestrCurrInput to PosSeq 18. Set RestrCurrCoeff to value 0.10
If required, this CVGAPC function can be used in directional comparison protection scheme for the power line protection if communication channels to the remote end of this power line are available. In that case typically two NegSeq overcurrent steps are required. One for forward and one for reverse direction. As explained before the OC1 stage can be used to detect faults in forward direction. The built-in OC2 stage can be used to detect faults in reverse direction.
However the following shall be noted for such application:
the set values for RCADir and ROADir settings will be as well applicable for OC2 stage
setting DirMode_OC2 shall be set to Reverse setting parameter StartCurr_OC2 shall be made more sensitive than pickup value
of forward OC1 element (that is, typically 60% of OC1 set pickup level) in order
Section 10 1MRK 511 310-UEN B Multipurpose protection
230 Application manual
to insure proper operation of the directional comparison scheme during current reversal situations
start signals from OC1 and OC2 elements shall be used to send forward and reverse signals to the remote end of the power line
the available scheme communications function block within IED shall be used between multipurpose protection function and the communication equipment in order to insure proper conditioning of the above two start signals
Furthermore the other built-in UC, OV and UV protection elements can be used for other protection and alarming purposes.
10.1.3.2 Negative sequence overcurrent protection
Example will be given how to use one CVGAPC function to provide negative sequence inverse time overcurrent protection for a generator with capability constant of 20s, and maximum continuous negative sequence rating of 7% of the generator rated current.
The capability curve for a generator negative sequence overcurrent protection, often used world-wide, is defined by the ANSI standard in accordance with the following formula:
2op
NS
r
kt I I
=
EQUATION1372 V1 EN (Equation 99)
where:
top is the operating time in seconds of the negative sequence overcurrent IED
k is the generator capability constant in seconds
INS is the measured negative sequence current
Ir is the generator rated current
By defining parameter x equal to maximum continuous negative sequence rating of the generator in accordance with the following formula
7% 0, 07x pu= = EQUATION1373 V1 EN (Equation 100)
Equation 99 can be re-written in the following way without changing the value for the operate time of the negative sequence inverse overcurrent IED:
1MRK 511 310-UEN B Section 10 Multipurpose protection
231 Application manual
2
2
1
op
NS
r
k xt
I x I
=
EQUATION1374 V1 EN (Equation 101)
In order to achieve such protection functionality with one CVGAPC functions the following must be done:
1. Connect three-phase generator currents to one CVGAPC instance (for example, GF01)
2. Set parameter CurrentInput to value NegSeq 3. Set base current value to the rated generator current in primary amperes 4. Enable one overcurrent step (for example, OC1) 5. Select parameter CurveType_OC1 to value Programmable
op P
At k B M C
= + — EQUATION1375 V1 EN (Equation 102)
where:
top is the operating time in seconds of the Inverse Time Overcurrent TOC/IDMT algorithm
k is time multiplier (parameter setting)
M is ratio between measured current magnitude and set pickup current level
A, B, C and P are user settable coefficients which determine the curve used for Inverse Time Overcurrent TOC/IDMT calculation
When the equation 99 is compared with the equation 101 for the inverse time characteristic of the OC1 it is obvious that if the following rules are followed:
1. set k equal to the generator negative sequence capability value 2. set A_OC1 equal to the value 1/x2 3. set B_OC1 = 0.0, C_OC1=0.0 and P_OC1=2.0 4. set StartCurr_OC1 equal to the value x
then the OC1 step of the CVGAPC function can be used for generator negative sequence inverse overcurrent protection.
For this particular example the following settings shall be entered to insure proper function operation:
Section 10 1MRK 511 310-UEN B Multipurpose protection
232 Application manual
1. select negative sequence current as measuring quantity for this CVGAPC function
2. make sure that the base current value for the CVGAPC function is equal to the generator rated current
3. set k_OC1 = 20 4. set A_OC1= 1/0.072 = 204.0816 5. set B_OC1 = 0.0, C_OC1 = 0.0 and P_OC1 = 2.0 6. set StartCurr_OC1 = 7%
Proper timing of the CVGAPC function made in this way can easily be verified by secondary injection. All other settings can be left at the default values. If required delayed time reset for OC1 step can be set in order to ensure proper function operation in case of repetitive unbalance conditions.
Furthermore the other built-in protection elements can be used for other protection and alarming purposes (for example, use OC2 for negative sequence overcurrent alarm and OV1 for negative sequence overvoltage alarm).
10.1.3.3 Generator stator overload protection in accordance with IEC or ANSI standards
Example will be given how to use one CVGAPC function to provide generator stator overload protection in accordance with IEC or ANSI standard if minimum-operating current shall be set to 116% of generator rating.
The generator stator overload protection is defined by IEC or ANSI standard for turbo generators in accordance with the following formula:
2
1 op
m
r
kt I I
=
—
EQUATION1376 V1 EN (Equation 103)
where:
top is the operating time of the generator stator overload IED
k is the generator capability constant in accordance with the relevant standard (k = 37.5 for the IEC standard or k = 41.4 for the ANSI standard)
Im is the magnitude of the measured current
Ir is the generator rated current
This formula is applicable only when measured current (for example, positive sequence current) exceeds a pre-set value (typically in the range from 105 to 125% of the generator rated current).
1MRK 511 310-UEN B Section 10 Multipurpose protection
233 Application manual
By defining parameter x equal to the per unit value for the desired pickup for the overload IED in accordance with the following formula:
x = 116% = 1.16 pu EQUATION1377 V2 EN (Equation 104)
formula 3.5can be re-written in the following way without changing the value for the operate time of the generator stator overload IED:
2
2
2
1
1 op
m
r
k xt
I x I x
=
—
EQUATION1378 V1 EN (Equation 105)
In order to achieve such protection functionality with one CVGAPC functions the following must be done:
1. Connect three-phase generator currents to one CVGAPC instance (for example, GF01)
2. Set parameter CurrentInput to value PosSeq 3. Set base current value to the rated generator current in primary amperes 4. Enable one overcurrent step (for example OC1) 5. Select parameter CurveType_OC1 to value Programmable
op P
At k B M C
= + — EQUATION1375 V1 EN (Equation 106)
where:
top is the operating time in seconds of the Inverse Time Overcurrent TOC/IDMT algorithm
k is time multiplier (parameter setting)
M is ratio between measured current magnitude and set pickup current level
A, B, C and P are user settable coefficients which determine the curve used for Inverse Time Overcurrent TOC/IDMT calculation
When the equation 105 is compared with the equation 106 for the inverse time characteristic of the OC1 step in it is obvious that if the following rules are followed:
1. set k equal to the IEC or ANSI standard generator capability value 2. set parameter A_OC1 equal to the value 1/x2 3. set parameter C_OC1 equal to the value 1/x2 4. set parameters B_OC1 = 0.0 and P_OC1=2.0 5. set StartCurr_OC1 equal to the value x
Section 10 1MRK 511 310-UEN B Multipurpose protection
234 Application manual
then the OC1 step of the CVGAPC function can be used for generator negative sequence inverse overcurrent protection.
1. select positive sequence current as measuring quantity for this CVGAPC function
2. make sure that the base current value for CVGAPC function is equal to the generator rated current
3. set k = 37.5 for the IEC standard or k = 41.4 for the ANSI standard 4. set A_OC1= 1/1.162 = 0.7432 5. set C_OC1= 1/1.162 = 0.7432 6. set B_OC1 = 0.0 and P_OC1 = 2.0 7. set StartCurr_OC1 = 116%
Proper timing of CVGAPC function made in this way can easily be verified by secondary injection. All other settings can be left at the default values. If required delayed time reset for OC1 step can be set in order to insure proper function operation in case of repetitive overload conditions.
Furthermore the other built-in protection elements can be used for other protection and alarming purposes.
In the similar way rotor overload protection in accordance with ANSI standard can be achieved.
10.1.3.4 Open phase protection for transformer, lines or generators and circuit breaker head flashover protection for generators
Example will be given how to use one CVGAPC function to provide open phase protection. This can be achieved by using one CVGAPC function by comparing the unbalance current with a pre-set level. In order to make such a function more secure it is possible to restrain it by requiring that at the same time the measured unbalance current must be bigger than 97% of the maximum phase current. By doing this it will be insured that function can only pickup if one of the phases is open circuited. Such an arrangement is easy to obtain in CVGAPC function by enabling the current restraint feature. The following shall be done in order to insure proper operation of the function:
1. Connect three-phase currents from the protected object to one CVGAPC instance (for example, GF03)
2. Set CurrentInput to value UnbalancePh 3. Set EnRestrainCurr to On 4. Set RestrCurrInput to MaxPh 5. Set RestrCurrCoeff to value 0.97 6. Set base current value to the rated current of the protected object in primary
amperes 7. Enable one overcurrent step (for example, OC1) 8. Select parameter CurveType_OC1 to value IEC Def. Time 9. Set parameter StartCurr_OC1 to value 5% 10. Set parameter tDef_OC1 to desired time delay (for example, 2.0s)
1MRK 511 310-UEN B Section 10 Multipurpose protection
235 Application manual
Proper operation of CVGAPC function made in this way can easily be verified by secondary injection. All other settings can be left at the default values. However it shall be noted that set values for restrain current and its coefficient will as well be applicable for OC2 step as soon as it is enabled.
Furthermore the other built-in protection elements can be used for other protection and alarming purposes. For example, in case of generator application by enabling OC2 step with set pickup to 200% and time delay to 0.1s simple but effective protection against circuit breaker head flashover protection is achieved.
10.1.3.5 Voltage restrained overcurrent protection for generator and step-up transformer
Example will be given how to use one CVGAPC function to provide voltage restrained overcurrent protection for a generator. Let us assume that the time coordination study gives the following required settings:
Inverse Time Over Current TOC/IDMT curve: ANSI very inverse Pickup current of 185% of generator rated current at rated generator voltage Pickup current 25% of the original pickup current value for generator voltages
below 25% of rated voltage
This functionality can be achieved by using one CVGAPC function. The following shall be done in order to ensure proper operation of the function:
1. Connect three-phase generator currents and voltages to one CVGAPC instance (for example, GF05)
2. Set CurrentInput to value MaxPh 3. Set VoltageInput to value MinPh-Ph (it is assumed that minimum phase-to-phase
voltage shall be used for restraining. Alternatively, positive sequence voltage can be used for restraining by selecting PosSeq for this setting parameter)
4. Set base current value to the rated generator current primary amperes 5. Set base voltage value to the rated generator phase-to-phase voltage in kV 6. Enable one overcurrent step (for example, OC1) 7. Select CurveType_OC1 to value ANSI Very inv 8. If required set minimum operating time for this curve by using parameter
tMin_OC1 (default value 0.05s) 9. Set StartCurr_OC1 to value 185% 10. Set VCntrlMode_OC1 to On 11. Set VDepMode_OC1 to Slope 12. Set VDepFact_OC1 to value 0.25 13. Set UHighLimit_OC1 to value 100% 14. Set ULowLimit_OC1 to value 25%
Proper operation of the CVGAPC function made in this way can easily be verified by secondary injection. All other settings can be left at the default values. Furthermore the other built-in protection elements can be used for other protection and alarming purposes.
Section 10 1MRK 511 310-UEN B Multipurpose protection
236 Application manual
10.1.3.6 Loss of excitation protection for a generator
Example will be given how by using positive sequence directional overcurrent protection element within a CVGAPC function, loss of excitation protection for a generator can be achieved. Let us assume that from rated generator data the following values are calculated:
Maximum generator capability to contentiously absorb reactive power at zero active loading 38% of the generator MVA rating
Generator pull-out angle 84 degrees
This functionality can be achieved by using one CVGAPC function. The following shall be done in order to insure proper operation of the function:
1. Connect three-phase generator currents and three-phase generator voltages to one CVGAPC instance (for example, GF02)
2. Set parameter CurrentInput to PosSeq 3. Set parameter VoltageInput to PosSeq 4. Set base current value to the rated generator current primary amperes 5. Set base voltage value to the rated generator phase-to-phase voltage in kV 6. Set parameter RCADir to value -84 degree (that is, current lead voltage for this
angle) 7. Set parameter ROADir to value 90 degree 8. Set parameter LowVolt_VM to value 5% 9. Enable one overcurrent step (for example, OC1) 10. Select parameter CurveType_OC1 to value IEC Def. Time 11. Set parameter StartCurr_OC1 to value 38% 12. Set parameter tDef_OC1 to value 2.0s (typical setting) 13. Set parameter DirMode_OC1 to Forward 14. Set parameter DirPrinc_OC1 to IcosPhi&U 15. Set parameter ActLowVolt1_VM to Block
Proper operation of the CVGAPC function made in this way can easily be verified by secondary injection. All other settings can be left at the default values. However it shall be noted that set values for RCA & ROA angles will be applicable for OC2 step if directional feature is enabled for this step as well. Figure 84 shows overall protection characteristic
Furthermore the other build-in protection elements can be used for other protection and alarming purposes.
1MRK 511 310-UEN B Section 10 Multipurpose protection
237 Application manual
0.2 0.4 0.6
-0.2
0.6
0.8
0.8 1
D ILowSet
B
A
C
0.4
0.2
0
1.2 1.4
-0.4
-0.6
-0.8
-rca
Operating Region
Q [pu]
P [pu]
rca
UPS
IPS ILowSet
Operating region
en05000535.vsd
IEC05000535 V2 EN
Figure 84: Loss of excitation
Section 10 1MRK 511 310-UEN B Multipurpose protection
238 Application manual
Section 11 System protection and control
11.1 Multipurpose filter SMAIHPAC
11.1.1 Identification Function description IEC 61850
identification IEC 60617 identification
ANSI/IEEE C37.2 device number
Multipurpose filter SMAIHPAC — —
11.1.2 Application
The multi-purpose filter, function block with name SMAI HPAC, is arranged as a three-phase filter. It has very much the same user interface (e.g. function block outputs) as the standard pre-processing function block SMAI. However the main difference is that it can be used to extract any frequency component from the input signal. For all four analogue input signals into this filter (i.e. three phases and the residual quantity) the input samples from the TRM module, which are coming at rate of 20 samples per fundamental system cycle, are first stored. When enough samples are available in the internal memory, the phasor values at set frequency defined by the setting parameter SetFrequency are calculated. The following values are internally available for each of the calculated phasors:
Magnitude Phase angle Exact frequency of the extracted signal
The SMAI HPAC filter is always used in conjunction with some other protection function (e.g. multi-purpose protection function or overcurrent function or over- voltage function or over-power function). In this way many different protection applications can be arranged. For example the following protection, monitoring or measurement features can be realized:
Sub-synchronous resonance protection for turbo generators Sub-synchronous protection for wind turbines/wind farms Detection of sub-synchronous oscillation between HVDC links and synchronous
generators Super-synchronous protection Detection of presence of the geo-magnetic induced currents
1MRK 511 310-UEN B Section 11 System protection and control
239 Application manual
Overcurrent or overvoltage protection at specific frequency harmonic, sub- harmonic, inter-harmonic etc.
Presence of special railway frequencies (e.g. 16.7Hz or 25Hz) in the three-phase power system
Sensitive reverse power protection Stator or rotor earth fault protection for special injection frequencies (e.g. 25Hz) etc.
The filter output can also be connected to the measurement function blocks such as CVMMXN (Measurements), CMMXU (Phase current measurement), VMMXU (Phase-phase voltage measurement), etc. in order to report the extracted phasor values to the supervisory system (e.g. MicroSCADA).
The following figure shoes typical configuration connections required to utilize this filter in conjunction with multi-purpose function as non-directional overcurrent protection.
IEC13000179-1-en.vsd
IEC13000179 V1 EN
Figure 85: Required ACT configuration
Such overcurrent arrangement can be for example used to achieve the subsynchronous resonance protection for turbo generators.
11.1.3 Setting guidelines
11.1.3.1 Setting example
A relay type used for generator subsynchronous resonance overcurrent protection shall be replaced. The relay had inverse time operating characteristic as given with the following formula:
01op
s
K t T
I = +
EQUATION13000029 V1 EN (Equation 107)
Where:
Section 11 1MRK 511 310-UEN B System protection and control
240 Application manual
top is the operating time of the relay T01 is fixed time delay (setting) K is a constant (setting) IS is measured subsynchronous current in primary amperes
The existing relay was applied on a large 50Hz turbo generator which had shaft mechanical resonance frequency at 18.5Hz. The relay settings were T01 = 0.64 seconds, K= 35566 Amperes and minimal subsynchronous current trip level was set at IS0=300 Amperes primary.
Solution:
First the IED configuration shall be arranged as shown in Figure 85. Then the settings for SMAI HPAC filter and multipurpose function shall be derived from existing relay settings in the following way:
The subsynchronous current frequency is calculated as follows:
50 18.5 31.5sf Hz Hz Hz= — = EQUATION13000030 V1 EN (Equation 108)
In order to properly extract the weak subsynchronous signal in presence of the dominating 50Hz signal the SMAI HPAC filter shall be set as given in the following table:
Table 20: Proposed settings for SMAIHPAC
I_HPAC_31_5Hz: SMAIHPAC:1
ConnectionType Ph N
SetFrequency 31.5
FreqBandWidth 0.0
FilterLength 1.0 s
OverLap 75
Operation On
Now the settings for the multi-purpose overcurrent stage one shall be derived in order to emulate the existing relay operating characteristic. To achieve exactly the same inverse time characteristic the programmable IDMT characteristic is used which for multi-purpose overcurrent stage one, which has the following equation (for more information see Section Inverse time characteristics in the TRM).
[ ] pt As B k
i C in
= + — >
EQUATION13000031 V1 EN (Equation 109)
1MRK 511 310-UEN B Section 11 System protection and control
241 Application manual
In order to adapt to the previous relay characteristic the above equation can be re- written in the following way:
[ ] 011 1
0
so
s
so
t
K Is T
I I
= + —
EQUATION13000032 V1 EN (Equation 110)
Thus if the following rules are followed when multi-purpose overcurrent stage one is set:
in > = IS0= 300A 35566 118.55
300so
A K I
= = =
01 0.64B T= =
0.0C =
1.0p =
1.0k =
then exact replica of the existing relay will be achieved. The following table summarizes all required settings for the multi-purpose function:
Setting Group1
Operation On
CurrentInput MaxPh
IBase 1000
VoltageInput MaxPh
UBase 20.50
OPerHarmRestr Off
I_2ndI_fund 20.0
BlkLevel2nd 5000
EnRestrainCurr Off
RestrCurrInput PosSeq
RestrCurrCoeff 0.00
RCADir -75
ROADir 75
LowVolt_VM 0.5
Section 11 1MRK 511 310-UEN B System protection and control
242 Application manual
OC1
Setting Group1
Operation_OC1 On
StartCurr_OC1 30.0
CurrMult_OC1 2.0
CurveType_OC1 Programmable
tDef_OC1 0.00
k_OC1 1.00
tMin1 30
tMin_OC1 1.40
ResCrvType_OC1 Instantaneous
tResetDef_OC1 0.00
P_OC1 1.000
A_OC1 118.55
B_OC1 0.640
C_OC1 0.000
1MRK 511 310-UEN B Section 11 System protection and control
243 Application manual
Section 12 Secondary system supervision
12.1 Current circuit supervision CCSSPVC
12.1.1 Identification Function description IEC 61850
identification IEC 60617 identification
ANSI/IEEE C37.2 device number
Current circuit supervision CCSSPVC — 87
12.1.2 Application
Open or short circuited current transformer cores can cause unwanted operation of many protection functions such as differential, earth-fault current and negative- sequence current functions. When currents from two independent three-phase sets of CTs, or CT cores, measuring the same primary currents are available, reliable current circuit supervision can be arranged by comparing the currents from the two sets. If an error in any CT circuit is detected, the protection functions concerned can be blocked and an alarm given.
In case of large currents, unequal transient saturation of CT cores with different remanence or different saturation factor may result in differences in the secondary currents from the two CT sets. Unwanted blocking of protection functions during the transient stage must then be avoided.
Current circuit supervision CCSSPVC must be sensitive and have short operate time in order to prevent unwanted tripping from fast-acting, sensitive numerical protections in case of faulty CT secondary circuits.
Open CT circuits creates extremely high voltages in the circuits which is extremely dangerous for the personnel. It can also damage the insulation and cause new problems. The application shall, thus, be done with this in consideration, especially if the protection functions are blocked.
1MRK 511 310-UEN B Section 12 Secondary system supervision
245 Application manual
12.1.3 Setting guidelines
Current circuit supervision CCSSPVC compares the residual current from a three- phase set of current transformer cores with the neutral point current on a separate input taken from another set of cores on the same current transformer.
The minimum operate current, IMinOp, must be set as a minimum to twice the residual current in the supervised CT circuits under normal service conditions and rated primary current.
The parameter Ip>Block is normally set at 150% to block the function during transient conditions.
The FAIL output is connected to the blocking input of the protection function to be blocked at faulty CT secondary circuits.
12.2 Fuse failure supervision FUFSPVC
12.2.1 Identification Function description IEC 61850
identification IEC 60617 identification
ANSI/IEEE C37.2 device number
Fuse failure supervision FUFSPVC — —
12.2.2 Application
Different protection functions within the protection IED, operates on the basis of the measured voltage in the relay point. Examples are:
impedance protection functions undervoltage function energizing check function and voltage check for the weak infeed logic
These functions can operate unintentionally if a fault occurs in the secondary circuits between the voltage instrument transformers and the IED.
It is possible to use different measures to prevent such unwanted operations. Miniature circuit breakers in the voltage measuring circuits, located as close as possible to the voltage instrument transformers, are one of them. Separate fuse-failure monitoring IEDs or elements within the protection and monitoring devices are another possibilities. These solutions are combined to get the best possible effect in the fuse failure supervision function (SDDRFUF).
SDDRFUF function built into the IED products can operate on the basis of external binary signals from the miniature circuit breaker or from the line disconnector. The
Section 12 1MRK 511 310-UEN B Secondary system supervision
246 Application manual
first case influences the operation of all voltage-dependent functions while the second one does not affect the impedance measuring functions.
The negative sequence detection algorithm, based on the negative-sequence measuring quantities, a high value of voltage 3U2 without the presence of the negative-sequence current 3I2, is recommended for use in isolated or high-impedance earthed networks.
The zero sequence detection algorithm, based on the zero sequence measuring quantities, a high value of voltage 3U0 without the presence of the residual current 3I0, is recommended for use in directly or low impedance earthed networks. In cases where the line can have a weak-infeed of zero sequence current this function shall be avoided.
A criterion based on delta current and delta voltage measurements can be added to the fuse failure supervision function in order to detect a three phase fuse failure. This is beneficial for example during three phase transformer switching.
12.2.3 Setting guidelines
12.2.3.1 General
The negative and zero sequence voltages and currents always exist due to different non-symmetries in the primary system and differences in the current and voltage instrument transformers. The minimum value for the operation of the current and voltage measuring elements must always be set with a safety margin of 10 to 20%, depending on the system operating conditions.
Pay special attention to the dissymmetry of the measuring quantities when the function is used on long untransposed lines, on multicircuit lines and so on.
The settings of negative sequence, zero sequence and delta algorithm are in percent of the base voltage and base current for the function. Common base IED values for primary current (IBase), primary voltage (UBase) and primary power (SBase) are set in Global Base Values GBASVAL. The setting GlobalBaseSel is used to select a particular GBASVAL and used its base values.
12.2.3.2 Setting of common parameters
Set the operation mode selector Operation to On to release the fuse failure function.
The voltage threshold USealIn< is used to identify low voltage condition in the system. Set USealIn< below the minimum operating voltage that might occur during emergency conditions. We propose a setting of approximately 70% of UBase.
The drop off time of 200 ms for dead phase detection makes it recommended to always set SealIn to On since this will secure a fuse failure indication at persistent fuse fail when closing the local breaker when the line is already energized from the other end. When the remote breaker closes the voltage will return except in the phase that has a
1MRK 511 310-UEN B Section 12 Secondary system supervision
247 Application manual
persistent fuse fail. Since the local breaker is open there is no current and the dead phase indication will persist in the phase with the blown fuse. When the local breaker closes the current will start to flow and the function detects the fuse failure situation. But due to the 200 ms drop off timer the output BLKZ will not be activated until after 200 ms. This means that distance functions are not blocked and due to the no voltage but current situation might issue a trip.
The operation mode selector OpMode has been introduced for better adaptation to system requirements. The mode selector enables selecting interactions between the negative sequence and zero sequence algorithm. In normal applications, the OpMode is set to either UNsINs for selecting negative sequence algorithm or UZsIZs for zero sequence based algorithm. If system studies or field experiences shows that there is a risk that the fuse failure function will not be activated due to the system conditions, the dependability of the fuse failure function can be increased if the OpMode is set to UZsIZs OR UNsINs or OptimZsNs. In mode UZsIZs OR UNsINs both negative and zero sequence based algorithms are activated and working in an OR-condition. Also in mode OptimZsNs both negative and zero sequence algorithms are activated and the one that has the highest magnitude of measured negative or zero sequence current will operate. If there is a requirement to increase the security of the fuse failure function OpMode can be selected to UZsIZs AND UNsINs which gives that both negative and zero sequence algorithms are activated and working in an AND-condition, that is, both algorithms must give condition for block in order to activate the output signals BLKU or BLKZ.
12.2.3.3 Negative sequence based
The relay setting value 3U2> is given in percentage of the base voltage UBase and should not be set lower than the value that is calculated according to equation 111.
100 3
2 23
UBase
U U
EQUATION1519 V5 EN (Equation 111)
where:
U2 is the maximal negative sequence voltage during normal operation conditions, plus a margin of 10…20%
UBase is the base voltage for the function according to the setting GlobalBaseSel
The setting of the current limit 3I2< is in percentage of parameter IBase. The setting of 3I2< must be higher than the normal unbalance current that might exist in the system and can be calculated according to equation 112.
Section 12 1MRK 511 310-UEN B Secondary system supervision
248 Application manual
100 2
23 IBase
I I
EQUATION1520 V5 EN (Equation 112)
where:
I2 is the maximal negative sequence current during normal operating conditions, plus a margin of 10…20%
IBase is the base current for the function according to the setting GlobalBaseSel
12.2.3.4 Zero sequence based
The IED setting value 3U0> is given in percentage of the base voltage UBase. The setting of 3U0> should not be set lower than the value that is calculated according to equation 113.
100 3
03 03
UBase
U U
EQUATION1521 V4 EN (Equation 113)
where:
3U0 is the maximal zero sequence voltage during normal operation conditions, plus a margin of 10…20%
UBase is the base voltage for the function according to the setting GlobalBaseSel
The setting of the current limit 3I0< is done in percentage of IBase. The setting of 3I0< must be higher than the normal unbalance current that might exist in the system. The setting can be calculated according to equation 114.
3 03 0 100II IBase
= <
EQUATION2293 V3 EN (Equation 114)
where:
3I0< is the maximal zero sequence current during normal operating conditions, plus a margin of 10…20%
IBase is the base current for the function according to the setting GlobalBaseSel
12.2.3.5 Delta U and delta I
Set the operation mode selector OpDUDI to On if the delta function shall be in operation.
1MRK 511 310-UEN B Section 12 Secondary system supervision
249 Application manual
The setting of DU> should be set high (approximately 60% of UBase) and the current threshold DI< low (approximately 10% of IBase) to avoid unwanted operation due to normal switching conditions in the network. The delta current and delta voltage function shall always be used together with either the negative or zero sequence algorithm. If USetprim is the primary voltage for operation of dU/dt and ISetprim the primary current for operation of dI/dt, the setting of DU> and DI< will be given according to equation 115 and equation 116.
DU USet
UBase prim> = 100.
EQUATION1523 V3 EN (Equation 115)
DI ISet IBase
prim< = 100.
EQUATION1524 V4 EN (Equation 116)
The voltage thresholds UPh> is used to identify low voltage condition in the system. Set UPh> below the minimum operating voltage that might occur during emergency conditions. A setting of approximately 70% of UBase is recommended.
The current threshold IPh> shall be set lower than the IMinOp for the distance protection function. A 5…10% lower value is recommended.
12.2.3.6 Dead line detection
The condition for operation of the dead line detection is set by the parameters IDLD< for the current threshold and UDLD< for the voltage threshold.
Set the IDLD< with a sufficient margin below the minimum expected load current. A safety margin of at least 15-20% is recommended. The operate value must however exceed the maximum charging current of an overhead line, when only one phase is disconnected (mutual coupling to the other phases).
Set the UDLD< with a sufficient margin below the minimum expected operating voltage. A safety margin of at least 15% is recommended.
12.3 Fuse failure supervision VDSPVC
12.3.1 Identification Function description IEC 61850
identification IEC 60617 identification
ANSI/IEEE C37.2 device number
Fuse failure supervision VDSPVC VTS 60
Section 12 1MRK 511 310-UEN B Secondary system supervision
250 Application manual
12.3.2 Application
Some protection functions operate on the basis of measured voltage at the relay point. Examples of such protection functions are distance protection function, undervoltage function and energisation-check function. These functions might mal-operate if there is an incorrect measured voltage due to fuse failure or other kind of faults in voltage measurement circuit.
VDSPVC is designed to detect fuse failures or faults in voltage measurement circuit based on comparison of the voltages of the main and pilot fused circuits phase wise. VDSPVC output can be configured to block voltage dependent protection functions such as high-speed distance protection, undervoltage relays, underimpedance relays and so on.
FuseFailSupvn IED
L1 L2 L3
U 2L
1
U 2L
2
U 2L
3
U 1L
1
U 1L
2
U 1L
3
IEC12000143-1-en.vsd
Main Vt circuit
P ilo
t V T
ci rc
ui t
IEC12000143 V1 EN
Figure 86: Application of VDSPVC
1MRK 511 310-UEN B Section 12 Secondary system supervision
251 Application manual
12.3.3 Setting guidelines
The parameters for Fuse failure supervision VDSPVC are set via the local HMI or PCM600.
The voltage input type (phase-to-phase or phase-to-neutral) is selected using ConTypeMain and ConTypePilot parameters, for main and pilot fuse groups respectively.
The connection type for the main and the pilot fuse groups must be consistent.
The settings Ud>MainBlock, Ud>PilotAlarm and USealIn are in percentage of the base voltage, UBase. Set UBase to the primary rated phase-to-phase voltage of the potential voltage transformer. UBase is available in the Global Base Value groups; the particular Global Base Value group, that is used by VDSPVC, is set by the setting parameter GlobalBaseSel.
The settings Ud>MainBlock and Ud>PilotAlarm should be set low (approximately 30% of UBase) so that they are sensitive to the fault on the voltage measurement circuit, since the voltage on both sides are equal in the healthy condition. If USetPrim is the desired pick up primary phase-to-phase voltage of measured fuse group, the setting of Ud>MainBlock and Ud>PilotAlarm will be given according to equation 117.
> or > 100S etPrim
Base
UUd MainBlock Ud PilotAlarm U
=
IECEQUATION2424 V2 EN (Equation 117)
USetPrim is defined as phase to neutral or phase to phase voltage dependent of the selected ConTypeMain and ConTypePilot. If ConTypeMain and ConTypePilot are set to Ph-N than the function performs internally the rescaling of USetPrim.
When SealIn is set to On and the fuse failure has last for more than 5 seconds, the blocked protection functions will remain blocked until normal voltage conditions are restored above the USealIn setting. The fuse failure outputs are deactivated when the normal voltage conditions are restored.
Section 12 1MRK 511 310-UEN B Secondary system supervision
252 Application manual
Section 13 Control
13.1 Synchrocheck, energizing check, and synchronizing SESRSYN
13.1.1 Identification Function description IEC 61850
identification IEC 60617 identification
ANSI/IEEE C37.2 device number
Synchrocheck, energizing check, and synchronizing
SESRSYN
sc/vc
SYMBOL-M V1 EN
25
13.1.2 Application
13.1.2.1 Synchronizing
To allow closing of breakers between asynchronous networks a synchronizing function is provided. The breaker close command is issued at the optimum time when conditions across the breaker are satisfied in order to avoid stress on the network and its components.
The systems are defined to be asynchronous when the frequency difference between bus and line is larger than an adjustable parameter. If the frequency difference is less than this threshold value the system is defined to have a parallel circuit and the synchrocheck function is used.
The synchronizing function measures the difference between the U-Line and the U- Bus. It operates and enables a closing command to the circuit breaker when the calculated closing angle is equal to the measured phase angle and the following conditions are simultaneously fulfilled:
The voltages U-Line and U-Bus are higher than the set values for UHighBusSynch and UHighLineSynch of the base voltages GblBaseSelBus and GblBaseSelLine.
The difference in the voltage is smaller than the set value of UDiffSynch. The difference in frequency is less than the set value of FreqDiffMax and larger
than the set value of FreqDiffMin. If the frequency is less than FreqDiffMin the synchrocheck is used and the value of FreqDiffMin must thus be identical to the value FreqDiffM resp FreqDiffA for synchrocheck function. The bus and line
1MRK 511 310-UEN B Section 13 Control
253 Application manual
frequencies must also be within a range of +/- 5 Hz from the rated frequency. When the synchronizing option is included also for autoreclose there is no reason to have different frequency setting for the manual and automatic reclosing and the frequency difference values for synchronism check should be kept low.
The frequency rate of change is less than set value for both U-Bus and U-Line. The closing angle is decided by the calculation of slip frequency and required pre-
closing time.
The synchronizing function compensates for measured slip frequency as well as the circuit breaker closing delay. The phase angle advance is calculated continuously. Closing angle is the change in angle during the set breaker closing operate time tBreaker.
The reference voltage can be phase-neutral L1, L2, L3 or phase-phase L1-L2, L2-L3, L3-L1 or positive sequence (Require a three phase voltage, that is UL1, UL2 and UL3) . By setting the phases used for SESRSYN, with the settings SelPhaseBus1, SelPhaseBus2, SelPhaseLine2 and SelPhaseLine2, a compensation is made automatically for the voltage amplitude difference and the phase angle difference caused if different setting values are selected for the two sides of the breaker. If needed an additional phase angle adjustment can be done for selected line voltage with the PhaseShift setting.
13.1.2.2 Synchrocheck
The main purpose of the synchrocheck function is to provide control over the closing of circuit breakers in power networks in order to prevent closing if conditions for synchronism are not detected. It is also used to prevent the re-connection of two systems, which are divided after islanding and after a three pole reclosing.
Single pole auto-reclosing does not require any synchrocheck since the system is tied together by two phases.
SESRSYN function block includes both the synchrocheck function and the energizing function to allow closing when one side of the breaker is dead. SESRSYN function also includes a built in voltage selection scheme which allows adoption to various busbar arrangements.
~ ~
en04000179.vsd
IEC04000179 V1 EN
Figure 87: Two interconnected power systems
Section 13 1MRK 511 310-UEN B Control
254 Application manual
Figure 87 shows two interconnected power systems. The cloud means that the interconnection can be further away, that is, a weak connection through other stations. The need for a check of synchronization increases if the meshed system decreases since the risk of the two networks being out of synchronization at manual or automatic closing is greater.
The synchrocheck function measures the conditions across the circuit breaker and compares them to set limits. Output is generated only when all measured conditions are within their set limits simultaneously. The check consists of:
Live line and live bus. Voltage level difference. Frequency difference (slip). The bus and line frequency must also be within a
range of 5 Hz from rated frequency. Phase angle difference.
A time delay is available to ensure that the conditions are fulfilled for a minimum period of time.
In very stable power systems the frequency difference is insignificant or zero for manually initiated closing or closing by automatic restoration. In steady conditions a bigger phase angle difference can be allowed as this is sometimes the case in a long and loaded parallel power line. For this application we accept a synchrocheck with a long operation time and high sensitivity regarding the frequency difference. The phase angle difference setting can be set for steady state conditions.
Another example is the operation of a power network that is disturbed by a fault event: after the fault clearance a highspeed auto-reclosing takes place. This can cause a power swing in the net and the phase angle difference may begin to oscillate. Generally, the frequency difference is the time derivative of the phase angle difference and will, typically oscillate between positive and negative values. When the circuit breaker needs to be closed by auto-reclosing after fault-clearance some frequency difference should be tolerated, to a greater extent than in the steady condition mentioned in the case above. But if a big phase angle difference is allowed at the same time, there is some risk that auto-reclosing will take place when the phase angle difference is big and increasing. In this case it should be safer to close when the phase angle difference is smaller.
To fulfill the above requirements the synchrocheck function is provided with duplicate settings, one for steady (Manual) conditions and one for operation under disturbed conditions (Auto).
1MRK 511 310-UEN B Section 13 Control
255 Application manual
SynchroCheck UHighBusSC > 50 — 120 % of GblBaseSelBus UHighLineSC > 50 — 120 % of GblBaseSelLine UDiffSC < 0.02 0.50 p.u. PhaseDiffM < 5 — 90 degrees PhaseDiffA < 5 — 90 degrees FreqDiffM < 3 — 1000 mHz FreqDiffA < 3 — 1000 mHz
Fuse fail
Fuse fail
Line voltage Line reference voltage
Bus voltage
IEC10000079-2-en.vsd IEC10000079 V2 EN
Figure 88: Principle for the synchrocheck function
13.1.2.3 Energizing check
The main purpose of the energizing check function is to facilitate the controlled re- connection of disconnected lines and buses to energized lines and buses.
The energizing check function measures the bus and line voltages and compares them to both high and low threshold values. The output is given only when the actual measured conditions match the set conditions. Figure 89 shows two substations, where one (1) is energized and the other (2) is not energized. Power system 2 is energized (DLLB) from substation 1 via the circuit breaker A.
Section 13 1MRK 511 310-UEN B Control
256 Application manual
1 2 A
EnergizingCheck UHighBusEnerg > 50 — 120 % of GblBaseSelBus UHighLineEnerg > 50 — 120 % of GblBaseSelLine ULowBusEnerg < 10 — 80 % of GblBaseSelBus ULowLineEnerg < 10 — 80 % of GblBaseSelLine UMaxEnerg < 50 — 180 % of GblBaseSelBus and/or GblBaseSelLine
Line voltageBus voltage
IEC10000078-4-en.vsd
B
IEC10000078 V4 EN
Figure 89: Principle for the energizing check function
The energizing operation can operate in the dead line live bus (DLLB) direction, dead bus live line (DBLL) direction, or in both directions over the circuit breaker. Energizing from different directions can be different for automatic reclosing and manual closing of the circuit breaker. For manual closing it is also possible to allow closing when both sides of the breaker are dead, Dead Bus Dead Line (DBDL).
The equipment is considered energized (Live) if the voltage is above 80% of the base voltage UBase, which is defined in the Global Base Value group, according to the setting of GblBaseSelBus and GblBaseSelLine; in a similar way, the equipment is considered non-energized (Dead) if the voltage is below 40% of the base voltage UBase of the Global Base Value group. A disconnected line can have a considerable potential because of factors such as induction from a line running in parallel, or feeding via extinguishing capacitors in the circuit breakers. This voltage can be as high as 50% or more of the base voltage of the line. Normally, for breakers with single breaking elements (<330 kV) the level is well below 30%.
When the energizing direction corresponds to the settings, the situation has to remain constant for a certain period of time before the close signal is permitted. The purpose of the delayed operate time is to ensure that the dead side remains de-energized and that the condition is not due to temporary interference.
13.1.2.4 Voltage selection
The voltage selection function is used for the connection of appropriate voltages to the synchrocheck, synchronizing and energizing check functions. For example, when the IED is used in a double bus arrangement, the voltage that should be selected depends on the status of the breakers and/or disconnectors. By checking the status of the disconnectors auxiliary contacts, the right voltages for the synchronizing, synchrocheck and energizing check functions can be selected.
1MRK 511 310-UEN B Section 13 Control
257 Application manual
Available voltage selection types are for single circuit breaker with double busbars and the 1 circuit breaker arrangement. A double circuit breaker arrangement and single circuit breaker with a single busbar do not need any voltage selection function. Neither does a single circuit breaker with double busbars using external voltage selection need any internal voltage selection.
Manual energization of a completely open diameter in 1 circuit breaker switchgear is allowed by internal logic.
The voltages from busbars and lines must be physically connected to the voltage inputs in the IED and connected, using the PCM software, to each of the SESRSYN functions available in the IED.
13.1.2.5 External fuse failure
Either external fuse-failure signals or signals from a tripped fuse (or miniature circuit breaker) are connected to HW binary inputs of the IED; these signals are connected to inputs of SESRSYN function in the application configuration tool of PCM600. The internal fuse failure supervision function can also be used, for at least the line voltage supply. The signal BLKU, from the internal fuse failure supervision function, is then used and connected to the fuse supervision inputs of the energizing check function block. In case of a fuse failure, the SESRSYN energizing function is blocked.
The UB1OK/UB2OK and UB1FF/UB2FF inputs are related to the busbar voltage and the ULN1OK/ULN2OK and ULN1FF/ULN2FF inputs are related to the line voltage.
External selection of energizing direction The energizing can be selected by use of the available logic function blocks. Below is an example where the choice of mode is done from a symbol ,created in the Graphical Design Editor (GDE) tool on the local HMI, through selector switch function block, but alternatively there can for example, be a physical selector switch on the front of the panel which is connected to a binary to integer function block (B16I).
If the PSTO input is used, connected to the Local-Remote switch on the local HMI, the choice can also be from the station HMI system, typically ABB Microscada through IEC 6185081 communication.
The connection example for selection of the manual energizing mode is shown in figure 90. Selected names are just examples but note that the symbol on the local HMI can only show the active position of the virtual selector.
Section 13 1MRK 511 310-UEN B Control
258 Application manual
IEC07000118 V3 EN
Figure 90: Selection of the energizing direction from a local HMI symbol through a selector switch function block.
13.1.3 Application examples
The synchronizing function block can also be used in some switchyard arrangements, but with different parameter settings. Below are some examples of how different arrangements are connected to the IED analogue inputs and to the function block SESRSYN. One function block is used per circuit breaker.
The input used below in example are typical and can be changed by use of configuration and signal matrix tools.
The SESRSYN and connected SMAI function block instances must have the same cycle time in the application configuration.
1MRK 511 310-UEN B Section 13 Control
259 Application manual
13.1.3.1 Single circuit breaker with single busbar
WA1_MCB
LINE
WA1
QB1
QA1
IEC10000093-4-en.vsd
LINE_VT
LINE_MCB
WA1_MCB
SESRSYN U3PBB1* U3PBB2*
U3PLN1*
U3PLN2*
GRP_OFF
UB1OK UB1FF
ULN1OK ULN1FF
WA1_VT
WA1_VT
LINE_VT
LINE_MCB
WA1_MCB
IEC10000093 V4 EN
Figure 91: Connection of SESRSYN function block in a single busbar arrangement
Figure 91 illustrates connection principles. For the SESRSYN function there is one voltage transformer on each side of the circuit breaker. The voltage transformer circuit connections are straightforward; no special voltage selection is necessary.
The voltage from busbar VT is connected to U3PBB1 and the voltage from the line VT is connected to U3PLN1. The positions of the VT fuses shall also be connected as shown above. The voltage selection parameter CBConfig is set to No voltage sel.
13.1.3.2 Single circuit breaker with double busbar, external voltage selection
WA1 WA2
QB1
QB2
LINE
QA1
IEC10000094-4-en.vsd
WA2_MCBWA1_MCB
LINE_VT
LINE_MCB
SESRSYN U3PBB1* U3PBB2*
U3PLN1*
U3PLN2*
GRP_OFF
UB1OK UB1FF
ULN1OK ULN1FF
WA1_VT/ WA2_VT
LINE_VT
LINE_MCB
WA1_MCB/ WA2_MCB
WA1_MCB / WA2_MCB
WA1_VT / WA2_VT
IEC10000094 V4 EN
Figure 92: Connection of SESRSYN function block in a single breaker, double busbar arrangement with external voltage selection
Section 13 1MRK 511 310-UEN B Control
260 Application manual
In this type of arrangement no internal voltage selection is required. The voltage selection is made by external relays typically connected according to figure 92. Suitable voltage and VT fuse failure supervision from the two busbars are selected based on the position of the busbar disconnectors. This means that the connections to the function block will be the same as for the single busbar arrangement. The voltage selection parameter CBConfig is set to No voltage sel.
13.1.3.3 Single circuit breaker with double busbar, internal voltage selection
WA1 WA2
QB1
QB2
LINE
QA1
IEC10000095-6-en.vsd
WA1_MCB WA2_MCB
LINE_VT
LINE_MCB
WA1_MCB
WA1_VT
WA2_VT
QB2
QB1
GRP_OFF
SESRSYN U3PBB1*
U3PBB2*
U3PLN1*
U3PLN2*
B1QOPEN B1QCLD B2QOPEN B2QCLD
UB1OK UB1FF UB2OK UB2FF ULN1OK ULN1FF
WA1_VT
WA2_VT
LINE_VT
QB1
QB2
WA1_MCB
WA2_MCB
LINE_MCB
IEC10000095 V4 EN
Figure 93: Connection of the SESRSYN function block in a single breaker, double busbar arrangement with internal voltage selection
When internal voltage selection is needed, the voltage transformer circuit connections are made according to figure 93. The voltage from the busbar 1 VT is connected to U3PBB1 and the voltage from busbar 2 is connected to U3PBB2. The voltage from the line VT is connected to U3PLN1. The positions of the disconnectors and VT fuses shall be connected as shown in figure 93. The voltage selection parameter CBConfig is set to Double bus.
1MRK 511 310-UEN B Section 13 Control
261 Application manual
13.1.3.4 Double circuit breaker
WA1
WA2
WA1_QA1
WA2_QA1
LINE
WA1_MCB WA2_ MCB
LINE_MCB
LINE_MCB
WA1_VT
WA1_QA1
GRP_OFF
SESRSYN U3PBB1*
U3PBB2*
U3PLN1*
U3PLN2*
WA1_VT
LINE_VT
UB1OK UB1FF
ULN1OK ULN1FF
WA1_MCB
LINE_MCB
WA2_QA1
GRP_OFF
SESRSYN U3PBB1*
U3PBB2*
U3PLN1*
U3PLN2*
WA2_VT
LINE_VT
UB1OK UB1FF
ULN1OK ULN1FF
WA2_MCB
LINE_MCB
WA2_MCB
WA1_MCB
WA2_VT
LINE_VT
IEC10000096-6-en.vsd
IEC10000096 V4 EN
Figure 94: Connections of the SESRSYN function block in a double breaker arrangement
A double breaker arrangement requires two function blocks, one for breaker WA1_QA1 and one for breaker WA2_QA1. No voltage selection is necessary, because the voltage from busbar 1 VT is connected to U3PBB1 on SESRSYN for WA1_QA1 and the voltage from busbar 2 VT is connected to U3PBB1 on SESRSYN for WA2_QA1. The voltage from the line VT is connected to U3PLN1 on both function blocks. The condition of VT fuses shall also be connected as shown in figure 93. The voltage selection parameter CBConfig is set to No voltage sel. for both function blocks.
13.1.3.5 1 1/2 circuit breaker
Figure 95 describes a 1 breaker arrangement with three SESRSYN functions in the same IED, each of them handling voltage selection for WA1_QA1, TIE_QA1 and WA2_QA1 breakers respectively. The voltage from busbar 1 VT is connected to U3PBB1 on all three function blocks and the voltage from busbar 2 VT is connected to U3PBB2 on all three function blocks. The voltage from line1 VT is connected to U3PLN1 on all three function blocks and the voltage from line2 VT is connected to U3PLN2 on all three function blocks. The positions of the disconnectors and VT fuses shall be connected as shown in Figure 95.
Section 13 1MRK 511 310-UEN B Control
262 Application manual
LINE1
QB2QB1
QB61 QB62
WA1
WA2
IEC10000097-4-en.vsd
Setting parameter CBConfig = 1 bus CB
Setting parameter CBConfig = Tie CB
Setting parameter CBConfig = 1 bus alt. CB
WA2_QA1
TIE_QA1
LINE1_QB9
WA1_QA1
WA1_VT
WA2_VT
LINE1_VT
LINE2_VT
TIE_QA1
WA2_QA1
LINE1_QB9
LINE2_QB9
WA1_MCB
WA2_MCB
LINE1_MCB
LINE2_MCB
SESRSYN U3PBB1*
B1 QOPEN B1 QCLD B2 QOPEN B2 QCLD LN1 QOPEN LN1 QCLD LN2 QOPEN LN2 QCLD UB1OK UB1FF UB2OK UB2FF ULN1OK ULN1FF ULN2OK ULN2FF
U3PLN2*
U3PLN1*
U3PBB2*
WA1_VT
WA2_VT
LINE1_VT
LINE2_VT
WA1_QA1
WA2_QA1
LINE1_QB9
LINE2_QB9
WA1_MCB
WA2_MCB
LINE1_MCB
LINE2_MCB
SESRSYN U3PBB1*
B1 QOPEN B1 QCLD B2 QOPEN B2 QCLD LN1 QOPEN LN1 QCLD LN2 QOPEN LN2 QCLD UB1OK UB1FF UB2OK UB2FF ULN1OK ULN1FF ULN2OK ULN2FF
U3PLN2*
U3PLN1*
U3PBB2*
WA1_VT
WA2_VT
LINE1_VT
LINE2_VT
WA1_QA1
TIE_QA1
LINE1_QB9
LINE2_QB9
WA1_MCB
WA2_MCB
LINE1_MCB
LINE2_MCB
SESRSYN U3PBB1*
B1 QOPEN B1 QCLD B2 QOPEN B2 QCLD LN1 QOPEN LN1 QCLD LN2 QOPEN LN2 QCLD UB1OK UB1FF UB2OK UB2FF ULN1OK ULN1FF ULN2OK ULN2FF
U3PLN2*
U3PLN1*
U3PBB2*
LINE1_MCB
TIE_QA1
LINE2
LINE2_MCB
LINE2_VT
LINE1_VT
LINE2_QB9
WA1_QA1
WA2_QA1
WA2_VT
WA2_MCB
WA1_MCB
WA1_VT WA1_QB6 WA2_QB6
LINE1_QB9
WA1_QA1
TIE_QA1
WA2_QA1
LINE2_QB9
IEC10000097 V4 EN
Figure 95: Connections of the SESRSYN function block in a 1 breaker arrangement with internal voltage selection
1MRK 511 310-UEN B Section 13 Control
263 Application manual
The connections are similar in all SESRSYN functions, apart from the breaker position indications. The physical analog connections of voltages and the connection to the IED and SESRSYN function blocks must be carefully checked in PCM600. In all SESRSYN functions the connections and configurations must abide by the following rules: Normally apparatus position is connected with contacts showing both open (b-type) and closed positions (a-type).
WA1_QA1:
B1QOPEN/CLD = Position of TIE_QA1 breaker and belonging disconnectors B2QOPEN/CLD = Position of WA2_QA1 breaker and belonging disconnectors LN1QOPEN/CLD = Position of LINE1_QB9 disconnector LN2QOPEN/CLD = Position of LINE2_QB9 disconnector UB1OK/FF = Supervision of WA1_MCB fuse UB2OK/FF = Supervision of WA2_MCB fuse ULN1OK/FF = Supervision of LINE1_MCB fuse ULN2OK/FF = Supervision of LINE2_MCB fuse Setting CBConfig = 1 1/2 bus CB
TIE_QA1:
B1QOPEN/CLD = Position of WA1_QA1 breaker and belonging disconnectors B2QOPEN/CLD = Position of WA2_QA1 breaker and belonging disconnectors LN1QOPEN/CLD = Position of LINE1_QB9 disconnector LN2QOPEN/CLD = Position of LINE2_QB9 disconnector UB1OK/FF = Supervision of WA1_MCB fuse UB2OK/FF = Supervision of WA2_MCB fuse ULN1OK/FF = Supervision of LINE1_MCB fuse ULN2OK/FF = Supervision of LINE2_MCB fuse Setting CBConfig = Tie CB
WA2_QA1:
B1QOPEN/CLD = Position of WA1_QA1 breaker and belonging disconnectors B2QOPEN/CLD = Position of TIE_QA1 breaker and belonging disconnectors LN1QOPEN/CLD = Position of LINE1_QB9 disconnector LN2QOPEN/CLD = Position of LINE2_QB9 disconnector UB1OK/FF = Supervision of WA1_MCB fuse UB2OK/FF = Supervision of WA2_MCB fuse ULN1OK/FF = Supervision of LINE1_MCB fuse ULN2OK/FF = Supervision of LINE2_MCB fuse Setting CBConfig = 1 1/2 bus alt. CB
If only two SESRSYN functions are provided in the same IED, the connections and settings are according to the SESRSYN functions for WA1_QA1 and TIE_QA1.
Section 13 1MRK 511 310-UEN B Control
264 Application manual
13.1.4 Setting guidelines
The setting parameters for the Synchronizing, synchrocheck and energizing check function SESRSYN are set via the local HMI (LHMI) or PCM600.
This setting guidelines describes the settings of the SESRSYN function via the LHMI.
The SESRSYN function has the following four configuration parameters, which on the LHMI are found under Settings/General Settings/Control/ Synchronizing(RSYN,25)/SESRSYN:X.
SelPhaseBus1 and SelPhaseBus2
Configuration parameters for selecting the measuring phase of the voltage for busbar 1 and 2 respectively, which can be a single-phase (phase-neutral), two-phase (phase- phase) or a positive sequence voltage.
SelPhaseLine1 and SelPhaseLine2
Configuration parameters for selecting the measuring phase of the voltage for line 1 and 2 respectively, which can be a single-phase (phase-neutral), two-phase (phase- phase) or a positive sequence voltage.
The same voltages must be used for both Bus and Line or, alternatively, a compensation of angle difference can be set. See setting PhaseShift below under General Settings.
The SESRSYN function has one setting for the bus reference voltage (UBaseBus) and one setting for the line reference voltage (UBaseLine), which can be set as a reference of base values independently of each other. This means that the reference voltage of bus and line can be set to different values, which is necessary, for example, when synchronizing via a transformer.
The settings for the SESRSYN function are found under Settings/Setting group N/ Control/Synchronizing(RSYN,25)/SESRSYN:X on the LHMI and are divided into four different groups: General, Synchronizing, Synchrocheck and Energizingcheck.
General settings Operation: The operation mode can be set On or Off from PST. The setting Off disables the whole SESRSYN function.
CBConfig
This configuration setting is used to define type of voltage selection. Type of voltage selection can be selected as:
1MRK 511 310-UEN B Section 13 Control
265 Application manual
no voltage selection single circuit breaker with double bus 1 1/2 circuit breaker arrangement with the breaker connected to busbar 1 1 1/2 circuit breaker arrangement with the breaker connected to busbar 2 1 1/2 circuit breaker arrangement with the breaker connected to line 1 and 2 (tie
breaker)
UBaseBus and UBaseLine
These are the configuration settings for the base voltages.
URatio
The URatio is defined as URatio = bus voltage/line voltage. This setting scales up the line voltage to an equal level with the bus voltage.
PhaseShift
This setting is used to compensate for a phase shift caused by a transformer between the two measurement points for bus voltage and line voltage, or by a use of different voltages as a reference for the bus and line voltages. The set value is added to the measured line phase angle. The bus voltage is the reference voltage.
Synchronizing settings OperationSynch
The setting Off disables the Synchronizing function. With the setting On, the function is in the service mode and the output signal depends on the input conditions.
UHighBusSynch and UHighLineSynch
The voltage level settings shall be chosen in relation to the bus/line network voltage. The threshold voltages UHighBusSynch and UHighLineSynch have to be set smaller than the value where the network is expected to be synchronized. A typical value is 80% of the rated voltage.
UDiffSynch
Setting of the voltage difference between the line voltage and the bus voltage. The difference is set depending on the network configuration and expected voltages in the two networks running asynchronously. A normal setting is 0.10-0.15 p.u.
FreqDiffMin
The setting FreqDiffMin is the minimum frequency difference where the systems are defined to be asynchronous. For frequency differences lower than this value, the systems are considered to be in parallel. A typical value for FreqDiffMin is 10 mHz. Generally, the value should be low if both synchronizing and synchrocheck functions are provided, and it is better to let the synchronizing function close, as it will close at exactly the right instance if the networks run with a frequency difference.
Section 13 1MRK 511 310-UEN B Control
266 Application manual
FreqDiffMin must be set to the same value as FreqDiffM, respective FreqDiffA for SESRSYN depending on whether the functions are used for manual operation, autoreclosing, or both.
FreqDiffMax
The setting FreqDiffMax is the maximum slip frequency at which synchronizing is accepted. 1/FreqDiffMax shows the time for the vector to move 360 degrees, one turn on the synchronoscope, and is called Beat time. A typical value for FreqDiffMax is 200-250 mHz, which gives beat times on 4-5 seconds. Higher values should be avoided as the two networks normally are regulated to nominal frequency independent of each other, so the frequency difference shall be small.
FreqRateChange
The maximum allowed rate of change for the frequency.
tBreaker
The setting tBreaker shall be set to match the closing time for the circuit breaker and must also include the possible auxiliary relays in the closing circuit. A typical setting is 80-150 ms, depending on the breaker closing time.
It is important to check that no slow logic components are used in the configuration of the IED, as this may cause variations in the closing time.
tClosePulse
The setting for the duration of the breaker close pulse.
tMaxSynch
The setting tMaxSynch is set to reset the operation of the synchronizing function if the operation does not take place within this time. The setting must allow for the setting of FreqDiffMin, which will decide how long it will take maximum to reach phase equality. At the setting of 10 ms, the beat time is 100 seconds and the setting would thus need to be at least tMinSynch plus 100 seconds. If the network frequencies are expected to be outside the limits from the start, a margin needs to be added. A typical setting is 600 seconds.
tMinSynch
The setting tMinSynch is set to limit the minimum time at which the synchronizing closing attempt is given. The synchronizing function will not give a closing command within this time, from when the synchronizing is started, even if a synchronizing condition is fulfilled. A typical setting is 200 ms.
1MRK 511 310-UEN B Section 13 Control
267 Application manual
Synchrocheck settings OperationSC
The OperationSC setting Off disables the synchrocheck function and sets the outputs AUTOSYOK, MANSYOK, TSTAUTSY and TSTMANSY to low. With the setting On, the function is in the service mode and the output signal depends on the input conditions.
UHighBusSC and UHighLineSC
The voltage level settings must be chosen in relation to the bus or line network voltage. The threshold voltages UHighBusSC and UHighLineSC have to be set lower than the value at which the breaker is expected to close with the synchronism check. A typical value can be 80% of the base voltages.
UDiffSC
The setting for voltage difference between line and bus in p.u, defined as (U-Bus/ UBaseBus) — (U-Line/UBaseLine).
FreqDiffM and FreqDiffA
The frequency difference level settings, FreqDiffM and FreqDiffA, are chosen depending on network conditions. At steady conditions, a low frequency difference setting is needed, where the FreqDiffM setting is used. For autoreclosing, a bigger frequency difference setting is preferable, where the FreqDiffA setting is used. A typical value for FreqDiffM can be10 mHz, and a typical value for FreqDiffA can be 100-200 mHz.
PhaseDiffM and PhaseDiffA
The phase angle difference level settings, PhaseDiffM and PhaseDiffA, are also chosen depending on conditions in the network. The phase angle setting must be chosen to allow closing under maximum load. A typical maximum value in heavy- loaded networks can be 45 degrees, whereas in most networks the maximum occurring angle is below 25 degrees. The PhaseDiffM setting will be a limitation also for PhaseDiffA as it is expected that, due to the fluctuations, which can occur at high speed autoreclosing, the PhaseDiffA is limited in setting.
tSCM and tSCA
The purpose of the timer delay settings, tSCM andtSCA, is to ensure that the synchrocheck conditions remain constant and that the situation is not due to a temporary interference. If the conditions do not persist for the specified time, the delay timer is reset and the procedure is restarted when the conditions are fulfilled again. Circuit breaker closing is thus not permitted until the synchrocheck situation has remained constant throughout the set delay setting time. Under stable conditions, a longer operation time delay setting is needed, where the tSCM setting is used. During auto-reclosing, a shorter operation time delay setting is preferable, where the tSCA
Section 13 1MRK 511 310-UEN B Control
268 Application manual
setting is used. A typical value for tSCM can be 1 second and a typical value for tSCA can be 0.1 seconds.
Energizingcheck settings AutoEnerg and ManEnerg
Two different settings can be used for automatic and manual closing of the circuit breaker. The settings for each of them are:
Off, the energizing function is disabled. DLLB, Dead Line Live Bus, the line voltage is below set value of
ULowLineEnerg and the bus voltage is above set value of UHighBusEnerg. DBLL, Dead Bus Live Line, the bus voltage is below set value of ULowBusEnerg
and the line voltage is above set value of UHighLineEnerg. Both, energizing can be done in both directions, DLLB or DBLL.
ManEnergDBDL
If the parameter is set to On, manual closing is enabled when both line voltage and bus voltage are below ULowLineEnerg and ULowBusEnerg respectively, and ManEnerg is set to DLLB, DBLL or Both.
UHighBusEnerg and UHighLineEnerg
The voltage level settings must be chosen in relation to the bus or line network voltage. The threshold voltages UHighBusEnerg and UHighLineEnerg have to be set lower than the value at which the network is considered to be energized. A typical value can be 80% of the base voltages.
ULowBusEnerg and ULowLineEnerg
The threshold voltages ULowBusEnerg and ULowLineEnerg, have to be set to a value greater than the value where the network is considered not to be energized. A typical value can be 40% of the base voltages.
A disconnected line can have a considerable potential due to, for instance, induction from a line running in parallel, or by being fed via the extinguishing capacitors in the circuit breakers. This voltage can be as high as 30% or more of the base line voltage.
Because the setting ranges of the threshold voltages UHighBusEnerg/ UHighLineEnerg and ULowBusEnerg/ULowLineEnerg partly overlap each other, the setting conditions may be such that the setting of the non-energized threshold value is higher than that of the energized threshold value. The parameters must therefore be set carefully to avoid the setting conditions mentioned above.
UMaxEnerg
1MRK 511 310-UEN B Section 13 Control
269 Application manual
This setting is used to block the closing when the voltage on the live side is above the set value of UMaxEnerg.
tAutoEnerg and tManEnerg
The purpose of the timer delay settings, tAutoEnerg and tManEnerg, is to ensure that the dead side remains de-energized and that the condition is not due to a temporary interference. If the conditions do not persist for the specified time, the delay timer is reset and the procedure is restarted when the conditions are fulfilled again. Circuit breaker closing is thus not permitted until the energizing condition has remained constant throughout the set delay setting time.
13.2 Autorecloser for 1 phase, 2 phase and/or 3 phase operation SMBRREC
13.2.1 Identification Function Description IEC 61850
identification IEC 60617 identification
ANSI/IEEE C37.2 device number
Autorecloser for 1 phase, 2 phase and/or 3 phase
SMBRREC
O->I
SYMBOL-L V1 EN
79
13.2.2 Application
Automatic reclosing is a well-established method for the restoration of service in a power system after a transient line fault. The majority of line faults are flashover arcs, which are transient by nature. When the power line is switched off by the operation of line protection and line breakers, the arc de-ionizes and recovers its ability to withstand voltage at a somewhat variable rate. Thus, a certain dead time with a de- energized line is necessary. Line service can then be resumed by automatic reclosing of the line breakers. The dead time selected should be long enough to ensure a high probability of arc de-ionization and successful reclosing.
For individual line breakers, auto-reclosing equipment, the auto-reclosing open time is used to determine line dead time. When simultaneous tripping and reclosing at the two line ends occurs, auto-reclosing open time is approximately equal to the line dead time. If the open time and dead time differ then, the line will be energized until the breakers at both ends have opened.
Section 13 1MRK 511 310-UEN B Control
270 Application manual
Open
Closed
Operate time
Line protection
Circuit breaker
Break time
Tr ip
c om
m an
d
C on
ta ct
s se
pa ra
te d
Ar e
ex tin
gu is
he rs
Fault duration AR open time for breaker Fault duration R
es et
s
In st
an t o
f f au
lt
O pe
ra te
s
Break timeClosing time
Operate time
Fa ul
t
O pe
ra te
s
R es
et s
C lo
se c
om m
an d
C on
ta ct
c lo
se d
Set AR open time Reclaim time Auto-reclosing
function
St ar
t A R
R ec
lo si
ng co
m m
an d
A R
re se
t
IEC04000146.vsd IEC04000146 V2 EN
Figure 96: Single-shot automatic reclosing at a permanent fault
Single-phase tripping and single-phase automatic reclosing is a way of limiting the effect of a single-phase line fault on power system operation. Especially at higher voltage levels, the majority of faults are of single-phase type (around 90%). To maintain system stability in power systems with limited meshing or parallel routing single phase auto reclosing is of particular value. During the single phase dead time the system is still capable of transmitting load on the two healthy phases and the system is still synchronized. It requires that each phase breaker operates individually, which is usually the case for higher transmission voltages.
A somewhat longer dead time may be required for single-phase reclosing compared to high-speed three-phase reclosing. This is due to the influence on the fault arc from the voltage and the current in the non-tripped phases.
To maximize the availability of the power system it is possible to choose single pole tripping and automatic reclosing during single-phase faults and three pole tripping and automatic reclosing during multi-phase faults. Three-phase automatic reclosing can be performed with or without the use of a synchronicity check, and an energizing check, such as dead line or dead busbar check.
During the single-pole open time there is an equivalent «series»-fault in the system resulting in a flow of zero sequence current. It is therefore necessary to coordinate the residual current protections (earth fault protection) with the single pole tripping and
1MRK 511 310-UEN B Section 13 Control
271 Application manual
the auto-reclosing function. Attention shall also be paid to «pole discordance» that arises when circuit breakers are provided with single pole operating devices. These breakers need pole discordance protection. They must also be coordinated with the single pole auto-recloser and blocked during the dead time when a normal discordance occurs. Alternatively, they should use a trip time longer than the set single phase dead time.
For the individual line breakers and auto-reclosing equipment, the auto-reclosing open time expression is used. This is the dead time setting for the Auto-Recloser. During simultaneous tripping and reclosing at the two line ends, auto-reclosing open time is approximately equal to the line dead time. Otherwise these two times may differ as one line end might have a slower trip than the other end which means that the line will not be dead until both ends have opened.
If the fault is permanent, the line protection will trip again when reclosing is attempted in order to clear the fault.
It is common to use one automatic reclosing function per line circuit-breaker (CB). When one CB per line end is used, then there is one auto-reclosing function per line end. If auto-reclosing functions are included in duplicated line protection, which means two auto-reclosing functions per CB, one should take measures to avoid uncoordinated reclosing commands. In 1 1/2 breaker, double-breaker and ring bus arrangements, two CBs per line end are operated. One auto-reclosing function per CB is recommended. Arranged in such a way, sequential reclosing of the two CBs can be arranged with a priority circuit available in the auto-reclose function. In case of a permanent fault and unsuccessful reclosing of the first CB, reclosing of the second CB is cancelled and thus the stress on the power system is limited. Another advantage with the breaker connected auto-recloser is that checking that the breaker closed before the sequence, breaker prepared for an auto-reclose sequence and so on. is much simpler.
The auto-reclosing function can be selected to perform single-phase and/or three- phase automatic-reclosing from several single-shot to multiple-shot reclosing programs. The three-phase auto-reclosing open time can be set to give either High- Speed Automatic Reclosing (HSAR) or Delayed Automatic-Reclosing (DAR). These expressions, HSAR and DAR, are mostly used for three-phase Reclosing as single phase is always high speed to avoid maintaining the unsymmetrical condition. HSAR usually means a dead time of less than 1 second.
In power transmission systems it is common practise to apply single and/or three phase, single-shot Auto-Reclosing. In Sub-transmission and Distribution systems tripping and auto-reclosing are usually three-phase. The mode of automatic-reclosing varies however. Single-shot and multi-shot are in use. The first shot can have a short delay, HSAR, or a longer delay, DAR. The second and following reclosing shots have a rather long delay. When multiple shots are used the dead time must harmonize with the breaker duty-cycle capacity.
Automatic-reclosing is usually started by the line protection and in particular by instantaneous tripping of such protection. The auto-reclosing function can be inhibited (blocked) when certain protection functions detecting permanent faults, such as shunt reactor, cable or busbar protection are in operation. Back-up protection
Section 13 1MRK 511 310-UEN B Control
272 Application manual
zones indicating faults outside the own line are also connected to inhibit the Auto- Reclose.
Automatic-reclosing should not be attempted when closing a CB and energizing a line onto a fault (SOTF), except when multiple-shots are used where shots 2 etc. will be started at SOTF. Likewise a CB in a multi-breaker busbar arrangement which was not closed when a fault occurred should not be closed by operation of the Auto-Reclosing function. Auto-Reclosing is often combined with a release condition from synchrocheck and dead line or dead busbar check. In order to limit the stress on turbo- generator sets from Auto-Reclosing onto a permanent fault, one can arrange to combine Auto-Reclosing with a synchrocheck on line terminals close to such power stations and attempt energizing from the side furthest away from the power station and perform the synchrocheck at the local end if the energizing was successful.
Transmission protection systems are usually sub-divided and provided with two redundant protection IEDs. In such systems it is common to provide auto-reclosing in only one of the sub-systems as the requirement is for fault clearance and a failure to reclose because of the auto-recloser being out of service is not considered a major disturbance. If two auto-reclosers are provided on the same breaker, the application must be carefully checked and normally one must be the master and be connected to inhibit the other auto-recloser if it has started. This inhibit can for example be done from Autorecloser for 3-phase operation(SMBRREC) In progress.
When Single and/or three phase auto-reclosing is considered, there are a number of cases where the tripping shall be three phase anyway. For example:
Evolving fault where the fault during the dead-time spreads to another phase. The other two phases must then be tripped and a three phase dead-time and auto- reclose initiated
Permanent fault Fault during three phase dead-time Auto-reclose out of service or CB not ready for an auto-reclosing cycle
Prepare three-phase tripping is then used to switch the tripping to three-phase. This signal is generated by the auto-recloser and connected to the trip function block and also connected outside the IED through IO when a common auto-recloser is provided for two sub-systems. An alternative signal Prepare 1 Phase tripping is also provided and can be used as an alternative when the autorecloser is shared with another subsystem. This provides a fail safe connection so that even a failure in the IED with the auto-recloser will mean that the other sub-system will start a three-phase trip.
A permanent fault will cause the line protection to trip again when it recloses in an attempt to energize the line.
The auto-reclosing function allows a number of parameters to be adjusted.
Examples:
1MRK 511 310-UEN B Section 13 Control
273 Application manual
number of auto-reclosing shots auto-reclosing program auto-reclosing open times (dead time) for each shot
13.2.2.1 Auto-reclosing operation OFF and ON
Operation of the automatic reclosing can be set OFF and ON by a setting parameter and by external control. Parameter Operation= Off, or On sets the function OFF and ON. With the settings Operation = On and ExternalCtrl = On , the control is made by input signal pulses to the inputs ON and OFF, for example, from the control system or from the binary input (and other systems).
When the function is set ON, the output SETON is set, and it become operative if other conditions such as CB closed and CB Ready are also fulfilled, the output READY is activated (high). When the function is ready to accept a reclosing start.
13.2.2.2 Start auto-reclosing and conditions for start of a reclosing cycle
The usual way to start a reclosing cycle, or sequence, is to start it at selective tripping by line protection by applying a signal to the input START. Starting signals can be either, General Trip signals or, only the conditions for Differential, Distance protection Zone 1 and Distance protection Aided trip. In some cases also Directional Earth fault function Aided trip can be connected to start an Auto-Reclose attempt. If general trip is used to start the auto- recloser it is important to block it from other functions that should not start a reclosing sequence.
In cases where one wants to differentiate three-phase auto-reclosing open time, (dead time) for different power system configuration or at tripping by different protection stages, one can also use the input STARTHS (Start High-Speed Reclosing). When initiating STARTHS, the auto-reclosing open time for three-phase shot 1, t1 3PhHS is used and the closing is done without checking the synchrocheck condition.
A number of conditions need to be fulfilled for the start to be accepted and a new auto- reclosing cycle to be started. They are linked to dedicated inputs. The inputs are:
CBREADY, CB ready for a reclosing cycle, for example, charged operating gear. CBPOS to ensure that the CB was closed when the line fault occurred and start
was applied. No signal at input INHIBIT that is, no blocking or inhibit signal present. After the
start has been accepted, it is latched in and an internal signal Started is set. It can be interrupted by certain events, like an Inhibit signal.
13.2.2.3 Start auto-reclosing from CB open information
If a user wants to initiate auto-reclosing from the «CB open» position instead of from protection trip signals, the function offers such a possibility. This starting mode is selected with the setting parameter StartByCBOpen=On. It is then necessary to block
Section 13 1MRK 511 310-UEN B Control
274 Application manual
reclosing for all manual trip operations. Typically CBAuxContType=NormClosed is also set and a CB auxiliary contact of type NC (normally closed) is connected to inputs CBPOS and START. When the signal changes from CB closed to CB open an auto-reclosing start pulse is generated and latched in the function, subject to the usual checks. Then the reclosing sequence continues as usual. One needs to connect signals from manual tripping and other functions, which shall not be reclosed automatically to the input INHIBIT.
13.2.2.4 Blocking of the autorecloser
Auto-Reclose attempts are expected to take place only for faults on the own line. The Auto-Recloser must be blocked by activating the INHIBIT input for the following conditions:
Tripping from Delayed Distance protection zones Tripping from Back-up protection functions Tripping from Breaker failure function Intertrip received from remote end Breaker failure function Busbar protection tripping
Depending of the starting principle (General Trip or only Instantaneous trip) adopted above the delayed and back-up zones might not be required. Breaker failure trip local and remote must however always be connected.
13.2.2.5 Control of the auto-reclosing open time for shot 1
Up to four different time settings can be used for the first shot, and one extension time. There are separate settings for single-, two- and three-phase auto-reclosing open time, t1 1Ph, t1 2Ph, t1 3Ph. If no particular input signal is applied, and an auto-reclosing program with single-phase reclosing is selected, the auto-reclosing open time t1 1Ph will be used. If one of the inputs TR2P or TR3P is activated in connection with the start, the auto-reclosing open time for two-phase or three-phase reclosing is used. There is also a separate time setting facility for three-phase high-speed auto-reclosing without Synchrocheck, t1 3PhHS, available for use when required. It is activated by the STARTHS input.
An auto-reclosing open time extension delay, tExtended t1, can be added to the normal shot 1 delay. It is intended to come into use if the communication channel for permissive line protection is lost. In such a case there can be a significant time difference in fault clearance at the two ends of the line. A longer auto-reclosing open time can then be useful. This extension time is controlled by setting parameter Extended t1=On and the input PLCLOST. If this function is used the autorecloser start must also be allowed from distance protection Zone 2 time delayed trip.
13.2.2.6 Long trip signal
In normal circumstances the trip command resets quickly because of fault clearance. The user can set a maximum trip pulse duration tTrip.If Extended t1=Off, a long trip
1MRK 511 310-UEN B Section 13 Control
275 Application manual
signal interrupts the reclosing sequence in the same way as a signal to input INHIBIT. If Extend t1=On the long trip time inhibit is disabled and Extend t1 is used instead.
13.2.2.7 Maximum number of reclosing shots
The maximum number of reclosing shots in an auto-reclosing cycle is selected by the setting parameter NoOfShots. The type of reclosing used at the first reclosing shot is set by parameter ARMode. The first alternative is three-phase reclosing. The other alternatives include some single-phase or two-phase reclosing. Usually there is no two-phase tripping arranged, and then there will be no two-phase reclosing.
The decision for single and 3 phase trip is also made in the tripping logic (SMPTTRC) function block where the setting 3Ph, 1/3Ph (or1/2/3Ph) is selected.
13.2.2.8 ARMode=3ph, (normal setting for a single 3 phase shot)
3-phase reclosing, one to five shots according to setting NoOfShots. The output Prepare three-phase trip PREP3P is always set (high). A trip operation is made as a three-phase trip at all types of fault. The reclosing is as a three-phase Reclosing as in mode 1/2/3ph described below. All signals, blockings, inhibits, timers, requirements and so on. are the same as in the example described below.
13.2.2.9 ARMode=1/2/3ph
1-phase, 2-phase or 3-phase reclosing first shot, followed by 3-phase reclosing shots, if selected. Here, the auto-reclosing function is assumed to be «On» and «Ready». The breaker is closed and the operation gear ready (operating energy stored). Input START (or STARTHS) is received and sealed-in. The output READY is reset (set to false). Output ACTIVE is set.
If inputs TR2P is low and TR3P is low (1-phase trip): The timer for 1-phase reclosing open time is started and the output 1PT1 (1-phase reclosing in progress) is activated. It can be used to suppress pole disagreement and earth-fault protection trip during the 1-phase open interval.
If TR2P is high and TR3P is low (2-phase trip): The timer for 2-phase reclosing open time is started and the output 2PT1 (2-phase reclosing in progress) is activated.
If TR3P is high (3-phase trip): The timer for 3-phase auto-reclosing open time, t1 3Ph is started and output 3PT1 (3-phase auto-reclosing shot 1 in progress) is set.
If STARTHS is high (3-phase trip): The timer for 3-phase auto-reclosing open time, t1 3PhHS is started and output 3PT1 (3-phase auto-reclosing shot 1 in progress) is set.
While any of the auto-reclosing open time timers are running, the output INPROGR is activated. When the «open time» timer runs out, the respective internal signal is transmitted to the output module for further checks and to issue a closing command to the circuit breaker.
Section 13 1MRK 511 310-UEN B Control
276 Application manual
When a CB closing command is issued the output prepare 3-phase trip is set. When issuing a CB closing command a reclaim timer tReclaim is started. If no tripping takes place during that time the auto-reclosing function resets to the Ready state and the signal ACTIVE resets. If the first reclosing shot fails, a 3-phase trip will be initiated and 3-phase reclosing can follow, if selected.
13.2.2.10 ARMode=1/2ph, 1-phase or 2-phase reclosing in the first shot.
In 1-phase or 2-phase tripping, the operation is as in the above described example, program mode 1/2/3ph. If the first reclosing shot fails, a 3-phase trip will be issued and 3-phase reclosing can follow, if selected. In the event of a 3-phase trip, TR3P high, the auto-reclosing will be blocked and no reclosing takes place.
13.2.2.11 ARMode=1ph + 1*2ph, 1-phase or 2-phase reclosing in the first shot
The 1-phase reclosing attempt can be followed by 3-phase reclosing, if selected. A failure of a 2-phase reclosing attempt will block the auto-reclosing. If the first trip is a 3-phase trip the auto-reclosing will be blocked. In the event of a 1-phase trip, (TR2P low and TR3P low), the operation is as in the example described above, program mode 1/2/3ph. If the first reclosing shot fails, a 3-phase trip will be initiated and 3-phase reclosing can follow, if selected. A maximum of four additional shots can be done (according to the NoOfShots parameter). At 2-phase trip (TR2P high and TR3P low), the operation is similar to the above. But, if the first reclosing shot fails, a 3-phase trip will be issued and the auto-reclosing will be blocked. No more shots are attempted! The expression 1*2ph should be understood as Just one shot at 2-phase reclosing During 3-phase trip (TR2P low and TR3P high) the auto-reclosing will be blocked and no reclosing takes place.
13.2.2.12 ARMode=1/2ph + 1*3ph, 1-phase, 2-phase or 3-phase reclosing in the first shot
At 1-phase or 2-phase trip, the operation is as described above. If the first reclosing shot fails, a 3-phase trip will be issued and 3-phase reclosing will follow, if selected. At 3-phase trip, the operation is similar to the above. But, if the first reclosing shot fails, a 3-phase trip command will be issued and the auto-reclosing will be blocked. No more shots take place! 1*3ph should be understood as Just one shot at 3-phase reclosing.
13.2.2.13 ARMode=1ph + 1*2/3ph, 1-phase, 2-phase or 3-phase reclosing in the first shot
At 1-phase trip, the operation is as described above. If the first reclosing shot fails, a 3- phase trip will be issued and 3-phase reclosing will follow, if selected. At 2-phase or 3- phase trip, the operation is similar as above. But, if the first reclosing shot fails, a 3- phase trip will be issued and the auto-reclosing will be blocked. No more shots take place! 1*2/3ph should be understood as Just one shot at 2-phase or 3-phase reclosing.
1MRK 511 310-UEN B Section 13 Control
277 Application manual
Table 21: Type of reclosing shots at different settings of ARMode or integer inputs to MODEINT
MODEINT (integer) ARMode Type of fault 1st shot 2nd-5th shot
1 3ph
1ph 3ph 3ph
2ph 3ph 3ph
3ph 3ph 3ph
2 1/2/3ph
1ph 1ph 3ph
2ph 2ph 3ph
3ph 3ph 3ph
3 1/2ph
1ph 1ph 3ph
2ph 2ph 3ph
3ph ….. …..
4 1ph + 1*2ph
1ph 1ph 3ph
2ph 2ph …..
3ph ….. …..
5 1/2ph + 1*3ph
1ph 1ph 3ph
2ph 2ph 3ph
3ph 3ph …..
6 1ph + 1*2/3ph
1ph 1ph 3ph
2ph 2ph …..
3ph 3ph …..
A start of a new reclosing cycle is blocked during the set reclaim time after the selected number of reclosing shots have been made.
13.2.2.14 External selection of auto-reclose mode
The auto-reclose mode can be selected by use of the available logic function blocks. Below is an example where the choice of mode is done from a hardware function key in front of the IED with only 3 phase or 1/3 phase mode, but alternatively there can for example, be a physical selector switch on the front of the panel which is connected to a binary to integer function block (BTIGAPC).
The connection example for selection of the auto-reclose mode is shown in figure 97.
IEC14000040-1-en.vsd
IEC07000119 V3 EN
Figure 97: Selection of the auto-reclose mode from a hardware functional key in front of the IED
Section 13 1MRK 511 310-UEN B Control
278 Application manual
13.2.2.15 Reclosing reclaim timer
The reclaim timer tReclaim defines the time it takes from issue of the reclosing command, until the reclosing function resets. Should a new trip occur during this time, it is treated as a continuation of the first fault. The reclaim timer is started when the CB closing command is given.
13.2.2.16 Pulsing of the CB closing command and Counter
The CB closing command, CLOSECB is given as a pulse with a duration set by parameter tPulse. For circuit-breakers without an anti-pumping function, close pulse cutting can be used. It is selected by parameter CutPulse=On. In case of a new trip pulse (start), the closing command pulse is then cut (interrupted). The minimum closing pulse length is always 50 ms. At the issue of the Reclosing command, the appropriate Reclosing operation counter is incremented. There is a counter for each type of Reclosing and one for the total number of Reclosing commands.
13.2.2.17 Transient fault
After the Reclosing command the reclaim timer keeps running for the set time. If no tripping occurs within this time, tReclaim, the Auto-Reclosing will reset. The CB remains closed and the operating gear recharges. The input signals CBPOS and CBREADY will be set
13.2.2.18 Permanent fault and reclosing unsuccessful signal
If a new trip occurs, and number of reclosing shots is set to 1, a new input signal START or TRSOTF appears, after the CB closing command, the output UNSUCCL (unsuccessful closing) is set high. The timer for the first shot can no longer be started. Depending on the set number of Reclosing shots further shots may be made or the Reclosing sequence is ended. After reclaim timer time-out the Auto-Reclosing function resets, but the CB remains open. The CB closed information through the input CBPOS is missing. Thus, the reclosing function is not ready for a new reclosing cycle.
Normally, the signal UNSUCCL appears when a new trip and start is received after the last reclosing shot has been made and the auto-reclosing function is blocked. The signal resets after reclaim time. The unsuccessful signal can also be made to depend on CB position input. The parameter UnsucClByCBChk should then be set to CBCheck, and a timer tUnsucCl should be set too. If the CB does not respond to the closing command and does not close, but remains open, the output UNSUCCL is set high after time tUnsucCl. The Unsuccessful output can for example, be used in Multi- Breaker arrangement to cancel the auto-reclosing function for the second breaker, if the first breaker closed onto a persistent fault. It can also be used to generate a Lock- out of manual closing until the operator has reset the Lock-out, see separate section.
1MRK 511 310-UEN B Section 13 Control
279 Application manual
13.2.2.19 Lock-out initiation
In many cases there is a requirement that a Lock-out is generated when the auto- reclosing attempt fails. This is done with logic connected to the in- and outputs of the Autoreclose function and connected to Binary IO as required. Many alternative ways of performing the logic exist depending on whether manual closing is interlocked in the IED, whether an external physical Lock-out relay exists and whether the reset is hardwired, or carried out by means of communication. There are also different alternatives regarding what shall generate Lock-out. Examples of questions are:
Shall back-up time delayed trip give Lock-out (normally yes) Shall Lock-out be generated when closing onto a fault (mostly) Shall Lock-out be generated when the Autorecloser was OFF at the fault or for
example, in Single phase AR mode and the fault was multi-phase (normally not as no closing attempt has been given)
Shall Lock-out be generated if the Breaker did not have sufficient operating power for an auto-reclosing sequence (normally not as no closing attempt has been given)
In figures 98 and 99 the logic shows how a closing Lock-out logic can be designed with the Lock-out relay as an external relay alternatively with the Lock-out created internally with the manual closing going through the Synchro-check function. An example of Lock-out logic.
Lock-out RXMD1
11
12 21
MAIN ZAK CLOSE CLOSE COMMAND
SMBO
OR
SMBRREC
OR
CCRBRF
BU-TRIP
ZCVPSOF-TRIP INHIBIT
UNSUCCL
TRBU
IEC05000315-4-en.vsd IEC05000315-WMF V4 EN
Figure 98: Lock-out arranged with an external Lock-out relay
Section 13 1MRK 511 310-UEN B Control
280 Application manual
CLOSE COMMAND
OR
SMBRREC
OR
CCRBRF
BU-TRIP
ZCVPSOF-TRIP INHIBIT
UNSUCCL
TRBU
SMPPTRC
AND
RESET LOCK-OUT
OR
OR
SESRSYN
Functional key, SOFTWARE
OR IO RESET
MANSYOK
MAN CLOSE
SMBRREC CLOSE
CLLKOUT
RSTLOUT
SETLKOUT
IEC05000316-3-en.vsd
SMBO
MANENOK
IEC05000316-WMF V3 EN
Figure 99: Lock-out arranged with internal logic with manual closing going through in IED
13.2.2.20 Evolving fault
An evolving fault starts as a single-phase fault which leads to single-phase tripping and then the fault spreads to another phase. The second fault is then cleared by three- phase tripping.
The Auto-Reclosing function will first receive a trip and start signal (START) without any three-phase signal (TR3P). The Auto-Reclosing function will start a single-phase reclosing, if programmed to do so. At the evolving fault clearance there will be a new signal START and three-phase trip information, TR3P. The single-phase reclosing sequence will then be stopped, and instead the timer, t1 3Ph, for three-phase reclosing will be started from zero. The sequence will continue as a three-phase reclosing sequence, if it is a selected alternative reclosing mode.
The second fault which can be single phase is tripped three phase because trip module (TR) in the IED has an evolving fault timer which ensures that second fault is always tripped three phase. For other types of relays where the relays do not include this function the output PREP3PH (or the inverted PERMIT1PH) is used to prepare the other sub-system for three phase tripping. This signal will, for evolving fault situations be activated a short time after the first trip has reset and will thus ensure that new trips will be three phase.
13.2.2.21 Automatic continuation of the reclosing sequence
SMBRREC function can be programmed to proceed to the following reclosing shots (if multiple shots are selected) even if start signals are not received from the protection functions, but the breaker is still not closed. This is done by setting parameter AutoCont = On and tAutoContWait to the required delay for the function to proceed without a new start.
1MRK 511 310-UEN B Section 13 Control
281 Application manual
13.2.2.22 Thermal overload protection holding the auto-reclosing function back
If the input THOLHOLD (thermal overload protection holding reclosing back) is activated, it will keep the reclosing function on a hold until it is reset. There may thus be a considerable delay between start of Auto-Reclosing and reclosing command to the circuit-breaker. An external logic limiting the time and sending an inhibit to the INHIBIT input can be used. The input can also be used to set the Auto-Reclosing on hold for a longer or shorter period.
13.2.3 Setting guidelines
13.2.3.1 Configuration
Use the PCM600 configuration tool to configure signals.
Autorecloser function parameters are set via the local HMI or Parameter Setting Tool (PST). Parameter Setting Tool is a part of PCM600.
Recommendations for input signals Please see figure 100, figure 101 and figure 102 and default factory configuration for examples.
ON and OFF These inputs can be connected to binary inputs or to a communication interface block for external control.
START It should be connected to the trip output protection function, which starts the autorecloser for 1/2/3-phase operation (SMBRREC) function. It can also be connected to a binary input for start from an external contact. A logical OR-gate can be used to combine the number of start sources.
If StartByCBOpen is used, the CB Open condition shall also be connected to the input START.
STARTHS, Start High-speed auto-reclosing It may be used when one wants to use two different dead times in different protection trip operations. This input starts the dead time t1 3PhHS. High-speed reclosing shot 1 started by this input is without a synchronization check.
INHIBIT To this input shall be connected signals that interrupt a reclosing cycle or prevent a start from being accepted. Such signals can come from protection for a line connected shunt reactor, from transfer trip receive, from back-up protection functions, busbar protection trip or from breaker failure protection. When the CB open position is set to
Section 13 1MRK 511 310-UEN B Control
282 Application manual
start SMBRREC, then manual opening must also be connected here. The inhibit is often a combination of signals from external IEDs via the IO and internal functions. An OR gate is then used for the combination.
CBPOS and CBREADY These should be connected to binary inputs to pick-up information from the CB. The CBPOS input is interpreted as CB Closed, if parameter CBAuxContType is set NormOpen, which is the default setting. At three operating gears in the breaker (single pole operated breakers) the connection should be All poles closed (series connection of the NO contacts) or At least one pole open (parallel connection of NC contacts) if the CBAuxContType is set to NormClosed. The CB Ready is a signal meaning that the CB is ready for a reclosing operation, either Close-Open (CO), or Open-Close-Open (OCO). If the available signal is of type CB not charged or not ready, an inverter can be inserted in front of the CBREADY input.
SYNC This is connected to the internal synchrocheck function when required. It can also be connected to a binary input for synchronization from an external device. If neither internal nor external synchronism or energizing check is required, it can be connected to a permanently high source, TRUE. The signal is required for three phase shots 1-5 to proceed (Note! Not the HS step).
PLCLOST This is intended for line protection permissive signal channel lost (fail) for example, PLC= Power Line Carrier fail. It can be connected, when required to prolong the AutoReclosing time when communication is not working, that is, one line end might trip with a zone 2 delay. If this is used the autorecloser must also be started from Zone2 time delayed trip.
TRSOTF This is the signal Trip by Switch Onto Fault. It is usually connected to the switch onto fault output of line protection if multi-shot Auto-Reclose attempts are used. The input will start the shots 2-5.
THOLHOLD Signal Thermal overload protection holding back Auto-Reclosing. It can be connected to a thermal overload protection trip signal which resets only when the thermal content has fallen to an acceptable level, for example, 70%. As long as the signal is high, indicating that the line is hot, the Auto-Reclosing is held back. When the signal resets, a reclosing cycle will continue. Please observe that this have a considerable delay. Input can also be used for other purposes if for some reason the Auto-Reclose shot need to be halted.
TR2P and TR3P Signals for two-phase and three-phase trip. They are usually connected to the corresponding output of the TRIP block. They control the choice of dead time and the
1MRK 511 310-UEN B Section 13 Control
283 Application manual
reclosing cycle according to the selected program. Signal TR2P needs to be connected only if the trip has been selected to give 1/2/3 phase trip and an auto reclosing cycle with two phase reclosing is foreseen.
WAIT Used to hold back reclosing of the low priority unit during sequential reclosing. See Recommendation for multi-breaker arrangement below. The signal is activated from output WFMASTER on the second breaker Auto-Recloser in multi-breaker arrangements.
BLKON Used to block the autorecloser for 3-phase operation (SMBRREC) function for example, when certain special service conditions arise. When used, blocking must be reset with BLOCKOFF.
BLOCKOFF Used to Unblock SMBRREC function when it has gone to Block due to activating input BLKON or by an unsuccessful Auto-Reclose attempt if the settingBlockByUnsucCl is set to On.
RESET Used to Reset SMBRREC to start condition. Possible Thermal overload Hold will be reset. Positions, setting On-Off. will be started and checked with set times.
Recommendations for output signals Please see figure 100, figure 101 and figure 102 and default factory configuration for examples.
SETON Indicates that Autorecloser for 1/2/3-phase operation (SMBRREC) function is switched on and operative.
BLOCKED Indicates that SMRREC function is temporarily or permanently blocked.
ACTIVE Indicates that SMBRREC is active, from start until end of Reclaim time.
INPROGR Indicates that a sequence is in progress, from start until reclosing command.
UNSUCCL Indicates unsuccessful reclosing.
Section 13 1MRK 511 310-UEN B Control
284 Application manual
CLOSECB Connect to a binary output for circuit-breaker closing command.
READY Indicates that SMBRREC function is ready for a new and complete reclosing sequence. It can be connected to the zone extension if a line protection should extended zone reach before automatic reclosing.
1PT1 and 2PT1 Indicates that single-phase or two-phase automatic reclosing is in progress. It is used to temporarily block an earth-fault and/or pole disagreement function during the single-phase or two-phase open interval.
3PT1, 3PT2, 3PT3, 3PT4 and 3PT5 Indicates that three-phase automatic reclosing shots 1-5 are in progress. The signals can be used as an indication of progress or for own logic.
PREP3P Prepare three-phase trip is usually connected to the trip block to force a coming trip to be a three-phase one. If the function cannot make a single-phase or two-phase reclosing, the tripping should be three-phase.
PERMIT1P Permit single-phase trip is the inverse of PREP3P. It can be connected to a binary output relay for connection to external protection or trip relays. In case of a total loss of auxiliary power, the output relay drops and does not allow single-phase trip.
WFMASTER Wait from master is used in high priority units to hold back reclosing of the low priority unit during sequential reclosing. Refer to the recommendation for multi- breaker arrangements in figure 102.
Other outputs The other outputs can be connected for indication, disturbance recording, as required.
1MRK 511 310-UEN B Section 13 Control
285 Application manual
ON
OFF
BLKON
BLOCKOFF
INHIBIT
BLOCKED
SETON
INPROGR
ACTIVE
UNSUCCL
SUCCL
CLOSECB
CBREADY
CBPOS
PLCLOST
1PT1
WFMASTER
RESET
START
THOLHOLD
READY
TRSOTF
SYNC
INPUT
xx
xx
xx
xx
xx
xx
xx
xx
xx
xx
OR
OR
OUTPUT
xx
xx
xx
xx
xx
xx
xx
xx
xx
xx
PROTECTION
xxxx-TRIP
ZCVPSOF-TRIP ZMFPDIS-TRIP
SESRSYN-AUTOOK
IOM IOM
SMBRREC
IEC04000135_3_en.vsd
PERMIT1P PREP3P
F
F
T
STARTHS SKIPHS
F
F
TR2P
TR3P
F
T
WAIT
RSTCOUNT
F
F
3PT1 2PT1
3PT2
3PT3
3PT4
3PT5
F
IEC04000135 V4 EN
Figure 100: Example of I/O-signal connections at a three-phase reclosing function
Setting recommendations for multi-breaker arrangements Sequential reclosing in multi-breaker arrangements, like 1 1/2-breaker, double breaker and ring bus, is achieved by giving the two line breakers different priorities. Please refer to figure 102. In a single breaker arrangement the setting is Priority = None. In a multi-breaker arrangement the setting for the first CB, the Master, is Priority = High and for the other CB Priority = Low.
While the reclosing of the master is in progress, it issues the signal WFMASTER. A reset delay of one second ensures that the WAIT signal is kept high for the duration of the breaker closing time. After an unsuccessful reclosing it is also maintained by the signal UNSUCCL. In the slave unit, the signal WAIT holds back a reclosing operation. When the WAIT signal is reset at the time of a successful reclosing of the first CB, the slave unit is released to continue the reclosing sequence. A parameter tWait sets a maximum waiting time for the reset of the WAIT. At time-out it interrupts the reclosing cycle of the slave unit. If reclosing of the first breaker is unsuccessful, the output signal UNSUCCL connected to the input INHIBIT of the slave unit interrupts the reclosing sequence of the latter.
Section 13 1MRK 511 310-UEN B Control
286 Application manual
The signals can be cross-connected to allow simple changing of the priority by just setting the High and the Low priorities without changing the configuration. The inputs CBPOS for each breaker are important in multi breaker arrangements to ensure that the CB was closed at the beginning of the cycle. If the High priority breaker is not closed the High priority moves to the low priority breaker.
ON OFF BLKON BLOCKOFF INHIBIT
BLOCKED SETON
INPROGR ACTIVE
UNSUCCL SUCCL
CLOSECB PERMIT1P
CBREADY CBPOS PLCLOST
3PT1
WFMASTER
RESET
START 1PT1 2PT1
TRSOTF
TR2P TR3P SYNC
INPUT xx xx xx xx xx xx xx xx xx xx
OR
OR
OUTPUT xx
OR
PROTECTION xxxx-TRIP
ZCVPSOF-TRIP ZMQPDIS—TRIP
TRIP-TR2P TRIP-TR3P SESRSYN-AUTOOK
EF4PTOC-BLOCK
IOM IOM SMBRREC
IEC04000136_3_en.vsd
xx xx xx xx xx
xx xx xx xx
STARTHS
SKIPHSF
F
THOLHOLDF
WAIT
RSTCOUNTF
F
3PT2 3PT3 3PT4 3PT5
F T
F
READY PREP3P TRIP-P3PTR
IEC04000136 V3 EN
Figure 101: Example of I/O-signal connections in a single-phase, two-phase or three-phase reclosing function
1MRK 511 310-UEN B Section 13 Control
287 Application manual
IEC04000137-3-en.vsd
ACTIVE UNSUCCL
READY
CLOSECB
3PT2 3PT3
WAIT
CBPOS CBREADY
TRSOTF
START
RESET
BLOCKOFF BLKON OFF ON BLOCKED
SETON INPROGR
3PT4 SYNC
INHIBIT
Terminal Master Priority = High
SMBRREC
CLOSECB
WAIT
Terminal Slave Priority = Low
CB1
CB2
WFMASTER
WFMASTER
*) Other input/output signals as in previous single breaker arrangements
PLCLOST SUCCL
SKIPHS STARTHS
RSTCOUNT
THOLHOLD
PERMIT1P PREP3P
3PT1 2PT1 1PT1
3PT5
RESET
BLOCKOFF BLKON OFF ON
INHIBIT
PLCLOST
START
SKIPHS STARTHS
CBPOS CBREADY
SYNC
THOLHOLD TRSOTF
3PT2 3PT3 3PT4
PERMIT1P PREP3P
3PT1 2PT1 1PT1
3PT5
ACTIVE UNSUCCL
READY
BLOCKED SETON
INPROGR
x
x
SUCCL
SMBRREC
IEC04000137 V3 EN
Figure 102: Additional input and output signals at multi-breaker arrangement. The connections can be made «symmetrical» to make it possible to control the priority by the settings, Priority:High/Low
Section 13 1MRK 511 310-UEN B Control
288 Application manual
13.2.3.2 Auto-recloser parameter settings
Operation The operation of the Autorecloser for 1/2/3-phase operation (SMBRREC) function can be switched On and Off. The setting ExternalCtrl makes it possible to switch it On or Off using an external switch via IO or communication ports.
NoOfShots, Number of reclosing shots In power transmission 1 shot is mostly used. In most cases one reclosing shot is sufficient as the majority of arcing faults will cease after the first reclosing shot. In power systems with many other types of faults caused by other phenomena, for example wind, a greater number of reclose attempts (shots) can be motivated.
First shot and reclosing program There are six different possibilities in the selection of reclosing programs. The type of reclosing used for different kinds of faults depends on the power system configuration and the users practices and preferences. When the circuit-breakers only have three- phase operation, then three-phase reclosing has to be chosen. This is usually the case in subtransmission and distribution lines. Three-phase tripping and reclosing for all types of faults is also widely accepted in completely meshed power systems. In transmission systems with few parallel circuits, single-phase reclosing for single- phase faults is an attractive alternative for maintaining service and system stability.
Auto-reclosing open times, dead times Single-phase auto-reclosing time: A typical setting is t1 1Ph = 800ms. Due to the influence of energized phases the arc extinction may not be instantaneous. In long lines with high voltage the use of shunt reactors in the form of a star with a neutral reactor improves the arc extinction.
Three-phase shot 1 delay: For three-phase High-Speed Auto-Reclosing (HSAR) a typical open time is 400ms. Different local phenomena, such as moisture, salt, pollution, can influence the required dead time. Some users apply Delayed Auto- Reclosing (DAR) with delays of 10s or more. The delay of reclosing shot 2 and possible later shots are usually set at 30s or more. A check that the CB duty cycle can manage the selected setting must be done. The setting can in some cases be restricted by national regulations. For multiple shots the setting of shots 2-5 must be longer than the circuit breaker duty cycle time.
Extended t1 and tExtended t1, Extended auto-reclosing open time for shot 1.
The communication link in a permissive (not strict) line protection scheme, for instance a power line carrier (PLC) link, may not always be available. If lost, it can result in delayed tripping at one end of a line. There is a possibility to extend the auto- reclosing open time in such a case by use of an input to PLCLOST, and the setting parameters. Typical setting in such a case: Extended t1 = On and tExtended t1 = 0.8 s.
1MRK 511 310-UEN B Section 13 Control
289 Application manual
tSync, Maximum wait time for synchronizationcheck The time window should be coordinated with the operate time and other settings of the synchronization check function. Attention should also be paid to the possibility of a power swing when reclosing after a line fault. Too short a time may prevent a potentially successful reclosing.
tTrip, Long trip pulse Usually the trip command and start auto-reclosing signal reset quickly as the fault is cleared. A prolonged trip command may depend on a CB failing to clear the fault. A trip signal present when the CB is reclosed will result in a new trip. Depending on the setting Extended t1 = Off or On a trip/start pulse longer than the set time tTrip will either block the reclosing or extend the auto-reclosing open time. A trip pulse longer than the set time tTrip will inhibit the reclosing. At a setting somewhat longer than the auto-reclosing open time, this facility will not influence the reclosing. A typical setting of tTrip could be close to the auto-reclosing open time.
tInhibit, Inhibit resetting delay A typical setting is tInhibit = 5.0 s to ensure reliable interruption and temporary blocking of the function. Function will be blocked during this time after the tinhibit has been activated.
tReclaim, Reclaim time The Reclaim time sets the time for resetting the function to its original state, after which a line fault and tripping will be treated as an independent new case with a new reclosing cycle. One may consider a nominal CB duty cycle of for instance, O-0.3sec CO- 3 min. CO. However the 3 minute (180 s) recovery time is usually not critical as fault levels are mostly lower than rated value and the risk of a new fault within a short time is negligible. A typical time may be tReclaim = 60 or 180 s dependent of the fault level and breaker duty cycle.
StartByCBOpen The normal setting is Off. It is used when the function is started by protection trip signals. If set On the start of the autorecloser is controlled by an CB auxiliary contact.
FollowCB The usual setting is Follow CB = Off. The setting On can be used for delayed reclosing with long delay, to cover the case when a CB is being manually closed during the auto-reclosing open time before the auto-reclosing function has issued its CB closing command.
tCBClosedMin A typical setting is 5.0 s. If the CB has not been closed for at least this minimum time, a reclosing start will not be accepted.
Section 13 1MRK 511 310-UEN B Control
290 Application manual
CBAuxContType, CB auxiliary contact type It shall be set to correspond to the CB auxiliary contact used. A NormOpen contact is recommended in order to generate a positive signal when the CB is in the closed position.
CBReadyType, Type of CB ready signal connected The selection depends on the type of performance available from the CB operating gear. At setting OCO (CB ready for an Open Close Open cycle), the condition is checked only at the start of the reclosing cycle. The signal will disappear after tripping, but the CB will still be able to perform the C-O sequence. For the selection CO (CB ready for a Close Open cycle) the condition is also checked after the set auto- reclosing dead time. This selection has a value first of all at multi-shot reclosing to ensure that the CB is ready for a C-O sequence at shot 2 and further shots. During single-shot reclosing, the OCO selection can be used. A breaker shall according to its duty cycle always have storing energy for a CO operation after the first trip. (IEC 56 duty cycle is O-0.3sec CO-3minCO).
tPulse, Breaker closing command pulse duration The pulse should be long enough to ensure reliable operation of the CB. A typical setting may be tPulse=200 ms. A longer pulse setting may facilitate dynamic indication at testing, for example, in Debug mode of Application Configuration tool (ACT). In CBs without anti-pumping relays, the setting CutPulse = On can be used to avoid repeated closing operation when reclosing onto a fault. A new start will then cut the ongoing pulse.
BlockByUnsucCl Setting of whether an unsuccessful auto-reclose attempt shall set the Auto-Reclose in block. If used the inputs BLOCKOFF must be configured to unblock the function after an unsuccessful Reclosing attempt. Normal setting is Off.
UnsucClByCBCheck, Unsuccessful closing by CB check The normal setting is NoCBCheck. The auto-reclosing unsuccessful event is then decided by a new trip within the reclaim time after the last reclosing shot. If one wants to get the UNSUCCL (Unsuccessful closing) signal in the case the CB does not respond to the closing command, CLOSECB, one can set UnsucClByCBCheck= CB Check and set tUnsucCl for instance to 1.0 s.
Priority and time tWaitForMaster In single CB applications, one sets Priority = None. At sequential reclosing the function of the first CB, e.g. near the busbar, is set Priority = High and for the second CB Priority = Low. The maximum waiting time, tWaitForMaster of the second CB is set longer than the auto-reclosing open time and a margin for synchrocheck at the first CB. Typical setting is tWaitForMaster=2sec.
1MRK 511 310-UEN B Section 13 Control
291 Application manual
AutoCont and tAutoContWait, Automatic continuation to the next shot if the CB is not closed within the set time The normal setting is AutoCont = Off. The tAutoContWait is the length of time SMBRREC waits to see if the breaker is closed when AutoCont is set to On. Normally, the setting can be tAutoContWait = 2 sec.
13.3 Apparatus control APC
13.3.1 Application
The apparatus control is a function for control and supervising of circuit breakers, disconnectors, and earthing switches within a bay. Permission to operate is given after evaluation of conditions from other functions such as interlocking, synchrocheck, operator place selection and external or internal blockings.
Figure 103 gives an overview from what places the apparatus control function receive commands. Commands to an apparatus can be initiated from the Control Centre (CC), the station HMI or the local HMI on the IED front.
Station HMI
GW
cc
Station bus
breakers disconnectors earthing switches IEC08000227.vsd
Apparatus Control
IED
I/O
Local HMI
Apparatus Control
IED
I/O
Apparatus Control
IED
I/O
Local HMI
Local HMI
IEC08000227 V1 EN
Figure 103: Overview of the apparatus control functions
Features in the apparatus control function:
Section 13 1MRK 511 310-UEN B Control
292 Application manual
Operation of primary apparatuses Select-Execute principle to give high security Selection and reservation function to prevent simultaneous operation Selection and supervision of operator place Command supervision Block/deblock of operation Block/deblock of updating of position indications Substitution of position indications Overriding of interlocking functions Overriding of synchrocheck Pole discordance supervision Operation counter Suppression of mid position
The apparatus control function is realized by means of a number of function blocks designated:
Switch controller SCSWI Circuit breaker SXCBR Circuit switch SXSWI Bay control QCBAY Position evaluation POS_EVAL Bay reserve QCRSV Reservation input RESIN Local remote LOCREM Local remote control LOCREMCTRL
The signal flow between the function blocks is shown in Figure 104. To realize the reservation function, the function blocks Reservation input (RESIN) and Bay reserve (QCRSV) also are included in the apparatus control function. The application description for all these functions can be found below. The function SCILO in the Figure below is the logical node for interlocking.
Control operation can be performed from the local IED HMI. If the administrator has defined users with the IED Users tool in PCM600, then the local/remote switch is under authority control. If not, the default (factory) user is the SuperUser that can perform control operations from the local IED HMI without LogOn. The default position of the local/remote switch is on remote.
1MRK 511 310-UEN B Section 13 Control
293 Application manual
en05000116.vsd
SXCBRSCSWI
SCILO
SXCBR SXCBR
SCSWI
SCILO
SXSWI
-QA1
-QB1
-QB9
IEC 61850
QCBAY
IEC05000116 V1 EN
Figure 104: Signal flow between apparatus control function blocks
Accepted originator categories for PSTO If the requested command is accepted by the authority, the value will change. Otherwise the attribute blocked-by-switching-hierarchy is set in the cause signal. If the PSTO value is changed during a command, then the command is aborted.
The accepted originator categories for each PSTO value are shown in Table 22
Table 22: Accepted originator categories for each PSTO
Permitted Source To Operate Originator (orCat)
0 = Off 4,5,6
1 = Local 1,4,5,6
2 = Remote 2,3,4,5,6
3 = Faulty 4,5,6
4 = Not in use 4,5,6
Table continues on next page
Section 13 1MRK 511 310-UEN B Control
294 Application manual
5 = All 1,2,3,4,5,6
6 = Station 2,4,5,6
7 = Remote 3,4,5,6
PSTO = All, then it is no priority between operator places. All operator places are allowed to operate.
According to IEC61850 standard the orCat attribute in originator category are defined in Table 23
Table 23: orCat attribute according to IEC61850
Value Description
0 not-supported
1 bay-control
2 station-control
3 remote-control
4 automatic-bay
5 automatic-station
6 automatic-remote
7 maintenance
8 process
13.3.1.1 Bay control (QCBAY)
The Bay control (QCBAY) is used to handle the selection of the operator place per bay. The function gives permission to operate from two main types of locations either from Remote (for example, control centre or station HMI) or from Local (local HMI on the IED) or from all (Local and Remote). The Local/Remote switch position can also be set to Off, which means no operator place selected that is, operation is not possible either from local or from remote.
For IEC 61850-8-1 communication, the Bay Control function can be set to discriminate between commands with orCat station and remote (2 and 3). The selection is then done through the IEC61850-8-1 edition 2 command LocSta.
QCBAY also provides blocking functions that can be distributed to different apparatuses within the bay. There are two different blocking alternatives:
Blocking of update of positions Blocking of commands
1MRK 511 310-UEN B Section 13 Control
295 Application manual
IEC13000016-2-en.vsd
IEC13000016 V2 EN
Figure 105: APC — Local remote function block
13.3.1.2 Switch controller (SCSWI)
SCSWI may handle and operate on one three-phase device or three one-phase switching devices.
After the selection of an apparatus and before the execution, the switch controller performs the following checks and actions:
A request initiates to reserve other bays to prevent simultaneous operation. Actual position inputs for interlocking information are read and evaluated if the
operation is permitted. The synchrocheck/synchronizing conditions are read and checked, and performs
operation upon positive response. The blocking conditions are evaluated The position indications are evaluated according to given command and its
requested direction (open or closed).
The command sequence is supervised regarding the time between:
Section 13 1MRK 511 310-UEN B Control
296 Application manual
Select and execute. Select and until the reservation is granted. Execute and the final end position of the apparatus. Execute and valid close conditions from the synchrocheck.
At error the command sequence is cancelled.
In the case when there are three one-phase switches (SXCBR) connected to the switch controller function, the switch controller will «merge» the position of the three switches to the resulting three-phase position. In case of a pole discordance situation, that is, the positions of the one-phase switches are not equal for a time longer than a settable time; an error signal will be given.
The switch controller is not dependent on the type of switching device SXCBR or SXSWI. The switch controller represents the content of the SCSWI logical node (according to IEC 61850) with mandatory functionality.
13.3.1.3 Switches (SXCBR/SXSWI)
Switches are functions used to close and interrupt an ac power circuit under normal conditions, or to interrupt the circuit under fault, or emergency conditions. The intention with these functions is to represent the lowest level of a power-switching device with or without short circuit breaking capability, for example, circuit breakers, disconnectors, earthing switches etc.
The purpose of these functions is to provide the actual status of positions and to perform the control operations, that is, pass all the commands to the primary apparatus via output boards and to supervise the switching operation and position.
Switches have the following functionalities:
Local/Remote switch intended for the switchyard Block/deblock for open/close command respectively Update block/deblock of position indication Substitution of position indication Supervision timer that the primary device starts moving after a command Supervision of allowed time for intermediate position Definition of pulse duration for open/close command respectively
The realizations of these function are done with SXCBR representing a circuit breaker and with SXSWI representing a circuit switch that is, a disconnector or an earthing switch.
Circuit breaker (SXCBR) can be realized either as three one-phase switches or as one three-phase switch.
The content of this function is represented by the IEC 61850 definitions for the logical nodes Circuit breaker (SXCBR) and Circuit switch (SXSWI) with mandatory functionality.
1MRK 511 310-UEN B Section 13 Control
297 Application manual
13.3.1.4 Reservation function (QCRSV and RESIN)
The purpose of the reservation function is primarily to transfer interlocking information between IEDs in a safe way and to prevent double operation in a bay, switchyard part, or complete substation.
For interlocking evaluation in a substation, the position information from switching devices, such as circuit breakers, disconnectors and earthing switches can be required from the same bay or from several other bays. When information is needed from other bays, it is exchanged over the station bus between the distributed IEDs. The problem that arises, even at a high speed of communication, is a space of time during which the information about the position of the switching devices are uncertain. The interlocking function uses this information for evaluation, which means that also the interlocking conditions are uncertain.
To ensure that the interlocking information is correct at the time of operation, a unique reservation method is available in the IEDs. With this reservation method, the bay that wants the reservation sends a reservation request to other bays and then waits for a reservation granted signal from the other bays. Actual position indications from these bays are then transferred over the station bus for evaluation in the IED. After the evaluation the operation can be executed with high security.
This functionality is realized over the station bus by means of the function blocks QCRSV and RESIN. The application principle is shown in Figure 106.
The function block QCRSV handles the reservation. It sends out either the reservation request to other bays or the acknowledgement if the bay has received a request from another bay.
The other function block RESIN receives the reservation information from other bays. The number of instances is the same as the number of involved bays (up to 60 instances are available). The received signals are either the request for reservation from another bay or the acknowledgment from each bay respectively, which have received a request from this bay. Also the information of valid transmission over the station bus must be received.
Section 13 1MRK 511 310-UEN B Control
298 Application manual
en05000117.vsd
IEDIED
From other SCSWI in the bay To other
SCSWI in the bay
3
Station bus
. . .
. . .
. . .
3
RESIN
EXCH_OUT EXCH_IN
RESIN
EXCH_OUT EXCH_IN
..
SCSWI
RES_RQ RES_GRT
RES_DATA
QCRSV
RES_RQ1
RES_RQ8
RES_GRT1
RES_GRT8
..
2
IEC05000117 V2 EN
Figure 106: Application principles for reservation over the station bus
The reservation can also be realized with external wiring according to the application example in Figure 107. This solution is realized with external auxiliary relays and extra binary inputs and outputs in each IED, but without use of function blocks QCRSV and RESIN.
SCSWI
SELECTED RES_EXT
+
IED
BI BO
IED
BI BO
OR Other SCSWI in the bay
en05000118.vsd
IEC05000118 V2 EN
Figure 107: Application principles for reservation with external wiring
The solution in Figure 107 can also be realized over the station bus according to the application example in Figure 108. The solutions in Figure 107 and Figure 108 do not have the same high security compared to the solution in Figure 106, but instead have a higher availability, since no acknowledgment is required.
1MRK 511 310-UEN B Section 13 Control
299 Application manual
SCSWI
SELECTED
RES_EXT
IEDIED
OROther SCWI in the bay
Station bus . . .
SPGAPC IN
RESGRANT
IntlReceive
. . .
. . .
RESGRANT
IntlReceive
IEC05000178-3-en.vsd
IEC05000178 V3 EN
Figure 108: Application principle for an alternative reservation solution
13.3.2 Interaction between modules
A typical bay with apparatus control function consists of a combination of logical nodes or functions that are described here:
The Switch controller (SCSWI) initializes all operations for one apparatus. It is the command interface of the apparatus. It includes the position reporting as well as the control of the position
The Circuit breaker (SXCBR) is the process interface to the circuit breaker for the apparatus control function.
The Circuit switch (SXSWI) is the process interface to the disconnector or the earthing switch for the apparatus control function.
The Bay control (QCBAY) fulfils the bay-level functions for the apparatuses, such as operator place selection and blockings for the complete bay.
The Reservation (QCRSV) deals with the reservation function. The Protection trip logic (SMPPTRC) connects the «trip» outputs of one or more
protection functions to a common «trip» to be transmitted to SXCBR. The Autorecloser (SMBRREC) consists of the facilities to automatically close a
tripped breaker with respect to a number of configurable conditions. The logical node Interlocking (SCILO) provides the information to SCSWI
whether it is permitted to operate due to the switchyard topology. The interlocking conditions are evaluated with separate logic and connected to SCILO .
The Synchrocheck, energizing check, and synchronizing (SESRSYN) calculates and compares the voltage phasor difference from both sides of an open breaker with predefined switching conditions (synchrocheck). Also the case that one side is dead (energizing-check) is included.
The Generic Automatic Process Control function, GAPC, handles generic commands from the operator to the system.
Section 13 1MRK 511 310-UEN B Control
300 Application manual
The overview of the interaction between these functions is shown in Figure 109 below.
IEC05000120-2-en.vsd
SXCBR (Circuit breaker)
Interlocking function block
(Not a LN)
SCSWI (Switching control)
QCBAY (Bay control)
SMBRREC
(Auto- reclosure)
I/O
Trip
Close rel.
Res. req.
S ta
rt AR
Close CB
Position
Res. granted
Operator place selection
SCSWI (Switching control)
SXSWI (Disconnector)
Open cmd
Close cmd
Position
SESRSYN (Synchrocheck & Synchronizer)
SCILO
SCILO
Synchrocheck OK
QCRSV (Reservation) Res. req.
Res. granted
GAPC (Generic
Automatic Process Control) Open/Close
Open/Close
Enable close
Enable open
Open rel.
Close rel. Open rel.
SMPPTRC (Trip logic)
Position
E na
bl e
op en
E na
bl e
cl os
e
P os
. f ro
m
ot he
r b ay
s
I/O
Open cmd Close cmd
(Interlocking)
(Interlocking)
Synchronizing in progress
IEC05000120 V2 EN
Figure 109: Example overview of the interactions between functions in a typical bay
1MRK 511 310-UEN B Section 13 Control
301 Application manual
13.3.3 Setting guidelines
The setting parameters for the apparatus control function are set via the local HMI or PCM600.
13.3.3.1 Bay control (QCBAY)
If the parameter AllPSTOValid is set to No priority, all originators from local and remote are accepted without any priority.
If the parameter RemoteIncStation is set to Yes, commands from IEC61850-8-1 clients at both station and remote level are accepted, when the QCBAY function is in Remote. If set to No, the command LocSta controls which operator place is accepted when QCBAY is in Remote. If LocSta is true, only commands from station level are accepted, otherwise only commands from remote level are accepted.
The parameter RemoteIncStation has only effect on the IEC61850-8-1 communication. Further, when using IEC61850 edition 1 communication, the parameter should be set to Yes, since the command LocSta is not defined in IEC61850-8-1 edition 1.
13.3.3.2 Switch controller (SCSWI)
The parameter CtlModel specifies the type of control model according to IEC 61850. The default for control of circuit breakers, disconnectors and earthing switches the control model is set to SBO Enh (Select-Before-Operate) with enhanced security.
When the operation shall be performed in one step, and no monitoring of the result of the command is desired, the model direct control with normal security is used.
At control with enhanced security there is an additional supervision of the status value by the control object, which means that each command sequence must be terminated by a termination command.
The parameter PosDependent gives permission to operate depending on the position indication, that is, at Always permitted it is always permitted to operate independent of the value of the position. At Not perm at 00/11 it is not permitted to operate if the position is in bad or intermediate state.
tSelect is the maximum allowed time between the select and the execute command signal, that is, the time the operator has to perform the command execution after the selection of the object to operate. When the time has expired, the selected output signal is set to false and a cause-code is given.
The time parameter tResResponse is the allowed time from reservation request to the feedback reservation granted from all bays involved in the reservation function. When the time has expired, the control function is reset, and a cause-code is given.
Section 13 1MRK 511 310-UEN B Control
302 Application manual
tSynchrocheck is the allowed time for the synchrocheck function to fulfill the close conditions. When the time has expired, the function tries to start the synchronizing function. If tSynchrocheck is set to 0, no synchrocheck is done, before starting the synchronizing function.
The timer tSynchronizing supervises that the signal synchronizing in progress is obtained in SCSWI after start of the synchronizing function. The start signal for the synchronizing is set if the synchrocheck conditions are not fulfilled. When the time has expired, the control function is reset, and a cause-code is given. If no synchronizing function is included, the time is set to 0, which means no start of the synchronizing function is done, and when tSynchrocheck has expired, the control function is reset and a cause-code is given.
tExecutionFB is the maximum time between the execute command signal and the command termination. When the time has expired, the control function is reset and a cause-code is given.
tPoleDiscord is the allowed time to have discrepancy between the poles at control of three one-phase breakers. At discrepancy an output signal is activated to be used for trip or alarm, and during a command, the control function is reset, and a cause-code is given.
SuppressMidPos when On suppresses the mid-position during the time tIntermediate of the connected switches.
The parameter InterlockCheck decides if interlock check should be done at both select and operate, Sel & Op phase, or only at operate, Op phase.
13.3.3.3 Switch (SXCBR/SXSWI)
tStartMove is the supervision time for the apparatus to start moving after a command execution. When the time has expired, the switch function is reset, and a cause-code is given.
During the tIntermediate time the position indication is allowed to be in an intermediate (00) state. When the time has expired, the switch function is reset, and a cause-code is given. The indication of the mid-position at SCSWI is suppressed during this time period when the position changes from open to close or vice-versa if the parameter SuppressMidPos is set to On in the SCSWI function.
If the parameter AdaptivePulse is set to Adaptive the command output pulse resets when a new correct end position is reached. If the parameter is set to Not adaptive the command output pulse remains active until the timer tOpenPulsetClosePulse has elapsed.
tOpenPulse is the output pulse length for an open command. If AdaptivePulse is set to Adaptive, it is the maximum length of the output pulse for an open command. The default length is set to 200 ms for a circuit breaker (SXCBR) and 500 ms for a disconnector (SXSWI).
1MRK 511 310-UEN B Section 13 Control
303 Application manual
tClosePulse is the output pulse length for a close command. If AdaptivePulse is set to Adaptive, it is the maximum length of the output pulse for an open command. The default length is set to 200 ms for a circuit breaker (SXCBR) and 500 ms for a disconnector (SXSWI).
13.3.3.4 Bay Reserve (QCRSV)
The timer tCancelRes defines the supervision time for canceling the reservation, when this cannot be done by requesting bay due to for example communication failure.
When the parameter ParamRequestx (x=1-8) is set to Only own bay res. individually for each apparatus (x) in the bay, only the own bay is reserved, that is, the output for reservation request of other bays (RES_BAYS) will not be activated at selection of apparatus x.
13.3.3.5 Reservation input (RESIN)
With the FutureUse parameter set to Bay future use the function can handle bays not yet installed in the SA system.
13.4 Voltage control
13.4.1 Identification Function description IEC 61850
identification IEC 60617 identification
ANSI/IEEE C37.2 device number
Automatic voltage control for tap changer, single control
TR1ATCC
U
IEC10000165 V1 EN
90
Automatic voltage control for tap changer, parallel control
TR8ATCC
U
IEC10000166 V1 EN
90
Tap changer control and supervision, 6 binary inputs
TCMYLTC — 84
Tap changer control and supervision, 32 binary inputs
TCLYLTC — 84
13.4.2 Application
When the load in a power network is increased the voltage will decrease and vice versa. To maintain the network voltage at a constant level, power transformers are
Section 13 1MRK 511 310-UEN B Control
304 Application manual
usually equipped with on-load tap-changer. This alters the power transformer ratio in a number of predefined steps and in that way changes the voltage. Each step usually represents a change in voltage of approximately 0.5-1.7%.
The voltage control function is intended for control of power transformers with a motor driven on-load tap-changer. The function is designed to regulate the voltage at the secondary side of the power transformer. The control method is based on a step- by-step principle which means that a control pulse, one at a time, will be issued to the tap changer mechanism to move it one position up or down. The length of the control pulse can be set within a wide range to accommodate different types of tap changer mechanisms. The pulse is generated whenever the measured voltage, for a given time, deviates from the set reference value by more than the preset deadband (degree of insensitivity).
The voltage can be controlled at the point of voltage measurement, as well as at a load point located out in the network. In the latter case, the load point voltage is calculated based on the measured load current and the known impedance from the voltage measuring point to the load point.
The automatic voltage control can be either for a single transformer, or for parallel transformers. Parallel control of power transformers can be made in three alternative ways:
With the master-follower method With the reverse reactance method With the circulating current method
Of these alternatives, the first and the last require communication between the function control blocks of the different transformers, whereas the middle alternative does not require any communication.
The voltage control includes many extra features such as possibility to avoid simultaneous tapping of parallel transformers, hot stand by regulation of a transformer within a parallel group, with a LV CB open, compensation for a possible capacitor bank on the LV side bay of a transformer, extensive tap changer monitoring including contact wear and hunting detection, monitoring of the power flow in the transformer so that for example, the voltage control can be blocked if the power reverses and so on.
The voltage control function is built up by two function blocks which both are logical nodes in IEC 61850-8-1:
Automatic voltage control for tap changer, TR1ATCC for single control and TR8ATCC for parallel control.
Tap changer control and supervision, 6 binary inputs, TCMYLTC and 32 binary inputs, TCLYLTC
Automatic voltage control for tap changer, TR1ATCC or TR8ATCC is a function designed to automatically maintain the voltage at the LV-side side of a power transformer within given limits around a set target voltage. A raise or lower command
1MRK 511 310-UEN B Section 13 Control
305 Application manual
is generated whenever the measured voltage, for a given period of time, deviates from the set target value by more than the preset deadband value (degree of insensitivity). A time delay (inverse or definite time) is set to avoid unnecessary operation during shorter voltage deviations from the target value, and in order to coordinate with other automatic voltage controllers in the system.
TCMYLTC and TCLYLTC are an interface between the Automatic voltage control for tap changer, TR1ATCC or TR8ATCC and the transformer load tap changer itself. More specifically this means that it gives command-pulses to a power transformer motor driven load tap changer and that it receives information from the load tap changer regarding tap position, progress of given commands, and so on.
TCMYLTC and TCLYLTC also serve the purpose of giving information about tap position to the transformer differential protection.
Control location local/remote The tap changer can be operated from the front of the IED or from a remote place alternatively. On the IED front there is a local remote switch that can be used to select the operator place. For this functionality the Apparatus control function blocks Bay control (QCBAY), Local remote (LOCREM) and Local remote control (LOCREMCTRL) are used.
Information about the control location is given to TR1ATCC or TR8ATCC function through connection of the Permitted Source to Operate (PSTO) output of the QCBAY function block to the input PSTO of the TR1ATCC or TR8ATCC function block.
Control Mode The control mode of the automatic voltage control for tap changer function, TR1ATCC for single control and TR8ATCC for parallel control can be:
Manual Automatic
The control mode can be changed from the local location via the command menu on the local HMI under Main menu/Control/Commands/ TransformerVoltageControl(ATCC,90)/TR1ATCC:x/TR8ATCC:x, or changed from a remote location via binary signals connected to the MANCTRL, AUTOCTRL inputs on TR1ATCC or TR8ATCC function block.
Measured Quantities In normal applications, the LV side of the transformer is used as the voltage measuring point. If necessary, the LV side current is used as load current to calculate the line- voltage drop to the regulation point.
Automatic voltage control for tap changer, TR1ATCC for single control and TR8ATCC for parallel control function block has three inputs I3P1, I3P2 and U3P2 corresponding to HV-current, LV-current and LV-voltage respectively. These analog quantities are fed to the IED via the transformer input module, the Analog to Digital Converter and thereafter a Pre-Processing Block. In the Pre-Processing Block, a great
Section 13 1MRK 511 310-UEN B Control
306 Application manual
number of quantities for example, phase-to-phase analog values, sequence values, max value in a three phase group etc., are derived. The different function blocks in the IED are then subscribing on selected quantities from the pre-processing blocks. In case of TR1ATCC or TR8ATCC, there are the following possibilities:
I3P1 represents a three-phase group of phase current with the highest current in any of the three phases considered. As only the highest of the phase current is considered, it is also possible to use one single-phase current as well as two-phase currents. In these cases, the currents that are not used will be zero.
For I3P2 and U3P2 the setting alternatives are: any individual phase current/ voltage, as well as any combination of phase-phase current/voltage or the positive sequence current/voltage. Thus, single-phase as well as, phase-phase or three- phase feeding on the LV-side is possible but it is commonly selected for current and voltage.
Lo ad T ap
C ha ng er
raise,lower signals/alarms
position
BOM
MIM
IED
IL1,IL2,IL3
TRM 3ph or ph-ph or 1ph Current
High Voltage Side
(Load Current) IL
Low Voltage Side
Line Impedance R+jX
UB (Busbar Voltage)
Load Center UL (Load Point Voltage)
IEC10000044-2-en.vsd
BIM
3ph or ph-ph or 1ph Voltage
IEC10000044 V2 EN
Figure 110: Signal flow for a single transformer with voltage control
On the HV side, the three-phase current is normally required in order to feed the three- phase over current protection that blocks the load tap changer in case of over-current above harmful levels.
The voltage measurement on the LV-side can be made single phase-earth. However, it shall be remembered that this can only be used in solidly earthed systems, as the
1MRK 511 310-UEN B Section 13 Control
307 Application manual
measured phase-earth voltage can increase with as much as a factor 3 in case of earth faults in a non-solidly earthed system.
The analog input signals are normally common with other functions in the IED for example, protection functions.
The LV-busbar voltage is designated UB, the load current IL and load point voltage UL.
Automatic voltage control for a single transformer Automatic voltage control for tap changer, single control TR1ATCC measures the magnitude of the busbar voltage UB. If no other additional features are enabled (line voltage drop compensation), this voltage is further used for voltage regulation.
TR1ATCC then compares this voltage with the set voltage, USet and decides which action should be taken. To avoid unnecessary switching around the setpoint, a deadband (degree of insensitivity) is introduced. The deadband is symmetrical around USet, see figure 111, and it is arranged in such a way that there is an outer and an inner deadband. Measured voltages outside the outer deadband start the timer to initiate tap commands, whilst the sequence resets when the measured voltage is once again back inside the inner deadband. One half of the outer deadband is denoted U. The setting of U, setting Udeadband should be set to a value near to the power transformers tap changer voltage step (typically 75125% of the tap changer step).
Voltage MagnitudeUmaxU2UsetU1UminUblock0
Raise Cmd
*) Action in accordance with setting
Security Range
Lower Cmd
IEC06000489_2_en.vsd
DD U U DUin DUin
*) *) *)
IEC06000489 V2 EN
Figure 111: Control actions on a voltage scale
During normal operating conditions the busbar voltage UB, stays within the outer deadband (interval between U1 and U2 in figure 111). In that case no actions will be taken by TR1ATCC. However, if UB becomes smaller than U1, or greater than U2, an appropriate raise or lower timer will start. The timer will run as long as the measured voltage stays outside the inner deadband. If this condition persists longer than the preset time delay, TR1ATCC will initiate that the appropriate ULOWER or URAISE command will be sent from TCMYLTC or TCLYLTC function block to the transformer tap changer. If necessary, the procedure will be repeated until the magnitude of the busbar voltage again falls within the inner deadband. One half of the inner deadband is denoted Uin. The inner deadband Uin, setting UDeadbandInner
Section 13 1MRK 511 310-UEN B Control
308 Application manual
should be set to a value smaller than U. It is recommended to set the inner deadband to 25-70% of the U value.
This way of working is used by TR1ATCC while the busbar voltage is within the security range defined by settings Umin and Umax.
A situation where UB falls outside this range will be regarded as an abnormal situation.
When UB falls below setting Ublock, or alternatively, falls below setting Umin but still above Ublock, or rises above Umax, actions will be taken in accordance with settings for blocking conditions (refer to table 27).
If the busbar voltage rises above Umax, TR1ATCC can initiate one or more fast step down commands (ULOWER commands) in order to bring the voltage back into the security range (settings Umin, and Umax). The fast step down function operation can be set in one of the following three ways: off /auto/auto and manual, according to the setting FSDMode. The ULOWER command, in fast step down mode, is issued with the settable time delay tFSD.
The measured RMS magnitude of the busbar voltage UB is shown on the local HMI as value BUSVOLT under Main menu/Test/Function status/Control/ TransformerVoltageControl(ATCC,90)/TR1ATCC:x/TR8ATCC:x.
Time characteristic The time characteristic defines the time that elapses between the moment when measured voltage exceeds the deadband interval until the appropriate URAISE or ULOWER command is initiated.
The purpose of the time delay is to prevent unnecessary load tap changer operations caused by temporary voltage fluctuations and to coordinate load tap changer operations in radial networks in order to limit the number of load tap changer operations. This can be done by setting a longer time delay closer to the consumer and shorter time delays higher up in the system.
The first time delay, t1, is used as a time delay (usually long delay) for the first command in one direction. It can have a definite or inverse time characteristic, according to the setting t1Use (Constant/Inverse). For inverse time characteristics larger voltage deviations from the USet value will result in shorter time delays, limited by the shortest time delay equal to the tMin setting. This setting should be coordinated with the tap changer mechanism operation time.
Constant (definite) time delay is independent of the voltage deviation.
The inverse time characteristic for the first time delay follows the formulas:
IECEQUATION2294 V2 EN (Equation 118)
1MRK 511 310-UEN B Section 13 Control
309 Application manual
DAD U
= D
EQUATION1986 V1 EN (Equation 119)
t1tMin D=
EQUATION1848 V2 EN (Equation 120)
Where:
DA absolute voltage deviation from the set point
D relative voltage deviation in respect to set deadband value
For the last equation, the condition t1 > tMin shall also be fulfilled. This practically means that tMin will be equal to the set t1 value when absolute voltage deviation DA is equal to U ( relative voltage deviation D is equal to 1). For other values see figure 112. It should be noted that operating times, shown in the figure 112 are for 30, 60, 90, 120, 150 & 180 seconds settings for t1 and 10 seconds for tMin.
t1=180
t1=150
t1=120
t1=90
t1=60
t1=30
IEC06000488_2_en.vsd
IEC06000488 V2 EN
Figure 112: Inverse time characteristic for TR1ATCC and TR8ATCC
The second time delay, t2, will be used for consecutive commands (commands in the same direction as the first command). It can have a definite or inverse time characteristic according to the setting t2Use (Constant/Inverse). Inverse time characteristic for the second time delay follows the similar formulas as for the first time delay, but the t2 setting is used instead of t1.
Section 13 1MRK 511 310-UEN B Control
310 Application manual
Line voltage drop The purpose with the line voltage drop compensation is to control the voltage, not at the power transformer low voltage side, but at a point closer to the load point.
Figure 113 shows the vector diagram for a line modelled as a series impedance with the voltage UB at the LV busbar and voltage UL at the load center. The load current on the line is IL, the line resistance and reactance from the station busbar to the load point are RL and XL. The angle between the busbar voltage and the current, is j. If all these parameters are known UL can be obtained by simple vector calculation.
Values for RL and XL are given as settings in primary system ohms. If more than one line is connected to the LV busbar, an equivalent impedance should be calculated and given as a parameter setting.
The line voltage drop compensation function can be turned On/Off by the setting parameter OperationLDC. When it is enabled, the voltage UL will be used by the Automatic voltage control for tap changer function, TR1ATCC for single control and TR8ATCC for parallel control for voltage regulation instead of UB. However, TR1ATCC or TR8ATCC will still perform the following two checks:
1. The magnitude of the measured busbar voltage UB, shall be within the security range, (setting Umin and Umax). If the busbar voltage falls-out of this range the line voltage drop compensation calculations will be temporarily stopped until the voltage UB comes back within the range.
2. The magnitude of the calculated voltage UL at the load point, can be limited such that it is only allowed to be equal to or smaller than the magnitude of UB, otherwise UB will be used. However, a situation where UL>UB can be caused by a capacitive load condition, and if the wish is to allow for a situation like that, the limitation can be removed by setting the parameter OperCapaLDC to On.
~
L o
a dRL XL
UB
UL
UB
RLIL
jXLIL Re
IEC06000487-2-en.vsd
IEC06000487 V2 EN
Figure 113: Vector diagram for line voltage drop compensation
1MRK 511 310-UEN B Section 13 Control
311 Application manual
The calculated load voltage UL is shown on the local HMI as value ULOAD under Main menu/Test/Function status/Control/TransformerVoltageControl(ATCC, 90)/TR1ATCC:x/TR8ATCC:x.
Load voltage adjustment Due to the fact that most loads are proportional to the square of the voltage, it is possible to provide a way to shed part of the load by decreasing the supply voltage a couple of percent. During high load conditions, the voltage drop might be considerable and there might be reasons to increase the supply voltage to keep up the power quality and customer satisfaction.
It is possible to do this voltage adjustment in two different ways in Automatic voltage control for tap changer, single control TR1ATCC and parallel control TR8ATCC:
1. Automatic load voltage adjustment, proportional to the load current. 2. Constant load voltage adjustment with four different preset values.
In the first case the voltage adjustment is dependent on the load and maximum voltage adjustment should be obtained at rated load of the transformer.
In the second case, a voltage adjustment of the set point voltage can be made in four discrete steps (positive or negative) activated with binary signals connected to TR1ATCC or TR8ATCC function block inputs LVA1, LVA2, LVA3 and LVA4. The corresponding voltage adjustment factors are given as setting parameters LVAConst1, LVAConst2, LVAConst3 and LVAConst4. The inputs are activated with a pulse, and the latest activation of anyone of the four inputs is valid. Activation of the input LVARESET in TR1ATCC or TR8ATCC block, brings the voltage setpoint back to USet.
With these factors, TR1ATCC or TR8ATCC adjusts the value of the set voltage USet according to the following formula:
2
L a ci
I Usetadjust Uset S S
I Base = + +
IECEQUATION1978 V1 EN (Equation 121)
Uset, adjust Adjusted set voltage in per unit
USet Original set voltage: Base quality is Un2
Sa Automatic load voltage adjustment factor, setting VRAuto
IL Load current
I2Base Rated current, LV winding
Sci Constant load voltage adjust. factor for active input i (corresponding to LVAConst1, LVAConst2, LVAConst3 and LVAConst4)
It shall be noted that the adjustment factor is negative in order to decrease the load voltage and positive in order to increase the load voltage. After this calculation Uset,
Section 13 1MRK 511 310-UEN B Control
312 Application manual
adjust will be used by TR1ATCC or TR8ATCC for voltage regulation instead of the original value USet. The calculated set point voltage USet, adjust is shown on the local HMI as a service value under Main menu/Test/Function status/Control/ TransformerVoltageControl(ATCC,90)/TR1ATCC:x/TR8ATCC:x.
Automatic control of parallel transformers Control of parallel transformers means control of two or more power transformers connected to the same busbar on the LV side and in most cases also on the HV side. Special measures must be taken in order to avoid a runaway situation where the tap changers on the parallel transformers gradually diverge and end up in opposite end positions.
Three alternative methods can be used for parallel control with the Automatic voltage control for tap changer, single/parallel control TR8ATCC:
master-follower method reverse reactance method circulating current method
In order to realize the need for special measures to be taken when controlling transformers in parallel, consider first two parallel transformers which are supposed to be equal with similar tap changers. If they would each be in automatic voltage control for single transformer that is, each of them regulating the voltage on the LV busbar individually without any further measures taken, then the following could happen. Assuming for instance that they start out on the same tap position and that the LV busbar voltage UB is within USet DU, then a gradual increase or decrease in the load would at some stage make UB fall outside USet DU and a raise or lower command would be initiated. However, the rate of change of voltage would normally be slow, which would make one tap changer act before the other. This is unavoidable and is due to small inequalities in measurement and so on. The one tap changer that responds first on a low voltage condition with a raise command will be prone to always do so, and vice versa. The situation could thus develop such that, for example T1 responds first to a low busbar voltage with a raise command and thereby restores the voltage. When the busbar voltage thereafter at a later stage gets high, T2 could respond with a lower command and thereby again restore the busbar voltage to be within the inner deadband. However, this has now caused the load tap changer for the two transformers to be 2 tap positions apart, which in turn causes an increasing circulating current. This course of events will then repeat with T1 initiating raise commands and T2 initiating lower commands in order to keep the busbar voltage within USet DU, but at the same time it will drive the two tap changers to their opposite end positions. High circulating currents and loss of control would be the result of this runaway tap situation.
Parallel control with the master-follower method In the master-follower method, one of the transformers is selected to be master, and will regulate the voltage in accordance with the principles for Automatic voltage control. Selection of the master is made by activating the binary input FORCMAST in TR8ATCC function block for one of the transformers in the group.
1MRK 511 310-UEN B Section 13 Control
313 Application manual
The followers can act in two alternative ways depending on the setting of the parameter MFMode. When this setting is Follow Cmd, raise and lower commands (URAISE and ULOWER) generated by the master, will initiate the corresponding command in all follower TR8ATCCs simultaneously, and consequently they will blindly follow the master irrespective of their individual tap positions. Effectively this means that if the tap positions of the followers were harmonized with the master from the beginning, they would stay like that as long as all transformers in the parallel group continue to participate in the parallel control. On the other hand for example, one transformer is disconnected from the group and misses a one tap step operation, and thereafter is reconnected to the group again, it will thereafter participate in the regulation but with a one tap position offset.
If the parameter MFMode is set to Follow Tap, then the followers will read the tap position of the master and adopt to the same tap position or to a tap position with an offset relative to the master, and given by setting parameter TapPosOffs (positive or negative integer value). The setting parameter tAutoMSF introduces a time delay on URAISE/ULOWER commands individually for each follower when setting MFMode has the value Follow Tap.
Selecting a master is made by activating the input FORCMAST in TR8ATCC function block. Deselecting a master is made by activating the input RSTMAST. These two inputs are pulse activated, and the most recent activation is valid that is, an activation of any of these two inputs overrides previous activations. If none of these inputs has been activated, the default is that the transformer acts as a follower (given of course that the settings are parallel control with the master follower method).
When the selection of master or follower in parallel control, or automatic control in single mode, is made with a three position switch in the substation, an arrangement as in figure 114 below is arranged with application configuration.
Section 13 1MRK 511 310-UEN B Control
314 Application manual
M
F
I SNGLMODE
FORCMAST
RSTMAST
BIM/IOM TR8ATCC
IEC06000633-2-en.vsd
IEC06000633 V2 EN
Figure 114: Principle for a three-position switch Master/Follower/Single
Parallel control with the reverse reactance method Consider Figure 115 with two parallel transformers with equal rated data and similar tap changers. The tap positions will diverge and finally end up in a runaway tap situation if no measures to avoid this are taken.
1MRK 511 310-UEN B Section 13 Control
315 Application manual
Load
T1
I L
T2
UB
UL
IT1 IT2
en06000486.vsd
IEC06000486 V1 EN
Figure 115: Parallel transformers with equal rated data.
In the reverse reactance method, the line voltage drop compensation is used. The original of the line voltage drop compensation function purpose is to control the voltage at a load point further out in the network. The very same function can also be used here to control the voltage at a load point inside the transformer, by choosing a negative value of the parameter Xline.
Figure 116, shows a vector diagram where the principle of reverse reactance has been introduced for the transformers in figure 115. The transformers are here supposed to be on the same tap position, and the busbar voltage is supposed to give a calculated compensated value UL that coincides with the target voltage USet.
IEC06000485_2_en.vsd
UB
RLIT1=RLIT2
jXLIT1=jXLIT2
IT1=IT2=(IT1+IT2)/2
UL1=UL2=USet
IEC06000485 V3 EN
Figure 116: Vector diagram for two transformers regulated exactly on target voltage.
Section 13 1MRK 511 310-UEN B Control
316 Application manual
A comparison with figure 113 gives that the line voltage drop compensation for the purpose of reverse reactance control is made with a value with opposite sign on XL, hence the designation reverse reactance or negative reactance. Effectively this means that, whereas the line voltage drop compensation in figure 113 gave a voltage drop along a line from the busbar voltage UB to a load point voltage UL, the line voltage drop compensation in figure 116 gives a voltage increase (actually, by adjusting the ratio XL/RL with respect to the power factor, the length of the vector UL will be approximately equal to the length of UB) from UB up towards the transformer itself. Thus in principal the difference between the vector diagrams in figure 113 and figure 116 is the sign of the setting parameter XL.
If now the tap position between the transformers will differ, a circulating current will appear, and the transformer with the highest tap (highest no load voltage) will be the source of this circulating current. Figure 117 below shows this situation with T1 being on a higher tap than T2.
IEC06000491_3_en.vsd
Load
T1 T2
UB
UL
IT1 IT2
UB
RIT1
jXLIT1
Icc
-Icc
(IT1+IT2)/2 IT1
IT2
RLIT2
jXLIT2
ICC…T2
ICC…T1
IL
IEC06000491 V3 EN
Figure 117: Circulating current caused by T1 on a higher tap than T2.
The circulating current Icc is predominantly reactive due to the reactive nature of the transformers. The impact of Icc on the individual transformer currents is that it increases the current in T1 (the transformer that is driving Icc) and decreases it in T2 at the same time as it introduces contradictive phase shifts, as can be seen in figure 117. The result is thus, that the line voltage drop compensation calculated voltage UL for T1 will be higher than the line voltage drop compensation calculated voltage UL for T2, or in other words, the transformer with the higher tap position will have the higher UL value and the transformer with the lower tap position will have the lower UL value. Consequently, when the busbar voltage increases, T1 will be the one to tap down, and when the busbar voltage decreases, T2 will be the one to tap up. The overall performance will then be that the runaway tap situation will be avoided and that the circulating current will be minimized.
1MRK 511 310-UEN B Section 13 Control
317 Application manual
Parallel control with the circulating current method Two transformers with different turns ratio, connected to the same busbar on the HV- side, will apparently show different LV-side voltage. If they are now connected to the same LV busbar but remain unloaded, this difference in no-load voltage will cause a circulating current to flow through the transformers. When load is put on the transformers, the circulating current will remain the same, but now it will be superimposed on the load current in each transformer. Voltage control of parallel transformers with the circulating current method means minimizing of the circulating current at a given voltage target value, thereby achieving:
1. that the busbar or load voltage is regulated to a preset target value 2. that the load is shared between parallel transformers in proportion to their ohmic
short circuit reactance
If the transformers have equal percentage impedance given in the respective transformer MVA base, the load will be divided in direct proportion to the rated power of the transformers when the circulating current is minimized.
This method requires extensive exchange of data between the TR8ATCC function blocks (one TR8ATCC function for each transformer in the parallel group). TR8ATCC function block can either be located in the same IED, where they are configured in PCM600 to co-operate, or in different IEDs. If the functions are located in different IEDs they must communicate via GOOSE interbay communication on the IEC 61850 communication protocol. Complete exchange of TR8ATCC data, analog as well as binary, via GOOSE is made cyclically every 300 ms.
The busbar voltage UB is measured individually for each transformer in the parallel group by its associated TR8ATCC function. These measured values will then be exchanged between the transformers, and in each TR8ATCC block, the mean value of all UB values will be calculated. The resulting value UBmean will then be used in each IED instead of UB for the voltage regulation, thus assuring that the same value is used by all TR8ATCC functions, and thereby avoiding that one erroneous measurement in one transformer could upset the voltage regulation. At the same time, supervision of the VT mismatch is also performed. This works such that, if a measured voltage UB, differs from UBmean with more than a preset value (setting parameter VTmismatch) and for more than a pre set time (setting parameter tVTmismatch) an alarm signal VTALARM will be generated.
The calculated mean busbar voltage UBmean is shown on the local HMI as a service value BusVolt under Main menu/Test/Function status/Control/ TransformerVoltageControl(ATCC,90)/TR8ATCC:x.
Measured current values for the individual transformers must be communicated between the participating TR8ATCC functions, in order to calculate the circulating current.
The calculated circulating current Icc_i for transformer i is shown on the HMI as a service value ICIRCUL under Main menu/Test/Function status/Control/ TransformerVoltageControl(ATCC,90)/TR8ATCC:x.
Section 13 1MRK 511 310-UEN B Control
318 Application manual
When the circulating current is known, it is possible to calculate a no-load voltage for each transformer in the parallel group. To do that the magnitude of the circulating current in each bay, is first converted to a voltage deviation, Udi, with equation 122:
_di i cc i iU C I X=
EQUATION1869 V1 EN (Equation 122)
where Xi is the short-circuit reactance for transformer i and Ci, is a setting parameter named Comp which serves the purpose of alternatively increasing or decreasing the impact of the circulating current in TR8ATCC control calculations. It should be noted that Udi will have positive values for transformers that produce circulating currents and negative values for transformers that receive circulating currents.
Now the magnitude of the no-load voltage for each transformer can be approximated with:
i Bmean diU U U= +
EQUATION1870 V1 EN (Equation 123)
This value for the no-load voltage is then simply put into the voltage control function for single transformer. There it is treated as the measured busbar voltage, and further control actions are taken as described previously in section «Automatic voltage control for a single transformer». By doing this, the overall control strategy can be summarized as follows.
For the transformer producing/receiving the circulating current, the calculated no- load voltage will be greater/smaller than the measured voltage UBmean. The calculated no-load voltage will then be compared with the set voltage USet. A steady deviation which is outside the outer deadband will result in ULOWER or URAISE being initiated alternatively. In this way the overall control action will always be correct since the position of a tap changer is directly proportional to the transformer no-load voltage. The sequence resets when UBmean is inside the inner deadband at the same time as the calculated no-load voltages for all transformers in the parallel group are inside the outer deadband.
In parallel operation with the circulating current method, different USet values for individual transformers can cause the voltage regulation to be unstable. For this reason, the mean value of USet for parallel operating transformers can be automatically calculated and used for the voltage regulation. This is set On/Off by setting parameter OperUsetPar. The calculated mean USet value is shown on the local HMI as a service value USETPAR under Main menu/Test/Function status/ Control/TransformerVoltageControl(ATCC,90)/TR8ATCC:x.
The use of mean USet is recommended for parallel operation with the circulating current method, especially in cases when Load Voltage Adjustment is also used.
1MRK 511 310-UEN B Section 13 Control
319 Application manual
Line voltage drop compensation for parallel control The line voltage drop compensation for a single transformer is described in section «Line voltage drop». The same principle is used for parallel control with the circulating current method and with the master follower method, except that the total load current, IL, is used in the calculation instead of the individual transformer current. (See figure 113 for details). The same values for the parameters Rline and Xline shall be set in all IEDs in the same parallel group. There is no automatic change of these parameters due to changes in the substation topology, thus they should be changed manually if needed.
Avoidance of simultaneous tapping
Avoidance of simultaneous tapping (operation with the circulating current method) For some types of tap changers, especially older designs, an unexpected interruption of the auxiliary voltage in the middle of a tap manoeuvre, can jam the tap changer. In order not to expose more than one tap changer at a time, simultaneous tapping of parallel transformers (regulated with the circulating current method) can be avoided. This is done by setting parameter OperSimTap to On. Simultaneous tapping is then avoided at the same time as tapping actions (in the long term) are distributed evenly amongst the parallel transformers.
The algorithm in Automatic voltage control for tap changer, parallel control TR8ATCC will select the transformer with the greatest voltage deviation Udi to tap first. That transformer will then start timing, and after time delay t1 the appropriate URAISE or ULOWER command will be initiated. If now further tapping is required to bring the busbar voltage inside UDeadbandInner, the process will be repeated, and the transformer with the then greatest value of Udi amongst the remaining transformers in the group will tap after a further time delay t2, and so on. This is made possible as the calculation of Icc is cyclically updated with the most recent measured values. If two transformers have equal magnitude of Udi then there is a predetermined order governing which one is going to tap first.
Avoidance of simultaneous tapping (operation with the master follower method) A time delay for the follower in relation to the command given from the master can be set when the setting MFMode is Follow Tap that is, when the follower follows the tap position (with or without an offset) of the master. The setting parameter tAutoMSF then introduces a time delay on UVRAISE/ULOWER commands individually for each follower, and effectively this can be used to avoid simultaneous tapping.
Homing
Homing (operation with the circulating current method) This function can be used with parallel operation of power transformers using the circulating current method. It makes possible to keep a transformer energized from the HV side, but open on the LV side (hot stand-by), to follow the voltage regulation of
Section 13 1MRK 511 310-UEN B Control
320 Application manual
loaded parallel transformers, and thus be on a proper tap position when the LV circuit breaker closes.
For this function, it is needed to have the LV VTs for each transformer on the cable (tail) side (not the busbar side) of the CB, and to have the LV CB position hardwired to the IED.
In TR8ATCC block for one transformer, the state «Homing» will be defined as the situation when the transformer has information that it belongs to a parallel group (for example, information on T1INCLD=1 or T2INCLD=1 … and so on), at the same time as the binary input DISC on TR8ATCC block is activated by open LV CB. If now the setting parameter OperHoming = On for that transformer, TR8ATCC will act in the following way:
The algorithm calculates the true busbar voltage, by averaging the voltage measurements of the other transformers included in the parallel group (voltage measurement of the disconnected transformer itself is not considered in the calculation).
The value of this true busbar voltage is used in the same way as Uset for control of a single transformer. The disconnected transformer will then automatically initiate URAISE or ULOWER commands (with appropriate t1 or t2 time delay) in order to keep the LV side of the transformer within the deadband of the busbar voltage.
Homing (operation with the master follower method) If one (or more) follower has its LV circuit breaker open and its HV circuit breaker closed, and if OperHoming = On, this follower continues to follow the master just as it would have made with the LV circuit breaker closed. On the other hand, if the LV circuit breaker of the master opens, automatic control will be blocked and TR8ATCC function output MFERR will be activated as the system will not have a master.
Adapt mode, manual control of a parallel group
Adapt mode (operation with the circulating current method) When the circulating current method is used, it is also possible to manually control the transformers as a group. To achieve this, the setting OperationAdapt must be set On, then the control mode for one TR8ATCC shall be set to Manual via the binary input MANCTRL or the local HMI under Main menu/Control/Commands/ TransformerVoltageControl(ATCC,90)/TR8ATCC:x whereas the other TR8ATCCs are left in Automatic. TR8ATCCs in automatic mode will then observe that one transformer in the parallel group is in manual mode and will then automatically be set in adapt mode. As the name indicates they will adapt to the manual tapping of the transformer that has been put in manual mode.
TR8ATCC in adapt mode will continue the calculation of Udi, but instead of adding Udi to the measured busbar voltage, it will compare it with the deadband DU. The following control rules are used:
1MRK 511 310-UEN B Section 13 Control
321 Application manual
1. If Udi is positive and its modulus is greater than DU, then initiate an ULOWER command. Tapping will then take place after appropriate t1/t2 timing.
2. If Udi is negative and its modulus is greater than DU, then initiate an URAISE command. Tapping will then take place after appropriate t1/t2 timing.
3. If Udi modulus is smaller than DU, then do nothing.
The binary output signal ADAPT on the TR8ATCC function block will be activated to indicate that this TR8ATCC is adapting to another TR8ATCC in the parallel group.
It shall be noted that control with adapt mode works as described under the condition that only one transformer in the parallel group is set to manual mode via the binary input MANCTRL or, the local HMI Main menu/Control/Commands/ TransformerVoltageControl(ATCC,90)/TR8ATCC:x.
In order to operate each tap changer individually when the circulating current method is used, the operator must set each TR8ATCC in the parallel group, in manual.
Adapt mode (operation with the master follower method) When in master follower mode, the adapt situation occurs when the setting OperationAdapt is On, and the master is put in manual control with the followers still in parallel master-follower control. In this situation the followers will continue to follow the master the same way as when it is in automatic control.
If one follower in a master follower parallel group is put in manual mode, still with the setting OperationAdaptOn, the rest of the group will continue in automatic master follower control. The follower in manual mode will of course disregard any possible tapping of the master. However, as one transformer in the parallel group is now exempted from the parallel control, the binary output signal ADAPT on TR8ATCC function block will be activated for the rest of the parallel group.
Plant with capacitive shunt compensation (for operation with the circulating current method) If significant capacitive shunt generation is connected in a substation and it is not symmetrically connected to all transformers in a parallel group, the situation may require compensation of the capacitive current to the ATCC.
An asymmetric connection will exist if for example, the capacitor is situated on the LV-side of a transformer, between the CT measuring point and the power transformer or at a tertiary winding of the power transformer, see figure 118. In a situation like this, the capacitive current will interact in opposite way in the different ATCCs with regard to the calculation of circulating currents. The capacitive current is part of the imaginary load current and therefore essential in the calculation. The calculated circulating current and the real circulating currents will in this case not be the same, and they will not reach a minimum at the same time. This might result in a situation when minimizing of the calculated circulating current will not regulate the tap changers to the same tap positions even if the power transformers are equal.
However if the capacitive current is also considered in the calculation of the circulating current, then the influence can be compensated for.
Section 13 1MRK 511 310-UEN B Control
322 Application manual
Load
T1
I L
T2
I cc….T2
I cc….T1
UB
UL
IT1 IT2
IC I T
2- I C
Load
T1
I L
T2
I cc….T2
I cc….T1
UB
UL
IT1 IT2
IT2
IT1
IT1
IC
en06000512.vsd IEC06000512 V1 EN
Figure 118: Capacitor bank on the LV-side
From figure 118 it is obvious that the two different connections of the capacitor banks are completely the same regarding the currents in the primary network. However the CT measured currents for the transformers would be different. The capacitor bank current may flow entirely to the load on the LV side, or it may be divided between the LV and the HV side. In the latter case, the part of IC that goes to the HV side will divide between the two transformers and it will be measured with opposite direction for T2 and T1. This in turn would be misinterpreted as a circulating current, and would upset a correct calculation of Icc. Thus, if the actual connection is as in the left figure the capacitive current IC needs to be compensated for regardless of the operating conditions and in ATCC this is made numerically. The reactive power of the capacitor bank is given as a setting Q1, which makes it possible to calculate the reactive capacitance:
2
1C
U X
Q =
EQUATION1871 V1 EN (Equation 124)
Thereafter the current IC at the actual measured voltage UB can be calculated as:
1MRK 511 310-UEN B Section 13 Control
323 Application manual
3 B
C
C
U I
X =
EQUATION1872 V1 EN (Equation 125)
In this way the measured LV currents can be adjusted so that the capacitor bank current will not influence the calculation of the circulating current.
Three independent capacitor bank values Q1, Q2 and Q3 can be set for each transformer in order to make possible switching of three steps in a capacitor bank in one bay.
Power monitoring The level (with sign) of active and reactive power flow through the transformer, can be monitored. This function can be utilized for different purposes for example, to block the voltage control function when active power is flowing from the LV side to the HV side or to initiate switching of reactive power compensation plant, and so on.
There are four setting parameters P>, P<, Q> and Q< with associated outputs in TR8ATCC and TR1ATCC function blocks PGTFWD, PLTREV, QGTFWD and QLTREV. When passing the pre-set value, the associated output will be activated after the common time delay setting tPower.
The definition of direction of the power is such that the active power P is forward when power flows from the HV-side to the LV-side as shown in figure 119. The reactive power Q is forward when the total load on the LV side is inductive ( reactance) as shown in figure 119.
ATCC
IED
HV-side
Pforward
LV-side IEC06000536_1_en.vsd
Qforward (inductive)
IEC06000536 V2 EN
Figure 119: Power direction references
With the four outputs in the function block available, it is possible to do more than just supervise a level of power flow in one direction. By combining the outputs with logical elements in application configuration, it is also possible to cover for example, intervals as well as areas in the P-Q plane.
Section 13 1MRK 511 310-UEN B Control
324 Application manual
Busbar topology logic Information of the busbar topology that is, position of circuit breakers and isolators, yielding which transformers that are connected to which busbar and which busbars that are connected to each other, is vital for the Automatic voltage control for tap changer, parallel control function TR8ATCC when the circulating current or the master-follower method is used. This information tells each TR8ATCC, which transformers that it has to consider in the parallel control.
In a simple case, when only the switchgear in the transformer bays needs to be considered, there is a built-in function in TR8ATCC block that can provide information on whether a transformer is connected to the parallel group or not. This is made by connecting the transformer CB auxiliary contact status to TR8ATCC function block input DISC, which can be made via a binary input, or via GOOSE from another IED in the substation. When the transformer CB is open, this activates that input which in turn will make a corresponding signal DISC=1 in TR8ATCC data set. This data set is the same data package as the package that contains all TR8ATCC data transmitted to the other transformers in the parallel group (see section «Exchange of information between TR8ATCC functions» for more details). Figure 120 shows an example where T3 is disconnected which will lead to T3 sending the DISC=1 signal to the other two parallel TR8ATCC modules (T1 and T2) in the group. Also see table 26.
T1 T2 T3
99000952.VSD
U1 U2 U3
Z1 Z2 Z3I1 I2 I3=0
IL=I1+I2
IEC99000952 V1 EN
Figure 120: Disconnection of one transformer in a parallel group
When the busbar arrangement is more complicated with more buses and bus couplers/ bus sections, it is necessary to engineer a specific station topology logic. This logic can be built in the application configuration in PCM600 and will keep record on which transformers that are in parallel (in one or more parallel groups). In each TR8ATCC function block there are eight binary inputs (T1INCLD,…, T8INCLD) that will be activated from the logic depending on which transformers that are in parallel with the transformer to whom the TR8ATCC function block belongs.
TR8ATCC function block is also fitted with eight outputs (T1PG,…, T8PG) for indication of the actual composition of the parallel group that it itself is part of. If parallel operation mode has been selected in the IED with setting TrfId = Tx, then the TxPG signal will always be set to 1. The parallel function will consider
1MRK 511 310-UEN B Section 13 Control
325 Application manual
communication messages only from the voltage control functions working in parallel (according to the current station configuration). When the parallel voltage control function detects that no other transformers work in parallel it will behave as a single voltage control function in automatic mode.
Exchange of information between TR8ATCC functions Each transformer in a parallel group needs an Automatic voltage control for tap changer, parallel control TR8ATCC function block of its own for the parallel voltage control. Communication between these TR8ATCCs is made either on the GOOSE interbay communication on the IEC 61850 protocol if TR8ATCC functions reside in different IEDs, or alternatively configured internally in one IED if multiple instances of TR8ATCC reside in the same IED. Complete exchange of TR8ATCC data, analog as well as binary, on GOOSE is made cyclically every 300 ms.
TR8ATCC function block has an output ATCCOUT. This output contains two sets of signals. One is the data set that needs to be transmitted to other TR8ATCC blocks in the same parallel group, and the other is the data set that is transferred to the TCMYLTC or TCLYLTC function block for the same transformer as TR8ATCC block belongs to.
There are 10 binary signals and 6 analog signals in the data set that is transmitted from one TR8ATCC block to the other TR8ATCC blocks in the same parallel group:
Table 24: Binary signals
Signal Explanation TimerOn This signal is activated by the transformer that has started its timer and is going
to tap when the set time has expired.
automaticCTRL Activated when the transformer is set in automatic control
mutualBlock Activated when the automatic control is blocked
disc Activated when the transformer is disconnected from the busbar
receiveStat Signal used for the horizontal communication
TermIsForcedMaster Activated when the transformer is selected Master in the master-follower parallel control mode
TermIsMaster Activated for the transformer that is master in the master-follower parallel control mode
termReadyForMSF Activated when the transformer is ready for master-follower parallel control mode
raiseVoltageOut Order from the master to the followers to tap up
lowerVoltageOut Order from the master to the followers to tap down
Table 25: Analog signals
Signal Explanation voltageBusbar Measured busbar voltage for this transformer
ownLoadCurrim Measured load current imaginary part for this transformer
ownLoadCurrre Measured load current real part for this transformer
Table continues on next page
Section 13 1MRK 511 310-UEN B Control
326 Application manual
Signal Explanation reacSec Transformer reactance in primary ohms referred to the LV side
relativePosition The transformer’s actual tap position
voltage Setpoint The transformer’s set voltage (USet) for automatic control
Manual configuration of VCTR GOOSE data set is required. Note that both data value attributes and quality attributes have to be mapped. The following data objects must be configured:
BusV LodAIm LodARe PosRel SetV VCTRStatus X2
The transformers controlled in parallel with the circulating current method or the master-follower method must be assigned unique identities. These identities are entered as a setting in each TR8ATCC, and they are predefined as T1, T2, T3,…, T8 (transformers 1 to 8). In figure 120 there are three transformers with the parameter TrfId set to T1, T2 and T3, respectively.
For parallel control with the circulating current method or the master-follower method alternatively, the same type of data set as described above, must be exchanged between two TR8ATCC. To achieve this, each TR8ATCC is transmitting its own data set on the output ATCCOUT as previously mentioned. To receive data from the other transformers in the parallel group, the output ATCCOUT from each transformer must be connected (via GOOSE or internally in the application configuration) to the inputs HORIZx (x = identifier for the other transformers in the parallel group) on TR8ATCC function block. Apart from this, there is also a setting in each TR8ATCC =/,…, =/ T1RXOP=Off/On,…, T8RXOP=Off/ On. This setting determines from which of the other transformer individuals that data shall be received. Settings in the three TR8ATCC blocks for the transformers in figure 120, would then be according to the table 26:
Table 26: Setting of TxRXOP
TrfId=T1 T1RXOP= Off
T2RXOP= On
T3RXOP= On
T4RXOP= Off
T5RXOP= Off
T6RXOP= Off
T7RXOP= Off
T8RXOP= Off
TrfId=T2 T1RXOP= On
T2RXOP= Off
T3RXOP= On
T4RXOP= Off
T5RXOP= Off
T6RXOP= Off
T7RXOP= Off
T8RXOP= Off
TrfId=T3 T1RXOP= On
T2RXOP= On
T3RXOP= Off
T4RXOP= Off
T5RXOP= Off
T6RXOP= Off
T7RXOP= Off
T8RXOP= Off
1MRK 511 310-UEN B Section 13 Control
327 Application manual
Observe that this parameter must be set to Off for the own transformer. (for transformer with identity T1 parameter T1RXOP must be set to Off, and so on.
Blocking
Blocking conditions The purpose of blocking is to prevent the tap changer from operating under conditions that can damage it, or otherwise when the conditions are such that power system related limits would be exceeded or when, for example the conditions for automatic control are not met.
For the Automatic voltage control for tap changer function, TR1ATCC for single control and TR8ATCC for parallel control, three types of blocking are used:
Partial Block: Prevents operation of the tap changer only in one direction (only URAISE or ULOWER command is blocked) in manual and automatic control mode.
Auto Block: Prevents automatic voltage regulation, but the tap changer can still be controlled manually.
Total Block: Prevents any tap changer operation independently of the control mode (automatic as well as manual).
Setting parameters for blocking that can be set in TR1ATCC or TR8ATCC under general settings in PST/local HMI are listed in table 27.
Table 27: Blocking settings
Setting Values (Range) Description OCBk (automatically reset)
Alarm Auto Block Auto&Man Block
When any one of the three HV currents exceeds the preset value IBlock, TR1ATCC or TR8ATCC will be temporarily totally blocked. The outputs IBLK and TOTBLK or AUTOBLK will be activated depending on the actual parameter setting.
OVPartBk (automatically reset)
Alarm Auto&Man Block
If the busbar voltage UB(not the compensated load point voltage UVL) exceedsUmax (see figure 111), an alarm will be initiated or further URAISE commands will be blocked. If permitted by setting in PST configuration, Fast Step Down (FSD) of the tap changer will be initiated in order to re-enter the voltage into the range Umin < UB < Umax. The FSD function is blocked when the lowest voltage tap position is reached. The time delay for the FSD function is separately set. The output UHIGH will be activated as long as the voltage is above Umax.
UVPartBk (automatically reset)
Alarm Auto&Man Block
If the busbar voltage UB (not the compensated load point voltage UL) is between Ublock and Umin (see figure111), an alarm will be initiated or further ULOWER commands will be blocked. The output ULOW will be activated.
UVBk (automatically reset)
Alarm Auto Block Auto&Man Block
If the busbar voltage UB falls below Ublock this blocking condition is active. It is recommended to block automatic control in this situation and allow manual control. This is because the situation normally would correspond to a disconnected transformer and then it should be allowed to operate the tap changer before reconnecting the transformer. The outputs UBLK and TOTBLK or AUTOBLK will be activated depending on the actual parameter setting.
Table continues on next page
Section 13 1MRK 511 310-UEN B Control
328 Application manual
Setting Values (Range) Description RevActPartBk(auto matically reset)
Alarm Auto Block
The risk of voltage instability increases as transmission lines become more heavily loaded in an attempt to maximize the efficient use of existing generation and transmission facilities. In the same time lack of reactive power may move the operation point of the power network to the lower part of the P-V-curve (unstable part). Under these conditions, when the voltage starts to drop, it might happen that an URAISE command can give reversed result that is, a lower busbar voltage. Tap changer operation under voltage instability conditions makes it more difficult for the power system to recover. Therefore, it might be desirable to block TR1ATCC or TR8ATCC temporarily. Requirements for this blocking are:
The load current must exceed the set value RevActLim
After an URAISE command, the measured busbar voltage shall have a lower value than its previous value
The second requirement has to be fulfilled for two consecutive URAISE commands
If all three requirements are fulfilled, TR1ATCC or TR8ATCC automatic control will be blocked for raise commands for a period of time given by the setting parameter tRevAct and the output signal REVACBLK will be set. The reversed action feature can be turned off/on with the setting parameter OperationRA.
CmdErrBk (manually reset)
Alarm Auto Block Auto&Man Block
Typical operating time for a tap changer mechanism is around 3-8 seconds. Therefore, the function should wait for a position change before a new command is issued. The command error signal, CMDERRAL on the TCMYLTC or TCLYLTC function block, will be set if the tap changer position does not change one step in the correct direction within the time given by the setting tTCTimeout in TCMYLTC or TCLYLTC function block. The tap changer module TCMYLTC or TCLYLTC will then indicate the error until a successful command has been carried out or it has been reset by changing control mode of TR1ATCC or TR8ATCC function to Manual and then back to Automatic. The outputs CMDERRAL on TCMYLTC or TCLYLTC and TOTBLK or AUTOBLK on TR1ATCC or TR8ATCC will be activated depending on the actual parameter setting. This error condition can be reset by the input RESETERR on TCMYLTC function block, or alternatively by changing control mode of TR1ATCC or TR8ATCC function to Manual and then back to Automatic.
TapChgBk (manually reset
Alarm Auto Block Auto&Man Block
If the input TCINPROG of TCMYLTC or TCLYLTC function block is connected to the tap changer mechanism, then this blocking condition will be active if the TCINPROG input has not reset when the tTCTimeout timer has timed out. The output TCERRAL will be activated depending on the actual parameter setting. In correct operation the TCINPROG shall appear during the URAISE/ULOWER output pulse and disappear before the tTCTimeout time has elapsed. This error condition can be reset by the input RESETERR on TCMYLTC function block, or alternatively by changing control mode of TR1ATCC or TR8ATCC function to Manual and then back to Automatic.
Table continues on next page
1MRK 511 310-UEN B Section 13 Control
329 Application manual
Setting Values (Range) Description TapPosBk (automatically reset/manually reset)
Alarm Auto Block Auto&Man Block
This blocking/alarm is activated by either:
1. The tap changer reaching an end position i.e. one of the extreme positions according to the setting parameters LowVoltTap and HighVoltTap. When the tap changer reaches one of these two positions further commands in the corresponding direction will be blocked. Effectively this will then be a partial block if Auto Block or Auto&Man Block is set. The outputs POSERRAL and LOPOSAL or HIPOSAL will be activated.
2. Tap Position Error which in turn can be caused by one of the following conditions:
Tap position is out of range that is, the indicated position is above or below the end positions.
The tap changer indicates that it has changed more than one position on a single raise or lower command.
The tap position reading shows a BCD code error (unaccepted combination) or a parity fault.
The reading of tap position shows a mA value that is out of the mA-range. Supervision of the input signal for MIM is made by setting the MIM parameters I_Max and I_Min to desired values, for example, I_Max = 20mA and I_Min = 4mA.
Very low or negative mA-values. Indication of hardware fault on BIM or MIM module.
Supervision of the input hardware module is provided by connecting the corresponding error signal to the INERR input (input module error) or BIERR on TCMYLTC or TCLYLTC function block.
Interruption of communication with the tap changer.
The outputs POSERRAL and AUTOBLK or TOTBLK will be set. This error condition can be reset by the input RESETERR on TCMYLTCfunction block, or alternatively by changing control mode of TR1ATCC or TR8ATCC function to Manual and then back to Automatic.
CircCurrBk (automatically reset)
Alarm Auto Block Auto&Man Block
When the magnitude of the circulating current exceeds the preset value (setting parameter CircCurrLimit) for longer time than the set time delay (setting parameter tCircCurr) it will cause this blocking condition to be fulfilled provided that the setting parameter OperCCBlock is On. The signal resets automatically when the circulating current decreases below the preset value. Usually this can be achieved by manual control of the tap changers. TR1ATCC or TR8ATCC outputs ICIRC and TOTBLK or AUTOBLK will be activated depending on the actual parameter setting.
MFPosDiffBk (manually reset)
Alarm Auto Block
In the master-follower mode, if the tap difference between a follower and the master is greater than the set value (setting parameter MFPosDiffLim) then this blocking condition is fulfilled and the outputs OUTOFPOS and AUTOBLK (alternatively an alarm) will be set.
Setting parameters for blocking that can be set in TR1ATCC or TR8ATCC under setting group Nx in PST/ local HMI are listed in table 28.
Section 13 1MRK 511 310-UEN B Control
330 Application manual
Table 28: Blocking settings
Setting Value (Range) Description TotalBlock (manually reset) On/Off TR1ATCC or TR8ATCC function
can be totally blocked via the setting parameter TotalBlock, which can be set On/Off from the local HMI or PST. The output TOTBLK will be activated.
AutoBlock (manually reset) On/Off TR1ATCC or TR8ATCC function can be blocked for automatic control via the setting parameter AutoBlock, which can be set On/Off from the local HMI or PST. The output AUTOBLK will be set.
TR1ATCC or TR8ATCC blockings that can be made via input signals in the function block are listed in table 29.
Table 29: Blocking via binary inputs
Input name Activation Description BLOCK (manually reset) On/Off(via binary input) The voltage control function can
be totally blocked via the binary input BLOCK on TR1ATCC or TR8ATCC function block. The output TOTBLK will be activated.
EAUTOBLK (manually reset) On/Off(via binary input) The voltage control function can be blocked for automatic control via the binary input EAUTOBLK on TR1ATCC or TR8ATCC function block. The output AUTOBLK will be activated. Deblocking is made via the input DEBLKAUT.
Blockings activated by the operating conditions, without setting or separate external activation possibilities, are listed in table 30.
1MRK 511 310-UEN B Section 13 Control
331 Application manual
Table 30: Blockings without setting possibilities
Activation Type of blocking Description Disconnected transformer (automatically reset)
Auto Block Automatic control is blocked for a transformer when parallel control with the circulating current method is used, and that transformer is disconnected from the LV-busbar. (This is under the condition that the setting OperHoming is selected Off for the disconnected transformer. Otherwise the transformer will get into the state Homing). The binary input signal DISC in TR1ATCC or TR8ATCC function shall be used to supervise if the transformer LV circuit breaker is closed or not. The outputs TRFDISC and AUTOBLK will be activated . Blocking will be removed when the transformer is reconnected (input signal DISC set back to zero).
No Master/More than one Master (automatically reset)
Auto Block Automatic control is blocked when parallel control with the master-follower method is used, and the master is disconnected from the LV-busbar. Also if there for some reason should be a situation with more than one master in the system, the same blocking will occur. The binary input signal DISC in TR1ATCC or TR8ATCC function shall be used to supervise if the transformer LV circuit breaker is closed or not. The outputs TRFDISC, MFERR and AUTOBLK will be activated. The followers will also be blocked by mutual blocking in this situation. Blocking will be removed when the transformer is reconnected (input signal DISC set back to zero).
One transformer in a parallel group switched to manual control (automatically reset)
Auto Block When the setting OperationAdapt is Off, automatic control will be blocked when parallel control with the master-follower or the circulating current method is used, and one of the transformers in the group is switched from auto to manual. The output AUTOBLK will be activated.
Communication error (COMMERR) (automatic deblocking)
Auto block If the horizontal communication (GOOSE) for any one of TR8ATCCs in the group fails it will cause blocking of automatic control in all TR8ATCC functions, which belong to that parallel group. This error condition will be reset automatically when the communication is re- established. The outputs COMMERR and AUTOBLK will be set.
Circulating current method
Mutual blocking When one parallel instance of voltage control TR8ATCC blocks its operation, all other TR8ATCCs working in parallel with that module, shall block their operation as well. To achieve this, the affected TR8ATCC function broadcasts a mutual block to the other group members via the horizontal communication. When mutual block is received from any of the group members, automatic operation is blocked in the receiving TR8ATCCs that is, all units of the parallel group.
The following conditions in any one of TR8ATCCs in the group will cause mutual blocking when the circulating current method is used:
Section 13 1MRK 511 310-UEN B Control
332 Application manual
Over-Current Total block via settings Total block via configuration Analog input error Automatic block via settings Automatic block via configuration Under-Voltage Command error Position indication error Tap changer error Reversed Action Circulating current Communication error
Master-follower method When the master is blocked, the followers will not tap by themselves and there is consequently no need for further mutual blocking. On the other hand, when a follower is blocked there is a need to send a mutual blocking signal to the master. This will prevent a situation where the rest of the group otherwise would be able to tap away from the blocked individual, and that way cause high circulating currents.
Thus, when a follower is blocked, it broadcasts a mutual block on the horizontal communication. The master picks up this message, and blocks its automatic operation as well.
Besides the conditions listed above for mutual blocking with the circulating current method, the following blocking conditions in any of the followers will also cause mutual blocking:
Master-follower out of position Master-follower error (No master/More than one master)
General It should be noted that partial blocking will not cause mutual blocking.
TR8ATCC, which is the source of the mutual blocking will set its AUTOBLK output as well as the output which corresponds to the actual blocking condition for example, IBLK for over-current blocking. The other TR8ATCCs that receive a mutual block signal will only set its AUTOBLK output.
The mutual blocking remains until TR8ATCC that dispatched the mutual block signal is de-blocked. Another way to release the mutual blocking is to force TR8ATCC, which caused mutual blocking to Single mode operation. This is done by activating the binary input SNGLMODE on TR8ATCC function block or by setting the parameter OperationPAR to Off from the built-in local HMI or PST.
TR8ATCC function can be forced to single mode at any time. It will then behave exactly the same way as described in section «Automatic voltage control for a single
1MRK 511 310-UEN B Section 13 Control
333 Application manual
transformer», except that horizontal communication messages are still sent and received, but the received messages are ignored. TR8ATCC is at the same time also automatically excluded from the parallel group.
Disabling of blockings in special situations When the Automatic voltage control for tap changer TR1ATCC for single control and TR8ATCC for parallel control, function block is connected to read back information (tap position value and tap changer in progress signal) it may sometimes be difficult to find timing data to be set in TR1ATCC or TR8ATCC for proper operation. Especially at commissioning of for example, older transformers the sensors can be worn and the contacts maybe bouncing etc. Before the right timing data is set it may then happen that TR1ATCC or TR8ATCC becomes totally blocked or blocked in auto mode because of incorrect settings. In this situation, it is recommended to temporarily set these types of blockings to alarm instead until the commissioning of all main items are working as expected.
Tap Changer position measurement and monitoring
Tap changer extreme positions This feature supervises the extreme positions of the tap changer according to the settings LowVoltTap and HighVoltTap. When the tap changer reaches its lowest/ highest position, the corresponding ULOWER/URAISE command is prevented in both automatic and manual mode.
Monitoring of tap changer operation The Tap changer control and supervision, 6 binary inputs TCMYLTC or 32 binary inputs TCLYLTC output signal URAISE or ULOWER is set high when TR1ATCC or TR8ATCC function has reached a decision to operate the tap changer. These outputs from TCMYLTC and TCLYLTC function blocks shall be connected to a binary output module, BOM in order to give the commands to the tap changer mechanism. The length of the output pulse can be set via TCMYLTC or TCLYLTC setting parameter tPulseDur. When an URAISE/ULOWER command is given, a timer ( set by setting tTCTimeout ) (settable in PST/local HMI) is also started, and the idea is then that this timer shall have a setting that covers, with some margin, a normal tap changer operation.
Usually the tap changer mechanism can give a signal, Tap change in progress, during the time that it is carrying through an operation. This signal from the tap changer mechanism can be connected via a BIM module to TCMYLTC or TCLYLTC input TCINPROG, and it can then be used by TCMYLTC or TCLYLTC function in three ways, which is explained below with the help of figure 121.
Section 13 1MRK 511 310-UEN B Control
334 Application manual
URAISE/ULOWER
tTCTimeout
TCINPROG
a h d
e f
g
cb
IEC06000482_2_en.vsd
IEC06000482 V2 EN
Figure 121: Timing of pulses for tap changer operation monitoring
pos Description
a Safety margin to avoid that TCINPROG is not set high without the simultaneous presence of an URAISE or ULOWER command.
b Time setting tPulseDur.
c Fixed extension 4 sec. of tPulseDur, made internally in TCMYLTC or TCLYLTC function.
d Time setting tStable
e New tap position reached, making the signal tap change in progress disappear from the tap changer, and a new position reported.
f The new tap position available in TCMYLTC or TCLYLTC.
g Fixed extension 2 sec. of TCINPROG, made internally in TCMYLTC or TCLYLTC function.
h Safety margin to avoid that TCINPROG extends beyond tTCTimeout.
The first use is to reset the Automatic voltage control for tap changer function TR1ATCC for single control and TR8ATCC for parallel control as soon as the signal TCINPROG disappears. If the TCINPROG signal is not fed back from the tap changer mechanism, TR1ATCC or TR8ATCC will not reset until tTCTimeout has timed out. The advantage with monitoring the TCINPROG signal in this case is thus that resetting of TR1ATCC or TR8ATCC can sometimes be made faster, which in turn makes the system ready for consecutive commands in a shorter time.
The second use is to detect a jammed tap changer. If the timer tTCTimeout times out before the TCINPROG signal is set back to zero, the output signal TCERRAL is set high and TR1ATCC or TR8ATCC function is blocked.
The third use is to check the proper operation of the tap changer mechanism. As soon as the input signal TCINPROG is set back to zero TCMYLTC or TCLYLTC function expects to read a new and correct value for the tap position. If this does not happen the output signal CMDERRAL is set high and TR1ATCC or TR8ATCC function is blocked. The fixed extension (g) 2 sec. of TCINPROG, is made to prevent a situation where this could happen despite no real malfunction.
1MRK 511 310-UEN B Section 13 Control
335 Application manual
In figure 121, it can be noted that the fixed extension (c) 4 sec. of tPulseDur, is made to prevent a situation with TCINPROG set high without the simultaneous presence of an URAISE or ULOWER command. If this would happen, TCMYLTC or TCLYLTC would see this as a spontaneous TCINPROG signal without an accompanying URAISE or ULOWER command, and this would then lead to the output signal TCERRAL being set high and TR1ATCC or TR8ATCC function being blocked. Effectively this is then also a supervision of a run-away tap situation.
Hunting detection Hunting detection is provided in order to generate an alarm when the voltage control gives an abnormal number of commands or abnormal sequence of commands within a pre-defined period of time.
There are three hunting functions:
1. The Automatic voltage control for tap changer function, TR1ATCC for single control and TR8ATCC for parallel control will activate the output signal DAYHUNT when the number of tap changer operations exceed the number given by the setting DayHuntDetect during the last 24 hours (sliding window). Active as well in manual as in automatic mode.
2. TR1ATCC or TR8ATCC function will activate the output signal HOURHUNT when the number of tap changer operations exceed the number given by the setting HourHuntDetect during the last hour (sliding window). Active as well in manual as in automatic mode.
3. TR1ATCC or TR8ATCC function will activate the output signal HUNTING when the total number of contradictory tap changer operations (RAISE, LOWER, RAISE, LOWER, and so on) exceeds the pre-set value given by the setting NoOpWindow within the time sliding window specified via the setting parameter tWindowHunt. Only active in automatic mode.
Hunting can be the result of a narrow deadband setting or some other abnormalities in the control system.
Wearing of the tap changer contacts Two counters, ContactLife and NoOfOperations are available within the Tap changer control and supervision function, 6 binary inputs TCMYLTC or 32 binary inputs TCLYLTC. They can be used as a guide for maintenance of the tap changer mechanism. The ContactLife counter represents the remaining number of operations (decremental counter) at rated load.
ContactLife ContactLifen+1 n Irated
Iload a
= —
EQUATION1873 V2 EN (Equation 126)
where n is the number of operations and is an adjustable setting parameter, CLFactor, with default value is set to 2. With this default setting an operation at rated load (current measured on HV-side) decrements the ContactLife counter with 1.
Section 13 1MRK 511 310-UEN B Control
336 Application manual
The NoOfOperations counter simply counts the total number of operations (incremental counter).
Both counters are stored in a non-volatile memory as well as, the times and dates of their last reset. These dates are stored automatically when the command to reset the counter is issued. It is therefore necessary to check that the IED internal time is correct before these counters are reset. The counter value can be reset on the local HMI under Main menu/Reset/Reset counters/TransformerTapControl(YLTC,84)/ TCMYLTC:1 or TCLYLTC:1/Reset Counter and ResetCLCounter
Both counters and their last reset dates are shown on the local HMI as service values under Main menu/Test/Function status/Control/ TransformerTapControl(YLTC,84)/TCMYLTC:x/TCLYLTC:x/ CLCNT_VALandMain menu/Test/Function status/Control/ TransformerTapControl (YLTC,84)/TCMYLTC:x/TCLYLTC:x/CNT_VAL
13.4.3 Setting guidelines
13.4.3.1 TR1ATCC or TR8ATCC general settings
TrfId: The transformer identity is used to identify transformer individuals in a parallel group. Thus, transformers that can be part of the same parallel group must have unique identities. Moreover, all transformers that communicate over the same horizontal communication (GOOSE) must have unique identities.
Xr2: The reactance of the transformer in primary ohms referred to the LV side.
tAutoMSF: Time delay set in a follower for execution of a raise or lower command given from a master. This feature can be used when a parallel group is controlled in the master-follower mode, follow tap, and it is individually set for each follower, which means that different time delays can be used in the different followers in order to avoid simultaneous tapping if this is wanted. It shall be observed that it is not applicable in the follow command mode.
OperationAdapt: This setting enables or disables adapt mode for parallel control with the circulating current method or the master-follower method.
MFMode: Selection of Follow Command or Follow Tap in the master-follower mode.
CircCurrBk: Selection of action to be taken in case the circulating current exceeds CircCurrLimit.
CmdErrBk: Selection of action to be taken in case the feedback from the tap changer has resulted in command error.
OCBk: Selection of action to be taken in case any of the three phase currents on the HV-side has exceeded Iblock.
MFPosDiffBk: Selection of action to be taken in case the tap difference between a follower and the master is greater than MFPosDiffLim.
1MRK 511 310-UEN B Section 13 Control
337 Application manual
OVPartBk: Selection of action to be taken in case the busbar voltage UB exceeds Umax.
RevActPartBk: Selection of action to be taken in case Reverse Action has been activated.
TapChgBk: Selection of action to be taken in case a Tap Changer Error has been identified.
TapPosBk: Selection of action to be taken in case of Tap Position Error, or if the tap changer has reached an end position.
UVBk: Selection of action to be taken in case the busbar voltage UB falls below Ublock.
UVPartBk: Selection of action to be taken in case the busbar voltage UB is between Ublock and Umin.
13.4.3.2 TR1ATCC or TR8ATCC Setting group
General Operation: Switching automatic voltage control for tap changer, TR1ATCC for single control and TR8ATCC for parallel control function On/Off.
I1Base: Base current in primary Ampere for the HV-side of the transformer.
I2Base: Base current in primary Ampere for the LV-side of the transformer.
UBase: Base voltage in primary kV for the LV-side of the transformer.
MeasMode: Selection of single phase, or phase-phase, or positive sequence quantity to be used for voltage and current measurement on the LV-side. The involved phases are also selected. Thus, single phase as well as phase-phase or three-phase feeding on the LV-side is possible but it is commonly selected for current and voltage.
Q1, Q2 and Q3: Mvar value of a capacitor bank or reactor that is connected between the power transformer and the CT, such that the current of the capacitor bank (reactor) needs to be compensated for in the calculation of circulating currents. There are three independent settings Q1, Q2 and Q3 in order to make possible switching of three steps in a capacitor bank in one bay.
TotalBlock: When this setting is On the voltage control function, TR1ATCC for single control and TR8ATCC for parallel control, is totally blocked for manual as well as automatic control.
AutoBlock: When this setting is On the voltage control function, TR1ATCC for single control and TR8ATCC for parallel control, is blocked for automatic control.
Section 13 1MRK 511 310-UEN B Control
338 Application manual
Operation FSDMode: This setting enables/disables the fast step down function. Enabling can be for automatic and manual control, or for only automatic control alternatively.
tFSD: Time delay to be used for the fast step down tapping.
Voltage UseCmdUSet: This setting enabled makes it possible to set the target voltage level via IEC 61850 set point command. This, in turn, makes the setting USet redundant.
USet: Setting value for the target voltage, to be set in percent of UBase.
UDeadband: Setting value for one half of the outer deadband, to be set in percent of UBase. The deadband is symmetrical around USet, see section «Automatic voltage control for a single transformer», figure 111. In that figure UDeadband is equal to DU. The setting is normally selected to a value near the power transformers tap changer voltage step (typically 75 — 125% of the tap changer step).
UDeadbandInner: Setting value for one half of the inner deadband, to be set in percent of UBase. The inner deadband is symmetrical around USet, see section «Automatic voltage control for a single transformer»,figure 111. In that figure UDeadbandInner is equal to DUin. The setting shall be smaller than UDeadband. Typically the inner deadband can be set to 25-70% of the UDeadband value.
Umax: This setting gives the upper limit of permitted busbar voltage (see section «Automatic voltage control for a single transformer», figure 111). It is set in percent of UBase. If OVPartBk is set to Auto&ManBlock, then busbar voltages above Umax will result in a partial blocking such that only lower commands are permitted.
Umin This setting gives the lower limit of permitted busbar voltage (see section «Automatic voltage control for a single transformer», figure 111). It is set in percent of UBase. If UVPartBk is set to Auto Block orAuto&ManBlock, then busbar voltages below Umin will result in a partial blocking such that only raise commands are permitted.
Ublock: Voltages below Ublock normally correspond to a disconnected transformer and therefore it is recommended to block automatic control for this condition (setting UVBk). Ublock is set in percent of UBase.
Time t1Use: Selection of time characteristic (definite or inverse) for t1.
t1: Time delay for the initial (first) raise/lower command.
t2Use: Selection of time characteristic (definite or inverse) for t2.
t2: Time delay for consecutive raise/lower commands. In the circulating current method, the second, third, etc. commands are all executed with time delay t2 independently of which transformer in the parallel group that is tapping. In the master-
1MRK 511 310-UEN B Section 13 Control
339 Application manual
follower method with the follow tap option, the master is executing the second, third, etc. commands with time delay t2. The followers on the other hand read the masters tap position, and adapt to that with the additional time delay given by the setting tAutoMSF and set individually for each follower.
tMin: The minimum operate time when inverse time characteristic is used (see section «Time characteristic», figure 112).
Line voltage drop compensation (LDC) OpertionLDC: Sets the line voltage drop compensation function On/Off.
OperCapaLDC: This setting, if set On, will permit the load point voltage to be greater than the busbar voltage when line voltage drop compensation is used. That situation can be caused by a capacitive load. When the line voltage drop compensation function is used for parallel control with the reverse reactance method, then OperCapaLDC must always be set On.
Rline and Xline: For line voltage drop compensation, these settings give the line resistance and reactance from the station busbar to the load point. The settings for Rline and Xline are given in primary system ohms. If more than one line is connected to the LV busbar, equivalent Rline and Xline values should be calculated and given as settings.
When the line voltage drop compensation function is used for parallel control with the reverse reactance method, then the compensated voltage which is designated load point voltage UL is effectively an increase in voltage up into the transformer. To achieve this voltage increase, Xline must be negative. The sensitivity of the parallel voltage regulation is given by the magnitude of Rline and Xline settings, with Rline being important in order to get a correct control of the busbar voltage. This can be realized in the following way. Figure 113 shows the vector diagram for a transformer controlled in a parallel group with the reverse reactance method and with no circulation (for example, assume two equal transformers on the same tap position). The load current lags the busbar voltage UB with the power factor j and the argument of the impedance Rline and Xline is designated j1.
Section 13 1MRK 511 310-UEN B Control
340 Application manual
UB
jIT*Xline
UL
Xline
Rline
Zline
IT
IT*Rline
j
j1
j2
DU
en06000626.vsd
IEC06000626 V1 EN
Figure 122: Transformer with reverse reactance regulation and no circulating current
The voltage DU=UB-UL=IT*Rline+j IT*Xline has the argument j2 and it is realised that if j2 is slightly less than -90, then UL will have approximately the same length as UB regardless of the magnitude of the transformer load current IT (indicated with the dashed line). The automatic tap change control regulates the voltage towards a set target value, representing a voltage magnitude, without considering the phase angle. Thus, UB as well as UL and also the dashed line could all be said to be on the target value.
Assume that we want to achieve that j2 = -90, then:
0 1 1( )90
0 1
0 1
90
90
j jj j
U Z I
Ue Ze Ie ZIej j jj
j j
j j
+-
D =
D = =
— = +
= — —
EQUATION1938 V1 EN (Equation 127)
If for example cosj = 0.8 then j = arcos 0.8 = 37. With the references in figure 122, j will be negative (inductive load) and we get:
0 0 0 1 ( 37 ) 90 53j = — — — = —
EQUATION1939 V1 EN (Equation 128)
1MRK 511 310-UEN B Section 13 Control
341 Application manual
To achieve a more correct regulation, an adjustment to a value of j2 slightly less than -90 (2 4 less) can be made.
The effect of changing power factor of the load will be that j2 will no longer be close to -90 resulting in UL being smaller or greater than UB if the ratio Rline/Xline is not adjusted.
Figure 123 shows an example of this where the settings of Rline and Xline for j = 11 from figure 122 has been applied with a different value of j (j = 30).
UB
jIT*Xline
UL
Xline
Rline
Zline
IT
IT*Rline
j=300
j1
j2
DU
j1=110-900=-790
en06000630.vsd
IEC06000630 V1 EN
Figure 123: Transformer with reverse reactance regulation poorly adjusted to the power factor
As can be seen in figure 123, the change of power factor has resulted in an increase of j2 which in turn causes the magnitude of UL to be greater than UB. It can also be noted that an increase in the load current aggravates the situation, as does also an increase in the setting of Zline (Rline and Xline).
Apparently the ratio Rline/Xline according to equation 128, that is the value of j1 must be set with respect to the power factor, also meaning that the reverse reactance method should not be applied to systems with varying power factor.
The setting of Xline gives the sensitivity of the parallel regulation. If Xline is set too low, the transformers will not pull together and a run away tap situation will occur. On the other hand, a high setting will keep the transformers strongly together with no, or only a small difference in tap position, but the voltage regulation as such will be more sensitive to a deviation from the anticipated power factor. A too high setting of Xline can cause a hunting situation as the transformers will then be prone to over react on deviations from the target value.
There is no rule for the setting of Xline such that an optimal balance between control response and susceptibility to changing power factor is achieved. One way of determining the setting is by trial and error. This can be done by setting e.g. Xline equal
Section 13 1MRK 511 310-UEN B Control
342 Application manual
to half of the transformer reactance, and then observe how the parallel control behaves during a couple of days, and then tune it as required. It shall be emphasized that a quick response of the regulation that quickly pulls the transformer tap changers into equal positions, not necessarily corresponds to the optimal setting. This kind of response is easily achieved by setting a high Xline value, as was discussed above, and the disadvantage is then a high susceptibility to changing power factor.
A combination of line voltage drop compensation and parallel control with the negative reactance method is possible to do simply by adding the required Rline values and the required Xline values separately to get the combined impedance. However, the line drop impedance has a tendency to drive the tap changers apart, which means that the reverse reactance impedance normally needs to be increased.
Load voltage adjustment (LVA) LVAConst1: Setting of the first load voltage adjustment value. This adjustment of the target value USet is given in percent of UBase.
LVAConst2: Setting of the second load voltage adjustment value. This adjustment of the target value USet is given in percent of UBase.
LVAConst3: Setting of the third load voltage adjustment value. This adjustment of the target value USet is given in percent of UBase.
LVAConst4: Setting of the fourth load voltage adjustment value. This adjustment of the target value USet is given in percent of UBase.
VRAuto: Setting of the automatic load voltage adjustment. This adjustment of the target value USet is given in percent of UBase, and it is proportional to the load current with the set value reached at the nominal current I2Base.
RevAct OperationRA: This setting enables/disables the reverse action partial blocking function.
tRevAct: After the reverse action has picked up, this time setting gives the time during which the partial blocking is active.
RevActLim: Current threshold for the reverse action activation. This is just one of two criteria for activation of the reverse action partial blocking.
Tap changer control (TCCtrl) Iblock: Current setting of the over current blocking function. In case, the transformer is carrying a current exceeding the rated current of the tap changer for example, because of an external fault. The tap changer operations shall be temporarily blocked. This function typically monitors the three phase currents on the HV side of the transformer.
DayHuntDetect: Setting of the number of tap changer operations required during the last 24 hours (sliding window) to activate the signal DAYHUNT
1MRK 511 310-UEN B Section 13 Control
343 Application manual
HourHuntDetect: Setting of the number of tap changer operations required during the last hour (sliding window) to activate the signal HOURHUNT
tWindowHunt: Setting of the time window for the window hunting function. This function is activated when the number of contradictory commands to the tap changer exceeds the specified number given by NoOpWindow within the time tWindowHunt.
NoOpWindow: Setting of the number of contradictory tap changer operations (RAISE, LOWER, RAISE, LOWER etc.) required during the time window tWindowHunt to activate the signal HUNTING.
Power P>: When the active power exceeds the value given by this setting, the output PGTFWD will be activated after the time delay tPower. It shall be noticed that the setting is given with sign, which effectively means that a negative value of P> means an active power greater than a value in the reverse direction. This is shown in figure 124 where a negative value of P> means pickup for all values to the right of the setting. Reference is made to figure 119 for definition of forward and reverse direction of power through the transformer.
en06000634_2_en.vsd
PP>
IEC06000634 V2 EN
Figure 124: Setting of a negative value for P>
P<: When the active power falls below the value given by this setting, the output PLTREV will be activated after the time delay tPower. It shall be noticed that the setting is given with sign, which effectively means that, for example a positive value of P< means an active power less than a value in the forward direction. This is shown in figure 125 where a positive value of P< means pickup for all values to the left of the setting. Reference is made to figure 119 for definition of forward and reverse direction of power through the transformer.
en06000635_2_en.vsd
PP<
IEC06000635 V2 EN
Figure 125: Setting of a positive value for P<
Section 13 1MRK 511 310-UEN B Control
344 Application manual
Q>: When the reactive power exceeds the value given by this setting, the output QGTFWD will be activated after the time delay tPower. It shall be noticed that the setting is given with sign, which effectively means that the function picks up for all values of reactive power greater than the set value, similar to the functionality for P>.
Q<: When the reactive power falls below the value given by this setting, the output QLTREV will be activated after the time delay tPower. It shall be noticed that the setting is given with sign, which effectively means that the function picks up for all values of reactive power less than the set value, similar to the functionality for P<.
tPower: Time delay for activation of the power monitoring output signals (PGTFWD, PLTREV, QGTFWD and QLTREV).
Parallel control (ParCtrl) OperationPAR: Setting of the method for parallel operation.
OperCCBlock: This setting enables/disables blocking if the circulating current exceeds CircCurrLimit.
CircCurrLimit: Pick up value for the circulating current blocking function. The setting is made in percent of I2Base.
tCircCurr: Time delay for the circulating current blocking function.
Comp: When parallel operation with the circulating current method is used, this setting increases or decreases the influence of the circulating current on the regulation.
If the transformers are connected to the same bus on the HV- as well as the LV-side, Comp can be calculated with the following formula which is valid for any number of two-winding transformers in parallel, irrespective if the transformers are of different size and short circuit impedance.
2 UComp a 100% n p D
=
EQUATION1941 V1 EN (Equation 129)
where:
DU is the deadband setting in percent.
n denotes the desired number of difference in tap position between the transformers, that shall give a voltage deviation Udi which corresponds to the dead-band setting.
p is the tap step (in percent of transformer nominal voltage).
a is a safety margin that shall cover component tolerances and other non-linear measurements at different tap positions (for example, transformer reactances
1MRK 511 310-UEN B Section 13 Control
345 Application manual
changes from rated value at the ends of the regulation range). In most cases a value of a = 1.25 serves well.
This calculation gives a setting of Comp that will always initiate an action (start timer) when the transformers have n tap positions difference.
OperSimTap: Enabling/disabling the functionality to allow only one transformer at a time to execute a Lower/Raise command. This setting is applicable only to the circulating current method, and when enabled, consecutive tap changes of the next transformer (if required) will be separated with the time delay t2.
OperUsetPar: Enables/disables the use of a common setting for the target voltage USet. This setting is applicable only to the circulating current method, and when enabled, a mean value of the USet values for the transformers in the same parallel group will be calculated and used.
OperHoming: Enables/disables the homing function. Applicable for parallel control with the circulating current method, as well for parallel control with the master- follower method.
VTmismatch: Setting of the level for activation of the output VTALARM in case the voltage measurement in one transformer bay deviates to the mean value of all voltage measurements in the parallel group.
tVTmismatch: Time delay for activation of the output VTALARM.
T1RXOP…….T8RXOP: This setting is set On for every transformer that can participate in a parallel group with the transformer in case. For this transformer (own transformer), the setting must always be Off.
TapPosOffs: This setting gives the tap position offset in relation to the master so that the follower can follow the masters tap position including this offset. Applicable when regulating in the follow tap command mode.
MFPosDiffLim: When the difference (including a possible offset according to TapPosOffs) between a follower and the master reaches the value in this setting, then the output OUTOFPOS in the Automatic voltage control for tap changer, parallel control TR8ATCC function block of the follower will be activated after the time delay tMFPosDiff.
tMFPosDiff: Time delay for activation of the output OUTOFPOS.
13.4.3.3 TCMYLTC and TCLYLTC general settings
LowVoltTap: This gives the tap position for the lowest LV-voltage.
HighVoltTap: This gives the tap position for the highest LV-voltage.
mALow: The mA value that corresponds to the lowest tap position. Applicable when reading of the tap position is made via a mA signal.
Section 13 1MRK 511 310-UEN B Control
346 Application manual
mAHigh: The mA value that corresponds to the highest tap position. Applicable when reading of the tap position is made via a mA signal.
CodeType: This setting gives the method of tap position reading.
UseParity: Sets the parity check On/Off for tap position reading when this is made by Binary, BCD, or Gray code.
tStable: This is the time that needs to elapse after a new tap position has been reported to TCMYLTC until it is accepted.
CLFactor: This is the factor designated a in equation 129. When a tap changer operates at nominal load current (current measured on the HV-side), the ContactLife counter decrements with 1, irrespective of the setting of CLFactor. The setting of this factor gives the weighting of the deviation with respect to the load current.
InitCLCounter: The ContactLife counter monitors the remaining number of operations (decremental counter). The setting InitCLCounter then gives the start value for the counter that is, the total number of operations at rated load that the tap changer is designed for.
EnabTapCmd: This setting enables/disables the lower and raise commands to the tap changer. It shall be On for voltage control, and Off for tap position feedback to the transformer differential protection T2WPDIF or T3WPDIF.
TCMYLTC and TCLYLTC Setting group
General Operation: Switching the TCMYLTC or TCLYLTC function On/Off.
IBase: Base current in primary Ampere for the HV-side of the transformer.
tTCTimeout: This setting gives the maximum time interval for a raise or lower command to be completed.
tPulseDur: Length of the command pulse (URAISE/ULOWER) to the tap changer. It shall be noticed that this pulse has a fixed extension of 4 seconds that adds to the setting value of tPulseDur.
13.5 Logic rotating switch for function selection and LHMI presentation SLGAPC
13.5.1 Identification Function description IEC 61850
identification IEC 60617 identification
ANSI/IEEE C37.2 device number
Logic rotating switch for function selection and LHMI presentation
SLGAPC — —
1MRK 511 310-UEN B Section 13 Control
347 Application manual
13.5.2 Application
The logic rotating switch for function selection and LHMI presentation function (SLGAPC) (or the selector switch function block, as it is also known) is used to get a selector switch functionality similar with the one provided by a hardware multi- position selector switch. Hardware selector switches are used extensively by utilities, in order to have different functions operating on pre-set values. Hardware switches are however sources for maintenance issues, lower system reliability and extended purchase portfolio. The virtual selector switches eliminate all these problems.
SLGAPC function block has two operating inputs (UP and DOWN), one blocking input (BLOCK) and one operator position input (PSTO).
SLGAPC can be activated both from the local HMI and from external sources (switches), via the IED binary inputs. It also allows the operation from remote (like the station computer). SWPOSN is an integer value output, giving the actual output number. Since the number of positions of the switch can be established by settings (see below), one must be careful in coordinating the settings with the configuration (if one sets the number of positions to x in settings for example, there will be only the first x outputs available from the block in the configuration). Also the frequency of the (UP or DOWN) pulses should be lower than the setting tPulse.
From the local HMI, the selector switch can be operated from Single-line diagram (SLD).
13.5.3 Setting guidelines
The following settings are available for the Logic rotating switch for function selection and LHMI presentation (SLGAPC) function:
Operation: Sets the operation of the function On or Off.
NrPos: Sets the number of positions in the switch (max. 32).
OutType: Steady or Pulsed.
tPulse: In case of a pulsed output, it gives the length of the pulse (in seconds).
tDelay: The delay between the UP or DOWN activation signal positive front and the output activation.
StopAtExtremes: Sets the behavior of the switch at the end positions if set to Disabled, when pressing UP while on first position, the switch will jump to the last position; when pressing DOWN at the last position, the switch will jump to the first position; when set to Enabled, no jump will be allowed.
13.6 Selector mini switch VSGAPC
Section 13 1MRK 511 310-UEN B Control
348 Application manual
13.6.1 Identification Function description IEC 61850
identification IEC 60617 identification
ANSI/IEEE C37.2 device number
Selector mini switch VSGAPC — —
13.6.2 Application
Selector mini switch (VSGAPC) function is a multipurpose function used in the configuration tool in PCM600 for a variety of applications, as a general purpose switch. VSGAPC can be used for both acquiring an external switch position (through the IPOS1 and the IPOS2 inputs) and represent it through the single line diagram symbols (or use it in the configuration through the outputs POS1 and POS2) as well as, a command function (controlled by the PSTO input), giving switching commands through the CMDPOS12 and CMDPOS21 outputs.
The output POSITION is an integer output, showing the actual position as an integer number 0 3.
An example where VSGAPC is configured to switch Autorecloser onoff from a button symbol on the local HMI is shown in figure126. The I and O buttons on the local HMI are normally used for onoff operations of the circuit breaker.
IEC07000112-3-en.vsd
PSTO
CMDPOS12
IPOS1
NAM_POS1 NAM_POS2
IPOS2
CMDPOS21 OFF ON
VSGAPC
SMBRREC ON OFF
SETON
INTONE
INVERTER INPUT OUT
IEC07000112 V3 EN
Figure 126: Control of Autorecloser from local HMI through Selector mini switch
VSGAPC is also provided with IEC 61850 communication so it can be controlled from SA system as well.
13.6.3 Setting guidelines
Selector mini switch (VSGAPC) function can generate pulsed or steady commands (by setting the Mode parameter). When pulsed commands are generated, the length of the pulse can be set using the tPulse parameter. Also, being accessible on the single line diagram (SLD), this function block has two control modes (settable through CtlModel): Dir Norm and SBO Enh.
1MRK 511 310-UEN B Section 13 Control
349 Application manual
13.7 Generic communication function for Double Point indication DPGAPC
13.7.1 Identification Function description IEC 61850
identification IEC 60617 identification
ANSI/IEEE C37.2 device number
Generic communication function for Double Point indication
DPGAPC — —
13.7.2 Application
DPGAPC function block is used to combine three logical input signals into a two bit position indication, and publish the position indication to other systems, equipment or functions in the substation. The three inputs are named OPEN, CLOSE and VALID. DPGAPC is intended to be used as a position indicator block in the interlocking stationwide logics.
The OPEN and CLOSE inputs set one bit each in the two bit position indication, POSITION. If both OPEN and CLOSE are set at the same time the quality of the output is set to invalid. The quality of the output is also set to invalid if the VALID input is not set.
13.7.3 Setting guidelines
The function does not have any parameters available in the local HMI or PCM600.
13.8 Single point generic control 8 signals SPC8GAPC
13.8.1 Identification Function description IEC 61850
identification IEC 60617 identification
ANSI/IEEE C37.2 device number
Single point generic control 8 signals SPC8GAPC — —
13.8.2 Application
The Single point generic control 8 signals (SPC8GAPC) function block is a collection of 8 single point commands that can be used for direct commands for example reset of LED’s or putting IED in «ChangeLock» state from remote. In this way, simple
Section 13 1MRK 511 310-UEN B Control
350 Application manual
commands can be sent directly to the IED outputs, without confirmation. Confirmation (status) of the result of the commands is supposed to be achieved by other means, such as binary inputs and SPGGIO function blocks.
PSTO is the universal operator place selector for all control functions. Even if PSTO can be configured to allow LOCAL or ALL operator positions, the only functional position usable with the SPC8GAPC function block is REMOTE.
13.8.3 Setting guidelines
The parameters for the single point generic control 8 signals (SPC8GAPC) function are set via the local HMI or PCM600.
Operation: turning the function operation On/Off.
There are two settings for every command output (totally 8):
Latchedx: decides if the command signal for output x is Latched (steady) or Pulsed.
tPulsex: if Latchedx is set to Pulsed, then tPulsex will set the length of the pulse (in seconds).
13.9 AutomationBits, command function for DNP3.0 AUTOBITS
13.9.1 Identification Function description IEC 61850
identification IEC 60617 identification
ANSI/IEEE C37.2 device number
AutomationBits, command function for DNP3 AUTOBITS — —
13.9.2 Application
Automation bits, command function for DNP3 (AUTOBITS) is used within PCM600 in order to get into the configuration the commands coming through the DNP3.0 protocol.The AUTOBITS function plays the same role as functions GOOSEBINRCV (for IEC 61850) and MULTICMDRCV (for LON).AUTOBITS function block have 32 individual outputs which each can be mapped as a Binary Output point in DNP3. The output is operated by a «Object 12» in DNP3. This object contains parameters for control-code, count, on-time and off-time. To operate an AUTOBITS output point, send a control-code of latch-On, latch-Off, pulse-On, pulse-Off, Trip or Close. The
1MRK 511 310-UEN B Section 13 Control
351 Application manual
remaining parameters are regarded as appropriate. For example, pulse-On, on- time=100, off-time=300, count=5 would give 5 positive 100 ms pulses, 300 ms apart.
For description of the DNP3 protocol implementation, refer to the Communication manual.
13.9.3 Setting guidelines
AUTOBITS function block has one setting, (Operation: On/Off) enabling or disabling the function. These names will be seen in the DNP3 communication management tool in PCM600.
13.10 Single command, 16 signals SINGLECMD
13.10.1 Identification Function description IEC 61850
identification IEC 60617 identification
ANSI/IEEE C37.2 device number
Single command, 16 signals SINGLECMD — —
13.10.2 Application
Single command, 16 signals (SINGLECMD) is a common function and always included in the IED.
The IEDs may be provided with a function to receive commands either from a substation automation system or from the local HMI. That receiving function block has outputs that can be used, for example, to control high voltage apparatuses in switchyards. For local control functions, the local HMI can also be used. Together with the configuration logic circuits, the user can govern pulses or steady output signals for control purposes within the IED or via binary outputs.
Figure 127 shows an application example of how the user can connect SINGLECMD via configuration logic circuit to control a high-voltage apparatus. This type of command control is normally carried out by sending a pulse to the binary outputs of the IED. Figure 127 shows a close operation. An open breaker operation is performed in a similar way but without the synchro-check condition.
Section 13 1MRK 511 310-UEN B Control
352 Application manual
Single command function SINGLECMD
CMDOUTy
OUTy
Close CB1
&User- defined conditions Synchro- check
Configuration logic circuits
en04000206.vsd IEC04000206 V2 EN
Figure 127: Application example showing a logic diagram for control of a circuit breaker via configuration logic circuits
Figure 128 and figure 129 show other ways to control functions, which require steady On/Off signals. Here, the output is used to control built-in functions or external devices.
Single command function SINGLECMD
CMDOUTy
OUTy
Function n
en04000207.vsd
Function n
IEC04000207 V2 EN
Figure 128: Application example showing a logic diagram for control of built-in functions
1MRK 511 310-UEN B Section 13 Control
353 Application manual
Single command function
SINGLESMD
CMDOUTy
OUTy
Device 1
User- defined conditions
Configuration logic circuits
en04000208.vsd
&
IEC04000208 V2 EN
Figure 129: Application example showing a logic diagram for control of external devices via configuration logic circuits
13.10.3 Setting guidelines
The parameters for Single command, 16 signals (SINGLECMD) are set via the local HMI or PCM600.
Parameters to be set are MODE, common for the whole block, and CMDOUTy which includes the user defined name for each output signal. The MODE input sets the outputs to be one of the types Off, Steady, or Pulse.
Off, sets all outputs to 0, independent of the values sent from the station level, that is, the operator station or remote-control gateway.
Steady, sets the outputs to a steady signal 0 or 1, depending on the values sent from the station level.
Pulse, gives a pulse with 100 ms duration, if a value sent from the station level is changed from 0 to 1. That means the configured logic connected to the command function block may not have a cycle time longer than the cycle time for the command function block.
13.11 Interlocking
The main purpose of switchgear interlocking is:
To avoid the dangerous or damaging operation of switchgear To enforce restrictions on the operation of the substation for other reasons for
example, load configuration. Examples of the latter are to limit the number of
Section 13 1MRK 511 310-UEN B Control
354 Application manual
parallel transformers to a maximum of two or to ensure that energizing is always from one side, for example, the high voltage side of a transformer.
This section only deals with the first point, and only with restrictions caused by switching devices other than the one to be controlled. This means that switch interlock, because of device alarms, is not included in this section.
Disconnectors and earthing switches have a limited switching capacity. Disconnectors may therefore only operate:
With basically zero current. The circuit is open on one side and has a small extension. The capacitive current is small (for example, < 5A) and power transformers with inrush current are not allowed.
To connect or disconnect a parallel circuit carrying load current. The switching voltage across the open contacts is thus virtually zero, thanks to the parallel circuit (for example, < 1% of rated voltage). Paralleling of power transformers is not allowed.
Earthing switches are allowed to connect and disconnect earthing of isolated points. Due to capacitive or inductive coupling there may be some voltage (for example < 40% of rated voltage) before earthing and some current (for example < 100A) after earthing of a line.
Circuit breakers are usually not interlocked. Closing is only interlocked against running disconnectors in the same bay, and the bus-coupler opening is interlocked during a busbar transfer.
The positions of all switching devices in a bay and from some other bays determine the conditions for operational interlocking. Conditions from other stations are usually not available. Therefore, a line earthing switch is usually not fully interlocked. The operator must be convinced that the line is not energized from the other side before closing the earthing switch. As an option, a voltage indication can be used for interlocking. Take care to avoid a dangerous enable condition at the loss of a VT secondary voltage, for example, because of a blown fuse.
The switch positions used by the operational interlocking logic are obtained from auxiliary contacts or position sensors. For each end position (open or closed) a true indication is needed — thus forming a double indication. The apparatus control function continuously checks its consistency. If neither condition is high (1 or TRUE), the switch may be in an intermediate position, for example, moving. This dynamic state may continue for some time, which in the case of disconnectors may be up to 10 seconds. Should both indications stay low for a longer period, the position indication will be interpreted as unknown. If both indications stay high, something is wrong, and the state is again treated as unknown.
In both cases an alarm is sent to the operator. Indications from position sensors shall be self-checked and system faults indicated by a fault signal. In the interlocking logic, the signals are used to avoid dangerous enable or release conditions. When the switching state of a switching device cannot be determined operation is not permitted.
1MRK 511 310-UEN B Section 13 Control
355 Application manual
For switches with an individual operation gear per phase, the evaluation must consider possible phase discrepancies. This is done with the aid of an AND-function for all three phases in each apparatus for both open and close indications. Phase discrepancies will result in an unknown double indication state.
13.11.1 Configuration guidelines
The following sections describe how the interlocking for a certain switchgear configuration can be realized in the IED by using standard interlocking modules and their interconnections. They also describe the configuration settings. The inputs for delivery specific conditions (Qx_EXy) are set to 1=TRUE if they are not used, except in the following cases:
QB9_EX2 and QB9_EX4 in modules BH_LINE_A and BH_LINE_B QA1_EX3 in module AB_TRAFO
when they are set to 0=FALSE.
13.11.2 Interlocking for line bay ABC_LINE
13.11.2.1 Application
The interlocking for line bay (ABC_LINE) function is used for a line connected to a double busbar arrangement with a transfer busbar according to figure 130. The function can also be used for a double busbar arrangement without transfer busbar or a single busbar arrangement with/without transfer busbar.
QB1 QB2 QC1
QA1
QC2
QB9 QC9
WA1 (A)
WA2 (B)
WA7 (C)
QB7
en04000478.vsd IEC04000478 V1 EN
Figure 130: Switchyard layout ABC_LINE
Section 13 1MRK 511 310-UEN B Control
356 Application manual
The signals from other bays connected to the module ABC_LINE are described below.
13.11.2.2 Signals from bypass busbar
To derive the signals:
Signal BB7_D_OP All line disconnectors on bypass WA7 except in the own bay are open.
VP_BB7_D The switch status of disconnectors on bypass busbar WA7 are valid.
EXDU_BPB No transmission error from any bay containing disconnectors on bypass busbar WA7
These signals from each line bay (ABC_LINE) except that of the own bay are needed:
Signal QB7OPTR Q7 is open
VPQB7TR The switch status for QB7 is valid.
EXDU_BPB No transmission error from the bay that contains the above information.
For bay n, these conditions are valid:
QB7OPTR (bay 1) QB7OPTR (bay 2)
. . .
. . . QB7OPTR (bay n-1)
& BB7_D_OP
VPQB7TR (bay 1) VPQB7TR (bay 2)
. . .
. . . VPQB7TR (bay n-1)
& VP_BB7_D
EXDU_BPB (bay 1) EXDU_BPB (bay 2)
. . .
. . . EXDU_BPB (bay n-1)
& EXDU_BPB
en04000477.vsd
IEC04000477 V1 EN
Figure 131: Signals from bypass busbar in line bay n
13.11.2.3 Signals from bus-coupler
If the busbar is divided by bus-section disconnectors into bus sections, the busbar- busbar connection could exist via the bus-section disconnector and bus-coupler within the other bus section.
1MRK 511 310-UEN B Section 13 Control
357 Application manual
Section 1 Section 2
A1A2_DC(BS) B1B2_DC(BS)
ABC_LINE ABC_BCABC_LINE ABC_BC
(WA1)A1 (WA2)B1 (WA7)C C
B2 A2
en04000479.vsd
IEC04000479 V1 EN
Figure 132: Busbars divided by bus-section disconnectors (circuit breakers)
To derive the signals:
Signal BC_12_CL A bus-coupler connection exists between busbar WA1 and WA2.
BC_17_OP No bus-coupler connection between busbar WA1 and WA7.
BC_17_CL A bus-coupler connection exists between busbar WA1and WA7.
BC_27_OP No bus-coupler connection between busbar WA2 and WA7.
BC_27_CL A bus-coupler connection exists between busbar WA2 and WA7.
VP_BC_12 The switch status of BC_12 is valid.
VP_BC_17 The switch status of BC_17 is valid.
VP_BC_27 The switch status of BC_27 is valid.
EXDU_BC No transmission error from any bus-coupler bay (BC).
These signals from each bus-coupler bay (ABC_BC) are needed:
Signal BC12CLTR A bus-coupler connection through the own bus-coupler exists between busbar WA1
and WA2.
BC17OPTR No bus-coupler connection through the own bus-coupler between busbar WA1 and WA7.
BC17CLTR A bus-coupler connection through the own bus-coupler exists between busbar WA1 and WA7.
BC27OPTR No bus-coupler connection through the own bus-coupler between busbar WA2 and WA7.
BC27CLTR A bus-coupler connection through the own bus-coupler exists between busbar WA2 and WA7.
VPBC12TR The switch status of BC_12 is valid.
VPBC17TR The switch status of BC_17 is valid.
VPBC27TR The switch status of BC_27 is valid.
EXDU_BC No transmission error from the bay that contains the above information.
These signals from each bus-section disconnector bay (A1A2_DC) are also needed. For B1B2_DC, corresponding signals from busbar B are used. The same type of
Section 13 1MRK 511 310-UEN B Control
358 Application manual
module (A1A2_DC) is used for different busbars, that is, for both bus-section disconnector A1A2_DC and B1B2_DC.
Signal DCOPTR The bus-section disconnector is open.
DCCLTR The bus-section disconnector is closed.
VPDCTR The switch status of bus-section disconnector DC is valid.
EXDU_DC No transmission error from the bay that contains the above information.
If the busbar is divided by bus-section circuit breakers, the signals from the bus- section coupler bay (A1A2_BS), rather than the bus-section disconnector bay (A1A2_DC) must be used. For B1B2_BS, corresponding signals from busbar B are used. The same type of module (A1A2_BS) is used for different busbars, that is, for both bus-section circuit breakers A1A2_BS and B1B2_BS.
Signal S1S2OPTR No bus-section coupler connection between bus-sections 1 and 2.
S1S2CLTR A bus-section coupler connection exists between bus-sections 1 and 2.
VPS1S2TR The switch status of bus-section coupler BS is valid.
EXDU_BS No transmission error from the bay that contains the above information.
For a line bay in section 1, these conditions are valid:
1MRK 511 310-UEN B Section 13 Control
359 Application manual
BC12CLTR (sect.1)
DCCLTR (A1A2) DCCLTR (B1B2)
>1 &
BC12CLTR (sect.2)
& VPBC12TR (sect.1)
VPDCTR (A1A2) VPDCTR (B1B2)
VPBC12TR (sect.2)
>1 &
BC17OPTR (sect.1)
DCOPTR (A1A2) BC17OPTR (sect.2)
>1 &
BC17CLTR (sect.1)
DCCLTR (A1A2) BC17CLTR (sect.2)
& VPBC17TR (sect.1)
VPDCTR (A1A2) VPBC17TR (sect.2)
>1 &
>1 &
&
&
BC27OPTR (sect.1)
DCOPTR (B1B2) BC27OPTR (sect.2)
BC27CLTR (sect.1)
DCCLTR (B1B2) BC27CLTR (sect.2)
VPBC27TR (sect.1) VPDCTR (B1B2)
VPBC27TR (sect.2)
EXDU_BC (sect.1) EXDU_DC (A1A2) EXDU_DC (B1B2) EXDU_BC (sect.2)
BC_12_CL
VP_BC_12
BC_17_OP
BC_17_CL
VP_BC_17
BC_27_OP
BC_27_CL
VP_BC_27
EXDU_BC
en04000480.vsd
IEC04000480 V1 EN
Figure 133: Signals to a line bay in section 1 from the bus-coupler bays in each section
For a line bay in section 2, the same conditions as above are valid by changing section 1 to section 2 and vice versa.
13.11.2.4 Configuration setting
If there is no bypass busbar and therefore no QB7 disconnector, then the interlocking for QB7 is not used. The states for QB7, QC71, BB7_D, BC_17, BC_27 are set to open
Section 13 1MRK 511 310-UEN B Control
360 Application manual
by setting the appropriate module inputs as follows. In the functional block diagram, 0 and 1 are designated 0=FALSE and 1=TRUE:
QB7_OP = 1 QB7_CL = 0
QC71_OP = 1 QC71_CL = 0
BB7_D_OP = 1
BC_17_OP = 1 BC_17_CL = 0 BC_27_OP = 1 BC_27_CL = 0
EXDU_BPB = 1
VP_BB7_D = 1 VP_BC_17 = 1 VP_BC_27 = 1
If there is no second busbar WA2 and therefore no QB2 disconnector, then the interlocking for QB2 is not used. The state for QB2, QC21, BC_12, BC_27 are set to open by setting the appropriate module inputs as follows. In the functional block diagram, 0 and 1 are designated 0=FALSE and 1=TRUE:
QB2_OP = 1 QB2_CL = 0
QC21_OP = 1 QC21_CL = 0
BC_12_CL = 0 BC_27_OP = 1 BC_27_CL = 0
VP_BC_12 = 1
13.11.3 Interlocking for bus-coupler bay ABC_BC
1MRK 511 310-UEN B Section 13 Control
361 Application manual
13.11.3.1 Application
The interlocking for bus-coupler bay (ABC_BC) function is used for a bus-coupler bay connected to a double busbar arrangement according to figure 134. The function can also be used for a single busbar arrangement with transfer busbar or double busbar arrangement without transfer busbar.
QB1 QB2
QC1
QA1
WA1 (A)
WA2 (B)
WA7 (C)
QB7QB20
QC2
en04000514.vsd IEC04000514 V1 EN
Figure 134: Switchyard layout ABC_BC
13.11.3.2 Configuration
The signals from the other bays connected to the bus-coupler module ABC_BC are described below.
13.11.3.3 Signals from all feeders
To derive the signals:
Signal BBTR_OP No busbar transfer is in progress concerning this bus-coupler.
VP_BBTR The switch status is valid for all apparatuses involved in the busbar transfer.
EXDU_12 No transmission error from any bay connected to the WA1/WA2 busbars.
These signals from each line bay (ABC_LINE), each transformer bay (AB_TRAFO), and bus-coupler bay (ABC_BC), except the own bus-coupler bay are needed:
Signal QQB12OPTR QB1 or QB2 or both are open.
VPQB12TR The switch status of QB1 and QB2 are valid.
EXDU_12 No transmission error from the bay that contains the above information.
Section 13 1MRK 511 310-UEN B Control
362 Application manual
For bus-coupler bay n, these conditions are valid:
QB12OPTR (bay 1) QB12OPTR (bay 2)
. . .
. . . QB12OPTR (bay n-1)
& BBTR_OP
VPQB12TR (bay 1) VPQB12TR (bay 2)
. . .
. . . VPQB12TR (bay n-1)
& VP_BBTR
EXDU_12 (bay 1) EXDU_12 (bay 2)
. . .
. . . EXDU_12 (bay n-1)
& EXDU_12
en04000481.vsd
IEC04000481 V1 EN
Figure 135: Signals from any bays in bus-coupler bay n
If the busbar is divided by bus-section disconnectors into bus-sections, the signals BBTR are connected in parallel — if both bus-section disconnectors are closed. So for the basic project-specific logic for BBTR above, add this logic:
Section 1 Section 2
A1A2_DC(BS) B1B2_DC(BS)
ABC_LINE ABC_BC
ABC_LINE ABC_BC
(WA1)A1 (WA2)B1 (WA7)C C
B2 A2
en04000482.vsd
AB_TRAFO
IEC04000482 V1 EN
Figure 136: Busbars divided by bus-section disconnectors (circuit breakers)
The following signals from each bus-section disconnector bay (A1A2_DC) are needed. For B1B2_DC, corresponding signals from busbar B are used. The same type of module (A1A2_DC) is used for different busbars, that is, for both bus-section disconnector A1A2_DC and B1B2_DC.
Signal DCOPTR The bus-section disconnector is open.
VPDCTR The switch status of bus-section disconnector DC is valid.
EXDU_DC No transmission error from the bay that contains the above information.
If the busbar is divided by bus-section circuit breakers, the signals from the bus- section coupler bay (A1A2_BS), rather than the bus-section disconnector bay
1MRK 511 310-UEN B Section 13 Control
363 Application manual
(A1A2_DC), have to be used. For B1B2_BS, corresponding signals from busbar B are used. The same type of module (A1A2_BS) is used for different busbars, that is, for both bus-section circuit breakers A1A2_BS and B1B2_BS.
Signal S1S2OPTR No bus-section coupler connection between bus-sections 1 and 2.
VPS1S2TR The switch status of bus-section coupler BS is valid.
EXDU_BS No transmission error from the bay that contains the above information.
For a bus-coupler bay in section 1, these conditions are valid:
BBTR_OP (sect.1)
DCOPTR (A1A2) DCOPTR (B1B2)
BBTR_OP (sect.2)
& VP_BBTR (sect.1)
VPDCTR (A1A2) VPDCTR (B1B2)
VP_BBTR (sect.2)
EXDU_12 (sect.1)
EXDU_DC (B1B2) EXDU_12 (sect.2)
VP_BBTR
EXDU_12
en04000483.vsd
&EXDU_DC (A1A2)
BBTR_OP
>1 &
IEC04000483 V1 EN
Figure 137: Signals to a bus-coupler bay in section 1 from any bays in each section
For a bus-coupler bay in section 2, the same conditions as above are valid by changing section 1 to section 2 and vice versa.
13.11.3.4 Signals from bus-coupler
If the busbar is divided by bus-section disconnectors into bus-sections, the signals BC_12 from the busbar coupler of the other busbar section must be transmitted to the own busbar coupler if both disconnectors are closed.
Section 1 Section 2
A1A2_DC(BS) B1B2_DC(BS)
ABC_BCABC_BC
(WA1)A1 (WA2)B1 (WA7)C C
B2 A2
en04000484.vsd
IEC04000484 V1 EN
Figure 138: Busbars divided by bus-section disconnectors (circuit breakers)
Section 13 1MRK 511 310-UEN B Control
364 Application manual
To derive the signals:
Signal BC_12_CL Another bus-coupler connection exists between busbar WA1 and WA2.
VP_BC_12 The switch status of BC_12 is valid.
EXDU_BC No transmission error from any bus-coupler bay (BC).
These signals from each bus-coupler bay (ABC_BC), except the own bay, are needed:
Signal BC12CLTR A bus-coupler connection through the own bus-coupler exists between busbar WA1
and WA2.
VPBC12TR The switch status of BC_12 is valid.
EXDU_BC No transmission error from the bay that contains the above information.
These signals from each bus-section disconnector bay (A1A2_DC) are also needed. For B1B2_DC, corresponding signals from busbar B are used. The same type of module (A1A2_DC) is used for different busbars, that is, for both bus-section disconnector A1A2_DC and B1B2_DC.
Signal DCCLTR The bus-section disconnector is closed.
VPDCTR The switch status of bus-section disconnector DC is valid.
EXDU_DC No transmission error from the bay that contains the above information.
If the busbar is divided by bus-section circuit breakers, the signals from the bus- section coupler bay (A1A2_BS), rather than the bus-section disconnector bay (A1A2_DC), must be used. For B1B2_BS, corresponding signals from busbar B are used. The same type of module (A1A2_BS) is used for different busbars, that is, for both bus-section circuit breakers A1A2_BS and B1B2_BS.
Signal S1S2CLTR A bus-section coupler connection exists between bus sections 1 and 2.
VPS1S2TR The switch status of bus-section coupler BS is valid.
EXDU_BS No transmission error from the bay containing the above information.
For a bus-coupler bay in section 1, these conditions are valid:
1MRK 511 310-UEN B Section 13 Control
365 Application manual
DCCLTR (A1A2) DCCLTR (B1B2)
BC12CLTR (sect.2)
VPDCTR (A1A2) VPDCTR (B1B2)
VPBC12TR (sect.2)
EXDU_DC (A1A2) EXDU_DC (B1B2) EXDU_BC (sect.2)
& BC_12_CL
VP_BC_12
EXDU_BC
en04000485.vsd
&
&
IEC04000485 V1 EN
Figure 139: Signals to a bus-coupler bay in section 1 from a bus-coupler bay in another section
For a bus-coupler bay in section 2, the same conditions as above are valid by changing section 1 to section 2 and vice versa.
13.11.3.5 Configuration setting
If there is no bypass busbar and therefore no QB2 and QB7 disconnectors, then the interlocking for QB2 and QB7 is not used. The states for QB2, QB7, QC71 are set to open by setting the appropriate module inputs as follows. In the functional block diagram, 0 and 1 are designated 0=FALSE and 1=TRUE:
QB2_OP = 1 QB2_CL = 0
QB7_OP = 1 QB7_CL = 0
QC71_OP = 1 QC71_CL = 0
If there is no second busbar B and therefore no QB2 and QB20 disconnectors, then the interlocking for QB2 and QB20 are not used. The states for QB2, QB20, QC21, BC_12, BBTR are set to open by setting the appropriate module inputs as follows. In the functional block diagram, 0 and 1 are designated 0=FALSE and 1=TRUE:
QB2_OP = 1 QB2_CL = 0
QB20_OP = 1 QB20_CL = 0
QC21_OP = 1 QC21_CL = 0
Section 13 1MRK 511 310-UEN B Control
366 Application manual
BC_12_CL = 0 VP_BC_12 = 1
BBTR_OP = 1 VP_BBTR = 1
13.11.4 Interlocking for transformer bay AB_TRAFO
13.11.4.1 Application
The interlocking for transformer bay (AB_TRAFO) function is used for a transformer bay connected to a double busbar arrangement according to figure 140. The function is used when there is no disconnector between circuit breaker and transformer. Otherwise, the interlocking for line bay (ABC_LINE) function can be used. This function can also be used in single busbar arrangements.
QB1 QB2 QC1
QA1
QC2
WA1 (A)
WA2 (B)
QA2
QC3
T
QC4
QB4QB3
QA2 and QC4 are not used in this interlocking
AB_TRAFO
en04000515.vsd IEC04000515 V1 EN
Figure 140: Switchyard layout AB_TRAFO
The signals from other bays connected to the module AB_TRAFO are described below.
1MRK 511 310-UEN B Section 13 Control
367 Application manual
13.11.4.2 Signals from bus-coupler
If the busbar is divided by bus-section disconnectors into bus-sections, the busbar- busbar connection could exist via the bus-section disconnector and bus-coupler within the other bus-section.
Section 1 Section 2
A1A2_DC(BS) B1B2_DC(BS)
AB_TRAFO ABC_BCAB_TRAFO ABC_BC
(WA1)A1 (WA2)B1 (WA7)C C
B2 A2
en04000487.vsd
IEC04000487 V1 EN
Figure 141: Busbars divided by bus-section disconnectors (circuit breakers)
The project-specific logic for input signals concerning bus-coupler are the same as the specific logic for the line bay (ABC_LINE):
Signal BC_12_CL A bus-coupler connection exists between busbar WA1 and WA2.
VP_BC_12 The switch status of BC_12 is valid.
EXDU_BC No transmission error from bus-coupler bay (BC).
The logic is identical to the double busbar configuration Signals from bus-coupler.
13.11.4.3 Configuration setting
If there are no second busbar B and therefore no QB2 disconnector, then the interlocking for QB2 is not used. The state for QB2, QC21, BC_12 are set to open by setting the appropriate module inputs as follows. In the functional block diagram, 0 and 1 are designated 0=FALSE and 1=TRUE:
QB2_OP = 1 QB2QB2_CL = 0
QC21_OP = 1 QC21_CL = 0
BC_12_CL = 0 VP_BC_12 = 1
If there is no second busbar B at the other side of the transformer and therefore no QB4 disconnector, then the state for QB4 is set to open by setting the appropriate module inputs as follows:
Section 13 1MRK 511 310-UEN B Control
368 Application manual
QB4_OP = 1 QB4_CL = 0
13.11.5 Interlocking for bus-section breaker A1A2_BS
13.11.5.1 Application
The interlocking for bus-section breaker (A1A2_BS) function is used for one bus- section circuit breaker between section 1 and 2 according to figure 142. The function can be used for different busbars, which includes a bus-section circuit breaker.
QA1
WA1 (A1)
QB2
QC4
QB1
QC3
WA2 (A2)
en04000516.vsd
QC2QC1
A1A2_BS
IEC04000516 V1 EN
Figure 142: Switchyard layout A1A2_BS
The signals from other bays connected to the module A1A2_BS are described below.
13.11.5.2 Signals from all feeders
If the busbar is divided by bus-section circuit breakers into bus-sections and both circuit breakers are closed, the opening of the circuit breaker must be blocked if a bus- coupler connection exists between busbars on one bus-section side and if on the other bus-section side a busbar transfer is in progress:
Section 1 Section 2
A1A2_BS B1B2_BS
ABC_LINE ABC_BC
ABC_LINE ABC_BC
(WA1)A1 (WA2)B1 (WA7)C C
B2 A2
en04000489.vsd
AB_TRAFOAB_TRAFO
IEC04000489 V1 EN
Figure 143: Busbars divided by bus-section circuit breakers
1MRK 511 310-UEN B Section 13 Control
369 Application manual
To derive the signals:
Signal BBTR_OP No busbar transfer is in progress concerning this bus-section.
VP_BBTR The switch status of BBTR is valid.
EXDU_12 No transmission error from any bay connected to busbar 1(A) and 2(B).
These signals from each line bay (ABC_LINE), each transformer bay (AB_TRAFO), and bus-coupler bay (ABC_BC) are needed:
Signal QB12OPTR QB1 or QB2 or both are open.
VPQB12TR The switch status of QB1 and QB2 are valid.
EXDU_12 No transmission error from the bay that contains the above information.
These signals from each bus-coupler bay (ABC_BC) are needed:
Signal BC12OPTR No bus-coupler connection through the own bus-coupler between busbar WA1 and
WA2.
VPBC12TR The switch status of BC_12 is valid.
EXDU_BC No transmission error from the bay that contains the above information.
These signals from the bus-section circuit breaker bay (A1A2_BS, B1B2_BS) are needed.
Signal S1S2OPTR No bus-section coupler connection between bus-sections 1 and 2.
VPS1S2TR The switch status of bus-section coupler BS is valid.
EXDU_BS No transmission error from the bay that contains the above information.
For a bus-section circuit breaker between A1 and A2 section busbars, these conditions are valid:
Section 13 1MRK 511 310-UEN B Control
370 Application manual
S1S2OPTR (B1B2) BC12OPTR (sect.1)
QB12OPTR (bay 1/sect.2)
QB12OPTR (bay n/sect.2)
S1S2OPTR (B1B2) BC12OPTR (sect.2)
QB12OPTR (bay 1/sect.1)
QB12OPTR (bay n /sect.1)
BBTR_OP
VP_BBTR
EXDU_12
en04000490.vsd
>1 &
>1 &
. . .
. . .
. . .
. . .
&
&
VPS1S2TR (B1B2) VPBC12TR (sect.1)
VPQB12TR (bay 1/sect.2)
VPQB12TR (bay n/sect.1) . . . . . .
VPBC12TR (sect.2) VPQB12TR (bay 1/sect.1)
VPQB12TR (bay n/sect.1)
. . .
. . .
&
EXDU_12 (bay 1/sect.2)
EXDU_12 (bay n /sect.2)
EXDU_12(bay 1/sect.1)
EXDU_12 (bay n /sect.1)
EXDU_BS (B1B2) EXDU_BC (sect.1)
EXDU_BC (sect.2)
. . .
. . .
. . .
. . .
IEC04000490 V1 EN
Figure 144: Signals from any bays for a bus-section circuit breaker between sections A1 and A2
For a bus-section circuit breaker between B1 and B2 section busbars, these conditions are valid:
1MRK 511 310-UEN B Section 13 Control
371 Application manual
S1S2OPTR (A1A2) BC12OPTR (sect.1)
QB12OPTR (bay 1/sect.2)
QB12OPTR (bay n/sect.2)
S1S2OPTR (A1A2) BC12OPTR (sect.2)
QB12OPTR (bay 1/sect.1)
QB12OPTR (bay n /sect.1)
BBTR_OP
VP_BBTR
EXDU_12
en04000491.vsd
>1 &
>1 &
. . .
. . .
. . .
. . .
&
&
VPS1S2TR (A1A2) VPBC12TR (sect.1)
VPQB12TR (bay 1/sect.2)
VPQB12TR (bay n/sect.1) . . . . . .
VPBC12TR (sect.2) VPQB12TR (bay 1/sect.1)
VPQB12TR (bay n/sect.1)
. . .
. . .
&
EXDU_12(bay 1/sect.2)
EXDU_12 (bay n /sect.2)
EXDU_12 (bay 1/sect.1)
EXDU_12 (bay n /sect.1)
EXDU_BS (A1A2) EXDU_BC (sect.1)
EXDU_BC (sect.2)
. . .
. . .
. . .
. . .
IEC04000491 V1 EN
Figure 145: Signals from any bays for a bus-section circuit breaker between sections B1 and B2
13.11.5.3 Configuration setting
If there is no other busbar via the busbar loops that are possible, then either the interlocking for the QA1 open circuit breaker is not used or the state for BBTR is set to open. That is, no busbar transfer is in progress in this bus-section:
BBTR_OP = 1 VP_BBTR = 1
Section 13 1MRK 511 310-UEN B Control
372 Application manual
13.11.6 Interlocking for bus-section disconnector A1A2_DC
13.11.6.1 Application
The interlocking for bus-section disconnector (A1A2_DC) function is used for one bus-section disconnector between section 1 and 2 according to figure 146. A1A2_DC function can be used for different busbars, which includes a bus-section disconnector.
WA1 (A1) WA2 (A2)
QB
QC1 QC2
A1A2_DC en04000492.vsd
IEC04000492 V1 EN
Figure 146: Switchyard layout A1A2_DC
The signals from other bays connected to the module A1A2_DC are described below.
13.11.6.2 Signals in single breaker arrangement
If the busbar is divided by bus-section disconnectors, the condition no other disconnector connected to the bus-section must be made by a project-specific logic.
The same type of module (A1A2_DC) is used for different busbars, that is, for both bus-section disconnector A1A2_DC and B1B2_DC. But for B1B2_DC, corresponding signals from busbar B are used.
Section 1 Section 2
A1A2_DC(BS) B1B2_DC(BS)
ABC_LINE ABC_BC
ABC_LINE
(WA1)A1 (WA2)B1 (WA7)C C
B3 A3
en04000493.vsd
AB_TRAFOAB_TRAFO
A2 B2
IEC04000493 V1 EN
Figure 147: Busbars divided by bus-section disconnectors (circuit breakers)
To derive the signals:
1MRK 511 310-UEN B Section 13 Control
373 Application manual
Signal S1DC_OP All disconnectors on bus-section 1 are open.
S2DC_OP All disconnectors on bus-section 2 are open.
VPS1_DC The switch status of disconnectors on bus-section 1 is valid.
VPS2_DC The switch status of disconnectors on bus-section 2 is valid.
EXDU_BB No transmission error from any bay that contains the above information.
These signals from each line bay (ABC_LINE), each transformer bay (AB_TRAFO), and each bus-coupler bay (ABC_BC) are needed:
Signal QB1OPTR QB1 is open.
QB2OPTR QB2 is open (AB_TRAFO, ABC_LINE).
QB220OTR QB2 and QB20 are open (ABC_BC).
VPQB1TR The switch status of QB1 is valid.
VPQB2TR The switch status of QB2 is valid.
VQB220TR The switch status of QB2 and QB20 are valid.
EXDU_BB No transmission error from the bay that contains the above information.
If there is an additional bus-section disconnector, the signal from the bus-section disconnector bay (A1A2_DC) must be used:
Signal DCOPTR The bus-section disconnector is open.
VPDCTR The switch status of bus-section disconnector DC is valid.
EXDU_DC No transmission error from the bay that contains the above information.
If there is an additional bus-section circuit breaker rather than an additional bus- section disconnector the signals from the bus-section, circuit-breaker bay (A1A2_BS) rather than the bus-section disconnector bay (A1A2_DC) must be used:
Signal QB1OPTR QB1 is open.
QB2OPTR QB2 is open.
VPQB1TR The switch status of QB1 is valid.
VPQB2TR The switch status of QB2 is valid.
EXDU_BS No transmission error from the bay BS (bus-section coupler bay) that contains the above information.
For a bus-section disconnector, these conditions from the A1 busbar section are valid:
Section 13 1MRK 511 310-UEN B Control
374 Application manual
QB1OPTR (bay 1/sect.A1) S1DC_OP
VPS1_DC
EXDU_BB
en04000494.vsd
&
&
&
QB1OPTR (bay n/sect.A1)
. . .
. . .
. . .
VPQB1TR (bay 1/sect.A1)
VPQB1TR (bay n/sect.A1)
EXDU_BB (bay 1/sect.A1)
EXDU_BB (bay n/sect.A1)
. . .
. . .
. . .
. . .
. . .
. . .
IEC04000494 V1 EN
Figure 148: Signals from any bays in section A1 to a bus-section disconnector
For a bus-section disconnector, these conditions from the A2 busbar section are valid:
QB1OPTR (bay 1/sect.A2) S2DC_OP
VPS2_DC
EXDU_BB
en04000495.vsd
QB1OPTR (bay n/sect.A2)
. . .
. . .
. . .
VPQB1TR (bay 1/sect.A2)
VPQB1TR (bay n/sect.A2) VPDCTR (A2/A3)
EXDU_BB (bay n/sect.A2)
. . .
. . .
. . .
. . .
. . .
. . .
&
&
&
DCOPTR (A2/A3)
EXDU_BB (bay 1/sect.A2)
EXDU_DC (A2/A3) IEC04000495 V1 EN
Figure 149: Signals from any bays in section A2 to a bus-section disconnector
For a bus-section disconnector, these conditions from the B1 busbar section are valid:
1MRK 511 310-UEN B Section 13 Control
375 Application manual
QB2OPTR (QB220OTR)(bay 1/sect.B1) S1DC_OP
VPS1_DC
EXDU_BB
en04000496.vsd
QB2OPTR (QB220OTR)(bay n/sect.B1)
. . .
. . .
. . .
VPQB2TR (VQB220TR)(bay 1/sect.B1)
VPQB2TR (VQB220TR)(bay n/sect.B1)
EXDU_BB (bay 1/sect.B1)
EXDU_BB (bay n/sect.B1)
. . .
. . .
. . .
. . .
. . .
. . .
&
&
&
IEC04000496 V1 EN
Figure 150: Signals from any bays in section B1 to a bus-section disconnector
For a bus-section disconnector, these conditions from the B2 busbar section are valid:
QB2OPTR (QB220OTR)(bay 1/sect.B2) S2DC_OP
VPS2_DC
EXDU_BB
en04000497.vsd
QB2OPTR (QB220OTR)(bay n/sect.B2)
. . .
. . .
. . .
VPQB2TR(VQB220TR) (bay 1/sect.B2)
VPQB2TR(VQB220TR) (bay n/sect.B2) VPDCTR (B2/B3)
EXDU_BB (bay n/sect.B2)
. . .
. . .
. . .
. . .
. . .
. . .
&
&
&
DCOPTR (B2/B3)
EXDU_BB (bay 1/sect.B2)
EXDU_DC (B2/B3) IEC04000497 V1 EN
Figure 151: Signals from any bays in section B2 to a bus-section disconnector
13.11.6.3 Signals in double-breaker arrangement
If the busbar is divided by bus-section disconnectors, the condition for the busbar disconnector bay no other disconnector connected to the bus-section must be made by a project-specific logic.
The same type of module (A1A2_DC) is used for different busbars, that is, for both bus-section disconnector A1A2_DC and B1B2_DC. But for B1B2_DC, corresponding signals from busbar B are used.
Section 13 1MRK 511 310-UEN B Control
376 Application manual
Section 1 Section 2
A1A2_DC(BS) B1B2_DC(BS)
DB_BUS DB_BUSDB_BUS DB_BUS
(WA1)A1 (WA2)B1 B2
A2
en04000498.vsd
IEC04000498 V1 EN
Figure 152: Busbars divided by bus-section disconnectors (circuit breakers)
To derive the signals:
Signal S1DC_OP All disconnectors on bus-section 1 are open.
S2DC_OP All disconnectors on bus-section 2 are open.
VPS1_DC The switch status of all disconnectors on bus-section 1 is valid.
VPS2_DC The switch status of all disconnectors on bus-section 2 is valid.
EXDU_BB No transmission error from double-breaker bay (DB) that contains the above information.
These signals from each double-breaker bay (DB_BUS) are needed:
Signal QB1OPTR QB1 is open.
QB2OPTR QB2 is open.
VPQB1TR The switch status of QB1 is valid.
VPQB2TR The switch status of QB2 is valid.
EXDU_DB No transmission error from the bay that contains the above information.
The logic is identical to the double busbar configuration Signals in single breaker arrangement.
For a bus-section disconnector, these conditions from the A1 busbar section are valid:
1MRK 511 310-UEN B Section 13 Control
377 Application manual
QB1OPTR (bay 1/sect.A1) S1DC_OP
VPS1_DC
EXDU_BB
en04000499.vsd
&
&
&
QB1OPTR (bay n/sect.A1)
. . .
. . .
. . .
VPQB1TR (bay 1/sect.A1)
VPQB1TR (bay n/sect.A1)
EXDU_DB (bay 1/sect.A1)
EXDU_DB (bay n/sect.A1)
. . .
. . .
. . .
. . .
. . .
. . .
IEC04000499 V1 EN
Figure 153: Signals from double-breaker bays in section A1 to a bus-section disconnector
For a bus-section disconnector, these conditions from the A2 busbar section are valid:
QB1OPTR (bay 1/sect.A2) S2DC_OP
VPS2_DC
EXDU_BB
en04000500.vsd
&
&
&
QB1OPTR (bay n/sect.A2)
. . .
. . .
. . .
VPQB1TR (bay 1/sect.A2)
VPQB1TR (bay n/sect.A2)
EXDU_DB (bay 1/sect.A2)
EXDU_DB (bay n/sect.A2)
. . .
. . .
. . .
. . .
. . .
. . .
IEC04000500 V1 EN
Figure 154: Signals from double-breaker bays in section A2 to a bus-section disconnector
For a bus-section disconnector, these conditions from the B1 busbar section are valid:
Section 13 1MRK 511 310-UEN B Control
378 Application manual
QB2OPTR (bay 1/sect.B1) S1DC_OP
VPS1_DC
EXDU_BB
en04000501.vsd
&
&
&
QB2OPTR (bay n/sect.B1)
. . .
. . .
. . .
VPQB2TR (bay 1/sect.B1)
VPQB2TR (bay n/sect.B1)
EXDU_DB (bay 1/sect.B1)
EXDU_DB (bay n/sect.B1)
. . .
. . .
. . .
. . .
. . .
. . .
IEC04000501 V1 EN
Figure 155: Signals from double-breaker bays in section B1 to a bus-section disconnector
For a bus-section disconnector, these conditions from the B2 busbar section are valid:
QB2OPTR (bay 1/sect.B2) S2DC_OP
VPS2_DC
EXDU_BB
en04000502.vsd
&
&
&
QB2OPTR (bay n/sect.B2)
. . .
. . .
. . .
VPQB2TR (bay 1/sect.B2)
VPQB2TR (bay n/sect.B2)
EXDU_DB (bay 1/sect.B2)
EXDU_DB (bay n/sect.B2)
. . .
. . .
. . .
. . .
. . .
. . .
IEC04000502 V1 EN
Figure 156: Signals from double-breaker bays in section B2 to a bus-section disconnector
13.11.6.4 Signals in 1 1/2 breaker arrangement
If the busbar is divided by bus-section disconnectors, the condition for the busbar disconnector bay no other disconnector connected to the bus-section must be made by a project-specific logic.
The same type of module (A1A2_DC) is used for different busbars, that is, for both bus-section disconnector A1A2_DC and B1B2_DC. But for B1B2_DC, corresponding signals from busbar B are used.
1MRK 511 310-UEN B Section 13 Control
379 Application manual
Section 1 Section 2
A1A2_DC(BS) B1B2_DC(BS)
BH_LINE
(WA1)A1 (WA2)B1 B2
A2
en04000503.vsd
BH_LINE BH_LINE BH_LINE
IEC04000503 V1 EN
Figure 157: Busbars divided by bus-section disconnectors (circuit breakers)
The project-specific logic is the same as for the logic for the double-breaker configuration.
Signal S1DC_OP All disconnectors on bus-section 1 are open.
S2DC_OP All disconnectors on bus-section 2 are open.
VPS1_DC The switch status of disconnectors on bus-section 1 is valid.
VPS2_DC The switch status of disconnectors on bus-section 2 is valid.
EXDU_BB No transmission error from breaker and a half (BH) that contains the above information.
13.11.7 Interlocking for busbar earthing switch BB_ES
13.11.7.1 Application
The interlocking for busbar earthing switch (BB_ES) function is used for one busbar earthing switch on any busbar parts according to figure 158.
QC
en04000504.vsd
IEC04000504 V1 EN
Figure 158: Switchyard layout BB_ES
The signals from other bays connected to the module BB_ES are described below.
13.11.7.2 Signals in single breaker arrangement
The busbar earthing switch is only allowed to operate if all disconnectors of the bus- section are open.
Section 13 1MRK 511 310-UEN B Control
380 Application manual
Section 1 Section 2
A1A2_DC(BS) B1B2_DC(BS)
AB_TRAFO ABC_LINE BB_ES
ABC_LINE
(WA1)A1 (WA2)B1 (WA7)C C
B2 A2
en04000505.vsd
BB_ESABC_BC
IEC04000505 V1 EN
Figure 159: Busbars divided by bus-section disconnectors (circuit breakers)
To derive the signals:
Signal BB_DC_OP All disconnectors on this part of the busbar are open.
VP_BB_DC The switch status of all disconnector on this part of the busbar is valid.
EXDU_BB No transmission error from any bay containing the above information.
These signals from each line bay (ABC_LINE), each transformer bay (AB_TRAFO), and each bus-coupler bay (ABC_BC) are needed:
Signal QB1OPTR QB1 is open.
QB2OPTR QB2 is open (AB_TRAFO, ABC_LINE)
QB220OTR QB2 and QB20 are open (ABC_BC)
QB7OPTR QB7 is open.
VPQB1TR The switch status of QB1 is valid.
VPQB2TR The switch status of QB2 is valid.
VQB220TR The switch status of QB2and QB20 is valid.
VPQB7TR The switch status of QB7 is valid.
EXDU_BB No transmission error from the bay that contains the above information.
These signals from each bus-section disconnector bay (A1A2_DC) are also needed. For B1B2_DC, corresponding signals from busbar B are used. The same type of module (A1A2_DC) is used for different busbars, that is, for both bus-section disconnectors A1A2_DC and B1B2_DC.
Signal DCOPTR The bus-section disconnector is open.
VPDCTR The switch status of bus-section disconnector DC is valid.
EXDU_DC No transmission error from the bay that contains the above information.
If no bus-section disconnector exists, the signal DCOPTR, VPDCTR and EXDU_DC are set to 1 (TRUE).
1MRK 511 310-UEN B Section 13 Control
381 Application manual
If the busbar is divided by bus-section circuit breakers, the signals from the bus- section coupler bay (A1A2_BS) rather than the bus-section disconnector bay (A1A2_DC) must be used. For B1B2_BS, corresponding signals from busbar B are used. The same type of module (A1A2_BS) is used for different busbars, that is, for both bus-section circuit breakers A1A2_BS and B1B2_BS.
Signal QB1OPTR QB1 is open.
QB2OPTR QB2 is open.
VPQB1TR The switch status of QB1 is valid.
VPQB2TR The switch status of QB2 is valid.
EXDU_BS No transmission error from the bay BS (bus-section coupler bay) that contains the above information.
For a busbar earthing switch, these conditions from the A1 busbar section are valid:
QB1OPTR (bay 1/sect.A1) BB_DC_OP
VP_BB_DC
EXDU_BB
en04000506.vsd
QB1OPTR (bay n/sect.A1)
. . .
. . .
. . .
VPQB1TR (bay 1/sect.A1)
VPQB1TR (bay n/sect.A1) VPDCTR (A1/A2)
EXDU_BB (bay n/sect.A1)
. . .
. . .
. . .
. . .
. . .
. . .
&
&
&
DCOPTR (A1/A2)
EXDU_BB (bay 1/sect.A1)
EXDU_DC (A1/A2)
IEC04000506 V1 EN
Figure 160: Signals from any bays in section A1 to a busbar earthing switch in the same section
For a busbar earthing switch, these conditions from the A2 busbar section are valid:
Section 13 1MRK 511 310-UEN B Control
382 Application manual
QB1OPTR (bay 1/sect.A2) BB_DC_OP
VP_BB_DC
EXDU_BB
en04000507.vsd
QB1OPTR (bay n/sect.A2)
. . .
. . .
. . .
VPQB1TR (bay 1/sect.A2)
VPQB1TR (bay n/sect.A2) VPDCTR (A1/A2)
EXDU_BB (bay n/sect.A2)
. . .
. . .
. . .
. . .
. . .
. . .
&
&
&
DCOPTR (A1/A2)
EXDU_BB (bay 1/sect.A2)
EXDU_DC (A1/A2)
IEC04000507 V1 EN
Figure 161: Signals from any bays in section A2 to a busbar earthing switch in the same section
For a busbar earthing switch, these conditions from the B1 busbar section are valid:
QB2OPTR(QB220OTR)(bay 1/sect.B1) BB_DC_OP
VP_BB_DC
EXDU_BB
en04000508.vsd
QB2OPTR (QB220OTR)(bay n/sect.B1)
. . .
. . .
. . .
VPQB2TR(VQB220TR) (bay 1/sect.B1)
VPQB2TR(VQB220TR) (bay n/sect.B1) VPDCTR (B1/B2)
EXDU_BB (bay n/sect.B1)
. . .
. . .
. . .
. . .
. . .
. . .
&
&
&
DCOPTR (B1/B2)
EXDU_BB (bay 1/sect.B1)
EXDU_DC (B1/B2)
IEC04000508 V1 EN
Figure 162: Signals from any bays in section B1 to a busbar earthing switch in the same section
For a busbar earthing switch, these conditions from the B2 busbar section are valid:
1MRK 511 310-UEN B Section 13 Control
383 Application manual
QB2OPTR(QB220OTR) (bay 1/sect.B2) BB_DC_OP
VP_BB_DC
EXDU_BB
en04000509.vsd
QB2OPTR(QB220OTR) (bay n/sect.B2)
. . .
. . .
. . .
VPQB2TR(VQB220TR) (bay 1/sect.B2)
VPQB2TR(VQB220TR) (bay n/sect.B2) VPDCTR (B1/B2)
EXDU_BB (bay n/sect.B2)
. . .
. . .
. . .
. . .
. . .
. . .
&
&
&
DCOPTR (B1/B2)
EXDU_BB (bay 1/sect.B2)
EXDU_DC (B1/B2)
IEC04000509 V1 EN
Figure 163: Signals from any bays in section B2 to a busbar earthing switch in the same section
For a busbar earthing switch on bypass busbar C, these conditions are valid:
QB7OPTR (bay 1) BB_DC_OP
VP_BB_DC
EXDU_BB
en04000510.vsd
&
&
&
QB7OPTR (bay n)
. . .
. . .
. . .
VPQB7TR (bay 1)
VPQB7TR (bay n)
EXDU_BB (bay 1)
EXDU_BB (bay n)
. . .
. . .
. . .
. . .
. . .
. . .
IEC04000510 V1 EN
Figure 164: Signals from bypass busbar to busbar earthing switch
13.11.7.3 Signals in double-breaker arrangement
The busbar earthing switch is only allowed to operate if all disconnectors of the bus section are open.
Section 13 1MRK 511 310-UEN B Control
384 Application manual
Section 1 Section 2
A1A2_DC(BS) B1B2_DC(BS) BB_ESBB_ES
DB_BUS
(WA1)A1 (WA2)B1 B2
A2
en04000511.vsd
DB_BUS
IEC04000511 V1 EN
Figure 165: Busbars divided by bus-section disconnectors (circuit breakers)
To derive the signals:
Signal BB_DC_OP All disconnectors of this part of the busbar are open.
VP_BB_DC The switch status of all disconnectors on this part of the busbar are valid.
EXDU_BB No transmission error from any bay that contains the above information.
These signals from each double-breaker bay (DB_BUS) are needed:
Signal QB1OPTR QB1 is open.
QB2OPTR QB2 is open.
VPQB1TR The switch status of QB1 is valid.
VPQB2TR The switch status of QB2 is valid.
EXDU_DB No transmission error from the bay that contains the above information.
These signals from each bus-section disconnector bay (A1A2_DC) are also needed. For B1B2_DC, corresponding signals from busbar B are used. The same type of module (A1A2_DC) is used for different busbars, that is, for both bus-section disconnectors A1A2_DC and B1B2_DC.
Signal DCOPTR The bus-section disconnector is open.
VPDCTR The switch status of bus-section disconnector DC is valid.
EXDU_DC No transmission error from the bay that contains the above information.
The logic is identical to the double busbar configuration described in section Signals in single breaker arrangement.
13.11.7.4 Signals in 1 1/2 breaker arrangement
The busbar earthing switch is only allowed to operate if all disconnectors of the bus- section are open.
1MRK 511 310-UEN B Section 13 Control
385 Application manual
Section 1 Section 2
A1A2_DC(BS) B1B2_DC(BS) BB_ESBB_ES
BH_LINE
(WA1)A1 (WA2)B1 B2
A2
en04000512.vsd BH_LINE
IEC04000512 V1 EN
Figure 166: Busbars divided by bus-section disconnectors (circuit breakers)
The project-specific logic are the same as for the logic for the double busbar configuration described in section Signals in single breaker arrangement.
Signal BB_DC_OP All disconnectors on this part of the busbar are open.
VP_BB_DC The switch status of all disconnectors on this part of the busbar is valid.
EXDU_BB No transmission error from any bay that contains the above information.
13.11.8 Interlocking for double CB bay DB
13.11.8.1 Application
The interlocking for a double busbar double circuit breaker bay including DB_BUS_A, DB_BUS_B and DB_LINE functions are used for a line connected to a double busbar arrangement according to figure 167.
Section 13 1MRK 511 310-UEN B Control
386 Application manual
WA1 (A)
WA2 (B)
QB1 QC1
QA1
QC2
QC9
QB61
QB9
QB2 QC4
QA2
QC5
QC3
QB62
DB_BUS_B
DB_LINE
DB_BUS_A
en04000518.vsd IEC04000518 V1 EN
Figure 167: Switchyard layout double circuit breaker
Three types of interlocking modules per double circuit breaker bay are defined. DB_BUS_A handles the circuit breaker QA1 that is connected to busbar WA1 and the disconnectors and earthing switches of this section. DB_BUS_B handles the circuit breaker QA2 that is connected to busbar WA2 and the disconnectors and earthing switches of this section.
For a double circuit-breaker bay, the modules DB_BUS_A, DB_LINE and DB_BUS_B must be used.
13.11.8.2 Configuration setting
For application without QB9 and QC9, just set the appropriate inputs to open state and disregard the outputs. In the functional block diagram, 0 and 1 are designated 0=FALSE and 1=TRUE:
QB9_OP = 1 QB9_CL = 0
QC9_OP = 1 QC9_CL = 0
If, in this case, line voltage supervision is added, then rather than setting QB9 to open state, specify the state of the voltage supervision:
1MRK 511 310-UEN B Section 13 Control
387 Application manual
QB9_OP = VOLT_OFF QB9_CL = VOLT_ON
If there is no voltage supervision, then set the corresponding inputs as follows:
VOLT_OFF = 1 VOLT_ON = 0
13.11.9 Interlocking for 1 1/2 CB BH
13.11.9.1 Application
The interlocking for 1 1/2 breaker diameter (BH_CONN, BH_LINE_A, BH_LINE_B) functions are used for lines connected to a 1 1/2 breaker diameter according to figure 168.
WA1 (A)
WA2 (B)
QB1 QC1
QA1
QC2
QC9
QB6
QB9
QB2 QC1
QA1
QC2
QC3
QB6
QC3
QB62QB61 QA1
QC1 QC2 QC9
QB9
BH_LINE_A BH_LINE_B
BH_CONN en04000513.vsd
IEC04000513 V1 EN
Figure 168: Switchyard layout 1 1/2 breaker
Three types of interlocking modules per diameter are defined. BH_LINE_A and BH_LINE_B are the connections from a line to a busbar. BH_CONN is the connection between the two lines of the diameter in the 1 1/2 breaker switchyard layout.
Section 13 1MRK 511 310-UEN B Control
388 Application manual
For a 1 1/2 breaker arrangement, the modules BH_LINE_A, BH_CONN and BH_LINE_B must be used.
13.11.9.2 Configuration setting
For application without QB9 and QC9, just set the appropriate inputs to open state and disregard the outputs. In the functional block diagram, 0 and 1 are designated 0=FALSE and 1=TRUE:
QB9_OP = 1 QB9_CL = 0
QC9_OP = 1 QC9_CL = 0
If, in this case, line voltage supervision is added, then rather than setting QB9 to open state, specify the state of the voltage supervision:
QB9_OP = VOLT_OFF QB9_CL = VOLT_ON
If there is no voltage supervision, then set the corresponding inputs as follows:
VOLT_OFF = 1 VOLT_ON = 0
1MRK 511 310-UEN B Section 13 Control
389 Application manual
Section 14 Scheme communication
14.1 Scheme communication logic for distance or overcurrent protection ZCPSCH
14.1.1 Identification Function description IEC 61850
identification IEC 60617 identification
ANSI/IEEE C37.2 device number
Scheme communication logic for distance or overcurrent protection
ZCPSCH — 85
14.1.2 Application
To achieve fast fault clearing for a fault on the part of the line not covered by the instantaneous zone 1, the stepped distance protection function can be supported with logic, that uses communication channels.
One communication channel in each direction, which can transmit an on/off signal is required. The performance and security of this function is directly related to the transmission channel speed, and security against false or lost signals. For this reason special channels are used for this purpose. When power line carrier is used for communication, these special channels are strongly recommended due to the communication disturbance caused by the primary fault.
Communication speed, or minimum time delay, is always of utmost importance because the purpose for using communication is to improve the tripping speed of the scheme.
To avoid false signals that could cause false tripping, it is necessary to pay attention to the security of the communication channel. At the same time it is important pay attention to the communication channel dependability to ensure that proper signals are communicated during power system faults, the time during which the protection schemes must perform their tasks flawlessly.
The logic supports the following communications schemes: blocking schemes (blocking and delta blocking), permissive schemes (overreaching and underreaching), unblocking scheme and direct intertrip.
A permissive scheme is inherently faster and has better security against false tripping than a blocking scheme. On the other hand, permissive scheme depends on a received CR signal for a fast trip, so its dependability is lower than that of a blocking scheme.
1MRK 511 310-UEN B Section 14 Scheme communication
391 Application manual
14.1.2.1 Blocking schemes
In blocking scheme a reverse looking zone is used to send a block signal to remote end to block an overreaching zone.
Since the scheme is sending the blocking signal during conditions where the protected line is healthy, it is common to use the line itself as communication media (PLC). The scheme can be used on all line lengths.
The blocking scheme is very dependable because it will operate for faults anywhere on the protected line if the communication channel is out of service. On the other hand, it is less secure than permissive schemes because it will trip for external faults within the reach of the tripping function if the communication channel is out of service.
Inadequate speed or dependability can cause spurious tripping for external faults. Inadequate security can cause delayed tripping for internal faults.
To secure that the send signal will arrive before the zone used in the communication scheme will trip, the trip is released first after the time delay tCoord has elapsed. The setting of tCoord must be set longer than the maximal transmission time of the channel. A security margin of at least 10 ms should be considered.
The timer tSendMin for prolonging the send signal is proposed to set to zero.
A B
ORB
Z revA
Z revA CSA TRIPB = ORB+ tCoord+ CR IEC09000015_2_en.vsd
IEC09000015 V2 EN
Figure 169: Principle of blocking scheme
OR: Overreaching
CR: Communication signal received
CS: Communication signal send
Z revA: Reverse zone
Section 14 1MRK 511 310-UEN B Scheme communication
392 Application manual
14.1.2.2 Delta blocking scheme
In the delta blocking scheme a fault inception detection element using delta based quantities of voltage and current will send a block signal to the remote end to block an overreaching zone.
The delta based start is very fast and if the transmission channel is fast then there is no need for delaying the operation of remote distance element. If the fault is in forward direction, the sending is inhibited by a forward directed distance (or directional current or directional earth fault) element.
Since the scheme is sending the blocking signal during conditions where the protected line is healthy, it is common to use the line itself as communication media (PLC). The scheme can be used on all line lengths.
The blocking scheme is very dependable because it will operate for faults anywhere on the protected line if the communication channel is out of service. Conversely, it is less secure than permissive schemes because it will trip for external faults within the reach of the tripping function if the communication channel is out of service.
Inadequate speed or dependability can cause spurious tripping for external faults. Inadequate security can cause delayed tripping for internal faults.
Since the blocking signal is initiated by the delta based detection which is very fast the time delay tCoord can be set to zero seconds, except in cases where the transmission channel is slow.
The timer tSendMin for prolonging the send signal is proposed to set to zero.
A B
ORB
DeltaBasedDetection (deltaA)
deltaA CS TRIPB = ORB+ tCoord+ CR IEC11000252-1-en.vsd
IEC11000252 V1 EN
Figure 170: Principle of delta blocking scheme
OR: Overreaching
CR: Communication signal received
CS: Communication signal send
deltaA: Delta based fault inception detection on A side that gets inhibited for forward faults
1MRK 511 310-UEN B Section 14 Scheme communication
393 Application manual
14.1.2.3 Permissive schemes
In permissive scheme permission to trip is sent from local end to remote end(s), that is protection at local end have detected a fault on the protected object. The received signal(s) is combined with an overreaching zone and gives an instantaneous trip if the received signal is present during the time the chosen zone is detected a fault in forward direction.
Either end may send a permissive (or command) signal to trip to the other end(s), and the teleprotection equipment need to be able to receive while transmitting.
A general requirement on permissive schemes is that it shall be fast and secure.
Depending on if the sending signal(s) is issued by underreaching or overreaching zone, it is divided into Permissive underreach or Permissive overreach scheme.
Permissive underreaching scheme Permissive underreaching scheme is not suitable to use on short line length due to difficulties for distance protection measurement in general to distinguish between internal and external faults in those applications.
The underreaching zones at local and remote end(s) must overlap in reach to prevent a gap between the protection zones where faults would not be detected. If the underreaching zone do not meet required sensitivity due to for instance fault infeed from remote end blocking or permissive overreaching scheme should be considered.
The received signal (CR) must be received when the overreaching zone is still activated to achieve an instantaneous trip. In some cases, due to the fault current distribution, the overreaching zone can operate only after the fault has been cleared at the terminal nearest to the fault. There is a certain risk that in case of a trip from an independent tripping zone, the zone issuing the send signal (CS) resets before the overreaching zone has operated at the remote terminal. To assure a sufficient duration of the received signal (CR), the send signal (CS), can be prolonged by a tSendMin reset timer. The recommended setting of tSendMin is 100 ms.
Since the received communication signal is combined with the output from an overreaching zone, there is less concern about false signal causing an incorrect trip. Therefore set the timer tCoord to zero.
Failure of the communication channel does not affect the selectivity, but delays tripping at one end(s) for certain fault locations.
Section 14 1MRK 511 310-UEN B Scheme communication
394 Application manual
A B
ORA
ORB
URB CSB
URA CSA
TRIP: UR, OR+CR IEC09000013-1-en.vsd
IEC09000013 V1 EN
Figure 171: Principle of Permissive underreaching scheme
UR: Underreaching
OR: Overreaching
CR: Communication signal received
CS: Communication signal send
Permissive overreaching scheme In permissive overreaching scheme there is an overreaching zone that issues the send signal. At remote end the received signal together with activating of an overreaching zone gives instantaneous trip of the protected object. The overreaching zone used in the teleprotection scheme must be activated at the same time as the received signal is present. The scheme can be used for all line lengths.
In permissive overreaching schemes, the communication channel plays an essential roll to obtain fast tripping at both ends. Failure of the communication channel may affect the selectivity and delay tripping at one end at least, for faults anywhere along the protected circuit.
Teleprotection operating in permissive overreaching scheme must beside the general requirement of fast and secure operation also consider requirement on dependability. Inadequate security can cause unwanted tripping for external faults. Inadequate speed or dependability can cause delayed tripping for internal faults or even unwanted operations.
This scheme may use virtually any communication media that is not adversely affected by electrical interference from fault generated noise or by electrical phenomena, such as lightning, that cause faults. Communication media that uses metallic path are particularly subjected to this type of interference, therefore, they must be properly shielded or otherwise designed to provide an adequate communication signal during power system faults.
At the permissive overreaching scheme, the send signal (CS) might be issued in parallel both from an overreaching zone and an underreaching, independent tripping
1MRK 511 310-UEN B Section 14 Scheme communication
395 Application manual
zone. The CS signal from the overreaching zone must not be prolonged while the CS signal from zone 1 can be prolonged.
To secure correct operations of current reversal logic in case of parallel lines, when applied, the send signal CS shall not be prolonged. So set the tSendMin to zero in this case.
There is no need to delay the trip at receipt of the signal, so set the timer tCoord to zero.
A B
ORA
ORB
ORA CSA TRIPB = ORB+ CRB , ORB+ T2
IEC09000014-1-en.vsd
IEC09000014 V1 EN
Figure 172: Principle of Permissive overreaching scheme
OR: Overreaching
CR: Communication signal received
CS: Communication signal send
T2: Timer step 2
Unblocking scheme Metallic communication paths adversely affected by fault generated noise may not be suitable for conventional permissive schemes that rely on signal transmitted during a protected line fault. With power line carrier, for example, the communication signal may be attenuated by the fault, especially when the fault is close to the line end, thereby disabling the communication channel.
To overcome the lower dependability in permissive schemes, an unblocking function can be used. Use this function at older, less reliable, power-line carrier (PLC) communication, where the signal has to be sent through the primary fault. The unblocking function uses a guard signal CRG, which must always be present, even when no CR signal is received. The absence of the CRG signal during the security time is used as a CR signal. This also enables a permissive scheme to operate when the line fault blocks the signal transmission. Set the tSecurity to 35 ms.
Section 14 1MRK 511 310-UEN B Scheme communication
396 Application manual
14.1.2.4 Intertrip scheme
In some power system applications, there is a need to trip the remote end breaker immediately from local protections. This applies, for instance, when transformers or reactors are connected to the system without circuit-breakers or for remote tripping following operation of breaker failure protection.
In intertrip scheme, the send signal is initiated by an underreaching zone or from an external protection (transformer or reactor protection). At remote end, the received signals initiate a trip without any further protection criteria. To limit the risk for unwanted trip due to spurious sending of signals, the timer tCoord should be set to 10-30 ms dependant on type of communication channel.
The general requirement for teleprotection equipment operating in intertripping applications is that it should be very secure and very dependable, since both inadequate security and dependability may cause unwanted operation. In some applications the equipment shall be able to receive while transmitting, and commands may be transmitted over longer time period than for other teleprotection systems.
14.1.3 Setting guidelines
The parameters for the scheme communication logic function are set via the local HMI or PCM600.
Configure the zones used for the CS send and for scheme communication tripping by using the ACT configuration tool.
The recommended settings of tCoord timer are based on maximal recommended transmission time for analogue channels according to IEC 60834-1. It is recommended to coordinate the proposed settings with actual performance for the teleprotection equipment to get optimized settings.
14.1.3.1 Blocking scheme
Set Operation = On
Set SchemeType = Blocking
Set tCoord 25 ms (10 ms + maximal transmission time)
Set tSendMin = 0 s
Set Unblock = Off (Set to NoRestart if Unblocking scheme with no alarm for loss of guard is to be used. Set to Restart if Unblocking scheme with alarm for loss of guard is to be used)
Set tSecurity = 0.035 s
1MRK 511 310-UEN B Section 14 Scheme communication
397 Application manual
14.1.3.2 Delta blocking scheme
Set Operation = On
Set SchemeType = DeltaBlocking
Set tCoord = 0 s
Set tSendMin = 0 s
Set Unblock = Off (Set to NoRestart if Unblocking scheme with no alarm for loss of guard is to be used. Set to Restart if Unblocking scheme with alarm for loss of guard is to be used)
Set tSecurity = 0.035 s
Set DeltaI = 10 %IB
Set DeltaU = 5 %UB
Set Delta3I0 = 10 %IB
Set Delta3U0 = 5 %UB
14.1.3.3 Permissive underreaching scheme
Set Operation = On
Set SchemeType = Permissive UR
Set tCoord = 0 ms
Set tSendMin = 0.1 s
Set Unblock = Off
Set tSecurity = 0.035 s
14.1.3.4 Permissive overreaching scheme
Set Operation = On
Set Scheme type = Permissive OR
Set tCoord = 0 ms
Set tSendMin = 0.1 s (0 s in parallel line applications)
Set Unblock = Off
Set tSecurity = 0.035 s
14.1.3.5 Unblocking scheme
Set Unblock = Restart (Loss of guard signal will give both trip and alarm Choose NoRestart if only trip is required)
Set tSecurity = 0.035 s
Section 14 1MRK 511 310-UEN B Scheme communication
398 Application manual
14.1.3.6 Intertrip scheme
Set Operation = On
Set SchemeType = Intertrip
Set tCoord 50 ms (10 ms + maximal transmission time)
Set tSendMin = 0.1 s (0 s in parallel line applications)
Set Unblock = Off
Set tSecurity = 0.015 s
14.2 Current reversal and Weak-end infeed logic for distance protection 3-phase ZCRWPSCH
14.2.1 Identification Function description IEC 61850
identification IEC 60617 identification
ANSI/IEEE C37.2 device number
Current reversal and weak-end infeed logic for distance protection 3-phase
ZCRWPSCH — 85
14.2.2 Application
14.2.2.1 Current reversal logic
If parallel lines are connected to common buses at both terminals, overreaching permissive communication schemes can trip unselectable due to current reversal. The unwanted tripping affects the healthy line when a fault is cleared on the parallel line. This lack of security results in a total loss of interconnection between the two buses.
To avoid this kind of disturbances, a fault current reversal logic (transient blocking logic) can be used.
The unwanted operations that might occur can be explained by looking into Figure 173 and Figure 174. Initially the protection A2 at A side will detect a fault in forward direction and send a communication signal to the protection B2 at remote end, which is measuring a fault in reverse direction.
1MRK 511 310-UEN B Section 14 Scheme communication
399 Application manual
L1
L2
A1
A2
B1
B2
IEC9900043-2.vsd
IEC99000043 V3 EN
Figure 173: Current distribution for a fault close to B side when all breakers are closed
When the breaker B1 opens for clearing the fault, the fault current through B2 bay will invert. If the communication signal has not reset at the same time as the distance protection function used in the teleprotection scheme has switched on to forward direction, we will have an unwanted operation of breaker B2 at B side.
L1
L2
A1
A2
B1
B2
IEC99000044-2.vsd
IEC99000044 V3 EN
Figure 174: Current distribution for a fault close to B side when breaker B1 has opened
To handle this the send signal CS or CSLn from B2 is held back until the reverse zone IRVLn has reset and the tDelayRev time has been elapsed. To achieve this the reverse zone on the distance protection shall be connected to input IRV and the output IRVL shall be connected to input BLKCS on the communication function block ZCPSCH.
The function can be blocked by activating the input IRVBLK or the general BLOCK input.
14.2.2.2 Weak-end infeed logic
Permissive communication schemes can basically operate only when the protection in the remote IED can detect the fault. The detection requires a sufficient minimum fault current, normally >20% of Ir. The fault current can be too low due to an open breaker or low short-circuit power of the source. To overcome these conditions, weak-end infeed (WEI) echo logic is used. The fault current can also be initially too low due to the fault current distribution. Here, the fault current increases when the breaker opens at the strong terminal, and a sequential tripping is achieved. This requires a detection of the fault by an independent tripping zone 1. To avoid sequential tripping as described, and when zone 1 is not available, weak-end infeed tripping logic is used. The weak end infeed function only works together with permissive overreach communication schemes as the carrier send signal must cover the hole line length.
Section 14 1MRK 511 310-UEN B Scheme communication
400 Application manual
The WEI function sends back (echoes) the received signal under the condition that no fault has been detected on the weak-end by different fault detection elements (distance protection in forward and reverse direction).
The WEI function can be extended to trip also the breaker in the weak side. The trip is achieved when one or more phase voltages are low during an echo function.
In case of single-pole tripping, the phase voltages are used as phase selectors together with the received signal CRLn.
Together with the blocking teleprotection scheme some limitations apply:
Only the trip part of the function can be used together with the blocking scheme. It is not possible to use the echo function to send the echo signal to the remote line IED. The echo signal would block the operation of the distance protection at the remote line end and in this way prevents the correct operation of a complete protection scheme.
A separate direct intertrip channel must be arranged from remote end when a trip or accelerated trip is given there. The intertrip receive signal is connect to input CRL.
The WEI function shall be set to WEI=Echo&Trip. The WEI function block will then give phase selection and trip the local breaker.
Avoid using WEI function at both line ends. It shall only be activated at the weak-end.
14.2.3 Setting guidelines
The parameters for the current reversal logic and the weak-end infeed logic (WEI) function are set via the local HMI or PCM600.
Common base IED values for primary current (IBase), primary voltage (UBase) and primary power (SBase) are set in a Global base values for settings function GBASVAL.
GlobalBaseSel: It is used to select a GBASVAL function for reference of base values.
14.2.3.1 Current reversal logic
Set CurrRev to On to activate the function.
Set tDelayRev timer at the maximum reset time for the communication equipment that gives the carrier receive (CRL) signal plus 30 ms. A minimum setting of 40 ms is recommended, typical 60 ms.
A long tDelayRev setting increases security against unwanted tripping, but delay the fault clearing in case of a fault developing from one line that evolves to the other one. The probability of this type of fault is small. Therefore set tDelayRev with a good margin.
1MRK 511 310-UEN B Section 14 Scheme communication
401 Application manual
Set the pick-up delay tPickUpRev to <80% of the breaker operate time, but with a minimum of 20 ms.
14.2.3.2 Weak-end infeed logic
Set WEI to Echo, to activate the weak-end infeed function with only echo function.
Set WEI to Echo&Trip to obtain echo with trip.
Set tPickUpWEI to 10 ms, a short delay is recommended to avoid that spurious carrier received signals will activate WEI and cause unwanted carrier send (ECHO) signals.
Set the voltage criterion UPP< and UPN< for the weak-end trip to 70% of the system base voltage UBase. The setting should be below the minimum operate voltage of the system but above the voltage that occurs for fault on the protected line. The phase-to- phase elements must be verified to not operate for phase to earth faults.
When single phase tripping is required a detailed study of the voltages at phase-to-phase respectively phase-to-earth faults, at different fault locations, is normally required.
14.3 Local acceleration logic ZCLCPSCH
14.3.1 Identification Function description IEC 61850
identification IEC 60617 identification
ANSI/IEEE C37.2 device number
Local acceleration logic ZCLCPSCH — —
14.3.2 Application
The local acceleration logic (ZCLCPSCH) is used in those applications where conventional teleprotection scheme is not available (no communication channel), but the user still require fast clearance for faults on the whole line.
This logic enables fast fault clearing during certain conditions, but naturally, it can not fully replace a teleprotection scheme.
The logic can be controlled either by the autorecloser (zone extension) or by the loss- of-load current (loss-of-load acceleration).
The loss-of-load acceleration gives selected overreach zone permission to operate instantaneously after check of the different current criteria. It can not operate for three- phase faults.
Section 14 1MRK 511 310-UEN B Scheme communication
402 Application manual
14.3.3 Setting guidelines
The parameters for the local acceleration logic functions are set via the local HMI or PCM600.
Set ZoneExtension to On when the first trip from selected overreaching zone shall be instantaneous and the definitive trip after autoreclosure a normal time-delayed trip.
Set LossOfLoad to On when the acceleration shall be controlled by loss-of-load in healthy phase(s).
LoadCurr must be set below the current that will flow on the healthy phase when one or two of the other phases are faulty and the breaker has opened at remote end (three- phase). Calculate the setting according to equation 130.
min0.5 Load
Base
I LoadCurr
I
=
EQUATION1320 V1 EN (Equation 130)
where:
ILoadmin is the minimum load current on the line during normal operation conditions.
The timer tLoadOn is used to increase the security of the loss-of-load function for example to avoid unwanted release due to transient inrush current when energizing the line power transformer. The loss-of-load function will be released after the timer tLoadOn has elapsed at the same time as the load current in all three phases are above the setting LoadCurr. In normal acceleration applications there is no need for delaying the release, so set the tLoadOn to zero.
The drop-out timer tLoadOff is used to determine the window for the current release conditions for Loss-of-load. The timer is by default set to 300ms, which is judged to be enough to secure the current release.
The setting of the minimum current detector, MinCurr, should be set higher than the unsymmetrical current that might flow on the non faulty line, when the breaker at remote end has opened (three-phase). At the same time it should be set below the minimum load current transfer during normal operations that the line can be subjected to. By default, MinCurr is set to 5% of IBase.
The pick-up timer tLowCurr determine the window needed for pick-up of the minimum current value used to release the function. The timer is by default set to 200 ms, which is judged to be enough to avoid unwanted release of the function (avoid unwanted trip).
1MRK 511 310-UEN B Section 14 Scheme communication
403 Application manual
14.4 Scheme communication logic for residual overcurrent protection ECPSCH
14.4.1 Identification Function description IEC 61850
identification IEC 60617 identification
ANSI/IEEE C37.2 device number
Scheme communication logic for residual overcurrent protection
ECPSCH — 85
14.4.2 Application
To achieve fast fault clearance of earth faults on the part of the line not covered by the instantaneous step of the residual overcurrent protection, the directional residual overcurrent protection can be supported with a logic that uses communication channels.
One communication channel is used in each direction, which can transmit an on/off signal if required. The performance and security of this function is directly related to the transmission channel speed and security against false or lost signals.
In the directional scheme, information of the fault current direction must be transmitted to the other line end.
With directional comparison in permissive schemes, a short operate time of the protection including a channel transmission time, can be achieved. This short operate time enables rapid autoreclosing function after the fault clearance.
During a single-phase reclosing cycle, the autoreclosing device must block the directional comparison earth-fault communication scheme.
The communication logic module enables blocking as well as permissive under/ overreaching schemes. The logic can also be supported by additional logic for weak- end infeed and current reversal, included in the Current reversal and weak-end infeed logic for residual overcurrent protection (ECRWPSCH) function.
Metallic communication paths adversely affected by fault generated noise may not be suitable for conventional permissive schemes that rely on signal transmitted during a protected line fault. With power line carrier, for example, the communication signal may be attenuated by the fault, especially when the fault is close to the line end, thereby disabling the communication channel.
To overcome the lower dependability in permissive schemes, an unblocking function can be used. Use this function at older, less reliable, power line carrier (PLC) communication, where the signal has to be sent through the primary fault. The unblocking function uses a guard signal CRG, which must always be present, even when no CR signal is received. The absence of the CRG signal during the security time
Section 14 1MRK 511 310-UEN B Scheme communication
404 Application manual
is used as a CR signal. This also enables a permissive scheme to operate when the line fault blocks the signal transmission. Set the tSecurity to 35 ms.
14.4.3 Setting guidelines
The parameters for the scheme communication logic for residual overcurrent protection function are set via the local HMI or PCM600.
The following settings can be done for the scheme communication logic for residual overcurrent protection function:
Operation: Off or On.
SchemeType: This parameter can be set to Off , Intertrip, Permissive UR, Permissive OR or Blocking.
tCoord: Delay time for trip from ECPSCH function. For Permissive under/ overreaching schemes, this timer shall be set to at least 20 ms plus maximum reset time of the communication channel as a security margin. For Blocking scheme, the setting should be > maximum signal transmission time +10 ms.
Unblock: Select Off if unblocking scheme with no alarm for loss of guard is used. Set to Restart if unblocking scheme with alarm for loss of guard is used.
14.5 Current reversal and weak-end infeed logic for residual overcurrent protection ECRWPSCH
14.5.1 Identification Function description IEC 61850
identification IEC 60617 identification
ANSI/IEEE C37.2 device number
Current reversal and weak-end infeed logic for residual overcurrent protection
ECRWPSCH — 85
14.5.2 Application
14.5.2.1 Fault current reversal logic
Figure 175 and Figure 176 show a typical system condition, which can result in a fault current reversal.
Assume that fault is near the B1 breaker. B1 Relay sees the fault in Zone1 and A1 relay identifies the fault in Zone2.
Note that the fault current is reversed in line L2 after the breaker B1 opening.
1MRK 511 310-UEN B Section 14 Scheme communication
405 Application manual
It can cause an unselective trip on line L2 if the current reversal logic does not block the permissive overreaching scheme in the IED at B2.
L1
L2
A1
A2
B1
B2
IEC9900043-2.vsd
IEC99000043 V3 EN
Figure 175: Current distribution for a fault close to B side when all breakers are closed
L1
L2
A1
A2
B1
B2
IEC99000044-2.vsd
IEC99000044 V3 EN
Figure 176: Current distribution for a fault close to B side when breaker at B1 is opened
When the breaker on the parallel line operates, the fault current on the healthy line is reversed. The IED at B2 recognizes the fault in forward direction from reverse direction before breaker operates. As IED at B2 already received permissive signal from A2 and IED at B2 is now detecting the fault as forward fault, it will immediately trip breaker at B2. To ensure that tripping at B2 should not occur, the permissive overreaching function at B2 needs to be blocked by IRVL till the received permissive signal from A2 is reset.
The IED at A2, where the forward direction element was initially activated, must reset before the send signal is initiated from B2. The delayed reset of output signal IRVL also ensures the send signal from IED B2 is held back till the forward direction element is reset in IED A2.
14.5.2.2 Weak-end infeed logic
Figure 177 shows a typical system condition that can result in a missing operation. Note that there is no fault current from node B. This causes that the IED at B cannot detect the fault and trip the breaker in B. To cope with this situation, a selectable weak- end infeed logic is provided for the permissive overreaching scheme.
Section 14 1MRK 511 310-UEN B Scheme communication
406 Application manual
A B
IEC99000054-3-en.vsd
Strong source
Weak source
IEC99000054 V3 EN
Figure 177: Initial condition for weak-end infeed
14.5.3 Setting guidelines
The parameters for the current reversal and weak-end infeed logic for residual overcurrent protection function are set via the local HMI or PCM600.
Common base IED values for primary current (IBase), primary voltage (UBase) and primary power (SBase) are set in a Global base values for settings function GBASVAL.
GlobalBaseSel: It is used to select a GBASVAL function for reference of base values.
14.5.3.1 Current reversal
The current reversal function is set on or off by setting the parameter CurrRev to On or Off. Time delays shall be set for the timers tPickUpRev and tDelayRev.
tPickUpRev is chosen shorter (<80%) than the breaker opening time, but minimum 20 ms.
tDelayRev is chosen at a minimum to the sum of protection reset time and the communication reset time. A minimum tDelayRev setting of 40 ms is recommended.
The reset time of the directional residual overcurrent protection (EF4PTOC) is typically 25 ms. If other type of residual overcurrent protection is used in the remote line end, its reset time should be used.
The signal propagation time is in the range 3 10 ms/km for most types of communication media. In communication networks small additional time delays are added in multiplexers and repeaters. Theses delays are less than 1 ms per process. It is often stated that the total propagation time is less than 5 ms.
When a signal picks-up or drops out there is a decision time to be added. This decision time is highly dependent on the interface between communication and protection used. In many cases an external interface (teleprotection equipment) is used. This equipment makes a decision and gives a binary signal to the protection device. In case of analog teleprotection equipment typical decision time is in the range 10 30 ms. For digital teleprotection equipment this time is in the range 2 10 ms.
If the teleprotection equipment is integrated in the protection IED the decision time can be slightly reduced.
1MRK 511 310-UEN B Section 14 Scheme communication
407 Application manual
The principle time sequence of signaling at current reversal is shown.
Protection Function
Protection Function
Tele- Protection Equipment
Tele- Protection Equipment
Tele- communication
System
CS from the protection
function, operate and reset time
CS initiation to the
communication system, operate and reset time
CS propagation, propagation
CR selection and decision, operate
and reset time
CR to the protection
function, operate and reset time
Time
Fault occurs
Protection pick-up CS initiation
CR to teleprot.
eq.
CR to prot. func
Fault current reversal
Sending protection
reset
CS to communication
drop
CR reception
drop CR to prot. func drop
Minimum setting of tDelay IEC05000536-2-en.vsd
IEC05000536 V2 EN
Figure 178: Time sequence of signaling at current reversal
14.5.3.2 Weak-end infeed
The weak-end infeed can be set by setting the parameter WEI to Off, Echo or Echo & Trip. Operating zero sequence voltage when parameter WEI is set to Echo & Trip is set with 3U0>.
The zero sequence voltage for a fault at the remote line end and appropriate fault resistance is calculated.
To avoid unwanted trip from the weak-end infeed logic (if spurious signals should occur), set the operate value of the broken delta voltage level detector (3U0) higher than the maximum false network frequency residual voltage that can occur during normal service conditions. The recommended minimum setting is two times the false zero-sequence voltage during normal service conditions.
Section 14 1MRK 511 310-UEN B Scheme communication
408 Application manual
Section 15 Logic
15.1 Tripping logic common 3-phase output SMPPTRC
15.1.1 Identification Function description IEC 61850
identification IEC 60617 identification
ANSI/IEEE C37.2 device number
Tripping logic common 3-phase output SMPPTRC
I->O
SYMBOL-K V1 EN
94
15.1.2 Application
All trip signals from the different protection functions shall be routed through the trip logic. In its simplest alternative the logic will only link the TRIP signal and make sure that it is long enough.
Tripping logic SMPPTRC offers three different operating modes:
Three-phase tripping for all fault types (3ph operating mode) Single-phase tripping for single-phase faults and three-phase tripping for multi-
phase and evolving faults (1ph/3ph operating mode). The logic also issues a three-phase tripping command when phase selection within the operating protection functions is not possible, or when external conditions request three- phase tripping.
Two-phase tripping for two-phase faults.
The three-phase trip for all faults offers a simple solution and is often sufficient in well meshed transmission systems and in sub-transmission systems. Since most faults, especially at the highest voltage levels, are single phase-to-earth faults, single-phase tripping can be of great value. If only the faulty phase is tripped, power can still be transferred on the line during the dead time that arises before reclosing. Single-phase tripping during single-phase faults must be combined with single pole reclosing.
To meet the different double, 1 breaker and other multiple circuit breaker arrangements, two identical SMPPTRC function blocks may be provided within the IED.
1MRK 511 310-UEN B Section 15 Logic
409 Application manual
One SMPPTRC function block should be used for each breaker, if the line is connected to the substation via more than one breaker. Assume that single-phase tripping and autoreclosing is used on the line. Both breakers are then normally set up for 1/3-phase tripping and 1/3-phase autoreclosing. As an alternative, the breaker chosen as master can have single-phase tripping, while the slave breaker could have three-phase tripping and autoreclosing. In the case of a permanent fault, only one of the breakers has to be operated when the fault is energized a second time. In the event of a transient fault the slave breaker performs a three-phase reclosing onto the non- faulted line.
The same philosophy can be used for two-phase tripping and autoreclosing.
To prevent closing of a circuit breaker after a trip the function can block the closing.
The two instances of the SMPPTRC function are identical except, for the name of the function block (SMPPTRC1 and SMPPTRC2). References will therefore only be made to SMPPTRC1 in the following description, but they also apply to SMPPTRC2.
15.1.2.1 Three-phase tripping
A simple application with three-phase tripping from the logic block utilizes part of the function block. Connect the inputs from the protection function blocks to the input TRIN. If necessary (normally the case) use a logic OR block to combine the different function outputs to this input. Connect the output TRIP to the digital Output/s on the IO board.
This signal can also be used for other purposes internally in the IED. An example could be the starting of Breaker failure protection. The three outputs TRL1, TRL2, TRL3 will always be activated at every trip and can be utilized on individual trip outputs if single-phase operating devices are available on the circuit breaker even when a three-phase tripping scheme is selected.
Set the function block to Program = 3Ph and set the required length of the trip pulse to for example, tTripMin = 150ms.
For special applications such as Lock-out refer to the separate section below. The typical connection is shown below in figure 179. Signals that are not used are dimmed.
Section 15 1MRK 511 310-UEN B Logic
410 Application manual
BLOCK
BLKLKOUT
TRIN
TRINL1
TRINL2
TRINL3
PSL1
PSL2
PSL3
1PTRZ
1PTREF
P3PTR
SETLKOUT
RSTLKOUT
SMPPTRC
TRIP
TRL1
TRL2
TRL3
TR1P
TR2P
TR3P
CLLKOUT
1
Impedance protection zone 1 TRIP
EF4PTOC TRIP
en05000544.vsd
Impedance protection zone 3 TRIP
Impedance protection zone 2 TRIP
IEC05000544 V2 EN
Figure 179: Tripping logic SMPPTRC is used for a simple three-phase tripping application
15.1.2.2 Single- and/or three-phase tripping
The single-/three-phase tripping will give single-phase tripping for single-phase faults and three-phase tripping for multi-phase fault. The operating mode is always used together with a single-phase autoreclosing scheme.
The single-phase tripping can include different options and the use of the different inputs in the function block.
The inputs 1PTRZ and 1PTREF are used for single-phase tripping for distance protection and directional earth fault protection as required.
The inputs are combined with the phase selection logic and the start signals from the phase selector must be connected to the inputs PSL1, PSL2 and PSL3 to achieve the tripping on the respective single-phase trip outputs TRL1, TRL2 and TRL3. The Output TRIP is a general trip and activated independent of which phase is involved. Depending on which phases are involved the outputs TR1P, TR2P and TR3P will be activated as well.
When single-phase tripping schemes are used a single-phase autoreclosing attempt is expected to follow. For cases where the autoreclosing is not in service or will not follow for some reason, the input Prepare Three-phase Trip P3PTR must be activated. This is normally connected to the respective output on the Synchrocheck, energizing check, and synchronizing function SESRSYN but can also be connected to other signals, for example an external logic signal. If two breakers are involved, one TR block instance and one SESRSYN instance is used for each breaker. This will ensure correct operation and behavior of each breaker.
1MRK 511 310-UEN B Section 15 Logic
411 Application manual
The output Trip 3 Phase TR3P must be connected to the respective input in SESRSYN to switch SESRSYN to three-phase reclosing. If this signal is not activated SESRSYN will use single-phase reclosing dead time.
Note also that if a second line protection is utilizing the same SESRSYN the three-phase trip signal must be generated, for example by using the three-trip relays contacts in series and connecting them in parallel to the TR3P output from the trip block.
The trip logic also has inputs TRINL1, TRINL2 and TRINL3 where phase-selected trip signals can be connected. Examples can be individual phase inter-trips from remote end or internal/external phase selected trip signals, which are routed through the IED to achieve, for example SESRSYN, Breaker failure, and so on. Other back- up functions are connected to the input TRIN as described above. A typical connection for a single-phase tripping scheme is shown in figure 180.
BLOCK
BLKLKOUT
TRIN
TRINL1
TRINL2
TRINL3
PSL1
PSL2
PSL3
1PTRZ
1PTREF
P3PTR
SETLKOUT
RSTLKOUT
SMPPTRC
TRIP
TRL1
TRL2
TRL3
TR1P
TR2P
TR3P
CLLKOUT
TR3P
SMBRREC PREP3P
1
TR3P
Phase Selection
PSL1
PSL2
PSL3
Distance protection zone 1 TRIP
Distance protection zone 2 TRIP
Distance protection zone 3 TRIP
Overcurrent protection TRIP
IEC05000545-3-en.vsd
IEC05000545 V3 EN
Figure 180: The trip logic function SMPPTRC used for single-phase tripping application
15.1.2.3 Single-, two- or three-phase tripping
The single-/two-/three-phase tripping mode provides single-phase tripping for single- phase faults, two-phase tripping for two-phase faults and three-phase tripping for multi-phase faults. The operating mode is always used together with an autoreclosing scheme with setting Program = 1/2/3Ph or Program = 1/3Ph attempt.
The functionality is very similar to the single-phase scheme described above. However SESRSYN must in addition to the connections for single phase above be
Section 15 1MRK 511 310-UEN B Logic
412 Application manual
informed that the trip is two phase by connecting the trip logic output TR2P to the respective input in SESRSYN.
15.1.2.4 Lock-out
This function block is provided with possibilities to initiate lock-out. The lock-out can be set to only activate the block closing output CLLKOUT or initiate the block closing output and also maintain the trip signal (latched trip).
The lock-out can then be manually reset after checking the primary fault by activating the input reset Lock-Out RSTLKOUT.
If external conditions are required to initiate Lock-out but not initiate trip this can be achieved by activating input SETLKOUT. The setting AutoLock = Off means that the internal trip will not activate lock-out so only initiation of the input SETLKOUT will result in lock-out. This is normally the case for overhead line protection where most faults are transient. Unsuccessful autoreclose and back-up zone tripping can in such cases be connected to initiate Lock-out by activating the input SETLKOUT.
15.1.2.5 Blocking of the function block
The function block can be blocked in two different ways. Its use is dependent on the application. Blocking can be initiated internally by logic, or by the operator using a communication channel. Total blockage of the trip function is done by activating the input BLOCK and can be used to block the output of the trip logic in the event of internal failures. Blockage of lock-out output by activating input BLKLKOUT is used for operator control of the lock-out function.
15.1.3 Setting guidelines
The parameters for Tripping logic SMPPTRC are set via the local HMI or PCM600.
The following trip parameters can be set to regulate tripping.
Operation: Sets the mode of operation. Off switches the tripping off. The normal selection is On.
Program: Sets the required tripping scheme. Normally 3Ph or 1/2Ph are used.
TripLockout: Sets the scheme for lock-out. Off only activates the lock-out output. On activates the lock-out output and latches the output TRIP. The normal selection is Off.
AutoLock: Sets the scheme for lock-out. Off only activates lock-out through the input SETLKOUT. On additonally allows activation through the trip function itself. The normal selection is Off.
tTripMin: Sets the required minimum duration of the trip pulse. It should be set to ensure that the breaker is tripped correctly. Normal setting is 0.150s.
1MRK 511 310-UEN B Section 15 Logic
413 Application manual
tWaitForPHS: Sets a duration after any of the inputs 1PTRZ or 1PTREF has been activated during which a phase selection must occur to get a single phase trip. If no phase selection has been achieved a three-phase trip will be issued after the time has elapsed.
15.2 Trip matrix logic TMAGAPC
15.2.1 Identification Function description IEC 61850
identification IEC 60617 identification
ANSI/IEEE C37.2 device number
Trip matrix logic TMAGAPC — —
15.2.2 Application
Trip matrix logic TMAGAPC function is used to route trip signals and other logical output signals to different output contacts on the IED.
The trip matrix logic function has 3 output signals and these outputs can be connected to physical tripping outputs according to the specific application needs for settable pulse or steady output.
15.2.3 Setting guidelines
Operation: Operation of function On/Off.
PulseTime: Defines the pulse time when in Pulsed mode. When used for direct tripping of circuit breaker(s) the pulse time delay shall be set to approximately 0.150 seconds in order to obtain satisfactory minimum duration of the trip pulse to the circuit breaker trip coils.
OnDelay: Used to prevent output signals to be given for spurious inputs. Normally set to 0 or a low value.
OffDelay: Defines a delay of the reset of the outputs after the activation conditions no longer are fulfilled. It is only used in Steady mode. When used for direct tripping of circuit breaker(s) the off delay time shall be set to at least 0.150 seconds in order to obtain a satisfactory minimum duration of the trip pulse to the circuit breaker trip coils.
ModeOutputx: Defines if output signal OUTPUTx (where x=1-3) is Steady or Pulsed.
Section 15 1MRK 511 310-UEN B Logic
414 Application manual
15.3 Logic for group alarm ALMCALH
15.3.1 Identification Function description IEC 61850
identification IEC 60617 identification
ANSI/IEEE C37.2 device number
Logic for group alarm ALMCALH — —
15.3.2 Application
Group alarm logic function ALMCALH is used to route alarm signals to different LEDs and/or output contacts on the IED.
ALMCALH output signal and the physical outputs allows the user to adapt the alarm signal to physical tripping outputs according to the specific application needs.
15.3.3 Setting guidelines
Operation: On or Off
15.4 Logic for group alarm WRNCALH
15.4.1 Identification Function description IEC 61850
identification IEC 60617 identification
ANSI/IEEE C37.2 device number
Logic for group warning WRNCALH — —
15.4.1.1 Application
Group warning logic function WRNCALH is used to route warning signals to LEDs and/or output contacts on the IED.
WRNCALH output signal WARNING and the physical outputs allows the user to adapt the warning signal to physical tripping outputs according to the specific application needs.
15.4.1.2 Setting guidelines
OperationOn or Off
1MRK 511 310-UEN B Section 15 Logic
415 Application manual
15.5 Logic for group indication INDCALH
15.5.1 Identification Function description IEC 61850
identification IEC 60617 identification
ANSI/IEEE C37.2 device number
Logic for group indication INDCALH — —
15.5.1.1 Application
Group indication logic function INDCALH is used to route indication signals to different LEDs and/or output contacts on the IED.
INDCALH output signal IND and the physical outputs allows the user to adapt the indication signal to physical outputs according to the specific application needs.
15.5.1.2 Setting guidelines
Operation: On or Off
15.6 Configurable logic blocks
The configurable logic blocks are available in two categories:
Configurable logic blocks that do not propagate the time stamp and the quality of signals. They do not have the suffix QT at the end of their function block name, for example, SRMEMORY. These logic blocks are also available as part of an extension logic package with the same number of instances.
Configurable logic blocks that propagate the time stamp and the quality of signals. They have the suffix QT at the end of their function block name, for example, SRMEMORYQT.
15.6.1 Application
A set of standard logic blocks, like AND, OR etc, and timers are available for adapting the IED configuration to the specific application needs. Additional logic blocks that, beside the normal logical function, have the capability to propagate timestamp and quality are also available. Those blocks have a designation including the letters QT, like ANDQT, ORQT etc.
Section 15 1MRK 511 310-UEN B Logic
416 Application manual
15.6.2 Setting guidelines
There are no settings for AND gates, OR gates, inverters or XOR gates as well as, for ANDQT gates, ORQT gates or XORQT gates.
For normal On/Off delay and pulse timers the time delays and pulse lengths are set from the local HMI or via the PST tool.
Both timers in the same logic block (the one delayed on pick-up and the one delayed on drop-out) always have a common setting value.
For controllable gates, settable timers and SR flip-flops with memory, the setting parameters are accessible via the local HMI or via the PST tool.
15.6.2.1 Configuration
Logic is configured using the ACT configuration tool in PCM600.
Execution of functions as defined by the configurable logic blocks runs according to a fixed sequence with different cycle times.
For each cycle time, the function block is given an serial execution number. This is shown when using the ACT configuration tool with the designation of the function block and the cycle time, see example below.
IEC09000695_2_en.vsd
IEC09000695 V2 EN
Figure 181: Example designation, serial execution number and cycle time for logic function
The execution of different function blocks within the same cycle is determined by the order of their serial execution numbers. Always remember this when connecting two or more logical function blocks in series.
Always be careful when connecting function blocks with a fast cycle time to function blocks with a slow cycle time. Remember to design the logic circuits carefully and always check the execution sequence for different functions. In other cases, additional
1MRK 511 310-UEN B Section 15 Logic
417 Application manual
time delays must be introduced into the logic schemes to prevent errors, for example, race between functions.
15.7 Fixed signal function block FXDSIGN
15.7.1 Identification Function description IEC 61850
identification IEC 60617 identification
ANSI/IEEE C37.2 device number
Fixed signals FXDSIGN — —
15.7.2 Application
The Fixed signals function FXDSIGN generates nine pre-set (fixed) signals that can be used in the configuration of an IED, either for forcing the unused inputs in other function blocks to a certain level/value, or for creating certain logic. Boolean, integer, floating point, string types of signals are available.
Example for use of GRP_OFF signal in FXDSIGN The Restricted earth fault function REFPDIF can be used both for auto-transformers and normal transformers.
When used for auto-transformers, information from both windings parts, together with the neutral point current, needs to be available to the function. This means that three inputs are needed.
I3PW1CT1 I3PW2CT1 I3P
REFPDIF
IEC09000619_3_en.vsd
IEC09000619 V3 EN
Figure 182: REFPDIF function inputs for autotransformer application
For normal transformers only one winding and the neutral point is available. This means that only two inputs are used. Since all group connections are mandatory to be connected, the third input needs to be connected to something, which is the GRP_OFF signal in FXDSIGN function block.
Section 15 1MRK 511 310-UEN B Logic
418 Application manual
I3PW1CT1 I3PW2CT1 I3P
REFPDIF
GRP_OFF FXDSIGN
IEC09000620_3_en.vsd
IEC09000620 V3 EN
Figure 183: REFPDIF function inputs for normal transformer application
15.8 Boolean 16 to Integer conversion B16I
15.8.1 Identification Function description IEC 61850
identification IEC 60617 identification
ANSI/IEEE C37.2 device number
Boolean 16 to integer conversion B16I — —
15.8.2 Application
Boolean 16 to integer conversion function B16I is used to transform a set of 16 binary (logical) signals into an integer. It can be used for example, to connect logical output signals from a function (like distance protection) to integer inputs from another function (like line differential protection). B16I does not have a logical node mapping.
The Boolean 16 to integer conversion function (B16I) will transfer a combination of up to 16 binary inputs INx where 1×16 to an integer. Each INx represents a value according to the table below from 0 to 32768. This follows the general formula: INx = 2x-1 where 1×16. The sum of all the values on the activated INx will be available on the output OUT as a sum of the values of all the inputs INx that are activated. OUT is an integer. When all INx where 1×16 are activated that is = Boolean 1 it corresponds to that integer 65535 is available on the output OUT. B16I function is designed for receiving up to 16 booleans input locally. If the BLOCK input is activated, it will freeze the output at the last value.
Values of each of the different OUTx from function block B16I for 1×16.
The sum of the value on each INx corresponds to the integer presented on the output OUT on the function block B16I.
1MRK 511 310-UEN B Section 15 Logic
419 Application manual
Name of input Type Default Description Value when activated
Value when deactivated
IN1 BOOLEAN 0 Input 1 1 0
IN2 BOOLEAN 0 Input 2 2 0
IN3 BOOLEAN 0 Input 3 4 0
IN4 BOOLEAN 0 Input 4 8 0
IN5 BOOLEAN 0 Input 5 16 0
IN6 BOOLEAN 0 Input 6 32 0
IN7 BOOLEAN 0 Input 7 64 0
IN8 BOOLEAN 0 Input 8 128 0
IN9 BOOLEAN 0 Input 9 256 0
IN10 BOOLEAN 0 Input 10 512 0
IN11 BOOLEAN 0 Input 11 1024 0
IN12 BOOLEAN 0 Input 12 2048 0
IN13 BOOLEAN 0 Input 13 4096 0
IN14 BOOLEAN 0 Input 14 8192 0
IN15 BOOLEAN 0 Input 15 16384 0
IN16 BOOLEAN 0 Input 16 32768 0
The sum of the numbers in column Value when activated when all INx (where 1×16) are active that is=1; is 65535. 65535 is the highest boolean value that can be converted to an integer by the B16I function block.
15.9 Boolean 16 to Integer conversion with logic node representation BTIGAPC
15.9.1 Identification Function description IEC 61850
identification IEC 60617 identification
ANSI/IEEE C37.2 device number
Boolean 16 to integer conversion with logic node representation
BTIGAPC — —
15.9.2 Application
Boolean 16 to integer conversion with logic node representation function BTIGAPC is used to transform a set of 16 binary (logical) signals into an integer. BTIGAPC can receive an integer from a station computer for example, over IEC 6185081. These functions are very useful when you want to generate logical commands (for selector
Section 15 1MRK 511 310-UEN B Logic
420 Application manual
switches or voltage controllers) by inputting an integer number. BTIGAPC has a logical node mapping in IEC 61850.
The Boolean 16 to integer conversion function (BTIGAPC) will transfer a combination of up to 16 binary inputs INx where 1×16 to an integer. Each INx represents a value according to the table below from 0 to 32768. This follows the general formula: INx = 2x-1 where 1×16. The sum of all the values on the activated INx will be available on the output OUT as a sum of the values of all the inputs INx that are activated. OUT is an integer. When all INx where 1×16 are activated that is = Boolean 1 it corresponds to that integer 65535 is available on the output OUT. BTIGAPC function is designed for receiving up to 16 booleans input locally. If the BLOCK input is activated, it will freeze the output at the last value.
Values of each of the different OUTx from function block BTIGAPC for 1×16.
The sum of the value on each INx corresponds to the integer presented on the output OUT on the function block BTIGAPC.
Name of input Type Default Description Value when activated
Value when deactivated
IN1 BOOLEAN 0 Input 1 1 0
IN2 BOOLEAN 0 Input 2 2 0
IN3 BOOLEAN 0 Input 3 4 0
IN4 BOOLEAN 0 Input 4 8 0
IN5 BOOLEAN 0 Input 5 16 0
IN6 BOOLEAN 0 Input 6 32 0
IN7 BOOLEAN 0 Input 7 64 0
IN8 BOOLEAN 0 Input 8 128 0
IN9 BOOLEAN 0 Input 9 256 0
IN10 BOOLEAN 0 Input 10 512 0
IN11 BOOLEAN 0 Input 11 1024 0
IN12 BOOLEAN 0 Input 12 2048 0
IN13 BOOLEAN 0 Input 13 4096 0
IN14 BOOLEAN 0 Input 14 8192 0
IN15 BOOLEAN 0 Input 15 16384 0
IN16 BOOLEAN 0 Input 16 32768 0
The sum of the numbers in column Value when activated when all INx (where 1×16) are active that is=1; is 65535. 65535 is the highest boolean value that can be converted to an integer by the BTIGAPC function block.
15.10 Integer to Boolean 16 conversion IB16
1MRK 511 310-UEN B Section 15 Logic
421 Application manual
15.10.1 Identification Function description IEC 61850
identification IEC 60617 identification
ANSI/IEEE C37.2 device number
Integer to boolean 16 conversion IB16 — —
15.10.2 Application
Integer to boolean 16 conversion function (IB16) is used to transform an integer into a set of 16 binary (logical) signals. It can be used for example, to connect integer output signals from one function to binary (logical) inputs to another function. IB16 function does not have a logical node mapping.
The Boolean 16 to integer conversion function (IB16) will transfer a combination of up to 16 binary inputs INx where 1×16 to an integer. Each INx represents a value according to the table below from 0 to 32768. This follows the general formula: INx = 2x-1 where 1×16. The sum of all the values on the activated INx will be available on the output OUT as a sum of the values of all the inputs INx that are activated. OUT is an integer. When all INx where 1×16 are activated that is = Boolean 1 it corresponds to that integer 65535 is available on the output OUT. IB16 function is designed for receiving up to 16 booleans input locally. If the BLOCK input is activated, it will freeze the output at the last value.
Values of each of the different OUTx from function block IB16 for 1×16.
The sum of the value on each INx corresponds to the integer presented on the output OUT on the function block IB16.
Name of input Type Default Description Value when activated
Value when deactivated
IN1 BOOLEAN 0 Input 1 1 0
IN2 BOOLEAN 0 Input 2 2 0
IN3 BOOLEAN 0 Input 3 4 0
IN4 BOOLEAN 0 Input 4 8 0
IN5 BOOLEAN 0 Input 5 16 0
IN6 BOOLEAN 0 Input 6 32 0
IN7 BOOLEAN 0 Input 7 64 0
IN8 BOOLEAN 0 Input 8 128 0
IN9 BOOLEAN 0 Input 9 256 0
IN10 BOOLEAN 0 Input 10 512 0
IN11 BOOLEAN 0 Input 11 1024 0
IN12 BOOLEAN 0 Input 12 2048 0
IN13 BOOLEAN 0 Input 13 4096 0
IN14 BOOLEAN 0 Input 14 8192 0
IN15 BOOLEAN 0 Input 15 16384 0
IN16 BOOLEAN 0 Input 16 32768 0
Section 15 1MRK 511 310-UEN B Logic
422 Application manual
The sum of the numbers in column Value when activated when all INx (where 1×16) are active that is=1; is 65535. 65535 is the highest boolean value that can be converted to an integer by the IB16 function block.
15.11 Integer to Boolean 16 conversion with logic node representation ITBGAPC
15.11.1 Identification Function description IEC 61850
identification IEC 60617 identification
ANSI/IEEE C37.2 device number
Integer to boolean 16 conversion with logic node representation
ITBGAPC — —
15.11.2 Application
Integer to boolean 16 conversion with logic node representation function (ITBGAPC) is used to transform an integer into a set of 16 boolean signals. ITBGAPC function can receive an integer from a station computer for example, over IEC 6185081. This function is very useful when the user wants to generate logical commands (for selector switches or voltage controllers) by inputting an integer number. ITBGAPC function has a logical node mapping in IEC 61850.
The Integer to Boolean 16 conversion with logic node representation function (ITBGAPC) will transfer an integer with a value between 0 to 65535 communicated via IEC 61850 and connected to the ITBGAPC function block to a combination of activated outputs OUTx where 1×16.
The values of the different OUTx are according to the Table 31.
If the BLOCK input is activated, it freezes the logical outputs at the last value.
Table 31: Output signals
Name of OUTx Type Description Value when activated
Value when deactivated
OUT1 BOOLEAN Output 1 1 0
OUT2 BOOLEAN Output 2 2 0
OUT3 BOOLEAN Output 3 4 0
OUT4 BOOLEAN Output 4 8 0
OUT5 BOOLEAN Output 5 16 0
OUT6 BOOLEAN Output 6 32 0
OUT7 BOOLEAN Output 7 64 0
OUT8 BOOLEAN Output 8 128 0
Table continues on next page
1MRK 511 310-UEN B Section 15 Logic
423 Application manual
Name of OUTx Type Description Value when activated
Value when deactivated
OUT9 BOOLEAN Output 9 256 0
OUT10 BOOLEAN Output 10 512 0
OUT11 BOOLEAN Output 11 1024 0
OUT12 BOOLEAN Output 12 2048 0
OUT13 BOOLEAN Output 13 4096 0
OUT14 BOOLEAN Output 14 8192 0
OUT15 BOOLEAN Output 15 16384 0
OUT16 BOOLEAN Output 16 32768 0
The sum of the numbers in column Value when activated when all OUTx (1×16) are active equals 65535. This is the highest integer that can be converted by the ITBGAPC function block.
15.12 Elapsed time integrator with limit transgression and overflow supervision TEIGAPC
15.12.1 Identification Function Description IEC 61850
identification IEC 60617 identification
ANSI/IEEE C37.2 device number
Elapsed time integrator TEIGAPC — —
15.12.2 Application
The function TEIGAPC is used for user-defined logics and it can also be used for different purposes internally in the IED. An application example is the integration of elapsed time during the measurement of neutral point voltage or neutral current at earth-fault conditions.
Settable time limits for warning and alarm are provided. The time limit for overflow indication is fixed to 999999.9 seconds.
15.12.3 Setting guidelines
The settings tAlarm and tWarning are user settable limits defined in seconds. The achievable resolution of the settings depends on the level of the values defined.
A resolution of 10 ms can be achieved when the settings are defined within the range
1.00 second tAlarm 99 999.99 seconds
Section 15 1MRK 511 310-UEN B Logic
424 Application manual
1.00 second tWarning 99 999.99 seconds.
If the values are above this range the resolution becomes lower
99 999.99 seconds tAlarm 999 999.9 seconds
99 999.99 seconds tWarning 999 999.9 seconds
Note that tAlarm and tWarning are independent settings, that is, there is no check if tAlarm > tWarning.
The limit for the overflow supervision is fixed at 999999.9 seconds.
1MRK 511 310-UEN B Section 15 Logic
425 Application manual
Section 16 Monitoring
16.1 Measurement
16.1.1 Identification Function description IEC 61850
identification IEC 60617 identification
ANSI/IEEE C37.2 device number
Measurements CVMMXN
P, Q, S, I, U, f
SYMBOL-RR V1 EN
—
Phase current measurement CMMXU
I
SYMBOL-SS V1 EN
—
Phase-phase voltage measurement VMMXU
U
SYMBOL-UU V1 EN
—
Current sequence component measurement
CMSQI
I1, I2, I0
SYMBOL-VV V1 EN
—
Voltage sequence component measurement
VMSQI
U1, U2, U0
SYMBOL-TT V1 EN
—
Phase-neutral voltage measurement VNMMXU
U
SYMBOL-UU V1 EN
—
16.1.2 Application
Measurement functions is used for power system measurement, supervision and reporting to the local HMI, monitoring tool within PCM600 or to station level for example, via IEC 61850. The possibility to continuously monitor measured values of active power, reactive power, currents, voltages, frequency, power factor etc. is vital
1MRK 511 310-UEN B Section 16 Monitoring
427 Application manual
for efficient production, transmission and distribution of electrical energy. It provides to the system operator fast and easy overview of the present status of the power system. Additionally, it can be used during testing and commissioning of protection and control IEDs in order to verify proper operation and connection of instrument transformers (CTs and VTs). During normal service by periodic comparison of the measured value from the IED with other independent meters the proper operation of the IED analog measurement chain can be verified. Finally, it can be used to verify proper direction orientation for distance or directional overcurrent protection function.
The available measured values of an IED are depending on the actual hardware (TRM) and the logic configuration made in PCM600.
All measured values can be supervised with four settable limits that is, low-low limit, low limit, high limit and high-high limit. A zero clamping reduction is also supported, that is, the measured value below a settable limit is forced to zero which reduces the impact of noise in the inputs.
Dead-band supervision can be used to report measured signal value to station level when change in measured value is above set threshold limit or time integral of all changes since the last time value updating exceeds the threshold limit. Measure value can also be based on periodic reporting.
Main menu/Measurement/Monitoring/Service values/CVMMXN
The measurement function, CVMMXN, provides the following power system quantities:
P, Q and S: three phase active, reactive and apparent power PF: power factor U: phase-to-phase voltage amplitude I: phase current amplitude F: power system frequency
, The measuring functions CMMXU, VMMXU and VNMMXU provide physical quantities:
I: phase currents (amplitude and angle) (CMMXU) U: voltages (phase-to-earth and phase-to-phase voltage, amplitude and angle)
(VMMXU, VNMMXU)
The CVMMXN function calculates three-phase power quantities by using fundamental frequency phasors (DFT values) of the measured current respectively voltage signals. The measured power quantities are available either, as instantaneously calculated quantities or, averaged values over a period of time (low pass filtered) depending on the selected settings.
Section 16 1MRK 511 310-UEN B Monitoring
428 Application manual
It is possible to calibrate the measuring function above to get better then class 0.5 presentation. This is accomplished by angle and amplitude compensation at 5, 30 and 100% of rated current and at 100% of rated voltage.
The power system quantities provided, depends on the actual hardware, (TRM) and the logic configuration made in PCM600.
The measuring functions CMSQI and VMSQI provide sequence component quantities:
I: sequence currents (positive, zero, negative sequence, amplitude and angle) U: sequence voltages (positive, zero and negative sequence, amplitude and
angle).
16.1.3 Zero clamping
The measuring functions, CVMMXN, CMMXU, VMMXU and VNMMXU have no interconnections regarding any setting or parameter.
Zero clampings are also entirely handled by the ZeroDb for each and every signal separately for each of the functions. For example, the zero clamping of U12 is handled by UL12ZeroDb in VMMXU, zero clamping of I1 is handled by IL1ZeroDb in CMMXU ETC.
Example how CVMMXN is operating:
The following outputs can be observed on the local HMI under Monitoring/ Servicevalues/SRV1
S Apparent three-phase power
P Active three-phase power
Q Reactive three-phase power
PF Power factor
ILAG I lagging U
ILEAD I leading U
U System mean voltage, calculated according to selected mode
I System mean current, calculated according to selected mode
F Frequency
The settings for this function is found under Setting/General setting/Monitoring/ Service values/SRV1
It can be seen that:
1MRK 511 310-UEN B Section 16 Monitoring
429 Application manual
When system voltage falls below UGenZeroDB, the shown value for S, P, Q, PF, ILAG, ILEAD, U and F on the local HMI is forced to zero
When system current falls below IGenZeroDB, the shown value for S, P, Q, PF, ILAG, ILEAD, U and F on the local HMI is forced to zero
When the value of a single signal falls below the set dead band for that specific signal, the value shown on the local HMI is forced to zero. For example, if apparent three-phase power falls below SZeroDb the value for S on the local HMI is forced to zero.
16.1.4 Setting guidelines
The available setting parameters of the measurement function CVMMXN, CMMXU, VMMXU, CMSQI, VMSQI, VNMMXU are depending on the actual hardware (TRM) and the logic configuration made in PCM600.
The parameters for the Measurement functions CVMMXN, CMMXU, VMMXU, CMSQI, VMSQI, VNMMXU are set via the local HMI or PCM600.
Operation: Off/On. Every function instance (CVMMXN, CMMXU, VMMXU, CMSQI, VMSQI, VNMMXU) can be taken in operation (On) or out of operation (Off).
The following general settings can be set for the Measurement function (CVMMXN).
PowAmpFact: Amplitude factor to scale power calculations.
PowAngComp: Angle compensation for phase shift between measured I & U.
Mode: Selection of measured current and voltage. There are 9 different ways of calculating monitored three-phase values depending on the available VT inputs connected to the IED. See parameter group setting table.
k: Low pass filter coefficient for power measurement, U and I.
UGenZeroDb: Minimum level of voltage in % of UBase used as indication of zero voltage (zero point clamping). If measured value is below UGenZeroDb calculated S, P, Q and PF will be zero.
IGenZeroDb: Minimum level of current in % of IBase used as indication of zero current (zero point clamping). If measured value is below IGenZeroDb calculated S, P, Q and PF will be zero.
UBase: Base voltage in primary kV. This voltage is used as reference for voltage setting. It can be suitable to set this parameter to the rated primary voltage supervised object.
IBase: Base current in primary A. This current is used as reference for current setting. It can be suitable to set this parameter to the rated primary current of the supervised object.
Section 16 1MRK 511 310-UEN B Monitoring
430 Application manual
SBase: Base setting for power values in MVA.
UAmpCompY: Amplitude compensation to calibrate voltage measurements at Y% of Ur, where Y is equal to 5, 30 or 100.
IAmpCompY: Amplitude compensation to calibrate current measurements at Y% of Ir, where Y is equal to 5, 30 or 100.
IAngCompY: Angle compensation to calibrate angle measurements at Y% of Ir, where Y is equal to 5, 30 or 100.
Parameters IBase, Ubase and SBase have been implemented as a settings instead of a parameters, which means that if the values of the parameters are changed there will be no restart of the application. As restart is required to activate new parameters values, the IED must be restarted in some way. Either manually or by changing some other parameter at the same time.
The following general settings can be set for the Phase-phase current measurement (CMMXU).
IAmpCompY: Amplitude compensation to calibrate current measurements at Y% of Ir, where Y is equal to 5, 30 or 100.
IAngCompY: Angle compensation to calibrate angle measurements at Y% of Ir, where Y is equal to 5, 30 or 100.
The following general settings can be set for the Phase-phase voltage measurement (VMMXU).
UAmpCompY: Amplitude compensation to calibrate voltage measurements at Y% of Ur, where Y is equal to 5, 30 or 100.
UAngCompY: Angle compensation to calibrate angle measurements at Y% of Ur, where Y is equal to 5, 30 or 100.
The following general settings can be set for all monitored quantities included in the functions (CVMMXN, CMMXU, VMMXU, CMSQI, VMSQI, VNMMXU) X in setting names below equals S, P, Q, PF, U, I, F, IL1-3, UL1-3UL12-31, I1, I2, 3I0, U1, U2 or 3U0.
Xmin: Minimum value for analog signal X set directly in applicable measuring unit.
Xmax: Maximum value for analog signal X.
XZeroDb: Zero point clamping. A signal value less than XZeroDb is forced to zero.
Observe the related zero point clamping settings in Setting group N for CVMMXN (UGenZeroDb and IGenZeroDb). If measured value is below UGenZeroDb and/or IGenZeroDb calculated S, P, Q and PF will be zero and these settings will override XZeroDb.
1MRK 511 310-UEN B Section 16 Monitoring
431 Application manual
XRepTyp: Reporting type. Cyclic (Cyclic), amplitude deadband (Dead band) or integral deadband (Int deadband). The reporting interval is controlled by the parameter XDbRepInt.
XDbRepInt: Reporting deadband setting. Cyclic reporting is the setting value and is reporting interval in seconds. Amplitude deadband is the setting value in % of measuring range. Integral deadband setting is the integral area, that is, measured value in % of measuring range multiplied by the time between two measured values.
XHiHiLim: High-high limit. Set in applicable measuring unit.
XHiLim: High limit.
XLowLim: Low limit.
XLowLowLim: Low-low limit.
XLimHyst: Hysteresis value in % of range and is common for all limits.
All phase angles are presented in relation to defined reference channel. The parameter PhaseAngleRef defines the reference, see section «».
Calibration curves It is possible to calibrate the functions (CVMMXN, CMMXU, VNMMXU and VMMXU) to get class 0.5 presentations of currents, voltages and powers. This is accomplished by amplitude and angle compensation at 5, 30 and 100% of rated current and voltage. The compensation curve will have the characteristic for amplitude and angle compensation of currents as shown in figure 184 (example). The first phase will be used as reference channel and compared with the curve for calculation of factors. The factors will then be used for all related channels.
Section 16 1MRK 511 310-UEN B Monitoring
432 Application manual
IEC05000652 V2 EN
Figure 184: Calibration curves
16.1.4.1 Setting examples
Three setting examples, in connection to Measurement function (CVMMXN), are provided:
Measurement function (CVMMXN) application for a OHL Measurement function (CVMMXN) application on the secondary side of a
transformer Measurement function (CVMMXN) application for a generator
For each of them detail explanation and final list of selected setting parameters values will be provided.
The available measured values of an IED are depending on the actual hardware (TRM) and the logic configuration made in PCM600.
Measurement function application for a 110kV OHL Single line diagram for this application is given in figure 185:
1MRK 511 310-UEN B Section 16 Monitoring
433 Application manual
110kV Busbar
110kV OHL
P Q
600/1 A 110 0,1/
3 3 kV
IEC09000039-2-en.vsd
IED
IEC09000039-1-EN V2 EN
Figure 185: Single line diagram for 110kV OHL application
In order to monitor, supervise and calibrate the active and reactive power as indicated in figure 185 it is necessary to do the following:
1. Set correctly CT and VT data and phase angle reference channel PhaseAngleRef (see section «») using PCM600 for analog input channels
2. Connect, in PCM600, measurement function to three-phase CT and VT inputs 3. Set under General settings parameters for the Measurement function:
general settings as shown in table 32. level supervision of active power as shown in table 33. calibration parameters as shown in table 34.
Table 32: General settings parameters for the Measurement function
Setting Short Description Selected value
Comments
Operation Operation Off/On On Function must be On
PowAmpFact Amplitude factor to scale power calculations
1.000 It can be used during commissioning to achieve higher measurement accuracy. Typically no scaling is required
PowAngComp Angle compensation for phase shift between measured I & U
0.0 It can be used during commissioning to achieve higher measurement accuracy. Typically no angle compensation is required. As well here required direction of P & Q measurement is towards protected object (as per IED internal default direction)
Mode Selection of measured current and voltage
L1, L2, L3 All three phase-to-earth VT inputs are available
k Low pass filter coefficient for power measurement, U and I
0.00 Typically no additional filtering is required
Table continues on next page
Section 16 1MRK 511 310-UEN B Monitoring
434 Application manual
Setting Short Description Selected value
Comments
UGenZeroDb Zero point clamping in % of Ubase
25 Set minimum voltage level to 25%. Voltage below 25% will force S, P and Q to zero.
IGenZeroDb Zero point clamping in % of Ibase 3 Set minimum current level to 3%. Current below 3% will force S, P and Q to zero.
UBase (set in Global base)
Base setting for voltage level in kV
400.00 Set rated OHL phase-to-phase voltage
IBase (set in Global base)
Base setting for current level in A 800 Set rated primary CT current used for OHL
Table 33: Settings parameters for level supervision
Setting Short Description Selected value
Comments
PMin Minimum value -100 Minimum expected load
PMax Minimum value 100 Maximum expected load
PZeroDb Zero point clamping in 0.001% of range
3000 Set zero point clamping to 45 MW that is, 3% of 200 MW
PRepTyp Reporting type db Select amplitude deadband supervision
PDbRepInt Cycl: Report interval (s), Db: In % of range, Int Db: In %s
2 Set db=30 MW that is, 2% (larger changes than 30 MW will be reported)
PHiHiLim High High limit (physical value) 60 High alarm limit that is, extreme overload alarm
PHiLim High limit (physical value) 50 High warning limit that is, overload warning
PLowLim Low limit (physical value) -50 Low warning limit. Not active
PLowLowlLim Low Low limit (physical value) -60 Low alarm limit. Not active
PLimHyst Hysteresis value in % of range (common for all limits)
2 Set Hysteresis MW that is, 2%
Table 34: Settings for calibration parameters
Setting Short Description Selected value
Comments
IAmpComp5 Amplitude factor to calibrate current at 5% of Ir
0.00
IAmpComp30 Amplitude factor to calibrate current at 30% of Ir
0.00
IAmpComp100 Amplitude factor to calibrate current at 100% of Ir
0.00
UAmpComp5 Amplitude factor to calibrate voltage at 5% of Ur
0.00
UAmpComp30 Amplitude factor to calibrate voltage at 30% of Ur
0.00
Table continues on next page
1MRK 511 310-UEN B Section 16 Monitoring
435 Application manual
Setting Short Description Selected value
Comments
UAmpComp100 Amplitude factor to calibrate voltage at 100% of Ur
0.00
IAngComp5 Angle calibration for current at 5% of Ir
0.00
IAngComp30 Angle pre-calibration for current at 30% of Ir
0.00
IAngComp100 Angle pre-calibration for current at 100% of Ir
0.00
Measurement function application for a power transformer Single line diagram for this application is given in figure 186.
Section 16 1MRK 511 310-UEN B Monitoring
436 Application manual
110kV Busbar
200/1
35 / 0,1kV
35kV Busbar
500/5
P Q
31,5 MVA 110/36,75/(10,5) kV
Yy0(d5)
UL1L2
IEC09000040-1-en.vsd
IED
IEC09000040-1-EN V1 EN
Figure 186: Single line diagram for transformer application
In order to measure the active and reactive power as indicated in figure 186, it is necessary to do the following:
1. Set correctly all CT and VT and phase angle reference channel PhaseAngleRef (see section «») data using PCM600 for analog input channels
2. Connect, in PCM600, measurement function to LV side CT & VT inputs 3. Set the setting parameters for relevant Measurement function as shown in the
following table 35:
1MRK 511 310-UEN B Section 16 Monitoring
437 Application manual
Table 35: General settings parameters for the Measurement function
Setting Short description Selected value
Comment
Operation Operation Off/On On Function must be On
PowAmpFact Amplitude factor to scale power calculations
1.000 Typically no scaling is required
PowAngComp Angle compensation for phase shift between measured I & U
180.0 Typically no angle compensation is required. However here the required direction of P & Q measurement is towards busbar (Not per IED internal default direction). Therefore angle compensation have to be used in order to get measurements in aliment with the required direction.
Mode Selection of measured current and voltage
L1L2 Only UL1L2 phase-to-phase voltage is available
k Low pass filter coefficient for power measurement, U and I
0.00 Typically no additional filtering is required
UGenZeroDb Zero point clamping in % of Ubase
25 Set minimum voltage level to 25%
IGenZeroDb Zero point clamping in % of Ibase 3 Set minimum current level to 3%
UBase (set in Global base)
Base setting for voltage level in kV
35.00 Set LV side rated phase-to-phase voltage
IBase (set in Global base)
Base setting for current level in A 495 Set transformer LV winding rated current
Measurement function application for a generator Single line diagram for this application is given in figure 187.
Section 16 1MRK 511 310-UEN B Monitoring
438 Application manual
220kV Busbar
300/1
15 / 0,1kV
4000/5
100 MVA 242/15,65 kV
Yd5
UL1L2 , UL2L3
G
P Q
100MVA 15,65kV
IEC09000041-1-en.vsd
IED
IEC09000041-1-EN V1 EN
Figure 187: Single line diagram for generator application
In order to measure the active and reactive power as indicated in figure 187, it is necessary to do the following:
1. Set correctly all CT and VT data and phase angle reference channel PhaseAngleRef(see section «») using PCM600 for analog input channels
2. Connect, in PCM600, measurement function to the generator CT & VT inputs 3. Set the setting parameters for relevant Measurement function as shown in the
following table:
1MRK 511 310-UEN B Section 16 Monitoring
439 Application manual
Table 36: General settings parameters for the Measurement function
Setting Short description Selected value
Comment
Operation Operation Off/On On Function must be On
PowAmpFact Amplitude factor to scale power calculations
1.000 Typically no scaling is required
PowAngComp Angle compensation for phase shift between measured I & U
0.0 Typically no angle compensation is required. As well here required direction of P & Q measurement is towards protected object (as per IED internal default direction)
Mode Selection of measured current and voltage
Arone Generator VTs are connected between phases (V-connected)
k Low pass filter coefficient for power measurement, U and I
0.00 Typically no additional filtering is required
UGenZeroDb Zero point clamping in % of Ubase
25% Set minimum voltage level to 25%
IGenZeroDb Zero point clamping in % of Ibase 3 Set minimum current level to 3%
UBase (set in Global base)
Base setting for voltage level in kV
15,65 Set generator rated phase-to- phase voltage
IBase (set in Global base)
Base setting for current level in A 3690 Set generator rated current
16.2 Gas medium supervision SSIMG
16.2.1 Identification Function description IEC 61850
identification IEC 60617 identification
ANSI/IEEE C37.2 device number
Gas medium supervision SSIMG — 63
16.2.2 Application
Gas medium supervision (SSIMG) is used for monitoring the circuit breaker condition. Proper arc extinction by the compressed gas in the circuit breaker is very important. When the pressure becomes too low compared to the required value, the circuit breaker operation shall be blocked to minimize the risk of internal failure. Binary information based on the gas pressure in the circuit breaker is used as an input signal to the function. The function generates alarms based on the received information.
16.2.3 Setting guidelines
The parameters for the gas medium supervision SSIMG are set via the local HMI or PCM600.
Section 16 1MRK 511 310-UEN B Monitoring
440 Application manual
Operation: Off/On PresAlmLimit: Alarm setting pressure limit for gas medium supervision PresLOLimit: Pressure lockout setting limit for gas medium supervision TempAlarmLimit: Temperature alarm level setting of the gas medium TempLOLimit: Temperature lockout level of the gas medium tPresAlarm: Time delay for pressure alarm of the gas medium tPresLockOut: Time delay for level lockout indication of the gas medium tTempAlarm: Time delay for temperature alarm of the gas medium tTempLockOut: Time delay for temperature lockout of the gas medium tResetPresAlm: Reset time delay for level alarm of the gas medium tResetPresLO: Reset time delay for level lockout of the gas medium tResetTempAlm: Reset time delay for temperature lockout of the gas medium tResetTempLO: Reset time delay for temperature alarm of the gas medium
16.3 Liquid medium supervision SSIML
16.3.1 Identification Function description IEC 61850
identification IEC 60617 identification
ANSI/IEEE C37.2 device number
Liquid medium supervision SSIML — 71
16.3.2 Application
Liquid medium supervision (SSIML) is used for monitoring the circuit breaker condition. Proper arc extinction by the compressed oil in the circuit breaker is very important. When the level becomes too low, compared to the required value, the circuit breaker operation is blocked to minimize the risk of internal failures. Binary information based on the oil level in the circuit breaker is used as input signals to the function. In addition to that, the function generates alarms based on received information.
16.3.3 Setting guidelines
The parameters for the Liquid medium supervision SSIML are set via the local HMI or PCM600.
Operation: Off/On LevelAlmLimit: Alarm setting level limit for liquid medium supervision LevelLOLimit: Level lockout setting limit for liquid medium supervision TempAlarmLimit: Temperature alarm level setting of the liquid medium TempLOLimit: Temperature lockout level of the liquid medium tLevelAlarm: Time delay for level alarm of the liquid medium tLevelLockOut: Time delay for level lockout indication of the liquid medium
1MRK 511 310-UEN B Section 16 Monitoring
441 Application manual
tTempAlarm: Time delay for temperature alarm of the liquid medium tTempLockOut: Time delay for temperature lockout of the liquid medium tResetLevelAlm: Reset time delay for level alarm of the liquid medium tResetLevelLO: Reset time delay for level lockout of the liquid medium tResetTempAlm: Reset time delay for temperature lockout of the liquid medium tResetTempLO: Reset time delay for temperature alarm of the liquid medium
16.4 Breaker monitoring SSCBR
16.4.1 Identification
Function description IEC 61850 identification
IEC 60617 identification
ANSI/IEEE C37.2 device number
Breaker monitoring SSCBR — —
16.4.2 Application
The circuit breaker maintenance is usually based on regular time intervals or the number of operations performed. This has some disadvantages because there could be a number of abnormal operations or few operations with high-level currents within the predetermined maintenance interval. Hence, condition-based maintenance scheduling is an optimum solution in assessing the condition of circuit breakers.
Circuit breaker contact travel time Auxiliary contacts provide information about the mechanical operation, opening time and closing time of a breaker. Detecting an excessive traveling time is essential to indicate the need for maintenance of the circuit breaker mechanism. The excessive travel time can be due to problems in the driving mechanism or failures of the contacts.
Circuit breaker status Monitoring the breaker status ensures proper functioning of the features within the protection relay such as breaker control, breaker failure and autoreclosing. The breaker status is monitored using breaker auxiliary contacts. The breaker status is indicated by the binary outputs. These signals indicate whether the circuit breaker is in an open, closed or error state.
Remaining life of circuit breaker Every time the breaker operates, the circuit breaker life reduces due to wear. The wear in a breaker depends on the interrupted current. For breaker maintenance or replacement at the right time, the remaining life of the breaker must be estimated. The remaining life of a breaker can be estimated using the maintenance curve provided by the circuit breaker manufacturer.
Section 16 1MRK 511 310-UEN B Monitoring
442 Application manual
Circuit breaker manufacturers provide the number of make-break operations possible at various interrupted currents. An example is shown in figure 188.
N um
be r o
f m ak
e- br
ea k
op er
at io
ns (
n)
Interrupted current (kA)
P1
P2
100000
50000
20000
10000
2000
5000
1000
100
200
500
10
20
50
0.1 0.2 0.5 1 2 5 10 20 50 100
IEC12000623_1_en.vsd
IEC12000623 V1 EN
Figure 188: An example for estimating the remaining life of a circuit breaker
Calculation for estimating the remaining life
The graph shows that there are 10000 possible operations at the rated operating current and 900 operations at 10 kA and 50 operations at rated fault current. Therefore, if the interrupted current is 10 kA, one operation is equivalent to 10000/900 = 11 operations at the rated current. It is assumed that prior to tripping, the remaining life of a breaker is 10000 operations. Remaining life calculation for three different interrupted current conditions is explained below.
Breaker interrupts at and below the rated operating current, that is, 2 kA, the remaining life of the CB is decreased by 1 operation and therefore, 9999 operations remaining at the rated operating current.
Breaker interrupts between rated operating current and rated fault current, that is, 10 kA, one operation at 10kA is equivalent to 10000/900 = 11 operations at the
1MRK 511 310-UEN B Section 16 Monitoring
443 Application manual
rated current. The remaining life of the CB would be (10000 10) = 9989 at the rated operating current after one operation at 10 kA.
Breaker interrupts at and above rated fault current, that is, 50 kA, one operation at 50 kA is equivalent to 10000/50 = 200 operations at the rated operating current. The remaining life of the CB would become (10000 200) = 9800 operations at the rated operating current after one operation at 50 kA.
Accumulated energy Monitoring the contact erosion and interrupter wear has a direct influence on the required maintenance frequency. Therefore, it is necessary to accurately estimate the erosion of the contacts and condition of interrupters using cumulative summation of Iy. The factor «y» depends on the type of circuit breaker. The energy values were accumulated using the current value and exponent factor for CB contact opening duration. When the next CB opening operation is started, the energy is accumulated from the previous value. The accumulated energy value can be reset to initial accumulation energy value by using the Reset accumulating energy input, RSTIPOW.
Circuit breaker operation cycles Routine breaker maintenance like lubricating breaker mechanism is based on the number of operations. A suitable threshold setting helps in preventive maintenance. This can also be used to indicate the requirement for oil sampling for dielectric testing in case of an oil circuit breaker.
Circuit breaker operation monitoring By monitoring the activity of the number of operations, it is possible to calculate the number of days the breaker has been inactive. Long periods of inactivity degrade the reliability for the protection system.
Circuit breaker spring charge monitoring For normal circuit breaker operation, the circuit breaker spring should be charged within a specified time. Detecting a long spring charging time indicates the time for circuit breaker maintenance. The last value of the spring charging time can be given as a service value.
Circuit breaker gas pressure indication For proper arc extinction by the compressed gas in the circuit breaker, the pressure of the gas must be adequate. Binary input available from the pressure sensor is based on the pressure levels inside the arc chamber. When the pressure becomes too low compared to the required value, the circuit breaker operation is blocked.
16.4.3 Setting guidelines
The breaker monitoring function is used to monitor different parameters of the circuit breaker. The breaker requires maintenance when the number of operations has reached a predefined value. For proper functioning of the circuit breaker, it is also essential to monitor the circuit breaker operation, spring charge indication or breaker
Section 16 1MRK 511 310-UEN B Monitoring
444 Application manual
wear, travel time, number of operation cycles and accumulated energy during arc extinction.
16.4.3.1 Setting procedure on the IED
The parameters for breaker monitoring (SSCBR) can be set using the local HMI or Protection and Control Manager (PCM600).
Common base IED values for primary current (IBase), primary voltage (UBase) and primary power (SBase) are set in Global base values for settings function GBASVAL.
GlobalBaseSel: It is used to select a GBASVAL function for reference of base values.
Operation: On or Off.
IBase: Base phase current in primary A. This current is used as reference for current settings.
OpenTimeCorr: Correction factor for circuit breaker opening travel time.
CloseTimeCorr: Correction factor for circuit breaker closing travel time.
tTrOpenAlm: Setting of alarm level for opening travel time.
tTrCloseAlm: Setting of alarm level for closing travel time.
OperAlmLevel: Alarm limit for number of mechanical operations.
OperLOLevel: Lockout limit for number of mechanical operations.
CurrExponent: Current exponent setting for energy calculation. It varies for different types of circuit breakers. This factor ranges from 0.5 to 3.0.
AccStopCurr: RMS current setting below which calculation of energy accumulation stops. It is given as a percentage of IBase.
ContTrCorr: Correction factor for time difference in auxiliary and main contacts’ opening time.
AlmAccCurrPwr: Setting of alarm level for accumulated energy.
LOAccCurrPwr: Lockout limit setting for accumulated energy.
SpChAlmTime: Time delay for spring charging time alarm.
tDGasPresAlm: Time delay for gas pressure alarm.
tDGasPresLO: Time delay for gas pressure lockout.
DirCoef: Directional coefficient for circuit breaker life calculation.
RatedOperCurr: Rated operating current of the circuit breaker.
1MRK 511 310-UEN B Section 16 Monitoring
445 Application manual
RatedFltCurr: Rated fault current of the circuit breaker.
OperNoRated: Number of operations possible at rated current.
OperNoFault: Number of operations possible at rated fault current.
CBLifeAlmLevel: Alarm level for circuit breaker remaining life.
AccSelCal: Selection between the method of calculation of accumulated energy.
OperTimeDelay: Time delay between change of status of trip output and start of main contact separation.
16.5 Event function EVENT
16.5.1 Identification Function description IEC 61850
identification IEC 60617 identification
ANSI/IEEE C37.2 device number
Event function EVENT
S00946 V1 EN
—
16.5.2 Application
When using a Substation Automation system with LON or SPA communication, time-tagged events can be sent at change or cyclically from the IED to the station level. These events are created from any available signal in the IED that is connected to the Event function (EVENT). The event function block is used for LON and SPA communication.
Analog and double indication values are also transferred through EVENT function.
16.5.3 Setting guidelines
The parameters for the Event (EVENT) function are set via the local HMI or PCM600.
EventMask (Ch_1 — 16) The inputs can be set individually as:
NoEvents OnSet, at pick-up of the signal OnReset, at drop-out of the signal OnChange, at both pick-up and drop-out of the signal AutoDetect
Section 16 1MRK 511 310-UEN B Monitoring
446 Application manual
LONChannelMask or SPAChannelMask Definition of which part of the event function block that shall generate events:
Off Channel 1-8 Channel 9-16 Channel 1-16
MinRepIntVal (1 — 16) A time interval between cyclic events can be set individually for each input channel. This can be set between 0 s to 3600 s in steps of 1 s. It should normally be set to 0, that is, no cyclic communication.
It is important to set the time interval for cyclic events in an optimized way to minimize the load on the station bus.
16.6 Disturbance report DRPRDRE
16.6.1 Identification Function description IEC 61850
identification IEC 60617 identification
ANSI/IEEE C37.2 device number
Analog input signals A41RADR — —
Disturbance report DRPRDRE — —
Disturbance report A1RADR — —
Disturbance report A2RADR — —
Disturbance report A3RADR — —
Disturbance report A4RADR — —
Disturbance report B1RBDR — —
Disturbance report B2RBDR — —
Disturbance report B3RBDR — —
Disturbance report B4RBDR — —
Disturbance report B5RBDR — —
Disturbance report B6RBDR — —
16.6.2 Application
To get fast, complete and reliable information about disturbances in the primary and/ or in the secondary system it is very important to gather information on fault currents, voltages and events. It is also important having a continuous event-logging to be able
1MRK 511 310-UEN B Section 16 Monitoring
447 Application manual
to monitor in an overview perspective. These tasks are accomplished by the disturbance report function DRPRDRE and facilitate a better understanding of the power system behavior and related primary and secondary equipment during and after a disturbance. An analysis of the recorded data provides valuable information that can be used to explain a disturbance, basis for change of IED setting plan, improve existing equipment, and so on. This information can also be used in a longer perspective when planning for and designing new installations, that is, a disturbance recording could be a part of Functional Analysis (FA).
Disturbance report DRPRDRE, always included in the IED, acquires sampled data of all selected analog and binary signals connected to the function blocks that is,
maximum 30 external analog signals, 10 internal derived analog signals, and 96 binary signals.
Disturbance report function is a common name for several functions that is, Indications (IND), Event recorder (ER), Event list (EL), Trip value recorder (TVR), Disturbance recorder (DR) and Fault locator (FL).
Disturbance report function is characterized by great flexibility as far as configuration, starting conditions, recording times, and large storage capacity are concerned. Thus, disturbance report is not dependent on the operation of protective functions, and it can record disturbances that were not discovered by protective functions for one reason or another. Disturbance report can be used as an advanced stand-alone disturbance recorder.
Every disturbance report recording is saved in the IED. The same applies to all events, which are continuously saved in a ring-buffer. Local HMI can be used to get information about the recordings, and the disturbance report files may be uploaded in the PCM600 using the Disturbance handling tool, for report reading or further analysis (using WaveWin, that can be found on the PCM600 installation CD). The user can also upload disturbance report files using FTP or MMS (over 6185081) clients.
If the IED is connected to a station bus (IEC 61850-8-1), the disturbance recorder (record made and fault number) and the fault locator information are available as GOOSE or Report Control data. The same information is obtainable if IEC60870-5-103 is used.
16.6.3 Setting guidelines
The setting parameters for the Disturbance report function DRPRDRE are set via the local HMI or PCM600.
It is possible to handle up to 40 analog and 96 binary signals, either internal signals or signals coming from external inputs. The binary signals are identical in all functions that is, Disturbance recorder (DR), Event recorder (ER), Indication (IND), Trip value recorder (TVR) and Event list (EL) function.
Section 16 1MRK 511 310-UEN B Monitoring
448 Application manual
User-defined names of binary and analog input signals is set using PCM600. The analog and binary signals appear with their user-defined names. The name is used in all related functions (Disturbance recorder (DR), Event recorder (ER), Indication (IND), Trip value recorder (TVR) and Event list (EL)).
Figure 189 shows the relations between Disturbance report, included functions and function blocks. Event list (EL), Event recorder (ER) and Indication (IND) uses information from the binary input function blocks (BxRBDR). Trip value recorder (TVR) uses analog information from the analog input function blocks (AxRADR), which is used by Fault locator (FL) after estimation by Trip Value Recorder (TVR). Disturbance report function acquires information from both AxRADR and BxRBDR.
Trip value rec Fault locator
Event list
Event recorder
Indications
Disturbance recorder
Disturbance Report
Binary signals
Analog signals
DRPRDRE FL
IEC09000336-3-en.vsdx
AxRADR
BxRBDR
IEC09000336 V3 EN
Figure 189: Disturbance report functions and related function blocks
For Disturbance report function there are a number of settings which also influences the sub-functions.
Three LED indications placed above the LCD screen makes it possible to get quick status information about the IED.
Green LED:
Steady light In Service
Flashing light Internal failure
Dark No power supply
Table continues on next page
1MRK 511 310-UEN B Section 16 Monitoring
449 Application manual
Yellow LED:
Steady light A Disturbance Report is triggered
Flashing light The IED is in test mode
Red LED:
Steady light Triggered on binary signal N with SetLEDN = On
Operation The operation of Disturbance report function DRPRDRE has to be set On or Off. If Off is selected, note that no disturbance report is registered, and none sub-function will operate (the only general parameter that influences Event list (EL)).
Operation = Off:
Disturbance reports are not stored. LED information (yellow — start, red — trip) is not stored or changed.
Operation = On:
Disturbance reports are stored, disturbance data can be read from the local HMI and from a PC using PCM600.
LED information (yellow — start, red — trip) is stored.
Every recording will get a number (0 to 999) which is used as identifier (local HMI, disturbance handling tool and IEC 61850). An alternative recording identification is date, time and sequence number. The sequence number is automatically increased by one for each new recording and is reset to zero at midnight. The maximum number of recordings stored in the IED is 100. The oldest recording will be overwritten when a new recording arrives (FIFO).
To be able to delete disturbance records, Operation parameter has to be On.
The maximum number of recordings depend on each recordings total recording time. Long recording time will reduce the number of recordings to less than 100.
The IED flash disk should NOT be used to store any user files. This might cause disturbance recordings to be deleted due to lack of disk space.
Section 16 1MRK 511 310-UEN B Monitoring
450 Application manual
16.6.3.1 Recording times
The different recording times for Disturbance report are set (the pre-fault time, post- fault time, and limit time). These recording times affect all sub-functions more or less but not the Event list (EL) function.
Prefault recording time (PreFaultRecT) is the recording time before the starting point of the disturbance. The setting should be at least 0.1 s to ensure enough samples for the estimation of pre-fault values in the Trip value recorder (TVR) function.
Postfault recording time (PostFaultRecT) is the maximum recording time after the disappearance of the trig-signal (does not influence the Trip value recorder (TVR) function).
Recording time limit (TimeLimit) is the maximum recording time after trig. The parameter limits the recording time if some trigging condition (fault-time) is very long or permanently set (does not influence the Trip value recorder (TVR) function).
Post retrigger (PostRetrig) can be set to On or Off. Makes it possible to choose performance of Disturbance report function if a new trig signal appears in the post- fault window.
PostRetrig = Off
The function is insensitive for new trig signals during post fault time.
PostRetrig = On
The function completes current report and starts a new complete report that is, the latter will include:
new pre-fault- and fault-time (which will overlap previous report) events and indications might be saved in the previous report too, due to overlap new fault locator and trip value calculations if installed, in operation and started
Operation in test mode If the IED is in test mode and OpModeTest = Off. Disturbance report function does not save any recordings and no LED information is displayed.
If the IED is in test mode and OpModeTest = On. Disturbance report function works in normal mode and the status is indicated in the saved recording.
16.6.3.2 Binary input signals
Up to 96 binary signals can be selected among internal logical and binary input signals. The configuration tool is used to configure the signals.
For each of the 96 signals, it is also possible to select if the signal is to be used as a trigger for the start of the Disturbance report and if the trigger should be activated on positive (1) or negative (0) slope.
1MRK 511 310-UEN B Section 16 Monitoring
451 Application manual
OperationN: Disturbance report may trig for binary input N (On) or not (Off).
TrigLevelN: Trig on positive (Trig on 1) or negative (Trig on 0) slope for binary input N.
Func103N: Function type number (0-255) for binary input N according to IEC-60870-5-103, that is, 128: Distance protection, 160: overcurrent protection, 176: transformer differential protection and 192: line differential protection.
Info103N: Information number (0-255) for binary input N according to IEC-60870-5-103, that is, 69-71: Trip L1-L3, 78-83: Zone 1-6.
See also description in the chapter IEC 60870-5-103.
16.6.3.3 Analog input signals
Up to 40 analog signals can be selected among internal analog and analog input signals. PCM600 is used to configure the signals.
For retrieving remote data from LDCM module, the Disturbance report function should not be connected to a 3 ms SMAI function block if this is the only intended use for the remote data.
The analog trigger of Disturbance report is not affected if analog input M is to be included in the disturbance recording or not (OperationM = On/Off).
If OperationM = Off, no waveform (samples) will be recorded and reported in graph. However, Trip value, pre-fault and fault value will be recorded and reported. The input channel can still be used to trig the disturbance recorder.
If OperationM = On, waveform (samples) will also be recorded and reported in graph.
NomValueM: Nominal value for input M.
OverTrigOpM, UnderTrigOpM: Over or Under trig operation, Disturbance report may trig for high/low level of analog input M (On) or not (Off).
OverTrigLeM, UnderTrigLeM: Over or under trig level, Trig high/low level relative nominal value for analog input M in percent of nominal value.
16.6.3.4 Sub-function parameters
All functions are in operation as long as Disturbance report is in operation.
Indications IndicationMaN: Indication mask for binary input N. If set (Show), a status change of that particular input, will be fetched and shown in the disturbance summary on local HMI. If not set (Hide), status change will not be indicated.
Section 16 1MRK 511 310-UEN B Monitoring
452 Application manual
SetLEDN: Set red LED on local HMI in front of the IED if binary input N changes status.
Disturbance recorder OperationM: Analog channel M is to be recorded by the disturbance recorder (On) or not (Off).
If OperationM = Off, no waveform (samples) will be recorded and reported in graph. However, Trip value, pre-fault and fault value will be recorded and reported. The input channel can still be used to trig the disturbance recorder.
If OperationM = On, waveform (samples) will also be recorded and reported in graph.
Event recorder Event recorder (ER) function has no dedicated parameters.
Trip value recorder ZeroAngleRef: The parameter defines which analog signal that will be used as phase angle reference for all other analog input signals. This signal will also be used for frequency measurement and the measured frequency is used when calculating trip values. It is suggested to point out a sampled voltage input signal, for example, a line or busbar phase voltage (channel 1-30).
Event list Event list (EL) (SOE) function has no dedicated parameters.
16.6.3.5 Consideration
The density of recording equipment in power systems is increasing, since the number of modern IEDs, where recorders are included, is increasing. This leads to a vast number of recordings at every single disturbance and a lot of information has to be handled if the recording functions do not have proper settings. The goal is to optimize the settings in each IED to be able to capture just valuable disturbances and to maximize the number that is possible to save in the IED.
The recording time should not be longer than necessary (PostFaultrecT and TimeLimit).
Should the function record faults only for the protected object or cover more? How long is the longest expected fault clearing time? Is it necessary to include reclosure in the recording or should a persistent fault
generate a second recording (PostRetrig)?
Minimize the number of recordings:
Binary signals: Use only relevant signals to start the recording that is, protection trip, carrier receive and/or start signals.
Analog signals: The level triggering should be used with great care, since unfortunate settings will cause enormously number of recordings. If nevertheless
1MRK 511 310-UEN B Section 16 Monitoring
453 Application manual
analog input triggering is used, chose settings by a sufficient margin from normal operation values. Phase voltages are not recommended for trigging.
Remember that values of parameters set elsewhere are linked to the information on a report. Such parameters are, for example, station and object identifiers, CT and VT ratios.
16.7 Logical signal status report BINSTATREP
16.7.1 Identification Function description IEC 61850
identification IEC 60617 identification
ANSI/IEEE C37.2 device number
Logical signal status report BINSTATREP — —
16.7.2 Application
The Logical signal status report (BINSTATREP) function makes it possible to poll signals from various other function blocks.
BINSTATREP has 16 inputs and 16 outputs. The output status follows the inputs and can be read from the local HMI or via SPA communication.
When an input is set, the respective output is set for a user defined time. If the input signal remains set for a longer period, the output will remain set until the input signal resets.
t t
INPUTn
OUTPUTn
IEC09000732-1-en.vsd IEC09000732 V1 EN
Figure 190: BINSTATREP logical diagram
16.7.3 Setting guidelines
The pulse time t is the only setting for the Logical signal status report (BINSTATREP). Each output can be set or reset individually, but the pulse time will be the same for all outputs in the entire BINSTATREP function.
Section 16 1MRK 511 310-UEN B Monitoring
454 Application manual
16.8 Fault locator LMBRFLO
16.8.1 Identification Function description IEC 61850
identification IEC 60617 identification
ANSI/IEEE C37.2 device number
Fault locator LMBRFLO — —
16.8.2 Application
The main objective of line protection and monitoring IEDs is fast, selective and reliable operation for faults on a protected line section. Besides this, information on distance to fault is very important for those involved in operation and maintenance. Reliable information on the fault location greatly decreases the downtime of the protected lines and increases the total availability of a power system.
The fault locator is started with the input CALCDIST to which trip signals indicating in-line faults are connected, typically distance protection zone 1 and accelerating zone or the line differential protection. The disturbance report must also be started for the same faults since the function uses pre- and post-fault information from the trip value recorder function (TVR).
Beside this information the function must be informed about faulted phases for correct loop selection (phase selective outputs from differential protection, distance protection, directional OC protection, and so on). The following loops are used for different types of faults:
for 3 phase faults: loop L1 — L2. for 2 phase faults: the loop between the faulted phases. for 2 phase-to-earth faults: the loop between the faulted phases. for phase-to-earth faults: the phase-to-earth loop.
LMBRFLO function indicates the distance to fault as a percentage of the line length, in kilometers or miles as selected on the local HMI. LineLengthUnit setting is used to select the unit of length either, in kilometer or miles for the distance to fault. The distance to the fault, which is calculated with a high accuracy, is stored together with the recorded disturbances. This information can be read on the local HMI, uploaded to PCM600 and is available on the station bus according to IEC 6185081.
The distance to fault can be recalculated on the local HMI by using the measuring algorithm for different fault loops or for changed system parameters.
16.8.3 Setting guidelines
The parameters for the Fault locator function are set via the local HMI or PCM600.
1MRK 511 310-UEN B Section 16 Monitoring
455 Application manual
The Fault locator algorithm uses phase voltages, phase currents and residual current in observed bay (protected line) and residual current from a parallel bay (line, which is mutual coupled to protected line).
The Fault locator has close connection to the Disturbance report function. All external analog inputs (channel 1-30), connected to the Disturbance report function, are available to the Fault locator and the function uses information calculated by the Trip value recorder. After allocation of analog inputs to the Disturbance report function, the user has to point out which analog inputs to be used by the Fault locator. According to the default settings the first four analog inputs are currents and next three are voltages in the observed bay (no parallel line expected since chosen input is set to zero). Use the Parameter Setting tool within PCM600 for changing analog configuration.
The list of parameters explains the meaning of the abbreviations. Figure 191 also presents these system parameters graphically. Note, that all impedance values relate to their primary values and to the total length of the protected line.
Z0m=Z0m+jX0m
R1A+jX1A
R0L+jX0L R1L+jX1L
R0L+jX0L R1L+jX1L
R1B+jX1B
DRPRDRE
LMBRFLO
ANSI05000045_2_en.vsd
ANSI05000045 V2 EN
Figure 191: Simplified network configuration with network data, required for settings of the fault location-measuring function
For a single-circuit line (no parallel line), the figures for mutual zero-sequence impedance (X0M, R0M) and analog input are set at zero.
Power system specific parameter settings shown in table 2 are not general settings but specific setting included in the setting groups, that is, this makes it possible to change conditions for the Fault locator with short notice by changing setting group.
The source impedance is not constant in the network. However, this has a minor influence on the accuracy of the distance-to-fault calculation, because only the phase angle of the distribution factor has an influence on the accuracy. The phase angle of the distribution factor is normally very low and practically constant, because the positive sequence line impedance, which has an angle close to 90, dominates it. Always set the source impedance resistance to values other than zero. If the actual values are not known, the values that correspond to the source impedance characteristic angle of 85 give satisfactory results.
Section 16 1MRK 511 310-UEN B Monitoring
456 Application manual
16.8.3.1 Connection of analog currents
Connection diagram for analog currents included IN from parallel line shown in figure 192
en07000113-1.vsd
L1 L2 L3
1
2
3
4
5
6
9
10
1
2
3
4
5
6
9
10
I1
I2
I3
I5
I1
I2
I3
I5
IEC07000113 V2 EN
Figure 192: Example of connection of parallel line IN for Fault locator LMBRFLO
16.9 Limit counter L4UFCNT
16.9.1 Identification Function description IEC 61850
identification IEC 60617 identification
ANSI/IEEE C37.2 device number
Limit counter L4UFCNT —
1MRK 511 310-UEN B Section 16 Monitoring
457 Application manual
16.9.2 Application
Limit counter (L4UFCNT) is intended for applications where positive and/or negative flanks on a binary signal need to be counted.
The limit counter provides four independent limits to be checked against the accumulated counted value. The four limit reach indication outputs can be utilized to initiate proceeding actions. The output indicators remain high until the reset of the function.
It is also possible to initiate the counter from a non-zero value by resetting the function to the wanted initial value provided as a setting.
If applicable, the counter can be set to stop or rollover to zero and continue counting after reaching the maximum count value. The steady overflow output flag indicates the next count after reaching the maximum count value. It is also possible to set the counter to rollover and indicate the overflow as a pulse, which lasts up to the first count after rolling over to zero. In this case, periodic pulses will be generated at multiple overflow of the function.
16.9.3 Setting guidelines
The parameters for Limit counter L4UFCNT are set via the local HMI or PCM600.
Section 16 1MRK 511 310-UEN B Monitoring
458 Application manual
Section 17 Metering
17.1 Pulse-counter logic PCFCNT
17.1.1 Identification Function description IEC 61850
identification IEC 60617 identification
ANSI/IEEE C37.2 device number
Pulse-counter logic PCFCNT
S00947 V1 EN
—
17.1.2 Application
Pulse-counter logic (PCFCNT) function counts externally generated binary pulses, for instance pulses coming from an external energy meter, for calculation of energy consumption values. The pulses are captured by the binary input module (BIM), and read by the PCFCNT function. The number of pulses in the counter is then reported via the station bus to the substation automation system or read via the station monitoring system as a service value. When using IEC 6185081, a scaled service value is available over the station bus.
The normal use for this function is the counting of energy pulses from external energy meters. An optional number of inputs from an arbitrary input module in IED can be used for this purpose with a frequency of up to 40 Hz. The pulse-counter logic PCFCNT can also be used as a general purpose counter.
17.1.3 Setting guidelines
From PCM600, these parameters can be set individually for each pulse counter:
Operation: Off/On tReporting: 0-3600s EventMask: NoEvents/ReportEvents
The configuration of the inputs and outputs of the pulse counter-logic PCFCNT function block is made with PCM600.
1MRK 511 310-UEN B Section 17 Metering
459 Application manual
On the Binary Input Module, the debounce filter default time is set to 1 ms, that is, the counter suppresses pulses with a pulse length less than 1 ms. The input oscillation blocking frequency is preset to 40 Hz. That means that the counter finds the input oscillating if the input frequency is greater than 40 Hz. The oscillation suppression is released at 30 Hz. The values for blocking/release of the oscillation can be changed in the local HMI and PCM600 under Main menu/Configurations/I/O modules.
The setting is common for all input channels on a Binary Input Module, that is, if changes of the limits are made for inputs not connected to the pulse counter, the setting also influences the inputs on the same board used for pulse counting.
17.2 Function for energy calculation and demand handling ETPMMTR
17.2.1 Identification Function description IEC 61850
identification IEC 60617 identification
ANSI/IEEE C37.2 device number
Function for energy calculation and demand handling
ETPMMTR W_Varh —
17.2.2 Application
Energy calculation and demand handling function (ETPMMTR) is intended for statistics of the forward and reverse active and reactive energy. It has a high accuracy basically given by the measurements function (CVMMXN). This function has a site calibration possibility to further increase the total accuracy.
The function is connected to the instantaneous outputs of (CVMMXN) as shown in figure 193.
Section 17 1MRK 511 310-UEN B Metering
460 Application manual
ETPMMTR
P Q STARTACC STOPACC RSTACC RSTDMD
ACCINPRG EAFPULSE EARPULSE ERFPULSE ERRPULSE
EAFALM EARALM ERFALM ERRALM EAFACC EARACC ERFACC ERRACC
MAXPAFD MAXPARD MAXPRFD MAXPRRD
IEC13000184-1-en.vsd IEC13000190 V1 EN
Figure 193: Connection of energy calculation and demand handling function ETPMMTR to the measurements function (CVMMXN)
The energy values can be read through communication in MWh and MVArh in monitoring tool of PCM600 and/or alternatively the values can be presented on the local HMI. The local HMI graphical display is configured with PCM600 Graphical Display Editor tool (GDE) with a measuring value which is selected to the active and reactive component as preferred. Also all Accumulated Active Forward, Active Reverse, Reactive Forward and Reactive Reverse energy values can be presented.
Maximum demand values are presented in MWh or MVArh in the same way.
Alternatively, the energy values can be presented with use of the pulse counters function (PCGGIO). The output energy values are scaled with the pulse output setting values EAFAccPlsQty, EARAccPlsQty, ERFAccPlsQty and ERVAccPlsQty of the energy metering function and then the pulse counter can be set-up to present the correct values by scaling in this function. Pulse counter values can then be presented on the local HMI in the same way and/or sent to the SA (Substation Automation) system through communication where the total energy then is calculated by summation of the energy pulses. This principle is good for very high values of energy as the saturation of numbers else will limit energy integration to about one year with 50 kV and 3000 A. After that the accumulation will start on zero again.
17.2.3 Setting guidelines
The parameters are set via the local HMI or PCM600.
The following settings can be done for the energy calculation and demand handling function ETPMMTR:
Operation: Off/On
EnaAcc: Off/On is used to switch the accumulation of energy on and off.
tEnergy: Time interval when energy is measured.
1MRK 511 310-UEN B Section 17 Metering
461 Application manual
tEnergyOnPls: gives the pulse length ON time of the pulse. It should be at least 100 ms when connected to the Pulse counter function block. Typical value can be 100 ms.
tEnergyOffPls: gives the OFF time between pulses. Typical value can be 100 ms.
EAFAccPlsQty and EARAccPlsQty: gives the MWh value in each pulse. It should be selected together with the setting of the Pulse counter (PCGGIO) settings to give the correct total pulse value.
ERFAccPlsQty and ERVAccPlsQty : gives the MVArh value in each pulse. It should be selected together with the setting of the Pulse counter (PCGGIO) settings to give the correct total pulse value.
For the advanced user there are a number of settings for direction, zero clamping, max limit, and so on. Normally, the default values are suitable for these parameters.
Section 17 1MRK 511 310-UEN B Metering
462 Application manual
Section 18 Station communication
18.1 670 series protocols
Each IED is provided with a communication interface, enabling it to connect to one or many substation level systems or equipment, either on the Substation Automation (SA) bus or Substation Monitoring (SM) bus.
Following communication protocols are available:
IEC 61850-8-1 communication protocol IEC 61850-9-2LE communication protocol LON communication protocol SPA or IEC 60870-5-103 communication protocol DNP3.0 communication protocol
Several protocols can be combined in the same IED.
18.2 IEC 61850-8-1 communication protocol
18.2.1 Application IEC 61850-8-1
IEC 61850-8-1 communication protocol allows vertical communication to HSI clients and allows horizontal communication between two or more intelligent electronic devices (IEDs) from one or several vendors to exchange information and to use it in the performance of their functions and for correct co-operation.
GOOSE (Generic Object Oriented Substation Event), which is a part of IEC 61850 81 standard, allows the IEDs to communicate state and control information amongst themselves, using a publish-subscribe mechanism. That is, upon detecting an event, the IED(s) use a multi-cast transmission to notify those devices that have registered to receive the data. An IED can, by publishing a GOOSE message, report its status. It can also request a control action to be directed at any device in the network.
Figure 194 shows the topology of an IEC 6185081 configuration. IEC 6185081 specifies only the interface to the substation LAN. The LAN itself is left to the system integrator.
1MRK 511 310-UEN B Section 18 Station communication
463 Application manual
KIOSK 2 KIOSK 3
Station HSI Base System
Engineering Workstation
SMS Gateway
Printer
CC
IEC09000135_en.v sd
KIOSK 1
IED 1
IED 2
IED 3
IED 1
IED 2
IED 3
IED 1
IED 2
IED 3
IEC09000135 V1 EN
Figure 194: SA system with IEC 6185081
Figure195 shows the GOOSE peer-to-peer communication.
Control Protection Control ProtectionControl and protection
GOOSE
en05000734.vsd
Station HSI MicroSCADA
Gateway
IED A
IED A
IED A
IED A
IED A
IEC05000734 V1 EN
Figure 195: Example of a broadcasted GOOSE message
Section 18 1MRK 511 310-UEN B Station communication
464 Application manual
18.2.2 Horizontal communication via GOOSE for interlocking GOOSEINTLKRCV
Table 37: GOOSEINTLKRCV Non group settings (basic)
Name Values (Range) Unit Step Default Description Operation Off
On — — Off Operation Off/On
18.2.3 Setting guidelines
There are two settings related to the IEC 6185081 protocol:
Operation User can set IEC 61850 communication to On or Off.
GOOSE has to be set to the Ethernet link where GOOSE traffic shall be send and received.
18.2.4 Generic communication function for Single Point indication SPGAPC, SP16GAPC
18.2.4.1 Application
Generic communication function for Single Point Value (SPGAPC) function is used to send one single logical output to other systems or equipment in the substation. It has one visible input, that should be connected in ACT tool.
18.2.4.2 Setting guidelines
There are no settings available for the user for SPGAPC.
18.2.5 Generic communication function for Measured Value MVGAPC
18.2.5.1 Application
Generic communication function for Measured Value MVGAPC function is used to send the instantaneous value of an analog signal to other systems or equipment in the substation. It can also be used inside the same IED, to attach a RANGE aspect to an analog value and to permit measurement supervision on that value.
1MRK 511 310-UEN B Section 18 Station communication
465 Application manual
18.2.5.2 Setting guidelines
The settings available for Generic communication function for Measured Value (MVGAPC) function allows the user to choose a deadband and a zero deadband for the monitored signal. Values within the zero deadband are considered as zero.
The high and low limit settings provides limits for the high-high-, high, normal, low and low-low ranges of the measured value. The actual range of the measured value is shown on the range output of MVGAPC function block. When a Measured value expander block (RANGE_XP) is connected to the range output, the logical outputs of the RANGE_XP are changed accordingly.
18.2.6 IEC 61850-8-1 redundant station bus communication
18.2.6.1 Identification
Function description LHMI and ACT identification
IEC 61850 identification
IEC 60617 identification
ANSI/IEEE C37.2 device number
Parallel Redundancy Protocol Status
PRPSTATUS RCHLCCH — —
Duo driver configuration
PRP — — —
18.2.6.2 Application
Parallel redundancy protocol status (PRPSTATUS) together with Duo driver configuration (PRP) are used to supervise and assure redundant Ethernet communication over two channels. This will secure data transfer even though one communication channel might not be available for some reason. Together PRPSTATUS and PRP provide redundant communication over station bus running IEC 61850-8-1 protocol. The redundant communication use both port AB and CD on OEM module.
Section 18 1MRK 511 310-UEN B Station communication
466 Application manual
Switch A Switch B
1 2
DataData
DataData
=IEC09000758=3=en=Original.vsd
IED Configuration
PRP PRPSTATUS
1 2
OEM
AB CD
Duo
Redundancy Supervision
Station Control System
IEC09000758 V3 EN
Figure 196: Redundant station bus
18.2.6.3 Setting guidelines
Redundant communication (PRP) is configured in the local HMI under Main menu/ Configuration/Communication/Ethernet configuration/PRP
The settings are found in the Parameter Setting tool in PCM600 under IED Configuration/Communication/Ethernet configuration/PRP. By default the settings are read only in the Parameter Settings tool, but can be unlocked by right clicking the parameter and selecting Lock/Unlock Parameter.
Operation: The redundant communication will be activated when this parameter is set to On.After confirmation the IED will restart and the setting alternatives Rear OEM — Port AB and CD will not be further displayed in the local HMI. The ETHLANAB and
1MRK 511 310-UEN B Section 18 Station communication
467 Application manual
ETHLANCD in the Parameter Setting Tool are irrelevant when the redundant communication is activated, only PRP IPAdress and IPMask are valid.
IEC10000057-3-en.vsd
IEC10000057 V3 EN
Figure 197: PST screen: PRP Operation is set to On, which affect Rear OEM — Port AB and CD which are both set to PRP
18.3 IEC 61850-9-2LE communication protocol
18.3.1 Introduction
Every IED can be provided with a communication interface enabling it to connect to a process bus, in order to get data from analog data acquisition units close to the process (primary apparatus), commonly known as Merging Units (MU). The protocol used in this case is the IEC 61850-9-2LE communication protocol.
Note that the IEC 61850-9-2LE standard does not specify the quality of the sampled values, only the transportation. Thus, the accuracy of the current and voltage inputs to the merging unit and the inaccuracy added by the merging unit must be coordinated with the requirement for actual type of protection function.
Factors influencing the accuracy of the sampled values from the merging unit are for example anti aliasing filters, frequency range, step response, truncating, A/D conversion inaccuracy, time tagging accuracy etc.
Section 18 1MRK 511 310-UEN B Station communication
468 Application manual
In principle shall the accuracy of the current and voltage transformers, together with the merging unit, have the same quality as direct input of currents and voltages.
The process bus physical layout can be arranged in several ways, described in Annex B of the standard, depending on what are the needs for sampled data in a substation.
IEC06000537 V1 EN
Figure 198: Example of a station configuration with separated process bus and station bus
The IED can get analog values simultaneously from a classical CT or VT and from a Merging Unit, like in this example:
The merging units (MU) are called so because they can gather analog values from one or more measuring transformers, sample the data and send the data over process bus to other clients (or subscribers) in the system. Some merging units are able to get data from classical measuring transformers, others from non-conventional measuring transducers and yet others can pick up data from both types. The electronic part of a non-conventional measuring transducer (like a Rogowski coil or a capacitive divider) can represent a MU by itself as long as it can send sampled data over process bus.
1MRK 511 310-UEN B Section 18 Station communication
469 Application manual
CTCT
ABB Merging
Unit
Ethernet Switch
IED
Combi Sensor
Conventional VT
IEC61850-9-2LE
IEC61850-9-2LE
Splitter Electrical-to-
Optical Converter
1PPS
1PPS
110 V 1 A 1 A
IEC61850-8-1
Station Wide SCADA System
Station Wide GPS Clock
Other Relays
IEC61850-8-1
en08000069-3.vsd
IEC08000069 V2 EN
Figure 199: Example of a station configuration with the IED receiving analog values from both classical measuring transformers and merging units.
18.3.2 Setting guidelines
There are several settings related to the Merging Units in local HMI under:
Main menuSettingsGeneral SettingsAnalog ModulesMerging Unit x
where x can take the value 1, 2, 3, 4, 5 or 6.
Section 18 1MRK 511 310-UEN B Station communication
470 Application manual
18.3.2.1 Specific settings related to the IEC 61850-9-2LE communication
The process bus communication IEC 61850-9-2LE have specific settings, similar to the analog inputs modules.
Besides the names of the merging unit channels (that can be edited only from PCM600, not from the local HMI) there are important settings related to the merging units and time synchronization of the signals:
When changing the sending (MU unit) MAC address, a reboot of the IED is required.
If there are more than one sample group involved, then time synch is mandatory and the protection functions will be blocked if there is no time synchronization.
SmpGrp this setting parameter is not used
CTStarPointx: This parameter specifies the direction to or from object. See also section «Setting of current channels».
AppSynch: If this parameter is set to Synch and the IED HW-time synchronization is lost or the synchronization to the MU time is lost, the protection functions in the list 38 will be blocked and the output SYNCH will be set.
SynchMode: marks how the IED will receive the data coming from a merging unit:
if it is set to NoSynch, then when the sampled values arrive, there will be no check on the SmpSynch flag
If it is set to Operation, the SmpSynch flag will be checked all time. setting Init, should not be used
For more information on the settings, see MU1_4I_4U Non group settings (basic) table.
18.3.2.2 Loss of communication
If IEC 61850-9-2LE communication is lost, see examples in figures 200, 201 and 202, the protection functions in table 38are blocked.
Case 1:
1MRK 511 310-UEN B Section 18 Station communication
471 Application manual
IEC13000298-1-en.vsd IEC13000298 V1 EN
Figure 200: Normal operation
Case 2:
Failure of the MU (sample lost) blocks the sending of binary signals through LDCM. The received binary signals are not blocked and processd normally.
DTT from the remote end is still processed.
IEC13000299-1-en.vsd IEC13000299 V1 EN
Figure 201: MU failed, mixed system
Case 3:
Failure of one MU (sample lost) blocks the sending and receiving of binary signals through LDCM.
DTT from the remote end is not working.
Section 18 1MRK 511 310-UEN B Station communication
472 Application manual
IEC13000300-1-en.vsd IEC13000300 V1 EN
Figure 202: MU failed, 9-2 system
Table 38: Blocked protection functions if IEC 61850-9-2LE communication is interrupted.
Function description IEC 61850 identification Function description IEC 61850 identification Accidental energizing protection for synchronous generator
AEGPVOC Two step overvoltage protection
OV2PTOV
Broken conductor check
BRCPTOC Four step single phase overcurrent protection
PH4SPTOC
Capacitor bank protection
CBPGAPC Radial feeder protection
PAPGAPC
Pole discordance protection
CCPDSC Instantaneous phase overcurrent protection
PHPIOC
Breaker failure protection
CCRBRF PoleSlip/Out-of-step protection
PSPPPAM
Breaker failure protection, single phase version
CCSRBRF Restricted earth fault protection, low impedance
REFPDIF
Current circuit supervison
CCSSPVC Two step residual overvoltage protection
ROV2PTOV
Compensated over- and undervoltage protection
COUVGAPC Rate-of-change frequency protection
SAPFRC
General currrent and voltage protection
CVGAPC Overfrequency protection
SAPTOF
Current reversal and weakend infeed logic for residual overcurrent protection
ECRWPSCH Underfrequency protection
SAPTUF
Four step residual overcurrent protection
EF4PTOC Sudden change in current variation
SCCVPTOC
Instantaneous residual overcurrent protection
EFPIOC Sensitive Directional residual over current and power protetcion
SDEPSDE
Phase selection, quadrilateral characteristic with fixed angle
FDPSPDIS Synchrocheck, energizing check, and synchronizing
SESRSYN
Table continues on next page
1MRK 511 310-UEN B Section 18 Station communication
473 Application manual
Function description IEC 61850 identification Function description IEC 61850 identification Faulty phase identification with load enchroachment
FMPSPDIS Circuit breaker condition monitoring
SSCBR
Phase selection, quadrilateral characteristic with settable angle
FRPSPDIS Insulation gas monitoring
SSIMG
Frequency time accumulation protection
FTAQFVR Insulation liquid monitoring
SSIML
Fuse failure supervision
FUFSPVC Stub protection STBPTOC
Generator differential protection
GENPDIF Transformer differential protection, two winding
T2WPDIF
Directional Overpower protection
GOPPDOP Transformer differential protection, three winding
T3WPDIF
Generator rotor overload protection
GRPTTR Automatic voltage control for tapchanger, single control
TR1ATCC
Generator stator overload protection
GSPTTR Automatic voltage control for tapchanger, parallel control
TR8ATCC
Directional Underpower protection
GUPPDUP Thermal overload protection, two time constants
TRPTTR
1Ph High impedance differential protection
HZPDIF Two step undervoltage protection
UV2PTUV
Line differential protection, 3 CT sets, 2-3 line ends
L3CPDIF Voltage differential protection
VDCPTOV
Line differential protection, 6 CT sets, 3-5 line ends
L6CPDIF Fuse failure supervision
VDRFUF
Low active power and power factor protection
LAPPGAPC Voltage-restrained time overcurrent protection
VRPVOC
Negative sequence overcurrent protection
LCNSPTOC Local acceleration logic ZCLCPSCH
Negative sequence overvoltage protection
LCNSPTOV Scheme communication logic for distance or overcurrent protection
ZCPSCH
Three phase overcurrent
LCP3PTOC Current reversal and weak-end infeed logic for distance protection
ZCRWPSCH
Three phase undercurrent
LCP3PTUC Automatic switch onto fault logic, voltage and current based
ZCVPSOF
Thermal overload protection, one time constant
LCPTTR Under impedance protection for generator
ZGVPDIS
Zero sequence overcurrent protection
LCZSPTOC Fast distance protection
ZMFCPDIS
Table continues on next page
Section 18 1MRK 511 310-UEN B Station communication
474 Application manual
Function description IEC 61850 identification Function description IEC 61850 identification Zero sequence overvoltage protection
LCZSPTOV High speed distance protection
ZMFPDIS
Line differential coordination
LDLPSCH Distance measuring zone, quadrilateral characteristic for series compensated lines
ZMCAPDIS
Additional security logic for differential protection
LDRGFC Distance measuring zone, quadrilateral characteristic for series compensated lines
ZMCPDIS
Loss of excitation LEXPDIS Fullscheme distance protection, mho characteristic
ZMHPDIS
Thermal overload protection, one time constant
LFPTTR Fullscheme distance protection, quadrilateral for earth faults
ZMMAPDIS
Loss of voltage check LOVPTUV Fullscheme distance protection, quadrilateral for earth faults
ZMMPDIS
Line differential protection 3 CT sets, with inzone transformers, 2-3 line ends
LT3CPDIF Distance protection zone, quadrilateral characteristic
ZMQAPDIS
Line differential protection 6 CT sets, with inzone transformers, 3-5 line ends
LT6CPDIF Distance protection zone, quadrilateral characteristic
ZMQPDIS
Negativ sequence time overcurrent protection for machines
NS2PTOC Distance protection zone, quadrilateral characteristic, separate settings
ZMRAPDIS
Four step directional negative phase sequence overcurrent protection
NS4PTOC Distance protection zone, quadrilateral characteristic, separate settings
ZMRPDIS
Four step phase overcurrent protection
OC4PTOC Power swing detection ZMRPSB
Overexcitation protection
OEXPVPH Mho Impedance supervision logic
ZSMGAPC
Out-of-step protection OOSPPAM
18.3.2.3 Setting examples for IEC 61850-9-2LE and time synchronization
It is important that the IED and the merging units (MU) uses the same time reference. This is especially true if analog data is used from several sources, for example an internal TRM and a MU. Or if several physical MU is used. The same time reference is important to correlate data so that channels from different sources refer to correct phase angel.
1MRK 511 310-UEN B Section 18 Station communication
475 Application manual
When only one MU is used as analog source it is theoretically possible to do without time- synchronization. However, this would mean that timestamps for analog and binary data/events would be uncorrelated. Disturbance recordings will appear incorrect since analog data will be timestamped by MU and binary events will use internal IED time. For this reason it is recommended to use time synchronization also when analog data emanate from only one MU.
An external time-source can be used to synchronize both the IED and the MU. It is also possible to use the MU as clock-master to synchronize the IED from the MU. When using an external clock, it is possible to set the IED to be synchronized via PPS or IRIG-B. It is also possible to use an internal GPS-receiver in the IED (if the external clock is using GPS).
Using the MU as time source for synchronization
IED
MU
Analog data
PPS
IEC 61850-9-2LE
Synchronization
IEC10000061-1-en.vsd IEC10000061 V1 EN
Figure 203: Setting example when MU is the synchronizing source
Settings in local HMI under Settings/Time/Synchronization/ TIMESYNCHGEN/IEC 61850-9-2:
HwSyncSrc: set to PPS since this is what is generated by the MU (ABB MU) AppSynch : set to Synch, since protection functions should be blocked in case of
loss of timesynchronization SyncAccLevel: could be set to 4us since this corresponds to a maximum phase-
angle error of 0.072 degrees at 50Hz fineSyncSource could still be set to something different in order to correlate
events and data to other IEDs in the station
Settings in PST in PCM600 under: Hardware/Analog modules/Merging units/ MU01
Section 18 1MRK 511 310-UEN B Station communication
476 Application manual
SyncMode : set to Operation. This means that the IED will be blocked if the MU loose time synchronization. Since the MU is set as Time-master, this is unlikely to happen so the setting of SyncMode is not important in this case
There are 3 signals that monitors state related to time synchronization:
TSYNCERR signal on the TIMEERR function block. This signal will go high whenever internal timeQuality goes above the setting SyncAccLevel (4us in this case) and this will block the protection functions.. This will happen max 4 seconds after an interruption of the PPS fiber from the MU (or if the fineSyncSource is lost).
SYNCH signal on the MU1_4I_4U function block indicates when protection functions are blocked due to loss of internal time synchronization to the IED (that is loss of the hardware synchSrc)
MUSYNCH signal on the MU_4I_4U function block monitor the synchronization from the MU (in the datastream). When the MU indicates loss of time synchronization this signal will go high. In this case the MU is set to master so it can not loose time synchronization.
The SMPLLOSTsignal will of course also be interesting since this indicate blocking due to missing analog data (interruption of IEC 61850-9-2LE fiber), although this has nothing to do with time synchronization.
Using an external clock for time synchronization
IED
MU
data
PPS
IEC 61850-9-2LE
PPS / IRIG-B
STATION CLOCK
IEC10000074-1-en.vsd IEC10000074 V1 EN
Figure 204: Setting example with external synchronization
Settings in local HMI under Settings/Time/Synchronization/ TIMESYNCHGEN/IEC 61850-9-2:
1MRK 511 310-UEN B Section 18 Station communication
477 Application manual
HwSyncSrc : set to PPS/IRIG-B depending on available outputs on the clock AppSynch : set to Synch, for blocking protection functions in case of loss of time
synchronization SyncAccLevel : could be set to 4us since this correspond to a maximum phase-
angle error of 0.072 degrees at 50Hz fineSyncSource :should be set to IRIG-B if this is available from the clock. If
using PPS for HWSyncSrc , full-time has to be acquired from another source. If the station clock is on the local area network (LAN) and has a sntp-server this is one option.
Settings in PST in PCM600 under: Hardware/Analog modules/Merging units/ MU01
SyncMode: set to Operation. This means that the IED will block if the MU loose time synchronization.
There are 3 signals that monitors state related to time synchronization:
TSYNCERR signal on the TIMEERR function block will go high whenever internal timeQuality goes above the setting SyncAccLevel (4us in this case). This will block the protection functions after maximum 4 seconds after an interruption in the PPS fiber communication from the MU.
SYNCH signal on the MU_4I_4U function block indicate that protection functions are blocked by loss of internal time synchronization to the IED (that is loss of the HW-synchSrc).
MUSYNCH signal on the MU_4I_4U function block monitors the synchronization flag from the MU (in the datastream). When the MU indicates loss of time synchronization, this signal is set.
A blockedByTimeSynch signal could be made by connecting the MUSYNCH and the SYNCH through an OR gate. If also the SMPLLOST signal is connected to the same OR gate, it will be more of a BlockedByProblemsWith9-2 signal.
No synchronization
Section 18 1MRK 511 310-UEN B Station communication
478 Application manual
IEC 61850-9-2LE
Data
MU
IED
IEC10000075-1-en.vsd IEC10000075 V1 EN
Figure 205: Setting example without time synchronization
It is possible to use IEC 61850-9-2LE communication without time synchronization. Settings in this case under Settings/Time/Synchronization/ TIMESYNCHGEN/IEC 61850-9-2 are:
HwSyncSrc: set to Off AppSynch: set to NoSynch. This means that protection functions will not be
blocked SyncAccLevel : set to unspecified
Settings in PST in PCM600 under: Hardware/Analog modules/Merging units/ MU01
SyncMode: set to NoSynch. This means that the IED do not care if the MU indicates loss of time synchronization.
TSYNCERR signal will not be set since there is no configured time synchronization source
SYNCH signal on the MU_4I_4U function block indicates when protection functions are blocked due to loss of internal time synchronization to the IED. Since AppSynch is set to NoSynch this signal will not be set.
MUSYNCH signal on the MU_4I_4U function block will be set if the datastream indicates time synchronization is lost. However, protection functions will not be blocked.
To get higher availability in the protection functions, it is possible to avoid blocking if time synchronization is lost when there is a single source of analog data. This means that if there is only one physical MU and no TRM, parameter AppSynch can be set to NoSynch but parameter HwSyncSrc can still be set to PPS. This will keep analog and
1MRK 511 310-UEN B Section 18 Station communication
479 Application manual
binary data correlated in disturbance recordings while not blocking the protection functions if PPS is lost.
18.4 LON communication protocol
18.4.1 Application
Control Center
IED IEDIED
Gateway
Star coupler RER 111
Station HSI MicroSCADA
IEC05000663-1-en.vsd
IEC05000663 V2 EN
Figure 206: Example of LON communication structure for a substation automation system
An optical network can be used within the substation automation system. This enables communication with the IEDs through the LON bus from the operators workplace, from the control center and also from other IEDs via bay-to-bay horizontal communication.
The fibre optic LON bus is implemented using either glass core or plastic core fibre optic cables.
Table 39: Specification of the fibre optic connectors
Glass fibre Plastic fibre Cable connector ST-connector snap-in connector
Cable diameter 62.5/125 m 1 mm
Max. cable length 1000 m 10 m
Wavelength 820-900 nm 660 nm
Transmitted power -13 dBm (HFBR-1414) -13 dBm (HFBR-1521)
Receiver sensitivity -24 dBm (HFBR-2412) -20 dBm (HFBR-2521)
Section 18 1MRK 511 310-UEN B Station communication
480 Application manual
The LON Protocol The LON protocol is specified in the LonTalkProtocol Specification Version 3 from Echelon Corporation. This protocol is designed for communication in control networks and is a peer-to-peer protocol where all the devices connected to the network can communicate with each other directly. For more information of the bay-to-bay communication, refer to the section Multiple command function.
Hardware and software modules The hardware needed for applying LON communication depends on the application, but one very central unit needed is the LON Star Coupler and optical fibres connecting the star coupler to the IEDs. To interface the IEDs from the MicroSCADA with Classic Monitor, application library LIB520 is required.
The HV Control 670 software module is included in the LIB520 high-voltage process package, which is a part of the Application Software Library in MicroSCADA applications.
The HV Control 670 software module is used for control functions in the IEDs. The module contains a process picture, dialogues and a tool to generate a process database for the control application in MicroSCADA.
When using MicroSCADA Monitor Pro instead of the Classic Monitor, SA LIB is used together with 670 series Object Type files.
The HV Control 670 software module and 670 series Object Type files are used with both 650 and 670 series IEDs.
Use the LON Network Tool (LNT) to set the LON communication. This is a software tool applied as one node on the LON bus. To communicate via LON, the IEDs need to know
The node addresses of the other connected IEDs. The network variable selectors to be used.
This is organized by LNT.
The node address is transferred to LNT via the local HMI by setting the parameter ServicePinMsg = Yes. The node address is sent to LNT via the LON bus, or LNT can scan the network for new nodes.
The communication speed of the LON bus is set to the default of 1.25 Mbit/s. This can be changed by LNT.
18.4.2 MULTICMDRCV and MULTICMDSND
1MRK 511 310-UEN B Section 18 Station communication
481 Application manual
18.4.2.1 Identification
Function description IEC 61850 identification
IEC 60617 identification
ANSI/IEEE C37.2 device number
Multiple command and receive MULTICMDRCV — —
Multiple command and send MULTICMDSND — —
18.4.2.2 Application
The IED provides two function blocks enabling several IEDs to send and receive signals via the interbay bus. The sending function block, MULTICMDSND, takes 16 binary inputs. LON enables these to be transmitted to the equivalent receiving function block, MULTICMDRCV, which has 16 binary outputs.
18.4.2.3 Setting guidelines
Settings The parameters for the multiple command function are set via PCM600.
The Mode setting sets the outputs to either a Steady or Pulsed mode.
18.5 SPA communication protocol
18.5.1 Application
SPA communication protocol as an alternative to IEC 60870-5-103. The same communication port as for IEC 60870-5-103 is used.
When communicating with a PC connected to the utility substation LAN, via WAN and the utility office LAN, as shown in figure 207, and using the rear Ethernet port on the optical Ethernet module (OEM), the only hardware required for a station monitoring system is:
Optical fibres from the IED to the utility substation LAN. PC connected to the utility office LAN.
Section 18 1MRK 511 310-UEN B Station communication
482 Application manual
IED IEDIED
Substation LAN
IEC05000715-4-en.vsd
Remote monitoring
Utility LAN
WAN
IEC05000715 V4 EN
Figure 207: SPA communication structure for a remote monitoring system via a substation LAN, WAN and utility LAN
The SPA communication is mainly used for the Station Monitoring System. It can include different IEDs with remote communication possibilities. Connection to a computer (PC) can be made directly (if the PC is located in the substation) or by telephone modem through a telephone network with ITU (former CCITT) characteristics or via a LAN/WAN connection.
glass <1000 m according to optical budget
plastic <25 m (inside cubicle) according to optical budget
Functionality The SPA protocol V2.5 is an ASCII-based protocol for serial communication. The communication is based on a master-slave principle, where the IED is a slave and the PC is the master. Only one master can be applied on each fibre optic loop. A program is required in the master computer for interpretation of the SPA-bus codes and for translation of the data that should be sent to the IED.
For the specification of the SPA protocol V2.5, refer to SPA-bus Communication Protocol V2.5.
18.5.2 Setting guidelines
The setting parameters for the SPA communication are set via the local HMI.
SPA, IEC 60870-5-103 and DNP3 uses the same rear communication port. Set the parameter Operation, under Main menu /Configuration /Communication /Station communication/Port configuration/SLM optical serial port/Protocol.
When the communication protocols have been selected, the IED is automatically restarted.
1MRK 511 310-UEN B Section 18 Station communication
483 Application manual
The most important settings in the IED for SPA communication are the slave number and baud rate (communication speed). These settings are absolutely essential for all communication contact to the IED.
These settings can only be done on the local HMI for rear channel communication and for front channel communication.
The slave number can be set to any value from 1 to 899, as long as the slave number is unique within the used SPA loop.
The baud rate, which is the communication speed, can be set to between 300 and 38400 baud. Refer to technical data to determine the rated communication speed for the selected communication interfaces. The baud rate should be the same for the whole station, although different baud rates in a loop are possible. If different baud rates in the same fibre optical loop or RS485 network are used, consider this when making the communication setup in the communication master, the PC.
For local fibre optic communication, 19200 or 38400 baud is the normal setting. If telephone communication is used, the communication speed depends on the quality of the connection and on the type of modem used. But remember that the IED does not adapt its speed to the actual communication conditions, because the speed is set on the local HMI.
Section 18 1MRK 511 310-UEN B Station communication
484 Application manual
18.6 IEC 60870-5-103 communication protocol
18.6.1 Application
TCP/IP
Control Center
IED IEDIED
Gateway
Star coupler
Station HSI
IEC05000660-4-en.vsd IEC05000660 V4 EN
Figure 208: Example of IEC 60870-5-103 communication structure for a substation automation system
IEC 60870-5-103 communication protocol is mainly used when a protection IED communicates with a third party control or monitoring system. This system must have software that can interpret the IEC 60870-5-103 communication messages.
When communicating locally in the station using a Personal Computer (PC) or a Remote Terminal Unit (RTU) connected to the Communication and processing module, the only hardware needed is optical fibres and an opto/electrical converter for the PC/RTU, or a RS-485 connection depending on the used IED communication interface.
Functionality IEC 60870-5-103 is an unbalanced (master-slave) protocol for coded-bit serial communication exchanging information with a control system. In IEC terminology a primary station is a master and a secondary station is a slave. The communication is based on a point-to-point principle. The master must have software that can interpret the IEC 60870-5-103 communication messages. For detailed information about IEC 60870-5-103, refer to IEC 60870 standard part 5: Transmission protocols, and to the section 103, Companion standard for the informative interface of protection equipment.
1MRK 511 310-UEN B Section 18 Station communication
485 Application manual
Design
General The protocol implementation consists of the following functions:
Event handling Report of analog service values (measurands) Fault location Command handling
Autorecloser ON/OFF Teleprotection ON/OFF Protection ON/OFF LED reset Characteristics 1 — 4 (Setting groups)
File transfer (disturbance files) Time synchronization
Hardware When communicating locally with a Personal Computer (PC) or a Remote Terminal Unit (RTU) in the station, using the SPA/IEC port, the only hardware needed is: Optical fibres, glass/plastic Opto/electrical converter for the PC/RTU PC/RTU
Commands The commands defined in the IEC 60870-5-103 protocol are represented in a dedicated function blocks. These blocks have output signals for all available commands according to the protocol.
IED commands in control direction
Function block with defined IED functions in control direction, I103IEDCMD. This block use PARAMETR as FUNCTION TYPE, and INFORMATION NUMBER parameter is defined for each output signal.
Function commands in control direction
Function block with pre defined functions in control direction, I103CMD. This block includes the FUNCTION TYPE parameter, and the INFORMATION NUMBER parameter is defined for each output signal.
Function commands in control direction
Function block with user defined functions in control direction, I103UserCMD. These function blocks include the FUNCTION TYPE parameter for each block in the private range, and the INFORMATION NUMBER parameter for each output signal.
Status The events created in the IED available for the IEC 60870-5-103 protocol are based on the:
Section 18 1MRK 511 310-UEN B Station communication
486 Application manual
IED status indication in monitor direction
Function block with defined IED functions in monitor direction, I103IED. This block use PARAMETER as FUNCTION TYPE, and INFORMATION NUMBER parameter is defined for each input signal.
Function status indication in monitor direction, user-defined
Function blocks with user defined input signals in monitor direction, I103UserDef. These function blocks include the FUNCTION TYPE parameter for each block in the private range, and the INFORMATION NUMBER parameter for each input signal.
Supervision indications in monitor direction
Function block with defined functions for supervision indications in monitor direction, I103Superv. This block includes the FUNCTION TYPE parameter, and the INFORMATION NUMBER parameter is defined for each output signal.
Earth fault indications in monitor direction
Function block with defined functions for earth fault indications in monitor direction, I103EF. This block includes the FUNCTION TYPE parameter, and the INFORMATION NUMBER parameter is defined for each output signal.
Fault indications in monitor direction
Function block with defined functions for fault indications in monitor direction, I103FLTPROT. This block includes the FUNCTION TYPE parameter, and the INFORMATION NUMBER parameter is defined for each input signal.
This block is suitable for distance protection, line differential, transformer differential, over-current and earth-fault protection functions.
Autorecloser indications in monitor direction
Function block with defined functions for autorecloser indications in monitor direction, I103AR. This block includes the FUNCTION TYPE parameter, and the INFORMATION NUMBER parameter is defined for each output signal.
Measurands The measurands can be included as type 3.1, 3.2, 3.3, 3.4 and type 9 according to the standard.
Measurands in public range
Function block that reports all valid measuring types depending on connected signals, I103Meas.
1MRK 511 310-UEN B Section 18 Station communication
487 Application manual
Measurands in private range
Function blocks with user defined input measurands in monitor direction, I103MeasUsr. These function blocks include the FUNCTION TYPE parameter for each block in the private range, and the INFORMATION NUMBER parameter for each block.
Fault location The fault location is expressed in reactive ohms. In relation to the line length in reactive ohms, it gives the distance to the fault in percent. The data is available and reported when the fault locator function is included in the IED.
Disturbance recordings
The transfer functionality is based on the Disturbance recorder function. The analog and binary signals recorded will be reported to the master by polling. The eight last disturbances that are recorded are available for transfer to the master. A file that has been transferred and acknowledged by the master cannot be transferred again.
The binary signals that are included in the disturbance recorder are those that are connected to the disturbance function blocks B1RBDR to B6RBDR. These function blocks include the function type and the information number for each signal. For more information on the description of the Disturbance report in the Technical reference manual. The analog channels, that are reported, are those connected to the disturbance function blocks A1RADR to A4RADR. The eight first ones belong to the public range and the remaining ones to the private range.
Settings
Settings for RS485 and optical serial communication
General settings SPA, DNP and IEC 60870-5-103 can be configured to operate on the SLM optical serial port while DNP and IEC 60870-5-103 only can utilize the RS485 port. A single protocol can be active on a given physical port at any time.
Two different areas in the HMI are used to configure the IEC 60870-5-103 protocol.
1. The port specific IEC 60870-5-103 protocol parameters are configured under: Main menu/Configuration/Communication/Station Communication/ IEC6870-5-103/ SlaveAddress BaudRate RevPolarity (optical channel only) CycMeasRepTime MasterTimeDomain TimeSyncMode
Section 18 1MRK 511 310-UEN B Station communication
488 Application manual
EvalTimeAccuracy EventRepMode CmdMode
is: OPTICAL103:1 for the optical serial channel on the SLM RS485103:1 for the RS485 port
2. The protocol to activate on a physical port is selected under: Main menu/Configuration/Communication/Station Communication/Port configuration/ RS485 port
RS485PROT:1 (off, DNP, IEC103) SLM optical serial port
PROTOCOL:1 (off, DNP, IEC103, SPA)
GUID-CD4EB23C-65E7-4ED5-AFB1-A9D5E9EE7CA8 V3 EN
GUID-CD4EB23C-65E7-4ED5-AFB1-A9D5E9EE7CA8 V3 EN
Figure 209: Settings for IEC 60870-5-103 communication
The general settings for IEC 60870-5-103 communication are the following:
SlaveAddress and BaudRate: Settings for slave number and communication speed (baud rate). The slave number can be set to any value between 1 and 254. The communication speed, can be set either to 9600 bits/s or 19200 bits/s.
RevPolarity: Setting for inverting the light (or not). Standard IEC 60870-5-103 setting is On.
CycMeasRepTime: See I103MEAS function block for more information. EventRepMode: Defines the mode for how events are reported. The event buffer
size is 1000 events.
Event reporting mode If SeqOfEvent is selected, all GI and spontaneous events will be delivered in the order they were generated by BSW. The most recent value is the latest value delivered. All GI data from a single block will come from the same cycle.
If HiPriSpont is selected, spontaneous events will be delivered prior to GI event. To prevent old GI data from being delivered after a new spontaneous event, the pending
1MRK 511 310-UEN B Section 18 Station communication
489 Application manual
GI event is modified to contain the same value as the spontaneous event. As a result, the GI dataset is not time-correlated.
The settings for communication parameters slave number and baud rate can be found on the local HMI under: Main menu/Configuration/Communication /Station configuration /SPA/SPA:1 and then select a protocol.
Settings from PCM600 I103USEDEF For each input of the I103USEDEF function there is a setting for the information number of the connected signal. The information number can be set to any value between 0 and 255. To get proper operation of the sequence of events the event masks in the event function is to be set to ON_CHANGE. For single-command signals, the event mask is to be set to ON_SET.
In addition there is a setting on each event block for function type. Refer to description of the Main Function type set on the local HMI.
Commands As for the commands defined in the protocol there is a dedicated function block with eight output signals. Use PCM600 to configure these signals. To realize the BlockOfInformation command, which is operated from the local HMI, the output BLKINFO on the IEC command function block ICOM has to be connected to an input on an event function block. This input must have the information number 20 (monitor direction blocked) according to the standard.
Disturbance Recordings For each input of the Disturbance recorder function there is a setting for the information number of the connected signal. The function type and the information number can be set to any value between 0 and 255. To get INF and FUN for the recorded binary signals, there are parameters on the disturbance recorder for each input. The user must set these parameters to whatever he connects to the corresponding input.
Refer to description of Main Function type set on the local HMI.
Recorded analog channels are sent with ASDU26 and ASDU31. One information element in these ASDUs is called ACC, and it indicates the actual channel to be processed. The channels on disturbance recorder are sent with an ACC as shown in Table 40.
Table 40: Channels on disturbance recorder sent with a given ACC
DRA#-Input ACC IEC 60870-5-103 meaning 1 1 IL1
2 2 IL2
3 3 IL3
4 4 IN
5 5 UL1
Table continues on next page
Section 18 1MRK 511 310-UEN B Station communication
490 Application manual
DRA#-Input ACC IEC 60870-5-103 meaning 6 6 UL2
7 7 UL3
8 8 UN
9 64 Private range
10 65 Private range
11 66 Private range
12 67 Private range
13 68 Private range
14 69 Private range
15 70 Private range
16 71 Private range
17 72 Private range
18 73 Private range
19 74 Private range
20 75 Private range
21 76 Private range
22 77 Private range
23 78 Private range
24 79 Private range
25 80 Private range
26 81 Private range
27 82 Private range
28 83 Private range
29 84 Private range
30 85 Private range
31 86 Private range
32 87 Private range
33 88 Private range
34 89 Private range
35 90 Private range
36 91 Private range
37 92 Private range
38 93 Private range
39 94 Private range
40 95 Private range
Function and information types Product type IEC103mainFunType value Comment:
REL 128 Compatible range
1MRK 511 310-UEN B Section 18 Station communication
491 Application manual
REC 242 Private range, use default
RED 192 Compatible range
RET 176 Compatible range
REB 207 Private range
REG 150 Private range
REQ 245 Private range
RES 118 Private range
Refer to the tables in the Technical reference manual /Station communication, specifying the information types supported by the communication protocol IEC 60870-5-103.
To support the information, corresponding functions must be included in the protection IED.
There is no representation for the following parts:
Generating events for test mode Cause of transmission: Info no 11, Local operation
Glass or plastic fibre should be used. BFOC/2.5 is the recommended interface to use (BFOC/2.5 is the same as ST connectors). ST connectors are used with the optical power as specified in standard.
For more information, refer to IEC standard IEC 60870-5-103.
18.7 DNP3 Communication protocol
18.7.1 Application
For more information on the application and setting guidelines for the DNP3 communication protocol refer to the DNP3 Communication protocol manual.
Section 18 1MRK 511 310-UEN B Station communication
492 Application manual
Section 19 Remote communication
19.1 Binary signal transfer
19.1.1 Identification Function description IEC 61850
identification IEC 60617 identification
ANSI/IEEE C37.2 device number
Binary signal transfer BinSignReceive — —
Binary signal transfer BinSignTransm — —
19.1.2 Application
The IEDs can be equipped with communication devices for line differential communication and/or communication of binary signals between IEDs. The same communication hardware is used for both purposes.
Communication between two IEDs geographically on different locations is a fundamental part of the line differential function.
Sending of binary signals between two IEDs, one in each end of a power line is used in teleprotection schemes and for direct transfer trips. In addition to this, there are application possibilities, for example, blocking/enabling functionality in the remote substation, changing setting group in the remote IED depending on the switching situation in the local substation and so on.
When equipped with a LDCM, a 64 kbit/s communication channel can be connected to the IED, which will then have the capacity of 192 binary signals to be communicated with a remote IED.
19.1.2.1 Communication hardware solutions
The LDCM (Line Data Communication Module) has an optical connection such that two IEDs can be connected over a direct fibre (multimode), as shown in figure 210. The protocol used is IEEE/ANSI C37.94. The distance with this solution is typical 110 km.
1MRK 511 310-UEN B Section 19 Remote communication
493 Application manual
LDCM
LDCM
LD CM
LDCM
en06000519-2.vsd IEC06000519 V2 EN
Figure 210: Direct fibre optical connection between two IEDs with LDCM
The LDCM can also be used together with an external optical to galvanic G.703 converter or with an alternative external optical to galvanic X.21 converter as shown in figure 211. These solutions are aimed for connections to a multiplexer, which in turn is connected to a telecommunications transmission network (for example, SDH or PDH).
Telecom. Network
*) *)
Multiplexer Multiplexer
en05000527-2.vsd *) Converting optical to galvanic G.703
IEC05000527 V2 EN
Figure 211: LDCM with an external optical to galvanic converter and a multiplexer
When an external modem G.703 or X21 is used, the connection between LDCM and the modem is made with a multimode fibre of max. 3 km length. The IEEE/ANSI C37.94 protocol is always used between LDCM and the modem.
Alternatively, a LDCM with X.21 built-in converter and micro D-sub 15-pole connector output can be used.
19.1.3 Setting guidelines
ChannelMode: This parameter can be set Normal or Blocked. Besides this, it can be set OutOfService which signifies that the local LDCM is out of service. Thus, with this
Section 19 1MRK 511 310-UEN B Remote communication
494 Application manual
setting, the communication channel is active and a message is sent to the remote IED that the local IED is out of service, but there is no COMFAIL signal and the analog and binary values are sent as zero.
TerminalNo: This setting shall be used to assign an unique address to each LDCM, in all current differential IEDs. Up to 256 LDCMs can be assigned a unique number. Consider a local IED with two LDCMs:
LDCM for slot 302: Set TerminalNo to 1 and RemoteTermNo to 2 LDCM for slot 303: Set TerminalNo to 3 and RemoteTermNo to 4
In multiterminal current differential applications, with 4 LDCMs in each IED, up to 20 unique addresses must be set.
The unique address is necessary to give high security against incorrect addressing in the communication system. Using the same number for setting TerminalNo in some of the LDCMs, a loop-back test in the communication system can give incorrect trip.
RemoteTermNo: This setting assigns a number to each related LDCM in the remote IED. For each LDCM, the parameter RemoteTermNo shall be set to a different value than parameter TerminalNo, but equal to the TerminalNo of the remote end LDCM. In the remote IED the TerminalNo and RemoteTermNo settings are reversed as follows:
LDCM for slot 302: Set TerminalNo to 2 and RemoteTermNo to 1 LDCM for slot 303: Set TerminalNo to 4 and RemoteTermNo to 3
The redundant channel is always configured in the lower position, for example
Slot 302: Main channel Slot 303: Redundant channel
The same is applicable for slot 312-313 and slot 322-323.
DiffSync: Here the method of time synchronization, Echo or GPS, for the line differential function is selected.
Using Echo in this situation is safe only as long as there is no risk of varying transmission asymmetry.
GPSSyncErr: If GPS synchronization is lost, the synchronization of the line differential function will continue during 16 s. based on the stability in the local IED clocks. Thereafter the setting Block will block the line differential function or the setting Echo will make it continue by using the Echo synchronization method. It shall
1MRK 511 310-UEN B Section 19 Remote communication
495 Application manual
be noticed that using Echo in this situation is only safe as long as there is no risk of varying transmission asymmetry.
CommSync: This setting decides the Master or Slave relation in the communication system and shall not be mistaken for the synchronization of line differential current samples. When direct fibre is used, one LDCM is set as Master and the other one as Slave. When a modem and multiplexer is used, the IED is always set as Slave, as the telecommunication system will provide the clock master.
OptoPower: The setting LowPower is used for fibres 0 1 km and HighPower for fibres >1 km.
TransmCurr: This setting decides which of 2 possible local currents that shall be transmitted, or if and how the sum of 2 local currents shall be transmitted, or finally if the channel shall be used as a redundant channel.
In a 1 breaker arrangement, there will be 2 local currents, and the earthing on the CTs can be different for these. CT-SUM will transmit the sum of the 2 CT groups. CT- DIFF1 will transmit CT group 1 minus CT group 2 and CT-DIFF2 will transmit CT group 2 minus CT group 1.
CT-GRP1 or CT-GRP2 will transmit the respective CT group, and the setting RedundantChannel makes the channel be used as a backup channel.
ComFailAlrmDel: Time delay of communication failure alarm. In communication systems, route switching can sometimes cause interruptions with a duration up to 50 ms. Thus, a too short time delay setting might cause nuisance alarms in these situations.
ComFailResDel: Time delay of communication failure alarm reset.
RedChSwTime: Time delay before switchover to a redundant channel in case of primary channel failure.
RedChRturnTime: Time delay before switchback to a the primary channel after channel failure.
AsymDelay: The asymmetry is defined as transmission delay minus receive delay. If a fixed asymmetry is known, the Echo synchronization method can be used if the parameter AsymDelay is properly set. From the definition follows that the asymmetry will always be positive in one end, and negative in the other end.
AnalogLatency: Local analog latency; A parameter which specifies the time delay (number of samples) between actual sampling and the time the sample reaches the local communication module, LDCM. The parameter shall be set to 2 when transmitting analog data from the .
RemAinLatency: Remote analog latency; This parameter corresponds to the LocAinLatency set in the remote IED.
Section 19 1MRK 511 310-UEN B Remote communication
496 Application manual
MaxTransmDelay: Data for maximum 40 ms transmission delay can be buffered up. Delay times in the range of some ms are common. It shall be noticed that if data arrive in the wrong order, the oldest data will just be disregarded.
CompRange: The set value is the current peak value over which truncation will be made. To set this value, knowledge of the fault current levels should be known. The setting is not overly critical as it considers very high current values for which correct operation normally still can be achieved.
MaxtDiffLevel: Allowed maximum time difference between the internal clocks in respective line end.
1MRK 511 310-UEN B Section 19 Remote communication
497 Application manual
Section 20 Basic IED functions
20.1 Authority status ATHSTAT
20.1.1 Application
Authority status (ATHSTAT) function is an indication function block, which informs about two events related to the IED and the user authorization:
the fact that at least one user has tried to log on wrongly into the IED and it was blocked (the output USRBLKED)
the fact that at least one user is logged on (the output LOGGEDON)
The two outputs of ATHSTAT function can be used in the configuration for different indication and alarming reasons, or can be sent to the station control for the same purpose.
20.2 Change lock CHNGLCK
20.2.1 Application
Change lock function CHNGLCK is used to block further changes to the IED configuration once the commissioning is complete. The purpose is to make it impossible to perform inadvertent IED configuration and setting changes.
However, when activated, CHNGLCK will still allow the following actions that does not involve reconfiguring of the IED:
Monitoring Reading events Resetting events Reading disturbance data Clear disturbances Reset LEDs Reset counters and other runtime component states Control operations
1MRK 511 310-UEN B Section 20 Basic IED functions
499 Application manual
Set system time Enter and exit from test mode Change of active setting group
The binary input controlling the function is defined in ACT or SMT. The CHNGLCK function is configured using ACT.
LOCK Binary input signal that will activate/deactivate the function, defined in ACT or SMT.
When CHNGLCK has a logical one on its input, then all attempts to modify the IED configuration and setting will be denied and the message «Error: Changes blocked» will be displayed on the local HMI; in PCM600 the message will be «Operation denied by active ChangeLock». The CHNGLCK function should be configured so that it is controlled by a signal from a binary input card. This guarantees that by setting that signal to a logical zero, CHNGLCK is deactivated. If any logic is included in the signal path to the CHNGLCK input, that logic must be designed so that it cannot permanently issue a logical one to the CHNGLCK input. If such a situation would occur in spite of these precautions, then please contact the local ABB representative for remedial action.
20.3 Denial of service DOS
20.3.1 Application
The denial of service functions (DOSFRNT, DOSLANAB and DOSLANCD) are designed to limit the CPU load that can be produced by Ethernet network traffic on the IED. The communication facilities must not be allowed to compromise the primary functionality of the device. All inbound network traffic will be quota controlled so that too heavy network loads can be controlled. Heavy network load might for instance be the result of malfunctioning equipment connected to the network.
DOSFRNT, DOSLANAB and DOSLANCD measure the IED load from communication and, if necessary, limit it for not jeopardizing the IEDs control and protection functionality due to high CPU load. The function has the following outputs:
LINKUP indicates the Ethernet link status WARNING indicates that communication (frame rate) is higher than normal ALARM indicates that the IED limits communication
20.3.2 Setting guidelines
The function does not have any parameters available in the local HMI or PCM600.
Section 20 1MRK 511 310-UEN B Basic IED functions
500 Application manual
20.4 IED identifiers TERMINALID
20.4.1 Application
IED identifiers (TERMINALID) function allows the user to identify the individual IED in the system, not only in the substation, but in a whole region or a country.
Use only characters A-Z, a-z and 0-9 in station, object and unit names.
20.5 Product information PRODINF
20.5.1 Application
The Product identifiers function contains constant data (i.e. not possible to change) that uniquely identifies the IED:
ProductVer ProductDef FirmwareVer SerialNo OrderingNo ProductionDate IEDProdType
The settings are visible on the local HMI , under Main menu/Diagnostics/IED status/Product identifiers and under Main menu/Diagnostics/IED Status/IED identifiers
This information is very helpful when interacting with ABB product support (e.g. during repair and maintenance).
20.5.2 Factory defined settings
The factory defined settings are very useful for identifying a specific version and very helpful in the case of maintenance, repair, interchanging IEDs between different Substation Automation Systems and upgrading. The factory made settings can not be changed by the customer. They can only be viewed. The settings are found in the local HMI under Main menu/Diagnostics/IED status/Product identifiers
The following identifiers are available:
IEDProdType
1MRK 511 310-UEN B Section 20 Basic IED functions
501 Application manual
Describes the type of the IED (like REL, REC or RET). Example: REL670 ProductDef
Describes the release number, from the production. Example: 1.2.2.0 ProductVer
Describes the product version. Example: 1.2.3
1 is the Major version of the manufactured product this means, new platform of the product
2 is the Minor version of the manufactured product this means, new functions or new hardware added to the product
3 is the Major revision of the manufactured product this means, functions or hardware is either changed or enhanced in the product
IEDMainFunType Main function type code according to IEC 60870-5-103. Example: 128
(meaning line protection). SerialNo OrderingNo ProductionDate
20.6 Measured value expander block RANGE_XP
20.6.1 Identification Function description IEC 61850
identification IEC 60617 identification
ANSI/IEEE C37.2 device number
Measured value expander block RANGE_XP — —
20.6.2 Application
The current and voltage measurements functions (CVMMXN, CMMXU, VMMXU and VNMMXU), current and voltage sequence measurement functions (CMSQI and VMSQI) and IEC 61850 generic communication I/O functions (MVGAPC) are provided with measurement supervision functionality. All measured values can be supervised with four settable limits, that is low-low limit, low limit, high limit and high-high limit. The measure value expander block ( RANGE_XP) has been introduced to be able to translate the integer output signal from the measuring functions to 5 binary signals, that is below low-low limit, below low limit, normal, above high-high limit or above high limit. The output signals can be used as conditions in the configurable logic.
Section 20 1MRK 511 310-UEN B Basic IED functions
502 Application manual
20.6.3 Setting guidelines
There are no settable parameters for the measured value expander block function.
20.7 Parameter setting groups
20.7.1 Application
Six sets of settings are available to optimize IED operation for different power system conditions. By creating and switching between fine tuned setting sets, either from the local HMI or configurable binary inputs, results in a highly adaptable IED that can cope with a variety of power system scenarios.
Different conditions in networks with different voltage levels require highly adaptable protection and control units to best provide for dependability, security and selectivity requirements. Protection units operate with a higher degree of availability, especially, if the setting values of their parameters are continuously optimized according to the conditions in the power system.
Operational departments can plan for different operating conditions in the primary equipment. The protection engineer can prepare the necessary optimized and pre- tested settings in advance for different protection functions. Six different groups of setting parameters are available in the IED. Any of them can be activated through the different programmable binary inputs by means of external or internal control signals.
A function block, SETGRPS, defines how many setting groups are used. Setting is done with parameter MAXSETGR and shall be set to the required value for each IED. Only the number of setting groups set will be available in the Parameter Setting tool for activation with the ActiveGroup function block.
20.7.2 Setting guidelines
The setting ActiveSetGrp, is used to select which parameter group to be active. The active group can also be selected with configured input to the function block SETGRPS.
The length of the pulse, sent out by the output signal SETCHGD when an active group has changed, is set with the parameter t.
The parameter MAXSETGR defines the maximum number of setting groups in use to switch between. Only the selected number of setting groups will be available in the Parameter Setting tool (PST) for activation with the ActiveGroup function block.
20.8 Rated system frequency PRIMVAL
1MRK 511 310-UEN B Section 20 Basic IED functions
503 Application manual
20.8.1 Identification Function description IEC 61850
identification IEC 60617 identification
ANSI/IEEE C37.2 device number
Primary system values PRIMVAL — —
20.8.2 Application
The rated system frequency and phase rotation direction are set under Main menu/ Configuration/ Power system/ Primary Values in the local HMI and PCM600 parameter setting tree.
20.8.3 Setting guidelines
Set the system rated frequency. Refer to section «Signal matrix for analog inputs SMAI» for description on frequency tracking.
20.9 Summation block 3 phase 3PHSUM
20.9.1 Application
The analog summation block 3PHSUM function block is used in order to get the sum of two sets of 3 phase analog signals (of the same type) for those IED functions that might need it.
20.9.2 Setting guidelines
The summation block receives the three-phase signals from SMAI blocks. The summation block has several settings.
SummationType: Summation type (Group 1 + Group 2, Group 1 — Group 2, Group 2 — Group 1 or (Group 1 + Group 2)).
DFTReference: The reference DFT block (InternalDFT Ref,DFTRefGrp1 or External DFT ref) .
FreqMeasMinVal: The minimum value of the voltage for which the frequency is calculated, expressed as percent of UBasebase voltage setting (for each instance x).
GlobalBaseSel: Selects the global base value group used by the function to define (IBase), (UBase) and (SBase).
Section 20 1MRK 511 310-UEN B Basic IED functions
504 Application manual
20.10 Global base values GBASVAL
20.10.1 Identification Function description IEC 61850
identification IEC 60617 identification
ANSI/IEEE C37.2 device number
Global base values GBASVAL — —
20.10.2 Application
Global base values function (GBASVAL) is used to provide global values, common for all applicable functions within the IED. One set of global values consists of values for current, voltage and apparent power and it is possible to have twelve different sets.
This is an advantage since all applicable functions in the IED use a single source of base values. This facilitates consistency throughout the IED and also facilitates a single point for updating values when necessary.
Each applicable function in the IED has a parameter, GlobalBaseSel, defining one out of the twelve sets of GBASVAL functions.
20.10.3 Setting guidelines
UBase: Phase-to-phase voltage value to be used as a base value for applicable functions throughout the IED.
IBase: Phase current value to be used as a base value for applicable functions throughout the IED.
SBase: Standard apparent power value to be used as a base value for applicable functions throughout the IED, typically SBase=3UBaseIBase.
20.11 Signal matrix for binary inputs SMBI
20.11.1 Application
The Signal matrix for binary inputs function SMBI is used within the Application Configuration tool in direct relation with the Signal Matrix tool. SMBI represents the way binary inputs are brought in for one IED configuration.
1MRK 511 310-UEN B Section 20 Basic IED functions
505 Application manual
20.11.2 Setting guidelines
There are no setting parameters for the Signal matrix for binary inputs SMBI available to the user in Parameter Setting tool. However, the user shall give a name to SMBI instance and the SMBI inputs, directly in the Application Configuration tool. These names will define SMBI function in the Signal Matrix tool. The user defined name for the input or output signal will also appear on the respective output or input signal.
20.12 Signal matrix for binary outputs SMBO
20.12.1 Application
The Signal matrix for binary outputs function SMBO is used within the Application Configuration tool in direct relation with the Signal Matrix tool. SMBO represents the way binary outputs are sent from one IED configuration.
20.12.2 Setting guidelines
There are no setting parameters for the Signal matrix for binary outputs SMBO available to the user in Parameter Setting tool. However, the user must give a name to SMBO instance and SMBO outputs, directly in the Application Configuration tool. These names will define SMBO function in the Signal Matrix tool.
20.13 Signal matrix for mA inputs SMMI
20.13.1 Application
The Signal matrix for mA inputs function SMMI is used within the Application Configuration tool in direct relation with the Signal Matrix tool. SMMI represents the way milliamp (mA) inputs are brought in for one IED configuration.
20.13.2 Setting guidelines
There are no setting parameters for the Signal matrix for mA inputs SMMI available to the user in the Parameter Setting tool. However, the user must give a name to SMMI instance and SMMI inputs, directly in the Application Configuration tool.
20.14 Signal matrix for analog inputs SMAI
Section 20 1MRK 511 310-UEN B Basic IED functions
506 Application manual
20.14.1 Application
Signal matrix for analog inputs (SMAI), also known as the preprocessor function block, analyses the connected four analog signals (three phases and neutral) and calculates all relevant information from them like the phasor magnitude, phase angle, frequency, true RMS value, harmonics, sequence components and so on. This information is then used by the respective functions connected to this SMAI block in ACT (for example protection, measurement or monitoring functions).
20.14.2 Frequency values
The SMAI function includes a functionality based on the level of positive sequence voltage, MinValFreqMeas, to validate if the frequency measurement is valid or not. If the positive sequence voltage is lower than MinValFreqMeas, the function freezes the frequency output value for 500 ms and after that the frequency output is set to the nominal value. A signal is available for the SMAI function to prevent operation due to non-valid frequency values. MinValFreqMeas is set as % of UBase/3
If SMAI setting ConnectionType is Ph-Ph, at least two of the inputs GRPxL1, GRPxL2 and GRPxL3, where 1×12, must be connected in order to calculate the positive sequence voltage. Note that phase to phase inputs shall always be connected as follows: L1-L2 to GRPxL1, L2-L3 to GRPxL2, L3-L1 to GRPxL3. If SMAI setting ConnectionType is Ph-N, all three inputs GRPxL1, GRPxL2 and GRPxL3 must be connected in order to calculate the positive sequence voltage.
If only one phase-phase voltage is available and SMAI setting ConnectionType is Ph- Ph, the user is advised to connect two (not three) of the inputs GRPxL1, GRPxL2 and GRPxL3 to the same voltage input as shown in figure 212 to make SMAI calculate a positive sequence voltage.
SMAI1
BLOCK
DFTSPFC
REVROT
^GRP1L1
^GRP1L2
^GRP1L3
^GRP1N
SPFCOUT
G1AI3P
G1AI1
G1AI2
G1AI4
G1N
NEUTRAL
PHASEL3
PHASEL2
PHASEL1
UL1L2
SAPTOF
U3P* BLOCK
BLKTRIP
TRIP START
BLKDMAGN
FREQ TRM_40.CH7(U)
SAPTOF(1)_TRIP
EC10000060-3-en.vsdx
IEC10000060 V3 EN
Figure 212: Connection example
The above described scenario does not work if SMAI setting ConnectionType is Ph-N. If only one phase-earth voltage is available, the same type of connection can be used but the SMAI ConnectionType setting must still be Ph-Ph and this has to be accounted for when setting MinValFreqMeas. If SMAI setting ConnectionType is Ph-N and the same voltage is connected to all three
1MRK 511 310-UEN B Section 20 Basic IED functions
507 Application manual
SMAI inputs, the positive sequence voltage will be zero and the frequency functions will not work properly.
The outputs from the above configured SMAI block shall only be used for Overfrequency protection (SAPTOF), Underfrequency protection (SAPTUF) and Rate-of-change frequency protection (SAPFRC) due to that all other information except frequency and positive sequence voltage might be wrongly calculated.
20.14.3 Setting guidelines
The parameters for the signal matrix for analog inputs (SMAI) functions are set via the local HMI or PCM600.
Every SMAI function block can receive four analog signals (three phases and one neutral value), either voltage or current. SMAI outputs give information about every aspect of the 3ph analog signals acquired (phase angle, RMS value, frequency and frequency derivates, and so on 244 values in total). Besides the block group name, the analog inputs type (voltage or current) and the analog input names that can be set directly in ACT.
Application functions should be connected to a SMAI block with same task cycle as the application function, except for e.g. measurement functions that run in slow cycle tasks.
DFTRefExtOut: Parameter valid only for function block SMAI1 .
Reference block for external output (SPFCOUT function output).
DFTReference: Reference DFT for the SMAI block use.
These DFT reference block settings decide DFT reference for DFT calculations. The setting InternalDFTRef will use fixed DFT reference based on set system frequency. DFTRefGrp(n) will use DFT reference from the selected group block, when own group is selected, an adaptive DFT reference will be used based on calculated signal frequency from own group. The setting ExternalDFTRef will use reference based on what is connected to input DFTSPFC.
The setting ConnectionType: Connection type for that specific instance (n) of the SMAI (if it is Ph-N or Ph-Ph). Depending on connection type setting the not connected Ph-N or Ph-Ph outputs will be calculated as long as they are possible to calculate. E.g. at Ph-Ph connection L1, L2 and L3 will be calculated for use in symmetrical situations. If N component should be used respectively the phase component during faults IN/UN must be connected to input 4.
Section 20 1MRK 511 310-UEN B Basic IED functions
508 Application manual
Negation: If the user wants to negate the 3ph signal, it is possible to choose to negate only the phase signals Negate3Ph, only the neutral signal NegateN or both Negate3Ph +N. negation means rotation with 180 of the vectors.
GlobalBaseSel: Selects the global base value group used by the function to define (IBase), (UBase) and (SBase).
MinValFreqMeas: The minimum value of the voltage for which the frequency is calculated, expressed as percent of UBase (for each instance n).
Settings DFTRefExtOut and DFTReference shall be set to default value InternalDFTRef if no VT inputs are available.
Even if the user sets the AnalogInputType of a SMAI block to Current, the MinValFreqMeas is still visible. However, using the current channel values as base for frequency measurement is not recommendable for a number of reasons, not last among them being the low level of currents that one can have in normal operating conditions.
Examples of adaptive frequency tracking
Preprocessing block shall only be used to feed functions within the same execution cycles (e.g. use preprocessing block with cycle 1 to feed transformer differential protection). The only exceptions are measurement functions (CVMMXN, CMMXU,VMMXU, etc.) which shall be fed by preprocessing blocks with cycle 8.
When two or more preprocessing blocks are used to feed one protection function (e.g. over-power function GOPPDOP), it is of outmost importance that parameter setting DFTReference has the same set value for all of the preprocessing blocks involved
1MRK 511 310-UEN B Section 20 Basic IED functions
509 Application manual
IEC07000197.vsd
SMAI instance 3 phase group SMAI1:1 1 SMAI2:2 2 SMAI3:3 3 SMAI4:4 4 SMAI5:5 5 SMAI6:6 6 SMAI7:7 7 SMAI8:8 8 SMAI9:9 9
SMAI10:10 10 SMAI11:11 11 SMAI12:12 12
Task time group 1
SMAI instance 3 phase group SMAI1:13 1 SMAI2:14 2 SMAI3:15 3 SMAI4:16 4 SMAI5:17 5 SMAI6:18 6 SMAI7:19 7 SMAI8:20 8 SMAI9:21 9
SMAI10:22 10 SMAI11:23 11 SMAI12:24 12
Task time group 2
SMAI instance 3 phase group SMAI1:25 1 SMAI2:26 2 SMAI3:27 3 SMAI4:28 4 SMAI5:29 5 SMAI6:30 6 SMAI7:31 7 SMAI8:32 8 SMAI9:33 9
SMAI10:34 10 SMAI11:35 11 SMAI12:36 12
Task time group 3
AdDFTRefCh7
AdDFTRefCh4
IEC07000197 V2 EN
Figure 213: Twelve SMAI instances are grouped within one task time. SMAI blocks are available in three different task times in the IED. Two pointed instances are used in the following examples.
The examples shows a situation with adaptive frequency tracking with one reference selected for all instances. In practice each instance can be adapted to the needs of the actual application. The adaptive frequency tracking is needed in IEDs that belong to the protection system of synchronous machines and that are active during run-up and shout-down of the machine. In other application the usual setting of the parameter DFTReference of SMAI is InternalDFTRef.
Example 1
Section 20 1MRK 511 310-UEN B Basic IED functions
510 Application manual
IEC07000198-2-en.vsd
SMAI1:1 BLOCK DFTSPFC ^GRP1L1 ^GRP1L2 ^GRP1L3 ^GRP1N
SPFCOUT AI3P
AI1 AI2 AI3 AI4 AIN
SMAI1:13 BLOCK DFTSPFC ^GRP1L1 ^GRP1L2 ^GRP1L3 ^GRP1N
SPFCOUT AI3P
AI1 AI2 AI3 AI4 AIN
SMAI1:25 BLOCK DFTSPFC ^GRP1L1 ^GRP1L2 ^GRP1L3 ^GRP1N
SPFCOUT AI3P
AI1 AI2 AI3 AI4 AIN
IEC07000198 V3 EN
Figure 214: Configuration for using an instance in task time group 1 as DFT reference
Assume instance SMAI7:7 in task time group 1 has been selected in the configuration to control the frequency tracking . Observe that the selected reference instance (i.e. frequency tracking master) must be a voltage type. Observe that positive sequence voltage is used for the frequency tracking feature.
For task time group 1 this gives the following settings (see Figure 213 for numbering):
SMAI1:1: DFTRefExtOut = DFTRefGrp7 to route SMAI7:7 reference to the SPFCOUT output, DFTReference = DFTRefGrp7 for SMAI1:1 to use SMAI7:7 as reference (see Figure 214) SMAI2:2 SMAI12:12: DFTReference = DFTRefGrp7 for SMAI2:2 SMAI12:12 to use SMAI7:7 as reference.
For task time group 2 this gives the following settings:
SMAI1:13 SMAI12:24: DFTReference = ExternalDFTRef to use DFTSPFC input of SMAI1:13 as reference (SMAI7:7)
For task time group 3 this gives the following settings:
SMAI1:25 SMAI12:36: DFTReference = ExternalDFTRef to use DFTSPFC input as reference (SMAI7:7)
Example 2
1MRK 511 310-UEN B Section 20 Basic IED functions
511 Application manual
IEC07000199-2-en.vsd
SMAI1:13 BLOCK DFTSPFC ^GRP1L1 ^GRP1L2 ^GRP1L3 ^GRP1N
SPFCOUT AI3P
AI1 AI2 AI3 AI4 AIN
SMAI1:1 BLOCK DFTSPFC ^GRP1L1 ^GRP1L2 ^GRP1L3 ^GRP1N
SPFCOUT AI3P
AI1 AI2 AI3 AI4 AIN
SMAI1:25 BLOCK DFTSPFC ^GRP1L1 ^GRP1L2 ^GRP1L3 ^GRP1N
SPFCOUT AI3P
AI1 AI2 AI3 AI4 AIN
IEC07000199 V3 EN
Figure 215: Configuration for using an instance in task time group 2 as DFT reference.
Assume instance SMAI4:16 in task time group 2 has been selected in the configuration to control the frequency tracking for all instances. Observe that the selected reference instance (i.e. frequency tracking master) must be a voltage type. Observe that positive sequence voltage is used for the frequency tracking feature.
For task time group 1 this gives the following settings (see Figure 213 for numbering):
SMAI1:1 SMAI12:12: DFTReference = ExternalDFTRef to use DFTSPFC input as reference (SMAI4:16)
For task time group 2 this gives the following settings:
SMAI1:13: DFTRefExtOut = DFTRefGrp4 to route SMAI4:16 reference to the SPFCOUT output, DFTReference = DFTRefGrp4 for SMAI1:13 to use SMAI4:16 as reference (see Figure 215) SMAI2:14 SMAI12:24: DFTReference = DFTRefGrp4 to use SMAI4:16 as reference.
For task time group 3 this gives the following settings:
SMAI1:25 SMAI12:36: DFTReference = ExternalDFTRef to use DFTSPFC input as reference (SMAI4:16)
Section 20 1MRK 511 310-UEN B Basic IED functions
512 Application manual
20.15 Test mode functionality TESTMODE
20.15.1 Application
The protection and control IEDs may have a complex configuration with many included functions. To make the testing procedure easier, the IEDs include the feature that allows individual blocking of a single-, several-, or all functions.
This means that it is possible to see when a function is activated or trips. It also enables the user to follow the operation of several related functions to check correct functionality and to check parts of the configuration, and so on.
20.15.1.1 IEC 61850 protocol test mode
The IEC 61850 Test Mode has improved testing capabilities for IEC 61850 systems. Operator commands sent to the IEC 61850 Mod determine the behavior of the functions. The command can be given from the LHMI under the Main menu/Test/ Function test modes menu or remotely from an IEC 61850 client. The possible values of IEC 61850 Mod are described in Communication protocol manual, IEC 61850 Edition 1 and Edition 2.
To be able to set the IEC 61850 Mod the parameter remotely, the PST setting RemoteModControl may not be set to Off. The possible values are Off, Maintenance or All levels. The Off value denies all access to data object Mod from remote, Maintenance requires that the category of the originator (orCat) is Maintenance and All levels allow any orCat.
The mod of the Root LD.LNN0 can be configured under Main menu/Test/Function test modes/Communication/Station communication/IEC61850 LD0 LLN0/ LD0LLN0:1
When the Mod is changed at this level, all components under the logical device update their own behavior according to IEC 61850-7-4. The supported values of IEC 61850 Mod are described in Communication protocol manual, IEC 61850 Edition 2. The IEC 61850 test mode is indicated with the Start LED on the LHMI.
The mod of an specific component can be configured under Main menu/Test/ Function test modes/Communication/Station Communication
It is possible that the behavior is also influenced by other sources as well, independent of the mode, such as the insertion of the test handle, loss of SV, and IED configuration or LHMI. If a function of an IED is set to Off, the related Beh is set to Off as well. The related mod keeps its current state.
1MRK 511 310-UEN B Section 20 Basic IED functions
513 Application manual
When the setting Operation is set to Off, the behavior is set to Off and it is not possible to override it. When a behavior of a function is Offthe function will not execute.
When IEC 61850 Mod of a function is set to Off or Blocked, the Start LED on the LHMI will be set to flashing to indicate the abnormal operation of the IED.
The IEC 61850-7-4 gives a detailed overview over all aspects of the test mode and other states of mode and behavior.
When the Beh of a component is set to Test, the component is not blocked and all control commands with a test bit are accepted.
When the Beh of a component is set to Test/blocked, all control commands with a test bit are accepted. Outputs to the process via a non-IEC 61850 link data are blocked by the LN. Only process-related outputs on LNs related to primary equipment are blocked. If there is an XCBR, the outputs EXC_Open and EXC_Close are blocked.
When the Beh of a component is set to Blocked, all control commands with a test bit are accepted. Outputs to the process via a non-IEC 61850 link data are blocked by the LN. In addition, the components can be blocked when their Beh is blocked. This can be done if the component has a block input. The block status of a component is shown as the Blk output under the Test/Function status menu. If the Blk output is not shown, the component cannot be blocked.
20.15.2 Setting guidelines
There are two possible ways to place the IED in the TestMode= On state. If, the IED is set to normal operation (TestMode = Off), but the functions are still shown being in the test mode, the input signal INPUT on the TESTMODE function block might be activated in the configuration.
Forcing of binary input and output signals is only possible when the IED is in IED test mode.
20.16 Self supervision with internal event list INTERRSIG
20.16.1 Application
The protection and control IEDs have many functions included. The included self- supervision with internal event list function block provides good supervision of the IED. The fault signals make it easier to analyze and locate a fault.
Both hardware and software supervision is included and it is also possible to indicate possible faults through a hardware contact on the power supply module and/or through the software communication.
Section 20 1MRK 511 310-UEN B Basic IED functions
514 Application manual
Internal events are generated by the built-in supervisory functions. The supervisory functions supervise the status of the various modules in the IED and, in case of failure, a corresponding event is generated. Similarly, when the failure is corrected, a corresponding event is generated.
Apart from the built-in supervision of the various modules, events are also generated when the status changes for the:
built-in real time clock (in operation/out of order). external time synchronization (in operation/out of order).
Events are also generated:
whenever any setting in the IED is changed.
The internal events are time tagged with a resolution of 1 ms and stored in a list. The list can store up to 40 events. The list is based on the FIFO principle, that is, when it is full, the oldest event is overwritten. The list contents cannot be modified, but the whole list can be cleared using the Reset menu in the LHMI.
The list of internal events provides valuable information, which can be used during commissioning and fault tracing.
The information can only be retrieved with the aid of PCM600 Event Monitoring Tool. The PC can either be connected to the front port, or to the port at the back of the IED.
20.17 Time synchronization TIMESYNCHGEN
20.17.1 Application
Use time synchronization to achieve a common time base for the IEDs in a protection and control system. This makes it possible to compare events and disturbance data between all IEDs in the system. If a global common source (i.e. GPS) is used in different substations for the time synchronization, also comparisons and analysis between recordings made at different locations can be easily performed and a more accurate view of the actual sequence of events can be obtained.
Time-tagging of internal events and disturbances are an excellent help when evaluating faults. Without time synchronization, only the events within one IED can be compared with each other. With time synchronization, events and disturbances within the whole network, can be compared and evaluated.
In the IED, the internal time can be synchronized from the following sources:
BIN (Binary Minute Pulse) DNP GPS
1MRK 511 310-UEN B Section 20 Basic IED functions
515 Application manual
IEC103 SNTP IRIG-B SPA LON PPS
For IEDs using IEC 61850-9-2LE in «mixed mode» a time synchronization from an external clock is recommended to the IED and all connected merging units. The time synchronization from the clock to the IED can be either optical PPS or IRIG-B. For IED’s using IEC 61850-9-2LE from one single MU as analog data source, the MU and IED still needs to be synchronized to each other. This could be done by letting the MU supply a PPS signal to the IED.
Out of these, LON and SPA contains two types of synchronization messages:
Coarse time messages are sent every minute and contain complete date and time, that is year, month, day, hour, minute, second and millisecond.
Fine time messages are sent every second and comprise only seconds and milliseconds.
The selection of the time source is done via the corresponding setting.
It is possible to set a backup time-source for GPS signal, for instance SNTP. In this case, when the GPS signal quality is bad, the IED will automatically choose SNTP as the time-source. At a given point in time, only one time-source will be used.
20.17.2 Setting guidelines
All the parameters related to time are divided into two categories: System time and Synchronization.
20.17.2.1 System time
The time is set with years, month, day, hour, minute, second and millisecond.
20.17.2.2 Synchronization
The setting parameters for the real-time clock with external time synchronization are set via local HMI or PCM600. The path for Time Synchronization parameters on local HMI is Main menu/Configuration/Time/Synchronization. The parameters are categorized as Time Synchronization (TIMESYNCHGEN) and IRIG-B settings (IRIG-B:1) in case that IRIG-B is used as the external time synchronization source.
TimeSynch When the source of the time synchronization is selected on the local HMI, the parameter is called TimeSynch. The time synchronization source can also be set from PCM600. The setting alternatives are:
Section 20 1MRK 511 310-UEN B Basic IED functions
516 Application manual
FineSyncSource which can have the following values:
Off SPA LON BIN (Binary Minute Pulse) GPS GPS+SPA GPS+LON GPS+BIN SNTP GPS+SNTP GPS+IRIG-B IRIG-B PPS
CoarseSyncSrc which can have the following values:
Off SPA LON SNTP DNP
CoarseSyncSrc which can have the following values:
Off SNTP DNP IEC60870-5-103
The function input to be used for minute-pulse synchronization is called TIME- MINSYNC.
The system time can be set manually, either via the local HMI or via any of the communication ports. The time synchronization fine tunes the clock (seconds and milliseconds).
The parameter SyncMaster defines if the IED is a master, or not a master for time synchronization in a system of IEDs connected in a communication network (IEC61850-8-1). The SyncMaster can have the following values:
Off SNTP -Server
Set the course time synchronizing source (CoarseSyncSrc) to Off when GPS time synchronization of line differential function is used. Set the fine time synchronization source (FineSyncSource) to GPS.
1MRK 511 310-UEN B Section 20 Basic IED functions
517 Application manual
The GPS will thus provide the complete time synchronization. GPS alone shall synchronize the analogue values in such systems.
20.17.2.3 Process bus IEC 61850-9-2LE synchronization
When process bus communication (IEC 61850-9-2LE protocol) is used, it is essential that the merging units are using the same time source as the IED. To achieve this, a satellite-controlled clock shall provide time synchronization to the IED (either internal GPS or via IRIG-B 00x with IEEE1344 support) and to the merging units (via for instance PPS). For the time synchronization of the process bus communication, GPS Time Module (GTM) and/or IRIG-B module can be used. If the IED contains a GTM, the merging unit can be synchronized from the PPS output of the GTM.
Section 20 1MRK 511 310-UEN B Basic IED functions
518 Application manual
Section 21 Requirements
21.1 Current transformer requirements
The performance of a protection function will depend on the quality of the measured current signal. Saturation of the current transformers (CTs) will cause distortion of the current signals and can result in a failure to operate or cause unwanted operations of some functions. Consequently CT saturation can have an influence on both the dependability and the security of the protection. This protection IED has been designed to permit heavy CT saturation with maintained correct operation.
21.1.1 Current transformer classification
To guarantee correct operation, the current transformers (CTs) must be able to correctly reproduce the current for a minimum time before the CT will begin to saturate. To fulfill the requirement on a specified time to saturation the CTs must fulfill the requirements of a minimum secondary e.m.f. that is specified below.
There are several different ways to specify CTs. Conventional magnetic core CTs are usually specified and manufactured according to some international or national standards, which specify different protection classes as well. There are many different standards and a lot of classes but fundamentally there are three different types of CTs:
High remanence type CT Low remanence type CT Non remanence type CT
The high remanence type has no limit for the remanent flux. This CT has a magnetic core without any airgaps and a remanent flux might remain almost infinite time. In this type of transformers the remanence can be up to around 80% of the saturation flux. Typical examples of high remanence type CT are class P, PX, TPX according to IEC, class P, X according to BS (old British Standard) and non gapped class C, K according to ANSI/IEEE.
The low remanence type has a specified limit for the remanent flux. This CT is made with a small air gap to reduce the remanence to a level that does not exceed 10% of the saturation flux. The small air gap has only very limited influences on the other properties of the CT. Class PXR, TPY according to IEC are low remanence type CTs.
The non remanence type CT has practically negligible level of remanent flux. This type of CT has relatively big air gaps in order to reduce the remanence to practically zero level. In the same time, these air gaps reduce the influence of the DC-component from the primary fault current. The air gaps will also decrease the measuring accuracy
1MRK 511 310-UEN B Section 21 Requirements
519 Application manual
in the non-saturated region of operation. Class TPZ according to IEC is a non remanence type CT.
Different standards and classes specify the saturation e.m.f. in different ways but it is possible to approximately compare values from different classes. The rated equivalent limiting secondary e.m.f. Eal according to the IEC 618692 standard is used to specify the CT requirements for the IED. The requirements are also specified according to other standards.
21.1.2 Conditions
The requirements are a result of investigations performed in our network simulator. The current transformer models are representative for current transformers of high remanence and low remanence type. The results may not always be valid for non remanence type CTs (TPZ).
The performances of the protection functions have been checked in the range from symmetrical to fully asymmetrical fault currents. Primary time constants of at least 120 ms have been considered at the tests. The current requirements below are thus applicable both for symmetrical and asymmetrical fault currents.
Depending on the protection function phase-to-earth, phase-to-phase and three-phase faults have been tested for different relevant fault positions for example, close in forward and reverse faults, zone 1 reach faults, internal and external faults. The dependability and security of the protection was verified by checking for example, time delays, unwanted operations, directionality, overreach and stability.
The remanence in the current transformer core can cause unwanted operations or minor additional time delays for some protection functions. As unwanted operations are not acceptable at all maximum remanence has been considered for fault cases critical for the security, for example, faults in reverse direction and external faults. Because of the almost negligible risk of additional time delays and the non-existent risk of failure to operate the remanence have not been considered for the dependability cases. The requirements below are therefore fully valid for all normal applications.
It is difficult to give general recommendations for additional margins for remanence to avoid the minor risk of an additional time delay. They depend on the performance and economy requirements. When current transformers of low remanence type (for example, TPY, PR) are used, normally no additional margin is needed. For current transformers of high remanence type (for example, P, PX, TPX) the small probability of fully asymmetrical faults, together with high remanence in the same direction as the flux generated by the fault, has to be kept in mind at the decision of an additional margin. Fully asymmetrical fault current will be achieved when the fault occurs at approximately zero voltage (0). Investigations have shown that 95% of the faults in the network will occur when the voltage is between 40 and 90. In addition fully asymmetrical fault current will not exist in all phases at the same time.
21.1.3 Fault current
Section 21 1MRK 511 310-UEN B Requirements
520 Application manual
The current transformer requirements are based on the maximum fault current for faults in different positions. Maximum fault current will occur for three-phase faults or single phase-to-earth faults. The current for a single phase-to-earth fault will exceed the current for a three-phase fault when the zero sequence impedance in the total fault loop is less than the positive sequence impedance.
When calculating the current transformer requirements, maximum fault current for the relevant fault position should be used and therefore both fault types have to be considered.
21.1.4 Secondary wire resistance and additional load
The voltage at the current transformer secondary terminals directly affects the current transformer saturation. This voltage is developed in a loop containing the secondary wires and the burden of all relays in the circuit. For earth faults the loop includes the phase and neutral wire, normally twice the resistance of the single secondary wire. For three-phase faults the neutral current is zero and it is just necessary to consider the resistance up to the point where the phase wires are connected to the common neutral wire. The most common practice is to use four wires secondary cables so it normally is sufficient to consider just a single secondary wire for the three-phase case.
The conclusion is that the loop resistance, twice the resistance of the single secondary wire, must be used in the calculation for phase-to-earth faults and the phase resistance, the resistance of a single secondary wire, may normally be used in the calculation for three-phase faults.
As the burden can be considerable different for three-phase faults and phase-to-earth faults it is important to consider both cases. Even in a case where the phase-to-earth fault current is smaller than the three-phase fault current the phase-to-earth fault can be dimensioning for the CT depending on the higher burden.
In isolated or high impedance earthed systems the phase-to-earth fault is not the dimensioning case. Therefore, the resistance of the single secondary wire can always be used in the calculation for this kind of power systems.
21.1.5 General current transformer requirements
The current transformer ratio is mainly selected based on power system data for example, maximum load and/or maximum fault current. It should be verified that the current to the protection is higher than the minimum operating value for all faults that are to be detected with the selected CT ratio. It should also be verified that the maximum possible fault current is within the limits of the IED.
The current error of the current transformer can limit the possibility to use a very sensitive setting of a sensitive residual overcurrent protection. If a very sensitive setting of this function will be used it is recommended that the current transformer should have an accuracy class which have an current error at rated primary current that is less than 1% (for example, 5P). If current transformers with less accuracy are used
1MRK 511 310-UEN B Section 21 Requirements
521 Application manual
it is advisable to check the actual unwanted residual current during the commissioning.
21.1.6 Rated equivalent secondary e.m.f. requirements
With regard to saturation of the current transformer all current transformers of high remanence and low remanence type that fulfill the requirements on the rated equivalent limiting secondary e.m.f. Eal below can be used. The characteristic of the non remanence type CT (TPZ) is not well defined as far as the phase angle error is concerned. If no explicit recommendation is given for a specific function we therefore recommend contacting ABB to confirm that the non remanence type can be used.
The CT requirements for the different functions below are specified as a rated equivalent limiting secondary e.m.f. Eal according to the IEC 61869-2 standard. Requirements for CTs specified according to other classes and standards are given at the end of this section.
21.1.6.1 Breaker failure protection
The CTs must have a rated equivalent limiting secondary e.m.f. Eal that is larger than or equal to the required rated equivalent limiting secondary e.m.f. Ealreq below:
sr R al alreq op ct L 2
pr r
I SE E 5 I R R I I
= + +
EQUATION1380 V2 EN (Equation 131)
where:
Iop The primary operate value (A)
Ipr The rated primary CT current (A)
Isr The rated secondary CT current (A)
Ir The rated current of the protection IED (A)
Rct The secondary resistance of the CT (W)
RL The resistance of the secondary cable and additional load (W). The loop resistance containing the phase and neutral wires, must be used for faults in solidly earthed systems. The resistance of a single secondary wire should be used for faults in high impedance earthed systems.
SR The burden of an IED current input channel (VA). SR=0.020 VA/channel for Ir=1 A and SR=0.150 VA/channel for Ir=5 A
21.1.6.2 Non-directional instantaneous and definitive time, phase and residual overcurrent protection
The CTs must have a rated equivalent limiting secondary e.m.f. Eal that is larger than or equal to the required rated equivalent limiting secondary e.m.f. Ealreq below:
Section 21 1MRK 511 310-UEN B Requirements
522 Application manual
sr R al alreq op ct L 2
pr r
I SE E 1,5 I R R I I
= + +
EQUATION1381 V2 EN (Equation 132)
where:
Iop The primary operate value (A)
Ipr The rated primary CT current (A)
Isr The rated secondary CT current (A)
Ir The rated current of the protection IED (A)
Rct The secondary resistance of the CT (W)
RL The resistance of the secondary cable and additional load (W). The loop resistance containing the phase and neutral wires, must be used for faults in solidly earthed systems. The resistance of a single secondary wire should be used for faults in high impedance earthed systems.
SR The burden of an IED current input channel (VA). SR=0.020 VA/channel for Ir=1 A and SR=0.150 VA/channel for Ir=5 A
21.1.6.3 Non-directional inverse time delayed phase and residual overcurrent protection
The requirement according to Equation 133 and Equation 134 does not need to be fulfilled if the high set instantaneous or definitive time stage is used. In this case Equation 132 is the only necessary requirement.
If the inverse time delayed function is the only used overcurrent protection function the CTs must have a rated equivalent limiting secondary e.m.f. Eal that is larger than or equal to the required rated equivalent limiting secondary e.m.f. Ealreq below:
sr R al alreq op ct L 2
pr r
I SE E 20 I R R I I
= + +
EQUATION1076 V2 EN (Equation 133)
where
Iop The primary current set value of the inverse time function (A)
Ipr The rated primary CT current (A)
Isr The rated secondary CT current (A)
Ir The rated current of the protection IED (A)
Rct The secondary resistance of the CT (W)
RL The resistance of the secondary cable and additional load (W). The loop resistance containing the phase and neutral wires, must be used for faults in solidly earthed systems. The resistance of a single secondary wire should be used for faults in high impedance earthed systems.
SR The burden of an IED current input channel (VA). SR=0.020 VA/channel for Ir=1 A and SR=0.150 VA/channel for Ir=5 A
1MRK 511 310-UEN B Section 21 Requirements
523 Application manual
Independent of the value of Iop the maximum required Eal is specified according to the following:
sr R al alreq max k max ct L 2
pr r
I SE E I R R I I
= + +
EQUATION1077 V2 EN (Equation 134)
where
Ikmax Maximum primary fundamental frequency current for close-in faults (A)
21.1.6.4 Directional phase and residual overcurrent protection
If the directional overcurrent function is used the CTs must have a rated equivalent limiting secondary e.m.f. Eal that is larger than or equal to the required rated equivalent limiting secondary e.m.f. Ealreq below:
sr R al alreq k max ct L 2
pr r
I SE E I R R I I
= + +
EQUATION1078 V2 EN (Equation 135)
where:
Ikmax Maximum primary fundamental frequency current for close-in forward and reverse faults (A)
Ipr The rated primary CT current (A)
Isr The rated secondary CT current (A)
Ir The rated current of the protection IED (A)
Rct The secondary resistance of the CT (W)
RL The resistance of the secondary cable and additional load (W). The loop resistance containing the phase and neutral wires, must be used for faults in solidly earthed systems. The resistance of a single secondary wire should be used for faults in high impedance earthed systems.
SR The burden of an IED current input channel (VA). SR=0.020 VA/channel for Ir=1 A and SR=0.150 VA/channel for Ir=5 A
21.1.7 Current transformer requirements for CTs according to other standards
All kinds of conventional magnetic core CTs are possible to use with the IEDs if they fulfill the requirements corresponding to the above specified expressed as the rated equivalent limiting secondary e.m.f. Eal according to the IEC 61869-2 standard. From different standards and available data for relaying applications it is possible to approximately calculate a secondary e.m.f. of the CT comparable with Eal. By
Section 21 1MRK 511 310-UEN B Requirements
524 Application manual
comparing this with the required rated equivalent limiting secondary e.m.f. Ealreq it is possible to judge if the CT fulfills the requirements. The requirements according to some other standards are specified below.
21.1.7.1 Current transformers according to IEC 61869-2, class P, PR
A CT according to IEC 61869-2 is specified by the secondary limiting e.m.f. Ealf. The value of the Ealf is approximately equal to the corresponding Eal. Therefore, the CTs according to class P and PR must have a secondary limiting e.m.f. Ealf that fulfills the following:
2max alreqE max E> EQUATION1383 V3 EN (Equation 136)
21.1.7.2 Current transformers according to IEC 61869-2, class PX, PXR (and old IEC 60044-6, class TPS and old British Standard, class X)
CTs according to these classes are specified approximately in the same way by a rated knee point e.m.f. Eknee (Ek for class PX and PXR, EkneeBS for class X and the limiting secondary voltage Ual for TPS). The value of the Eknee is lower than the corresponding Eal according to IEC 61869-2. It is not possible to give a general relation between the Eknee and the Eal but normally the Eknee is approximately 80 % of the Eal. Therefore, the CTs according to class PX, PXR, X and TPS must have a rated knee point e.m.f. Eknee that fulfills the following:
( )knee k kneeBS al alreqE E E U 0.8 maximum of E >
EQUATION2100 V2 EN (Equation 137)
21.1.7.3 Current transformers according to ANSI/IEEE
Current transformers according to ANSI/IEEE are partly specified in different ways. A rated secondary terminal voltage UANSI is specified for a CT of class C. UANSI is the secondary terminal voltage the CT will deliver to a standard burden at 20 times rated secondary current without exceeding 10 % ratio correction. There are a number of standardized UANSI values for example, UANSI is 400 V for a C400 CT. A corresponding rated equivalent limiting secondary e.m.f. EalANSI can be estimated as follows:
1MRK 511 310-UEN B Section 21 Requirements
525 Application manual
alANSI sr ct ANSI sr ct sr bANSIE 20 I R U 20 I R 20 I Z= + = +
EQUATION971 V2 EN (Equation 138)
where:
ZbANSI The impedance (that is, with a complex quantity) of the standard ANSI burden for the specific C class (W)
UANSI The secondary terminal voltage for the specific C class (V)
The CTs according to class C must have a calculated rated equivalent limiting secondary e.m.f. EalANSI that fulfils the following:
alANSI alreqE maximum of E>
EQUATION1384 V2 EN (Equation 139)
A CT according to ANSI/IEEE is also specified by the knee point voltage UkneeANSI that is graphically defined from an excitation curve. The knee point voltage UkneeANSI normally has a lower value than the knee-point e.m.f. according to IEC and BS. UkneeANSI can approximately be estimated to 75 % of the corresponding Eal according to IEC 61869-2. Therefore, the CTs according to ANSI/IEEE must have a knee point voltage UkneeANSI that fulfills the following:
kneeANSI alreqV 0.75 (max imum of E )> EQUATION2101 V2 EN (Equation 140)
21.2 Voltage transformer requirements
The performance of a protection function will depend on the quality of the measured input signal. Transients caused by capacitive voltage transformers (CVTs) can affect some protection functions.
Magnetic or capacitive voltage transformers can be used.
The capacitive voltage transformers (CVTs) should fulfill the requirements according to the IEC 61869-5 standard regarding ferro-resonance and transients. The ferro- resonance requirements of the CVTs are specified in chapter 6.502 of the standard.
The transient responses for three different standard transient response classes, T1, T2 and T3 are specified in chapter 6.503 of the standard. CVTs according to all classes can be used.
The protection IED has effective filters for these transients, which gives secure and correct operation with CVTs.
Section 21 1MRK 511 310-UEN B Requirements
526 Application manual
21.3 SNTP server requirements
The SNTP server to be used is connected to the local network, that is not more than 4-5 switches or routers away from the IED. The SNTP server is dedicated for its task, or at least equipped with a real-time operating system, that is not a PC with SNTP server software. The SNTP server should be stable, that is, either synchronized from a stable source like GPS, or local without synchronization. Using a local SNTP server without synchronization as primary or secondary server in a redundant configuration is not recommended.
21.4 Sample specification of communication requirements for the protection and control terminals in digital telecommunication networks
The communication requirements are based on echo timing.
Bit Error Rate (BER) according to ITU-T G.821, G.826 and G.828
<10-6 according to the standard for data and voice transfer
Bit Error Rate (BER) for high availability of the differential protection
<10-8-10-9 during normal operation <10-6 during disturbed operation
During disturbed conditions, the trip security function in can cope with high bit error rates up to 10-5 or even up to 10-4. The trip security can be configured to be independent of COMFAIL from the differential protection communication supervision, or blocked when COMFAIL is issued after receive error >100ms. (Default).
Synchronization in SDH systems with G.703 E1 or IEEE C37.94
The G.703 E1, 2 Mbit shall be set according to ITU-T G.803, G.810-13
One master clock for the actual network The actual port Synchronized to the SDH system clock at 2048 kbit Synchronization; bit synchronized, synchronized mapping Maximum clock deviation <50 ppm nominal, <100 ppm operational Jitter and Wander according to ITU-T G.823 and G.825 Buffer memory <250 s, <100 s asymmetric difference Format.G 704 frame, structured etc.Format. No CRC-check
Synchronization in PDH systems connected to SDH systems
1MRK 511 310-UEN B Section 21 Requirements
527 Application manual
Independent synchronization, asynchronous mapping The actual SDH port must be set to allow transmission of the master clock from
the PDH-system via the SDH-system in transparent mode. Maximum clock deviation <50 ppm nominal, <100 ppm operational Jitter and Wander according to ITU-T G.823 and G.825 Buffer memory <100 s Format: Transparent Maximum channel delay Loop time <40 ms continuous (2 x 20 ms)
IED with echo synchronization of differential clock (without GPS clock)
Both channels must have the same route with maximum asymmetry of 0,2-0,5 ms, depending on set sensitivity of the differential protection.
A fixed asymmetry can be compensated (setting of asymmetric delay in built in HMI or the parameter setting tool PST).
IED with GPS clock
Independent of asymmetry.
21.5 IEC 61850-9-2LE Merging unit requirements
The merging units that supply the IED with measured values via the process bus must fulfill the IEC61850-9-2LE standard.
This part of the IEC61850 is specifying Communication Service Mapping (SCSM) Sampled values over ISO/IEC 8802, in other words sampled data over Ethernet. The 9-2 part of the IEC61850 protocol uses also definitions from 7-2, Basic communication structure for substation and feeder equipment Abstract communication service interface (ACSI). The set of functionality implemented in the IED (IEC61850-9-2LE) is a subset of the IEC61850-9-2. For example the IED covers the client part of the standard, not the server part.
The standard does not define the sample rate for data, but in the UCA users group recommendations there are indicated sample rates that are adopted, by consensus, in the industry.
There are two sample rates defined: 80 samples/cycle (4000 samples/sec. at 50Hz or 4800 samples/sec. at 60 Hz) for a merging unit type1 and 256 samples/cycle for a merging unit type2. The IED can receive data rates of 80 samples/cycle.
Note that the IEC 61850-9-2 LE standard does not specify the quality of the sampled values, only the transportation. Thus, the accuracy of the current and voltage inputs to the merging unit and the inaccuracy added by the merging unit must be coordinated with the requirement for actual type of protection function.
Section 21 1MRK 511 310-UEN B Requirements
528 Application manual
Factors influencing the accuracy of the sampled values from the merging unit are for example anti aliasing filters, frequency range, step response, truncating, A/D conversion inaccuracy, time tagging accuracy etc.
In principle the accuracy of the current and voltage transformers, together with the merging unit, shall have the same quality as direct input of currents and voltages.
1MRK 511 310-UEN B Section 21 Requirements
529 Application manual
Section 22 Glossary
AC Alternating current
ACC Actual channel
ACT Application configuration tool within PCM600
A/D converter Analog-to-digital converter
ADBS Amplitude deadband supervision
ADM Analog digital conversion module, with time synchronization
AI Analog input
ANSI American National Standards Institute
AR Autoreclosing
ASCT Auxiliary summation current transformer
ASD Adaptive signal detection
ASDU Application service data unit
AWG American Wire Gauge standard
BBP Busbar protection
BFOC/2,5 Bayonet fibre optic connector
BFP Breaker failure protection
BI Binary input
BIM Binary input module
BOM Binary output module
BOS Binary outputs status
BR External bistable relay
BS British Standards
BSR Binary signal transfer function, receiver blocks
BST Binary signal transfer function, transmit blocks
C37.94 IEEE/ANSI protocol used when sending binary signals between IEDs
CAN Controller Area Network. ISO standard (ISO 11898) for serial communication
CB Circuit breaker
CBM Combined backplane module
1MRK 511 310-UEN B Section 22 Glossary
531 Application manual
CCITT Consultative Committee for International Telegraph and Telephony. A United Nations-sponsored standards body within the International Telecommunications Union.
CCM CAN carrier module
CCVT Capacitive Coupled Voltage Transformer
Class C Protection Current Transformer class as per IEEE/ ANSI
CMPPS Combined megapulses per second
CMT Communication Management tool in PCM600
CO cycle Close-open cycle
Codirectional Way of transmitting G.703 over a balanced line. Involves two twisted pairs making it possible to transmit information in both directions
COM Command
COMTRADE Standard Common Format for Transient Data Exchange format for Disturbance recorder according to IEEE/ANSI C37.111, 1999 / IEC 60255-24
Contra-directional Way of transmitting G.703 over a balanced line. Involves four twisted pairs, two of which are used for transmitting data in both directions and two for transmitting clock signals
COT Cause of transmission
CPU Central processing unit
CR Carrier receive
CRC Cyclic redundancy check
CROB Control relay output block
CS Carrier send
CT Current transformer
CU Communication unit
CVT or CCVT Capacitive voltage transformer
DAR Delayed autoreclosing
DARPA Defense Advanced Research Projects Agency (The US developer of the TCP/IP protocol etc.)
DBDL Dead bus dead line
DBLL Dead bus live line
DC Direct current
DFC Data flow control
DFT Discrete Fourier transform
Section 22 1MRK 511 310-UEN B Glossary
532 Application manual
DHCP Dynamic Host Configuration Protocol
DIP-switch Small switch mounted on a printed circuit board
DI Digital input
DLLB Dead line live bus
DNP Distributed Network Protocol as per IEEE Std 1815-2012
DR Disturbance recorder
DRAM Dynamic random access memory
DRH Disturbance report handler
DSP Digital signal processor
DTT Direct transfer trip scheme
EHV network Extra high voltage network
EIA Electronic Industries Association
EMC Electromagnetic compatibility
EMF Electromotive force
EMI Electromagnetic interference
EnFP End fault protection
EPA Enhanced performance architecture
ESD Electrostatic discharge
F-SMA Type of optical fibre connector
FAN Fault number
FCB Flow control bit; Frame count bit
FOX 20 Modular 20 channel telecommunication system for speech, data and protection signals
FOX 512/515 Access multiplexer
FOX 6Plus Compact time-division multiplexer for the transmission of up to seven duplex channels of digital data over optical fibers
FTP File Transfer Protocol
FUN Function type
G.703 Electrical and functional description for digital lines used by local telephone companies. Can be transported over balanced and unbalanced lines
GCM Communication interface module with carrier of GPS receiver module
GDE Graphical display editor within PCM600
GI General interrogation command
1MRK 511 310-UEN B Section 22 Glossary
533 Application manual
GIS Gas-insulated switchgear
GOOSE Generic object-oriented substation event
GPS Global positioning system
GSAL Generic security application
GSE Generic substation event
HDLC protocol High-level data link control, protocol based on the HDLC standard
HFBR connector type Plastic fiber connector
HMI Human-machine interface
HSAR High speed autoreclosing
HV High-voltage
HVDC High-voltage direct current
IDBS Integrating deadband supervision
IEC International Electrical Committee
IEC 60044-6 IEC Standard, Instrument transformers Part 6: Requirements for protective current transformers for transient performance
IEC 60870-5-103 Communication standard for protection equipment. A serial master/slave protocol for point-to-point communication
IEC 61850 Substation automation communication standard
IEC 6185081 Communication protocol standard
IEEE Institute of Electrical and Electronics Engineers
IEEE 802.12 A network technology standard that provides 100 Mbits/s on twisted-pair or optical fiber cable
IEEE P1386.1 PCI Mezzanine Card (PMC) standard for local bus modules. References the CMC (IEEE P1386, also known as Common Mezzanine Card) standard for the mechanics and the PCI specifications from the PCI SIG (Special Interest Group) for the electrical EMF (Electromotive force).
IEEE 1686 Standard for Substation Intelligent Electronic Devices (IEDs) Cyber Security Capabilities
IED Intelligent electronic device
I-GIS Intelligent gas-insulated switchgear
IOM Binary input/output module
Instance When several occurrences of the same function are available in the IED, they are referred to as instances of that function. One instance of a function is identical to another of the same kind but has a different number in the IED user interfaces. The word «instance» is sometimes defined as an
Section 22 1MRK 511 310-UEN B Glossary
534 Application manual
item of information that is representative of a type. In the same way an instance of a function in the IED is representative of a type of function.
IP 1. Internet protocol. The network layer for the TCP/IP protocol suite widely used on Ethernet networks. IP is a connectionless, best-effort packet-switching protocol. It provides packet routing, fragmentation and reassembly through the data link layer. 2. Ingression protection, according to IEC 60529
IP 20 Ingression protection, according to IEC 60529, level 20
IP 40 Ingression protection, according to IEC 60529, level 40
IP 54 Ingression protection, according to IEC 60529, level 54
IRF Internal failure signal
IRIG-B: InterRange Instrumentation Group Time code format B, standard 200
ITU International Telecommunications Union
LAN Local area network
LIB 520 High-voltage software module
LCD Liquid crystal display
LDCM Line differential communication module
LDD Local detection device
LED Light-emitting diode
LNT LON network tool
LON Local operating network
MCB Miniature circuit breaker
MCM Mezzanine carrier module
MIM Milli-ampere module
MPM Main processing module
MVAL Value of measurement
MVB Multifunction vehicle bus. Standardized serial bus originally developed for use in trains.
NCC National Control Centre
NOF Number of grid faults
NUM Numerical module
OCO cycle Open-close-open cycle
OCP Overcurrent protection
OEM Optical Ethernet module
1MRK 511 310-UEN B Section 22 Glossary
535 Application manual
OLTC On-load tap changer
OTEV Disturbance data recording initiated by other event than start/pick-up
OV Overvoltage
Overreach A term used to describe how the relay behaves during a fault condition. For example, a distance relay is overreaching when the impedance presented to it is smaller than the apparent impedance to the fault applied to the balance point, that is, the set reach. The relay sees the fault but perhaps it should not have seen it.
PCI Peripheral component interconnect, a local data bus
PCM Pulse code modulation
PCM600 Protection and control IED manager
PC-MIP Mezzanine card standard
PMC PCI Mezzanine card
POR Permissive overreach
POTT Permissive overreach transfer trip
Process bus Bus or LAN used at the process level, that is, in near proximity to the measured and/or controlled components
PSM Power supply module
PST Parameter setting tool within PCM600
PT ratio Potential transformer or voltage transformer ratio
PUTT Permissive underreach transfer trip
RASC Synchrocheck relay, COMBIFLEX
RCA Relay characteristic angle
RISC Reduced instruction set computer
RMS value Root mean square value
RS422 A balanced serial interface for the transmission of digital data in point-to-point connections
RS485 Serial link according to EIA standard RS485
RTC Real-time clock
RTU Remote terminal unit
SA Substation Automation
SBO Select-before-operate
SC Switch or push button to close
SCL Short circuit location
SCS Station control system
Section 22 1MRK 511 310-UEN B Glossary
536 Application manual
SCADA Supervision, control and data acquisition
SCT System configuration tool according to standard IEC 61850
SDU Service data unit
SLM Serial communication module.
SMA connector Subminiature version A, A threaded connector with constant impedance.
SMT Signal matrix tool within PCM600
SMS Station monitoring system
SNTP Simple network time protocol is used to synchronize computer clocks on local area networks. This reduces the requirement to have accurate hardware clocks in every embedded system in a network. Each embedded node can instead synchronize with a remote clock, providing the required accuracy.
SOF Status of fault
SPA Strmberg Protection Acquisition (SPA), a serial master/ slave protocol for point-to-point and ring communication.
SRY Switch for CB ready condition
ST Switch or push button to trip
Starpoint Neutral point of transformer or generator
SVC Static VAr compensation
TC Trip coil
TCS Trip circuit supervision
TCP Transmission control protocol. The most common transport layer protocol used on Ethernet and the Internet.
TCP/IP Transmission control protocol over Internet Protocol. The de facto standard Ethernet protocols incorporated into 4.2BSD Unix. TCP/IP was developed by DARPA for Internet working and encompasses both network layer and transport layer protocols. While TCP and IP specify two protocols at specific protocol layers, TCP/IP is often used to refer to the entire US Department of Defense protocol suite based upon these, including Telnet, FTP, UDP and RDP.
TEF Time delayed earth-fault protection function
TLS Transport Layer Security
TM Transmit (disturbance data)
TNC connector Threaded Neill-Concelman, a threaded constant impedance version of a BNC connector
TP Trip (recorded fault)
1MRK 511 310-UEN B Section 22 Glossary
537 Application manual
TPZ, TPY, TPX, TPS Current transformer class according to IEC
TRM Transformer Module. This module transforms currents and voltages taken from the process into levels suitable for further signal processing.
TYP Type identification
UMT User management tool
Underreach A term used to describe how the relay behaves during a fault condition. For example, a distance relay is underreaching when the impedance presented to it is greater than the apparent impedance to the fault applied to the balance point, that is, the set reach. The relay does not see the fault but perhaps it should have seen it. See also Overreach.
UTC Coordinated Universal Time. A coordinated time scale, maintained by the Bureau International des Poids et Mesures (BIPM), which forms the basis of a coordinated dissemination of standard frequencies and time signals. UTC is derived from International Atomic Time (TAI) by the addition of a whole number of «leap seconds» to synchronize it with Universal Time 1 (UT1), thus allowing for the eccentricity of the Earth’s orbit, the rotational axis tilt (23.5 degrees), but still showing the Earth’s irregular rotation, on which UT1 is based. The Coordinated Universal Time is expressed using a 24-hour clock, and uses the Gregorian calendar. It is used for aeroplane and ship navigation, where it is also sometimes known by the military name, «Zulu time.» «Zulu» in the phonetic alphabet stands for «Z», which stands for longitude zero.
UV Undervoltage
WEI Weak end infeed logic
VT Voltage transformer
X.21 A digital signalling interface primarily used for telecom equipment
3IO Three times zero-sequence current.Often referred to as the residual or the earth-fault current
3UO Three times the zero sequence voltage. Often referred to as the residual voltage or the neutral point voltage
Section 22 1MRK 511 310-UEN B Glossary
538 Application manual
Contact us
For more information please contact:
ABB AB Substation Automation Products SE-721 59 Vsters, Sweden Phone +46 (0) 21 32 50 00
www.abb.com/substationautomation
Note: We reserve the right to make technical changes or modify the contents of this document without prior notice. ABB AB does not accept any responsibility whatsoever for potential errors or possible lack of information in this document. We reserve all rights
Manualsnet FAQs
If you want to find out how the 670 Series ABB works, you can view and download the ABB 670 Series REC670 2.0 IEC Bay Control Application Manual on the Manualsnet website.
Yes, we have the Application Manual for ABB 670 Series as well as other ABB manuals. All you need to do is to use our search bar and find the user manual that you are looking for.
The Application Manual should include all the details that are needed to use a ABB 670 Series. Full manuals and user guide PDFs can be downloaded from Manualsnet.com.
The best way to navigate the ABB 670 Series REC670 2.0 IEC Bay Control Application Manual is by checking the Table of Contents at the top of the page where available. This allows you to navigate a manual by jumping to the section you are looking for.
This ABB 670 Series REC670 2.0 IEC Bay Control Application Manual consists of sections like Table of Contents, to name a few. For easier navigation, use the Table of Contents in the upper left corner.
You can download ABB 670 Series REC670 2.0 IEC Bay Control Application Manual free of charge simply by clicking the “download” button in the upper right corner of any manuals page. This feature allows you to download any manual in a couple of seconds and is generally in PDF format. You can also save a manual for later by adding it to your saved documents in the user profile.
To be able to print ABB 670 Series REC670 2.0 IEC Bay Control Application Manual, simply download the document to your computer. Once downloaded, open the PDF file and print the ABB 670 Series REC670 2.0 IEC Bay Control Application Manual as you would any other document. This can usually be achieved by clicking on “File” and then “Print” from the menu bar.
Мониторинг и оптимизация электрических режимов дуговых печей АСУ электрической части энергообъектов Диспетчеризация электроснабжения промышленных
ЭНКС-1 ЭНМИ ЭНКС-3 ES-PDC БКВ ЭНКС-2 ЭНКС-3м ЭНМВ Система телемеханики ЭНТМ ES-Энергия ENMU ЭНИП-2
Каталог CPC 100.pdf Каталог ПТК ЭКРА.pdf Каталог POCON.pdf Каталог ПТК EVICON.pdf Каталог СПП.pdf ЭКРА
БЭ2502 ШЭ2607 ШЭ1110-ШЭ1113 БЭ2704 ОС и ПО ШЭЭ 24Х, ЭКРА 24Х (управление присоединением) ЭКРА217
Шкаф ДФЗ с трёхфазным отключением ШЭМ 2601 102.pdf Шкаф управления выкл ШЭМ 2601 501.pdf
Протокол наладки ШМЗТ2-10 БКЖИ.018-10.02.doc Протокол наладки ШМЗТ2-10 БКЖИ.018-10.04.doc Протокол наладки ШМСУ-10 БКЖИ.032-10.doc Протокол наладки
БКЖИ.656457.024-06РЭ ШМ35-06 изм0.pdf КЖИ.656457.024-39РЭ ШМ35-39 изм0.pdf БКЖИ.656455.006 РЭ ШМ35.pdf БКЖИ.656457.018-36РЭ ШМЗТ2-36 изм0.pdf БКЖИ.656457.033-03.01РЭ ШМ35-ВС3
Оперативная блокировка ШМОБ Защиты линии ШМЗЛ Защиты трансформатора ШМЗТ Защиты шин и ошиновки ШМЗШ
Типовые проекты БЭМП 1 БКЖИ.656316.001-10.40 РЭ2 БЭМП 1-10 изм1.pdf БКЖИ.656316.001-20.02 РЭ2 БЭМП 1-20 изм6.pdf
Свидетельства и ЗАКи Высоковольтная аппаратура Шкафы и панели Ретрофит Программное обеспечение ЧЭАЗ Дополнительное оборудование
SIMEAS R Power Quality_Catalog_2014_EN.pdf SICAM MMU SICAM_Q100 SICAM_Q80 SICAM T SICAM P50-55 (7KG85) SICAM
SICAM miniRTU SICAM PAS SICAM CMIC SICAM eRTU SICAM MIC SICAM 1703 SICAM_Catalog_EN.pdf SICAM
7SD600 7SS600 7SJ600 7SV600 7RW600 7VH600 7SN600 7SJ602 7SJ601
7SJ46x_Руководство_ru.pdf 7SJ45_46_Application.pdf 7SJ46_Catalog_SIP_E7.pdf 7SJ45x_Manual_en.pdf 7SJ45_Catalog_SIP_E7.pdf FAQ_E_7SJ45_46.pdf 7SJ46x_Manual_en.pdf
7SC80 7SK80 7RW80 7SJ80 7SD80 7SJ81 7SK81 Остальная информация
6MD613 7SS52 7SA522 7SJ66 7SJ62_64 6MD66 7UT613_63 6MD665 7VU683 7SJ63 7SJ61 7SD61 7UT612 7UM62
Системное описание_SIPROTEC4_DIGSI4_RU.pdf DIGSI_MANUAL_CFC (Руководство)_RU.pdf DIGSI_STARTUP (Руководство)_RU.pdf DIGSI CFC Руководство пользователя_RU.pdf Типы информации в DIGSI4.pdf
7XV5652_Преобразователь RS232 – оптика_Manual.pdf 7XV5653_Двухканальный преобразователь дискретных сигналов_Manual.pdf 7XV5673 Блок расширения входов-выходов 7XV5450_Звездообразный разветвитель_Manual.pdf
Download Applications manual of ABB rec670 Controller, Control Systems for Free or View it Online on All-Guides.com.
Brand:
ABB
Category:
Controller
, Control Systems
, Control Unit
, Industrial Electrical
, Industrial Equipment
, Measuring Instruments
, Power distribution unit
, Power protection unit
, Protection Device
, Relays
, Transformer
Type:
Applications manual
Model:
ABB rec670
, ABB Relion 670 series
Pages: 482
Download ABB rec670 Applications manual

1

2

3

4

5

6

7

8

9

10

11

12

13

14

15

16

17

18

19

20

21

22

23

24

25

26

27

28

29

30

31

32

33

34

35

36

37

38

39

40

41

42

43

44

45

46

47

48

49

50

51

52

53

54

55

56

57

58

59

60

61

62

63

64

65

66

67

68

69

70

71

72

73

74

75

76

77

78

79

80

81

82

83

84

85

86

87

88

89

90

91

92

93

94

95

96

97

98

99

100

101

102

103

104

105

106

107

108

109

110

111

112

113

114

115

116

117

118

119

120

121

122

123

124

125

126

127

128

129

130

131

132

133

134

135

136

137

138

139

140

141

142

143

144

145

146

147

148

149

150

151

152

153

154

155

156

157

158

159

160

161

162

163

164

165

166

167

168

169

170

171

172

173

174

175

176

177

178

179

180

181

182

183

184

185

186

187

188

189

190

191

192

193

194

195

196

197

198

199

200

201

202

203

204

205

206

207

208

209

210

211

212

213

214

215

216

217

218

219

220

221

222

223

224

225

226

227

228

229

230

231

232

233

234

235

236

237

238

239

240

241

242

243

244

245

246

247

248

249

250

251

252

253

254

255

256

257

258

259

260

261

262

263

264

265

266

267

268

269

270

271

272

273

274

275

276

277

278

279

280

281

282

283

284

285

286

287

288

289

290

291

292

293

294

295

296

297

298

299

300

301

302

303

304

305

306

307

308

309

310

311

312

313

314

315

316

317

318

319

320

321

322

323

324

325

326

327

328

329

330

331

332

333

334

335

336

337

338

339

340

341

342

343

344

345

346

347

348

349

350

351

352

353

354

355

356

357

358

359

360

361

362

363

364

365

366

367

368

369

370

371

372

373

374

375

376

377

378

379

380

381

382

383

384

385

386

387

388

389

390

391

392

393

394

395

396

397

398

399

400

401

402

403

404

405

406

407

408

409

410

411

412

413

414

415

416

417

418

419

420

421

422

423

424

425

426

427

428

429

430

431

432

433

434

435

436

437

438

439

440

441

442

443

444

445

446

447

448

449

450

451

452

453

454

455

456

457

458

459

460

461

462

463

464

465

466

467

468

469

470

471

472

473

474

475

476

477

478

479

480

481

482
