|
Intelligence data updated. The following is a transcript of a game manual. The manual(s) can be directly accessed here:
|
The following article serves as a partial transcript† of the Command & Conquer: Red Alert 2 manual. All material written in this article is of copyright ©2000 by Electronic Arts, Inc. The author of this article claims no right of the material written.
† The following sections were removed to preserve only or mostly the lore-related information:
- Installing the Game
- Introduction
- Main Menu
- Setting Up a Network or Skirmish Game
- The Interface
- Game Basics
- Advance Gameplay
- The Advanced Command Bar
- Way Points
- Keyboard Commands
- Westwood Online
- In-Game Chatting
- Credits
- Technical Support
Story
If you could go back in time, what would you change? Would it be possible to prevent wars from ever occurring? Or would tampering with the past have drastic effects on the present and the future?
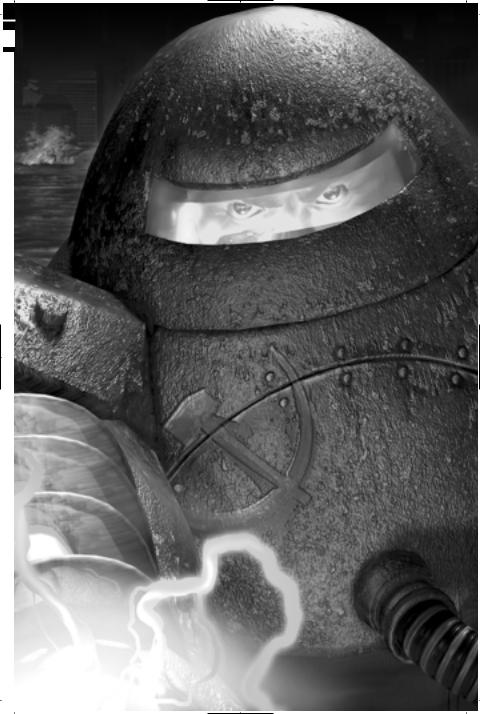
Experiments in time travel have drastically altered the course of history. Assassinations altered the fates of nations, and thus the entire world. The Soviet Union found herself without enemies to check her expansion to the west. Under Josef Stalin, they began a march to the Atlantic, hoping to fulfil their manifest destiny of a continental Soviet Union.
Only the combined might of the Allied forces prevented complete domination by the Soviets. The huge army of Mother Russia was finally stopped by the superior technology of the Allies. A peaceful world finally became reality. Stalin perished in the conflict, leaving the fate of the world’s largest nation undecided. After the war, the Allies placed Alexi Romanov [sic] in charge of the new Soviet Empire. He seemed to be the perfect choice. A career politician, he espoused the ideals of the Allied powers and set about making the Soviet Union a benevolent, peaceful country. The Allied leaders breathed a sigh of relief. The great menace was finally put to rest. Or was it? Secretly, Romanov burned with hatred of the Allied powers that had destroyed his beloved country. Once in power, he immediately began plotting his revenge. Because the Allies had won with superior technology, he vowed that the Soviets would create their own superior weapons. The armies of the old Soviet Union would march again, this time, they would not fail. This time, they would conquer the United States!
For years the Allies were complacent. Nobody knew of the secret Soviet experiments into mind control or the nuclear tests conducted by Romanov’s scientists. The invasion takes the United States by surprise. Suddenly, there are Soviet troops rushing into California, Texas and New York. Civilians are succumbing to the Soviet mind control and leaving their country forsaken, taking up arms in favour of the invaders. Giant squids are appearing on American shores, crushing ships with their massive tentacles. The onslaught has begun! Fortunately, the current US leader, President Dugan, has not let the old Allied technology stand. Massing his forces and preparing technology that allow him to control both the nature of time and the forces of nature, President Dugan prepares to battle the Soviet Union once again. Romanov has incredible power, surprise, and massive forces. The Allies are fighting for their home and their way of life. Once again, the entire world is erupting into conflict.
Units and Structures
Allied Forces
Infantry
GI
The GI is the basic Allied infantry unit. Slow and capable of only light damage, GIs are nonetheless necessary because of their low cost and ability to set up sandbags around them like a bunker. Left-clicking on a selected GI unit will cause him to deploy into a heavy machine gun platform which offers increased range and power, but no ability to move. Left-clicking again undeploys the GI.
Engineer
Although unarmed, the Engineer is a very useful unit. Surgical use of engineering teams can quickly turn the tide of battle. Note that when an engineer is used, the unit itself is lost. Engineers can be used to repair destroyed bridges (enter the bridge huts), steal enemy structures, repair your own structures and repair or capture neutral tech buildings. Engineers can also defuse Crazy Ivan bombs by targeting the affected unit or structure.
Rocketeer
The Rocketeer is the aerial assault version of the simple Allied GI. Armed with a powerful weapon and strapped into an equally powerful jetpack, the Rocketeer hovers over the battlefield. Rocketeers are excellent in providing anti-air defence and air-to-ground attacks on weaker targets.
Spy
The Spy is a stealth unit used by the Allied forces to gain an advantage over their foes. Rather than attacking enemy units, the Spy targets an enemy and changes his appearance to that of the enemy unit. This allows him to sneak past enemies and into enemy structures, providing substantial benefits. The Spy’s function inside the enemy structure depends on which building he enters. Attack Dogs are never fooled by the Spy’s disguise, so watch out for them. If a Spy enters…
Enemy Barracks: Your infantry units are created as veterans.
Enemy War Factories: Your vehicles are created as veterans.
Enemy Refineries: He steals all of the money currently in that Refinery.
Enemy Power Plants: He temporarily shuts down the enemy power supply.
Enemy Battle Labs: He gains the ability to make a special infantry tech unit. This will appear on your INFANTRY Tab on the Command Bar.
Enemy Radar Domes: He resets the shroud for the enemy.
Tanya
The most versatile infantry unit for the Allied forces is Tanya. About as fast as a typical GI, Tanya also has the ability to swim across rivers and oceans. While not that powerful against vehicles, Tanya’s powerful weapon kills off enemy infantry units with a single shot. Tanya can also plant C4 charges on enemy buildings or ships, destroying them instantly. Planting C4 charges on the repair huts of bridges allows Tanya to destroy bridges as well.
Attack Dog
Specially-trained German Shepherds, Attack Dog are extremely effective against infantry, but are completely worthless against vehicles and structures. Additionally, Attack Dogs are your first, best and only line of defence against Allied Spies. You’ll want Attack Dogs guarding your base at all times.
Chrono Legionnaire
A Chrono Legionnaire never walks anywhere. Instead of walking, he teleports around the map. The distance of the teleport determines how long it takes him to “phase back in” at his new location. While phasing back in, the Chrono Legionnaire is vulnerable to enemy fire. His weapon is unique. Rather than destroying enemy units and structures, his weapon simply erases them out of time. The more powerful the enemy, the longer this takes. While being erased, the enemy unit is invulnerable. If the Chrono Legionnaire is killed while erasing a unit, the partially-erased unit will reappear.
Vehicles
Grizzly Battle Tank
The Grizzly is a standard Allied tank. Useful for base assaults, Grizzly Battle Tanks are also capable of grinding enemy infantry units under their powerful treads. This all-purpose vehicle is useful both in defence and attack.
Infantry Fighting Vehicle (IFV)
An incredibly versatile vehicle, this transport alters its weapon depending on what type of infantry unit is placed inside it. For instance, putting an Engineer into this craft turns it into a mobile repair vehicle, able to repair your damaged vehicles without the necessity of bringing your units back to your base, while GIs enhance the vehicle’s ability to gun down infantry, etc. Explore the many unique abilities the IFV has to offer.
Note: Some units have no effect and will default to a rocket weapon.
Harrier
This fast jet-aircraft is used for ground attacks against enemy positions. Useful for strafing enemy structures or incoming columns of enemy units, the Harrier is vulnerable to Soviet anti-aircraft fire.
Mirage Tank
In most ways, the Mirage Tank is similar to the Grizzly Battle Tank of the Allies. However, when not moving, this unit changes in appearance to look like a tree. It can fire on enemy units from this camouflaged state, making it difficult for the enemy to discover where the fire is coming from. They do, however, appear for a brief moment when firing. Used carefully (for instance, stopping Mirage Tanks in or near a forested area), these units can provide a devastating surprise attack.
Night Hawk Transport
This massive transport helicopter is used to move infantry units across the map quickly and efficiently, without regard to terrain. The Night Hawk Transport is also completely invisible to enemy radar, making it even more effective at shuttling units back and forth. It is vulnerable to anti-aircraft fire, however.
Prism Tank
This powerful Allied tank uses a weapon similar to the Allied Prism Tower. The powerful and deadly beam of light launched from the Prism Tank’s cannon radiates from the target to hit other nearby enemies, allowing this vehicle to single-handedly destroy entire groups of enemy units. The range of dispersal depends on how close the Prism Tank is to its initial target.
MCV (Mobile Construction Vehicle)
As you will see in the section on Allied buildings, the heart of every base is the Construction Yard. On many occasions you will not start with this structure in place but will have an MCV, or Mobile Construction Vehicle, at your disposal. When deployed, this vehicle becomes a Construction Yard, providing you with all of the benefits of that building. To deploy an MCV, select the vehicle and hold the cursor over it. If the cursor changes to a golden circle with four arrows, left-clicking on it will deploy the vehicle. If the cursor has a red circle with a line through it, there is either not enough room to deploy or something is in the way. Move the vehicle (or the offending object) to find a suitable deployment site.
Chrono Miner
The heart of your economy is the Chrono Miner, a small vehicle that collects Ore and returns it to your Refineries. This Ore is then converted into money, which allows you to produce units and structures to increase your power. When travelling to an Ore field, the Chrono Miner moves like a normal vehicle. However, when full of Ore, the Miner “chronos” back to the Refinery, much like a Chrono Legionnaire moves across the map. This saves considerable time in getting the Ore into the refinery.
Amphibious Transport
The Allied Amphibious Transport is used to transport units from place to place. While not invisible to radar like the Night Hawk Transport, the hovercraft is capable of carrying vehicles as well as infantry. It can cross both land and water, allowing for amphibious assaults of enemy positions. This vehicle has no armament.
Destroyer
The basic Allied naval unit, the Destroyer is designed to automatically defend against submerged enemy units like submarines. The Destroyer can also be used to bombard shorelines and enemy installations, allowing for easier amphibious invasions.
Aegis Cruiser
Another important Allied ship, the Aegis Cruiser is used to defend against aerial attacks. In addition to standard anti-aircraft defenses, Aegis Cruisers are also equipped with anti-missile defenses that can protect vital installations against missile attacks.
Aircraft Carrier
Exactly as you might guess, the Aircraft Carrier is a large ship that attacks by sending its aircraft to launch an assault on the target. Planes from an Aircraft Carrier land, reload and continue attacking until the selected target is destroyed. Even better, any aircraft lost by the Aircraft Carrier are automatically replaced without any cost.
Dolphin
Dolphins are an important naval unit for the Allied forces. Cloaked and invisible to enemy radar, Dolphins attack with a sonar amplification device. They are effective against any Soviet naval units, particularly Giant Squids and Subs.
Soviet Forces
Infantry
Conscript
The counterpart to the Allied GI is the Soviet Conscript. Not able to deploy into a fortified position, Conscripts are cheaper to build than the Allied GI.
Engineer
Although unarmed, the Engineer is a very useful unit. Surgical use of engineering teams can quickly turn the tide of battle. Note that when an engineer is used, the unit itself is lost. Engineers can be used to repair destroyed bridges (enter the bridge huts), steal enemy structures, repair your own structures and repair or capture neutral tech buildings. Engineers can also defuse Crazy Ivan bombs by targeting the affected unit or structure.
Attack Dog
Specially-trained Siberian Huskies, Attack Dogs are extremely effective against infantry, but are completely worthless against vehicles and structures. Additionally, Attack Dogs are your first, best, and only line of defence against Allied Spies. You’ll want Attack Dogs guarding your base at all times.
Tesla Trooper
This specialised infantry unit attacks with a powerful electrical charge generated from his portable Tesla coil. Tesla Troopers are valuable for a number of reasons, not the least of which is their immunity to being steam-rolled by enemy tanks. In times of emergency power shortages, Tesla Troopers can charge up the Tesla Coils defending your base to keep them operating against enemy units. Charging up a Tesla Coil will also increase its range and power. To charge a Tesla Coil, simply move a Tesla Trooper near it. Charging will happen automatically.
Crazy Ivan
A codename used for Soviet demolitions experts, a Crazy Ivan attacks by placing dynamite around the map. Virtually anything can be wired to explode, from enemy structures to individual Conscripts—even wandering cows. Once placed on enemies or neutral units and structures, the bombs will count down to detonation and then explode. Crazy Ivan units can also demolish bridges by placing dynamite on bridge huts.
Flak Trooper
This advanced infantry unit is useful against both ground and air targets. The Flak Trooper attacks with explosive flak, allowing him to damage aircraft as well as seriously wound enemy infantry.
Yuri
The result of unique Soviet research, Yuri has the ability to mentally control most organic units and vehicles. When controlled, the enemy vehicle becomes, effectively, your unit, and you can order it to move and attack just as if you had built it yourself. If Yuri is killed, the connection with the enemy vehicle is broken and it returns to its original team. Yuri cannot control War-Miners, Chrono Miners, Attack Dogs, aircraft or other Yuri units. Yuri can also boil the minds of others with his mind-blowing attack. Simply double-click on him and watch surrounding infantry sizzle.
Vehicles
Rhino Heavy Tank
The Soviet answer to the Allied Grizzly Battle Tank is the Rhino Heavy Tank. Larger and slower than the Grizzly, the Rhino is geared toward pure power and is extremely effective against structures.
Flak Track
This light Soviet vehicle is designed to defend against both air- and light ground-assaults. It attacks by expelling flak, much like the Flak Trooper. This vehicle can also operate as a troop transport, carrying infantry units over-ground. This vehicle is not amphibious and cannot cross water.
V3 Rocket Launcher
The V3 Rocket Launcher is the closest thing the Soviet army has to artillery. While physically weak and easily destroyed, the V3 is capable of tremendous devastation. It launches very powerful, long-range rockets that can cause huge amounts of damage to whatever they hit. A great support weapon, the V3 Rocket Launcher is too vulnerable to lead an assault.
Kirov Airship
These huge Soviet zeppelins are a true force to contend with in the air. Able to withstand tremendous amounts of damage, a Kirov attacks with massive payloads of heavy bombs. These can devastate an area. Slow speed is the main weakness of this unit.
Terror Drone
Terror Drones are a new robotic unit created by the Soviet military. These small, mechanical spiders scuttle across the battlefield looking for enemy vehicles. When a vehicle comes within range, the Terror Drone leaps into action, jumping inside the vehicle and dismantling it from the inside. Only a Service Depot or Outpost can remove a Terror Drone once it attacks.
Apocalypse Assault Tank
The ultimate Soviet tank, the Apocalypse Assault Tank has a massive gun. A huge vehicle, the Apocalypse can take large amounts of damage before succumbing. This vehicle can be used to attack both ground and air targets.
MCV
As you will see in the section on Soviet buildings, the heart of every base is the Construction Yard. On many occasions you will not start with this structure in place but will have an MCV, or Mobile Construction Vehicle, at your disposal. When deployed, this vehicle becomes a Construction Yard, providing you with all of the benefits of that building. To deploy an MCV, select the vehicle and hold the cursor over it. If the cursor changes to a golden circle with four arrows, left-clicking on it will deploy the vehicle. If the cursor has a red circle with a line through it, there is either not enough room to deploy or something is in the way. Move the vehicle (or the offending object) to find a suitable deployment site.
War-Miner
The counterpart to the Allied Chrono Miner, the main purpose of the War-Miner is collecting Ore to be processed into credits. Once processed by a refinery, the Ore allows for the production of both units and structures. Unlike the Allied Chrono Miner, the War-Miner is not completely defenceless. It is armed with a sizeable mounted gun, which gives it the ability to protect itself from minor threats. Like all heavy vehicles, it can also crush enemy infantry by driving over them.
Amphibious Transport
Similar to the Allied Amphibious Transport, the Transport is a way to move both infantry and vehicles across both land and water. This vehicle is unarmed, but is heavily armoured to help ensure that its cargo gets to its ultimate destination.
Typhoon Attack Sub
This naval vessel attacks from below the waves, launching powerful torpedoes at its foes. Not capable of attacking land-based targets, the Typhoon is nonetheless a powerful unit for naval conflicts, and in large numbers conflicts and, in large numbers, can take complete control of waterways. Typhoon Attack Subs are stealth units and do not appear on enemy radar.
Dreadnought
This large ship is useful in attacking both enemy ships and ground installations. It hits with powerful long-range missiles, making it difficult for enemy units to approach within range to destroy it.
Sea Scorpion
This fast ship is capable of attacking all targets. It is also equipped with an anti-missile system, and can be used to protect valuable structures and locations from missile attack.
Giant Squid
Captured and trained by Soviet scientists, these huge creatures are capable of grasping enemy ships and crushing them with their huge, powerful tentacles. Giant Squids are stealth units and do not appear on enemy radar.
Special Multiplayer Forces
In Multiplayer and Skirmish games, you will select not just a particular side (Allied or Soviet) but a specific army as well. Allied forces include the United States, France, Germany, Great Britain and the Republic of Korea. Soviet forces include the Soviet Union, Cuba, Libya and Iraq. Each of these armies gains a particular unit or ability they can use to help them achieve victory:
American Paratroopers
The American army in Multiplayer games gains the ability to produce and deploy Paratroopers throughout the battle once an Air Force Command Headquarters has been built. The Paratroopers can be deployed to any ground location on the map (they cannot be deployed in water). When selected, a transport plane will deliver a group of five Paratroopers to the selected location. Once on the ground, the Paratroopers are essentially normal GIs. If the transport plane is shot down, the Paratroopers are lost. The ability to deploy Paratroopers changes over time, so you cannot deploy them constantly.
French Grand Cannon
This special French weapon is not a vehicle, but a large structure called the Grand Cannon. Once created, the Grand Cannon provides extremely effective base defence against enemy attacks, particularly against armoured units.
German Tank Destroyer
German scientists have developed the Tank Destroyer, a unit designed specifically to give German forces an edge against enemy armour. While very weak against structures or infantry, Tank Destroyers are extremely powerful against enemy vehicles, and can be used either to clear the way for your own attacks or to blunt incoming columns of enemy armour.
British Sniper
This British infantry unit is equipped with a special long-range rifle useful in taking out enemy infantry units. Much better than regular GIs, the sniper gains tremendous range and power, killing off enemy infantry units with a single shot from well out of their range.
Korean Black Eagle
The special weapon in the Korean arsenal is the Black Eagle. Effectively, this aircraft is a stronger Harrier, offering increased ability to both take and dish out damage.
Russian Tesla Tank
The Soviet Tesla Tank is a large ground vehicle that fires a Tesla charge instead of a ballistic weapon. This charge is effective against both units and structures.
Cuban Terrorist
The Cubans have developed the Terrorist unit to attack enemy bases. The Terrorist carries C4 charges taped to his body and kamikazes enemies, blowing them up quickly and efficiently.
Libyan Demolition Truck
The Libyan Demolition Truck is a suicide vehicle designed to create maximum mayhem and carnage in the enemy base. This truck carries a small nuclear charge. When the truck is attacked, the charge detonates, destroying everything in a wide radius.
Iraqi Desolator
Iraqi scientists have created the Desolator, a soldier that creates large areas of scorched, impassable earth. When deployed, the Desolator uses a radiation cannon to irradiate the ground around him, making it completely impassable to both infantry and light vehicles. He wears a protective suit to keep him safe from the radiation. When the Desolator is killed or undeployed, the ground he has poisoned will slowly return to normal.
Allied Structures
Structures
Construction Yard
The heart of every base is the Construction Yard. This structure is responsible for the creation of all other buildings in your base from simple walls to the technologically-advanced Battle Labs. Because this building controls your ability to expand your base and acquire new technologies, the wise commander protects it at all costs and at all times. In many missions, you will start with a Construction Yard already in place, while in others you will begin with an MCV and must deploy it to begin building.
Power Plant
While a few of your buildings, like your Construction Yard, provide their own power, most do not. To get them to operate at peak efficiency, you must provide them with power. That’s the function of this structure. Power Plants put out a good deal of energy, but larger bases will require multiple Power Plants to operate effectively. Power Plants are physically weak and critically important, so keep them well guarded.
Ore Refinery
Your Chrono Miners need somewhere to take the Ore they collect. That place is the Ore Refinery, a structure at the very heart of your economic operation. A filled Miner will return to the Refinery to dump its load of Ore before returning to the field. This Ore is then converted into credits, which you can use to purchase structures and units. Each Ore Refinery comes with a Miner. You will need one of these buildings in every mission, and will often want several. Make more Miners and Ore Refineries to make more money.
Barracks
The creation of all infantry units from the basic GI to the advanced Chrono Legionnaire is performed at the Allied Barracks. Many of your more powerful and effective structures and base defenses require the presence of a Barracks.
War Factory
If you wish to build vehicles (and you will), you will need a War Factory. All ground vehicles are created at the War Factory, although many may require the addition of other buildings to allow for production.
Naval Shipyard
Your navy will play an important role both in protecting your base and in attacking the enemy position. All of your naval units, including Dolphins, are created at your Naval Yard. This structure must be placed entirely in water. Damaged ships can be returned to the Naval Yard to be repaired.
Air Force Command Headquarters
The Allied Air Force Command Headquarters has two critical functions. Firstly, it provides radar, activating your Radar display, and allowing you to see the areas of the shroud you have removed on your Radar map. Secondly, this structure allows for the creation of aircraft. Each Air Force Command Headquarters can control up to four Harriers. Additional aircraft will require the production of a new Air Force Command Headquarters.
Service Depot
During the course of a battle, your units will become damaged. Moving a damaged vehicle into a Service Depot begins the repair process. Repairing damaged vehicles costs credits, with the cost depending on the severity of the damage to the unit.
Battle Lab
Many of the more advanced Allied units and defenses depend upon additional technology found only at the Battle Lab. To create the Allied special weapons, you must have a Battle Lab at your base. While expensive to build and requiring a lot of power to run, the units and structures available with the Battle Lab make it a necessary addition to any Allied base.
Ore Purifier
The Allies have developed the Ore Purifier as a way to further refine the Ore they mine. While an expensive structure, the Ore Purifier allows you to gain additional credits from every load of Ore your miners return to your Refineries. Over time, the Ore Purifier pays for itself many times over.
Spy Satellite Uplink
The Allied army depends on superior information to defeat the Soviet menace. When built and deployed, the Spy Satellite Uplink completely removes the shroud, showing all locations on the battlefield and on the Radar display.
Armoury
Fortress Walls
Walls are a passive defence system designed to stop enemy infantry and vehicles. Multiple pieces of wall section can be placed at once for quick building.
Pill-Box
Pill-boxes are fortified gun emplacements designed to protect an area against attacks by enemy infantry. Pill-boxes are not very effective against vehicles and they cannot shoot through walls.
Prism Tower
The Prism Tower is a powerful base defence for the Allies. Prism Towers fire a concentrated beam of light at any approaching enemy ground units. If Prism Towers are placed close enough together, they can fire one large, powerful beam by targeting each other and combining light beams on the target.
Patriot Missile System
The Patriot Missile System is an anti-aircraft device design to keep Allied bases protected from Soviet aircraft. Effective against all enemy flying units, the Patriot can also target and destroy incoming enemy missiles.
Gap Generator
Much of the Allied strategy revolves around gathering superior information and denying information to the Soviets. When a Gap Generator is deployed, it creates a shroud over a wide radius, hiding the Allied base from Soviet radar. The Gap Generator requires a great deal of power to maintain.
Chronosphere
Allied research into time travel has developed the Chronosphere, a device that allows units to move instantly across the map. When used, the Chronosphere will move vehicles in a selected wide radius to another point on the map. Additionally, enemy vehicles can be transported with the Chronosphere. Enemy ships can be placed on land or enemy ground vehicles can be dropped in water, destroying them instantly. Like the Weather Control Device, when the Chronosphere is built, all players are notified and the shroud above the device is removed.
Weather Control Device
The Weather Control Device gives the Allied commander the ability to control the forces of nature. Once built, the Weather Control Device will create a powerful lightning storm, which can be deployed over any part of the map, causing incredible destruction. The lighting storm will destroy buildings and units over a large area. When a Weather Control Device is built, all players will receive notification of the construction, and the shroud above the device is removed. All players will also receive a countdown as the lightning storm is developed.
Soviet Structures
Structures
Construction Yard
The heart of every base is the Construction Yard. This structure is responsible for the creation of all other buildings in your base from simple walls to the technologically-advanced Battle Labs. Because this building controls your ability to expand your base and acquire new technologies, the wise commander protects it at all costs and at all times. In many missions, you will start with a Construction Yard already in place, while in others you will begin with an MCV and must deploy it to begin building.
Tesla Reactor
The Soviet army depends on the Tesla Reactor to run its base operations. Like Power Plants, Tesla Reactors are extremely important, but are very vulnerable. These structures must be protected at all times. Spies are a particular nuisance.
Ore Refinery
Your War Miners need somewhere to take the Ore they collect. That place is the Ore Refinery, a structure at the very heart of your economic operation. A filled Miner will return to the Refinery to dump its load of Ore before returning to the field. This Ore is then converted into credits, which you can use to purchase structures and units. Each Ore Refinery comes with a Miner. You will need one of these buildings in every mission and will often want several. Make more Miners and Ore Refineries to make more money.
Barracks
The creation of all infantry units from the basic Conscript to the advanced Crazy Ivan is performed at the Soviet Barracks. Many of your more powerful and effective structures and base defenses require the presence of a Barracks.
War Factory
If you wish to build vehicles (and you will), you will need a War Factory. All ground vehicles are created at the War Factory, although many may require the addition of other buildings to allow for production.
Naval Shipyard
Your navy will play an important role both in protecting your base and in attacking the enemy position. All of your naval units, including Giant Squid, are created at your Naval Yard. This structure must be placed entirely in water. Damaged ships can be returned to the Naval Yard to be repaired.
Radar Tower
Because the Soviets do not have traditional aircraft, they have no need of an airfield. The Radar Tower, when created, activates the Soviet Radar display.
Service Depot
During the course of a battle, your units will become damaged. Moving a damaged vehicle into a Service Depot begins the repair process. Repairing damaged vehicles costs credits, with the cost depending on the severity of the damage to the unit.
Battle Lab
Many of the more advanced Soviet units and defenses depend upon additional technology found only at the Battle Lab. To create the Soviet special weapons, you must have a Battle Lab at your base. While expensive to build and requiring a lot of power to run, the units and structures available with the Battle Lab make it a necessary addition to any Soviet base.
Nuclear Reactor
The Soviets have solved the problem of needing additional Tesla Reactors by developing the Nuclear Reactor. This large building puts out the equivalent of many Tesla Reactors, supplying the Soviet commander with virtually all of the power he will ever need. The destruction of a Nuclear Reactor causes a large nuclear explosion, and creates fallout that will kill infantry and lightly-armoured vehicles.
Cloning Vats
A unique piece of Soviet technology, the Cloning Vat allows you to duplicate any infantry unit you create with your Barracks for free. Once you have built and placed a Cloning Vat, any unit you create in your Barracks will also produce an identical unit at the Cloning Vat.
Infantry units can be sent into the Cloning Vat and destroyed. This will give you a small amount of credits in return. Additionally, any infantry units captured by Yuri can be sent to the Cloning Vat. Try this for an extra cash bonus.
Armoury
Fortress Walls
Walls are a passive defence system designed to stop enemy infantry and vehicles. Multiple pieces of wall section can be placed at once for quick building.
Sentry Gun
This stationary gun is used to defend against enemy infantry. It is not a very effective weapon against vehicles.
Tesla Coil
A powerful base-defence against all ground units, the Tesla Coil attacks with a powerful bolt of electricity. Unlike other base-defenses, a Tesla Coil can be charged by Tesla Troopers, and will remain active even if the base loses power.
Flak Cannon
The Soviet Flak Cannon is a basic form of defence against aerial units. It is extremely effective against all Allied air units, including Rocketeers.
Psychic Sensor
Soviet research into psychic phenomena has resulted in the Psychic Sensor. When deployed, this device allows you to see the orders given to any enemy units planning to attack any friendly units or structures within the device’s radius. When built, the sensor shows the attack target when the target is within range of the Psychic Sensor.
Iron Curtain
A fascinating piece of Soviet technology, the Iron Curtain allows you to make units and structures invulnerable for a short period of time. When ready and selected, the Iron Curtain will make all structures and units in a small area completely invulnerable to attack. Invulnerable units cannot be attacked by Terror Drones, but can still be mind-controlled. The force of the Iron Curtain will kill any infantry units it is used on. In this way, it can be used against enemy infantry as a weapon. When the Iron Curtain is built, all players are notified and the shroud above the device is removed for all players.
Nuclear Missile Silo
The ultimate weapon in the Soviet arsenal is the Nuclear Missile Silo. Once built, the Nuclear Missile Silo creates a huge nuclear missile that can be used to cause incredible devastation in the chosen area. Additionally, the aftermath of the missile leaves radiation that will kill any infantry units in the area and will damage lightly-armoured vehicles. When the Nuclear Missile Silo is built, all players are notified and the shroud above the device is removed for all players.
External links
- Command & Conquer: Red Alert 2 Game Manual at replacementdocs.com
|
v·d·e Command & Conquer official manuals and guides |
||||||||||||||||||
|---|---|---|---|---|---|---|---|---|---|---|---|---|---|---|---|---|---|---|
|


K E Y B O A R D C O M M A N D S
BASIC KEYBOARD FUNCTIONS
|
NAME |
KEY |
|
Deploy item/unit |
D |
Guard Current Area
Attack Move
Scatter
Stop
Force Fire
Force Move
G
Click unit, CTRL/SHIFT, move to area
X
S
Hold CTRL key, guide cursor over target, left-click
Hold ALT key, guide cursor over target, left-click
|
Options Menu |
ESC |
|
Create Team |
CTRL + 1-9 |
|
Select Team |
1-9 |
|
Ally with chosen side |
A |
|
Type Select |
T |
|
Chat to all Listeners |
Enter to bring up chat cursor, |
|
(in Multiplayer) |
ENTER to send message, Right- |
|
click to cancel message |
|
|
Chat to all Allies |
Hit BACKSPACE, type, hit ENTER |
|
(in Multiplayer) |
|
|
Chat to all Players |
Press ‘’ to bring up chat cursor, |
|
(in Multiplayer) |
ENTER to send message, Right- |
|
click to cancel message |
|
|
Place Beacon |
(B), press Enter, write message, |
|
press Enter to send message. |
|
|
Press DEL to delete beacon |
|
|
Enter Way Point mode |
Click on unit, press and hold Z, |
|
set down the way points, release |
|
|
to initiate movement command |
DEFINITION
Some units have secondary functions that enable greater or different attacks or powers. You can also click on them when the «deploy» cursor appears above the unit. GIs, Desolators and Yuri all have secondary powers. You can also use this to exit units or garrisoned buildings.
Units will actively scan the terrain and attack enemies automatically.
Units will travel from place to place and actively attack & destroy enemies they encounter.
Units will try to avoid being run over. Press when vehicle tries to run over your infantry.
Stops selected unit’s movement in its tracks.
Forces a unit to fire on a friendly or neutral unit.
Forces a unit to drive/walk over an area or to run over a unit.
Go to Options Menu.
Creates teams of units.
Selects a team you have already created.
Press to avoid attacking friends.
Left-click on TYPE SELECT button in the Advanced Command Bar or press T once to select all the units on screen of the same type (one click). Double-click to select them across the battlefield.
Sends messages to all listeners
Sends messages to all allies
Sends messages to all players
Writes messages to allies and sets them on battlefield.
Sets Way Points.

K E Y B O A R D C O M M A N D S
|
Set Rally Point |
Click on Barracks, War Factory, |
|
Shipyard or Cloning Vats and select |
|
|
the rally point on the battlefield |
|
|
Go to Event on Radar |
Space Bar |
|
All units cheer! |
C |
|
Go to Diplomacy Menu |
Tab |
Rallies your units to a spot on the battlefield after they are produced.
Centers your view on latest radar map ping. Makes all your infantry cheer in victory! Accesses the Diplomacy Screen.
ADVANCED KEYBOARD FUNCTIONS
|
NAME |
KEY |
|
Follow |
F |
|
Guard Destination |
CTRL/ALT + click area |
|
Escort Unit |
CTRL/ALT + click unit |
|
Guard a Structure |
CTRL/ALT + click structure |
|
Structure Tab |
Q |
|
Armory Tab |
W |
|
Infantry Tab |
E |
|
Unit Tab |
R |
|
Next Unit |
M |
|
Previous Unit |
N |
|
Select All |
P |
|
Cycle through Elites |
Y |
|
Cycle through health |
U |
|
Modify Selected Units |
Hold SHIFT and click on selected |
|
unit to deselect. Click on |
|
|
unselected unit to add to group |
|
|
Center Tactical |
H |
|
Map on Base |
|
|
Repair Mode |
Left-click structure, K |
|
Sell Mode |
Left-click structure, L |
|
Bookmark Creation |
CTRL +F1-F4 |
|
Go to Bookmark |
F1-F4 |
|
Selection |
|
|
Multiplayer Taunts |
F5-F12 |
DEFINITION
Game viewport follows selected unit. Moves to area and then guard it.
Guards a unit while it moves about terrain. Guards a specific structure.
Hotkey to Structures.
Hotkey to Armory.
Hotkey to Infantry.
Hotkey to Units.
Selects the next unit in order of creation. Selects the previous unit you selected. Selects all units on battlefield.
Selects all veteran or all elite units. Selects all units with like health bars.
Remove specific unit(s) from a group of units.
Centers your view on your base. Normally this is your Construction Yard.
Repairs your structures.
Sells your structures.
Creates a spot on the map you want to instantly jump to.
Jumps to bookmarked terrain area.
Sends preset audio messages to other players.

|
T A B L E O F C O N T E N T S |
|
|
GETTING STARTED . . . . . . . . . . . . . . . . . . . . . . . . . . . . . . . . . . . . . . . . . . . . . . . . . . . . . . . . . . . . |
. .1 |
|
WELCOME BACK, COMMANDER . . . . . . . . . . . . . . . . . . . . . . . . . . . . . . . . . . . . . . . . . . . . . . . . . . |
.2 |
|
STORY . . . . . . . . . . . . . . . . . . . . . . . . . . . . . . . . . . . . . . . . . . . . . . . . . . . . . . . . . . . . . . . . . . . . . |
.3 |
|
MAIN MENU . . . . . . . . . . . . . . . . . . . . . . . . . . . . . . . . . . . . . . . . . . . . . . . . . . . . . . . . . . . . . . . . . . . |
4 |
|
SINGLE PLAYER GAME . . . . . . . . . . . . . . . . . . . . . . . . . . . . . . . . . . . . . . . . . . . . . |
.5 |
|
NEW CAMPAIGN . . . . . . . . . . . . . . . . . . . . . . . . . . . . . . . . . . . . . . . . . . . . . . . . . . . |
5 |
|
DIFFICULTY . . . . . . . . . . . . . . . . . . . . . . . . . . . . . . . . . . . . . . . . . . . . . . . . . . . . . . |
.5 |
|
LOAD SAVED GAME . . . . . . . . . . . . . . . . . . . . . . . . . . . . . . . . . . . . . . . . . . . . . . . |
.5 |
|
SKIRMISH GAMES . . . . . . . . . . . . . . . . . . . . . . . . . . . . . . . . . . . . . . . . . . . . . . . . |
.6 |
|
INTERNET . . . . . . . . . . . . . . . . . . . . . . . . . . . . . . . . . . . . . . . . . . . . . . . . . . . . . . . . . . . . |
.6 |
|
NETWORK . . . . . . . . . . . . . . . . . . . . . . . . . . . . . . . . . . . . . . . . . . . . . . . . . . . . . . . . . . . . . |
6 |
|
MOVIES & CREDITS . . . . . . . . . . . . . . . . . . . . . . . . . . . . . . . . . . . . . . . . . . . . . . . . . . . . . |
6 |
|
OPTIONS . . . . . . . . . . . . . . . . . . . . . . . . . . . . . . . . . . . . . . . . . . . . . . . . . . . . . . . . . . . . . |
7 |
|
DISPLAY OPTIONS . . . . . . . . . . . . . . . . . . . . . . . . . . . . . . . . . . . . . . . . . . . . . . . . |
.7 |
|
GAME OPTIONS . . . . . . . . . . . . . . . . . . . . . . . . . . . . . . . . . . . . . . . . . . . . . . . . . . . |
7 |
|
USER INTERFACE OPTIONS . . . . . . . . . . . . . . . . . . . . . . . . . . . . . . . . . . . . . . . . . . |
8 |
|
AUDIO OPTIONS . . . . . . . . . . . . . . . . . . . . . . . . . . . . . . . . . . . . . . . . . . . . . . . . . . . |
8 |
|
KEYBOARD . . . . . . . . . . . . . . . . . . . . . . . . . . . . . . . . . . . . . . . . . . . . . . . . . . . . . . . |
8 |
|
NETWORK . . . . . . . . . . . . . . . . . . . . . . . . . . . . . . . . . . . . . . . . . . . . . . . . . . . . . . . . |
9 |
|
SETTING UP A NETWORK OR SKIRMISH GAME . . . . . . . . . . . . . . . . . . . . . . . . . . . . . . . . . . . . . . . |
10 |
|
MULTIPLAYER GAME MODES . . . . . . . . . . . . . . . . . . . . . . . . . . . . . . . . . . . . . . . . . |
11 |
|
CO-OP PLAY . . . . . . . . . . . . . . . . . . . . . . . . . . . . . . . . . . . . . . . . . . . . . . . . . . . . . |
12 |
|
CHOOSING A BATTLEFIELD . . . . . . . . . . . . . . . . . . . . . . . . . . . . . . . . . . . . . . . . . . |
12 |
|
CREATE A RANDOM MAP . . . . . . . . . . . . . . . . . . . . . . . . . . . . . . . . . . . . . . . . . . . . |
12 |
|
THE INTERFACE . . . . . . . . . . . . . . . . . . . . . . . . . . . . . . . . . . . . . . . . . . . . . . . . . . . . . . . . . . . . . . . |
13 |
|
THE TACTICAL MAP . . . . . . . . . . . . . . . . . . . . . . . . . . . . . . . . . . . . . . . . . . . . . . . . . . . . . |
13 |
|
THE GAME MOUSE . . . . . . . . . . . . . . . . . . . . . . . . . . . . . . . . . . . . . . . . . . . . . . . . . . . . . |
13 |
|
THE COMMAND BAR . . . . . . . . . . . . . . . . . . . . . . . . . . . . . . . . . . . . . . . . . . . . . . . . . . . . |
13 |
|
GAME BASICS . . . . . . . . . . . . . . . . . . . . . . . . . . . . . . . . . . . . . . . . . . . . . . . . . . . . . . . . . . . . . . . . |
16 |
|
MOUSE CONTROL . . . . . . . . . . . . . . . . . . . . . . . . . . . . . . . . . . . . . . . . . . . . . . . . . . . . . . |
16 |
|
SELECTING UNITS . . . . . . . . . . . . . . . . . . . . . . . . . . . . . . . . . . . . . . . . . . . . . . . . . . . . . |
16 |
|
MOVING AND FIRING . . . . . . . . . . . . . . . . . . . . . . . . . . . . . . . . . . . . . . . . . . . . . . . . . . . |
16 |
|
THE SHROUD . . . . . . . . . . . . . . . . . . . . . . . . . . . . . . . . . . . . . . . . . . . . . . . . . . . . . . . . . |
16 |
|
GATHERING ORE/EARNING CREDITS . . . . . . . . . . . . . . . . . . . . . . . . . . . . . . . . . . . . . . . |
16 |

T A B L E O F C O N T E N T S
|
BUILDING UNITS AND STRUCTURES . . . . . . . . . . . . . . . . . . . . . . . . . . . . . . . . . . . . . . |
.17 |
|
BUILD QUEUING . . . . . . . . . . . . . . . . . . . . . . . . . . . . . . . . . . . . . . . . . . . . . . . . . . . . . . |
.17 |
|
RALLY POINTS . . . . . . . . . . . . . . . . . . . . . . . . . . . . . . . . . . . . . . . . . . . . . . . . . . . . . . . |
.18 |
|
PLACING STRUCTURES ON THE BATTLEFIELD . . . . . . . . . . . . . . . . . . . . . . . . . . . . . . . |
.18 |
|
POWER . . . . . . . . . . . . . . . . . . . . . . . . . . . . . . . . . . . . . . . . . . . . . . . . . . . . . . . . . . . . . |
.18 |
|
TECH BUILDINGS . . . . . . . . . . . . . . . . . . . . . . . . . . . . . . . . . . . . . . . . . . . . . . . . . . . . . |
.19 |
|
FORTIFYING CIVILIAN BUILDINGS . . . . . . . . . . . . . . . . . . . . . . . . . . . . . . . . . . . . . . . . |
.19 |
|
CAPTURING ENEMY BUILDINGS & REPAIRING |
|
|
BRIDGES, CIVILIAN STRUCTURES . . . . . . . . . . . . . . . . . . . . . . . . . . . . . . . . . . . . . . . . . . |
20 |
|
GAME ALLIANCES . . . . . . . . . . . . . . . . . . . . . . . . . . . . . . . . . . . . . . . . . . . . . . . . . . . . . |
20 |
|
ADVANCED GAMEPLAY . . . . . . . . . . . . . . . . . . . . . . . . . . . . . . . . . . . . . . . . . . . . . . . . . . . . . . . . . |
.21 |
|
CREATING TEAMS . . . . . . . . . . . . . . . . . . . . . . . . . . . . . . . . . . . . . . . . . . . . . . . . . . . . . |
.21 |
|
SELLING AND REPAIRING . . . . . . . . . . . . . . . . . . . . . . . . . . . . . . . . . . . . . . . . . . . . . . . |
.21 |
|
GUARD MODE . . . . . . . . . . . . . . . . . . . . . . . . . . . . . . . . . . . . . . . . . . . . . . . . . . . . . . . . |
.21 |
|
ATTACK MOVE . . . . . . . . . . . . . . . . . . . . . . . . . . . . . . . . . . . . . . . . . . . . . . . . . . . . . . . . |
.21 |
|
VETERAN & ELITE UNITS . . . . . . . . . . . . . . . . . . . . . . . . . . . . . . . . . . . . . . . . . . . . . . . |
.21 |
|
FORCED FIRING . . . . . . . . . . . . . . . . . . . . . . . . . . . . . . . . . . . . . . . . . . . . . . . . . . . . . . . . |
22 |
|
POWER-UP CRATES . . . . . . . . . . . . . . . . . . . . . . . . . . . . . . . . . . . . . . . . . . . . . . . . . . . . |
22 |
|
THE ADVANCED COMMAND BAR . . . . . . . . . . . . . . . . . . . . . . . . . . . . . . . . . . . . . . . . . . . . . . . . . . |
23 |
|
WAY POINTS . . . . . . . . . . . . . . . . . . . . . . . . . . . . . . . . . . . . . . . . . . . . . . . . . . . . . . . . . . . . . . . . . |
25 |
|
UNITS AND STRUCTURES . . . . . . . . . . . . . . . . . . . . . . . . . . . . . . . . . . . . . . . . . . . . . . . . . . . . . . . |
27 |
|
ALLIED TECH TREE . . . . . . . . . . . . . . . . . . . . . . . . . . . . . . . . . . . . . . . . . . . . . . . . . . . . . |
27 |
|
ALLIED UNITS TECH LEVELS . . . . . . . . . . . . . . . . . . . . . . . . . . . . . . . . . . . . . . . . . . . . . |
27 |
|
ALLIED FORCES . . . . . . . . . . . . . . . . . . . . . . . . . . . . . . . . . . . . . . . . . . . . . . . . . . . . . . . |
28 |
|
SOVIET TECH TREE . . . . . . . . . . . . . . . . . . . . . . . . . . . . . . . . . . . . . . . . . . . . . . . . . . . . |
32 |
|
SOVIET UNITS TECH LEVELS . . . . . . . . . . . . . . . . . . . . . . . . . . . . . . . . . . . . . . . . . . . . . |
32 |
|
SOVIET FORCES . . . . . . . . . . . . . . . . . . . . . . . . . . . . . . . . . . . . . . . . . . . . . . . . . . . . . . . |
33 |
|
SPECIAL MULTIPLAYER FORCES . . . . . . . . . . . . . . . . . . . . . . . . . . . . . . . . . . . . . . . . . . |
36 |
|
ALLIED STRUCTURES . . . . . . . . . . . . . . . . . . . . . . . . . . . . . . . . . . . . . . . . . . . . . . . . . . . |
38 |
|
SOVIET STRUCTURES . . . . . . . . . . . . . . . . . . . . . . . . . . . . . . . . . . . . . . . . . . . . . . . . . . |
.41 |
|
WESTWOOD ONLINE . . . . . . . . . . . . . . . . . . . . . . . . . . . . . . . . . . . . . . . . . . . . . . . . . . . . . . . . . . . |
44 |
|
CREDITS . . . . . . . . . . . . . . . . . . . . . . . . . . . . . . . . . . . . . . . . . . . . . . . . . . . . . . . . . . . . . . . . . . . . |
50 |
|
TECHNICAL SUPPORT . . . . . . . . . . . . . . . . . . . . . . . . . . . . . . . . . . . . . . . . . . . . . . . . . . . . . . . . . |
59 |


G E T T I N G S T A R T E D
G E T T I N G S T A R T E D
TO INSTALL COMMAND & CONQUER™ RED ALERT™ 2
WINDOWS¨ 95/98/2000/MILLENNIUM/NT AUTOPLAY
1.Insert either the Allied or Soviet disc into your CD-ROM drive and click on “Install”.
2.Click “Next” and read through the license agreement. When finished, click the check box to agree or click “Cancel” to exit.
3.Enter the serial number that is provided on the back of your Command & Conquer: Red Alert 2 jewel case, then click Next.
4.Follow the prompts to finish the installation.
WINDOWS¨ 95/98/2000/MILLENNIUM/NT MANUAL INSTALL
1.Click on the “Start” button and select the “Run” option on the menu.
2.Select “browse” and go to your CD-ROM drive.
3.Double-click on the “Setup.exe” file. This may appear as “Setup” on some systems, but will always have a CD icon before it.
4.Click “OK”.
5.Follow the procedures outlined in the AUTOPLAY section above, starting at #2.
TO UNINSTALL
1.Click on “Start” and then select “Programs,” “Westwood,” “Red Alert 2,” “Red Alert 2 Uninstall.”
2.Follow the on-screen instructions to complete the uninstall process.
TO UNINSTALL THROUGH THE AUTORUN FEATURE
1.Insert either the Allied or Soviet disc into the CD-ROM drive.
2.When the AutoPlay window pops up, click “Uninstall”.
3.Follow the on-screen instructions to complete the uninstall process.
1
W E L C O M E B A C K , C O M M A N D E R
W E L C O M E B A C K , C O M M A N D E R
Command & Conquer Red Alert 2 gives you the choice of playing as one of two completely distinct forces: the honorable Allies or the aggressive and militaristic Soviets.
In single-player games, if you elect to play as the Allies, you will battle against Soviet forces, and if you choose to play as the Soviets, you will fight against the Allies. In multiplayer games, both Allied and Soviet forces and factions can battle against each other.
The two sides are very different, and share only a few common units and structures. Each side has a unique array of strengths and weaknesses that can be exploited. The units and structures of the two armies reflect the basic philosophy behind the armies. While the Allies depend on superior technology and finesse, the Soviet forces rely on brute strength to achieve their objectives.
NOTE TO PLAYERS NEW TO THE COMMAND & CONQUER UNIVERSE
We highly recommend that you play the Boot Camp missions before jumping into the full game if you are new to Command & Conquer. We always strive to make sure the game is easy to pick up, but the Boot Camp will kick you off with the basics. It’ll teach you about base building, training units, the need to collect Ore with Refineries, how to move/target and many other things that will enhance your game experience.
2

S T O R Y
S T O R Y
If you could go back in time, what would you change? Would it be possible to prevent wars from ever occurring? Or would tampering with the past have drastic effects on the present and the future?
Experiments in time travel have drastically altered the course of history. Assassinations altered the fates of nations, and thus the entire world. The Soviet Union found herself without enemies to check her expansion to the west. Under Josef Stalin, they began a march to the Atlantic, hoping to fulfill their manifest destiny of a continental Soviet Union.
Only the combined might of the Allied forces prevented complete domination by the Soviets. The huge army of Mother Russia was finally stopped by the superior technology of the Allies. A peaceful world finally became reality. Stalin perished in the conflict, leaving the fate of the world’s largest nation undecided.
After the war, the Allies placed Alexi Romanov in charge of the new Soviet Empire. He seemed to be the perfect choice. A career politician, he espoused the ideals of the Allied powers and set about making the Soviet Union a benevolent, peaceful country. The Allied leaders breathed a sigh of relief. The great menace was finally put to rest.
Or was it? Secretly, Romanov burned with hatred of the Allied powers that had destroyed his beloved country. Once in power, he immediately began plotting his revenge. Because the Allies had won with superior technology, he vowed that the Soviets would create their own superior weapons. The armies of the old Soviet Union would march again, and this time, they would not fail. This time, they would conquer the United States!
For years the Allies were complacent. No one knew of the secret Soviet experiments into mind control or the nuclear tests conducted by Romanov’s scientists. The invasion took the United States by surprise. Suddenly, there were Soviet troops rushing into California, Texas, and New York. Civilians succumbed to the Soviet mind control and left their country forsaken, taking up arms in favor of the invaders. Giant squids appeared on American shores, crushing ships with their massive tentacles. The onslaught had begun!
Fortunately, the current US leader, President Dugan, has not let the old Allied technology stand. Massing his forces and preparing technology that allow him to control both the nature of time and the forces of nature, President Dugan prepared to battle the Soviet Union once again. Romanov has incredible power, surprise, and massive forces. The Allies are fighting for their home, and their way of life. And once again, the entire world erupts into conflict.
3
![]()
M A I N M E N U
M A I N M E N U
When you start the game, you will be presented with a short cinematic sequence of the Soviet invasion of the United States. Following this, you will be taken to the Main menu, where you will select the type of game you wish to play or determine a variety of options to optimize the performance of the game on your computer.
On the Main menu, your selections include Single Player; Internet;
Network; Movies & Credits; Options; and Exit Game.
SINGLE PLAYER
Allows you to select new campaigns, load previously saved games, replay missions and set up Skirmish matches against the computer
INTERNET
Play “Head-to-Head” or “Co-Op” games over the Internet through Westwood’s free matching service.
NETWORK
Play “Head-to-Head” or “Co-Op” games over a Local Area Network (LAN).
MOVIES & CREDITS
Watch movies from the missions you’ve completed or meet your friends from the Command & Conquer Red Alert 2 team.
OPTIONS
Adjust your game settings.
EXIT GAME
Exits the game and returns you to your desktop.
4

M A I N M E N U
SINGLE PLAYER GAME
To play single-player game of Command & Conquer Red Alert 2, click on this button on the Main menu. You will be taken to a new menu with several new options to choose from. These are: New Campaign; Load Saved Game; and Skirmish. To return to the Main menu, click the Main menu button in the bottom-right corner of the screen.
NEW CAMPAIGN
Clicking on the New Campaign button takes you to the Campaign menu. Here, you can choose to play either as the Allies or the Soviets. You can also elect to go through Boot Camp, which will teach you many of the basics of the game, including how to move your units around the map, how to target enemies, how to build your base, and more. It is highly recommended that players new to the real-time strategy genre or the Command & Conquer series play through the Boot Camp levels to familiarize themselves with the interface. While experienced players can skip the Boot Camp, it does include many new features that can help you tremendously.
If you decide not to start a new campaign, click on the Back button to return to the Single Player menu.
DIFFICULTY
On the Campaign menu, you can select the difficulty of the campaign you will play. There are three settings ranging from Easy to Hard. Players new to real-time strategy gaming should start with the Easy level, while experienced players will find the Hard level quite challenging.
LOAD SAVED GAME
Clicking on this button takes you to the Load Mission menu. Here, you can select a previously saved game and continue playing where you left off. Select the mission you wish to continue, then click on the Load button. If you decide not to load a previously saved game, click on the Back button to return to the Single Player menu.
5
M A I N M E N U
SKIRMISH GAMES
Skirmish games are unique. In a sense, a Skirmish is like playing a multiplayer game, but instead of playing against other people, you play against computer-controlled opponents. Clicking on this button will take you to the Skirmish menu, explained in greater detail later in the manual.
INTERNET
Press the Internet button located on the Main menu to go to Westwood Online. Westwood Online is a matching service sponsored by Westwood Studios for Red Alert 2 fans. It is always best to play with players with strong Internet connections and recommended system requirements. The game’s performance will be affected by these factors. More information can be found in the Westwood Online section of the manual. You must already be connected to the internet through your Internet Service Provider in order to connect to Westwood On-Line
NETWORK
Click on this button to set up or join a game played over a Local Area Network. More information about playing games over a network can be found in the Options section of the manual.
MOVIES & CREDITS
Click on this button on the Main menu to go to the Movies & Credits menu. Here you can view movie sequences you have earned in campaign play, and see the credits for Command & Conquer Red Alert 2.
6
M A I N M E N U
OPTIONS
The Options menu allows you to customize a variety of aspects of your game.
When you click on the Options button on the Main menu, you’ll be taken to the Options menu.
DISPLAY OPTIONS
VISUAL DETAILS: Choose Low to High. Higher detail will look more attractive, but requires increased processor speed. Slower computers will have difficulty playing the game with high detail. Visual details refers to special effects like smoke, lighting or water wakes behind ships.
SET A VIDEO RESOLUTION: Setting higher resolution is more attractive and crisper, but requires a more powerful computer. You will also be able to see more of the battlefield during gameplay. Playing the game in 640 x480 (lowest resolution) will increase the performance of the game on your system.
GAME OPTIONS
Located below the display options are the game options.
GAME SPEED: Use this slider to adjust the speed of the game units and the time it takes to build structures. NOTE: In the single player game, the game is locked to the default game speed.
GAME DIFFICULTY: Change the difficulty to Easy, Normal or Hard. Newcomers to the C&C universe should play on the Easy level to begin.
7
M A I N M E N U
USER INTERFACE OPTIONS
The user interface options give you additional control over the game and allow you to tailor it to your preferences. There are several tabs under this heading.
TOOLTIPS: Displays helpful text when a cursor is left on a game object for 2 seconds.
TARGET LINES: When you tell a unit to move to a particular location or attack a certain enemy, a line from the unit to the target will appear. With this box clicked off, these target lines will not appear.
SEE HIDDEN OBJECTS: Allows you to spot units behind buildings and other obstacles. With this box clicked on, units and defensive structures behind obstacles will be indicated. If this box is clicked off, hidden units will not be visible.
SCROLL RATE: Determines how quickly you can scroll around the screen with the mouse.
AUDIO OPTIONS
The three bars under Audio Options allow you to control the volume of the various sounds in the game. Values range from 0 (off) to 10 (loud).
MUSIC VOLUME: Adjusts the mission and menu music volume.
SOUND VOLUME: Adjusts sound effects (gunfire, explosions, etc.).
VOICE VOLUME: Adjusts the character voices.
KEYBOARD
Click on the Keyboard button to customize your keyboard commands.
CATEGORIES: The keyboard commands are broken down into various categories, which you can find by clicking on the arrow in the Category menu in the top left. The group of commands in that category will appear in the Commands box on the right.
COMMANDS: Select the command you wish to change. The current key for that command will appear below “Current Hotkey.”
CURRENT HOTKEY: Click in the Press New Hotkey and select the key you wish to use for that command. To assign the selected key to that command, click the Assign button. You may choose a key that is already assigned to another command. When this happens, the command that the selected key is currently assigned to will appear below the Assign New Hotkey box. You can still assign the selected key to the chosen command, but the command for which that key was the default will no longer have a Hotkey.
8

M A I N M E N U
RESET ALL: To return to the Westwood sponsored default key commands, click the Reset All button at the bottom of the screen.
NETWORK
Click on the Network button to configure your network settings. Note: Only adjust these settings if you are experienced in networking protocol.
9
SET TING UP A NET WORK OR SKIRMISH GAME
S E T T I N G U P A N E T W O R K O R
S K I R M I S H G A M E
Network and Skirmish games are unlike campaign games in that they are Head-to-Head or Co-Op battles between two or more armies. There’s no particular objective other than destroying everything else on the screen.
Clicking on the Skirmish button on the
Single Player menu or starting a new network game will bring up a list of possible options you can change.
PLAYER: Along the top left, you will see the player tabs. In a Skirmish game, the top box will be you. Clicking into the top box under Player will allow you to give yourself a name. The default name is “New Player.” In Skirmish, you can also choose the level of expertise of your opponent. “Easy” enemy will be much easier than the “Hard” enemy.
COUNTRY: Click in the box to the right to determine which of the nine countries you would like to play as or click Random to have the computer select for you.
COLOR: You can also determine the team color of your nation, or have this randomly selected as well.
Computer opponents (or other network players) can be set up in the same way, clicking on the button under the Player menu to activate a player, then clicking on the country and color buttons. By default, computer-controlled enemies are random in terms of country and color.
Below these menus, you will find a series of additional options.
GAME SPEED: Use this slider to adjust the speed of the game units and the time it takes to build structures. If you are having trouble keeping up with the computer opponents, consider slowing the game speed down.
CREDITS: Determines the amount of money you start the mission with.
UNIT COUNT: Determines the size of your starting army.
SHORT GAME: If clicked on, you can defeat the enemy by destroying just his structures. If clicked off, you’ll have to destroy all of the enemy’s units to eliminate him completely.
SUPER WEAPONS: Turn super weapons on or off.
BUILD NEAR ALLY: Allows you to build your structures near your ally’s construction yard.
10
SET TING UP A NET WORK OR SKIRMISH GAME
MCV REPACKS: Allows you to repack your Construction Yard, turning it back into a Mobile Construction Vehicle (MCV), which allows you to move your base. To move a Construction Yard, left-click on the structure and then left-click on the terrain area to which you would like it moved.
CRATES APPEAR: Enables random power-up crates to appear on the map.
If you are happy with the settings you have picked and wish to play, click the Start Game button on the right side of the screen. You can also choose a different map by clicking on the Customize Battle button.
MULTIPLAYER GAME MODES
Red Alert 2 comes jam packed with lots of battlefields to play on. Click on the Customize Battle button. This will take you to a new menu where you will be able to select not only a different map but also different Game Modes for your battle.
In the Game Modes menu, you will see the different types of games available to you. Because many maps are not available for particular game types, you will want to decide on which type
of game you want to play before selecting a map. The game types are:
BATTLE: Any of the options on the Skirmish or Network map can be toggled on or off. Alliances and cooperative victories are supported. This is the default game. An “alliance” will allow you to team up with a friend against an enemy. You will not target that partner as an enemy and you’ll also be able to see areas of the map he can see under the Shroud.
FREE FOR ALL: Identical to Battle, except that alliances are not allowed.
UNHOLY ALLIANCE: Each player starts with both an Allied and a Soviet MCV, and can build along either tech tree.
MEGAWEALTH: Players must capture Oil Derricks with Engineers to gain a steady inflow of cash. No Miners allowed!
LAND RUSH: Players begin in the middle of the battlefield with an MCV. Power-up crates are strewn around the maps and players must rush to set up their base to grab all the goodies. The Shroud begins completely removed.
11
SET TING UP A NET WORK OR SKIRMISH GAME
MEAT GRINDER: This type of game forces players to rely on infantry and tanks.
NAVAL WAR: Players battle on small islands.
COOPERATIVE: Allows you to play with a friend through a specially designed campaign.
CO-OP PLAY
Command & Conquer Red Alert 2 allows two friends to play against preset computer opponents throughout the course of a short campaign. There are five campaigns, some harder than others.
CHOOSING A BATTLEFIELD
When you select a game type, the maps available for that type of game will appear in the menu on the right. Each map has a suggested number of players. Click on the map you wish to play, and you will see a small overview of the map in the top right corner of the screen. Click the Use Map button to return to the Skirmish/Multiplayer menu, where you can start the game.
CREATE A RANDOM MAP
You can create a random map by clicking on the Create Random Map button. Here you will be able to determine the terrain type you wish to use, the time of day of the battle, the climate, the general size of the map, the availability of resources, and the number of players. If you have no preferences, clicking on the Surprise Me button will generate a completely random map. You can preview the map you have created with the Preview Map button.
LOAD MAP: Use a previously saved randomly created map.
SAVE MAP: If the random map you have created appeals to you, you can save it for future play. Saved random maps can be loaded and deleted from this menu as well.
DELETE MAP: Delete a map you’ve created.
USE MAP: Use the created map and return to the Choose Map menu.
PREVIEW MAP: Allows you to sneak a peek at the map you’ve created. A small version of the map will appear in the upper right hand corner of the screen.
12
T H E I N T E R F A C E
T H E I N T E R F A C E
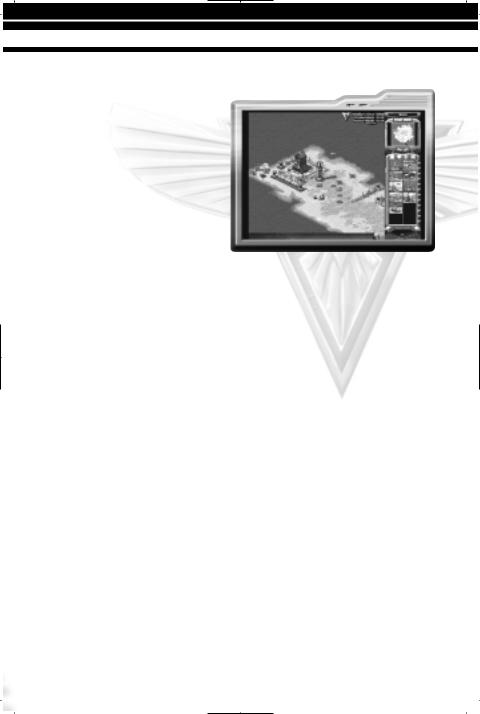
THE TACTICAL MAP
The Tactical Map dominates the bulk of your screen. It is here that you command your troops, build your base, and attack the enemy. The Tactical Map shows only a portion of the actual battlefield. To scroll your view around the battlefield, move your cursor to the edge of the screen. The cursor will change to a green arrow, and your view will scroll in the indicated direction. If you are currently
at an edge of the battlefield, a slash red arrow will appear.
THE GAME MOUSE
Red Alert 2 can be played almost exclusively using a mouse. By left-clicking the mouse you can order and select your troops, choose targets to destroy or move your army around the battlefield. Right-clicking the mouse will cancel or negate orders. You can also scroll the view faster by holding down the right mouse button and dragging the cursor in the direction you wish to scroll.
THE COMMAND BAR
On the right side of the screen you will find the Command Bar. The Command Bar contains a number of important tabs and information you will need to operate your base successfully and efficiently.
CREDITS: At the top of the Command Bar is your current amount of credits. This represents how much money you possess, and indicates how much you can build. Building an army costs money!
13
![]()
T H E I N T E R F A C E
BRIEFING BUTTON:
(Single Player/Co-Op Play Only): This button will allow you to quickly review the objectives of the current mission in Single Player or Co-Op games. It is located at the very top of the command bar.
DIPLOMACY BUTTON:
(Internet/Network Play Only): In Multiplayer, there are no mission objectives or briefings. The Briefing button is replaced by the Diplomacy button. Clicking on this will list all of the active players, show the color of each army in the game, list any alliances currently in effect, tally the number of kills scored by each army and allow you to select which players can receive your in game chat messages.. Allies can always read your messages unless you turn off the “Chat With” option in this screen.
OPTIONS BUTTON
Clicking on this will allow you to load or save your game, abort the mission, or change your keyboard commands, visual display and sound options. This is very similar to the option menu already noted in this manual. It is located at the very top of the command bar.
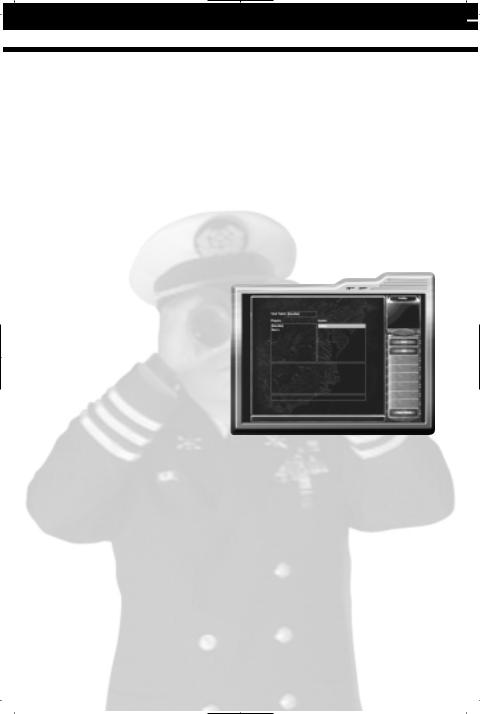
RADAR SCREEN:
On the main screen, you can only see a small portion of the current battlefield. The radar display, located just below the Briefing/Diplomacy and Options buttons, shows you the entire battlefield in a glance. You will be able to see any parts of the map you have revealed through troop
movements. You can use the Radar Screen to move both your troops and your view of the battle. With units selected, click on the Radar Screen to give your troops an order to move to the selected location. If you do not have units selected and click on the radar screen, your view will move to the selected location. This is a way to move your view from place to place on the battlefield quickly and without scrolling. NOTE: The radar screen will appear only if you have a Soviet Radar Tower or Allied Airforce Command and your base has enough power.
REPAIR BUTTON:
In the course of battle, many of your buildings will become damaged. To fix them, click on the small wrench icon located just below the Radar Screen.
This will turn your cursor into a wrench. Clicking with this cursor on a damaged building will cause it to start repairing. The cursor will appear with a slash when over buildings that are in full repair or that cannot be repaired. Keep in mind that repairing a building will cost you credits, but that this is cheaper and faster than allowing your buildings to be destroyed and having to replace them.
14
 Loading…
Периодически на нашем форуме публикуются статьи и гайды по ретро-играм. Удивительно, но многие из этих игр до сих пор пользуются интересом и популярностью. Например Red Alert 2, в которую и сейчас активно играют многие ценители RTS старой школы. Некоторое время назад на нашем форуме был опубликован гайд по данной стратегии. Автор руководства AdreySute предлагает изучить основы игры для участия в сетевых баталиях. Предлагаем ознакомиться со статьёй и поделиться своими воспоминаниями о временах Red Alert 2.

Официальное руководство пользователя Command & Conquer RA2 Yuri’s Revenge на английском в формате .pdf
Для просмотра мануала потребуется программа Acrobat Reader. Книжка содержит описание настроек, режимов игры, юнитов, сооружений и другую полезную информацию.
Скачать (244 КБ)
Об авторе

Читайте также
Need a manual for your PC Command and Conquer Red Alert 2? Below you can view and download the PDF manual for free. There are also frequently asked questions, a product rating and feedback from users to enable you to optimally use your product. If this is not the manual you want, please contact us.
Is your product defective and the manual offers no solution? Go to a Repair Café for free repair services.
Manual

Rating
Let us know what you think about the PC Command and Conquer Red Alert 2 by leaving a product rating. Want to share your experiences with this product or ask a question? Please leave a comment at the bottom of the page.
Are you satisfied with this PC product?
Yes No
Be the first to rate this product
0 votes
Скачать
RA2ManualRev-twR1 9/24/01 11:46 AM Page 63