10
Руководство пользователя Fireface UC © RME
6. Установка оборудования
• Подключите блок питания к Fireface UC и в розетку электросети. Включите Fireface при
помощи переключателя на задней панели
.
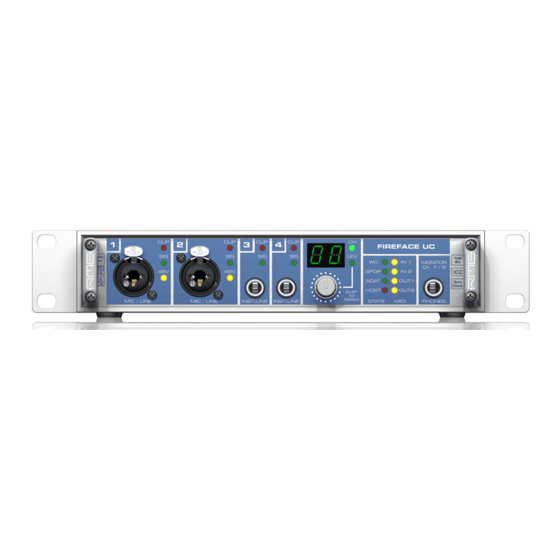
• Убедитесь в корректной версии прошивки при помощи двойного нажатия на ручке энкодера.
Значение
PC на дисплее означает прошивку для системы Windows, AP − для Mac. Двойное
нажатие автоматически переключает между двумя версиями
. Примечание: изменение
возможно только когда устройство ещё не подключено к компьютеру.
• Соедините компьютер и Fireface UC используя кабель USB, который идёт в комплекте.
• Windows обнаружит новое устройство как Fireface UC Win (серийный номер) и вызовет
сообщение об установке драйвера
.
7. Драйвер и прошивка
7.1 Установка драйвера
Для установки драйвера, его необходимо предварительно загрузить с официального сайта RME
по ссылке:
www.rme-audio.de/download/driver_usb_win.zip
Всегда загружайте самую новую
версию драйвера. Данный файл представляет собой запакованный архив. Распакуйте этот архив
в отдельную папку на жёстком диске. После включения устройства (см. раздел 6. Установка
оборудования), в системе будет обнаружено оборудование Fireface UC Win (серийный номер) и
появится диалоговое окно. Убедитесь, что прошивка установлена для
Windows. Если на дисплее
Fireface UC указана версия для Mac, устройство должно быть отключено от компьютера и его
прошивка должна быть изменена (см. выше) до установки драйвера. Не позволяйте Windows
производить автоматический поиск драйвера, всегда указывайте путь к папке с драйвером.
Следуйте дальнейшим инструкциям, которые появятся на экране вашего монитора.
Windows установит драйвер Fireface UC и зарегистрирует
его как новое аудио устройство в системе. После
перезагрузки, в системной панеле появятся значки
TotalMix’а и программного конфигуратора устройства.
Индикатор красного цвета
Host (сообщающий об ошибке) погаснет.
В случае, если Мастер установки оборудования не появляется автоматически после
подключения устройства, не пытайтесь установить драйверы принудительно! Установка
драйверов для оборудования, которое не было инициализировано системой, может
вызывать синий экран при загрузке Windows!
В Windows 7 Microsoft удалила автоматический запуск обновления драйверов. Поэтому
обновление драйвера необходимо запускать вручную после неудачной установки драйвера.
Нажмите клавишу “Windows”, напечатайте “Диспетчер устройств”, выберите в появившемся
списке и нажмите Enter.
Устройство будет показано в списке с жёлтым знаком предупреждения. Обычно оно уже
находится в соответствующей категории “Звуковые, видео и игровые устройства” (Plug & Play
обнаружит мультимедийное устройство). Нажмите правой кнопкой мыши на устройстве и
выберите “Обновить драйвер” из контекстного меню.
Появится окно обновления драйвера. Теперь следуйте дальнейшим инструкциям.
Возможные причины, почему Fireface UC не обнаруживается автоматически:
• Порт USB не активен в системе (проверьте Диспетчер устройств)
• Кабель USB не подключен вообще или подключен некорректно
• Отсутствует питание. После включения Fireface’а на дисплее должна появиться индикация.
Перед вами файл pdf, где представлена инструкция (руководство) на русском для RME Fireface UC. Вы можете скачать ее либо изучить в онлайн режиме.
Подробные сведения об инструкции:
Устройство из раздела: аудио интерфейс
Бренд-производитель: RME
Наименование модели: RME Fireface UC
Язык: Руководство на русском языке
Файл: pdf
Размер файла: 2,30 MB
Скачать инструкцию к HARPER HDT2-1110
ЗАГРУЗИТЬ
Просмотр инструкции онлайн
-
#1
Доброго дня.
Сегодня, после года (или более) нерегулярного сидения, наконец то доделал перевод мануала к RME Fireface UC. Старался сделать максимально возможно, исправлял ошибки оригинального мануала (в основном совсем грубые несоответствия номеров разделов — как будто они документ с бодуна собирали, возможно просто разные люди делали разные разделы).
Поскольку сам имею данный девайс, некоторые вещи проверял на рабочей системе, чтобы построить более грамотный текст перевода.
Мануал в формате .doc с картинками (натыренными из оригинала) и оглавлением.
Перевод делался по мануалу, который шел под ПО TotalMix FX (первоначальный мануал шел по старой версии ПО). Естественно в TotalMix FX доступны те элементы, которые задействованы девайсом, FX функции недоступны.
Для начала я пока не выкладываю мануал на обменник, и не даю ссылку, поскольку не знаю нюансов вопроса политики размещения материалов содержащих сторонние закопирайченные фрагменты (в мануале присутствуют скриншоты из оригинального руководства). Точнее знаю — требуется письменное извещение/разрешение от RME.
Возможно ситуацию можно формализовать после согласования данного вопроса с Андреем Ивановым. Может после проверки орфографии, содержания и соответствия великому и могучему начнут прикладывать печатный вариант при продаже девайса в России…
По поводу остальных вереводов мануалов для других девайсов семейства — пока не планирую. Долго и нудно.:swoon:
P.S.:
Если все-же кто-то хочет получить данный перевод руководства в частном порядке, пишите: [email protected] — вышлю; правки и дополнения приветствуются.

-
#2
Думаю лучше дождаться мануалов одобренных самой компанией производителем, но иногда у кого-то горит ))
-
#3
Ждать можно длительное время, но если они возьмут мой перевод, проверят его и согласуют — потребуется гораздо меньше времени хотя бы для одного устройства.
А остальные пусть сами переводят для российского рынка.
На текущий момент еще вроде не одного официального руководства на русском для продуктов не было представлено.
Не помню точно статью закона о защите прав потребителя — но покупатель кажется вправе требовать с электронным сложным устройством русскоязычного руководства (по крайней мере в разных случаях может к этому аппелировать как причине возврата товара например).
-
#4
Ждать можно длительное время, но если они возьмут мой перевод, проверят его и согласуют — потребуется гораздо меньше времени хотя бы для одного устройства.
А остальные пусть сами переводят для российского рынка.
На текущий момент еще вроде не одного официального руководства на русском для продуктов не было представлено.Не помню точно статью закона о защите прав потребителя — но покупатель кажется вправе требовать с электронным сложным устройством русскоязычного руководства (по крайней мере в разных случаях может к этому аппелировать как причине возврата товара например).
Ну мануал ,они точно брать не будут ) без обид, но эта не та категория, кому нужна такого рода услуга) Поверьте! Даже сам Иванов Андрей не проявит к Вам ни малейшего интереса, исходя из соображений собственно внутрикорпоративной этики ) Другой уровень) Но всё равно спасибо! Уверен, что кому то он точно пригодится!
-
#5
А как можно с ним ознакомиться…мне нужно разобраться с TotalMixFX, они же аналогичны?
-
#6
Ну не будут и ладно)
Повторюсь, если нужно кому — пишите на почту, вышлю (ящик в тексте, в самом верху приведен).
-
#7
Ух ты ж! Спасибо. Я написал на емэйл
-
#8
ага, и я, и я правда я уже один раз писал на мыло, и пока ничего
-
#9
Andrey Ivanov, Спасибо за столь прелестный мануал !
:super:
-
#10
Спасибо за мануал у меня такой вопросик маленький, карта RME Fireface UFX 400 сможет поддержать 32bit 44.1 кГц в Cubase или всётакие её предел 24bit 192 кГц ?
-
#11
Обратите внимание, пользователь заблокирован на форуме.
Запись идет в 24 бита. Не слышал про карту с записью 32 бита)))
-
#13
Обратите внимание, пользователь заблокирован на форуме.
А что вот это такое ? —
Программы, которые поддерживают функцию прямого мониторинга через протокол ASIO (ASIO
Direct Monitoring (ADM): Samplitude, Sequoia, Cubase, Nuendo и т.д.), передают управляющие
команды в TotalMix. Это напрямую отображается в TotalMix’е. Когда фейдер перемещается в ASIO-приложении, то соответствующий фейдер в TotalMix’ебудет также двигаться. TotalMix
отображает все изменения усиления и панорамы ADM в реальном времени.
Ни разу с таким не сталкивался — как это включить?
Последнее редактирование: 14 Окт 2012
-
#14
krosslove_1980, в кубенде например, в настройках, где выбираются дрова, есть галочка Direct monitoring, вот её включаем. Затем создаём трек или берем уже какой нибудь из проекта, включаем на нём запись и мониторниг и не забываем выбрать входной канал с которого будет идти запись. Все , теперь двигая фейдер в нунде на этом канале, мы так же двигаем фейдер и в тотатлмиксе на канале с которого идет запись
-
#15
Обратите внимание, пользователь заблокирован на форуме.
Ага. В кубе нормально работает. То есть на фейдеры тотал микса передается тот же уровень что и в кубе. А вот в сампле отличия на довольно много. То есть в программе значение 0 дб а в тотал миксе +12… Интересно, как практически можно использовать данную фичу?))))…
-
Contents
-
Table of Contents
-
Troubleshooting
-
Bookmarks
Quick Links
User’s Guide
Fireface UC
Portable USB Audio at its best!
™
TotalMix
24 Bit / 192 kHz
™
™
™
SyncAlign
ZLM
SyncCheck
™
SteadyClock
USB 2.0 Digital I/O System
8 + 8 + 2 Channels Analog / ADAT / SPDIF Interface
24 Bit / 192 kHz Digital Audio
36 x 18 Matrix Router
2 x MIDI I/O
Stand-Alone Operation
MIDI Remote Control
Related Manuals for RME Audio Fireface UC
-

Recording Equipment RME Audio Fireface 800 User Manual
Firewire 800 / 400 digital i/o system 10 + 16 + 2 channels analog / adat / spdif interface 24 bit / 192 khz digital audio 56 x 28 matrix router midi i/o stand-alone operation midi remote control stand-alone midi controlled operation (99 pages)
-
Stereo System RME Audio Fireface 800 User Manual
Firewire 800 / 400 digital i/o system 10 + 16 + 2 channels analog / adat / spdif interface 24 bit / 192 khz digital audio 56 x 28 matrix router midi i/o stand-alone operation midi remote control stand-alone midi controlled operation (95 pages)
-
-
Accessories RME Audio Fireface UFX User Manual
Usb 2.0 / firewire 400 digital i/o system 12 + 16 + 2 channels analog / adat / aes interface 24 bit / 192 khz digital audio 60 x 30 matrix router 2 x midi i/o full stand-alone operation midi remote control (110 pages)
-
-
-
Accessories RME Audio Fireface 400 User Manual
Firewire 400 digital i/o system 8 + 8 + 2 channels analog / adat / spdif interface 24 bit / 192 khz digital audio 36 x 18 matrix router midi i/o stand-alone operation midi remote control stand-alone midi controlled operation (91 pages)
-
Accessories RME Audio Fireface 400 User Manual
Firewire 400 digital i/o system 8 + 8 + 2 channels analog / adat / spdif interface 24 bit / 192 khz digital audio 36 x 18 matrix router midi i/o stand-alone operation midi remote control stand-alone midi controlled operation (100 pages)


-
-
Accessories RME Audio Babyface User Manual
Usb 2.0 digital i/o system 22 channels analog / adat / spdif interface 24 bit / 192 khz digital audio 20 x 12 matrix router midi i/o midi remote control stand-alone operation class compliant operation (94 pages)
-
-
-
-
-
-


Summary of Contents for RME Audio Fireface UC
-
Page 1
User’s Guide Fireface UC Portable USB Audio at its best! ™ TotalMix 24 Bit / 192 kHz ™ ™ ™ SyncAlign SyncCheck ™ SteadyClock USB 2.0 Digital I/O System 8 + 8 + 2 Channels Analog / ADAT / SPDIF Interface 24 Bit / 192 kHz Digital Audio 36 x 18 Matrix Router 2 x MIDI I/O… -
Page 2: Table Of Contents
16.2 Clock Modes — Synchronization ……32 Mac OS X FAQ 17.1 Round about Driver Installation……33 17.2 MIDI doesn’t work ……….33 17.3 Repairing Disk Permissions ………33 17.4 Supported Sample Rates……..33 17.5 Channel Count under Core Audio……34 17.6 Various Information ……….34 User’s Guide Fireface UC © RME…
-
Page 3
26.7.2 MIDI Page ………… 64 26.7.3 OSC Page………… 65 26.8 Hotkeys and Usage ……….66 26.9 Menu Options…………67 The Matrix 27.1 Overview ………….. 68 27.2 The User Interface ……….68 27.3 Usage…………..68 User’s Guide Fireface UC © RME… -
Page 4
31.6 AES/EBU – SPDIF ……….85 31.7 Noise Level in DS / QS Mode ……86 31.8 SteadyClock …………86 Diagrams 32.1 Block Diagram Fireface UC ………87 32.2 Connector Pinouts……….88 Miscellaneous Accessories ………….90 Warranty…………..90 Appendix …………..91 Declaration of Conformity ……..92 User’s Guide Fireface UC © RME… -
Page 5
User’s Guide Fireface UC General User’s Guide Fireface UC © RME… -
Page 6: Introduction
• SyncCheck tests and reports the synchronization status of input signals • Word clock input and output • 2 x MIDI I/O, 32 channels high-speed MIDI • 1 x Hi-power headphone output • DIGICheck DSP: Level meter in hardware, peak- and RMS calculation User’s Guide Fireface UC © RME…
-
Page 7: First Usage — Quick Start
The State LEDs (WC, SPDIF, ADAT) indicate a valid input signal separately for each digital input. Additionally, RME’s exclusive SyncCheck indicates if one of these inputs is locked, but not synchronous to the others, in which case the LED will flash. See also chapter 9.8/16.2, Clock Modes — Synchronization.
-
Page 8: Quick Start
The Fireface UC remembers all settings, and loads these automatically when switched on. With this, the Fireface UC can be used stand-alone after setting it up accordingly, replacing lots of dedicated devices (see chapter 21). User’s Guide Fireface UC © RME…
-
Page 9: Installation And Operation — Windows
User’s Guide Fireface UC Installation and Operation — Windows User’s Guide Fireface UC © RME…
-
Page 10: Hardware Installation
Win (see above) prior to installing the drivers. Insert the RME Driver CD into your CD-ROM drive, and follow further instructions which appear on your computer screen. The driver files are located in the directory Fireface_USB on the RME Driver CD.
-
Page 11: Driver Update
Settings dialog, and the registration of the ASIO driver. These entries can be re- moved from the registry by a software de-installation request. This request can be found (like all de-installation entries) in Control Panel, Software. Click on the entry ‘RME Fireface USB’. 7.4 Firmware Update The Flash Update Tool updates the firmware of the Fireface UC to the latest version.
-
Page 12: Configuring The Fireface Uc
(see chapter 13/14). The string Errors does not refer to buffer errors, but USB transmission errors. The display will be reset on any start of a playback/record. More information can be found in chapter 35.3. User’s Guide Fireface UC © RME…
-
Page 13
In Clock Mode the clock reference is shown. See also chapter 31.1. The About tab includes information about the current driver version as well as the current firm- ware version of the Fireface UC. User’s Guide Fireface UC © RME… -
Page 14: Settings Dialog — Pitch
Therefore the internal clock can be set to 44.1 kHz or 48 kHz, but not to a value in be- tween. SteadyClock, RME’s sensational Low Jitter Clock System, is based on a Direct Digital Synthesizer (DDS). This superior circuitry can generate nearly any frequency with highest pre- cision.
-
Page 15: Settings Dialog — Gain
Basically Timecode can also be used as clock source. However, the calculation of the position information is less precise then. Recommended is a clocking of the Fireface UC with a clock signal (for example Word) directly from the device that sends the Timecode. User’s Guide Fireface UC © RME…
-
Page 16: Operation And Usage
Therefore the driver of the Fireface UC includes a workaround: the sample rate can be set glob- ally for all WDM devices within the Settings dialog, see chapter 8.1. User’s Guide Fireface UC © RME…
-
Page 17: Dvd-Playback (Ac-3/Dts)
(tab Sounds, scheme ‘No audio’). Note 2: The DVD player will be synced backwards from the Fireface. This means when using AutoSync and/or word clock, the playback speed and pitch follows the incoming clock signal. User’s Guide Fireface UC © RME…
-
Page 18: Notes On Wdm
(the basic and the interleaved device). Multi-Channel using WDM The WDM Streaming device Loudspeaker (Analog 1+2) of the RME driver can operate as usual stereo device, or as up to 8-channel device. An 8-channel playback using the Windows Media Player requires the speaker setup 7.1 Sur- round.
-
Page 19: Channel Count Under Wdm
RME’s sophisticated tool DIGICheck is an exception to this rule. It operates like an ASIO host, using a special technique to access playback channels directly. Therefore DIGICheck is able to analyse and display playback data from any software, no matter which format it uses.
-
Page 20: Analog Recording
An automated control of real-time monitoring can be achieved by Steinberg’s ASIO protocol with RME’s ASIO drivers and any ASIO 2.0 compatible program. When ‘ASIO Direct Monitoring’ has been switched on, the input signal is routed in real-time to the output whenever a recording is started (punch-in).
-
Page 21: Clock Modes — Synchronization
If the input sample rate is different then there will be no Sync indication. With RME’s AutoSync and SyncCheck, finally anyone can master this common source of error, previously one of the most complex issues in the digital studio world.
-
Page 22: Operation Under Asio
Fireface UC ADAT 5 to 6 Fireface UC ADAT 5 to 6 Fireface UC ADAT 5 to 6 Fireface UC ADAT 7 to 8 Fireface UC ADAT 7 to 8 Fireface UC ADAT 7 to 8 User’s Guide Fireface UC © RME…
-
Page 23: Known Problems
Note: TotalMix is part of the hardware of each Fireface. Up to three mixers are available, but these are separated and can’t interchange data. Therefore a global mixer for all units is not possible. User’s Guide Fireface UC © RME…
-
Page 24: Digicheck Windows
• Completely multi-client. Open as many measurement windows as you like, on any chan- nels and inputs or outputs! To install DIGICheck, go to the DIGICheck directory on the RME Driver CD and run setup.exe. Follow the instructions prompted on the screen.
-
Page 25: Hotline — Troubleshooting
13. Hotline – Troubleshooting 13.1 General The newest information can always be found on our website www.rme-audio.com, section FAQ, Latest Additions. Important: Check that the correct (PC = Windows, AP = Mac) firmware is loaded by a double- click on the rotary encoder.
-
Page 26
User’s Guide Fireface UC © RME… -
Page 27
User’s Guide Fireface UC Mac OS X – Installation and Operation User’s Guide Fireface UC © RME… -
Page 28: Hardware Installation
15.1 Driver Installation After the Fireface has been connected, (see 14. Hardware Installation) install the drivers from the RME Driver CD. The driver files are located in the folder Fireface_USB. Installation works automatically by a double-click on the file Fireface USB.pkg.
-
Page 29: Driver Update
The Safety BIOS can also be activated manually: Push the rotary encoder button while switch- ing on the unit. This method is also useful to temporarily deactivate a newer firmware. With pressed button the older version of the firmware will be loaded. User’s Guide Fireface UC © RME…
-
Page 30: Configuring The Fireface
Properties For to select the unit to be configured. On the right of it the current firmware and driver version is shown. User’s Guide Fireface UC © RME…
-
Page 31
Consumer state. Note: The optical input detects the incoming format automatically. SPDIF coax. The coaxial SPDIF output can have the Channel Status Consumer or Professional. For further details please refer to chapter 24.2. User’s Guide Fireface UC © RME… -
Page 32: Clock Modes — Synchronization
In this case, the Clock Source should be set temporarily to SPDIF. RME’s exclusive SyncCheck technology (first implemented in the Hammerfall) enables an easy to use check and display of the current clock status. Input Status indicates whether there is a valid signal (Lock, No Lock) for each input (Word Clock, ADAT, SPDIF and LTC), or if there is a valid and synchronous signal (Sync).
-
Page 33: Mac Os X Faq
17. Mac OS X FAQ 17.1 Round about Driver Installation The driver with the file suffix zip provided by RME is a compressed archive. Zip is directly sup- ported by OS X, a double click on the file is all one needs to do.
-
Page 34: Channel Count Under Core Audio
1/2, without further delay/latency. Use Speaker Setup to freely configure the playback to all available channels. Even multichan- nel playback (Surround, DVD Player) can be set up this way. User’s Guide Fireface UC © RME…
-
Page 35: Using More Than One Fireface
• Completely multi-client. Open as many measurement windows as you like, on any chan- nels and inputs or outputs! To install DIGICheck, go to the DIGICheck directory on the RME Driver CD and run setup.exe. Follow the instructions prompted on the screen.
-
Page 36: Hotline — Troubleshooting
20. Hotline – Troubleshooting The newest information can always be found on our website www.rme-audio.com, section FAQ, latest Additions. Important: Check that the correct (PC = Windows, AP = Mac) firmware is loaded by a double- click on the rotary encoder.
-
Page 37: Stand-Alone Operation, Connections
User’s Guide Fireface UC Stand-Alone Operation and Connections User’s Guide Fireface UC © RME…
-
Page 38: Stand-Alone Operation
Pushing the knob for more than a second activates the Link (Gang) mode. The display will show off or on. In stereo (on) mode, the display only presents the left channels of a stereo pair (L1, L3, L5…). The gain and volume setting is then valid for both channels. User’s Guide Fireface UC © RME…
-
Page 39: 8-Channel Ad/Da-Converter
The Matrix in TotalMix enables you to route and link all inputs and outputs completely freely. All the above functionalities are even available simultaneously, can be mixed and combined in many ways. Simply said: the Fireface UC is a perfect analog/digital routing matrix! User’s Guide Fireface UC © RME…
-
Page 40: Analog Inputs
+4 dBu nominal level. The above levels are also found in our ADI-8 series of AD/DA converters, the Multiface, and even in our Mic-Preamps QuadMic and OctaMic. Therefore all RME devices are fully compati- ble to each other.
-
Page 41: Instrument / Line Front
Overall the inputs 3/4 can work with levels from –16 dBu up to +25 dBu. Two LEDs display a present signal (from –65 dBFS on) and warn against overload (-2 dBFS). User’s Guide Fireface UC © RME…
-
Page 42: Analog Outputs
+2 dBV 12 dB The above levels are also found in our ADI-8 series of AD/DA converters, the Multiface, and even in our Mic-Preamps QuadMic and OctaMic. Therefore all RME devices are fully compati- ble to each other. 23.2 Phones (7/8) Channels 7/8 of the Fireface are available on the front via one 1/4″…
-
Page 43: Digital Connections
The ADAT optical input of the Fireface UC is fully compatible with all ADAT optical outputs. RME’s unsurpassed Bitclock PLL prevents clicks and drop outs even in extreme varipitch op- eration, and guarantees a fast and low jitter lock to the digital input signal. A usual TOSLINK cable is sufficient for connection.
-
Page 44: Midi
However, due to the limited bandwidth of MIDI, this kind of application will often show various problems. Note: The MIDI input LED displays any kind of MIDI activity, including MIDI Clock, MTC and Active Sensing. The latter is sent by most keyboards every 0.3 seconds. User’s Guide Fireface UC © RME…
-
Page 45: Word Clock
WC LED is lit, and the Settings dialog shows either Lock or Sync (see chapter 35.1). Thanks to RME’s Signal Adaptation Circuit, the word clock input still works correctly even with heavily mis-shaped, dc-prone, too small or overshoot-prone signals. Thanks to automatic signal centering, 300 mV (0.3V) input level is sufficient in principle.
-
Page 46: Technical Description And Background
22 MHz from a slow word clock of 44.1 kHz is no problem anymore. Additionally, jitter on the input signal is highly rejected, so that even in real world usage the re-gained clock signal is of highest quality. User’s Guide Fireface UC © RME…
-
Page 47: Cables And Termination
Lock LED, but appears on the monitor, i.e. the user can check immediately whether a valid word clock signal is present and is currently being used. The Input State also displays the frequency of the current word clock signal, measured by the hardware. User’s Guide Fireface UC © RME…
-
Page 48
User’s Guide Fireface UC © RME… -
Page 49: Totalmix Fx
User’s Guide Fireface UC TotalMix FX User’s Guide Fireface UC © RME…
-
Page 50: Totalmix: Routing And Monitoring
TotalMix provides the means to mix and monitor these on a single stereo output. • Mixing of the input signal to the playback signal (complete ASIO Direct Monitoring). RME not only is the pioneer of ADM, but also offers the most complete implementation of the ADM functions.
-
Page 51
User’s Guide Fireface UC © RME… -
Page 52: The User Interface
Now move the faders up from all sources — input and playback channels — that you want to hear at the submix output. The following chapters explain step by step all functions of the user interface. User’s Guide Fireface UC © RME…
-
Page 53: The Channel
The arrow symbol at the bottom minimizes the channel width to that of the level meters. An- other click maximizes it again. A mouse click with held Ctrl key causes all channels to the right to enlarge and minimize at once. User’s Guide Fireface UC © RME…
-
Page 54: Settings
In the View Options / Routing the function Trim Gains can be globally switched on and off for all channels. The global Trim mode is recommended when using TotalMix FX as live mixing desk. User’s Guide Fireface UC © RME…
-
Page 55
Main Out. With this any hardware output can be controlled and listened to through the monitoring output very conveniently. Using the option Assign / Cue to in the Control Room section, Cue can also be used with any of the Phones outputs. User’s Guide Fireface UC © RME… -
Page 56: Section Control Room
AN 1 to 8, SPDIF and AS 1/2, as at 192 kHz the other ADAT channels are not available anymore. The output for the Cue signal, which is usually Main, can also be set to one of the Phones outputs. User’s Guide Fireface UC © RME…
-
Page 57: The Control Strip
Fader. A Shift-click on a fader adds the fader to the temporary fader group. All faders now marked yellow are ganged, and move simultaneously in a relative way. The temporary fader group is deleted by a click on the F symbol. User’s Guide Fireface UC © RME…
-
Page 58: View Options
2 Rows. Switches the mixer view to 2 rows. Hardware Inputs and Software Playbacks are placed side by side. This view saves a lot of space, especially in height. O-Names. Display of the original names of channels when they had been renamed by the user. User’s Guide Fireface UC © RME…
-
Page 59: Snapshots — Groups
Hide Channel in MIDI Remote 1. The selected channels are hidden for MIDI remote (CC and Mackie Protocol). Hide Channel in OSC Remote 1. The selected channels are hidden for OSC remote con- trol. User’s Guide Fireface UC © RME…
-
Page 60
Layout Preset. That makes it very easy to see and to verify which channels are mixed/routed to the current output. Sub makes checking and verifying of mixes, but also the mix editing itself, a lot easier, and maintains perfect overview even with lots of channels. User’s Guide Fireface UC © RME… -
Page 61: Scroll Location Marker
When the TotalMix FX window is intentionally made small in width, so only a few channels are shown. • When some or all EQ or Dynamics panels are open. Then all relevant settings are always visible, but require a lot of space horizontally. User’s Guide Fireface UC © RME…
-
Page 62: Preferences
UC, overwriting the current ones in the unit. Graphics Use D2D (Change requires restart). Default on. Can be deactivated to use a compatible but CPU-taxing graphics mode, in case graphics problems show up. User’s Guide Fireface UC © RME…
-
Page 63: Settings
Dim. Amount of attenuation for the Main Out in dB. External Input. Selects the stereo input that replaces the mix signal on the Main Out when activated. The volume of the stereo signal is adjusted by the slider Gain. User’s Guide Fireface UC © RME…
-
Page 64: Midi Page
TotalMix level meters in the preferences. Note: When MIDI Out is set to NONE then TotalMix FX can still be controlled by Mackie Control MIDI commands, but the 8-channel block is not marked as remote target. User’s Guide Fireface UC © RME…
-
Page 65: Osc Page
Options Activates Send Peak Level. transmission of the peak level meter data. Peak Hold activates the peak hold function as set up for the TotalMix level meters in the preferences. User’s Guide Fireface UC © RME…
-
Page 66: Hotkeys And Usage
Copy Submix. Copies the whole submix of the selected output into memory. All input and play- back faders from that routing will be included. Paste Submix. Writes the previously copied submix on to the now selected output. User’s Guide Fireface UC © RME…
-
Page 67: Menu Options
Reset output volumes. All faders of the third row will be set to 0 dB, Main and Speaker B to -10 dB. Reset channel names. Removes all names assigned by the user. Total Reset. Playback routing 1:1 with mixdown to Main Out. Switches off all other func- tions. User’s Guide Fireface UC © RME…
-
Page 68: The Matrix
View options, as they don’t make sense here. Instead the button Mono Mode lets you decide whether all the actions per- formed in the Matrix are valid for two channels or just one. User’s Guide Fireface UC © RME…
-
Page 69: Tips And Tricks
– the Main Out and the other Hardware Output. Even better: the faders of both outputs are still active, so the signal level can be adjusted individually. User’s Guide Fireface UC © RME…
-
Page 70: Recording A Submix — Loopback
The block diagram shows how the software’s input signal is played back, and fed back from the hardware output to the software input. User’s Guide Fireface UC © RME…
-
Page 71: Ms Processing
Low Cut, Expander, Compressor or Delay. The most basic application is the manipulation of the stereo width: a change of the level of the side channel allows to manipulate the stereo width from mono to stereo up to extended. User’s Guide Fireface UC © RME…
-
Page 72: Midi Remote Control
Snapshot 1 — 8 select Main Out F10 — F12 select Cue Phones 1 — 3 *Tested with Behringer BCF2000 Firmware v1.07 in Mackie Control emulation for Steinberg mode and with Mackie Control under Mac OS X. User’s Guide Fireface UC © RME…
-
Page 73: Setup
TotalMix also supports the 9th fader of the Mackie Control. This fader (labelled Master) will con- trol the stereo output fader (lowest row) which is set up as Main Out in the Control Room sec- tion. User’s Guide Fireface UC © RME…
-
Page 74: Midi Control
16 Controller numbers are used: 102 up to 117 (= hex 66 to 75). With these 16 Controllers (= faders) and 4 MIDI channels each per row, up to 64 faders can be controlled per row (as re- quired by the HDSPe MADI). User’s Guide Fireface UC © RME…
-
Page 75: Loopback Detection
27.8.3. An OSC implementation chart can be downloaded from the RME website: http://www.rme-audio.de/download/osc_table_totalmix.zip RME offers a free iPad template for the iOS app TouchOSC (by Hexler, available in the Apple App-Store): http://www.rme-audio.de/download/tosc_tm_ipad_template.zip The RME forum hosts further information, more templates (iPhone…) and lots of useful user feedback.
-
Page 76: Stand-Alone Midi Control
ARROW DOWN or Assignable2/PAGE- move one row down Master Mute MUTE Ch. 1 – 8 Mute SELECT Ch. 1 – 8 Select REC Ch. 1 – 8 select output bus (current submix) User’s Guide Fireface UC © RME…
-
Page 77: Technical Reference
User’s Guide Fireface UC Technical Reference User’s Guide Fireface UC © RME…
-
Page 78: Technical Specifications
• Maximum input level XLR, Gain 65 dB: -55 dBu • Maximum input level TRS, Gain +0 dB: +21 dBu • Maximum input level TRS, Gain +65 dB: -44 dBu • CLIP LED: -2 dBFS • SIG LED: -65 dBFS User’s Guide Fireface UC © RME…
-
Page 79: Midi
• Level range: 1.0 Vpp – 5.6 Vpp • Lock Range: 27 kHz – 200 kHz • Jitter when synced to input signal: < 1 ns • Jitter suppression: > 30 dB (2.4 kHz) User’s Guide Fireface UC © RME…
-
Page 80: Digital Outputs
• Temperature range: +5° up to +50° Celsius (41° F up to 122°F) • Relative humidity: < 75%, non condensing • Included power supply: Internal switching PSU, 100 — 240 V AC, 2 A, 24 Watts User’s Guide Fireface UC © RME…
-
Page 81: Technical Background
The same information is presented in the Fireface’s Settings dialog. In the status display Input State the state of all clocks is decoded and shown as simple text (No Lock, Lock, Sync). User’s Guide Fireface UC © RME…
-
Page 82: Latency And Monitoring
31.2 Latency and Monitoring The term Zero Latency Monitoring has been introduced by RME in 1998 for the DIGI96 series of audio cards. It stands for the ability to pass-through the computer’s input signal at the inter- face directly to the output. Since then, the idea behind has become one of the most important features of modern hard disk recording.
-
Page 83: Usb Audio
Fireface is connected. With multiple devices it can also be checked if they are connected to the same controller. Furthermore this information can be used to operate an external USB drive without disturbing the Fireface UC, by simply connecting the drive to the other controller. User’s Guide Fireface UC © RME…
-
Page 84: Ds — Double Speed
As the transmission of quad rate signals is done at standard sample rate (Single Speed), the ADAT output still delivers 44.1 kHz or 48 kHz. The SPDIF (AES) output of the Fireface UC provides 192 kHz as Single Wire only. User’s Guide Fireface UC © RME…
-
Page 85: Aes/Ebu — Spdif
The table shows that a Professional-coded signal would lead to malfunctions for copy prohibi- tion and emphasis, if being read as Consumer-coded data. Nowadays many devices with SPDIF input can handle Professional subcode. Devices with AES3 input almost always accept Consumer SPDIF (passive cable adapter necessary). User’s Guide Fireface UC © RME…
-
Page 86: Noise Level In Ds / Qs Mode
When limiting the measurement range from 20 Hz to 20 kHz (so called audio bandpass) the value would be -110 dB again. This can be verified with RME’s DIGICheck. The function Bit Statistic & Noise measures the noise floor by Limited Bandwidth, ignoring DC and ultrasound.
-
Page 87: Diagrams
32. Diagrams 32.1 Block Diagram Fireface UC User’s Guide Fireface UC © RME…
-
Page 88: Connector Pinouts
TRS plug to TS plugs is required. The pin assignment follows interna- tional standards. The left channel is connected to the tip, the right chan- nel to the ring of the TRS jack/plug. User’s Guide Fireface UC © RME…
-
Page 89: Miscellaneous
User’s Guide Fireface UC Miscellaneous User’s Guide Fireface UC © RME…
-
Page 90: Accessories
33. Accessories RME offers several optional components for the Fireface UC: Part Number Description Optical cable for SPDIF and ADAT operation: OK0050 Optical cable, TOSLINK, 0.5 m (1.6 ft) OK0100 Optical cable, TOSLINK, 1 m (3.3 ft) OK0200 Optical cable, TOSLINK, 2 m (6.6 ft) OK0300 Optical cable, TOSLINK, 3 m (9.9 ft)
-
Page 91: Appendix
Current driver version: W: 1.025, Mac OS X: 1.76, Firmware 116 Although the contents of this User’s Guide have been thoroughly checked for errors, RME can not guarantee that it is correct throughout. RME does not accept responsibility for any mislead- ing or incorrect information within this guide.
-
Page 92: Declaration Of Conformity
For this the device has to be sent free to the door to: IMM Elektronik GmbH Leipziger Straße 32 D-09648 Mittweida Germany Shipments not prepaid will be rejected and returned on the original sender’s costs. User’s Guide Fireface UC © RME…
В представленном списке руководства для конкретной модели Звуковой карты — RME Fireface UC. Вы можете скачать инструкции к себе на компьютер или просмотреть онлайн на страницах сайта бесплатно или распечатать.
В случае если инструкция на русском не полная или нужна дополнительная информация по этому устройству, если вам нужны
дополнительные файлы: драйвера, дополнительное руководство пользователя (производители зачастую для каждого
продукта делают несколько различных документов технической помощи и руководств), свежая версия прошивки, то
вы можете задать вопрос администраторам или всем пользователям сайта, все постараются оперативно отреагировать
на ваш запрос и как можно быстрее помочь. Ваше устройство имеет характеристики:Тип: внешняя, Тип подключения: USB 2.0, Необходимость дополнительного питания: есть, Возможность вывода многоканального звука: есть, Разрядность ЦАП: 24 бит, Максимальная частота ЦАП (стерео): 192 кГц, полные характеристики смотрите в следующей вкладке.
Для многих товаров, для работы с RME Fireface UC могут понадобиться различные дополнительные файлы: драйвера, патчи, обновления, программы установки. Вы можете скачать онлайн эти файлы для конкретнй модели RME Fireface UC или добавить свои для бесплатного скачивания другим посетителями.
Если вы не нашли файлов и документов для этой модели то можете посмотреть интсрукции для похожих товаров и моделей, так как они зачастую отличаются небольшим изменениями и взаимодополняемы.
Обязательно напишите несколько слов о преобретенном вами товаре, чтобы каждый мог ознакомиться с вашим отзывом или вопросом. Проявляйте активность что как можно бльше людей смогли узнать мнение настоящих людей которые уже пользовались RME Fireface UC.
Дмитрий
2017-07-25 18:19:14
Только приобрел, выглядит хорошо, металлический корпус.
Надеюсь оправдает все ожидания!
Sound SF
2017-12-10 21:55:37
классная карта
Основные и самые важные характеристики модели собраны из надежных источников и по характеристикам можно найти похожие модели.
| Общие характеристики | |
| Тип | внешняя |
| Тип подключения | USB 2.0 |
| Необходимость дополнительного питания | есть |
| Возможность вывода многоканального звука | есть |
| Звуковые характеристики | |
| Разрядность ЦАП | 24 бит |
| Максимальная частота ЦАП (стерео) | 192 кГц |
| Аналоговые входы | |
| Входных аналоговых каналов (балансных) | 8 (8) |
| Входных разъемов jack 6.3 мм | 8 |
| Входных разъемов XLR | 2 |
| Микрофонных входов | 2 |
| Фантомное питание | есть |
| Аналоговые выходы | |
| Выходных аналоговых каналов | 8 |
| Выходных аналоговых разъемов | 7 |
| Прочие разъемы и интерфейсы | |
| Цифровые интерфейсы S/PDIF | коаксиальный вход, коаксиальный выход |
| Поддержка AES/EBU | есть |
| Поддержка ADAT | есть |
| Поддержка внешней синхронизации | есть |
| MIDI-интерфейсы — входы/выходы | 2 / 2 |
| Поддержка стандартов | |
| Поддержка EAX | нет |
| Поддержка ASIO | v. 2.0 |
Здесь представлен список самых частых и распространенных поломок и неисправностей у Звуковых карт. Если у вас такая поломка то вам повезло, это типовая неисправность для RME Fireface UC и вы можете задать вопрос о том как ее устранить и вам быстро ответят или же прочитайте в вопросах и ответах ниже.
| Название поломки | Описание поломки | Действие |
|---|---|---|
| Встроенная Звуковая Карта Вышла Из Строя | ||
| Не Включается | ||
| Перегорели Процессоры | ||
| Tc Konnekt 6 | Питание Через Кабель Есть,Но Панель Управления Пишет No Device | |
| Красный Индикатор | При Подключении Загорается Красный Индикатор И Тухнет, Хотя Должен Заниматься Зеленый И Подключаться | |
| Focusrite Saffire Le | Правый Выход (Гнездо 2)Работает На 25%Тише | |
| При Проверке Колонок 1 Из Колонок Не Воспроизводит | На Виндомс 10 Захожу В Настройки Подключить 5.1 И Там Воспроизводится Левая Передняя Пр-Ва Передняя Центральная Сабвуфер Здания Пр-Ва А Левая Нет И Когда Включа | |
| Infrasonic Quartet | При Воспроизведении Звукового Файла Через Некоторое Время Появляется Хрипы В Обоих Каналах |
В нашей базе сейчас зарегестрированно 18 353 сервиса в 513 города России, Беларусии, Казахстана и Украины.

ASUS
⭐
⭐
⭐
⭐
⭐
Адресс:
Сущевский Вал, д.23
Телефон:
74999630187
Сайт:
n/a
Время работы
Время работы не указано
МУЗЫКАЛЬНЫЙ СЕРВИС-ЦЕНТР
⭐
⭐
⭐
⭐
⭐
Адресс:
улица Гурьянова дом 30
Телефон:
74997050606
Сайт:
n/a
Время работы
Будни: с 1000 до 1900
Суббота: с 1000 до 1900
Воскресенье: выходной
РОССЕРВИС-АЙТИ
⭐
⭐
⭐
⭐
⭐
Адресс:
Большой знаменский переулок, дом 2, строение 7
Телефон:
74956416530
Сайт:
n/a
Время работы
Будни: с 0800 до 2300
Суббота: с 0800 до 2300
Воскресенье: с 1000 до 2100
REMOBI
⭐
⭐
⭐
⭐
⭐
Адресс:
ул. Барклая, 8, ТЦ Горбушка
Телефон:
74993222524
Сайт:
n/a
Время работы
Ежедневно: с 1000 до 2100
REMOBI
⭐
⭐
⭐
⭐
⭐
Адресс:
Ленинградский пр., 62А, ТЦ Галерея
Телефон:
74993222524
Сайт:
n/a
Время работы
Ежедневно: с 1000 до 2100