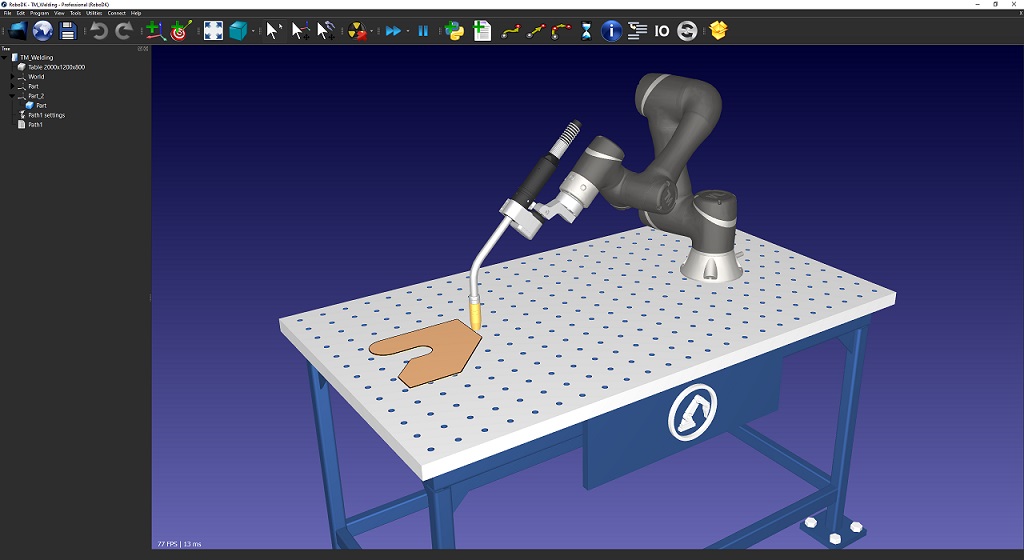
Reference Frames
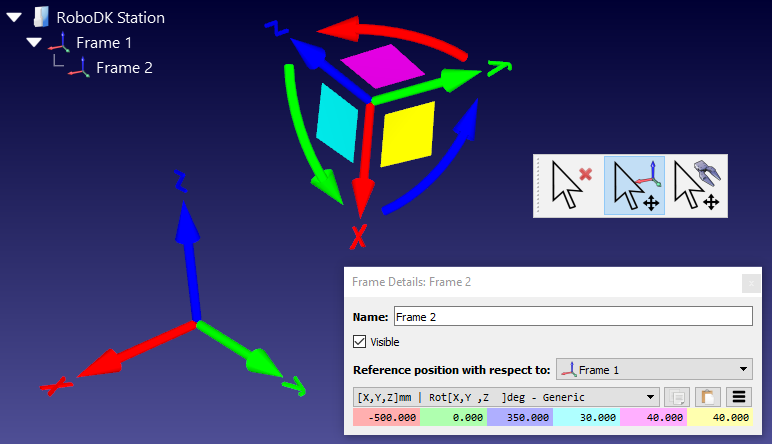
Reference frames allow placing objects with respect to each other. Drag & drop any reference frame or object in the Station Tree to create nested reference frames.
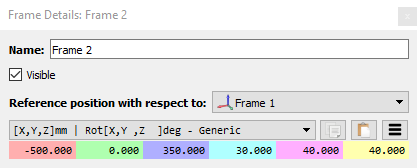
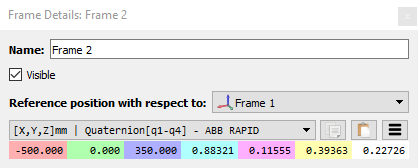
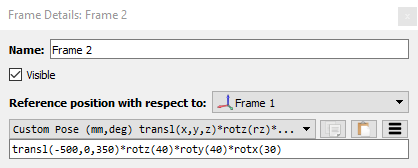
Hold the Alt key to move Reference Frames by selecting them on the 3D view. It is also possible to manually enter the translation and rotation values specific to any robot, including quaternion values and different types of Euler rotations.
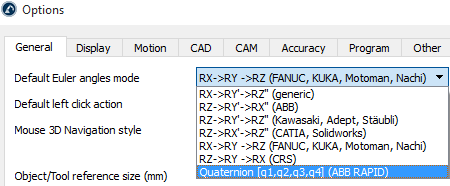
Select the preferred Euler orientation in the menu: Tools-Options-General-Default Euler Angles mode.
Select the buttons on the right to copy/paste the values from/to an array of values or as a 4×4 pose.
Learn more
Default Euler angles
Quaternion values
Custom translation&orientation
Keyboard Shortcuts

Create a robot tool (TCP)
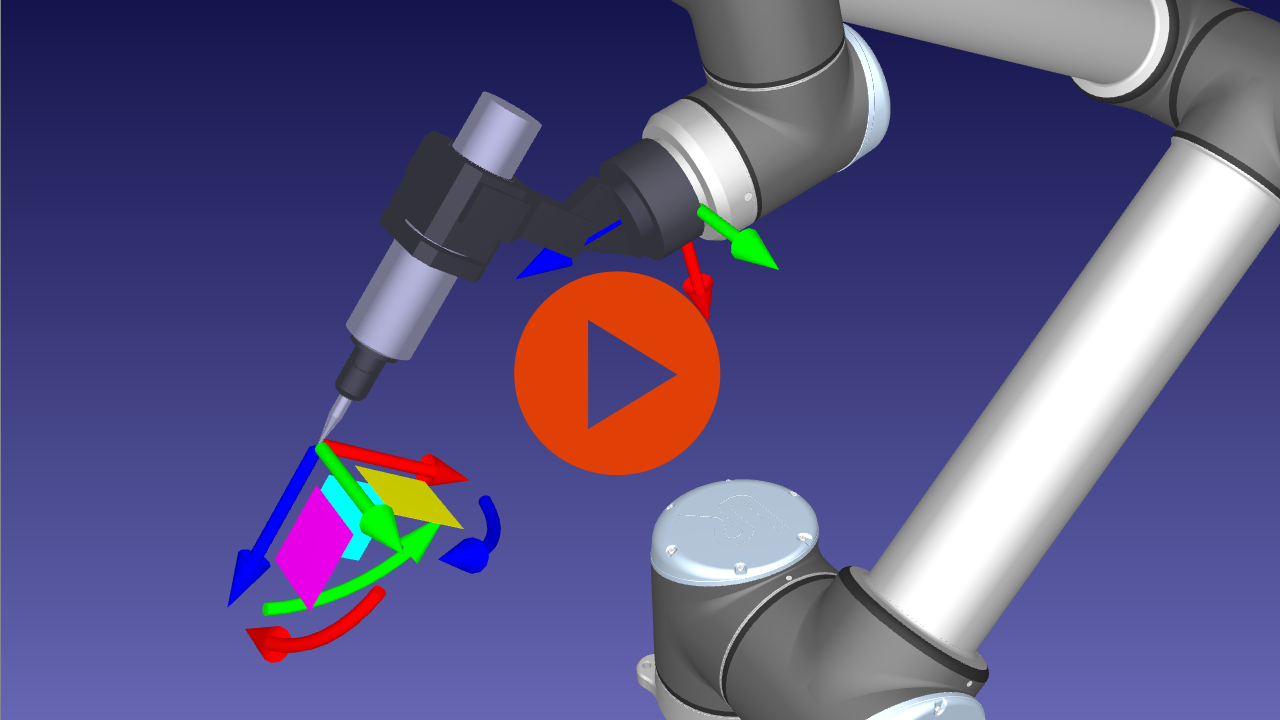
Robot tools can be easily created by importing a 3D object and drag & dropping it to the robot. The object is then automatically converted into a tool.
Import 3D objects to model the cell. Accepted 3D formats include STL, IGES and STEP files.
Learn more about creating robot tools in the documentation
Export a simulation in 3D format
Once a simulation is ready, export it as a 3D HTML simulation or as a 3D PDF. This feature allows to easily sharing layout and simulation concepts.
Example of a 3D HTML simulation document
Example of a 3D PDF simulation document
(3D PDF simulations must be opened with Acrobat Reader, not a browser)
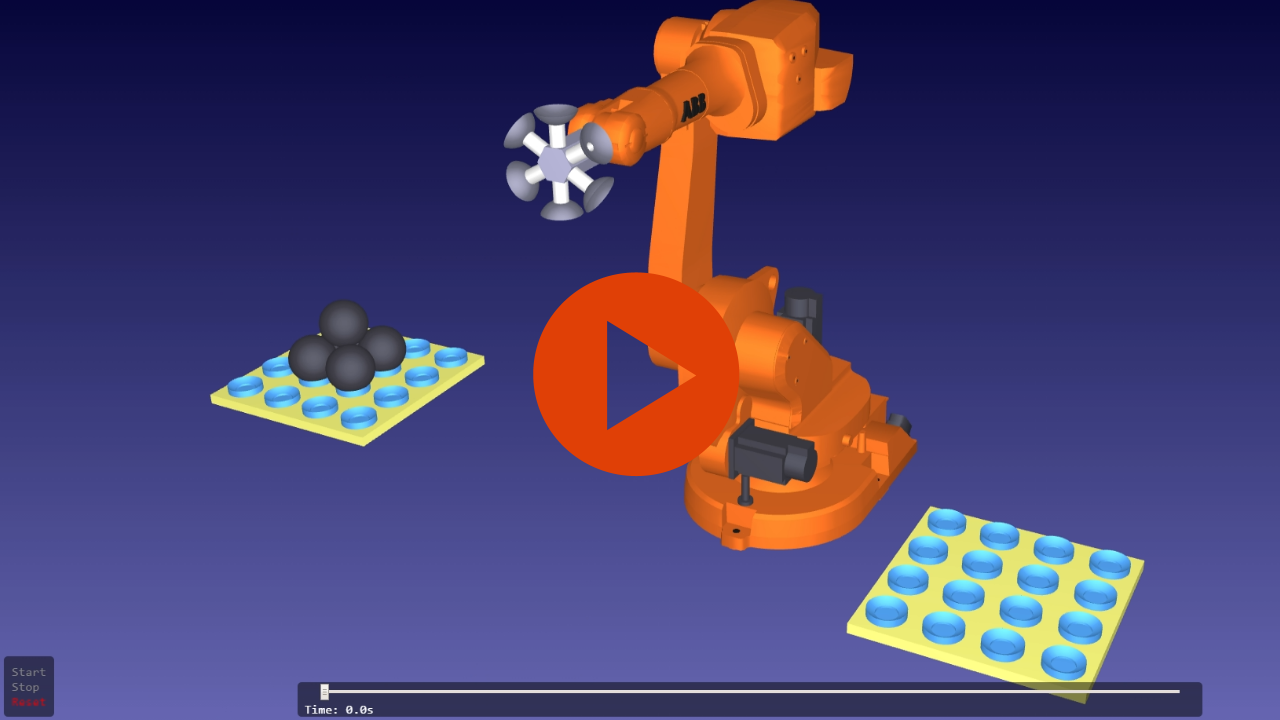
Tip: HTML simulations are larger than PDF simulations, compressing them will considerably reduce their size. The HTML simulation does not have any dependencies and can be shared as one single file.
- 0:02 Select File-Export Simulation to export the simulation in your desired format
- 0:11 The Start button will start recording the simulation
- 0:28 The 3D HTML simulation allows navigating in 3D and control the simulation time
- 0:55 The 3D PDF simulation also allows navigating in 3D and control the simulation time
Learn more about exporting simulations in the documentation
Create or modify a robot Post Processor
The robot Post Processor defines how the robot programs should be generated. The conversion of the simulator movements to specific robot instructions is done by a Post Processor. Post Processors provide complete flexibility to generate the robot programs for specific requirements.
RoboDK provides Post Processors for most robot brands. Post Processors can be easily created or modified. One Post Processor in RoboDK is simply a Python file that defines how the code should be generated.
Each robot brand uses a default post processor that can be modified to customize program generation and better adjust to specific applications.
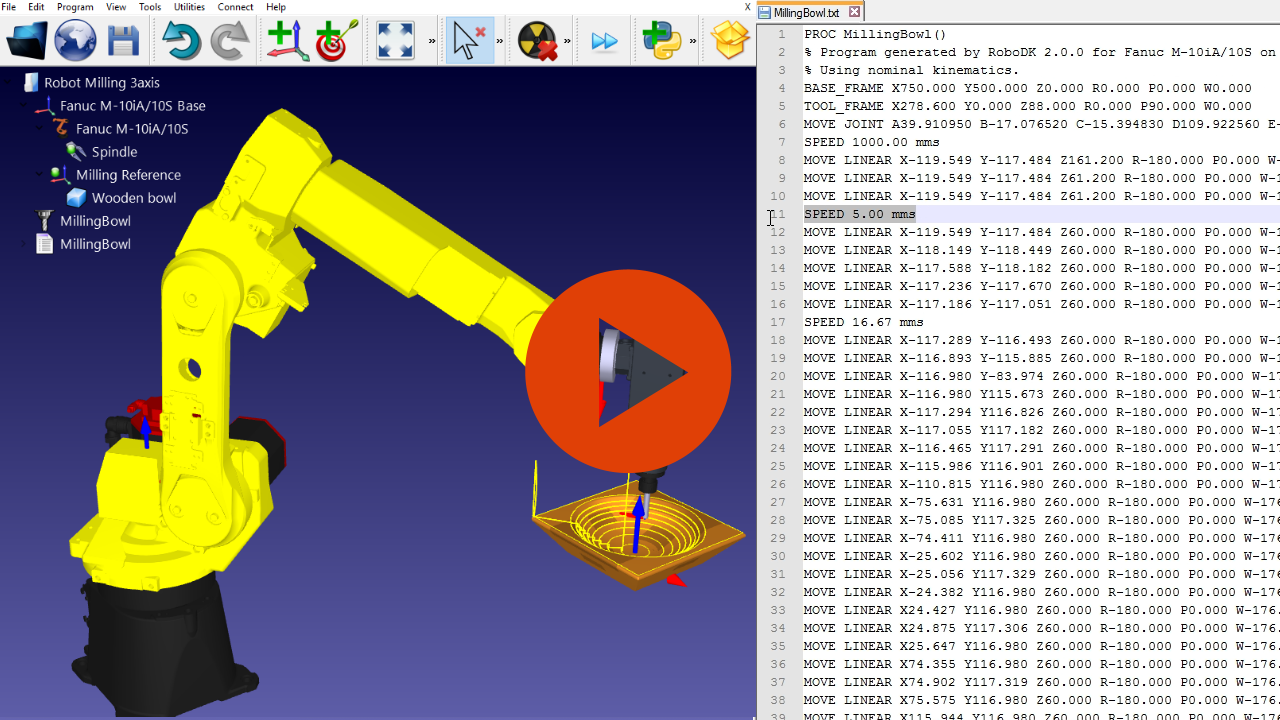
Tip: Double click a post processor to see a preview of a sample robot program.
- 0:17 Once a program is ready, select F6 to generate the robot program
- 0:35 Create or Modify a post processor by selecting Program-Add/Edit post processor
- 0:56 Editing Joint and Linear movement commands to obtain the desired results
- 1:16 Right click a program and select Select post processor to select a post processor
Learn more about post processors in the documention
Privacy
OK
Our website stores cookies as described in our cookie statement.
By using our website you accept the use of cookies.
RoboDK – программное обеспечение, которое симулирует сделанного бота. Также, приложение стремительно составляет программу по управлению. Моделирование при помощи данной нам утилиты существенно уменьшает время, которое было бы затрачено на программирование бота в настоящем производстве.
Значимый плюс – это то, что приложение делает все само, не необходимы практически никакие способности программирования. Довольно только придумать и осознавать, что должен созодать бот и как смотреться.
- Язык интерфейса: на Русском языке, на Английском и других
- Лечение: Крякнутый
- Системные требования: Windows 10 / 11 / 8.1 / 8 / 7 (х32/x64/x86 бит)
- Типы файлов: RAR, EXE
Гайд по активации
Перед установкой рекомендуется удалить все прошлые версии, почистив реестр. Отключить интернет и антивирус. Извлечь папку из архива в хоть какое комфортное пространство на PC. Установить программу
Поместить файлы из папки crack с подменой в папку с программкойПароль к архиву: 1progs
Скачать бесплатно RoboDK 5.2.5 + crack

- 20.06.2022
RoboDK – программное обеспечение, которое симулирует созданного робота. Также, приложение быстро составляет программу по управлению. Моделирование с помощью этой утилиты значительно уменьшает время, которое было бы затрачено на программирование робота в реальном производстве.
Значительный плюс – это то, что приложение делает все само, не нужны почти никакие навыки программирования. Достаточно лишь придумать и понимать, что должен делать робот и как выглядеть.
Скачать бесплатно RoboDK 5.2.5 + crack
Инструкция по активации
- Перед установкой рекомендуется удалить все предыдущие версии, почистив реестр. Отключить интернет и антивирус. Извлечь папку из архива в любое удобное место на ПК. Установить программу
- Поместить файлы из папки crack с заменой в папку с программой
[свернуть]
Пароль ко всем архивам: 1progs
В RoboDK существует огромная база различных механизмов и функций, поэтому каждый разработчик может найти то, что подходит для его задумки. А посмотреть на все это можно с помощью качественных и детальных 3D-моделей.
Быстрый отклик на изменение механизмов действия или любых других параметров сильно экономит время, и позволяет сразу увидеть их влияние на робота. Еще приложение очень хорошо ограничивает будущее творение, и не дает ему выйти за пределы зоны, в которой оно должно функционировать.
Если встроенных функций оказывается мало, а установить нужно что-то еще, можно написать программы собственноручно и передать их на выполнение в приложение. RoboDK поддерживает большинство популярных языков программирования для разработки.
#Теги
- Программы для проектирования
robodk post processor for Fanuc welding robots
is configured for running on a Fanuc R30iB robot controller
Repository
This repository contains Fanuc post processor files for use with robodk in interpreting robot actions from robodk into readable commands by a Fanuc R30iB robot controller. This repository contains these three folders:
|-> Posts  # Contains post processor files
|-> Python # Contains robodk package files
|-> Tests  # Contains test code for robodk modules
/Posts will contain the relavent post processors. Fanuc_R30iA.py is the base post processor for all Fanuc R30iB robot controllers. Fanuc_G6T.py inherits all the functionality from Fanuc_R30iA.py, and makes use of higher level functionality for welding/cladding operations. All other post processors will depend on Fanuc_G6T.py and be workcell specific.
/Python includes a copy of the Robodk API that is used for these posts. Future versions of the API may conflict with the usage of these post processors.
/Tests contains examples of working python scripts to run inside of robodk. This differs from the def test_post(): function in each of the post processor files in that it includes examples on how to call post processor functionality from robodk through the robolink API.
Program Structure
Program motion must be called through:
robot.MoveJ(robot.Pose())
robot.MoveL(robot.Pose())
robot.MoveC(robot.Pose())
which represent joint, linear, and circular motions respectively.
Outside of robolink motion types are represented as:
robot.MoveJ(pose, joints)
where pose is pose object (transformation matrix), and joints is a list of joints.
Some attributes make use of the __setattr__ method to properly format their output strings. These attributes include:
- robot.REG_SPEED
- robot.TIMEAFTER
- robot.P_OFFSET
- robot.TOOL_OFFSET
Attributes
motion termination
Motion termination is controlled in robot.CNT_VALUE and can be defined and altered in the function:
def setZoneData(self, zone_mm):
where zone_mm is the termination where 0-100 is continuous, and -1 is a fine termination.
motion modifiers
Two motion modifiers are defined which are declared as attributes:
robot.TIMEAFTER = (time, event)
robot.P_OFFSET = pr_idx
robot.TOOL_OFFSET = pr_idx
robot.COORD = True
robot.TIMEAFTER will trigger a time after call, e.g.:
robot.TIMEAFTER = (0, 50)
L P[1] 15mm/sec CNT100 TA   0.00sec,DO[50]=ON ;
The first argument (time) specifies the amount of time after reaching the pose to trigger the second argument (event). event can either be a digital output, or a call to a sub routine program, e.g.:
robot.TIMEAFTER = (0, "PROG1")
:L P[1] 15mm/sec CNT100 TA   0.00sec,CALL PROG1 ;
robot.P_OFFSET will add an offset position register to the motion, where pr_idx is the position register index of the position register of which to apply the offsets.
robot.TOOL_OFFSET is the same as robot.P_OFFSET but will incorperate offsets from the position register into the toolframe not the userframe.
robot.COORD is used for enabling coordinated motion.
In order to stop using these motion modifiers delete the class attribute, e.g.:
# delete coordinated motion
del robot.COORD
# remove tool offset
del robot.TOOL_OFFSET
Speed
A hardcoded speed can be set by running:
def setSpeed(self, speed_mms):
with speed_mms being the desired speed in mm/s. Motions will use robot.SPEED only if robot.REG_SPEED is not set. The function setSpeed(speed_mms) will ensure this by deleting the attribute robot.REG_SPEED.
if robot.REG_SPEED is set it will be used as the motion speed. robot.REG_SPEED should hold the number register index, and will be represented as:
in the ls output.
For joint moves, attribute robot.JOINT_SPEED will be used for setting the speed. The value type of this attribute should be a string in the form:
robot.JOINT_SPEED can also be set with the function:
def setSpeedJoints(self, speed_degs):
where speed_degs should be a number between 1-100.
Timers
timers can be started, stopped, or rest using the follow functions:
def startTimer(self, timer_var):
def stopTimer(self, timer_var):
def resetTimer(self, timer_var):
Wait
A wait time can be added using this function:
def waitMS(self, timeout_ms):
where timeout_ms is the time to wait in milliseconds.
A wait timeout can also be called with the function:
def waitDI(self, io_var, io_value, timeout_ms=-1):
where io_var is digital input register, io_value where 1 = ON, and 0 = OFF, and timeout_ms is the amount of time to wait for the digital input trigger. If timeout_ms = -1 it will wait indefinitely. If ditigal input condition is not met it will move into a pause. Ouput of a wait timeout will look like:
:  $WAITTMOUT=500 ;
:  WAIT DI[50]=ON TIMEOUT, LBL[4] ;
:  MESSAGE[Timed out for LBL[4]] ;
:  PAUSE ;
:  LBL[4] ;
A pause or wait can also be triggered using this function:
def Pause(self, time_ms):
if time_ms = 0, a the program will be paused. If time_ms is > 0, a WAIT will be used.
Running post processor code in Robodk scripts
In order to use custom defined functions in the post processor class in a robodk python script, we need to work around the private scope of the post processor class. If the function does not exist in robolink.py it will not be able to be processed in a python script. To increase the scope of these functions they can be executed in the RunCode function. A case statement can be made looking for keywords in the string passed to RunCode. From here either an internal function can be called, or a class attribute can be set. For example:
exec('self.TIMEAFTER=' + value) # for setting an attribute
exec('self.toolOn()') # for calling a function
in order to trigger these events in a robodk python script they must be called through the robolink function:
robot.RunInstruction('toolOn', INSTRUCTION_CALL_PROGRAM)
where the first argument is the RunCode event trigger string, and the second is a flag for turning is_function_call on in RunCode.
Arguments can also be passed this way inserting them in brackets right after the trigger string. For example to set a time after call you would write:
robot.RunInstruction('TIMEAFTER(0,50)', INSTRUCTION_CALL_PROGRAM)
in the python script. The values inside the brackets pertain to the first and second argument in the setTimeAfter() function. This is accomplished by trimming the trigger word from the string:
value = code[len('TIMEAFTER'):]
and then passing the remainder as arguments into the execution statement:
exec('self.TIMEAFTER=' + value)
External axes groups
For turnables and linear rails/tracks, depending on workcell configuration can be represented in the position data of the .ls file in various ways. If the track or turntable is represented as in independent external group then attributes robot.GRP_TRACK, and/or robot.GRP_TURNTABLE will need to be set to the proper groups in the corresponding post processor file. For instance if the robot.GRP_TRACK=3, and the robot.GRP_TURNTABLE=2 then the pose output on the .ls file will represented as:
P[1]{
   GP1:
    UF : 4, UT : 5,        CONFIG : 'F U T, 0, 0, 0',
	X =   138.721  mm,	Y =    57.800  mm,	Z =   196.953  mm,
	W =    89.868 deg,	P =    -0.284 deg,	R =   -42.380 deg
   GP3:
    UF : 4, UT : 5,
	J1=   700.000 mm
   GP2:
    UF : 4, UT : 5,
	J1=   -90.000 deg,	J2=    58.380 deg
};
However, if say the linear track is configured as an extended axis on the robot robot.GRP_TRACK should be set to 0 which will give a pose output of:
P[1]{
   GP1:
    UF : 4, UT : 5,        CONFIG : 'F U T, 0, 0, 0',
	X =   138.721  mm,	Y =    57.800  mm,	Z =   196.953  mm,
	W =    89.868 deg,	P =    -0.284 deg,	R =   -42.380 deg,
    E1 = 700.000 mm
   GP2:
    UF : 4, UT : 5,
	J1=   -90.000 deg,	J2=    58.380 deg
};
Labels
self.LBL_ID_COUNT is defined as the default attribute for storing label numbers starting at ‘1’. For setting a label i.e.:
use the post processor function:
def setLBL(self, counterName='LBL_ID_COUNT', labelName=None):
If you would like to start the labelling at a different number, or store the label counter in another attribute, first define the attribute i.e.:
and then change the counterName argument as the name of the new label counter,
robot.setLBL('SETCOUNTER', 'set counter')
the second argument is just a comment for the label for making the code more readable.
Jump labels can be written by calling the function:
def jump2LBL(self, labelNumber=None, numReg=None):
The jump label can either be defined as the label number to jump to (argument labelNumber), or an indirect call to a number register that is storing the label number (argument numReg)
A conditional jump label can also be performed using:
def ifOnJump(self, conditional, labelNumber=None, numReg=None):
The conditional argument should be declared as a string i.e.:
robot.ifOnJump('R[1:i]>=R[4:inc]', 5001)
giving an output of
: IF R[1:i]>=R[4:inc],JMP LBL[5001] ;
An example of the usage of labels can be found in:
In Fanuc_R30iA.py. These label function have a private scope with the post processor, and are not setup to be ran in the RunCode function between python and robodk, unless in an encapsulating function (see def startPassLoop(self) in Fanuc_G6T.py)
RoboDK 5.2.5

- Дата публикации:04.02.2023
- Просмотров:122
- Комментариев:0
- Категория:Программы / Данные и диски
- Разработчик:RoboDK (Сайт)
- Язык интерфейса:Английский
- Пароль на архив:manshet.org [Ошибка?]
Описание
Это мощный и экономичный симулятор для промышленных роботов и программирования роботов. Это программное обеспечение для моделирования позволяет программировать роботов вне производственной среды.
Он может программировать роботов непосредственно с вашего компьютера и устранять простои производства, вызванные программированием цеха. Он автоматически оптимизирует траекторию робота, избегая сингулярностей, пределов осей и столкновений.
Создайте свою виртуальную среду, чтобы имитировать свою работу за считанные минуты. Для любого контроллера робота быстро генерируйте программы роботов в автономном режиме. Вам больше не нужно изучать программирование для конкретных поставщиков.
Особенности:
- Навыки программирования не требуются
- Простой, интуитивно понятный интерфейс
- Запрограммируйте любого робота в автономном режиме всего несколькими щелчками мыши
- Обширная библиотека с более чем 500 роботизированными руками
- Программное обеспечение для автономного программирования
- Экспорт программ на робота
- Поддержка многих контроллеров роботов
Пароль на все архивы: manshet.org


