Roborock S6 Pure Manual

Safety Information
Restrictions
- This product is designed for indoor floor cleaning only, do not use it outdoors (such as on an open-ended terrace), on any surface other than the ground (such as a sofa), or in any commercial or industrial environment.
- Do not use this product on elevated surfaces without barriers such as the floor of a loft, an open-ended terrace, or on top of furniture.
- Do not use the product when the ambient temperature is higher than 104°F (40°C), lower than 39°F (4°C), or if there are liquids or tacky substances on the floor.
- Before using the product, move wires off the ground or place them to the side to prevent them being pulled on by the cleaner.
- To prevent blocking the product and to avoid damage to valuables, remove light-weight items (such as plastic bags) and fragile objects (such as vases) from the floor before cleaning.
- Children should be supervised to ensure that they do not play with the appliance.
- This product is not intended for use by persons (including children) with reduced physical, sensory or mental capabilities, or lack of experience and knowledge, unless they have been given supervision or instruction concerning use of the product by a person responsible for their safety (CB).
- This product can be used by children aged from 8 years and above and persons with reduced physical, sensory or mental capabilities or lack of experience and knowledge if they have been given supervision or instruction concerning use of the product in a safe way and understand the hazards involved. Children shall not play with the product. Cleaning and user maintenance shall not be made by children without supervision (EU).
- Keep the main brush cleaning tools out of reach of children.
- Do not place any object (including children and pets) on the product, whether it is in operation or not.
- Keep hair, loose clothing, fingers, and all parts of the body away from openings and moving parts.
- Do not use the product on burning objects (such as cigarette butts).
- Do not use the product on high pile carpets (product effectiveness may also be reduced on dark carpets).
- Do not use the product to clean hard or sharp objects (such as decoration wastes, glass and nails).
- Do not carry the product using the laser scanner cap, main unit cover, or collision buffer.
- The product must be switched off and the plug must be removed from socket-outlet before cleaning or maintaining the product.
- Do not use wet cloth or liquids for cleaning the product.
- Do not use the mopping module on carpets.
- Use the product according to the manual. Any loss or damage caused from improper use will be borne by the user.
- This product contains batteries that are only replaceable by skilled persons.
Battery and Charging
- Do not charge non-rechargeable batteries.
- For the purposes of recharging the battery, only use the detachable supply unit roborock CDZ11 RR or CDZ12RR provided with this product.
- Do not dismantle, repair or modify the battery or charging dock.
- Keep the charging dock away from heat (such as heating vents).
- The battery must be removed from the appliance before it is scrapped.
- The product must be disconnected from the supply mains when removing the battery.
- The battery must be disposed of safely. Do not discard waste batteries. Leave them with a professional recycling organization.
- Do not wipe or clean the charger prongs with wet cloth or wet hands.
- If the power cord is damaged, stop using it immediately. It must be replaced by the manufacturer, its service agent, or similarly qualified persons to avoid a hazard.
- Make sure the product is powered off before shipment.
- Use of the original packaging is advised.
- If to be left unused for a long period of time, fully charge the product and switch it off before storing it in a cool, dry place.
- Charge it at least every three months to avoid over discharging the battery.
- To satisfy RF exposure requirements, a separation distance of 20 cm or more should be maintained between this device and persons during device operation.
- To ensure compliance, operations at closer than this distance is not recommended. The antenna used for this transmitter must not be co-located in conjunction with any other antenna or transmitter.
Roborock robot vacuum cleaner troubleshooting
| Roborock robot vacuum cleaner troubleshooting | |
| Name | Troubleshooting |
| Robot | Problem listed in the User Manual |
| The product cannot be powered on | |
| The main brush, side brush, fan, or main wheels do not work | |
| Charging dock | The robot does not receive power |
| Power cable | The charging dock cannot be supplied with power |
Product Introduction
Robot

 On/Off
- Press to start cleaning
- Press and hold to power on or off
Power Indicator
- White: battery level ≥ 20%
- Red: battery level < 20%
- Slow flashing: Charging or starting up
- Flashing red: Error
 Dock/Spot Clean
- Press to return to the dock
- Press and hold to spot clean
Note: Press any button to pause cleaning, returning to dock, or spot cleaning.
Parts list
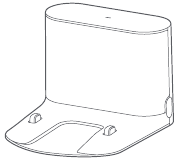
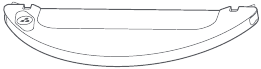
Charging dock

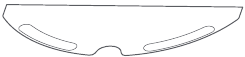
Moisture-proof mat

Power cable
Adjustable water tank
Mop cloth
Dustbin

WiFi indicator light
- Off: WiFi disabled
- Slow flashing: Waiting for connection
- Fast flashing: Connecting
- Steady: WiFi connected
Robot and sensors

Mopping module

Charging dock

Installation
Using the robot
- Place the charging dock against the wall on a flat surface and plug it into the mains power.

Note:- The charging dock should have more than 0.5m (1.6ft) of clearance on each side, and more than 1.5m (4.9ft) in the front.
- If the power cable is vertical to the ground, it may be caught by the robot, causing the charging dock to be disconnected.
- The charging dock indicator is on when the charging dock is electrified, and off when the robot is charging.
- Secure the charging dock with the adhesive tape. Wipe the floor of the area where the charging dock will be placed with a dry cloth, then stick the enclosed double-sided tape to the floor. Place the dock onto the double-sided tape to secure it in place.
Note:- Use of the double-sided tape to secure the charging dock is optional.
- When necessary, remove the double-sided tape slowly to reduce residue glue.
- Secure the moisture-proof mat.
After securing the charging dock, wipe the area where the moisture-proof mat will be placed with a dry cloth as shown. Stick the double-sided tape first to the moisture-proof mat then in position on the floor.
Note:
Always use the moisture-proof when placing the charging dock on a wooden floor - Press and hold the button to turn on the robot. When the power indicator lights up, place the robot onto the charging dock to begin charging. The robot uses a highperformance lithium-ion rechargeable battery. To maintain peak battery performance, always keep the robot charged.
- White: Battery level ≥ 20%
- Red: Battery level < 20%
Note:
The robot will not turn on when the battery is low. Place the robot directly onto the charging dock to begin charging.


 button to turn on the robot. When the power indicator lights up, place the robot onto the charging dock to begin charging. The robot uses a highperformance lithium-ion rechargeable battery. To maintain peak battery performance, always keep the robot charged.
Connect to the app
- Connect to the app. (recommended)
- Download the Roborock app or Xiaomi home app
- Search «Roborock» in the App Store or Google Play, Or scan the QR code below, then download and install the app.

- Search «Xiaomi home» in the App Store or Google Play, Or scan the QR code below, then download and install the app.

- Search «Roborock» in the App Store or Google Play, Or scan the QR code below, then download and install the app.
- Reset WiFi
- Open the top cover of the robot to reveal the WiFi indicator light.
- Press and hold the button and the button until you hear the «Reset WiFi» voice alert. When the WiFi indicator light is flashing slowly, the robot has entered network configuration mode.
Note:
If you cannot connect your phone to the robot, reset the WiFi, and add your robot as a new device.
- Add device
Open the app and click «+» in the top right corner, then follow the instructions in-a pp. Once your robot has been added, it will be found in a list on the homepage.
Note:- Due to ongoing app development, the actual process may differ slightly from the above description. Always follow the instructions given in the app.
- Only 2.4GHz WiFi is supported.
- Off: WiFi disabled
- Slow flashing: Waiting for connection
- Fast flashing: Connecting
- Steady: WiFi connected
- Download the Roborock app or Xiaomi home app


Using the robot
- Mopping
Note: - Start cleaning.
When the battery is fully charged, the power indicator will remain lit. Press the button or use the app to start a cleanup. - Remove the mopping module.
After the machine completes cleaning and returns to the charging dock, press the two side latches inwards and pull to remove the mop module.
Note:- When the charging dock is placed on a wooden floor, always use it with the moisture-proof mat to prevent moisture damage.
- Remove the mopping module after mopping, empty residual water and clean the mop cloth to prevent mildew or unpleasant odors.
- Remove the mopping module if not mopping.

Instructions for Use
On/off
Press and hold the  button to turn on the robot. The power indicator will turn on and the robot will enter Standby mode. If the robot is in Sleep mode, press and hold the button to turn it off and end the current cleanup.
Note: The robot cannot be turned off when it is charging.
Start cleanup
Press the button to start cleaning. Once started, the robot will plan its cleaning route based on its scan of the area. It cleans along the edges of a zone first and then moves in a Z-shaped cleaning route to cover the internal area efficiently and thoroughly.
Note:
- Cleaning cannot start if the battery level is too low. Allow the robot to charge before restarting cleanup.
- Tidy away any cables on the ground (including the power cable of the charging dock) before cleaning to avoid losing power or damaging either the robot or the connected device.
- If a cleanup finishes within 10 minutes, cleaning repeats by default.
- If the battery runs low before cleanup is complete, the robot will carry out a top-up charge before resuming cleanup from where it left off.
Pause
When the robot is cleaning, press any button to pause it. Then press the  button to continue cleaning or the
  button to return it to the charging dock and stop the cleaning cycle.
Note: Placing a paused robot on the charging dock manually will end the current cleanup.
Sleep
If the robot is paused for over 10-minutes, it will go to sleep, and its power indicator will flash slowly. Press any button to wake it back up.
Note:
- The robot will not go to sleep when it is on the charging dock.
- The robot will automatically shut down if left in sleep mode for more than 12 hours.
Start cleanup
Auto: After cleaning, the robot will automatically return to the charging dock to recharge.
Manual: In Pause mode, press the button to send the robot back to the charging dock.
The power indicator will flash slowly as the robot charges.
Note: If the cleaning cycle was started away from the charging dock and the robot could not return to the dock after cleaning, it will instead return to its starting point. Place the robot directly on the dock to recharge it.
Error
If an error occurs while the robot is cleaning, the power indicator will flash red quickly, and you will hear a voice alert. See «Troubleshooting» for resolution options.
Note:
- The robot will go to sleep automatically if left in an Error state for over 10-minutes.
- Placing the robot on the charging dock in an error state will stop the current cleanup.
Reset WiFi
If your phone cannot connect to the robot because you have changed your router configuration, forgotten your password, or any other reason, open the top cover to see the WiFi indicator light, then press and hold the Spot Cleaning button and the Recharge button until you hear the «Resetting WiFi» voice alert. When the WiFi indicator light flashes slowly, the robot has entered network configuration mode.
Note: If the robot is left connecting to the network for over an hour, its WiFi will be disabled. Reset WiFi before attempting reconnection.
Spot Cleaning
In Standby or Pause mode, press and hold the button to start spot cleaning. This mode is used to clean a 1.5m × 1.5m square area centered on the robot. After cleanup, the robot will return to the center of the square. 
Note: Starting spot cleaning in pause mode will stop the current cleaning cycle.
Selective Room Cleaning
Select specific rooms for cleaning in the app. In this mode, the robot will only clean the selected rooms. 
Note:
- A full map must be created and Map Saving mode switched on before this function can be used.
- After cleaning starts, the robot may move beyond the defined areas. Make sure there are no obstacles preventing the robot’s access to the target rooms.
Scheduled Cleaning
Use the app to set start times for scheduled cleanups. The robot will return to the charging dock after each cleanup.
Zone Cleaning
Use the app to draw a specific zone for the robot to clean.
Note: While cleaning the designated zone, the robot may move outside zone borders. Make sure that there are no cables or obstacles placed close to the cleanup zone.
Pin n Go
Use the app to set a destination for the robot to go to.
Cleaning mode
Use the app to choose from Quiet, Balanced, Strong, or MAX modes. The balanced mode is the default.
Do Not Disturb (DND) mode
In DND mode, no cleanups will start, no voice alerts will play, and the power indicator will dim. DND mode set from 22:00 to 08:00 by default and can be disabled or modified in the app.
Virtual no-go zones and walls
The app can be used to draw Virtual No-Go Zones and Walls to keep the robot from entering the areas you define.
Note:
- «Map Saving Mode» must be turned on in the app to use virtual no-go zones.
- Virtual no-go zones and walls should only be used to customize the cleaning area. They should not be used to isolate hazards.
- Moving the robot manually or making significant changes to the home environment may cause the loss of virtual no-go zones and walls.

More app functions
| Real-time map updates | Carpet Boost | Robot location |
| Change cleaning mode | Part replacement schedule | Do Not Disturb (DND) mode |
| View cleaning history | Remote control | Firmware update |
| Change robot voice | View robot status |
Note: Functions and details of the app may vary slightly due to continuous app development and upgrades.
Refilling the water tank or cleaning the mop cloth mid-clean
To refill the water tank or clean the mop cloth during a cleanup, pause cleaning by pressing any button and remove the mop module. Refill the water tank and/or clean the mop cloth as required. Reinstall the mop module and press the button to continue cleaning.
Charging Dock
The charging dock should be plugged in and placed against a wall on level ground, with more than 0.5m (1.6ft) of clearance on each side, and more than 1.5m (4.9ft) in front. For the best experience when using the mobile app, place the charging dock in an area with strong WiFi coverage. 
Note: Do not place the charging dock in direct sunlight or block the locator beacon; otherwise, the robot may not be able to return to the charging dock.
Routine maintenance
Main brush
*Clean weekly
- Turn the robot over then unlatch and remove the main brush cover.
- Take out the main brush, remove and clean its bearings.
- Remove the main brush cap, rotating in the unlock direction.
- Use the supplied main brush cleaning tool to remove any entangled hair.
- Re-install the cap and bearings following the lock direction.
- Re-insert the main brush and secure the brush cover.

Note: Main brush replacement every 6-12 months is recommended.
Using the main brush cleaning tool
Use the main brush cleaning tool to remove any hair entangled around the main brush. 
Note: If there is a large amount of hair, or hair is tightly entangled, remove it carefully to avoid damage to the main brush.
Dustbin and filter
*Weekly cleaning is recommended
- Open the top cover of the robot, squeeze the dustbin latch, and remove the dustbin.
- Open the dust bin lid as indicated by the arrow and pour out the contents.


Clean the washable filter
*Clean every two weeks
- Open the dust bin lid as indicated by the arrow and pour out the contents.
- Fill the dust bin with clean water and close the cover.
Gently shake the dust bin, then pour out the dirty water.
Note: To prevent blockage, only use fresh water without cleaning liquid. - Remove the filter and clean it with water.
Note: To avoid damage, do not touch the surface of the filter with hands, brushes, or sharp objects. - Rinse repeatedly and tap the filter frame to remove as much dirt as possible.
- Leave the filter to dry before reinstalling it.
Note: Allow the filter to dry thoroughly before use. 24-hours of drying is recommended. Alternating between two filters is recommended.


Battery
The robot is equipped with a high-performance lithium-ion rechargeable battery pack. To maintain battery performance, keep the robot charged.
Note: If the robot is to be left unused for an extended period, turn it off before storage and charge it at least once every three months to avoid battery damage resulting from over-discharging.
Charging dock
*Monthly cleaning recommended
Use a soft dry cloth to clean the charging contacts of the charging dock.
Side brush
*Monthly Side cleaning brush recommended
- Turn the robot over and remove the screw holding the side brush.
- Remove and clean the side brush.
- Reinstall the side brush and tighten the screw.

Note: Side brush replacement every 3-6 months is recommended to maintain cleaning quality.
Mop cloth
*Clean after use
- Remove the mop cloth from the mopping module.
- Clean and dry the mop cloth.
Note:- Always remove the mop cloth after cleaning to filter blockage.
- If the mop cloth gets excessively dirty, the cleaning quality will be affected. Always use clean cloth.
- Replacing the mop cloth every 3-6 months is recommended to maintain cleaning quality

Filter Assembly
*Replacement every 1-3 months recommended
- Move your finger along the notch to remove both filters.
- Install the new filters.
Note: Changing filters every 1-3 months is recommended, depending on the quality of water and frequency of use, to ensure cleaning quality.

Omnidirectional wheel
*Clean as required
- Turn the robot over.
- Use a small screwdriver to pry out the axle and remove the wheel.
- Rinse the axle and the wheel with water to remove any hair and dirt.
- Dry and reinstall the wheel, then press it back in place.
Note: The omnidirectional wheel bracket cannot be removed.

System Reset
If the robot does not respond when you press a button or the robot cannot be shut down, press the Reset button. The robot will then restart.
Note: After a system reset, cleaning schedules, WiFi and other settings will be restored to factory settings.
Restore factory settings
If the robot is not functioning after a system reset, turn it on, then press the button, and then press and hold the Reset button until you hear the «Start restoring initial version» voice alert. The robot will then be restored to factory settings.
Robot sensors
*Clean monthly
Use a soft dry cloth to wipe and clean all sensors, including:
- Four cliff sensors at the bottom of the robot.
- The wall sensor on the right of the robot.
- The charging contact on the bottom of the robot.

Firmware update
Update the robot using the app. Place the robot on the charging dock and ensure that the battery level is higher than 20% before updating. The power indicator will flash white quickly during a firmware update.
Environmental protection description
Removing the battery
*The following information applies only when disposing of the robot and should not be followed for day-to-day operations
The chemical substances contained in the built-in lithium-ion battery of this product can cause environmental pollution. Remove the battery before disposing of this product and hand it to a professional battery recycling facility for centralized disposal.
- Operate the robot until its battery no longer holds a charge or can no longer connect to the charging dock.
- Turn off the robot.
- Unscrew the battery cover.
- Remove the battery cover.
- Press the latch to pull out the battery connector and remove the battery.
Note:
- Before removing the battery, make sure it is fully drained. Do not attempt to remove the battery if the robot is connected to the charging dock.
- Remove the entire battery pack. Avoid damaging the battery pack casing to avoid short-circuits or leakage of hazardous substances.
- In the event of accidental contact with battery fluid, rinse thoroughly with water and seek immediate medical care.
Basic Parameters
Robot
| Name | Parameters |
| Model | Roborock 56 Pure |
| Dimensions | 350 × 350 × 96.5 mm |
| Battery | 14.4V/5200mAh lithium battery |
| Weight | Approx. 3.2kg |
| Wireless connection | WiFi Smart Connect |
| Rated voltage | 14.4 V DC |
| Rated power | 58W |
| Charging time | < 6h |
Charging Dock
| Name | Specs |
| Model | CDZ11 RR or CDZ12RR |
| Dimensions | 151 × 130 × 98 mm |
| Rated power | 28W |
| Rated input | 100-240 V AC |
| Rated output | 20 V DC 1.2A |
| Rated frequency | 50-60 Hz |
WiFi Specification
| Service | Protocol | Frequency Range | Max. Output Power |
| WIFI | 802.11 b/g/n | 2400-2483.5 MHz | ≤ 20dBm |
Troubleshooting
If an error occurs during cleanup, the power indicator will flash red quickly, and a voice alert will play. Refer to the table below for resolution options.
| Error | Solution |
| Error 1: Rotate the laser head to check that it turns freely. | The LDS unit is jammed. Remove any items blocking it then move the robot to a new location and restart. |
| Error 2: Clean and lightly tap the bumper. | The bumper is stuck. Tap the bumper repeatedly to dislodge any jammed items. If nothing falls out, move the robot to a new location and restart. |
| Error 3: Move the robot to a new location and restart. | A wheel is suspended. Move the robot to a new location and restart it. |
| Error 4: Wipe the cliff sensors, move the robot away from raised edges, and restart. | The robot is suspended. Move it to a new location and restart. If the problem persists, clean the cliff sensors. This error may also be caused by a dirty cliff sensor. Try wiping all sensors clean. |
| Error 5: Remove the main brush and clean the brush and bearing. | The main brush may be tangled up. Remove and clean it. |
| Error 6: Remove and clean the side brush. | The side brush may be tangled up. Remove and clean it. |
| Error 7: Look for anything stuck in the main wheels then move the robot to a new location and restart. | The main wheels may be jammed. Remove and clean them. |
| Error 8: Clear away any obstacles around the robot. | The robot may be stuck. Clear any obstacles around it. |
| Error 9: Install the dust bin and filter. | Reinstall the dustbin and filter and check that they are correctly installed. If the problem persists, try replacing the filter. |
| Error 10: Make sure that the filter is dry or clean the filter. | The filter is not completely dry. Dry the filter for at least 24 hours. The filter may also be blocked and require cleaning. If the problem persists, replace the filter. |
| Error 11: High-intensity magnetic field detected. | The robot ls too close to magnetic tape and cannot start. Move it to a new location and restart. |
| Error 12: Battery level is too low. Recharge before use. | Low battery. Recharge before use. |
| Error 13: Charging error. Clean the charging contact area. | Use a dry cloth to clean the charging contacts on the robot and on the charging dock. |
| Error 14: Battery error. | The battery temperature is either too high or too low. Wait until it returns to normal. |
| Error 16: Robot is tilted. Place it on flat ground and restart. | The robot is tilted. Move it to flat ground and restart. |
| Error 17: Side brush module error. Reset the system. | The side brush module is experiencing a fault. Reset the system. |
| Error 18: Vacuum fan error. Reset the system. | The vacuum fan is experiencing a fault. Reset the system. |
| Error 22: Wipe the recharge sensor. | The recharge sensor is blocked by dust. Wipe the dust off. |
| Error 23: Clean the charging dock locator beacon | The charging dock is jammed. Clear it and retry. |
| Error 24: Virtual no-go zone or wall detected Move the robot to a new location and restart. | Move the robot away from the virtual no-go zone or barrier and restart. |
| Error 26: Wipe the wall sensor. | The wall sensor is dirty. Wipe it clean. |
| Internal error. Reset the system. | Malfunction due to an internal error. Reset the system. |
FAQs
| Problem Type | Solution |
| Unable to power on | The battery level is low. Put the robot on the charging dock and charge it before use. The battery temperature is too low or too high. Only use the robot within the range of 0-40°( (32-104°F). |
| Unable to charge | If the charging dock is not receiving power, check that both ends of the power cable are properly connected. If contact is poor, clean the contact areas of the charging dock and the robot. Power is restored when the power indicator light turns on. |
| Slow charging | When used at high or low temperatures, the robot will automatically reduce its charging speed to extend battery life. Charging contacts may be dirty. Clean them with a dry cloth. |
| Unable to return to dock | There are too many obstacles near the charging dock. Move it to an open area. The robot is too far from the charging dock. Place it closer and retry. |
| Abnormal behavior | Restart the robot. |
| Noise during cleaning | The main brush, side brush, or main wheels may jammed. Turn off the robot and clean them. If the omnidirectional wheel is jammed, remove it for cleaning. |
| Poor cleaning ability or dust falling out | The dust bin is full and needs emptying. The filter is blocked and needs cleaning. The main brush is jammed and needs cleaning. |
| Unable to connect to WiFi | WiFi is disabled. Reset the WiFi and try again. WiFi signal is poor. Make sure that the robot is in an area with good WiFi signal reception. Abnormal WiFi connection. Reset the WiFi, download the latest mobile app and retry. The current device is not supported. You can find supported models inside the app. Unable to connect to WiFi. There may be an error with your router settings. Contact Roborock customer service for help with troubleshooting. |
| Scheduled cleaning is not working | The battery level is too low. Scheduled cleaning can only begin when the battery level is above 20%. |
| Is power always being drawn when the robot is on the charging dock? | The robot will draw power while it is docked to maintain battery performance, but power consumption is extremely low. |
| Does the robot need to be charged for at least 16 hours the first three times it is used? | No. The robot can be used any time after it has been fully charged once. |
| No or little water during mopping | Check whether there is water in the water tank, adjust the water volume switch to high, rinse the mop cloth, replace the filters, or follow the instructions in the user manual to ensure that mop cloth is correctly installed. |
| Floors are too wet after mopping | Check that the water tank seal is closed, that the flow level is set to low, and that both water filter elements are properly installed |
| Cleaning does not resume after recharging | Make sure that the robot is not in DND mode. DND mode will prevent cleanup. When cleaning a space requiring a top-up charge, if the robot was placed manually on the charging dock before it recharged automatically, it will not be able to continue cleanup. |
| The robot cannot return to the charging dock after spot cleaning or when it has been moved manually. | After spot cleaning or a significant position change, the robot will re-generate the map. If the charging dock is too far away, it may not be able to return for recharging and must be placed on the charger manually. |
| The robot has begun to miss certain spots | The wall sensor or cliff sensors may be dirty. Clean them with a soft dry cloth. |
| The water tank is too full | The filter may be blocked and need cleaning. |
EU Declaration of Conformity
Hereby we:
| Name of manufacturer | Beijing Roborock Technology Co.,Ltd. |
| Address | Floor6, Suite6016, 6017, 6018, Building C, Kangjian Baosheng Plaza, No.8 Heiquan Road, Haidian District, Beijing, P.R. CHINA |
declare that this DoC is issued under our sole responsibility and that the products:
| Product description | Robotic Vacuum Cleaner and Accessories |
| Type(model) designation(s) | Roborock S6 Pure |
are in conformity and verified through testing with the provision of the following EU directives:
| RED Directive 2014/53/EU Article 3.1 a): Safety& Health
|
|
| RED Directive 2014/53/EU Article 3.1 b): EMC
|
|
| RED Directive 2014/53/EU Article 3.2: Radio Spectrum EN 300 328 V2.1.1 | Wideband transmission systems; Data transmission equipment operating in the 2,4 GHz ISM band and using wide band modulation techniques; Harmonized Standard covering the essential requirements of article 3.2 of Directive 2014/53/EU |
| RoHS Directive 2011/65/EU EN50581:2012 | Technical documentation for the assessment of electrical and electronic products with respect to the restriction of hazardous substances. |
| Product description | Charging Dock and Accessories |
| Type(model) designation(s) | Charging Dock, models: CDZ08RR or CDZ09RR. |
are in conformity and verified through testing with the provision of the following EU directives:
Low Voltage Directive 2014/35/EU
|
|
EMC Directive 2014/30/EU
|
|
| RoHS Directive 2011/65/EU EN50581:2012 |
Technical documentation for the assessment of electrical and electronic products with respect to the restriction of hazardous substances |
Person responsible for making this declaration:
Printed name: Rui. Shen
Position/Title: Quality Director
Signature: 
Date of issue: Dec 30, 2019
Place of issue: Floor 6, Suite 6016, 6017, 6018, Building C, Kangjian Baosheng Plaza, No. 8 Heiquan Road, Haidian District, Beijing, P.R. CHINA
WEEE Information
 Correct Disposal of this product. This marking indicates that this product should not be disposed with other household wastes throughout the EU. To prevent possible harm to the environment or human health from uncontrolled waste disposal, recycle it responsibly to promote the sustainable reuse of material resources. To return your used device, please use the return and collection systems or contact the retailer where the product was purchased. They can take this product for environmental safe recycling.
Warranty Information
Warranty Information
The seller provides warranty in accordance with the legislation of the customer’s own country of residence, with a minimum of 1 year, starting from the date on which the appliance is sold to the end user.
The warranty only covers defects in material or workmanship.
The repairs under warranty may only be carried out by an authorized service centre. When making a claim under the warranty, the original bill of purchase (with purchase date) must be submitted. The warranty will not apply in cases of:
- Normal wear and tear
- Incorrect use, e.g. overloading of the appliance, use of non-approved accessories
- Use of force, damage caused by external influences
- Damage caused by non-observance of the user manual, e.g. connection to an unsuitable mains supply or non-compliance with the installation instructions
- Partially or completely dismantled appliances.
Laser Safety
The laser distance sensor of this product meets the standards for Class I Laser Products in IEC 60825-1:2014 and will not generate hazardous laser radiation.

Videos
Roborock S6 Pure Review Video
Documents / Resources
References
Download manual
Here you can download full pdf version of manual, it may contain additional safety instructions, warranty information, FCC rules, etc.
Download Roborock S6 Pure Manual
Руководство по эксплуатации робота-пылесоса
-Серия S6-

Благодарим вас за выбор нашего продукта. Пожалуйста, внимательно прочитайте эту инструкцию перед использованием.
Добро пожаловать в использование
Благодарим вас за выбор нашего робота-пылесоса.
Наш робот-пылесос — это умный и интеллектуальный робот-пылесос, который сочетает в себе планирование пути, уборку и швабру «все в одном», он оснащен специальным чипом управления движением и технологией имитации вычислений, может построить точную карту и предлагает точную навигацию для вашего дома. , расчет построения карты и технология навигации GYRO обеспечат вам организованную, высокую скорость очистки, высокую скорость и высокую эффективность работы. Он также может применяться в различных сложных средах для разных домов, автоматически перезаряжается, когда заряд батареи ниже 1%, автоматически в течение всего рабочего периода, освобождая вас от работы по уборке!
Наука и технологии меняют нашу жизнь, теперь вы и ваша семья освобождаетесь от мучительной уборки пола, у вас появляется больше времени, чтобы наслаждаться красивой и легкой жизнью!
Наслаждайся сейчас!
Введение продукта
[Название частей]


 * Высота робота составляет 78 мм для модели камеры.
Инструкция по использованию
[Размещение док-станции для зарядки]
Примечание:
- Пожалуйста, оставьте зарядную док-станцию включенной, иначе робот не сможет найти зарядную док-станцию для подзарядки.
- Пожалуйста, убедитесь, что робот работает от зарядной станции при использовании, чтобы помочь ему запомнить путь возвращения.
- Чтобы продлить срок службы батареи, разрядите существующую батарею, а затем зарядите робота как минимум за § часов до первого использования.
- Когда робот находится в режиме влажной уборки шваброй, НЕ заряжайте его на зарядной станции.
Индикатор кнопки «Очистить» во время зарядки:
| Статус заряда | Индикатор кнопки «Чисто» |
| Низкий уровень заряда батареи | Красный свет |
| Чаринг | Красный свет мигает |
| Полностью заряжен | Зеленый свет |
Примечание. Когда робот заряжается, он не будет выполнять никаких действий при переводе бокового выключателя питания робота в положение ВКЛ/ВЫКЛ. «I» означает «ВКЛ.», а «O» означает «ВЫКЛ.».
[ВКЛ/ПАУЗА/ВЫКЛ]
- Поверните боковой выключатель питания робота в положение ON, робот перейдет в режим ожидания.
- Нажмите кнопку очистки на роботе или кнопку СТАРТ/СТОП на пульте дистанционного управления. Робот сразу начинает работать в режиме АВТОМАТИЧЕСКОЙ уборки. (Очистка Z-типа по умолчанию)
- Приостановите работу робота, нажав кнопку очистки на роботе или кнопку СТАРТ/СТОП на пульте дистанционного управления. (Робот будет находиться в режиме ожидания и экономить заряд батареи)
- Если робот не используется и не находится в зарядной док-станции / не заряжается, он перейдет в спящий режим и будет издавать голосовое оповещение, когда заряд батареи ниже 20%, во избежание каких-либо помех, вызванных этим, выключите робота. когда он не используется в течение длительного времени.
[РЕЖИМ СНА]
Спящий режим означает, что робот находится в спящем режиме, кнопка очистки на роботе не мигает, а кнопки на пульте дистанционного управления отключены.
A) Если робот находится в режиме паузы более 60 секунд, он переходит в спящий режим для экономии заряда батареи.
Б) дважды нажмите кнопку питания на пульте дистанционного управления, робот перейдет в режим сна.
Примечание: Перед очисткой убедитесь, что робот не спит, а кнопка очистки горит зеленым светом. Если робот не просыпается, нажмите кнопку очистки на роботе или «![]() »Кнопка питания на пульте дистанционного управления, чтобы вывести его из спящего режима.
»Кнопка питания на пульте дистанционного управления, чтобы вывести его из спящего режима.
[Дистанционное управление]
Используйте 2 батарейки AAA R03 в пульте дистанционного управления и установите боковой выключатель питания робота в положение ON.
- Нажмите «
 ” Кнопка питания, робот просыпается и переходит в режим ожидания, снова нажмите кнопку питания. Робот находится в спящем режиме.
 - Нажмите «
 Кнопка «Домой», робот возвращается к зарядной станции и автоматически перезаряжается, кнопка «Очистка» на роботе мигает.
 - Нажмите «
 ” Кнопка «Старт/Стоп», чтобы начать уборку, нажмите еще раз, робот остановлен/приостановлен.
  » Вперед, «
 «Лен»,
 Право, направление робота во время закрытия или остановки.
 Кнопка WIFI: (только для робота с функцией приложения) после включения робота нажмите эту кнопку в течение 3 секунд после звонка «DingDingDong»: Модуль инициализации Настройка Wi-Fi смартфона — поиск робота WIFI: IMA — xxx, подключено, управление! Робот через приложение для смартфона в любом месте в любое время.
- Нажмите «
 ” Кнопка Enhance Suction, робот усиливает всасывание во время уборки.
 - «Умная уборка зигзагом»: этот режим применим для небольшого участка с концентрированной грязью или пылью. Робот бежит зигзагообразным движением шириной # метра.
- ” Точечная очистка: этот режим применим для участков с высокой концентрацией грязи или пыли. Робот работает в меньшем режиме уборки Z-типа. останавливает или возобновляет автоматическую очистку после ее завершения. точечная уборка.
- ” Очистка краев: этот режим подходит для очистки краев и углов комнаты. В режиме очистки краев робот убирает вдоль границы (например, стены).
- ” Голосовая кнопка: нажмите эту кнопку один раз, чтобы отключить голосовое оповещение, нажмите кнопку еще раз, чтобы снова включить голосовое оповещение.
[Выбор режима уборки] Режимы уборки выбираются с помощью пульта дистанционного управления.
Инструкция по использованию
[Выбор режима уборки] Режимы уборки выбираются с помощью пульта дистанционного управления.
Обслуживание
[ Очистка пылесборника и фильтров ]
A) Нажмите желтую кнопку освобождения пылесборника и извлеките пылесборник из задней части робота.
B) Удерживая пылесборник на одном уровне, откройте крышку пылесборника, нажав желтую кнопку фиксатора — Опорожните пылесборник — Снимите фильтры — Промойте пылесборник, сетку фильтра и губчатый фильтр под проточной водой — Просушите пылесборник, сетку фильтра и Sponge Filter полностью перед переустановкой.
Примечание:
- Перед чисткой и обслуживанием Ronot выключите робот и отсоедините зарядную док-станцию.
- Пожалуйста, проверьте и очистите всасывающий патрубок, если на нем есть посторонние предметы.
- Срок службы фильтра составляет 24 месяца, промывайте фильтр каждые 15–30 дней.
- Полностью высушите пылесборник, фильтрующую сетку и губчатый фильтр перед повторной установкой.
(Примечание: Не ставьте фильтры постоянное воздействие солнца)
[Очистка основной щетки]
А) Переверните робота. Нажмите на два выступа на крышке основной щетки, чтобы снять ее. Потяните справа наверх, чтобы снять основную щетку. Используйте прилагаемый инструмент для очистки, чтобы удалить волосы, запутавшиеся вокруг основной щетки.
B) Промойте основную щетку под проточной водой и установите ее на место после полного высыхания.
[Наполнение резервуара для воды и MOP]
A) Наполнение резервуара для воды: Откройте запорную пробку резервуара для воды — Вода полностью заполнена (необходимо закрыть запорную пробку) — Наклейте швабру на дно резервуара для воды — Нажмите желтую кнопку фиксатора — Вставьте резервуар для воды внутрь робота.
B) Очистка швабры: нажмите желтую кнопку фиксатора и извлеките резервуар для воды из задней части робота — вытащите швабру из резервуара для воды — очистите швабру моющим средством — высушите швабру.
Примечание:
- Полностью положите швабру на дно резервуара для воды, прижмите ее к наклейке.
- ЗАПРЕЩАЕТСЯ заряжать робота на зарядной станции, когда он находится в Web Режим мытья полов
- Пожалуйста, опорожните и высушите резервуар для воды, очистите и высушите швабру после использования.
Примечание: НЕ вынимайте уплотнительный силикон и уплотнительный шарик из резервуара для воды, чтобы ребенок случайно не проглотил их и не поранился.
[Чистка боковых щеток]
A) Снимите боковые щетки с помощью отвертки.
B) Протрите боковые щетки сухой тканью.
C) Замените боковую щетку, если она повреждена и вышла из строя.
D) Если есть небольшие повреждения или неправильная форма стороны
Почистите, снимите его с робота и придайте форму кипяченой водой.
[ Очистка датчиков и зарядных контактов)
Протрите датчики, зарядные контакты и контакты зарядной док-станции, всасывающее отверстие с помощью прилагаемого чистящего инструмента или мягкой сухой ткани, чтобы сохранить их эффективность.
Примечание: ЗАПРЕЩАЕТСЯ использовать чистящие растворы (например, жидкости, такие как вода, разбавитель и т. д.) для очистки датчиков.
[Товарная накладная]
| Роботик | 1 шт |
| Зарядная док-станция | 1 шт |
| Пульт дистанционного управления (без батареи) | 1 шт |
| Адаптер питания | 1 шт |
| Боковая кисть | 2 шт |
| Инструмент для очистки | 1 шт |
| Инструкция по эксплуатации | 1 шт |
[Исправление проблем]
Пожалуйста, используйте эту таблицу для устранения распространенных проблем
| Неисправность (голосовое оповещение) | Решения |
| Основная щетка запуталась | Проверьте основную кисть, удалите препятствия |
| Левое колесо запуталось | Проверьте левое колесо, удалите препятствия |
| Запуталось правое колесо | Проверьте правое колесо, устраните препятствия |
| Датчики заблокированы | Проверьте датчик и очистите его |
| Оповещение о столкновении | Проверьте чувствительность бампера, удалите препятствия |
| Ненормальный заряд батареи | Очистите зарядные контакты (используйте мягкую сухую ткань) |
| Сбой зарядки аккумулятора | Проверьте, правильно ли подключены зарядные контакты к зарядной док-станции. Вы можете перемещать робота вручную, чтобы выполнить подключение и очистить контакторы, если это необходимо. |
| Робот попадает в беду во время работы и останавливается | Удалите препятствия и перезапустите |
| Не удалось подключиться к WIFI | Проверьте мощность сигнала WIFI, убедитесь, что робот работает в хорошем состоянии WIFI и неправильное подключение. |
| Низкая эффективность очистки / Утечка грязи или пыли | Мусорное ведро заполнено, пожалуйста, опорожните и очистите его. Забился фильтр, очистите фильтр |
| Ненормальный шум в уборке | Основная щетка/Боковые щетки/Колеса зацепились за что-то на полу, выключите робота и удалите препятствия |
| Ошибка автоматической перезарядки | Удалите препятствия вокруг зарядной станции и разместите ее на открытой площадке без препятствий. |
| Робот не может включиться | Низкий заряд батареи, пожалуйста, полностью зарядите перед использованием |
[ Запись ]
Пожалуйста, попробуйте следующее. Если устранить неполадку не удалось:
- Переместите боковую кнопку питания в положение ON. Перезапустите робота.
- Если робот отстал, похлопайте по бамперу и перезапустите робота.
- Если робот не будет двигаться вперед, проверьте датчики защиты от падения и очистите крышку датчиков.
- Если проблема все еще не решена вышеуказанными действиями, отправьте робота обратно в наш центр послепродажного обслуживания.
Важные инструкции по безопасности
[Диапазон применения]
- ТОЛЬКО ДЛЯ ВНУТРЕННЕГО бытового использования. Не используйте устройство на открытом воздухе, в коммерческих или промышленных условиях.
- Если из-за ступеньки или лестницы в зоне уборки произошел обрыв, следует включить прибор, чтобы убедиться, что он может обнаружить ступеньку, не упав с края. Может возникнуть необходимость установить физический барьер на краю, чтобы устройство не упало.
- Не используйте прибор в очень жарких или холодных условиях (выше 40 ° C или ниже 0 ° C) и не используйте на поверхности слизи.
- Очистите область, которую нужно очистить. Уберите с пола шнуры питания и мелкие предметы, которые могут запутать устройство. Заправьте бахрому под основание коврика и приподнимите с пола такие предметы, как шторы и скатерти.
- Не используйте прибор в местах, где есть зажженные свечи или хрупкие предметы.
- Дети не должны играть с прибором. Уборка и техническое обслуживание не должны производиться детьми без присмотра. Пожалуйста, держите безопасное пространство от детей и домашних животных, когда прибор убирает комнату.
- Пожалуйста, храните чистящие средства в безопасном месте, недоступном для детей.
- Не кладите никакие предметы на прибор. {В том числе дети и домашние животные.)
- Не используйте прибор для сбора крупных предметов или острых предметов (например, камней, стекла, железных гвоздей и т. д.).
- Не используйте прибор на длинном плюшевом ковре.
- Не используйте Прибор для сбора легковоспламеняющихся или горючих материалов, таких как бензин, тонер для принтеров или копировальных аппаратов, горящие окурки, или используйте в местах, где они могут находиться.
- Выключите / отключите питание перед очисткой или обслуживанием устройства / зарядной док-станцией.
- Устройство необходимо использовать в соответствии с указаниями в данной инструкции по эксплуатации.
Мы не можем нести ответственность за любой ущерб или травмы, вызванные неправильным использованием.
[Зарядка батареи ]![]()
- Используйте только оригинальные аккумуляторную батарею и зарядную док-станцию, поставляемые с устройством от производителя.
- Робот содержит батареи, которые могут сниматься/ремонтироваться/заменяться только квалифицированным персоналом.
- Не размещайте зарядную станцию рядом с источником тепла. (например, радиатор отопления)
- Не протирайте контакты зарядной док-станции и зарядные контакты damp тряпкой или влажной рукой.
- Перед утилизацией прибора аккумулятор необходимо извлечь и утилизировать в соответствии с местными законами и постановлениями.
- Убедитесь, что робот выключен во время транспортировки, настоятельно рекомендуется использовать оригинальную упаковку от производителя.
- Если шнур питания поврежден, он должен быть заменен производителем или его агентом по обслуживанию, чтобы избежать опасности.
- Если робот не используется в течение длительного времени, храните его в сухом и прохладном месте, полностью зарядив аккумулятор. Во избежание повреждения аккумулятора перезаряжайте аккумулятор каждые 3 месяца.
Условия гарантии
Послепродажное обслуживание роботов-пылесосов осуществляется строго в соответствии с Законом о защите прав потребителей КНР и Законом о качестве продукции КНР.
[Гарантийный срок]
- Через 7 дней после подтверждения получения робота, если есть какие-либо проблемы с качеством, которые проверены и подтверждены сервисным центром, робот будет иметь бесплатный возврат или услугу замены.
- В течение 8–15 дней с момента подтверждения получения робота, если есть какие-либо проблемы с качеством, проверенные и подтвержденные сервисным центром, роботу будет предоставлена бесплатная замена или ремонт.
- 12 месяцев с момента подтверждения получения робота, если есть какие-либо проблемы с качеством. которые проверены и подтверждены сервисным центром, Робот будет иметь бесплатную услугу ремонта.
Советы: Пожалуйста, храните все упаковочные материалы не менее 30 дней, чтобы избежать повреждений во время транспортировки.
[Гарантия]
| Товары | Детали и компоненты | Гарантийный срок |
| Роботик | Робот (содержит литий-ионные батареи) | 12 месяца |
| соучастник | Зарядная док-станция, шнур питания, мусорное ведро, бак для воды | 12 месяца |
| Потребляемый | Основная щетка, боковые щетки, пульт дистанционного управления, тряпка для швабры, фильтры, чистящие средства | / |
Примечание: Предоставленные расходные материалы с роботом от производителя предназначены только для замены, покупайте их у производителя или его агентов.
[ Негарантийные условия ]
- Несанкционированный ремонт, неправильное использование, падение, повреждение или контакт с водой / жидкостью, изменение / замена компонентов, использование неподходящих компонентов, которые не являются оригинальными, тера или тampНаклейку с гарантией или наклейку с защитой от подделки.
- Гарантийный срок истек.
- Поврежден в результате форс-мажора.
- Неудачи не связаны с качеством.
- Неисправности/повреждения, вызванные неправильным сохранением или использованием клиента.
Инструкция по загрузке приложения
Только для робота с функцией WiFi.
- Отсканируйте следующий QR-код, чтобы загрузить приложение.
- После установки приложения включите робота, нажмите кнопку WIFI на пульте дистанционного управления, пока не услышите звонок «Дин-Дин-Донг». (Модель без камеры не имеет звонка «Дин-Дин-Донг»)
- Откройте приложение, подключитесь к своему роботу, нажмите «Инструкция по эксплуатации» в нижней правой части приложения и следуйте инструкциям шаг за шагом или обратитесь к руководству пользователя приложения.
* Примечание: применимо только к роботу с функцией Wi-Fi *
изменения или модификации, явно не одобренные стороной, ответственной за соответствие, могут лишить пользователя права на эксплуатацию оборудования. Это устройство соответствует требованиям части 15 правил FCC. Эксплуатация возможна при соблюдении следующих двух условий:
- это устройство не должно вызывать вредных помех, и
- это устройство должно принимать любые помехи, включая помехи, которые могут вызвать сбои в работе.
Примечание: Это оборудование было протестировано и признано соответствующим ограничениям для цифровых устройств класса B в соответствии с частью 15 правил FCC. Эти ограничения предназначены для обеспечения разумной защиты от вредных помех при установке в жилых помещениях. Это оборудование генерирует, использует и может излучать радиочастотную энергию, и, если оно не установлено и не используется в соответствии с инструкциями, может создавать вредные помехи для радиосвязи. Однако нет гарантии, что помехи не возникнут в конкретной установке. Если это оборудование создает вредные помехи для радио- или телевизионного приема, что можно определить, выключив и включив оборудование, пользователю рекомендуется попытаться устранить помехи одним или несколькими из следующих способов:
- Изменить ориентацию или местоположение приемной антенны.
- Увеличьте расстояние между оборудованием и приемником.
- Подключите оборудование к розетке в цепи, отличной от той, к которой подключен приемник.
- Обратитесь за помощью к дилеру или опытному радио / телевизионному технику.
Документы / Ресурсы
Описание
Младший брат из флагманской линейки S6, включающей также Roborock S6 и Roborock S6 MaxV. Является удешевленной версией модели S6.
Представлен в двух цветовых решениях:
- S6P02-00 — белый
- S6P52-00 — черный
Основные отличия от старшей модели:
- 4-ре датчика падения вместо 6-ти,
- Нет улучшенной шумоизоляции двигателя,
- Покрытие корпуса матовое (меньше отпечатков),
- Контейнер для пыли уменьшен на 20 мл., резервуар для воды, напротив, увеличили на 20 мл.
- Скромнее комплектация (из запасных частей положили только 2-е пары клапанов-дозаторов для водяного резервуара),
- Зарядная база не имеет отсека для сворачивания в него лишнего провода питания.
Через официальное приложение MiHome подключается только на Россию или Европу. При использовании мода от Vevs и модифицированного плагина (находится в разделе «Файлы»), с разблокированным регионом, подключается на любой регион.
«Из коробки» доступен русский голосовой пакет. Плагин в приложении также переведен на русский.
Влажная уборка представлена модулем, пристегивающимся к днищу пылесоса. Конструкция предусматривает два режима подачи воды: слабый и сильный (регулируются ручным регулятором). Полностью отключить подачу воды нельзя поэтому если нужна только сухая уборка, то модуль с водой нужно снимать, либо оставлять его пустым.
Оснащен лидаром, что позволяет пылесосу хорошо ориентироваться в помещении и строить подробную карту. Лидар с кнопкой, что позволяет ему не застрять под мебелью.
Умеет: сохранение карты, зональная уборка / по комнатам, указание запретных зон и виртуальных стен, режим ковра, режим «Не беспокоить», таймер, история уборок, деление на комнаты (а также объединение нескольких в одну), выбор разного уровня мощности в каждой комнате.
| Лазерный дальномер | |
| Емкий аккумулятор 5200 мАч | |
| Зональная уборка / по комнатам | |
| Запретные зоны, виртуальные стены | |
| Уборка по таймеру | |
| Цена (ниже у всех линейки S6) | |
| Механическое управление подачей воды | |
| Бедная комплектация |
Пылесос Xiaomi Roborock S6 Pure Smart Sweeping Vacuum Cleaner — инструкция пользователя по применению, эксплуатации и установке на русском языке. Мы надеемся, она поможет вам решить возникшие у вас вопросы при эксплуатации техники.
Вы можете скачать инструкцию к Xiaomi Roborock S6 Pure Smart Sweeping Vacuum Cleaner по ссылке ниже, если не хотите ждать загрузки. Если остались вопросы, задайте их в комментариях после инструкции.
«Загружаем инструкцию», означает, что нужно подождать пока файл загрузится и можно будет его читать онлайн. Некоторые инструкции очень большие и время их появления зависит от вашей скорости интернета.
Полезные видео
Остались вопросы?
Не нашли свой ответ в руководстве или возникли другие проблемы? Задайте свой вопрос в форме ниже с подробным описанием вашей ситуации, чтобы другие люди и специалисты смогли дать на него ответ. Если вы знаете как решить проблему другого человека, пожалуйста, подскажите ему

Часто задаваемые вопросы

Как посмотреть инструкцию к Xiaomi Roborock S6 Pure Smart Sweeping Vacuum Cleaner?
Необходимо подождать полной загрузки инструкции в сером окне на данной странице или скачать кликнув по специальной кнопке.
Руководство на русском языке?
Все наши руководства представлены на русском языке или схематично, поэтому вы без труда сможете разобраться с вашей моделью
Как можно распечатать инструкцию?
Скачайте ее по специальной кнопке над формой чтения на ваше устройства и отправьте на печать.