-
Contents
-
Table of Contents
-
Bookmarks
Quick Links
IN-WASH INSPIRA
A803060001
A803060002
ES / EN / FR / DE / RU / PT / PL / CZ
Related Manuals for Roca IN-WASH INSPIRA A803060001
Summary of Contents for Roca IN-WASH INSPIRA A803060001
-
Page 1
IN-WASH INSPIRA A803060001 A803060002 ES / EN / FR / DE / RU / PT / PL / CZ… -
Page 2
— Antes de instalar, asegúrese de leer este manual de instalación y la hoja adjunta de precaucio- nes de seguridad. Las piezas deben ser instaladas de acuerdo a las instrucciones. — Las aguas de lluvia o desmineralizadas, así como el agua de mar, agua industrial o agua gris, no son adecuadas para el uso de este equipo. -
Page 3
— Lesen Sie vor der Installation diese Montageanleitung und das beiliegende Blatt mit den Si- cherheitshinweisen. Die Teile müssen gemäß der Anleitung installiert werden. — Elektronische Anschlüsse dürfen nicht beschädigt werden. — Regenwasser oder Grauwasser bzw. voll entsaltztes Wasser sind für den Betrieb nicht geeig- net. -
Page 4
— Przed instalacja, nalezy uwaznie przeczytac niniejsza instrukcje instalacji oraz dołaczona karte z opisem srodków ostroznosci i bezpieczenstwa. Czesci powinny byc instalowane zgodnie z instrukcja. — Uwazac, by nie uszkodzic elementów podłaczenia elektrycznego. — Zalecany zakres cisnienia wody wynosi od 0,05 MPa — 0,9 MPa. Urzadzenie nalezy uzytkowac we wskazanym zakresie cisnienia wody. -
Page 5
[mm]… -
Page 7
Instalación recomendada Recommended installation Installation recommandée Empfohlene Installation Рекомендации для монтажа Zalecana instalacja Doporučený způsob montáže Fijación Fixation Ø40 Fixations Befestigung Крепления Mocowanie Upevnění Ø110 55 ÷ 60 Ejemplo de instalación Recomendado Installation example Recommended Recommandé Exemple d’installation Installationsbeispiel Empfohlen Пример… -
Page 8
Podłaczenie hydrauliczne Wasseranschluss Conexión hidráulica Шланг для подключения воды Potrubí Pipes Ligação hidráulica Raccordement en eau Opción Opción Option Option Option Option Option Option Вариант Вариант Opção Opção Opcja Opcja Možnost Možnost 0,5 — 9 bar Ø1/2” Ø1/2” [mm] Conexión eléctrica Podłaczenie elektryczne Stromanschluss Электрокабель… -
Page 9
Según normativa vigente According to current legislation Selon les normes en vigueur Gemäß geltender Norm В соответствии с национальными нормативами De acordo com a legislação em vigor 25A lDn 0.03A 10 ó 15A Saskaņā ar spēkā esošajiem noteikumiem V souladu s aktuálními právními předpisy 3 x 1mm Obligatorio L Min. -
Page 10
La instalación eléctrica debe protegerse mediante un interruptor diferencial de IDn 0,03A y 25A de potencia y de un interruptor magnetotérmico de 10 ó 15A. situado fuera de los volúmenes del cuarto de baño. La conexión de alimentación de este producto debe realizarse siempre mediante el conector suministrado, a una instalación fija o a un enchufe de pared . La línea eléctrica a instalar debe ser manguera de tres conductores (fase, neutro, tierra) de mínimo 1mm 2 de sección exclusivamente dedicada al inodoro. -
Page 11
L Min. = 300 mm Neutro Tierra Vivo Neutral Ground Vivo Neutre Terre Vivo Neutralleiter Schutzleiter Phase Ноль Земля Фаза Neutro Terra Fase Zero Uziemienie Plus Střední vodič (N) Uzemění Fáze (+3mm) 45º (+3mm) -
Page 13
No incluido Not Included Not inclues Nicht im Lieferumfang enthalten Не включено Não incluído Nie dołączone Není součástí dodávky… -
Page 18
X = 2mm X = 3mm X = 4mm Max. 1mm… -
Page 19
CR 2032 (x2) Incluídas Included Enthalten Opcional Optional Optional Abrir agua Enchufar Sincronizar Auto-calibración Open Power Connect Auto-test Ouvrir l’eau Brancher Synchroniser Auto-calibrage Wasser auf Stroman Verbinden Selbsttest Открытие Включение Установка связи Автокалибровка Крана Электропитания Sincronizar Auto-calibração Abrir água Ligar Zsynchronizować… -
Page 20
120 sekund vytéká voda z trysky e-bidetu. Ver manual de usuario See user manual Voir le manuel d’utilisation Siehe Gebrauchsanleitung Пожалуйста, изучите Руководство по использованию Veja o manual do usuário Patrz podręcznik użytkownika Viz. uživatelská příručka Roca Sanitario, S.A. Avda. Diagonal, 513 08029 Barcelona SPAIN www.roca.com…
Узнавай о новинках и акциях первым
Вы успешно зарегистрированы на сайте.
Вам доступен личный кабинет пользователя.
Перейти к покупкам
Ваш пароль воcстановлен!
Теперь вы можете полноценно пользоваться
всеми возможностями нашего интернет-магазина.
Здравствуйте, Ваша претензия принята и зарегистрирована.
В течение 3-х рабочих дней Вам, на электронную почту, будет дан письменный ответ. В случае возникновения дополнительных вопросов, менеджер претензионного отдела свяжется с Вами.
Перейти к покупкам

Ваше сообщение об ошибке на сайте успешно отправлено.
Большое спасибо!
Добавить отзыв о магазине
Торг для данного товара сейчас не возможен!
Сколько вы готовы заплатить за этот товар?
Введите ваше ценовое предложение
Мы согласны с вашим предложением
Мы принимаем вашу цену, и вы можете купить товар по цене:
0 руб.
Roca IN-WASH INSPIRA: List of Available Documents
Note for Owners:
Guidesimo.com webproject is not a service center of Roca trademark and does not carries out works for diagnosis and repair of faulty Roca IN-WASH INSPIRA equipment. For quality services, please contact an official service center of Roca company. On our website you can read and download documentation for your Roca IN-WASH INSPIRA device for free and familiarize yourself with the technical specifications of device.
More Toilets Devices:
-
Glacier bay BECK
GBTO103INSTALLATION MANUAL | MANUEL D’INSTALLATION | MANUAL DE INSTALACIÓNMeasures: inch [millimeter]Mesures: pouce [millimètre]Medidas: pulgadas [milímetros]Flush | Chasse | Descarga1.1 & 1.6 gal | 4 & 6 L6” [150]28 3/8” [720]18 1/2” [470]12” [305]17 1/8” [434]15 3/4” [400]27 3/8” [695]29 7/8” [760]15 3/4” [400]29 7/8” [760]10 5/8” [270]15 3/4” [400]6 11/16” …
BECK Toilets, 8
-
Invacare H450
ThismanualMUSTbegiventotheuseroftheproduct.BEFOREusingthisproduct,thismanualMUSTbereadandsavedforfuturereference.Invacare®OmegaH450/H450LAenStationaryToiletChairUserManual…………………………………..4frChaise-toilettesposéexeManueld’utilisation………………………………6itSediadatoilettessaManualed’uso………………………………….10esSilladeinodoro� …
H450 Medical Equipment, 36
-
Helvex AT-5
INSTALLATION GUIDE GUÍA DE INSTALACIÓNAsiento para WC Alargado, Frente Abierto con Tapa de Cierre LentoElongated Toilet Seat for WC, Open Front with Slow Closing Toilet LidAT-5 RelaciónInstallationRequirementsHerramienta Requerida/ Required Toolsdesarmador de cruz / screwdriverInstalación General/ General InstallationAbra los cubretornillos del asiento con tapa. / Seat Open screw caps.1cubre …
AT-5 Toilets, 2
-
Teka INCA RIMLESS BTW 700200200
INCA RIMLESS BTWGUIA INSTALACIÓN INODOROTOILET INSTALLATION GUIDEINODORO PEGADO A LA PAREDBACK TO WALL TOILETCUVETTE CARÉNÉE JUSQU´AU MURWC-KOMBINATION BACK-TO-WALL WWW.STROHM-TEKA.COMREF.: 700200200ESENFRDE …
INCA RIMLESS BTW 700200200 Toilets, 12
-
American Standard FUNZIONALE Series
FUNZIONALESERIESERIE Sanitario inteligente de una piezaSmart one piece toilet Ref. 609561001 6.0 / 4.2 Lpf. 1.6 / 1.1 Gpf. · Dual Flush for an 1.1 Gpf. average consumption· Seat heating system · Hidden trap with elongated profile· Integrated dryer to be used after …
FUNZIONALE Series Toilets, 3
Recommended Documentation:
Roca Manuals and Guides:
The main types of Roca IN-WASH INSPIRA instructions: user guide — rules of useing and characteristics, service manual — repair, diagnostics, maintenance, operation manual — description of the main functions of Roca IN-WASH INSPIRA equipment, etc.
Most of the instructions, that you can see on the site are uploaded by our users. If you have available a manual or document for Roca IN-WASH INSPIRA, which is currently not on the site or present in a different language version, we ask you to upload your document on website, using the «uploading form» available to all registered users.
- Manuals
- Brands
- Roca Manuals
- Toilets
- IN-WASH INSPIRA
- Manual
-
Contents
-
Table of Contents
-
Troubleshooting
-
Bookmarks
Quick Links
IN-WASH INSPIRA
ES / EN / FR / DE
Related Manuals for Roca IN-WASH INSPIRA
Summary of Contents for Roca IN-WASH INSPIRA
-
Page 1
IN-WASH INSPIRA ES / EN / FR / DE… -
Page 2
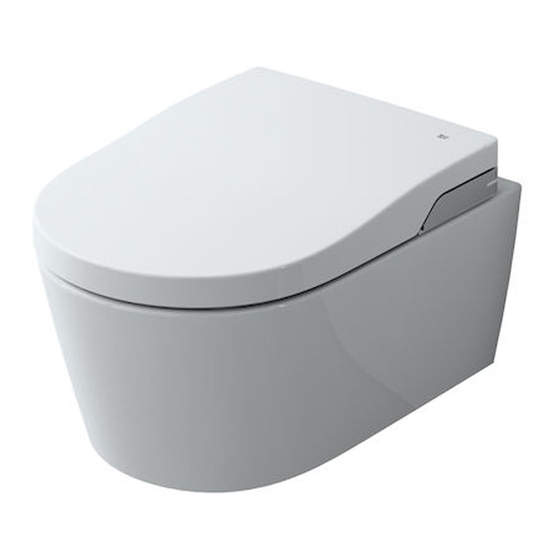
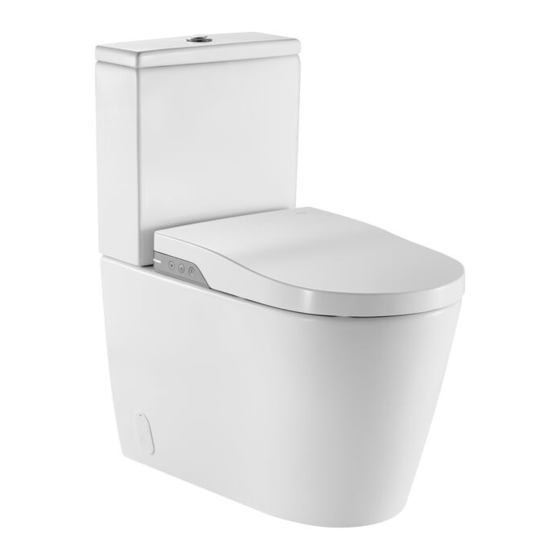
Fig. 1 Modelo In-Wash Inspira suspendido Modelo In-Wash Inspira tanque bajo Wall-hung In-Wash Inspira model Floorstanding In-Wash Inspira model Modèle In-Wash Inspira suspendu Modèle In-Wash Inspira au sol In-Wash Inspira Wandmodell In-Wash Inspira Standmodell Soporte a pared Wall bracket Support mural… -
Page 3
Fig. 2 Mando a distancia In-Wash Inspira In-Wash Inspira remote control Télécommande In-Wash Inspira In-Wash Inspira Fernbedienung FUNCIONES FUNCTIONS FONCTIONS FUNKTIONEN AJUSTES ADJUSTMENTS RÉGLAGES EINSTELLUNGEN AGUA AIRE WATER WASSER LUFT Lavado perineal Perineal cleaning Lavage périnéal Ladydusche Secado Drying Séchage… -
Page 4: Table Of Contents
Una negligencia o el mal uso del producto, podrían provocar lesiones graves. El In-Wash Inspira no es apropiado para ser utilizado por personas (incluyendo niños) con limitacio- nes de sus capacidades físicas, sensoriales o mentales o que carezcan de la experiencia o del cono- cimiento para utilizarlo, a no ser, que por su seguridad, sean vigiladas por una persona responsable o que reciban instrucciones de cómo se debe utilizar.
-
Page 5: Precauciones De Instalación
• No utilice el aparato más allá del tiempo establecido por ciclo. Si lo hace, puede alterar el equilibrio natural del cuerpo. • Las personas que están recibiendo tratamiento médico o terapia en estas áreas corporales deben consultar a su médico antes de usar este tipo de producto. Acerca de la tapa y el aro: •…
-
Page 6: Precauciones De Mantenimiento
El In-Wash Inspira es un inodoro que está diseñado para la limpieza de la zona anal y perineal. Su uso está previsto, principalmente, para su utilización en el ámbito privado; Su uso queda restringido a espacios cerrados. Cualquier otro uso se considerará no conforme a su finalidad y Roca no asumirá…
-
Page 7: Puesta En Marcha
❚ 2.2 PUESTA EN MARCHA 2.2.1 VINCULACIÓN DEL MANDO A DISTANCIA Y AUTO-CALIBRACIÓN Para vincular el mando al In- Wash es necesario: AUTO-CALIBRACIÓN Max. 60 s. CR 2032 (x2) 5 s. 120 s. 1- Colocar las pilas en el mando. 2- Abrir la llave de paso de agua.
-
Page 8: Función Secado
3.1.3 FUNCIÓN SECADO 3.1.4 FUNCIÓN PARO/STOP Esta función proporciona aire para el secado tras el Detiene cualquier función activa. uso de las funciones de lavado. Durante el uso de esta función se permite el ajuste de: • Temperatura del aire. Para detener la función presionar el botón Paro/Stop del mando a distancia o del control lateral auxiliar.
-
Page 9: Secado Mediante Control Lateral Auxiliar
3.3.2 SECADO MEDIANTE CONTROL LATERAL AUXILIAR La función secador también está preestablecida con una temperatura media. Para detener la función presionar el botón Paro/Stop del mando a distancia o del control lateral auxiliar. El secado se detiene a los 3 minutos si no se presiona ningún botón.
-
Page 10: Vuelta A Los Ajustes De Fábrica
❚ 3.5 VUELTA A LOS AJUSTES DE FÁBRICA. Para volver a los ajustes de fábrica presionar en el mando a distancia simultáneamente durante 5 segundos las teclas Secado y Paro/Stop. Se borrarán todos los valores modificados previamente por el usuario y el In-Wash quedará con los ajustes de fábrica: •…
-
Page 11: Limpieza De La Cánula / Sustitución De La Boquilla
❚ 4.2 LIMPIEZA DE LA CÁNULA / SUSTITUCIÓN DE LA BOQUILLA Se recomienda limpiar la cánula y la boquilla semanalmente. El e-bidet se suministra con una boquilla adicional con 3 orificios de salida que proporciona un lavado más intenso. Se puede sustituir la boquilla ins- talada por ésta.
-
Page 12: Cambio De Pilas Del Mando A Distancia
1. Cerrar la llave de paso. 2. Con ayuda de un destornillador o moneda retirar el filtro. 3. Limpiar el filtro. 4. Volver a colocar el filtro en su posición asegurando que esté bien colocado y volver a abrir la llave de paso. Para el modelo tanque bajo: 1.
-
Page 13: Solución De Problemas
Advertencia importante: Blanco Si al retirar la tapa y el aro se extraen los amortiguadores, es importante tener en cuenta la posición de estos ya que su cam- bio de posición puede dañar gravemente el Gris producto. El amortiguador blanco va situado en la de- recha (para amortiguar el asiento) y el gris a la izquierda (para amortiguar la tapa).
-
Page 14: Características Técnicas
NOTA: Este símbolo y sistema de reciclado es de aplicación únicamente en la Unión Europea. NO aplica en el resto del mundo. En ROCA estamos comprometidos con la protección del medio ambiente. Por favor, ayúdenos desechando este producto al final de su vida de forma responsable, para evitar que determinadas sustancias contenidas en los productos eléctricos o electrónicos puedan…
-
Page 15: Safety
A negligence or an incorrect use of the product can lead to serious injuries. The In-Wash Inspira is not suitable to be used by individuals (including children) with physical, sen- sory or mental disabilities or who lack the experience or knowledge to use it, unless, for their own safety, they are monitored by a responsible person or they receive instructions on how to use it.
-
Page 16: Installation Precautions
These precautions are important for a safe use. Make sure you follow them and use the product properly. The In-Wash Inspira is a WC that has been designed for the cleaning of the anal and perineal areas. It has been designed mainly for private use. Its use is restricted to enclosed spaces. Any other use will not be deemed in accordance with its purpose and Roca will not accept any responsibility for the consequences that might arise from an improper use.
-
Page 17: Maintenance Precautions
To lean back when you are sitting on the In-Wash will facilitate the adjustment of the nozzle and will reduce possible splashing. Do not urinate or splash water or cleaning agents on the main body or the mains plug. If you do it, you may cause a fire, electric shock, heat or a short-circuit and you may cause stains or a malfunction.
-
Page 18: Use Of The Product
1- Place the batteries inside the remote control. 2- Open water supply valve 3- Activate the power to supply the In-Wash. 4- After connecting the power, you have 60 seconds to link the remote control, pressing simultaneously the Drying and Stop buttons on the remote control for 5 seconds.
-
Page 19: Settings With The Remote Control
❚ 3.2 SETTINGS WITH THE REMOTE CONTROL 3.2.1 SETTING OF TEMPERATURE 3.2.2 SETTING OF WATER PRESSURE The water and air functions have a temperature setting. The cleaning water pressure may be modified obtaining a higher or lower water force in 3 levels. The water temperature has 4 levels: By pressing the plus symbol we can obtain a higher •…
-
Page 20: Operating Modes Led Lights
• Position- 3 Perineal, 3 Anal. To set a different value to the pre-set one, with the activated function, adjust each of the temperature, pressure or position parameters to the desired level and press the + and — buttons simultaneously on the remote control for 3 seconds.
-
Page 21: Turning Off (Stand-By) / Reset Of The Product
❚ 3.6 TURNING OFF (STAND-BY) / RESET OF THE PRODUCT To switch off the In-Wash, press the Stop button on the auxiliary side control for 3 seconds. To reactivate the In-Wash, press the Stop button on the auxiliary side control. From that moment on the device carries out a power self-calibration for 2 minutes;…
-
Page 22: Descaling Of The Tip
4- Remove the tip by rotating it in an anti-clockwise direction. 5- Clean the nozzle. 6- Clean the tip. 7- Replace the tip on the nozzle. 8- Once the cleaning is finished, press the Stop button on the remote control or the auxiliary side control. Should you fail to do so, the nozzle will move backwards automatically after 5 minutes.
-
Page 23: Removal Of Seat And Cover
4.7 REMOVAL OF SEAT AND COVER ❚ To remove the seat and cover, slide the internal side tab upwards and carry out the movement described in the image; raise the side of the turned tab and slide it sideways towards the opposite side. To replace the seat and cover carry out the operation in reverse.
-
Page 24: Technical Features
The seat moves when sitting down. Tighten the rear brackets of the seat. Should the problem persist, please call the Technical Assistance. 6. TECHNICAL FEATURES 6.1 FEATURES / SPECIFICATIONS ❚ SPECIFICATIONS In-Wash INSPIRA Model Power supply 220-240V AC Frequency 50/60Hz Max. power input…
-
Page 25: Disposal Of Electric And Electronic Products
NOTE: This symbol and recycling system is only applicable in the European Union. It does NOT apply to the rest of the world. At ROCA we are committed to protecting the environment. Please help us by discarding this product at the end of it life-cycle in a res- ponsible manner, to prevent that certain substances contained in electrical or electronic equipment may cause harm to human health and the environment.
-
Page 26: Sécurité
1.1.1 AVERTISSEMENTS GÉNÉRAUX A propos de l’emballage: • L’emballage du In-Wash Inspira n’est pas un jouet. • Ne pas laisser les enfants jouer avec les sacs en plastique ou avec les cartons d’emballage, cela peut présenter un risque d’asphyxie ou de blessure. Conserver l’emballage dans un lieu sur ou jeter le en suivant les règles environnementales.
-
Page 27: Précautions D’installation
Ces précautions sont importantes pour une utilisation sûre. Assurez-vous de les suivre et d’utiliser correctement le produit. Le In-Wash Inspira est un WC conçu pour le nettoyage de la région anale et périnéale. Son utilisa- tion est principalement destinée à une utilisation dans le secteur privé; Son utilisation est limité à des espaces clos.
-
Page 28: Précautions D’entretien
Ne pas monter sur le produit. Éviter de forcer la fermeture du siège ou de l’abattant. Ne pas plier, tirer, tordre ou placer des objets lourds sur le cordon d’alimentation. En cas de fuite d’eau, toujours fermer le robinet d’arrêt. Ne pas utiliser de siège d’apoint pour les enfants ou les adultes si vous utilisez l’In-Wash.
-
Page 29: Fonctionnement
Le préchauffage est effectué à 36°. Les fonctions peuvent être activées à tout moment, mais si elles sont activées trop tôt, l’eau n’aura pas le temps d’atteindre la température établie.Une période de préchauffage minimum de 30 secondes est donc recommandées entre le moment où…
-
Page 30: Réglage De La Température
3.2.1 RÉGLAGE DE LA TEMPÉRATURE 3.2.2 RÉGLAGE DE LA PRESSION DE L’EAU Les fonctions eau et air disposent d’un réglage de tem- La pression de l’eau peut être modifiée pour obtenir pérature. une pression plus ou moins forte sur 3 niveaux. La température de l’eau a 4 niveaux : Presser le symbole plus pour obtenir une pression plus forte, presser le symbole moins pour obtenir une pres-…
-
Page 31: Modes De Fonctionnement Des Lumières Led
• Position 3 pour le lavage périnéal et le lavage anal. Pour modifier les valeurs pré-établies, lorsque la fonction est activée, ajuster la température, la pression et la position jusqu’à obtenir les paramètres voulus et appuyez sur les boutons + et — simultanément sur la télécommande pendant 3 secondes.
-
Page 32: Arrêt Du Produit (Stand-By) / Reset
❚ 3.6 ARRÊT DU PRODUIT (STAND-BY) / RESET Pour arrêter le In-Wash, appuyez sur le bouton Stop du clavier latéral pendant 3 secondes. Pour réactiver le In-Wash, appuyez sur le bouton Stop du clavier latéral. A partir de ce moment l’appareil effectue un auto-calibrage de puissance pendant 2 minutes, pendant cette période de l’eau coule de la canule.
-
Page 33: Détartrage De L’embout
3- La canule sort sans projeter d’eau. 4- Enlever l’embout en le tournant dans le sens contraire des aiguilles d’une montre. 5- Nettoyer la canule. 6- Nettoyer l’embout. 7- Replacer l’embout de la canule. 8- Une fois que le nettoyage est terminé, appuyer sur le bouton Stop de la télécommande ou du clavier latéral. Si vous ne le faites pas, la canule va se rentrer automatiquement après 5 minutes.
-
Page 34: Arrêt Dû À Une Absence Prolongée
4.6 ARRÊT DÛ À UNE ABSENCE PROLONGÉE ❚ Si vous n’utilisez pas le In-Wash pendant une longue période, il est recommander de l’éteindre. Voir chapitre 3.6. 4.7 RETRAIT DE L’ABATTANT ❚ Pour retirer l’abattant, faites glisser la languette latérale intérieure vers le haut et effectuez le mouvement décrit sur l’image; Lever le côté e la languette tournée et la faire coulisser latéralement vers le côté…
-
Page 35: Caractéristiques Techniques
Les fixations du siège ne sont pas assez sérées Ressérez les fixations Si le problème persiste, appeler le Service Technique. 6. CARACTÉRISTIQUES TECHNIQUES ❚ 6.1 CARACTÉRISTIQUES / SPÉCIFICATIONS SPÉCIFICATIONS In-Wash INSPIRA Modèle Alimentation électrique 220-240V AC Fréquence 50/60Hz Potencia absorbida máx.
-
Page 36: Déchets D’équipements Électriques Et Électroniques
NOTE: Ce système de symboles et de recyclage est applicable uniquement dans l’Union européenne. Ne pas appliquer au reste du monde. Chez ROCA nous sommes engagés à protéger l’environnement. Aidez nous en jetant ce produit à la fin de sa vie de façon responsable afin d’éviter que certaines substances contenues dans les produits probablement électriques ou électroniques nuisent à…
-
Page 37: Sicherheit
Personen (einschließlich Kinder), die aufgrund ihrer physischen, sensorischen oder geistigen Fähigkei- ten oder ihrer Unerfahrenheit oder Unkenntnis nicht in der Lage sind, das In-Wash Inspira sicher zu bedienen, dürfen dieses Produkt zu ihrer eigenen Sicherheit nicht ohne Aufsicht oder Anweisung durch eine verantwortliche Person benutzen.
-
Page 38: Montagehinweise
Nachstehende Hinweise sind wichtig für einen sicheren Gebrauch. Beachten Sie diese Hinweise und verwenden Sie das Produkt richtig. Das In-Wash Inspira ist ein Dusch-WC mit Gesäß- und Ladydusche, also eine Kombination aus WC und Bidet. Es ist hauptsächlich für Privatbereiche bestimmt und darf nur in geschlossenen Räumen verwendet werden.
-
Page 39: Pflegehinweise
empfohlen, sich auf den hinteren Bereich des In-Wash-Sitzes zu setzen. Haupteinheit und Steckdose dürfen nicht mit Urin, Wasser oder Reinigungsmitteln in Berührung kom- men, da dies zu Brand, Stromschlag, Überhitzung, Kurzschluss und Fleckenbildung führen oder Be- triebsstörungen hervorrufen kann. In Öffnungen des Produkts dürfen keinerlei Gegenstände eingelassen oder eingeführt und Öffnungen dürfen nicht blockiert werden.
-
Page 40: Gebrauch Des Produkts
5- Sie hören einen Signalton und alle LEDs der Fernbedienung leuchten auf. Der Synchronisationsvorgang beginnt. Dieser dauert 120 Sekunden. Währenddessen läuft Wasser aus dem Duschstab in das WC. Trennen Sie das Gerät während dieses Prozesses nicht vom Stromnetz. Falls keine Verbindung hergestellt wird, ist der Vorgang ab Schritt 2 zu wiederholen. 2.2.2 GEBRAUCH DES PRODUKTS Das In-Wash ist mit einem kleinen internen Wassertank ausgestattet, der im Bereitschaftsmodus Kaltwasser enthält.
-
Page 41: Einstellungen Mit Der Fernbedienung
❚ 3.2 EINSTELLUNGEN MIT DER FERNBEDIENUNG 3.2.1 TEMPERATUREINSTELLUNG 3.2.2 EINSTELLUNG DER DUSCHSTRAHLINTENSI- TÄT Die Wasser- und die Föhntemperatur können reguliert Die Intensität des Duschstrahls lässt sich in 3 Stufen werden. regulieren. Die Wassertemperatur lässt sich in 4 Stufen einstellen: Durch Drücken der Plustaste wird die Intensität erhöht, durch Drücken der Minustaste gesenkt.
-
Page 42: Betriebsmodi Led-Leuchten
Temperatur, Intensität und Position der Reihe nach auf den gewünschten Wert eingestellt und jeweils die Tasten — und + der Fernbedienung 3 Sekunden lang gleichzeitig gedrückt. Jeder Temperatur-, Intensitäts- oder Positionsparameter ist einzeln zu speichern. Nach erfolgter Änderung gibt das In-Wash einen Piepton aus und die LEDs der Fernbedienung blinken. Wenn also beispielsweise die 3 Einstellungen der Gesäßdusche geändert werden sollen, sind bei aktivierter Funktion der Reihe nach folgende Tasten zu drücken Diese gespeicherten Werte werden gelöscht, falls die Fernbedienung aus irgendeinem Grund erneut mit dem Gerät verbunden werden muss.
-
Page 43: Reinigung Und Pflege
RESET Bei der erneuten Aktivierung des Produkts nach dem Stand-by Modus wird das Gerät zurückgesetzt (Reset). Nach jedem Reset führt das Gerät 2 Minuten lang die Selbstkalibrierung der Leistung durch. 4. REINIGUNG UND PFLEGE ❚ 4.1 ALLGEMEINE REINIGUNG REINIGUNG UND PFLEGE Die Fernbedienung muss vorsichtig mit einem feu- chten Tuch gereinigt werden.
-
Page 44: Entkalken Des Duschkopfs
❚ 4.3 ENTKALKEN DES DUSCHKOPFS Die Düsen des Duschkopfs können mit der Zeit verkalken. In diesem Fall ist der Duschkopf in einen handelsüblichen Entkalker einzulegen. Danach ausspülen und wieder montieren. ❚ 4.4 REINIGUNG DES FILTERS Anti-cal Entkalker Für den ordnungsgemäßen Gerätebetrieb wird empfohlen, den Wasserfilter mindestens einmal jährlich zu reini- gen.
-
Page 45: Abnehmen Der Sitzgarnitur
4.7 ABNEHMEN DER SITZGARNITUR ❚ Zum Abnehmen des Deckels und des Sitzes die innere seitliche Arretierung nach oben drehen und die abgebildete Bewegung ausführen: Die Seite mit der gedrehten Arretierung nach oben abheben und seitwärts zur anderen Seite schieben. Um den Sitz und den Deckel wieder einzusetzen, ist der Vorgang in umgekehrter Reihenfolge durchzuführen. Wichtiger Hinweis: Blanco Weiß…
-
Page 46: Technische Merkmale
Keramik sind nicht richtig festgezogen. Keramik festziehen. Falls das Problem weiterhin besteht, wenden Sie sich bitte an den Kundendienst. 6. TECHNISCHE MERKMALE 6.1 MERKMALE / SPEZIFIKATIONEN ❚ SPEZIFIKATIONEN Modell In-Wash Inspira Stromversorgung 220-240V AC Frequenz 50/60Hz Max. Leistungsaufnahme 1700W Wassererhitzer…
-
Page 47: Entsorgung Von Elektrischen Und Elektronischen Geräten
Anwendung. Bei ROCA setzen wir uns für den Umweltschutz ein. Bitte helfen Sie uns dabei und entsorgen Sie dieses Produkt am Ende seiner Le- bensdauer umweltgerecht, um zu verhindern, dass die in elektrischen und elektronischen Geräten enthaltenen Substanzen Schäden an Menschen und der Umwelt anrichten.
-
Page 48
Roca Sanitario, S.A. Avda. Diagonal, 513 08029 Barcelona SPAIN www.roca.com…
 |
[Page 1] Roca IN-WASH INSPIRA A803060001 IN-WASH INSPIRA A803060001 A803060002 ES / EN / FR / DE / RU / PT / PL / CZ |
 |
[Page 2] Roca IN-WASH INSPIRA A803060001 2 — Antes de instalar, asegúrese de leer este manual de instalación y la hoja adjunta de precaucio- nes de seguridad. Las piezas deben ser instaladas de acuerdo a las instrucciones. — Las aguas de lluvia o desmineralizadas, así como el agua de mar… |
 |
[Page 3] Roca IN-WASH INSPIRA A803060001 3 DE — Lesen Sie vor der Installation diese Montageanleitung und das beiliegende Blatt mit den Si- cherheitshinweisen. Die Teile müssen gemäß der Anleitung installiert werden. — Elektronische Anschlüsse dürfen nicht beschädigt werden. — Regenwa… |
 |
[Page 4] Roca IN-WASH INSPIRA A803060001 4 — Przed instalacja, nalezy uwaznie przeczytac niniejsza instrukcje instalacji oraz dołaczona karte z opisem srodków ostroznosci i bezpieczenstwa. Czesci powinny byc instalowane zgodnie z instrukcja. — Uwazac, by nie uszkodzic elementów podłac… |
 |
[Page 5] Roca IN-WASH INSPIRA A803060001 5 562 400 960 390 31 X2 X2 X2 X2 X1 X1 X1 X1 X1 X1X1 X2 X2 [mm] S M L |
 |
[Page 6] Roca IN-WASH INSPIRA A803060001 6 |
 |
[Page 7] Roca IN-WASH INSPIRA A803060001 7 LH 55 ÷ 60 A890090800 Recomendado Recommended Recommandé Empfohlen Рекомендованная система инсталляции Recomendado Zalecane Doporučeno Ejemplo de instalación Installation example Exemple d’installation Inst… |
 |
[Page 8] Roca IN-WASH INSPIRA A803060001 8 1 2 Conexión eléctrica Electrical Raccordement électrique Stromanschluss Электрокабель Ligação elétrica Podłaczenie elektryczne Elektro 75 [mm] 70 Ø1/2” 75 70 Ø1/2” 250 300 250 300 0,5 — 9 bar 55 55 55 55 Conexión hidráu… |
 |
[Page 9] Roca IN-WASH INSPIRA A803060001 9 OFF 25A lDn 0.03A 10 ó 15A A 220-240 VAC 50/60 Hz. 1700 W Max. D 600 2250 600 E V2 V3 V1 V0 C B 3 x 1mm 2 L Min. = 300 mm ØMin: 6 mm ØMax: 8,5 mm Este WC eléctrico puede instalarse en el volumen 2, aunque en caso de conectarse mediante una ba… |
 |
[Page 10] Roca IN-WASH INSPIRA A803060001 10 ES A La instalación eléctrica debe protegerse mediante un interruptor diferencial de IDn 0,03A y 25A de potencia y de un interruptor magnetotérmico de 10 ó 15A. situado fuera de los volúmenes del cuarto de baño. B La conexión de alimentac… |
 |
[Page 11] Roca IN-WASH INSPIRA A803060001 11 1 2 3 1 2 3 4 5 6 d1 d2 (+3mm) d2 d1 (+3mm) 45º s s/2 Neutro Neutral Neutre Neutralleiter Ноль Neutro Zero Střední vodič (N) Tierra Ground Terre Schutzleiter Земля Terra Uziemienie Uzemění Vivo Vivo Vivo Phase Фаза Fase Plus Fá… |
 |
[Page 12] Roca IN-WASH INSPIRA A803060001 12 1 OFF 3 2 1 2 3 4 |
 |
[Page 13] Roca IN-WASH INSPIRA A803060001 13 1 2 19 x2 No incluido Not Included Not inclues Nicht im Lieferumfang enthalten Не включено Não incluído Nie dołączone Není součástí dodávky 5 6 |
 |
[Page 14] Roca IN-WASH INSPIRA A803060001 14 2 3 1 1 1 2 3 2 3 7 8 |
 |
[Page 15] Roca IN-WASH INSPIRA A803060001 15 1 2 3 3 2 1 9 |
 |
[Page 16] Roca IN-WASH INSPIRA A803060001 16 1 3 2 4 6 5 2 1 3 10 11 |
 |
[Page 17] Roca IN-WASH INSPIRA A803060001 17 = = 3 1 12 13 |
 |
[Page 18] Roca IN-WASH INSPIRA A803060001 18 X X = 2mm S X = 3mm M X = 4mm L Max. 1mm 3 2 1 14 15 |
 |
[Page 19] Roca IN-WASH INSPIRA A803060001 19 CR 2032 (x2) 21 3 4 ON 120 s. 5 s. Max. 60 s. Incluídas Included Enthalten Opcional Optional Optional Abrir agua Open Ouvrir l’eau Wasser auf Открытие Крана Abrir água Odkręcić Wodę Otevřete Enchufar Power Brancher Stroman… |
 |
[Page 20] Roca IN-WASH INSPIRA A803060001 Ver manual de usuario See user manual Voir le manuel d’utilisation Siehe Gebrauchsanleitung Пожалуйста, изучите Руководство по использованию Veja o manual do usuário Patrz podręcznik użytkownika Viz…. |
Inspira In-Wash 39х56,2х47,6см, подвесной электронный унитаз, функция биде, безободковый, с сиденьем, арт. 803060001, Roca
Вес, нетто: 37 кг
с горизонтальным выпуском
безободковая технология Rimless.
требуется подключение к сети.
Количество форсунок: 1
Мытье горячей водой
Панель управления: Пульт управления
Система слива: Горизонтальное смывание
Функция очистки
In-Wash Roca оборудован датчиком движения, который блокирует функции смыва и сушки, когда туалет не используется. Помимо этого, выдвижная форсунка очищается автоматически до и после использования, а также фильтрует воду перед очищением.
Пользуясь In-Wash Roca можно выбирать два типа омывания – спереди и сзади, – а также регулировать в обоих режимах температуру воды и положение форсунки.
На унитазе сбоку есть встроенная панель, которая позволяет настраивать основные функции без пульта управления.
Эксклюзивная формула керамики, в состав которой входит глина, каолин, шпат, кварц и другие минералы, а также высококачественное глазурованное покрытие делают изделия Roca прочными и износостойкими. Материал способен выдерживать более 400 кг веса. Уникальное фарфоровое покрытие обеспечивает устойчивость к использованию абразивных моющих средств, высокой температуре и ультрафиолету.