Для ознакомления с инструкцией необходимо нажать на ссылку «ЗАГРУЗИТЬ», чтобы скачать pdf файл. Если есть кнопка «ПРОСМОТР», то можно просто посмотреть документ онлайн.
Для удобства, Вы можете сохранить данную страницу с файлом руководства по эксплуатации в свой список «избранное» прямо на сайте (доступно для зарегистрированных пользователей).
Смотрите инструкцию для похожих моделей:

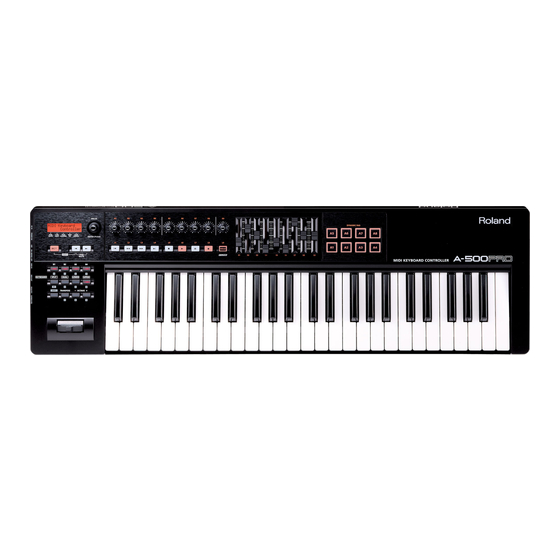
Вы можете задать вопрос посетителям сайта по модели ROLAND A-300PRO. Если Вы являетесь её пользователем, то пожалуйста оставьте, по возможности развёрнутый отзыв:
Скачать инструкцию
Инструкция в формате — PDF
Размер — 29 МБ
Доступно — Бесплатное скачивание
Онлайн чтение не доступно
Чтение данной инструкции онлайн, сейчас не доступно. Вы можете скачать файл, нажав на кнопку «Скачать инструкцию»
Руководство пользователя на русском языке для продукта CAKEWALK A-300PRO.
Спецификация:
Оригинальное руководство пользователя на русском языке.
Формат листа A4.
Плотность бумаги 80 гр/м2.
Цвет печати — монохромный.
Обложки — пластиковые 2 шт.
Переплёт — пластиковая пружина.
Общее количество страниц 87 (44 листов).
* это печатное руководство пользователя мы прилагаем бесплатно к одноимённому продукту, покупаемому клиентами в нашем магазине.

-
Contents
-
Table of Contents
-
Troubleshooting
-
Bookmarks
Quick Links
Related Manuals for Roland cakewalk A-300PRO
Summary of Contents for Roland cakewalk A-300PRO
-
Page 2: Contents Of The Package
* Please use only the included USB cable. If you require a replacement for the supplied USB cable (for example due to damage or loss), please contact the nearest Roland Service Center, or an authorized Roland distributor, as listed on the separate sheet titled “Information.”…
-
Page 3: Using The Unit Safely
• Do not attempt to repair the unit, or replace parts within it (except when this manual provides specific instructions directing you to do so). Refer all servicing to your retailer, the nearest Roland Service Center, or an authorized Roland distributor, as listed on the separate sheet titled “Information.”…
-
Page 4
Technology Properties Limited (TPL). Roland has licensed this technology from the TPL Group. * Roland and GS are either registered trademarks or trademarks of Roland Corporation in the United States and/or other countries. -
Page 5: Important Notes
Roland assumes no liability concerning such loss of data. Additional Precautions • Please be aware that the contents of memory can be irretrievably lost as a result of a malfunction, or the improper operation of the unit.
-
Page 6: Table Of Contents
Contents Contents of the Package… 2 USING THE UNIT SAFELY… 3 IMPORTANT NOTES… 5 Names of Things and What They Do… 8 Panel … 8 Side Panel …11 Installing the Driver …12 Windows 7/Windows Vista Users…12 Windows XP Users …15 Mac OS X Users …17 Verifying that Installation was Successful…19 Checking with a SONAR Soft Synths (Windows) …19…
-
Page 7
Assigning MIDI Messages (EDIT Mode) …48 Assigning a MIDI Message on the A-PRO Keyboard…48 Note Assignments …49 Aftertouch Assignment …50 Control Change Assignment …51 Program Change Assignment…52 RPN/NRPN Assignment …53 Tempo Assignment…54 Convenient Functions…56 Copying an Assignment…56 Clearing an Assignment (NO ASSIGN)…56 System Settings (EDIT Mode) …57 LCD Contrast Setting …59 LCD CONTRAST…59… -
Page 8: Names Of Things And What They Do
Names of Things and What They Do Panel Display This shows a variety of information, such as the current state. Indication Alphanumeric characters PRM MUTE CTRL MAP PGM CHANGE MIDI CH USER ASSIGN [VALUE] knob, [ENTER] button You can turn the [VALUE] knob to change the MIDI channel, switch program changes or control maps, or change the value of a user-specified parameter.
-
Page 9
] button, [ ] button You can use the [ ] buttons to move the cursor that is shown at CTRL MAP, PGM CHANGE, MIDI CH, or USER ASSIGN in the display. Controllers [B1]–[B4] (button) You can assign any desired MIDI messages to these buttons. ➝… -
Page 10
Names of Things and What They Do fig.Panel-Top.eps Controllers [R1]–[R9] (knobs) You can assign the desired MIDI messages to these knobs. ➝ “Assigning MIDI Messages” (p. 29) Controllers [L1]–[L8] (button) You can assign the desired MIDI messages to these buttons. ➝… -
Page 11: Side Panel
You can connect a separately sold AC adaptor here. If you want to purchase an AC adaptor, contact the retailer from whom you purchased the product, or the nearest Roland Service Center. [Power] switch Power on using the AC adaptor…
-
Page 12: Installing The Driver
Installing the Driver A driver is software that transfers data between the A-PRO and the application software on your computer when the A-PRO is connected to your computer. The procedure for installation and checking will depend on your system. Perform the following two steps to install and check the driver.
-
Page 13
Windows 7 users Open “Control Panel,” click “System and Security,” and then click [System]. If the Control Panel shows the icon view, click [System]. Windows Vista users Open “Control Panel,” click [System and Maintenance], and then click [System]. If the Control Panel shows the classic view, double-click the “System” icon. A user account control confirmation screen will appear. -
Page 14
Installing the Driver When the installation is completed, the “A-PRO Driver Setup” dialog box will indicate “Installation has been completed.” Click [Close] to close the “A-PRO Driver Setup” dialog box. If the “System Settings Change” dialog box appears, click [Yes]. Windows will automatically restart. -
Page 15: Windows Xp Users
Windows XP Users Steps to be performed on the A-PRO keyboard itself are marked by a With the A-PRO disconnected, start up Windows. Disconnect all USB cables from your computer, with the exception of those for a USB keyboard and USB mouse (if used). Close all currently running software.
-
Page 16
Installing the Driver If you are asked whether you want to connect to Windows Update, choose [No, not this time] and click [Next]. fig.xpwupd-e.eps Choose [Install the software automatically (Recommended)], and click [Next]. fig.xpdrv6-e.eps If the “Hardware Installation” dialog box appears, click [Continue Anyway] to continue the installation. -
Page 17
Mac OS X Users Steps to be performed on the A-PRO keyboard itself are marked by a * If the “Authenticate” or “Installer requires that you type your password” dialog box appears during the installation, enter an administrator password and click [OK]. * What you actually see on the screen may differ depending on your system. -
Page 18
Installing the Driver Verify that [A-PRO] is shown in the “MIDI Studio” or “Audio MIDI Settings” dialog box. fig.osxaudiomidi1-e.eps If the A-PRO is not shown or is grayed-out, the A-PRO has not been recognized correctly. Try clicking [Rescan MIDI]. You can also try disconnecting the USB cable connected to the A-PRO, then re-connecting it. -
Page 19: Verifying That Installation Was Successful
Verifying that Installation was Successful Proceed as follows to verify that the driver was installed correctly. We will use SONAR LE as an example for Windows, and GarageBand as an example for Mac OS X. Checking with a SONAR Soft Synths (Windows) Here’s an example using a plug-in synth included with SONAR LE.
-
Page 20: Checking In Garageband (Mac Os X)
Installing the Driver Checking in GarageBand (Mac OS X) GarageBand is software that is included with Apple’s iLife. Here, the explanation assumes that you’re using GarageBand ‘09. The steps or screens may be different if you’re using a different version. In the [Applications] folder, double-click [GarageBand].
-
Page 21: Look What You Can Do With The A-Pro
Look what You Can Do with the A-PRO Play When playing the A-PRO’s keyboard, you can select sounds in your sound module from the A-PRO. You can also play two sounds together (DUAL) or separately (SPLIT). For details, refer to “Performing (Play Mode)” (p. 41). Use ACT If you’re using SONAR, you can use the A-PRO as a controller for SONAR simply by pressing the A-PRO’s [ACT] button to turn it on.
-
Page 22: Using A-Pro Editor
Using A-PRO Editor A-PRO Editor is software that lets you create control maps (p. 21) for the A-PRO series on your computer, and make settings for the keyboard. The graphical screen makes it easy to edit the values (settings). fig.editor-mainwindow-e+.eps_39 The A-PRO has a total of 44 controllers: [B1]–[B4], [R1]–[R9], [L1]–[L9], [S1]–[S9], [A1]–…
-
Page 23: Midi Port Assignments
MIDI Port Assignments In order to transfer control maps between A-PRO Editor and the A-PRO keyboard, you’ll need to specify the MIDI ports used by A-PRO Editor. * If the A-PRO is connected via USB, the ports will be as follows. If you’re using a MIDI connection, specify the MIDI input port and MIDI output port of the MIDI device to which the A-PRO is connected, instead of “A-PRO 2”…
-
Page 24: Items In The Windows
Using A-PRO Editor Items in the Windows Main Window fig.editor-mainwindow-e.eps Title You can assign a name to the control map you’re editing. Only single-byte alphanumeric characters can be entered for the control map name. The name you enter here is shown as the title of the HTML file that’s exported by the [File] menu command [Export Assign List].
-
Page 25: Button Mode
Message assignment area Here you can specify the value of various parameters for the MIDI message you selected in the Assign Message selection list For details on the parameters of each MIDI message, refer to “Message Parameters” (p. Output Port This specifies the USB port from which the MIDI messages will be transmitted to a USB- connected computer.
-
Page 26: Keyboard Set Window
Using A-PRO Editor Keyboard Set Window fig.keyboarset-e.eps What is a Keyboard Set? Keyboard-related settings such as the MIDI channel and split point for the UPPER and LOWER parts, and the octave settings, are collectively called a “keyboard set.” You can use A-PRO Editor to make keyboard set settings and store them to the [SPLIT]/[DUAL]/[LOWER] buttons.
-
Page 27: Menus
Menus File Menu Menu Explanation Creates a new control map. The new control map will have no MIDI messages assigned to any of the controllers. Loads a control map that was saved in SMF format. For details, refer Open to “Loading a Control Map that was Saved on Your Computer” (p. 32). Saves the control map currently being edited by overwriting the Save SMF.
-
Page 28: Keyboard Shortcuts
Using A-PRO Editor Keyboard Shortcuts You can use the following keyboard shortcuts with A-PRO Editor. Command (Windows) [File]–[New] Ctrl + N [File]–[Open] Ctrl + O [File]–[Save] Ctrl + S [File]–[Save As] Ctrl + Shift + S [File]–[Exit] Alt + F4 [Edit]–[Copy] Ctrl + C [Edit]–[Paste]…
-
Page 29: Using Control Maps
Using Control Maps Assigning MIDI Messages Here’s how to assign a MIDI message to each controller. fig.editor-assign1.eps In the main window, click the controller to which you want to assign a MIDI message. fig.editor-assign2.eps In the message assignment window, use the Assign Message field to select the type of MIDI message you want to assign.
-
Page 30: Checking The Assigned Midi Messages
Using A-PRO Editor Checking the Assigned MIDI Messages You can use either of the following two methods to check the MIDI messages that are assigned. Viewing an assignment list If you want to use your Web browser to view an assignment list of the current control map, choose the [File] menu command [View Assign List].
-
Page 31: Receiving A Control Map From The A-Pro
Receiving a Control Map from the A-PRO If you want to edit the control map settings of the A-PRO keyboard in A-PRO Editor, use the following procedure to receive control map data from the A-PRO keyboard so that it can be edited. fig..editor-rcv1.eps From the numbers displayed in the [Control Map] dropdown list, select…
-
Page 32: Saving A Control Map On Your Computer
Using A-PRO Editor Saving a Control Map on Your Computer Control map settings you’ve edited in A-PRO Editor can not only be transferred directly between the A-PRO keyboard and your computer, they can also be saved on your computer as an SMF format file. To save an SMF file, proceed as follows.
-
Page 33: Message Parameters
Message Parameters The setting items shown in the message assign window will depend on the MIDI message you’ve selected. This section explains the setting items for each MIDI message. Values for parameters are specified in decimal. For details on the Settings field, refer to “Message Assignment Window” (p. 24). NO ASSIGN Clears any message assignment.
-
Page 34: Polyphonic Key Pressure
Using A-PRO Editor Channel Message Polyphonic Key Pressure Assign a polyphonic key pressure message. fig.editor-poly.eps Specify the following parameters. Item Content MIDI Channel MIDI channel Note Number Note number Min Value Lower value of key pressure Max Value Upper value of key pressure Control Change Assign a control change message.
-
Page 35: Channel Message
Channel Message Program Change (Min-Max) Assign a program change message (with a variable program number). fig.editor-pcmm.eps Specify the following parameters. Item Content MIDI Channel MIDI channel Min Number Lower limit of the program number. Max Number Upper limit of the program number. * The range of the program number is 1–128.
-
Page 36: Program Change – Inc
Using A-PRO Editor Channel Message Program Change – Inc Assign the program change increment function (PC INC). This will transmit a program change number that is one greater than the program change number most recently transmitted in the A-PRO’s program change mode.
-
Page 37
Channel Message Encoder Simulate Assign a function that simulates a rotary encoder. fig.editor-encsim.eps Specify the following parameters. Item Content MIDI Channel MIDI channel Control Number Controller number * This can be assigned to a button, but will not do anything. System Realtime/F6 Assign a system realtime message or F6 (Tune Request). -
Page 38: System Ex
Checksum insertion checksum is to be inserted, and its type. location and type S1: The most common type, used by Roland and other man- ufacturers. S2: Choose this if a method other than S1 is used. If you want a channel number to be inserted in the exclusive…
-
Page 39
Free Message Assign a MIDI message. You can enter up to twenty-four bytes. You may assign more than one MIDI message if desired. fig.editor-freemsg.eps Specify the following parameters. Item You can enter a MIDI message of up to twenty-four bytes. Enter each byte as a hexadecimal value separated by a single-byte space. -
Page 40: Using Keyboard Sets
Using A-PRO Editor Using Keyboard Sets Receiving a Keyboard Set If you want to edit a keyboard set, use the following procedure to load the keyboard map data from the A-PRO, so that it can be edited. fig.keyboardset1.eps Use the [SPLIT]/[DUAL]/[LOWER] buttons to select the keyboard set that you want to edit.
-
Page 41: Performing (Play Mode)
Performing (Play Mode) Use Play mode when you want to play the A-PRO’s keyboard or use its controllers to control your software or sound modules. Broadly speaking, the A-PRO has the following two modes. Mode Explanation This is the mode in which you play the keyboard and operate the controllers.
-
Page 42: Specifying The Current Channel (Midi Transmit Channel)
Performing (Play Mode) Specifying the Current Channel (MIDI Transmit Channel) Here’s how to specify the current channel on which performance data from the keyboard will be transmitted. What is the current channel? The current channel is the MIDI transmit select for the keyboard and bender lever. * Each controller can have its own separate transmit channel.
-
Page 43: Selecting Sounds (Program Change/Bank)
Selecting Sounds (PROGRAM CHANGE/BANK) You can transmit program changes to select sounds on your sound module from the A-PRO. If you want to select a sound from a different bank, first use bank mode to transmit a bank select message that will switch the bank. Then transmit a program change message. The bank select message must be transmitted before the program change.
-
Page 44: Selecting The Upper And Lower Sounds
Performing (Play Mode) Selecting the UPPER and LOWER Sounds The A-PRO’s keyboard provides two parts, UPPER and LOWER, and you can assign a different sound to each. Selecting the UPPER Sound The entire keyboard will play the UPPER sound. fig.Upper-e.eps UPPER Press the [UPPER] button so it’s lit.
-
Page 45: Layering Two Sounds (Dual)
Layering Two Sounds (DUAL) The DUAL button lets you simultaneously play both the LOWER and UPPER sounds from the entire keyboard. fig.Dual-e.eps UPPER LOWER Press the [DUAL] button so it’s lit. * If the cursor is at “PGM CHANGE” in the display, turning the [VALUE] knob will change the UPPER sound.
-
Page 46: Adjusting The Playing Dynamics (Velocity)
Performing (Play Mode) Adjusting the Playing Dynamics (VELOCITY) Normally, note messages are transmitted with a velocity value that corresponds to the force with which you play the keyboard. If desired, the A-PRO can also transmit notes with a fixed velocity value, regardless of your playing dynamics. This is convenient when you want to record notes into your DAW software at a fixed velocity.
-
Page 47: Muting The Controller Values (Prm Mute)
Muting the Controller Values (PRM MUTE) You can mute all controllers so that MIDI messages will not be transmitted when you move a controller. This is useful in situations such as when a parameter value is far away from the position of the controller; you can use the [PRM MUTE] button to mute the controller, and then move the controller near the parameter value to match the knob position with the parameter value before you perform.
-
Page 48: Assigning Midi Messages (Edit Mode)
Assigning MIDI Messages (EDIT Mode) The A-PRO allows you to assign MIDI messages to each of its 44 controllers: [B1]–[B4], [R1]–[R9], [L1]–[L9], [S1]–[S9], [A1]–[A8], HOLD (P1), EXPRESSION (P2), BENDER, MODULATION, and AFTERTOUCH. Edit mode is used to make MIDI message assignments. This section of the manual explains how to assign MIDI messages to the controllers using only the A-PRO keyboard. You can also use A-PRO Editor to make assignments.
-
Page 49: Note Assignments
Note Assignments Here’s how to assign a note message to a controller. In addition to their use in performance, note messages can also be used to control DAW software. MIDI transmit channel Note number 1–16 0–127 (00–7FH) Press the [ACT] button and [ ] button simultaneously.
-
Page 50: Aftertouch Assignment
Assigning MIDI Messages (EDIT Mode) Aftertouch Assignment Here’s how to assign an aftertouch message to a controller. A-PRO Editor lets you assign aftertouch messages for individual notes (Polyphonic Key Pressure) as well as channel aftertouch (Channel Pressure) (p. 34). MIDI transmit channel Value range 1–16 0–127 (00–7FH)
-
Page 51: Control Change Assignment
Control Change Assignment Here’s how to assign a control change message to a controller. MIDI transmit channel Control change number 1–16 0–127 (00–7FH) Press the [ACT] button and [ ] button simultaneously. Slightly move the controller to which you want to assign a control change message.
-
Page 52: Program Change Assignment
Assigning MIDI Messages (EDIT Mode) Program Change Assignment Here’s how to assign a program change message to a controller. MIDI transmit channel BANK MSB 1–16 Press the [ACT] button and [ ] button simultaneously. Slightly move the controller to which you want to assign a control change message.
-
Page 53: Rpn/Nrpn Assignment
RPN/NRPN Assignment Here’s how to assign an RPN or NRPN to a controller. Data entry MSB (CC#6) range Data entry LSB (CC#38) range 0–127 (00–7FH) not transmitted Press the [ACT] button and [ ] button simultaneously. Slightly move the controller to which you want to assign a control change message.
-
Page 54: Tempo Assignment
Assigning MIDI Messages (EDIT Mode) Tempo Assignment You can assign the MIDI CLOCK speed (20–250) to a controller. In order to transmit MIDI CLOCK, the MIDI CLOCK setting must be “ON.” ➝ “MIDI CLOCK ON/OFF” (p. 64) Press the [ACT] button and [ ] button simultaneously.
-
Page 55
Button mode setting In Edit mode, when you assign a message to a button as described in “Assigning a MIDI Message on the A-PRO Keyboard” (p. 48), you can specify how the button will operate (the “button mode”). If a button is assigned as a controller, the maximum value will be transmitted when the button is turned on, and the minimum value will be transmitted when the button is turned off. -
Page 56: Convenient Functions
Assigning MIDI Messages (EDIT Mode) Convenient Functions Copying an Assignment By using this function, a message assigned to a controller can be copied to a different controller. For example, if you want to assign similar messages to multiple controllers, assign the desired MIDI message to one of the controllers, and then use this function to copy that message to the assignment of the other controllers.
-
Page 57: System Settings (Edit Mode)
System Settings (EDIT Mode) This section explains how to make system settings for the A-PRO. System settings include the following items. Category Item LCD CONTRAST KEYBOARD VELOCITY CURVE KEYBOARD AFTERTOUCH CURVE KEYBOARD PORT SET Keyboard KEYBOARD ACTIVE PART TRANSPOSE SHIFT KEY LATCH PAD VELOCITY CURVE Pads PAD AFTERTOUCH CURVE…
-
Page 58
System Settings (EDIT Mode) Category Item H-ACTIVITY ON/OFF L9 FUNCTION Other OMNI FACTORY RESET Contents Turn this on when using specific applications (such as Pro Tools LE). If this is On, the message “90 00 7F” will be transmitted from “A-PRO 2” at intervals of approximately 500 ms. Specifies the function of the [HOLD] button. -
Page 59: Lcd Contrast Setting
LCD Contrast Setting LCD CONTRAST If you find the text in the display difficult to read, you can adjust the contrast as follows. The brightness of the screen may be affected by environmental conditions such as temperature. Simultaneously press the [ACT] button and the [ Use the [VALUE] knob to select “LCD CONTRAST,”…
-
Page 60: Keyboard-Related Settings
System Settings (EDIT Mode) Keyboard-related Settings KEYBOARD VELOCITY CURVE Here’s how to change the velocity curve, which specifies how the transmitted velocity value will correspond to your keyboard playing dynamics. Simultaneously press the [ACT] button and the [ Use the [VALUE] knob to select “KEYBOARD/PAD,” and press the [ENTER] button.
-
Page 61: Keyboard Aftertouch Curve
KEYBOARD AFTERTOUCH CURVE Here’s how to specify the way that keyboard aftertouch will respond. Simultaneously press the [ACT] button and the [ Use the [VALUE] knob to select “KEYBOARD/PAD,” and press the [ENTER] button. fig.lcd-KBDAFTCHCURVE.eps Use the [VALUE] knob to select “KBD AFTCH CURVE,”…
-
Page 62: Keyboard Active Part
System Settings (EDIT Mode) KEYBOARD ACTIVE PART Here’s how to specify the part that will be affected by the [VALUE] knob, BENDER, MODULATION, AFTERTOUCH, HOLD, and EXPRESSION controllers. Simultaneously press the [ACT] button and the [ Use the [VALUE] knob to select “KEYBOARD/PAD,” and press the [ENTER] button.
-
Page 63: Pad-Related Settings
Pad-related Settings PAD VELOCITY CURVE Here’s how to specify the way in which the force of your strike on the controller pads [A1]–[A8] will affect the velocity that is transmitted. Simultaneously press the [ACT] button and the [ Use the [VALUE] knob to select “KEYBOARD/PAD,” and press the [ENTER] button.
-
Page 64: Clock-Related Settings
System Settings (EDIT Mode) Clock-related Settings MIDI CLOCK ON/OFF Here’s how to specify whether MIDI CLOCK will be transmitted. Simultaneously press the [ACT] button and the [ Use the [VALUE] knob to select “MIDI CLOCK,” and press the [ENTER] button. Use the [VALUE] knob to select “MIDI CLK ON/OFF,”…
-
Page 65: Usb-Related Settings
USB-related Settings ADVANCED DRIVER MODE Here’s how to turn ADVANCED DRIVER MODE on/off. We recommend that you normally leave this On. If you change this setting, the new setting will take force after you’ve turned the power off, then on again. Simultaneously press the [ACT] button and the [ Use the [VALUE] knob to select “USB SETTING,”…
-
Page 66: Midi-Related Settings
System Settings (EDIT Mode) MIDI-related Settings MIDI I/F SWITCH This setting specifies whether the MIDI connectors will be used as a MIDI interface. Simultaneously press the [ACT] button and the [ Use the [VALUE] knob to select “MIDI SETTING,” and press the [ENTER] button.
-
Page 67: Midi Merge Destination
MIDI MERGE DESTINATION The A-PRO provides a [MIDI MERGE] switch (p. 11). Here’s how to specify the port that will be merged as the MIDI MERGE DESTINATION when the [MIDI MERGE] switch is On. The MIDI MERGE function is convenient when an external MIDI controller other than the A-PRO is connected to the A-PRO’s MIDI IN connector. For example, you might connect a second A-PRO unit, and use one A-PRO to play a software synthesizer while using the other A-PRO unit to control your DAW software.
-
Page 68: Control Map Settings
System Settings (EDIT Mode) Control Map Settings STARTUP MEMORY Here you can specify which control map is to be called up when the A-PRO is powered up. Simultaneously press the [ACT] button and the [ Use the [VALUE] knob to select “SYSTEM SETTING,” and press the [ENTER] button.
-
Page 69: Other Settings
Other Settings H-ACTIVITY ON/OFF Turn this On when using certain applications (such as Pro Tools LE). If this is On, the message “90 00 7F” will be transmitted to “A-PRO 2” at intervals of approximately 500 Simultaneously press the [ACT] button and the [ Use the [VALUE] knob to select “SYSTEM SETTING,”…
-
Page 70: Omni
System Settings (EDIT Mode) OMNI Refer to “What is OMNI?” (p. 42). FACTORY RESET This will return the A-PRO to its factory-set condition. Simultaneously press the [ACT] button and the [ Use the [VALUE] knob to select “FACTORY RESET,” and press the [ENTER] button.
-
Page 71: Appendices
Appendices Two MIDI Ports If the A-PRO is connected to your computer via USB, the A-PRO will be able to use two MIDI output ports (PORT 1 and PORT 2). Each controller of the A-PRO can be assigned to send its MIDI messages to either port.
-
Page 72: Connecting The A-Pro Directly To A Sound Module
Appendices Connecting the A-PRO Directly to a Sound Module You can connect the A-PRO connected directly to a MIDI sound module, and use it to play and control the sound module. If you’re not connecting the A-PRO to your computer via USB, you’ll need to use a separately available AC adaptor. You can purchase the appropriate AC adaptor from your dealer.
-
Page 73: About Standard Driver Mode
About Standard Driver Mode Use this mode if you want to use the standard driver provided by your operating system. Installing the Standard Driver Switch off “ADVANCED DRIVER MODE” (p. 65). Close all currently running software. Turn the A-PRO’s [POWER] switch off, then on again. The driver will be installed automatically.
-
Page 74: Troubleshooting
Troubleshooting If you experience problems, read this chapter first. It contains information that will help you solve the problem. * For help with Windows or Mac OS X operation, refer to the documentation for your computer or operating system. Problems when Installing the Driver Can’t start up the installer Is the CD-ROM inserted correctly in your CD-ROM drive? Make sure that the CD-ROM is correctly inserted in the CD-ROM drive.
-
Page 75
Installation is not successfully completed when you connect the A-PRO Could the A-PRO’s ADVANCED DRIVER mode switch be OFF? Refer to “ADVANCED DRIVER MODE” (p. 65) and set the A-PRO’s ADVANCED DRIVER MODE to ON. Then, install the driver again. After you connect the A-PRO, it may take several tens of seconds or several minutes before it is recognized by your computer. -
Page 76: Problems With Settings
Troubleshooting Problems with Settings Can’t select/use the A-PRO within software or in system settings Could the A-PRO be in use by other software? Close all software you currently have running. Next, switch off the A-PRO’s power, then turn it back on again. If this does not solve the problem, reinstall the driver.
-
Page 77: Problems When Playing
Problems when Playing Playback contains clicks, dropouts, or other problems Check the power management settings You may be able to eliminate clicks and pops by changing your system’s power management settings. ➝ “Power management settings” (p. 81) Try updating the driver of your display adaptor (Windows) You may be able to eliminate clicks and pops by updating the driver for the display adaptor installed in your computer.
-
Page 78
Troubleshooting Can’t play Was the driver installed correctly? Driver installation may have failed. Reinstall the driver. ➝ “Reinstalling the driver” (p. 80) Did you make input/output device settings for your software? Refer to the owner’s manual of your software and to the following pages, and select the A-PRO as the input/output device. -
Page 79: Other Problems
Other Problems Removing the driver Your computer may fail to correctly recognize the A-PRO if the driver could not be installed according to the specified procedure. If so, you’ll need to delete the driver that was detected by mistake. Use the following procedure to remove the driver, and then install the driver once again according to the procedure given in “Installing the Driver”…
-
Page 80: Reinstalling The Driver
Troubleshooting Reinstalling the driver If a problem occurred while installing the driver, use the following procedure to reinstall it. Uninstall the A-PRO driver as described in “Removing the driver” (p. 79). Install the driver once again as described in “Installing the Driver” (p.
-
Page 81: Power Management Settings
Power management settings If you experience problems such as interrupted notes or dropouts in the sound, you may be able to solve the problem by changing your computer’s power management settings. Windows 7 users Open the “Control Panel,” click [System and Security], and then click [Power Options].
-
Page 82
Troubleshooting System “Performance” settings (Windows) You may be able to solve the problem by changing the “Performance” setting of the system as described below. Windows 7 users Open the “Control Panel,” click [System and Security], and click [System]. If you’re using an icon display, double-click the [System] icon. At the left, click [Advanced system settings]. -
Page 83: Midi Implementation Chart
MIDI Implementation Chart Model: A-300PRO/500PRO/800PRO Function… Basic Default Channel Changed Default Mode Messages Altered Note Number : True Voice Note ON Velocity Note OFF Key’s Aftertouch Ch’s Pitch Bend Control Change Program Change : True # System Exclusive : Song Pos System : Song Sel Common…
-
Page 84: Main Specifications
Expression Pedal: EV-5/EV-7 AC Adaptor (Please contact the retailer from whom you purchased the product, or the nearest Roland Service Center.) * In the interest of product improvement, the specifications, appearance, and/or contents of this unit are subject to change without prior notice.
-
Page 85: Index
Index AC Adaptor … 72 ACT … 21 [ACT] Button … 8 ADVANCED DRIVER MODE … 65 ADVANCED DRIVER SWITCH … 57 AFT Mode … 25 Aftertouch … 25 Aftertouch Assignment … 50 Aftertouch Mode … 25 A-PRO … 23 A-PRO 1 …
-
Page 86
Index L9 FUNCTION … 58, 69 LATCH … 25, 55 LCD CONTRAST … 57, 59 Loading a Control Map that was Saved on Your Computer … 32 LOWER … 44, 45 [LOWER] Button … 9 LSB … 68 Mac OS X … 17 Main Window … -
Page 87
Tempo … 24, 39 Tempo Assignment … 54 Tempo control … 24 Title … 24 Transmission … 31 TRANSPOSE … 41, 57, 62 [TRANSPOSE] Button … 9 Tune Request … 24, 37 Uninstall the driver Mac OS X … 79 Windows … -
Page 88: Declaration Of Conformity
THIS APPARATUS MUST BE EARTHED WARNING: THE WIRES IN THIS MAINS LEAD ARE COLOURED IN ACCORDANCE WITH THE FOLLOWING CODE. IMPORTANT: GREEN-AND-YELLOW: EARTH, BLUE: NEUTRAL, BROWN: LIVE As the colours of the wires in the mains lead of this apparatus may not correspond with the coloured markings identifying the terminals in your plug, proceed as follows: The wire which is coloured GREEN-AND-YELLOW must be connected to the terminal in the plug which is marked by the letter E or by the safety earth symbol…
-
Page 89
This product complies with the requirements of EMC Directive 2004/108/EC. FEDERAL COMMUNICATIONS COMMISSION RADIO FREQUENCY INTERFERENCE STATEMENT This equipment has been tested and found to comply with the limits for a Class B digital device, pursuant to Part 15 of the FCC Rules. These limits are designed to provide reasonable protection against harmful interference in a residential installation. -
Page 90
For EU Countries… -
Page 91
For China…