Последнее обновление: 14.07.2021

-
Глава 1. Введение в HTML5
-
Что такое HTML
-
Элементы и атрибуты
-
Создание документа
-
Разновидности синтаксиса
-
-
Глава 2. Элементы в HTML5
-
Элемент head и метаданные веб-страницы
-
Элементы группировки
-
Заголовки
-
Форматирование текста
-
Работа с изображениями
-
Списки
-
Элемент details
-
Список определений
-
Таблицы
-
Ссылки
-
Элементы figure и figcaption
-
Фреймы
-
-
Глава 3. Работа с формами
-
Формы
-
Элементы форм
-
Кнопки
-
Текстовые поля
-
Метки и автофокус
-
Элементы для ввода чисел
-
Флажки и переключатели
-
Элементы для ввода цвета, url, email, телефона
-
Элементы для ввода даты и времени
-
Отправка файлов
-
Список select
-
Textarea
-
Валидация форм
-
Элементы fieldset и legend
-
-
Глава 4. Семантическая структура страницы
-
Элемент article
-
Элемент section
-
Элемент nav
-
Элементы header, footer и address
-
Элемент aside
-
Элемент main
-
-
Глава 5. Основы CSS3. Селекторы
-
Введение в стили
-
Селекторы
-
Селекторы потомков
-
Селекторы дочерних элементов
-
Селекторы элементов одного уровня
-
Псевдоклассы
-
Псевдоклассы дочерних элементов
-
Псевдоклассы форм
-
Псевдоэлементы
-
Селекторы атрибутов
-
Наследование стилей
-
Каскадность стилей
-
Псевдоклассы :is() и :where()
-
-
Глава 6. Основы CSS3. Свойства
-
Цвет в CSS
-
Стилизация шрифтов
-
Внешние шрифты
-
Высота шрифта
-
Форматирование текста
-
Стилизация абзацев
-
Стилизация списков
-
Стилизация таблиц
-
Блочная модель
-
Внешние отступы
-
Внутренние отступы
-
Границы
-
Размеры элементов. Box-sizing
-
Фон элемента
-
Создание тени у элемента
-
Контуры элементов
-
Обтекание элементов
-
Прокрутка элементов
-
Линейный градиент
-
Радиальный градиент
-
Стилизация элемента details
-
-
Глава 7. Создание макета страницы и верстка
-
Блочная верстка. Часть 1
-
Блочная верстка. Часть 2
-
Вложенные плавающие блоки
-
Выравнивание столбцов по высоте
-
Свойство display
-
Создание панели навигации
-
Выравнивание плавающих элементов
-
Создание простейшего макета
-
Позиционирование
-
Фиксированное позиционирование
-
-
Глава 8. Трансформации, переходы и анимации
-
Трансформации
-
Переходы
-
Анимация
-
-
Глава 9. Адаптивный дизайн
-
Введение в адаптивный дизайн
-
Метатег Viewport
-
Media Query в CSS
-
-
Глава 10. Мультимедиа
-
Видео
-
Аудио
-
Media API. Управление видео из JavaScript
-
-
Глава 11. Canvas
-
Доступ к canvas и рисование прямоугольников
-
Настройка рисования
-
Фоновые изображения
-
Создание градиента
-
Рисование текста
-
Рисование фигур
-
Рисование изображений
-
Добавление теней
-
Редактирование пикселей
-
Трансформации
-
Рисование мышью
-
-
Глава 12. Flexbox
-
Что такое Flexbox. Flex Container
-
Направление flex-direction
-
flex-wrap
-
flex-flow. Порядок элементов
-
Выравнивание элементов. justify-content
-
Выравнивание элементов. align-items и align-self
-
Выравнивание строк и столбцов. align-content
-
Управление элементами. flex-basis, flex-shrink и flex-grow
-
Многоколоночный дизайн на Flexbox
-
Макет страницы на Flexbox
-
-
Глава 13. Grid Layout
-
Что такое Grid Layout. Grid Container
-
Строки и столбцы
-
Функция repeat и свойство grid
-
Размеры строк и столбцов
-
Отступы между столбцами и строками
-
Позиционирование элементов
-
Наложение элементов
-
Направление и порядок элементов
-
Именованные grid-линии
-
Именованные grid-линии и функция repeat
-
Области грида
-
Макет страницы в Grid Layout
-
-
Глава 14. Переменные CSS
-
Стилизация с помощью переменных
-
Создание тем CSS с помощью переменных
-
Стили CSS как хранилище данных
-
- Глава 1. Введение в HTML5
- Что такое HTML
- Элементы и атрибуты
- Создание документа
- Разновидности синтаксиса
- Глава 2. Элементы в HTML5
- Элемент head и метаданные веб-страницы
- Элементы группировки
- Заголовки
- Форматирование текста
- Работа с изображениями
- Списки
- Элемент details
- Список определений
- Таблицы
- Ссылки
- Элементы figure и figcaption
- Фреймы
- Глава 3. Работа с формами
- Формы
- Элементы форм
- Кнопки
- Текстовые поля
- Метки и автофокус
- Элементы для ввода чисел
- Флажки и переключатели
- Элементы для ввода цвета, url, email, телефона
- Элементы для ввода даты и времени
- Отправка файлов
- Список select
- Textarea
- Валидация форм
- Элементы fieldset и legend
- Глава 4. Семантическая структура страницы
- Элемент article
- Элемент section
- Элемент nav
- Элементы header, footer и address
- Элемент aside
- Элемент main
- Глава 5. Основы CSS3. Селекторы
- Введение в стили
- Селекторы
- Селекторы потомков
- Селекторы дочерних элементов
- Селекторы элементов одного уровня
- Псевдоклассы
- Псевдоклассы дочерних элементов
- Псевдоклассы форм
- Псевдоэлементы
- Селекторы атрибутов
- Наследование стилей
- Каскадность стилей
- Псевдоклассы :is() и :where()
- Глава 6. Основы CSS3. Свойства
- Цвет в CSS
- Стилизация шрифтов
- Внешние шрифты
- Высота шрифта
- Форматирование текста
- Стилизация абзацев
- Стилизация списков
- Стилизация таблиц
- Блочная модель
- Внешние отступы
- Внутренние отступы
- Границы
- Размеры элементов. Box-sizing
- Фон элемента
- Создание тени у элемента
- Контуры элементов
- Обтекание элементов
- Прокрутка элементов
- Линейный градиент
- Радиальный градиент
- Стилизация элемента details
- Глава 7. Создание макета страницы и верстка
- Блочная верстка. Часть 1
- Блочная верстка. Часть 2
- Вложенные плавающие блоки
- Выравнивание столбцов по высоте
- Свойство display
- Создание панели навигации
- Выравнивание плавающих элементов
- Создание простейшего макета
- Позиционирование
- Фиксированное позиционирование
- Глава 8. Трансформации, переходы и анимации
- Трансформации
- Переходы
- Анимация
- Глава 9. Адаптивный дизайн
- Введение в адаптивный дизайн
- Метатег Viewport
- Media Query в CSS
- Глава 10. Мультимедиа
- Видео
- Аудио
- Media API. Управление видео из JavaScript
- Глава 11. Canvas
- Доступ к canvas и рисование прямоугольников
- Настройка рисования
- Фоновые изображения
- Создание градиента
- Рисование текста
- Рисование фигур
- Рисование изображений
- Добавление теней
- Редактирование пикселей
- Трансформации
- Рисование мышью
- Глава 12. Flexbox
- Что такое Flexbox. Flex Container
- Направление flex-direction
- flex-wrap
- flex-flow. Порядок элементов
- Выравнивание элементов. justify-content
- Выравнивание элементов. align-items и align-self
- Выравнивание строк и столбцов. align-content
- Управление элементами. flex-basis, flex-shrink и flex-grow
- Многоколоночный дизайн на Flexbox
- Макет страницы на Flexbox
- Глава 13. Grid Layout
- Что такое Grid Layout. Grid Container
- Строки и столбцы
- Функция repeat и свойство grid
- Размеры строк и столбцов
- Отступы между столбцами и строками
- Позиционирование элементов
- Наложение элементов
- Направление и порядок элементов
- Именованные grid-линии
- Именованные grid-линии и функция repeat
- Области грида
- Макет страницы в Grid Layout
- Глава 14. Переменные в CSS
- Стилизация с помощью переменных
- Создание тем CSS с помощью переменных
- Стили CSS как хранилище данных
Помощь сайту
YooMoney:
410011174743222
Перевод на карту
Номер карты:
4048415020898850
I wrote this article to help you quickly learn CSS and get familiar with the advanced CSS topics.
CSS is often quickly dismissed as an easy thing to learn by developers, or one thing you just pick up when you need to quickly style a page or app. Due to this reason, it’s often learned on-the-fly, or we learn things in isolation right when we have to use them. This can be a huge source of frustration when we find that the tool does not simply do what we want.
This article will help you get up to speed with CSS and get an overview of the main modern features you can use to style your pages and apps.
I hope to help you get comfortable with CSS and get you quickly up to speed with using this awesome tool that lets you create stunning designs on the Web.
Click here to get a PDF / ePub / Mobi version of this post to read offline
CSS, a shorthand for Cascading Style Sheets, is one of the main building blocks of the Web. Its history goes back to the 90’s, and along with HTML it has changed a lot since its humble beginnings.
As I’ve been creating websites since before CSS existed, I have seen its evolution.
CSS is an amazing tool, and in the last few years it has grown a lot, introducing many fantastic features like CSS Grid, Flexbox and CSS Custom Properties.
This handbook is aimed at a vast audience.
First, the beginner. I explain CSS from zero in a succinct but comprehensive way, so you can use this book to learn CSS from the basics.
Then, the professional. CSS is often considered like a secondary thing to learn, especially by JavaScript developers. They know CSS is not a real programming language, they are programmers and therefore they should not bother learning CSS the right way. I wrote this book for you, too.
Next, the person that knows CSS from a few years but hasn’t had the opportunity to learn the new things in it. We’ll talk extensively about the new features of CSS, the ones that are going to build the web of the next decade.
CSS has improved a lot in the past few years and it’s evolving fast.
Even if you don’t write CSS for a living, knowing how CSS works can help save you some headaches when you need to understand it from time to time, for example while tweaking a web page.
Thank you for getting this ebook. My goal with it is to give you a quick yet comprehensive overview of CSS.
Flavio
You can reach me via email at flavio@flaviocopes.com, on Twitter @flaviocopes.
My website is flaviocopes.com.
Table of Contents
- INTRODUCTION TO CSS
- A BRIEF HISTORY OF CSS
- ADDING CSS TO AN HTML PAGE
- SELECTORS
- CASCADE
- SPECIFICITY
- INHERITANCE
- IMPORT
- ATTRIBUTE SELECTORS
- PSEUDO-CLASSES
- PSEUDO-ELEMENTS
- COLORS
- UNITS
- URL
- CALC
- BACKGROUNDS
- COMMENTS
- CUSTOM PROPERTIES
- FONTS
- TYPOGRAPHY
- BOX MODEL
- BORDER
- PADDING
- MARGIN
- BOX SIZING
- DISPLAY
- POSITIONING
- FLOATING AND CLEARING
- Z-INDEX
- CSS GRID
- FLEXBOX
- TABLES
- CENTERING
- LISTS
- MEDIA QUERIES AND RESPONSIVE DESIGN
- FEATURE QUERIES
- FILTERS
- TRANSFORMS
- TRANSITIONS
- ANIMATIONS
- NORMALIZING CSS
- ERROR HANDLING
- VENDOR PREFIXES
- CSS FOR PRINT
- WRAPPING UP
INTRODUCTION TO CSS
CSS (an abbreviation of Cascading Style Sheets) is the language that we use to style an HTML file, and tell the browser how should it render the elements on the page.
In this book I talk exclusively about styling HTML documents, although CSS can be used to style other things too.
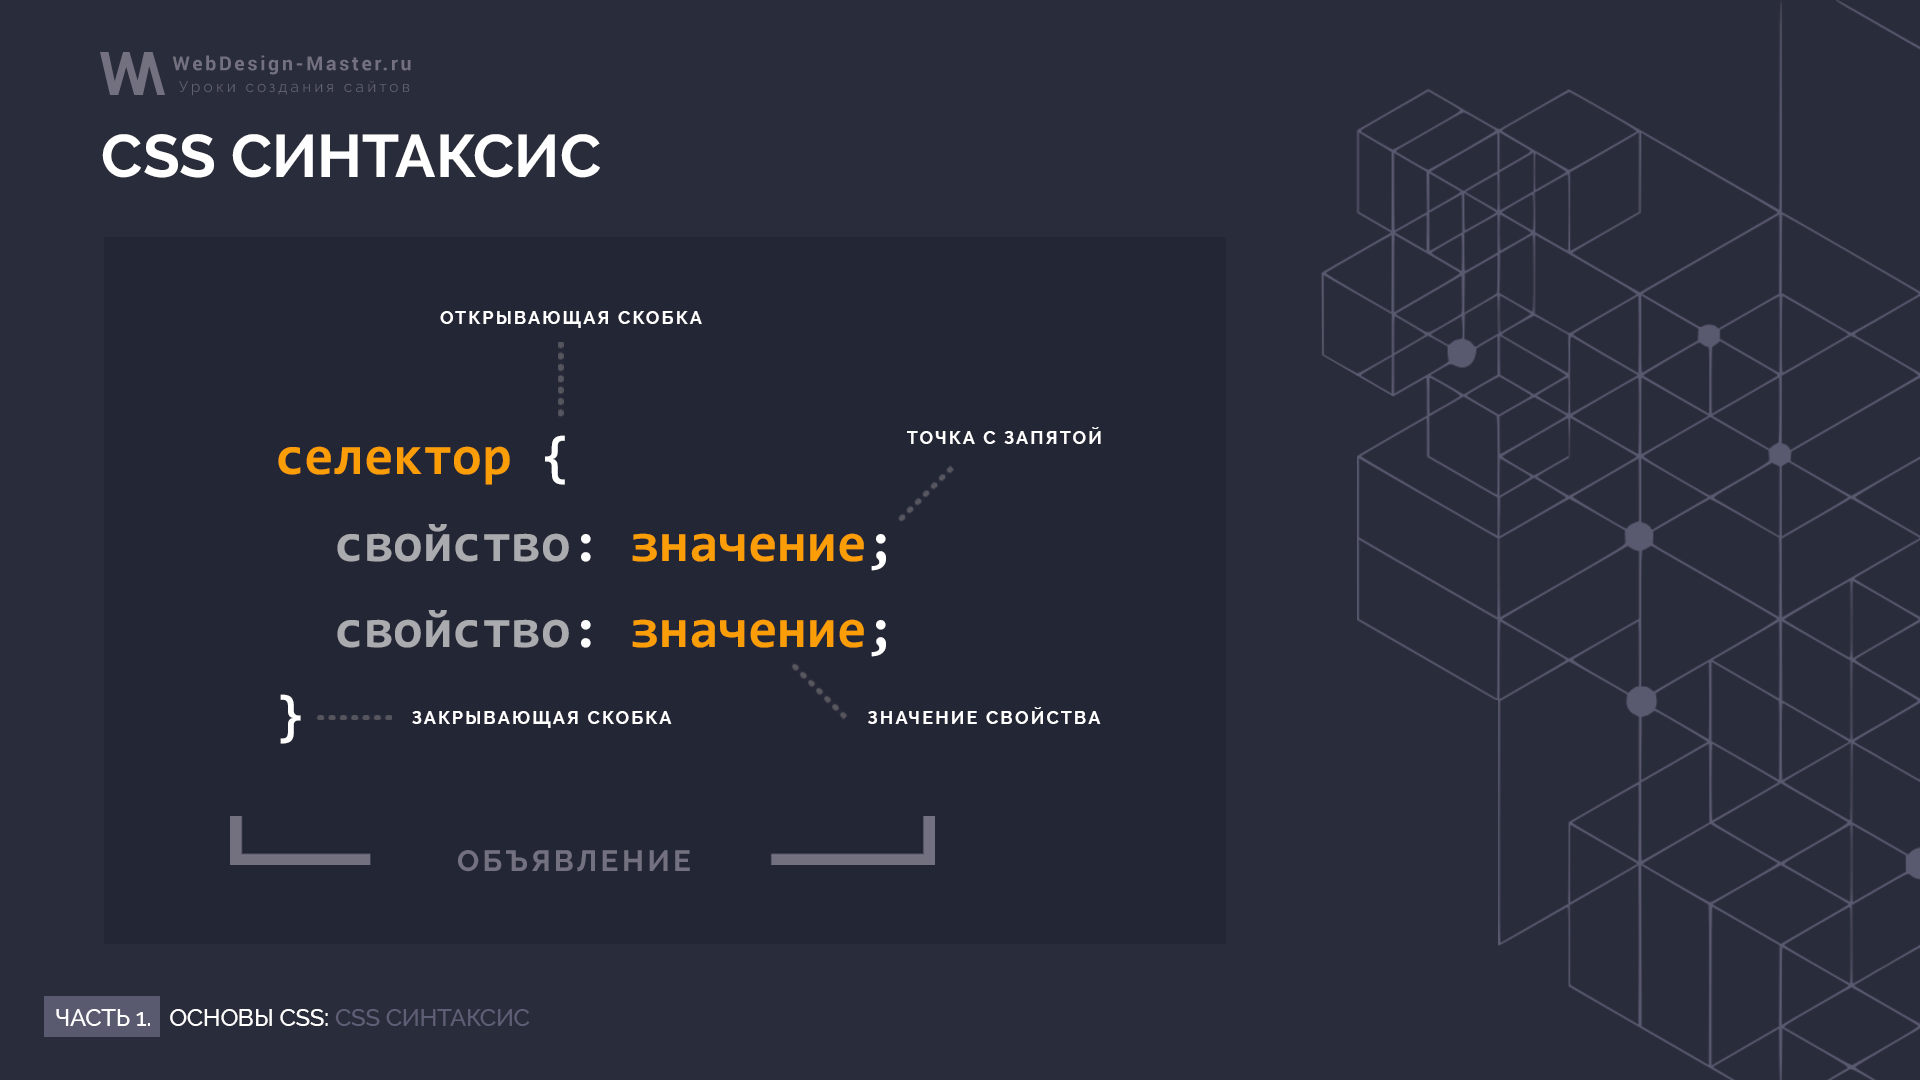
A CSS file contains several CSS rules.
Each rule is composed by 2 parts:
- the selector
- the declaration block
The selector is a string that identifies one or more elements on the page, following a special syntax that we’ll soon talk about extensively.
The declaration block contains one or more declarations, in turn composed by a property and value pair.
Those are all the things we have in CSS.
Carefully organising properties, associating them values, and attaching those to specific elements of the page using a selector is the whole argument of this ebook.
How does CSS look like
A CSS rule set has one part called selector, and the other part called declaration. The declaration contains various rules, each composed by a property, and a value.
In this example, p is the selector, and applies one rule which sets the value 20px to the font-size property:
p {
  font-size: 20px;
}
Multiple rules are stacked one after the other:
p {
  font-size: 20px;
}

a {
  color: blue;
}
A selector can target one or more items:
p, a {
  font-size: 20px;
}
and it can target HTML tags, like above, or HTML elements that contain a certain class attribute with .my-class, or HTML elements that have a specific id attribute with #my-id.
More advanced selectors allow you to choose items whose attribute matches a specific value, or also items which respond to pseudo-classes (more on that later)
Semicolons
Every CSS rule terminates with a semicolon. Semicolons are not optional, except after the last rule. But I suggest to always use them for consistency and to avoid errors if you add another property and forget to add the semicolon on the previous line.
Formatting and indentation
There is no fixed rule for formatting. This CSS is valid:
p
      {
  font-size:           20px   ;
                      }

a{color:blue;}
but a pain to see. Stick to some conventions, like the ones you see in the examples above: stick selectors and the closing brackets to the left, indent 2 spaces for each rule, have the opening bracket on the same line of the selector, separated by one space.
Correct and consistent use of spacing and indentation is a visual aid in understanding your code.
A BRIEF HISTORY OF CSS
Before moving on, I want to give you a brief recap of the history of CSS.
CSS was grown out of the necessity of styling web pages. Before CSS was introduced, people wanted a way to style their web pages, which looked all very similar and “academic” back in the day. You couldn’t do much in terms of personalisation.
HTML 3.2 introduced the option of defining colors inline as HTML element attributes, and presentational tags like center and font, but that escalated quickly into a far from ideal situation.
CSS let us move everything presentation-related from the HTML to the CSS, so that HTML could get back being the format that defines the structure of the document, rather than how things should look in the browser.
CSS is continuously evolving, and CSS you used 5 years ago might just be outdated, as new idiomatic CSS techniques emerged and browsers changed.
It’s hard to imagine the times when CSS was born and how different the web was.
At the time, we had several competing browsers, the main ones being Internet Explorer or Netscape Navigator.
Pages were styled by using HTML, with special presentational tags like bold and special attributes, most of which are now deprecated.
This meant you had a limited amount of customisation opportunities.
The bulk of the styling decisions were left to the browser.
Also, you built a site specifically for one of them, because each one introduced different non-standard tags to give more power and opportunities.
Soon people realised the need for a way to style pages, in a way that would work across all browsers.
After the initial idea proposed in 1994, CSS got its first release in 1996, when the CSS Level 1 (“CSS 1”) recommendation was published.
CSS Level 2 (“CSS 2”) got published in 1998.
Since then, work began on CSS Level 3. The CSS Working Group decided to split every feature and work on it separately, in modules.
Browsers weren’t especially fast at implementing CSS. We had to wait until 2002 to have the first browser implement the full CSS specification: IE for Mac, as nicely described in this CSS Tricks post: https://css-tricks.com/look-back-history-css/
Internet Explorer implemented the box model incorrectly right from the start, which led to years of pain trying to have the same style applied consistently across browsers. We had to use various tricks and hacks to make browsers render things as we wanted.
Today things are much, much better. We can just use the CSS standards without thinking about quirks, most of the time, and CSS has never been more powerful.
We don’t have official release numbers for CSS any more now, but the CSS Working Group releases a “snapshot” of the modules that are currently considered stable and ready to be included in browsers. This is the latest snapshot, from 2018: https://www.w3.org/TR/css-2018/
CSS Level 2 is still the base for the CSS we write today, and we have many more features built on top of it.
ADDING CSS TO AN HTML PAGE
CSS is attached to an HTML page in different ways.
1: Using the link tag
The link tag is the way to include a CSS file. This is the preferred way to use CSS as it’s intended to be used: one CSS file is included by all the pages of your site, and changing one line on that file affects the presentation of all the pages in the site.
To use this method, you add a link tag with the href attribute pointing to the CSS file you want to include. You add it inside the head tag of the site (not inside the body tag):
<link rel="stylesheet" type="text/css" href="myfile.css">The rel and type attributes are required too, as they tell the browser which kind of file we are linking to.
2: using the style tag
Instead of using the link tag to point to separate stylesheet containing our CSS, we can add the CSS directly inside a style tag. This is the syntax:
<style>
...our CSS...
</style>
Using this method we can avoid creating a separate CSS file. I find this is a good way to experiment before “formalising” CSS to a separate file, or to add a special line of CSS just to a file.
3: inline styles
Inline styles are the third way to add CSS to a page. We can add a style attribute to any HTML tag, and add CSS into it.
<div style="">...</div>Example:
<div style="background-color: yellow">...</div>SELECTORS
A selector allows us to associate one or more declarations to one or more elements on the page.
Basic selectors
Suppose we have a p element on the page, and we want to display the words into it using the yellow color.
We can target that element using this selector p, which targets all the element using the p tag in the page. A simple CSS rule to achieve what we want is:
p {
  color: yellow;
}
Every HTML tag has a corresponding selector, for example: div, span, img.
If a selector matches multiple elements, all the elements in the page will be affected by the change.
HTML elements have 2 attributes which are very commonly used within CSS to associate styling to a specific element on the page: class and id.
There is one big difference between those two: inside an HTML document you can repeat the same class value across multiple elements, but you can only use an id once. As a corollary, using classes you can select an element with 2 or more specific class names, something not possible using ids.
Classes are identified using the . symbol, while ids using the # symbol.
Example using a class:
<p class="dog-name">
  Roger
</p>

.dog-name {
  color: yellow;
}
Example using an id:
<p id="dog-name">
  Roger
</p>

#dog-name {
  color: yellow;
}
Combining selectors
So far we’ve seen how to target an element, a class or an id. Let’s introduce more powerful selectors.
Targeting an element with a class or id
You can target a specific element that has a class, or id, attached.
Example using a class:
<p class="dog-name">
  Roger
</p>

p.dog-name {
  color: yellow;
}
Example using an id:
<p id="dog-name">
  Roger
</p>

p#dog-name {
  color: yellow;
}
Why would you want to do that, if the class or id already provides a way to target that element? You might have to do that to have more specificity. We’ll see what that means later.
Targeting multiple classes
You can target an element with a specific class using .class-name, as you saw previously. You can target an element with 2 (or more) classes by combining the class names separated with a dot, without spaces.
Example:
<p class="dog-name roger">
  Roger
</p>

.dog-name.roger {
  color: yellow;
}
Combining classes and ids
In the same way, you can combine a class and an id.
Example:
<p class="dog-name" id="roger">
  Roger
</p>

.dog-name#roger {
  color: yellow;
}
Grouping selectors
You can combine selectors to apply the same declarations to multiple selectors. To do so, you separate them with a comma.
Example:
<p>
  My dog name is:
</p>
<span class="dog-name">
  Roger
</span>

p, .dog-name {
  color: yellow;
}
You can add spaces in those declarations to make them more clear:
p,
.dog-name {
  color: yellow;
}
Follow the document tree with selectors
We’ve seen how to target an element in the page by using a tag name, a class or an id.
You can create a more specific selector by combining multiple items to follow the document tree structure. For example, if you have a span tag nested inside a p tag, you can target that one without applying the style to a span tag not included in a p tag:
<span>
  Hello!
</span>
<p>
  My dog name is:
  <span class="dog-name">
    Roger
  </span>
</p>

p span {
  color: yellow;
}
See how we used a space between the two tokens p and span.
This works even if the element on the right is multiple levels deep.
To make the dependency strict on the first level, you can use the > symbol between the two tokens:
p > span {
  color: yellow;
}
In this case, if a span is not a first children of the p element, it’s not going to have the new color applied.
Direct children will have the style applied:
<p>
  <span>
    This is yellow
  </span>
  <strong>
    <span>
      This is not yellow
    </span>
  </strong>
</p>
Adjacent sibling selectors let us style an element only if preceded by a specific element. We do so using the + operator:
Example:
p + span {
  color: yellow;
}
This will assign the color yellow to all span elements preceded by a p element:
<p>This is a paragraph</p>
<span>This is a yellow span</span>
We have a lot more selectors we can use:
- attribute selectors
- pseudo class selectors
- pseudo element selectors
We’ll find all about them in the next sections.
CASCADE
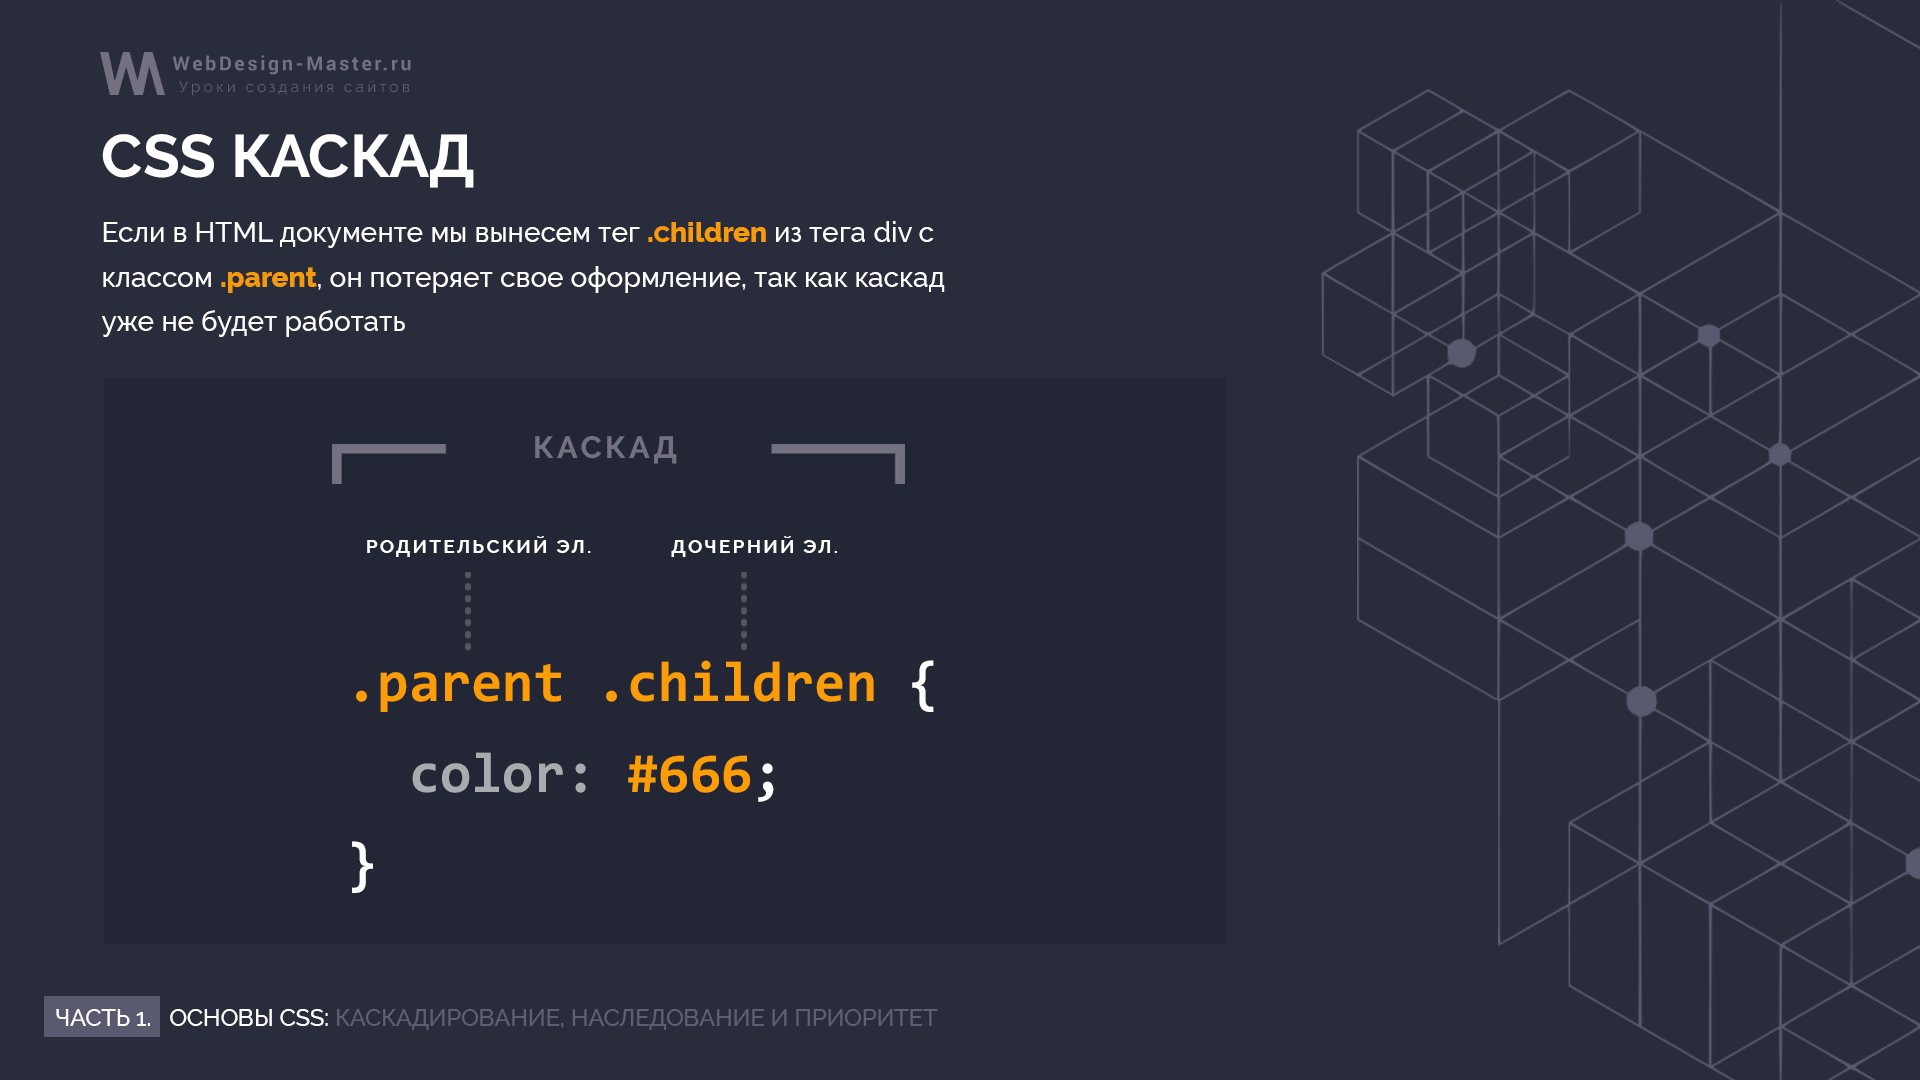
Cascade is a fundamental concept of CSS. After all, it’s in the name itself, the first C of CSS — Cascading Style Sheets — it must be an important thing.
What does it mean?
Cascade is the process, or algorithm, that determines the properties applied to each element on the page. Trying to converge from a list of CSS rules that are defined in various places.
It does so taking in consideration:
- specificity
- importance
- inheritance
- order in the file
It also takes care of resolving conflicts.
Two or more competing CSS rules for the same property applied to the same element need to be elaborated according to the CSS spec, to determine which one needs to be applied.
Even if you just have one CSS file loaded by your page, there is other CSS that is going to be part of the process. We have the browser (user agent) CSS. Browsers come with a default set of rules, all different between browsers.
Then your CSS comes into play.
Then the browser applies any user stylesheet, which might also be applied by browser extensions.
All those rules come into play while rendering the page.
We’ll now see the concepts of specificity and inheritance.
SPECIFICITY
What happens when an element is targeted by multiple rules, with different selectors, that affect the same property?
For example, let’s talk about this element:
<p class="dog-name">
  Roger
</p>
We can have
.dog-name {
  color: yellow;
}
and another rule that targets p, which sets the color to another value:
p {
  color: red;
}
And another rule that targets p.dog-name. Which rule is going to take precedence over the others, and why?
Enter specificity. The more specific rule will win. If two or more rules have the same specificity, the one that appears last wins.
Sometimes what is more specific in practice is a bit confusing to beginners. I would say it’s also confusing to experts that do not look at those rules that frequently, or simply overlook them.
How to calculate specificity
Specificity is calculated using a convention.
We have 4 slots, and each one of them starts at 0: 0 0 0 0. The slot at the left is the most important, and the rightmost one is the least important.
Like it works for numbers in the decimal system: 1 0 0 0 is higher than 0 1 0 0.
Slot 1
The first slot, the rightmost one, is the least important.
We increase this value when we have an element selector. An element is a tag name. If you have more than one element selector in the rule, you increment accordingly the value stored in this slot.
Examples:
p {}                    /* 0 0 0 1 */
span {}                 /* 0 0 0 1 */
p span {}               /* 0 0 0 2 */
p > span {}             /* 0 0 0 2 */
div p > span {}         /* 0 0 0 3 */
Slot 2
The second slot is incremented by 3 things:
- class selectors
- pseudo-class selectors
- attribute selectors
Every time a rule meets one of those, we increment the value of the second column from the right.
Examples:
.name {}                 /* 0 0 1 0 */
.users .name {}          /* 0 0 2 0 */
[href$='.pdf'] {}        /* 0 0 1 0 */
:hover {}                /* 0 0 1 0 */
Of course slot 2 selectors can be combined with slot 1 selectors:
div .name {}             /* 0 0 1 1 */
a[href$='.pdf'] {}       /* 0 0 1 1 */
.pictures img:hover {}   /* 0 0 2 1 */
One nice trick with classes is that you can repeat the same class and increase the specificity. For example:
.name {}              /* 0 0 1 0 */
.name.name {}         /* 0 0 2 0 */
.name.name.name {}    /* 0 0 3 0 */
Slot 3
Slot 3 holds the most important thing that can affect your CSS specificity in a CSS file: the id.
Every element can have an id attribute assigned, and we can use that in our stylesheet to target the element.
Examples:
#name {}                    /* 0 1 0 0 */
.user #name {}              /* 0 1 1 0 */
#name span {}               /* 0 1 0 1 */
Slot 4
Slot 4 is affected by inline styles. Any inline style will have precedence over any rule defined in an external CSS file, or inside the style tag in the page header.
Example:
<p style="color: red">Test</p> /* 1 0 0 0 */Even if any other rule in the CSS defines the color, this inline style rule is going to be applied. Except for one case — if !important is used, which fills the slot 5.
Importance
Specificity does not matter if a rule ends with !important:
p {
  font-size: 20px!important;
}
That rule will take precedence over any rule with more specificity
Adding !important in a CSS rule is going to make that rule more important than any other rule, according to the specificity rules. The only way another rule can take precedence is to have !important as well, and have higher specificity in the other less important slots.
Tips
In general you should use the amount of specificity you need, but not more. In this way, you can craft other selectors to overwrite the rules set by preceding rules without going mad.
!important is a highly debated tool that CSS offers us. Many CSS experts advocate against using it. I find myself using it especially when trying out some style and a CSS rule has so much specificity that I need to use !important to make the browser apply my new CSS.
But generally, !important should have no place in your CSS files.
Using the id attribute to style CSS is also debated a lot, since it has a very high specificity. A good alternative is to use classes instead, which have less specificity, and so they are easier to work with, and they are more powerful (you can have multiple classes for an element, and a class can be reused multiple times).
Tools to calculate the specificity
You can use the site https://specificity.keegan.st/ to perform the specificity calculation for you automatically.
It’s useful especially if you are trying to figure things out, as it can be a nice feedback tool.
INHERITANCE
When you set some properties on a selector in CSS, they are inherited by all the children of that selector.
I said some, because not all properties show this behaviour.
This happens because some properties make sense to be inherited. This helps us write CSS much more concisely, since we don’t have to explicitly set that property again on every single child.
Some other properties make more sense to not be inherited.
Think about fonts: you don’t need to apply the font-family to every single tag of your page. You set the body tag font, and every child inherits it, along with other properties.
The background-color property, on the other hand, makes little sense to be inherited.
Properties that inherit
Here is a list of the properties that do inherit. The list is non-comprehensive, but those rules are just the most popular ones you’ll likely use:
- border-collapse
- border-spacing
- caption-side
- color
- cursor
- direction
- empty-cells
- font-family
- font-size
- font-style
- font-variant
- font-weight
- font-size-adjust
- font-stretch
- font
- letter-spacing
- line-height
- list-style-image
- list-style-position
- list-style-type
- list-style
- orphans
- quotes
- tab-size
- text-align
- text-align-last
- text-decoration-color
- text-indent
- text-justify
- text-shadow
- text-transform
- visibility
- white-space
- widows
- word-break
- word-spacing
I got it from this nice Sitepoint article on CSS inheritance.
Forcing properties to inherit
What if you have a property that’s not inherited by default, and you want it to, in a child?
In the children, you set the property value to the special keyword inherit.
Example:
body {
    background-color: yellow;
}

p {
  background-color: inherit;
}
Forcing properties to NOT inherit
On the contrary, you might have a property inherited and you want to avoid so.
You can use the revert keyword to revert it. In this case, the value is reverted to the original value the browser gave it in its default stylesheet.
In practice this is rarely used, and most of the times you’ll just set another value for the property to overwrite that inherited value.
Other special values
In addition to the inherit and revert special keywords we just saw, you can also set any property to:
initial: use the default browser stylesheet if available. If not, and if the property inherits by default, inherit the value. Otherwise do nothing.unset: if the property inherits by default, inherit. Otherwise do nothing.
IMPORT
From any CSS file you can import another CSS file using the @import directive.
Here is how you use it:
@import url(myfile.css)url() can manage absolute or relative URLs.
One important thing you need to know is that @import directives must be put before any other CSS in the file, or they will be ignored.
You can use media descriptors to only load a CSS file on the specific media:
@import url(myfile.css) all;
@import url(myfile-screen.css) screen;
@import url(myfile-print.css) print;
ATTRIBUTE SELECTORS
We already introduced several of the basic CSS selectors: using element selectors, class, id, how to combine them, how to target multiple classes, how to style several selectors in the same rule, how to follow the page hierarchy with child and direct child selectors, and adjacent siblings.
In this section we’ll analyze attribute selectors, and we’ll talk about pseudo class and pseudo element selectors in the next 2 sections.
Attribute presence selectors
The first selector type is the attribute presence selector.
We can check if an element has an attribute using the [] syntax. p[id] will select all p tags in the page that have an id attribute, regardless of its value:
p[id] {
  /* ... */
}
Exact attribute value selectors
Inside the brackets you can check the attribute value using =, and the CSS will be applied only if the attribute matches the exact value specified:
p[id="my-id"] {
  /* ... */
}
Match an attribute value portion
While = lets us check for exact value, we have other operators:
*=checks if the attribute contains the partial^=checks if the attribute starts with the partial$=checks if the attribute ends with the partial|=checks if the attribute starts with the partial and it’s followed by a dash (common in classes, for example), or just contains the partial~=checks if the partial is contained in the attribute, but separated by spaces from the rest
All the checks we mentioned are case sensitive.
If you add an i just before the closing bracket, the check will be case insensitive. It’s supported in many browsers but not in all, check https://caniuse.com/#feat=css-case-insensitive.
PSEUDO-CLASSES
Pseudo classes are predefined keywords that are used to select an element based on its state, or to target a specific child.
They start with a single colon :.
They can be used as part of a selector, and they are very useful to style active or visited links, for example, change the style on hover, focus, or target the first child, or odd rows. Very handy in many cases.
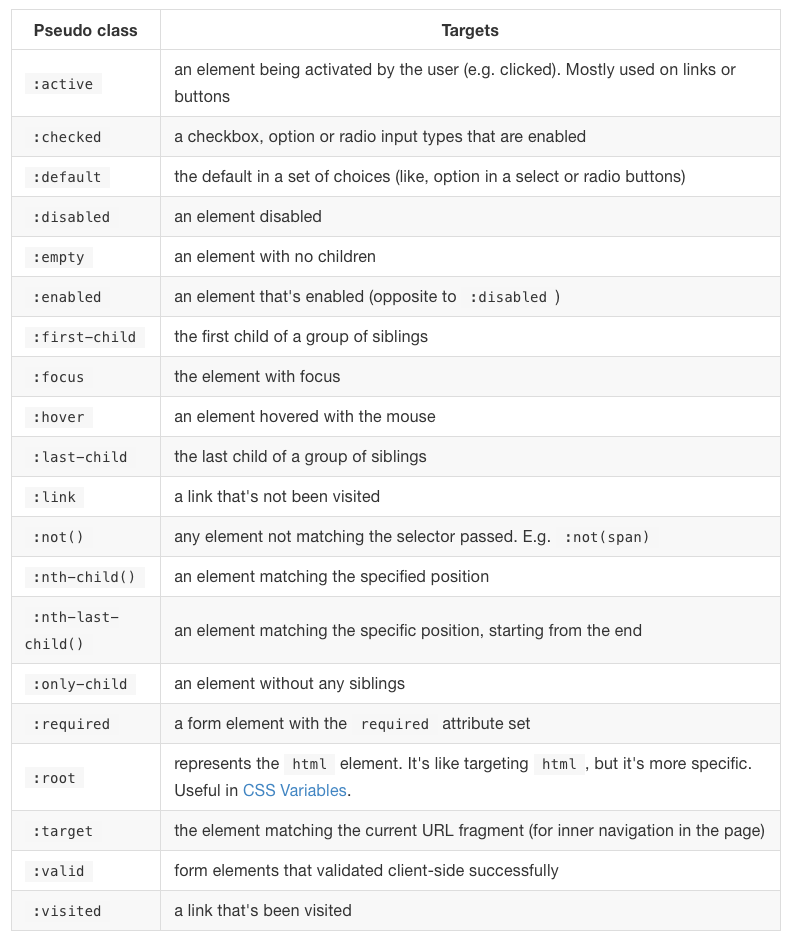
These are the most popular pseudo classes you will likely use:
Let’s do an example. A common one, actually. You want to style a link, so you create a CSS rule to target the a element:
a {
  color: yellow;
}
Things seem to work fine, until you click one link. The link goes back to the predefined color (blue) when you click it. Then when you open the link and go back to the page, now the link is blue.
Why does that happen?
Because the link when clicked changes state, and goes in the :active state. And when it’s been visited, it is in the :visited state. Forever, until the user clears the browsing history.
So, to correctly make the link yellow across all states, you need to write
a,
a:visited,
a:active {
  color: yellow;
}
:nth-child() deserves a special mention. It can be used to target odd or even children with :nth-child(odd) and :nth-child(even).
It is commonly used in lists to color odd lines differently from even lines:
ul:nth-child(odd) {
  color: white;
    background-color: black;
}
You can also use it to target the first 3 children of an element with :nth-child(-n+3). Or you can style 1 in every 5 elements with :nth-child(5n).
Some pseudo classes are just used for printing, like :first, :left, :right, so you can target the first page, all the left pages, and all the right pages, which are usually styled slightly differently.
PSEUDO-ELEMENTS
Pseudo-elements are used to style a specific part of an element.
They start with a double colon ::.
Sometimes you will spot them in the wild with a single colon, but this is only a syntax supported for backwards compatibility reasons. You should use 2 colons to distinguish them from pseudo-classes.
::before and ::after are probably the most used pseudo-elements. They are used to add content before or after an element, like icons for example.
Here’s the list of the pseudo-elements:
Let’s do an example. Say you want to make the first line of a paragraph slightly bigger in font size, a common thing in typography:
p::first-line {
  font-size: 2rem;
}
Or maybe you want the first letter to be bolder:
p::first-letter {
  font-weight: bolder;
}
::after and ::before are a bit less intuitive. I remember using them when I had to add icons using CSS.
You specify the content property to insert any kind of content after or before an element:
p::before {
  content: url(/myimage.png);
}

.myElement::before {
    content: "Hey Hey!";
}
COLORS
By default an HTML page is rendered by web browsers quite sadly in terms of the colors used.
We have a white background, black color, and blue links. That’s it.
Luckily CSS gives us the ability to add colors to our designs.
We have these properties:
colorbackground-colorborder-color
All of them accept a color value, which can be in different forms.
Named colors
First, we have CSS keywords that define colors. CSS started with 16, but today there is a huge number of colors names:
aliceblueantiquewhiteaquaaquamarineazurebeigebisqueblackblanchedalmondbluebluevioletbrownburlywoodcadetbluechartreusechocolatecoralcornflowerbluecornsilkcrimsoncyandarkbluedarkcyandarkgoldenroddarkgraydarkgreendarkgreydarkkhakidarkmagentadarkolivegreendarkorangedarkorchiddarkreddarksalmondarkseagreendarkslatebluedarkslategraydarkslategreydarkturquoisedarkvioletdeeppinkdeepskybluedimgraydimgreydodgerbluefirebrickfloralwhiteforestgreenfuchsiagainsboroghostwhitegoldgoldenrodgraygreengreenyellowgreyhoneydewhotpinkindianredindigoivorykhakilavenderlavenderblushlawngreenlemonchiffonlightbluelightcorallightcyanlightgoldenrodyellowlightgraylightgreenlightgreylightpinklightsalmonlightseagreenlightskybluelightslategraylightslategreylightsteelbluelightyellowlimelimegreenlinenmagentamaroonmediumaquamarinemediumbluemediumorchidmediumpurplemediumseagreenmediumslatebluemediumspringgreenmediumturquoisemediumvioletredmidnightbluemintcreammistyrosemoccasinnavajowhitenavyoldlaceoliveolivedraborangeorangeredorchidpalegoldenrodpalegreenpaleturquoisepalevioletredpapayawhippeachpuffperupinkplumpowderbluepurplerebeccapurpleredrosybrownroyalbluesaddlebrownsalmonsandybrownseagreenseashellsiennasilverskyblueslateblueslategrayslategreysnowspringgreensteelbluetantealthistletomatoturquoisevioletwheatwhitewhitesmokeyellowyellowgreen
plus tranparent, and currentColor which points to the color property, for example it’s useful to make the border-color inherit it.
They are defined in the CSS Color Module, Level 4. They are case insensitive.
Wikipedia has a nice table which lets you pick the perfect color by its name.
Named colors are not the only option.
RGB and RGBa
You can use the rgb() function to calculate a color from its RGB notation, which sets the color based on its red-green-blue parts. From 0 to 255:
p {
  color: rgb(255, 255, 255); /* white */
    background-color: rgb(0, 0, 0); /* black */
}
rgba() lets you add the alpha channel to enter a transparent part. That can be a number from 0 to 1:
p {
    background-color: rgb(0, 0, 0, 0.5);
}
Hexadecimal notation
Another option is to express the RGB parts of the colors in the hexadecimal notation, which is composed by 3 blocks.
Black, which is rgb(0,0,0) is expressed as #000000 or #000 (we can shortcut the 2 numbers to 1 if they are equal).
White, rgb(255,255,255) can be expressed as #ffffff or #fff.
The hexadecimal notation lets us express a number from 0 to 255 in just 2 digits, since they can go from 0 to “15” (f).
We can add the alpha channel by adding 1 or 2 more digits at the end, for example #00000033. Not all browsers support the shortened notation, so use all 6 digits to express the RGB part.
HSL and HSLa
This is a more recent addition to CSS.
HSL = Hue Saturation Lightness.
In this notation, black is hsl(0, 0%, 0%) and white is hsl(0, 0%, 100%).
If you are more familiar with HSL than RGB because of your past knowledge, you can definitely use that.
You also have hsla() which adds the alpha channel to the mix, again a number from 0 to 1: hsl(0, 0%, 0%, 0.5)
UNITS
One of the things you’ll use every day in CSS are units. They are used to set lengths, paddings, margins, align elements and so on.
Things like px, em, rem, or percentages.
They are everywhere. There are some obscure ones, too. We’ll go through each of them in this section.
Pixels
The most widely used measurement unit. A pixel does not actually correlate to a physical pixel on your screen, as that varies, a lot, by device (think high-DPI devices vs non-retina devices).
There is a convention that make this unit work consistently across devices.
Percentages
Another very useful measure, percentages let you specify values in percentages of that parent element’s corresponding property.
Example:
.parent {
  width: 400px;
}

.child {
  width: 50%; /* = 200px */
}
Real-world measurement units
We have those measurement units which are translated from the outside world. Mostly useless on screen, they can be useful for print stylesheets. They are:
cma centimeter (maps to 37.8 pixels)mma millimeter (0.1cm)qa quarter of a millimeterinan inch (maps to 96 pixels)pta point (1 inch = 72 points)pca pica (1 pica = 12 points)
Relative units
emis the value assigned to that element’sfont-size, therefore its exact value changes between elements. It does not change depending on the font used, just on the font size. In typography this measures the width of themletter.remis similar toem, but instead of varying on the current element font size, it uses the root element (html) font size. You set that font size once, andremwill be a consistent measure across all the page.exis likeem, but instead of measuring the width ofm, it measures the height of thexletter. It can change depending on the font used, and on the font size.chis likeexbut instead of measuring the height ofxit measures the width of0(zero).
Viewport units
vwthe viewport width unit represents a percentage of the viewport width.50vwmeans 50% of the viewport width.vhthe viewport height unit represents a percentage of the viewport height.50vhmeans 50% of the viewport height.vminthe viewport minimum unit represents the minimum between the height or width in terms of percentage.30vminis the 30% of the current width or height, depending which one is smallervmaxthe viewport maximum unit represents the maximum between the height or width in terms of percentage.30vmaxis the 30% of the current width or height, depending which one is bigger
Fraction units
fr are fraction units, and they are used in CSS Grid to divide space into fractions.
We’ll talk about them in the context of CSS Grid later on.
URL
When we talk about background images, @import, and more, we use the url() function to load a resource:
div {
  background-image: url(test.png);
}
In this case I used a relative URL, which searches the file in the folder where the CSS file is defined.
I could go one level back
div {
  background-image: url(../test.png);
}
or go into a folder
div {
  background-image: url(subfolder/test.png);
}
Or I could load a file starting from the root of the domain where the CSS is hosted:
div {
  background-image: url(/test.png);
}
Or I could use an absolute URL to load an external resource:
div {
  background-image: url(https://mysite.com/test.png);
}
CALC
The calc() function lets you perform basic math operations on values, and it’s especially useful when you need to add or subtract a length value from a percentage.
This is how it works:
div {
    max-width: calc(80% - 100px)
}
It returns a length value, so it can be used anywhere you expect a pixel value.
You can perform
- additions using
+ - subtractions using
- - multiplication using
* - division using
/
One caveat: with addition and subtraction, the space around the operator is mandatory, otherwise it does not work as expected.
Examples:
div {
    max-width: calc(50% / 3)
}

div {
    max-width: calc(50% + 3px)
}
BACKGROUNDS
The background of an element can be changed using several CSS properties:
background-colorbackground-imagebackground-clipbackground-positionbackground-originbackground-repeatbackground-attachmentbackground-size
and the shorthand property background, which allows us to shorten definitions and group them on a single line.
background-color accepts a color value, which can be one of the color keywords, or an rgb or hsl value:
p {
  background-color: yellow;
}

div {
  background-color: #333;
}
Instead of using a color, you can use an image as background to an element, by specifying the image location URL:
div {
  background-image: url(image.png);
}
background-clip lets you determine the area used by the background image, or color. The default value is border-box, which extends up to the border outer edge.
Other values are
padding-boxto extend the background up to the padding edge, without the bordercontent-boxto extend the background up to the content edge, without the paddinginheritto apply the value of the parent
When using an image as background you will want to set the position of the image placement using the background-position property: left, right, center are all valid values for the X axis, and top, bottom for the Y axis:
div {
  background-position: top right;
}
If the image is smaller than the background, you need to set the behavior using background-repeat. Should it repeat-x, repeat-y or repeat on all the axes? This last one is the default value. Another value is no-repeat.
background-origin lets you choose where the background should be applied: to the entire element including padding (default) using padding-box, to the entire element including the border using border-box, to the element without the padding using content-box.
With background-attachment we can attach the background to the viewport, so that scrolling will not affect the background:
div {
  background-attachment: fixed;
}
By default the value is scroll. There is another value, local. The best way to visualize their behavior is this Codepen.
The last background property is background-size. We can use 3 keywords: auto, cover and contain. auto is the default.
cover expands the image until the entire element is covered by the background.
contain stops expanding the background image when one dimension (x or y) covers the whole smallest edge of the image, so it’s fully contained into the element.
You can also specify a length value, and if so it sets the width of the background image (and the height is automatically defined):
div {
  background-size: 100%;
}
If you specify 2 values, one is the width and the second is the height:
div {
  background-size: 800px 600px;
}
The shorthand property background allows to shorten definitions and group them on a single line.
This is an example:
div {
  background: url(bg.png) top left no-repeat;
}
If you use an image, and the image could not be loaded, you can set a fallback color:
div {
  background: url(image.png) yellow;
}
You can also set a gradient as background:
div {
  background: linear-gradient(#fff, #333);
}
CSS gives you the ability to write comments in a CSS file, or in the style tag in the page header
The format is the /* this is a comment */ C-style (or JavaScript-style, if you prefer) comments.
This is a multiline comment. Until you add the closing */ token, the all the lines found after the opening one are commented.
Example:
#name { display: block; } /* Nice rule! */

/* #name { display: block; } */

#name {
    display: block; /*
    color: red;
    */
}
CSS does not have inline comments, like // in C or JavaScript.
Pay attention though — if you add // before a rule, the rule will not be applied, looking like the comment worked. In reality, CSS detected a syntax error and due to how it works it ignored the line with the error, and went straight to the next line.
Knowing this approach lets you purposefully write inline comments, although you have to be careful because you can’t add random text like you can in a block comment.
For example:
// Nice rule!
#name { display: block; }
In this case, due to how CSS works, the #name rule is actually commented out. You can find more details here if you find this interesting. To avoid shooting yourself in the foot, just avoid using inline comments and rely on block comments.
CUSTOM PROPERTIES
In the last few years CSS preprocessors have had a lot of success. It was very common for greenfield projects to start with Less or Sass. And it’s still a very popular technology.
The main benefits of those technologies are, in my opinion:
- They allow you to nest selectors
- The provide an easy imports functionality
- They give you variables
Modern CSS has a new powerful feature called CSS Custom Properties, also commonly known as CSS Variables.
CSS is not a programming language like JavaScript, Python, PHP, Ruby or Go where variables are key to do something useful. CSS is very limited in what it can do, and it’s mainly a declarative syntax to tell browsers how they should display an HTML page.
But a variable is a variable: a name that refers to a value, and variables in CSS help reduce repetition and inconsistencies in your CSS, by centralizing the values definition.
And it introduces a unique feature that CSS preprocessors won’t ever have: you can access and change the value of a CSS Variable programmatically using JavaScript.
The basics of using variables
A CSS Variable is defined with a special syntax, prepending two dashes to a name (--variable-name), then a colon and a value. Like this:
:root {
  --primary-color: yellow;
}
(more on :root later)
You can access the variable value using var():
p {
  color: var(--primary-color)
}
The variable value can be any valid CSS value, for example:
:root {
  --default-padding: 30px 30px 20px 20px;
  --default-color: red;
  --default-background: #fff;
}
Create variables inside any element
CSS Variables can be defined inside any element. Some examples:
:root {
  --default-color: red;
}

body {
  --default-color: red;
}

main {
  --default-color: red;
}

p {
  --default-color: red;
}

span {
  --default-color: red;
}

a:hover {
  --default-color: red;
}
What changes in those different examples is the scope.
Variables scope
Adding variables to a selector makes them available to all the children of it.
In the example above you saw the use of :root when defining a CSS variable:
:root {
  --primary-color: yellow;
}
:root is a CSS pseudo-class that identifies the root element of a tree.
In the context of an HTML document, using the :root selector points to the html element, except that :root has higher specificity (takes priority).
In the context of an SVG image, :root points to the svg tag.
Adding a CSS custom property to :root makes it available to all the elements in the page.
If you add a variable inside a .container selector, it’s only going to be available to children of .container:
.container {
  --secondary-color: yellow;
}
and using it outside of this element is not going to work.
Variables can be reassigned:
:root {
  --primary-color: yellow;
}

.container {
  --primary-color: blue;
}
Outside .container, --primary-color will be yellow, but inside it will be blue.
You can also assign or overwrite a variable inside the HTML using inline styles:
<main style="--primary-color: orange;">
  <!-- ... -->
</main>
CSS Variables follow the normal CSS cascading rules, with precedence set according to specificity.
Interacting with a CSS Variable value using JavaScript
The coolest thing with CSS Variables is the ability to access and edit them using JavaScript.
Here’s how you set a variable value using plain JavaScript:
const element = document.getElementById('my-element')
element.style.setProperty('--variable-name', 'a-value')
This code below can be used to access a variable value instead, in case the variable is defined on :root:
const styles = getComputedStyle(document.documentElement)
const value = String(styles.getPropertyValue('--variable-name')).trim()
Or, to get the style applied to a specific element, in case of variables set with a different scope:
const element = document.getElementById('my-element')
const styles = getComputedStyle(element)
const value = String(styles.getPropertyValue('--variable-name')).trim()
Handling invalid values
If a variable is assigned to a property which does not accept the variable value, it’s considered invalid.
For example you might pass a pixel value to a position property, or a rem value to a color property.
In this case the line is considered invalid and is ignored.
Browser support
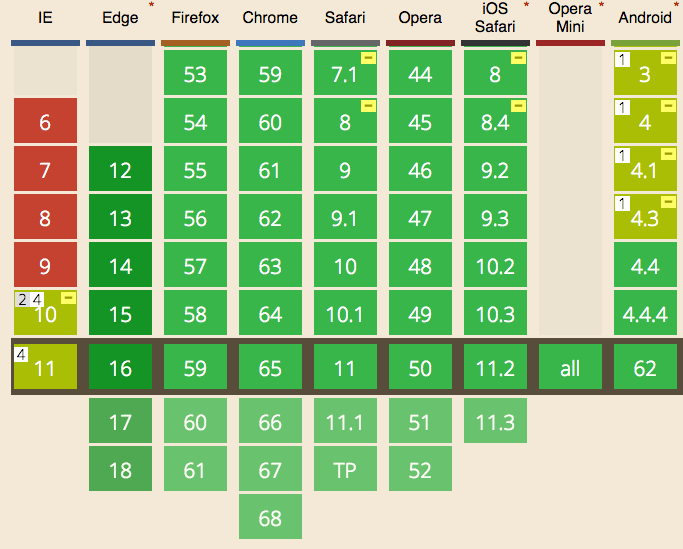
Browser support for CSS Variables is very good, according to Can I Use.
CSS Variables are here to stay, and you can use them today if you don’t need to support Internet Explorer and old versions of the other browsers.
If you need to support older browsers you can use libraries like PostCSS or Myth, but you’ll lose the ability to interact with variables via JavaScript or the Browser Developer Tools, as they are transpiled to good old variable-less CSS (and as such, you lose most of the power of CSS Variables).
CSS Variables are case sensitive
This variable:
--width: 100px;is different than this one:
--Width: 100px;Math in CSS Variables
To do math in CSS Variables, you need to use calc(), for example:
:root {
  --default-left-padding: calc(10px * 2);
}
Media queries with CSS Variables
Nothing special here. CSS Variables normally apply to media queries:
body {
  --width: 500px;
}

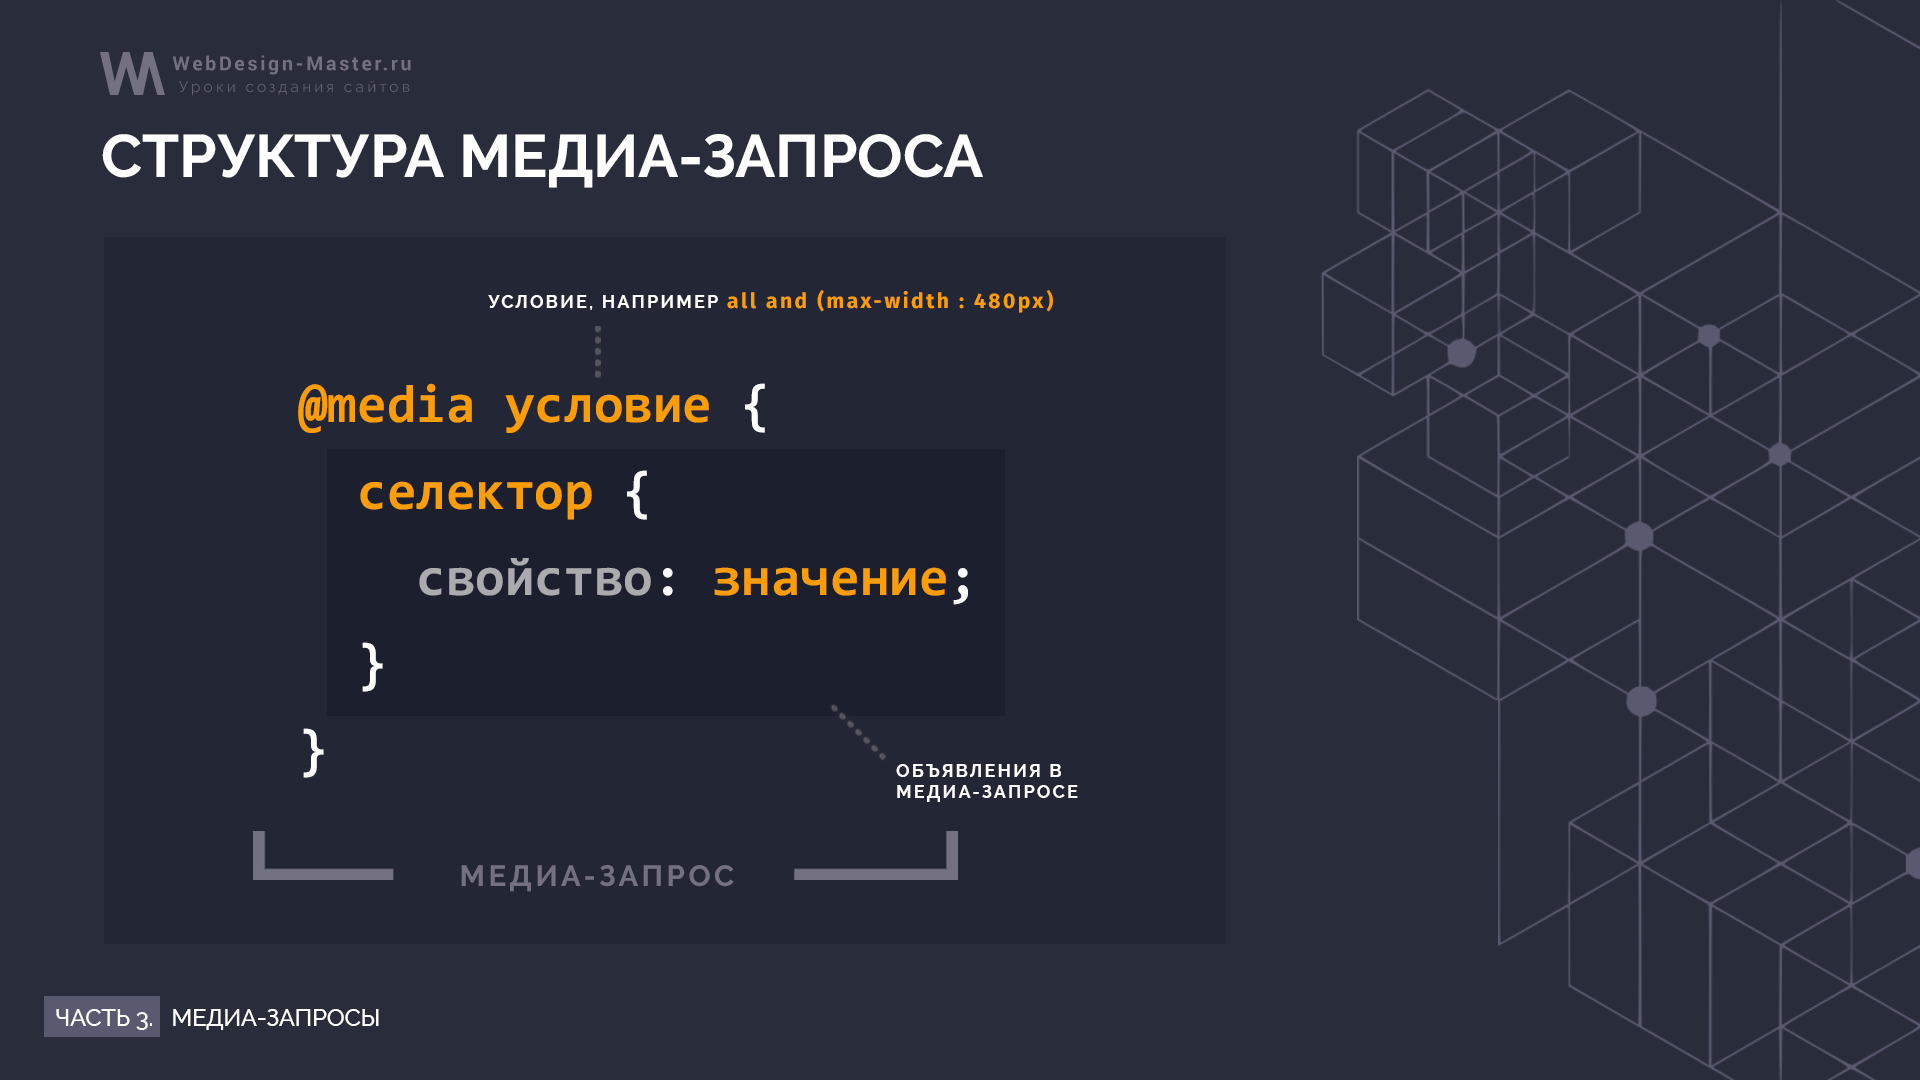
@media screen and (max-width: 1000px) and (min-width: 700px) {
  --width: 800px;
}

.container {
  width: var(--width);
}
Setting a fallback value for var()
var() accepts a second parameter, which is the default fallback value when the variable value is not set:
.container {
  margin: var(--default-margin, 30px);
}
FONTS
At the dawn of the web you only had a handful of fonts you could choose from.
Thankfully today you can load any kind of font on your pages.
CSS has gained many nice capabilities over the years in regards to fonts.
The font property is the shorthand for a number of properties:
font-familyfont-weightfont-stretchfont-stylefont-size
Let’s see each one of them and then we’ll cover font.
Then we’ll talk about how to load custom fonts, using @import or @font-face, or by loading a font stylesheet.
font-family
Sets the font family that the element will use.
Why “family”? Because what we know as a font is actually composed of several sub-fonts which provide all the style (bold, italic, light..) we need.
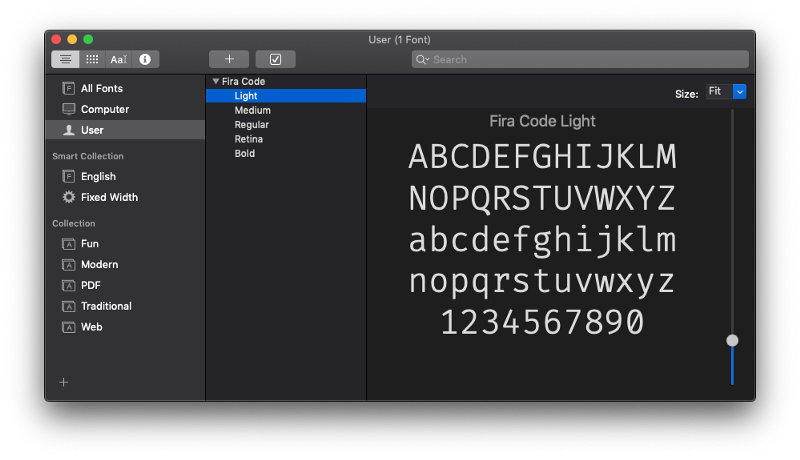
Here’s an example from my Mac’s Font Book app — the Fira Code font family hosts several dedicated fonts underneath:
This property lets you select a specific font, for example:
body {
  font-family: Helvetica;
}
You can set multiple values, so the second option will be used if the first cannot be used for some reason (if it’s not found on the machine, or the network connection to download the font failed, for example):
body {
  font-family: Helvetica, Arial;
}
I used some specific fonts up to now, ones we call Web Safe Fonts, as they are pre-installed on different operating systems.
We divide them in Serif, Sans-Serif, and Monospace fonts. Here’s a list of some of the most popular ones:
Serif
- Georgia
- Palatino
- Times New Roman
- Times
Sans-Serif
- Arial
- Helvetica
- Verdana
- Geneva
- Tahoma
- Lucida Grande
- Impact
- Trebuchet MS
- Arial Black
Monospace
- Courier New
- Courier
- Lucida Console
- Monaco
You can use all of those as font-family properties, but they are not guaranteed to be there for every system. Others exist, too, with a varying level of support.
You can also use generic names:
sans-serifa font without ligaturesserifa font with ligaturesmonospacea font especially good for codecursiveused to simulate handwritten piecesfantasythe name says it all
Those are typically used at the end of a font-family definition, to provide a fallback value in case nothing else can be applied:
body {
  font-family: Helvetica, Arial, sans-serif;
}
font-weight
This property sets the width of a font. You can use those predefined values:
- normal
- bold
- bolder (relative to the parent element)
- lighter (relative to the parent element)
Or using the numeric keywords
- 100
- 200
- 300
- 400, mapped to
normal - 500
- 600
- 700 mapped to
bold - 800
- 900
where 100 is the lightest font, and 900 is the boldest.
Some of those numeric values might not map to a font, because that must be provided in the font family. When one is missing, CSS makes that number be at least as bold as the preceding one, so you might have numbers that point to the same font.
font-stretch
Allows you to choose a narrow or wide face of the font, if available.
This is important: the font must be equipped with different faces.
Values allowed are, from narrower to wider:
ultra-condensedextra-condensedcondensedsemi-condensednormalsemi-expandedexpandedextra-expandedultra-expanded
font-style
Allows you to apply an italic style to a font:
p {
  font-style: italic;
}
This property also allows the values oblique and normal. There is very little, if any, difference between using italic and oblique. The first is easier to me, as HTML already offers an i element which means italic.
font-size
This property is used to determine the size of fonts.
You can pass 2 kinds of values:
- a length value, like
px,em,remetc, or a percentage - a predefined value keyword
In the second case, the values you can use are:
- xx-small
- x-small
- small
- medium
- large
- x-large
- xx-large
- smaller (relative to the parent element)
- larger (relative to the parent element)
Usage:
p {
  font-size: 20px;
}

li {
  font-size: medium;
}
font-variant
This property was originally used to change the text to small caps, and it had just 3 valid values:
normalinheritsmall-caps
Small caps means the text is rendered in “smaller caps” beside its uppercase letters.
font
The font property lets you apply different font properties in a single one, reducing the clutter.
We must at least set 2 properties, font-size and font-family, the others are optional:
body {
  font: 20px Helvetica;
}
If we add other properties, they need to be put in the correct order.
This is the order:
font: <font-stretch> <font-style> <font-variant> <font-weight> <font-size> <line-height> <font-family>;Example:
body {
  font: italic bold 20px Helvetica;
}

section {
  font: small-caps bold 20px Helvetica;
}
Loading custom fonts using @font-face
@font-face lets you add a new font family name, and map it to a file that holds a font.
This font will be downloaded by the browser and used in the page, and it’s been such a fundamental change to typography on the web — we can now use any font we want.
We can add @font-face declarations directly into our CSS, or link to a CSS dedicated to importing the font.
In our CSS file we can also use @import to load that CSS file.
A @font-face declaration contains several properties we use to define the font, including src, the URI (one or more URIs) to the font. This follows the same-origin policy, which means fonts can only be downloaded from the current origin (domain + port + protocol).
Fonts are usually in the formats
woff(Web Open Font Format)woff2(Web Open Font Format 2.0)eot(Embedded Open Type)otf(OpenType Font)ttf(TrueType Font)
The following properties allow us to define the properties to the font we are going to load, as we saw above:
font-familyfont-weightfont-stylefont-stretch
A note on performance
Of course loading a font has performance implications which you must consider when creating the design of your page.
TYPOGRAPHY
We already talked about fonts, but there’s more to styling text.
In this section we’ll talk about the following properties:
text-transformtext-decorationtext-alignvertical-alignline-heighttext-indenttext-align-lastword-spacingletter-spacingtext-shadowwhite-spacetab-sizewriting-modehyphenstext-orientationdirectionline-breakword-breakoverflow-wrap
text-transform
This property can transform the case of an element.
There are 4 valid values:
capitalizeto uppercase the first letter of each worduppercaseto uppercase all the textlowercaseto lowercase all the textnoneto disable transforming the text, used to avoid inheriting the property
Example:
p {
  text-transform: uppercase;
}
text-decoration
This property adds decorations to the text, including
underlineoverlineline-throughblinknone
Example:
p {
  text-decoration: underline;
}
You can also set the style of the decoration, and the color.
Example:
p {
  text-decoration: underline dashed yellow;
}
Valid style values are solid, double, dotted, dashed, wavy.
You can do all in one line, or use the specific properties:
text-decoration-linetext-decoration-colortext-decoration-style
Example:
p {
  text-decoration-line: underline;
  text-decoration-color: yellow;
  text-decoration-style: dashed;
}
text-align
By default text align has the start value, meaning the text starts at the «start», origin 0, 0 of the box that contains it. This means top left in left-to-right languages, and top right in right-to-left languages.
Possible values are start, end, left, right, center, justify (nice to have a consistent spacing at the line ends):
p {
  text-align: right;
}
vertical-align
Determines how inline elements are vertically aligned.
We have several values for this property. First we can assign a length or percentage value. Those are used to align the text in a position higher or lower (using negative values) than the baseline of the parent element.
Then we have the keywords:
baseline(the default), aligns the baseline to the baseline of the parent elementsubmakes an element subscripted, simulating thesubHTML element resultsupermakes an element superscripted, simulating thesupHTML element resulttopalign the top of the element to the top of the linetext-topalign the top of the element to the top of the parent element fontmiddlealign the middle of the element to the middle of the line of the parentbottomalign the bottom of the element to the bottom of the linetext-bottomalign the bottom of the element to the bottom of the parent element font
line-height
This allows you to change the height of a line. Each line of text has a certain font height, but then there is additional spacing vertically between the lines. That’s the line height:
p {
  line-height: 0.9rem;
}
text-indent
Indent the first line of a paragraph by a set length, or a percentage of the paragraph width:
p {
  text-indent: -10px;
}
text-align-last
By default the last line of a paragraph is aligned following the text-align value. Use this property to change that behavior:
p {
  text-align-last: right;
}
word-spacing
Modifies the spacing between each word.
You can use the normal keyword, to reset inherited values, or use a length value:
p {
  word-spacing: 2px;
}

span {
  word-spacing: -0.2em;
}
letter-spacing
Modifies the spacing between each letter.
You can use the normal keyword, to reset inherited values, or use a length value:
p {
  letter-spacing: 0.2px;
}

span {
  letter-spacing: -0.2em;
}
text-shadow
Apply a shadow to the text. By default the text has no shadow.
This property accepts an optional color, and a set of values that set
- the X offset of the shadow from the text
- the Y offset of the shadow from the text
- the blur radius
If the color is not specified, the shadow will use the text color.
Examples:
p {
  text-shadow: 0.2px 2px;
}

span {
  text-shadow: yellow 0.2px 2px 3px;
}
white-space
Sets how CSS handles the white space, new lines and tabs inside an element.
Valid values that collapse white space are:
normalcollapses white space. Adds new lines when necessary as the text reaches the container endnowrapcollapses white space. Does not add a new line when the text reaches the end of the container, and suppresses any line break added to the textpre-linecollapses white space. Adds new lines when necessary as the text reaches the container end
Valid values that preserve white space are:
prepreserves white space. Does not add a new line when the text reaches the end of the container, but preserves line break added to the textpre-wrappreserves white space. Adds new lines when necessary as the text reaches the container end
tab-size
Sets the width of the tab character. By default it’s 8, and you can set an integer value that sets the character spaces it takes, or a length value:
p {
  tab-size: 2;
}

span {
  tab-size: 4px;
}
writing-mode
Defines whether lines of text are laid out horizontally or vertically, and the direction in which blocks progress.
The values you can use are
horizontal-tb(default)vertical-rlcontent is laid out vertically. New lines are put on the left of the previousvertical-lrcontent is laid out vertically. New lines are put on the right of the previous
hyphens
Determines if hyphens should be automatically added when going to a new line.
Valid values are
none(default)manualonly add an hyphen when there is already a visible hyphen or a hidden hyphen (a special character)autoadd hyphens when determined the text can have a hyphen.
text-orientation
When writing-mode is in a vertical mode, determines the orientation of the text.
Valid values are
mixedis the default, and if a language is vertical (like Japanese) it preserves that orientation, while rotating text written in western languagesuprightmakes all text be vertically orientedsidewaysmakes all text horizontally oriented
direction
Sets the direction of the text. Valid values are ltr and rtl:
p {
  direction: rtl;
}
word-break
This property specifies how to break lines within words.
normal(default) means the text is only broken between words, not inside a wordbreak-allthe browser can break a word (but no hyphens are added)keep-allsuppress soft wrapping. Mostly used for CJK (Chinese/Japanese/Korean) text.
Speaking of CJK text, the property line-break is used to determine how text lines break. I’m not an expert with those languages, so I will avoid covering it.
overflow-wrap
If a word is too long to fit a line, it can overflow outside of the container.
This property is also known as
word-wrap, although that is non-standard (but still works as an alias)
This is the default behavior (overflow-wrap: normal;).
We can use:
p {
  overflow-wrap: break-word;
}
to break it at the exact length of the line, or
p {
  overflow-wrap: anywhere;
}
if the browser sees there’s a soft wrap opportunity somewhere earlier. No hyphens are added, in any case.
This property is very similar to word-break. We might want to choose this one on western languages, while word-break has special treatment for non-western languages.
BOX MODEL
Every CSS element is essentially a box. Every element is a generic box.
The box model explains the sizing of the elements based on a few CSS properties.
From the inside to the outside, we have:
- the content area
- padding
- border
- margin
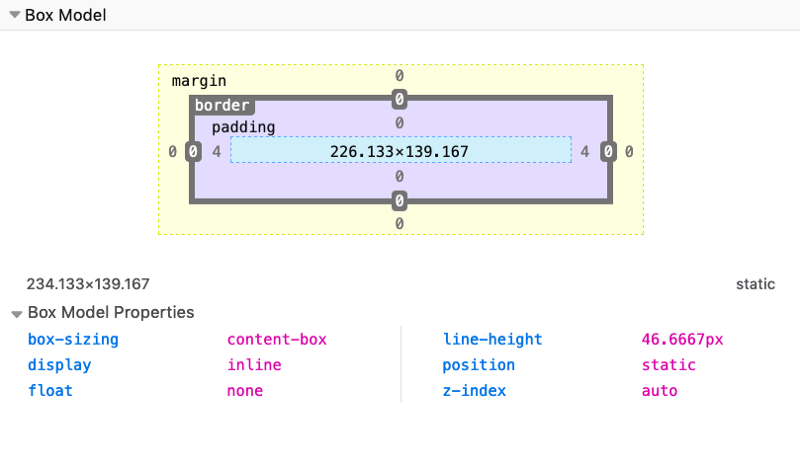
The best way to visualize the box model is to open the browser DevTools and check how it is displayed:
Here you can see how Firefox tells me the properties of a span element I highlighted. I right-clicked on it, pressed Inspect Element, and went to the Layout panel of the DevTools.
See, the light blue space is the content area. Surrounding it there is the padding, then the border and finally the margin.
By default, if you set a width (or height) on the element, that is going to be applied to the content area. All the padding, border, and margin calculations are done outside of the value, so you have to keep this in mind when you do your calculation.
Later you’ll see how you can change this behavior using Box Sizing.
BORDER
The border is a thin layer between padding and margin. By editing the border, you can make elements draw their perimeter on screen.
You can work on borders by using those properties:
border-styleborder-colorborder-width
The property border can be used as a shorthand for all those properties.
border-radius is used to create rounded corners.
You also have the ability to use images as borders, an ability given to you by border-image and its specific separate properties:
border-image-sourceborder-image-sliceborder-image-widthborder-image-outsetborder-image-repeat
Let’s start with border-style.
The border style
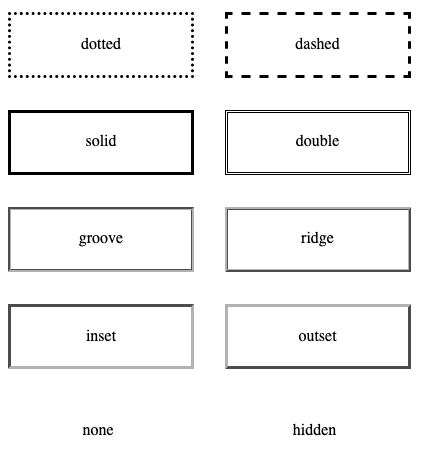
The border-style property lets you choose the style of the border. The options you can use are:
dotteddashedsoliddoublegrooveridgeinsetoutsetnonehidden
Check out this Codepen for a live example.
The default for the style is none, so to make the border appear at all you need to change it to something else. solid is a good choice most of the time.
You can set a different style for each edge using the properties
border-top-styleborder-right-styleborder-bottom-styleborder-left-style
or you can use border-style with multiple values to define them, using the usual Top-Right-Bottom-Left order:
p {
  border-style: solid dotted solid dotted;
}
The border width
border-width is used to set the width of the border.
You can use one of the pre-defined values:
thinmedium(the default value)thick
or express a value in pixels, em or rem or any other valid length value.
Example:
p {
  border-width: 2px;
}
You can set the width of each edge (Top-Right-Bottom-Left) separately by using 4 values:
p {
  border-width: 2px 1px 2px 1px;
}
or you can use the specific edge properties border-top-width, border-right-width, border-bottom-width, border-left-width.
The border color
border-color is used to set the color of the border.
If you don’t set a color, the border by default is colored using the color of the text in the element.
You can pass any valid color value to border-color.
Example:
p {
  border-color: yellow;
}
You can set the color of each edge (Top-Right-Bottom-Left) separately by using 4 values:
p {
  border-color: black red yellow blue;
}
or you can use the specific edge properties border-top-color, border-right-color, border-bottom-color, border-left-color.
The border shorthand property
Those 3 properties mentioned, border-width, border-style and border-color can be set using the shorthand property border.
Example:
p {
  border: 2px black solid;
}
You can also use the edge-specific properties border-top, border-right, border-bottom, border-left.
Example:
p {
  border-left: 2px black solid;
  border-right: 3px red dashed;
}
The border radius
border-radius is used to set rounded corners to the border. You need to pass a value that will be used as the radius of the circle that will be used to round the border.
Usage:
p {
  border-radius: 3px;
}
You can also use the edge-specific properties border-top-left-radius, border-top-right-radius, border-bottom-left-radius, border-bottom-right-radius.
Using images as borders
One very cool thing with borders is the ability to use images to style them. This lets you go very creative with borders.
We have 5 properties:
border-image-sourceborder-image-sliceborder-image-widthborder-image-outsetborder-image-repeat
and the shorthand border-image. I won’t go in much details here as images as borders would need a more in-depth coverage as what I can do in this little chapter. I recommend reading the CSS Tricks almanac entry on border-image for more information.
PADDING
The padding CSS property is commonly used in CSS to add space in the inner side of an element.
Remember:
marginadds space outside an element borderpaddingadds space inside an element border
Specific padding properties
padding has 4 related properties that alter the padding of a single edge at once:
padding-toppadding-rightpadding-bottompadding-left
The usage of those is very simple and cannot be confused, for example:
padding-left: 30px;
padding-right: 3em;
Using the padding shorthand
padding is a shorthand to specify multiple padding values at the same time, and depending on the number of values entered, it behaves differently.
1 value
Using a single value applies that to all the paddings: top, right, bottom, left.
padding: 20px;2 values
Using 2 values applies the first to bottom & top, and the second to left & right.
padding: 20px 10px;3 values
Using 3 values applies the first to top, the second to left & right, the third to bottom.
padding: 20px 10px 30px;4 values
Using 4 values applies the first to top, the second to right, the third to bottom, the fourth to left.
padding: 20px 10px 5px 0px;So, the order is top-right-bottom-left.
Values accepted
padding accepts values expressed in any kind of length unit, the most common ones are px, em, rem, but many others exist.
MARGIN
The margin CSS property is commonly used in CSS to add space around an element.
Remember:
marginadds space outside an element borderpaddingadds space inside an element border
Specific margin properties
margin has 4 related properties that alter the margin of a single edge at once:
margin-topmargin-rightmargin-bottommargin-left
The usage of those is very simple and cannot be confused, for example:
margin-left: 30px;
margin-right: 3em;
Using the margin shorthand
margin is a shorthand to specify multiple margins at the same time, and depending on the number of values entered, it behaves differently.
1 value
Using a single value applies that to all the margins: top, right, bottom, left.
margin: 20px;2 values
Using 2 values applies the first to bottom & top, and the second to left & right.
margin: 20px 10px;3 values
Using 3 values applies the first to top, the second to left & right, the third to bottom.
margin: 20px 10px 30px;4 values
Using 4 values applies the first to top, the second to right, the third to bottom, the fourth to left.
margin: 20px 10px 5px 0px;So, the order is top-right-bottom-left.
Values accepted
margin accepts values expressed in any kind of length unit, the most common ones are px, em, rem, but many others exist.
It also accepts percentage values, and the special value auto.
Using auto to center elements
auto can be used to tell the browser to select automatically a margin, and it’s most commonly used to center an element in this way:
margin: 0 auto;As said above, using 2 values applies the first to bottom & top, and the second to left & right.
The modern way to center elements is to use Flexbox, and its justify-content: center; directive.
Older browsers of course do not implement Flexbox, and if you need to support them margin: 0 auto; is still a good choice.
Using a negative margin
margin is the only property related to sizing that can have a negative value. It’s extremely useful, too. Setting a negative top margin makes an element move over elements before it, and given enough negative value it will move out of the page.
A negative bottom margin moves up the elements after it.
A negative right margin makes the content of the element expand beyond its allowed content size.
A negative left margin moves the element left over the elements that precede it, and given enough negative value it will move out of the page.
BOX SIZING
The default behavior of browsers when calculating the width of an element is to apply the calculated width and height to the content area, without taking any of the padding, border and margin in consideration.
This approach has proven to be quite complicated to work with.
You can change this behavior by setting the box-sizing property.
The box-sizing property is a great help. It has 2 values:
border-boxcontent-box
content-box is the default, the one we had for ages before box-sizing became a thing.
border-box is the new and great thing we are looking for. If you set that on an element:
.my-div {
  box-sizing: border-box;
}
width and height calculation include the padding and the border. Only the margin is left out, which is reasonable since in our mind we also typically see that as a separate thing: margin is outside of the box.
This property is a small change but has a big impact. CSS Tricks even declared an international box-sizing awareness day, just saying, and it’s recommended to apply it to every element on the page, out of the box, with this:
*, *:before, *:after {
  box-sizing: border-box;
}
DISPLAY
The display property of an object determines how it is rendered by the browser.
It’s a very important property, and probably the one with the highest number of values you can use.
Those values include:
blockinlinenonecontentsflowflow-roottable(and all thetable-*ones)flexgridlist-iteminline-blockinline-tableinline-flexinline-gridinline-list-item
plus others you will not likely use, like ruby.
Choosing any of those will considerably alter the behavior of the browser with the element and its children.
In this section we’ll analyze the most important ones not covered elsewhere:
blockinlineinline-blocknone
We’ll see some of the others in later chapters, including coverage of table, flex and grid.
inline
Inline is the default display value for every element in CSS.
All the HTML tags are displayed inline out of the box except some elements like div, p and section, which are set as block by the user agent (the browser).
Inline elements don’t have any margin or padding applied.
Same for height and width.
You can add them, but the appearance in the page won’t change — they are calculated and applied automatically by the browser.
inline-block
Similar to inline, but with inline-block width and height applied as you specify.
block
As mentioned, normally elements are displayed inline, with the exception of some elements, including
divpsectionul
which are set as block by the browser.
With display: block, elements are stacked one after each other, vertically, and every element takes up 100% of the page.
The values assigned to the width and height properties are respected, if you set them, along with margin and padding.
none
Using display: none makes an element disappear. It’s still there in the HTML, but just not visible in the browser.
POSITIONING
Positioning is what makes us determine where elements appear on the screen, and how they appear.
You can move elements around, and position them exactly where you want.
In this section we’ll also see how things change on a page based on how elements with different position interact with each other.
We have one main CSS property: position.
It can have those 5 values:
staticrelativeabsolutefixedsticky
Static positioning
This is the default value for an element. Static positioned elements are displayed in the normal page flow.
Relative positioning
If you set position: relative on an element, you are now able to position it with an offset, using the properties
- top
- right
- bottom
- left
which are called offset properties. They accept a length value or a percentage.
Take this example I made on Codepen. I create a parent container, a child container, and an inner box with some text:
<div class="parent">
  <div class="child">
    <div class="box">
      <p>Test</p>
    </div>
  </div>
</div>
with some CSS to give some colors and padding, but does not affect positioning:
.parent {
  background-color: #af47ff;
  padding: 30px;
  width: 300px;
}

.child {
  background-color: #ff4797;
  padding: 30px;
}

.box {
  background-color: #f3ff47;
  padding: 30px;
  border: 2px solid #333;
  border-style: dotted;
  font-family: courier;
  text-align: center;
  font-size: 2rem;
}
here’s the result:
You can try and add any of the properties I mentioned before (top, right, bottom, left) to .box, and nothing will happen. The position is static.
Now if we set position: relative to the box, at first apparently nothing changes. But the element is now able to move using the top, right, bottom, left properties, and now you can alter the position of it relatively to the element containing it.
For example:
.box {
  /* ... */
  position: relative;
  top: -60px;
}
A negative value for top will make the box move up relatively to its container.
Or
.box {
  /* ... */
  position: relative;
  top: -60px;
  left: 180px;
}
Notice how the space that is occupied by the box remains preserved in the container, like it was still in its place.
Another property that will now work is z-index to alter the z-axis placement. We’ll talk about it later on.
Absolute positioning
Setting position: absolute on an element will remove it from the document’s flow.
Remember in relative positioning that we noticed the space originally occupied by an element was preserved even if it was moved around?
With absolute positioning, as soon as we set position: absolute on .box, its original space is now collapsed, and only the origin (x, y coordinates) remain the same.
.box {
  /* ... */
  position: absolute;
}
We can now move the box around as we please, using the top, right, bottom, left properties:
.box {
  /* ... */
  position: absolute;
  top: 0px;
  left: 0px;
}
or
.box {
  /* ... */
  position: absolute;
  top: 140px;
  left: 50px;
}
The coordinates are relative to the closest container that is not static.
This means that if we add position: relative to the .child element, and we set top and left to 0, the box will not be positioned at the top left margin of the window, but rather it will be positioned at the 0, 0 coordinates of .child:
.child {
  /* ... */
  position: relative;
}

.box {
  /* ... */
  position: absolute;
  top: 0px;
  left: 0px;
}
Here’s how we already saw that .child is static (the default):
.child {
  /* ... */
  position: static;
}

.box {
  /* ... */
  position: absolute;
  top: 0px;
  left: 0px;
}
Like for relative positioning, you can use z-index to alter the z-axis placement.
Fixed positioning
Like with absolute positioning, when an element is assigned position: fixed it’s removed from the flow of the page.
The difference with absolute positioning is this: elements are now always positioned relative to the window, instead of the first non-static container.
.box {
  /* ... */
  position: fixed;
}
.box {
/* ... */
position: fixed;
top: 0;
left: 0;
}Another big difference is that elements are not affected by scrolling. Once you put a fixed element somewhere, scrolling the page does not remove it from the visible part of the page.
Sticky positioning
While the above values have been around for a very long time, this one was introduced recently and it’s still relatively unsupported (see caniuse.com)
The UITableView iOS component is the thing that comes to mind when I think about position: sticky. You know when you scroll in the contacts list and the first letter is stuck to the top, to let you know you are viewing that particular letter’s contacts?
We used JavaScript to emulate that, but this is the approach taken by CSS to allow it natively.
FLOATING AND CLEARING
Floating has been a very important topic in the past.
It was used in lots of hacks and creative usages because it was one of the few ways, along with tables, we could really implement some layouts. In the past we used to float the sidebar to the left, for example, to show it on the left side of the screen and added some margin to the main content.
Luckily times have changed and today we have Flexbox and Grid to help us with layout, and float has gone back to its original scope: placing content on one side of the container element, and making its siblings show up around it.
The float property supports 3 values:
leftrightnone(the default)
Say we have a box which contains a paragraph with some text, and the paragraph also contains an image.
Here’s some code:
<div class="parent">
  <div class="child">
    <div class="box">
      <p>This is some random paragraph and an image. <img src="https://via.placeholder.com/100x100" /> The image is in the middle of the text. The image is in the middle of the text. The image is in the middle of the text. The image is in the middle of the text. The image is in the middle of the text. The image is in the middle of the text. The image is in the middle of the text. The image is in the middle of the text. The image is in the middle of the text.
      </p>
    </div>
  </div>
</div>

.parent {
  background-color: #af47ff;
  padding: 30px;
  width: 500px;
}

.child {
  background-color: #ff4797;
  padding: 30px;
}

.box {
  background-color: #f3ff47;
  padding: 30px;
  border: 2px solid #333;
  border-style: dotted;
  font-family: courier;
  text-align: justify;
  font-size: 1rem;
}
and the visual appearance:
As you can see, the normal flow by default considers the image inline, and makes space for it in the line itself.
If we add float: left to the image, and some padding:
img {
  float: left;
  padding: 20px 20px 0px 0px;
}
this is the result:
and this is what we get by applying a float: right, adjusting the padding accordingly:
img {
  float: right;
  padding: 20px 0px 20px 20px;
}
A floated element is removed from the normal flow of the page, and the other content flows around it.
See the example on Codepen
You are not limited to floating images, too. Here we switch the image with a span element:
<div class="parent">
  <div class="child">
    <div class="box">
      <p>This is some random paragraph and an image. <span>Some text to float</span> The image is in the middle of the text. The image is in the middle of the text. The image is in the middle of the text. The image is in the middle of the text. The image is in the middle of the text. The image is in the middle of the text. The image is in the middle of the text. The image is in the middle of the text. The image is in the middle of the text.
      </p>
    </div>
  </div>
</div>

span {
  float: right;
  margin: 20px 0px 20px 20px;
  padding: 10px;
  border: 1px solid black
}
and this is the result:
Clearing
What happens when you float more than one element?
If when floated they find another floated image, by default they are stacked up one next to the other, horizontally. Until there is no room, and they will start being stacked on a new line.
Say we had 3 inline images inside a p tag:
If we add float: left to those images:
img {
  float: left;
  padding: 20px 20px 0px 0px;
}
this is what we’ll have:
if you add clear: left to images, those are going to be stacked vertically rather than horizontally:
I used the left value for clear. It allows
leftto clear left floatsrightto clear right floatsbothto clear both left and right floatsnone(default) disables clearing
Z-INDEX
When we talked about positioning, I mentioned that you can use the z-index property to control the Z axis positioning of elements.
It’s very useful when you have multiple elements that overlap each other, and you need to decide which one is visible, as nearer to the user, and which one(s) should be hidden behind it.
This property takes a number (without decimals) and uses that number to calculate which elements appear nearer to the user, in the Z axis.
The higher the z-index value, the more an element is positioned nearer to the user.
When deciding which element should be visible and which one should be positioned behind it, the browser does a calculation on the z-index value.
The default value is auto, a special keyword. Using auto, the Z axis order is determined by the position of the HTML element in the page — the last sibling appears first, as it’s defined last.
By default elements have the static value for the position property. In this case, the z-index property does not make any difference — it must be set to absolute, relative or fixed to work.
Example:
.my-first-div {
    position: absolute;
    top: 0;
    left: 0;
    width: 600px;
    height: 600px;
    z-index: 10;
}

.my-second-div {
    position: absolute;
    top: 0;
    left: 0;
    width: 500px;
    height: 500px;
    z-index: 20;
}
The element with class .my-second-div will be displayed, and behind it .my-first-div.
Here we used 10 and 20, but you can use any number. Negative numbers too. It’s common to pick non-consecutive numbers, so you can position elements in the middle. If you use consecutive numbers instead, you would need to re-calculate the z-index of each element involved in the positioning.
CSS GRID
CSS Grid is the new kid in the CSS town, and while not yet fully supported by all browsers, it’s going to be the future system for layouts.
CSS Grid is a fundamentally new approach to building layouts using CSS.
Keep an eye on the CSS Grid Layout page on caniuse.com (https://caniuse.com/#feat=css-grid) to find out which browsers currently support it. At the time of writing, April 2019, all major browsers (except IE, which will never have support for it) are already supporting this technology, covering 92% of all users.
CSS Grid is not a competitor to Flexbox. They interoperate and collaborate on complex layouts, because CSS Grid works on 2 dimensions (rows AND columns) while Flexbox works on a single dimension (rows OR columns).
Building layouts for the web has traditionally been a complicated topic.
I won’t dig into the reasons for this complexity, which is a complex topic on its own. But you can think yourself as a very lucky human because nowadays you have 2 very powerful and well supported tools at your disposal:
- CSS Flexbox
- CSS Grid
These 2 are the tools to build the Web layouts of the future.
Unless you need to support old browsers like IE8 and IE9, there is no reason to be messing with things like:
- Table layouts
- Floats
- clearfix hacks
display: tablehacks
In this guide there’s all you need to know about going from zero knowledge of CSS Grid to being a proficient user.
The basics
The CSS Grid layout is activated on a container element (which can be a div or any other tag) by setting display: grid.
As with flexbox, you can define some properties on the container, and some properties on each individual item in the grid.
These properties combined will determine the final look of the grid.
The most basic container properties are grid-template-columns and grid-template-rows.
grid-template-columns and grid-template-rows
Those properties define the number of columns and rows in the grid, and they also set the width of each column/row.
The following snippet defines a grid with 4 columns each 200px wide, and 2 rows with a 300px height each.
.container {
  display: grid;
  grid-template-columns: 200px 200px 200px 200px;
  grid-template-rows: 300px 300px;
}
Here’s another example of a grid with 2 columns and 2 rows:
.container {
  display: grid;
  grid-template-columns: 200px 200px;
  grid-template-rows: 100px 100px;
}
Automatic dimensions
Many times you might have a fixed header size, a fixed footer size, and the main content that is flexible in height, depending on its length. In this case you can use the auto keyword:
.container {
  display: grid;
  grid-template-rows: 100px auto 100px;
}
Different columns and rows dimensions
In the above examples we made regular grids by using the same values for rows and the same values for columns.
You can specify any value for each row/column, to create a lot of different designs:
.container {
  display: grid;
  grid-template-columns: 100px 200px;
  grid-template-rows: 100px 50px;
}
Another example:
.container {
  display: grid;
  grid-template-columns: 10px 100px;
  grid-template-rows: 100px 10px;
}
Adding space between the cells
Unless specified, there is no space between the cells.
You can add spacing by using those properties:
grid-column-gapgrid-row-gap
or the shorthand syntax grid-gap.
Example:
.container {
  display: grid;
  grid-template-columns: 100px 200px;
  grid-template-rows: 100px 50px;
  grid-column-gap: 25px;
  grid-row-gap: 25px;
}
The same layout using the shorthand:
.container {
  display: grid;
  grid-template-columns: 100px 200px;
  grid-template-rows: 100px 50px;
  grid-gap: 25px;
}
Spanning items on multiple columns and/or rows
Every cell item has the option to occupy more than just one box in the row, and expand horizontally or vertically to get more space, while respecting the grid proportions set in the container.
These are the properties we’ll use for that:
grid-column-startgrid-column-endgrid-row-startgrid-row-end
Example:
.container {
  display: grid;
  grid-template-columns: 200px 200px 200px 200px;
  grid-template-rows: 300px 300px;
}

.item1 {
  grid-column-start: 2;
  grid-column-end: 4;
}

.item6 {
  grid-column-start: 3;
  grid-column-end: 5;
}
The numbers correspond to the vertical line that separates each column, starting from 1:
The same principle applies to grid-row-start and grid-row-end, except this time instead of taking more columns, a cell takes more rows.
Shorthand syntax
Those properties have a shorthand syntax provided by:
grid-columngrid-row
The usage is simple, here’s how to replicate the above layout:
.container {
  display: grid;
  grid-template-columns: 200px 200px 200px 200px;
  grid-template-rows: 300px 300px;
}

.item1 {
  grid-column: 2 / 4;
}

.item6 {
  grid-column: 3 / 5;
}
Another approach is to set the starting column/row, and set how many it should occupy using span:
.container {
  display: grid;
  grid-template-columns: 200px 200px 200px 200px;
  grid-template-rows: 300px 300px;
}

.item1 {
  grid-column: 2 / span 2;
}

.item6 {
  grid-column: 3 / span 2;
}
More grid configuration
Using fractions
Specifying the exact width of each column or row is not ideal in every case.
A fraction is a unit of space.
The following example divides a grid into 3 columns with the same width, 1/3 of the available space each.
.container {
  grid-template-columns: 1fr 1fr 1fr;
}
Using percentages and rem
You can also use percentages, and mix and match fractions, pixels, rem and percentages:
.container {
  grid-template-columns: 3rem 15% 1fr 2fr
}
Using repeat()
repeat() is a special function that takes a number that indicates the number of times a row/column will be repeated, and the length of each one.
If every column has the same width, you can specify the layout using this syntax:
.container {
  grid-template-columns: repeat(4, 100px);
}
This creates 4 columns with the same width.
Or using fractions:
.container {
  grid-template-columns: repeat(4, 1fr);
}
Specify a minimum width for a row
Common use case: Have a sidebar that never collapses more than a certain amount of pixels when you resize the window.
Here’s an example where the sidebar takes 1/4 of the screen and never takes less than 200px:
.container {
  grid-template-columns: minmax(200px, 3fr) 9fr;
}
You can also set just a maximum value using the auto keyword:
.container {
  grid-template-columns: minmax(auto, 50%) 9fr;
}
or just a minimum value:
.container {
  grid-template-columns: minmax(100px, auto) 9fr;
}
Positioning elements using grid-template-areas
By default elements are positioned in the grid using their order in the HTML structure.
Using grid-template-areas you can define template areas to move them around in the grid, and also to span an item on multiple rows / columns instead of using grid-column.
Here’s an example:
<div class="container">
  <main>
    ...
  </main>
  <aside>
    ...
  </aside>
  <header>
    ...
  </header>
  <footer>
    ...
  </footer>
</div>

.container {
  display: grid;
  grid-template-columns: 200px 200px 200px 200px;
  grid-template-rows: 300px 300px;
  grid-template-areas:
    "header header header header"
    "sidebar main main main"
    "footer footer footer footer";
}
main {
  grid-area: main;
}
aside {
  grid-area: sidebar;
}
header {
  grid-area: header;
}
footer {
  grid-area: footer;
}
Despite their original order, items are placed where grid-template-areas define, depending on the grid-area property associated to them.
Adding empty cells in template areas
You can set an empty cell using the dot . instead of an area name in grid-template-areas:
.container {
  display: grid;
  grid-template-columns: 200px 200px 200px 200px;
  grid-template-rows: 300px 300px;
  grid-template-areas:
    ". header header ."
    "sidebar . main main"
    ". footer footer .";
}
Fill a page with a grid
You can make a grid extend to fill the page using fr:
.container {
  display: grid;
  height: 100vh;
  grid-template-columns: 1fr 1fr 1fr 1fr;
  grid-template-rows: 1fr 1fr;
}
An example: header, sidebar, content and footer
Here is a simple example of using CSS Grid to create a site layout that provides a header op top, a main part with sidebar on the left and content on the right, and a footer afterwards.
Here’s the markup:
<div class="wrapper">
  <header>Header</header>
  <article>
    <h1>Welcome</h1>
    <p>Hi!</p>
  </article>
  <aside><ul><li>Sidebar</li></ul></aside>
  <footer>Footer</footer>
</div>
and here’s the CSS:
header {
  grid-area: header;
  background-color: #fed330;
  padding: 20px;
}
article {
  grid-area: content;
  background-color: #20bf6b;
  padding: 20px;
}
aside {
  grid-area: sidebar;
  background-color: #45aaf2;
}
footer {
  padding: 20px;
  grid-area: footer;
  background-color: #fd9644;
}
.wrapper {
  display: grid;
  grid-gap: 20px;
  grid-template-columns: 1fr 3fr;
  grid-template-areas:
    "header  header"
    "sidebar content"
    "footer  footer";
}
I added some colors to make it prettier, but basically it assigns to every different tag a grid-area name, which is used in the grid-template-areas property in .wrapper.
When the layout is smaller we can put the sidebar below the content using a media query:
@media (max-width: 500px) {
  .wrapper {
    grid-template-columns: 4fr;
    grid-template-areas:
      "header"
      "content"
      "sidebar"
      "footer";
  }
}
See on CodePen
These are the basics of CSS Grid. There are many things I didn’t include in this introduction but I wanted to make it very simple, so you can start using this new layout system without making it feel overwhelming.
FLEXBOX
Flexbox, also called Flexible Box Module, is one of the two modern layouts systems, along with CSS Grid.
Compared to CSS Grid (which is bi-dimensional), flexbox is a one-dimensional layout model. It will control the layout based on a row or on a column, but not together at the same time.
The main goal of flexbox is to allow items to fill the whole space offered by their container, depending on some rules you set.
Unless you need to support old browsers like IE8 and IE9, Flexbox is the tool that lets you forget about using
- Table layouts
- Floats
- clearfix hacks
display: tablehacks
Let’s dive into flexbox and become a master of it in a very short time.
Browser support
At the time of writing (Feb 2018), it’s supported by 97.66% of the users. All the most important browsers have implemented it for years, so even older browsers (including IE10+) are covered:
While we must wait a few years for users to catch up on CSS Grid, Flexbox is an older technology and can be used right now.
Enable Flexbox
A flexbox layout is applied to a container, by setting
display: flex;or
display: inline-flex;The content inside the container will be aligned using flexbox.
Container properties
Some flexbox properties apply to the container, which sets the general rules for its items. They are
flex-directionjustify-contentalign-itemsflex-wrapflex-flow
Align rows or columns
The first property we see, flex-direction, determines if the container should align its items as rows, or as columns:
flex-direction: rowplaces items as a row, in the text direction (left-to-right for western countries)flex-direction: row-reverseplaces items just likerowbut in the opposite directionflex-direction: columnplaces items in a column, ordering top to bottomflex-direction: column-reverseplaces items in a column, just likecolumnbut in the opposite direction
Vertical and horizontal alignment
By default, items start from the left if flex-direction is row, and from the top if flex-direction is column.
You can change this behavior using justify-content to change the horizontal alignment, and align-items to change the vertical alignment.
Change the horizontal alignment
justify-content has 5 possible values:
flex-start: align to the left side of the container.flex-end: align to the right side of the container.center: align at the center of the container.space-between: display with equal spacing between them.space-around: display with equal spacing around them
Change the vertical alignment
align-items has 5 possible values:
flex-start: align to the top of the container.flex-end: align to the bottom of the container.center: align at the vertical center of the container.baseline: display at the baseline of the container.stretch: items are stretched to fit the container.
A note on baseline:
baseline looks similar to flex-start in this example, due to my boxes being too simple. Check out this Codepen to have a more useful example, which I forked from a Pen originally created by Martin Michálek. As you can see there, item dimensions are aligned.
Wrap
By default, items in a flexbox container are kept on a single line, shrinking them to fit in the container.
To force the items to spread across multiple lines, use flex-wrap: wrap. This will distribute the items according to the order set in flex-direction. Use flex-wrap: wrap-reverse to reverse this order.
A shorthand property called flex-flow allows you to specify flex-direction and flex-wrap in a single line, by adding the flex-direction value first, followed by flex-wrap value, for example: flex-flow: row wrap.
Properties that apply to each single item
Up to this point, we’ve seen the properties you can apply to the container.
Single items can have a certain amount of independence and flexibility, and you can alter their appearance using those properties:
orderalign-selfflex-growflex-shrinkflex-basisflex
Let’s see them in detail.
Moving items before / after another one using order
Items are ordered based on the order they are assigned. By default every item has order 0 and the appearance in the HTML determines the final order.
You can override this property using order on each separate item. This is a property you set on the item, not the container. You can make an item appear before all the others by setting a negative value.
Vertical alignment using align-self
An item can choose to override the container align-items setting, using align-self, which has the same 5 possible values of align-items:
flex-start: align to the top of the container.flex-end: align to the bottom of the container.center: align at the vertical center of the container.baseline: display at the baseline of the container.stretch: items are stretched to fit the container.
Grow or shrink an item if necessary
flex-grow
The default for any item is 0.
If all items are defined as 1 and one is defined as 2, the bigger element will take the space of two “1” items.
flex-shrink
The defaut for any item is 1.
If all items are defined as 1 and one is defined as 3, the bigger element will shrink 3x the other ones. When less space is available, it will take 3x less space.
flex-basis
If set to auto, it sizes an item according to its width or height, and adds extra space based on the flex-grow property.
If set to 0, it does not add any extra space for the item when calculating the layout.
If you specify a pixel number value, it will use that as the length value (width or height depends on if it’s a row or a column item)
flex
This property combines the above 3 properties:
flex-growflex-shrinkflex-basis
and provides a shorthand syntax: flex: 0 1 auto
TABLES
Tables in the past were greatly overused in CSS, as they were one of the only ways we could create a fancy page layout.
Today with Grid and Flexbox we can move tables back to the job they were intended to do: styling tables.
Let’s start from the HTML. This is a basic table:
<table>
  <thead>
    <tr>
      <th scope="col">Name</th>
      <th scope="col">Age</th>
    </tr>
  </thead>
  <tbody>
    <tr>
      <th scope="row">Flavio</th>
      <td>36</td>
    </tr>
    <tr>
      <th scope="row">Roger</th>
      <td>7</td>
    </tr>
  </tbody>
</table>
By default it’s not very attractive. The browser provides some standard styles, and that’s it:
We can use CSS to style all the elements of the table, of course.
Let’s start with the border. A nice border can go a long way.
We can apply it on the table element, and on the inner elements too, like th and td:
table, th, td {
  border: 1px solid #333;
}
If we pair it with some margin, we get a nice result:
One common thing with tables is the ability to add a color to one row, and a different color to another row. This is possible using the :nth-child(odd) or :nth-child(even) selector:
tbody tr:nth-child(odd) {
  background-color: #af47ff;
}
This gives us:
If you add border-collapse: collapse; to the table element, all borders are collapsed into one:
CENTERING
Centering things in CSS is a task that is very different if you need to center horizontally or vertically.
In this post I explain the most common scenarios and how to solve them. If a new solution is provided by Flexbox I ignore the old techniques because we need to move forward, and Flexbox has been supported by browsers for years, IE10 included.
Center horizontally
Text
Text is very simple to center horizontally using the text-align property set to center:
p {
  text-align: center;
}
Blocks
The modern way to center anything that is not text is to use Flexbox:
#mysection {
  display: flex;
  justify-content: center;
}
any element inside #mysection will be horizontally centered.
Here is the alternative approach if you don’t want to use Flexbox.
Anything that is not text can be centered by applying an automatic margin to left and right, and setting the width of the element:
section {
  margin: 0 auto;
  width: 50%;
}
the above margin: 0 auto; is a shorthand for:
section {
  margin-top: 0;
  margin-bottom: 0;
  margin-left: auto;
  margin-right: auto;
}
Remember to set the item to display: block if it’s an inline element.
Center vertically
Traditionally this has always been a difficult task. Flexbox now provides us a great way to do this in the simplest possible way:
#mysection {
  display: flex;
  align-items: center;
}
any element inside #mysection will be vertically centered.
Center both vertically and horizontally
Flexbox techniques to center vertically and horizontally can be combined to completely center an element in the page.
#mysection {
  display: flex;
  align-items: center;
  justify-content: center;
}
The same can be done using CSS Grid:
body {
  display: grid;
  place-items: center;
  height: 100vh;
}
LISTS
Lists are a very important part of many web pages.
CSS can style them using several properties.
list-style-type is used to set a predefined marker to be used by the list:
li {
  list-style-type: square;
}
We have lots of possible values, which you can see here https://developer.mozilla.org/en-US/docs/Web/CSS/list-style-type with examples of their appearance. Some of the most popular ones are disc, circle, square and none.
list-style-image is used to use a custom marker when a predefined marker is not appropriate:
li {
  list-style-image: url(list-image.png);
}
list-style-position lets you add the marker outside (the default) or inside of the list content, in the flow of the page rather than outside of it
li {
  list-style-position: inside;
}
The list-style shorthand property lets us specify all those properties in the same line:
li {
  list-style: url(list-image.png) inside;
}
MEDIA QUERIES AND RESPONSIVE DESIGN
In this section we’re going to first introduce media types and media feature descriptors, then we’ll explain media queries.
Media types
Used in media queries and @import declarations, media types allow us to determine on which media a CSS file, or a piece of CSS, is loaded.
We have the following media types
allmeans all the mediaprintused when printingscreenused when the page is presented on a screenspeechused for screen readers
screen is the default.
In the past we had more of them, but most are deprecated as they proved to be ineffective ways of determining device needs.
We can use them in @import statements like this:
@import url(myfile.css) screen;
@import url(myfile-print.css) print;
We can load a CSS file on multiple media types separating each with a comma:
@import url(myfile.css) screen, print;The same works for the link tag in HTML:
<link rel="stylesheet" type="text/css" href="myfile.css" media="screen" />
<link rel="stylesheet" type="text/css" href="another.css" media="screen, print" />
We’re not limited to just using media types in the media attribute and in the @import declaration. There’s more.
Media feature descriptors
First, let’s introduce media feature descriptors. They are additional keywords that we can add to the media attribute of link or the the @import declaration, to express more conditionals over the loading of the CSS.
Here’s the list of them:
widthheightdevice-widthdevice-heightaspect-ratiodevice-aspect-ratiocolorcolor-indexmonochromeresolutionorientationscangrid
Each of them has a corresponding min- and max-, for example:
min-width,max-widthmin-device-width,max-device-width
and so on.
Some of those accept a length value which can be expressed in px or rem or any length value. It’s the case of width, height, device-width, device-height.
For example:
@import url(myfile.css) screen and (max-width: 800px);Notice that we wrap each block using media feature descriptors in parentheses.
Some accept a fixed value. orientation, used to detect the device orientation, accepts portrait or landscape.
Example:
<link rel="stylesheet" type="text/css" href="myfile.css" media="screen and (orientation: portrait)" />scan, used to determine the type of screen, accepts progressive (for modern displays) or interlace (for older CRT devices).
Some others want an integer.
Like color which inspects the number of bits per color component used by the device. Very low-level, but you just need to know it’s there for your usage (like grid, color-index, monochrome).
aspect-ratio and device-aspect-ratio accept a ratio value representing the width to height viewport ratio, which is expressed as a fraction.
Example:
@import url(myfile.css) screen and (aspect-ratio: 4/3);resolution represents the pixel density of the device, expressed in a resolution data type like dpi.
Example:
@import url(myfile.css) screen and (min-resolution: 100dpi);Logic operators
We can combine rules using and:
<link rel="stylesheet" type="text/css" href="myfile.css" media="screen and (max-width: 800px)" />We can perform an “or” type of logic operation using commas, which combines multiple media queries:
@import url(myfile.css) screen, print;We can use not to negate a media query:
@import url(myfile.css) not screen;Important:
notcan only be used to negate an entire media query, so it must be placed at the beginning of it (or after a comma).
Media queries
All those above rules we saw applied to @import or the the link HTML tag can be applied inside the CSS, too.
You need to wrap them in a @media () {} structure.
Example:
@media screen and (max-width: 800px) {
  /* enter some CSS */
}
and this is the foundation for responsive design.
Media queries can be quite complex. This example applies the CSS only if it’s a screen device, the width is between 600 and 800 pixels, and the orientation is landscape:
@media screen and (max-width: 800px) and (min-width: 600px) and (orientation: landscape) {
  /* enter some CSS */
}
FEATURE QUERIES
Feature queries are a recent and relatively unknown ability of CSS, but a well supported one.
We can use it to check if a feature is supported by the browser using the @supports keyword.
I think this is especially useful, at the time of writing, for checking if a browser supports CSS grid, for example, which can be done using:
@supports (display: grid) {
  /* apply this CSS */
}
We check if the browser supports the grid value for the display property.
We can use @supports for any CSS property, to check any value.
We can also use the logical operators and, or and not to build complex feature queries:
@supports (display: grid) and (display: flex) {
  /* apply this CSS */
}
FILTERS
Filters allow us to perform operations on elements.
Things you normally do with Photoshop or other photo editing software, like changing the opacity or the brightness, and more.
You use the filter property. Here’s an example of it applied on an image, but this property can be used on any element:
img {
  filter: <something>;
}
You can use various values here:
blur()brightness()contrast()drop-shadow()grayscale()hue-rotate()invert()opacity()sepia()saturate()url()
Notice the parentheses after each option, because they all require a parameter.
For example:
img {
  filter: opacity(0.5);
}
means the image will be 50% transparent, because opacity() takes one value from 0 to 1, or a percentage.
You can also apply multiple filters at once:
img {
  filter: opacity(0.5) blur(2px);
}
Let’s now talk about each filter in detail.
blur()
Blurs an element content. You pass it a value, expressed in px or em or rem that will be used to determine the blur radius.
Example:
img {
  filter: blur(4px);
}
opacity()
opacity() takes one value from 0 to 1, or a percentage, and determines the image transparency based on it.
0, or 0%, means totally transparent. 1, or 100%, or higher, means totally visible.
Example:
img {
  filter: opacity(0.5);
}
CSS also has an opacity property. filter however can be hardware accelerated, depending on the implementation, so this should be the preferred method.
drop-shadow()
drop-shadow() shows a shadow behind the element, which follows the alpha channel. This means that if you have a transparent image, you get a shadow applied to the image shape, not the image box. If the image does not have an alpha channel, the shadow will be applied to the entire image box.
It accepts a minimum of 2 parameters, up to 5:
- offset-x sets the horizontal offset. Can be negative.
- offset-y sets the vertical offset. Can be negative.
- blur-radius, optional, sets the blur radius for the shadow. It defaults to 0, no blur.
- spread-radius, optional, sets the spread radius. Expressed in
px,remorem - color, optional, sets the color of the shadow.
You can set the color without setting the spread radius or blur radius. CSS understands the value is a color and not a length value.
Example:
img {
  filter: drop-shadow(10px 10px 5px orange);
}

img {
  filter: drop-shadow(10px 10px orange);
}

img {
  filter: drop-shadow(10px 10px 5px 5px #333);
}
grayscale()
Makes the element have a gray color.
You pass one value from 0 to 1, or from 0% to 100%, where 1 and 100% mean completely gray, and 0 or 0% mean the image is not touched, and the original colors remain.
Example:
img {
  filter: grayscale(50%);
}
sepia()
Makes the element have a sepia color.
You pass one value from 0 to 1, or from 0% to 100%, where 1 and 100% mean completely sepia, and 0 or 0% mean the image is not touched, and the original colors remain.
Example:
img {
  filter: sepia(50%);
}
invert()
Invert the colors of an element. Inverting a color means looking up the opposite of a color in the HSL color wheel. Just search “color wheel” in Google if you have no idea what that means. For example, the opposite of yellow is blue, the opposite of red is cyan. Every single color has an opposite.
You pass a number, from 0 to 1 or from 0% to 100%, that determines the amount of inversion. 1 or 100% means full inversion, 0 or 0% means no inversion.
0.5 or 50% will always render a 50% gray color, because you always end up in the middle of the wheel.
Example:
img {
  filter: invert(50%);
}
hue-rotate()
The HSL color wheel is represented in degrees. Using hue-rotate() you can rotate the color using a positive or negative rotation.
The function accepts a deg value.
Example:
img {
  filter: hue-rotate(90deg);
}
brightness()
Alters the brightness of an element.
0 or 0% gives a total black element. 1 or 100% gives an unchanged image.
Values higher than 1 or 100% make the image brighter up to reaching a total white element.
Example:
img {
  filter: brightness(50%);
}
contrast()
Alters the contrast of an element.
0 or 0% gives a total gray element. 1 or 100% gives an unchanged image.
Values higher than 1 or 100% give more contrast.
Example:
img {
  filter: contrast(150%);
}
saturate()
Alters the saturation of an element.
0 or 0% gives a total grayscale element (with less saturation). 1 or 100% gives an unchanged image.
Values higher than 1 or 100% give more saturation.
Example:
img {
  filter: saturate();
}
url()
This filter allows to apply a filter defined in an SVG file. You point to the SVG file location.
Example:
img {
  filter: url(filter.svg);
}
SVG filters are out of the scope of this piece, but you can read more on this Smashing Magazine post: https://www.smashingmagazine.com/2015/05/why-the-svg-filter-is-awesome/
TRANSFORMS
Transforms allow you to translate, rotate, scale, and skew elements, in the 2D or 3D space. They are a very cool CSS feature, especially when combined with animations.
2D transforms
The transform property accepts those functions:
translate()to move elements aroundrotate()to rotate elementsscale()to scale elements in sizeskew()to twist or slant an elementmatrix()a way to perform any of the above operations using a matrix of 6 elements, a less user friendly syntax but less verbose
We also have axis-specific functions:
translateX()to move elements around on the X axistranslateY()to move elements around on the Y axisscaleX()to scale elements in size on the X axisscaleY()to scale elements in size on the Y axisskewX()to twist or slant an element on the X axisskewY()to twist or slant an element on the Y axis
Here is an example of a transform which changes the .box element width by 2 (duplicating it) and the height by 0.5 (reducing it to half):
.box {
    transform: scale(2, 0.5);
}
transform-origin lets us set the origin (the (0, 0) coordinates) for the transformation, letting us change the rotation center.
Combining multiple transforms
You can combine multiple transforms by separating each function with a space.
For example:
transform: rotateY(20deg) scaleX(3) translateY(100px);3D transforms
We can go one step further and move our elements in a 3D space instead of in a 2D space. With 3D, we are adding another axis, Z, which adds depth to our visuals.
Using the perspective property you can specify how far the 3D object is from the viewer.
Example:
.3Delement {
  perspective: 100px;
}
perspective-origin determines the appearance of the position of the viewer, how are we looking at it in the X and Y axis.
Now we can use additional functions that control the Z axis, and that add up to the other X and Y axis transforms:
translateZ()rotateZ()scaleZ()
and the corresponding shorthands translate3d(), rotate3d() and scale3d() as shorthands for using the translateX(), translateY() and translateZ() functions and so on.
3D transforms are a bit too advanced for this handbook, but are a great topic to explore on your own.
TRANSITIONS
CSS Transitions are the simplest way to create an animation in CSS.
In a transition, you change the value of a property, and you tell CSS to slowly change it according to some parameters, towards a final state.
CSS Transitions are defined by these properties:
The transition property is a handy shorthand:
.container {
  transition: property
              duration
              timing-function
              delay;
}
Example of a CSS Transition
This code implements a CSS Transition:
.one,
.three {
  background: rgba(142, 92, 205, .75);
  transition: background 1s ease-in;
}

.two,
.four {
  background: rgba(236, 252, 100, .75);
}

.circle:hover {
  background: rgba(142, 92, 205, .25); /* lighter */
}
See the example on Glitch https://flavio-css-transitions-example.glitch.me
When hovering the .one and .three elements, the purple circles, there is a transition animation that eases the change of background, while the yellow circles do not, because they do not have the transition property defined.
Transition timing function values
transition-timing-function allows you to specify the acceleration curve of the transition.
There are some simple values you can use:
lineareaseease-inease-outease-in-out
This Glitch shows how these work in practice.
You can create a completely custom timing function using cubic bezier curves. This is rather advanced, but basically any of those functions above are built using bezier curves. We have handy names as they are common ones.
CSS Transitions in Browser DevTools
The Browser DevTools offer a great way to visualize transitions.
This is Chrome:
This is Firefox:
From those panels you can live edit the transition and experiment in the page directly without reloading your code.
Which Properties you can Animate using CSS Transitions
A lot! They are the same you can animate using CSS Animations, too.
Here’s the full list:
backgroundbackground-colorbackground-positionbackground-sizeborderborder-colorborder-widthborder-bottomborder-bottom-colorborder-bottom-left-radiusborder-bottom-right-radiusborder-bottom-widthborder-leftborder-left-colorborder-left-widthborder-radiusborder-rightborder-right-colorborder-right-widthborder-spacingborder-topborder-top-colorborder-top-left-radiusborder-top-right-radiusborder-top-widthbottombox-shadowcaret-colorclipcolorcolumn-countcolumn-gapcolumn-rulecolumn-rule-colorcolumn-rule-widthcolumn-widthcolumnscontentfilterflexflex-basisflex-growflex-shrinkfontfont-sizefont-size-adjustfont-stretchfont-weightgrid-areagrid-auto-columnsgrid-auto-flowgrid-auto-rowsgrid-column-endgrid-column-gapgrid-column-startgrid-columngrid-gapgrid-row-endgrid-row-gapgrid-row-startgrid-rowgrid-template-areasgrid-template-columnsgrid-template-rowsgrid-templategridheightleftletter-spacingline-heightmarginmargin-bottommargin-leftmargin-rightmargin-topmax-heightmax-widthmin-heightmin-widthopacityorderoutlineoutline-coloroutline-offsetoutline-widthpaddingpadding-bottompadding-leftpadding-rightpadding-topperspectiveperspective-originquotesrighttab-sizetext-decorationtext-decoration-colortext-indenttext-shadowtoptransform.vertical-alignvisibilitywidthword-spacingz-index
ANIMATIONS
CSS Animations are a great way to create visual animations, not limited to a single movement like CSS Transitions, but much more articulated.
An animation is applied to an element using the animation property.
.container {
  animation: spin 10s linear infinite;
}
spin is the name of the animation, which we need to define separately. We also tell CSS to make the animation last 10 seconds, perform it in a linear way (no acceleration or any difference in its speed) and to repeat it infinitely.
You must define how your animation works using keyframes. Example of an animation that rotates an item:
@keyframes spin {
  0% {
    transform: rotateZ(0);
  }
  100% {
    transform: rotateZ(360deg);
  }
}
Inside the @keyframes definition you can have as many intermediate waypoints as you want.
In this case we instruct CSS to make the transform property to rotate the Z axis from 0 to 360 grades, completing the full loop.
You can use any CSS transform here.
Notice how this does not dictate anything about the temporal interval the animation should take. This is defined when you use it via animation.
A CSS Animations Example
I want to draw four circles, all with a starting point in common, all 90 degrees distant from each other.
<div class="container">
  <div class="circle one"></div>
  <div class="circle two"></div>
  <div class="circle three"></div>
  <div class="circle four"></div>
</div>

body {
  display: grid;
  place-items: center;
  height: 100vh;
}

.circle {
  border-radius: 50%;
  left: calc(50% - 6.25em);
  top: calc(50% - 12.5em);
  transform-origin: 50% 12.5em;
  width: 12.5em;
  height: 12.5em;
  position: absolute;
  box-shadow: 0 1em 2em rgba(0, 0, 0, .5);
}

.one,
.three {
  background: rgba(142, 92, 205, .75);
}

.two,
.four {
  background: rgba(236, 252, 100, .75);
}

.one {
  transform: rotateZ(0);
}

.two {
  transform: rotateZ(90deg);
}

.three {
  transform: rotateZ(180deg);
}

.four {
  transform: rotateZ(-90deg);
}
You can see them in this Glitch: https://flavio-css-circles.glitch.me
Let’s make this structure (all the circles together) rotate. To do this, we apply an animation on the container, and we define that animation as a 360 degree rotation:
@keyframes spin {
  0% {
    transform: rotateZ(0);
  }
  100% {
    transform: rotateZ(360deg);
  }
}

.container {
  animation: spin 10s linear infinite;
}
See it on https://flavio-css-animations-tutorial.glitch.me
You can add more keyframes to have funnier animations:
@keyframes spin {
  0% {
    transform: rotateZ(0);
  }
  25% {
    transform: rotateZ(30deg);
  }
  50% {
    transform: rotateZ(270deg);
  }
  75% {
    transform: rotateZ(180deg);
  }
  100% {
    transform: rotateZ(360deg);
  }
}
See the example on https://flavio-css-animations-four-steps.glitch.me
The CSS animation properties
CSS animations offers a lot of different parameters you can tweak:
The animation property is a shorthand for all these properties, in this order:
.container {
  animation: name
             duration
             timing-function
             delay
             iteration-count
             direction
             fill-mode
             play-state;
}
This is the example we used above:
.container {
  animation: spin 10s linear infinite;
}
JavaScript events for CSS Animations
Using JavaScript you can listen for the following events:
animationstartanimationendanimationiteration
Be careful with animationstart, because if the animation starts on page load, your JavaScript code is always executed after the CSS has been processed, so the animation is already started and you cannot intercept the event.
const container = document.querySelector('.container')

container.addEventListener('animationstart', (e) => {
  //do something
}, false)

container.addEventListener('animationend', (e) => {
  //do something
}, false)

container.addEventListener('animationiteration', (e) => {
  //do something
}, false)
Which Properties You Can Animate using CSS Animations
A lot! They are the same you can animate using CSS Transitions, too.
Here’s the full list:
backgroundbackground-colorbackground-positionbackground-sizeborderborder-colorborder-widthborder-bottomborder-bottom-colorborder-bottom-left-radiusborder-bottom-right-radiusborder-bottom-widthborder-leftborder-left-colorborder-left-widthborder-radiusborder-rightborder-right-colorborder-right-widthborder-spacingborder-topborder-top-colorborder-top-left-radiusborder-top-right-radiusborder-top-widthbottombox-shadowcaret-colorclipcolorcolumn-countcolumn-gapcolumn-rulecolumn-rule-colorcolumn-rule-widthcolumn-widthcolumnscontentfilterflexflex-basisflex-growflex-shrinkfontfont-sizefont-size-adjustfont-stretchfont-weightgrid-areagrid-auto-columnsgrid-auto-flowgrid-auto-rowsgrid-column-endgrid-column-gapgrid-column-startgrid-columngrid-gapgrid-row-endgrid-row-gapgrid-row-startgrid-rowgrid-template-areasgrid-template-columnsgrid-template-rowsgrid-templategridheightleftletter-spacingline-heightmarginmargin-bottommargin-leftmargin-rightmargin-topmax-heightmax-widthmin-heightmin-widthopacityorderoutlineoutline-coloroutline-offsetoutline-widthpaddingpadding-bottompadding-leftpadding-rightpadding-topperspectiveperspective-originquotesrighttab-sizetext-decorationtext-decoration-colortext-indenttext-shadowtoptransform.vertical-alignvisibilitywidthword-spacingz-index
NORMALIZING CSS
The default browser stylesheet is the set of rules that browsers have to apply to give some minimum style to elements.
Most of the time those styles are very useful.
Since every browser has its own set, it’s common to find a common ground.
Rather than removing all defaults, like one of the CSS reset approaches does, the normalizing process removes browser inconsistencies, while keeping a basic set of rules you can rely on.
Normalize.css http://necolas.github.io/normalize.css is the most commonly used solution for this problem.
You must load the normalizing CSS file before any other CSS.
ERROR HANDLING
CSS is resilient. When it finds an error, it does not act like JavaScript which packs up all its things and goes away altogether, terminating all the script executions after the error is found.
CSS tries very hard to do what you want.
If a line has an error, it skips it and jumps to the next line without any error.
If you forget the semicolon on one line:
p {
  font-size: 20px
  color: black;
  border: 1px solid black;
}
the line with the error AND the next one will not be applied, but the third rule will be successfully applied on the page. Basically, it scans all until it finds a semicolon, but when it reaches it, the rule is now font-size: 20px color: black;, which is invalid, so it skips it.
Sometimes it’s tricky to realize there is an error somewhere, and where that error is, because the browser won’t tell us.
This is why tools like CSS Lint exist.
VENDOR PREFIXES
Vendor prefixes are one way browsers use to give CSS developers access to newer features not yet considered stable.
Before going on, keep in mind that this approach is declining in popularity. People now favour using experimental flags, which must be enabled explicitly in the user’s browser.
Why? Because developers, instead of considering vendor prefixes as a way to preview features, sometimes ship them in production — something considered harmful by the CSS Working Group.
Mostly because once you add a flag and developers start using it in production, browsers are in a bad position if they realise something must change. With flags, you can’t ship a feature unless you can push all your visitors to enable that flag in their browser (just joking, don’t try).
That said, let’s see what vendor prefixes are.
I specifically remember them for working with CSS Transitions in the past. Instead of just using the transition property, you had to do this:
.myClass {
    -webkit-transition: all 1s linear;
    -moz-transition: all 1s linear;
    -ms-transition: all 1s linear;
    -o-transition: all 1s linear;
    transition: all 1s linear;
}
Now you just use
.myClass {
    transition: all 1s linear;
}
since the property is now well supported by all modern browsers.
The prefixes used are:
-webkit-(Chrome, Safari, iOS Safari / iOS WebView, Android)-moz-(Safari)-ms-(Edge, Internet Explorer)-o-(Opera, Opera Mini)
Since Opera is Chromium-based and Edge will soon be too, -o- and -ms- will probably soon go out of fashion. But as we said, vendor prefixes as a whole are going out of fashion, too.
Writing prefixes is hard, mostly because of uncertainty. Do you actually need a prefix for one property? Several online resources are outdated, too, which makes it even harder to do right. Projects like Autoprefixer can automate the process in its entirety without us needing to find out if a prefix is needed any more, or the feature is now stable and the prefix should be dropped. It uses data from caniuse.com, a very good reference site for all things related to browser support.
If you use React or Vue, projects like create-react-app and Vue CLI, two common ways to start building an application, use autoprefixer out of the box, so you don’t even have to worry about it.
CSS FOR PRINT
Even though we increasingly stare at our screens, printing is still a thing.
Even with blog posts. I remember one time back in 2009 I met a person that told me he made his personal assistant print every blog post I published (yes, I stared blankly for a little bit). Definitely unexpected.
My main use case for looking into printing usually is printing to a PDF. I might create something inside the browser, and I want to make it available as PDF.
Browsers make this very easy, with Chrome defaulting to “Save” when trying to print a document and a printer is not available, and Safari has a dedicated button in the menu bar:
Print CSS
Some common things you might want to do when printing is to hide some parts of the document, maybe the footer, something in the header, the sidebar.
Maybe you want to use a different font for printing, which is totally legit.
If you have a large CSS for print, you’d better use a separate file for it. Browsers will only download it when printing:
<link rel="stylesheet"
      src="print.css"
      type="text/css"
      media="print" />
CSS @media print
An alternative to the previous approach is media queries. Anything you add inside this block:
@media print {
  /* ... */
}
is going to be applied only to printed documents.
Links
HTML is great because of links. It’s called HyperText for a good reason. When printing we might lose a lot of information, depending on the content.
CSS offers a great way to solve this problem by editing the content, appending the link after the <;a> tag text, using:
@media print {
    a[href*='//']:after {
        content:" (" attr(href) ") ";
        color: $primary;
    }
}
I target a[href*='//'] to only do this for external links. I might have internal links for navigation and internal indexing purposes, which would be useless in most of my use cases. If you also want internal links to be printed, just do:
@media print {
    a:after {
        content:" (" attr(href) ") ";
        color: $primary;
    }
}
Page margins
You can add margins to every single page. cm or in is a good unit for paper printing.
@page {
margin-top: 2cm;
margin-bottom: 2cm;
margin-left: 2cm;
margin-right: 2cm;
}@page can also be used to only target the first page, using @page :first, or only the left and right pages using @page :left and @page: right.
Page breaks
You might want to add a page break after some elements, or before them. Use page-break-after and page-break-before:
.book-date {
page-break-after: always;
}
.post-content {
page-break-before: always;
}Those properties accept a wide variety of values.
Avoid breaking images in the middle
I experienced this with Firefox: images by default are cut in the middle, and continue on the next page. It might also happen to text.
Use
p {
page-break-inside: avoid;
}and wrap your images in a p tag. Targeting img directly didn’t work in my tests.
This applies to other content as well, not just images. If you notice something is cut when you don’t want, use this property.
Debug the printing presentation
The Chrome DevTools offer ways to emulate the print layout:
Once the panel opens, change the rendering emulation to print:
WRAPPING UP
I hope this article helped you get up to speed with CSS and get an overview of the main features you can use to style your pages and apps. I wrote it to help you get comfortable with CSS and get you quickly up to speed with using this awesome tool that lets you create stunning designs on the Web, and I hope I achieved with this goal.
Click here to get a PDF / ePub / Mobi version of this post to read offline
Flavio
Learn to code for free. freeCodeCamp’s open source curriculum has helped more than 40,000 people get jobs as developers. Get started
Приветствую, дорогие друзья! В этом уроке вы узнаете что такое CSS, для чего нужен и как его правильно использовать. Это базовый урок из серии «Для самых маленьких», в котором я постараюсь объяснить наиболее понятным языком основы стилизации документов посредством CSS — Каскадных таблиц стилей (Cascading Style Sheets).
Часть 1. Основы CSS
В данном уроке мы затронем стилизацию документа, созданного с использованием языка разметки, т.е. придание определенной формы, определенного цвета, последовательности, размеров различных элементов и текста на странице, рассмотрим наиболее эффективные приемы работы с каскадными таблицами стилей. Поняв основы, вы сможете самостоятельно правильно и эффективно стилизовать HTML документы.
Обращаю ваше внимание, что в данном руководстве мы будем рассматривать CSS только в контексте использования с HTML документами в веб-браузере. С помощью CSS можно стилизовать и другие документы, использующие различные языки разметки. Например, стилизовать XML в Android приложениях, SVG или различные Desktop Environment в Unix-подобных операционных системах.
Вообще, CSS довольно элементарный формальный язык, который придумали для описания внешнего вида документов. Это говорит о том, что он довольно прост и состоит из самобытных примитивных конструкций, которые не так сложны для изучения. Самое сложное не синтаксис, не правила написания конструкций, а огромное количество CSS свойств для запоминания, которые выполняют различные задачи. Благо, все правила англоязычные с соответствующей смысловой нагрузкой. Простой перевод на наш язык дает понятие о том, что это правило делает и наоборот — при переводе того, что мы хотим добиться определенным свойством на английский язык, велика вероятность того, что мы получим правильное свойство. Это значительно упрощает запоминание CSS правил на интуитивном уровне. Например, если нужно задать фоновый цвет достаточно сделать перевод на английский, в результате чего получаем background-color (отдельные слова в CSS пишутся через дефис).
1.1 Использование CSS в HTML документах
CSS довольно просто использовать в HTML документах. Его можно:
-
Подключить как внешний CSS файл к документу. Для этого достаточно прописать тег <link rel=»stylesheet» href=»путь/до/файла.css»> в теге <head>. Это наиболее распространенный способ подключения таблиц стилей к документу, когда внешнее оформление страниц выносится в отдельный внешний CSS файл.
-
Прописать стили в самом документе, используя тег <style>.
Это менее популярный способ внутренней стилизации, который применяется в особых случаях, когда: А. Базовые стили должны быть моментально интерпретированы браузером до загрузки основных CSS файлов; Б. Когда стили должны быть опционально изменены в процессе работы над веб-сайтом, например, опциональный размер шрифта и другие опции оформления при работе сайта на какой-либо CMS, поддерживающей создание параметров в админ. панели или в других случаях, когда это действительно необходимо.
Пример вывода опции из админки в тело документа:
<style> .class { background-color: <?php echo $bgc_option; ?> } </style> -
Инлайновое использование CSS свойств в конкретных тегах с помощью атрибута style.
Такой способ внутренней стилизации используется очень редко в особых случаях, когда необходимо: А. Вывести из админ. панели сайта параметры для конкретных тегов; Б. Сделать динамическую стилизацию элементов посредством JavaScript.
Пример инлайнового вывода фонового изображения секции из админ. панели сайта:
<section style="background-image: url(<?php echo $bgi_option; ?>)">
Вывод $bgi_option — простой пример, показывающий что значение свойства задается в админке сайта.
Это довольно топорный способ стилизации элементов на странице, который не стоит использовать в повседневной работе. Только в исключительных случаях, когда это действительно необходимо. Инлайновая стилизация (от слова inline — встроенный) работает только в том элементе, в котором она прописана. Инлайновые стили имеют наибольший приоритет. То-есть если во внешнем файле у вас указана одна картинка для фона, а в инлайновых стилях другая — сработает вторая.
1.2 CSS синтаксис
Как я уже говорил ранее, CSS имеет довольно простой синтаксис. Давайте разберем его.
Правила объявлений настолько просты, что их можно описать в одном предложении. Сначала пишется селектор, который выбирает конкретный элемент на странице, после фигурных скобок пишутся свойства со значениями после двоеточия, а сами свойства отделяются друг от друга точкой с запятой. Это все.
Просто, не правда ли?
Самое сложное в CSS объявлении — селектор. Подробнее узнать о том, как формируются и как используются селекторы вы можете в уроке Все CSS селекторы в одном уроке — это очень важная тема, так как здесь раскрывается вся магия выборки элементов на странице, рекомендую посмотреть этот урок в обязательном порядке всем новичкам.
Вкратце CSS селектор — (от слова select — выбирать) — это конструкция, с которой начинается каждый блок объявлений и которая служит для выборки элемента или однотипных элементов на странице для дальнейшей стилизации. Чаще всего в качестве селектора используется определенный класс тега, например:
//HTML:
<div class="my-class"></div>
//CSS:
.my-class {
background-color: #999;
}
Здесь селектором выступает класс my-class тега div, который получает необходимое оформление в CSS файле. В данном случае фоновый цвет — серый. Соответственно, если на странице есть несколько тегов (не только div) с классом my-class, все эти элементы получат одинаковое оформление — серый фон цвета #999.
1.3 Каскадирование, наследование и приоритет
Понять принцип каскадирования несложно. Давайте взглянем на пример:
//HTML
<div class="parent">
Далеко-далеко за словесными горами в стране.
<div class="children">
Далеко-далеко за словесными горами.
</div>
</div>
//CSS
.parent .children {
color: #666;
}
.parent {
padding: 10px;
color: #999;
}
Из примера мы видим, что в CSS написан каскад, в котором класс .parent стоит на первом месте, после него через пробел указан дочерний класс .children, который отвечает уже за стилизацию только дочернего элемента. Дочерний тег обязательно должен быть вложен в тег с классом .parent. Если в HTML документе мы вынесем тег .children из тега div с классом .parent, он потеряет свое оформление, так как каскад уже не будет работать, структура нарушена.
Что мы получим в результате нашего примера. Тег с классом .children получит цвет текста #666, так как имеет более длинный каскад, а .parent покрасится в цвет #999. Родительский класс будет иметь внутренние отступы 10px, в то время, как дочерний этих отступов иметь не будет, так как свойство padding не распространяется на дочерние элементы. Однако если мы уберем color: #666; у селектора .parent .children, то его текст покрасится в цвет родителя color: #999;
Каскадирование и наследование позволяют стилизовать конкретные элементы на странице и определять приоритет применяемых стилей. Давайте рассмотрим иерархию приоритетов.
- Самым высоким приоритетом обладают свойства, в конце объявления которых указана конструкция !important. Не важно, какую вложенность имеет селектор, каким образом используются стили — инлайново или подключением внешнего файла, у них будет наибольший приоритет. Я крайне не рекомендую использовать !important при стилизации, так как в процессе поддержки или даже в процессе разработки в дальнейшем обязательно возникнет путаница, которую спасет только рефакторинг стилей. Как показывает практика, всегда есть способ не использовать !important.
Пример использования !important:.my-class { background-color: #999!important; } - Следующим по значимости приоритетом обладают инлайновые стили, прописанные в самом теге через атрибут style, которые мы рассмотрели ранее: <section style=»background-color: #eee;»>
- Стили, заданные в теге style в самом документе имеют меньший приоритет;
- Еще меньшим приоритетом обладают стили, подключенные к документу как внешний CSS файл посредством тега <link>
- Самый низкий приоритет, окромя стандартных стилей браузера имеют стили родительских селекторов перед дочерними, например:
//HTML <div class="my-class"> <p>Далеко-далеко за словесными горами.</p> </div> //CSS .my-class { margin: 10px; } будет иметь меньший приоритет для дочернего p, чем: .my-class p { margin: 15px; }В результате тег <p>, находящийся в теге с классом .my-class получит значение свойства margin: 15px.
Стоит также отметить, что количество классов или идентификаторов, а также наличие дополнительных псевдоклассов и конструкций в селекторе повышают приоритет для стилизации:
.my-class.class-2 {
margin: 10px;
} будет иметь больший приоритет, чем:
.my-class {
margin: 15px;
}
И т.д. по логической цепочке.
И в завершение по приоритетам важно отметить, что стили, идущие в последующих объявлениях ниже по документу также имеют наибольший приоритет. Например:
.my-class {
margin: 10px;
} будет иметь меньший приоритет, чем идущий после него точно такой-же селектор:
.my-class {
margin: 15px;
}
В результате последний селектор в потоке документа получит значение свойства margin: 15px, так как является наиболее приоритетным. Однако если бы селектор первого объявления был длиннее, значния его свойств несомненно бы превалировали.
Что касается наследования, здесь все просто. Все дочерние элементы наследуют некоторые свойства родителя. Какие именно свойства наследуются предстоит выяснить вам в процессе изучения различных свойств и применении их на практике. Например, цвет текста всегда наследуется потомками, а отступы — нет.
Часть 2. CSS свойства
Я думаю нет смысла перечислять все CSS свойства, так как их очень много и практичней обратиться к справочнику всех CSS свойств. Я рекомендую изучить CSS свойства в справочнике на HTMLBook.
Однако рассмотрим 10 самых используемых CSS свойств в верстке. Я взял 10 больших CSS файлов из своих проектов и отсортировал свойства по частоте использования.
CSS Свойство |
Частота использования |
Описание |
| color | 960 раз | Цвет текста элемента: 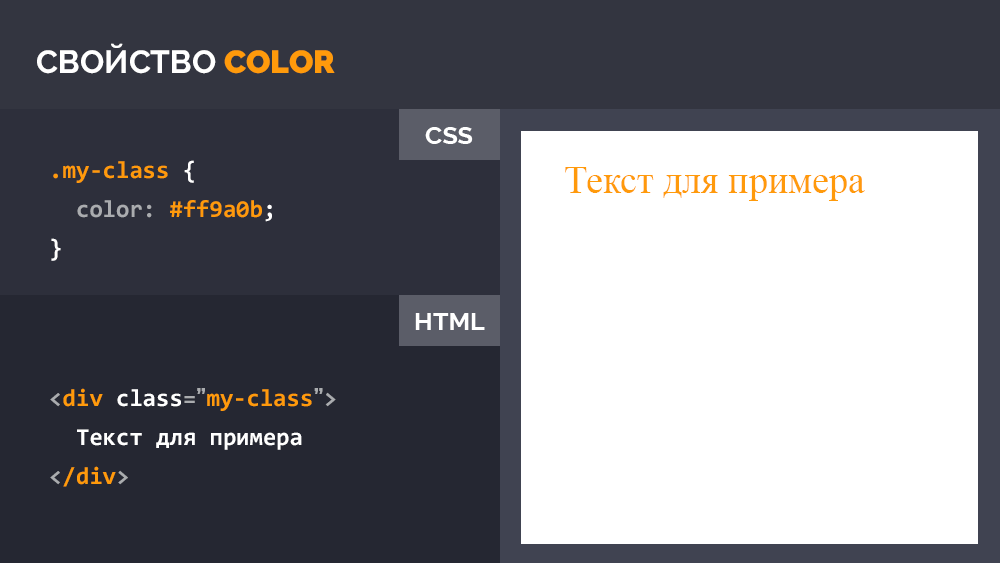 |
| background-color | 755 раз | Цвет фона элемента: 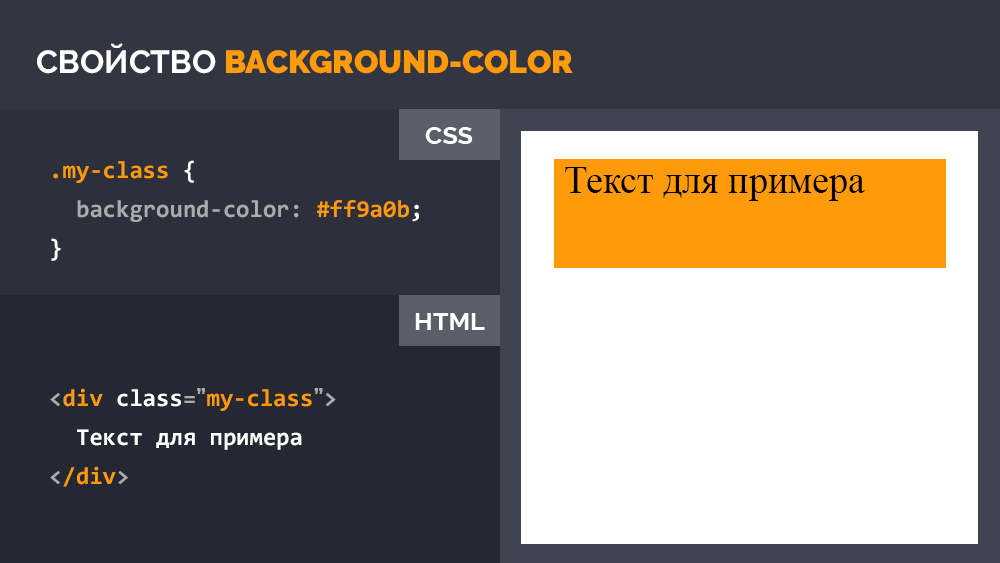 |
| font-size | 524 раза | Размер шрифта: 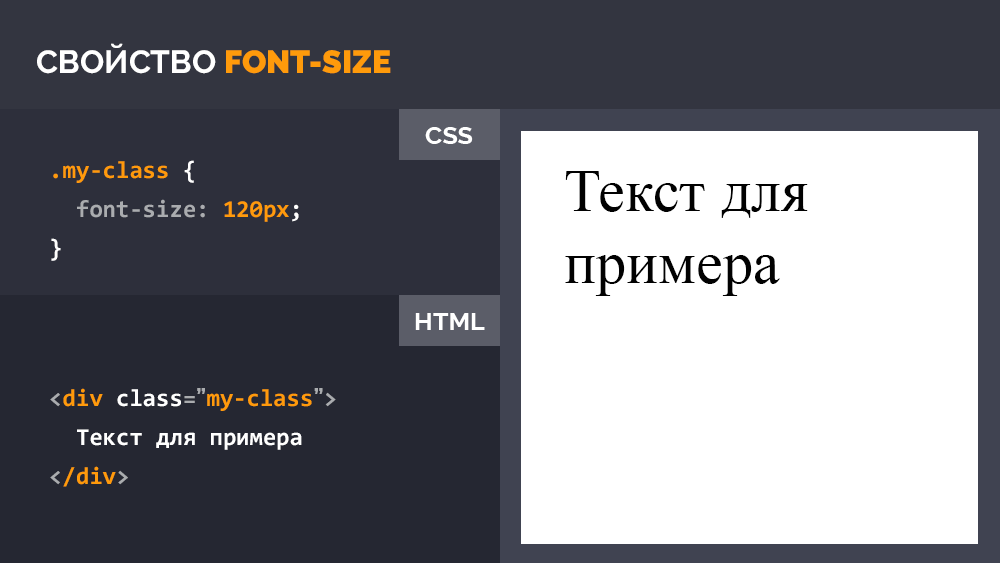 |
| opacity | 435 раз | Уровень прозрачности элемента: 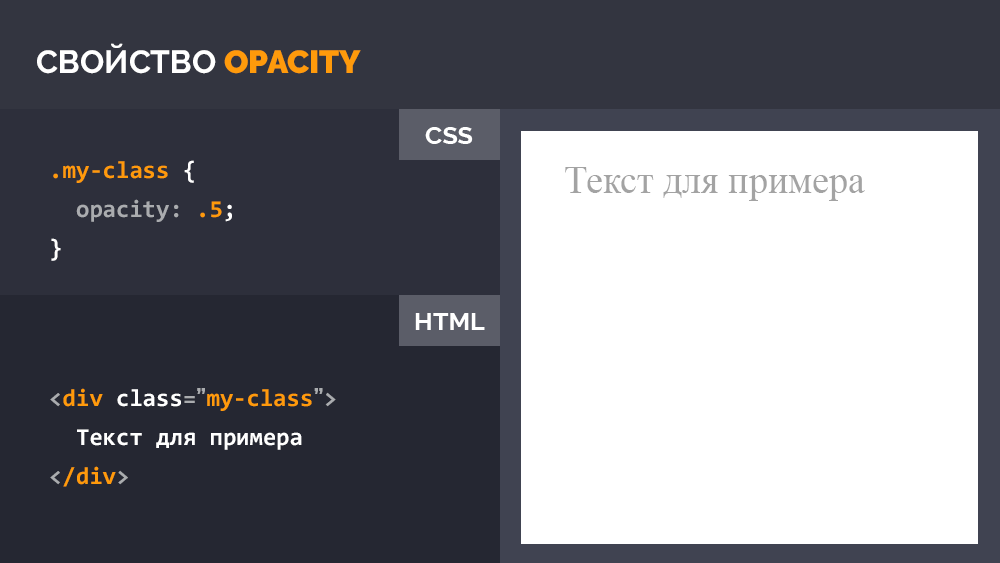 |
| padding | 372 раза | Размер полей внутри элемента: 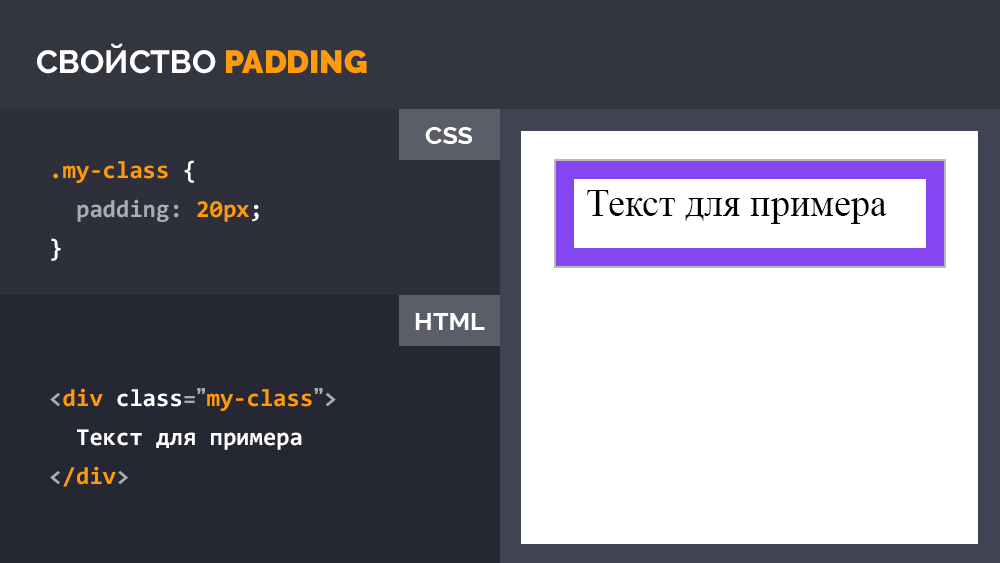 |
| width | 356 раз | Ширина блочного элемента, не включая размеры границ и полей: 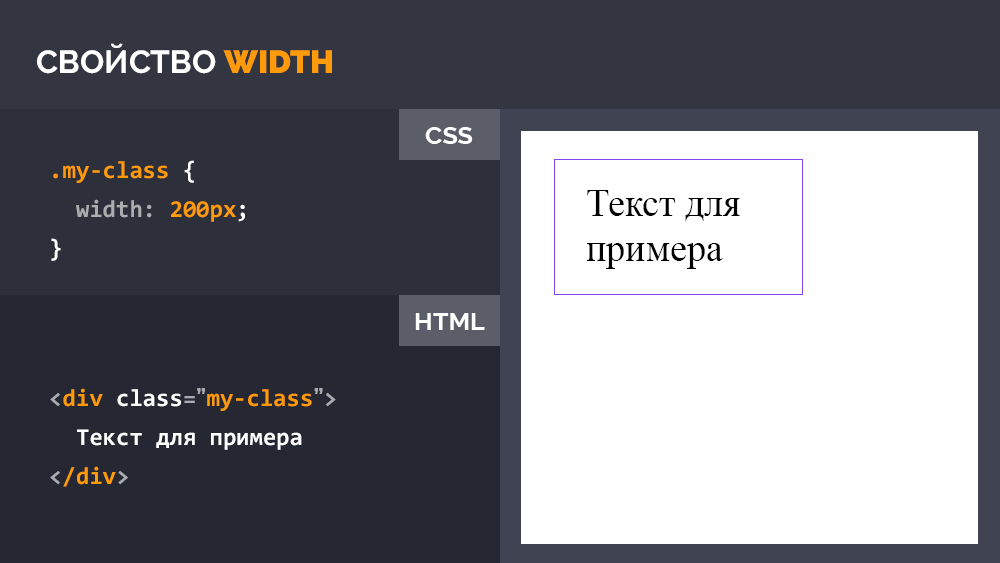 |
| margin | 311 раз | Внешние отступы элемента: 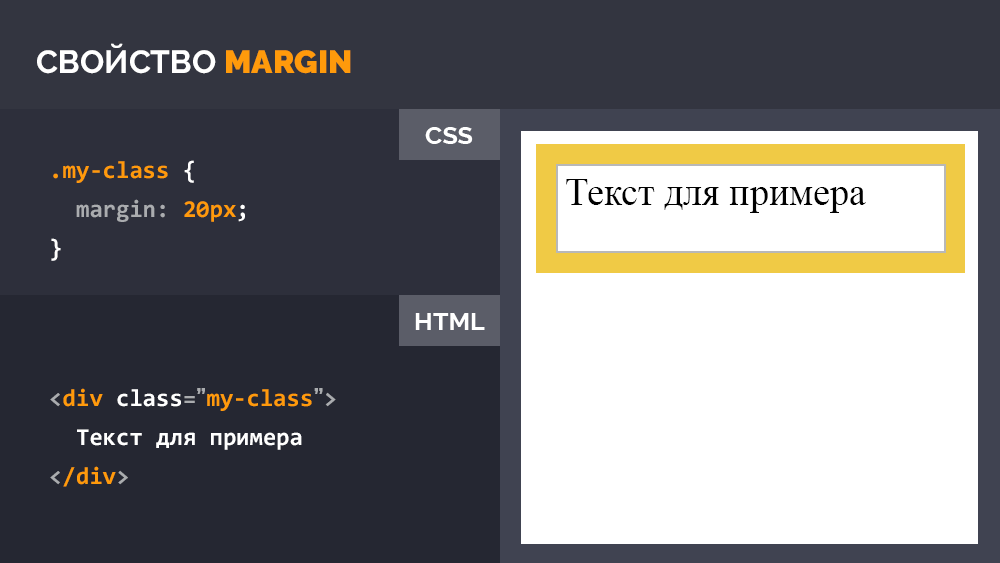 |
| height | 305 раз | Высота блочного элемента, не включая размеры границ и полей: 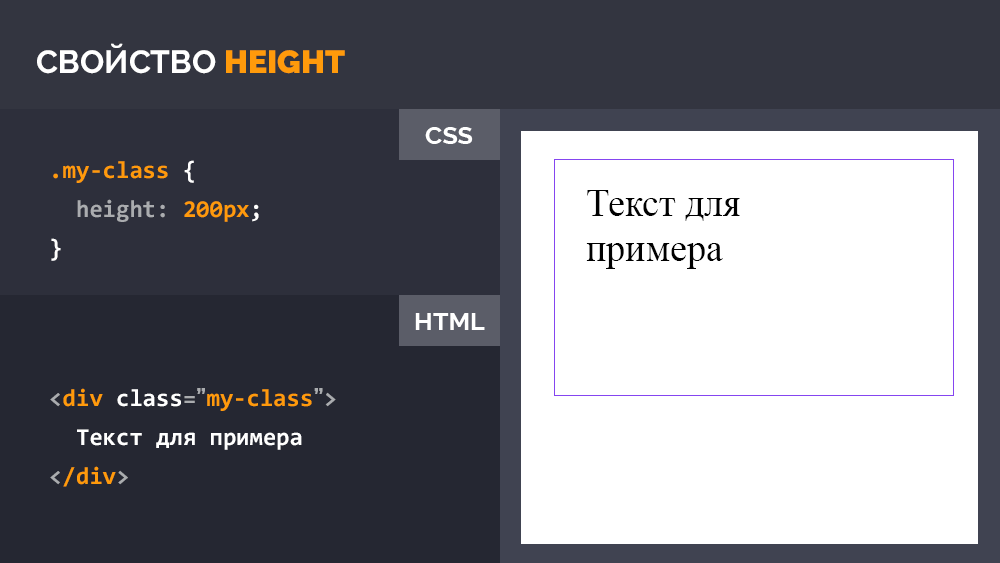 |
| font-weight | 280 раз | Насыщенность шрифта: 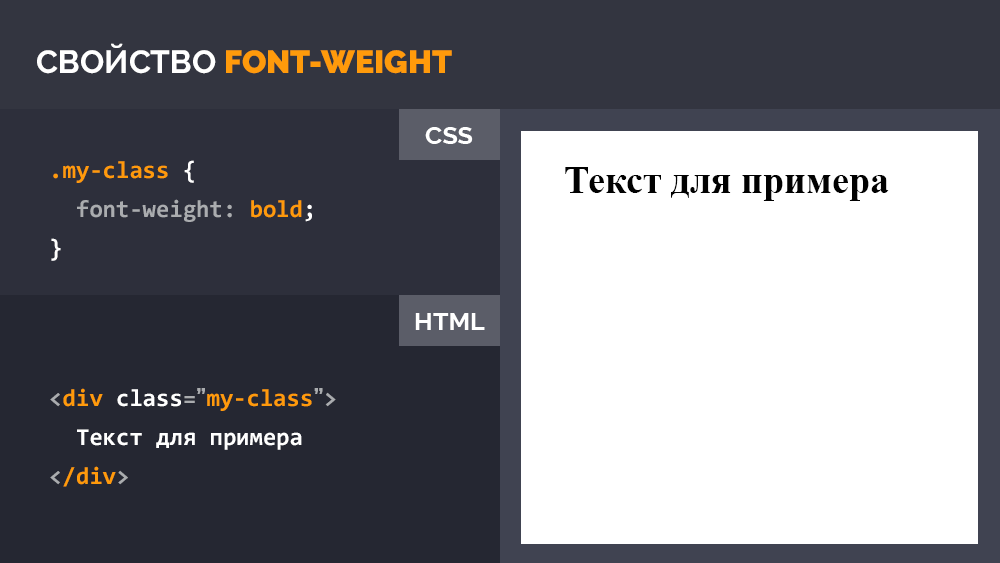 |
| text-align | 245 раз | Горизонтальное выравнивание текста: 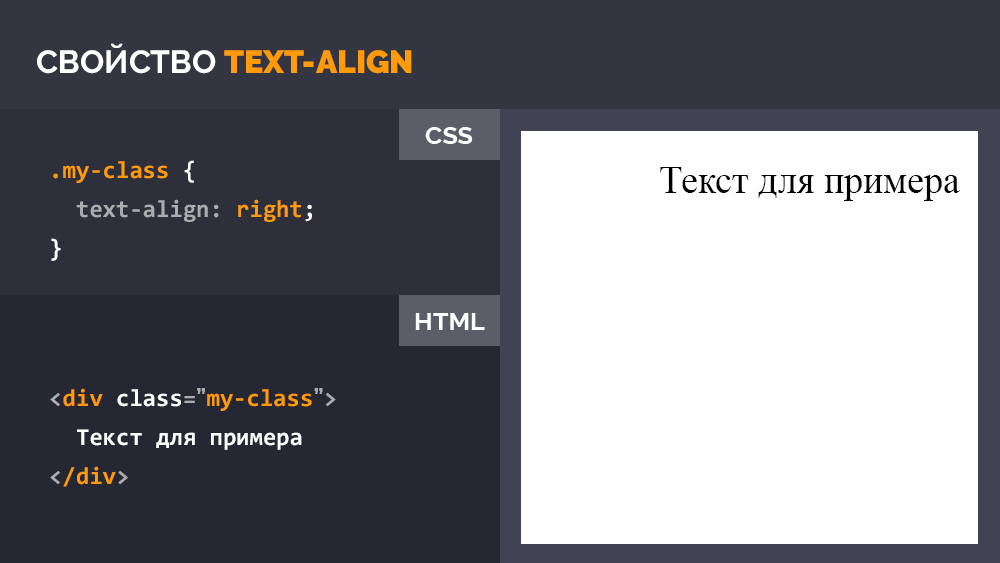 |
Часть 3. Медиа-запросы
Медиа-запросы в CSS — это база для создания отзывчивой верстки, позволяющая стилизовать элементы в зависимости от размера экрана или устройства, на котором отображается веб-сайт. Технически Медиа-запрос — это простое логическое выражение, которое может быть или истинным или ложным. Условиями для такого выражения являются либо параметры устройства, на котором отображается веб-страница, либо размер экрана в пикселах.
В данном руководстве мы рассмотрим базовые возможности медиа-запросов, которые необходимы для адаптивной верстки сайтов и практически полезны.
Медиа-запрос пишется в самом файле стилей или в теле документа (тег style) и начинается с объявления правила @media. Структура медиа запроса довольно проста:
Условием может выступать либо устройство — all (все устройства), screen, print, tv и т.д., либо медиа-функции, которые задают параметры устройства или разрешение экрана, на котором отображается документ.
Наиболее часто используемые медиа-функции определяют именно максимальное и минимальное разрешение экрана устройства:
Здесь устройства с максимальным разрешением экрана 480px или минимальным разрешением 320px будут отображать текст тега с классом .my-class серым. Данное условие я привел для примера, практически оно бесполезно. Чаще всего требуется указать либо только максимальное разрешение, либо только минимальное, в пределах которого будет прменяться свойство.
Кроме всего прочего, как мы видим из примера, функции могут содержать условия and (И), not (НЕ) и only (Для старых браузеров, не поддерживающих медиа-запросы). Нет логического оператора or (ИЛИ), его роль выполняет запятая. Медиа-функции, как мы видим заключают в обычные круглые скобки.
Размещение свойств в медиа-запросе не дает никакого приоритета, поэтому логичней размещать медиа-запросы в конце CSS документа, либо загружать тегом link внешний CSS файл с медиа-запросами после загрузки основных стилей сайта для правильного переопределения последних на разных разрешениях или на различных устройствах.
Часть 4. Рекомендации
Ну и конечно-же мои рекомендации. За всю практику верстки у меня накопились некоторые правила, которыми я с радостью поделюсь.
- Старайтесь использовать только внешние подключаемые CSS файлы. Внутреннюю стилизацию применяйте только если это необходимо для корректного функционирования веб-сайта;
- Старайтесь стилизовать только классы. Не стилизуйте идентификаторы (задаются через id=»решетку» и пишутся через #решетку). Старайтесь меньше стилизовать теги без классов. Например, если вы стилизуете тег h3, а в дальнейшем SEO специалист решит, что заголовок здесь не уместен, обычный div должен иметь такие-же свойства с классом заголовка и отображаться также. Как вариант можно сделать дубликаты HTML тегов в классы, например, .h1, .h2, .h3, .footer, .header, .aside и стилизовать их соответствующим образом;
- Старайтесь стилизовать элементы максимально автономно, сокращайте цепочку каскада до одного блока, чтобы было меньше зависимостей от родительских элементов. Это необходимо для максимально эффективного повторного использования блоков на странице и их модификации в других местах верстки. Но без фанатизма. Не стоит задавать отдельные классы каждому тегу в блоке, если не предполагается его автономное использование. Если вы перенесете блок в другое место страницы, он должен отображаться также и не зависеть от родителя. В этом вам поможет использование какой-либо методологии именования классов. Не важно, будет это БЭМ, методология, либо разработанная на основе вашего личного опыта или простые правила, предложенные мной — это лучше, чем называть классы как попало и строить нелогичные и длинные цепочки классов;
- Старайтесь называть классы тегов в зависимости от того, какую функцию выполняет блок, а не от того, какое в нем будет содержание. Например, если у вас есть секция с отзывами в виде карусели, не стоит называть селекторы, используя слова reviews, otzivy и т.д. Лучше назвать carousel-once, если планируется выводит по одному пункту карусели на странице. В дальнейшем, возможно вы будете использовать эту карусель не только для оформления отзывов, а задействуете этот код например, для вывода списка коллег компании. В таком случае наименование класса reviews будет несколько неуместным;
- Используйте CSS препроцессоры, в этом нет ничего сложного. Мой выбор пал на препроцессор Sass уже довольно давно и я его рекомендую к использованию. У нас есть неплохой урок, в котором я рассказываю как легко пользоваться препроцессором и как он упрощает жизнь: Sass для самых маленьких — подробное руководство;
- Используйте сброс стандартных стилей браузера или нормализацию, которая приводит стандартные стили к общему для всех браузеров знаменателю. Я использую в своих проектах Normalize.css, который входит в состав CSS фреймворка Bootstrap;
- Когда почувствуете, что выполняете слишком много однообразной работы в процессе верстки — переходите к использованию какого-либо CSS фреймворка или разработайте свой с наиболее часто используемыми элементами, это ускорит вашу работу. Я использую в работе только сетку Bootstrap без стилистического оформления кнопок, панелей и прочих элементов. Этого вполне достаточно для эффективной работы. Хорошая адаптивность Bootstrap сетки по умолчанию также радует;
- Самостоятельно экспериментируйте со свойствами. Открывайте CSS справочник и пробуйте. Только так можно наработать опыт, запомнить какое свойство что делает и довести написание стилей документа до автоматизма.
Премиум уроки от WebDesign Master
Другие уроки по теме «Верстка»
- Создание сайта с крутой анимацией скролла (GSAP) | Материалы урока
- Создание красивого сайта с горизонтальным Parallax эффектом | Материалы урока
- Создание сайта портфолио с крутой анимацией | Материалы урока
- Создание красивого сайта с Parallax эффектом при скролле | Материалы урока
- Создание Parallax эффекта на сайте при движении мыши | Материалы урока
- Создание красивого сайта с поддержкой темной темы (HTML, CSS, GSAP) | Материалы урока
Уровень сложности
Простой
Время на прочтение
6 мин
Количество просмотров 20K
Хотите войти в веб-разработку, но не знаете, с чего начать? Освоение CSS станет отличным стартом и, к счастью для вас, в сети существует огромное количество учебных ресурсов.
Мы провели исследование и собрали 12 наиболее актуальных сайтов, которые помогут вам продвинуться от уровня новичка до профессионала по CSS за кратчайшие сроки.
Будь вы начинающий программист или опытный, на этих сайтах есть информация для всех уровней: от полноценных учебных пособий до памяток и фрагментов кода. Эти ресурсы предоставят вам инструменты и знания, необходимые для создания красивых, функциональных веб-страниц. К тому же большинство из них абсолютно бесплатны.
Так что пристегните ремни и приступайте к написанию кода!
▍ Flexbox Froggy — освоение Flexbox
Если вы любите играть, то это идеальный сайт для освоения Flexbox. Flexbox Froggy – это восхитительная интерактивная игра, которая научит вас основам синтаксиса Flexbox.
По мере продвижения через уровни каждый «прыжок через пруд» будет становиться всё сложнее. К тому моменту, когда вы поймаете всех лягушек, у вас сформируется твёрдое понимание принципов работы Flexbox, и вы будете готовы использовать этот инструмент в своей работе.
Но не стоит верить нам на слово. Попробуйте Flexbox Froggy, и вы увидите, что ваши знания CSS начнут стремительно расти.
▍ CSS Grid Garden — освоение CSS Grid
Готовы перенести своё понимание CSS на новый уровень? Если да, то игра CSS Grid Garden – для вас!
Эта интерактивная игра научит вас основам Grid Layout — мощной системы построения макетов, которая становится всё более популярной. Задача в этой игре проста – вам нужно поливать сад, и каждый раз, когда вы будете делать это правильно – в него будет добавляться новая строка или столбец.
Для полива требуется написать код CSS и применить его к саду. По мере продвижения, когда вы начнёте успешно проходить всё более сложные уровни, ваше знание CSS Grid возрастёт десятикратно!
CSS Grid Garden также содержит дополнительные уровни для тех, кто желает отточить свои навыки. С помощью этих уровней вы научитесь использовать дроби при проектировании сетки, узнаете, как работает выравнивание при вытягивании элементов по сетке, и даже освоите создание удивительных паттернов с помощью этих элементов.
Плюс всё это можно делать в захватывающем стиле со множеством забавных анимаций и визуальных эффектов.
▍ Flex Box Adventure
Готовы к серьёзному испытанию? Flex Box Adventure гарантирует его вам.
Обучающая игровая среда Flex Box Adventure требует от вас отвечать на вопросы, создавать макеты на флексбоксах и сражаться со свирепыми монстрами для освоения искусства CSS Flexbox. Ваша цель? Стать «Мастером Flexbox» или «Жрецом CSS».
Это может прозвучать сложно, но представленная в данной игре дружелюбная для пользователя среда не только вдохновит вас, но и обеспечит поддержку для достижения успеха. Не пугайтесь – Flex Box Adventure подходит для людей с любым уровнем навыков. Каждое упражнение сопровождается пошаговыми инструкциями и примерами кода, которые можно использовать в качестве справки.
▍ CSS Diner — проверьте свои знания селекторов
Интересует весёлая задачка для тестирования ваших новых навыков CSS? Остановите своё внимание на CSS Diner. Этот ресурс представляет различные уровни, которые начинаются с простых селекторов и завершаются более продвинутыми темами вроде псевдоклассов и комбинаторов.
На каждом уровне вам даются столовые тарелки, и нужно выбирать селекторы, с которыми они связаны в коде CSS. Узнав верный селектор, его нужно ввести в текстовое окно и нажать «Ввод» для продолжения.
Каждая задача сопровождается объяснением, которое позволяет понять, почему определённый селектор подходит лучше другого. При этом на случай затруднений игра также предоставляет подсказки.
Готовы к испытанию? Вперёд на CSS Diner!
▍ Flexbox Defense
Готовы повысить свои навыки CSS и освоить искусство Flexbox Defense? Тогда этот сайт для вас. Игра Flexbox Defense ставит перед собой задачу помочь вам понять и отработать создание макетов Flexbox с использованием забавных графических элементов.
Flexbox Defense представляет захватывающий способ попрактиковать свои навыки CSS и попутно немного поразвлечься. Если для вас это звучит интересно, то смело пробуйте.
▍ Codecademy — курсы и обучающие материалы по CSS
Codecademy – это отличный выбор для всех, кто ищет более углублённых инструкций по использованию CSS. Этот ресурс предлагает интерактивные уроки, опросники и упражнения по написанию кода, которые помогут вам освоить CSS. Помимо этого, представленная на сайте информационная панель позволяет отслеживать прогресс, чтобы сохранять мотивацию.
Codecademy также предлагает курсы, посвящённые более специфичным темам вроде HTML & CSS, Responsive Design и Flexbox. Ещё очень здорово, что после завершения каждого курса или урока вам выдают сертификат, подтверждающий получение навыков.
Если вы хотите ускорить темпы обучения, то ознакомьтесь с подпиской Pro, которая даёт доступ к полезным учебным материалам вроде проектов, аналитики, а также позволяет пошагово отслеживать свой прогресс.
▍ CSSReference.io
Готовы стать мастером CSS? Тогда добавьте в закладки CSSReference.io, бесплатное видеоруководство по CSS. Предлагая множество примеров для каждого свойства и объясняя причины использования каждого примера, этот сайт является одним из лучших информационных ресурсов по теме свойств CSS.
Здесь же вы найдёте диаграммы и иллюстрации – идеальные помощники для тех, кто предпочитает осваивать материал визуально.
Кроме того, этот сайт регулярно пополняется новым контентом, включая поддержку Flexbox, Grid и кастомных свойств.
Обратите внимание на колонку «popular views», где представлена информация о новшествах каждого раздела.
Так что, если для вас такой ресурс кажется интересным и полезным, не откладывайте его посещение в долгий ящик.
▍ Knights of the Flexbox Table
Готовы стать мастером Flexbox? Попробуйте бесплатную онлайн-игру для начинающих Knights of Flexbox Table.
Этот сайт даёт вам простое введение и обучает основам, таким как создание макетов, выравнивание контента, разработка отзывчивого дизайна и быстрое изменение значений CSS.
Освойте и запомните Flexbox с Tailwind CSS, чтобы начать обходиться без шпаргалок.
▍ Flexbox Zombies
Если вы ищете крутой и весёлый способ изучения основ CSS Flexbox, тогда Flexbox Zombies может оказаться тем, что надо.
С помощью этой интерактивной игры вы будете осваивать особенности Flexbox, сражаясь с зомби и оттачивая навыки написания кода.
Что делает Flexbox Zombies крутым обучающим инструментом:
- Она даёт вам практический подход к освоению CSS Flexbox.
- Требует умелого решения задач для победы над зомби и прохождения уровней Flexbox.
- Упрощает запоминание фрагментов кода за счёт мнемоник.
- Предлагает реальные задачи, такие как создание строк и столбцов с помощью Flexbox с применением обретённых навыков.
Помимо этого, освоение Flexbox также поможет вам повысить навыки решения задач, поскольку использование этого функционала предоставляет инструменты для оптимизации дизайна любой веб-страницы.
▍ Mozilla Developer Network — ресурсы по CSS и HTML
Mozilla Developer Network – это отличный источник для освоения CSS и HTML. На нём есть всё, начиная с короткого знакомства с HTML, а также пошаговые руководства для изучения основ CSS Grid и Flexbox.
На MDN есть документы, в которых приводится полноценная информация о технологиях, веб-разработке и опенсорсных проектах, включая HTML, CSS, JavaScript, графику, мобильные/десктопные приложения и не только.
Плюс здесь есть форум, где можно задавать вопросы опытным разработчикам и получать ответы в течение считаных часов. MDN также даёт доступ к таблицам совместимости с браузерами, по которым можно выяснить, будут ли используемые вами HTML-элементы или свойства CSS работать с тем или иным браузером.
И если что-то в вашем коде работает не так, MDN поможет эту проблему отладить.
▍ CSSTricks — уроки, советы и трюки для становления экспертом CSS
Имеете средний уровень навыков в CSS и ищете возможность подтянуть основы и изучить продвинутые принципы? Тогда идеальным ресурсом для вас будет CSSTricks. Этот сайт основал Крис Куайе, и на нём вы найдёте обучающие материалы, советы и трюки, которые помогут вам на пути становления экспертом по CSS.
На CSSTricks найдётся материал для любого уровня, начиная с уроков для новичков и заканчивая продвинутыми рекомендациями для профессионалов, которые хотят поспевать за последними тенденциями.
Здесь также приводятся фрагменты кода, которые вы можете интегрировать в собственные проекты, и регулярно публикуются посты по теме последних трендов индустрии.
Если вы стремитесь улучшить ваши навыки написания кода, CSSTricks определённо будет вам полезен.
▍ CSS Zen Garden
CSS Zen Garden – это один из первых сайтов, который помогал людям осваивать CSS. Позиционируется он как ресурс, «стремящийся показать, какие визуальные решения можно получить с помощью CSS-дизайна».
CSS Zen Garden играл значительную роль в развитии веб-стандартов в течение более 15 лет и продолжает предлагать обучающие материалы по всем темам CSS, начиная с визуального отделения содержания от презентации и заканчивая невероятными идеями вроде трансформирования всего макета с помощью медиазапросов.
Он также предоставляет методы для отделения HTML-содержимого от презентации, чтобы все визуальные эффекты применялись исключительно с помощью CSS.
Ищете вдохновения?
Тогда CSS Zen Garden должен находиться в начале списка полезных ресурсов. Он содержит впечатляющую коллекцию стильных дизайнов и обучающих материалов, которые помогут отточить навыки по созданию красивых сайтов с помощью CSS.
▍ Заключение
При всём разнообразии ресурсов и сайтов CSS не обязательно должен быть чересчур объёмным и трудным в освоении. Независимо от того, являетесь вы новичком или опытным разработчиком, существует множество опций для продвижения на вашем пути.
Освоение ключевых методик вроде Flexbox и Grid позволит вам повысить выразительность и эффективность любого сайта. Приведённый выше список поможет упростить изучение CSS.
Ну а вложенное в это время обязательно себя окупит, поскольку CSS является очень ценным инструментом для любого веб-разработчика и верстальщика.
🏆 Голосуй за нас на премии «ЦОДы РФ»!

