Введение к руководству на английском языке по устройству, техническому обслуживанию и ремонту автомобилей Smart Fortwo Coupe и Smart Forfour 453-й серии.
- Автор: —
- Издательство: Daimler AG
- Год издания: 2014
- Страниц: 122
- Формат: PDF
- Размер: 7,2 Mb
Введение к руководству на английском языке по устройству, техническому обслуживанию и ремонту автомобиля Smart Fortwo 451-й серии.
- Автор: —
- Издательство: Smart USA
- Год издания: 2007
- Страниц: 122
- Формат: PDF
- Размер: 11,6 Mb
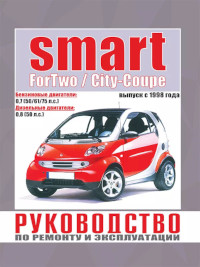
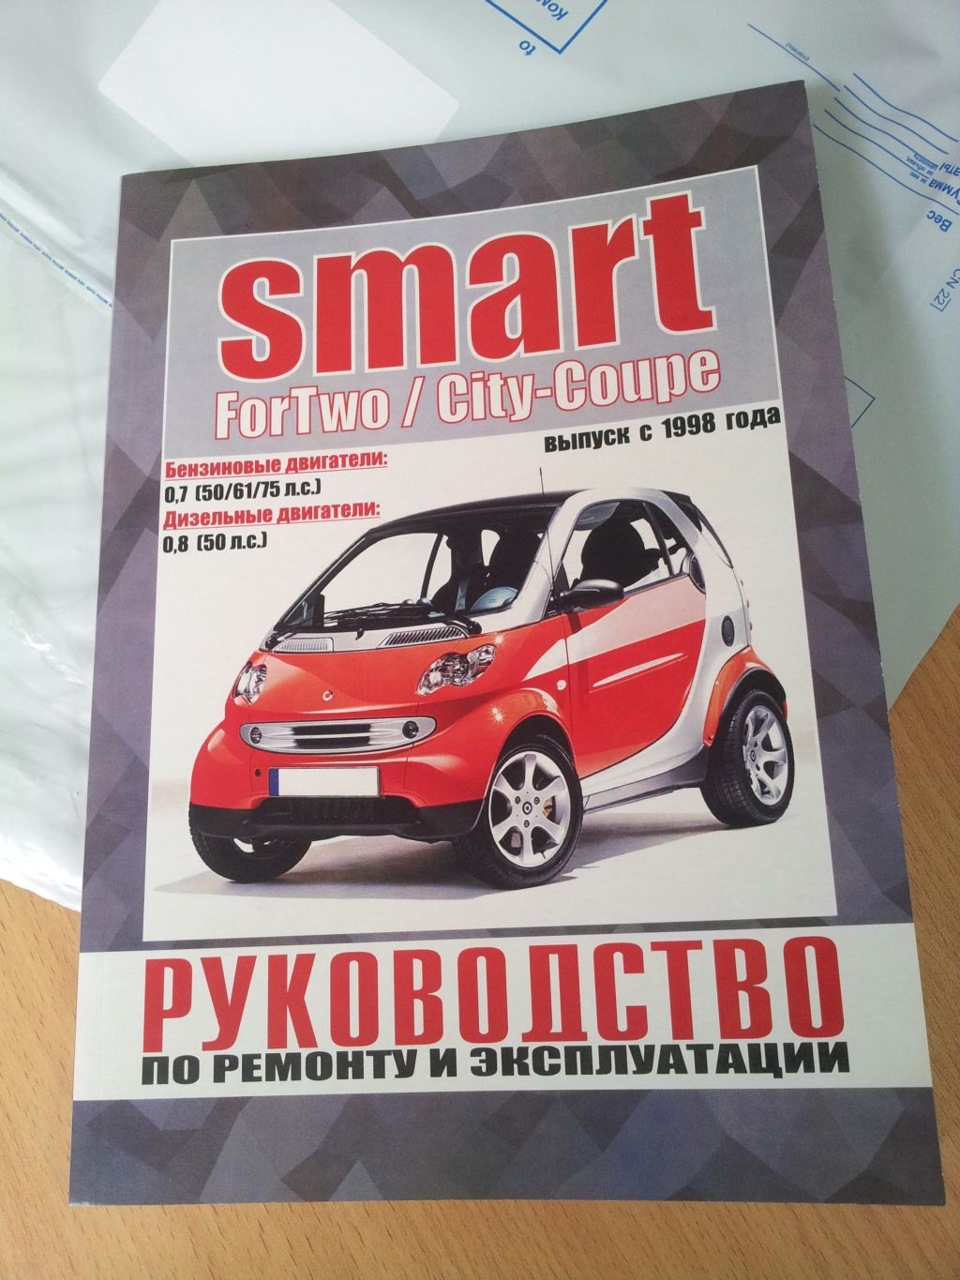
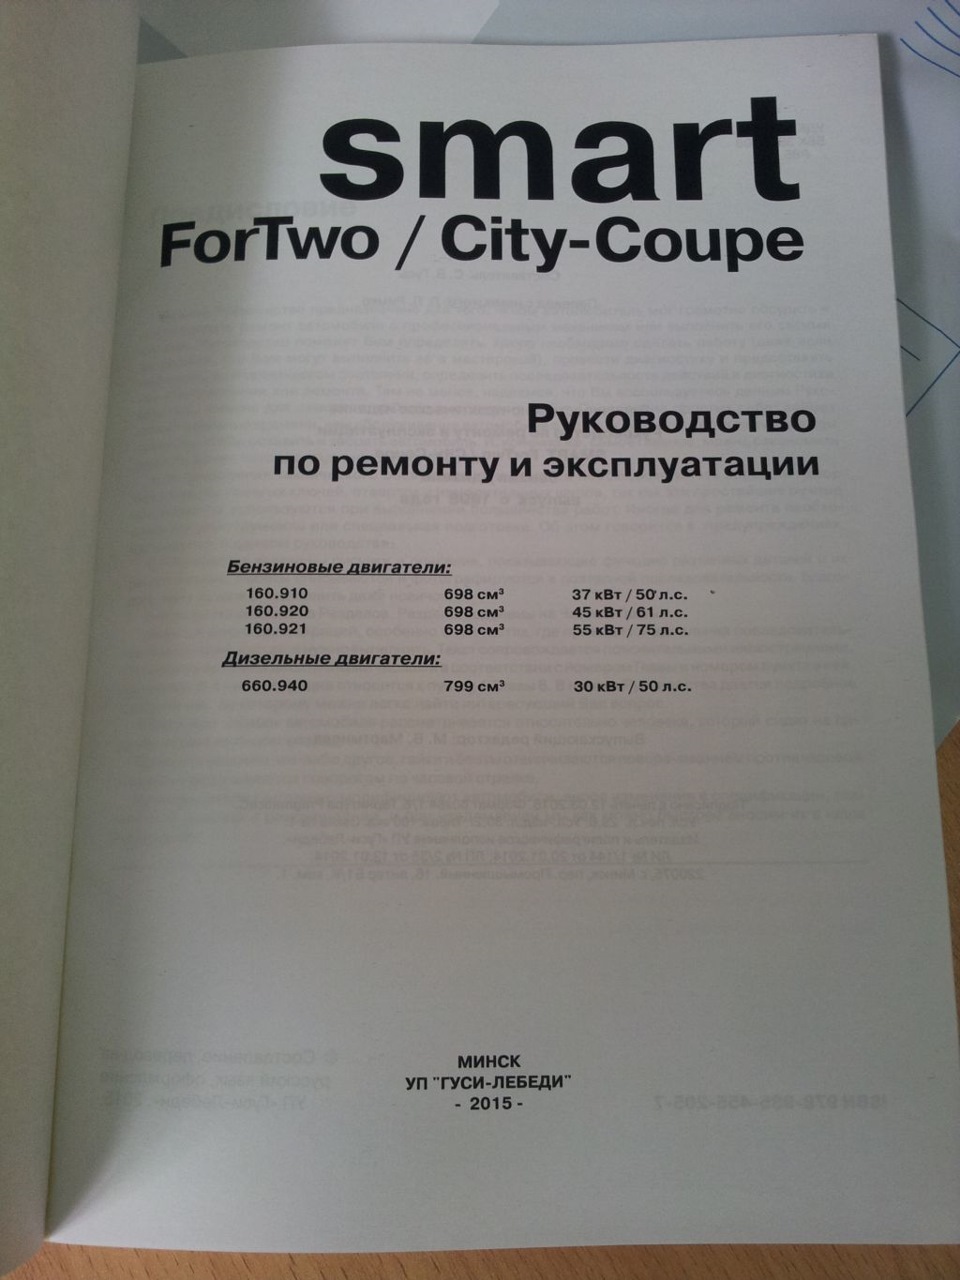
Руководство по эксплуатации и ремонту автомобилей Smart ForTwo и Smart City-Coupe с 1998 года выпуска с бензиновыми и дизельными двигателями.
- Автор: —
- Издательство: Гуси-Лебеди
- Год издания: —
- Страниц: 252
- Формат: —
- Размер: —
| Главная » Статьи » Мануалы |
| В разделе материалов: 2 Показано материалов: 1-2 |
Руководство по ремонту и эксплуатации Smart Roadster на русском
Мануалы |
Просмотров: 4677 |
Добавил: Leks |
Дата: 05.10.2019
| Комментарии (0)
Руководство по эксплуатации Smart Fortwo 451 на русском
Мануалы |
Просмотров: 5721 |
Добавил: Leks |
Дата: 29.09.2019
| Комментарии (0)
- Manuals
- Brands
- SMART Manuals
- Automobile
- Series 451
- Service manual
-
Contents
-
Table of Contents
-
Bookmarks
Quick Links
Related Manuals for SMART Series 451
Summary of Contents for SMART Series 451
-
Page 2
SN_Typ 451_us.book Seite 1 Freitag, 30. November 2007 1:56 13 Introduction of the smart fortwo Model Series 451 Introduction into Service Manual smart USA… -
Page 3
All rights reserved. Reproduction by any means, electronic or mechanical, including photocopying, recording, or by any information storage and retrieval system or translation in whole or part is not permitted without written authorization from the publisher. Published by smart USA, 2007 Printed in U.S.A. www.smartusa.com… -
Page 4: Table Of Contents
On-board electrical system/power supply Complete networking Wiring harnesses Diagnosis SAM control unit Engine M132 Engine description Performance graph Engine data Valve assembly Valve timing Gasoline injection and ignition system Belt drive Cooling system Engine mount Introduction of the smart fortwo, Model Series 451…
-
Page 5
Exhaust system Overview Secondary air injection Automated manual transmission Transmission description Transmission data Shift mechanism Synchronization Transmission control Park pawl Clutch Chassis Front axle Rear axle Rear module Tire pressure monitor Brakes Steering Introduction of the smart fortwo, Model Series 451… -
Page 6: Introduction Of The Smart Fortwo, Model Series 451
Content Body Interior Doors/flaps Roof systems Central locking Anti-theft alarm system (ATA [EDW]) Exterior lights Audio system Climate control Customized Bodypanel System (CBS) Seats Supplemental restraint system Body Accessories smart accessories Index Introduction of the smart fortwo, Model Series 451…
-
Page 7: Introduction Of The Smart Fortwo, Model Series
SN_Typ 451_us.book Seite 6 Freitag, 30. November 2007 1:56 13 Content Introduction of the smart fortwo, Model Series 451…
-
Page 8: Preface
451 and, as such, is not stored in WIS. The employed in service, maintenance and repair as well contents of this brochure are not updated. No provi- sion is made for supplements.
-
Page 9: Overview
SN_Typ 451_us.book Seite 8 Freitag, 30. November 2007 1:56 13 Overview smart fortwo coupé P00.10-4192-00 smart fortwo cabrio P00.10-4198-00 Introduction of the smart fortwo, Model Series 451…
-
Page 10
The smart fortwo is avail- legroom and sufficient trunk capacity. able in a variety of colors. The tridion safety cell in The interior compartment has a classic design. -
Page 11: Technical Data
106.1 (2695) Vehicle width in (mm) 61.4 (1559) Vehicle height in (mm) 60.7 (1542) Wheelbase in (mm) 73.5 (1867) Front track width in (mm) 50.5 (1283) Rear track width in (mm) 54.5 (1385) Introduction of the smart fortwo, Model Series 451…
-
Page 12
106.1 (2695) Vehicle width in (mm) 61.3 (1559) Vehicle height in (mm) 60.7 (1542) Wheelbase in (mm) 73.5 (1867) Front track width in (mm) 50.5 (1283) Rear track width in (mm) 54.5 (1385) Introduction of the smart fortwo, Model Series 451… -
Page 13
(kg) (50) Max. seating capacity Luggage compartment volume up to belt line (220) up to roof (340) Turning circle 9.57 (8.75) Tank capacity/including reserve US gal 8.72/1.32 33/5 Introduction of the smart fortwo, Model Series 451… -
Page 14: Maintenance
With 3.7 US qt (3.5 liters), the smart • Customers have lower vehicle operating costs due fortwo has a relatively small quantity of engine oil, to the reduced maintenance costs as a whole.
-
Page 15
STAR DIAGNOSIS. (See WIS for a detailed description.) Meaning of wrench symbols: • 1 wrench means Oil Service Plus • 2 wrenches mean maintenance service P54.32-5677-00 Multifunction display with maintenance interval display Introduction of the smart fortwo, Model Series 451… -
Page 16
P00.20-2629-00 Maintenance points at front end 1 Brake fluid reservoir 4 Lamp unit for bulb replacement 2 Windshield washer fluid reservoir 5 Service flap 3 Coolant expansion reservoir 6 Check strap Introduction of the smart fortwo, Model Series 451… -
Page 17
• Oil dipstick • Air filter housing • Spark plugs P00.20-2630-00 Maintenance points in engine compartment 7 Oil filler neck 9 Air filter housing 8 Oil dipstick 10 Ignition coils (spark plugs) Introduction of the smart fortwo, Model Series 451… -
Page 18: Safety Concept
SN_Typ 451_us.book Seite 17 Freitag, 30. November 2007 1:56 13 Safety concept In the smart fortwo, high levels of active safety are provided by both tried-and-tested and newly devel- oped systems and components. Active safety Active safety includes measures and equipment that…
-
Page 19
• Deformable steering column to dissipate energy, prevent intrusion and lengthen the forward displacement distance in a frontal collision • Full interior lining to reduce head injuries P91.60-3663-00 1 Driver airbag 2 Passenger airbag 3 Head/thoraxbag Introduction of the smart fortwo, Model Series 451… -
Page 20
The extended range of functions following an accident includes: • Automatic engine off feature • Interruption of the fuel supply • Unlocking of the doors • Activation of the hazard warning system Introduction of the smart fortwo, Model Series 451… -
Page 21: On-Board Electrical System/Power Supply
The starter has an output of 0.95 kW and supplies the torque necessary to start the engine. It takes the necessary energy from the adequately charged battery. P54.10-2890-00 Battery Secondary air injection pump fuse Starter/alternator fuse SAM prefuse Introduction of the smart fortwo, Model Series 451…
-
Page 22
The alternator is pre-excited via a direct line. The alternator load is reported back to the ME-SFI [ME] control unit over a separate line and monitored. P54.10-2891-00 P54.32-5684-00 Alternator Instrument cluster A1e5 Alternator charge monitoring and warning lamp Introduction of the smart fortwo, Model Series 451… -
Page 23: Complete Networking
SAM control unit (FFO)) under the center console near the on the left under the instrument panel handbrake lever N15/5 Electronic selector lever module control unit (Legend continued on the next page) Introduction of the smart fortwo, Model Series 451…
-
Page 24
Controller Area Network bus (data bus/CAN bus) CAN-B Controller Area Network bus class B (interior compartment) LIN B Interior Local Interconnect Network 1 LIN C Interior Local Interconnect Network 2 Introduction of the smart fortwo, Model Series 451… -
Page 25: Wiring Harnesses
1 Main wiring harness 2 Engine wiring harness — Door wiring harness 3 Transmission wiring harness — Soft top wiring harness (in smart fortwo cabrio) 4 Battery wiring harness — Rear-end door wiring harness Introduction of the smart fortwo, Model Series 451…
-
Page 26
Wiring harness repair kit supplement for passenger cars Tools for repairing individual lines, wiring harnesses and connectors in combination with the basic wiring harness repair kit (W000 589 13 99 00). P54.18-4140-00 Wiring harness repair kit Introduction of the smart fortwo, Model Series 451… -
Page 27: Diagnosis
The data link connector is located in the vehicle interior on the underside of the instrument panel on the driver side. P54.22-2048-00 Location of data link connector (X11/4) Introduction of the smart fortwo, Model Series 451…
-
Page 28
SCN is written in the control unit and can be interrogated. For the other control units a virtual SCN is generated during the coding process, but this is not written to the control unit. Introduction of the smart fortwo, Model Series 451… -
Page 29: Sam Control Unit
A-pillar under the instrument • Yaw rate, lateral and longitudinal acceleration panel. sensor • Steering angle sensor • Data link connector P54.21-2702-00 SAM control unit (front) Introduction of the smart fortwo, Model Series 451…
-
Page 30
The fuse and relay box is integrated in the SAM • Soft top closing relay (K66/2) (only cabrio) control unit. i Note Up to six transmitter keys can be stored in the SAM control unit. P54.21-2703-00 SAM control unit (rear) Introduction of the smart fortwo, Model Series 451… -
Page 31: Engine M132
SN_Typ 451_us.book Seite 30 Freitag, 30. November 2007 1:56 13 Engine description Engine M132 At market launch, the smart fortwo is available with a 3-cylinder gasoline engine with 61 in (999 cm displacement and 52 kW P01.10-2942-00 3-cylinder gasoline engine (M132)
-
Page 32: Performance Graph
(M) in relation to the engine speed (n). M (lb-ft) P (kW) 1000 2000 3000 4000 5000 6000 7000 n (1/min) P01.00-2999-00 Power and torque graph M132 M Torque (lb-ft) P Engine power (kW) n Engine speed (rpm) Introduction of the smart fortwo, Model Series 451…
-
Page 33: Engine Data
(shown on the gasoline pump) should be at least 91. This is an average value based on tests of the octane number (RON) and motor octane number (MON) (RON+MON/2). It is also known as the anti-knock index. Introduction of the smart fortwo, Model Series 451…
-
Page 34: Valve Assembly
7 Timing chain 1 Exhaust camshaft sprocket 8 Intake valve 2 Exhaust camshaft 9 Exhaust valve 3 Camshaft adjuster 10 Valve spring 4 Intake camshaft 11 Cup tappet 5 Crankshaft gear 6 Crankshaft Introduction of the smart fortwo, Model Series 451…
-
Page 35: Valve Timing
2 Camshaft bearing cap 8 Valve spring retainer 3 Intake camshaft 9 Valve locks 4 Exhaust camshaft 10 Valve spring 5 Cup tappet 11 Valve stem seal 6 Intake valve 12 Valve seat Introduction of the smart fortwo, Model Series 451…
-
Page 36: Gasoline Injection And Ignition System
• Oil pressure switch The ME-SFI [ME] control unit has an integral fault memory and can exchange information with STAR DIAGNOSIS via a data link connector that is connected to the CAN. Introduction of the smart fortwo, Model Series 451…
-
Page 37
SN_Typ 451_us.book Seite 36 Freitag, 30. November 2007 1:56 13 Gasoline injection and ignition system P07.61-3578-00 Data flow chart of M132 injection system Introduction of the smart fortwo, Model Series 451… -
Page 38
Cylinder 1 fuel injection valve Secondary air injection pump Y62/2 Cylinder 2 fuel injection valve N3/10 ME-SFI [ME] control unit Y62/3 Cylinder 3 fuel injection valve Controller Area Network (data bus/CAN bus) Introduction of the smart fortwo, Model Series 451… -
Page 39: Belt Drive
Belt drive 1 Alternator belt pulley 5 Crankshaft pulley 2 Poly-V belt 6 Tensioning device 3 Coolant pump belt pulley 7 Tensioning device belt pulley 4 Refrigerant compressor belt pulley 8 Stretch belt Introduction of the smart fortwo, Model Series 451…
-
Page 40: Cooling System
Heater heat exchanger 3 Coolant return line Coolant pipe 4 Coolant feed line (large circuit) 5 Coolant pump B11/4 Coolant temperature sensor 6 Coolant pump belt pulley M4/2 Coolant fan motor 7 Thermostat Introduction of the smart fortwo, Model Series 451…
-
Page 41
Note The cooling system must be filled and bled only when the engine is cold. P20.00-2340-00 1 Cooling system cap 3 Coolant hose 2 Expansion reservoir 4 Clamp Introduction of the smart fortwo, Model Series 451… -
Page 42: Engine Mount
P22.10-2299-00 Engine mount, transmission mount and torque support 1 Frame-type integral support 3 Transmission mount 2 Engine mount 4 Torque support Introduction of the smart fortwo, Model Series 451…
-
Page 43: Fuel Supply
0.004 to 0.007 psi/s (0.3 to 0.5 mbar/s) (depends on fuel level). If the vacuum drops more rapidly, there is a fine leak. The test will be interrupted and the «fine leak» fault will be registered. Introduction of the smart fortwo, Model Series 451…
-
Page 44
If the closed tank vent • Battery voltage > 11 V valve jams, the fault «gross leak» is stored. The outside air shutoff valve is reopened after the tests. Introduction of the smart fortwo, Model Series 451… -
Page 45
M3/3 Fuel pump with fuel level sensor 3 Vent line Outside air shutoff valve 4 Filler neck Tank vent valve 5 Filler neck hose connection 6 Purge line 7 Fuel distributor rail Introduction of the smart fortwo, Model Series 451… -
Page 46: Exhaust System
P49.00-2109-00 Exhaust system 1 Exhaust manifold G3/1 O2 sensor downstream of TWC [KAT] 2 Catalytic converter G3/2 O2 sensor upstream of TWC [KAT] 3 Main muffler Introduction of the smart fortwo, Model Series 451…
-
Page 47: Secondary Air Injection
33 seconds. P14.30-2183-00 Secondary air injection 1 Cylinder head Secondary air injection pump 2 Combination valve Secondary air injection pump switchover 3 Air hose valve 4 Vacuum hose Introduction of the smart fortwo, Model Series 451…
-
Page 48: Transmission Description
SN_Typ 451_us.book Seite 47 Freitag, 30. November 2007 1:56 13 Transmission description 5-speed automated manual transmission (AMT 2) The smart fortwo is fitted with the newly developed Features: 2nd generation 5-speed automated manual transmis- • 5-speed transmission sion (AMT 2).
-
Page 49: Transmission Data
Overall length (including 3 in (75 mm) for clutch) 14.3 (mm) (364) Housing material Aluminum alloy Weight (without oil charge) Approx. 74.9 (kg) (34) Oil charge (permanent charge) US qt (2.3) Housing Two-piece with bell housing Introduction of the smart fortwo, Model Series 451…
-
Page 50: Shift Mechanism
2 Shift fork for reverse gear sliding gear Selector drum 2/4, R 3 Shift fork for shift collar 1/3 Input shaft 4 Shift fork for shift collar 2/4 M17/3 Transmission motor 1 5 Main shaft M17/4 Transmission motor 2 Introduction of the smart fortwo, Model Series 451…
-
Page 51
The sliding blocks in the selector drum 1/3, 5 are in (7.5 mm)) the neutral position. Neutral position (N) The sliding blocks in the grooves of the selector drum are in the neutral position. No gear is engaged. P26.60-2356-00 Introduction of the smart fortwo, Model Series 451… -
Page 52
(7.5 mm) to the left. The shift collar 1/3 is slid into the idler gear of the first gear. The sliding blocks in the selector drum 2/4, R are in the neutral position. P26.60-2357-00 Introduction of the smart fortwo, Model Series 451… -
Page 53
0.3 in (7.5 mm) to the right. It presses the shift collar 1/3 into the idler gear of the third gear. The other sliding blocks are in the neutral position. P26.60-2358-00 Introduction of the smart fortwo, Model Series 451… -
Page 54
5 into the idler gear of the fifth gear. (7.5 mm)) The selector drum 2/4, R is rotated through 40° downwards. The sliding blocks in the selector drum 2/4, R are in the neutral position. P26.60-2362-00 Introduction of the smart fortwo, Model Series 451… -
Page 55: Synchronization
The shift collar travel from neutral to complete engagement in the relevant idler gear is approx. 0.3 in (7.7 mm). P26.50-2173-00 1 Clutch body 2 Synchronizer ring 3 Shift collar 4 Locking splines Introduction of the smart fortwo, Model Series 451…
-
Page 56: Transmission Control
The speeds of the input shaft and the drive wheels are used to determine the actual gear engaged. The diagram illustrates the oscilloscope picture of an rpm sensor. P26.19-2104-00 Input shaft Transmission rpm sensor Introduction of the smart fortwo, Model Series 451…
-
Page 57
The transmission motors are only actuated to execute the shift operations. Once a target position is reached, a pin engages in the locking groove of the selector drum to maintain the selected gear. Introduction of the smart fortwo, Model Series 451… -
Page 58
• Disengaging the gear after 1 s when a door is (N15/5) opened without the service brake or • Park pawl switch (S16/2) accelerator pedal being actuated • Crawl function • Clutch operation • Monitoring of clutch load Introduction of the smart fortwo, Model Series 451… -
Page 59
When the transmitter key is removed, the selector lever is locked in position P. i Note When reverse gear is requested, the backup light is actuated directly by the electronic selector lever module control unit. Introduction of the smart fortwo, Model Series 451… -
Page 60
Gear range display (automatic mode) mines the gear changes. The selected gear range D Gear display (manual mode) is displayed on the multifunction display in the Instrument cluster instrument cluster. A1p13 Multifunction display Introduction of the smart fortwo, Model Series 451… -
Page 61
N47-5 ESP control unit 17 Park pawl status S16/2 Park pawl switch S112s1 Steering wheel gear shifter PLUS (SAL) S112s2 Steering wheel gear shifter MINUS (SAL) Controller Area Network (data bus/CAN bus) Introduction of the smart fortwo, Model Series 451… -
Page 62: Park Pawl
The status of the park pawl is reported to the auto- mated manual transmission control unit via the park pawl switch (S16/2). P26.60-2377-00 Transmission Cable Park pawl N15/5 Electronic selector lever module control unit S16/2 Park pawl switch Introduction of the smart fortwo, Model Series 451…
-
Page 63: Clutch
P25.00-2010-00 Single-plate dry clutch 1 Pressure plate 2 Clutch plate 3 Flywheel with starter ring gear Introduction of the smart fortwo, Model Series 451…
-
Page 64
The single-plate dry clutch is actuated by the clutch actuating plunger. The power flow is interrupted and motor. the shift operation can be performed. P25.19-2010-00 4 Electric motor Clutch motor 5 Electric motor connector 6 Actuating plunger Introduction of the smart fortwo, Model Series 451… -
Page 65: Front Axle
1 Front axle crossmember 4 Coil spring 2 Stabilizer bar 5 Two-tube shock absorber 3 Transverse control arm with press-fitted support- 6 Wheel carrier, cast iron ing ball joint with pressed-in wheel bearing Introduction of the smart fortwo, Model Series 451…
-
Page 66: Rear Axle
Rear axle — smart fortwo model 451 7 Axle tube 11 Single-tube shock absorber pin bearing 8 Frame-type integral support 12 Single-tube shock absorber 9 Coil spring 13 Center bearing 10 Bar link Introduction of the smart fortwo, Model Series 451…
-
Page 67: Rear Module
This shortens repair times and reduces costs while improving customer satisfaction at the same time. P35.00-2085-00 Lowered rear drive module Introduction of the smart fortwo, Model Series 451…
-
Page 68: Tire Pressure Monitor
• Individual serial number loosened, all components of the valve element • Status information must be replaced. (manufacturer, direction of rotation, operating mode etc.) See the Workshop Information System (WIS) for further instructions and information. Introduction of the smart fortwo, Model Series 451…
-
Page 69
Right front TPM [RDK] wheel sensor TPM [RDK] control unit A69/3 Left rear TPM [RDK] wheel sensor S6/1 Cockpit switch group A69/4 Right rear TPM [RDK] wheel sensor S6/1s9 TPM [RDK] switch Introduction of the smart fortwo, Model Series 451… -
Page 70: Brakes
The brake force is distributed to the disk brakes and drum brakes by the ESP unit via the integrated antilock brake system (ABS) and the electronic brake force distribution (EBD) system. Introduction of the smart fortwo, Model Series 451…
-
Page 71
Right rear rpm sensor 6 Hand brake cables N47-5 ESP control unit 7 Drum brake (consisting of: anchor plate, wheel Steering angle sensor brake cylinder, brake shoe, springs and brake drum) 8 Hand brake lever Introduction of the smart fortwo, Model Series 451… -
Page 72
9 Pedal head Linkage 10 Housing Seal 11 Carrier Pedal assembly seal 12 Brake booster Perforated boot 13 Master brake cylinder Bolt 14 Grommet 15 Brake pedal module cover S9/1 Brake light switch Introduction of the smart fortwo, Model Series 451… -
Page 73
Note See the Workshop Information System (WIS) for the exact procedure for repairing the brake system and for the relevant safety information. Introduction of the smart fortwo, Model Series 451… -
Page 74
Deactivation of the hazard warning func- tion occurs automatically when the vehicle speed is detected to have risen above 6 mph (10 km/h) or manually by actuation of the hazard warning system switch. Introduction of the smart fortwo, Model Series 451… -
Page 75
Steering angle sensor Handbrake status S9/1 Brake light switch Brake fluid status Brake fluid indicator switch Parking brake indicator switch Instrument cluster A1e41 ESP warning lamp Controller Area Network (data bus/CAN bus) Introduction of the smart fortwo, Model Series 451… -
Page 76: Steering
• Active steering centering • Reduced fuel consumption. EPS operates without hydraulic components such as pumps, reservoirs, coolers, lines and hydraulic fluid, and is therefore a dry, environmentally compatible system. P46.10-2935-00 Electric power steering EPS Introduction of the smart fortwo, Model Series 451…
-
Page 77
Components of the electric power steering (EPS) Steering gear housing Steering gear pinion shaft Steering gear input shaft Toothed rack Worm shaft Hyperbolic gear Power steering torque sensor Power steering motor Steering assist control unit Introduction of the smart fortwo, Model Series 451… -
Page 78
The power steering motor transmits the appropriate supplementary steering torque to the face of the hyperbolic gear via the worm shaft. Introduction of the smart fortwo, Model Series 451… -
Page 79
Once the vehicle stops and the engine is switched off, the steering power assistance is deactivated in stages after approx. 3 s. Introduction of the smart fortwo, Model Series 451… -
Page 80
Power steering motor 5 Steering angle, steering rate N3/10 ME-SFI [ME] control unit 6 Engine speed N47-5 ESP control unit Steering angle sensor Steering assist control unit Controller Area Network (data bus/CAN bus) Introduction of the smart fortwo, Model Series 451… -
Page 81
The left-hand paddle shift is used to downshift and the right-hand paddle shift is for upshifts. The gear which is currently engaged is displayed on the multifunction display in the instrument cluster. P46.10-2840-00 Three-spoke sport steering wheel with paddle shifts Introduction of the smart fortwo, Model Series 451… -
Page 82
The exact procedure for removal/installation of the steering wheel and its components is described in the Workshop Information System (WIS). P46.10-2841-00 Introduction of the smart fortwo, Model Series 451… -
Page 83: Interior
The harmonized color scheme of the interior also gives a positive impression in combination with the passenger compartment as a whole. P68.00-5039-00 Shown on the smart coupé pure Introduction of the smart fortwo, Model Series 451…
-
Page 84
• Passenger safety The instrument panel is designed with straight lines and equipped with airbags and a full length knee bolster to improve passenger protection. P68.10-3852-00 Shown on the smart coupé passion Introduction of the smart fortwo, Model Series 451… -
Page 85
• Gear indicator (in manual mode) • Automatic transmission indicator (in automatic mode) P54.32-5677-00 • Fuel reserve indicator (US gal) Multifunction display • Maintenance interval display with symbol • Fuel level and reserve indicator • Clock Introduction of the smart fortwo, Model Series 451… -
Page 86
A1e66 Tire pressure monitor warning lamp A1e5 Alternator charge monitoring and warning A1e67 Low beam indicator lamp lamp A1p8 Electronic speedometer A1e7 Brake fluid and parking brake warning lamp A1p13 Multifunction display Introduction of the smart fortwo, Model Series 451… -
Page 87: Doors/Flaps
SN_Typ 451_us.book Seite 86 Freitag, 30. November 2007 1:56 13 Doors/flaps Side doors The doors of the new smart fortwo follow the typical smart brand construction principle with a metal carrier part and the plastic CBS door paneling. The doors of the smart coupé and the smart cabrio are identical.
-
Page 88
7 CBS door paneling S21/1 Left power window switch 8 Curved handle S21/2 Right power window switch 9 Side window Outside mirror adjustment switch 10 Triangular window S87/7 Left door rotary tumbler microswitch Introduction of the smart fortwo, Model Series 451… -
Page 89
SN_Typ 451_us.book Seite 88 Freitag, 30. November 2007 1:56 13 Doors/flaps Rear-end door P72.20-2599-00 Design of rear-end door shown on the smart fortwo coupé 1 Upper rear-end door Door lock of upper rear-end door 2 Upper rear-end door paneling Door panel lining… -
Page 90
Doors/flaps Emergency unlocking of rear-end door The rear-end door in the smart fortwo can be unlocked from the inside in an emergency, if the trunk lid central locking motor for operating the rotary tumbler is defective or de-energized. Emergency unlocking in smart fortwo coupé… -
Page 91: Roof Systems
• Panoramic sunroof made of polycarbonate (PC) smart fortwo cabrio • Fully electric Tritop fabric soft top P65.00-2119-00 Vehicle with PU roof P77.21-2226-00 Vehicle with panoramic sunroof P77.00-2338-00 Vehicle with fully electric Tritop fabric soft top Introduction of the smart fortwo, Model Series 451…
-
Page 92
The roof and roller blind can be replaced separately. The panoramic sunroof is manufactured by a two- component injection molding process in which the second component material serves to blacken the edges. Introduction of the smart fortwo, Model Series 451… -
Page 93
SN_Typ 451_us.book Seite 92 Freitag, 30. November 2007 1:56 13 Roof systems Tritop fabric soft top The Tritop fabric soft top of the smart fortwo cabrio The soft top control system is fully electronic and is the only one in the world that can be opened and features the following functions: closed while driving up to the maximum speed. -
Page 94
There would be a risk of injury during the closing process because limbs of vehicle occupants could become trapped between the roof frame and folding top in the area of the windshield. Introduction of the smart fortwo, Model Series 451… -
Page 95
If all the preconditions are met, the SAM control unit actuates the appropriate motor(s) for the desired operation. P77.00-2340-00 Targa roof position Introduction of the smart fortwo, Model Series 451… -
Page 96
Folding top microswitch S84/38 Left roof cassette microswitch S84/39 Right rear soft top microswitch S84/40 Right roof cassette microswitch S84/41 Left rear soft top microswitch Transmitter key Controller Area Network (data bus/CAN bus) Introduction of the smart fortwo, Model Series 451… -
Page 97: Central Locking
The anti-theft alarm system is deactivated smart cabrio. A distinction is drawn between manual and all turn signal indicators flash once.
-
Page 98
Note The radio signal for unlocking the door is picked up by an antenna integrated in the SAM control unit. There is no external antenna for the central locking. Introduction of the smart fortwo, Model Series 451… -
Page 99
Right turn signal light S17/8 Trunk lid rotary tumbler microswitch E3e11 Left brake/turn signal light (cabrio) E4e11 Right brake/turn signal light S88/9 Rear-end door handle switch Transmitter key Controller Area Network (data bus/CAN bus) Introduction of the smart fortwo, Model Series 451… -
Page 100: Anti-Theft Alarm System (Ata [Edw])
15 ON. protection/interior protection switch. The interior protection or tow-away protection is reactivated automatically the next time the vehicle is locked. Introduction of the smart fortwo, Model Series 451…
-
Page 101
ATA [EDW] microwave sensor Transmitter key E1e5 Left turn signal light Controller Area Network (data bus/CAN bus) E2e5 Right turn signal light LIN C Interior Local Interconnect Network 2 E3e11 Left brake/turn signal light Introduction of the smart fortwo, Model Series 451… -
Page 102: Exterior Lights
12 s. The function is also activated by the rain sensor/light sensor; the position of the combination switch is immaterial. The Coming- Home function can only be deactivated by coding in the workshop. Introduction of the smart fortwo, Model Series 451…
-
Page 103: Audio System
SN_Typ 451_us.book Seite 102 Freitag, 30. November 2007 1:56 13 Audio system Radio and sound systems Two radio variants are available as special equipment and accessories for model series 451. Variant 1: smart radio 9 with radio and CD player P82.60-5801-00…
-
Page 104
A2/1 smart radio 9 H4/9 Left front speaker A2/2 smart radio 10 H4/10 Right front speaker H4/9 Left front speaker H4/10 Right front speaker H4/29 Subwoofer H4/33 Left tweeter H4/34 Right tweeter Introduction of the smart fortwo, Model Series 451… -
Page 105: Climate Control
SN_Typ 451_us.book Seite 104 Freitag, 30. November 2007 1:56 13 Climate control Heating Model series 451 is equipped with a heating system as The rear window heater button in the heater/AC oper- standard. The temperature and blower speed are each ating unit switches on the heated rear window and the set by means of a slide control.
-
Page 106
• At a coolant temperature greater than 239 °F (115 °C), The air conditioning cannot be operated in • At outside temperatures below 37 °F (3 °C). temperatures below 37 °F (3 °C). P83.40-3926-00 Heater/AC operating unit Introduction of the smart fortwo, Model Series 451… -
Page 107: Customized Bodypanel System (Cbs)
The CBS concept is composed of «bodypanels» that are Rear-end door installed as detachable parts around the vehicle and The inside of the rear-end door in the new smart form a large proportion of the vehicle’s external skin. fortwo coupé contains an integral compartment for…
-
Page 108
14 Fuel filler flap 6 Front center part 15 Rear CMS 7 Maintenance flap 16 Exhaust system covering 8 Fresh-air intake cover 17 Rear center part 9 Left door paneling 18 Rear-end door paneling Introduction of the smart fortwo, Model Series 451… -
Page 109: Seats
Seat heaters The safety integral seats on both sides of model The seat heater special equipment in model 451 series 451 can be adjusted in terms of seat length and consists of two heating elements which are installed in backrest angle.
-
Page 110: Supplemental Restraint System
• Shutoff of engine and fuel pump lights up as soon as the shutoff function is activated. • Unlocking of door locks • Activation of hazard warning lamp function Introduction of the smart fortwo, Model Series 451…
-
Page 111
The required restraint equipment is enabled; Seat mat filled with silicone oil B48/4 Seat occupied recognition pressure sensor the airbag OFF indicator lamp is switched OFF. N110 Weight Sensing System (WSS) control unit Introduction of the smart fortwo, Model Series 451… -
Page 112
SN_Typ 451_us.book Seite 111 Freitag, 30. November 2007 1:56 13 Supplemental restraint system P91.60.3634-00 Data flow chart of supplemental restraint system See next page for legend Introduction of the smart fortwo, Model Series 451… -
Page 113
Driver-side frontal acceleration sensor Controller Area Network (data bus/CAN bus) B48/2 Passenger-side frontal acceleration sensor CAN-B Controller Area Network bus class B B48/3 Belt tension sensor (interior compartment) B48/4 Seat occupied recognition pressure sensor Introduction of the smart fortwo, Model Series 451… -
Page 114: Body
SN_Typ 451_us.book Seite 113 Freitag, 30. November 2007 1:56 13 Body Bodyshell structure The bodyshell structure of model series 451 exhibits Bodyshell material diagram of the steels used (coupé the following features: and cabrio) • tridion safety cell with high-strength steels and…
-
Page 115
SN_Typ 451_us.book Seite 114 Freitag, 30. November 2007 1:56 13 Body P60.20-2063-00 Overview of bodyshell materials — smart fortwo coupé P60.20-2064-00 Overview of bodyshell materials — smart fortwo cabrio Introduction of the smart fortwo, Model Series 451… -
Page 116
Crash management system (CMS) CMS concept Model series 451 features a bolt-on crash manage- ment system at the front and rear in the smart fortwo coupé and smart fortwo cabrio. To prevent damage, the front CMS is mounted on the longitudinal frame member and the rear CMS on the frame-type integral support. -
Page 117: Smart Accessories
For versatile anchoring of objects in — — the trunk. Trunk net package Package consisting of one net pocket AZ68.50-P-0003MCC G 68 7476 0 for the left trunk side panel and one trunk floor net. Introduction of the smart fortwo, Model Series 451…
-
Page 118
Chrome package Radiator grille, outside mirror caps — — and rear trim strip plated in high gloss chrome. Front fog lamps (chrome The ideal supplement to the chrome — — style) package. Introduction of the smart fortwo, Model Series 451… -
Page 119
G 82 7970 0 midrange speakers. Subwoofer Active subwoofer, optimally tuned to AZ82.62-P-0004MCU G 82 7970 0 suit the smart interior. It is mounted G 82 7814 0 under the driver seat. Introduction of the smart fortwo, Model Series 451… -
Page 120
Safety Plus package 2-piece foam insert for the stowage — — compartment in the liftgate with useful accessories such as a first-aid pouch, smart umbrella, flashlight and smart ice scraper. Introduction of the smart fortwo, Model Series 451… -
Page 121: Index
Crash management system ..115 tow-away protection ….99 Customized Bodypanel System (CBS) ..106 Introduction of the smart fortwo, Model Series 451…
-
Page 122
Restraint system ….109 Wiring harness repair capability ..25 Wiring harness repair kit … .25 Introduction of the smart fortwo, Model Series 451…
-
Каталог
- Smart
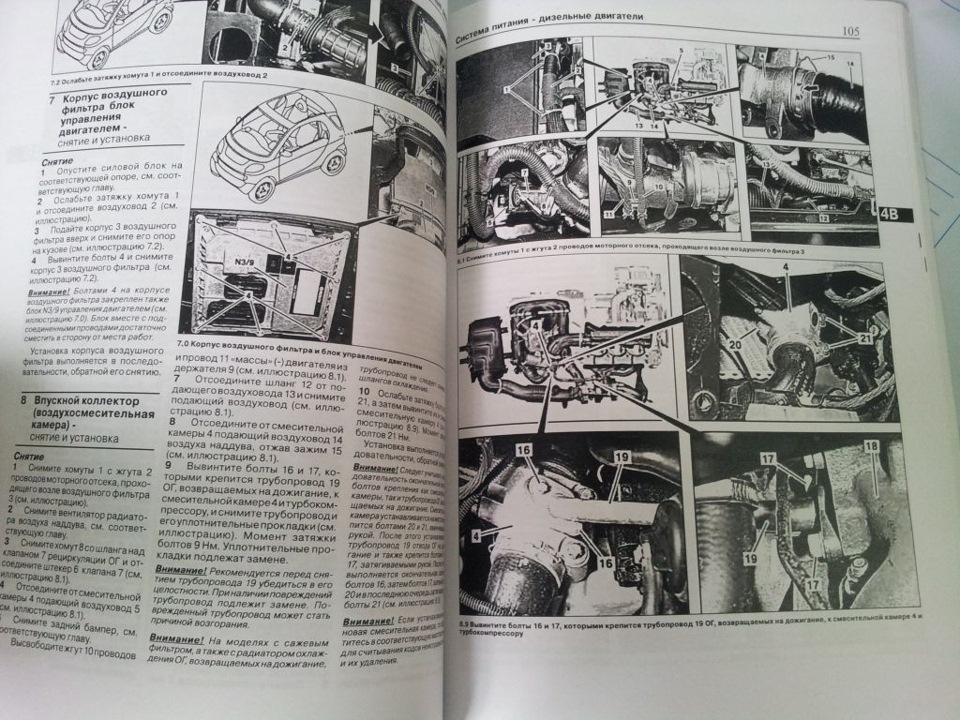
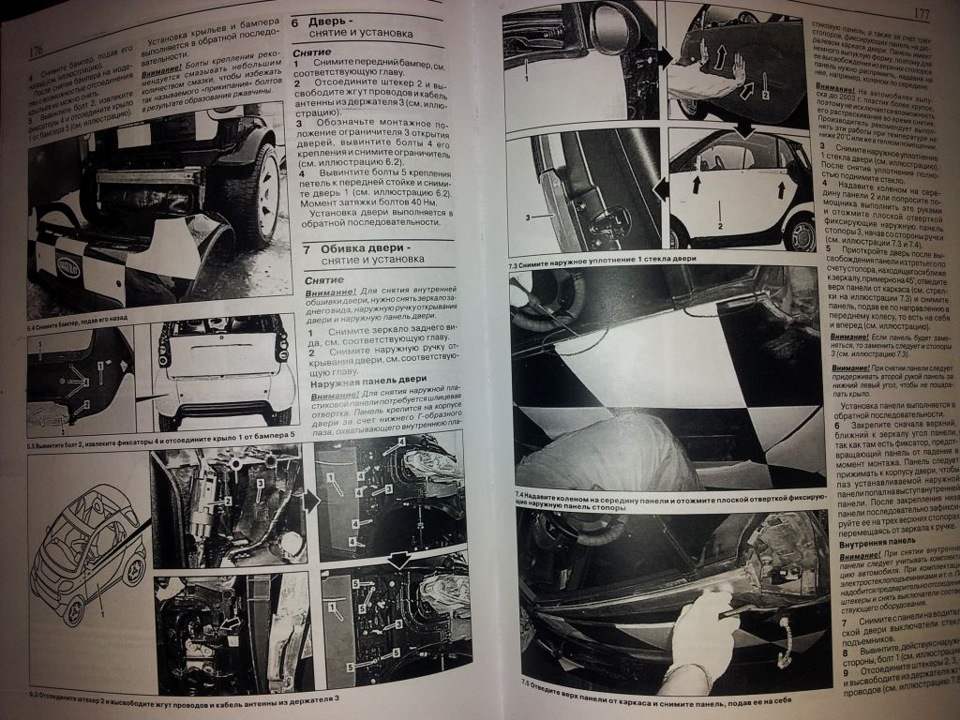
Иллюстрированное пособие по ремонту Smart City-Coupe / ForTwo , а также руководство по техническому обслуживанию и эксплуатации автомобилей Смарт Сити-Коуп / Форту с 1998 года выпуска. Автомобили оснащены бензиновыми моторами рабочим объемом 0,7 л. (50 / 61 / 75 л.с.) и дизельными двигателями рабочим объемом 0.8 л. (50 л.с.).
Информационно-справочное руководство по ремонту Smart ForTwo / City-Coupe, а также пособие по техническому обслуживанию и эксплуатации автомобилей Смарт Форту / Сити-Коуп. В книге представлено описание автомобилей с 1998 года выпуска, оборудованные бензиновыми двигателями рабочим объемом 0,7 л. (50 / 61 / 75 л.с.) и дизельными двигателями рабочим объемом 0.8 л. (50 л.с.)
ISBN: 985-455-205-7
Цена не установлена
Предзаказ
Вынуждены информировать, что на сегодня пособие по ремонту, техническому обслуживанию и эксплуатации автомобилей Smart Roadster еще не успело выпустить ни одно издательство автолитературы. Но Вы можете сделать предзаказ на будущий мануал
Перейти к контенту
Введение к руководству на английском языке по устройству, техническому обслуживанию и ремонту автомобиля Smart
Введение к руководству на английском языке по устройству, техническому обслуживанию и ремонту автомобилей Smart
Всем привет.
Нашел SMART Series 451 Service Manual.
Выпущена для американского рынка.
Очень инересная! С картинками!
Если, кому, надо берите.
www.manualslib.com/manual…294/Smart-Series-451.html
ЗЫ. Там еще много, чего, интересного есть 
Пришла наконец-то к нам заказанная ещё 4 июня книга.
Доооолго шла из Москвы…
сразу бросился в глаза дизельный двигатель в 50 лошадей… откуда они это взяли?! всегда было 41 кобыла.
потом я увидел, что это г. Минск… какое-то УП «Гуси-Лебеди» и что-то в голове начало проясняться)))))…
потом прочитал, что составитель тоже Гусь С.В. и книга в переводе с немецкого… да и тираж то всего в 100 экземпляров (мы одни из ста обладателей этой книги!).
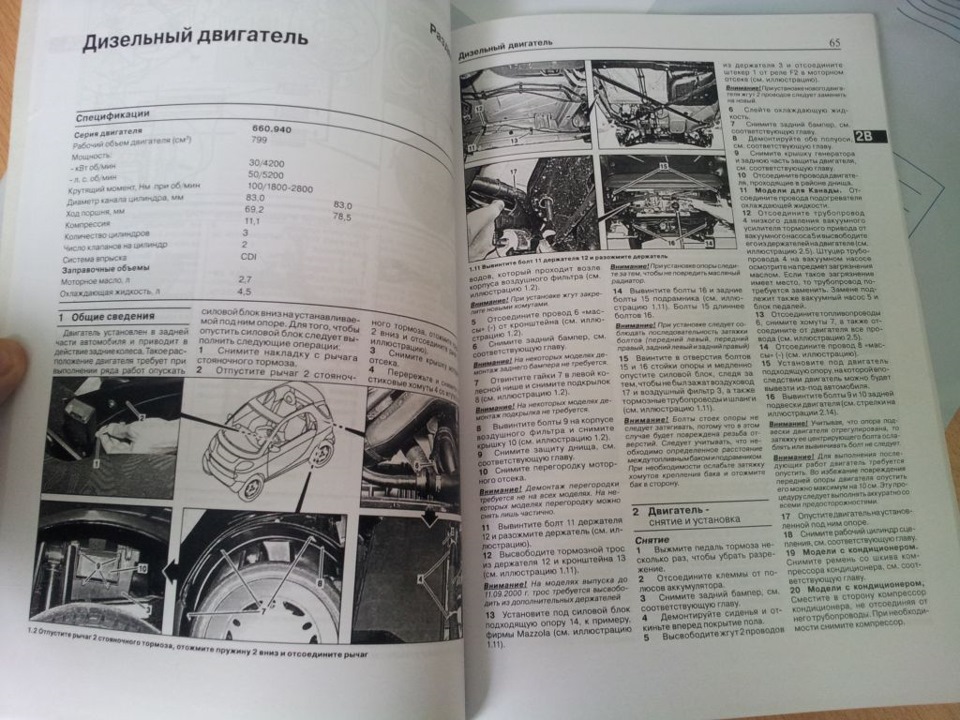
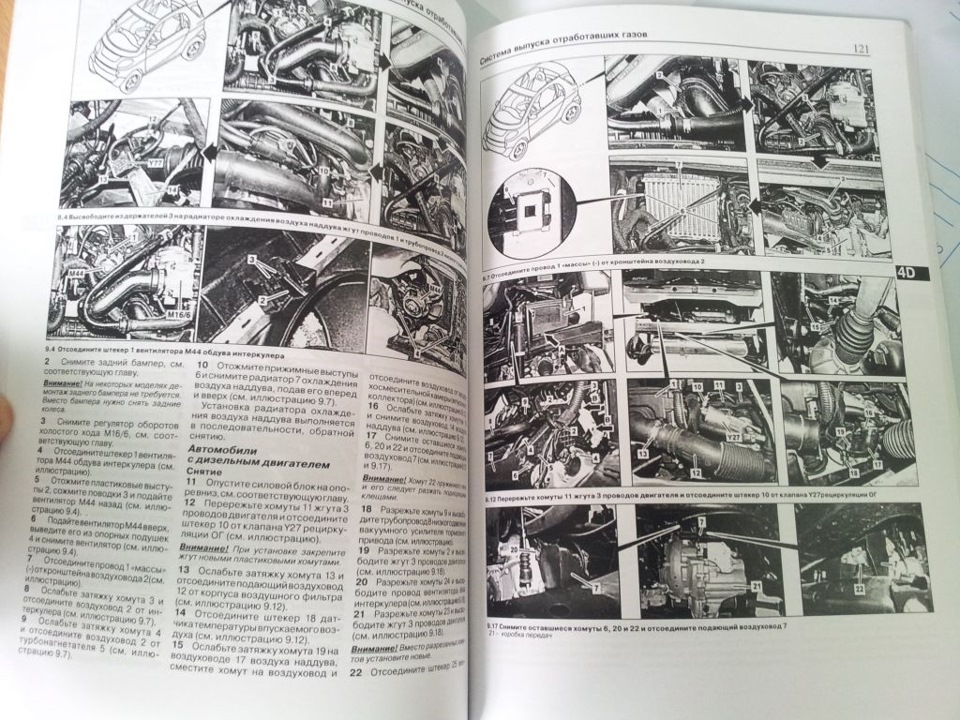
книга в мягком не дорогом переплете, черно-белая, бросилось в глаза, что распечатана (или откопирована) на обычном лазерном принтере…
но честно сказать, это хоть что-то по машине, которая у нас тут в диковинку))))).
p.s. Да, забыл.
Заказывал здесь: autoinform96.com/smart/sm…ntu-smart-1998g-chishovka
p.p.s. Завтра выложу пару фоток…для заманухи и привлечения Ziggurat-а)))))
Думаю наблюдательные люди по фоткам быстро сообразят, что к чему.
А теперь обещанная интрижка)))))
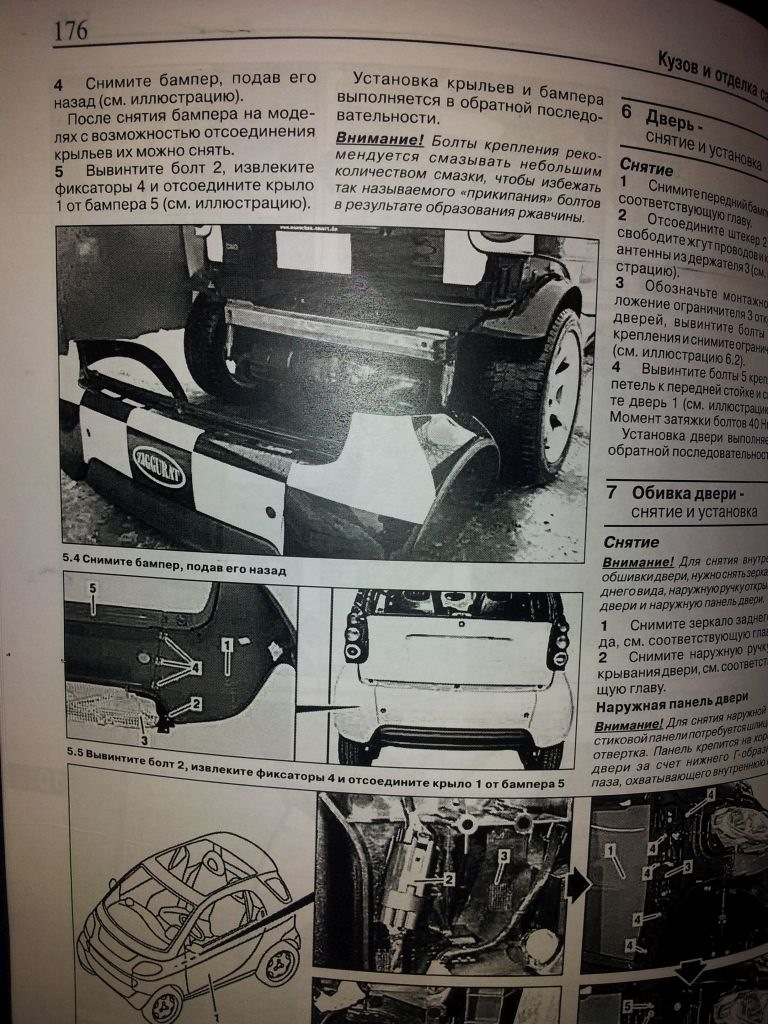
Снятие обшивки Смарта
и укрупненный вариант))))
Укрупненный вариант
ничего по фоткам в глаза не бросается?
Цена вопроса: 1 550 ₽
Только оригинальные руководства
Доступно сразу после оплаты
Полное соответствие бумажным изданиям
100% защита ваших оплат
Издательство: © «Гуси-Лебеди»
ISBN: 985-455-205-7
Количество страниц: 252
Формат: файл PDF
О руководстве
Тип двигателя: бензин / дизель
Объем двигателя: 0.7 / 0.8D л.
В руководстве вы найдете
- Пошаговое руководство по ремонту различных узлов и агрегатов
- Инструкцию по самостоятельному уходу и обслуживанию
- Сведения о конструкции автомобиля и о том как предупредить неисправность
- Информацию для поездки на СТО, если самостоятельный ремонт невозможен
Содержание
Инструкция по эксплуатации
Техническое обслуживание
- Уход за автомобилем
- Запуск двигателя с использованием вспомогательного аккумулятора
- Буксировка автомобиля
- Поддомкрачивание автомобиля
- Техническое обслуживание — перечень работ
- Техническое обслуживание — работы
- Моторное масло и масляный фильтр — замена
- Охлаждающая жидкость — проверка уровня
- Ручейковый ремень — проверка состояния
- Система выпуска отработавших газов — визуальная проверка
- Свечи зажигания — снятие и установка
- Топливный фильтр — снятие и установка
- Воздушный фильтр — замена фильтрующего элемента
- Коробка передач. Главная передача
- Коробка передач — визуальная проверка на герметичность
- Автоматическая коробка передач — замена трансмиссионной жидкости
- Подвеска и рулевое управление
- Манжеты рулевого управления — проверка
- Колпачки шаровых опор — проверка
- Тормоза, шины, колеса
- Тормозная жидкость — проверка уровня
- Стояночный тормоз — проверка функционирования и регулировка
- Колеса и шины
- Кузов. Оборудование салона. Отопитель
- Противопылевой фильтр — замена
- Электрооборудование
- Стеклоочистители — проверка резиновых лент щеток
- Аккумуляторная батарея — проверка уровня электролита
Бензиновый двигатель
- Спецификации
- Общие сведения
- Двигатель — снятие и установка
- Крышка головки блока цилиндров — снятие и установка
- Головка блока цилиндров — снятие и установка
- Крышка привода газораспределительного механизма — снятие и установка
- Цепь привода газораспределительного механизма — снятие и установка
- Успокоитель и натяжитель цепи ГРМ — снятие и установка
- Упорный башмак натяжителя цепи — снятие и установка
- Ведущая звездочка ГРМ — снятие и установка
- Ручейковый ремень — снятие и установка
- Шкив ручейкового ремня — снятие и установка
- Натяжитель ремня кондиционера — снятие и установка
- Система смазки двигателя — общая информация
- Моторное масло — циркуляция
- Давление масла- проверка
- Масляный поддон — снятие и установка
- Масляный насос -снятие и установка
- Направляющая трубка масляного щупа — снятие и установка
- Распределительный вал — снятие и установка
- Клапаны — снятие и установка
- Гидрокомпенсаторы — снятие и установка
- Шатунно-поршневая группа — снятие и установка
- Передний сальник коленчатого вала — снятие и установка
Дизельный двигатель
- Спецификации
- Общие сведения
- Двигатель — снятие и установка
- Крышка головки блока цилиндров — снятие и установка
- Головка блока цилиндров — снятие и установка
- Крышка привода газораспределительного механизма — снятие и установка
- Цепь привода газораспределительного механизма — снятие и установка
- Успокоитель и натяжитель цепи ГРМ — снятие и установка
- Ведущая звездочка ГРМ — снятие и установка
- Ручейковый ремень — снятие и установка
- Шкив ручейкового ремня — снятие и установка
- Натяжитель ремня кондиционера — снятие и установка
- Система смазки двигателя — общая информация
- Моторное масло — циркуляция
- Давление масла — проверка
- Масляный поддон — снятие и установка
- Масляный насос — снятие и установка
- Направляющая трубка масляного щупа — снятие и установка
- Распределительный вал — снятие и установка
- Клапаны — снятие и установка
- Гидрокомпенсаторы — снятие и установка
- Передний сальник коленчатого вала — снятие и установка
Система охлаждения, отопления и вентиляции
- Система охлаждения двигателя
- Охлаждающая жидкость
- Охлаждающая жидкость — замена
- Термостат — снятие и установка
- Расширительный бачок и датчик уровня охлаждающей жидкости — снятие и установка
- Система охлаждения — проверка герметичности
- Водяной насос-снятие и установка
- Вентилятор обдува радиатора и его диффузор — снятие и установка
- Моноблочный радиатор — снятие и установка
- Отопитель и кондиционер
- Электрический водяной насос — снятие и установка
- Вентилятор обдува салона — снятие и установка
- Дополнительное сопротивление вентилятора обдува салона — снятие и установка
- Отопитель — снятие и установка
- Компрессор кондиционера — снятие и установка
- Датчик температуры охлаждающей жидкости — снятие и установка
Система впрыска топлива — бензиновые двигатели
- Общее описание и меры предосторожности
- Система впрыска топлива — принцип действия
- Топливные форсунки — проверка
- Топливная рампа — снятие и установка
- Топливные форсунки — снятие и установка
- Впускной коллектор — снятие и установка
- Регулятор оборотов холостого хода — снятие и установка
- Корпус воздушного фильтра — снятие и установка
- Датчик температуры впускаемого воздуха — снятие и установка
- Датчик давления во впускном коллекторе — снятие и установка
- Датчик детонационного сгорания — снятие и установка
- Электронный акселератор — снятие и установка
Система питания — дизельные двигатели
- Принцип работы дизельного двигателя
- Свечи накаливания — проверка
- Свечи накаливания — снятие и установка
- Реле свечей накаливания — снятие и установка
- Топливные форсунки — снятие и установка
- Топливная рампа — снятие и установка
- Корпус воздушного фильтра блок управления двигателем — снятие и установка
- Впускной коллектор (воздухосмесительная камера) — снятие и установка
- Датчик оборотов / положения коленчатого вала- снятие и установка
- Датчик температуры впускаемого воздуха — снятие и установка
- Датчик давления топлива в рампе — снятие и установка
- Электронный акселератор — снятие и установка
- Редукционный клапан давления топлива в рампе — снятие и установка
- Топливный насос высокого давления — снятие и установка
Топливная система
- Общие положения
- Топливный насос и датчик указателя запаса топлива — снятие и установка
- Топливный бак — снятие и установка
- Воронка заправочной горловины — снятие и установка
- Электромагнитный клапан продувки адсорбера — снятие и установка
Система выпуска отработавших газов
- Общие сведения
- Катализатор — принцип действия
- Турбокомпрессор, работающий на отработавш их газах — общая информация
- Выпускной коллектор с турбонагнетателем — снятие и установка
- Приемная труба и катализатор — снятие и установка
- Сажевый фильтр — снятие и установка
- Лямбда-зонд -снятие и установка
- Клапан системы рециркуляции ОГ — снятие и установка
- Интеркулер — снятие и установка
Система зажигания
- Общее описание
- Катушки зажигания — снятие и установка
- Свечи зажигания — снятие и установка
Сцепление
- Сцепление — снятие и установка
- Привод сцепления — снятие и установка
Коробка передач
- Коробка передач — смятие / установка
- Электродвигатель коробки передач — снятие и установка
- Датчик оборотов первичного вала коробки передач — снятие и установка
- Датчик положения ведущей шестерни коробки передач — снятие и установка
- Блок переключения передач — снятие и установка
- Контактная пружина функции автоматического переключения передач — снятие и установка
- Уплотнительные прокладки коробки передач – замена
Тормозная система
- Спецификации
- Общее описание
- Тормозные колодки передних колес — снятие и установка
- Суппорт переднего колеса — снятие и установка
- Тормозной диск переднего колеса — проверка, снятие и установка
- Тормозные колодки заднего колеса — снятие и установка
- Колесный тормозной цилиндр — снятие и установка
- Тормозные шланги — снятие и установка
- Трос стояночного тормоза — снятие и установка
- Рычаг стояночного тормоза — снятие и установка
- Тормозная жидкость — общая информация
- Тормозная система — заправка и удаление воздуха
- Тормозные трубопроводы — снятие и установка
- Выключатель стоп-сигналов — снятие и установка
- Датчик-выключатель сигнальной лампочки стояночного тормоза — снятие и установка
- Бачок тормозной жидкости — снятие и установка
Подвеска и рулевое управление
- Передняя подвеска — общие сведения
- Амортизационная стойка — снятие и установка
- Амортизационная стойка — разборка
- Амортизатор — проверка
- Нижний поперечный рычаг передней подвески — снятие и установка
- Подрамник передней подвески — снятие и установка
- Поворотный кулак — снятие и установка
- Ступица переднего колеса — снятие и установка
- Задняя подвеска — общая информация
- Амортизатор задней подвески — снятие иустановка
- Амортизационная пружина задней подвески — снятие и установка
- Стабилизатор поперечной устойчивости — снятие и установка
- Ступица заднего колеса — снятие и установка
- Приводные валы — снятие и установка
- Чехлы ШРУСов — снятие и установка
- Рулевое управление — общая информация
- Подушки безопасности — меры предосторожности
- Рулевое колесо — снятие и установка
- Наконечник поперечной рулевой тяги — снятие и установка
- Манжеты рулевого механизма — снятие и установка
- Рулевой механизм — снятие и установка
- Электродвигатель усилителя рулевого управления — снятие и установка
- Блок управления электронным усилителем рулевого управления — снятие и установка
- Датчик угла поворота рулевого колеса — снятие и установка
Кузов и отделка салона
- Кузов — общее описание и меры предосторожности
- Защита днища — снятие и установка
- Передний бампер — снятие и установка
- Переднее крыло — снятие и установка
- Задний бампер — снятие и установка
- Дверь — снятие и установка
- Обивка двери — снятие иустановка
- Зеркало заднего вида — снятие и установка
- Наружная ручка двери — снятие и установка
- Замок двери — снятие и установка
- Задняя дверь — снятие и установка
- Панель приборов — снятие иустановка
- Центральная консоль — снятие и установка
- Задняя часть центральной консоли — снятие и установка
- Внутреннее зеркало заднего вида — снятие и установка
Электрическая система
- Общее описание и меры предосторожности
- Дополнительное электрооборудование — установка
- Поиск неисправностей электрического оборудования
- Выключатели – проверка на прохождение тока
- Проверкареле
- Обогреватель заднего стекла — проверка
- Звуковой сигнал и его реле — снятие и установка
- Предохранители — замена
- Аккумулятор — снятие и установка
- Генератор
- Генератор — снятие и установка
- Стартер — снятие и установка
- Держатель щетки очистителя ветрового стекла — снятие и установка
- Механизм очистителя переднего стекла — снятие и установка
- Щеткодержатель и электродвигатель очистителя заднего стекла — снятие и установка
- Бачокомывателя — снятие и установка
- Насос омывателя — снятие и установка
- Жиклеры омывателя — снятие, установка и регулировка
- Осветительные приборы — снятие и установка
- Задняя фара — снятие и установка
- Лампочки освещения номерного знака — снятие и установка
- Лампочка повторителя поворота — снятие и установка
- Щиток приборов — снятие и установка
Выявление неисправностей
Принципиальные электрические схемы
Написать отзыв
Ваше Имя:
Ваш отзыв:
Оценка:
Отзывы покупателей
На СТО за ремонт просили просто невероятных денег. Не пожадничал и купил книгу. И вуаля! Оказывается хотели тупо кинуть с ремонтом. Книга помогла разобраться что и сколько сколько стоит. Рекомендую перед поездкой на СТО самому попытаться разобраться насколько нужен сложный ремонт.


