| title | description | ms.topic | ms.assetid | ms.author | author | manager | ms.date |
|---|---|---|---|---|---|---|---|
|
bcdedit |
Reference article for the bcdedit command, which creates new stores, modify existing stores, and add boot menu parameters. |
reference |
ab2da47d-3aac-44a0-b7fd-bd9561d61553 |
jgerend |
JasonGerend |
mtillman |
05/27/2021 |
Boot Configuration Data (BCD) files provide a store that is used to describe boot applications and boot application settings. The objects and elements in the store effectively replace Boot.ini.
BCDEdit is a command-line tool for managing BCD stores. It can be used for a variety of purposes, including creating new stores, modifying existing stores, adding boot menu parameters, and so on. BCDEdit serves essentially the same purpose as Bootcfg.exe on earlier versions of Windows, but with two major improvements:
-
Exposes a wider range of boot parameters than Bootcfg.exe.
-
Has improved scripting support.
[!NOTE]
Administrative privileges are required to use BCDEdit to modify BCD.
BCDEdit is the primary tool for editing the boot configuration of Windows Vista and later versions of Windows. It is included with the Windows Vista distribution in the %WINDIR%System32 folder.
BCDEdit is limited to the standard data types and is designed primarily to perform single common changes to BCD. For more complex operations or nonstandard data types, consider using the BCD Windows Management Instrumentation (WMI) application programming interface (API) to create more powerful and flexible custom tools.
Syntax
bcdedit /command [<argument1>] [<argument2>] ...
Parameters
General BCDEdit Command-Line Options
| Option | Description |
|---|---|
| /? | Displays a list of BCDEdit commands. Running this command without an argument displays a summary of the available commands. To display detailed help for a particular command, run bcdedit /? <command>, where <command> is the name of the command you are searching for more information about. For example, bcdedit /? createstore displays detailed help for the Createstore command. |
Parameters that Operate on a Store
| Option | Description |
|---|---|
| /createstore | Creates a new empty boot configuration data store. The created store is not a system store. |
| /export | Exports the contents of the system store into a file. This file can be used later to restore the state of the system store. This command is valid only for the system store. |
| /import | Restores the state of the system store by using a backup data file previously generated by using the /export option. This command deletes any existing entries in the system store before the import takes place. This command is valid only for the system store. |
| /store | This option can be used with most BCDedit commands to specify the store to be used. If this option is not specified, then BCDEdit operates on the system store. Running the bcdedit /store command by itself is equivalent to running the bcdedit /enum active command. |
Parameters that Operate on Entries in a Store
| Parameter | Description |
|---|---|
| /copy | Makes a copy of a specified boot entry in the same system store. |
| /create | Creates a new entry in the boot configuration data store. If a well-known identifier is specified, then the /application, /inherit, and /device parameters cannot be specified. If an identifier is not specified or not well known, an /application, /inherit, or /device option must be specified. |
| /delete | Deletes an element from a specified entry. |
Parameters that Operate on Entry Options
| Parameter | Description |
|---|---|
| /deletevalue | Deletes a specified element from a boot entry. |
| /set | Sets an entry option value. |
Parameters that Control Output
| Parameter | Description |
|---|---|
| /enum | Lists entries in a store. The /enum option is the default value for BCEdit, so running the bcdedit command without parameters is equivalent to running the bcdedit /enum active command. |
| /v | Verbose mode. Usually, any well-known entry identifiers are represented by their friendly shorthand form. Specifying /v as a command-line option displays all identifiers in full. Running the bcdedit /v command by itself is equivalent to running the bcdedit /enum active /v command. |
Parameters that Control the Boot Manager
| Parameter | Description |
|---|---|
| /bootsequence | Specifies a one-time display order to be used for the next boot. This command is similar to the /displayorder option, except that it is used only the next time the computer starts. Afterwards, the computer reverts to the original display order. |
| /default | Specifies the default entry that the boot manager selects when the timeout expires. |
| /displayorder | Specifies the display order that the boot manager uses when displaying boot parameters to a user. |
| /timeout | Specifies the time to wait, in seconds, before the boot manager selects the default entry. |
| /toolsdisplayorder | Specifies the display order for the boot manager to use when displaying the Tools menu. |
Parameters that Control Emergency Management Services
| Parameter | Description |
|---|---|
| /bootems | Enables or disables Emergency Management Services (EMS) for the specified entry. |
| /ems | Enables or disables EMS for the specified operating system boot entry. |
| /emssettings | Sets the global EMS settings for the computer. /emssettings does not enable or disable EMS for any particular boot entry. |
Parameters that Control Debugging
| Parameter | Description |
|---|---|
| /bootdebug | Enables or disables the boot debugger for a specified boot entry. Although this command works for any boot entry, it is effective only for boot applications. |
| /dbgsettings | Specifies or displays the global debugger settings for the system. This command does not enable or disable the kernel debugger; use the /debug option for that purpose. To set an individual global debugger setting, use the bcdedit /set <dbgsettings> <type> <value> command. |
| /debug | Enables or disables the kernel debugger for a specified boot entry. |
Related links
For examples of how to use BCDEdit, see the BCDEdit Options Reference article.
To see the notation used to indicate command-line syntax, see Command-Line Syntax Key.
This guide explains how to use the BCDEdit (bcdedit.exe) utility for the following Windows versions: Vista, 7, 8, 8.1or10
BCDEdit is the command-line utility that you can use to manage BCD stores on your computer. BCDEdit works similarly to Bootcfg.exe available on Windows XP systems, but with more options available and various improvements.
BCDEdit on Windows
You must be logged-in as an Administrator in order to use BCDEdit.
Always create a backup of your current BCD file before using the utility with the help of the /export parameter:
bcdedit /export C:exportBCDfile
To open bcdedit, you need to:
- Open Command Prompt
- Type:
bcdedit
- Press Enter
When you type bcdedit in Command Prompt, the output is your computer’s current BCD configuration:
Microsoft Windows [Version 6.0]
 Copyright (c) 2006 Microsoft Corporation. All rights reserved.

 C:Windowssystem32>bcdedit

 Windows Boot Manager
 --------------------
 identifier {bootmgr}
 device partition=C:
 description Windows Boot Manager
 locale en-US
 inherit {globalsettings}
 default {current}
 resumeobject {0}
 displayorder {current}
 toolsdisplayorder {memdiag}
 timeout 30

 Windows Boot Loader
 -------------------
 identifier {current}
 device partition=C:
 path Windowssystem32winload.exe
 description Microsoft Windows Vista
 locale en-US
 inherit {bootloadersettings}
 recoverysequence {0}
 recoveryenabled Yes
 osdevice partition=C:
 systemroot Windows
 resumeobject {0}
 nx OptIn
BCDEdit on Windows XP
Windows XP doesn’t have a bcdedit.exe utility available, but the bootcfg.exe utility instead. Bootcfg.exe is part of the Windows XP’s Recovery Console.
To read about bootcfg, follow our guide: Bootcfg – Guide for Windows XP.
BCDEdit on Windows Vista
To run bcdedit.exe on a Windows Vista system, you have these options available:
- Use the original Windows Vista installation media to access Command Prompt
- If Repair Your Computer option is available on Advanced Boot Options menu, boot into this mode to access Command Prompt
- Use Easy Recovery Essentials
If you have the Windows Vista installation DVD, follow these steps:
- Insert the installation media and boot from it
- Select a language, time and keyboard and click Next
- Click Repair your computer

Windows Vista Repair Your Computer Menu
- Select the operating system
- Click Next
- At the System Recovery Options screen, click Command Prompt

Windows Vista System Recovery Options
- Type:
bcdedit.exe
- Press Enter


If you have the “Repair Your Computer” option available, you can access Command Prompt from there:
- Restart the computer
- Press the F8 key to open the Advanced Boot Options menu
- Select Repair Your Computer and press Enter

- If Repair Your Computer isn’t available, the recovery tools aren’t installed on your computer.
- At the System Recovery Options screen, click Command Prompt
- Type:
bcdedit.exe
- Press Enter
If you use Easy Recovery Essentials Command-line:
- Download Easy Recovery Essentials
- Burn the ISO Image. Follow our instructions on how to burn a bootable ISO image. If you’d like to have a recovery USB instead, follow our instructions on how to make a recovery USB.
- Boot Easy Recovery Essentials from the CD, DVD or USB
- Select Launch Command Line


To download Easy Recovery Essentials, click here.
BCDEdit on Windows 7
The options to run bcdedit.exe on Windows 7 systems are similar to those of Windows Vista.
If you have the Windows 7 installation DVD available, follow these steps:
- Insert the DVD in the optical drive
- Boot from it by restarting the computer and pressing any key when prompted
- Select a language, time and keyboard
- Click Next
- Click Repair your computer

Install Now (Windows 7)
- Select the operating system from the list and click Next
- At System Recovery Options, click Command Prompt
- Type:
bcdedit.exe
- Press Enter

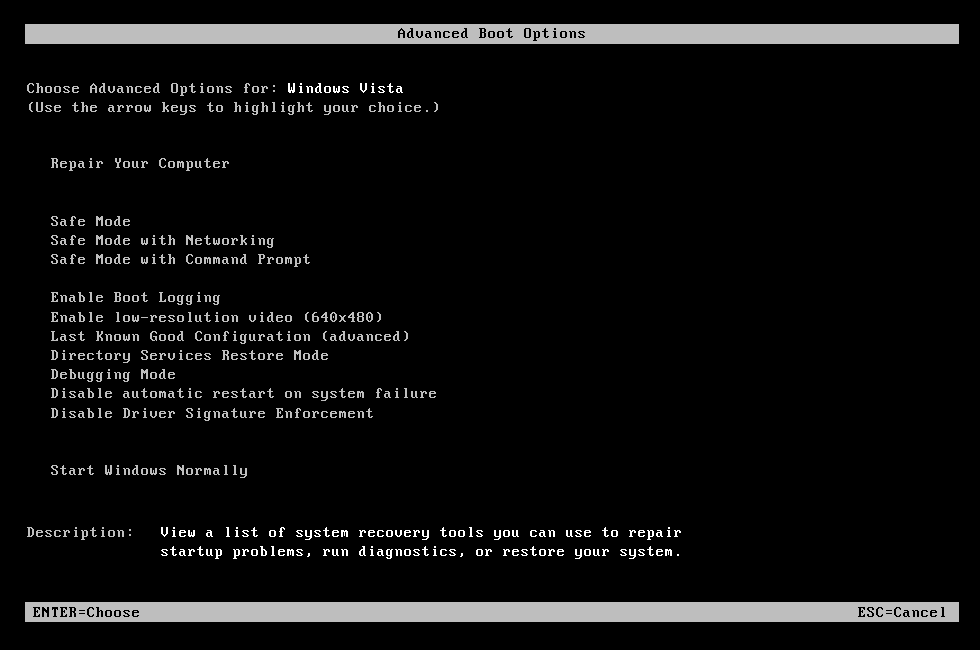
If you have the “Repair Your Computer” available at “Advanced Boot Options” (most Windows 7 systems have these recovery tools installed), follow these steps:
- Restart the computer
- Press the F8 key to open Advanced Boot Options
- Select Repair your computer

Advanced Boot Options on Windows 7
- Press Enter
- At the System Recovery Options, click Command Prompt
- Type:
bcdedit.exe
- Press Enter

If you use Easy Recovery Essentials Command-line:
- Download Easy Recovery Essentials
- Burn the ISO Image. Follow our instructions on how to burn a bootable ISO image. If you’d like to have a recovery USB instead, follow our instructions on how to make a recovery USB.
- Boot Easy Recovery Essentials from the CD, DVD or USB
- Select Launch Command Line
To download Easy Recovery Essentials, click here.
BCDEdit on Windows 8
On Windows 8 or Windows 8.1 systems, you need to have the original installation media (DVD or USB drive) in order to access Command Prompt.
If you have the installation media, follow these steps:
- Insert the Windows 8 DVD or Windows 8.1 USB drive
- Restart the computer and boot from the DVD/USB
- Click Repair your computer

Windows 8 Repair Your Computer Menu
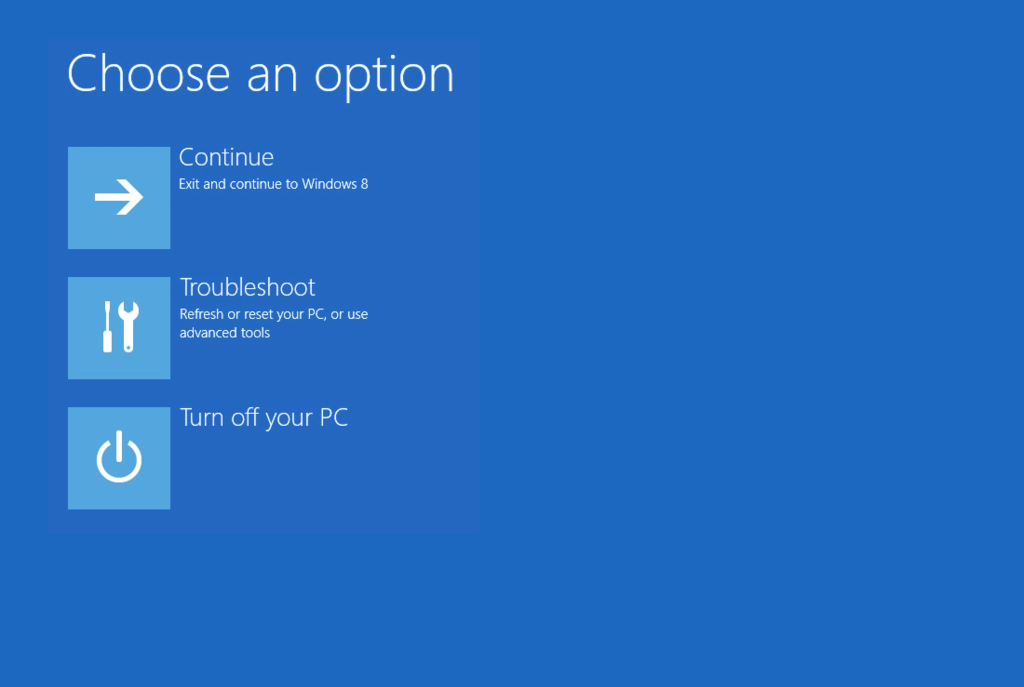
- Click Troubleshoot

Troubleshoot in Windows 8 recovery options screen
- Click Command Prompt
- Type:
bcdedit.exe
- Press Enter

If you use Easy Recovery Essentials Command-line:
- Download Easy Recovery Essentials
- Burn the ISO Image. Follow our instructions on how to burn a bootable ISO image. If you’d like to have a recovery USB instead, follow our instructions on how to make a recovery USB.
- Boot Easy Recovery Essentials from the CD, DVD or USB
- Select Launch Command Line
To download Easy Recovery Essentials, click here.
BCDEdit on Windows 10
On Windows 10 systems, you need to have the original installation media (DVD or USB drive) in order to access Command Prompt.
If you have the installation media, follow these steps:
- Insert the Windows 10 media
- Restart the computer and boot from the DVD/USB
- Click Repair your computer

- Click Troubleshoot

- Click Command Prompt
- Type:
bcdedit.exe
- Press Enter


If you use Easy Recovery Essentials Command-line:
- Download Easy Recovery Essentials
- Burn the ISO Image. Follow our instructions on how to burn a bootable ISO image. If you’d like to have a recovery USB instead, follow our instructions on how to make a recovery USB.
- Boot Easy Recovery Essentials from the CD, DVD or USB
- Select Launch Command Line
To download Easy Recovery Essentials, click here.
Commands and parameters
For the complete list of commands and parameters you can use with BCDEdit, type:
bcdedit /?
Whenever you are using this utility to modify a BCD store, make use use of these parameters:
/createstoreto create a new empty boot configuration data (BCD) store./exportto export the current configuration of the BCD store./importto import a previously exported configuration file./createto create a new entry in the BCD store./deleteto delete an entry from the BCD store./deletevalueto delete a specified value./setto set a new value./defaultto specify the default entry./timeoutto specify the timeout at startup value.
For example, to create a new entry in the BCD file to load Windows XP, run these commands:
-
bcdedit /create {ntldr} /d "Windows XP" -
bcdedit /set {ntldr} device partition=C: -
bcdedit /set {ntldr} path ntldr -
bcdedit /displayorder {ntldr} /addlast
More Information
Linked Entries
- bootcfg
Support Links
- Easy Recovery Essentials for Windows – our repair and recovery disk.
It’s an easy-to-use and automated diagnostics disk. It’s available for Windows 8, Windows 7 and Windows Vista. It’s also available for Windows XP and Windows Server.
Read more at Windows Recovery Disks.
- The NeoSmart Support Forums, member-to-member technical support and troubleshooting.
- Get a discounted price on replacement setup and installation discs: Windows XP, Windows Vista, Windows 7, Windows 8, Windows 10.
Applicable Systems
This Windows-related knowledgebase article applies to the following operating systems:
- Windows XP (all editions)
- Windows Vista (all editions)
- Windows 7 (all editions)
- Windows 8 (all editions)
- Windows 8.1 (all editions)
- Windows 10 (all editions)
Propose an edit
Updated: 01/31/2023 by

The bcdedit command line tool modifies the boot configuration data store, contains configuration parameters and controls how the operating system is booted. These parameters were previously in the boot.ini file (in BIOS-based operating systems) or in the nonvolatile RAM entries (in EFI (Extensible Firmware Interface-based) operating systems). You can use Bcdedit.exe to add, delete, edit, and append entries in the boot configuration data store.
Availability
Bcdedit is an external command that is available for the following Microsoft operating systems as bcdedit.exe.
- Windows Vista
- Windows 7
- Windows 8
- Windows 10
- Windows 11
Bcdedit syntax
Note
Running «bcdedit» by itself is equivalent to running «bcdedit /enum ACTIVE».
Commands that operate on a store
| /createstore |
This command creates a new empty boot configuration data store. The created store is not a system store. bcdedit /createstore <file name> <file name> specifies the file name of the boot configuration data store. If the file name contains spaces, it must be enclosed in quotation marks («»). Example: The following command creates the specified store file: bcdedit /createstore C:DATABCD |
| /export |
This command exports the contents of the system store into a file. This file can be used later to restore the state of the system store. This command is only valid for the system store. <file name> is the file name to be used as the destination for the export. If the file name contains spaces, it must be enclosed in quotation marks («»). Example: The following command exports the system store to the specified file: bcdedit /export "C:DataBCD Backup" |
| /import |
This command restores the state of the system store using a backup data file previously generated using the /export command. Any existing entries in the system store are deleted before the import takes place. This command is only valid for the system store. bcdedit /import <file name> [/clean] <file name> the name of the file that is imported into the system store. If the file name contains spaces, it must be enclosed in quotation marks («»). /clean specifies that all existing firmware boot entries should be deleted (only affects EFI systems). Example: The following command imports the specified file into the system store. bcdedit /import "C:DataBCD Backup" /clean |
| /sysstore |
This command sets the system store device. This command is only valid for EFI systems in cases where the system store device is ambiguous. This setting does not persist across reboots. bcdedit /sysstore <devicename> <devicename> the name of a system partition to set as the system store device. The device must be a system partition. Example: The following command sets the system store device as specified: bcdedit /sysstore C: |
Commands that operate on entries in a store
| /copy |
This command creates a copy of the specified boot entry. bcdedit [/store <file name>] /copy {<id>} /d <description>
<file name> specifies the store to be used. If this option is not specified, the system store is used. For more information, run «bcdedit /? store». <id> specifies the identifier of the entry to be copied. For more information about identifiers, run»bcdedit /? ID». <description> specifies the description to be applied to the new entry. Example: The following command creates a copy of the specified operating system boot entry: bcdedit /copy {cbd971bf-b7b8-4885-951a-fa03044f5d71} /d "Copy of entry"
|
| /create |
The following command creates an NTLDR based OS loader entry (Ntldr): bcdedit /create {ntldr} /d "Earlier Windows OS Loader"
The following command creates a RAM disk additional options entry: bcdedit /create {ramdiskoptions}
The following command creates a new operating system boot entry: bcdedit /create /d "Windows Vista" /application osloader The following command creates a new debugger settings entry: bcdedit /create {dbgsettings}
|
| /delete |
This command deletes an entry from the boot configuration data store. bcdedit [/store <file name>] /delete <id> [/f] [/cleanup | /nocleanup] <file name> specifies the store to be used. If this option is not specified, the system store is used. For more information, run «bcdedit /? store». <id> specifies the identifier of the boot entry that you want to delete. For more information about identifiers, run «bcdedit /? ID». /f — Deletes the specified entry. Without this option, bcdedit will not delete any entries that have a well-known identifier. /cleanup — Deletes the specified entry and removes the entry from the display order. Any other references to the entry being deleted are removed from the store. When deleting an OS loader entry, the associated resume from hibernation entry is also deleted if it is not referenced by any other OS loaders. This option is assumed unless /nocleanup is specified. /nocleanup — Deletes the specified entry without removing the entry from the display order. Examples: The following command deletes the specified operating system entry from the store and removes the entry from the display order: bcdedit /delete {cbd971bf-b7b8-4885-951a-fa03044f5d71}
The following command deletes the specified operating system entry from the store and removes the entry from the display order: bcdedit /delete {cbd971bf-b7b8-4885-951a-fa03044f5d71} /cleanup
The following command deletes the specified operating system entry from the store without removing the entry from the display order: bcdedit /delete {cbd971bf-b7b8-4885-951a-fa03044f5d71} /nocleanup
The following command deletes the NTLDR based OS loader entry from the store: bcdedit /delete {ntldr} /f
|
| /mirror |
This command creates a mirror of the specified boot entry. bcdedit [/store <file name>] /mirror {<id>}
<file name> specifies the store to be used. If this option is not specified, the system store is used. For more information, run «bcdedit /? store». <id> specifies the identifier of the entry to be mirrored. For more information about identifiers, run «bcdedit /? ID». Example: The following command creates a mirror of the specified operating system boot entry: bcdedit /mirror {cbd971bf-b7b8-4885-951a-fa03044f5d71}
|
Commands that operate on entry options
| /deletevalue |
This command deletes a data element from an entry in the boot configuration data store. bcdedit [/store <file name>] /deletevalue [<id>] <datatype> <file name> specifies the store to be used. If this option is not specified, the system store is used. For more information, run «bcdedit /? store». <id> specifies the identifier of the entry that will be modified. If not specified, {current} is used. For more information about identifiers, run «bcdedit /? ID». <datatype> specifies the option that will be removed from the specified entry. Run «bcdedit /? TYPES» for more information about data types. Examples: The following command deletes the bootsequence option from the boot manager entry: bcdedit /deletevalue {bootmgr} bootsequence
The following command deletes the Windows Pre-installation Environment (WinPE) value from the current operating system boot entry: bcdedit /deletevalue winpe The following command deletes the Windows PE value from the specified operating system boot entry: bcdedit /deletevalue {cbd971bf-b7b8-4885-951a-fa03044f5d71} winpe
|
| /set |
This command sets an entry option value in the boot configuration data store. bcdedit [/store <file name>] /set [{<id>}] <datatype> <value> [ /addfirst | /addl ast | /remove ]
<file name> specifies the store to be used. If this option is not specified, the system store is used. For more information, run «bcdedit /? store». <id> specifies the identifier of the entry to be modified. If not specified, {current} is used. For more information about identifiers, run «bcdedit /? ID». <datatype> specifies the option data type that will be created or modified. Run «bcdedit /? TYPES» for more information about data types. <value> specifies the value that should be assigned to the option. The format of <value> depends on the data type specified. Run «bcdedit /? FORMATS» for more information about data formats. /addfirst — This switch can only be used if datatype is an object list. Adds the specified entry identifier to the top of the list. If this switch is specified, only a single entry identifier may be specified. If the specified identifier is already in the list, it is moved to the top of the list. /addlast — This switch can only be used if datatype is an object list. Adds the specified entry identifier to the end of the list. If this switch is specified, only a single entry identifier may be specified. If the specified identifier is already in the list, it is moved to the end of the list. /remove — This switch can only be used if datatype is an object list. Removes the specified entry identifier from the list. If this switch is specified, only a single entry identifier may be specified. If the identifier is not in the list, then the operation has no effect. If the last entry is being removed, then the datatype value is deleted. Examples: The following command sets the application device to the partition C: for the specified operating system entry: bcdedit /set {cbd971bf-b7b8-4885-951a-fa03044f5d71} device partition=C:
NOTE: Use ‘hd_partiton=’ syntax to explicitly disable automatic VHD detection, and create entries that are compatible for booting a virtual machine, for example: bcdedit /store F:bootbcd /set {default} device hd_partition=F:
The following command sets the OS device to a VHD file (C:vdisksvdisk01.vhd) for the specified operating system entry: bcdedit /set {cbd971bf-b7b8-4885-951a-fa03044f5d71} osdevice vhd=[C:]vdisksdisk01.vhd
The following command sets the application path to windowssystem32winload.exe for the specified operating system entry: bcdedit /set {cbd971bf-b7b8-4885-951a-fa03044f5d71} path windowssystem32winload.exe
The following command sets the NX policy to OptIn for the current operating system boot entry. bcdedit /set nx optin |
Commands that control output
| /enum |
This command lists entries in a store. The /enum command is the default, so running «bcdedit» without parameters is equivalent to running «bcdedit /enum ACTIVE». bcdedit [/store <file name>] /enum [<type> | <id>] [/v] <file name> specifies the store to be used. If this option is not specified, the system store is used. For more information, run «bcdedit /? store». <type> specifies the type of entries to be listed. <type> can be one of the following: ACTIVE — All entries in the boot manager display order by default. FIRMWARE — All firmware applications. BOOTAPP — All boot environment applications. BOOTMGR — The boot manager. OSLOADER — All operating system entries. RESUME — All resume from hibernation entries. INHERIT — All inherit entries. ALL — Do all entries. <id> specifies the identifier of the entry to be listed. If an identifier is provided, then only the specified object will be listed. For information about identifiers, run «bcdedit /? ID». /v Displays entry identifiers in full, rather than using names for well-known identifiers. Examples: The following command lists all operating system loader boot entries: bcdedit /enum OSLOADER The following command lists all boot manager entries: bcdedit /enum BOOTMGR The following command lists only the default boot entry: bcdedit /enum {default}
The following command lists only the specified operating system boot entry: bcdedit /enum {b38a9fc1-5690-11da-b795-e9ad3c5e0e3a}
|
| /v |
Command line option that displays entry identifiers in full, rather than using names for well-known identifiers. Use /v by itself as a command to display entry identifiers in full for the ACTIVE type. Usually, any well-known entry identifiers are replaced by their friendly shorthand form. Specifying /v as a command line switch prevents this replacement and displays all identifiers in full. Running «bcdedit /v» by itself is equivalent to running «bcdedit /enum ACTIVE /v». bcdedit /v Example: The following command lists the active entries in the system store with all entry identifiers displayed in full. bcdedit /enum ACTIVE /v |
Commands that control the boot manager
| /bootsequence |
This command sets the one-time boot sequence to be used by the boot manager. bcdedit /bootsequence <id> [...] [ /addfirst | /addlast | /remove ] <id> […] specifies a list of identifiers that make up the boot sequence. You must specify at least one identifier and must separate identifiers by spaces. For more information about identifiers, run «bcdedit /? ID». /addfirst — Adds the specified entry identifier to the top of the boot sequence. If this switch is specified, only a single identifier may be specified. If the identifier is already in the list, it is moved to the top of the list. /addlast — Adds the specified entry identifier to the end of the boot sequence. If this switch is specified, only a single identifier may be specified. If the identifier is already in the list, it is moved to the end of the list. /remove — Removes the specified entry identifier from the boot sequence. If this switch is specified, only a single entry identifier may be specified. If the identifier is not in the list, then the operation has no effect. If the last entry is being removed, then the boot sequence value is deleted from the boot manager entry. Examples: The following command sets two OS entries and the NTLDR based OS loader in the boot manager one-time boot sequence: bcdedit /bootsequence {802d5e32-0784-11da-bd33-000476eba25f} {cbd971bf-b7b8-4885-951a-fa03044f5d71} {ntldr}
The following command adds the specified OS entry to the end of the boot manager one-time boot sequence: bcdedit /bootsequence {802d5e32-0784-11da-bd33-000476eba25f} /addlast
|
| /default |
This command sets the default entry that the boot manager will use when the timeout expires. bcdedit /default <id> <id> specifies the identifier of the boot entry to be used as the default when the time-out expires. For information about identifiers, run «bcdedit /? ID». Examples: The following command sets the specified entry as the default boot manager entry: bcdedit /default {cbd971bf-b7b8-4885-951a-fa03044f5d71}
The following command sets the NTLDR based OS loader as the default entry: bcdedit /default {ntldr}
|
| /displayorder |
This command sets the display order to be used by the boot manager. bcdedit /displayorder <id> [...] [ /addfirst | /addlast | /remove ] <id> […] specifies a list of identifiers that make up the display order. At least one identifier must be specified and they must be separated by spaces. For more information about identifiers, run «bcdedit /? ID». /addfirst — Adds the specified entry identifier to the top of the display order. If this switch is specified, only a single entry identifier may be specified. If the specified identifier is already in the list, it is moved to the top of the list. /addlast — Adds the specified entry identifier to the end of the display order. If this switch is specified, only a single entry identifier may be specified. If the specified identifier is already in the list, it is moved to the end of the list. /remove — Removes the specified entry identifier from the display order. If this switch is specified, only a single entry identifier may be specified. If the identifier is not in the list, then the operation has no effect. If the last entry is being removed, then the display order value is deleted from the boot manager entry. Examples: The following command sets two OS entries and the NTLDR based OS loader in the boot manager display order: bcdedit /displayorder {802d5e32-0784-11da-bd33-000476eba25f} {cbd971bf-b7b8-4885-951a-fa03044f5d71} {ntldr}
The following command adds the specified OS entry to the end of the boot manager display order: bcdedit /displayorder {802d5e32-0784-11da-bd33-000476eba25f} /addlast
|
| /timeout |
This command sets the time to wait, in seconds, before the boot manager selects a default entry. For information about setting the default entry, run «bcdedit /? default». bcdedit /timeout <timeout> <timeout> specifies the time to wait, in seconds, before the boot manager selects a default entry. Example: The following command sets the boot manager <timeout> to 30 seconds: bcdedit /timeout 30 |
| /toolsdisplayorder |
This command will set the display order to be used by the boot manager when displaying the tools menu. bcdedit /toolsdisplayorder <id> [...] [ /addfirst | /addlast | /remove ] <id> […] specifies a list of identifiers that make up the tools display order. At least one identifier must be specified and they must be separated by spaces. For more information about identifiers, run «bcdedit /? ID». /addfirst — Adds the specified entry identifier to the top of the tools display order. If this switch is specified, only a single entry identifier may be specified. If the specified identifier is already in the list, it is moved to the top of the list. /addlast — Adds the specified entry identifier to the end of the tools display order. If this switch is specified, only a single entry identifier may be specified. If the specified identifier is already in the list, it is moved to the end of the list. /remove — Removes the specified entry identifier from the tools display order. If this switch is specified, only a single entry identifier may be specified. If the identifier is not in the list, then the operation has no effect. If the last entry is being removed, then the tools display order value is deleted from the boot manager entry. Examples: The following command sets two tools entries and the memory diagnostic in the boot manager’s tools display order: bcdedit /toolsdisplayorder {802d5e32-0784-11da-bd33-000476eba25f} {cbd971bf-b7b8-4885-951a-fa03044f5d71} {memdiag}
The following command adds the specified tool entry to the end of the boot manager’s tools display order: bcdedit /toolsdisplayorder {802d5e32-0784-11da-bd33-000476eba25f} /addlast
|
Commands that control Emergency Management Services for a boot application
| /bootems |
This command enables or disables Emergency Management Services for the specified entry. bcdedit /bootems [<id>] { ON | OFF }
<id> specifies the identifier of the entry to be modified. Although this command will work for any entry, it is only effective for boot applications. Example: The following command enables Emergency Management Services for the boot manager: bcdedit /bootems {bootmgr} ON
|
| /ems |
This command enables or disables Emergency Management Services for the specified operating system boot entry. bcdedit /ems [<id>] { ON | OFF }
<id> specifies the identifier of the entry to be modified. Only «Windows boot loader» entries can be specified. If not specified, {current} is used. For more information about identifiers, run «bcdedit /? ID». Example: The following command enables Emergency Management Services for the current operating system boot entry: bcdedit /ems ON |
| /emssettings |
This command sets the global Emergency Management Services settings for the system. Emssettings does not enable or disable Emergency Management Services for any particular boot entry. bcdedit /emssettings [ BIOS ] | [ EMSPORT:<port> | [EMSBAUDRATE:<baudrate>] ] BIOS specifies that the system will use BIOS settings for the Emergency Management Services configuration. This switch only works on systems that have Emergency Management Services support provided by the BIOS. <port> specifies the serial port to use as the Emergency Management Services port. This option should not be specified with the BIOS option. <baudrate> specifies the serial baud rate to use for Emergency Management Services. This command should not be specified with the BIOS option. <baudrate> is optional, and the default is 9,600 baud. Examples: The following command sets the Emergency Management Services parameters to use BIOS settings: bcdedit /emssettings BIOS The following command sets the Emergency Management Services parameters to use com2: at 115,200 baud. bcdedit /emssettings EMSPORT:2 EMSBAUDRATE:115200 |
Command that control debugging
| /bootdebug |
This command enables or disables the boot debugger for the specified boot entry. Although this command works for any entry, it is only effective for boot applications. bcdedit /bootdebug [<id>] { ON | OFF }
<id> specifies the identifier of the entry to be modified. For information about identifiers, run «bcdedit /? ID». Examples: The following command enables boot debugging for the Windows operating system loader of the current operating system boot entry: bcdedit /bootdebug ON The following command disables boot debugging for the Windows boot manager: bcdedit /bootdebug {bootmgr} OFF
|
| /dbgsettings |
Sets the global debugger parameters. |
| /debug |
This command enables or disables the kernel debugger for the specified boot entry. bcdedit /debug [<id>] { ON | OFF }
<id> specifies the identifier of the entry to be modified. Only Windows boot loader entries may be specified. If not specified, {current} is used. For more information about identifiers, run «bcdedit /? ID». Examples: The following command enables kernel debugging for the current Windows operating system boot entry: bcdedit /debug ON The following command disables kernel debugging for the specified operating system entry: bcdedit /debug {cbd971bf-b7b8-4885-951a-fa03044f5d71} OFF
|
| /hypervisorsettings |
This command sets or displays the hypervisor settings for the system. This command does not enable or disable the hypervisor debugger for any particular OS loader entry. To enable or disable the hypervisor debugger for a particular OS loader entry, use «bcdedit /set <identifier> HYPERVISORDEBUG ON». For information about identifiers, run «bcdedit /? ID». To set an individual hypervisor debugger setting, use «bcdedit /set {hypervisorsettings} <type> <value>». For information about valid types, run «bcdedit /? TYPES». bcdedit /hypervisorsettings [ <debugtype> [DEBUGPORT:<port>] [BAUDRATE:<baud>] [CHANNEL:<channel>] [HOSTIP:<ip>] [PORT:<port>] ] <debugtype> specifies the type of debugger. <debugtype> can be one of SERIAL, 1394, or NET. <port> for SERIAL debugging, specifies the serial port to use as the debugging port. <baud> for SERIAL debugging, specifies the baud rate to be used for debugging. <channel> for 1394 debugging, specifies the 1394 channel to be used for debugging. <ip> for network debugging, specifies the IPv4 address of the host debugger. <port> for network debugging, specifies the port to communicate with on the host debugger. Should be 49152 or higher. Examples: The following command displays the current hypervisor settings: bcdedit /hypervisorsettings The following command sets the hypervisor debugger settings to serial debugging over COM1 at 115,200 baud: bcdedit /hypervisorsettings SERIAL DEBUGPORT:1 BAUDRATE:115200 The following command sets the hypervisor debugger settings to 1394 debugging using channel 23: bcdedit /hypervisorsettings 1394 CHANNEL:23 The following command sets the hypervisor debugger settings to network debugging with a debugger host at 192.168.1.2 communicating on port 50000: bcdedit /hypervisorsettings NET HOSTIP:192.168.1.2 PORT:50000 |
Bcdedit examples
See each of the above bcdedit command switch syntax and examples.
Tip
See our Safe Mode page for steps on using bcdedit to boot into Windows Safe Mode from a command line.
Команды утилиты BCDEDIT применяются для редактирования данных конфигурации загрузки операционной системы (BCD — Boot Configuration Data).
Команды утилиты bcdedit необходимо выполнять в командной строке, запущенной с правами администратора. Для этого нажмите сочетание клавиш ![]() + X и в появившемся контекстном меню выберите пункт Командная строка (а
+ X и в появившемся контекстном меню выберите пункт Командная строка (а
дминистратор).

Если ввести команду bcdedit без параметров, то в окне командной строки будет выведена информация, хранящаяся в BCD. Информация представлена в виде двух столбцов: слева расположены названия параметров, справа – их значения.

Основные параметры bcdedit отвечающие за загрузку:
- идентификатор — глобальный уникальный идентификатор (GUID) идентификационный номер, указывающий на запись в меню загрузки. Представляет из себя 32-значный буквенно-цифровой код, заключенный в фигурные скобки. Для стандартных идентификаторов используются названия, например {current} — текущая система, {default} — система по умолчанию;
- device— указывает раздел, на котором расположен загрузчик операционной системы;
- osdevice— указывает раздел, на котором находится сама операционная система. Как правило, значения device и osdevice идентичны;
- path— путь к загрузчику операционной системы;
- description— описание операционной системы, отображающееся в меню при загрузке;
- default— операционная система, загружаемая по умолчанию;
- timeout— время ожидания перед загрузкой ОС по умолчанию;
- displayorder— порядок, в котором системы отображаются при загрузке.
Примеры использования BCDEDIT.
Содержание
- Сохранение и восстановление данных конфигурации загрузки
- Как изменить операционную систему, загружаемую по умолчанию
- Как изменить размещение записей в меню загрузки
- Как изменить значение задержки загрузки
- Как изменить язык менеджера загрузки
- Как изменить название операционной системы в меню загрузки
- Добавление новой загрузочной записи, для мультизагрузки
- Как удалить запись об операционной системе из менеджера загрузки и BCD
- Возвращение старого загрузочного меню в Windows 8 и 8.1
- Включение меню опций запуска Windows 8 и 8.1
- Отключение логотипа Windows во время загрузки
- Отключение анимированного круга во время загрузки Windows 8 и 8.1
Сохранение и восстановление данных конфигурации загрузки
Сохранение конфигурации BCD — это то, с чего желательно начинать работу с программой bcdedit.
Для этого создайте на любом диске папку BootBackup и введите в командной строке следующую команду:
bcdedit /export D:\BootBackup\bcd
Вместо D:\ можете указать любой другой диск.
Для восстановления конфигурации из ранее сохраненной копии используется команда:
bcdedit /import D:\BootBackup\bcd
Как изменить операционную систему, загружаемую по умолчанию
Чтобы установить в качестве загружаемой по умолчанию системы текущую ОС, в среде которой выполняется команда bcdedit, выполните команду:
bcdedit /default {current}
При необходимости выбора другой ОС, не являющейся текущей, нужно указывать ее GUID, команда будет такого вида:
bcdedit /default {xxxxxxxx-xxxx-xxxx-xxxx-xxxxxxxxxxxx}
где вместо {xxxxxxxx-xxxx-xxxx-xxxx-xxxxxxxxxxxx} укажите настоящий GUID нужной вам операционной системы.
Как изменить размещение записей в меню загрузки
Рассмотрим, как можно перемещать записи. Делаем запись первой в списке:
bcdedit /displayorder {ID} /addfirst
Делаем запись последней в списке:
bcdedit /displayorder {ID} /addlast
Указываем точный порядок записей:
bcdedit /displayorder {ID3} {ID1} {ID2}
где вместо {ID3} {ID1} {ID2} укажите идентификаторы операционных систем.
Как изменить значение задержки загрузки
Чтобы изменить значение задержки, по истечению которого начнется загрузка операционной системы, выполните такую команду:
bcdedit /timeout XX
в данном случае XX — число в секундах.
Как изменить язык менеджера загрузки
Используйте следующую команду:
bcdedit /set {bootmgr} locale ru-RU
Аналогичным образом вместо ru-RU можно указать en-US или обозначение любого другого языка.
Как изменить название операционной системы в меню загрузки
С помощью bcdedit можно изменить название системы, отображаемое в меню загрузки.
Команда выглядит так:
bcdedit /set {current} description «Название системы»
Где вместо «Название системы» укажите например «Microsoft Windows 8.1 Enterprise».
Добавление новой загрузочной записи, для мультизагрузки
1. копируем текущую запись и называем ее по новому
bcdedit /copy {current} /d «New Windows 8.1»
2. указываем местоположение загрузчика системы
bcdedit /set {ID} device partition=D:
3. указываем местоположение операционной системы
bcdedit /set {ID} osdevice partition=D:
4. добавляем запись о системе в меню загрузки, в конец списка
bcdedit /displayorder {ID} /addlast
Как удалить запись об операционной системе из менеджера загрузки и BCD
Чтобы удалить загрузочную запись выполните следующую команду:
bcdedit /delete {ID}
При выполнении выше указанной команды удаляется вся информация об установленной операционной системе из BCD и меню загрузки. У этой команды есть одна особенность — если в качестве ID указывается название, например {default}, то команда должна выполняться с ключом /f, если же ID записывается в буквенно-цифровом коде, ключ /f не нужен.
Возвращение старого загрузочного меню в Windows 8 и 8.1
Представленная ниже команда позволяет переключить загрузчик Windows 8, Windows 8.1 в legacy режим, т.е. придать ему вид загрузочного меню Windows 7.
Этот режим может быть интересен тем пользователям, которые используют двойную загрузку с Windows 8 и не желают при этом менять систему, запускаемую по умолчанию (как известно, если выставить системой по умолчанию не Windows 8, можно добиться того же эффекта).
Также выполнив эту команду появляется возможность вызвать Дополнительные варианты загрузки при нажатии клавиши F8
bcdedit /set {default} bootmenupolicy legacy
Старое загрузочное меню с установленными операционными системами Windows 8.1, Windows 10:

Меню Дополнительные варианты загрузки при нажатии клавиши F8 с установленной Windows 8.1:

Команда для возвращения штатного режима загрузчика Windows 8:
bcdedit /set {default} bootmenupolicy standard
Стандартный режим загрузчика Windows 8:

Включение меню опций запуска Windows 8 и 8.1
Команда для включения меню опций запуска Windows 8, Windows 8.1 выглядит так:
bcdedit /set {globalsettings} advancedoptions true
Выполнив выше указанную команду будет появляться меню опций при каждом запуске системы показанное на скриншоте ниже. Удобно для диагностики или для экспериментов с не подписанными драйверами.

Выключить меню можно, выполнив эту команду:
bcdedit /deletevalue {globalsettings} advancedoptions
Отключение логотипа Windows во время загрузки
Чтобы отключить отображение логотипа Windows во время загрузки ведите следующую команду:
bcdedit /set {globalsettings} custom:16000067 true
После перезагрузки синий логотип Windows вы не увидите.

Чтобы вернуть логотип на прежнее место, воспользуйтесь следующей командой:
bcdedit /deletevalue {globalsettings} custom:16000067
Отключение анимированного круга во время загрузки Windows 8 и 8.1
Команда для отключения анимированного круга:
bcdedit /set {globalsettings} custom:16000069 true
Изменения вы увидите при следующей перезагрузке.

Вернуть анимированный круг можно выполнив следующую команду:
bcdedit /deletevalue {globalsettings} custom:16000069
Для получения справочной информации о BCDEDIT выполните команду:
bcdedit /?

4 January 2021 Senior Program Developer
Summary
BCDEdit is a command line tool for managing boot configuration data. What are the often-used BCDEdit commands? And what are their functions? Get more about how to use the BCDEdit Command Line Tool in Windows 10 here.

What Is BCDEdit?
BCDEdit is a command line tool for managing boot configuration data. If you intend to use BCDEdit to change BCD, you will need administrator privileges to enable Command Prompt or command prompt in Windows RE.

BCDEdit Command Line Options
| BCDEdit /createstore | Creates a new empty boot configuration data storage (BCD). |
| BCDEdit /export | Exports the contents that system stores into a file which could be used to restore the state of the system store. |
| BCDEdit /import | Restores the system store using a backup file created by /export option. |
| BCDEdit /copy | Makes a copy of a boot entry in the system store. |
| BCDEdit /create | Creates a new entry in the boot configuration data store. |
| BCDEdit /set | Sets an entry option value. |
| BCDEdit /delete | Deletes a boot entry. |
| BCDEdit /default | Specifies the default entry that the boot manager selects when the timeout expires. |
| BCDEdit /displayorder | Specifies the display order of boot options. |
| BCDEdit /timeout | Specifies how long the boot manager displays. |
Note: You will need administrator privileges to enable Command Prompt. If you don’t have an administrator account, it’s recommended to use Renee Passnow to create it.
Use the BCDEdit Command Line Tool When Windows Boots Properly
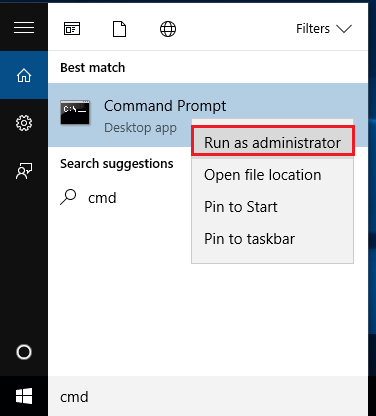
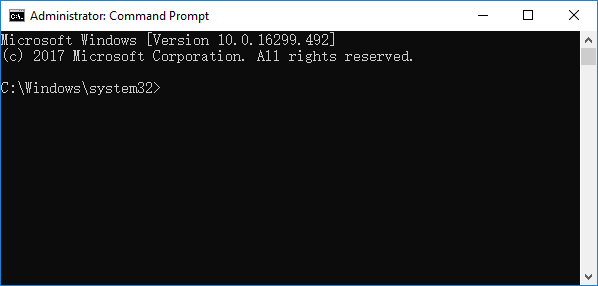
Step 1: Type “cmd” in search box. Right click the “Command Prompt” and select “Run as administrator”.
Step 2: In the Command Prompt, type in the BCDEdit command that you need. Press “Enter”. After executing the command successfully, you can shut down the command prompt.
Use the BCDEdit Command Line Tool When Windows Fails to Boot

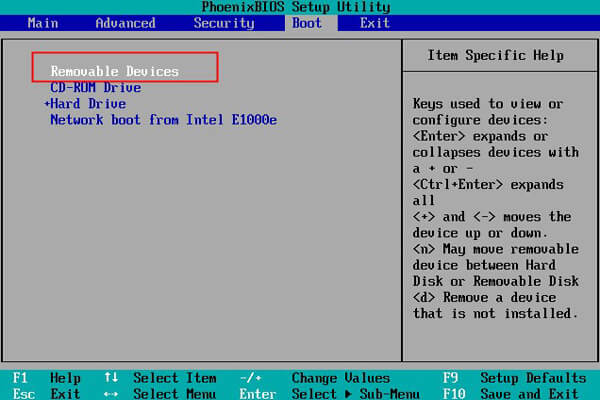
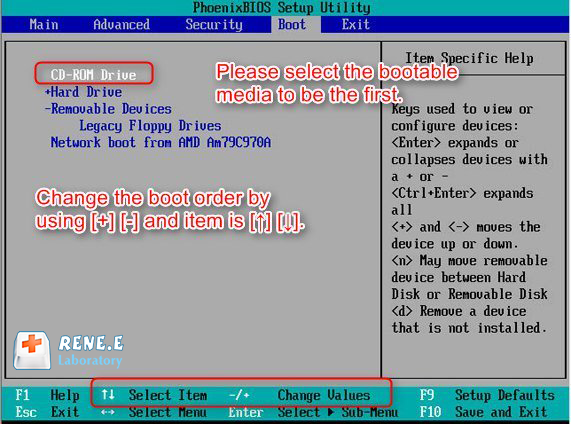
Step 2: Turn on the PC. Change the boot order in BIOS setup and put “Removable Devices” as the first boot choice.
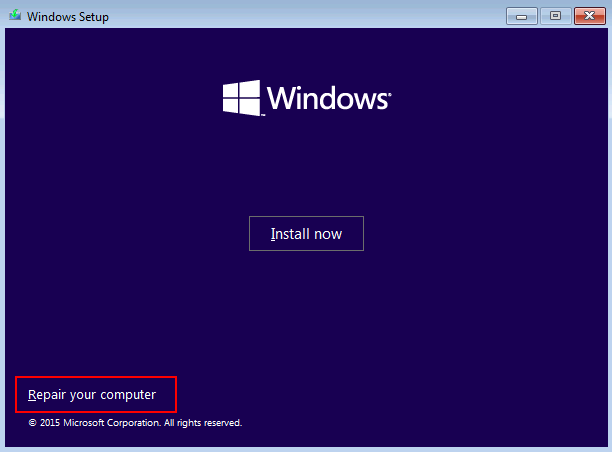
Step 3: After you enter the Windows installation screen, click “Repair your computer” in the bottom-left corner.
Step 4: Then select “Troubleshoot”> “Advanced Options”> “Command Prompt”.

Step 5: In the Command Prompt, type in the BCDEdit command you may need. Press “Enter”.
Enable Windows Boot Manager via BCDEdit Command Line Tool
Step 1: Type “cmd” in search box. Right click the “Command Prompt” and select “Run as administrator”.
Step 2: In the Command Prompt, type in: bcdedit /set {bootmgr} displaybootmenu yes and bcdedit /set {bootmgr} timeout 30. Please press “Enter” after you type each command.
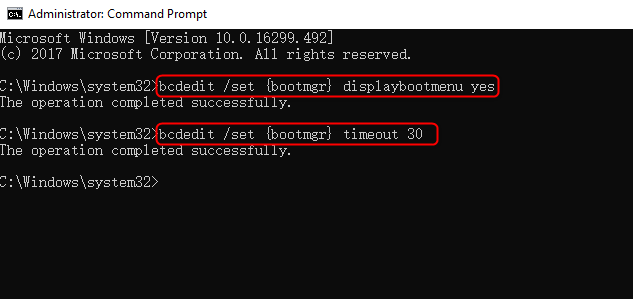
If you want to disable Windows Boot Manager, just type in: bcdedit /set {bootmgr} timeout 0.
Add a Boot Option via BCDEdit Command Line Tool
For example, you want to add a boot entry (Windows XP) to Windows Boot Manager, please follow steps below:
Step 1: Type “cmd” in search box. Right click the “Command Prompt” and select “Run as administrator”.
Step 2: In the Command Prompt, type the following commands. Please press “Enter” after you type each command.
| Bcdedit /create {ntldr} /d “Windows XP” |
| Bcdedit /set {ntldr} device partition=C: |
| Bcdedit /set {ntldr} path ntldr |
| Bcdedit /displayorder {ntldr} -addlast |
| Bcdedit /set {ntldr} description “Windows XP” |
After executing the above commands successfully, the boot entry (Windows XP) will be an option in Windows Boot Manager.
Create Administrator Account Using Renee PassNow
System rescue tool- Renee PassNow
Step 1: Download and install Renee PassNow in any workable Windows computer.

Step 2: Choose creation method, USB or CD/DVD.
Select one option from [Crate a Live USB] and [Create a Live CD]. Then, select [x64] or [x86] according to your computer. Next, click on [Download Now] to download the licensed ISO. Remember to activate the software beforehand. After that, click on [Create USB] to create the boot media.

Step 3: Boot the target PC from the created password reset USB/CD/DVD.
You will boot the target computer via a new created reset disk. Firstly, please hold a hot key to enter the BIOS menu and put CD-ROM or Removable Devices as the first choice. Please click here to know about how to change the boot order of your computer. After changing it successfully, please remember to save your setting and then restart your PC.
Step 4: Select “PassNow!”.
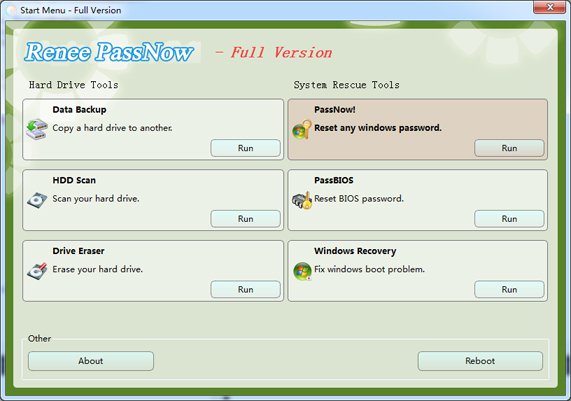
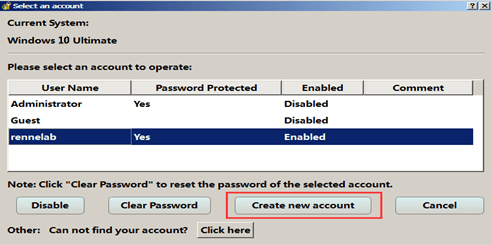
Step 5: Click “Create new account” to create a new administrator to quickly access your PC.
The created administrator account named “Reneelab” with administrator rights, and its default password is “123456789”. You are able to change the password of target account with this new created administrator.