
2
Символы
Смотрите Руководство Пользователя
Внимание (ознакомьтесь с документацией)!
Соблюдайте указания по технике безопасно-
сти, приведенными в Руководстве пользова-
теля Вашего прибора.
Хранить при
Производитель
Каталожный номер
Номер лота
IVD
Для IN VITRO диагностики.
На упаковке и на наклейке с техническими данными прибора Вы найдете следующие символы. Они означают:
0088
Эта продукция отвечает требованиям Дирек-
тивы 98/79/EC в отношении медицинских
приборов in vitro диагностики.
Данный продукт полностью отвечает законо-
дательству КНР по использованию определен-
ных веществ в электронных приборах.
Значения остальных символов разъясняются в инструкци-
ях/вкладышах, находящихся в упаковке с комплектующи-
ми прибора.
Последняя редакция: 2008-05
man_05334306001_01_Ru.indd 2
06.10.2008 19:43:12

![]()
|
||
|
||
|
||
|
||
|
||
|
||
|
||
|


Информация о лекарственных препаратах, размещенная на AptekaMos.ru, не должна использоваться неспециалистами для самостоятельного принятия решения об их покупке и применении без консультации врача.
Свидетельство о регистрации средства массовой информации ЭЛ № ФС77-44705 выдано Федеральной службой по надзору в сфере связи, информационных технологий и массовых коммуникаций (Роскомнадзор) 21 апреля 2011 года.
• Инструкция по применению Глюкометр «Акку-Чек Актив».
• Способ применения и дозировка, состав, побочное действие и взаимодействие Глюкометр «Акку-Чек Актив»
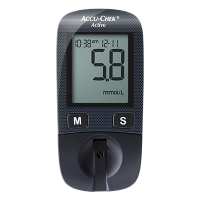
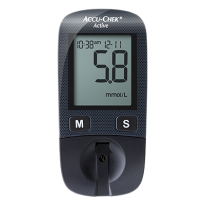
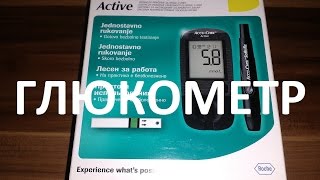
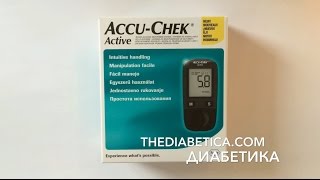
Акку-Чек Актив
Посмотреть информацию о безопасности
Still can’t find what you need?
Акку-Чек Актив
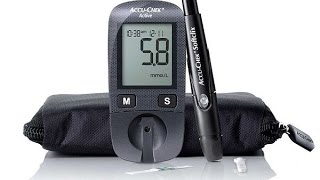
Описание
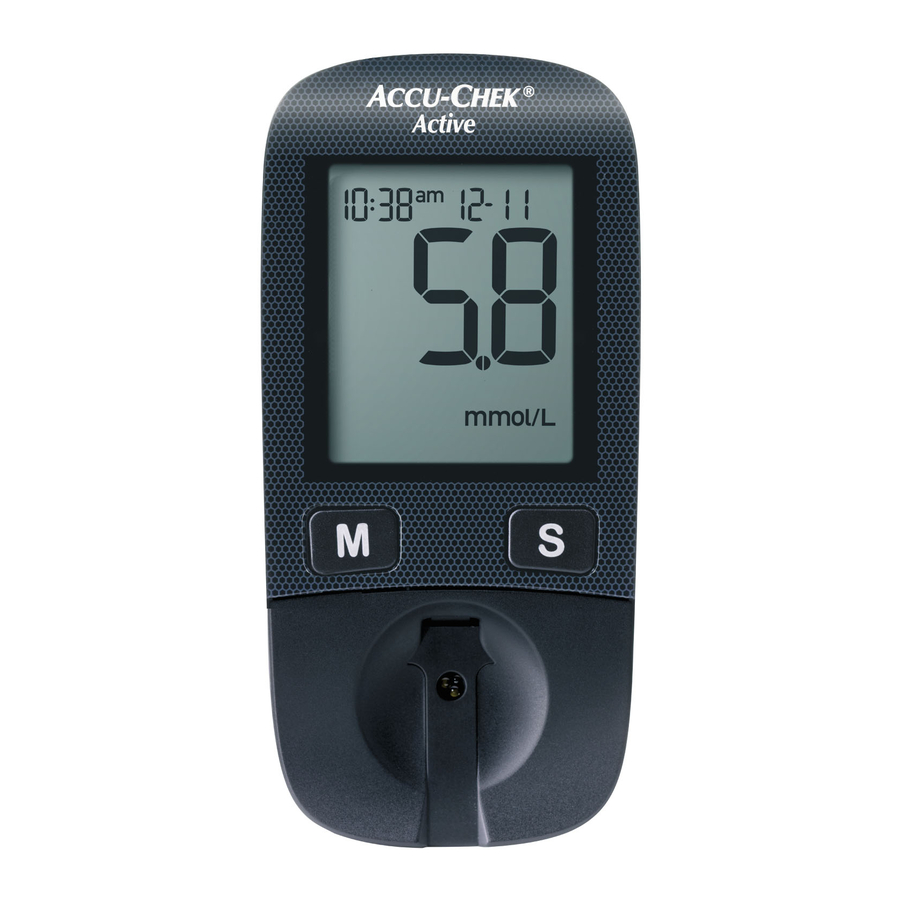
Акку-Чек Актив — Глюкометр, который отличается.
Инструкции
Дисплей
жидкокристаллический дисплей (ЖКД) c 96 сегментами
Объем капли крови
1-2 мкл
Вес
50 г с батарейкой
Время измерения
5 секунд
Размеры
97,8 x 46,8 x 19,1 мм
Технические характеристики
Время измерения:
5 секунд (при измерении вне прибора — 8 секунд)
Объем капли крови:
1-2 мкл
Объем памяти:
500 результатов измерений с указанием времени и даты, средние значения за 7, 14, 30 и 90 дней
Напоминание о проведении измерения после еды:
да
Передача данных на ПК через микро-USB:
временно недоступно из-за отсутствия ПО
Длительность работы батарейки:
примерно 1000 измерений
Автоматическое включение и выключение:
- Автоматическое включение при введении тест-полоски
- Прибор отключается через 30 секунд или 90 секунд в зависимости от режима работы
Диапазон измерений:
0,6-33,3 ммоль/л
Метод измерения:
фотометрический
Условия хранения:
- от -25°C до +70°C без батарейки
- от -20°C до +50°C с батарейкой
Рабочая температура системы:
от +8°C до +42°C
Рабочий диапазон относительной влажности:
более 85%
Рабочая высота:
до 4000 м над уровнем моря
Дисплей:
жидкокристаллический дисплей (ЖКД) c 96 сегментами
Размеры:
97,8 x 46,8 x 19,1 мм
Использование
Нанесение капли крови на тест-полоску, вставленную в прибор
Когда на дисплее появится мигающий символ капли, нанесите каплю крови на середину тестового поля зеленого цвета. При нанесении крови разрешается прикасаться к тестовому полю.
Результат
При нанесении крови на тест-полоску, вставленную в прибор, результат анализа появится на дисплее через 5 секунд и будет автоматически сохранен в памяти с отметкой даты и времени. При нанесении капли крови вне прибора, результат появится через 8 секунд.
Более подробную информацию о работе прибора можно найти в руководстве пользователя или в разделе сервис.
В случае возникновения дополнительных вопросов обращайтесь в Информационный центр Акку-Чек
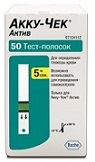
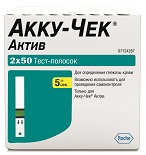
Аксессуары
|
Тест-полоски Акку-Чек Актив 50шт |
Тест-полоски Акку-Чек Актив 100шт |
|
Ланцеты Акку-Чек Софткликс 25шт |
Ланцеты Акку-Чек Софткликс 200шт |


 08:43
08:43
Глюкометр Акку-Чек Актив для измерения уровня сахара в крови.Проверено на Себе.
 07:27
07:27
Использование прибора Акку-Чек Актив
 12:22
12:22
Как пользоваться глюкометром Акку Чек
 03:47
03:47
Глюкометр Акку Чек Актив (Accu Chek Active) описание, инструкция и обзор.
 02:40
02:40
Глюкометр accu-chek active инструкция — видео
 03:36
03:36
Отзывы об глюкометре Accu Chek ACTIVE. Негативные и положительные отзывы
 06:39
06:39
Инструкция пользователя Акку-Чек Актив
 08:26
08:26
Хороший бюджетный глюкометр Accu-Chek Actve
Символы Смотрите Руководство Пользователя Внимание…
Здоровье и гигиена Акку-Чек
- Изображение
- Текст
2
Символы
Смотрите Руководство Пользователя
Внимание (ознакомьтесь с документацией)!
Соблюдайте указания по технике безопасно-
сти, приведенными в Руководстве пользова-
теля Вашего прибора.
Хранить при
Производитель
Каталожный номер
Номер лота
IVD
Для IN VITRO диагностики.
На упаковке и на наклейке с техническими данными прибора Вы найдете следующие символы. Они означают:
0088
Эта продукция отвечает требованиям Дирек-
тивы 98/79/EC в отношении медицинских
приборов in vitro диагностики.
Данный продукт полностью отвечает законо-
дательству КНР по использованию определен-
ных веществ в электронных приборах.
Значения остальных символов разъясняются в инструкци-
ях/вкладышах, находящихся в упаковке с комплектующи-
ми прибора.
Последняя редакция: 2008-05
man_05334306001_01_Ru.indd 2
06.10.2008 19:43:12

3
Область применения
Область применения
Прибор для определения уровня глюкозы крови
Акку-Чек Актив
Прибор для количественного определения уровня глюкозы
свежей капиллярной крови с помощью тест-полосок
Акку-Чек Актив.
Возможно использовать для проведения самоконтроля.
Прибор может использоваться людьми с диабетом для
определения уровня глюкозы крови, а также профессио-
нальными медицинскими работниками.
Прибор не разрешен к использованию слабовидящими
людьми.
Эта продукция отвечает требованиям Дирек-
тивы 98/79/EC в отношении медицинских
приборов in vitro диагностики.
Данный продукт полностью отвечает законо-
дательству КНР по использованию определен-
ных веществ в электронных приборах.
Значения остальных символов разъясняются в инструкци-
ях/вкладышах, находящихся в упаковке с комплектующи-
ми прибора.
Последняя редакция: 2008-05
Медицинские работники должны соблюдать
инструкции, изложенные в главе 10 «Измерение
уровня глюкозы крови у нескольких пациентов –
инструкции для медицинских работников».
Любые предметы, находящиеся в контакте с кровью
человека, являются потенциальным источником
инфекций (см. Clinical and Laboratory Standards
Institute: Protection of Laboratory Workers from
Occupationally Acquired Infections; Approved Guideline
– Third Edition; CLSI document M29-A3, 2005).
man_05334306001_01_Ru.indd 3
06.10.2008 19:43:12

4
Об этом Руководстве пользователя
Об этом Руководстве пользователя
Перед тем, как приступить к первому измерению уровня
глюкозы крови, мы просим Вас внимательно и полностью
ознакомиться с Руководством пользователя. По всем
возникающим вопросам просим обращаться в Информаци-
онный центр (см. главу 17).
Это Руководство пользователя поможет Вам шаг за шагом
познакомиться с Вашим новым прибором. Здесь Вы найдете
всю информацию по обращению и уходу за прибором и по
устранению неполадок. Безупречное функционирование
Данное Руководство пользователя содержит три вида
предупреждающих символов. Внимательно прочтите
указания к ним!
Этот символ указывает на возможность получе-
ния травм и причинения вреда Вашему
здоровью или здоровью окружающих.
Этот символ указывает на действия, которые могут
повлечь за собой повреждение прибора.
Этот символ указывает на важность изложенной
информации.
прибора гарантируется не только правильным обращением,
но и соблюдением прочих указаний по применению. Этот
прибор является точным инструментом, неправильное
обращение с ним может привести к неисправности прибора.
Мы рекомендуем начать с ознакомления со всеми элемен-
тами Вашего прибора (см. главу 1.1). Проведите все опера-
ции, описанные в этом Руководстве пользователя, а также
проведите измерение уровня глюкозы крови.
man_05334306001_01_Ru.indd 4
06.10.2008 19:43:12

Об этом Руководстве пользователя Данное Руководство пользов…
Страница 4
- Изображение
- Текст
5
Об этом Руководстве пользователя
Данное Руководство пользователя содержит три вида
предупреждающих символов. Внимательно прочтите
указания к ним!
Этот символ указывает на возможность получе-
ния травм и причинения вреда Вашему
здоровью или здоровью окружающих.
Этот символ указывает на действия, которые могут
повлечь за собой повреждение прибора.
i
Этот символ указывает на важность изложенной
информации.
Все указания к действию выделяются цветным фоном,
например:
1 Вставьте тест-полоску в прибор.
man_05334306001_01_Ru.indd 5
06.10.2008 19:43:12

Об этом Руководстве пользователя В этом Руководстве пользов…
Страница 5
- Изображение
- Текст
6
Об этом Руководстве пользователя
В этом Руководстве пользователя Вы найдете примеры
показаний на дисплее. Элементы в этих примерах, обрам-
ленные лучами, мигают на дисплее.
Обратите внимание на следующее:
Данные, время или результаты измерений на изображениях
дисплея в этом Руководстве пользователя – это только
примеры. Они показывают результаты измерения в едини-
цах измерения ммоль/л (например 7,1 ммоль/л), дату в
порядке число-месяц (например 18- 5) и время суток в
24-часовом формате (например 15:27). На дисплее Вашего
прибора могут быть (и будут) показаны другие значения. На
Вашем приборе могут быть показаны результаты измере-
ния в единицах измерения мг/дл (например 128 мг/дл),
дата в порядке месяц-число (например 5-18) и время суток
в 12-часовом формате (например 03:27 pm).
man_05334306001_01_Ru.indd 6
06.10.2008 19:43:12

Содержание
1 Первое знакомство
12
1.1 Oписание компонентов прибора …………………………………………………………………………………………………………………… 12
1.2 Обзор основных характеристик …………………………………………………………………………………………………………………….. 14
2 Перед проведением измерения
16
2.1 Проверка комплектности поставки ……………………………………………………………………………………………………………….. 16
2.2 Проверка единиц измерения уровня глюкозы крови……………………………………………………………………………………… 17
2.3 Удаление защитной пленки с батарейки ………………………………………………………………………………………………………… 18
2.4 Проверка полной проверки дисплея ……………………………………………………………………………………………………………… 19
3 Настройка времени и даты
21
3.1 Обзор ………………………………………………………………………………………………………………………………………………………….. 22
3.2 Проведение настроек …………………………………………………………………………………………………………………………………… 24
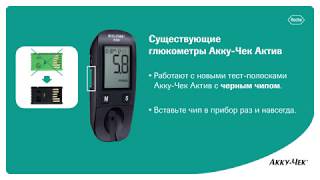
4 Кодирование
28
7
Содержание
man_05334306001_01_Ru.indd 7
06.10.2008 19:43:12

5 Определение уровня глюкозы крови
30
5.1 Подготовка к измерению уровня глюкозы крови …………………………………………………………………………………………… 30
5.2 Проведение измерения уровня глюкозы крови ……………………………………………………………………………………………… 31
Включение прибора ……………………………………………………………………………………………………………………………… 31
Нанесение капли крови на тест-полоску, находящуюся в приборе ……………………………………………………………. 34
Нанесение капли крови на тест-полоску, находящуюся вне прибора ………………………………………………………… 36
Отключение прибора ……………………………………………………………………………………………………………………………. 39
Маркировка результатов измерений ……………………………………………………………………………………………………… 40
5.3 Проверка результата измерения через контрольное окно тест-полоски ………………………………………………………….. 43
5.4 Символы и их значение перед измерением, в течение или после измерения ………………………………………………….. 45
5.5 Указания по определению уровня глюкозы крови………………………………………………………………………………………….. 46
5.6 Оценка результатов измерения …………………………………………………………………………………………………………………….. 49
Диапазон измерений ……………………………………………………………………………………………………………………………. 50
Сомнительные результаты – возможные причины …………………………………………………………………………………. 51
8
Содержание
man_05334306001_01_Ru.indd 8
06.10.2008 19:43:12

6 Использование прибора в качестве дневника
53
6.1 Память………………………………………………………………………………………………………………………………………………………… 53
6.2 Извлечение результатов из памяти ………………………………………………………………………………………………………………. 54
6.3 Расчет и просмотр средних значений…………………………………………………………………………………………………………….. 58
6.4 Передача результатов измерений …………………………………………………………………………………………………………………. 64
Если передача данных сорвалась …………………………………………………………………………………………………………… 69
7 Проверка прибора
70
7.1 Подготовка к контрольному измерению ……………………………………………………………………………………………………….. 71
7.2 Проведение контрольного измерения …………………………………………………………………………………………………………… 72
7.3 Причины возможных ошибок при проведении контрольных измерений ………………………………………………………… 79
8 Чистка прибора
82
8.1 Внешняя поверхность ………………………………………………………………………………………………………………………………….. 83
8.2 Направляющая для тест-полоски и измерительное окно ………………………………………………………………………………… 83
9
Содержание
man_05334306001_01_Ru.indd 9
06.10.2008 19:43:12

Измерение уровня глюкозы крови у нескольких пациентов…
Страница 9
- Изображение
- Текст
9 Замена батарейки
87
10 Измерение уровня глюкозы крови у нескольких пациентов – инструкции для медицинских работников 91
10.1 Проведение измерения уровня глюкозы крови ……………………………………………………………………………………………… 93
10.2 Дезинфекция прибора………………………………………………………………………………………………………………………………….. 95
11 Условия использования и хранения прибора
96
11.1 Температура ………………………………………………………………………………………………………………………………………………… 96
11.2 Влажность воздуха ………………………………………………………………………………………………………………………………………. 98
11.3 Освещение ………………………………………………………………………………………………………………………………………………….. 98
11.4 Источники внешних помех …………………………………………………………………………………………………………………………… 99
12 Символы, помехи и сообщения об ошибках
100
12.1 Символы, отображаемые на дисплее ………………………………………………………………………………………………………….. 101
12.2 Неполадки …………………………………………………………………………………………………………………………………………………. 107
12.3 Сообщения об ошибках ………………………………………………………………………………………………………………………………. 109
10
Содержание
man_05334306001_01_Ru.indd 10
06.10.2008 19:43:12

13 Технические характеристики
116
14 Утилизация прибора
121
15 Компоненты системы
122
16 Патенты
123
17 Информационный центр
124
17.1 Информационная служба …………………………………………………………………………………………………………………………… 124
17.2 Адреса ………………………………………………………………………………………………………………………………………………………. 124
18 Указатель терминов
125
11
Содержание
man_05334306001_01_Ru.indd 11
06.10.2008 19:43:12

Комментарии
- Manuals
- Brands
- Accu-Chek Manuals
- Blood Glucose Meter
- ACTIVE
- User manual
-
Contents
-
Table of Contents
-
Bookmarks
Quick Links
Prüfmittelnummer n/a
R2/1 – man_cover_06658768001_01_EN_ Format 127 x 154 mm – Black
R2/2 – man_cover_06658768001_01_EN_ Format 127 x 154 mm – PMS 287 CVC
User’s Manual
Blood Glucose Meter
Related Manuals for Accu-Chek Active
Summary of Contents for Accu-Chek Active
-
Page 1: Blood Glucose Meter
Prüfmittelnummer n/a R2/1 – man_cover_06658768001_01_EN_ Format 127 x 154 mm – Black R2/2 – man_cover_06658768001_01_EN_ Format 127 x 154 mm – PMS 287 CVC User’s Manual Blood Glucose Meter…
-
Page 2
This User’s Manual features three types of warning: This symbol indicates a possible risk of injury or of damage to your own health or the health of others. This symbol draws attention to actions that could result in damage to the meter. This symbol draws your attention to important information. -
Page 3: Table Of Contents
Contents Contents Intended use � � � � � � � � � � � � � � � � � � � � � � � � � � � � � � � � � � � � � � � � � � � � � � � � � � � � � � � � � � � � � � � � 2 About this User’s Manual �…
-
Page 4: Intended Use
People with diabetes can use this system • Only use the Accu‑Chek Active meter with to self‑test their blood glucose. Healthcare Accu‑Chek Active test strips that are approved professionals can use this system to check by Roche Diagnostics.
-
Page 5: About This User’s Manual
About this User’s Manual About this User’s Manual Read this User’s Manual carefully and completely before testing blood glucose for the first time. If you have any questions, please contact your customer support and service centre (see page 63). This User’s Manual will provide you with all the information you need to operate, troubleshoot and care for your blood glucose meter.
-
Page 6: Getting To Know The Blood Glucose Monitoring System
Getting to know the blood glucose monitoring system Getting to know the blood glucose monitoring system The Accu-Chek Active blood glucose meter and its components 1. Display 6. Locking catch displays the current and saved test results or opens the battery compartment cover device messages 7.
-
Page 7
Getting to know the blood glucose monitoring system Buttons of the blood glucose meter Overview of the M and S button functions: M button S button Press the M button to Press the S button to turn the meter on and call up turn the meter on and call up saved values settings, e.g. -
Page 8
Getting to know the blood glucose monitoring system The main features • Short testing time • Memory The meter needs only approximately 5 seconds The meter automatically saves up to 500 test for each test. results with the time and date of the test and all other information that is important for the test. -
Page 9: Checking The Unit Of Measurement
Steps before testing Steps before testing Unpacking the contents Check that the contents of the package are complete. You will find a list with the contents on the box. If anything is missing, please contact your customer support and service centre (see page 63). Checking the unit of measurement Test results can be displayed in two different units of measurement (mg/dL or mmol/L).
-
Page 10: Checking The Display
Steps before testing Checking the display You can check if all of the display elements are properly displayed, by carrying out a full display check. mg/dL meter mmol/L meter With the meter turned off, press Compare the elements displayed on your meter with the display the M and S buttons at the same shown here.
-
Page 11
Steps before testing Inserting the code chip A code chip is used to give the meter information about the properties of the test strips. This is why each test strip box contains a code chip. • Each time you open a new test strip box, you must replace the old code chip from the meter with the new… -
Page 12: Changing Settings
Changing settings Changing settings Overview You can make changes to the meter settings for the time format, time, date and beep. The meter is delivered with the date and time pre‑set. You may need to adjust the settings to your time zone.
-
Page 13
Changing settings Go to the next setting Turning the meter off Order of the settings Turning off Time format Time (hour) Time (minute) Year Date (month) Press the M and S buttons briefly at the same time. Date (day) When the final display appears on the display, the modified settings are also saved. -
Page 14: Setting The Time Format
Changing settings Setting the time format You can choose between two formats: 24-hour format Time from 0:00 to 23:59, date in the day‑month format (DD‑MM) Time from 12:00 to 11:59 followed by am or pm, date in the month‑day 12-hour format format (MM‑DD) When you change the time format, the time and date are changed accordingly.
-
Page 15: Setting The Time And Date
Changing settings Setting the time and date 24-hour format Setting the hours 24-hour format 12-hour format 12-hour format The hours flash on the display. Press the M button to set the Press the S button. Next come hours. the minutes. 24-hour format Setting the minutes�…
-
Page 16
Changing settings 24-hour format Setting the month 24-hour format 12-hour format 12-hour format The month flashes on the Press the M button to set the Press the S button. Next comes display. month. the day. 24-hour format Setting the day 24-hour format 12-hour format 12-hour format… -
Page 17
Changing settings Setting the beep Beep is on Turning the beep on or off Beep is off The beep symbol appears Press the M button briefly to turn The beep symbol appears together with (on) on the the beep on or off. together with (off) on the display. -
Page 18: Testing Blood Glucose
Testing blood glucose Using the Accu‑Chek Active meter, you can test blood glucose in two different ways. You can either apply the blood drop to the test field while the test strip is in the meter (see page 19), or you can remove the test strip from the meter and then apply the blood drop to the test field (see page 20).
-
Page 19
Testing blood glucose Testing blood glucose Turning the meter on mg/dL meter mmol/L meter Take a test strip from the test The meter turns on and first Following the display check, the strip container. Close the test performs a default display check code number is displayed (689 is strip container again (approx. -
Page 20
Testing blood glucose If you missed the code number on the display after sliding in the test strip, remove the test strip from the meter and slide it in again. Check that this code number is Following the code number, the the same as the code number on test strip symbol and the flashing the label of the test strip… -
Page 21
Testing blood glucose Applying blood With test strip in the meter mg/dL meter mmol/L meter Lance the side of a fingertip with Apply the blood drop to the The test is over in approximately your lancing device. centre of the green field and then 5 seconds. -
Page 22: Applying Blood
Testing blood glucose Applying blood With test strip outside the meter Lance the side of a fingertip with When the test strip and the The test strip and blood drop your lancing device. flashing blood drop symbols are symbols flash afterwards on the displayed: display.
-
Page 23: Turning The Meter Off
Testing blood glucose Turning the meter off Turn off mg/dL meter mmol/L meter Gently slide the test strip into the The test is over in approximately Remove the test strip from the test strip guide in the direction of 8 seconds. The test result meter.
-
Page 24: Notes On Blood Glucose Testing
Testing blood glucose Notes on blood glucose testing Incorrect results can cause the wrong therapy recommendation to be made and so produce serious adverse health effects. Therefore, follow the following instructions: • Use only test strips which are within the use by date. • The test strips are sensitive to humidity and moisture.
-
Page 25
Testing blood glucose Marking test results You can mark test results to describe certain events connected to the test result or particular characteristics of the test result. You can only mark a test result while the test strip is still in the meter and the test result is being displayed. -
Page 26
Testing blood glucose mg/dL meter No marker Control Before meal mmol/L Test reminder meter Other In the example above, the Before meal marker ( symbol) was selected. After meal After choosing the desired marker, you can turn the meter off. The test result is saved together As long as the test result is being displayed on the display, you can with the marker. -
Page 27
Testing blood glucose Setting a test reminder mg/dL If the meter is switched on at meter the time of the test reminder, the meter cancels the test reminder. If you perform a blood glucose test up to 1 hour before a test reminder, the meter cancels the test reminder. -
Page 28
Testing blood glucose Checking your test results The test strip itself allows you to estimate the test result through colour comparison and thus also to check the displayed result. After the blood glucose test The label on the test strip container shows blood glucose values in mg/dL and mmol/L next to each coloured dot. -
Page 29
Testing blood glucose Symbols before, during or after a blood glucose test The following symbols can appear on the display before, during or after a test. For further information, please refer to the “Symbols, problems and error messages” chapter (see page 52). Symbol Meaning The battery is almost empty. -
Page 30
Testing blood glucose Evaluating test results Blood glucose results are influenced, amongst others, by nutritional choices, medicine taken, state of health, stress and physical activity. • Do not change your therapy without talking about it with your healthcare professional first. • If the blood glucose result is above or below the target range that you have set together with your healthcare professional, please contact your healthcare professional. -
Page 31
Testing blood glucose Did you bend the test strip while sliding it into the meter? Did you apply the blood drop immediately after it formed? Did you bend or move the test strip before or during the test? Are the test strips past their use by date (check next to the symbol on the test strip container label and also the symbol on your meter’s display)? -
Page 32: Using The Meter As A Diary
Using the meter as a diary Using the meter as a diary The meter can save up to 500 test results with the time and the date and calculate averages from the saved test results. The meter automatically saves all test results. If all the memory locations are occupied, the oldest test result is deleted to create space for the new one when you perform a new blood glucose test.
-
Page 33
Using the meter as a diary Order of the saved test results In increasing order up to the to the averages oldest test result (memory location 500) In decreasing order down to the newest test result (memory location 1) mg/dL meter mmol/L meter Press the M button to retrieve the older test results. -
Page 34: Retrieving Averages
Using the meter as a diary Retrieving averages The averages calculated by the meter are calculated for 3 groups of test results and for 4 time periods per group. The meter calculates the averages in the following order: Group Test results Period (days) All test results Only test results which have been marked with…
-
Page 35
Using the meter as a diary Order of the averages Before meal mg/dL (7, 14, 30, 90 = number of days taken into account) meter All results Results marked with (Before meal) mmol/L meter “Before meal”… -
Page 36
Using the meter as a diary Back Turn off No average To go back to the saved test To turn the meter off: If there are no test results saved results: for the selected average, three Press the M button and S button dashes are displayed. -
Page 37: Analysing Test Results On The Pc
Analysing test results on the PC Analysing test results on the PC The meter has a built‑in USB (Universal Serial Bus) port for transferring saved test results to a computer (PC) that is equipped accordingly. Roche Diagnostics offers a variety of special diabetes management hardware and software products which enhance the integrated diary functions of your meter.
-
Page 38
Analysing test results on the PC If the meter is off, it is turned on when it gets connected to the Once the connection to the computer. computer has been successfully established, the meter transfers Read the User’s Manual of the software in use. There you will find all all saved test results. -
Page 39: If The Transfer Is Unsuccessful
Analysing test results on the PC The meter is supplied with electricity via the USB cable while it is connected to the computer. Nonetheless, there must be a battery in the meter. To turn the meter off, unplug the For approximately 3 seconds, USB connector from the meter is displayed.
-
Page 40: Checking Your Meter
• the meter with the code chip inserted • the Accu‑Chek Active test strips that belong to the code chip • Accu‑Chek Active control solution Control 1 (low glucose concentration) or Control 2 (high glucose concentration) • a clean, dry paper towel • the concentration table for the control solutions (see label on the test strip container)
-
Page 41
Checking your meter Carrying out a control test mg/dL meter mmol/L meter Read the package insert which The meter turns on and first Following the display check, the comes with the control solutions. performs a default display check code number is displayed (689 is (approx. -
Page 42
Checking your meter mmol/L meter mg/dL meter When the flashing blood drop is Hold the bottle downwards at an The test starts. The flashing displayed on the display and the angle. hourglass symbol indicates that beep sounds, you have approx. the test is in progress. -
Page 43
Checking your meter These figures mmol/L meter are only examples Accu‑Chek Active Control ® Level mg/dL mmol/L 40-70 2�2-3�9 135-182 7�5-10�1 Control solution Unit of mg/dL used measurement meter While the result of the control After marking the result as a… -
Page 44
Checking your meter Sources of inaccurate control tests If the result of the control test is outside the specified concentration range, repeat the control test. If the result of the second test is also outside the concentration range, check the following points. If your responses to the questions below are different from those given, make the respective corrections when you perform the next test. -
Page 45
Checking your meter Are the test strip guide and measurement window clean? Has the control solution been open for less than 3 months? Once opened, control solutions keep for only 3 months. They must not be used after this period. Have you read the section “Treating the control solutions properly”… -
Page 46: Cleaning The Meter
Cleaning the meter Cleaning the meter If the meter is dirty, it may be necessary to clean it. Healthcare professionals using the meter to test several patients’ blood glucose must also read the instructions on disinfection (see page 49). • Use only cold water as a cleaning agent. • Clean the meter using a lightly moistened cloth or a lightly moistened cotton swab.
-
Page 47
Cleaning the meter Cleaning the measurement window CLICK Carefully dab the measurement Place the cover straight and Slide the cover closed. The cover window and its surrounding area centred onto the meter. must audibly CLICK into place. using a lightly moistened cloth or In doing so, the guides on the cotton swab. -
Page 48: Changing The Battery
Changing the battery Changing the battery When the battery symbol appears on the display for the first time, the battery is almost empty. You can perform approximately 50 more tests with the battery. Change the battery as soon as possible. The battery has already lost a lot of power and changeable conditions (e.g.
-
Page 49
Changing the battery Never throw batteries into a fire. They may explode. CLICK Dispose of used batteries in an environmentally friendly way at a collection depot or through your dealer. Place the battery compartment Press the battery compartment cover back on again. The two cover closed. -
Page 50: Testing Blood Glucose In More Than One Patient
• Patients and medical staff are potentially at risk of becoming infected if the same Accu‑Chek Active meter is used to test blood glucose in more than one patient. All objects that come into contact with human blood are potential sources of infection.
-
Page 51: Disinfecting The Meter
Testing blood glucose in more than one patient Disinfecting the meter The following parts of the meter may become contaminated: • the case • the cover • the measurement window The meter, the cover and the measurement window must be carefully cleaned and disinfected after every use (see the “Cleaning the meter”…
-
Page 52: Test And Storage Conditions
Test and storage conditions Test and storage conditions So that the meter works reliably and you obtain accurate test results, make sure that the following conditions are met. Temperature • Do not use test results obtained at the limits of • For blood glucose tests and control tests the the permitted temperature range as a basis for temperature must be between +8 and…
-
Page 53
Test and storage conditions Light conditions Avoid sudden changes in light conditions while Do not perform a test when the meter and the testing. The flash of a camera, for example, can test strips are exposed to direct sunlight. Go to a lead to incorrect test results. -
Page 54: Symbols, Problems And Error Messages
Symbols, problems and error messages Symbols, problems and error messages In addition to test results, time and date, other symbols and error messages also appear in your meter’s display. The following provides an overview of all symbols and error messages. Please pay attention to all symbols and error messages when you use the meter.
-
Page 55
Symbols, problems and error messages Symbol Meaning When an average is displayed (memory): the symbol is preceded by the number of days taken into account. Together with error message E‑5: The meter is exposed to too much light. Flashing – A test is in progress or an average is being calculated. The beep is turned on. -
Page 56
• There is no code chip in the meter. Insert the code chip that belongs to the Accu‑Chek Active test strips you are currently using. Averages cannot be calculated because • you have not set the time and date, • only test results without a time and date are saved,… -
Page 57
Symbols, problems and error messages Symbol Meaning The test result has been lost from memory. Decimal point: displayed by mmol/L meters and is part of the test result (e.g. 8.2 mmol/L is displayed as The meter is connected to a computer (PC). The meter has been disconnected from the computer (PC). -
Page 58
Symbols, problems and error messages Problems Problem Cause and solution The meter will not turn on. • The battery is empty or there is no battery in the meter. Insert a new battery. • You have inserted the battery the wrong way round. Remove the battery and place it in the battery compartment as shown there. -
Page 59: Error Messages
Symbols, problems and error messages Error messages When an error occurs, an error message appears on the display and two beeps sound. Turn the meter off. Depending on the situation, either briefly press the M button and S button or remove the test strip from the meter to turn the meter off.
-
Page 60
• The incorrect code chip is currently in the meter. Remove the code chip and insert the code chip that belongs to the Accu‑Chek Active test strips you are currently using. • While the test was in progress, you connected the meter to a computer that was on. -
Page 61: Disposing Of Your Meter
Disposing of your meter Disposing of your meter During blood glucose testing the meter may come into contact with blood. Used meters therefore carry a risk of infection. After having removed the battery, please dispose of your used meter according to the regulations applicable in your country.
-
Page 62: Technical Data And System Components
You will find information on how the system works, on the test principle and on reference methods in the Accu‑Chek Active test strip package insert. Measuring interval 10–600 mg/dL (0.6–33.3 mmol/L) Blood volume 1–2 µL (1 µL (microlitre) = 1 thousandth of a millilitre)
-
Page 63
Interference on other electrically‑driven equipment is not anticipated. Performance The performance data for the Accu‑Chek Active system (Accu‑Chek Active analysis meter with Accu‑Chek Active test strips) was obtained using capillary blood from diabetic patients (method comparison, accuracy), venous blood (repeatability) and control solution (reproducibility). Calibration and… -
Page 64: System Components
Use only these test strips when you test blood glucose using the Accu‑Chek Active meter. Accu-Chek Active control solutions Use only these control solutions when you carry out control tests using the Accu‑Chek Active meter and the respective test strips.
-
Page 65: Customer Support And Service Centre
Customer Support and Service Centre Information service and troubleshooting For questions on how to operate your Accu‑Chek Active meter, or regarding implausible test results, or if you suspect the meter or test strips to be defective, contact your Roche Diagnostics customer support and service centre.
-
Page 66
#11-01 Central Plaza Abu Dhabi Singapore, 168730 www.accu-chekarabia.com Accu-Chek ExtraCare line: 6272 9200 www.accu-chek.com.sg South Africa Roche Products (Pty) Ltd. Diagnostics Division 9 Will Scarlet Road, Ferndale P.O. Box 1927, Randburg 2125 Accu-Chek Customer Care Centre: 080-DIABETES (Dial 080-34-22-38-37) www.diabetes.co.za… -
Page 67: Alphabetical Index
Index Index display 4 display check sources of error drop (symbol) control test 42 alternative sites 23 testing blood glucose 28 apple core (symbol) 23 storage conditions 50 electromagnetic field 51, 58, apple (symbol) sun (symbol) error messages 57 applying blood 19, 20, symbols (display) 52 exp (symbol)
-
Page 71: Explanation Of Symbols
Explanation of symbols Various symbols are featured on the packaging and type plate of the meter. Their meanings are as follows: Symbol Meaning Consult instructions for use Caution, refer to safety‑related notes in the instructions for use accompanying this product. Biological Risks –…
-
Page 72
For more information contact ©2013 Roche Diagnostics ACCU‑CHEK is a trademark of Roche. Roche Diagnostics GmbH Sandhofer Strasse 116 68305 Mannheim, Germany www.accu‑chek.com…