- Manuals
- Brands
- Ducati Manuals
- Automobile
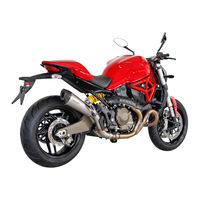
- MONSTER 821
Manuals and User Guides for Ducati MONSTER 821. We have 3 Ducati MONSTER 821 manuals available for free PDF download: Workshop Manual, Owner’s Manual
Ducati MONSTER 821 Workshop Manual (1165 pages)
2015
Brand: Ducati
|
Category: Automobile
|
Size: 49.81 MB
Table of Contents
-
Symbols — Abbreviations — References
9
-
Product Specifications
9
-
General Safety Rules
13
-
Model Identification
17
-
Identification Data
17
-
Data Stamped on the Frame, Europe (Monster 821) and Australia Version
18
-
Data Stamped on the Frame, Europe (Monster 821 – 35 Kw) Version
18
-
Data Stamped on the Frame, France (Monster 821 — 25 Kw) Version
18
-
Data Stamped on the Frame, Usa/Canada, California Version
19
-
Data Stamped on the Europe/France/Japan Version Engine
19
-
Data Stamped on Engine, Australia Version
20
-
Data Stamped on the Usa/Canada Version Engine
20
-
Lights/Instrument Panel
26
-
Fuel System
28
-
Injection-Ignition System
29
-
Hydraulic Brakes
31
-
Dimensions
43
-
Fuel, Lubricants and Other Fluids
44
-
Engine Oil
44
-
Viscosity
45
-
Engine Tightening Torque Values
46
-
Frame Tightening Torque Values
51
-
Diagnosis Special Tools
60
-
Frame Special Tools
61
-
Engine Special Tools
63
-
Vehicle Pre-Delivery
69
-
Scheduled Maintenance Chart: Operations to be Carried out by the Customer
70
-
Scheduled Maintenance Chart: Operations to be Carried out by the Dealer
71
-
Adjusting the Steering Head Bearing Play
73
-
Change Timing Belts
75
-
Adjusting the Rear Shock Absorber
76
-
Adjusting the Position of the Gearchange Pedal and Rear Brake Pedal
78
-
Gear Change Pedal
78
-
Rear Brake Lever Pedal
78
-
Adjusting the Front Brake Lever
82
-
Checking Rear Brake Pad Wear and Replacing Brake Pads
83
-
Checking Front Brake Pad Wear and Replacing Brake Pads
90
-
Adjusting the Chain Tension
94
-
Clutch Control Cable Adjustment
96
-
Changing the Fluid in the Rear Brake System
99
-
Connect Bleeding Tool to Left-Hand Front Brake Calliper Bleed Valve or to Rear Brake Bleed Valve
102
-
Changing the Fluid in the Front Brake Circuit
104
-
Changing the Coolant
110
-
Check the Coolant Level
115
-
Changing and Cleaning the Air Filters
116
-
Replacing the Spark Plugs
119
-
Checking Valve Clearance
122
-
Checking the Opening Clearance
123
-
Checking the Closing Clearance
124
-
Changing the Engine Oil and Filter Cartridge
127
-
Check Engine Oil Level
134
-
Refitting the Rear-View Mirrors
135
-
Removing the Rear-View Mirrors
136
-
Refitting the Instrument Panel Assembly
137
-
Removing the Instrument Panel Assembly
140
-
Refitting the Seat Bottom Cover
142
-
Removing the Seat Bottom Cover
143
-
Refitting the Rear Grab Handles
144
-
Removing the Rear Grab Handles
145
-
Refitting the Seat Release Mechanism
146
-
Removing the Seat Release Mechanism
149
-
Refitting the Seat
152
-
Removing the Seat
157
-
Refitting the Rear Mudguard
162
-
Removing the Rear Mudguard
163
-
Refitting the Front Mudguard
164
-
Removing the Front Mudguard
167
-
Table V
169
-
Table T
177
-
Rear Guard
177
-
Table S
179
-
Rear Subframe
179
-
Table R
181
-
Rear Subframe and BBS Control Unit Wiring
181
-
Table Q
183
-
Wiring for Rear Speed and Rear Stop Sensor
183
-
Table P
187
-
Table O
189
-
Electrical Component Compartment and Box
189
-
Table N
191
-
Lower/Front Cable Passage
191
-
Table M
194
-
Crankcase Lh/Lower Cables
194
-
Table L
199
-
LH Side Wiring Branch: Coils, Pick-Up
199
-
Table I
204
-
Vertical Head LH Side Wiring Branch
204
-
Table H
206
-
Front RH Wiring Branch
206
-
Table G
210
-
Front Branches in Headlight Rear Area (Right)
210
-
Table F
212
-
Front Branches in Headlight Rear Area (Left)
212
-
Table E
214
-
Front Branches in Headlight Rear Area
214
-
Table C
222
-
Airbox Front Main Wiring Branch
222
-
Airbox LH Side Wiring Branch
223
-
Branches on Airbox
225
-
Routing of Wiring on Frame
228
-
Fuse Box Keys
233
-
Wire Colour Coding
236
-
Injection /Electric System Diagram Key
237
-
Rectifier-Regulator
238
-
Removing the Regulator
238
-
Refitting the Regulator
238
-
Regulator Fuse
238
-
Alternator / Generator
241
-
Removing the Generator
241
-
Refitting the Generator
242
-
Battery Safety Rules
243
-
Instructions for Battery Use
243
-
Removing the Battery
243
-
Topping up the Electrolyte
254
-
Remove the Battery
254
-
Recharging the Battery
258
-
Storing the Battery
258
-
Checking the Battery Charging System
259
-
Solenoid Starter
260
-
Checking Operation of the Solenoid Starter
263
-
Refitting the Solenoid Starter
263
-
Starter Motor
266
-
Electric Starting System
267
-
Aligning the Headlight
268
-
Replacing the Light Bulbs — Headlight
270
-
Replacing the Light Bulbs — Tail Light
271
-
Instantaneous Fuel Consumption
272
-
VIN Code
273
-
Activations through DDS 2
274
-
Software Remote Update
275
-
Light Control
276
-
Low/High Beam
276
-
Turn Indicators
276
-
Setting the Units of Measurement
277
-
Engine Rpm Indication (RPM)
281
-
Changing the PIN CODE
282
-
Entering the «Old» Code
282
-
Entering the «New» Code
282
-
Vehicle Release
283
-
Pin Code
285
-
Clock Setting
287
-
Lap
288
-
Stored Laps Displaying
288
-
Backlighting Adjustment
291
-
Battery Voltage
292
-
Customising the Riding Mode: Restoring Default Settings
293
-
Customising the Riding Mode: ABS Setting
295
-
Customising the Riding Mode: DTC Level Setting
297
-
Customising the Riding Mode: Engine Setting
298
-
Customising Riding Mode: Parameter Storage
299
-
Customising the Riding Mode
300
-
Setting MENU
302
-
Lap Time
303
-
Lap Recording
303
-
Displayed Errors Description
305
-
Error Icons Table
306
-
Error Warnings
308
-
Errors
309
-
«OIL SERVICE» or «DESMO SERVICE» Warning
310
-
The Message «OIL SERVICE» or «DESMO SERVICE» Countdown
311
-
«OIL SERVICE» Zero Warning
312
-
Service Indication
313
-
Ambient Air Temperature
314
-
Average Fuel Consumption
315
-
Clock
317
-
Trip Time
318
-
Partial Fuel Reserve Counter (TRIP FUEL)
319
-
Trip Meter 2
320
-
Odometer
322
-
Engine Coolant Temperature
324
-
Dtc
325
-
Abs
328
-
Riding Mode
330
-
Main Functions
333
-
Displayed Functions
333
-
Parameter Setting/Displaying
334
-
Function Buttons
337
-
Technological Dictionary
338
-
Power Mode
338
-
Ride by Wire
338
-
Ducati Traction Control
338
-
Instrument Panel
340
-
Accelerator Position System (APS)
342
-
Electric Diagram
343
-
CAN Line
344
-
Ducati Traction Control (DTC)
345
-
Electronic Throttle Valve (ETV)
346
-
Black Box System (BBS)
348
-
Map Sensor
350
-
Timing/Rpm Sensor
353
-
Throttle Position Potentiometer (TPS)
357
-
Lambda Sensor
359
-
Electronic Control Unit
362
-
ECU 2 Connector
363
-
Solenoid Valves
367
-
Exhaust Valve Motor
368
-
Right-Hand Switch
371
-
Engine Stop Button
372
-
Starter Button
372
-
Left-Hand Switch
374
-
Horn Button
375
-
Turn Indicator Switch (TURN)
375
-
Control Switch (SET UP) (SET DOWN)
375
-
Low Beam and High Beam (Hi Beam)
375
-
Horn
378
-
Checking the Fuses
379
-
Front Fuse Boxes
379
-
MAIN FUSES and ABS
382
-
Side Stand Switch
386
-
Air Temperature Sensor
388
-
Engine Temperature Sensor
390
-
Clutch Switch
392
-
Oil Pressure Sensor
393
-
Gear/Neutral Sensor
395
-
Rear Stop Switch
397
-
Front Stop Switch
399
-
Refitting the Front Wheel
401
-
Overhauling the Front Wheel
404
-
Wheel Bearings
404
-
Inspecting the Wheel Shaft
405
-
Overhauling the Wheel Rim
406
-
Removing the Front Wheel
408
-
Refitting the Rear Wheel
411
-
Overhauling the Rear Wheel
415
-
Removing the Rear Wheel
416
-
Refitting the Front Brake System
420
-
Refitting the Brake Discs
425
-
Overhauling the Front Brake Components
426
-
Removing the Brake Discs
427
-
Removing the Front Brake System
428
-
Maintenance Operations
430
-
Refitting the Front Brake Master Cylinder
431
-
Removing the Front Brake Master Cylinder
436
-
Refitting the Rear Brake Calliper
439
-
Removing the Rear Brake Disc
441
-
Checking the Brake Disc
441
-
Refitting the Brake Disc
441
-
Removing the Rear Brake Calliper
443
-
Refitting the Rear Brake Control
445
-
Disassembling the Rear Brake Control
450
-
Removing the Rear Brake Control
451
-
ABS System Deactivation
455
-
View Parameters/States
456
-
ABS System Operation Information
456
-
ABS Diagnosis
456
-
Select the Function «View Errors»
457
-
Operating Principle
459
-
Key to ABS Hydraulic System
459
-
Braking Without ABS
460
-
ABS 1 Modulation: Braking
460
-
Routing Wiring Harnesses/Hoses
463
-
Refitting the ABS Control Unit
477
-
Removing the ABS Control Unit
480
-
Changing the Rear Phonic Wheel Sensor
482
-
Changing the Front Phonic Wheel Sensor
486
-
Bleeding of the ABS Hydraulic System
488
-
Adjusting the AIR-GAP of Phonic Wheel Sensor
490
-
Refitting the Throttle Control
493
-
Removing the Throttle Control
496
-
Refitting the Handlebar
498
-
Removing the Handlebar
506
-
Removing the Left Handgrip
507
-
Refitting the Clutch Assembly
511
-
Removing the Clutch Assembly
515
-
Refitting the Gear Change Control
519
-
Disassembling the Gear Change Control
522
-
Removing the Gear Change Control
523
-
Refitting the Front Fork
525
-
Overhauling the Front Fork
528
-
Removing the Front Fork
561
-
Refitting the Steering Tube Components
564
-
Removing the Steering Tube Components
567
-
Steering Angle Adjustment
570
-
Adjusting the Steering Head Bearing Clearance
572
-
Refitting the Rear Suspension
573
-
Overhauling the Rear Shock Absorber
575
-
Spring Preload
575
-
Removing the Rear Shock Absorber
577
-
Rear Suspension System
579
-
Refitting the Rear Swinging Arm
580
-
Overhauling the Rear Swinging Arm
586
-
Inspecting the Swinging Arm Shaft
587
-
Removing the Swinging Arm
588
-
Refitting the Rear Sprocket
597
-
Replacing the Rear Sprocket
599
-
Refitting the Front Sprocket
601
-
Removing the Front Sprocket
605
-
Inspection of the Final Drive
608
-
Refitting the Footpeg Holder Plate
610
-
Removing the Footpeg Holder Plate
615
-
Refitting the Front Footpegs
618
-
Refitting the Rear Footpegs
618
-
Removing the Front Footpegs
620
-
Removing the Rear Footpegs
620
-
Refitting the Side Stand
621
-
Reassembling the Side Stand
621
-
Removing the Side Stand
624
-
Refitting the Light Assembly
627
-
Front Light Assembly
627
-
Refitting the Turn Indicators
629
-
Refitting the Headlight
630
-
Refitting the Rear Subframe
634
-
Refitting the Structural Parts and Frame
636
-
Checking the Frame
645
-
Frame Overall Dimensions
645
-
Removing the Rear Subframe
647
-
Removing the Light Assembly
650
-
Removing Structural Components and Frame
656
-
Removing the Tail Light
664
-
Refitting the Number Plate Holder
666
-
Removing the Number Plate Holder
673
-
Refitting the Electric Components Compartment
681
-
Removing the Electric Components Compartment
693
-
Refitting the Fuel Tank Flange
703
-
Removing the Fuel Tank Flange
706
-
Refitting the Tank Filler Plug
707
-
Removing the Tank Filler Plug
708
-
Removing the Fuel Tank
709
-
Refitting the Airbox and Throttle Body
711
-
Removing the Airbox and Throttle Body
729
-
Refitting the Secondary Air System
741
-
Removing the Secondary Air System
744
-
Refitting the Air Filter
747
-
Removing the Air Filters
748
-
Refitting the Silencer
749
-
Refitting the Exhaust System
754
-
Removing the Exhaust System
761
-
Removing the Silencer
767
-
Refitting the Canister Filter
769
-
Removing the Canister Filter
772
-
Canister Filter System
775
-
Refitting the Engine
777
-
Removing the Engine
783
-
Refitting the Oil Pump
788
-
Reassembling the Oil Pump
792
-
Disassembling the Oil Pump
795
-
Removing the Oil Pump
796
-
Refitting the Water Tank
799
-
Removing the Water Tank
806
-
Refitting the Cooling System Hoses and Unions
811
-
Removing the Cooling System Hoses and Unions
815
-
Replacing the Electric Fan
828
-
Removing the Radiator
829
-
Refitting the Water Pump
837
-
Removing the Water Pump
844
-
Checking the Engine Timing
849
-
Checking Valve Lift
854
-
Checking and Adjusting the Valve Clearance
860
-
Refitting the Timing Outer Covers
865
-
Refitting the Timing Belts
867
-
Refitting the Cylinder Heads Pulleys/Idler Pulleys
877
-
Reassembling the Timing Pulleys
881
-
Refitting the Tensioner Pins
882
-
Refitting the Timing Layshaft Pulley
884
-
Removing the Timing Layshaft Pulleys
890
-
Disassembling the Camshaft Pulleys
894
-
Removing the Tensioner Pins
895
-
Removing the Cylinder Head Pulley/Fixed Tensioner
896
-
Removing the Mobile Tensioner/Timing Belt
898
-
Removing the Timing Belt Covers
900
-
Refitting the Intake Manifold and Water Union
902
-
Removing the Intake Manifold and Water Union
905
-
Refitting the Camshafts
907
-
Sealing Rings
913
-
Cylinder Head Cover
914
-
Check of the Camshafts and Supports
923
-
Removing the Camshafts
925
-
Refitting the Cylinder Head Assemblies
931
-
Reassembling the Cylinder Head
933
-
Valve Guide Sealing Rings
935
-
Overhauling the Cylinder Head Components
937
-
Valve Seats
938
-
Removing the Valve Rocker Arms
949
-
Removing the Valves
965
-
Refitting Valves, Closing Shims and Split Rings
966
-
Closing Shims
966
-
Removing the Cylinder Heads
972
-
Refitting the Cylinder/Piston Assembly
973
-
Overhauling the Cylinder
982
-
Overhauling the Piston
983
-
Checking the Piston-Cylinder Clearance
984
-
Overhauling the Gudgeon Pins
984
-
Overhauling the Piston Rings
986
-
Checking the Piston Ring/Cylinder Clearance
989
-
Removing the Cylinder/Piston Assembly
991
-
Refitting the Clutch
997
-
Checking and Overhauling the Components
1004
-
Clearance between the Clutch Housing and Friction Plate
1004
-
Overhauling the Clutch Plates
1004
-
Overhauling the Pressure Plate
1005
-
Pusher Plate Springs
1005
-
Removing the Clutch
1006
-
Description of the Clutch Assembly
1014
-
Reassembling the Clutch Cover
1020
-
Disassembling the Clutch Cover
1024
-
Removing the Clutch Cover
1027
-
Refitting the Primary Drive Gears
1030
-
Removing the Primary Drive Gears
1034
-
Refitting the Gearchange Mechanism
1038
-
Refitting the Gear Interlock Plunger and Ratchet
1041
-
Disassembling Gear Interlock Plunger and Ratche
1043
-
Removing the Gearchange Mechanism
1045
-
Reassembling the Gearbox Assembly
1047
-
Reassembling the Gearbox Shafts
1049
-
Inspecting the Fork Selector Drum
1057
-
Inspecting the Gear Selector Forks
1058
-
Overhauling the Gearbox
1060
-
Disassembling the Gearbox Shafts
1061
-
Removing the Gearbox Assembly
1068
-
Fitting the Generator Cover
1073
-
Fitting the Flywheel/Generator Assembly
1078
-
Overhauling the Flywheel/Generator Assembly
1081
-
Removing the Flywheel/Generator Assembly
1087
-
Disassembling the Generator Cover
1089
-
Removing the Generator Cover
1091
-
Removing the Starter Motor
1097
-
Refitting the Starter Motor Gear
1100
-
Removing the Starter Motor Idler Gear
1101
-
Refitting the Timing Gears
1103
-
Removing the Timing Gears
1105
-
Refitting the External Components
1109
-
Removing Outer Components
1118
-
Reassembling the Crankcase Halves
1127
-
Main Bearing Shells
1130
-
Changing the Crankshaft Bearing Shells
1130
-
Overhauling the Crankcase Halves
1137
-
Separating the Crankcase Halves
1141
-
Refitting the Connecting Rod Assembly
1148
-
Reassembling the Connecting Rod Assembly
1149
-
Overhauling the Connecting Rod Assembly
1154
-
Big-End Bearing-Crank Pin Clearance
1161
-
Tightening Procedure
1161
-
Disassembling the Connecting Rod Assembly
1163
-
Removing the Connecting Rod Assembly
1164
Advertisement

Ducati MONSTER 821 Owner’s Manual (295 pages)
Brand: Ducati
|
Category: Motorcycle
|
Size: 5.41 MB
Table of Contents
-
Table of Contents
4
-
Introduction
8
-
Safety Guidelines
8
-
Warning Symbols Used in the Manual
9
-
Intended Use
10
-
Rider’s Obligations
11
-
Rider’s Training
13
-
Apparel
13
-
Safety «Best Practices
14
-
Refuelling
16
-
Carrying the Maximum Load Allowed
17
-
Dangerous Products — Warnings
18
-
Vehicle Identification Number
20
-
Engine Identification Number
21
-
-
Instrument Panel (Dashboard)
22
-
Instrument Panel
22
-
Acronyms and Abbreviations Used in the Manual
27
-
Technological Dictionary
27
-
Information Statement on UE Directive 2014/53/UE
29
-
Function Buttons
31
-
Parameter Setting and Displaying
32
-
Main Functions
45
-
Engine Rpm Indication (RPM)
47
-
Motorcycle Speed
50
-
Gear
51
-
Riding Mode (RIDING MODE)
52
-
Dtc
57
-
Abs
62
-
Menu Functions
67
-
Odometer (TOT)
69
-
Trip Meter 1 (TRIP 1)
70
-
Trip Meter 2 (TRIP 2)
71
-
Residual Range (RANGE)
72
-
Lap Time
73
-
Engine Coolant Temperature
76
-
Instantaneous Fuel Consumption
78
-
Average Fuel Consumption
79
-
Average Speed
80
-
Trip Time
81
-
Ambient Air Temperature
82
-
Clock
83
-
Auxiliary Functions
84
-
Infotainment
85
-
Service Indication (SERVICE)
96
-
OIL SERVICE Zero Warning
97
-
OIL SERVICE or ANNUAL SERVICE or DESMO SERVICE Countdown Indication
98
-
OIL SERVICE or ANNUAL SERVICE or DESMO SERVICE Indication
99
-
Warnings/Alarms (WARNING)
100
-
Error Warnings
105
-
Viewing Side Stand Status
107
-
Setting Menu
108
-
Customising the RIDING MODE
110
-
Customizing the Riding Mode: ABS Adjustment
112
-
Customizing the Riding Mode: Setting the DTC Level
115
-
Customizing the Riding Mode: Engine Adjustment
118
-
Customizing the Riding Mode: Restoring Default Settings
121
-
Display Mode Setting
125
-
Display Backlighting Setting
127
-
Pin Code
130
-
Changing the PIN CODE
134
-
Lap
138
-
Setting the Units of Measurement
143
-
Date Setting
152
-
Clock Setting
158
-
Bluetooth Device Setting
162
-
Service Information
173
-
Information (INFO)
174
-
Tire Setting
175
-
Display Backlighting Colour
181
-
Light Control
182
-
Immobilizer System
186
-
Keys
187
-
Operation
188
-
Key Duplication
189
-
Restoring Motorcycle Operation Via the PIN CODE
190
-
-
Controls
194
-
Position of Motorcycle Controls
194
-
Ignition Switch and Steering Lock
195
-
Left-Hand Switch
196
-
Clutch Lever
197
-
Right-Hand Switch
200
-
Throttle Twistgrip
201
-
Front Brake Lever
202
-
Rear Brake Pedal
203
-
Gear Change Pedal
204
-
Adjusting the Position of the Gearchange Pedal and Rear Brake Pedal
205
-
-
Main Components and Devices
207
-
Position on the Vehicle
207
-
Tank Filler Plug
208
-
Seat Lock
209
-
Seat Height Adjustment
210
-
Helmet Cable
214
-
Side Stand
215
-
Rear Shock Absorber Adjusters
216
-
-
Riding the Motorcycle
219
-
Running-In Recommendations
219
-
Pre-Ride Checks
221
-
Engine Start
223
-
Moving off
225
-
Braking
226
-
Stopping the Motorcycle
228
-
Refuelling
229
-
Parking
230
-
Tool Kit and Accessories
231
-
-
Main Use and Maintenance Operations
232
-
Checking Coolant Level and Topping Up, if Necessary
232
-
Changing the Air Filter
233
-
Check Brake Fluid Level
234
-
Checking Brake Pads for Wear
235
-
Charging the Battery
236
-
Charging and Maintenance of the Battery During Winter Storage
239
-
Removing the Battery
241
-
Refitting the Battery
248
-
Checking Drive Chain Tension
254
-
Lubricating the Drive Chain
256
-
Changing Bulbs
257
-
Aligning the Headlight
258
-
Tyres
260
-
Check Engine Oil Level
263
-
Cleaning and Replacing the Spark Plugs
265
-
Cleaning the Motorcycle
266
-
Storing the Motorcycle
268
-
Important Notes
268
-
-
Scheduled Maintenance Chart
269
-
Technical Data
274
-
Weights
274
-
Dimensions
275
-
Fuel, Lubricants and Other Fluids
276
-
Engine
278
-
Timing System
279
-
Performance Data
280
-
Spark Plugs
280
-
Fuel System
280
-
Brakes
281
-
Transmission
282
-
Frame
283
-
Wheels
283
-
Tyres
283
-
Suspension
283
-
Exhaust System
283
-
Available Colours
283
-
Electric System
285
-
Routine Maintenance Record
291
-

Ducati MONSTER 821 Owner’s Manual (253 pages)
Brand: Ducati
|
Category: Motorcycle
|
Size: 7.29 MB
Table of Contents
-
Table of Contents
4
-
Introduction
8
-
Safety Guidelines
8
-
Warning Symbols Used in the Manual
9
-
Intended Use
10
-
Rider’s Obligations
10
-
Rider’s Training
12
-
Apparel
12
-
Safety «Best Practices
13
-
Refuelling
15
-
Carrying the Maximum Load Allowed
16
-
Dangerous Products — Warnings
17
-
Vehicle Identification Number
19
-
Engine Identification Number
20
-
-
Instrument Panel (Dashboard)
21
-
Display Settings and Functions
21
-
Acronyms and Abbreviations Used in the Manual
25
-
Technological Dictionary
25
-
Function Push-Buttons
27
-
Parameter Setting/Displaying
28
-
Main Functions
35
-
Motorcycle Speed
37
-
Engine Rpm Indication (RPM)
38
-
Riding Mode
40
-
Abs
44
-
Dtc
49
-
Engine Coolant Temperature
54
-
Menu 1 Functions
56
-
Odometer (TOT)
57
-
Trip Meter 1 (TRIP A)
59
-
Trip Meter 2 (TRIP B)
60
-
Partial Fuel Reserve Counter (TRIP FUEL)
61
-
Trip Time
62
-
Clock
63
-
Menu 2 Functions
64
-
Average Fuel Consumption
65
-
Instantaneous Fuel Consumption
67
-
Average Speed
68
-
Ambient Air Temperature
70
-
Service Indication (SERVICE)
71
-
OIL SERVICE Zero Warning
72
-
The Message «OIL SERVICE» or «DESMO SERVICE» Countdown
73
-
Warning
74
-
Errors
75
-
Error Warnings
76
-
Displayed Errors Description
77
-
LAP Time
81
-
Setting MENU
84
-
Customising the Riding Mode
86
-
Customising Riding Mode: Parameter Storage
89
-
Customising the Riding Mode: Engine Setting
91
-
Customising the Riding Mode: DTC Level Setting
93
-
Customising the Riding Mode: ABS Setting
96
-
Customising Riding Mode: Restore Default Settings (ALL DEFAULT)
99
-
Customising the Riding Mode: Restoring Default Settings
100
-
Battery Voltage
102
-
Back-Lighting Setting
104
-
Lap
106
-
Clock Setting
114
-
Pin Code
117
-
Changing the PIN CODE
121
-
Engine Rpm Digital Indication (RPM)
126
-
Setting the Units of Measurement
127
-
Light Control
137
-
The Immobilizer System
140
-
Keys
141
-
Operation
142
-
Duplicate Keys
143
-
Restoring Motorcycle Operation Via the PIN CODE
144
-
-
Controls
148
-
Position of Motorcycle Controls
148
-
Key-Operated Ignition Switch and Steering
149
-
Lock
149
-
Left-Hand Switch
150
-
Clutch Lever
151
-
Right-Hand Switch
154
-
Throttle Twistgrip
155
-
Front Brake Lever
156
-
Rear Brake Pedal
157
-
Gear Change Pedal
158
-
Adjusting the Position of the Gearchange and Rear Brake Pedals
159
-
-
Main Components and Devices
161
-
Position on the Vehicle
161
-
Tank Filler Plug
162
-
Seat Lock
163
-
Seat Height Adjustment
165
-
Helmet Holder Cable
170
-
Side Stand
171
-
Front Fork Adjusters
173
-
Rear Shock Absorber Adjusters
175
-
-
Riding the Motorcycle
179
-
Running-In Recommendations
179
-
Pre-Ride Checks
181
-
Starting the Engine
184
-
Moving off
186
-
Braking
187
-
Stopping the Motorcycle
189
-
Refuelling
190
-
Parking
191
-
Tool Kit and Accessories
192
-
-
Main Maintenance Operations
193
-
Checking Coolant Level and Topping Up, if Necessary
193
-
Changing the Air Filter
194
-
Check Brake Fluid Level
195
-
Checking Brake Pads for Wear
197
-
Charging the Battery
198
-
Charging and Maintenance of the Battery During Winter Storage
201
-
Removing the Battery
203
-
Refitting the Battery
209
-
Checking Drive Chain Tension
215
-
Chain Lubrication
217
-
Replacing the Bulbs
218
-
Beam Setting
219
-
Tyres
221
-
Check Engine Oil Level
224
-
Cleaning and Replacing the Spark Plugs
226
-
Cleaning the Motorcycle
227
-
Storing the Motorcycle
229
-
Important Notes
229
-
-
Maintenance
230
-
Scheduled Maintenance Chart: Operations to be Performed by the Dealer
230
-
Scheduled Maintenance Chart: Operations to be Performed by the Customer
233
-
-
Technical Data
234
-
Weights
234
-
Dimensions
235
-
Fuel, Lubricants and Other Fluids
236
-
Engine
237
-
Timing System
238
-
Performance Data
239
-
Spark Plugs
239
-
Fuel System
239
-
Brakes
240
-
Transmission
241
-
Frame
242
-
Wheels
242
-
Tyres
242
-
Suspensions
242
-
Exhaust System
242
-
Available Colours
242
-
Electrical System
244
-
-
Routine Maintenance Record Routine Maintenance Record
250
Advertisement
Advertisement
Related Products
-
Ducati MONSTER 821 2016
-
Ducati mr 821 20016
-
Ducati 800Sport
-
Ducati SUPERBIKE 848
-
Ducati Superbike 848evo Corse
-
Ducati 8500 SF
-
Ducati 888 S.P.
-
Ducati 1992 Superbike 888 Sport Production
-
Ducati superbike 899 panigale
-
Ducati 860 GTS
Ducati Categories
Motorcycle
Motorcycle Accessories
Scooter
Control Unit
Gate Opener
More Ducati Manuals
-
Contents
-
Table of Contents
-
Bookmarks
Quick Links
DUCATI MONSTER 821 Workshop
Manual 2015
M.01 — General
How to use this manual
Layout of the manual
Hazardous Products — Warnings
General maintenance instructions
M.02 — Information about the model
M.03 — Technical data
Technical specifications
Injection system
Cooling system
Gearbox
Crankshaft
Charging system/generator
Rear suspension
Rear wheel
Front suspension
Front wheel
Cylinder/Piston
Timing system/valves
Transmission
Colours
General
Dimensions
Dimensions
Fuel, lubricants and other fluids
Torque settings
Service tools
Special diagnosis equipment
Special tools for the frame
Specific tools for the engine
M.04 — Maintenance operations
Vehicle pre-delivery
Scheduled maintenance chart
Operations to be carried out by the customer
Operations to be carried out by the dealer
Changing the timing belts
Adjusting the position of the gear change and rear brake pedals
1
Ducati Manuals Resource
Summary of Contents for Ducati MONSTER 821
Не можете найти ответ на свой вопрос в руководстве? Вы можете найти ответ на свой вопрос ниже, в разделе часто задаваемых вопросов о Ducati Monster 821 (2020).
Как перевести мили в километры?
В чем разница между топливом E10 и E5?
Какова рекомендуемая частота замены масляного фильтра в двигателе Ducati?
Как часто следует менять масло в двигателе Ducati?
Как удалить ржавчину с устройства Ducati мотоцикл?
Инструкция Ducati Monster 821 (2020) доступно в русский?
Не нашли свой вопрос? Задайте свой вопрос здесь
|
Detail Specifications: 1757/1757825-monster_821.pdf file (17 Mar 2023) |
Accompanying Data:
Ducati MONSTER 821 Automobile, Motorcycle PDF Owner’s Manual (Updated: Friday 17th of March 2023 07:36:47 AM)
Rating: 4.2 (rated by 96 users)
Compatible devices: MULTISTRADA V45, PANIGALE V4 2020, MULTISTRADA Series, MONSTER S4R S, Multistrada 1000DS 2004, 450 Mark 3, 748SPS, 999.
Recommended Documentation:
Text Version of Owner’s Manual
(Ocr-Read Summary of Contents, UPD: 17 March 2023)
-
235, Dimensions 800 mm 1055 mm ** 1045 mm 1480 mm 180 mm 363 mm 2170 mm 501 mm Fig. 162 ** Adjustable seat height 785 mm — 810 mm. 234
… -
188, Warning When ABS is disabled, the motorcycle restores the standard brake system features; using the two brake controls separately reduces the motorcycle braking efficiency. Never use the brake controls harshly or suddenly as you may lock the wheels and lose control of the motorcycle. When riding in the rain or on slippery surfaces, braking will become less effective. Always…
-
147, Important If this procedure is necessary in order to start the motorcycle, contact an Authorised Ducati Service Centre as soon as possible to fix the problem. Note The vehicle can be started until a Key-Off is performed. If the problem still persists upon the next starting attempt, repeat the procedure from the beginning in order to start the motorcycle temporarily again. 146
… -
108, Ducati MONSTER 821 Note When the LAP function is active, the FLASH button takes on the dual function of high beam «FLASH» and LAP timer start / stop (new lap start indication). Note Upon Key-OFF, the «LAP» function status is saved to restore it upon next Key-ON. Note When the battery is off, if the LAP function is active (ON), it is automatically disabled. 107 …
-
11, Warning Some medications and drugs may cause drowsiness or other effects that slow down reaction time and the rider’s ability to control the motorcycle, possibly leading to an accident. Some states require vehicle insurance. Warning Check your state laws. Obtain insurance coverage and keep your insurance document secure with the other motorcycle documents. To …
-
141, Keys The motorcycle comes with 2 keys. They contain the «Immobilizer system code». Keys (B) are those for the standard use, i.e. to: — start the engine; — open the fuel tank plug; — open the seat lock. Warning Separate the keys and use only one of the two to ride the bike. B Fig. 72 140
… -
44, ABS The motorcycle is equipped with ABS, the instrument panel displays the rectangle with ABS status. The instrument panel displays: — if the ABS is active, the message «ABS» and the rectangle with the set intervention level number (1 to 3); — if the ABS is not active, the message «ABS» and the rectangle with the steady symbol «- -«; — if the ABS is in fa…
-
233, Scheduled maintenance chart: operations to be performed by the customer List of operations and type of intervention (set mileage (km/mi) or time interval *) Km x1,000 1 mi x1,000 0.6 Months 6 Check engine oil level Check brake fluid level Check tyre pressure and wear Check final drive chain tension and lubrication Check brake pads. If necessary,…
-
48, Ducati MONSTER 821 The choice of the correct level mainly depends on the following parameters: 1) The tyre/asphalt grip (type of tyre, amount of tyre wear, the road/track surface, weather conditions, etc.). 2) The rider’s experience and sensitivity: expert riders can tackle a lift-up in trying to reduce the stopping distance to a minimum, while less expert riders are recommended to use settings…
-
89, Ducati MONSTER 821 Customising Riding Mode: Parameter storage After changing a Riding Style parameter (ENGINE, DTC and/or ABS), to make the change effective, it is necessary to save it before quitting the customisation menu. It is possible to save the parameters set for each riding mode. To save the parameter settings of a Riding Mode, it is necessary to gain access to the SETTING MENU, use buttons (1) a…
Recommended Instructions:
NavMate Car GPS Receiver, The Bloke Amp, GGE388LX — 8-18-10, IP Camera, Optical Normal Through Panel Pro Patch, JS02


-
PREFACEWe at Hero MotoCorp, are committed to demonstrate excellence in our environment performance on a continual basis, as an intrinsic element of our corporate philosophy. To achieve this we commit ourselves to continue product innovations to improve environment compatibility, comply with all applicable legislation including environment legislation and stre …
Passion Xpro 57
-
This manual should be considered a permanent part of the motorcycle and should remain with the motorcycle when resold or otherwise transferred to a new owner or operator. The manual contains important safety information and instructions that should be read carefully before start operating the motorcycle.English version • JUNE 2009OWNER’S MANUAL PR4SUPERMOTO • …
PR4 33
-
WARNINGNever attempt to start this Mini Bike without reading and understanding the Owner’s/Operator’s manual. The Owner’s/Operator’s manual provides information on safety, parts,functions, pre-ride inspection, starting and maintenance. !ASSEMBLY/PRE-RIDE INSPECTION INSTRUCTIONS CAUTIONThis mini bike was shipped without engine oil. Always fill with w …
CT100U 13
-
2006 BUELL ULYSSES SERVICE MANUAL Part Number 99494-06Y Section 1: MaintenanceSection 2: ChassisSection 3: EngineSection 4: Fuel SystemSection 5: StarterSection 6: Drive/TransmissionSection 7: ElectricalAppendices …
Ulysses 2006 638
Popular Right Now:
Operating Impressions, Questions and Answers:
Ducati Manuals and Guides:
The main types of Ducati MONSTER 821 instructions: user guide — rules of useing and characteristics, service manual — repair, diagnostics, maintenance, operation manual — description of the main functions of Ducati MONSTER 821 equipment, etc.
Most of the instructions, that you can see on the site are uploaded by our users. If you have available a manual or document for Ducati MONSTER 821, which is currently not on the site or present in a different language version, we ask you to upload your document on website, using the «uploading form» available to all registered users.