Мультимедийное руководство по техническому обслуживанию и ремонту Fiat Ducato, многоязычный интерфейс (русского нет).
- Автор: —
- Издательство: —
- Год издания: —
- Страниц: —
- Формат: NRG
- Размер: 116,5 Mb
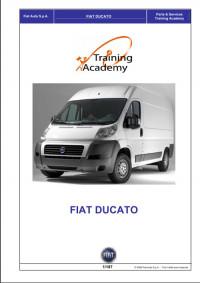
Руководство на итальянском языке по техническому обслуживанию и ремонту Fiat Ducato с 2006 года выпуска.
- Автор: —
- Издательство: Fiat Auto
- Год издания: 2006
- Страниц: 187
- Формат: PDF
- Размер: 8,8 Mb
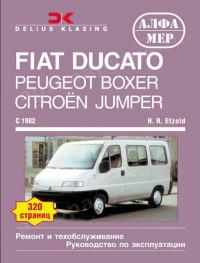
Руководство по техническому обслуживанию, ремонту и эксплуатации Citroen Jumper, Fiat Ducato и Peugeot Boxer с 1982 года выпуска.
- Автор: H.R. Etzold
- Издательство: Алфамер Паблишинг
- Год издания: —
- Страниц: 320
- Формат: —
- Размер: —
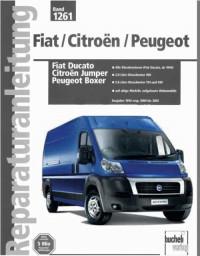
Руководство на немецком языке по ремонту и техническому обслуживанию Citroen Jumper, Fiat Ducato и Peugeot Boxer 1994-2002 годов выпуска.
- Автор: —
- Издательство: —
- Год издания: —
- Страниц: 200
- Формат: PDF
- Размер: 21,9 Mb
Руководство по ремонту и эксплуатации Citroen C25/Jumper, Fiat Ducato и Peugeot J5/Boxer 1982-2005 годов выпуска с бензиновыми и дизельными двигателями.
- Автор: —
- Издательство: Гуси-Лебеди
- Год издания: —
- Страниц: 120
- Формат: PDF
- Размер: 74,2 Mb
Руководство по ремонту и эксплуатации Citroen Jumper, Fiat Ducato и Peugeot Boxer с 1994 года выпуска с бензиновыми и дизельными двигателями.
- Автор: —
- Издательство: Монолит
- Год издания: —
- Страниц: 308
- Формат: —
- Размер: —
Руководство по эксплуатации и ремонту автомобилей Citroen Jumper, Peugeot Boxer и Fiat Ducato с 2006 года выпуска с дизельными двигателями объемом 2,2/2,3/3,0 л.
- Автор: —
- Издательство: Монолит
- Год издания: —
- Страниц: 352
- Формат: —
- Размер: —
Руководство по эксплуатации и ремонту автомобилей Fiat Ducato, Citroen Jumper и Peugeot Boxer с 2014 года выпуска с дизельными двигателями объемом 2,2/2,3/3,0 л.
- Автор: —
- Издательство: Монолит
- Год издания: —
- Страниц: 368
- Формат: —
- Размер: —
Руководство по эксплуатации, техническому обслуживанию и ремонту Citroen Jumper, Fiat Ducato и Peugeot Boxer с 2002 года выпуска с бензиновыми и дизельными двигателями.
- Автор: —
- Издательство: Арго-Авто
- Год издания: —
- Страниц: 640
- Формат: —
- Размер: —
Руководство по эксплуатации, техническому обслуживанию и ремонту Citroen Jumper, Fiat Ducato и Peugeot Boxer с 2006 года выпуска с бензиновыми и дизельными двигателями.
- Автор: —
- Издательство: Арго-Авто
- Год издания: —
- Страниц: 400
- Формат: —
- Размер: —
Руководство по эксплуатации, техническому обслуживанию и ремонту Citroen Jumper, Fiat Ducato и Peugeot Boxer с 2006 года выпуска.
- Автор: —
- Издательство: Арус
- Год издания: —
- Страниц: 320
- Формат: —
- Размер: —
Подборка руководств по эксплуатации и техническому обслуживанию, руководство по аудиосистеме Fiat Ducato.
- Автор: —
- Издательство: Fiat Auto
- Год издания: 2011/2014/2011
- Страниц: 265/391/40
- Формат: PDF
- Размер: 19,2 Mb
Руководство по эксплуатации, техническому обслуживанию и ремонту Fiat Ducato с 2000 года выпуска с бензиновыми и дизельными двигателями.
- Автор: —
- Издательство: Машсервис
- Год издания: 2010
- Страниц: 352
- Формат: —
- Размер: —

Уважаемый покупатель!
Спасибо Вам за выбор автомобиля марки Fiat!
Данные руководства помогут Вам в полной мере оценить качества этого транспортного средства.
 Рекомендуем прочитать все его разделы, прежде чем в первый раз приступить к вождению автомобиля.
В руководстве содержится важная информация, советы и рекомендации по эксплуатации автомобиля, которые позволят Вам воспользоваться техническими достоинствами Вашего Fiat Ducato.
Приятного Вам чтения и в добрый путь!
Инструкция по эксплуатации Fiat Ducato (X290)
Инструкция по эксплуатации Fiat Ducato (X250)
Инструкция по эксплуатации Fiat Ducato (X244)
Инструкция по эксплуатации Fiat Scudo
Инструкция по эксплуатации Fiat New Doblo (1015)
Инструкция по эксплуатации Fiat Doblo (1014)
Привет читателям.
Долго искал нужные мануалы для Fiat Ducato 2, что нашел — собрал в одну папку на гугл диске
Забираем, если нужно.
Fiat Ducato 1982 RU.pdf — мануал на русском языке для 1 поколения (возможно пригодится).
Fiat Ducato 1994 EN.pdf — мануал на английском языке (переведен с немецкого) для 2 поколения (дорестайл)
Fiat Ducato 1994 GE.djvu — мануал на немецком языке для 2 поколения (дорестайл)
Fiat Ducato 1994 RU-Demo.pdf — обрывок из мануала на русском (издательство Монолит), который есть в свободном доступе
Fiat Ducato 1994 Монолит 2.pdf — полный мануал на русском языке для всех версий 2 поколения (с нераспознанным текстом, издательство Монолит)
Fiat Ducato 1994 Монолит.pdf- тот же мануал, но с распознанным текстом
Fiat Ducato 1994 Монолит.djvu- тот же мануал, но в djvu
Fiat Ducato 1996 GE.pdf — мануал на немецком (так сказать рестайл).
Fiat Ducato 2000 RU Elabuga.pdf — мануал на русском языке для 2 поколения (издательство Машсервис)
Fiat Ducato 2000 RU Elabuga 2.pdf — то же самое, но от неизвестного издательства
Возможно я ошибаюсь в обозначениях, поправьте если что)
П.С. Мануал от Монолита в сети только платный, спасибо человеку, который сфотографировал все страницы и собрал в один файлик.

Здесь вы можете скачать рекламные буклеты с подробным техническим описанием автомобилей FIAT, а также инструкции для владельцев (формат PDF). Для просмотра и распечатки этих электронных документов вам потребуется Adobe Acrobat Reader.
500
Руководство по эксплуатации FIAT 500 2012 pdf 4,8 МБ
Руководство по эксплуатации FIAT 500 2007 pdf 77 МБ
Panda
Руководство по эксплуатации pdf 30,5 МБ
Руководство по музыкальной системе pdf 0,8 МБ
Grande Punto
Руководство по эксплуатации pdf 5,5 МБ
Руководство по музыкальной системе pdf 1,2 МБ
Albea
Руководство по эксплуатации pdf 16,2 МБ
Croma
Руководство по эксплуатации pdf 3,3 МБ
Doblo
Руководство по эксплуатации pdf 2,9 МБ
Bravo
Руководство по эксплуатации pdf 21,3 МБ
Руководство по мультимедийной системе Blue&Me pdf 1,8 МБ
Руководство по навигационной системе pdf 1,8 МБ
Sedici
Руководство по эксплуатации pdf 6,2 МБ
Linea
Руководство по эксплуатации pdf 11,1 МБ
Руководство по роботизированной КПП pdf 0,4 МБ
Руководство по эксплуатации pdf 3,8 МБ
 |
Страница 1 из 1 | [ Тем: 26 ] |
|
|
|||||
| Темы | Автор | Ответы | Просмотры | Последнее сообщение | |
|---|---|---|---|---|---|
| Изменение категории с Д на С. |
5 |
877 |
07 ноя 2022, 14:39 КомБат |
||
| Гдескачать электронное руководство по ремонту Ducato 2.8TDI |
Иванов999 |
3 |
1522 |
23 янв 2020, 19:39 dawidof |
|
| Коректор фар ситроен джампер 1995 год |
Serega2301 |
4 |
619 |
25 фев 2019, 17:34 Kler |
|
|
Книга по Дукато!
[ |
DELETE |
111 |
14915 |
19 июн 2018, 10:58 Liny |
|
|
Руководство по эксплуатации FIAT Ducato Елабуга
[ |
Platinum |
15 |
7597 |
18 фев 2018, 14:37 AnisimoFF |
|
|
Двигатели SOFIM 8140 Fiat-Iveco
[ |
nick |
24 |
14448 |
05 июн 2017, 13:00 nick |
|
|
Хочу переделать 230L в 244. Ищу информацию.
[ |
aat1977 |
16 |
3962 |
13 ноя 2016, 01:39 fomix |
|
| Шайбы для регулировки клапанов |
JTD28 |
0 |
1122 |
16 июн 2016, 15:13 JTD28 |
|
|
Книги на Фиат все года
[ |
коса |
17 |
7550 |
30 апр 2016, 21:38 kkk2010 |
|
|
Руководство по ремонту Fiat Ducato eLearn
[ |
nick |
55 |
32073 |
23 июн 2014, 16:24 Gen |
|
|
FIAT ePER
[ |
Lex |
121 |
16792 |
11 фев 2014, 11:03 Толяныч |
|
| Нужна ИНФА!!! |
mekgt1 |
12 |
1963 |
17 янв 2014, 20:58 MOlegA |
|
| Руководство по ремонту Fiat Ducato с 2000 года выпуска |
Platinum |
3 |
4526 |
14 янв 2014, 19:31 Knyazech |
|
|
Online Инструкция по эксплуатации Fiat Ducato (244 кузов)Rus
[ |
GrAnd |
15 |
6727 |
05 апр 2013, 20:59 Andrew153 |
|
|
Схема предохранителей
[ |
epolit |
24 |
6379 |
27 янв 2013, 09:57 odonmvdrf |
|
| Fiat Ducato Service Manual 2006 |
Platinum |
5 |
3387 |
03 дек 2012, 01:39 ГИБ2Д |
|
| Приборная доска Фиат дукато 91г |
BOOL |
3 |
1898 |
15 сен 2012, 01:03 MOlegA |
|
| Где взять инструкцию? |
kich614 |
3 |
1651 |
06 авг 2012, 09:44 коса |
|
| Ссылки на руководства по ремонту |
Толяныч |
4 |
5718 |
07 апр 2012, 16:51 Piligrim |
|
|
Информация из книг по Fiat Ducato 1982-2005гг
[ |
Almeida |
127 |
28079 |
06 апр 2012, 22:27 ГИБ2Д |
|
| Нужна документация по устройсту BOXER (1998 г / 1,9 дизель) |
nestor |
6 |
1436 |
31 мар 2012, 07:14 Dmitriy |
|
| Не могу найти докуметацию на 2.5(Sofim 8144.67 дизель)75л.с |
Системотехник |
6 |
2688 |
07 янв 2012, 14:25 Лёха31 |
|
| Инструкция по установке Elearn Fiat Ducato |
tann711 |
4 |
2587 |
01 фев 2011, 16:15 tann711 |
|
| Каталог комплектующих DUCATO |
nick |
8 |
4928 |
11 окт 2010, 11:26 vermut |
|
|
Образ диска-это не страшно!
[ |
ГИБ2Д |
29 |
3785 |
29 апр 2010, 14:09 леон12 |
|
|
Руководство по эксплуатации Fiat Ducato 2.8 TD
[ |
bykan |
16 |
10268 |
14 янв 2010, 01:07 Михаил Л.Т. |
|
| Показать темы за: Поле сортировки |
|
Страница 1 из 1 | [ Тем: 26 ] |
-

Автор темы
S-master
- Модератор
- Всего сообщений: 2497
- Зарегистрирован: 10.06.2007
- Авто: Boxer III . L3H3. HDI 3.0

Руководство по эксплуатации Fiat Ducato
Это книга не по ремонту, это книжка которую получают при покупке авто. Книжка в формате PDF, размер 6.18Мб.

Для просмотра файлов PDF на компе должен стоять: Adobe Acrobat
-

KBB
- Привык

- Всего сообщений: 146
- Зарегистрирован: 28.08.2008
- Профессия: Инженегр
- Откуда: Рязань


Re: Руководство по эксплуатации Fiat Ducato
Сообщение
KBB » 27 апр 2017, 10:37
По ссылке книга недоступна. Пожалуйста, у кого она есть, поделитесь.
DAIHATSU Atrai7 2003г. 4WD X Sport.
MAZDA Bongo Friendee, SGEW 2.0, 2002г.
Автодом HUMER FIAT DUCATO 230, 1996 г.
-

пет.мих.мих.
- Настоящий эльграндовод-2011
- Всего сообщений: 2832
- Зарегистрирован: 05.09.2009
- Детей: 2
- Профессия: водитель-пенсионер
- Откуда: г.Тюмень
- Авто: Ниссан—пантфандер 2008 г.в.,дизель-2.5, 4 WD +хилой модуль Скорпион.
- Возраст: 54

Re: Руководство по эксплуатации Fiat Ducato
Сообщение
пет.мих.мих. » 29 апр 2017, 10:37
Я себе от сюда и скачивал,всё номально было. ![]()
![]()
Ну желаю чтобы всем…Ранее были:НИССАН-ЛАРГО 1995г.в.,дизель,4-WD,НИССАН-СЕРЕНА 2000г.в.,YD-25,2-WD.Ниссан-Эльгранд-1997г.в.,дизель-3.2,4WD.СY-Родиус 2008 г в-дизель 2.7,4-WD.Фиат-Дукато автодом.
-
mtechnolog
- Ветром занесло
- Всего сообщений: 1
- Зарегистрирован: 25.05.2017
- Откуда: Voronezh
- Авто: iveco daily 35-10, sofim 8140.27s 2.5td
Re: Руководство по эксплуатации Fiat Ducato
Сообщение
mtechnolog » 30 май 2017, 21:46
KBB: По ссылке книга недоступна. Пожалуйста, у кого она есть, поделитесь.
Привет!
Ты нашел книгу? Скинь пожалуйста.
Отправлено спустя 24 секунды:
пет.мих.мих., поделись книгой.
-
пет.мих.мих.
- Настоящий эльграндовод-2011
- Всего сообщений: 2832
- Зарегистрирован: 05.09.2009
- Детей: 2
- Профессия: водитель-пенсионер
- Откуда: г.Тюмень
- Авто: Ниссан—пантфандер 2008 г.в.,дизель-2.5, 4 WD +хилой модуль Скорпион.
- Возраст: 54
Re: Руководство по эксплуатации Fiat Ducato
Сообщение
пет.мих.мих. » 31 май 2017, 05:16
Отправлено спустя 7 минут 15 секунд:
Есть ещё по ремонту,но чего то вставить не могу,пишет,что слишком большой файл. ![]()
![]()
Отправлено спустя 5 минут 31 секунду:
Если нужна по ремонту,скинте почту,попробую туда отправить. ![]()
![]()
Ну желаю чтобы всем…Ранее были:НИССАН-ЛАРГО 1995г.в.,дизель,4-WD,НИССАН-СЕРЕНА 2000г.в.,YD-25,2-WD.Ниссан-Эльгранд-1997г.в.,дизель-3.2,4WD.СY-Родиус 2008 г в-дизель 2.7,4-WD.Фиат-Дукато автодом.
-
пет.мих.мих.
- Настоящий эльграндовод-2011
- Всего сообщений: 2832
- Зарегистрирован: 05.09.2009
- Детей: 2
- Профессия: водитель-пенсионер
- Откуда: г.Тюмень
- Авто: Ниссан—пантфандер 2008 г.в.,дизель-2.5, 4 WD +хилой модуль Скорпион.
- Возраст: 54
Re: Руководство по эксплуатации Fiat Ducato
Сообщение
пет.мих.мих. » 02 июн 2017, 05:19
Чего всё, по ремонту не надо,хоть бы за это спасибо сказали. ![]()
![]()
Ну желаю чтобы всем…Ранее были:НИССАН-ЛАРГО 1995г.в.,дизель,4-WD,НИССАН-СЕРЕНА 2000г.в.,YD-25,2-WD.Ниссан-Эльгранд-1997г.в.,дизель-3.2,4WD.СY-Родиус 2008 г в-дизель 2.7,4-WD.Фиат-Дукато автодом.
-
KBB
- Привык
- Всего сообщений: 146
- Зарегистрирован: 28.08.2008
- Профессия: Инженегр
- Откуда: Рязань
Re: Руководство по эксплуатации Fiat Ducato
Сообщение
KBB » 05 июн 2017, 13:46
пет.мих.мих., спасибо огромное, выручил ). Конечно, и по ремонту надо! Почту свою в ЛС отправлю.
Тоже вот домиком на базе Дукато обзавелся, нужно матчасть изучать ).
DAIHATSU Atrai7 2003г. 4WD X Sport.
MAZDA Bongo Friendee, SGEW 2.0, 2002г.
Автодом HUMER FIAT DUCATO 230, 1996 г.
-
пет.мих.мих.
- Настоящий эльграндовод-2011
- Всего сообщений: 2832
- Зарегистрирован: 05.09.2009
- Детей: 2
- Профессия: водитель-пенсионер
- Откуда: г.Тюмень
- Авто: Ниссан—пантфандер 2008 г.в.,дизель-2.5, 4 WD +хилой модуль Скорпион.
- Возраст: 54
Re: Руководство по эксплуатации Fiat Ducato
Сообщение
пет.мих.мих. » 05 июн 2017, 16:29
Аааа понял,давай фото автодома в ветке автодомов выкладывай. ![]()
![]()
Ну желаю чтобы всем…Ранее были:НИССАН-ЛАРГО 1995г.в.,дизель,4-WD,НИССАН-СЕРЕНА 2000г.в.,YD-25,2-WD.Ниссан-Эльгранд-1997г.в.,дизель-3.2,4WD.СY-Родиус 2008 г в-дизель 2.7,4-WD.Фиат-Дукато автодом.
-
homo
- Ветром занесло
- Всего сообщений: 3
- Зарегистрирован: 30.10.2013
- Откуда: Украина
- Авто: Пежо Боксер 3
Re: Руководство по эксплуатации Fiat Ducato
Сообщение
homo » 23 июн 2017, 09:20
Здравствуйте
Если можно, скиньте книгу по ремонту на почту [email protected]
Заранее спасибо
-
пет.мих.мих.
- Настоящий эльграндовод-2011
- Всего сообщений: 2832
- Зарегистрирован: 05.09.2009
- Детей: 2
- Профессия: водитель-пенсионер
- Откуда: г.Тюмень
- Авто: Ниссан—пантфандер 2008 г.в.,дизель-2.5, 4 WD +хилой модуль Скорпион.
- Возраст: 54
Re: Руководство по эксплуатации Fiat Ducato
Сообщение
пет.мих.мих. » 23 июн 2017, 15:50
homo, Отправил. ![]()
![]()
Ну желаю чтобы всем…Ранее были:НИССАН-ЛАРГО 1995г.в.,дизель,4-WD,НИССАН-СЕРЕНА 2000г.в.,YD-25,2-WD.Ниссан-Эльгранд-1997г.в.,дизель-3.2,4WD.СY-Родиус 2008 г в-дизель 2.7,4-WD.Фиат-Дукато автодом.
-
пет.мих.мих.
- Настоящий эльграндовод-2011
- Всего сообщений: 2832
- Зарегистрирован: 05.09.2009
- Детей: 2
- Профессия: водитель-пенсионер
- Откуда: г.Тюмень
- Авто: Ниссан—пантфандер 2008 г.в.,дизель-2.5, 4 WD +хилой модуль Скорпион.
- Возраст: 54
Re: Руководство по эксплуатации Fiat Ducato
Сообщение
пет.мих.мих. » 11 июл 2017, 18:40
Talmay, Отправил. ![]()
![]()
Ну желаю чтобы всем…Ранее были:НИССАН-ЛАРГО 1995г.в.,дизель,4-WD,НИССАН-СЕРЕНА 2000г.в.,YD-25,2-WD.Ниссан-Эльгранд-1997г.в.,дизель-3.2,4WD.СY-Родиус 2008 г в-дизель 2.7,4-WD.Фиат-Дукато автодом.
-
пет.мих.мих.
- Настоящий эльграндовод-2011
- Всего сообщений: 2832
- Зарегистрирован: 05.09.2009
- Детей: 2
- Профессия: водитель-пенсионер
- Откуда: г.Тюмень
- Авто: Ниссан—пантфандер 2008 г.в.,дизель-2.5, 4 WD +хилой модуль Скорпион.
- Возраст: 54
Re: Руководство по эксплуатации Fiat Ducato
Сообщение
пет.мих.мих. » 12 сен 2017, 16:04
Скину на днях,сегодня не могу. ![]()
![]()
Ну желаю чтобы всем…Ранее были:НИССАН-ЛАРГО 1995г.в.,дизель,4-WD,НИССАН-СЕРЕНА 2000г.в.,YD-25,2-WD.Ниссан-Эльгранд-1997г.в.,дизель-3.2,4WD.СY-Родиус 2008 г в-дизель 2.7,4-WD.Фиат-Дукато автодом.
Быстрый ответ, комментарий, отзыв
К этому ответу прикреплено по крайней мере одно вложение.
Если вы не хотите добавлять вложения, оставьте поля пустыми. Можно прикреплять файлы, перетаскивая их в окно сообщения.
Максимально разрешённый размер вложения: 30 МБ.
- Manuals
- Brands
- Fiat Manuals
- Automobile
- Ducato 2021
- Owner’s handbook manual
-
Contents
-
Table of Contents
-
Bookmarks
Quick Links
F
I
A
T
D
U
C
A
T
O
O
W
N
E
R
H
A
N
D
B
O
O
K
Related Manuals for Fiat Ducato 2021
Summary of Contents for Fiat Ducato 2021
-
Page 3
Dear Customer, We would like to congratulate and thank you for choosing a Fiat Ducato. We have written this handbook to help you get to know all the features of your vehicle and use it in the best possible way. You should read it right through before taking to the road for the first time. -
Page 4
If, after buying the vehicle, you decide to add electrical accessories (with the risk of gradually draining the battery), visit a Fiat Dealership. They can calculate the overall electrical requirement and check that the electrical system of the vehicle can support the required load. -
Page 5
GRAPHICAL INDEX KNOWING YOUR VEHICLE KNOWING THE INSTRUMENT PANEL SAFETY STARTING AND DRIVING IN CASE OF EMERGENCY SERVICING AND MAINTENANCE TECHNICAL SPECIFICATIONS MULTIMEDIA CONTENTS… -
Page 7
GRAPHICAL INDEX 3/4 front F1A5000 Changing a wheel ..HEADLIGHTS WINDSCREEN WIPER Fix&Go tyre repair kit ..Bulb types ….Operation . -
Page 8
3/4 rear F1A5001 REAR LIGHTS Bulb types ….Bulb replacement ..LOAD COMPARTMENT Opening/closing … THIRD BRAKE LIGHT Bulb types . -
Page 9
Dashboard (versions with 7″ and 10″ Uconnect™ system) F1A0673 Interior fittings … . Heated rear window ..AIR VENTS Front airbag … . . Lane Control System . -
Page 10
Dashboard (versions with Uconnect™ Radio 5″ system) F1A0684 Interior fittings … . Heated rear window ..AIR VENTS Front airbag … . . Lane Control System . -
Page 11
Interior F1A0601 BONNET OPENING LEVER SEATS Opening/closing … Adjustments ….Sprung seat ….CONTROL PANEL Seats with adjustable armrests . -
Page 12
The handbook that you are reading ALTERATIONS……11 HEAD RESTRAINTS ….. 69 simply and directly explains how it is THE FIAT CODE SYSTEM ….. 11 INTERIOR FITTINGS ….. 69 made and how it works. THE KEYS……..12 TACHOGRAPH ……76 That’s why we advise you to read it… -
Page 13
(for example The code is sent only if the Fiat CODE due to a voltage drop). system control unit has recognised the If the icon/warning light stays on, code transmitted from the key. -
Page 14
Versions with «Keyless Go» system the lock on the dashboard drawer; IMPORTANT the battery disconnect switch. On versions equipped with the «Keyless Go» system, the vehicle is fitted with a Version with 3 sensors 1) The electronic components inside mechanical key. Press button (B) fig. -
Page 15
Door lock and load compartment 3 seconds. The LED will flash more slowly when the alarm is on. Briefly press the «FIAT» / button: locking of doors and load compartment F1A0603 with ceiling light off and single flash of… -
Page 16
For vehicles with keys with remote REPLACING THE control , if one or more doors are open, ELECTRONIC KEY BATTERY the doors will not be locked. To replace the battery, proceed as This situation is indicated by a rapid follows: flashing of the direction indicators (where provided). -
Page 17
2 hours Fiat Dealership, which will take care of their and cause death. Keep new and used disposal. -
Page 18
“Display” chapter, where provided, and The ignition device has the following repeated. contact the Fiat Dealership as soon as possible states: possible. For more information on the STOP: engine off, steering column 3) 4) 5) 6) engine start-up, see the description in locked. -
Page 19
(e.g. attempted theft), have it checked ignition device is pressed and the start the vehicle. over by a Fiat Dealership before driving 9) Never extract the mechanical key while electronic key is recognised. again. -
Page 20
WARNING The engine stop function is bonnet are correctly closed, a fault guaranteed by the Fiat CODE, which versions with the message on the… -
Page 21
3 seconds. With the function on, the the instrument panel” section). button (A) fig. 24 is disabled. Double-tapping on the «FIAT» / DISARMING THE ALARM button on the remote control activates To permanently disable the alarm (e.g. the dead lock device (see «Dead lock»… -
Page 22
If a power supply is not present (blown fuse, battery disconnected, etc.) it is, however, possible to lock the doors manually. While travelling, at speeds exceeding 20 km/h, all the doors will be locked automatically if the function was selected in the Setup menu. PASSIVE ENTRY/KEYLESS F1A0603… -
Page 23
Door locking / unlocking The vehicle doors can be locked WARNING To avoid leaving the anyway pressing the button on the electronic key inside the vehicle To lock/unlock the doors, proceed as electronic key or on the inner panel. accidentally, the Passive Entry/Keyless follows: Entry function features an automatic make sure that you have the… -
Page 24
After closing the doors of the load through the display Menu or the Notes compartment, the alarm system will be Uconnect™ system. The vehicle will unlock the doors if one reactivated again. of the following conditions is met: MECHANICAL LOCK the doors were closed by pressing OF PASSENGER SIDE WARNING If only the load… -
Page 25
compartment or centralised) or an presses on the button on the key unlocking request from the remote with remote control fig. 23. control/door latch or by using the For vehicles equipped with the Passive Passive Entry/Keyless Entry. Entry/Keyless Entry system, Dead Lock is activated every time the vehicle is locked using the button on the outside handle. -
Page 26
SLIDING SIDE DOOR Position (1): Device not engaged (door may be opened from the inside); 12) 13) Position (2): Device engaged (door To open the sliding side door, lift the locked). handle (A) fig. 29 and accompany the The device stays on even if the doors door in the opening direction. -
Page 27
Manual opening of the second swing door Pull the lever (C) fig. 34 in the direction indicated by the arrow. The double rear swing doors have two opening positions: the first to an angle of approximately 90° and the second is approximately 180°;… -
Page 28
REAR FOOTBOARD disengaged only by inserting the key instrument panel display if it is not fully (for goods carrier van versions) metal insert in either of the door locks as retracted in the same way as if the rear described previously: in this case the doors are not shut. -
Page 29
SEATS weight off the part of the seat that must be lowered. Backrest angle adjustment Turn knob (D) fig. 38. Longitudinal adjustment Lift lever (A) fig. 38 and push the seat Lumbar adjustment forwards or backwards: in the driving Operate the knob (E) fig. 39 to adjust. position, you should be able to rest your arms on the rim of the steering wheel. -
Page 30
the seat on the opposite side. Operate their adjustment, see the «Seats with the control (A) fig. 43 to turn the seat. adjustable armrests» paragraph) and Before turning the seat, it must be a head restraint with adjustable height moved forward and only then adjusted (adjusting it, see the «head restraints»… -
Page 31
Height adjustment adjustments (revolving or fixed, with seat belt, etc.) or heated. Operate the controls (B) fig. 46 or (C) fig. 46 to raise or lover the front/rear For the various adjustments refer to part of the seat, respectively. what is described in the previous paragraph «Revolving seat with seat Seat rotation belt»). -
Page 32
EAT&WORK TABLE no buttons need to be pressed to compartment fig. 53 located behind the return to the closed position. It will be (for versions/markets, where provided) cab. sufficient to push in the area indicated The seat is equipped with a folding by the arrow fig. -
Page 33
When the seat is restored to its normal position, it engages with the retaining device without the need to operate the lever again. On the one-piece Panorama seat in the second row both side seats are fixed. Folding middle seat backrest (2 nd — 3 rd row) Lift the lever (C) fig. -
Page 34
F1A0710 F1A0712 F1A0035 remove the plastic casing of the disconnect the connector fig. 62; – turn the backrest 5° towards the rear benches fig. 60; area; – fold the backrest forward with your left hand. F1A0713 F1A0711 lift the lever (A), tilt the backrest undo the screws (C) and (D) and forward into the Easy Entry position and pull out the head restraints fig. -
Page 35
lift the lever (A) (movement 3), over the retaining slider (C) fig. 68 (on the side) which holds the system in raised position during the operations. When the base has been locked, it will be possible to move the seat by accompanying it with both hands to move it forwards or backwards fig. -
Page 36
4-SEATER BENCH the holes in the tracks; in that position push the latch lever downwards (easily found by sliding the base a little SEAT (Crew Cab Van fig. 71 with sufficient force, until the and simultaneously pulling it out) the versions) system locks. -
Page 37
contents of the adhesive plate located WARNING under the bench. 22) All adjustments must be made with the IMPORTANT vehicle stationary. 23) After releasing the adjustment lever, always check that the seat is locked on 6) The fabric upholstery of your vehicle is the guides by trying to move it back and designed to withstand the normal wear forth. -
Page 38
REAR-VIEW If the display is difficult to see, clean the camera fig. 77. If snow, ice, mud MIRRORS or other foreign matter obstruct the INTERIOR MIRROR camera lens, clean it with water and Lever (A) fig. 75 can be used to move dry it with a soft cloth. -
Page 39
(positions (3) and (4) available on short to prevent damage according to these arm external rear-view mirrors, Tempo three positions fig. 80: Libero versions and on all medium and 1 Normal long arm rear-view mirrors). 2 All backwards After rotating the knob (B) on the mirror 3 All forwards to be adjusted, move it in the direction shown by the arrows to adjust the… -
Page 40
press point (2) of the rocker button (A) Defrosting/demisting fig. 81 until you hear an engagement (for versions/markets, where provided) «click», then press again point (1) of the Mirrors are fitted with resistors that will button. activate when turning the heated rear window on (by pressing button Folding forwards The mirrors can be manually folded… -
Page 41
EXTERNAL LIGHTS automatically switch the external lights (for versions/markets where it is provided), no light comes on when the The left stalk (A) fig. 82 operates most ring is turned to Function activation of the exterior lights. Where provided, if the direction Turn the left stalk ring to position The exterior lights turn on also with indicators are operated, the daytime… -
Page 42
REAR FOG LIGHT wide wheel rotation angles or at the Deactivation switching on the direction indicator, a The rear fog light button is located on Keep the left stalk in main beam light will turn on (built in the front fog the left control panel (button (A) fig. -
Page 43
To deactivate the automatic function running lights (DRL) are switched Fiat Dealership to have the headlights rotate the light switch ring to position /parking lights are activated. checked and adjusted. HEADLIGHT ALIGNMENT «Lane Change» function CORRECTOR To indicate a change of lane with the… -
Page 44
The interior lights can be set to three which you are driving. Comply with legal requirements. positions (OFF/ left position, centre Contact a Fiat Dealership to have the position, ON/ right position). Using the headlights checked and adjusted. switch (D) on the bottom of the upper… -
Page 45
the buttons or if any movement is Battery save detected. To extend the life of the vehicle battery, when the engine is turned off and one LOAD COMPARTMENT of the doors is left open for 15 minutes, SIDE CEILING LIGHT the interior lights are automatically (for versions/markets, where provided) turned off. -
Page 46
seconds, independently of the vehicle speed. In position , the pause time between two strokes is set according to the speed of the vehicle: when the speed increases, the time between two strokes decreases.In position LO or HI, the windscreen wiper moves continuously, i.e. -
Page 47
RAIN SENSOR Uconnect™ system and rotating the no wiping cycle occurs for system ring nut (A) fig. 91 to position or . protection reasons. (where provided) These will be used to set the rain This temporary inhibition prevents 9) 10) sensor sensitivity: in position , the unwanted activation of the wipers This device is located behind the… -
Page 48
F1A0691 intervene. If operation is not subsequently restored, even after restarting the vehicle, contact a Fiat Dealership. Do not operate the screen wiper with the blades lifted from the windscreen glass. -
Page 49
HEATING AND VENTILATION F1A0714 1. Upper fixed vent 2. Adjustable central vents 3. Fixed side vents 4. Adjustable side vents 5. Lower diffusers for front seats. -
Page 50
HEATING AND turn ring (A) to the red section; to warm the feet and convey turn ring (C) to the required position; VENTILATION slightly cooler air to the turn knob (B) to the required speed. dashboard vents, in intermediate CONTROLS temperature conditions;… -
Page 51
turn off internal air recirculation by perform the following preventive window demisting procedure: turning the knob (D) to turn the ring (C) to turn ring (A) to the red section; turn knob (B) to 4 (max. fan turn off internal air recirculation by speed). -
Page 52
MANUAL CLIMATE CLIMATE CONTROL for heating when the outside SYSTEM (cooling) CONTROL SYSTEM temperature is very low: to For fast cooling of the passenger direct as much air as possible to (for versions/markets, where provided) compartment, proceed as follows: the feet; turn ring (A) to the blue section;… -
Page 53
turn ring (C) to the required position; turn the ring (C) to turn knob (B) to the required speed. turn off internal air recirculation by turning the knob (D) to FAST PASSENGER COMPARTMENT WARNING To ensure rapid HEATING demisting/defrosting, if there is an For the fast heating of the passenger additional heater/air conditioner (under compartment, proceed as follows:… -
Page 54
10 minutes. At any time linked to the type of cooling gas, please refer to a Fiat Dealership. after the first activation, the function is deactivated after 5 minutes. Press the… -
Page 55
AUTOMATIC CLIMATE CONTROL SYSTEM CONTROLS ON THE CLIMATE CONTROL FRONT PANEL F1A0625 A. Required temperature up/down button B. Display C. Ventilation up/down button D. Climate control system off button E. Recirculation button F. Climate control compressor on/off button G. Air supply selection button H. Maximum cooling on/off button I. -
Page 56
CONTROLS ON SYSTEM DISPLAY (for versions/markets where provided) F1A0573 There are graphic buttons on some Uconnect™ systems that let you turn on the functions described in this paragraph. IMPORTANT 11) To clean the climate control system and the display use a soft, clean, dry, antistatic cloth and make sure that it is switched off during cleaning. -
Page 57
Description of the compressor on/off, compatibly with temperature, quantity and distribution controls environmental conditions; of the air introduced into the passenger variation of set temperature; compartment. It also manages the air The automatic climate control system heated rear window on/off (where recirculation system and the enabling maintains comfort inside the passenger the air conditioning compressor. -
Page 58
Air distribution selection Air recirculation pressing the arrows of the dedicated button: Pressing the button (G) fig. 101 The air recirculation can be switched on the dashboard or the graphic on/off by pressing the button (E) maximum fan speed: all bars are lit buttons located on the display of the fig. -
Page 59
(where provided). Before summer, have the system stores the temperatures set before the checked at a Fiat Dealership. system was switched off and restores WARNING Do not apply stickers to the them when any button of the system is inside of the heated rear window over pressed. -
Page 60
Otherwise the device could lock The additional heater (during winter) and require the assistance of a Fiat heats, maintains the temperature of Dealership. and circulates engine coolant for a set… -
Page 61
Heating menu heater back on. If it still does not work, OVERVIEW consult a Fiat Dealership. Control panel fig. 105 and menu structure: Update program time WARNING The heater is equipped (1) Menu item name… -
Page 62
Information display Symbol Description Status LED lighting The following information about the Heater off — control connected heater and the control panel WHITE steady Time on panel on is shown on the start-up display: name of the control panel; Error — Heating mode RED flashing name of the connected heater;… -
Page 63
further changes can be made after a boat, etc.). A maximum number of 21 pressing the button. The operating minimum operating time of 10 minutes. active timers can be available. mode can be changed according to An extension is only possible after your wishes. -
Page 64
saved and shown on the display Press the control button. Saved Then press the control button to (temperature indicator for air heaters timers are shown on the display. (Fan confirm the selection. The time flashes only). speed indicator for air heaters only) on the display. -
Page 65
The «Settings» menu item has been The «Settings» menu item has been Turn the control button to select the selected. selected. required «Day» heating level. Then press the control button to Turn the control button to select the Turn the control button to select the confirm the selection. -
Page 66
error messages are also marked Then press the control button to WARNING: Maintenance and repair with a «!». Error messages must be confirm the selection. A reboot is work on heaters must only be carried acknowledged as soon as they appear performed. -
Page 67
106. Button (E) fig. 109 on Have the additional heater checked the control panel must be enabled regularly at a Fiat Dealership (and for operation; the air conditioning always at the start of every winter). only works if the main climate control This will guarantee safe and economic system is on. -
Page 68
outlets (located under the seat in WARNING the 2nd and 3rd row for Panorama versions and the grille on the left wheel 39) The heater burns fuel in the same way arch side for Combi versions). as the engine, though to a lesser extent. To prevent poisoning and asphyxiation, ADDITIONAL REAR the supplementary heater must never be… -
Page 69
the ceiling and the rear footwell vents, Continuous automatic operation WARNING varying the temperature. The driver’s side front window allows continuous automatic operation in both 40) Improper use of the electric windows directions: opening and closing. The WARNING If the compressor on the can be dangerous. -
Page 70
locking device by trying to open it. If it WARNING is not perfectly closed, do not try to press the bonnet down but open it and 41) Be very careful not to allow scarves, repeat the procedure. neck ties and other loose articles of clothing from touching, even accidentally, WARNING Always check that the any moving parts. -
Page 71
HEAD RESTRAINTS WARNING FRONT HEAD RESTRAINTS 46) All adjustments must be carried out only with the vehicle stationary and the On certain versions the head restraints engine off. Head restraints must be are adjustable in height and they lock adjusted so that the head, rather than the automatically in the required position. -
Page 72
0.75 litres) fig. 121 are available on the the middle of the dashboard. central dashboard in the place of the Compartment (B) fig. 120 is located on storage compartment. the right side of the dashboard, above the oddment box. F1A0089 GLOVE COMPARTMENT WITH LOCK F1A0628… -
Page 73
COMPARTMENT economic transaction or interruption of BENEATH PASSENGER charge. SIDE FRONT SEAT Proceed as follows to use the compartment: Open the flap (A) fig. 123 and remove it as shown; turn the lock knob (B) anticlockwise and remove it to allow the compartment to be removed. -
Page 74
in the specific housing, the user will be WARNING Not all mobile phone covers informed by means of a LED indicating guarantee the correct charging of the state of the wireless charging the phone. Check that charging is in system: progress after having placed the phone in the charging compartment. -
Page 75
«power on ignition only» to «constant dashboard. battery power». For more information, contact a Fiat Dealership. 12) 13) 14) 15) F1A0631 220V CURRENT SOCKET 12V CURRENT SOCKET… -
Page 76
on the dashboard as illustrated in the They can be adjusted forwards and sideways. figure. On versions with double passenger A vanity mirror is fitted on the passenger side sun visor on all side airbag, the desk is fixed. versions. F1A0342 SHELF ABOVE THE CAB (for versions/markets, where provided) -
Page 77
CAB GLOVE WARNING COMPARTMENT (CAPUCINE) 47) To prevent serious injury or death: (for versions/markets, where provided) Only devices designed for use in this type The glove compartment is fitted above of socket should be inserted into any 12 the sun visors fig. 138 and is designed Volt socket. -
Page 78
SELF-LEVELLING WARNINGS not being started (with accessories still Do not use abrasive detergents or plugged in), the vehicle must be driven AIR SUSPENSION a sufficient length of time to allow the solvents to clean the device. alternator to recharge the battery. GENERAL INFORMATION To clean the device externally, use a 15) Power sockets are designed for… -
Page 79
ROOF RACK/SKI Adjustment not available If, after selecting a button, the LED RACK remains lit up (for about 5 seconds) To fit the roof/ski rack, with provision rather than flashing, this means that the for versions H1 and H2, use the pins adjustment is temporarily unavailable. -
Page 80
Fiat are fitted that involve modifications to Dealership, whose qualified personnel, the features of the vehicle. This may… -
Page 81
PROTECTING THE Telepass in the appropriate area shown Powertrain Control Module according in fig. 144 — fig. 145. to the filter conditions and vehicle ENVIRONMENT usage conditions. The following devices are used for During regeneration, the following reducing diesel fuel engine emissions: may occur: a limited increase in the oxidising catalytic converter;… -
Page 82
KNOWING THE INSTRUMENT PANEL This section of the handbook provides EOBD SYSTEM ……81 all information that is useful for getting INSTRUMENT PANEL to know, interpreting, and using the FEATURES……..82 instrument panel correctly. DISPLAY ……..88 WARNING LIGHTS AND MESSAGES …….. -
Page 83
This check can also be carried out by traffic control authorities. WARNING After eliminating the failure, to check the system completely, Fiat Dealerships run a bench test and, if… -
Page 84
INSTRUMENT PANEL FEATURES 3.5″ DISPLAY HEAVY DUTY VERSION F1A0768 A. Speedometer B. Multifunction display C. Tachometer D. Fuel level gauge E. AdBlue ® diesel emissions additive level gauge WARNING The illumination of the instrument panel graphics may vary according to version. -
Page 85
3.5″ DISPLAY HEAVY DUTY VERSION (RIGHT HAND DRIVE VERSION) F1A0782 A. Speedometer B. Multifunction display C. Tachometer D. Fuel level gauge E. AdBlue ® diesel emissions additive level gauge WARNING The illumination of the instrument panel graphics may vary according to version. -
Page 86
3.5″ DISPLAY LIGHT DUTY VERSION F1A0769 A. Speedometer B. Multifunction display C. Tachometer D. Fuel level gauge E. Engine coolant temperature gauge WARNING The illumination of the instrument panel graphics may vary according to version. -
Page 87
3.5″ DISPLAY LIGHT DUTY VERSION (RIGHT HAND DRIVE VERSION) F1A0781 A. Speedometer B. Multifunction display C. Tachometer D. Fuel level gauge E. Engine coolant temperature gauge WARNING The illumination of the instrument panel graphics may vary according to version. -
Page 88
7” DISPLAY F1A0686 A. Tachometer B. Speedometer and multifunction display C. Fuel level gauge WARNING The illumination of the instrument panel graphics may vary according to version. -
Page 89
If this is The digital gauge (E) fig. 146 indicates flow of fuel when the engine is over- the case, go to a Fiat Dealership to the level of AdBlue® diesel emissions revving, resulting in a gradual loss of have the system checked. -
Page 90
DISPLAY When the symbol appears on the display, the GSI is advising the DESCRIPTION driver to shift up, while the The vehicle is equipped with a display symbol advises the driver to shift down. (B) that can show useful information to The indication in the display remains the driver while driving. -
Page 91
B Vehicle speed, warning D Yellow symbols messages/any failure warnings E GSI indications — reconfigurable area C Total kilometres (or miles) run and F Speedometer and driving assistance symbols of any failure indications device indications D Gear shift indication (GSI). G Red symbols Heavy Duty Version F1A0637… -
Page 92
The menus are indicative and may vary Vehicle info In the case of multiple screens, for versions and markets. indicates the presence of screens Press and release Screenshot list to the right and/or left of those Tyre pressure displayed. Scrolling between Coolant temp Main screen pages is possible using the arrows… -
Page 93
«Average consumption», «Distance», or red at the bottom of the screen «Average speed», «Travel time». according to the type of warning. The sizes are displayed in «km»/»mi» Refer to the «Starting and Driving» and «km/h»/»mph» depending on the section for more information about display settings. -
Page 94
When the service interval has expired a Recent call list. dedicated alert will be shown on the The system stores the last 10 display. received messages marked «read» later on, if the time for changing the or «unread». The user can select the engine oil is getting close, the distance desired message using the steering until the next oil change will appear on… -
Page 95
NOTE Some settings may be managed Time setting. Traffic Sign Assist: enable, using the Uconnect™ system (see Format setting: 12 hours/24 disable. hours. Traffic Sign Assist alert: off, «Settings» in the «Vehicle mode» Date setting. paragraph in the «Multimedia» section). visual, visual and acoustic. -
Page 96
Courtesy lights: 0, 30, 60, 90 seconds. Automatic main beam: enable, disable. Cornering lights: enable, disable. Doors & Locks Select this item to make the following adjustments (where provided): Automatic door lock: enable, disable. Door unlock on exit: enable, disable. Flash dipped beam headlights when closing: enable/disable. -
Page 97
EBD system or that the system is not available. In this case, the rear wheels may suddenly lock and the vehicle may swerve when braking sharply. The display shows the dedicated message. Drive very carefully to the nearest Fiat Dealership to have the system inspected immediately. -
Page 98
The warning light flashes and an acoustic warning will sound if the vehicle is in motion and the driver’s seat belt is not correctly fastened. For permanent deactivation of the acoustic signal (buzzer) of the SBR (Seat Belt Reminder) system contact a Fiat Dealership. With the multifunction display, you can also reactivate the system through the Setup menu. -
Page 99
MIN and MAX marks on the reservoir itself. Also check visually for any fluid leaks. If, when restarting, the warning light switches on again, contact a Fiat Dealership. -
Page 100
Under these conditions, the vehicle can continue travelling at moderate speed without demanding excessive effort from the engine. Prolonged use of the vehicle with the warning light on may cause damage. Contact a Fiat Dealership as soon as possible. -
Page 101
On some versions, the triangle on the right side of the symbol indicates the side of the vehicle with the fuel filler. amber The warning light will blink to indicate a system fault. If this is the case, go to a Fiat Dealership to have the system checked. -
Page 102
On certain versions a dedicated message is displayed. Flashing of the warning light while driving indicates the intervention of the ESC system. If the warning light does not go out or remains on whilst driving, go to a Fiat Dealership. HILL HOLDER SYSTEM FAILURE amber The warning light will turn on when the Hill Holder system is faulty. -
Page 103
LANE CONTROL SYSTEM FAILURE (where provided) This warning light or symbol also appears on the display in the event of a Lane Control system failure. The display shows the dedicated message. Contact a Fiat Dealership as soon as possible. amber… -
Page 104
The warning light or symbol on the display switches on (together with a message on the display) if the system is triggered. The warning light and symbol, with dedicated message, switch on in case of system unavailability. amber Contact a Fiat Dealership as soon as possible. FULL BRAKE CONTROL SYSTEM MANUAL DEACTIVATION OR RESTARTING (for versions/markets, where provided) The warning light or symbol on the display switches on constantly (together with a specific alert on the display) if the system is manually deactivated, temporary blinding of the front camera or temporarily until it is restarted. -
Page 105
Before continuing, contact a Fiat Dealership to have the system… -
Page 106
«Oil level» function on the Connect system. ALTERNATOR FAILURE The switching on of the symbol with engine on corresponds to an alternator failure. Contact a Fiat Dealership as soon as possible. -
Page 107
AUTOMATIC TRANSMISSION FAILURE The symbol switches on, together with a message in the display and an acoustic warning, to indicate that the automatic transmission or the dual clutch automatic transmission is faulty. Contact a Fiat Dealership as soon as possible. -
Page 108
For reactivating the fuel cut-off system, refer to the description in the «Fuel cut-off system» section in the «In an amber emergency» chapter. If it is still not possible to restore the fuel supply, contact a Fiat Dealership. FUEL CUT-OFF SYSTEM FAILURE The symbol switches on in the event of fuel cut-off system failure. -
Page 109
WARNING In the event of external temperature sensor failure, the digits that indicate the value are replaced by amber dashes. FIAT CODE SYSTEM FAILURE The symbol switches on to indicate a failure of the Fiat CODE system. Contact a Fiat Dealership as soon as possible. amber… -
Page 110
The red symbol comes on in the event of a permanent Park Assist system failure. The system malfunction might amber / red be due to the battery voltage being too low or other faults in the electrical system. Contact a Fiat Dealership as soon as possible. -
Page 111
It is also displayed each time the ignition device is turned to MAR. The display will be in km or miles depending on the unit of measurement set. Go to a Fiat Dealership, where the «Service Schedule» operations will be performed and the message will be reset. -
Page 112
The deterioration of engine oil is accelerated by using the vehicle for short drives, preventing the engine from reaching operating temperature. Contact a Fiat Dealership as soon as possible. -
Page 113
(generic failure warning light flashing). In this case, the warning light (or symbol) may not indicate any faults with the restraint systems. Before continuing, contact a Fiat Dealership immediately to have the system checked. rain sensor failure / trailer connection failure / sound system failure / parking sensors failure. In these cases, contact a Fiat Dealership as soon as possible to have the fault fixed. -
Page 114
Symbol What it means START&STOP SYSTEM ACTIVATION The symbol appears in the case of Start&Stop (engine switching off) intervention. Restarting the engine, the green warning light switches off. HEADLIGHT HEIGHT The symbol indicates the height of the dipped beam headlights, set to four levels (0-4) using buttons white SINGLE GEAR SHIFT INDICATION (SHIFTING UP) This symbol appears to suggest engaging a higher gear (upshifting). -
Page 115
TRAILER TOWING FAILURE The symbol switches on to report a failure of the trailer system. white Contact a Fiat Dealership as soon as possible. «DRIVE MODE” FUNCTION (versions with manual transmission) white The message appears on the display if the «ECO» function is activated. -
Page 116
21) The presence of water in the fuel system circuit may cause severe damage to the injection system and irregular engine operation. If the symbol is displayed contact a Fiat Dealership as soon as possible to bleed the system. If the above indications come on immediately after refuelling, water has probably been poured into the tank: switch the engine off immediately and contact a Fiat Dealership. -
Page 117
SAFETY The chapter that you are about to ABS ……… 116 read is very important: it describes the ESC (Electronic Stability Control) safety systems with which the vehicle is SYSTEM ……..117 equipped and provides instructions on TRACTION PLUS SYSTEM ..120 how to use them correctly. -
Page 118
58) When the ABS cuts in and you feel the brake pedal pulsating, do not remove SYSTEM INTERVENTION This is an integral part of the braking your foot, but keep the pedal pushed The driver can feel that the ABS has system, which prevents one or more down;… -
Page 119
ESC (Electronic necessary for starting is reached, or in any case for a maximum of 2 seconds, Stability Control) allowing your right foot to be moved SYSTEM easily from the brake pedal to the accelerator. (for versions/markets, where provided) 65) 66) 67) When the 2 seconds have elapsed, The ESC system improves the SYSTEM INTERVENTION… -
Page 120
Depending on the slipping conditions, If the ASR is disengaged during driving, 70) 71) 72) two different control systems are it is automatically reactivated when the ERM (ELECTRONIC ROLLOVER activated: vehicle is next started. MITIGATION) SYSTEM if the slipping involves both drive When travelling on snowy roads with The system monitors the tendency of wheels, the ASR intervenes reducing… -
Page 121
LED on the button turns on and the If the function is not made available excessive speed on corners, driving on display shows a dedicated message. when the button is pressed, this could low-grip surfaces or aquaplaning. 67) The capability of the ESC system be due to brake overheating. -
Page 122
If the «Traction Plus» system is faulty, fig. 164 on the dashboard and works of putting the safety of the driver or other the «general failure» instrument panel people at risk. below a level of 50 km/h. Over this warning light comes on steady. -
Page 123
DRIVING about a lane on both sides of the vehicle (approx. 3 metres). ASSISTANCE Such zone begins near the centre pillar SYSTEMS of the vehicle and extends up to 6 metres from the rear of the vehicle. The vehicle may be fitted with the following driving assistance systems: When the sensors are active the system monitors the detection areas on… -
Page 124
Do not cover the side rear bumper The system activation is signalled to the driver by means of a visual and area fig. 165 where the radar sensors are located with any object (e.g. acoustic warning. adhesives, bike rack, etc.). Rear view WARNING If the detection field of The system detects vehicles coming… -
Page 125
and visual warnings when an object is displayed depending on the selected detected. unit of measurement. Trailer Detection When an acoustic warning is sent, the If the trailer is longer than 9 m, the The system can detect the presence volume of the radio is lowered. -
Page 126
ATTENTION ASSIST DESCRIPTION The (red) symbol appears on SYSTEM The tyre pressure monitoring system the instrument panel screen with a (where provided) (TPMS) warns the driver of low tyre dedicated message suggesting the pressure on the basis of the cold This is an auxiliary driving assistance driver to stop and take a break. -
Page 127
inflation pressure must be adjusted until pressure limit for any reason including the vehicle for about 20 minutes at a it reaches the pressure prescribed for low temperature and normal pressure speed higher than 20 km/h to allow the cold tyres. After the automatic update loss of the tyre. -
Page 128
and the warning light will switch off, This is a driving assistance system value, but repeat the check when tyres are provided that the pressure of none of consisting of a camera mounted in cold. the four tyres is below the insufficient 81) The TPMS cannot indicate sudden the middle of the windscreen fig. -
Page 129
If intervention by the driver on of «Display» paragraph in the «Knowing Following a deactivation, the system the brake pedal is detected but the instrument panel» section). will not warn the driver about the not deemed sufficient, the system The system can be turned off even with possible accident with the preceding may intervene in order to improve the ignition device in MAR position. -
Page 130
Although the vehicle can still be driven contact a Fiat Dealership as soon as «Near» setting but shorter than that in normal conditions, the system may possible. -
Page 131
system will display the relevant warning WARNING message indicating the direction of obstacle detection and, if necessary, 86) The system is an aid for the driver, apply the brakes. who must always pay full attention while Lane change by other vehicles driving. -
Page 132
(e.g. application of fillers or glues to vehicle ranges between 60 km/h and If the vehicle continues going beyond remove scratches). Go to a Fiat Dealership 180 km/h; the line of the lane without any for any operation of this type. -
Page 133
Exiting a lane with detection of a In accordance with the different Should the fault persist, contact a Fiat single limit conditions detected, the system can Dealership. When the system is active and only, for… -
Page 134
The contact a Fiat Dealership as soon as seat belts; SBR (Seat Belt Reminder) reel mechanism operates locking the possible. -
Page 135
(see the following paragraphs). high-speed bends. NOTE To deactivate the acoustic warning permanently contact a Fiat HEIGHT ADJUSTMENT Dealership. The acoustic warning can To adjust, press button (A) fig. 176 and be reactivated at any time through the raise or lower the handle (B). -
Page 136
Front seat belt warning light As soon as a speed threshold of The icons (A) shown on the display 20 km/h is reached, with driver side indicate: behaviour When the ignition device is turned to seat belt or the passenger side seat three symbols : left, centre, right belt (with occupant seated) unfastened,… -
Page 137
Icons on the 7” display For the rear seats and on the third row, Fiat Dealership to have it replaced. The icons are displayed according to the icons will activate a few seconds… -
Page 138
WARNING To obtain the highest between the abdomen and the steering degree of protection from the action of wheel. The seat belt strap must not be twisted. The upper part must the pretensioner, wear the seat belt pass over the shoulder and cross the tight to the chest and pelvis. -
Page 139
As far as the characteristics of the around the pretensioners may damage or wear or cuts. child seats used allow, you are advised deploy them. Contact a Fiat Dealership should intervention be necessary on these to keep children in rear facing child components. -
Page 140
These devices are GROUP 3 recommended, having been specifically For children from 22 kg to 36 kg in designed for Fiat cars. weight the size of the child’s chest no longer requires a support to space the child’s back from the backrest. -
Page 141
as possible to avoid contact between the the child restraint system according to the child seat and the dashboard. instructions, which must be included. 99) On the sun visor there is a label with 105) Car seats for weight groups 0 and suitable symbols reminding the user that 1 feature an anchor in front of the vehicle it is compulsory to deactivate the airbag if… -
Page 142
PASSENGER SEAT COMPLIANCE FOR USING UNIVERSAL CHILD SEATS The vehicle complies with the new European Directive 2000/3/EC which governs the arrangement possibilities for child restraint systems on the seats of a vehicle as shown in the following table (the table refers to the single cab Van, Combi and Panorama versions): … -
Page 143
SETUP FOR 106) 107) 108) 109) “UNIVERSAL ISOFIX» CHILD RESTRAINT SYSTEM The vehicle is set up for fitting an Isofix child restraint system. The ISOFIX system lets you install the ISOFIX child restraining system quickly, simply and safely, without using the F1A0156 vehicle seat belts, but by connecting F1B0117C… -
Page 144
107) Fiat Professional recommends fitting the child restraint system according to the instructions, which must be included. 108) Never use the same lower anchorage to attach more than one child restraint. 109) If a Universal ISOFIX child restraint system is not fixed to all three anchorages, it will not be able to protect the child correctly. -
Page 145
SUITABILITY OF PASSENGER SEATS FOR USE WITH ISOFIX CHILD SEATS The table below shows the different installation possibilities for «Universal ISOFIX» child restraint systems on the seats fitted with ISOFIX attachments, in accordance with European regulation ECE 16. Rear side Isofix Rear side Isofix Child restraint system Weight group… -
Page 146
NOTE: The other weight groups are covered by specific ISOFIX child restraint systems, which can only be used if specifically tested for this vehicle (see list of vehicles provided with the child restraint system). -
Page 147
i-Size CHILD RESTRAINT SYSTEMS These child restraint systems, built and type-approved according to the i-Size (ECE R129) standard, ensure better safety conditions to carry children on board a vehicle: the child must be transported rearward facing until 15 months; child restraint system protection J0A0450 is increased in the event of a side collision;… -
Page 148
The following table, according to European standard ECE 129, indicates the possibility of i-Size child restraint system installation. i-Size POSITIONS ON THE VEHICLE Rear side Rear central Device Front passenger passengers passenger ISO/R2 i-Size child restraint systems ISO/F2 X: seat not suitable for Universal i-Size child restraint systems. WARNING This vehicle is not approved for use with i-Size child restraint systems. -
Page 149
CHILD RESTRAINT SYSTEMS RECOMMENDED BY FIAT PROFESSIONAL FOR YOUR NEW DUCATO In the markets in which they are available, Lineaccessori MOPAR offers a complete range of child restraint systems to be fixed using the seat belt with three anchor points or the ISOFIX anchorages. -
Page 150
Child restraint system Type of child restraint system Child restraint system installation BeSafe iZi Modular i-Size Fiat order code: 71808565 The approved i-Size child restraint system that must be installed in the vehicle together with the underneath iZi Modular Group 0+/1: from 9 up to… -
Page 151
Follow the instructions for assembly, disassembly and positioning that the Manufacturer must supply with the child restraint system. 111) Fiat Professional recommends fitting the child restraint system according to the instructions, which must be included. 112) Never use the same lower anchorage to attach more than one child restraint. -
Page 152
Below is a summary of While travelling, do not let the child of a collision. If you need to carry a the main safety rules sit incorrectly or unfasten the belts. child on the front passenger seat in a rear-facing cradle restraint system, the to be followed when Never carry children on your lap, passenger side airbags (front and side… -
Page 153
the bag between the occupant and the Failure to deploy in the conditions steering wheel or dashboard. described above is due to the fact that the airbags may not provide any Therefore, non-activation in other additional protection compared with types of collisions (side collisions, rear seat belts, so their activation would shunts, roll-overs, etc.) is not a system be inappropriate. -
Page 154
AIRBAG AND CHILD be deactivated. least 5 seconds have elapsed from the RESTRAINT SYSTEMS previous switching off. If not, contact a Fiat Dealership. WARNING To manually deactivate 116) If the vehicle is switched off/on again Rearward facing child restraint systems… -
Page 155
of the passenger airbag and also cause serious injury to the passengers. 116) When there is an active passenger airbag, DO NOT install rearward facing child restraint systems on the front seat. Deployment of the airbag in a crash could cause fatal injuries to the child regardless of the severity of the collision. -
Page 156
PASSENGER SIDE FRONT AIRBAG AND CHILD RESTRAINT SYSTEMS: IMPORTANT F1A0387… -
Page 157
SIDE BAGS FRONT SIDE BAGS FOR CHEST PROTECTION 117) 118) 119) 120) 121) 122) 123) 124) 125) 126) 127) (for versions/markets, where provided) 128) 129) 130) To help increase occupant protection Housed in the seat backrests fig. 199, in the event of a side collision, for they are composed of an instantly versions/markets where provided, the inflating bag, which serves to protect… -
Page 158
124) Have the airbag system checked by this «Owner Handbook». 122) The airbag must be able to inflate a Fiat Dealership if the vehicle was stolen, without obstruction in the event of if theft was attempted, or if the vehicle was deployment. -
Page 159
126) Do not wash the seats with water or pressurised steam (wash by hand or at automatic seat washing stations). 127) The front airbag deployment threshold is higher than that of the pretensioners. For impacts whose intensity falls between the two levels, normally, only the pretensioners will be activated. -
Page 160
STARTING AND DRIVING Let’s get to the core of the vehicle: STARTING THE ENGINE ….. 159 SAVING FUEL……208 seeing how you can exploit all of its WHEN PARKED ……160 REFUELLING THE VEHICLE ..209 potential to the full. ®… -
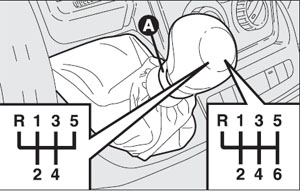
Page 161
R to engage reverse). put the gear lever into neutral; to start, see the paragraph “The Fiat take the ignition device to MAR: The gear engaged will be shown on CODE system” in section “Know your the instrument panel display. -
Page 162
can be used with the vehicle on a electronic key. The ignition device is 39) If the engine fails to start with a gear level surface during tight parking thus activated and the engine can be engaged, the potentially dangerous situation due to the fact that the manoeuvres using the brake pedal started. -
Page 163
WARNING If this is not the case, engaged, always keep the brake pedal 1 st , (R) or (N) with the engine off, the contact a Fiat Dealership to have the pressed until you decide to set off, key in the MAR position and the brake handbrake adjusted. -
Page 164
WARNING 132) Never leave children unattended in the vehicle. Always remove the ignition key when leaving the vehicle and take it out with you. IMPORTANT F1A0649 42) If the vehicle is equipped with F1A0162 self-levelling air suspension, always check To release the parking brake: that there is sufficient space above the WARNING Always engage the electric roof and around the vehicle when parking. -
Page 165
The electric parking brake can be driver’s side pulled as long as the brake press the switch on the lower part of engaged in two ways: action is necessary. the dashboard on driver’s side. manually by pulling the switch Noise may be heard from the rear of The warning light may switch on the vehicle and a slight movement… -
Page 166
ELECTRIC PARKING will automatically engage to hold the versions with manual transmission, the BRAKE OPERATING vehicle in safety conditions; clutch pedal is detected; “ Auto Park Brake ”: if the speed of MODES the electric parking brake engages the vehicle is lower than 3 km/h, the automatically to prevent vehicle The electric parking brake may operate electric parking brake will automatically… -
Page 167
MANUAL AUTOMATIC WARNING The clutch pedal should be used only for gear changes. TRANSMISSION TRANSMISSION To engage the gears, press the clutch (for versions/markets, where provided) Do not drive with your foot resting on pedal fully and put the gear lever into Some versions are equipped with the of the clutch pedal, however lightly. -
Page 168
F1A0697 F1A0665 GEAR LEVER LEVER POSITIONS Park (P) 137) 138) 139) 140) 141) 142) The (A) fig. 206 lever has the following positions: The transmission is mechanically P = Park locked in position P. R = Reverse The ignition key can be removed only N = Neutral when the lever is in position P. -
Page 169
Before moving the gear lever to must be pressed to move from the N to D. The best ratio is selected by the position P, apply the parking brake, D or R position. It is advisable not to control unit depending speed, engine accelerate and to make sure that the load (accelerator pedal position) and otherwise moving the gear lever to P… -
Page 170
VEHICLE MOVEMENT heavy load, on slopes, with strong manoeuvres using the brake pedal headwind or when towing heavy only. To move the vehicle, from position trailers), it is recommended to use the P press the brake pedal and move Autostick (sequential shifting) mode to the lever to the desired position (D or LEVER MOVEMENT select and keep a lower fixed ratio. -
Page 171
Transmission function is monitored always remove the mechanical key to contact a Fiat Dealership as soon as electronically for abnormal conditions. (where provided) from the ignition possible. -
Page 172
«DRIVE MODE» could operate incorrectly until it cools 140) Before moving the gear lever from down; position P, bring the ignition device FUNCTION to position MAR and press the brake when using the vehicle with pedal. Otherwise, the gear lever may get (for versions/markets, where provided) extremely low external temperatures, damaged. -
Page 173
START&STOP if the gear lever is in a position other than (R). SYSTEM NOTE On versions with automatic transmission in the event of stops IN BRIEF uphill, the engine switching off is disabled to activate the «Hill Holder» The Start&Stop device automatically function (works only with running stops the engine each time the engine). -
Page 174
MISSED ENGINE the lever to «+», «–», R (Reverse) or N battery not sufficiently charged; (Neutral). STOPPING CONDITIONS reduced braking system vacuum (e.g. if the brake pedal is pressed With the device activated, for reasons When the engine has been stopped repeatedly);… -
Page 175
Start&Stop system is deactivated. The driver is informed about the fault through the switching on of the icon together with a message on the display. In this case, contact a Fiat F1A0137 Dealership. VEHICLE INACTIVITY In the event of vehicle inactivity,… -
Page 176
ECO FUNCTION SPEED LIMITER If the Adaptive Cruise Control has been activated previously, button (A) fig. 212 (For versions/markets, where provided) (where provided) must be pressed twice. The first press To activate the function press the DESCRIPTION switches off the function activated ECO (A) fig. -
Page 177
«LIM» symbol appears on the 145) 146) 147) must be pressed twice to activate the display. In this case, contact a Fiat Cruise Control (because the first press Dealership. deactivates the Speed Limiter, and the second press activates the Cruise Control). -
Page 178
INCREASING / The device cannot be turned on in WARNING On steeply sloping roads, either reverse or in neutral. DECREASING SPEED the system may not be able to maintain the set speed, which may increase the Increasing speed speed of the vehicle. It is, therefore, Once the electronic Cruise Control WARNING It is dangerous to leave the preferable to switch the device off… -
Page 179
146) In case of a malfunction or failure of heating of the engine and/or the versions with manual transmission); the device, contact a Fiat Dealership. passenger compartment. 147) The electronic Cruise Control can gear shift lever in position P (for be dangerous if the system cannot keep versions with automatic transmission). -
Page 180
90, 100, 110, 130 km/h. along a wall. To activate/deactivate this function, If several obstacles are detected by contact a Fiat Dealership. the sensors, only the nearest one is Following the operation, a sticker will considered. be applied to the windscreen showing… -
Page 181
(see «Settings» in the «Vehicle mode» the entire surface of the sides of the paragraph in the «Multimedia» section). vehicle and some signals may be delayed). In addition to the acoustic warning, the system indicates the presence of an The sensors warn the driver about the presence of obstacles with acoustic obstacle in the rear area by displaying a signal and, where provided, also with… -
Page 182
Deactivation when the obstacle is not within the trajectory of the vehicle. The acoustic and visual signals are deactivated automatically in the If the sensors detect several obstacles following cases: at the same time, in the front, side and rear area, the acoustic warning of the engaging a gear other than reverse obstacle in the nearest trajectory is gear at a speed above 18 km/h;… -
Page 183
Parking sensor faults, if any, will be washing the vehicle, in case of rain, to contact a Fiat Dealership for indicated by a message on the display strong wind,; the ParkSense ® system update the signals sent by the sensor can (see description in the «Warning… -
Page 184
Fiat Dealership. Interventions on the bumper that are not carried out properly may compromise the operation of the parking sensors. 51) Only have the bumper repainted or any retouches to the paintwork in the area of the sensors carried out by a Fiat F1A0701… -
Page 185
parking sensors which provide further «Parallel» : the vehicle will search a distance information when approaching parking place parallel to the driving obstacles in front of and behind the direction; vehicle. «Perpendicular» : the vehicle will search a parking place perpendicular to If the driver activates the Active ParkSense ®… -
Page 186
DESCRIPTION OF WARNING While searching, vehicle be released (for example, to allow a speed should not exceed 30 km/h; pedestrian to go by in the area of the MANOEUVRING OUT FROM PARALLEL when 25 km/h have been reached, the manoeuvre). PARKING driver is asked to decrease the speed;… -
Page 187
manoeuvre the car out of the parking If the sensors are dirty, covered by compatible with the parking area place. snow, ice or mud or are repainted vs. detected by the system. The use of tyres (one or more) or the original conditions, the system The driver controls the movements of rims with dimensions other than those… -
Page 188
53) Only have the bumper repainted or Camera activation/deactivation WARNING During the assisted parking any retouches to the paintwork in the area of the sensors carried out by a Fiat Every time reverse is engaged, the manoeuvre may be interrupted due to Dealership. Incorrect paint application display fig. -
Page 189
SYMBOLS AND WARNING MESSAGES ON THE DISPLAY 152) Parking and other potentially Indications on the display dangerous manoeuvres are, however, If activated, using Uconnect™ system always the driver’s responsibility. While settings, it is possible to activate the carrying out these manoeuvres, always make sure that no people (especially guidelines on the display. -
Page 190
Messages on the display the instrument panel (see the «Display» The recognition of valid road limits chapter in the «Knowing the instrument depends very much on road If the rear load compartment is open, panel» section). conditions, the positioning of signs, the camera will not detect any obstacle NOTE The rain, fog or snow type visibility conditions and various other… -
Page 191
encountered along the road. The unit of measurement chosen by the speed limit suggested and offered user. to Intelligent Speed Assist (ISA) and The system can display the shape of Intelligent Adaptive Cruise Control the signs consistently with the current (IACC) systems (where active) is shape of the country in which you are therefore intended according to the unit… -
Page 192
INTELLIGENT SPEED ADAPTIVE CRUISE Sign Recognition» system has been acquired as the new Speed Limiter ASSIST CONTROL (ACC) value, the activation of Intelligent Speed The «Intelligent Speed Assist» system (where provided) Assist is indicated by the symbol LIM can be used to set a speed limit on on the display and the relevant road 153) 154) 155) 156) 157) 158) 159) the «Speed Limiter»… -
Page 193
by braking (or accelerating) slightly in order not to exceed the original set speed, so that the vehicle keeps the preset distance, seeking to adapt to the speed of the vehicle ahead. It is advisable to turn the device off in the following cases: driving in fog, heavy rain, snow, heavy traffic and in complex driving… -
Page 194
Deactivation the device will not be able to control when the ESC (or ABS or other the distance between the vehicle and stability control systems) are operating With the device active, to deactivate it the one ahead. In this case the speed or have just operated;… -
Page 195
CHANGING THE SPEED the button is released. The set speed The device is switched off while driving decrease is shown on the display. if the brakes overheat. Increasing speed After having set the device, the stored WARNINGS CHANGING THE SPEED speed can be stored by holding the By keeping the accelerator pedal The system can be used to set a speed… -
Page 196
RECALLING THE SPEED driver, the new distance will be stored also after the system is deactivated and Once the system has been cancelled reactivated. but not deactivated, if a speed was previously set simply press the RES To decrease the distance button and remove your foot from the Press and release the button to accelerator to recall it. -
Page 197
STOP system functions end, this will go back position. to normal and complete operation. Should the fault persist, contact a Fiat The device is cancelled (the set speed WARNING If the device predicts that Dealership. -
Page 198
When leaving the curve, the device the utmost attention at all times and resets the previously set speed. be always ready to press the brakes if needed. F1A0995 Stationary objects and vehicles F1A0997 The device cannot detect the presence F1A0996 of stationary vehicles or objects. -
Page 199
Go to DESCRIPTION stationary objects (e.g. a vehicle standing a Fiat Dealership for any operation of this in a queue or a broken down vehicle). The Adaptive Cruise Control with type. -
Page 200
The system allows the vehicle to be driving in fog, heavy rain, snow; held at the desired speed without driving near a bend (winding roads), icy, snowy, slippery roads or with steep needing to press the accelerator. It also allows holding the distance set by the slopes and descents;… -
Page 201
accelerator pedal to make the vehicle in case of failure of the device; Hold the SET + or SET — button go faster than the set speed. While the when the engine is off; pressed: the set speed will increase or accelerator pedal is pressed: on very steep slopes;… -
Page 202
will be shown with a message. The cause serious accidents and fatal current traffic and road conditions driver can confirm the speed setting injuries. could cause an acceleration or a suggested by the road sign with the deceleration of the vehicle. Failure to RES button. -
Page 203
The distances from the vehicle ahead The distance setting decreases by one approaching the vehicle ahead by are proportional to speed. The interval bar (shorter) every time the button is displaying an alert message on the display. An acoustic signal is also of time with respect to the vehicle pressed. -
Page 204
The hazard warning lights will be Should the fault persist, contact a Fiat If these conditions occur while the activated as soon as the system Dealership. activates the automatic braking. When… -
Page 205
be always ready to press the brakes if Stationary objects and vehicles needed. The system cannot detect the presence of stationary objects and vehicles if you are travelling at a speed exceeding 60 km/h (37 mph). For example, the system may not operate if the vehicle ahead leaves the lane and a car stopped on the lane ahead of if. -
Page 206
(e.g. application of fillers or glues to also managing speed. maintain a safe distance from the vehicle in remove scratches). Go to a Fiat Dealership front. for any operation of this type. 166) 167) 168) 169) 170) 171) 172) 173) 174) -
Page 207
OPERATION the Co-Driver system must be if the left or right direction indicator is switched on by pressing the button (A) activated; The system only works if the driver if the driver intentionally changes keeps his or her hands on the steering fig. -
Page 208
INDICATIONS ON THE DISPLAY The system status can always be viewed through a dedicated area on the instrument panel display. The system status is indicated by the colour of the symbol. If the driver’s hands are not on the steering wheel, a series of warnings will appear on the instrument panel F1A0744 F1A0776… -
Page 209
171) If the windscreen must be replaced WARNING due to scratches, chipping or breakage, F1A0778 contact exclusively a Fiat Dealership. Do not replace the windscreen on your When the Co-Driver system is active, 166) Many unpredictable situations can own, risk of malfunction! It is advisable to… -
Page 210
accessories reduce the aerodynamic is therefore advisable to move off with other equipment that causes coefficient of the vehicle and have a immediately, slowly, avoiding high electromagnetic waves. negative effect on fuel consumption. speeds: in this way the engine will When transporting particularly large warm up more quickly. -
Page 211
USAGE CONDITIONS REFUELLING THE it is also advisable to keep the tank over 50% full. The main usage conditions that VEHICLE negatively affect fuel consumption are listed below. IN BRIEF REFUELLING CAPACITY Cold starting To ensure that you fill the tank Stop the engine before refuelling. -
Page 212
insert the AdBlue ® (UREA) nozzle WARNING When the gun distributor fuel «snaps» or interrupts the supply, in the filler, start refilling and stop the tank is nearly full and you can run refilling at the first shut-off (the shut-off two additional top-ups after shooting indicates that the AdBlue ®… -
Page 213
AdBlue ® (UREA) was topped result in serious engine damage, Since AdBlue ® (UREA) starts to contact a Fiat Dealership. up when the tank was empty, refer freeze around -11°C, the vehicle is Do not add additives or other fluids to the “Refuelling ”… -
Page 214
with water favours the proliferation of time, you must not only drain the fuel tank, WARNING «microbes». but the rest of the supply circuit as well. These microbes create a «slime» that 175) Do not approach naked flames or can clog the filter system and fuel ADBLUE ®… -
Page 215
LOADING ADVICE behaviour of the vehicle is affected by the weight transported: in particular, The Fiat Ducato version used by you TOWING TRAILERS the stopping distances are longer, has been designed and type approved IMPORTANT NOTES especially at high speed. -
Page 216
7 or 13 pin 12 VDC connections are You are advised to fit a suitable trailer, it is advisable to contact a Fiat to be used (CUNA/UNI and ISO/DIN stabiliser to the trailer drawbar. -
Page 217
The structure Ø must be fixed in the points indicated using a total of 6 M10x1.25 screws and 4 M12 screws. MAX LOAD ON BALL: 100/120 kg depending on the payload (see the “Weights” table in the “Technical Specifications” chapter). WARNING 182) The ABS with which the vehicle may be equipped will not control the braking… -
Page 218
F1A0164… -
Page 219
F1A0165… -
Page 220
Locked position, driving INSTRUCTIONS FOR removed and the closing cap must USING THE REMOVABLE always be inserted in the housing pipe. BALL HEAD TOW BAR This applies particularly if the visibility of the number plate characters or of the 71) 72) 73) 74) 75) 76) lighting system is reduced. -
Page 221
is disengaged before the installation, or 3. Close the lock and always remove 73) To ensure correct operation of the at any other time, and is in the locked the key. The key cannot be removed system, periodically remove all dirt deposits from the ball head bar and from position, it must be pre-loaded. -
Page 222
PROLONGED sprinkle talcum powder on the windscreen and rear window wiper VEHICLE INACTIVITY rubber blades and lift them off the If the vehicle needs to be off the glass; road for longer than one month, the slightly open the windows; following precautions must be taken: cover the vehicle with a piece of park the vehicle indoors in a dry and,… -
Page 223
disconnected, the anti-theft system would recognise this as a break-in attempt. guarantee that all the vehicle electrical systems have been deactivated. With the battery disconnected, access to the vehicle will only be possible by unlocking the driver’s door using the mechanical lock. -
Page 224
It is also possible to call the FUSES……..238 00 800 3428 0000 freephone number CHANGING A WHEEL ….246 to search the nearest Fiat Dealership. FIX&GO AUTOMATIC QUICK TYRE REPAIR KIT …… 250 JUMP STARTING ……. 252 RECHARGING THE BATTERY ..253 ADDITIONAL HEATER FUEL CUT-OFF SWITCH ….. -
Page 225
HAZARD WARNING WARNING The use of hazard warning lights is governed by the highway code LIGHTS of the country you are in. Comply with They are switched on by pressing legal requirements. the switch (A) fig. 259 or (A) fig. 260, according to the versions, regardless of EMERGENCY BRAKING the position of the ignition key. -
Page 226
For further that the geolocation function is active NOTE If the ASSIST call button is information visit the Fiat official website. (ON). When geolocation is on, the pressed by mistake, the call can be vehicle position is tracked to enable ended by pressing the same button the functions that require it. -
Page 227
When using the services, customers protection policies on the Fiat official shall keep their passwords secret for website. strictly personal use and not to disclose The customer is solely responsible them to third parties. -
Page 228
Uconnect™ system display indicates when the malfunction is detected. indication that the occupant has that the geolocation function is active Contact a Fiat Dealership as soon as made an HELP call; (ON). When geolocation is on, the possible. vehicle brand;… -
Page 229
WARNING Do not place network not be guaranteed in places such as general conditions of service and data antennas, CB radios or aftermarket tunnels, garages, multi-storey car protection policies on the Fiat official electrical equipment to avoid parks, mountains. website. interference. Such interference could… -
Page 230
No operations are allowed versions/markets where provided) and contacts for oxidation; on the 12V battery. Always go to a Fiat by means of a notification via mobile burnt bulbs must be replaced by Dealership. -
Page 231
BULB TYPES Various types of bulbs are fitted to your vehicle: All-glass bulb: (type A) these are pressure fitted — pull to remove. Bayonet bulb: (type B) to remove them press the bulb and turn it anticlockwise. Cylindrical bulbs: (type C) release them from their contacts to remove. -
Page 232
Light bulbs Light bulbs Type Power Figure ref. Main beams – – FULL LED Dipped headlights – – FULL LED W21/5W — LED (*) 21/5W Front side / Daytime running lights (DRL) – – LED (*) – Front fog lights (**) WY21W Front direction indicators –… -
Page 233
Light bulbs Type Power Figure ref. Front roof light (movable lens) 12V10W Rear ceiling light 12V10W (*) Where provided (**) For versions/markets, where provided (***) XL and Tempo Libero versions (****) All other versions… -
Page 234
REPLACING AN disconnect the electrical connector (A) fig. 263 from the headlight. EXTERIOR BULB For the type of bulb and power rating, see the “Replacing a bulb” paragraph above. FRONT LIGHT CLUSTERS The front light clusters contain the side lights and DRLs (where the LED solution is not provided), dipped beam, F1A0313 main beam and direction indicator… -
Page 235
SIDE LIGHTS/DAYTIME MAIN BEAM HEADLIGHTS DIPPED BEAM RUNNING LIGHTS HEADLIGHTS To replace the bulb, proceed as With incandescent bulbs follows: remove the protective rubber cover (A) fig. 266; turn the bulb holder (B) fig. 267 anticlockwise; extract the bulb by pulling and replace it;… -
Page 236
(for versions/markets, where provided) replace it; For replacing these bulbs, contact a remove the bulb by pushing it slightly Fiat Dealership. and turning it anticlockwise (bayonet mount); FOG LIGHTS refit the bulb holder (B) by turning it… -
Page 237
open the rear swing door; replace it; extract the bulb (G), (H) undo the 7 fixing screws (A) of the pulling it outwards; plastic cover; refit the bulb holder and tighten the undo the two fixing screws (B); screws (C); extract the unit outwards and reconnect the electrical connector, disconnect the electrical connector;… -
Page 238
THIRD BRAKE LIGHTS NUMBER PLATE LIGHTS For truck and chassis cab versions: F1A0204 F1A0206 To replace the bulb proceed as follows: operate in the point indicated by the arrow and remove the lens unit (A) fig. 280; change the bulb releasing it from the side contacts and making sure the new bulb is correctly fastened between the contacts;… -
Page 239
INTERIOR BULBS LIGHT For the type of bulb and relevant power (for versions/markets, where provided) rating, see the “Changing a bulb” Contact a Fiat Dealership for replacing paragraph. an LED front ceiling light. FRONT CEILING LIGHT REAR CEILING LIGHT To replace the bulbs, proceed as… -
Page 240
If it is not, replace the blown fuse with fig. 286, loosen the screws (A) fig. 287 another with the same ampere rating and remove the cover. (same colour). (B) intact fuse. (C) fuse with damaged filament. For fuse replacement, contact a Fiat Dealership. -
Page 241
slowly rotate the screw anticlockwise Engine compartment fusebox until resistance is encountered (do not overtighten); slowly release the screw; opening is indicated by the entire screw head coming out of its housing; remove the cover. To refit the cover proceed as follows: join the cover with the box correctly;… -
Page 242
190) If the replaced fuse blows again, F1A0458-1 contact a Fiat Dealership. 191) Contact Fiat Dealership if a safety Optional wired module system (airbags, brakes), engine system (engine, transmission) or steering system general protection fuse blows. -
Page 243
Dashboard fusebox Protected device Fuse Ampere Internal light relay Battery monitoring sensor for Start&Stop versions (+battery) Minibus interior lights (emergency) Radio, Climate control system, Alarm, Tachograph, Battery disconnecting control unit, Current stabiliser for radio setup (S&S), TBM (+battery) Instrument panel, Front radar, Central control panel (+key) Door lock (+battery) Windscreen wiper (+key) Driver’s side electric window… -
Page 244
2.2 120 HP — 140 HP — 160 HP — 180 HP H3-Power versions with AdBlue ® F1A0472 A: Engine compartment fusebox — B: Wired module — C: Optional wired module Protected device Fuse Ampere Engine cooling high speed fan (+battery) 40/60 Engine cooling low speed fan (+battery) 40/50… -
Page 245
Protected device Fuse Ampere Windscreen wiper Auxiliary control panel for mirror movement and folding (+key) Mirror defrosting Webasto control unit Passenger compartment fan with Webasto Trailer hook socket Trailer control unit Trailer control unit Trailer hook socket Empty Empty Empty Empty Self-levelling suspension 220V inverter… -
Page 246
Right central pillar optional fusebox F1A0475 Protected device Fuse Ampere Engine intake / ventilation fan (MBUS) Heated seats Rear passenger power socket Additional heater under the seat Left heated rear window… -
Page 247
Protected device Fuse Ampere Right heated rear window – Not available – Not available – Not available Additional passenger heater control – Not available Additional passenger heater fan… -
Page 248
CHANGING A WHEEL GENERAL INSTRUCTIONS Wheel replacement and correct use of the jack and spare wheel (for versions/markets, where provided) call for some precautions, which are listed below. 193) 194) 195) 196) 197) Please note that: F1A0168 F1A0420 the jack weight is 4.5 kg; engage first gear or reverse;… -
Page 249
F1A0634 F1A0169 F1A0171 lift the vehicle. warn anybody nearby that the vehicle after unwinding the whole cable of After lifting the vehicle: is about to be lifted. They must stay the spare wheel lifting device, remove for all versions, access the rear right clear and not touch the vehicle until it is the wheel from the vehicle;… -
Page 250
supported in its housing beneath the floor pan (D) fig. 301. 202) F1A0174 F1A0422 with the tools assembled, undo the At the end of the operation: bolts fig. 303 fully and remove the take the replaced wheel, reattach it F1A0430 wheel;… -
Page 251
confirmation reference (D) fig. 301 appears on the device; check that the position of the replaced wheel under the platform is correct (the lifting system is equipped with a clutch to limit the end of the stroke, incorrect positioning may jeopardise safety);… -
Page 252
FIX&GO AUTOMATIC 195) Repair and refit the standard wheel 202) At the end of the operation of as soon as possible. Do not apply grease raising/locking the spare wheel, after QUICK TYRE REPAIR to the bolt threads before fitting: they having checked the correct positioning could come unscrewed. -
Page 253
REPAIR PROCEDURE Move the vehicle approximately 10 metres to distribute the sealant. Proceed as follows: Stop the vehicle safely, operate the stop the vehicle in a position that parking brake and restore pressure is not dangerous for oncoming traffic where you can change the wheel; using the black inflation pipe (C) stop the engine, apply the parking fig. -
Page 254
JUMP STARTING examined and repaired by a specialist as soon as possible. Before using the kit, Go to a Fiat Dealership immediately if ensure that the tyre is not excessively damaged and that the rim is in good warning light… -
Page 255
To carry out this operation contact a contact. Fiat Dealership. 209) 210) BUMP STARTING VERSIONS WITHOUT WARNING After setting the ignition Never bump start the motor by START&STOP SYSTEM… -
Page 256
ADDITIONAL turn on the charger; damage to the vehicle electrical devices at the end of the charging process, (e.g. headlights). HEATER FUEL switch the battery charger off; CUT-OFF SWITCH after having disconnected the battery FUEL CUT-OFF charger, reconnect connector (A) to the The vehicle is fitted with a safety switch SYSTEM sensor (C) as shown fig. -
Page 257
Reset procedure In case of a minor in the rear right corner of the gear stop the vehicle in safe conditions, collision, simply turn the key to STOP selector unit (fig. 317) and press the engage a gear and the parking brake; release lever and the button on the using the key (A) fig. -
Page 258
322 to be IMPORTANT removed; take the screwdriver provided from 81) It is advisable to contact a Fiat F1A0221 the box and prise up at the point Dealership to have the refitting procedure shown to raise the cap (C) fig. 324;… -
Page 259
take the tow ring (D) from the box WARNING and screw onto the threaded pin fig. 324. 213) Screw on the tow ring and check that The rear ring (B) fig. 325 is located at it stops at the end of travel position. the point shown in the figure. -
Page 260
SERVICING AND MAINTENANCE Correct maintenance permits the SCHEDULED SERVICING … 259 performance of the vehicle to be PERIODIC CHECKS ….259 maintained over time, as well as limited DEMANDING VEHICLE USE ..259 running costs and safeguarding the SERVICE SCHEDULE ….260 efficiency of the safety systems. -
Page 261
PERIODIC CHECKS under the best conditions. towing a trailer or caravan; Every 1000 km or before long journeys, For this reason, Fiat Professional dusty roads; has planned a series of checks and check and, if necessary, top up: short, repeated journeys (less… -
Page 262
SERVICE SCHEDULE Thousands of miles Thousands of kilometres Years Check battery charge status and possibly recharge Check tyre condition/wear and adjust pressure, if necessary; check the expiry date of the “Fix&Go Automatic” repair kit (for versions/markets, where provided) Check operation of lighting system (headlights, direction indicators, hazard warning lights, boot, passenger compartment, glove compartment, instrument panel warning lights, etc.) Check operation of the windscreen wiper/washer system and adjust nozzles, if… -
Page 263
Thousands of miles Thousands of kilometres Years Inspect the conditions of toothed timing drive belt Check parking brake lever travel and adjust, if necessary Check exhaust emissions/smokiness Use the diagnosis socket to check fuel/engine management system operation and engine oil decay (the latter for versions/markets, where provided) Check cleanliness of sliding side door lower guides for versions with S.S.D. -
Page 264
Thousands of miles Thousands of kilometres Years Replace TBM battery (where provided) (1) Only ever use the fluids shown in the handbook for topping up, and only after checking that the system is intact. (2) If the vehicle is equipped with an air cleaner specially for dusty areas: check and clean filter every 20,000 km, change filter every 40,000 km or change the air cleaner whenever the obstructed air cleaner indicator appears. -
Page 265
CHECKING LEVELS F1A0397 A. Engine oil filler plug B. Engine coolant C. Windscreen washer fluid D. Brake fluid 222) 223) -
Page 266
WARNING 222) Never smoke while working in the engine compartment: inflammable gases and vapours may be present, constituting a fire risk. 223) Be very careful working in the engine compartment when the engine is hot: you may get burned. Remember that the fan may start up if the engine is hot: this could injure you. -
Page 267
ENGINE OIL Oil level indication update on considered stabilised after the first 5,000–6,000 km. display If a top-up is needed, proceed as ENGINE COOLANT follows to ensure correct indication of WARNING It is advisable to check the 224) the oil level on the display: engine oil level indication before long Proceed as follows: journeys. -
Page 268
BRAKE FLUID winter or 50% PETRONAS DURANCE SC 35 and 50% water in winter. 228) 229) At temperatures below -20°C, use undiluted PETRONAS DURANCE SC Undo the cap (D) — fig. 326: check that 35 fluid. the liquid contained in the reservoir is at the maximum level. -
Page 269
FILTER 227) Do not release the cap from the F1A0238 extension without previously extracting the Have the air cleaner replaced by a Fiat system using the ring. When the setting is reached the Dealership. 228) Brake fluid is poisonous and highly indicator (B) fig. -
Page 270
USEFUL ADVICE FOR is advisable to contact a Fiat Dealership For versions without Start&Stop to change the cleaner. EXTENDING THE LIFE OF system: disconnect the negative YOUR BATTERY terminal from the battery terminal. If the vehicle is equipped with a… -
Page 271
(anti-theft, radio phone, etc.), period of 5 days, it is advisable to rubber to the glass. Use a de-icing go to a Fiat Dealership, which will suggest disconnect the negative battery product to release it if required; the most suitable devices and advise you terminal to maintain its charge.If the… -
Page 272
If the vehicle needs to be lifted, go to a fit the new blade, inserting the tab Fiat Dealership which is equipped with into the special slot in the arm, making the arm hoist or workshop lift. -
Page 273
Go The tyres must be replaced when the to a Fiat Dealership if required; tread is less than 1.6 mm thick. In any WARNING avoid overloading the car when… -
Page 274
WARNING For versions fitted with SNOW TYRES 225/75 R16 tyre, use snow chains with 239) A Fiat Dealership will be happy to max. thickness 16 mm.When travelling provide advice concerning the most on snowy roads with snow chains, it suitable type of tyre for the customer’s… -
Page 275
ADVICE FOR wash, follow these recommendations: also not to be underestimated. PRESERVING THE remove the aerial from the roof so it On your vehicle, Fiat has implemented BODYWORK does not get damaged; the best manufacturing technologies Paintwork the vehicle should be washed with to effectively protect the bodywork water added to a soapy solution;… -
Page 276
the vehicle under trees; the resinous ENGINE COMPARTMENT conditions. Do not use chemicals/acids to substances released by many species WASHING defrost windows/vehicle glass as they can give the paint a dull appearance and damage the paint. 91) Some automatic systems equipped increase the possibility of corrosion. -
Page 277
INTERIOR LEATHER STEERING 241) Do not keep aerosol cans in the WHEEL/GEAR LEVER vehicle: they might explode. Aerosol cans Regularly check that water is not must not be exposed to temperatures KNOB/PARKING BRAKE trapped under the mats (due to water higher than 50°C. -
Page 278
TECHNICAL SPECIFICATIONS Everything you may find useful for IDENTIFICATION DATA ….277 understanding how your vehicle is ENGINE CODES — BODYWORK made and works is contained in this VERSION ……..279 chapter and illustrated with data, tables ENGINE ……..282 and graphics. -
Page 279
This plate is fitted to the engine The marking includes: compartment front crossmember and A Paint manufacturer. type of vehicle; contains the following data fig. 335: B Colour name. chassis serial number. C Fiat colour code. D Respray and touch up code. Name of manufacturer. -
Page 280
F1A0369 MOTOR MARKING It is stamped on the cylinder block and includes the type and the engine serial number. -
Page 281
ENGINE CODES — BODYWORK VERSION Model Engine code 2.2 120 HP H3-Power with AdBlue ® 46349131 2.2 140 HP H3-Power with AdBlue ® 46349131 2.2 160 HP H3-Power with AdBlue ® 46348913 2.2 180 HP H3-Power with AdBlue ® 46348913… -
Page 282
BODYWORK VERSIONS ENGINE B 3500 kg / 3650 kg LONG There is an example of a bodywork K F1A 2.2 103 kW 140 HP VGT EURO C 3500 kg / 3650 kg STRETCHED version code below by way of 4 C637 D 3500 kg / 3650 kg ROLLING explanation with a key which is valid for L F1A 2.2 103 kW 140 HP VGT EURO… -
Page 283
TRANSMISSION C CHASSIS SINGLE CAB LOW ROOF N Mechanical transmission D CHASSIS CREW CAB LOW ROOF B Automatic transmission AT9 E GLAZED VAN (TEMPO LIBERO) LOW ROOF WHEELBASE F GLAZED VAN (TEMPO LIBERO) SHORT(S) = 0, 4, 9 , E MEDIUM ROOF MEDIUM (M) = 1 , 5 , A , F G PANELLED VAN MEDIUM ROOF… -
Page 284
ENGINE 2.2 120 HP H3-Power 2.2 140 HP H3-Power 2.2 160 HP H3-Power 2.2 180 HP H3-Power General information with AdBlue ® with AdBlue ® with AdBlue ® with AdBlue ® Engine code 46349131 46349131 46348913 46348913 Cycle Diesel Diesel Diesel Diesel… -
Page 285
POWER SUPPLY Versions Intake system Diesel Common Rail direct injection 242) WARNING 242) Modifications or repairs to the fuel supply system that are not carried out properly or do not take the system’s technical specifications into account can cause malfunctions leading to the risk of fire. -
Page 286
TRANSMISSION Versions Transmission Clutch Traction 2.2 120 HP H3-Power with AdBlue ® 2.2 140 HP H3-Power with Six forward speed plus AdBlue ® reverse with synchronisers Self-adjusting pedal MANUAL TRANSMISSION for the engagement of the without idle stroke 2.2 160 HP H3-Power with forward speeds AdBlue ®… -
Page 287
SUSPENSION Front Rear McPherson independent wheels Tubular rigid beam axle; longitudinal leaf spring IMPORTANT 93) Carefully check that the composite leaf springs do not come in contact with any kind of acid… -
Page 288
BRAKES Front service brakes Rear service brakes Parking brake Versions with mechanical parking Controlled by handbrake lever, Self-ventilated discs Disc brake acting on the rear brakes Versions with electric parking Self-ventilated discs Self-ventilated discs Electric brake (EPB) WARNING Water, ice and salt spread on the roads may deposit on the brake discs reducing braking efficiency the first time the brakes are applied. -
Page 289
STEERING Versions Kerb-to-kerb turning circle (m) Type Short wheelbase 11.06 Medium wheelbase 12.46 Medium-long wheelbase 13.54 Rack and pinion with electric power steering. 14.28 Long wheelbase Extra-long wheelbase 15.3… -
Page 290
WHEELS Load index (capacity) RIMS AND TYRES 70 = 335 kg 95 = 690 kg Alloy or pressed steel rims. Tubeless radial carcass tyres. 71 = 345 kg 96 = 710 kg All approved tyres are listed in the registration document. -
Page 291
90 = 600 kg 115 = 1215 kg 91 = 615 kg 116 = 1250 kg 92 = 630 kg 117 = 1285 kg 93 = 650 kg 118 = 1320 kg 94 = 670 kg 119 = 1360 kg RIM PROTECTOR TYRES 243) F1A0248… -
Page 292
RIMS AND TYRES PROVIDED Rims for versions with manual gearbox TYRES VERSION PAYLOAD (Size/Load index and speed) 3000 215/70 R15 C 225/70 R15C LIGHT 15” 3300 (109/107 S) (112/110 S) 3500 225/70 R15C 6 Jx15-68 (112/110 R) M+S – 3000 LIGHT TEMPO 215/70 R15 CP –… -
Page 293
Rims for versions with automatic transmission TYRES VERSION PAYLOAD (Size/Load index and speed) 215/70 R15 C 225/70 R15C LIGHT 15» 3000 (109/107 S) (112/110 S) 225/70 R15C 6 Jx15-68 (112/110 R) M+S 215/70 R15 CP LIGHT TEMPO – 3000 LIBERO 15″ (109/107 Q) 3300 215/75 R16 C… -
Page 294
COLD TYRE INFLATION PRESSURE (bar) Tyres provided Front Rear 3000 PTT (*) with basic tyres, except PANORAMA 215/70 R15 C 3300 GVW (*) / 3500 PTT (*) with basic tyres 215/70 R15 C PANORAMA with basic tyres 3000 PTT (*) with oversized tyres, except PANORAMA 225/70 R15 C 3300 GVW (*) / 3500 GVW (*) with oversized… -
Page 295
The pressure value can be up to +1.0 bar more than the recommended one when the tyres are warm. However, recheck that the value is correct with the tyre cold. -
Page 296
DIMENSIONS PANORAMA / COMBI VERSION Dimensions are expressed in mm and refer to the vehicle fitted with standard tyres. Height is measured with vehicle unladen. F1A0367… -
Page 297
COMBI — PANORAMA 3000 3450 4035 1015 1015 1015 — 1380 (*) 4963 5413 5998 — 6363(*) 2254 2524 2524 1810 1810 1810 2050 2050 2050 1790 1790 1790 (*) MINIBUS version, 16 + 1 seats The sizes vary according to the various versions within the limits indicated above. -
Page 298
VAN VERSION Dimensions are expressed in mm and refer to the vehicle fitted with standard tyres. Height is measured with vehicle unladen. F1A0328… -
Page 299
CH1 — CH2 MH1 — MH2 LH2 — LH3 XLH2 — XLH3 3000 3450 4035 4035 1015 1015 1015 1380 4963 5413 5998 6363 2254 — 2524 2254 — 2524 (*) 2524 — 2764 (**) 2524 — 2764 1810 1810 1810 1810… -
Page 300
TRUCK VERSION Dimensions are expressed in mm and refer to the vehicle fitted with standard tyres. Height is measured with vehicle unladen. F1A0329… -
Page 301
TRUCK BODY CHASSIS CAB MH1 — XLH1 XLH1 XXLH1 MLH1 3450 — 3000 3450 4035 4035 3000 4035 4035 4300 3800 1345 1345 1345 1710 1325 1590 5358 — 5293 5743 6328 6693 4908 5943 6308 6573 5708 – –… -
Page 302
CHASSIS COWL SPECIAL CAB VAN MH1 — MH1 — XLH1 XXLH1 XLH1 XXLH1 MLH1 MLH1 3450 — 3450 — 3000 4035 4035 4300 3000 4035 4035 4300 3800 3800 1225 1490 1245 1510 5235 — 5278 — 4785 5820 6125 6390 4828… -
Page 303
SPECIAL CHASSIS COWL MH1 — MH2 XLH1 XXLH1 3000 3450 — 3800 4035 4035 4300 1245 1510 4805 5255 — 5605 5840 6205 6470 1810 1810 1810 1810 1810 1790 — 1980 1790 — 1980 1790 — 1980 1790 — 1980 1790 — 1980 2050 2050… -
Page 304
CREW CAB VERSION Dimensions are expressed in mm and refer to the vehicle fitted with standard tyres. Height is measured with vehicle unladen. F1A0368… -
Page 305
CREW CAB XLH1 3450 4035 4035 1340 1245 1695 5798 6228 6678 2424 2424 2424 1810 1810 1810 2100 2100 2100 1790 1790 1790 The sizes vary according to the various versions within the limits indicated above. -
Page 306
PERFORMANCE Top permitted speed after initial vehicle use in km/h. Versions with manual transmission 2.2 120 HP H3-Power 2.2 140 HP H3-Power 2.2 160 HP H3-Power 2.2 180 HP H3-Power with AdBlue ® with AdBlue ® with AdBlue ® with BODYWORK VERSION AdBlue ®… -
Page 307
2.2 120 HP H3-Power 2.2 140 HP H3-Power 2.2 160 HP H3-Power 2.2 180 HP H3-Power with AdBlue ® with AdBlue ® with AdBlue ® with BODYWORK VERSION AdBlue ® Light Light Heavy Light Heavy Light (*) Heavy (**) LOW roof (H1) VAN (Tempo MEDIUM roof (H2) Libero version) -
Page 308
Versions with automatic transmission 2.2 140 HP H3-Power 2.2 160 HP H3-Power 2.2 180 HP H3-Power with AdBlue ® with AdBlue ® with AdBlue ® BODYWORK VERSION Light Heavy Light Heavy Light Heavy 162 (R15) 169 (R15) LOW roof (H1) 161 (R16) 161 (R16) VAN (excluding… -
Page 309
WEIGHTS AND H Maximum permitted weight on LOADS second axle (rear). To calculate the towable weight with To identify the weights and loads a braked trailer, take the difference for your vehicle, refer to the plate between values F and E shown on the shown in fig. -
Page 310
TOWABLE WEIGHTS (kg) Key: A = TOWABLE WEIGHT B = UNBRAKED TRAILER C = LOAD ON TOW HOOK VERSION (GVW) ENGINE 2800 2000 2.2 120 HP H3-Power with AdBlue ® 3000/3300/3500/3650 2500 3000/3300/3500/3510 2500 2.2 140 HP H3-Power with AdBlue ® LIGHT 3650 (T.L. -
Page 311
VERSION (GVW) ENGINE 3500 3000(*) 120(*) 3510 3000 2.2 180 HP H3-Power with AdBlue ® MAXI 3995/4005 2500 4250 2250 4400 2100 (*) For Special T.L. 2500 kg (towable weight = 100 kg) (°) Increased suspension NOTE The following vehicles are excluded from the table: Key: A = TOWABLE WEIGHT B = UNBRAKED TRAILER… -
Page 312
REFUELLING 2.2 120 HP -140 HP -160 HP -180 HP H3-Power with AdBlue ® Prescribed fuels and original lubricants Network Tempo Libero Fuel tank (litres): 90 (*) 75 (**) Automotive Diesel (EN590 specifications) Including a reserve of (litres): 10 / 12 AdBlue ®… -
Page 313
2.2 120 HP -140 HP -160 HP -180 HP Prescribed fuels and original lubricants H3-Power with AdBlue ® 50% mixture of distilled water and Engine cooling system (litres): 10 (**) PARAFLU UP (***) Engine sump (litres): SELENIA WR FORWARD 0W-30 Engine sump and filter (litres): Transmission/differential casing (litres): 2.2 (C637 transmission) -
Page 314
FLUIDS AND LUBRICANTS Your vehicle is equipped with an engine oil that has been thoroughly developed and tested in order to meet the requirements of the Scheduled Servicing Plan. Constant use of the prescribed lubricants guarantees the fuel consumption and emission specifications. -
Page 315
Original liquids and Features Specification Replacement interval lubricants TUTELA MTF 900 Mechanical transmission SAE 75W-70 API GL-4+ 9.55550-MZ14 Contractual Technical and differential (C637 grade synthetic lubricant Reference N° F006.B21 transmission) TUTELA Mechanical transmission TRANSMISSION Synthetic base lubricant 9.55550-MZ3 GEARTECH and differential (M40 SAE 75W-85 grade Contractual Technical… -
Page 316
Original liquids and Features Specification Replacement interval lubricants Red protective with antifreeze action, based on inhibited monoethyl Cooling circuits. Use rate PARAFLU UP Protective agent for glycol with organic 50% up to -35°C. Mixture 9.55523 or MS.90032 Contractual Technical radiators formula. -
Page 317
FUEL CONSUMPTION AND CO 2 EMISSIONS The fuel consumption and CO 2 emission figures declared by the manufacturer are determined on the basis of the type-approval tests laid down by the applicable standards in the country where the vehicle is registered. The type of route, traffic situations, weather conditions, driving style, general conditions of the vehicle, trim level/equipment/accessories, climate control system, vehicle load, roof rack, other situations that affect aerodynamics or air drag may lead to different fuel consumption levels than those measured. -
Page 318
PRESCRIPTIONS FOR HANDLING THE VEHICLE AT THE END OF ITS LIFE FCA has been committed for many years to safeguarding the environment through the constant improvement of its production processes and manufacturing products that are increasingly «eco-compatible». To grant customers the best possible service in terms of respecting environmental laws and in response to European Directive 2000/53/EC governing vehicles at the end of their life, FCA is offering its customers the chance to hand over their vehicle at the end of its life without incurring any additional costs. -
Page 319
… A TYRE DEFLATES. Restore the correct pressure..THE INTERNAL CEILING LIGHT DOES Replace the bulb. See page 237 or contact a Fiat Dealership. NOT SWITCH ON..AN EXTERNAL BULB (main beam, dipped Replace the bulb. See page 232 or contact a Fiat Dealership. -
Page 320
The battery protection fuse might be broken. Avoid trying to force starting by persisting See page 238 or contact a Fiat Dealership. with the key in the AVV position. Do not connect any external loads to the battery. -
Page 321
MULTIMEDIA TIPS, CONTROLS AND GENERAL INFO ……320 This section describes the main functions of the Uconnect™ Uconnect™ ……. 322 infotainment system that may be fitted Uconnect™ Radio …… 340 on vehicle. CONNECTED SERVICES — UCONNECT SERVICES ….350 OFFICIAL TYPE APPROVALS ..353… -
Page 322
In the case of loss of the radio derived products to clean the unit (Body Computer) is replaced, passport, contact the Fiat Dealership, display lens and make sure that the… -
Page 323
(e.g. WARNINGS horns, ambulances, police vehicles, etc.). In the event of a fault, the system must only be checked and repaired by a Fiat IMPORTANT Dealership. If the temperature is particularly low, 95) Only clean the front panel and the… -
Page 324
Uconnect™ Uconnect™ 10” (where provided) F1A0722… -
Page 325
Uconnect™ 7” (where provided) F1A0748… -
Page 326
GRAPHIC BUTTONS ON DISPLAY (A) Graphic button Functions Mode — Home Show the main screen Press graphic button Access Media mode to select available — Media sources, folder tracks and interaction with Press graphic button audio settings Climate control system settings (air flow, set — Comfort (where provided) indoor temperature) and heated seat (where Press graphic button… -
Page 327
STATUS BAR Area Functions Mode Quick access to functions: Profiles (*), Reconfigurable quick button bar Notifications, External temperature, Voice Press graphic button recognition (*) Display the current time / access to the Timetable / App customisation Apps list for customising the reconfigurable Press graphic button bar (**) Audio track playing, tuned radio station, call… -
Page 328
CONTROLS ON THE STEERING WHEEL The controls for the main system functions are present on the steering wheel to make control easier. F1A0729 Steering wheel controls summary table Button Interaction Acceptance of incoming call Acceptance of the second incoming call and putting the active call on hold Activation of voice recognition for phone functionality Activation of voice recognition (where provided or via CarPlay or Android Auto) Interruption of the voice message in order to give a new voice command… -
Page 329
CONTROLS BEHIND THE STEERING WHEEL Buttons Interaction Button A (steering wheel left side) Brief button press : search for next radio station or selection of USB next track. Upper button Long button press : scan of higher frequencies until released/fast forward of USB track. -
Page 330
CENTRAL DASHBOARD HOT BUTTONS To return to the previous screen CONTROLS press «X» or «OK» or «Cancel» or «Yes» Up to 2 hot buttons (3) fig. 346 can be or anywhere outside the pop-up set on the status bar. depending on the choice the system Press the button below the time ((4) makes, or simply by selecting the fig. -
Page 331
Left part: Display of the user’s three the recirculation function; The graphic buttons can be favourite sources. To choose the the AUTO function; used to browse the list of artists, music the activation/deactivation of the source, select «All sources» and then genres and albums on the connected device via USB or Bluetooth ®… -
Page 332
USB SOURCE favourite (the device will have priority will appear on the display and the over all other devices to be paired operation will be ended. There are two USB ports: the first is subsequently). If «No» is selected, the located on the dashboard for charging display and call contacts from the priority is determined according to the… -
Page 333
telephone in CarPlay or Android Auto When a text message is received, «Do Not Disturb» function mode. the display will show a screen where If supported by the connected phone, the options «Read», «Show», «Call» or by pressing the «Do Not Disturb» «Ignore»… -
Page 334
See you in 5 (or 10, 15, 20, 25, 30, NOTE The date and time shown on the only perform this procedure with the 45, 60) (*) minutes Uconnect™ system display must vehicle stationary. match the actual date and time, even (*) Only use the numbers listed, Once connected to the USB port, the after disconnecting the battery. -
Page 335
Play playlist… navigation session in progress, the activated by saying «Hey Fiat» or «Hey system navigation mode is interrupted Uconnect» (if the user has previously Radio to continue the navigation session of enabled the function). -
Page 336
NAVIGATION an address) with vehicle in motion or «Recent»: Select this button if driving is resumed without having (where provided) to open the list of recent completed engagement, a warning Press the «Nav» graphic button to show destinations. Select a recent message will appear on the display the navigation map on the display. -
Page 337
The navigation system can also be commands. Use this button to access the updated at the Fiat Dealership. VEHICLE MODE «Route Options» menu. With an NOTE The dealer may charge for active route, you can change Pressing the «Vehicle»… -
Page 338
The menu is indicative and includes the maximum number of pages allowed if in alphabetical order from A to Z or Z to following items: you try to add an additional page. My Profile To add or remove an app from the WIDGETS Language Favourites list, select or deselect the… -
Page 339
PROFILES MOVING THE WIDGETS When a software update is available, a pop-up window will appear on screen Select the desired widget and then: (where provided) informing that a new software version By entering the Profiles environment or new features for the Uconnect™ you can create an avatar and enter system are available. -
Page 340
To enable software updates: Select “Enable software download over Wi-Fi» on the Wi-Fi settings screen. When a software update is available, a pop-up window will appear on the Uconnect™ system screen to alert you that a new update is available. When asked to connect to a Wi-Fi network, select «Yes». -
Page 341
«An error has occurred. The system will revert to the previous software version.» «Update failed. An error occurred during the update procedure. Please contact your dealer. Error code: XXXX» Contact a Fiat Dealership in these cases. -
Page 342
Uconnect™ Radio CONTROLS ON FRONT PANEL F1A0528… -
Page 343
FRONT CONTROL PANEL SUMMARY TABLE Button Functions Mode Source selection: AM, FM, DAB (where provided) Brief button press RADIO Source selection: USB, Bluetooth ® audio MEDIA Brief button press Volume on/off (MUTE) Brief button press Switching the system on Brief button press Switching the system off Long button press… -
Page 344
Button Functions Mode Radio source: Select the radio station stored under «Preset 4» Brief button press Media source: On/Off repeat tracks in USB device Radio source: Store the radio station currently playing under «Preset 4» Long button press Access the settings menu Brief button press Confirmation of the option displayed Brief button press… -
Page 345
CONTROLS ON THE STEERING WHEEL The controls for the main system functions are present on the steering wheel to make control easier. The activation of the function selected is controlled, in some cases, by how long the button is pressed (short or long press) as described in the table below. -
Page 346
STEERING WHEEL CONTROLS SUMMARY TABLE Button Interaction Acceptance of incoming call Acceptance of the second incoming call and putting the active call on hold Activation of «Siri» function recognition (where provided) or voice assistant Brief press: interruption of the voice message in order to give a new voice command (applies to «Siri»); for «Google»: close voice session Long press: voice recognition interruption Rejection of incoming call… -
Page 347
CONTROLS BEHIND THE STEERING WHEEL Buttons Interaction Button A (steering wheel left side) Short press : next radio station search / next preset (according to the «Steering Wheel Seek Buttons» setting) (Radio source), next track selection Upper button (Media source) Long button press : scan of higher frequencies until released/fast forward of USB track With each press it scrolls through sources AM, FM, DAB, USB. -
Page 348
SYSTEM ON / OFF In the lower part : display additional for the DAB function and then select information (if available) of the radio one of the following options: The system is switched on by briefly pressing the VOL button/knob on the station you are listening to. -
Page 349
MEDIA MODE SHUFFLE «Autoplay» function is ON, all files in all folders will be played automatically. A dedicated messages will appear Press button 1 on the front on the display if no Media device WARNING After using a USB charging panel to play the tracks on USB or is connected to the system or if port, we recommend disconnecting the… -
Page 350
Access the «Settings» menu of the the system and the paired device, access the «Settings» menu of the Phone; the pairing procedure will start. If the Phone; turn the BROWSE ENTER pairing procedure is successful, the turn the BROWSE ENTER new device is recorded and connected button/knob to select the «Pair new button/knob and select the «Connect»… -
Page 351
with the mobile phone and continue you can interact with «Siri» to impart the “Bass”; using the system (never allow yourself desired commands. “Medium”; “Treble”; to be distracted while driving). When Voice assistant «Balance»; a phone number is dialled with the (only available with Android compatible «Fade»… -
Page 352
(where fitted) provision of services is not guaranteed. protection policies on the official Fiat Uconnect Services connected services Coverage may not be guaranteed Professional website. enrich the experience of use of the… -
Page 353
Go» function to send the destination the customer via «FIAT app» and home. from the «FIAT app» to the navigation web. This service is provided NOTE: The hotspot name and system of the vehicle and «Last Mile… -
Page 354
When geolocation mode is deactivated to do so. The customer is liable for all risks customer to confirm or postpone the some of the services on «FIAT app» associated with using the functions and update itself. or mobile devices and web that use applications of the vehicle. -
Page 355
French SAR Decree Law of 15/11/2019. For more information about certifications and open source lists available for vehicle components use the following link:http://aftersales.fiat.com/elum/ Radio frequency devices All radio frequency devices comply with the regulations in force in the countries in which they are sold. -
Page 358
MAINTAIN YOUR VEHICLE IN TIP TOP CONDITIONS WITH Mopar Vehicle Protection offers a series of service contracts that are designed to give all our customers the pleasure of driving their vehicle without any hitch’s and concerns. Our product portfolio consists of a wide and flexible range of extended warranty and maintenance plans endorsed by FCA. -
Page 361
NOTES… -
Page 363
CONTENTS Automatic transmission ..165 Ceiling lights ….42 Automatic transmission gear lever Changing a wheel … 246 -Seater bench seat (Crew Cab Van release . -
Page 364
Digital Rear-View Mirror ..36 Fix&Go quick tyre repair kit ..250 Heating and ventilation controls ….48 Dimensions . -
Page 365
Lights off ….39 Pre-tensioners ….135 Saving fuel ….208 Loading advice . -
Page 366
Starting the engine … 159 IN plate ….282 Steering ….287 arming up the engine just after it Steering wheel . -
Page 368
The data contained in this publication is intended merely as a guide. FCA Italy S.p.A. reserves the right to modify the models and versions described in this booklet at any time for technical and commercial reasons. If you have any further questions please consult your FIAT dealer. Printed in recycled paper without chlorine.
 Do not operate the screen wiper with the blades lifted from the windscreen glass.
 Для ознакомления с инструкцией необходимо нажать на ссылку «ЗАГРУЗИТЬ», чтобы скачать pdf файл. Если есть кнопка «ПРОСМОТР», то можно просто посмотреть документ онлайн.
Для удобства, Вы можете сохранить данную страницу с файлом руководства по эксплуатации в свой список «избранное» прямо на сайте (доступно для зарегистрированных пользователей).
Смотрите инструкцию для похожих моделей:

Вы можете задать вопрос посетителям сайта по модели FIAT DUCATO (2009). Если Вы являетесь её пользователем, то пожалуйста оставьте, по возможности развёрнутый отзыв:
- Manuals
- Brands
- Fiat Manuals
- Automobile
- Ducato
- Owner’s handbook manual
-
Contents
-
Table of Contents
-
Bookmarks
Quick Links
Chapters
-
Table of Contents
5 -
Sa Fe Ty D E V I Cessafetydevices
98 -
Table of Contents
116 -
Table of Contents
128 -
I N a N E M E R G En Cyinanemergency
140 -
Ve Hi Cle M a I N T En a N Cevehiclemaintenance
172 -
Tech N IC a L S P Eci Fi Ca Ti O N Stechnicalspecifications
194
Related Manuals for Fiat Ducato
Summary of Contents for Fiat Ducato
-
Page 2
Thank you for selecting Fiat and congratulations on your choice of a Fiat Ducato. We have written this handbook to help you get to know all your new Fiat Ducato features and use it in the best possible way. You should read it right through before taking the road for the first time. -
Page 3
MUST BE READ! REFUELLING Diesel engines: only refuel with diesel fuel conforming to the European specification EN590. ENGINE STARTING Diesel engines: make sure that the handbrake is engaged; set the gearshift lever to neutral; fully depress the clutch pedal, without pressing the accelerator, then turn the ignition key to MAR and wait for the warning lights to go off;… -
Page 4
ELECTRICAL ACCESSORIES If, after buying the vehicle, you decide to add electrical accessories (that will gradually drain the battery), visit a Fiat Dealership. They can calculate the overall electrical requirement and check that the vehicle’s electric system can support the required load. -
Page 5: Table Of Contents
DASHBOARD ……………. CRUISE CONTROL …………. SYMBOLS …………….. CEILING LIGHTS …………..THE FIAT CODE SYSTEM ……….. CONTROLS …………….THE KEYS …………….POWER SUPPLY AND FUEL CUT-OFF SWITCH..IGNITION DEVICE…………..INTERIOR FITTINGS …………INSTRUMENT PANEL …………MULTIMETER …………….INSTRUMENTS …………… DOORS ………………
-
Page 6: Dashboard
DASHBOARD The presence and the position of the instruments and warning lights may vary according to the vehicle version. fig. 1 F0N0001m 1. Fixed side air vents — 2. Swivel side air vents — 3. Left steering column stalk: external lights — 4. Instrument panel and warning lights — 5.
-
Page 7: Symbols
To further protect your vehicle from theft, near or actually on some of the compo- it has been fitted with an engine immobil- nents of your Ducato. These labels bear ising system. This system is automatically symbols that remind you of the precau-…
-
Page 8: Operation
❒ If the warning light stays on, con- IMPORTANT Every key has its own code, The code is sent only if the Fiat CODE tact a Fiat Dealership. which must be memorised by the system system control unit has recognised the control unit.
-
Page 9: Code Card
B the mechanical key code to be given F0N0003m F0N0004m fig. 3 fig. 4 to the Fiat Dealership when ordering duplicate keys. KEY WITH REMOTE CONTROL All the keys and the CODE IMPORTANT In order to ensure perfect fig. 4…
-
Page 10
Button Æ shall be used for opening the WARNING front doors. Button B should only be Button Ø shall be used for locking all pressed when the key is doors. away from the body, in particular from the eyes and from objects that Button ∞… -
Page 11
The system can recognise up to 8 keys. Should a new key with remote control be necessary, contact a Fiat Dealership, tak- ing with you the CODE card and the keys, a personal identity document and the ve- hicle’s ownership documents. -
Page 12
The metal insert of the key A is fixed. law in the special containers The key operates: provided, or take them to a Fiat Deal- ership, which will deal with their dis- ❒ ignition switch; posal. -
Page 13
The main functions that can be activated with the keys (with or without remote control) are the following: Door Door closing Dead lock Load Type of key Window opening Window closing opening form the outside activation compartment (where provided) (where provided) (where provided) unlocking Key turning… -
Page 14: Ignition Device
(e.g.: attempted formance and safety, cause the lapse theft), have it checked over by a Fiat of warranty and also result in non- Dealership as soon as possible. compliance of the vehicle with ho-…
-
Page 15: Instrument Panel
INSTRUMENT PANEL Versions with digital display A Speedometer (speed indicator) B Digital display C Rev counter D Engine coolant temperature gauge and excessive temperature warning light E Fuel level gauge with reserve warning light F0N0008m fig. 10 Versions with multifunction display A Speedometer (speed indicator) B Multifunction display C Rev counter…
-
Page 16: Instruments
INSTRUMENTS Instrument background color and type may vary according to the version. F0N0012m F0N0013m fig. 12 fig. 13 SPEEDOMETER fig. 12 REV COUNTER fig. 13 It shows the engine speed. Rev counter shows engine rpm. IMPORTANT The electronic injection control system gradually shuts off the flow of fuel when the engine is “over-revving”…
-
Page 17
IMPORTANT The needle sets to E with warning light A flashing to indicate that the system is failing. In this event contact Fiat Dealership to have the system checked. IMPORTANT Do not turn the supple- mentary heater (Webasto) on, under fu-… -
Page 18
ENGINE OIL LEVEL GAUGE Few seconds after, engine oil amount sym- Partial gradual turning off of the symbols bols will disappear from the display, and: indicates oil decrease. This gauge shows the engine oil level. ❒ if scheduled servicing interval is near When the oil level falls below the preset to come, the display will show the dis- limit the display will show the dedicated… -
Page 19: Digital Display
DIGITAL DISPLAY STANDARD SCREEN fig. 16 The standard screen shows the following indications: A Headlight aiming position (only with dipped beam headlights on). B Clock (always displayed, even with ig- F0N0016m F0N0017m fig. 16 fig. 17 nition key removed and front doors closed).
-
Page 20: Setup Menu
SETUP MENU fig. 18 Selecting a menu option Press the button MODE for long The menu comprises a series of functions – to quit the set up menu if you are in the – press briefly button MODE to select arranged in a “circular fashion”…
-
Page 21
Briefly press button MODE to start surfing from the standard screen. To surf the menu use buttons ▲ or ▼. Note For safety reasons, when the vehicle is running, it is possible to access only the reduced menu (for set- ting “SPEEd”). -
Page 22
Setting the speed limit (SPEEd) Note The possible setting is between 30 Setting the clock (Hour) and 200 km/h, or between 20 and 125 With this function it is possible to set the With this function it is possible to set the mph depending on the unit set previous- vehicle speed limit (km/h or mph), when clock. -
Page 23
– press button ▲ or ▼ to select the re- Adjusting the buzzer volume Setting the distance unit (Unit) quired volume (volume can be adjusted ac- (bUZZ) With this function it is possible to set the cording to 8 levels). unit. -
Page 24
Front passenger’s air bag and side bag (where provided) activation/deactivation (BAG P) This function shall be used to activate/de- activate the front passenger’s air bag. MODE ▲ ▲ Proceed as follows: ▼ ▼ ❒ press button MODE and after dis- playing the message (BAG P OFF) (to deactivate) or (BAG P On) (to acti- vate) by pressing buttons ▲… -
Page 25: Multifunction Display
MULTIFUNCTION DISPLAY (where provided) The multifunction display shows useful in- formation necessary when driving, in par- ticular: INFORMATION ON F0N0018m F0N0017m fig. 19 fig. 20 “STANDARD” SCREEN fig. 19 The standard screen shows the following Note Buttons ▲ and ▼ activate different CONTROL BUTTONS fig.
-
Page 26
SETUP MENU fig. 21 Selecting an option of the main menu with Selecting “Set Date” and submenu: “Set time”: The menu comprises a series of functions arranged in a “circular fashion” which can – press briefly button to display the first –… -
Page 27
BELT BUZZ. ( SEE RADIO ▲ ▼ ▼ AUTOCLOSE ▲ BUTTON VOL. ▼ F0N1000g ▼ UNITS BUZZER VOLUME LANGUAGE ▲ ▼ ▼ ▲ fig. 21 ▲ ▲ (*) This function can be only displayed after deactivating the S.B.R. system at Fiat Dealership. -
Page 28
– press button ▲ or ▼ for setting; Speed limit (Speed Beep) – briefly press button MODE to go back to the menu screen or press the button With this function it is possible to set the – briefly press button MODE to go back for long to go back to the standard screen vehicle speed limit (km/h or mph);… -
Page 29
Set clock (Set time) Set date (Set Date) – if selecting “Mode”: briefly press button MODE, “24h” or “12h” mode will flash This function enables to set the clock This function enables to update the date on the display; through two sub-menus: “Time” and (year — month — day). -
Page 30
Audio repetition (See radio) Set unit (Units) Automatic door locking with vehicle running (Autoclose) With this function the display repeats in- With this function it is possible to set the formation relevant to the sound system. units through three sub-menus: “Distances”, When activated (On), this function locks “Consumption”… -
Page 31
Adjusting the failure/warning If the distance unit set is “km” the fuel con- Selecting the language (Language) sumption unit will be displayed in km/l or buzzer volume Display messages can be shown (after set- l/100km. (Buzzer Volume) ting) in different languages: Italian, German, If the distance unit set is “mi”… -
Page 32
“Service” fol- lowed by the number of km/mi to go be- – briefly press button MODE to go back fore vehicle servicing. Contact a Fiat Deal- to the menu screen or press the button ership to carry out any service operation for long to go back to the standard screen. -
Page 33
Front passenger’s air bag and side bag where provided) activation/deactivation (Passenger’s Bag) MODE This function shall be used to activate/de- ▲ ▲ activate the front passenger’s air bag. ▼ ▼ Proceed as follows: ❒ press button MODE and, after dis- playing of messages (Bag pass: Off) (to deactivate) or (Bag pass: On) (to ac- tivate) by pressing buttons ▲… -
Page 34: Trip Computer
TRIP COMPUTER “Trip B”, available on multifunction display Exit Menu only, shall be used to display the figures This is the last function that closes the cir- relating to: cular setting cycle listed in the initial menu General features – Trip distance B screen.
-
Page 35
Average consumption – after disconnecting/reconnecting the battery. This value shows the average consump- tion from the start of the new mission. IMPORTANT The reset operation in the presence of the screens concerning the Instant consumption “Trip A” makes it possible to reset only the information associated with this func- This value shows instant fuel consumption tion. -
Page 36: Front Seats
Only make adjustments when the vehicle is stationary. Back rest angle adjustment fig. 23 Turn knob D. F0N0118m fig. 23 Fabric upholstery of your Fiat WARNING Ducato is purpose-made to Once you have released the withstand common wear re- WARNING…
-
Page 37
F0N0147m F0N0139m F0N0148m fig. 24 fig. 25 fig. 26 Lumbar adjustment SEATS WITH ADJUSTABLE Setting seat shock ARMRESTS absorbers/weight This feature ensures better back support. The driver’s seat can be fitted with an ad- Use the adjusting knob A-fig. 25 to set To adjust, turn the knob E-fig. -
Page 38
WARNING Make sure the outer armrest (door side) is completely up- right before unfastening the seat belts and getting out of the vehicle. WARNING F0N0187m F0N0173m fig. 27 fig. 28 Should it be absolutely nec- essary to carry a child seat REVOLVING SEAT REVOLVING SEAT WITH on the front passenger’s seat, make… -
Page 39: Head Restraints
HEAD RESTRAINTS FRONT fig. 31 On certain versions head restraints are ad- justable in height and they lock automati- cally in the required position. To adjust head restraints F0N0174m F0N0175m fig. 29 fig. 30 ❒ to raise: raise the head restraint until hearing the locking click.
-
Page 40: Steering Wheel
STEERING WHEEL The steering wheel can be adjusted axial- Proceed as follows: ❒ release the lever A-fig. 32 pulling it towards the steering wheel (position ❒ adjust the steering wheel as required; F0N0020m F0N0021m fig. 31 fig. 32 ❒ lock the lever A pushing it forwards ❒…
-
Page 41: Rearview Mirrors
REARVIEW MIRRORS DRIVING MIRROR fig. 33 The mirror is fitted with a safety device that causes it to be released in the event of a violent crash. F0N0022m F0N0024m fig. 33 fig. 34 It can be moved using the lever A to two different positions: normal or antiglare.
-
Page 42
Demisting/defrosting WARNING (where provided) The reflecting surface of the lower part of the mirror is Mirrors are fitted with resistors that will parabolic to increase the range. Con- activate when turning the heated rear win- sequently, the dimension of the re- dow on (by pressing button flected image is reduced, giving the IMPORTANT This function is timed and… -
Page 43: Heating And Ventilation
HEATING AND VENTILATION F0N0025m fig. 37 1. Fixed upper vent — 2. Central swivel vents — 3. Fixed side vents — 4. Side swivel vents — 5. Lower vents for front seats.
-
Page 44
F0N0026m fig. 38 fig. 39 F0N0027m F0N0028m fig. 40 ADJUSTABLE AND SWIVEL CONTROLS fig. 40 Fan activation / SIDE AND CENTRAL VENTS speed adjustment knob B fig. 38-39 Air temperature slider A p 0 = fan off (mixing hot and cold air) A Fixed vents for side windows. -
Page 45
Air distribution slider C VENTILATION FAST HEATING ¶ to convey air to the centre and side To ventilate the passenger’s compartment For fast heating of the passenger com- vents; properly proceed as follows: partment, proceed as follows: ß ❒ turn slider A to blue section; ❒… -
Page 46
FRONT WINDOW FAST Window demisting DEMISTING/ In the event of considerable outside mois- DEFROSTING (WINDSCREEN ture and/or rain and/or considerable dif- AND SIDE WINDOWS) ferences in temperature inside and outside the passenger compartment, perform the Proceed as follows: following preventive demisting procedure: ❒… -
Page 47: Manual Climate Control System
MANUAL CLIMATE AIR RECIRCULATION IMPORTANT The inside air recirculation system makes it possible to reach the re- CONTROL SYSTEM Ò Turn knob D to quired “heating” or “cooling” conditions (where provided) faster. This function is particularly useful when the outside air is heavily polluted (in a traf- Do not use the air recirculation function fic jam, tunnel etc.).
-
Page 48
Air recirculation on/off knob D Press the button (button led on) to turn air recirculation on. Press the button again (button led off) to turn air recirculation off. Climate control system on/off button E Press the button (button led on) to turn climate control system on. -
Page 49
VENTILATION CLIMATE CONTROL (cooling) WARMING THE PASSENGER COMPARTMENT To ventilate the passenger’s compartment For fast cooling of the passenger com- properly proceed as follows: partment, proceed as follows: Proceed as follows: ❒ turn slider A to blue section; ❒ turn slider A to blue section; ❒… -
Page 50
FAST HEATING FRONT WINDOW FAST After demisting/defrosting, operate the controls to keep the required comfort. DEMISTING/DEFROSTING For fast heating of the passenger com- (WINDSCREEN AND SIDE partment, proceed as follows: IMPORTANT The climate control system WINDOWS) is very useful to speed up demisting since ❒… -
Page 51
Window demisting AIR RECIRCULATION Ò In the event of considerable outside mois- Turn knob D to ture and/or rain and/or considerable dif- This function is particularly useful when ferences in temperature inside and outside the outside air is heavily polluted (in a traf- the passenger compartment, perform the fic jam, tunnel etc.). -
Page 52: Supplementary Heater
(where provided) for about 10 minutes. Before summer, have the system checked at a Fiat Deal- Certain versions are also fitted a supple- ership. mentary heater set under the driver’s seat.
-
Page 53: Self-Standing Supplementary Heater
❒ heat exchanger connected to the en- plementary heater in closed areas, Fiat Ducato can be equipped, upon re- garages or workshops not equipped gine cooling system pipes; quest, with two different self-standing…
-
Page 54
In cold weather, the supplementary heater The electronic control unit also controls warms and circulates constant tempera- the circulation pump delivery in order to ture fluid in the engine cooling system for reduce initial heating time. When the sys- the time required to ensure optimal en- tem is operating, the control unit operates gine ignition and passenger compartment the heater unit fan to the second speed. -
Page 55
F0N0151m fig. 46 tempt to turn it back on again. If you can- not turn the heater on, contact a Fiat Digital timer fig. 46 Dealership. 1) Heater cycle warning light 2) Display light… -
Page 56
F0N0152m F0N0153m F0N0154m fig. 47 fig. 48 fig. 49 “Heat now” function fig. 47 Setting the clock Programmed heating fig. 49 ❒ Press button 4: display and warning To turn the heater on manually, press Heater ignition can be delayed from 1 timer button 8. -
Page 57
IMPORTANT To recall other preset Turning the heater off times, press button 6 within 10 seconds. According to the operation mode (auto- – press button 5 or 7 within 10 seconds matic or manual), the heater can be turned to select the starting time required. off: ❒… -
Page 58
❒ Maintenance and repairs must always or leaves: fire risk! plementary heater in closed areas, be carried out by a Fiat Dealership and garages or workshops not equipped ❒ The temperature near the heater must only genuine spare parts must be used. -
Page 59: External Lights
EXTERNAL LIGHTS The left-hand stalk operates most of the external lights. The external lights can only be switched on when the ignition key is at ON. LIGHTS SWITCHED OFF fig. 51 Knurled ring turned to å . F0N0030m F0N0032m fig. 51 fig.
-
Page 60
F0N0033m F0N0034m F0N0035m fig. 54 fig. 55 fig. 56 MAIN BEAM HEADLIGHTS fig. 54 FLASHING THE HEADLIGHTS DIRECTION INDICATORS fig. 55 fig. 56 When the knurled ring is at pull the lever towards the steering wheel (2nd un- Pull the stalk towards the steering wheel Move the stalk to (stable) position: stable position). -
Page 61
Each time the stalk is operated, the in- strument panel warning light 3 will turn on together with a message on the display (see section “Warning lights and mes- sages”) until the function is active. The warning light comes on the first time the stalk is operated and will stay on up to au- tomatic function deactivation. -
Page 62: Window Washing
— = slow intermittent consequence. If operation is not re- — = intermittent medium stored contact Fiat Dealership. —- = fast intermittent fig. 59 F0N0038m “Smart washing” function C: continuous slow;…
-
Page 63
RAIN SENSOR Deactivation fig. 61 (where provided) Move the stalk off B or turn the ignition key to OFF. At next engine starting (key The rain sensor is located behind the dri- at ON), the sensor will not be reactivated ving mirror in contact with the windscreen even if the stalk is at B. -
Page 64: Cruise Control
CRUISE CONTROL TO MEMORISE SPEED (where provided) Proceed as follows: ❒ turn the knurled ring A to ON and It is a device able to support the driver, press the accelerator pedal to the re- with electronic control, which allows dri- quired speed;…
-
Page 65
A to OFF and contact a two ways: will not be necessary to press button Fiat Dealership after checking the ❒ disengaging the device and then mem- RES to resume previous conditions protection fuse integrity. -
Page 66: Ceiling Lights
❒ for about 10 seconds when closing the CEILING LIGHTS doors. Timing will stop when turning the ignition FRONT CEILING LIGHT WITH key to MAR. SPOT LIGHTS LIGHT TIMING WHEN GETTING Switch A-fig. 63 turn on/off these lights. OUT OF THE VEHICLE With switch A-fig.
-
Page 67: Controls
CONTROLS HAZARD LIGHTS fig. 65 They turn on by pressing switch A, re- gardless of the position of the ignition key. When the device is on, the switch is flash- Î ¥ ing and warning lights on the cluster come on. F0N0042m F0N0044m fig.
-
Page 68
F0N0045m F0N0046m F0N0043m fig. 66 fig. 67 fig. 68 FRONT FOG LIGHTS REAR FOG LIGHT fig. 67 HEATED REAR WINDOW (where provided) fig. 66 (where provided) fig. 68 Press button 4, to turn these lights on it is necessary to have the dipped beam To turn front fog lights on, press button Press button A to turn on this function. -
Page 69: Power Supply And Fuel Cut-Off Switch
POWER SUPPLY AND FUEL CUT-OFF SWITCH The vehicle is fitted with a safety switch that in the event of a crash comes into opera- tion by cutting off fuel and turning off the en- gine as a consequence. When the inertial switch cuts in, fuel supply is stopped and haz- ard and sidelights will turn on, for turning off press button A.
-
Page 70: Interior Fittings
INTERIOR EQUIPMENT UPPER ODDMENT COMPARTMENT — REFRIGERATED COMPARTMENT (where provided) fig. 73 To use it, lift the lid as shown in the figure. F0N0127m F0N0049m fig. 72 fig. 73 If the climate control system is fitted, the compartment (with bottle holder recess) can be cooled/warmed through a poper WARNING outlet connected to the climate control…
-
Page 71
F0N0052m F0N0128m F0N0134m fig. 76 fig. 78 fig. 79 DOOR POCKETS ODDMENT COMPARTMENT UNDER THE FRONT Document / map pockets are located in PASSENGER’S SEAT door panels. To use it, proceed as follows: ❒ Open lid A and remove it as shown in fig. -
Page 72
F0N0054m F0N0055m F0N0146m fig. 80 fig. 81 fig. 82 GLASS HOLDER — CAN HOLDER CIGAR LIGHTER fig. 81 ASHTRAY fig. 82 fig. 80 It is located in the central panel. The ashtray is a removable plastic box that can be fitted into the glass/can recesses on Glass — can holder recesses are located on Press button A to switch on the cigar the central panel. -
Page 73
F0N0056m F0N0058m F0N0190m fig. 83 fig. 85 fig. 85a WRITING/READING DESK STOWING SPACE ABOVE THE (where provided) CAB fig. 85a (where provided) In the middle of the dashboard, above the It is set above the driver’s cab and it has sound system compartment, is fitted a been designed to stow light items. -
Page 74: Multimeter
MULTIMETER See the booklet provided by the multi- meter Manufacturer for more detailed in- formation on operation and use. Multimeter installation is compulsory if the vehicle weight (with or without the trail- er) exceeds 3.5 tons. IMPORTANT Changes to the instrument F0N0191m F0N0149m fig.
-
Page 75: Doors
DOORS IMPORTANT Do not use abrasive detergents or sol- vents to clean the device. To clean its ex- CENTRAL DOOR ternal surface, use a wet cloth or special LOCKING/UNLOCKING SYSTEM products for cleaning synthetic materials. The multimeter is installed and sealed with Locking from the outside lead by authorised personnel: access to With the doors closed, press the button…
-
Page 76
After locking doors by: ❒ remote control; ❒ door revolving plug; it will not be possible to unlock the doors by pressing button A-fig. 90. IMPORTANT With central locking active pulling the opening lever of one of the front doors will cause central locking deactivation. F0N0059m F0N0047m fig. -
Page 77
DEAD LOCK DEVICE Device activation WARNING (where provided) The dead lock device is automatically ac- Once the dead lock device This safety device enables to inhibit: tivated on every door when pressing twice has been actuated, doors briefly the remote control button Ø, fig. cannot be opened from the passen- ❒… -
Page 78
To open the side sliding door, raise the handle A and guide the door. The side sliding door is equipped with a lock that stops it at the end of its open- ing run. Operate the outer handle A (or the corresponding inner one) and push the door to close it. -
Page 79
F0N0129m F0N0130m F0N0131m fig. 94 fig. 95 fig. 96 REAR DOUBLE DOOR Opening the second door by hand (fig. 96) Opening the first door by hand Pull the handle C in the direction of the from the outside arrow. Turn the key counterclockwise fig. 89 or The double rear doors are fitted with a press the remote control button ∞… -
Page 80: Power Windows/Window Winders
POWER WINDOWS WARNING fig. 99 The spring catch system is designed to ensure the best comfort in use. An accidental knock The driver’s door armrest features the or gust of wind could release the switches that with the key at MAR: springs and make doors close.
-
Page 81: Bonnet
BONNET WARNING Improper use of the power windows can be dangerous. TO OPEN THE BONNET Before and during its operation en- Proceed as follows: sure that any passengers are not at ❒ open the driver’s door to fing the bon- risk from the moving glass either by personal objects getting caught in the net opening handle;…
-
Page 82
WARNING For safety reasons the bon- net must be closed properly to avoid its opening while the vehi- cle is travelling. Therefore, always check it is properly closed and the catch engaged. Should you notice that the catch is not perfectly en- gaged when travelling, stop the vehi- cle immediately and close the bonnet. -
Page 83: Roof Rack/Ski Rack
WARNING ROOF RACK/SKI RACK Distribute the load evenly and when driving, bear in mind the increased sensitivity of the To fit roof racks/ski racks, with presetting vehicle to side wind. for versions H1 and H2, use the proper pins set at roof edges fig. 104. Long wheelbase vehicles are fitted with 8 pins;…
-
Page 84: Headlights
LIGHTS (where provided) It works with ignition key at MAR and Contact Fiat Dealership to have the head- dipped beams on. When the vehicle is lights properly adjusted. loaded, it slopes backwards. This means that the headlight beam rises.
-
Page 85: Abs System
ABS SYSTEM INTERVENTION cient, though without the aid of the ABS when braking, makes the most of road grip system. Drive carefully to the closest Fiat The driver can tell the ABS system has and gives the best control when emergency Dealership to have the system checked.
-
Page 86: Esp System
ESP, in the event of ESP sys- The ESP system is therefore particularly tem failure (indicated by warning light á fully to the nearest Fiat Dealership to have useful when grip conditions of the road sur- the system checked.
-
Page 87
❒ downhill: vehicle at a standstill on a messages”) and with the button led ASR. road with a gradient higher than 5%, In this case contact a Fiat Dealership as engine running, clutch and brake ped- soon as possible. al pressed and reverse gear engaged. -
Page 88
ASR SYSTEM (Antislip Regulator) WARNING The ASR function controls vehicle drive For correct operation of the and cuts in automatically every time one ESP and ASR systems, the or both driving wheels slip. tyres must absolutely be of the same brand and type on all wheels, in per- According to slipping conditions, two dif- fect conditions and, above all, of… -
Page 89: Eobd System
ASR. ters for engine operation and diagnosis. In this case contact a Fiat Dealership as This check can also be carried out by the soon as possible.
-
Page 90: Parking Sensors
PARKING SENSORS Detection distances (where provided) Central action radius 140 cm ±10 cm Side action radius 60 cm ±20 cm Parking sensors are located in the rear If several obstacles are detected, the con- bumper fig. 107 and their function is to trol unit indicates the nearest one.
-
Page 91
OPERATION WITH WARNING For proper operation, the TRAILER parking sensors shall always Parking manoeuvres howev- be clean from mud, dirt, snow Parking sensor operation is deactivated au- er are always under the dri- or ice. When cleaning the sen- tomatically when the trailer electric cable ver’s responsibility that shall always sors, take the utmost care to prevent plug is fitted into the vehicle tow hook… -
Page 92
❒ The sensor detects a non-existent ob- ❒ Parking system performance could al- GENERAL WARNINGS ject (“echo disturbances”) caused by so be affected by sensor position. For ❒ When parking, take the utmost care disturbances of mechanical nature, instance, when trimming is changed to obstacles that may be set above or e.g.: vehicle washing, rain (extreme (due to wear of shock absorbers, sus-… -
Page 93: Sound System
SOUND SYSTEM SOUND SYSTEM PRESETTING (where provided) (where provided) The system consists of: ❒ sound system power wires For sound system operation refer to the ❒ front speaker connecting wires Supplement attached to the Owner Hand- book. ❒ aerial power wire ❒…
-
Page 94: Accessories Purchased By The Owner
Fiat Dealership, whose qualified personnel, besides suggesting the most suitable devices belonging to Lineaccessori WARNING Fiat, will also evaluate the overall electric For connection to existing ve- absorption, checking whether the vehicle hicle presetting system, con- electric system is able to withstand the…
-
Page 95: At The Filling Station
AT THE FILLING RADIO TRANSMITTERS AND The possibility of topping up with diesel fuel not complying with EN590 European CELLULAR TELEPHONES STATION Norm might make it necessary to replace Radio transceiver equipment (e.g.: e-tacs the filter more frequently than indicated mobile phones, HAM radio systems and If the outside temperature is very low, the in the Service Schedule.
-
Page 96
WARNING The vehicle must only be filled with diesel fuel for motor ve- Do not put naked flames or hicles, in compliance with Eu- lighted cigarettes near the ropean Standard EN590. The fuel filler hole as there is a danger of use of other products or mixtures may fire. -
Page 97: Protecting The Environment
PROTECTING THE WARNING ENVIRONMENT During normal service the catalyst reaches high tem- peratures. Do not therefore park the The devices for curtailing diesel fuel en- vehicle over inflammable materials gine emissions are the following: (grass, dry leaves, pine needles, etc.): ❒…
-
Page 98
SEAT BELTS …………….S.B.R. SYSTEM ……………. PRETENSIONERS …………..CARRYING CHILDREN SAFELY……..FRONT AIR BAGS …………..SIDE AIR BAGS ………….. -
Page 99: Seat Belts
SEAT BELTS USING THE SEAT BELTS fig. 1 The belt should be worn keeping the chest straight and rested against the seat back. To fasten the seat belts, take hold the tongue A and insert it into the buckle B, until hearing the locking click.
-
Page 100: S.b.r. System
For permanent deactivation, contact Fiat three anchor points for the centre seat. Dealership. With digital display, the S.B.R. system can only be reset at Fiat Dealership. With multifunction display, the S.B.R. sys- tem can also be reset through the set-up menu.
-
Page 101: Pretensioners
The pretensioner does not require any Contact a Fiat Dealership for any as- maintenance or greasing. sistance. Anything that modifies its original condi- tions invalidates its efficiency.
-
Page 102
F0N0120m F0N0121m F0N0122m fig. 4 fig. 5 fig. 6 GENERAL INSTRUCTIONS FOR Seat belts are also to be worn by expec- Of course they must position the lower tant mothers: the risk of injury in the case part of the belt very low down so that it USING THE SEAT BELTS of accident is greatly reduced for them and passes under the abdomen, see fig. -
Page 103
WARNING Under no circumstances should the components of the seat belts and pretensioners be tampered with or removed. Any op- eration should be carried out by qual- ified and authorised personnel. Al- ways contact a Fiat Dealership. -
Page 104: Carrying Children Safely
CARRYING CHILDREN SAFELY HOW TO KEEP THE SEAT BELTS ALWAYS IN EFFICIENT CONDITIONS For optimal protection in the event of a Group 0 0-10 kg in weight Observe the following: crash, all passengers must be seated and Group 0+ 0-13 kg in weight ❒…
-
Page 105
Lineaccessori Fiat offers seats for each the front passenger seat since the air passenger’s seat with the weight group, which are the recommend-… -
Page 106
F0N0123m F0N0124m F0N0125m fig. 7 fig. 8 fig. 9 GROUP 0 and 0+ GROUP 1 GROUP 2 Babies up to 13 kg must be carried facing Starting from 9 kg to 18 kg in weight, chil- Starting from 15 kg to 25 kg in weight, chil- backwards on a cradle seat, which, sup- dren may be carried facing forwards, with dren may be restrained directly by the ve-… -
Page 107
PASSENGER SEAT COMPLIANCE WITH REGULATIONS ON CHILD’S SEAT USE Your vehicle complies with the new European Directive 2000/3/EC regulating child’s seat assembling on the different vehicle seats according to the following tables: Group Range of weight Single seat Two bench-seater «… -
Page 108
To sum up the safety precautions 5) Only one child is to be strapped to WARNING each retaining system. to follow when transporting With front passenger’s air children: 6) Always check the seat belts do not fit bag active do not place cra- around the child’s throat. -
Page 109: Front Air Bags
FRONT AIR BAGS The driver / passenger front air bags are Front air bags may not be activated in the not a replacement of but complementary following situations: to the use of belts, which should always The vehicle is fitted with front air bags for ❒…
-
Page 110
WARNING Do not apply stickers or oth- er objects to the steering wheel or to the air bag cover on the passenger’s side or on the side roof lining. Never put objects (e.g. mobile phones) on the dashboard on pas- senger side since they could interfere with proper air bag inflation and al- so cause serious injury. -
Page 111: Side Air Bags
SIDE AIR BAGS MANUAL DEACTIVATION OF WARNING PASSENGER’S FRONT AIR BAG SERIOUS DANGER: With AND SIDE BAG The vehicle is fitted with front side bags passenger’s air bag active (where provided) for driver and passenger (where provid- (ON), never place child’s ed) for protecting the chest and window seats with the cradle facing Should it be absolutely necessary to car-…
-
Page 112
Fiat Dealership to cushion inflation surface. have the devices activated replaced and to have the system checked. -
Page 113
Contact Fiat Dealership imme- diately to have the system checked. WARNING Do not cover the backrest of… -
Page 114
Fiat Dealership. gered. ing vehicle. Therefore, never seat chil- dren on the front seat even when the vehicle is stationary. -
Page 115
WARNING WARNING WARNING Do not wash the seat back Do not hook rigid objects to The air bag does not substi- rest with pressurised water the coat hooks and to the tute the seat belts, but only or steam (by hand or at automatic support handles. -
Page 116
ENGINE STARTING …………116 PARKING……………… 118 USING THE MANUAL GEARBOX ……..118 LOAD RECOMMENDATIONS ……… 119 CONTAINING RUNNING COSTS ……… 120 SNOW TYRES…………….. 125 SNOW CHAINS…………..125 VEHICLE INACTIVITY …………126… -
Page 117: Engine Starting
❒ put the gear lever into neutral; from draining the battery. gine lock device: if the engine fails to start, see the paragraph “The Fiat CODE sys- ❒ turn the ignition key to MAR: the tem” in section “Dashboard and controls”.
-
Page 118
You can use Never bump start the engine the vehicle as usual if the engine starts by pushing, towing or coast- but you should contact Fiat Dealership ing downhill as this could as soon as possible. cause fuel to flow into the catalytic exhaust system and damage it beyond repair. -
Page 119: Parking The Vehicle
IMPORTANT If this is not the case, con- tact Fiat Dealership to have the handbrake adjusted.
-
Page 120: Load Recommendations
Chance knocks or sudden braking can cause sudden shifts of the load which could jeop- The version of the Fiat Ducato you are ardise the safety of the driver and the driving has been designed and approved passengers: before you start off make…
-
Page 121: Containing Running Costs
CONTAINING Roof rack/ski rack WARNING RUNNING COSTS Remove the roof rack or the ski rack from Observe the enforced rules if the roof as soon as they are no longer you need to carry a spare used. These accessories lower air pene- can of petrol.
-
Page 122
TOWING TRAILERS DRIVING STYLE Acceleration Accelerating violently increasing the revs Starting IMPORTANT NOTES will greatly affect consumption and emis- sions: acceleration should be gradual and Do not warm the engine when the vehi- For towing caravans or trailers the vehi- should not exceed the maximum torque. -
Page 123
An electric brake should be supplied di- Do not exceed the speed limits of the INSTALLING THE TOW rectly by the battery through a cable with country you are driving in. In any case do HOOK a cross section of no less than 2,5 mm not exceed 100 km/h. -
Page 124
Assembly diagram — Van versions fig. 3 The tow hook structure must be fastened in the points shown by the symbol Ø us- ing a total of 6 M8 screws and 4 M12 screws. Existing hole The internal counterplates are to be at least 5 mm thick. -
Page 125
Assembly diagram — Truck and Chassis Cab versions — fig. 4 A specific tow hook for Truck and Chas- sis Cab versions is shown in fig. 4. Struc- ture Ø must be fastened in the points shown by a total of 6 M8 and 4 M12 screws. -
Page 126: Snow Tyres
(in- Fiat Dealership will be happy to provide Use of snow chains should be in compli- creased by 5%), place a notice in the pas- advice concerning the most suitable type ance with local regulations.
-
Page 127: Vehicle Inactivity
❒ cover the vehicle with a cloth or per- VEHICLE INACTIVITY WARNING forated plastic sheet. Do not use Keep your speed down when sheets of non-perforated plastic as If the vehicle is to be left inactive for longer snow chains are fitted. Do they do not allow moisture on the ve- than a month, the following precautions not exceed 50 km/h.
-
Page 128
GLOW PLUG WARMING FAILURE …….. LIMITED RANGE …………..WATER IN DIESEL FUEL FILTER ……..SPEED LIMIT EXCEEDED ……….. VEHICLE PROTECTION SYSTEM FAILURE FIAT CODE …………….ENGINE COOLANT LEVEL……….EXTERNAL LIGHTS FAILURE……….SCHEDULED SERVICING ……….. REAR FOGLIGHTS …………..SELF-LEVELLING SUSPENSIONS FAILURE …. -
Page 129: General Warnings
The warning cycle of both failure cate- sage on the display) stop the vehicle gories can be stopped by pressing button immediately and contact Fiat Deal- MODE. The instrument panel warning ership. light will stay on until eliminating the fault.
-
Page 130: Air Bag Failure
MIN and MAX marks more than the normal 4 seconds of in the reservoir. Check visually any the passenger’s front air bag deacti- leak. If, when restarting, the warning vated warning light F. light comes on again, contact a Fiat Dealership.
-
Page 131: Low Battery Charge
Exhausted oil If the warning light stays on glowing steadi- ly or flashing: contact immediately Fiat The warning light with turn on flashing to- Dealership. gether with the message on the display (where provided) when the system de- tects that the engine oil is exhausted.
-
Page 132: Incomplete Door Locking
S.B.R. (Seat Belt Reminder) buzzer can on- that the system is unavailable; in this case door or rear doors/load compartment are ly be excluded by Fiat Dealership. On cer- heavy braking may cause the rear wheels open. tain versions the system can be reactivat- to lock before time, with the possibility of ed through the set-up menu.
-
Page 133: Injection System Failure
ABS system. Caution is ad- emissions at the exhaust, possible lack of onds, it flashes for other 4 seconds and visable and it is necessary to contact Fiat performance, poor handling and high con- then it shall go off.
-
Page 134: Glow Plug Warming
“Dashboard and controls”). The warning light turns on when there is gether with the message on the display) Contact Fiat Dealership to have all the key a failure in the glow plug warming system. contact Fiat Dealership as soon as pos- memorised.
-
Page 135: External Lights Failure
Parking sensor failure gine oil pressure sensor is faulty. Contact – direction indicators. (versions with multifunction Fiat Dealership as soon as possible. The failure referring to these lights could display) be: one or more blown bulbs, a blown Inertial fuel cut-off switch…
-
Page 136: Esp — Asr System Failure
Note Warning light flashing when driving indicates that the ESP system is active. Hill Holder failure The warning light will turn on when the Hill Holder system is faulty. Contact Fiat Dealership as soon as possible. On certain versions the dedicated mes- sage is displayed.
-
Page 137: Parking Sensor Failure
DIRECTION INDICATOR Follow me home Contact Fiat Dealership. (green — intermittent) The warning light will turn when this de- On certain versions the dedicated mes- vice is active (see “Follow me home” in sage is displayed.
-
Page 138: Right-Hand Direction Indicator
On certain versions the dedicated mes- the ASR system. In this case contact Fiat sage is displayed. Dealership as soon as possible. Messages are displayed when the ASR function is activated/deactivated manual- ly (see “ASR system”…
-
Page 139: Possible Presence Of Ice On The Road
GEARBOX OIL warning light will turn off after carrying out The display will show the dedicated mes- TEMPERATURE servicing at Fiat Dealership or after 1000 sage to warn the driver that the cruising (where provided) (red) km at servicing deadline.
-
Page 140
ENGINE STARTING …………IF A TYRE IS PUNCTURED ……….QUICK TYRE REPAIR KIT FIX & GO automatic …………. WHEN NEEDING TO CHANGE A BULB ….IF AN EXTERIOR LIGHT BURNS OUT ……IF AN INTERIOR LIGHT BURNS OUT……IF A FUSE BLOWS …………..IF THE BATTERY IS FLAT ……….. -
Page 141: Engine Starting
Contact Fiat Dealership to have the bat- tery checked/replaced. If after a few attempts the engine does not start, do not insist but contact the near- est Fiat Dealership.
-
Page 142: If A Tyre Is Punctured
IF A TYRE IMPORTANT Do not directly connect the BUMP STARTING negative terminals of the two batteries: IS PUNCTURED Never bump start the engine (by pushing, sparks could ignite the flammable gas from towing, or coasting downhill) as this could the battery.
-
Page 143
Please note: WARNING WARNING ❒ the jack weight is 4,5 kg; The spare wheel is specific to The jack shall only be used your vehicle, do not use it on for changing wheels on the ❒ the jack requires no adjustment; other models, or use the spare wheel vehicle with which it is provided or on ❒… -
Page 144
F0N0186m F0N0163m F0N0165m fig. 3 fig. 4 fig. 6 To change a wheel proceed as follows: ❒ stop the vehicle in a position that is not dangerous for oncoming traffic where you can change the wheel safe- ly. The ground should be flat and ad- equately firm;… -
Page 145
❒ loosen one turn the bolts of the wheel to change; ❒ turn the ring nut to extend the jack partially; ❒ set the jack near the lifting support close to the wheel to change in the points shown in fig. 7a. For short wheelbase versions with retractable footboard, the jack shall be set in the F0N0193m… -
Page 146: Quick Tyre Repair Kit Fix & Go Automatic
❒ remove the extension B-fig. 4 and re- QUICK TYRE REPAIR fit it together with the wrench C-fig. KIT — FIX & GO automatic 5 into the tool compartment; ❒ refit the tool compartment into the Il Fix & Go automatic kit includes: proper space under the passenger’s ❒…
-
Page 147
IT SHOULD BE NOTICED THAT: In the event of a puncture caused by foreign bodies, it is The sealing fluid of the quick tyre repair possible to repair tyres show- kit is effective with external temperatures ing damages on the track or between –20 °C and +50 °C. -
Page 148
WARNING Replace the cylinder if sealer has run out. Do not throw The cylinder contains ethyl- away the cylinder and the ene glycol. The cylinder con- sealing fluid. Have the sealing tains latex: it can cause allergic reac- fluid and the cylinder disposed of in tions. -
Page 149
3 bar, do not start driving since the tyre is excessively damaged and the quick tyre repair kit cannot guarantee suitable sealing, contact Fiat Dealer- ship; WARNING ❒ re-start immediately if the tyre has If the pressure falls below 3 been inflated to 4 bar pressure;… -
Page 150
Tyre pressure” in section “Technical Specifications” (with engine running and handbrake on) and restart; ❒ drive with the utmost care to the nearest Fiat Dealership. F0N0181m F0N0184m fig. 15 fig. 17 FOR CHECKING AND… -
Page 151: When Needing To Change A Bulb
If the transparent bulb Tubular bulbs: release them from therefore contact Fiat Dealership. is touched with the fingers, its their contacts to remove. lighting intensity is reduced and life of the bulb may be compromised.
-
Page 152
Bulbs Ref. figure Type Power Main-beam headlights Dipped beam headlights Front sidelights Front fog lights (where provided) – Front direction indicators PY21W Side direction indicators W16WF Rear direction indicators PY21W Taillights P21/5W Brake lights P21/5W Third brake light (additional brake light) Reversing light –… -
Page 153: If An Exterior Light Burns Out
IF AN EXTERIOR LIGHT BURNS OUT For the type of bulb and power rating, see “When needing to change a bulb”. FRONT LIGHT UNITS fig. 19 The front light units contain sidelights, dipped beam, main beam and direction in- F0N0079m F0N0082m fig.
-
Page 154
F0N0083m F0N0081m F0N0084m fig. 22 fig. 23 fig. 24 MAIN BEAM HEADLIGHTS DIRECTION INDICATORS DIPPED BEAM HEADLIGHTS To change the bulb, proceed as follows: To change the bulb, proceed as follows: With incandescent bulb ❒ remove the protection cover A-fig. ❒… -
Page 155
F0N0169m F0N0170m F0N0085m fig. 25 fig. 26 fig. 27 ❒ use the screwdriver provided to Side fig. 25 — 26 FRONT FOG LIGHTS loosen the screws and remove the (where provided) To change the bulb, proceed as follows: bulb holder unit releasing it from the To change front fog lights A-fig. -
Page 156
fig. 28 F0N0086m fig. 29 F0N0087m fig. 30 F0N0088m To replace a bulb proceed as follows: ❒ remove the bulb to replace D, E, F or REAR LIGHT UNITS fig. 28-29-30 ❒ open the rear swing door and loosen G pushing it slightly and turning it counterclockwise (“bayonet”… -
Page 157: If An Interior Light Burns Out
IF AN INTERIOR LIGHT BURNS OUT For the type of bulb and power rating, see “When needing to change a bulb”. FRONT CEILING LIGHT To replace the bulbs proceed as follows: ❒ work in the points shown by the ar- F0N0141m F0N0089m fig.
-
Page 158: If A Fuse Blows
IF A FUSE BLOWS GENERAL The fuse is a protective device for the electric system: it comes into action (i.e. it cuts off) mainly due to a fault or im- proper action on the system. When a device does not work, check the F0N0090m F0N0092m fig.
-
Page 159
FUSE, MIDI-FUSE, MAXI- rating, DANGER OF FIRE. FUSE) cuts in, do not attempt any re- pair and contact Fiat Dealership. Be- fore changing a fuse, check the igni- tion key has been removed and that all the other electric devices have been turned off/disabled. -
Page 160
FUSE LOCATION Fuses are grouped into three fuse boxes to be found respectively on the dashboard, on the passenger compartment right pil- lar and in the engine compartment. Fuse box on the dashboard To gain access to the fuses in the fuse box F0N0095m fig. -
Page 161
Fuse box in engine compartment To gain access to the fuse box, remove the protection cover fig. 41. F0N0098m fig. 41 F0N0097m fig. 42… -
Page 162
Optional fuse box on the right cen- tral post (where provided) To gain access to the fuse box, remove the protection cover fig. 43. F0N0172m fig. 43 F0N0171m fig. 44… -
Page 163
FUSE SUMMARY TABLE Fuse box on dashboard USERS FUSE AMPERE Right dipped beam headlight Left dipped beam headlight, Headlight aiming device Engine compartment fuse box relay, dashboard fuse box relay (+key) Minibus internal lights (emergency) Rear current outlet Absent – Reversing lights, sevotronic control unit, Water in diesel fuel filter sensor, (+key) Central door locking (+ battery) Brake lights (main), Third brake light, Instrument panel (+key) -
Page 164
USERS FUSE AMPERE Control on driver’s door, Controls on passenger’s door Absent – Driver’s power window Passenger’s power window Sound System, Driver’s power window, Dashboard controls, Alarm control unit, Rain sensor (+key) Airbag (+key) A/C control, Cruise control, Chronotachograph (+key) Optional fuse box relay Instrument panel, Rear fog lights (+battery) -
Page 165
Fuse box in engine compartment USERS FUSE AMPERE ABS pump (+battery) Glow plug heating (+battery) Ignition switch (+battery) Webasto control unit (+battery) Passenger’s compartment ventilation with Webasto (+battery) Engine cooling fan high speed (+battery) 40/60 Engine cooling fan low speed (+battery) 40/50 Passenger’s compartment fan (+key) Headlight washer pump… -
Page 166
USERS FUSE AMPERE Fuel pump E.i. system (primary services) ABS solenoid valves Automatic transmission 8 (+key) Front fog lights… -
Page 167
Right central post optional fuse box USERS FUSE AMPERE Absent – Heated seats Rear passenger’s current outlet Additional heater under seat Sidelights Self-levelling suspensions (+battery) Absent – Absent – Absent – Passenger’s additional heater control Absent – Passenger’s additional heater fan… -
Page 168: If The Battery Is Flat
This operation should be car- from naked flames or possible sources nel to make sure that the internal el- ried out by Fiat Dealership. of sparks: explosion and fire risk. ements are not damaged and that the You are advised to recharge the battery…
-
Page 169: Jacking The Vehicle
TOWING THE VEHICLE VEHICLE The vehicle has two eyes for anchoring the towing device. If the vehicle is to be lifted, go to a Fiat Dealership which is equipped with the arm hoist or workshop lift. WARNING When towing, remember that…
-
Page 170
WARNING Before starting to tow, disen- gage the steering lock (see paragraph “Ignition device” in section “Dashboard and controls”). When towing, remember that without the help of the brake booster and power steering, a greater effort is required on the pedal and steering wheel. Do not use flexible cables for towing and F0N0134m F0N0136m… -
Page 171
❒ take the screwdriver from the tool compartment and lever in the point shown to raise the cap C-fig. 48; ❒ Take the tow ring D from the tool compartment and screw it on the threaded pin fig. 48. F0N0117m fig. -
Page 172
SCHEDULED SERVICING ……….SERVICE SCHEDULE…………. ROUTINE MAINTENANCE ……….HEAVY-DUTY ……………. CHECKING FLUID LEVELS……….AIR FILTER …………….POLLEN FILTER …………..BATTERY ……………… WHEELS AND TYRES …………RUBBER HOSES…………..WINDSCREEN/REAR WINDOW WIPERS….BODYWORK …………….INTERIORS ……………. -
Page 173: Scheduled Servicing
SCHEDULED SERVICING IMPORTANT You are advised to contact IMPORTANT The Programmed Mainte- Fiat Dealership in the event of any minor nance coupons are specified by the Man- operating faults, without waiting for the ufacturer. The failure to have them car- Correct maintenance is essential for en- next service coupon.
-
Page 174: Service Schedule
SERVICE SCHEDULE (2.3 MULTIJET) Thousands of km ● ● ● ● ● Check tyre conditions/wear and adjust pressure if required Check light system operation (headlights, direction ● ● ● ● ● indicators, hazard lights, boot lights, instrument panel warning lights, etc.) Check windscreen wiper/washer operation and adjust ●…
-
Page 175
Thousands of km ● ● ● ● ● Replace fuel filter Replace air cleaner cartridge ● ● ● ● ● Top up fluids ● ● ● ● ● (engine coolant — brakes — power steering — windscreen washer — etc.) ●… -
Page 176
SERVICE SCHEDULE (2.2 MULTIJET) Thousands of km ● ● ● ● ● Check tyre conditions/wear and adjust pressure if required Check electric system operation (headlights, direction indicators, ● ● ● ● ● hazard lights, boot light, instrument panel warning lights, etc.) Check windscreen washer/wiper operation, adjust nozzles ●… -
Page 177
Thousands of km Replace air cleaner cartridge ● ● ● ● ● Check and top up fluids, if required ● ● ● ● ● (engine coolant — brakes — power steering — windscreen washer — etc.) ● Change accessory drive belt ●… -
Page 178: Routine Maintenance
Service quired: engine oil level. Schedule: You are recommended to use FL ❒ check front disk brake pad conditions Selenia, products, designed and pro- and wear; duced specifically for Fiat vehicles (see table “Capacities” in section “Technical specifications”).
-
Page 179: Checking Fluid Levels
CHECKING FLUID WARNING Never smoke while working in the engine compartment; gas and inflammable vapours may be present, with the risk of fire. When topping up take care not to confuse the various types of fluids: they are all in- compatible with one anoth- F0N0099m fig.
-
Page 180
WARNING Never smoke while working in the engine compartment; gas and inflammable vapours may be present, with the risk of fire. When topping up take care not to confuse the various types of fluids: they are all in- compatible with one anoth- er and could seriously damage the ve- hicle. -
Page 181
WARNING When the engine is hot, take care when working inside the engine compartment to avoid burns. Remember that when the engine is hot, fan may cut in: danger of injury. Scarves, ties and other loose cloth- ing might be pulled by moving parts. F0N0101m F0N0102m fig. -
Page 182
PARAFLU UP. Use the same fluid type as that already in the cooling system when topping up. PARAFLU UP fluid cannot be mixed with any other type of fluid. Should it happen, under no circumstances start the engine; contact a Fiat Dealership. -
Page 183
50% TUTELA PROFESSIONAL SC35 and 50% water in winter. In case of temperatures below –20°C, use undiluted TUTELA PROFESSIONAL SC35 fluid. Check level through the reservoir. F0N0105m F0N0107m fig. 7 — 2.2 — 2.3 versions fig. 8 WARNING WINDSCREEN/REAR WINDOW BRAKE FLUID fig. -
Page 184
If the fluid level in the reservoir is below Make sure that the highly the specified level, top up with one of the corrosive brake fluid does not products specified in table “Fluids and lu- drip onto the paintwork; if it bricants”… -
Page 185: Air Filter
Remove the protection cover to find WARNING Running the battery with low fluid level can damage Contact Fiat Dealership to have the bat- the battery beyond repair and could tery checked/replaced. also cause its explosion. CHECKING THE CHARGE fig.
-
Page 186
If after buying the vehicle, you to have the battery changed want to install electric accessories at a Fiat Dealership, which is properly which require permanent electric sup- equipped for disposing of used batter- ply (alarm, free-hand phone kit, etc.) ies respecting nature and the law. -
Page 187
(alarm, etc.) tery or near it, always wear running; contact Fiat Dealership whose qualified the proper goggles. personnel, in addition to suggesting the ❒ before performing any operation on… -
Page 188: Wheels And Tyres
WARNING to at a Fiat Dealership; Remember that road holding ❒ avoid overloading the vehicle when depends also on the correct travelling: this may cause serious dam- tyre inflating pressure.
-
Page 189: Rubber Hoses
RUBBER HOSES WINDSCREEN WARNING If the pressure is too low the As far as the brake system and fuel rubber tyre overheats and this can BLADES hoses are concerned, carefully follow the cause it serious damage. “Service schedule” in this section. Periodically clean the rubber part using special products;…
-
Page 190
WARNING Driving with worn wiper blades is a serious hazard, because visibility is reduced in bad weather. F0N0137m F0N0112m fig. 14 fig. 15 Changing the windscreen wiper SPRAY NOZZLES blades fig. 14 Windscreen wiper fig. 15 Proceed as follows: If the jet of fluid is inadequate, firstly check ❒… -
Page 191: Bodywork
❒ Use of “open” boxed sections to pre- In the case of deep scrapes or scores, you On your vehicle, Fiat implemented the vent condensation and pockets of are advised to have the necessary touching best manufacturing technologies to effec- moisture from triggering rust inside.
-
Page 192
Do not wash the vehicle after it has been Windows To correctly wash the vehicle: left in the sun or with the bonnet hot: this ❒ remove the aerial from the roof to Use specific window cleaner products. may alter the shine of the paintwork. Use also clean cloths to avoid scratching prevent damage to it if the vehicle is Exterior plastic parts must be cleaned in… -
Page 193: Interiors
Before using special products for clean- ing interiors, read carefully label instruc- WARNING tions and indications to make sure they Fabric upholstery of your Fiat Never use flammable prod- are free from spirit and/or alcohol-based Ducato is purpose-made to ucts like oil ether or rectified substances.
-
Page 194
IDENTIFICATION DATA ……….. ENGINE CODES — BODYWORK VERSIONS ….ENGINE ………………FUEL FEED …………….TRANSMISSION …………..BRAKES ………………SUSPENSIONS…………….. STEERING…………….. WHEELS ………………DIMENSIONS …………….PERFORMANCE …………..WEIGHTS …………….. CAPACITIES …………….FLUIDS AND LUBRICANTS……….FUEL CONSUMPTION …………EMISSIONS ………….. -
Page 195: Identification Data
IDENTIFICATION DATA H Maximum vehicle weight on rear axle. Engine type. You are advised to note the identification L Body version code. codes. The identification data stamped and given on the plates and their position are M Spare part code. the following: N Smoke opacity index (for diesel en- ❒…
-
Page 196
The plate is to be found on the front cross member of the engine compartment and it bears the following identification data: A Paint manufacturer. B Colour name. C Fiat colour code. fig. 4 F0N0161m D Respray and touch up code. CHASSIS MARKING fig. 3 These are to be found respectively: on the internal wheelhouse on passenger’s side… -
Page 197: Engine Codes — Bodywork Versions
ENGINE CODES — BODYWORK VERSIONS Versions Engine code 2.2 Multijet 100HP 2.3 Multijet 120HP SOFIM F1AE0481D 2.3 Multijet 130HP SOFIM F1AE0481N Below is an example of body version with relevant key valid for any body version: Key: MODEL CAPACITY ENGINE TRANSMISSION/DRIVING AXLES BODYWORK WHEELBASE…
-
Page 198
CAPACITY 3,000 kg 3,300 kg 3,500 kg LIGHT 3,500 kg HEAVY 4,005 kg ENGINES 2.2 Multijet 100 HP 2.3 Multijet 120 HP 2.3 Multijet 130 HP TRANSMISSION Mechanical gearbox Automatic gearbox BODYWORK Chassis-cab chassis Long cab body Chassis without cab Long cab chassis Chassis-cab floor Minibus… -
Page 199: Engine
ENGINE GENERAL 2.2 Multijet 2.3 Multijet 2.3 Multijet 130 HP 100 HP 120 HP Engine code Sofim F1AE0481D Sofim F1AE0481N Diesel Cycle Diesel Diesel 4 in line 4 in line 4 in line Number and layout of cylinders Piston bore and stroke 86 x 94.6 88 x 94 88 x 94…
-
Page 200: Fuel Feed
FUEL FEED Fuel feed Multijet direct injection “Common Rail” WARNING Modifications or repairs to the fuel feed system that are not carried out properly or do not take the system’s technical specifications into account can cause malfunctions leading to the risk of fire. TRANSMISSION 2.2 Multijet 100 HP 2.3 Multijet…
-
Page 201: Brakes
BRAKES Service brakes: – front self-ventilating disc disc – rear Parking brake controlled by hand lever, it works on rear brakes IMPORTANT Water, ice and antifreeze salt on roads may deposit on the brake discs thus reducing braking efficiency at first braking. SUSPENSIONS Mc Pherson independent wheels Front…
-
Page 202: Wheels
WHEELS SPARE WHEEL Printed steel rim. RIMS AND TYRES Tubeless tyre (same as those fitted). Pressed steel or alloy rims. Tubeless tyres WHEEL GEOMETRY with radial carcass. The homologated tyres are listed in the Log book. Front wheel toe-in measured from rim to rim: 1 ±…
-
Page 203
Maximum speed rating Load rating (capacity) UNDERSTANDING RIM MARKING fig. 4 Q = up to 160 km/h. 70 = 335 kg 81 = 462 kg Example: 6J x 15 ET43 R = up to 170 km/h. 71 = 345 kg 82 = 475 kg 5,00 = rim width in inches 1. -
Page 204
Versions Rims Standard tyres All types, light 215/70 R15C 109/107S 6J x 15” — H2 (excluding free time) 225/70 R15C 112/110S All types, light 6J x 15” — H2 215/70 R15CP 109/107Q (free time) 215/70 R16C 116/114R All types, heavy 6J x 16”… -
Page 205
COLD TYRE INFLATION PRESSURE (bar) Application Front Rear 205/70 R15 3000 PTT(*) Light 4.0 ± 0,05 4.0 ± 0,05 3000 PTT(*) Light / 3500 PTT(*) Light 4.1 ± 0,05 4.5 ± 0,05 3000 PTT(*) Light with oversize tyres 4.0 ± 0,05 4.0 ±… -
Page 206: Dimensions
DIMENSIONS VAN VERSION Dimensions are expressed in mm and refer to the vehicle fitted with standard tyres. Height is intended on an unladen vehicle. fig. 5 F0N0115m…
-
Page 207
Versions XLH2 XLH3 3000 3450 4035 4035 1015 1015 1015 1380 4963 5413 5998 6363 2254 2254/2522 2522/2760 2522/2760 1810 1810 1810 1810 2050 2050 2050 2050 – – – – 1790 1790 1790 1790 Dimensions vary according to the version, within the limits indicated above… -
Page 208
TRUCK VERSION Dimensions are expressed in mm and refer to the vehicle fitted with standard tyres. Height is intended on an unladen vehicle. fig. 6 F0N0116m… -
Page 209
Versions Body Chassis-cab chassis XLH1 XLH1 MLH1 3000 3450 4035 4035 3000 3450/3800 4035 4035 1390 1390 1247 1756 1325 5358/5708 5943 5338 5789 6230 6739 4908 6308 2798 3248 3833 4198 – – – – 2254 2254 2254 2254 2254÷3500 2254÷3500 2254÷3500… -
Page 210
Versions Chassis cowl chassis Chassis-cab special XLH1 XLH1 MLH1 MLH1 3000 3450/3800 4035 4035 3000 3450/3800 4035 4035 1225 1245 5278/5628 5863 4785 5235/5585 5820 6185 4808 6228 – – – – – – – – 3500 (Max) 3500 (Max) 3500 (Max) 3500 (Max) 2254÷3500… -
Page 211
Versions Chassis cowl special XLH1 MLH1 3000 3450/3800 4035 4035 1245 4805 5255/5605 5840 6205 – – – – 3500 (Max) 3500 (Max) 3500 (Max) 3500 (Max) 1810 1810 1810 1810 1790÷1980 1790÷1980 1790÷1980 1790÷1980 2050÷2350 2050÷2350 2050÷2350 2050÷2350 Dimensions vary according to the version, within the limits indicated above… -
Page 212: Performance
PERFORMANCE Top speeds allowable after running in km/h. 2.2 Multijet 100 HP 2.3 Multijet 120 HP 2.3 Multijet 130 HP CH1-MH1 – MH2-LH2 – XLH2 LH3-XLH3 – CHASSIS CAB/ MH1-MLH1 CHASSIS COWL (excluding free time) LH1-XLH1 CHASSIS CAB/ MH1-MLH1 CHASSIS COWL (excluding free time) LH1-XLH1…
-
Page 213: Weights
VAN WEIGHTS 2.2 Multijet 2.3 Multijet Weights (kg) 100 HP 120 HP Versions 3,000 kg capacity Kerb weight (including fuel, spare wheel, tools and accessories): 1845 ÷ 1910 1860 ÷ 1925 Payload (*) including the driver: 758 ÷ 905 808 ÷ 890 Maximum admitted loads (**) 1600 1600…
-
Page 214
VAN WEIGHTS 2.2 Multijet 2.3 Multijet Weights (kg) 100 HP 120 HP Versions 3,300 kg capacity Kerb weight (including fuel, spare wheel, tools and accessories): 1845 ÷ 1985 1860 ÷ 2000 Payload (*) including the driver: 1058 ÷ 1205 1043 ÷ 1150 Maximum admitted loads (**) 1750 1750… -
Page 215
VAN WEIGHTS 2.2 Multijet 2.3 Multijet Weights (kg) 100 HP 120 HP Versions 3,500 kg capacity Kerb weight (including fuel, spare wheel, tools and accessories): 1845 ÷ 1985 1860 ÷ 2000 Payload (*) including the driver: 1183 ÷ 1405 1168 ÷ 1390 Maximum admitted loads (**) 1850 1850… -
Page 216
TRUCK BODY WEIGHTS (2/3 SEATS) 2.2 Multijet 2.3 Multijet Weights (kg) 100 HP 120 HP Versions 3,000 kg capacity Kerb weight (including fuel, spare wheel, tools and accessories): 1795 ÷ 1840 1810 ÷ 1855 Payload (*) including the driver: 868 ÷ 985 858 ÷… -
Page 217
TRUCK BODY WEIGHTS (2/3 SEATS) 2.2 Multijet 2.3 Multijet Weights (kg) 100 HP 120 HP Versions 3,300 kg capacity Kerb weight (including fuel, spare wheel, tools and accessories): 1795 ÷ 1895 1810 ÷ 1910 Payload (*) including the driver: 1098 ÷ 1285 1133 ÷… -
Page 218
TRUCK BODY WEIGHTS (2/3 SEATS) 2.2 Multijet 2.3 Multijet Weights (kg) 100 HP 120 HP Versions 3,500 kg capacity Kerb weight (including fuel, spare wheel, tools and accessories): 1795 ÷ 1895 1810 ÷ 1910 Payload (*) including the driver: 1278 ÷ 1445 1278 ÷… -
Page 219
CHASSIS-CAB CHASSIS WITH FLOOR WEIGHTS (2/3 SEATS) 2.2 Multijet 2.3 Multijet Weights (kg) 100 HP 120 HP Versions 3,000 kg capacity Kerb weight (including fuel, spare wheel, tools and accessories): 1580 ÷ 1600 1595 ÷ 1615 Payload (*) including the driver: 1168 ÷… -
Page 220
CHASSIS-CAB CHASSIS WITH FLOOR WEIGHTS (2/3 SEATS) 2.2 Multijet 2.3 Multijet Weights (kg) 100 HP 120 HP Versions 3,300 kg capacity Kerb weight (including fuel, spare wheel, tools and accessories): 1580 ÷ 1615 1595 ÷ 1630 Payload (*) including the driver: 1453 ÷… -
Page 221
CHASSIS-CAB CHASSIS WITH FLOOR WEIGHTS (2/3 SEATS) 2.2 Multijet 2.3 Multijet Weights (kg) 100 HP 120 HP Versions 3,500 kg capacity Kerb weight (including fuel, spare wheel, tools and accessories): 1580 ÷ 1615 1595 ÷ 1630 Payload (*) including the driver: 1653 ÷… -
Page 222
CHASSIS-CAB CHASSIS WEIGHTS (2/3 SEATS) 2.2 Multijet 2.3 Multijet 2.3 Multijet Weights (kg) 2.2 Multijet Versions 3,000 kg capacity 120 HP (❏) 120 HP (▼) 100 HP (❏) 100 HP (▼) Kerb weight (including fuel, spare wheel, tools and accessories): 1590 ÷… -
Page 223
CHASSIS-CAB CHASSIS WEIGHTS (2/3 SEATS) 2.2 Multijet 2.2 Multijet 2.3 Multijet 2.3 Multijet 2.3 Multijet Weights (kg) 2.3 Multijet Versions 3,300 kg capacity 120 HP (▼) 130 HP (❏) 130 HP (▼) 100 HP (❏) 100 HP (▼) 120 HP (❏) Kerb weight (including fuel, spare wheel, tools and accessories):… -
Page 224
CHASSIS-CAB CHASSIS WEIGHTS (2/3 SEATS) 2.2 Multijet 2.2 Multijet 2.3 Multijet 2.3 Multijet 2.3 Multijet Weights (kg) 2.3 Multijet Versions 3,500 kg capacity 120 HP (▼) 130 HP (❏) 130 HP (▼) 100 HP (❏) 100 HP (▼) 120 HP (❏) Kerb weight (including fuel, spare wheel, tools and accessories):… -
Page 225: Capacities
(*) For all versions it is possible to request 120 litre tank. On “Free time” versions it is possible to request 60 litre tank. (▼) With Webasto: 11.15 litres Heater under the seat 600cc: 11.6 litres Rear heater 900cc: 11.9 litres (●) Ask Fiat Dealership for the appropriate Tutela product.
-
Page 226: Fluids And Lubricants
Should non-genuine SAE 5W-40 products be used, lubricants with minimum ACEA B4 properties are tolerated; in this event top engine performance is not guaranteed. Using low-quality products, not compliant with ACEA B4 properties and specifications could cause engine damages not covered by warranty. For very cold temperatures, consult Fiat Dealership for the proper Selenia product to use.
-
Page 227
CUNA NC 956-II PROFESSIONAL undiluted in wind- washer fluid SC 35 screen/rear window washer/wiper systems (*) IMPORTANT Do not top up or mix with fluids having characteristics different from those specified. (●) Ask Fiat Dealership for the appropriate Tutela product. -
Page 228: Fuel Consumption
❒ extra-urban cycle: frequent acceler- FUEL CONSUMPTION IMPORTANT The type of route, traffic situations, weather conditions, driving ating in all gears, simulating extraurban style, general conditions of the vehicle, use of the vehicle; the speed varies be- The fuel consumption figures given in the trim level/equipment/accessories, load, cli- tween 0 and 120 km/h;…
-
Page 229: Co 2 Emissions
EMISSIONS The CO emission levels at the exhaust given in the following tables refer to combined consumption. Versions emissions according to 1999/100/CE Directive (g/km) 2.2 Multijet 2.3 Multijet (*) Values not available for the present.
-
Page 230
Bodywork exhaust emissions ….. 228 BS …………84 Code card……….– maintenance ……..190 Accessories purchased by Consumption the user ……….93 – version codes ……… 194 – engine oil ………. 180 Air bags (front)……..108 Bonnet ………… 80 – fuel …………. 227 Air bags (side)…….. -
Page 231
– rear bulb replacement ….155 Folding top ……….73 Headlight washer – side bulb replacement….154 Follow me home (device) ….60 – control ……….62 Doors …………. 74 Front ceiling lights Headlights……….83 – bulb replacement ……156 –… -
Page 232
– engine oil ……… 180 – identification data……194 Reversing light ……..155 – power steering fluid ….. 183 Pollen filter……….184 Rims – windscreen/rear window/ – understanding rim marking..202 Power steering fluid level ….183 headlight washer……182 Power windows Roof rack/ski rack …….. -
Page 233
Sound system ……..92 Tyre pressure ……..204 Windscreen washer – control ……….61 Tyres Starting the engine ……. 116 – fluid level ……… 182 – changing ……….. 141 – bump starting ……… 141 Windscreen wipers – snow tyres ……..125 –… -
Page 237
On “Free time” versions it is possible to request 60 litre tank Fiat Auto S.p.A. — Quality — Assistenza Tecnica — Ingegneria Assistenziale — Largo Senatore G. Agnelli, 5 — 10040 Volvera — Torino (Italia) Print n. 603.45.991- I/2006 — 1…