-
Bookmarks
Quick Links
Océ Operations Guide
Education Services
1.1.1.
English version
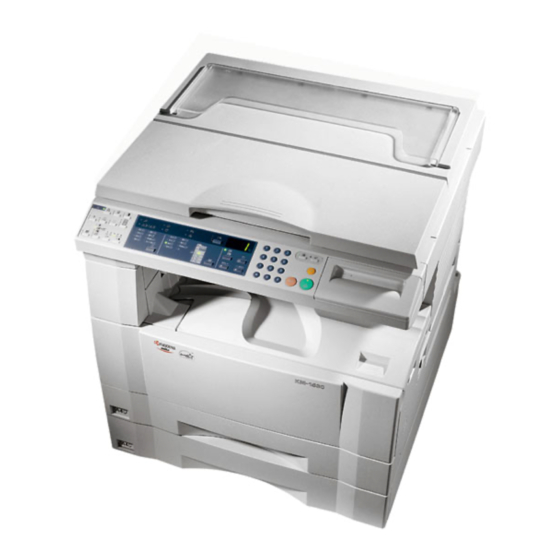
Océ OP15
Printing System Functions
Operations Guide
Related Manuals for Oce Oce Printing System
Summary of Contents for Oce Oce Printing System
-
Page 1
Océ Operations Guide Education Services 1.1.1. English version Océ OP15 Printing System Functions Operations Guide… -
Page 2
INSTRUCTION HANDBOOK <Functions Edition> Introduction Chapter 1 Printer-related operation 1. Printer Settings (15 ppm copier) 2. Printer Settings (20 ppm copier) 3. Memory Card / RAM Disk Chapter 2 Software-related operation 1. Procedure for Installing and Printing with a Printer Driver 2. -
Page 3: Trademark Information
This On-Line Manual is included with your Printing System (K) and should be read in combination with the Instruction Handbook <Set-Up Edition> for that product. This manual contains information on making settings in your printer, as well as on installing and setting the printing properties for the corresponding Printer Drivers.
-
Page 4
4. General You may terminate your license at any time. IBM may terminate your license if you fail to comply with the terms and conditions of this license. In either event, you must destroy all your copies of the Program. You are responsible for payment of any taxes, including personal property taxes, resulting from this license. -
Page 5
Typeface Trademark Acknowledgement All resident fonts in this printer are licensed from Agfa Corporation. Helvetica, Palatino and Times are registered trademarks of Linotype-Hell AG. ITC Avant Garde Gothic, ITC Bookman, ITC ZapfChancery and ITC Zapf Dingbats are registered trademarks of International Typeface Corporation. -
Page 6
1-1 Procedure for making settings Press the Printer key. The machine will switch to the printer mode and “P00” will appear in the copy quality/magnification display. Use the numeric keys to enter the desired menu number and then press the Enter key. -
Page 7
1. Printer Settings (15 ppm copier) Operation keys <15 ppm copier — Inch version> Printer Key Copy quality/magnification display Enter (Manual) key Numeric keys [Zoom (-)] key [Zoom (+)] key Stop/Clear Start (GO) key (CANCEL) key <15 ppm copier — Metric version>… -
Page 8
Menu Item number Printer Status Page print out Prints out a list of such items as the current printer default settings and memory volume, etc. Parallel TX/RX mode Sets the transmission and reception mode when the printer is connected to your computer with a parallel interface. -
Page 9
Carriage Return (CR) handling (parallel interface) Carriage Return (CR) handling (network inter- face) Available settings (1) On (2) Off (1) Line Printer (2) IBM Proprinter (3) DIABLO 630 (4) EPSON LQ-850 (5) PCL 6 (1) Line Printer Available only when the Network (2) IBM Proprinter Card is installed. -
Page 10
Multi-Bypass, paper feed will be accomplished from the Multi-Bypass. Force-print time-out If “000” seconds is selected here, successive pages will not be printed until they are manually force- printed (by pressing the Start key in the printer mode). Available settings (1) On (2) Off… -
Page 11
The receive dump mode will be canceled under the following circumstances: • The Start key is pressed in the printer mode. • A force-print time-out occurs. Printer reset Resets the Printer Board only even without turning the power to the machine OFF. -
Page 12
2. Printer Settings (20 ppm copier) 2-1 Procedure for making settings Press the Printer key. The machine will switch to the printer mode. Use the “ ” and “ ” cursor keys to select “MENU” and then press the Enter key. -
Page 13
2. Printer Settings (20 ppm copier) Operation keys <20 ppm copier — Inch version> Printer Key < (Cursor left) <20 ppm copier — Metric version> Printer Key < (Cursor left) Message display > (Cursor right) (Cursor) key “GO” command “CANCEL” command “MENU”… -
Page 14
2-2 Menu flow chart MENU Printer Status Page print out Interface selection Parallel setting Network Card (option) settings Emulation protocol Line Printer IBM Proprinter DIABLO 630 Epson LQ-850 PCL 6 KPDL KPDL(AUTO) Parallel TX/RX mode NetWare ON/OFF NetWare frame type… -
Page 15
2. Printer Settings (20 ppm copier) Font settings Internal Option Printing environment settings Number of copies Printing orientation Page Protect Line Feed (LF) handling Carriage Return (CR) handling Wide A4 ON/OFF Printing resolution settings Draft Mode ON/OFF Printing resolution Font selection… -
Page 16
2. Printer Settings (20 ppm copier) RAM disk ON/OFF RAM disk size Reading data Reading program data Writing data Deleting data Deleting font data Deleting program data Deleting macro data Partition List print out Memory Card settings Reading fonts Reading macro data… -
Page 17
2. Printer Settings (20 ppm copier) Paper handling settings Duplex mode A4 & Letter usage ON/OFF Bypass mode Other settings Form feed time-out Receive dump mode Printer reset Resource protect mode Auto Continue ON/OFF Service Recovery time for Auto Continue… -
Page 18
Network Card will be printed out as well when the standard Status Page for the printer (item No.: 1) or that for use by your service representative (item No.: 60) are printed out. A more detailed Status Page is printed out together with the “Service Rep Status Page print out”… -
Page 19
This setting is made by entering the ID of the desired font. To select an font that is already installed in the printer, enter “I###” (with the corresponding font ID entered in place of the ###). To verify font IDs, print out a Font List by carrying out the “Font List print out”… -
Page 20
If “OK” is selected here, the machine will enter a “waiting for data” state until data is sent from the host computer. To exit this state, select the “GO” command in the printer mode and then press the Enter key. Display message Available settings Page Protect… -
Page 21
“waiting for data” state until data is sent from the host computer. To exit this state, select the “GO” command in the printer mode and then press the Enter key. Deleting data Deletes the selected data from the Memory Card. -
Page 22
Form feed time-out If “000” seconds is selected here, successive pages will not be printed until they are manually force-printed (by selecting the “GO” command in the printer mode and then pressing the Enter key). Display message Available settings Delete Font… -
Page 23
2. Printer Settings (20 ppm copier) Item No. Item Receive dump mode The data that the printer receives for debugging programs and files is turned into hexadecimal code and printed out. If “OK” is selected here, this receive dump mode will be activated. -
Page 24
IMPORTANT! The RAM Disk is created from that portion of the printer’s memory that is normally available to the user. Thus, if the size of the RAM disk created is too large, printing speed may actually be decreased or the machine may run out of available memory. -
Page 25
It is possible to issue simple commands to the Memory Card and RAM Disk from the MS-DOS Prompt in Windows. 3-3-1 Using printer control commands A printer control command line includes “!R!” (Command operation start), as well the actual commands and parameters that are to be implemented and that are entered after that. -
Page 26
Perform the following procedure when you want to initialize the Memory Card from your computer. * In 20 ppm copiers, the Memory Card is initialized from the operation panel on the copier itself. Refer to “2. Printer Settings (20 ppm copier)”… -
Page 27
* Refer to “3-3-7 Printing out the Partition List” for information on printing that list. * In 20 ppm copiers, Partition List print out is accomplished from the operation panel on the copier itself. Refer to “2. Printer Settings (20 ppm copier)” on page 2-1 for information on the appropriate procedure. -
Page 28
List” for information on printing that list. * In 20 ppm copiers, Partition List print out is accomplished from the operation panel on the copier itself. Refer to “2. Printer Settings (20 ppm copier)” on page 2-1 for information on the appropriate procedure. -
Page 29
Memory Card or RAM Disk. * In 20 ppm copiers, Partition List print out is accomplished from the operation panel on the copier itself. Refer to “2. Printer Settings (20 ppm copier)” on page 2-1 for information on the appropriate procedure. -
Page 30
1-1 Included printer drivers The following printer drivers are included with this product. * Each type of printer driver has a version appropriate to a specific model of copy machine. Be sure to choose the driver that is appropriate for your copier. -
Page 31: Installing The Printer Drivers
System requirements Recomended requirements CD-ROM drive Parallel interface port IBM PC / AT or compatible i486SX 25 MHz or more 8 MB or more 10 MB or more Pentium 90 MHz or more 16 MB or more 10 MB or more…
-
Page 32
Click to display a menu including uninstallation of the printer driver. [Remove Drivers] … Starts the uninstaller of the printer driver. [Make Driver Disk] … Copies the installer program to a floppy disk. Use of this floppy disk allows you to install the printer I Documentation Click to display the manual (PDF) supplied with the printer driver. -
Page 33: Installing The Printer Driver (Windows)
Install the printer driver as follows: * The printer can be connected to the computer by one of the following two methods: local or network. If you want to connect them through network, refer to the operation manual of the operating system (OS).
-
Page 34
Select the driver type. From the list, select the type of driver to be installed, then click Next. * Refer to “1-1 Included printer Drivers” on page 1-1 for information regarding each printer driver. The End User Licence Agreement will be displayed. Please read all of the contract and, if you agree with the conditions contained therein, click on [Accept]. -
Page 35
The settings you have made so far will appear. If they are correct, click Next. Installation of the printer driver will start. To exit installation, click Finish. * If you want to add another printer driver, click Add Printer and then repeat the same procedure. Installation of the printer driver is now complete. -
Page 36
1. Installing the Printer Drivers 1-5 Uninstalling the Printer Driver The following procedure explains how to uninstall the printer drivers. The uninstall program can be found on the CD-ROM that is included with this product. Start Windows. Insert the printer driver installer CD-ROM into the CD-ROM drive on your computer. -
Page 37
1. Procedure for Installing and Printing with a Printer Driver 1-6 Printing The following is an example procedure for printing using a printer driver under the conditions and environment noted below. • OS : Windows 95 • Printer driver : KPDL2 Driver •… -
Page 38
1. Procedure for Installing and Printing with a Printer Driver Printing from the application Use the application that you want to use to open the document that you want to print. Select [Print] in the [File] menu. The [Print] dialogue box will appear. -
Page 39
Use the mouse to point to [Settings] and click on [Printers] in the submenu that is displayed. The [Printers] folder will open. Use the right mouse button to click on the icon for this printer. A pop-up menu will be displayed. -
Page 40
You can select the source of paper feed according to the desired tray. Selection is possible from among the following items. If you select “Auto Source Selection”, the printer will automatically choose the tray that contains the most appropriate paper for the job. The factory default setting is “Auto Source Selection”. -
Page 41
2. Windows XL Driver 2-2-1 Custom Media Size dialog box Setting a custom paper size Perform the following procedure in order to register a custom size when you want to print onto a non-standard size of paper. The information registered here will be displayed under the “Page Size” setting in the Media Tab as well as in the Paper Size setting of your application. -
Page 42
2. Windows XL Driver 2-3 Layout Tab Pages per Sheet: Allows you to print reduced images of multiple (1, 2, 4, 6, 9, 16 or 25) pages onto a single sheet of paper. This function is called “N-Up” printing (where “N” equals the number of image pages). Reduction of the images is calculated automatically so that all of the selected pages fit onto the single sheet of paper. -
Page 43
Selects the method of printing with fonts. The factory default setting is “Download TrueType fonts as outline”. [Download TrueType fonts as outline] … TrueType fonts will be downloaded to the printer as outline fonts for printing. [Download TrueType fonts as bitmap] … -
Page 44
2. Windows XL Driver 2-5 Output Tab Output to: Specifies the location of ejection of printed copies. Selection is possible when the optional Job Separator and or Finisher are installed. [Inner Tray] … Copies will be ejected onto the Inner tray. [Separator Tray] … -
Page 45
* In order to create a RAM disk, it is necessary to increase the memory capacity of your printer. After increasing memory, perform the setting here according to the “Memory” setting below. Memory Specifies the amount of memory installed in the printer. If you make a mistake in the setting here, it is possible that printing will not be accomplished properly. RAM Disk Specifies the amount of memory to be used for the RAM disk. -
Page 46
Code” field here and that registered in the printer itself do not match, printing will not be possible. * If Copy Management is turned ON and this setting does not match the setting made in the printer itself, it will not be possible to make test prints. -
Page 47: Printer Driver For Windows 95
15 ppm copiers as well. * Depending upon version upgrades of the printer driver, the screenshots shown here may differ somewhat from that of the actual printer driver. * Depending upon the model of your copier, there may be functions that are not supported or that require optional equipment to be installed. Even if the settings for such functions are performed, they will not be effective.
-
Page 48
You can select the source of paper feed according to the desired tray. Selection is possible from among the following items. If you select “Auto Select”, the printer will automatically select the tray that contains the most appropriate paper for the job. The factory default setting is “Auto Select”. -
Page 49
3. Printer Driver for Windows 95/98 3-2-1 Paper — More Options (Universal Driver) Printing on both sides (duplex printing) Allows you to set the desired duplex mode. The factory default setting is “None”. [None] … Does not print on both sides. -
Page 50
3. Printer Driver for Windows 95/98 3-3 Graphics Tab (Universal Driver) Resolution: Specify the desired print resolution. The resolution must be specified in the number of dots per inch (dpi). Select between “600 x 600 dots per inch” and “300 x 300 dots per inch”. The factory default setting is “600 dots per inch”. -
Page 51
The factory default setting is “Management Code Off”. * If Copy Management is turned ON and this setting does not match the setting made in the printer itself, it will not be possible to make test prints. Thus, when you install the printer driver, you will need to check the Copy Management settings and make a test print AFTER the installation procedure is complete. -
Page 52
You can select the source of paper feed according to the tray or the desired type of paper. Selection is possible from among the following items. If you select “AutoSelect Tray”, the printer will automatically select the tray that contains the most appropriate paper for the job. The factory default setting is “AutoSelect Tray”. -
Page 53
3. Printer Driver for Windows 95/98 3-5-1 More Paper Options (KPDL2 Driver) <Only available in the 20 ppm copiers> Printing on both sides (duplex printing) Allows you to set the desired duplex mode. The factory default setting is “None”. [None] … Does not print on both sides. -
Page 54
However, the default printer settings should work in most cases. * Do not change these settings unless you have experience using halftones. To return to the default settings after you have made changes, click Use printer’s settings. -
Page 55
I Print features It is possible to change the settings related to various printer functions. Select the desired function here and then change the setting in the field under “Change setting for: xxxx”. Functions available for selection are as follows: G Draft Mode Saves on toner. -
Page 56
* If Copy Management is turned ON and this setting does not match the setting made in the printer itself, it will not be possible to make test prints. -
Page 57
3. Printer Driver for Windows 95/98 3-8 PostScript Tab (KPDL2 Driver) Allows you to make PostScript-related settings. Refer to On-Line Help for more detailed information. 3-11… -
Page 58: Printer Driver For Windowsnt
15 ppm copiers as well. * Depending upon version upgrades of the printer driver, the screenshots shown here may differ somewhat from that of the actual printer driver. * Depending upon the model of your copier, there may be functions that are not supported or that require optional equipment to be installed. Even if the settings for such functions are performed, they will not be effective.
-
Page 59
You can select the source of paper feed according to the desired tray. Selection is possible from among the following items. If you select “Automatically Select”, the printer will automatically choose the tray that contains the most appropriate paper for the job. The factory default setting is “Automatically Select”. -
Page 60
4. Printer Driver for WindowsNT Print on Both Side (Duplex Printing): Allows you to set the desired duplex mode. Setting can be made in the “Change ‘Print on Both Sides “Duplex Printing”’ Setting area. The factory default setting is “None”. -
Page 61
The factory default setting is “Management Code Off”. * If Copy Management is turned ON and this setting does not match the setting made in the printer itself, it will not be possible to make test prints. -
Page 62
In order to view this window and make settings for optional equipment, select “Properties” in step 4 on page 4-1 and then click on the “Device Settings” Tab. Installed Memory (Kilobyte) Perform this setting according to the amount of memory in your printer. If a mistake is made in this setting, there is a possibility that printing will not be accomplished properly. -
Page 63
You can select the source of paper feed according to the tray or the desired type of paper. Selection is possible from among the following items. If you select “Automatically Select”, the printer will automatically select the tray that contains the most appropriate paper for the job. -
Page 64
4. Printer Driver for WindowsNT Copy Count: Set the number of copies to be made. The allowable range is from 1 to 999. Setting can be made in the “Change ‘Copy Count’ Setting” area. Click the arrow buttons ( , ) or enter directly from the keyboard. The factory default setting is “1”. -
Page 65
4. Printer Driver for WindowsNT 4-8 Document Options (KPDL2 Driver) 4-8-1 PostScript Options: Allows you to make PostScript-related settings. Refer to On-Line Help for more detailed information. -
Page 66: Printer Features
4. Printer Driver for WindowsNT 4-8-2 Printer Features I Draft Mode: Saves on toner. Setting can be made in the “Change ‘EcoPrint’ Setting” area. The factory default setting is “Off”. I Paper Destination: Allows you to select the location of ejection when the optional Job Separator or Finisher is installed.
-
Page 67
The factory default setting is “Off”. * If Copy Management is turned ON and this setting does not match the setting made in the printer itself, it will not be possible to make test prints. Thus, when you install the printer driver, you will need to check the Copy Management settings and make a test print AFTER the installation procedure is complete. -
Page 68
“Memory” setting below. Memory Perform this setting according to the amount of memory in your printer. If a mistake is made in this setting, there is a possibility that printing will not be accomplished properly. -
Page 69: Printer Driver For Windows
15 ppm copiers as well. * Depending upon version upgrades of the printer driver, the screenshots shown here may differ somewhat from that of the actual printer driver. * Depending upon the model of your copier, there may be functions that are not supported or that require optional equipment to be installed. Even if the settings for such functions are performed, they will not be effective.
-
Page 70
Page Order The Printer has the ability to print from the 1st page or from the last page. * It is necessary to enable “Advanced Printing Features” in order to perform this setting. Refer to “ Advanced Printing Features” on page 5-5. -
Page 71
You can select the source of paper feed according to the tray or the desired type of paper. Selection is possible from among the following items. If you select “Automatically Select”, the printer will automatically select the tray that contains the most appropriate paper for the job. -
Page 72
5-4-1 Paper/Output Paper Size: Select the size of standard-size paper sheet or envelope. Selection can be made in the drop-down list. The following standard-size paper sheets and envelopes can be used with this printer: Standard-size paper Letter (8 1/2″ sheet… -
Page 73
5. Printer Driver for Windows2000 5-4-3 Document Options Advanced Printing Features: Be sure to select “Enable” for this setting if you want to use the “Pages Per Sheet” (N-Up) function or the “Back to Front” option under the “Page Order” setting. -
Page 74
5. Printer Driver for Windows2000 5-4-4 Printer Features I Draft Mode: Saves on toner. The factory default setting is “Off”. I Paper Destination: Allows you to select the location of ejection when the optional Job Separator or Finisher is installed. -
Page 75
The factory default setting is “Off”. * If Copy Management is turned ON and this setting does not match the setting made in the printer itself, it will not be possible to make test prints. -
Page 76
5. Printer Driver for Windows2000 5-4-5 PostScript Options: This option can only be used with a KPDL2 Driver. Allows you to make PostScript-related settings. Refer to On-Line Help for more detailed information. -
Page 77
“Memory” setting below. Memory Perform this setting according to the amount of memory in your printer. If a mistake is made in this setting, there is a possibility that printing will not be accomplished properly. -
Page 78: Printer Driver For Macintosh
When using unit as a network printer, it is possible to print PostScript files from a Macintosh Computer. This section contains explanations regarding the procedure to install the Macintosh PPD files and select this printer, as well as explanation about the computer environment required to run the installed files.
-
Page 79
6. Printer Driver for Macintosh Double-Click on the icon for the CD-ROM disk. “A copy machine product name of use” dialog box will appear. Double-Click on “the copy machine product name of use” Installer icon. The window shown on the right will appear. Click on “Continue”. -
Page 80
The Chooser will appear. Click once on the LaserWriter 8 icon. Select the name of this printer in the [Select a PostScript Printer] list and then click on the [Create] button. * The name of this printer can be verified by printing out a Status Page from the printer’s operation panel. -
Page 81
You can select the source of paper feed according to the tray or the desired type of paper. Selection is possible from among the following items. If you select “Auto Select”, the printer will automatically select the tray that contains the most appropriate paper for the job. The factory default setting is “Auto Select”. -
Page 82
Sets the type of line to appear around the page. Print on Both sides When this checkbox is selected, the printer will print on both sides of the paper. [Binding] Enable selection of the desired the binding orientation. If left button is selected, the binding orientation is along the side of the paper. -
Page 83
Management Code: This setting is used when Copy Management is turned ON in the printer. If the Management code that you selected from the dropdown list here and that selected in the printer itself do not match, printing will not be possible. -
Page 84
(1) Change the “Installable Options” setting in step 9 on page 6-3 to the following. Select “Finisher” as the “Output Device” setting and “RAM Disk” under “Optional Disk”. (2) “Printer Specific Options” setting on page 6-6. Select “Finisher” as the “Output Bin” setting and “On” under “Sort”. -
Page 85
* For the user using Mac OS 7.6.1, we strongly recommend that you update the LaserWriter8.3.2 to Laser Writer 8.5.1. Format for: Use this pop-up menu to select the Printer that you want to use. Paper: Select in this pop-up list the desired paper size. Choose from among Letter, Legal, Ledger, Folio, Statement, A3, A4, Custom,… -
Page 86
6. Printer Driver for Macintosh 6-7 PostScript Dialog Box The actual layout of each dialog box and the available options and settings may differ somewhat depending upon the application and the version of LaserWriter that you are using. Visual Effects: Visual effects such as horizontal and vertical flip and image inverting can be selected here. -
Page 87
6. Printer Driver for Macintosh 6-8 Custom paper sizes Dialog Box When a paper sizes is selected in “Custom paper sizes” Dialog Box , the paper size can be set as desired. * The actual layout of each dialog box and the available options and settings may differ somewhat depending upon the application and the version of LaserWriter that you are using.
This manual is also suitable for:
Op15
В настоящее время вы находитесь на странице с руководствами Océ. Выберите одну из категорий продуктов, чтобы быстро найти нужное руководство Océ. Не удалось найти нужный продукт Océ? Тогда попробуйте вбить в строку поиска Océ и модель, чтобы найти нужное руководство Océ. На ManualsPDF.ru в настоящее время имеется 19 руководств Océ, разделенных на 2. Самые популярные категории продуктов Océ:
- принтеры
Самые популярные продукты из Océ на сегодня:
- Océ 9400
- Océ TDS700
- Océ CS230
На этой странице вы можете совершенно бесплатно скачать Инструкция по эксплуатации Oce North America TDS600.
У документа PDF Инструкция по эксплуатации 338 страниц, а его размер составляет 3.56 Mb.
Читать онлайн МФУ Oce North America TDS600 Инструкция по эксплуатации

Скачать файл PDF «Oce North America TDS600 Инструкция по эксплуатации» (3.56 Mb)
Популярность:
30837 просмотры
Подсчет страниц:
338 страницы
Тип файла:
Размер файла:
3.56 Mb
Прочие инструкции Oce North America МФУ


Прочие инструкции Oce North America


Руководстве по эксплуатации Oce Oce TDS400 — вам приходилось его терять? Поскольку вы попали сюда, наверняка с вами это случилось. Но вы не единственный человек, сталкивающийся с проблемами с хранением руководства по эксплуатации всех домашних устройств. Ниже несколько советов, касающихся того, зачем собирать руководства по эксплуатации.
Руководстве по эксплуатации Oce Oce TDS400 это определенный вид технической документации, являющейся неразлучным элементом каждого устройства, которое мы приобретаем. Они отличаются между собой количеством информации, которую можно найти на тему данного устройства: напр. Oce Oce TDS400. Конечно же, если производитель считает что необходимо передать нам большее количество информации, касающейся устройства Oce Oce TDS400, то стоит ее хоть раз прочитать — в начале, сразу же после покупки данной вещи. Однако мы считаем, что инструкции должны заключать самую важную, наиболее необходимую информацию о Oce Oce TDS400, так, чтобы не отнимать желания пользователя прочесть ее уже в самом начале. Несомненно, если устройство Oce Oce TDS400 имеет много продвинутых функций, неизбежно большое количество информации в содержании этого документа.
Które из информации в инструкции Oce Oce TDS400 необходимо обязательно прочитать?
- Информацию, касающуюся правильного использования и ухода за устройством Oce Oce TDS400 — нам необходимо ознакомиться с основными правилами, чтобы в случае проблем с устройством сервисный центр не отказал нам в гарантийном обслуживании, из-за неправильного использования
- Информация, касающаяся самых частых проблем с Oce Oce TDS400 и способы их решения
- Информация, касающаяся гарантии устройства Oce Oce TDS400 и ближайших сервисных центров, способных починить устройство в соответствии с рекомендациям производителя Oce
Как хранить инструкции дома?
Хорошей идеей является предназначение одного ящика, в котором бы хранилась инструкция Oce Oce TDS400 а также всех других домашних устройств которыми мы пользуемся. Тогда значительно легче вам будет ее найти, чем искать в родных коробках, которые наверняка уже выбросили вы, или другие домочадцы. Раз в год достаточно просмотреть ящик и выбросить инструкции, которые касаются устройств, которыми вы уже не пользуетесь. Таким образом вы избежите хранения ненужных документов, а останутся только актуальные. Вы можете также скачать и распечатать инструкцию Oce Oce TDS400 чтобы разместить ее в своем ящике.