
-
Contents
-
Table of Contents
-
Troubleshooting
-
Bookmarks
Quick Links
01:03-02
en-GB
Issue 9
11 and 12 litre engines
Work description
©
1 585 592
Scania CV AB 2011, Sweden
www.motodiesel.ir
Related Manuals for Scania DC11
Summary of Contents for Scania DC11
-
Page 1
01:03-02 en-GB Issue 9 11 and 12 litre engines Work description © 1 585 592 Scania CV AB 2011, Sweden www.motodiesel.ir… -
Page 2: Table Of Contents
Renewing a piston ……….91 Checking the connecting rod ……..94 Bearing bush in connecting rod……96 Flywheel Removing the flywheel……….. 98 Fitting the flywheel……….99 Support bearing ………… 101 External ring gear ……….102 01:03-02 © Scania CV AB 2011, Sweden www.motodiesel.ir…
-
Page 3
Oil filter …………..127 Oil cooler ………….. 128 Oil filter unit …………130 Oil pump…………… 135 Turbocharger …………….136 Measuring radial and axial clearance ….138 Checks after breakdown ……..140 Belt transmission …………….141 01:03-02 © Scania CV AB 2011, Sweden www.motodiesel.ir… -
Page 4: General Information
4 Engine serial number, stamp. DC11 DC12 Cylinder diameter 127.0 mm 127.0 mm Piston stroke 140.0 mm 154.0 mm Cubic capacity 10.64 dm 11.7 dm No. of main bearings Firing sequence 1-5-3-6-2-4 1-5-3-6-2-4 01:03-02 © Scania CV AB 2011, Sweden www.motodiesel.ir…
-
Page 5
00:03-09 00:03-09 Total weight without oil and water 1,010-1,030 kg 1,020-1,040 kg Lubrication Engine oil must be applied to all moving parts before fitting unless otherwise stated. 01:03-02 © Scania CV AB 2011, Sweden www.motodiesel.ir… -
Page 6: Removing The Engine
Disconnect The positive and negative cables. Remove The clamps to release electrical cables 13 and 14. Tilt the cab according to instructions, refer to Group 18. Remove The mudguards. 01:03-02 © Scania CV AB 2011, Sweden www.motodiesel.ir…
-
Page 7
Engine assembly 01:03-02 © Scania CV AB 2011, Sweden www.motodiesel.ir… -
Page 8
Detach The flexible hose for the charge air pipe. Lift off The poly-V-belt. Only on vehicles with air conditioning. Detach The air hose for the exhaust brake cylinder. Remove The exhaust pipe. 01:03-02 © Scania CV AB 2011, Sweden www.motodiesel.ir… -
Page 9
Engine assembly 01:03-02 © Scania CV AB 2011, Sweden www.motodiesel.ir… -
Page 10
The hydraulic pump and move it aside. 5 bolts in the flange. Remove The gearbox. Refer to Group 5. 99 318 Note: When removing the gearbox, engine support 99 318 must be used to support the engine. 01:03-02 © Scania CV AB 2011, Sweden www.motodiesel.ir… -
Page 11
Engine assembly 01:03-02 © Scania CV AB 2011, Sweden www.motodiesel.ir… -
Page 12
1 360 442. Fasten lifting chain 98 094 to the rear lifting eyes. 587 308 Fasten ratchet lever hoist 587 308 to the front lifting eye. 01:03-02 © Scania CV AB 2011, Sweden www.motodiesel.ir… -
Page 13
30°, when lifting an engine with the gearbox removed. For engines without the gearbox removed, the maximum angle is 20°. Remove the bolts in the engine brackets and lift out the engine. 01:03-02 © Scania CV AB 2011, Sweden www.motodiesel.ir… -
Page 14: Fitting The Engine
RV= upper, RA= lower. The ground connection. At the compressor. The water heater hose. The compressor feed pipe. The AC compressor. The flexible hose for the charge air pipe. Tightening torque, 8 Nm. 01:03-02 © Scania CV AB 2011, Sweden www.motodiesel.ir…
-
Page 15
Engine assembly 01:03-02 © Scania CV AB 2011, Sweden www.motodiesel.ir… -
Page 16
100 rpm. The compressor air pipe and the crankcase ventilation hose on the induction pipe. The poly-V-belt. Route Cables 13 and 14 to the front of the cab. 01:03-02 © Scania CV AB 2011, Sweden www.motodiesel.ir… -
Page 17
Engine assembly 01:03-02 © Scania CV AB 2011, Sweden www.motodiesel.ir… -
Page 18
Connector 14 (C188) is only fitted on vehicles without a coordinator. All cables with clamps. The plastic cover over the central electric unit. The negative cable on the battery and the battery cover. 01:03-02 © Scania CV AB 2011, Sweden www.motodiesel.ir… -
Page 19
Engine assembly 01:03-02 © Scania CV AB 2011, Sweden www.motodiesel.ir… -
Page 20: Mounting The Engine In An Engine Stand
Required brackets Engines with HPI unit injectors Remove: Pos. Fuel filter Control unit Compressor Starter motor Feed pump Securely bolt the engine to the engine stand as illustrated. Use tool 99 331. 01:03-02 © Scania CV AB 2011, Sweden www.motodiesel.ir…
-
Page 21
Engine assembly 99 331 1 Bolt M10x30 (8 off), Tightening torque 47 Nm. 2 Nut M16 (4 off), Tightening torque 180 Nm. 3 Bolt M16x50 (4 off). 01:03-02 © Scania CV AB 2011, Sweden www.motodiesel.ir… -
Page 22: Measuring The Compression Pressure
There may be damage to the cylinder head valves, cylinder liners or piston rings. The measurement indicates which cylinder(s) should be subject to further testing. 01:03-02 © Scania CV AB 2011, Sweden www.motodiesel.ir…
-
Page 23
3 Remove the rocker cover. 4 Remove the injectors and copper washers. 5 Turn the engine with the starter motor a couple of times to remove any loose soot in the cylinders. 01:03-02 © Scania CV AB 2011, Sweden www.motodiesel.ir… -
Page 24
18 Valve seat internally. 19 O-ring 3 Reassemble the parts. Ensure that O-ring 19 is not damaged. Screw valve seat 18 into place properly so that it forms a seal with gauge rod 4. 01:03-02 © Scania CV AB 2011, Sweden www.motodiesel.ir… -
Page 25
35 Flange screw 10 Valve spring 23 Rocker arm 36 Instruction plate 11 Valve spring collar 24 Rocker arm 37 Emission plate 12 Exhaust valve 25 Adjusting screw 13 Valve spring, outer 26 Nut 01:03-02 © Scania CV AB 2011, Sweden www.motodiesel.ir… -
Page 26: Removing The Cylinder Head
2 Detach the intake manifold and remove the fuel return pipe. 3 Remove the cooling system bleed pipe. 4 Remove the heat shields on the exhaust manifold and remove the exhaust manifold. 01:03-02 © Scania CV AB 2011, Sweden www.motodiesel.ir…
-
Page 27
9 Pull out the injectors with tools 99 079 and 99 074. 10 Remove the cylinder head. Mark the 99 074 cylinder heads if more than one is being removed at the same time. 99 079 01:03-02 © Scania CV AB 2011, Sweden www.motodiesel.ir… -
Page 28
2 Clean the rocker cover and the area around 3 Remove the top part of the rocker cover. 4 Relieve the pressure on the valves by undoing the bolts on the rocker arm shaft alternately. 01:03-02 © Scania CV AB 2011, Sweden www.motodiesel.ir… -
Page 29
11 Detach the intake manifold, fuel manifold, cooling system bleed pipe and the exhaust manifold. 12 Remove the cylinder head. Mark the cylinder heads if more than one is being removed at the same time. 01:03-02 © Scania CV AB 2011, Sweden www.motodiesel.ir… -
Page 30
2 Remove the top part of the rocker cover. 3 Relieve the pressure on the valves by undoing the bolts on the rocker arm shaft alternately. 4 Remove the rocker arm shaft. 01:03-02 © Scania CV AB 2011, Sweden www.motodiesel.ir… -
Page 31
10 Detach the intake manifold, fuel manifold, cooling system bleed pipe and the exhaust manifold. 11 Remove the cylinder head. Mark the cylinder heads if more than one is being removed at the same time. 01:03-02 © Scania CV AB 2011, Sweden www.motodiesel.ir… -
Page 32: Fitting The Cylinder Head
Nut for adjusting screw on rocker arm 35 Nm Bolt for exhaust manifold 59 Nm Bolt for pressure pipe 20 +/-5 Nm Lubricant Lubricant for exhaust pipe bolts and joints 561 205 01:03-02 © Scania CV AB 2011, Sweden www.motodiesel.ir…
-
Page 33
4 Finally, tighten all bolts by 90° 5 Make a mark with a centre punch on the head of the bolt. 5 Fit the lower part of the rocker cover and tighten the bolts to 26 Nm. 01:03-02 © Scania CV AB 2011, Sweden www.motodiesel.ir… -
Page 34
8 Fit the intake manifold and fuel return pipe. 9 Fit the pressure pipes and tighten the bolts using tool 99 310 to 20 +/- 5 Nm. Secure the pressure pipes with clamps. 01:03-02 © Scania CV AB 2011, Sweden www.motodiesel.ir… -
Page 35
1-8 in booklet 03:04-04. 4 Fit the valve bridges. IMPORTANT! Lubricate the valve bridges with engine oil. 5 Refit the upper rocker cover and torque tighten the bolts to 18 Nm. 01:03-02 © Scania CV AB 2011, Sweden www.motodiesel.ir… -
Page 36: Checking And Adjusting The Valve Clearance
3 Exhaust cyl 4 Intake cyl 5 Exhaust cyl 2 Exhaust O Intake valve cyl 3 Intake X Exhaust valve cyl 4 Exhaust cyl 5 Intake cyl 6 Intake and exhaust 01:03-02 © Scania CV AB 2011, Sweden www.motodiesel.ir…
-
Page 37
Push the pinion into the external ring gear and rotate the flywheel using a ratchet handle and a 14 mm socket. Read the marking on the flywheel in the upper window in the flywheel housing. 01:03-02 © Scania CV AB 2011, Sweden www.motodiesel.ir… -
Page 38: Removing Valves
3 Fit the valve springs and the valve spring collar. 4 Press together the springs in a press with tool 99 322 and fit the split collets. Ensure that the split collets are positioned correctly. 01:03-02 © Scania CV AB 2011, Sweden www.motodiesel.ir…
-
Page 39: Checking And Machining Valves
Exhaust valve Head angle 44.5° Minimum dimension A for ground valve 1.8 mm Grind the valves in a valve grinding machine. Minimum dimension A for ground valve Check dimension A on all valves. 01:03-02 © Scania CV AB 2011, Sweden www.motodiesel.ir…
-
Page 40: Renewing The Valve Stem Seal
2 Remove the valve stem seal with a pair of pliers. 3 Fit the valve. 4 Tap in a new valve stem seal carefully using tool 99 323 and a hammer. 99 323 01:03-02 © Scania CV AB 2011, Sweden www.motodiesel.ir…
-
Page 41: Renewing The Valve Seats
1 Remove the valve seat inserts with an expanding sleeve from the kit with standard puller 587 270. Note: Insert, for example, an aluminium sheet between the cylinder head and counterhold to protect against damage. 01:03-02 © Scania CV AB 2011, Sweden www.motodiesel.ir…
-
Page 42
Risk of frost injuries. Oversize valve seat inserts can be fitted if the valve seat insert position has been damaged. The position must then be machined using tool 587 277. 01:03-02 © Scania CV AB 2011, Sweden www.motodiesel.ir… -
Page 43: Machining The Cylinder Head
0.75 — 1.8 mm Oversize valve seat insert: External diameter 46.254 — 46.265 mm Valve seat insert position, diameter 46.200 — 46.216 mm Cooling temperature when fitting valve seat insert approx. -80°C 01:03-02 © Scania CV AB 2011, Sweden www.motodiesel.ir…
-
Page 44
0.66 — 1.8 mm Oversize valve seat insert: External diameter 44.281 — 44.292 mm Valve seat insert position, diameter 44.200 — 44.216 mm Cooling temperature when cooling valve seat insert. approx. -80°C 01:03-02 © Scania CV AB 2011, Sweden www.motodiesel.ir… -
Page 45
2 Select the largest spindle that moves easily in the valve guide. Insert the guide spindle and turn the feed screw to its uppermost position. 3 Select the cutter and fit it. 01:03-02 © Scania CV AB 2011, Sweden www.motodiesel.ir… -
Page 46
1 mm. Centre the tool precisely. 8 Turn on the magnet (position 1). 9 Lock the quick-release catch. Make sure the crank can be turned easily. If not, redo the centering. 01:03-02 © Scania CV AB 2011, Sweden www.motodiesel.ir… -
Page 47
Continue turning while backing off the feed screw. The valve seat cutter is now ready for the next valve seat. The valve seats can also be machined using tools from kit 587 061. 01:03-02 © Scania CV AB 2011, Sweden www.motodiesel.ir… -
Page 48: Renewing The Valve Guides
2 Press in the new valve guides using drift 99 382. Press the guide down as far as the drift allows, i.e. until it makes contact with the spring seat in the cylinder head. 01:03-02 © Scania CV AB 2011, Sweden www.motodiesel.ir…
-
Page 49: Renewing The Injector Sleeves
IMPORTANT! Mark the position of the groove on the cylinder head sleeve according to the illustration. The new sleeve must be in the same position to allow the return and leak-off pipe to be free. 01:03-02 © Scania CV AB 2011, Sweden www.motodiesel.ir…
-
Page 50
561 200 on the sleeve and cylinder head contact surfaces. 5 Drive in the sleeve using drift 99 381. IMPORTANT! Ensure that the groove in the sleeve is located according to the marking. 01:03-02 © Scania CV AB 2011, Sweden www.motodiesel.ir… -
Page 51: Renewing The Unit Injector Sleeves
Tool board 99 396 Guide + pilot tap M30x1.5 D2-B1 99 381 Drift D2-A1 99 381 99 397 Extension piece with threaded D2-C5, C6 99 397 shank 588 222 Pilot tap M30x1.5 01:03-02 © Scania CV AB 2011, Sweden www.motodiesel.ir…
-
Page 52
Unit injector, PDE Guide 99 394 Pilot tap 588 221 Extension piece 99 397 Unit injector, HPI Guide 99 396 Pilot tap 588 222 Extension piece 99 397 01:03-02 © Scania CV AB 2011, Sweden www.motodiesel.ir… -
Page 53
561 200 on the sleeve and cylinder head contact surfaces. 5 Press in the sleeve using the drift and guide. PDE unit injector. HPI unit injector. 99 395 99 394 01:03-02 © Scania CV AB 2011, Sweden www.motodiesel.ir… -
Page 54: Reconditioning
2 Compare the dimensions with those in the table. Minimum permitted Maximum permitted Greatest permitted difference between diameter diameter the largest and smallest diameter on the same main bearing seat. 112.200 mm 112.222 mm 0.016 mm 01:03-02 © Scania CV AB 2011, Sweden www.motodiesel.ir…
-
Page 55: Removing The Cylinder Liners
2 Remove the cylinder liner using puller 99 066. 99 003 3 Remove the sealing ring in the cylinder 99 066 block. Cylinder liner extractor with hydraulic hole cylinder 01:03-02 © Scania CV AB 2011, Sweden www.motodiesel.ir…
-
Page 56: Fitting The Cylinder Liners
584 084, and fit it. 5 Lubricate the lower guide surface on the cylinder liner. 6 Turn the liner with the stamped cylinder number facing forward and carefully tap it down with a rubber mallet. 01:03-02 © Scania CV AB 2011, Sweden www.motodiesel.ir…
-
Page 57
Maximum permitted height difference on one and the 0.02 mm same liner between measurements made at two diametrically opposite points Special tools Number Denomination Illustration Tool board 87 198 Frame gauge 98 075 Dial gauge 01:03-02 © Scania CV AB 2011, Sweden www.motodiesel.ir… -
Page 58
5 Height of cylinder liner D (= A-B) over the cylinder block after machining must be: 0.20-0.30 mm. 6 The difference between two diametrically opposite points on the same cylinder liner may be max. 0.02 mm. 01:03-02 © Scania CV AB 2011, Sweden www.motodiesel.ir… -
Page 59
Example of calculation of cutting depth Height required 0.25 mm Current cylinder liner height 0.14 mm Increase in cylinder height = 0.25-0.14 0.11 mm Shim thickness 0.2 mm Material to be removed = 0.2-0.11 0.09 mm 01:03-02 © Scania CV AB 2011, Sweden www.motodiesel.ir… -
Page 60
2 Fit extension 588 672 on the cutter 587 512. 3 Set the depth of the extension to 206 mm. 01:03-02 © Scania CV AB 2011, Sweden www.motodiesel.ir… -
Page 61
6 Lift the rapid feed ring and move the cutter by hand until it is positioned above the liner seat surface without including the cylinder block walls. 01:03-02 © Scania CV AB 2011, Sweden www.motodiesel.ir… -
Page 62
Release the horizontal feed screw when the cutter has gone over the edge so that feeding stops. IMPORTANT! Never wind the cylinder liner cutter anticlockwise; otherwise the cutter will break. 01:03-02 © Scania CV AB 2011, Sweden www.motodiesel.ir… -
Page 63: Renewing The Rear Crankshaft Seal
Alternatively a self- tapping screw can be screwed into the crankshaft seal so that the crankshaft seal can be pulled out with a slide hammer. 01:03-02 © Scania CV AB 2011, Sweden www.motodiesel.ir…
-
Page 64
Note: When working with 185 mm crankshaft seal: The edge of drift 99 058 will stop against the recess in the flywheel housing. 5 Fit the flywheel according to the section Fitting the flywheel. 01:03-02 © Scania CV AB 2011, Sweden www.motodiesel.ir… -
Page 65: Renewing Camshaft Bearings
Note: Wipe around the edges and the bearing seat surfaces around the old bearings to avoid damaging the contact surfaces when fitting the new bearings. 3 Wipe the bearing seat surfaces clean around the old bearings. 01:03-02 © Scania CV AB 2011, Sweden www.motodiesel.ir…
-
Page 66
Tool 99 373 1 Threaded stem with eight flange nuts 5 Place the flange nuts on the threaded stem, 2 Press drift included in tool 99 373, as illustrated. 3 Flange 01:03-02 © Scania CV AB 2011, Sweden www.motodiesel.ir… -
Page 67
8 Screw the flange securely to the hydraulic cylinder at the rear of the engine with two M10x25 bolts. 9 Screw flange nut 8, from tool 99 373, onto the threaded stem. 01:03-02 © Scania CV AB 2011, Sweden www.motodiesel.ir… -
Page 68
Secure the threaded stem between the press drift and hydraulic cylinder 99 003 by tightening flange nut 8 on the stem. Secure the threaded stem by tightening flange nut 8. 01:03-02 © Scania CV AB 2011, Sweden www.motodiesel.ir… -
Page 69
99 003 and hydraulic pump 99 004. Measure to check that the bearing is correctly positioned. 15 Carefully knock with a plastic hammer to release the old bearing. 01:03-02 © Scania CV AB 2011, Sweden www.motodiesel.ir… -
Page 70
20 Refit the camshaft according to the section Fitting the Camshaft. Then check the Check measurement of bearing number 2. camshaft setting. 01:03-02 © Scania CV AB 2011, Sweden www.motodiesel.ir… -
Page 71
29 Flywheel 8 Cover 19 Clamp 30 External ring gear 9 Gasket 20 Clamp 31 Bolt 10 Flange screw 21 Bolt 32 Ball bearing 11 Cover 22 Timing gear plate 33 Circlip 01:03-02 © Scania CV AB 2011, Sweden www.motodiesel.ir… -
Page 72: Removing The Flywheel Housing
M10: 50 Nm M12: 90 Nm Sealant Sealant for flywheel housing 816 064 Tools Number Denomination Illustration Tool board 588 189 Air-operated spray gun 584 117 Adapter for cartridge 584 118 Nozzle 01:03-02 © Scania CV AB 2011, Sweden www.motodiesel.ir…
-
Page 73
25 minutes of starting to apply the sealant. 3 Fit the flywheel housing against the timing gear plate. Note: The bolts are of various sizes and lengths. Ensure that they are fitted in the correct places. 01:03-02 © Scania CV AB 2011, Sweden www.motodiesel.ir… -
Page 74
Flywheel housing and timing gear plate, up to engine serial number: and including engine serial number: Scania Södertälje 6 123 710 Scania Södertälje 6 123 709 Scania Latin America 3 138 539 Scania Latin America 3 138 538 M10 x 60 01:03-02 ©… -
Page 75
M10 x 60 M10 x 80 M10 x 45 Engines with injection pump, later version Engines with unit injectors M10 x 60 M10 x 80 M10 x 60 Engines with injection pump, earlier version 01:03-02 © Scania CV AB 2011, Sweden www.motodiesel.ir… -
Page 76: Removing The Fan Coupling
1 Fit the fan bearing housing onto the engine. 290 Nm 2 Screw in the screw for the pulley. Tighten the screw to 290 Nm. 3 Fit the oil sump. 4 Fit the belt and fan. 01:03-02 © Scania CV AB 2011, Sweden www.motodiesel.ir…
-
Page 77: Renewing The Bearing In The Fan Coupling
Tool board 87 752 Drift 98 334 Counterholding tube 98 433 Drift 98 622 Press drift 98 647 Support drift Other tools Number Denomination Illustration Tool board 587 318 Puller 587 321 Puller 01:03-02 © Scania CV AB 2011, Sweden www.motodiesel.ir…
-
Page 78
5 Place the extracted bearing inner race on the bearing in the fan housing. Press the bearing 87 752 out of the fan housing. Use drift 87 752 and counterholding tube 98 334. 98 334 01:03-02 © Scania CV AB 2011, Sweden www.motodiesel.ir… -
Page 79
98 433 and counterholding tube 98 334. 98 433 98 334 2 Fit the retaining ring. 3 Press the spindle into the housing. 4 Push the pulley onto the fan coupling spindle. 01:03-02 © Scania CV AB 2011, Sweden www.motodiesel.ir… -
Page 80: Renewing The Front Crankshaft Seal
20 Pipe 5 Pulley 13 Shaft journal 21 Flange screw 6 Shaft seal 14 Flange screw 22 Gasket 7 Flange screw 15 Cover 23 Torsion damper 8 Housing 16 Diaphragm 24 Flange screw 01:03-02 © Scania CV AB 2011, Sweden www.motodiesel.ir…
-
Page 81
2 Remove the fan ring and the fan. Keep the fan upright. Note: The crankshaft seal seals against the pulley. Handle the pulley with care. 3 Remove the poly-V-belt and pulley. Sealing surface for crankshaft seal 01:03-02 © Scania CV AB 2011, Sweden www.motodiesel.ir… -
Page 82
8 Wipe clean the sealing surface on the pulley and fit it immediately. 9 Fit the fan belt. 10 Fit the fan and fan ring. 11 Refit the radiator according to the description in Group 02, Cooling system. 01:03-02 © Scania CV AB 2011, Sweden www.motodiesel.ir… -
Page 83: Troubleshooting
This will result in a large oil carryover from the crankcase ventilation. 01:03-02 © Scania CV AB 2011, Sweden www.motodiesel.ir…
-
Page 84
3 Press forward the rubber seal so that it forms a seal with the plastic pipe. Damaged turbocharger Oil can leak into the charge air system from a damaged turbocharger. Refer to Workshop Manual 01:03-02, Turbocharger, for checking the turbocharger. 01:03-02 © Scania CV AB 2011, Sweden www.motodiesel.ir… -
Page 85: Renewing The Diaphragm
1999 onwards. On vehicles fitted with the spring, the spring does not need to be refitted. 5 Fit the new diaphragm. 6 Fit the cover. 7 Fit the idler roller. 8 Fit the belt. 01:03-02 © Scania CV AB 2011, Sweden www.motodiesel.ir…
-
Page 86
14 Bearing bush 5 O-ring 15 Connecting rod 6 Compression ring 16 Crankshaft 7 Compression ring 17 Bearing shell 8 Oil scraper ring 18 Bearing cap 9 Circlip 19 Flange screw 10 Steel piston 01:03-02 © Scania CV AB 2011, Sweden www.motodiesel.ir… -
Page 87: Removing A Piston
Note: Always check the connecting rod as described in Checking the connecting rod, if the cylinder has seized, been filled with water or had a broken valve. Bent connecting rods must not be straightened. 01:03-02 © Scania CV AB 2011, Sweden www.motodiesel.ir…
-
Page 88
7 Pull up the plate until it abuts against the piston ring pressed into the liner. 8 Drive out the scraper ring with the impact setting tool. 9 Fit the scraper ring in place after the piston has been fitted. 01:03-02 © Scania CV AB 2011, Sweden www.motodiesel.ir… -
Page 89: Fitting A Piston
5 For engines with a scraper ring in the lining: Fit the assembly tool 99 380 in the lining in place of the scraper ring. 01:03-02 © Scania CV AB 2011, Sweden www.motodiesel.ir…
-
Page 90
Damaged nozzles must not be re-aligned; renew them instead. 10 Fit the oil sump. 11 Fit the cylinder head. Tighten the cylinder head bolts according to the section Fitting the cylinder head. 01:03-02 © Scania CV AB 2011, Sweden www.motodiesel.ir… -
Page 91: Renewing A Piston
Turn the rings marked «TOP» with the mark face up. Special tools Number Denomination Illustration Tool board 87 362 Drift 87 362 Other tools Number Denomination Illustration Tool board 587 309 Piston ring expander 01:03-02 © Scania CV AB 2011, Sweden www.motodiesel.ir…
-
Page 92
5 Clean the piston and its rings thoroughly without scratching the sides of the ring grooves. Clean the oil holes in the piston using a suitable drill bit. 01:03-02 © Scania CV AB 2011, Sweden www.motodiesel.ir… -
Page 93
Short end of the connecting rod on left hand side. 11 Insert the gudgeon pin using tool 87 362 and fit the second retaining ring for the gudgeon pin. 01:03-02 © Scania CV AB 2011, Sweden www.motodiesel.ir… -
Page 94: Checking The Connecting Rod
2 Mount the connecting rod in the tool using the expander and fit the corresponding gudgeon pin in the gudgeon pin bush. 3 Then apply the indicator to the gudgeon pin. 01:03-02 © Scania CV AB 2011, Sweden www.motodiesel.ir…
-
Page 95
Turn the connecting rod around and measure the corresponding distance. The deviation must not be greater than 0.6 mm. Checking whether the connecting rod is bent in an S-shape 01:03-02 © Scania CV AB 2011, Sweden www.motodiesel.ir… -
Page 96: Bearing Bush In Connecting Rod
The tool comprises three parts: 1. Pressplate with guide pin 2. Press drift 3. Supports There are different supports, depending on the engine type. The support marked D is for the DC11 and DSC/DC12. 01:03-02 © Scania CV AB 2011, Sweden www.motodiesel.ir…
-
Page 97
After pressing in a new bearing bush, it must be finish-turned. This requires special equipment. Measurements as illustrated. 0.007 0.008 0.008 A Diameter, d = 54.030-54.043 mm. Surface quality = 0.6 Ra. 01:03-02 © Scania CV AB 2011, Sweden www.motodiesel.ir… -
Page 98: Removing The Flywheel
1 Remove the rotational speed sensor(s) in the flywheel housing. 2 Remove the flywheel bolts. 14″ flywheel: Also remove the washers. 3 Pull off the flywheel from the crankshaft 87 368 using puller bolts 87 368. 01:03-02 © Scania CV AB 2011, Sweden www.motodiesel.ir…
-
Page 99: Fitting The Flywheel
Guide pins 99 324 99 321 Tool for locking the flywheel on 99 321 engines with injection pump. 99 411 Tool for locking the flywheel on 99 411 engines with unit injectors. 01:03-02 © Scania CV AB 2011, Sweden www.motodiesel.ir…
-
Page 100
99 411 for engines with unit injectors. Locking the flywheel on engines with unit injectors. 4 Torque tighten the bolts alternately to 130 Nm and then a further 90°. 5 Refit the rotational speed sensor(s). 01:03-02 © Scania CV AB 2011, Sweden www.motodiesel.ir… -
Page 101: Support Bearing
2 Knock out the support bearing from the flywheel using drift 99 250. 3 Fit the inner retaining ring and fit the new support bearing with drift 99 250. 4 Fit the outer retaining ring. 01:03-02 © Scania CV AB 2011, Sweden www.motodiesel.ir…
-
Page 102: External Ring Gear
If necessary, tap down the external ring gear using a plastic hammer. 5 The external ring gear must not be cooled down rapidly but be left to cool in the open air. 01:03-02 © Scania CV AB 2011, Sweden www.motodiesel.ir…
-
Page 103: Removing The Crankshaft
5 Remove the main bearing caps and main bearings. Note: The main bearings and main bearing caps are marked and must be refitted in the same place. 6 Lift out the crankshaft. 01:03-02 © Scania CV AB 2011, Sweden www.motodiesel.ir…
-
Page 104: Fitting The Crankshaft
4 Lubricate the bolt thread and the surface of the main bearing cap where the bolt is tightened. Scania engine oil can be used. Tighten the bearing cap bolts. 5 Fit the pistons with connecting rods according to the section Fitting the connecting rod and piston.
-
Page 105: Machining Crankshafts
Check the fillet radius using a template as illustrated. 3 After grinding the bearing journals, round off and polish the oil hole openings on the bearing surfaces. 01:03-02 © Scania CV AB 2011, Sweden www.motodiesel.ir…
-
Page 106
0.051-0.114 mm Thrust washers Standard, thickness 3.370-3.430 mm Oversize 1, thickness 3.450-3.510 mm Oversize 2, thickness 3.500-3.560 mm Oversize 3, thickness 3.630-3.690 mm Oversize 4, thickness 3.880-3.940 mm Axial clearance 0.138-0.380 mm 01:03-02 © Scania CV AB 2011, Sweden www.motodiesel.ir… -
Page 107
Crankshaft 01:03-02 © Scania CV AB 2011, Sweden www.motodiesel.ir… -
Page 108
Timing gear Timing gear Exploded view A = Parts for engines with an injection pump. 01:03-02 © Scania CV AB 2011, Sweden www.motodiesel.ir… -
Page 109
13 Intermediate gear 31 Slide ring 14 Ball bearing 32 Retaining ring 15 Retaining ring 33 Pushrod 16 Spacing sleeve 34 Spacing sleeve 17 Bolt 35 Injection pump gear 18 Shaft 36 Roller tappet 01:03-02 © Scania CV AB 2011, Sweden www.motodiesel.ir… -
Page 110: Removing The Intermediate Gear
1 Turn the crankshaft so that cylinder number 1 is close to TDC. Use tool 99 309 or 99 109 and a ratchet handle at the flywheel starter gear. 99 309 01:03-02 © Scania CV AB 2011, Sweden www.motodiesel.ir…
-
Page 111
587 526 99 074 IMPORTANT! After removing the intermediate gear, neither the camshaft nor the crankshaft must be rotated. This may cause pistons and valves to collide and be damaged. 01:03-02 © Scania CV AB 2011, Sweden www.motodiesel.ir… -
Page 112: Fitting The Intermediate Gear
50 Nm + 60 to 50 Nm + 60°. 5 Fit the flywheel housing according to the section Fitting the flywheel housing. 6 Fit the flywheel according to the section Fitting the flywheel. 01:03-02 © Scania CV AB 2011, Sweden www.motodiesel.ir…
-
Page 113: Renewing The Bearing In The Intermediate Gear For The Compressor
87 348. Do not press on the outer race. 5 Press the ring on the shaft journal. 6 Press the bearing packet into the intermediate gear. Use tool 87 592. 7 Fit the retaining ring. 01:03-02 © Scania CV AB 2011, Sweden www.motodiesel.ir…
-
Page 114: Renewing The Bearing In The Intermediate Gear For The Camshaft
5 Press the bearing and shaft journal into the intermediate gear using drift 87 592. 6 Fit the retaining ring. 7 Press the spacing ring onto the shaft journal. Ensure that the shaft journal is on the press table. 01:03-02 © Scania CV AB 2011, Sweden www.motodiesel.ir…
-
Page 115: Removing The Camshaft Gear
4 Remove the intermediate gear. IMPORTANT! After removing the intermediate gear, neither the camshaft nor the crankshaft must be rotated. This may cause pistons and valves to collide and be damaged. 5 Remove the camshaft gear. 01:03-02 © Scania CV AB 2011, Sweden www.motodiesel.ir…
-
Page 116: Fitting The Camshaft Gear
2 Fit the camshaft gear and tighten the bolts to 63 Nm. 3 Fit the flywheel housing according to the section Fitting the flywheel housing. 4 Fit the flywheel according to the section Fitting the flywheel. 01:03-02 © Scania CV AB 2011, Sweden www.motodiesel.ir…
-
Page 117: Removing The Crankshaft Gear
4 Remove the intermediate gear. IMPORTANT! After removing the intermediate gear, neither the camshaft nor the crankshaft must be rotated. This may cause pistons and valves to collide and be damaged. 5 Remove the crankshaft gear. 01:03-02 © Scania CV AB 2011, Sweden www.motodiesel.ir…
-
Page 118: Fitting The Crankshaft Gear
2 Fit the intermediate gear, refer to Fitting the intermediate gear, steps 1-2. 3 Fit the flywheel housing according to the section Fitting the flywheel housing. 4 Fit the flywheel according to the section Fitting the flywheel. 01:03-02 © Scania CV AB 2011, Sweden www.motodiesel.ir…
-
Page 119: Removing The Camshaft
8 Remove the roller tappets. Note: Mark the roller tappets because they must be refitted in the same positions. 9 Pull out the camshaft backwards. Take care not to damage the cams and bearings. 01:03-02 © Scania CV AB 2011, Sweden www.motodiesel.ir…
-
Page 120: Fitting The Camshaft
Sealant Sealant for flywheel housing 816 064 Axial clearance Permitted axial play 0.05-0.35 mm Tools Number Denomination Illustration Tool board 588 189 Air-operated gun 584 117 Adapter for cartridge 584 118 Nozzle 01:03-02 © Scania CV AB 2011, Sweden www.motodiesel.ir…
-
Page 121
• camshaft using a dial gauge. The axial clearance should be between 0.05-0.35 mm. If the play is outside the permitted range, • renew the thrust washer. Remove the camshaft gear. • 01:03-02 © Scania CV AB 2011, Sweden www.motodiesel.ir… -
Page 122
IMPORTANT! Assembly must be completed within 25 minutes of starting to apply the sealant. 7 Fit the timing gear plate onto the cylinder block. Tighten the bolts to 63 Nm. 01:03-02 © Scania CV AB 2011, Sweden www.motodiesel.ir… -
Page 123: Checking The Camshaft Setting
TDC again. 6 Read off both dial gauges and compare with the values given below: Intake valve lifting height 0.37-1.47 Exhaust valve lifting height 0.16-1.16 01:03-02 © Scania CV AB 2011, Sweden www.motodiesel.ir…
-
Page 124: General
Oil nozzle for piston cooling, banjo screw 23 Nm Plug for relief valve in oil filter unit 40 Nm The magnetic plug in the oil sump must be lubricated with oil before fitting. 01:03-02 © Scania CV AB 2011, Sweden www.motodiesel.ir…
-
Page 125: Measuring The Oil Pressure
Version 1, early model 1 Disconnect the connector from the oil pressure sensor. 2 Remove the oil pressure sensor and fit the M14x1.5 measuring equipment. Use the union and adapter according to the illustrations. 01:03-02 © Scania CV AB 2011, Sweden www.motodiesel.ir…
-
Page 126
Version 2, later model 1 Remove the oil pressure sensor from the oil M14x1.5 filter. 99 412 2 Fit the measuring equipment with the union and adapters as illustrated. 3 Fit the oil pressure sensor. 01:03-02 © Scania CV AB 2011, Sweden www.motodiesel.ir… -
Page 127: Oil Filter
Number Denomination Illustration Tool board 587 025 Filter tongs Only use original Scania filters and renew the oil filter according to our inspection instructions. 587 025 Use filter tongs 587 025 when removing the oil filter. IMPORTANT! When renewing the oil filter,…
-
Page 128: Oil Cooler
6 Core plug 11 Spring 2 O-ring 7 Cover 12 Plug 3 O-ring 8 Gasket 13 Gasket 4 Flange screw 9 Bolt 14 Gasket 5 Oil cooler cover 10 Piston 15 Flange screw 01:03-02 © Scania CV AB 2011, Sweden www.motodiesel.ir…
-
Page 129
4 Renew the O-rings, 4 off. 5 Fit the oil cooler insert and bolt it into place in the cover to 26 Nm. 6 Bolt the side cover into place in the cylinder block. 01:03-02 © Scania CV AB 2011, Sweden www.motodiesel.ir… -
Page 130: Oil Filter Unit
Permitted thickness of deposits on walls of cover 26 mm Tightening torques Lock nut for oil cleaner housing cover 15 Nm Nut for rotor cover Tightened by hand Rotor shaft 27 Nm Locking compound Locking compound 561 200 01:03-02 © Scania CV AB 2011, Sweden www.motodiesel.ir…
-
Page 131
7 Flange screw 18 Nozzle 29 Gasket 8 Oil filter 19 Strainer 30 Flange screw 9 Housing 20 Rotor cover 31 Oil pressure sensor 10 Plug 21 Nut 32 Gasket 11 Piston 22 O-ring 01:03-02 © Scania CV AB 2011, Sweden www.motodiesel.ir… -
Page 132
IMPORTANT! The rotor must not be put in a vice. Never strike the rotor cover. This may cause damage resulting in imbalance. 01:03-02 © Scania CV AB 2011, Sweden www.motodiesel.ir… -
Page 133
10 Check that the bearings are undamaged. 11 Position the O-ring in the cover. Renew the O-ring if it is at all damaged. 12 Assemble the parts and tighten the rotor nut by hand. 01:03-02 © Scania CV AB 2011, Sweden www.motodiesel.ir… -
Page 134
14 Refit the rotor and rotate it by hand to make sure it rotates easily. 15 Check the O-ring on the cover of the oil cleaner housing and fit it. Torque tighten the lock nut to 15 Nm. 01:03-02 © Scania CV AB 2011, Sweden www.motodiesel.ir… -
Page 135: Oil Pump
8 Flange screw 4 Flange screw 9 Pipe 5 Suction pipe 10 Sealing ring In the event of leakage or fault with the oil pump, it must not be overhauled but renewed completely. 01:03-02 © Scania CV AB 2011, Sweden www.motodiesel.ir…
-
Page 136
If the lubrication oil return pipe from the turbocharger is damaged, the pressure of the lubricating oil may cause oil to leak out through the seals. 01:03-02 © Scania CV AB 2011, Sweden www.motodiesel.ir… -
Page 137
It is then often broken during operation causing the turbocharger to break down completely, which also can damage the engine. Measuring the charging pressure Measure the charging pressure using Scania Diagnos 2. SCANIA Diagnos Tools for Scania Diagnos Cleaning Low charging pressure could be caused by a dirty compressor impeller. -
Page 138: Measuring Radial And Axial Clearance
When the turbocharger seems to be functioning poorly or noisily, measuring the charging pressure or radial and axial clearance can indicate whether the turbocharger is defective. 01:03-02 © Scania CV AB 2011, Sweden www.motodiesel.ir…
-
Page 139
2 Press the shaft longitudinally to and fro and take a reading at the end positions. The difference between the readings is the axial clearance. 3 Repeat the test three times. 01:03-02 © Scania CV AB 2011, Sweden www.motodiesel.ir… -
Page 140: Checks After Breakdown
5 Check that the oil pressure pipe to the turbocharger is not blocked, deformed or leaking under pressure. 6 Renew the oil filter and clean the lubrication system. 01:03-02 © Scania CV AB 2011, Sweden www.motodiesel.ir…
-
Page 141
4 Idler roller 5 Alternator 6 Crankshaft Engine with air conditioning and two idler rollers 1 Automatic belt tensioner 2 Coolant pump 3 Idler roller 4 AC compressor 5 Alternator 6 Crankshaft 01:03-02 © Scania CV AB 2011, Sweden www.motodiesel.ir… -
Page 142
1 Automatic belt tensioner 2 Coolant pump 3 Alternator 4 Crankshaft Engine without air conditioning with an idler roller 1 Automatic belt tensioner 2 Coolant pump 3 Idler roller 4 Alternator 5 Crankshaft 01:03-02 © Scania CV AB 2011, Sweden www.motodiesel.ir… -
Page 143
Belt transmission Belt transmission, industrial and marine engines 1 Pulley on torsion damper. 2 Belt tensioner. 3 Coolant pump. 4 Fan pulley 5 Alternator. 6 Poly-V-belt. 7 Carrying roller. 01:03-02 © Scania CV AB 2011, Sweden www.motodiesel.ir…
This manual is also suitable for:
Dc12
Каталог руководств по обслуживанию и ремонту автомобилей самых популярных марок
![]()
![]()
![]()
![]()
![]()
![]()
![]()
![]()
![]()
![]()
![]()
![]()
![]()
![]()
![]()
![]()
![]()
![]()
![]()
![]()
![]()
![]()
![]()
![]()
![]()
![]()
![]()
![]()
© 2022 manuals4car.ru Все права защищены.
При упоминании использовании материалов активная ссылка на manuals4car.ru обязательна.
7,43 Мб
Руководство по обслуживанию двигателей Scania DS14, DSC14
Формат: pdf
-
Год:
1988
-
Страниц:
83
-
Язык:
русский
-
Размер:
7,43 Мб
-
Категории:
Двигатели Scania
9,83 Мб
Руководство по обслуживанию двигателей Scania DN11Y, DS11
Формат: pdf
-
Год:
2000
-
Страниц:
67
-
Язык:
испанский
-
Размер:
9,83 Мб
-
Категории:
Двигатели Scania
1,81 Мб
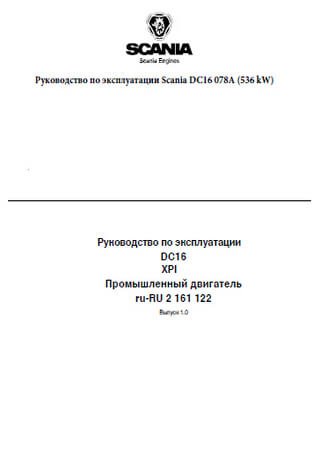
Руководство по эксплуатации двигателя Scania DC16 078A
Формат: pdf
-
Год:
2012
-
Страниц:
59
-
Язык:
русский
-
Размер:
1,81 Мб
-
Категории:
Двигатели Scania
2,92 Мб
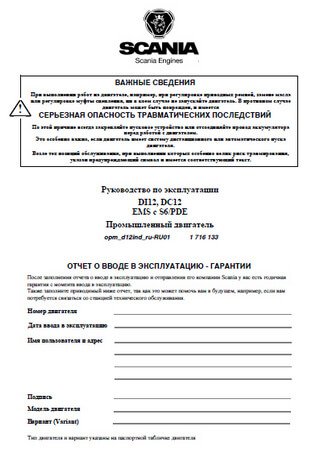
Руководство по эксплуатации двигателей Scania DC12, DI12
Формат: pdf
-
Год:
2009
-
Страниц:
65
-
Язык:
английский, русский
-
Размер:
2,92 Мб
-
Категории:
Двигатели Scania
1,92 Мб
Руководство по эксплуатации двигателя Scania DC9
Формат: pdf
-
Год:
2012
-
Страниц:
71
-
Язык:
русский
-
Размер:
1,92 Мб
-
Категории:
Двигатели Scania

0,7 Мб
Руководство оператора двигателей Scania D11, DC11, DI11
Формат: pdf
-
Год:
1997
-
Страниц:
44
-
Язык:
английский
-
Размер:
0,7 Мб
-
Категории:
Двигатели Scania
11,2 Мб
Руководство оператора двигателей Scania DS9, DSC9
Формат: pdf
-
Год:
1994
-
Страниц:
54
-
Язык:
английский
-
Размер:
11,2 Мб
-
Категории:
Двигатели Scania
1 Мб
Руководство оператора двигателей Scania D14, DC14, DI14
Формат: pdf
-
Год:
2001
-
Страниц:
50
-
Язык:
английский
-
Размер:
1 Мб
-
Категории:
Двигатели Scania
555 Мб
Руководство по техническому обслуживанию и ремонту Скания
Формат: djvu, pdf, doc
-
Год:
1999
-
Страниц:
930
-
Язык:
русский, английский
-
Размер:
555 Мб
-
Категории:
Двигатели Scania
В издании имеются детальные описания особенностей техобслуживания и устранения неполадок автомобилей Scania, завоевавших популярность у водителей, благодаря не раз подтвержденным превосходным характеристикам.
-
Автор темы
POIKO
- На орбите

- Всего сообщений: 766
- Зарегистрирован: 29.12.2013
- Авто: Scania
- Откуда: Москва
- Возраст: 49

Мануалы по Scania
Здесь размещаем все печатную информацию по обслуживанию и ремонту.
-
Автор темы
POIKO
- На орбите
- Всего сообщений: 766
- Зарегистрирован: 29.12.2013
- Авто: Scania
- Откуда: Москва
- Возраст: 49
Re: МАНУАЛЫ
Сообщение
POIKO » 19 фев 2016, 20:52
Пневмоподвеска
-
- Пневмоподвеска.pdf
- (1.03 МБ) 3658 скачиваний
-
Автор темы
POIKO
- На орбите
- Всего сообщений: 766
- Зарегистрирован: 29.12.2013
- Авто: Scania
- Откуда: Москва
- Возраст: 49
Re: МАНУАЛЫ
Сообщение
POIKO » 20 фев 2016, 09:01
Рулевая колонка
-
- Рулевая колонка.doc
- (493.5 КБ) 1107 скачиваний
-
Автор темы
POIKO
- На орбите
- Всего сообщений: 766
- Зарегистрирован: 29.12.2013
- Авто: Scania
- Откуда: Москва
- Возраст: 49
Re: МАНУАЛЫ
Сообщение
POIKO » 20 фев 2016, 09:03
Шаровой шарнир
-
- Шаровой шарнир.doc
- (55 КБ) 694 скачивания
-
truck78
- Третья ступень
- Всего сообщений: 462
- Зарегистрирован: 19.04.2012
- Авто: Скании 3-4-R серии
- Откуда: Тула

Re: МАНУАЛЫ
Сообщение
truck78 » 22 фев 2016, 00:13
Диагностика ABC Wabco 3 серия
-
- 10-92 01 27.pdf
- (5.11 МБ) 4271 скачивание
-
truck78
- Третья ступень
- Всего сообщений: 462
- Зарегистрирован: 19.04.2012
- Авто: Скании 3-4-R серии
- Откуда: Тула
Re: МАНУАЛЫ
Сообщение
truck78 » 22 фев 2016, 00:15
Ретарда и диагностика 3 серия
-
- 10-93 12 27.pdf
- (844.29 КБ) 1978 скачиваний
-
truck78
- Третья ступень
- Всего сообщений: 462
- Зарегистрирован: 19.04.2012
- Авто: Скании 3-4-R серии
- Откуда: Тула
Re: МАНУАЛЫ
Сообщение
truck78 » 22 фев 2016, 00:16
Горный тормоз 3 серия
-
- 10-94 01 28.pdf
- (126.6 КБ) 718 скачиваний
-
truck78
- Третья ступень
- Всего сообщений: 462
- Зарегистрирован: 19.04.2012
- Авто: Скании 3-4-R серии
- Откуда: Тула
Re: МАНУАЛЫ
Сообщение
truck78 » 22 фев 2016, 00:22
пневматическая подвеска и её основные узлы 3 серия
-
- 12-87 01 30.pdf
- (2.09 МБ) 4667 скачиваний
-
Автор темы
POIKO
- На орбите
- Всего сообщений: 766
- Зарегистрирован: 29.12.2013
- Авто: Scania
- Откуда: Москва
- Возраст: 49
Re: МАНУАЛЫ
Сообщение
POIKO » 24 фев 2016, 07:38
Редуктор R780 ремонт
-
- R780 ремонт.pdf
- (2.87 МБ) 3965 скачиваний
-
truck78
- Третья ступень
- Всего сообщений: 462
- Зарегистрирован: 19.04.2012
- Авто: Скании 3-4-R серии
- Откуда: Тула
Re: МАНУАЛЫ
Сообщение
truck78 » 25 фев 2016, 07:16
Система вентиляции картера
-
- WSM_0000731_13.pdf
- (1.94 МБ) 4272 скачивания
-
Автор темы
POIKO
- На орбите
- Всего сообщений: 766
- Зарегистрирован: 29.12.2013
- Авто: Scania
- Откуда: Москва
- Возраст: 49
Re: МАНУАЛЫ
Сообщение
POIKO » 25 фев 2016, 15:10
Регулировка клапанов PDE и HPI
-
- Регулировк клапанов.doc
- (204.5 КБ) 2367 скачиваний
-
truck78
- Третья ступень
- Всего сообщений: 462
- Зарегистрирован: 19.04.2012
- Авто: Скании 3-4-R серии
- Откуда: Тула
Re: МАНУАЛЫ
Сообщение
truck78 » 26 фев 2016, 20:59
Онлайн каталог, также как в Multi забиваешь свои последние 7 цифр вин и смотришь каталожный номер http://www.scan-catalog.ru/
-
Автор темы
POIKO
- На орбите
- Всего сообщений: 766
- Зарегистрирован: 29.12.2013
- Авто: Scania
- Откуда: Москва
- Возраст: 49
Re: МАНУАЛЫ
Сообщение
POIKO » 28 фев 2016, 20:25
Моменты затяжки
-
- Моменты затяжки.doc
- (1.31 МБ) 9658 скачиваний
-
Автор темы
POIKO
- На орбите
- Всего сообщений: 766
- Зарегистрирован: 29.12.2013
- Авто: Scania
- Откуда: Москва
- Возраст: 49
Re: МАНУАЛЫ
Сообщение
POIKO » 03 мар 2016, 18:17
Прокачка ГУРа
-
- Прокачка ГУРа.doc
- (57.5 КБ) 858 скачиваний
-
truck78
- Третья ступень
- Всего сообщений: 462
- Зарегистрирован: 19.04.2012
- Авто: Скании 3-4-R серии
- Откуда: Тула
Re: МАНУАЛЫ
Сообщение
truck78 » 07 мар 2016, 00:08
Пневмоподвеска 3 серия
-
- 12-91 11 27.pdf
- (3.22 МБ) 1547 скачиваний
-
truck78
- Третья ступень
- Всего сообщений: 462
- Зарегистрирован: 19.04.2012
- Авто: Скании 3-4-R серии
- Откуда: Тула
-
vserv
- Зажигание
- Всего сообщений: 36
- Зарегистрирован: 06.02.2016

Re: МАНУАЛЫ
Сообщение
vserv » 10 мар 2016, 09:18
Технические жидкости и заправочные объёмы
-
- 00-45-01.pdf
- Информация по разборке. Серия 4
- (4.5 МБ) 2436 скачиваний
-
- 00-03-09.pdf
- Топливо, масла, пластичные жидкости и смазки
- (412.7 КБ) 7045 скачиваний
-

alvos
- Третья ступень
- Всего сообщений: 340
- Зарегистрирован: 29.01.2013
- Авто: scania R124 GA4X2NA 420 vin 4477252
- Откуда: Ирк. обл. Тайшет
- Возраст: 44

Re: МАНУАЛЫ
Сообщение
alvos » 11 мар 2016, 17:22
по эбершпехеру и предохранители 4 серия
-
- ебер1.pdf
- еще по эберу 1 компакт
- (6.62 МБ) 764 скачивания
-
- Предохранители.pdf
- предохранители 4 серия
- (46.08 КБ) 1197 скачиваний
-
vserv
- Зажигание
- Всего сообщений: 36
- Зарегистрирован: 06.02.2016
-
Автор темы
POIKO
- На орбите
- Всего сообщений: 766
- Зарегистрирован: 29.12.2013
- Авто: Scania
- Откуда: Москва
- Возраст: 49
Re: МАНУАЛЫ
Сообщение
POIKO » 18 мар 2016, 00:08
ПГУ Сцепления
-
- ПГУ.pdf
- (1.42 МБ) 4964 скачивания
-
Автор темы
POIKO
- На орбите
- Всего сообщений: 766
- Зарегистрирован: 29.12.2013
- Авто: Scania
- Откуда: Москва
- Возраст: 49
Re: МАНУАЛЫ
Сообщение
POIKO » 22 мар 2016, 16:17
Ретардер
-
- ретардер.pdf
- (2.25 МБ) 2757 скачиваний
-

artas
- Отрыв
- Всего сообщений: 62
- Зарегистрирован: 01.05.2012
- Авто: SCANIA R124
- Возраст: 57


Re: МАНУАЛЫ
Сообщение
artas » 24 мар 2016, 22:11
Клапан огр.давления гур
гур
-
artas
- Отрыв
- Всего сообщений: 62
- Зарегистрирован: 01.05.2012
- Авто: SCANIA R124
- Возраст: 57
Re: МАНУАЛЫ
Сообщение
artas » 24 мар 2016, 22:44
Шум в гидроусилителе рулевого привода
-
- TID_0001718_13.pdf
- (305.25 КБ) 845 скачиваний
-
alvos
- Третья ступень
- Всего сообщений: 340
- Зарегистрирован: 29.01.2013
- Авто: scania R124 GA4X2NA 420 vin 4477252
- Откуда: Ирк. обл. Тайшет
- Возраст: 44
Re: МАНУАЛЫ
Сообщение
alvos » 01 апр 2016, 08:32
есть инфа по седлам и лапам JOST но сюда вставить не могу «файл слишком большой» кому надо скину на мыло
-
sereschka
- Полёт нормальный
- Всего сообщений: 1770
- Зарегистрирован: 02.06.2012
- Авто: ремонт SCANIA MAN VOVLVO RENO
- Откуда: МУРМАНСК
- Возраст: 43

Re: МАНУАЛЫ
Сообщение
sereschka » 17 апр 2016, 00:11
всвязи с глобальной тахографикацией , думаю , будет кому то в помощь по монтажу
Установка на 4ку и переделка 5ой с аналоговым…4ой.
-
- установка цифрового тахографа SCANIA.pdf
- (1.05 МБ) 1310 скачиваний
-
truck78
- Третья ступень
- Всего сообщений: 462
- Зарегистрирован: 19.04.2012
- Авто: Скании 3-4-R серии
- Откуда: Тула
Re: Мануалы по Scania
Сообщение
truck78 » 10 июл 2016, 00:25
Топливная система 3 серия порядок работ
-
- 3-85 12 29.pdf
- (1.85 МБ) 1371 скачивание
-
truck78
- Третья ступень
- Всего сообщений: 462
- Зарегистрирован: 19.04.2012
- Авто: Скании 3-4-R серии
- Откуда: Тула
Re: Мануалы по Scania
Сообщение
truck78 » 10 июл 2016, 00:50
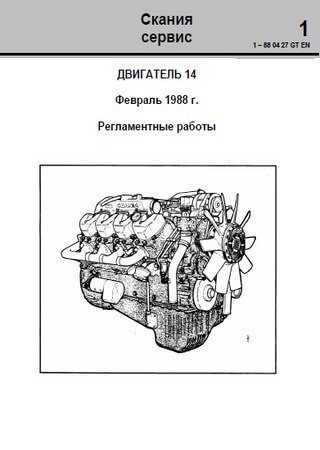
14 литровый двигатель, ремонт порядок работ
-
- 1-88 04 27.pdf
- (7.44 МБ) 3228 скачиваний
-
truck78
- Третья ступень
- Всего сообщений: 462
- Зарегистрирован: 19.04.2012
- Авто: Скании 3-4-R серии
- Откуда: Тула
Re: Мануалы по Scania
Сообщение
truck78 » 10 июл 2016, 00:54
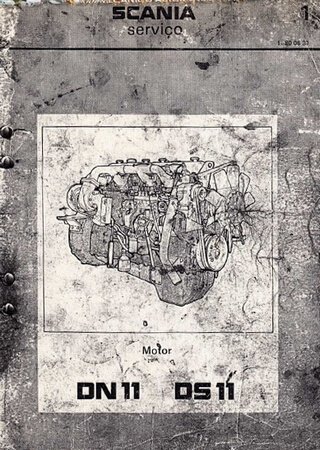
11 литровый двигатель ремонт 3 серия
-
- 1-85 05 27.pdf
- (2.69 МБ) 5274 скачивания
-

alsurikov
- Новичок
- Всего сообщений: 3
- Зарегистрирован: 11.08.2015
- Авто: скания 124 Т

Re: Мануалы по Scania
Сообщение
alsurikov » 16 окт 2016, 21:51
alvos: есть инфа по седлам и лапам JOST но сюда вставить не могу «файл слишком большой» кому надо скину на мыло
Здравствуйте, если можно мне [email protected]
-
Гость
Re: Мануалы по Scania
Сообщение
Гость » 18 фев 2017, 15:04
Добрый день.
Помогите найти мнуал для двигателя DC 11/03 с системой впрыска PDE.
Зарание всем благодарен.
-
Гость
Re: Мануалы по Scania
Сообщение
Гость » 31 мар 2017, 07:27
https://cloud.mail.
ru/public/4c4jHrLyvJ6f/%D0%A1%D0%BA%D0%B0%D0%BD%D0%B8%D1%8F%20%D1%80%D1%83%D0%BA%D0%BE%D0%B2%D0%BE%D0%B4%D1%81%D1%82%D0%B2%D0%BE%20%D0%BF%D0%BE%20%D0%A2%D0%9E%20%D0%B8%20%D1%80%D0%B5%D0%BC%D0%BE%D0%BD%D1%82%D1%83
Пробел уберешь и увидишь мануалы на все
 7621 просмотр")
-
Гость
Re: Мануалы по Scania
Сообщение
Гость » 21 дек 2017, 20:55
Подскажите пожалуйста не запускается автономная на скании
-
hehe
- Новичок
- Всего сообщений: 5
- Зарегистрирован: 11.08.2021
- Авто: scania, daf, isuzu, volvo
- Откуда: saint — petersburg
Re: Мануалы по Scania
Сообщение
hehe » 11 авг 2021, 12:41
пароль какой на архивы?
-
Bumper
Re: Мануалы по Scania
Сообщение
Bumper » 04 мар 2022, 09:48
Подскажите, пожалуйста, на сканию 144 G Самосвал 8×4 нужна распечатка назначения предохранителей и реле в блоке в кабине
-
- 9 Ответы
- 11038 Просмотры
-
Последнее сообщение Николай 96
20 июл 2015, 05:16
-
- 1 Ответы
- 6318 Просмотры
-
Последнее сообщение nadezhda777
04 дек 2016, 18:29
-
- 0 Ответы
- 5805 Просмотры
-
Последнее сообщение Кардан
16 апр 2013, 16:33
-
- 0 Ответы
- 4961 Просмотры
-
Последнее сообщение Кардан
16 апр 2013, 16:45
-
- 36 Ответы
- 30939 Просмотры
-
Последнее сообщение Michael88
05 окт 2018, 17:18

СКАНИЯ
Параметры скорости вращения двигателей
транспортных средств
Тип двигателя
Малые обороты
холостого хода
Высокие обороты
холостого хода
Максимальная скорость
вращения при полной
нагрузке
DN8 01
450-500*
2700
2400
DS8 01
-“-
2650
2400
DS8 05
-“-
2750
2400
DS8 06
-“-
2750
2400
DSI8 01
-“-
2800
2400
DS9 01
-“-
2600
2200
DS9 03
-“-
2350
2000
DSC9 01
-“-
2600
2200
*Для транспортных средств с автоматической коробкой передач: 550-600 об/мин
Скания
сервис
3
3 – 85 07 29 GT / I

СКАНИЯ
2
SCANIA service
3-85 07 29 GT/ I
Тип двигателя
Малые обороты
холостого хода
Высокие обороты
холостого хода
Максимальная
скорость вращения
при полной нагрузке
DN11 01
450-500*
2550
2200
DN11 04
-“-
2500
2200
DN11 06/07
-“-
2250
2000
DS11 01
-“-
2500
2200
DS11 02
-“-
2500
2200
DS11 04
-“-
2400
2200
DS11 11
-“-
2450
2100
DS11 14
-“-
2300
2000
DS11 15
-“-
2300
2000
DS11 18
-“-
2375
2100
DS11 19
-“-
2025
1800
DS11 20
-“-
2400
2200
DS11 25
-“-
2500
2200
DS11 26
-“-
2500
2200
DS11 28
-“-
2550
2200
DS11 33
-“-
2500
2200
DSc11 01
-“-
2350
2000
DSC11 02
-“-
2400
2000
DS14 01
-“-
2350
2000
DS14 02
-“-
2500
2200
DS14 06
-“-
2300
2000
DS14 07
-“-
2375
2100
DSC14 01
-“-
2275
1900
DSC14 02
-“-
2250
1900
*
Для транспортных средств с автоматической коробкой передач: 550-600 об/мин

СКАНИЯ
1
ТОПЛИВНАЯ СИСТЕМА
Порядок работ
Содержание
Обслуживание топливной системы …………………. 2
Выпуск воздуха из системы ……………………………. 2
Фильтр грубой очистки …………………………………… 3
Топливные фильтры………………………………………. 4
Нагнетательный патрубок ………………………………. 5
Нагнетательный насос …………………………………… 6
Перепускной клапан ………………………………………. 6
Ограничитель выхлопа…………………………………… 6
Проверка и регулировка ограничителя выхлопа . 7
Диски муфты насоса………………………………………. 8
Нагнетательный насос одинарного действия…… 9
Нагнетательный насос двойного действия…….. 11
Демонтаж форсунок……………………………………… 13
Восстановление форсунок ……………………………. 14
Монтаж форсунок ………………………………………… 19
Испытание и восстановление насосов
для впрыска …………………………………………………. 21
Параметры настройки мощности двигателя
и насоса ………………………………………………………. 21
Демонтаж насоса для впрыска………………………. 22
Монтаж насоса для впрыска………………………….. 22
Проверка синхронизации впрыска …………………. 25
Проверка хода управляющей рейки ………………. 30
Опломбирование насоса ………………………………. 32
Проверка холостого хода ……………………………… 34
Измерение концентрации выхлопных газов……. 35
Технические характеристики…………………………. 37
Моменты затяжки …………………………………………. 37
Специальный инструмент……………………………… 38
Скания
сервис
3
3 – 85 12 29 G EN
Заменяет 3 – 85 06 30

Выпуск воздуха из системы
СКАНИЯ
2
3-85 12 29 G EN
Обслуживание топливной системы
Обслуживание оборудования для впрыска топлива
может производиться только специально обученным
персоналом, имеющим доступ к необходимому
инструменту и испытательному оборудованию.
Для проверки и регулировки насосов для впрыска
предусмотрены специальные испытательные
таблицы и инструкции, приведенные в «Системе
впрыска», специальной версии Руководства (См.
также «Параметры настройки мощности двигателя и
насоса»).
Топливная система чувствительна к загрязнениям
различного характера. Соблюдайте чистоту при
работах, где существует риск попадания
загрязнений в систему. Всегда используйте
защитные заглушки для закрытия открытых
соединений.
Заглушки
Заводские настройки максимальной мощности и
скорости вращения были подвергнуты испытаниям и
не должны изменяться с целью достижения более
высоких показателей. Для обеспечения этого
оборудование для впрыска опломбировано
гарантийными пломбами.
Несанкционированное вскрытие пломб аннулирует
фирменную гарантию в отношении неполадок,
которые могут возникнуть в результате
неправильных настроек.
В Швеции и ряде других стран законодательством
установлены нормы концентрации выхлопных газов
для транспортных средств. Это может выражаться в
установлении дополнительных пломб на
оборудование для впрыска.
Выпуск воздуха из системы
1
2
Ослабить винт предохранительного клапана. Выкрутить
рифленую рукоятку ручного насоса для нагнетания
топлива.
Нагнетать топливо ручным насосом до исчезновения
пузырьков в топливе при открытом винте
предохранительного клапана.
3
4
Завинтить винт предохранительного клапана и нагнетать
топливо еще несколько минут. Воздух, находящийся в
насосе для впрыска, будет выходить из перепускного
клапана.
Закрыть ручной насос. Запустить двигатель и
убедиться в отсутствии утечек топлива.