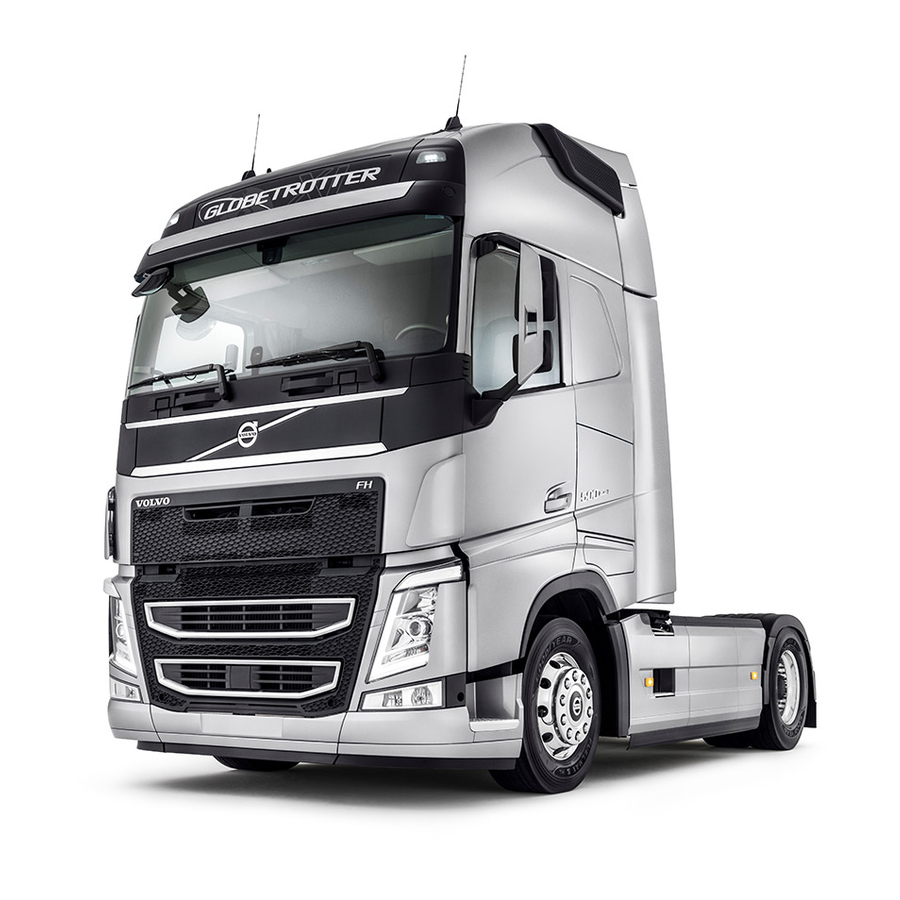
volvo fmx
Overview
It’s tough out there
The new Volvo FMX is ready for the toughest of construction jobs. This truck
stands up to heavy loads, poor roads and challenging inclines. The tougher
the conditions, the more at home it is.
With its massive torque, this truck can literally move mountains – and it
does so economically. And the I-Shift gearbox has set the benchmark for
comfort and performance ever since it was launched about ten years ago.
Try it and you’ll love it.
Volvo Trucks
Руководство для водителя
Перед вами уникальное руководство для водителя, учитывающее номер шасси вашего грузового автомобиля и предпочитаемый вами язык. Руководство доступно в различных форматах и содержит только информацию, относящуюся к конфигурации вашего грузовика. Чтобы посмотреть онлайн-версию, нажмите приводимую ниже кнопку. Или выберите один из других вариантов.
Мобильное приложение
Вы можете загрузить руководство на свое мобильное устройство в виде приложения. Загрузите его через App Store (iOS) или Google Play (Android), затем введите свой уникальный номер шасси и предпочитаемый вами язык.
Формат PDF
Нажмите на ссылку ниже, чтобы загрузить свое собственное руководство для водителя в формате PDF. Информация приводится с учетом вашего уникального номера шасси, на предпочитаемом вами языке.
Встроенный дисплей
Кроме того, руководство водителя можно почитать в специальном приложении на встроенном дисплее вашего грузовика. Через него вы сможете получить доступ ко всем возможностям вашего автомобиля. Информация приводится на предпочитаемом вами языке.
Напечатанное руководство
Если вы потеряли свое руководство или хотите заказать новую версию на другом языке — обратитесь к своему дилеру. Он поможет вам разместить ваш заказ.

В дилерской базе по ремонту и техническому обслуживанию грузовиков и автобусов Volvo Impact представлены: каталог запчастей грузовых автомобилей Volvo, руководства по ремонту, обслуживанию, диагностике, спецификации, сервисные бюллетени, нормочасы, расшифровка диагностических кодов неисправностей и инструмент для грузовиков и автобусов Volvo для европейского рынка.
- Издательство: Volvo
- Актуальность: 06/2016
- Система: Windows
- Интерфейс: Многоязычный (русский присутствует)
- Формат: ISZ
- Размер: 31,1 Gb
В дилерской базе по ремонту и техническому обслуживанию грузовиков и автобусов Volvo Impact представлены: каталог запчастей грузовых автомобилей Volvo, руководства по ремонту, обслуживанию, диагностике, спецификации, сервисные бюллетени, нормочасы, расшифровка диагностических кодов неисправностей и инструмент для грузовиков и автобусов Volvo для европейского и американского рынков. Отсутствуют модели старше 2006 года выпуска (они есть в Volvo Impact 2016).
- Издательство: Volvo
- Актуальность: 11/2018
- Система: Windows
- Интерфейс: Многоязычный (русский присутствует)
- Формат: ISO
- Размер: 57,4 Gb

Схемы на английском языке электрооборудования грузовых автомобилей Volvo FH12/FH16 с левым рулем.
- Автор: —
- Издательство: Volvo Truck Corporation
- Год издания: 1998
- Страниц: 128
- Формат: PDF
- Размер: 3,6 Mb
Схемы на английском языке электрооборудования грузовых автомобилей Volvo FM.
- Автор: —
- Издательство: Volvo Truck Corporation
- Год издания: —
- Страниц: 270
- Формат: PDF
- Размер: 20,3 Mb
Руководство по ремонту грузовых автомобилей Volvo F12 1979-1987 годов выпуска.
- Автор: —
- Издательство: СпецИнфо
- Год издания: —
- Страниц: 104
- Формат: —
- Размер: —
Руководство по техническому обслуживанию и ремонту грузовых автомобилей Volvo FE/FL с 2006 года выпуска.
- Автор: —
- Издательство: Диез
- Год издания: —
- Страниц: 504
- Формат: —
- Размер: —
Руководство по эксплуатации, техническому обслуживанию и ремонту + каталог запчастей грузовых автомобилей Volvo FH12.
- Автор: —
- Издательство: Диез
- Год издания: —
- Страниц: 392
- Формат: —
- Размер: —
Руководство по техническому обслуживанию и ремонту грузовых автомобилей Volvo FH12 1993-2005 годов выпуска.
- Автор: —
- Издательство: Диез
- Год издания: —
- Страниц: 416
- Формат: —
- Размер: —
Руководство по ремонту грузовых автомобилей Volvo F10 и Volvo FL10 с 1988 года выпуска.
- Автор: —
- Издательство: Терция
- Год издания: —
- Страниц: 164
- Формат: —
- Размер: —
Руководство по техническому обслуживанию и ремонту грузовых автомобилей Volvo FH и Volvo FM с 9- и 13-литровыми двигателями.
- Автор: —
- Издательство: Диез
- Год издания: —
- Страниц: 432
- Формат: —
- Размер: —
Руководство по ремонту грузовых автомобилей Volvo FH и Volvo FM с 9- и 13-литровыми двигателями.
- Автор: —
- Издательство: Диез
- Год издания: —
- Страниц: 480
- Формат: —
- Размер: —
Руководство по ремонту грузовых автомобилей Volvo FH и Volvo FM до 2005 года выпуска.
- Автор: —
- Издательство: Диез
- Год издания: —
- Страниц: 464
- Формат: —
- Размер: —
Руководство по эксплуатации, техническому обслуживанию и ремонту грузовых автомобилей Volvo VN/VHD 2002-2007 годов выпуска.
- Автор: —
- Издательство: Диез
- Год издания: —
- Страниц: 432
- Формат: —
- Размер: —
Руководство по эксплуатации, техническому обслуживанию и ремонту грузовых автомобилей Volvo VNL/VNM 1996-2002 годов выпуска.
- Автор: —
- Издательство: Диез
- Год издания: —
- Страниц: 336
- Формат: —
- Размер: —
Мультимедийное руководство на английском языке по техническому обслуживанию и ремонту грузовых автомобилей Volvo VN/VHD 1996-2002 годов выпуска.
- Автор: —
- Издательство: Volvo Truck Corporation
- Год издания: 2004
- Страниц: —
- Формат: ISO
- Размер: 297,8 Mb
Мультимедийное руководство на английском языке по техническому обслуживанию и ремонту грузовых автомобилей Volvo VN/VHD 2002-2004 годов выпуска.
- Автор: —
- Издательство: Volvo Truck Corporation
- Год издания: 2004
- Страниц: —
- Формат: ISO
- Размер: 112,7 Mb

Руководство по ремонту грузовых автомобилей Volvo F16/TF16.
- Автор: —
- Издательство: Терция
- Год издания: —
- Страниц: 128
- Формат: —
- Размер: —

Руководство по ремонту грузовых автомобилей Volvo FM9.
- Автор: —
- Издательство: Терция
- Год издания: —
- Страниц: 208
- Формат: —
- Размер: —
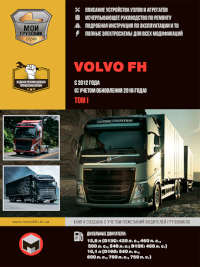
Руководство по ремонту эксплуатации и ремонту грузовых автомобилей Volvo FH с 2012 года выпуска с дизельными двигателями объемом 12,8/16,1 л.
- Автор: —
- Издательство: Монолит
- Год издания: —
- Страниц: 442
- Формат: —
- Размер: —
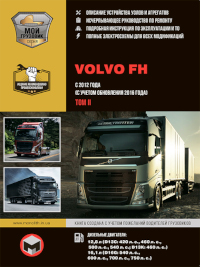
Руководство по ремонту эксплуатации и ремонту грузовых автомобилей Volvo FH с 2012 года выпуска с дизельными двигателями объемом 12,8/16,1 л.
- Автор: —
- Издательство: Монолит
- Год издания: —
- Страниц: 592
- Формат: —
- Размер: —
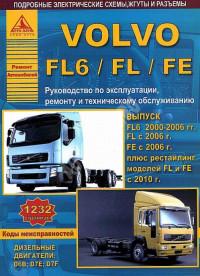
Руководство по техническому обслуживанию и ремонту грузовых автомобилей Volvo FE/FL/FL6 с 2000 года выпуска.
- Автор: —
- Издательство: Атласы автомобилей
- Год издания: —
- Страниц: 1232
- Формат: —
- Размер: —
Руководство по эксплуатации, техническому обслуживанию и ремонту грузовых автомобилей Volvo FH с 2002 года выпуска.
- Автор: —
- Издательство: Арго-Авто
- Год издания: —
- Страниц: 1240
- Формат: —
- Размер: —
Руководство по эксплуатации, техническому обслуживанию и ремонту грузовых автомобилей Volvo FM с 2002 года выпуска.
- Автор: —
- Издательство: Арго-Авто
- Год издания: —
- Страниц: 1312
- Формат: —
- Размер: —

Схемы на немецком языке электрооборудования автобусов Volvo B 12.
- Автор: —
- Издательство: —
- Год издания: —
- Страниц: 95
- Формат: PDF
- Размер: 37,1 Mb
Руководство по техническому обслуживанию грузовых автомобилей Volvo серий AC/VN/WG/WX.
- Автор: —
- Издательство: Терция
- Год издания: —
- Страниц: 112
- Формат: —
- Размер: —
Руководство на испанском языке с описанием конструкции двигателя модели D9A грузовых автомобилей Volvo FM.
- Автор: —
- Издательство: —
- Год издания: —
- Страниц: 54
- Формат: PDF
- Размер: 16,9 Mb
Руководство по эксплуатации и техническому обслуживанию грузовых автомобилей Volvo VNL/VNM.
- Автор: —
- Издательство: Терция
- Год издания: —
- Страниц: 252
- Формат: —
- Размер: —
Руководство по эксплуатации и ремонту грузовых автомобилей Volvo FL6
- Автор: —
- Издательство: Терция
- Год издания: —
- Страниц: 164
- Формат: —
- Размер: —
Руководство по эксплуатации и техническому обслуживанию автобусов Volvo B 10 M 1986-1992 годов выпуска.
- Автор: —
- Издательство: Терция
- Год издания: —
- Страниц: 113
- Формат: —
- Размер: —
Руководство по эксплуатации и техническому обслуживанию грузовых автомобилей Volvo FH/FM.
- Автор: —
- Издательство: Терция
- Год издания: —
- Страниц: 260
- Формат: —
- Размер: —

- Manuals
- Brands
- Volvo Manuals
- Trucks
- FM
- Driver’s handbook manual
-
Contents
-
Table of Contents
-
Troubleshooting
-
Bookmarks
Quick Links
Related Manuals for Volvo FM
Summary of Contents for Volvo FM
-
Page 1
komp-gbr… -
Page 3
komp-gbr… -
Page 5
komp-gbr… -
Page 7
komp-gbr… -
Page 9
komp-gbr… -
Page 10
1:10… -
Page 11
komp-gbr 1:11… -
Page 12
1:12… -
Page 13
komp-gbr 1:13… -
Page 14
1:14… -
Page 15
komp-gbr 1:15… -
Page 16
1:16… -
Page 17
komp-gbr 1:17… -
Page 18
1:18… -
Page 19
komp-gbr 1:19… -
Page 20
1:20… -
Page 21
komp-gbr 1:21… -
Page 22
1:22… -
Page 23
komp-gbr 1:23… -
Page 24
1:24… -
Page 25
komp-gbr 1:25… -
Page 26
1:26… -
Page 27
komp-gbr 1:27… -
Page 28
1:28… -
Page 29
komp-gbr 1:29… -
Page 30
1:30… -
Page 31
komp-gbr 1:31… -
Page 32
1:32… -
Page 33
komp-gbr 1:33… -
Page 34
1:34… -
Page 35
komp-gbr 1:35… -
Page 36
1:36… -
Page 37
komp-gbr 1:37… -
Page 38
1:38… -
Page 39
komp-gbr 1:39… -
Page 40
1:40… -
Page 41
komp-gbr 1:41… -
Page 42
1:42… -
Page 43
komp-gbr 1:43… -
Page 44
1:44… -
Page 45
komp-gbr 1:45… -
Page 46
1:46… -
Page 47
komp-gbr 1:47… -
Page 48
1:48… -
Page 49
komp-gbr 1:49… -
Page 50
1:50… -
Page 51
komp-gbr 1:51… -
Page 52
1:52… -
Page 53
komp-gbr 1:53… -
Page 54
1:54… -
Page 55
komp-gbr 1:55… -
Page 56
1:56… -
Page 57
komp-gbr 1:57… -
Page 58
1:58… -
Page 59
komp-gbr 1:59… -
Page 60
1:60… -
Page 61
komp-gbr 1:61… -
Page 62
1:62… -
Page 63
komp-gbr 1:63… -
Page 64
1:64… -
Page 65
komp-gbr 1:65… -
Page 66
1:66… -
Page 67
komp-gbr 1:67… -
Page 68
1:68… -
Page 69
komp-gbr 1:69… -
Page 70
1:70… -
Page 71
komp-gbr 1:71… -
Page 72
1:72… -
Page 73
komp-gbr 1:73… -
Page 74
1:74… -
Page 75
komp-gbr 1:75… -
Page 76
1:76… -
Page 77
komp-gbr 1:77… -
Page 78
1:78… -
Page 79
komp-gbr 1:79… -
Page 80
1:80… -
Page 81
komp-gbr 1:81… -
Page 82
1:82… -
Page 83
komp-gbr 1:83… -
Page 84
1:84… -
Page 85
komp-gbr 1:85… -
Page 86
1:86… -
Page 87
komp-gbr 1:87… -
Page 88
1:88… -
Page 89
komp-gbr 1:89… -
Page 90
1:90… -
Page 91
komp-gbr 1:91… -
Page 92
1:92… -
Page 93
komp-gbr 1:93… -
Page 94
1:94… -
Page 95
komp-gbr 1:95… -
Page 96
1:96… -
Page 97
komp-gbr 1:97… -
Page 98
1:98… -
Page 99
komp-gbr 1:99… -
Page 100
1:100… -
Page 101
komp-gbr 1:101… -
Page 102
1:102… -
Page 103
komp-gbr 1:103… -
Page 104
1:104… -
Page 105
komp-gbr 1:105… -
Page 106
1:106… -
Page 107
komp-gbr 1:107… -
Page 108
1:108… -
Page 109
komp-gbr 1:109… -
Page 110
1:110… -
Page 111
komp-gbr 1:111… -
Page 112
1:112… -
Page 113
komp-gbr 1:113… -
Page 114
1:114… -
Page 115
komp-gbr 1:115… -
Page 116
1:116… -
Page 117
komp-gbr 1:117… -
Page 118
1:118… -
Page 119
komp-gbr 1:119… -
Page 120
1:120… -
Page 121
komp-gbr 1:121… -
Page 122
1:122… -
Page 123
komp-gbr 1:123… -
Page 124
1:124… -
Page 125
komp-gbr 1:125… -
Page 126
1:126… -
Page 127
komp-gbr 1:127… -
Page 128
1:128… -
Page 129
komp-gbr 1:129… -
Page 130
1:130… -
Page 131
komp-gbr 1:131… -
Page 132
1:132… -
Page 133
Operating Instructions T0010216 komp-gbr 1:133… -
Page 134
1:134… -
Page 135
General An ADR adapted vehicle must be able to transport dangerous goods in such a way that it does not cause and cannot aggravate a possible accident situation. The ADR legal requirements differ between countries but all are based on the ADR ac- cord. -
Page 136
Switch off the current • Press in the switch on the dashboard • Press the switch on the rear of the cab (optional extra) When the ignition key is removed from the starter switch the current is initially cut af- ter twenty minutes. -
Page 137
Turn on the current Switch on both emergency switches T0010215 Turn the ignition key to the lowest radio position. The ignition key must be left in the ignition switch in any position in order for current to be used during rest and over night stops. The ignition key must have first been in the lowest radio position. -
Page 138
Switch on the current within twenty minutes Both emergency switches must be on. T0010215 There are two ways to switch the current on within twenty minutes: • First turn the ignition key to the radio position • Then turn the ignition key to the off position •… -
Page 139
• Hold in the starter switch for two sec- onds The main current will be cut after twenty minutes. If the parking lamps, parking heater or haz- ard warning lamps are on or if the air suspension is active (the control button not in the run position) the current will not be cut at all. -
Page 140
Volvo Truck Corporation Göteborg, Sweden 20 158829 English .01.2002 Printed in Sweden 1:140… -
Page 141
komp-gbr 1:141… -
Page 142
1:142… -
Page 143
komp-gbr 1:143… -
Page 144
1:144… -
Page 145
komp-gbr 1:145… -
Page 146
1:146… -
Page 147
komp-gbr 1:147… -
Page 148
1:148… -
Page 149
komp-gbr 1:149… -
Page 150
1:150… -
Page 151
komp-gbr 1:151… -
Page 152
1:152… -
Page 153
komp-gbr 1:153… -
Page 154
1:154… -
Page 155
komp-gbr 1:155… -
Page 156
1:156… -
Page 157
komp-gbr 1:157… -
Page 158
1:158… -
Page 159
komp-gbr 1:159… -
Page 160
1:160… -
Page 161
komp-gbr 1:161… -
Page 162
1:162… -
Page 163
komp-gbr 1:163… -
Page 164
1:164… -
Page 165
komp-gbr 1:165… -
Page 166
1:166… -
Page 167
komp-gbr 1:167… -
Page 168
1:168… -
Page 169
komp-gbr 1:169… -
Page 170
1:170… -
Page 171
komp-gbr 1:171… -
Page 172
1:172… -
Page 173
komp-gbr 1:173… -
Page 174
1:174… -
Page 175
komp-gbr 1:175… -
Page 176
1:176… -
Page 177
komp-gbr 1:177… -
Page 178
1:178… -
Page 179
komp-gbr 1:179… -
Page 180
1:180… -
Page 181
komp-gbr 1:181… -
Page 182
1:182… -
Page 183
komp-gbr 1:183… -
Page 184
1:184… -
Page 185
komp-gbr 1:185… -
Page 186
1:186… -
Page 187
komp-gbr 1:187… -
Page 188
1:188… -
Page 189
komp-gbr 1:189… -
Page 190
1:190… -
Page 191
komp-gbr 1:191… -
Page 192
1:192… -
Page 193
komp-gbr 1:193… -
Page 194
1:194… -
Page 195
komp-gbr 1:195… -
Page 196
1:196… -
Page 197
komp-gbr 1:197… -
Page 198
1:198… -
Page 199
komp-gbr 1:199… -
Page 200
1:200… -
Page 201
komp-gbr 1:201… -
Page 202
1:202… -
Page 203
komp-gbr 1:203… -
Page 204
1:204… -
Page 205
komp-gbr 1:205… -
Page 206
1:206… -
Page 207
komp-gbr 1:207… -
Page 208
1:208… -
Page 209
komp-gbr 1:209… -
Page 210
1:210… -
Page 211
komp-gbr 1:211… -
Page 212
1:212… -
Page 213
komp-gbr 1:213… -
Page 214
1:214… -
Page 215
komp-gbr 1:215… -
Page 216
1:216… -
Page 217
komp-gbr 1:217… -
Page 218
1:218… -
Page 219
komp-gbr 1:219… -
Page 220
1:220… -
Page 221
komp-gbr 1:221… -
Page 222
1:222… -
Page 223
komp-gbr 1:223… -
Page 224
1:224… -
Page 225
komp-gbr 1:225… -
Page 226
1:226… -
Page 227
komp-gbr 1:227… -
Page 228
1:228… -
Page 229
komp-gbr 1:229… -
Page 230
1:230… -
Page 231
komp-gbr 1:231… -
Page 232
1:232… -
Page 233
komp-gbr 1:233… -
Page 234
1:234… -
Page 235
komp-gbr 1:235… -
Page 236
1:236… -
Page 237
komp-gbr 1:237… -
Page 238
1:238… -
Page 239
komp-gbr 1:239… -
Page 240
1:240… -
Page 241
komp-gbr 1:241… -
Page 242
1:242… -
Page 243
komp-gbr 1:243… -
Page 244
1:244… -
Page 245
Operating Instructions Display, graphic Numeric language komp-gbr 1:245… -
Page 246
1:246… -
Page 247: Table Of Contents
Contents Numeric language, general …………..1 Numeric language, general …………..1 Display control stalk …………….1 Text strings ………………1 Stop message ………………2 Change language ……………… 3 Change language …………….. 3 Menus ………………..5 General ………………..5 Password protected menus …………..5 Menus available when driving …………
-
Page 248
1:248… -
Page 249: Numeric Language, General
Numeric language, general Numeric language, general The instruction describes how the numeric language is made up and functions. Only the most important menus and messages are described. For more in depth informa- tion about the display see ”Operating instructions Display, graphic”. Display control stalk Manual communication with the display is achieved using the control stalk on the…
-
Page 250: Stop Message
Numeric language, general Stop message Red stop lamp + stop symbol If the red stop lamp and stop symbol are shown in the display the vehicle must be stopped immediately and the engine must be switched off. The accompanying nu- T3014364 meric text should be read off to establish where the fault lies.
-
Page 251: Change Language
Change language Change language The numeric language is an option and can be shown as one of three languages in the display. The language can be changed in the menu ”Display setting”. P-heater timer Display setting Vehicle Settings Diagnostics Service Data log Password 7658.8 km…
-
Page 252
Change language Language MENU: Display setting, Language The language settings apply even after the ignition has been switched off. Select “Language” using /∇ and press SELECT. Display setting Language Units Time/date Display lighting Change Password 7658.8 km Up to three languages can be dis- played. -
Page 253: Menus
Menus General The numeric language is hierarchical and follows the same structure as in ”Operating instructions Display, graphic”. In the menus which have text the text is marked with the number. All the menu titles and text strings are in the menu list. Password protected menus The key symbol to the right in the menu list means that the menu is password pro-…
-
Page 254
Menus <<400>> = Reset ALL fuel data? Press SELECT for 1 second. Remaining fuel Menu 3 <<102>> = Time/distance Time and date Setting, time and date Alarm clock Setting, alarm clock <<301>> = ON <<302>> = OFF <<303>> = NEW TIME Tripmeter Reset the tripmeter <<403>>… -
Page 255
Menus Menu 5 <<104>> = Vehicle messages <<309>> = No messages MID 128 = Engine control unit MID 136 = Brake control unit MID 130 = Gearbox MID 223 = Gearshift control MID 222 = Retarder control unit MID 144 = Vehicle control unit MID 140 = Display MID 150 = Air suspension MID 249 = Body builder module… -
Page 256
Menus <<1008>> = TOO LOW <<1011>> = Stop, fault <<1012>> = Check data link <<1013>> = Check data link open circuit <<1014>> = Low pressure Menu 6 <<105>> = Reset <<406>> = Reset ALL data? Press SELECT for 1 second. 1:256… -
Page 257: Menus When Vehicle Stationary
Menus Menus when vehicle stationary Menu 7 <<107>> = P-heater timer <<212>> = Program <<356>> = Set start date <<418>> = Set start time <<502>> = Set duration <<213>> = Reset <<214>> = No time programmed Menu 8 <<108>> = Display setting <<200>>…
-
Page 258
Menus <<313>> = Clock Format <<409>> = 24 h <<410>> = AM/PM <<314>> = Date format <<411>> = yymmdd <<412>> = ddmmyy <<413>> = mmddyy <<203>> = Display lighting <<315>> = Contrast <<316>> = Background lighting <<317>> = Night display <<1023>>… -
Page 259
Menus Menu 9 <<109>> = Vehicle Settings <<205>> = Traction control <<301>> = On <<302>> = Off <<206>> = Fleet target <<321>> = Engine speed (max) <<415>> = Present value: <<416>> = Enter new value: <<1015>> = The transfer is complete. <<1016>>… -
Page 260
Menus <<324>> = Fleet id: <<325>> = Enter new fleet id: <<1015>> = The transfer is complete. <<1016>> = Action unsuccessful. <<211>> = Daytime running lights <<301>> = On <<302>> = Off 1:260… -
Page 261
Menus Menu 10 <<110>> = Diagnostics <<215>> = Fault Diagnostics MID 128 = Engine control unit MID 136 = Brake control unit MID 130 = Gearbox MID 223 = Gearshift control MID 222 = Retarder control unit MID 144 = Vehicle control unit MID 140 = Display MID 150 = Air suspension MID 249 = Body builder module… -
Page 262
Menus <<505>> = Reset? Hold SELECT for 1 second <<506>> = Too many fault messages. <<424>> = Reset all faults for this MID? Press SELECT for 1 second <<216>> = Instrument test <<326>> = Indicator lamp test <<327>> = Gauge test <<328>>… -
Page 263
Menus Menu 11 <<111>> = Vehicle data <<221>> = Oil level <<331>> = min< <<332>> = >max <<330>> = Not available. X min remaining. <<222>> = Load indicator komp-gbr 1:263… -
Page 264
Menus Menu 12 <<112>> = Data log <<223>> = Vehicle number <<1017>> = Data transfer in progress, please wait <<333>> = Fleet id: <<334>> = Chassis number: <<1018>> = No data <<224>> = Totals <<335>> = Total distance: <<336>> = Total fuel consumption: <<337>>… -
Page 265
Menus <<354>> = Trip cruise time <<226>> = Reset trip data <<433>> = Reset all trip data? Press SELECT for 1 second. <<1017>> = Data transfer in progress, please wait <<1015>> = The transfer is complete. <<1016>> = Action unsuccessful Menu 13 <<113>>… -
Page 266: Numerical Conversion Table
Numerical conversion table General In order to quickly see what each number means here is a list of all numbers in order together with the meaning. <<100>> to <<113>> Number Meaning Gauge Fuel data Time/distance Display Vehicle messages Reset P-heater timer Display setting Vehicle Settings Diagnostics…
-
Page 267
Numerical conversion table <<200>> to <<227>> Number Meaning Language Units Time/Date Display lighting Change password Traction control Fleet target Ammeter calibration Fleet id Fog lights Spotlights Daytime running lights Program Reset No time programmed Fault diagnostics Instrument test Part number General enquiry Other systems Reset all… -
Page 268
Numerical conversion table <<300>> to <<356>> Number Meaning New time Black Panel Favourite Display Background lighting Favourite Display, setting Night/day No messages Distance Fuel consumption Temperature Clock Format Date format Contrast Background lighting Night display Transport company, password Workshop, password 2 Workshop, password 1 Engine speed (max) Road speed (max) -
Page 269
Numerical conversion table Display test Loudspeaker test Not available. X min remaining. min< >max Fleet id: Chassis number: Total distance: Total fuel consumption: Total number of hours engine has been run: Total idling time: Total power take off time: Total number of engine revolutions: Trip distance: Trip average fuel consumption: Trip total fuel consumption:… -
Page 270
Numerical conversion table <<400>> to <<434>> Number Meaning Reset ALL fuel data? Press SELECT for 1 second Reset? Press SELECT for 1 second. Give distance: Reset ALL data? Press SELECT for 1 second. AM/PM yymmdd ddmmyy mmddyy Enter new password: Present value: Enter new value: Switch off all power consumers, then switch off the ignition. -
Page 271
Numerical conversion table Warning Turn indicators Hardware number: Software number: Give over speed Reset all trip data? Press SELECT for 1 second. No other systems accessible. <<500>> to <<506>> Number Meaning Calibration in progress, please wait Sensor component changed. Switch on the ignition Set duration: First: Last:… -
Page 272
Numerical conversion table <<1000>> to <<1024>> Number Meaning 1000 No data 1001 High 1002 Too high 1003 Icy conditions 1004 Discharge 1005 Refuel now 1006 Check 1007 1008 Too low 1009 Check 1010 Check at next stop 1011 Stop. Fault. 1012 Check data link 1013… -
Page 273
Numerical conversion table MID 128 to MID 250 Number Meaning MID 128 Engine control unit MID 130 Gearbox MID 136 Brake control unit MID 140 Display MID 144 Vehicle control unit MID 146 Climate unit MID 150 Air suspension MID 163 Anti-theft protection MID 203 Transport information system… -
Page 274
1:274… -
Page 275: Table Of Contents
Index Index Numerical conversion table . . . 18 Change language ..3 Password protected menus ..5 Control stalk ..1 Red stop lamp + stop symbol .
-
Page 276
Volvo Truck Corporation Göteborg, Sweden 20 151591 English .01.2002 1:276… -
Page 277
komp-gbr 1:277… -
Page 278
1:278… -
Page 279
komp-gbr 1:279… -
Page 280
1:280… -
Page 281
komp-gbr 1:281… -
Page 282
1:282… -
Page 283
komp-gbr 1:283… -
Page 284
1:284… -
Page 285
komp-gbr 1:285… -
Page 286
1:286… -
Page 287
komp-gbr 1:287… -
Page 288
1:288… -
Page 289
komp-gbr 1:289… -
Page 290
1:290… -
Page 291
komp-gbr 1:291… -
Page 292
1:292… -
Page 293
komp-gbr 1:293… -
Page 294
1:294… -
Page 295
komp-gbr 1:295… -
Page 296
1:296… -
Page 297
komp-gbr 1:297… -
Page 298
1:298… -
Page 299
komp-gbr 1:299… -
Page 300
1:300… -
Page 301
Operating Instructions Tachograph 1324 komp-gbr 1:301… -
Page 302
1:302… -
Page 303: Table Of Contents
Contents System overview ……………………1 General information ………………….2 Operating controls ……………………. 3 Enable the device ……………………5 Opening the drawer ………………….5 Inserting the driver 2 chart ………………..6 Inserting the driver 1 chart ………………..6 Setting the time groups ………………….8 Removing the charts ………………….
-
Page 304
1:304… -
Page 305
System overview Tachograph 1324 Indicating instrument Charts Sensor 2170 The new tachograph 1324 sets new stand- Within the immediate field of view of the ards in performance, technology, and design driver, there is an approved indicating due to its modular design with separate dis- instrument with analogous vehicle speed play and recording. -
Page 306: General Information
General information The symbols in these operating instructions • The tachograph 1324 will be installed have the following meanings: and sealed by authorised persons. Please do not intervene at the device or at the supply lines. ATTENTION! The text next to this symbol contains ❒…
-
Page 307: Operating Controls
Operating controls Tachograph 1324 komp-gbr 1:307…
-
Page 308
Operating controls (see figure page 3) 1 Left-hand keypad 4 Checkpoint marking for checking the temporally correct posi- Key for unlocking the drawer. tion of the chart carrier. Key for adjusting the time group for driver 1. 5 «Pear-shaped» chart carrier 2 Right-hand keypad 6 Separating plate Key for adjusting the time group… -
Page 309
Enable the device Opening the drawer 2. Pull out the hinged drawer to the limit The drawer may only be opened, stop and tip it down. if … Remove driver 1 chart if necessary. • the vehicle is at a standstill and •… -
Page 310: Inserting The Driver 2 Chart
Enable the device Inserting the driver 2 chart 5. Tilt separating plate downwards. Before starting to drive, the centre field of the chart has to be duly ➥ recorded, see page 18. 4. The driver 2 inserts the recorded chart with the front side facing up in the «pear- shaped»…
-
Page 311
Enable the device Comment on 1 driver operation 9. The basic display is shown: ½ including date, time, and the total In the 1 driver operation, only the chart for number of kilometres, driver 1 is to be inserted on the separating ½… -
Page 312: Setting The Time Groups
Enable the device Setting the time groups 2 driver operation 1 driver operation • 10. Driver 1 presses the key. Only insert the chart for driver 1 on the ½ Press the key several times, until the separating plate during 1 driver opera- desired time group is shown in the dis- tion.
-
Page 313: Removing The Charts
Removing the charts Comment Remove your chart from the tachograph 1324 • in case of a change of driver or vehicle, In case you have, however, switched off the ignition, it is possible that the drawer does • at the end of the working time not properly lock after closing.
-
Page 314: Driver Change
Driver change Case 1: The crew changes among them- selves, driver 2 becomes driver 1 : 1. Exchange the charts. ½ Driver 1 (now driver 2) places his chart below the separating plate and driver 2 (now driver 1) on the separat- Chart ing plate.
-
Page 315: Adjusting The Time
Adjusting the time • The function TIME ADJUSTMENT may only be selected if the vehicle is stationary. • For an automatic synchronisation of the chart carrier and the time, the ignition has to be switched on and there must not be any chart inserted in the = Depress key shortly tachograph 1324.
-
Page 316: A Message Is Being Displayed
Messages The tachograph 1324 monitors the function- and notes may be shown in the display imme- ing of the system and automatically signals diately after having closed the drawer or any failure occurring in one of the compo- when the failure occurs. nents, the device or the handling.
-
Page 317: Displaying The Error Memory
Messages Displaying the error memory To find out the reason for the error message please refer to the ERROR MEMORY menu. The display ERROR MEMORY function may only be selected if the vehicle is at a standstill! 1. Select the ERROR MEMORY menu by shortly depressing the key twice.
-
Page 318: Error Code Overview
Meaning / measure 9 0 0 A = Error during CAN transmission 9 0 0 B Contact Volvo workshop. 9 0 0 F = Keypad error, key pressed too long or blocked 9 0 1 0 = LCD error (display)
-
Page 319: Troubleshooting
Messages Displayed messages Code Meaning / measure 9 4 30 = Error at «B7» v-pulse output A 0 0C = Internal error A 0 50 = Trip without driver 1 chart (Error code cannot be found in the error memory.) Insert driver 1 chart.
-
Page 320
Outside the EU, the respective national ap- proval marks and provisions are valid. Depending on the full-scale value and the de- vice design, you may use the following charts within the tachograph 1324: Standard chart Volvo Chart for electronical Volvo Approval mark part no. -
Page 321: Recordings On The Front Part Of The Chart
Description of the chart Recordings on the front part of the chart 7 Distance travelled An up- or downward movement corresponds to 5 km. = 5km Note The distance recording will be interrupted if … • the time group switches have been set to break time «…
-
Page 322: Entries In The Centre Field
Description of the chart Entries in the centre field a) … before trip name and first name of the driver place of departure date of insertion (upper line) vehicle registration number beginning odometer reading b) … after trip place of arrival date of chart retrieval (bottom line) ending odometer reading distance travelled (may be entered)
-
Page 323: The Rear Side Of The Chart
Description of the chart The rear side of the chart 1 Entry field for the time groups This entry field is used for manual entries of the time groups. Manual entries are required if, for example, the crew members work away from the vehicle and therefore are not able to operate the tachograph 1324 or else in case of a fail- ure of the time group recording mecha-…
-
Page 324: Recording Of Failures
Recording of failures Power loss In case there is power available again, the tachograph 1324 will draw a line (1) on the chart shortly after the vehicle has started to move. Sensor 2170 disconnection Failure of the transmission link between sensor 2170 Ø tachograph 1324: •…
-
Page 325: Compulsory Inspection Of Tachographs
Appendix Compulsory inspection of tachographs The vehicle owner is obliged to have the ed, e.g. in conjunction with the technical installed tachograph 1324 inspected at inspection of your vehicle. regular intervals. Please ensure that the installation plate is At least once every two years, the proper op- replaced at each inspection and contains the eration of the tachograph 1324 has to be test- information required.
-
Page 326
1:326… -
Page 327
komp-gbr 1:327… -
Page 328
Volvo Truck Corporation Göteborg, Sweden 20 151946 Printed in Sweden 1:328… -
Page 329
Operating Instructions Geartronic T4017824 komp-gbr 1:329… -
Page 330
1:330… -
Page 331: Table Of Contents
Contents Introduction ………………1 Geartronic, general …………….1 Instruments and controls …………..2 Info Display ………………2 Gear lever ……………….. 4 Buttons ………………..5 Starting and stopping …………….6 Starting instructions …………….6 Stopping the vehicle …………….6 Driving ………………..7 Automatic shifting …………….
-
Page 332
1:332… -
Page 333: Geartronic, General
Introduction Geartronic, general Geartronic is an automatic shifting system mounted on the VT2014B/VT2514B. The gearbox has 14 forward gears and 4 reverse gears. The Geartronic changes gears auto- matically, but the driver can also choose to change gear manually, either in low and high range.
-
Page 334
Instruments and controls Info Display Select the GAUGES menu from the display to view information on Geartronic (applies to both a stationary vehicle and one in mo- tion). The display provides information on current gear position and which gears are available. -
Page 335: Available Gears
Instruments and controls 3. Available gears The section second from the left of the dis- play shows with arrows the number of lower gears (half steps) that are available (maximum 3 arrows). ∇ The section second from the right of the ∇…
-
Page 336: Gear Lever
Instruments and controls Gear lever When engaging a gear, move the gently to the desired gear position. Note! Do not press hard on the lever. The gear will not be engaged any faster. The engine must be running before a gear can be engaged.
-
Page 337: Economy/Power (E/P)
Instruments and controls Buttons Changing up/down The spring-loaded three-way switch is used for: • splitter gear changing in manual mode • manual gear changing in automatic mode • selecting reverse gear T4017825 Economy/Power (E/P) There is an economy/power button (E/P) on the gear selector housing.
-
Page 338: Starting And Stopping
Starting and stopping Starting instructions The gear lever should be in neutral posi- tion or the engine will not start. When the air pressure to the gearbox is too T3014366 low, a warning will be displayed automati- cally. An icon will appear on the display at the same time as the information lamp comes on.
-
Page 339: Automatic Shifting
Driving Automatic shifting The simplest way of driving the vehicle un- der normal conditions is to use automatic (position ”A”). Gear changing takes place automatically and the driver can concen- trate on the actual driving. When changing gear, the system will con- trol the clutch, gearbox shifting and engine acceleration.
-
Page 340: Gear Hold
Driving Gear hold This function is used in automatic mode only. The hold function can be used in all for- ward gears (1L to 6H). The hold function marked with an ”H” is located on the gear lever behind position ”A”.
-
Page 341
Driving Driving programme There are three different driving pro- grammes: • economy • power • braking Economy The is always active when starting the mo- tor (showed with an E in the display). The economy programme gives priority to fuel economy and is used when driving under normal conditions. -
Page 342
Driving Kick-down. Kick-down is activated by pressing the ac- celerator pedal all the way down (position ”B”). Kick-down will often result in a lower gear being engaged so that the en- gine works at a higher speed. This is possible in both economy and power pro- grammes but not in hold position. -
Page 343: Manual Shifting
Driving Manual shifting You can select to drive only with manual shift or ”take over” from the automatic shifting system whenever necessary. The gear lever is used like a normal gear lever except that there is no clutch pedal. When engaging a gear, push the gear lever gently towards the desired position.
-
Page 344: Reverse/Crawl Gears
Driving Reverse/crawl gears To prevent reverse or crawl gears being en- gaged unintentionally, the gear lever has a resistance built in. Reverse gears The gearbox has four reverse gears (rL, rH, RL, RH). The vehicle must be stationary before the reverse gear can be engaged. Moving the gear lever to position ”R”…
-
Page 345: Crawl Gears
Driving Crawl gears The gearbox has two crawl gears (cL and cH). T4014983 komp-gbr 1:345…
-
Page 346: Starting Uphill/Downhill
Driving Starting uphill/downhill Consideration must be taken to the incline of the hill and the gross weight of the vehi- cle/combination when selecting starting gear on hills. • The vehicle can be kept still using the parking brake or trailer brake. •…
-
Page 347: In Case Of Gearbox Malfunction
Driving In case of gearbox malfunction The Geartronic system is equipped with a limp-home function that makes it possible to drive a short distance if there is a fault in the gearbox or clutch position sensor. Note! The limp-home function should only be used for short distances.
-
Page 348
Driving 1:348… -
Page 349
Driving komp-gbr 1:349… -
Page 350
1:350… -
Page 351: Table Of Contents
Index Index Hold function ..8 Air pressure, gearbox ..6 Info Display ..2 Automatic shifting ..7 Instruments and controls .
-
Page 352
Volvo Truck Corporation Göteborg, Sweden 20 157682 English .01.02 Printed in Sweden 1:352… -
Page 353
komp-gbr 1:353… -
Page 354
1:354… -
Page 355
komp-gbr 1:355… -
Page 356
1:356… -
Page 357
komp-gbr 1:357… -
Page 358
1:358… -
Page 359
komp-gbr 1:359… -
Page 360
1:360… -
Page 361
komp-gbr 1:361… -
Page 362
1:362… -
Page 363
komp-gbr 1:363… -
Page 364
1:364… -
Page 365
komp-gbr 1:365… -
Page 366
1:366… -
Page 367
komp-gbr 1:367… -
Page 368
1:368… -
Page 369
komp-gbr 1:369… -
Page 370
1:370… -
Page 371
komp-gbr 1:371… -
Page 372
1:372… -
Page 373
komp-gbr 1:373… -
Page 374
1:374… -
Page 375
komp-gbr 1:375… -
Page 376
1:376… -
Page 377
komp-gbr 1:377… -
Page 378
1:378… -
Page 379
komp-gbr 1:379… -
Page 380
1:380… -
Page 381
komp-gbr 1:381… -
Page 382
1:382… -
Page 383
komp-gbr 1:383… -
Page 384
1:384… -
Page 385
komp-gbr 1:385… -
Page 386
1:386… -
Page 387
komp-gbr 1:387… -
Page 388
1:388… -
Page 389
komp-gbr 1:389… -
Page 390
1:390… -
Page 391
komp-gbr 1:391… -
Page 392
1:392… -
Page 393
komp-gbr 1:393… -
Page 394
1:394… -
Page 395
komp-gbr 1:395… -
Page 396
1:396… -
Page 397
Operating Instructions All wheel drive 4×4, 6×6 T0010208 komp-gbr 1:397… -
Page 398
1:398… -
Page 399: Table Of Contents
Contents Front wheel drive …………….1 Engaging front-wheel drive on 6×6 ………… 1 Engaging front-wheel drive on 4×4 ………… 1 Differential lock ………………. 2 Engaging the differential locks on 6×6 ……….2 Engaging the differential lock on 4×4 ……….4 komp-gbr 1:399…
-
Page 400
1:400… -
Page 401: Front Wheel Drive
Front wheel drive Engaging front-wheel drive on 6×6 1 Make sure none of the wheels are spin- ning 2 Engage the differential lock between the rear axles. The control lamp on the instrument panel will come on. T4017789 3 Move the front-wheel drive switch to its bottom position.
-
Page 402
Differential lock Engaging the differential locks on 6×6 Warning! Engage the differential lock just before Drive carefully once the dif- reaching the slippery surface and disengage ferential lock is engaged. Never turn it once you have past the slippery surface. corners on firm ground with the differ- ential lock engaged. -
Page 403
Differential lock 5 Move the front-wheel drive switch to its bottom position. The control lamp on the instrument panel will come on. T4015829 6 Engage the differential lock between the front wheels. The control lamp on the instrument panel will come on. 7 Release the clutch pedal 8 Drive away from the slippery area 9 Release the accelerator… -
Page 404: Engaging The Differential Lock On 4X
Differential lock Engaging the differential lock on 4×4 Warning! Engage the differential lock just before Drive carefully once the dif- reaching the slippery surface and disengage ferential lock is engaged. Never turn it once you have past the slippery surface. corners on firm ground with the differ- ential lock engaged.
-
Page 405
Differential lock 5 Engage the differential lock between the front wheels. The control lamp on the instrument panel will come on. 6 Release the clutch pedal 7 Drive away from the slippery area 8 Release the accelerator 9 Disengaging the differential locks T4015830 The differential lock between the front wheels will be disengaged if the differential… -
Page 406
Differential lock 1:406… -
Page 407
komp-gbr 1:407… -
Page 408
Volvo Truck Corporation Göteborg, Sweden 20 156900 English .01.2002 Printed in Sweden 1:408… -
Page 409
komp-gbr 1:409… -
Page 410
1:410… -
Page 411
komp-gbr 1:411… -
Page 412
1:412… -
Page 413
komp-gbr 1:413… -
Page 414
1:414… -
Page 415
komp-gbr 1:415… -
Page 416
1:416… -
Page 417
komp-gbr 1:417… -
Page 418
1:418… -
Page 419
komp-gbr 1:419… -
Page 420
1:420… -
Page 421
komp-gbr 1:421… -
Page 422
1:422… -
Page 423
komp-gbr 1:423… -
Page 424
1:424… -
Page 425
komp-gbr 1:425… -
Page 426
1:426… -
Page 427
komp-gbr 1:427… -
Page 428
1:428… -
Page 429
komp-gbr 1:429… -
Page 430
1:430… -
Page 431
komp-gbr 1:431… -
Page 432
1:432… -
Page 433
komp-gbr 1:433… -
Page 434
1:434… -
Page 435
komp-gbr 1:435… -
Page 436
1:436… -
Page 437
komp-gbr 1:437… -
Page 438
1:438… -
Page 439
komp-gbr 1:439… -
Page 440
1:440… -
Page 441
komp-gbr 1:441… -
Page 442
1:442… -
Page 443
komp-gbr 1:443… -
Page 444
1:444… -
Page 445
komp-gbr 1:445… -
Page 446
1:446… -
Page 447
komp-gbr 1:447… -
Page 448
1:448… -
Page 449
komp-gbr 1:449… -
Page 450
1:450… -
Page 451
komp-gbr 1:451… -
Page 452
1:452… -
Page 453
komp-gbr 1:453… -
Page 454
1:454… -
Page 455
komp-gbr 1:455… -
Page 456
1:456… -
Page 457
komp-gbr 1:457… -
Page 458
1:458… -
Page 459
komp-gbr 1:459… -
Page 460
1:460… -
Page 461
komp-gbr 1:461… -
Page 462
1:462… -
Page 463
komp-gbr 1:463… -
Page 464
1:464… -
Page 465
komp-gbr 1:465… -
Page 466
1:466… -
Page 467
komp-gbr 1:467… -
Page 468
1:468… -
Page 469
komp-gbr 1:469… -
Page 470
1:470… -
Page 471
komp-gbr 1:471… -
Page 472
1:472… -
Page 473
komp-gbr 1:473… -
Page 474
1:474… -
Page 475
komp-gbr 1:475… -
Page 476
1:476… -
Page 477
komp-gbr 1:477… -
Page 478
1:478… -
Page 479
komp-gbr 1:479… -
Page 480
1:480… -
Page 481
Operating Instructions Volvo’s Swap body undercar- riage T9007993 komp-gbr 1:481… -
Page 482
1:482… -
Page 483: Table Of Contents
Contents Swap body ……………….. 1 Fetch the swap body …………….1 Leave the swap body …………….6 Container ………………..9 Fetch a container …………….. 9 Deliver a container …………….12 komp-gbr 1:483…
-
Page 484
1:484… -
Page 485
Swap body Fetch the swap body 1 Check that the load is secure 2 Check that the centre of gravity of the load is in conformity with the vehicle’s ca- pacity 3 Position the vehicle exactly in front of the platform’s main members or guidance tunnel 4 Position the guiding members correctly on the vehicle… -
Page 486
Swap body 6 Open all four container locks on the vehicle T9007931 7 Lower the lock pins with the switch in the cab T9007932 1:486… -
Page 487
Swap body 8 Lower the vehicle with the air suspension so that when reversing there will be 50 mm clear space between the vehicle and the platform T9007934 9 Carefully reverse the vehicle in under the platform 10 Stop when the container locks on the vehicle are under the lock holes in the platform 11 Raise the vehicle with the air suspension… -
Page 488
Swap body 12 Raise the lock pins with the switch in the cab T9007995 13 Lock the container locks by turning them 90 T9007933 14 Put the support legs in the transport position 1:488… -
Page 489
Swap body 15 Lower the lock pins with the switch in the cab in order to lock the platform on the vehicle T9007994 16 Put the air suspension in the driving po- sition 17 The vehicle is ready to be driven away T7008396 komp-gbr 1:489… -
Page 490: Leave The Swap Body
Swap body Leave the swap body 1 Check that the place where the platform is to be put is flat and will take the weight of the platform 2 Position the vehicle in the correct place for setting down 3 Raise the vehicle with the air suspension 4 Raise the lock pins with the switch in the T9007997 5 Position the platform’s support legs in the…
-
Page 491
Swap body 7 Unlock the container locks T9007931 8 Lower the vehicle with the air suspension so that there is 50 mm clear space between the vehicle and the platform T9007934 komp-gbr 1:491… -
Page 492
Swap body 9 Lower the lock pins with the switch in the cab T9007932 10 Carefully drive straight forward out from under the platform until the vehicle is completely outside the platform 11 Put the air suspension in the driving po- sition 12 The vehicle is ready to be driven away T7008396… -
Page 493: Fetch A Container
Container Fetch a container 1 Position the guiding members for the swap body in the holders so that a con- tainer can be positioned on the vehicle T0010207 2 Raise the lock pins with the switch in the T9007995 komp-gbr 1:493…
-
Page 494
Container 3 Check that all four container locks are open T9007931 4 Raise the air suspension to its highest level so that the chassis will not be dam- aged when the container is lifted on 5 The container is lifted on 6 Lock the container locks T9007933 1:494… -
Page 495
Container 7 Lower the lock pins with the switch in the cab 8 The vehicle is ready to be driven away T9007994 komp-gbr 1:495… -
Page 496: Deliver A Container
Container Deliver a container 1 Lower the air suspension to its lowest level so that the chassis is not damaged when the container is lifted off 2 Raise the lock pins with the switch in the T9007997 3 Unlock the container locks 4 The container is lifted off 5 The vehicle is ready to be driven away T9007931…
-
Page 497
Container komp-gbr 1:497… -
Page 498
Container 1:498… -
Page 499
komp-gbr 1:499… -
Page 500
Volvo Truck Corporation Göteborg, Sweden 20 156880 English .01.2002 Printed in Sweden 1:500… -
Page 501
Operating Instructions Hydraulic kit T0010289 komp-gbr 1:501… -
Page 502
1:502… -
Page 503
Connecting to trailer Connect the trailer Connect electric connections Connect hydraulic hose Adjust correct pressure with the switch in the cab. The indicator lamp in the switch will come on when high pressure is se- lected. T0010290 Important! Use the correct hydraulic out- Switch for selecting the correct let. -
Page 504
Tipping the platform Pull the catch forward and lift the lever to tip the platform. T9007845 Pull the catch forward and press down the lever to lower the platform. T9007846 Release the lever to stop the platform. The lever will spring back to the centre position. T9007847 1:504… -
Page 505
komp-gbr 1:505… -
Page 506
1:506… -
Page 507
komp-gbr 1:507… -
Page 508
Volvo Truck Corporation Göteborg, Sweden 20 160768 English .01.2002 Printed in Sweden 1:508… -
Page 509
komp-gbr 1:509… -
Page 510
1:510… -
Page 511
komp-gbr 1:511… -
Page 512
1:512… -
Page 513
komp-gbr 1:513… -
Page 514
1:514… -
Page 515
komp-gbr 1:515… -
Page 516
1:516… -
Page 517
komp-gbr 1:517… -
Page 518
1:518… -
Page 519
komp-gbr 1:519… -
Page 520
1:520… -
Page 521
komp-gbr 1:521… -
Page 522
1:522… -
Page 523: Komp-Gbr
komp-gbr 1:523…
-
Page 524
1:524… -
Page 525
komp-gbr 1:525… -
Page 526
1:526… -
Page 527
komp-gbr… -
Page 529
komp-gbr… -
Page 531
komp-gbr… -
Page 533
komp-gbr… -
Page 535
komp-gbr… -
Page 536
2:10… -
Page 537
komp-gbr 2:11… -
Page 538
2:12… -
Page 539
komp-gbr 2:13… -
Page 540
2:14… -
Page 541
komp-gbr 2:15… -
Page 542
2:16… -
Page 543
komp-gbr 2:17… -
Page 544
2:18… -
Page 545
komp-gbr 2:19… -
Page 546
2:20… -
Page 547
komp-gbr 2:21… -
Page 548
2:22… -
Page 549
komp-gbr 2:23… -
Page 550
2:24… -
Page 551
komp-gbr 2:25… -
Page 552
2:26… -
Page 553
komp-gbr 2:27… -
Page 554
2:28… -
Page 555
komp-gbr 2:29… -
Page 556
2:30… -
Page 557
komp-gbr 2:31… -
Page 558
2:32… -
Page 559
komp-gbr 2:33… -
Page 560
2:34… -
Page 561
komp-gbr 2:35… -
Page 562
2:36… -
Page 563
komp-gbr 2:37… -
Page 564
2:38… -
Page 565
komp-gbr 2:39… -
Page 566
2:40… -
Page 567
komp-gbr 2:41… -
Page 568
2:42… -
Page 569
komp-gbr 2:43… -
Page 570
2:44… -
Page 571
komp-gbr 2:45… -
Page 572
2:46… -
Page 573
komp-gbr 2:47… -
Page 574
2:48… -
Page 575
komp-gbr 2:49… -
Page 576
2:50… -
Page 577
komp-gbr 2:51… -
Page 578
2:52… -
Page 579
komp-gbr 2:53… -
Page 580
2:54… -
Page 581
komp-gbr 2:55… -
Page 582
2:56… -
Page 583
komp-gbr 2:57… -
Page 584
2:58… -
Page 585
komp-gbr 2:59… -
Page 586
2:60… -
Page 587
komp-gbr 2:61… -
Page 588
2:62… -
Page 589
komp-gbr 2:63… -
Page 590
2:64… -
Page 591
komp-gbr 2:65… -
Page 592
2:66… -
Page 593
komp-gbr 2:67… -
Page 594
2:68… -
Page 595
komp-gbr 2:69… -
Page 596
2:70… -
Page 597
komp-gbr 2:71… -
Page 598
2:72… -
Page 599
komp-gbr 2:73… -
Page 600
2:74… -
Page 601
komp-gbr 2:75… -
Page 602
2:76… -
Page 603
komp-gbr 2:77… -
Page 604
2:78… -
Page 605
komp-gbr 2:79… -
Page 606
2:80… -
Page 607
komp-gbr 2:81… -
Page 608
2:82… -
Page 609
komp-gbr 2:83… -
Page 610
2:84… -
Page 611
komp-gbr 2:85… -
Page 612
2:86… -
Page 613
komp-gbr 2:87… -
Page 614
2:88… -
Page 615
komp-gbr 2:89… -
Page 616
2:90… -
Page 617
komp-gbr 2:91… -
Page 618
2:92… -
Page 619
komp-gbr 2:93… -
Page 620
2:94… -
Page 621
komp-gbr 2:95… -
Page 622
2:96… -
Page 623
komp-gbr 2:97… -
Page 624
2:98… -
Page 625
komp-gbr 2:99… -
Page 626
2:100… -
Page 627
komp-gbr 2:101… -
Page 628
2:102… -
Page 629
komp-gbr 2:103… -
Page 630
2:104… -
Page 631
komp-gbr 2:105… -
Page 632
2:106… -
Page 633
komp-gbr 2:107… -
Page 634
2:108… -
Page 635
komp-gbr 2:109… -
Page 636
2:110… -
Page 637
komp-gbr 2:111… -
Page 638
2:112… -
Page 639
komp-gbr 2:113… -
Page 640
2:114… -
Page 641
komp-gbr 2:115… -
Page 642
2:116… -
Page 643
komp-gbr 2:117… -
Page 644
2:118… -
Page 645
komp-gbr 2:119… -
Page 646
2:120… -
Page 647
komp-gbr 2:121… -
Page 648
2:122… -
Page 649
komp-gbr 2:123… -
Page 650
2:124… -
Page 651
komp-gbr 2:125… -
Page 652
2:126… -
Page 653
komp-gbr 2:127… -
Page 654
2:128… -
Page 655
komp-gbr 2:129… -
Page 656
2:130… -
Page 657
komp-gbr 2:131… -
Page 658
2:132… -
Page 659
komp-gbr 2:133… -
Page 660
2:134… -
Page 661
komp-gbr 2:135… -
Page 662
2:136… -
Page 663
komp-gbr 2:137… -
Page 664
2:138… -
Page 665
komp-gbr 2:139… -
Page 666
2:140… -
Page 667
komp-gbr 2:141… -
Page 668
2:142… -
Page 669
komp-gbr 2:143… -
Page 670
2:144… -
Page 671
komp-gbr 2:145… -
Page 672
2:146… -
Page 673
komp-gbr 2:147… -
Page 674
2:148… -
Page 675
komp-gbr 2:149… -
Page 676
2:150… -
Page 677
komp-gbr 2:151… -
Page 678
2:152… -
Page 679
komp-gbr 2:153… -
Page 680
2:154… -
Page 681
Operating Instructions Radio VR100, VR200, VR300, VR400 komp-gbr 2:155… -
Page 682
2:156… -
Page 683: Table Of Contents
Table of Contents Table of Contents …………….i System Overview …………….1 Using the Radio …………….2 Security Code ……………..2 Power On/Off ……………..2 Language ………………3 Country Frequency Selection ………….3 Display Illumination……………3 Clock………………..4 Displaying the Time ……………4 Setting the Clock …………….4 12- or 24-Hour Format ……………4 Setting Time of Day …………..4 Alarm Clock and Timer…………..5 Setting the Alarm Clock ………….5…
-
Page 684: Table Of Contents
Band Select……………….11 Weather Band …………….11 Longwave Band …………….11 Tune ………………..11 Seek ………………..12 Seek Sensitivity — FM and AM (U.S. Frequency bands only)…12 Scan ………………..12 RDS (Radio Data System) Features……….13 Alternate Frequency Switching (AF) ……..13 Setting FM Memory (European programmed radio frequencies only)……13 Traffic Program (TP) …………..14…
-
Page 685: Table Of Contents
Change Cassette Side …………..23 Model VR 100 …………….23 Model VR 200 and VR 400…………23 Stop and Eject …………….24 Model VR 100 …………….24 Model VR 200 and VR 400…………24 Pause…………………24 Model VR 100 …………….24 Fast Forward and Rewind………….24 Model VR 100 …………….24 Model VR 200 and VR 400…………24 Radio Monitor Function ……………24 Next Music Search (Except Model VR 100) …….25…
-
Page 686: Table Of Contents
Repeat Track Function …………..31 Repeat CD Function …………..31 Random Track Function ……………32 Random CD/Track Function …………32 Scan Tracks Function …………..33 Scan CDs Function……………33 Infrared Remote …………….34 Power On/Off …………….34 Volume………………34 Mute………………..34 Radio Select………………34 Radio Tune ……………….34 Radio Seek………………34 Radio Presets …………….34 Cassette Select…………….35 CD Select (Single, Integrated CD)……….35 Track Select ………………35…
-
Page 687
System Overview Four models of the radio are available: • AM/FM/Mechanical Cassette – Model VR 100 • AM/FM/Logic cassette with exter- Model VR 100 nal CD changer capability – Model VR 200 • 1-Din AM/FM/CD player with external CD changer capability –… -
Page 688: Using The Radio
(i.e. Note: Contact your local dealer regard- FM, CD, etc.) and is ready to use. ing your security code if lost. If the code is entered incorrectly, you When the radio power is first turned on can try 2 more times.
-
Page 689: Country Frequency Selection
Using the Radio 3 Language Country Frequency Selection Different countries broadcast on different To select the desired Radio Data System sets of radio frequencies. You can select (RDS) Program Type Function (PTY) from several different country-specific display language, turn the radio off, radio frequency bands.
-
Page 690: Displaying The Time
4 Clock Note: When the European frequency is Clock selected, 24-hour format is selected Displaying the Time automatically; however, it can be changed by following the previous steps. When the ignition is on, the time of day Likewise, when Non-European frequen- is displayed, even when the radio is off.
-
Page 691: Alarm Clock And Timer
Clock 5 Alarm Clock and Timer Alarm Clock On / Off / Snooze To turn the alarm on or off, press and (Except Model VR 100) hold the SELECT knob for 3 seconds Setting the Alarm Clock until “12/24” is displayed, then turn the To set the alarm clock, SELECT knob until “ALARM”…
-
Page 692: One-Hour Timer
6 Clock One-Hour Timer You can set the radio to play for one hour and then automatically turn off. To turn the radio on for another hour, with the ignition off, press the VOL- UME knob. After 1 hour of play, the radio will turn off.
-
Page 693
Audio Controls Balance Control The bass and treble audio settings apply To adjust the left/right balance, to all radio modes (AM/FM, LW or WX, cassette and CD). A separate set of the following audio adjustments can be stored for each mode. -
Page 694: Treble Control
8 Audio Controls Treble Control Midrange Control (Model VR 400 only) Press AUD repeatedly Turn VOLUME to to display TREB. adjust TREBLE. Press AUD repeatedly Turn VOLUME to to display MID. adjust MIDRANGE. Turn SELECT to adjust TREBLE. Turn SELECT to adjust MIDRANGE.
-
Page 695: Or 4-Speaker Select
Audio Controls 9 TALK: This mode limits the fre- 2- or 4-Speaker Select quency response and delays audio Depending on the radio speaker installa- from the rear speakers compared to tion in your vehicle, 2- or 4-speaker out- the front speakers. This effect is put can be selected.
-
Page 696
10 Audio Controls To change the degree of effect for the To turn on Speed-Dependent Volume, selected simulation Press and hold to display 12/24. Press AUD to scroll Turn VOLUME to RSIM # to change the increase or decrease degree of effect. effect. -
Page 697
MODE for 3 seconds display AM_MW. Tune until beep to select AM_MW. In any tuner mode (AM, FM, WX or LW) Weather Band The National Oceanic and Atmospheric Administration (NOAA) of the U.S. Department of Commerce provides con- tinuous broadcasts of taped weather messages. -
Page 698
(U.S. Frequency bands only) seconds, the manual tune function is cancelled and the SELECT returns to its In FM and AM tuner modes, the sensi- default function. tivity of the Seek function can be adjust- ed to stop at stations with weaker or Seek stronger signals. -
Page 699: Rds (Radio Data System) Features
After 5 seconds, While in FM Mode, press and hold TUNE the audio mutes again and the radio con- for 3 seconds to display AF-ON.
-
Page 700: Traffic Program (Tp)
14 Tuning the Radio button for 5 seconds while in FM mode. The radio also will automatically start an FM Memory search any time you Seek a Press to turn on. [TP] icon will display. TP station when AF is off, or Seek a TP station when the radio is not tuned to an RDS station.
-
Page 701: Traffic Announcement Volume
Tuning the Radio 15 Traffic Announcement Volume Program Type Function You can adjust the volume of all Traffic (PTY) Announcements by adjusting the volume To select a particular type of music pro- while an announcement is being heard. gramming (Jazz, Sports, Country, etc.), When the next announcement is received, the volume will automatically increase to this volume.
-
Page 702
16 Tuning the Radio European Program Type List The PTY listing is shown below: EUROPEAN PTY LISTING CODE TYPE ENGLISH FRENCH GERMAN NO TYPE NO PTY RIEN TPY KEIN PTY NEWS NEWS INFOS NACHRICH CURRENT AFFAIRS AFFAIRS MAGAZINE AKTUELL INFORMATION INFO SERVICES INFO… -
Page 703
Tuning the Radio 17 EUROPEAN PTY LISTING (continued) CODE TYPE ENGLISH FRENCH GERMAN LEISURE LEISURE LOISIRS REISEN MUSIC JAZZ M JAZZ JAZZ MUSIC COUNTRY COUNTRY COUNTRY NATIONAL MUSIC NATION M M NATION NATIONAL OLDIES MUSIC OLDIES RETRO OLDIES FOLK MUSIC FOLK_M FOLKLORE FOLKLORE… -
Page 704: North American Pty Listing
18 Tuning the Radio ITALIAN & SPANISH PTY LISTINGS (continued) CODE TYPE ITALIAN SPANISH PHONE-ON TELEF. CONSULTA TRAVEL VIAGGI VIAJES LEISURE HOBBY OCIO JAZZ JAZZ JAZZ COUNTRY COUNTRY FOLKLORE NATIONAL MUSIC MUS.ITAL M. NCNAL OLDIES MUSIC OLDIES M_AYER FOLK MUSIC M_FOLK M_FOLK DOCUMENTARY…
-
Page 705: Program Type Interrupt
Tuning the Radio 19 NORTH AMERICAN PTY LISTING (continued) CODE TYPE ENGLISH FRENCH SPANISH LANGUAGE LANGUAGE LANGUE IDIOMAS RELIGOUS MUSIC REL_MUSC MUS_REL MUS_REL RELIGOUS TALK REL_TALK CAU_REL CHRL_REL PERSONALITY PERSNLTY PERS PRSONAJE PUBLIC PUBLIC PUBLIC PUBLICA COLLEGE COLLEGE UNIV. UNIVER 24-28 SPARE BLANK…
-
Page 706: Radio Text (Rt)
• To look for identical and similar gramming. stations, choose “ACPT VAR” (in To enable a news interrupt, while in FM US) or “REG OFF” (in Europe). mode, • To look for only identical stations choose “RJCT VAR”…
-
Page 707: Accessing The Preset Stations
Accessing the Preset Model VR 100 has 12 FM, 12 AM and 6 Stations WX preset channels (U.S. models only) or 6 LW preset channels (European models only).
-
Page 708: Auto-Store Presets
To automatically store the strongest 18 Emergency Broadcasts while a broad- stations available (12 stations for Model cast is being heard. When the next VR 100) as presets, (AM, FM, WX or Emergency Broadcast is received, the LW): volume will automatically increase to this volume.
-
Page 709
MODE button, the Model VR 100 radio will display “NO TAPE” and To play the opposite side of a playing return to FM mode. cassette, press the RW and FF buttons at Cassette Tightening and the same time. -
Page 710: Stop And Eject
24 Using the Cassette Player Stop and Eject To activate Rewind, press the Rewind button until “<< REV” is dis- Model VR 100 played. To cancel Fast Forward or To eject the cassette, press the EJECT Rewind, press the same button again. button .
-
Page 711: Next Music Search
Using the Cassette Player 25 Next Music Search Previous Music Search (except Model VR 100) (except Model VR 100) Most cassettes have blank space between To rewind to the previous blank space on each selection. You can use Next Music the cassette, Search to find these pauses, allowing you to find the beginning of the next selection.
-
Page 712: Dolby Noise Reduction
26 Using the Cassette Player Never touch the cassette head with mag- Dolby Noise Reduction netic or hard objects. (Models VR 200 and VR 400) Do not lubricate the player mechanism. Enabling the Dolby B-type noise reduc- tion function during cassette playback Do not use cassettes that are longer than will reduce background noise on tapes 90 minutes (C-90).
-
Page 713
Using the Cassette Player 27 Note: Do not release the AUD button before “CLN RST” is displayed to reset the clean condition. If you experience poor sound quality from your cassette player, try playing a different cassette tape to see if the tape or tape player is at fault. -
Page 714
If you select the CD mode while no CD is loaded, the radio will display “NO Turn counter clockwise to CD” and return to FM mode. skip backward. CD Eject Continue to turn the knob and the play-… -
Page 715: Repeat Play Function
Compact Disc (CD) Player 29 Repeat Play Function Fast Forward To repeat the current track, To activate Fast Forward, Press until RPT is displayed to REPEAT current track. Press and hold to FAST FORWARD. Press to cancel After 3 seconds, the CD begins to fast REPEAT.
-
Page 716: Cd Player
30 Compact Disc (CD) Player Scan Tracks Function (CD Player) The Scan Tracks function plays the first 10 seconds of each track in order. To activate this function, Press until SCN T# is displayed to scan tracks. To cancel the scan, Press and hold to cancel scan.
-
Page 717: Repeat Cd Function
Using the CD Changer 31 Using the CD Changer The RPT icon is displayed. To cancel the Repeat CD function, (CDX) (CDX not compatible with Radio Model VR100) Press RPT twice to cancel REPEAT. CD Changer Select Repeat CD Function To replay the current CD, Press MODE until CDX is displayed.
-
Page 718: Random Track Function
32 Using the CD Changer Random Track Function Random CD/Track Function To play chosen tracks randomly on the To play chosen tracks randomly from all current CD, CDs, Press and hold SELECT Turn to display RND. Press and hold SELECT Turn to display RND.
-
Page 719: Scan Cds Function
Using the CD Changer 33 Scan Tracks Function Scan CDs Function The Scan Tracks function plays the first The Scan CDs function plays the first 10 10 seconds of each track on the current seconds of the first track of each CD in CD.
-
Page 720
34 Infrared Remote Infrared Remote (Accessory) The infrared remote can be used to con- trol all models except Model VR 100. Power On/Off Press the POWER button to turn the receiver on or off. The vehicle must be turned on. Volume Press the “+”… -
Page 721: Track Select
Infrared Remote 35 Cassette Select CD Changer Select Press the cassette/CD button Press the CD changer button until “CASS” is displayed. until the CD changer symbol and track “TAPE_A” or “TAPE_B” is displayed, number are displayed. The last selected depending on which side of the tape is CD and track begin to play and the track playing.
-
Page 722: Steering Wheel Controls
36 Steering Wheel Controls Steering Wheel Controls The Steering Wheel Controls allow you to keep your hands on the wheel while controlling many radio functions. Steering Wheel Controls are not avail- able with Model VR 100. Volume Press the “ + ” button to raise the vol- ume or press the “—”…
-
Page 723: Switched Auxiliary Outputs
Outputs Note: The features below are applicable Press and hold for at least 5 seconds. only with certain optional equipment. See an authorized Volvo dealer for The radio will return to the previous details. operating mode. Switched Auxiliary Outputs Selecting Speakers for Auxiliary…
-
Page 724
2:198… -
Page 725: Table Of Contents
Cassette………..24 CD Select……….28 Fast Forward — CD……29 Canceling a Next/Previous Music ..Fast Reverse — CD……29 Search ……….25 FM Memory ……..14 Cassette Clean Indicator….26 Cassette Fast Forward/Rewind — Infrared Remote……..34 Steering Wheel Control ….36 Cassette player – Using….23 Cassette Select……..23 Language ……….3…
-
Page 726: Table Of Contents
40 Index Seek Sensitivity – FM and AM ..12 Selecting Speakers for Auxiliary Pause……….24 Audio ……….37 Power On/Off ……..2 Setting FM Memory (European)..13 Power On/Off — Infrared Remote ..34 Setting the Alarm Clock …..6 Presets……….21 Setting the Clock ……..4 Preset Scan ……..21 Setting Time of Day ……4…
-
Page 727
komp-gbr 2:201… -
Page 728
Volvo Truck Corporation Göteborg, Sweden 20 146386 English 01.2002 Printed in Sweden 2:202… -
Page 729
komp-gbr 2:203… -
Page 730
2:204… -
Page 731
komp-gbr 2:205… -
Page 732
2:206… -
Page 733
komp-gbr 2:207… -
Page 734
2:208… -
Page 735
komp-gbr 2:209… -
Page 736
2:210… -
Page 737
Operating Instructions Telephone T3015502 komp-gbr 2:211… -
Page 738
2:212… -
Page 739: Table Of Contents
Contents Getting started ………………1 Switch on the telephone …………..1 Switch off the telephone …………..1 Insert the SIM card …………….1 Enter your PIN code…………….2 Change language …………….. 2 Telephone mode: …………….. 3 Calling ………………..4 Making a call ………………
-
Page 740
2:214… -
Page 741
Getting started Switch on the telephone Turn the ignition key to the driving position or radio position Hold in ON/OFF until the green lamp in the button lights T3014429 Switch off the telephone Hold down ON/OFF until the telephone switches off. The green lamp in the button goes out. -
Page 742: Enter Your Pin Code
Getting started Enter your PIN code. A PIN-code is sometimes activated when the SIM-card is first fitted. You must enter PIN code: your PIN code in order to use the tele- phone. This code must be entered every time the telephone is switched on. This function can be switched off in menu 5.4 (see “Menus”…
-
Page 743: Telephone Mode
Getting started Telephone mode: Once the telephone has been switched on, Telephone mode: the driver’s display will show information concerning the telephone; Return to information mode by pressing NO on the keypad or from the steering Operator wheel by pressing the ESC stalk switch. |<<…
-
Page 744: Making A Call
Calling Making a call 1Go to telephone mode (YES) Operator |<< Memory Menu >>| 2 Dial the number, including the area code If incorrect: Number: • Erase the last digits dialled using CLR 0123456789 • Erase a digit in the middle of a num- ber by scrolling using the arrows until the cursor is directly under the digit and then pressing CLR.
-
Page 745: Finishing A Call
Calling Finishing a call Press NO or hang up the receiver. The sound system will return to the same volume as before the call. T3014427 Making an emergency call It is always possible to make an emergency Emergency call position: call, even without the ignition key or SIM card.
-
Page 746: Telephone Book
Calling Telephone book The telephone book holds 99 names and number. Additional names and numbers can be stored on the SIM card. Search the telephone book Telephone mode: Go to telephone mode Press << Press YES Operator Scroll through the numbers until you |<<…
-
Page 747: While Making A Call
While making a call Change volume The volume can be adjusted using + and — on the steering wheel. T6008661 Respond to call waiting during a call Press YES to answer the call. Press NO to ignore the call. The engaged signal sounds when calling.
-
Page 748
Managing messages There are other message functions apart from the ones described. See “Menus, overview” page 13 for a list of options available in menu 2, Messages. It is not possible to manage messages whilst driving. Writing and sending messages 1Go to telephone mode (YES) Operator |<<… -
Page 749
Managing messages 6 Type the message: But- Character Select the key marked with the letter you wish to type. Press once to select the first [ ] 1 -? ¿! ¡,.: » ’ ( ) letter, twice for the second and so on. a b c 2 ä… -
Page 750: Reading Messages
Managing messages Reading messages An envelope symbol shown in the display indicates that a message has been received. Operator |<< Memory Menu >>| 13:30 0007658.8 km 1 Go to menu 2, ”Messages” 2 Press YES Menu |<< Messages >>| 3 Go to menu 21, ”Read” 4 Press YES Menu |<<…
-
Page 751
Managing messages 9 Select between erasing, answering, edit- ing, sending, calling the sender or saving the number. text. 10 Press YES to select |<< Erase >>| Press NO to ignore the alternatives. Press NO several times or hold NO to re- turn to telephone mode. -
Page 752: Scroll Between The Menus
Menus Scroll between the menus Go to telephone mode (YES). Press >> to Example: access the menus. Currently in telephone mode and wish to change ringing signals. • Scroll between the side menus using >> and << Press >> to access the menus. Scroll using >>…
-
Page 753: Menus, Overview
Menus Menus, overview Only a few menus are accessible whilst driving. Menu Comments 1 Call log Information on incoming and outgoing calls is stored here. Missed calls Select between calling, saving or erasing each number. Received calls Select between calling, saving or erasing each number. Dialled calls Select between calling, saving or erasing each number.
-
Page 754
Menus Menu Comments 2 Messages If Dynafleet is on, the menu ”Messages” will be locked and all message handling must take place via Dynafleet. Read Read messages are marked R, new unread marked N and saved messages marked S. Each message can be erased, answered, changed and sent. -
Page 755
Menus Menu Comments 3 Edit memory Adding a name and a telephone number. Select save in the telephone memory or in the SIM card memory. Search Search using the first letter or first few letters of a name. Choose to answer, erase, copy or move the number. Copy- ing the number so that it is stored in both the telephone memory and in the SIM-card memory. -
Page 756
Menus Menu Comments 4 Call functions Send number Select whether the telephone number is to be displayed along side the sender when ringing out. Call waiting Choose whether to answer other calls while talking in the telephone. Auto-answer Select whether the telephone automatically answers all in- coming calls. -
Page 757
Menus Menu Comments 5 Settings Factory settings Resets the telephone to the factory settings (affects lan- guage, operator, ring volume, ring signal, button click, speed-dependent volume, radio auto-mute, Dynafleet) Operator Select whether the telephone should search for another op- erator when the correct one is not found or whether to select the operator manually. -
Page 758: No Display
Troubleshooting No display The telephone will function even if it is not in contact with the display. To dial a num- ber, enter the number and press YES. Damaged handsfree or receiver If handsfree does not work the telephone automatically switches off the handsfree function and only the receiver can be used.
-
Page 759
Index Index Menus … . 12 jump directly to a ..12 Answer … . 4 overview . -
Page 760
Volvo Truck Corporation Göteborg, Sweden 20 156860 English .01.2002 Printed in Sweden 2:234… -
Page 761
Operating Instructions Refrigerator box T0010493 komp-gbr 2:235… -
Page 762
2:236… -
Page 763
Safety regulations • • Under no circumstances interfere with Never use detergent which contains the refrigerant circuit abrasive agents, acid or solvent • • The refrigerator box is not intended for When the refrigerator box is to be dis- storing corrosive material or solvent carded a specialist should be consulted •… -
Page 764
Starting the refrigerator box Hold down the switch marked ”ON/OFF” (1) for about 1 second. The green light diode (2) lights up and the compressor starts. The compressor will only start when the battery voltage exceeds 24.2 Volts. If the battery voltage is lower than this, the green light diode (2) begins to flash. -
Page 765
C5W 24V SV 8.5. Fault tracing If the refrigerator box does not work, first action. If the fault persists, contact your check that the voltage protector has not ac- Volvo dealer. tivated. See “Voltage protector” page 3 for komp-gbr 2:239… -
Page 766
Tips on saving energy • • Let warm goods cool down properly Do not keep the refrigerator/freezer before you put them in the refrigerator space at too low a temperature • Do not open the lid unless it is neces- •… -
Page 767
komp-gbr 2:241… -
Page 768
Volvo Truck Corporation Göteborg, Sweden 20 145162 English .01.2002 Printed in Sweden 2:242… -
Page 769
Operating Instructions Refrigerator T0010509 komp-gbr 2:243… -
Page 770
2:244… -
Page 771: Safety Instructions
Safety instructions • • Do not open the refrigerant circuit un- Never use a cleaning agent containing der any circumstances polish, acid, lye or solvent • • The refrigerator is not intended to be When the refrigerator is scrapped an used for the storage of corrosive mate- expert must be consulted to recycle the rial or solvents…
-
Page 772
Switch on the refrigerator Hold the switch marked ”ON/OFF” (1) in for approximately 1 second. The green LED (2) comes on and the compressor starts. The compressor only starts if the battery voltage exceeds 24.2 Volts. If the battery voltage is lower the green LED (2) will start to flash. -
Page 773: Tilting The Cab
The bulb is replaced by removing Fault-tracing If the refrigerator does not function first corrective action. If the fault remains con- check that the voltage switch has not tact your Volvo dealer. tripped. See “Voltage switch” page 3 for komp-gbr 2:247…
-
Page 774
Energy conservation tips • • Allow warm items to cool thoroughly Do not open the door more than nec- before putting them in the refrigerator essary • • Defrost as soon as ice begins to form Never leave the door open on the walls of the refrigerator •… -
Page 775
komp-gbr 2:249… -
Page 776
Volvo Truck Corporation Göteborg, Sweden 20 147661 English .01.2002 Printed in Sweden 2:250… -
Page 777
Operating Instructions Ladder T8008441 T8008440 Warning! Important! Fix the ladder securely. Never climb the ladder when it is installed on the cab. FM, FH, Tab 2 komp-gbr 2:251… -
Page 778
Volvo Truck Corporation Göteborg, Sweden 20 142766 English 3000.8.00 Printed in Sweden 2:252… -
Page 779
komp-gbr 2:253… -
Page 780
2:254… -
Page 781
komp-gbr 2:255… -
Page 782
2:256… -
Page 783
komp-gbr 2:257… -
Page 784
2:258… -
Page 785
komp-gbr 2:259… -
Page 786
2:260… -
Page 787
komp-gbr 2:261… -
Page 788
2:262… -
Page 789
komp-gbr 2:263… -
Page 790
2:264… -
Page 791
komp-gbr 2:265… -
Page 792
2:266… -
Page 793
komp-gbr 2:267… -
Page 794
2:268… -
Page 795
komp-gbr 2:269… -
Page 796
2:270… -
Page 797
komp-gbr 2:271… -
Page 798
2:272… -
Page 799
komp-gbr 2:273… -
Page 800
2:274… -
Page 801
Operating Instructions Side underrun protection T0010430 komp-gbr 2:275… -
Page 802
2:276… -
Page 803
Fold out the side underrun protection Pull up the pins Fold out the side underrun protection Note! Do not pull the side skirt T0010429 Remove the side underrun protection Fold out the side underrun protection Remove the light if mounted in the side skirt Undo the cable holding the side under- run protection… -
Page 804
Volvo Truck Corporation Göteborg, Sweden 20 155329 English .01.2002 Printed in Sweden 2:278… -
Page 805
komp-gbr… -
Page 807
komp-gbr… -
Page 809
komp-gbr… -
Page 811
komp-gbr… -
Page 813
komp-gbr… -
Page 814
3:10… -
Page 815
komp-gbr 3:11… -
Page 816
3:12… -
Page 817
komp-gbr 3:13… -
Page 818
3:14… -
Page 819
komp-gbr 3:15… -
Page 820
3:16… -
Page 821
komp-gbr 3:17… -
Page 822
3:18… -
Page 823
komp-gbr 3:19… -
Page 824
3:20… -
Page 825
komp-gbr 3:21… -
Page 826
3:22… -
Page 827
komp-gbr 3:23… -
Page 828
3:24… -
Page 829
komp-gbr 3:25… -
Page 830
3:26… -
Page 831
komp-gbr 3:27… -
Page 832
3:28… -
Page 833
komp-gbr 3:29… -
Page 834
3:30… -
Page 835
komp-gbr 3:31… -
Page 836
3:32… -
Page 837
komp-gbr 3:33… -
Page 838
3:34… -
Page 839
komp-gbr 3:35… -
Page 840
3:36… -
Page 841
komp-gbr 3:37… -
Page 842
3:38… -
Page 843
komp-gbr 3:39… -
Page 844
3:40… -
Page 845
komp-gbr 3:41… -
Page 846
3:42… -
Page 847
komp-gbr 3:43… -
Page 848
3:44… -
Page 849
komp-gbr 3:45… -
Page 850
3:46… -
Page 851
komp-gbr 3:47… -
Page 852
3:48… -
Page 853
komp-gbr 3:49… -
Page 854
3:50… -
Page 855
komp-gbr 3:51… -
Page 856
3:52… -
Page 857
komp-gbr 3:53… -
Page 858
3:54… -
Page 859
komp-gbr 3:55… -
Page 860
3:56… -
Page 861
komp-gbr 3:57… -
Page 862
3:58… -
Page 863
komp-gbr 3:59… -
Page 864
3:60… -
Page 865
komp-gbr 3:61… -
Page 866
3:62… -
Page 867
komp-gbr 3:63… -
Page 868
3:64… -
Page 869
komp-gbr 3:65… -
Page 870
3:66… -
Page 871
komp-gbr 3:67… -
Page 872
3:68… -
Page 873
komp-gbr 3:69… -
Page 874
3:70… -
Page 875
komp-gbr 3:71… -
Page 876
3:72… -
Page 877
komp-gbr 3:73… -
Page 878
3:74… -
Page 879
komp-gbr 3:75… -
Page 880
3:76… -
Page 881
komp-gbr 3:77… -
Page 882
3:78… -
Page 883
komp-gbr 3:79… -
Page 884
3:80… -
Page 885
komp-gbr 3:81… -
Page 886
3:82… -
Page 887
komp-gbr 3:83… -
Page 888
3:84… -
Page 889
komp-gbr 3:85… -
Page 890
3:86… -
Page 891
komp-gbr 3:87… -
Page 892
3:88… -
Page 893
komp-gbr 3:89… -
Page 894
3:90… -
Page 895
komp-gbr 3:91… -
Page 896
3:92… -
Page 897
komp-gbr 3:93… -
Page 898
3:94… -
Page 899
komp-gbr 3:95… -
Page 900
3:96… -
Page 901
komp-gbr 3:97… -
Page 902
3:98… -
Page 903
komp-gbr 3:99… -
Page 904
3:100… -
Page 905
komp-gbr 3:101… -
Page 906
3:102… -
Page 907
komp-gbr 3:103… -
Page 908
3:104… -
Page 909
komp-gbr 3:105… -
Page 910
3:106… -
Page 911
komp-gbr 3:107… -
Page 912
3:108… -
Page 913
komp-gbr 3:109… -
Page 914
3:110… -
Page 915
komp-gbr 3:111… -
Page 916
3:112… -
Page 917
komp-gbr 3:113… -
Page 918
3:114… -
Page 919
komp-gbr 3:115… -
Page 920
3:116… -
Page 921
komp-gbr 3:117… -
Page 922
3:118… -
Page 923
komp-gbr 3:119… -
Page 924
3:120… -
Page 925
komp-gbr 3:121… -
Page 926
3:122… -
Page 927
komp-gbr 3:123… -
Page 928
3:124… -
Page 929
komp-gbr 3:125… -
Page 930
3:126… -
Page 931
komp-gbr 3:127… -
Page 932
3:128… -
Page 933
komp-gbr 3:129… -
Page 934
3:130… -
Page 935
komp-gbr 3:131… -
Page 936
3:132… -
Page 937
komp-gbr 3:133… -
Page 938
3:134… -
Page 939
komp-gbr 3:135… -
Page 940
3:136… -
Page 941
komp-gbr 3:137… -
Page 942
3:138… -
Page 943
komp-gbr 3:139… -
Page 944
3:140… -
Page 945
komp-gbr 3:141… -
Page 946
3:142… -
Page 947
Operating Instructions Spare wheel T0010204 komp-gbr 3:143… -
Page 948
3:144… -
Page 949
Lower the wheel First check that the tensioning band • is mounted • is complete, including the seam • has a knot in the roll • is properly coiled on the roll Tighten the band if necessary. T0010180 Stand outside the wheel’s radius Loosen all four nuts. -
Page 950
Lift up the wheel First check that the tensioning band • is mounted • is complete, including the seam • has a knot in the roll • is properly coiled on the roll Tighten the band if necessary. T0010181 If the vehicle has a side underrun guard or chassis fairing, use the inner hole (A) on the holder. -
Page 951
komp-gbr 3:147… -
Page 952
3:148… -
Page 953
komp-gbr 3:149… -
Page 954
Volvo Truck Corporation Göteborg, Sweden 20 159590 English .01.2002 Printed in Sweden 3:150… -
Page 955
komp-gbr 3:151… -
Page 956
3:152… -
Page 957
komp-gbr 3:153… -
Page 958
3:154… -
Page 959
Operating Instructions Central lubrication FM, FH T9007781 komp-gbr 3:155… -
Page 960
3:156… -
Page 961
”MIN” marking Consistency of the grease NLGI 00 or NLGI 000 System volume Tractor ……approx. 2.7 kg Other ……approx. 6 kg For more detailed information concerning approved grease types contact an authorised Volvo dealer. komp-gbr 3:157… -
Page 962
Volvo Truck Corporation Göteborg, Sweden 20 144662 English .05.2001 Printed in Sweden 3:158… -
Page 963
An exhaust extractor hose must be connected to the exhaust opening if the engine is to be driven in an enclosed space. Important! With each oil change the filter insert should be taken out, cleaned and turned. Contact a Volvo workshop for service. komp-gbr 3:159… -
Page 964
Volvo Truck Corporation Göteborg, Sweden 20 169514 English .02.2002 Printed in Sweden 3:160… -
Page 965
komp-gbr…
This manual is also suitable for:
Fh
On this page you can free download workshop repair manuals PDF for Volvo trucks, and also fault codes PDF and Wiring Diagrams.
|
Title |
File Size |
Download Links |
|
Volvo C 303 Owner’s Manual [PDF] |
4Mb |
Download |
|
Volvo driver information display manual [PDF] |
772kb |
Download |
|
Volvo FM, FH, NH, FL, NL Service Manual — Lubrication service and oil |
1.9Mb |
Download |
|
Volvo truck Oil and Filter Service Scheduale [PDF] |
1.1Mb |
Download |
|
Volvo Truck Quality Manual [PDF] |
2.4Mb |
Download |
|
Volvo Trucks Service Bulletin — Transmission [PDF] |
7.2Mb |
Download |
|
Volvo TSI Vehicle Management System (VECTRO II, ECU) Service Manual |
4.5Mb |
Download |
|
Title |
File Size |
Download Links |
|
Volvo Cab Exterior Catalog [PDF] |
808.5kb |
Download |
|
Volvo Catalog Spare parts for trucks [PDF] |
2.5Mb |
Download |
|
Volvo Replacement Parts Catalog — Climate [PDF] |
248.2kb |
Download |
|
Volvo Replacement Parts Catalog 2012 [PDF] |
4.3Mb |
Download |
|
Volvo Truck / Bus Replacement Spare Parts Catalog PDF [PDF] |
7.7Mb |
Download |
|
VolvoCab Interior Catalog [PDF] |
1.3Mb |
Download |
![]()
Volvo driver information display manual
Volvo driver information display manual.
Adobe Acrobat Document
767.0 KB
![]()
Volvo Instrument Cluster Control Module (MID 140) Diagnostic Trouble Code (DTC), Guide
Volvo Instrument Cluster Control Module
Adobe Acrobat Document
439.4 KB
![]()
Volvo Engine D12A Fault Codes PDF
Volvo Engine D12A Fault Codes PDF.pdf
Adobe Acrobat Document
1’021.7 KB
![]()
Volvo L150F, L180F, L220F Recycling Manual
Volvo L150F, L180F, L220F Recycling Manu
Adobe Acrobat Document
2.1 MB
![]()
VOLVO 240 Engines d20 d24 repairs manual
VOLVO 240 Engines d20 d24 repairs manual
Adobe Acrobat Document
17.2 MB
![]()
Volvo FM, FH, NH, FL, NL Service Manual — Lubrication service and oil changes
Volvo FM, FH, NH, FL, NL Service Manual
Adobe Acrobat Document
2.0 MB
![]()
Volvo Maintenance and Engine — Operator’s Manual
Volvo Maintenance and Engine — Operator’
Adobe Acrobat Document
1.4 MB
![]()
Volvo L150F/L180F/L220F Recycling Manual
Volvo Tractor_Manual_L150F__L220F.pdf
Adobe Acrobat Document
2.1 MB
![]()
Volvo trucks Operator’s Manual: Maintenance and Engines
Volvo_Truck_Owners_Operators_M.pdf
Adobe Acrobat Document
1.4 MB
![]()
Volvo D12, D12A and D12B engines Workshop Manual PDF
Volvo D12, D12A and D12B engines Worksho
Adobe Acrobat Document
17.6 MB
![]()
Volvo Tractor L60F/L120F Recycling Manual
Volvo Tractor Manual_L60F__L120F.pdf
Adobe Acrobat Document
2.4 MB
![]()
Volvo Truck Fault codes
Volvo Truck Fault codes.rar
compressed file archive
790.6 KB
![]()
Volvo VHD 2,VN,VT Service Manual
Volvo VHD 2,VN,VT Manual.pdf
Adobe Acrobat Document
702.1 KB
![]()
Vovlo TAD650VE, TAD660VE, TAD734GE, TAD750VE, TAD760VE Workshop Manual
Vovlo TAD650VE, TAD660VE, TAD734GE, TAD7
Adobe Acrobat Document
2.3 MB
|
Title |
File Size |
Download Links |
|
Volvo A35 / A40D [PDF] |
458.4kb |
Download |
|
Volvo A35e Fs Articulated Dump Truck Workshop Manual [PDF] |
2.1Mb |
Download |
|
Volvo A35E, A35E FS, A40E, A40E FS Operator’s Manual [PDF] |
7.8Mb |
Download |
|
Volvo A40D Maintenance Manual [PDF] |
289.1kb |
Download |
|
Volvo A60H Maintenance Manual [PDF] |
7.1Mb |
Download |
|
Title |
File Size |
Download Links |
|
Volvo EC160B, 180B, 210B, 240B, 290B, 360B, 460B Service Manual |
11.7Mb |
Download |
|
VOLVO L120E Electrical Schematic Diagram [PDF] |
824.7kb |
Download |
|
Volvo Semi Truck Wiring Diagram [JPG] |
114.4kb |
Download |
![]()
Volvo Truck FH12, FH16 Electrical Wiring Diagrams
Volvo Truck FH12, FH16 Electrical Wiring Diagrams
Volvo Truck FH12, FH16 EWD.rar
compressed file archive
3.1 MB
![]()
Volvo FH12/FH16 Service Manual: Electrical Wiring Diagrams
Volvo FH12/FH16 Service Manual: Electrical Wiring Diagrams
Volvo_FH12_FH16 Manual.pdf
Adobe Acrobat Document
3.6 MB
![]()
Volvo FH12/FH16/RHD Wiring Diagrams
Volvo FH12 FH16 RHD Wiring Diagramc Wiri
Adobe Acrobat Document
3.1 MB
![]()
Volvo-FH-12(D12A-380) wiring diagrams
Volvo-FH-12(D12A-380) wiring diagrams.ra
compressed file archive
2.0 MB
![]()
VOLVO L120E Electrical Schematic Diagram
VOLVO L120E Electrical Schematic Diagram
Adobe Acrobat Document
955.0 KB
![]()
Volvo FH12 Geartronic Wiring diagram
Volvo FH12 Geartronic Wiring diagram.pdf
Adobe Acrobat Document
13.5 MB
Volvo D12A Fault Codes
Volvo driver information display manual
Volvo Instrument Cluster Control Module (MID 140) Diagnostic Trouble Code (DTC), Guide
Volvo L150F, L180F, L220F Recycling Manual
Volvo Maintenance and Engine — Operator’s Manual
Volvo Semi Truck Wiring Diagram
Volvo Tractor Manual_L60F__L120F
Volvo Tractor_Manual_L150F__L220F
Volvo Truck Fault codes
Volvo Truck FH12, FH16 EWD
Volvo VHD 2,VN,VT Manual
Volvo VN VHD Trucks Service & Repair Manual From Aug 1996-Nov 2002
Volvo_FH12_FH16 Manual
Volvo_Truck_Owners_Operators_M
Volvo-FH-12(D12A-380) wiring diagrams
|
Title |
File Size |
Download Links |
|
Volvo AQ125,145 Engine Unit Workshop Manual [PDF] |
5.3Mb |
Download |
|
Volvo BW55, AW55, AW70, AW71 Service and Repair Manual [PDF] |
10.5Mb |
Download |
|
Volvo D11H, D11H, D13H, D16H Engines Operator’s Manual [PDF] |
4.5Mb |
Download |
|
Volvo D12, D12A and D12B engines Workshop Manual PDF [PDF] |
17.8Mb |
Download |
|
Volvo D12, D12A, D12B, D12C Service Manual [PDF] |
668.5kb |
Download |
|
Volvo D13 Engine Service Manual [PDF] |
1.9Mb |
Download |
|
Volvo D13F Engine Workshop Manual [PDF] |
4.1Mb |
Download |
|
Volvo D13F Engines Fuel System, Design and Function Service Manual |
296.2kb |
Download |
|
Volvo D7, D12 Engines Service Manual [PDF] |
1.4Mb |
Download |
|
Volvo D7E B7RLE Manual [PDF] |
4Mb |
Download |
|
Volvo Engine D 20, D 24 Service and Repair Manual [PDF] |
16.3Mb |
Download |
|
Volvo Maintenance and Engine — Operator’s Manual [PDF] |
1.4Mb |
Download |
|
Vovlo TAD650VE, TAD660VE, TAD734GE, TAD750VE, TAD760VE Workshop |
2.3Mb |
Download |
Volvo Trucks Corporation is a Swedish automotive company, one of the world leaders in the production of heavy trucks. Belongs to the second largest truck manufacturer in the
world «Volvo Group».
Volvo Trucks in 2001 acquired a controlling package of Renault’s cargo division (RVI), which in 2002 became part of Renault Trucks. The president and chairman of the board of
directors is Leif Johansson. The post of the chairman of the board is occupied by the former head of Renault — Louis Schweitzer.
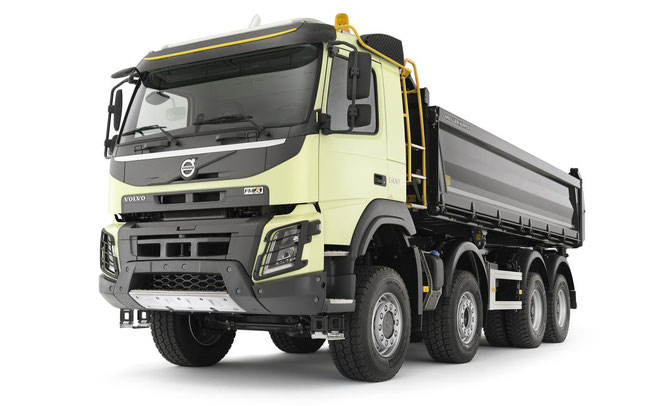
The company was founded in 1916 by Assar Gabrielsson (Swede Assar Gabrielsson) and Gustaf Larson (Swede Gustaf Larson) as a subsidiary of the well-known bearing manufacturer SKF. In 1927, the
first production car leaves the factory gate. Already in 1935 Volvo gained complete independence from SKF.
The first truck appeared at the beginning of 1928 — it was LV series 1, which had instant success, and 500 units were sold until the summer. It had a 2.0 liter engine with 4 cylinders, a capacity
of 28 hp. (21 kW).
Volvo produces mainly (95%) heavy commercial vehicles (in the class of over 16 tons). In terms of production volumes, Volvo Truck Corporation ranks second in the world market. In 2006, Volvo
Trucks sold 105519 units of trucks.
Volvo trucks are positioned by the manufacturer as safe and comfortable.
The global international corporation Volvo Trucks Corporation includes design and manufacturing centers located in Sweden, Belgium, Brazil and the USA, as well as a large number of assembly
enterprises around the world, some of which are represented by the corporation as a co-founder, together with local industrial groups, in Others are directly owned by the Volvo Group.
Volvo Trucks, in addition to the same brand, is also the owner of such brands of truck manufacturers as Renault Trucks (Renault Trucks), Mack Truck (American brand) and Nissan Diesel (now — UD Trucks).
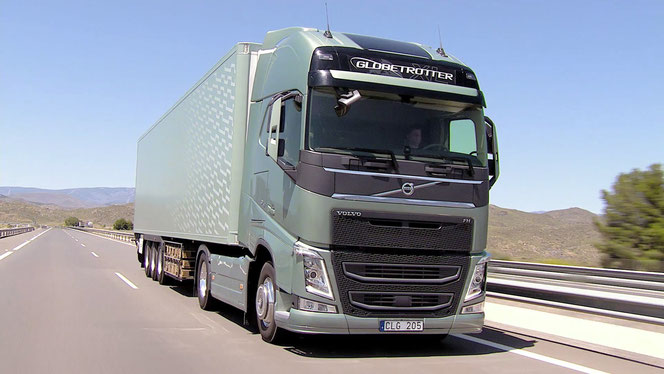
Volvo Trucks also was once the co-owner of the well-known truck manufacturer Scania, but in accordance with the decision of the antimonopoly committee of the European Union sold its share of the
company’s shares on the market.
Volvo Trucks has representative offices and service centers in more than 130 countries. Over 1000 local dealerships in different parts of the world and 1800 technical centers provide sales and
maintenance of trucks.
Almost half of the total sales of its new equipment Volvo Trucks in Western Europe, more than a third — in America. Eastern Europe accounts for 6% of gross sales, but this market is currently the
fastest growing for Volvo Trucks. In Russia in 2006, 2436 units of Volvo Trucks’ heavy-duty vehicles were sold.
In the structure of production of Volvo trucks Volvo FH owns the largest share, in 2006 the manufacturer sold over 40 thousand trucks of this series.
It’s easier than the FH series in the current lineup — Volvo’s FM series trucks, which are designed for short and medium haulage. Ravozovye
trucks — this Volvo FL. These trucks mainly serve for quick deliveries in the city and in the suburbs, the removal of domestic waste and the provision of other utilities.
Despite the fact that Volvo sold its Volvo Car division, the VOLVO group includes the following units:
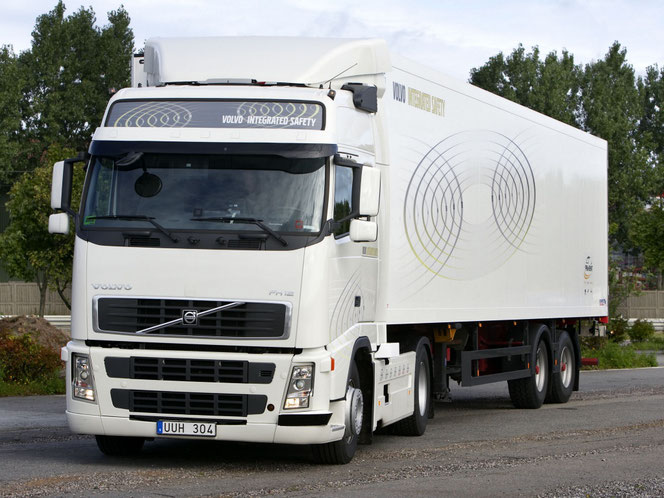
- Volvo Trucks (manufactures lorries)
- Mack Trucks
- Renault Trucks
- UD Trucks
- Volvo Bussar
- Volvo Construction Equipment
- Volvo Penta
- Volvo Aero
- Volvo Financial Services
In 2008, Volvo Trucks sold 105,952 trucks
Перечень файлов для ремонта грузовых автомобилей ВОЛЬВО .
VOLVO (Вольво) electric circuits, pneumatic schemes, diagnostic mistakes, instructions, service manuals. В переводе с латинского языка volvo» означает я качусь; или я кручусь. Электрические схемы , пневматические схемы , диагностика , диагностические ошибки , руководства по ремонту тормозной системы,пневмосистем, двигателя ,кпп.
Volvo FH12,FH16 1 версии электрическая схема (электросхема) и описание,
Volvo FH 12FH 16 LHD электрическая схема сервисный мануал для ремонта всех узлов автомобиля вольво фх 12,фх 16.диагностика,
VOLVO FH12.FH16 предохранители и реле 2 варианта монтажных блоков. перевод на русский язык обозначения и местоположения электрического монтажного блока предохранителей и реле вольво,
VOLVO FM, FH версии 2 предохранители и реле описание на русском языке
VOLVO FH 12FH 16 электросхема стеклоочистителя
VOLVO FH 12FH 16 электросхема аварийки и поворотов
VOLVO (Вольво) FH 12FH 16 электросхема отопителя и кондиционера
VOLVO (Вольво) FH 12FH 16 электросхема автономки эбешпехер DL1C (фен),
VOLVO (Вольво) FH 12FH 16 электросхема автономки эбешпехер DW80 (мокрая).
VOLVO (Вольво) FH 12FH 16 электросхема звукового сигнала
VOLVO (Вольво) FH 12FH 16 электросхема прикуривателя
Коды неисправностей VOLVO FH12 c двигателем D12A. Вольво до 1989 году выпуска,
VOLVO FH12 электрическая схема управления двигателя D12A.
Volvo Geartronic FH12 электрическая схема
Volvo 587F12 EDC LUCAS полное описание электросхемы (электрические схемы) на русском языке,
Volvo Geartronic FH 12 электрическая схема и описание коробки передач (кпп),
Volvo FH16 (Вольво FH16) обзор параметры обзорная статья и фото
Volvo FH (Вольво FH) обзор — В качестве основного силового агрегата для грузовика Volvo FH предлагается 12,8-литровый шестицилиндровый рядный дизель D13A с турбонагнетателем и промежуточным охладителем. Он доступен в четырех различных вариантах мощности: 400, 440, 480 и 520 л.с. Хотя предлагается также и двигатель D13С мощностью 420, 460, 500 и 540 л.с.
VOLVO FM9FM12FH12FH16NH12 2 версии электрические схемы (электросхемы),
VOLVO FH FN 2 версии, обозначения на электрических схемах
VOLVO FH FM условные сокращения обозначений на схемах
анализ эксплуатационных свойств сдельного тягача Volvo FH12, (по данным НИИ Транстехника на 2013 год)
места соединений «массы» VOLVO FM, FH 2 версии,
VOLVO FM, FH Схема соединений, электрооборудования
VOLVO FH12 — 380 как прочитать диагностические коды,
VOLVO коды неисправности MID PID FMI SID,
Volvo F10 F12 F16 LHD сервис мануал и электрические схемы (электросхемы)
тахограф Volvo инструкция,подключение,чтение (диагностика) и расшифровка диагностических ошибок (кодов) на русском языке,
Volvo FL (Вольво FL) обзор, выпускается в трех разных вариантах грузоподъемности: 12-16, 14-16 и 18 тонн, и с тремя вариантами кабины. Колесная база грузовика от 3 070 до 6 800 мм, а полная разрешенная масса от 12 480 до 13 030 кг.
Volvo FMX (Вольво FMX) обзор, Для Volvo FMX доступны два типа дизельных двигателей: D11 и D13 с большим
количеством вариантов мощности от 330 до 500 л.с.
Volvo FE (Вольво FE) обзор Двигатель для грузовика Volvo FE это 7,2-литровый дизельный мотор D7E с турбокомпрессором, который, в зависимости от исполнения, способен выдавать 240, 280 и 320 л.с. а в качестве трансмиссий предлагаются шести- и девятиступенчатые механические коробки передач, либо шестуступенчатый автомат со встроенным ретардером.
Volvo FM (Вольво FM) обзор параметры и фото и описание.Двигатель D11C для Вольво FM имеет четыре варианта мощности: 330, 370, 410 и 450 л.с. двигатель D13B 360, 400 и 440 л.с. и, наконец, двигатель D13C 380, 420, 460 и 500 л.с.
Нормы расхода топлива на седельные тягачи Volvo Нормы расхода топлива на седельные тягачи согласно постановлению Министерства транспорта и коммуникаций
ЗАПЧАСТИ Б/У,РАЗБОРКИ И МАГАЗИНЫ Б.У. АВТОЗАПЧАСТЕЙ Volvo (Москва)
Обзор Американских моторов-слабые места двигателей Detroit Diesel,Cummins,Caterpillar,Volvo,
Тарировка топливных баков по таблице,Под словом тарировка топливных баков понимается калибровка или градуировка бака. Более точный термин,тарировка. Тарировка производится с помощью тарировочной таблицы.Таблица перевеводит значение уровня топлива в баке измерителем ( или датчиком ) в объем топлива в баке.Не применяя специальных приспособлений.
VOLVO диагностическая колодка-распиновка
распиновка розеток прицепного устройства


Один из первых грузовиков компании Volvo 1,5-тонный Series 1, выпущенный в 1928 году и сохранившийся до наших дней
Aktiebolaget Volvo (Volvo Group, Volvokoncernen) концерн из Швеции. Производит автобусы, грузовые и коммерческие автомобили, двигатели и разное оборудование. Раньше Volvo выпускал также и легковые машины, но в 1999 продал за 6,45 млрд долларов отделение легковых машин под именем Volvo Personvagnar концерну Ford, который в 2010 далее перепродал это отделение за $1,8 млрд китайскому концерну Geely.
Вся информация находящаяся на этих страницах, носит ознакомительный характер для помощи по ремонту,диагностике, обслуживанию,эксплуатации грузового,спец. транспорта


 |
|||
|
|


: Инструкция по эксплуатации, техническое обслуживание, руководство по ремонту")
- Главная
- Volvo
- FH
Компания Volvo Truck Corporation – это шведская фирма которая занимается производством грузовых тягачей. А конкретно серия Volvo FH, расшифровывается как «большой грузовик с высокой кабиной». А другая серия – FL, расшифровывается как «грузовик с низкой кабиной». А цифры после этих букв – это литраж двигателей. В 1993 году были выпущены модели F12 и F16. И по сей день новые ревизии этих моделей находятся в производстве. Серия FH является одной из самых успешных серий машин этой компании. Модель FH получила награду «грузовик года». В обе модели был установлен 6-ти цилиндровый дизельных двигатель. Была установлена износостойкая система торможения. На низких оборотах двигателя, механизм не использовался.
Если вы хотите стать обладателем данной серии автомобилей Volvo FH, Вы уже наверняка знаете, что грузовые машины не подвержены быстрому износу. Но стоит понимать, что при покупке более старой ревизии с рук, кое-какие ремонтные работы провести все же придется. При незначительных поломках, отдавать машину мастеру будет неразумно. Поскольку провести ремонт самостоятельно не так сложно, Вы можете сделать это сами. Но лучше себя перестраховать, предварительно прочитав несколько книг по ремонту машин. На нашем сайте Вы сможете скачать руководство по эксплуатации Volvo FH и большое количество другой литературы по ремонту и обслуживанию.
Обновление цен:
19.05.2023
Диапазон цен:
1349 — 5660 руб.
Инструкции по ремонту двигателей Volvo FH с 2012 г.
Volvo FH (с 2012 г.) – автомобиль нового поколения крупнотоннажной грузовой техники производства шведской компании Volvo Trucks Corporation. Оснащен двигателями на 12.8 л (D13C и D13K) и 16.1 л (D16G) мощностью 420 / 460 / 500 / 540 / 600 / 700 / 750 л. с.
- от 1640 руб.
- 2012 — 2023 гг.
- дизель
- скачать
Электросхемы, инструкции по эксплуатации и ремонту Volvo FH с 2012 г.
Крупногабаритный Volvo FH колесит по дорогам мира с 2012 года. Дизельные двигателя (12,8 — 16,1 л) делают его относительно экономичным. С бензиновыми двигателями не выпускается. Гораздо проще управлять таким грузовым авто, имея под рукой данное руководство по эксплуатации Volvo FH.
- от 1620 руб.
- 2012 — 2023 гг.
- бензин
- скачать
Руководство по ремонту и эксплуатации Volvo FH с 2012 г., Том 2
Автомобиль марки Volvo FH выпускается начиная с 2012 года. Данные машины оснащаются двигателями различного объема, которые работают на дизельном топливе. Автомобили такого модельного ряда отличаются комфортом и приспособлены для рейсов на достаточно большие расстояния.
- от 2560 руб.
- 2012 — 2023 гг.
- дизель
- скачать
Руководство по ремонту и обслуживанию Volvo FH (Том 2)
Эта PDF-книга (2 том из коллекции) содержит руководство по эксплуатации Volvo FH и версии FM с 2012 г. в. с моторами D9B (9 л.) и D12B (13 л.) мощностью от 300 до 520 л. с. В книге пошагово описан ремонт электрики, ходовой части, кузова и трансмиссии тягача.
- от 1349 руб.
- 2012 — 2021 гг.
- дизель
- скачать
Мануал по эксплуатации и ремонту Volvo FH до 2005 г. (Том 3)
PDF-книга по ремонту Volvo FH (3-ий том из серии книг) и модели FM описывает электросхемы и пошаговые алгоритмы поиска неполадок грузовиков 1998-2005 г. в., которые можно купить с двигателями D13A/D9B емкостью 12.8 и 9.4 л. Соответственно.
- от 1605 руб.
- 1998 — 2005 гг.
- дизель
- скачать
Книга по ремонту и обслуживанию Volvo FH (Том 1)
Книга по ремонту Volvo FH (1-ый том из коллекции) также рассчитана на тягачи серии FM и включает в себя инструкции по обслуживанию и ремонту грузовиков с 2002 г. в., которые можно купить с дизельными двигателями D13F (12.8 л) и D9B (9.4 л.).
- от 1349 руб.
- 2002 — 2012 гг.
- дизель
- скачать
Руководство по ремонту и эксплуатации Volvo FH12 1993–2013 г.
Volvo FH12 относится к грузовым автомобилям. Представляем руководство по обслуживанию и эксплуатации автомобиля Volvo FH12 с двигателями 12,1 л., мощностью 340, 380, 420 л.с. Оно поможет хорошо узнать автомобиль, его характеристики и самостоятельно исправить неполадки.
- от 1542 руб.
- 1993 — 2013 гг.
- дизель
- скачать