| Order | Area | TOCTitle | ContentId | PageTitle | DateApproved | MetaDescription |
|---|---|---|---|---|---|---|
|
18 |
editor |
Emmet |
baf4717c-ea52-486e-9ea3-7bf1c4134dad |
Emmet in Visual Studio Code |
5/3/2023 |
Using Emmet abbreviations inside Visual Studio Code. |
Emmet in Visual Studio Code
Support for Emmet snippets and expansion is built right into Visual Studio Code, no extension required. Emmet 2.0 has support for the majority of the Emmet Actions including expanding Emmet abbreviations and snippets.
How to expand Emmet abbreviations and snippets
Emmet abbreviation and snippet expansions are enabled by default in html, haml, pug, slim, jsx, xml, xsl, css, scss, sass, less and stylus files, as well as any language that inherits from any of the above like handlebars and php.
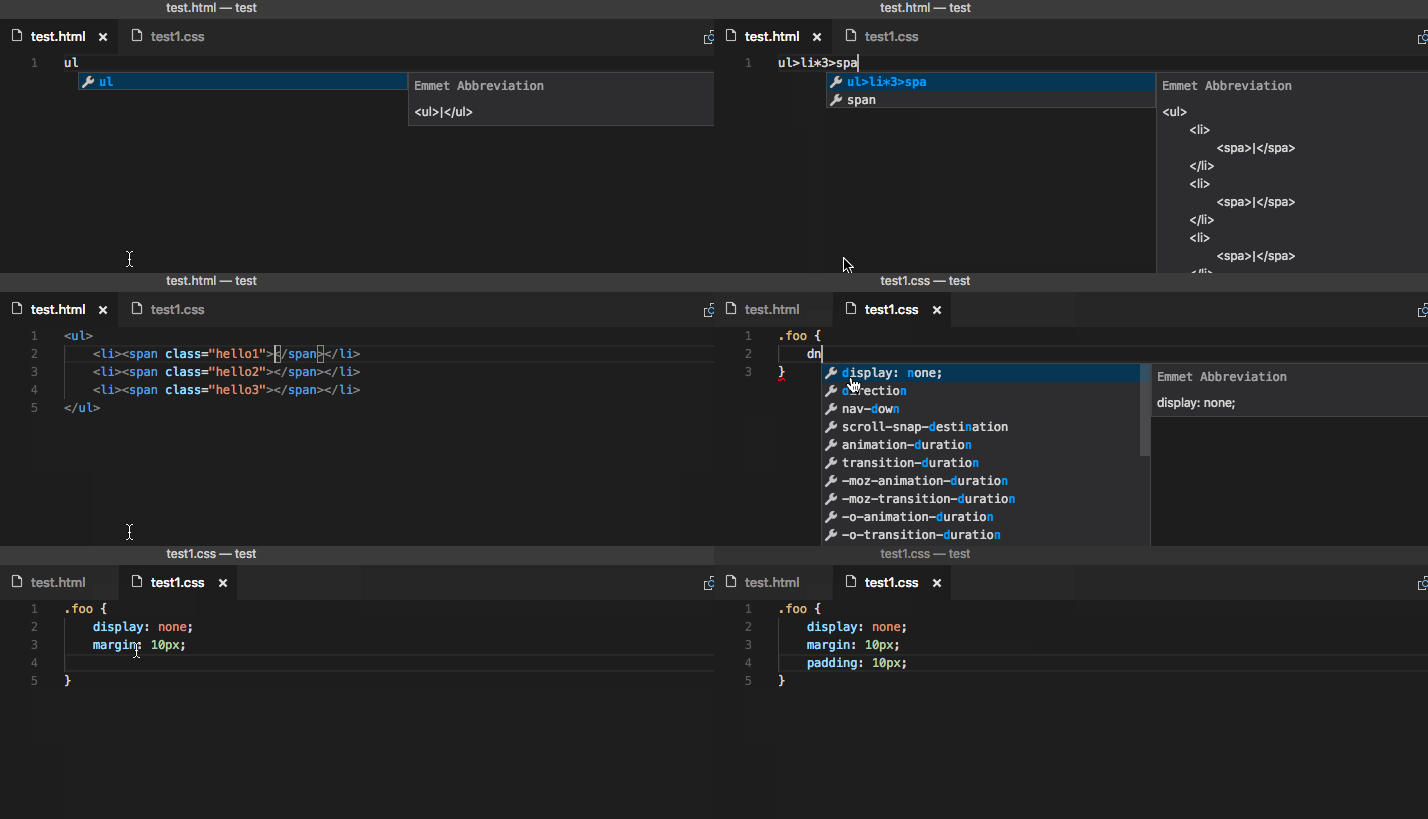
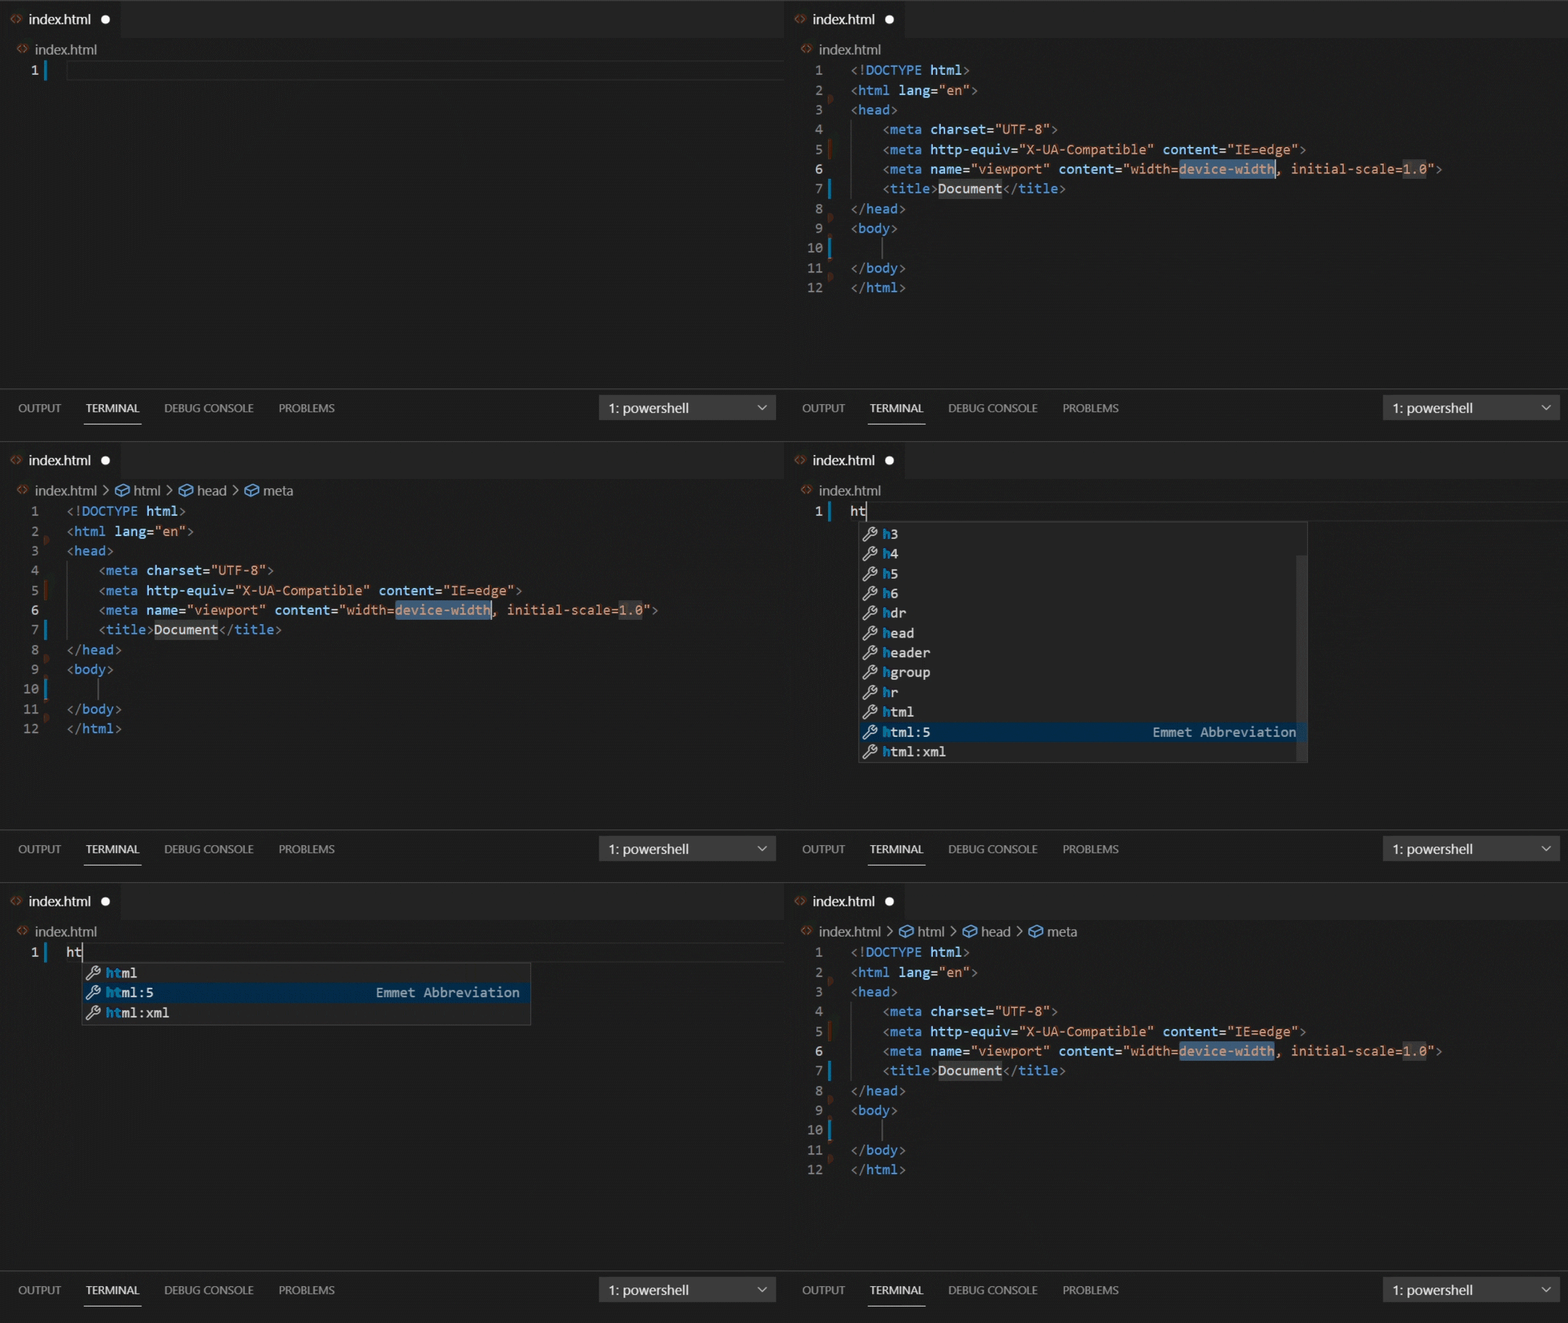
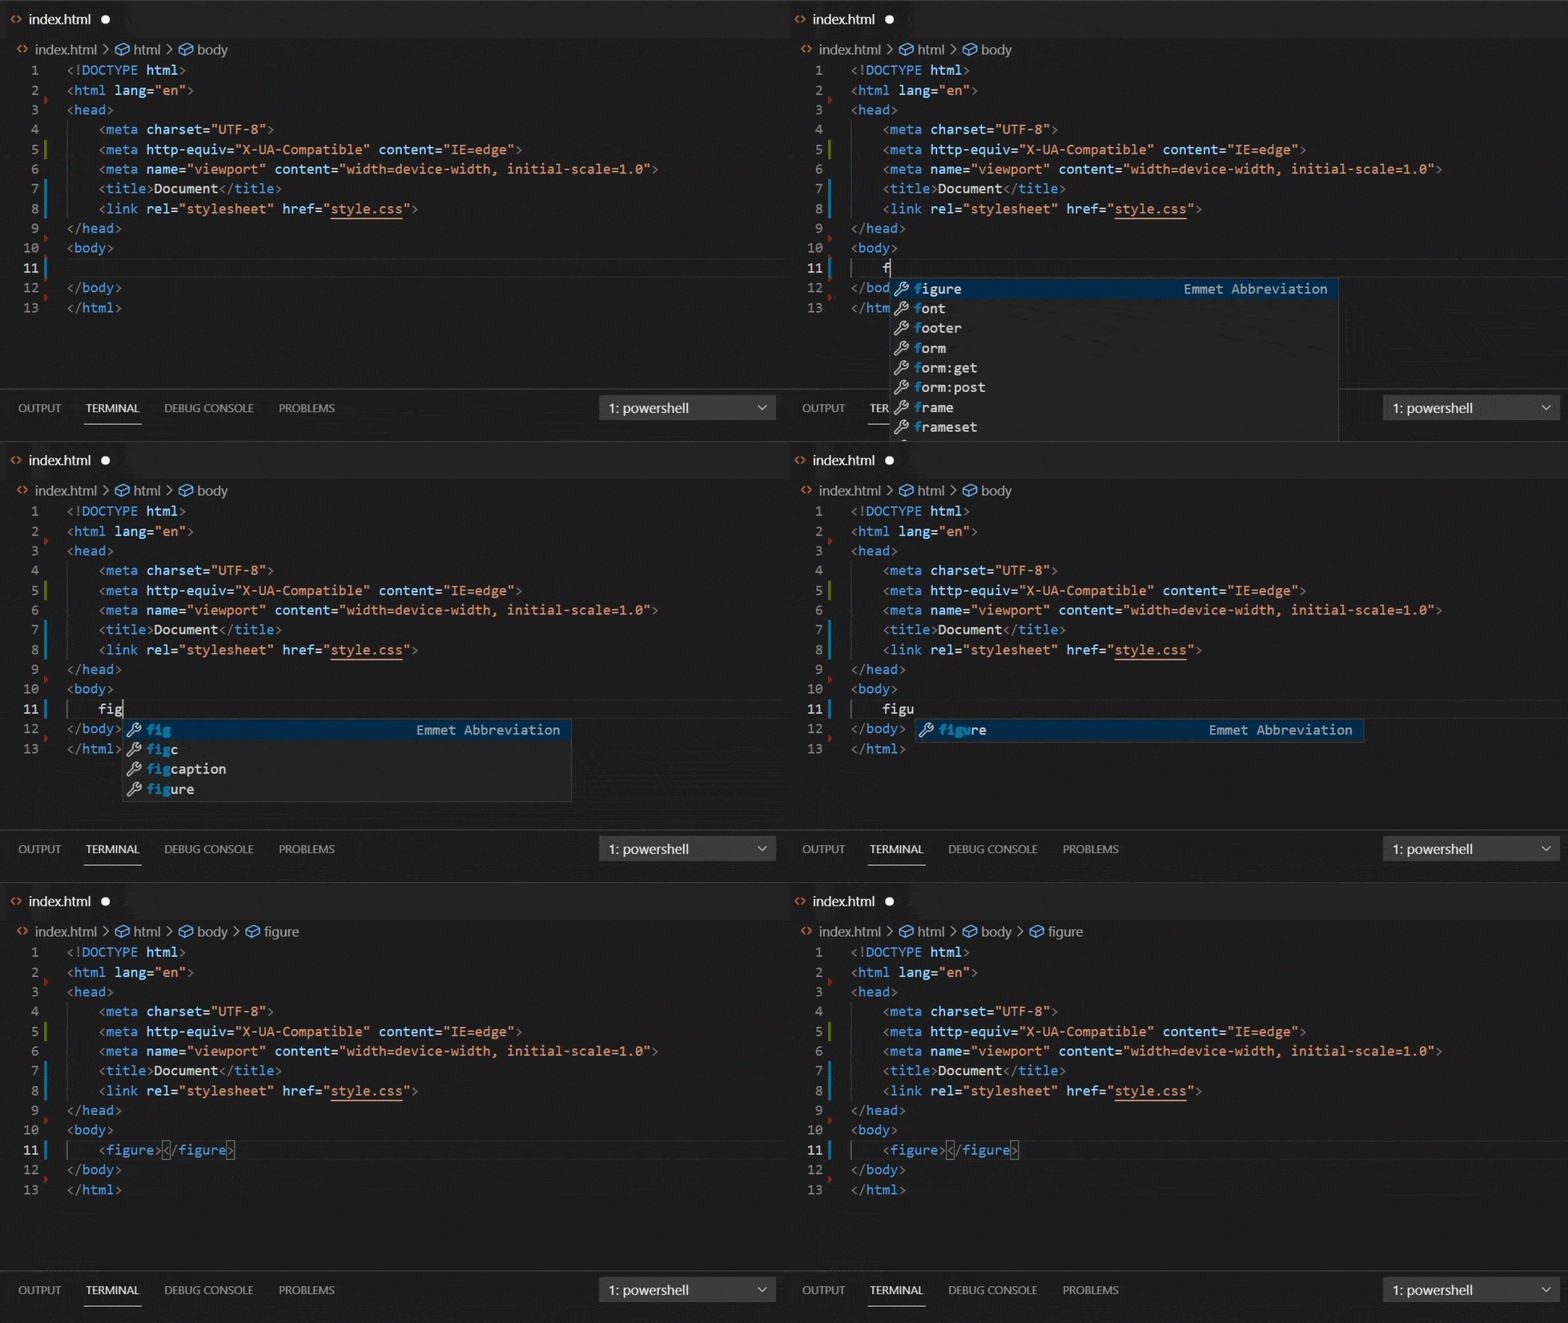
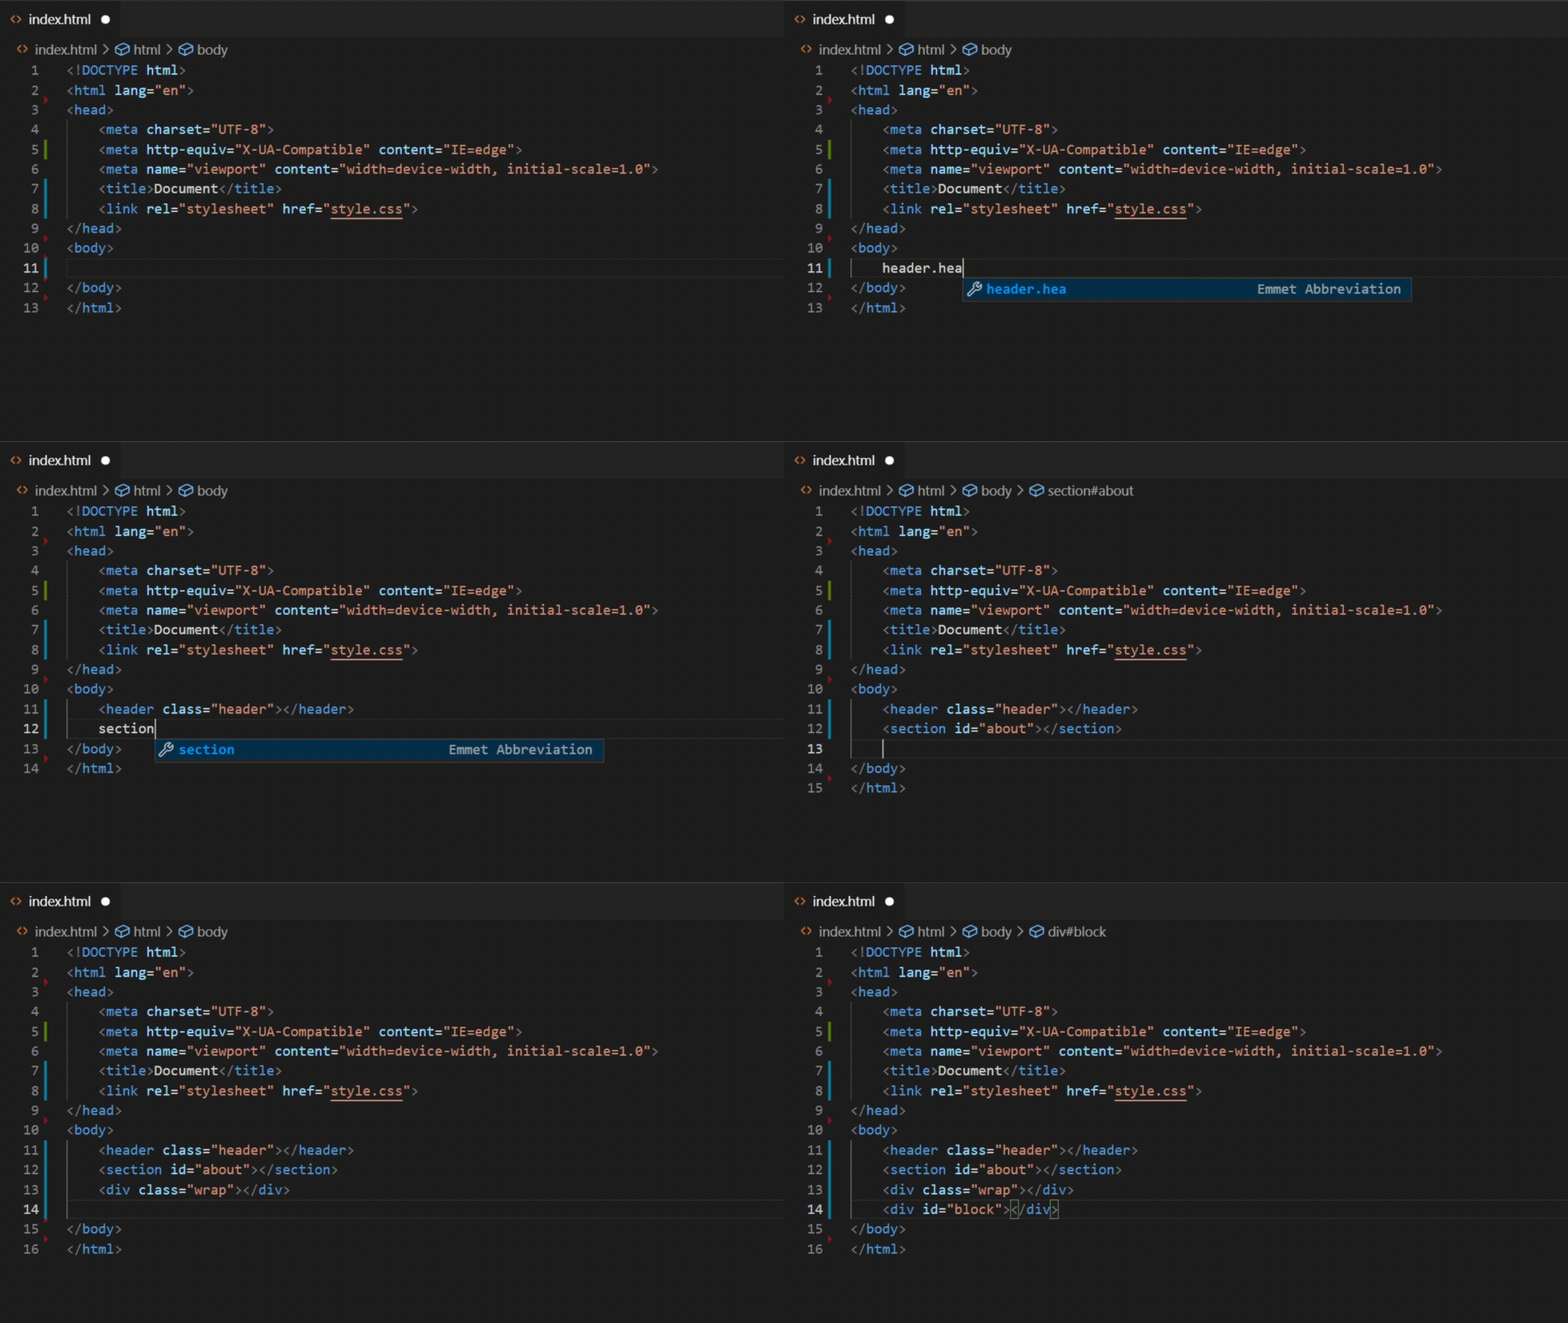
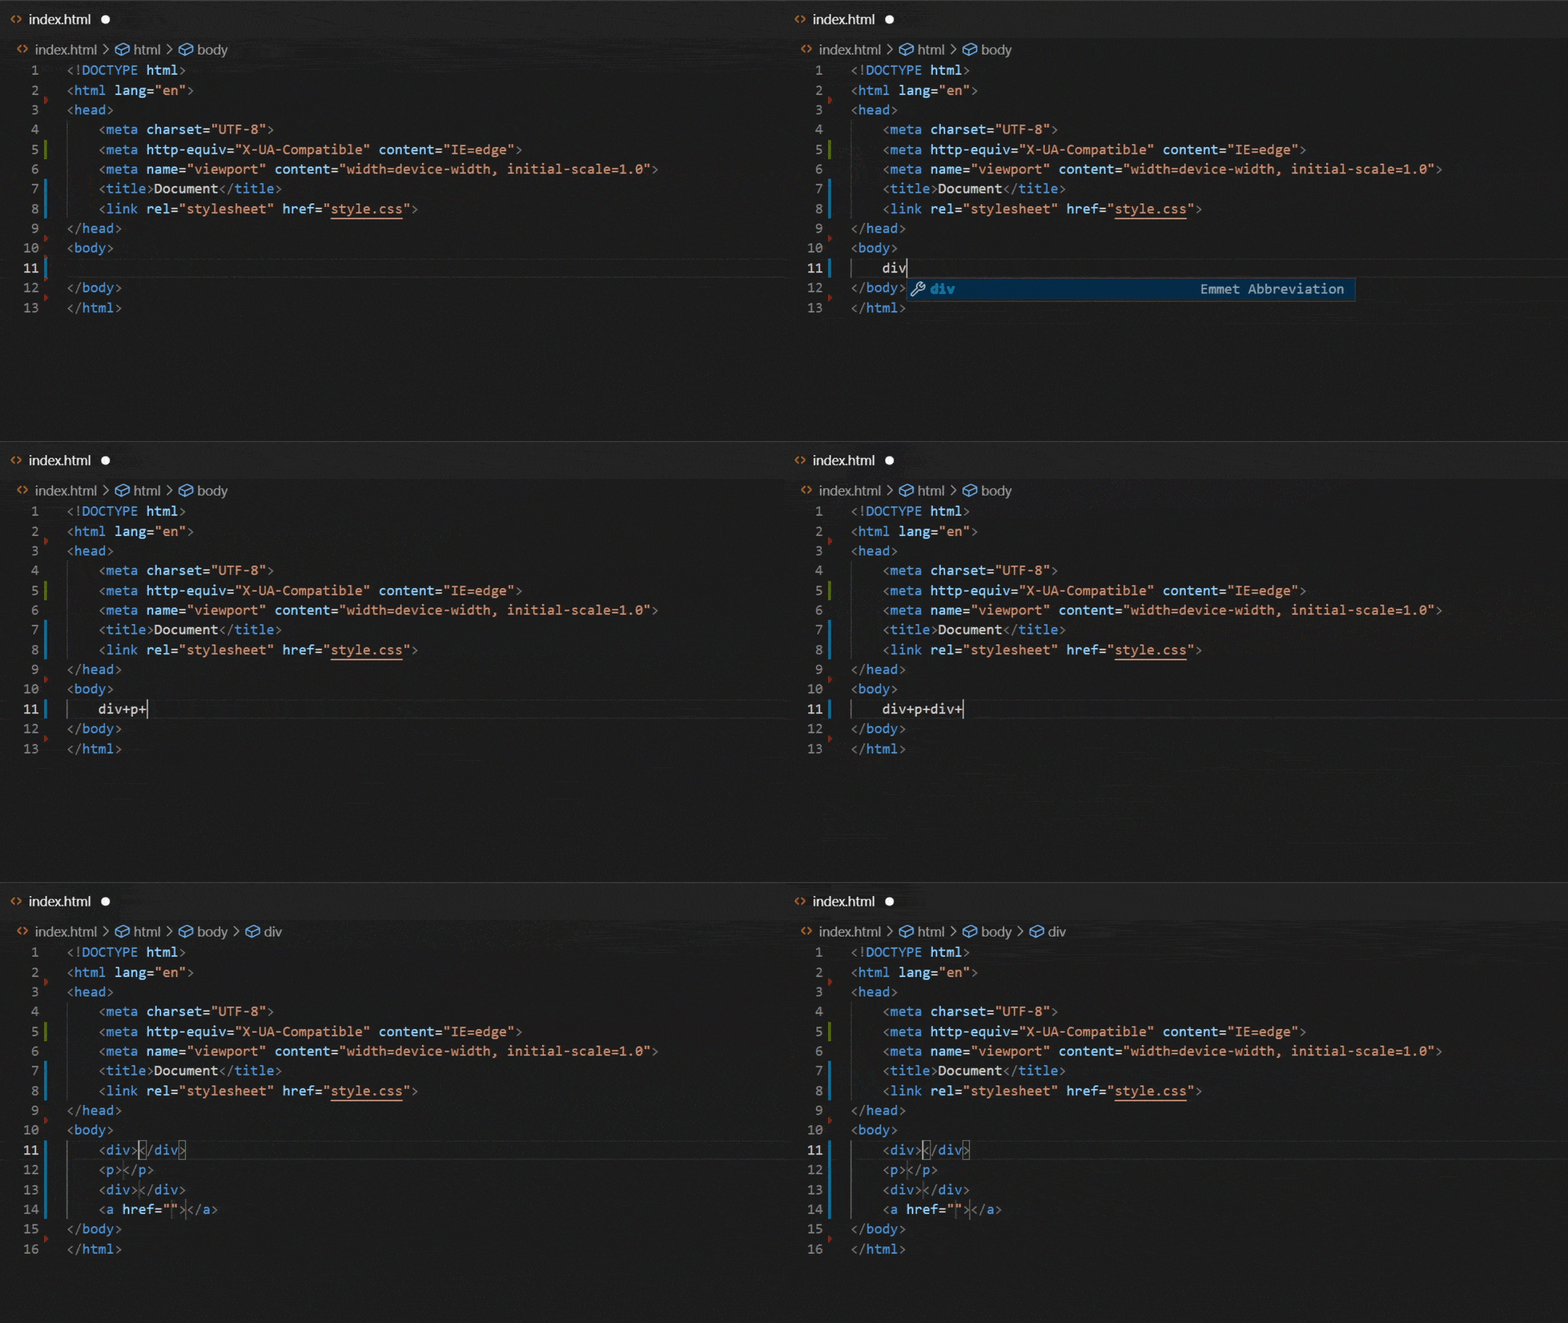
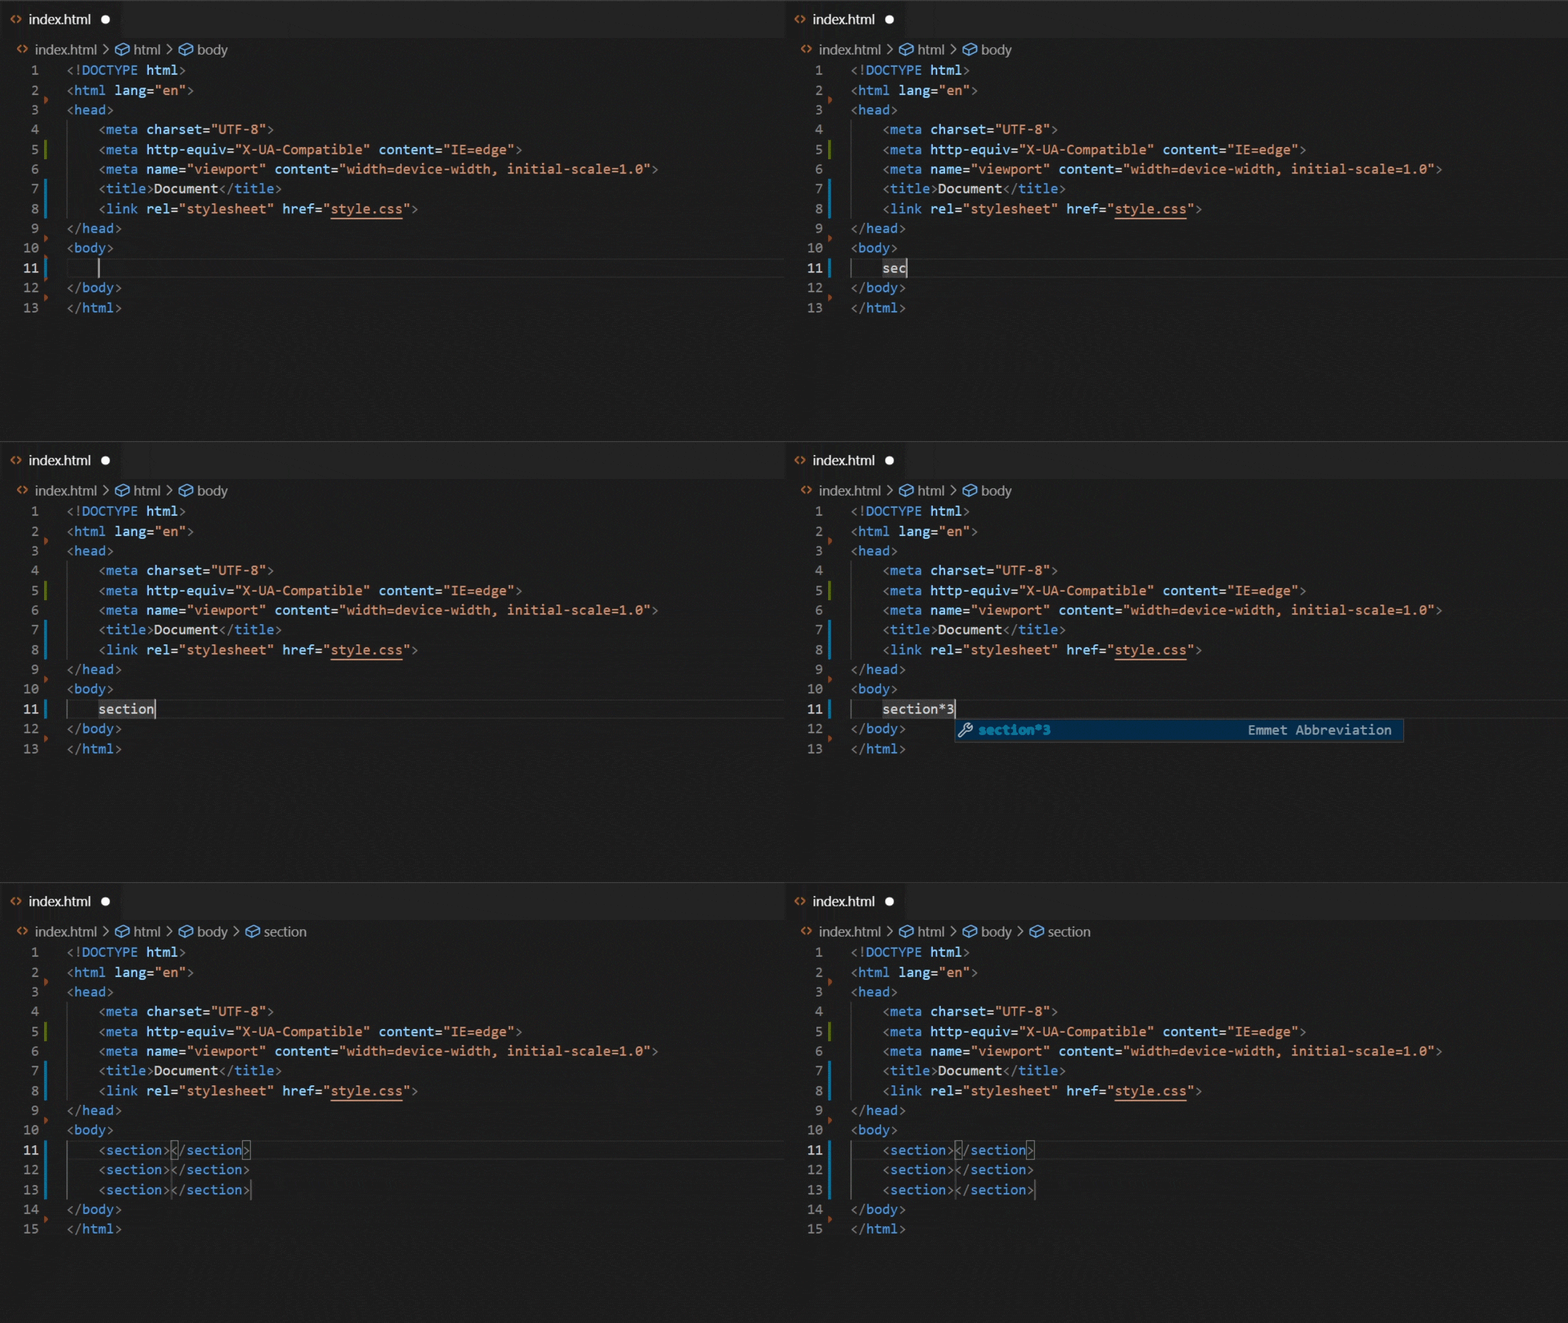
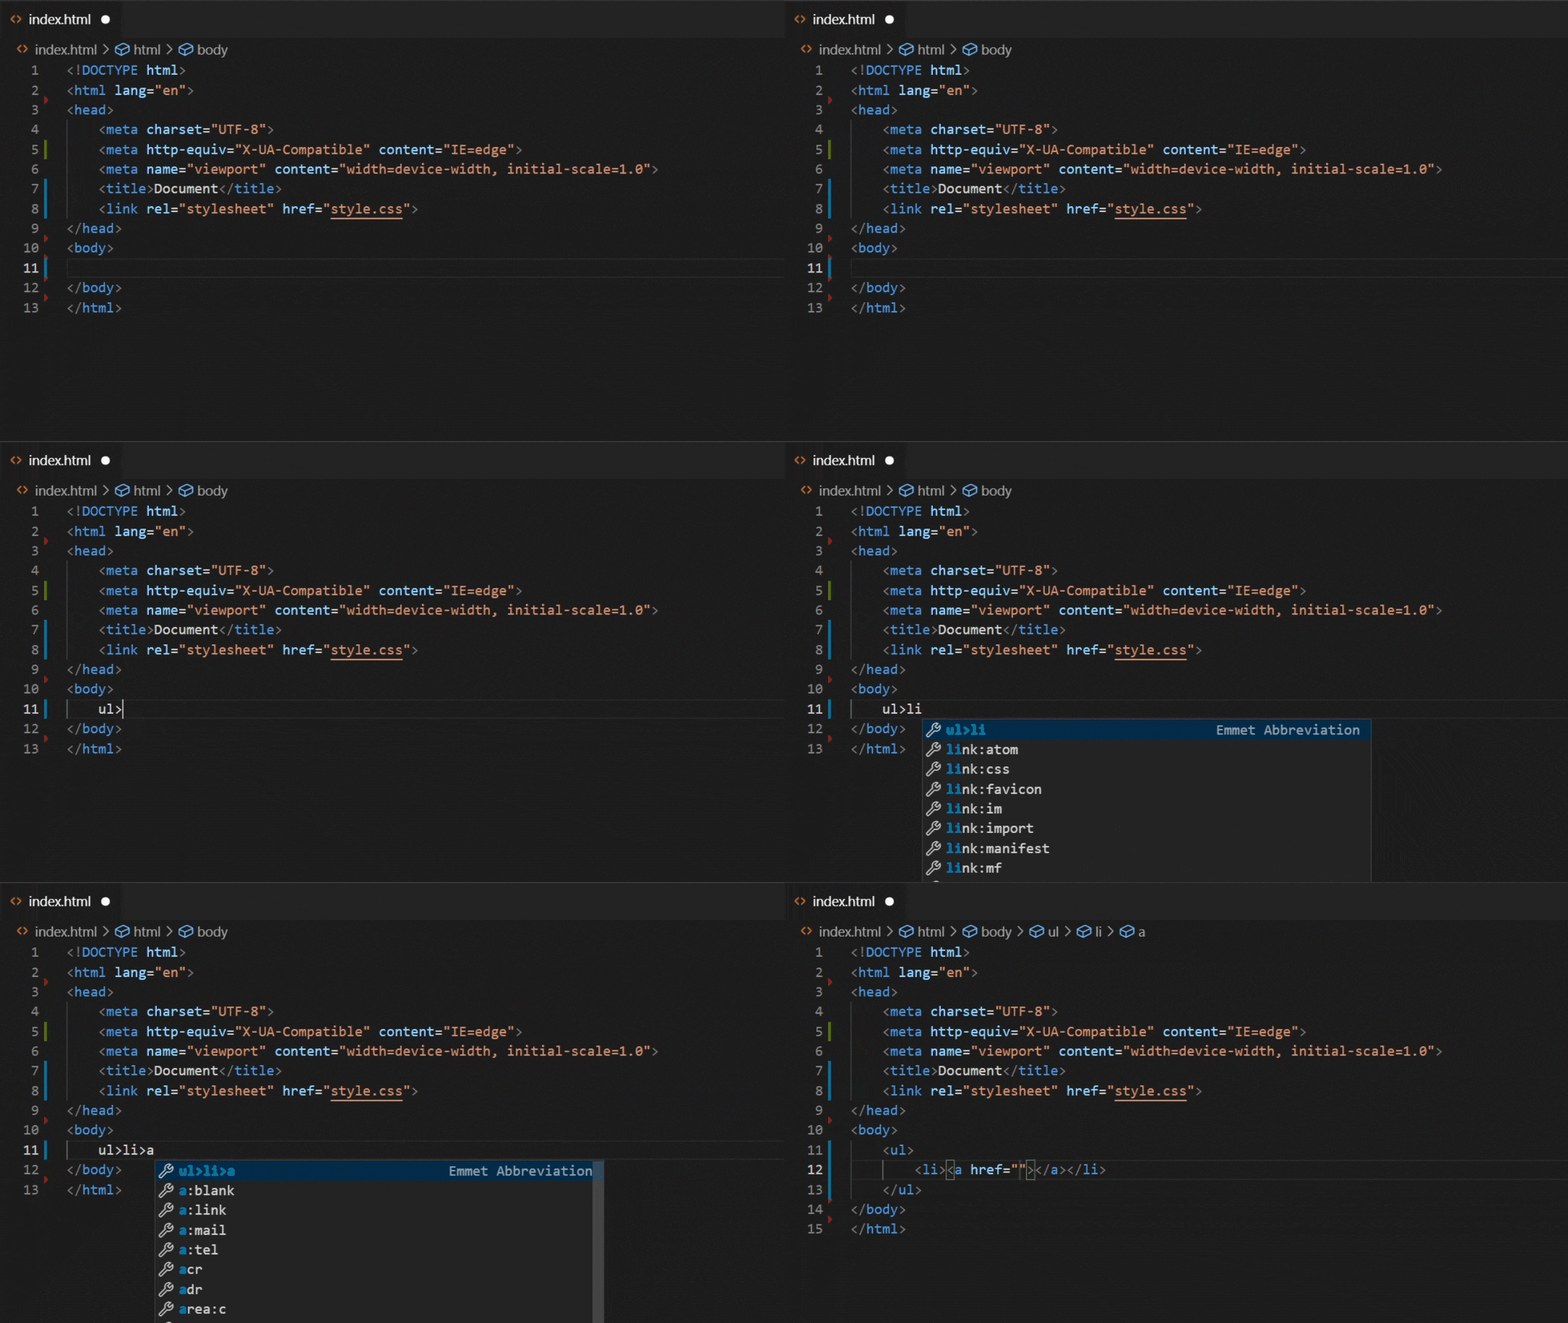
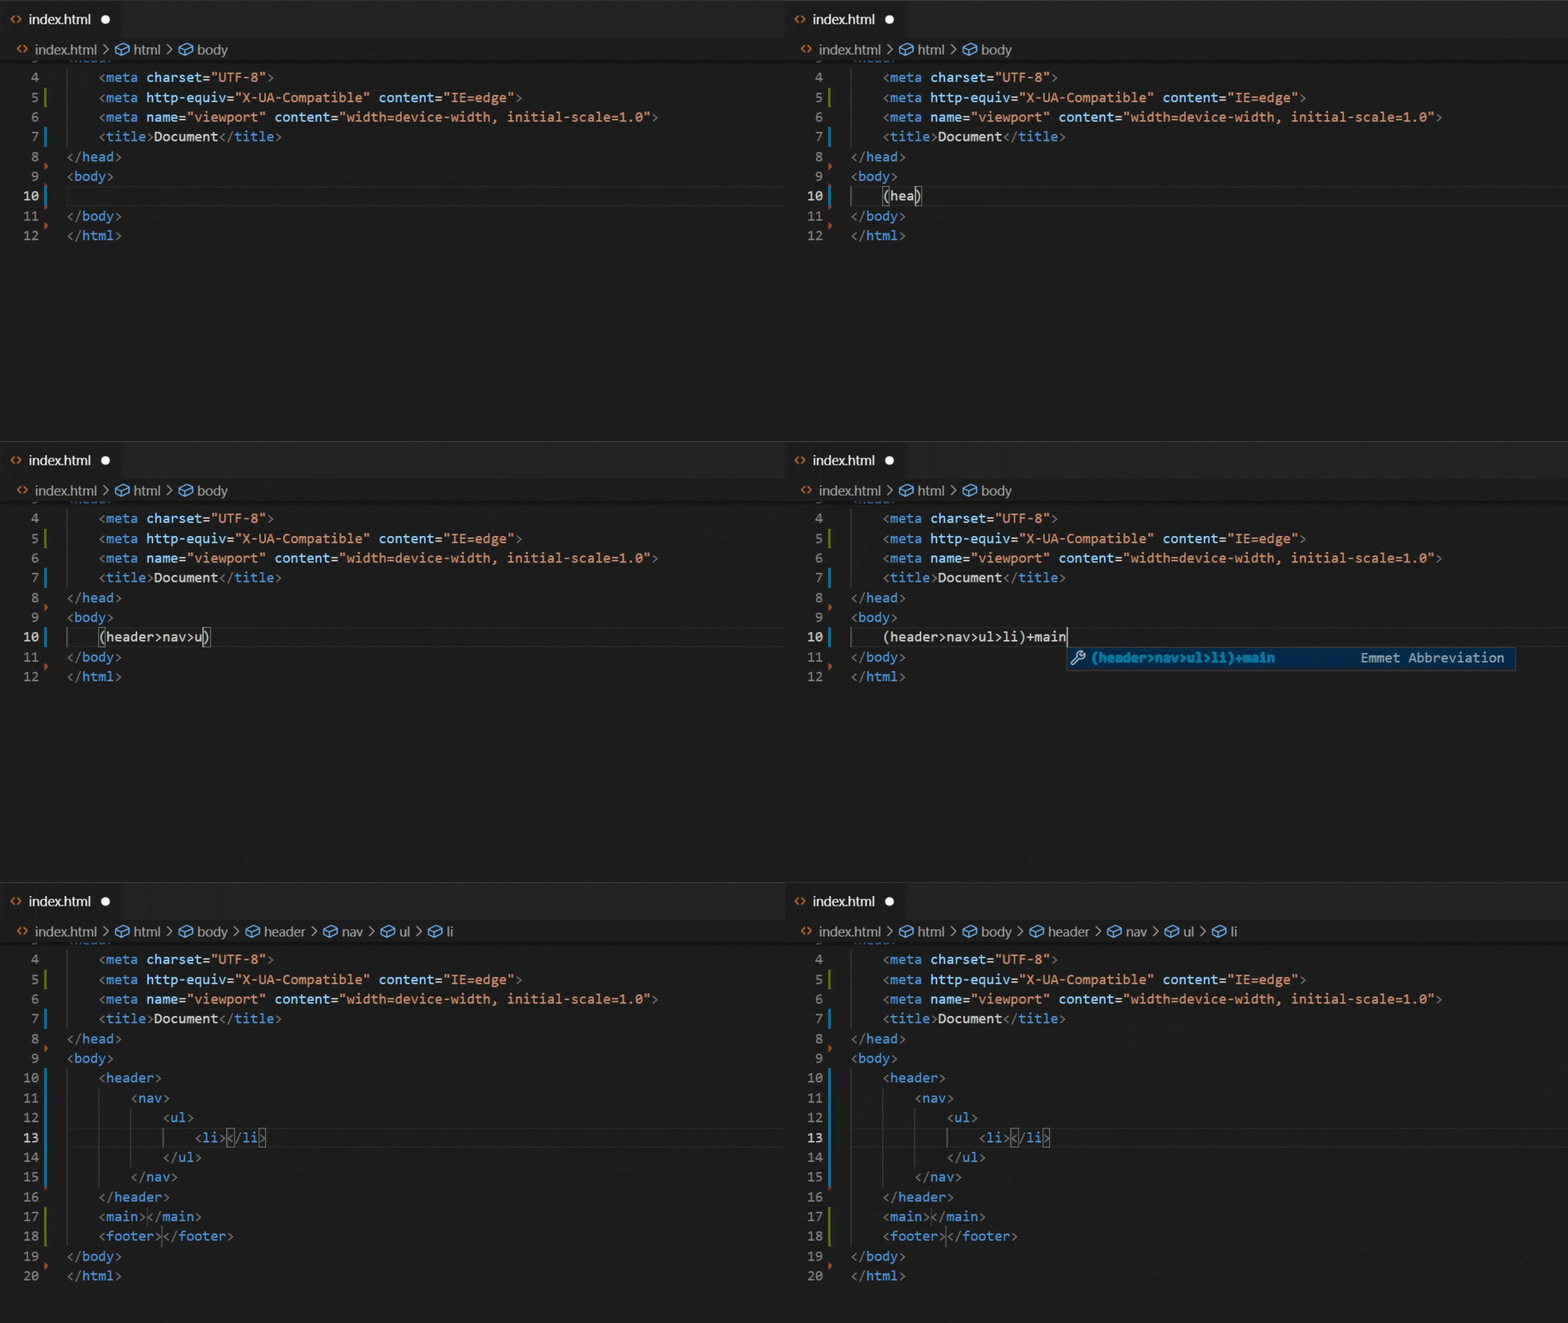
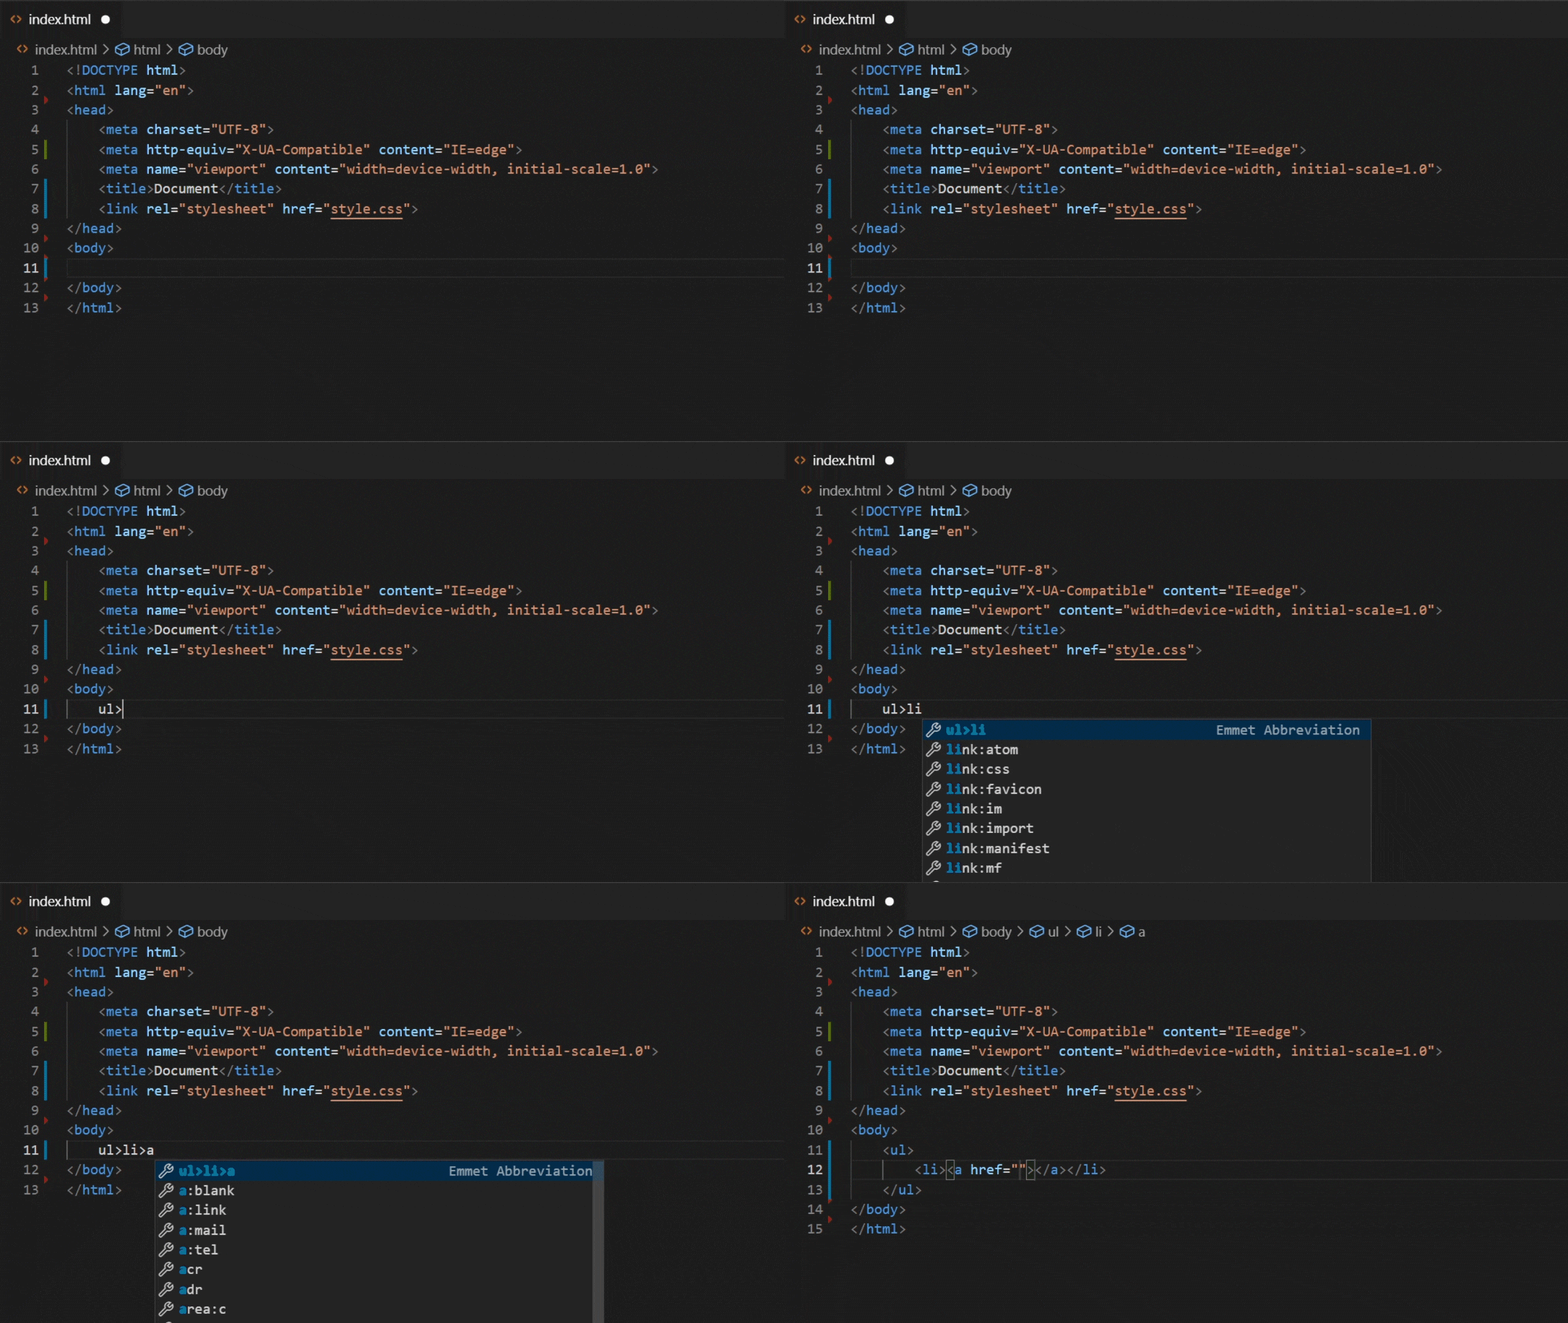
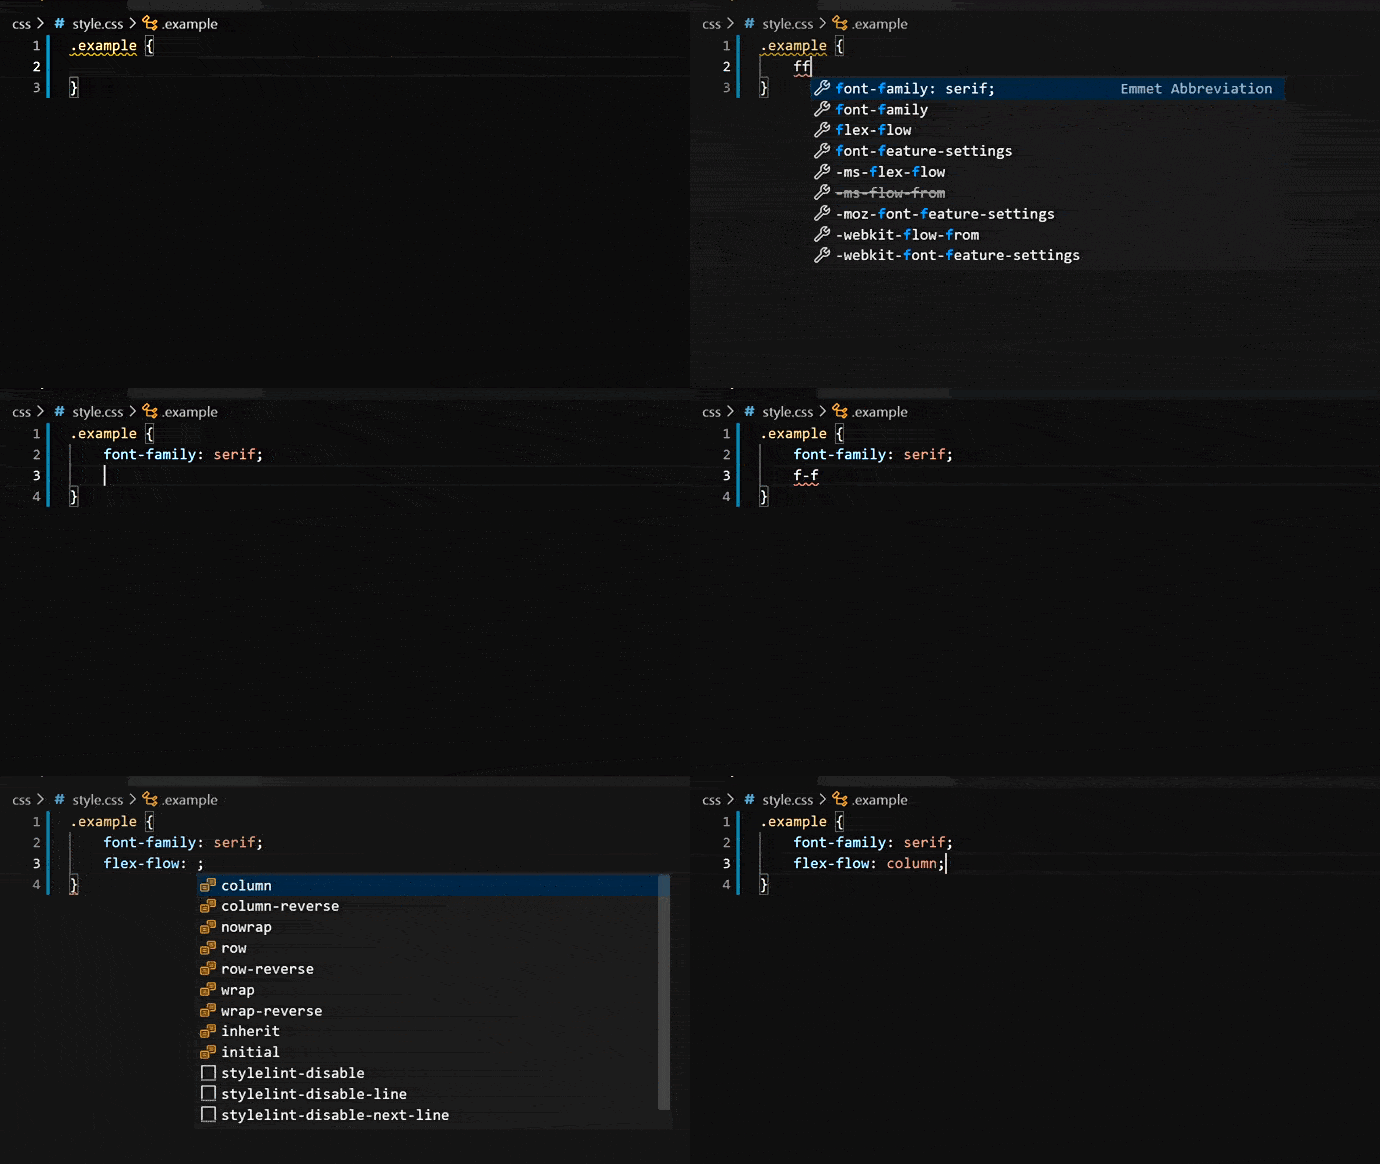
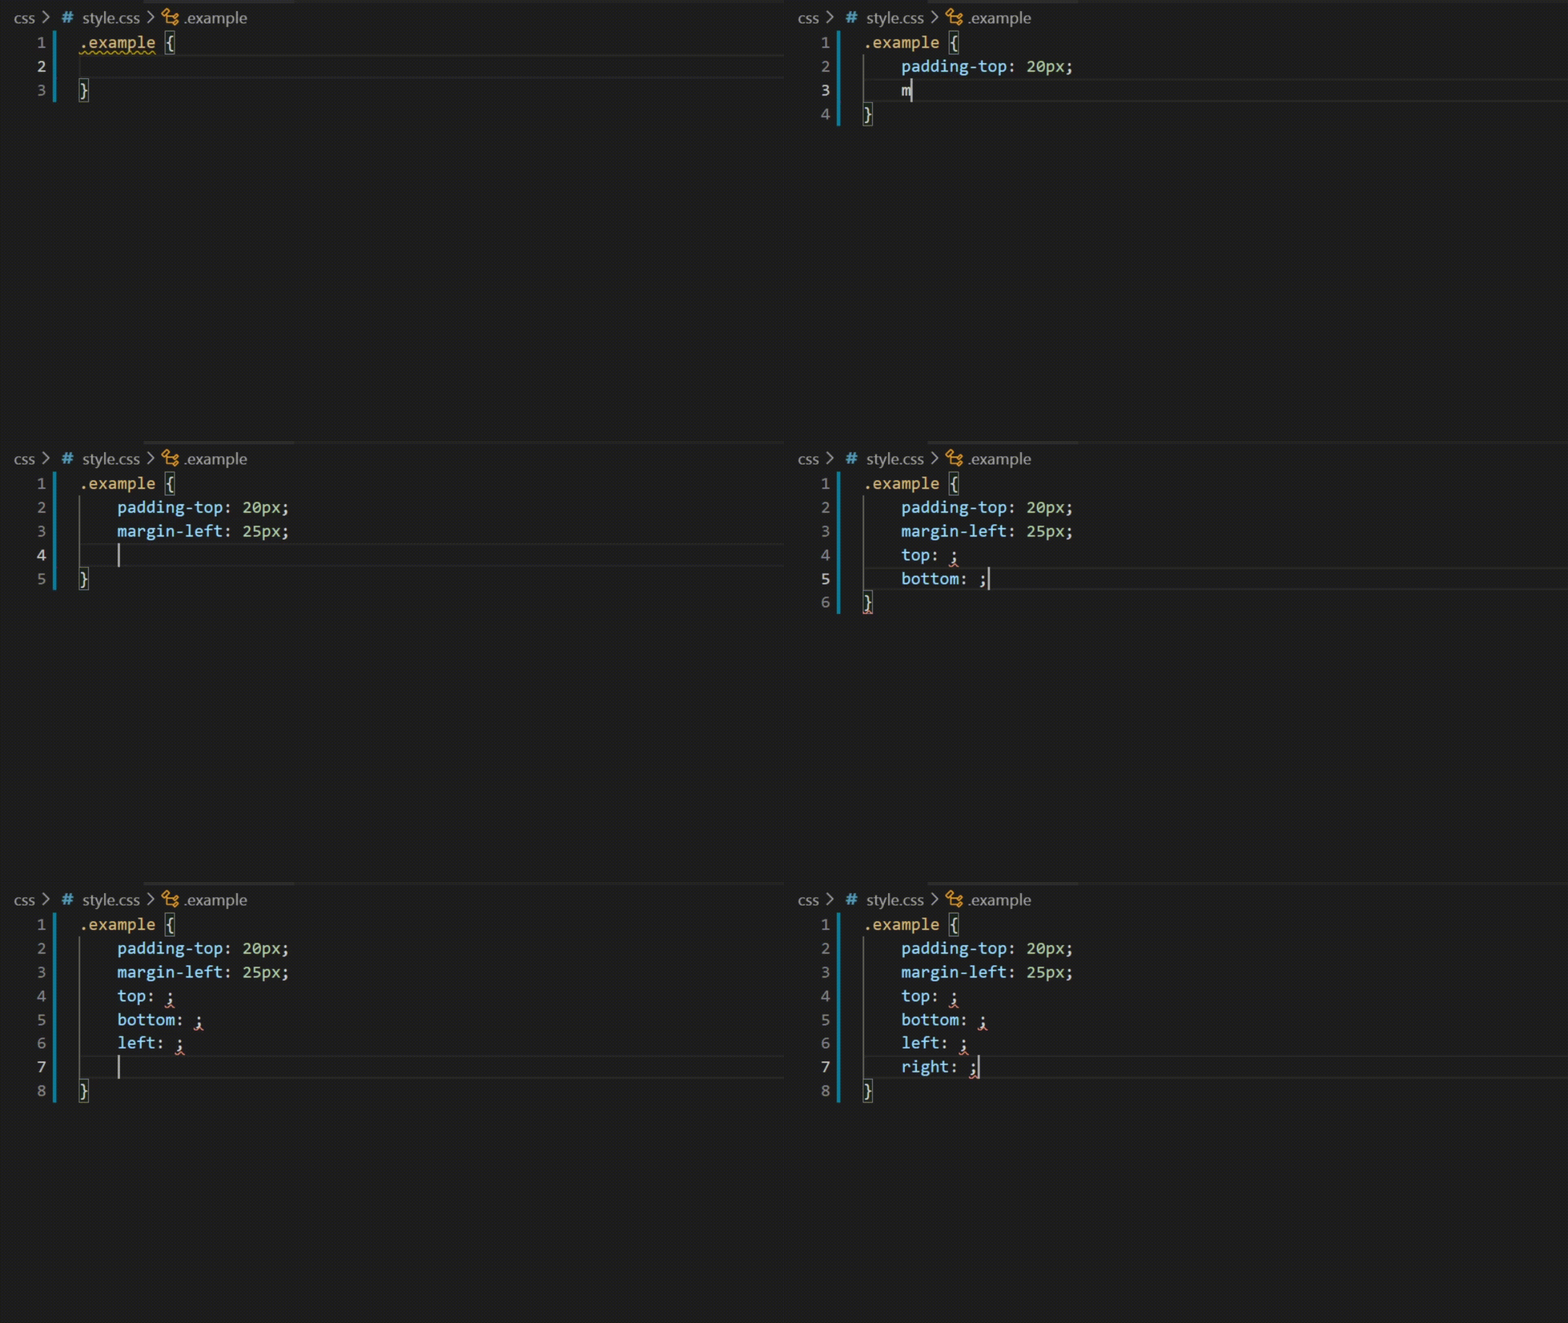
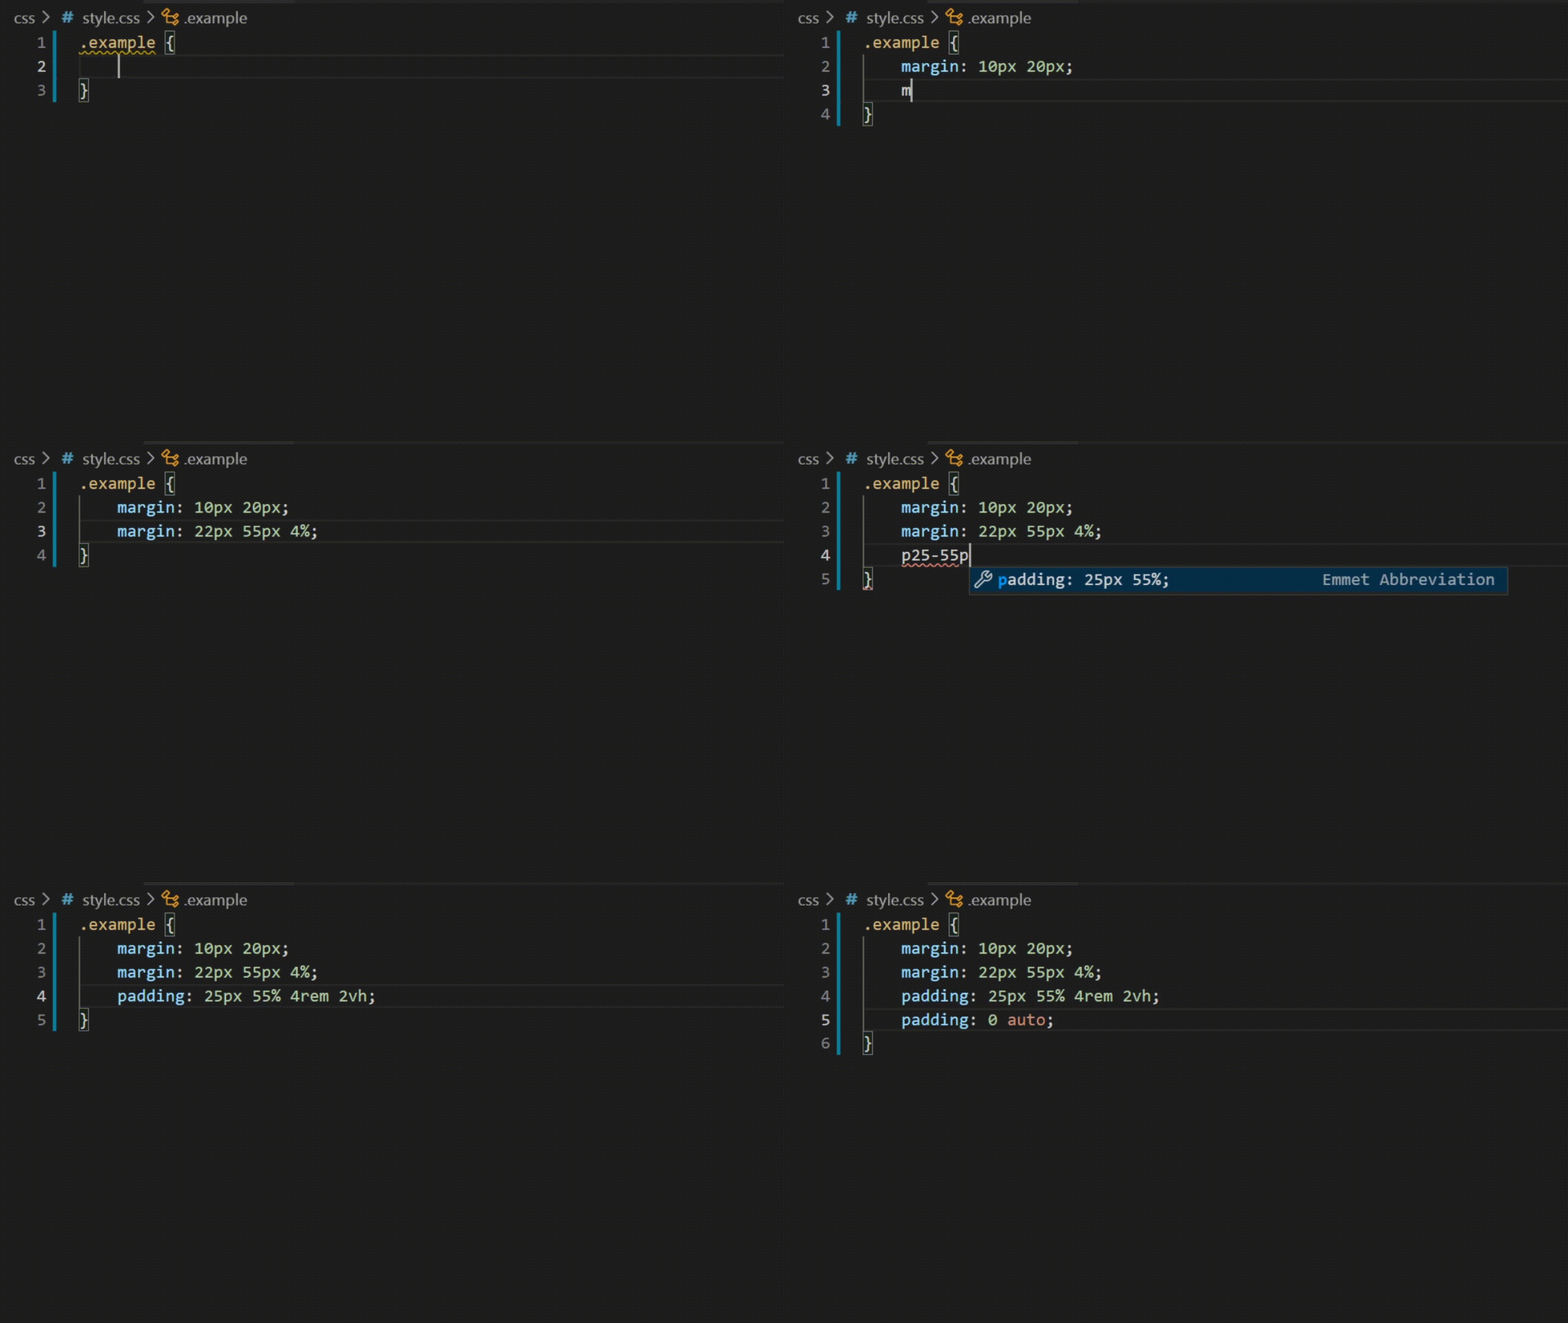
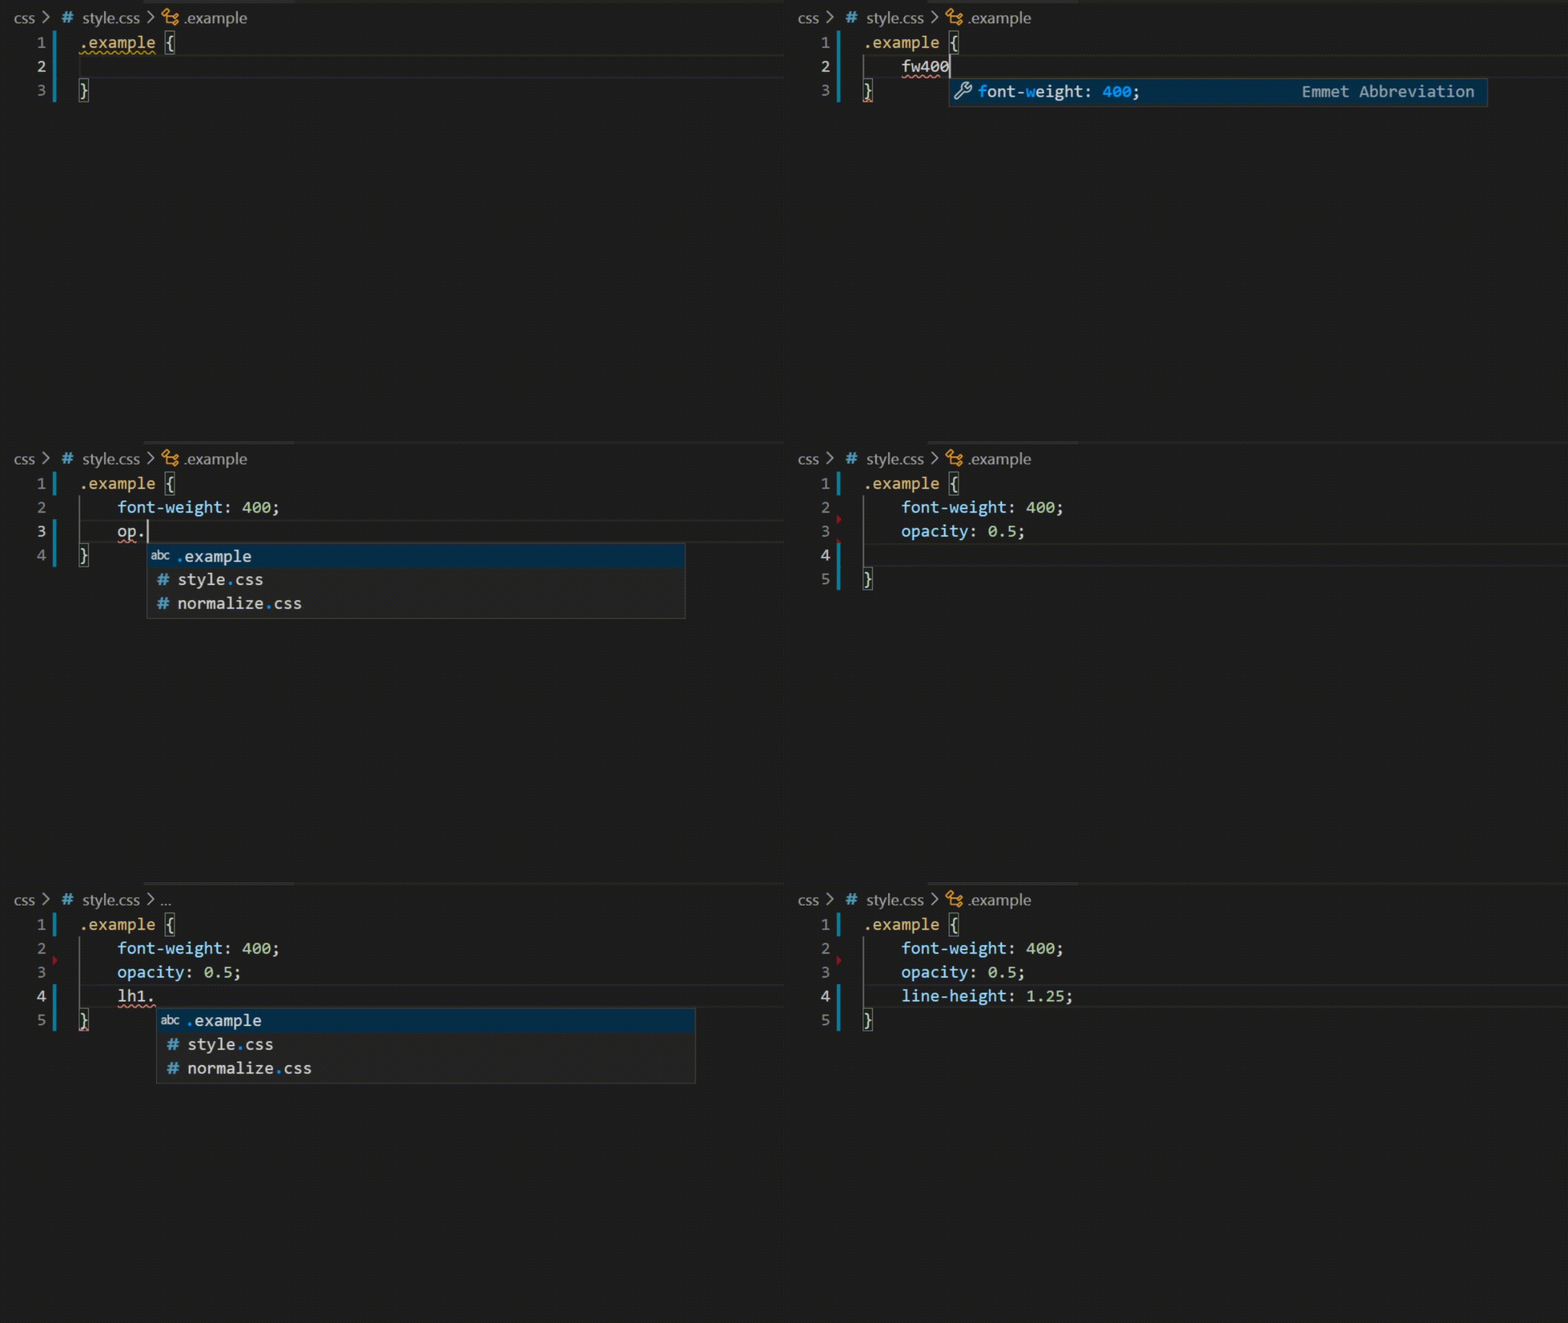
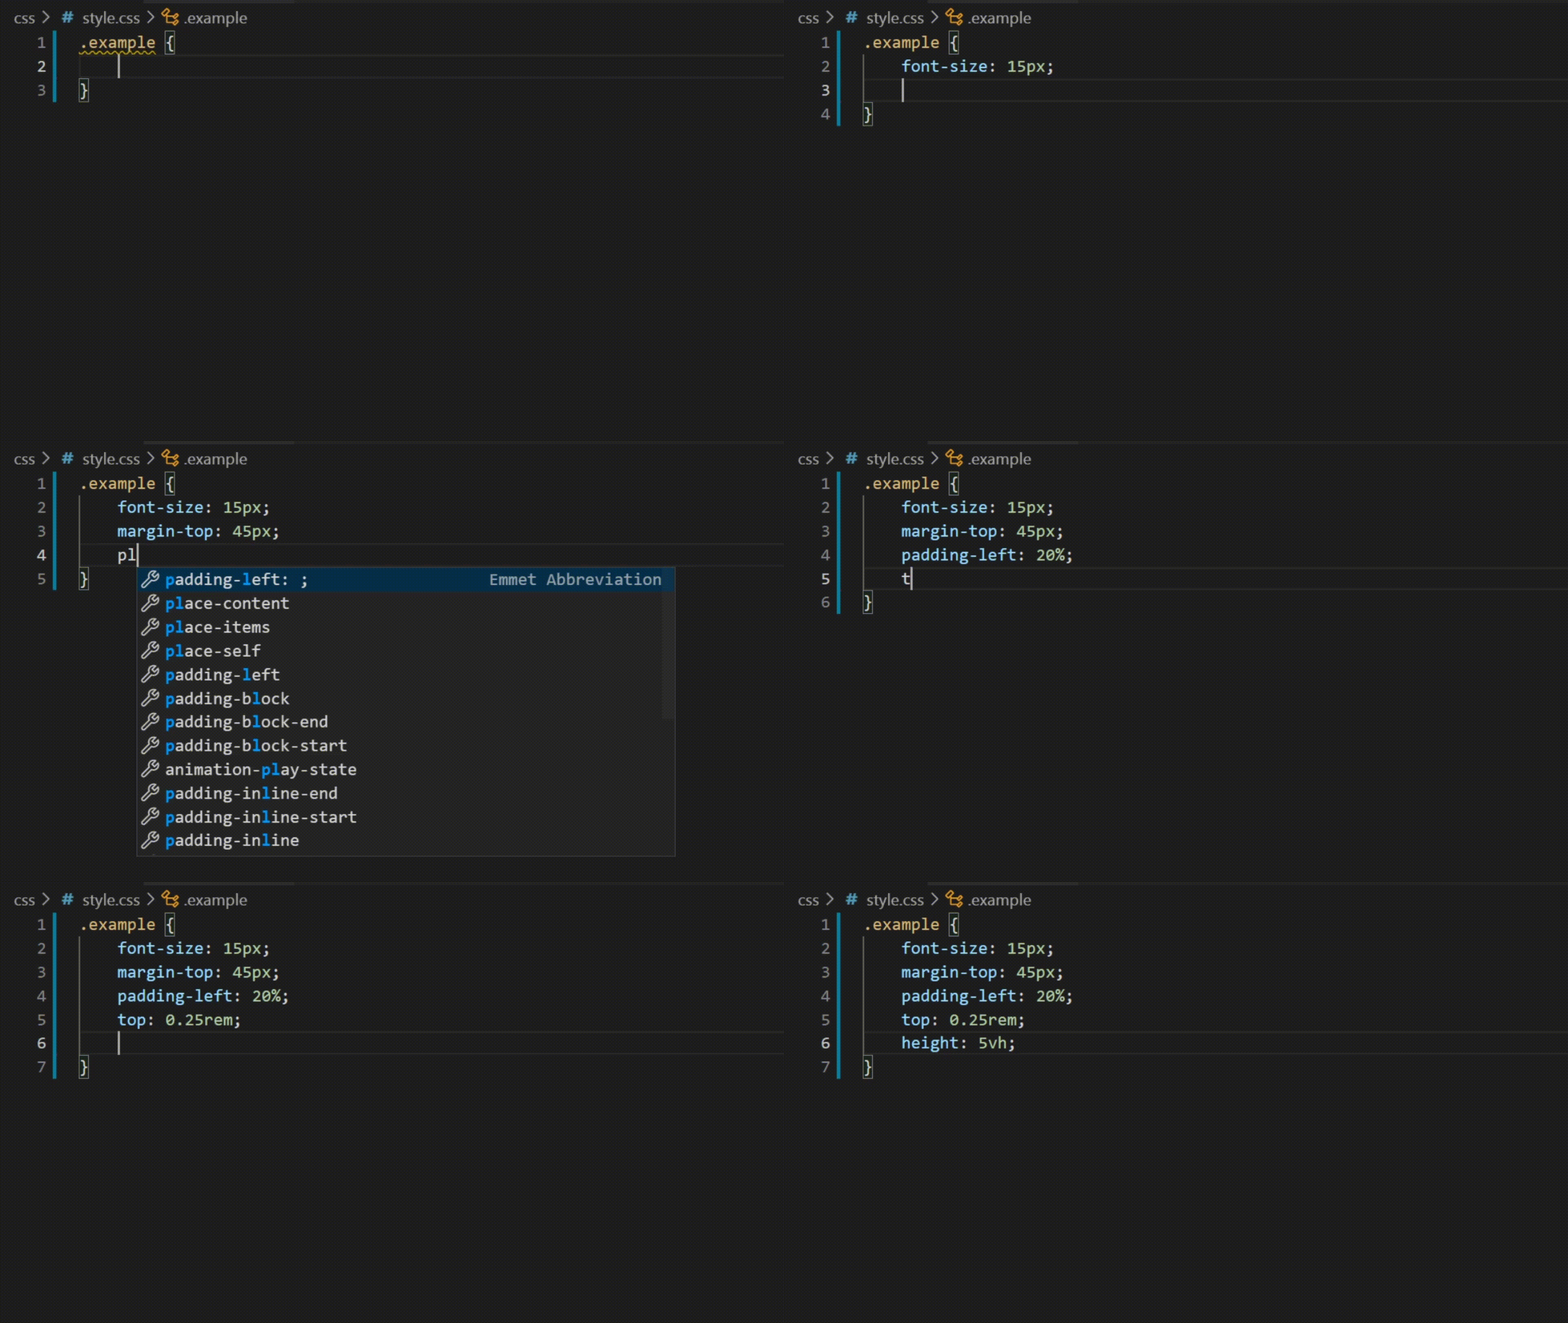
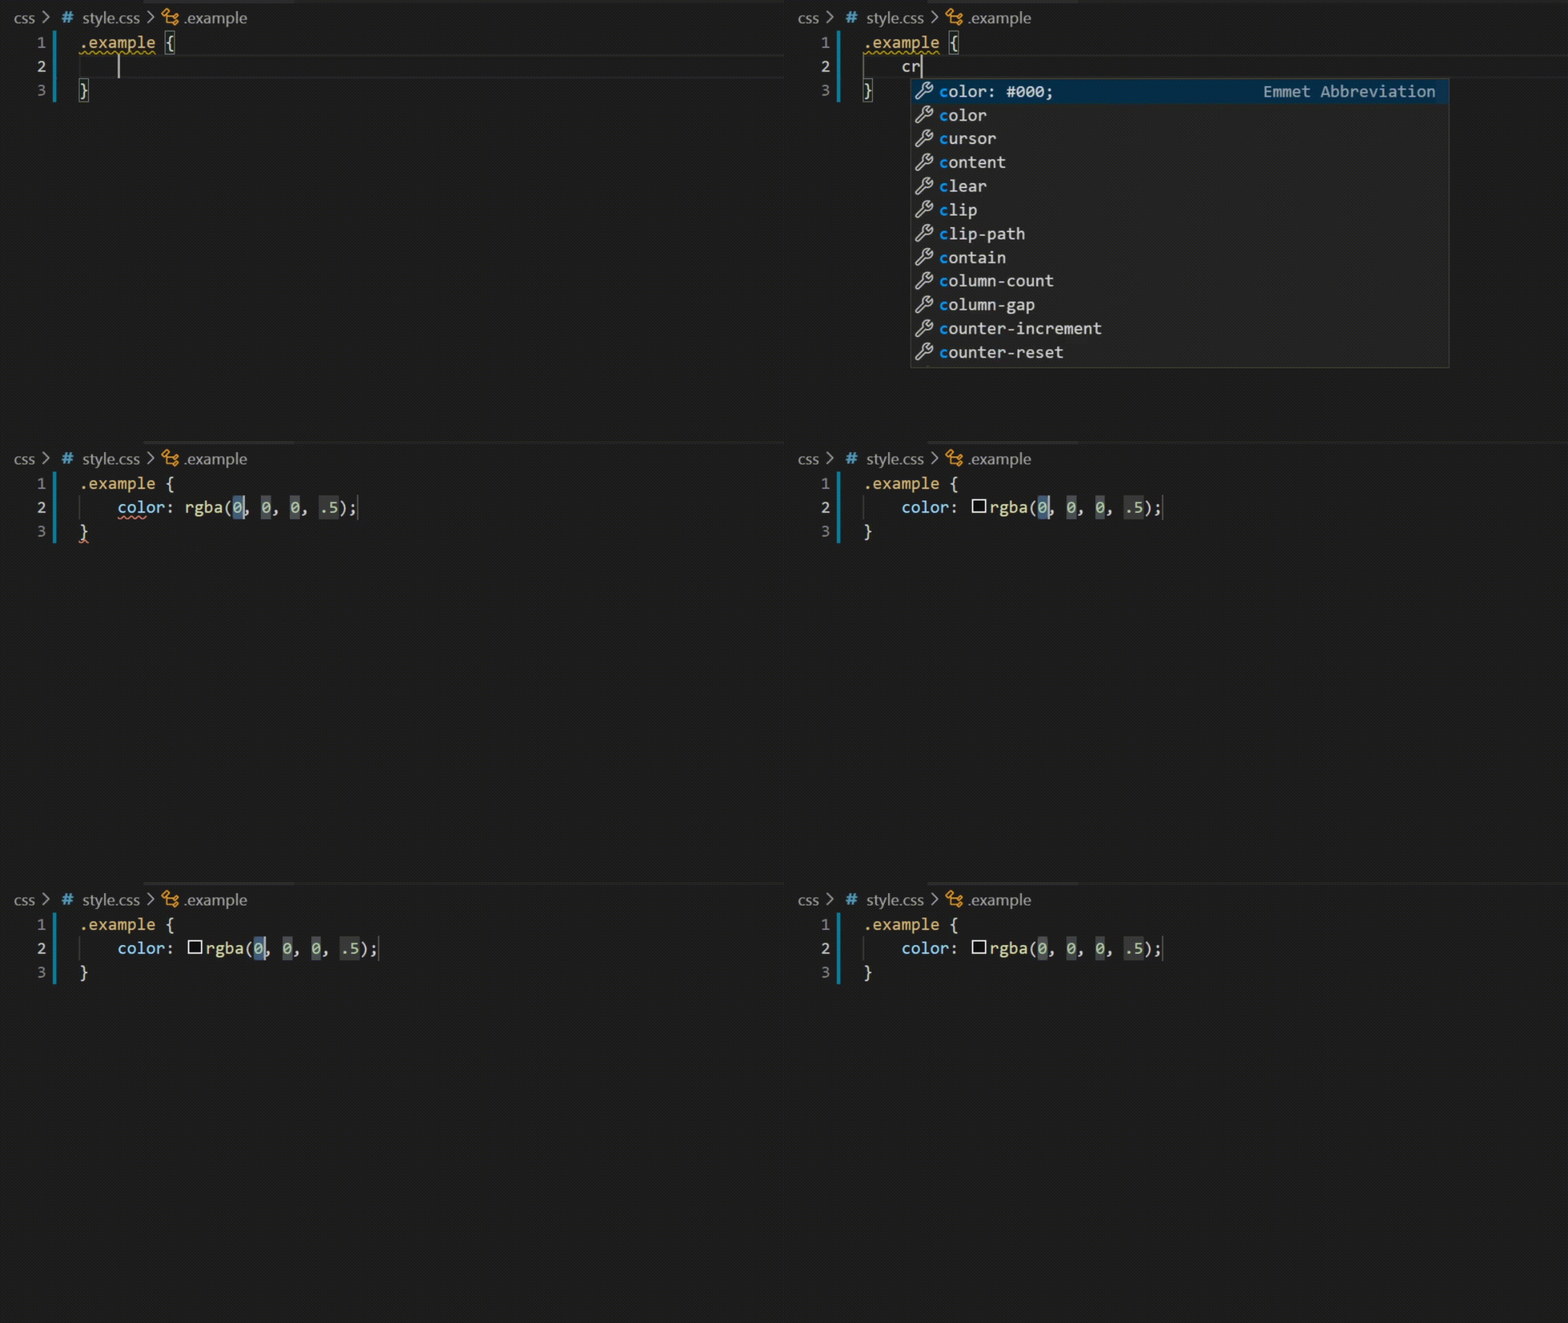
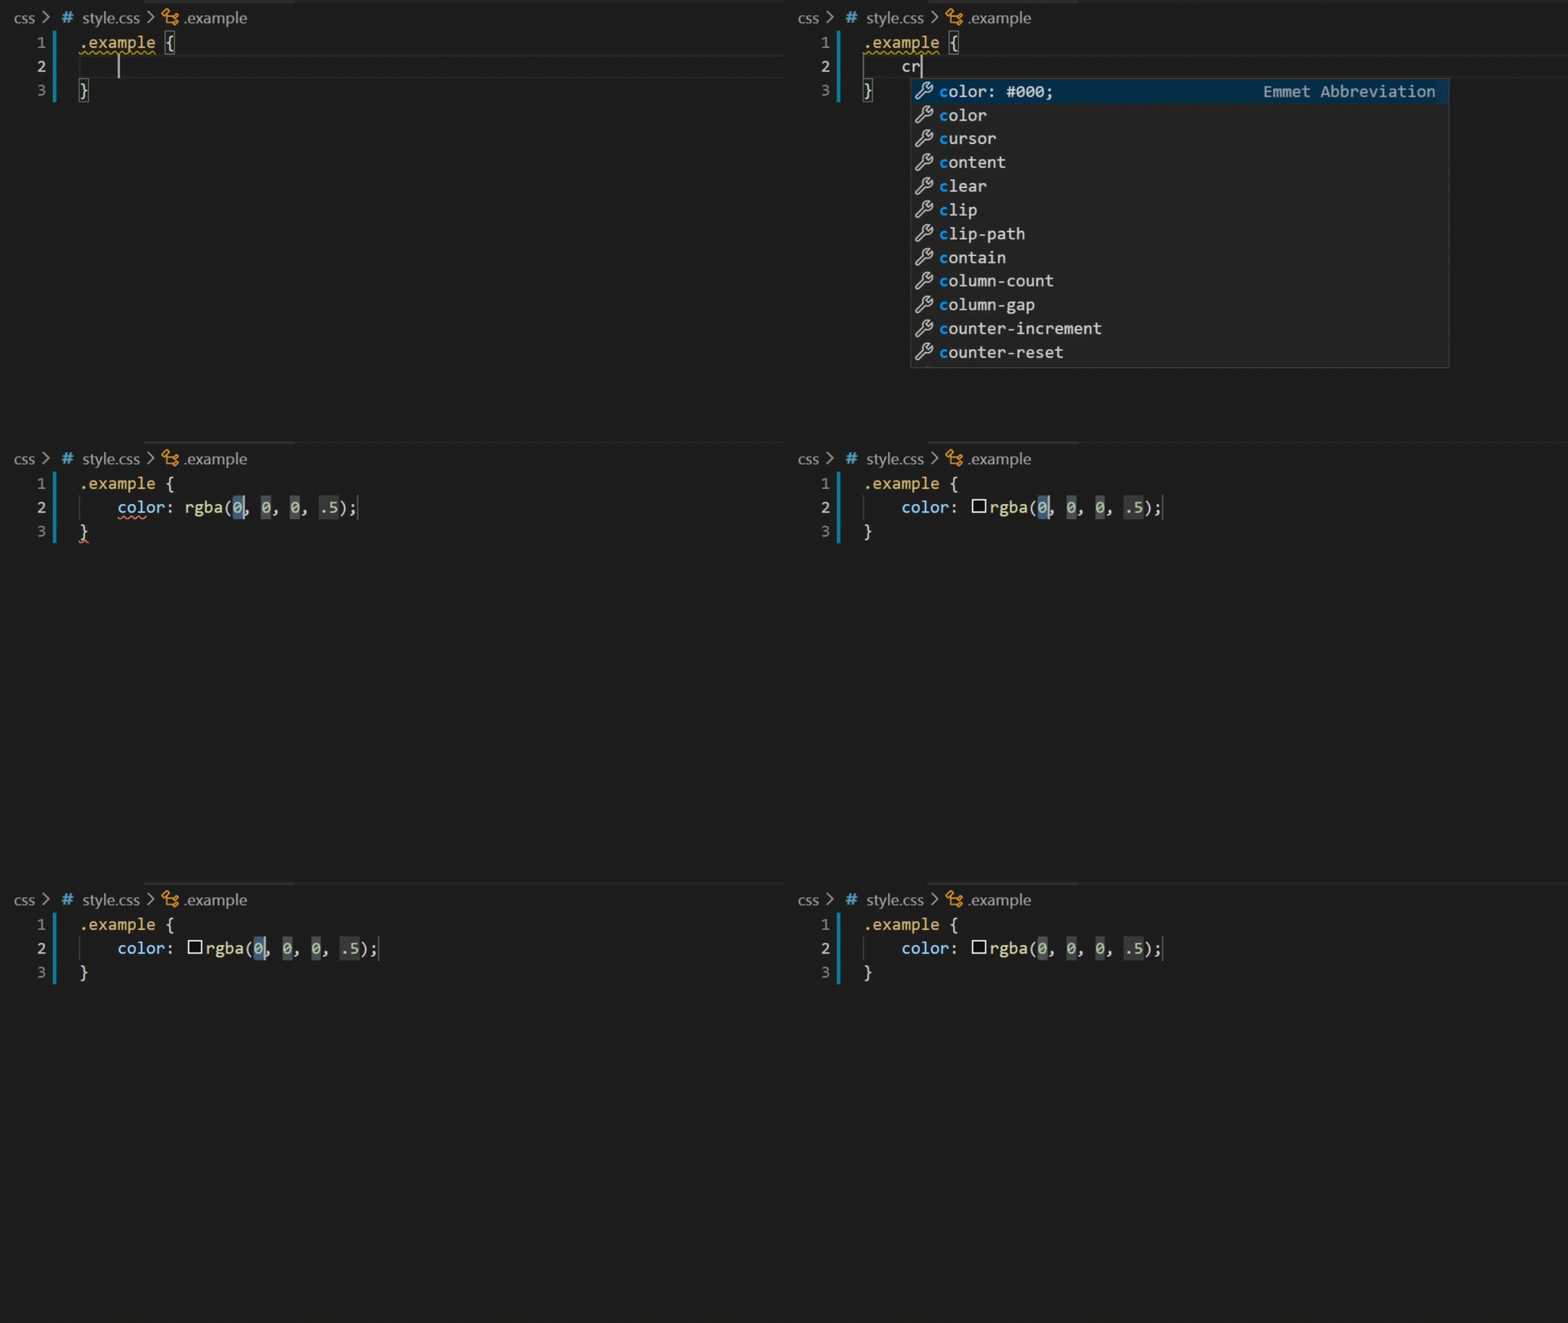
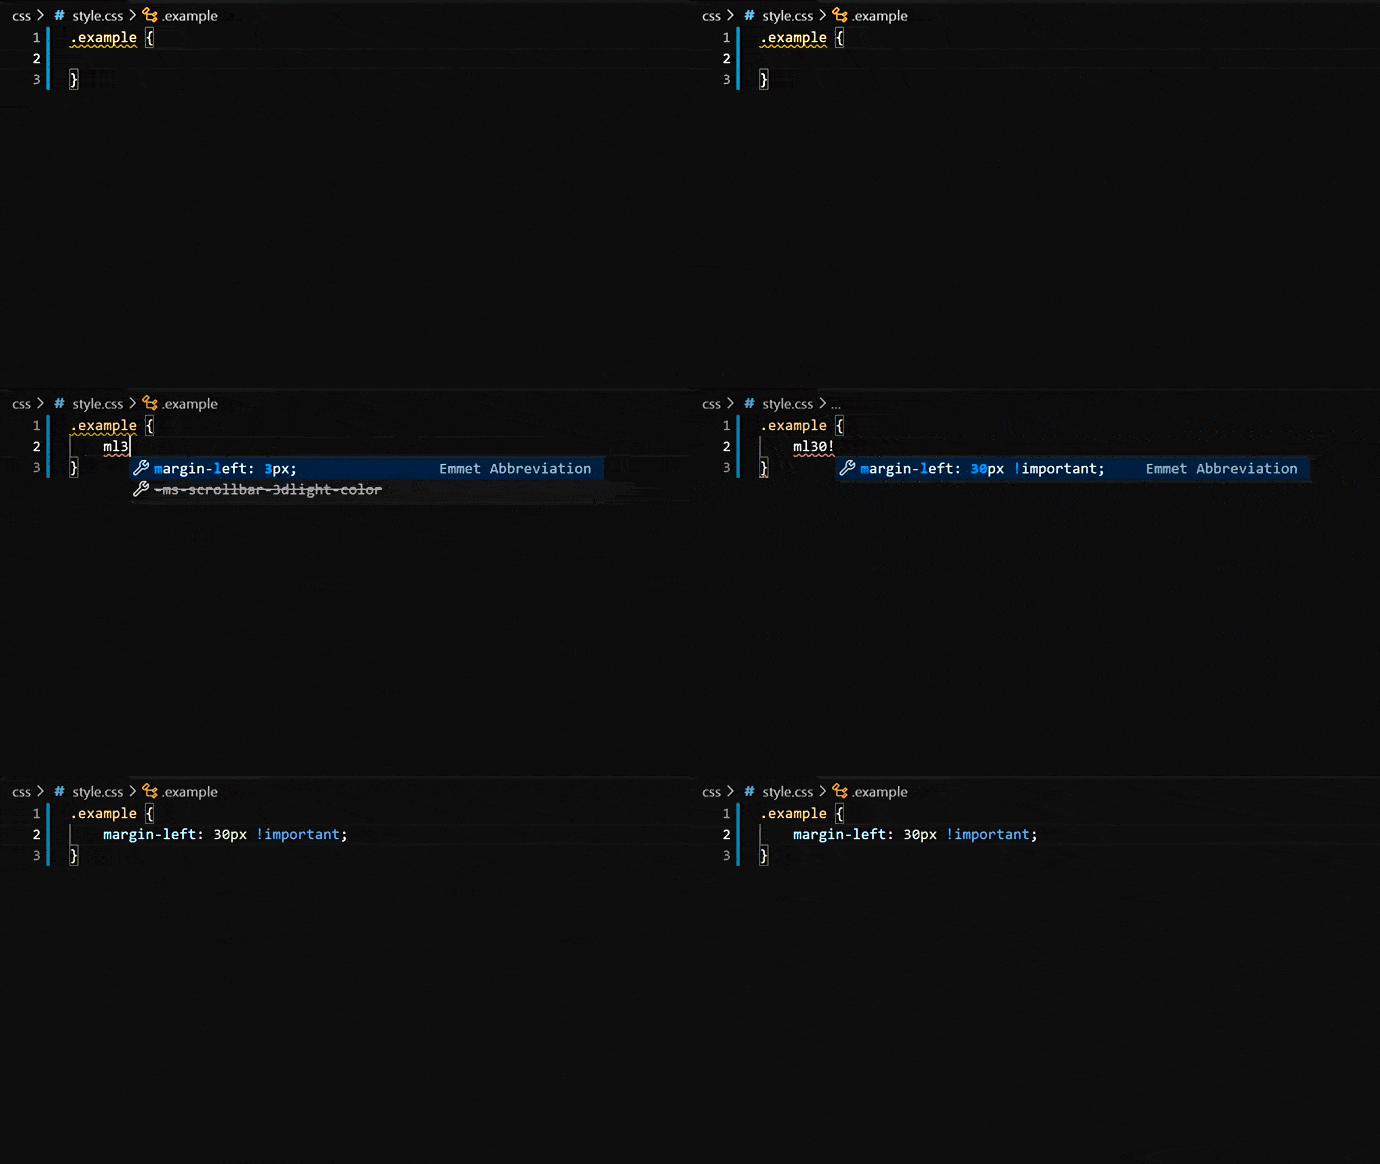
When you start typing an Emmet abbreviation, you will see the abbreviation displayed in the suggestion list. If you have the suggestion documentation fly-out open, you will see a preview of the expansion as you type. If you are in a stylesheet file, the expanded abbreviation shows up in the suggestion list sorted among the other CSS suggestions.
Using Tab for Emmet expansions
If you want to use the kbstyle(Tab) key for expanding the Emmet abbreviations, add the following setting:
"emmet.triggerExpansionOnTab": true
This setting allows using the kbstyle(Tab) key for indentation when text is not an Emmet abbreviation.
Emmet when quickSuggestions are disabled
If you have disabled the editor.quickSuggestions setting, you won’t see suggestions as you type. You can still trigger suggestions manually by pressing kb(editor.action.triggerSuggest) and see the preview.
Disable Emmet in suggestions
If you don’t want to see Emmet abbreviations in suggestions at all, then use the following setting:
"emmet.showExpandedAbbreviation": "never"
You can still use the command Emmet: Expand Abbreviation to expand your abbreviations. You can also bind any keyboard shortcut to the command id editor.emmet.action.expandAbbreviation as well.
Emmet suggestion ordering
To ensure Emmet suggestions are always on top in the suggestion list, add the following settings:
"emmet.showSuggestionsAsSnippets": true,
"editor.snippetSuggestions": "top"
Emmet abbreviations in other file types
To enable the Emmet abbreviation expansion in file types where it is not available by default, use the emmet.includeLanguages setting. Make sure to use language identifiers for both sides of the mapping, with the right side being the language identifier of an Emmet supported language (see the list above).
For example:
"emmet.includeLanguages": {
  "javascript": "javascriptreact",
  "razor": "html",
  "plaintext": "pug"
}
Emmet has no knowledge of these new languages, and so there might be Emmet suggestions showing up in non HTML/CSS contexts. To avoid this, you can use the following setting.
"emmet.showExpandedAbbreviation": "inMarkupAndStylesheetFilesOnly"
Note: If you used
emmet.syntaxProfilespreviously to map new file types, from VS Code 1.15 onwards you should use the settingemmet.includeLanguagesinstead.emmet.syntaxProfilesis meant for customizing the final output only.
Emmet with multi-cursors
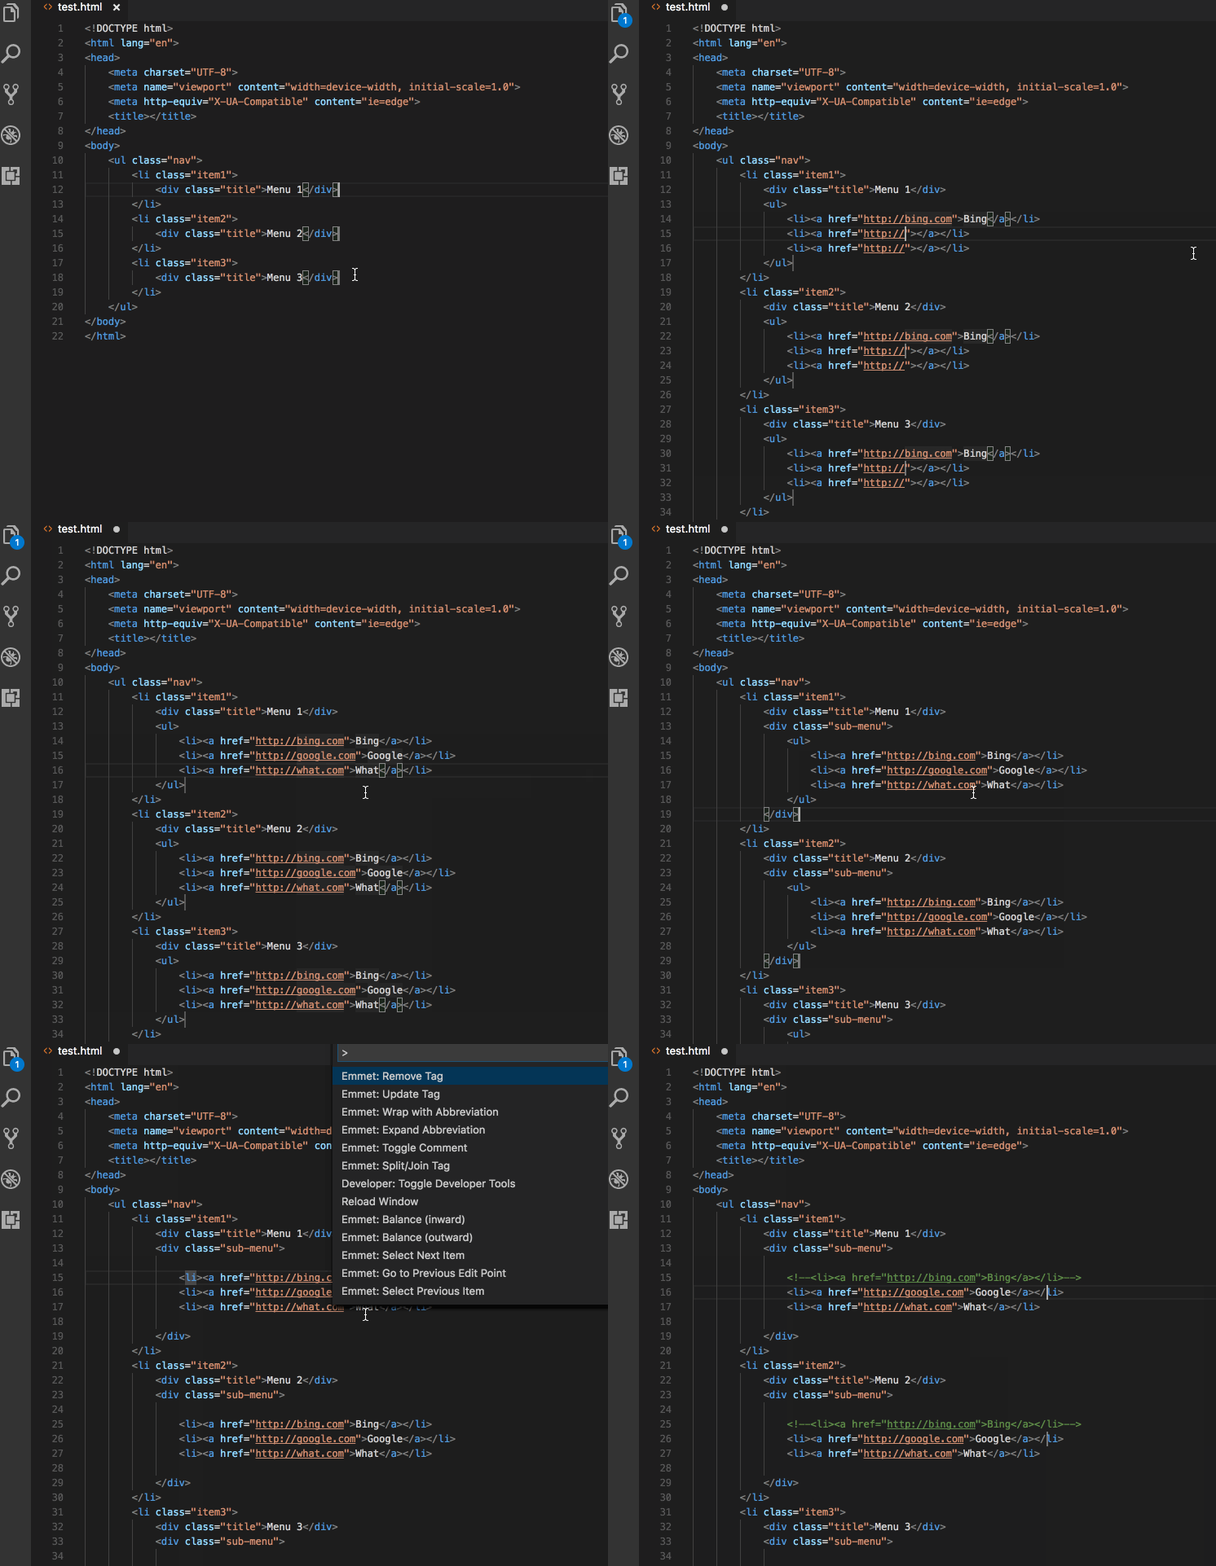
You can use most of the Emmet actions with multi-cursors as well:
Using filters
Filters are special post-processors that modify the expanded abbreviation before it is output to the editor. There are 2 ways to use filters; either globally through the emmet.syntaxProfiles setting or directly in the current abbreviation.
Below is an example of the first approach using the emmet.syntaxProfiles setting to apply the bem filter for all the abbreviations in HTML files:
"emmet.syntaxProfiles": {
  "html": {
    "filters": "bem"
  }
}
To provide a filter for just the current abbreviation, append the filter to your abbreviation. For example, div#page|c will apply the comment filter to the div#page abbreviation.
BEM filter (bem)
If you use the Block Element Modifier (BEM) way of writing HTML, then bem filters are very handy for you to use. To learn more about how to use bem filters, read BEM filter in Emmet.
You can customize this filter by using the bem.elementSeparator and bem.modifierSeparator preferences as documented in Emmet Preferences.
Comment filter (c)
This filter adds comments around important tags. By default, «important tags» are those tags with id and/or class attribute.
For example div>div#page>p.title+p|c will be expanded to:
<div>
    <div id="page">
        <p class="title"></p>
        <!-- /.title -->
        <p></p>
    </div>
    <!-- /#page -->
</div>
You can customize this filter by using the filter.commentTrigger, filter.commentAfter and filter.commentBefore preferences as documented in Emmet Preferences.
The format for the filter.commentAfter preference is different in VS Code Emmet 2.0.
For example, instead of:
"emmet.preferences": {
  "filter.commentAfter": "n<!-- /<%= attr('id', '#') %><%= attr('class', '.') %> -->"
}
in VS Code, you would use a simpler:
"emmet.preferences": {
  "filter.commentAfter": "n<!-- /[#ID][.CLASS] -->"
}
Trim filter (t)
This filter is applicable only when providing abbreviations for the Emmet: Wrap with Abbreviation command. It removes line markers from wrapped lines.
Using custom Emmet snippets
Custom Emmet snippets need to be defined in a json file named snippets.json. The emmet.extensionsPath setting should have the path to the directory containing this file.
Below is an example for the contents of this snippets.json file.
{
    "html": {
        "snippets": {
            "ull": "ul>li[id=${1} class=${2}]*2{ Will work with html, pug, haml and slim }",
            "oll": "<ol><li id=${1} class=${2}> Will only work in html </ol>",
            "ran": "{ Wrap plain text in curly braces }"
        }
    },
    "css": {
        "snippets": {
            "cb": "color: black",
            "bsd": "border: 1px solid ${1:red}",
            "ls": "list-style: ${1}"
        }
    }
}
Authoring of Custom Snippets in Emmet 2.0 via the snippets.json file differs from the old way of doing the same in a few ways:
| Topic | Old Emmet | Emmet 2.0 |
|---|---|---|
| Snippets vs Abbreviations | Supports both in 2 separate properties called snippets and abbreviations |
The 2 have been combined into a single property called snippets. See default HTML snippets and CSS snippets |
| CSS snippet names | Can contain : |
Do not use : when defining snippet names. It is used to separate property name and value when Emmet tries to fuzzy match the given abbreviation to one of the snippets. |
| CSS snippet values | Can end with ; |
Do not add ; at end of snippet value. Emmet will add the trailing ; based on the file type (css/less/scss vs sass/stylus) or the emmet preference set for css.propertyEnd, sass.propertyEnd, stylus.propertyEnd |
| Cursor location | ${cursor} or ` |
` can be used |
HTML Emmet snippets
HTML custom snippets are applicable to all other markup flavors like haml or pug. When snippet value is an abbreviation and not actual HTML, the appropriate transformations can be applied to get the right output as per the language type.
For example, for an unordered list with a list item, if your snippet value is ul>li, you can use the same snippet in html, haml, pug or slim, but if your snippet value is <ul><li></li></ul>, then it will work only in html files.
If you want a snippet for plain text, then surround the text with {}.
CSS Emmet snippets
Values for CSS Emmet snippets should be a complete property name and value pair.
CSS custom snippets are applicable to all other stylesheet flavors like scss, less or sass. Therefore, don’t include a trailing ; at the end of the snippet value. Emmet will add it as needed based on whether the language requires it.
Do not use : in the snippet name. : is used to separate property name and value when Emmet tries to fuzzy match the abbreviation to one of the snippets.
Tab stops and cursors in custom snippets
The syntax for tab stops in custom Emmet snippets follows the Textmate snippets syntax.
- Use
${1},${2}for tab stops and${1:placeholder}for tab stops with placeholders. - Previously,
|or${cursor}was used to denote the cursor location in the custom Emmet snippet. This is no longer supported. Use${1}instead.
Emmet configuration
Below are Emmet settings that you can use to customize your Emmet experience in VS Code.
-
emmet.includeLanguagesUse this setting to add mapping between the language of your choice and one of the Emmet supported languages to enable Emmet in the former using the syntax of the latter. Make sure to use language IDs for both sides of the mapping.
For example:
"emmet.includeLanguages": {
  "javascript": "javascriptreact",
  "plaintext": "pug"
}
-
emmet.excludeLanguagesIf there is a language where you do not want to see Emmet expansions, add it in this setting which takes an array of language ID strings.
-
emmet.syntaxProfilesSee Emmet Customization of output profile to learn how you can customize the output of your HTML abbreviations.
For example:
"emmet.syntaxProfiles": {
  "html": {
    "attr_quotes": "single"
  },
  "jsx": {
    "self_closing_tag": true
  }
}
-
emmet.variablesCustomize variables used by Emmet snippets.
For example:
"emmet.variables": {
  "lang": "de",
  "charset": "UTF-16"
}
-
emmet.showExpandedAbbreviationControls the Emmet suggestions that show up in the suggestion/completion list.
Setting Value Description neverNever show Emmet abbreviations in the suggestion list for any language. inMarkupAndStylesheetFilesOnlyShow Emmet suggestions only for languages that are purely markup and stylesheet based (‘html’, ‘pug’, ‘slim’, ‘haml’, ‘xml’, ‘xsl’, ‘css’, ‘scss’, ‘sass’, ‘less’, ‘stylus’). alwaysShow Emmet suggestions in all Emmet supported modes as well as the languages that have a mapping in the emmet.includeLanguagessetting.Note: In the
alwaysmode, the new Emmet implementation is not context aware. For example, if you are editing a JavaScript React file, you will get Emmet suggestions not only when writing markup but also while writing JavaScript. -
emmet.showAbbreviationSuggestionsShows possible emmet abbreviations as suggestions. It is
trueby default.For example, when you type
li, you get suggestions for all emmet snippets starting withlilikelink,link:css,link:faviconetc.
This is helpful in learning Emmet snippets that you never knew existed unless you knew the Emmet cheatsheet by heart.Not applicable in stylesheets or when
emmet.showExpandedAbbreviationis set tonever. -
emmet.extensionsPathProvide the location of the directory that houses the
snippets.jsonfile which in turn has your custom snippets. -
emmet.triggerExpansionOnTabSet this to true to enable expanding Emmet abbreviations with
kbstyle(Tab)key. We use this setting to provide the appropriate fallback to provide indentation when there is no abbreviation to expand. -
emmet.showSuggestionsAsSnippetsIf set to
true, then Emmet suggestions will be grouped along with other snippets allowing you to order them as pereditor.snippetSuggestionssetting. Set this totrueandeditor.snippetSuggestionstotop, to ensure that Emmet suggestions always show up on top among other suggestions. -
emmet.preferencesYou can use this setting to customize Emmet as documented in Emmet Preferences. The below customizations are currently supported:
css.propertyEndcss.valueSeparatorsass.propertyEndsass.valueSeparatorstylus.propertyEndstylus.valueSeparatorcss.unitAliasescss.intUnitcss.floatUnitbem.elementSeparatorbem.modifierSeparatorfilter.commentBeforefilter.commentTriggerfilter.commentAfterformat.noIndentTagsformat.forceIndentationForTagsprofile.allowCompactBooleancss.fuzzySearchMinScore
The format for the
filter.commentAfterpreference is different and simpler in Emmet 2.0.For example, instead of the older format
"emmet.preferences": {
  "filter.commentAfter": "n<!-- /<%= attr('id', '#') %><%= attr('class', '.') %> -->"
}
you would use
"emmet.preferences": {
  "filter.commentAfter": "n<!-- /[#ID][.CLASS] -->"
}
If you want support for any of the other preferences as documented in Emmet Preferences, please log a feature request.
Next steps
Emmet is just one of the great web developer features in VS Code. Read on to find out about:
- HTML — VS Code supports HTML with IntelliSense, closing tags, and formatting.
- CSS — We offer rich support for CSS, SCSS and Less.
Troubleshooting
Custom tags do not get expanded in the suggestion list
Custom tags when used in an expression like MyTag>YourTag or MyTag.someclass do show up in the suggestion list. But when these are used on their own like MyTag, they do not appear in the suggestion list. This is designed so to avoid noise in the suggestion list as every word is a potential custom tag.
Add the following setting to enable expanding of Emmet abbreviations using tab which will expand custom tags in all cases.
"emmet.triggerExpansionOnTab": true
My HTML snippets ending with + do not work
HTML snippets ending with + like select+ and ul+ from the Emmet cheatsheet are not supported. This is a known issue in Emmet 2.0 Issue: emmetio/html-matcher#1. A workaround is to create your own custom Emmet snippets for such scenarios.
Abbreviations are failing to expand
First, check if you’re using custom snippets (if there is a snippets.json file being picked up by the emmet.extensionsPath setting). The format of custom snippets changed in VS Code release 1.53. Instead of using | to indicate where the cursor position is, use tokens such as ${1}, ${2}, etc. instead. The default CSS snippets file from the emmetio/emmet repository shows examples of the new cursor position format.
If abbreviations are still failing to expand:
- Check the builtin extensions to see if Emmet has been disabled.
- Try restarting the extension host by running the Developer: Restart Extension Host (
workbench.action.restartExtensionHost) command in the Command Palette.
Where can I set all the preferences as documented in Emmet preferences?
You can set the preferences using the setting emmet.preferences. Only a subset of the preferences that are documented in Emmet preferences can be customized. Please read the preferences section under Emmet configuration.
Any tips and tricks?
Of course!
- In CSS abbreviations, when you use
:, the left part is used to fuzzy match with the CSS property name and the right part is used to match with CSS property value. Take full advantage of this by using abbreviations likepos:f,trf:rx,fw:b, etc. - Explore all other Emmet features as documented in Emmet Actions.
- Don’t hesitate to create your own custom Emmet snippets.

Сокращение при помощи плагина EMMET, позволяет значительно увеличить скорость верстки за счет комбинации команд и аббревиатур. Как пользоваться emmet подробно разбирали в видео уроке «Плагин EMMET молниеносная верстка», где показывал дополнительно как делать свои аббревиатуры. EMMET прост в установке интегрируется в такие редакторы как PHPStorm, Sublime Text, Adobe Dreamviewer, Notepad++, WebStorm, Aptana, Coda, TextMate, Eclipse, CodeMirror, Brackets, Emacs, HippoEDIT, HTML-Kit и други, полный их перечень найдете на сайте EMMET. В данной статье представлены шпаргалки по часто используемым комбинациям с их аббревиатурами по плагину EMMET.
- Базовый синтаксис
- HTML сокращения
- CSS сокращения
- Визуальное форматирование
- Margin и Padding
- Box Sizing
- Font
- Text
- Background
- Color
- Generated content
- Outline
- Tables
- Border
- Lists
- Align
- Animation
- Flex
- Transform
- Дополнительные сокращения
| Сокращение | Расшифровка сокращений |
|---|---|
| Дочерний: > |
<!-- nav>ul>li -->
<nav>
    <ul>
        <li></li>
    </ul>
</nav>
|
| Соединение: + |
<!-- div+p+bq --> <div></div> <p></p> <blockquote></blockquote> |
| Поместить выше (в дереве HTML): ^ |
<!-- div+div>p>span+em^bq -->
<div></div>
<div>
    <p><span></span><em></em></p>
    <blockquote></blockquote>
</div>

<!-- div+div>p>span+em^^bq -->
<div></div>
<div>
    <p><span></span><em></em></p>
</div>
<blockquote></blockquote>
|
| Группировка: () |
<!-- div>(header>ul>li*2>a)+footer>p -->
<div>
    <header>
        <ul>
            <li><a href=""></a></li>
            <li><a href=""></a></li>
        </ul>
    </header>
    <footer>
        <p></p>
    </footer>
</div>
|
| Умножение: * |
<!-- ul>li*3 -->
<ul>
    <li></li>
    <li></li>
    <li></li>
</ul>
|
| Нумерация: $ |
<!-- ul>li.item$*3 -->
<ul>
    <li class="item1"></li>
    <li class="item2"></li>
    <li class="item3"></li>
</ul>

<!-- h$[title=item$]{Header $}*3 -->
<h1 title="item1">Header 1</h1>
<h2 title="item2">Header 2</h2>
<h3 title="item3">Header 3</h3>

<!-- ul>li.item$$$*3 -->
<ul>
    <li class="item001"></li>
    <li class="item002"></li>
    <li class="item003"></li>
</ul>

<!-- ul>li.item$@-*3 -->
<ul>
    <li class="item3"></li>
    <li class="item2"></li>
    <li class="item1"></li>
</ul>

<!-- ul>li.item$@3*5 -->
<ul>
    <li class="item3"></li>
    <li class="item4"></li>
    <li class="item5"></li>
    <li class="item6"></li>
    <li class="item7"></li>
</ul>
|
| id и class |
<!-- #header --> <div id="header"></div> <!-- .title --> <div class="title"></div> <!-- form#search.wide --> <form id="search" class="wide"></form> <!-- p.class1.class2.class3 --> <p class="class1 class2 class3"></p> |
| Атрибуты: [] |
<!-- p[title="Hello world"] --> <p title="Hello world"></p> <!-- td[rowspan=2 colspan=3 title] --> <td rowspan="2" colspan="3" title=""></td> <!-- [a='value1' b="value2"] --> <div a="value1" b="value2"></div> |
| Текст: {} |
<!-- a{Click me} -->
<a href="">Click me</a>

<!-- p>{Click }+a{here}+{ to continue} -->
<p>Click <a href="">here</a> to continue</p>
|
| Сокращение тегов: |
<!-- .class -->
<div class="class"></div>

<!-- em>.class -->
<em><span class="class"></span></em>

<!-- ul>.class -->
<ul>
    <li class="class"></li>
</ul>

<!-- table>.row>.col -->
<table>
    <tr class="row">
        <td class="col"></td>
    </tr>
</table>
|
| Генератор текста: lorem |
<!-- .wrapper>h1{My Text}+p*3>lorem5 -->
<div class="wrapper">
   <h1>My Text</h1>
   <p>Lorem ipsum dolor sit amet.</p>
   <p>Debitis dolorum illo nisi suscipit!</p>
   <p>Animi explicabo libero quis voluptates?</p>
</div>
|
HTML сокращения в EMMET
| !, html:5 |
<!DOCTYPE html>
<html lang="en">
<head>
    <meta charset="UTF-8" />
    <title>Document</title>
</head>
<body>

</body>
</html>
|
| !!! |
<!DOCTYPE html> |
| a |
<a href=""></a> |
| a:link |
<a href="http://"></a> |
| a:mail |
<a href="mailto:"></a> |
| br |
<br /> |
| frame |
<frame /> |
| link |
<link rel="stylesheet" href="" /> |
| link:css |
<link rel="stylesheet" href="style.css" /> |
| link:favicon |
<link rel="shortcut icon" type="image/x-icon" href="favicon.ico" /> |
| link:rss |
<link rel="alternate" type="application/rss+xml" title="RSS" href="rss.xml" /> |
| meta |
<meta /> |
| meta:utf |
<meta http-equiv="Content-Type" content="text/html;charset=UTF-8" /> |
| meta:win |
<meta http-equiv="Content-Type" content="text/html;charset=windows-1251" /> |
| meta:vp |
<meta name="viewport" content="width=device-width, user-scalable=no, initial-scale=1.0, maximum-scale=1.0, minimum-scale=1.0" /> |
| meta:compat |
<meta http-equiv="X-UA-Compatible" content="IE=7" /> |
| style |
<style></style> |
| script |
<script></script> |
| script:src |
<script src=""></script> |
| img |
<img src="" alt="" /> |
| img:srcset, img:s |
<img srcset="" src="" alt="" /> |
| img:sizes, img:z |
<img sizes="" srcset="" src="" alt="" /> |
| map |
<map name=""></map> |
| form |
<form action=""></form> |
| label |
<label for=""></label> |
| input |
<input type="text" /> |
| inp |
<input type="text" name="" id="" /> |
| input:text, input:t |
<input type="text" name="" id="" /> |
| input:search |
<input type="search" name="" id="" /> |
| input:email |
<input type="email" name="" id="" /> |
| input:url |
<input type="url" name="" id="" /> |
| input:password, input:p |
<input type="password" name="" id="" /> |
| input:datetime |
<input type="datetime" name="" id="" /> |
| input:date |
<input type="date" name="" id="" /> |
| input:time |
<input type="time" name="" id="" /> |
| input:tel |
<input type="tel" name="" id="" /> |
| input:number |
<input type="number" name="" id="" /> |
| input:color |
<input type="color" name="" id="" /> |
| input:checkbox, input:c |
<input type="checkbox" name="" id="" /> |
| input:radio, input:r |
<input type="radio" name="" id="" /> |
| input:range |
<input type="range" name="" id="" /> |
| input:file, input:f |
<input type="file" name="" id="" /> |
| input:submit, input:s |
<input type="submit" value="" /> |
| input:image, input:i |
<input type="image" src="" alt="" /> |
| input:button, input:b |
<input type="button" value="" /> |
| input:reset |
<input type="reset" value="" /> |
| select |
<select name="" id=""></select> |
| select:disabled, select:d |
<select name="" id="" disabled="disabled"></select> |
| option, opt |
<option value=""></option> |
| textarea |
<textarea name="" id="" cols="30" rows="10"></textarea> |
| marquee |
<marquee behavior="" direction=""></marquee> |
| menu:context, menu:c |
<menu type="context"></menu> |
| menu:toolbar, menu:t |
<menu type="toolbar"></menu> |
| video |
<video src=""></video> |
| audio |
<audio src=""></audio> |
| html:xml |
<html xmlns="http://www.w3.org/1999/xhtml"></html> |
| keygen |
<keygen /> |
| command |
<command /> |
| button:submit, button:s, btn:s |
<button type="submit"></button> |
| button:reset, button:r, btn:r |
<button type="reset"></button> |
| button:disabled, button:d, btn:d |
<button disabled="disabled"></button> |
| bq |
<blockquote></blockquote> |
| fig |
<figure></figure> |
| figc |
<figcaption></figcaption> |
| pic |
<picture></picture> |
| ifr |
<iframe src="" frameborder="0"></iframe> |
| emb |
<embed src="" type="" /> |
| obj |
<object data="" type=""></object> |
| cap |
<caption></caption> |
| colg |
<colgroup></colgroup> |
| fst, fset |
<fieldset></fieldset> |
| btn |
<button></button> |
| optg |
<optgroup></optgroup> |
| tarea |
<textarea name="" id="" cols="30" rows="10"></textarea> |
| leg |
<legend></legend> |
| sect |
<section></section> |
| art |
<article></article> |
| hdr |
<header></header> |
| ftr |
<footer></footer> |
| adr |
<address></address> |
| dlg |
<dialog></dialog> |
| str |
<strong></strong> |
| prog |
<progress></progress> |
| mn |
<main></main> |
| tem |
<template></template> |
| datag |
<datagrid></datagrid> |
| datal |
<datalist></datalist> |
| kg |
<keygen /> |
| out |
<output></output> |
| det |
<details></details> |
| cmd |
<command /> |
| ol+ |
<ol>
    <li></li>
</ol>
|
| ul+ |
<ul>
    <li></li>
</ul>
|
| dl+ |
<dl>
    <dt></dt>
    <dd></dd>
</dl>
|
| map+ |
<map name="">
    <area shape="" coords="" href="" alt="" />
</map>
|
| table+ |
<table>
    <tr>
        <td></td>
    </tr>
</table>
|
| colgroup+, colg+ |
<colgroup>
    <col />
</colgroup>
|
| tr+ |
<tr>
    <td></td>
</tr>
|
| select+ |
<select name="" id="">
    <option value=""></option>
</select>
|
| optgroup+, optg+ |
<optgroup>
    <option value=""></option>
</optgroup>
|
| pic+ |
<picture>
    <source srcset="" />
    <img src="" alt="" />
</picture>
|
CSS сокращения в EMMET
| pos |
position:relative; |
| pos:s |
position:static; |
| pos:a |
position:absolute; |
| pos:r |
position:relative; |
| pos:f |
position:fixed; |
| t |
top:; |
| t:a |
top:auto; |
| r |
right:; |
| r:a |
right:auto; |
| b |
bottom:; |
| b:a |
bottom:auto; |
| l |
left:; |
| l:a |
left:auto; |
| z |
z-index:; |
| z:a |
z-index:auto; |
| fl |
float:left; |
| fl:n |
float:none; |
| fl:l |
float:left; |
| fl:r |
float:right; |
| cl |
clear:both; |
| cl:n |
clear:none; |
| cl:l |
clear:left; |
| cl:r |
clear:right; |
| cl:b |
clear:both; |
| d |
display:block; |
| d:n |
display:none; |
| d:b |
display:block; |
| d:f |
display:flex; |
| d:if |
display:inline-flex; |
| d:i |
display:inline; |
| d:ib |
display:inline-block; |
| d:li |
display:list-item; |
| d:ri |
display:run-in; |
| d:cp |
display:compact; |
| d:tb |
display:table; |
| d:itb |
display:inline-table; |
| d:tbcp |
display:table-caption; |
| d:tbcl |
display:table-column; |
| d:tbclg |
display:table-column-group; |
| d:tbhg |
display:table-header-group; |
| d:tbfg |
display:table-footer-group; |
| d:tbr |
display:table-row; |
| d:tbrg |
display:table-row-group; |
| d:tbc |
display:table-cell; |
| d:rb |
display:ruby; |
| d:rbb |
display:ruby-base; |
| d:rbbg |
display:ruby-base-group; |
| d:rbt |
display:ruby-text; |
| d:rbtg |
display:ruby-text-group; |
| v |
visibility:hidden; |
| v:v |
visibility:visible; |
| v:h |
visibility:hidden; |
| v:c |
visibility:collapse; |
| ov |
overflow:hidden; |
| ov:v |
overflow:visible; |
| ov:h |
overflow:hidden; |
| ov:s |
overflow:scroll; |
| ov:a |
overflow:auto; |
| zoo, zm |
zoom:1; |
| cp |
clip:; |
| cp:a |
clip:auto; |
| cp:r |
clip:rect(top right bottom left); |
| rsz |
resize:; |
| rsz:n |
resize:none; |
| cur |
cursor:${pointer};
|
| cur:a |
cursor:auto; |
| cur:d |
cursor:default; |
| cur:c |
cursor:crosshair; |
| cur:ha |
cursor:hand; |
| cur:he |
cursor:help; |
| cur:m |
cursor:move; |
| cur:p |
cursor:pointer; |
| cur:t |
cursor:text; |
| m |
margin:; |
| m:a |
margin:auto; |
| mt |
margin-top:; |
| mt:a |
margin-top:auto; |
| mr |
margin-right:; |
| mr:a |
margin-right:auto; |
| mb |
margin-bottom:; |
| mb:a |
margin-bottom:auto; |
| ml |
margin-left:; |
| ml:a |
margin-left:auto; |
| p |
padding:; |
| pt |
padding-top:; |
| pr |
padding-right:; |
| pb |
padding-bottom:; |
|
m:a |
padding-bottom:; |
| pl |
padding-left:; |
| bxz |
box-sizing:border-box; |
| bxz:cb |
box-sizing:content-box; |
| bxz:bb |
box-sizing:border-box; |
| bxsh |
box-shadow:inset hoff voff blur color; |
| bxsh:r |
box-shadow:inset hoff voff blur spread #000000; |
| bxsh:ra |
box-shadow:inset h v blur spread rgba(0, 0, 0, .5); |
| bxsh:n |
box-shadow:none; |
| w |
width:; |
| w:a |
width:auto; |
| h |
height:; |
| h:a |
height:auto; |
| maw |
max-width:; |
| maw:n |
max-width:none; |
| mah |
max-height:; |
| mah:n |
max-height:none; |
| miw |
min-width:; |
| mih |
min-height:; |
| f |
font:; |
| f+ |
font:1em Arial,sans-serif; |
| fw |
font-weight:; |
| fw:n |
font-weight:normal; |
| fw:b |
font-weight:bold; |
| fw:br |
font-weight:bolder; |
| fw:lr |
font-weight:lighter; |
| fs |
font-style:${italic};
|
| fs:n |
font-style:normal; |
| fs:i |
font-style:italic; |
| fs:o |
font-style:oblique; |
| fv |
font-variant:; |
| fv:n |
font-variant:normal; |
| fv:sc |
font-variant:small-caps; |
| fz |
font-size:; |
| fza |
font-size-adjust:; |
| fza:n |
font-size-adjust:none; |
| ff |
font-family:; |
| ff:s |
font-family:serif; |
| ff:ss |
font-family:sans-serif; |
| ff:c |
font-family:cursive; |
| ff:f |
font-family:fantasy; |
| ff:m |
font-family:monospace; |
| ff:a |
font-family: Arial, "Helvetica Neue", Helvetica, sans-serif; |
| ff:t |
font-family: "Times New Roman", Times, Baskerville, Georgia, serif; |
| ff:v |
font-family: Verdana, Geneva, sans-serif; |
| fef |
font-effect:; |
| fef:n |
font-effect:none; |
| fef:eg |
font-effect:engrave; |
| fef:eb |
font-effect:emboss; |
| fef:o |
font-effect:outline; |
| va, va:t |
vertical-align:top; |
| va:sup |
vertical-align:super; |
| va:tt |
vertical-align:text-top; |
| va:m |
vertical-align:middle; |
| va:bl |
vertical-align:baseline; |
| va:b |
vertical-align:bottom; |
| va:tb |
vertical-align:text-bottom; |
| va:sub |
vertical-align:sub; |
| ta, ta:l |
text-align:left; |
| ta:c |
text-align:center; |
| ta:r |
text-align:right; |
| ta:j |
text-align:justify; |
| ta-lst |
text-align-last:; |
| tal:a |
text-align-last:auto; |
| tal:l |
text-align-last:left; |
| tal:c |
text-align-last:center; |
| tal:r |
text-align-last:right; |
| td, td:n |
text-decoration:none; |
| td:u |
text-decoration:underline; |
| td:o |
text-decoration:overline; |
| td:l |
text-decoration:line-through; |
| te |
text-emphasis:; |
| te:n |
text-emphasis:none; |
| te:ac |
text-emphasis:accent; |
| te:dt |
text-emphasis:dot; |
| te:c |
text-emphasis:circle; |
| te:ds |
text-emphasis:disc; |
| te:b |
text-emphasis:before; |
| te:a |
text-emphasis:after; |
| th |
text-height:; |
| th:a |
text-height:auto; |
| th:f |
text-height:font-size; |
| th:t |
text-height:text-size; |
| th:m |
text-height:max-size; |
| ti |
text-indent:; |
| ti:- |
text-indent:-9999px; |
| tj |
text-justify:; |
| tj:a |
text-justify:auto; |
| tj:iw |
text-justify:inter-word; |
| tj:ii |
text-justify:inter-ideograph; |
| tj:ic |
text-justify:inter-cluster; |
| tj:d |
text-justify:distribute; |
| tj:k |
text-justify:kashida; |
| tj:t |
text-justify:tibetan; |
| to |
text-outline:; |
| to+ |
text-outline:0 0 #000; |
| to:n |
text-outline:none; |
| tr |
text-replace:; |
| tr:n |
text-replace:none; |
| tt |
text-transform:uppercase; |
| tt:n |
text-transform:none; |
| tt:c |
text-transform:capitalize; |
| tt:u |
text-transform:uppercase; |
| tt:l |
text-transform:lowercase; |
| tw |
text-wrap:; |
| tw:n |
text-wrap:normal; |
| tw:no |
text-wrap:none; |
| tw:u |
text-wrap:unrestricted; |
| tw:s |
text-wrap:suppress; |
| tsh |
text-shadow:hoff voff blur #000; |
| tsh:r |
text-shadow:h v blur #000000; |
| tsh:ra |
text-shadow:h v blur rgba(0, 0, 0, .5); |
| tsh+ |
text-shadow:0 0 0 #000; |
| tsh:n |
text-shadow:none; |
| lh |
line-height:; |
| lts |
letter-spacing:; |
| lts-n |
letter-spacing:normal; |
| whs |
white-space:; |
| whs:n |
white-space:normal; |
| wob |
word-break:; |
| wob:n |
word-break:normal; |
| wos |
word-spacing:; |
| wow |
word-wrap:; |
| wow:nm |
word-wrap:normal; |
| wow:n |
word-wrap:none |
| bg |
background:#000; |
| bg+ |
background:#fff url() 0 0 no-repeat; |
| bg:n |
background:none; |
| bgc |
background-color:#fff; |
| bgc:t |
background-color:transparent; |
| bgi |
background-image:url(); |
| bgi:n |
background-image:none; |
| bgr |
background-repeat:; |
| bgr:n |
background-repeat:no-repeat; |
| bgr:x |
background-repeat:repeat-x; |
| bgr:y |
background-repeat:repeat-y; |
| bgr:sp |
background-repeat:space; |
| bgr:rd |
background-repeat:round; |
| bga |
background-attachment:; |
| bga:f |
background-attachment:fixed; |
| bga:s |
background-attachment:scroll; |
| bgp |
background-position:0 0; |
| bgpx |
background-position-x:; |
| bgpy |
background-position-y:; |
| bgbk |
background-break:; |
| bgbk:bb |
background-break:bounding-box; |
| bgbk:eb |
background-break:each-box; |
| bgbk:c |
background-break:continuous; |
| bgcp |
background-clip:padding-box; |
| bgcp:bb |
background-clip:border-box; |
| bgcp:pb |
background-clip:padding-box; |
| bgcp:cb |
background-clip:content-box; |
| bgcp:nc |
background-clip:no-clip; |
| bgo |
background-origin:; |
| bgo:pb |
background-origin:padding-box; |
| bgo:bb |
background-origin:border-box; |
| bgo:cb |
background-origin:content-box; |
| bgsz |
background-size:; |
| bgsz:a |
background-size:auto; |
| bgsz:ct |
background-size:contain; |
| bgsz:cv |
background-size:cover; |
| c |
color:#000; |
| c:r |
color:#000000; |
| c:ra |
color:rgba(0, 0, 0, .5); |
| op |
opacity:; |
| cnt |
content:''; |
| cnt:n, ct:n |
content:normal; |
| cnt:oq, ct:oq |
content:open-quote; |
| cnt:noq, ct:noq |
content:no-open-quote; |
| cnt:cq, ct:cq |
content:close-quote; |
| cnt:ncq, ct:ncq |
content:no-close-quote; |
| cnt:a, ct:a |
content:attr(); |
| cnt:c, ct:c |
content:counter(); |
| cnt:cs, ct:cs |
content:counters(); |
| ct |
content:; |
| q |
quotes:; |
| q:n |
quotes:none; |
| q:ru |
quotes:'0AB' '0BB' '201E' '201C'; |
| q:en |
quotes:'201C' '201D' '2018' '2019'; |
| coi |
counter-increment:; |
| cor |
counter-reset:; |
| ol |
outline:; |
| ol:n |
outline:none; |
| olo |
outline-offset:; |
| olw |
outline-width:; |
| olw:tn |
outline-width:thin; |
| olw:m |
outline-width:medium; |
| olw:tc |
outline-width:thick; |
| ols |
outline-style:; |
| ols:n |
outline-style:none; |
| ols:dt |
outline-style:dotted; |
| ols:ds |
outline-style:dashed; |
| ols:s |
outline-style:solid; |
| ols:db |
outline-style:double; |
| ols:g |
outline-style:groove; |
| ols:r |
outline-style:ridge; |
| ols:i |
outline-style:inset; |
| ols:o |
outline-style:outset; |
| olc |
outline-color:#000; |
| olc:i |
outline-color:invert; |
| tbl |
table-layout:; |
| tbl:a |
table-layout:auto; |
| tbl:f |
table-layout:fixed; |
| cps |
caption-side:; |
| cps:t |
caption-side:top; |
| cps:b |
caption-side:bottom; |
| ec |
empty-cells:; |
| ec:s |
empty-cells:show; |
| ec:h |
empty-cells:hide; |
| bd |
border:; |
| bd+ |
border:1px solid #000; |
| bd:n |
border:none; |
| bdbk, bdbk:c |
border-break:close; |
| bdcl |
border-collapse:; |
| bdcl:c |
border-collapse:collapse; |
| bdcl:s |
border-collapse:separate; |
| bdc |
border-color:#000; |
| bdc:t |
border-color:transparent; |
| bdi |
border-image:url(); |
| bdi:n |
border-image:none; |
| bdti |
border-top-image:url(); |
| bdti:n |
border-top-image:none; |
| bdri |
border-right-image:url(); |
| bdri:n |
border-right-image:none; |
| bdbi |
border-bottom-image:url(); |
| bdbi:n |
border-bottom-image:none; |
| bdli |
border-left-image:url(); |
| bdli:n |
border-left-image:none; |
| bdci |
border-corner-image:url(); |
| bdci:n |
border-corner-image:none; |
| bdci:c |
border-corner-image:continue; |
| bdtli |
border-top-left-image:url(); |
| bdtli:n |
border-top-left-image:none; |
| bdtli:c |
border-top-left-image:continue; |
| bdtri |
border-top-right-image:url(); |
| bdtri:n |
border-top-right-image:none; |
| bdtri:c |
border-top-right-image:continue; |
| bdbri |
border-bottom-right-image:url(); |
| bdbri:n |
border-bottom-right-image:none; |
| bdbri:c |
border-bottom-right-image:continue; |
| bdbli |
border-bottom-left-image:url(); |
| bdbli:n |
border-bottom-left-image:none; |
| bdbli:c |
border-bottom-left-image:continue; |
| bdf |
border-fit:repeat; |
| bdf:c |
border-fit:clip; |
| bdf:r |
border-fit:repeat; |
| bdf:sc |
border-fit:scale; |
| bdf:st |
border-fit:stretch; |
| bdf:ow |
border-fit:overwrite; |
| bdf:of |
border-fit:overflow; |
| bdf:sp |
border-fit:space; |
| bdlen |
border-length:; |
| bdlen:a |
border-length:auto; |
| bdsp |
border-spacing:; |
| bds |
border-style:; |
| bds:n |
border-style:none; |
| bds:h |
border-style:hidden; |
| bds:dt |
border-style:dotted; |
| bds:ds |
border-style:dashed; |
| bds:s |
border-style:solid; |
| bds:db |
border-style:double; |
| bds:dtds |
border-style:dot-dash; |
| bds:dtdtds |
border-style:dot-dot-dash; |
| bds:w |
border-style:wave; |
| bds:g |
border-style:groove; |
| bds:r |
border-style:ridge; |
| bds:i |
border-style:inset; |
| bds:o |
border-style:outset; |
| bdw |
border-width:; |
| bdt, bt |
border-top:; |
| bdt+ |
border-top:1px solid #000; |
| bdt:n |
border-top:none; |
| bdtw |
border-top-width:; |
| bdts |
border-top-style:; |
| bdts:n |
border-top-style:none; |
| bdtc |
border-top-color:#000; |
| bdtc:t |
border-top-color:transparent; |
| bdr, br |
border-right:; |
| bdr+ |
border-right:1px solid #000; |
| bdr:n |
border-right:none; |
| bdrw |
border-right-width:; |
| bdrst |
border-right-style:; |
| bdrst:n |
border-right-style:none; |
| bdrc |
border-right-color:#000; |
| bdrc:t |
border-right-color:transparent; |
| bdb, bb |
border-bottom:; |
| bdb+ |
border-bottom:1px solid #000; |
| bdb:n |
border-bottom:none; |
| bdbw |
border-bottom-width:; |
| bdbs |
border-bottom-style:; |
| bdbs:n |
border-bottom-style:none; |
| bdbc |
border-bottom-color:#000; |
| bdbc:t |
border-bottom-color:transparent; |
| bdl, bl |
border-left:; |
| bdl+ |
border-left:1px solid #000; |
| bdl:n |
border-left:none; |
| bdlw |
border-left-width:; |
| bdls |
border-left-style:; |
| bdls:n |
border-left-style:none; |
| bdlc |
border-left-color:#000; |
| bdlc:t |
border-left-color:transparent; |
| bdrs |
border-radius:; |
| bdtrrs |
border-top-right-radius:; |
| bdtlrs |
border-top-left-radius:; |
| bdbrrs |
border-bottom-right-radius:; |
| bdblrs |
border-bottom-left-radius:; |
| lis |
list-style:; |
| lis:n |
list-style:none; |
| lisp |
list-style-position:; |
| lisp:i |
list-style-position:inside; |
| lisp:o |
list-style-position:outside; |
| list |
list-style-type:; |
| list:n |
list-style-type:none; |
| list:d |
list-style-type:disc; |
| list:c |
list-style-type:circle; |
| list:s |
list-style-type:square; |
| list:dc |
list-style-type:decimal; |
| list:dclz |
list-style-type:decimal-leading-zero; |
| list:lr |
list-style-type:lower-roman; |
| list:ur |
list-style-type:upper-roman; |
| lisi |
list-style-image:; |
| lisi:n |
list-style-image:none; |
| pgbb |
page-break-before:; |
| pgbb:au |
page-break-before:auto; |
| pgbb:al |
page-break-before:always; |
| pgbb:l |
page-break-before:left; |
| pgbb:r |
page-break-before:right; |
| pgbi |
page-break-inside:; |
| pgbi:au |
page-break-inside:auto; |
| pgbi:av |
page-break-inside:avoid; |
| pgba |
page-break-after:; |
| pgba:au |
page-break-after:auto; |
| pgba:al |
page-break-after:always; |
| pgba:l |
page-break-after:left; |
| pgba:r |
page-break-after:right; |
| orp |
orphans:; |
| wid |
widows:; |
| ac |
align-content:; |
| ac:c |
align-content:center; |
| ac:fe |
align-content:flex-end; |
| ac:fs |
align-content:flex-start; |
| ac:s |
align-content:stretch; |
| ac:sa |
align-content:space-around; |
| ac:sb |
align-content:space-between; |
| ai |
align-items:; |
| ai:b |
align-items:baseline; |
| ai:c |
align-items:center; |
| ai:fe |
align-items:flex-end; |
| ai:fs |
align-items:flex-start; |
| ai:s |
align-items:stretch; |
| anim |
animation:; |
| anim- |
animation:name duration timing-function delay iteration-count direction fill-mode; |
| animdel |
animation-delay:time; |
| animdir |
animation-direction:normal; |
| animdir:a |
animation-direction:alternate; |
| animdir:ar |
animation-direction:alternate-reverse; |
| animdir:n |
animation-direction:normal; |
| animdir:r |
animation-direction:reverse; |
| animdur |
animation-duration:0s; |
| animfm |
animation-fill-mode:both; |
| animfm:b |
animation-fill-mode:backwards; |
| animfm:bt, animfm:bh |
animation-fill-mode:both; |
| animfm:f |
animation-fill-mode:forwards; |
| animic |
animation-iteration-count:1; |
| animic:i |
animation-iteration-count:infinite; |
| animn |
animation-name:none; |
| animps |
animation-play-state:running; |
| animps:p |
animation-play-state:paused; |
| animps:r |
animation-play-state:running; |
| animtf |
animation-timing-function:linear; |
| animtf:cb |
animation-timing-function:cubic-bezier(0.1, 0.7, 1.0, 0.1); |
| animtf:e |
animation-timing-function:ease; |
| animtf:ei |
animation-timing-function:ease-in; |
| animtf:eio |
animation-timing-function:ease-in-out; |
| animtf:eo |
animation-timing-function:ease-out; |
| animtf:l |
animation-timing-function:linear; |
| fx |
flex:; |
| fxb |
flex-basis:; |
| fxd |
flex-direction:; |
| fxd:c |
flex-direction:column; |
| fxd:cr |
flex-direction:column-reverse; |
| fxd:r |
flex-direction:row; |
| fxd:rr |
flex-direction:row-reverse; |
| fxf |
flex-flow:; |
| fxg |
flex-grow:; |
| fxsh |
flex-shrink:; |
| fxw |
flex-wrap: ; |
| fxw:n |
flex-wrap:nowrap; |
| fxw:w |
flex-wrap:wrap; |
| fxw:wr |
flex-wrap:wrap-reverse; |
| trf |
transform:; |
| trf:r |
transform: rotate(angle); |
| trf:rx |
transform: rotateX(angle); |
| trf:ry |
transform: rotateY(angle); |
| trf:rz |
transform: rotateZ(angle); |
| trf:sc |
transform: scale(x, y); |
| trf:sc3 |
transform: scale3d(x, y, z); |
| trf:scx |
transform: scaleX(x); |
| trf:scy |
transform: scaleY(y); |
| trf:scz |
transform: scaleZ(z); |
| trf:skx |
transform: skewX(angle); |
| trf:sky |
transform: skewY(angle); |
| trf:t |
transform: translate(x, y); |
| trf:t3 |
transform: translate3d(tx, ty, tz); |
| trf:tx |
transform: translateX(x); |
| trf:ty |
transform: translateY(y); |
| trf:tz |
transform: translateZ(z); |
| trfo |
transform-origin:; |
| trfs |
transform-style:preserve-3d; |
| trs |
transition:prop time; |
| trsde |
transition-delay:time; |
| trsdu |
transition-duration:time; |
| trsp |
transition-property:prop; |
| trstf |
transition-timing-function:tfunc; |
| ! |
!important |
| @f |
@font-face {
    font-family:;
    src:url(|);
}
|
| @f+ |
@font-face {
    font-family: 'FontName';
    src: url('FileName.eot');
    src: url('FileName.eot?#iefix') format('embedded-opentype'),
         url('FileName.woff') format('woff'),
         url('FileName.ttf') format('truetype'),
         url('FileName.svg#FontName') format('svg');
    font-style: normal;
    font-weight: normal;
}
|
| @i, @import |
@import url(); |
| @kf |
@-webkit-keyframes identifier {
    from {  }
    to {  }
}

@-o-keyframes identifier {
    from {  }
    to {  }
}

@-moz-keyframes identifier {
    from {  }
    to {  }
}

@keyframes identifier {
    from {  }
    to {  }
}
|
| @m, @media |
@media screen {

}
|
| jc |
justify-content:; |
| jc:c |
justify-content:center; |
| jc:fe |
justify-content:flex-end; |
| jc:fs |
justify-content:flex-start; |
| jc:sa |
justify-content:space-around; |
| jc:sb |
justify-content:space-between; |
| op+ |
opacity: ; filter: alpha(opacity=) |
| tov |
text-overflow:${ellipsis};
|
| tov:c |
text-overflow:clip; |
| tov:e |
text-overflow:ellipsis; |
Support for Emmet snippets and expansion is built right into Visual Studio Code, no extension required. Emmet 2.0 has support for the majority of the Emmet Actions including expanding Emmet abbreviations and snippets.
How to expand Emmet abbreviations and snippets
Emmet abbreviation and snippet expansions are enabled by default in html, haml, pug, slim, jsx, xml, xsl, css, scss, sass, less and stylus files, as well as any language that inherits from any of the above like handlebars and php.
When you start typing an Emmet abbreviation, you will see the abbreviation displayed in the suggestion list. If you have the suggestion documentation fly-out open, you will see a preview of the expansion as you type. If you are in a stylesheet file, the expanded abbreviation shows up in the suggestion list sorted among the other CSS suggestions.
Using Tab for Emmet expansions
If you want to use the Tab key for expanding the Emmet abbreviations, add the following setting:
"emmet.triggerExpansionOnTab": true
This setting allows using the Tab key for indentation when text is not an Emmet abbreviation.
Emmet when quickSuggestions are disabled
If you have disabled the editor.quickSuggestions setting, you won’t see suggestions as you type. You can still trigger suggestions manually by pressing ⌃Space (Windows, Linux Ctrl+Space) and see the preview.
Disable Emmet in suggestions
If you don’t want to see Emmet abbreviations in suggestions at all, then use the following setting:
"emmet.showExpandedAbbreviation": "never"
You can still use the command Emmet: Expand Abbreviation to expand your abbreviations. You can also bind any keyboard shortcut to the command id editor.emmet.action.expandAbbreviation as well.
Emmet suggestion ordering
To ensure Emmet suggestions are always on top in the suggestion list, add the following settings:
"emmet.showSuggestionsAsSnippets": true,
"editor.snippetSuggestions": "top"
Emmet abbreviations in other file types
To enable the Emmet abbreviation expansion in file types where it is not available by default, use the emmet.includeLanguages setting. Make sure to use language identifiers for both sides of the mapping, with the right side being the language identifier of an Emmet supported language (see the list above).
For example:
"emmet.includeLanguages": {
  "javascript": "javascriptreact",
  "razor": "html",
  "plaintext": "pug"
}
Emmet has no knowledge of these new languages, and so there might be Emmet suggestions showing up in non HTML/CSS contexts. To avoid this, you can use the following setting.
"emmet.showExpandedAbbreviation": "inMarkupAndStylesheetFilesOnly"
Note: If you used
emmet.syntaxProfilespreviously to map new file types, from VS Code 1.15 onwards you should use the settingemmet.includeLanguagesinstead.emmet.syntaxProfilesis meant for customizing the final output only.
Emmet with multi-cursors
You can use most of the Emmet actions with multi-cursors as well:
Using filters
Filters are special post-processors that modify the expanded abbreviation before it is output to the editor. There are 2 ways to use filters; either globally through the emmet.syntaxProfiles setting or directly in the current abbreviation.
Below is an example of the first approach using the emmet.syntaxProfiles setting to apply the bem filter for all the abbreviations in HTML files:
"emmet.syntaxProfiles": {
  "html": {
    "filters": "bem"
  }
}
To provide a filter for just the current abbreviation, append the filter to your abbreviation. For example, div#page|c will apply the comment filter to the div#page abbreviation.
BEM filter (bem)
If you use the Block Element Modifier (BEM) way of writing HTML, then bem filters are very handy for you to use. To learn more about how to use bem filters, read BEM filter in Emmet.
You can customize this filter by using the bem.elementSeparator and bem.modifierSeparator preferences as documented in Emmet Preferences.
This filter adds comments around important tags. By default, «important tags» are those tags with id and/or class attribute.
For example div>div#page>p.title+p|c will be expanded to:
<div>
    <div id="page">
        <p class="title"></p>
        <!-- /.title -->
        <p></p>
    </div>
    <!-- /#page -->
</div>
You can customize this filter by using the filter.commentTrigger, filter.commentAfter and filter.commentBefore preferences as documented in Emmet Preferences.
The format for the filter.commentAfter preference is different in VS Code Emmet 2.0.
For example, instead of:
"emmet.preferences": {
  "filter.commentAfter": "n<!-- /<%= attr('id', '#') %><%= attr('class', '.') %> -->"
}
in VS Code, you would use a simpler:
"emmet.preferences": {
  "filter.commentAfter": "n<!-- /[#ID][.CLASS] -->"
}
Trim filter (t)
This filter is applicable only when providing abbreviations for the Emmet: Wrap with Abbreviation command. It removes line markers from wrapped lines.
Using custom Emmet snippets
Custom Emmet snippets need to be defined in a json file named snippets.json. The emmet.extensionsPath setting should have the path to the directory containing this file.
Below is an example for the contents of this snippets.json file.
{
  "html": {
    "snippets": {
      "ull": "ul>li[id=${1} class=${2}]*2{ Will work with html, pug, haml and slim }",
      "oll": "<ol><li id=${1} class=${2}> Will only work in html </ol>",
      "ran": "{ Wrap plain text in curly braces }"
    }
  },
  "css": {
    "snippets": {
      "cb": "color: black",
      "bsd": "border: 1px solid ${1:red}",
      "ls": "list-style: ${1}"
    }
  }
}
Authoring of Custom Snippets in Emmet 2.0 via the snippets.json file differs from the old way of doing the same in a few ways:
| Topic | Old Emmet | Emmet 2.0 |
|---|---|---|
| Snippets vs Abbreviations | Supports both in 2 separate properties called snippets and abbreviations |
The 2 have been combined into a single property called snippets. See default HTML snippets and CSS snippets |
| CSS snippet names | Can contain : |
Do not use : when defining snippet names. It is used to separate property name and value when Emmet tries to fuzzy match the given abbreviation to one of the snippets. |
| CSS snippet values | Can end with ; |
Do not add ; at end of snippet value. Emmet will add the trailing ; based on the file type (css/less/scss vs sass/stylus) or the emmet preference set for css.propertyEnd, sass.propertyEnd, stylus.propertyEnd |
| Cursor location | ${cursor} or ` |
` can be used |
HTML Emmet snippets
HTML custom snippets are applicable to all other markup flavors like haml or pug. When snippet value is an abbreviation and not actual HTML, the appropriate transformations can be applied to get the right output as per the language type.
For example, for an unordered list with a list item, if your snippet value is ul>li, you can use the same snippet in html, haml, pug or slim, but if your snippet value is <ul><li></li></ul>, then it will work only in html files.
If you want a snippet for plain text, then surround the text with {}.
CSS Emmet snippets
Values for CSS Emmet snippets should be a complete property name and value pair.
CSS custom snippets are applicable to all other stylesheet flavors like scss, less or sass. Therefore, don’t include a trailing ; at the end of the snippet value. Emmet will add it as needed based on whether the language requires it.
Do not use : in the snippet name. : is used to separate property name and value when Emmet tries to fuzzy match the abbreviation to one of the snippets.
Tab stops and cursors in custom snippets
The syntax for tab stops in custom Emmet snippets follows the Textmate snippets syntax.
- Use
${1},${2}for tab stops and${1:placeholder}for tab stops with placeholders. - Previously,
|or${cursor}was used to denote the cursor location in the custom Emmet snippet. This is no longer supported. Use${1}instead.
Emmet configuration
Below are Emmet settings that you can use to customize your Emmet experience in VS Code.
-
emmet.includeLanguagesUse this setting to add mapping between the language of your choice and one of the Emmet supported languages to enable Emmet in the former using the syntax of the latter. Make sure to use language IDs for both sides of the mapping.
For example:
"emmet.includeLanguages": { "javascript": "javascriptreact", "plaintext": "pug" } -
emmet.excludeLanguagesIf there is a language where you do not want to see Emmet expansions, add it in this setting which takes an array of language ID strings.
-
emmet.syntaxProfilesSee Emmet Customization of output profile to learn how you can customize the output of your HTML abbreviations.
For example:
"emmet.syntaxProfiles": { "html": { "attr_quotes": "single" }, "jsx": { "self_closing_tag": true } } -
emmet.variablesCustomize variables used by Emmet snippets.
For example:
"emmet.variables": { "lang": "de", "charset": "UTF-16" } -
emmet.showExpandedAbbreviationControls the Emmet suggestions that show up in the suggestion/completion list.
Setting Value Description neverNever show Emmet abbreviations in the suggestion list for any language. inMarkupAndStylesheetFilesOnlyShow Emmet suggestions only for languages that are purely markup and stylesheet based (‘html’, ‘pug’, ‘slim’, ‘haml’, ‘xml’, ‘xsl’, ‘css’, ‘scss’, ‘sass’, ‘less’, ‘stylus’). alwaysShow Emmet suggestions in all Emmet supported modes as well as the languages that have a mapping in the emmet.includeLanguagessetting.Note: In the
alwaysmode, the new Emmet implementation is not context aware. For example, if you are editing a JavaScript React file, you will get Emmet suggestions not only when writing markup but also while writing JavaScript. -
emmet.showAbbreviationSuggestionsShows possible emmet abbreviations as suggestions. It is
trueby default.For example, when you type
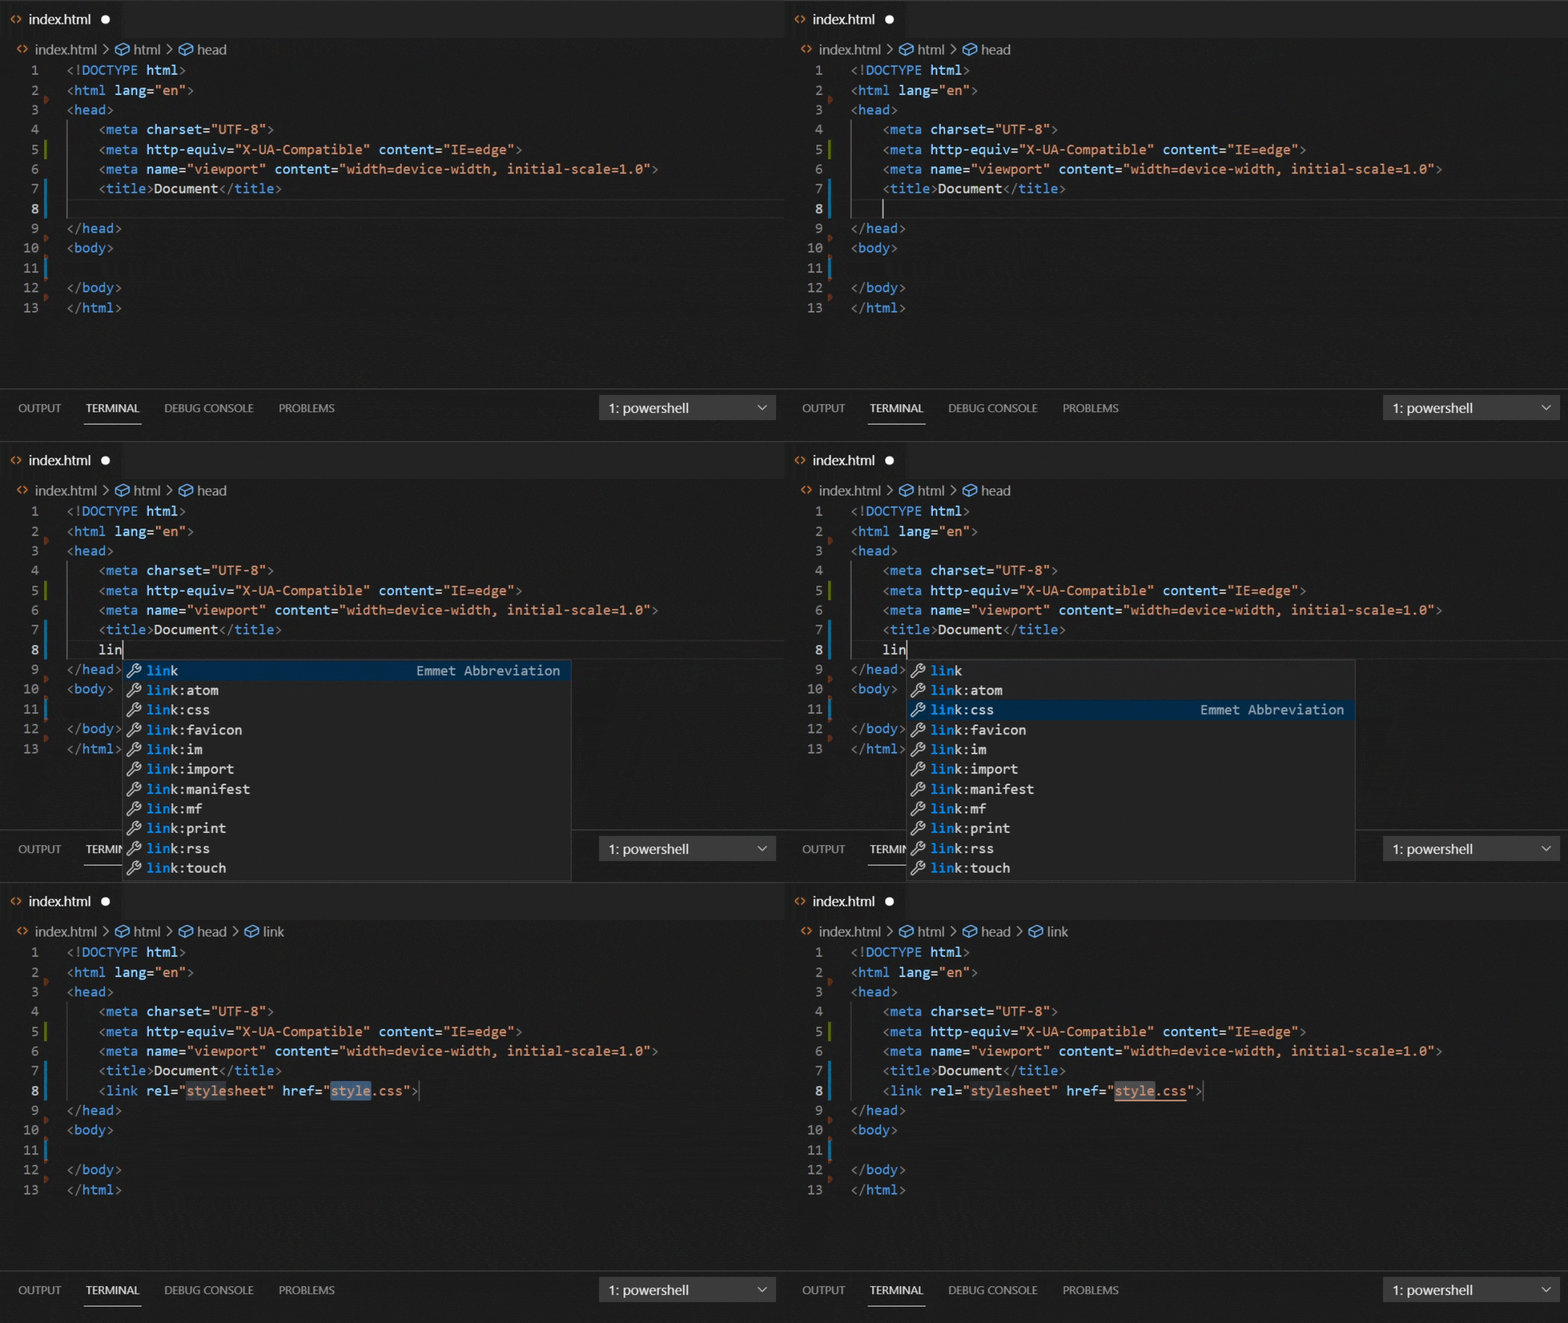
li, you get suggestions for all emmet snippets starting withlilikelink,link:css,link:faviconetc.
This is helpful in learning Emmet snippets that you never knew existed unless you knew the Emmet cheatsheet by heart.Not applicable in stylesheets or when
emmet.showExpandedAbbreviationis set tonever. -
emmet.extensionsPathProvide the location of the directory that houses the
snippets.jsonfile which in turn has your custom snippets. -
emmet.triggerExpansionOnTabSet this to true to enable expanding Emmet abbreviations with Tab key. We use this setting to provide the appropriate fallback to provide indentation when there is no abbreviation to expand.
-
emmet.showSuggestionsAsSnippetsIf set to
true, then Emmet suggestions will be grouped along with other snippets allowing you to order them as pereditor.snippetSuggestionssetting. Set this totrueandeditor.snippetSuggestionstotop, to ensure that Emmet suggestions always show up on top among other suggestions. -
emmet.preferencesYou can use this setting to customize Emmet as documented in Emmet Preferences. The below customizations are currently supported:
css.propertyEndcss.valueSeparatorsass.propertyEndsass.valueSeparatorstylus.propertyEndstylus.valueSeparatorcss.unitAliasescss.intUnitcss.floatUnitbem.elementSeparatorbem.modifierSeparatorfilter.commentBeforefilter.commentTriggerfilter.commentAfterformat.noIndentTagsformat.forceIndentationForTagsprofile.allowCompactBooleancss.fuzzySearchMinScore
The format for the
filter.commentAfterpreference is different and simpler in Emmet 2.0.For example, instead of the older format
"emmet.preferences": {
  "filter.commentAfter": "n<!-- /<%= attr('id', '#') %><%= attr('class', '.') %> -->"
}
you would use
"emmet.preferences": {
  "filter.commentAfter": "n<!-- /[#ID][.CLASS] -->"
}
If you want support for any of the other preferences as documented in Emmet Preferences, please log a feature request.
Next steps
Emmet is just one of the great web developer features in VS Code. Read on to find out about:
- HTML — VS Code supports HTML with IntelliSense, closing tags, and formatting.
- CSS — We offer rich support for CSS, SCSS and Less.
Troubleshooting
Custom tags do not get expanded in the suggestion list
Custom tags when used in an expression like MyTag>YourTag or MyTag.someclass do show up in the suggestion list. But when these are used on their own like MyTag, they do not appear in the suggestion list. This is designed so to avoid noise in the suggestion list as every word is a potential custom tag.
Add the following setting to enable expanding of Emmet abbreviations using tab which will expand custom tags in all cases.
"emmet.triggerExpansionOnTab": true
My HTML snippets ending with + do not work
HTML snippets ending with + like select+ and ul+ from the Emmet cheatsheet are not supported. This is a known issue in Emmet 2.0 Issue: emmetio/html-matcher#1. A workaround is to create your own custom Emmet snippets for such scenarios.
Abbreviations are failing to expand
First, check if you’re using custom snippets (if there is a snippets.json file being picked up by the emmet.extensionsPath setting). The format of custom snippets changed in VS Code release 1.53. Instead of using | to indicate where the cursor position is, use tokens such as ${1}, ${2}, etc. instead. The default CSS snippets file from the emmetio/emmet repository shows examples of the new cursor position format.
If abbreviations are still failing to expand:
- Check the builtin extensions to see if Emmet has been disabled.
- Try restarting the extension host by running the Developer: Restart Extension Host (
workbench.action.restartExtensionHost) command in the Command Palette.
Where can I set all the preferences as documented in Emmet preferences?
You can set the preferences using the setting emmet.preferences. Only a subset of the preferences that are documented in Emmet preferences can be customized. Please read the preferences section under Emmet configuration.
Any tips and tricks?
Of course!
- In CSS abbreviations, when you use
:, the left part is used to fuzzy match with the CSS property name and the right part is used to match with CSS property value. Take full advantage of this by using abbreviations likepos:f,trf:rx,fw:b, etc. - Explore all other Emmet features as documented in Emmet Actions.
- Don’t hesitate to create your own custom Emmet snippets.
5/3/2023
Всем привет друзья! Сегодня вы научитесь использовать emmet и начнете кодить со скоростью света.
Для чего нужны сокращения?
В основном, большинство текстовых редакторов позволяют сохранять и повторно использовать куски кода, под названием “фрагменты”, но чтобы использовать фрагменты их необходимо заранее определить, это не всегда удобно. Так вот, команды Emmet — готовые сокращения для вывода определенных кусочков кода.
Как пользоваться?
В популярных редакторах кода — Sublime Text 3, Atom и Visual Studio Code, Brackets после установки emmet как плагина сразу появляется возможность использовать сокращения.
Обычно, чтобы протестировать работают ли сокращения, я открываю пустой html файл и пишу !. Чтобы сокращение превратилось в полноценный кусок кода необходимо нажать tab.
<!DOCTYPE html>
<html lang="en">
<head>
<meta charset="UTF-8">
<title>Document</title>
</head>
<body>
</body>
</html>
Если восклицательный знак превратился в подобный код, значит emmet отлично работает. Поехали дальше
HTML аббревиатуры
Инициализаторы
! — это аббревиатура для создания в новом HTML документе стартовой разметки, вы можете использовать и другие варианты этого сокращения.
| html:5 или ! | HTML5 doctype |
| html:xt | XHTML transitional doctype |
| html:4s | HTML4 strict doctype |
Теги
Для того чтобы создать html тег, вам также необходимо написать его краткое сокращение и нажать tab
Ниже представлены наиболее распространенные теги
| a |
<a href=»»></a> |
| a:link |
<a href=»http://»></a> |
| a:mail |
<a href=»mailto:»></a> |
| base |
<base href=»»> |
| br |
<br> |
| link |
<link rel=»stylesheet» href=»»> |
| link:css |
<link rel=»stylesheet» href=»style.css»> |
| link:favicon |
<link rel=»shortcut icon» type=»image/x-icon» href=»favicon.ico»> |
| link:rss |
<link rel=»alternate» type=»application/rss+xml» title=»RSS» href=»rss.xml»> |
| link:atom |
<link rel=»alternate» type=»application/atom+xml» title=»Atom» href=»atom.xml»> |
| meta:utf |
<meta http-equiv=»Content-Type» content=»text/html;charset=UTF-8″> |
| meta:vp |
<meta name=»viewport» content=»width=device-width, user-scalable=no, initial-scale=1.0, maximum-scale=1.0, minimum-scale=1.0″> |
| meta:compat |
<meta http-equiv=»X-UA-Compatible» content=»IE=7″> |
| script:src |
<script src=»»></script> |
| img |
<img src=»» alt=»»> |
| ifr |
<iframe src=»» frameborder=»0″></iframe> |
| emb |
<embed src=»» type=»»> |
| obj |
<object data=»» type=»»></object> |
| map |
<map name=»»></map> |
| map+ |
<map name=»»> <area shape=»» coords=»» href=»» alt=»»> </map> |
| area |
<area shape=»» coords=»» href=»» alt=»»> |
| form |
<form action=»»></form> |
| form:geform:post |
<form action=»» method=»get»></form> <form action=»» method=»post»></form> |
| label |
<label for=»»></label> |
| input |
<input type=»text»> |
| inp |
<input type=»text» name=»» id=»»> |
| input:h |
<input type=»hidden» name=»»> |
| input:p |
<input type=»password» name=»» id=»»> |
| input:c |
<input type=»checkbox» name=»» id=»»> |
| input:r |
<input type=»radio» name=»» id=»»> |
| input:f |
<input type=»file» name=»» id=»»> |
| input:s |
<input type=»submit» value=»»> |
| input:i |
<input type=»image» src=»» alt=»»> |
| input:b |
<input type=»button» value=»»> |
| input:reset |
<input type=»reset» value=»»> |
| select |
<select name=»» id=»»></select> |
| select+ |
<select name=»» id=»»> <option value=»»></option> </select> |
| opt |
<option value=»»></option> |
| tarea |
<textarea name=»» id=»» cols=»30″ rows=»10″> </textarea> |
| video |
<video src=»»></video> |
| audio |
<audio src=»»></audio> |
| bq |
<blockquote></blockquote> |
| fst |
<fieldset></fieldset> |
| btn |
<button></button> |
| btn:s |
<button type=»submit»></button> |
| btn:b |
<button type=»button»></button> |
| btn:r |
<button type=»reset»></button> |
| sect |
<section></section> |
| art |
<article></article> |
| hdr |
<header></header> |
| ftr |
<footer></footer> |
| str |
<strong></strong> |
| ol+ |
<ol> <li></li> </ol> |
| ul+ |
<ul> <li></li> </ul> |
| dl+ |
<dl> <dt></dt> <dd></dd> </dl> |
| table+ |
<table> <tr> <td></td> </tr> </table> |
| tr+ |
<tr> <td></td> </tr> |
| c |
<!— Комментарий —> |
| cc:ie6 |
<!—[if lte IE 6]> <![endif]—> |
| cc:ie |
<!—[if IE]> <![endif]—> |
| cc:noie |
<!—[if !IE]><!—> <!—<![endif]—> |
| Любой тег |
div <div></div> span <span></span> Любой другой тег <tagname></tagname> |
Классы ID и атрибуты
Классы
Чтобы добавить к создаваемому тегу класс необходимо прописать его в таком виде: тег.класс
h1.title даст такой результат <h1 class=»title»></h1>
ID
Для добавления ID к элементу используем такую запись: тег#ID
h1#title даст такой результат <h1 id=»title»></h1>
Атрибуты
Чтобы добавить к элементу атрибут нербходимо использовать такой вид записи: тег[атрибут=’значение’].
h1[name=’title’] даст такой результат <h1 name=»title»></h1> значение можно не указывать h1[active] выдаст <h1 active=»»></h1>
Вложенность элементов
Используя селекторы > и + можно создать соответственно, дочерние и соседние элементы, а с помощью селектора ^ можно поднять элемент на уровень выше в иерархии элементов.
p>span <p><span></span></p> p+span <p></p> <span></span> p>span^p <p><span></span></p> <p></p>
Группировка
Для того чтобы работать с сокращениями эффективно, нужно использовать группировку операторов — работает как в математике)
(h2>span)+(p>span) <h2><span></span></h2> <p><span></span></p>
Добавление контента
В ходе написания цепочки сокращений вам может понадобится сразу добавить текст в элемент, сделать это вы можете используя фигурные скобки {}
p{Это мой текст} <p>Это мой текст</p> h1.title{Заголовок}+(div>p>span{Текст}) <h1 class=»title»>Заголовок</h1> <div> <p><span>Текст</span></p> </div>
Умножение
Вы можете определить сколько элементов должно выть выведено с помощью оператора умножения *
ul>li*3 <ul> <li></li> <li></li> <li></li> </ul>
Нумерация
Мы можем сделать изменение названия класса, ID или атрибута с каждым следующим повторением, для этого нужно всего лишь добавить к ним знак доллара $
ul>li.item$*10 <ul> <li class=»item1″></li> <li class=»item2″></li> <li class=»item3″></li> <li class=»item4″></li> <li class=»item5″></li> <li class=»item6″></li> <li class=»item7″></li> <li class=»item8″></li> <li class=»item9″></li> <li class=»item10″></li> </ul>
CSS аббревиатуры
Основа работает так-же как и с HTML — пишем сокращение и жмем TAB, но есть некоторые различия, например добавление значение производиться по другому, конструктор вложенности не поддерживается и тд. Их мы рассмотрим после тегов.
Теги
| pos |
position: relative; |
| posa |
position: absolute; |
| posr |
position: relative; |
| posf |
position: fixed; |
| t |
top: ; |
| t:a |
top: auto; |
| r |
right: ; |
| r:a |
right: auto; |
| b |
bottom: ; |
| b:a |
bottom: auto; |
| l |
left: ; |
| l:a |
left: auto; |
| z |
z-index: ; |
| za |
z-index: auto; |
| fl |
float: left; |
| fln |
float: none; |
| fr |
float: right; |
| cl |
clear: both; |
| d |
display: block; |
| dn |
display: none; |
| di |
display: inline; |
| dib |
display: inline-block; |
| dt |
display: table; |
| dtc |
display: table-cell; |
| dtr |
display: table-row; |
| v |
visibility: hidden; |
| vv |
visibility: visible; |
| oh |
overflow: hidden; |
| ovv |
overflow: visible; |
| os |
overflow: scroll; |
| oa |
overflow: auto; |
| zm |
zoom: 1; |
| cu |
cursor: ; |
| cup |
cursor: pointer; |
| cud |
cursor: default; |
| cuh |
cursor: hand; |
| cuhe |
cursor: help; |
| cum |
cursor: move; |
| cut |
cursor: text; |
| m |
margin: ; |
| m:a |
margin: auto; |
| mt |
margin-top: ; |
| mta |
margin-top: auto; |
| mr |
margin-right: ; |
| mra |
margin-right: auto; |
| mb |
margin-bottom: ; |
| mba |
margin-bottom: auto; |
| ml |
margin-left: ; |
| mla |
margin-left: auto; |
| p |
padding: ; |
| pt |
padding-top: ; |
| pr |
padding-right: ; |
| pb |
padding-bottom: ; |
| pl |
padding-left: ; |
| bsh |
-webkit-box-shadow: inset hoff voff blur color; -moz-box-shadow: inset hoff voff blur color; box-shadow: inset hoff voff blur color; |
| bshn |
-webkit-box-shadow: none; -moz-box-shadow: none; box-shadow: none; |
| w |
width: ; |
| wa |
width: auto; |
| h |
height: ; |
| ha |
height: auto; |
| maw |
max-width: ; |
| mah |
max-height: ; |
| mw |
min-width: ; |
| mh |
min-height: ; |
| f |
font: ; |
| f+ |
font: 1em Arial,sans-serif; |
| fw |
font-weight: ; |
| fwn |
font-weight: normal; |
| fwb |
font-weight: bold; |
| fs |
font-style: italic; |
| fsn |
font-style: normal; |
| fsi |
font-style: italic; |
| fz |
font-size: ; |
| ff |
font-family: ; |
| ffs |
font-family: serif; |
| ffss |
font-family: sans-serif; |
| ffm |
font-family: monospace; |
| ffa |
font-family: Arial, «Helvetica Neue», Helvetica, sans-serif; |
| va |
vertical-align: top; |
| vm |
vertical-align: middle; |
| vabl |
vertical-align: baseline; |
| vb |
vertical-align: bottom; |
| vs |
vertical-align: sub; |
| ta |
text-align: left; |
| tac |
text-align: center; |
| tar |
text-align: right; |
| taj |
text-align: justify; |
| td |
text-decoration: none; |
| tdu |
text-decoration: underline; |
| tdo |
text-decoration: overline; |
| tdl |
text-decoration: line-through; |
| tt |
text-transform: uppercase; |
| ttn |
text-transform: none; |
| ttl |
text-transform: lowercase; |
| ts |
text-shadow: hoff voff blur #000; |
| tra |
text-shadow: h v blur rgba(0, 0, 0, .5); |
| ts+ |
text-shadow: 0 0 0 #000; |
| tsn |
text-shadow: none; |
| lh |
line-height: ; |
| lts |
letter-spacing: ; |
| ws |
white-space: ; |
| wsn |
white-space: normal; |
| wsnw |
white-space: nowrap; |
| bg |
background: #000; |
| bg+ |
background: #fff url() 0 0 no-repeat; |
| bn |
background: none; |
| bgc |
background-color: #fff; |
| bgt |
background-color: transparent; |
| bgi |
background-image: url(); |
| bgin |
background-image: none; |
| bgr |
background-repeat: ; |
| bgrn |
background-repeat: no-repeat; |
| bgrx |
background-repeat: repeat-x; |
| bgry |
background-repeat: repeat-y; |
| bga |
background-attachment: ; |
| baf |
background-attachment: fixed; |
| bas |
background-attachment: scroll; |
| bgp |
background-position: 0 0; |
| bgs |
-webkit-background-size: ; background-size: ; |
| bsa |
-webkit-background-size: auto; background-size: auto; |
| c |
color: #000; |
| cra |
color: rgba(0, 0, 0, .5); |
| op |
opacity: ; |
| ct |
content: »; |
| q |
quotes: ; |
| ol |
outline: ; |
| on |
outline: none; |
| tbl |
table-layout: ; |
| cs |
caption-side: ; |
| ec |
empty-cells: ; |
| bd |
border: ; |
| bd+ |
border: 1px solid #000; |
| bdn |
border: none; |
| bdc |
border-color: #000; |
| bdi |
-webkit-border-image: url(); -moz-border-image: url(); -o-border-image: url(); border-image: url(); |
| bdin |
-webkit-border-image: none; -moz-border-image: none; -o-border-image: none; border-image: none; |
| bf |
-webkit-border-fit: repeat; border-fit: repeat; |
| bdle |
border-length: ; |
| bsp |
border-spacing: ; |
| bds |
border-style: ; |
| bw |
border-width: ; |
| bt |
border-top: ; |
| bt+ |
border-top: 1px solid #000; |
| bdtn |
border-top: none; |
| br |
border-right: ; |
| br+ |
border-right: 1px solid #000; |
| bdrn |
border-right: none; |
| bb |
border-bottom: ; |
| bb+ |
border-bottom: 1px solid #000; |
| bdbn |
border-bottom: none; |
| bl |
border-left: ; |
| bl+ |
border-left: 1px solid #000; |
| bdln |
border-left: none; |
| bdrs |
-webkit-border-radius: ; -moz-border-radius: ; border-radius: ; |
| btrr |
border-top-right-radius: ; |
| bdtrs |
border-top-left-radius: ; |
| bbrr |
border-bottom-right-radius: ; |
| bblr |
border-bottom-left-radius: ; |
| lis |
list-style: ; |
| lisn |
list-style: none; |
| lst |
list-style-type: ; |
| lstn |
list-style-type: none; |
| lstd |
list-style-type: disc; |
| lstc |
list-style-type: circle; |
| lsts |
list-style-type: square; |
| lstdc |
list-style-type: decimal; |
| lsi |
list-style-image: ; |
| lsin |
list-style-image: none; |
| ! |
!important |
| @f |
@font-face { font-family:; src:url(); } |
| @f+ |
@font-face { font-family: ‘FontName’; src: url(‘FileName.eot’); src: url(‘FileName.eot?#iefix’) format(’embedded-opentype’), url(‘FileName.woff’) format(‘woff’), url(‘FileName.ttf’) format(‘truetype’), url(‘FileName.svg#FontName’) format(‘svg’); font-style: normal; font-weight: normal; } |
| @i |
@import url(); |
| @m |
@media screen { } |
| anim |
-webkit-animation: ; -o-animation: ; animation: ; |
| ap |
-webkit-appearance: none; -moz-appearance: none; appearance: none; |
| bgie |
filter:progid:DXImageTransform .Microsoft.AlphaImageLoader (src=’x.png’,sizingMethod=’crop’); |
| cm |
/* Комментарий */ |
| colm |
columns: ; |
| trf |
-webkit-transform: ; -moz-transform: ; -ms-transform: ; -o-transform: ; transform: ; |
| trfr |
-webkit-transform: rotate(angle); -moz-transform: rotate(angle); -ms-transform: rotate(angle); -o-transform: rotate(angle); transform: rotate(angle); |
| trfsc |
-webkit-transform: scale(x, y); -moz-transform: scale(x, y); -ms-transform: scale(x, y); -o-transform: scale(x, y); transform: scale(x, y); |
| trft |
-webkit-transform: translate(x, y); -moz-transform: translate(x, y); -ms-transform: translate(x, y); -o-transform: translate(x, y); transform: translate(x, y); |
| tfo |
-webkit-transform-origin: ; -moz-transform-origin: ; -ms-transform-origin: ; -o-transform-origin: ; transform-origin: ; |
| trs |
-webkit-transition: prop time; -moz-transition: prop time; -ms-transition: prop time; -o-transition: prop time; transition: prop time; |
| trsde |
-webkit-transition-delay: time; -moz-transition-delay: time; -ms-transition-delay: time; -o-transition-delay: time; transition-delay: time; |
| trsdu |
-webkit-transition-duration: time; -moz-transition-duration: time; -ms-transition-duration: time; -o-transition-duration: time; transition-duration: time; |
| trsp |
-webkit-transition-property: prop; -moz-transition-property: prop; -ms-transition-property: prop; -o-transition-property: prop; transition-property: prop; |
| us |
-webkit-user-select: none; -moz-user-select: none; -ms-user-select: none; user-select: none; |
Добавление значения
Для добавления значния необходимо добавить его к аббревиатуре css свойства, по умолчанию добавление производится в стандартной для свойства величине.
lh1 line-height: 1; p10 padding: 10px;
Вы также можете писать величину в которой измеряется значение, в таком случае стандартная величина подставляться не будет.
mt10em margin-top: 10em; bdrs50% border-radius: 50%; fz10rem font-size: 10rem;
Сокращение величины значений
Да, круто, для величин тоже есть сокращения:
- p → %
- e → em
- x → ex
Пример использования:
bdrs5p border-radius: 5%; fz16e font-size: 16em;
Префиксы
И даже для префиксов придуманы свои, удобные команды
- w → -webkit-
- m → -moz-
- s → -ms-
- o → -o-
Пример:
-w-trf -webkit-transform: ; transform: ;
Их также можно группировать:
-wm-trf -webkit-transform: ; -moz-transform: ; transform: ;
Ну вот друзья, надеюсь я вам принес непоправимую Пользу. Увидемся в других статьях.
Владимир Матасов, выпускник курса Skillbox по веб-вёрстке, рассказал о своём опыте работы с плагином Emmet. Также подготовил инструкции по основным возможностям и командам для начинающих верстальщиков.
Привет, Хабр! Когда я только решил самостоятельно изучать вёрстку, то понял, что это будет долгий путь с большим количеством новой информации и практики.ну
Вначале любая задача занимала у меня много времени и результаты работы были небольшие. Я с некоторым недоумением смотрел на задачи для фрилансеров с биржи и не понимал, как можно успевать вести несколько таких проектов. Было понятно, что есть какие-то лайфхаки.
В это же время я поступил на курс по веб-вёрстке. Это сэкономило время на проверку всех советов, какие я нашёл в интернете. Преподаватели дали рекомендации по инструментам, которые сами проверили, в том числе несколько плагинов для редакторов кода.
Вариантов было много, можно было бы сравнить, составить табличку с плюсами и минусами, но мой путь в изучении вёрстки быстро привёл меня к редактору VSCode, а в него уже встроен плагин Emmet. Выбор сделан, мой подход в веб-вёрстке изменился, решил проблему, поэтому я расскажу, как работаю с Emmet.
Установка
Для тех, кто ещё совсем не знаком с плагинами, я начну с того, что это такое. Emmet — бесплатный плагин для текстовых редакторов. Напоминает автоподстановку текста в смартфоне, но более функциональную, сокращающую время написания рутинной разметки. Вы вводите несколько символов — начало названия тега или свойства, а программа предлагает самостоятельно дописать остальное, выбрав из выпадающего списка. Остаётся нажать Tab или Enter, и нужный вам код написан целиком.
Скачать плагин можно на официальном сайте. Хорошо, если вы уже определились с IDE или редактором кода. Нажимаете на картинку нужного редактора и вас перекинет на страницу с инструкцией.
Освоить Emmet — это недолго, правила простые и синтаксис привычный. Но это сэкономит вам кучу времени и нервов, сделает вёрстку намного эффективнее.
Emmet на практике: пишем HTML
Я поделюсь своим опытом, как сейчас использую Emmet при вёрстке.
Первое, с чего начинаю создание HTML-разметки, — пишу базовую структуру, где объявляю тип документа, указываю язык страницы, кодировку, метатеги, заголовок и тело будущей интернет-страницы.
Создаём базовую структуру HTML-разметки
Для начинающего верстальщика следующий фокус может показаться удивительным, но с помощью Emmet создать базовую структуру HTML-разметки можно за несколько секунд.
Сначала я использовал долгий вариант: набирал «html» и в выпадающем списке выбирал «html:5». Потом перешёл на более экономичный способ: набираю в редакторе «!» и нажимаю Tab, можно нажать Enter, тоже работает. Итог обеих манипуляций одинаковый: Emmet вставит скелет HTML-документа.
Подключаем стили и скрипты
Шапка документа готова, далее размещаю теги <link> внутри <head> — с указанием путей к стилям или скриптам. Используя Emmet, я пишу «link», а автоподстановка предложит не только тег целиком, но и готовые варианты: там есть стили CSS, и установка favicon, и многое другое.
<!— Введи и проверь: —>
link
Добавляем ссылки
Ничего сложного в указании ссылок нет, но благодаря Emmet мне стало легко и приятно их добавлять.
Пишу «a» и выбираю нужный вариант — простую гиперссылку, ссылку на номер телефона, электронную почту и так далее. Или можно уточнить тип, начиная вводить после двоеточия значение атрибута. Например, «a:tel».
<!— Введи любой вариант и проверь: —>
a
a:tel
Вводим теги
Когда я только начинал пробовать себя в вёрстке, то печатал всё – от «<» до «>», затем составлял себе шпаргалки с готовыми тегами и копировал их. Чуть далее станет понятно, почему эти способы недостаточно хороши. Сейчас, с плагином, всё просто: пишу название тега и нажимаю Tab или Enter.
Достаточно ввести первые несколько букв названия тега, чтобы появился выпадающий список с вариантами. Emmet заботливо предложит нужный вариант и, если тег парный, добавит к нему закрывающий.
<!— Введи и проверь: —>
figure
Некоторые теги Emmet всё же не добавляет. Например, на момент написания этой статьи, не подставляется тег «figcaption». Кто знает, в чём он провинился.
Задаём классы и идентификаторы
Я показал, как вводить теги, а теперь усложним этот процесс. Часто нужно указать класс или id. Делается это сразу при вводе тега. После ввода названия тега, без пробелов, добавляю символы «.» или «#», пишу название класса или идентификатора, на выходе получаю оформленный тег.
<!— Введи и проверь: —>
header.header
section#about
Частный случай, когда нужно задать класс или id для тега <div>, то сразу ставим точку или «решётку», не набирая название тега, затем пишем название класса или идентификатора.
<!— Введи и проверь: —>
.wrap
#block
Если вы знакомы с css-селекторами вида section#about.red, то возможно уже обратили внимание на схожесть синтаксиса. Дальше будет интересней – Emmet практически полностью повторяет правила по которым формируются обычные селекторы. Поэтому барьеры входа при изучении Emmet ещё меньше, не надо учить новый синтаксис, используем тот, что есть в css.
Используем группировку и вложенность
До этого я показал самые простые возможности Emmet, которые использую. Сейчас начинается настоящая магия.
С помощью синтаксиса Emmet легко создаю сложные конструкции разного уровня вложенности всего из одной строки символов. Это немного похоже на css-селекторы со знаками сложения и умножения.
По отношению друг к другу элементы в HTML-разметке могут быть родительскими, дочерними и соседними. Покажу на примерах, как их можно расположить и сгруппировать.
Пример 1. Соседние элементы
Знак «+» создаст несколько соседних тегов, расположенных на одном иерархическом уровне.
<!— Введи и проверь: —>
div+p+div+a
А если я хочу повторить элемент 3 раза? Ответ: да очень просто – добавим знак умножения, и вуаля!
<!— Введи и проверь: —>
section*3
Пример 2. Дочерние элементы
Символ «>» делает следующий за ним элемент дочерним по отношению к первому, вложенным, обёрнутым в первый. При этом Emmet не забывает о закрывающих тегах и отступах при форматировании, код будет структурирован и отформатирован.
<!— Введи и проверь: —>
ul>li>a
Пример 3. Сгруппированные элементы
Представим, что нужно создать структуру простой страницы, состоящей из шапки, основной части и подвала. При этом внутри шапки будет навигационная панель в виде маркированного списка без нумерации. А блоки main и footer будут на одном уровне с header.
Чтобы это сделать, header и его содержимое беру в круглые скобки. С их помощью можно сгруппировать элементы с разными уровнями вложенности.
Всё это записываю одной строкой, а на выходе получаю девять. Такая магия с вложенностями и группировками.
<!— Введи и проверь: —>
(header>nav>ul>li)+main+footer
Бонусный уровень: генерируем рыбу-текст
Когда я только начинал заниматься вёрсткой, то читал много мнений: это хорошо, то плохо. Про рыбу-текст пишут разное. Но для меня это полезная вещь, например, для проверки вёрстки на переполнение.
<!— Введи и проверь: —>
p>lorem
Если нужен текст на русском языке, то вводим «loremru».
Emmet для CSS
Следующая задача для верстальщика после создания HTML-страницы, описать её внешний вид, для этого оформляем стили. В CSS нет разметки или вложенности, как в HTML, — только селектор, свойство и значение. Но и в случае со стилями Emmet даёт ощутимый прирост эффективности.
Способы ввода сокращений
В работе с CSS используются сокращённые названия свойств. Здесь меньше правил, с некоторым опытом всё становится интуитивно понятным и привычным: набираем первую букву — появляется подстановка всего слова.
Если название свойства составное, тогда слитно либо через дефис набираем первые буквы каждого слова и Emmet подскажет.
/* Введи и проверь: */.example {
ff
f-f
}
Если свойства начинаются на одну и ту же букву или комбинацию букв, например, color и columns, то подобрать сочетания для каждого из них — дело нескольких секунд. Для color будет достаточно «c».
Некоторые сочетания очевидные, например, «fs» предложит нам font-style, но есть и сокращения, к которым надо привыкнуть: «fz» — font-size. Мне понадобилось некоторое время, чтобы выработать стратегию и собственный словарь сокращений.
Ещё одна особенность автоподстановки в CSS: если используешь часто повторяющуюся пару «свойство — значение», то Emmet предложит его в первую очередь. Если во время вёрстки несколько раз указать display: flex, в следующий раз при нажатии «d» этот вариант будет первым в списке.
Таким же образом при вводе свойства color в выпадающем списке будут перечислены все ранее указанные цвета.
Направления полей и отступов
Отдельно скажу про свойства margin и padding, они набираются, соответственно, «m» и «p», чтобы указать направление отступов, достаточно без пробела или через дефис добавить t, b, l и r — обозначающие top, bottom, left и right. И без пробела добавляем значение отступа.
/* Введи и проверь: */.example {
pt20
ml25
t
b
l
r
}
Уточнения свойств через двоеточие
Для ввода пары «свойство — значение» я использую двоеточие в случаях, когда значение указывается буквами, например, цвет. Это конкретизирует сокращение.
При попытке написать «cred» будут предложены варианты column-rule-width и даже -webkit-column-break-inside. Так будет в VSCode. Всё потому, что одновременно работает IntelliSense, встроенное автодополнение. Если использовать двоеточие, лишние подсказки IntelliSense будут отброшены. Работает Emmet, понятно, что указано значение red для свойства color.
/* Введи и проверь: */.example {
c:red
}
Единицы измерения
В этом направлении есть несколько правил. Ряд свойств CSS очень удобные в работе и не требуют указания единиц измерения. К этим свойствам относятся, например, font-weight, line-height и opacity. Для описания свойства font-weight помимо ключевых слов normal, bold, bolder и lighter можно использовать условные единицы от 100 до 900, для opacity — диапазон дробных чисел от 0 до 1, для line-height — любой множитель, чаще всего в диапазоне от 1.1 до 2.
/* Введи и проверь: */.example {
fw400
op.5
lh1.25
}
Для тех свойств, где могут быть указаны разные единицы измерения, по умолчанию используются абсолютные пиксели (px). При этом нужно указать только число.
Но если мне захотелось указать значение в процентах, тогда использую символ «p». Для остальных единиц измерения прописываю их название.
Чтобы записать дробное значение, достаточно поставить точку, не указывая перед ней 0.
/* Введи и проверь: */.example {
fz15
mt45
pl20p
t.25rem
h5vh
}
Несколько значений после двоеточия
Бывает, что для описания свойства требуется несколько значений, которые пишутся через пробел. Чаще всего встречается при использовании полей и отступов.
И для такого случая у Emmet есть изящное, на мой взгляд, решение: если единицы измерения пиксели или auto, пишем значения свойства через дефис. Проценты указываем, используя p. Другие единицы измерения (em, rem, wh, wv и так далее) пишем полностью без пробелов.
/* Введи и проверь: */.example {
m10-20
m22-55-4p
p25-55p4rem2vh
p0-a
}
Не меньше мне нравится использовать частные случаи, например, указание цвета с прозрачностью.
/* Введи и проверь: */.example {
cra
}
Использование декларации !important
Ещё есть фишка с !important, он позволяет повысить приоритет стиля. Здесь всё просто: в конце сокращения ставится восклицательный знак. Но это противоречивая вещь. В курсе по веб-вёрстке преподаватели рекомендовали применять !important в самых крайних случаях, обдуманно. В чужом коде гораздо лучше разобраться, почему они не применялись без импортанта и исправить. А в своём сразу писать чуть более точный и «тяжёлый» селектор, чтобы решить проблему.
/* Пример: */.example {
ml30!
}
Подытожим
Для меня использование Emmet стало одним из слагаемых успеха в качестве веб-разработчика, наряду со знанием горячих клавиш, кодстайла, тегов и свойств.
Создайте для себя «словарь сокращений» Emmet и выучите основные комбинации. Это увеличит скорость написания кода, и со временем вы станете более квалифицированным верстальщиком. Если нужна шпаргалка по всем сокращениям, её можно найти на сайте разработчиков дополнения.
На курсе «Веб-вёрстка» вы познакомитесь со стандартами Web 2.0, научитесь работать с макетами и форматировать код, освоите адаптивную вёрстку, а по итогу — сможете создавать быстрые и удобные сайты, которые точно понравятся пользователям. Посмотреть программу и записаться по ссылке.


