НЕ ПУТАЙТЕ С ХАРДКОРОМ!
Хардмод (Hardmode) — режим, появившийся с версии 1.1, в который переходит мир после победы над Стеной плоти. При этом появляется надпись «Древние духи света и тьмы были освобождены» («The ancient spirits of light and dark have been released«). В хардмоде появляется много нового контента и возможностей, но и игра становится гораздо сложнее и опаснее.
При переходе в хардмод-режим мир терпит следующие изменения:
- Появляется возможность разрушать демонические/кровавые алтари с помощью нагибатора (pwmhammer) или молотов, идущих после него, что будет добавлять в мир новые руды. Также, сломав алтарь, существует 66% шанс того, что один случайный каменный блок будет превращён в эбонит/кримонит.
- Появляются новые биомы — Освящение, Подземное освящение и подземное Искажение/подземный Багрянец. Искажение и Багрянец теперь будут распространяться значительно быстрее, захватывая камень, лёд и песок, превращая их в эбонит/кримонит, фиолетовый лёд/красный лёд и эбонитовый песок/кровавый песок соответственно. Распространение нельзя будет остановить с помощью подсолнуха. Все типы заражения будут распространяются и под землёй.
- Помимо увеличения характеристик у пре-хардмодных мобов. появляются совершенно новые и более сложные мобы.
Новые противники
Будут появляться новые мобы, такие как:
 Одержимая броня (Posessed Armor) (Поверхность, Ночь)
 Блуждающий глаз (Wandering Eye) (Поверхность, Ночь)
 Призрак (Wraith) (Поверхность, Ночь; при разрушении демонического/кровавого алтаря, Всегда)
 Виверна (Wyvern) (На уровне летающих островов, Всегда)
 Фея (Pixie) (Святые земли, День)
 Единорог (Unicorn) (Святые земли, После второй половины дня)
 Брюхоног (Gastropod) (Святые земли, Ночь)
 Мумия (Mummy) (Пустыня, Всегда)
 Светлая мумия (Light Mummy) (Святая пустыня, Всегда)
 Тёмная мумия (Dark Mummy) (Искажённая пустыня, Всегда)
 кровавая мумия (Blood Mummy) (Багряная пустыня, Всегда)
- Порченный слизень (Corrupt Slime) (Искажение, Всегда)
 Слизневик (Slimer) (Искажение, Всегда)
 Искажатель (Corruptor) (Искажение, Подземное искажение, Всегда)
 Светящийся слизень (Illuminant Slime) (Подземные святые земли, Всегда)
 Светящаяся летучая мышь (Illuminant Bat) (Подземные святые земли, Всегда)
 Элементаль хаоса (Chaos Elemental) (Подземные святые земли, Всегда)
 Заколдованный меч (Enchanted Sword) (Подземные святые земли, Всегда)
- Проклятый молот (Cursed Hammer) (Подземное искажение, Всегда)
 Подражатель (Mimic) (Подземелье, Всегда; Поверхность, Кровавая луна)
 Бронированный скелет (Armored Skeleton) (Подземелье, Всегда)
 Скелет-лучник (Skeleton Archer) (Подземелье, Всегда)
- Гигантская летучая мышь (Giant Bat) (Подземелье, Всегда)
 Зелёная медуза (Green Jellyfish) (Подземелье, Всегда)
 Хвататель (Clinger) (Подземное искажение, Всегда)
 Кормилец миров (World Feeder) (Искажение, Подземное искажение)
 Оборотень (Werewolf) (Поверхность, Ночь полнолуния)
 Клоун (Clown) (Поверхность, Кровавая луна)
 Грозная туча (Angry Nimbus) (Поверхность, Дождь)
Радужный слизень (Rainbow Slime) (Поверхность, Дождь, Граница святых земель и не святых земель)
 Прыгающий Джек (Hoppin’ Jack) (Поверхность, Хэллоуин)
Ледяной элементаль (Ice Elemental) (Снежный биом, Ночью; Подземный снежный биом, Всегда)
 Ледяной голем (Ice Golem) (Снежный биом, метель/дождь)
- Привидение (Ghost) (Каменный слой, Хэллоуин)
 Рунный маг (Rune Wizard) (Каменный слой, всегда)
 Землекоп (Digger) (Подземелье, Всегда)
 Ледяная черепаха (Ice Tortoise) (Подземный снежный биом)
Бронированный викинг (Armored Viking) (Подземный снежный биом)
Ледяной мерфолк (Icy Merman) (Подземный снежный биом)
 Свинья-дракон (Pigron) (Подземный снежный биом, заражённый искажением, багрянцем или святыми землями, всегда)
 Мохнатый шершень (Moss Hornet) (Подземные джунгли, Всегда)
 Гигантская черепаха (Giant Tortoise) (Наземные джунгли, Всегда)
 Яростный охотник (Angry Trapper) (Джунгли, Всегда)
 Паук джунглей (Jungle Creeper) (Подземелья джунглей, всегда)
Мотылёк (Moth) (Подземелья джунглей, Всегда)
 Рыба-удильщик (Angler Fish) (Подземелья, Всегда; Джунгли, всегда)
 Гигантская летучая лисица (Giant Flying Fox) (Наземные джунгли, Ночь)
 Арапаима (Arapaima) (Джунгли, Всегда)
- Чертова блоха (Derpling) (Наземные джунгли, День)
Лавовая летучая мышь (Lava Bat) (Ад, после убийства хардмод-босса)
Красный дьявол (Red Devil) (Ад, после убийства хардмод-босса)
- Кровосос (Blood Feeder) (Подземный багрянец, Всегда)
Кровавая медуза (Blood Jelly) (Подземный багрянец, Всегда)
Летучий Поганец (Floaty Gross) (Подземный багрянец, Всегда)
 Багряный топор (Crimson Axe) (Подземный багрянец, Всегда)
 Распылитель ихора (Ichor Sticker) (Подземный багрянец, Всегда)
- Гигантский гриб-лампа (Giant Fungi Bulb) (Биом светящихся грибов, Всегда)
 Грибная медуза (Fungo Fish) (Биом светящихся грибов, Всегда)
Хардмод-данж
Здесь следует внести поправку, данж — единственный Биом, который становится хардмодным только после убийства Плантеры.
Пиратское вторжение
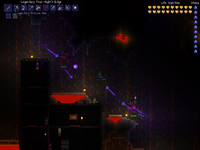
Солнечное затмение
![]()
Тыквенная луна
Ледяная луна
Марсианское безумие
| Гигазаппер (Gigazapper) | |
| Марсианский инженер (Martian Engineer) | |
| Турель Тесла (Tesla Turret) | |
| Лучевой стрелок (Ray Gunner) | |
| Скутликс (Scutlix) | |
| Марсианский офицер (Martian Officer) | |
| Серый пехотинец (Gray Grunt) | |
| Шифровщик мозга (Brain Scrambler) | |
| Марсианский дрон (Martian Drone) | |
| Марсианский шагоход (Martian Walker) | |
| Летающая тарелка марсиан (Martian Saucer) |
Также такие боссы как:
Все эти мобы, в отличие от дохардмодных, наносят большой урон и имеют большую защиту, так что при переходе в хардмод будьте наготове не менее чем с адской броней, гранью ночи и желательно с неплохими аксессуарами, например, спектральные или ракетные ботинки, кобальтовый или обсидиановый щит, счастливая или обсидиановая подкова.
Новые руды
 Кобальт — Добывается Литой киркой.
- Палладий — Добывается Литой киркой.
- Мифрил — Добывается кобальтовым или палладиевым буром / киркой.
- Орихалк — Добывается кобальтовым или палладиевым буром / киркой.
- Адамантит — Добывается орихалковым или мифриловым буром / киркой.
- Титан — Добывается орихалковым или мифриловым буром / киркой.
- Хлорофит — Добывается буропилом, киркопилом или киркотопором.
- Люминит — Дроп с Лунного Лорда.
_____________________________________________________________________________________________
При переходе в режим хардмод мир нельзя будет вернуть в обычный режим.
Для любопытных. Вот что происходит, когда только включается хардмод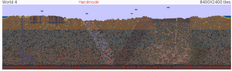
Хардмод сильно изменит и усложнит игру, так что трижды подумайте перед тем, как бросать куклу вуду гида в лаву или убивать над ней демона вуду.
_____________________________________________________________________________________________
Заражение
Сразу после перехода в хардмод можно лишится базы, так как искажение или багрянец увеличатся в 2-3 раза. Также скорость их распространения увеличилась в 2 раза. Если вы спуститесь в пещеру то не удивляйтесь если вас там будет ждать искажение, багрянец или освящение.В подземных заражениях можно получить души света или тьмы с мобов. Если вы играете на более старых версия (до 1.4) эти души можно фармить королём слизней. В подземном освящении можно найти желатиновый кристалл.
![]()
This is a Guide page.
This means the page will walk you through a specific task, strategy, or enemy/boss fight.
Status: Subject to revision (This Guide does not meet certain quality standards and may be heavily outdated.)
• Most likely outdated since 1.4. Remember not to delete pre-1.4 content; use {{eicons}} and {{eversions}}!
Hardmode is a game advancement that is triggered in a world when the Wall of Flesh is defeated for the first time. The change is permanent (unless using third-party tools, ignored in this guide).
The beginning of Hardmode is considered to be one of the hardest parts of the game, so this guide will hopefully make it easier for a new player.
Preparations[]
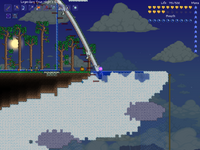
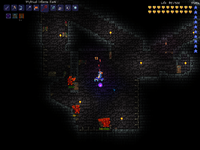
Initial Hardmode map of a small world on the 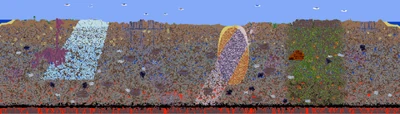
![]() PC version. Notice the «V» made of the new outburst of Corruption (dark purple) and Hallow (pale pink), which each replace existing world blocks upon the defeat of the Wall of Flesh.
PC version. Notice the «V» made of the new outburst of Corruption (dark purple) and Hallow (pale pink), which each replace existing world blocks upon the defeat of the Wall of Flesh.
One of the things players should prepare for is the spread of the Hallow and Corruption/Crimson. As soon as Hardmode starts, two diagonal strips of Hallow and Corruption/Crimson will generate in a V-shape, and the two biomes start to slowly consume the world.
On ![]() Old-gen console version,
Old-gen console version, Windows Phone version,
![]() Old Chinese version, Nintendo
Old Chinese version, Nintendo version,
![]() tModLoader version, and
tModLoader version, and ![]() tModLoader 1.3-Legacy version, the main threat of the infection is its effects on the Jungle. Mud Blocks can be affected by Corruption/Crimson (but not Hallow), and they will be permanently turned into regular Dirt Blocks. Although it takes an extremely long time for it to consume a large part of it, the damage is very hard to repair as it requires the player to manually replace all the Dirt for Mud. A large, 3 block wide tunnel filled with incorruptible blocks will protect the biome. Note that smashing a Demon Altar/Crimson Altar on these versions has a chance to corrupt or hallow a random block on the map, which could be inside of the Jungle.
tModLoader 1.3-Legacy version, the main threat of the infection is its effects on the Jungle. Mud Blocks can be affected by Corruption/Crimson (but not Hallow), and they will be permanently turned into regular Dirt Blocks. Although it takes an extremely long time for it to consume a large part of it, the damage is very hard to repair as it requires the player to manually replace all the Dirt for Mud. A large, 3 block wide tunnel filled with incorruptible blocks will protect the biome. Note that smashing a Demon Altar/Crimson Altar on these versions has a chance to corrupt or hallow a random block on the map, which could be inside of the Jungle.
The player will need the best gear available in Pre-Hardmode if they want to survive for longer before obtaining better items.
- Melee users should use Molten armor and weapons like Night’s Edge, Dark Lance, Sunfury or Cascade.
- Ranged users benefit from the Necro armor. The best weapons available for them are the Quad-Barrel Shotgun or Molten Fury. The Star Cannon is also powerful.
- For magic users, Jungle armor or the Wizard set are the best available, with weapons like the Flamelash, Water Bolt or Demon Scythe.
- A Summoner’s best choices are the Bee armor or Obsidian Armor with the Imp Staff and the Spinal Tap.
- All classes should also bring accessories like the Terraspark Boots or Amphibian Boots, and one of the Emblems dropped by the Wall of Flesh. If in Expert or Master mode, bring a Shield of Cthulhu and a Worm Scarf/Brain of Confusion ()
- Additionally, a Molten Pickaxe (or, on the
Windows Phone version,
 Old Chinese version, Nintendo
 version, and
 tModLoader 1.3-Legacy version, a Reaver Shark, obtained from fishing in the ocean) is required to mine Cobalt or Palladium ore.
Rare drops like the Black Lens, Nazar or Bezoar are easier to get without the stronger enemies of Hardmode.
A house in the Jungle should be made for the Witch Doctor, as he will sell Leaf Wings when he is in the biome at night. A King Statue can also be used to simply teleport him to the Jungle.
The player should make a Surface Glowing Mushroom biome with a house for Truffle. Because the enemies there are significantly stronger in Hardmode, it is advised that one create the biome and town pre-hardmode.
A Hellevator should also be built, as it’s an effective way to access any depth at any time, which will save a lot of time when mining the new ores and farming for rare drops.
The First Steps[]
The first thing to do in Hardmode is to go to the natural Corruption/Crimson Biome and start smashing Altars.
Smashing every set of three after this point will cyclically generate the same ore, but much less than the last, so smashing 9 to 12 will be more than enough.
It’s difficult to survive in this new environment, since the new enemies will quickly overwhelm players equipped with even the best Pre-hardmode gear. Because of this, it’s better to look for a new weapon before going down into the Caverns to mine the new ores.
The easiest way to obtain Hardmode ore is mining them on the ceiling of the Underworld, as the Underworld won’t get any new difficult enemies immediately upon entering hardmode.
A much more time-consuming way to obtain Hardmode ore is from fishing crates. While much slower than other methods, this does not require the player to smash any altars, which can help keep quarantined areas of the map safe from the new randomly-placed Hallow or Corruption/Crimson block that spawns when smashing each one.
There are many different choices for every class:
- Melee users can get an
 Amarok very early on, although alternatives such as the craftable Chik will suffice until they do. The Amarok has a low chance to be dropped by any enemy in the Snow Biome, so with a quick farm they can easily (if perhaps not quickly) obtain it. The
  Swords or
  Spears made from ores can be quickly obtained and they will get the job done until better weapons (e.g. a
  Phasesaber) are acquired. The
  Dao of Pow is a good flail, reasonably easy to craft, and the only option of flail for a while.
 - Ranged users can buy a
 Shotgun from the Arms Dealer as soon as Hardmode starts, which can then be upgraded to the
  Onyx Blaster , using the drops from the corrupted/crimson desert and underground crimson or corruption. The
  Clockwork Assault Rifle is also very strong and should definitely be used if the Wall of Flesh dropped it. A Cobalt or
  Palladium Repeater also gets the job done until better options (e.g. higher-tier-ore repeaters,
  Shadowflame Bow, or
  Daedalus Stormbow) are acquired.
- Ranged users have many more ammo options in Hardmode, several of which are available right away with a little exploration or farming, although obtaining a better weapon is a higher priority than getting better ammunition. Crystal Bullets,
 Cursed Bullets (in Corruption worlds), and
  Ichor Bullets (in Crimson worlds) are interesting options that require very few special crafting ingredients, while
  Exploding Bullets can be crafted entirely from purchased ingredients. Likewise,
  Holy Arrows, Cursed Arrows (in Corruption Worlds), and
  Ichor Arrows (in Crimson worlds) are special arrows which require few unusual ingredients. However, on , the dryad can sell the opposite evil seeds in a graveyard, allowing the use of Ichor and Cursed Flames, regardless of the world’s evil.
- Ranged users have many more ammo options in Hardmode, several of which are available right away with a little exploration or farming, although obtaining a better weapon is a higher priority than getting better ammunition.
- A Magic user can quickly farm for the
 Sky Fracture, a weapon that is very useful even after Plantera is defeated. They can also fish for a
  Crystal Serpent, but it can take longer to obtain. The
  Meteor Staff is even easier to craft, however it is hard to use it underground. The
  Laser Rifle, if it dropped from the Wall of Flesh, will also be highly useful initially.
- Other early-Hardmode options that should be high priorities are the
 Crystal Storm (which has high DPS for early-Hardmode crowd control), the Cursed Flames (in Corruption worlds, which has high-damage piercing projectiles that inflict a high-DPS debuff), and the
  Golden Shower (in Crimson worlds, which deals modest damage but inflicts an extremely useful, defense-lowering debuff which few enemies — not even the Moon Lord — are immune to).
- These will require first locating the
 Wizard NPC, which is a critical priority for magic users.
- These will require first locating the
- Also be on the lookout for an abundance of enemy-dropped weapons, most crucially the
 Frost Staff (a good starting weapon), Poison Staff (an upgradeable magic shotgun), and
  Nimbus Rod (a powerful, upgraded Crimson Rod).
 - The above weapons will help magic-using players be able to eventually obtain more powerful early-Hardmode weapons, such as the
 Shadowflame Hex Doll, the
  Life Drain, and the
  Spirit Flame.
- Other early-Hardmode options that should be high priorities are the
- A Summoner will have to get the Spider Staff and the Queen Spider Staff. This is a problem because the
 Black Recluses can very easily kill a player in 3 to 4 hits. Since they can’t go through blocks, it is recommended to farm the
  Spider Fangs inside of a «box» while the minions kill the spiders from the outside. Make sure to have your
  Magic Mirror (or, preferably, Cell Phone) ready in case a
  Giant Worm or another enemy spawns. Be sure to utilize any other, more easily-obtainable weapons for other classes to defend yourself as needed. Wall of Flesh drops can also be highly useful, especially if it dropped the Firecracker; if it didn’t, you may consider farming for it.
With these new weapons and a couple Mining and Spelunker Potions, getting the Hardmode ores will be a much easier task.
Before bosses[]
The Mechanical Bosses can be very hard to kill for a new player, so using the best weapons, armors and accessories is advised. If you are up to it, Queen Slime can be fought to get better gear (Such as the Blade Staff ()) and/or practice fighting.
Palladium and Titanium armors are very good with their defensive set bonuses, while Adamantite and Orichalcum armors are better for those looking for the maximum DPS. It is better to skip Cobalt and Mythril armor, as they don’t have very good stats or a special set bonus to make up for it. There is also Frost and Forbidden armor, but they should only be used if the player wishes to mix different damage types, as they aren’t strong enough by themselves. Another good armor set for all classes is the Crystal Assassin Armor, dropped by Queen Slime.
If the player hasn’t obtained them already, Wings are essential for the fights, as it’s hard to dodge their attacks without them. The best ones available are the Frost Wings, but the Leaf Wings are easier to obtain at the cost of some speed.
An Emblem of the player’s class is also important, as well as defensive and mobility accessories like the Cross Necklace, Philosopher’s Stone, Ankh or Obsidian Shield, and Frog Leg. Having good modifiers like Lucky, Menacing or Warding is also very important for the battles.
Now that the player is well equipped, the only thing left to do is to make a good arena, since having one will make the bosses much easier to fight.
Two to three rows of platforms will be enough space to move around. Additionally:
This content is transcluded from Guide:Practical tips § Combat.
- For nocturnal bosses, starting the battle just after the sun sets (7:30 PM) will provide the maximum amount of time to defeat the boss. In Hardmode, the
 Moon Charm and/or
  Moon Stone and their upgrades are also useful at night.
 - Boss battles can be won or lost before the battle ever starts. Choose your equipment and have it ready; find and/or make potions and placed buffs; use the highest-tier food you have available; set up an arena appropriate to the boss; learn the strategies for the boss you’re facing.
- Prepare your Boss-fighting arena with adequate lighting,
 Campfires and
  Heart Lanterns for health regeneration, and
  Stars in Bottles for mana regeneration if you use magic.
  Bast Statues will provide a significant defensive boost.
  Garden Gnomes and (if underground) proper torch placement will reduce damage taken and increase damage dealt due to the luck. Note Torch God’s Favor helps with this.
  Honey pools can also be used for extra health regeneration.
 -
 Sunflowers provide the Happy! buff to players within a 50-tile radius, which grants a +10% movement speed bonus and 17% reduction in enemy spawn rate.
 - Always carry around a stack of the highest-tier healing potion available, as relying only on natural Health Regeneration is not a good idea. Depending on the game stage, this can include items such as Mushrooms or Honeyfins. On the
 PC,
PC,  Console, Mobile, and tModLoader versions, Restoration Potions are healing potions with a shorter cooldown.
- It is suggested to build houses for the
 Dryad and the
  Nurse NPCs in your arena. The former casts the Dryad’s Blessing buff, which increases your defense and provides you with a thorns-like effect, while the latter can heal and remove debuffs instantly, at the cost of some
  coins.
 - Bosses are displayed on the Minimap: Follow the boss’s icon to track it when you’re struggling to find it. You can identify the boss icons by checking their respective wiki pages.
- Once you have freed the
 Mechanic in the Dungeon, you can use Wire to enhance your arena with Traps and helpful
  Heart and Star Statues. The former helps to damage the enemies, though be careful to set them up correctly in order not to hurt yourself during the battle. The latter will spawn heart and star pickups, respectively. Connect these devices to timers.
 - It may be useful to summon and kill the Eye of Cthulhu or King Slime before summoning any harder boss in order to spawn an extra one-use pool of Hearts. Note that this will prevent any Heart Statues from spawning new Hearts.
- Remember to use the
 Sharpening Station, Ammo Box, Crystal Ball,
  Bewitching Table, and Slice of Cake before you go to explore or battle bosses/invasions. These will give boosts that are useful to take, with the first four being class-specific. They give Sharpened, Ammo Box, Clairvoyance, Bewitched, and Sugar Rush, respectively.
Surviving in Environments
![]()
This is a Guide page.
This means the page will walk you through a specific task, strategy, or enemy/boss fight.
Smashing Altars
Starting Hardmode is very difficult: you’re underequipped and almost everything is stronger than you. You will have to return underground in search of ores to get some decent gear. But first, you’ll need to make a detour because none of that new ore actually exists yet. You’ll have to smash a few Altars with the Pwnhammer to make it appear. Every time you destroy an Altar, ore will be generated in various places underground, spawning more densely at lower depths.
- The first altar destroyed will spawn Cobalt / Palladium.
- The second altar destroyed will spawn Mythril / Orichalcum.
- The third altar destroyed will spawn Adamantite / Titanium.
The pattern will repeat with additional altars destroyed, spawning more Cobalt or Palladium, then more Mythril or Orichalcum, then more Adamantite or Titanium. There’s diminishing returns on this: after you’ve smashed your first three altars, generating that amount of ore again requires you to smash a further nine (12 total), then 21 (33 total).
Also note, however, that each altar destroyed may spawn a new block of Ebon/Crimstone, or Pearlstone somewhere in the world, causing the respective biomes to spread from another location.
On your way to smash altars, you may find yourself passing through some of these biomes:
![]()
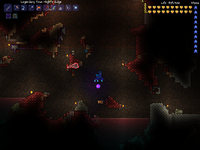
Be cautious when exploring the surface at Night. New, more powerful monsters come out at night. A player used to traveling at night may find it difficult to progress when they are out after dark.
New Enemies
 Mummy
Mummy
(normal Desert only)
 Dark Mummy
(Corrupted Desert only)
 Blood Mummy
(Crimson Desert only)
 Light Mummy
(Hallowed Desert only)
 Shadow Mummy
(Corrupted Desert only)
- Spectral Mummy
(Hallowed Desert only)
Natural deserts typically don’t last long in hardmode. When corrupted, crimsoned, or hallowed, they become very similar to their respective biomes. Hardmode deserts are the only places where the Mummy can be found.
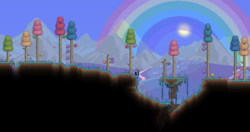
The Hallow spreads rapidly through the world, just like the Corruption and Crimson. Be wary of the seemingly whimsical denizens of the Hallow. All of them are hostile and are just as dangerous as their corrupted counterparts. Like with the evil biomes, players new to Hardmode should avoid staying in this biome for longer than necessary.
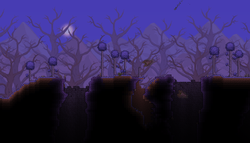
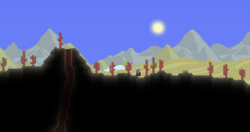
- Corruption Biome (Hardmode)
Corruption now spreads through the world at a fast pace. Players that are new to Hardmode should move through this biome as quickly as possible.
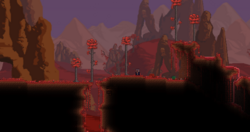
Crimson spreads identically to Corruption, and is just as dangerous, or perhaps even worse, since the Herpling, which has no corrupt counterpart, exists. They are very fast, have a short hitbox, high health, defense, and high damage. Their only significant weakness is rough terrain, as they will have difficulty reaching the high speeds they often use to surprise players. Extra caution is advised, especially in flat terrain.
Mining Hardmode Ores
Once enough ore has been spawned, the player should begin mining Cobalt or Palladium with a Molten Pickaxe. The other ores cannot be mined. Proceed with extreme caution: the most dangerous biomes in Hardmode are found underground. If the player created a Hellevator, they should use it to access the lower layers quickly. Hardmode ores are more abundant deeper underground.
Biome: Cavern (Hardmode)
New Monsters: Armored Skeleton, Skeleton Archer, Giant Bat, Digger, Angler Fish (water), Green Jellyfish (water), Mimic
Monster Drops: ![]() Armor Polish,
Armor Polish,  Beam Sword (rare),
 ![]() Magic Quiver,
Magic Quiver, ![]() Marrow,
Marrow,
- Mimic Drops:
 Dual Hook,
  Magic Dagger,
  Titan Glove, Philosopher’s Stone,
  Cross Necklace, Star Cloak
Recommended Equipment: Molten, Molten Pickaxe
This biome is very dangerous, but it is less dangerous than the Underground Corruption, Crimson, and Hallow. It’s for this reason that this biome is one of the ideal biomes for mining hardmode ores. However, don’t underestimate the new monsters in this biome: the Armored Skeleton’s «Broken Armor» debuff is particularly lethal. Consider returning to town and talking to the Nurse if hit by the debuff. They sometimes drop ![]() Armor Polish, which prevents the debuff and will be very helpful later on. The Mimic will also spawn underground here, and if you can, attempt to take some down. You can use the Lifeform Analyzer to tell when these enemies are near. Be wary, however, that even they will inflict high amounts of damage, so ranged and/or high knockback weapons are recommended.
Armor Polish, which prevents the debuff and will be very helpful later on. The Mimic will also spawn underground here, and if you can, attempt to take some down. You can use the Lifeform Analyzer to tell when these enemies are near. Be wary, however, that even they will inflict high amounts of damage, so ranged and/or high knockback weapons are recommended.
![]() Biome: Underground Hallow
Biome: Underground Hallow
![]()
Monsters: Chaos Elemental, Illuminant Bat, Illuminant Slime, Enchanted Sword, Hallowed Mimic
Monster Drops: ![]() Soul of Light,
Soul of Light, ![]() Blessed Apple,
Blessed Apple, ![]() Rod of Discord
Rod of Discord
- Mimic Drops:
 Daedalus Stormbow,
  Flying Knife,
  Crystal Vile Shard, Illuminant Hook
Notable Resources: ![]() Crystal Shard
Crystal Shard
Recommended Equipment: Mythril or Palladium; Ironskin Potions and Regeneration Potions
It is recommended to mine elsewhere until Mythril armor or better is obtained. Chaos Elementals and Enchanted Swords can easily reach the player. If you do decide to venture in and run into a Hallowed Mimic in chest form, avoid going near, and especially avoid attacking it. If one is already on your tail, you should attempt to use your Magic Mirror at the nearest convenience.
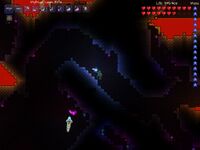
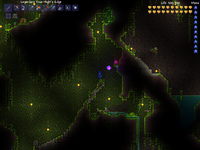
![]() Biome: Underground Corruption
Biome: Underground Corruption
![]()
Monsters: Clinger, Corrupt Slime, Corruptor, Cursed Hammer, Devourer, Slimer, World Feeder
Monster Drops: ![]() Soul of Night,
Soul of Night, ![]() Cursed Flame,
Cursed Flame, ![]() Nazar,
Nazar, ![]() Vitamins
Vitamins
- Mimic Drops:
 Dart Rifle,
  Worm Hook,
  Chain Guillotines,
  Clinger Staff,
  Putrid Scent
Recommended Equipment: Mythril or Palladium; Ironskin Potions and Regeneration Potions
As with the Underground Hallow, it is recommended that the player avoids this biome until they obtain Mythril armor. The denizens of this biome will make mining extremely difficult for a player without hardmode gear.
![]() Biome: Underground Crimson
Biome: Underground Crimson
![]()
Monsters: Ichor Sticker, Floaty Gross, Blood Jelly, Blood Feeder, Crimson Axe
Monster Drops: ![]() Soul of Night,
Soul of Night, ![]() Ichor,
Ichor, ![]() Nazar,
Nazar, ![]() Vitamins,
Vitamins, ![]() Meat Grinder
Meat Grinder
- Mimic Drops:
 Life Drain,
  Dart Pistol, Fetid Baghnakhs,
  Flesh Knuckles, Tendon Hook
Recommended Equipment: Mythril or Palladium; Ironskin Potions and Regeneration Potions
Similarly the underground Corruption and Hallow, the Crimson should be avoided early on in hardmode. Attempt to stay farther from this biome than others, though, as Floaty Grosses can pass through blocks, even if you aren’t in the biome.
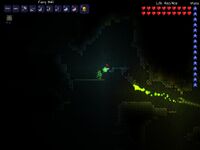
![]() Biome: Underground Glowing Mushroom biome
Biome: Underground Glowing Mushroom biome
![]()

Underground Glowing Mushroom biome
Monsters: Fungi Bulb, Anomura Fungus, Mushi Ladybug, Giant Fungi Bulb, Fungo Fish
Monster Drops: None
Notable Resources: ![]() Truffle Worm
Truffle Worm
Recommended Equipment: Mythril or Palladium; Ironskin Potions and Regeneration Potions
The player can find Truffle Worms in this biome, which are used to summon Duke Fishron. Otherwise, the new enemies are comparable to those of other underground biomes, and their attacks, especially those of the Giant Fungi Bulb, can be very dangerous. If you are exposed to the biome directly, you may be hit by the Fungi Bulb’s attacks, which are very small but deal a lot of damage. Stay away from this biome unless you need an emergency supply of Glowing Mushrooms or Mushroom Seeds.
It can be very difficult to survive long enough in Hardmode biomes to mine enough ore. If the player finds they are having difficulty mining, they should consider looking for ores in the ceiling of the Underworld. This biome has the same mobs as it did pre-Hardmode, making it considerably safer than almost anywhere else in the world.
Aim to upgrade to a ![]() Cobalt Drill or
Cobalt Drill or ![]() Palladium Drill (or their pickaxe equivalents) as quickly as possible. The Cobalt Drill or Pickaxe and its counterpart can mine Mythril/Orichalcum. The first Mythril/Orichalcum ores mined should be used to craft a
Palladium Drill (or their pickaxe equivalents) as quickly as possible. The Cobalt Drill or Pickaxe and its counterpart can mine Mythril/Orichalcum. The first Mythril/Orichalcum ores mined should be used to craft a ![]() Mythril/Orichalcum Anvil and then a Mythril Drill (or their Orichalcum counterparts). The Mythril Drill and Pickaxe (and their Orichalcum counterparts) can mine Adamantite/Titanium. The first 30 Adamantite/Titanium ore mined should be used to create an
Mythril/Orichalcum Anvil and then a Mythril Drill (or their Orichalcum counterparts). The Mythril Drill and Pickaxe (and their Orichalcum counterparts) can mine Adamantite/Titanium. The first 30 Adamantite/Titanium ore mined should be used to create an ![]() Adamantite Forge or
Adamantite Forge or ![]() Titanium Forge. Upgrading to an Adamantite Drill or Titanium Drill isn’t crucial, as it does not grant access to any new ores.
Titanium Forge. Upgrading to an Adamantite Drill or Titanium Drill isn’t crucial, as it does not grant access to any new ores.
Be mindful when opening chests. A seemingly innocuous treasure chest may be a Mimic posing as a chest. Mimics will chase the player when they approach or when attacked. A good approach is to shoot any chests with a ranged weapon before opening them. This will cause any Mimics to break their ruse and attack. Mimics can drop items that are incredibly useful in hardmode, and also always drop several gold coins.
Use any leftover ore to upgrade armor, then weapons, and lastly tools. Keep mining until enough Adamantite or Titanium is collected to craft a full set of armor and any weapons or tools the player may want.
The Goblin Army (Hardmode)
![]() Event: Goblin Army (Hardmode)
Event: Goblin Army (Hardmode)
![]()
New Monsters: Goblin Warlock
Monster Drops: ![]() Shadowflame Hex Doll,
Shadowflame Hex Doll, ![]() Shadowflame Knife,
Shadowflame Knife, ![]() Shadowflame Bow
Shadowflame Bow
Recommended Equipment: Adamantite/Titanium or better, Demon Scythe, Crystal Storm, Golden Shower, Lightning Boots, Wings
This time, it’s much more difficult with the new Goblin Warlock in the mix. She can attack you with her highly damaging spells. However, it is indeed worth the trouble to defeat her, as she can drop powerful weapons, like the Shadowflame Bow, which can prove devastating when used against the mechanical bosses, as these weapons can inflict the Shadowflame debuff, dealing 5 damage per second.
The Pirate Invasion
![]() Event: Pirate Invasion
Event: Pirate Invasion
![]()
Monsters: Pirate Deckhand, Pirate Deadeye, Pirate Corsair, Pirate Crossbower, Pirate Captain, Parrot, Flying Dutchman
Monster Drops: ![]() Coin Gun,
Coin Gun, ![]() Lucky Coin,
Lucky Coin, ![]() Discount Card,
Discount Card, ![]() Cutlass,
Cutlass, ![]() Pirate Staff,
Pirate Staff, ![]() Gold Ring, Various Golden furniture,
Gold Ring, Various Golden furniture, ![]() Sailor costume,
Sailor costume, ![]() Buccaneer costume,
Buccaneer costume,
Recommended Armor: Hallowed armor
Recommended Weaponry: Death Sickle, Chlorophyte Saber, Chlorophyte Partisan, Optic Staff, Golden Shower, Uzi, Megashark
A Pirate Invasion can occur after a player smashes one demon altar, or alternatively when the player uses a ![]() Pirate Map.
Pirate Map.
The Pirate Invasion can generally be difficult in early Hardmode, so it is best if the player is prepared in case one arrives. When a Pirate Invasion spawns or is summoned using a Pirate Map, a message will appear saying «Pirates are approaching from the (East/West)!»
When the Pirates’ initial wave reaches the spawn, their arrival is announced with «The Pirates have arrived!»
For more information, see Pirate Invasion for more info and tips.
The Great Run-up
Whilst you’re trying to find enough ore to make better gear, it’s highly recommended that you make the following other preparations in the run-up to the mech bosses:
- Make sure you have a home for the Wizard. Like the Goblin Tinkerer and Stylist, he can be found tied up underground. This NPC is mandatory for magic users, as he sells Greater Mana Potions and crafting ingredients used to craft some very powerful spells.
- Make sure you have a full set of buff potions and at least a stack of Greater Healing Potions or Honeyfin. The mech bosses’ damaging attacks will eat away at your health very quickly, so acquiring better potions is recommended.
Collecting Souls
Collecting souls is the last task the player should complete before fighting the Mechanical bosses. There are three types of souls dropped by normal monsters: Soul of Light, Soul of Night, and Soul of Flight. Souls of Light can be obtained from any monster found in the Underground Hallow, Souls of Night can be obtained from any monster found in the Underground Corruption or Crimson, and lastly, Souls of Flight can be obtained from Wyverns. The order in which the player obtains these souls does not matter. However, it can be advantageous to gather Souls of Flight first, as Wings are very useful when navigating the Underground Hallow or Underground Corruption.
Soul of Flight
Wyverns can be found at very high altitudes, at around the same level as Floating Islands. Look for Wyverns on Floating Islands, as it is much easier to fight them this way.
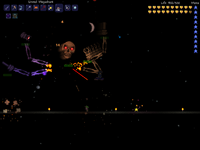
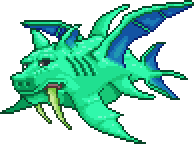
![]() Biome: Floating Island (Hardmode)
Biome: Floating Island (Hardmode)
![]()
Floating Island (Hardmode)
New Monsters: Wyvern, Arch Wyvern
Monster Drops: ![]() Soul of Flight
Soul of Flight ![]() Shadow Key (from Arch Wyvern)
Shadow Key (from Arch Wyvern)
Recommended Equipment: Adamantite or Titanium armor, piercing weapons (Demon Scythe is particularly effective), and Gravitation, Ironskin, and Regeneration Potions (Shotgun kills them will around 50 Exploding Bullets)
The only hardmode addition to floating islands is the Wyvern enemy. These Wyverns are of interest because they drop Souls of Flight, which are required to craft wings.
Wyverns are very difficult to kill. They fly through the air using the same AI as worms, but they move much faster, do much more damage, and have a lot more life. They are very difficult to dodge and attack at the same time. Piercing weapons are very effective against the Wyvern, like with all segmented monsters.
Soul of Light
Souls of Light can be found by killing enemies in the Underground Hallow. Underworld Enemies spawned below the Underground Hallow will also drop Souls. Try to gather crystal shards while looking for souls. Try to gather at least 50 souls, although more is better. If the Hallow in your world went through a Spider Nest, you can also farm the spiders, taking advantage of their fast spawn rate.
Soul of Night
Souls of Night can be found by killing enemies in the Underground Corruption and Crimson. Many of the same rules apply within these biomes.
Miscellaneous Items
There are a few other important items not mentioned above:
- Pixies from the surface Hallow will drop Pixie Dust, which is needed to make Greater Healing Potions, or combined with Unicorn Horns to make Holy Arrows.
- Mummies from the Corrupt or Crimson Desert will drop Dark Shards; Mummies from the Hallowed Desert will drop Light Shards. Collect these to craft the Dao of Pow.
- Biome Keys have an extremely rare drop from enemies in the six main biomes (Hallow, Corruption, Crimson, Jungle, Desert, and Snow). These can be used to open the Biome Chests in the Dungeon once that Plantera has been defeated (see below), which contain extremely powerful items.
- Mimics can appear in just about any biome. Look for Mimics using Hunter Potions or a Lifeform Analyzer and kill them until you get a Philosopher’s Stone and a Cross Necklace.
- Fifteen Souls of Light or Night can be used to make Light or Night Keys, respectively. A Key of Light or Night placed into an empty chest will create Hallowed or Corrupt/Crimson Mimics, which are larger than normal mimics and more dangerous, but with unique rewards.
- Hallowed, Corrupt and Crimson Mimics can also naturally appear in their respective underground biomes.
Queen Slime
Queen Slime is an entirely optional but fun boss: none of its drops are necessary for game advancement.
She is summoned by using a Gelatin Crystal, found in the underground hallow alongside Crystal Shards, anywhere in any hallowed biome.
Defeating her rewards you with similar drops to King Slime: the Crystal Assassin armor set, the only armor set to increase all types of damage, the Hook of Dissonance, which teleports you to the grappled location, and the Gelatinous Pillion, allowing increased airborne movement capabilities. In Expert and Master mode, she also drops the Volatile Gelatin which automatically hurls bouncing slime balls at nearby enemies.
Like King Slime, much of the reason she is easier than the 3 main bosses at this point is because of her limited movement and attacking capabilities; she has no rapid, long range attack, and even in her second form she moves significantly slower than The Twins or Skeletron Prime.
The Three Mechanical Bosses
Once you have a stockpile of the various hardmode resources, it’s time to begin preparing to defeat the first three hardmode bosses. Each must be summoned with an item that can be crafted or dropped by enemies. It’s also possible for one to spawn on its own at sunset, though the player will probably not be able to defeat it unless they are well prepared.
Recommended Equipment for Mechanical Bosses
Following is a list of equipment recommendations for use against the mechanical bosses. This is not an exhaustive list; other items may prove to be effective. This list assumes no Hardmode bosses have been defeated yet:This content is transcluded from Guide:Class setups.
At this point, you may also want to start working on getting good modifiers for your equipment.
- ↑ Despite being a Pre-Hardmode sword, it can still be reliable in many early Hardmode scenarios, especially if paired with a Power Glove.
For the mechanical bosses you have a choice between two whip-summon combinations. The Firecracker pairs well with the Sanguine Staff due to it’s high base damage getting increased with the Firecracker’s debuff that increases summon damage by 2.75x. The Blade Staff pairs well with whip stacking the Cool Whip, Durendal (After one Mechanical Boss), Spinal Tap & Snapthorn to the Blade Staff’s low damage highly benefitting from the tag damage that the mentioned whips inflict.
Building a Hardmode Arena
Proper terrain preparation is almost completely essential to successfully defeat all three mechanical bosses. Players who intend to solo the hardmode bosses will find the task very challenging without an adequate arena.
For solo players, build a very long bridge out of wood platforms. The bridge should be at least 1000 platforms long, but 2500 is recommended. Build the bridge a large distance from the ground; the ground should not be visible from any part of the bridge. Place blocks at each end of the bridge to prevent running off of the sides.
For team players, the arena can be much shorter. A team arena can be between 250-500 platforms long, but should also have 2-3 separate rows. Space the rows so they are not too close together, but are reachable with rocket boots.
Another Re-Usable Arena can be made out of the pre-hardmode boss arena, the old ones army one, and your skybridge. This allows reusing of the old arenas for Eye of Cthulhu/King Slime, events, and the wyvern arena.
Consider setting up Heart Statues and Star Statues on 1 Second Timers, as well as Sunflowers, Heart Lanterns, Campfires, and pools of Honey as these can make the battles much easier.
If you don’t quite feel up to the task of making a second very long bridge, you could simply use the first one you built for the Wall of Flesh. This will also make the first fight easier due to all of the ambient light. However, after defeating your first mechanical boss, this becomes much harder due to the additional spawns of Lava Bats and Red Devils.
Fighting the Mechanical Bosses
The Destroyer is arguably the easiest of the three bosses and should be fought first. The Destroyer has a chance of spawning naturally at sunset with the message «You feel vibrations deep below…» It can also be summoned by using a Mechanical Worm at night. Fight the Destroyer first if you prefer melee or ranged, as its souls can be used to craft the Light Disc and the Megashark.
![]() Boss: The Destroyer
Boss: The Destroyer
![]()

Life: 80000
Defense: 0 (Head), 30 (Body), 35 (Tail)
Damage: 60 (Head), 40 (Body), 20 (Tail), 22 (Death Laser)
Minions: Probes
Drops: 20-44 ![]() Hallowed Bar, 20-40
Hallowed Bar, 20-40 ![]() Soul of Might, 5-15
Soul of Might, 5-15 ![]() Greater Healing Potion,
Greater Healing Potion, ![]() Mechanical Wagon Piece (expert)
Mechanical Wagon Piece (expert)
Recommended Equipment: See above section «Recommended Equipment for Hardmode Bosses»
The Destroyer is the hardmode version of Eater of Worlds. The Destroyer uses a variation of worm AI, burrowing into the ground and making long sweeping passes at the player. The Destroyer is much longer than the Eater of Worlds and moves much faster. Unlike the Eater of Worlds, the Destroyer does not break into segments. The Destroyer’s segments all have a shared life of 80000. All of its segments will be destroyed when this life reaches 0. The Destroyer will release Probes as it takes damage. Probes will drop hearts when killed. If the Destroyer is not defeated before 4:30 AM, it will run away.
Piercing weapons and AoE weapons are particularly effective against this boss. The Destroyer will frequently try to trap you with its body. Use a hook to get out of these situations. The Destroyer’s drops come from its head when it is killed. When its health is very low, wait until any of its segments are above the ground before finishing it off.
The destroyer does not despawn if you use a Magic Mirror or Recall Potion to flee and will instead follow you. This can be helpful if the player sets up a house near the spawn point for the Nurse to move in, aiding the player in healing if the player’s health is low.
Hallowed equipment (except for the Drax/Pickaxe Axe, which is necessary for progression) doesn’t require boss souls; it only requires Hallowed Bars, which you can farm up from the Destroyer.
It is recommended to fight Skeletron Prime next, as ranged characters can make a Flamethrower if he is defeated.
![]() Boss: Skeletron Prime
Boss: Skeletron Prime
![]()
Life: 25000 (Head), 6000 (Cannon), 8000 (Saw), 8000 (Vice), 5000 (Laser)
Defense: 25 (Head), 50 (Head, while spinning), 25 (Cannon), 40 (Saw), 35 (Vice), 20 (Laser)
Damage (Melee): 50 (Head), 100 (Head, while spinning), 30 (Cannon), 52 (Saw), 45 (Vice), 29 (Laser)
Damage (Grenade): 40
Damage (Laser): 25
Drops: 19-35 ![]() Hallowed Bar, 20-40
Hallowed Bar, 20-40 ![]() Soul of Fright, 5-15
Soul of Fright, 5-15 ![]() Greater Healing Potions,
Greater Healing Potions, ![]() Mechanical Battery Piece (expert)
Mechanical Battery Piece (expert)
Recommended Equipment: See above section «Recommended Equipment for Hardmode Bosses»
Skeletron Prime is the hardmode version of Skeletron. Skeletron Prime behaves very similarly to its predecessor. It alternates between attacking with its various appendages and using a deadly spinning attack with its head. Skeletron Prime has a lot of health and can take a long time to kill. If Skeletron Prime is not defeated before the sun rises, it will use an attack that instantly kills the player on touch.
The damage from all of its arms can add up quickly. Try to destroy the arms before focusing on the head. The Prime Saw and Prime Vice are very difficult to avoid and should be destroyed first. The Prime Laser is only a medium threat and should be killed after the Vice and Saw, and the Prime Cannon can be ignored. There are two methods to avoiding Skeletron Prime’s attacks. The first is to use the maximum speed of Lightning or Frostspark Boots to stay out of reach (Prime Saw will always be able to keep up), combined with well-timed jumps to throw off the aim of Skeletron Prime’s spinning head attack. The second method is to use Gravitation potions for a similar effect, though it can be harder to dodge some of Skeletron Prime’s attacks this way.
The last of the three mechanical bosses is the Twins. This boss is the hardest of the three for most players and should be defeated last. The Twins have a chance of spawning at sunset with the message «This is going to be a terrible night…» They can also be summoned by using a Mechanical Eye at night. The Twins are recommended for magic and summoner players, as the Rainbow Rod, Magical Harp, and Optic Staff will be very useful weapons later on.
![]() Boss: The Twins
Boss: The Twins
![]()
Retinazer
Life: 20000
Defense: 10 (First Stage), 25 (Second Stage)
Damage (Melee): 50 (First Stage), 75 (Second Stage)
Damage (Laser): 20 (First Stage), 25 (Second Stage), 20 (Second Stage, Rapid Fire)
Spazmatism
Life: 23000
Defense: 10 (First Stage), 35 (Second stage)
Damage (Melee): 50 (First Stage), 75 (Second Stage)
Damage (Cursed Flame): 25 (First Stage), 30 (Second Stage)
Drops: 20-35 ![]() Hallowed Bar, 20-40
Hallowed Bar, 20-40 ![]() Soul of Sight, 5-15
Soul of Sight, 5-15 ![]() Greater Healing Potion,
Greater Healing Potion, ![]() Mechanical Wheel Piece (Drops from last boss to be killed)
Mechanical Wheel Piece (Drops from last boss to be killed)
Recommended Equipment: See above section «Recommended Equipment for Hardmode Bosses»
The Twins are the hardmode version of Eye of Cthulhu. Both Twins will alternate between their signature attack (Laser for Retinazer, Cursed flame for Spazmatism), and charging at the player. The two choose attacks independently of the other. There will be times when one uses their signature while the other charges, when they both use their signature, and when they both charge. When a Twin gets down a certain amount of health (8000 / 12000 for Retinazer, 9200 / 13800 for Spazmatism), it will transform into a more powerful second stage. Both will gain a rapid-fire version of their signature attack and a much more damaging melee attack in their second stages. The first Twin killed will not yield any drops. When the second Twin is killed, the listed drops will appear where it was killed. The eyes can be killed in any order. If the Twins are not defeated before the sun rises, they will run away.
Each twin is much more dangerous in its second stage. Focus on one Twin at a time, and only move on to the second Twin when the first is destroyed. Retinazer’s stage one signature is less dangerous, so kill Spazmatism first. The Twins have a charging attack that is extremely difficult to dodge. This charging attack will cripple a player if they can’t consistently dodge it. There are two methods to dodging the attacks, like with Skeletron Prime. The first method is to reach max running speed with Lightning or Frostspark Boots and use timed jumps to throw off the trajectory of the charge. Jump just as a Twin is about to start a charge while maintaining run speed. This will cause the charging Twin to charge too fast, and then attempt to correct it as they try to charge again. The second method is to use Gravitation Potions and constantly fall — they won’t be able to catch up to you. If a Twin is off screen too long, it will despawn like any other enemy (only on console and mobile though). This can be used to make Spazmatism despawn and simplify the fight greatly. However, you will not gain the loot.
Once any mechanical boss has been defeated, new challenges unlock, and the player gains access to new materials to work with, starting with the souls and bars dropped by the boss. Hallowed Bars can be used to craft Hallowed armor and several kinds of weapons.
The player can also return to the Underground Jungle to search for Life Fruit, a consumable item that can increase the player’s maximum health to 500.
The Solar Eclipse is a very rare event and drops powerful weapons for all classes. You may need to do many before obtaining every item. In the ![]() Desktop version,
Desktop version, ![]() Console version, and
Console version, and ![]() Mobile version, the Solar Eclipse can be summoned manually using a Solar Tablet, which can be crafted with eight Solar Tablet Fragments. The fragments drop from Flying Snakes And Lihzahrds, and can be found in Lihzahrd Chests in the Jungle Temple.
Mobile version, the Solar Eclipse can be summoned manually using a Solar Tablet, which can be crafted with eight Solar Tablet Fragments. The fragments drop from Flying Snakes And Lihzahrds, and can be found in Lihzahrd Chests in the Jungle Temple.
![]() Event: Solar Eclipse
Event: Solar Eclipse
![]()
Monsters: Frankenstein, Swamp Thing, Reaper, Vampire, Eyezor, The Possessed, Fritz, Creature from the Deep
Monster Drops:  Death Sickle,
 ![]() Moon Stone,
Moon Stone, ![]() Broken Bat Wing,
Broken Bat Wing, ![]() Eye Spring,
Eye Spring, ![]() Broken Hero Sword,
Broken Hero Sword, ![]() Neptune’s Shell
Neptune’s Shell
Recommended Equipment: Hallowed or Chlorophyte
Solar eclipses occur randomly at dawn and last throughout the day. The enemies here are extremely dangerous and it may require gear from the Hardmode Jungle and Dungeon to efficiently farm them. If all the mechanical bosses are defeated, Reapers will begin to spawn and drop the Death Sickle, which is good for melee characters with its high DPS and piercing ability. After defeating Plantera, Nailheads, Butchers, Deadly Spheres, Mothrons, Dr. Man Flys and Psychos begin to appear, making even the most well-equipped player thus far to reach for his Magic Mirror. On the ![]() Old-gen console version and Nintendo
Old-gen console version and Nintendo ![]() version, the event is much safer, with only Frankensteins, Swamp Things, Reapers, Vampires, and Eyezors spawning.
version, the event is much safer, with only Frankensteins, Swamp Things, Reapers, Vampires, and Eyezors spawning.
![]() Biome: The Underworld (Hardmode)
Biome: The Underworld (Hardmode)
![]()
The Underworld (Hardmode)
New Monsters: Lava Bat, Red Devil, Tortured Soul
Monster Drops: ![]() Magma Stone,
Magma Stone, ![]() Unholy Trident,
Unholy Trident, ![]() Fire Feather
Fire Feather
Recommended Equipment: Hallowed
Two new enemies now spawn in the Underworld after one Mechanical Boss has been defeated. Lava Bats are simply a stronger version of the Hellbat. Red Devils are the real danger, being able to deal over 100 damage with their trident attack. It’s recommended that the player does anything they need to do in the Underworld (such as farming the Wall of Flesh for its special drops) before defeating mechanical bosses; otherwise, doing anything here may become much harder. As soon as Hardmode begins, it is possible to find a Tortured Soul which, when purification powder is used in it rather than killing it, transformed into a Tax Collector, which greatly boosts income.
Return to the Underground Jungle
![]() Biome: Underground Jungle (Hardmode)
Biome: Underground Jungle (Hardmode)
![]()
Underground Jungle (Hardmode)
New Monsters: Moth, Moss Hornet, Angry Trapper, Arapaima, Giant Tortoise
Monster Drops: ![]() Uzi,
Uzi, ![]() Bezoar,
Bezoar, ![]() Turtle Shell,
Turtle Shell, ![]() Butterfly Dust,
Butterfly Dust, ![]() Tattered Bee Wing,
Tattered Bee Wing, ![]() Yelets
Yelets
Notable Resources: ![]() Chlorophyte Ore,
Chlorophyte Ore, ![]() Life Fruit
Life Fruit
Recommended Equipment: Hallowed
Now that one or more of the mechanical bosses have been defeated, Chlorophyte ore spawns throughout the underground jungle. Hardmode also makes it so that Life Fruits can occasionally be found growing amongst the foliage. Harvesting these two items should be a top priority. Life Fruits increase the player’s health by 5, up to a maximum of 500, and Chlorophyte can be crafted into weapons and armor a step above Hallowed equipment.
Players using melee or ranged weapons can make even better armor by acquiring an additional material. Creating a house in the glowing mushroom biome will spawn the Truffle NPC, who sells the Autohammer. The Autohammer turns Chlorophyte bars into Shroomite bars, which are used to create Shroomite armor, a great armor for ranged attackers. Giant Tortoise drop Turtle Shell, which when combined with Chlorophyte Bars make Turtle armor, a powerful melee armor set. Make note that the Autohammer cannot be purchased until Plantera has been defeated.
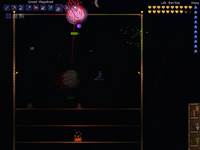
Plantera
Also found in the underground jungle is a mysterious pink bulb. Destroying this bulb with a drill or pickaxe summons the boss Plantera.
![]() Boss: Plantera
Boss: Plantera
![]()
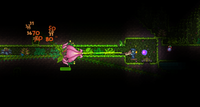
Life: 30000
Defense: 14
Damage: 50
Drops: ![]() Temple Key,
Temple Key, ![]() Grenade Launcher,
Grenade Launcher, ![]() Pygmy Staff,
Pygmy Staff, ![]() Venus Magnum,
Venus Magnum, ![]() Nettle Burst,
Nettle Burst, ![]() Leaf Blower,
Leaf Blower, ![]() Flower Pow,
Flower Pow, ![]() Wasp Gun,
Wasp Gun, ![]() Seedling,
Seedling,  The Axe
Recommended Equipment: Chlorophyte or Turtle; piercing weapons
Plantera can be one of the easiest bosses if you have an arena. Simply bomb out a large cave (although of course, make sure NOT to accidentally destroy Plantera’s Bulb) and put a short wall in the middle of the cave. Put platforms below the wall so that you have a place to grapple to, and summon Plantera. Run around the wall you built and you should be fine. (See also: Guide:Plantera strategies)
Upon defeating Plantera, the message «Screams are echoing from the dungeon…» appears, and powerful new enemies are added to the dungeon. The boss also drops the Temple Key, which is used to open the Jungle Temple.
Jungle Temple
Golem
At the bottom of the Jungle Temple, there is a boss room with a lihzahrd altar. Using a Lihzahrd Power Cell on it summons the Golem.
![]() Boss: Golem
Boss: Golem
![]()
Life: 15000 (Head), 8000 (Body), 6000 (Fist)
Defense: 24
Damage: 70
Drops: ![]() Stynger with
Stynger with ![]() Stynger Bolt,
Stynger Bolt, ![]() Possessed Hatchet,
Possessed Hatchet, ![]() Sun Stone,
Sun Stone, ![]() Eye of the Golem,
Eye of the Golem, ![]() Picksaw,
Picksaw, ![]() Heat Ray,
Heat Ray, ![]() Staff of Earth,
Staff of Earth, ![]() Golem Fist,
Golem Fist, ![]() Golem Trophy,
Golem Trophy, ![]() Beetle Husk,
Beetle Husk, ![]() Shiny Stone (expert)
Shiny Stone (expert)
Recommended Equipment: Chlorophyte, Turtle, or Shroomite and post-Plantera weapons
Golem in its first stage is made significantly easier if the player focuses on destroying his fists before releasing his head’s other attacks. Constant damage to the fists will nullify their attacks, leaving you free to attack at a range while avoiding his head’s fireballs and lasers. In his second form, it is best to have built platforms to run underneath his jumping body Bowser-style while taking shots at him and avoiding his head attacks. This means that ranged attacks would be the safest strategy to beating him, providing you don’t make too many mistakes and other mobs don’t interfere. Note that his body has the ability to move midair, meaning that he can still change direction and land on you after running beneath him at a close distance.
The Golem drops the Picksaw, which enables the player to mine Lihzahrd Brick. The Stynger is a very effective explosive weapon. The Possessed Hatchet and Golem Fist are melee weapons with considerable range. Beetle Husk can make a great new melee armor. Heat Ray and Staff of Earth are efficient in the Hardmode Dungeon, where you should go next. The bonuses of the Sun Stone and Eye of the Golem will help as well.
See also: Guide:Golem strategies
Return to the Dungeon
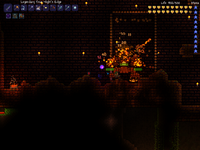
![]() Biome: Dungeon (Hardmode)
Biome: Dungeon (Hardmode)
![]()
New Monsters: Rusty Armored Bones, Blue Armored Bones, Bone Lee, Paladin, Tactical Skeleton, Dungeon Spirit, Skeleton Commando, Necromancer, Giant Cursed Skull, Diabolist, Ragged Caster, Skeleton Sniper
Monster Drops: ![]() Shadowbeam Staff,
Shadowbeam Staff,  Keybrand,
 ![]() Ectoplasm,
Ectoplasm, ![]() Sniper Rifle,
Sniper Rifle, ![]() Rifle Scope,
Rifle Scope, ![]() Tactical Shotgun,
Tactical Shotgun, ![]() Paladin’s Shield,
Paladin’s Shield, ![]() Paladin’s Hammer,
Paladin’s Hammer, ![]() Wisp in a Bottle,
Wisp in a Bottle, ![]() Magnet Sphere,
Magnet Sphere, ![]() Tabi,
Tabi, ![]() Black Belt,
Black Belt, ![]() Spectre Staff,
Spectre Staff, ![]() Inferno Fork
Inferno Fork
Recommended Equipment: Chlorophyte, Shroomite, Turtle, Beetle
After defeating Plantera, the dungeon’s difficulty increases dramatically. There are stronger enemies and new drops from each. Also, note that the dungeon has 5 biome-related chests. To unlock each one, you may need to defeat many of the respective biome’s enemies to get a key, which is used to unlock the respective chest. Dungeon Spirits, which may spawn after the player kills enemies in the dungeon, drop Ectoplasm, which is used to craft Spectre armor, a great armor for mages.
Duke Fishron
![]() Boss: Duke Fishron
Boss: Duke Fishron
![]()
Life: 50000
Defense: 50
Damage: 100 (melee)
Drops: ![]() Flairon,
Flairon, ![]() Tsunami,
Tsunami, ![]() Razorblade Typhoon,
Razorblade Typhoon, ![]() Tempest Staff,
Tempest Staff, ![]() Bubble Gun,
Bubble Gun, ![]() Fishron Wings,
Fishron Wings, ![]() Shrimpy Truffle (expert)
Shrimpy Truffle (expert)
Recommended Melee Equipment: Turtle or Beetle armor, ![]() Possessed Hatchet, and
Possessed Hatchet, and ![]() Vampire Knives
Vampire Knives
Recommended Ranged Equipment: Shroomite armor, ![]() Chain Gun or
Chain Gun or ![]() Tactical Shotgun with Chlorophyte Bullets, or
Tactical Shotgun with Chlorophyte Bullets, or ![]() Stynger
Stynger
Recommended Magic Equipment: Spectre armor (Hood), ![]() Heat Ray,
Heat Ray, ![]() Bat Scepter,
Bat Scepter, ![]() Golden Shower (maybe);
Golden Shower (maybe); ![]() Celestial Cuffs,
Celestial Cuffs, ![]() Sorcerer Emblem or
Sorcerer Emblem or ![]() Celestial Stone
Celestial Stone
Recommended Accessories (all classes): Hoverboard (or any ![]() Wings),
Wings), ![]() Frostspark Boots,
Frostspark Boots, ![]() Amphibian Boots,
Amphibian Boots, ![]() Destroyer Emblem,
Destroyer Emblem, ![]() Tabi /
Tabi / ![]() Master Ninja Gear,
Master Ninja Gear, ![]() Shield of Cthulhu (expert)
Shield of Cthulhu (expert)
Recommended Buff Potions (all classes): Ironskin, Regeneration, Swiftness, Thorns, Water Walking, Well Fed, Wrath, Rage, Lifeforce, Endurance, Summoning, Gravitation (optional)
Duke Fishron is one of the hardest bosses in the game as of 1.3.3.3. Just summoning the Duke is a significant challenge in itself, as you will need to capture the wily and elusive Truffle Worm. The spawn rates in naturally occurring Underground Glowing Mushroom biomes are low, and if you intend on getting the Fishron Wings (1/15 chance), as well as all his drops, you’ll need to defeat him on average 10 times. Add in a few more for the times you die and because the RNG hates you, and you could easily be looking at 20-25 truffle worms needed. Trying to net that many manually, even with the help of a Clentaminator, Golden Bug Net and Blue Solution, is tedious and frankly boring. Your best bet is to build a Truffle Worm farm, for which you can find a guide here.
Once you’ve collected sufficient Truffle Worms, you should select your class. Melee, ranged, and magic are all viable options. Ironically, the ranger, which has up until now been a mainstay of boss fights, is probably the worst option. Although the Ranger is still great at dealing high DPS, the lack of a self-healing attack, unlike the other two, also makes this the most dangerous approach, and with the Duke’s extremely high damage, leaves you very little margin for error. If you’re a ranger, make one mistake and you’re dead. Melee using Vampire Knives is the second option, which is relatively safe. And despite Spectre armor (Hood) getting its damage nerfed by 40%, and mana potions nerfed a further 25%, the magic approach is probably still the best one (which goes to show how overpowered it was). As of 1.3, the new magic weapon Life Drain, with a 20% drop rate from the difficult Crimson Mimic, can serve as a magical replacement for the Vampire Knives, and can be obtained earlier in Hardmode by farming for Souls of Night, crafting a Key of Night, and farming Crimson Mimics. However, know that whereas the Vampire Knives’ regenerative powers are proportional to damage, Life Drain simply provides faster regeneration, which may not be enough to save the player from death.
Unlike most boss fights, an arena is of little help. Duke Fishron seems to have been designed with the intention of being farm-proof (he’s not), and if you sit still or linger in the same area, he can literally take you from a full 600hp to zero in two seconds flat in his second stage, whereas if you keep moving and keep your distance, you shouldn’t take much damage. It is important to keep in mind that if you move too far away from him that he will despawn, wasting a precious Truffle worm.
Once you’re ready to fight the Duke, summon him by fishing in the Ocean using a Truffle Worm as bait. From there, the best strategy is to just continually run away while firing until he’s dead. Don’t stop moving at any time or you’ll die. In theory it’s best to use a Gravitation Potion for maximum mobility, but in reality you may actually have very little experience using Gravitation Potions, as they can be disorienting, you can run into floating islands, mountains, or worst, lakes (which will kill you), you can’t fly too high or you will float, and it will be very difficult to dodge (which will kill you). With Wings and Frostspark Boots, you’re very mobile on the ground too and both approaches are viable, so go with what you’re most comfortable with. The Tabi/Master Ninja Gear will allow you to dash out of the way of his more lethal attacks, but be wary of accidentally dashing into a Sharknado. If you have the Shield of Cthulhu, you are even better off, as it allows to dash into him without taking damage (if timed correctly). This can actually be a reliable lifesaver from his quick lunging attacks during his second stage, especially on expert mode (3rd stage). Note that of 1.3 if the player leaves the Ocean Biome Duke Fishron’s defense and attack will double, making fighting across the map an invalid option. The best option as of the latest update will be to build platforms over the Ocean Biome and begin building a flexible arena.
Although Duke Fishron is a very difficult boss, he’s probably still easier than the Lunar Events and it’s probably best to beat him before taking on the Events. However, if you find yourself stuck attempting and failing to kill him, the Lunar Events may be the only other option to continue. If you do undergo the events, it’s best to defeat your class’s pillar (Vortex for ranged, Nebula for magic, Solar for melee, and Stardust for Summoner). Defeating a Pillar once allows the crafting of one of the Lunar Weapons. An optional detour is to defeat the Stardust Pillar to gain a powerful minion (Stardust Dragon or Stardust Cell) to aid you in the fight. BEWARE: if you defeat all Lunar Pillars, the Moon Lord will spawn, and chances are if you can’t defeat Fishron, you have an even lower chance of defeating the Moon Lord. If you’re fighting Duke Fishron multiple times, the fight will be somewhat easier once you’ve acquired his weapon drops and wings.
For more strategies to defeat the Duke, see Guide:Duke Fishron strategies.
The Pumpkin Moon
![]() Event: Pumpkin Moon
Event: Pumpkin Moon
![]()
Monsters: Scarecrow, Splinterling, Hellhound, Poltergeist, Mourning Wood, Headless Horseman, Pumpking
Monster Drops: ![]() Scarecrow costume,
Scarecrow costume, ![]() Spooky Wood,
Spooky Wood, ![]() Cursed Sapling,
Cursed Sapling, ![]() Spooky Twig,
Spooky Twig, ![]() Spooky Hook,
Spooky Hook, ![]() Necromantic Scroll,
Necromantic Scroll, ![]() Stake Launcher,
Stake Launcher, ![]() Mourning Wood Trophy,
Mourning Wood Trophy, ![]() Jack ‘O Lantern Mask,
Jack ‘O Lantern Mask,  The Horseman’s Blade,
 ![]() Pumpking Trophy,
Pumpking Trophy, ![]() Candy Corn Rifle,
Candy Corn Rifle, ![]() Raven Staff,
Raven Staff, ![]() Jack ‘O Lantern Launcher,
Jack ‘O Lantern Launcher, ![]() Bat Scepter,
Bat Scepter, ![]() Black Fairy Dust,
Black Fairy Dust, ![]() Spider Egg
Spider Egg
Recommended Equipment: Chlorophyte, Turtle, Spectre, or Shroomite
The Pumpkin Moon is summoned at night using the ![]() Pumpkin Moon Medallion. Unlike the Blood Moon and Solar Eclipse, enemies appear in up to 15 consecutive waves, similar to an invasion. During this event, the moon turns orange with a jack ‘o lantern face.
Pumpkin Moon Medallion. Unlike the Blood Moon and Solar Eclipse, enemies appear in up to 15 consecutive waves, similar to an invasion. During this event, the moon turns orange with a jack ‘o lantern face.
See also: Guide:Pumpkin Moon strategies
The Frost Moon
![]() Event: Frost Moon
Event: Frost Moon
![]()

Monsters: Present Mimic, Flocko, GingerBread, Zombie Elf, Elf Archer, Nutcracker, Yeti, Elf Copter, Everscream, Krampus, Ice Queen, Santa-NK1
Monster Drops:  Christmas Tree Sword,
 ![]() Festive Wings,
Festive Wings, ![]() Razorpine,
Razorpine, ![]() Christmas Hook,
Christmas Hook, ![]() Everscream Trophy,
Everscream Trophy,  Blizzard Staff,
  North Pole,
 ![]() Ice Queen Trophy,
Ice Queen Trophy, ![]() Snowman Cannon,
Snowman Cannon, ![]() Baby Grinch’s Mischief Whistle,
Baby Grinch’s Mischief Whistle, ![]() Reindeer Bells,
Reindeer Bells, ![]() Elf Melter,
Elf Melter, ![]() Chain Gun,
Chain Gun, ![]() Santa-NK1 Trophy
Santa-NK1 Trophy
Recommended Equipment: Chlorophyte, Turtle, Spectre, or Shroomite
The Frost Moon is summoned at night using the ![]() Naughty Present. It is one of the most difficult events in the game, as it is meant for endgame players. Like the Pumpkin Moon, enemies appear in 15 standard waves as well as 5 extra bonus waves. During this event, the moon changes color to look like the face of a snowman.
Naughty Present. It is one of the most difficult events in the game, as it is meant for endgame players. Like the Pumpkin Moon, enemies appear in 15 standard waves as well as 5 extra bonus waves. During this event, the moon changes color to look like the face of a snowman.
See also: Guide:Frost Moon strategies
Martian Madness
![]() Event: Martian Madness
Event: Martian Madness
![]()
Monsters: Brain Scrambler, Gray Grunt, Ray Gunner, Martian Officer, Martian Engineer, Gigazapper, Tesla Turret, Martian Walker, Scutlix, Martian Saucer
Monster Drops: ![]() Martian Conduit Plating,
Martian Conduit Plating, ![]() Martian Costume,
Martian Costume, ![]() Laser Machinegun,
Laser Machinegun, ![]() Xenopopper,
Xenopopper, ![]() Cosmic Car Key,
Cosmic Car Key, ![]() Laser Drill,
Laser Drill, ![]() Electrosphere Launcher,
Electrosphere Launcher, ![]() Charged Blaster Cannon,
Charged Blaster Cannon,  Influx Waver,
 ![]() Anti-Gravity Hook,
Anti-Gravity Hook, ![]() Martian Saucer Trophy
Martian Saucer Trophy
Recommended Equipment:Shroomite armor, Turtle armor, Beetle armor, Spectre armor
Martian Madness is an invasion-type event that can happen after defeating Golem. Occasionally, in the outer two-thirds of your map, a Martian Probe will randomly appear. If it scans you and escapes, the event will start. This event cannot be triggered manually.
The Lunatic Cultist
![]() Boss: Lunatic Cultist
Boss: Lunatic Cultist
![]()
Life: 32000
Damage: 50
Defense: 42
Minions: Phantasm Dragon, Ancient Vision
Drops: ![]() Ancient Manipulator,
Ancient Manipulator, ![]() Ancient Cultist Mask,
Ancient Cultist Mask, ![]() Ancient Cultist Trophy,
Ancient Cultist Trophy, ![]() Greater Healing Potions
Greater Healing Potions
The Lunatic Cultist is a boss summoned by killing the four Cultists that spawn at the Dungeon after defeating Golem. Once the Lunatic Cultist is defeated, the Lunar Events will start.
Before reaching a certain health level, it will use 3 attacks:
After reaching around half health, it will use a fourth attack:
- Firing 2 spreads of 5 destructible Ancient Light.
In Expert Mode, it may also spawn numerous ![]() Ancient Dooms that fire four purple projectiles in a cross pattern.
Ancient Dooms that fire four purple projectiles in a cross pattern.
After cycling through its attacks a few times, it will fade away, and reappear in a ritual-like circle, with duplicates of itself called Ancient Cultists. The player must hit the real cultist to stop the ritual. Attacking a fake or letting the ritual finish will cause a Phantasm Dragon to spawn, and cause the respective Ancient Cultist to fight alongside the real cultist, if the former happens. This fake cultist can be destroyed by attacking the real cultist when it performs its ritual again.
Attacking a fake while the Phantasm Dragon is still alive will result an Ancient Vision being spawned, NOT another Phantasm Dragon.
See also: Lunatic Cultist
See also: Guide:Lunatic Cultist strategies
The Celestial Pillars
Once the Lunatic Cultist is defeated, four pillars will spawn in the world. These can easily be found with the map. Be sure to pick up the Ancient Manipulator the Cultist drops, as it is needed to craft end-game gear.
Chances are that you will be near a pillar when they spawn. The pillars represent the four classes: Solar for melee, Vortex for ranged, Nebula for magic, and Stardust for summoning. There is no set order necessary to kill them, but it is preferable to take on the one corresponding to your class first, then the Stardust Pillar to get the powerful Stardust Dragon Staff.
![]() Boss: Solar Pillar
Boss: Solar Pillar
![]()
Life: 20000
Defense: 20
Damage: 0 (melee), 90 (solar flare)
Minions: Selenian, Drakanian, Corite, Sroller, Drakomire, Crawltipede
Drops: ![]() Solar Fragment (12-60) 18-90
Solar Fragment (12-60) 18-90
Recommended Melee Equipment: Turtle or Beetle armor, and Vampire Knives, North Pole, Paladin’s Hammer, Scourge of the Corruptor, Influx Waver
Recommended Ranged Equipment: Shroomite armor and Stynger, Megashark, Chain Gun, Electrosphere Launcher, Tsunami, Sniper Scope
Recommended Magic Equipment: Spectre armor (Hood)/(Mask), Razorblade Typhoon, Laser Machinegun, Blizzard Staff, Bat Scepter, Golden Shower, Celestial Cuffs, Sorcerer Emblem or Celestial Stone, Razorpine, Bubble Gun, Magic Power Potion, Mana Regeneration Potion, Crystal Ball
Recommended Accessories (all classes): Frostspark Boots, Star Veil
Recommended Buff Potions (all classes): Ironskin, Regeneration, Swiftness, Thorns, Well Fed, Wrath, Rage, Lifeforce, Endurance, Summoning.
The Solar Pillar is a tough one to crack, and, like all the Pillars, you will be under constant attack from its minions.
To make the Solar Pillar (or any pillar) vulnerable, you must kill 100 (50 after the Moon Lord is defeated) minions to deactivate its shield, allowing it to be harmed directly.
Try to stay out of the air around the Solar Pillar if possible, because the Crawltipedes will swarm and kill you quickly otherwise. If need be, aim at their weak spot, the tail, to kill them. This will give you a small window to take flight before another spawns.
Be sure to also be wary of the Corites that spawn as well, because their charge attack can be deadly, or even fatal when they swarm you.
The Selenians are extremely deadly when they are spinning, as they can reflect damage, which is able to deal heavy damage to the caster/shooter. Avoid high damage ranged/magic weapons like Nebula Blaze and Sniper Rifle. It is recommended to use low-damage, high fire weapons like the Razorpine, melee weapons, and summons.
Because many of the enemies from this pillar cannot pass through solid blocks, it’s recommended that you attempt to find an area where most mobs will have trouble reaching you, but where you can reach them. If possible, try to obtain a weapon that can pass through walls, such as the Nettle Burst or Flying Dragon.
![]() Boss: Vortex Pillar
Boss: Vortex Pillar
![]()
Life: 20000
Defense: 20
Damage: 0
Minions: Vortexian, Storm Diver, Alien Hornet, Alien Queen
Drops: ![]() Vortex Fragment (12-60) 18-90
Vortex Fragment (12-60) 18-90
Recommended Melee Equipment: Turtle or Beetle armor, and Vampire Knives
Recommended Ranged Equipment: Shroomite armor and Stynger, Megashark
Recommended Magic Equipment: Spectre armor (Hood)/(Mask), Bat Scepter, Golden Shower, Celestial Cuffs, Sorcerer Emblem or Celestial Stone, Razorpine/Bubble Gun, Magic Power Potion, Mana Regeneration Potion, Crystal Ball
Recommended Accessories (all classes): Wings, Frostspark Boots, Master Ninja Gear (Black Belt), Star Veil
Recommended Buff Potions (all classes): Ironskin, Regeneration, Swiftness, Thorns, Well Fed, Wrath, Rage, Lifeforce, Endurance, Summoning.
Like every Pillar, to make the Vortex Pillar susceptible to damage, you must defeat 100 (50 after the Moon Lord is defeated) minions to deactivate its shield.
Try to take out the Storm Divers and Alien Queens first, as the Storm divers have a very strong shotgun attack that can deal large amounts of damage, while the Alien Queens can inflict the distorted debuff, which leaves the player extremely susceptible to other enemies.
Gravity is distorted around areas of the Vortex Pillar as well, so beware of the area around it. Because this is a ranged pillar, you will find that many of the enemies are going to fire volleys of projectiles at you. Due to this, it is recommended you have a Black Belt or a Master Ninja Gear, so you can have a slight chance to dodge these attacks.
![]() Boss: Nebula Pillar
Boss: Nebula Pillar
![]()
Life: 20000
Defense: 20
Damage: 0
Minions: Nebula Floater, Brain Suckler, Predictor, Evolution Beast
Drops: ![]() Nebula Fragment (12-60) 18-90
Nebula Fragment (12-60) 18-90
Recommended Melee Equipment: Turtle or Beetle armor, and Vampire Knives
Recommended Ranged Equipment: Shroomite armor and Stynger, Megashark
Recommended Magic Equipment: Spectre armor (Hood)/(Mask), Bat Scepter, Golden Shower, Celestial Cuffs, Sorcerer Emblem or Celestial Stone, Razorpine/Bubble Gun, Magic Power Potion, Mana Regeneration Potion, Crystal Ball
Recommended Accessories (all classes): Wings, Master Ninja Gear (Black Belt), Frozen Turtle Shell
Recommended Buff Potions (all classes): Ironskin, Regeneration, Swiftness, Thorns, Well Fed, Wrath, Rage, Lifeforce, Endurance, Summoning.
Like every Pillar, to make the Nebula Pillar susceptible to damage, you must defeat 100 (50 after the Moon Lord is defeated) minions to deactivate its shield.
Focus on the Brain Sucklers that fly at you to prevent them from latching onto your head. If they do, aim your weapon above you to knock them off, or simply swing any regular sword/ melee weapon. The Nebula Floaters are tricky, as they will randomly teleport around. Take them out quickly, and dodge their beam attacks.
With this pillar, it is best to avoid the ground. Predictors and Evolution Beasts can make quick work of any player ground-bound, so sticking to the air is best. This is because Brain Sucklers have no projectile attack, and are relatively easy to kill. If the player is skilled, the pillar can be defeated relatively easily.
It is highly recommended to use flight accessories like wings for temporary flight, or the Cosmic Car Key, Shrimpy Truffle, and Scaly Truffle for permanent flight.
![]() Boss: Stardust Pillar
Boss: Stardust Pillar
![]()
Life: 20000
Defense: 20
Damage: 0
Minions: Star Cell, Flow Invader, Twinkle Popper, Stargazer, Milkyway Weaver
Drops: Stardust Fragment (12-60) 18-90
Recommended Melee Equipment: Turtle or Beetle armor, and Vampire Knives
Recommended Ranged Equipment: Shroomite armor and Stynger, Megashark
Recommended Magic Equipment: Spectre armor (Hood)/(Mask), Bat Scepter, Golden Shower, Celestial Cuffs, Sorcerer Emblem or Celestial Stone, Razorpine/Bubble Gun, Magic Power Potion, Mana Regeneration Potion, Crystal Ball
Recommended Accessories (all classes): Wings
Recommended Buff Potions (all classes): Ironskin, Regeneration, Swiftness, Thorns, Well Fed, Wrath, Rage, Lifeforce, Endurance, Summoning.
Like every Pillar, to make the Stardust Pillar susceptible to damage, you must defeat 100 (50 after the Moon Lord is defeated) minions to deactivate its shield.
Take out the Star Cells quickly so they don’t overwhelm you, but be sure to also kill the little ones they split into as well. If left to long, these will grow into full-sized Star Cells again. The Milkyway Weavers are a big threat, as unlike normal worm AI, they can follow you into the air. Attack their head to kill them easily. The Stargazers should not be taken lightly either, as they have a beam attack that could easily drain a player’s health.
If you are experienced, you may want to herd together a group of Star Cells and only kill the large ones, leaving the small ones alive, then wait for them to regrow. Using this tactic, you can max out the spawn limit such that nothing else can spawn, and farm out the Star Cells until the Pillar is vulnerable.
Once the final Pillar is defeated, the status message «Impending doom approaches…» will appear. About a minute later, the Moon Lord will spawn. It is recommended to have potions for the fight, as he will easily kill you if you are not prepared.
The Moon Lord
For more elaborate strategies on defeating Moon Lord, including Weapon and Arena recommendations, see Guide:Moon Lord strategies.
The Moon Lord, bearing a striking resemblance to Cthulhu but confirmed not to be by the developers (although at health thresholds it spawns True Eyes of Cthulhu), is summoned directly after defeating the final Celestial Pillar and serves as Terraria’s final boss as of version 1.3.
![]()
Damage
Head:
150 / 300 (Phantasmal Deathray)
60 / 120 (Phantasmal Bolt)
Hands:
100 / 200 (Phantasmal Sphere)
60 / 120 (Phantasmal Eye)
60 / 120 (Phantasmal Bolt)
80 (Melee (eye socket))
Defense
Head: 50
Hands: 40
Core: 70
There’s a reason the developers chose him to be the game’s «final boss». Similar to Duke Fishron, the boss sweeps side to side, taking up the entire screen and making arenas less effective than with other bosses. Recommended arenas include a minecart track or an asphalt skybridge, running along the length of the world for maximum damage output. Its defeat means subsequent runs will be easier with its drops but still provides quite a challenge even with the best gear. Luminite is used to craft end-game gear and mounts, including the Drill Containment Unit, which requires 40 Luminite Bars, or ~two Moon Lord defeats. To craft all items with Luminite, 1308 ores are required, meaning Moon Lord must be defeated 15-19 times in Normal Mode. However, to craft all the equipment related to only one type of lunar fragment, 204 ores are required, meaning Moon Lord must only be defeated 3 times in Normal Mode.
The Post-Game
After defeating the moon invasions and acquiring all their drops, the player is free to do anything. You could try designing an ultimate castle or PvP with other top-tier players, or even overcome incredibly difficult challenges (e.g. Frost Moon wave 15+ with Ranger, no arena.) The only end is the player’s imagination!
Some things you might try:
- Purify the Corruption or Crimson biomes.
- Reach top tier in Fishing and acquire the Hotline Fishing Hook/Golden Fishing Rod.
- Beat multiple Bosses at once.
- Complete all the achievements.
- Defeat the Dungeon Guardian.
- Get 100% in the Bestiary.
- Play on an online server.
- Explore player-made custom maps and content.
- Make your own theme park using minecarts.
- Learn how to golf.
- Experiment with the extremely elaborate combinations possible with wiring and teleporters, such as making your own in-game computer!
- Try to complete the game as different Classes.
- Do a hardcore playthrough.
- Do speedruns.
- Play, design, and/or create new PvP modes for all to enjoy!
- Acquire every single weapon and tool.
- Obtain every single armor and vanity set.
- Gather up every single accessory and dye.
- Collect every single Trophy/Relic and Banner.
- Play through the game on Expert Mode or Master Mode.
- Seek out the rarest items in the game, such as the Nymph Banner or Pinky Banner.
- Find bugs and glitches so developers can fix them.
- Create a mod or texture pack, or maybe an adventure/puzzle map.
- Become a wiki contributor!
- Get every item in the duplication window (Journey Mode).
Surviving in Environments
Гайд на хардмод в Terraria – Часть 1

В первой части хардмодного мира мы разберем всех боссов и события вплоть до Плантеры. Главное что вам необходимо будет знать после убийства Стены плоти, это то, что все мобы теперь стали сильнее, а так же их ряды пополнились новыми индивидуумами, которые стали еще более токсичны чем ранее.
Боссы в Terraria в режиме Хардмод
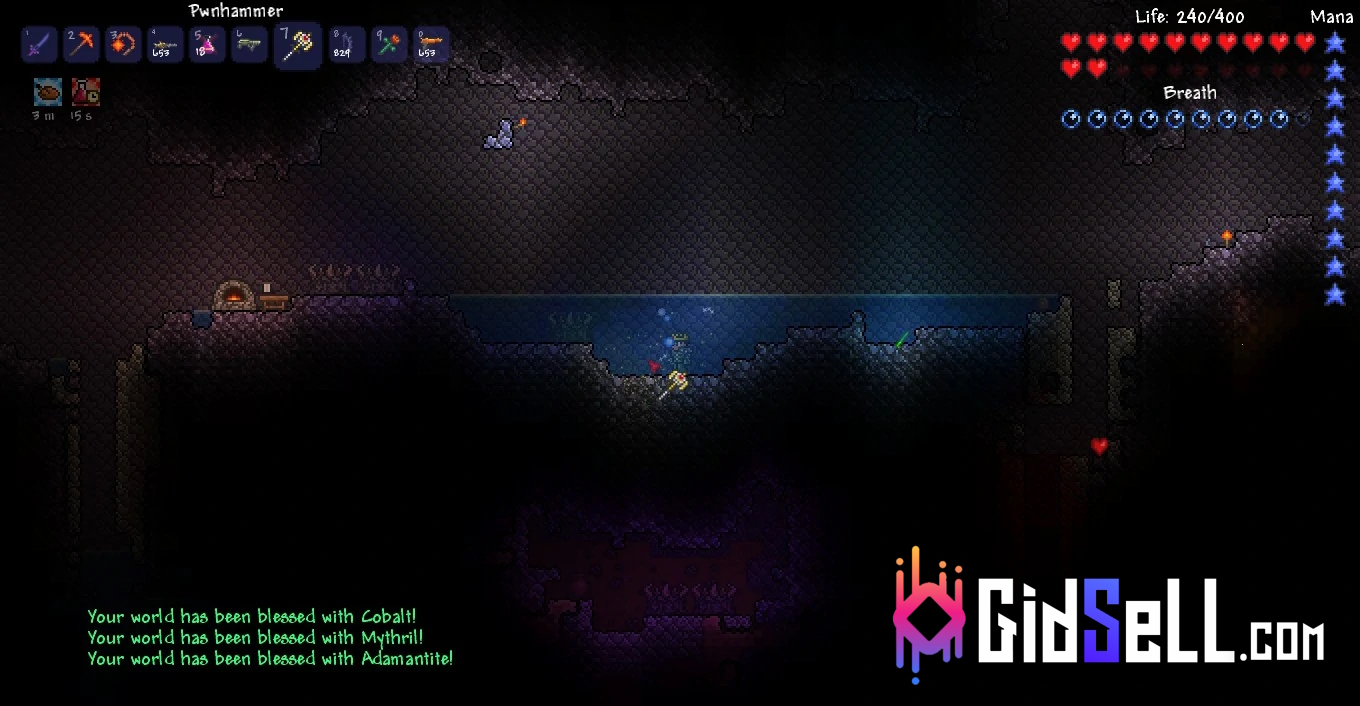
С этого момента вам стоит понять некоторые вещи связанные с вашими следующими босфайтами, которые вам еще предстоит пройти. Искусственный интеллект всех боссов намного лучше проработан, чем в до-хардмодном мире.
Так же стоит отметить огромный прирост к показателям брони всех монстров и боссов, а так же – что логично, поднятие максимального здоровья и урона всех целей. Однако, не стоит унывать, ведь теперь вам станут доступны к получению более могущественные аксессуары и оружие с броней, чем раньше.
Королева слизней
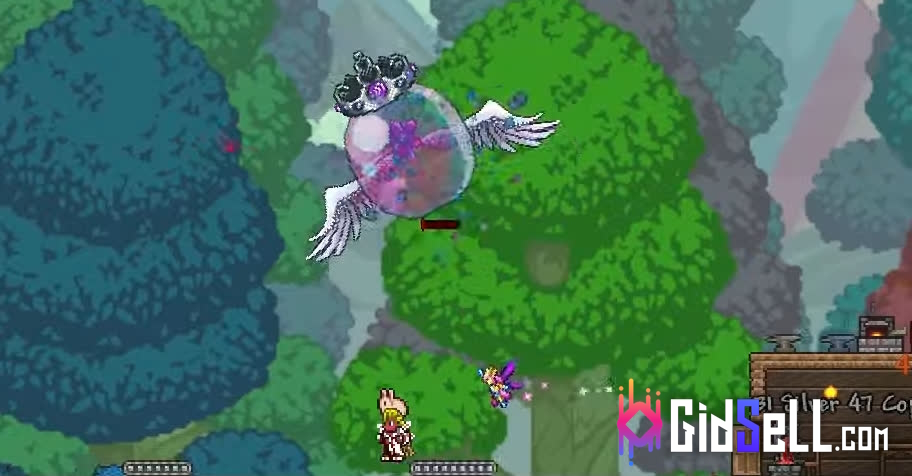
Первый и самый легкий по сложности босс в Terraria после наступления Хардмода. В своей первой фазе напоминает по своим атакам Короля злизней, хоть и имеет особую атаку и призыв трех разных видов слаймов. Во второй фазе начинает очень резво летать вверх и по диагонали, попутно спавня все тех же преспешников и стреляя из себя шариками слизи которые рикошетят от всех поверхностей. Важно, этот босс находится все обязательной сюжетной линии.
Механики
Тут вас встретят три механических босса, примерно схожих по своей сложности. Этот параметр, который вызовет у вас трудности будет напрямую зависеть от класса, за который вы планируете свое прохождение. Про все классы в Terraria вы сможете узнать в другой статье.
Уничтожитель

Представляет собой усовершенствованную версию Пожирателя миров, однако он не распадается на сегменты по уничтожению одной и сегментов босса, а напротив – разрушение одной из секций призывает дрона, который проходит сквозь блоки и атакует героя лазером. Так же, его длина намного превосходит своего предшественника.
Близнецы

Первый и единственный босс в Terraria, который по факту состоит из двух совершенно разных по атакам монстров, однако они оба являются аналогом до-хардмодного Глаза Ктулху. Просто представьте что ваши глаза заменили металлическими протезами, один из которых будет поливать все вокруг проклятым пламенем, а второй без остановки спамить лазером.
Скелетрон-Прайм
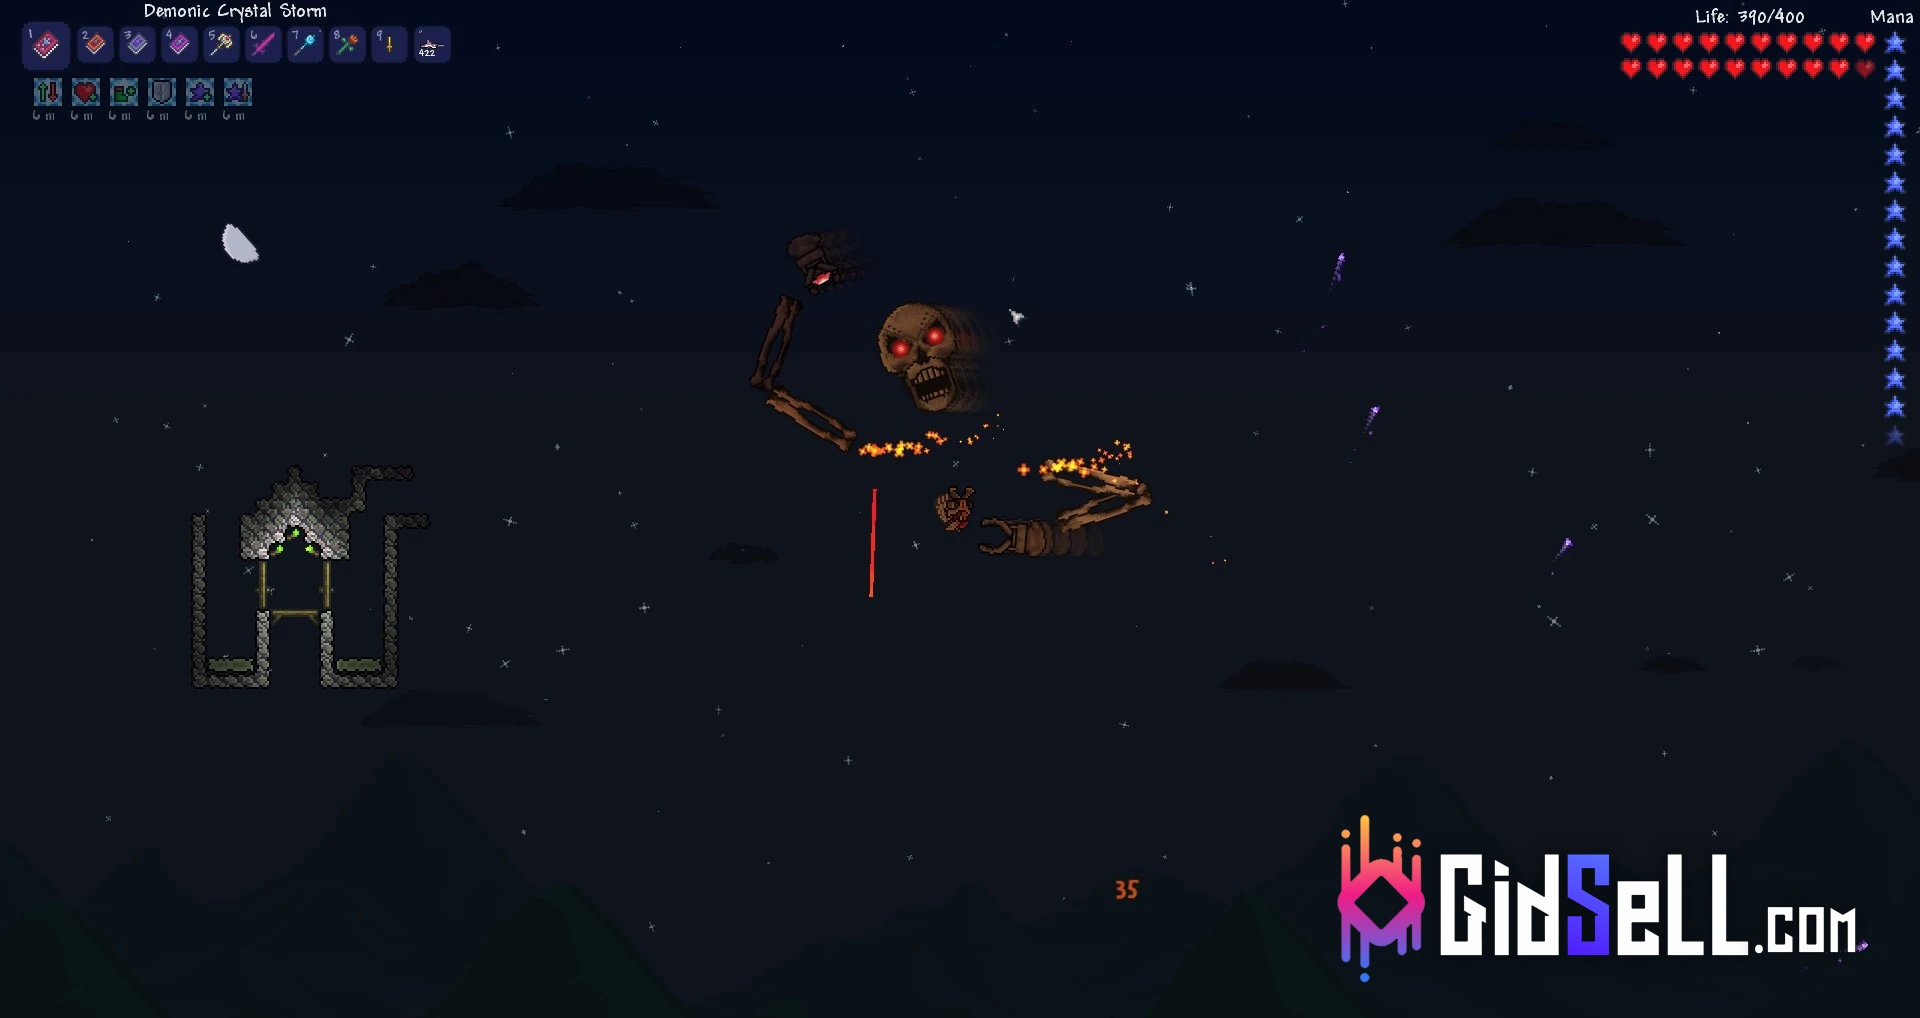
Хранитель данжа отрастил себе еще две руки, да и теперь у него не просто руки. На каждой из рук инструмент для уничтожения всего живого. Голова Прайма так же обзавелась шипами, которые будут активироваться при крученой атаке головой.
Герцог Рыброн
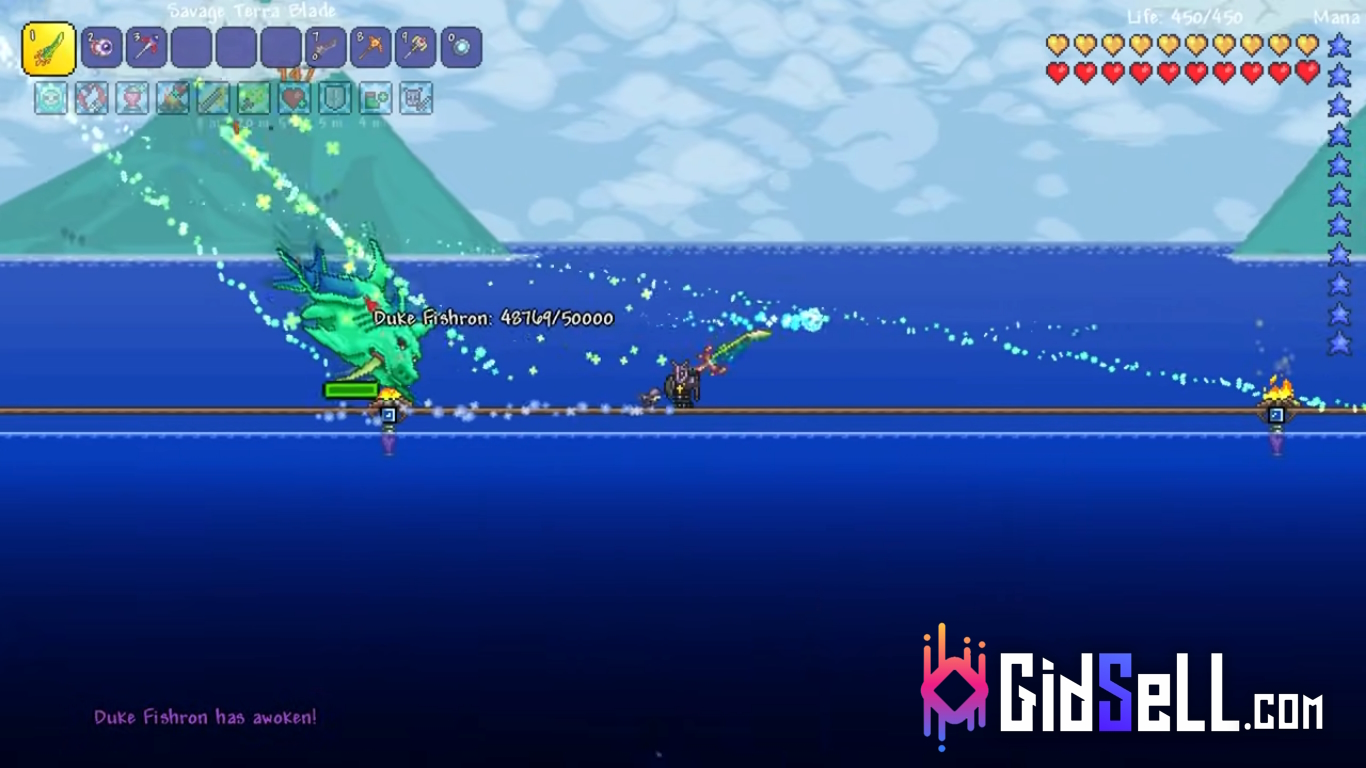
Данный деликатес можно призвать в любом моменте сложного режима в Terraria, как и достать приманку для него. Представляет собой гибрид свиньи и ихтиозавра. Из того факта что он наполовину является рыбой, то зоной для его убийства будет океан. Так что если сменить зону сражения – он пропадет. Так же как и Королева является необязательным боссом, однако в качестве лута предоставить невероятно сильно снаряжения даже после убийства механиков.
Плантера
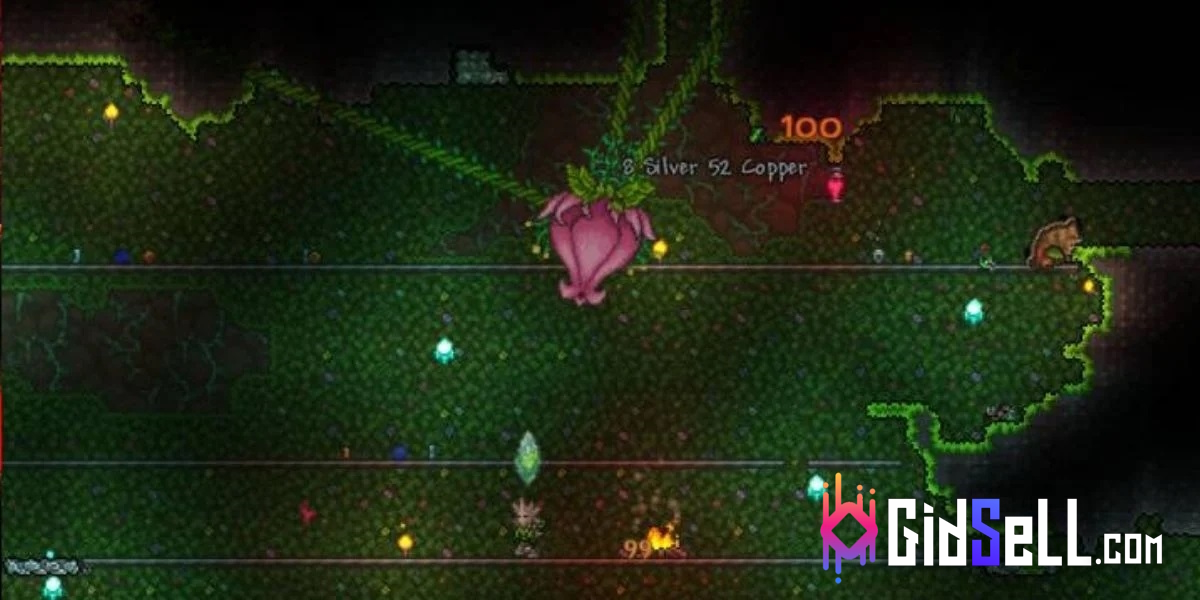
Можно сказать, что она является ключевым боссом, убийство которой открывает по сути дорогу на финал игры, однако не все так просто. В прошлом Плантера была одним из самых сильных боссов игры, а так как разработчики никак не ослабляли ее, может сделать вам нервы и при текущем прохождении. Для ее призыва не понадобится предмет, достаточно будет лишь найти специальный бутон в джунглях и разрушить его. После этого сразу появится босс.
![]()
Download Article
![]()
Download Article
Do you think you’re ready to defeat the Wall of Flesh and enter hardmode? If you are, then here are some tips to prepare for this huge change in your Terraria world.
-

1
Dig hellevators to prevent spreading of the Corruption/Crimson. Hellevators are 3-block wide tunnels that prevent spreading of Corruption/Crimson. Why is this crucial? Every biome has something unique about it, and has unique drops, and this will get you far.
-
2
Get top-tier pre-hardmode gear. This includes Molten Armor (25 defense for a full set), Night’s Edge (42 melee damage), a Molten Pickaxe (can mine Cobalt/Palladium, trust me, you will not regret crafting one or find a drax if you are on 3DS), Sharanga (35 ranged damage, turns all arrows in to Spectral Arrows), Flamarang, Sunfury, and a Phoenix Blaster.
Advertisement
-
3
Build a flat surface across the top of the Underworld. This makes your fight with the Wall of Flesh a lot easier.


Advertisement
-
1
Summon the Wall of Flesh. To summon the Wall, throw a Guide Voodoo Doll in to a lava pool. If you are playing on mobile version of Terraria, just tap on the doll and it will summon it.
-
2
Fight off the Hungry. The Hungry are little, mouth shaped creatures at the front off the wall. Use your Night’s Edge or your Sunfury to fend them off. (Note: They will detach from the boss when they are down to 1/3 health.)
-
3
Fight the Wall itself. This is when you should use your Phoenix Blaster, Flamarang, and your Sharanga. Your Sunfury also helps for this part too. Make sure to go for either the eyes or the mouth, because those are the only parts of it that take damage.


Advertisement
-
1
Collect the loot dropped by the Wall of Flesh. This may include, but not limited to, Pwnhammer, Breaker Blade, Clockwork Assault Rifle, Summoner Emblem, Sorcerer Emblem, Ranger Emblem, and Warrior Emblem. Make sure to have a pickaxe on you, because the loot is in a room with demonite bricks. Don’t worry about where to find the room; it will be very close by.
-
2
Locate the Hallow. The Hallow is the Corruption/Crimson counterpart, where everything is happy and fun. It is normally on the other side of the world of where the the Corruption/Crimson is. Once you locate the Hallow, dig hellevators on the ends of that biome; it does spread like Corruption/Crimson.
-
3
Break Demon Altars. Find Demon Altars in your world, and destroy them with the Pwnhammer. It will bless your world with Cobalt, Mythril, or Adamantite.
-
4
Mine Cobalt/Palladium. Cobalt/Palladium is crucial to the start of hardmode, and it can mine Mythril/Orichalcum, make your first set of hardmode gear, etc.


Advertisement
Add New Question
-
Question
Why do people say the destroyer is the easiest mech boss?

Because they find it easier. Everyone has different opinions about how difficult certain portions of the game are.
-
Question
I accidentally summoned the Wall of Flesh too early so obviously I died. I’ve tried to summon it again, but the doll just disappears and I can’t summon it. Why?
You need to have a guide living in the world to use the Voodoo Doll.
-
Question
I am aiming for the mouth of the Wall of Flesh, but it does not take as much damage as the eyes. Why is this?
QAZ101_1
Community Answer
The mouth has more defense than the eyes (I believe about 5-20 more), so you should mostly aim for the eyes.

See more answers
Ask a Question
200 characters left
Include your email address to get a message when this question is answered.
Submit
Advertisement
-
Always fish crates before kill the WoF and use them AFTER you kill it, it will get you plenty of hardmode ores. After that, hardmode mobs will not be a problem to you!
Thanks for submitting a tip for review!
Advertisement
-
DO NOT underestimate hardmode creatures.
Advertisement
References
About This Article
Thanks to all authors for creating a page that has been read 58,958 times.