5.3.8 Сборка программных средств
Данная работа состоит из следующих задач применительно к каждому программному объекту архитектуры (или объекту программной конфигурации, если он определен):
5.3.8.1 Разработчик должен разработать план сборки для объединения программных модулей и компонентов в программный объект. План должен включать требования к испытаниям (тестированию), процедуры тестирования, контрольные данные, обязанности исполнителя и программу испытаний. План должен быть документально оформлен.
5.3.8.2 Разработчик должен собрать программные модули и компоненты и протестировать их как продукты, разработанные в соответствии с планом сборки. Должно быть обеспечено, чтобы каждая сборка удовлетворяла требованиям к программному объекту и чтобы программный объект был полностью собран в результате данной работы. Результаты сборки и тестирования должны быть документально оформлены.
5.3.8.3 Разработчик, при необходимости, должен уточнить документацию пользователя.
5.3.8.4 Разработчик должен разработать и документально оформить для каждого квалификационного требования к программному объекту — набор тестов, контрольных примеров (исходные и выходные данные, критерии тестирования), процедуры испытаний для проведения квалификационных испытаний программных средств. Разработчик должен обеспечить, чтобы собранный программный объект был готов к квалификационным испытаниям.
5.3.8.5 Разработчик должен оценить план сборки, проект, запрограммированный программный объект, проведенные испытания, результаты тестирования и документацию пользователя по следующим критериям (при этом результаты оценок должны быть документально оформлены):
a. учет требований к системе;
b. внешнее соответствие требованиям к системе;
c. внутренняя согласованность между программными объектами;
d. тестовое покрытие требований к программному объекту;
e. соответствие используемых испытательных стандартов и методов испытаний;
f. соответствие ожидаемым результатам;
g. выполнимость квалификационного испытания программного объекта;
h. возможность эксплуатации и сопровождения.
5.3.8.6 Разработчик должен проводить совместный анализ(ы) в соответствии с подразделом 6.6.
Читайте также
Сборка подшипников скольжения
Сборка подшипников скольжения
Основное требование, которое предъявляется к подшипникам скольжения, – это минимальная величина силы трения при равномерно распределенной нагрузке во время работы механизма. Достигнуть этого позволяет сама конструкция подшипника: на
Сборка цепных передач
Сборка цепных передач
О цепных передачах разговор особый, ибо и сами они не совсем обычны: с одной стороны, цепная передача относится к разряду гибких, где цепь представляет собой своеобразный ремень, но, с другой стороны, передача вращающего момента осуществляется не за
Окончательная сборка
Окончательная сборка
После подстройки порогового значения уровня освещенности вы можете приступить к окончательной сборке. Приклейте батарейный отсек для элементов АА к корпусу редуктора, тщательно следя за тем, чтобы клей не попал на шестерни редуктора. Затем
6 ПРИНЦИПЫ ПРОЕКТИРОВАНИЯ И СОДЕРЖАНИЕ РАБОТ ПО СТАДИЯМ СОЗДАНИЯ ПРОГРАММНЫХ СРЕДСТВ СИСТЕМ ВООРУЖЕНИЯ
6 ПРИНЦИПЫ ПРОЕКТИРОВАНИЯ И СОДЕРЖАНИЕ РАБОТ ПО СТАДИЯМ СОЗДАНИЯ ПРОГРАММНЫХ СРЕДСТВ СИСТЕМ ВООРУЖЕНИЯ
6.1 При разработке ПССВ должны быть применены следующие принципы проектирования:- системности;- технологической полноты.6.1.1 Принцип системности разработки ПССВ
7 ПОРЯДОК ДОКУМЕНТИРОВАНИЯ ПРОГРАММНЫХ СРЕДСТВ СИСТЕМ ВООРУЖЕНИЯ
7 ПОРЯДОК ДОКУМЕНТИРОВАНИЯ ПРОГРАММНЫХ СРЕДСТВ СИСТЕМ ВООРУЖЕНИЯ
7.1 Установлены следующие виды программной документации на ПССВ и их программные компоненты:- проектная ПД;- эксплуатационная ПД;- организационно-техническая ПД;- технологическая ПД;- документация
ПРИЛОЖЕНИЕ Б (рекомендуемое) СОДЕРЖАНИЕ РАБОТ ПО ФАЗАМ, СТАДИЯМ И ЭТАПАМ ЖИЗНЕННОГО ЦИКЛА ПРОГРАММНЫХ СРЕДСТВ СИСТЕМ ВООРУЖЕНИЯ
ПРИЛОЖЕНИЕ Б (рекомендуемое)
СОДЕРЖАНИЕ РАБОТ ПО ФАЗАМ, СТАДИЯМ И ЭТАПАМ ЖИЗНЕННОГО ЦИКЛА ПРОГРАММНЫХ СРЕДСТВ СИСТЕМ ВООРУЖЕНИЯ
Содержание работ по фазам, стадиям и этапам жизненного цикла ПССВ приведено в таблицах Б.1-Б.10.Таблица Б.1 — Фаза Анализ». Стадия «Формирование
5.3.6 Техническое проектирование программных средств
5.3.6 Техническое проектирование программных средств
Данная работа состоит из следующих задач применительно к каждому программному объекту архитектуры (или объекту программной конфигурации, если он определен):5.3.6.1 Разработчик должен разработать технический проект для
5.3.7 Программирование и тестирование программных средств
5.3.7 Программирование и тестирование программных средств
Данная работа состоит из следующих задач применительно к каждому программному объекту архитектуры (или объекту программной конфигурации, если он определен):5.3.7.1 Разработчик должен разработать и документально
5.3.9 Квалификационные испытания программных средств
5.3.9 Квалификационные испытания программных средств
Данная работа состоит из следующих задач применительно к каждому программному объекту архитектуры (или объекту программной конфигурации, если он определен):5.3.9.1 Разработчик должен проводить квалификационные
5.3.12 Ввод в действие программных средств
5.3.12 Ввод в действие программных средств
Данная работа состоит из следующих задач:5.3.12.1 Разработчик должен разработать план по вводу в действие программного продукта в среде эксплуатации, определенной в договоре. Должны быть определены и иметься в наличии ресурсы и
5.3.13 Обеспечение приемки программных средств
5.3.13 Обеспечение приемки программных средств
Данная работа состоит из следующих задач:5.3.13.1 Разработчик должен обеспечить проведение заказчиком оценки готовности к приемке и приемочным испытаниям программного продукта. При оценке готовности к приемке и приемочных
Лекция 12 Защита информации от компьютерных вирусов и других опасных воздействий по каналам распространения программных средств
Лекция 12
Защита информации от компьютерных вирусов и других опасных воздействий по каналам распространения программных средств
Учебные вопросы:1. Юридические и организационные меры защиты.2. Программно-аппаратные методы и средства защиты.3. Защита программ и ценных
ПРИЛОЖЕНИЕ А (Справочное) ГРАФИЧЕСКОЕ ПРЕДСТАВЛЕНИЕ ПРОГРАММНЫХ КОНСТРУКТИВОВ
ПРИЛОЖЕНИЕ А (Справочное)
ГРАФИЧЕСКОЕ ПРЕДСТАВЛЕНИЕ ПРОГРАММНЫХ КОНСТРУКТИВОВ
Следующие схематические обозначения программных конструктивов в колонках от А до Н таблицы А.1 являются примерами прикладных графических представлений конструктивов.Колонка «Справка»
3.3. Сборка и установка опор ВЛ
3.3. Сборка и установка опор ВЛ
Все работы по сборке и установке опор производятся по проектам производства работ, разрабатываемым в соответствии со СНиП 12–01—2004. До начала производства работ по сборке и монтажу опор должна быть подготовлена площадка, на которой будут
Rpm — это и менеджер пакетов, и формат пакета, используемый многими дистрибутивами Linux, такими как Fedora, Red Hat и CentOS, для управления и распространения программного обеспечения в двоичной форме. В этом руководстве мы увидим, как собрать и упаковать простое приложение.
В этом уроке вы узнаете:
- Каковы основные концепции процесса построения rpm.
- Что такое среда сборки.
- Что такое specfile.
- Как использовать макросы внутри specfile.
- Как установить зависимости сборки.
- Как создать файл specfile.
- Как собрать пакет rpm.
Требования к программному обеспечению и используемые условные обозначения
| Категория | Требования, условные обозначения или используемая версия программного обеспечения |
|---|---|
| Система | Fedora 29 |
| Программного обеспечения | N / A |
| Другой | Привилегированный доступ к вашей системе Linux с правами root или через судо команда для установки необходимых пакетов. |
| Условные обозначения |
# — требует данных команды linux для выполнения с привилегиями root либо непосредственно как пользователь root, либо с использованием
instagram viewer
|
Основные понятия об / мин

Установка, удаление, обновление (одним словом, управление) программного обеспечения — важная задача для каждой операционной системы. Когда менеджеры пакетов не использовались, единственный способ установить программу — это скомпилировать ее исходный код и разместить полученные файлы в соответствующих местах файловой системы. Отслеживать зависимости каждого фрагмента кода было действительно сложно и требовало много времени. Потом были внедрены менеджеры пакетов, и все стало проще.
В настоящее время каждый современный дистрибутив Linux имеет свой менеджер пакетов: Debian и его производные используют dpkg, покаоб / мин используется в семействе дистрибутивов Red Hat. Программное обеспечение предоставляется предварительно скомпилированным в виде пакеты, которые в основном представляют собой сжатые архивы, содержащие метаданные о версии программного обеспечения, его зависимостях и возможных конфликтах с другими пакетами.
В этом руководстве мы увидим, как создать пакет rpm, начиная с исходного кода приложения. Приложение, которое мы упакуем, feh, простая программа просмотра изображений из командной строки: она довольно мала и имеет несколько зависимостей. Однако перед тем, как начать сборку нашего первого пакета, мы должны усвоить несколько важных концепций.
Среда сборки
Корнем дерева среды сборки rpm является rpmbuild каталог, содержащий 6 подкаталогов: СТРОИТЬ, ВСТРОЕННЫЙ, RPMS, ИСТОЧНИКИ, ТЕХНИЧЕСКИЕ ХАРАКТЕРИСТИКИ и SRPMS. Мы увидим, как можно создать эту среду, запустив простую команду; а пока просто упомянем роль этих каталогов. Вот представление рабочего дерева:
rpmbuild | - СТРОИТЬ | - СТРОЙКА | - RPMS | - ИСТОЧНИКИ | - ТЕХНИЧЕСКИЕ ХАРАКТЕРИСТИКИ | - SRPMS.
Каждый из этих каталогов играет определенную роль в процессе построения:
- В
СТРОИТЬкаталог — это место, где создается исходный код программы, которую мы хотим упаковать - В
ВСТРОЕННЫЙкаталог — это место, где файлы, полученные в результате компиляции программного обеспечения внутри BUILD каталог копируются, отражая структуру целевой системы внутри подкаталога с пакет маме:
в нашем случае двоичный файл «feh», который будет установлен в/usr/binбудет отображаться как BUILDROOT / feh-3.0-1.fc29.x86_64 / usr / bin. - В
RPMSкаталог, гдеоб / мингенерируются пакеты: каждый rpm будет помещен в подкаталог
названный в честь его архитектуры, или,Ноархесли это не зависит от архитектуры. - В
ИСТОЧНИКИВ каталоге хранится сжатый исходный код программного обеспечения, которое мы хотим упаковать, часто в виде архива zip-файла. - В
ТЕХНИЧЕСКИЕ ХАРАКТЕРИСТИКИкаталог, куда мы помещаем.specфайл с инструкциями по сборке нашего пакета: мы сейчас проанализируем структуру этого файла. - В
SRPMSdirectory является эквивалентом RPMS, но для исходных rpms. Эти специальные пакеты содержат исходный исходный код приложения, возможные исправления и файл спецификации, используемый для сборки пакета.
Спецификационный файл
Файл, в котором определены все инструкции и информация, необходимые для создания пакета rpm, — это .spec файл. Specfile содержит, среди прочего, построить зависимости (программное обеспечение, необходимое для компиляции программы, которую мы хотим упаковать), зависимости во время выполнения (библиотеки, необходимые для правильной работы программы) и команды, которые необходимо выполнить для компиляции программного обеспечения.
Файл состоит из двух макросов: a преамбула и тело. В каждом из этих разделов могут быть указаны разные инструкции. Посмотрим на некоторые из них. В преамбула Раздел может содержать следующие инструкции:
-
- Имя: Базовое имя пакета (оно должно совпадать с именем файла спецификации)
- Версия: Исходная версия упакованного программного обеспечения.
- Релиз: Номер выпуска пакета.
- Лицензия: Лицензия, используемая для программного обеспечения, которое мы хотим упаковать.
- URL: Исходный URL-адрес программного обеспечения.
- Источник0: Прямой URL или путь к сжатому исходному коду программного обеспечения (tarball или zip-файл).
- BuildArch: Архитектура пакета: если архитектура не указана, будет использоваться одна из хост-системы
- BuildRequires: Зависимости, необходимые для создания программного обеспечения
- Требует: Зависимости, необходимые для запуска программного обеспечения.
В тело раздел specfile, как правило, содержит следующие разделы:
- %описание: Необязательно многострочное описание упакованного программного обеспечения.
- % преп: Команды, необходимые для подготовки исходного кода (например, команды, необходимые для извлечения архива)
- %строить: Команды, необходимые для сборки программного обеспечения.
-
%установить: Команды, необходимые для копирования файла, полученного в процессе сборки, в
ВСТРОЕННЫЙкаталог - % файлов: Список файлов из пакета, который будет установлен в системе.
Макросы
Чтобы упростить нашу работу, внутри specfile мы можем использовать некоторые макросы, которые позволяют нам ссылаться на многие полезные вещи и автоматически выполнять определенные задачи. Прежде всего у нас есть Макросы каталога RPM которые позволяют использовать ссылки на каталоги нашей среды сборки; мы всегда должны использовать их вместо прямых путей:
-
% {_ topdir}: Этот макрос ссылается на
rpmbuildкаталог -
% {_ builddir}: Ссылается на
СТРОИТЬкаталог внутри нашего дерева сборки -
% {_ rpmdir}: Ссылается на путь
RPMSкаталог -
% {_ sourcedir}: Этот макрос оценивается как путь к
ИСТОЧНИКИкаталог -
% {_ specdir}: Макрос, который представляет путь к
ТЕХНИЧЕСКИЕ ХАРАКТЕРИСТИКИкаталог -
% {_ srcrpmdir}: Ссылается на путь
SRPMSкаталог -
% {_ buildrootdir}: Ссылается на путь
ВСТРОЕННЫЙкаталог
Другие макросы позволяют нам ссылаться на самые важные каталоги в файловой системе нашего компьютера, например:
-
% {_ sysconfigdir}: The
/etcкаталог -
%{_префикс}: The
/usrкаталог -
% {_ bindir}: The
/usr/binкаталог -
% {_ mandir}: Путь к
/usr/share/manкаталог
Приведенный выше список не является полным, но он дает вам представление. Дополнительно мы также можем использовать набор макросов, которые выполняют определенные задачи. Чтобы расширить определение макроса и увидеть его содержимое, мы можем использовать rpm --eval команда, которая принимает макрос в качестве аргумента. Вот несколько примеров часто используемых макросов:
- В
%настраиватьмакрос, используется в% configраздел specfile и в основном выполняет следующие действия:- Извлекает исходный код программы, которую мы хотим упаковать, в
BUILDDIRкаталог - Переход в извлеченный каталог
- Устанавливает соответствующие права доступа к файлу внутри него
- Извлекает исходный код программы, которую мы хотим упаковать, в
- В
% {make_build}макрос используется в%строитьраздел specfile, и в основном запускаетделатькоманда с предопределенным набором параметров, чтобы скомпилировать исходный код программного обеспечения. Если мы развернем его, мы сможем проверить команду, которую он запускает:$ rpm --eval "% {make_build}" / usr / bin / make -O -j4. - В
% {make_install}макрос вместо этого используется в%установитьраздел файла и запускаетсделать установкусDESTDIRпараметр, используемый для указания команде установить скомпилированные файлы относительно данного каталога вместо реальной системы/:$ rpm --eval "% {make_install}" / usr / bin / make install DESTDIR = / home / egdoc / rpmbuild / BUILDROOT /% {NAME} -% {VERSION} -% {RELEASE} .x86_64 INSTALL = "/ usr / bin / install -p"
Пошаговая инструкция по созданию пакета rpm
Теперь, когда мы изучили базовую концепцию процесса сборки пакета, мы можем увидеть, как создать нашу среду сборки и наш первый rpm-пакет. Давайте создадим наш пакет.
Установите зависимости сборки
Первым делом нам нужно установить rpmdevtools, плюс зависимости, необходимые для создания feh:
$ sudo dnf install rpmdevtools gcc make imlib2-devel libjpeg-devel libpng-devel libXt-devel libXinerama-devel libexif-devel perl-Test-Command perl-Test-Harness libcurl-devel.
После установки пакетов мы можем сгенерировать нашу среду сборки. Все, что нам нужно сделать, это запустить следующую команду:
$ rpmdev-setuptree
На данный момент rpmbuild каталог и все подкаталоги, которые мы видели ранее, должны быть созданы. Следующим шагом будет написание нашего specfile.
Создайте файл спецификации
Мы создаем specfile в нашем любимом текстовом редакторе и сохраняем его в папке ТЕХНИЧЕСКИЕ ХАРАКТЕРИСТИКИ каталог с таким же названием пакета. Вот как должен выглядеть минимальный specfile:
Имя: feh. Версия: 3.0.0 Релиз: 1% {? Dist} Описание: Быстрый просмотрщик изображений из командной строки с использованием Imlib2. Лицензия: MIT. URL: http://feh.finalrewind.org. Источник0: http://feh.finalrewind.org/feh-%{version}.tar.bz2 BuildRequires: gcc. BuildRequires: imlib2-devel. BuildRequires: libcurl-devel. BuildRequires: libjpeg-devel. BuildRequires: libpng-devel. BuildRequires: libXt-devel. BuildRequires: libXinerama-devel. BuildRequires: libexif-devel. BuildRequires: perl-Test-Command. BuildRequires: perl-Test-Harness% description. Быстрый просмотрщик изображений из командной строки с использованием Imlib2% prepare. % setup -q% build. % {make_build}% установить. % {make_install} PREFIX =% {_ prefix}% файлов. /usr/bin/feh. /usr/lib/debug/usr/bin/feh-3.0-1.fc29.x86_64.debug. /usr/share/applications/feh.desktop. /usr/share/doc/feh/AUTHORS. /usr/share/doc/feh/ChangeLog. /usr/share/doc/feh/README.md. /usr/share/doc/feh/TODO. /usr/share/doc/feh/examples/buttons. /usr/share/doc/feh/examples/find-lowres. /usr/share/doc/feh/examples/keys. /usr/share/doc/feh/examples/themes. /usr/share/feh/fonts/black.style. /usr/share/feh/fonts/menu.style. /usr/share/feh/fonts/yudit.ttf. /usr/share/feh/images/feh.png. /usr/share/feh/images/feh.svg. /usr/share/feh/images/menubg_default.png. /usr/share/icons/hicolor/48x48/apps/feh.png. /usr/share/icons/hicolor/scalable/apps/feh.svg. /usr/share/man/man1/feh.1.gz.
Давайте проанализируем это. Во-первых, мы указали некоторую базовую информацию о программном обеспечении, которое мы хотим упаковать: его название и исходную версию, его лицензия, расположение главной страницы проекта и прямая ссылка на tarball с исходным кодом, затем мы объявили построить зависимости с использованием BuildRequires. Список зависимостей может быть представлен в виде встроенного списка, разделенного пробелами или запятыми, но для удобства чтения мы объявили по одной зависимости для каждой строки, повторяя BuildRequires инструкция.
После объявления зависимостей, необходимых для сборки программного обеспечения, мы предоставили краткое описание в %описание раздел, а затем перешли к самой важной части specfile: инструкциям по подготовке, сборке и установке программного обеспечения, соответственно в % преп, %строить и %установить разделы.
в % преп раздел, обеспечивающий % настройка -q макроса было достаточно: как было сказано ранее, этот макрос будет запускать команды, необходимые для распаковки архива с исходным кодом и помещения извлеченного каталога в папку СТРОИТЬ папка.
В %строить Здесь мы указываем команды, которые должны быть выполнены для сборки исходного кода. Даже здесь все, что нам нужно было использовать, это просто % {make_build} макрос, который запускает делать с параметрами, которые мы видели ранее, в каталог, содержащий распакованный исходный код приложения, которое мы хотим упаковать.
в %установить раздел, мы использовали другой макрос, % {make_install}, обеспечивая также ПРЕФИКС параметр, установив его на %{_префикс}, который будет расширен до /usr. Результирующая команда приведет к тому, что файлы, созданные компиляцией исходного кода, будут помещены в «поддельный корень», установленный с помощью DESTDIR параметр, содержащийся в макросе. Поскольку в % {make_install} макрос, «DESTDIR» установлен на /home/egdoc/rpmbuild/BUILDROOT/%{NAME}-%{VERSION}-%{RELEASE}.x86_64, файлы будут установлены в папку: /home/egdoc/rpmbuild/BUILDROOT/%{NAME}-%{VERSION}-%{RELEASE}.x86_64/usr.
Наконец, мы предоставили в % файлов раздел, список файлов, которые будут установлены нашим пакетом. Позже этот список можно будет проверить, запустив rpm -qlp / путь / к / в / rpm или, если пакет уже установлен, просто запустив rpm -ql имя пакета.
Получите исходные коды и соберите пакет rpm
Теперь, когда наш файл спецификации наконец готов, мы можем построить наш об / мин. Вы можете заметить, что мы еще не загрузили архив с исходным кодом «feh»: нет необходимости делать это вручную, поскольку мы можем использовать Spectool команда:
$ specool -g -R ~ / rpmbuild / SPECS / feh.spec. Получающий http://feh.finalrewind.org/feh-3.0.tar.bz2 в /home/egdoc/rpmbuild/SOURCES/feh-3.0.tar.bz2% Всего% получено% Xferd Средняя скорость Время Время Время Текущая загрузка загрузки Общая затраченная оставшаяся скорость. 100 185 100 185 0 0 898 0 --:--:-- --:--:-- --:--:-- 898. 100 2057k 100 2057k 0 0 1988k 0 0:00:01 0:00:01 -: -: - 4191k.
Эта команда загрузит источники, на которые мы ссылались с URL-адресом внутри specfile, в соответствующий каталог нашего рабочего дерева: ~ / rpmbuild / ИСТОЧНИКИ. Имея исходные коды, мы можем создать наш rpm: все, что нам нужно сделать, это запустить rpmbuild и укажите путь к файлу specfile. При запуске с -bb вариант, rpmbuild построит только двоичный пакет: если мы хотим также сгенерировать исходная частота вращения, мы должны использовать -ba вместо этого (обратитесь к странице руководства rpmbuild для обзора возможных опций).
Важно помнить, что команду rpmbuild нельзя запускать с правами root. разрешения: при этом даже простая ошибка в specfile может оказать нежелательное влияние на наши система. Запустим rpmbuild:
$ rpmbuild -bb ~ / rpmbuild / SPECS / feh.spec
Результат выполненных операций будет напечатан на экране, и, если все пойдет так, как ожидалось, пакет rpm будет сгенерирован внутри RPMS каталог.
Выводы
В этом руководстве мы изучили фундаментальные концепции, связанные с созданием пакета rpm. Мы узнали несколько макросов и научились создавать .spec файл, содержащий все необходимые инструкции для процесса сборки. Мы также представили реальный пример, сборку и упаковку. feh, простая программа просмотра изображений из командной строки. Предлагаю вам проконсультироваться с официальное руководство по упаковке Red Hat для дальнейшего расширения концепций, упомянутых в этом руководстве.
Подпишитесь на новостную рассылку Linux Career Newsletter, чтобы получать последние новости, вакансии, советы по карьере и рекомендуемые руководства по настройке.
LinuxConfig ищет технических писателей, специализирующихся на технологиях GNU / Linux и FLOSS. В ваших статьях будут представлены различные руководства по настройке GNU / Linux и технологии FLOSS, используемые в сочетании с операционной системой GNU / Linux.
Ожидается, что при написании статей вы сможете идти в ногу с технологическим прогрессом в вышеупомянутой технической области. Вы будете работать самостоятельно и сможете выпускать как минимум 2 технических статьи в месяц.
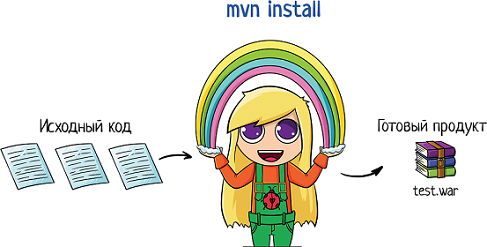
Когда вы открываете любой сайт — например, google или facebook, вы видите конечный продукт. Но чтобы этот продукт увидеть, и пощупать, нужно:
-
Написать код приложения
-
Собрать проект
-
Поднять его на сервере приложения
Сегодня я расскажу про второй этап. Сборку приложения можно проводить вручную, но есть также специальные инструменты для этого, которые называются «сборщик продукта». О них мы и поговорим.
Содержание
-
Что это такое и зачем он нужен
-
Как работает сборщик
-
Проект
-
Свойства
-
Цели
-
Задачи
-
Доп ссылки
-
-
Как запустить сборку
-
Фаза maven: mvn
-
Фаза maven: clean
-
Фаза maven: install
-
Параметр maven: -Dmaven.test.skip=true
-
Флаг maven: -U
-
Фаза maven: test
-
-
Что сборщик умеет делать
-
Компилировать проект
-
Чистить все ненужное
-
Выводить информацию о проекте
-
Обращаться к библиотекам, используемым в проекте
-
Запускать приложение
-
Запускать тесты
-
Другие задачи
-
-
Где хранить скрипт компоновки
-
Программы сборки
-
Как выбрать программу для сборки
-
Итого
-
Другие статьи из цикла «Что такое…»
Что это такое и зачем он нужен
Вася решил стать разработчиком, еще будучи студентом. Он выбрал язык программирования Java и начал его изучать. Тренировался на простых вещах:
— Hello Word
— Калькулятор
Сначала весь код его мини-программ хранился в одном файле — Main.java. Чтобы запустить приложение, достаточно было дважды кликнуть этот файл. И всё!

Потом Вася освоил Page Object Pattern и стал разносить логику по разным классам. Но всё равно это были простые программы, и для запуска оставался главный класс.
А потом Вася… Устроился на работу. Да-да, зеленым новичком, и такое бывает! Старший разработчик Николай на собеседовании разглядел в нем потенциал. Так Вася стал джуниор-разработчиком в компании ООО «Котики».
Проект в компании большой, с семилетней историй. Он состоит из 6000 классов исходного кода, над которыми трудятся 5 разработчиков.
В первый рабочий день Николай подошел к Васе и стал рассказывать:
— Наш код хранится в git. Знаешь, что это такое?
— Ага, система контроля версий!
— Да. Вот тебе ссылочка, скачивай.

Вася скачал. Только вот… Что делать дальше? Какой из 6000 классов запустить, чтобы пощупать приложение?

Николай только ухмыльнулся:
— Нет, так оно только для мелких проектов работает. А тебе нужно:
-
скомпилировать проект — из исходных текстов получить файлы классов с байт-кодом (которые потом будет исполнять JVM);
-
объединить вот эти классы в библиотеку Search.jar;
-
объединить вот эти классы в библиотеку Clean.jar;
-
объединить вот эти классы в библиотеку Update.jar;
-
объединить вот эти классы в библиотеку Report.jar;
-
объединить вот эти классы в библиотеку Link.jar;
-
а вот эти классы…
Вася в шоке выкатил глаза и промямлил:
— Ээээ, подожди… Мне это выучить надо?

Николай рассмеялся:
— В учебных проектах тебе не надо заморачиваться. Запустил конкретный класс, и всё работает. Ну, может, еще одну-две библиотечки собрал, но это тоже несложно.

Но когда приложение растет, растет и список действий. Вручную его выполнять смысла нет — скука, да и только. К тому же человек легко может ошибиться, а в итоге получим неработающее приложение.
Поэтому эту работу автоматизируют. Можно написать скрипт сборки на коленке, но зачем, если уже есть стандартные сборщики? Скажем, для java это ant, maven, gradle… У нас используется maven, почитай пока о нем.
Сборщик уже настроен, так что тебе достаточно зайти через командную строку в директорию проекта и написать команду:
mvn clean installА дальше он сам всё сделает. На выходе получим cats.war. Это и есть наше приложение, которое мы потом подложим на сервер wildfly, чтобы его запустить.
— Ага, хорошо, спасибо!
Николай ушел, а Вася завороженно смотрел в экран, где в командной строке работал maven. Быстро-быстро бежали буквы по экрану. И вот, наконец, сборщик остановился. Он написал «BUILD SUCCESS». Значит, всё прошло хорошо. И в нужной директории Вася нашел архив «cats.war».

Пока Николая не было, Вася успел нагуглить это новое слово: «maven». И даже смог найти в проекте скрипт сборки, и начал разбираться, что конкретно там происходит. Всё-таки не зря его взяли на работу! Это отличное качество разработчика (да и не только его) — гуглить и копать самому, а не сидеть сложа ручки в ожидании ментора.
Когда Николай вернулся, он подытожил то, что Вася узнал:
— Когда разработчик пишет код — он просто создает набор файликов с текстом. Чтобы эти файлики превратились в работающее приложение, код нужно скомпилировать и запустить.
Что нужно сделать с кодом-источником:
-
скомпилировать проект;
-
объединить классы в файл JAR или другую библиотеку;
-
установить набор зависимостей;
-
…
-
запустить конкретный класс или несколько классов.
И только после всех этих манипуляций у нас появляется ПО. Набор манипуляций зависит от конкретного проекта, но чем сложнее проект, тем больше действий надо сделать.
А если задача повторяется снова и снова, она становится первым кандидатом на автоматизацию. Ведь нам нужно что? За один шаг получить работающий проект! Этим и занимаются системы сборки!

— О, стой! Так в IDEA (среда для написания кода) же кнопка «Build» есть. Она ведь тоже билдит, то есть собирает код! Да? Это аналог maven-а?
— Не совсем. Это кнопка:
-
компилирует код — проверяет его на наличие простых синтаксических ошибок вида «забыл поставить точку с запятой в конце команды»
-
собирает нужные ресурсы (файлы конфигов и подобные) в одну папочку, из которой уже можно запускать программу
— Так если она все собирает и можно программу запускать, зачем maven нужен?)
— Она не собирает само приложение, так как не знает всех зависимостей. Поэтому нужна отдельная программа-сборщик кода.
— А в чем тогда смысл собирать ресурсы?
— Ну, например, для запуска автотестов. Когда мы их запускаем, там не используется полностью варник (приложение cats.war). Там вызываются конкретные функции + используются конкретные ресурсы типа справочника телефонных номеров.
Разработчик исправил код и нажимает «Build». Это обновляет ресурсы, которые используются в тестах. А если тебе нужен варник приложения, то собираешь maven-ом (ну или аналогом).
Комментарий коллеги-разработчика:
— Диалог правильный, но это подход 10-летней давности. Сейчас всё делегируют maven/gradle. В IDE даже галочка есть отдельная для этого. А уже в maven/gradle делаются гранулярные цели для каждой задачи.
— А вообще главное отличие сборщика от IDE — сборщик можно запустить из командной строки, на любом окружении, независимо от среды разработки + в CI/CD системе (TeamCity, Jenkins и тп). Это воспроизводимый билд.
То есть при желании IDEA можно настроить, чтобы она все это делала. Прописать все зависимости и другое, но это будет нерасширяемо.
Как работает сборщик
Сборщики работают примерно одинаково. Базовый функционал:
-
компилировать код (проверять на простейшие синтаксические ошибки)
-
создавать и удалять директории
-
группировать файлы
-
…
Есть и более продвинутые программы, которые также позволяют автоматически извлекать зависимости в библиотеке или автоматизировать тестирование.
Как сборщик поймет, что именно от него нужно? Благодаря скрипту компоновки. В нем разработчик описывает, что конкректно сборщик должен делать.
Давайте посмотрим, как такой скрипт выглядит, на примере Ant. Ant — инструмент компоновки для Java-проектов.


Файл компоновки Ant — это XML-документ. Он разбит на 4 основные части:
-
Проект
-
Свойства
-
Цели
-
Задачи
В каждом файле компоновки есть проект, и хотя бы одна (умолчательная) цель. Внутри цели находятся задачи — что именно системе надо сделать, если вызвана данная цель.
Проект
Всё в файле является частью проекта. Поэтому тег <project> является корневым в скрипте:
<project name="folks" default="dist">где:
-
name — имя проекта
-
default — умолчательная (дефолтная) цель, срабатывающая при запуске скрипта.
Внутри проекта уже находится все остальное — цели, которых мы хотим достичь, и конкретные действия для их достижения.

По-хорошему, у проекта должно быть имя и умолчательная цель. Хотя согласно официальной документации, эти параметры не являются обязательными.
Дефолтная цель сработает по умолчанию, если при запуске ant не указана другая. Поэтому в ней должно быть все нужное для работы проекта.
Свойства
Свойства Ant похожи на константы. Один раз указали значение, и используем в скрипте хоть в 20 местах. А если значение изменилось, исправить надо будет одно место, а не двадцать. Сюда очень хорошо выносить версии продукта и зависимых библиотек, а также пути к директориям.

Записываются свойства в теге <property>:
<property name="version" value="2.0"/>

<property name="src" location="src"/>

<property name="bin" location="bin"/>
У каждого свойства есть:
-
имя — name
-
значение — value, или место — location (если указываем путь к директории)
Свойства можно переиспользовать, записав как ${имя свойства}
<property name="lib-src" location="${src}/lib"/>Цели
Цель — это то, что мы хотим получить от сборщика. Краткое название для «я хочу скомпилировать проект» или «я хочу создать все нужные папочки».

Цели записываются в тегах <target>:
<target name=”init”>

<target name=”init” description=”Create the needed directories”>

<target name=”build” depends=”compile”>
Основные атрибуты цели:
-
name — имя цели, которое мы будет указывать в командной строке, поэтому лучше делать его коротким. Обязательный параметр.
-
description — описание цели. Выводится при запросе информации по проекту.
-
depends — от кого эта цель зависит. То есть какую цель надо запустить перед выполнением текущей. Необязательный параметр
В примере цель ”build” зависит от цели ”compile”. Мы не можем начать сборку билда, пока не скомпилировали его. Поэтому, если мы вызываем ant с целью сборки билда, то он:
-
Выполнит цель ”compile”
-
Выполнит цель ”build”
То есть за один присест можно выполнить сразу несколько целей, если прописать их в блоке depends. В данном случае мы вызвали одну цель, а выполнили две. Можно ли выполнить больше? Можно ли указать сразу несколько зависимостей? Да! Для этого надо записать имена целей через запятую в блоке depends:
<target name="D" depends="C,B,A"/>

Call-Graph:  A → B → C → D
Обратите внимание на граф вызова целей. Исходно мы хотим выполнить цель D. Читая атрибут depends, можно подумать, что первой будет вызвана цель C, потом B, и потом A. Это не так! Читать блок depends надо так:
-
C зависит от B
-
B зависит от A
Таким образом, сначала мы вызываем цель A, потом B, и только потом C. То есть фактически читаем справа налево этот атрибут.
У цели могут быть и другие атрибуты. Например, условие «if». Но подробнее о них читайте в официальной документации Ant — статья «Targets».
Цель по умолчанию
Какой должна быть цель по умолчанию? Должна ли проводиться компиляция, группировка, генерирование документации или все вместе?

Это зависит от проекта. Если кто-то берет код с сервера, что он будет с ним делать? Захочет посмотреть на проект и будет ожидать, что он запустится за один шаг? Если так, целью по умолчанию будет выполнение всех операций.
Но для выполнения всех операций надо использовать ключи шифрования, установщики типа InstallShield и т.д. Стоит ли париться? Многие ставят целью по умолчанию вывод справки по проекту, чтобы новые люди сообразили, что им нужно делать.
Задачи
Задача — это конкретное действие, которое нужно выполнить, чтобы достичь поставленной цели. Например, создать директорию, скопировать файлы, скомпилировать Java-код…

В Ant задача обычно отражает определенную команду: «javac», «mkdir» или даже «javadoc». Именно эта команда и будет названием тега:
<mkdir dir=”bin”/> --- создать директорию «bin»Эти теги всегда будут внутри тегов <target>. Задача всегда относится к какой-то цели. А вот цель может не иметь задач. Правда, тогда она будет бесполезная =)
Внутри цели может быть одна задача. Например, для компиляции проекта нам нужно скомпилировать java-код в конкретной директории:
<target name=”compile” depends=”init” description=”compile project”>

    <javac srcdir=”src” destrdir=”bin”/>

<target>
При вызове цели compile будет вызвана задача javac. Она компилирует код java в srcdir и складывает классы в destrdir.
Внутри цели может быть несколько задач, как одинаковых, так и разных. Например, мы хотим создать все нужные проекту директории, а их несколько. Вызываем несколько раз задачу mkdir. Она создает директорию, определяемую атрибутом dir:
<target name=”init” description=”Create the needed directories”>

   <mkdir dir=”bin”/>

   <mkdir dir=”lib”/>

<target>
При вызове цели init у нас будут созданы 2 директории — ”bin” и ”lib”.
Возможно, нам надо не только создать директорию, но и подложить в нее какой-то файл. Тогда задачи будут разные.
<target name=”init” description=”Create the needed directories”>

   <mkdir dir=”bin”/>

   <mkdir dir=”lib”/>

   <copy file=”test.jar” todir=”lib”/>

<target>
Стандартная версия Ant содержит более 150 заданий. Вот некоторые из них:
-
echo – вывод сообщений в консоль
-
mkdir – создание директорий
-
copy — копирование файлов
-
delete – удаление файлов и директорий
-
move – перемещение файлов и директорий
-
replace — замещение фрагментов текста в файлах
-
javac – компиляция Java–кода
-
java – запуск class и jar файлов
-
jar – создание jar файла
-
junit – запуск тестов
-
exec — выполнение внешней команды
-
zip — создание архива в формате Zip
Доп ссылки
Writing a Simple Buildfile — официальная дока на английском
Apache Ant – быстрый старт — статья на Хабре
Apache Ant — википедия
Сборка Java приложения, ant
Как запустить сборку
Все зависит от сборщика. Но обычно это название сборщика + название цели, которую мы запускаем. Для Ant это выглядит так:
ant name_of_targetЦелей может быть несколько:
ant name_of_target_1 name_of_target_2 name_of_target_3Фишка ant в том, что вы можете назвать цель как угодно:
ant pupsik

ant mario

ant iron_man

…
С одной стороны, это звучит даже забавно:
— Запускайте Марио!

И все вокруг знают, что это означает пересобрать проект… Но такие хиханьки-хаханьки хороши лишь в умеренных дозах. Подумайте сами — если каждую цель назвать как-то «невпопад», то придется просто заучивать эти названия. Что неудобно.
А уж если в коллектив придет новый человек, то ему придется пояснять, почему используются такие загадочные названия и почему ему надо их выучить.

Поэтому обычно используют стандартные названия целей
-
clean — чистка проекта: удаление файлов заготовок, которые остаются после компиляции. Приводит проект к виду, в котором он хранится в репозитории
-
compile — компиляция исходного кода
-
test — запуск тестов
-
install — установка пакетов в локальный репозиторий, чтобы использовать зависимости от других проектов локально
-
…
Посмотрим на примере, который можно взять и пощупать — в проекте folks используется сборщик maven. А в статье «Как собрать проект и запустить тесты» (в старой версии, там возникли проблемки со сборщиком после обновления и команды заменили) мы видим такие команды:
mvn clean install -Dmaven.test.skip=true -U

mvn clean test
Эти команды — типовые для maven-а. Давайте разберемся, что они означают.
mvn
Это сокращение от maven. Название сборщика, к которому мы обращаемся.
Первое слово, которое вы пишете в командной строке — это вызов команды. Это может быть путь к самой программе вида:
D:allpairspictpict.exeА может быть просто название команды:
pict

mvn
В этом случае система (я говорю про винду) полезет в PATH и проверит: а есть ли там такое? Если есть, то запустит программу и по короткой команде. Подробнее про PATH можно почитать здесь.
Когда вы устанавливаете maven (ant или любой другой сборщик), вы прописываете путь к нему в переменную PATH. По крайней мере, в инструкции по установке есть такой пункт. Именно благодаря этому пункту команда «mvn» в командной строке начинает работать.

По сути, тут все то же самое, что и в ant — мы пишем название сборщика (mvn) и те цели, которые мы хотим запустить. Точнее, фазы. В maven это называется phases, и набор фаз вполне определенный. В этом отличие сборщиков, ant более гибкий и цели мы можем настраивать и называть так, как захотим. В maven не можем.
clean
В обеих командах сначала вызывается фаза clean. Она нужна для того, чтобы очистить созданные другими сборками артефакты. Так как я тестировщик, то объясню с точки зрения тестирования.
Допустим, мы запускаем автотесты. Их можно запускать пачкой (вообще все или из конкретной папки), а можно запускать один конкретный. Во время прогона система создает артефакты — это может быть состояние базы данных или поискового индекса, временные файлики, или что-то еще.
Теперь, когда мы просто запускаем тест, без clean, система переиспользует созданные артефакты. И это хорошо! Потому что так тесты гоняются намного быстрее. Система уже не тратит время на повторное создание артефактов.
Это как если у вас перед готовкой пустой холодильник или полный. Если пустой — надо идти в магазин. Если вы уже вчера туда сходили и продукты все есть, можно сразу приступать к готовке!

Да, переиспользование артефактов — это хорошо. Но иногда их надо почистить. Вот, скажем, если у вас яйца протухли, то и омлет станет отравой, и шарлотку есть будет нельзя. Любое блюдо будет испорчено из-за одного плохого ингредиента. Баг в исходнике «сломал» готовый продукт!

Что мы делаем в таком случае? Испорченные яйца выкидываем, идем в магазин за новыми. Примерно так и работает clean — чистит наш холодильник. Единственная проблема — она чистит всё. Удалять так удалять!
Фаза удаляет все артефакты, созданные предыдущими сборками. То есть система возвращается в состояние на момент забора данных из репозитория. Плюс твои локальные изменения кода (именно исходного кода, а не сгенеренных по нему артефактов).

Фазу можно и не вызывать, но это надо делать с полным осознанием своих действий. Чтобы потом не тупить над тем, почему это вдруг разработчик исправил баг и у него все хорошо, а у вас до сих пор плохо.
Понимаете, часто повторяющиеся действия мы делаем на автомате, не задумываясь о них. Допустим, что мы привыкли утром очищать свой репозиторий и прогонять
mvn clean installА потом, в процессе дня, мы фазу clean уже не вызываем:
mvn install

mvn test

...
Так вот, в коде обнаружился баг, который из кода «переехал» в артефакты. Разработчик баг исправил, даже проверил у себя локально — работает! Отдает вам, вы пересобираете проект — не работает! Как так?? Вы же пересобрали! Ведь вызвали же фазу «install».
При этом иногда над простыми ошибками тупят дольше всего. Разработчик снова ковыряется в коде, тратит время — должно же работать. Вы снова собираете — нет, не работает! И только когда разработчик приходит посмотреть, что именно вы делаете, он обращает внимание на команду:
— Стой! Ты же clean не делаешь!
— Ну да, я его только по утрам вызываю…

Это называется «делать на автомате», не задумываясь о своих действиях. Если вы не хотите думать над командой по сборке, то всегда вызывайте clean, не прогадаете. Да, сборка чуть дольше будет идти, но вы точно не огребете такую проблему.
Аналогичная ситуация может возникнуть при прогоне автотестов. Прогнали один тест — все хорошо, он работает. Прогоняете другой — он падает, причем очень странно. Тест пишет, что ожидает «Иванова», которого в вашем тесте нет вообще! Откуда же он взялся??
Да просто первый тест не почистил базу за собой! И Иванов остался в артефактах. А вы не вызвали фазу clean для экономии времени. Отсюда и баг. Поэтому при подозрительных падениях тестов из серии «откуда он взял эти данные» стоит перепрогнать тест с фазой clean.
install
Это сборка продукта. Folks нельзя развернуть и потыкать, но если бы можно было, то это выглядело бы именно так:
-
Скачали исходный код продукта
-
Выполнили команду «mvn clean install»
-
Забрали готовый билд в определенной папочке!

Хотя по сути своей фаза install ничего не собирает. Она публикует собранный артефакт в локальном репозитории. Смотрите — в maven есть свой жизненный цикл (подробнее см в статье «Maven in 5 Minutes», раздел «Maven Phases»):
-
validate
-
compile
-
test
-
package
-
integration-test
-
verify
-
install
-
deploy
И когда вы вызываете какую-то команду, maven идет по своему жизненному циклу и выполняет все, что идет перед вызванной фазой:
-
Вызвали compile — система выполнит validate, а потом compile.
-
Вызвали test — система выполнит validate, compile, а потом уже test.
Таким образом, когда мы вызываем install, система на самом деле выполняет кучу других фаз. В том числе и package, который собственно собирает артефакт (jar-файл, war-файл, или что-то еще).
-Dmaven.test.skip=true
Это свойство, которое помогает пропустить тесты во время выполнения вызванной фазы. В нашем случае вызывается:
mvn clean install -Dmaven.test.skip=trueЭто означает, что мы хотим собрать проект, не прогоняя при этом тесты. В большом проекте, где много тестов, именно так и делают. Потому что есть разница:
-
Собрать проект — 2-5 мин
-
Прогнать все тесты — 30+ мин

Если разработчик исправил баг в коде и вам просто нужна свежая сборка, вы собираете ее с флагом -Dmaven.test.skip=true. А система CI при этом прогоняет все автотесты.
У меня на одном из проектов в системе CI задачи были разделены — одна собирает только билд, с флагом -Dmaven.test.skip=true, а вторая честно прогоняет все тесты. И если в коде есть баг, из-за которого даже билд не собирается, мы узнаем об этом через 2 минуты, а не через 32. Удобно =)
-U
Это флаг означает принудительное обновление зависимостей.

Чем больше проект, тем больше там зависимостей. Это могут быть зависимости от каких-то стандартных библиотек, или от других ваших проектов. Вот, скажем, у меня на одной работе было несколько проектов. Чтобы не дублировать код, разработчики создали проект Utils, куда вынесли общие классы, которые никак не привязаны к бизнес логике проекта:
-
скопировать директорию;
-
распаковать архив;
-
и т.д
Проект использует код из Utils. И если разработчик вносил правки в Utils, то наш проект надо собирать обязательно с флагом -U. Иначе изменения не подтянутся и система продолжит работать по старому.
Разработчики используют флаг сознательно. Они ведь меняют код и понимают, нужно обновлять зависимости или нет. А тестировщики в проект Utils обычно не лезут, и за изменениями в нем не следят. Поэтому нас учили так — всегда используй флаг -U, не прогадаешь. И на первом этапе знакомства со сборщиком этого вполне достаточно =)
test
Фаза test запускает автотесты. Причем если запускать без параметров:
mvn clean testТо система прогонит ВСЕ тесты. Разумеется, это не всегда то, что нам надо. Вот, например, у нас в компании 4000 модульных автотестов. Прогоняются они за полчаса. Мне выдали новый функционал на тестирование, я пишу автотесты. Как прогнать только свеженаписанный тест? Чтобы узнать ответ через полминуты, а не полчаса?
Для этого есть параметры:
-
-Dtest — запустить Java-класс с тестом. А Java-класс обычно описывает логику автотестов, например — «Внутри этой директории тесты на поиск. Возьми данные из файла с таким названием, положи в базу. Потом возьми вот эту строку и по ней ищи».
-
-Dtest.case — запустить конкретный тест-кейс. Это уже точечная проверка: «В базе есть Маша и Ваня, поиск по «Ваня» Ваню вернет, а Машу нет» (это особенность фреймворка folks, а не работа из коробки maven).

Итого
Для запуска сборки вам надо ввести в командную строку название сборщика + название цели, которую мы хотим выполнить. Иногда цели могут называться как ваша левая пятка того пожелает (ant), а иногда это набор вполне конкретных значений (maven).
Что сборщик умеет делать
1. Компилировать проект
Это самое важное в сборщике. В большинстве случаев нам нужно, чтобы при помощи одной команды делалось всё — от установки до упаковки проекта в пакеты.

2. Чистить все ненужное
Для этого обычно создают цель clean. Она нужна для наведения порядка после компоновки проекта — удаляет директории, созданные по ходу процесса компоновки, или артефакты тестирования.

3. Выводить информацию о проекте
Гуглить — это, конечно, хорошо. Но не всегда помогает. Для maven вы можете нагуглить команду сборки, а как быть с Ant? Что, если коллеги назвали цель сборки «SuperMario»? В сборщике должен быть:
-
Мануал — информация о том, как его использовать.
-
Информация о проекте — список доступных целей, описание каждой и цель, установленная по умолчанию.
В Ant для вывода информации о проекте достаточно напечатать команду:
ant -projecthelp
4. Обращаться к библиотекам, используемым в проекте
Это только на очень небольшом самописном проекте можно обойтись без сторонних библиотек. Да и то придется городить костыли и придумывать велосипеды. А зачем, когда есть готовые библиотеки? Сборщик должен уметь с ними общаться.

В Ant можно добавить библиотеки в путь компоновки, используя элемент «classpath» в задаче «javac»:
<javac srcdir=”src” destdir=”bin”>

  <classpath>

     <pathelement location=”libs/junit.jar”>

     <pathelement location=”libs/log4j.jar”>

  </classpath>

</javac>
В данном примере мы подключаем к проекту 2 библиотечки:
-
junit — для автотестов;
-
log4j — для логирования;
Каждый элемент пути (pathelement) указывает на добавление отдельного jar-файла. Но можно указать на директорию со внешними библиотеками.
Также сборщики умеют загружать библиотеки при помощи FTP, HTTP, SCP и т.д.
5. Запускать приложение
Запуск приложения может оказаться нетривиальной задачей. Например, для этого нужно прописать ряд переменных в разных файлах, или много разных опций в командной строке. Человек ошибается, робот — нет. Отдайте ему эту работу.
6. Запускать тесты
В идеале у каждого проекта должны быть автотесты, гоняемые при любом изменении кода. Увы, пока это остается лишь мечтами — нет бюджета, времени, да и просто не нужно для временного проекта.
Но если автотесты есть, сборщик должен уметь их запускать. Именно это мы и делаем в folks — пишем команду:
mvn clean testИ уже сборщик (maven) запускает прогон автотестов.

7. Другие задачи
Еще несколько примеров того, что может делать сборщик:
-
Брать код для внесения исправлений
-
Копировать компоновку в архивные директории
-
Шифровать файлы
-
Высылать сообщения на эл почту, когда закончена компоновка
-
Запускать SQL
-
…
Автоматизация позволяет сфокусироваться на коде, а не на повторяющихся задачах. С хорошим скриптом компоновки мы можем автоматизировать этот крайне сложный процесс.
Иногда для одного проекта есть несколько файлов компоновки, по одному для каждой библиотеки или компонента. И тогда нужен основной файл компоновки, который это все объединит.
Где хранить скрипт компоновки
Скрипт компоновки — это тоже код. Так что положите его в систему контроля версий.
Теперь, если на проект придет новый разработчик, у него не будет проблем! Выкачал из системы контроля версий исходный код и скрипт компоновки, прочитал скрипт и запустил нужную опцию!

Программы сборки
Для java — Ant, Maven, Gradle
.Net — NAnt
Ruby — rake
В Microsoft Visual Studio – MSBuild
При использовании Perl или PHP скрипты компоновки не так полезны. Но можно использовать инструмент для компоновки, даже если нужны не все его функции.
Как выбрать программу для сборки
На что ориентироваться при выборе сборщика? На то, что он умеет и насколько геморройно будет это настроить! А главное, что из этих функций нужно именно вам.
Иногда можно вообще обойтись с помощью командного файла. Ну а что, прописать всё те же команды через bash — создай файл, удали директорию… Но в системах компоновки есть много специальных задач, ориентированных на разработку. И в командном файле их придется писать самому. А зачем, когда есть готовое решение?

В статье я приводила примеры по двум инструментам для Java-проектов — Ant и Maven. Как выбрать из них?
Ant — очень простой инструмент компоновки. Может компилировать код, создавать и удалять директории, группировать файлы. Ant ничего не знает о жизненном цикле продукта. Он просто выполняет те задачи, которые вы пропишете в скрипте компоновки.
Однако Ant сейчас лучше не использовать. Он совсем устаревший, да и в нем нет из коробки поддержки зависимостей. Его используют на проектах, где «так повелось», где он был исходно. Ну или фриланс-разработчики, которые делают совсем небольшой проект.
У нас на одном из проектов был Ant. В целом, свои функции он выполнял. Все скрипты уже давно написаны, так что жили по принципу «Работает? Не трогай».
С другой стороны, делать что-то новое намного сложнее, чем на более гибких инструментах. В итоге переехали на gradle. Да, переезд занимает время, но оно окупается, как и любой рефакторинг.
Maven — более многофункциональный инструмент. Он знает про жизненный цикл продукта. Знает, что и в каком порядке нужно делать. И умеет кучу всего, что Ant не делает:
-
автоматическое извлечение зависимостей в библиотеке;
-
автоматизация тестирования;
-
и т.д.
Это замечательный инструмент, но он предоставляет слишком много возможностей. А это не всегда хорошо ))
К тому же для любого действия maven «выкачивает полинтернета», как называют это мои коллеги. Ну да, он умеет автоматически извлекать зависимости. И он будет это делать, даже если вам надо прогнать один небольшой автотестик!

Чтобы выжать их Maven максимум, проект нужно структурировать определенным образом. Пример можно посмотреть все в том же folks. Эта структура:
-
main
-
test
То есть когда у тебя есть «главная» папка проекта или какого-то модуля, а в ней отдельно код, отдельно тесты — это как раз структура, которую требует maven. И намного проще писать проект под maven c нуля, чем переписывать уже существующий. Миграция — это жизньболь.
Gradle — более гибкий, позволяющий легко на языке программирования (groovy/kotlin) дописать сложную логику сборки
При работе с небольшими проектами Ant обеспечит весь необходимый функционал. И проще выбрать его. Если нужно больше возможностей, осознанно выбираем Maven. Если нужно больше возможностей, но что-то погибче, тогда смотрим на Gradle.
Итого по выбору
Как выбрать — вопрос неоднозначный. В принципе, если команда уже освоила какой-то сборщик и он всех устраивает, то его можно и использовать.
-
maven более декларативный и простой (требует только понимания xml)
-
gradle более гибкий, позволяющий легко на языке программирования (groovy/kotlin) дописать сложную логику сборки, но скорее всего среди энтерпрайза встречается реже
-
ant лучше не юзать уже, он устаревший, да и в нем нет из коробки поддежки зависимостей
Итого
Когда разработчик пишет код — он просто создает набор файликов с текстом. Чтобы эти файлики превратились в работающее приложение, нам нужно выполнить ряд действий:
-
скомпилировать проект;
-
объединить классы в файл JAR или другую библиотеку;
-
установить набор зависимостей;
-
запустить конкретный класс или несколько классов.
И только после всех этих манипуляций у нас появляется ПО. Набор манипуляций зависит от конкретного проекта.
Можно выполнять манипуляции вручную, но проще использовать готовое решение. Программу для сборки продукта. Тогда это все будет работать при выполнении одной команды, например:
ant installСборщик можно запустить из командной строки, на любом окружении, независимо от среды разработки + в CI/CD системе (TeamCity, Jenkins и тп).
См также:
Управление разработкой ПО. Дэн Пилон, Расс Майлз — отличная книга о процессе разработки, в том числе и о сборщиках там есть
Другие статьи из цикла «Что такое…»
Что такое VCS (система контроля версий)
Что такое API
Что такое XML
Что такое JSON
Что такое клиент-серверная архитектура
Что такое CI (Continuous Integration)
Что такое транзакция
Что такое регулярные выражения (regexp)
Что такое Docker
PS — больше полезных статей ищите в моем блоге по метке «полезное». А полезные видео — на моем youtube-канале
Установка программ из исходного кода в Linux⚓︎
Linux-системы неразрывно связаны с концепцией GNU – проекта, поддерживающего и развивающего философию свободно распространяемого программного обеспечения (ПО), в том числе и в виде исходного кода. А поскольку систем на базе ядра Linux существует великое множество и разработчики дистрибутивов всегда для своих систем используют исходный код ПО при сборке комплектов утилит, пакетов, да и самого ядра, то, очевидно, что использование исходных кодов ПО — это неотъемлемый аспект в эксплуатации Linux-систем. По крайней мере, любому пользователю, достаточно хорошо освоившему UNIX-подобные системы, рано или поздно приходится сталкиваться со сборкой ПО из исходного кода.
Но поскольку системы Linux, как правило, снабжены хранилищами пакетов (репозиториями), из которых происходит загрузка, установка и обновление ПО, то часто бывает так, что разработчики дистрибутива, которые и поддерживают репозитории, ещё не успели сформировать новые пакеты ПО, для которых уже выпущено обновление. В этом случае можно прибегнуть к самостоятельной сборке требуемых пакетов.
Общий порядок сборки пакетов — утилита make⚓︎
Для облегчения сборки ПО из исходных кодов существует свободная утилита make. Она применяется во всех UNIX-подобных системах для подавляющего большинства утилит. При сборке пакета очень полезно изучать информацию, содержащуюся, как правило, в файлах README или INSTALL, входящих в пакет. В этих файлах разработчики ПО указывают инструкции и специфические мероприятия для успешной сборки пакетов. Здесь также можно найти и системные требования для работы ПО и описания необходимых зависимостей, без которых собрать пакет будет невозможно.
Порядок сборки выглядит так:⚓︎
-
Распаковка архива, содержащего файлы исходного кода (обычно именно так «исходники» и распространяются);
-
Переход в директорию с распакованными исходными текстами;
-
Подготовка (конфигурирование) предстоящей сборки (указание директорий установки, сторонних библиотек, архитектуры, дополнительных компонентов и т.д.). Для этого обычно используются служебные скрипты;
-
Непосредственно, сама сборка — команда make;
-
Установка (распространение) построенного ПО — например, командой
make install.
Ниже будет приведена эта процедура на примере пакета Zlib.
Скачаем архив пакета:
wget https://zlib.net/zlib-1.2.11.tar.xz
Распакуем архив:
tar -xvf zlib-1.2.11.tar.xz
В результате в текущем каталоге появится еще один каталог, с распакованным пакетом. Перейдём в него:
Для успешной сборки и работы пакета необходимо проверить существующую конфигурацию системы на наличие требуемых зависимостей, библиотек и настроек, а также сконфигурировать сборку, запустив соответствующий скрипт configure:
Подобные скрипты создаются разработчиками для облегчения процесса сборки/установки.
Вывод этого скрипта показывает, готов ли данный пакет к сборке:
Checking for gcc...
Checking for shared library support...
Building shared library libz.so.1.2.11 with gcc.
Checking for size_t... Yes.
Checking for off64_t... Yes.
Checking for fseeko... Yes.
Checking for strerror... Yes.
Checking for unistd.h... Yes.
Checking for stdarg.h... Yes.
Checking whether to use vs[n]printf() or s[n]printf()... using vs[n]printf().
Checking for vsnprintf() in stdio.h... Yes.
Checking for return value of vsnprintf()... Yes.
Checking for attribute(visibility) support... Yes.
Если вы хотите изменить место, куда должен впоследствии установиться пакет, то используйте ключ --prefix=ДИРЕКТОРИЯ:
./configure --prefix=/usr
Это означает, что пакет впоследствии будет установлен в /usr.
Также по мере компиляции пакетов ключи у configure будут меняться. Для новых опций будет краткое описание.
Для просмотра всех доступных ключей и опций, выполните:
Изучив вывод скрипта configure, можно сделать вывод о том, стоит ли далее приступать к сборке пакета. Обычно о критических ошибках сообщается фразами «configure: error». Убедившись, что всё нормально, можно приступать к построению:
Далее в консоль будет направлен вывод, отображающий ход сборки:
gcc -O3 -D_LARGEFILE64_SOURCE=1 -DHAVE_HIDDEN -I. -c -o example.o test/example.c
gcc -O3 -D_LARGEFILE64_SOURCE=1 -DHAVE_HIDDEN  -c -o adler32.o adler32.c
gcc -O3 -D_LARGEFILE64_SOURCE=1 -DHAVE_HIDDEN  -c -o crc32.o crc32.c
gcc -O3 -D_LARGEFILE64_SOURCE=1 -DHAVE_HIDDEN  -c -o deflate.o deflate.c
gcc -O3 -D_LARGEFILE64_SOURCE=1 -DHAVE_HIDDEN  -c -o infback.o infback.c
gcc -O3 -D_LARGEFILE64_SOURCE=1 -DHAVE_HIDDEN  -c -o inffast.o inffast.c
gcc -O3 -D_LARGEFILE64_SOURCE=1 -DHAVE_HIDDEN  -c -o inflate.o inflate.c
gcc -O3 -D_LARGEFILE64_SOURCE=1 -DHAVE_HIDDEN  -c -o inftrees.o inftrees.c
gcc -O3 -D_LARGEFILE64_SOURCE=1 -DHAVE_HIDDEN  -c -o trees.o trees.c
gcc -O3 -D_LARGEFILE64_SOURCE=1 -DHAVE_HIDDEN  -c -o zutil.o zutil.c
gcc -O3 -D_LARGEFILE64_SOURCE=1 -DHAVE_HIDDEN  -c -o compress.o compress.c
gcc -O3 -D_LARGEFILE64_SOURCE=1 -DHAVE_HIDDEN  -c -o uncompr.o uncompr.c
gcc -O3 -D_LARGEFILE64_SOURCE=1 -DHAVE_HIDDEN  -c -o gzclose.o gzclose.c
gcc -O3 -D_LARGEFILE64_SOURCE=1 -DHAVE_HIDDEN  -c -o gzlib.o gzlib.c
gcc -O3 -D_LARGEFILE64_SOURCE=1 -DHAVE_HIDDEN  -c -o gzread.o gzread.c
gcc -O3 -D_LARGEFILE64_SOURCE=1 -DHAVE_HIDDEN  -c -o gzwrite.o gzwrite.c
ar rc libz.a adler32.o crc32.o deflate.o infback.o inffast.o inflate.o inftrees.o trees.o zutil.o compress.o uncompr.o gzclose.o gzlib.o gzread.o gzwrite.o
gcc -O3 -D_LARGEFILE64_SOURCE=1 -DHAVE_HIDDEN -o example example.o -L. libz.a
gcc -O3 -D_LARGEFILE64_SOURCE=1 -DHAVE_HIDDEN -I. -c -o minigzip.o test/minigzip.c
gcc -O3 -D_LARGEFILE64_SOURCE=1 -DHAVE_HIDDEN -o minigzip minigzip.o -L. libz.a
gcc -O3 -fPIC -D_LARGEFILE64_SOURCE=1 -DHAVE_HIDDEN  -DPIC -c -o objs/adler32.o adler32.c
gcc -O3 -fPIC -D_LARGEFILE64_SOURCE=1 -DHAVE_HIDDEN  -DPIC -c -o objs/crc32.o crc32.c
gcc -O3 -fPIC -D_LARGEFILE64_SOURCE=1 -DHAVE_HIDDEN  -DPIC -c -o objs/deflate.o deflate.c
gcc -O3 -fPIC -D_LARGEFILE64_SOURCE=1 -DHAVE_HIDDEN  -DPIC -c -o objs/infback.o infback.c
gcc -O3 -fPIC -D_LARGEFILE64_SOURCE=1 -DHAVE_HIDDEN  -DPIC -c -o objs/inffast.o inffast.c
gcc -O3 -fPIC -D_LARGEFILE64_SOURCE=1 -DHAVE_HIDDEN  -DPIC -c -o objs/inflate.o inflate.c
gcc -O3 -fPIC -D_LARGEFILE64_SOURCE=1 -DHAVE_HIDDEN  -DPIC -c -o objs/inftrees.o inftrees.c
gcc -O3 -fPIC -D_LARGEFILE64_SOURCE=1 -DHAVE_HIDDEN  -DPIC -c -o objs/trees.o trees.c
gcc -O3 -fPIC -D_LARGEFILE64_SOURCE=1 -DHAVE_HIDDEN  -DPIC -c -o objs/zutil.o zutil.c
gcc -O3 -fPIC -D_LARGEFILE64_SOURCE=1 -DHAVE_HIDDEN  -DPIC -c -o objs/compress.o compress.c
gcc -O3 -fPIC -D_LARGEFILE64_SOURCE=1 -DHAVE_HIDDEN  -DPIC -c -o objs/uncompr.o uncompr.c
gcc -O3 -fPIC -D_LARGEFILE64_SOURCE=1 -DHAVE_HIDDEN  -DPIC -c -o objs/gzclose.o gzclose.c
gcc -O3 -fPIC -D_LARGEFILE64_SOURCE=1 -DHAVE_HIDDEN  -DPIC -c -o objs/gzlib.o gzlib.c
gcc -O3 -fPIC -D_LARGEFILE64_SOURCE=1 -DHAVE_HIDDEN  -DPIC -c -o objs/gzread.o gzread.c
gcc -O3 -fPIC -D_LARGEFILE64_SOURCE=1 -DHAVE_HIDDEN  -DPIC -c -o objs/gzwrite.o gzwrite.c
gcc -shared -Wl,-soname,libz.so.1,--version-script,zlib.map -O3 -fPIC -D_LARGEFILE64_SOURCE=1 -DHAVE_HIDDEN -o libz.so.1.2.11 adler32.lo crc32.lo deflate.lo infback.lo inffast.lo inflate.lo inftrees.lo trees.lo zutil.lo compress.lo uncompr.lo gzclose.lo gzlib.lo gzread.lo gzwrite.lo  -lc
rm -f libz.so libz.so.1
ln -s libz.so.1.2.11 libz.so
ln -s libz.so.1.2.11 libz.so.1
gcc -O3 -D_LARGEFILE64_SOURCE=1 -DHAVE_HIDDEN -o examplesh example.o -L. libz.so.1.2.11
gcc -O3 -D_LARGEFILE64_SOURCE=1 -DHAVE_HIDDEN -o minigzipsh minigzip.o -L. libz.so.1.2.11
gcc -O3 -D_LARGEFILE64_SOURCE=1 -DHAVE_HIDDEN -I. -D_FILE_OFFSET_BITS=64 -c -o example64.o test/example.c
gcc -O3 -D_LARGEFILE64_SOURCE=1 -DHAVE_HIDDEN -o example64 example64.o -L. libz.a
gcc -O3 -D_LARGEFILE64_SOURCE=1 -DHAVE_HIDDEN -I. -D_FILE_OFFSET_BITS=64 -c -o minigzip64.o test/minigzip.c
gcc -O3 -D_LARGEFILE64_SOURCE=1 -DHAVE_HIDDEN -o minigzip64 minigzip64.o -L. libz.a
После успешного окончания которого можно произвести установку пакета (от пользователя root):
Или вместе с командой sudo (если этот пакет установлен; выполняется эта команда от имени обычного пользователя):
В том случае, если вы собираете бинарный пакет для какого-либо пакетного менеджера (например, если вы написали его сами), то пакет нужно установить в отдельную директорию, а не в тот путь, который указан скриптом configure. Тогда укажите make переменную DESTDIR:
make DESTDIR=/путь/до/места/установки install
Пакет будет установлен в $DESTDIR (где DESTDIR — путь до нужной папки). Если в configure был указан, например, --prefix-/usr, то пакет будет установлен в $DESTDIR/usr. К примеру, создадим в директории сборки папку PKG и установим пакет туда:
mkdir PKG
make DESTDIR=$PWD/PKG install
Обратите внимание
Указание переменной $PWD в таком случае желательно, если директория для установки находится в папке с исходным кодом, в которой выполняется сборка.
Некоторые системы сборки не поддерживают переменную DESTDIR, но поддерживают что-то аналогичное, например INSTALL_DIR. Либо prefix. Программы, собранные через qmake, устанавливаются через переменную INSTALL_ROOT:
make install INSTALL_ROOT="/путь/до/места/установки"
Некоторые системы сборки вообще не поддерживают такие переменные окружения, в этом случае файлы придётся копировать самому. Помните, что в той отдельной директории должна располагаться зеркальная иерархия корня системы, то есть так, как эти файлы должны лежать в системе со всеми подкаталогами. Например:
$ find PKG

PKG
PKG/usr
PKG/usr/include
PKG/usr/include/zconf.h
PKG/usr/include/zlib.h
PKG/usr/lib
PKG/usr/lib/libz.so
PKG/usr/lib/libz.so.1.2.11
PKG/usr/lib/libz.so.1
PKG/usr/lib/pkgconfig
PKG/usr/lib/pkgconfig/zlib.pc
PKG/usr/lib/libz.a
PKG/usr/share
PKG/usr/share/man
PKG/usr/share/man/man3
PKG/usr/share/man/man3/zlib.3
На этом сборка из исходных кодов и установка пакета zlib успешно завершена.
Adam Miller, Maxim Svistunov, Marie Doleželová, et al.
Вступление
Документы RPM Packaging Guide:
Как подготовить исходный код для упаковки в RPM.
Это для людей, не имеющих опыта в разработке программного обеспечения. См. Подготовка программного обеспечения к упаковке.
Как упаковать исходный код в RPM.
Это для разработчиков программного обеспечения, которым необходимо упаковать программное обеспечение в RPM. См. Упаковка программного обеспечения.
Расширенные сценарии упаковки.
Это справочный материал для упаковщиков RPM, имеющих дело со сложными сценариями RPM Packaging. Смотрите продвинутые темы.
PDF версия
Вы также можете скачать PDF-версию этого документа.
Соглашения о документе
В документе используются следующие условные обозначения:
- Вывод команды и содержимое текстовых файлов, включая исходный код, размещаются в блоках:
$ tree ~/rpmbuild/
/home/user/rpmbuild/
|-- BUILD
|-- RPMS
[command output trimmed]
Name:           bello
Version:
Release:        1%{?dist}
Summary:

[file contents trimmed]
#!/usr/bin/env python

print("Hello World")
-
Темы, представляющие интерес или словарные термины, называются URL-адресами соответствующей документации или веб-сайта, выделены жирным шрифтом или курсивом. Первые вхождения некоторых терминов ссылаются на соответствующую документацию.
-
Названия утилит, команд и вещей, обычно встречающихся в коде, написаны моноширинным шрифтом.
Предпосылки
Чтобы следовать этому руководству, вам необходимо установить следующие пакеты:
Примечание
Некоторые из этих пакетов установлены по умолчанию в Fedora, CentOS и RHEL. Они перечислены в явном виде, чтобы показать, какие инструменты используются в этом руководстве.
$ dnf install gcc rpm-build rpm-devel rpmlint make python bash coreutils diffutils patch rpmdevtools
$ yum install gcc rpm-build rpm-devel rpmlint make python bash coreutils diffutils patch rpmdevtools
Содействие этому руководству
Вы можете внести свой вклад в это руководство, отправив вопрос или запрос на извлечение в репозитории GitHub.
Обе формы вклада высоко ценятся и приветствуются.
Не стесняйтесь подавать заявку на выпуск с обратной связью, отправлять запрос на GitHub или оба!
Почему пакет программного обеспечения с RPM?
RPM Package Manager (RPM) — это система управления пакетами, которая работает в Red Hat Enterprise Linux, CentOS и Fedora. RPM упрощает распространение, управление и обновление программного обеспечения, созданного для Red Hat Enterprise Linux, CentOS и Fedora. Многие поставщики программного обеспечения распространяют свое программное обеспечение через обычный архивный файл (такой как tarball). Тем не менее, есть несколько преимуществ в упаковке программного обеспечения в пакеты RPM. Эти преимущества изложены ниже.
С RPM, вы можете:
-
Установить, переустановить, удалить, обновить и проверить пакеты
Пользователи могут использовать стандартные инструменты управления пакетами (например Yum или PackageKit) установить, переустановить, удалить, обновить и проверить rpm-пакетов. -
Использовать базу данных установленных пакетов запроса и проверка пакетов
Поскольку оборотах ведет базу данных установленных пакетов и их файлов, пользователи могут легко запросить и проверить пакеты на своей системе. -
Использовать метаданные для описания пакетов, их инструкций по установке и т. д.
Каждый пакет RPM включает в себя метаданные, которые описывают компоненты пакета, версию, выпуск, размер, URL проекта, инструкции по установке и так далее. -
Упаковать исходные программные источники в исходные и двоичные пакеты
RPM позволяет вам брать исходные программные источники и упаковывать их в исходные и двоичные пакеты для ваших пользователей. В пакетах с исходным кодом у вас есть нетронутые исходные коды вместе с любыми использованными исправлениями, а также полные инструкции по сборке. Этот дизайн облегчает обслуживание пакетов по мере выпуска новых версий вашего программного обеспечения. -
Добавить пакеты в репозитории Yum
Вы можете добавить свой пакет в репозиторий Yum, который позволит клиентам легко находить и развертывать ваше программное обеспечение. -
В цифровой форме подписать свои пакеты
Используя ключ подписи GPG, вы можете подписать пакет цифровой подписью, чтобы пользователи могли проверить подлинность пакета.
Ваш первый пакет RPM
Создание пакета RPM может быть сложным. Вот полный, рабочий файл спецификации RPM с несколькими пропущенными и упрощенными вещами.
Name:       hello-world
Version:    1
Release:    1
Summary:    Most simple RPM package
License:    FIXME

%description
This is my first RPM package, which does nothing.

%prep
# we have no source, so nothing here

%build
cat > hello-world.sh <<EOF
#!/usr/bin/bash
echo Hello world
EOF

%install
mkdir -p %{buildroot}/usr/bin/
install -m 755 hello-world.sh %{buildroot}/usr/bin/hello-world.sh

%files
/usr/bin/hello-world.sh

%changelog
# let's skip this for now
Сохраните этот файл как hello-world.spec.
Теперь используйте эти команды:
$ rpmdev-setuptree
$ rpmbuild -ba hello-world.spec
Команда rpmdev-setuptree создает несколько рабочих каталогов. Поскольку эти каталоги постоянно хранятся в $HOME, эту команду больше не нужно использовать.
Команда rpmbuild создает реальный пакет rpm. Вывод этой команды может быть похож на:
... [SNIP]
Wrote: /home/mirek/rpmbuild/SRPMS/hello-world-1-1.src.rpm
Wrote: /home/mirek/rpmbuild/RPMS/x86_64/hello-world-1-1.x86_64.rpm
Executing(%clean): /bin/sh -e /var/tmp/rpm-tmp.wgaJzv
+ umask 022
+ cd /home/mirek/rpmbuild/BUILD
+ /usr/bin/rm -rf /home/mirek/rpmbuild/BUILDROOT/hello-world-1-1.x86_64
+ exit 0
Файл /home/mirek/rpmbuild/RPMS/x86_64/hello-world-1-1.x86_64.rpm — это ваш первый пакет RPM. Может быть установлен в системе и протестирован.
Подготовка программного обеспечения для упаковки
Эта глава посвящена исходному коду и созданию программного обеспечения, которое является необходимым фоном для RPM Packager.
Что такое исходный код?
Исходный код представляет собой понятные человеку инструкции для компьютера, которые описывают, как выполнять вычисления. Исходный код выражается с использованием языка программирования.
В этом уроке представлены три версии программы Hello World, каждая из которых написана на своем языке программирования. Программы, написанные на этих трех разных языках, упакованы по-разному и охватывают три основных варианта использования упаковщика RPM.
Примечание
Есть тысячи языков программирования. В этом документе представлены только три из них, но их достаточно для концептуального обзора.
Hello World, написанный на bash:
bello
#!/bin/bash

printf "Hello Worldn"
Hello World, написанный на Python:
pello.py
#!/usr/bin/env python

print("Hello World")
Hello World, написанный на C:
cello.c
#include <stdio.h>

int main(void) {
    printf("Hello Worldn");
    return 0;
}
Целью каждой из трех программ является вывод Hello World в командной строке.
Примечание
Knowing how to program is not necessary for a software packager, but is helpful.
Как создаются программы
Существует много методов, с помощью которых читаемый человеком исходный код становится машинным кодом — инструкции, которые компьютер выполняет для фактического выполнения программы. Однако все методы можно свести к этим трем:
- Программа изначально скомпилирована.
- Программа интерпретируется с помощью необработанного перевода.
- Программа интерпретируется байтовой компиляцией.
Скомпилированный Машинный Код
Собственно скомпилированное программное обеспечение — это программное обеспечение, написанное на языке программирования, который компилируется в машинный код с полученным двоичным исполняемым файлом. Такое программное обеспечение может работать автономно.
RPM-пакеты, созданные таким образом, зависят от архитектуры. Это означает, что если вы скомпилируете такое программное обеспечение на компьютере, который использует 64-разрядный (x86_64) процессор AMD или Intel, оно не будет работать на 32-разрядном (x86) процессоре AMD или Intel. Полученный пакет будет иметь архитектуру, указанную в его имени.
Интерпретированный код
Некоторые языки программирования, такие как bash или Python, не компилируются в машинный код. Вместо этого исходный код их программ выполняется пошагово, без предшествующих преобразований, интерпретатором языка или виртуальной машиной языка.
Программное обеспечение, написанное полностью на интерпретируемых языках программирования, не зависит от архитектуры. Следовательно, полученный RPM-пакет будет иметь строку noarch в своем имени.
Интерпретируемые языки либо байтово скомпилированы, либо интерпретируются как необработанные. Эти два типа отличаются в процессе сборки программы и в процедуре упаковки.
Необработанные программы
Необработанные языковые программы вообще не нуждаются в компиляции, они выполняются непосредственно интерпретатором.
Байт-скомпилированные программы
Скомпилированные байты языки должны быть скомпилированы в байтовый код, который затем исполняется языковой виртуальной машиной.
Примечание
Некоторые языки предоставляют выбор: они могут быть интерпретированы в необработанном виде или скомпилированы байтами.
Сборка программного обеспечения из источника
Этот раздел объясняет создание программного обеспечения из его исходного кода.
-
Для программного обеспечения, написанного на скомпилированных языках, исходный код проходит процесс сборки, производя машинный код. Этот процесс, обычно называемый компиляцией или трансляцией, варьируется для разных языков. Полученное встроенное программное обеспечение может быть запущено или «выполнено», что заставляет компьютер выполнять задачу, указанную программистом.
-
Для программного обеспечения, написанного на необработанных интерпретируемых языках, исходный код не создается, а выполняется напрямую.
-
Для программного обеспечения, написанного на интерпретируемых байтовых языках, исходный код компилируется в байтовый код, который затем исполняется языковой виртуальной машиной.
Нативный скомпилированный код
В этом примере вы соберете программу cello.c, написанную на языке C, в исполняемый файл.
cello.c
#include <stdio.h>

int main(void) {
    printf("Hello Worldn");
    return 0;
}
Ручная сборка
Вызовите компилятор C из коллекции компиляторов GNU (GCC), чтобы скомпилировать исходный код в двоичный файл:
Выполнить получившийся двоичный файл cello.
Это все. Вы создали и запустили исходно скомпилированное программное обеспечение из исходного кода.
Автоматизированная сборка
Вместо того, чтобы создавать исходный код вручную, вы можете автоматизировать сборку. Это обычная практика, используемая крупномасштабным программным обеспечением. Автоматизация сборки выполняется путем создания Makefile и последующего запуска утилиты make GNU.
Чтобы настроить автоматическое построение, создайте файл с именем Makefile в том же каталоге, что и cello.c:
Makefile
cello:
        gcc -g -o cello cello.c

clean:
        rm cello
Теперь, чтобы собрать программное обеспечение, просто запустите make:
$ make
make: 'cello' is up to date.
Поскольку сборка уже существует, выполните make clean и снова запустите make:
$ make clean
rm cello

$ make
gcc -g -o cello cello.c
Опять же, попытка построить после другой сборки ничего не сделает:
$ make
make: 'cello' is up to date.
Наконец, выполните программу:
Теперь вы скомпилировали программу как вручную, так и с помощью инструмента сборки.
Интерпретированный код
Следующие два примера демонстрируют байт-компиляцию программы, написанной на Python, и raw-интерпретацию программы, написанной на bash.
Примечание
В двух приведенных ниже примерах #! строка в верхней части файла называется shebang и не является частью исходного кода языка программирования.
Shebang позволяет использовать текстовый файл в качестве исполняемого файла: загрузчик системной программы анализирует строку, содержащую shebang, чтобы найти путь к двоичному исполняемому файлу, который затем используется в качестве интерпретатора языка программирования.
Байт-скомпилированный код
В этом примере вы скомпилируете программу pello.py, написанную на Python, в байт-код, который затем выполняется виртуальной машиной языка Python. Исходный код Python также может быть интерпретирован в необработанном виде, но версия с байтовой компиляцией работает быстрее. Следовательно, RPM-упаковщики предпочитают упаковывать байтовую версию для распространения среди конечных пользователей.
pello.py
#!/usr/bin/env python

print("Hello World")
Процедура для байтовых программ различна для разных языков. Это зависит от языка, виртуальной машины языка и инструментов и процессов, используемых с этим языком.
Примечание
Python часто компилируется байтами, но не так, как описано здесь. Следующая процедура нацелена не на соответствие стандартам сообщества, а на простоту. Для реальных рекомендаций Python см. Упаковка и распространение программного обеспечения.
Байт-компиляция pello.py:
$ python -m compileall pello.py

$ file pello.pyc
pello.pyc: python 2.7 byte-compiled
Выполните байт-код в pello.pyc:
$ python pello.pyc
Hello World
Необработанный интерпретированный код
В этом примере вы будете интерпретировать программу bello, написанную на встроенном языке оболочки bash.
bello
#!/bin/bash

printf "Hello Worldn"
Программы, написанные на языках сценариев оболочки, таких как bash, интерпретируются в необработанном виде. Следовательно, вам нужно только сделать файл с исходным кодом исполняемым и запустить его:
$ chmod +x bello
$ ./bello
Hello World
Исправление программного обеспечения(Patching Software)
Патч — это исходный код, который обновляет другой исходный код. Он отформатирован как diff, потому что он представляет различия между двумя версиями текста. Разница создается с помощью утилиты diff, которая затем применяется к исходному коду с помощью утилиты patch.
Примечание
Разработчики программного обеспечения часто используют системы контроля версий, такие как git, для управления своей базой кода. Такие инструменты предоставляют свои собственные методы создания различий или исправлений программного обеспечения.
В следующем примере мы создаем патч из исходного кода с использованием diff, а затем применяем его с помощью patch. Исправление используется в следующем разделе при создании RPM, Работа с файлами SPEC.
Как исправления связаны с упаковкой RPM? В упаковке вместо простого изменения исходного исходного кода мы сохраняем его и используем для него патчи.
Чтобы создать патч для cello.c:
- Сохраните исходный код:
$ cp cello.c cello.c.orig
Это распространенный способ сохранить исходный файл исходного кода.
- Change cello.c:
#include <stdio.h>

int main(void) {
    printf("Hello World from my very first patch!n");
    return 0;
}
Сгенерируйте патч с помощью утилиты diff:
Примечание
Мы используем несколько общих аргументов для утилиты diff. Для получения дополнительной информации о них см. Страницу руководства diff.
$ diff -Naur cello.c.orig cello.c
--- cello.c.orig        2016-05-26 17:21:30.478523360 -0500
+++ cello.c     2016-05-27 14:53:20.668588245 -0500
@@ -1,6 +1,6 @@
 #include<stdio.h>

 int main(void){
-    printf("Hello World!n");
+    printf("Hello World from my very first patch!n");
     return 0;
 }
Строки, начинающиеся с -, удаляются из исходного исходного кода и заменяются строками, начинающимися с +.
- Сохраните патч в файл:
$ diff -Naur cello.c.orig cello.c > cello-output-first-patch.patch
- Восстановите оригинальный cello.c:
$ cp cello.c.orig cello.c
Мы сохраняем оригинальный cello.c, потому что при сборке RPM используется оригинальный файл, а не измененный. Для получения дополнительной информации см. Работа с файлами SPEC.
Чтобы выполнить исправление cello.c с помощью cello-output-first-patch.patch, перенаправьте файл исправления в команду исправления:
$ patch < cello-output-first-patch.patch
patching file cello.c
Содержимое cello.c теперь отражает патч:
$ cat cello.c
#include<stdio.h>

int main(void){
    printf("Hello World from my very first patch!n");
    return 0;
}
Для сборки и запуска пропатченного cello.c:
$ make clean
rm cello

$ make
gcc -g -o cello cello.c

$ ./cello
Hello World from my very first patch!
Вы создали исправление, исправили программу, создали исправленную программу и запустите ее.
Установка произвольных артефактов
Большим преимуществом Linux и других Unix-подобных систем является стандарт иерархии файловых систем (FHS). Он указывает, в каком каталоге какие файлы должны находиться. Файлы, установленные из пакетов RPM, должны быть размещены в соответствии с FHS. Например, исполняемый файл должен находиться в каталоге, который находится в системной переменной PATH.
В контексте данного руководства, Произвольный Артефакт — это что-либо, установленное из RPM в систему. Для RPM и для системы это может быть скрипт, двоичный файл, скомпилированный из исходного кода пакета, предварительно скомпилированный двоичный файл или любой другой файл.
Мы рассмотрим два популярных способа размещения произвольных артефактов в системе: с помощью команды install и с помощью команды make install.
Использование команды установки
Иногда использование инструментов автоматизации сборки, таких как GNU make, не оптимально, например, если упакованная программа проста и не требует дополнительных затрат. В этих случаях упаковщики часто используют команду установки (предоставляемую системе coreutils), которая помещает артефакт в указанный каталог в файловой системе с указанным набором разрешений.
В приведенном ниже примере будет использоваться файл bello, который мы ранее создали, в качестве произвольного артефакта в зависимости от нашего метода установки. Обратите внимание, что вам либо понадобятся разрешения sudo, либо выполните эту команду от имени пользователя root, за исключением части команды sudo.
В этом примере install помещает файл bello в /usr/bin с разрешениями, общими для исполняемых скриптов:
$ sudo install -m 0755 bello /usr/bin/bello
Теперь bello находится в каталоге, который указан в переменной $PATH. Следовательно, вы можете выполнить bello из любого каталога, не указав его полный путь:
$ cd ~

$ bello
Hello World
Использование команды make install
Популярный автоматизированный способ установки встроенного программного обеспечения в систему — использование команды make install. Требуется указать, как устанавливать произвольные артефакты в систему в Makefile.
Примечание
Обычно файл Makefile написан разработчиком, а не упаковщик.
Добавьте раздел установки в Makefile:
Makefile
cello:
        gcc -g -o cello cello.c

clean:
        rm cello

install:
        mkdir -p $(DESTDIR)/usr/bin
        install -m 0755 cello $(DESTDIR)/usr/bin/cello
Переменная $(DESTDIR) является встроенной в GNU make и обычно используется для указания установки в каталог, отличный от корневого каталога.
Теперь вы можете использовать Makefile не только для сборки программного обеспечения, но и для его установки в целевой системе.
Чтобы собрать и установить программу cello.c:
$ make
gcc -g -o cello cello.c

$ sudo make install
install -m 0755 cello /usr/bin/cello
Теперь виолончель находится в каталоге, который указан в переменной $PATH. Следовательно, вы можете выполнить виолончель из любого каталога, не указав его полный путь:
$ cd ~

$ cello
Hello World
Вы установили артефакт сборки в выбранное место в системе.
Подготовка исходного кода для упаковки
Примечание
Код, созданный в этом разделе, можно найти здесь.
Разработчики часто распространяют программное обеспечение в виде сжатых архивов исходного кода, которые затем используются для создания пакетов. В этом разделе вы создадите такие сжатые архивы.
Примечание
Создание архивов исходного кода обычно выполняется не RPM Packager, а разработчиком. Упаковщик работает с готовым архивом исходного кода.
Программное обеспечение должно распространяться с лицензией на программное обеспечение. Для примеров мы будем использовать лицензию GPLv3. Текст лицензии помещается в файл LICENSE для каждой из примеров программ. Упаковщик RPM должен иметь дело с файлами лицензий при упаковке.
Для использования со следующими примерами создайте файл LICENSE:
$ cat /tmp/LICENSE
This program is free software: you can redistribute it and/or modify
it under the terms of the GNU General Public License as published by
the Free Software Foundation, either version 3 of the License, or
(at your option) any later version.

This program is distributed in the hope that it will be useful,
but WITHOUT ANY WARRANTY; without even the implied warranty of
MERCHANTABILITY or FITNESS FOR A PARTICULAR PURPOSE.  See the
GNU General Public License for more details.

You should have received a copy of the GNU General Public License
along with this program.  If not, see <http://www.gnu.org/licenses/>.
Упаковка исходного кода в Tarball
В приведенных ниже примерах мы поместили каждую из трех программ Hello World в сжатый gzip архив. Программное обеспечение часто выпускается таким образом, чтобы быть позже упакованным для распространения.
bello
Проект bello реализует Hello World в bash. Реализация содержит только скрипт оболочки bello, поэтому полученный архив tar.gz будет иметь только один файл, кроме файла LICENSE. Предположим, что это версия 0.1 программы.
Подготовить проект bello для распространения:
- Поместите файлы в один каталог:
$ mkdir /tmp/bello-0.1

$ mv ~/bello /tmp/bello-0.1/

$ cp /tmp/LICENSE /tmp/bello-0.1/
- Создайте архив для распространения и переместите его в ~/rpmbuild/SOURCES/:
$ cd /tmp/

$ tar -cvzf bello-0.1.tar.gz bello-0.1
bello-0.1/
bello-0.1/LICENSE
bello-0.1/bello

$ mv /tmp/bello-0.1.tar.gz ~/rpmbuild/SOURCES/
pello
Проект pello реализует Hello World на Python. Реализация содержит только программу pello.py, поэтому полученный архив tar.gz будет иметь только один файл, кроме файла LICENSE. Предположим, что это версия 0.1.1 программы.
Подготовьте проект pello для распространения:
- Поместите файлы в один каталог:
$ mkdir /tmp/pello-0.1.1

$ mv ~/pello.py /tmp/pello-0.1.1/

$ cp /tmp/LICENSE /tmp/pello-0.1.1/
- Создайте архив для распространения и переместите его в ~/rpmbuild/SOURCES/:
$ cd /tmp/

$ tar -cvzf pello-0.1.1.tar.gz pello-0.1.1
pello-0.1.1/
pello-0.1.1/LICENSE
pello-0.1.1/pello.py

$ mv /tmp/pello-0.1.1.tar.gz ~/rpmbuild/SOURCES/
cello
Проект виолончели реализует Hello World на C. Реализация содержит только файлы cello.c и Makefile, поэтому итоговый архив tar.gz будет иметь только два файла, кроме файла LICENSE. Предположим, что это версия 1.0 программы.
Обратите внимание, что файл патча не распространяется в архиве с программой. RPM Packager применяет исправление при сборке RPM. Патч будет помещен в каталог ~/rpmbuild/SOURCES/ рядом с .tar.gz.
Подготовьте проект cello для распространения:
- Поместите файлы в один каталог:
$ mkdir /tmp/cello-1.0

$ mv ~/cello.c /tmp/cello-1.0/

$ mv ~/Makefile /tmp/cello-1.0/

$ cp /tmp/LICENSE /tmp/cello-1.0/
- Создайте архив для распространения и переместите его в ~/rpmbuild/SOURCES/:
$ cd /tmp/

$ tar -cvzf cello-1.0.tar.gz cello-1.0
cello-1.0/
cello-1.0/Makefile
cello-1.0/cello.c
cello-1.0/LICENSE

$ mv /tmp/cello-1.0.tar.gz ~/rpmbuild/SOURCES/
- Добавьте патч:
$ mv ~/cello-output-first-patch.patch ~/rpmbuild/SOURCES/
Теперь исходный код готов к упаковке в RPM.
Упаковка Программного Обеспечения
В этом руководстве описываются пакеты RPM для дистрибутивов Linux семейства Red Hat, в первую очередь:
- Fedora
- CentOS
- Red Hat Enterprise Linux (RHEL)
Эти дистрибутивы используют RPM Packaging Format.
Хотя эти дистрибутивы являются целевой средой, это руководство в основном применимо ко всем дистрибутивам на основе RPM. Тем не менее, инструкции должны быть адаптированы для специфических для распространения функций, таких как обязательные элементы установки, рекомендации или макросы.
В этом руководстве не предполагается, что вы уже знали о программном обеспечении для любой операционной системы, Linux или других.
NOTE
If you do not know what a software package or a GNU/Linux distribution is, consider exploring some articles on the topics of Linux and Package Managers.
RPM Packages
This section covers the basics of the RPM packaging format. See Advanced Topics for more advanced information.
What is an RPM?
An RPM package is simply a file containing other files and information about them needed by the system. Specifically, an RPM package consists of the cpio archive, which contains the files, and the RPM header, which contains metadata about the package. The rpm package manager uses this metadata to determine dependencies, where to install files, and other information.
There are two types of RPM packages:
source RPM (SRPM)
binary RPM
SRPMs and binary RPMs share the file format and tooling, but have different contents and serve different purposes. An SRPM contains source code, optionally patches to it, and a SPEC file, which describes how to build the source code into a binary RPM. A binary RPM contains the binaries built from the sources and patches.
RPM Packaging Tools
The rpmdevtools package, installed in Prerequisites, provides several utilities for packaging RPMs. To list these utilities, run:
$ rpm -ql rpmdevtools | grep bin
For more information on the above utilities, see their manual pages or help dialogs.
RPM Packaging Workspace
To set up a directory layout that is the RPM packaging workspace, use the rpmdev-setuptree utility:
$ rpmdev-setuptree
$ tree ~/rpmbuild/
/home/user/rpmbuild/
|— BUILD
|— RPMS
|— SOURCES
|— SPECS
`— SRPMS
5 directories, 0 files
The created directories serve these purposes:
Directory
Purpose
BUILD
When packages are built, various %buildroot directories are created here. This is useful for investigating a failed build if the logs output do not provide enough information.
RPMS
Binary RPMs are created here, in subdirectories for different architectures, for example in subdirectories x86_64 and noarch.
SOURCES
Here, the packager puts compressed source code archives and patches. The rpmbuild command looks for them here.
SPECS
The packager puts SPEC files here.
SRPMS
When rpmbuild is used to build an SRPM instead of a binary RPM, the resulting SRPM is created here.
What is a SPEC File?
A SPEC file can be thought of as the «recipe» that the rpmbuild utility uses to actually build an RPM. It tells the build system what to do by defining instructions in a series of sections. The sections are defined in the Preamble and the Body. The Preamble contains a series of metadata items that are used in the Body. The Body contains the main part of the instructions.
Preamble Items
This table lists the items used in the Preamble section of the RPM SPEC file:
SPEC Directive
Definition
Name
The base name of the package, which should match the SPEC file name.
Version
The upstream version number of the software.
Release
The number of times this version of the software was released. Normally, set the initial value to 1%{?dist}, and increment it with each new release of the package. Reset to 1 when a new Version of the software is built.
Summary
A brief, one-line summary of the package.
License
The license of the software being packaged. For packages distributed in community distributions such as Fedora this must be an open source license abiding by the specific distribution’s licensing guidelines.
URL
The full URL for more information about the program. Most often this is the upstream project website for the software being packaged.
Source0
Path or URL to the compressed archive of the upstream source code (unpatched, patches are handled elsewhere). This should point to an accessible and reliable storage of the archive, for example, the upstream page and not the packager’s local storage. If needed, more SourceX directives can be added, incrementing the number each time, for example: Source1, Source2, Source3, and so on.
Patch0
The name of the first patch to apply to the source code if necessary. If needed, more PatchX directives can be added, incrementing the number each time, for example: Patch1, Patch2, Patch3, and so on.
BuildArch
If the package is not architecture dependent, for example, if written entirely in an interpreted programming language, set this to BuildArch: noarch. If not set, the package automatically inherits the Architecture of the machine on which it is built, for example x86_64.
BuildRequires
A comma- or whitespace-separated list of packages required for building the program written in a compiled language. There can be multiple entries of BuildRequires, each on its own line in the SPEC file.
Requires
A comma- or whitespace-separated list of packages required by the software to run once installed. There can be multiple entries of Requires, each on its own line in the SPEC file.
ExcludeArch
If a piece of software can not operate on a specific processor architecture, you can exclude that architecture here.
The Name, Version, and Release directives comprise the file name of the RPM package. RPM Package Maintainers and Systems Administrators often call these three directives N-V-R or NVR, because RPM package filenames have the NAME-VERSION-RELEASE format.
You can get an example of an NAME-VERSION-RELEASE by querying using rpm for a specific package:
$ rpm -q python
python-2.7.5-34.el7.x86_64
Here, python is the Package Name, 2.7.5 is the Version, and 34.el7 is the Release. The final marker is x86_64, which signals the architecture. Unlike the NVR, the architecture marker is not under direct control of the RPM packager, but is defined by the rpmbuild build environment. The exception to this is the architecture-independent noarch package.
Body Items
This table lists the items used in the Body section of the RPM SPEC file:
SPEC Directive
Definition
%description
A full description of the software packaged in the RPM. This description can span multiple lines and can be broken into paragraphs.
%prep
Command or series of commands to prepare the software to be built, for example, unpacking the archive in Source0. This directive can contain a shell script.
%build
Command or series of commands for actually building the software into machine code (for compiled languages) or byte code (for some interpreted languages).
%install
Command or series of commands for copying the desired build artifacts from the %builddir (where the build happens) to the %buildroot directory (which contains the directory structure with the files to be packaged). This usually means copying files from ~/rpmbuild/BUILD to ~/rpmbuild/BUILDROOT and creating the necessary directories in ~/rpmbuild/BUILDROOT. This is only run when creating a package, not when the end-user installs the package. See Working with SPEC files for details.
%check
Command or series of commands to test the software. This normally includes things such as unit tests.
%files
The list of files that will be installed in the end user’s system.
%changelog
A record of changes that have happened to the package between different Version or Release builds.
Advanced items
The SPEC file can also contain advanced items. For example, a SPEC file can have scriptlets and triggers. They take effect at different points during the installation process on the end user’s system (not the build process).
See the Scriptlets and Triggers for advanced topics.
BuildRoots
In the context of RPM packaging, «buildroot» is a chroot environment. This means that the build artifacts are placed here using the same filesystem hierarchy as will be in the end user’s system, with «buildroot» acting as the root directory. The placement of build artifacts should comply with the filesystem hierarchy standard of the end user’s system.
The files in «buildroot» are later put into a cpio archive, which becomes the main part of the RPM. When RPM is installed on the end user’s system, these files are extracted in the root directory, preserving the correct hierarchy.
NOTE
Starting from Red Hat Enterprise Linux 6 release, the rpmbuild program has its own defaults. As overriding these defaults leads to several problems, Red Hat does not recommend to define your own value of this macro. You can use the %{buildroot} macro with the defaults from the rpmbuild directory.
RPM Macros
An rpm macro is a straight text substitution that can be conditionally assigned based on the optional evaluation of a statement when certain built-in functionality is used. What this means is that you can have RPM perform text substitutions for you so that you don’t have to.
This is useful when, for example, referencing the packaged software Version multiple times in the SPEC file. You define Version only once — in the %{version} macro. Then use %{version} throughout the SPEC file. Every occurrence will be automatically substituted by Version you defined previously.
NOTE
If you see an unfamiliar macro, you can evaluate it with:
$ rpm —eval %{_MACRO}
For example:
$ rpm —eval %{_bindir}
/usr/bin
$ rpm —eval %{_libexecdir}
/usr/libexec
A common macro is %{?dist}, which signifies the “distribution tag”. It signals which distribution is used for the build.
For example:
On a RHEL 7.x machine
$ rpm —eval %{?dist}
.el7
On a Fedora 23 machine
$ rpm —eval %{?dist}
.fc23
For more information on macros, see More on Macros.
Working with SPEC files
A big part of packaging software into RPMs is editing the SPEC file. In this section we discuss how to create and modify a spec file.
To package new software, you need to create a new SPEC file. Instead of writing it manually from scratch, use the rpmdev-newspec utility. It creates an unpopulated SPEC file, and you fill in the necessary directives and fields.
For this tutorial, we use the three example implementations of the ‘Hello World!’ program created in Preparing Software for Packaging:
bello-0.1.tar.gz
pello-0.1.1.tar.gz
cello-1.0.tar.gz
cello-output-first-patch.patch
Place them in ~/rpmbuild/SOURCES.
Create a SPEC file for each of the three programs:
NOTE
Some programmer-focused text editors pre-populate a new .spec file with their own SPEC template. The rpmdev-newspec provides an editor-agnostic method, which is why it is used in this guide.
$ cd ~/rpmbuild/SPECS
$ rpmdev-newspec bello
bello.spec created; type minimal, rpm version >= 4.11.
$ rpmdev-newspec cello
cello.spec created; type minimal, rpm version >= 4.11.
$ rpmdev-newspec pello
pello.spec created; type minimal, rpm version >= 4.11.
The ~/rpmbuild/SPECS/ directory now contains three SPEC files named bello.spec, cello.spec, and pello.spec.
Examine the files. The directives in them represent the ones described in the What is a SPEC File? section. In the following sections, you will populate these SPEC files.
NOTE
The rpmdev-newspec utility does not use guidelines or conventions specific to any particular Linux distribution. However, this document targets Fedora, CentOS, and RHEL, so you will notice that:
Use rm $RPM_BUILD_ROOTwhen building on CentOS (versions previous to 7.0) or on Fedora (versions previous to 18).
We favor the use of %{buildroot} notation over $RPM_BUILD_ROOT when referencing RPM’s Buildroot for consistency with all other defined or provided macros throughout the SPEC file.
There are three examples below. Each one is fully described, so you can go to a specific one if it matches your packaging needs. Or, read them all to fully explore packaging different kinds of software.
Software Name
Explanation of example
bello
A program written in a raw interpreted programming language. It demonstrates when the source code does not need to be built, but only needs to be installed. If a pre-compiled binary needs to be packaged, you can also use this method since the binary would also just be a file.
pello
A program written in a byte-compiled interpreted programming language. It demonstrates byte-compiling the source code and installating the bytecode — the resulting pre-optimized files.
cello
A program written in a natively compiled programming language. It demonstrates a common process of compiling the source code into machine code and installing the resulting executables.
bello
The first SPEC file is for the bello bash shell script from Preparing Software for Packaging.
Ensure that you have:
Placed bello source code into ~/rpmbuild/SOURCES/. See Working with SPEC files.
Created the unpopulated SPEC file ~/rpmbuild/SPECS/bello.spec. The file has these contents:
Name: bello
Version:
Release: 1%{?dist}
Summary:
License:
URL:
Source0:
BuildRequires:
Requires:
%description
%prep
%setup -q
%build
%configure
make %{?_smp_mflags}
%install
rm -rf $RPM_BUILD_ROOT
%make_install
%files
%doc
%changelog
- Tue May 31 2016 Adam Miller maxamillion@fedoraproject.org
Now, modify ~/rpmbuild/SPECS/bello.spec for creating bello RPMs:
Populate the Name, Version, Release, and Summary directives:
The Name was already specified as an argument to rpmdev-newspec.
Set the Version to match the “upstream” release version of the bello source code, 0.1.
The Release is automatically set to 1%{?dist}, which is initially 1. Increment the initial value whenever updating the package without a change in the upstream release Version — such as when including a patch. Reset Release to 1 when a new upstream release happens, for example, if bello version 0.2 is released. The disttag macro is covered in RPM Macros.
The Summary is a short, one-line explanation of what this software is.
After your edits, the first section of the SPEC file should resemble:
Name: bello
Version: 0.1
Release: 1%{?dist}
Summary: Hello World example implemented in bash script
Populate the License, URL, and Source0 directives:
The License field is the Software License associated with the source code from the upstream release.
Follow this format for the License field: Fedora License Guidelines
For example, use GPLv3+.
The URL field provides URL to the upstream software page. For example, use https://example.com/bello. However, for consistency, utilize the %{name} macro and instead use https://example.com/%{name}.
The Source0 field provides URL to the upstream software source code. It should link directly to the version of software that is being packaged. In this example, we can use https://example.com/bello/releases/bello-0.1.tar.gz. Instead, use the %{name} macro. Also, use the %{version} macro to accomodate for changes in version. The resulting entry is https://example.com/%{name}/releases/%{name}-%{version}.tar.gz.
After your edits, the first section of the SPEC file should resemble:
Name: bello
Version: 0.1
Release: 1%{?dist}
Summary: Hello World example implemented in bash script
License: GPLv3+
URL: https://example.com/%{name}
Source0: https://example.com/%{name}/release/%{name}-%{version}.tar.gz
Populate the BuildRequires and Requires directives and include the BuildArch directive:
BuildRequires specifies build-time dependencies for the package. There is no building step for bello, because bash is a raw interpreted programming language, and the files are simply installed to their location on the system. Just delete this directive.
Requires specifies run-time dependencies for the package. The bello script requires only the bash shell environment to execute, so specify bash in this directive.
Since this is software written in an interpreted programming language with no natively compiled extensions, add the BuildArch directive with the noarch value. This tells RPM that this package does not need to be bound to the processor architecture on which it is built.
After your edits, the first section of the SPEC file should resemble:
Name: bello
Version: 0.1
Release: 1%{?dist}
Summary: Hello World example implemented in bash script
License: GPLv3+
URL: https://example.com/%{name}
Source0: https://example.com/%{name}/release/%{name}-%{version}.tar.gz
Requires: bash
BuildArch: noarch
Populate the %description, %prep, %build, %install, %files, and %license directives. These directives can be thought of as “section headings”, because they are directives that can define multi-line, multi-instruction, or scripted tasks to occur.
The %description is a longer, fuller description of the software than Summary, containing one or more paragraphs. In our example we will use only a short description.
The %prep section specifies how to prepare the build environment. This usually involves expansion of compressed archives of the source code, application of patches, and, potentially, parsing of information provided in the source code for use in a later portion of the SPEC. In this section we simply use the built-in macro %setup -q.
The %build section specifies how to actually build the software we are packaging. However, since a bash does not need to be built, simply remove what was provided by the template and leave this section blank.
The %install section contains instructions for rpmbuild on how to install the software, once it has been built, into the BUILDROOT directory. This directory is an empty chroot base directory, which resembles the end user’s root directory. Here we should create any directories that will contain the installed files.
Since for installing bello we only need to create the destination directory and install the executable bash script file there, we will use the install command. RPM macros allow us to do this without hardcoding paths.
The %install section should look like the following after your edits:
%install
mkdir -p %{buildroot}/%{_bindir}
install -m 0755 %{name} %{buildroot}/%{_bindir}/%{name}
The %files section specifies the list of files provided by this RPM and their full path location on the end user’s system. Therefore, the listing for the bello file we are installing is /usr/bin/bello, or, with RPM Macros, %{_bindir}/%{name}.
Within this section, you can indicate the role of various files using built-in macros. This is useful for querying the package file manifest metadata using the rpm command. For example, to indicate that the LICENSE file is a software license file, we use the %license macro.
After your edits, the %files section looks like this:
%files
%license LICENSE
%{_bindir}/%{name}
The last section, %changelog, is a list of datestamped entries for each Version-Release of the package. They log packaging changes, not software changes. Examples of packaging changes: adding a patch, changing the build procedure in %build.
Follow this format for the first line:
- Day-of-Week Month Day Year Name Surname — Version-Release
Follow this format for the actual change entry:
Each change entry can contain multiple items — one for each change
Each item starts on a new line.
Each item begins with a — character.
An example datestamped entry:
%changelog
- Tue May 31 2016 Adam Miller maxamillion@fedoraproject.org — 0.1-1
- First bello package
- Example second item in the changelog for version-release 0.1-1
You have now written an entire SPEC file for bello. The full SPEC file for bello now resembles:
Name: bello
Version: 0.1
Release: 1%{?dist}
Summary: Hello World example implemented in bash script
License: GPLv3+
URL: https://www.example.com/%{name}
Source0: https://www.example.com/%{name}/releases/%{name}-%{version}.tar.gz
Requires: bash
BuildArch: noarch
%description
The long-tail description for our Hello World Example implemented in
bash script.
%prep
%setup -q
%build
%install
mkdir -p %{buildroot}/%{_bindir}
install -m 0755 %{name} %{buildroot}/%{_bindir}/%{name}
%files
%license LICENSE
%{_bindir}/%{name}
%changelog
- Tue May 31 2016 Adam Miller maxamillion@fedoraproject.org — 0.1-1
- First bello package
- Example second item in the changelog for version-release 0.1-1
The next section covers how to build the RPM.
pello
Our second SPEC file will be for our example written in the Python programming language that you downloaded (or you created a simulated upstream release in the Preparing Software for Packaging section) and placed its source code into ~/rpmbuild/SOURCES/ earlier. Let’s go ahead and open the file ~/rpmbuild/SPECS/pello.spec and start filling in some fields.
Before we start down this path, we need to address something somewhat unique about byte-compiled interpreted software. Since we will be byte-compiling this program, the shebang is no longer applicable because the resulting file will not contain the entry. It is common practice to either have a non-byte-compiled shell script that will call the executable or have a small bit of the Python code that isn’t byte-compiled as the “entry point” into the program’s execution. This might seem silly for our small example but for large software projects with many thousands of lines of code, the performance increase of pre-byte-compiled code is sizeable.
NOTE
The creation of a script to call the byte-compiled code or having a non-byte-compiled entry point into the software is something that upstream software developers most often address before doing a release of their software to the world, however this is not always the case and this exercise is meant to help address what to do in those situations. For more information on how Python code is normally released and distributed please reference the Software Packaging and Distribution documentation.
We will make a small shell script to call our byte compiled code to be the entry point into our software. We will do this as a part of our SPEC file itself in order to demonstrate how you can script actions inside the SPEC file. We will cover the specifics of this in the %install section later.
Let’s go ahead and open the file ~/rpmbuild/SPECS/pello.spec and start filling in some fields.
The following is the output template we were given from rpmdev-newspec.
Name: pello
Version:
Release: 1%{?dist}
Summary:
License:
URL:
Source0:
BuildRequires:
Requires:
%description
%prep
%setup -q
%build
%configure
make %{?_smp_mflags}
%install
rm -rf $RPM_BUILD_ROOT
%make_install
%files
%doc
%changelog
- Tue May 31 2016 Adam Miller maxamillion@fedoraproject.org
Just as with the first example, let’s begin with the first set of directives that rpmdev-newspec has grouped together at the top of the file: Name, Version, Release, Summary. The Name is already specified because we provided that information to the command line for rpmdev-newspec.
Let’s set the Version to match what the “upstream” release version of the pello source code is, which we can observe is 0.1.1 as set by the example code we downloaded (or we created in the Preparing Software for Packaging section).
The Release is already set to 1%{?dist} for us, the numerical value which is initially 1 should be incremented every time the package is updated for any reason, such as including a new patch to fix an issue, but doesn’t have a new upstream release Version. When a new upstream release happens (for example, pello version 0.1.2 were released) then the Release number should be reset to 1. The disttag of %{?dist} should look familiar from the previous section’s coverage of RPM Macros.
The Summary should be a short, one-line explanation of what this software is.
After your edits, the first section of the SPEC file should resemble the following:
Name: pello
Version: 0.1.1
Release: 1%{?dist}
Summary: Hello World example implemented in Python
Now, let’s move on to the second set of directives that rpmdev-newspec has grouped together in our SPEC file: License, URL, Source0.
The License field is the Software License associated with the source code from the upstream release. The exact format for how to label the License in your SPEC file will vary depending on which specific RPM based Linux distribution guidelines you are following, we will use the notation standards in the Fedora License Guidelines for this document and as such this field will contain the text GPLv3+
The URL field is the upstream software’s website, not the source code download link but the actual project, product, or company website where someone would find more information about this particular piece of software. Since we’re just using an example, we will call this https://example.com/pello. However, we will use the RPM macro variable of %{name} in it’s place for consistency.
The Source0 field is where the upstream software’s source code should be able to be downloaded from. This URL should link directly to the specific version of the source code release that this RPM Package is packaging. Once again, since this is an example we will use an example value: https://example.com/pello/releases/pello-0.1.1.tar.gz
We should note that this example URL has hard coded values in it that are possible to change in the future and are potentially even likely to change such as the release version 0.1.1. We can simplify this by only needing to update one field in the SPEC file and allowing it to be reused. we will use the value https://example.com/%{name}/releases/%{name}-%{version}.tar.gz instead of the hard coded examples string previously listed.
After your edits, the top portion of your spec file should look like the following:
Name: pello
Version: 0.1.1
Release: 1%{?dist}
Summary: Hello World example implemented in Python
License: GPLv3+
URL: https://example.com/%{name}
Source0: https://example.com/%{name}/release/%{name}-%{version}.tar.gz
Next up we have BuildRequires and Requires, each of which define something that is required by the package. However, BuildRequires is to tell rpmbuild what is needed by your package at build time and Requires is what is needed by your package at run time.
In this example we will need the python package in order to perform the byte-compile build process. We will also need the python package in order to execute the byte-compiled code at runtime and therefore need to define python as a requirement using the Requires directive. We will also need the bash package in order to execute the small entry-point script we will use here.
Something we need to add here since this is software written in an interpreted programming language with no natively compiled extensions is a BuildArch entry that is set to noarch in order to tell RPM that this package does not need to be bound to the processor architecture that it is built using.
After your edits, the top portion of your spec file should look like the following:
Name: pello
Version: 0.1.1
Release: 1%{?dist}
Summary: Hello World example implemented in Python
License: GPLv3+
URL: https://example.com/%{name}
Source0: https://example.com/%{name}/release/%{name}-%{version}.tar.gz
BuildRequires: python
Requires: python
Requires: bash
BuildArch: noarch
The following directives can be thought of as “section headings” because they are directives that can define multi-line, multi-instruction, or scripted tasks to occur. We will walk through them one by one just as we did with the previous items.
The %description should be a longer, more full length description of the software being packaged than what is found in the Summary directive. For the sake of our example, this isn’t really going to contain much content but this section can be a full paragraph or more than one paragraph if desired.
The %prep section is where we prepare our build environment or workspace for building. Most often what happens here is the expansion of compressed archives of the source code, application of patches, and potentially parsing of information provided in the source code that is necessary in a later portion of the SPEC. In this section we will simply use the provided macro %setup -q.
The %build section is where we tell the system how to actually build the software we are packaging. Here we will perform a byte-compilation of our software. For those who read the Preparing Software for Packaging section, this portion of the example should look familiar.
The %build section of our SPEC file should look as follows.
%build
python -m compileall pello.py
The %install section is where we instruct rpmbuild how to install our previously built software into the BUILDROOT which is effectively a chroot base directory with nothing in it and we will have to construct any paths or directory hierarchies that we will need in order to install our software here in their specific locations. However, our RPM Macros help us accomplish this task without having to hardcode paths.
We had previously discussed that since we will lose the context of a file with the shebang line in it when we byte compile that we will need to create a simple wrapper script in order to accomplish that task. There are many options on how to accomplish this including, but not limited to, making a separate script and using that as a separate SourceX directive and the option we’re going to show in this example which is to create the file in-line in the SPEC file. The reason for showing the example option that we are is simply to demonstrate that the SPEC file itself is scriptable. What we’re going to do is create a small “wrapper script” which will execute the Python byte-compiled code by using a here document . We will also need to actually install the byte-compiled file into a library directory on the system such that it can be accessed.
NOTE
You will notice below that we are hard coding the library path. There are various methods to avoid needing to do this, many of which are addressed in Advanced Topics, under the More on Macros section, and are specific to the programming language in which the software that is being packaged was written in. In this example we hard code the path for simplicity as to not cover too many topics simultaneously.
The %install section should look like the following after your edits:
%install
mkdir -p %{buildroot}/%{_bindir}
mkdir -p %{buildroot}/usr/lib/%{name}
cat > %{buildroot}/%{_bindir}/%{name} <<-EOF
#!/bin/bash
/usr/bin/python /usr/lib/%{name}/%{name}.pyc
EOF
chmod 0755 %{buildroot}/%{_bindir}/%{name}
install -m 0644 %{name}.py* %{buildroot}/usr/lib/%{name}/
The %files section is where we provide the list of files that this RPM provides and where it’s intended for them to live on the system that the RPM is installed upon. Note here that this isn’t relative to the %{buildroot} but the full path for the files as they are expected to exist on the end system after installation. Therefore, the listing for the pello file we are installing will be %{_bindir}/pello. We will also need to provide a %dir listing to define that this package “owns” the library directory we created as well as all the files we placed in it.
Also within this section, you will sometimes need a built-in macro to provide context on a file. This can be useful for Systems Administrators and end users who might want to query the system with rpm about the resulting package. The built-in macro we will use here is %license which will tell rpmbuild that this is a software license file in the package file manifest metadata.
The %files section should look like the following after your edits:
%files
%license LICENSE
%dir /usr/lib/%{name}/
%{_bindir}/%{name}
/usr/lib/%{name}/%{name}.py*
The last section, %changelog is a list of date-stamped entries that correlate to a specific Version-Release of the package. This is not meant to be a log of what changed in the software from release to release, but specifically to packaging changes. For example, if software in a package needed patching or there was a change needed in the build procedure listed in the %build section that information would go here. Each change entry can contain multiple items and each item should start on a new line and begin with a — character. Below is our example entry:
%changelog
- Tue May 31 2016 Adam Miller maxamillion@fedoraproject.org — 0.1.1-1
- First pello package
- Example second item in the changelog for version-release 0.1.1-1
Note the format above, the date-stamp will begin with a * character, followed by the calendar day of the week, the month, the day of the month, the year, then the contact information for the RPM Packager. From there we have a — character before the Version-Release, which is an often used convention but not a requirement. Then finally the Version-Release.
That’s it! We’ve written an entire SPEC file for pello! In the next section we will cover how to build the RPM!
The full SPEC file should now look like the following:
Name: pello
Version: 0.1.1
Release: 1%{?dist}
Summary: Hello World example implemented in python
License: GPLv3+
URL: https://www.example.com/%{name}
Source0: https://www.example.com/%{name}/releases/%{name}-%{version}.tar.gz
BuildRequires: python
Requires: python
Requires: bash
BuildArch: noarch
%description
The long-tail description for our Hello World Example implemented in
Python.
%prep
%setup -q
%build
python -m compileall %{name}.py
%install
mkdir -p %{buildroot}/%{_bindir}
mkdir -p %{buildroot}/usr/lib/%{name}
cat > %{buildroot}/%{_bindir}/%{name} <<-EOF
#!/bin/bash
/usr/bin/python /usr/lib/%{name}/%{name}.pyc
EOF
chmod 0755 %{buildroot}/%{_bindir}/%{name}
install -m 0644 %{name}.py* %{buildroot}/usr/lib/%{name}/
%files
%license LICENSE
%dir /usr/lib/%{name}/
%{_bindir}/%{name}
/usr/lib/%{name}/%{name}.py*
%changelog
- Tue May 31 2016 Adam Miller maxamillion@fedoraproject.org — 0.1.1-1
- First pello package
cello
Our third SPEC file will be for our example written in the C programming language that we created a simulated upstream release of previously (or you downloaded) and placed it’s source code into ~/rpmbuild/SOURCES/ earlier.
- First pello package
Let’s go ahead and open the file ~/rpmbuild/SPECS/cello.spec and start filling in some fields.
The following is the output template we were given from rpmdev-newspec.
Name: cello
Version:
Release: 1%{?dist}
Summary:
License:
URL:
Source0:
BuildRequires:
Requires:
%description
%prep
%setup -q
%build
%configure
make %{?_smp_mflags}
%install
rm -rf $RPM_BUILD_ROOT
%make_install
%files
%doc
%changelog
- Tue May 31 2016 Adam Miller maxamillion@fedoraproject.org
Just as with the previous examples, let’s begin with the first set of directives that rpmdev-newspec has grouped together at the top of the file: Name, Version, Release, Summary. The Name is already specified because we provided that information to the command line for rpmdev-newspec.
Let’s set the Version to match what the “upstream” release version of the cello source code is, which we can observe is 1.0 as set by the example code we downloaded (or we created in the Preparing Software for Packaging section).
The Release is already set to 1%{?dist} for us, the numerical value which is initially 1 should be incremented every time the package is updated for any reason, such as including a new patch to fix an issue, but doesn’t have a new upstream release Version. When a new upstream release happens (for example, cello version 2.0 were released) then the Release number should be reset to 1. The disttag of %{?dist} should look familiar from the previous section’s coverage of RPM Macros.
The Summary should be a short, one-line explanation of what this software is.
After your edits, the first section of the SPEC file should resemble the following:
Name: cello
Version: 1.0
Release: 1%{?dist}
Summary: Hello World example implemented in C
Now, let’s move on to the second set of directives that rpmdev-newspec has grouped together in our SPEC file: License, URL, Source0. However, we will add one to this grouping as it is closely related to the Source0 and that is our Patch0 which will list the first patch we need against our software.
The License field is the Software License associated with the source code from the upstream release. The exact format for how to label the License in your SPEC file will vary depending on which specific RPM based Linux distribution guidelines you are following, we will use the notation standards in the Fedora License Guidelines for this document and as such this field will contain the text GPLv3+
The URL field is the upstream software’s website, not the source code download link but the actual project, product, or company website where someone would find more information about this particular piece of software. Since we’re just using an example, we will call this https://example.com/cello. However, we will use the rpm macro variable of %{name} in it’s place for consistency.
The Source0 field is where the upstream software’s source code should be able to be downloaded from. This URL should link directly to the specific version of the source code release that this RPM Package is packaging. Once again, since this is an example we will use an example value: https://example.com/cello/releases/cello-1.0.tar.gz
We should note that this example URL has hard coded values in it that are possible to change in the future and are potentially even likely to change such as the release version 1.0. We can simplify this by only needing to update one field in the SPEC file and allowing it to be reused. we will use the value https://example.com/%{name}/releases/%{name}-%{version}.tar.gz instead of the hard coded examples string previously listed.
The next item is to provide a listing for the .patch file we created earlier such that we can apply it to the code later in the %prep section. We will need a listing of Patch0: cello-output-first-patch.patch.
After your edits, the top portion of your spec file should look like the following:
Name: cello
Version: 1.0
Release: 1%{?dist}
Summary: Hello World example implemented in C
License: GPLv3+
URL: https://example.com/%{name}
Source0: https://example.com/%{name}/release/%{name}-%{version}.tar.gz
Patch0: cello-output-first-patch.patch
Next up we have BuildRequires and Requires, each of which define something that is required by the package. However, BuildRequires is to tell rpmbuild what is needed by your package at build time and Requires is what is needed by your package at run time.
In this example we will need the gcc and make packages in order to perform the compilation build process. Runtime requirements are fortunately handled for us by rpmbuild because this program does not require anything outside of the core C standard libraries and we therefore will not need to define anything by hand as a Requires and can omit that directive.
After your edits, the top portion of your spec file should look like the following:
Name: cello
Version: 0.1
Release: 1%{?dist}
Summary: Hello World example implemented in C
License: GPLv3+
URL: https://example.com/%{name}
Source0: https://example.com/%{name}/release/%{name}-%{version}.tar.gz
BuildRequires: gcc
BuildRequires: make
The following directives can be thought of as “section headings” because they are directives that can define multi-line, multi-instruction, or scripted tasks to occur. We will walk through them one by one just as we did with the previous items.
The %description should be a longer, more full length description of the software being packaged than what is found in the Summary directive. For the sake of our example, this isn’t really going to contain much content but this section can be a full paragraph or more than one paragraph if desired.
The %prep section is where we prepare our build environment or workspace for building. Most often what happens here is the expansion of compressed archives of the source code, application of patches, and potentially parsing of information provided in the source code that is necessary in a later portion of the SPEC. In this section we will simply use the provided macro %setup -q.
The %build section is where we tell the system how to actually build the software we are packaging. Since wrote a simple Makefile for our C implementation, we can simply use the GNU make command provided by rpmdev-newspec. However, we need to remove the call to %configure because we did not provide a configure script ifdef::rhel[configure script]. The %build section of our SPEC file should look as follows.
%build
make %{?_smp_mflags}
The %install section is where we instruct rpmbuild how to install our previously built software into the BUILDROOT which is effectively a chroot base directory with nothing in it and we will have to construct any paths or directory hierarchies that we will need in order to install our software here in their specific locations. However, our RPM Macros help us accomplish this task without having to hardcode paths.
Once again, since we have a simple Makefile the installation step can be accomplished easily by leaving in place the %make_install macro that was again provided for us by the rpmdev-newspec command.
The %install section should look like the following after your edits:
%install
%make_install
The %files section is where we provide the list of files that this RPM provides and where it’s intended for them to live on the system that the RPM is installed upon. Note here that this isn’t relative to the %{buildroot} but the full path for the files as they are expected to exist on the end system after installation. Therefore, the listing for the cello file we are installing will be %{_bindir}/cello.
Also within this section, you will sometimes need a built-in macro to provide context on a file. This can be useful for Systems Administrators and end users who might want to query the system with rpm about the resulting package. The built-in macro we will use here is %license which will tell rpmbuild that this is a software license file in the package file manifest metadata.
The %files section should look like the following after your edits:
%files
%license LICENSE
%{_bindir}/%{name}
The last section, %changelog is a list of date-stamped entries that correlate to a specific Version-Release of the package. This is not meant to be a log of what changed in the software from release to release, but specifically to packaging changes. For example, if software in a package needed patching or there was a change needed in the build procedure listed in the %build section that information would go here. Each change entry can contain multiple items and each item should start on a new line and begin with a — character. Below is our example entry:
%changelog
- Tue May 31 2016 Adam Miller maxamillion@fedoraproject.org — 0.1-1
- First cello package
Note the format above, the date-stamp will begin with a * character, followed by the calendar day of the week, the month, the day of the month, the year, then the contact information for the RPM Packager. From there we have a — character before the Version-Release, which is an often used convention but not a requirement. Then finally the Version-Release.
That’s it! We’ve written an entire SPEC file for cello! In the next section we will cover how to build the RPM!
The full SPEC file should now look like the following:
Name: cello
Version: 1.0
Release: 1%{?dist}
Summary: Hello World example implemented in C
License: GPLv3+
URL: https://www.example.com/%{name}
Source0: https://www.example.com/%{name}/releases/%{name}-%{version}.tar.gz
Patch0: cello-output-first-patch.patch
BuildRequires: gcc
BuildRequires: make
%description
The long-tail description for our Hello World Example implemented in
C.
%prep
%setup -q
%patch0
%build
make %{?_smp_mflags}
%install
%make_install
%files
%license LICENSE
%{_bindir}/%{name}
%changelog
- Tue May 31 2016 Adam Miller maxamillion@fedoraproject.org — 1.0-1
- First cello package
The rpmdevtools package provides a set of SPEC file templates for several popular languages in the /etc/rpmdevtools/ directory.
Building RPMS
RPMs are built with the rpmbuild command. Different scenarios and desired outcomes require different combinations of arguments to rpmbuild. This section describes the two prime scenarios:
building a source RPM
building a binary RPM
The rpmbuild command expects a certain directory and file structure. This is the same structure as set up by the rpmdev-setuptree utility. The previous instructions also confirmed to the required structure.
Source RPMs
Why build a Source RPM (SRPM)?
To preserve the exact source of a certain Name-Version-Release of the RPM that was deployed to an environment. This includes the exact SPEC file, the source code, and all relevant patches. This is useful for looking back in history and for debugging.
To be able to build a binary RPM on a different hardware platform or architecture.
To create a SRPM:
$ rpmbuild -bs SPECFILE
Substitute SPECFILE with the SPEC file. The -bs option stands for «build source».
Here we build SRPMs for bello, pello, and cello:
$ cd ~/rpmbuild/SPECS/
$ rpmbuild -bs bello.spec
Wrote: /home/admiller/rpmbuild/SRPMS/bello-0.1-1.el7.src.rpm
$ rpmbuild -bs pello.spec
Wrote: /home/admiller/rpmbuild/SRPMS/pello-0.1.1-1.el7.src.rpm
$ rpmbuild -bs cello.spec
Wrote: /home/admiller/rpmbuild/SRPMS/cello-1.0-1.el7.src.rpm
Note that SRPMs were placed into the rpmbuild/SRPMS directory, which is part of the structure expected by rpmbuild.
This is all there is to building a SRPM.
Binary RPMS
There are two methods for building Binary RPMs:
Rebuilding it from a SRPM using the rpmbuild —rebuild command.
Building it from a SPEC file using the rpmbuild -bb command. The -bb option stands for «build binary».
Rebuilding from a Source RPM
To rebuild bello, pello, and cello from Source RPMs (SRPMs), run:
$ rpmbuild —rebuild ~/rpmbuild/SRPMS/bello-0.1-1.el7.src.rpm
[output truncated]
$ rpmbuild —rebuild ~/rpmbuild/SRPMS/pello-0.1.1-1.el7.src.rpm
[output truncated]
$ rpmbuild —rebuild ~/rpmbuild/SRPMS/cello-1.0-1.el7.src.rpm
[output truncated]
Now you have built RPMs. A few notes:
The output generated when creating a binary RPM is verbose, which is helpful for debugging. The output varies for different examples and corresponds to their SPEC files.
The resulting binary RPMs are in ~/rpmbuild/RPMS/YOURARCH where YOURARCH is your architecture or in ~/rpmbuild/RPMS/noarch/, if the package is not architecture-specific.
Invoking rpmbuild —rebuild involves:
Installing the contents of the SRPM — the SPEC file and the source code — into the ~/rpmbuild/ directory.
Building using the installed contents.
Removing the SPEC file and the source code.
You can retain the SPEC file and the source code after building. For this, you have two options:
When building, use the —recompile option instead of —rebuild.
Install the SRPMs using these commands:
$ rpm -Uvh ~/rpmbuild/SRPMS/bello-0.1-1.el7.src.rpm
Updating / installing…
1:bello-0.1-1.el7 ################################# [100%]
$ rpm -Uvh ~/rpmbuild/SRPMS/pello-0.1.1-1.el7.src.rpm
Updating / installing…
1:pello-0.1.1-1.el7 ################################# [100%]
$ rpm -Uvh ~/rpmbuild/SRPMS/cello-1.0-1.el7.src.rpm
Updating / installing…
1:cello-1.0-1.el7 ################################# [100%]
For this tutorial, execute the rpm -Uvh commands above to continue interacting with the SPEC files and sources.
Building Binary from the SPEC file
To build bello, pello, and cello from their SPEC files, run:
$ rpmbuild -bb ~/rpmbuild/SPECS/bello.spec
$ rpmbuild -bb ~/rpmbuild/SPECS/pello.spec
$ rpmbuild -bb ~/rpmbuild/SPECS/cello.spec
Now you have built RPMs from SPEC files.
Most of the information in Rebuilding from a Source RPM apply here.
Checking RPMs For Sanity
After creating a package, it is good to check its quality. Quality of the package, not of the software delivered within it. The main tool for this is rpmlint. It improves RPM maintainability and enables sanity and error checking by performing static analysis of the RPM. This utility can check Binary RPMs, Source RPMs (SRPMs), and SPEC files, so is useful for all stages of packaging, as shown in the following examples.
Note that rpmlint has very strict guidelines, and sometimes it is acceptable and necessary to skip some of its Errors and Warnings, as shown in the following examples.
NOTE
In the examples, we run rpmlint without any options, which produces non-verbose output. For detailed explanations of each Error or Warning, run rpmlint -i instead.
Checking the bello SPEC File
This is the output of running rpmlint on the SPEC file for bello:
$ rpmlint bello.spec
bello.spec: W: invalid-url Source0: https://www.example.com/bello/releases/bello-0.1.tar.gz HTTP Error 404: Not Found
0 packages and 1 specfiles checked; 0 errors, 1 warnings.
Observations:
For bello.spec there is only one warning. It says that the URL listed in the Source0 directive is unreachable. This is expected, because the specified example.com URL does not exist. Presuming that we expect this URL to work in the future, we can ignore this warning.
This is the output of running rpmlint on the SRPM for bello:
$ rpmlint ~/rpmbuild/SRPMS/bello-0.1-1.el7.src.rpm
bello.src: W: invalid-url URL: https://www.example.com/bello HTTP Error 404: Not Found
bello.src: W: invalid-url Source0: https://www.example.com/bello/releases/bello-0.1.tar.gz HTTP Error 404: Not Found
1 packages and 0 specfiles checked; 0 errors, 2 warnings.
Observations:
For the bello SRPM there is a new warning, which says that the URL specified in the URL directive is unreachable. Assuming the link will be working in the future, we can ignore this warning.
Checking the bello Binary RPM
When checking Binary RPMs, rpmlint checks for more things, including:
documentation
manual pages
consistent use of the
Filesystem Hierarchy Standard
This is the output of running rpmlint on the Binary RPM for bello:
$ rpmlint ~/rpmbuild/RPMS/noarch/bello-0.1-1.el7.noarch.rpm
bello.noarch: W: invalid-url URL: https://www.example.com/bello HTTP Error 404: Not Found
bello.noarch: W: no-documentation
bello.noarch: W: no-manual-page-for-binary bello
1 packages and 0 specfiles checked; 0 errors, 3 warnings.
Observations:
The no-documentation and no-manual-page-for-binary warnings say that the RPM has no documentation or manual pages, because we did not provide any.
Apart from the above warnings, our RPM is passing rpmlint checks.
Checking the pello SPEC File
This is the output of running rpmlint on the SPEC file for pello:
$ rpmlint pello.spec
pello.spec:30: E: hardcoded-library-path in %{buildroot}/usr/lib/%{name}
pello.spec:34: E: hardcoded-library-path in /usr/lib/%{name}/%{name}.pyc
pello.spec:39: E: hardcoded-library-path in %{buildroot}/usr/lib/%{name}/
pello.spec:43: E: hardcoded-library-path in /usr/lib/%{name}/
pello.spec:45: E: hardcoded-library-path in /usr/lib/%{name}/%{name}.py*
pello.spec: W: invalid-url Source0: https://www.example.com/pello/releases/pello-0.1.1.tar.gz HTTP Error 404: Not Found
0 packages and 1 specfiles checked; 5 errors, 1 warnings.
Observations:
The invalid-url Source0 warning says that the URL listed in the Source0 directive is unreachable. This is expected, because the specified example.com URL does not exist. Presuming that we expect this URL to work in the future, we can ignore this warning.
There are many errors, because we intentionally wrote this SPEC file to be uncomplicated and to show what errors rpmlint can report.
The hardcoded-library-path errors suggest to use the %{_libdir} macro instead of hard-coding the library path. For the sake of this example, we ignore these errors, but for packages going in production you need a good reason for ignoring this error.
This is the output of running rpmlint on the SRPM for pello:
$ rpmlint ~/rpmbuild/SRPMS/pello-0.1.1-1.el7.src.rpm
pello.src: W: invalid-url URL: https://www.example.com/pello HTTP Error 404: Not Found
pello.src:30: E: hardcoded-library-path in %{buildroot}/usr/lib/%{name}
pello.src:34: E: hardcoded-library-path in /usr/lib/%{name}/%{name}.pyc
pello.src:39: E: hardcoded-library-path in %{buildroot}/usr/lib/%{name}/
pello.src:43: E: hardcoded-library-path in /usr/lib/%{name}/
pello.src:45: E: hardcoded-library-path in /usr/lib/%{name}/%{name}.py*
pello.src: W: invalid-url Source0: https://www.example.com/pello/releases/pello-0.1.1.tar.gz HTTP Error 404: Not Found
1 packages and 0 specfiles checked; 5 errors, 2 warnings.
Observations:
The new invalid-url URL error here is about the URL directive, which is unreachable. Assuming that we expect the URL to become valid in the future, we can ignore this error.
Checking the pello Binary RPM
When checking Binary RPMs, rpmlint checks for more things, including:
documentation
manual pages
consistent use of the
Filesystem Hierarchy Standard
This is the output of running rpmlint on the Binary RPM for pello:
$ rpmlint ~/rpmbuild/RPMS/noarch/pello-0.1.1-1.el7.noarch.rpm
pello.noarch: W: invalid-url URL: https://www.example.com/pello HTTP Error 404: Not Found
pello.noarch: W: only-non-binary-in-usr-lib
pello.noarch: W: no-documentation
pello.noarch: E: non-executable-script /usr/lib/pello/pello.py 0644L /usr/bin/env
pello.noarch: W: no-manual-page-for-binary pello
1 packages and 0 specfiles checked; 1 errors, 4 warnings.
Observations:
The no-documentation and no-manual-page-for-binary warnings say that the RPM has no documentation or manual pages, because we did not provide any.
The only-non-binary-in-usr-lib warning says that you provided only non-binary artifacts in /usr/lib/. This directory is normally reserved for shared object files, which are binary files. Therefore, rpmlint expects at least one or more files in /usr/lib/ to be binary.
This is an example of an rpmlint check for compliance with Filesystem Hierarchy Standard .
Normally, use RPM macros to ensure the correct placement of files. For the sake of this example, we can ignore this warning.
The non-executable-script error warns that the /usr/lib/pello/pello.py file has no execute permissions. Since this file contains the shebang , rpmlint expects the file to be executable. For the purpose of the example, leave this file without execute permissions and ignore this error.
Apart from the above warnings and errors, our RPM is passing rpmlint checks.
Checking the cello SPEC File
This is the output of running rpmlint on the SPEC file for cello:
$ rpmlint ~/rpmbuild/SPECS/cello.spec
/home/admiller/rpmbuild/SPECS/cello.spec: W: invalid-url Source0: https://www.example.com/cello/releases/cello-1.0.tar.gz HTTP Error 404: Not Found
0 packages and 1 specfiles checked; 0 errors, 1 warnings.
Observations:
The only warning for cello.spec says that the URL listed in the Source0 directive is unreachable. This is expected, because the specified example.com URL does not exist. Presuming that we expect this URL to work in the future, we can ignore this warning.
This is the output of running rpmlint on the SRPM file for cello:
$ rpmlint ~/rpmbuild/SRPMS/cello-1.0-1.el7.src.rpm
cello.src: W: invalid-url URL: https://www.example.com/cello HTTP Error 404: Not Found
cello.src: W: invalid-url Source0: https://www.example.com/cello/releases/cello-1.0.tar.gz HTTP Error 404: Not Found
1 packages and 0 specfiles checked; 0 errors, 2 warnings.
Observations:
For the cello SRPM there is a new warning, which says that the URL specified in the URL directive is unreachable. Assuming the link will be working in the future, we can ignore this warning.
Checking the cello Binary RPM
When checking Binary RPMs, rpmlint checks for more things, including:
documentation
manual pages
consistent use of the Filesystem Hierarchy Standard .
This is the output of running rpmlint on the Binary RPM for cello:
$ rpmlint ~/rpmbuild/RPMS/x86_64/cello-1.0-1.el7.x86_64.rpm
cello.x86_64: W: invalid-url URL: https://www.example.com/cello HTTP Error 404: Not Found
cello.x86_64: W: no-documentation
cello.x86_64: W: no-manual-page-for-binary cello
1 packages and 0 specfiles checked; 0 errors, 3 warnings.
Observations:
The no-documentation and no-manual-page-for-binary warnings say that the RPM has no documentation or manual pages, because we did not provide any.
Apart from the above warnings and errors, our RPM is passing rpmlint checks.
Our RPMs are now ready and checked with rpmlint. This concludes the tutorial. For more information on packaging RPMs, proceed to Advanced Topics.
Advanced Topics
This chapter covers topics that are beyond the scope of the introductory tutorial but are often useful in real-world RPM packaging.
Signing Packages
Signing a package is a way to secure the package for an end user. Secure transport can be achieved with implementation of the HTTPS protocol, which can be done when the package is downloaded just before installing. However, the packages are often downloaded in advance and stored in local repositories before they are used. The packages are signed to make sure no third party can alter the content of a package.
There are three ways to sign a package:
Adding a signature to an already existing package.
Replacing the signature on an already existing package.
Signing a package at build-time.
Adding a Signature to a Package
In most cases packages are built without a signature. The signature is added just before the release of the package.
In order to add another signature to the package package, use the —addsign option. Having more than one signature makes it possible to record the package’s path of ownership from the package builder to the end-user.
As an example, a division of a company creates a package and signs it with the division’s key. The company’s headquarters then checks the package’s signature and adds the corporate signature to the package, stating that the signed package is authentic.
With two signatures, the package makes its way to a retailer. The retailer checks the signatures and, if they check out, adds their signature as well.
The package now makes its way to a company that wishes to deploy the package. After checking every signature on the package, they know that it is an authentic copy, unchanged since it was first created. Depending on the deploying company’s internal controls, they may choose to add their own signature, to reassure their employees that the package has received their corporate approval.
The output from the —addsign option:
$ rpm —addsign blather-7.9-1.i386.rpm
Enter pass phrase:
Pass phrase is good.
blather-7.9-1.i386.rpm:
To check the signatures of a package with multiple signatures:
$ rpm —checksig blather-7.9-1.i386.rpm
blather-7.9-1.i386.rpm: size pgp pgp md5 OK
The two pgp strings in the output of the rpm —checksig command show that the package has been signed twice.
RPM makes it possible to add the same signature multiple times. The —addsign option does not check for multiple identical signatures.
$ rpm —addsig blather-7.9-1.i386.rpm
Enter pass phrase:
Pass phrase is good.
blather-7.9-1.i386.rpm:
$ rpm —addsig blather-7.9-1.i386.rpm
Enter pass phrase:
Pass phrase is good.
blather-7.9-1.i386.rpm:
$ rpm —addsig blather-7.9-1.i386.rpm
Enter pass phrase:
Pass phrase is good.
blather-7.9-1.i386.rpm:
$ rpm —checksig blather-7.9-1.i386.rpm
blather-7.9-1.i386.rpm: size pgp pgp pgp pgp md5 OK
The output of the rpm —checksig command displays four signatures.
Replacing a Package Signature
To change the public key without having to rebuild each package, use the —resign option.
$ rpm —resign blather-7.9-1.i386.rpm
Enter pass phrase:
Pass phrase is good.
blather-7.9-1.i386.rpm:
To use the —resign option on multiple package files:
$ rpm —resign b*.rpm
Enter pass phrase:
Pass phrase is good.
blather-7.9-1.i386.rpm:
bother-3.5-1.i386.rpm:
Build-time Signing
To sign a package at build-time, use the rpmbuild command with the —sign option. This requires entering the PGP passphrase.
For example:
$ rpmbuild -ba —sign blather-7.9.spec
Enter pass phrase:
Pass phrase is good.
- Package: blather
…
Binary Packaging: blather-7.9-1
Finding dependencies…
…
Generating signature: 1002
Wrote: /usr/src/redhat/RPMS/i386/blather-7.9-1.i386.rpm
…
Source Packaging: blather-7.9-1
…
Generating signature: 1002
Wrote: /usr/src/redhat/SRPMS/blather-7.9-1.src.rpm
The «Generating signature» message appears in both the binary and source packaging sections. The number following the message indicates that the signature added was created using PGP.
NOTE
When using the —sign option for rpmbuild, use only -bb or -ba options for package building. -ba option mean build binary and source packages.
To verify the signature of a package, use the rpm command with —checksig option. For example:
$ rpm —checksig blather-7.9-1.i386.rpm
blather-7.9-1.i386.rpm: size pgp md5 OK
Building Multiple Packages
When building multiple packages, use the following syntax to avoid entering the PGP passphrase multiple times. For example when building the blather and bother packages, sign them by using the following:
$ rpmbuild -ba —sign b*.spec
Enter pass phrase:
Pass phrase is good.
- Package: blather
…
Binary Packaging: blather-7.9-1
…
Generating signature: 1002
Wrote: /usr/src/redhat/RPMS/i386/blather-7.9-1.i386.rpm
…
Source Packaging: blather-7.9-1
…
Generating signature: 1002
Wrote: /usr/src/redhat/SRPMS/blather-7.9-1.src.rpm
… - Package: bother
…
Binary Packaging: bother-3.5-1
…
Generating signature: 1002
Wrote: /usr/src/redhat/RPMS/i386/bother-3.5-1.i386.rpm
…
Source Packaging: bother-3.5-1
…
Generating signature: 1002
Wrote: /usr/src/redhat/SRPMS/bother-3.5-1.src.rpm
Mock
Mock is a tool for building packages. It can build packages for different architectures and different Fedora or RHEL versions than the build host has. Mock creates chroots and builds packages in them. Its only task is to reliably populate a chroot and attempt to build a package in that chroot.
Mock also offers a multi-package tool, mockchain, that can build chains of packages that depend on each other.
Mock is capable of building SRPMs from source configuration management if the mock-scm package is present, then building the SRPM into RPMs. See –scm-enable in the documentation. (From the upstream documentation)
NOTE
In order to use Mock on a RHEL or CentOS system, you will need to enable the “Extra Packages for Enterprise Linux” (EPEL) repository. This is a repository provided by the Fedora community and has many useful tools for RPM Packagers, systems administrators, and developers.
One of the most common use cases RPM Packagers have for Mock is to create what is known as a “pristine build environment”. By using mock as a “pristine build environment”, nothing about the current state of your system affects the RPM Package itself. Mock uses different configurations to specify what the build “target” is, these are found on your system in the /etc/mock/ directory (once you’ve installed the mock package). You can build for different distributions or releases just by specifying it on the command line. Something to keep in mind is that the configuration files that come with mock are targeted at Fedora RPM Packagers, and as such RHEL and CentOS release versions are labeled as “epel” because that is the “target” repository these RPMs would be built for. You simply specify the configuration you want to use (minus the .cfg file extension). For example, you could build our cello example for both RHEL 7 and Fedora 23 using the following commands without ever having to use different machines.
$ mock -r epel-7-x86_64 ~/rpmbuild/SRPMS/cello-1.0-1.el7.src.rpm
$ mock -r fedora-23-x86_64 ~/rpmbuild/SRPMS/cello-1.0-1.el7.src.rpm
One example of why you might want to use mock is if you were packaging RPMs on your laptop and you had a package installed (we’ll call it foo for this example) that was a BuildRequires of that package you were creating but forgot to actually make the BuildRequires: foo entry. The build would succeed when you run rpmbuild because foo was needed to build and it was found on the system at build time. However, if you took the SRPM to another system that lacked foo it would fail, causing an unexpected side effect. Mock solves this by first parsing the contents of the SRPM and installing the BuildRequires into its chroot which means that if you were missing the BuildRequires entry, the build would fail because mock would not know to install it and it would therefore not be present in the buildroot.
Another example is the opposite scenario, let’s say you need gcc to build a package but don’t have it installed on your system (which is unlikely as an RPM Packager, but just for the sake of the example let us pretend that is true). With Mock, you don’t have to install gcc on your system because it will get installed in the chroot as part of mock’s process.
Below is an example of attempting to rebuild a package that has a dependency that I’m missing on my system. The key thing to note is that while gcc is commonly on most RPM Packager’s systems, some RPM Packages can have over a dozen BuildRequires and this allows you to not need to clutter up your workstation with otherwise un-needed or un-necessary packages.
$ rpmbuild —rebuild ~/rpmbuild/SRPMS/cello-1.0-1.el7.src.rpm
Installing /home/admiller/rpmbuild/SRPMS/cello-1.0-1.el7.src.rpm
error: Failed build dependencies: gcc is needed by cello-1.0-1.el7.x86_64
$ mock -r epel-7-x86_64 ~/rpmbuild/SRPMS/cello-1.0-1.el7.src.rpm
INFO: mock.py version 1.2.17 starting (python version = 2.7.5)…
Start: init plugins
INFO: selinux enabled
Finish: init plugins
Start: run
INFO: Start(/home/admiller/rpmbuild/SRPMS/cello-1.0-1.el7.src.rpm) Config(epel-7-x86_64)
Start: clean chroot
Finish: clean chroot
Start: chroot init
INFO: calling preinit hooks
INFO: enabled root cache
Start: unpacking root cache
Finish: unpacking root cache
INFO: enabled yum cache
Start: cleaning yum metadata
Finish: cleaning yum metadata
Mock Version: 1.2.17
INFO: Mock Version: 1.2.17
Start: yum update
base | 3.6 kB 00:00:00
epel | 4.3 kB 00:00:00
extras | 3.4 kB 00:00:00
updates | 3.4 kB 00:00:00
No packages marked for update
Finish: yum update
Finish: chroot init
Start: build phase for cello-1.0-1.el7.src.rpm
Start: build setup for cello-1.0-1.el7.src.rpm
warning: Could not canonicalize hostname: rhel7
Building target platforms: x86_64
Building for target x86_64
Wrote: /builddir/build/SRPMS/cello-1.0-1.el7.centos.src.rpm
Getting requirements for cello-1.0-1.el7.centos.src
—> Already installed : gcc-4.8.5-4.el7.x86_64
—> Already installed : 1:make-3.82-21.el7.x86_64
No uninstalled build requires
Finish: build setup for cello-1.0-1.el7.src.rpm
Start: rpmbuild cello-1.0-1.el7.src.rpm
Building target platforms: x86_64
Building for target x86_64
Executing(%prep): /bin/sh -e /var/tmp/rpm-tmp.v9rPOF
- umask 022
- cd /builddir/build/BUILD
- cd /builddir/build/BUILD
- rm -rf cello-1.0
- /usr/bin/gzip -dc /builddir/build/SOURCES/cello-1.0.tar.gz
- /usr/bin/tar -xf —
- STATUS=0
- ‘[‘ 0 -ne 0 ‘]’
- cd cello-1.0
- /usr/bin/chmod -Rf a+rX,u+w,g-w,o-w .
Patch #0 (cello-output-first-patch.patch): - echo ‘Patch #0 (cello-output-first-patch.patch):’
- /usr/bin/cat /builddir/build/SOURCES/cello-output-first-patch.patch
patching file cello.c - /usr/bin/patch -p0 —fuzz=0
- exit 0
Executing(%build): /bin/sh -e /var/tmp/rpm-tmp.UxRVtI - umask 022
- cd /builddir/build/BUILD
- cd cello-1.0
- make -j2
gcc -g -o cello cello.c - exit 0
Executing(%install): /bin/sh -e /var/tmp/rpm-tmp.K3i2dL - umask 022
- cd /builddir/build/BUILD
- ‘[‘ /builddir/build/BUILDROOT/cello-1.0-1.el7.centos.x86_64 ‘!=’ / ‘]’
- rm -rf /builddir/build/BUILDROOT/cello-1.0-1.el7.centos.x86_64
++ dirname /builddir/build/BUILDROOT/cello-1.0-1.el7.centos.x86_64 - mkdir -p /builddir/build/BUILDROOT
- mkdir /builddir/build/BUILDROOT/cello-1.0-1.el7.centos.x86_64
- cd cello-1.0
- /usr/bin/make install DESTDIR=/builddir/build/BUILDROOT/cello-1.0-1.el7.centos.x86_64
mkdir -p /builddir/build/BUILDROOT/cello-1.0-1.el7.centos.x86_64/usr/bin
install -m 0755 cello /builddir/build/BUILDROOT/cello-1.0-1.el7.centos.x86_64/usr/bin/cello - /usr/lib/rpm/find-debuginfo.sh —strict-build-id -m —run-dwz —dwz-low-mem-die-limit 10000000 —dwz-max-die-limit 110000000 /builddir/build/BUILD/cello-1.0
extracting debug info from /builddir/build/BUILDROOT/cello-1.0-1.el7.centos.x86_64/usr/bin/cello
dwz: Too few files for multifile optimization
/usr/lib/rpm/sepdebugcrcfix: Updated 0 CRC32s, 1 CRC32s did match. - /usr/lib/rpm/check-buildroot
- /usr/lib/rpm/redhat/brp-compress
- /usr/lib/rpm/redhat/brp-strip-static-archive /usr/bin/strip
- /usr/lib/rpm/brp-python-bytecompile /usr/bin/python 1
- /usr/lib/rpm/redhat/brp-python-hardlink
- /usr/lib/rpm/redhat/brp-java-repack-jars
Processing files: cello-1.0-1.el7.centos.x86_64
Executing(%license): /bin/sh -e /var/tmp/rpm-tmp.vxtAuO - umask 022
- cd /builddir/build/BUILD
- cd cello-1.0
- LICENSEDIR=/builddir/build/BUILDROOT/cello-1.0-1.el7.centos.x86_64/usr/share/licenses/cello-1.0
- export LICENSEDIR
- /usr/bin/mkdir -p /builddir/build/BUILDROOT/cello-1.0-1.el7.centos.x86_64/usr/share/licenses/cello-1.0
- cp -pr LICENSE /builddir/build/BUILDROOT/cello-1.0-1.el7.centos.x86_64/usr/share/licenses/cello-1.0
- exit 0
Provides: cello = 1.0-1.el7.centos cello(x86-64) = 1.0-1.el7.centos
Requires(rpmlib): rpmlib(CompressedFileNames) <= 3.0.4-1 rpmlib(FileDigests) <= 4.6.0-1 rpmlib(PayloadFilesHavePrefix) <= 4.0-1
Requires: libc.so.6()(64bit) libc.so.6(GLIBC_2.2.5)(64bit) rtld(GNU_HASH)
Processing files: cello-debuginfo-1.0-1.el7.centos.x86_64
Provides: cello-debuginfo = 1.0-1.el7.centos cello-debuginfo(x86-64) = 1.0-1.el7.centos
Requires(rpmlib): rpmlib(FileDigests) <= 4.6.0-1 rpmlib(PayloadFilesHavePrefix) <= 4.0-1 rpmlib(CompressedFileNames) <= 3.0.4-1
Checking for unpackaged file(s): /usr/lib/rpm/check-files /builddir/build/BUILDROOT/cello-1.0-1.el7.centos.x86_64
Wrote: /builddir/build/RPMS/cello-1.0-1.el7.centos.x86_64.rpm
warning: Could not canonicalize hostname: rhel7
Wrote: /builddir/build/RPMS/cello-debuginfo-1.0-1.el7.centos.x86_64.rpm
Executing(%clean): /bin/sh -e /var/tmp/rpm-tmp.JuPOtY - umask 022
- cd /builddir/build/BUILD
- cd cello-1.0
- /usr/bin/rm -rf /builddir/build/BUILDROOT/cello-1.0-1.el7.centos.x86_64
- exit 0
Finish: rpmbuild cello-1.0-1.el7.src.rpm
Finish: build phase for cello-1.0-1.el7.src.rpm
INFO: Done(/home/admiller/rpmbuild/SRPMS/cello-1.0-1.el7.src.rpm) Config(epel-7-x86_64) 0 minutes 16 seconds
INFO: Results and/or logs in: /var/lib/mock/epel-7-x86_64/result
Finish: run
As you can see, mock is a fairly verbose tool. You will also notice a lot of yum or dnf output (depending on RHEL7, CentOS7, or Fedora mock target) that is not found in this output which was omitted for brevity and is often omitted after you have done an —init on a mock target, such as mock -r epel-7-x86_64 —init which will pre-download all the required packages, cache them, and pre-stage the build chroot.
For more information, please consult the Mock upstream documentation.
Version Control Systems
When working with RPMs, it is often desireable to utilize a Version Control System (VCS) such as git for managing components of the software we are packaging. Something to note is that storing binary files in a VCS is not favorable because it will drastically inflate the size of the source repository as these tools are engineered to handle differentials in files (often optimized for text files) and this is not something that binary files lend themselves to so normally each whole binary file is stored. As a side effect of this there are some clever utilities that are popular among upstream Open Source projects that work around this problem by either storing the SPEC file where the source code is in a VCS (i.e. — it is not in a compressed archive for redistribution) or place only the SPEC file and patches in the VCS and upload the compressed archive of the upstream release source to what is called a “look aside cache”.
In this section we will cover two different options for using a VCS system, git, for managing the contents that will ultimately be turned into a RPM package. One is called tito and the other is dist-git.
NOTE
For the duration of this section you will need to install the git package on you system in order to follow along.
tito
Tito is an utility that assumes all the source code for the software that is going to be packaged is already in a git source control repository. This is good for those practicing a DevOps workflow as it allows for the team writing the software to maintain their normal Branching Workflow. Tito will then allow for the software to be incrementally packaged, built in an automated fashion, and still provide a native installation experience for RPM based systems.
NOTE
The tito package is available in Fedora as well as in the EPEL repository for use on RHEL 7 and CentOS 7.
Tito operates based on git tags and will manage tags for you if you elect to allow it, but can optionally operate under whatever tagging scheme you prefer as this functionality is configurable.
Let’s explore a little bit about tito by looking at an upstream project already using it. We will actually be using the upstream git repository of the project that is our next section’s subject, dist-git. Since this project is publicly hosted on GitHub, let’s go ahead and clone the git repo.
$ git clone https://github.com/release-engineering/dist-git.git
Cloning into ‘dist-git’…
remote: Counting objects: 425, done.
remote: Total 425 (delta 0), reused 0 (delta 0), pack-reused 425
Receiving objects: 100% (425/425), 268.76 KiB | 0 bytes/s, done.
Resolving deltas: 100% (184/184), done.
Checking connectivity… done.
$ cd dist-git/
$ ls *.spec
dist-git.spec
$ tree rel-eng/
rel-eng/
├── packages
│ └── dist-git
└── tito.props
1 directory, 2 files
As we can see here, the spec file is at the root of the git repository and there is a rel-eng directory in the repository which is used by tito for general book keeping, configuration, and various advanced topics like custom tito modules. We can see in the directory layout that there is a sub-directory entitled packages which will store a file per package that tito manages in the repository as you can have many RPMs in a single git repository and tito will handle that just fine. In this scenario however, we see only a single package listing and it should be noted that it matches the name of our spec file. All of this is setup by the command tito init when the developers of dist-git first initialized their git repo to be managed by tito.
If we were to follow a common workflow of a DevOps Practitioner then we would likely want to use this as part of a Continuous Integration (CI) or Continuous Delivery (CD) process. What we can do in that scenario is perform what is known as a “test build” to tito, we can even use mock to do this. We could then use the output as the installation point for some other component in the pipeline. Below is a simple example of commands that could accomplish this and they could be adapted to other environments.
$ tito build —test —srpm
Building package [dist-git-0.13-1]
Wrote: /tmp/tito/dist-git-git-0.efa5ab8.tar.gz
Wrote: /tmp/tito/dist-git-0.13-1.git.0.efa5ab8.fc23.src.rpm
$ tito build —builder=mock —arg mock=epel-7-x86_64 —test —rpm
Building package [dist-git-0.13-1]
Creating rpms for dist-git-git-0.efa5ab8 in mock: epel-7-x86_64
Wrote: /tmp/tito/dist-git-git-0.efa5ab8.tar.gz
Wrote: /tmp/tito/dist-git-0.13-1.git.0.efa5ab8.fc23.src.rpm
Using srpm: /tmp/tito/dist-git-0.13-1.git.0.efa5ab8.fc23.src.rpm
Initializing mock…
Installing deps in mock…
Building RPMs in mock…
Wrote:
/tmp/tito/dist-git-selinux-0.13-1.git.0.efa5ab8.el7.centos.noarch.rpm
/tmp/tito/dist-git-0.13-1.git.0.efa5ab8.el7.centos.noarch.rpm
$ sudo yum localinstall /tmp/tito/dist-git-*.noarch.rpm
Loaded plugins: product-id, search-disabled-repos, subscription-manager
Examining /tmp/tito/dist-git-0.13-1.git.0.efa5ab8.el7.centos.noarch.rpm: dist-git-0.13-1.git.0.efa5ab8.el7.centos.noarch
Marking /tmp/tito/dist-git-0.13-1.git.0.efa5ab8.el7.centos.noarch.rpm to be installed
Examining /tmp/tito/dist-git-selinux-0.13-1.git.0.efa5ab8.el7.centos.noarch.rpm: dist-git-selinux-0.13-1.git.0.efa5ab8.el7.centos.noarch
Marking /tmp/tito/dist-git-selinux-0.13-1.git.0.efa5ab8.el7.centos.noarch.rpm to be installed
Resolving Dependencies
—> Running transaction check
—> Package dist-git.noarch 0:0.13-1.git.0.efa5ab8.el7.centos will be installed
Note that the final command would need to be run with either sudo or root permissions and that much of the output has been omitted for brevity as the dependency list is quite long.
This concludes our simple example of how to use tito but it has many amazing features for traditional Systems Administrators, RPM Packagers, and DevOps Practitioners alike. I would highly recommend consulting the upstream documentation found at the tito GitHub site for more information on how to quickly get started using it for your project as well as various advanced features it offers.
dist-git
The dist-git utility takes a slightly different approach from that of tito such that instead of keeping the raw source code in git it instead will keep spec files and patches in a git repository and upload the compressed archive of the source code to what is known as a “look-aside cache”. The “look-aside-cache” is a term that was coined by the use of RPM Build Systems storing large files like these “on the side”. A system like this is generally tied to a proper RPM Build System such as Koji. The build system is then configured to pull the items that are listed as SourceX entries in the spec files in from this look-aside-cache, while the spec and patches remain in a version control system. There is also a helper command line tool to assist in this.
In an effort to not duplicate documentation, for more information on how to setup a system such as this please refer to the upstream dist-git docs.
More on Macros
There are many built-in RPM Macros and we will cover a few in the following section, however an exhaustive list can be found at the RPM Official Documentation.
There are also macros that are provided by your Linux Distribution, we will cover some of those provided by Fedora, CentOS and RHEL in this section as well as provide information on how to inspect your system to learn about others that we don’t cover or for discovering them on other RPM-based Linux Distributions.
Defining Your Own Macros
You can define your own macros. Below is an excerpt from the RPM Official Documentation, which provides a comprehensive reference on macros capabilities.
To define a macro, use:
%global [(opts)]
All whitespace surrounding is removed. Name may be composed of alphanumeric characters, and the character _ and must be at least 3 characters in length. A macro without an (opts) field is “simple” in that only recursive macro expansion is performed. A parameterized macro contains an (opts) field. The opts (the string between parentheses) is passed exactly as is to getopt(3) for argc/argv processing at the beginning of a macro invocation.
NOTE
Older RPM SPEC files may use the %define macro pattern. The differences between %define and %global macros are as follows:
%define has local scope, which means that it applies only to a specified part of a SPEC file. In addition, the body of a %define macro is expanded when used—it is lazily evaluated.
%global has global scope, which means that it applies to an entire SPEC file. In addition, the body of a %global macro is expanded at definition time.
Examples:
%global githash 0ec4e58
%global python_sitelib %(%{__python} -c «from distutils.sysconfig import get_python_lib; print(get_python_lib())»)
NOTE
Macros are always evaluated, even in comments. Sometimes it is harmless. But in the second example, we are executing python command to get the content of a macro. This command will be executed even when you comment out the macro. Or when you put the name of the macro into %changelog. To comment out macro, use %%. For example: %%global.
%setup
Macro %setup can be used to build the package with source code tarballs. Standard behavior of the %setup macro can be seen in the rpmbuild output. At the beginning of each phase macro outputs Executing(%something). For example:
Executing(%prep): /bin/sh -e /var/tmp/rpm-tmp.DhddsG
The shell output is set with set -x enabled. To see the content of /var/tmp/rpm-tmp.DhddsG use —debug option, since rpmbuild deletes temporary files after successful build. This displays the setup of environment variables followed by for example:
cd ‘/builddir/build/BUILD’
rm -rf ‘cello-1.0’
/usr/bin/gzip -dc ‘/builddir/build/SOURCES/cello-1.0.tar.gz’ | /usr/bin/tar -xof —
STATUS=$?
if [ $STATUS -ne 0 ]; then
exit $STATUS
fi
cd ‘cello-1.0’
/usr/bin/chmod -Rf a+rX,u+w,g-w,o-w .
The %setup ensures that we are working in the right directory, removes residues of previous builds, unpacks the source tarball, and sets up some default privileges. There are multiple options to adjust the behavior of the %setup macro.
%setup -q
Option -q limits verbosity of %setup macro. Only tar -xof is executed instead of tar -xvvof. This option has to be used as first.
%setup -n
In some cases, the directory from expanded tarball has a different name than expected %{name}-%{version}. This can lead to an error of the %setup macro. The name of a directory has to be specified by -n directory_name option.
For example, if the package name is cello, but the source code is archived in hello-1.0.tgz and contained hello/ directory, the SPEC file content needs to be:
Name: cello
Source0: https://example.com/%{name}/release/hello-%{version}.tar.gz
…
%prep
%setup -n hello
%setup -c
The -c option can be used if the source code tarball does not contain any subdirectories and after unpacking, files from an archive fill the current directory. The -c option creates the directory and steps into the archive expansion. An illustrative example:
/usr/bin/mkdir -p cello-1.0
cd ‘cello-1.0’
The directory is not changed after archive expansion.
%setup -D and -T
-D option disables deleting of source code directory. This option is useful if %setup macro is used several times. Essentially, -D option means that following lines are not used:
rm -rf ‘cello-1.0’
The -T option disables expansion of the source code tarball by removing the following line from the script:
/usr/bin/gzip -dc ‘/builddir/build/SOURCES/cello-1.0.tar.gz’ | /usr/bin/tar -xvvof —
%setup -a and -b
Options -a and -b expand specific sources.
Option -b (which stands for before) expands specific sources before entering the working directory.
Option -a (which stands for after) expands those sources after entering. Their arguments are source numbers from the spec file preamble.
For example, let’s say the cello-1.0.tar.gz archive contains empty examples directory, and the examples are shipped in separate examples.tar.gz tarball and they expand into the directory of the same name. In this case use -a 1, as we want to expand Source1 after entering the working directory:
Source0: https://example.com/%{name}/release/%{name}-%{version}.tar.gz
Source1: examples.tar.gz
…
%prep
%setup -a 1
But if the examples were in the separate cello-1.0-examples.tar.gz tarball, which expands into cello-1.0/examples, use -b 1 options, since the Source1 should be expanded before entering the working directory:
Source0: https://example.com/%{name}/release/%{name}-%{version}.tar.gz
Source1: %{name}-%{version}-examples.tar.gz
…
%prep
%setup -b 1
You can also use a combination of all these options.
%files
Common “advanced” RPM Macros needed in the %files section are as follows:
Macro
Definition
%license
This identifies the file listed as a LICENSE file and it will be installed and labeled as such by RPM. Example: %license LICENSE
%doc
This identifies the file listed as documentation and it will be installed and labeled as such by RPM. This is often used not only for documentation about the software being packaged but also code examples and various items that should accompany documentation. In the event code examples are included, care should be taken to remove executable mode from the file. Example: %doc README
%dir
Identifies that the path is a directory that should be owned by this RPM. This is important so that the RPM file manifest accurately knows what directories to clean up on uninstall. Example: %dir %{_libdir}/%{name}
%config(noreplace)
Specifies that the following file is a configuration file and therefore should not be overwritten (or replaced) on a package install or update if the file has been modified from the original installation checksum. In the event that there is a change, the file will be created with .rpmnew appended to the end of the filename upon upgrade or install so that the pre-existing or modified file on the target system is not modified. Example: %config(noreplace) %{_sysconfdir}/%{name}/%{name}.conf
Built-In Macros
Your system has many built-in RPM Macros and the fastest way to view them all is to simply run the rpm —showrc command. Note that this will contain a lot of output so it is often used in combination with a pipe to grep.
You can also find information about the RPMs macros that come directly with your system’s version of RPM by looking at the output of the rpm -ql rpm taking note of the files titled macros in the directory structure.
RPM Distribution Macros
Different distributions will supply different sets of recommended RPM Macros based on the language implementation of the software being packaged or the specific guidelines of the distribution in question.
These are often provided as RPM Packages themselves and can be installed with the distribution package manager, such as yum or dnf. The macro files themselves once installed can be found in /usr/lib/rpm/macros.d/ and will be included in the rpm —showrc output by default once installed.
One primary example of this is the Fedora Packaging Guidelines section pertaining specifically to Application Specific Guidelines which at the time of this writing has over 60 different sets of guidelines along with associated RPM Macro sets for subject matter specific RPM Packaging.
One example of this kind of RPMs would be for Python version 2.x and if we have the python2-rpm-macros package installed (available in EPEL for RHEL 7 and CentOS 7), we have a number of python2 specific macros available to us.
$ rpm -ql python2-rpm-macros
/usr/lib/rpm/macros.d/macros.python2
$ rpm —showrc | grep python2
-14: __python2 /usr/bin/python2
CFLAGS=»%{optflags}» %{__python2} %{py_setup} %{?py_setup_args} build —executable=»%{__python2} %{py2_shbang_opts}» %{?1}
CFLAGS=»%{optflags}» %{__python2} %{py_setup} %{?py_setup_args} install -O1 —skip-build —root %{buildroot} %{?1}
-14: python2_sitearch %(%{__python2} -c «from distutils.sysconfig import get_python_lib; print(get_python_lib(1))»)
-14: python2_sitelib %(%{__python2} -c «from distutils.sysconfig import get_python_lib; print(get_python_lib())»)
-14: python2_version %(%{__python2} -c «import sys; sys.stdout.write(‘{0.major}.{0.minor}’.format(sys.version_info))»)
-14: python2_version_nodots %(%{__python2} -c «import sys; sys.stdout.write(‘{0.major}{0.minor}’.format(sys.version_info))»)
The above output displays the raw RPM Macro definitions, but we are likely more interested in what these will evaluate to which we can do with rpm —eval in order to determine what they do as well as how they may be helpful to us when packaging RPMs.
$ rpm —eval %{__python2}
/usr/bin/python2
$ rpm —eval %{python2_sitearch}
/usr/lib64/python2.7/site-packages
$ rpm —eval %{python2_sitelib}
/usr/lib/python2.7/site-packages
$ rpm —eval %{python2_version}
2.7
$ rpm —eval %{python2_version_nodots}
27
Custom Macros
You can override the distribution macros in the ~/.rpmmacros file. Any changes you make will affect every build on your machine.
There are several macros you can use to override:
%_topdir /opt/some/working/directory/rpmbuild
You can create this directory, including all subdirectories using the rpmdev-setuptree utility. The value of this macro is by default ~/rpmbuild.
%_smp_mflags -l3
This macro is often used to pass to Makefile, for example make %{?_smp_mflags}, and to set a number of concurrent processes during the build phase. By default, it is set to -jX, where X is a number of cores. If you alter the number of cores, you can speed up or slow down a build of packages.
While you can define any new macros in the ~/.rpmmacros file, this is discouraged, because those macros would not be present on other machines, where users may want to try to rebuild your package.
Epoch, Scriptlets, and Triggers
There are various topics in the world of RPM SPEC files that are considered advanced because they have implications on not only the SPEC file, how the package is built, but also on the end machine that the resulting RPM is installed upon. In this section we will cover the most common of these such as Epoch, Scriptlets, and Triggers.
Epoch
First on the list is Epoch, epoch is a way to define weighted dependencies based on version numbers. It’s default value is 0 and this is assumed if an Epoch directive is not listed in the RPM SPEC file. This was not covered in the SPEC File section of this guide because it is almost always a bad idea to introduce an Epoch value as it will skew what you would normally otherwise expect RPM to do when comparing versions of packages.
For example if a package foobar with Epoch: 1 and Version: 1.0 was installed and someone else packaged foobar with Version: 2.0 but simply omitted the Epoch directive either because they were unaware of it’s necessity or simply forgot, that new version would never be considered an update because the Epoch version would win out over the traditional Name-Version-Release marker that signifies versioning for RPM Packages.
This approach is generally only used when absolutely necessary (as a last resort) to resolve an upgrade ordering issue which can come up as a side effect of upstream software changing versioning number schemes or versions incorporating alphabetical characters that can not always be compared reliably based on encoding.
Scriptlets and Triggers
In RPM Packages, there are a series of directives that can be used to inflict necessary or desired change on a system during install time of the RPM. These are called scriptlets.
One primary example of when and why you’d want to do this is when a system service RPM is installed and it provides a systemd unit file. At install time we will need to notify systemd that there is a new unit so that the system administrator can run a command similar to systemctl start foo.service after the fictional RPM foo (which provides some service daemon in this example) has been installed. Similarly, we would need to inverse of this action upon uninstallation so that an administrator would not get errors due to the daemon’s binary no longer being installed but the unit file still existing in systemd’s running configuration.
There are a small handful of common scriptlet directives, they are similar to the “section headers” like %build or %install in that they are defined by multi-line segments of code, often written as standard POSIX shell script but can be a few different programming languages such that RPM for the target machine’s distribution is configured to allow them. An exhaustive list of these available languages can be found in the RPM Official Documentation.
Scriptlet directives are as follows:
Directive
Definition
%pre
Scriptlet that is executed just before the package is installed on the target system.
%post
Scriptlet that is executed just after the package is installed on the target system.
%preun
Scriptlet that is executed just before the package is uninstalled from the target system.
%postun
Scriptlet that is executed just after the package is uninstalled from the target system.
Is is also common for RPM Macros to exist for this function. In our previous example we discussed systemd needing to be notified about a new unit file, this is easily handled by the systemd scriptlet macros as we can see from the below example output. More information on this can be found in the Fedora systemd Packaging Guidelines.
$ rpm —showrc | grep systemd
-14: __transaction_systemd_inhibit %{__plugindir}/systemd_inhibit.so
-14: _journalcatalogdir /usr/lib/systemd/catalog
-14: _presetdir /usr/lib/systemd/system-preset
-14: _unitdir /usr/lib/systemd/system
-14: _userunitdir /usr/lib/systemd/user
/usr/lib/systemd/systemd-binfmt %{?} >/dev/null 2>&1 || :
/usr/lib/systemd/systemd-sysctl %{?} >/dev/null 2>&1 || :
-14: systemd_post
-14: systemd_postun
-14: systemd_postun_with_restart
-14: systemd_preun
-14: systemd_requires
Requires(post): systemd
Requires(preun): systemd
Requires(postun): systemd
-14: systemd_user_post %systemd_post —user —global %{?}
-14: systemd_user_postun %{nil}
-14: systemd_user_postun_with_restart %{nil}
-14: systemd_user_preun
systemd-sysusers %{?} >/dev/null 2>&1 || :
echo %{?} | systemd-sysusers — >/dev/null 2>&1 || :
systemd-tmpfiles —create %{?} >/dev/null 2>&1 || :
$ rpm —eval %{systemd_post}
if [ $1 -eq 1 ] ; then
# Initial installation
systemctl preset >/dev/null 2>&1 || :
fi
$ rpm —eval %{systemd_postun}
systemctl daemon-reload >/dev/null 2>&1 || :
$ rpm —eval %{systemd_preun}
if [ $1 -eq 0 ] ; then
# Package removal, not upgrade
systemctl —no-reload disable > /dev/null 2>&1 || :
systemctl stop > /dev/null 2>&1 || :
fi
Another item that provides even more fine grained control over the RPM Transaction as a whole is what is known as triggers. These are effectively the same thing as a scriptlet but are executed in a very specific order of operations during the RPM install or upgrade transaction allowing for a more fine grained control over the entire process.
The order in which each is executed and the details of which are provided below.
all-%pretrans
…
any-%triggerprein (%triggerprein from other packages set off by new install)
new-%triggerprein
new-%pre for new version of package being installed
… (all new files are installed)
new-%post for new version of package being installed
any-%triggerin (%triggerin from other packages set off by new install)
new-%triggerin
old-%triggerun
any-%triggerun (%triggerun from other packages set off by old uninstall)
old-%preun for old version of package being removed
… (all old files are removed)
old-%postun for old version of package being removed
old-%triggerpostun
any-%triggerpostun (%triggerpostun from other packages set off by old un
install)
…
all-%posttrans
The above items are from the included RPM documentation found in /usr/share/doc/rpm/triggers on Fedora systems and /usr/share/doc/rpm-4.*/triggers on RHEL 7 and CentOS 7 systems.
Using Non-Shell Scripts in SPEC File
A scriptlet option, -p, in a SPEC file allows to invoke a specific interpreter instead of the default -p /bin/sh. An illustrative example is a script, which prints out a message after the installation of pello.py.
Open the pello.spec file.
Find the following line:
install -m 0644 %{name}.py* %{buildroot}/usr/lib/%{name}/
Under this line, insert the following code:
%post -p /usr/bin/python3
print(«This is {} code».format(«python»))
Build your package according to the Building RPMS chapter.
Install your package:
dnf install /home//rpmbuild/RPMS/noarch/pello-0.1.1-1.fc27.noarch.rpm
The output of this command is the following message after the installation:
Installing : pello-0.1.1-1.fc27.noarch 1/1
Running scriptlet: pello-0.1.1-1.fc27.noarch 1/1
This is python code
NOTE
To use a Python 3 script: Write a line %post -p /usr/bin/python3 under the line install -m in a SPEC file.
To use a Lua script: Write a line %post -p under the line install -m in a SPEC file.
This way any interpreter can be specified in the SPEC file.
RPM Conditionals
RPM Conditionals enable the conditional inclusion of various sections of the SPEC file.
Most commonly, conditional inclusions deal with:
architecture-specific sections
operating system-specific sections
compatibility issues between various versions of operating systems
existence and definition of macros
RPM Conditionals Syntax
If expression is true, then do some action:
%if expression
…
%endif
If expression is true, then do some action, in other case, do another action:
%if expression
…
%else
…
%endif
RPM Conditionals Examples
The %if Conditional
%if 0%{?rhel} == 6
sed -i ‘/AS_FUNCTION_DESCRIBE/ s/^/#/’ configure.in
sed -i ‘/AS_FUNCTION_DESCRIBE/ s/^/#/’ acinclude.m4
%endif
This conditional handles compatibility between RHEL6 and other operating systems in terms of support of the AS_FUNCTION_DESCRIBE macro. When the package is build for RHEL, the %rhel macro is defined and it is expanded to RHEL version. If its value is 6, meaning the package is build for RHEL 6, then the references to AS_FUNCTION_DESCRIBE, which is not supported by RHEL6, are deleted from autoconfig scripts.
%if 0%{?el6}
%global ruby_sitearch %(ruby -rrbconfig -e ‘puts Config::CONFIG[«sitearchdir»]’)
%endif
This conditional handles compatibility between Fedora version 17 and newer and RHEL6 in terms of support of the %ruby_sitearch macro. Fedora version 17 and newer defines %ruby_sitearch by default, but RHEL6 does not support this macro. The conditional checks whether the operating system is RHEL6. If it is, %ruby_sitearch is defined explicitly. Note that 0%{?el6} has the same meaning as 0%{?rhel} == 6 from the previous example, and it tests whether a package is built on RHEL6.
%if 0%{?fedora} >= 19
%global with_rubypick 1
%endif
This conditional handles support for the rubypick tool. If the operating system is Fedora version 19 or newer, rubypick is supported.
%define ruby_archive %{name}-%{ruby_version}
%if 0%{?milestone:1}%{?revision:1} != 0
%define ruby_archive %{ruby_archive}-%{?milestone}%{?!milestone:%{?revision:r%{revision}}}
%endif
This conditional handles definition of the macros. If the %milestone or the %revision macros are set, the %ruby_archive macro, which defines the name of the upstream tarball, is redefined.
Specialized variants of %if Conditional
The %ifarch conditional, %ifnarch conditional and %ifos conditional are specialized variants of the %if conditionals. These variants are commonly used, so they have their own macros.
The %ifarch Conditional
The %ifarch conditional is used to begin a block of the SPEC file that is architecture-specific. It is followed by one or more architecture specifiers, each separated by commas or whitespace.
%ifarch i386 sparc
…
%endif
All the contents of the SPEC file between %ifarch and %endif are processed only on the 32-bit AMD and Intel architectures or Sun SPARC-based systems.
The %ifnarch Conditional
The %ifnarch conditional has a reverse logic than %ifarch conditional.
%ifnarch alpha
…
%endif
All the contents of the SPEC file between %ifnarch and %endif are processed only if not being done on a Digital Alpha/AXP-based system.
The %ifos Conditional
The %ifos conditional is used to control processing based on the operating system of the build. It can be followed by one or more operating system names.
%ifos linux
…
%endif
All the contents of the SPEC file between %ifos and %endif are processed only if the build was done on a Linux system.
Appendix A: New features of RPM in RHEL 7
This list documents most noticable changes in RPM packaging between Red Hat Enterprise Linux 6 and 7.
A new command, rpmkeys, used for keyring import and signature verification has been added.
A new command, rpmspec, used for spec queries and parsed output has been added.
A new command, rpmsign, used for package signing has been added.
The posix.exec() and os.exit() extensions embedded in %{lua:…} scripts fail the script unless called from a child process created with the posix.fork() scriptlet.
The %pretrans scriptlet failure causes the package installation to be skipped.
Scriptlets can be macro-expanded and queryformat-expanded at runtime.
Pre-transaction and post-transaction scriptlet dependencies can now be correctly expressed with Requires(pretrans) and Requires(posttrans) scriptlets.
The OrderWithRequires tag for supplying additional ordering hints has been added. The tag follows Requires tag syntax, but does not generate actual dependencies. The ordering hints are treated as if they were Requires when calculating the transaction order, only if the involved packages are present in the same transaction.
The %license flag can be used in the %files section. This flag can be used similar to the %doc flag to mark files as licenses, which need to be installed despite the —nodocs option.
The %autosetup macro for automating patch application, with optional distributed version control system integration has been added.
The automatic dependency generator has been rewritten into extensible and customizable rule based system with built-in filtering.
The OpenPGP V3 public keys are no longer supported.
Appendix B: References
Below are references to various topics of interest around RPMs, RPM packaging, and RPM building. Some of these are advanced and extend far beyond the introductory material included in this guide.
Software Collections — SoftwareCollections.org is an open-source project for building and distributing community-supported Software Collections (SCLs) for Red Hat Enterprise Linux, Fedora, CentOS, and Scientific Linux.
Creating RPM package — Step-by-step guide for learning basics of RPM packaging.
Packaging software with RPM, Part 1, Part 2, Part 3 — IBM RPM packaging guide.
RPM Documentation — The official RPM documentation.
Fedora Packaging Guidelines — The official packaging guidelines for Fedora, useful for all RPM-based distributions.
rpm