Руководство Пользователя
Корпорация InterVideo Digital Technology
Вас приветствует Ulead VideoStudio
Благодарим вас за использование VideoStudio. приложения видеомонтажа, позволяющего даже начинающим создавать фильмы профессионального уровня. VideoStudio предлагает полный спектр средств для захвата видеороликов, их монтажа, а также записи результата на диск CD, DVD, HD DVD или размещения в Интернете.

- Manuals
- Brands
- Ulead Manuals
- Software
- VIDEOSTUDIO SE
- User manual
-
Contents
-
Table of Contents
-
Bookmarks
Quick Links
User Guide
Ulead Systems, Inc.
March 2006
Related Manuals for Ulead VIDEOSTUDIO SE
Summary of Contents for Ulead VIDEOSTUDIO SE
-
Page 1
User Guide Ulead Systems, Inc. March 2006… -
Page 2
All rights reserved. No part of this publication may be reproduced or transmitted in any form or by any means, electronic or mechanical, including photocopying, recording or storing in a retrieval system, or translated into any language in any form without the express written permission of Ulead Systems, Inc. Software license The software described in this document is furnished under a License Agreement, which is included with the product. -
Page 3: Table Of Contents
ULEAD VIDEOSTUDIO USER GUIDE Getting started 5 Movie Wizard 5 Step 1: Add video and images……5 Step 2: Select a template .
-
Page 4
ULEAD VIDEOSTUDIO USER GUIDE Audio ……….37 Adding voiceover narration . -
Page 5: Getting Started
ULEAD VIDEOSTUDIO USER GUIDE Getting started When you run VideoStudio, a startup screen appears which allows you to choose between the following video editing modes: • VideoStudio Editor gives you the full editing features of VideoStudio. • Movie Wizard is ideal for users who are new to video editing.
-
Page 6: Step 2: Select A Template
ULEAD VIDEOSTUDIO USER GUIDE Jog Slider Mark-in/ Mark-out handles Library Media Navigation Clip Panel List Step 2: Select a template 1. Select a theme template from the Theme template list. Home Movies templates allow you to create movies that include both video and images while Slideshow templates are used exclusively for creating image slideshows.
-
Page 7: Step 3: Finish
Click Create Video File to output your movie as a video file that can be played back on the computer. Click Create Disc to burn your movie onto a disc. Click Edit in Ulead VideoStudio Editor to make further edits to your movie using VideoStudio Editor. VideoStudio Editor VideoStudio Editor provides a step-by-step workflow that makes creating movies simple and easy.
-
Page 8: The User Interface
ULEAD VIDEOSTUDIO USER GUIDE The user interface Step Panel Menu Bar Preview Window Navigation Panel Toolbar Project Timeline Options Panel Library Note: To change the user interface layout, click Preferences: UI Layout. The Toolbar The toolbar allows you to easily access buttons for editing.
-
Page 9: Starting A New Movie Project
ULEAD VIDEOSTUDIO USER GUIDE Storyboard View Storyboard View is the fastest and simplest way to add video clips to your movie. You can drag and drop video clips to insert and arrange them. Transition effects can be inserted between video clips. A selected video clip can be trimmed in the Preview Window.
-
Page 10: Setting Project Properties
ULEAD VIDEOSTUDIO USER GUIDE Setting project properties Project Properties serve as your template for previewing your movie projects. The project settings in the Project Properties dialog box determine the appearance and quality of a project when it is previewed on-screen. To customize project settings, select File: Project Properties.
-
Page 11: Capture
ULEAD VIDEOSTUDIO USER GUIDE Capture The steps on how to capture is similar for all types of video sources except for the available capture settings in the Capture Video Options Panel that can be selected for each type of source.
-
Page 12: Dv Quick Scan
ULEAD VIDEOSTUDIO USER GUIDE DV AVI type-1 and type-2 When capturing DV, click Options in the Options Panel to open a menu, then select DV Type in the menu and choose whether to capture DV as DV type-1 or DV type-2.
-
Page 13: Edit
ULEAD VIDEOSTUDIO USER GUIDE Edit The Edit Step is where you arrange, edit and trim the video clips used in your project. Adding clips to the Video Track You only work on the Video Track when you are in the Edit Step. On the Video Track, you can insert three types of clips: video, image and color clips.
-
Page 14
ULEAD VIDEOSTUDIO USER GUIDE To split a clip into two: 1. Select the clip you want to split on the Storyboard or Timeline. 2. Drag the Jog Slider to the point where you want to cut the clip. Tip: Click to set the cutting point more precisely. -
Page 15: Saving Trimmed Clips
ULEAD VIDEOSTUDIO USER GUIDE 2. Drag the yellow Trim handles on either side of the clip to change its length. Or, click the timecode in the Duration box in the Options Panel and enter the desired clip length Duration Trim Handles 3.
-
Page 16: Adding Chapters Using Chapter Point Bar
ULEAD VIDEOSTUDIO USER GUIDE A color clip is inserted before the original clip and all clips where Ripple Editing is applied shift accordingly To insert clips in Ripple Editing mode: 1. Click Ripple Editing to activate the panel, then select the corresponding box for each track where you want to apply Ripple Editing.
-
Page 17: Playback Speed
ULEAD VIDEOSTUDIO USER GUIDE 3. Select an output folder in Save in folder. 4. In Save as type, choose your desired output type. 5. Click Convert. 6. The result is shown in the Task Report dialog box. Click OK to finish.
-
Page 18: Multi-Trimming Your Video
ULEAD VIDEOSTUDIO USER GUIDE 2. Click Split by Scene in the Options Panel. This will open the Scenes dialog box. 3. Choose your preferred scan method (DV Recording Time Scan or Frame Content). 4. Click Options. In the Scene Scanning Sensitivity dialog box, drag the slider to set the Sensitivity level.
-
Page 19
ULEAD VIDEOSTUDIO USER GUIDE Timeline zoom AccuCut Timeline Drag up and down to sub-divide a video Scan a video clip frame by frame for clip into frames per second. accurate mark-in and mark-out positions. Jog Wheel Shuttle Slider Use to scroll to different parts of the clip. -
Page 20: Applying Video Filters
ULEAD VIDEOSTUDIO USER GUIDE 4. Drag the Jog Slider until you get to the part of the video that you want to use as the beginning frame of the first segment. Click Start. 5. Drag the Jog Slider again, this time, to the point where you want the segment to end.
-
Page 21: Key Frame Settings
ULEAD VIDEOSTUDIO USER GUIDE Key frame settings Key frames are frames in a clip where you can specify a different attribute or behavior for your video filter. This gives you the flexibility to determine how your video filter will look like at any point in a clip.
-
Page 22: Pan & Zoom
ULEAD VIDEOSTUDIO USER GUIDE Tip: You can preview the clip with applied video filter on VideoStudio’s Preview Window or an external device such as a TV monitor or DV camcorder. Click , then click to open the Preview Playback Options dialog box where you can choose the display medium.
-
Page 23
ULEAD VIDEOSTUDIO USER GUIDE To apply Pan & Zoom: 1. Drag the Start key frame, represented by a crosshair in the Image Window, to the subject that you want to focus. Image Preview 2. Zoom in on the subject by minimizing the marquee box or by increasing the Zoom ratio. -
Page 24: Effect
ULEAD VIDEOSTUDIO USER GUIDE Effect Transition effects make your movie smoothly change from one scene to the next. They are applied between clips in the Video Track and their attributes can be modified in the Options Panel. Effective use of this feature can add a professional touch to your movie.
-
Page 25
ULEAD VIDEOSTUDIO USER GUIDE 2. Scroll through the effects thumbnails in the Library. Select and drag an effect to the Timeline, roughly between two video clips. Drop your effect and it will snap into place. You can only drag and drop one clip at a time. -
Page 26: Overlay
ULEAD VIDEOSTUDIO USER GUIDE Overlay The Overlay Step allows you to add overlay clips to combine with your videos in the Video Track. Use an overlay clip to create a picture-in-picture effect or add a lower-third graphic to create more professional-looking movie productions.
-
Page 27
AVI video file or an image file with an alpha channel. You can use an animation program such as Ulead COOL 3D Production Studio or an image editing program such as Ulead PhotoImpact to create these video and image files. -
Page 28
ULEAD VIDEOSTUDIO USER GUIDE To specify Chroma Key settings to the current overlay clip: 1. Click Mask & Chroma Key in the Attribute tab to go to the Overlay Options Panel. 2. Select Apply Overlay Options then Chroma Key in Type. -
Page 29
ULEAD VIDEOSTUDIO USER GUIDE To resize the current overlay clip: In the Attribute tab, drag a handle on the overlay clip on the Preview Window to resize it. If you drag a yellow corner handle, it will keep the aspect ratio when you resize the clip. -
Page 30: Adding Objects Or Frames
ULEAD VIDEOSTUDIO USER GUIDE To apply a filter to the current overlay clip: You can apply video filters to your overlay clips. For more details on how to apply, you can refer to Edit: Applying video filters. To use the same attributes for different overlay clips: You can use the attributes (size and position) of one overlay clip and apply it to a different overlay clip on your movie project.
-
Page 31
ULEAD VIDEOSTUDIO USER GUIDE 2. Select a Flash animation then drag it onto the Overlay Track on the Timeline. 3. Click the Attribute tab to resize and reposition the object/frame. To customize the current object, frame, or Flash animation: Use the various options available in the Edit and Attribute tabs to customize your object and frame. -
Page 32: Title
Adding text Ulead VideoStudio allows you to add text either in multiple text boxes or in a single text box. Using multiple text boxes gives you the flexibility to position the different words of your text anywhere on the video frame and allows you to arrange the stacking order of the text.
-
Page 33
ULEAD VIDEOSTUDIO USER GUIDE If you switch to Single title before adding to the Timeline the multiple text that you entered, only the selected text or the first text that you typed in (when no text box is selected) will be retained. The other text boxes will be removed and the Text backdrop option will be disabled. -
Page 34
ULEAD VIDEOSTUDIO USER GUIDE • For multiple titles, select the title clip on the Title Track and click the Preview Window then click the text that you want to edit. Notes: • Once a title clip has been inserted onto the Timeline, you can adjust its duration by either dragging the handles of the clip, or entering a Duration value in the Options Panel. -
Page 35: Modifying Text Attributes
ULEAD VIDEOSTUDIO USER GUIDE Modifying text attributes Modify the attributes of your text, such as font face, style, size, and more, by using the available settings in the Options Panel. More options allow you to set the style and alignment, apply a Border, Shadow and Transparency and add a Text backdrop to your text.
-
Page 36: Applying Animation
ULEAD VIDEOSTUDIO USER GUIDE Applying animation Apply motion to your text with VideoStudio’s text animation tools such as Fade, Moving Path, and Drop. To apply animation to the current text: 1. In the Animation tab, select Apply Animation. 2. Select the animation category to use in Type.
-
Page 37: Ulead Videostudio User Guide
ULEAD VIDEOSTUDIO USER GUIDE Audio Sounds are one of the elements that determine the success of your video production. VideoStudio’s Audio Step allows you to add both narration and music to your project. The Audio Step consists of two tracks: Voice and Music. Insert your narrations on the Voice Track and your background music or sound effects on the Music Track.
-
Page 38: Adding Background Music
ULEAD VIDEOSTUDIO USER GUIDE Adding background music Set the tone of your movie with the background music of your choice. VideoStudio can record and convert song tracks from your CD into WAV files and then insert them onto the Timeline.
-
Page 39: Adding Audio Files
ULEAD VIDEOSTUDIO USER GUIDE Adding audio files VideoStudio provides a separate Voice Track and Music Track but you may interchangeably insert voice and music files on either track. To insert, click and select Insert Audio. Choose which track to insert your audio file.
-
Page 40: Stretching Audio Duration
ULEAD VIDEOSTUDIO USER GUIDE Tip: To play the trimmed portion of the clip, click Play Trimmed Clip. Note: VideoStudio also has an Auto-trim function. When you insert an audio clip between two existing clips in the Timeline, it will automatically be trimmed to fit the available space.
-
Page 41: Fade-In/Out
ULEAD VIDEOSTUDIO USER GUIDE Fade-in/out Background music that starts and ends gradually is commonly used to create smooth transitions. For each of your music clips, you can click to fade- in and fade-out the volume at the start and end of the clip.
-
Page 42: Duplicating An Audio Channel
ULEAD VIDEOSTUDIO USER GUIDE Duplicating an audio channel Audio files sometimes separate the vocal sound from the background audio and put them in different channels. Duplicating an audio channel allows you to mute the other channel. For example, the voice is on the left audio channel and the background music on the right.
-
Page 43: Applying Audio Filters
ULEAD VIDEOSTUDIO USER GUIDE 4. Drag the key frame upwards/downwards to increase/decrease the volume level at this point of the clip. 5. Repeat steps 3 and 4 to add more key frames to the rubber band and to adjust the volume level.
-
Page 44: Share
Creating movie templates Movie templates contain settings which define how to create the final movie file. By using the preset movie templates provided by Ulead VideoStudio, or by creating your own templates in the Make Movie Manager, you can have multiple variations of your final movie.
-
Page 45: Creating And Saving A Video File
ULEAD VIDEOSTUDIO USER GUIDE 4. Click OK. Notes: • Movie templates will appear in a selection menu when you click Create Video File in the Share Step. If you do not want to use a movie template, you can select Custom from the pop-up menu.
-
Page 46
ULEAD VIDEOSTUDIO USER GUIDE 2. To create a movie file using the current project settings, select Same as Project Settings. Or, select one of the preset movie templates. These templates let you create a movie file that is suitable for the Web or for output to DVD, SVCD or VCD. -
Page 47: Burning A Dvd, Vcd Or Svcd
ULEAD VIDEOSTUDIO USER GUIDE 4. Select a movie template. 5. In the Create Video File dialog box, click Options. In the Options dialog box, select Preview range. Click OK. 6. Enter a file name and click Save. Another method of partially rendering your project is to click Play-Project while holding down the [Shift] key.
-
Page 48: Assembling Files
ULEAD VIDEOSTUDIO USER GUIDE Mark-in Media Clip List Jog Slider Settings and options Mark-in/-out Navigation Panel Project Settings Change display Mark-out aspect ratio Assembling files Import videos or VideoStudio project files (VSP) you want to include in your final movie.
-
Page 49
ULEAD VIDEOSTUDIO USER GUIDE 2. Click Open. Notes: • You can add video formats such as AVI, QuickTime, and MPEG files. You can also add VCD video (DAT) files. • After a video clip is added to the Media Clip List, sometimes you may see a black thumbnail. -
Page 50: Adding/Editing Chapters
ULEAD VIDEOSTUDIO USER GUIDE Adding/Editing chapters This feature is only available when the Create menu option is selected. By adding chapters, you can create submenus linked to their associated video clip. Represented as a video thumbnail in a submenu, each chapter is like a bookmark for a video clip.
-
Page 51: Creating Selection Menus
DV camcorder, Ulead VideoStudio can automatically detect scene changes and add chapters accordingly. • If the selected video is an MPEG-2 file with scene change information, Ulead VideoStudio automatically generates these chapters for you when you click Auto Add Chapters.
-
Page 52
ULEAD VIDEOSTUDIO USER GUIDE In this example, Clip 1 has three chapters so when you click the Clip 1 video thumbnail, it will jump to submenu #1. If you look at Clip 2, it has no chapters assigned to it so when you click Clip 2, the video will start playing from the beginning. -
Page 53: Previewing
ULEAD VIDEOSTUDIO USER GUIDE Tips: • Select Motion Menu to enable motion attributes to the selected menu template. • Click Layout Settings to specify whether to apply layout to all pages of the menu, reset the page, or reset all pages of the menu.
-
Page 54
3. Click Burning Options to define additional burner and output settings. 4. Click Burn to start the burning process. 5. After successfully burning your disc, a dialog box appears from which you can select the next step. • Close prompts you to save your work and close Ulead VideoStudio. -
Page 55
ULEAD VIDEOSTUDIO USER GUIDE Burning options • Disc burner Specify the settings for your burning device. • Label Enter a volume name of up to 32 characters onto the CD/DVD. • Drive Select the disc burner that you want to use to burn the video file. -
Page 56: Project Playback
ULEAD VIDEOSTUDIO USER GUIDE Required/Available hard disk space Displays the space needed by the working folder of the project and the space available for use in the hard drive. Required/Available disc space Displays the space needed to fit the video file in the disc and the space that is available for use.
-
Page 57
ULEAD VIDEOSTUDIO USER GUIDE 3. In the Project Playback — Options dialog box, select Use device control then click Next. Note: If you only want to output the preview range of your project to the DV camcorder, select Preview range. -
Page 58: Exporting Your Movie
ULEAD VIDEOSTUDIO USER GUIDE Tip: Click Transmit to device unit for preview to preview your project on the DV camcorder’s LCD monitor. 5. Click Record. When recording is complete, click Finish. Exporting your movie VideoStudio provides you with a number of ways to export and share your movie, which will be discussed in the following sections.
-
Page 59
ULEAD VIDEOSTUDIO USER GUIDE reasonable file sizes, viewers can download your movies from the Internet. Creating video for the Internet requires proper use of video format and compression to produce good quality but small file size video files. After you have created a movie that is suitable for posting to the Internet, VideoStudio can assist with the task of coding the HTML document. -
Page 60: Sending A Movie By E-Mail
ULEAD VIDEOSTUDIO USER GUIDE Your default browser will open, displaying your page. When you upload this page to your Web server, you need to change one line of code to reflect the relative links to the associated movie file. With Activemovie control…
-
Page 61: Electronic Greeting Cards
ULEAD VIDEOSTUDIO USER GUIDE 2. Select Mail & Newsgroups in the Category list. 3. Select Use Netscape Messenger from MAPI-based applications. 4. Click OK. To enable MAPI in Eudora: 1. In Eudora, select Tools: Options. 2. Select MAPI in the Category list.
-
Page 62: Setting Your Video As Your Movie Screen Saver
ULEAD VIDEOSTUDIO USER GUIDE The background templates that are provided with VideoStudio are JPEG image files. You can create your own templates in any graphics editor, or even use still frames captured from your movies. To use your own backgrounds, search for images using Browse next to the Background template file name entry box.
-
Page 63: Recording Back To A Dv Camcorder
ULEAD VIDEOSTUDIO USER GUIDE 5. Enter a file name and click Save. Recording back to a DV camcorder After editing your project and creating a video file, VideoStudio allows you to record the video to your DV camcorder. You can only record a video that is using DV AVI format to your DV camcorder.
-
Page 64: Index
ULEAD VIDEOSTUDIO USER GUIDE Index ActiveMovie 59 Capture Step 11 Adding 10 Capturing 11 audio files analog video background music Digital Video (DV) chapters Chapter Point Bar 16 clips to Overlay Track Chroma Key 28 clips to the Video Track…
-
Page 65
ULEAD VIDEOSTUDIO USER GUIDE DV Quick Scan 12 DVD/DVD-VR 12 Pan & Zoom 22 Playback Speed 17 Previewing 10 Edit in Ulead VideoStudio Editor 7 Project Playback 56 Editing 13 Project Properties 10 chapters (Create Disc) Edit Step text Rearranging stacking order for titles… -
Page 66
ULEAD VIDEOSTUDIO USER GUIDE Trimming 13 audio clips Trim Bar Trim handles Video clips 13 Video filter 20 applying to overlay clip key frame Video Track 13 VideoStudio Editor 5 project timeline toolbar user interface Volume rubber banding 42…
-
11.11.2010, 16:41
#1
 Для «Чайников» — Ulead VideoStudio
Здравствуйте, дорогие форумчане. Долго не решалась создать эту тему из-за отсутствия свободного времени. Но многочисленные просьбы форумчан рассказать, как и чем я делаю свои работы, и какая програмка подойдёт для «чайников», что бы было всё легко и просто в обучении, заставили меня пойти на этот шаг. Я не смогу объяснить вам всё и сразу, буду пояснять и показывать поэтапно, при наличии свободной минутки. Наберитесь терпения. Я использую много редакторов для своей работы, но вам расскажу о самом простом и в тоже время качественном редакторе в котором вы вполне сможете делать домашнее видео в хорошем качестве. Сразу хочу попросить вас не обращать внимание на мои орфографические ошибки, у меня проблемма правописания в этом языке, но я стараюсь и совершенствуюсь.
Ну, что, начнём с чистого листа? И не пугайтесь, всё гораздо проще, чем вам может показаться на первый взгляд.
[IMG]http://*********net/133073.jpg[/IMG]
Ulead VideoStudio — Удобный и легкий в освоении видеоредактор а точнее пакет программ для эффективной работы с видеоматериалом в домашних условиях. Программа позволяет быстро записать видео во всех основных форматах, смонтировать сложное видео с использованием спецэффектов, добавить в проект музыкальные файлы или звуковые дорожки с аудиоCD и т.д. и т.п. Версия Plus поддерживает новейшие технологии, включая возможность записывать диски в формате HD DVD (проигрывать их можно входящим в дистрибутив плеером InterVideo WinDVD), конвертирование HD-видео в файлы меньшего размера, добавление одновременно до шести эффектов «картинка в картинке», использование Dolby Digital 5.1 Surround Sound и многое другое. В Ulead VideoStudio Plus имеется большое количество предустановок, множество шаблонов и эффектов, прямое копирование видео с камеры на DVD, поддерживается преобразование видео в форматы, которые можно загружать на мобильные устройства — Apple iPod, Sony PSP, смартфоны.
Благодаря функции DV-to-DVD Wizard пользователи получают возможность быстрой и конвертации DV-материалов с видеокамеры на DVD. Пакет VideoStudio обладает всей необходимой функциональностью для создания DVD-дисков и позволяет при помощи всего лишь нескольких кликов мыши получать как обычные DVD, так и HD DVD с мультимедийными меню. Более опытным пользователям программа предоставляет гибкие возможности для создания богатых и насыщенных меню, в том числе технологию Corel SmartScene, с помощью которой можно создавать в полном смысле слова интерактивные DVD-меню.С помощью помощника Movie Wizard пользователи могут создавать собственные заставки. Впоследствии же, можно передавать свои видеоролики на смартфоны и ряд других мобильных устройста. Пользователи версии VideoStudio Plus могут экспортировать видео для работы с Apple iPod, Sony PSP, YouTube и телефоны Nokia.
Для экономии времени как новичков в деле видео монтажа, так и продвинутых пользователей пакет VideoStudio оснащен фильтрами Anti-shake и Enhance Lighting. Используя новые алгоритмы для коррекции изображения, новая функция Auto Colour & Tone позволяет автоматически скорректировать цвет и тон видео, записанного при недостаточном освещении или с неудачным балансом белого. Кроме того, в новой версии появился фильтр DeBlock Filter, позволяющий устранить артефакты сжатия, например, характерные для файлов, скачанных из сети Интернет. Новый фильтр DeSnow Filter снижает уровень шумов в видео, оцифрованном с аналоговых источников, в частности, с кассет VHS.
Программный пакет Ulead VideoStudio 11.5 Plus включает в себя инструменты Overlay Video Tools, позволяющие одновременно реализовывать эффект прозрачности и маску или разделение по цветовому тону, а также обрезать полученное видео для устранения нежелательных элементов. В версии Plus доступна функция Expanded Timeline, с помощью которой пользователи, работающие более чем с одним слоем.
Помимо стандартных функций, в пакете Ulead VideoStudio 11 Plus реализовано полнофункциональное решение для работы с HD DVD. Теперь пользователи могут импортировать видео высокого разрешения с дисковых накопителей или с AVCHD видеокамер и редактировать его в режиме реального времени без промежуточных этапов и без использования высокопроизводительных систем. Благодаря технологии Corel PureHD редактирование видео высокого разрешения не отличается от редактирования обычного DV-видео на компьютерах среднего уровня. Для быстрого и простого создания HD-видео в новом пакете реализован усовершенствованный помощник Movie Wizard, с помощью которого можно захватывать, редактировать и выводить HD фильмы в полном разрешении и с объемным звучанием Dolby Digital 5.1 Surround Sound. Кроме того, в комплекте с VideoStudio 11.5 Plus поставляется плеер InterVideo WinDVD 8 Silver — первый универсальный плеер, сертифицированный для работы с AVCHD.
Не совсем всё поняли? В таком случае скачайте бесплатную версию VideoStudio 11.5 Plus в интернете и установите её на свой комьютер.
Хочу ещё сразу посоветовать скачать и установить QuickTime любой версии. С её помощью мы сможем загружать в студию футажи, которые обычно выкладываются в интернете в формате mov и использовать при наложении в своих работах.Надеюсь, что Игорь поможет с ответами на вопросы в моё отсутствие.
(ПРОДОЛЖЕНИЕ СЛЕДУЕТ)
-
Следующий пользователь сказал cпасибо Kliakca за это полезное сообщение:
-
11.11.2010, 18:02
#2
Если вы уже скачали или у вас была эта програмка, то после её инсталяции(установки) должно появиться вот такое окно при нажатии на ярлык.
[IMG]http://*********net/178156.jpg[/IMG]
В этом окне мы выбираем, какой размер экрана вы хотели бы получить. Я обычно всё стараюсь делать в 16:9. Ставим галочку и выбираем VideoStudio Редактор. У вас должет открыться сам редактор для создания фильмов, клипов, роликов, слайд-шоу или что вы захотите создать.
[IMG]http://*********net/163820.jpg[/IMG]
Давайте начнём первое знакомство с самого простого, с создания слайд-шоу из ваших фотографий.
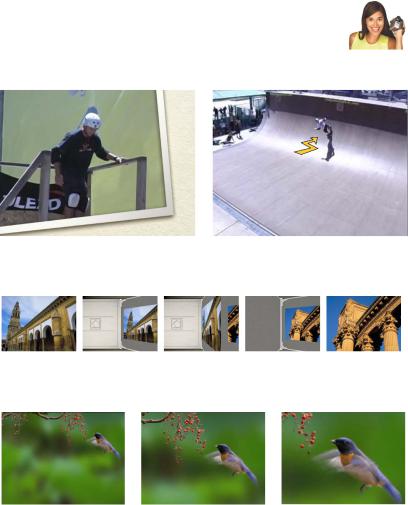
Для начала мы создадим папочку «Фото-фильм» и сложим в неё все фотографии, которые мы бы хотели запечатлеть в нашей работе. Можно брать фотографии любых размеров, хоть маленькие, хоть большие. Тяжелее будет работать с вертикальными фотографиями. Если их оставлять в таком виде, то экран не будет заполнен полностью и по бокам будут отражаться пустые полосы, которые ухудшают общее впечатление от просмотра. Советую вырезать из них нужные места и сделать горизонтальные, потому, что не все фотографии можно будет растянуть на экран редактора.Для примера:
Было…[IMG]http://*********net/154592.jpg[/IMG]
Стало…
[IMG]http://*********net/153568.jpg[/IMG]
Скопировали все нужные фотографии в папочку? Теперь нам нужно их поместить в редактор.
Для этого мы открываем редактор, в окне выбераем «Image» и нажимаем на нарисованную папочку.[IMG]http://*********net/179170.jpg[/IMG]
В открывшемся окне указываем приготовленную папку с фотографиями. Если вы всё сделали правильно, то они откроются на странице редактора.
[IMG]http://*********net/164837.jpg[/IMG]
(ПРОДОЛЖЕНИЕ СЛЕДУЕТ)
-
13.11.2010, 17:18
#3
Ну,что же… Давайте продолжим?
Мы установили редактор и загрузили подготовленные фотографии.
Теперь посмотрим и ознакомимся с чем придётся работать и какими способностями обладает редактор. Вот оснавной набор опций от простой загрузки из папки, копирования с видеокамеры, до создания фидеофайла, футажа или записи на диск готового фильма.[IMG]http://*********net/131616.jpg[/IMG]
Мы сможем накладывать и редактировать звук под наше желание.
[IMG]http://*********net/195106.jpg[/IMG]
Регулировать цветностью, освещением, имитировать погоду и её сезоны.
[IMG]http://*********net/162338.jpg[/IMG]
Имитировать перемещение в заданной траектории наших работ, крутить их, создавать проявление и исчезание, делать картинку в картинке и помещать изображение на фоне, подложке, с применением Хромокея.
[IMG]http://*********net/178725.jpg[/IMG]
Вставлять между кадрами переходы на разные стили и делать сюжет приятный взгляду.
[IMG]http://*********net/132645.jpg[/IMG]
Применять в футажах разнообразные фильтра, маски, декорации, анимацию.
[IMG]http://*********net/168484.jpg[/IMG]
Накладывать анимационные заголовки и надписи.
[IMG]http://*********net/179751.jpg[/IMG]
Изменять скорость, как футажей, так и полностью всей проделанной работы.
[IMG]http://*********net/156199.jpg[/IMG]
После чего мы всё это сохраним в виде файла на компьютере.
[IMG]http://*********net/144935.jpg[/IMG]
или сразу создать и записать на диск с применением собственного меню.
[IMG]http://*********net/159270.jpg[/IMG]
И это только малая часть с которой нам предстоит познакомиться и освоить.
Но будем делать всё медленно и по порядку, что бы легче было запомнить и применять свои знания на практике.(ПРОДОЛЖЕНИЕ СЛЕДУЕТ)
-
Следующий пользователь сказал cпасибо Kliakca за это полезное сообщение:
-
13.11.2010, 19:36
#4
Теперь перейдём к практике и первым шагам по созданию слайд-шоу.
Если вы освоите работу с фотками, то вам будет легче потом работать с видеоматериалом и вставлять видеофутажи вместо них.Шаг 1.
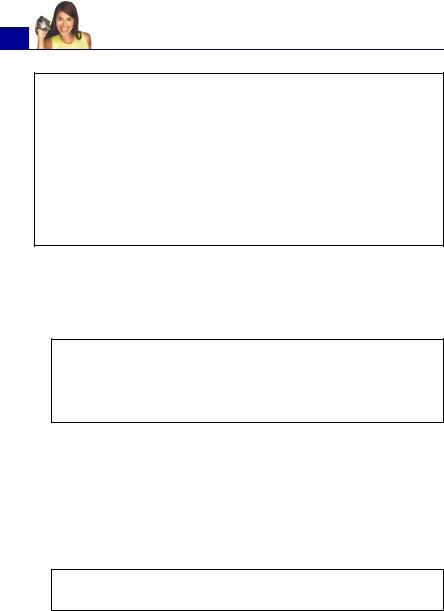
Давайте теперь переташим наши фотографии на полосу редактирования.[IMG]http://*********net/185908m.jpg[/IMG]
Если мы сохраним теперь в таком виде в видео файл, то у нас фотографии будут тупо менять одна другую. Но мы можем встаить видеопереходы между фотографиями и вставить их двумя способами.
Первый способ, это вставить их автоматически, но у них будет отсутствовать тематика стиля. Переходы установятся из разных стилей хаотически.[IMG]http://*********net/174647m.jpg[/IMG]
Переходы будут размещаться между фотографиями.
[IMG]http://*********net/149087m.jpg[/IMG]
Мы можем задать какой то определённый стиль переходов, выбрав его из огромного набора в редакторе.
[IMG]http://*********net/154167m.jpg[/IMG]
Если вы что-то сделали не так, то всегда можно откатить назад последнее действие.
[IMG]http://*********net/146998m.jpg[/IMG]
В принципе можно было бы сохранить в таком виде и смотреть, но надо учитывать, что при наложении переходов временная длина отображения фотографии уменьшается и они будут прокручиваться слишком быстро. Что мы делает для нужного нам промежутка показа по времени?
Мы нажимаем на вторую вкладку и наш проект открывается в окне редактирования с множеством дорожек.[IMG]http://*********net/174665m.jpg[/IMG]
Мы видим наши фотографии на первой дорожке. Это основная дорожка и на ней все файлы приклеиваются друг к другу, как бы вы не пытались их передвинуть. Последняя всегда будет приклеиваться к уже вставленным файлам. Эту дорожку обычно используют для основного фильма или фона, на который накладываются фотографии, картинки, футажи, рамки и всё, что может дополнить наш сюжет, но давайте всё по порядку.Об наложении и других функциях мы поговорим позже, когда вы уже освоите хоть маленько функции редактирования.
На других дорожках, в отличии от основной, можно будет переставлять и редактировать все файлы на наш вкус.
На картинке мы видим, что два перехода уже вставленны и они уменьшили размер просмотра. Что бы увеличить размер на 5-8 секунд, надо просто нажать(выделить) нужную фотографию и ухватив за кончик хвоста растянуть на нужное вам время. Если музыка будет медленная, то растягиваем на 8-10 секунд, а в местах быстрых переходов музыки можно установить 3-5 секунд. Поэксперементируйте и прокрутите на экране, как это всё будет выглядеть после сохранения.Ну вот, с фотографиями мы уже маленько разобрались, теперь нам надо наложить музыку для приятного просмотра. Для этого загружаем нужную нам композицию точно так же, как мы загружали фотографии, но в верхнем окне выбираем Аudio. Теперь нам осталось вставить этот файл в нижнию полосу редактора, где уже вставлены фотографии. Ну вот вроде бы и всё, можно сохранять!
Но у нас музыкальный файл получился длиньше или короче, чем слайд-шоу.
Теперь нам надо сровнять все файлы и сделать музыку в начале нарастающей, а в конце затихающей.Но у меня опять нет времени закончить урок.
(ПРОДОЛЖЕНИЕ СЛЕДУЕТ)
Последний раз редактировалось Kliakca; 13.11.2010 в 19:48.
-
2 пользователей поблагодарили Kliakca за это полезное сообщение:
krulena (18.07.2018), Леся Тавр (16.09.2017)
-
14.11.2010, 10:00
#5
[IMG]http://s.******info/1ecbb87f39797eb81f3180e12b36d7e6.gif[/IMG]
Не наследи в душЕ, осторожно топайТупой ничего не прощает и не забывает; наивный прощает и забывает; умный прощает, но не забывает.
Томас Сас
Как научиться развивать свой ЛИЧНЫЙ Бренд и как стать членом Клуба Успешных Бизнес Леди.
Записывайтесь.
-
14.11.2010, 19:16
#6
(ПРОДОЛЖЕНИЕ УРОКА 1)
Давайте закончим первый вариант урока по созданию слайд-шоую.
Мы вставили звуковой файл в нижнию звуковую дорожку и нам надо его обрезать по размеру видео.
Для этого мы подводим мышку к окончанию видео и нажимаем на ножницы.
[IMG]http://*********net/261622m.jpg[/IMG]Если у вас инструмент (ножницы) не активировался, то ткните мышкой в звуковой файл и опять подведите мышкой к окончанию видео и обрежте. Осталось только удалить лишнюю часть музыки.(Когда, в дальнейшем, вы будете использовать много дорожек и файлов, то для обрезки нужного файла вам надо будет активировать мышкой именно его, что бы на других файлах было меньше порезов.)
[IMG]http://*********net/234998m.jpg[/IMG]
Теперь давайте закончим работу со звуком. Для этого нам надо нажать на третью вкладку, где нарисован динамик и аудио файл у нас станет прозрачным. Теперь мы видим кривую импульсов звука и редакционную полосу.
[IMG]http://*********net/219638m.jpg[/IMG]
Сделать нарастание звука и затухание очень просто. Для этого мышкой мы косаемся полосы, отступив от начала 3-5 секунд и оставляем фиксированную точку. Подводим мышку к самому началу и при появлении руки, опускаем край полосы до минимума.
[IMG]http://*********net/261384.jpg[/IMG]
Точно так же делаем с окончанием звукового файла.
[IMG]http://*********net/197896.jpg[/IMG]
Ну вот, осталось только сохранить и самый простой способ создания слайд-шоу мы сделали.
[IMG]http://*********net/199947m.jpg[/IMG]
После сохранения готовая работа будет у вас отражаться в редакторе. Не спешите её удалять, она нам может понадобиться для дальнейшего урока.
[IMG]http://*********net/259338m.jpg[/IMG]
Думаю, что для первого раза и знакомства с програмкой вполне достаточно.
Дальше мы будем делать тоже самое, но усложняя и украшая свою работу.
Делая её более интересной, на движущихся фонах, меняющую свою троекторию и так далее.
Чем дальше, тем будет интересней!!! Сообщение от Mazaykina
Настюшка! Спасибо большое!!! Для многих пользователей твоя темка- это спасательный круг.
Спасибо, т.Марина.
Я надеюсь, что не зря убью драгоценное время и мои уроки пойдут на помощь форумчанам.
-
Следующий пользователь сказал cпасибо Kliakca за это полезное сообщение:
-
14.11.2010, 22:42
#7
Настя, спасибо большое! Как раз мне нужно было разобраться с этой программкой! А тут все разжевали и в рот положили! Спасибо!
-
16.11.2010, 19:01
#8
-
16.11.2010, 22:11
#9
olgaring,АннаМария, спасибо за интерес и поддержку, хотя я ждала вопросов:- А почему у меня не все фотографии на весь экран и по краям чёрный фон?
Отвечу без вопроса. У нас были разного размера фотографии, соответственно и результат получился такой. Но это был только ознакомительный урок принципа работы в редакторе.
Можно конечно довести получившееся до ума вставив во вторую дорожку и растянув на весь экран или вставить в первую дорожку, а на второй наложить рамочку и так далее. Вариантов много и все они интересны по отдельности. Если захотите поэксперементировать, то я с радостью уделю этому ещё несколько уроков.
А сейчас я вам расскажу новый урок, в котором мы не будем использовать переходы програмки, а создадим другой проект из фотографий на фоне.УРОК № 2
Что бы выполнить этот урок нам надо создать собственные футажи из каждой фотографии и скачать в интернете красивую картинку, на фоне которой у нас будут отражаться фотографии.
Я взяла фоновую картинку воздушных шаров, который очень подходит, как для проекта, так и для форума.
1) Создаём футаж из фотографии.
У нас уже есть папочка с фотографиями от первого урока, с ней мы и будем работать.
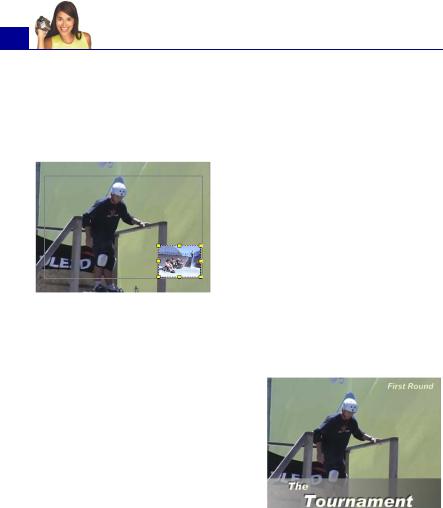
Загружаем фотографии из папки в редактор (если вы их удаляли), возьмём первую фотографию и вставим её (внимание) во вторую полосу. Подводим мышку к краю фотографии и когда появится двойная стрелка, то хватаем за кончик фотографии и растягиваем до края плеера.[IMG]http://*********net/239706m.jpg[/IMG]
Точно так же растягиваем в другую сторону, что бы экран был заполнен полностью.
[IMG]http://*********net/227418m.jpg[/IMG]
Теперь нажмите во второй дорожке на заготовку и ухватив за край растяните на 5-7 секунд.
[IMG]http://*********net/213082m.jpg[/IMG]
Сохраните эту заготовку в отдельную папочку и поставьте цифру 1.
Удалите с 2 дорожки фотографию и вставьте в неё следующую. Проделайте ту же операцию со всеми подготовленными фотографиями.
Перед сохранением заготовок попробуйте поиграть с цветностью и освещением.
Подберите для себя оптимальный вариант.[IMG]http://*********net/214109m.jpg[/IMG]
Если вы создали из всех фотографий футажи, то давайте приступим к созданию нашего ролика.
Возьмите фоновую картинку и вставьте её в первую дорожку. Теперь растяните за правый край подальше. Лишнее мы отрежем по окончанию создания ролика.[IMG]http://*********net/218205m.jpg[/IMG]
Вставьте все приготовленные футажи из фотографий во вторую дорожку. В плеере можно каждому футажу затать свой размер или оставить так, как есть.
[IMG]http://*********net/251999m.jpg[/IMG]
Теперь нам надо задать двидение каждому футажу по очереди. Для этого надо поработать в закладке «Атрибуты».
[IMG]http://*********net/214111.jpg[/IMG]
В первом квадратике мы задаём с какой стороны у нас прилетит фотография.
Во втором квадратике выбираем куда улетит фотография или выбрав центр, оставляем её по центру. Если мы оставляем по центру, то хорошо подайдёт кнопочка изчезания или растворения. Появление и растворение у нас под цифрой 4. Под цифрой три расположено кручение футажа.
Поэксперементируйте с каждой фотографией в отдельности и подберите очерёдность изменения движения на ваш вкус.
Когда вы весь сюжет прокрутите в плеере и вас будет устраивать, то не забудьте про лишний размер фона. Его можно обрезать по размеру или ухватив за хвост уменьшить до нужного размера.
Осталось вставить музыку и сохранить.У меня получился вот такой ролик на скорую руку.
Интересно было бы посмотреть на то, что получиться у вас и не стесняйтесь задавать вопросы.
-
Следующий пользователь сказал cпасибо Kliakca за это полезное сообщение:
-
17.11.2010, 16:49
#10
С удовольствием показала бы свои работы , но проблема в том , что чтобы закачать видео в интернет иногда уходит столько времени и нервов, что не хочется даже с этим связываться. Так что заранее извиняюсь за пассивность .
-
17.11.2010, 16:51
#11
Настя , а для чего ты делаешь заготовки и сохраняешь их ? Ведь гораздо проще сразу работать и оставлять их на 2 шпуре ( дорожке)
-
17.11.2010, 20:48
#12
Сообщение от olgaring
Настя , а для чего ты делаешь заготовки и сохраняешь их ? Ведь гораздо проще сразу работать и оставлять их на 2 шпуре ( дорожке)
olgaring, я делаю свои работы за один заход. Мне эта програмка больше напоминает разукрашку для маленьких детишек, хотя свои первые шаги делала именно в этой програмке и она была самая лёгкая в освоении. Сейчас я использую более профессиональные редакторы и монтажные столы, но речь необомне…
У многих пользователей ещё остались старенькие платформы и програмки вышибают все созданные труды. Да и в уроках надо привить пользователям способы и методы редактирования, удаления и сохранения. Чем чаще они будут это делать, тем быстрее запомнят функции редактора. Для других уроков могут пригодиться созданные футажи, ведь из готового проекта потом уже не вытащить и приходится создавать по новой. А использовать собственные футажи в своих работах всегда приятней, чем мусором из интернета, на который предьявляют права авторы и которые встречаются почти во всех работах начинающих.Давайте забежим маленько вперёд и попробуем поработать паралельно с видео.
Сегодня я хочу показать, как быстро и легко можно создать простенький клип изпользуя Ulead VideoStudio 11 и узнаем ещё несколько новых для вас кнопочек с которыми вам придёться работать в дальнейших своих работах.
На форуме много творческих людей которые обучают своих питомцев и устраивают показательные выступления и отчёты своих трудов. Все они любят снимать происходящее на камеру, но не всегда эти записи бывают достойны к просмотру и вниманию окружающих.Для урока я взяла три дубля одной новенькой песни…
…и теперь нам предстоит их изрезать, измельчить, порубить на мелкие-мелкие части, что бы получить разноплановый, красивый клип.
(ПРОДОЛЖЕНИЕ СЛЕДУЕТ)
-
17.11.2010, 20:56
#13
Достойный ответ . Спасибо! У меня вопрос. А с помощью Corel Ulead можно вырезать объекты как в фотошопе? Ну ,например, человеческую фигуру из фотографии можно как-то вырезать ? И ещё , в профессиональных студиях переход от одного кадра к другому более мягче что ли , в Улеаде резкий. Существует ли здесь функция ( кроме переходов )?
-
18.11.2010, 09:00
#14
Настя, спасибо! С нетерпением жду продолжения…очень интересно…открываю для себя что-то новое.
-
18.11.2010, 21:51
#15
Сообщение от LINSLI
С нетерпением жду продолжения…очень интересно…открываю для себя что-то новое.
LINSLI, Спасибо,что заглянул. Чем успею, тем и поделюсь с удовольствием.
=====================================================================
Сообщение от olgaring
А с помощью Corel Ulead
Виста-98 ?
Круто!!!
Это отчепятка или проверка на вшивость?
Сorel VideoStudio, это не Ulead VideoStudio, а её прототип и соответственно имеет значительное отличие, как в плагинах, так и в привязках Adorage Magic, Vitascene, Burger и других возможностей. Все студии имеют одно предназначение, создавать видео!
В Сorel VideoStudio можно фильтры наложить и на титры,и применять фильтр автоскетч. В ней ненужно мучиться с прорисовкой видео,применяешь его и студия сама делает это.
Но если вы заметили, то мы здесь проводим уроки по Ulead VideoStudio, а не по Сorel.
Если мне понадобиться создать что-то поинтересней, то я не стану возиться с Adorage или Burger, а лучше воспользуюсь Adobe After Effects. Сообщение от olgaring
И ещё , в профессиональных студиях переход от одного кадра к другому более мягче что ли , в Улеаде резкий. Существует ли здесь функция ( кроме переходов )?
olgaring, после ваших вопросов начинаю очень сильно сомневаться, что:
Сообщение от olgaring
много лет пользуюсь программой ( начинала с 9). Кажется , что знаю её как родную
Сообщение от olgaring
С удовольствием показала бы свои работы , но проблема в том , что
Почему-то сразу вспомнился любимчик форума Лёвушка и его трактовка:
-«Покажи, докажи или непонти!»
Когда я начинала своё знакомство с интернетом, то ещё небыло всех этих новейших технологий и скоростей. Был обычный шнурок, для закачки картинок в телефон и простенький «Samsung X-100».
Используя его, как GPRS модем, перелопачивала всю помойку интерната, в поисках интересной информации, скачивала и выкладывала огромное количество файлов. После WAP это было круто!
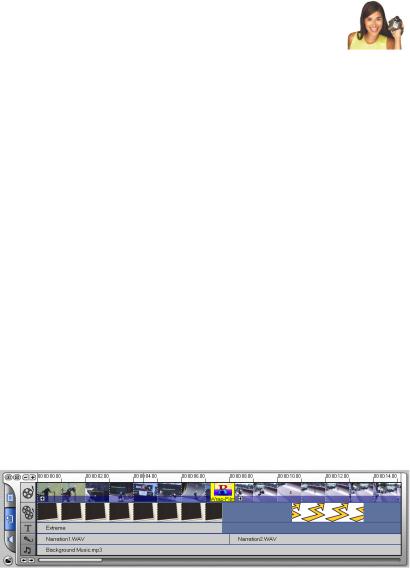
Сейчас, когда придумали тарелки, спутники, волокно и другие средства соединения, смешно читать такие формулировки. Можно жить даже в глухой деревне, юрте, чуме, ауле, на дрейфующей льдине и отправлять любые файлы. Достаточно дойти до любого сотового оператора, купить GPRS или 3G модем (размером с флешку) и воткнуть его в ………….хотя бы в первый Пентиум. Особенно смешно это читать от Европейских жителей. Всё же не Попуа-Новая Гвинея, где в место эллектричества всё ещё используют лучину.Но не смотря на всё выше перечисленное, я отвечу и покажу в следующих уроках. А пока нам предстоит закончить начатый урок.И так, у нас есть три дубля одной песни, но снятые на разных сценах. Этого вполне хватит для создания домашнего, быстрого клиппа. Давайте загрузим их в редактор и приступим к созданию.
Загружаем первый дубль в первую дорожку, второй во вторую и …. Мы видим, что дорожки закончились, но не пугайтесь. У нас их придостаточно и для большего количества дублей.
Нажимаем на «Менеджер дорожки наложения(Оверлей)» и добавляем ещё одну дорожку наложения.[IMG]http://*********net/256681m.jpg[/IMG]
[IMG]http://*********net/243369m.jpg[/IMG]
Теперь у нас есть три дорожки с озвученными дублями. Что бы звуки не накладывались друг на друга мы их удалим. Нажимаем на первую дорожку и выключаем звук. Тоже самое проделываем с двумя оставшимися.
[IMG]http://*********net/223913m.jpg[/IMG]
Но ведь клип не может остаться немым и нам надо его озвучить? Давайте возьмём ещё раз первый дубль и вставим его в звуковую дорожку.
[IMG]http://*********net/228009m.jpg[/IMG]
-Как же так? Это же видео?- Спросите вы.
Вот такой фокус, отвечу вам я.
Помещая озвученное видео в звуковую дорожку будет отражаться только звук. Во многих других студиях вы бы не смогли проделать подобные фокусы и они бы стали ругаться о несовместимости файла. Но в нашей студии это приемлемо.
Собственно теперь мы можем приступить к портняжным работам. Нажимаем на вкладку звука и у нас проявляется кривая импульсов. Учитывая, что композиция быстрая, то можно было бы просто порезать с интервалом в 5 секунд и удалить лишние кусочки, но ведь мы не боимся трудностей и будем резать в такт музыки. Что бы увидеть такты надо сдвинуть мышкой движок шкалы в правую сторону до конца. Теперь нам стали видны всплески на звуковой дорожке, вот по ним мы и будем резать.[IMG]http://*********net/210601m.jpg[/IMG]
Но если резать на всех всплесках, то получится слишком быстрая смена кадров и смотреться будет не красиво. Возьмём интервал по 5 секунд, а на проигрышах по 15. Начало не трогаем, оставляем до первого вступления.
Нажимаем на третий дубль, что бы активировать ножницы и что бы они не порезали нам звуковую дорожку вместо видео. Нажимаем инструмент (ножницы) и режем третий дубль, теперь нажимаем соответственно второй дубль, что бы все были порезаны на одном месте и переходим к следующему отмеренному такту.[IMG]http://*********net/219816m.jpg[/IMG]
(ПРОДОЛЖЕНИЕ СЛЕДУЕТ)
-
Следующий пользователь сказал cпасибо Kliakca за это полезное сообщение:


Программа для видеомонтажа Ulead VideoStudio 11 позволяет записывать и монтировать видео во всех основных видеоформатах. Также программа позволяет применять профессиональные спецэффекты, добавлять музыкальные дорожки и редактировать их по своему усмотрению. Ulead Videostudio — идеальная программа для видеомонтажа в домашних условиях. Теперь Вы можете оживить фотографии из семейного архива и превратить их в креативный видеоролик. А к любому празднику (день рождения, годовщина свадьба, юбилей и т.д) — такое поздравление будет самым лучшим подарком. С помощью этой статьи можно узнать, как сделать видео полностью самостоятельно, а также, как можно обрабатывать видео и делать видеоролики.
Установка программы Ulead VideoStudio 11
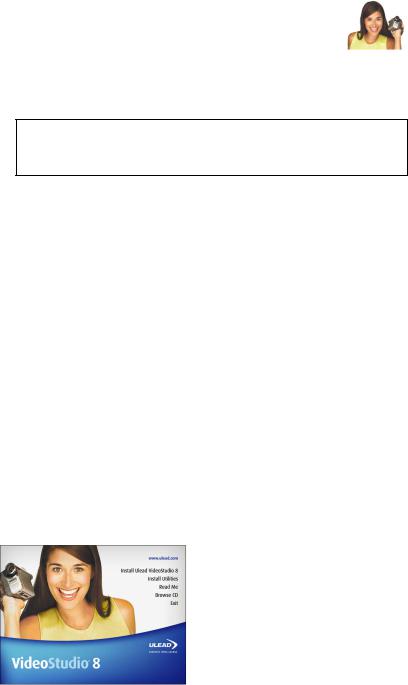
Программу Ulead VideoStudio 11 можно бесплатно и без регистрации скачать на официальном сайте. Установка программы не должна вызвать проблем. Достаточно лишь в точности следовать инструкциям Мастера установки.
Для запуска программы кликаем мышкой на ярлык Ulead Videostudio, расположенный на Рабочем столе или открываем меню «Пуск«=> «Программы» => «Ulead VideoStudio 11«. Появится окно, в котором нужно выбрать вкладку VideoStudio редактор:
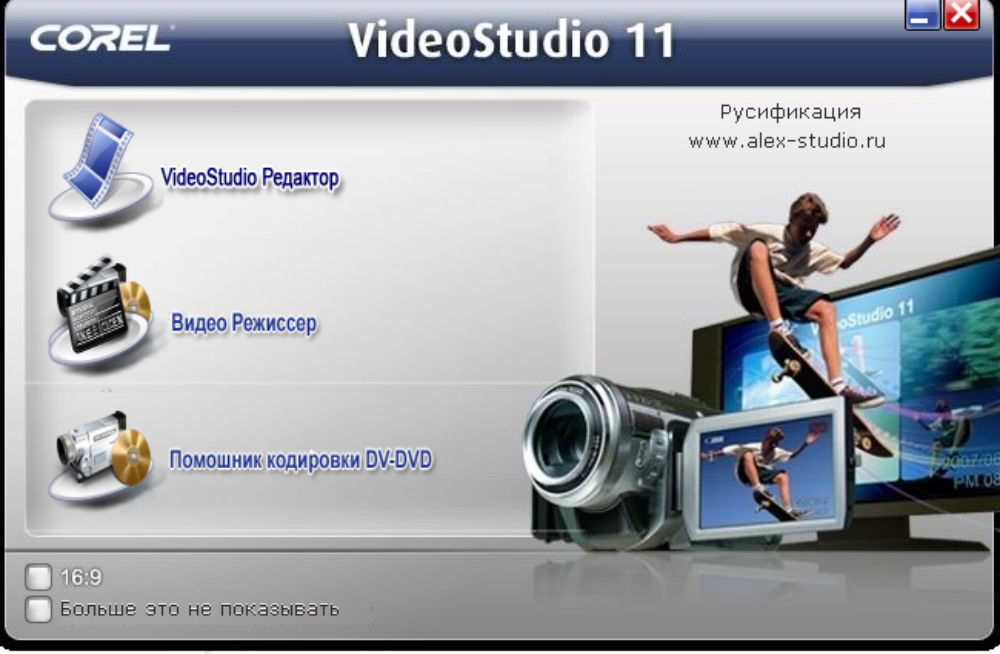
Рис. 1
После чего мы переходим в главное окно видеоредактора.
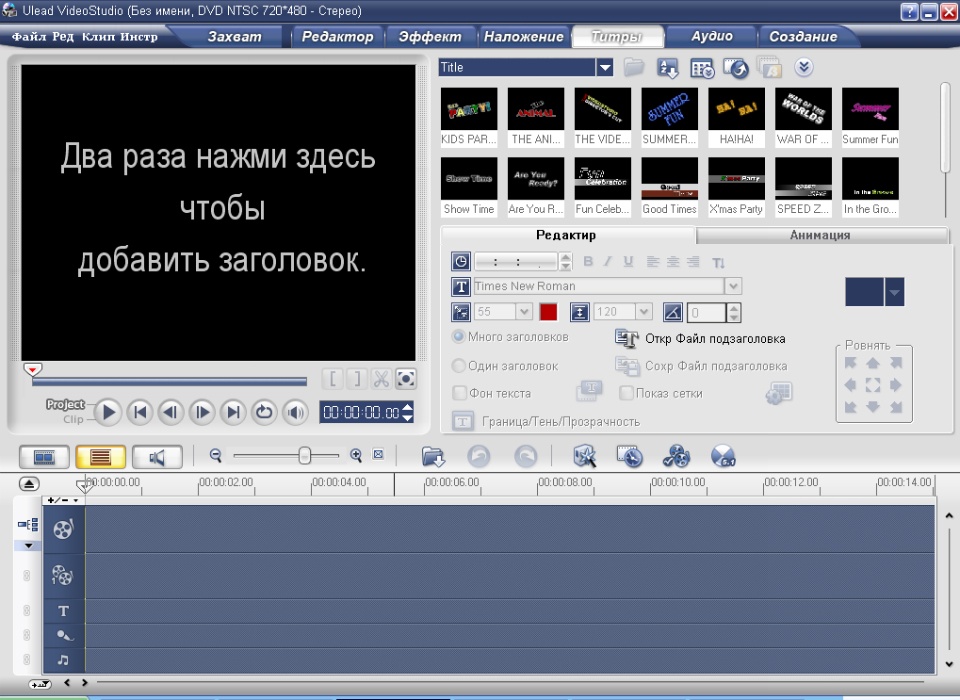
Рис. 2
Как сделать видео в программе Ulead VideoStudio 11
Теперь можно приступать к работе. Как видно из рисунка, данная программа для монтажа видео предлагает для работы всего одну видеодорожку. Но если Вы планируете использовать эффекты наложения, то нужно будет добавить их необходимое количество на таймлинию. Делается это с помощью значка Менеджер дорожки наложения.
Видеофайлы, которые Вы желаете использовать для создания будущего фильма, загружаются в видеоредактор следующим образом. Выбираем вкладку Редактор, а в появившемся окне — Video. Для вставки фотографий или рисунков, выбираем соответственно Image.
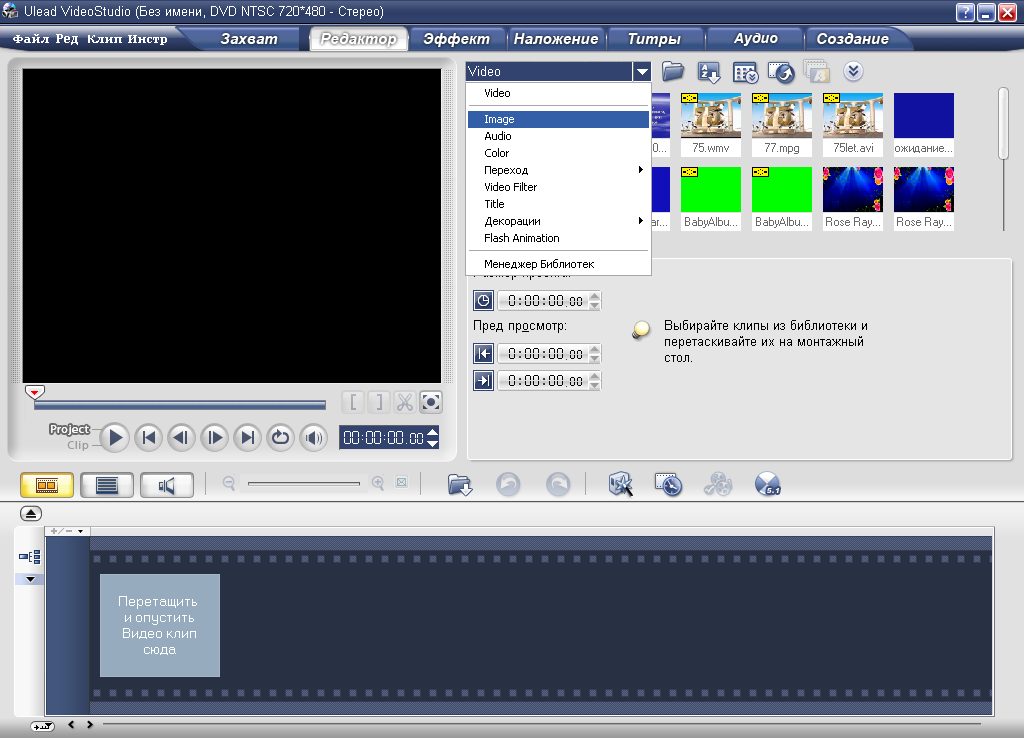
Рис. 3
По мере добавления фотографий и видеороликов, они будут отображаться в открытом окне. Теперь видео и фотографии нужно перенести на видеодорожку. Причем, в каком порядке Вы будете их туда помещать, в таком они и будут показаны в видеофильме.
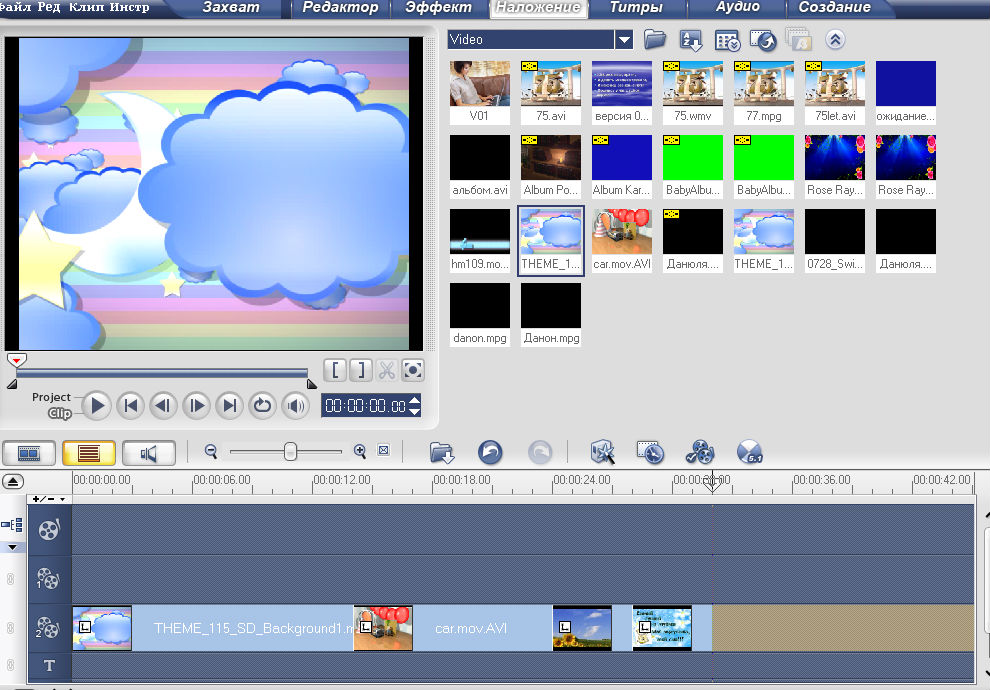
Рис. 4
Музыкальное оформление тоже немаловажно, для добавления звука в фильм необходимо выполнить такое действие: открыть пункт «Audio«, выбрать нужный аудиофайл и с помощью мышки перенести его на звуковую дорожку.
Эффекты и переходы придадут фильму красочности и оригинальности. В меню выбираем «Переход» и «Видеофильтр» и вставляет их на таймлинию. Первые — между кадрами, а вторые — прямо на них.
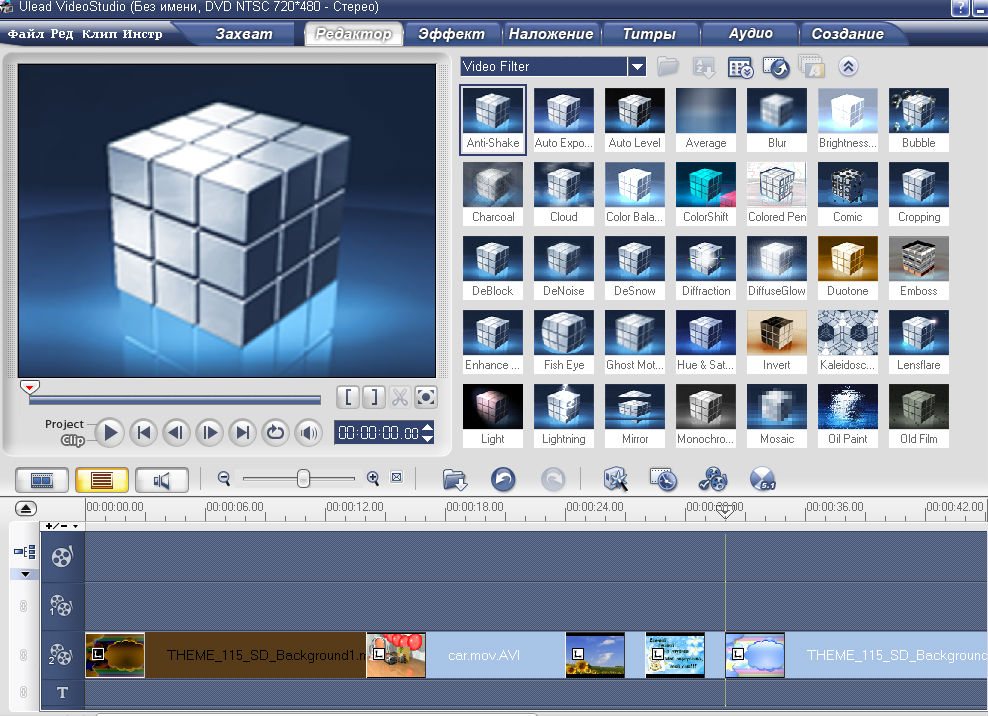
Рис. 5
Программа для создания видеороликов Ulead VideoStudio 11 позволяет использовать различные эффекты наложения. Для этого необходимо скачать футажи из Интернета (на многих сайтах эта услуга совершенно бесплатна) и расположить их в необходимой последовательности на дополнительной видеодорожке.
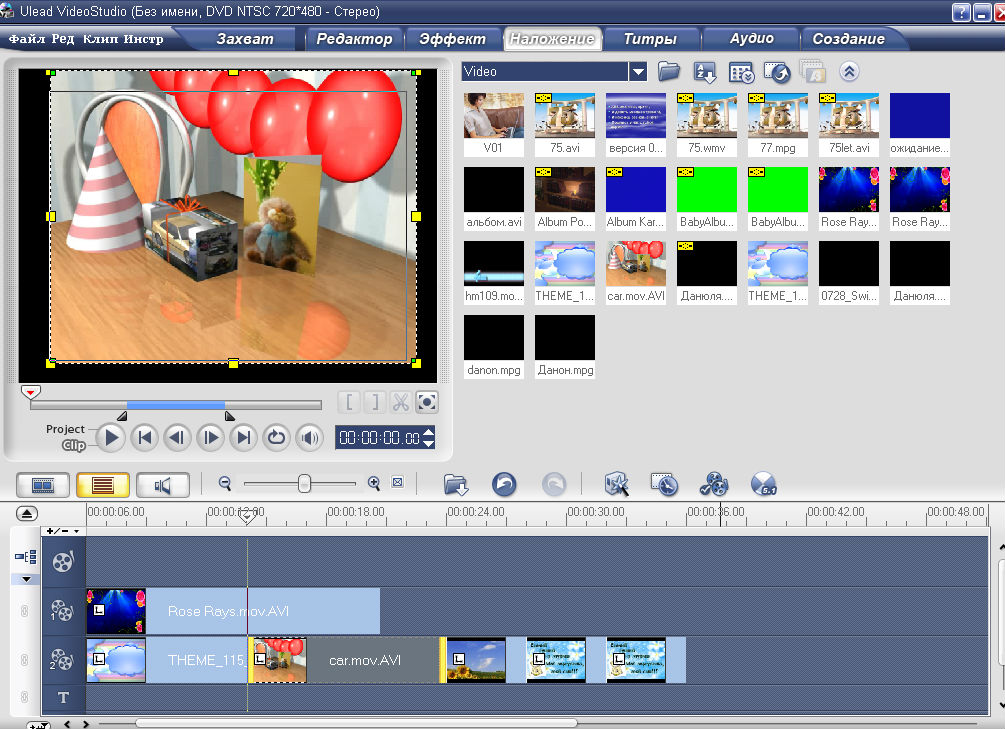
Рис. 6
При желании, видеомонтаж может быть дополнен титрами. С их помощью можно подписать то или иное фото, указать дату и место проведения торжества, написать пожелания юбиляру. Титры вызываются путем нажатия вкладки Title, и после выбора типа отображения переносятся на дорожку титров, где можно приступать к набору текста.
Теперь, когда весь отснятый материал со звуковым сопровождением и надписями находится на таймлинии, обработка видео завершена. Можно приступать к созданию и записи будущего фильма. Ulead VideoStudio 11 позволяет предварительно просмотреть созданный проект: пункт «Создание» — «Запустить проект».
При положительных впечатлениях можно переходить к записи проекта. Выбираем пункт «Создать файл видео» и указываем необходимый формат. Ulead Videostudio поддерживает большое количество форматов, отличающихся как по качеству картинки, так и по занимаемому объёму. Для примера выбираем HD DVD 1920. Указываем название своего фильма, выбираем путь для установки и все — процесс пошел. Программа для монтажа видео Ulead VideoStudio 11 позволяет просматривать процесс записи в реальном времени. При желании созданный фильм можно с лёгкостью экспортировать на мобильное устройство или на любой тип диска.
Администрация сайта CADELTA.RU выражает благодарность за статью автору Oksi10.
![]()
User Guide
Ulead Systems, Inc.
March 2004
English edition for Ulead VideoStudio 8, March 2004.
© 1992-2004 Ulead Systems, Inc.
All rights reserved. No part of this publication may be reproduced or transmitted in any form or by any means, electronic or mechanical, including photocopying, recording or storing in a retrieval system, or translated into any language in any form without the express written permission of Ulead Systems, Inc.
Software license
The software described in this document is furnished under a License Agreement, which is included with the product. This Agreement specifies the permitted and prohibited uses of the product.
Licenses and trademarks
ICI Library © 1991–1992 C-Cube Microsystems.
All rights reserved. Ulead and the Ulead Systems logo are registered trademarks and Ulead VideoStudio is a trademark of Ulead Systems, Inc. Intel, Pentium and MMX are registered trademarks and/or trademarks of Intel Corporation. Microsoft, Windows, DirectX and/or other Microsoft products referenced herein are either trademarks or registered trademarks of Microsoft Corporation. Adobe, the Adobe logo, and Acrobat are trademarks of Adobe Systems Incorporated.
All other product names and any registered and unregistered trademarks mentioned in this manual are used for identification purposes only and remain the exclusive property of their respective owners.
Sample files
Files provided as samples on the program CD can be used for personal demonstrations, productions and presentations. No rights are granted for commercial reproduction or redistribution of any sample files.
|
North & South America |
International |
|
Ulead Systems Inc. |
Ulead Systems, Inc. |
|
http://www.ulead.com |
http://www.ulead.com |
|
Support: http://www.ulead.com/tech |
http://www.asiapac.ulead.com |
|
http://www.ulead.com.tw |
|
|
Support: |
|
|
http://www.ulead.com/tech |
|
|
http://www.asiapac.ulead.com/tech |
|
|
http://www.ulead.com.tw/tech |
|
Japan |
China |
|
Ulead Systems Inc. |
Ulead Systems, Inc. |
|
http://www.ulead.co.jp |
http://www.ulead.com.cn |
|
Support: http://www.ulead.co.jp/tech |
Support: http://www.ulead.com.cn/tech |
|
Germany |
United Kingdom |
|
Ulead Systems GmbH |
http://www.ulead.co.uk |
|
http://www.ulead.de |
Support: http://www.ulead.co.uk/tech |
|
Support: http://www.ulead.de/tech |
|
|
France |
|
|
http://www.ulead.fr |
|
|
Support: http://www.ulead.fr/tech |

|
3 |
|
|
ULEAD VIDEOSTUDIO USER GUIDE |
|
|
Welcome to Ulead VideoStudio ……………………………… |
7 |
|
How VideoStudio works ………………………………….. |
7 |
|
What’s new …………………………………………………. |
8 |
|
System requirements ……………………………………. |
12 |
|
Installing and running VideoStudio ……………………. |
13 |
|
Setting up your computer …………………………………… |
15 |
|
Installing a capture card ………………………………… |
15 |
|
Connecting a video camera to the computer ………… |
15 |
|
DV or Digital 8 camcorder ………………………………… |
15 |
|
Analog video sources ………………………………………. |
19 |
|
USB camera …………………………………………………. |
24 |
|
Preparation for video capturing and editing …………. |
25 |
|
Getting started ………………………………………………….. |
26 |
|
VideoStudio Movie Wizard ………………………………. |
26 |
|
Step 1: Add video and images …………………………… |
26 |
|
Step 2: Select a template ………………………………… |
29 |
|
Step 3: Finish ……………………………………………….. |
32 |
|
VideoStudio Editor ……………………………………….. |
33 |
|
The user interface …………………………………………. |
33 |
|
The Step Panel ……………………………………………… |
34 |
|
The Menu Bar …………………………………………….. |
35 |
|
The Options Panel …………………………………………. |
36 |
|
The Navigation Panel ………………………………………. |
36 |
|
The project timeline ……………………………………….. |
37 |
|
The Library ………………………………………………….. |
41 |
|
Starting a new movie project …………………………… |
44 |
|
Saving your project ………………………………………… |
45 |
|
Setting your preferences ………………………………….. |
46 |
|
Setting project properties ………………………………… |
46 |
|
Adding clips …………………………………………………. |
47 |
|
Previewing …………………………………………………… |
47 |
|
Capture ……………………………………………………………. |
49 |
|
Seamless DV and MPEG capture ………………………. |
49 |
|
The Capture Step Options Panel ……………………….. |
50 |
|
Capturing video …………………………………………… |
51 |
|
Digital Video (DV) ………………………………………….. |
53 |
|
Analog video ………………………………………………… |
55 |

|
4 |
ULEAD VIDEOSTUDIO USER GUIDE |
|
Direct video capturing to MPEG format …………………. |
58 |
|
Direct video capturing to Windows Media Video ………. |
59 |
|
Batch Capture …………………………………………….. |
62 |
|
Capturing still images ……………………………………. |
63 |
|
Edit ………………………………………………………………….. |
64 |
|
Adding clips to the Video Track ………………………… |
64 |
|
Video clips ……………………………………………………. |
64 |
|
Images ……………………………………………………….. |
65 |
|
Color clips ……………………………………………………. |
65 |
|
The Edit Step Options Panel ……………………………. |
66 |
|
Split by Scene …………………………………………….. |
67 |
|
Trimming a clip …………………………………………… |
69 |
|
Multi-trim Video ………………………………………….. |
71 |
|
Saving trimmed clips …………………………………….. |
73 |
|
Playback Speed …………………………………………… |
73 |
|
Capturing still images in the Edit Step ……………….. |
74 |
|
Pan & Zoom ……………………………………………….. |
75 |
|
Applying video filters …………………………………….. |
77 |
|
Key frame settings …………………………………………. |
79 |
|
Effect ……………………………………………………………….. |
81 |
|
Adding transitions ………………………………………… |
81 |
|
The Effect Step Options Panel ………………………….. |
82 |
|
The Album transition …………………………………….. |
83 |
|
Overlay …………………………………………………………….. |
87 |
|
Adding clips to the Overlay Track ……………………… |
87 |
|
The Overlay Step Options Panel ……………………….. |
91 |
|
Adding decorations ………………………………………. |
92 |
|
Title …………………………………………………………………. |
94 |
|
Adding text ………………………………………………… |
94 |
|
Modifying text attributes ………………………………… |
97 |
|
The Title Step Options Panel …………………………… |
98 |
|
Applying animation ………………………………………. |
99 |
|
Animation effects …………………………………………… |
99 |
|
Audio ……………………………………………………………… |
103 |
|
The Audio Step Options Panel ………………………… |
103 |

|
5 |
|
|
ULEAD VIDEOSTUDIO USER GUIDE |
|
|
Adding voiceover narration ……………………………. |
104 |
|
Adding background music …………………………….. |
106 |
|
Adding audio files ………………………………………. |
107 |
|
Trimming audio clips …………………………………… |
108 |
|
Fading-in/out …………………………………………… |
108 |
|
Mixing audio tracks …………………………………….. |
109 |
|
Using the Clip Volume Control ………………………….. |
109 |
|
Using the Audio Mixing Panel ……………………………. |
109 |
|
Volume rubber banding ………………………………….. |
110 |
|
Applying audio filters …………………………………… |
111 |
|
Share ……………………………………………………………… |
112 |
|
The Share Step Options Panel ………………………… |
112 |
|
Creating movie templates …………………………….. |
112 |
|
Creating and saving a video file ……………………… |
114 |
|
Burning a DVD, VCD or SVCD ………………………… |
116 |
|
Assembling files ……………………………………………. |
117 |
|
Adding/Editing chapters ………………………………….. |
118 |
|
Creating selection menus ………………………………… |
120 |
|
Previewing …………………………………………………. |
122 |
|
Burning your project onto a disc ……………………….. |
122 |
|
Project Playback ………………………………………… |
124 |
|
Exporting your movie ………………………………….. |
126 |
|
Exporting videos to Ulead DVD-VR Wizard ……………. |
126 |
|
Recording back to a DV camcorder …………………….. |
129 |
|
Posting your video on a Web page ……………………… |
130 |
|
Sending a movie by e-mail ………………………………. |
131 |
|
Electronic greeting cards …………………………………. |
132 |
|
Creating an audio file ………………………………….. |
133 |
|
Appendix A: Menus and dialog boxes …………………. |
134 |
|
Menus …………………………………………………….. |
134 |
|
File menu …………………………………………………… |
134 |
|
Edit menu …………………………………………………… |
135 |
|
Clip menu …………………………………………………… |
136 |
|
Tools menu …………………………………………………. |
137 |
|
Help menu ………………………………………………….. |
138 |
|
Dialog boxes …………………………………………….. |
139 |
|
Audio Save Options ……………………………………….. |
139 |
|
Batch Convert ……………………………………………… |
140 |

|
6 |
ULEAD VIDEOSTUDIO USER GUIDE |
|
Burner Advanced Settings ………………………………. |
141 |
|
Border/Shadow/Transparency ………………………….. |
142 |
|
Capture Options …………………………………………… |
143 |
|
Change Capture Plug-in ………………………………….. |
144 |
|
Output Advanced Settings ………………………………. |
144 |
|
Preferences: File menu …………………………………… |
145 |
|
Preferences (Create Disc) ………………………………. |
151 |
|
Preview Playback Options ……………………………….. |
152 |
|
Project Properties …………………………………………. |
153 |
|
Project Options ……………………………………………. |
153 |
|
Project Settings (Create Disc) ………………………….. |
154 |
|
Preview Files Manager ……………………………………. |
155 |
|
Select Device Control …………………………………….. |
156 |
|
Video and Audio Capture Property Settings ………….. |
157 |
|
Video Color Manager ……………………………………… |
159 |
|
Video Save Options ……………………………………….. |
160 |
|
Appendix B: Shortcuts ……………………………………… |
166 |
|
Menu command shortcuts ……………………………. |
166 |
|
Step Panel shortcuts …………………………………… |
166 |
|
Navigation Panel shortcuts ……………………………. |
167 |
|
Timeline shortcuts ……………………………………… |
168 |
|
Multi-trim Video shortcuts …………………………….. |
168 |
|
Others ……………………………………………………. |
169 |
|
Appendix C: Technology Overview ……………………… |
170 |
|
Analog vs. Digital ………………………………………. |
170 |
|
SmartRender Technology ……………………………… |
171 |
|
DV SmartPlay ……………………………………………. |
171 |
|
DVD, VCD, and SVCD ………………………………….. |
172 |
|
Appendix D: System tweaks ……………………………… |
173 |
|
Enabling DMA for IDE disks …………………………… |
173 |
|
Disabling Write-Behind Caching ……………………… |
176 |
|
Setting the Paging File size …………………………… |
179 |
|
Appendix E. Tips and techniques ……………………….. |
182 |
|
Glossary …………………………………………………………. |
184 |
|
Index ……………………………………………………………… |
194 |
|
ULEAD VIDEOSTUDIO USER GUIDE |
7 |
Welcome to Ulead VideoStudio
Thank you for purchasing VideoStudio, the video editing software that allows even beginners to come up with professional-looking movies. It provides you with a complete set of tools to capture videos, edit them, and share your final production on tape, DVD, CD, or the Web.
How VideoStudio works
VideoStudio follows a step-by-step paradigm so that editing tasks remain uncomplicated from start to finish. VideoStudio also offers more than a hundred transition effects, professional titling capabilities and simple soundtrack creation tools. Learn in seconds, create in minutes.
To make a movie production, first capture footage from a camcorder or another video source. You can then trim the captured videos, arrange their order, apply transitions, and add overlays, animated titles, voiceover narration, and background music. These elements are organized in separate tracks. Changes to one track do not affect other tracks.
Components of a project as displayed in Timeline View
A movie production is in the form of a VideoStudio project file (*.VSP), which contains information on the path location of the clips and how the movie has been put together. After you have finished your movie production, you can burn it to a DVD, VCD or SVCD or record the movie back to your camcorder. You can also output your movie as a video file for playback on the computer.
|
8 |
ULEAD VIDEOSTUDIO USER GUIDE |
VideoStudio uses the information in the video project file to combine all the elements in your movie into a video file. This process is called rendering.
What’s new
Take advantage of VideoStudio’s latest features and enhancements:
VideoStudio Movie Wizard
The new VideoStudio Movie Wizard helps novice users finish stylish movies in only three steps. Choose from preset styles such as romantic, travel, celebration and more. (See “VideoStudio Movie Wizard” on page 26).
Batch Convert
Batch Convert your video, audio and image files to other formats and save valuable time. (See “Batch Convert” on page 140).
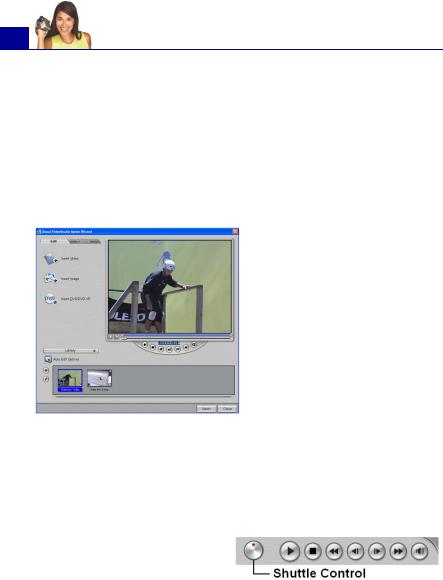
Shuttle Control
Shuttle Control lets you navigate to exact scenes in your DV camcorder. (See “Controlling the DV camcorder with the Navigation Panel” on page 54).
|
ULEAD VIDEOSTUDIO USER GUIDE |
9 |
More effects, filters and content
Stylize your videos with objects and frames. (See “Adding decorations” on page 92).
The Album transition simulates leafing through a book full of memories. (See “The Album transition” on page 83).
Pan and Zoom lets you scan over and gives you a closer view to add more emphasis to your still images. (See “Pan & Zoom” on page 75).
The Auto Exposure filter repairs uneven brightness. Amaze your viewers with effects like the Duotone Filter for tints on videos – perfect for creating scene flashbacks – or the Diffuse Glow Filter for a dream-like appearance. Filters are fully adjustable to match your theme. (For information on applying video filters, see “Applying video filters” on page 77).
|
10 |
ULEAD VIDEOSTUDIO USER GUIDE |
Audio Filters like Audio Normalization, Remove Noise, Amplify, Long Echo and Stadium, can repair tracks or add special effects. (See “Applying audio filters” on page 111).
Enhanced Overlay Step
VideoStudio gives more flexibility in using video and image overlays. You can now apply filters and special effects on overlays; and also move and resize them directly on the screen. (See “Overlay” on
page 87).
Versatile title design
Easily make informative and eye-catching titles.
•Multiple Text Objects can be placed anywhere on a single title clip, each with its own look and animation, directly on the screen. (See “Adding text” on page 94).
•Title animations such as Drop, Swing, and Moving Path give new options in
making text move gracefully on the screen. directly on the screen. (See “Applying animation” on page 99).
•Add Solid and Gradient Bars behind Titles to increase the visibility of text. (See “Modifying text attributes” on page 97).
![]()
|
ULEAD VIDEOSTUDIO USER GUIDE |
11 |
Greater audio control
VideoStudio helps you match volume with particular scenes in the movie.
•Audio Mixer is ideal if you want to change the volume of specific points in your audio track or decrease background music during dialogue. (See “Using the Audio Mixing Panel” on page 109).
•Rubber Banding Timeline lets you visually adjust audio levels at any point simply by clicking and dragging. (See “Volume rubber banding” on page 110).
•Stereo Panning allows you to mix and balance the volume for left and right audio channels. This can be used to direct sounds to the left or right speaker. For example, make the realistic sound of an object moving from left and right. (See “Using the Audio Mixing Panel” on page 109).
Auto Music Generator
Need background music for a scene? VideoStudio’s Auto Music Generator uses award-winning SmartSound™ technology that provides original tunes to fit perfectly with each scene’s mood and duration. (See “Adding background music” on page 106).
Enhanced DVD authoring wizard
DVDs without Pre-Rendering can be accomplished by sending projects to the DVD Wizard directly from the Timeline.
Choose from a wider choice of DVD menu templates for more variety and customization in layout and design. (For information on creating movie projects on disc, see “Burning a DVD, VCD or SVCD” on page 116).
Full Screen Preview
Full Screen Preview lets you see your movie on the entire screen with no distortion at any time during the project. (See “Tools menu” on page 137).

|
12 |
ULEAD VIDEOSTUDIO USER GUIDE |
System requirements
Video demands a lot from your computer. When setting up your system for video editing, the basic factors to consider are the size and speed of your hard drive, RAM, and processor. These determine how much video you can store and how quickly you can process or render your files. If you can afford a bigger hard drive, more RAM, and faster chip, go with it. Just remember that technology is changing so rapidly and by evaluating first the kind of video editing projects you plan to do, you can better determine the setup that works best for you.
The following are the system requirements for VideoStudio:
•Intel® Pentium® III 800 MHz or higher
•Microsoft® Windows® 98 SE, ME, 2000, XP
•256MB of RAM (512MB or above for editing)
•600MB of available hard drive space for program installation
•4 GB+ hard drive space for video capture and editing
•Windows-compatible display with at least 1024×768 resolution
•Windows compatible sound card
•CDROM, CD-R/RW or DVD-R/RW
Real-time features perform best with at least:
•Pentium 4, 2.0 GHz CPU
•512 MB of RAM
•7200 rpm IDE hard drive
Input/Output device support
•1394 FireWire cards for use with DV/D8 camcorders
•Support for OHCI Compliant IEEE-1394 and 1394 Adaptec 8940/8945
•Analog capture cards for analog camcorders (VFW & WDM support)
•USB capture devices and PC Cameras
|
ULEAD VIDEOSTUDIO USER GUIDE |
13 |
•Windows-compatible DVD-R/RW, DVD+R/RW, CD-R/RW
•Sony MicroMV™
Tip: Follow the installation instructions of your hardware components carefully (especially your capture card), and consult the operating manual of your camcorder or capture device.
File format support
•Video: AVI, MPEG-1, MPEG-2, MICROMV, WMV, QuickTime, FLC, FLI, GIF, UIS
•Image: BMP, CLP, CUR, DCS, EPS, FPX, GIF, ICO, IFF, IMG, JPG, PCD, PCT, PCX, PIC, PNG, PSD, PXR, RAS, RLE, SCT, SHG, TGA, TIF, WMF
•Audio: AIF, AIFC, AIFF, AU, AVI, MOV, MP3, MPEG-1, MPEG-2, QT, WAV
Output formats
•Disc: DVD, Video CD (VCD), and Super Video CD (SVCD) movie titles
•Video: AVI, MPEG-1, MPEG-2, QuickTime, WMV, FLC, FLI, FLX, UIS, WMV
•Image: BMP, CLP, EPS, FPX, GIF, IFF, IMG, JPG, PCX, PNG, PSD, PXR, RAS, RLE, SCT, TGA, TIF, WMF
•Audio: WAV, MPA, RM, WMA
Installing and running VideoStudio
The VideoStudio CD has an autorun feature that automatically starts up the installation.
Back up your projects and media files first before installing the new version of VideoStudio.
|
14 |
ULEAD VIDEOSTUDIO USER GUIDE |
Note: If you have a previous version of Ulead VideoStudio installed in your system, it is recommended that you uninstall it only after installing Ulead VideoStudio 8. During installation, the Setup Wizard will auto-detect your capture device plug-in and specially supported codecs (such as MPEG-4, AC-3, 3GP, DivX) from the previous VideoStudio version and integrate them onto VideoStudio 8.
However, if you installed Ulead VideoStudio 8 then you uninstalled the older version, program files and fonts that are used by both versions will also be deleted. To install them back to VideoStudio 8, double-click Add or Remove Programs in the Control Panel, select
Ulead VideoStudio 8, click Change/Remove, then click Repair.
To install VideoStudio:
1.Insert the VideoStudio CD into your CD-ROM drive.
2.When the Setup screen appears, follow the instructions to install VideoStudio onto your computer.
Note: If the Setup screen does not appear after loading the CD, then you can manually start it by double-clicking the My Computer icon on your desktop, then double-clicking the icon for the CD-ROM drive. When the CD-ROM window opens, double-click the Setup icon.
3.Install also the following applications for playing back video files and for viewing the electronic file of this user guide. The installation program will walk you through the installation.
|
• |
QuickTime |
• |
Acrobat Reader |
|
• |
SmartSound |
• |
DirectX |
|
• |
Windows Media Format |
• |
Sony MicroMV |
|
• |
RealPlayer |
• |
Indeo |
Note: Skip this step if you already have newer versions of the above supporting applications installed in your PC.
To run VideoStudio:
•Double-click the VideoStudio icon on your Windows desktop. OR,
•Select the VideoStudio icon from the VideoStudio program group on the Windows Start menu.
|
ULEAD VIDEOSTUDIO USER GUIDE |
15 |
Setting up your computer
Before you can start making movie projects using your own video footage, you first need to capture video from your video camera into your computer. Your computer needs to be equipped with the proper capture card or interface port for connecting your video camera and for capturing video to your computer. Since capturing and video editing require a lot of computer resources, your computer must also be properly set up to ensure successful capturing and smooth editing of your videos.
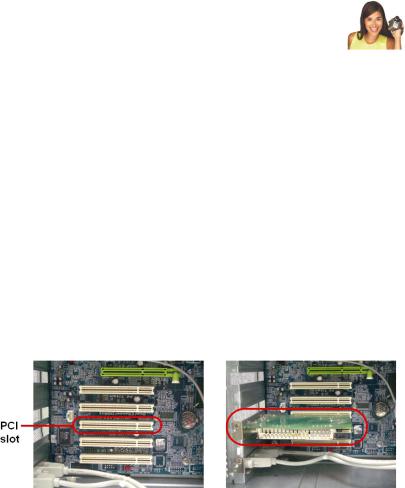
Installing a capture card
If your capture card is a PCI-based card, install the card on your computer by inserting it in an available PCI slot on the computer’s motherboard.
Connecting a video camera to the computer
To connect your video camera to your computer, the type of capture card or interface port that you will need depends on the type of video camera you are using.
DV or Digital 8 camcorder
If you are using a DV (Digital Video) or Digital 8 camcorder, you will need an IEEE-1394 interface on your computer. Some newer computers already have built-in IEEE-1394 ports. If you do not have them on your computer, install an IEEE-1394 card.
|
16 |
ULEAD VIDEOSTUDIO USER GUIDE |
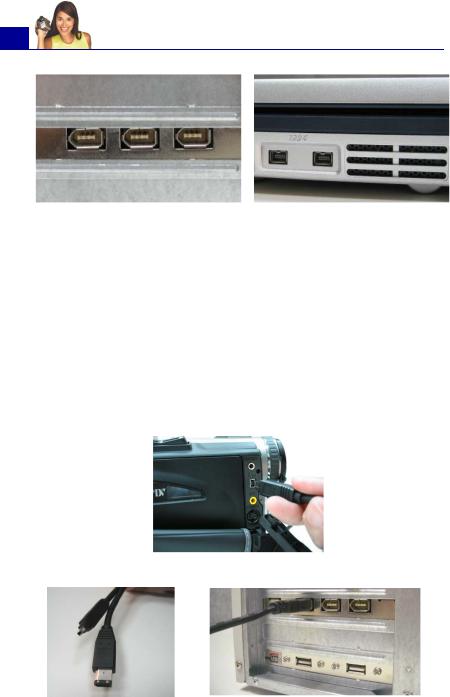
6-pin IEEE-1394 ports on a desktop computer
4-pin IEEE-1394 ports on a notebook computer
Connecting the camcorder to the IEEE-1394 interface
Use an IEEE-1394 cable to connect your digital camcorder to the IEEE-1394 port. Before purchasing one, check first the pin connectors used on your camcorder and your computer. Most DV and Digital 8 camcorders have a 4-pin connector, whereas desktop computers that come with IEEE-1394 ports or installed with IEEE1394 cards usually have 6-pin connectors. The IEEE-1394 cable that is required for desktop computers is a 4-pin to 6-pin cable. Most notebook computers have 4-pin connectors which require a 4- pin to 4-pin cable.
Connecting the IEEE-1394 cable to the DV camcorder
Connecting a 4-pin to 6-pin IEEE-1394 cable to a desktop computer
|
ULEAD VIDEOSTUDIO USER GUIDE |
17 |
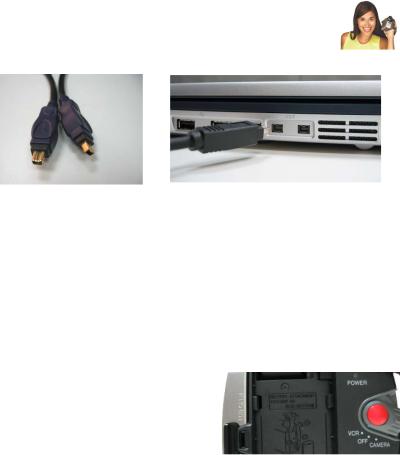
Connecting a 4-pin to 4-pin IEEE-1394 cable to a notebook computer
Checking the hardware setup
After connecting your digital camcorder to the computer, check if the device is detected by your Windows system. If you installed an IEEE-1394 card on your computer, check also if the card is detected.
To check if the IEEE-1394 card and digital camcorder are detected:
1.Insert your video tape into the camcorder and switch it on. Make sure it is in playback mode (usually named VTR or VCR). Check your camcorder’s manual for specific instructions.
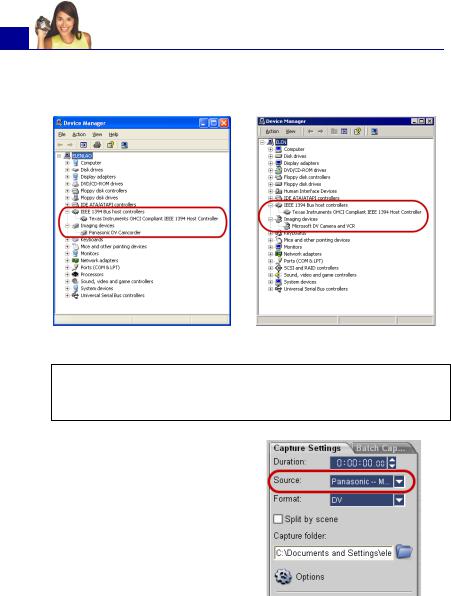
2.Open the Control Panel, then open System: Hardware — Device Manager.
3.Make sure the following device names are listed in the Device Manager.
Under Windows XP or Windows Me:
•1394 Bus Controller
•<Brand name> DV Camcorder (The brand name depends on the DV camcorder connected to the IEEE-1394 interface.)
Under Windows 2000 or Windows 98SE:
•1394 Bus Controller
•Image Device: Microsoft DV Camera and VCR (For Microsoft DV driver only.)
18ULEAD VIDEOSTUDIO USER GUIDE
•Sound, video and game controllers: 1394 camcorder (For Texas Instruments DV driver only.)
|
Windows XP: Device Manager |
Windows 2000: Device Manager |
Note: In addition to commonly used Texas Instruments and Microsoft DV drivers, there are other drivers available. Consult your camcorder’s manual for suitable drivers.
4.If your digital camcorder has been detected properly, it will be listed as a source device in VideoStudio’s Options Panel. In VideoStudio, select the Capture Step and check if your camcorder is displayed under the
Source list in the Options Panel.
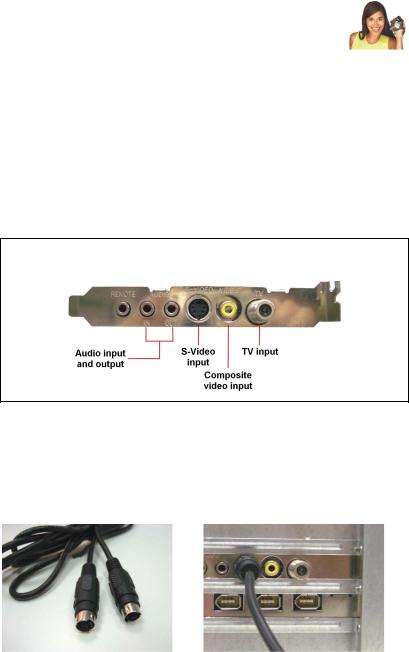
|
ULEAD VIDEOSTUDIO USER GUIDE |
19 |
Analog video sources
VHS, S-VHS, Video-8, and Hi8 camcorders and VCRs are examples of analog video sources. To capture video from analog sources, you will need to install an analog capture card in your computer. (See “Installing a capture card” on page 15).
Conventional broadcast television is also an analog source. To capture TV footage, you need to have a TV tuner card installed in your computer.
Note: TV capture cards provide S-Video/Composite inputs and a TV tuner, which can be used to capture both video and TV footage.
Connecting the video device to the analog capture card
To connect your video device to the analog capture card, use either an S-Video or RCA Composite cable depending on your device’s video output. If your video device has both types of output, use the S-Video connection for higher video quality captures.
|
S-Video cable |
Connecting the S-Video source to the |
|
capture card |
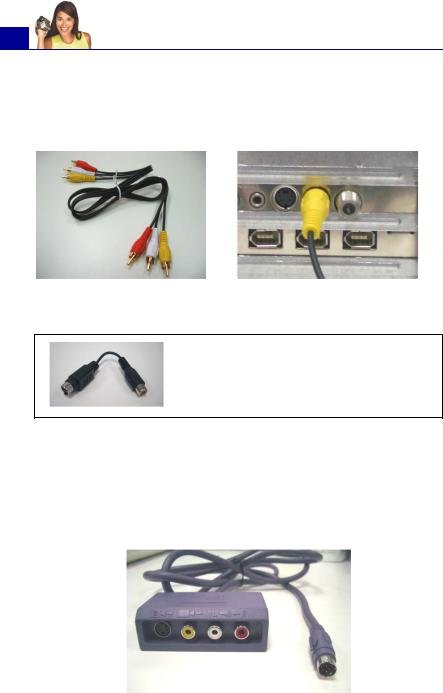
|
20 |
ULEAD VIDEOSTUDIO USER GUIDE |
If you want to use the Composite output of your video device, connect the yellow plugs of the Composite cable to the video output of your video device and the video input port of the analog capture card.
|
Composite cable |
Connecting the Composite video |
|
source to the capture card |
Tip: If your analog capture card provides S- Video input only and you are using a Composite video source, you need a Composite to S-Video adapter to make the connection.
Most higher-end analog capture cards do not have the Composite/ S-Video input ports crowded on the side of the cards. Instead, these cards come with an external breakout box that provide all the video input ports at the front of the box. Video devices can be connected to the capture card more easily through the breakout box.
![]()
|
ULEAD VIDEOSTUDIO USER GUIDE |
21 |
Connecting a TV antenna to the tuner card
A tuner card has a TV antenna input just like the regular television monitor. Plug your TV antenna to the TV connector of the tuner card.
|
TV antenna cable |
Connecting TV antenna to the tuner card |
Note: When purchasing a tuner card, make sure you acquire one that provides the correct TV system (NTSC or PAL) for your region.
Connecting the capture or tuner card to the sound card
Most capture and tuner cards only allow video capture. To preview the audio from your video device or TV and to capture the audio into your computer, you need to connect the audio output of the capture or tuner card to the sound card’s Line In port. The required cables for connecting to the sound card are different for each type of video source:
Line-in and audio cables for S-Video
S-Video connection

|
22 |
ULEAD VIDEOSTUDIO USER GUIDE |
Line-in and audio cables for Composite video
Line-in cable for TV tuner card
Line-in cable for high-end TV capture card
Composite video connection
TV tuner connection
High-end TV capture card connection
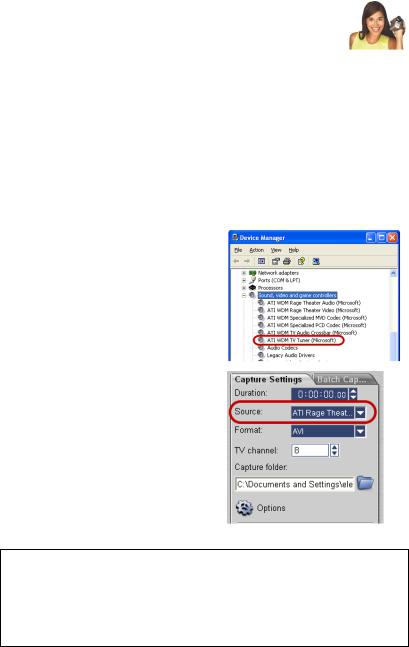
|
ULEAD VIDEOSTUDIO USER GUIDE |
23 |
Checking the hardware setup
After connecting your analog source to the capture or tuner card, check if the card is detected by your Windows system.
To check if the capture or tuner card is detected:
1.If you are using a video device such as a camcorder as your source, insert your videotape into the video device and switch it on. Make sure it is in the playback mode (usually named VTR or VCR). See your machine’s manual for specific instructions.
2.Open the Control Panel, then open System: Hardware — Device Manager.
3.In the Device Manager, doubleclick Sound, video and game controllers. Check if your capture or tuner card is listed in this folder.
4.If your capture or tuner card has been detected properly, it will be listed as a source device in VideoStudio’s Options Panel. In VideoStudio, select the Capture Step and check if your capture or tuner card is displayed under the Source list in the Options Panel.
Note: If your capture device supports multiple video sources, the
Video and Audio Capture Property Settings dialog box allows you to select your desired video source such as Composite, Tuner, or S-Video. Likewise, if you have multiple audio sources, this dialog box allows you to select your desired audio source. (See “Video and Audio Capture Property Settings” on page 157).
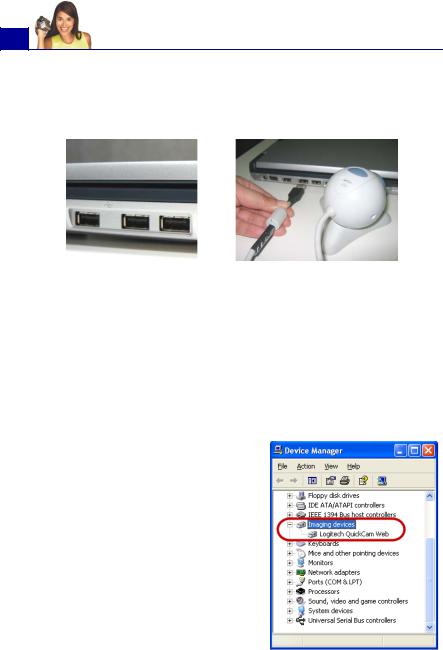
|
24 |
ULEAD VIDEOSTUDIO USER GUIDE |
USB camera
To capture live video and still images from a USB camera, connect the camera to an available USB port on your computer.
|
USB ports |
Connecting a USB camera |
USB cameras may require installation of a device driver, depending on the Windows version you are using. For information on how to install your USB camera, refer to its accompanying manual.
After properly installing your USB camera, check if it is detected by your Windows system.
To check if the USB camera is detected:
1.Open the Control Panel, then open System: Hardware — Device Manager.
2.In the Device Manager, doubleclick Imaging devices. Check if your USB camera is listed in this folder.
3.If your USB camera has been detected properly, it will be listed as a source device in VideoStudio’s Options Panel. In VideoStudio, select the Capture Step and check if your USB camera is displayed under the
Source list in the Options Panel.

|
ULEAD VIDEOSTUDIO USER GUIDE |
25 |
Preparation for video capturing and editing
Capturing and video editing are tasks that require a lot of computer resources. Your computer must be properly set up to ensure successful capturing and smooth video editing. Below are some tips on how to prepare your digital camcorder and optimize your computer for capturing and editing.
•For better workability of batch capture and camcorder device control, correct timecode on the DV tape is a must. To do this, before shooting your video, use the standard playback (SP) mode and shoot a blank video (for example, leaving the lens cover on while recording) without interruption from start to end of a tape.
•It is recommended that you close all other applications when working with VideoStudio. You should also turn off any automatically-launched software like screen savers to avoid possible interruptions while capturing.
•If you have two hard drives in your system, it is recommended that you install VideoStudio to your system drive (usually C:) and store captured videos in your other drive (usually D:).
The choice of what hard disk to use is also crucial. Using a dedicated video hard drive, preferably with Ultra-DMA/66 7200 rpm and 30GB free space, is recommended.
•Make sure DMA is enabled for your hard disk. (See “Enabling DMA for IDE disks” on page 173).
•Disable Write-Behind Caching on the hard drive used for video capture. (See “Disabling Write-Behind Caching” on
page 176).
•Increase the Paging File (Swap File) size to twice your amount of RAM. (See “Setting the Paging File size” on page 179).
|
26 |
ULEAD VIDEOSTUDIO USER GUIDE |
Getting started
When you run VideoStudio, a startup screen appears which allows you to choose between two modes of video editing:
•VideoStudio Movie Wizard is ideal for users who are new to video editing. It guides you through the movie production process in three quick, easy steps.
•VideoStudio Editor gives you the full editing features of VideoStudio. It
provides you total control over the movie production process, from adding clips, titles, effects, overlays, and music to making the final movie on disc or other medium.
VideoStudio Movie Wizard
If you are new to video editing or you want to quickly make a movie, you can use the VideoStudio Movie Wizard to assemble video clips and images, add background music and titles, then output the final movie as a video file, burn it onto a disc, or further edit the movie in VideoStudio Editor.
Step 1: Add video and images
Assemble your video and images into a movie.
To add video and images:
1.If you have not captured any video footage or images into your computer yet, click the Capture tab and capture. (See “To capture video and images:” on page 28).
2.Use these buttons to collect video and images for your movie.
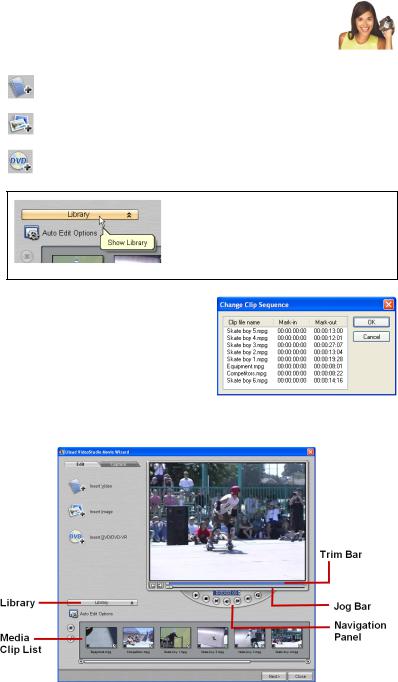
|
ULEAD VIDEOSTUDIO USER GUIDE |
27 |
Click Insert Video to add video files of different formats such as AVI, MPEG, and, WMV.
Click Insert Image to add still images. (You can create a photo slideshow if you choose to only add images.)
Click Insert DVD/DVD-VR to add video from a DVDVideo or DVD-VR formatted disc.
Tip: Click Library to open the media library that contains media clips that come with VideoStudio. To import your own video or image files to the
Library, click  .
.
3.If you selected multiple clips, the
Change Clip Sequence dialog box will appear where you can arrange the order of the clips.
Drag the clips to the desired sequence then click OK.
4.The video and image clips that you selected for your movie will be added to the Media Clip List.
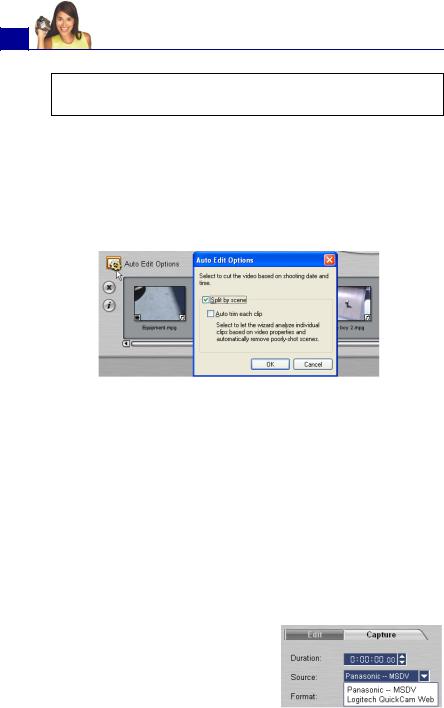
|
28 |
ULEAD VIDEOSTUDIO USER GUIDE |
Tip: You can also arrange clips in the Media Clip List by dragging them to the desired sequence.
5.To preview the clips, select each clip in the Media Clip List and use the Jog Bar and Navigation Panel buttons. When trimming a clip, drag the Mark-in and Mark-out handles on the Trim Bar to select the desired start and end points of the clip.
6.Click Auto Edit Options. In the Auto Edit Options dialog box, select Split by scene to automatically split lengthy video clips into smaller clips based on their shooting dates and times.
Select Auto-trim each clip if you want the wizard to analyze individual clips based on video properties such as color and lighting, and automatically remove poorly-shot scenes. Clips that have long audio pauses in between scenes (such as pauses in between dialogues) will also be segmented into smaller clips so that they can be blended smoothly to the background music’s beat and tempo. This option is only available when Split by scene is selected.
7. Click Next.
To capture video and images:
1.Connect your camcorder to your computer and turn on the device. Set it to Play (or VTR / VCR) mode.
2.Check if your camcorder is selected in the Source list.
3.Click the Capture tab in the VideoStudio Movie Wizard.
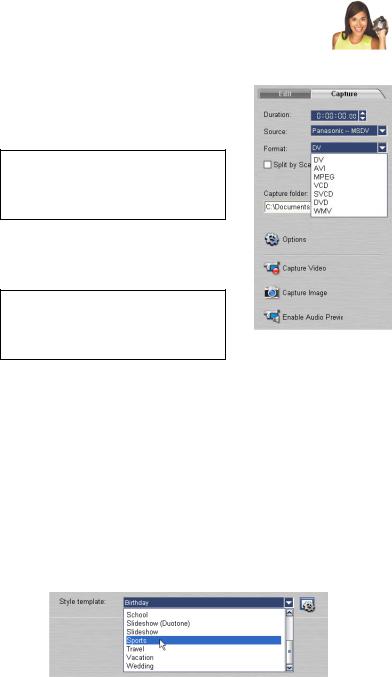
|
ULEAD VIDEOSTUDIO USER GUIDE |
29 |
4.Select the video file format to use for saving captured video files from the Format list. Specify the Capture folder in which to save the files.
Note: Click Options to customize capture settings specific to your video device. For details, see “Capturing video” on page 51.
5.Play the videotape in your camcorder, and position the tape on the part of the video where to start capturing.
Tip: If you are capturing video from a DV camcorder, use the
Navigation Panel to play your videotape.
6.Click Capture Video to start capturing. Click Stop Capture or press [Esc] to stop capturing.
7.To capture a still image from the video footage, pause the video on the desired image then click Capture Image.
Step 2: Select a template
Select a style template to apply to your movie. Each template provides a different theme which comes with preset start and ending video clips, transitions, title and background music.
To apply a style template:
1. Select a template from the Style template list.
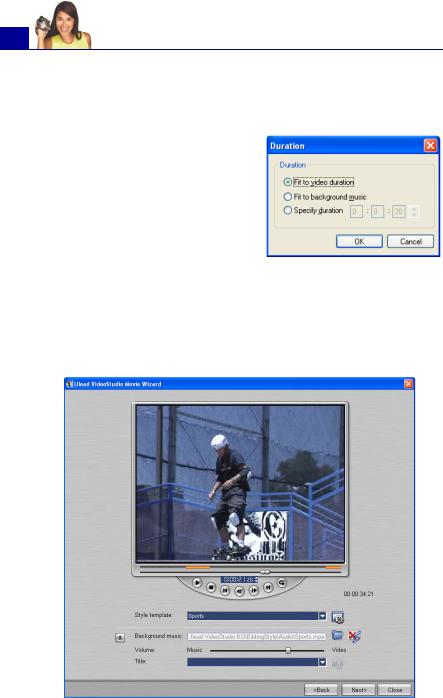
30ULEAD VIDEOSTUDIO USER GUIDE
2.To customize the overall length of your movie, click  . In the Duration dialog box, select how you want the movie duration to be adjusted:
•Fit to video duration: Keeps the current movie duration.
•Fit to background music:
Adjusts the movie duration to fit into the length of the background music. (The background music is added to your movie in the second step of the Movie Wizard.)
•Specify duration: Lets you define a custom duration for the whole movie.
3.Click  to view more options.
![]()
|
ULEAD VIDEOSTUDIO USER GUIDE |
31 |
4.To replace the background music, click  . Locate and select the desired music file.
Note: Make sure that your background music is 30 seconds or longer if you want to fit the video to the music. If the music duration is less than 30 seconds, the music will not be looped leaving the remaining video without any background music.
5.Use the Volume slider to adjust the volume of the background music with respect to the video’s audio. Dragging the slider to the left increases the volume of the background music and decreases the volume of the video’s audio.
6.To replace the title, first select the preset title from the Title list. Double-click the preset text in the Preview Window, then type in your text.

|
32 |
ULEAD VIDEOSTUDIO USER GUIDE |
7. Click  to change text formatting.
In the Text Properties dialog box, select a font type, size and color for the text, and set the desired shadow color and transparency.
8. Click Next.
Note: If you opened the VideoStudio Wizard within VideoStudio Editor, clicking Next will skip the last step and directly insert the clips onto the Timeline in the VideoStudio Editor.
Step 3: Finish
Select how to output the final movie:
Click Create Video File to output your movie as a video file that can be played back on the computer.
Click Create Disc to burn your movie onto a disc. (For details, see “Burning a DVD, VCD or SVCD” on page 116).
Click Edit in Ulead VideoStudio Editor to make further edits to your movie using VideoStudio Editor.

|
ULEAD VIDEOSTUDIO USER GUIDE |
33 |
VideoStudio Editor
VideoStudio Editor provides a step-by-step workflow that makes creating movies simple and easy.
This section introduces you to the VideoStudio Editor interface and briefly explains the steps involved in creating a movie. Refer to the succeeding chapters for more in-depth information on each step.
The user interface
1 Step Panel
Contains buttons that correspond to the different steps in video editing.
2Menu Bar
Contains menus that provide different set of commands.
3Options Panel
Contains controls, buttons, and other information that you can use to customize the settings of the selected clip. The contents of this panel change depending on the step you are in.
4Preview Window
Shows the current clip, video filter, effect, or title.

|
34 |
ULEAD VIDEOSTUDIO USER GUIDE |
5Navigation Panel
Provides buttons for playback and for precision trimming of clips. In the Capture Step, this also acts as the device control for the DV camcorder.
6Library
Stores and organizes all of your media clips.
7Timeline
Displays all the clips, titles, and effects included in your project.
The Step Panel
VideoStudio simplifies the process of creating movies into seven simple steps. Click the buttons in the Step Panel to switch between steps.
Once a project is opened in VideoStudio, video can be recorded directly to your computer’s hard disk in the Capture Step. Footage from a videotape can be captured as a single file or automatically divided into multiple files. This step allows you to capture video and still images. (See “Capture” on page 49).
The Edit Step and the Timeline are the heart of VideoStudio. This is where you arrange, edit, and trim your video clips. Video filters can also be applied to your video clips in this step. (See “Edit” on page 64).
The Effect Step lets you add transitions between video clips in your project. Choose from the variety of transition effects in the Library. (See “Effect” on
page 81).
The Overlay Step allows you to superimpose one clip over another to create a picture-in- picture effect. (See “Overlay” on page 87).

|
ULEAD VIDEOSTUDIO USER GUIDE |
35 |
No movie would be complete without opening titles, captions and closing credits. In the Title Step, you can create animated text titles or choose from various presets in the Library. (See “Title” on page 94).
When your movie is complete, you can create a video file for sharing on the Web or output the movie on tape, DVD, or CD in the Share Step. (See “Share” on page 112).
Background music sets the mood of your movie. The Audio Step lets you select and record music files from one or several CD-ROM drives attached to your computer. You can also dub over your video in this step. (See “Audio” on
page 103).
Note: These steps do not necessarily need to be followed in the order that they are presented.
The Menu Bar
The Menu Bar provides various commands for customizing VideoStudio, opening and saving movie projects, working with individual clips, and more. For details on each command, see “Appendix A: Menus and dialog boxes” on page 134.

|
36 |
ULEAD VIDEOSTUDIO USER GUIDE |
The Options Panel
The Options Panel changes depending on the program’s mode and the step or track you are working on. The Options Panel may contain one or two tabs. The controls and options in each tab vary, depending on the selected clip.
See the Options Panel sections in the succeeding chapters for details.
The Navigation Panel
The Navigation Panel is used to preview and edit the clips used in your project. Use the Navigation Controls to move around a selected clip or your project. Use the Trim Bar and Jog Bar to edit your clips.
When capturing video from a DV camcorder, the Navigation Controls are used for device control. Use these buttons to control your DV camcorder or any other DV device. (See “Controlling the DV camcorder with the Navigation Panel” on page 54).
1 Play Mode
Select whether you want to preview your project or only the selected clip.
2Play
Plays, pauses or resumes the current project or a selected clip.

|
ULEAD VIDEOSTUDIO USER GUIDE |
37 |
3Home
Returns to the starting frame.
5Next
Moves to the next frame.
7Repeat
Loops playback.
9Timecode
Allows you to directly jump to a part of your project or selected clip by specifying the exact timecode.
11Trim Bar
Allows you to set a preview range in the project or trim a clip.
13Split Video
Cuts the selected clip into two. Position the Jog Bar to where you want the first clip to end and the second one to start, then click this button.
4Previous
Moves to the previous frame.
6End
Moves to the end frame.
8System Volume
Click and drag the slider to adjust the volume of your computer’s speakers.
10Mark-in/out
Use these buttons to set a preview range in the project, or to mark the start and end points where to trim a clip.
12Jog Bar
Allows you to scrub through the project or clip.
14Enlarge Preview Window
Click to increase the size of the Preview Window. You can only preview, not edit, your clips when the Preview Window is enlarged.
The project timeline
The project timeline at the lower part of the VideoStudio Editor window is where you assemble your movie project.
There are three types of views for displaying the project timeline:
Storyboard, Timeline, and Audio View. Click the buttons at the left side of the project timeline to switch between different views.

|
38 |
ULEAD VIDEOSTUDIO USER GUIDE |
Storyboard View
Storyboard View is the fastest and simplest way to add video clips to your movie. Each thumbnail in the storyboard represents an event in your movie, an event being a video clip or a transition. Thumbnails show at a glance the chronological order of events in your project. The duration of each clip is shown at the bottom of each thumbnail.
You can drag and drop video clips to insert and arrange them. Transition effects can be inserted between video clips. A selected video clip can be trimmed in the Preview Window. (See “Trimming a clip” on page 69).
Click  Enlarge to maximize the storyboard display. With a larger workspace, you can arrange video clips and apply transitions more easily. Furthermore, there is a small screen at the bottom of the window where you can preview clips.

|
ULEAD VIDEOSTUDIO USER GUIDE |
39 |
Timeline View
Timeline View gives you the most comprehensive display of the elements in your movie project. It divides a project into separate tracks for video, overlay, title, voice, and music. Timeline View allows you to perform frame-accurate editing of your clips.
|
1 |
Track buttons |
2 |
Video Track |
|
Click the buttons to switch between |
Contains video/image/color clips |
||
|
the different tracks. |
and transitions. |
||
|
3 |
Overlay Track |
4 |
Title Track |
|
Contains overlay clips, which can |
Contains title clips. |
||
|
be video, image or color clips. |
|||
|
5 |
Voice Track |
6 |
Music Track |
|
Contains voiceover clips. |
Contains music clips recorded from |
||
|
audio CDs or acquired from Auto |
|||
|
Music’s Library. |
7Insert media files
Displays a menu allowing you to place video, audio or image clips directly on the project.
9 Timeline ruler
8Project scroll controls
Use the left and right buttons or drag the Scroll Bar to move around your project.
10 Selected range
Displays the project’s timecode increments in hours:minutes: seconds.frames, which helps you determine clip and project length
This color bar represents the trimmed or selected part of a clip or project.

|
40 |
ULEAD VIDEOSTUDIO USER GUIDE |
|
11 Zoom controls |
12 Fit project in Timeline window |
|
Increase or decrease the number |
Fits the whole project within the |
|
of frames displayed in the |
Timeline window. |
|
Timeline. |
13 Zoom to
Allows you to change the timecode increments in the Timeline ruler.
To switch to different tracks:
•Click a Step button in the Step Panel that corresponds to the track.
•Click the Track buttons.
•Double-click the desired track, or click a clip on the track.
Tip: If you have a wheel mouse, its scroll wheel can be used to scroll through the Timeline.
Audio View
Audio View allows you to visually adjust the volume levels of video, voice and music clips.
Clips that contain audio are displayed with a volume rubber band that you can click and drag to adjust their volume. For details, see “Volume rubber banding” on page 110.
![]()
|
ULEAD VIDEOSTUDIO USER GUIDE |
41 |
In Audio View, the Options Panel also displays the Audio Mixing Panel that can be used to adjust the volume levels of the
Video, Overlay, Voice, and Music Tracks. For details, see “Using the Audio Mixing Panel” on page 109.
The Library
The Library is a storage depot for everything you need to create a movie: video clips, video filters, audio clips, still images, transition effects, music files, titles and color clips. These are collectively known as media clips.
To add media clips to the Library:
1.Click Load media to open a dialog box for locating the media clip to insert in the Library.
Load media allows you to locate the clip you want to add to the Library.
2.Select the desired file.
3.Click Open when you are finished.
Note: You can also drag and drop files from Windows Explorer straight to the Library.

|
42 |
ULEAD VIDEOSTUDIO USER GUIDE |
|
Right-click a clip in the Library to |
Hold [Ctrl] or [Shift] to select |
|
view the clip’s properties as well |
multiple clips. |
|
as copy, delete, or split by scene. |
To delete media clips from the Library:
1.Select the clip to remove from the Library, then press [Delete]. Or,
Right-click the clip in the Library and select Delete.
2.When prompted, verify whether you also want to delete the source file from your hard disk.
Note: Deleting source files from your hard disk permanently removes them from your computer. You may not be able to recover them.

|
ULEAD VIDEOSTUDIO USER GUIDE |
43 |
Sorting clips in the Library
To arrange clips in the Library, click  in the Library to open the Options menu, then select Sort by Name or Sort by Date.
The way video clips are sorted by date depends on the file format. DV AVI files (i.e., AVI files captured from DV camcorders) will be arranged by order of the shooting date and time of the footage. Other video file formats will be sorted by order of file date.
Notes:
•You can also right-click on the Library then select the desired sorting type in the Sort By submenu.
•To toggle between ascending and descending order, select Sort by Name or Sort by Date again.
Library Manager
The Library Manager organizes your custom Library folders. These folders help you store and manage all kinds of media files.
To use the Library Manager:
1.Click Tools: Library Manager to launch the Library Manager dialog box. You can also click the Folder arrow and select Library Manager from the drop-down list.
The Folder arrow button

44ULEAD VIDEOSTUDIO USER GUIDE
2.Select a media type from the Available custom folders list.
3.Click New to display the New Custom Folder dialog box and create a new folder. Specify a library Folder name and a
Description. Click OK.
Click Edit to rename or modify the description of a selected custom folder.
Click Delete to remove a selected custom folder from the
Library.
4. Click Close.
Starting a new movie project
When you run VideoStudio, it automatically opens a new project and lets you start composing your movie production. A new project always uses VideoStudio’s default settings. To check what these settings are, click File: Project Properties.
Project settings determine how your movie project is rendered when you preview it. Rendering is the process by which VideoStudio converts raw video, titles, sounds, and effects into a continuous stream of data which can be played back in your computer. You can modify the project settings in the Project Properties dialog box. For details, see “Project Properties” on page 153.
When you capture or insert your first video clip into the project, VideoStudio automatically checks the properties of the clip and your project. If properties such as file format, frame size, etc. are

|
ULEAD VIDEOSTUDIO USER GUIDE |
45 |
not identical, VideoStudio automatically adjusts the project settings to match the clip’s properties. Changing the project settings to conform with clip properties allows VideoStudio to perform the SmartRender function. For information on SmartRender, see “SmartRender Technology” on page 171.
Tip:
To toggle between displaying or not displaying the above message box, select or clear Show message when inserting first video clip into the Timeline in the Preferences dialog box.
Saving your project
While composing your movie project, select File: Save [Ctrl + S] to frequently save your project and avoid accidental loss of your work. VideoStudio project files are saved in .VSP file format.
To open an existing project, select File: Open Project [Ctrl + O]. To create a new project again, select File: New Project [Ctrl + N].

|
46 |
ULEAD VIDEOSTUDIO USER GUIDE |
Setting your preferences
Customize the program’s working environment through the Preferences dialog box. You can specify a working folder for saving files, set undo levels, choose preferred settings for program behavior, and more. To open the Preferences dialog box, select File: Preferences [F6]. For details, see “Preferences: File menu” on page 145.
Setting project properties
Project Properties serve as your template for previewing your movie projects. The project settings in the Project Properties dialog box determine the appearance and quality of a project when it is previewed on-screen. To customize project settings, select File: Project Properties.
When customizing project settings, it is recommended that you make the settings the same as the attributes of the video footage that will be captured to avoid distorting the video images and have smooth playback without jumping frames.
When you customize project properties to be the same as the desired output settings for your project (for instance, setting project properties to DVD settings if you will output the project to a DVD disc), you can have more accurate previews of your final movie.

|
ULEAD VIDEOSTUDIO USER GUIDE |
47 |
Adding clips
There are three ways you can do to add clips to your project:
•Capture video clips from a video source. The video clips will be inserted onto the Video Track.
•Drag clips from the Library onto the correct tracks.
•Click  to directly insert media files to the different tracks.
Previewing
The Play button in the Navigation Panel serves two purposes: for playback of your entire project or a selected clip. To play back, click
Project or Clip, then click Play.
While working on your project, you will want to preview your work frequently to see how your project is progressing. VideoStudio offers you two preview options: Instant Playback and High Quality Playback. Select File: Preferences — General, then choose the preview method that you prefer.
Instant Playback allows you to quickly preview changes in your project without the need to create a temporary preview file, however, playback may be jerky depending on your computer resources. High Quality Playback renders your project as a temporary preview file then plays this preview file. Playback is smoother in High Quality Playback mode, but rendering your project for the first time in this mode may take a long time to complete depending on the size of your project and computer resources.

|
48 |
ULEAD VIDEOSTUDIO USER GUIDE |
Note: When Perform non-square pixel rendering is selected in the Project Options dialog box (opened from Project Properties dialog box), Instant Playback performance may be affected if computer resources are insufficient.
In High Quality Playback mode, VideoStudio uses SmartRender technology which renders only the changes you made such as transitions, titles and effects, and eliminates re-rendering the entire project. SmartRender saves time when generating previews.
Setting a preview range
For faster previews, you may choose to play only a part of your project. The selected range of frames to preview is referred to as the preview range, and it is marked as a red bar in the Ruler Panel.
To play the preview area only:
1.Use the Trim Bar or the Mark-in/out buttons to select the preview range.
The Preview range mark-in and Preview range mark-out timecodes will then be displayed in the Options Panel.
2.To preview the selected range of frames, hold [Shift], select what you want to preview (Project or Clip), then click Play.

|
ULEAD VIDEOSTUDIO USER GUIDE |
49 |
Capture
The bulk of video work involves working with raw footage. Transferring footage from a source device to the computer involves a process called capturing.
When capturing, video data is transferred from a source (usually a video camera) through a capture card to the computer’s hard drive.
Seamless DV and MPEG capture
VideoStudio runs on Windows operating systems and is subject to limitations in file size when capturing or rendering video. VideoStudio automatically performs seamless capture, saving video into a new file every time the maximum allowable file size for a single video file has been reached.
Seamless capture will be performed only when capturing DV Type-1 or DV Type-2 (from DV camcorder), or when capturing MPEG video (from DV camcorder or analog capture device). The maximum captured file size per video file is 4 GB in Windows operating systems (such as Windows 98 SE and Me) that use the FAT 32 partition file system. Captured video data in excess of 4 GB are automatically saved to a new file. In Windows 2000 and Windows XP which can use the NTFS file system, there is no limit in the captured file size.
Seamless capture is not available in VFW (Video For Windows) capture.

|
50 |
ULEAD VIDEOSTUDIO USER GUIDE |
Note: VideoStudio automatically detects your file system and performs seamless capture only in a FAT 32 partition file system.
The Capture Step Options Panel
The Capture Step Options Panel consists of two tabs. The Capture Settings tab allows you to switch between video sources to capture from, customize capture settings, and capture video or still images. The Batch Capture tab allows you to select segments of video from a digital camcorder then capture them all at once.
Capture Settings tab
•Duration: Sets the length of time for the capture.
•Source: Displays the detected capture device and lists other capture devices installed in your computer.
•Format: Where you select a file format for saving your captured video.
•Split by scene: Automatically separates captured video into several files based on changes in shooting date and time. (This feature can be used only when capturing video from a DV camcorder.)
•Capture folder: Where a copy of your captured file is saved.
•Options: Displays a menu allowing you to modify your capture settings.
•Capture Video: Transfers video from your source to your hard disk.
•Capture Image: Captures the displayed video frame as an image.
•Enable Audio Preview: Allows you to preview audio on the computer while capturing DV.
If the audio sounds choppy, there may be a problem with previewing audio on your computer during DV capture. This does not affect the audio capture quality. If this happens, click Disable Audio Preview to mute the audio while capturing.
 Loading…