Последнее обновление: 23.03.2023

-
Глава 1. Введение в Java
-
Язык программирования Java
-
Первая программа на Java в Windows
-
Первая программа в IntelliJ IDEA
-
Первая программа в NetBeans
-
Первая программа в Eclipse
-
-
Глава 2. Основы программирования на Java
-
Структура программы
-
Переменные и константы
-
Типы данных
-
Консольный ввод/вывод в Java
-
Арифметические операции
-
Поразрядные операции
-
Условные выражения
-
Операции присваивания и приоритет операций
-
Преобразования базовых типов данных
-
Условные конструкции
-
Циклы
-
Массивы
-
Методы
-
Параметры методов
-
Оператор return. Результат метода
-
Перегрузка методов
-
Рекурсивные функции
-
Введение в обработку исключений
-
-
Глава 3. Классы. Объектно-ориентированное программирование
-
Классы и объекты
-
Пакеты
-
Модификаторы доступа и инкапсуляция
-
Статические члены и модификатор static
-
Объекты как параметры методов
-
Внутренние и вложенные классы
-
Наследование
-
Абстрактные классы
-
Иерархия наследования и преобразование типов
-
Интерфейсы
-
Интерфейсы в механизме обратного вызова
-
Перечисления enum
-
Класс Object и его методы
-
Обобщения (Generics)
-
Ограничения обобщений
-
Наследование и обобщения
-
Ссылочные типы и клонирование объектов
-
Records
-
-
Глава 4. Обработка исключений
-
Оператор throws
-
Классы исключений
-
Создание своих классов исключений
-
-
Глава 5. Коллекции
-
Типы коллекций. Интерфейс Collection
-
Класс ArrayList и интерфейс List
-
Очереди и класс ArrayDeque
-
Класс LinkedList
-
Интерфейс Set и класс HashSet
-
SortedSet, NavigableSet, TreeSet
-
Интерфейсы Comparable и Comporator. Сортировка
-
Интерфейс Map и класс HashMap
-
Интерфейсы SortedMap и NavigableMap. Класс TreeMap
-
Итераторы
-
-
Глава 6. Потоки ввода-вывода. Работа с файлами
-
Потоки ввода-вывода
-
Чтение и запись файлов. FileInputStream и FileOutputStream
-
Закрытие потоков
-
Классы ByteArrayInputStream и ByteArrayOutputStream
-
Буферизованные потоки BufferedInputStream и BufferedOutputStream
-
Форматируемый вывод. PrintStream и PrintWriter
-
Классы DataOutputStream и DataInputStream
-
Чтение и запись текстовых файлов
-
Буферизация символьных потоков. BufferedReader и BufferedWriter
-
Сериализация объектов
-
Класс File. Работа с файлами и каталогами
-
Работа с ZIP-архивами
-
Класс Console
-
-
Глава 7. Работа со строками
-
Введение в строки. Класс String
-
Основные операции со строками
-
StringBuffer и StringBuilder
-
Регулярные выражения
-
-
Глава 8. Лямбда-выражения
-
Введение в лямбда-выражения
-
Лямбды как параметры и результаты методов
-
Встроенные функциональные интерфейсы
-
-
Глава 9. Многопоточное программирование
-
Класс Thread
-
Создание и выполнение потоков
-
Завершение и прерывание потока
-
Синхронизация потоков. Оператор synchronized
-
Взаимодействие потоков. Методы wait и notify
-
Семафоры
-
Обмен между потоками. Класс Exchanger
-
Класс Phaser
-
Блокировки. ReentrantLock
-
Условия в блокировках
-
-
Глава 10. Stream API
-
Введение в Stream API
-
Создание потока данных
-
Фильтрация, перебор элементов и отображение
-
Сортировка
-
Получение подпотока и объединение потоков
-
Методы skip и limit
-
Операции сведения
-
Метод reduce
-
Тип Optional
-
Метод collect
-
Группировка
-
Параллельные потоки
-
Параллельные операции над массивами
-
-
Глава 11. Модульность
-
Создание модуля
-
Зависимые модули
-
Взаимодействие между модулями
-
-
Глава 12. Дополнительные классы
-
Математические вычисления и класс Math
-
Большие числа BigInteger и BigDecimal
-
Работа с датами. LocalDate
-
- Глава 1. Введение в Java
- Язык программирования Java
- Первая программа на Java в Windows
- Первая программа в IntelliJ IDEA
- Первая программа в NetBeans
- Первая программа в Eclipse
- Глава 2. Основы программирования на Java
- Структура программы
- Переменные и константы
- Типы данных
- Консольный ввод/вывод в Java
- Арифметические операции
- Поразрядные операции
- Условные выражения
- Операции присваивания и приоритет операций
- Преобразования базовых типов данных
- Условные конструкции
- Циклы
- Массивы
- Методы
- Параметры методов
- Оператор return. Результат метода
- Перегрузка методов
- Рекурсивные функции
- Введение в обработку исключений
- Глава 3. Классы. Объектно-ориентированное программирование
- Классы и объекты
- Пакеты
- Модификаторы доступа и инкапсуляция
- Статические члены и модификатор static
- Объекты как параметры методов
- Внутренние и вложенные классы
- Наследование
- Абстрактные классы
- Иерархия наследования и преобразование типов
- Интерфейсы
- Интерфейсы в механизме обратного вызова
- Перечисления enum
- Класс Object и его методы
- Обобщения (Generics)
- Ограничения обобщений
- Наследование и обобщения
- Ссылочные типы и клонирование объектов
- Records
- Глава 4. Обработка исключений
- Оператор throws
- Классы исключений
- Создание своих классов исключений
- Глава 5. Коллекции
- Типы коллекций. Интерфейс Collection
- Класс ArrayList и интерфейс List
- Очереди и класс ArrayDeque
- Класс LinkedList
- Интерфейс Set и класс HashSet
- SortedSet, NavigableSet, TreeSet
- Интерфейсы Comparable и Comporator. Сортировка
- Интерфейс Map и класс HashMap
- Интерфейсы SortedMap и NavigableMap. Класс TreeMap
- Итераторы
- Глава 6. Потоки ввода-вывода. Работа с файлами
- Потоки ввода-вывода
- Чтение и запись файлов. FileInputStream и FileOutputStream
- Закрытие потоков
- Классы ByteArrayInputStream и ByteArrayOutputStream
- Буферизованные потоки BufferedInputStream и BufferedOutputStream
- Форматируемый вывод. PrintStream и PrintWriter
- Классы DataOutputStream и DataInputStream
- Чтение и запись текстовых файлов
- Буферизация символьных потоков. BufferedReader и BufferedWriter
- Сериализация объектов
- Класс File. Работа с файлами и каталогами
- Работа с ZIP-архивами
- Класс Console
- Глава 7. Работа со строками
- Введение в строки. Класс String
- Основные операции со строками
- StringBuffer и StringBuilder
- Регулярные выражения
- Глава 8. Лямбда-выражения
- Введение в лямбда-выражения
- Лямбды как параметры и результаты методов
- Встроенные функциональные интерфейсы
- Глава 9. Многопоточное программирование
- Класс Thread
- Создание и выполнение потоков
- Завершение и прерывание потока
- Синхронизация потоков. Оператор synchronized
- Взаимодействие потоков. Методы wait и notify
- Семафоры
- Обмен между потоками. Класс Exchanger
- Класс Phaser
- Блокировки. ReentrantLock
- Условия в блокировках
- Глава 10. Stream API
- Введение в Stream API
- Создание потока данных
- Фильтрация, перебор элементов и отображение
- Сортировка
- Получение подпотока и объединение потоков
- Методы skip и limit
- Операции сведения
- Метод reduce
- Тип Optional
- Метод collect
- Группировка
- Параллельные потоки
- Параллельные операции над массивами
- Глава 11. Модульность
- Создание модуля
- Зависимые модули
- Взаимодействие между модулями
- Глава 12. Дополнительные классы
- Математические вычисления и класс Math
- Большие числа BigInteger и BigDecimal
- Работа с датами. LocalDate
Помощь сайту
YooMoney:
410011174743222
Перевод на карту
Номер карты:
4048415020898850
Дисклаймер
Сразу хочу вас предупредить, чтобы стать настоящим java разработчиком с нуля вам нужно будет потратить в разы больше его времени. Как преподаватель java в Сбер Университете, по своему опыту могу сказать, чтобы точно получить хорошую работу на изучение языка и его инфраструктуры вы должны потратить 5-6 месяцев – при этом заниматься минимум 40 часов в неделю.
Начинаем!
История языка и предпосылки к лидерству
Почему Java так популярен? Во-первых это старый язык по меркам сферы ИТ. Ему уже более 25 лет. За это время было написано огромное количество приложений и библиотек, сформировано, наверное, самое многочисленное комьюнити программистов, которое поможет найти ответ на любой вопрос. Во-вторых java создавался с прицелом на высокую надежность: в то время доминировали языки C и C++, которые обладали высоким порогом входа – нужно было внимательно следить за за каждой строчкой. Легко можно было выстрелить себе в ногу, неправильно использовав множественное наследование, не почистив правильно память и т.д.
В Java учли эти ошибки. В нем сделали удобный автоматический сборщик мусора, добавили развитую систему исключений: появились исключения типа checked, которые существенно увеличили надежность кода. Были созданы более удобные механизмы работы с многопоточностью, а так же использована статическая типизация.
Все это позволило сделать Java в свое время самым надежным языком на рынке, поэтому многие компании выбрали его в качестве основного и не прогадали.
Одной из киллер-фич был подход к исполнению кода. Он не компилировался напрямую в бинарники. Компилятор создавал на основе исходного кода байт-код, который уже в свою очередь с помощью специального приложения – JAVA машины исполнялся на компьютере. Такой подход давал ряд существенных преимуществ: программист мог запустить один и тот же код по разными операционными системами, процессорами вообще без каких-либо изменений!
Не надо было перекомпилировать код под новую платформу, соответственно администратор без привлечения программистов мог осуществить перенос приложения на новый сервис с абсолютно другой архитектурой за пару часов.
Второе важное преимущество – с каждой новой версией Java-машина получала новые возможности, которые позволяли оптимизировать код на лету. Один и тот же код с каждой новой версией выполнялся все быстрее и быстрее вообще без вмешательства программистов!
Недавно java перешла на новый релизный цикл – каждая новая версия выходит через полгода. Это позволяет быстрее доставлять новые возможности в язык и практически полностью сократить отставание языка от других jvm языков.
Возможно, сейчас многие из преимуществ непонятны, но изучая java вы поймете, насколько они замечательные и как Java в свое время определила развитие ИТ.
Подготовка окружения
В первую очередь нам надо скачать JDK – это та самая виртуальная машина, а также набор утилит, которые позволят собирать код. После чего мы уже можем начинать программировать в любимом редакторе. Если у вас такового не имеется, могу порекомендовать скачать и установить – IntelliJ IDEA Community. Это самый популярный редактор исходного кода на Java, базовая версия которого распространяется бесплатно.
После того как мы скачали все и запустили редактор, приступим к изучению.
В java все является объектом. Что такое объект? Это некоторая сущность в которой описано ее состояние с помощью каких-либо переменных, а также описано ее поведение с помощью функций. Рассмотрим все на примере из реального мира.
У нас есть автомобиль, у него много характеристик. Мы абстрагируемся от них, нас интересует только два параметра: текущая скорость и максимальная скорость. В мире объектно-ориентированного программирования этот подход так и называется – абстракция. Какое поведение мы ожидаем от автомобиля? Всего два – начать движение и остановиться. Напишем этот код на java в файле с именем Car.java:
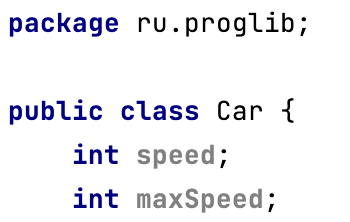
public class Car {
int speed;
int maxSpeed;
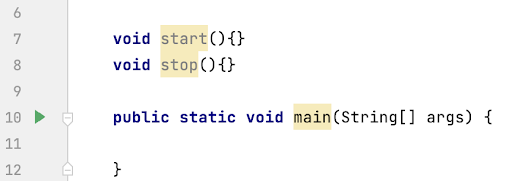
void start(){}
void stop(){}
}
Здесь мы описали шаблон будущего объекта – класс. У него есть две переменные состояния – speed и maxSpeed, а также две функции, которые описывают поведение объекта.
Теперь приложение нужно запустить, для этого Java надо подсказать, где находится точка входа в него. Для этого существует особое соглашение – нужно добавить в описание любого объекта метод:
        public static void main(String[] args) {

}
Именно, тот код, который мы в нем укажем и начнет выполняться.
Выполним теперь в консоли следующие команды:
        javac Car.java
java Car
Либо, что в разы проще, просто нажимаем зеленую стрелочку около метода и редакторе:
Наше приложение запустилось, но ничего не произошло, потому что мы не добавили никакой логики в метод. Добавим простой вывод на консоль текста:
        public static void main(String[] args) {
   System.out.println("Hello");
}
Результат выполнения виден на консоли.
Отмечу, что каждый файл может содержать только один публичный класс. То есть ключевое слово public вместе со словом class.
Ключевое слово public – это так называемый модификатор доступа. Оно определяет уровень доступности этого класса/метода/переменной из других частей программы.
Имя файла должно совпадать с именем класса, включая регистр, и иметь расширение .java. Ключевое слово static, говорит компилятору о том, что данный метод/переменная принадлежит именно шаблону объекта, то есть классу, а не конкретному объекту.
Пока не будем особо на это заострять внимание.
Пакеты в java
Стоит отметить, что часто в программах классы называют одинаково, поэтому была предложена идея их раскладывать по папкам, чтобы не было конфликта имен. Папка, в которой находится класс указывается в самом верху файла:
Создатели предложили называть эти папки как доменные имена в интернете, чтобы точно разграничить их, но это не обязательно, вы можете называть их как захотите.
Это так же позволяет легко импортировать чужие классы в свой код:
        package ru.proglib;

import java.util.Random;  // импортируем описание класса из пакета java.util.
public class Import {
   public static void main(String[] args) {
       var random = new Random();
       System.out.println(random.nextInt());  // выводим на экран случайное число
   }
 }
В нашем пакете нет определения класса Random, поэтому я воспользовался ключевым словом import, чтобы его добавить в нашу программу. Теперь я могу с ним работать. Используя ключевое слово new я создаю на основе класса объект random, который могу использовать в дальнейшем коде. Далее у объекта я вызываю метод, nextInt который описывает следующее поведение объекта: объект возвращает из метода натуральное число, которое произвольно каким-то образом у себя генерирует. Мы не знаем как именно это происходит – мы знаем только то, что в результате вызова этого метода мы получим какое-то целое число типа int. В объектно ориентированном программировании этот прием называется инкапсуляцией – когда объект внутри себя, основываясь на своем состоянии генерирует некий результат, при этом пользователь данного метода не знает как это работает под капотом.
Продолжим далее разбираться с кодом, который был представлен выше. Начнем с самого простого. Если мы хотим добавить какое-то пояснение к коду, мы можем вставить в любую строчку два косых слеша и весь текст после них будет отброшен при компиляции программы, но при просмотре исходного кода он виден.
Создание объектов
В коде у нас была следующая строка:
Random random = new Random();
Что она делает?
Здесь мы с помощью ключевого слова new создаем новый объект из его шаблона. Мы указываем, что в своем коде мы будем использовать имя random для обращения к этому объекту. В последней строке мы вызываем метод nextInt который приводит к тому, что в нашу программу возвращается какое-то число, после чего это же число мы передаем в метод println который уже выводит его на экран.
Попробуем для создать класс нашего автомобиля и задать ему поведение:
        public class Car {
   int speed;
   int maxSpeed;

   void start() {
       System.out.println("Я начал ехать");
   }

   void stop() {
       System.out.println("Я остановился");
   }

   public static void main(String[] args) {
       var myCar = new Car();
       myCar.start();
       myCar.stop();
   }
}
Запустите код и посмотрите, что будет выведено на консоль.
Теперь вернемся к нашим переменным состояния объекта.
Примитивные типы в java
Компьютеры работают в основном с числами, поэтому были придуманы несколько ключевых слов, которые обозначают разные типы данных, по другому их называют примитивные типы данных:
| Ключевое слово | Тип | Пример |
| boolean | true или false (8-bit число) | true |
| byte | 8-bit число | 123 |
| short | 16-bit число | 123 |
| int | 32-bit число | 123 |
| long | 64-bit число | 123L |
| float | 32-bit число | 123.0f |
| double | 64-bit число | 123.0 |
| char | 16-bit число | ‘a’ |
Так как компьютеры развивались постепенно, то на разных этапах своей жизни они могли хранить число, которое не выше разряда процессора, на котором они работают.
Поэтому появилась такая битовая таблица различных чисел. В нашем случае мы будем использовать числа типа int, которые могут быть описаны 32 битами в памяти компьютера. То есть наши числа будут лежать в промежутке -2,147,483,648 (-2^31) to 2,147,483,647 (2^31-1).
Конструкторы объектов
Теперь мы хотим, чтобы наше поведение зависело и от внутреннего состояния объекта. Для этого его надо как-то задать. Посмотрим как это можно сделать.
        public class Car {
   int speed;
   int maxSpeed;

   public Car(int speed, int maxSpeed) {
       this.speed = speed;
       this.maxSpeed = maxSpeed;
       System.out.println("Объект готов");

   }

   void start() {
       System.out.println("Я начал ехать");
       System.out.println(speed);
   }

   void stop() {
       System.out.println("Я остановился");
       System.out.println(maxSpeed);
   }

   public static void main(String[] args) {
       var myCar = new Car(100, 500);
       myCar.start();
       myCar.stop();
   }
}
Мы добавили в наш код специальный код – конструктор. Он позволяет инициализировать объект перед тем как начать им пользоваться. При этом при создании объекта в методе main я добавил два натуральных числа, которые соответственно инициализировали состояние объекта. В конструкторе мы можем указать любую логику, которую необходимо выполнить при создании объекта.
Если вы запустите приложение, то увидите, что кроме строк на экран выводятся и числа – как раз те, которые мы передали в конструкторе. Теперь наш объект инициализирован – у него есть какое-то внутреннее состояние.
Ссылки vs примитивные типы
Теперь рассмотрим ключевое различие между ссылками на объект, которые мы использовали для работой с объектами и примитивными типами. Для ссылок мы можем написать так:
        var myCar = new Car(100, 500);
myCar = null;
Мы приравняли наш указатель на объект к ключевому слову null, которое говорит виртуальной машине, что по данному указателю уже нельзя обращаться к объекту, то есть вызов myCar.start(); приведет к ошибке. Что произойдет с нашим объектом, который мы создали? В виртуальной машине java запускается сборщик мусора, который обнаружит, что данный объект живет без какой либо ссылки и удалит его из памяти – то есть сотрет его в оперативной памяти.
Но подобное не работает с примитивными типами:
int x = null;
Подобный код вызовет ошибку.
Также стоит отметить, что строки также являются классами, но при этом для них в языке сделаны существенные изменения.
Строки описываются классом String. Посмотрим какие исключения для них есть:
        var str = "Я остановился";
var srt2 =  new String("Я остановился");
Это единственный класс, который мы можем создать без оператора new.
Кроме того, строки можно складывать друг с другом или другими примитивными типами, но не вычитать, делить и т.п.:
        System.out.println("Я начал ехать" + "в направлении М1");
System.out.println("Я начал ехать" + "в направлении М1 со скоростью " + speed);
Добавьте данные строчки в наш код и вы увидите, что все прекрасно работает. Но повторюсь, что подобное исключение сделано только для одного класса – String, потом что строки очень часто используются.
Операторы в java
Раз мы упомянули операторы, давайте посмотрим какие предлагает java.
Унарный оператор – это оператор, для работы которого требуется только один операнд, или переменная, часто выполняют простые операции.
| Оператор | Описание | Пример |
| ! | Инвертирует логическое значение булевой функции | !true будет равно false |
| + либо — | Указывает на знак числа | -123 |
| ++ | Добавляет к числу единицу | var i = 5; i++; //i будет равно 6 |
| — | Отнимает от числа единицу | var i = 5; i—; //i будет равно 4 |
Далее мы перейдем к операторам, принимающим два аргумента, которые называются бинарными операторами. Бинарные операторы являются самыми распространенными операторами в языке Java. Ранее мы уже познакомились с оператором сложения для строк.
Они могут использоваться для выполнения математических операций над переменными, создания логических выражений и выполнения базовых присваиваний переменных.
| Оператор | Описание | Пример |
| + | Cложение | var i = 5; var k = 6; System.out.println(i + k) |
| — | Вычитание | var i = 5; var k = 6; System.out.println(i – k) |
| * | Умножение | var i = 5; var k = 6; System.out.println(i * k) |
| / | Деление | var i = 5; var k = 6; System.out.println(i / k) |
| % | Взятие по модулю | var i = 15; var k = 6; System.out.println(i % k) |
Если мы пишем сложное математическое выражение, то лучше пользоваться скобками:
var x = 5 * (6 – 8);
Завершить секцию с операторами я хотел бы таблицей с условными операторами, результат работы которых true либо false:
| Оператор | Описание | Пример |
| == | Сравнение на равенство | var i = 5; var k = 6; System.out.println(i == k) |
| < либо <= | Меньше, меньше либо равно | var i = 5; var k = 6; System.out.println(i < k) |
| > либо >= | Больше, больше либо равно | var i = 5; var k = 6; System.out.println(i >= k) |
| && | Логическое и. В обоих частях должно быть true, чтобы оператор вернул true | System.out.println(true && true) |
| || | Логическое и. Хотя бы в одной части должно быть true, чтобы оператор вернул true | System.out.println(false || true) |
Мы познакомились с самыми популярными операторами в java, настало время их использовать.
Мы хотим, чтобы наш автомобиль мог менять свое поведение, а именно изменять текущую скорость, которую мы задали при его создании.
Добавим новый метод, который будет это делать:
        void setSpeed(int speed){
   this.speed = speed;
}
Но мы не хотим, чтобы кто-то, кто пользуется нашим классом мог устанавливать скорость выше максимальной.
Условные выражения
Для того, чтобы наложить какие-либо ограничения на переменную, нам необходимо провести проверку, для этого нам понадобиться использовать условное выражение if:
        void setSpeed(int speed) {
   if (speed < maxSpeed) {
       this.speed = speed;
   }
}
В круглых скобках мы помещаем условие, которое должно вернуть либо true либо false, а в фигурных мы добавляем тот код, который будет выполнен если условие правдиво.
Так же, если условие вернуло false мы можем добавить с помощью ключевого слова else еще один блок кода, который выполняем в таком случае:
        void setSpeed(int speed) {
   if (speed < maxSpeed) {
       this.speed = speed;
   }
   else {
       System.out.println("Вы передали слишком большую скорость");
   }
}
Циклы
Что делать, если мы хотим повторять какой-то блок кода много раз? Если вместо if написать while у нас получится самый простой цикл, который будет выполняться до тех пор пока выражение в круглых скобках истинно или не произойдет прерывания цикла с помощью ключевого слова break, либо пока программа не завершиться, например из другого потока. Выглядеть это будет так:
        public static void main(String[] args) {
   var myCar = new Car(100, 500);
   var i = 0;
   while (i < 10){
       myCar.start();
       i++;
   }
}
В данном случае, мы создаем некую примитивную переменную i изначально равную 0. В цикле у нас есть условие того, что она меньше 10, если это не так, то код в фигурных скобках выполняться не будет. В них же мы увеличиваем значение i на единицу, если бы мы этого не делали, то выполнялся бы цикл вечно. Запустите программу и посмотрите, что будет выведено на экран и сколько раз.
Для того, чтобы отделить те логику работы цикла от нашего кода был создан цикл for.
Найдите различия:
        for (var i = 0; i < 10; i++) {
   myCar.start();
}
В круглых скобках у нас создается счетчик, передается условие цикла и рецепт, что делать со счетчиком на каждой итерации. Согласитесь, так код выглядит более компактно и логика управления циклом не перемешивается с нашей логикой.
если не передать никаких условий, то получится бесконечный цикл:
        for( ; ; ) {
   System.out.println("Hello World");
}
Выйти из него никак нельзя, только прервав работу приложения с помощью средств операционной системы. Мы можем прервать его работу с помощью ключевого слова break:
        for( ; ; ) {
   System.out.println("Hello World");
   break;
}
Сообщение будет выведено на консоль и на этом месте цикл остановится.
Массивы и коллекции
В своем проекте мы создали только один автомобиль, давайте теперь создадим несколько и поместим их в какое-то хранилище.
        var myCar = new Car(100, 500);
var myCar2 = new Car(10, 50);
var garage = new Car[2];

garage[0] = myCar;
garage[1] = myCar2;

for (Car car : garage) {
   car.start();
}
В примере выше мы создали два автомобиля, потом создали массив из указателей на объекты класса Car размером 2 и положили в него указатели на наши объекты. Как видно, отсчет ячеек массива начинается с 0. После чего мы использовали специальную модификацию цикла for для массивов и коллекций, который позволяет пройтись по всем элементам и совершить с ними какую-то логику.
То есть теперь у нас есть объект, который может хранить в себе несколько указателей на другие объекты, но работать с массивами не удобно. Нужно знать заранее точный размер и в какие ячейки, что нужно записывать. Поэтому сейчас самый востребованный метод хранения данных – коллекции.
Перепишем наш код с помощью коллекций:
        var myCar = new Car(100, 500);
var myCar2 = new Car(10, 50);
var garage = new ArrayList<Car>();

garage.add(myCar);
garage.add(myCar2);

for (Car car : garage) {
   car.start();
}
Как вы можете видеть, код не сильно изменился, но пропали эти неуклюжие записи указателей в конкретные ячейки. Теперь все сохраняется автоматически.
Для объявления коллекции мы написали так:
var garage = new ArrayList<Car>();
Что это значит? Здесь мы говорим, что будем использовать коллекцию на основе массива и что в нашей коллекции будут лежать объекты типа Car.
Самое важное, что мы не задали размер нашей коллекции. Так как она позволяет добавлять в себя любое число элементов, которые могут поместиться в оперативной памяти вашего компьютера.
Коллекция типа HashSet (множество) не позволит положить в себя два одинаковых значения, сравните выводы:
        var garage = new HashSet<Car>();

garage.add(myCar);
garage.add(myCar);
garage.add(myCar2);

for (Car car : garage) {
   car.start();
}
А потом замените первую строку
var garage = new ArrayList<Car>();
Кроме списка так же популярна коллекция Map, она позволяет присваивать объектам ключи и потом получать эти объекты по уникальному ключу:
        var myCar = new Car(100, 500);
var myCar2 = new Car(10, 50);
var garage = new HashMap<String, Car>();

garage.put("Мой авто", myCar);
garage.put("Мой второй авто", myCar2);

garage.get("Мой второй авто").start();
Я указал строку в качестве ключа – очень частая практика. И положил в коллекцию два своих объекта. Потом я по ключу достал свой объект и вызвал его метод.
Могу сказать, что коллекции – это то, чем вы будете пользоваться всегда в своей работе, поэтому их надо знать. Здесь я рассказал лишь о трех из них, которые используются в 99% случаев, при том не рассказав какие дополнительные методы они несут в себе.
Исключения
Чтобы произошло, если бы я написал свой запрос так:
garage.get("второй авто").start();
То на консоли увидел бы следующее:
        Exception in thread "main" java.lang.NullPointerException
	at ru.proglib.Car.main(Car.java:42)
Возникла исключительная ситуация и программа прервала свою работу. Так как метод get вернул null о котором мы говорили ранее. Соответственно у нас не было объекта на котором мы могли бы вызвать метод. Для предотвращения таких ситуаций был придумал блок try/catch. Посмотрим как он помог бы решить нашу проблему:
        try {
   garage.get("второй авто").start();
}catch (NullPointerException exception){
   System.out.println("В словаре нет автомобиля с таким ключем");
}
После try я в фигурных скобках пишу код, в качестве которого не уверен. В блоке круглых скобок catch я указываю какого типа ошибки могут возникнуть. Ошибки также являются в java объектами. Соответственно в фигурных скобках я указываю ту логику, которая будет выполнена при возникновении исключительной ситуации.
Вывод
Наше беглое знакомство с Java заканчивается. В этом материале мы рассмотрели лишь малую часть возможностей языка и его конструкций. Но я надеюсь, вы поняли, что на нем можно писать довольно лаконично и емко, при том программы, которые вы будете создавать будут отличаться надежностью и мультиплатформенностью из коробки. Java сейчас один из самых востребованных языков в мире разработки и если вы выберете его в качестве своего основного, то вы однозначно выиграете от этого решения. Ниже я привел лучше ресурсы, откуда можно черпать свои знания. Удачного обучения!
Дополнительные материалы:
- Очень рекомендую ознакомится с заметкой ТОП-10 лучших книг по Java для программистов ( https://proglib.io/p/java-books-2019). В ней вы найдете поборку из прекрасных книг по java.
- Если необходимо узнать какую-то информацию о бзовых возможностях java, то лучше официально документации ничего нет – https://docs.oracle.com/en/java/javase/16/
- А если вам нужно усваивать материал через видео, то нет ничего лучше, чем лекции, которые читает Java Champion.
***

Мне всё еще непонятно, с чего начинать путь в IT. Что посоветуете?
Стоит подумать, как построить свой путь в индустрию, чтобы получить качественные знания и устроиться на работу.
Онлайн-университет Skypro помогает новичкам в IT комфортно сменить сферу деятельности. Курс «Java-разработчик» построен так, чтобы дать полноценный взгляд на IT и базовые знания для работы младшим специалистом. Вы научитесь:
- писать код на языках Java и SQL;
- управлять схемами баз данных;
- собирать проекты на Maven и Spring;
- работать с кешем и потоками.
На протяжении всего обучения студентов поддерживают наставники и обучают топовые специалисты рынка. Если вы не устроитесь на работу в течение четырех месяцев после окончания обучения, Skypro вернет деньги — это прописано в договоре.

Юрий Пономарев
консультант по программным продуктам Oracle Центра технической поддержки компании РДТЕХ
Java – один из самых востребованных языков программирования в мире и один из двух официальных языков программирования, используемых в разработке Android (другой – Kotlin). Разработчики, знакомые с Java, весьма востребованы и способны создавать широкий спектр различных приложений, игр и инструментов. С помощью этой краткой статьи по Java для начинающих вы сможете сделать свои первые шаги к тому, чтобы стать одним из таких разработчиков. Мы рассмотрим все, что вам нужно знать, чтобы начать работу, и поможем вам создать свое первое простое приложение.
Java-это объектно-ориентированный язык программирования, разработанный компанией Sun Microsystems в 1990-х годах (позже купленной Oracle).
Понятие «объектно-ориентированный» относится к способу написания структурного кода Java, а именно: разделение кода на так называемые «классы», которые запускаются вместе, чтобы обеспечить согласованное порождение объектов. Мы обсудим это позже, но достаточно сказать, что это приводит к универсальному и организованному коду, который легко редактировать и перепрофилировать.
Java находится под влиянием C и C++, поэтому она имеет много общего с этими языками (и C#). Одним из больших преимуществ Java является то, что он «платформенно-независимый». Это означает, что код, который вы пишете на одной платформе, можно легко запустить на другой. Это называется принципом «пишем один раз, запускаем где угодно» (хотя на практике это не всегда так просто, как кажется).
Чтобы запустить и использовать Java, вам нужно три вещи:
- JDK – Java Development Kit
- JRE – Java Runtime Environment
- JVM – Java Virtual Machine
Виртуальная машина Java (JVM) гарантирует, что у ваших приложений Java есть доступ к минимальным ресурсам, необходимым для их запуска. Именно благодаря JVM программы Java так легко запускаются на разных платформах.
Среда исполнения Java (JRE) предоставляет собой «контейнер» для всех этих элементов и кода для запуска приложения. JDK – это «компилятор», который интерпретирует сам код и выполняет его. В JDK также есть инструменты разработчика, необходимые для написания кода Java (как и следует из названия).
Хорошая новость заключается в том, что разработчикам нужно только позаботиться о загрузке JDK, поскольку он поставляется вместе с двумя другими компонентами.
Как начать писать на Java
Если вы планируете разрабатывать приложения на Java на своем настольном компьютере, то вам нужно будет загрузить и установить JDK.
Вы можете получить последнюю версию JDK непосредственно с сайта Oracle. Как только вы установите его, ваш компьютер будет иметь возможность понимать и запускать код на Java. Тем не менее, вам все равно понадобится некоторое вспомогательное ПО, чтобы было действительно удобно писать код. Это так называемая «интегрированная среда разработки» или IDE: интерфейс, используемый разработчиками для ввода текста кода и вызова JDK.
При разработке для Android вы будете использовать IDE Android Studio. Она не только послужит интерфейсом для кода на Java (или Kotlin), но и станет мостом для доступа к специфичным для Android вызовам из SDK.
Для целей нашего краткого руководства по Java может быть и проще написать свой код непосредственно в приложении-компиляторе Java. Они могут быть скачаны для Android и iOS, можно даже найти веб-приложения, которые работают в вашем браузере. Эти инструменты предоставляют все необходимое в одном месте и позволяют сразу начать тестирование кода. Например, compilejava.net.
Насколько легко научиться программированию на Java?
Если вы новичок в разработке на Java, то ваши опасения вполне понятны. Так насколько же легко изучить Java?
Этот вопрос имеет несколько субъективную природу, но лично я бы отнес Java к языкам, не самым простым для изучения. Хотя он проще, чем C++, и часто описывается как более удобный для пользователя, но он, безусловно, не столь прост, как такие его конкуренты, как Python или BASIC, которые больше подходят для изучения начинающим программистам.
C# также немного проще по сравнению с Java, хотя они очень похожи.
Конечно, задавшись конкретной целью – стать разработчиком приложений для Android, – проще всего сразу начать с языка, который уже поддерживается этой платформой.
У языка Java есть свои особенности, но его, безусловно, можно изучить, и как только вы его освоите, вам откроется множество возможностей. А поскольку Java имеет много общего с C и C#, вы сможете перейти на эти языки без особых усилий.
Каков синтаксис Java?
Прежде чем мы погрузимся в самую суть этого руководства по Java для начинающих, стоит уделить некоторое время изучению синтаксиса Java.
Синтаксис Java относится к способу написания конкретных алгоритмов. Java очень принципиален в этом вопросе, и, если вы не пишете код определенным образом, то ваша программа не будет работать!
На самом деле я написал целую статью о синтаксисе Java для разработки Android, кратко перечислю особенности синтаксиса:
- Большинство строк должно заканчиваться точкой с запятой «;».
- Исключение составляет строка, открывающая новый блок кода. Она должна начинаться открытой фигурной скобкой «{». В качестве альтернативы эту открытую скобку можно поместить на новую строку под оператором. Блоки кода – это фрагменты кода, которые выполняют определенные, отдельные задачи.
- Код внутри блока кода должен иметь отступ, чтобы отделить его от остальных.
- Открытые блоки кода должны быть закрыты закрывающей фигурной скобкой «}».
- Комментарии – это строки, которым предшествуют символы «//».
Если вы нажимаете кнопку «запустить» или «скомпилировать» и получаете ошибку, то есть большая вероятность, что вы где-то пропустили точку с запятой!
Вы никогда не перестанете делать это, и это никогда не перестанет вас раздражать. Расслабьтесь!
С этими знаниями мы сможем глубже погрузиться в руководство по Java!
Основы Java: ваша первая программа
Зайдите на compilejava.net, и вас встретит редактор с кучей готовых примеров.
(Если же вы предпочитаете использовать другую IDE или стороннее приложение, это тоже прекрасно! Скорее всего, ваш новый проект будет состоять из аналогичного кода).
Удалите все, кроме следующего:
public class HelloWorld
{
  public static void main(String[] args)
  {
  }
}
Это то, что мы, программисты, мы называем «шаблоном» (этот код скопирован из учебника Java от Фила Данфи). Шаблонный код – так можно назвать любой код, который встречается внутри практически любой программы.
Первая строка здесь определяет «класс», который по сути является модулем кода. Затем нам нужен метод внутри этого класса, который представляет собой небольшой блок кода, выполняющий задачу. В каждой программе Java должен быть метод main, так как он сообщает Java, где начинается программа.
Об остальном поговорим чуть ниже, не беспокойтесь. Все, что нам нужно знать для этого урока Java прямо сейчас, – это то, что код, который мы действительно хотим запустить, должен быть помещен в фигурные скобки под словом «main».
Поместите сюда следующий оператор:
System.out.print("Hello world!");
Этот оператор напишет слова: «Hello world!» на вашем экране. Нажмите «Compile & Execute» и вы увидите его в действии.
Поздравляю! Вы только что написали свое первое Java-приложение!
Переменные в Java
Теперь пришло время рассказать о некоторых более важных вещах, лежащих в основе Java. Мало что может быть более фундаментальным в программировании, чем обучение использованию переменных!
Переменная по сути является «контейнером» для некоторых данных. Это означает, что вы выберете слово, которое будет представлять какое-то значение. Нам также необходимо определить переменные, основанные на типе данных, на которые они будут ссылаться.
Вот три основных типа переменных, которые мы собираемся ввести в этом руководстве по Java:
- Целые числа (integers) – как целые числа.
- Плавающие точки (floats) – или «переменные с плавающей точкой». Они содержат все числа, в том числе те, которые представляют десятичные дроби. «Плавающая точка» относится к десятичному разряду.
- Строки (strings)– строки содержат буквенно-цифровые символы и символы. Обычно строка используется для хранения чьего-то имени или, возможно, предложения.
Как только мы определяем переменную, мы можем вставить ее в наш код, чтобы изменить выходные данные. Например:
public class HelloWorld
{
  public static void main(String[] args)
  {
    String name = "Adam";
    System.out.print("Hello " + name);
  }
}
В этом примере кода мы определили строковую переменную с именем name. Мы сделали это, используя тип данных String, за которым следует имя нашей переменной, а затем данные. Когда вы помещаете что-то в двойные кавычки, то Java интерпретирует это дословно как строку.
Теперь мы печатаем на экране, как и раньше, но на этот раз заменяем «Hello world!» на «Hello + имя». Этот код показывает строку «Hello», за которой следует любое значение, содержащееся в следующей строковой переменной!
Самое замечательное в использовании переменных заключается в том, что они позволяют нам манипулировать данными, чтобы наш код мог вести себя динамически. Изменяя значение name, вы можете изменить поведение программы, не изменяя никакого фактического кода!
Условные операторы в Java
Еще одна из самых важных основ Java – это работа с условными операторами.
Условные операторы используют блоки кода, которые выполняются только при определенных условиях. Например, мы можем захотеть предоставить специальные пользовательские права основному пользователю нашего приложения.
Посмотрите на следующий код:
public class HelloWorld
{
  public static void main(String[] args)
  {
    String name = "Adam";
    System.out.print("Hello " + name +"rn");

    if (name == "Adam")
    {
      System.out.print("Special user priveledges granted!");
    }
  }

}
Запустите этот код, и вы увидите, что специальные разрешения предоставлены. Но, если вы измените значение name на что-то другое, то код не будет работать.
В этом коде используется оператор if. Он проверяет, является ли утверждение, содержащееся в скобках, истинным. Если это так, то будет запущен следующий блок кода. Не забудьте сделать отступ в коде, а затем закрыть блок в конце! Если оператор в скобках имеет значение false, то код просто пропустит этот раздел и продолжит работу с закрытых скобок.
Обратите внимание, что при наложении условия на данные мы используем два знака «=». Вы же используете только один, когда присваиваете какие-то данные переменным.
Методы на Java
Еще одна простая концепция, которую мы можем ввести в этом руководстве Java – это использование методов. Это даст вам немного больше понимания того, как структурирован Java-код и что с ним можно сделать.
Все, что мы собираемся сделать, – это взять часть кода, который мы уже написали, а затем поместить его в другой метод вне метода main:
public class HelloWorld
{

  public static void main(String[] args)
  {
    String name = "Adam";
    System.out.print("Hello " + name +"rn");
        if (name == "Adam") {
      grantPermission();
    }

  }

  static void grantPermission()
  {
       System.out.print("Special user priveleges granted!");
  }

}
Мы создали новый метод в строке, которая начинается со static void. Это означает, что метод определяет функцию, а не свойство объекта, и что он не возвращает никаких данных.
Но все, что мы вставляем в следующий блок кода, теперь будет выполняться каждый раз, когда мы «вызываем» метод, записывая его имя в нашем коде: grantPermission(). Затем программа выполнит этот блок кода и вернется к точке, из которой она вышла.
Если бы мы написали вызов grantPermission() несколько раз, то сообщение «Special user priveleges granted» также отобразилось бы несколько раз. Именно это делает методы такими фундаментальными основами Java: они позволяют выполнять повторяющиеся задачи, не записывая код снова и снова.
Передача аргументов в Java
Но самое замечательное в методах то, что они могут принимать переменные и манипулировать ими. Мы сделаем это, передав переменные в наши методы как «строки». Вот для чего и нужны скобки, следующие за названием метода.
В следующем примере я создал метод, который получает строковую переменную, названную nameCheck. Затем я могу обратиться к nameCheck из этого блока кода, и ее значение будет равно тому, что я поместил в фигурные скобки, когда вызвал метод.
Для этого руководства по Java я передал значение name методу и поместил туда оператор if. Таким образом, мы можем проверять несколько имен подряд, не набирая один и тот же код снова и снова.
Надеюсь, это даст вам представление о том, насколько мощными могут быть методы!
public class HelloWorld
{

  public static void main(String[] args)
  {
    String name = "Adam";
    System.out.print("Hello " + name +"rn");

    checkUser(name);

  }

  static void checkUser(String nameCheck)
  {
    if (nameCheck == "Adam")
    {
       System.out.print("Special user priveledges granted!");
    }
  }

}
В завершение
Надеюсь, теперь у вас есть хорошее представление о том, как изучать Java. Вы даже можете сами написать какой-нибудь простой код: используя переменные и условные операторы, вы действительно можете заставить Java делать некоторые интересные вещи уже сейчас.
Следующий этап состоит в понимании объектно-ориентированного программирования и классов. Это понимание есть то, что действительно дает Java и подобным языкам их силу, но поначалу может быть немного сложным для осмысления.
Перевод статьи «Java tutorial for beginners: Write a simple app with no previous experience»

Java has been around since the 90s. And despite its massive success in many areas, this cross-platform, object-oriented programming language is often maligned.
Regardless of how people feel about Java, I can tell you from experience is that it is an excellent programming language. After its first appearance back in 1995, it’s still widely-used – and chances are it’s not going anywhere anytime soon.
You can use Java to build servers, create desktop applications, games, mobile applications and more. There are also other JVM (we’ll discuss what that means very soon) languages such as Kotlin, Groovy, Scala, and Clojure that you can use for different purposes.
Java is also cross-platform which means code you write and compile on one platform can run on any other platform that has Java installed on it. We’ll discuss this topic in much more detail later on.
For now, I can tell you that although Java has its fair share of flaws, it also a has a lot to offer.
Table of Contents
- Prerequisites
- How to Write Hello World in Java
- What’s Going On in the Code?
- What is JVM?
- What is JRE and JDK?
- How To Setup Java on Your Computer?
- How To Install a Java IDE on Your Computer?
- How To Create a New Project on IntelliJ IDEA
- How to Work with Variables in Java
- What Are the Rules for Declaring Variables?
- What Are final Variables?
- What are the Primitive Data Types in Java?
- What is Type Conversion or Casting?
- What are Wrapper Classes in Java
- How to Use Operators in Java
- What Are the Arithmetic Operators?
- What Are the Assignment Operators?
- What Are the Relational Operators?
- What Are the Logical Operators?
- What Are the Unary Operators?
- How to Work with Strings in Java
- How to Format a String
- How to Get the Length of a String or Check if It’s Empty or Not
- How to Split and Join Strings
- How to Convert a String to Upper or Lowercase
- How to Compare Two Strings
- How to Replace Characters or Substring in a String
- How to Check If a String Contains a Substring or Not
- What Are the Different Ways of Inputting and Outputting Data?
- How to Use Conditional Statements in Java
- What is a switch-case statement?
- What is Variable Scope in Java?
- What Are Default Values of Variables in Java?
- How to Work with Arrays in Java
- How to Sort an Array
- How to Perform Binary Search on an Array
- How to Fill an Array
- How to Make Copies of an Array
- How to Compare Two Arrays
- How to Use Loops in Java
- For Loop
- For-Each Loop
- While Loop
- Do-While Loop
- How to Work with Array Lists in Java
- How to Add or Remove Multiple Elements
- How to Remove Elements Based on a Condition
- How to Clone and Compare Array Lists
- How To Check if an Element Is Present or the Array List Is Empty
- How to Sort an Array List
- How To Keep Common Elements From Two Array Lists
- How To Perform an Action on All Elements of an Array List
- How To Work With Hash Maps in Java
- How To Put or Replace Multiple Elements in a Hash Map
- How To Check if a Hash Map Contains an Item or if It’s Empty
- How To Perform an Action on All Elements of a Hash Map
- Classes and Objects in Java
- What is a Method?
- What is Method Overloading?
- What are Constructors in Java?
- What Are Access Modifiers in Java?
- What Are the Getter and Setter Methods in Java?
- What is Inheritance in Java?
- How to Override a Method in Java
- Conclusion
Prerequisites
The only re-requisite for this course is familiarity with any other programming language such as Python, JavaScript, and so on.
Although I’ll explain crucial programming concepts in the context of Java, I’ll not explain things like what a variable is in the context of programming in general.
How to Write Hello World in Java
Ideally the first step should’ve been setting up Java on your computer, but I don’t want to bore you with downloading and installing a bunch of software right at the beginning. For this example, you’ll use https://replit.com/ as your platform.
First, head over to https://replit.com/ and create a new account if you don’t already have one. You can use your existing Google/GitHub/Facebook account to login. Once logged in, you’ll land on your home. From there, use the Create button under My Repls to create a new repl.

In the Create a Repl modal, choose Java as Template, set a descriptive Title such as HelloWorld and hit the Create Repl button.

A code editor will show up with an integrated terminal as follows:

On the left side is the list of files in this project, in the middle is the code editor, and on the right side is the terminal.
The template comes with some code by default. You can run the code by hitting the Run button. Go ahead and do that, run the program.
If everything goes fine, you’ll see the words «Hello world!» printed on the right side. Congratulations, you’ve successfully run your first Java program.
What’s Going On in the Code?
The hello world program is probably the most basic executable Java program that you can possibly write – and understanding this program is crucial.
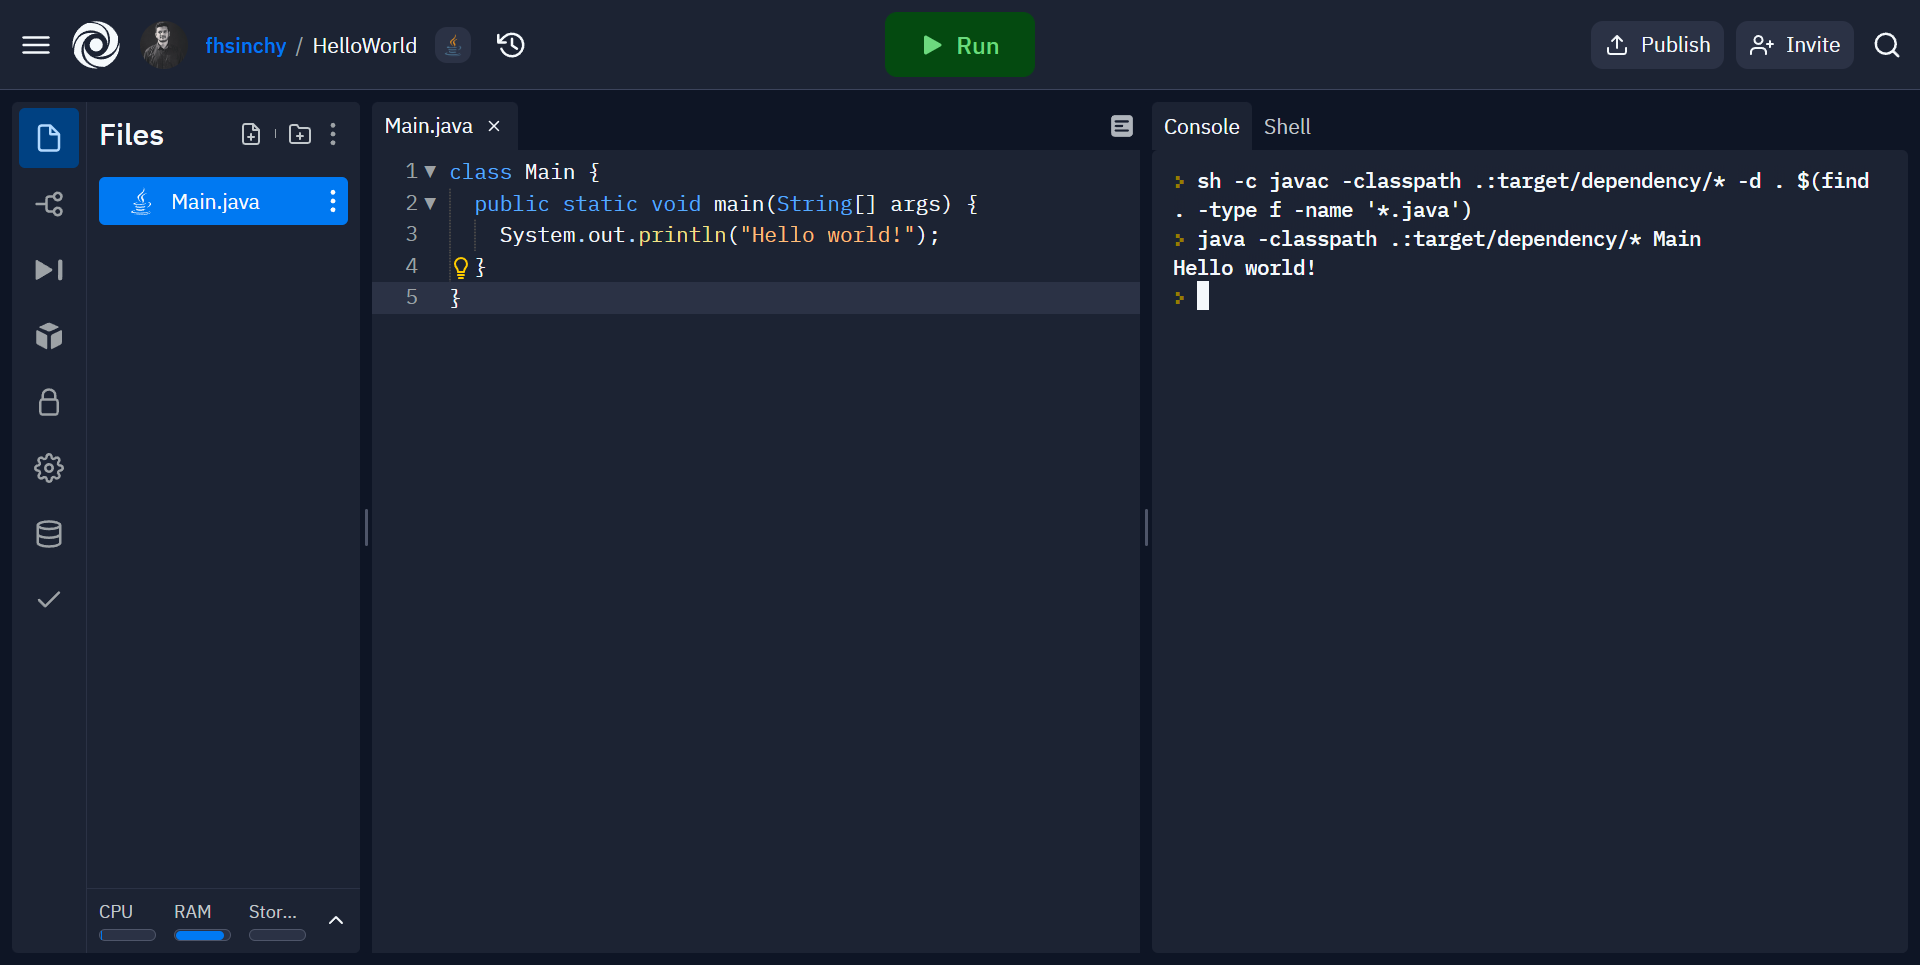
class Main {
  public static void main(String[] args) {
    System.out.println("Hello world!");
  }
}
Let’s start with the first line:
class Main {
  //...
}
This line creates a Main class. A class groups together a bunch of related code within a single unit.
This is a public class, which means this class is accessible anywhere in the codebase. One Java source file (files with the .java extension) can contain only one top level public class in it.
This top level public class has to be named exactly the same as the source code filename. That’s why the file named Main.java contains the main class in this project.
To understand why, click on the three dots in the list of files and click on the Show hidden files option.

This will unveil some new files within the project. Among them is the Main.class file. This is called a bytecode. When you hit the Run button, the Java compiler compiled your code from the Main.java file into this bytecode.
Now, modify the existing Hello World code as follows:
class Main {
  public static void main(String[] args) {
    System.out.println("Hello world!");
  }
}

class NotMain {
  public static void main(String[] args) {
    System.out.println("Not hello world!");
  }
}
As you can see, a new class called NotMain has been added. Go ahead and hit the Run button once more while keeping your eyes on the Files menu.

A new bytecode named NotMain.class has showed up. This means that for every class you have within your entire codebase, the compiler will create a separate bytecode.
This creates confusion about which class is the entry-point to this program. To solve this issue, Java uses the class that matches the source code file name as the entry-point to this program.
Enough about the class, now let’s look at the function inside it:
class Main {
  public static void main(String[] args) {
    System.out.println("Hello world!");
  }
}
The public static void main (String[] args) function is special in Java. If you have experience with languages like C, C++ or Go, you should already know that every program in those languages has a main function. The execution of the program begins from this main function.
In Java, you have to write this function as exactly public static void main (String[] args) otherwise it won’t work. In fact, if you change it even a little bit Java will start to scream.
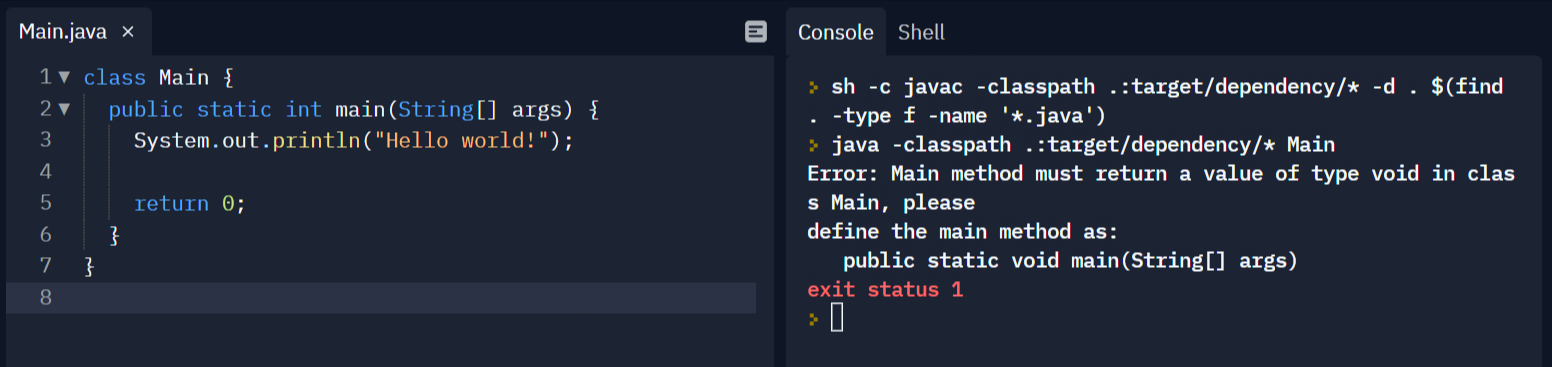
The return type has changed from void to int and the function now returns 0 at the end. As you can see in the console, it says:
Error: Main method must return a value of type void in class Main, please
define the main method as:
   public static void main(String[] args)
Listen to that suggestion and revert your program back to how it was before.
class Main {
  public static void main(String[] args) {
    System.out.println("Hello world!");
  }
}
The main method is a public method and the static means, you can call it without instantiating its class.
The void means that the function doesn’t return any value and the String[] args means that the function takes an array of strings as an argument. This array holds command line arguments passed to the program during execution.
The System.out.println prints out strings on the terminal. In the example above, "Hello world!" has been passed to the function, so you get Hello world! printed on the terminal.
In Java, every statement ends with a semicolon. Unlike JavaScript or Python, semicolons in Java are mandatory. Leaving one out will cause the compilation to fail.
That’s pretty much it for this program. If you didn’t understand every aspect of this section word by word, don’t worry. Things will become much clearer as you go forward.
For now, remember that the top level public class in a Java source file has to match the file name, and the main function of any Java program has to be defined as public static void main(String[] args).
What is JVM?
I’ve uttered the word «bytecode» a few times already in the previous section. I’ve also said that Java is «cross-platform» which means code written and compiled in one platform can run on any platform that has Java installed on it.
You see, your processor doesn’t understand English. In fact the only thing it understands are zeros and ones, aka binary.
When you write and compile a C++ program it results in a binary file. Your processor understands it and based on the program’s targeted platform, this file can be different.
Take an AMD64 and an ARMv8-A processor for example. These processors have different instruction sets. So in order to run your program on these two different platforms, you’ll have to compile them separately.
But a Java program can be written once and run anywhere. I hope you remember the bytecodes we talked about in the previous section. When you compile Java code it doesn’t result in binary but rather in bytecode.
This bytecode is not entirely binary but it’s also not human readable. In fact, your processor can’t read it either.
So instead of throwing this bytecode at the CPU, we instead run it through the Java Virtual Machine or JVM for short. JVM then reads and interprets the bytecode to the CPU.
If you would like to understand the architecture of JVM at a deeper level, I would suggest Siben Nayak’s in-depth article on the topic.
What is JRE and JDK?
JRE stands for Java Runtime Environment and JDK stands for Java Development Kit.
The JRE or Java Runtime Environment packages together an implementation of the JVM along with a set of libraries required for running Java programs.
The JDK, on the other hand, packages the JRE along with all the necessary libraries for developing Java programs.
So if you want to run Java programs on your computer you install the JRE. If you want to develop Java programs yourself, you install the JDK. There are multiple implementation of the JDK.
There is the Java SE (Standard Edition) Development Kit from Oracle, then there is the OpenJDK, an official reference implementation of Java SE (Standard Edition) Development Kit.
As you can tell from the name of OpenJDK, it’s open-source. So there are multiple builds of it. If you’re on a Linux machine and use your distro’s package manager to install JDK, it’s highly likely that you’ll install an OpenJDK build such as Adoptium, Microsoft Build of OpenJDK and so on.
I hope that you understand that JRE is a superset of JVM and JDK is a superset of JRE. Don’t worry about different implementations or builds at the moment, you’ll get your hands on them when the time comes.
How to Setup Java on Your Computer
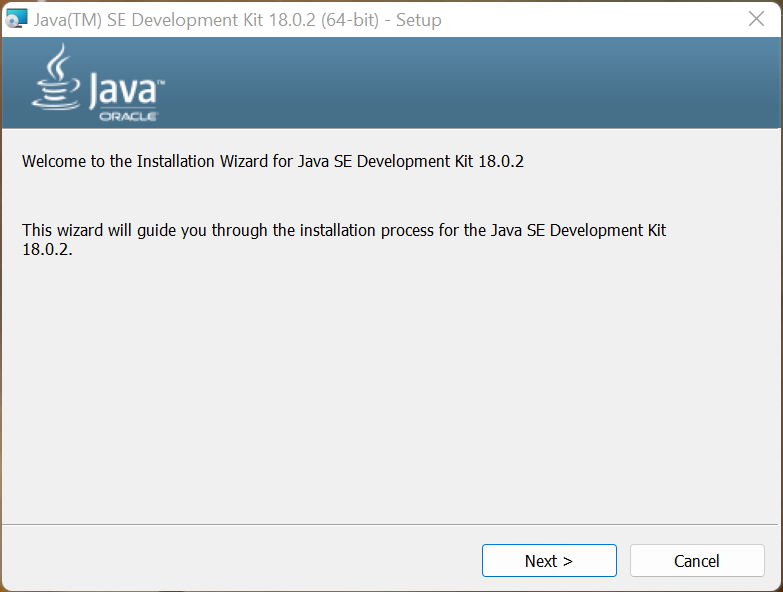
First, head over to https://www.oracle.com/java/technologies/downloads/ and download the latest version of the Java SE Development Kit according to the platform you’re on:

Once the download has finished, start the installer and go through the installation process by hitting the Next buttons. Finish it by hitting the Close button on the last page.
The installation process may vary on macOS and Linux but you should be able to figure it out by yourself.
Once the installation has finished, execute the following command on your terminal:
java --version

# java 18.0.2 2022-07-19
# Java(TM) SE Runtime Environment (build 18.0.2+9-61)
# Java HotSpot(TM) 64-Bit Server VM (build 18.0.2+9-61, mixed mode, sharing)
If it works, you’ve successfully install Java SE Development Kit on your computer. If you want to use OpenJDK instead, feel free to download Microsoft Build of OpenJDK or Adoptium and go through the installation process.
For the simple example programs that we’re going to write in this article, it won’t matter which JDK you’re using. But in real life, make sure that your JDK version plays nicely with the type of project you’re working on.
How to Install a Java IDE on Your Computer
When it comes to Java, IntelliJ IDEA is undeniably the best IDE out there. Even Google uses it as a base for their Android Studio.
The ultimate version of the IDE can cost an individual up-to $149.00 per year. But if you’re student, you can get educational licenses for all JetBrains products for free.
There is also the completely free and open-source community edition. This is the one we’ll be using throughout the entire book.
Head over to the IntelliJ IDEA download page, and download the community edition for your platform.

Once the download finishes, use the installer to install IntelliJ IDEA like any other software.
How to Create a New Project on IntelliJ IDEA
Use the shortcut from your start menu to start IntelliJ IDEA. The following window will show up:

Use the New Project button and a New Project window will show up:

Put a descriptive name for your project. Leave the rest of the options as they are and press the Create button.
The project creation shouldn’t take longer than a moment and once it’s done, the following window will show up:

That’s the project tool window on the left side. All your source code will live inside that src folder.
Right click on the src folder and go to New > Java Class.

In the next step, put a name, such as Main for your class and make sure Class is highlighted as the type.

A new class will be created with a few lines of code.

Update the code as follows:
public class Main {
    public static void main (String[] args) {
        System.out.println("Hello World!");
    }
}
To run this code, use the green play button on the right side of the top bar.

The code will run and the output will be shown in the integrated terminal at the bottom of the window.

Congratulations, you’ve successfully recreated the previously discussed HelloWorld program in IntelliJ IDEA.
How to Work with Variables in Java
To work with different kinds of data in Java, you can create variables of different types. For example, if you want to store your age in a new variable, you can do so like this:
public class Main {

	public static void main(String[] args) {
		// <type> <name>
		int age;

	}

}
You start by writing out the type of data or variable. Since age is a whole number, its type will be integer or int for short, followed by the name of the variable age and a semicolon.
At the moment, you’ve declared the variable but you haven’t initialized it. In other words, the variable doesn’t have any value. You can initialize the variable as follows:
public class Main {

	public static void main(String[] args) {
		// <type> <name>
		int age;

		// <name> = <value>
		age = 27;

		// prints the age on the terminal
		System.out.println("I am " + age + " years old.");

	}

}
When assigning a value, you start by writing the name of the variable you want to initialize, followed by an equal sign (it’s called the assignment operator) then the value you want to assign to the variable. And don’t forget the semicolon at the end.
The System.out.println(); function call will print the line I am 27 years old. to the console. In case you’re wondering, using a plus sign is one of the many ways to dynamically print out variables in the middle of a sentence.
One thing that you have to keep in mind is you can not use an uninitialized variable in Java. So if you comment out the line age = 27 by putting two forward slashes in front of it and try to compile the code, the compiler will throw the following error message at you:
Exception in thread "main" java.lang.Error: Unresolved compilation problem:
	The local variable age may not have been initialized

	at variables.Main.main(Main.java:13)
The line The local variable age may not have been initialized indicates that the variable has not been initialized.
Instead of declaring and initializing the variable in different lines, you can do that in one go as follows:
public class Main {

	public static void main(String[] args) {
		// <type> <name> = <value>
		int age = 27;

		// prints the age on the terminal
		System.out.println("I am " + age + " years old.");

	}

}
The code should be back to normal again. Also, you can change the value of a variable as many times as you want in your code.
public class Main {

	public static void main(String[] args) {
		int age = 27;

		// updates the value to be 28 instead of 27
		age = 28;

		System.out.println("I am " + age + " years old.");

	}

}
In this code, the value of age will change from 27 to 28 because you’re overwriting it just before printing.
Keep in mind, while you can assign values to a variables as many times as you want, you can not declare the same variable twice.
public class Main {

	public static void main(String[] args) {
		// <type> <name> = <value>
		int age = 27;

		int age = 28;

		// prints the age on the terminal
		System.out.println("I am " + age + " years old.");

	}

}
If you try to compile this code, the compiler will throw the following error message at you:
Exception in thread "main" java.lang.Error: Unresolved compilation problem:
	Duplicate local variable age

	at variables.Main.main(Main.java:9)
The line Duplicate local variable age indicates that the variable has already been declared.
Apart from variables, you may find the term «literal» on the internet. Literals are variables with hardcoded values.
For example, here, age = 27 and it’s not dynamically calculated. You’ve written the value directly in the source code. So age is an integer literal.
What Are the Rules for Declaring Variables?
There are some rules when it comes to naming your variables in Java. You can name it anything as long as it doesn’t start with a number and it can’t contain any spaces in the name.
Although, you can start a variable name with an underscore (_) or a dollar sign ($), not being mindful of their usage can make your code hard to read. Variable names are also case sensitive. So age and AGE are two different variables.
Another important thing to remember is you can not use any of the keywords reserved by Java. There are around 50 of them at present. You can learn about these keywords from the official documentation but don’t worry about memorizing them.
As you keep practicing, the important ones will slip into your neurons automatically. And if you still manage to mess up a variable declaration, the compiler will be there to remind you that something’s wrong.
Apart from the rules, there are some conventions that you should follow:
- Start your variable name with small letter and not any special character (like an underscore or dollar sign).
- If the variable name has multiple words, use camel case:
firstName,lastName - Don’t use single letter names:
f,l
As long as you follow these rules and conventions, you’re good to go. If you’d like to learn more about naming conventions in general, checkout my article on the topic.
What Are final Variables?
A final variable in Java can be initialized only once. So if you declare a variable as final, you can not reassign it.
public class Main {

	public static void main(String[] args) {
		// final <type> <name> = <value>
		final int age = 27;

		age = 28;

		System.out.println("I am " + age + " years old.");

	}

}
Since the age variable has been declared as final, the code will throw the following error message at you:
Exception in thread "main" java.lang.Error: Unresolved compilation problem:
	The final local variable age cannot be assigned. It must be blank and not using a compound assignment

	at variables.Main.main(Main.java:9)
However, if you leave the variable uninitialized while declaring, the code will work:
public class Main {

	public static void main(String[] args) {
		// final <type> <name>
		final int age;

		age = 28;

		// prints the age on the terminal
		System.out.println("I am " + age + " years old.");

	}

}
So, declaring a variable as final will limit your ability to reassign its value. If you leave it uninitialized, you’ll be able to initialize it as usual.
What are the Primitive Data Types in Java?
At a high level, there are two types of data in Java. There are the «primitives types» and the «non-primitive» or «reference types».
Primitive types store values. For example, int is a primitive type and it stores an integer value.
A reference type, on the other hand, stores the reference to a memory location where a dynamic object is being stored.
There are eight primitive data types in Java.
| TYPE | EXPLANATION |
|---|---|
byte |
8-bit signed integer within the range of -128 to 127 |
short |
16-bit signed integer within the range of -32,768 to 32,767 |
int |
32-bit signed integer within the range of -2147483648 to 2147483647 |
long |
64-bit signed integer within the range of -9223372036854775808 to 9223372036854775807 |
float |
single-precision 32-bit floating point within the range of 1.4E-45 to 3.4028235E38 |
double |
double-precision 64-bit floating point within the range of 4.9E-324 to 1.7976931348623157E308 |
boolean |
It can be either true or false |
char |
single 16-bit Unicode character within the range of u0000 (or 0) to uffff (or 65,535 inclusive) |
Yeah yeah I know the table looks scary but don’t stress yourself. You don’t have to memorize them.
You will not need to think about these ranges very frequently, and even if you do, there are ways to print them out within your Java code.
However, if you do not understand what a bit is, I would recommend this short article to learn about binary.
You’ve already learned about declaring an integer in the previous section. You can declare a byte, short, and long in the same way.
Declaring a double also works the same way, except you can assign a number with a decimal point instead of an integer:
public class Main {

	public static void main(String[] args) {
		double gpa = 4.8;

		System.out.println("My GPA is " + gpa + ".");

	}
}
If you assign an int to the double, such as 4 instead of 4.8, the output will be 4.0 instead of 4, because double will always have a decimal point.
Since double and float are similar, you may think that replacing the double keyword with float will convert this variable to a floating point number – but that’s not correct. You’ll have to append a f or F after the value:
public class Main {

	public static void main(String[] args) {
		float gpa = 4.8f;

		System.out.println("My GPA is " + gpa + ".");

	}
}
This happens because, by default, every number with a decimal point is treated as a double in Java. If you do not append the f, the compiler will think you’re trying to assign a double value to a float variable.
boolean data can hold either true or false values.
public class Main {

	public static void main(String[] args) {
		boolean isWeekend = false;

		System.out.println(isWeekend); // false

	}
}
As you can imagine, false can be treated as a no and true can be treated as a yes.
Booleans will become much more useful once you’ve learned about conditional statements. So for now, just remember what they are and what they can hold.
The char type can hold any Unicode character within a certain range.
public class Main {

	public static void main(String[] args) {
		char percentSign = '%';

		System.out.println(percentSign); // %

	}
}
In this example, you’ve saved the percent sign within a char variable and printed it out on the terminal.
You can also use Unicode escape sequences to print out certain symbols.
public class Main {

	public static void main(String[] args) {
		char copyrightSymbol = 'u00A9';

		System.out.println(copyrightSymbol); // ©

	}
}
The Unicode escape sequence for the copyright symbol, for example, is u00A9 and you can find more Unicode escape sequences on this website.
Among these 8 types of data, you’ll be working with int, double, boolean, and char majority of the time.
What is Type Conversion or Casting?
Type conversion in Java can be either «implicit» or «explicit». When the compiler converts a smaller type of data to a larger one automatically, it’s known as an implicit or narrowing type conversion.
public class Main {

	public static void main(String[] args) {
		int number1 = 8;
		double number2 = number1;

		System.out.println(number2); // 8.0
	}

}
Since a double is larger than an integer, the compiler could easily perform the conversion. If you try to do the reverse however, you’ll face the following error from the compiler:
Exception in thread "main" java.lang.Error: Unresolved compilation problem:
	Type mismatch: cannot convert from double to int

	at operators.Main.main(Main.java:7)
When performing an implicit conversion, the flow of conversion should be as follows:

You can of course go from a short to a double, for example, skipping the others in between.
You can also go from smaller data types to larger ones. That’s called an explicit or widening type conversion.
package datatypes;

public class Main {

	public static void main(String[] args) {
		double number1 = 8.5;
		int number2 = (int) number1;

		System.out.println(number2); // 8
	}

}
Previously you’ve seen that if you try to convert a larger data type to a smaller one, the compiler complains. But when you add the (int) cast operator explicitly, you show the compiler who’s boss.
In doing so, you lose a part of your data. If you change the initial double number from 8.5 to just 8.0, you’ll not lose any information. So whenever you’re performing an explicit conversion, be careful.
You can also convert a char to an int as follows:
public class Main {

	public static void main(String[] args) {
		char character = 'F';
		int number = character;

		System.out.println(number); // 70
	}

}
70 is the ASCII code for the character F – that’s why the output was like this. If you’d like to learn more about ASCII codes, my colleague Kris Koishigawa has written an excellent article on the topic.
The flow of conversion in this case will be the opposite of what you’ve seen already.

I’d suggest you to experiment by converting various values from one type to another and see what happens. This will deepen your understanding and make you confident.
What are Wrapper Classes in Java?
Wrapper classes can wrap around primitive datatypes and turn them into reference types. Wrapper classes are available for all eight primitive data types.
| Primitive Type | Wrapper Class |
|---|---|
int |
Integer |
long |
Long |
short |
Short |
byte |
Byte |
boolean |
Boolean |
char |
Character |
float |
Float |
double |
Double |
You can use these wrapper classes as follows:
public class Main {
    public static void main (String[] args) {
        Integer age = 27;
        Double gpa = 4.8;

        System.out.println(age); // 27
        System.out.println(gpa); // 4.8
    }
}
All you have to do is replace the primitive data type with the equivalent wrapper class. These reference types also have methods for extracting the primitive type from them.
For example, age.intValue() will return the age as a primitive integer and the gpa.doubleValue() will return the GPA in a primitive double type.
There are such methods for all eight datatypes. Although you’ll use the primitive types most of the time, these wrapper classes will be handy in some scenarios we’ll discuss in a later section.
How to Use Operators in Java
Operators in programming are certain symbols that tell the compiler to perform certain operations such as arithmetic, relational, or logical operations.
Although there are six types of operators in Java, I won’t talk about bitwise operators here. Discussing bitwise operators in a beginner guide can make it intimidating.
What Are the Arithmetic Operators?
Arithmetic operators are the ones that you can use to perform arithmetic operations. There are five of them:
| OPERATOR | OPERATION |
|---|---|
+ |
Addition |
- |
Subtraction |
* |
Multiplication |
/ |
Division |
% |
Remainder (Modulo/Modulus) |
Addition, subtraction, multiplication, and division operations are pretty self-explanatory. Have a look at the following code example to understand:
public class Main {

	public static void main(String[] args) {
		int number1 = 10;
		int number2 = 5;

		System.out.println(number1 + number2); // 15
		System.out.println(number1 - number2); // 5
		System.out.println(number1 * number2); // 50
		System.out.println(number1 / number2); // 2
		System.out.println(number1 % number2); // 0

	}

}
Outputs from the first four operations need no explanation. In the last operation, you’ve performed a modulo/modulus operation using the % symbol. The result is 0 because if you divide 10 by 2, there’ll be nothing left (no remainder).
Addition and multiplication operations are quite simple. But, when performing a subtraction, if the first operand is larger than the second operand, the result will be a negative number, just like in real life.
The type of data you’re working with makes a difference in the result of division and modulo operations.
public class Main {

	public static void main(String[] args) {
		int number1 = 8;
		int number2 = 5;

		System.out.println(number1 / number2); // 1
	}

}
Although the result of this operation should’ve been 1.6 it didn’t happen because in Java, if you divide an integer by another integer, the result will be an integer. But if you change both or one of them to a float/double, everything will be back to normal.
public class Main {

	public static void main(String[] args) {
		double number1 = 8;
		double number2 = 5;

		System.out.println(number1 / number2); // 1.6
	}

}
This principle applies to the modulo operations as well. If both or one of the operands are a float/double, the result will be a float/double.
What Are the Assignment Operators?
You’ve already worked with the assignment operator in a previous section.
public class Main {

	public static void main(String[] args) {
		// <type> <name> = <value>
		int age = 27;

		// prints the age on the terminal
		System.out.println(age);

	}

}
When you use the = symbol to assign a value to a variable, it works as an assignment operator. But, this is not the only form of this operator.
Combining the regular assignment operator with the arithmetic operators, you can achieve different results.
| OPERATOR | OPERATION | EQUIVALENT TO |
|---|---|---|
+= |
a += b |
a = a + b |
-= |
a -= b |
a = a - b |
*= |
a *= b |
a = a * b |
/= |
a /= b |
a = a / b |
%= |
a %= b |
a = a % b |
The following code example should make things clearer:
package operators;

public class Main {

	public static void main(String[] args) {
		double number1 = 10;
		double number2 = 5;

		number1 += number2;

		System.out.println(number1); // 15
	}

}
The other operators work the same. They operate and then assign the resultant value to the left operand.
I could demonstrate the other ones using code but I think if you try them out yourself, you’ll get a better understanding. After all, experimentation and practice are the only ways to solidify your knowledge.
What Are the Relational Operators?
Relational operators are used to check the relation between operands. Such as whether an operand is equal to another operand or not.
These relational operators return either true or false depending on the operation you’ve performed.
There are six relational operators in Java.
| OPERATOR | EXPLANATION | USAGE |
|---|---|---|
== |
Is Equal To | 5 == 8 returns false |
!= |
Is Not Equal To | 5 != 8 returns true |
> |
Is Greater Than | 5 > 8 returns false |
< |
Is Less Than | 5 < 8 returns true |
>= |
Greater Than or Equal To | 5 >= 8 returns false |
<= |
Less Than or Equal To | 5 <= 8 returns true |
The following code example demonstrates the usage of these operators:
public class Main {

	public static void main(String[] args) {
		double number1 = 10;
		double number2 = 5;

		System.out.println(number1 == number2); // false
		System.out.println(number1 != number2); // true
		System.out.println(number1 > number2); // true
		System.out.println(number1 < number2); // false
		System.out.println(number1 >= number2); // true
		System.out.println(number1 <= number2); // false
	}

}
Practical usage of these operators will become much apparent to you once you’ve learned about conditional statements in a later section.
You can also use these operators with characters.
public class Main {

	public static void main(String[] args) {
		char smallLetter = 'a';
		char capitalLetter = 'A';

		System.out.println(smallLetter > capitalLetter); // ???
	}

}
What do you think the output of this code will be? Find out for yourself. Remember the ASCII values of the characters? They play a role in the output of this program.
What Are the Logical Operators?
Imagine a scenario where a program you’ve made can only be used by people who are 18 and up but not over 40 years old. So the logic should be as follows:
can run the program if ->
	age >= 18 and age <= 40
Or in another scenario, a user has to be a student of your school or member of the library to borrow books. In this case the logic should be as follows:
can borrow books if ->
	isSchoolStudent or isLibraryMember
These logical decisions can be made using logical operators. There are three such operators in Java.
| OPERATOR | USAGE | EXPLANATION |
|---|---|---|
Logical And (&&) |
age >= 18 && age <= 40 |
Evaluates to true, only if both conditions are true |
Logical Or (||) |
isSchoolStudent || isLibraryMember |
Evaluates to true if one of the two or both conditions are true |
Not (!) |
!isLibraryMember |
Evaluates to false if the inner condition evaluates to true and vise versa |
Let’s see these operators in code. First, the logical and operator:
public class Main {

	public static void main(String[] args) {
		int age = 20;

		System.out.println(age >= 18 && age <= 40); // true
	}

}
In this case, there are two conditions on either side of the && operator. If and only if both conditions evaluate to true, the and operation evaluates to true.
If the first condition evaluates to false, the computer will not evaluate the rest of the conditions and return false. Because if the first one evaluates to false, then there is no way for the entire operation to evaluate to true.
The logical or operator works similarly, but in this case, if any of the conditions are true then the entire operation will evaluate to true:
public class Main {

	public static void main(String[] args) {
		boolean isSchoolStudent = true;
		boolean isLibraryMember = false;

		System.out.println(isSchoolStudent || isLibraryMember); // true
	}

}
If the first condition of a logical or operation evaluates to true, the computer will not evaluate the rest of the conditions and return true. Because if the first condition evaluates to true the operation will evaluate to true regardless of what the other conditions evaluate to.
Finally the not operator evaluates to the opposite of whatever its condition evaluates to. Take a look at the following code example:
public class Main {

	public static void main(String[] args) {
		boolean isLibraryMember = true;

		System.out.println(isLibraryMember); // true
		System.out.println(!isLibraryMember); // false
	}

}
As you can see, the not operator returns the opposite of the given boolean value. The not operator is a unary operator, meaning it operates on a single operand.
public class Main {

	public static void main(String[] args) {
		boolean isLibraryMember = true;
		boolean isSchoolStudent = false;

		System.out.println(!isSchoolStudent || isLibraryMember); // true
	}

}
In this example, the not operator turns isSchoolStudent into true, so the operation evaluates to true. However, if you modify the code as follows:
public class Main {

	public static void main(String[] args) {
		boolean isLibraryMember = true;
		boolean isSchoolStudent = false;

		System.out.println(!(isSchoolStudent || isLibraryMember)); // false
	}

}
First, the logical or operation will take place and evaluate to true. The not operator will turn it into false.
Although you’ve used two operands with each operator, you can use as many as you want. You can also mix and match multiple operators together.
public class Main {

	public static void main(String[] args) {
		boolean isSchoolStudent = true;
		boolean isLibraryMember = false;
		int age = 10;

		System.out.println(isSchoolStudent || isLibraryMember && age > 18); // ???
	}

}
What do you think the output of this code will be? I’d recommend you find out by yourself. 
What Are the Unary Operators?
There are some operators that are used with one operand at a time and these are called the unary operators. Although there are five of them, I’ll only discuss two.
| OPERATOR | EXPLANATION |
|---|---|
Increment (++) |
Increments a given value by 1 |
Decrement (--) |
Decrements a given value by 1 |
The following code example will demonstrate them nicely:
public class Main {

	public static void main(String[] args) {
		int score = 95;
		int turns = 11;

		score++;
		turns--;

		System.out.println(score); // 96
		System.out.println(turns); // 10
	}

}
You can also use the operators as prefixes:
public class Main {

	public static void main(String[] args) {
		int score = 95;
		int turns = 11;

		++score;
		--turns;

		System.out.println(score); // 96
		System.out.println(turns); // 10
	}

}
So far this is simple. But there are some slight differences between the postfix and prefix syntaxes that you need to understand. Look at the following code:
package operators;

public class Main {

	public static void main(String[] args) {
		int score = 95;


		System.out.println(++score); // 96
		System.out.println(score); // 96
	}

}
This is expected behavior. The prefix decrement operator will work the same. But look what happens if you switch to the postfix version:
package operators;

public class Main {

	public static void main(String[] args) {
		int score = 95;


		System.out.println(score++); // 95
		System.out.println(score); // 96
	}

}
Confusing, isn’t it? What do you think is the actual value of the variable right now? It’s 96. Let me explain.
When using the postfix syntax within a print function, the print function encounters the variable first and then increments it. That’s why the second line prints out the newly updated value.
In case of the prefix syntax, the function encounters the increment operator first and performs the operation. Then it goes on to printing the updated value.
This little difference may catch you off guard if you’re not careful. Or you try to avoid incrementing or decrementing within function calls.
How to Work with Strings in Java
The String type in Java is one of the most commonly used reference types. It’s a collection of characters that you can use to form lines of text in your program.
There are two ways of creating new strings in Java. The first one is the literal way:
public class Main {
	public static void main(String[] args) {
		String name = "Farhan";

		System.out.println("My name is " + name + ".");
	}

}
As you can see, declaring and using a String this way is not very different from declaring the primitive types in Java.
The second way to create a new String is by using the new operator.
public class Main {
	public static void main(String[] args) {
		// <type> <name> = new <type>(<value>)
		String name = new String("Farhan");

		System.out.println("My name is " + name + ".");
	}

}
This program will work exactly like the previous one but there’s a slight difference between the two.
The JVM maintains a portion of your computer’s memory for storing strings. This portion is called the string pool.
Whenever you create a new String in the literal way, the JVM first checks if that String already exists in the pool. If it does, JVM will reuse it. If it doesn’t, then the JVM will create it.
On the other hand, when you use the new operator, the JVM will always create a new String object no matter what. The following program demonstrates this concept clearly:
public class Main {

	public static void main(String[] args) {
		String literalString1 = "abc";
		String literalString2 = "abc";

		String objectString1 = new String("abc");
		String objectString2 = new String("abc");

		System.out.println(literalString1 == literalString2);
		System.out.println(objectString1 == objectString2);

	}

}
As you may already know, the == operator is used for checking equality. The output of this program will be:
true
false
Since abc was already in the string pool, the literalString2 variable reuses that. In case of the object strings however, both of them are different entities.
How to Format a String
You’ve already seen the usage of the + operator to sew strings together or format them in a specific way.
That approach works until you have a lot of additions to a string. It’s easy to mess up the placements of the quotation marks.
A better way to format a string is the String.format() method.
public class Main {
	public static void main(String[] args) {
		String name = "Farhan";
		int age = 27;

		String formattedString = String.format("My name is %s and I'm %d years old.", name, age);

		System.out.println(formattedString);
	}

}
The method takes a string with format specifiers as its first argument and arguments to replace those specifiers as the later arguments.
In the code above, the %s, and %d characters are format specifiers. They’re responsible for telling the compiler that this part of the string will be replaced with something.
Then the compiler will replace the %s with the name and the %d with the age. The order of the specifiers needs to match the order of the arguments and the arguments need to match the type of the specifier.
The %s and %d are not random. They are specific for string data and decimal integers. A chart of the commonly used specifiers are as follows:
| Specifier | Data Type |
|---|---|
%b, %B |
Boolean |
%s, %S |
String |
%c, %C |
Unicode Character |
%d |
Decimal Integer |
%f |
Floating Point Numbers |
There is also %o for octal integers, %x or %X for hexadecimal numbers, and %e or %E for scientific notations. But since, we won’t discuss them in this book, I’ve left them out.
Just like the %s and %d specifiers you saw, you can use any of these specifiers for their corresponding data type. And just in case you’re wondering, that %f specifier works for both floats and doubles.
How to Get the Length of a String or Check if It’s Empty or Not
Checking the length of a string or making sure its not empty before performing some operation is a common task.
Every string object comes with a length() method that returns the length of that string. It’s like the length property for arrays.
public class Main {
	public static void main(String[] args) {
		String name = "Farhan";

		System.out.println(String.format("Length of this string is: %d.", name.length())); // 6
	}

}
The method returns the length as an integer. So you can freely use it in conjunction with the integer format specifier.
To check if a string is empty or not, you can use the isEmpty() method. Like the length() method, it also comes with every string object.
public class Main {
	public static void main(String[] args) {
		String name = "Farhan";

		if (name.isEmpty()) {
			System.out.println("There is no name mentioned here");
		} else {
			System.out.println(String.format("Okay, I'll take care of %s.", name));
		}
	}

}
The method returns a boolean value so you can use it directly in if statements. The program checks if the name is empty or not and prints out different responses based off of that.
How to Split and Join Strings
The split() method can split a string based on a regular expression.
import java.util.Arrays;

public class Main {
	public static void main(String[] args) {
		String name = "Farhan Hasin Chowdhury";

		System.out.println(Arrays.toString(name.split(" ")));
	}

}
The method returns an array of strings. Each string in that array will be a substring from the original string. Here for example, you’re breaking the string Farhan Hasin Chowdhury at each space. So the output will be [Farhan, Hasin, Chowdhury].
Just a reminder that arrays are collections of multiple data of the same type.
Since the method takes a regex as argument, you can use regular expressions to perform more complex split operations.
You can also join this array back into a string like this:
public class Main {
	public static void main(String[] args) {
		String name = "Farhan Hasin Chowdhury";

		String substrings[] = name.split(" ");

		String joinedName = String.join(" ", substrings);

		System.out.println(joinedName); // Farhan Hasin Chowdhury
	}

}
The join() method can also help you in joining multiple strings together outside of an array.
public class Main {
	public static void main(String[] args) {
		System.out.println(String.join(" ", "Farhan", "Hasin", "Chowdhury")); // Farhan Hasin Chowdhury
	}

}
How to Convert a String to Upper or Lowercase
Converting a string to upper or lower case is very straightforward in Java. There are the aptly named toUpperCase() and toLowerCase() methods to perform the tasks:
public class Main {
	public static void main(String[] args) {
		String name = "Farhan Hasin Chowdhury";

		System.out.println(name.toUpperCase()); // FARHAN HASIN CHOWDHURY

		System.out.println(name.toLowerCase()); // farhan hasin chowdhury
	}

}
How to Compare Two Strings
Since strings are reference types, you can not compare them using the = operator.
The equals() method checks whether two strings are equal or not and the equalsIgnoreCase() method ignores their casing when comparing.
public class Main {
	public static void main(String[] args) {
		String name = "Farhan Hasin Chowdhury";
		String nameUpperCase = name.toUpperCase();

		System.out.println(name.equals(nameUpperCase)); // false

		System.out.println(name.equalsIgnoreCase(nameUpperCase)); // true
	}

}
How to Replace Characters or Substrings in a String
The replace() method can replace characters or entire substrings from a given string.
package strings;

public class Main {
	public static void main(String[] args) {
		String loremIpsumStd = "Sed ut perspiciatis unde omnis iste natus error sit voluptatem accusantium doloremque laudantium, totam rem aperiam, eaque ipsa quae ab illo inventore veritatis et quasi architecto beatae vitae dicta sunt explicabo.";

		System.out.println(String.format("Standard lorem ipsum text: %s", loremIpsumStd));

		String loremIpsumHalfTranslated = loremIpsumStd.replace("Sed ut perspiciatis unde omnis iste natus error sit voluptatem accusantium doloremque laudantium", "But I must explain to you how all this mistaken idea of denouncing pleasure and praising pain was born and I will give you a complete account of the system");

		System.out.println(String.format("Translated lorem ipsum text: %s", loremIpsumHalfTranslated));
	}

}
Here, the loremIpsumStd string contains a portion of the original lorem ipsum text. Then you’re replacing the first line of that string and saving the new string in the loremIpsumHalfTranslated variable.
How to Check If a String Contains a Substring or Not
The contains() method can check whether a given string contains a certain substring or not.
public class Main {
	public static void main(String[] args) {
		String lyric = "Roses are red, violets are blue";

		if (lyric.contains("blue")) {
			System.out.println("The lyric has the word blue in it.");
		} else {
			System.out.println("The lyric doesn't have the word blue in it.");
		}
	}

}
The method returns a boolean value, so you can use the function in any conditional statement.
There were some of the most common string methods. If you’d like to learn about the other ones, feel free to consult the official documentation.
What Are the Different Ways of Inputting and Outputting Data?
So far you’ve learned about the System.out.println() method to print out information on the terminal. You’ve also learned about the String.format() method in a previous section.
In this section, you’ll learn about some siblings of the System.out.println() method. You’ll also learn about taking input from the user.
Taking input from user is extremely easy in languages like Python. However in Java, it takes a few more lines of code.
import java.util.Scanner;

public class Main {

	public static void main(String[] args) {
		Scanner scanner = new Scanner(System.in);

		System.out.print("What's your name? ");
		String name = scanner.nextLine();

		System.out.printf("So %s. How old are you? ", name);
		int age = scanner.nextInt();

		System.out.printf("Cool! %d is a good age to start programming.", age);

		scanner.close();

	}

}
The java.util.Scanner class is necessary for taking user inputs. You can bring the class to your program using the import keyword.
Then, you’ll need to create a new instance of the Scanner class using the new keyword. While creating the new instance, you’ll have to let it know your desired input stream.
You may want to take input from the user or from a file. Whatever it is, you’ll have to let the compiler know about it. The System.in stream is the standard input and output stream.
The scanner object has methods like nextLine() for taking string input, nextInt() for taking integer input, nextDouble() for taking double input and so on.
In the code above, the scanner.nextLine() method will ask for a string from the user and return the given input with a newline character appended.
Then the scanner.nextInt() method will ask for an integer and return the given number from the user.
You may be seeing the System.out.printf() method for the first time here. Well, apart from the System.out.println() method, there is also the System.out.print() method that prints out a given string without appending a newline character to it.
The System.out.printf() is kind of a combination of the System.out.print() and String.format() methods. You can use the previously discussed format specifiers in this method as well.
Once you’re done with taking input, you’ll need to close the scanner object. You can do that by simply calling the scanner.close() method.
Simple right? Let me complicate it a bit.
import java.util.Scanner;

public class Main {

    public static void main(String[] args) {
        Scanner scanner = new Scanner(System.in);

        System.out.print("What's your name? ");
        String name = scanner.nextLine();

        System.out.printf("So %s. How old are you? ", name);
        int age = scanner.nextInt();

        System.out.printf("Cool! %d is a good age to start programming. nWhat language would you prefer? ", age);
        String language = scanner.nextLine();

        System.out.printf("Ah! %s is a solid programming language.", language);

        scanner.close();

    }

}
I’ve added a new scanner.nextLine() statement after the scanner.nextInt() method call. Will it work?
No, it won’t. The program will simply skip the last input prompt and print out the last line. This behavior is not exclusive to just scanner.nextInt(). If you use scanner.nextLine() after any of the other nextWhatever() methods, you’ll face this issue.
In short, this happens because when you press enter on the scanner.nextInt() method, it consumes the integer and leaves the newline character in the input buffer.
So when scanner.nextLine() is invoked, it consumes that newline character as the end of the input. The easiest solution to this problem is writing an additional scanner.nextLine() call after the other scanner method calls.
import java.util.Scanner;

public class Main {

    public static void main(String[] args) {
        Scanner scanner = new Scanner(System.in);

        System.out.print("What's your name? ");
        String name = scanner.nextLine();

        System.out.printf("So %s. How old are you? ", name);
        int age = scanner.nextInt();

        // consumes the dangling newline character
        scanner.nextLine();

        System.out.printf("Cool! %d is a good age to start programming. nWhat language would you prefer? ", age);
        String language = scanner.nextLine();

        System.out.printf("Ah! %s is a solid programming language.", language);

        scanner.close();

    }

}
There is another way of solving this problem. But I won’t get into that here. If you’re interested, checkout my article on this topic.
How to Use Conditional Statements in Java
You use conditional statements for making decision based on conditions.
It’s done using the if statement as follows:
public class Main {

	public static void main(String[] args) {
		int age = 20;

		// if (condition) {...}
		if (age >= 18 && age <= 40) {
			System.out.println("you can use the program");
		}

	}

}
The statement starts with an if and then there is the condition inside a pair of parenthesis. If the condition evaluates to true, the code within the curly braces will be executed.
Code enclosed between a set of curly braces is known as a code block.
If you change the value of age to 50 the print statement will not be executed and there’ll be no output on the console. For these kind of situations where the condition evaluates to false, you can add an else block:
public class Main {

	public static void main(String[] args) {
		int age = 20;

		if (age >= 18 && age <= 40) {
			System.out.println("you can use the program");
		} else {
			System.out.println("you can not use the program");
		}

	}

}
Now if the condition evaluates to false, the code within the else block will execute and you’ll see you can not use the program printed on your terminal.
You can also have multiple conditions within an if-else if-else ladder:
public class Main {

	public static void main(String[] args) {
		int age = 50;
		boolean isSchoolStudent = true;
		boolean isLibraryMember = false;

		// if (condition) {...}
		if (age >= 18 && age <= 40) {
			System.out.println("you can use the program");
		} else if (isSchoolStudent || isLibraryMember) {
			System.out.println("you can use the program for a short time");
		} else {
			System.out.println("you can not use the program");
		}

	}

}
Now, if the first condition evaluates to false then the second condition will be tested. If the second one evaluates to true then the code within curly braces will be executed. If the conditions in both if statements evaluate to false, then the else block will be executed.
You can also nest if statements within other if statements as follows:
package operators;

public class Main {

	public static void main(String[] args) {
		int age = 20;

		if (age >= 18 && age <= 40) {
			boolean isSchoolStudent = true;
			boolean isLibraryMember = false;

			if (isSchoolStudent || isLibraryMember) {
				System.out.println("you can use the program");
			}
		} else {
			System.out.println("you can not use the program");
		}

	}

}
In this case, only if the first if statement evaluates to true will the inner if statement be tested.
What is a switch-case statement?
Apart from the if-else blocks, there are also switch cases where you can define multiple cases based on a single switch.
import java.util.Scanner;

public class Main {

    public static void main(String[] args) {
        Scanner scanner = new Scanner(System.in);

        System.out.print("What is the first operand? ");
        int a =scanner.nextInt();

        // consumes the dangling newline character
        scanner.nextLine();

        System.out.print("What is the second operand? ");
        int b = scanner.nextInt();

        // consumes the dangling newline character
        scanner.nextLine();

        System.out.print("What operation would you like to perform? ");
        String operation = scanner.nextLine();

        switch (operation) {
            case "sum":
                System.out.printf("%d + %d = %d", a, b, a+b);
                break;
            case "sub":
                System.out.printf("%d - %d = %d", a, b, a-b);
                break;
            case "mul":
                System.out.printf("%d * %d = %d", a, b, a*b);
                break;
            case "div":
                if (b == 0) {
                    System.out.print("Can't divide by zero!");
                } else {
                    System.out.printf("%d / %d = %d", a, b, a / b);
                }
                break;
            default:
                System.out.printf("Invalid Operation!");
        }

        scanner.close();

    }

}
This is a very simple calculator program. The program prompts the user for two numbers and then asks what operation they would like to perform.
Every switch-case statement will have one switch and multiple cases. When you say case "sum", the program checks whether the value of the switch or the operation variable in this is sum or not.
If it matches, the case body will execute. If none of the cases match, the default case will be executed.
And about that break statement. It does what it sounds like: stops the program from going into the next case.
If you remove the break statements, all the cases will be executed one after the other until the default case has been reached.
What is Variable Scope in Java?
Scope is the lifetime and accessibility of a variable. Depending on where you declare a variable you may or may not be able to access it from other places.
Take the following code snippet as an example:
public class Main {

	public static void main(String[] args) {
		int age = 20;

		if (age >= 18 && age <= 40) {
			// age variable is accessible here
			// booleans are not accessible here

			boolean isSchoolStudent = true;
			boolean isLibraryMember = false;

			if (isSchoolStudent || isLibraryMember) {
				// booleans are accessible here
				// age variable is accessible here

				System.out.println("you can use the program");
			}
		} else {
			// age variable is accessible here
			// booleans are not accessible here

			System.out.println("you can not use the program");
		}

	}

}
Here, the age variable is declared within the class code block. That means you can access this variable within the entire class without any issue. Since the variable is accessible in the entire class instance, it’s an instance variable.
However, the isSchoolStudent and isLibraryMember variables have been declared within the first if statement code block. So it’ll not be accessible outside of that code block.
But, it’ll be accessible within any nested code block inside the first if block. These are called local variables.
There are also class variables declared using the static keyword but you’ll learn about them in the object-oriented programming sections.
So for now, the rule of thumb is, a variable will be accessible within the code block it was declared at and any other code block nested inside the parent block.
What Are Default Values of Variables in Java?
You’ve learned that in Java, you need to initialize a variable after declaring it. Otherwise, you’ll not be able to use that. Well that’s not true in all cases.
If you declare a variable in the class level, that variable will be assigned a default value by the compiler.
public class Main {

	// gets 0 as the value by default
	static int age;

	public static void main(String[] args) {
		System.out.println(age); // 0
	}
}
Since the main method is static, it can only access static variables in the class level. I’ll discuss static in greater detail in the object-oriented programming section.
But if you move the variable declaration inside the main method, it becomes local to that method and doesn’t get any default value.
public class Main {
	public static void main(String[] args) {
		// remains uninitialized
		int age;

		System.out.println(age); // fails to compile
	}
}
This code will throw the The local variable age may not have been initialized error on compilation.
Variables get their default values based on their type. In most cases, it’ll be 0 or null. I’m giving a list of all the primitive types and their default values:
| Data Type | Default Value |
|---|---|
byte |
0 |
short |
0 |
int |
0 |
long |
0L |
float |
0.0f |
double |
0.0d |
char |
'u0000' |
boolean |
false |
Any reference type will be assigned the value null by default. We’ll discuss reference types, classes, and objects in the object-oriented programming sections.
How to Work with Arrays in Java
You’ve already learned about declaring single variables and using them in your program. This is where arrays come in.
Arrays are data structures containing multiple value sof the same data type in sequential memory locations. Arrays can be of any primitive or non-primitive data type.
You can create an array in Java as follows:
public class Main {

	public static void main(String[] args) {
		// <type> <name>[] = new <type>[<length>]
		char vowels[] = new char[5];

	}
}
You start by typing out the type of data you want to hold in the array, char in this case. Then you write out the name of the array, vowels followed by a pair of square braces here. This pair of braces tells Java that you’re declaring an array of characters and not a regular character variable.
Then you put an equal sign followed by the new operator used for creating new objects in Java. Since arrays are reference types in Java, new is required to create new instances.
You finish off the declaration by writing out the type again, followed by another pair of square braces enclosing the length of the array. Here, 5 means the array will hold five elements and not more than that.
When working with a single variable, you can refer to the variable simply by its name. But in case of an array, each element will have an index and arrays are zero-based. This means the first element in an array will have 0 as its index and not 1.
To access an element in an array, you start by writing out the name of the array – in this case vowels followed by a pair of square braces enclosing your desired index. So if you want to access the first element in the array, you can do so as follows:
public class Main {

	public static void main(String[] args) {
		char vowels[] = new char[5];

		vowels[0] = 'a';
	}
}
At this point, vowels[0] is similar to a regular character variable. You can print it out, assign new value to it, perform calculations in case of number types, and so on.
Since the array is empty at this moment, I’m assigning the character a to the first index. You can assign the rest of the vowels to the rest of the indices as follows:
public class Main {

	public static void main(String[] args) {
		char vowels[] = new char[5];

		vowels[0] = 'a';
		vowels[1] = 'e';
		vowels[2] = 'i';
		vowels[3] = 'o';
		vowels[4] = 'u';

	}
}
Since the indices start at 0 they’ll end at the length of the array — 1, which in this case is 4. If you try to assign another element to the array like vowels[4] = 'x'; the compiler will throw the following error:
Exception in thread "main" java.lang.ArrayIndexOutOfBoundsException: Index 5 out of bounds for length 5
	at arrays.Main.main(Main.java:18)
Arrays can not be printed like regular variables. You’ll have to use a loop or you’ll have to convert the array into a string. Since, I haven’t discussed loops yet, I’ll use the second method.
import java.util.Arrays;

public class Main {

	public static void main(String[] args) {
		char vowels[] = new char[5];

		vowels[0] = 'a';
		vowels[1] = 'e';
		vowels[2] = 'i';
		vowels[3] = 'o';
		vowels[4] = 'u';

		System.out.println("These are the vowels: " + Arrays.toString(vowels));

	}
}
You’ll need to first import the java.util.Arrays; and use the Arrays.toString() method to convert the array to a string. This class has a bunch of other interesting methods, but before discussing them, I’d like to show you how you can declare and initialize an array in one go.
import java.util.Arrays;

public class Main {

	public static void main(String[] args) {
		char vowels[] = {'a', 'e', 'i', 'o', 'u'};

		System.out.println("These are the vowels: " + Arrays.toString(vowels));

	}
}
The left side of the declaration syntax remains unchanged. However, after the assignment operator, instead of using new you write out the individual array elements separated by comma and enclosed within a pair of curly braces.
In this case the compiler will count the number of elements in the array and use that as the length of the array.
If you do not know the length of an array, you can take a look at the length property.
In this case, vowels.length will be 5 since there are five elements in the array. The length property is an integer and is present in every array in Java.
Arrays can also be multidimensional. So far you’ve worked with arrays that look like this:

Single dimensional arrays like this are perfect when you want to store a series of values. But imagine someone’s daily medicine routine in the form of a table:

The first row represents the seven days in a week and the columns represent how many times the patient should take their medicine out of three times a day. 0 means no and 1 means yes.
You can map this routine using a multidimensional array in your program:
import java.util.Arrays;

public class Main {

	public static void main(String[] args) {
		int medicineRoutine[][] = {
				{1, 2, 3, 4, 5, 6, 7},
				{0, 1, 1, 0, 1, 1, 0},
				{1, 0, 1, 0, 1, 0, 0},
				{0, 0, 1, 1, 0, 1, 0},
		};

		System.out.println(Arrays.deepToString(medicineRoutine)); // [[1, 2, 3, 4, 5, 6, 7], [0, 1, 1, 0, 1, 1, 0], [1, 0, 1, 0, 1, 0, 0], [0, 0, 1, 1, 0, 1, 0]]

	}
}
Multidimensional arrays can not be printed out using the regular Arrays.toString() method, you have to dig deeper.
Although the output doesn’t look anything like the table, you can make it look like a table using some clever programming:
import java.util.Arrays;

public class Main {

	public static void main(String[] args) {
		int medicineRoutine[][] = {
				{1, 2, 3, 4, 5, 6, 7},
				{0, 1, 1, 0, 1, 1, 0},
				{1, 0, 1, 0, 1, 0, 0},
				{0, 0, 1, 1, 0, 1, 0},
		};

		System.out.println(Arrays.deepToString(medicineRoutine).replace("], ", "]n"));
	}
}

// [[1, 2, 3, 4, 5, 6, 7]
// [0, 1, 1, 0, 1, 1, 0]
// [1, 0, 1, 0, 1, 0, 0]
// [0, 0, 1, 1, 0, 1, 0]]
You’ve already learned about the replace() method for strings. You’re just replacing the ending square brace in each line with a square brace and a newline character.
The first row represents the 7 weekdays and the rest of the rows are medicine routines for each day. Each line in this table represents an array.
To access a single value from a multidimensional array, you’ll need two indices. The first index determines the row and the second one determines the column.
So medicineRoutine[2][3] will select the element in index 3 of the third array. That element will be 0. Working with multidimensional array can seem a bit tricky but practicing will make it much easier.
Since you can create arrays of any type in Java, why don’t you try creating some other types of arrays by yourself, huh?
How to Sort an Array
One of the most common tasks that you will perform on arrays is sorting them. The java.utils.Arrays comes with the Arrays.sort() method to do just that:
import java.util.Arrays;

public class Main {

	public static void main(String[] args) {
		char vowels[] = {'e', 'u', 'o', 'i', 'a'};

		Arrays.sort(vowels);

		System.out.println("The sorted array: " + Arrays.toString(vowels)); // [a, e, i, o , u]

	}
}
The Arrays.sort() method takes the unsorted array as its argument and sorts it in place. So instead of getting a new sorted array in return, your original array itself will be sorted in ascending order.
By default, the method treats the first index of the array as its starting index and the length of the array as its ending index.
You can specify these two indices manually. For example, if you want to sort only u, o, i in ascending order and leave e, a as is, you can do so as follows:
import java.util.Arrays;

public class Main {

	public static void main(String[] args) {
		char vowels[] = {'e', 'u', 'o', 'i', 'a'};

		int startIndex = 1;
		int endIndex = 4;

		Arrays.sort(vowels, startIndex, endIndex);

		System.out.println("The sorted array: " + Arrays.toString(vowels)); // [e, i, o, u , a]

	}
}
This time, the method takes the array as the first parameter, the starting index as the second parameter, and the ending index as the third parameter. The rest of the behaviors stay the same as before.
How to Perform Binary Search on an Array
Searching for values within a sorted value is another common task. The Arrays.binarySearch() method lets you search for items in a sorted array using the binary search algorithm.
public class Main {

	public static void main(String[] args) {
		char vowels[] = {'a', 'e', 'i', 'o', 'u'};

        char key = 'i';

		int foundItemIndex = Arrays.binarySearch(vowels, key);

		System.out.println("The vowel 'i' is at index: " + foundItemIndex); // 2

	}
}
The Arrays.binarySearch() method takes an array as its first parameter and the the search key (aka the item you’re looking for) as its second parameter. It’ll return the index of the found item as an integer.
You can store that index in an int and use that to access the element from the array as vowels[foundItemIndex].
Note that the array has to be sorted in ascending order. If you’re unsure of the array’s ordering, use the Arrays.sort() method to sort it first.
By default, the method treats the first index of the array as its starting index and the length of the array as its ending index. But you can also specify those indices manually.
For example, if you want the search to take place from index 2 to index 4, you can do so as follows:
import java.util.Arrays;

public class Main {

	public static void main(String[] args) {
		char vowels[] = {'a', 'e', 'i', 'o', 'u'};

        char key = 'i';
		int startIndex = 2;
		int endIndex = 4;

		int foundItemIndex = Arrays.binarySearch(vowels, startIndex, endIndex, key);

		System.out.println("The vowel 'i' is at index: " + foundItemIndex); // 2

	}
}
This time the method takes the array you want to search on as the first parameter, the starting index as the second parameter, the ending index as the third parameter, and the search key as the fourth parameter.
Now the search will take place within i, o, and u. So if you look for a, it’ll not be found. In cases where the given item is not found, you’ll get a negative index. The resultant negative index will vary based on a number of factors but I won’t get into those here. If you’re interested in learning more, check out my article on the topic.
How to Fill an Array
You’ve already learned about initializing an array with values but you may sometimes want to fill an entire array with the same value. The Arrays.fill() method can do that for you:
import java.util.Arrays;

public class Main {

	public static void main(String[] args) {
		char vowels[] = {'e', 'u', 'o', 'i', 'a'};

		Arrays.fill(vowels, 'x');

		System.out.println("The filled array: " + Arrays.toString(vowels)); // [x, x, x, x, x]

	}
}
Like the Arrays.sort() method, Arrays.fill() also performs its operation in place. It takes your array as the first parameter, the value you want to fill the array with as the second parameter, and updates the original array in place.
This method also treats the first index as the starting index and the length of the array as the ending index. You can specify these indices manually as follows:
import java.util.Arrays;

public class Main {

	public static void main(String[] args) {
		char vowels[] = {'e', 'u', 'o', 'i', 'a'};

		int startIndex = 1;
		int endIndex = 4;

		Arrays.fill(vowels, startIndex, endIndex, 'x');

		System.out.println("The filled array: " + Arrays.toString(vowels)); // [e, x, x, x, a]

	}
}
This time the method takes your array as the first argument, the starting index as the second argument, the ending index as the third argument, and the filler as the fourth argument.
How to Make Copies of an Array
Since arrays in Java are of reference types, copying them using the assignment operator can cause some unexpected behavior.
import java.util.Arrays;

public class Main {

	public static void main(String[] args) {
		int oddNumbers[] = {1, 3, 5};
		int copyOfOddNumbers[] = oddNumbers;

		Arrays.fill(oddNumbers, 0);

		System.out.println("The copied array: " + Arrays.toString(copyOfOddNumbers)); // [0, 0, 0]

	}
}
Although you’ve made changes to the source array, the copy reflects them as well. This happens because when you use the assignment operator to copy an array, the copy references the original array in the memory.
To properly copy an array, you can use the Arrays.copyOf() method as follows:
import java.util.Arrays;

public class Main {

	public static void main(String[] args) {
		int oddNumbers[] = {1, 3, 5};
		int copyOfOddNumbers[] = Arrays.copyOf(oddNumbers, oddNumbers.length);

		Arrays.fill(oddNumbers, 0);

		System.out.println("The copied array: " + Arrays.toString(copyOfOddNumbers)); // [1, 3, 5]

	}
}
The method takes the source array as its first argument and the desired length of the new array as the second argument. If you want the length to be the same, simply pass the length of the original array using the length property.
If you put a smaller length, any value after that will be cut off and if you put a larger length, the new indices will be filled with the default value of the array data type.
There is another method Arrays.copyOfRange() that can copy a portion of an array to a new one:
import java.util.Arrays;

public class Main {

	public static void main(String[] args) {
		int oddNumbers[] = {1, 3, 5, 7, 9, 11, 13, 15};

		int startIndex = 2;
		int endIndex = 7;

		int copyOfOddNumbers[] = Arrays.copyOfRange(oddNumbers, startIndex, endIndex);

		System.out.println("The copied array: " + Arrays.toString(copyOfOddNumbers)); // [5, 7, 9, 11, 13]

	}
}
This method takes the source array as its first argument, then the start index and finally the end index.
Keep in mind, the ending index is not inclusive. That’s why 15 is absent from the new array. But if you want to include the last index of the array, use the length of the original array as the ending index.
import java.util.Arrays;

public class Main {

	public static void main(String[] args) {
		int oddNumbers[] = {1, 3, 5, 7, 9, 11, 13, 15};

		int startIndex = 2;
		int endIndex = oddNumbers.length;

		int copyOfOddNumbers[] = Arrays.copyOfRange(oddNumbers, startIndex, endIndex);

		System.out.println("The copied array: " + Arrays.toString(copyOfOddNumbers)); // [5, 7, 9, 11, 13, 15]

	}
}
Now the new array will also include 15 in it. You can also put a higher number than the length of the source array. In that case the newly added indices will contain the default value of the array data type.
How to Compare Two Arrays
If you try two check if two arrays are the same or not in Java using the equal relational operator, you’ll get some unexpected results.
public class Main {

	public static void main(String[] args) {
		int oddNumbers1[] = {1, 3, 5, 7, 9, 11, 13, 15};
		int oddNumbers2[] = {1, 3, 5, 7, 9, 11, 13, 15};

		System.out.println(oddNumbers1 == oddNumbers2); // false
	}
}
Even though the two arrays are identical, the output of the program is false. Since arrays are reference types, the relational operator will check whether they are the same instance or not.
To compare two arrays in Java, you can use the Arrays.equals() method:
import java.util.Arrays;

public class Main {

	public static void main(String[] args) {
		int oddNumbers1[] = {1, 3, 5, 7, 9, 11, 13, 15};
		int oddNumbers2[] = {1, 3, 5, 7, 9, 11, 13, 15};

		System.out.println(Arrays.equals(oddNumbers1, oddNumbers2)); // true
	}
}
However, if you change even a single element in either of these arrays, the output will be false since the arrays will not remain identical anymore.
You can also compare multidimensional arrays, but for that you’ll have to use the Arrays.deepEquals() method instead of the regular one.
import java.util.Arrays;

public class Main {

	public static void main(String[] args) {
		int medicineRoutine[][] = {
				{1, 2, 3, 4, 5, 6, 7},
				{0, 1, 1, 0, 1, 1, 0},
				{1, 0, 1, 0, 1, 0, 0},
				{0, 0, 1, 1, 0, 1, 0},
		};

		int medicineRoutine2[][] = {
				{1, 2, 3, 4, 5, 6, 7},
				{0, 1, 1, 0, 1, 1, 0},
				{1, 0, 1, 0, 1, 0, 0},
				{0, 0, 1, 1, 0, 1, 0},
		};

		System.out.println(Arrays.deepEquals(medicineRoutine, medicineRoutine2)); // true
	}
}
This method calls itself each time it encounters a new array inside the parent array.
These were some of the most common methods inside the java.util.Arrays class. You can consult the official documentation if you’d like to learn more.
How to Use Loops in Java
If you ever need to repeat a task for a set number of times, you can use a loop. Loops can be of three types: they are for loops, for...each loops, and while loops.
For Loop
For loops are probably the most common types of loops that you’ll see on the internet.
Every for loop consists of three parts. The initialization, condition, and update expression. The looping happens in multiple steps.

If you want to print the numbers from 0 to 10 using a for loop, you can do so as follows:
public class Main {

	public static void main(String[] args) {
		for (int number = 0; number <= 10; number++) {
			System.out.println(number);
		}
	}
}

// 0
// 1
// 2
// 3
// 4
// 5
// 6
// 7
// 8
// 9
// 10
The flowchart for this loop looks like this:

- In the beginning of the loop, you initialize a new integer named
numberwith the initial value of0. - Then you check whether the
numberis less than or equal to10or not. - If its less than or equal to
10, you execute the statement inside the loop block and print out the number on the terminal. - Then you update the number variable by incrementing its value by 1.
- The loop goes back to checking whether the value of number is still less than or equal or not.
As long as the value of number remains less than or equal to 10, the loop goes on. The moment the value of the number variable becomes 11, the loop ends.
You can use a for loop to loop over an array as follows:
public class Main {

	public static void main(String[] args) {
		int fibonacciNumbers[] = {0, 1, 1, 2, 3, 5, 8, 13, 21, 34, 55};

		for(int index = 0; index < fibonacciNumbers.length; index++) {
			System.out.println(fibonacciNumbers[index]);
		}
	}
}
The flowchart for this loop will be as follows:

Since the last index of the array is one less than its length, you run the loop as long as the index is less than the array length. The moment the index becomes equal to the length of the array, you exit the loop.
One of the fun things that you can do with loops is printing out multiplication tables. For example, the multiplication table for 5 will be as follows:
public class Main {

	public static void main(String[] args) {
		int number = 5;

		for (int multiplier = 1; multiplier <= 10; multiplier++) {
			System.out.println(String.format("%d x %d = %d", number, multiplier, number * multiplier));
		}
	}
}

// 5 x 1 = 5
// 5 x 2 = 10
// 5 x 3 = 15
// 5 x 4 = 20
// 5 x 5 = 25
// 5 x 6 = 30
// 5 x 7 = 35
// 5 x 8 = 40
// 5 x 9 = 45
// 5 x 10 = 50
Loops can also be nested. Which means you can put one loop inside another. You can print out the multiplication table of all the numbers from 1 to 10 using nested loops:
public class Main {

	public static void main(String[] args) {
		for (int number = 1; number <= 10; number++) {
			System.out.println(String.format("nmultiplication table of %d", number));
			for (int multiplier = 1; multiplier <= 10; multiplier++) {
				System.out.println(String.format("%d x %d = %d", number, multiplier, number * multiplier));
			}
		}
	}
}
I wouldn’t dare printing out the output here. Instead, try out the code by yourself. Draw out each iteration of the loop on a piece of paper so that you understand what’s happening on each step.
For-Each Loop
If you want to iterate over a collection like an array and perform some operation on each element of that collection, you can use a for…each loop.
public class Main {

	public static void main(String[] args) {
		int fibonacciNumbers[] = {0, 1, 1, 2, 3, 5, 8, 13, 21, 34, 55};

		for(int number : fibonacciNumbers) {
			System.out.println(number);
		}
	}
}
In the case of a for-each loop, the type of the item needs to match the type of the collection you’re working with. Here, the array is of type integer so the item in the loop is of type integer.
This does the same task as the previously shown for loop. But in this one, you don’t have to keep track of the index or use the square braces to access the elements. It looks cleaner and is less error prone.
While Loop
If you want to execute a bunch of code until a certain condition is met, you can use a while loop.

There are no initialization or update steps in a while loop. Whatever happens, happens within the loop body. If you rewrite the program for printing out the multiplication table of 5 using a while loop, it’ll be as follows:
public class Main {

	public static void main(String[] args) {
		int number = 5;
		int multiplier = 1;

		while (multiplier <= 10) {
			System.out.println(String.format("%d x %d = %d", number, multiplier, number*multiplier));

			multiplier++;
		}
	}
}

// 5 x 1 = 5
// 5 x 2 = 10
// 5 x 3 = 15
// 5 x 4 = 20
// 5 x 5 = 25
// 5 x 6 = 30
// 5 x 7 = 35
// 5 x 8 = 40
// 5 x 9 = 45
// 5 x 10 = 50
Although, while loops are not as common as for loops in the real world, learning about them is worth it.
Do-While Loop
The final type of loop you’ll learn about is the do-while loop. It kind of reverses the order of the regular while loop – so instead of checking the condition before executing the loop body, you execute the loop body first and then check the condition.

The multiplication table code implemented using a do-while loop will be as follows:
public class Main {

	public static void main(String[] args) {
		int number = 5;
		int multiplier = 1;

		do {
			System.out.println(String.format("%d x %d = %d", number, multiplier, number*multiplier));

			multiplier++;
		} while (multiplier <= 10);
	}
}

// 5 x 1 = 5
// 5 x 2 = 10
// 5 x 3 = 15
// 5 x 4 = 20
// 5 x 5 = 25
// 5 x 6 = 30
// 5 x 7 = 35
// 5 x 8 = 40
// 5 x 9 = 45
// 5 x 10 = 50
Do-while loops are very useful when you need to perform some operation until the user gives a specific input. Such as, show a menu until user presses the «x» key.
How to Work with Array Lists in Java
Arrays in Java are not resizable. Once you’ve set a length for an array, you can not change it any way. The ArrayList class in Java mitigates this limitation.
import java.util.ArrayList;

public class Main {
    public static void main (String[] args) {
        ArrayList<Integer> oddNumbers = new ArrayList<>();

        oddNumbers.add(1);
        oddNumbers.add(3);
        oddNumbers.add(5);
        oddNumbers.add(7);
        oddNumbers.add(9);

        System.out.println(oddNumbers.toString()); // [1, 3, 5, 7, 9]
    }
}
To create array lists, you’ll need to import the java.util.ArrayList class at the top of your source file.
Then you start by writing ArrayList and then inside a pair of less than-greater than signs, you’ll write the data type for the elements. Then you’ll add the name of the array list itself followed by the assignment operator and new ArrayList<>().
You can not create array lists of primitive types, so you’ll have to use the corresponding wrapper class.
Although these elements have zero-based indices like arrays, you can not use the square brace notation to access them. Instead, you’ll have to use the get() method:
import java.util.ArrayList;

public class Main {
    public static void main (String[] args) {
        ArrayList<Integer> oddNumbers = new ArrayList<>();

        oddNumbers.add(1);
        oddNumbers.add(3);
        oddNumbers.add(5);
        oddNumbers.add(7);
        oddNumbers.add(9);

        System.out.println(oddNumbers.get(2)); // 5
    }
}
The get() method will get the value in the given index. Just like get() you can use the set() method to update the value of an element.
import java.time.LocalDate;
import java.util.ArrayList;

public class Main {
    public static void main (String[] args) {
        ArrayList<Integer> oddNumbers = new ArrayList<>();

        oddNumbers.add(1);
        oddNumbers.add(3);
        oddNumbers.add(5);
        oddNumbers.add(7);
        oddNumbers.add(9);

        oddNumbers.set(2, 55);

        System.out.println(oddNumbers.get(2)); // 55
    }
}
The first parameter to the set() method is the index and the second one is the updated value.
There is no length property like in an array but you can use the size() method on any array list to find out its length.
import java.util.ArrayList;

public class Main {
    public static void main (String[] args) {
        ArrayList<Integer> oddNumbers = new ArrayList<>();

        oddNumbers.add(1);
        oddNumbers.add(3);
        oddNumbers.add(5);
        oddNumbers.add(7);
        oddNumbers.add(9);

        System.out.println(oddNumbers.size()); // 5
    }
}
You can remove elements from an array list using the remove method:
import java.util.ArrayList;

public class Main {
    public static void main (String[] args) {
        ArrayList<Integer> oddNumbers = new ArrayList<>();

        oddNumbers.add(1);
        oddNumbers.add(3);
        oddNumbers.add(5);
        oddNumbers.add(7);
        oddNumbers.add(9);

        oddNumbers.remove(Integer.valueOf(7));
        oddNumbers.remove(Integer.valueOf(9));

        System.out.println(oddNumbers.toString()); // [1, 3, 5]
    }
}
The remove() method can remove an element by value or by index. If you pass a primitive integer value to the method, it’ll remove the element in the given index.
But if you pass an object like in this code, the method will find and delete that given element. The valueOf() method is present in all wrapper classes and it can convert a primitive value to a reference type.
How to Add or Remove Multiple Elements
You’ve already seen examples of the add() and remove() methods. There are two other methods addAll() and removeAll() for working with multiple elements.
import java.util.ArrayList;

public class Main {
    public static void main (String[] args) {
        ArrayList<Integer> oddNumbers = new ArrayList<>();

        oddNumbers.add(1);
        oddNumbers.add(3);
        oddNumbers.add(5);

        ArrayList<Integer> moreOddNumbers = new ArrayList<>();

        moreOddNumbers.add(7);
        moreOddNumbers.add(9);
        moreOddNumbers.add(11);

        oddNumbers.addAll(moreOddNumbers); // [1, 3, 5, 7, 9, 11]

        System.out.println(oddNumbers.toString());

        oddNumbers.removeAll(moreOddNumbers);

        System.out.println(oddNumbers.toString()); // [1, 3, 5]
    }
}
Both methods accept collections as their parameter. In the code above, you’re creating two separate array lists and joining them using the addAll() method.
Then you remove the elements from the second array list using the removeAll() method and the array list goes back to its original state.
You can also drop all elements from an array list using the clear() method:
import java.util.ArrayList;

public class Main {
    public static void main (String[] args) {
        ArrayList<Integer> oddNumbers = new ArrayList<>();

        oddNumbers.add(1);
        oddNumbers.add(3);
        oddNumbers.add(5);

        oddNumbers.clear();

        System.out.println(oddNumbers.toString()); // []
    }
}
The method doesn’t require any parameter at all and also doesn’t return any value. It just empties your array list in a single call.
How to Remove Elements Based on a Condition
The removeIf() method can remove elements from an array list if they meet a certain condition:
import java.util.ArrayList;

public class Main {
    public static void main (String[] args) {
        ArrayList<Integer> numbers = new ArrayList<>();

        for (int i = 0; i <= 10; i++) {
            numbers.add(i);
        }

        System.out.println(numbers.toString()); // [0, 1, 2, 3, 4, 5, 6, 7, 8, 9, 10]

        numbers.removeIf(number -> number % 2 == 1);

        System.out.println(numbers.toString()); // [0, 2, 4, 6, 8, 10]
    }
}
The method takes a lambda expression as a parameter. Lambda expressions are like unnamed methods. They can receive parameters and work with them.
Here, the removeIf() method will loop over the array list and pass each element to the lambda expression as the value of the number variable.
Then the lambda expression will check whether the given number is divisible by 2 or not and return true or false based on that.
If the lambda expression returns true, the removeIf() method will keep the value. Otherwise the value will be deleted.
How to Clone and Compare Array Lists
To make a duplicate of an array list, you can use the clone() method.
import java.util.ArrayList;

public class Main {
    public static void main (String[] args) {
        ArrayList<Integer> numbers = new ArrayList<>();

        for (int i = 0; i <= 10; i++) {
            numbers.add(i);
        }

        ArrayList<Integer> numbersCloned = (ArrayList<Integer>)numbers.clone();

        System.out.println(numbersCloned.equals(numbers)); // true
    }
}
The clone() method returns an object, so you’ll have to cast it to a proper array list manually. You can compare two array lists using the equals() method just like in arrays.
How to Check if an Element Is Present or the Array List Is Empty
You can use the contains() method to check if an array list contains a given element or not:
import java.util.ArrayList;

public class Main {
    public static void main (String[] args) {
        ArrayList<Integer> oddNumbers = new ArrayList<>();

        oddNumbers.add(1);
        oddNumbers.add(3);
        oddNumbers.add(5);
        oddNumbers.add(7);
        oddNumbers.add(9);

        System.out.println(oddNumbers.isEmpty()); // false
        System.out.println(oddNumbers.contains(5)); // true
    }
}
If you want to check if an array list is empty or not, just call the isEmpty() method on it and you’ll get a boolean in return.
How to Sort an Array List
You can sort an array list in different orders using the sort() method:
import java.util.ArrayList;
import java.util.Comparator;

public class Main {
    public static void main (String[] args) {
        ArrayList<Integer> oddNumbers = new ArrayList<>();

        oddNumbers.add(5);
        oddNumbers.add(7);
        oddNumbers.add(1);
        oddNumbers.add(9);
        oddNumbers.add(3);

        System.out.println(oddNumbers.toString()); [5, 7, 1, 9, 3]

        oddNumbers.sort(Comparator.naturalOrder());

        System.out.println(oddNumbers.toString()); [1, 3, 5, 7, 9]
    }
}
The sort() method takes a comparator as its parameter. A comparator imposes the order of sorting on the array list.
You can sort the array list in reverse order just by changing the passed comparator:
import java.util.ArrayList;
import java.util.Comparator;

public class Main {
    public static void main (String[] args) {
        ArrayList<Integer> oddNumbers = new ArrayList<>();

        oddNumbers.add(5);
        oddNumbers.add(7);
        oddNumbers.add(1);
        oddNumbers.add(9);
        oddNumbers.add(3);

        System.out.println(oddNumbers.toString()); // [5, 7, 1, 9, 3]

        oddNumbers.sort(Comparator.reverseOrder());

        System.out.println(oddNumbers.toString()); // [9, 7, 5, 3, 1]
    }
}
Comparators have other usages as well but those are out of the scope of this book.
How to Keep Common Elements From Two Array Lists
Think of a scenario where you have two array lists. Now you’ll have to find out which elements are present in both array lists and remove the rest from the first array list.
import java.util.ArrayList;

public class Main {
    public static void main (String[] args) {
        ArrayList<Integer> oddNumbers = new ArrayList<>();

        oddNumbers.add(1);
        oddNumbers.add(3);
        oddNumbers.add(5);

        ArrayList<Integer> moreOddNumbers = new ArrayList<Integer>();

        moreOddNumbers.add(5);
        moreOddNumbers.add(7);
        moreOddNumbers.add(9);

        oddNumbers.retainAll(moreOddNumbers);

        System.out.println(oddNumbers.toString()); // [5]
    }
}
The retainAll() method can get rid of the uncommon elements from the first array list for you. You’ll need to call the method on the array list you want to operate on and pass the second array list as a parameter.
How to Perform an Action on All Elements of an Array List
You’ve already learned about looping in previous sections. Well, array lists have a forEach() method of their own that takes a lambda expression as parameter and can perform an action on all the elements of the array list.
import java.util.ArrayList;

public class Main {
    public static void main (String[] args) {
        ArrayList<Integer> oddNumbers = new ArrayList<>();

        oddNumbers.add(1);
        oddNumbers.add(3);
        oddNumbers.add(5);
        oddNumbers.add(7);
        oddNumbers.add(9);

        oddNumbers.forEach(number -> {
            number = number * 2;
            System.out.printf("%d ", number); // 2 6 10 14 18
        });

        System.out.println(oddNumbers.toString()); // [1, 3, 5, 7, 9]
    }
}
Last time, the lambda expression you saw was a single line – but they can be bigger. Here, the forEach() method will loop over the array list and pass each element to the lambda expression as the value of the number variable.
The lambda expression will then multiply the supplied value by 2 and print it out on the terminal. However, the original array list will be unchanged.
How to Work With Hash Maps in Java
Hash maps in Java can store elements in key-value pairs. This collection type is comparable to dictionaries in Python and objects in JavaScript.
import java.util.HashMap;

public class Main {
    public static void main (String[] args) {
        HashMap<String, Double> prices = new HashMap<>();

        prices.put("apple", 2.0);
        prices.put("orange", 1.8);
        prices.put("guava", 1.5);
        prices.put("berry", 2.5);
        prices.put("banana", 1.0);

        System.out.printf(prices.toString()); // {orange=1.8, banana=1.0, apple=2.0, berry=2.5, guava=1.5}
    }
}
To create hash maps, you’ll first have to import the java.util.HashMap class at the top of your source file.
Then you start by writing HashMap and then inside a pair of less than-greater than signs, you’ll write the data type for the key and the value.
Here, the keys will be strings and values will be doubles. After that the assignment operator, followed by new HashMap<>().
You can use the put() method to put a record in the hash map. The method takes the key as the first parameter and its corresponding value as the second parameter.
There is also the putIfAbsent() method that adds the given element only if it already doesn’t exist in the hash map.
import java.util.HashMap;

public class Main {
    public static void main (String[] args) {
        HashMap<String, Double> prices = new HashMap<>();

        prices.put("apple", 2.0);
        prices.put("orange", 1.8);
        prices.put("guava", 1.5);
        prices.put("berry", 2.5);
        prices.put("banana", 1.0);

        prices.putIfAbsent("guava", 2.9);

        System.out.println(prices.toString()); // {orange=1.8, banana=1.0, apple=2.0, berry=2.5, guava=1.5}
    }
}
You can use the get() method to bring out a value from the hash map. The method takes the key as its parameter.
import java.util.HashMap;

public class Main {
    public static void main (String[] args) {
        HashMap<String, Double> prices = new HashMap<>();

        prices.put("apple", 2.0);
        prices.put("orange", 1.8);
        prices.put("guava", 1.5);
        prices.put("berry", 2.5);
        prices.put("banana", 1.0);

        System.out.println(prices.get("banana")); // 1.000000
    }
}
There is another variation of the this method. The getOrDefault() method works like get() but if the given key is not found, it’ll return a specified default value.
import java.util.HashMap;

public class Main {
    public static void main (String[] args) {
        HashMap<String, Double> prices = new HashMap<>();

        prices.put("apple", 2.0);
        prices.put("orange", 1.8);
        prices.put("guava", 1.5);
        prices.put("berry", 2.5);
        prices.put("banana", 1.0);

        System.out.println(prices.getOrDefault("jackfruit", 0.0)); // 0.0
    }
}
The default value has to match the type of the values in the hash map. You can update a value in a hash map using the replace() method:
import java.util.HashMap;

public class Main {
    public static void main (String[] args) {
        HashMap<String, Double> prices = new HashMap<>();

        prices.put("apple", 2.0);
        prices.put("orange", 1.8);
        prices.put("guava", 1.5);
        prices.put("berry", 2.5);
        prices.put("banana", 1.0);

        prices.replace("berry", 2.8);

        System.out.printf(prices.toString()); // {orange=1.8, banana=1.0, apple=2.0, berry=2.8, guava=1.5}
    }
}
For removing elements from a hash map, you can use the aptly named remove() method:
import java.util.HashMap;

public class Main {
    public static void main (String[] args) {
        HashMap<String, Double> prices = new HashMap<>();

        prices.put("apple", 2.0);
        prices.put("orange", 1.8);
        prices.put("guava", 1.5);
        prices.put("berry", 2.5);
        prices.put("banana", 1.0);

        prices.remove("guava");

        System.out.printf(prices.toString()); // {orange=1.8, banana=1.0, apple=2.0, berry=2.5}
    }
}
If you ever need to know how many entries are there in a hash map, you can do so by using the size() method:
import java.util.HashMap;

public class Main {
    public static void main (String[] args) {
        HashMap<String, Double> prices = new HashMap<>();

        prices.put("apple", 2.0);
        prices.put("orange", 1.8);
        prices.put("guava", 1.5);
        prices.put("berry", 2.5);
        prices.put("banana", 1.0);

        System.out.println(prices.size()); // 5
    }
}
Finally if you want to clear a hash map in Java, you can do so by using the clear() method.
import java.util.HashMap;

public class Main {
    public static void main (String[] args) {
        HashMap<String, Double> prices = new HashMap<>();

        prices.put("apple", 2.0);
        prices.put("orange", 1.8);
        prices.put("guava", 1.5);
        prices.put("berry", 2.5);
        prices.put("banana", 1.0);

        prices.clear();

        System.out.println(prices.toString()); // {}
    }
}
Just like in the array lists, the method doesn’t take any argument or return any value.
How to Put in or Replace Multiple Elements in a Hash Map
If you want to put multiple elements into a hash map in a single go, you can do so by using the putAll() method:
import java.util.HashMap;

public class Main {
    public static void main (String[] args) {
        HashMap<String, Double> prices = new HashMap<>();

        prices.put("apple", 2.0);
        prices.put("orange", 1.8);
        prices.put("guava", 1.5);
        prices.put("berry", 2.5);
        prices.put("banana", 1.0);

        HashMap<String, Double> morePrices = new HashMap<>();

        prices.put("jackfruit", 2.9);
        prices.put("pineapple", 1.1);
        prices.put("tomato", 0.8);

        prices.putAll(morePrices);

        System.out.println(prices.toString()); // {orange=1.8, banana=1.0, apple=2.0, berry=2.5, pineapple=1.1, tomato=0.8, guava=1.5, jackfruit=2.9}
    }
}
The method takes another hash map as its parameter and adds its elements to the one the method has been called upon.
You can also use the replaceAll() method to update multiple values in a hash map.
import java.util.HashMap;

public class Main {
    public static void main (String[] args) {
        HashMap<String, Double> prices = new HashMap<>();

        prices.put("apple", 2.0);
        prices.put("orange", 1.8);
        prices.put("guava", 1.5);
        prices.put("berry", 2.5);
        prices.put("banana", 1.0);

        prices.replaceAll((fruit, price) -> price * 2);

        System.out.println(prices.toString()); // {orange=3.6, banana=2.0, apple=4.0, berry=5.0, guava=3.0}
    }
}
The replace all method iterates over the hashmap and passes each key value pair to the lambda expression.
The first parameter to the lambda expression is the key and the second one is the value. Inside the lambda expression, you perform your actions.
How to Check if a Hash Map Contains an Item or if It’s Empty
You can use the methods containsKey() and containsValue() for checking if a hash map contains a value or not.
import java.util.HashMap;

public class Main {
    public static void main (String[] args) {
        HashMap<String, Double> prices = new HashMap<>();

        prices.put("apple", 2.0);
        prices.put("orange", 1.8);
        prices.put("guava", 1.5);
        prices.put("berry", 2.5);
        prices.put("banana", 1.0);

        System.out.println(prices.containsKey("banana")); // true
        System.out.println(prices.containsValue(2.5)); // true
    }
}
Difference between the two methods is that the containsKey() method checks if the given key exists or not and the containsValue() method checks if the given value exists or not.
And if you want to check if a hash map is empty or not, you can do so by using the isEmpty() method:
import java.util.HashMap;

public class Main {
    public static void main (String[] args) {
        HashMap<String, Double> prices = new HashMap<>();

        prices.put("apple", 2.0);
        prices.put("orange", 1.8);
        prices.put("guava", 1.5);
        prices.put("berry", 2.5);
        prices.put("banana", 1.0);

        System.out.println(prices.isEmpty()); // false
    }
}
Since the method returns a boolean value, you can use it within if-else statements.
How to Perform an Action on All Elements of a Hash Map
Like the array lists, hash maps also have their own forEach() method that you can use to loop over the hash map and repeat a certain action over each entry.
import java.util.HashMap;

public class Main {
    public static void main (String[] args) {
        HashMap<String, Double> prices = new HashMap<>();

        prices.put("apple", 2.0);
        prices.put("orange", 1.8);
        prices.put("guava", 1.5);
        prices.put("berry", 2.5);
        prices.put("banana", 1.0);

        System.out.println("prices after discounts");

        prices.forEach((fruit, price) -> {
            System.out.println(fruit + " - " + (price - 0.5));
        });
    }
}

// prices after discounts
// orange - 1.3
// banana - 0.5
// apple - 1.5
// berry - 2.0
// guava - 1.0
The method loops over each entry and passes the key and value to the lambda expression. Inside the lambda expression body, you can do whatever you want.
Classes and Objects in Java
Here’s a helpful definition of object-oriented programming:
OOP (Object-oriented programming) is a programming paradigm based on the concept of «objects», which can contain data and code: data in the form of fields (often known as attributes or properties), and code, in the form of procedures (often known as methods).
Imagine a library management system where members of the library can log in, take a look at the books they have already borrowed, request new ones, and so on.
In this system the users and the books can all be objects. These objects will have their own properties such as name and birthday (in case of a user) and title and author in case of the books.
Classes in object oriented programming are blueprints for the aforementioned objects. We’ve already discussed the possible properties of the user and book objects.
To create a new User class, right click on the src folder once again. Then go to New > Java Class, name it User, and hit enter.
Keeping the previously discussed properties in mind, your code for the User class should be as follows:
import java.time.LocalDate;

public class User {
    String name;
    LocalDate birthDay;
}
The LocalDate is a reference data type that represents a date. Now go back to the Main.java file and create a new instance of this class:
import java.time.LocalDate;

public class Main {
    public static void main (String[] args) {
        User user = new User();

        user.name = "Farhan";
        user.birthDay = LocalDate.parse("1996-07-15");

        System.out.printf("%s was born on %s.", user.name, user.birthDay.toString()); // Farhan was born on 15th July 1996.
    }
}
Creating a new user is not very different from creating a new string or array. You start by writing out the name of the class then the instance or object name.
Then you put the assignment operator followed by the new keyword and the constructor call. The constructor is a special method that initializes the object.
The constructor has initialized the object properties with default values which is null for all these reference types.
You can access the properties of the object by writing out the name of the object followed by a dot and then the name of the property.
The LocalDate.parse() method can parse a date from a given string. Since the birthDay is a reference type, you’ll have to use the toString() method to print out on the console.
What is a Method?
The variables or properties of a class describe the state of its objects. Methods on the other hand describes the behavior.
For example, you can have a method within your User class that calculates the user’s age.
import java.time.Period;
import java.time.LocalDate;

public class User {
    String name;
    LocalDate birthDay;

    int age() {
        return Period.between(this.birthDay, LocalDate.now()).getYears();
    }
}
Here, the this keyword represents the current instance of the class. You start by writing out the return type of the method. Since the age of a user is an integer, the return type of this method will be int.
After the return type, you write the name of the method, followed by a pair of parenthesis.
Then you write the method body within a pair of curly braces. The Period class in Java expresses a time frame in the ISO-8601 calendar system. The LocalDate.now() method returns the current date.
So the Period.between(this.birthDay, LocalDate.now()).getYears() method call will return the difference between the current date and the date of birth in years.
Now back in the Main.java file, you can call this method as follows:
import java.time.LocalDate;

public class Main {
    public static void main (String[] args) {
        User user = new User();

        user.name = "Farhan";
        user.birthDay = LocalDate.parse( "1996-07-15");

        System.out.printf("%s is %s years old.", user.name, user.age()); // Farhan a 26 years old.
    }
}
Methods can also accept parameters. For example, if you want to create a method borrow() for inserting new books into the list of borrowed books for this user, you can do so as follows:
import java.time.LocalDate;
import java.time.Period;
import java.util.ArrayList;

public class User {
    String name;
    LocalDate birthDay;

    ArrayList<String> borrowedBooks = new ArrayList<String>();

    int age() {
        return Period.between(this.birthDay, LocalDate.now()).getYears();
    }

    void borrow(String bookTitle) {
        this.borrowedBooks.add(bookTitle);
    }
}
Back in the Main.java file, you can call this method as follows:
public class Main {
    public static void main (String[] args) {
        User user = new User();

        user.name = "Farhan";

        user.borrow("Carmilla");
        user.borrow("Hard West");

        System.out.printf("%s has borrowed these books: %s", user.name, user.borrowedBooks.toString()); // Farhan has borrowed these books: [Carmilla, Hard West]
    }
}
Let’s create a class for the books as well:
import java.util.ArrayList;

public class Book {
    String title;
    ArrayList<String> authors = new ArrayList<String>();
}
Books often have multiple authors. Now you can create a new book instance back in the Main.java file.
import java.time.LocalDate;

public class Main {
    public static void main (String[] args) {
        User user = new User();
        user.name = "Farhan";
        user.birthDay = LocalDate.parse( "1996-07-15");

        Book book = new Book();
        book.title = "Carmilla";
        book.authors.add("Sheridan Le Fanu");

        System.out.printf("%s is written by %s", book.title, book.authors.toString()); // Carmilla is written by [Sheridan Le Fanu]

    }
}
Now let’s go back to the User.java file and create a relationship between the users and the books:
import java.time.LocalDate;
import java.time.Period;
import java.util.ArrayList;

public class User {
    String name;
    LocalDate birthDay;

    ArrayList<Book> borrowedBooks = new ArrayList<Book>();

    int age() {
        return Period.between(this.birthDay, LocalDate.now()).getYears();
    }

    void borrow(Book book) {
        this.borrowedBooks.add(book);
    }
}
Instead of using an array list of strings, you’re now using an array list of books to store the books borrowed by this user.
Since the argument type of the method has changed, you’ll have to update the code in the Main.java file accordingly:
import java.time.LocalDate;

public class Main {
    public static void main (String[] args) {
        User user = new User();
        user.name = "Farhan";
        user.birthDay = LocalDate.parse( "1996-07-15");

        Book book = new Book();
        book.title = "Carmilla";
        book.authors.add("Sheridan Le Fanu");

        user.borrow(book);

        System.out.printf("%s has borrowed these books: %s", user.name, user.borrowedBooks.toString()); // Farhan has borrowed these books: [Book@30dae81]
    }
}
Everything works out fine except the fact that book information has not been printed properly.
I hope you remember the toString() method. When you call user.borrowedBooks.toString() the compiler realizes that the items stored in the arraylist are objects or reference types. So it starts calling the toString() methods inside those items.
The problem is, there is no proper implementation of toString() in your Book class. Open Book.java and update its code as follows:
import java.util.ArrayList;

public class Book {
    String title;
    ArrayList<String> authors = new ArrayList<String>();

    public String toString() {
        return String.format("%s by %s", this.title, this.authors.toString());
    }
}
The toString() method now returns a nicely formatted string instead of the object reference. Run the code once again and this time the output should be Farhan has borrowed these books: [Carmilla by [Sheridan Le Fanu]].
As you can see, being able to design your software around real-life entities makes it a lot more relatable. Although there is just an array list and a bunch of strings in play, it feels like as if a real book borrowing operation is going on.
What is Method Overloading?
In Java, multiple methods can have the same name if their parameters are different. This is called method overloading.
One example can be the borrow() method on the User class. Right now, it accepts a single book as its parameter. Let’s make an overloaded version which can accept an array of books instead.
import java.time.LocalDate;
import java.time.Period;
import java.util.ArrayList;
import java.util.Arrays;

public class User {
    private String name;
    private LocalDate birthDay;
    private ArrayList<Book> borrowedBooks = new ArrayList<Book>();

    public String getName() {
        return this.name;
    }

    public void setName(String name) {
        this.name = name;
    }

    public String getBorrowedBooks() {
        return this.borrowedBooks.toString();
    }

    User (String name, String birthDay) {
        this.name = name;
        this.birthDay = LocalDate.parse(birthDay);
    }

    int age() {
        return Period.between(this.birthDay, LocalDate.now()).getYears();
    }

    void borrow(Book book) {
        borrowedBooks.add(book);
    }

    void borrow(Book[] books) {
        borrowedBooks.addAll(Arrays.asList(books));
    }
}
The return type and name of the new method is identical to the previous one, but this one accepts an array of Book objects instead of a single object.
Let’s update the Main.java file to make use of this overloaded method.
public class Main {
    public static void main (String[] args) {
        User user = new User("Farhan", "1996-07-15");

        Book book1 = new Book("Carmilla", new String[]{"Sheridan Le Fanu"});
        Book book2 = new Book("Frankenstein", new String[]{"Mary Shelley"});
        Book book3 = new Book("Dracula", new String[]{"Bram Stoker"});

        user.borrow(new Book[]{book1, book2});

        user.borrow(book3);

        System.out.printf("%s has borrowed these books: %s", user.getName(), user.getBorrowedBooks());
    }
}
As you can see, the borrow() method now accepts an array of books or a single book object without any issue.
What are Constructors in Java?
Constructors are a special kind of method that exists in every class, and whenever you create a new object from a class, the compiler calls it.
Since the method is called during the construction of an object, it’s called a constructor. By default, a constructor assigns default values to all its properties.
To override the default constructor, you need to create a new method under your classes with the same name as the class.
import java.time.LocalDate;
import java.time.Period;
import java.util.ArrayList;

public class User {
    public String name;
    public LocalDate birthDay;
    public ArrayList<Book> borrowedBooks = new ArrayList<Book>();

    User (String name, String birthDay) {
        this.name = name;
        this.birthDay = LocalDate.parse(birthDay);
    }

    int age() {
        return Period.between(this.birthDay, LocalDate.now()).getYears();
    }

    void borrow(Book book) {
        this.borrowedBooks.add(book);
    }
}
Now that you have a constructor, instead of parsing the date from a string in the Main.java file, you can do that here.
This is because the format of the birthday is the concern of the User class and the Main class doesn’t need to bother about it.
Same treatment for the book class as well:
import java.util.ArrayList;
import java.util.Arrays;

public class Book {
    public String title;
    public ArrayList<String> authors = new ArrayList<String>();

    Book(String title, String[] authors) {
        this.title = title;
        this.authors = new ArrayList<String>(Arrays.asList(authors));
    }

    public String toString() {
        return String.format("%s by %s", this.title, this.authors.toString());
    }
}
Again, the type of the authors collection is not a concern of the Main class. The most basic way of working with a bunch of values in Java is an array.
So you’ll receive the author names as an array from the Main class and create an array list out of it in the Book class.
Now you’ll have to pass those parameters to the constructor when creating a new user or book object in the Main.java file.
import java.util.ArrayList;

public class Main {
    public static void main (String[] args) {
        User user = new User("Farhan", "1996-07-15");

        Book book = new Book("Carmilla", new String[]{"Sheridan Le Fanu"});

        user.borrow(book);

        System.out.printf("%s has borrowed these books: %s", user.name, user.borrowedBooks.toString()); // Farhan has borrowed these books: [Carmilla, Hard West]
    }
}
Look how much cleaner it already looks. But soon it’ll look better.
What Are Access Modifiers in Java?
You’ve already seen the keyword public multiple times. This is one of the access modifiers in Java.
There are four access modifiers in Java:
| Primitive Type | Wrapper Class |
|---|---|
| Default | Accessible within the package |
| Public | Accessible everywhere |
| Private | Accessible within the class |
| Protected | Accessible within the class and subclasses |
For now, I’ll discuss the Default, Public and Private access modifiers. Protected will be discussed in a later section.
You’ve already learned about classes. Packages are collections of multiple classes separated by their functionality.
For example, if you’re making a game, you can put all the physics-related classes in a separate package and the graphics-related ones in a different one.
Packages are outside of the scope of this book, but as you keep working on larger and larger projects, you’ll get the hang of them.
The Public access modifier is pretty self-explanatory. These variables, methods, or classes are accessible from any other class or package in your project.
The Private ones, on the other hand, are the opposite. They’re only available within their class.
Take the User class, for example. The name and birthday of a user shouldn’t be accessible from the outside.
import java.time.LocalDate;
import java.time.Period;
import java.util.ArrayList;

public class User {
    private String name;
    private LocalDate birthDay;
    private ArrayList<Book> borrowedBooks = new ArrayList<Book>();

    User (String name, String birthDay) {
        this.name = name;
        this.birthDay = LocalDate.parse(birthDay);
    }

    int age() {
        return Period.between(this.birthDay, LocalDate.now()).getYears();
    }

    void borrow(Book book) {
        borrowedBooks.add(book);
    }
}
That’s better. Update the Book class as well to hide the title and author information from the outside world.
import java.util.ArrayList;
import java.util.Arrays;

public class Book {
    private String title;
    private ArrayList<String> authors = new ArrayList<String>();

    Book(String title, String[] authors) {
        this.title = title;
        this.authors = new ArrayList<String>(Arrays.asList(authors));
    }

    public String toString() {
        return String.format("%s by %s", this.title, this.authors.toString());
    }
}
Since the properties have become private now, the System.out.println() line in the Main.java file will fail to directly access them and will cause an issue.
The solution to this program is writing public methods that other classes can use to access these properties.
What Are the Getter and Setter Methods in Java?
Getters and setters are public methods in classes used to read and write private properties.
import java.time.LocalDate;
import java.time.Period;
import java.util.ArrayList;

public class User {
    private String name;
    private LocalDate birthDay;
    private ArrayList<Book> borrowedBooks = new ArrayList<Book>();

    public String getName() {
        return this.name;
    }

    public String getBirthDay() {
        return this.birthDay.toString();
    }

    public String getBorrowedBooks() {
        return this.borrowedBooks.toString();
    }

    User (String name, String birthDay) {
        this.name = name;
        this.birthDay = LocalDate.parse(birthDay);
    }

    int age() {
        return Period.between(this.birthDay, LocalDate.now()).getYears();
    }

    void borrow(Book book) {
        borrowedBooks.add(book);
    }
}
The getName() and getBorrowedBooks() are responsible for returning the value of the name and borrowedBooks variables.
You never actually access the birthday variable out of the age() method, so a getter is not necessary.
Since the type of the borrowedBooks variable is not a concern of the Main class, the getter makes sure to return the value in the proper format.
Now update the code in the Main.java file to make use of these methods:
public class Main {
    public static void main (String[] args) {
        User user = new User("Farhan", "1996-07-15");

        Book book = new Book("Carmilla", new String[]{"Sheridan Le Fanu"});

        user.borrow(book);

        System.out.printf("%s has borrowed these books: %s", user.getName(), user.getBorrowedBooks());
    }
}
Excellent. It has become even cleaner and easier to read. Like getters, there are setters for writing values to the private properties.
For example, you may want to allow the user to change their name or birthday. The borrow() method already works as a setter for the borrowedBooks array list.
import java.time.LocalDate;
import java.time.Period;
import java.util.ArrayList;

public class User {
    private String name;
    private LocalDate birthDay;
    private ArrayList<Book> borrowedBooks = new ArrayList<Book>();

    public String getName() {
        return this.name;
    }

    public void setName(String name) {
        this.name = name;
    }

    public void setBirthDay(String birthDay) {
        this.birthDay = LocalDate.parse(birthDay);
    }

    public String getBorrowedBooks() {
        return this.borrowedBooks.toString();
    }

    User (String name, String birthDay) {
        this.name = name;
        this.birthDay = LocalDate.parse(birthDay);
    }

    int age() {
        return Period.between(this.birthDay, LocalDate.now()).getYears();
    }

    void borrow(Book book) {
        borrowedBooks.add(book);
    }
}
Now you can call the setName() method with whatever name you want to set to the user. Similarly, the setBirthDay() method can set the birthday.
You can implement some getters and setters for the Book class as well.
import java.util.ArrayList;
import java.util.Arrays;

public class Book {
    private String title;
    private ArrayList<String> authors = new ArrayList<String>();

    public String getTitle() {
        return this.title;
    }

    public void setTitle(String title) {
        this.title = title;
    }

    public String getAuthors() {
        return this.authors.toString();
    }

    public void setTitle(String[] authors) {
        this.authors = new ArrayList<String>(Arrays.asList(authors));
    }

    Book(String title, String[] authors) {
        this.title = title;
        this.authors = new ArrayList<String>(Arrays.asList(authors));
    }

    public String toString() {
        return String.format("%s by %s", this.title, this.authors.toString());
    }
}
Now you can not access those properties directly. Instead you’ll have to use one of the getters or setters.
What is Inheritance in Java?
Inheritance is another big feature of object oriented programming. Imagine you have three kinds of books. The regular ones, e-books, and audio books.
Although they have similarities such as title and author, they also have some differences. For example, the regular books and e-books have page count whereas audio books have run time. The e-books also have format such as PDF or EPUB.
So using the same class for all three of them is not an option. That doesn’t mean you’ll have to create three separate classes with minor differences, though. You can just create separate classes for e-books and audio books and make them inherit the properties and methods from the Book class.
Let’s begin by adding the page count in the Book class:
import java.util.ArrayList;
import java.util.Arrays;

public class Book {
    private String title;
    private int pageCount;
    private ArrayList<String> authors = new ArrayList<String>();

    Book(String title, int pageCount, String[] authors) {
        this.title = title;
        this.pageCount = pageCount;
        this.authors = new ArrayList<String>(Arrays.asList(authors));
    }

    public String length() {
        return String.format("%s is %d pages long.", this.title, this.pageCount);
    }

    public String toString() {
        return String.format("%s by %s", this.title, this.authors.toString());
    }
}
Since you’re not going to use getters and setters in these examples, cleaning up seemed like a good idea. The length() method returns the length of the book as a string.
Now create a new Java class named AudioBook and put the following code in it:
public class AudioBook extends Book{
    private int runTime;

    AudioBook(String title, String[] authors, int runTime) {
        super(title, 0, authors);

        this.runTime = runTime;
    }
}
The extends keyword lets the compiler know that this class is a subclass of the Book class. This means that this class inherits all the properties and methods from the parent class.
Inside the AudioBook constructor method, you set the run time for the audio book which is fine – but you’ll also have to manually call the constructor of the parent class.
The super keyword in Java refers to the parent class, so super(title, 0, authors) essentially calls the parent constructor method with the necessary parameters.
Since the audio books don’t have any pages, setting the page count to zero can be an easy solution.
Or you can create an overloaded version of the Book constructor method that doesn’t require the page count.
Next, create another Java class named Ebook with the following code:
public class Ebook extends Book{
    private String format;

    Ebook(String title, int pageCount, String[] authors, String format) {
        super(title, pageCount, authors);

        this.format = format;
    }
}
This class is largely identical to the Book class except the fact that it has a format property.
public class Main {
    public static void main (String[] args) {
        Book book = new Book("Carmilla", 200, new String[]{"Sheridan Le Fanu"});
        Ebook ebook = new Ebook("Frankenstein", 220, new String[]{"Mary Shelley"}, "EPUB");
        AudioBook audioBook = new AudioBook("Dracula", new String[]{"Bram Stoker"}, 160);

        System.out.println(book.toString()); // Carmilla by [Sheridan Le Fanu]
        System.out.println(ebook.toString()); // Frankenstein by [Mary Shelley]
        System.out.println(audioBook.toString()); // Dracula by [Bram Stoker]
    }
}
So far everything is working fine. But do you remember the length() method you wrote inside the Book class? It’ll work for the regular books but will break in the e-books.
That’s because the page count property is marked as private and no other class except Book will be able to access it. The title is also a private property.
Open the Book.java file and mark the title and pageCount properties as protected.
import java.util.ArrayList;
import java.util.Arrays;

public class Book {
    protected String title;
    protected int pageCount;
    private ArrayList<String> authors = new ArrayList<String>();

    Book(String title, int pageCount, String[] authors) {
        this.title = title;
        this.pageCount = pageCount;
        this.authors = new ArrayList<String>(Arrays.asList(authors));
    }

    public String length() {
        return String.format("%s is %d pages long.", this.title, this.pageCount);
    }

    public String toString() {
        return String.format("%s by %s", this.title, this.authors.toString());
    }
}
This’ll make them accessible from the subclasses. The audio books have another problem with the length() method.
Audio books don’t have a page count. They have run times and this difference will break the length method.
One way to solve this problem is by overriding the length() method.
How to Override a Method in Java
As the name suggests, overriding means cancelling the effect of a method by replacing it with something else.
public class AudioBook extends Book{
    private int runTime;

    AudioBook(String title, String[] authors, int runTime) {
        super(title, 0, authors);

        this.runTime = runTime;
    }

    @Override
    public String length() {
        return String.format("%s is %d minutes long.", this.title, this.runTime);
    }
}
You override a method from the parent class by rewriting the method in the subclass. The @Override keyword is an annotation. Annotations in Java are metadata.
It’s not mandatory to annotate the method like this. But if you do, the compiler will know that the annotated method overrides a parent method and will make sure you’re following all the rules of overriding.
For example, if you make a mistake in the method name and it doesn’t match any method from the parent, the compiler will let you know that the method is not overriding anything.
public class Main {
    public static void main (String[] args) {
        AudioBook audioBook = new AudioBook("Dracula", new String[]{"Bram Stoker"}, 160);

        System.out.println(audioBook.length()); // Dracula is 160 minutes long.
    }
}
Cool, isn’t it? Whenever overriding a method in Java, keep in mind that both the original and overridden method must have the same return type, same name, and same parameters.
Conclusion
I would like to thank you from the bottom of my heart for the time you’ve spent on reading this book. I hope you’ve enjoyed your time and have learned all the fundamental concepts of Java.
This handbook is not frozen in time. I’ll keep working on it and I’ll update it with improvements, new content, and more. You can provide anonymous opinions and suggestion on the handbook in this form.
Apart from this one, I’ve written full-length handbooks on other complicated topics available for free on freeCodeCamp.
These handbooks are part of my mission to simplify hard to understand technologies for everyone. Each of these handbooks takes a lot of time and effort to write.
If you’ve enjoyed my writing and want to keep me motivated, consider leaving starts on GitHub and endorse me for relevant skills on LinkedIn.
I’m always open to suggestions and discussions on Twitter or LinkedIn. Hit me up with direct messages.
In the end, consider sharing the resources with others, because:
In open source, we feel strongly that to really do something well, you have to get a lot of people involved. — Linus Torvalds
Till the next one, stay safe and keep learning.
Learn to code for free. freeCodeCamp’s open source curriculum has helped more than 40,000 people get jobs as developers. Get started